There was a vacuum after the competition gown was finished, so I just had to sew a medieval kirtle for my little niece. She was so happy! This was done in a few hours, so I needed yet another project. I have some beautiful whitework embroidery saved from pillow cases, which I believe were made by my husband’s grandmother. As I also recieved an old curtain with a pretty floral print, screeming Regency, I knew I just had to make a regency dress for another niece.
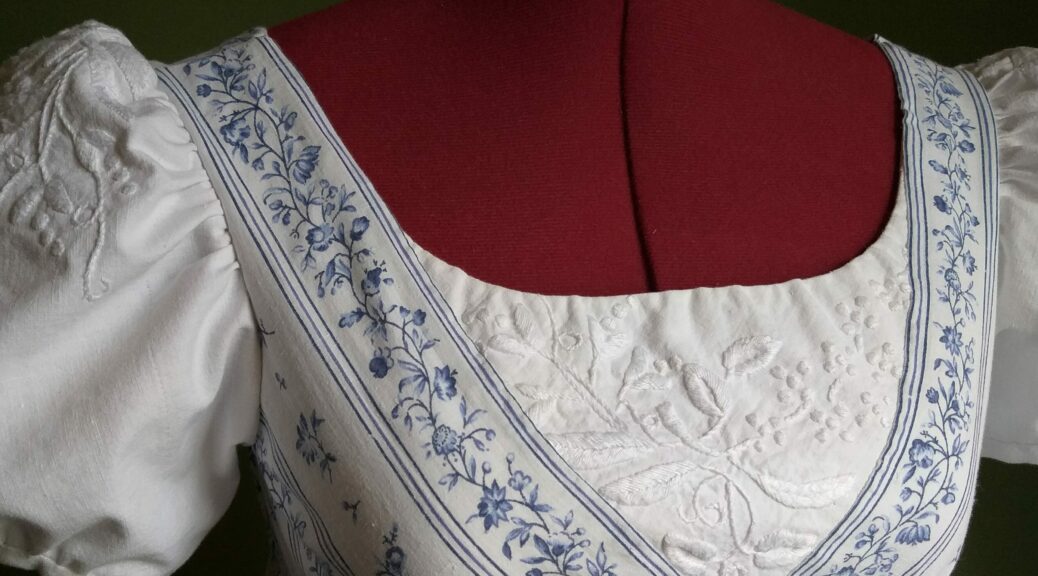
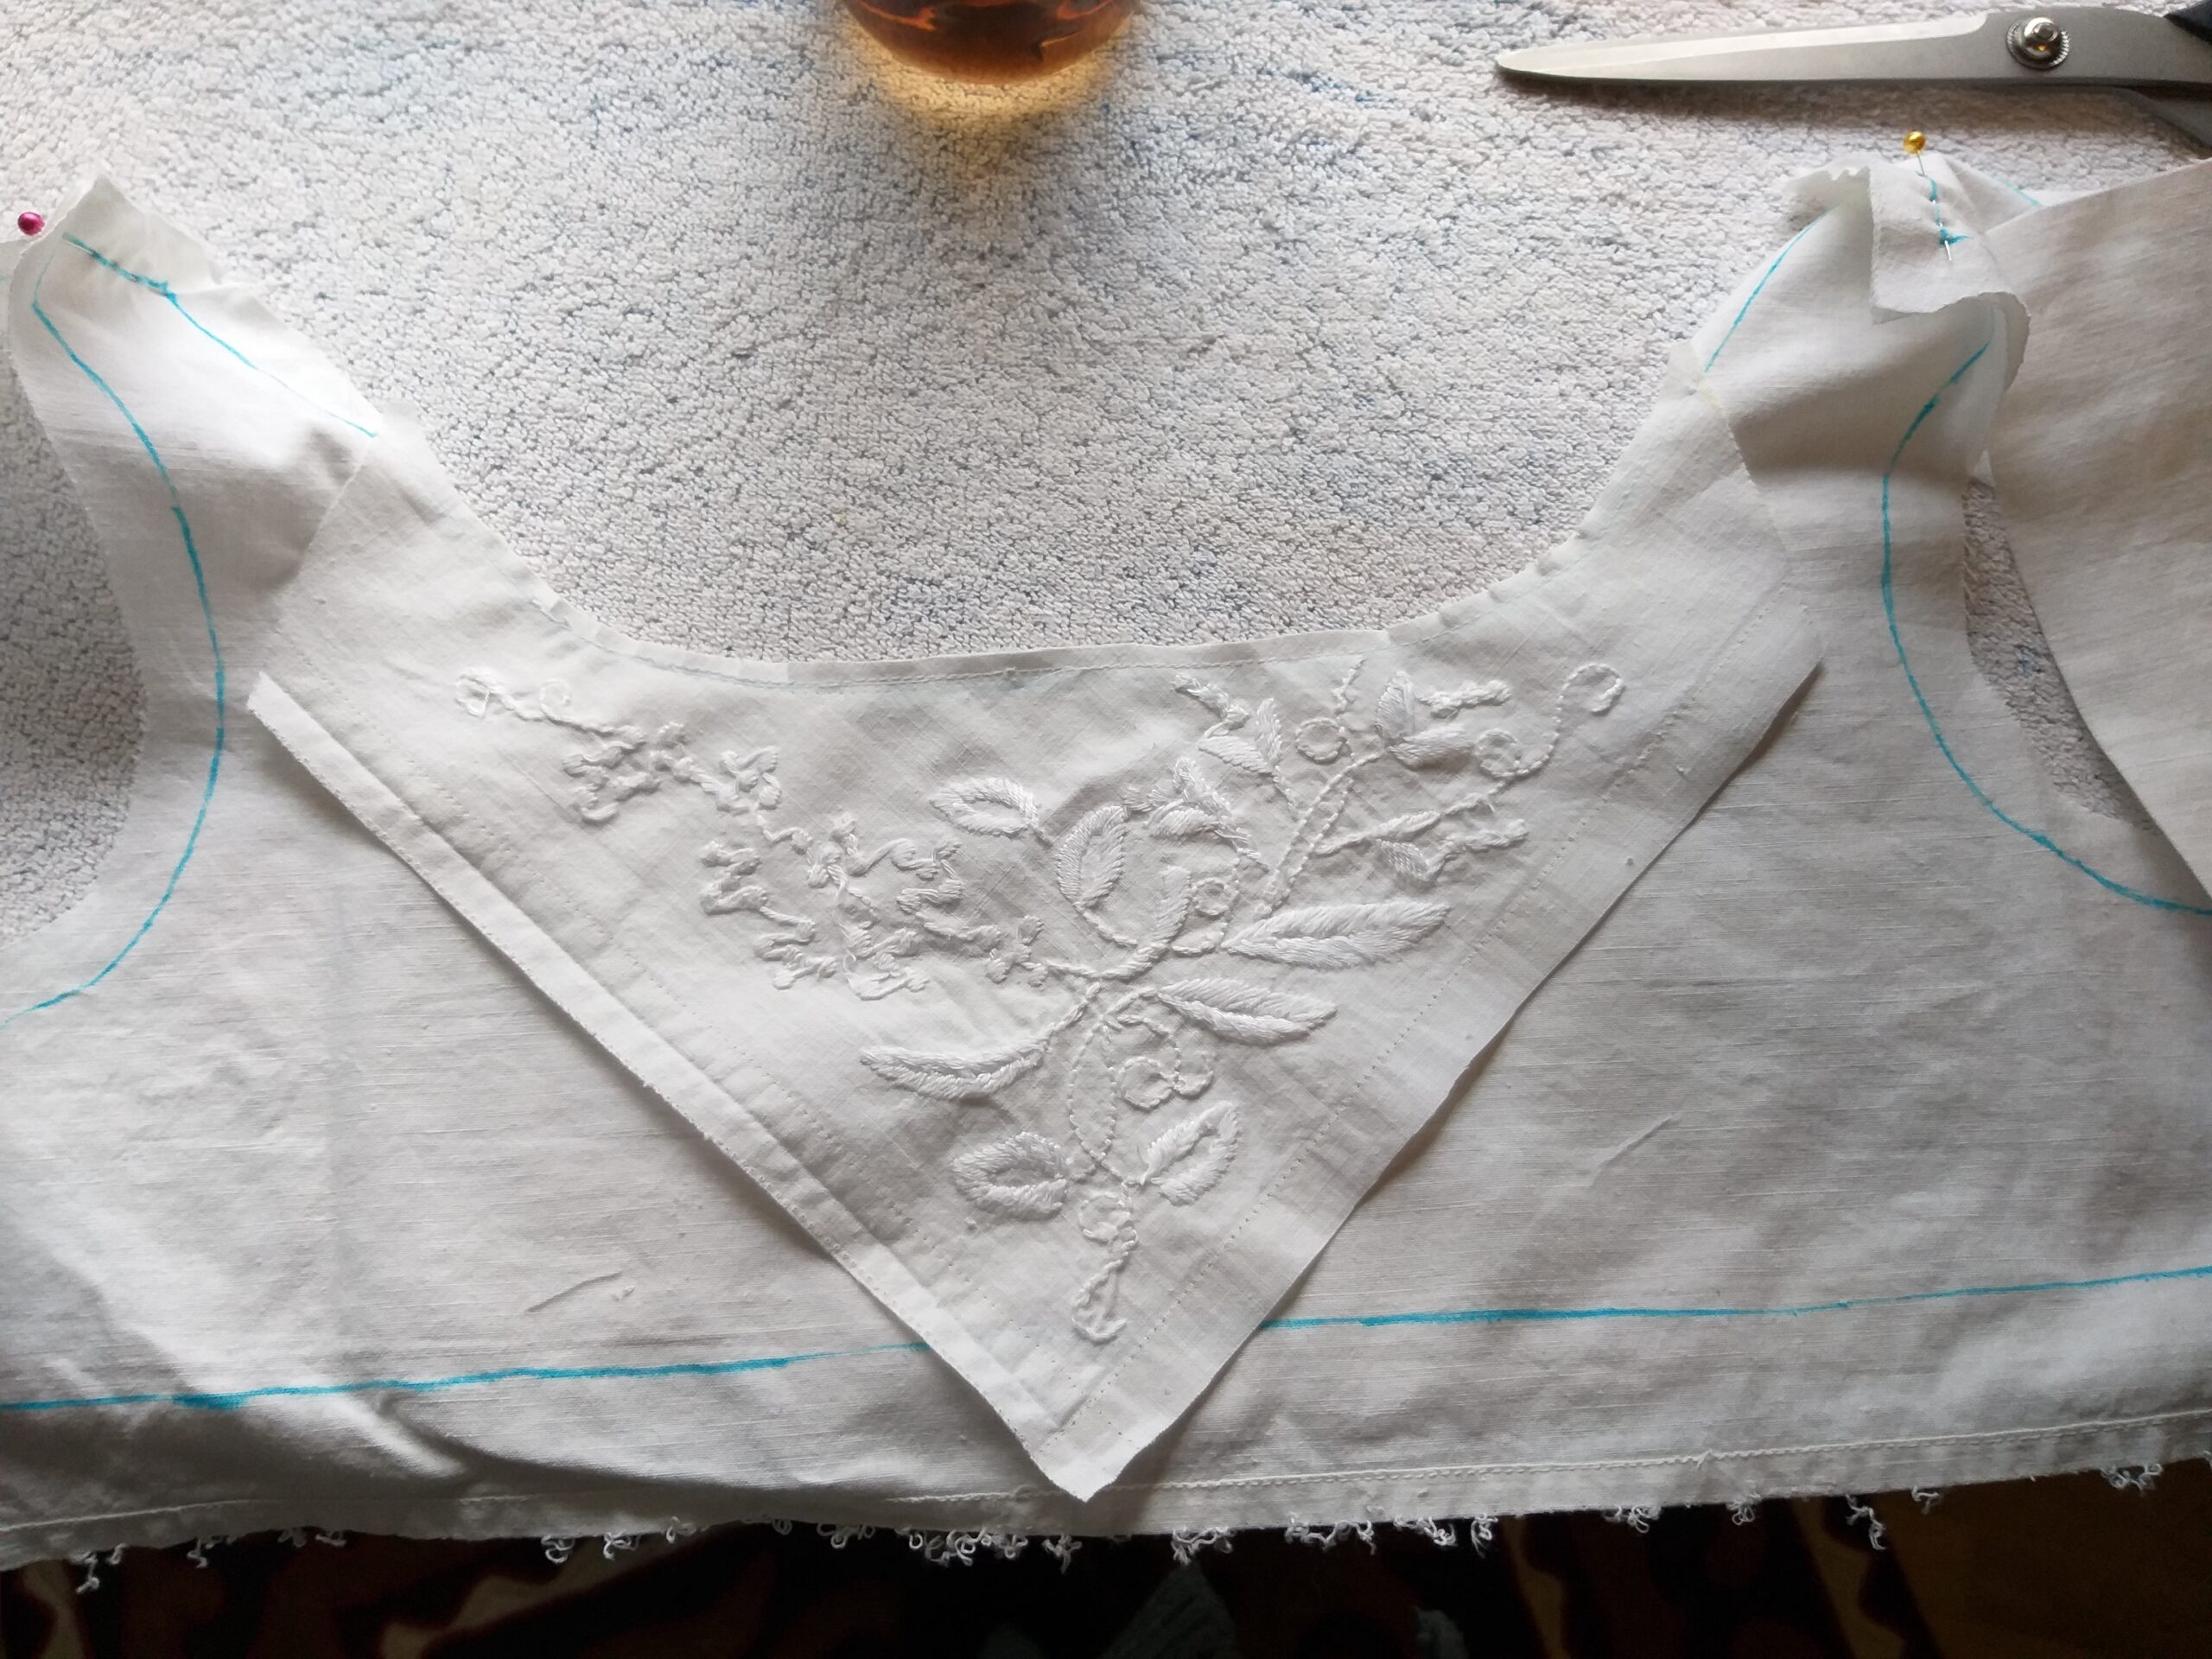
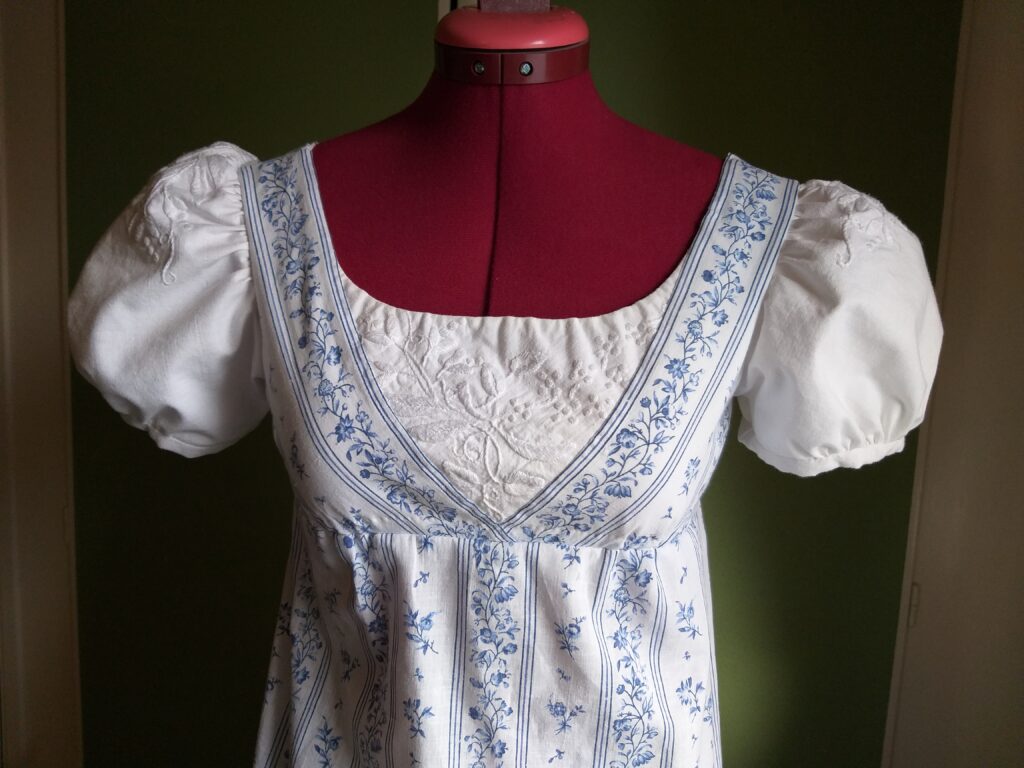
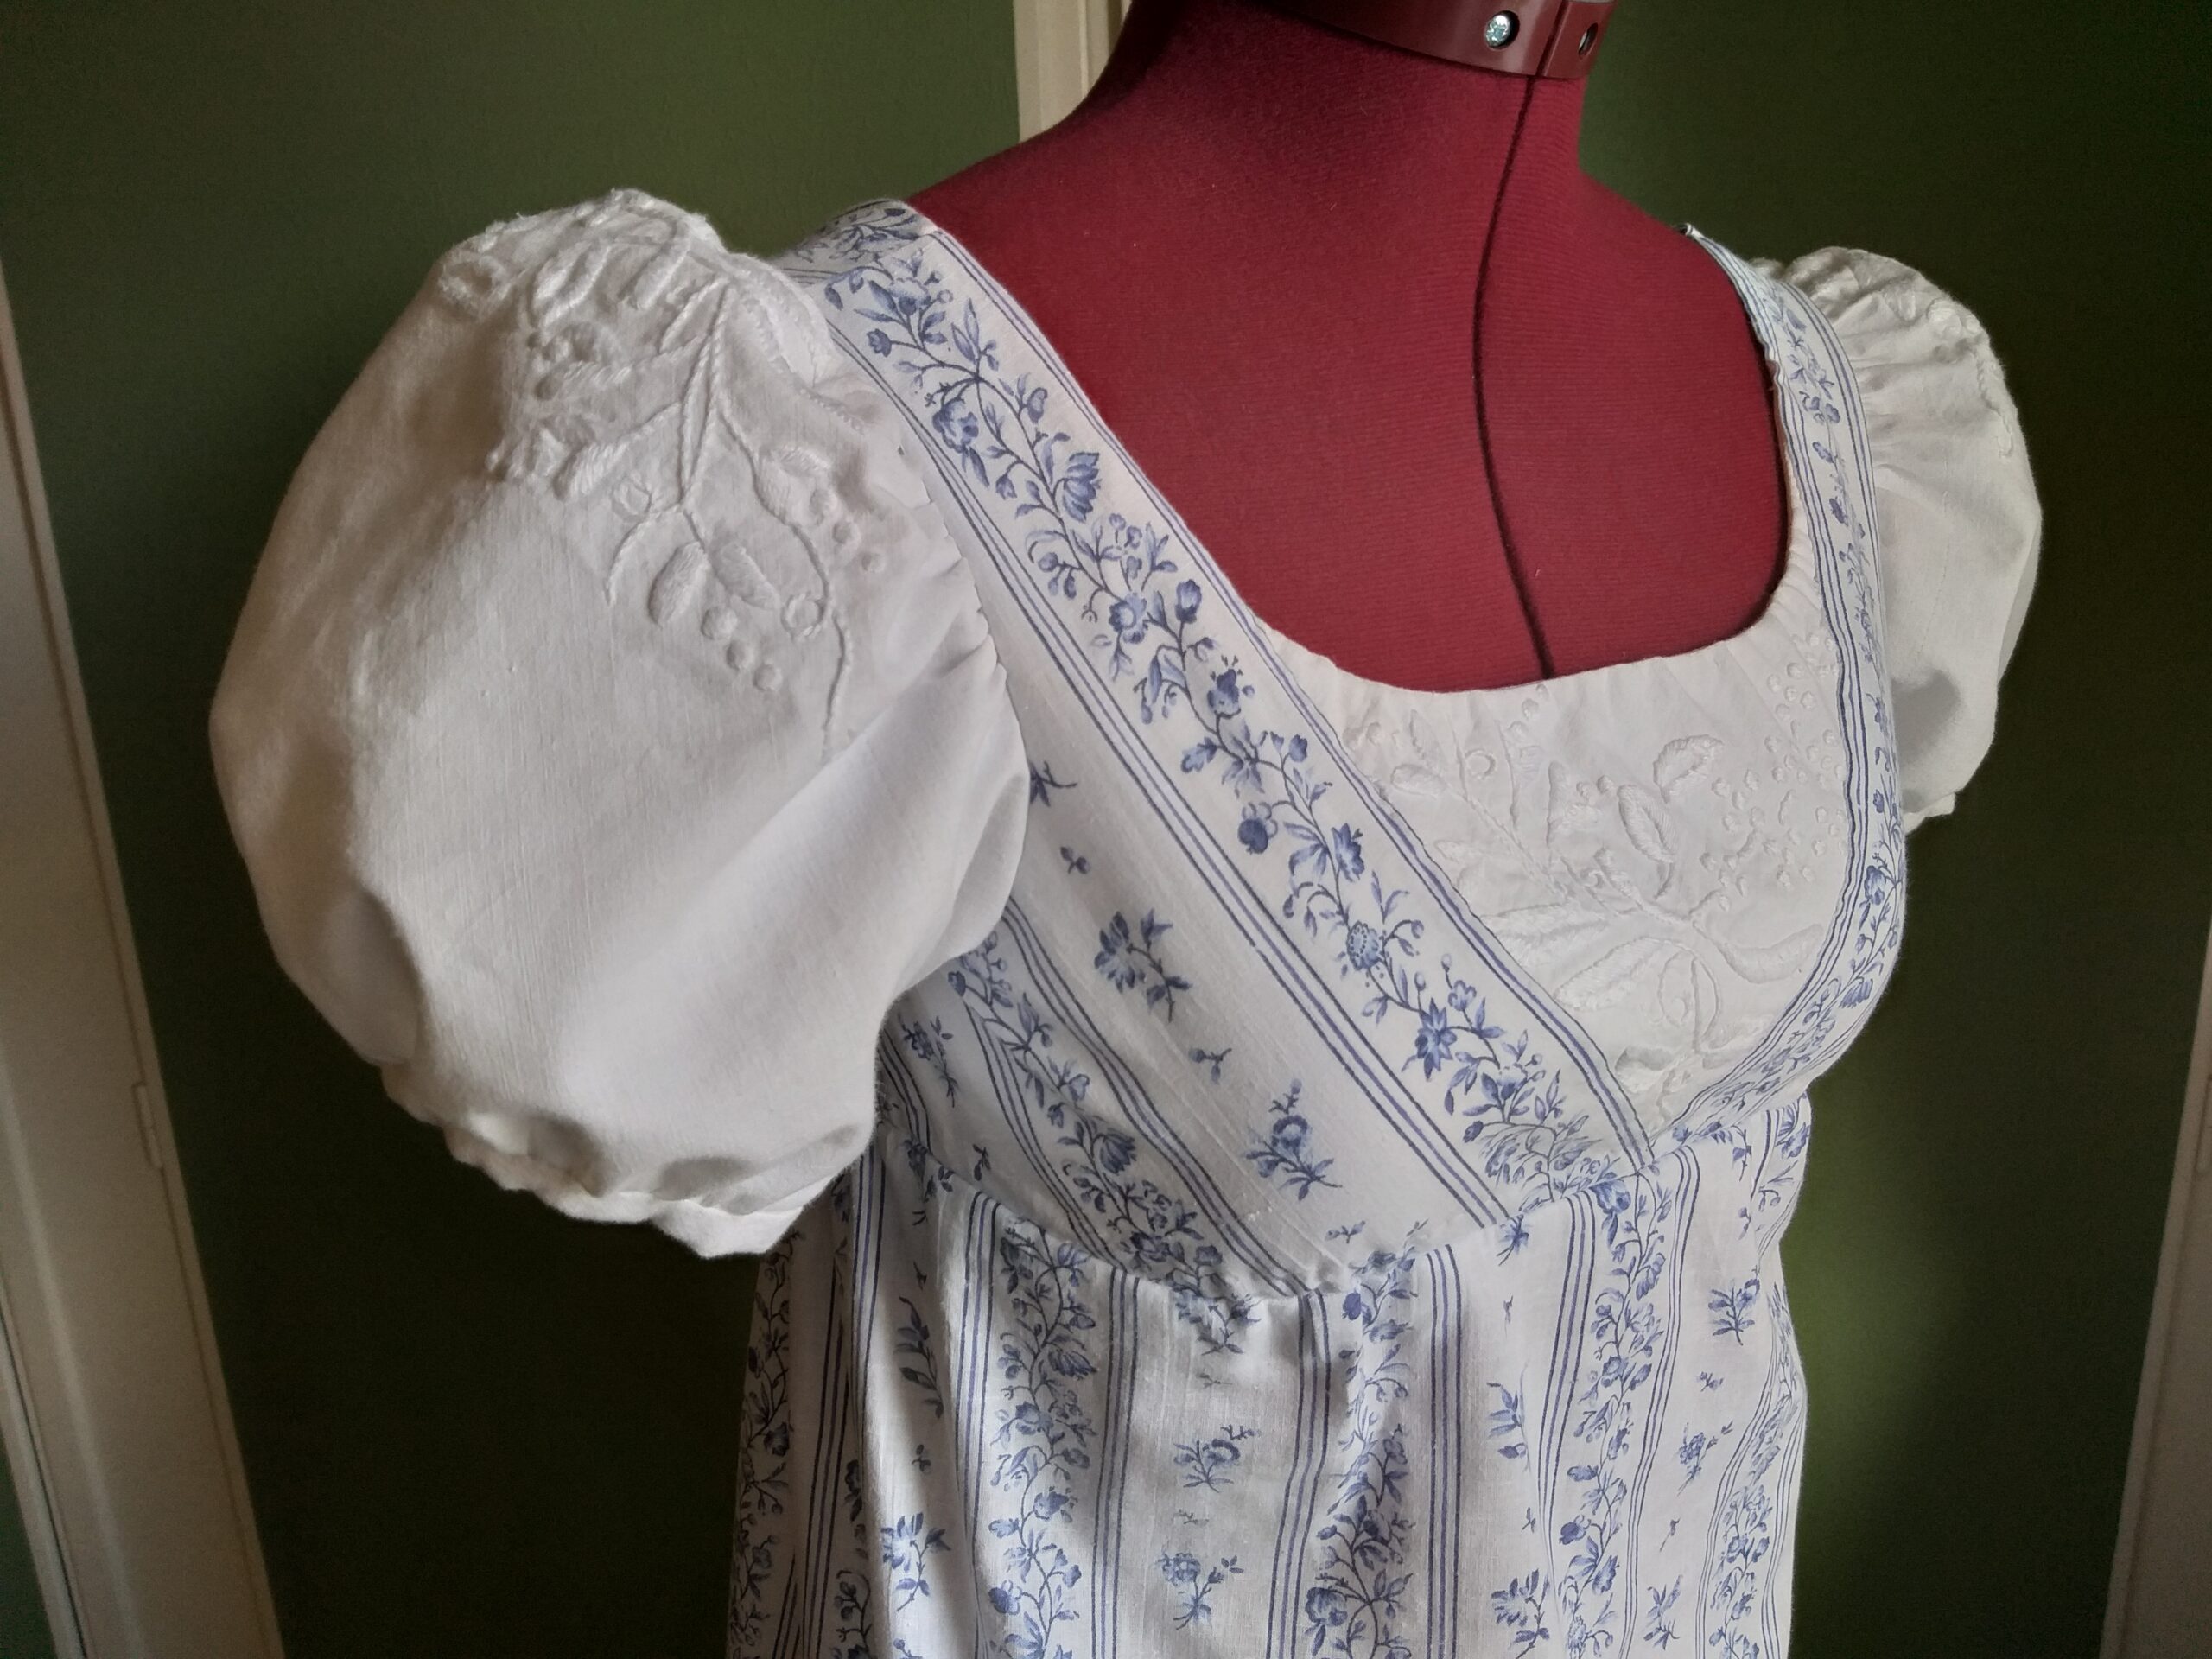
I incorporated the embroidery in the bodice and the poofy arms.
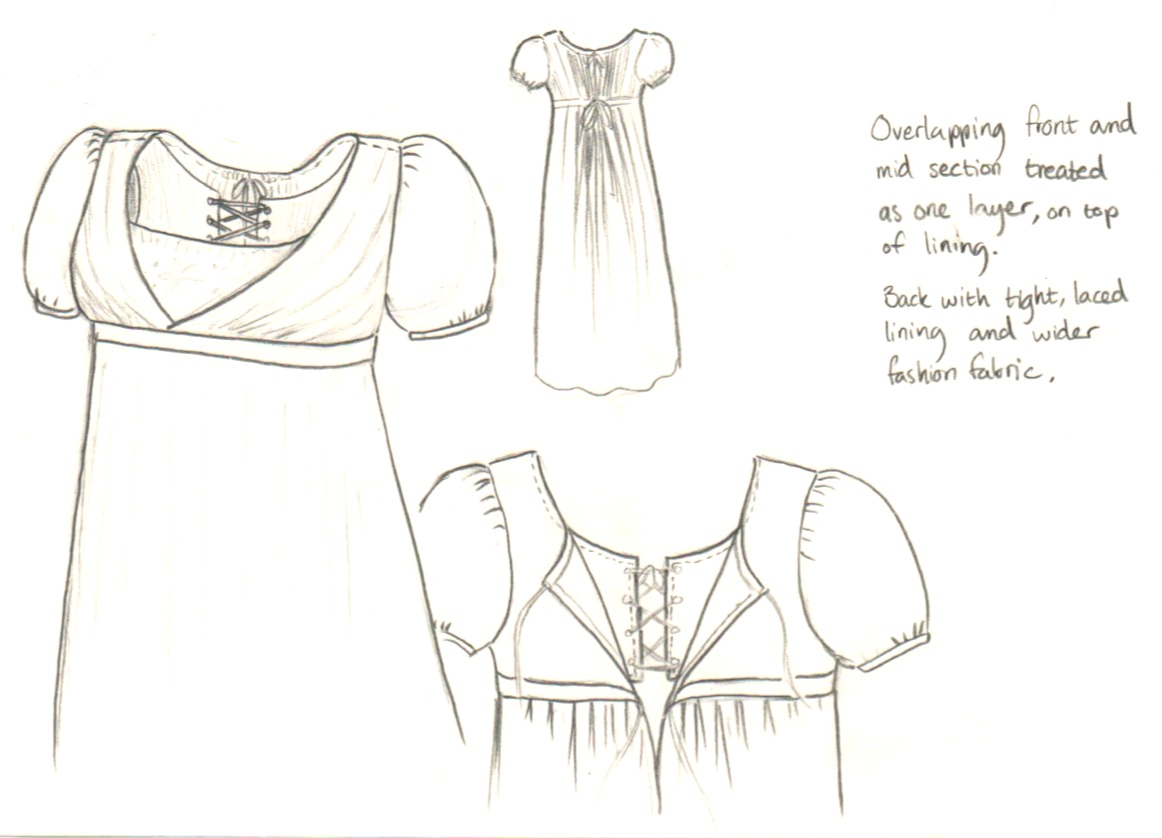
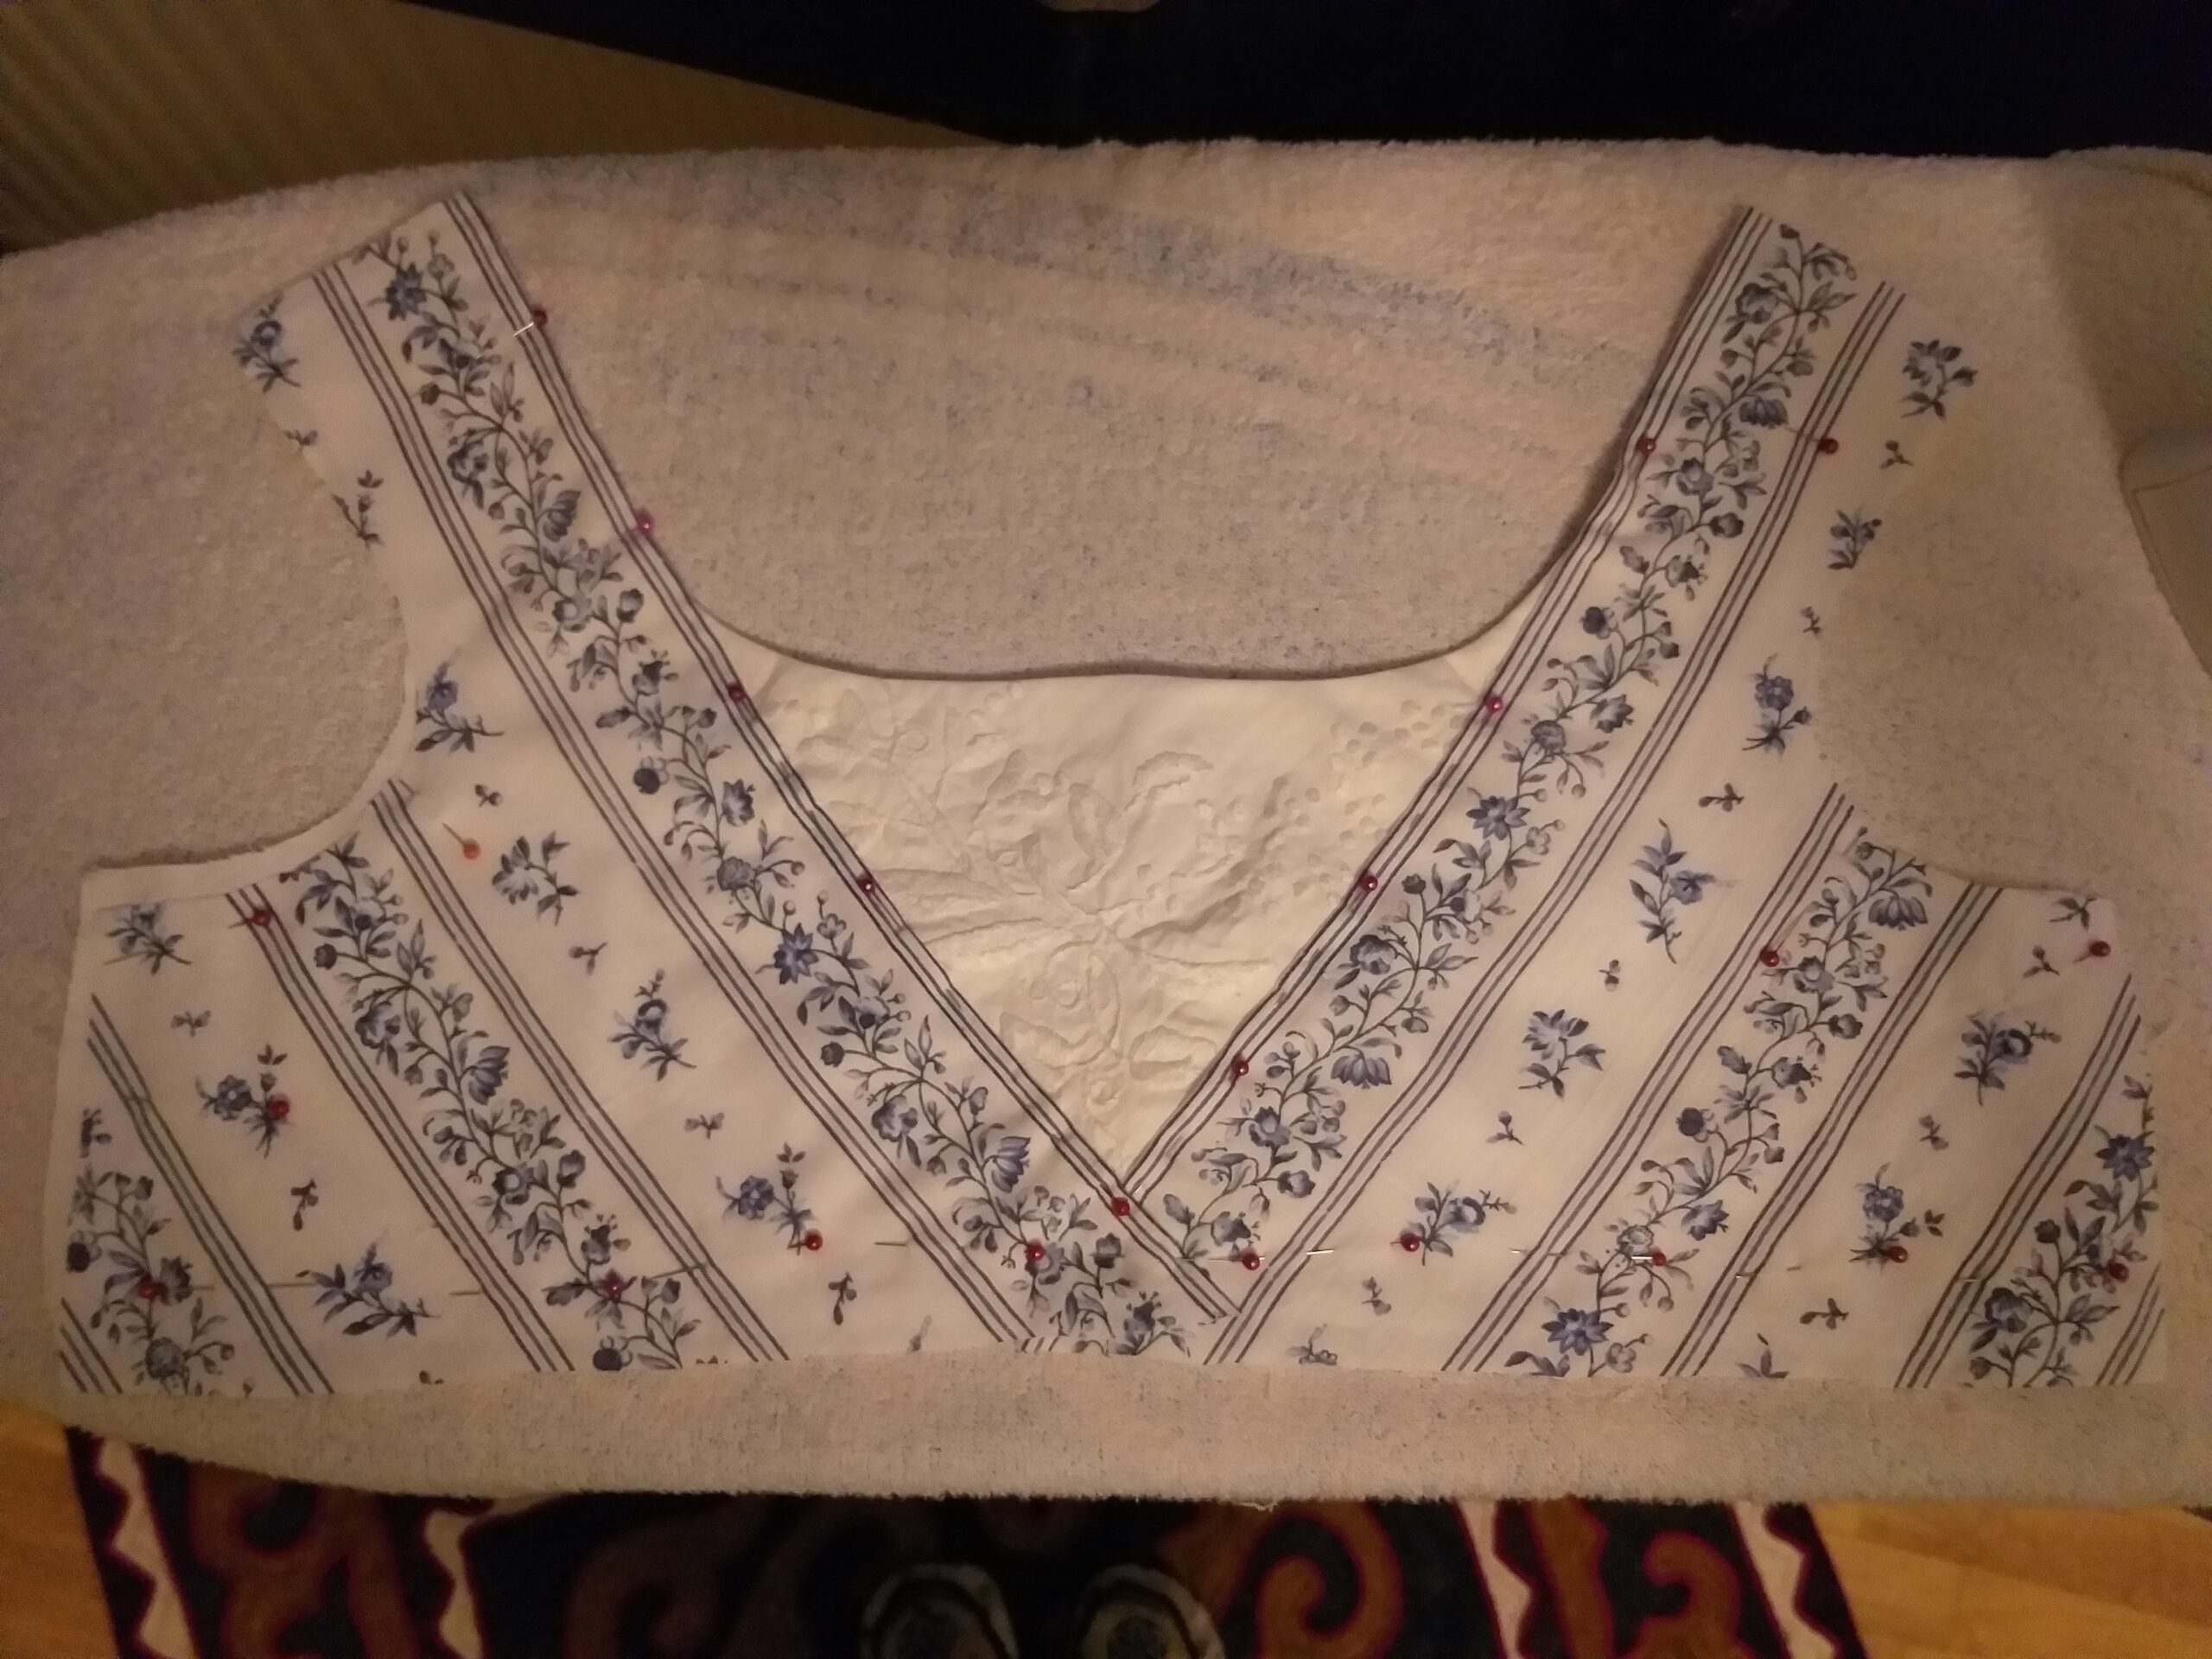
The embroidery piece is stitched to the bodice piece.Then the fashion fabric (or rather, the old curtain) was sewn onto the front of the bodice piece.Embroideries put in the mid front and in the arms.
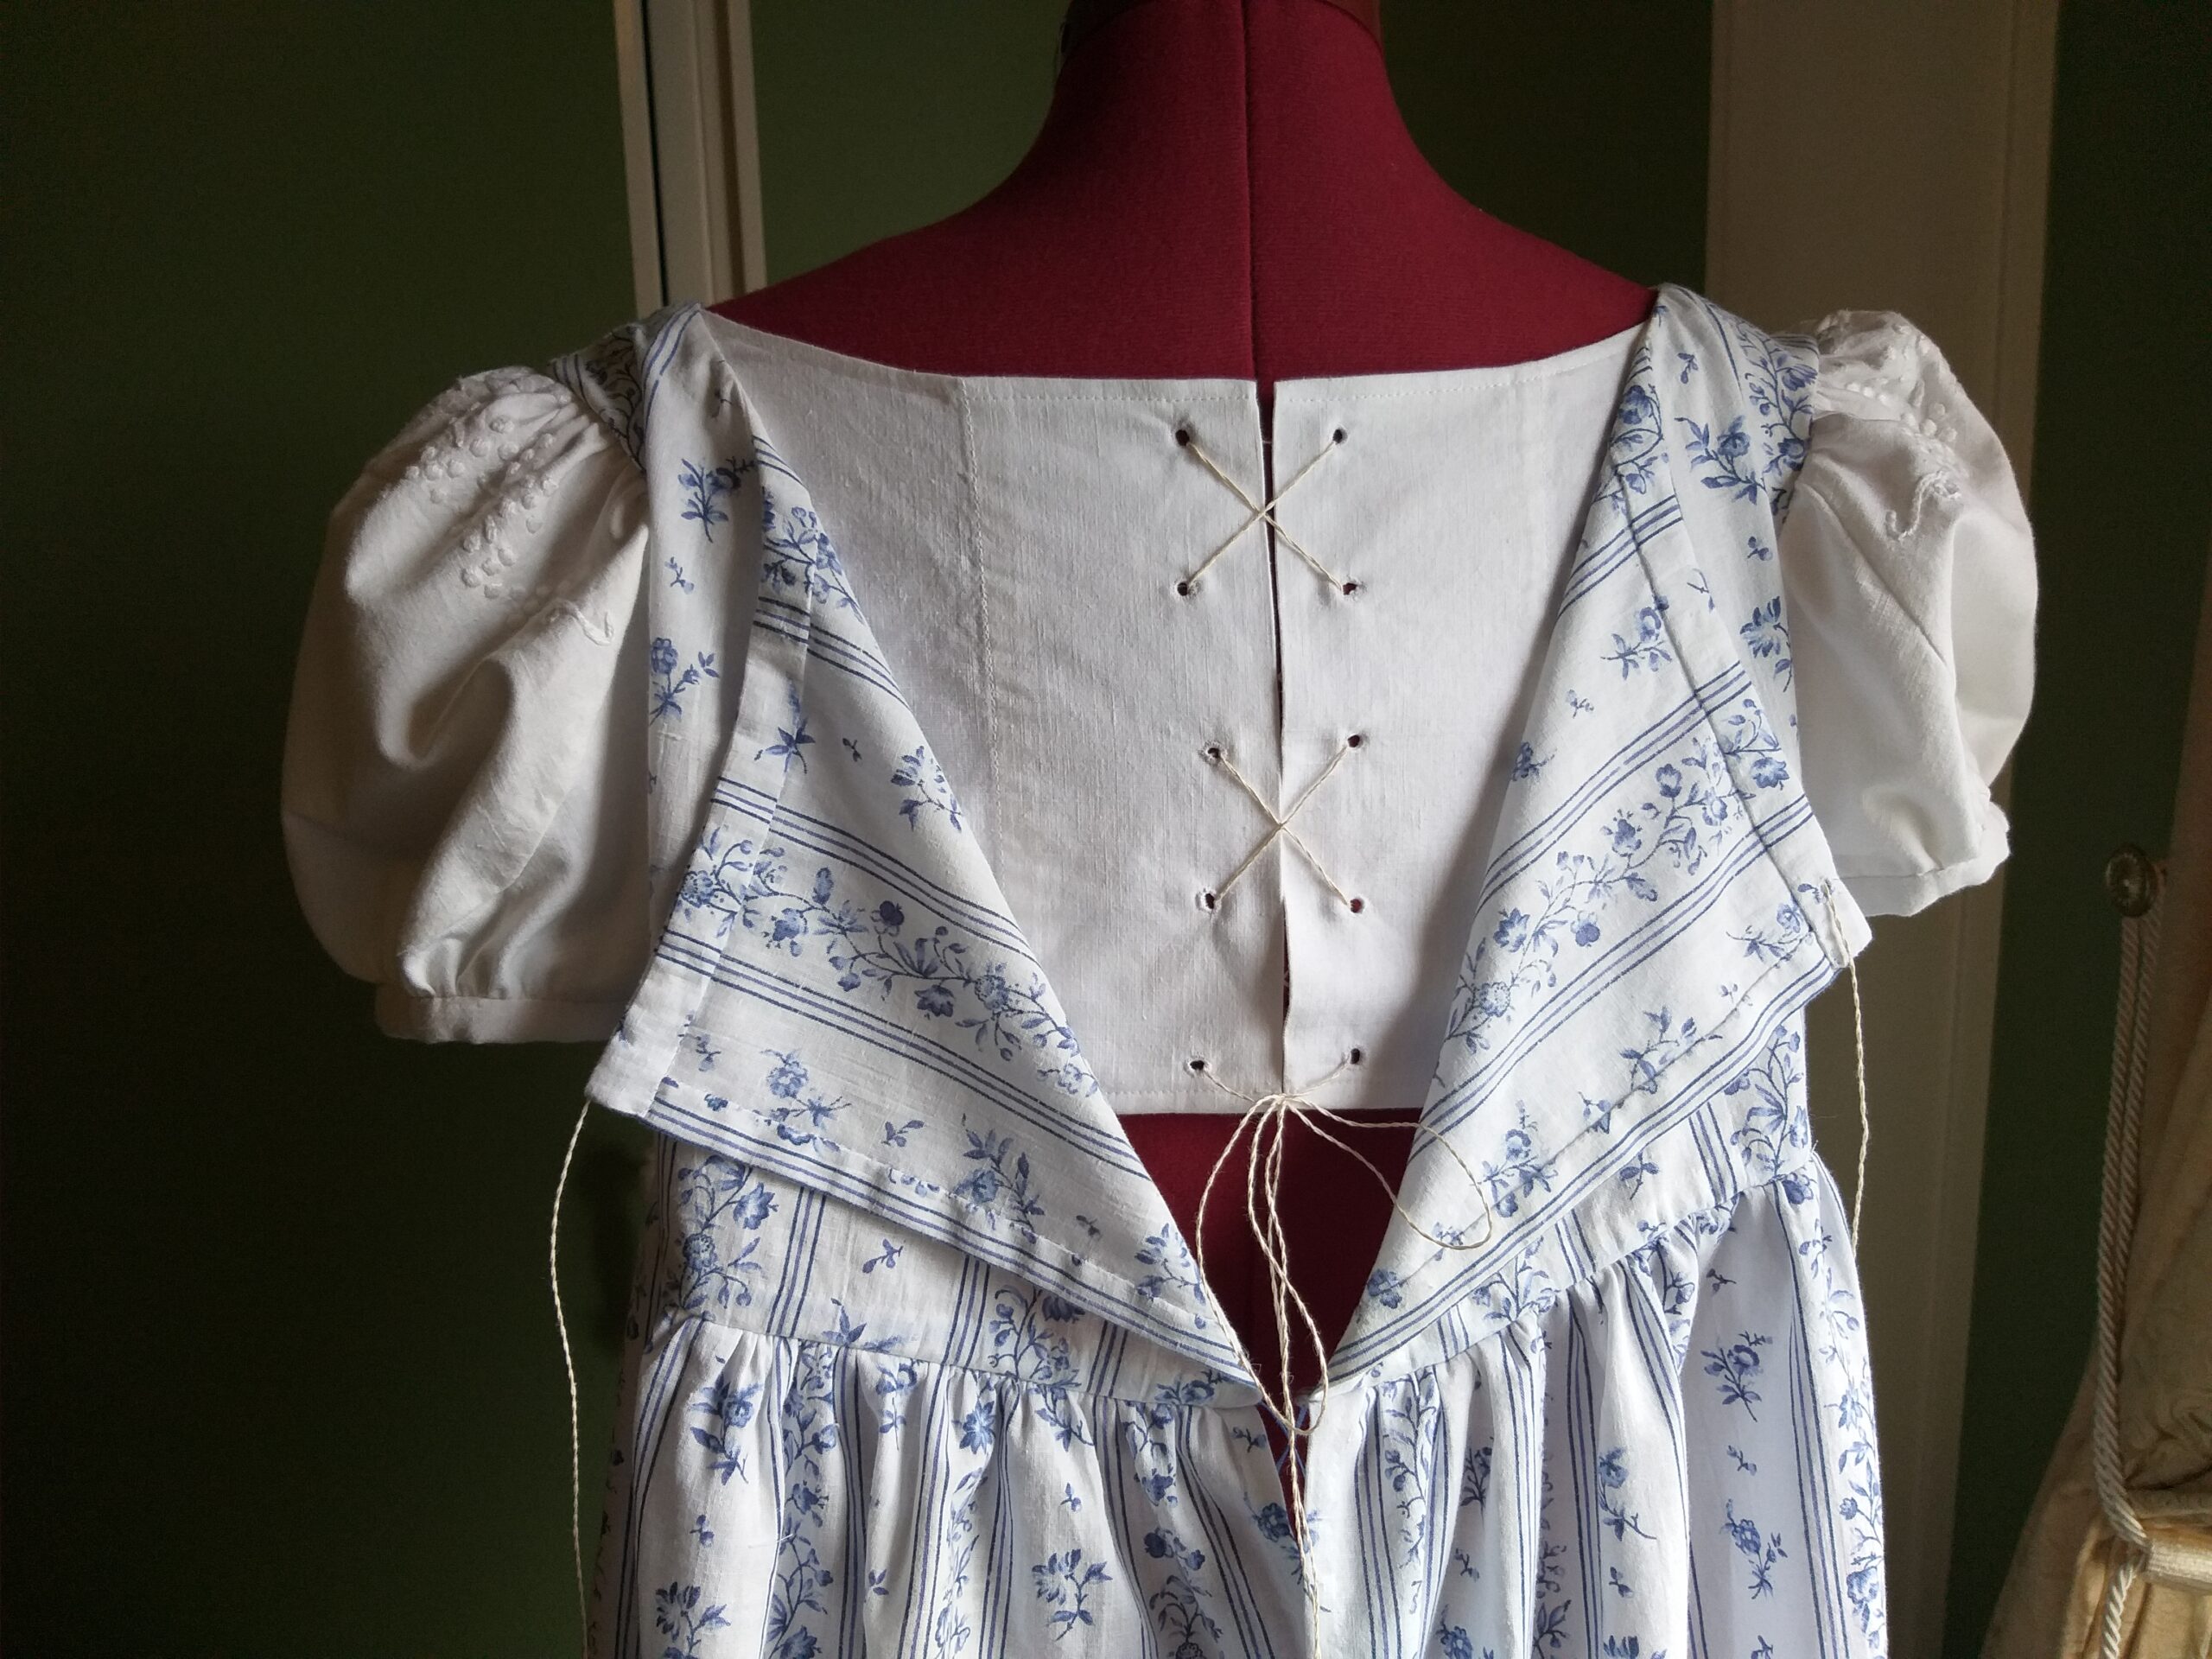
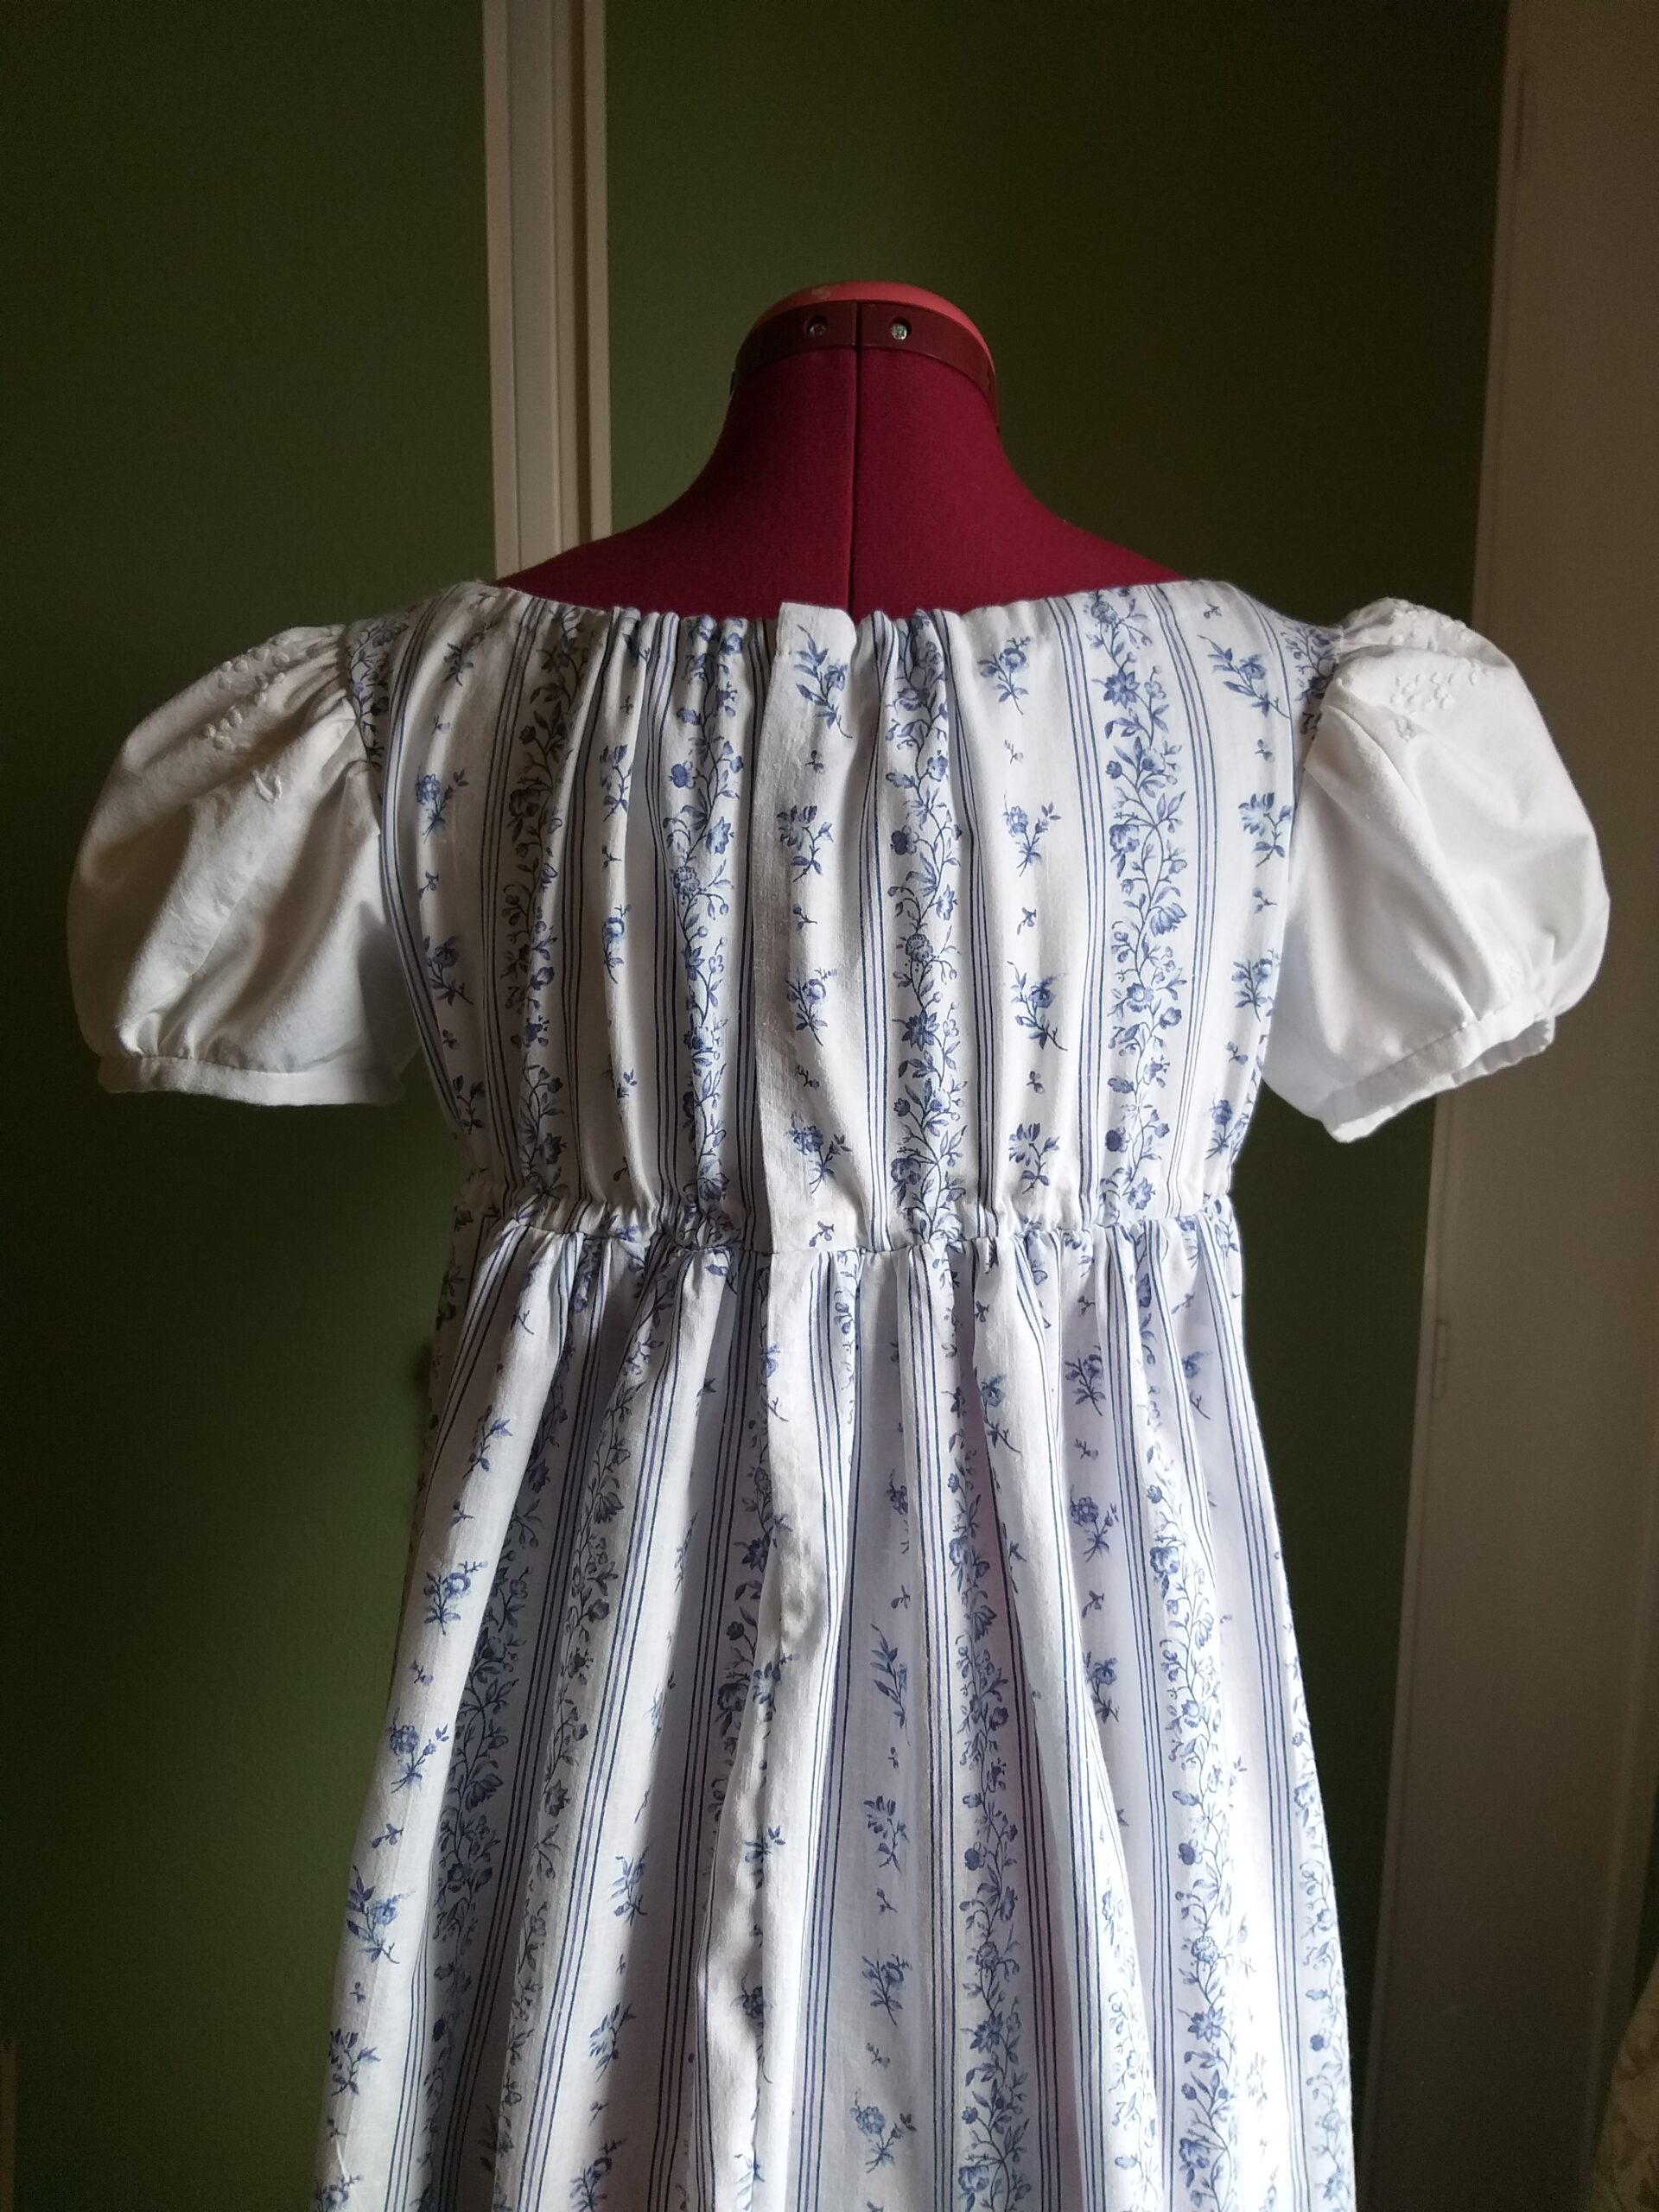
I made an interior bodice with lacing in the back, in order to leave room for some growth. The fashion layer has drawstrings in the neckline and under the bust.
The back lining close with lacing (perhaps there should be boning inside the eyelets?). The eyelets are hand sewn and the strings are also hand made from linen thread.The two sections of the back close with drawstrings in the neckline and under the bust.
Aren’t these embroideries adorable?
Now I am eager to see whether the dress fits the pretty maiden.
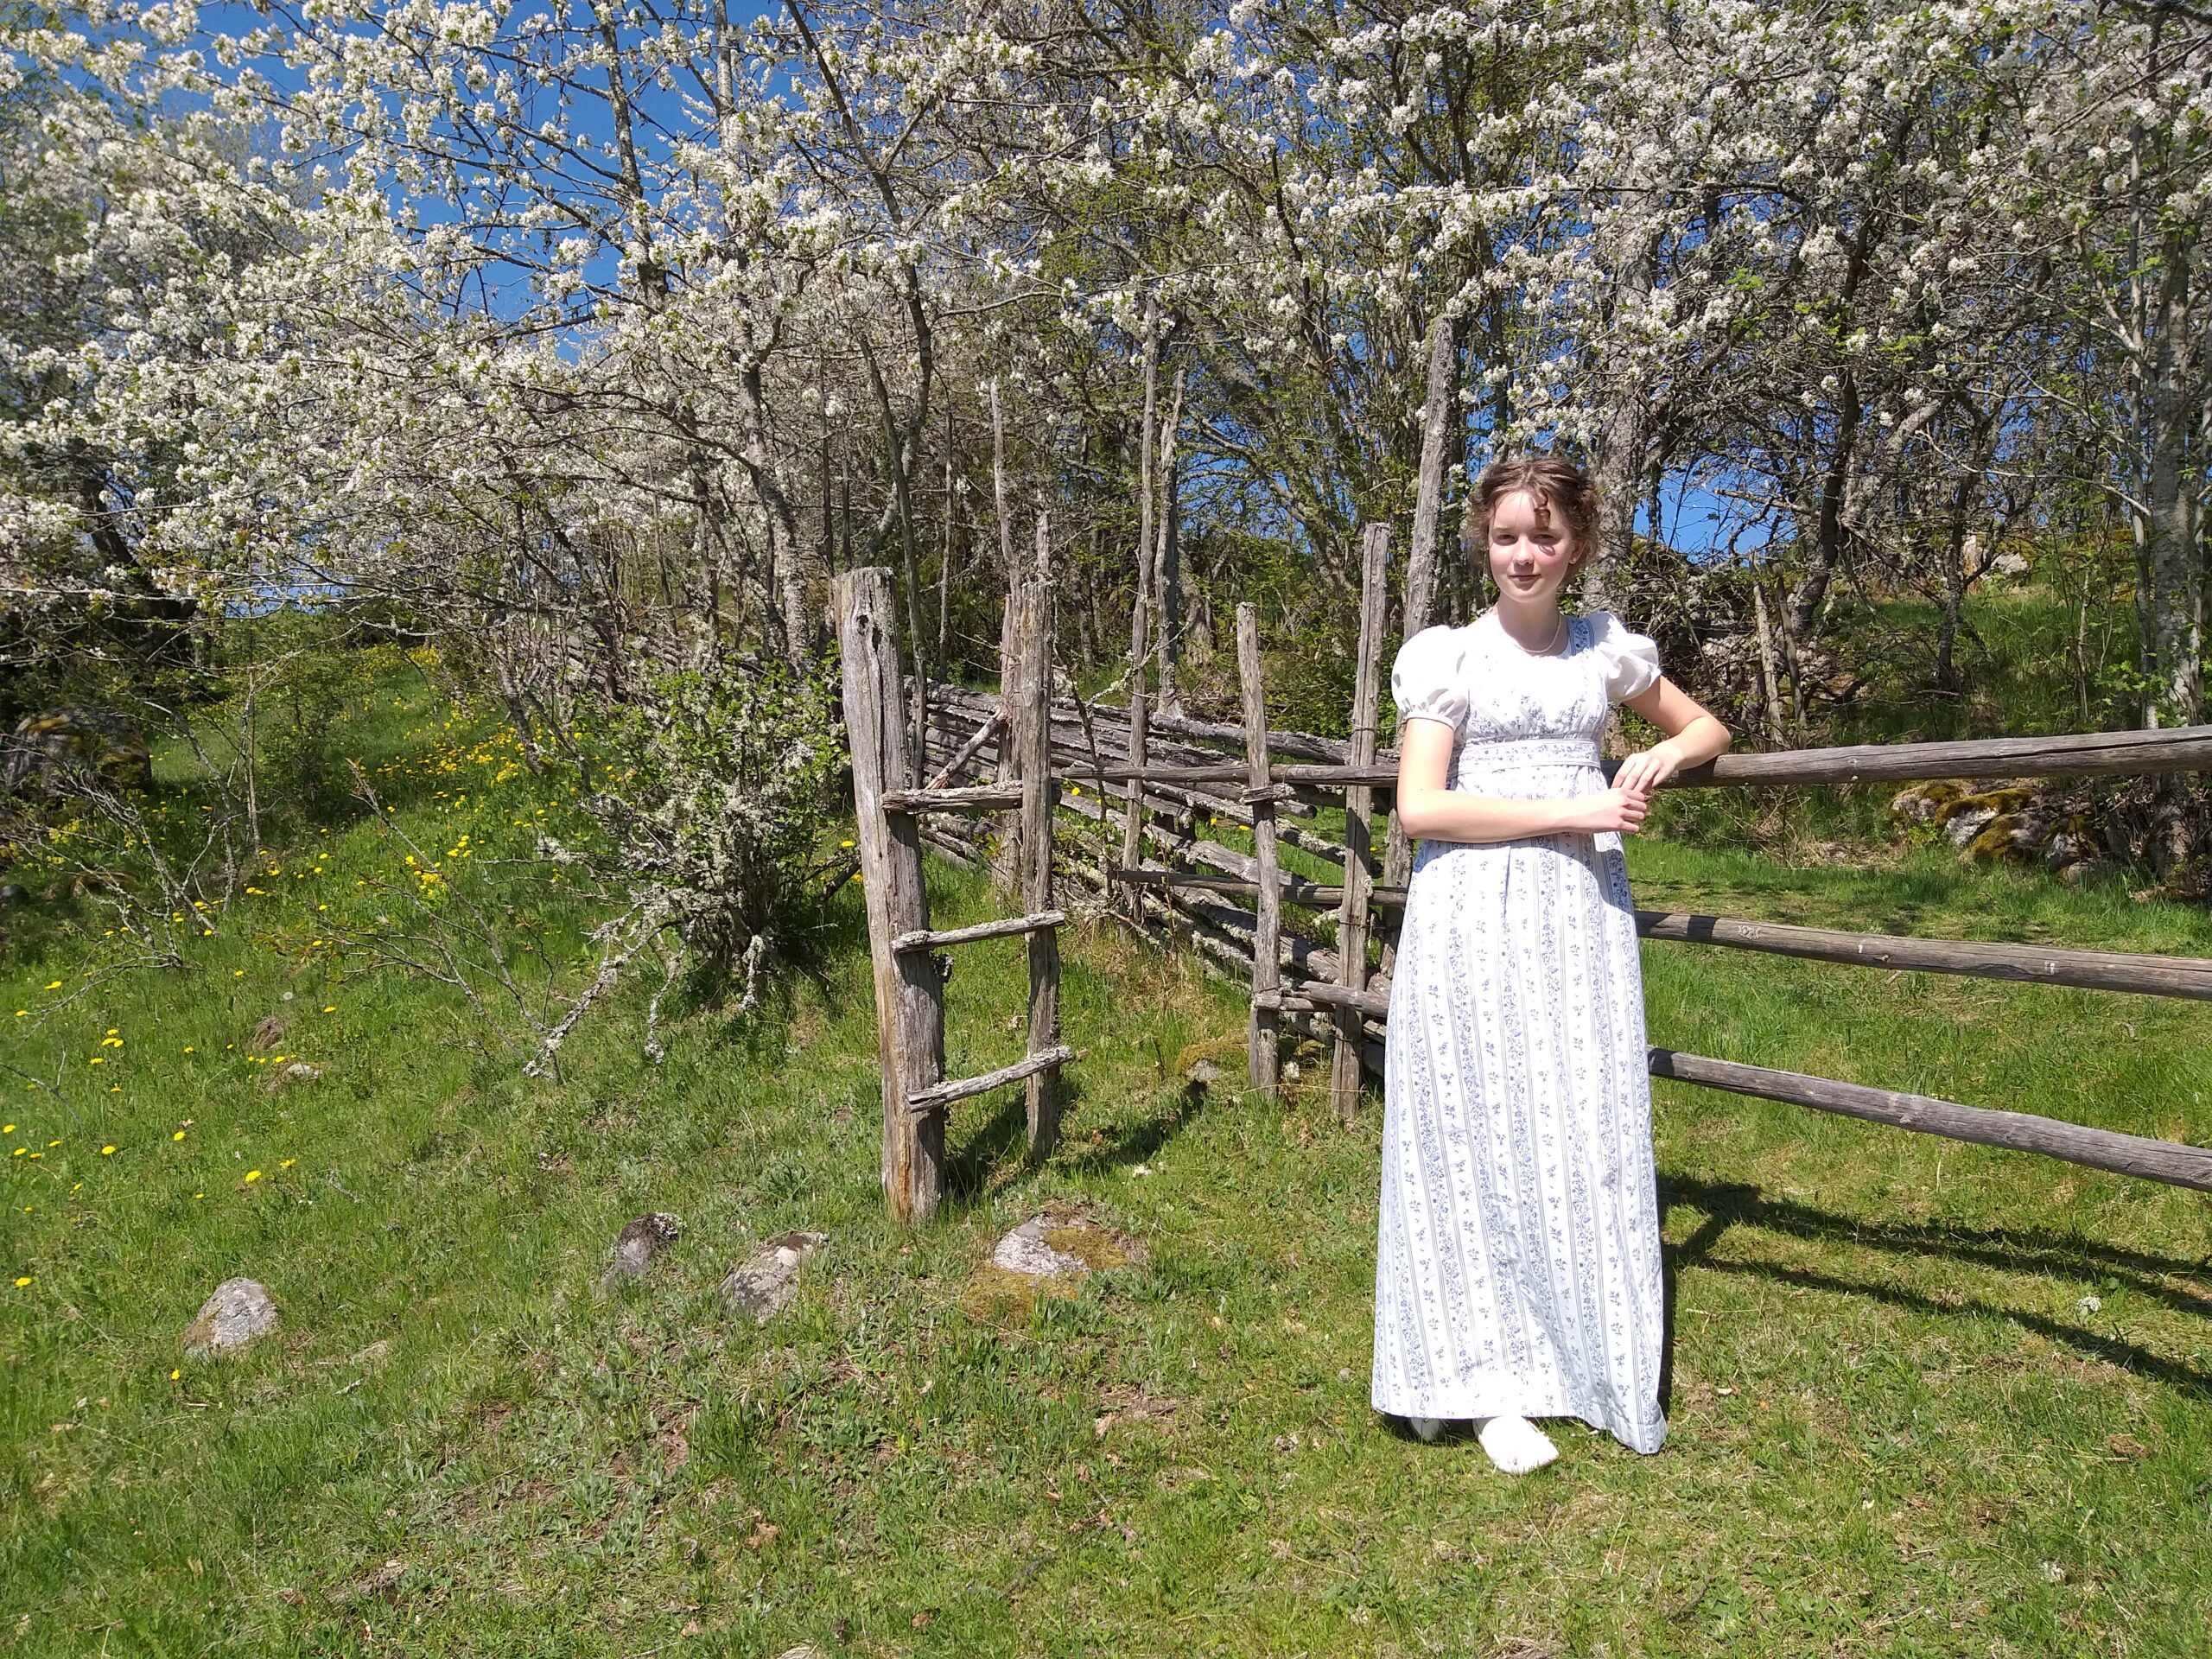
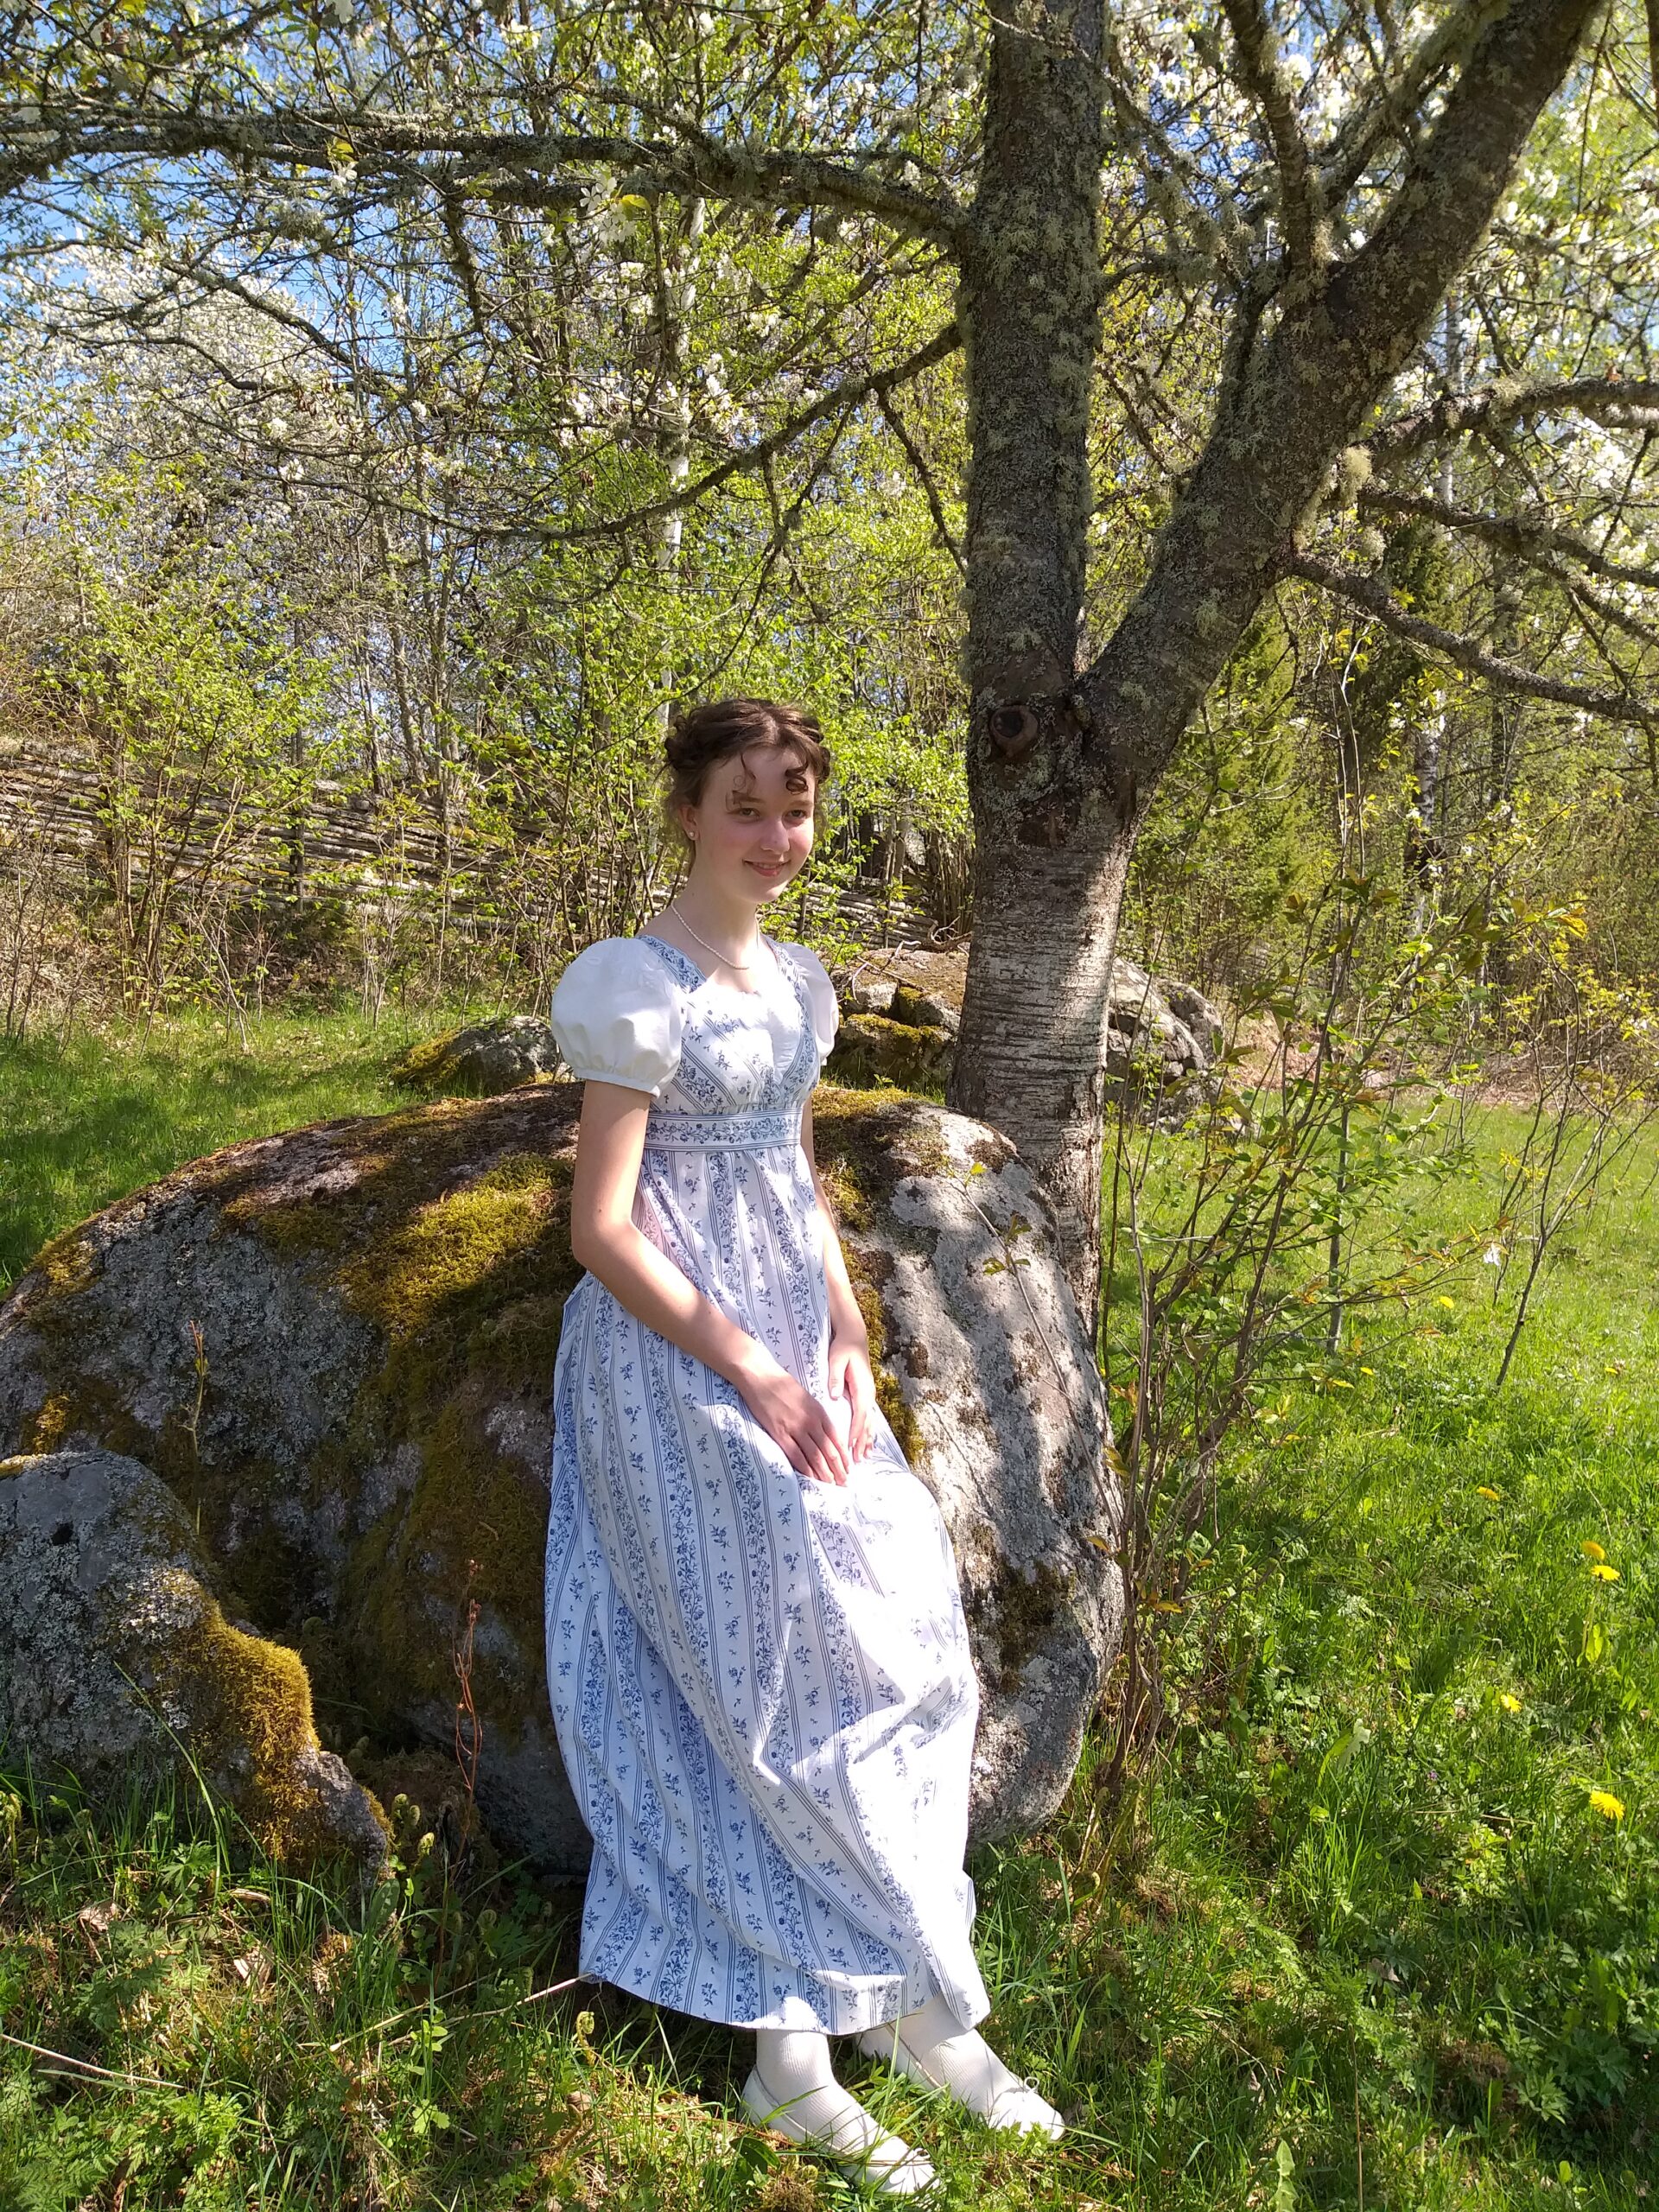
Photo Shoot In The Valley of Cherry Blossoms
The dress fits my niece so well! I’m so proud of this intelligent, pretty young maiden and her wonderful family.
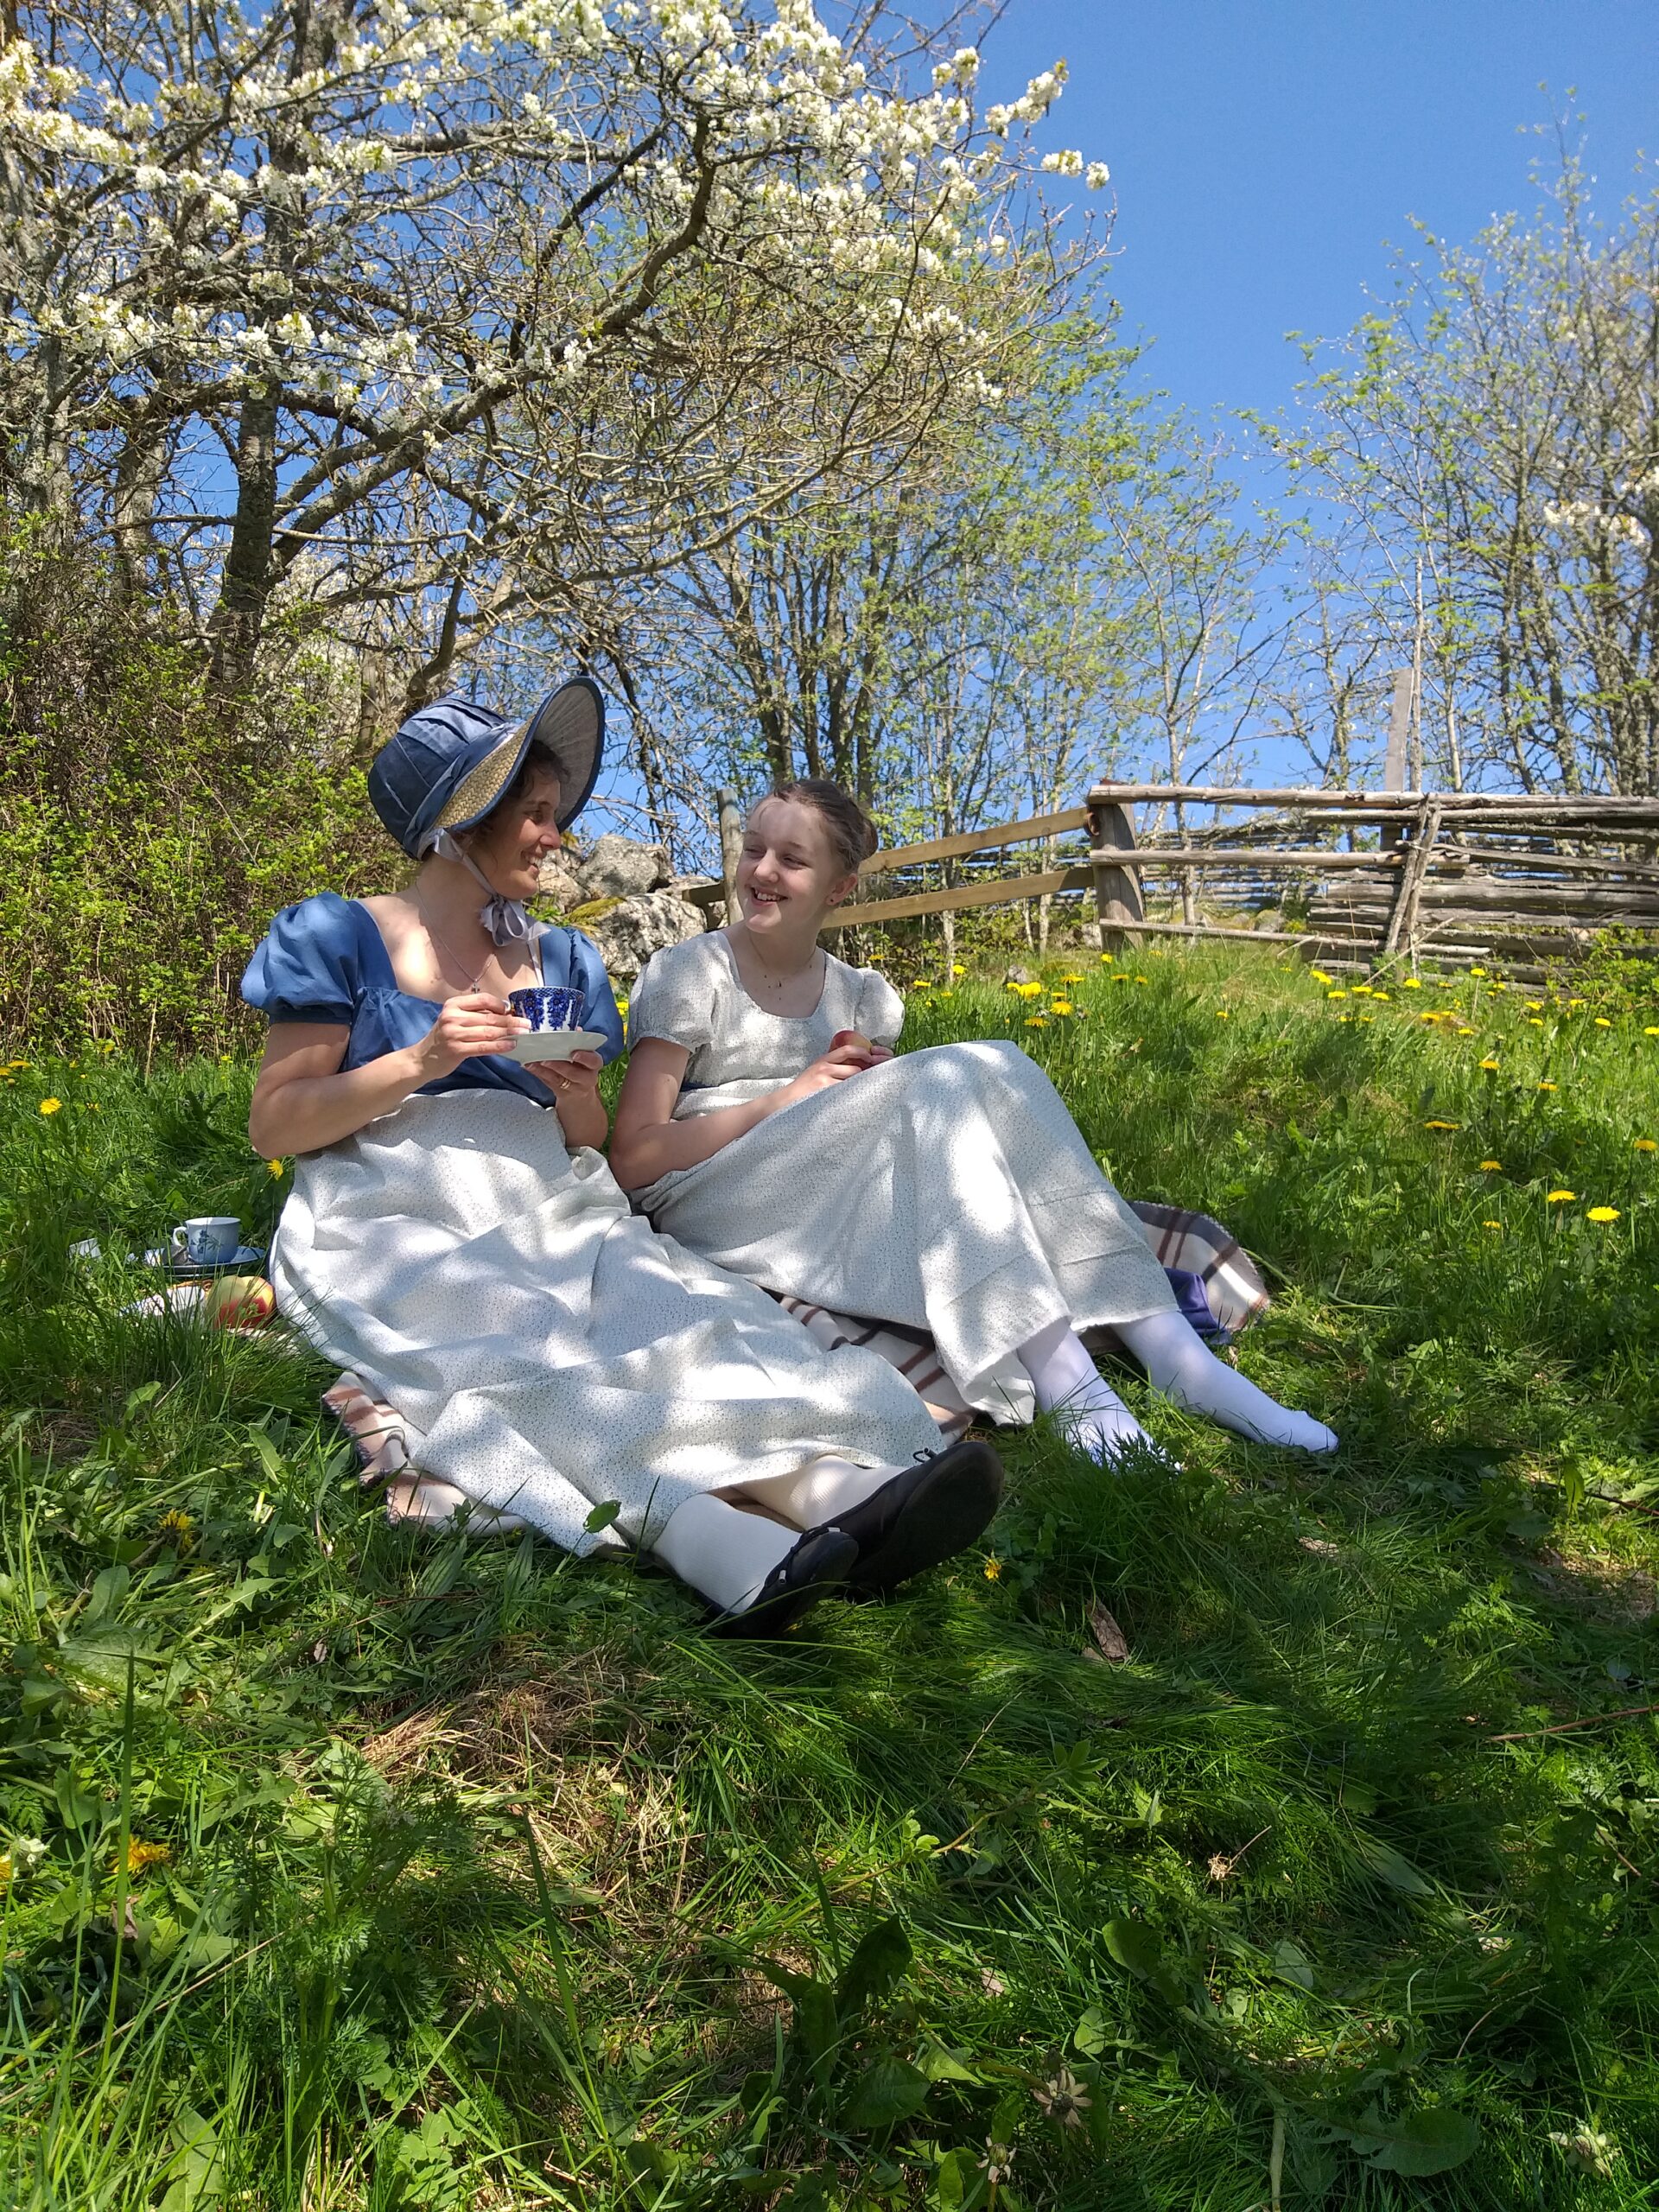
As you might see, there was also a pregnant seamstress lurking around.
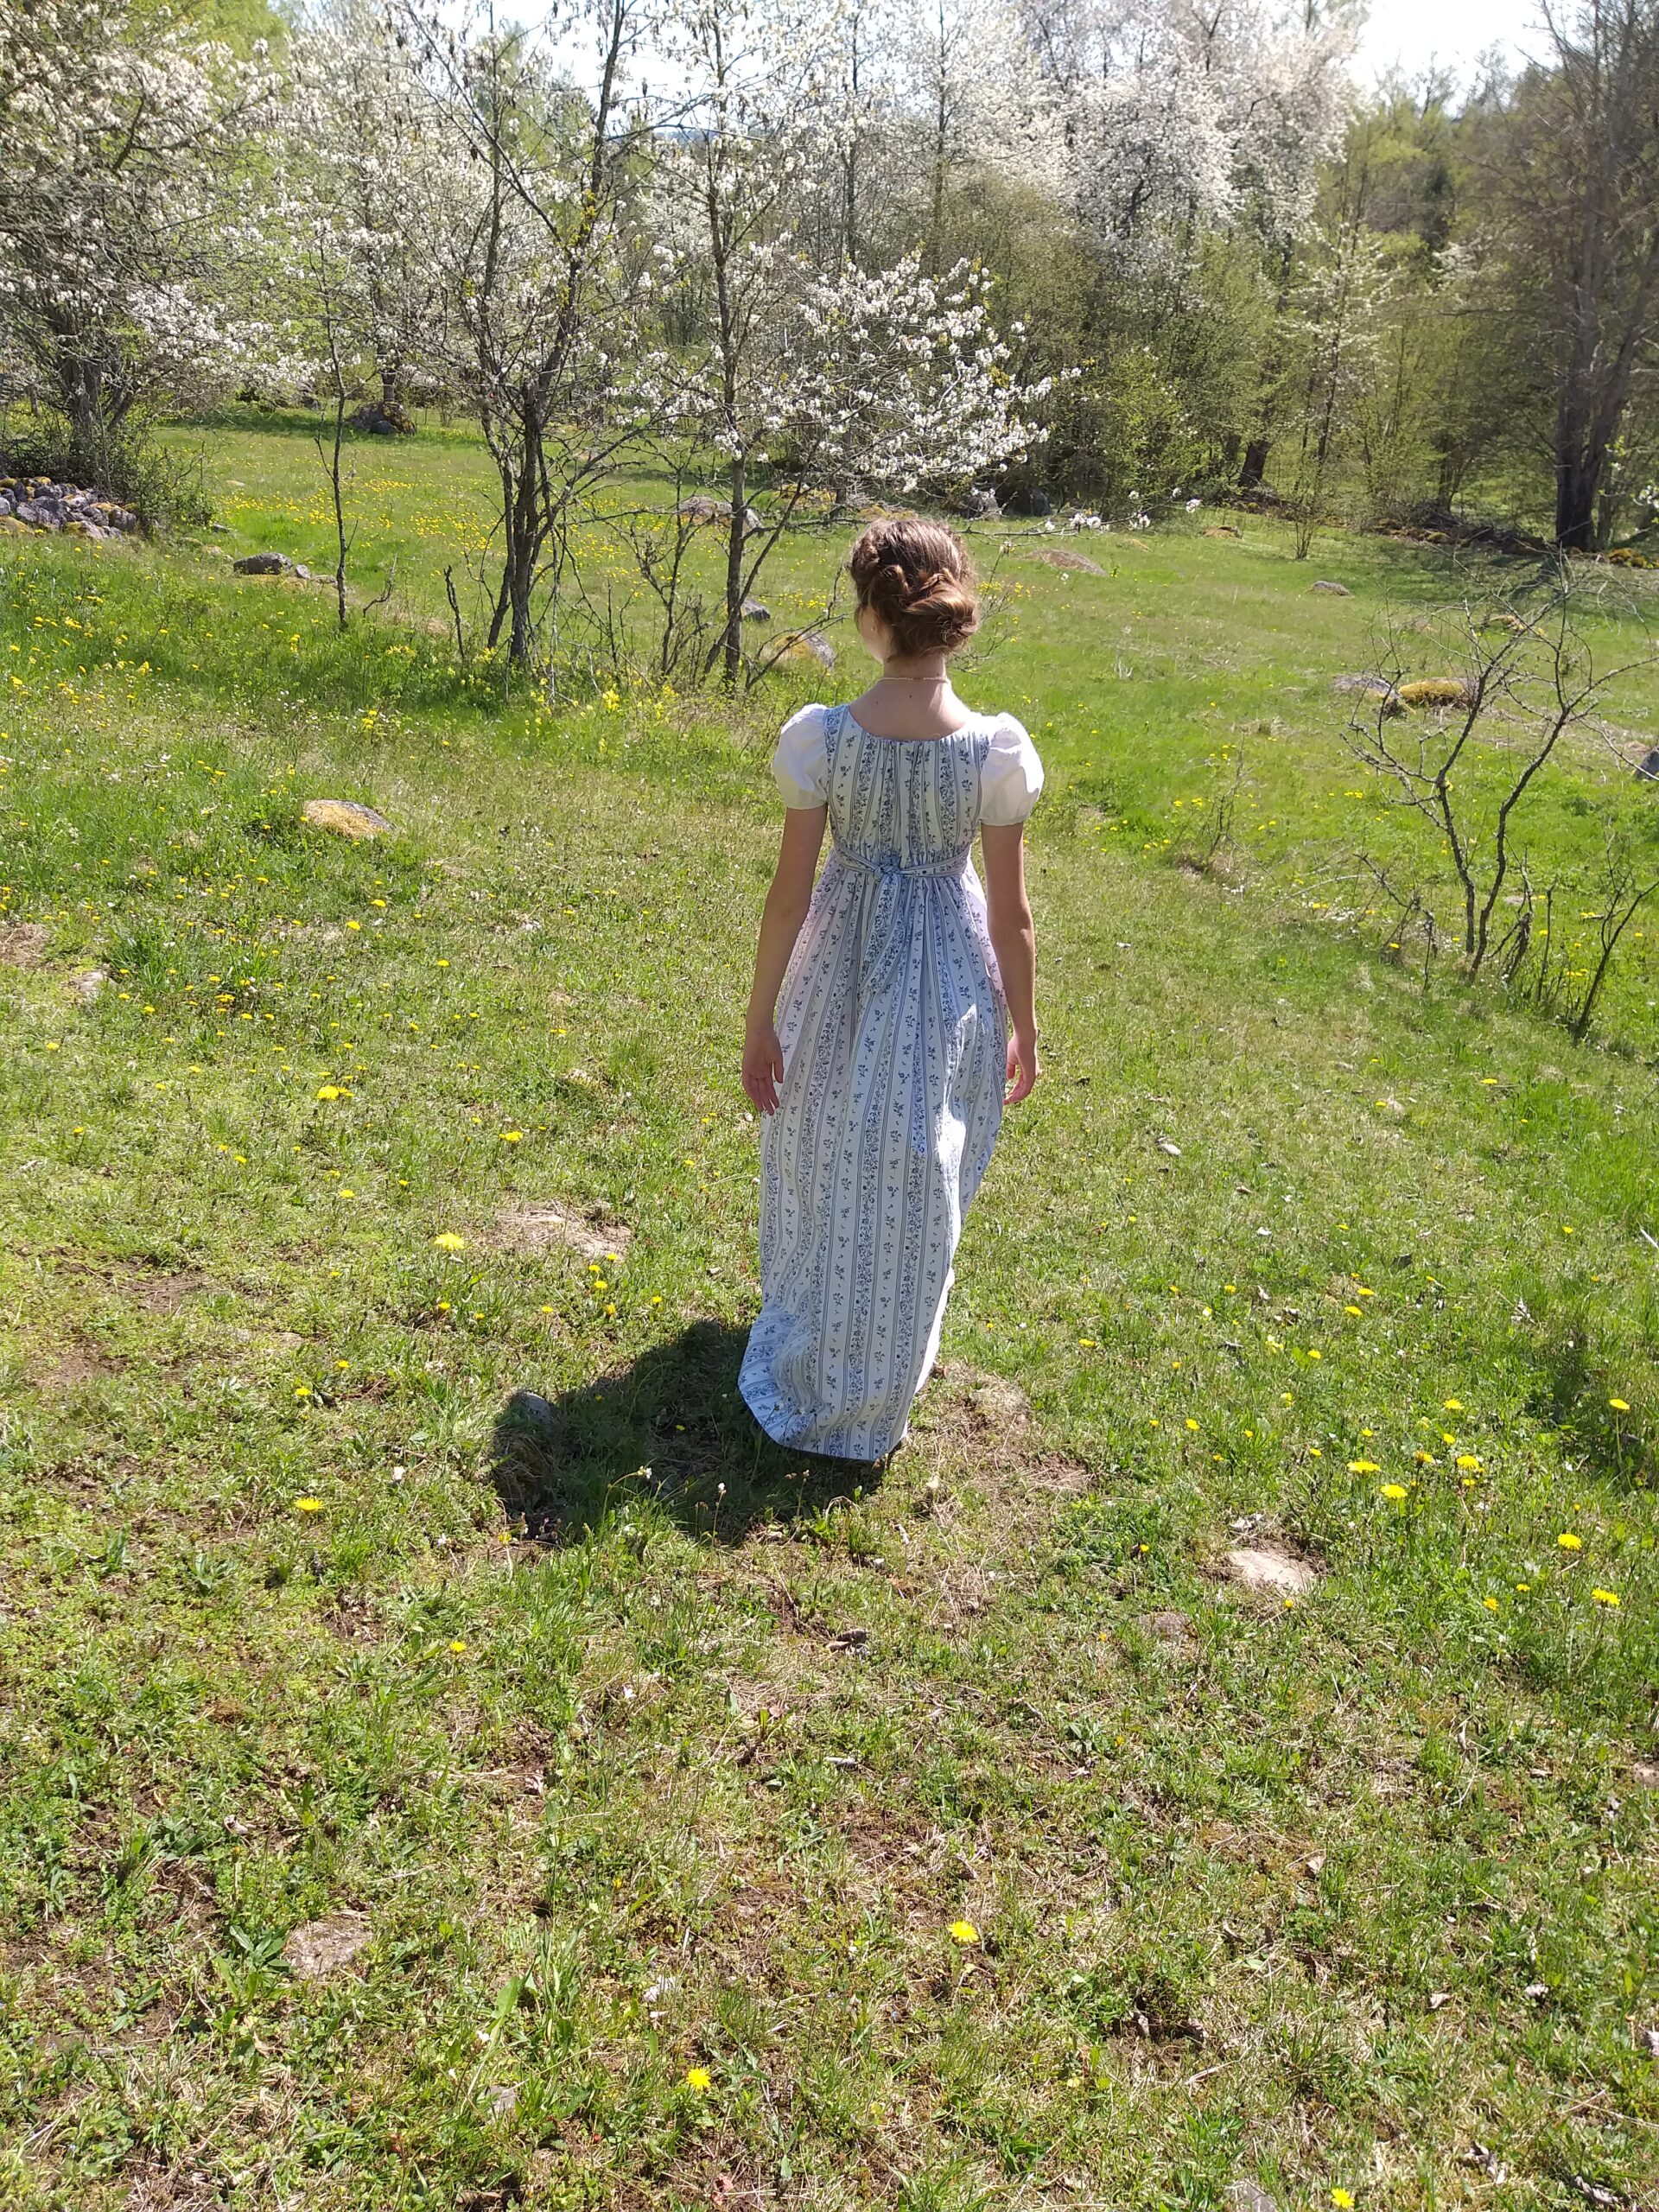
Ugnstorp really is the most beautiful place in May
As my only practical regency dress is now too big for me, I wanted a new, washable dress. Once again, I used the simple model with drawstrings at the neckline and under the bust, just as I have done with the girls’ dresses. I remembered to have seen a dress with smooth waist at the front, but I have not been able to find that picture again. Has anyone else seen this picture, or did I make it up? Probably, the back should be open and closed by drawstrings, in order to be truly accurate.
Eftersom min enda praktiska empirklänning endast passade under graviditeten, var jag sugen på att sy en ny, tvättbar klänning. Jag använde modell som flickornas klänningar, med dragsko i urringning och under bysten. Jag mindes att jag sett en klänning där tyget låg slätt framtill, under bysten, men har sedan inte kunnat hitta bilden igen. Har ni sett den, eller har jag hittat på? För att klänningen skulle vara tidstypisk, borde den egentligen ha haft en öppning i ryggen, som stängts med dragskorna.
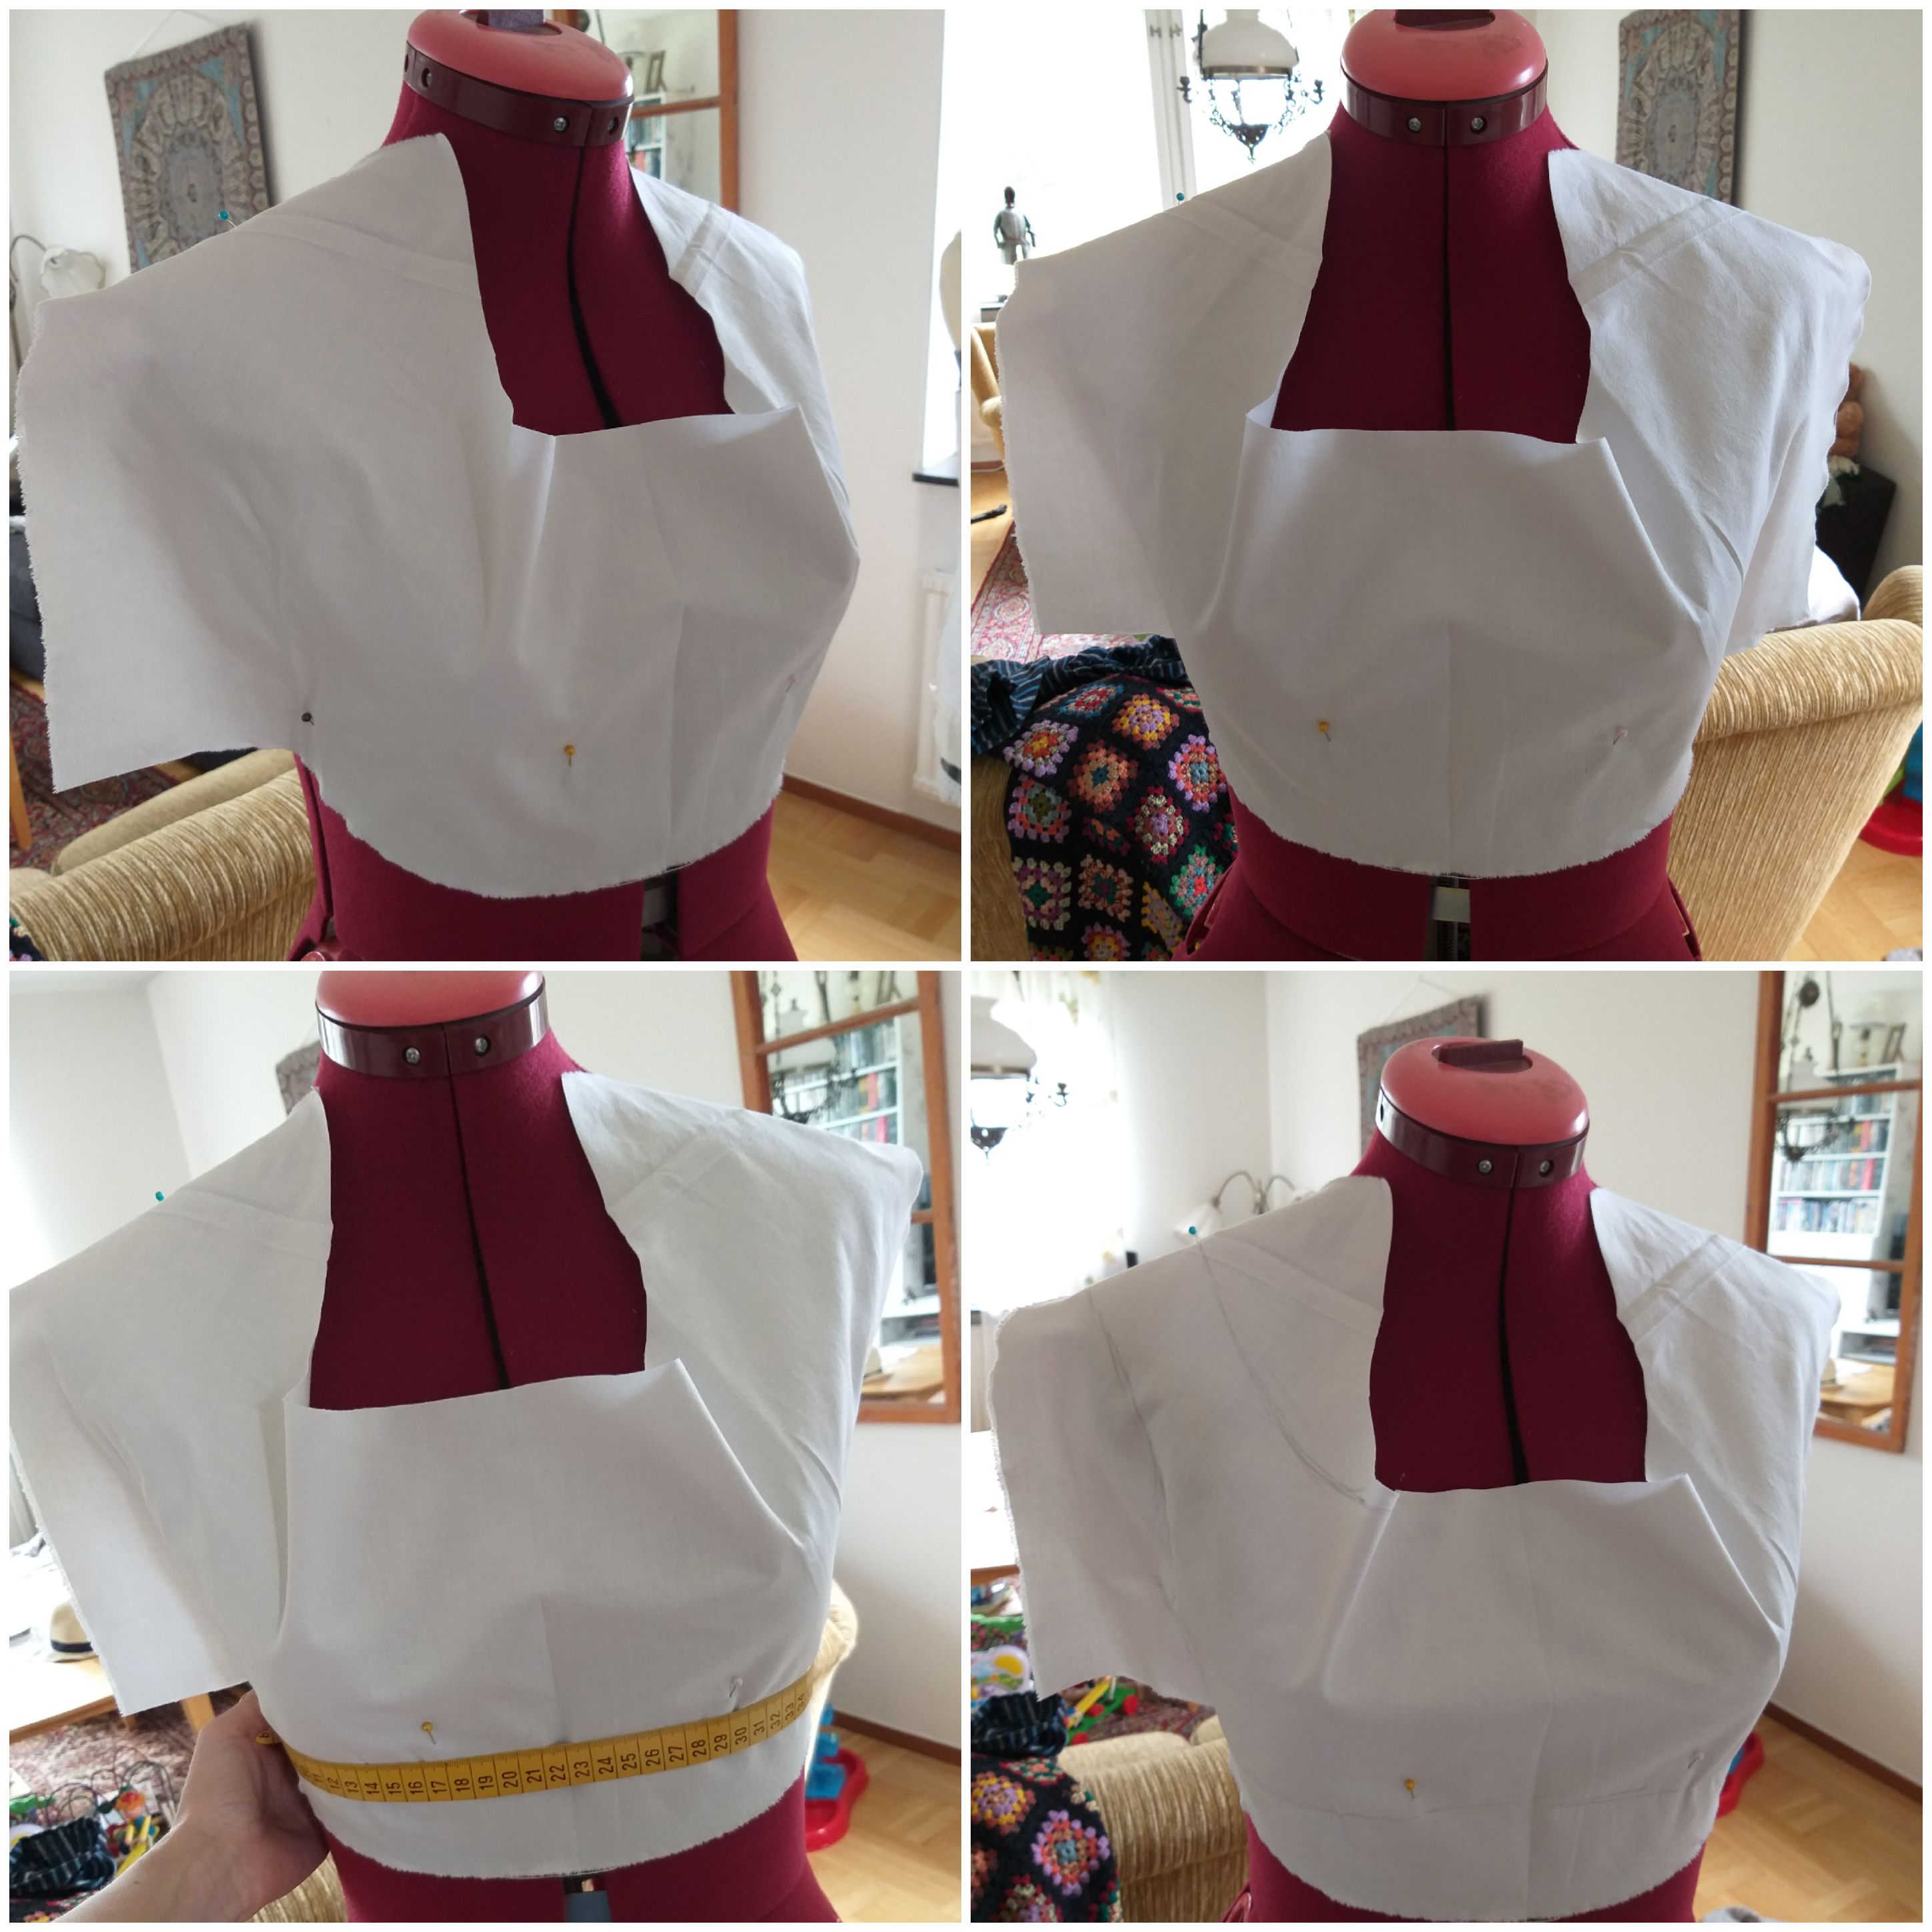
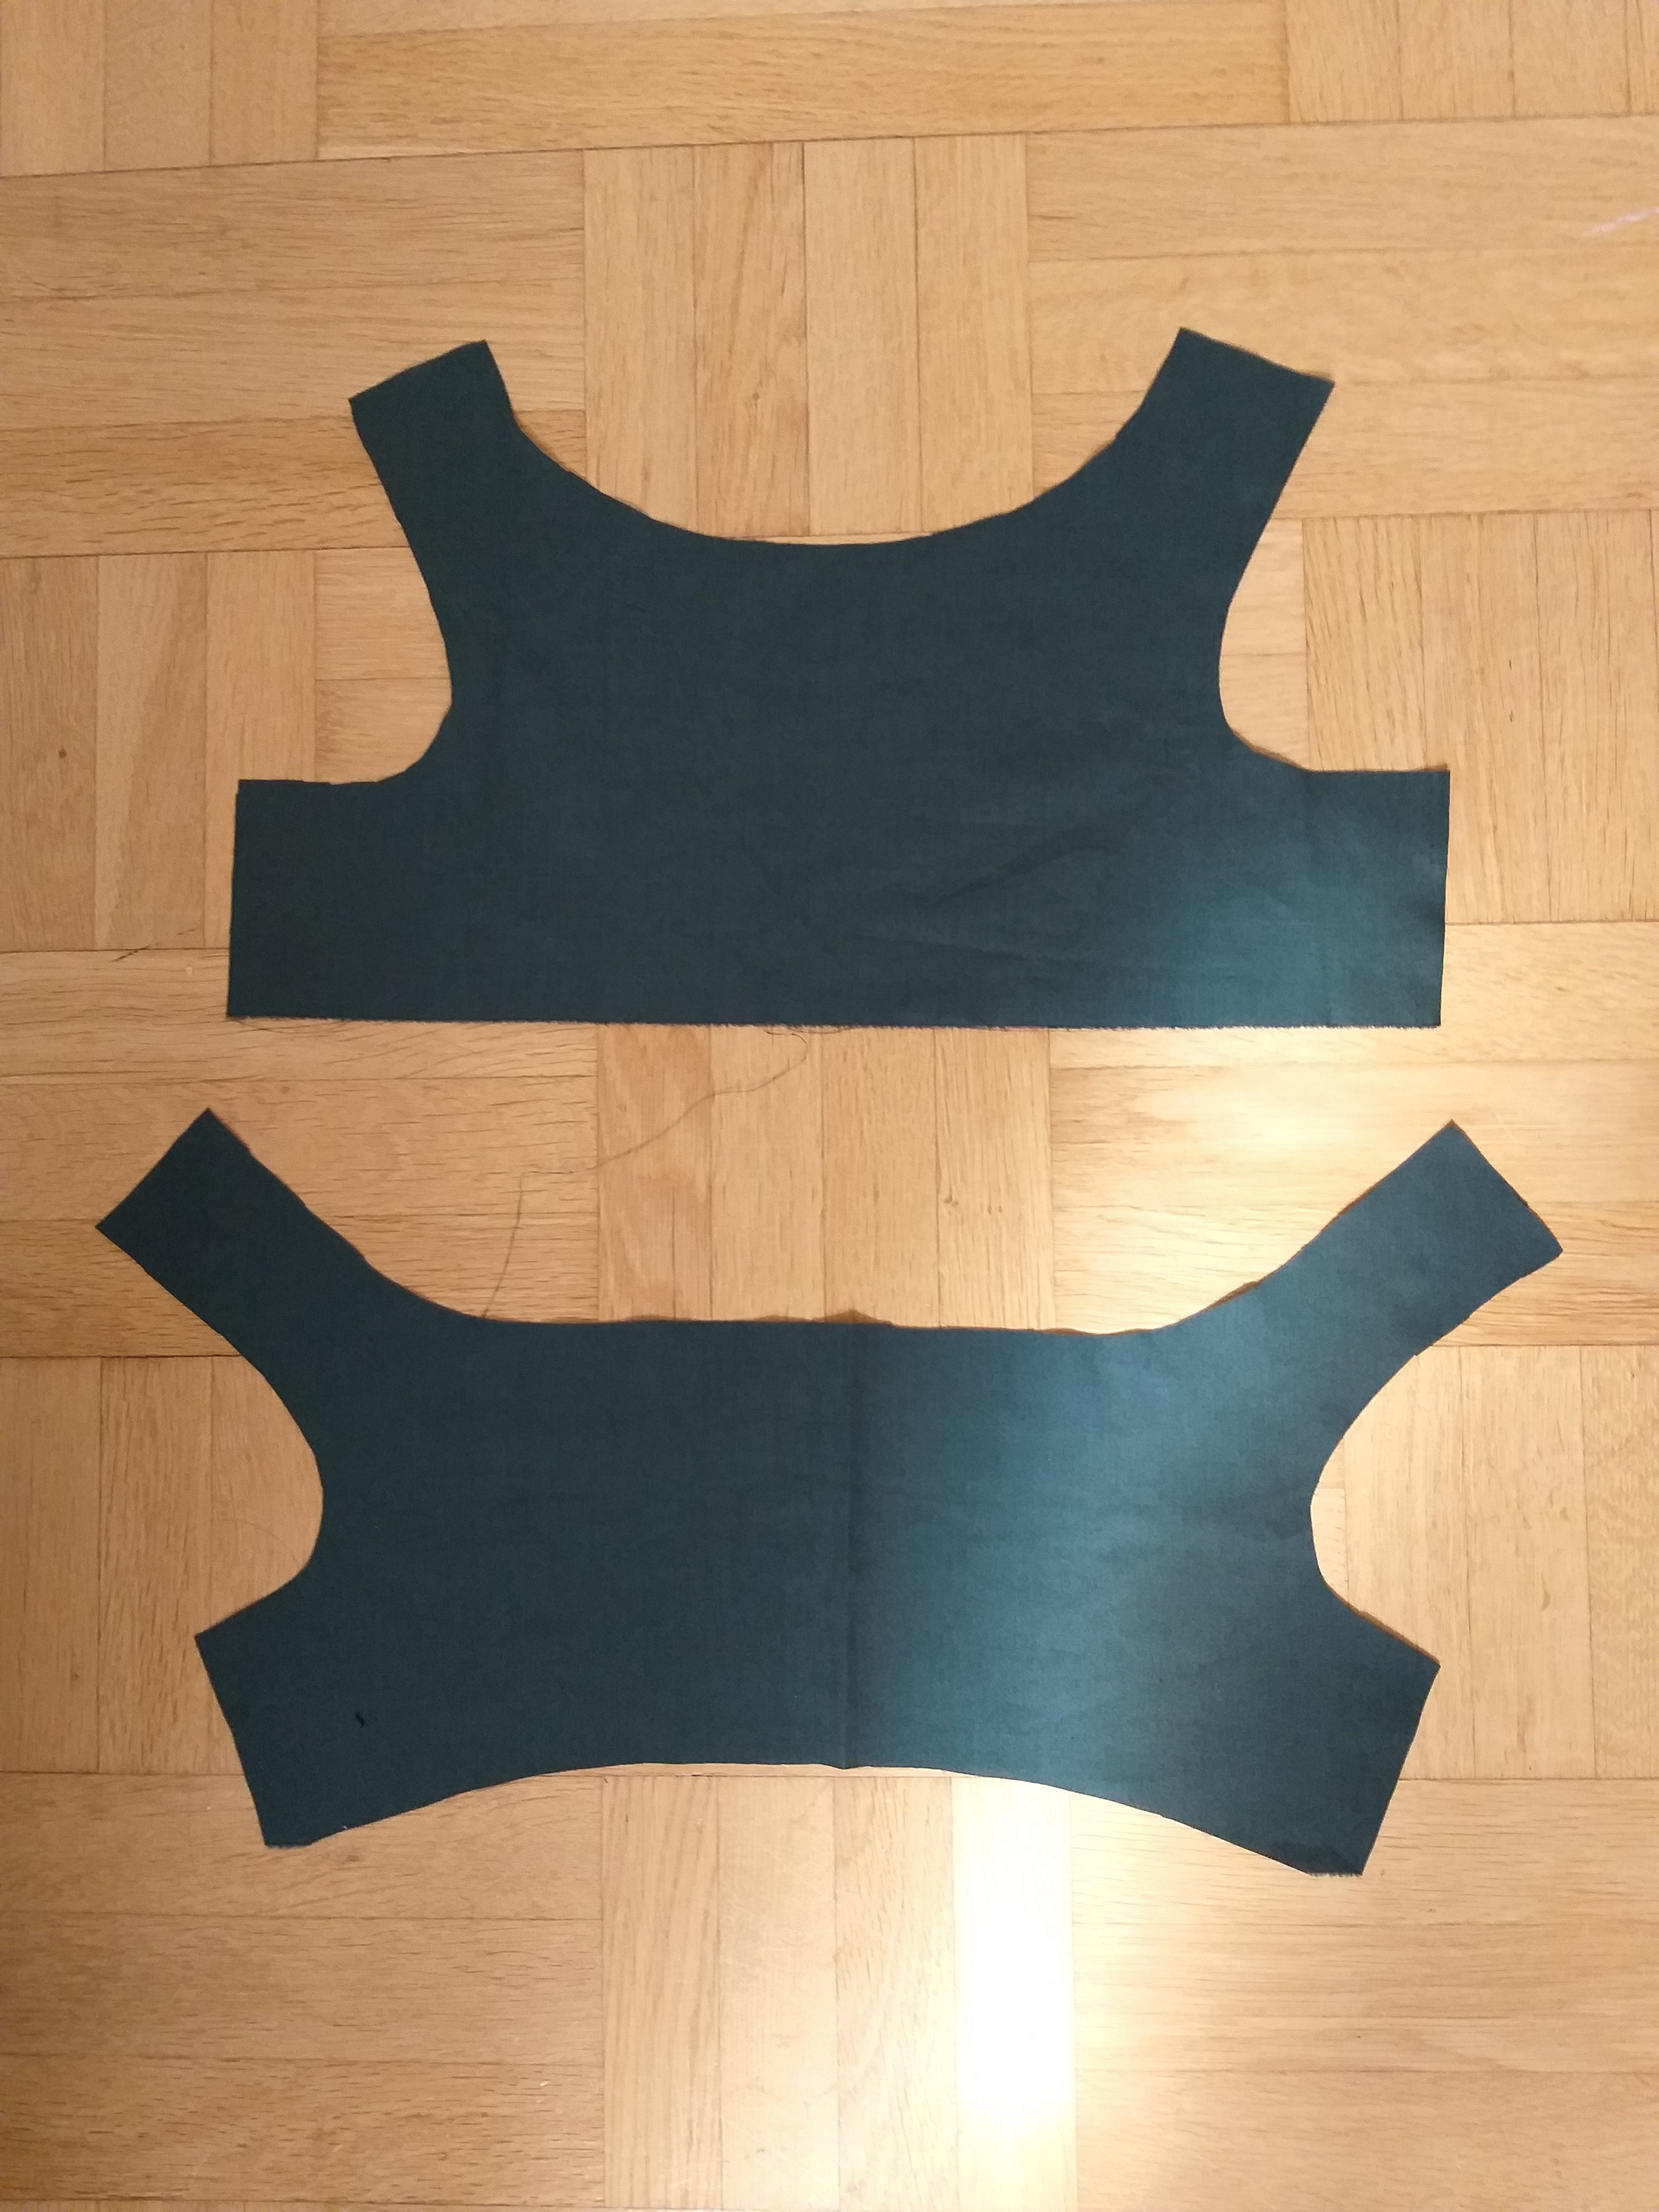
This was how I made the pattern smooth over the waist. Then I trimmed away the excess fabric in the neckline and armpit. The back of the bodice is just broad overall.
Back of the bodice at the top. Front at the bottom.
After sewing the front and back bodice parts together, I attached the skirt. In the front it lays smooth, while it is gathered in the back. At the waist seam, I added a waistband, where I hid the drawstring. At the inside of the neckline I also put a drawstring. I made a simple, straight arm. Last, I stitched the rolled hems by hand.
Efter att ha sytt samman fram- och bakstycke satte jag dit kjolen. Framtill ligger den slätt mot överdelen, medan den är rynkad baktill. Över sömmen under bysten fäste jag ett midjeband, som jag använde för dragskon. Ärmarna är bara raks tygstycken med ärmkulle. Jag handsydde rullfållarna sist.
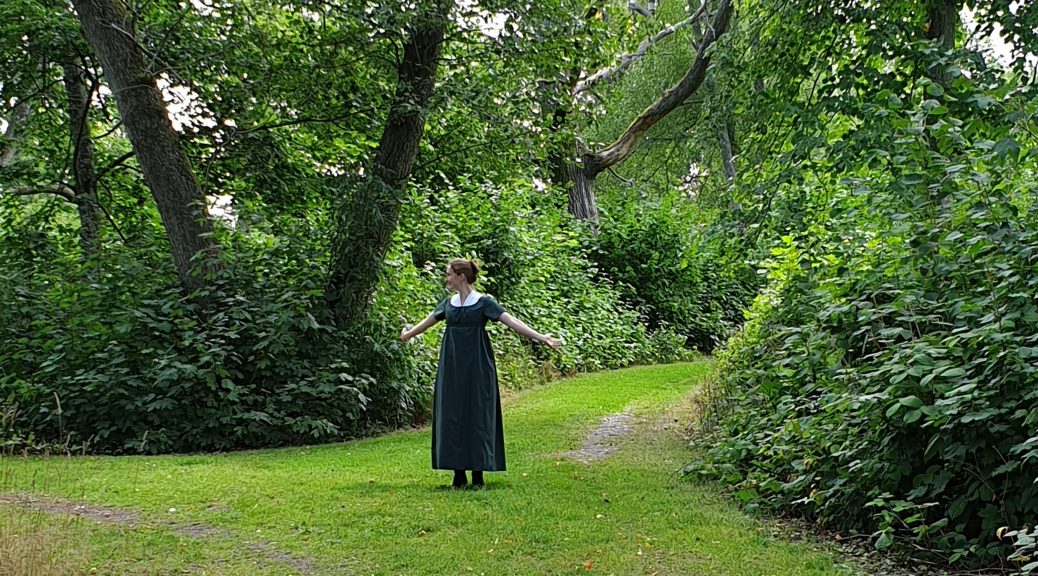
I am happy with the result. I felt like one of the Dashwood sisters. The only thing lacking now are long kid gloves. Please tell me if you find a pair for me!
Jag är nöjd. Jag kände mig faktiskt som en av systrarna Dashwood. Vad som verkligen saknas i denna ensamble är ett par långa skinnhandskar. Säg till mig om ni hittar ett sådant par, snälla!
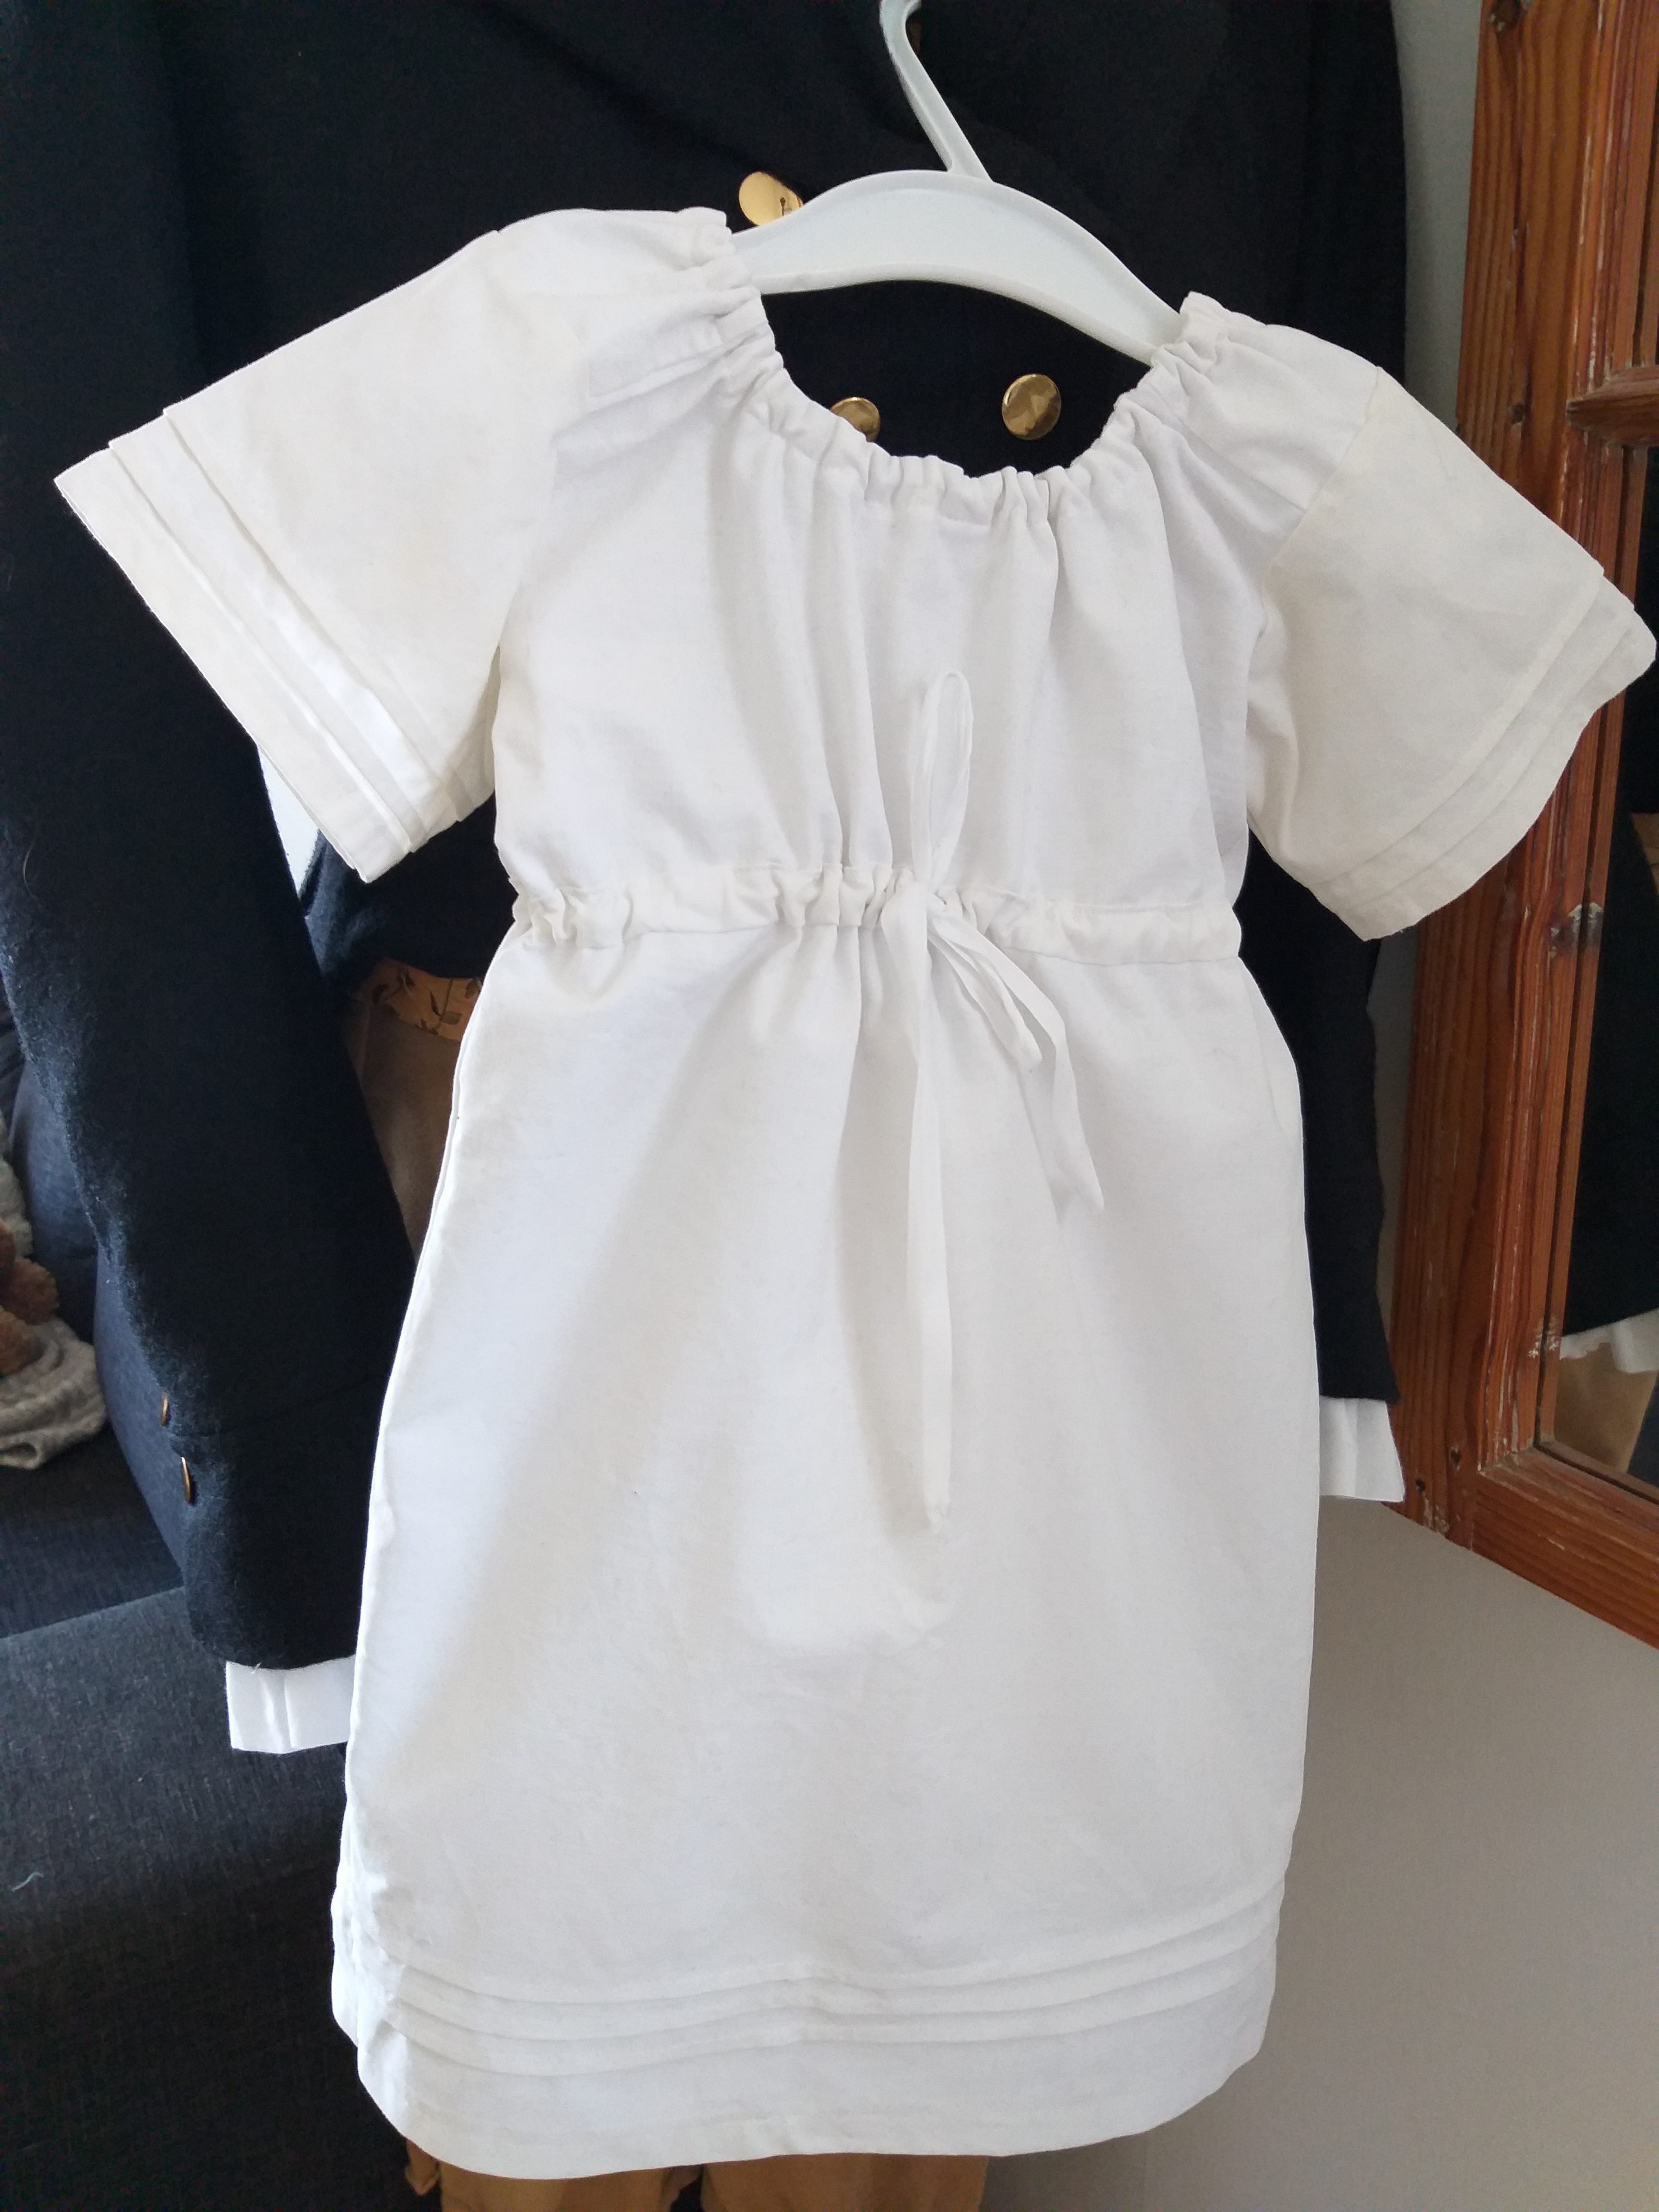
These last few months have been crazy. I’ve had my internship at the psychiatric ward, which have been both thrilling and exhausting, as I have been working nights a lot more than I tolerate. At the same time I have been preparing clothes for a recency ball. In a weak moment I decided to even participate in dancing sessions before the ball, in order to fully enjoy the historically authentic ball (for those of you who don’t know me, I am not the dancing type). My dear nieces will accompany us for the dancing lessons and thus, there is need for one more regency dress, for a slender thirteenyearold. The younger niece will wear this dress which will be long enough after having removed the pin tucks. I made the quickest dress ever, with the least amount of material ever, leaving approximately five square centimetres of scraps. This is the result.
This is what fabric was left after making the dress. I’m quite proud of myself.
The new dress with floral print and the old white dress which has now been successfully lengthened by removing the pin tucks.
Toddler’s Dress
Our toddler will join the dancing sessions, off course. So he needs a kirtle. I made one in a few hours by machine. He should have a pair of trousers and a hat too, but there is no time and what does it matter, really? If you want some background about children’s clothing, see this lovely page.
Tired boy in the company of his best friends
Fall Front Breeches
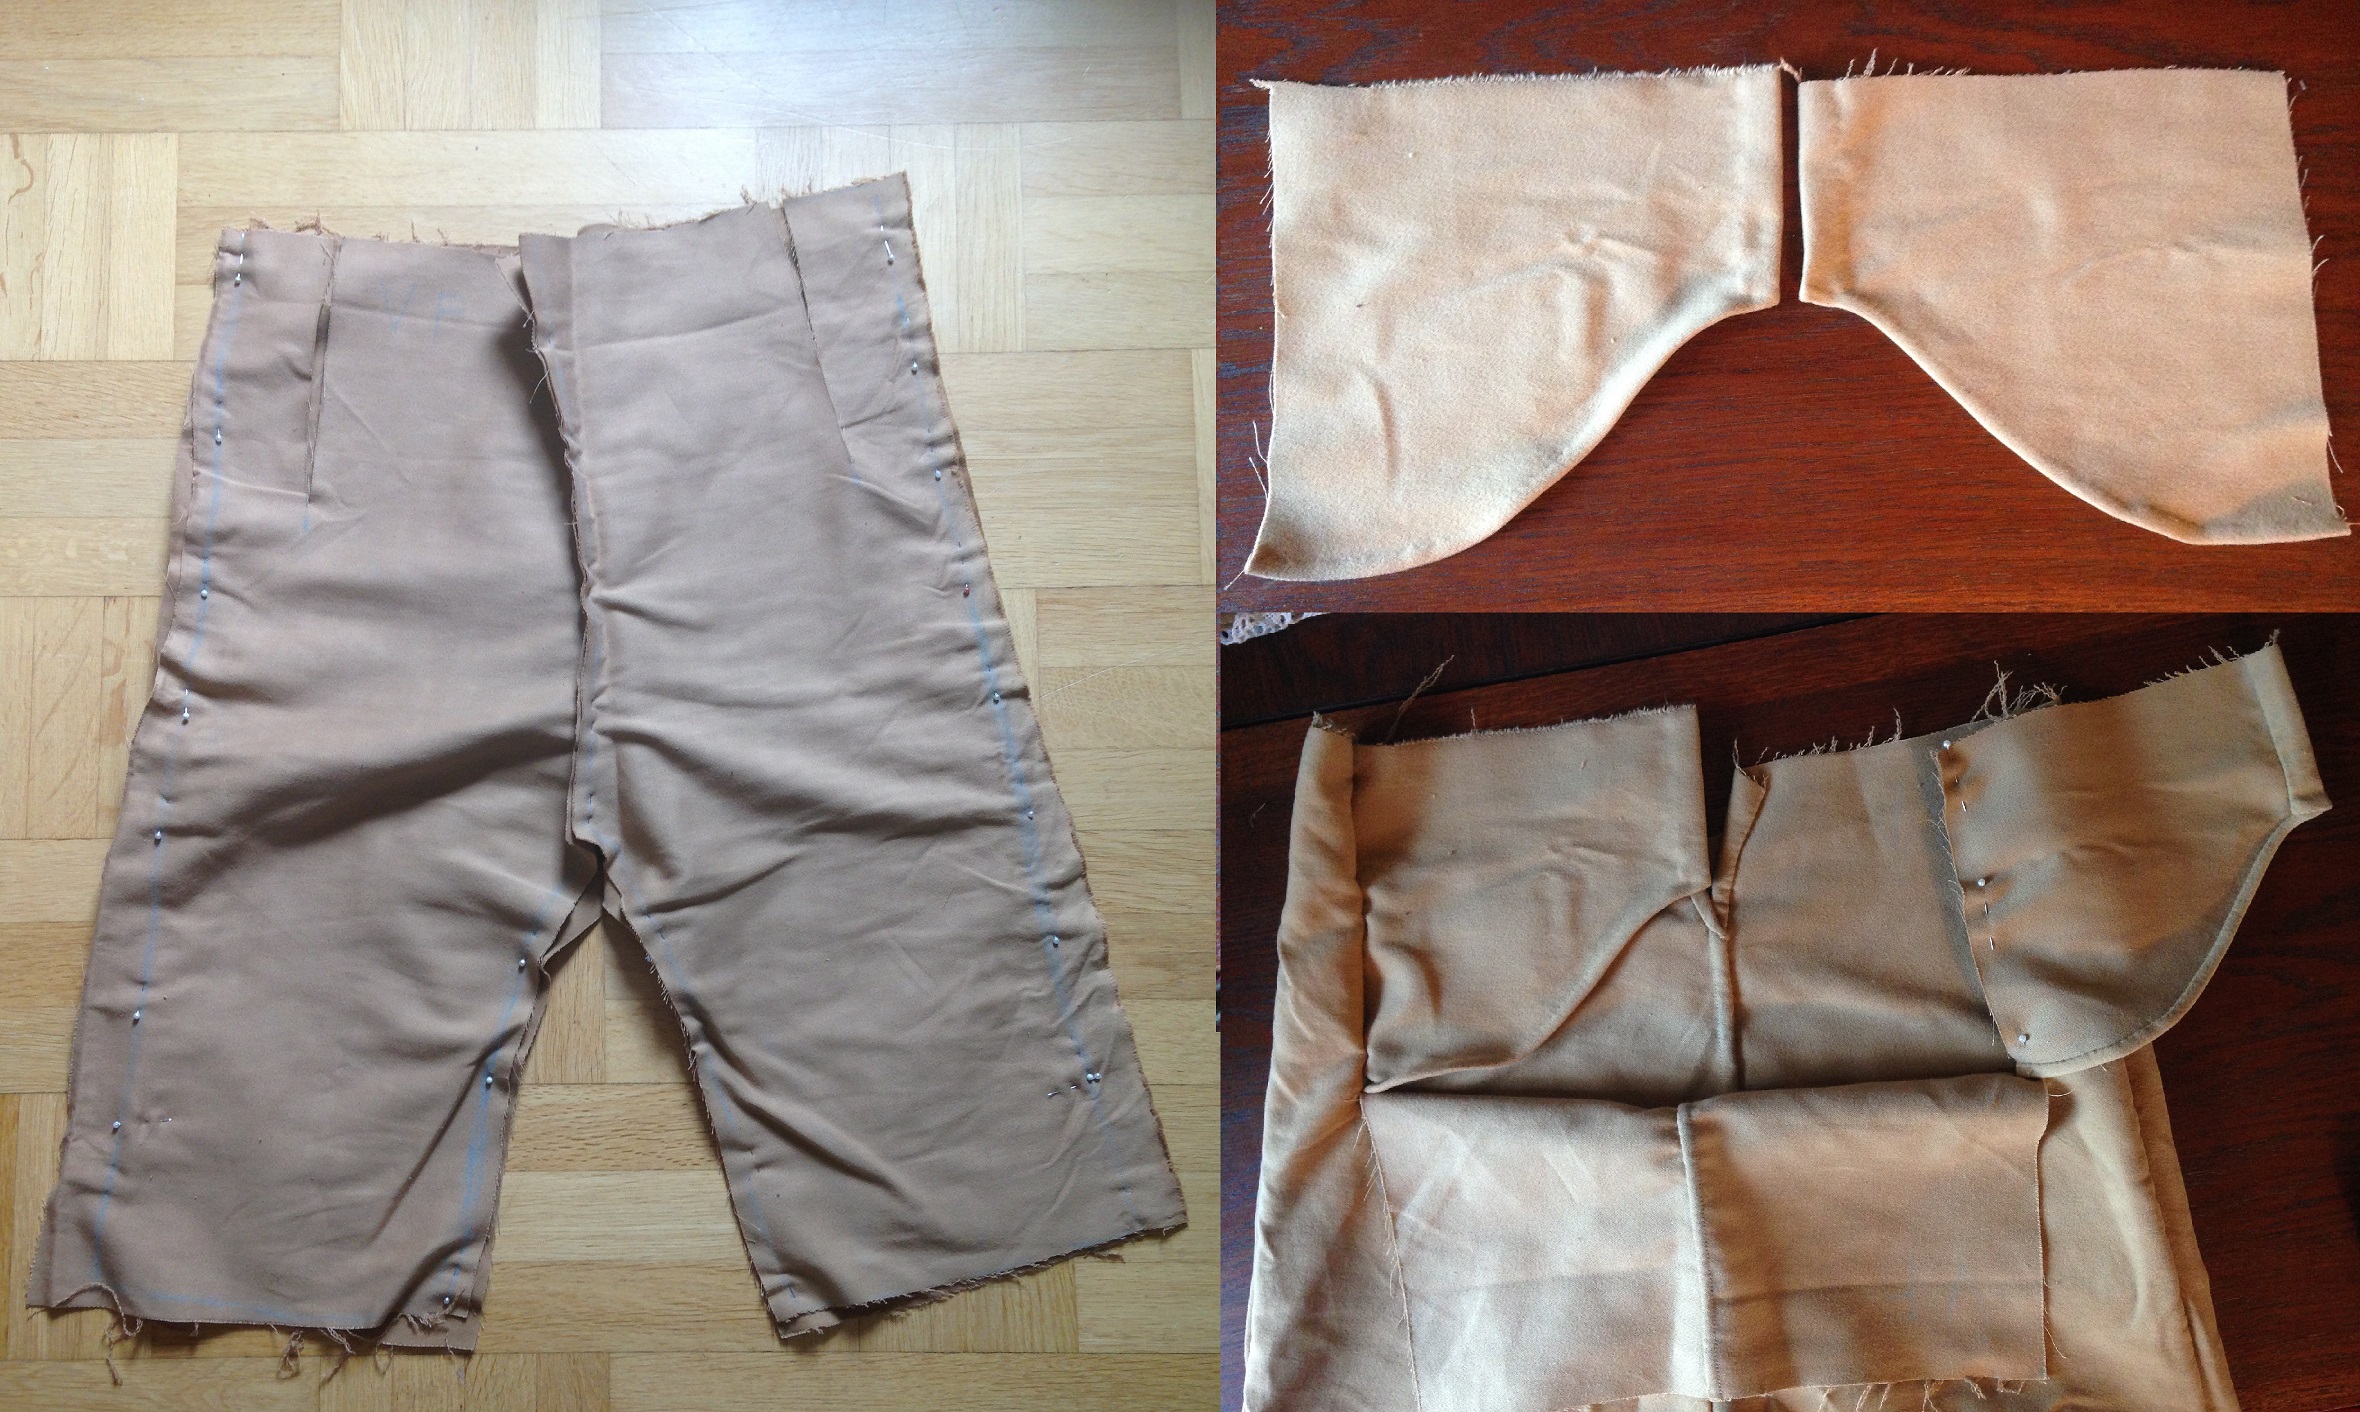
I have been working on a new pair of breeches for my husband for some years, moments at a time. Now only the buttons remain. I have tried to solve the mystery of the construction of the elusive fall front breeches and drafted the pattern myself. This is how I have interpreted what I have seen in pictures.
1) putting together front, back and both sides 2) cutting slits by the sides for narrow or broad fall front 3) adding the pieces behind the fall front
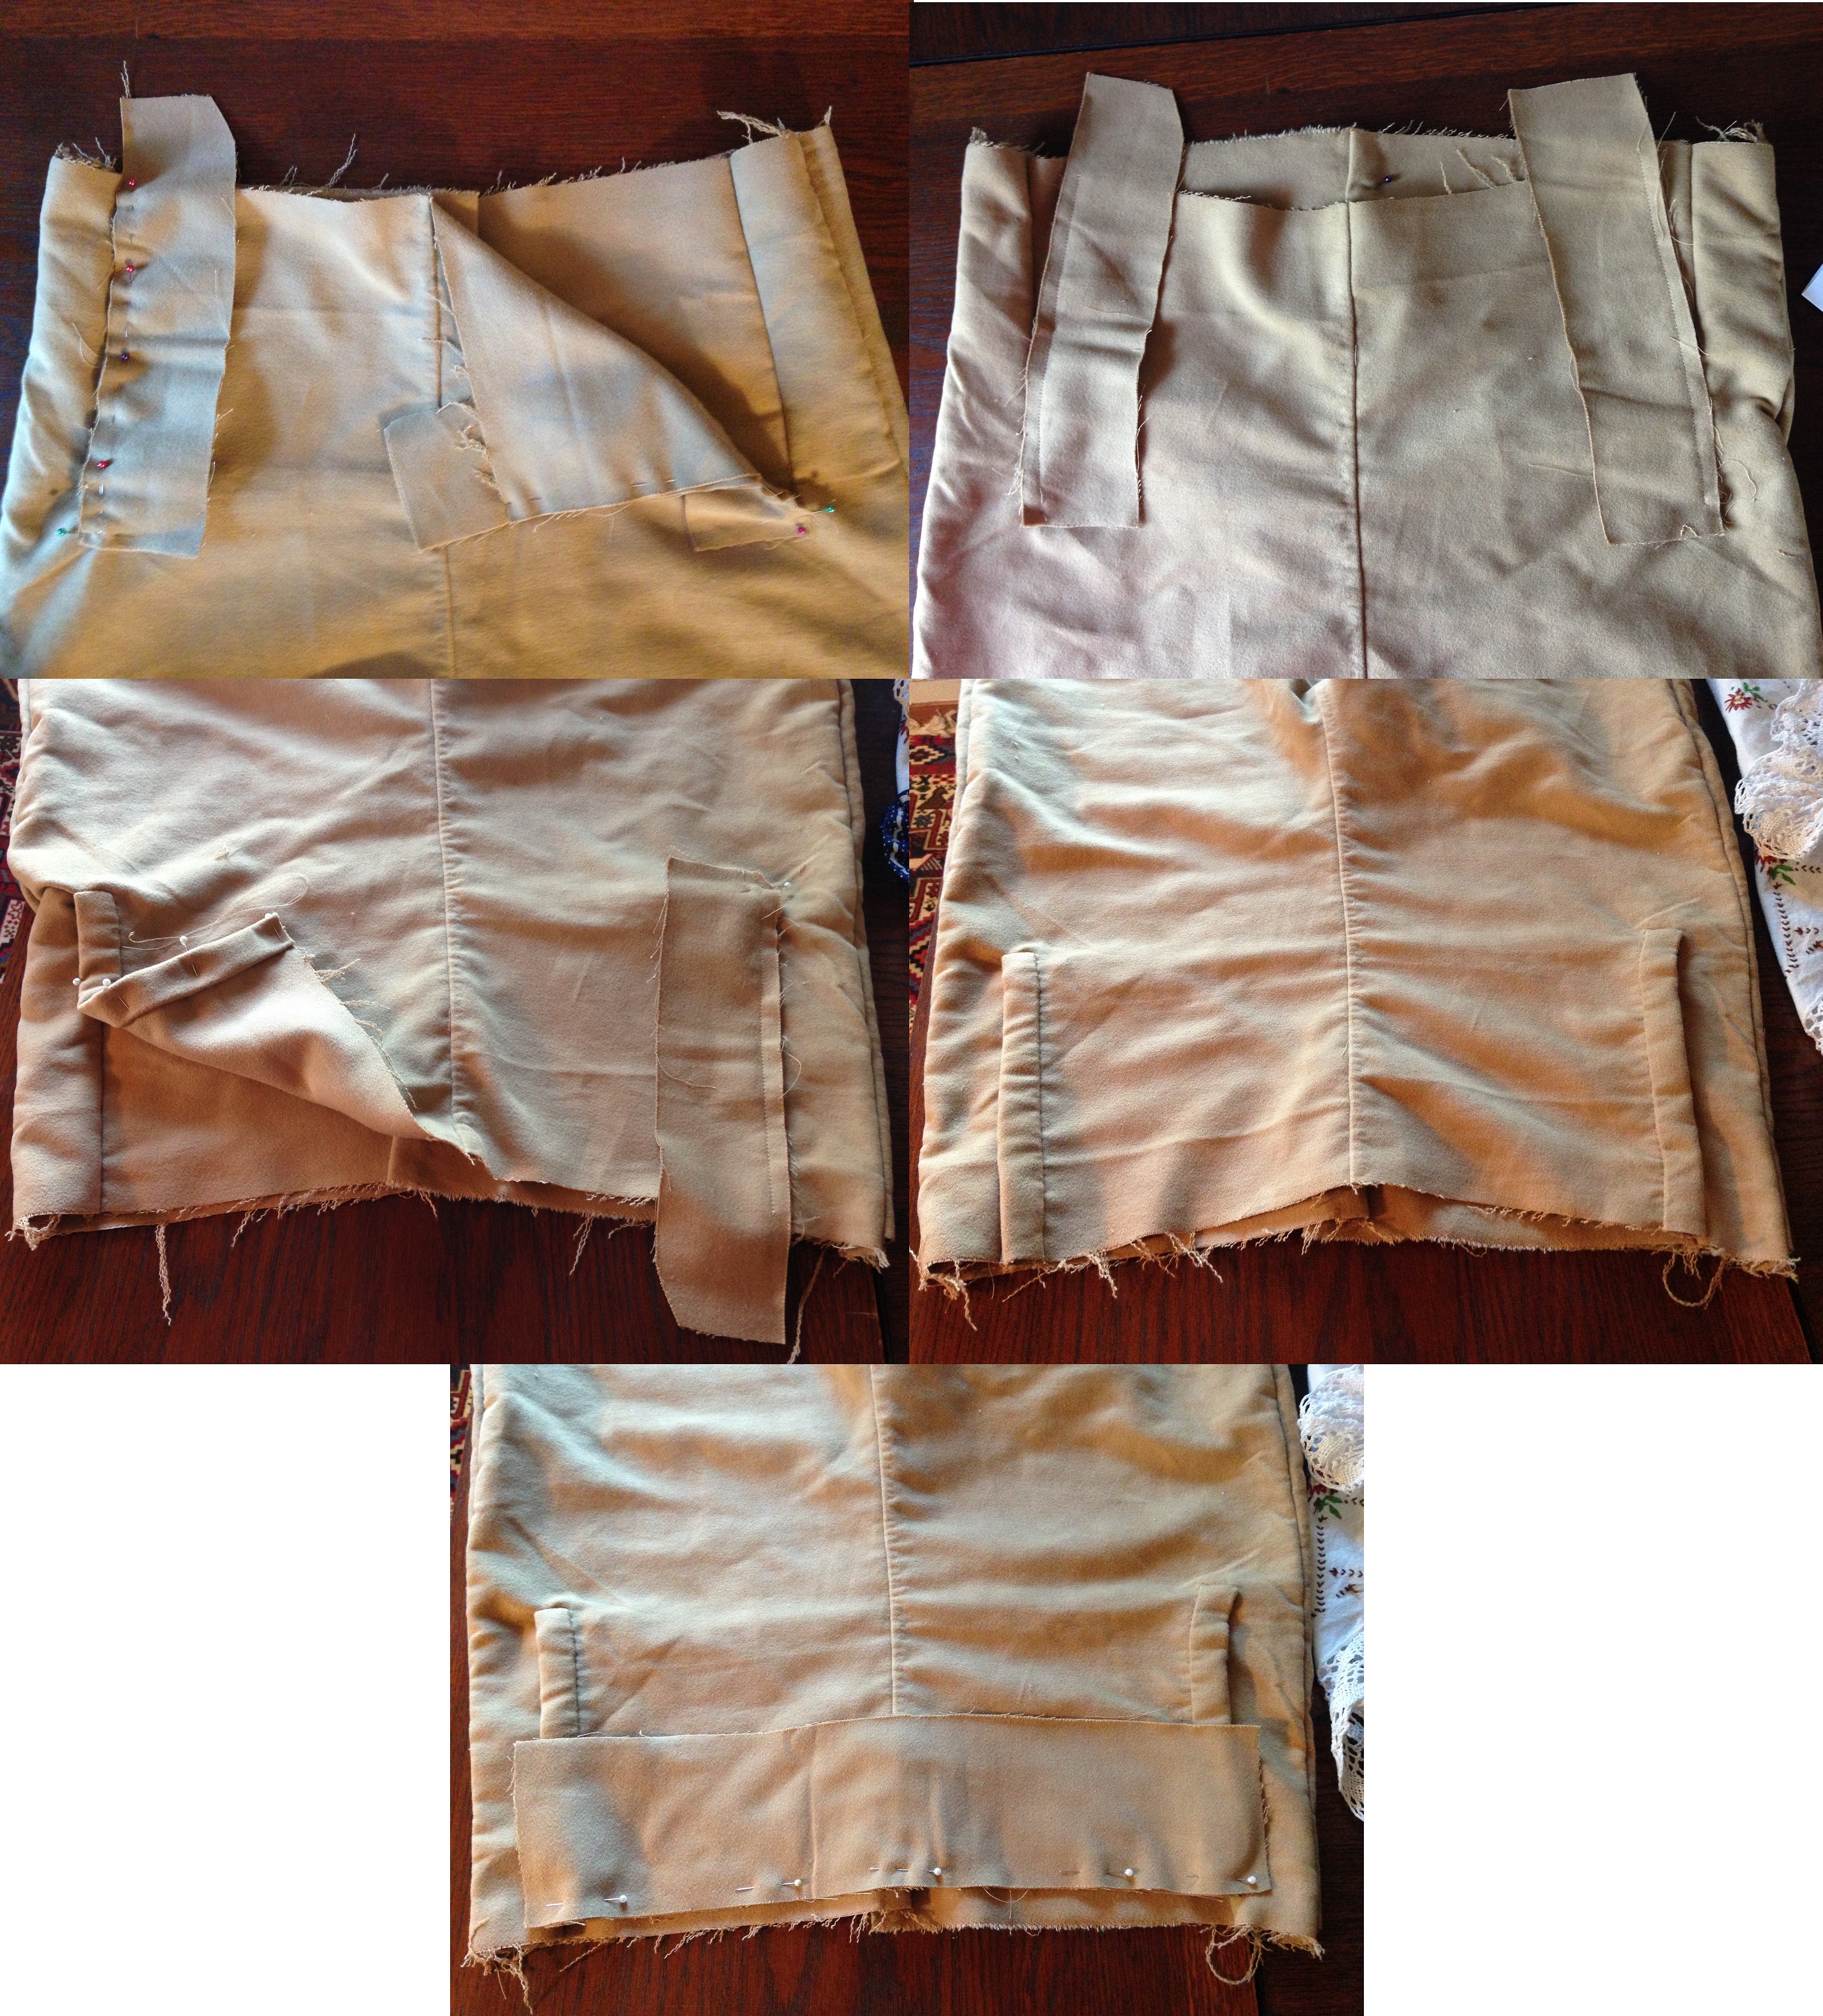
5) adding fabric pieces to the fall front sides 6) folding the pieces around the sides in order to hide the raw edges 7) adding one piece more to the top of the fall front in the same way
After I stopped documenting this process – why, in heavens name? – I added a waistband to hide the raw edges at the rest of the top of the breeches. I hid the raw edges of the end of the legs in the same way. And at the very last I will add buttons and make button holes!
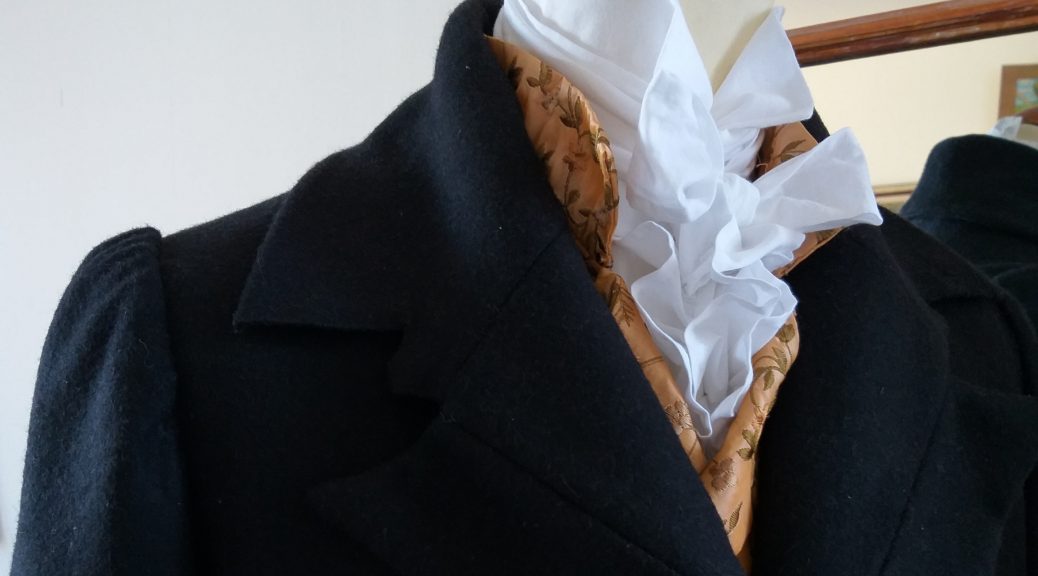
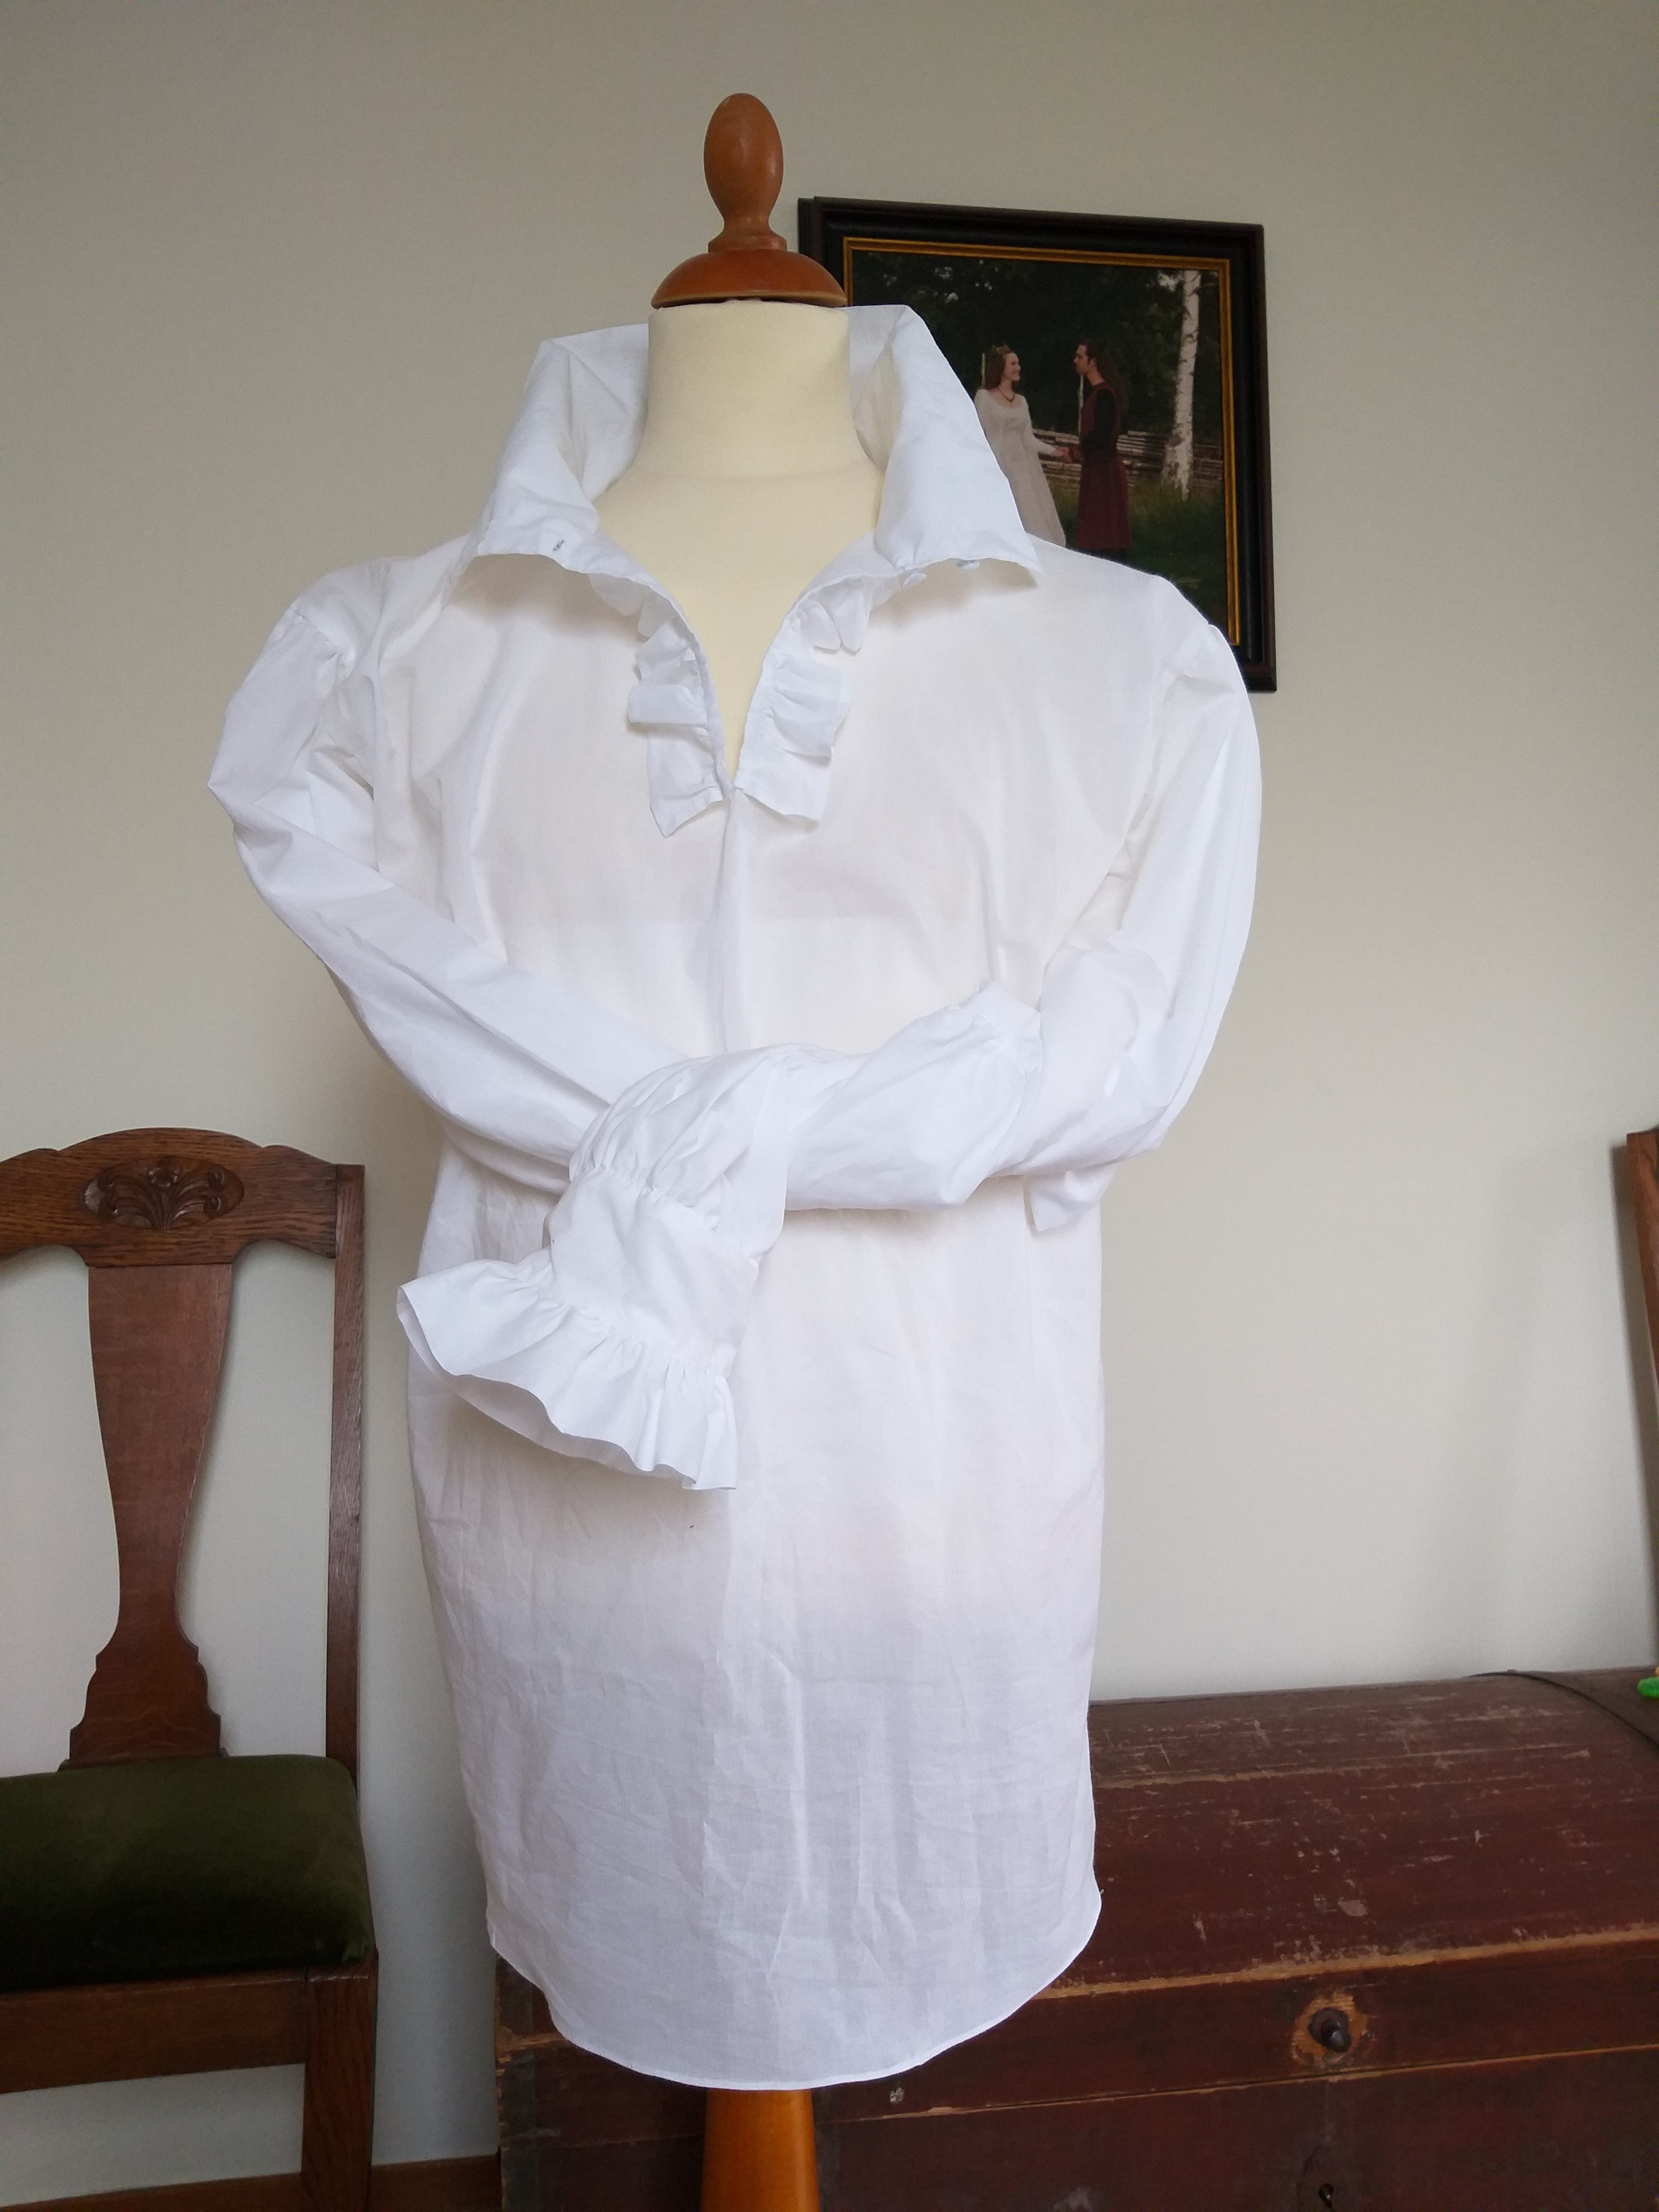
Shirt with Ruffles
I thought that he also needed a nicer shirt and cravat than the first set of clothes, so I made a new shirt with ruffles in the neckline and by the cuffs. Afterwards, I have found excellent tutorials for period regency shirt construction, as in Fabric and Fiction and at Your Wardrobe Unlocked. This one is obviously wrong in many ways.
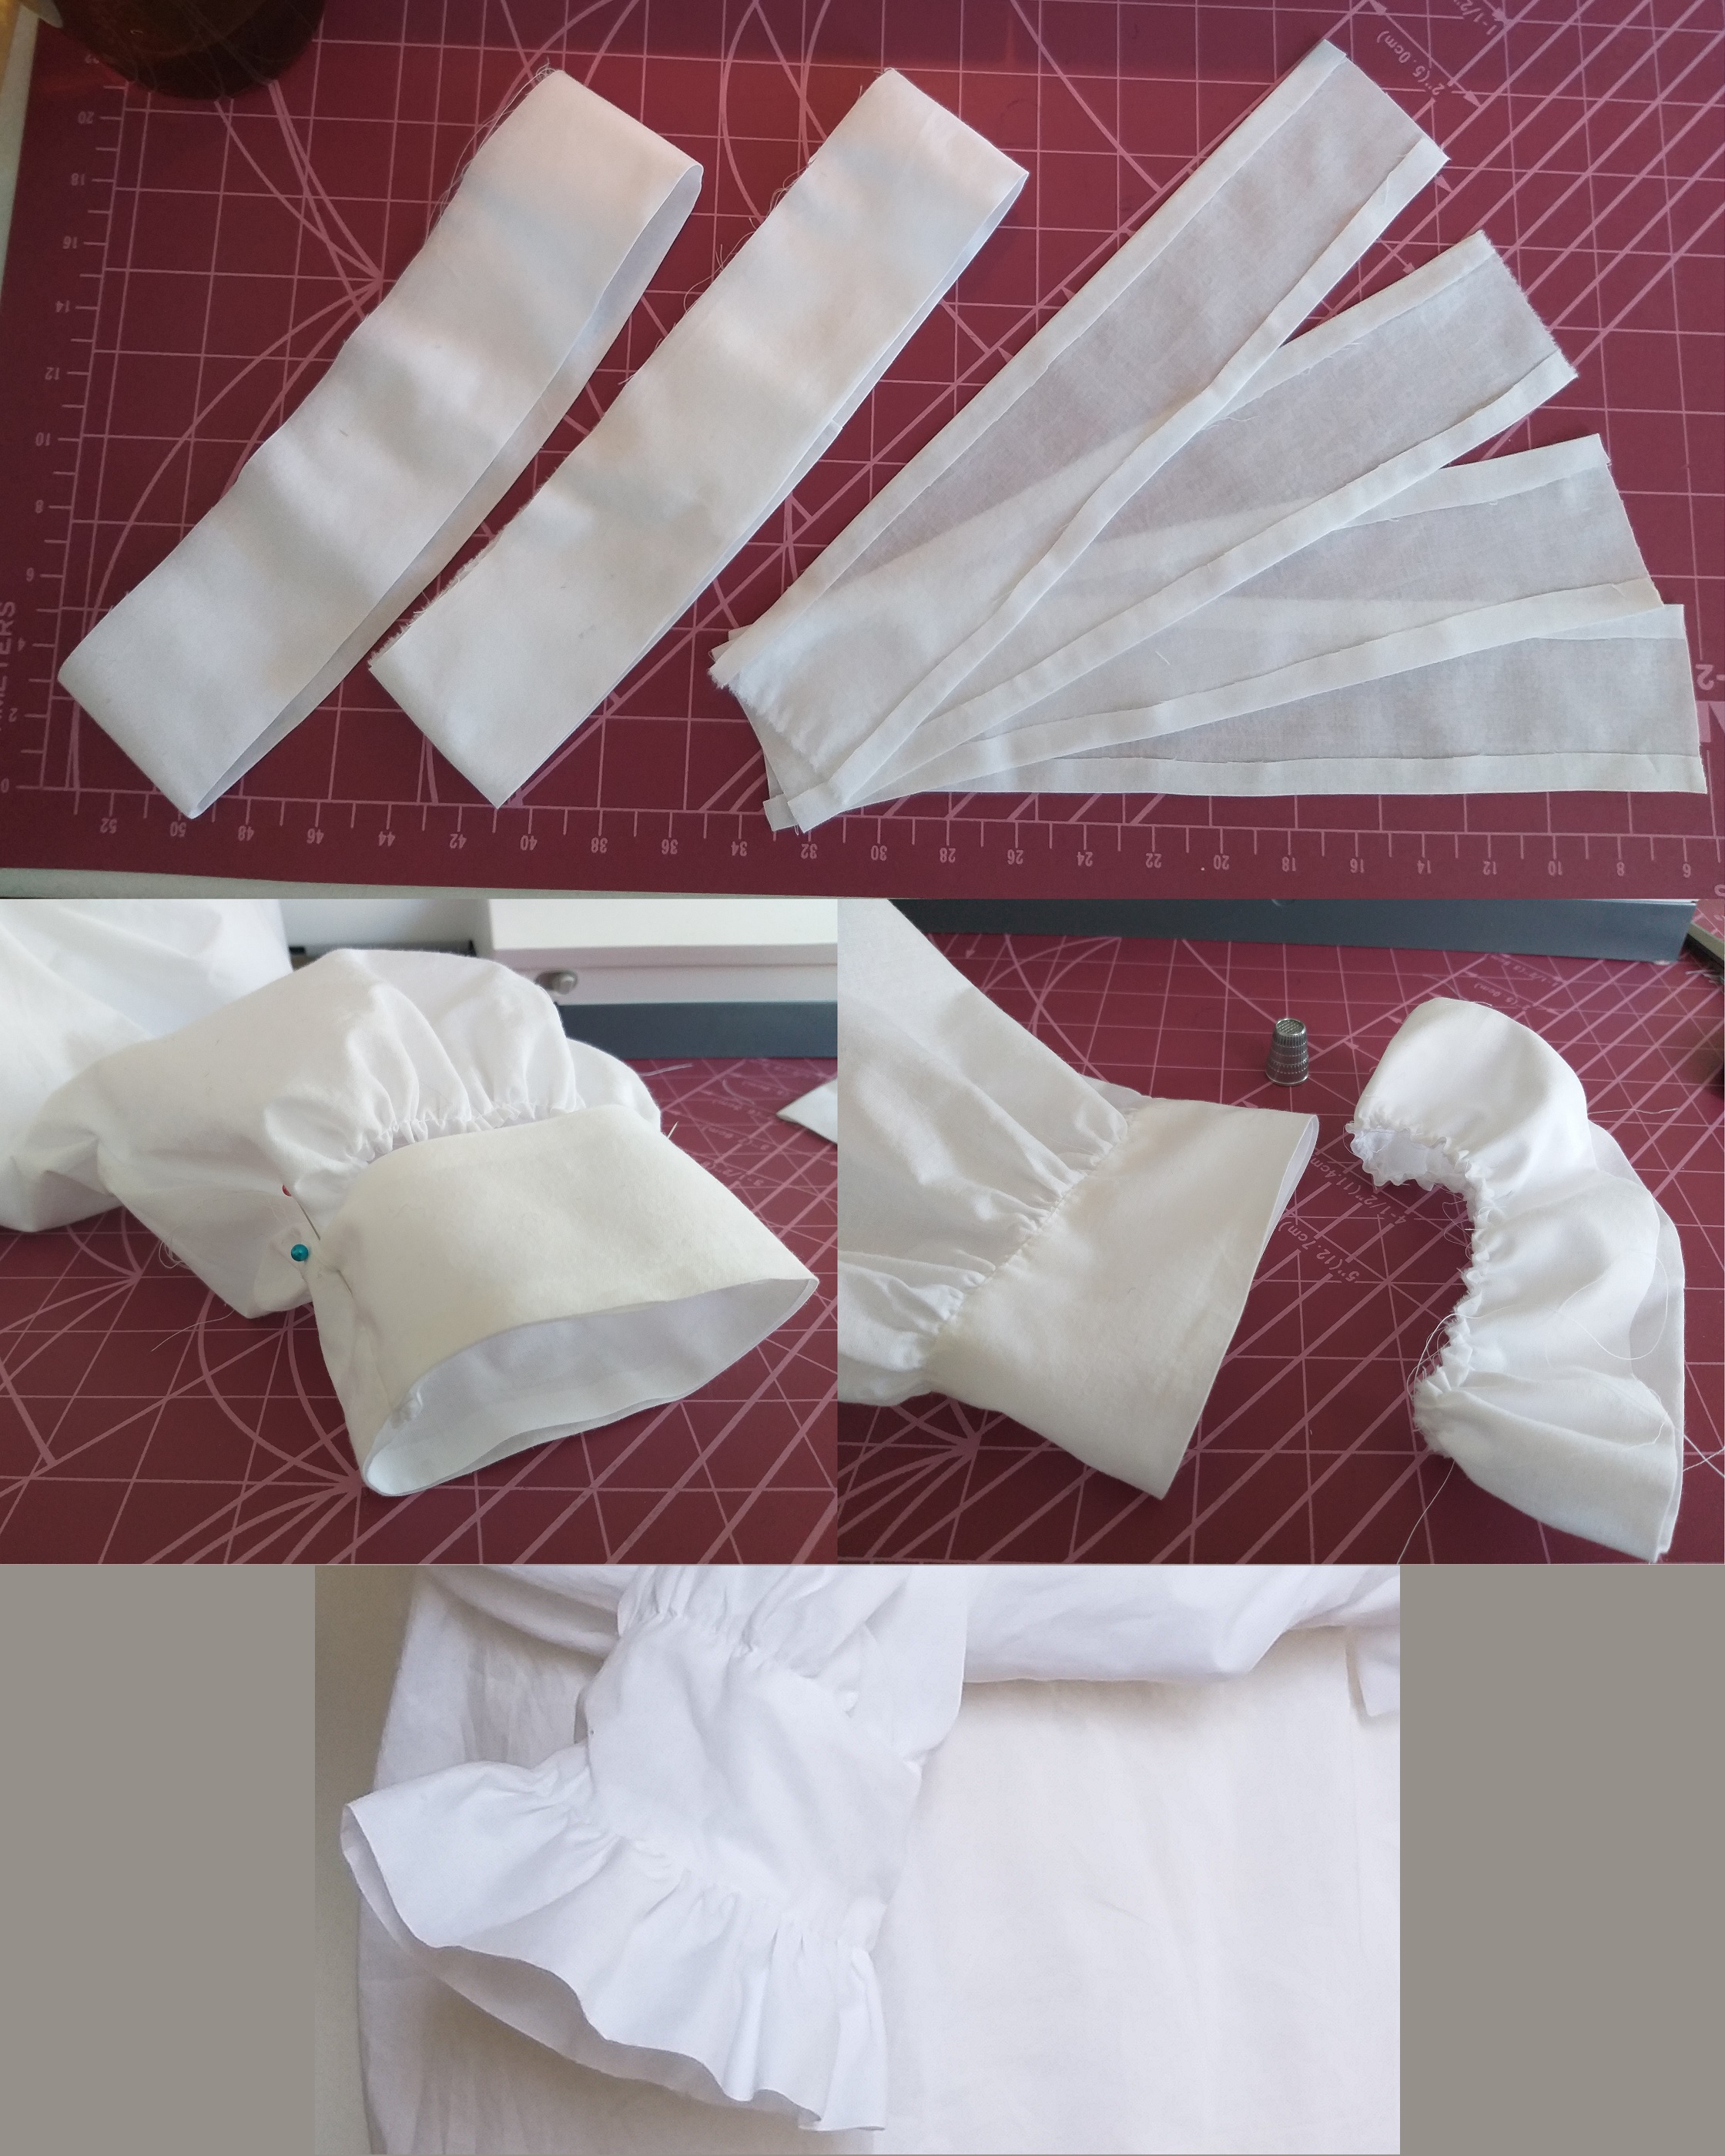
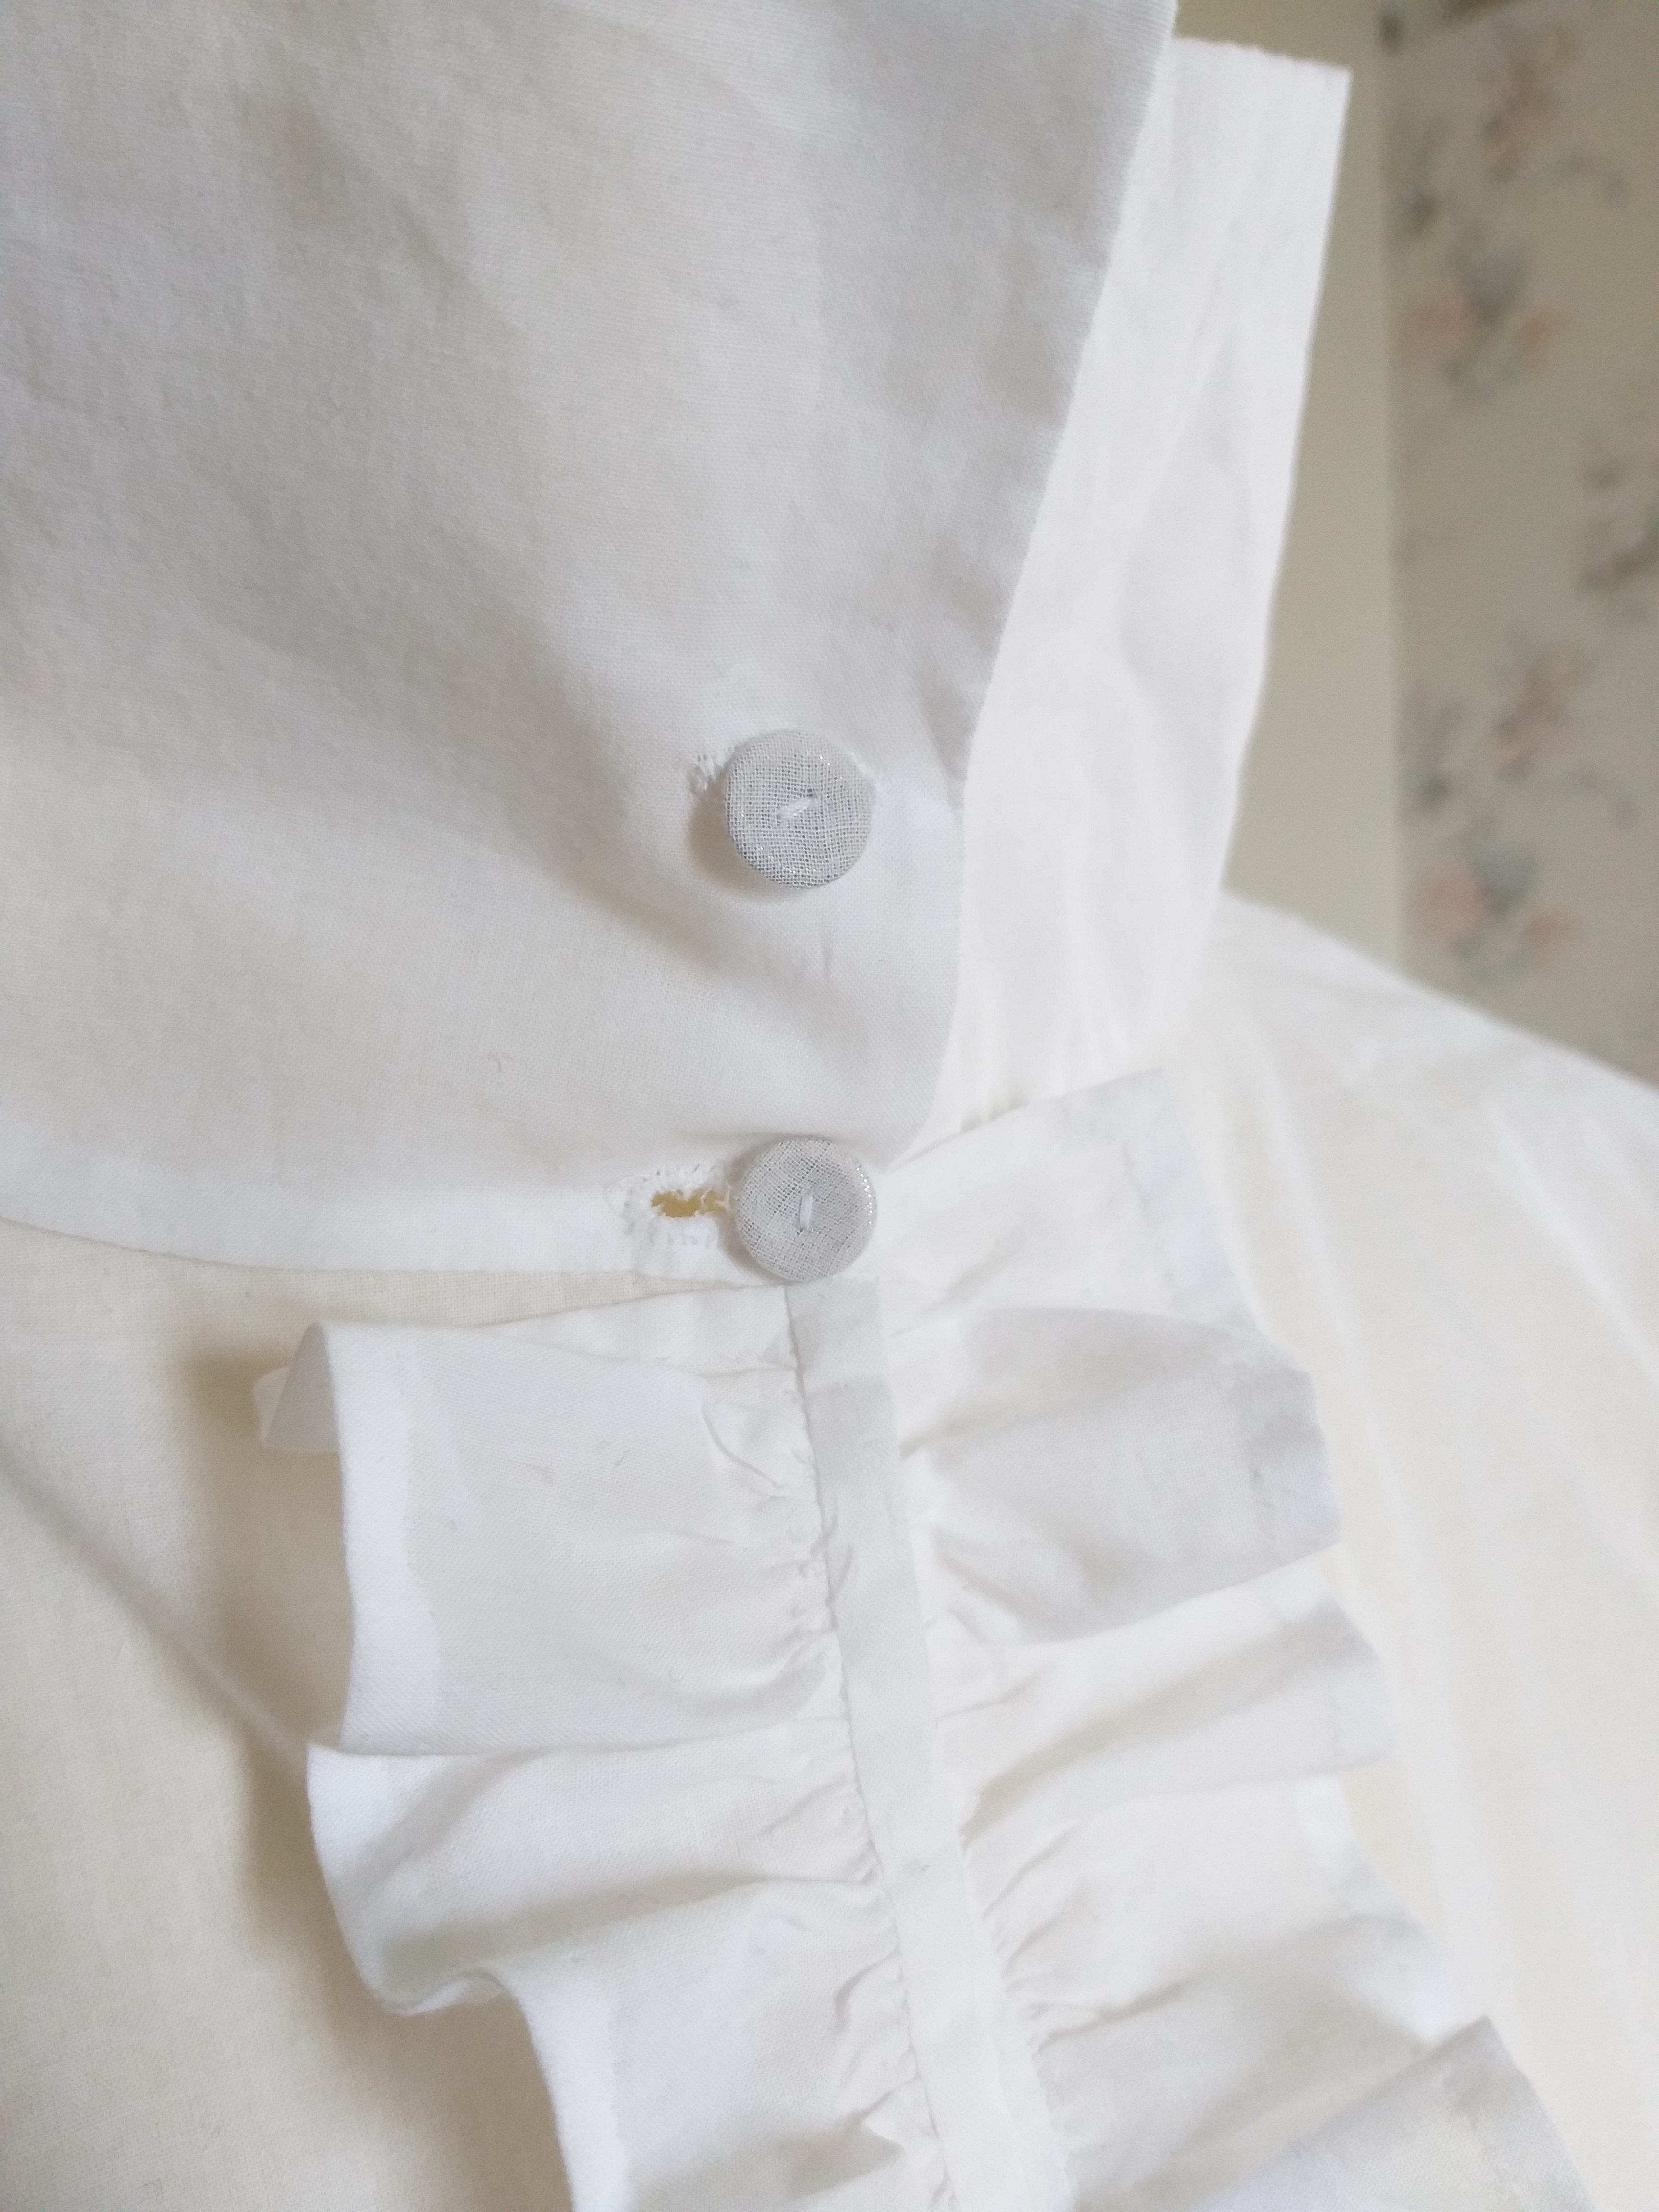
I started by cutting the double length wished for, folded and cut a whole for the head and a slit at the mid front. Then I added two square arms with square gussets at the arm pits, with gathering at the shoulder and at the end of the arms. I also added ruffles at the slit in the front, although I found out later that the slit should probably have been 3-4 dm long and the ruffles should have been in one continuing piece, instead of one on each side.
I have no idea how this should be done, but this was my way of making the ruffles at the end of the arms: I had two pieces of fabrics in which I hid the raw edge of the arm gathering. After having stitched this in place, I added a folded piece of fabric with gathering, which I tucked in between the two layers in the same way as the arm gathering.
I believe that the opening in the from should have been longer, but then there would not have been enough of fabric for ruffles.
Ruffles sewn by hand and self covered buttons for the collar.
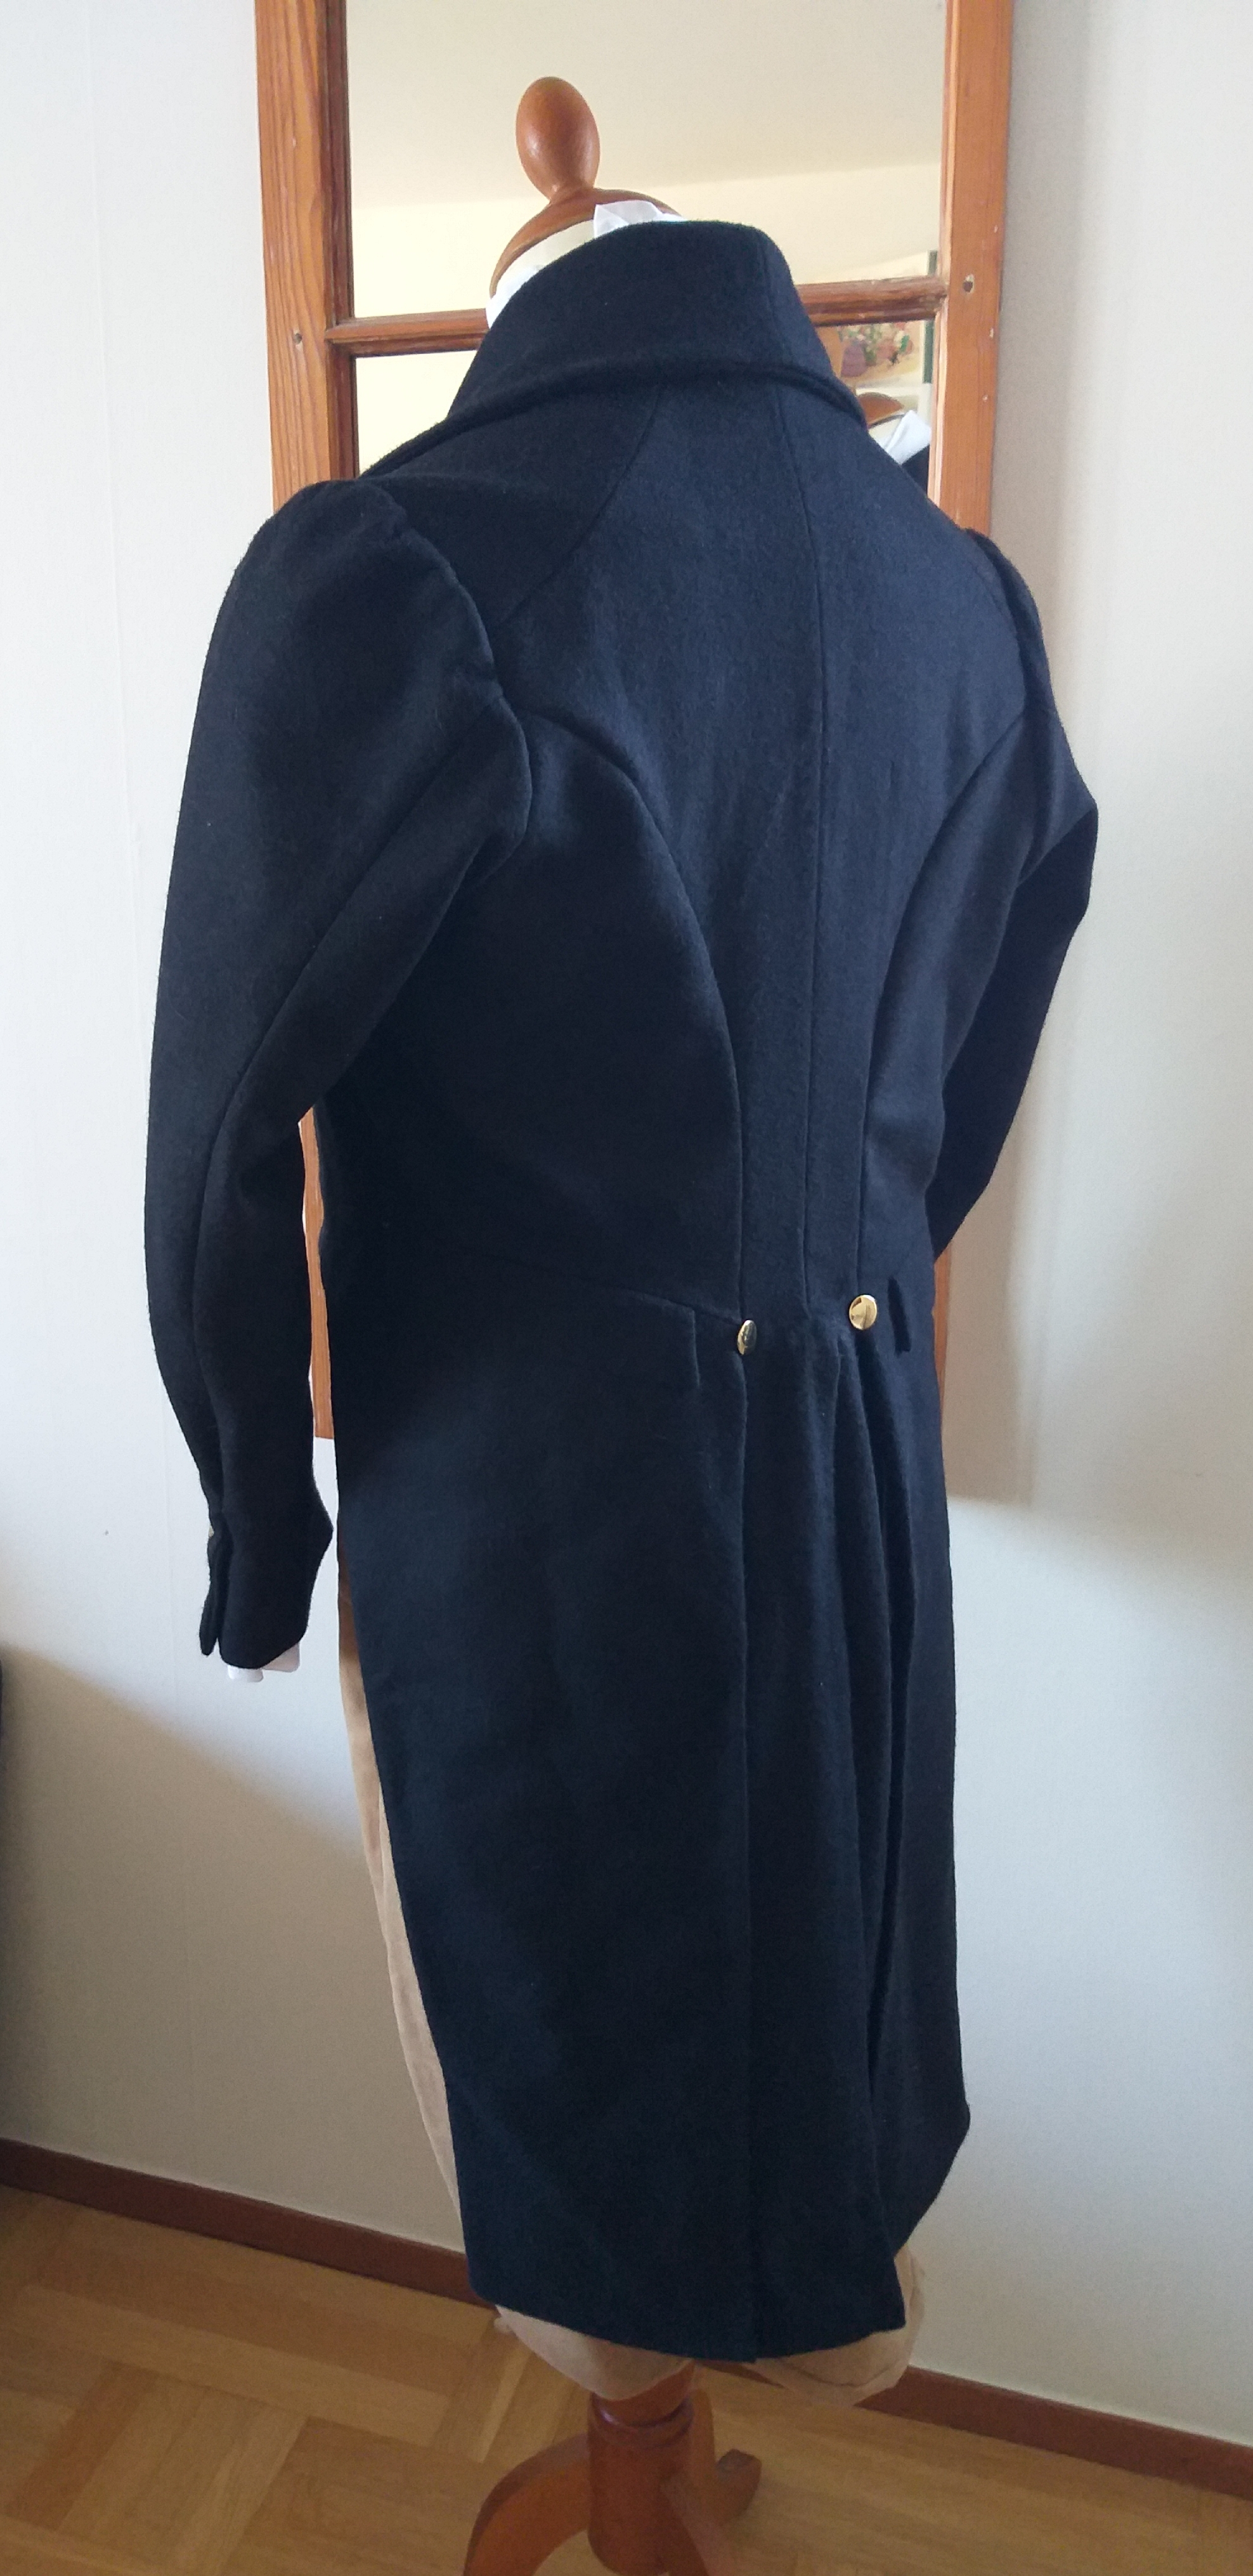
Tailcoat
My most time consuming sewing project ever must be his new tailcoat. I have used historical methods and made all of the interlining by hand – hundreds of stitches that no one will ever see… ? I used the fantastic pattern of Laughing Moon that I bought for the prize money for my win in the 2017 competition of Your Wardrobe Unlocked.
Now there is only a new waistcoat left to make the suit complete. And a pair of shoes, stockings, pocket watch, new hair etc… When starting to update the historical wardrobe, there is no end to it, especially as the family expands.
If I’m still alive by the end of the week, after two more nights at work, I look forward to see all of these clothes during the dancing session.
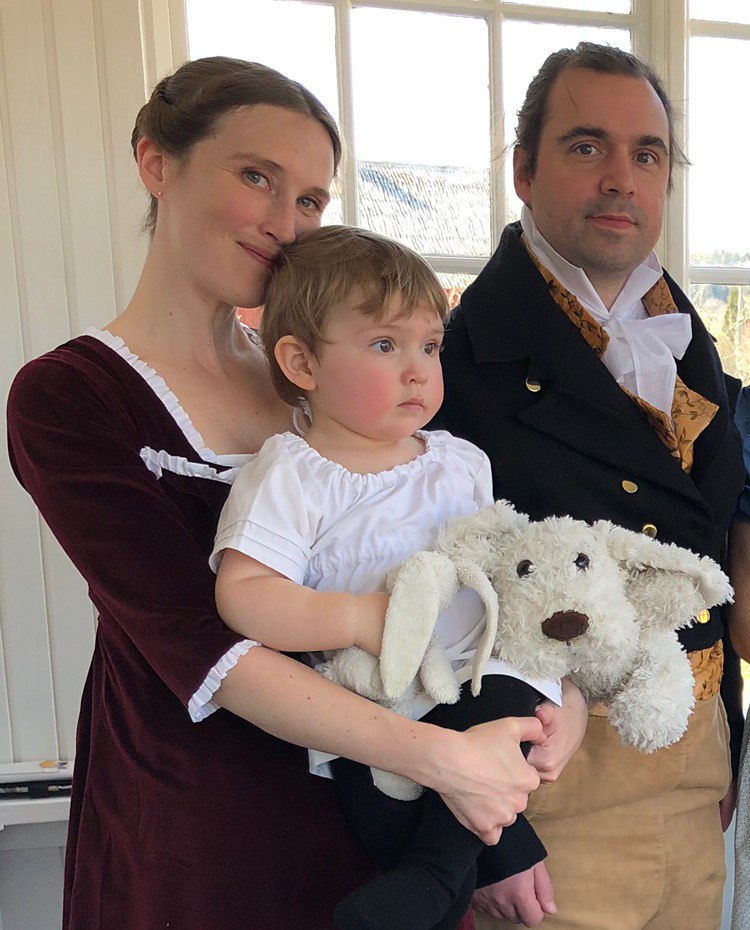
The dance training was featured in the local newspaper, with some nice pictures. This was what our family looked like. Alas, it was all too obvious that I had not made adjustments for the tail coat during the process, for it did not fit as well as I had hoped for.
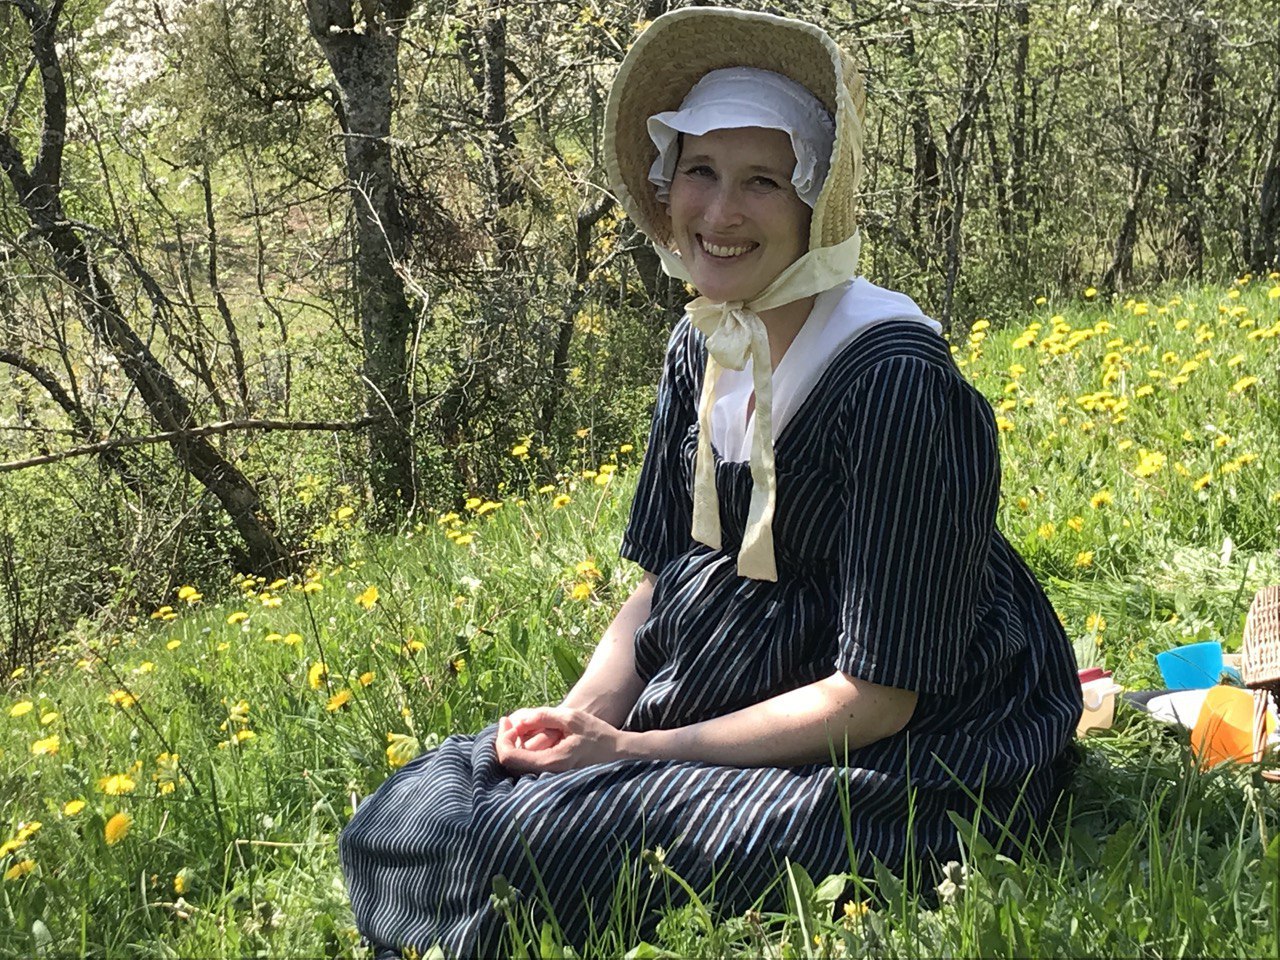
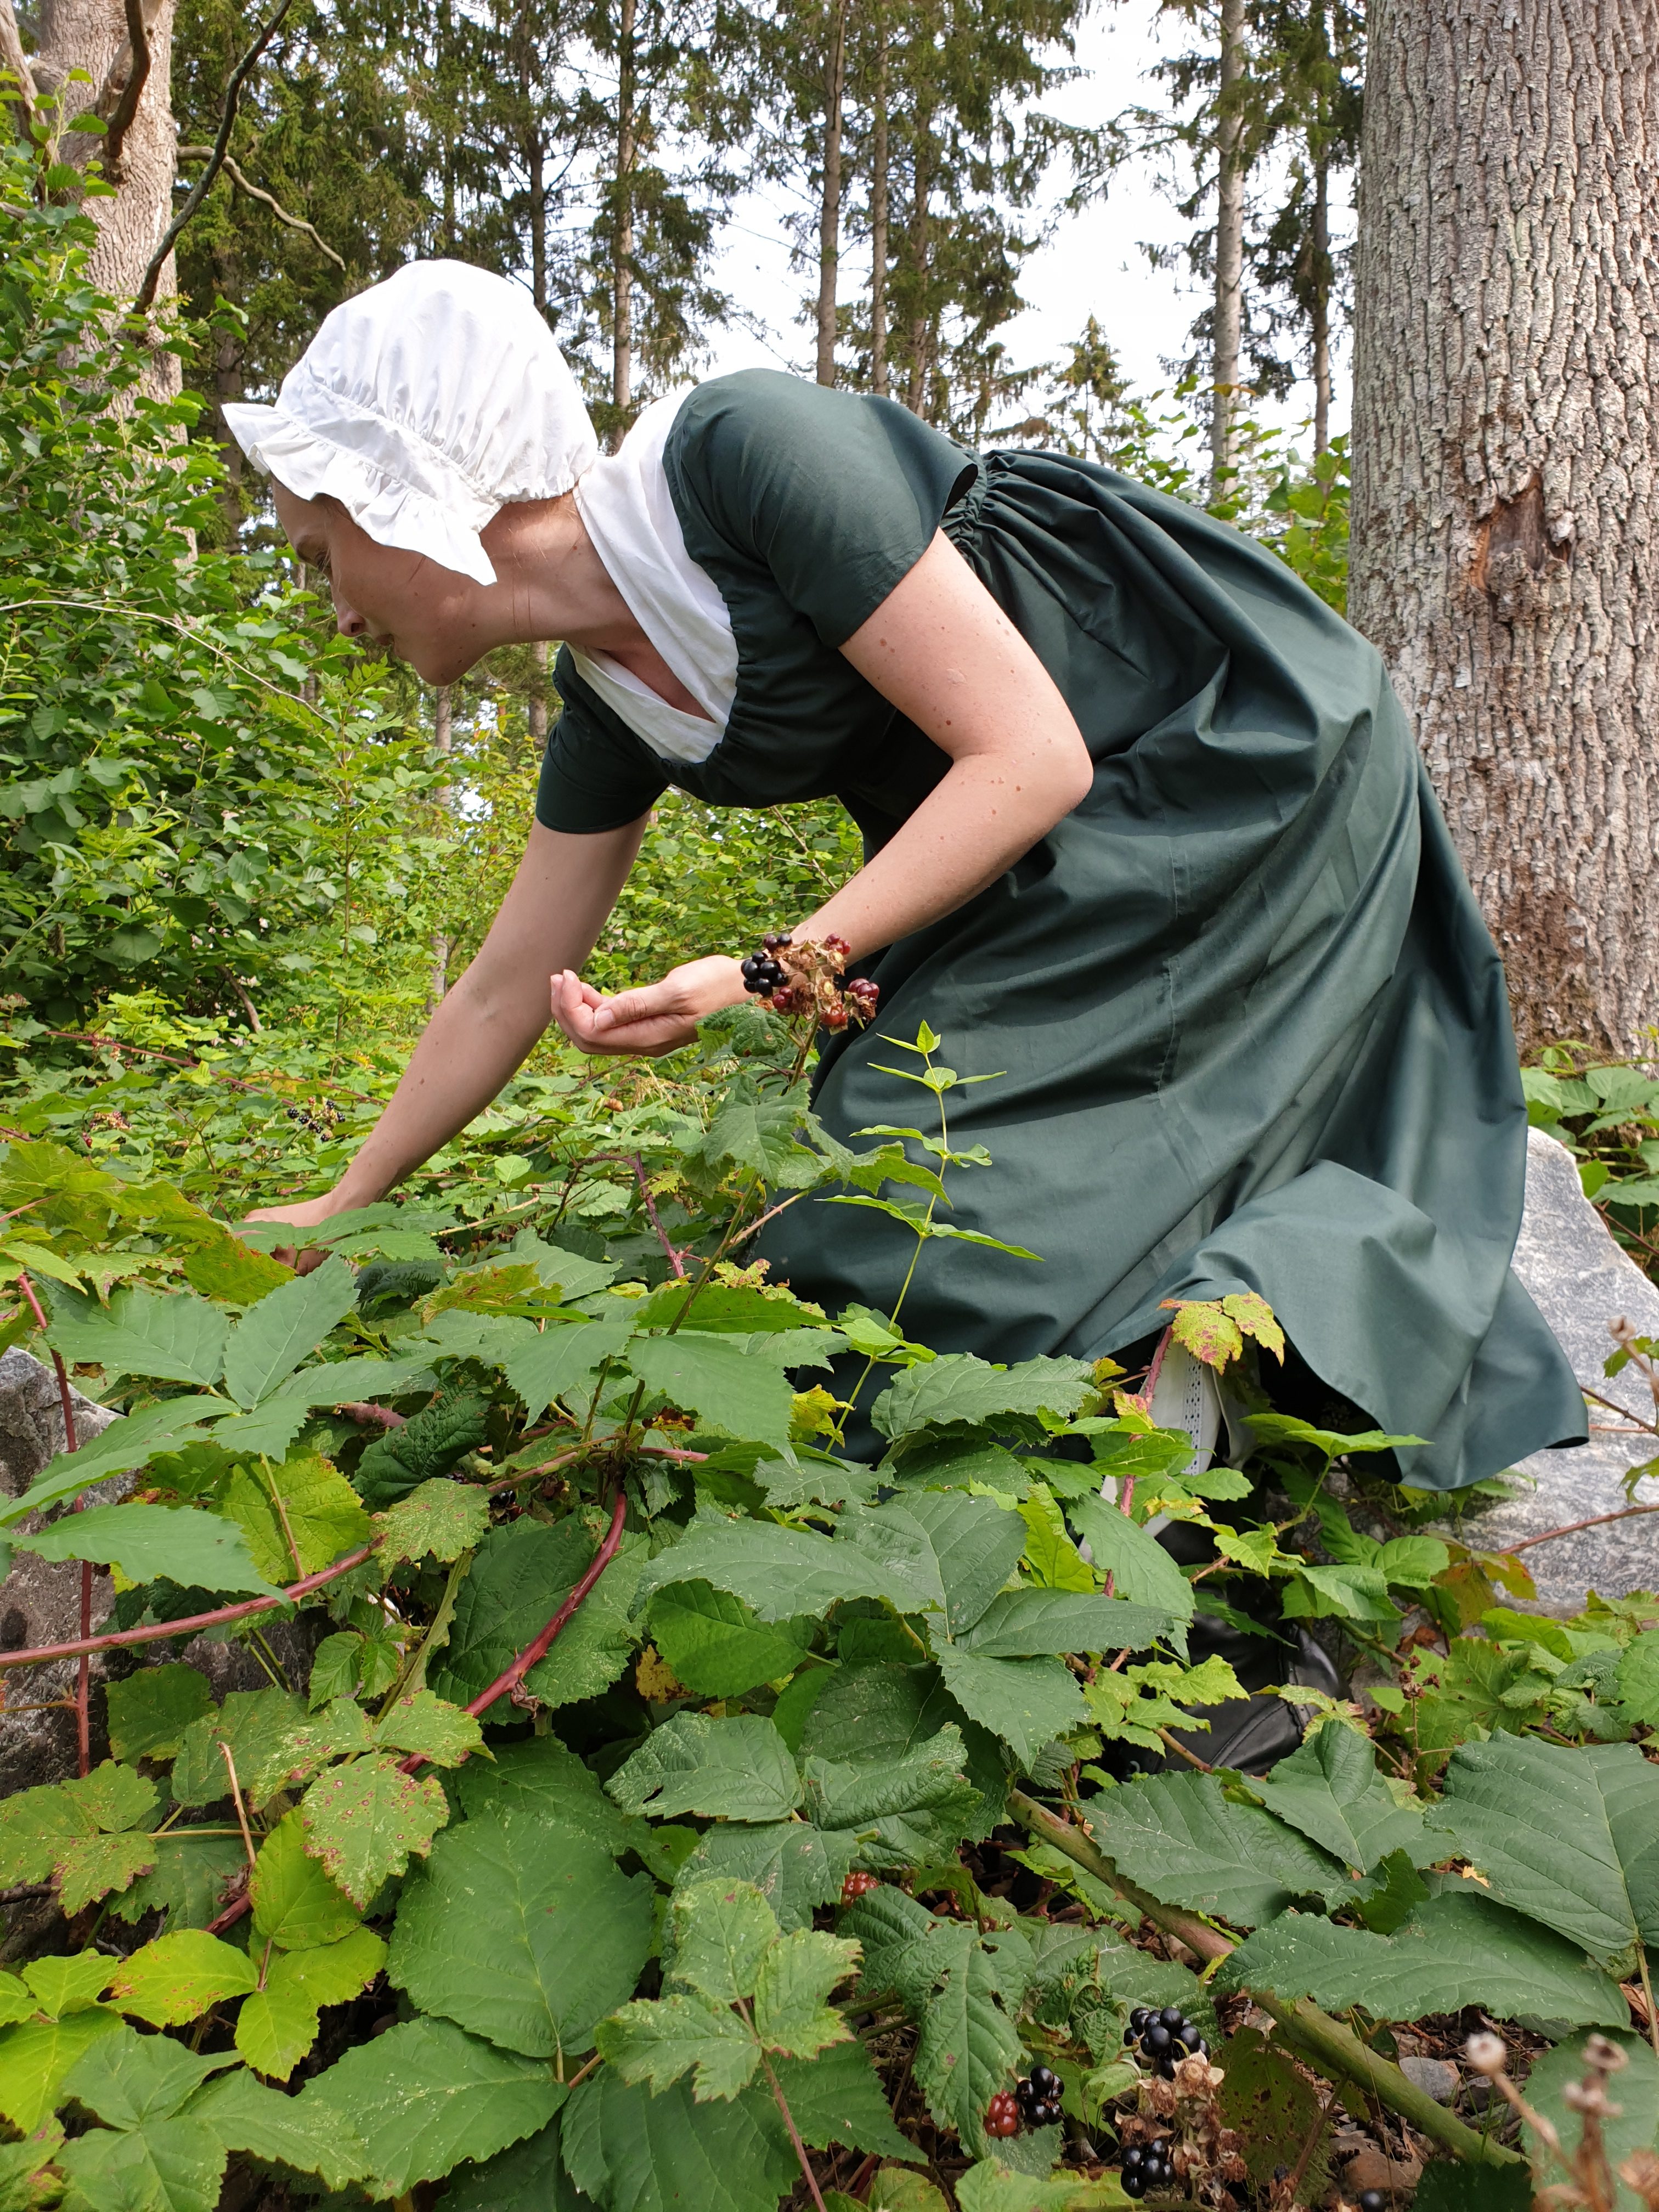
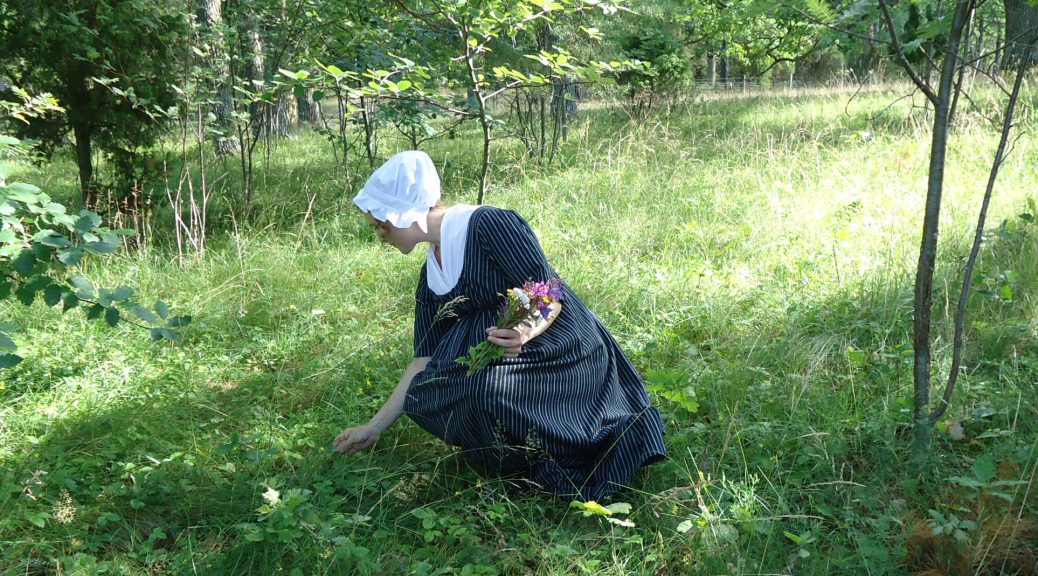
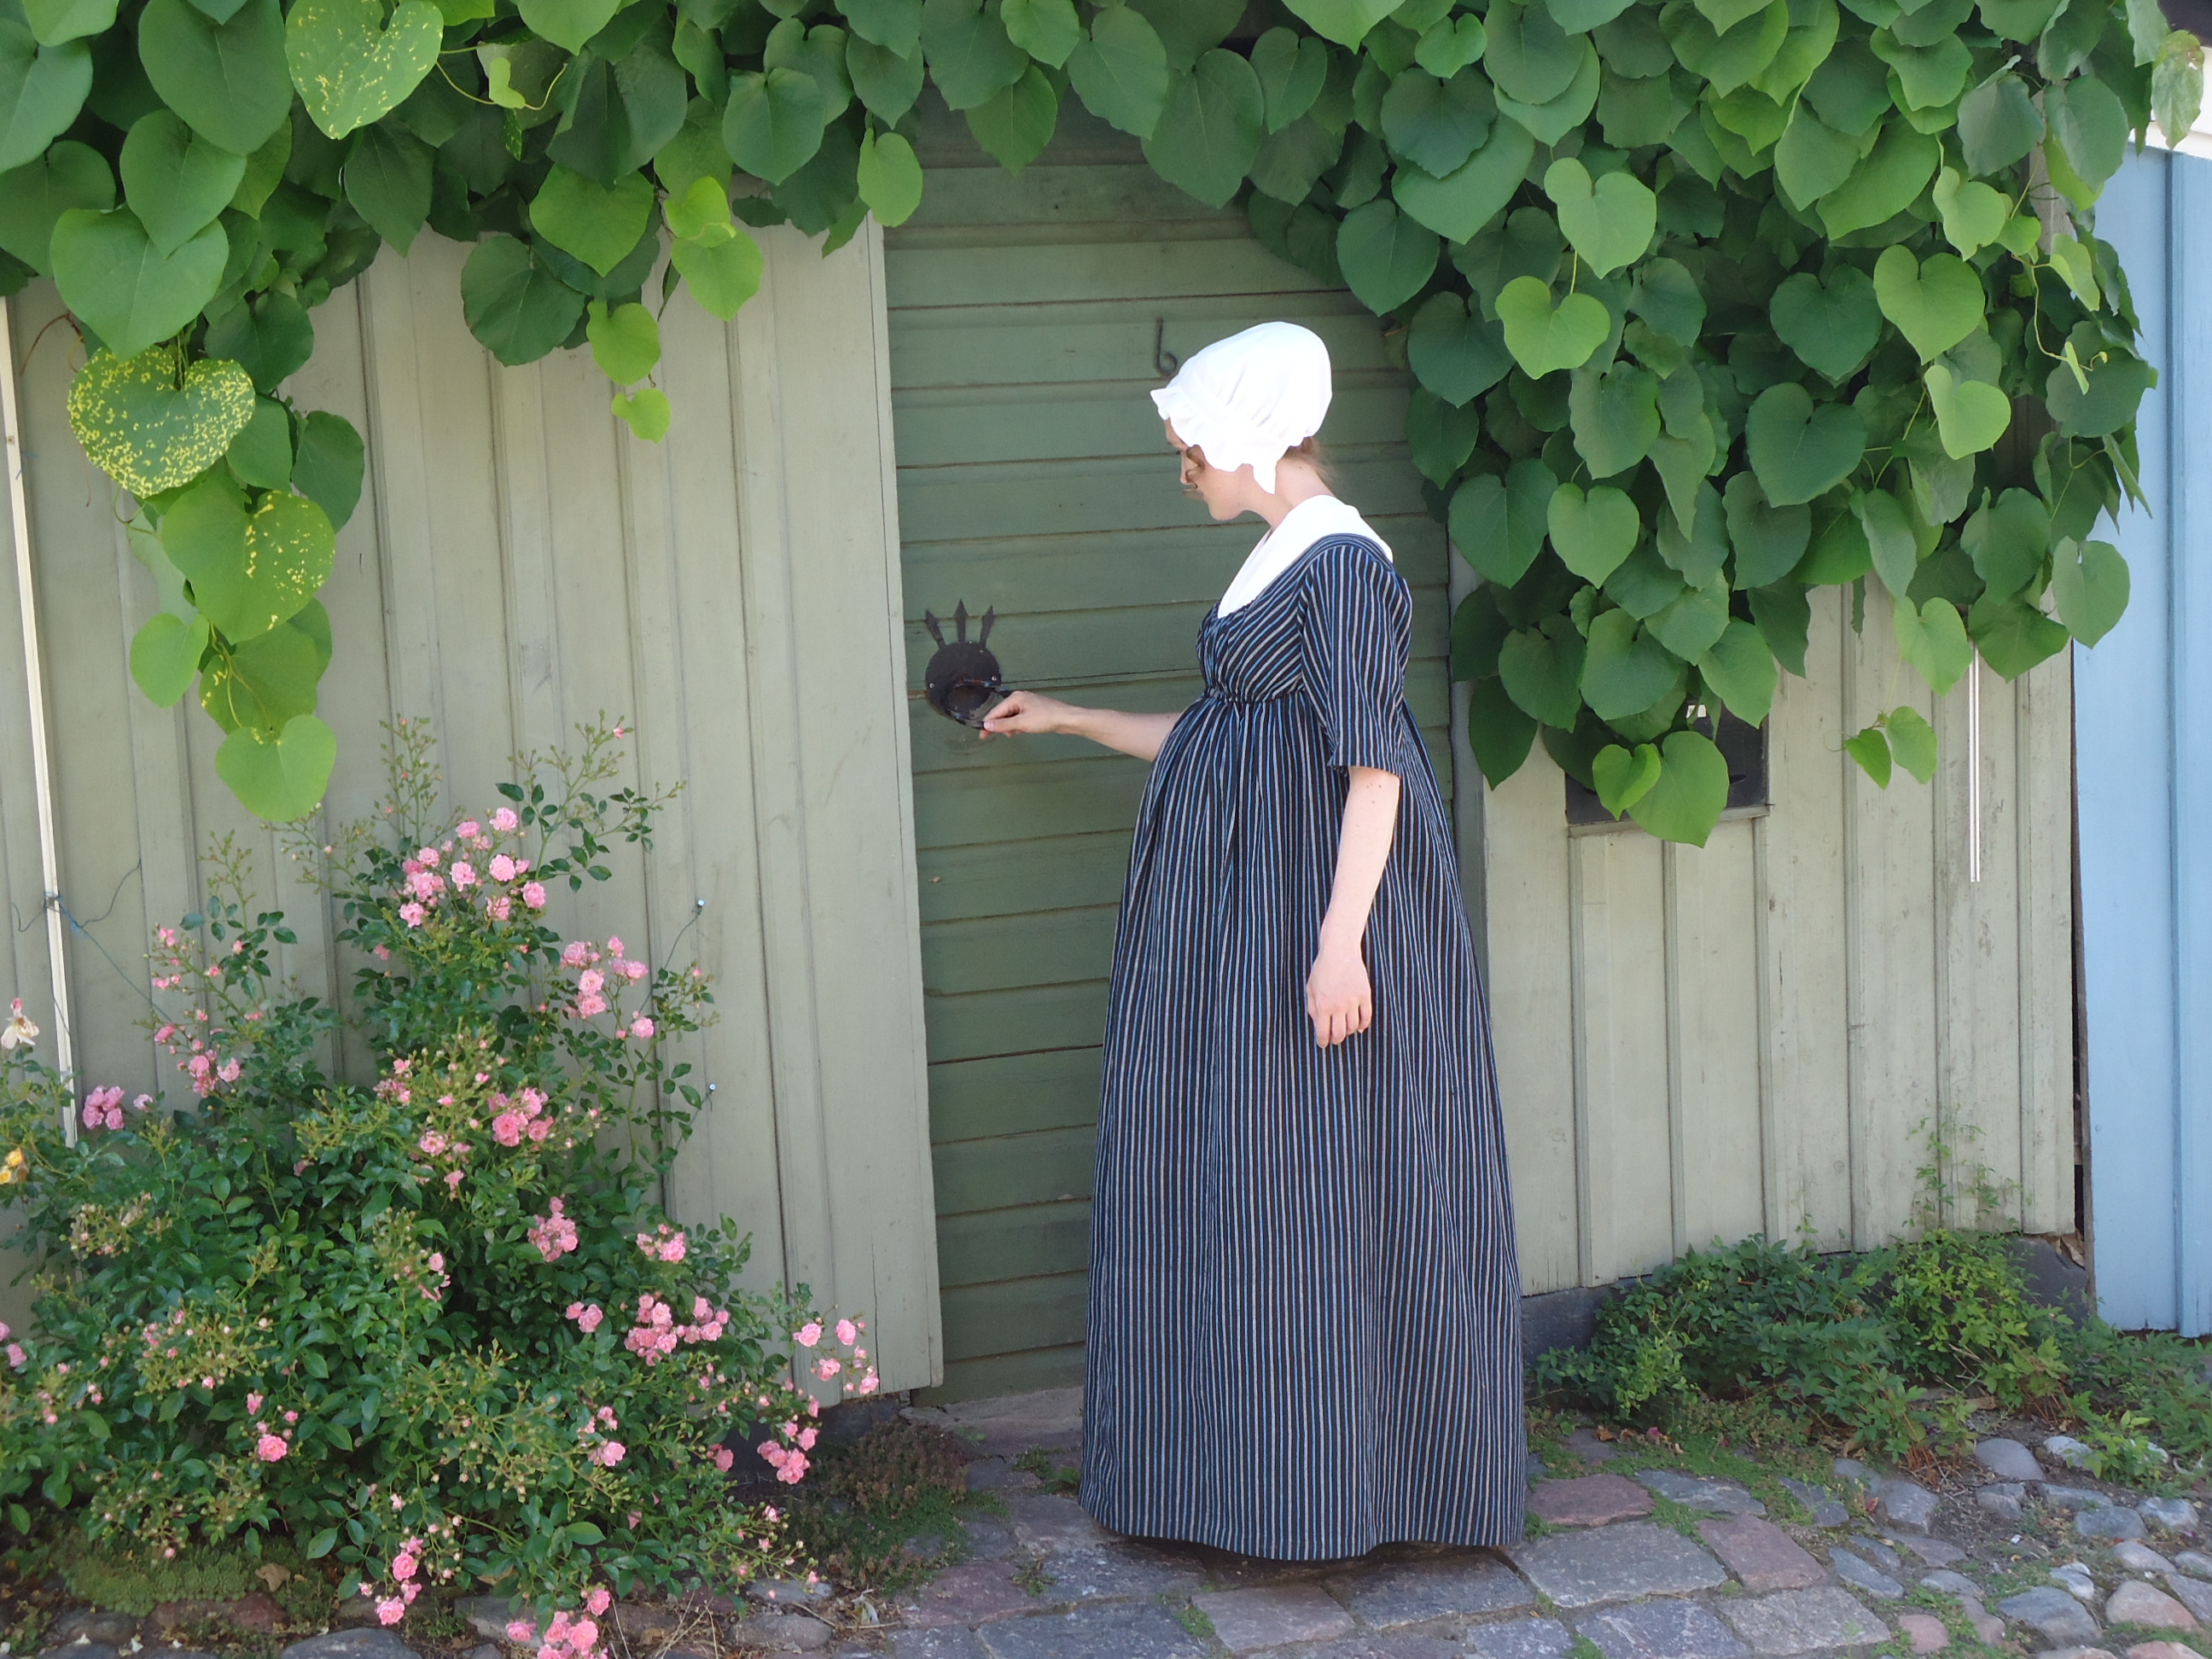
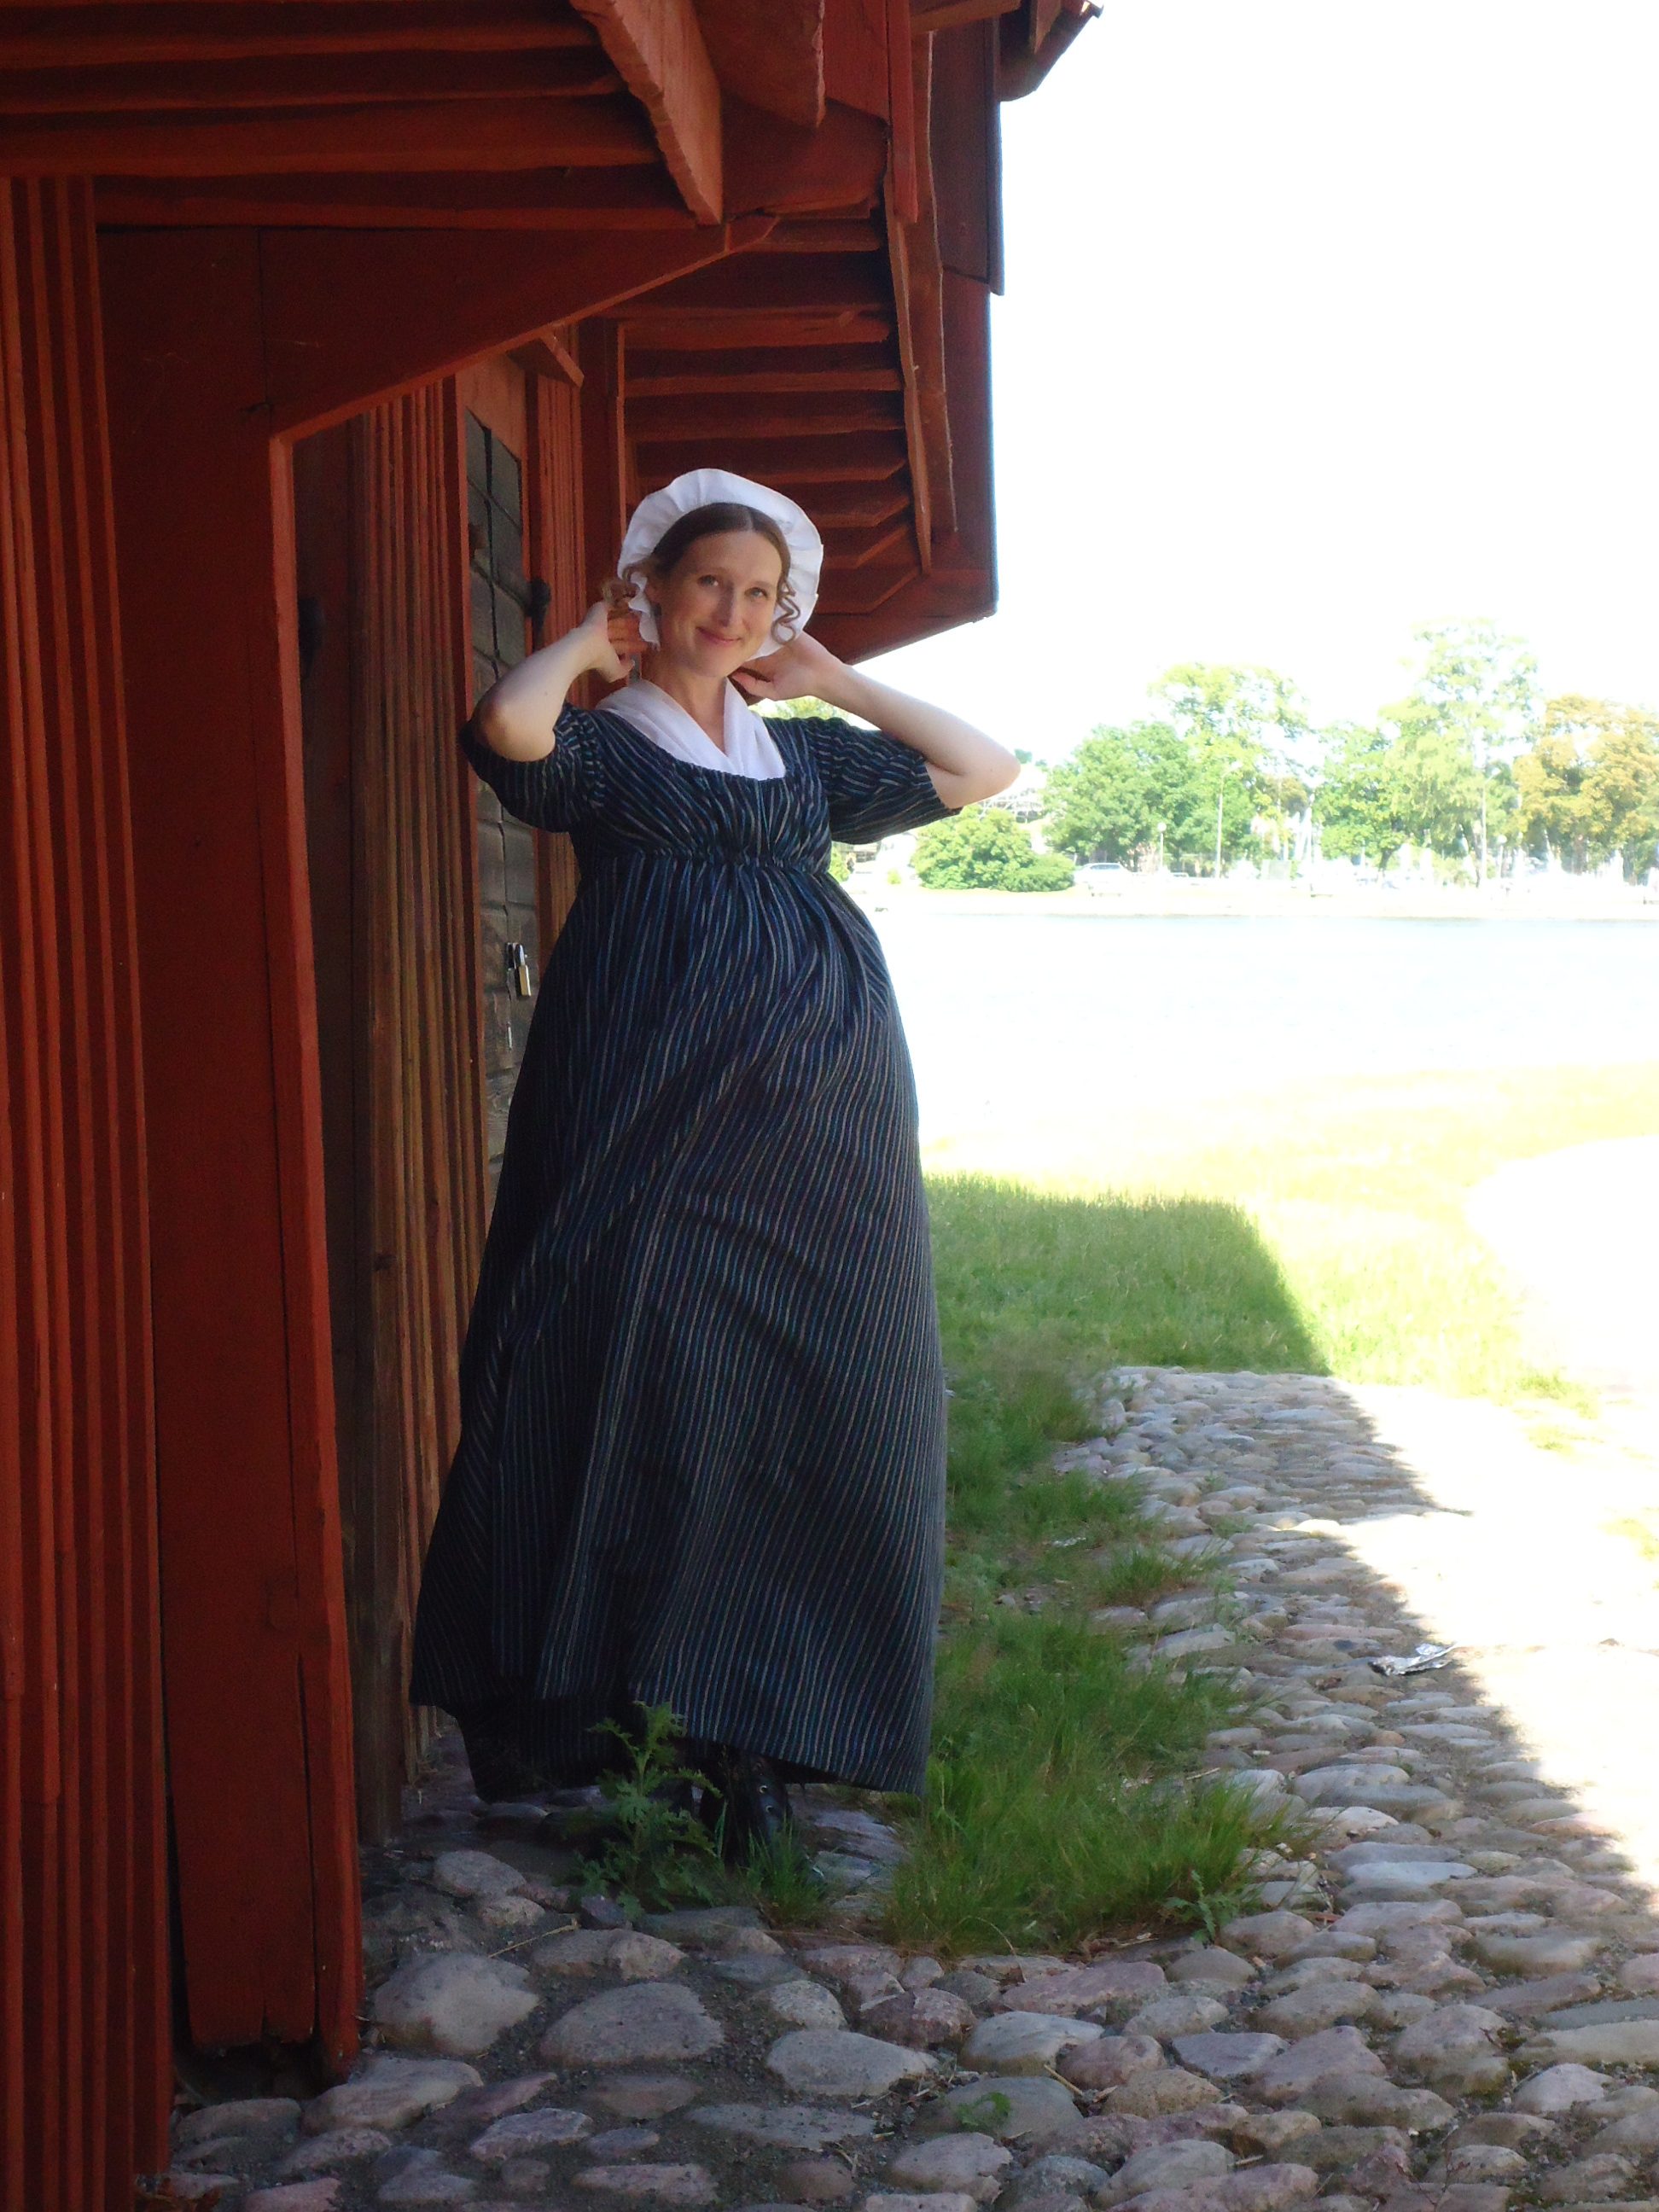
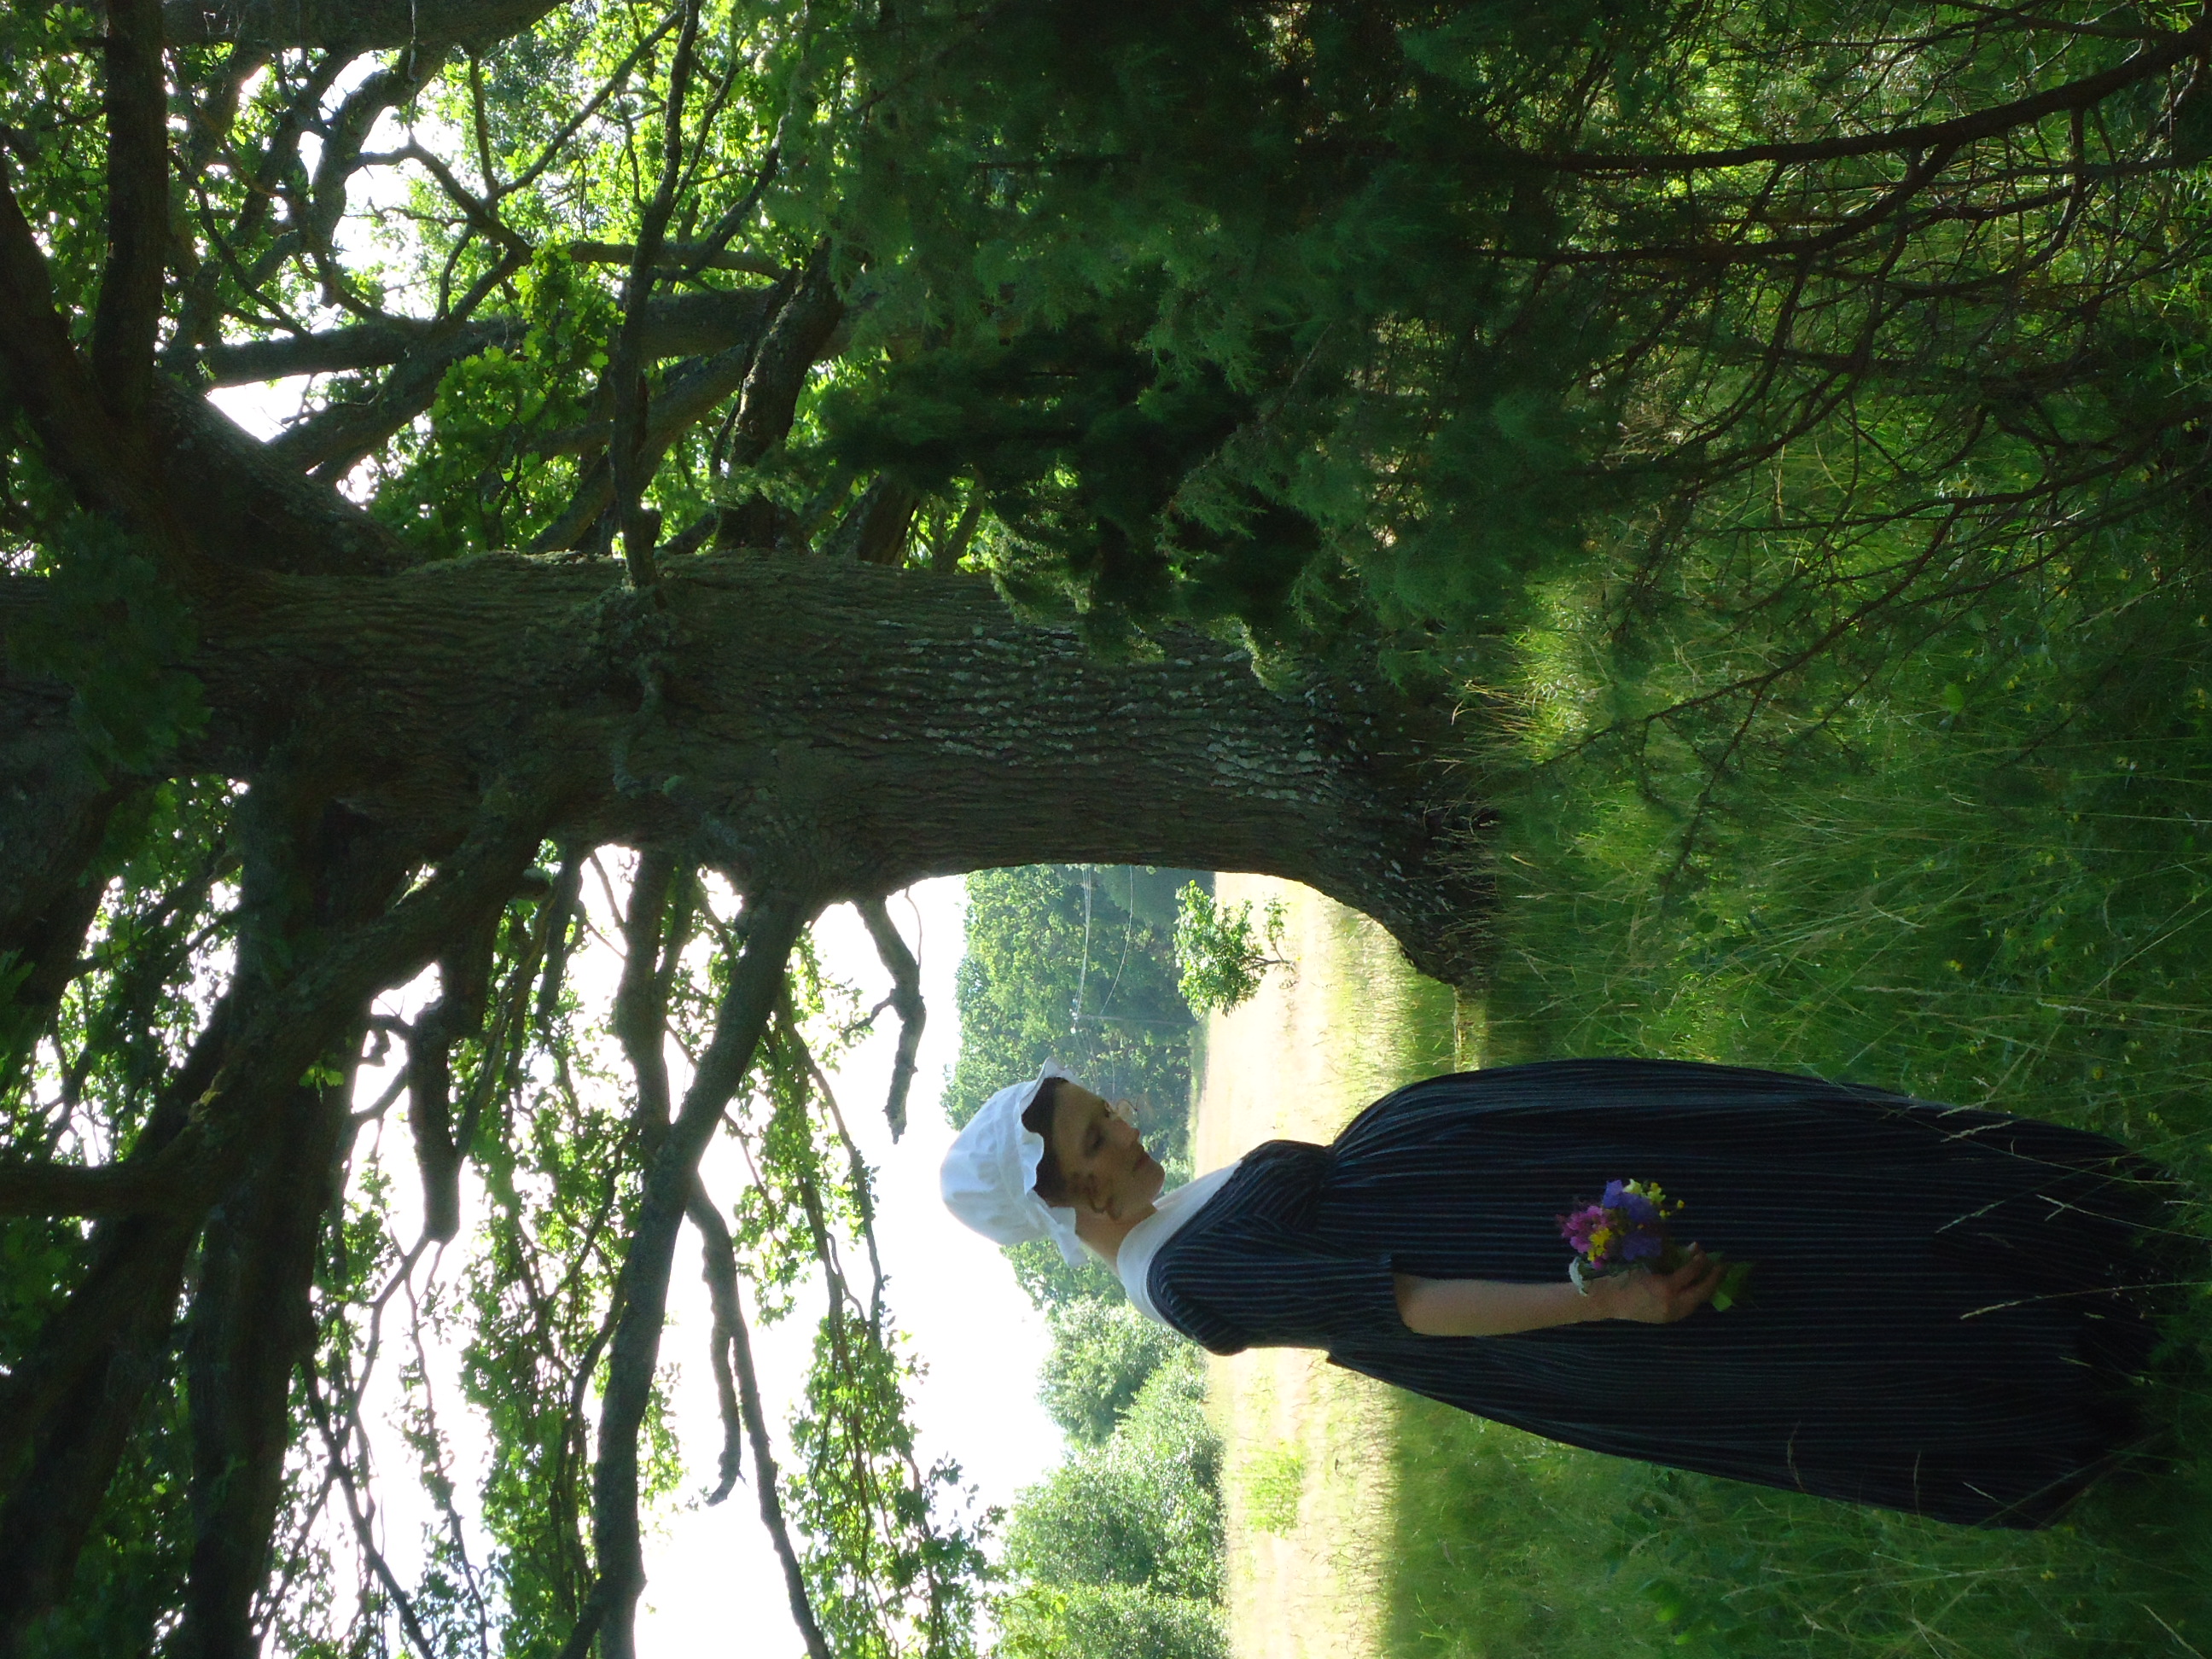
As I suppose that my body shape will not be what it used to be for a long time, I wanted to make a modest gown for the last part of my pregnancy and the nursing period. I do not know if the fabric is accurate for regency fashion, but as I still have several metres left, I used the striped cotton fabric yet again!
Eftersom jag är medveten om att min kropp förmodligen inte kommer vara sig lik på väldigt lång tid framöer, ville jag sy en vardagsklänning att använda under sluttampen på graviditeten och under amningsperioden. Jag vet inte om tyget är korrekt för empirmodet, men jag har ju fortfarande tiotals meter kvar, så jag använde samma tyg igen.
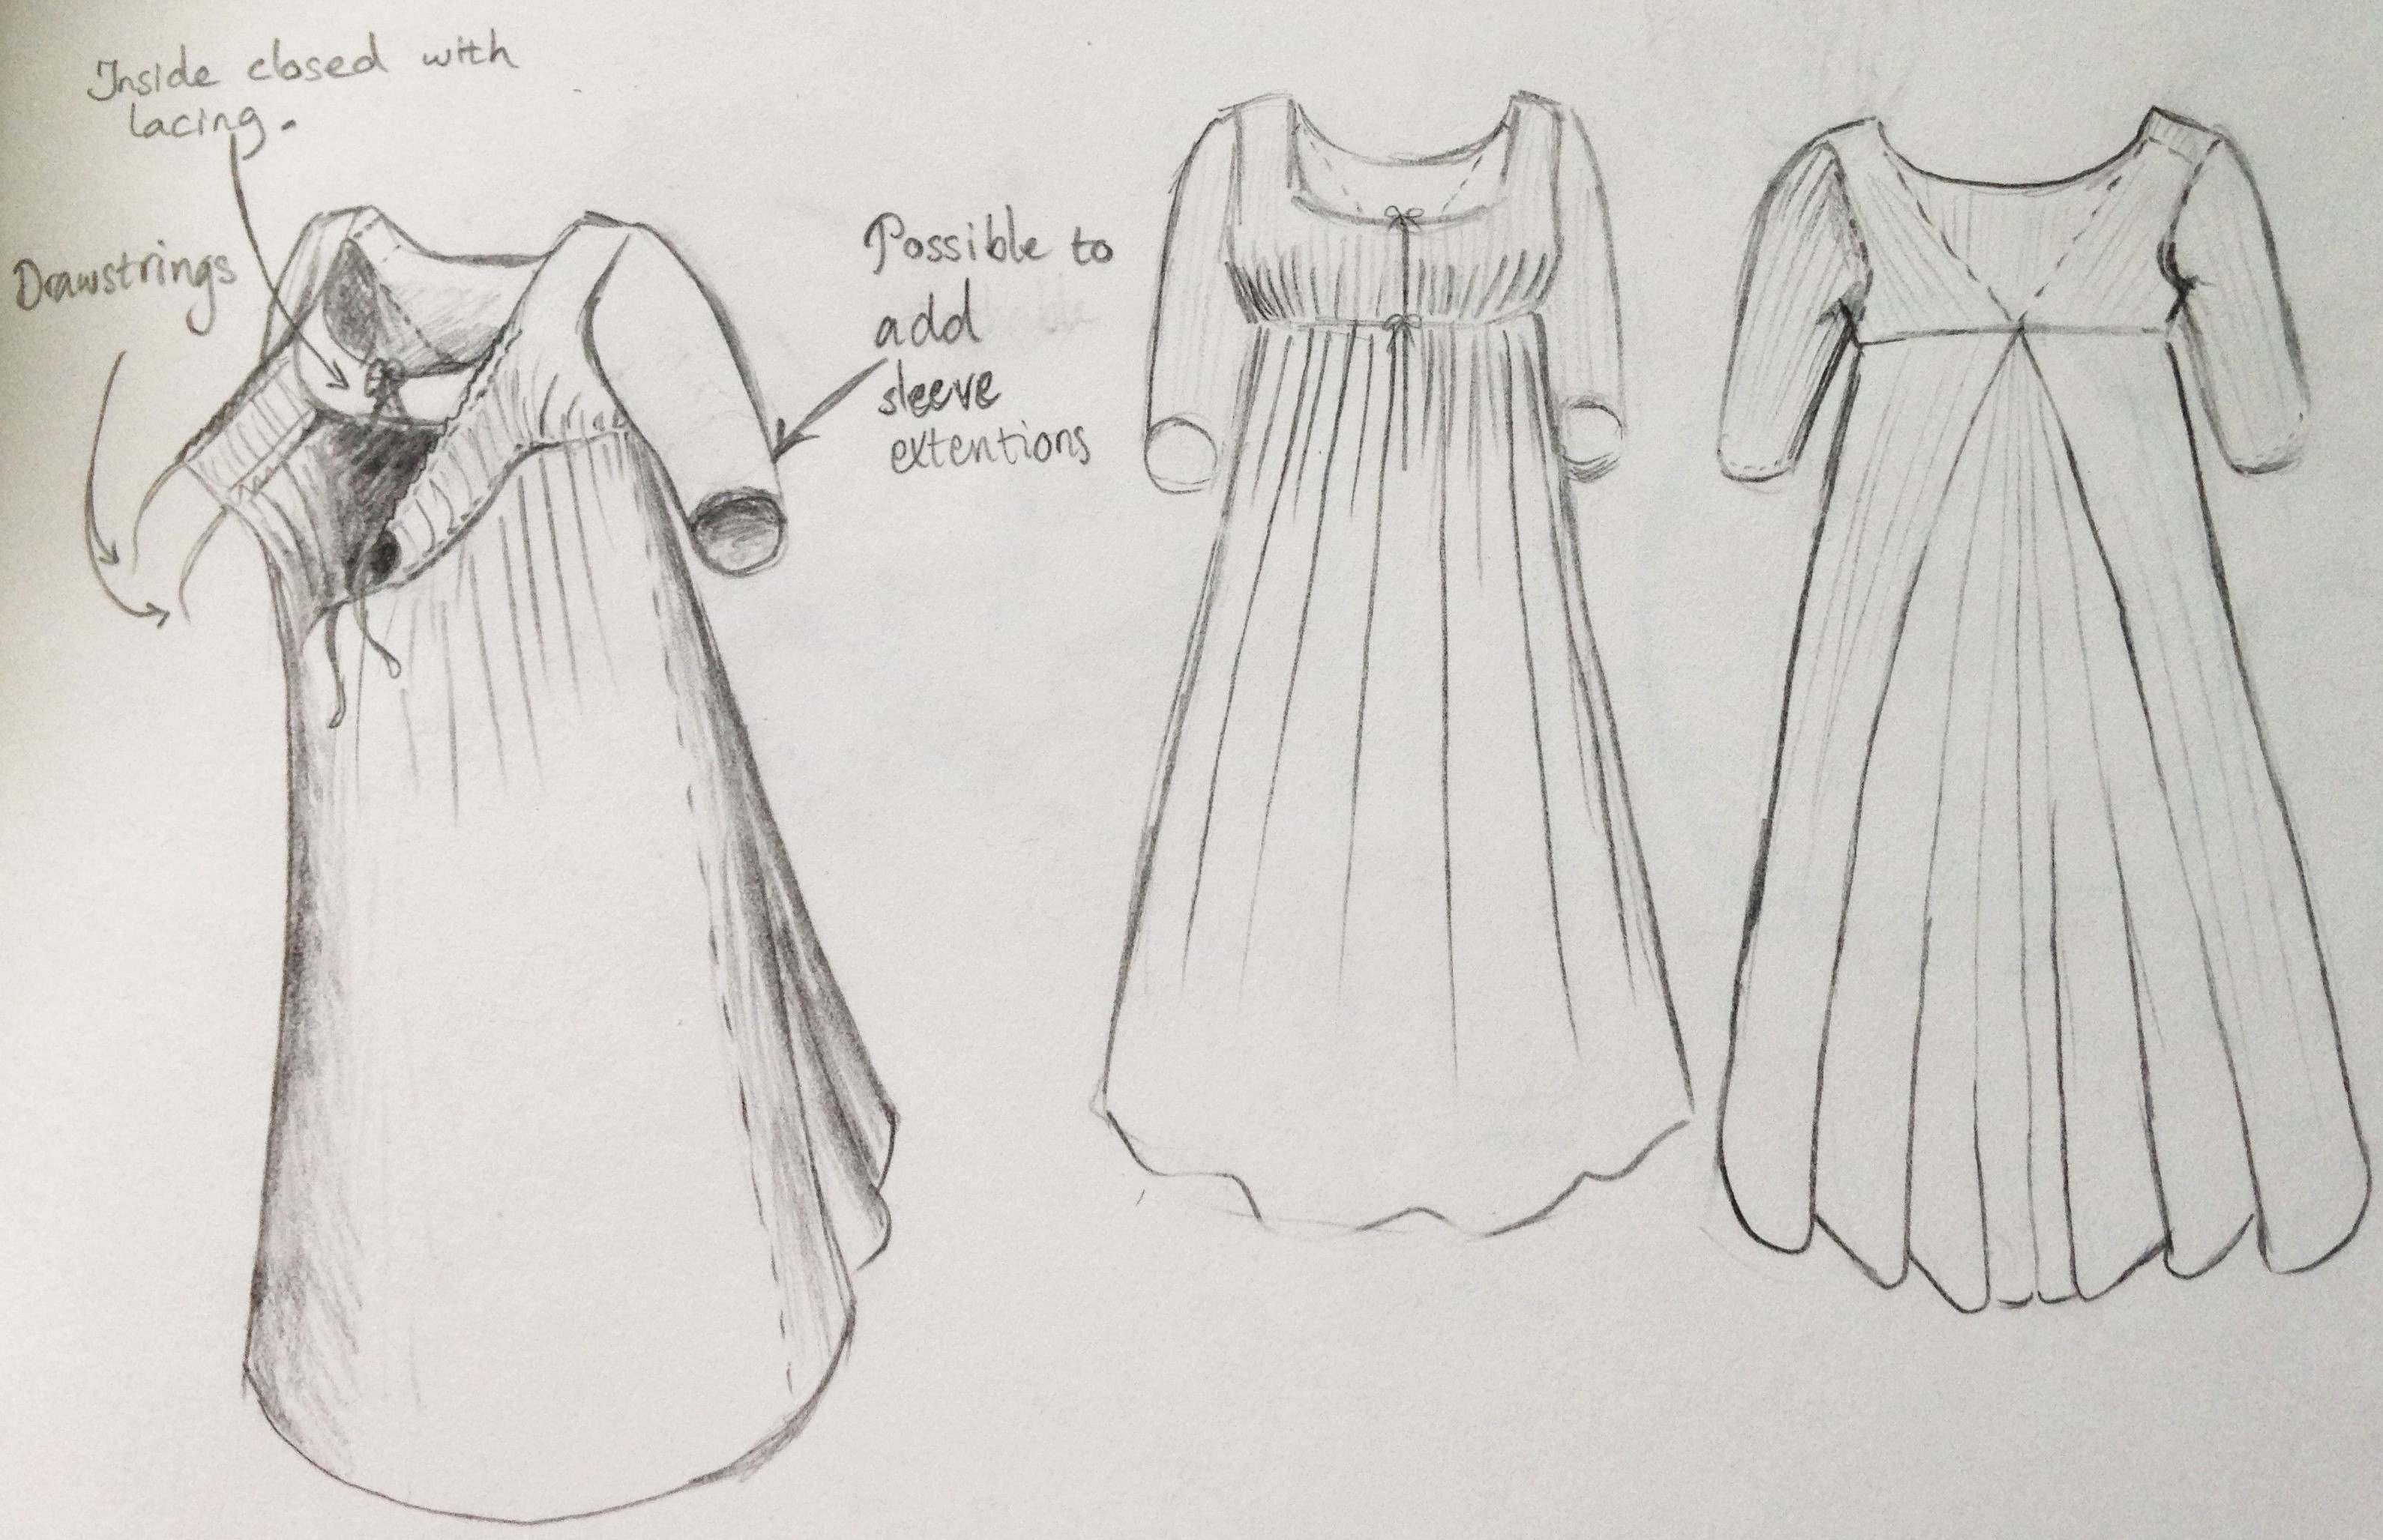
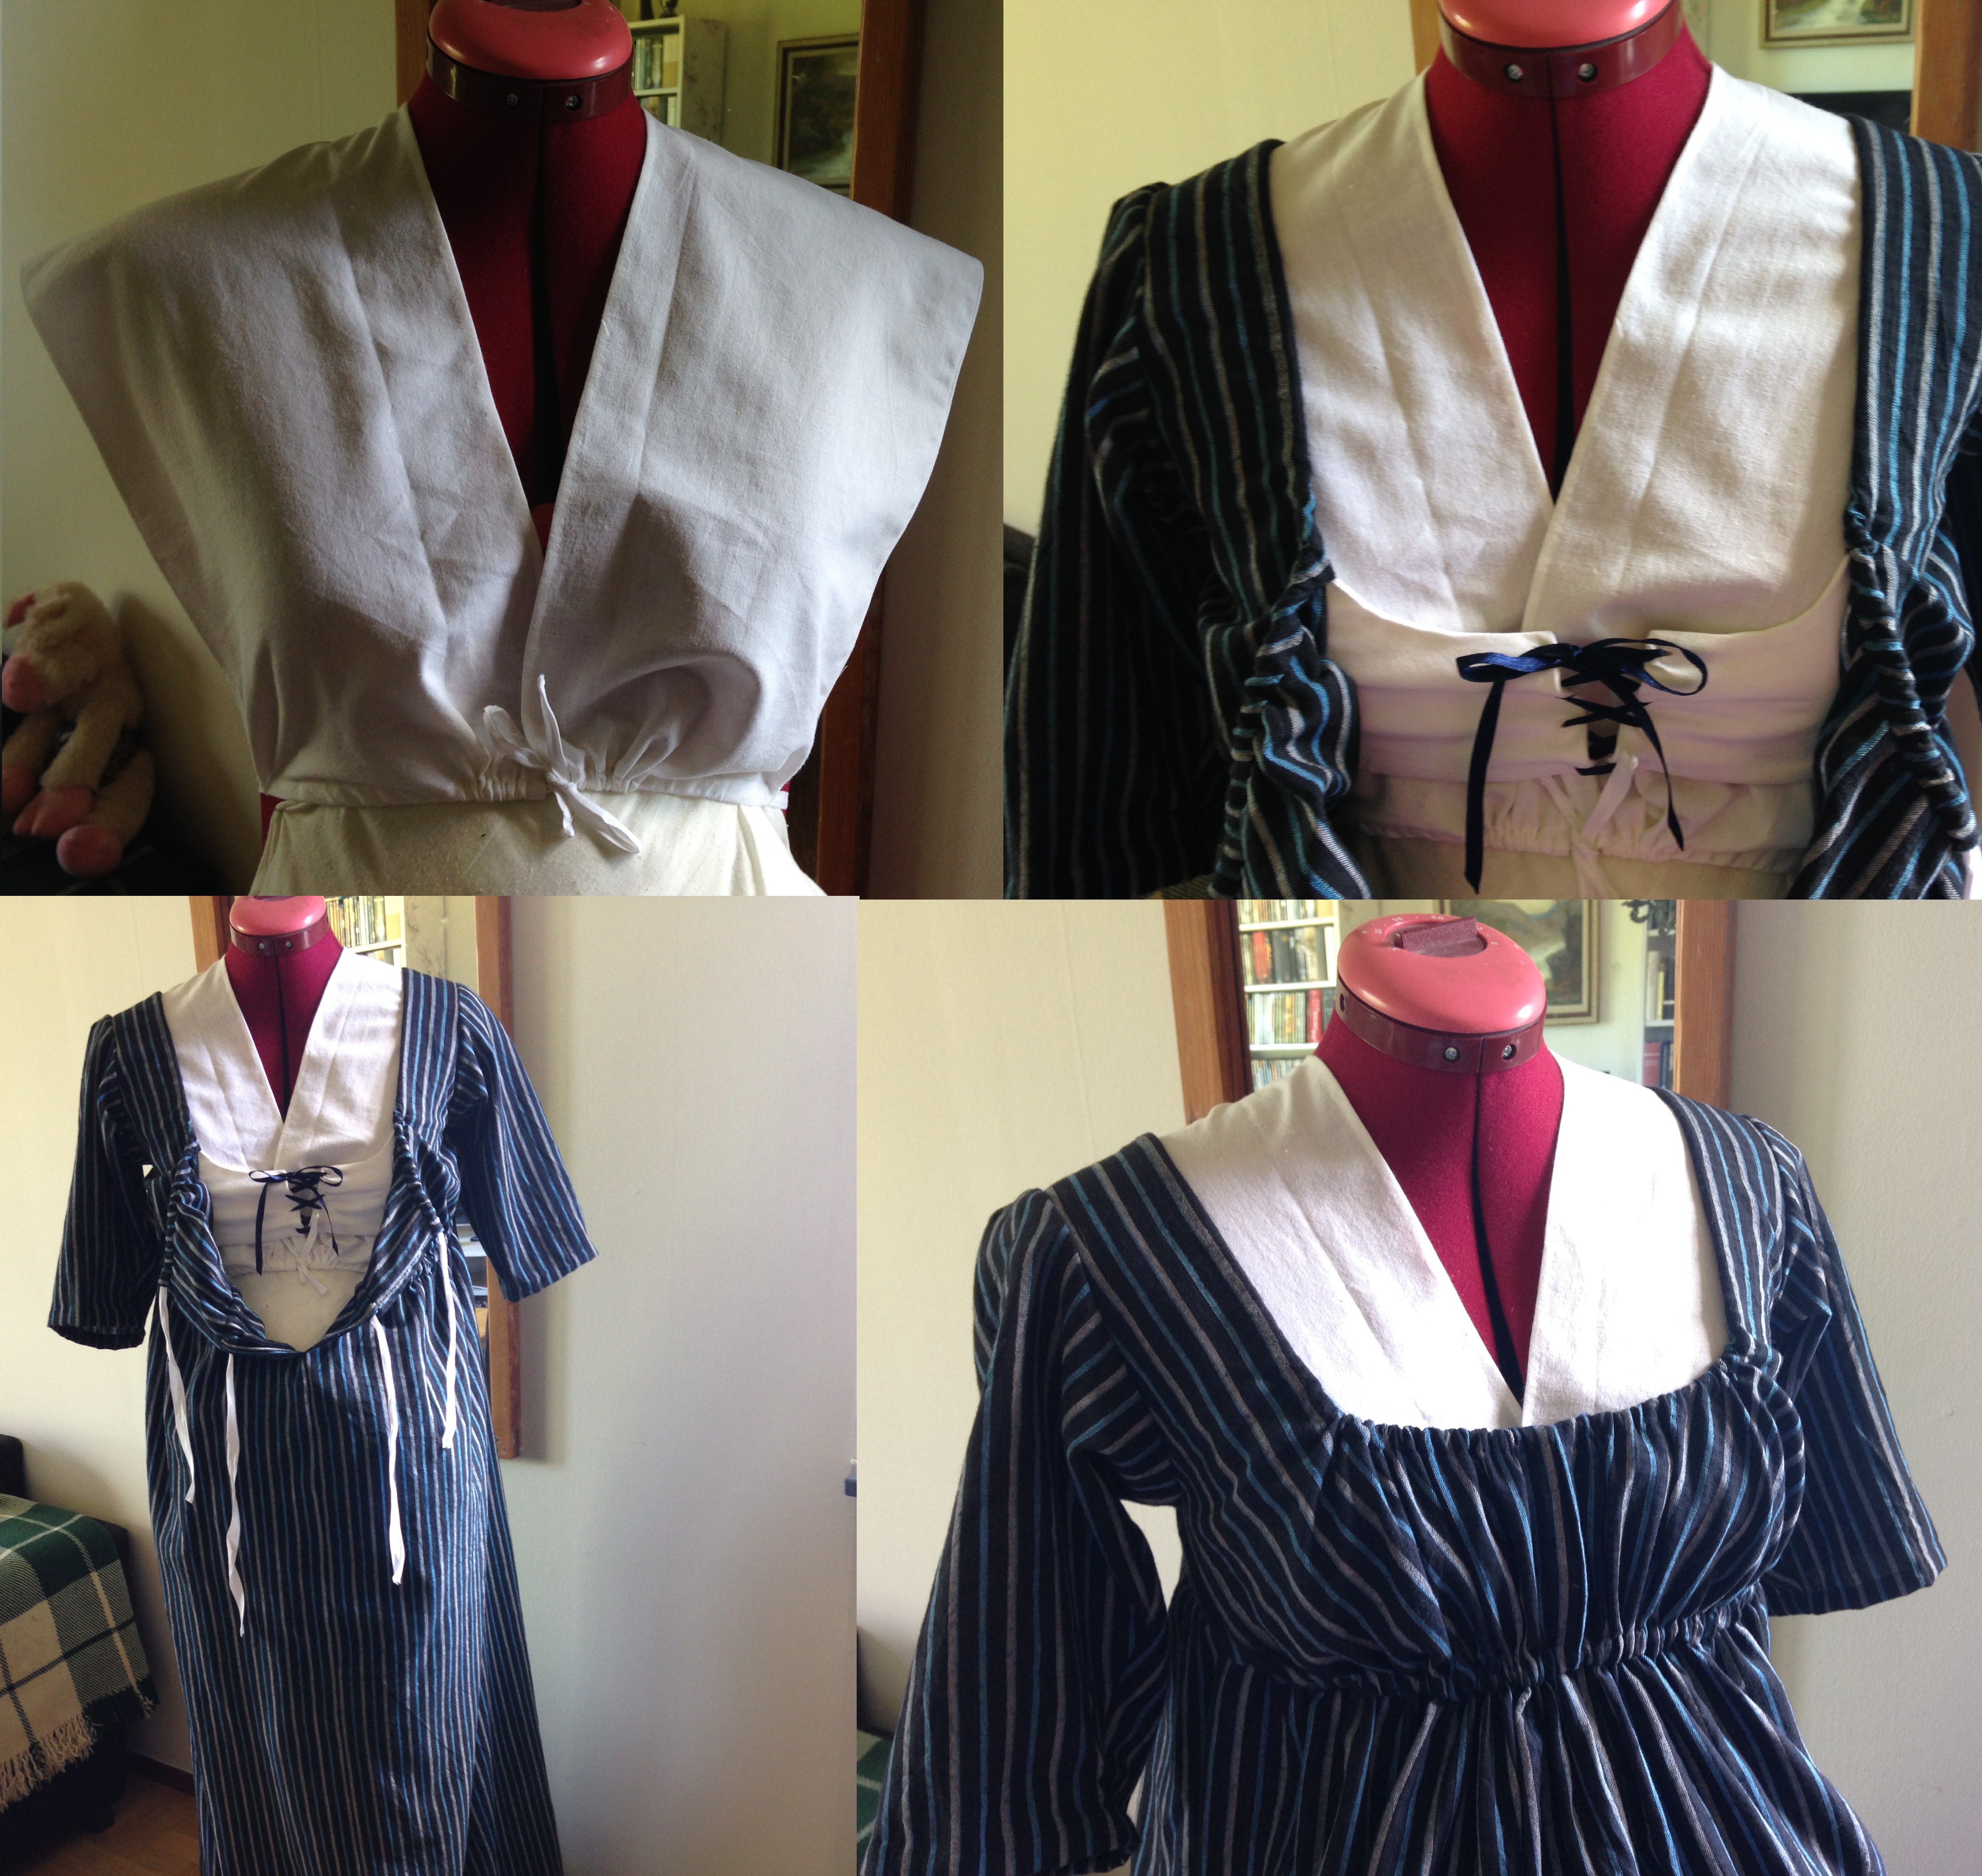
I used a bodice, where the lining is laced in the front and the dress fabric is gathered with drawstrings. I was inspired by many different vintage gowns, among which are these:
Jag valde en konstruktion där livet är fodrat och insidan snörs samman framtill och själva klänningstyget samlas med dragsko över och under bysten.
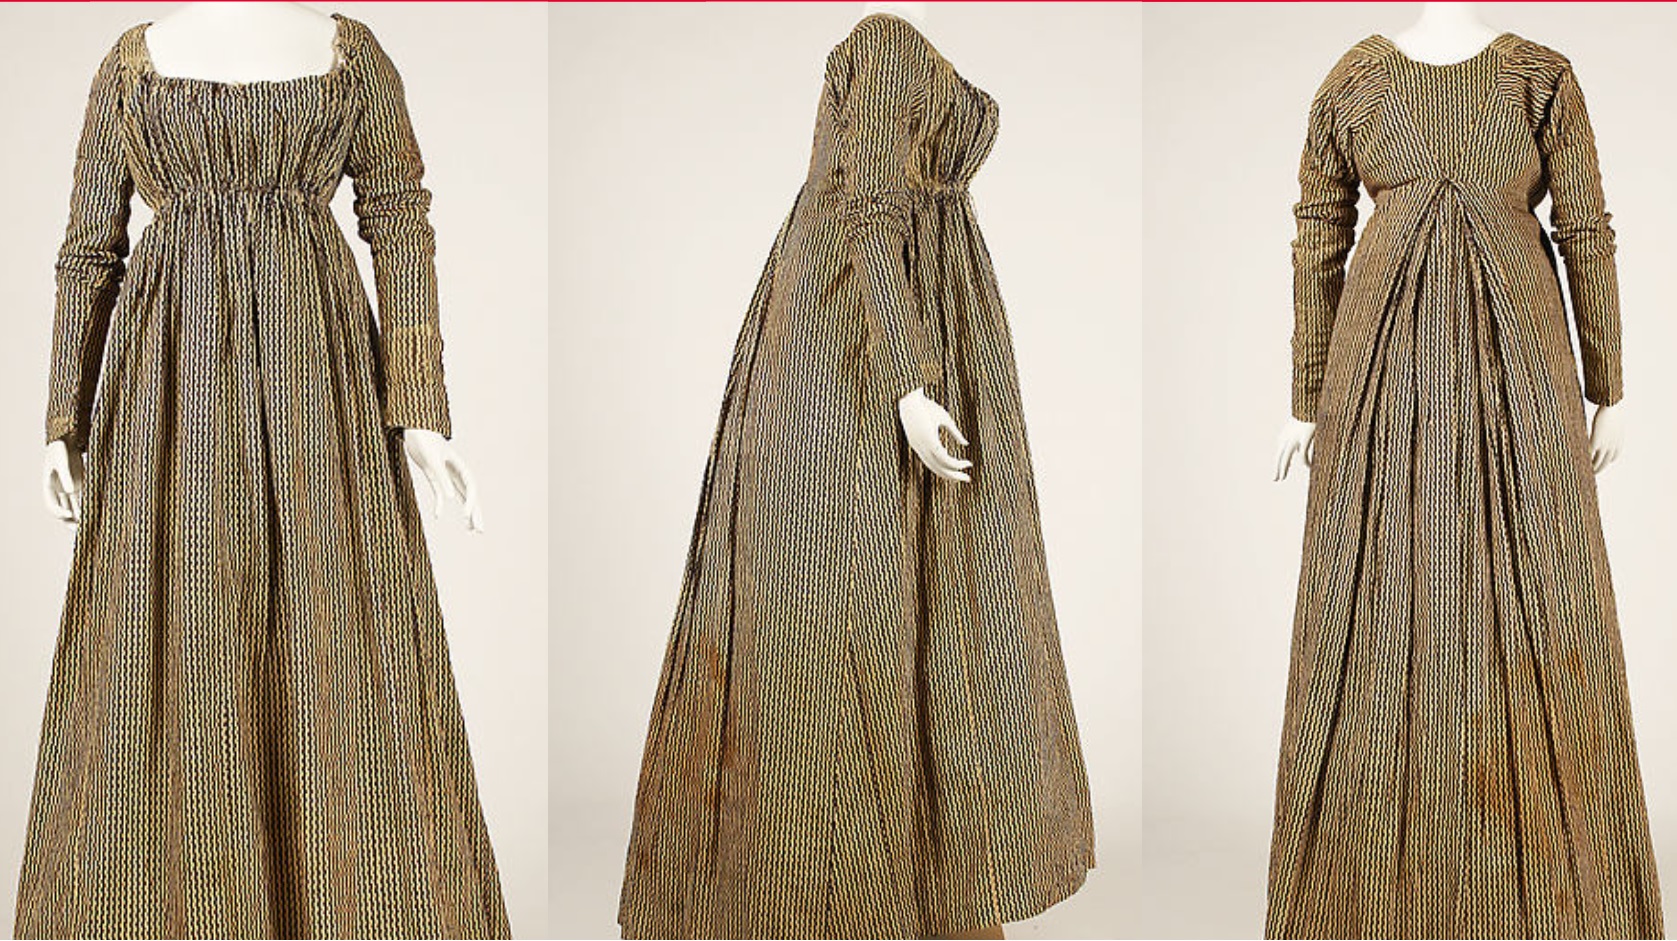
Striped gown found at the Metropolitan Museum of Art. Unfortunately, I cannot find the link again.
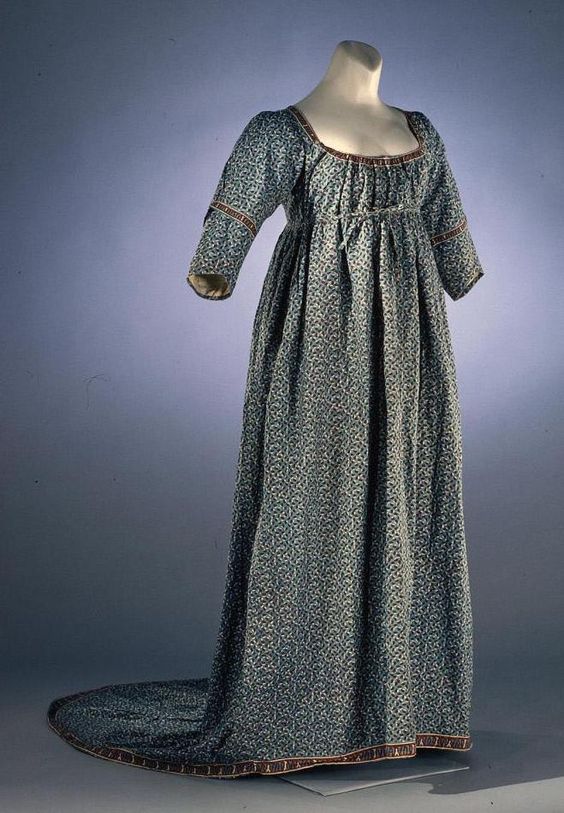
Gown with detachable sleeve extentions, closed in the front with drawstrings. Colonial Williamsburg Education
Fishu and Cap
For the modest motherly look, I needed a fishu for the neck line and a cap. The fishu will go well together with many of my regency dresses. There is a fantastic blog post about fishus here.
För den anspråkslösa, moderliga looken, behövde jag en chemisette till urringningen och en mössa. Chemisetten kommer passa till flera av mina empirklänningar. Här är ett jättebra blogginlägg om olika typer av chemisetter och schalar.
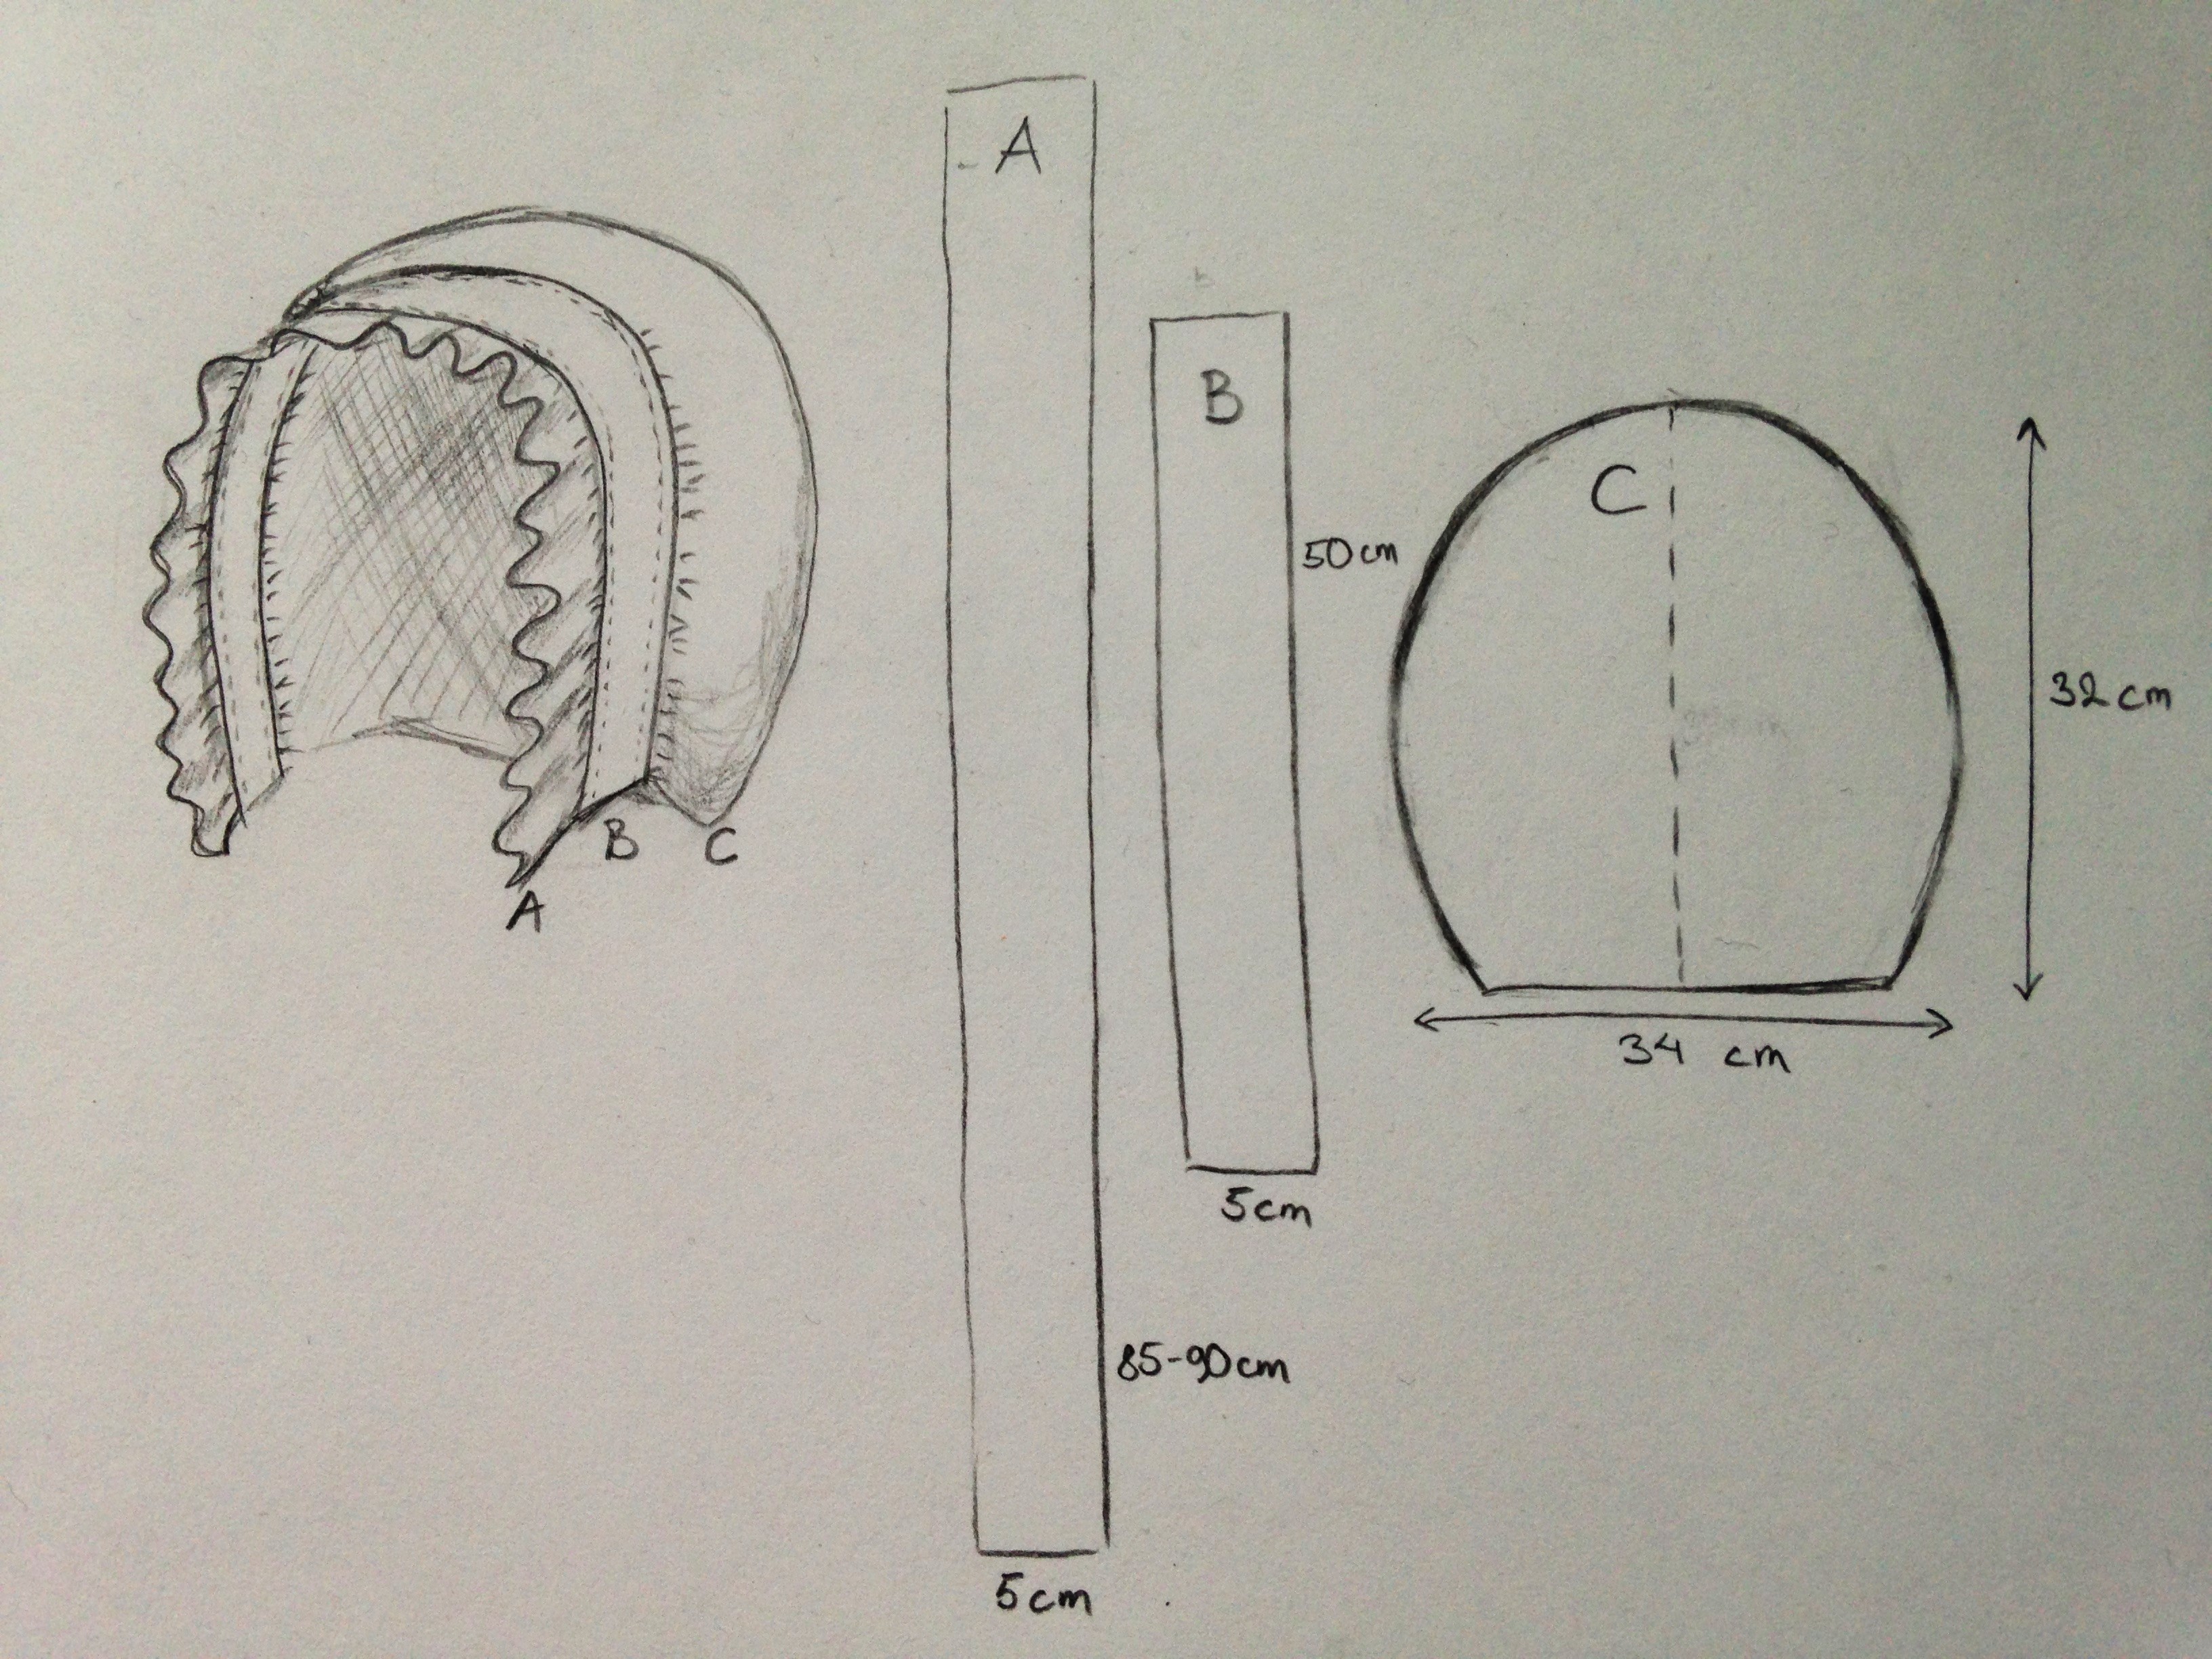
Cap construction/Mössans konstruktion
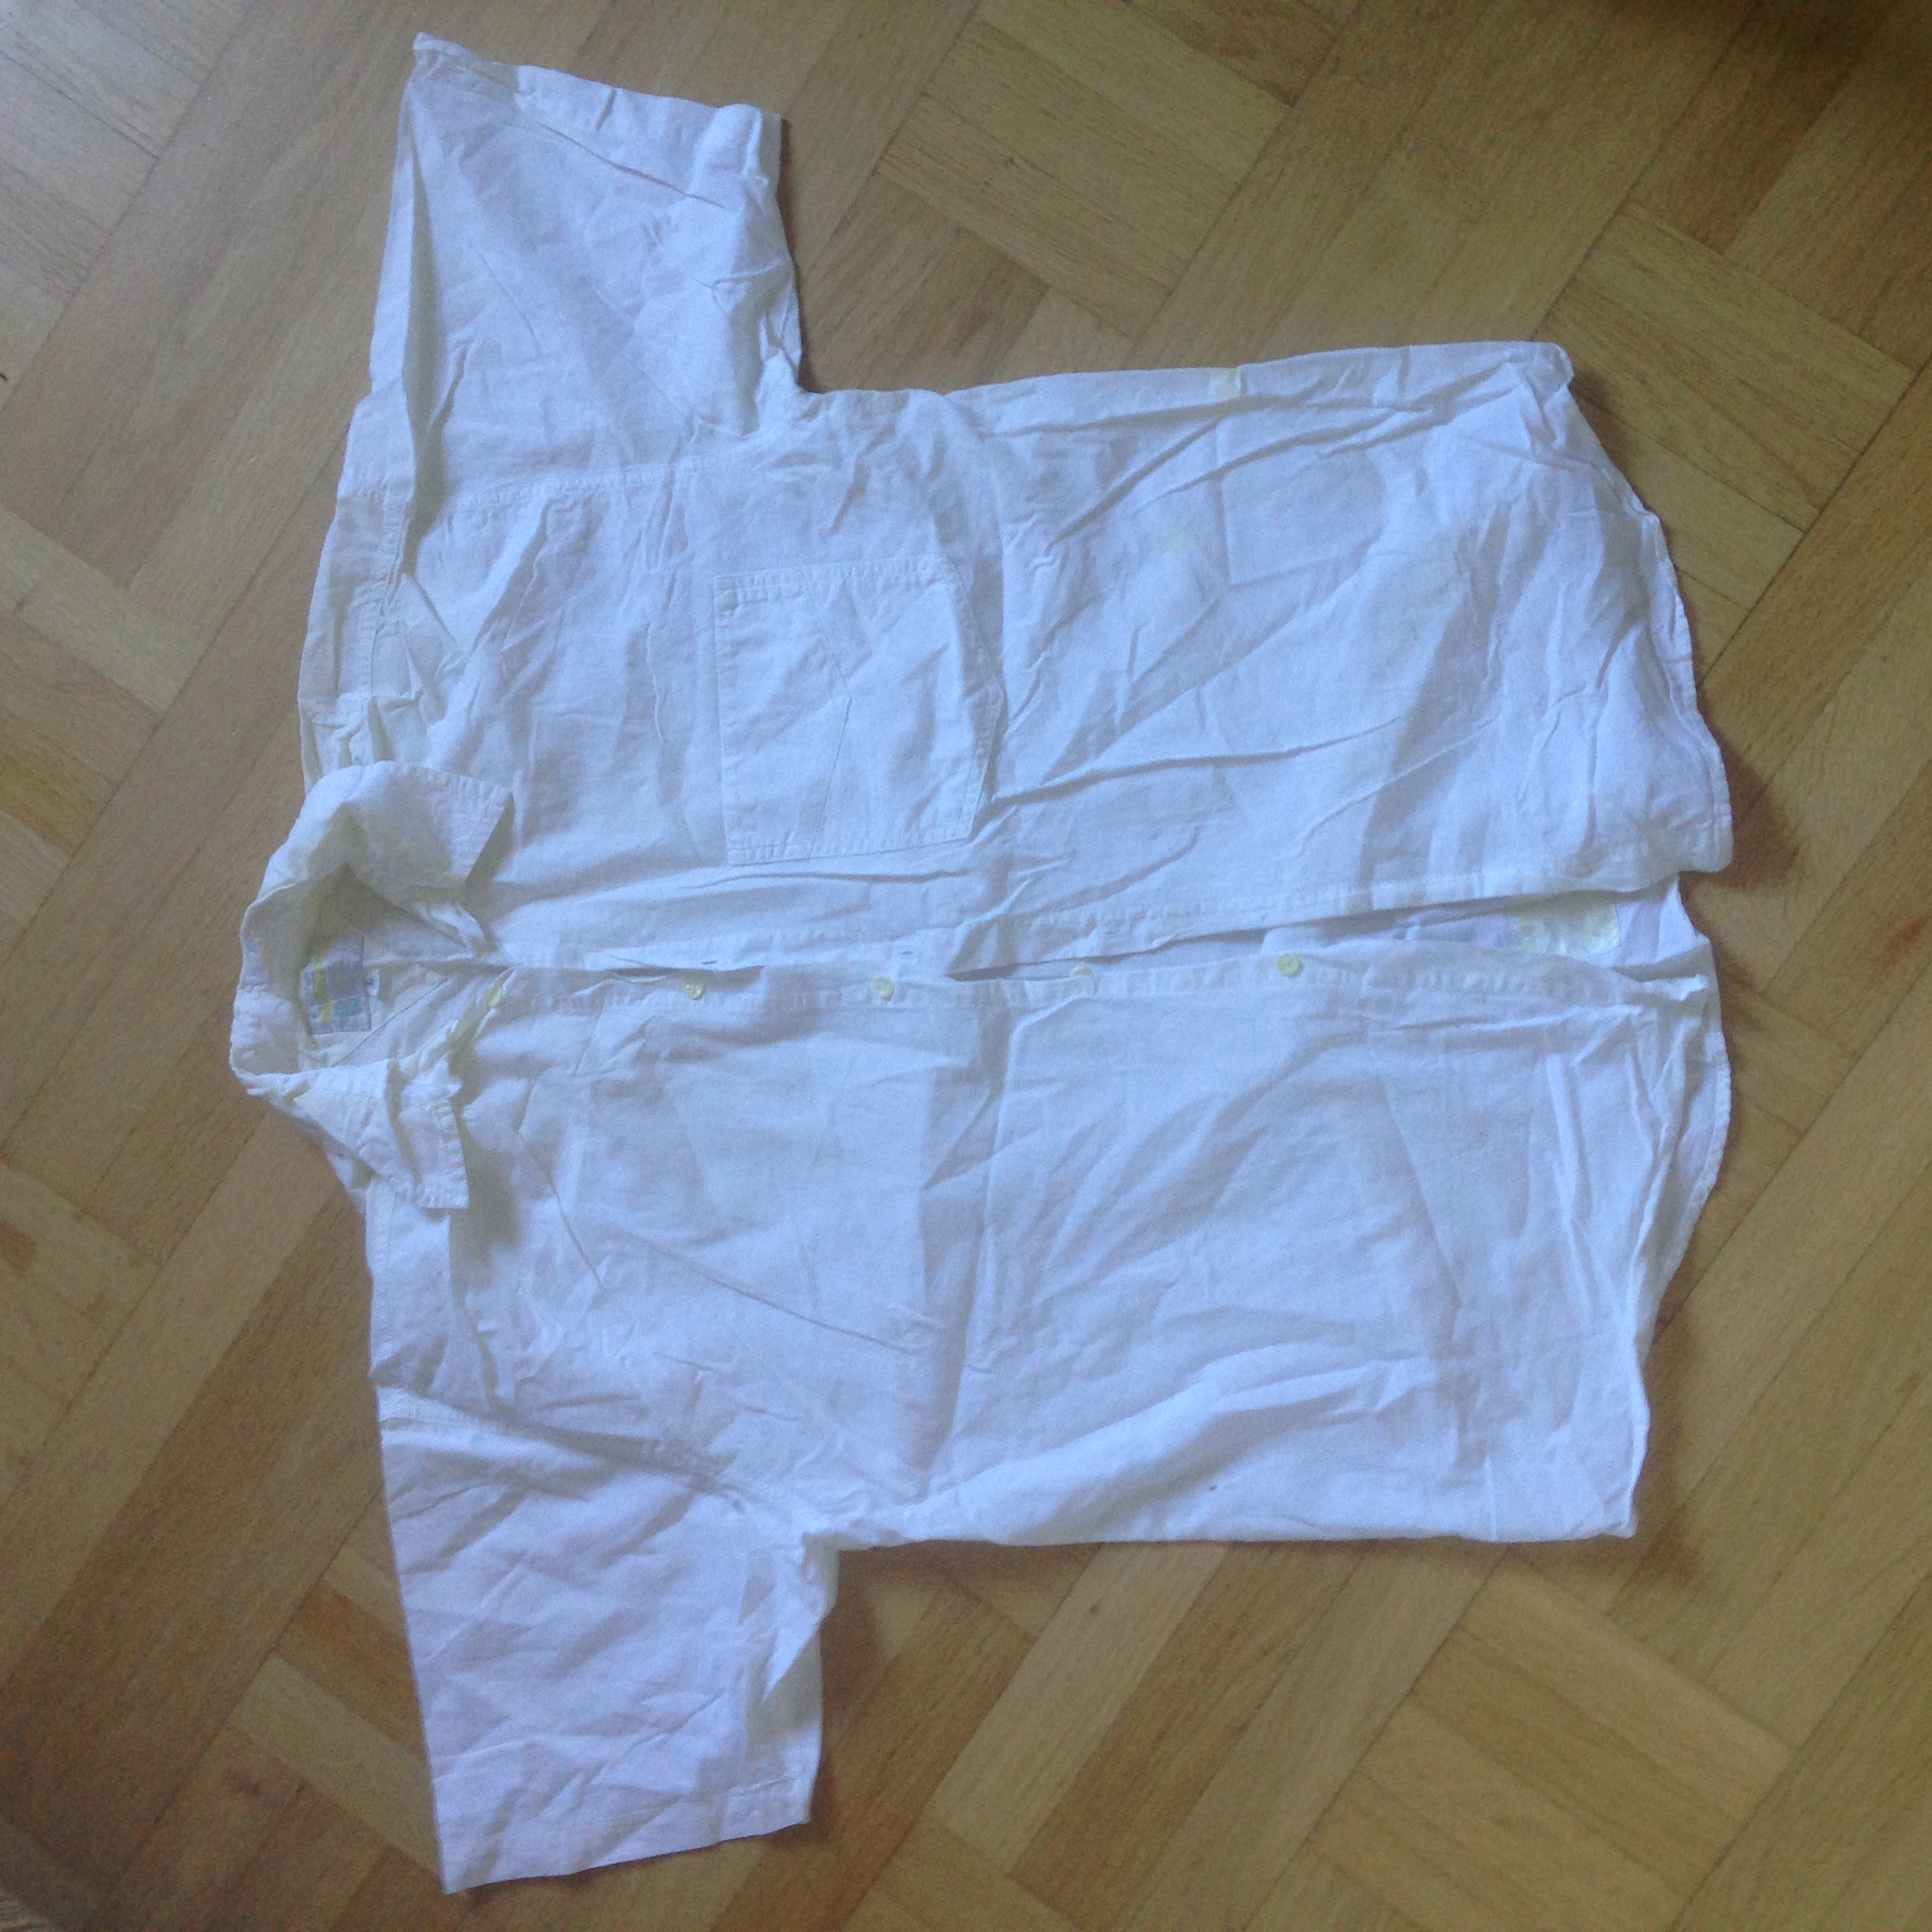
My main inspiration for the cap was this one, as it has no laces or expensive fabrics that would match poorly with my crude dress fabric. In my parents basement, there is a cupboard where they put old clothes, curtains and bed sheets, which have forfeited their purpose but could perhaps find a new use later on. Last week I dug deep and found an old, stained shirt with just enough unstained fabric for making a cap and a fishu!
Inspirationen för mössan kommer huvudsakligen från denna, eftersom den inte är gjord i något dyrt tyg eller har någon spets, vilket skulle matcha mitt grova bomullstyg väldigt dåligt. I mina föräldrars källare finns det en garderob full av gamla undanlagda gardiner, kläder och sängkläder. Där grävde jag runt förra veckan och hittade faktiskt en gammal fläckig skjorta, som hade precis lagom med rent tyg över för att räcka till mössan och chemisetten.
This is how it came out. I think that you can figure out how it is done by yourselves, so I will not linger at that.
Så här blev det. Jag tror att ni själva kan räkna ut hur man gör dessa enkla plagg, så jag går hastigt vidare.
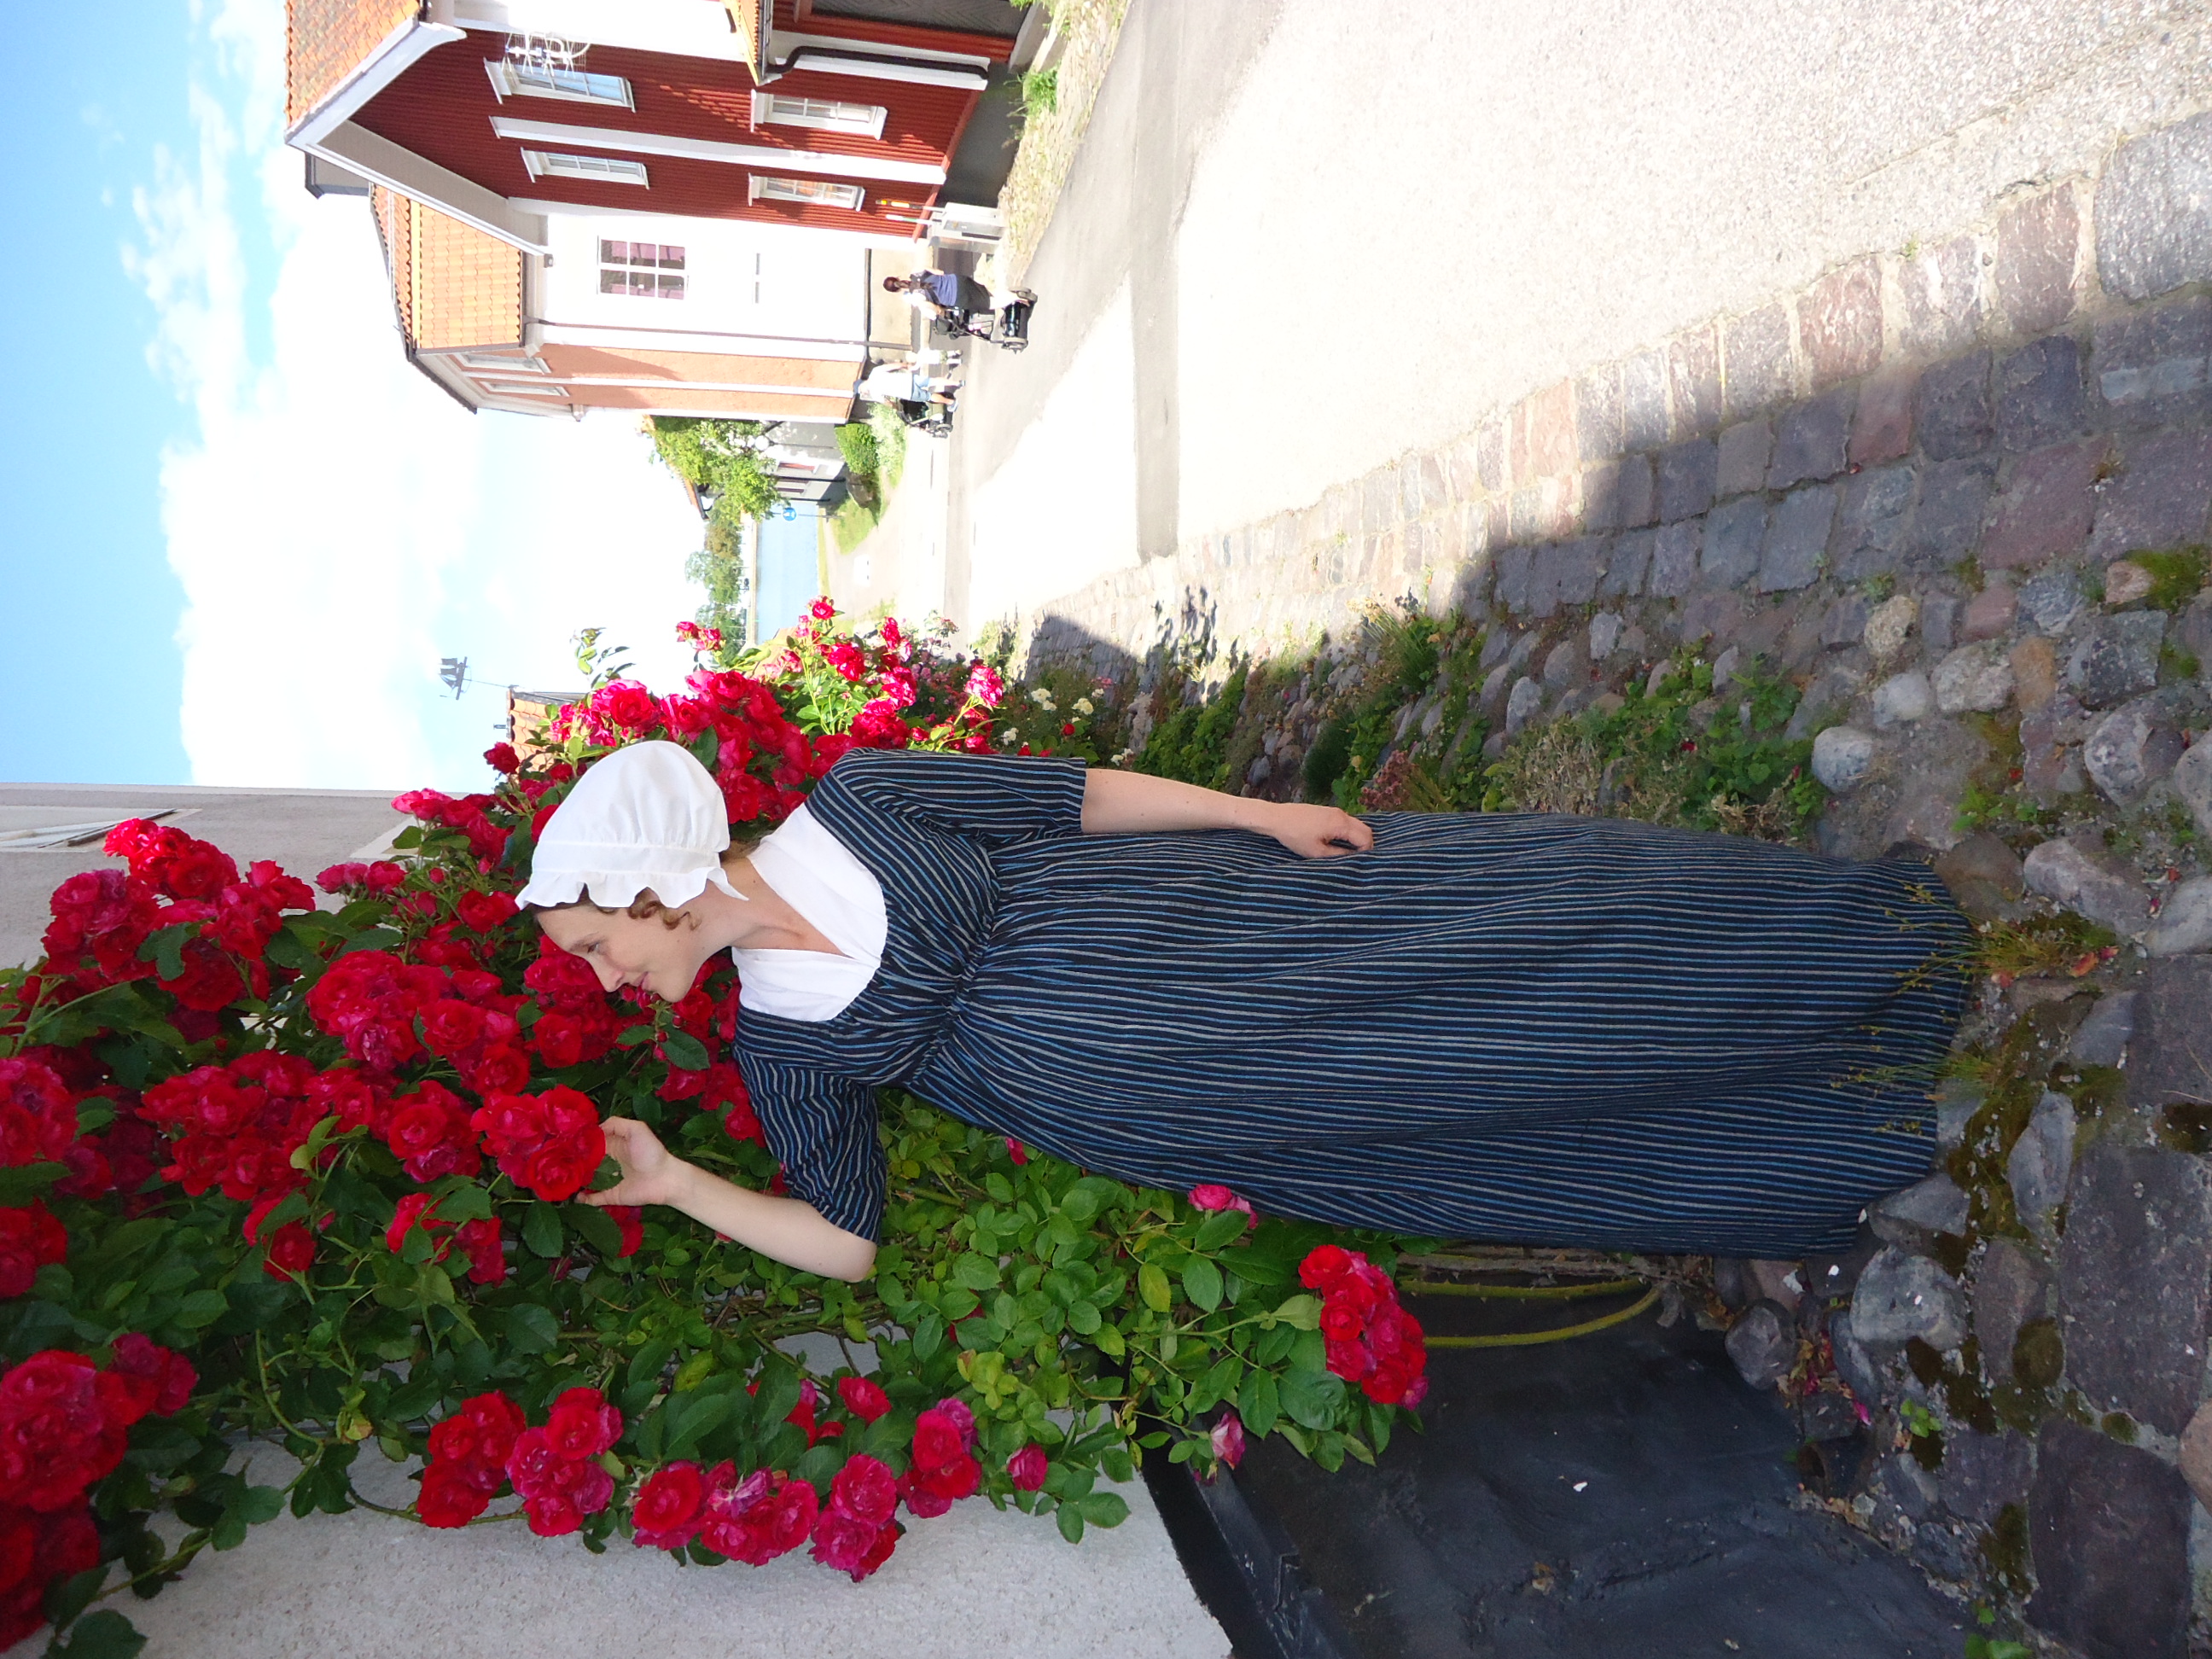
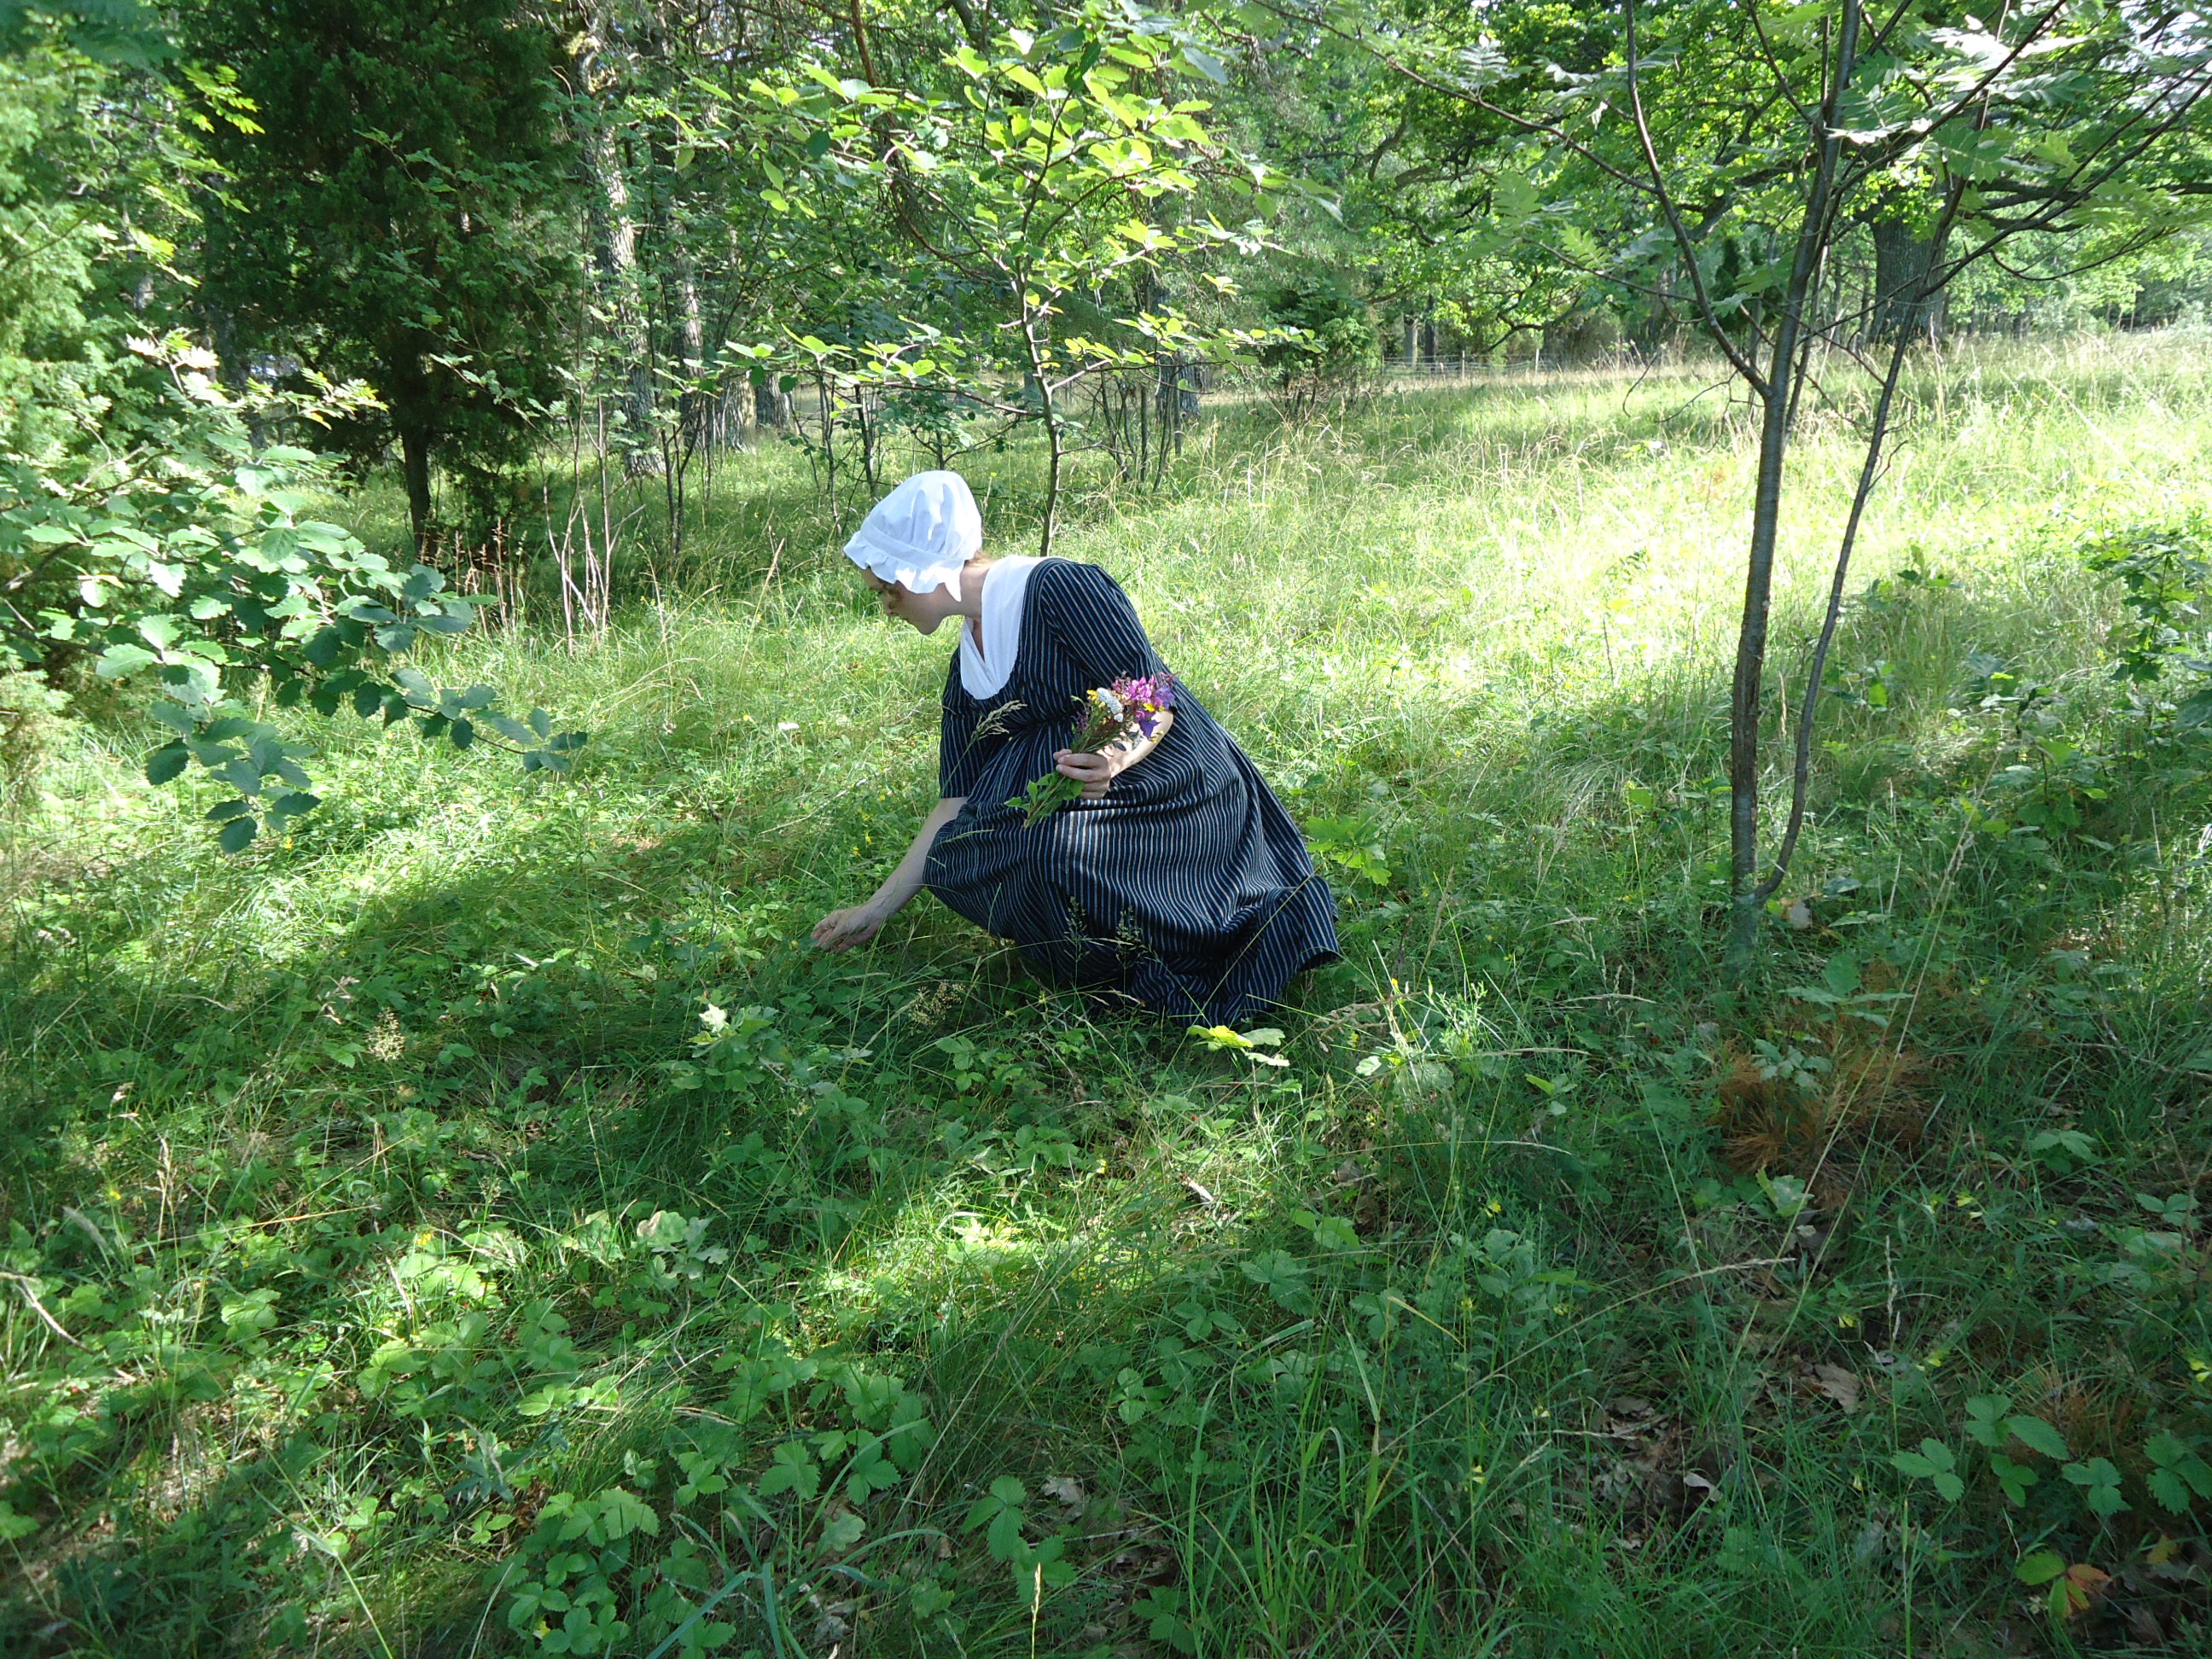
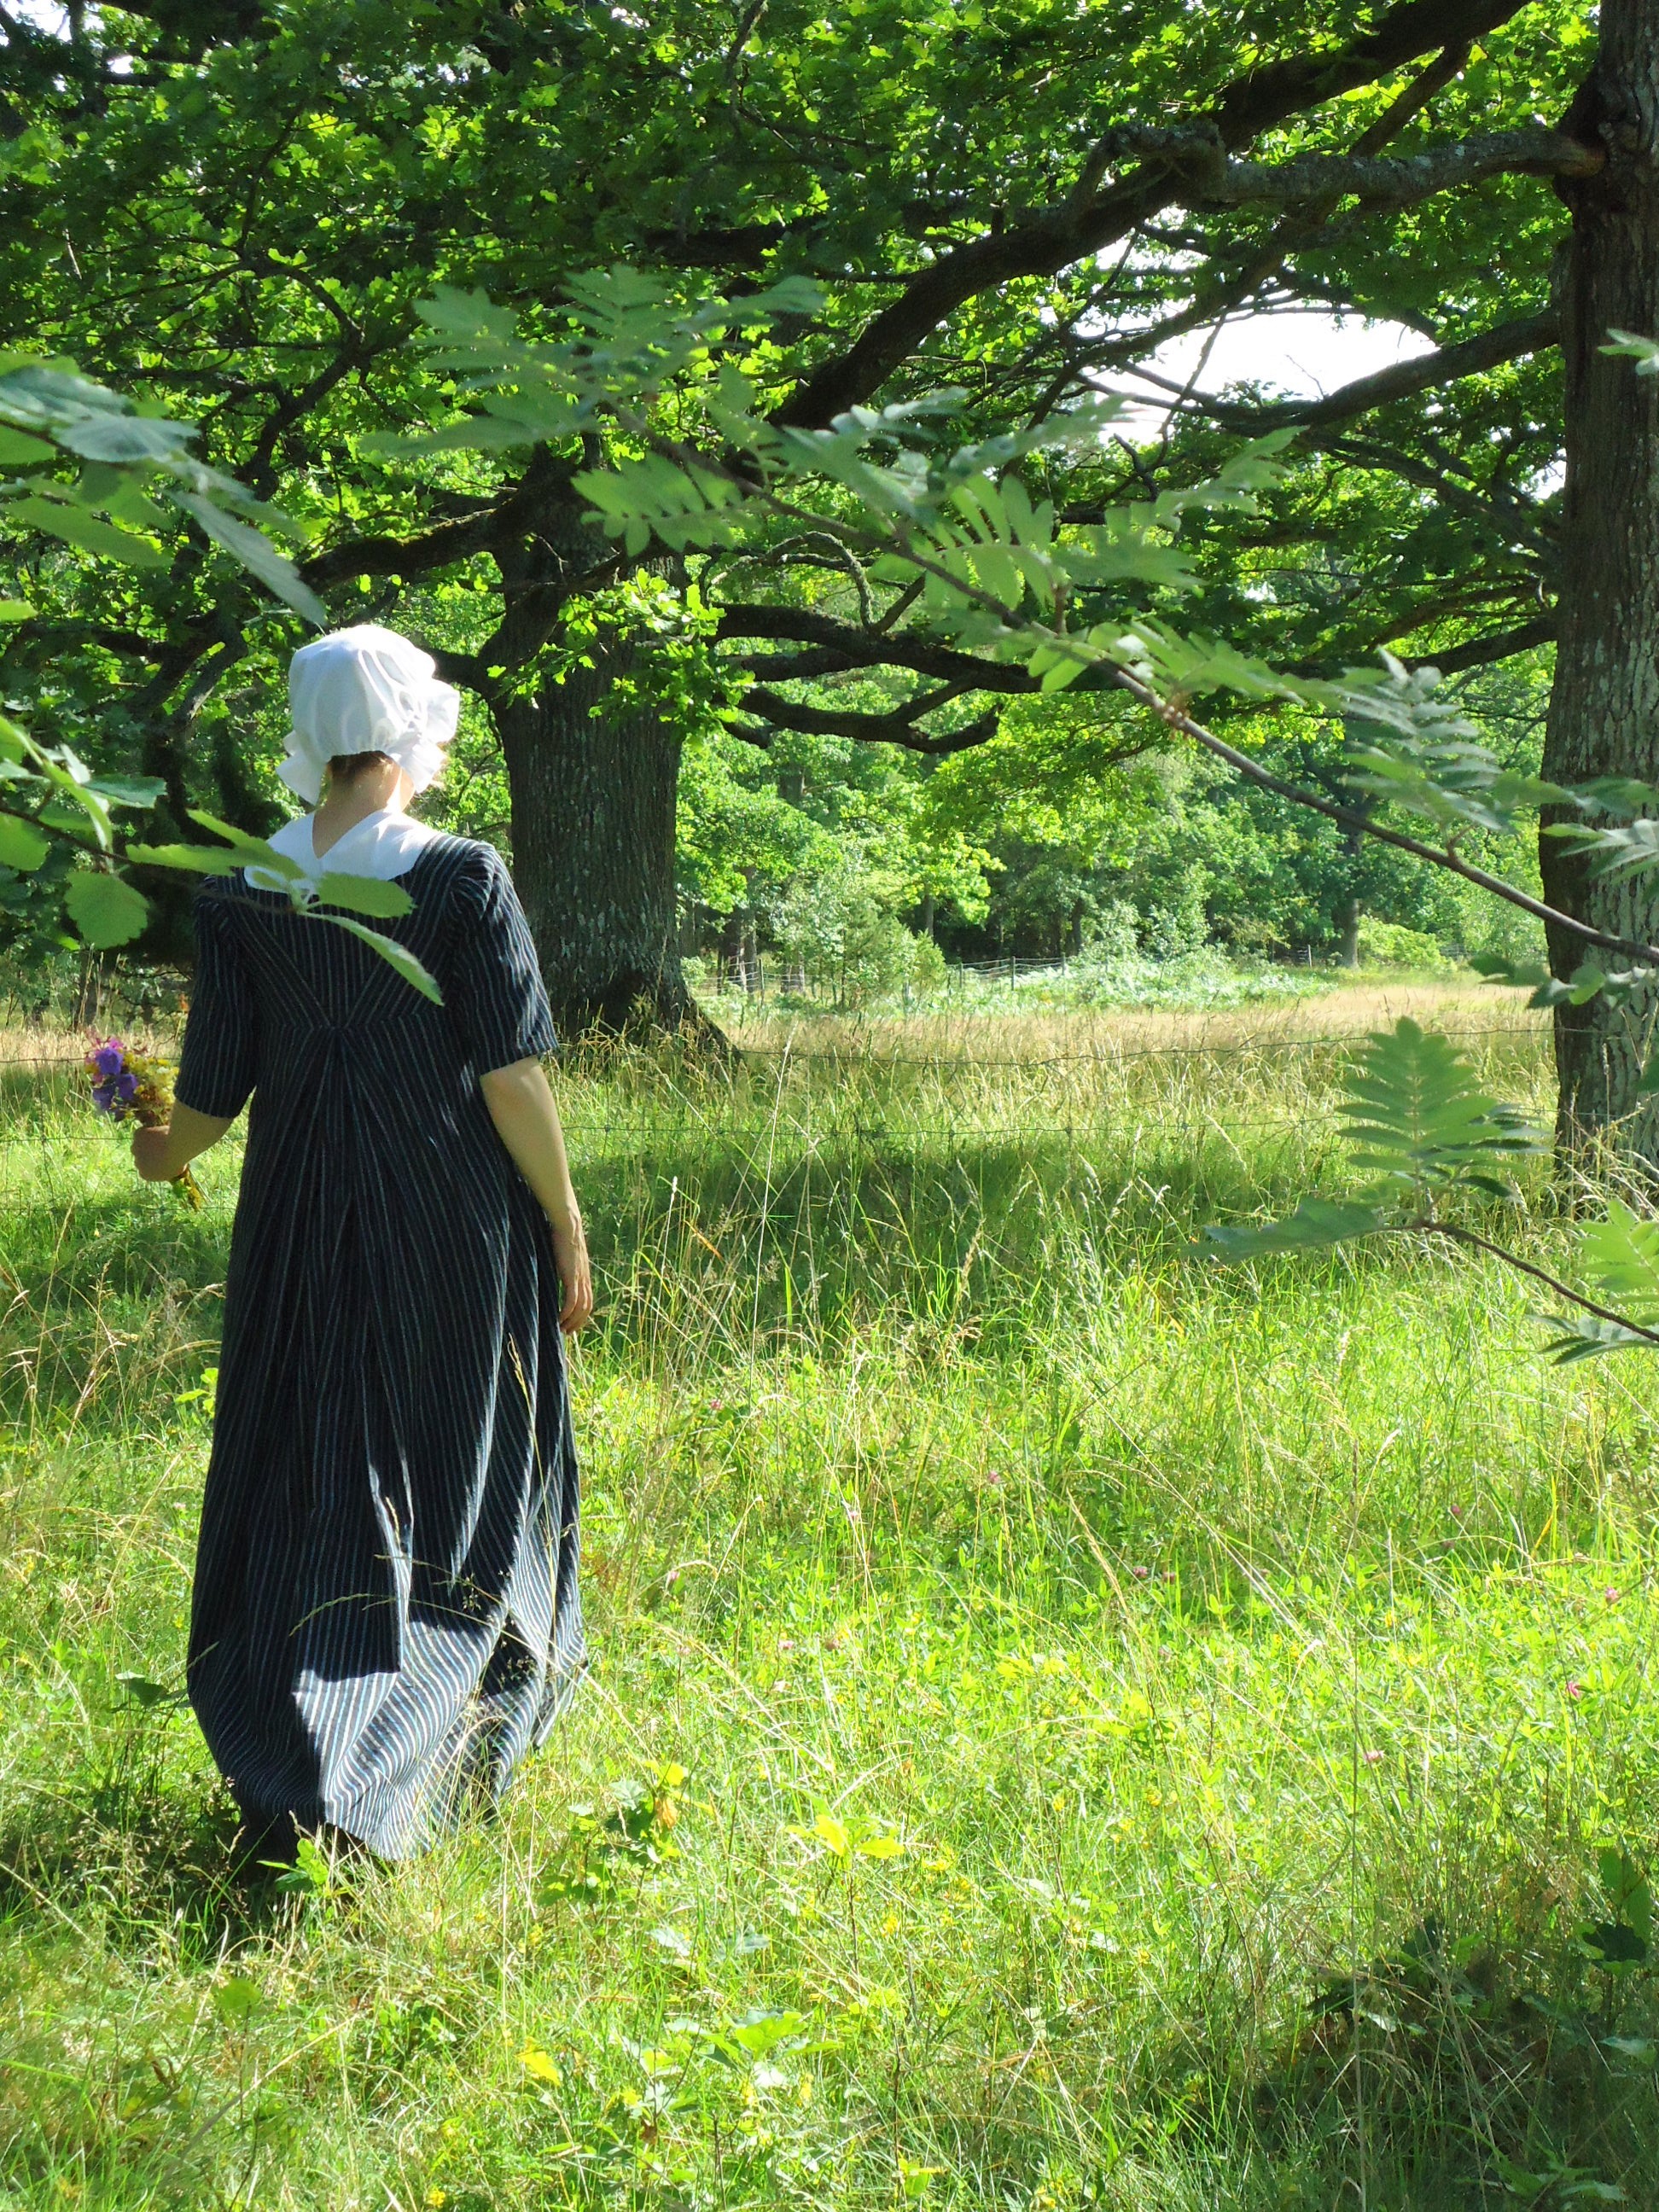
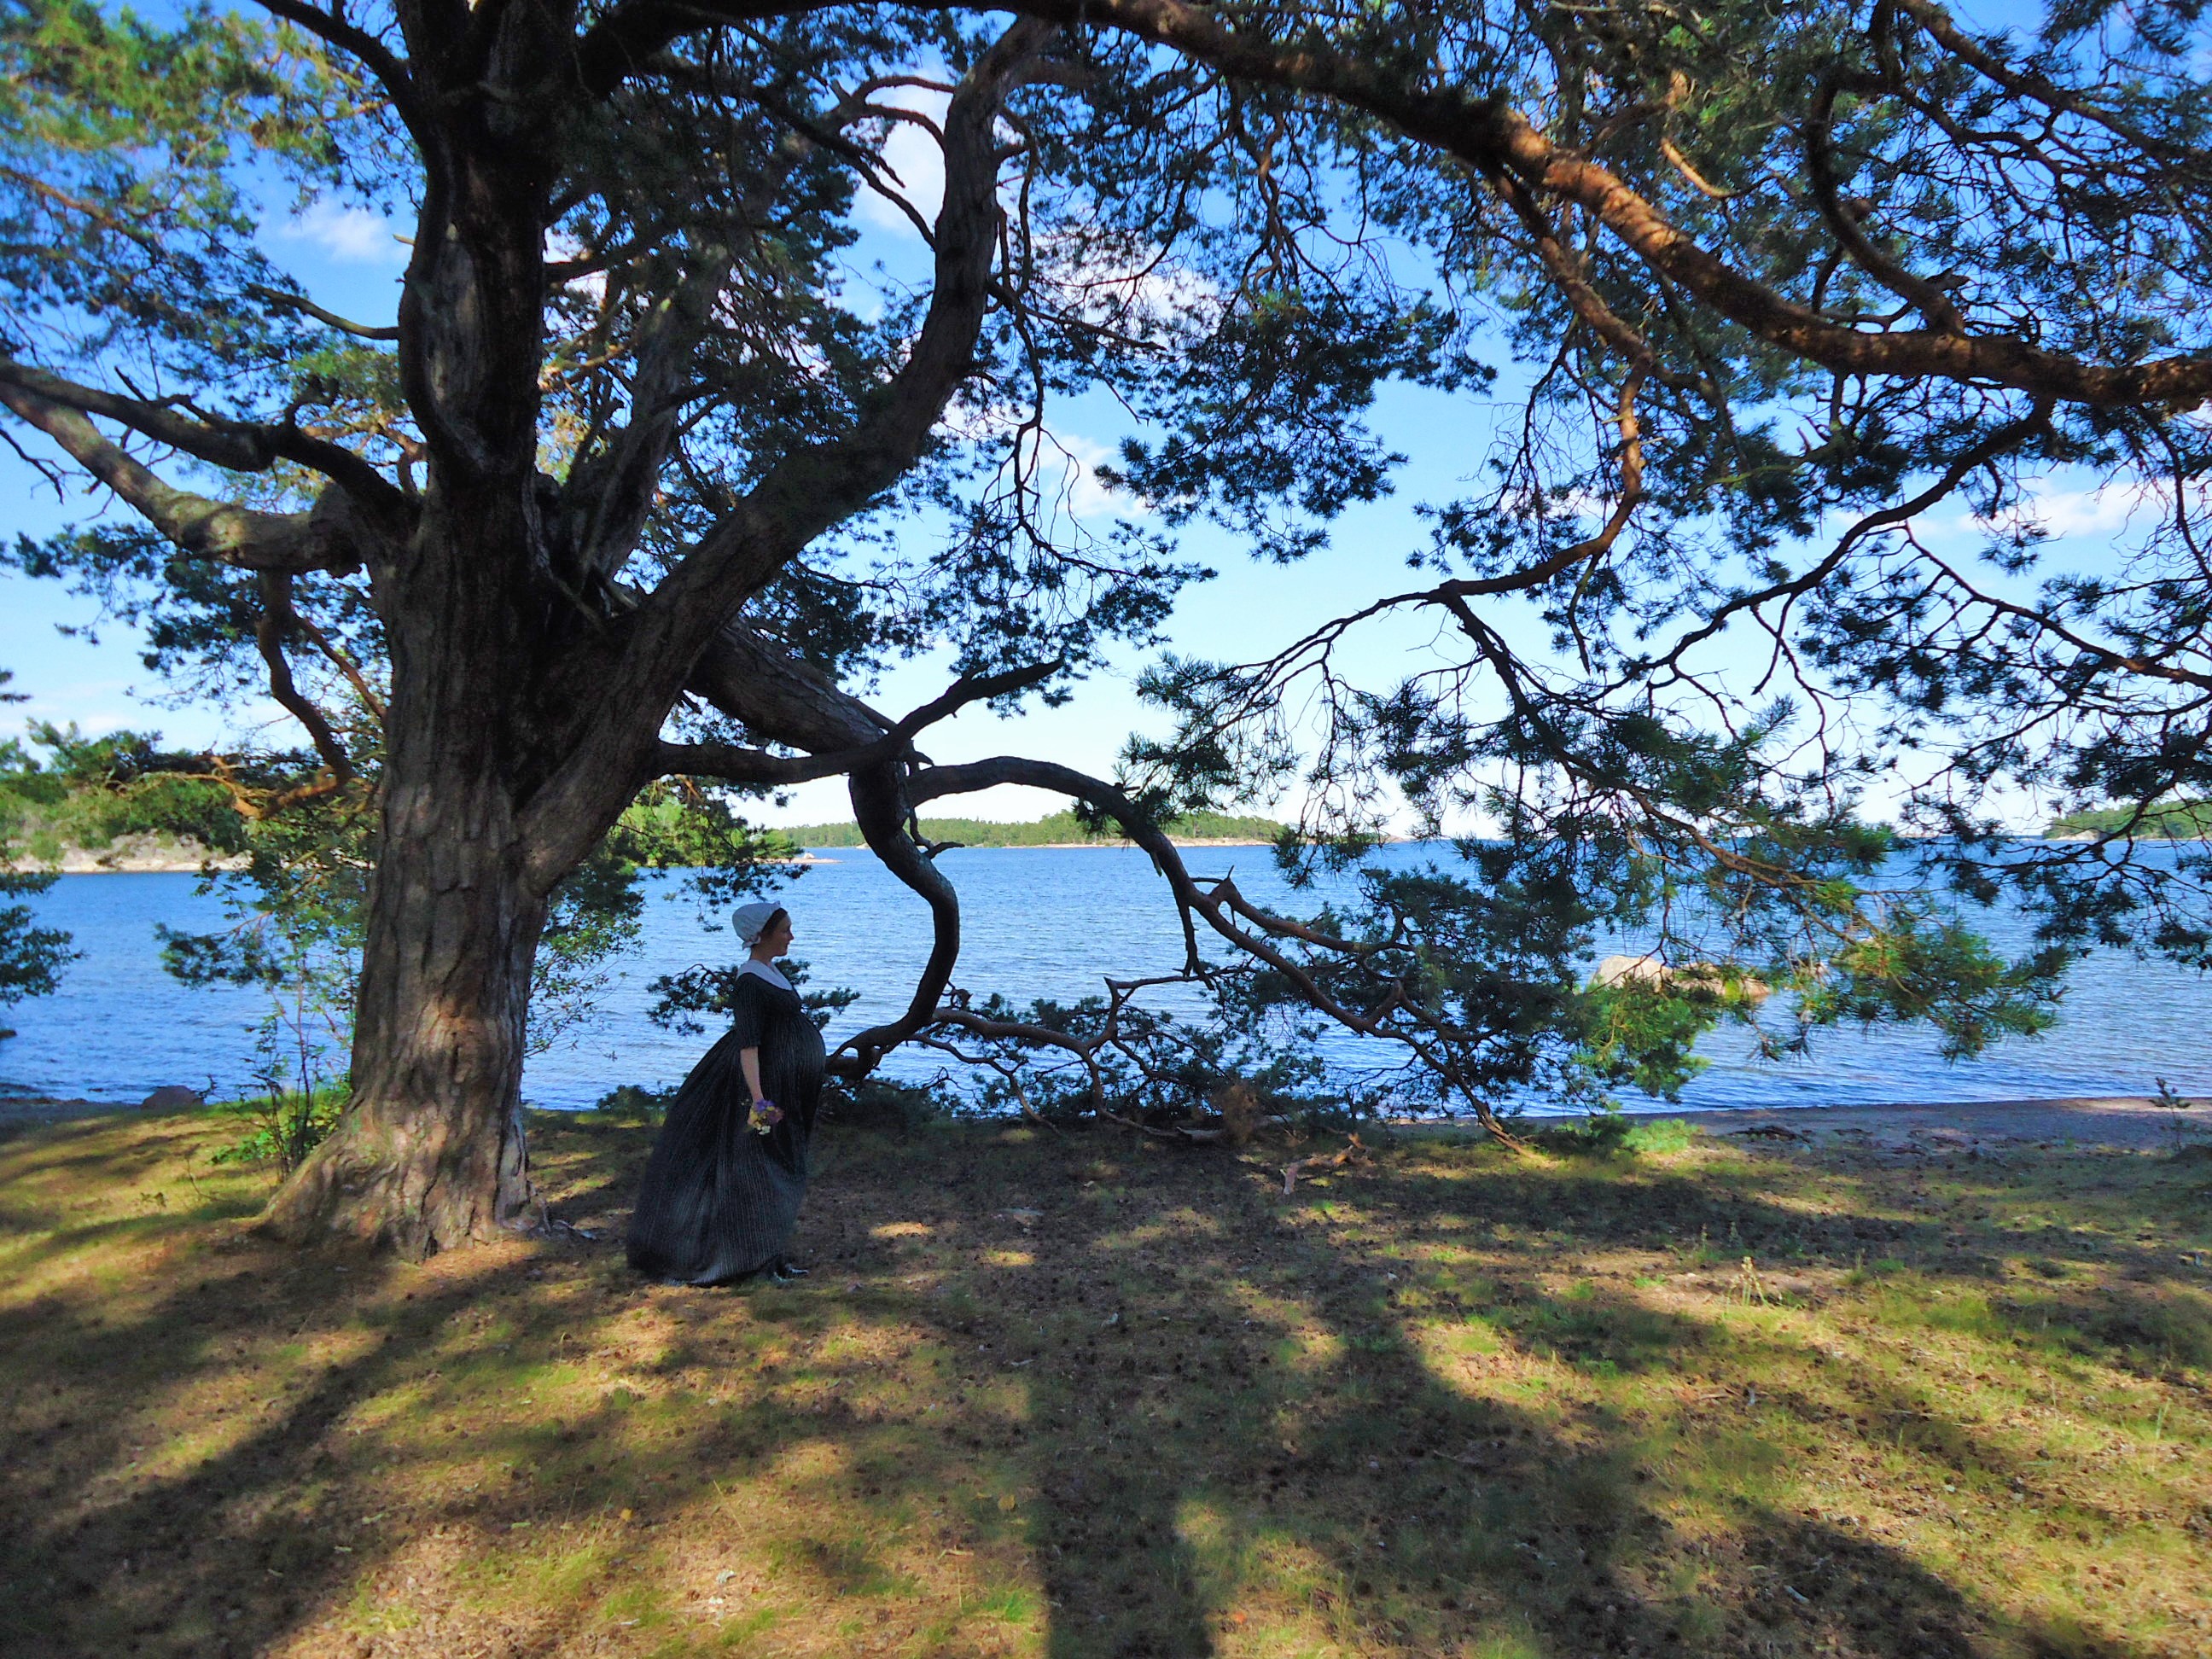
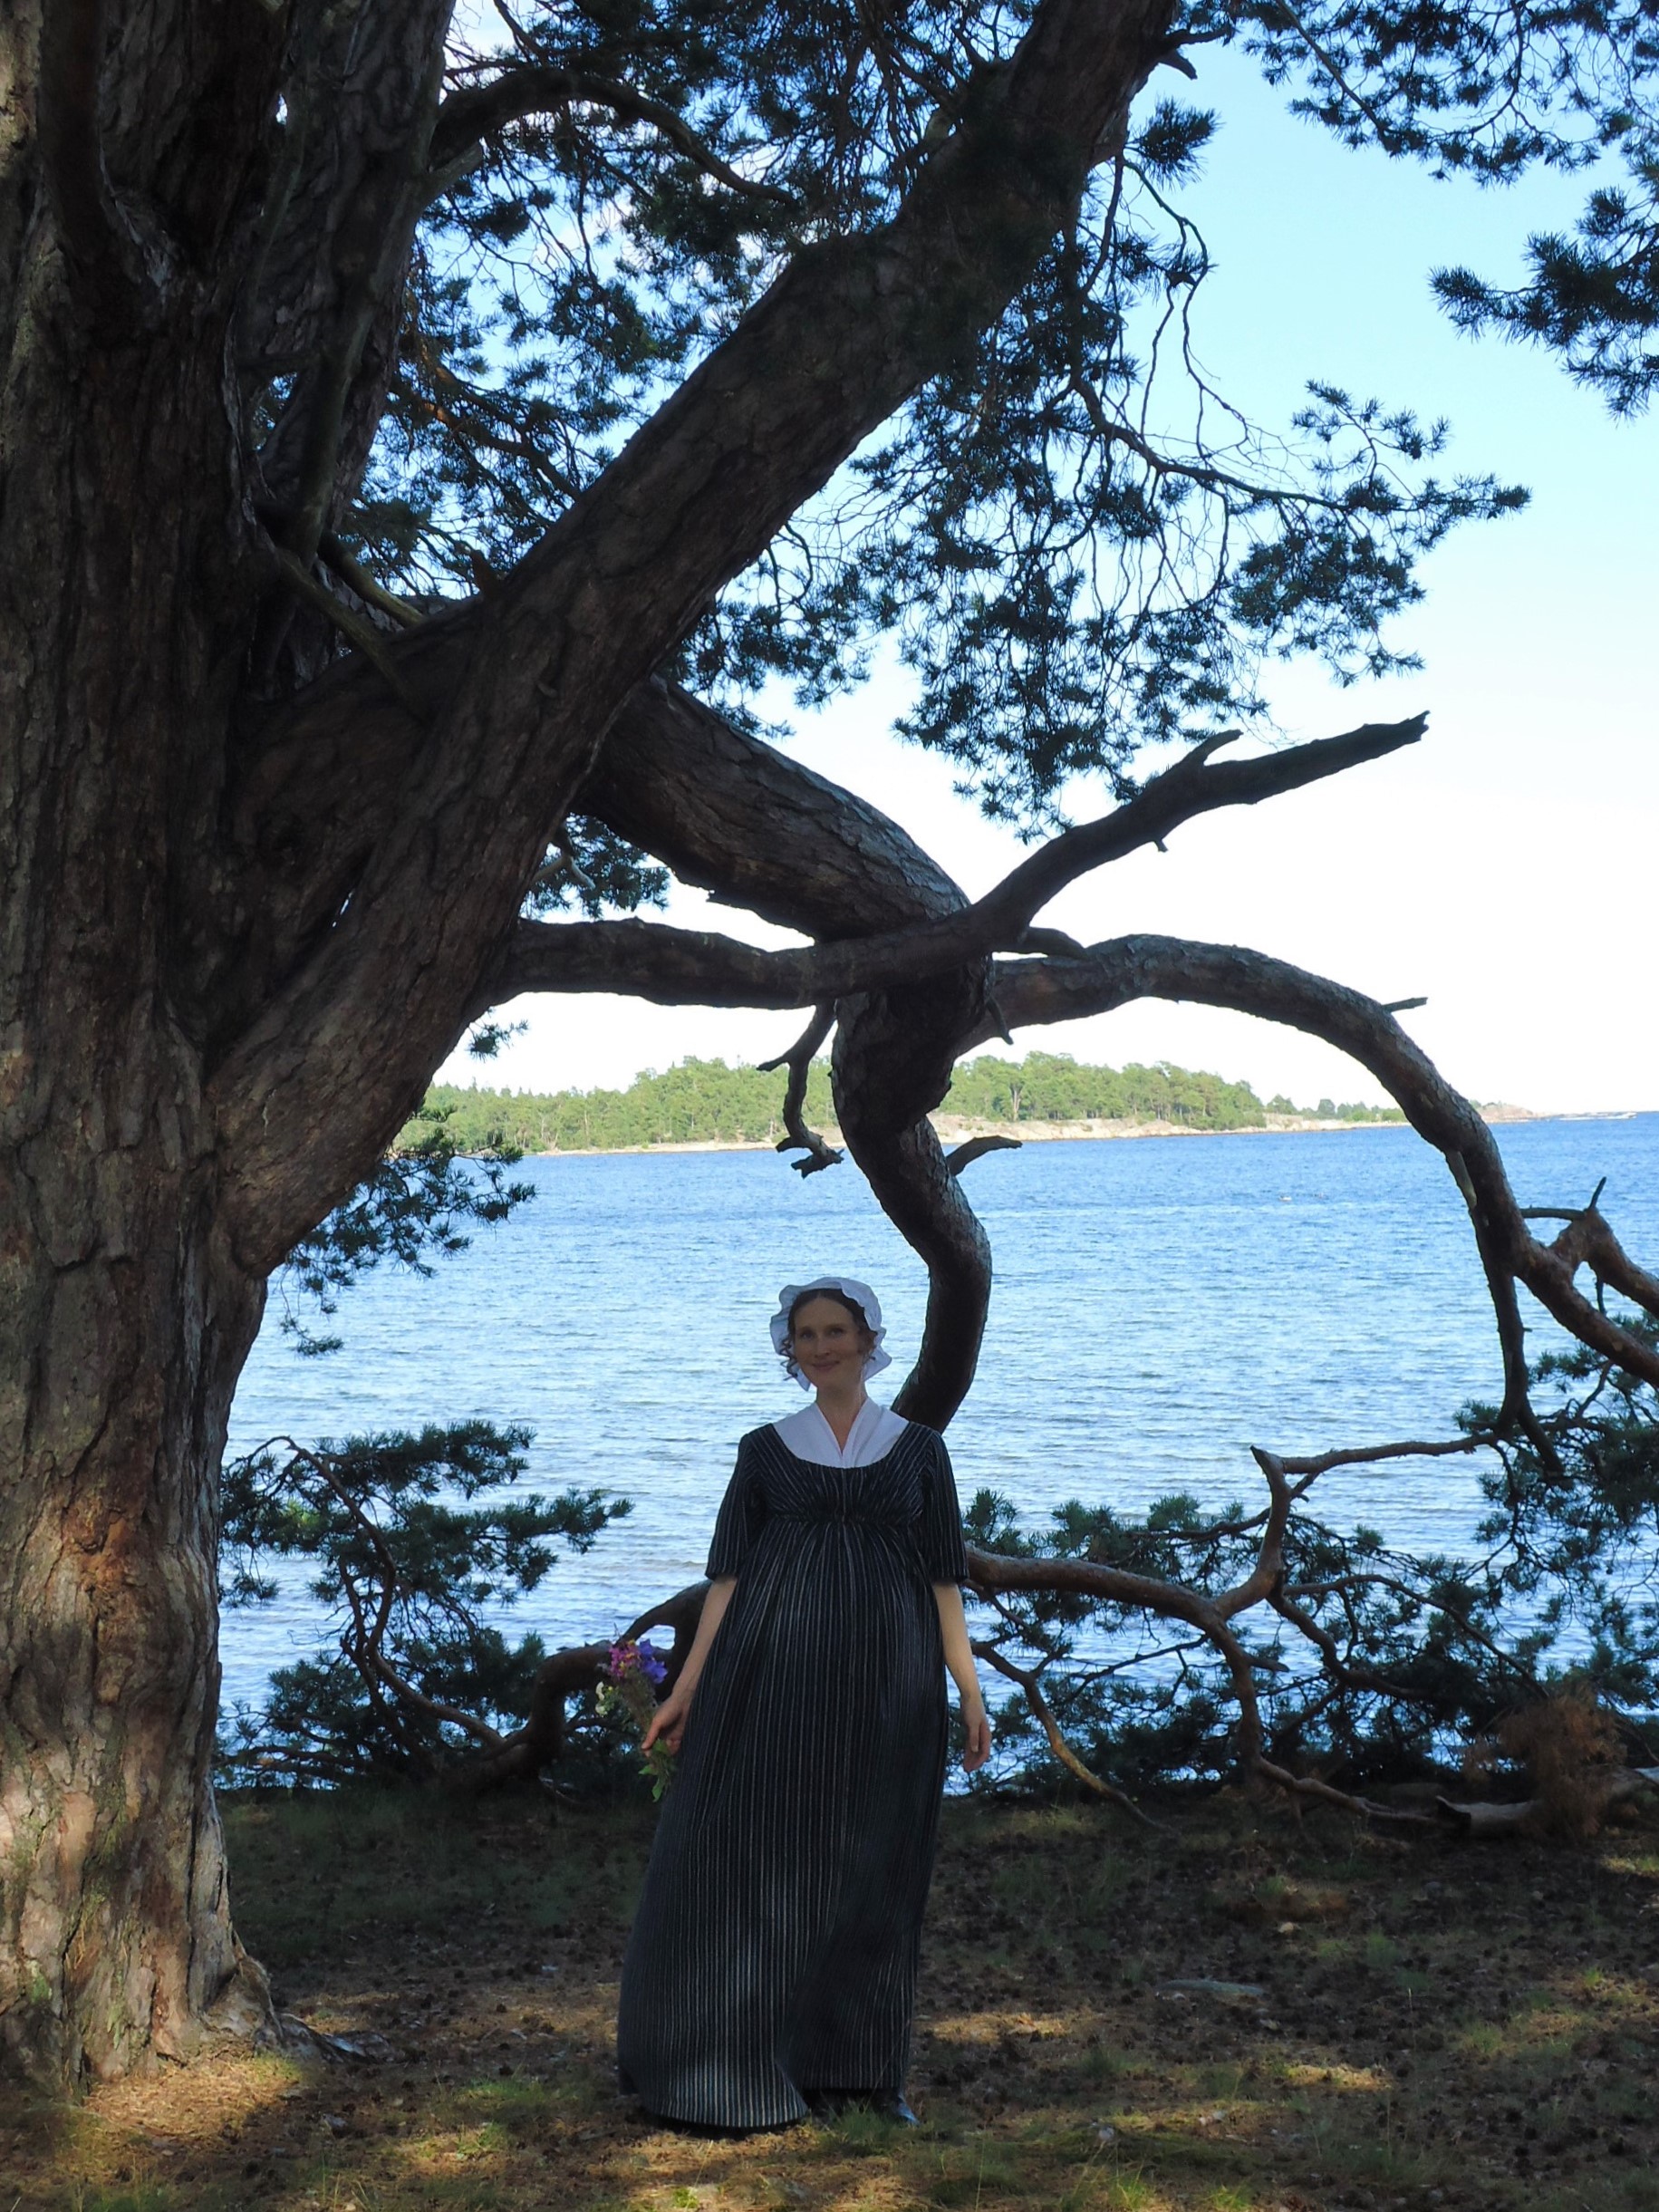
The finished gown with fishu and cap
I did not believe that you were interested in construction process of this one, as it is very similar to my other regency gowns. Here is how it is put on, anyway.
Jag trodde inte att ni var intresserade av att se hur denna klänning syddes, eftersom den påminner om de jag har gjort tidigare. Här ser ni åtminstone hur den tas på, över chemisetten.
My new hometown, Västervik, is really beautiful this time of year. Maybe these pictures might tempt you to come and visit this dear part of Sweden?
Min nya hemstad, Västervik, är så vackert vid den här tiden på året. Kanske kan dessa bilder locka dig att besöka den här delen av Sverige?
Ten years ago I bought lots of a blue ”synthetic silk” fabric. Already by then, I thought that it would be perfect for a V-lined regency gown, but I was not a confident pattern maker by then, so when I couldn’t find any suitable pattern, it was stowed away.
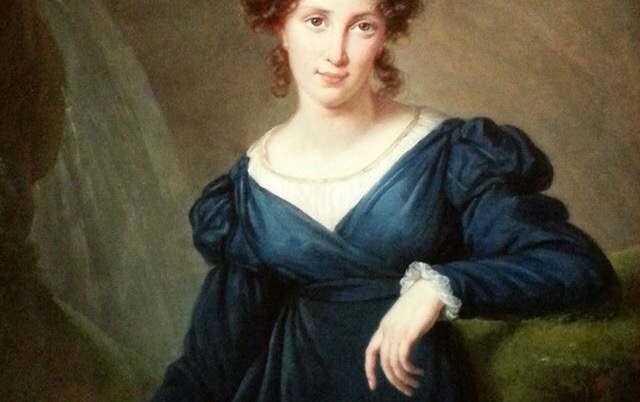
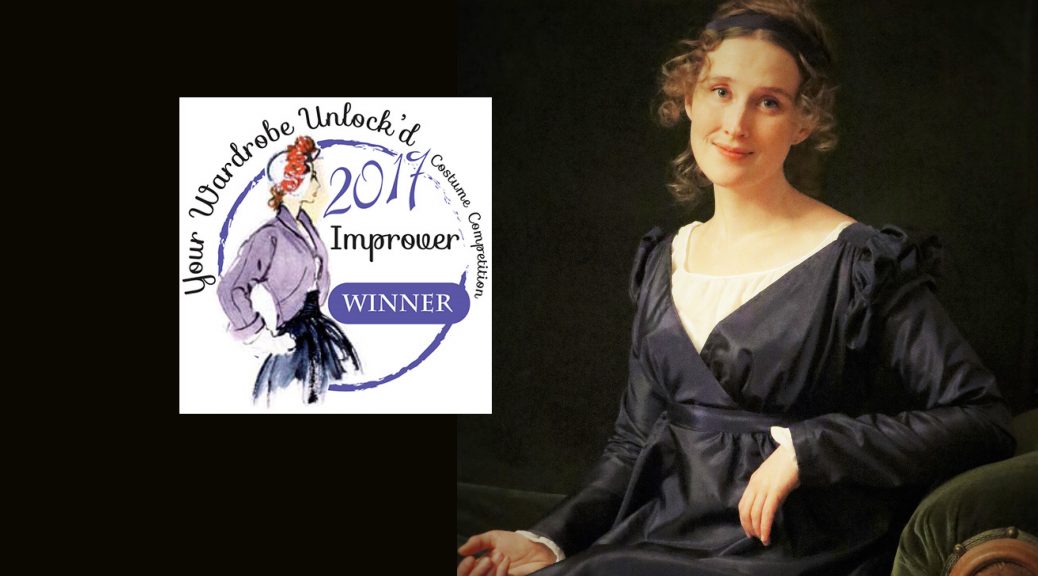
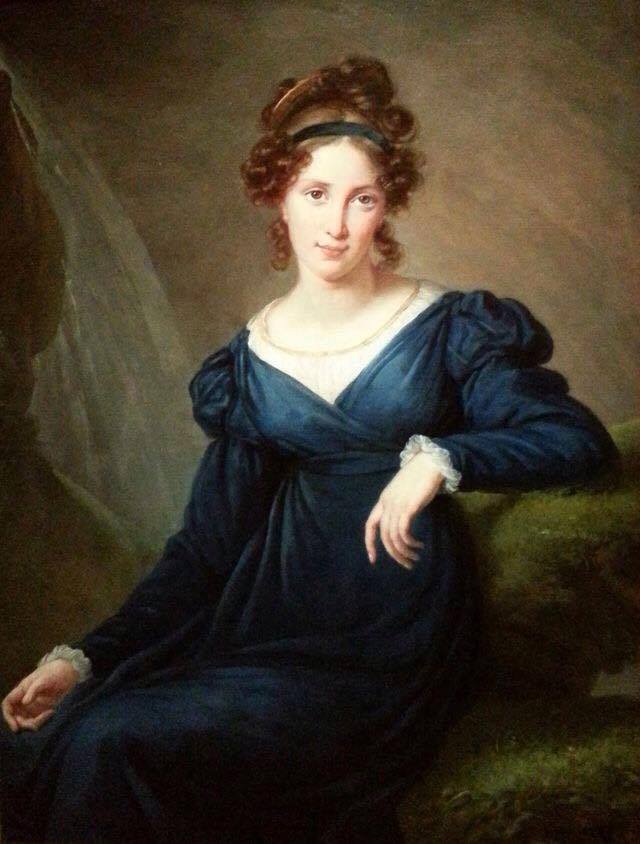
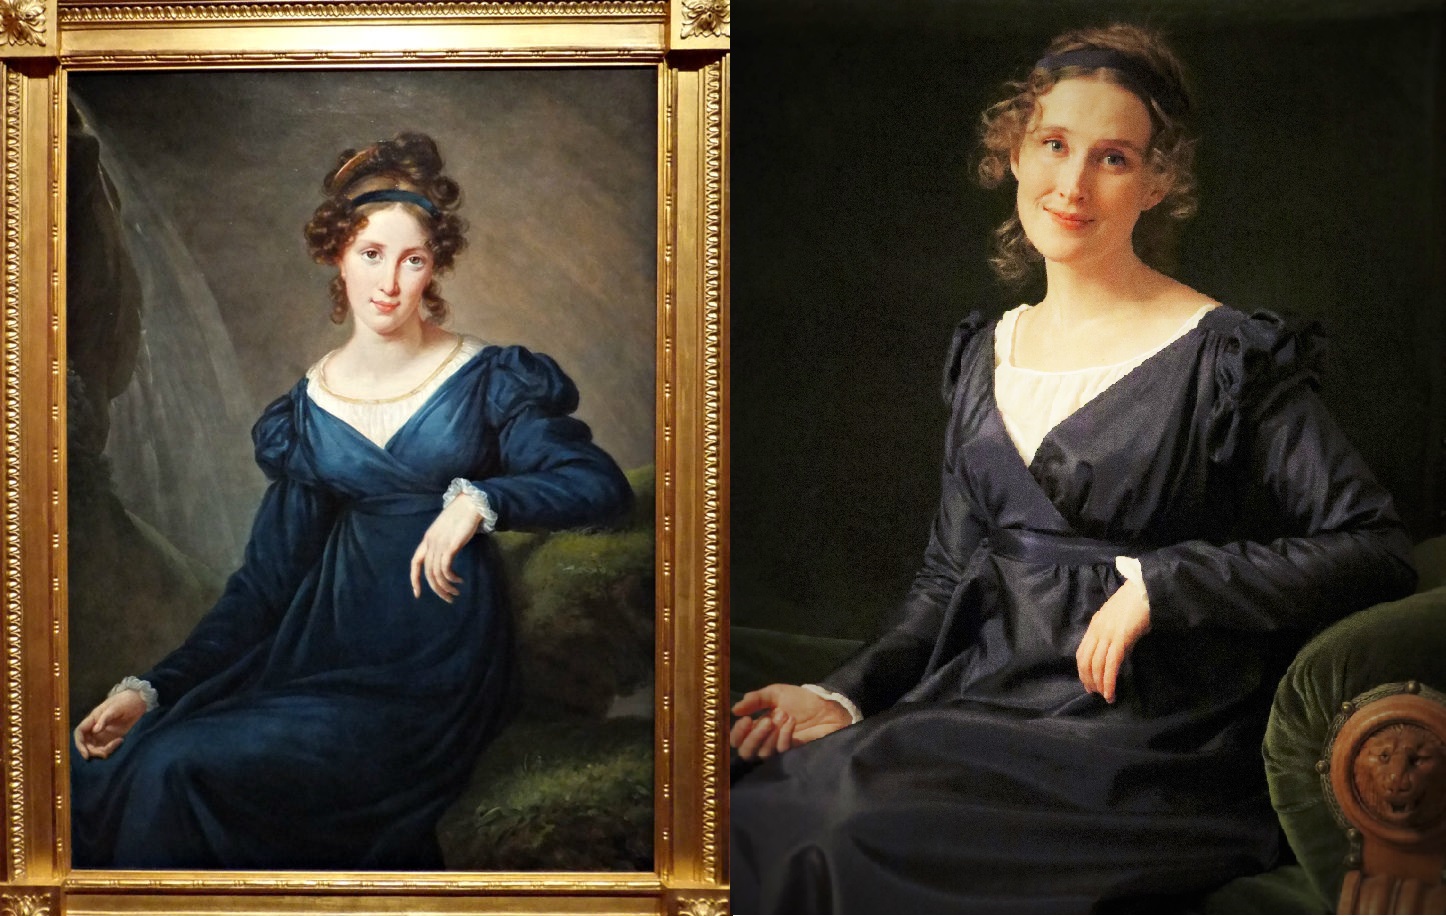
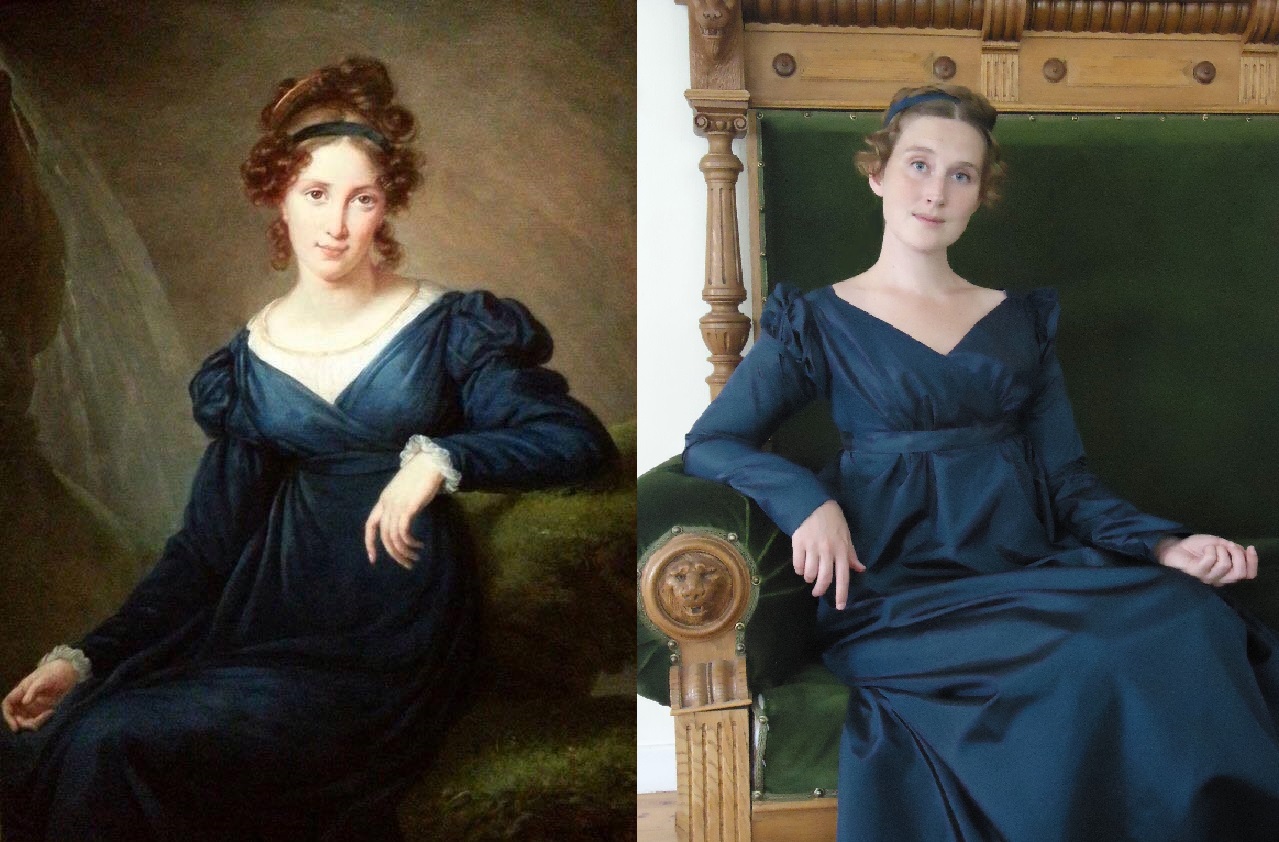
Thanks to Pinterest and many helpful blogposts, I could at last decipher how the V-lined gowns were constructed. When I also stumbled over this lovely portrait of Tatyana Borisovna Potemkina, I knew that this gown would be my entry in this year’s competition.
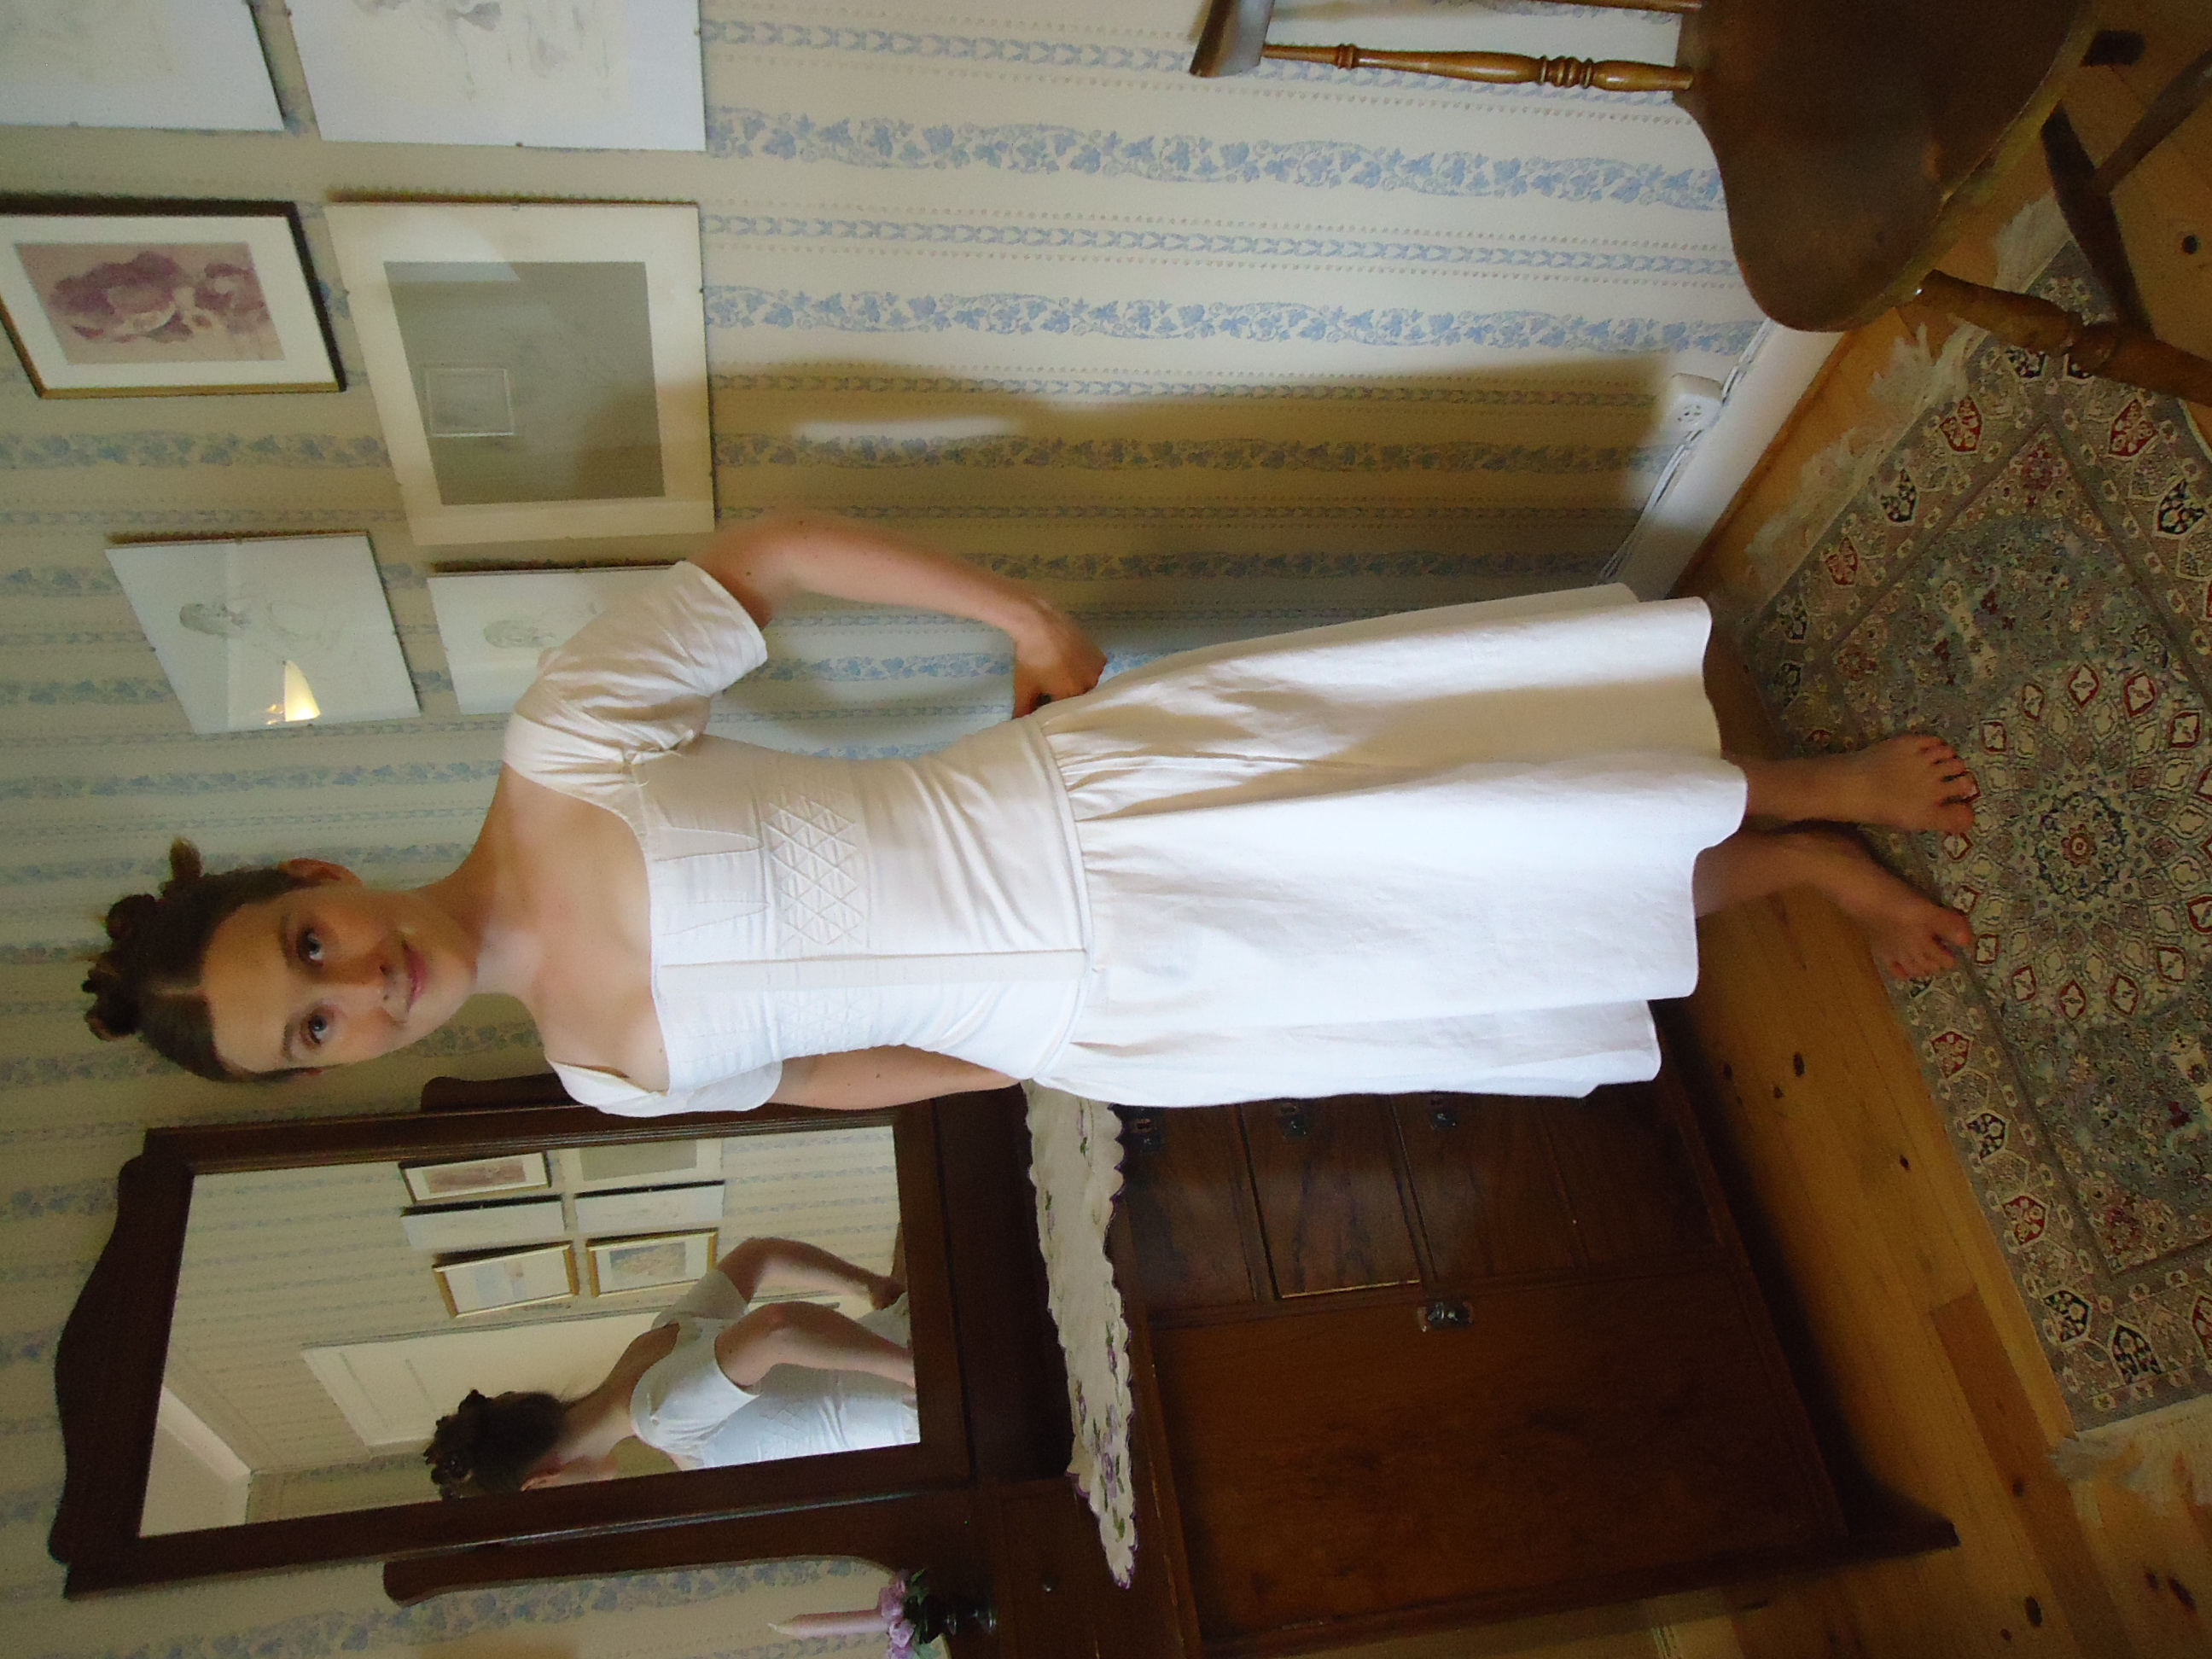
I needed better underwear, so I started with making chorded stays (and because I hate hand sewing, I cheated in every way, where there weren’t visible seams), a new chemise and petticoat – faithful to my tradition, I only used old bedsheets.
Chemise, chorded stays and petticoat
Before we left Denmark for the busy holidays in Sweden, I had made a pattern for the bodice, but I had not yet figured out whether the lining should have as much fabric as the outside, or if the outside should be pleated and then stitched down to the lining. After examining some photos of vintage dresses, I ended up using the same pattern for both lining and main fabric. There is now room for all bust sizes! The skirt also ended up being quite voluminous, because I had to fully trust my instincts when I cut the fabric and pleated it to the top, without my dear mannequin at hand.
I had the most fun constructing the sleeves. It was only a bit time consuming to hand stich and arrange the pleating and the thin strings. The trickiest part by far was to make the regency hair. I had to make my own hair pieces, with much help from YWU articles and blogs.
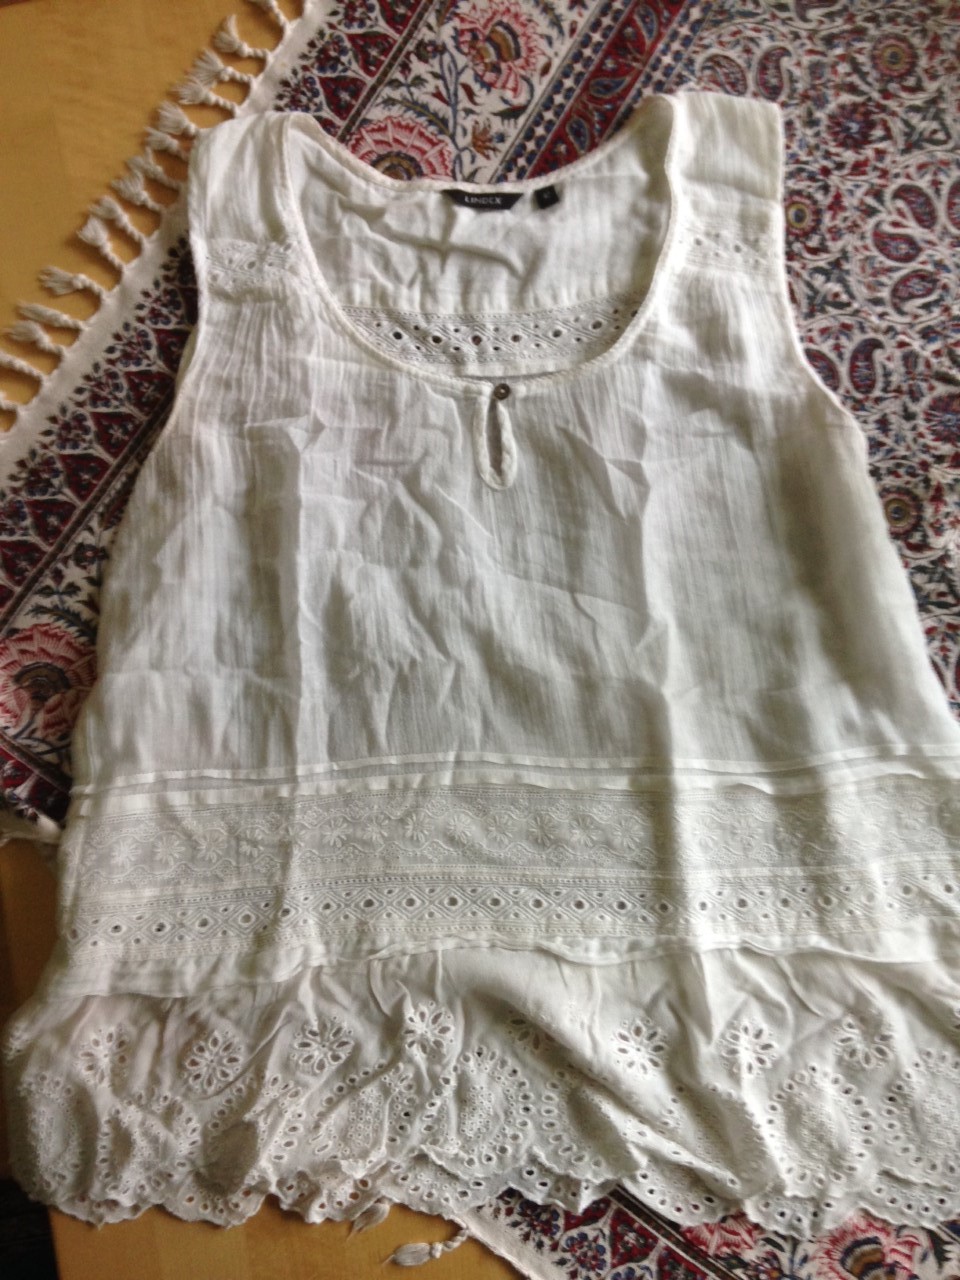
When my mother heard that I needed lightweight cotton for the chemisette she bestowed a sleeveless blouse on me. It consisted mainly of lace, so there was not much fabric to work with. I laid it aside for some months, hoping for a good idea. Our last night before going home for the Christmas Holidays (where my gown waited), I finally had inspiration for the chemisette and cut the blouse to pieces. I made the neck-part on the bus ride to Sweden and then I used the remaining decimeters from the blouses’ shoulders, for fake sleeves. On its own, it does not look much like a historic chemisette, but when only the neck part and the arm pieces are seen under the gown, I think it looks right.
We were both sick and tired when my husband took this photography. Afterwards I found out that we had not arranged the fabric volumes to its advantage. You have to look at the other pictures, from our summer photo session, to see how the dress is really meant to look like.
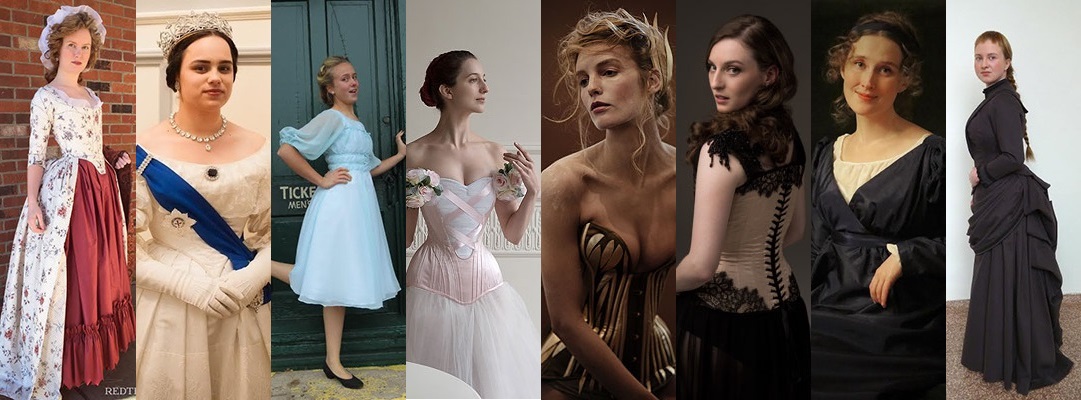
And can you believe it? I won, alongside these incredibly talented seamstresses! Crazy…
Galet nog, så vann jag, tillsammans med dessa otroligt duktiga sömmerskor! Känner mig grymt hedrad.
This Wednesday I had my very last exam and I passed. Crazy! Now there is only the Hippocratic oath, by the end of the month, between the world of medical doctorship and myself. It has been a hard ride, with many sleepless nights, tears of anguish and boring “holidays” filled with studies. But now it has finally come to an end. Wow.
I onsdags hade jag min allra sista tenta och klarade den. Galet! Nu är det bara det Hippokratiska läkarlöftet vid månadsslutet, som ligger mellan mig och världen av dokorskap. Det har varit en hård resa, med många sömnlösa nätter, tårar av ångest och tråkiga ”lov” fyllda av studier. Men nu är det äntligen över. Wow.
This semester has been about as tough as the others and I have not had time for bigger projects (except for grandmothers wedding gown). Here comes some small projects that I have used as distraction, though.
Den här terminen har varit lika tuff som de tidigare och jag har inte haft tid för större project (förutom mormors brudklänning, förstås). Här kommer några småprojekt som jag har haft som distraktion.
I needed a chemisette for completing Tatyana Borisovna Potemkina’s look. I got material from my ever benevolent mother, who sacrificed a sleeveless blouse for this purpose. I sew it on our bus trip back to Sweden, for the Christmas holidays, so nothing is documented, but before and after.
För att fullborda Tatyana Borisovna Potemkina’s klädsel behövde jag en chemisette. Jag fick material av min ständigt nådiga mor, som offrade en ärmlös blus. Jag sydde samman överdelen på bussresan hem till Sverige över jullovet. Därför är ingenting av processen dokumenterat, men åtminstone hur blusen såg ut före och efter.
The blouse before the transformation // Blusen innan förvandlingen
We were so horribly tired, my husband and I, when it was time for photographing the whole look, so the dress does not fit as well as it should. But you have seen the earlier photos, where it is perfect, haven’t you?
Jag och min man var fasansfullt trötta när vi skulle fotografera dräkten, så tyvärr sitter den inte så bra som den borde. Men du har väl sett de tidigare bilderna, där den sitter perfekt, eller hus?
Another look-alike // Ännu ett försök till look-alike-bild
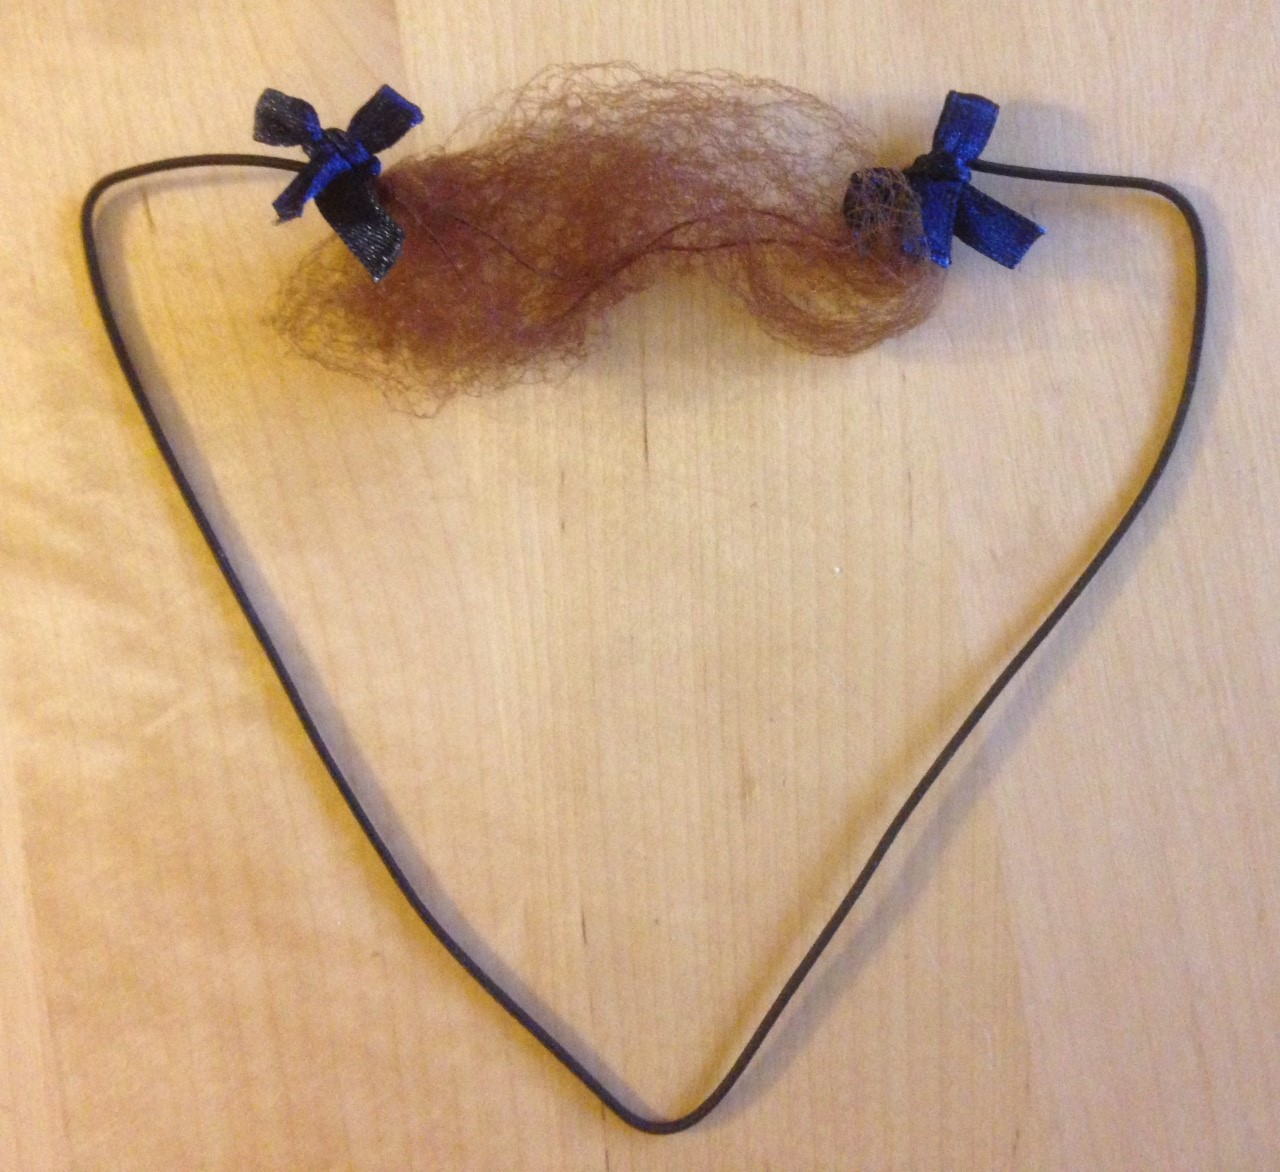
My brother has grown an impressive moustache. It needs some special care. I made a mustache net for his birthday. Therefor I took one of my hair nets and attached an elastic ribbon. I hid the knots underneath some manly bows.
Min bror har fått en präktig mustasch. Den behöver lite extra omvårdnad. Därför gjorde jag ett mustaschnät åt honom i födelsedagspresent. Jag använde ett hårnät och knöt fast ett svart resårband. Knutarna dålde jag under manliga rosetter.
Moustach net // Mustasch-nät
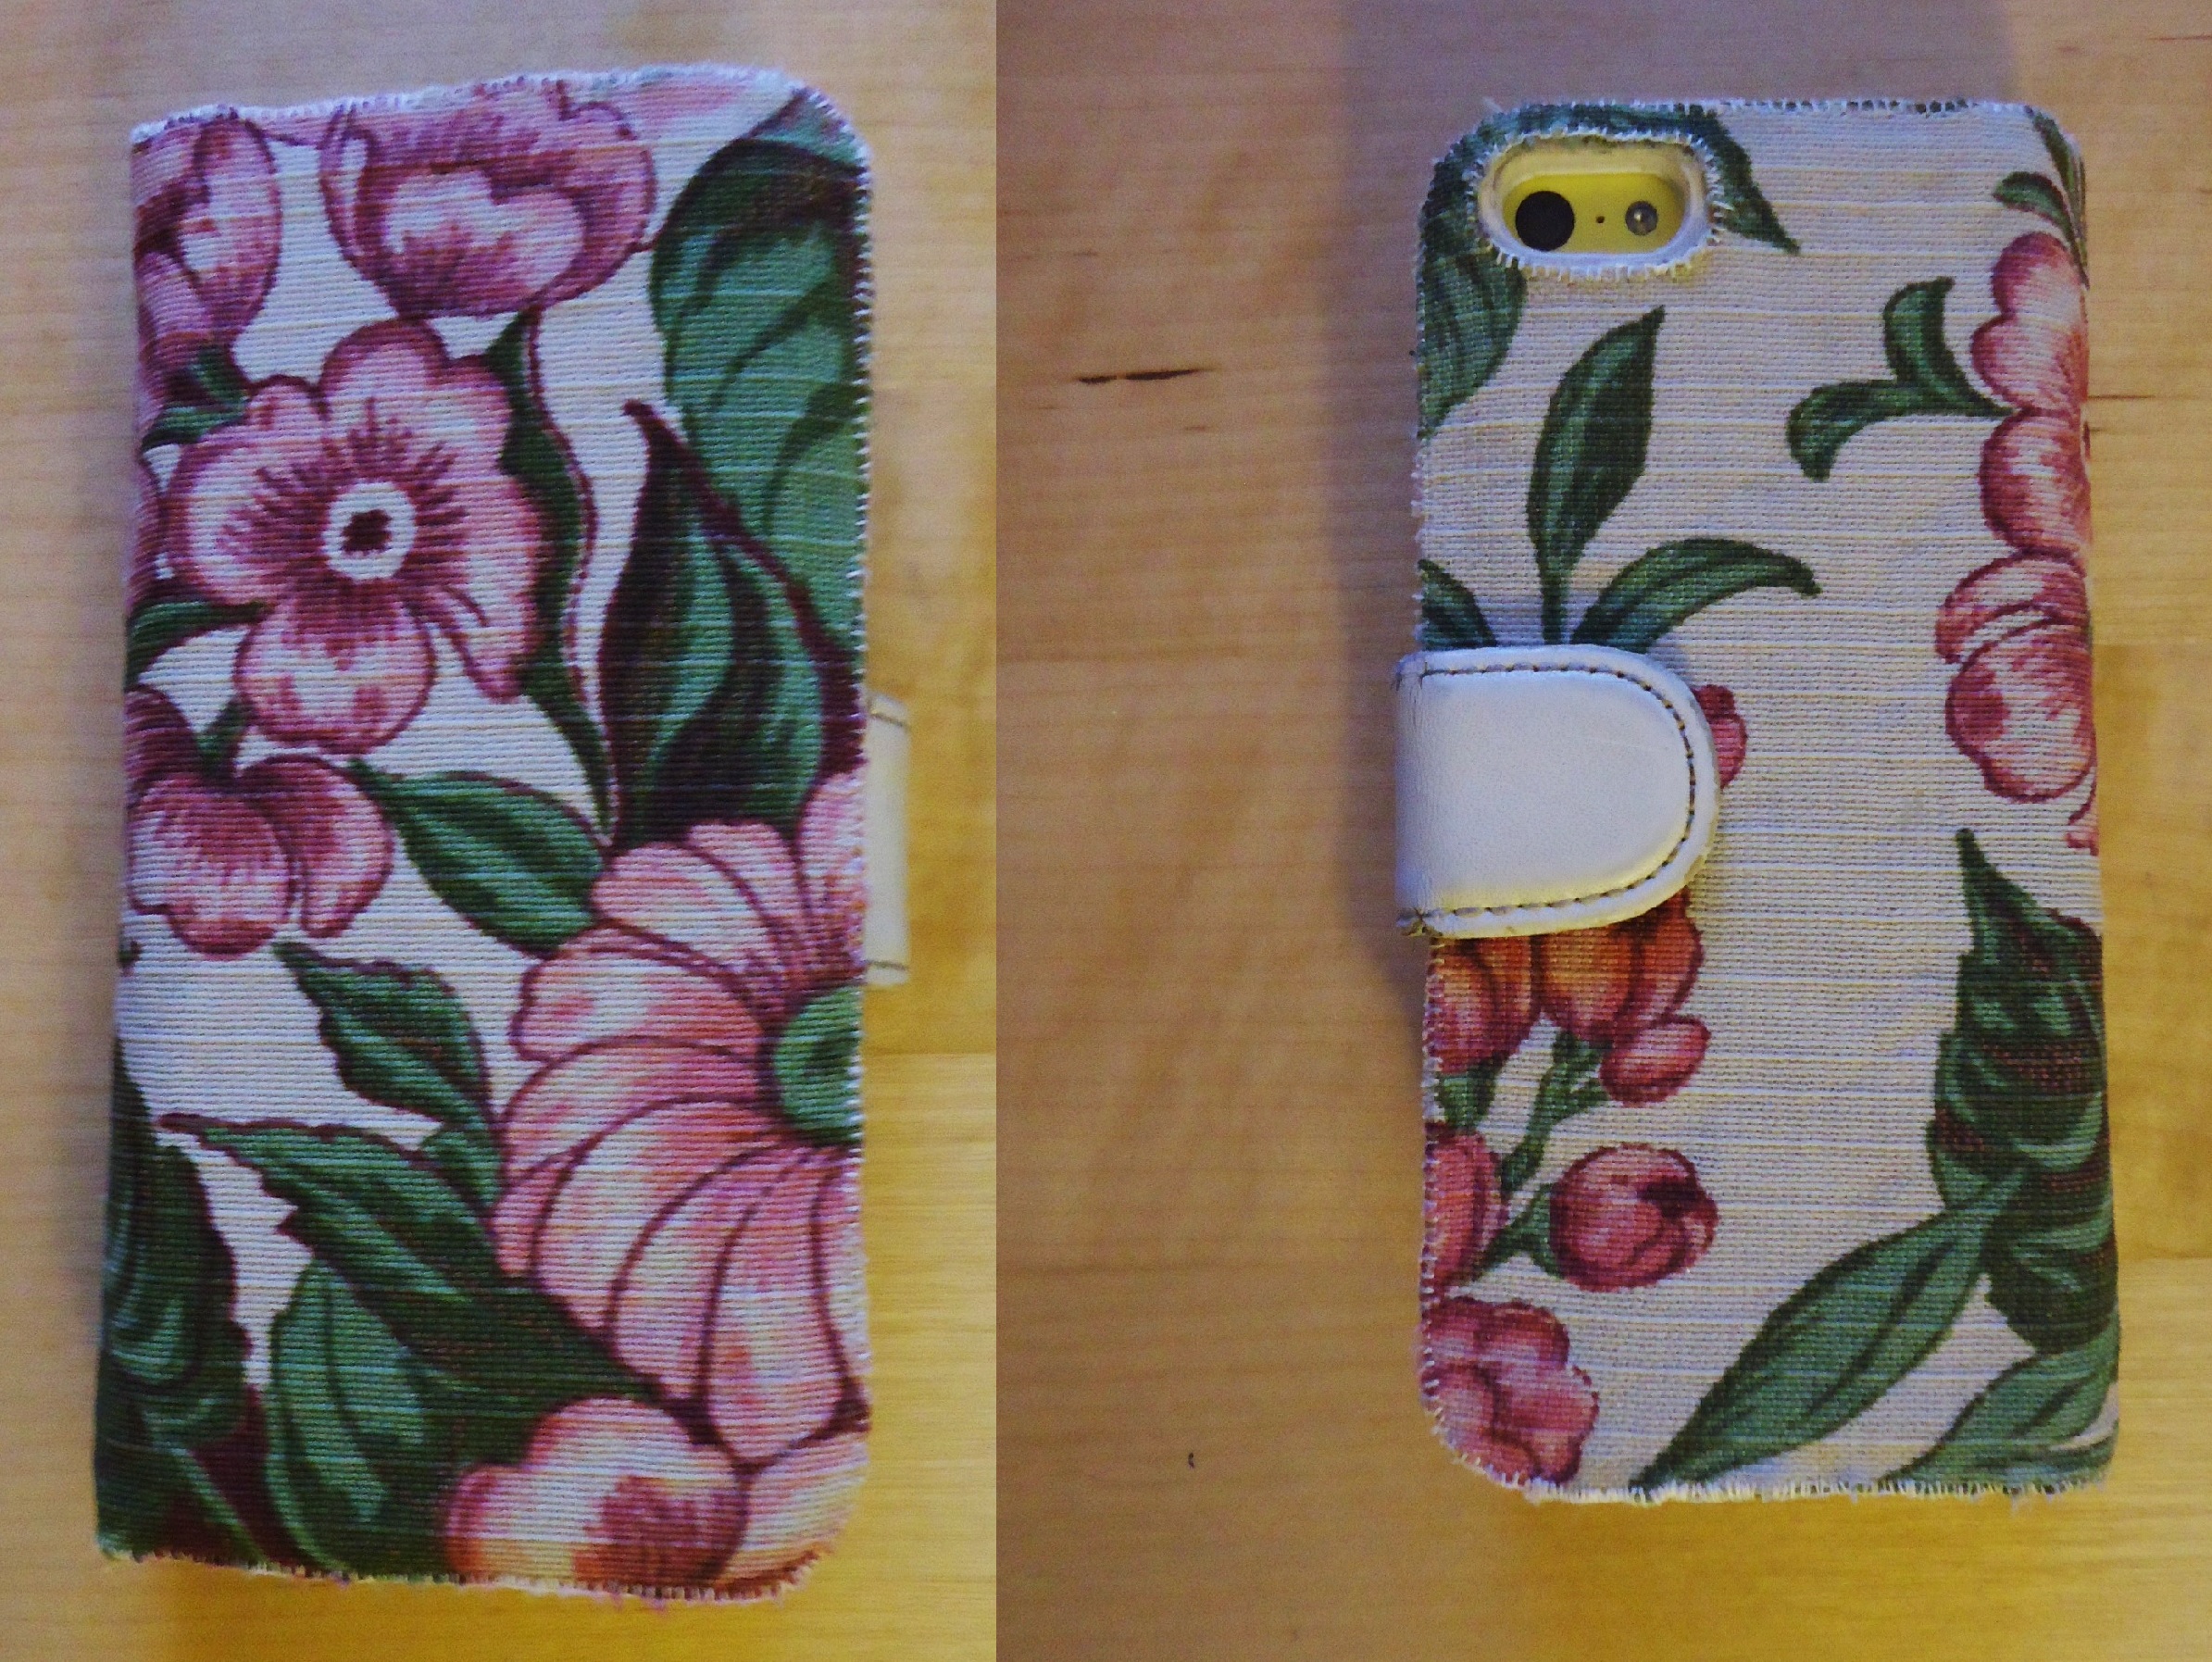
The case for my cell phone was in a horrible state when I should go to my last exam. Because we had the opportunity to use the Internet, while interviewing and examining our patient, I felt that it would be directly disrespectful to use filthy, unhygienic case more. So I used an old scrap fabric (from the lampshade) to dress it up a bit. Sweet. Then I discovered that there was absolutely no time for checking stuff on the internet anyway, but I’m glad I now don’t have to feel gross when I want to use my cell phone.
Mitt mobilfodral såg förfärligt ut när det drog ihop sig för min sista tenta. Vi skulle ha möjlighet att använda internet under journalskrivningen och detta kunde jag bara komma åt via min mobil. Därför kände jag att det skulle vara näst intill respektlöst mot patienten om jag använde detta äckliga fodral. Jag klädde om fodralet med en gammal stuvbit, från när jag klädde om en lampskärm. Det blev ganska fint. Sedan blev det absolut ingen tid över för att använda internet ändå, men det är skönt att slippa känna sig äcklig när man använder sin telefon.
Case for the cell phone // Mobilfodral
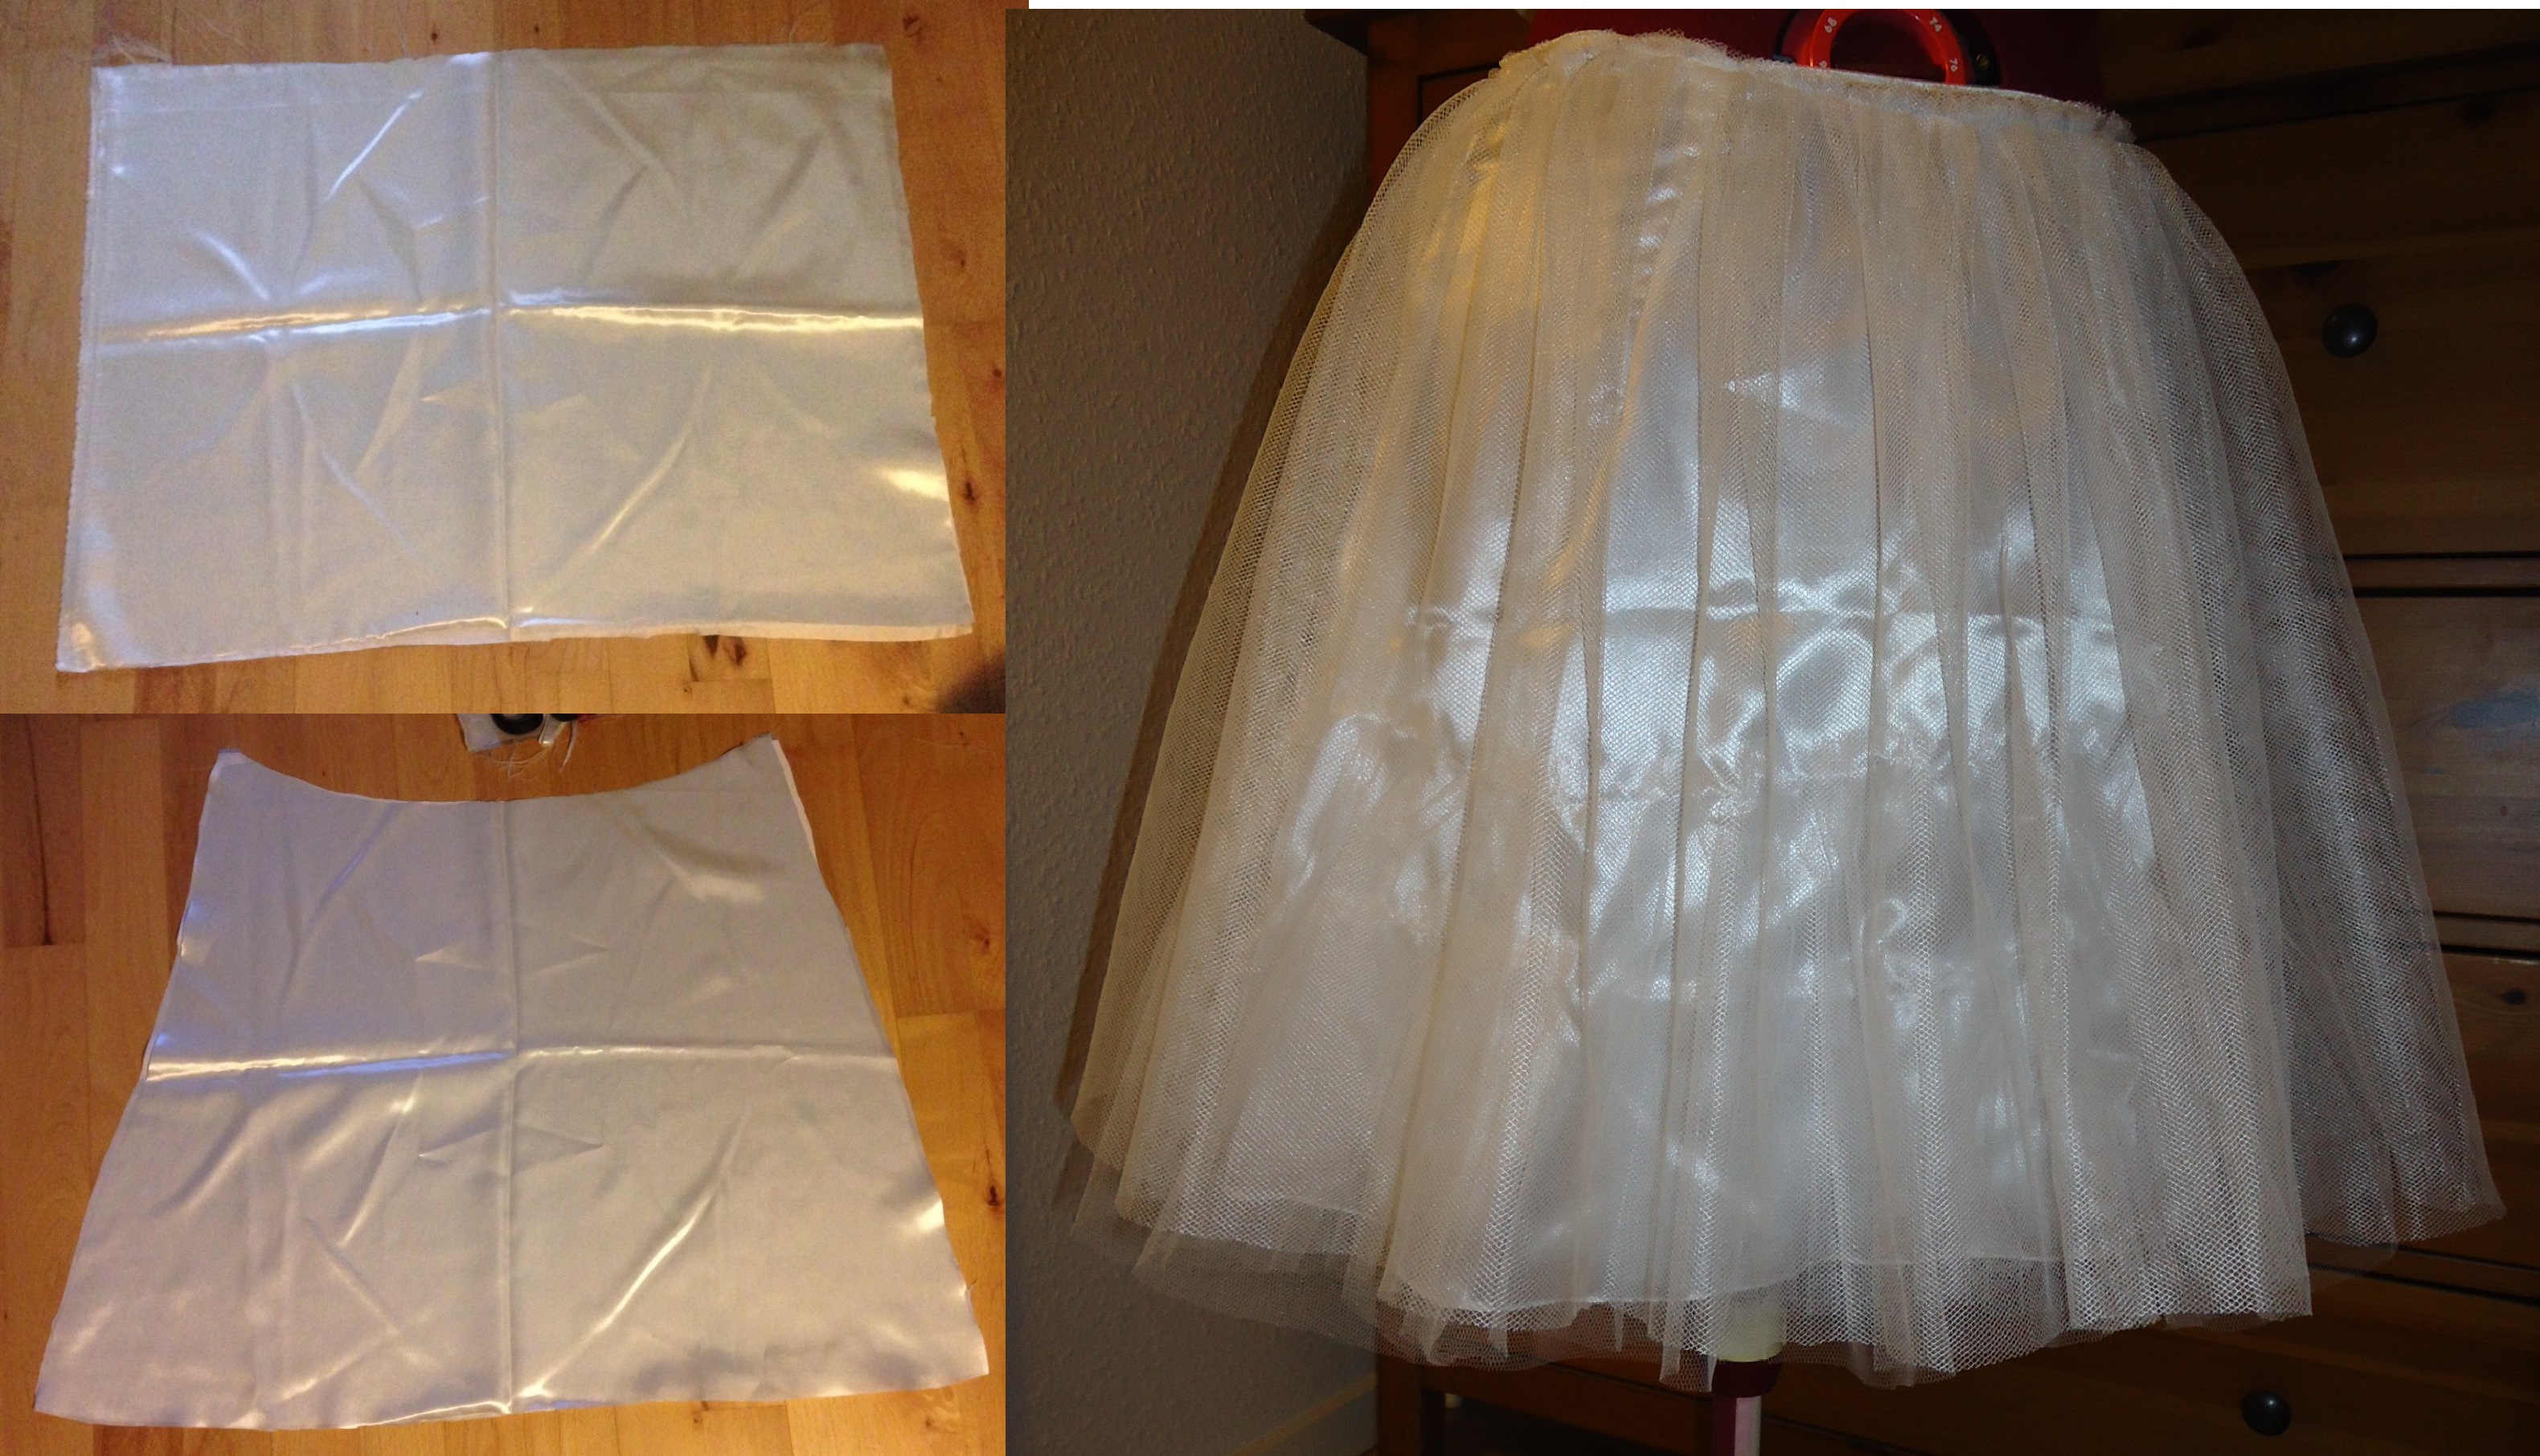
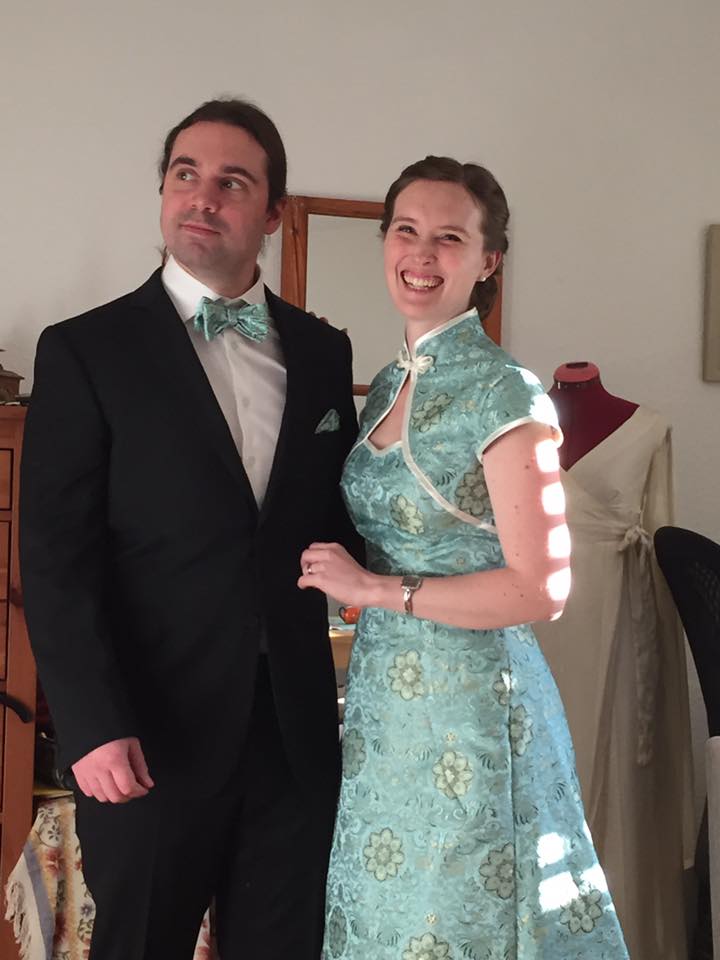
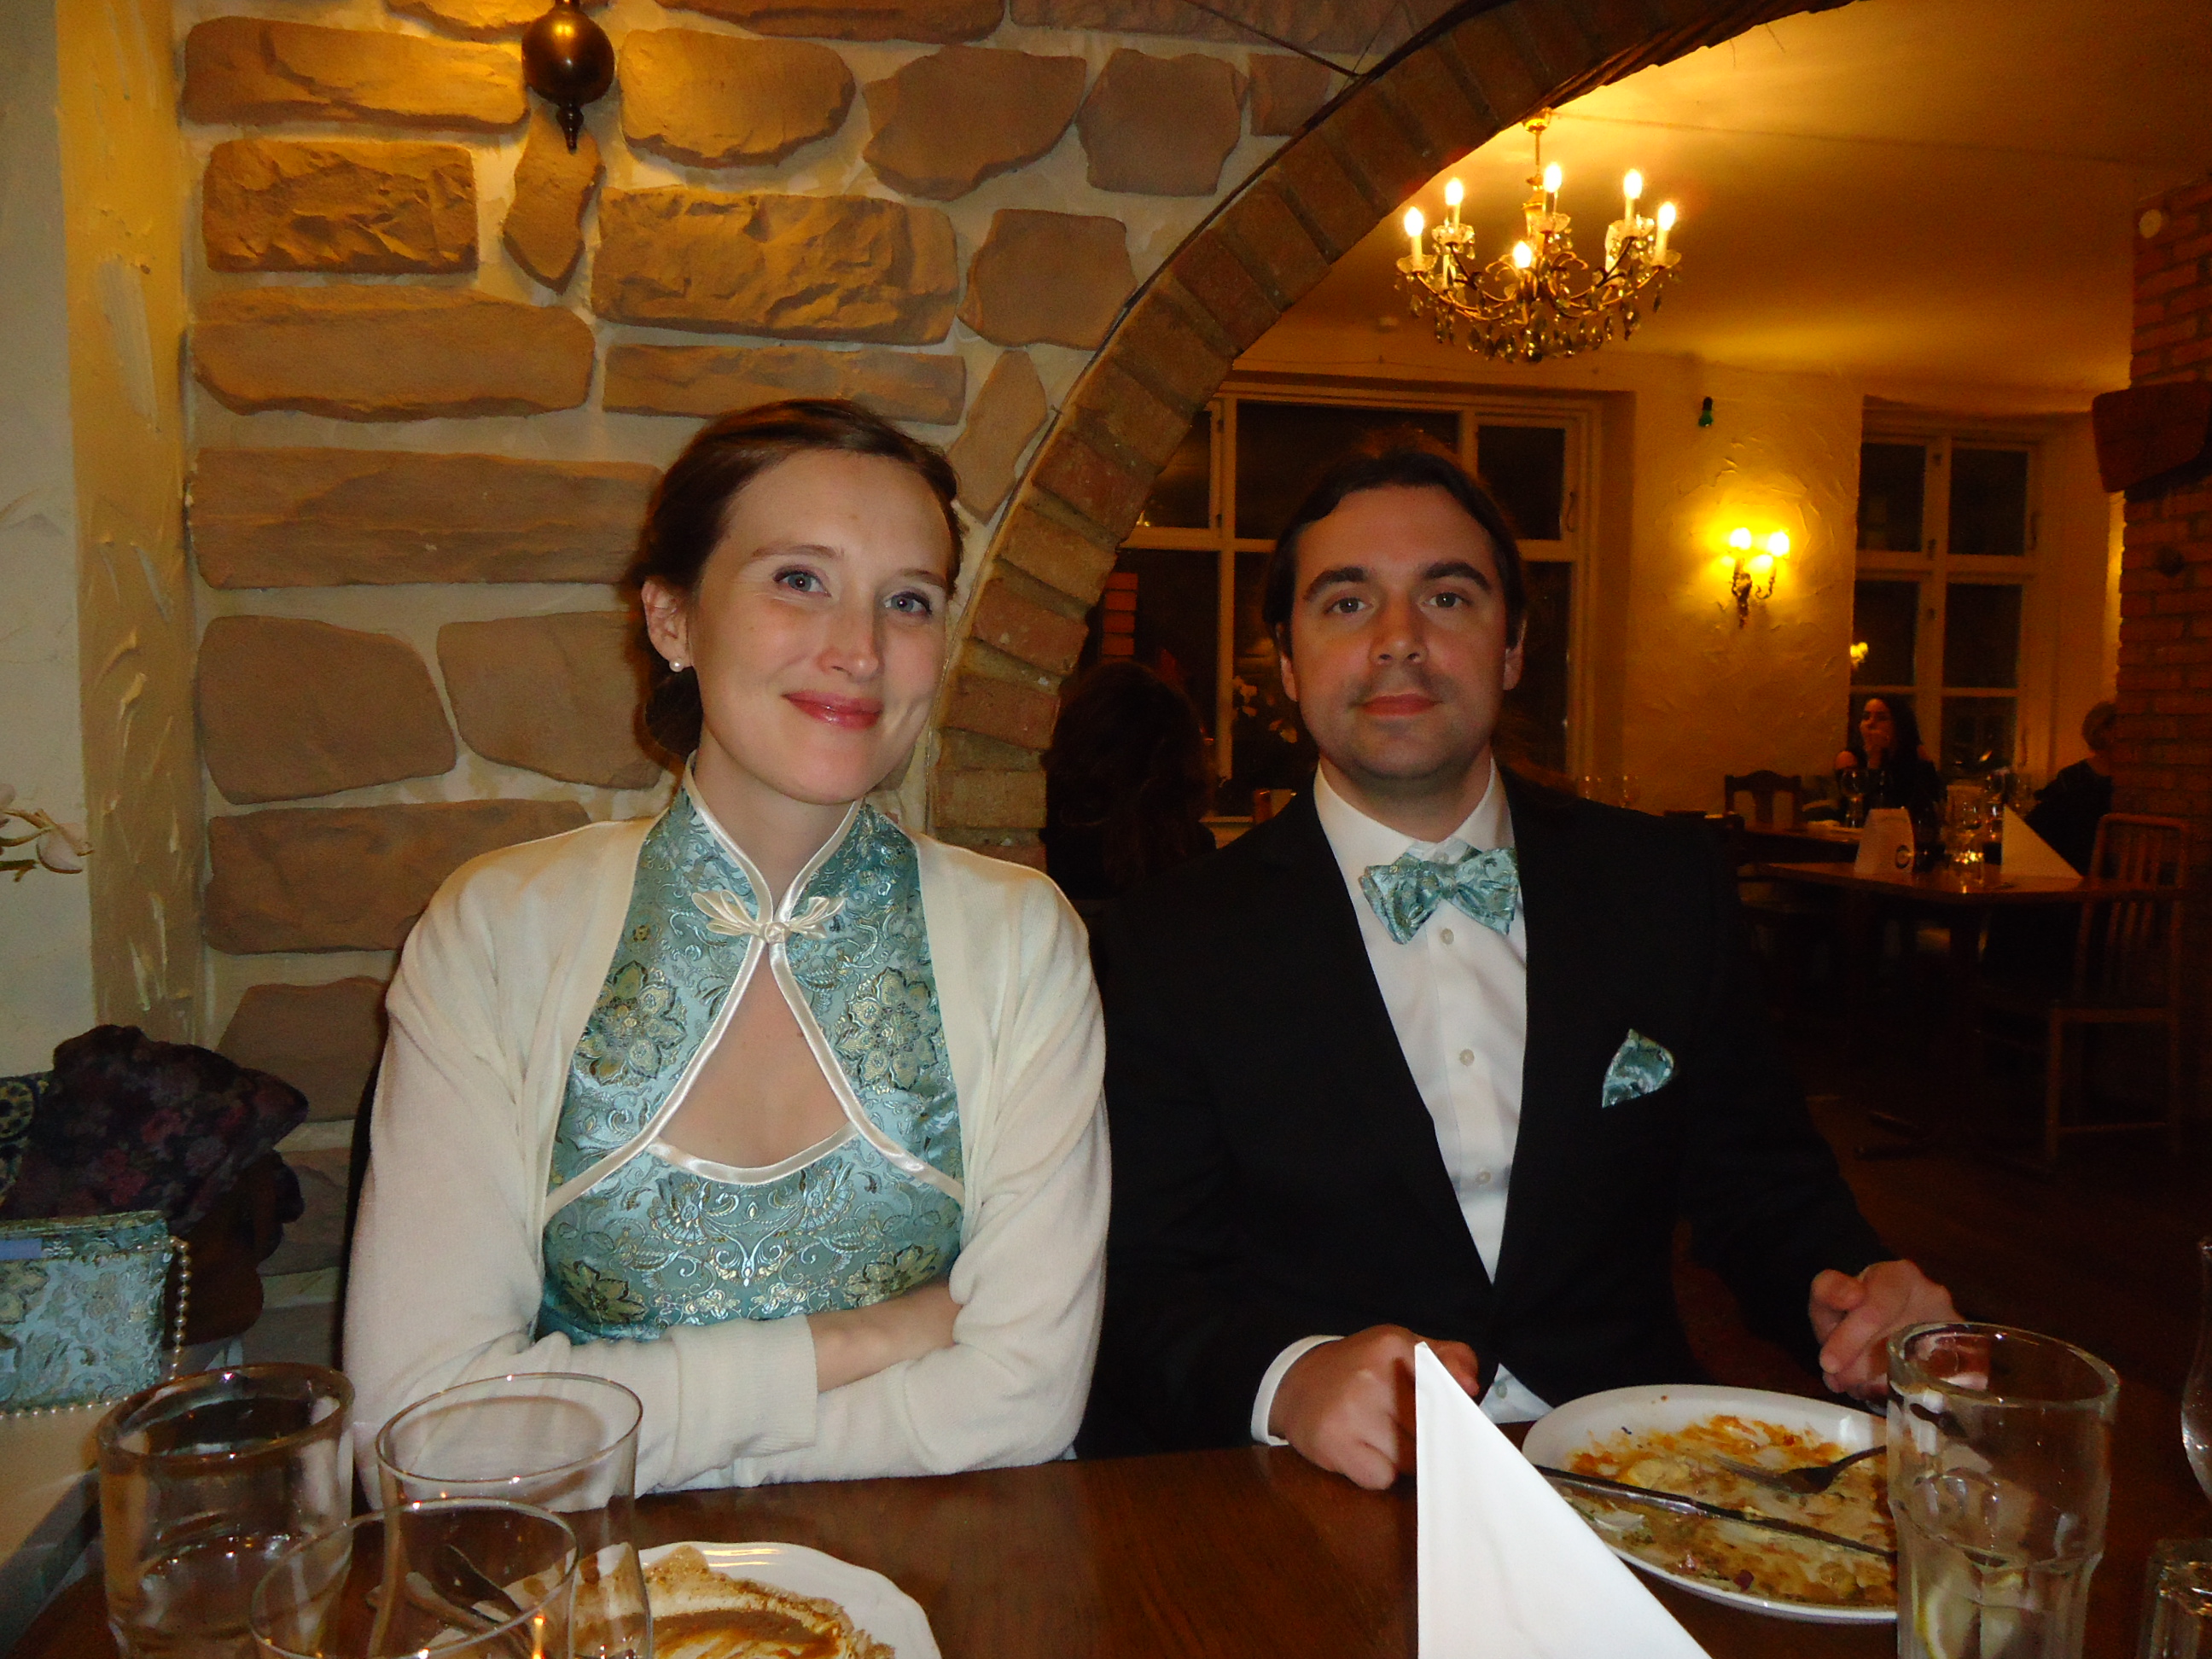
After having made my Chinese silk dress, I found out that I maybe should have a fluffy petticoat underneath. I had some fabric at home, so I threw this together.
Efter att jag hade sytt min kinesiska sidenklänning, insåg jag att den kanske skulle sitta bättre med en fluffig underkjol under. Jag hade lite tyg hemma, så jag slängde ihop denna.
Fluffy petticoat // Fluffig underkjol
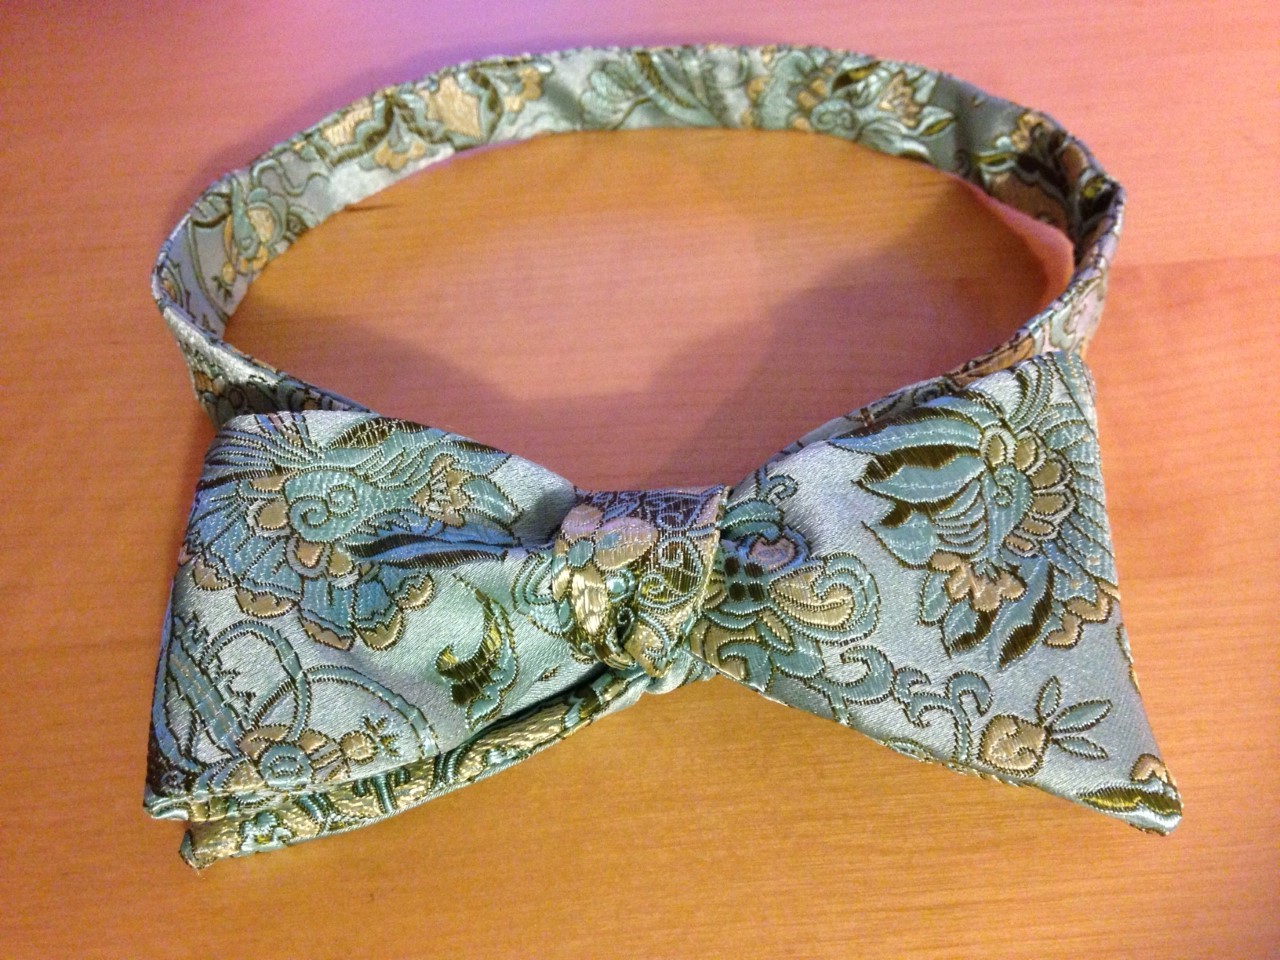
Today, I also made a bow tie for my husband, in the same fabric as the dress. We’ll see if he can wear it without suffocating.
Idag sydde jag en matchande fluga åt min man. Vi får se om han dessutom kan använda den utan att kvävas.
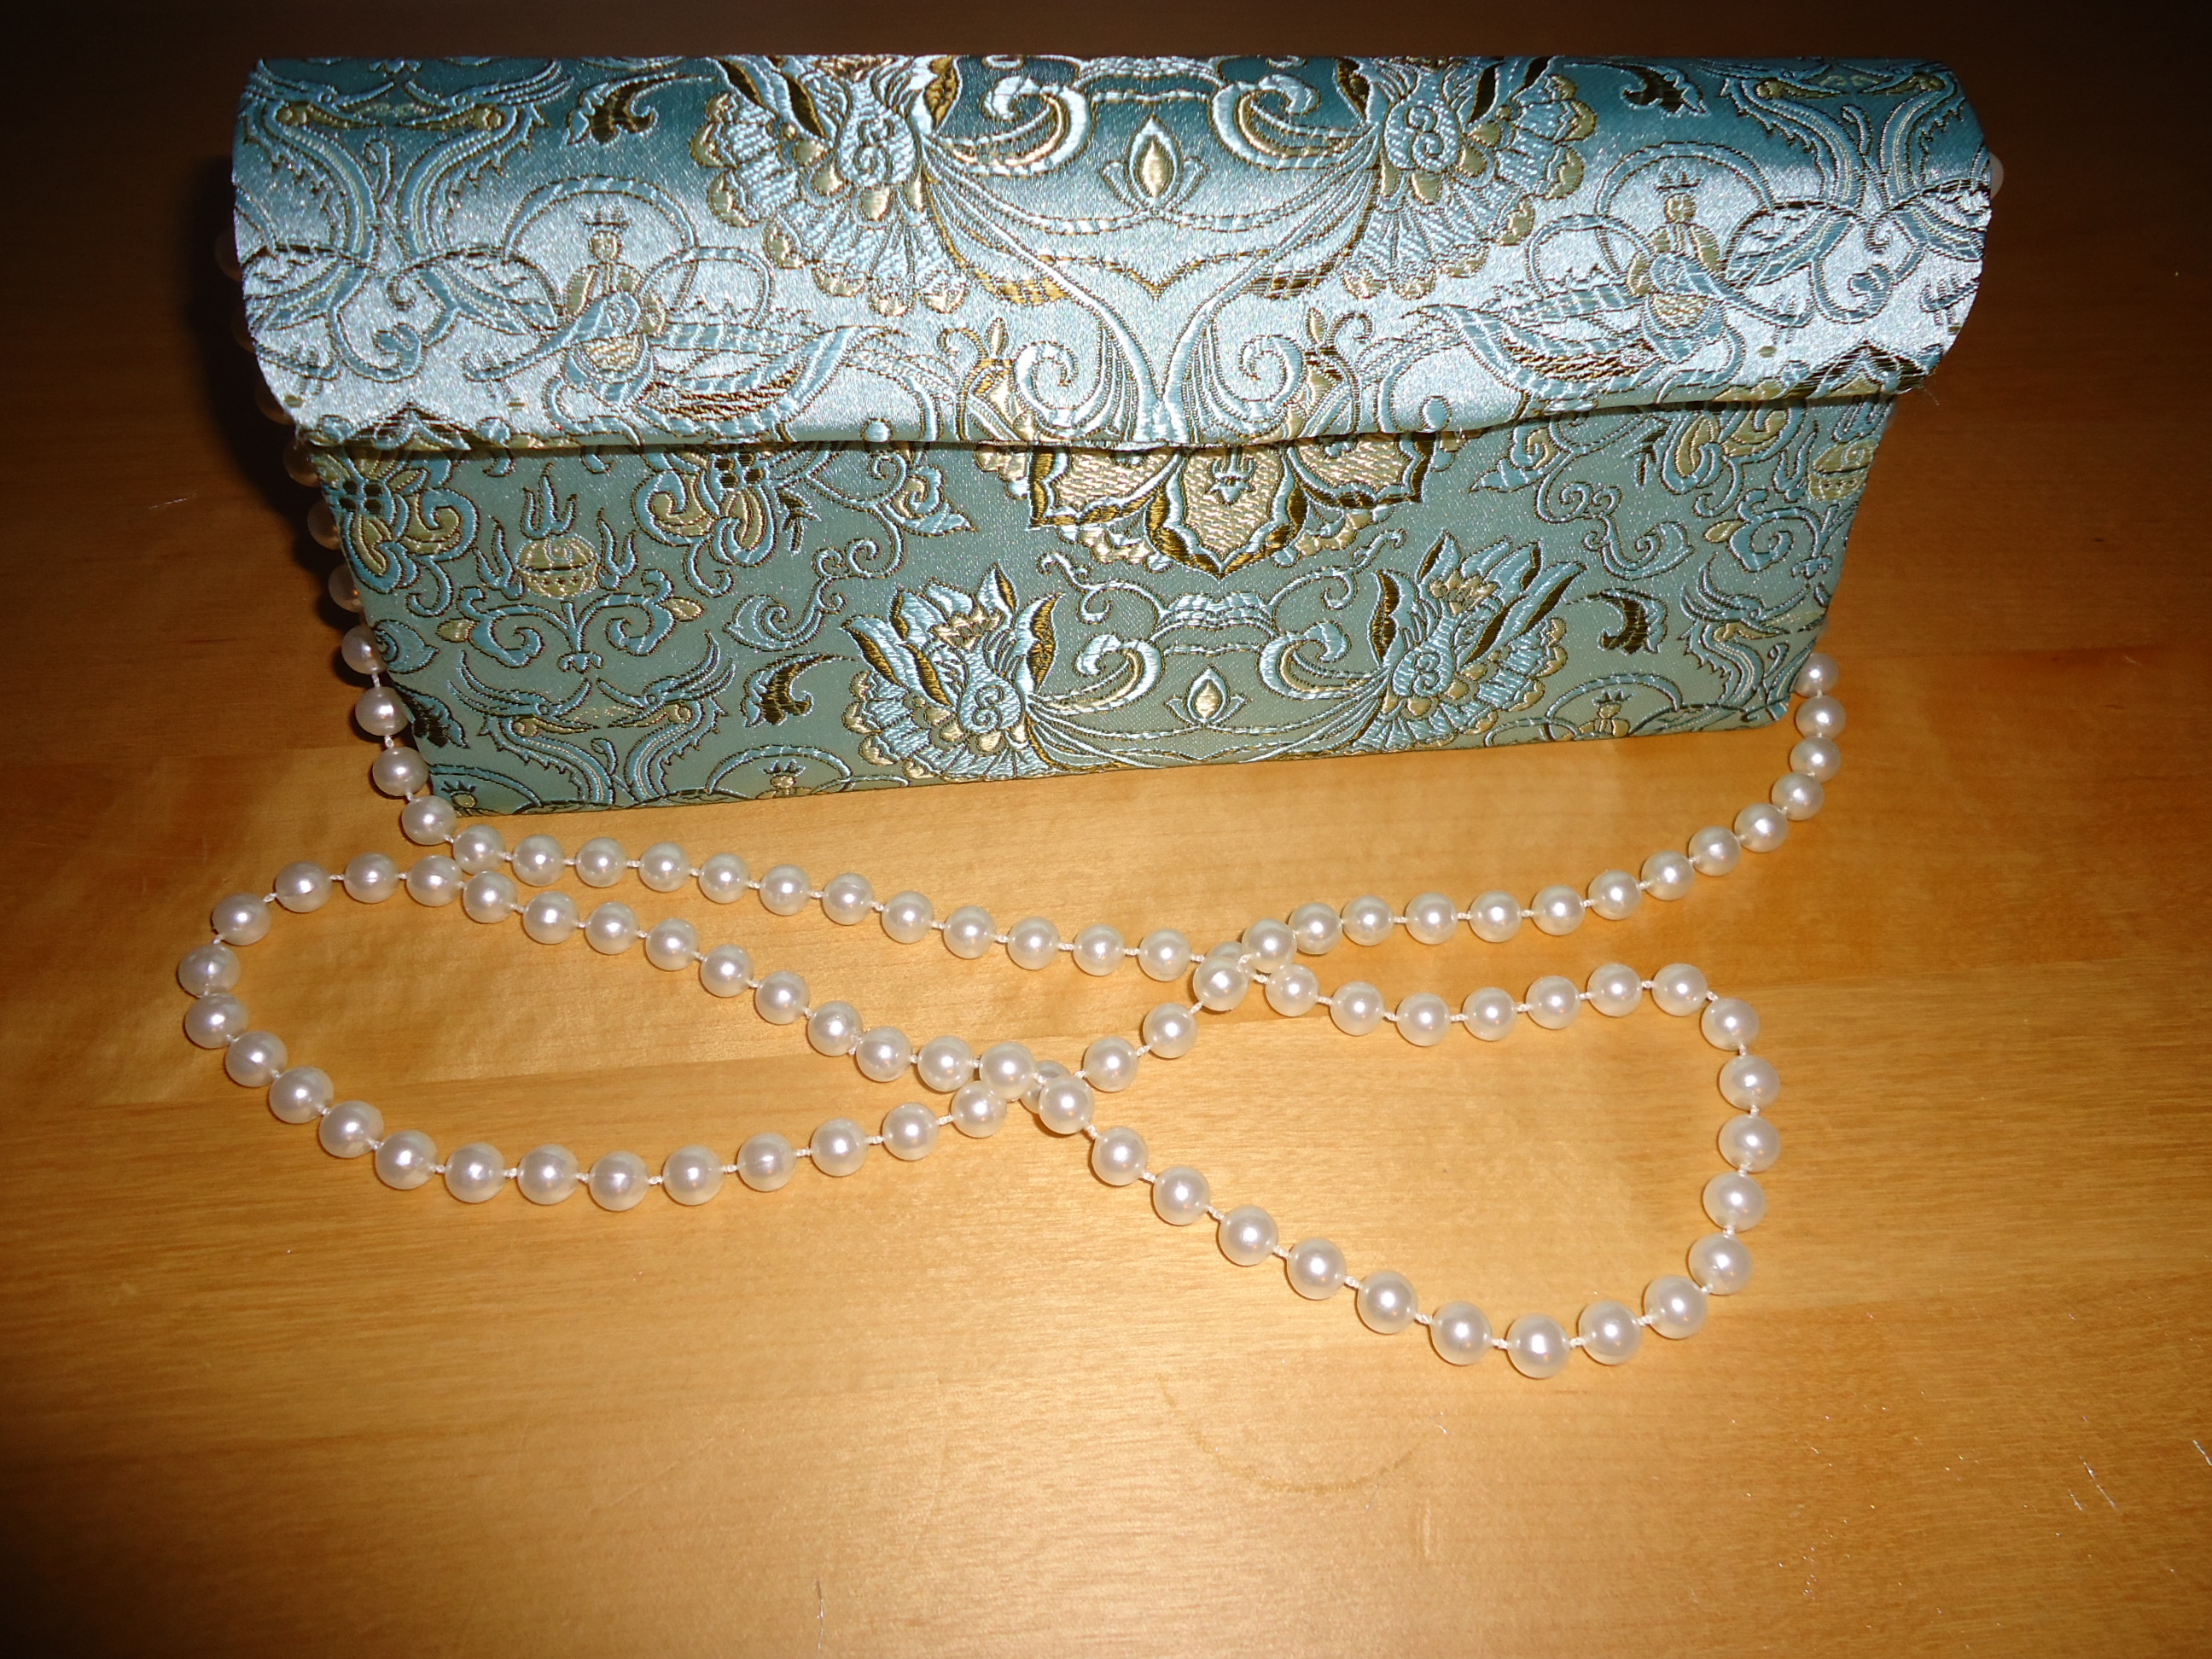
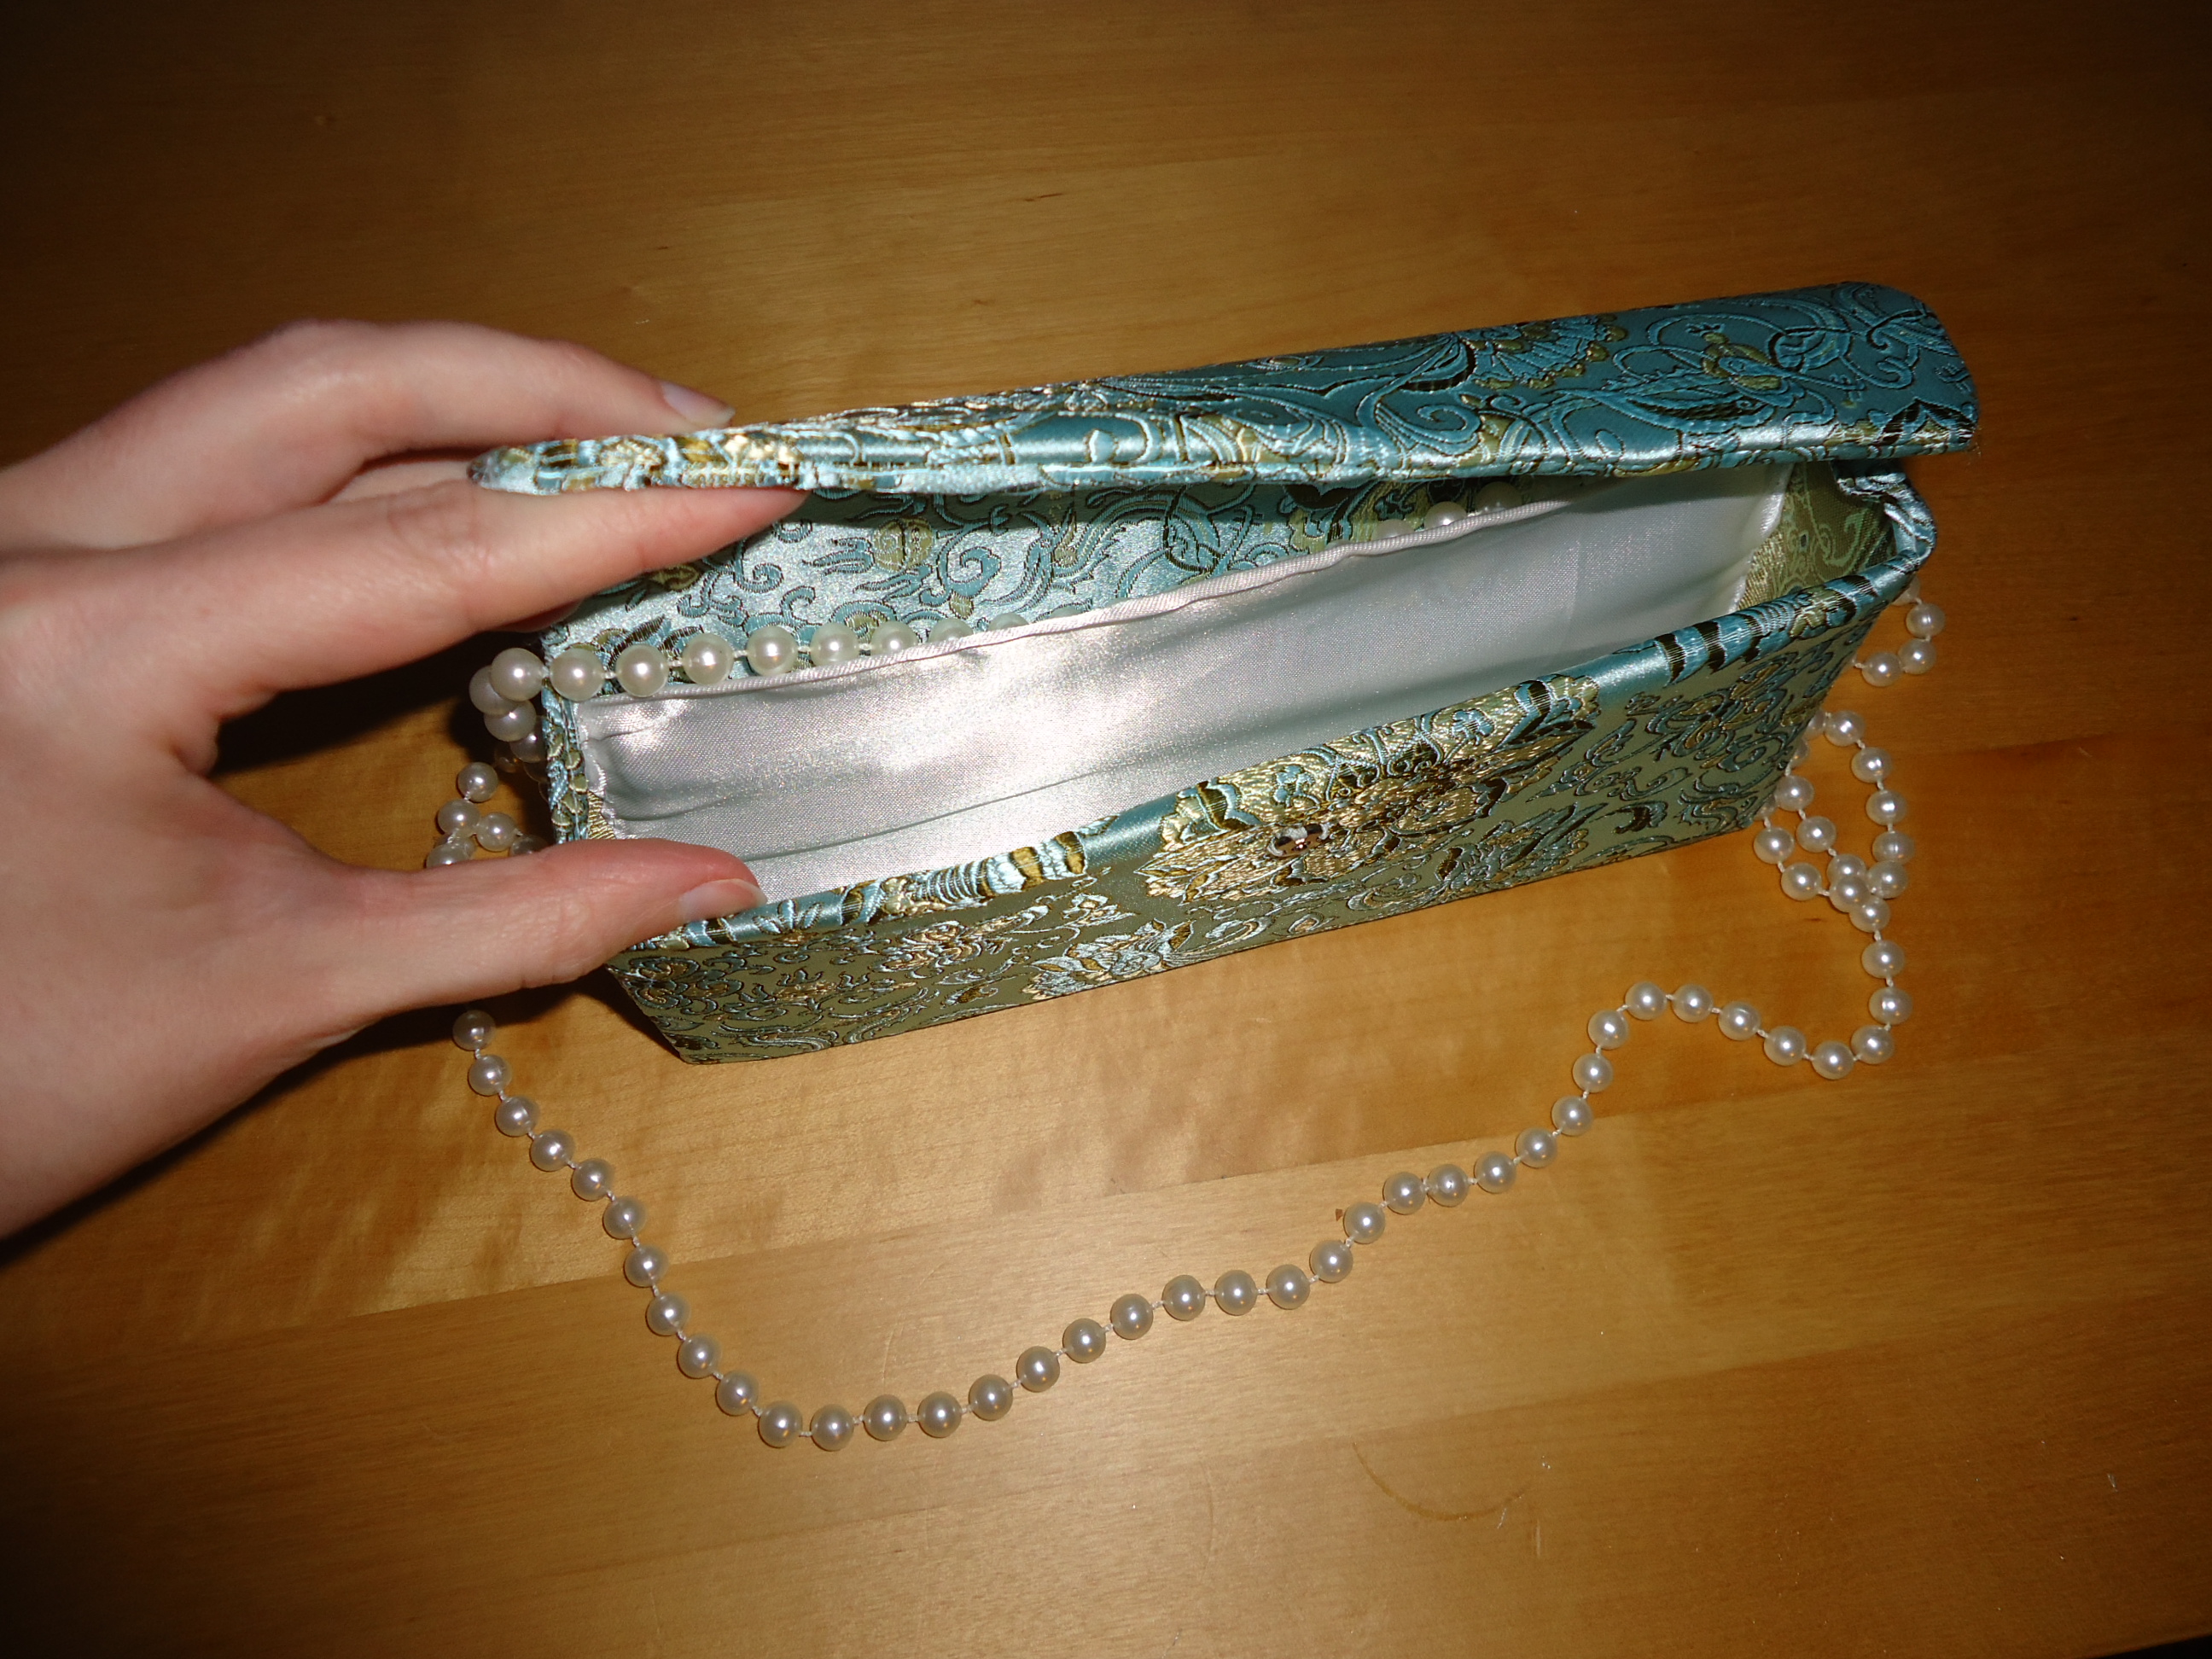
I also wanted a matching purse, so I took the few scraps left of the silk and cut an old plastic portfolio to pieces. The plastic stabilizes the front, back and lid. There was not enough fabric to match the patterns. The lining is from the same fabric as the petticoat. I was able to make a little pocket at the back of the purse, by overlapping the lining and the main fabric. For shoulder strap, I used a plastic necklace bought at a Second Hand store many years ago. I was in a real hurry, so I cut the fabric and threw the purse altogether by instinct. In spite of this carelessness, I think the purse looks really nice.
Jag ville ha en matchande liten handväska, så jag tog de sista små stuvbitarna och klippte itu en av mina gamla plastmappar som jag använt under utbildningen. Mappen ger stadga fram, bak och i locket. Fodret kommer från samma tyg som underkjolen. Genom att överlappa fodret och sidentyget, fick jag till en ficka på bakre väggen. Till axelband använde jag ett gammalt plasthalsband från Second Hand. Jag hade väldigt bråttom, så jag klippte till tygbitarna och sydde samman handväskan på ren instinkt. Trots denna vårdslöshet, tycker jag att den blev riktigt fin.
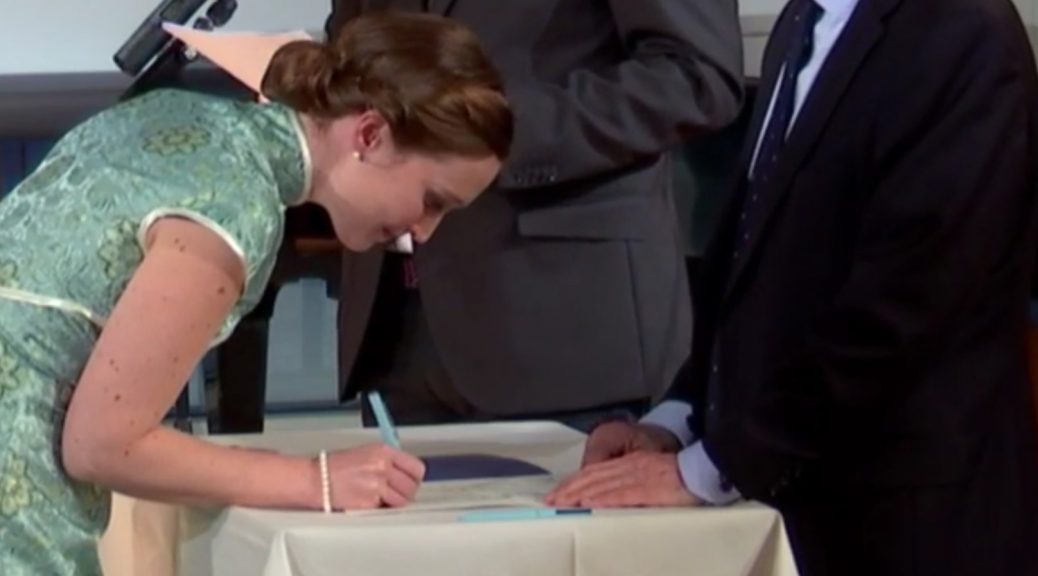
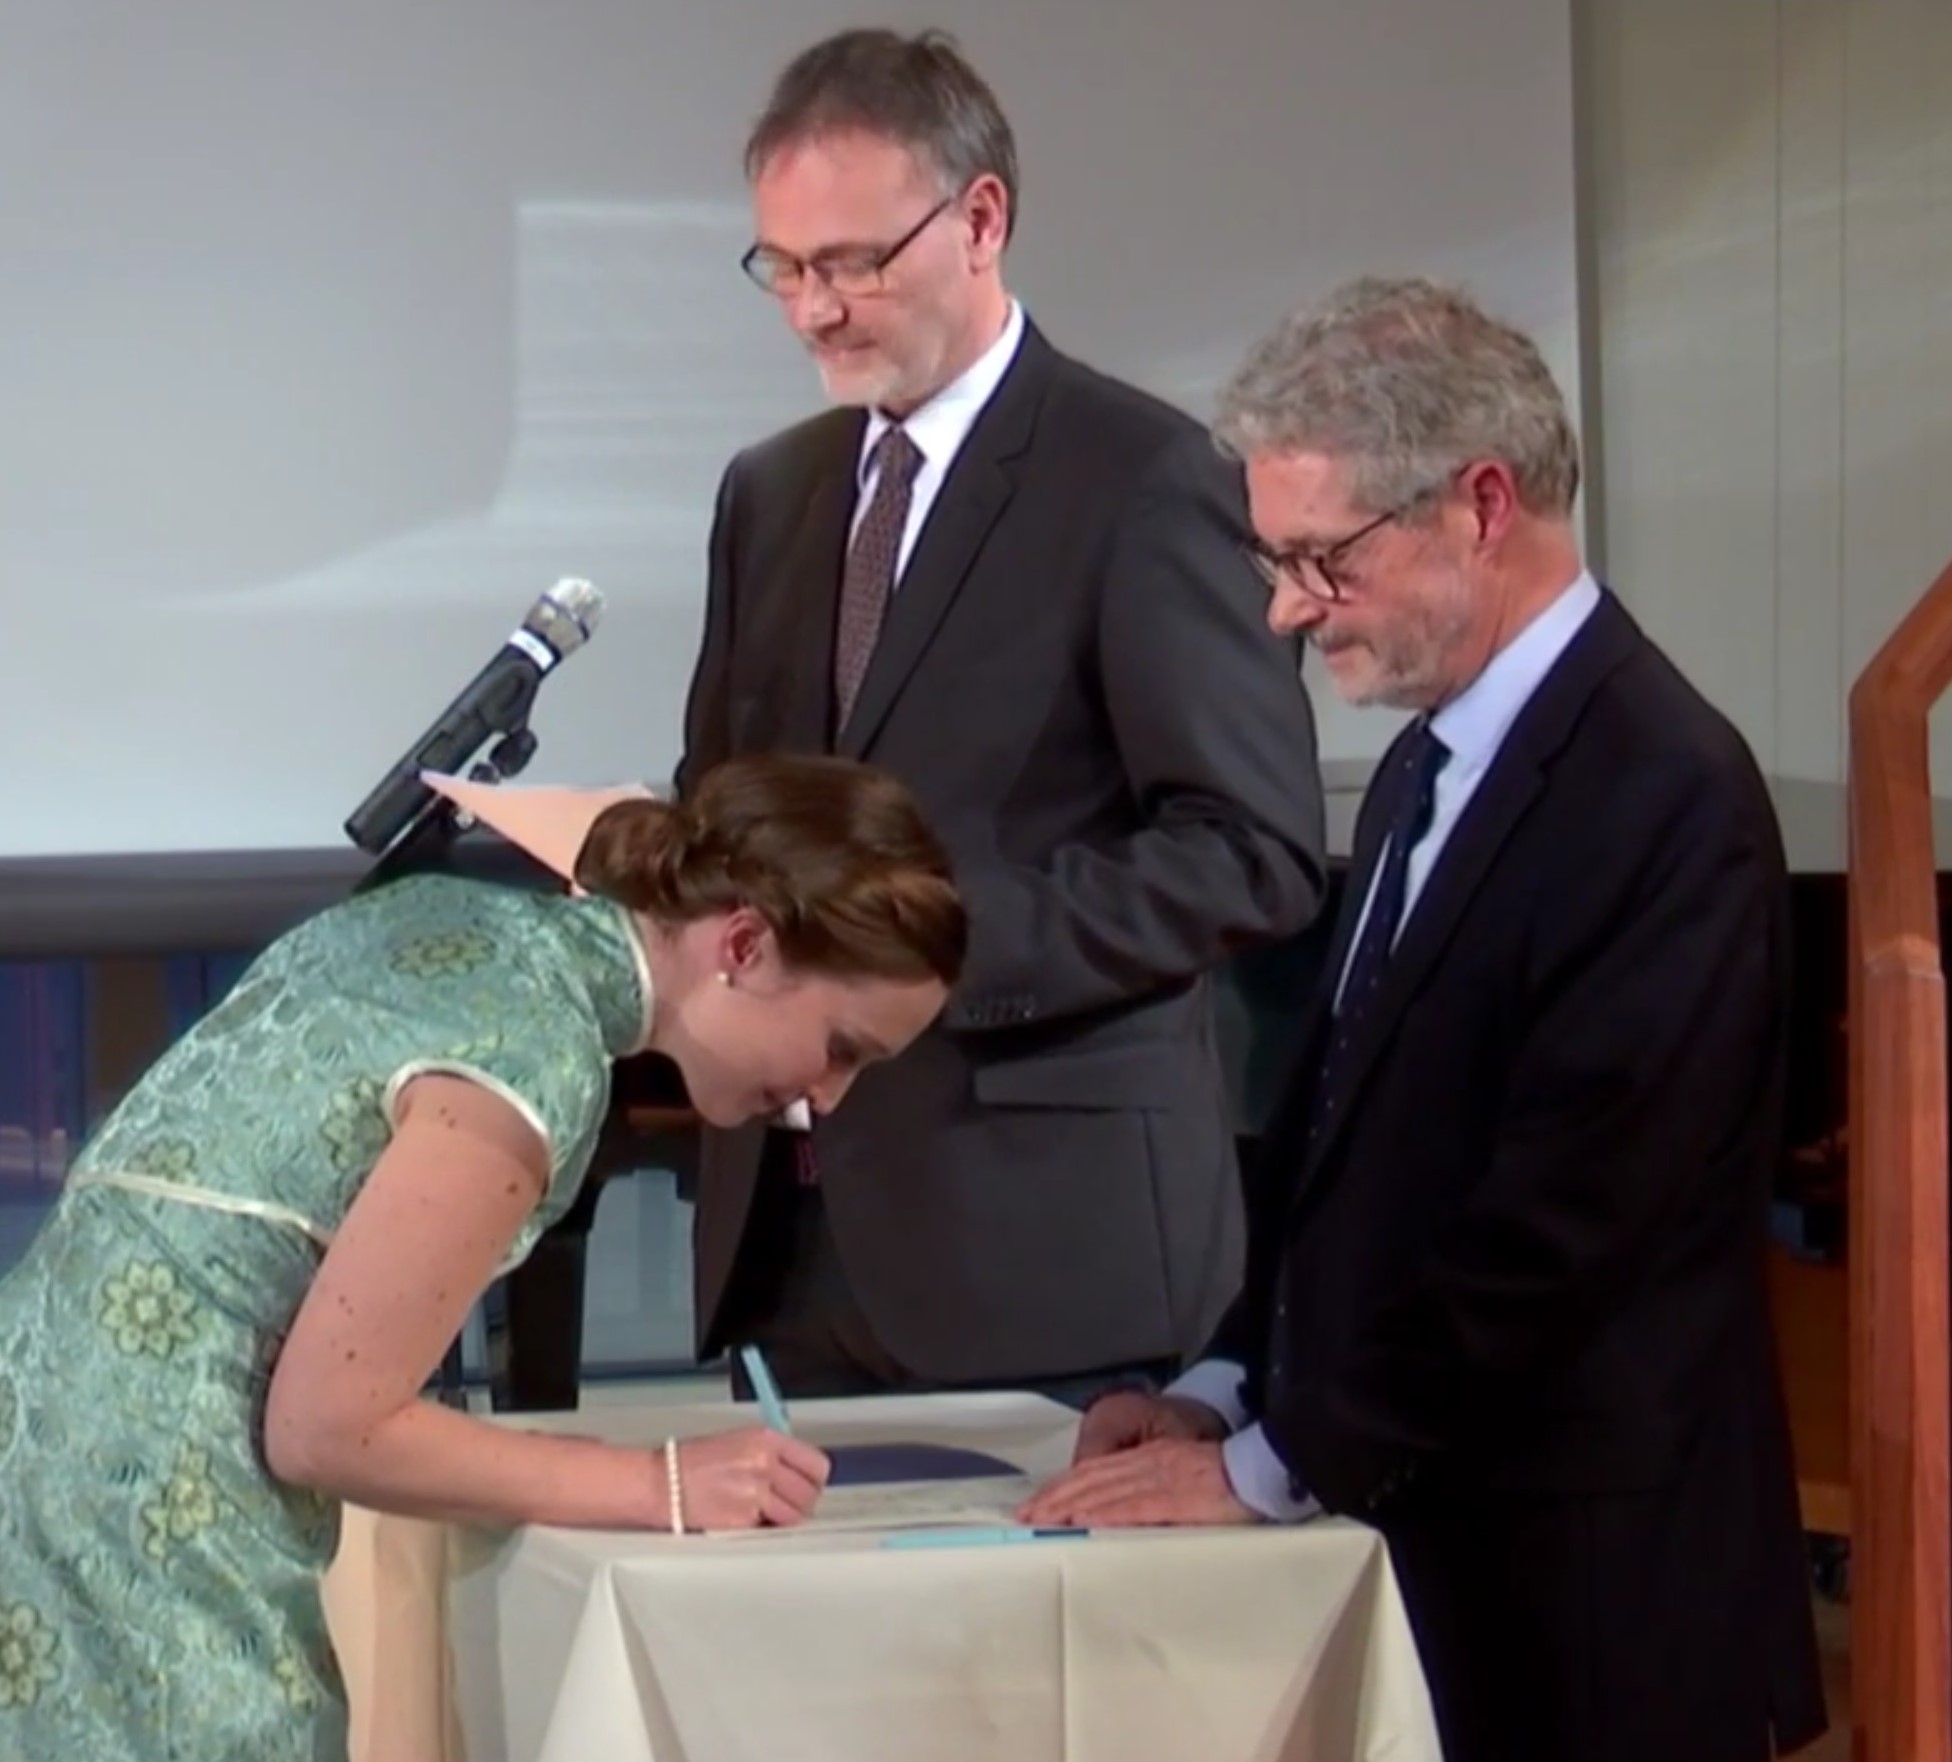
Inauguration/Hippocratic Oath, the 27th of January
Yesterday was the Inauguration/Hippocratic Oath. Today I am exhausted and so inexplicably happy! It is a big thing to swear to always serve others, always do your best and to never make any difference between patients. But its a good thing.
Igår var Läkarlöftet. Idag är jag helt utpumpad och så extremt glad! Det är en väldigt stor grej att lova att alltid tjäna andra, alltid göra sitt allra bästa och aldrig göra skillnad mellan sina patienter. Men det är en väldigt bra grej!
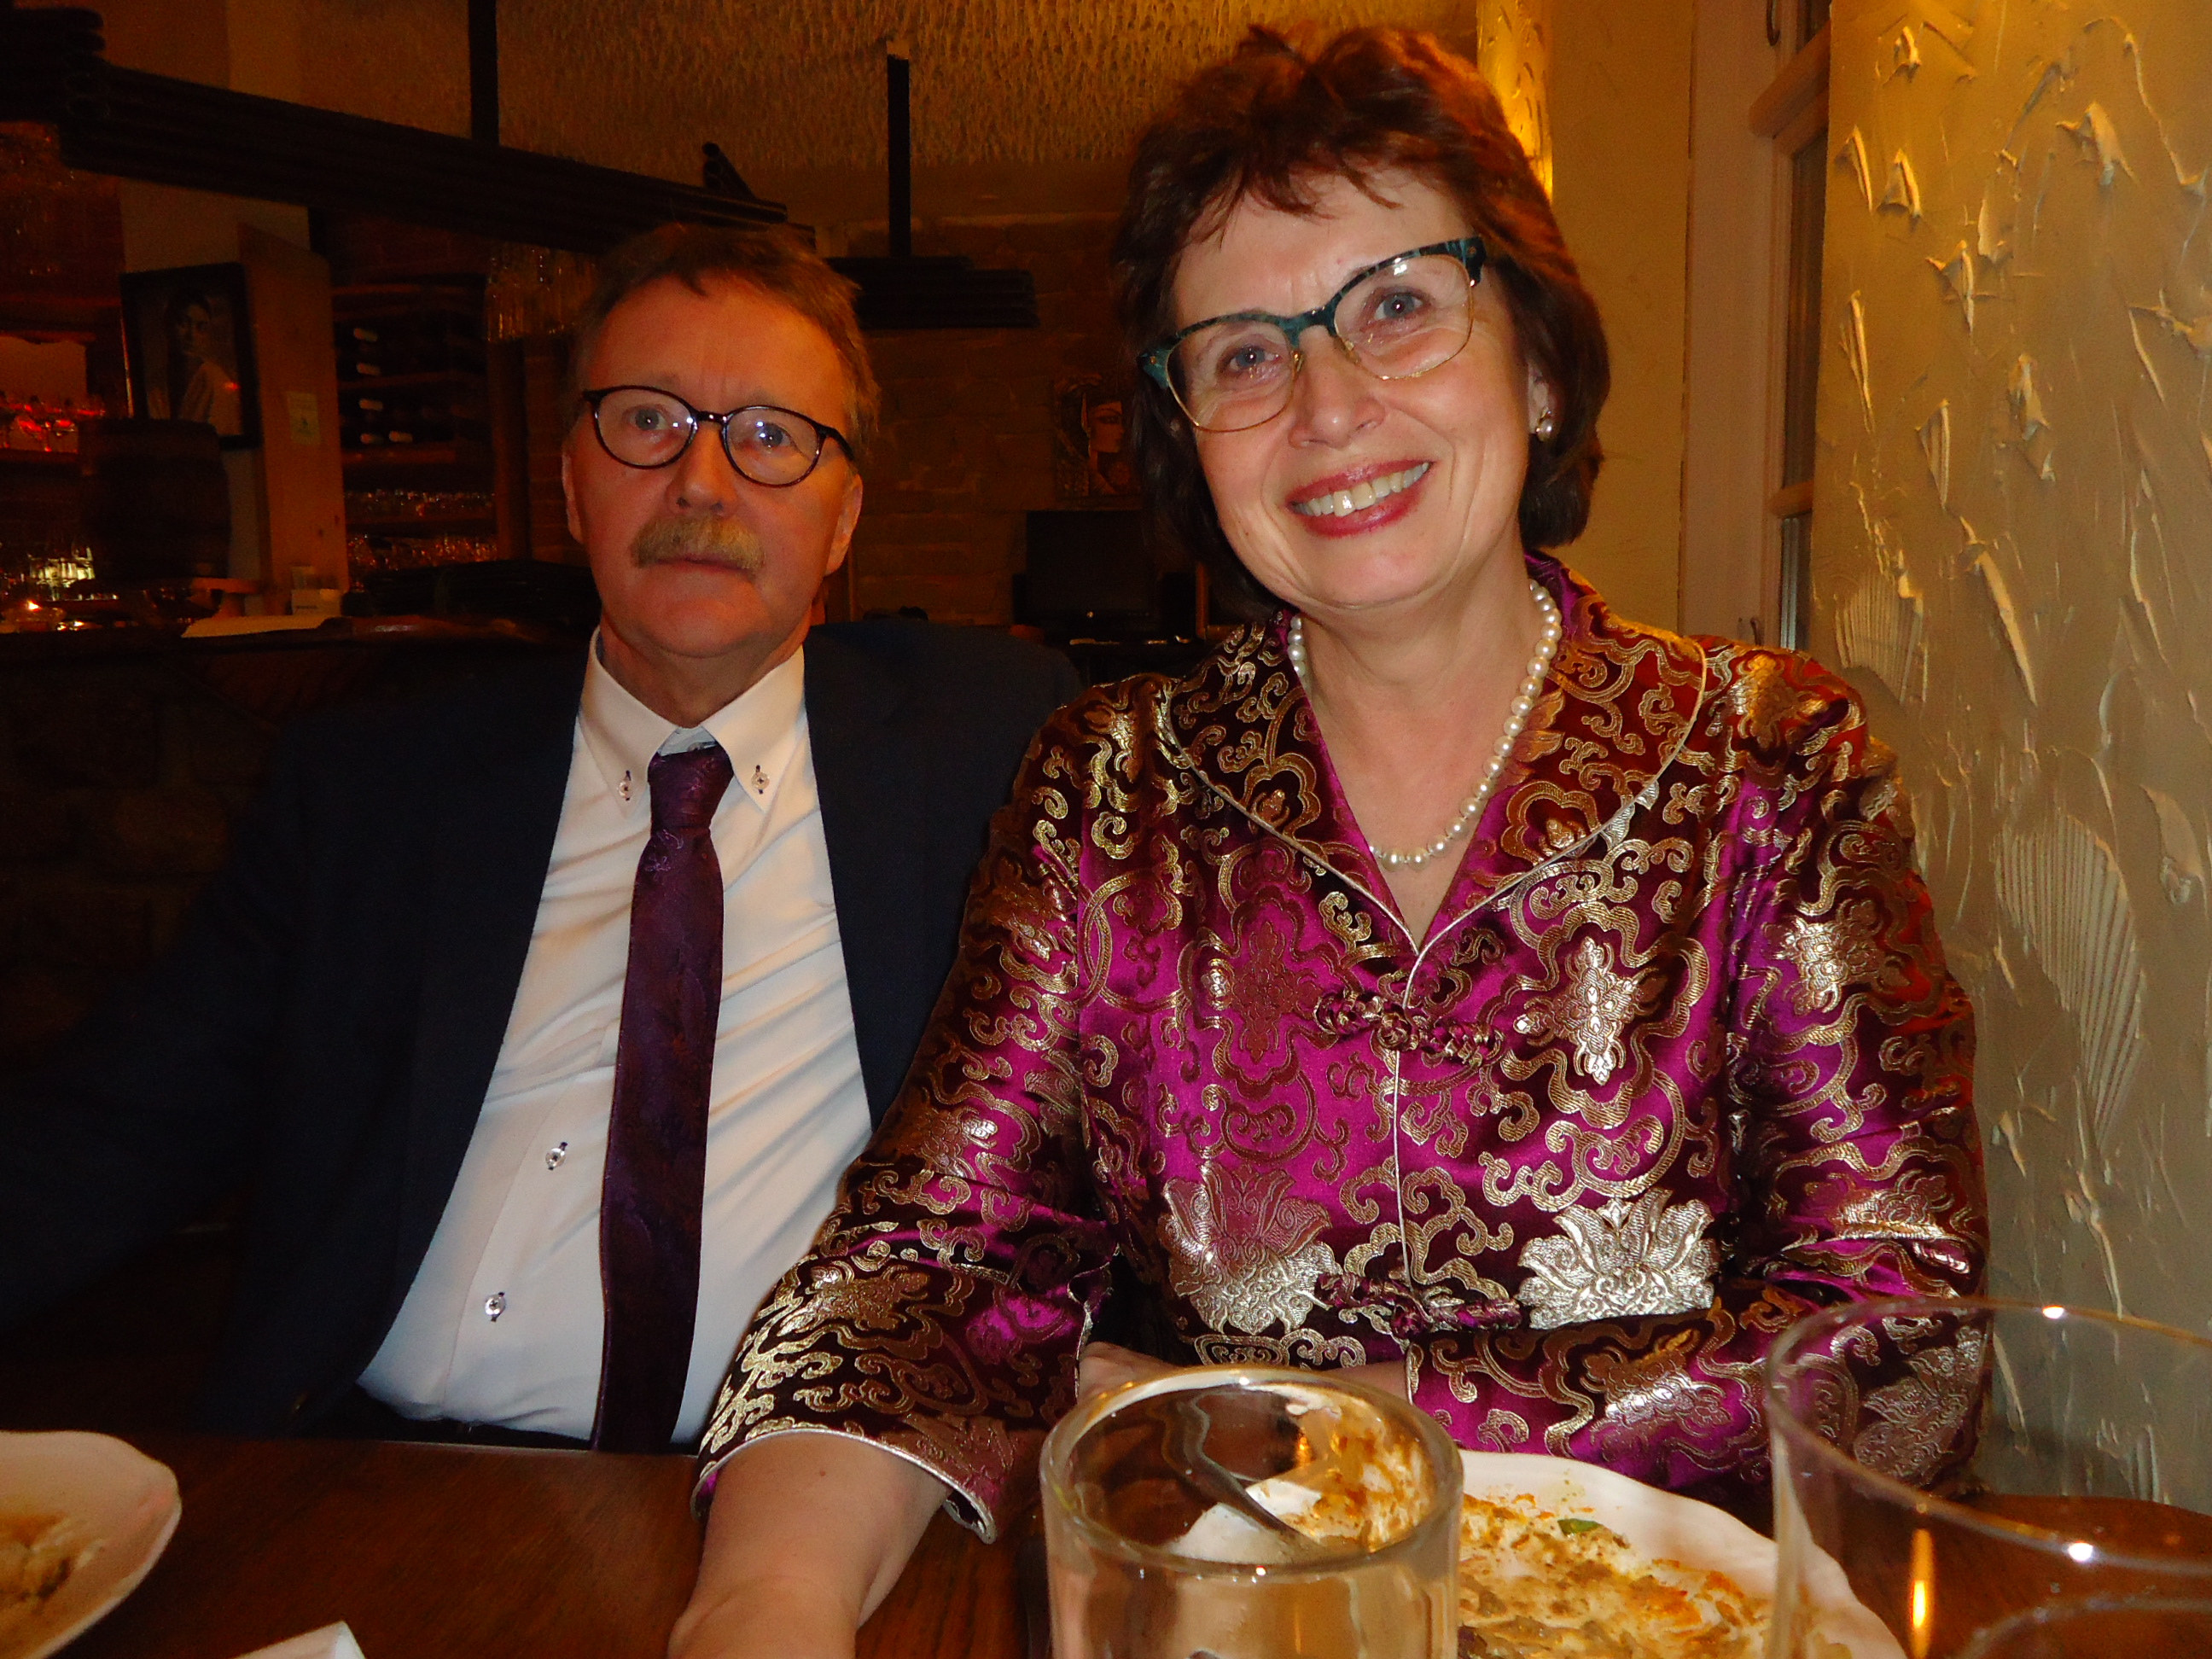
I was very happy that my parents were able to come and celebrate with me! They have been a huge support to me during this education.
Jag var väldigt glad för att mina föräldrar hade möjlighet att komma och fira med mig! De har varit ett stort stöd för mig under den här långa utbildningen.
My greatest support, though, has been my everpatient and loving husband. Thank you so much!
Mitt allra största stöd har dock varit min alltid tålmodige och älskande man. Tack så otroligt mycket!
Off course there have been many heroes involved during these six years! Among them, I have to mention the rest of my family, the family of my husband and my dear Århus-friends Svea, Ingeborg, Camilla, Frida, Hildegunn, Paulina, Abi and Christina and all other lovely people spread out in over Sweden and the rest of the world. Thank you so much for not giving up on me, when I’m in anguish after many sleepless nights and when I reject fun things because of studies. Thank you for all nice distractions that have made surviving possible. I love you and am so thankful for having got to know you! Hope that we will see each other again.
Det har så klart varit många hjältar inblandade under dessa sex år! Bland dem, måste jag nämna resten av min familj, min mans familj och mina kära Århus-vänner Svea, Ingeborg, Camilla, Frida, Hildegunn, Paulina, Abi, Christina och alla andra underbara människor i Vimmerby och resten av världen. Tack så mycket för att ni har stått ut med mig när jag har haft ångest efter många sömnlösa nätter och när jag har avstått från roliga påhitt på grund av studierna. Tack också för alla trevliga avledande förströelser. Jag älskar er och är så tacksam för att ha fått lära känna er! Hoppas att vi får ses igen.This post ended up being more cheesy than I could have ever imagined. Perhaps it’s because of the cheesy music in the background or just because of that I really have so much to be thankful for.
Have a good day!
Detta blogginlägg blev visst väldigt mycket mer tårdrypande än jag hade tänkt mig. Kanske beror det på den sliskiga musiken jag har i bakgrunden, eller bara på att jag har så otroligt mycket att vara tacksam för.
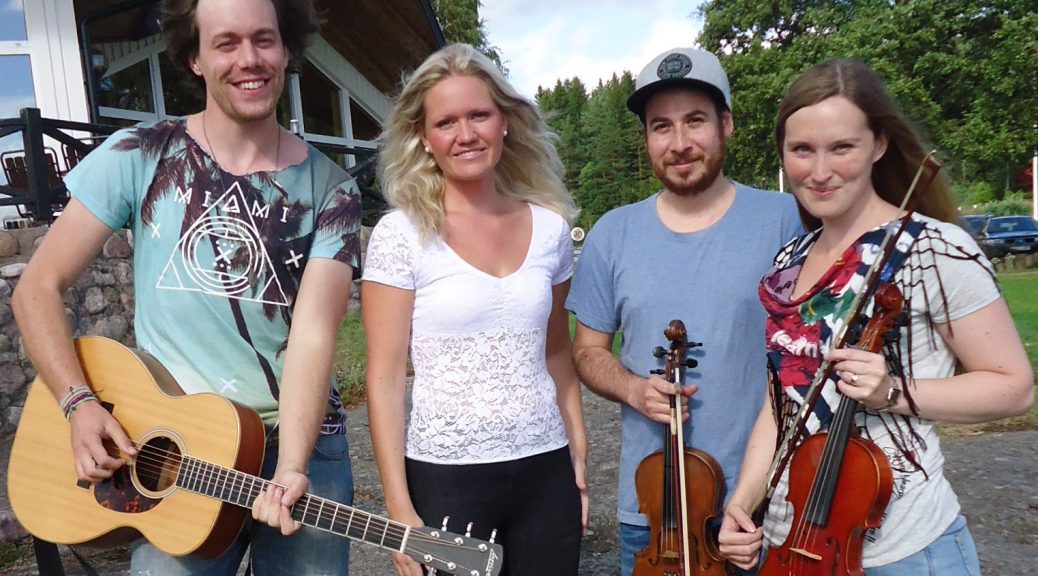
This summer was intense! After the marathon of exams and preparations for selling our old apartment, I came home to Sweden, where I started with two weeks work as a doctor’s assistant, abruptly finished with singing at a funeral at my last lunch break. After the “real work” I had my own concert, in Vimmerby kyrka, together with Olle Långström:
Den här sommaren var fullspäckad! Efter galna veckor med lägenhetsförsäljning och tentor, kom jag hem till Sverige och arbetade två veckor som läkarassistent, abrupt avslutat med begravningssång på min sista lunchrast. Tre dagar efter att mitt “riktiga sommarjobb” var avslutat hade jag min egen konsert i Vimmerby kyrka, med Olle Långström.
Next, I had to sew a few things for the castle adventure and the next concert.
Sedan behövde jag sy några plagg inför vår slottsutflykt och nästa konsert.
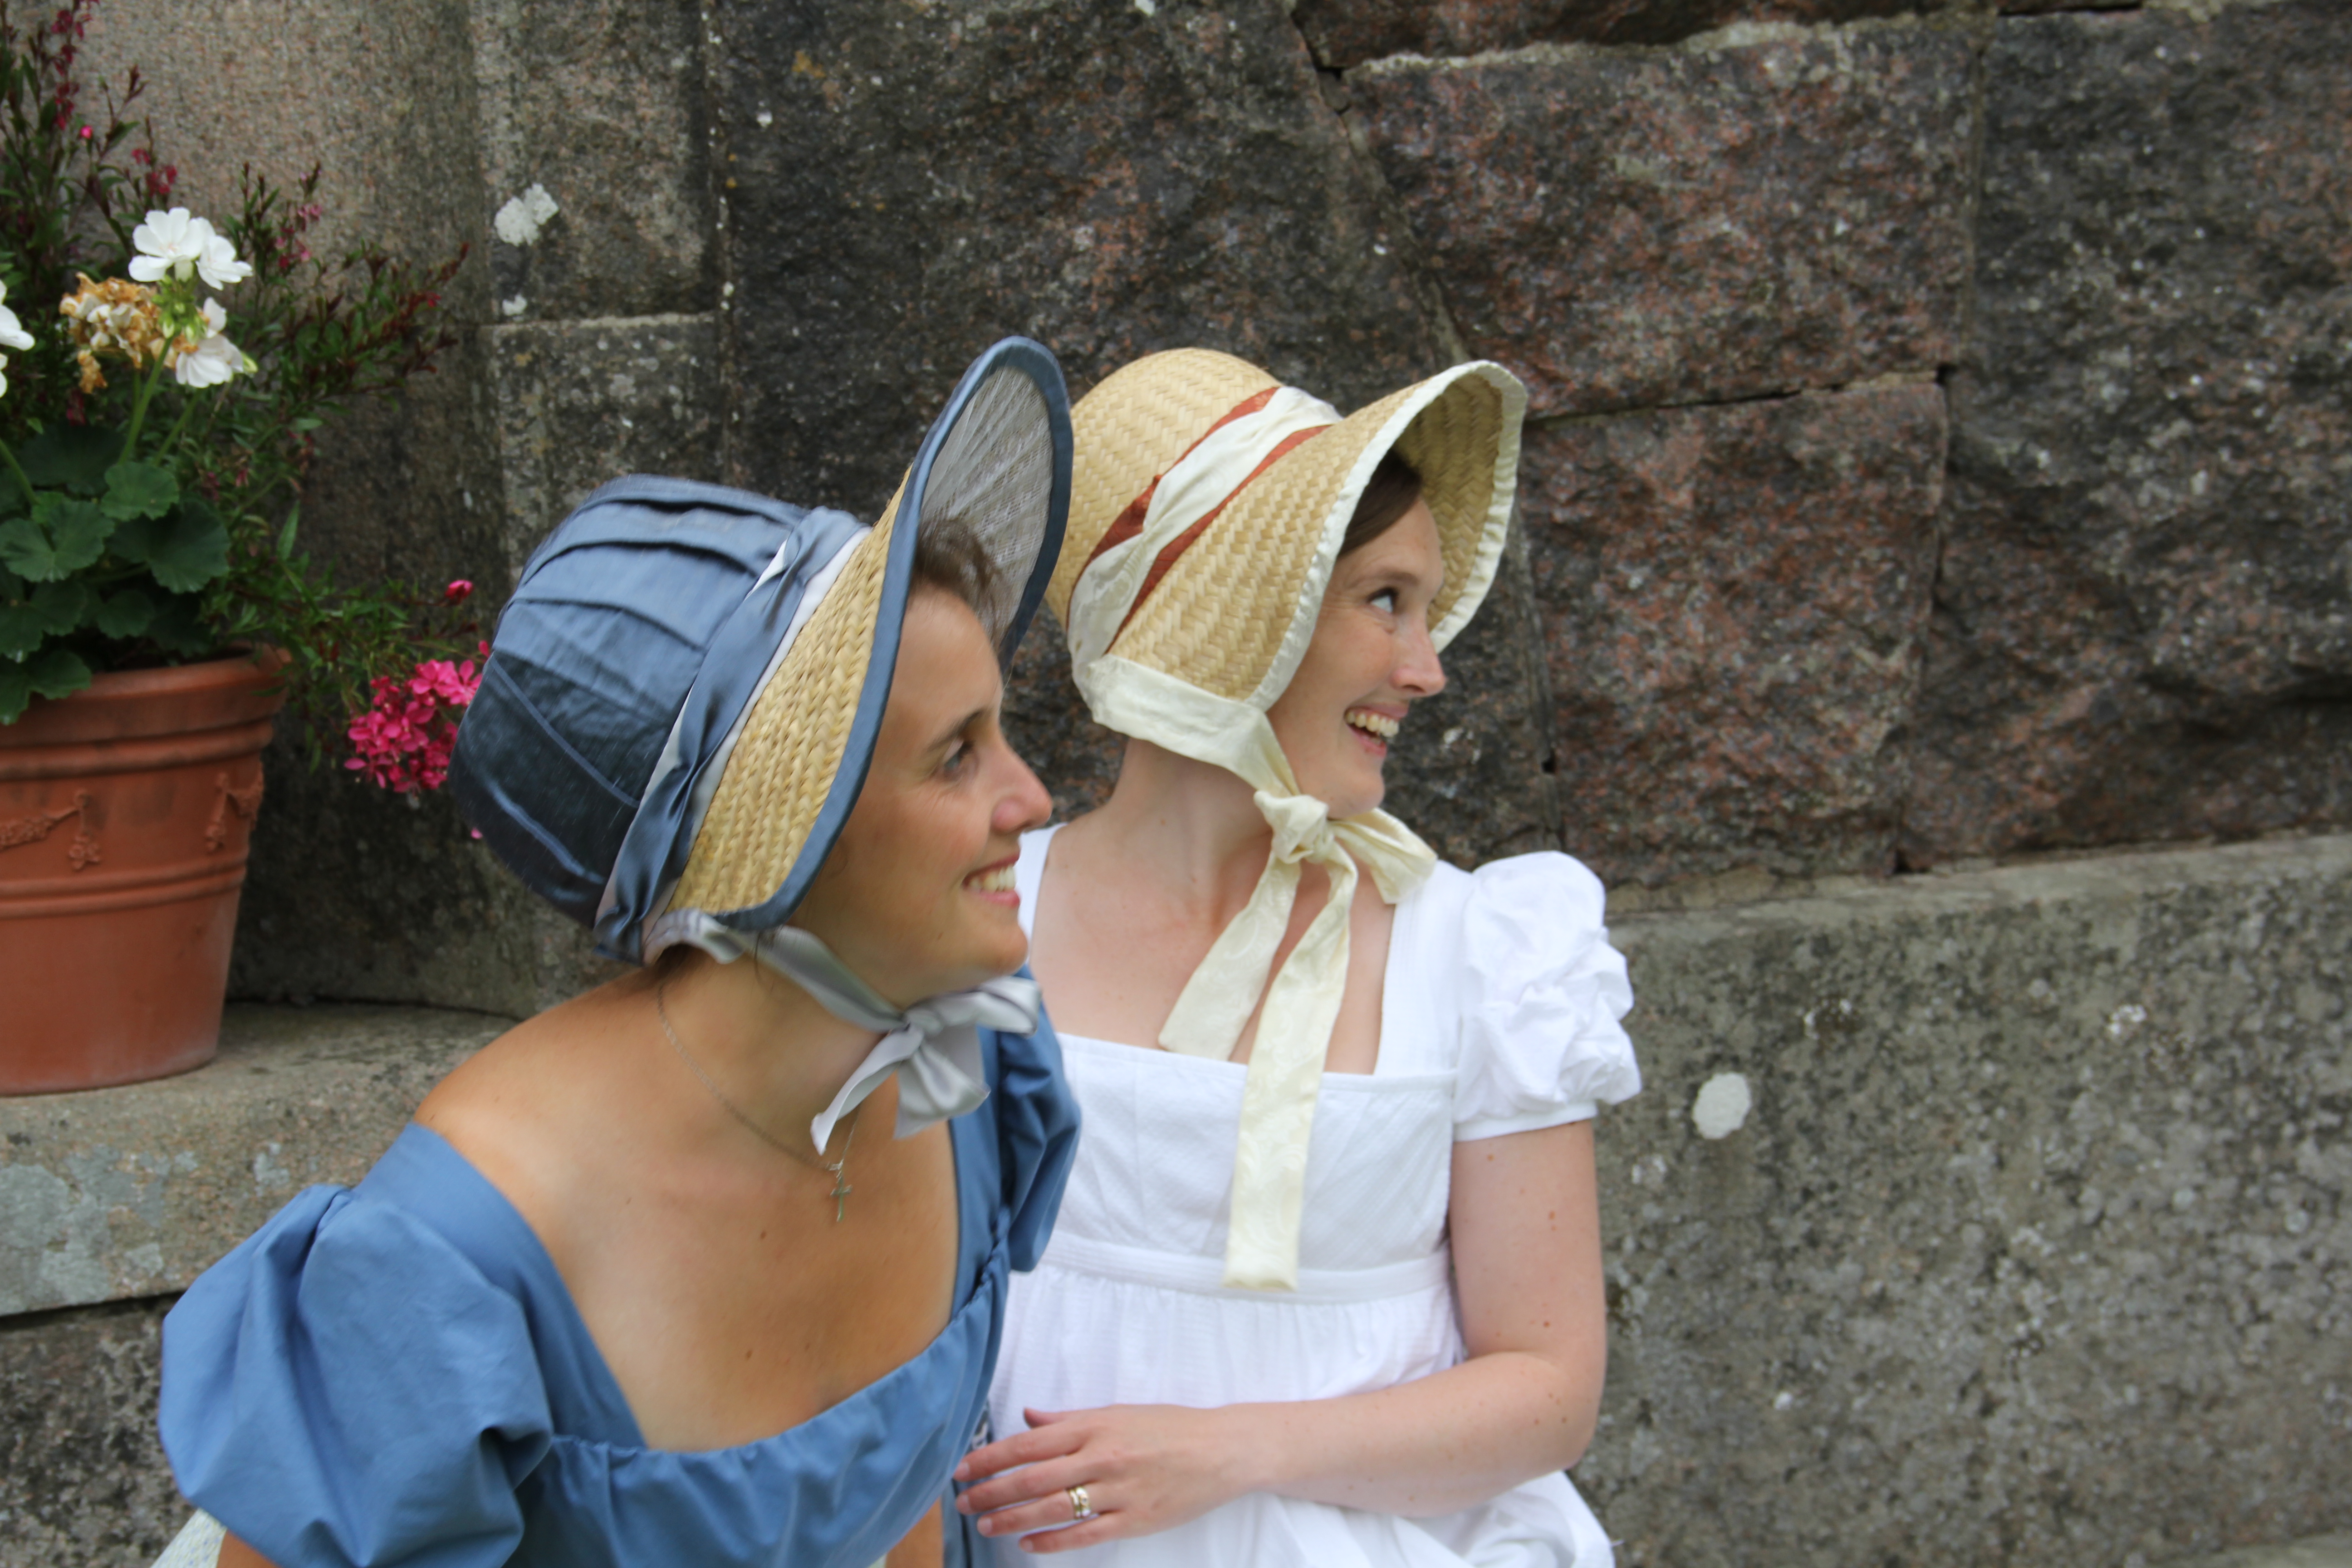
I designed and sew the girl’s dress and remade the blue dress. I also made the petticoat shown in the last post.
Jag designade och sydde flickans klänning och sydde om den blå klänningen. Dessutom sydde jag underkjolen, som jag visade i förra inlägget.
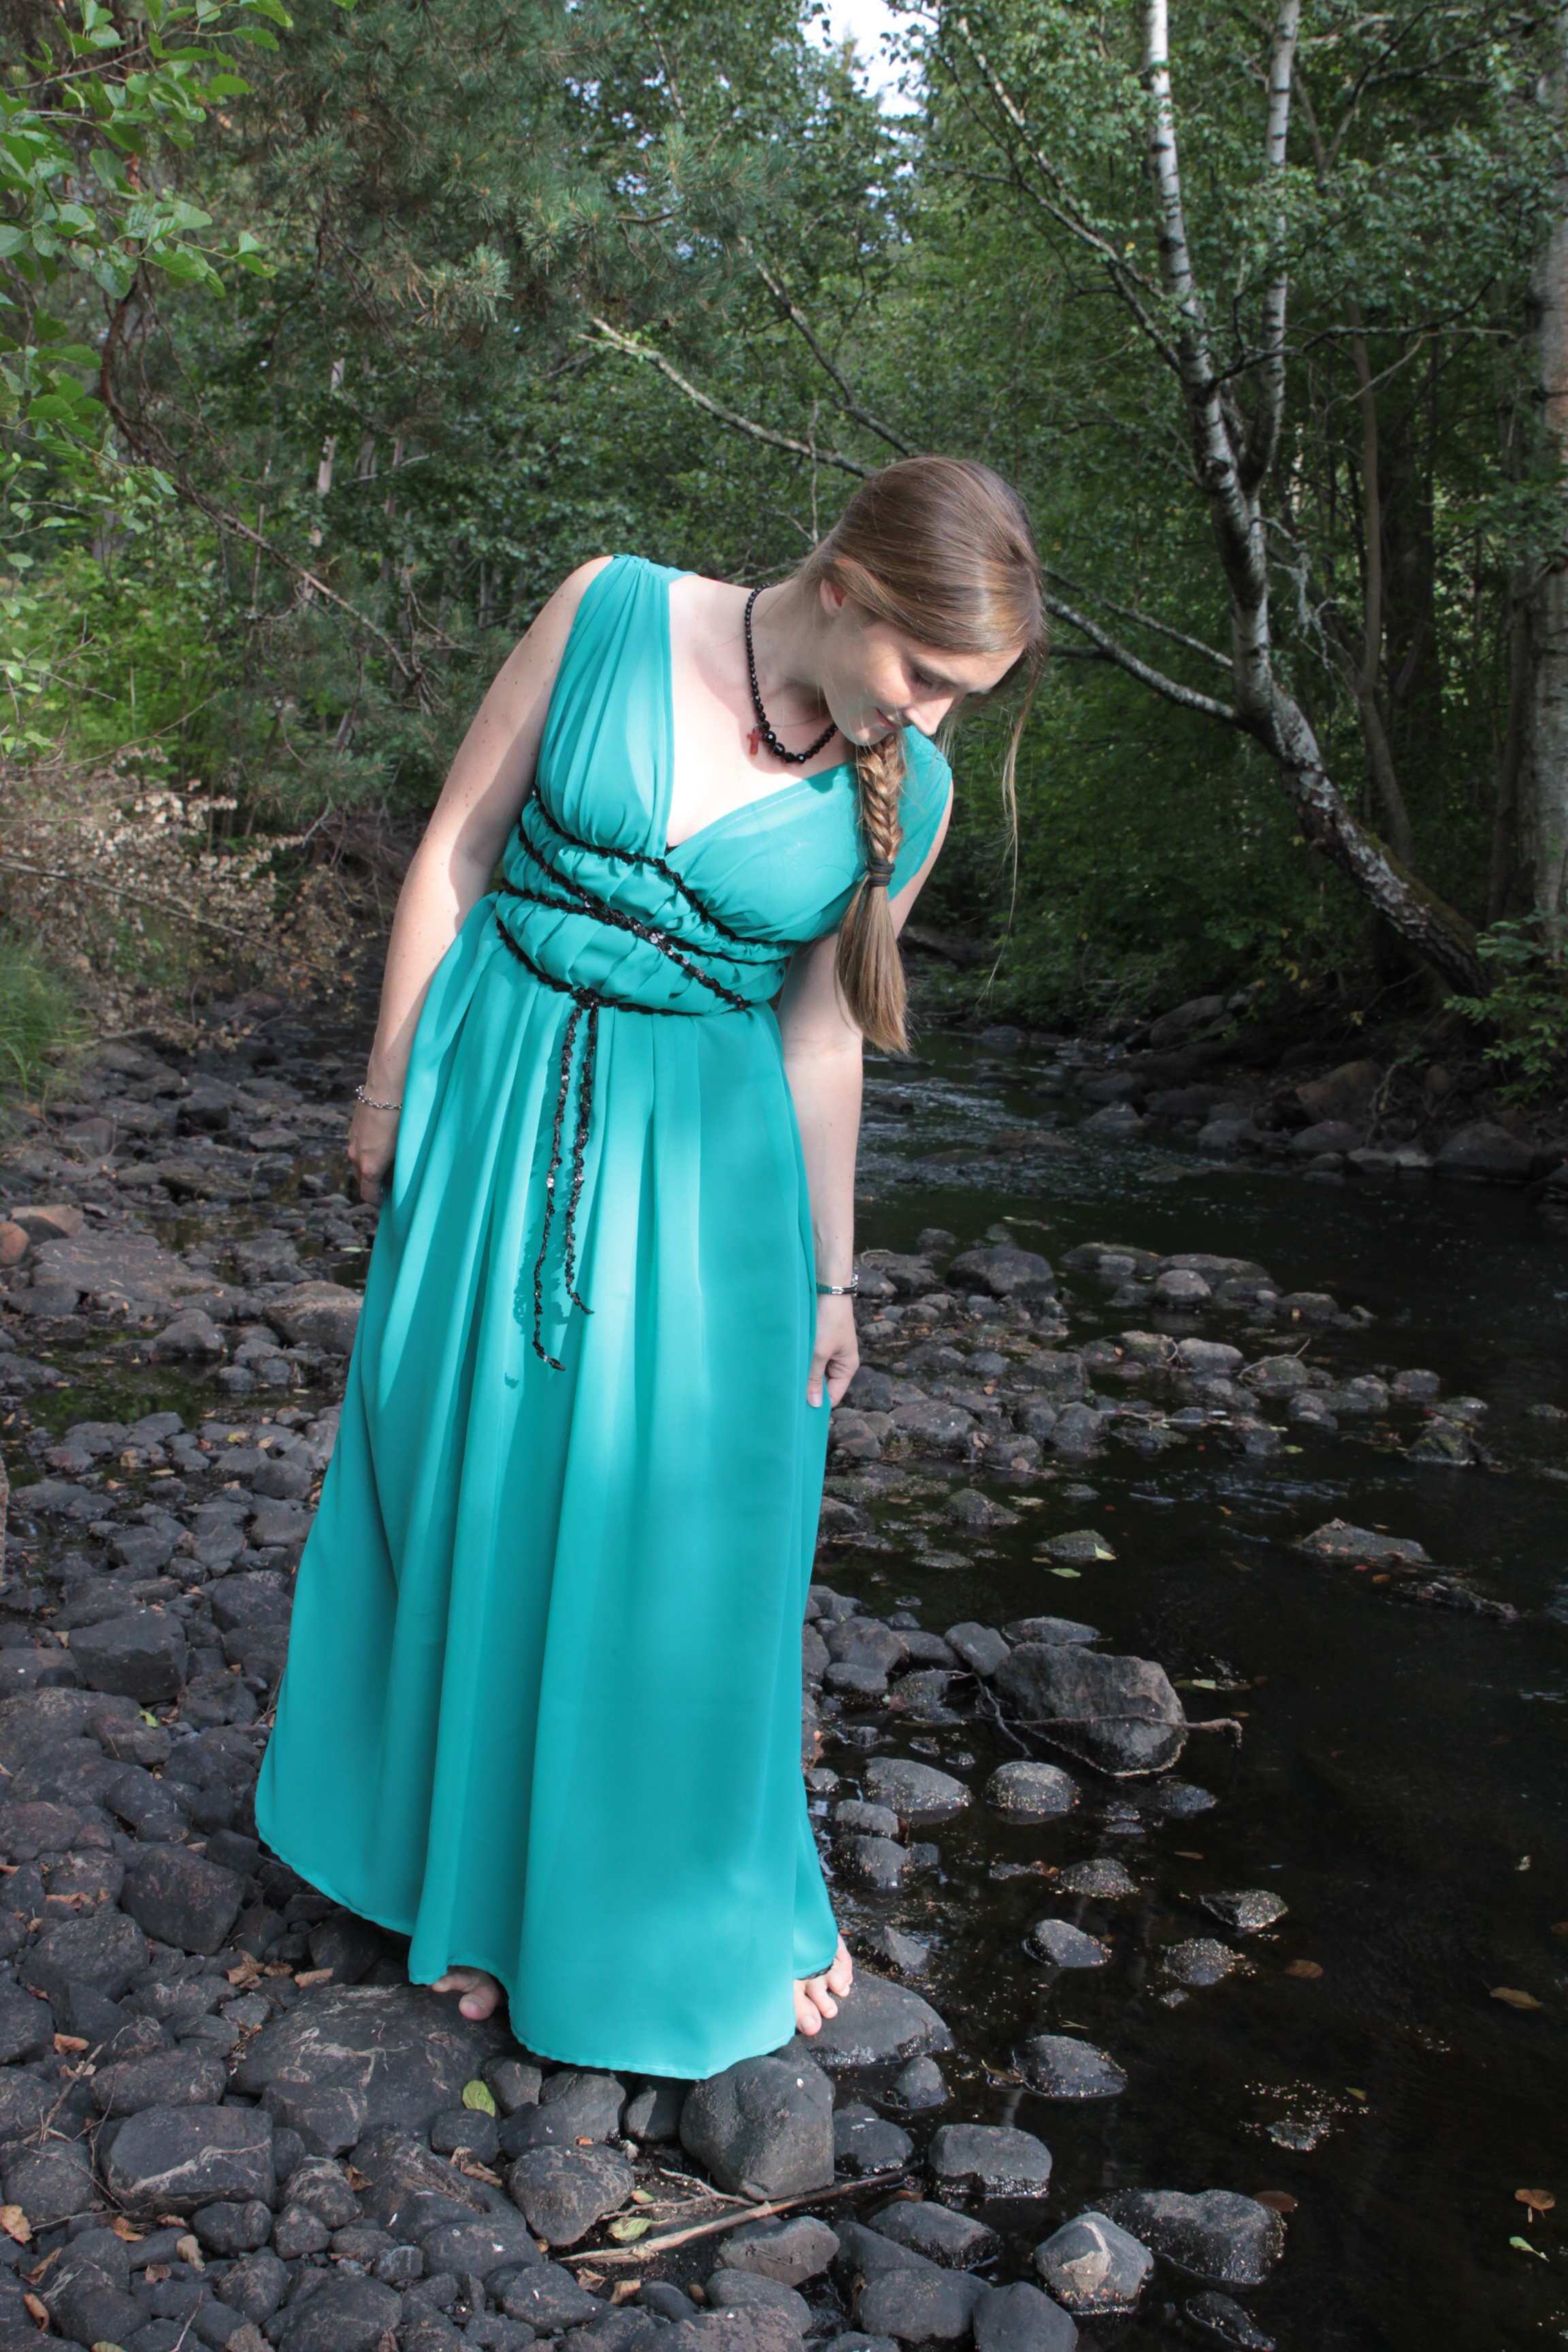
I had such grand plans for this gown. Alas, I could never fulfill my dreams. The black satin dress underneath would be wearable on its own, but I could not make the darts at the bust without wrinkling and bulking. As I had feared, it also proved to be impossible to drape a chiffon dress without mannequin. This is the best picture, where you cannot see all of the horrible bulk.
Jag hade så storslagna planer för denna klänning. Men ack, mina drömmar gick inte i uppfyllelse. Den svarta satinklänningen, under, skulle gå att använda för sig, men jag kunde inte få till de eländes inprovningarna vid bysten. Dessutom visade det sig, som jag fruktat, vara omöjligt att drapera chiffongtyget utan provdockan. Klänningen såg slutligen ut som en billig, illa sydd tärnklänning. Detta är den bästa bilden, man ser inte alla fel.
A lovely pick nick with a long lost friend and my husband.
Then there were some more funerals, weddings and our annual concert at Kröngården. Oh, what fun it was! =D
The video is terrible, but you get a glimps of what it was like:
Sedan sjöng jag på några fler begravningar, bröllop och vår årliga konsert med Martin Carlsson, Hanna Karlsson och Henry Trejos Muños på Kröngården. Åh, så roligt det var!
Videon har inte särskilt hög kvalitet, men du får åtminstone ett hum om hur det lät.
The last two weeks, where I had nothing yet planned, I had decided to start working with my last year project, about pregnancy diabetes. I lasted one day. Then I felt how terribly tired I was! I just had to take a real break before returning to my studies. That was my excuse for making the regency gown instead.
Under de sista veckorna, som var helt oplanerade, hade jag tänkt börja med mitt specialarbete, om graviditetsdiabetes. Jag höll ut en hel dag. Sedan kände jag hur offantligt trött jag verkligen var! Jag var helt enkelt tvungen att ta ledigt innan jag återvände till studierna. Det var min ursäkt för att sy en empirklänning istället.
All together, it has been a wonderful, hectic summer, full of friends, fun projects, music and family. Tomorrow the reality starts – hopefully my last semester at the University of Århus.
Sammantaget, har det varit en underbar, hektisk sommar, full av vänner, roliga projekt, musik och familj. Imorgon tar verkligheten vid – förhoppningsvis min sista termin på läkarutbildningen vid Århus Universitet.
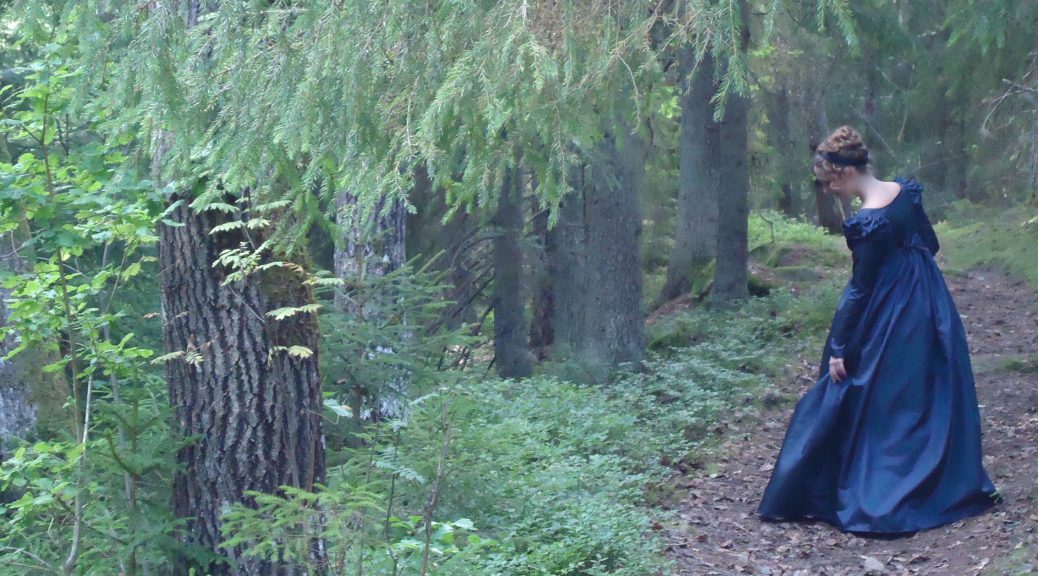
Today, I finished the blue regency gown, which I have thought about during the whole summer! I had planned for wearing it at the castle pick nick with my friends, but this was cancelled, so I had to find some other location for my photo session.
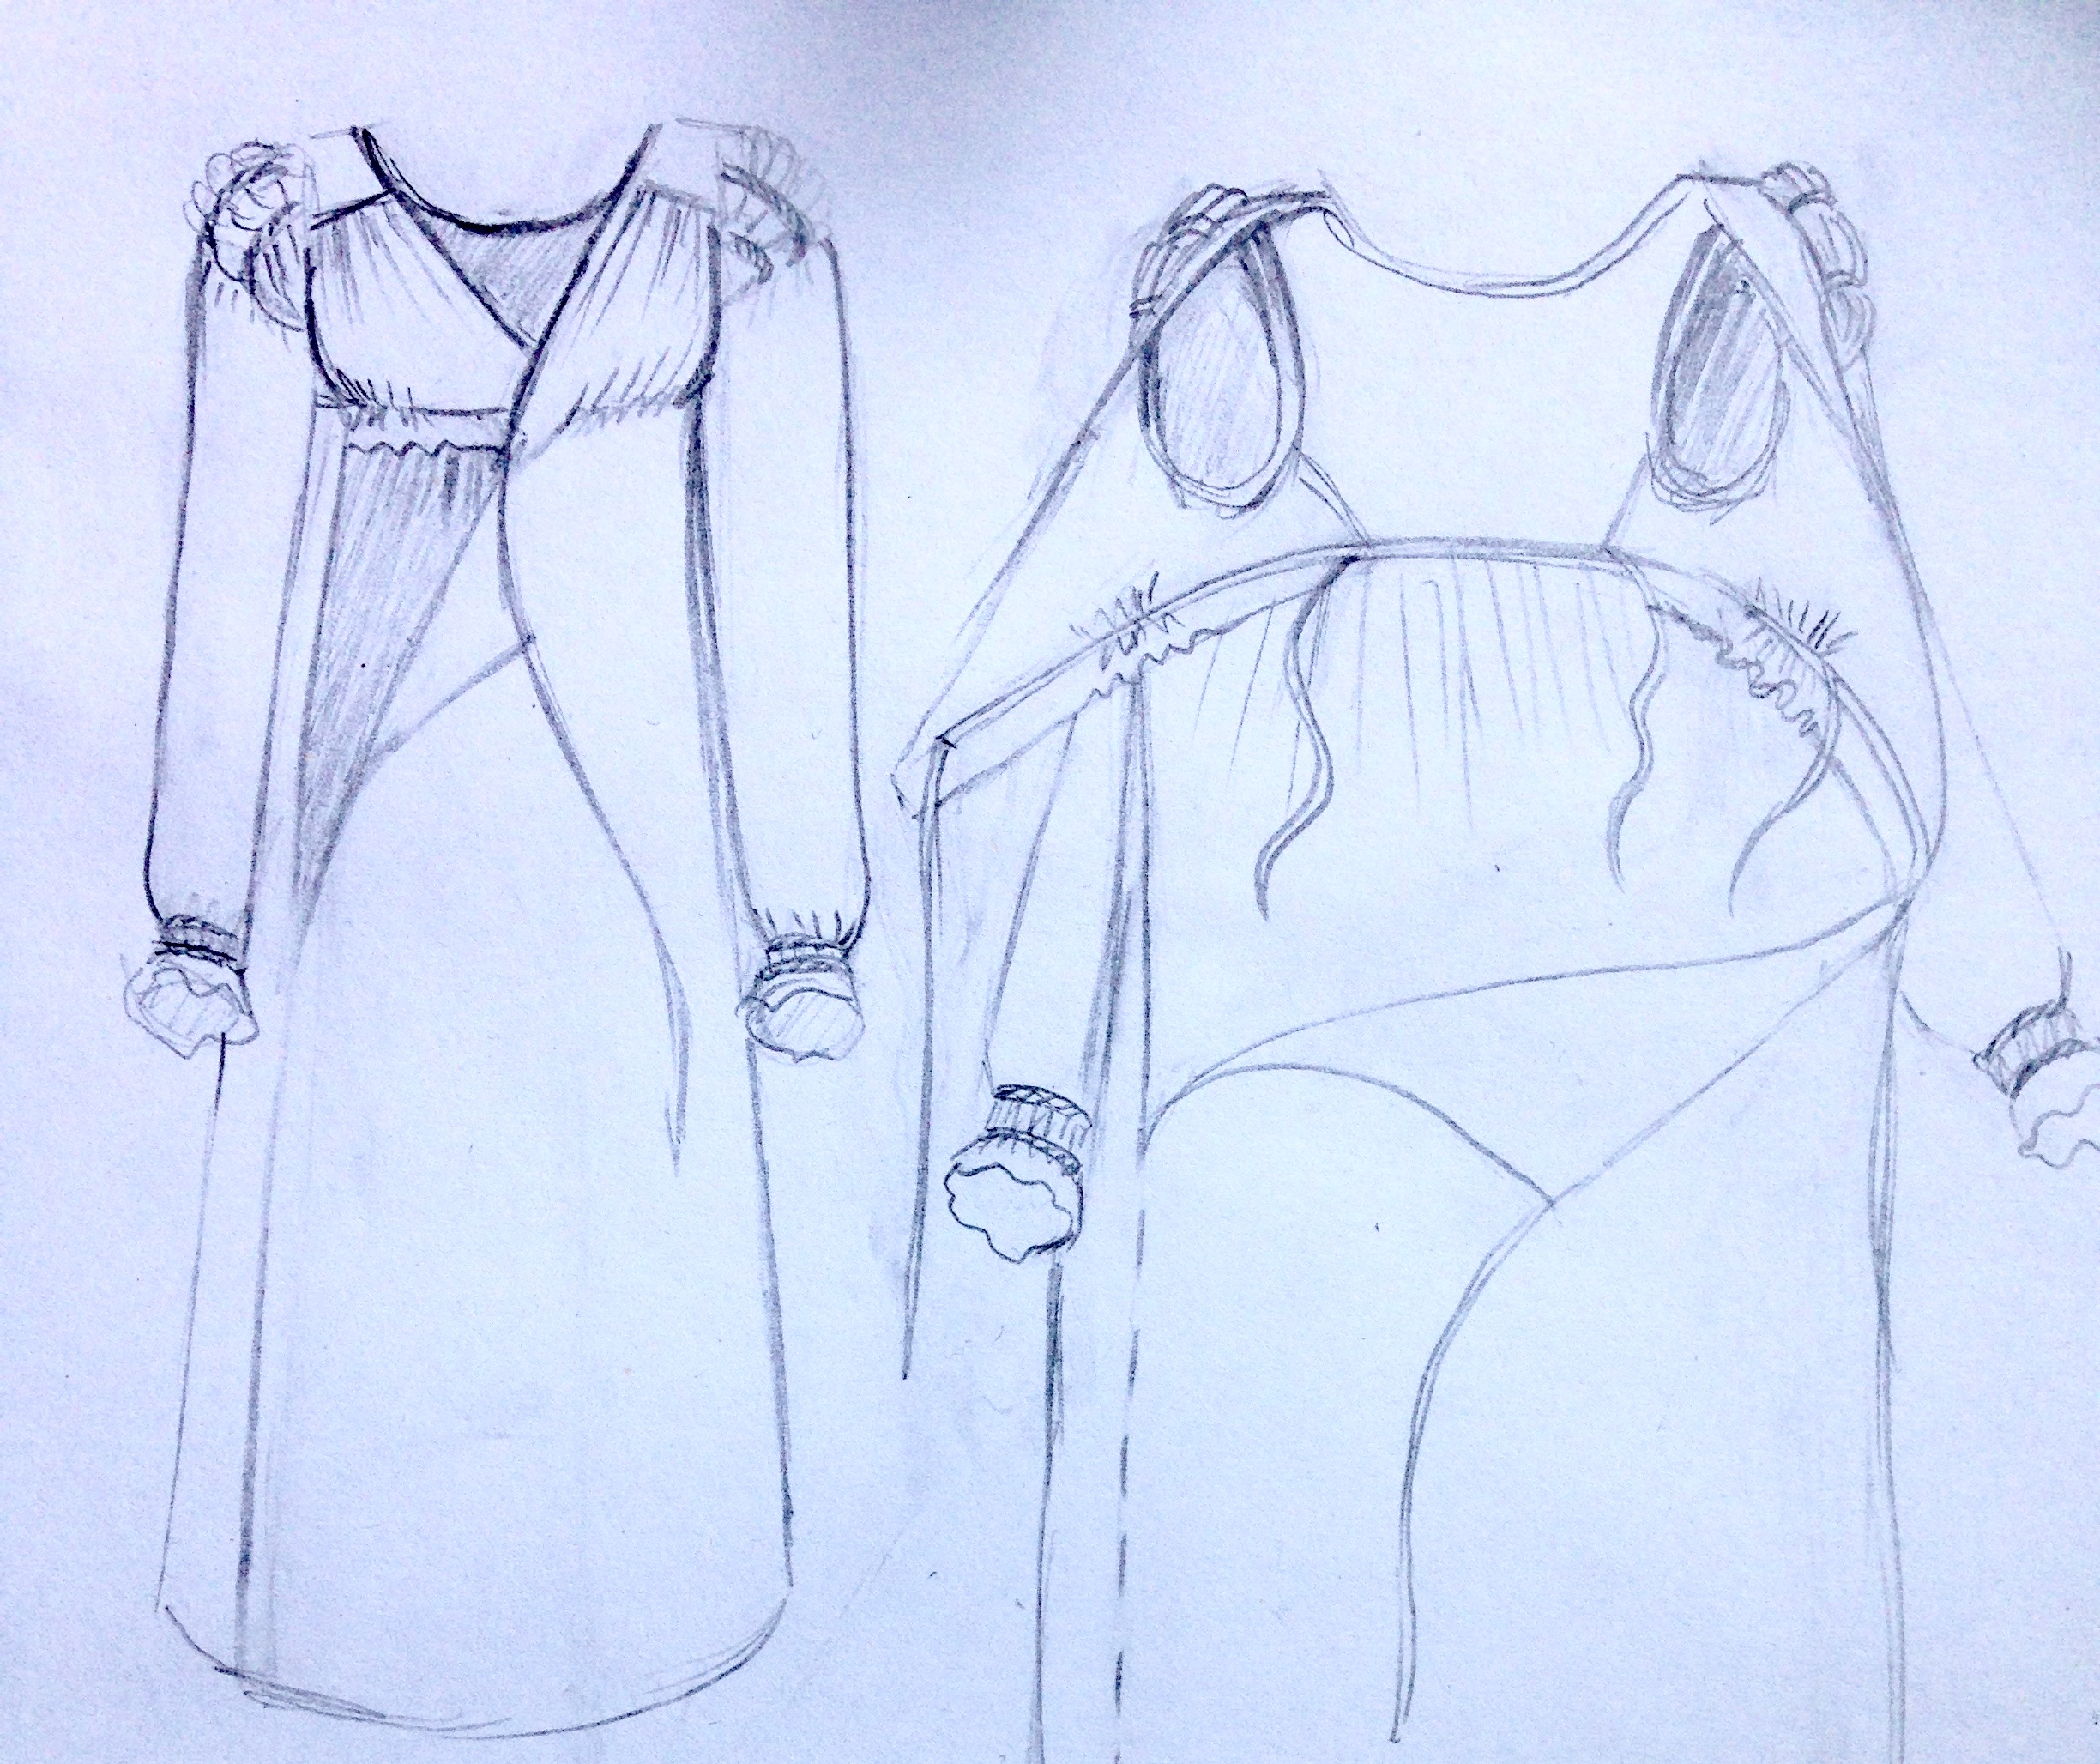
In this post I will first give you a quick look at the construction, then the new underpinnings put on in the right order, the gown put on and last, all of the romantic pictures of the gown.
Idag blev jag äntligen färdig med min nya empirklänning, som jag har tänkt på hela sommaren. Jag hade ju tänkt använda den på Tjolöholmsutflykten, tillsammans med mina vänner, men utflykten blev inställd, så jag var tvungen att hitta ett annat ställe att fota på.
I detta inlägg visar jag först lite av klänningskonstruktionen, sedan alla underklädeslager och sist själva klänningen.
Construction of the gown
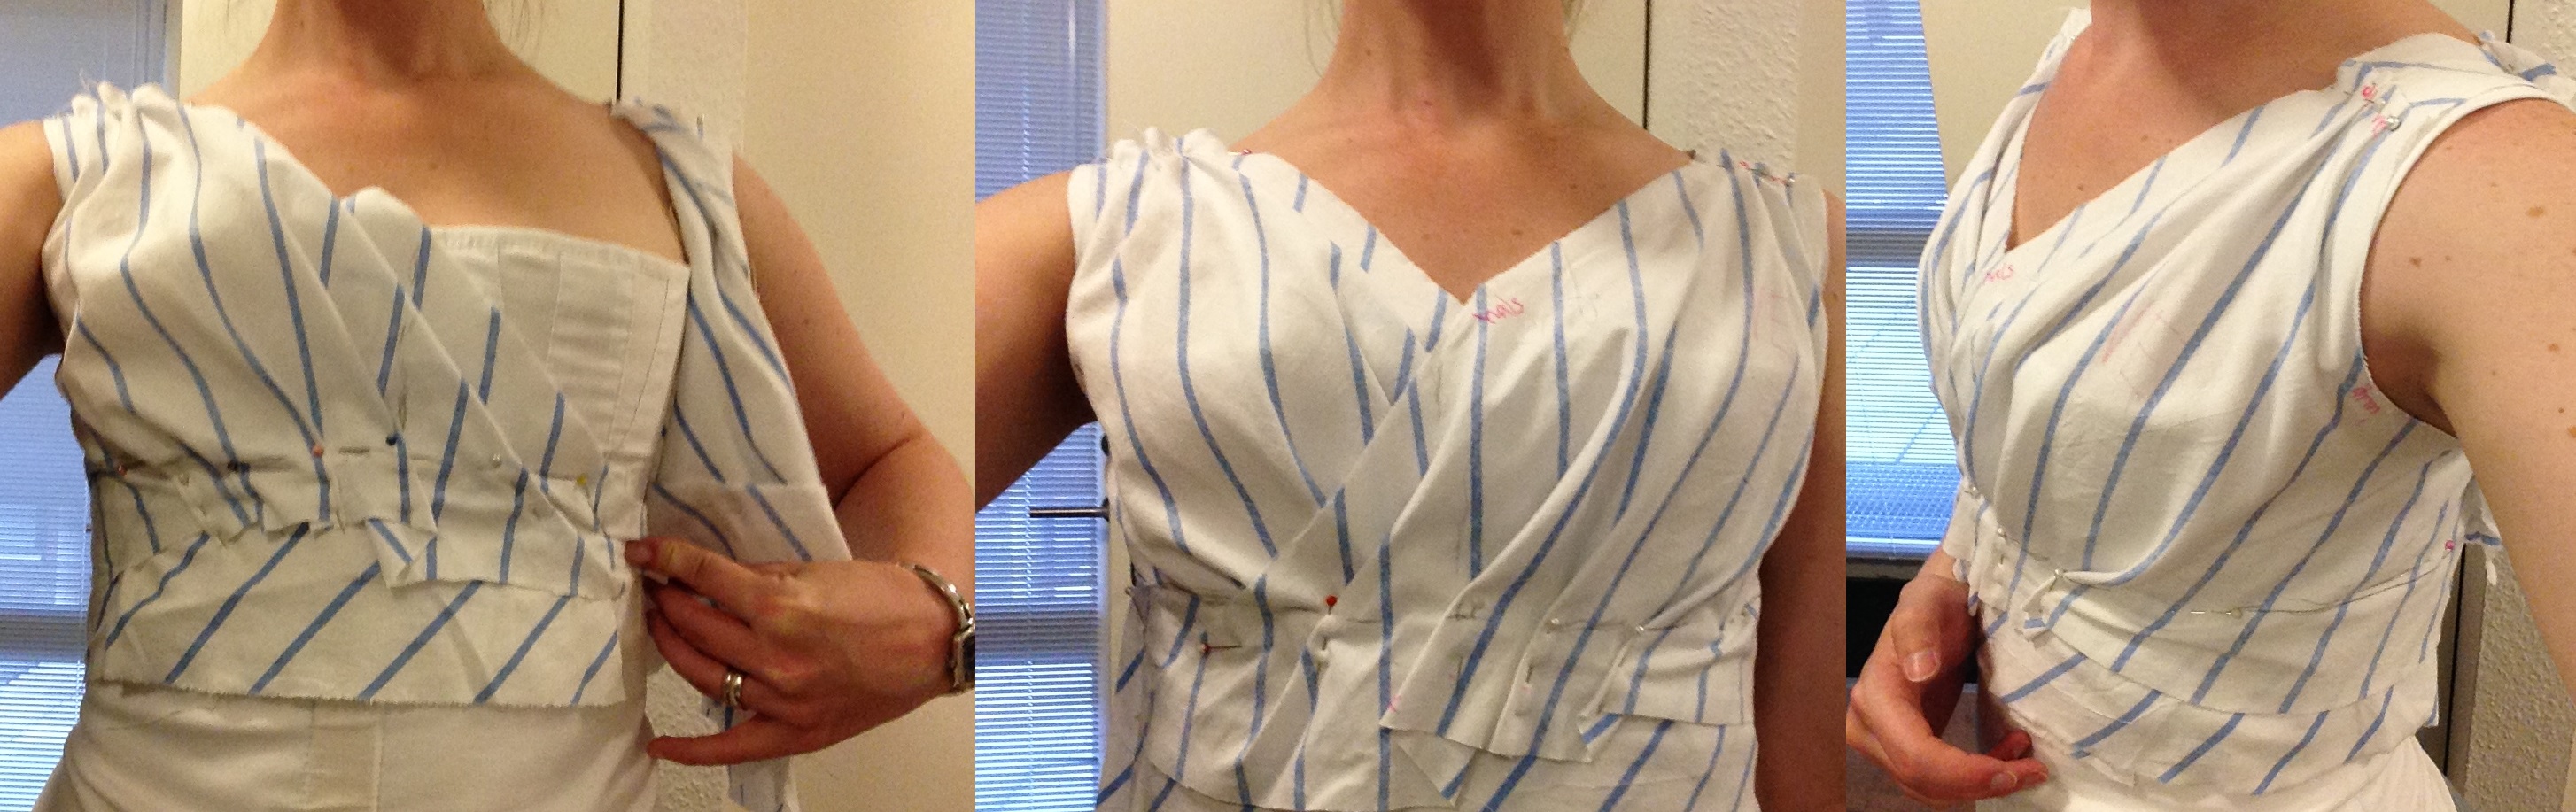
I made a mock-up for the bodice part, on my mannequin before I left it for Sweden. The mock-up was used as a pattern when I cut the fabric.
Jag gjorde en toille på min provdocka i Danmark och använde nu denna som mönster när jag klippte ut tyget.
Thus, I constructed the mock-up. The pinned tucks represent the tucks that will be created by drawstrings at the high waist.
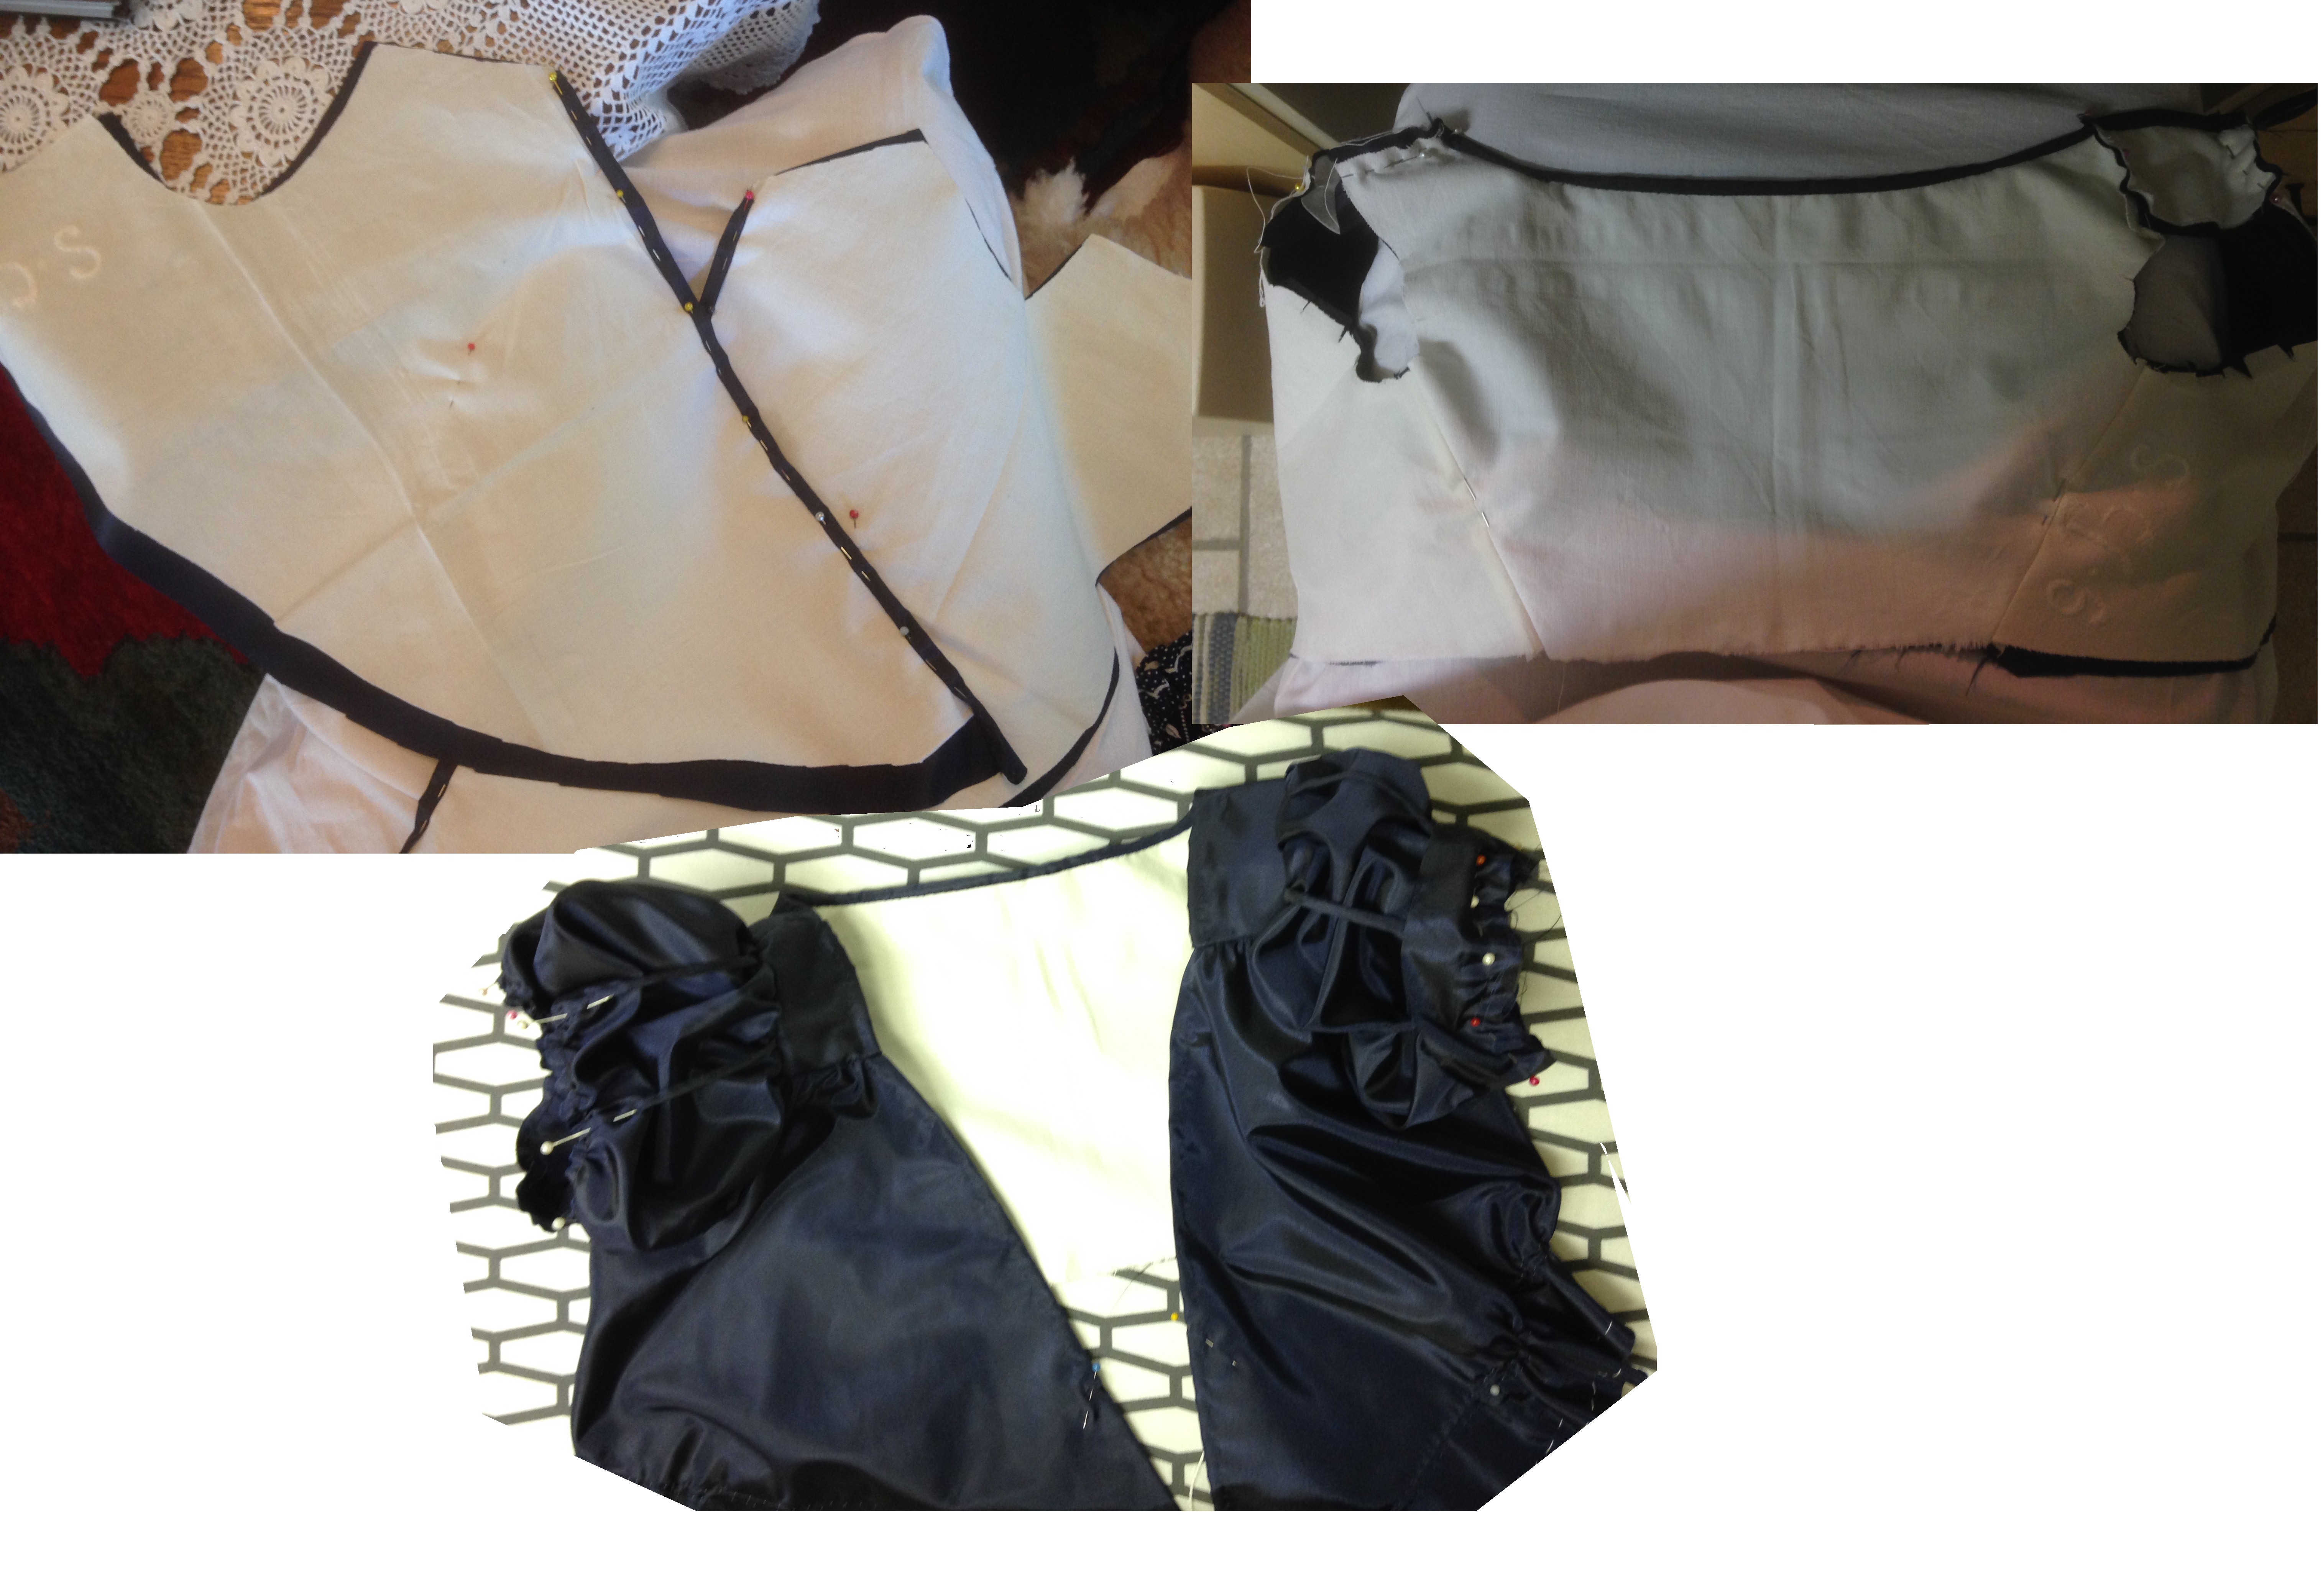
First I put the bodice together and hand stitched the hem in the neckline. Then I put on the arms and last, I made the skirt. I cut some corners by sewing long loose machine seams for gathering the fabric in the arms and skirt.
Först satte jag ihop livet och fållade sömmarna i halsringningen. Sedan fäste jag ärmarna och sist kjolen. Jag struntade i att göra vecksömmar för hand, genom att i stället sy långa lösa raksömmar på symaskinen för att rynka puffärmarna och kjolen.
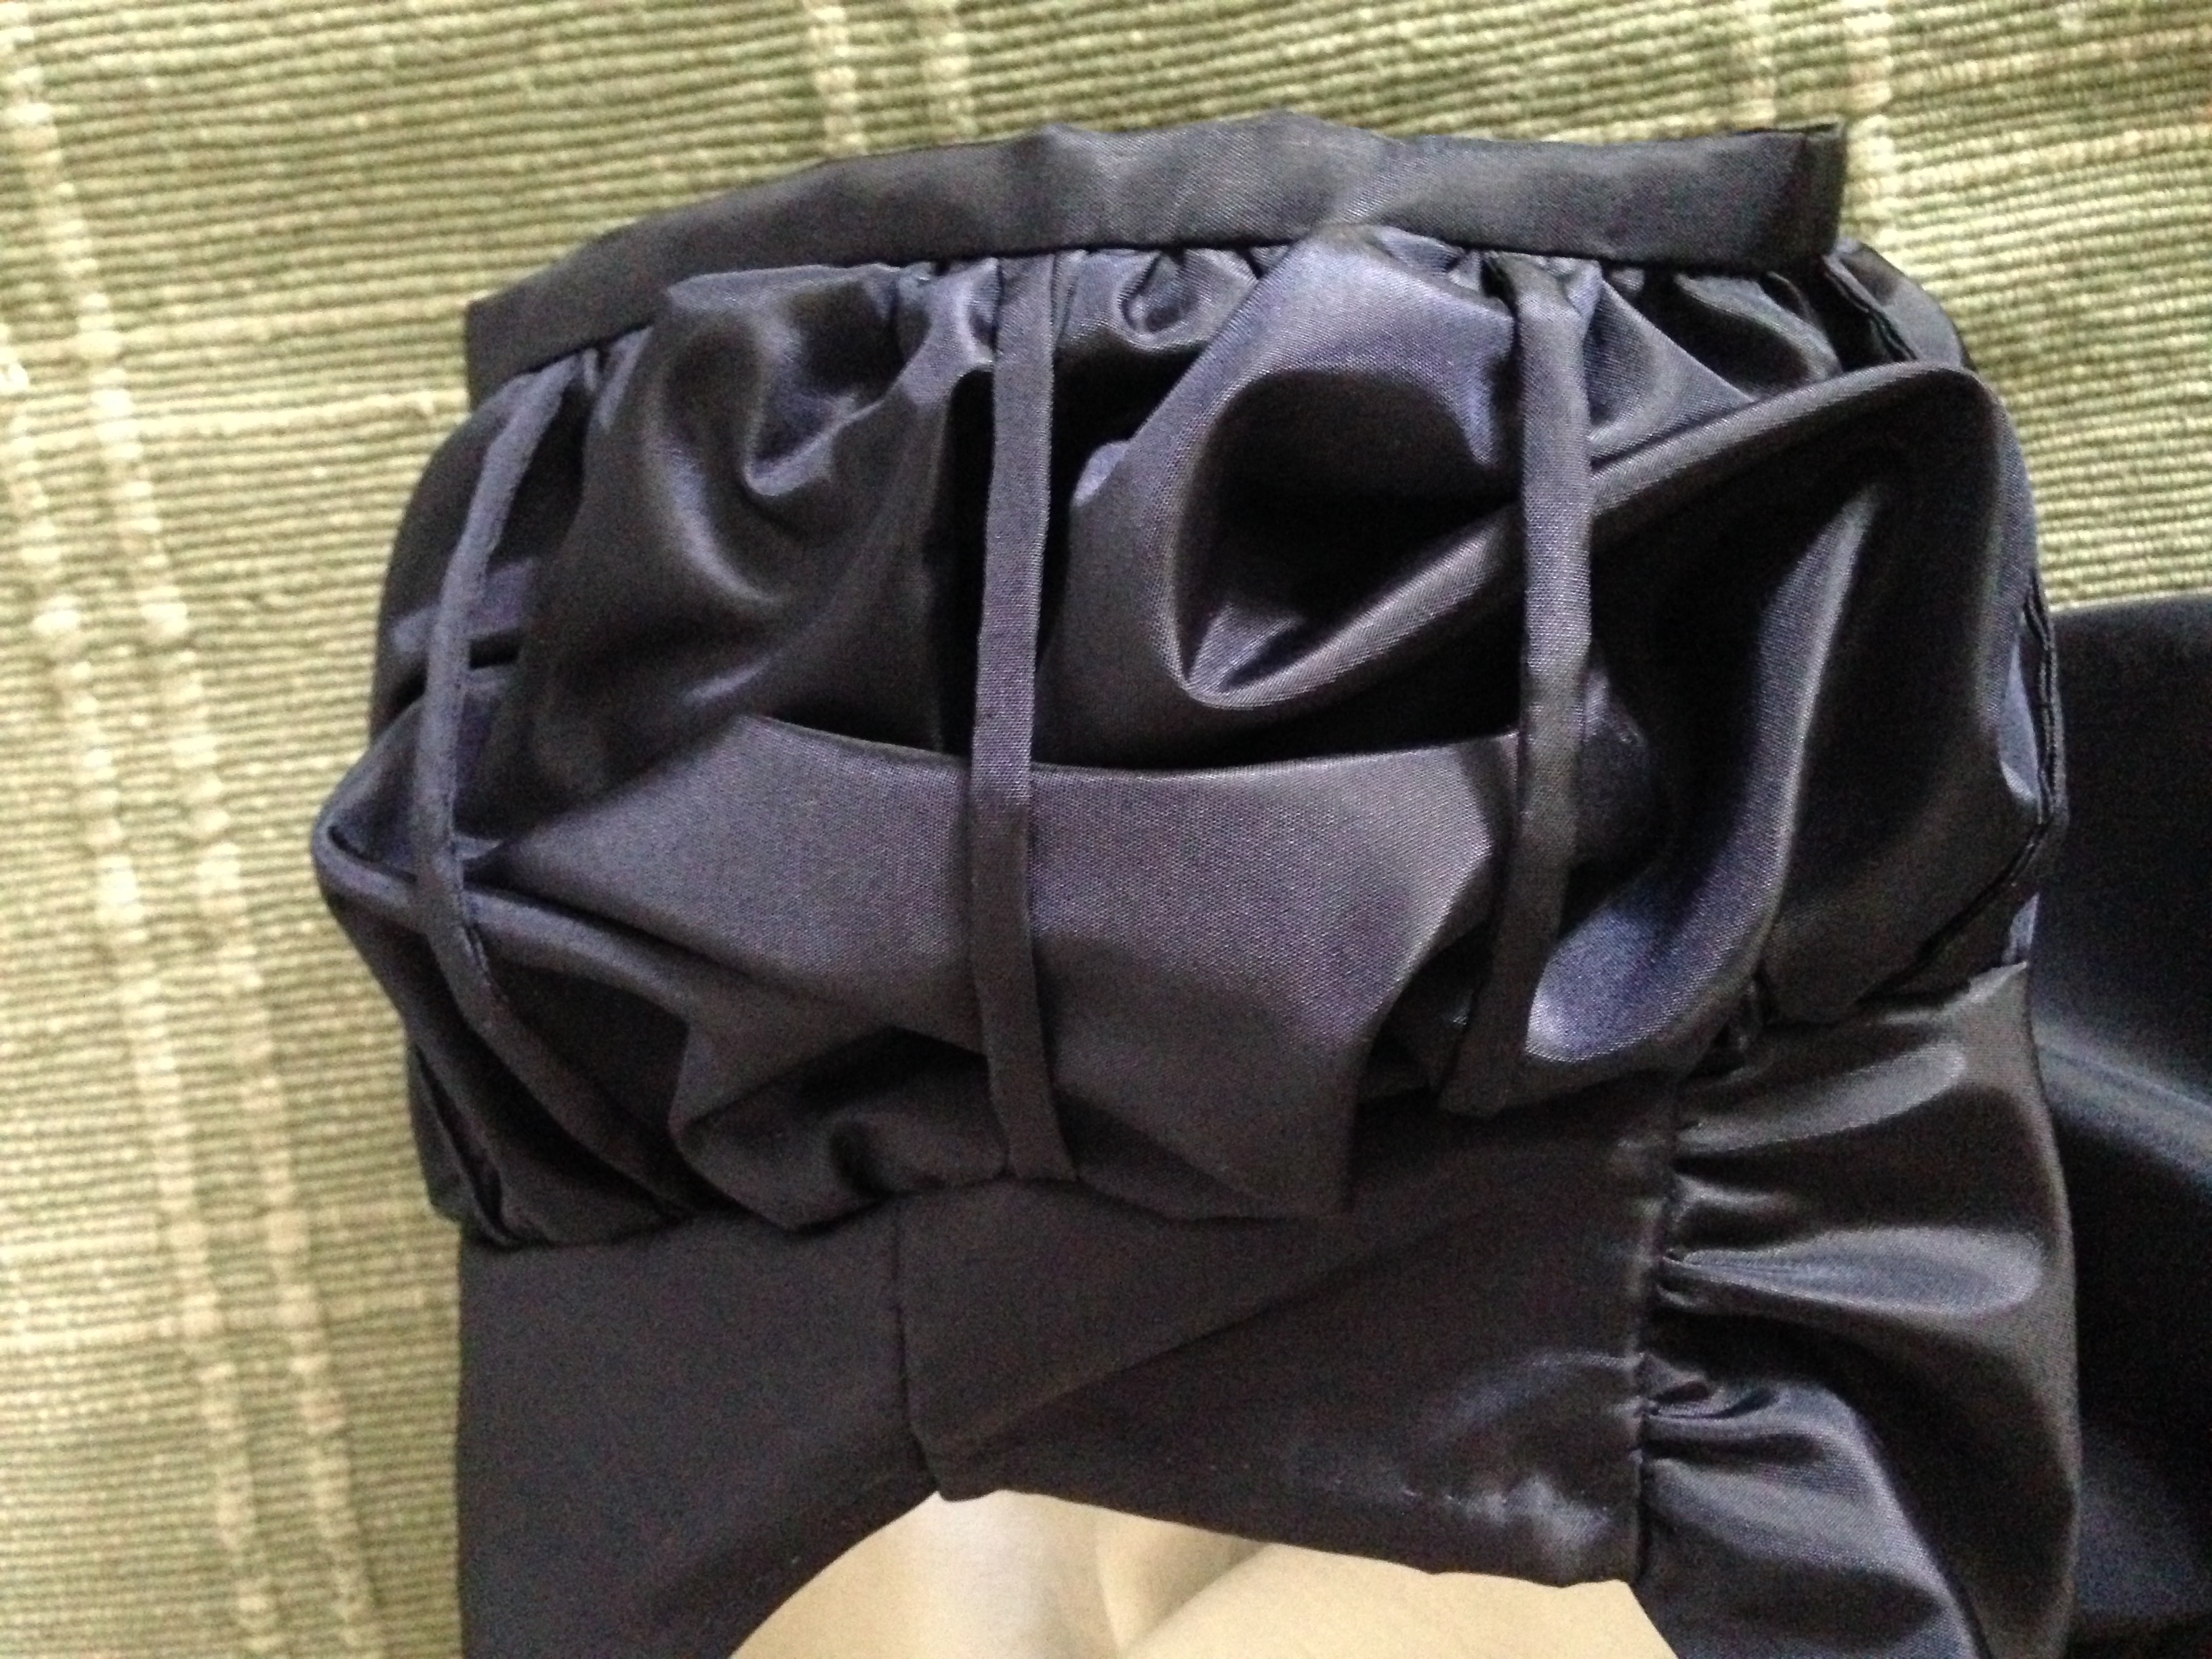
1) The bodice parts are put together after hand stitching all the parts of the neck line. 2) The inside fabric comes from an old pillow case. 3) The fabric of the arms is gathered both at the shoulder and bottom and also vertically by thin strings attatched to the shoulder and tape at the bottom om the arm.
Poofy arm with fabric gathered beneath handsewn strings
Inside the bodice and the closing of it.
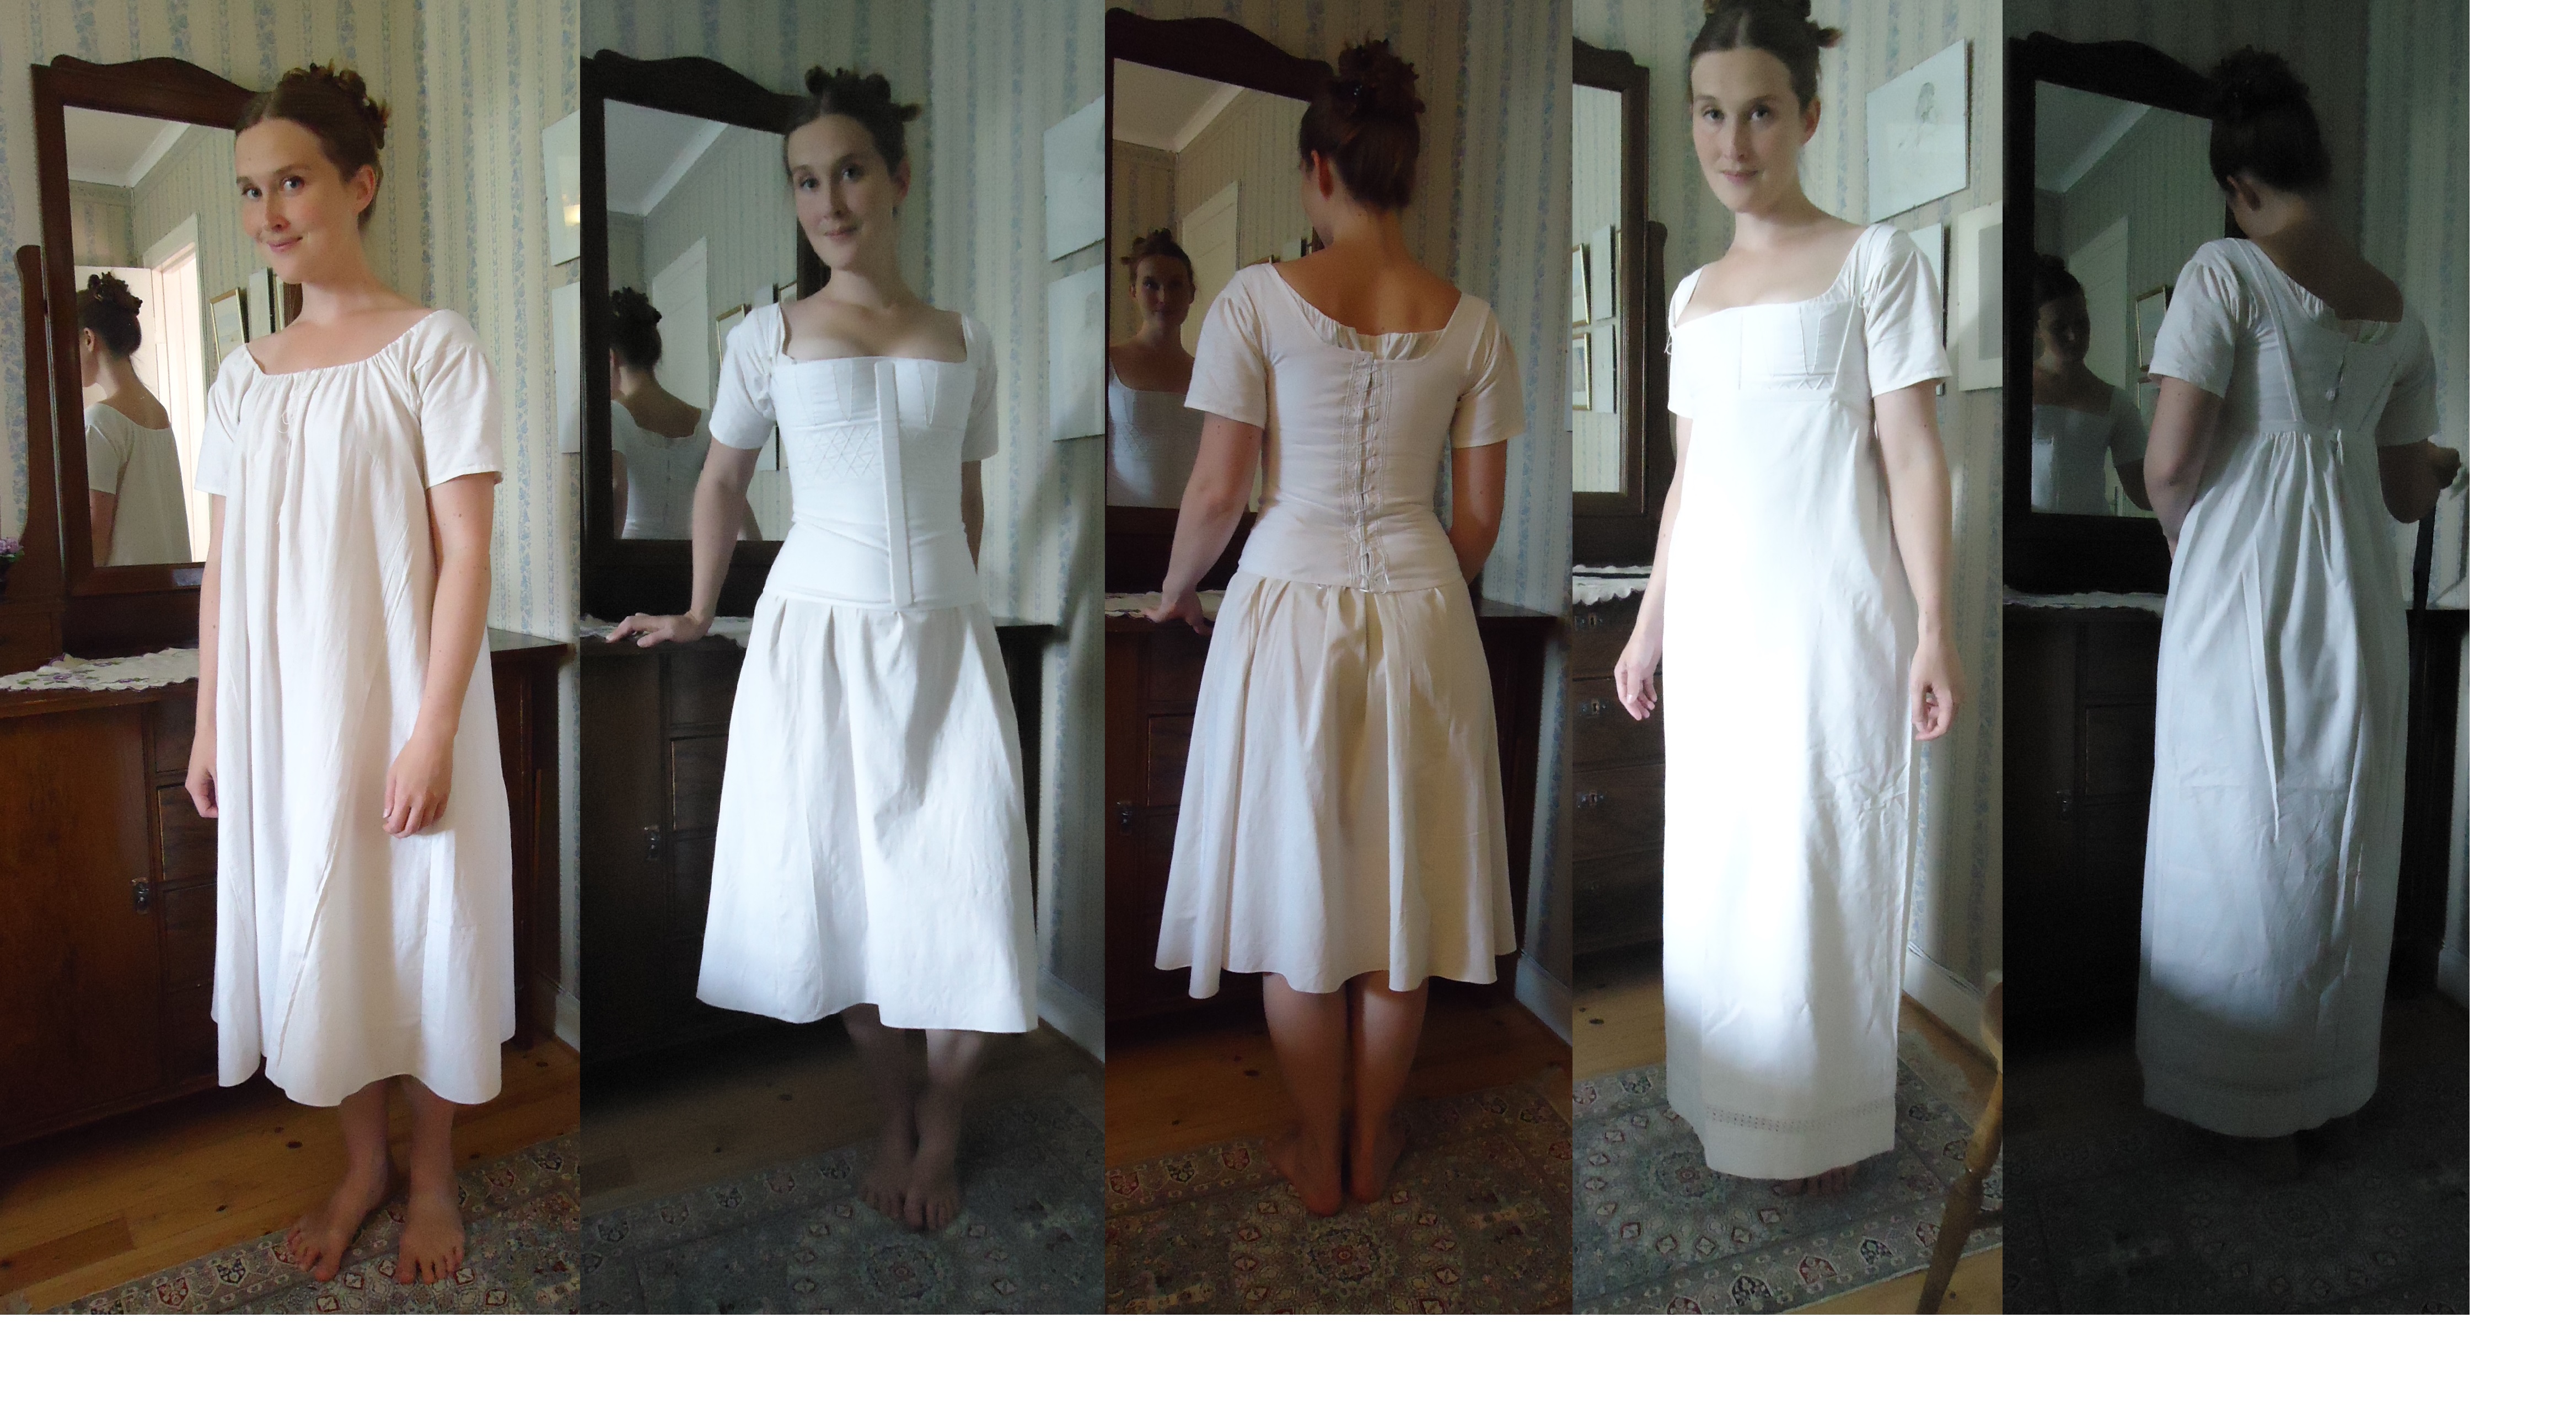
The Underpinnings
Here are all the layers of underpinnings (except for stockings and shoes), then the making of the hair and at last comes the wonderful gown:
Här får ni se hur alla underkläder tas på i rätt ordning (utom strumpor och skor), sedan hur frisyren görs i ordning och slutligen den nya klänningen ses i all sin glans:
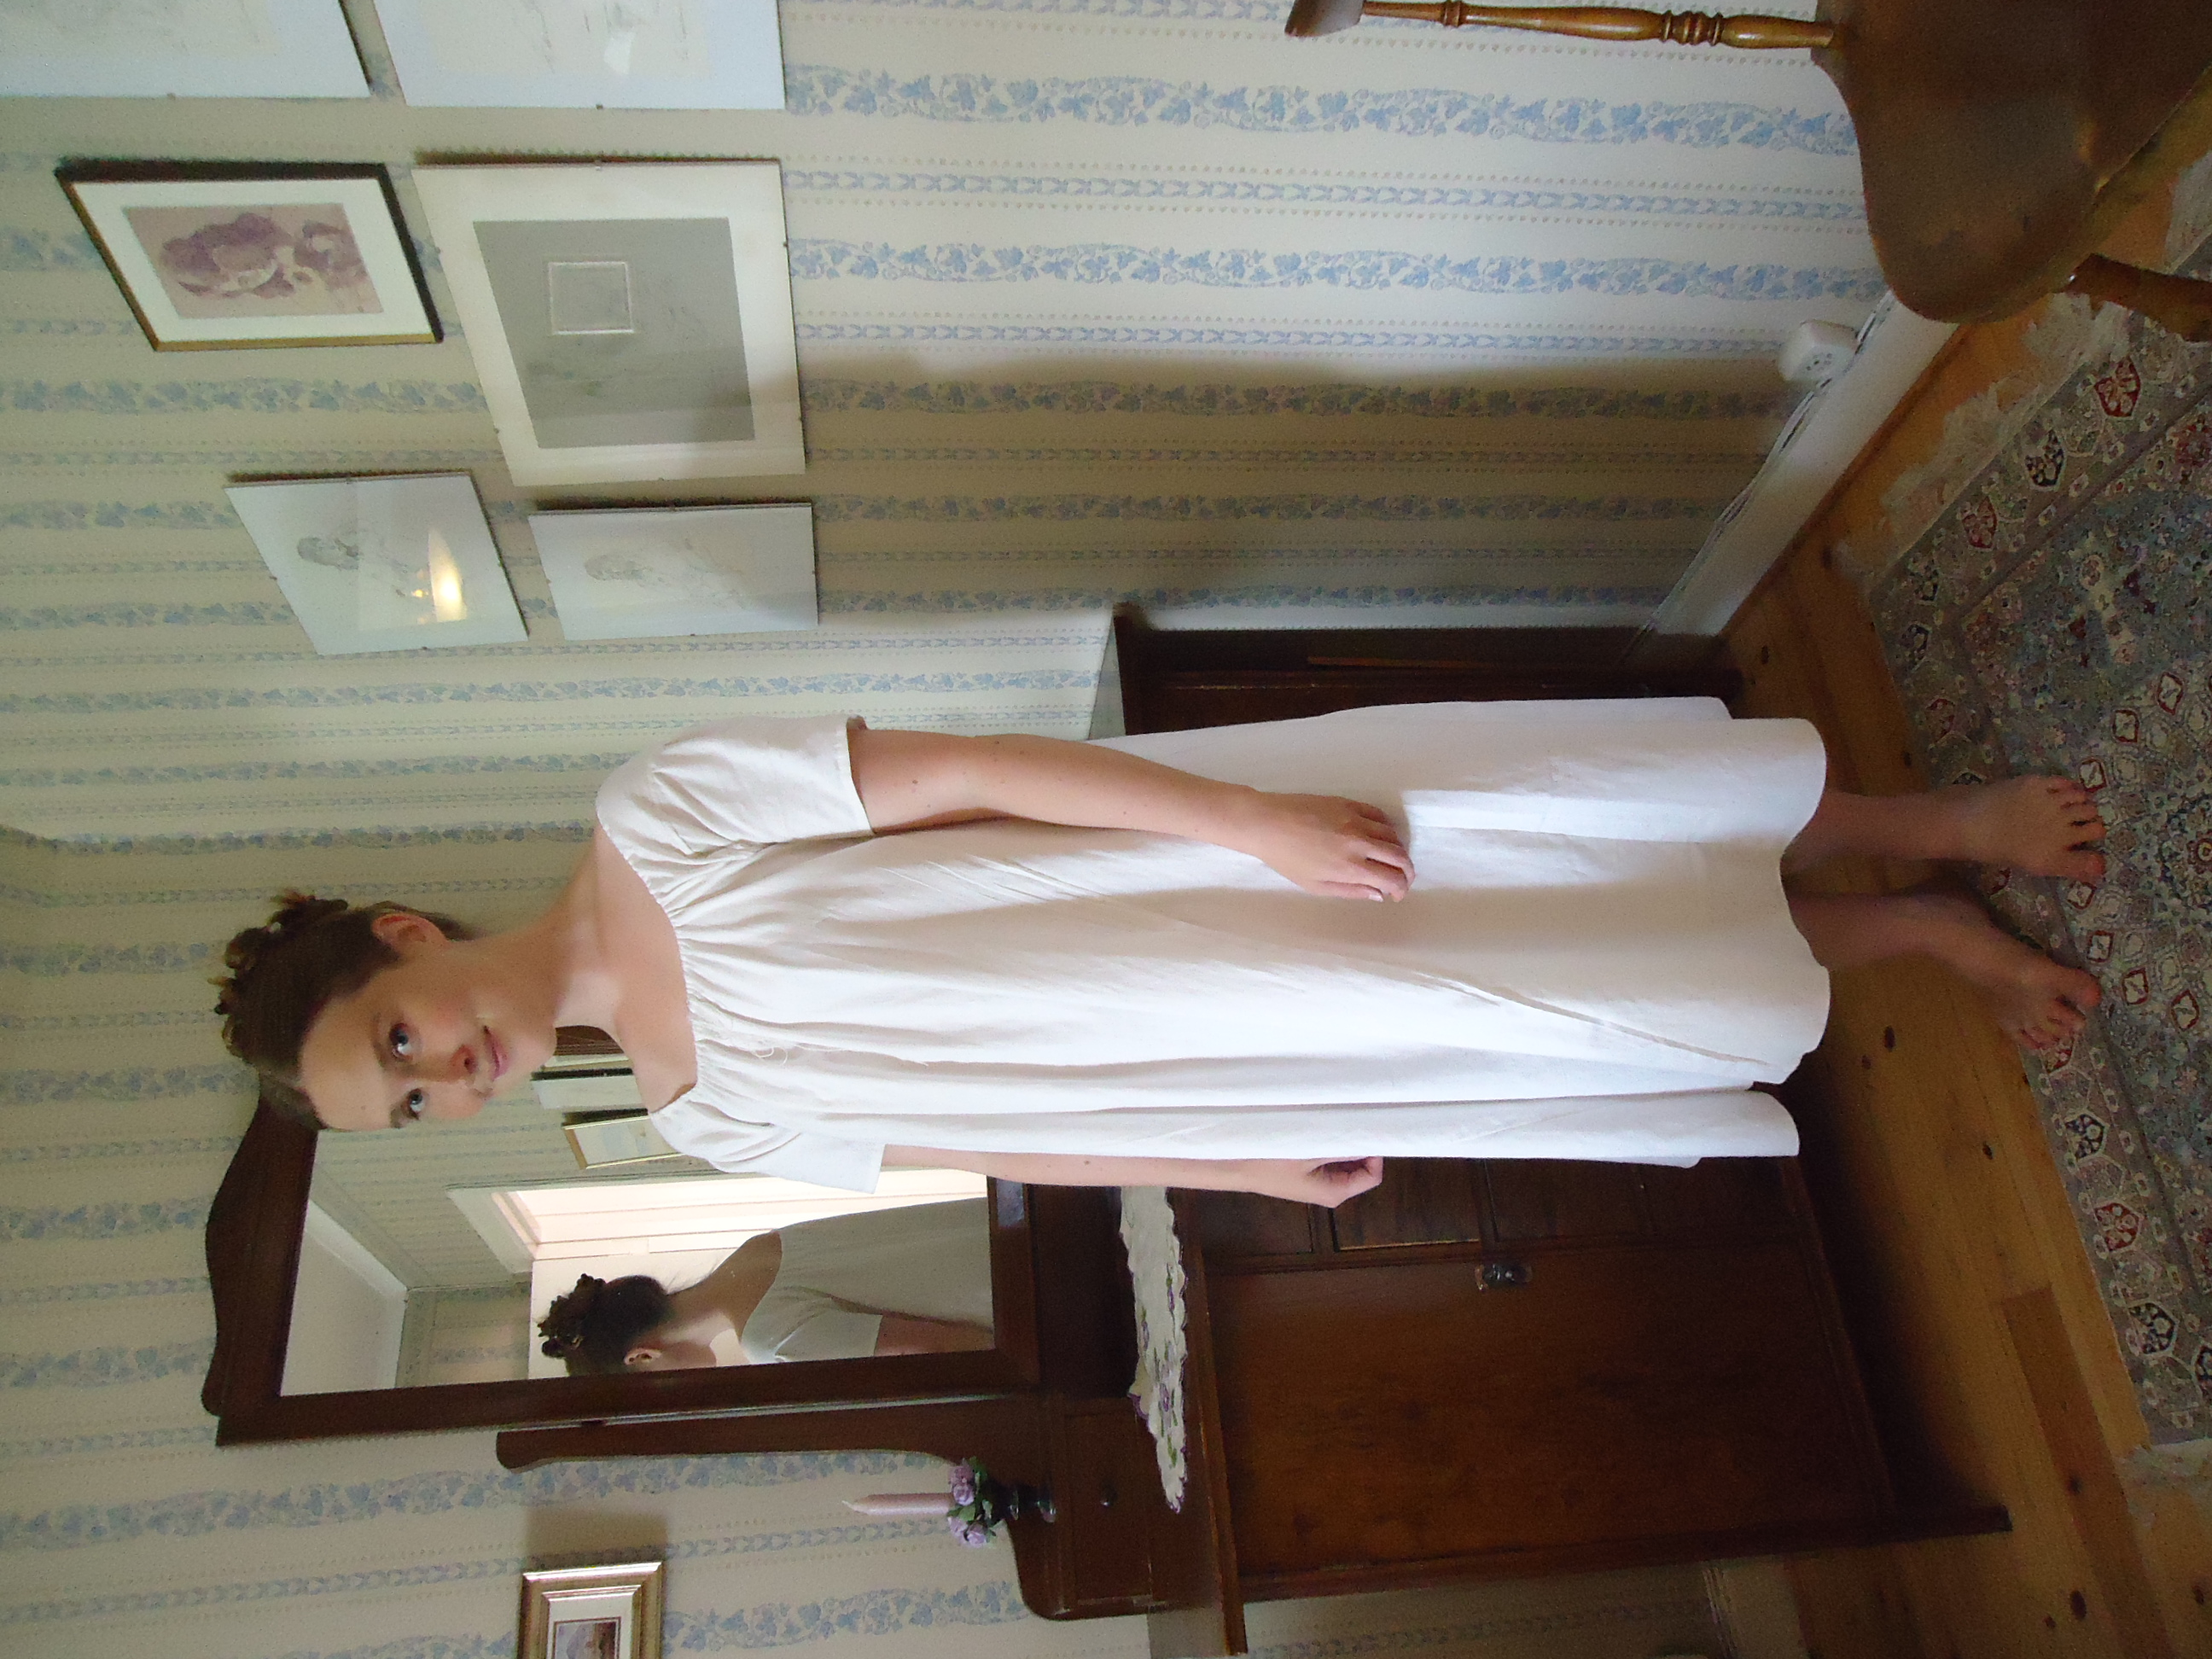
Chemise
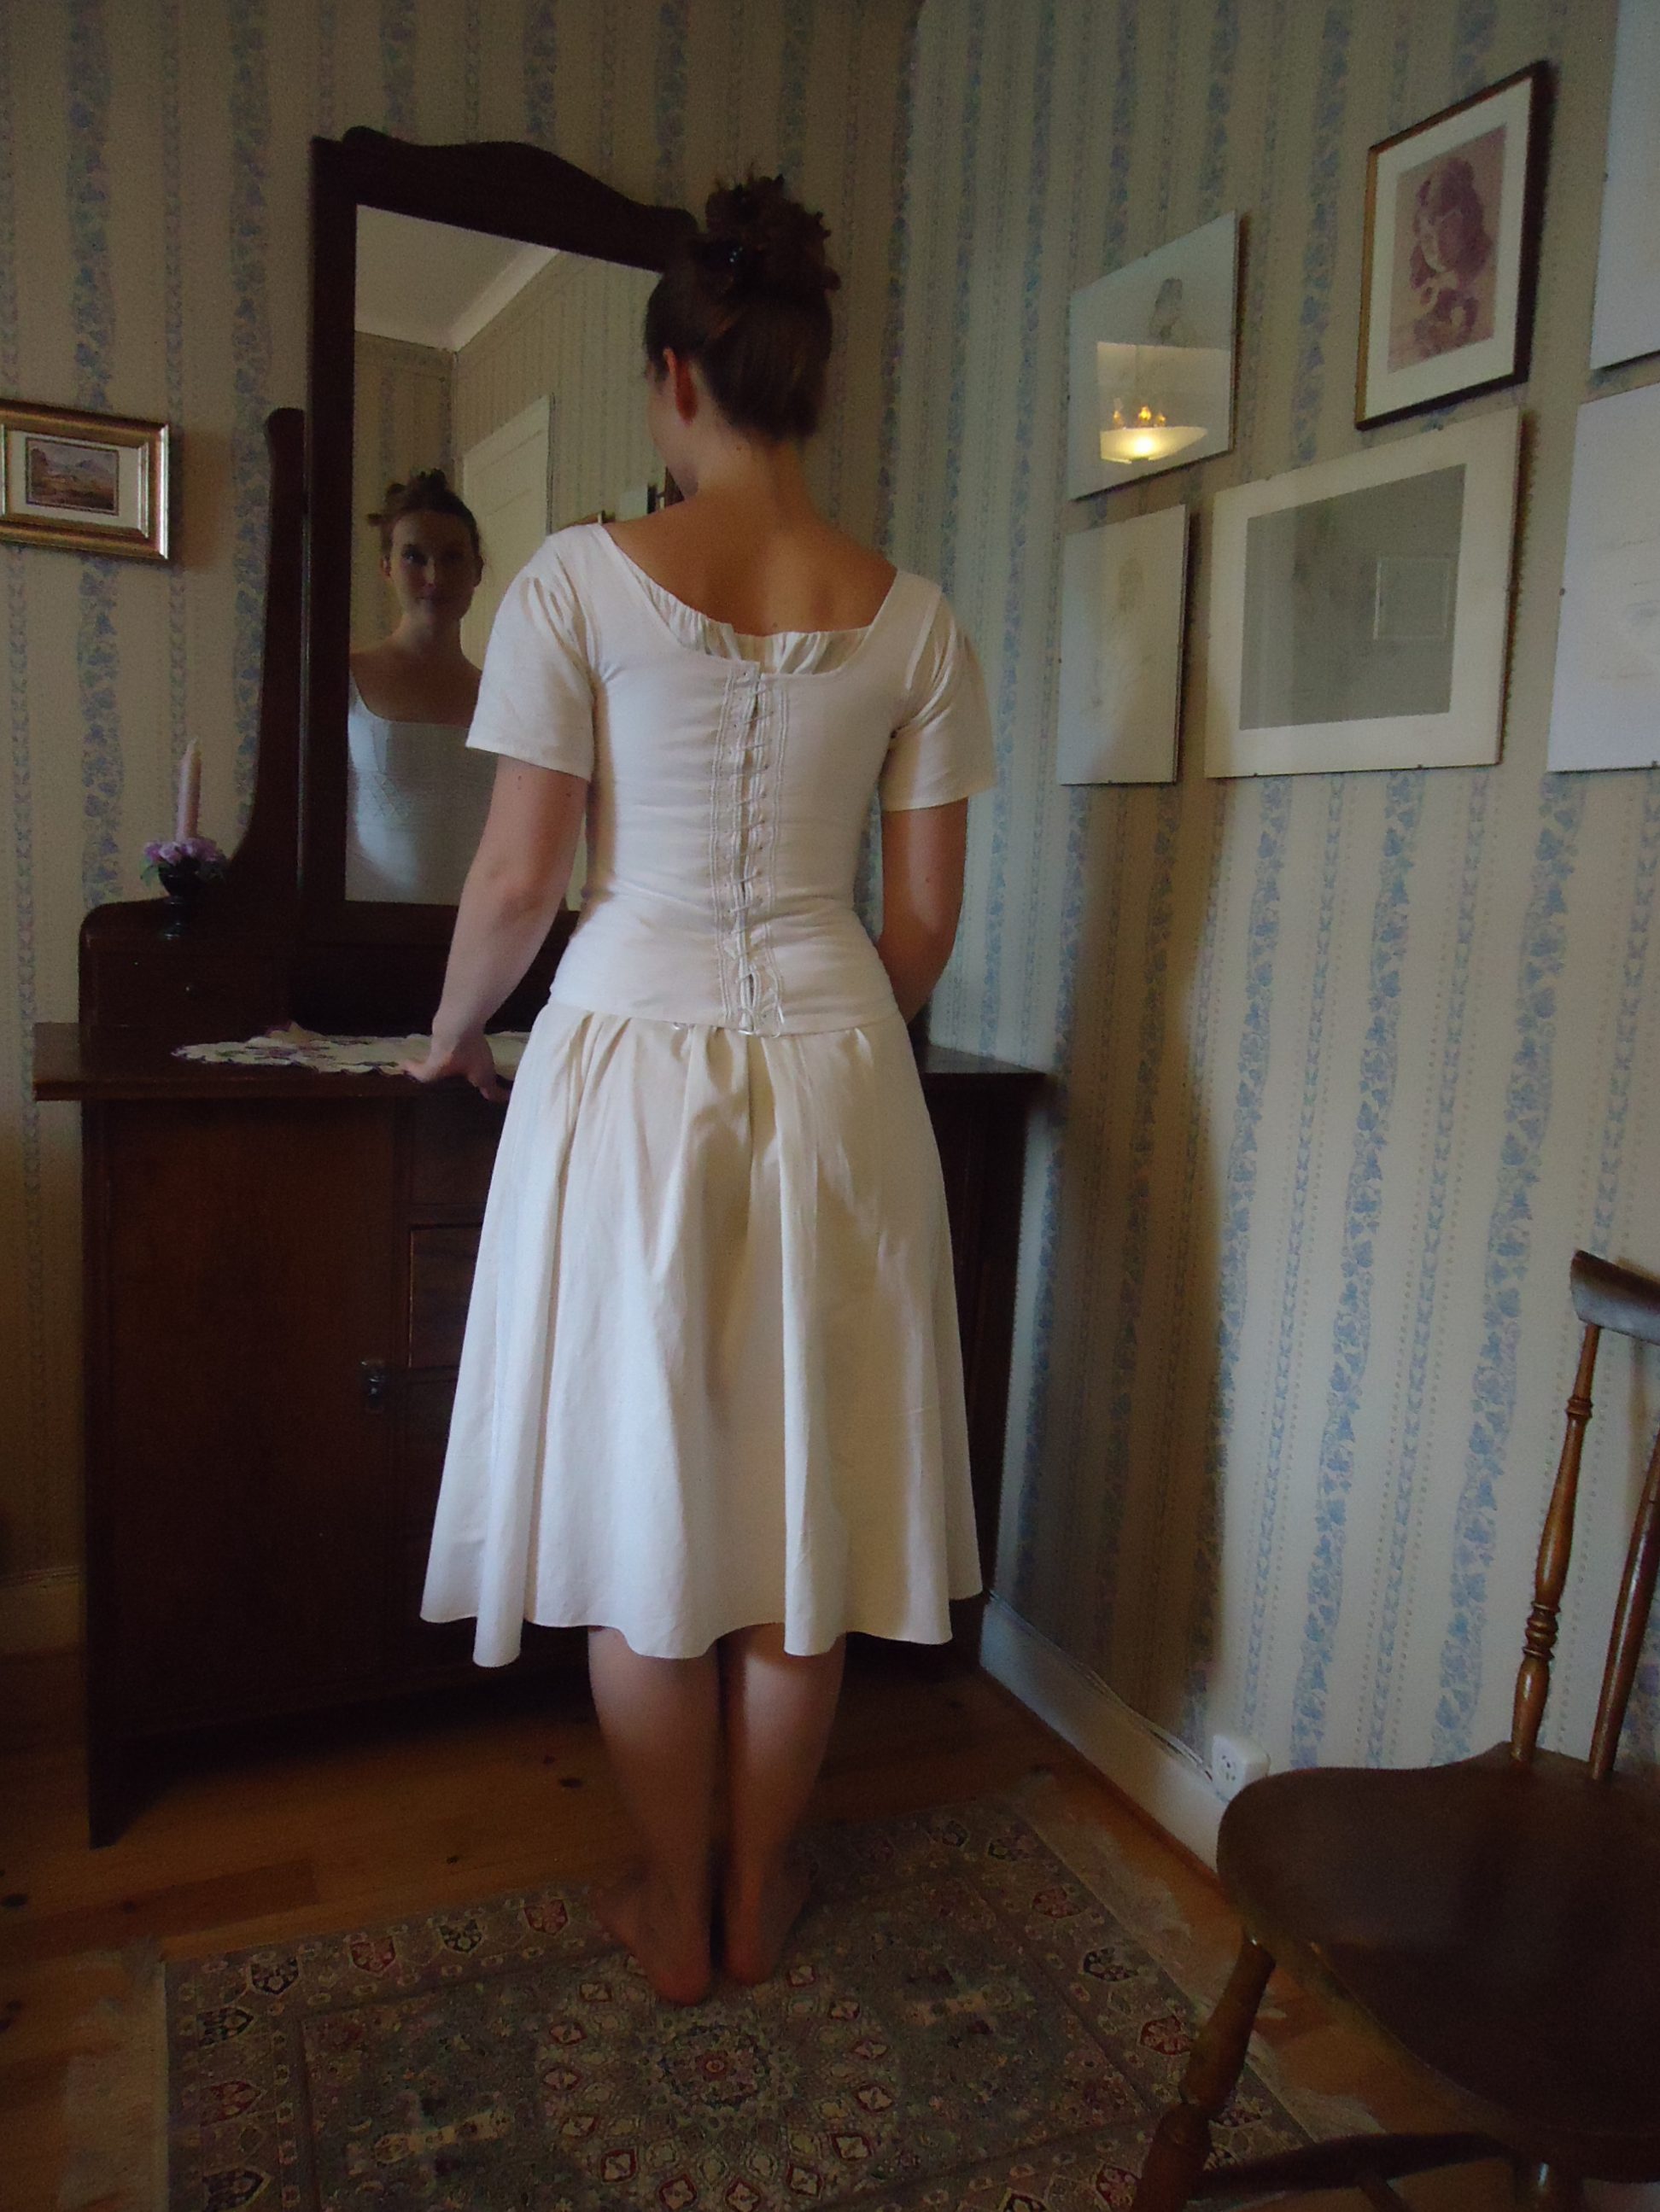
Corset
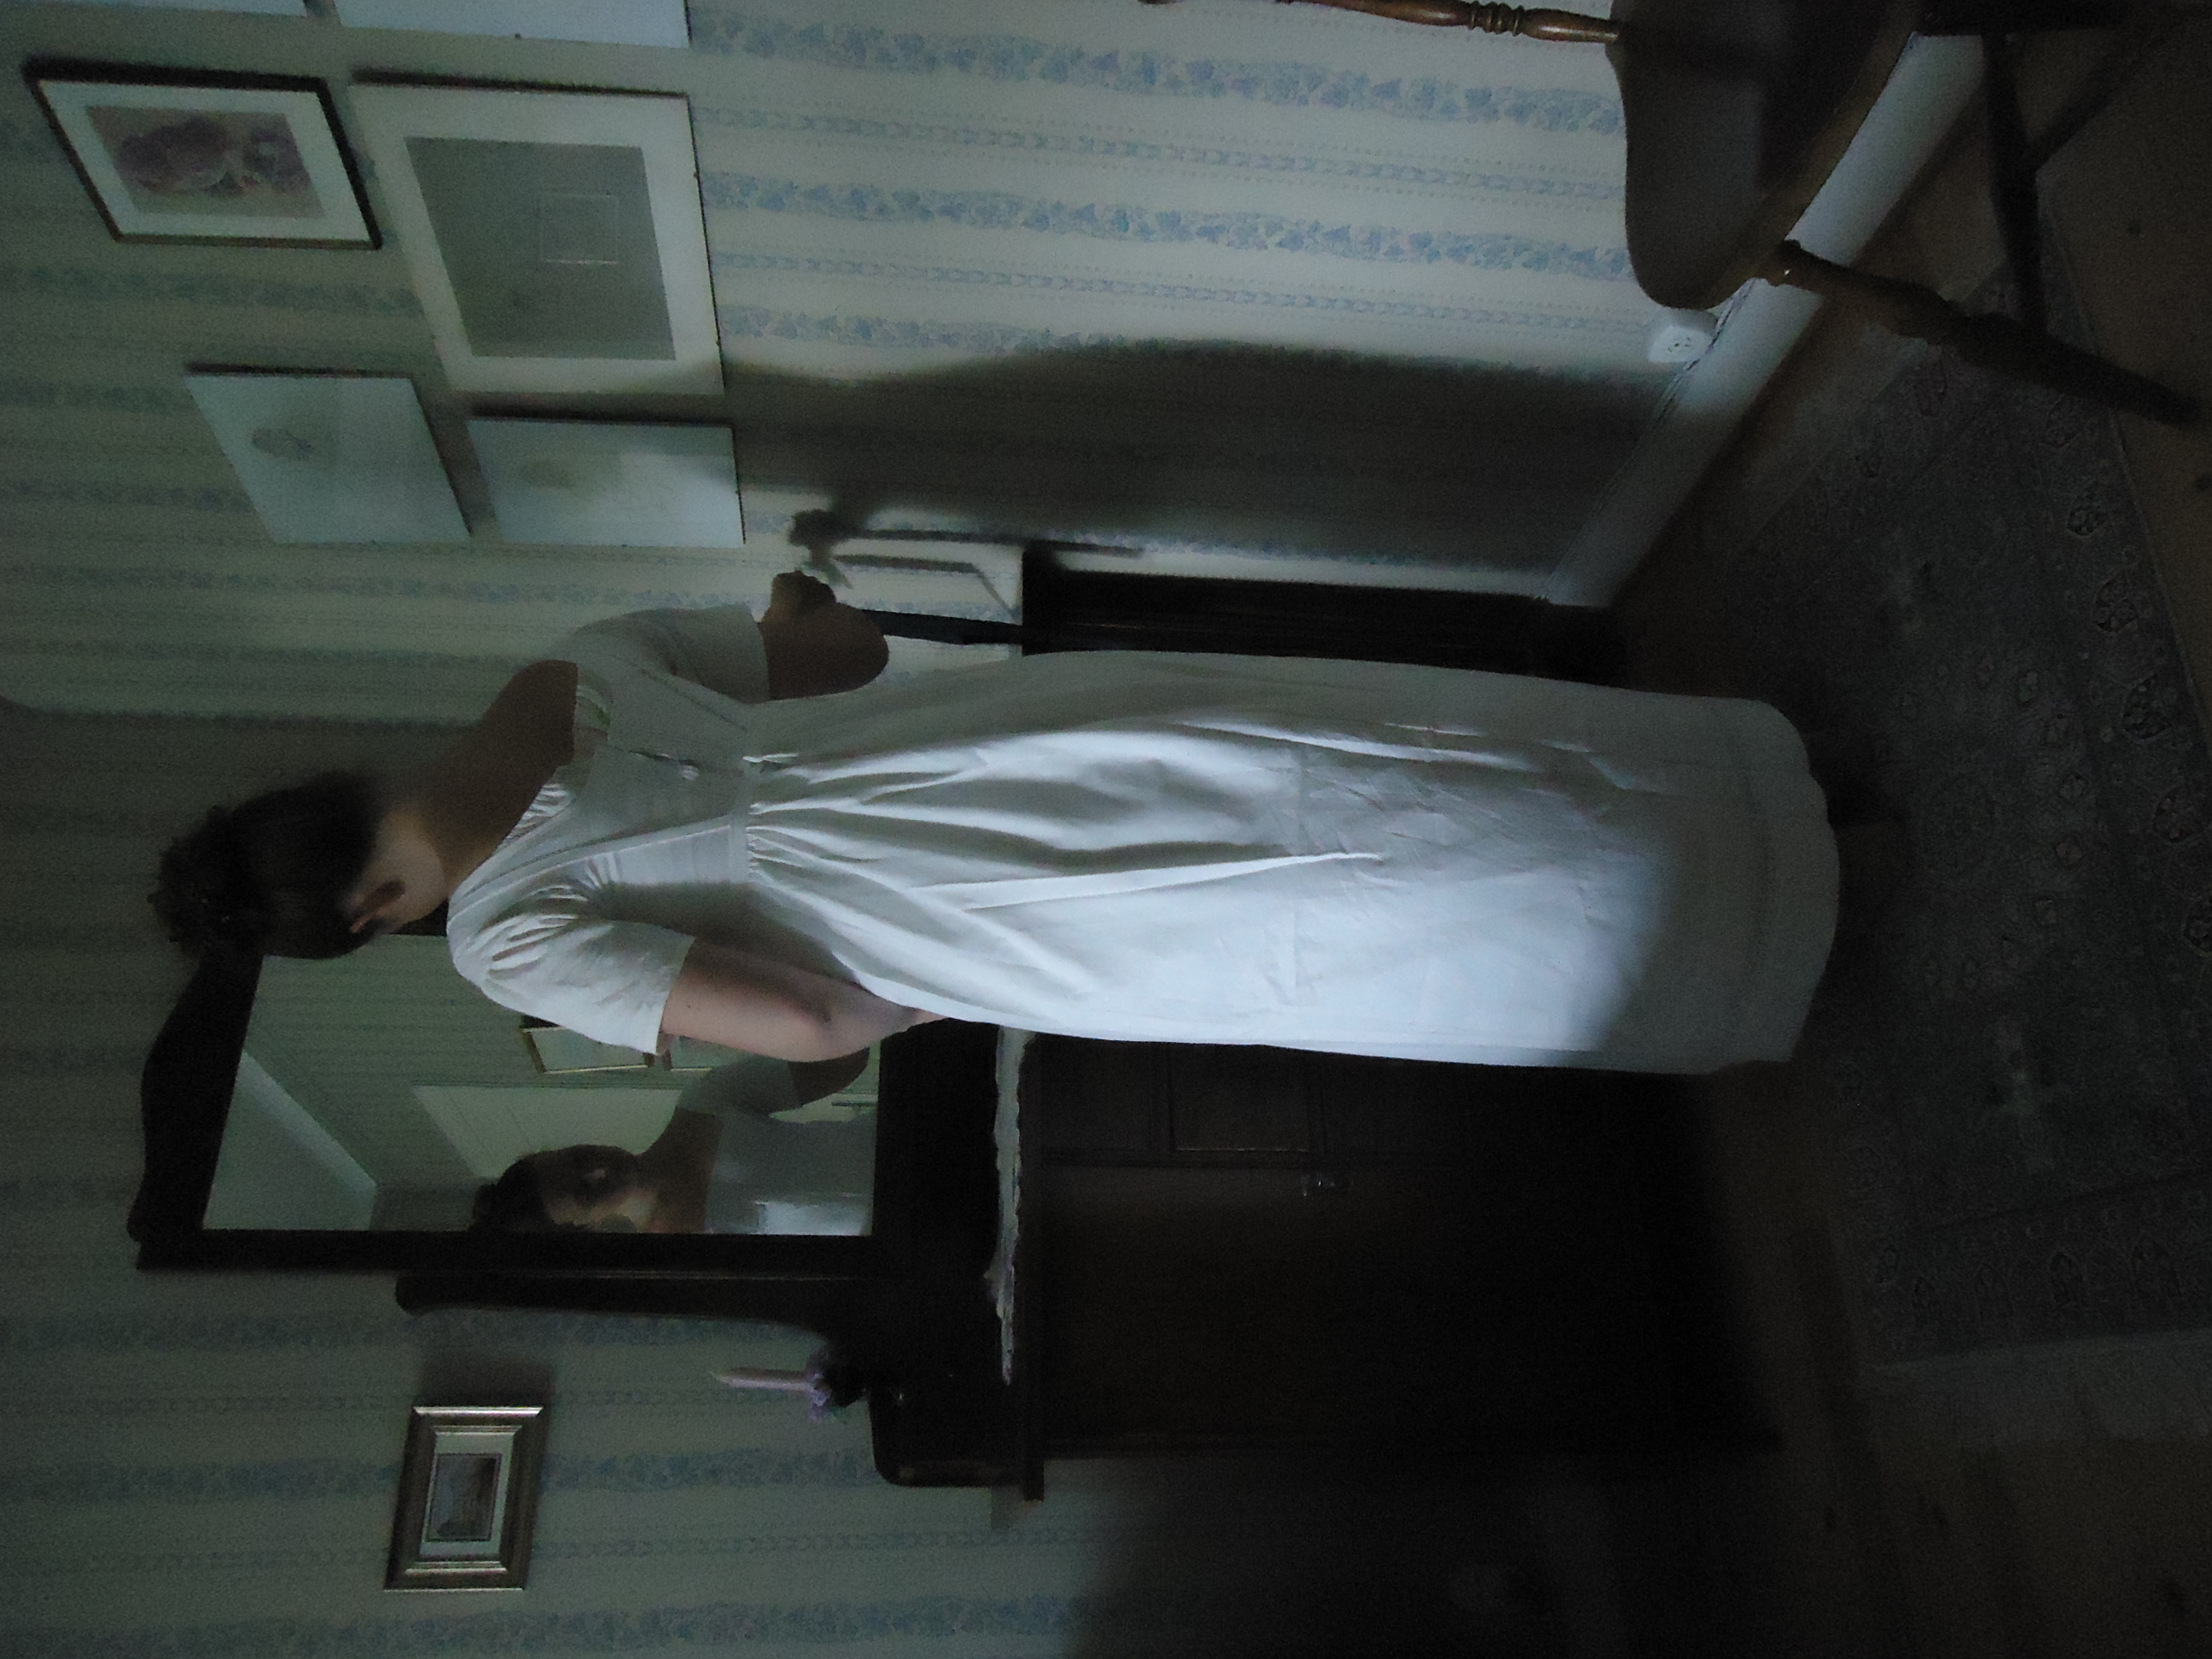
Petticoat sewn from an old bed sheet, closed in the back with hooks and eyes. Held up with suspenders.
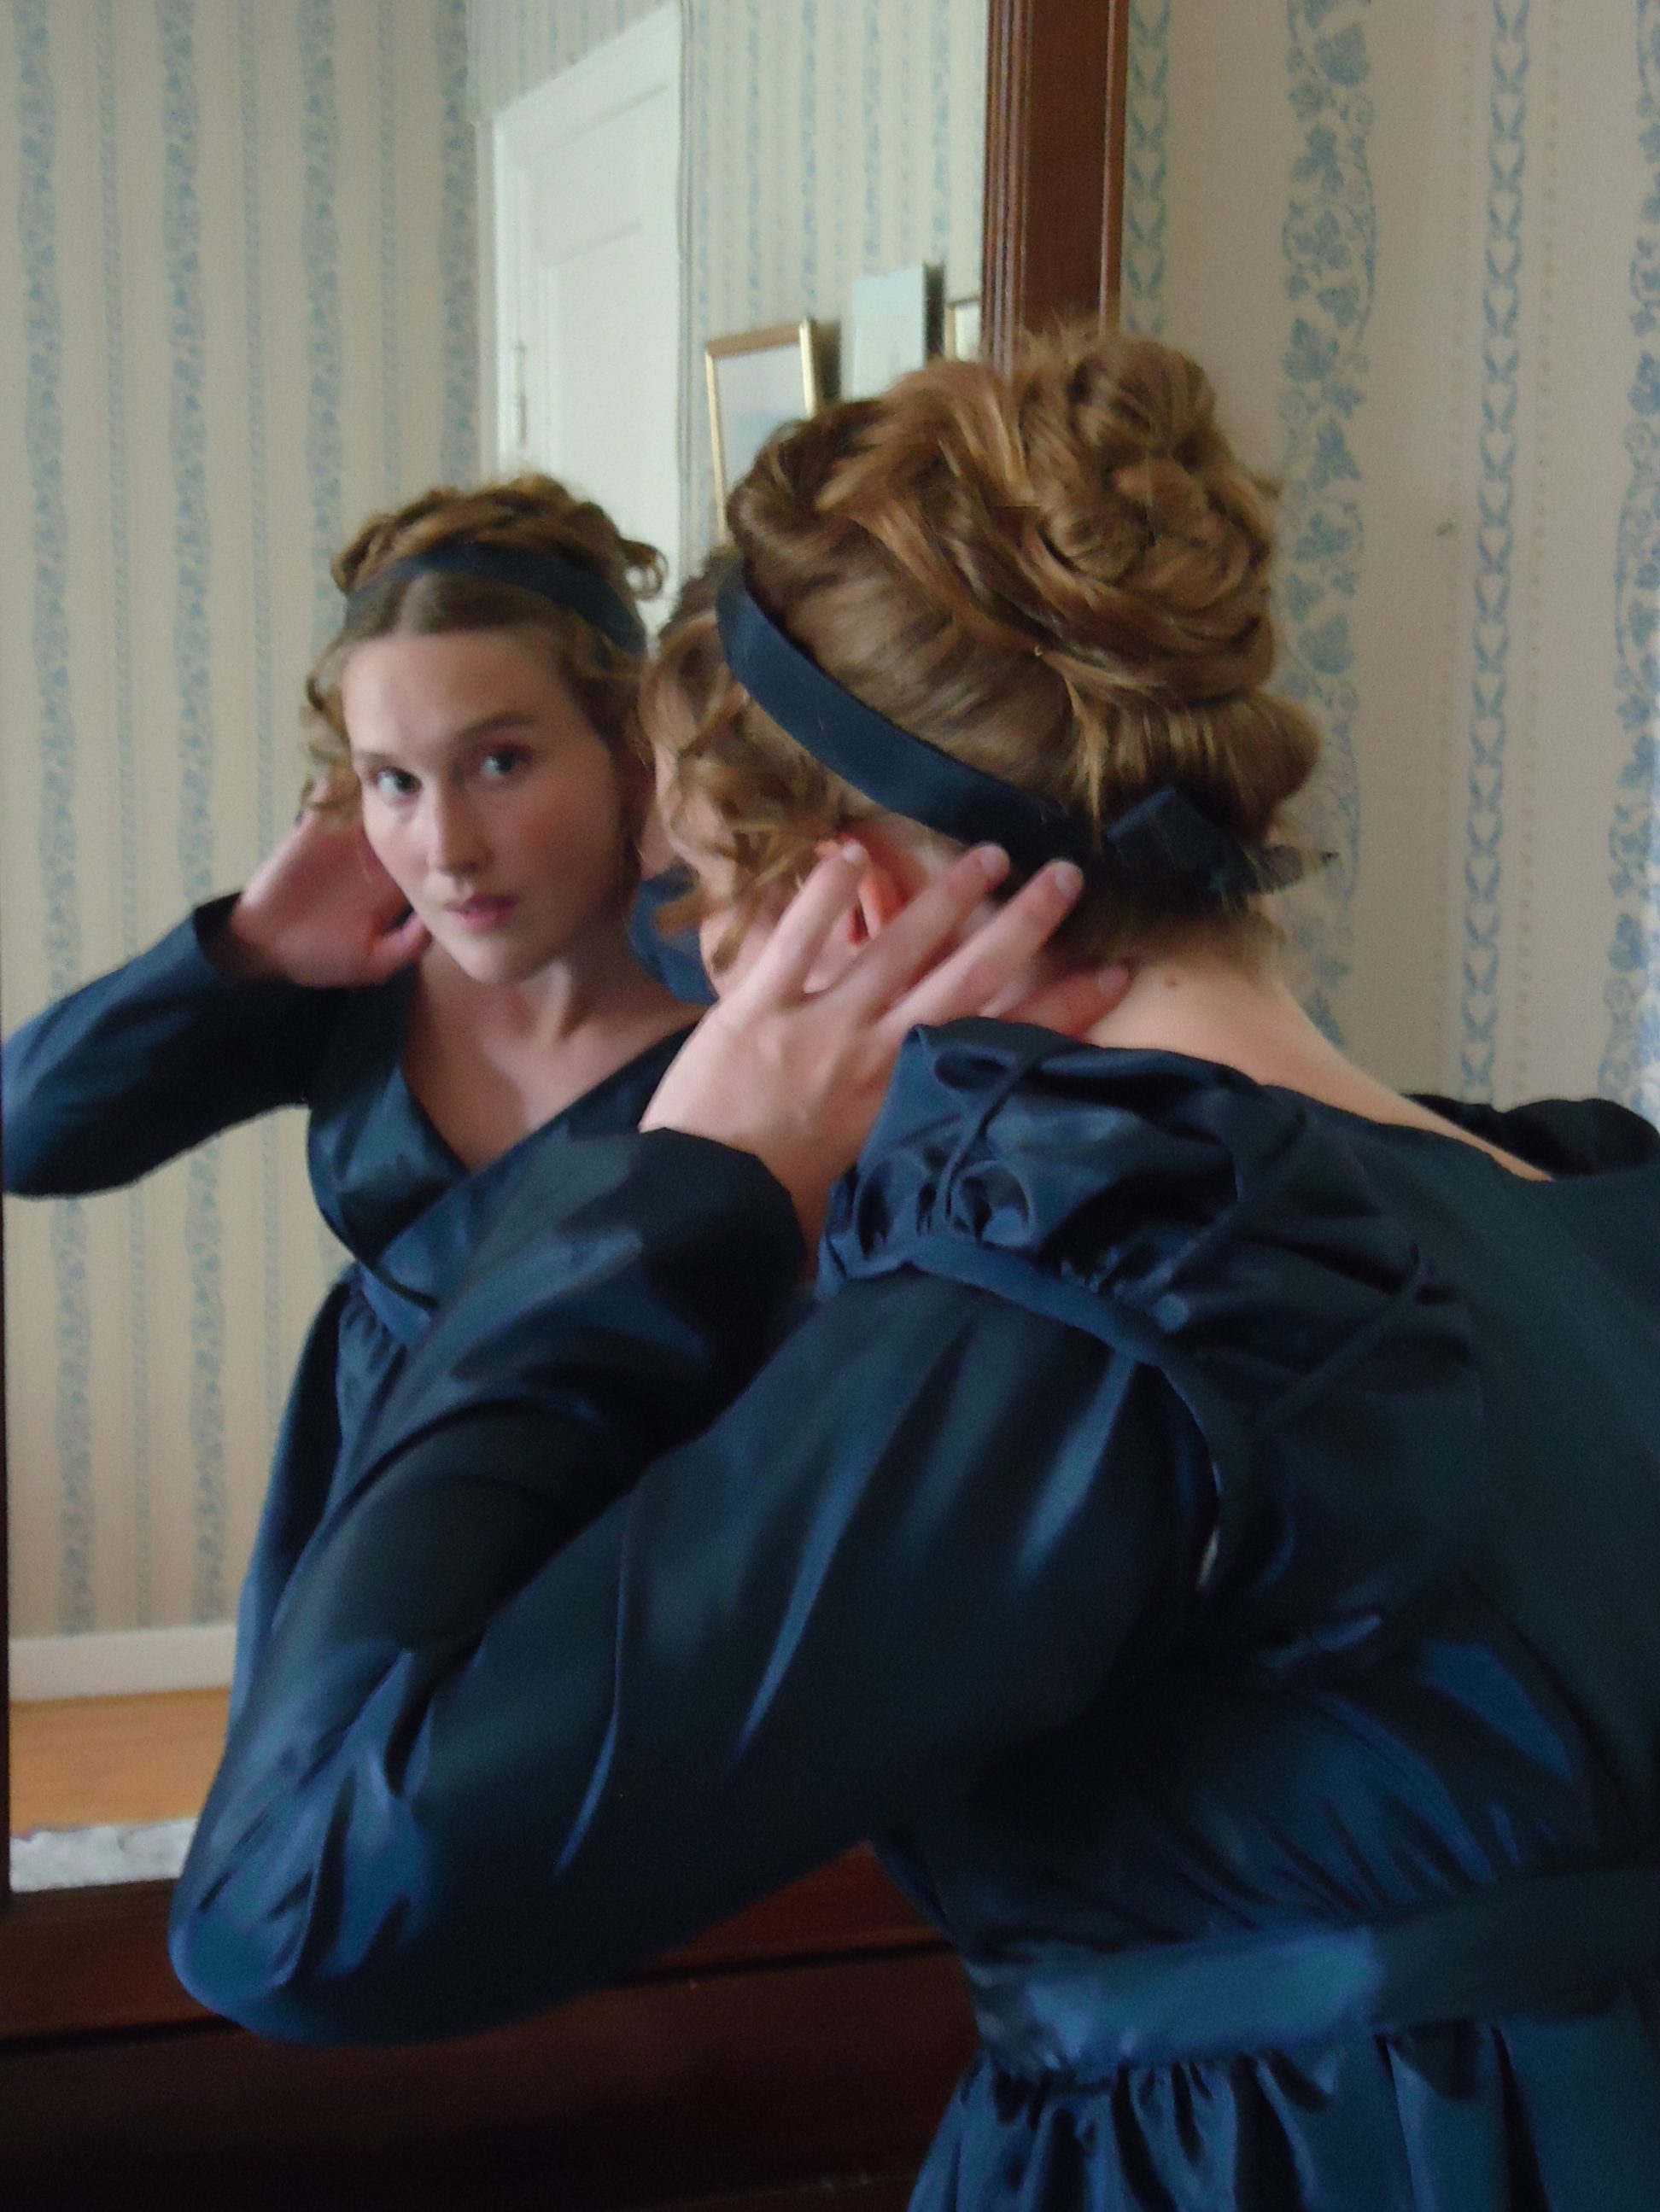
The Regency Hair
Now it is time for making the hair! I have long, straight hair, that never hold the curls for more than five minutes. After some lovely articles at Your Wardrobe Unlocked and the wonderful blog Places in Time, I have finally gathered up enough courage to make my own hair pieces.
Nu är det dags för att fixa håret! Jag har långt, rakt hår, som aldrig låter lockarna stanna i mer än fem minuter. Efter några uppmuntrande artiklar på Your Wardrobe Unlocked och den underbara bloggen Places in Time, har jag äntligen samlat tillräckligt med mod för att fixa eget löshår!
Using the hair pieces (my own hair glued to barrets). After fastening the hairpieces at my temples, I loosened my “curled hair” from the knot at the back of my head (I had hoped for these to be curly, but off course they were as straight as allways) and destributed this hair forward on the top of my head, in a way that made it look a little bit curly. Then I hid the barrets of the hair pieces under a ribbon.
I am too greedy to buy synthetic wig hair, so… I know some of you will think that this is truly shocking… I harvested all the hair that got stuck in my brush for one month, taped it together and finally glued it to a small piece of fabric and to barrets. Then I wound the hair up around my finger and fastened the curl with hair pins. These new hair pieces were put away for about two weeks before I could use them (I tried them after just one week, but that wouldn’t do at all!).
Jag är för gniden för att köpa syntetiskt löshår, så… jag vet att några av er kommer rygga tillbaka i avsky, men… jag sparade allt hår som fastnade i hårborsten i en månad, tejpade samman det och limmade slutligen fast det på hårspännen, samman med en liten tygbit. Sedan rullade jag upp håret runt fingret och fäste lockarna i hårnålar och la undan allt i två veckor innan fotosessionen (jag testade löshåret efter bara en vecka, men då släppte lockarna på en minut).
I have divided my hair into several parts, that I have twined loosely and layed over each other, in order to make it resemble curls. The barrets of the hair pieces are hidden beneath the ribbon.
For those of you, who have shorter hair, I believe that Diary of a Mantua Maker may be helpful.
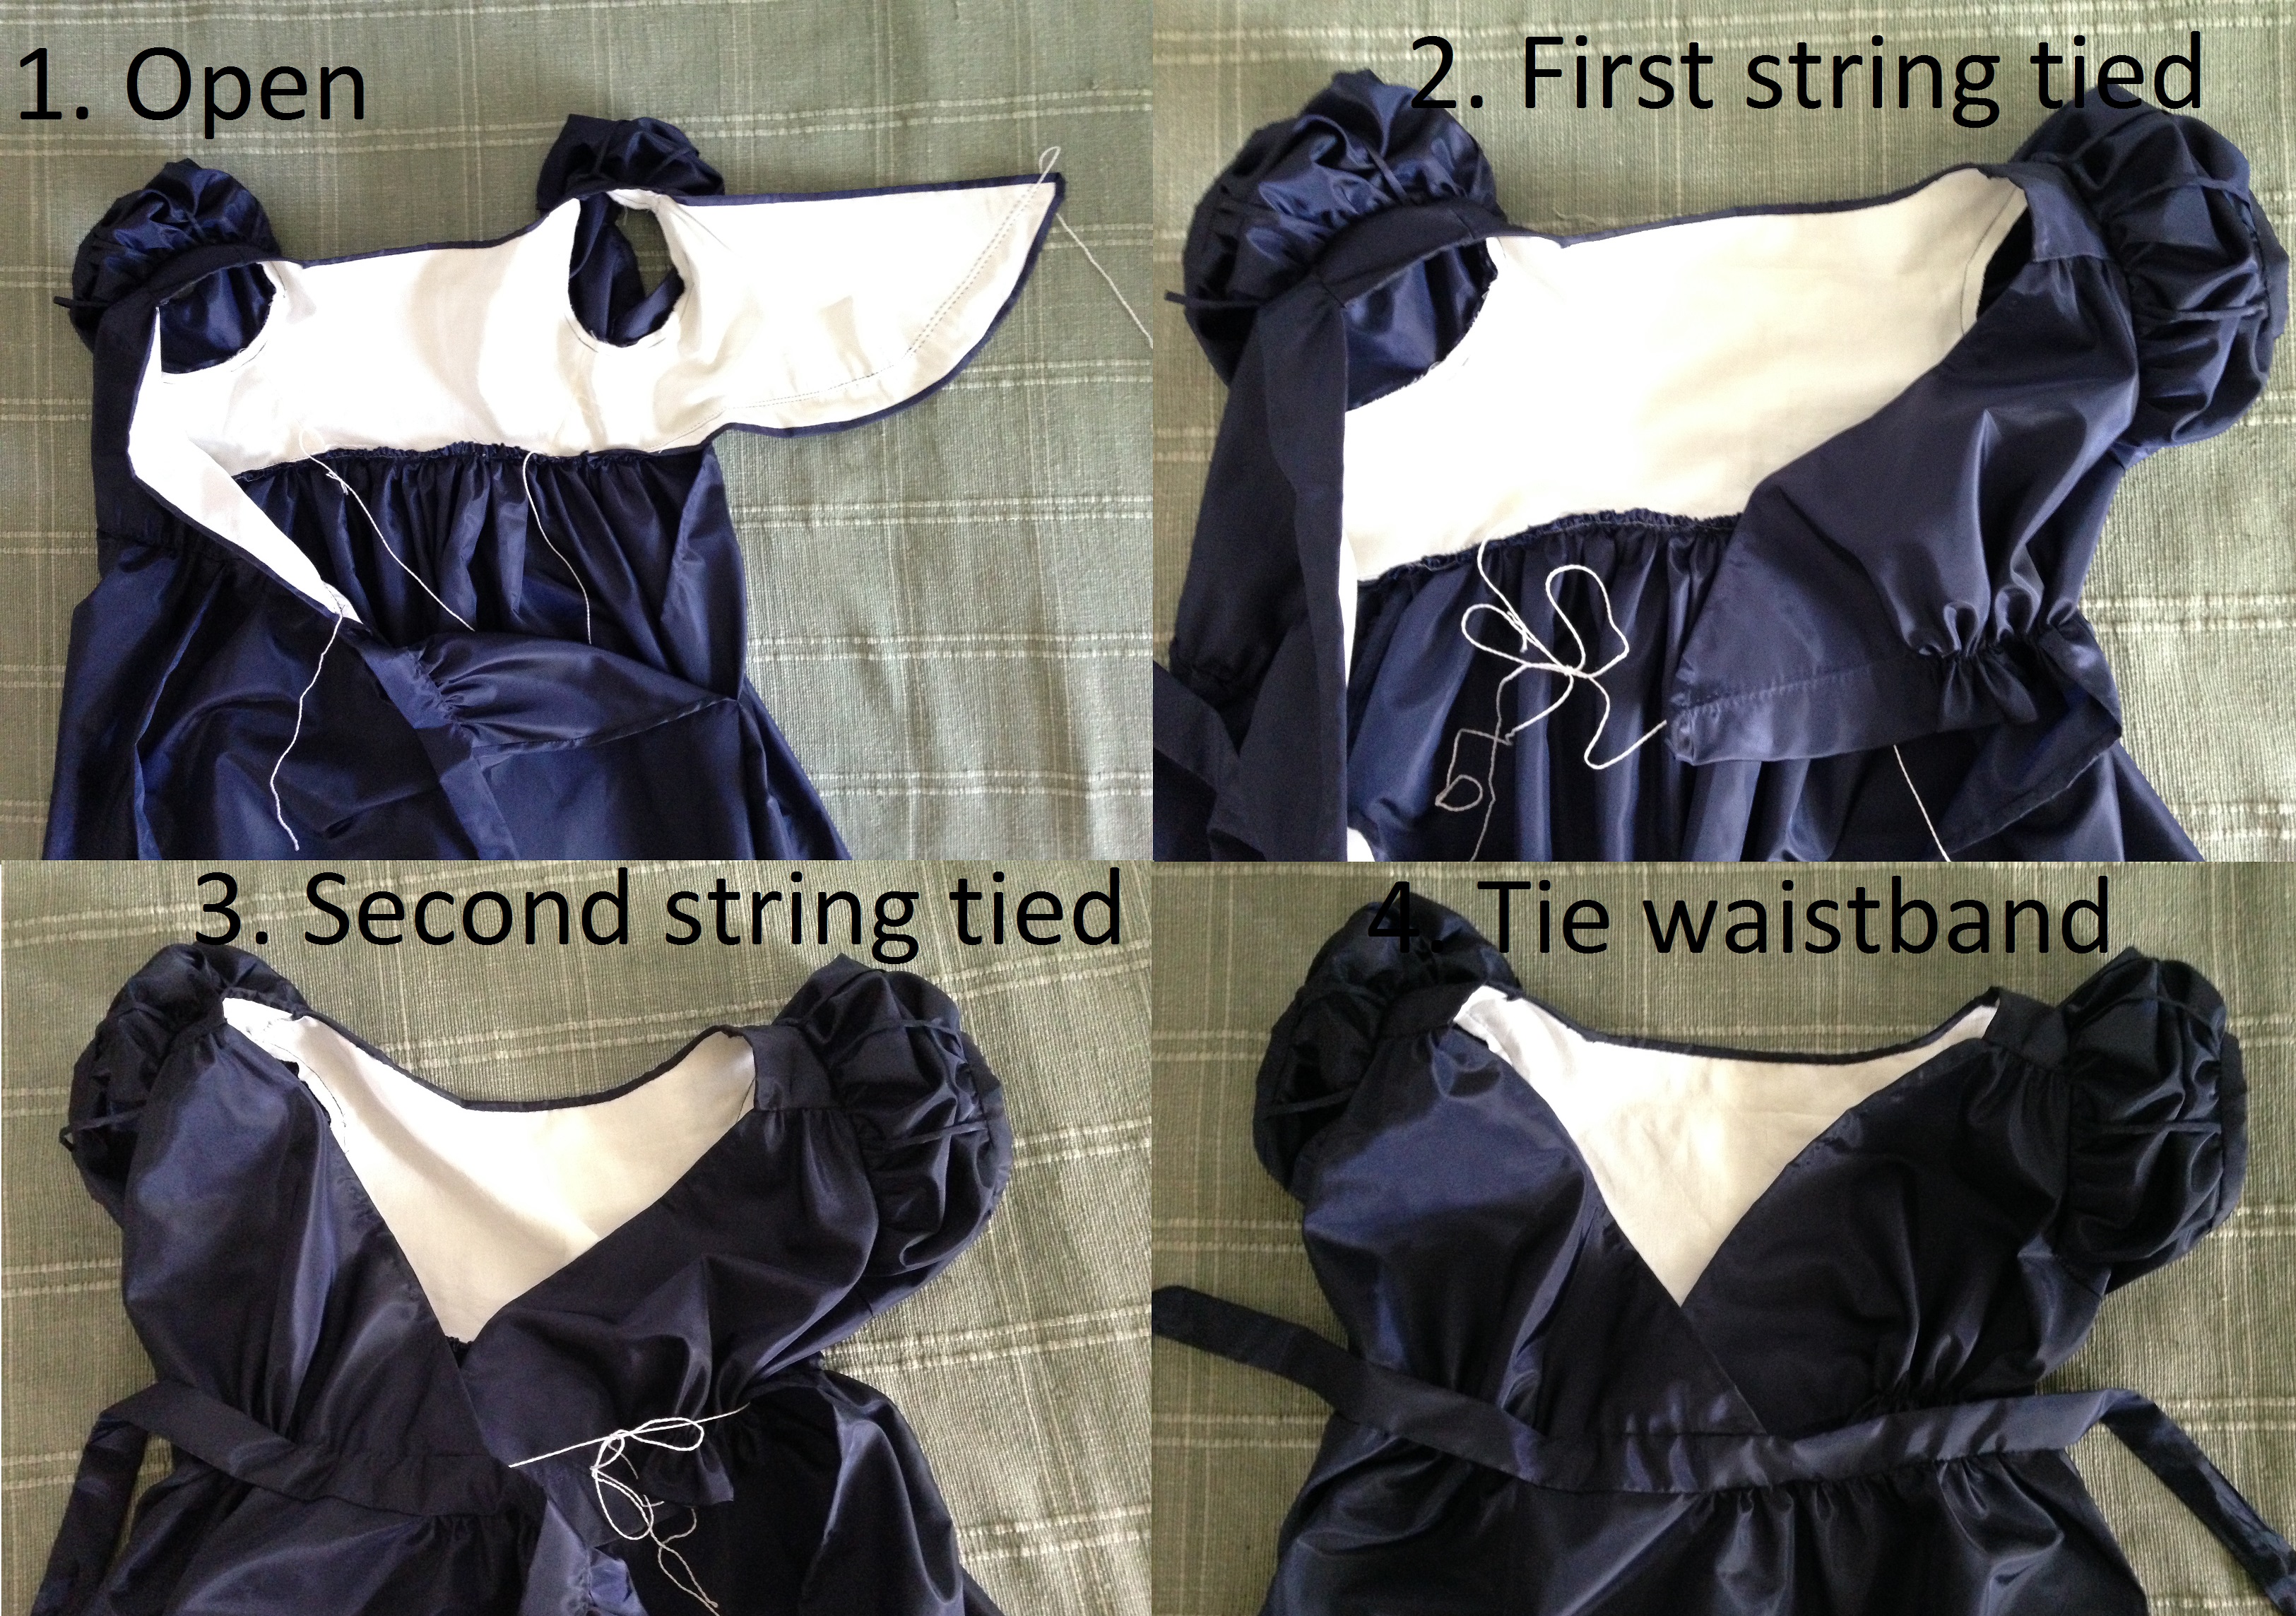
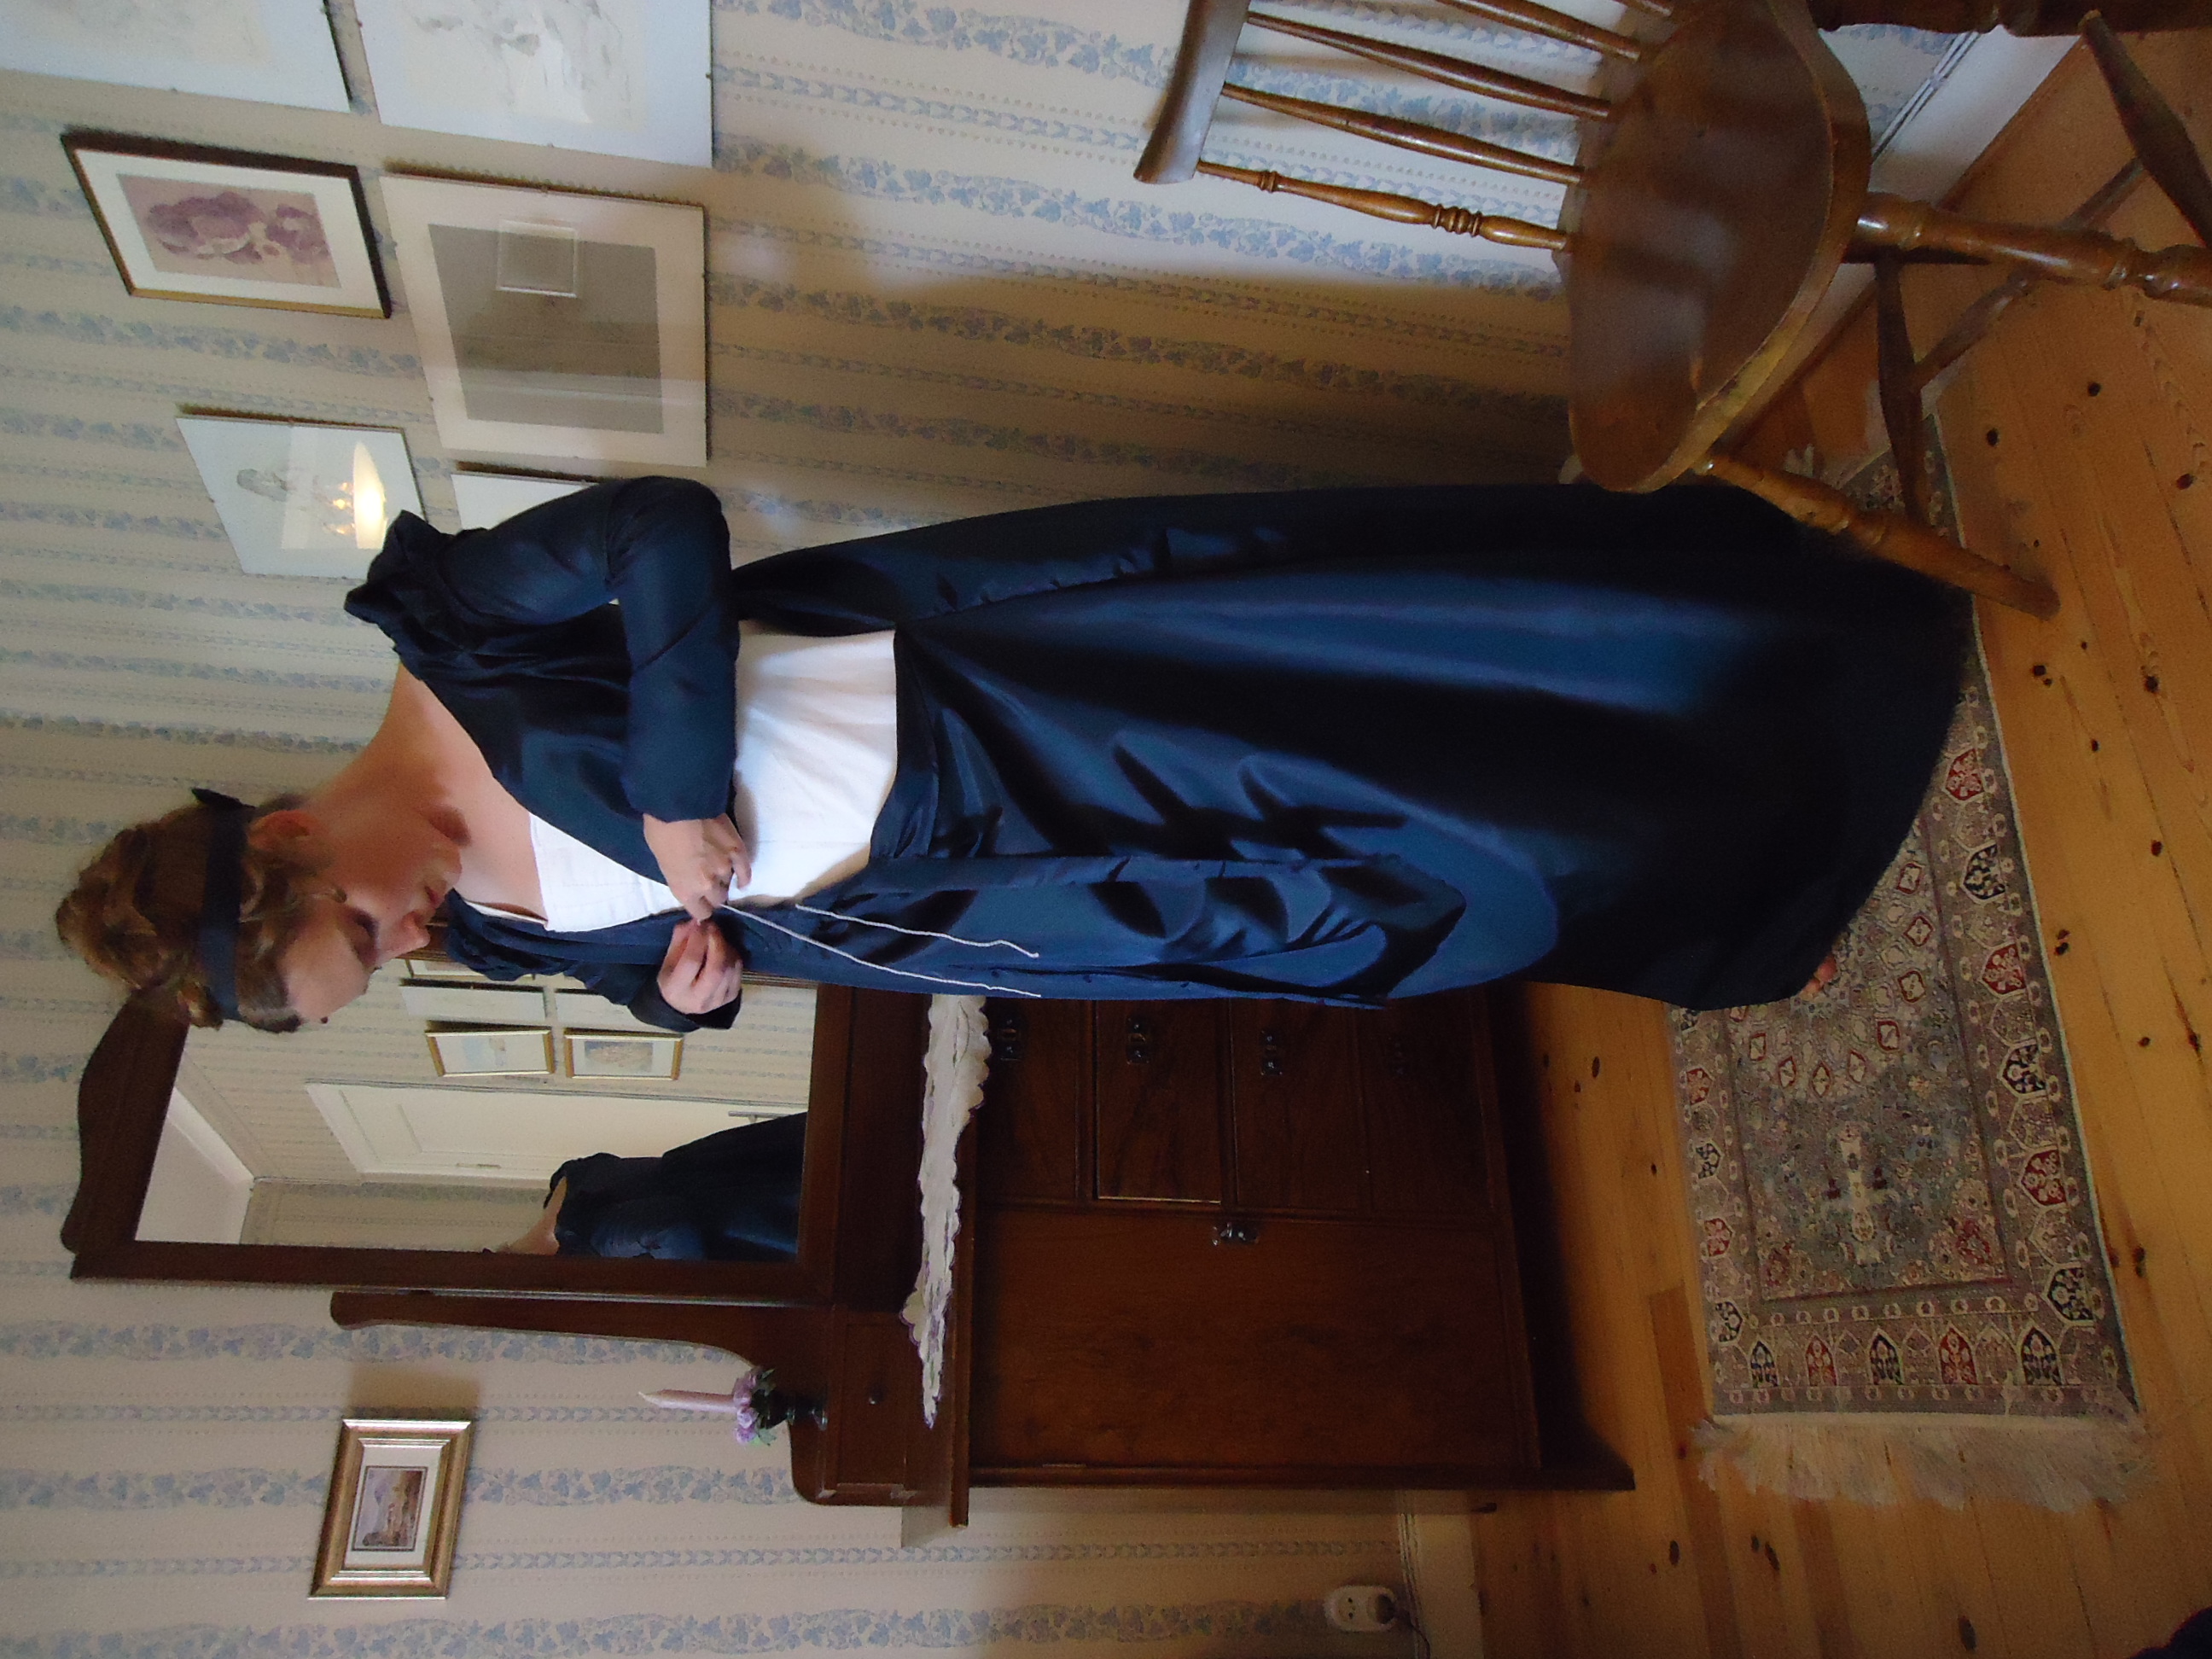
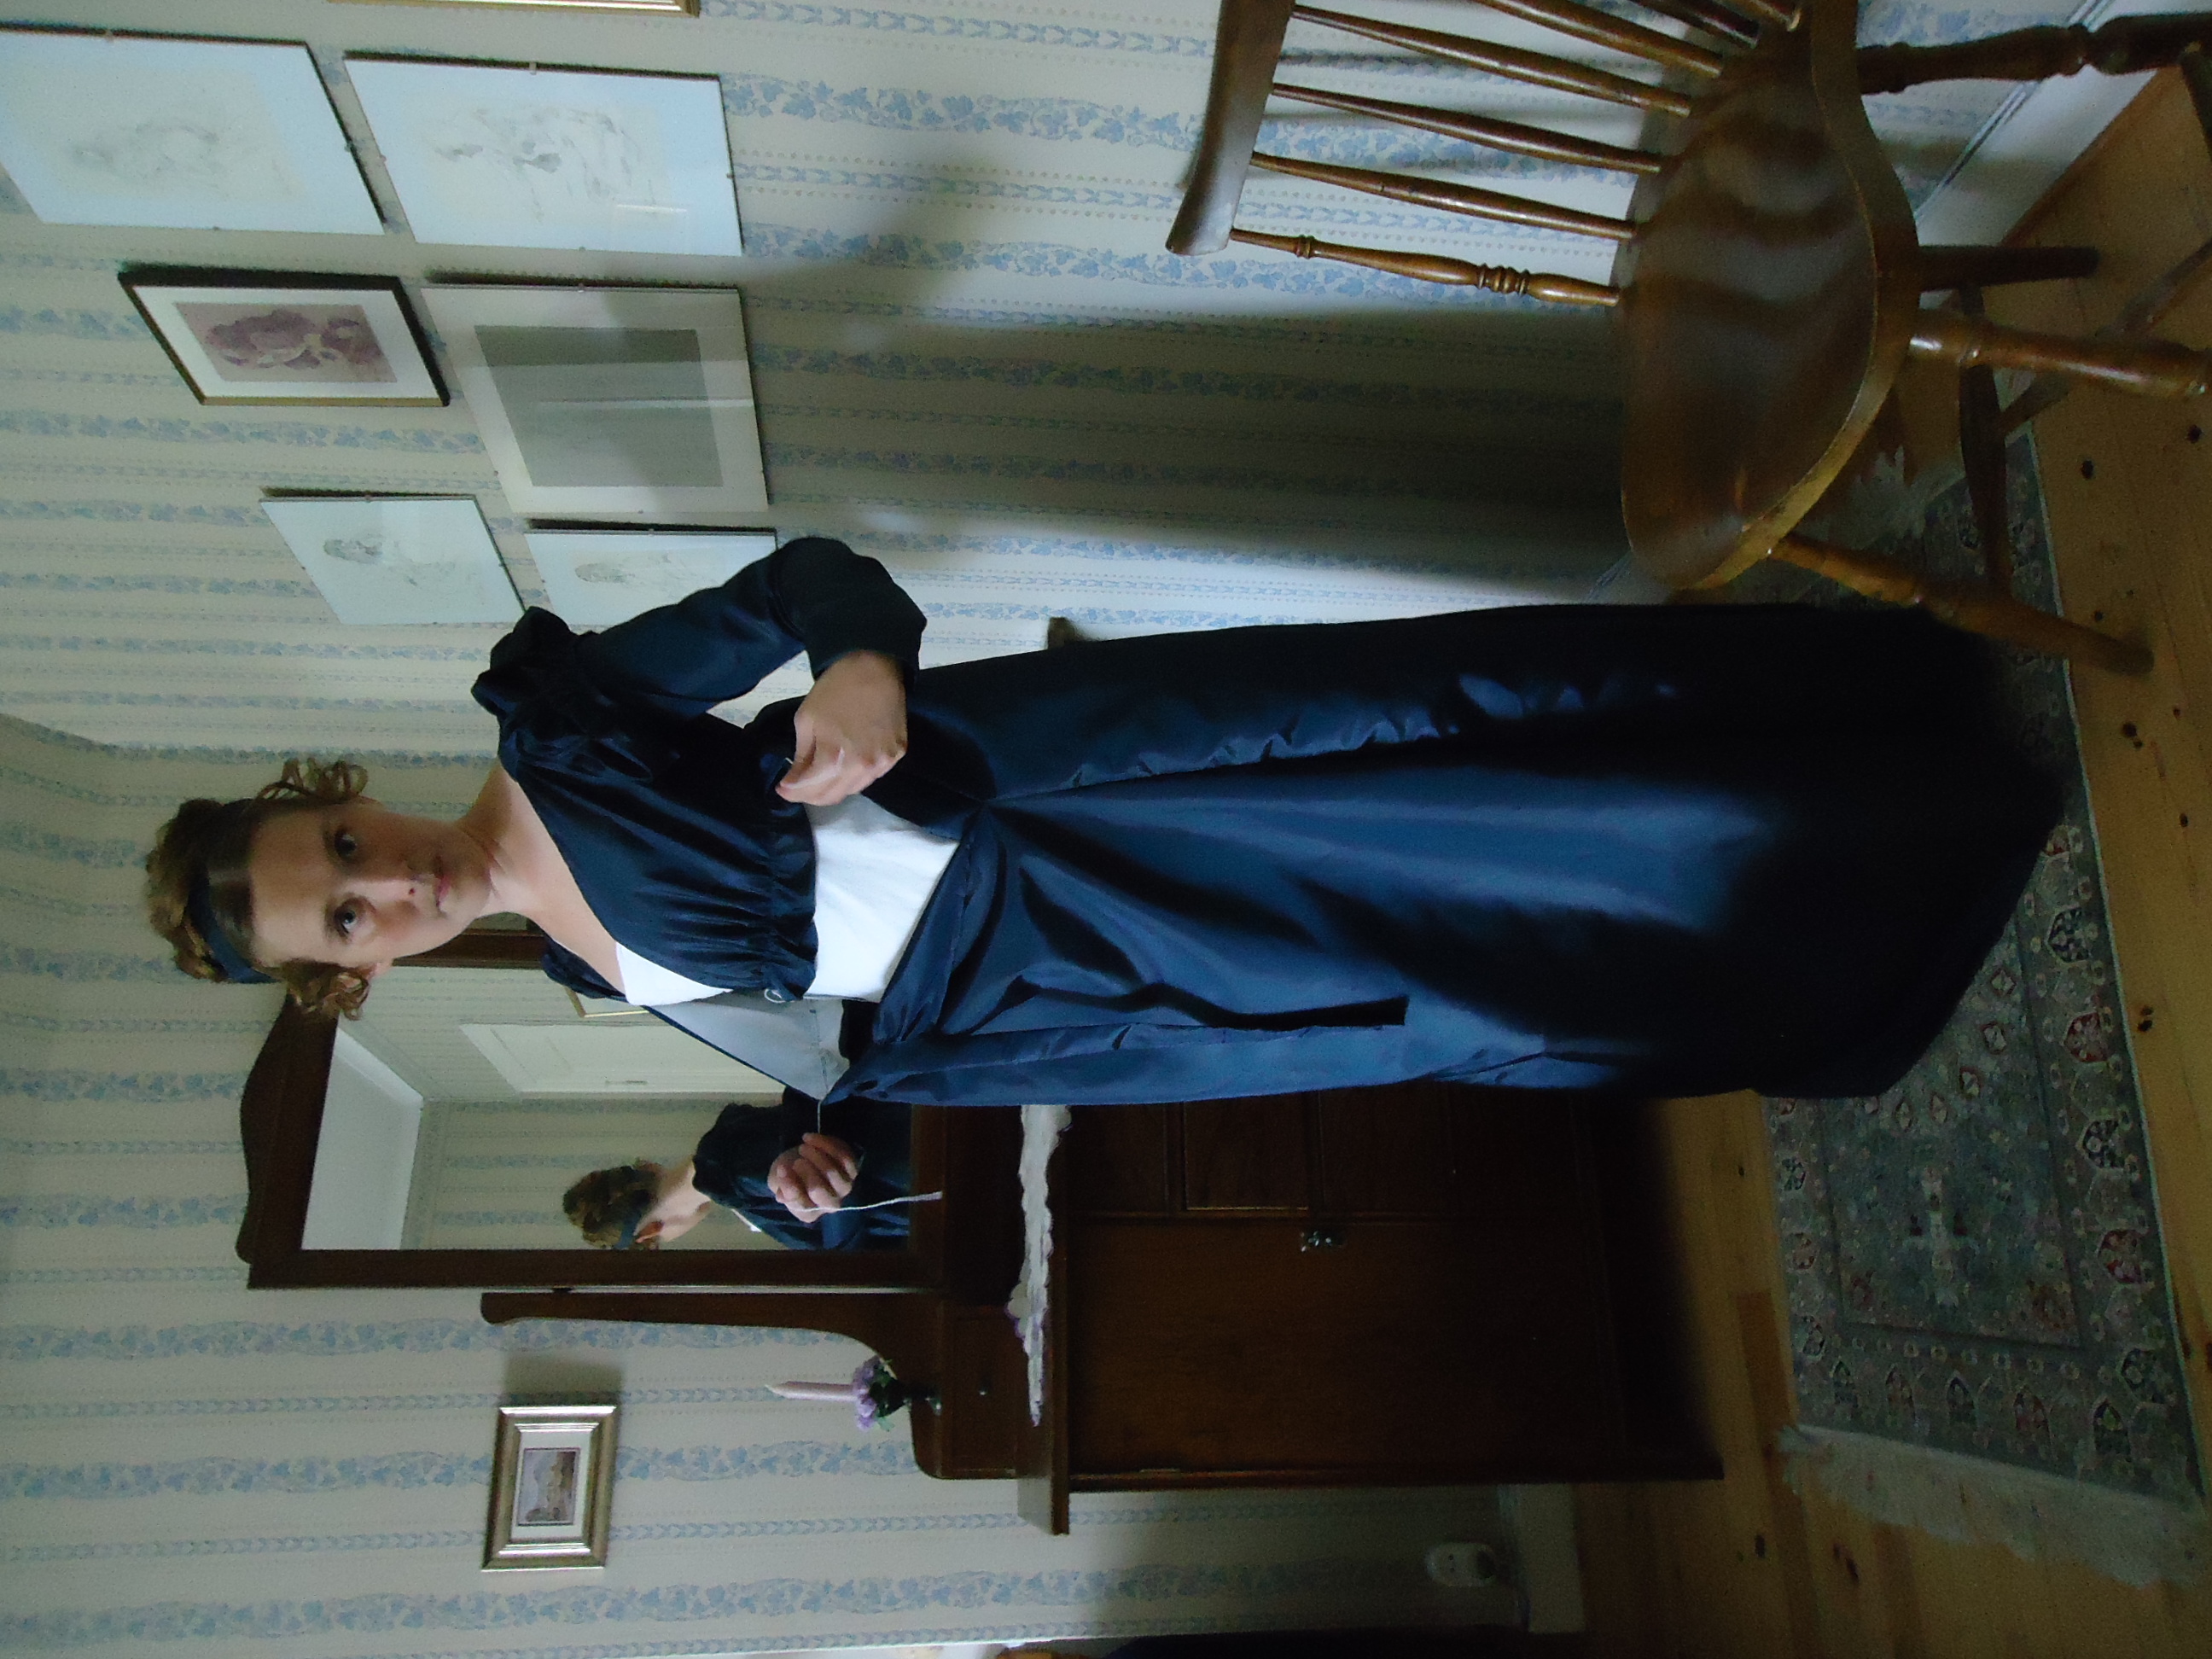
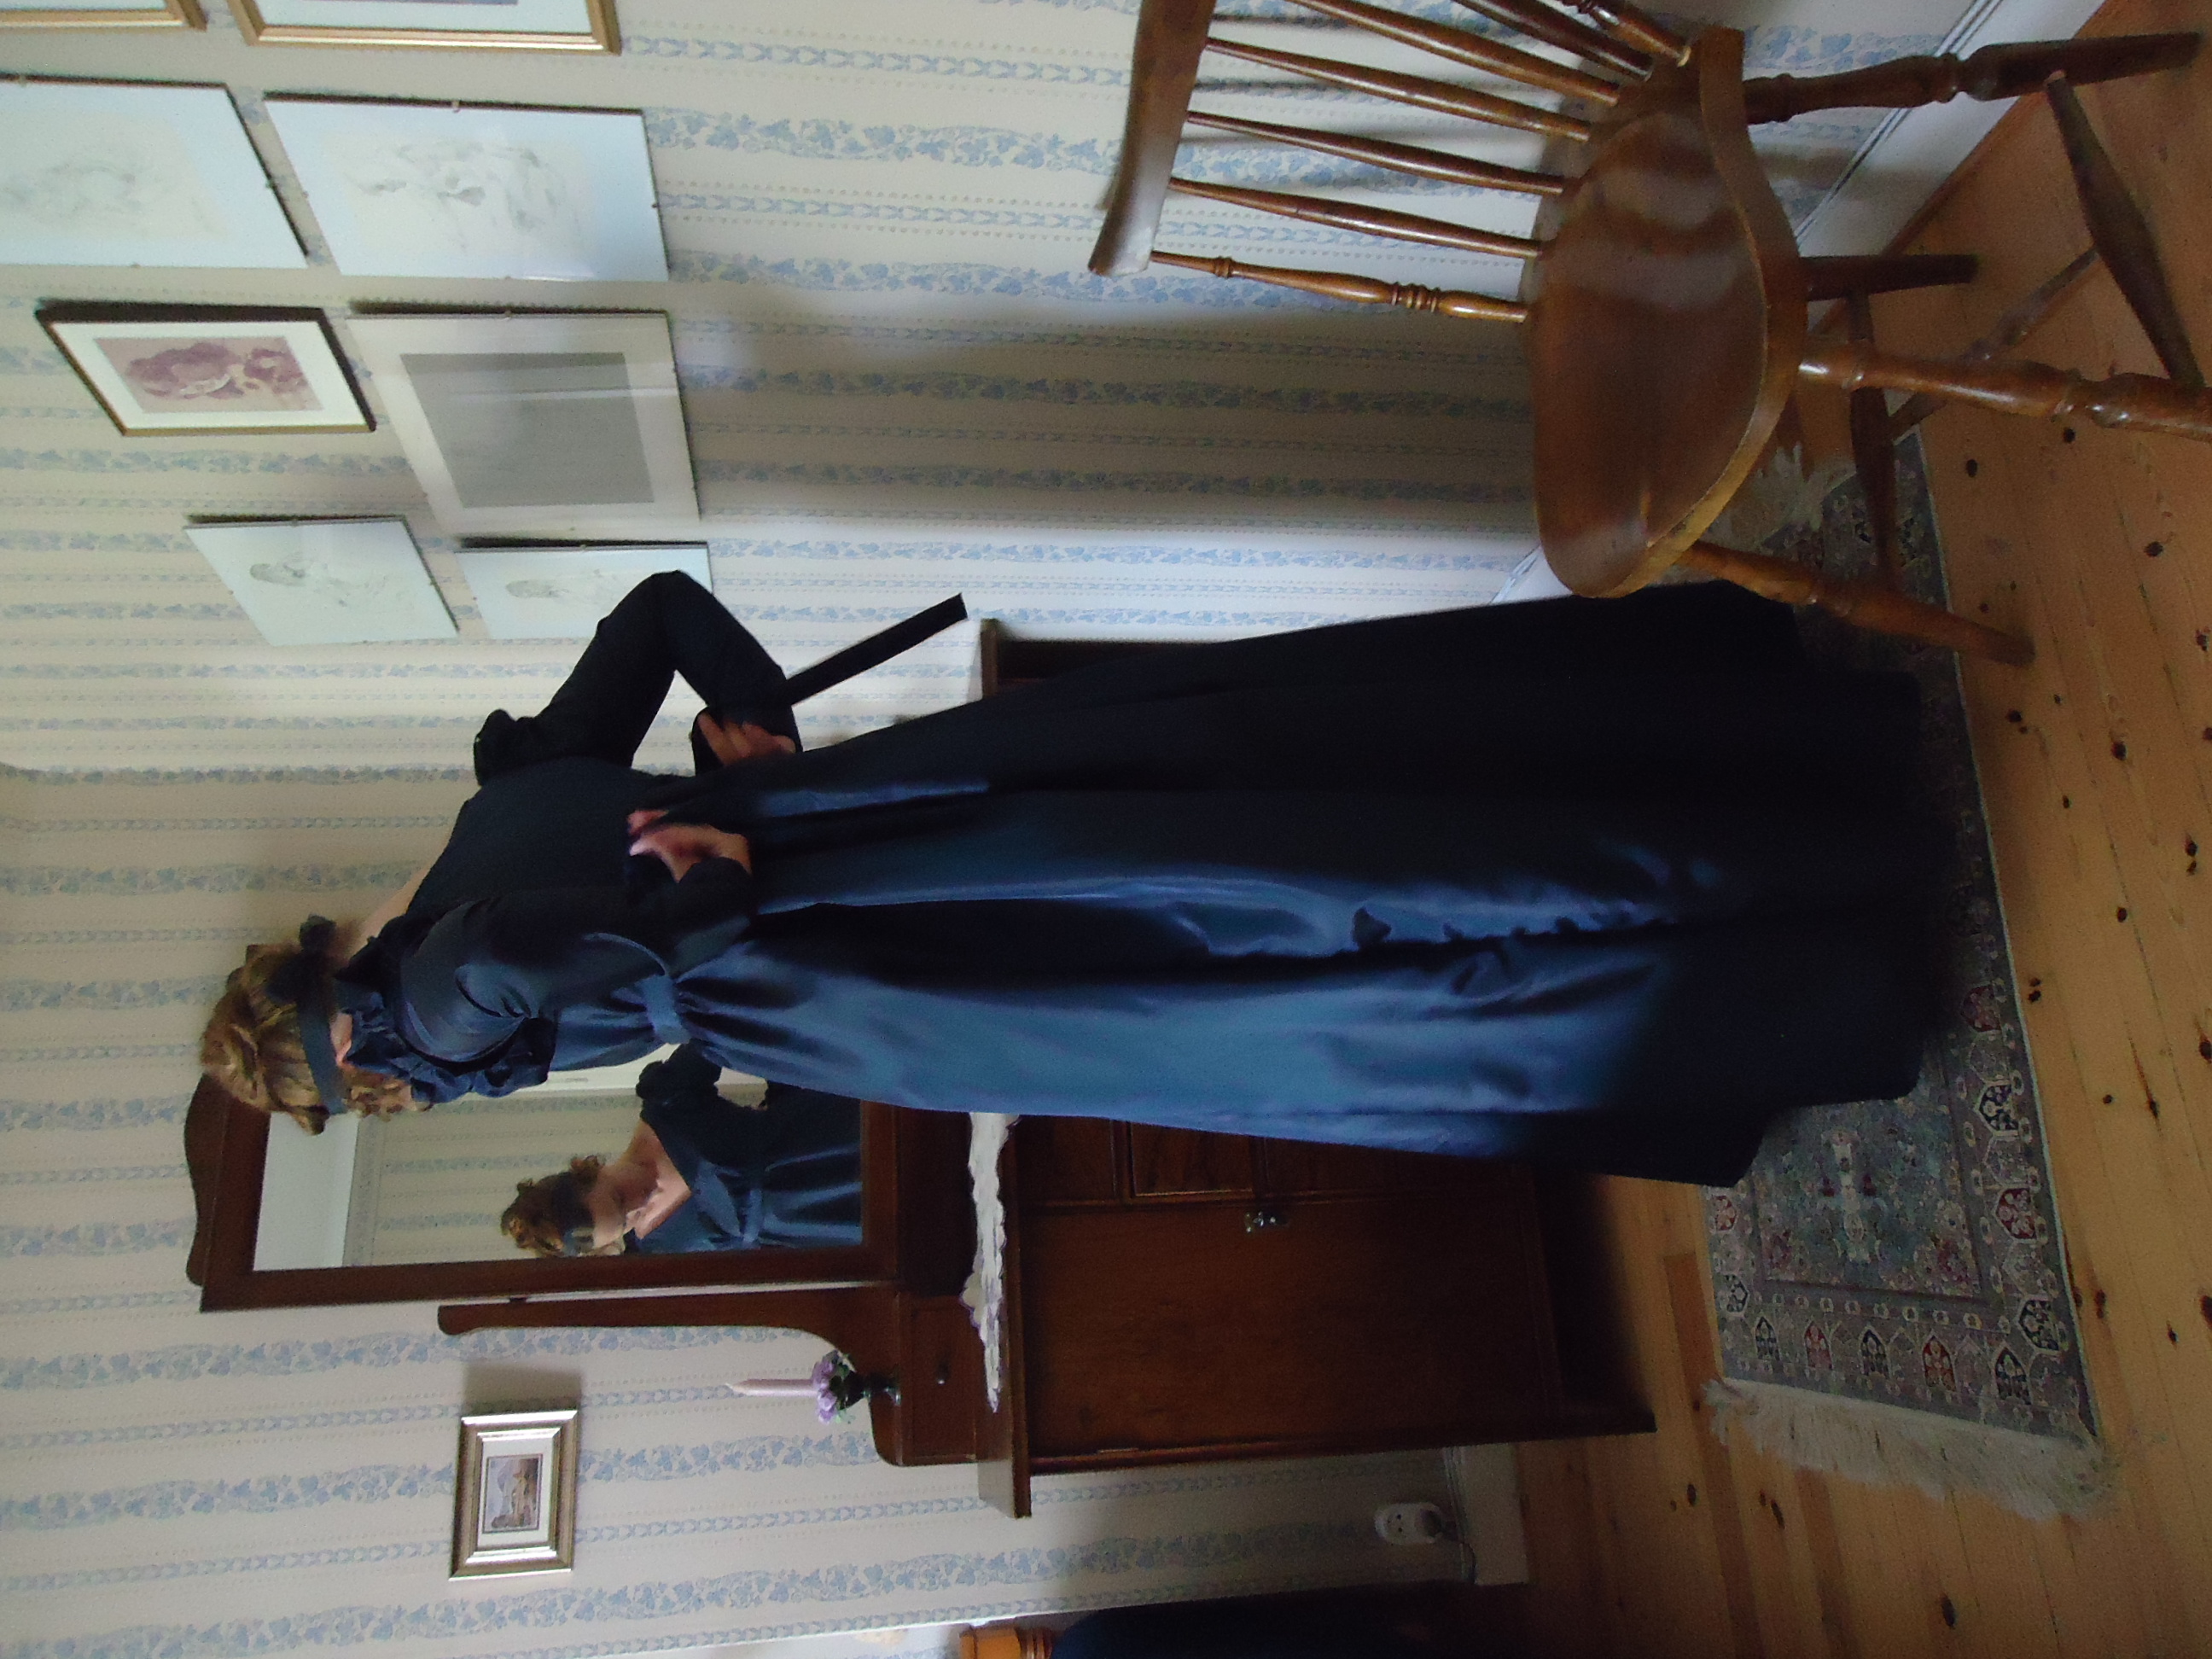
I had to read several blogs and examine many photos of vintage gowns, before I understood how the V-lined gowns are constructed (which is shown in this post), so I will kindly show you how it is put on.
Jag var tvungen att läsa igenom flera bloggar och kolla på många fotografier av vintageklänningar, innan jag förstod hur dessa V-ringade klänningar var konstruerade (vilket syns i detta inlägg). Eftersom kanske fler än jag är förvirrade över detta, visar jag hur man tar på sig den.
Making a knot for one side of the bodice.
Pulling the drawstrings together for making a knot for the other side of the bodice.
Making the last knot.
Pulling the outer ribbon together behind the back.
Obviously, it was impossible for me to tie the bow behind my back, so I got help from my skilled husband.
Finally, I am fully dressed!
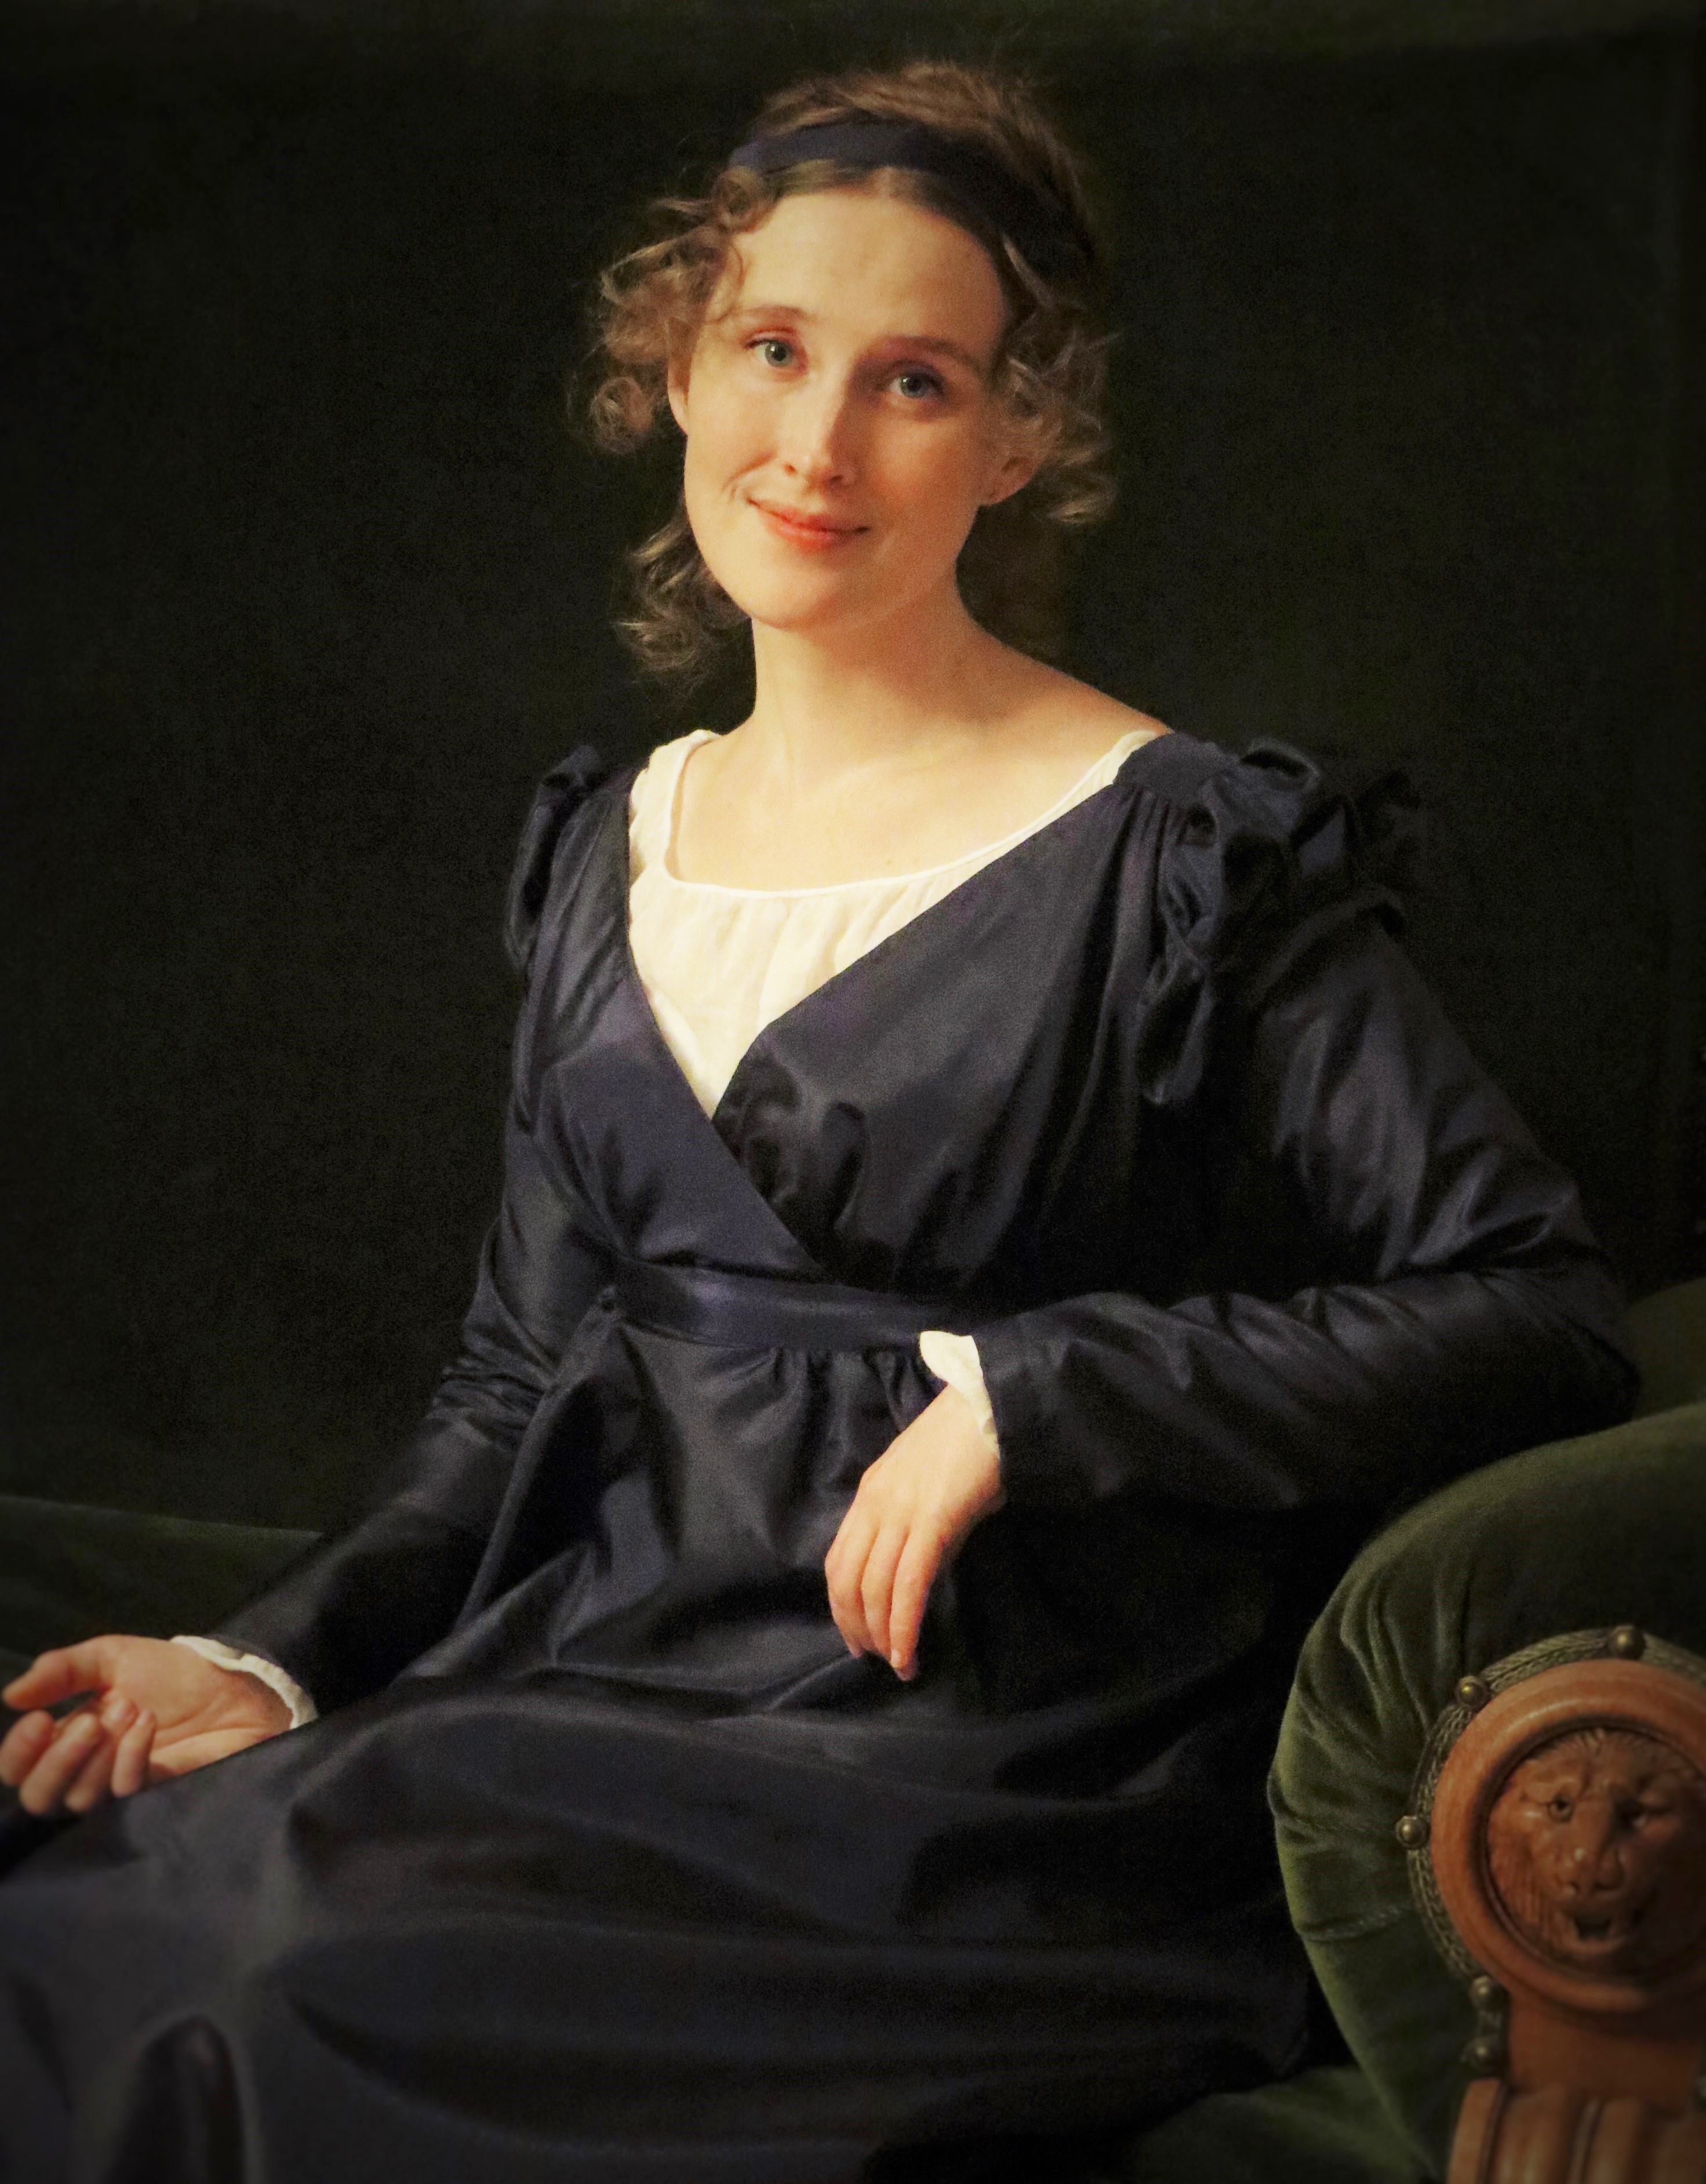
By the window
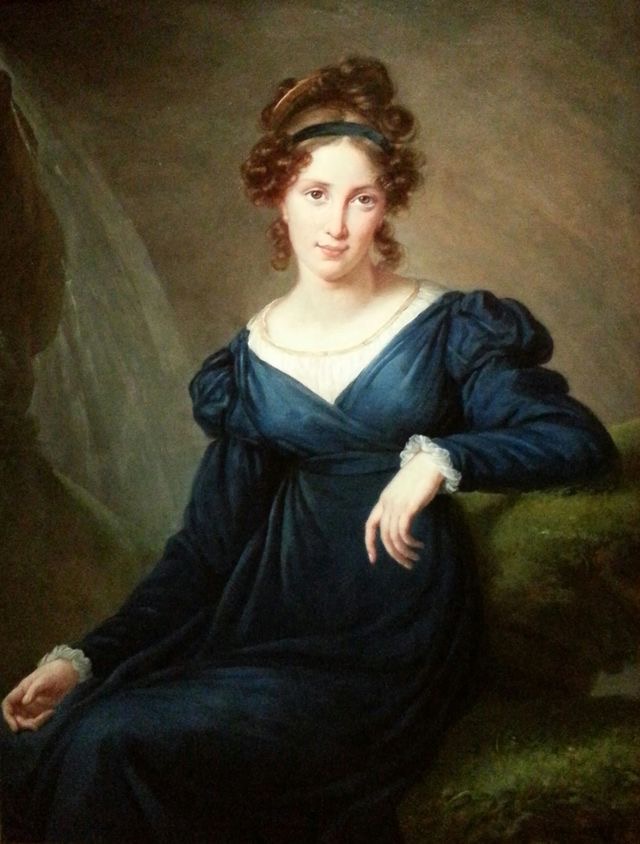
The portrait and myself.
Clearly, we aren’t twins, the lady in the portrait and me, but I am very satisfied with the likeness of the dress. I hope to find a fabric for a similar chemisette with long arms too.
At first, I thought that the lady sat in a velvet sofa, but after a closer look, I think that she is seated in the moss, by a waterfall. Well, I won’t find that in my neighbourhood, so I will make do with the woods of Vimmerby.
Damen i porträttet och jag är kan inte misstas för att vara tvillingar, men jag är väldigt nöjd med hur lika klänningarna blev. Jag hoppas på att hitta ett tyg för en likadan chemisette, med långa ärmar.
Först trodde jag att hon satt i en sammetssoffa (som jag), men när jag tittade närmare på bilden, insåg jag att hon sitter i mossan, intill ett vattenfall. Det finns inte i grannskapet, så jag får nöja mig med mossiga bilder från Vimmerbys skogar.
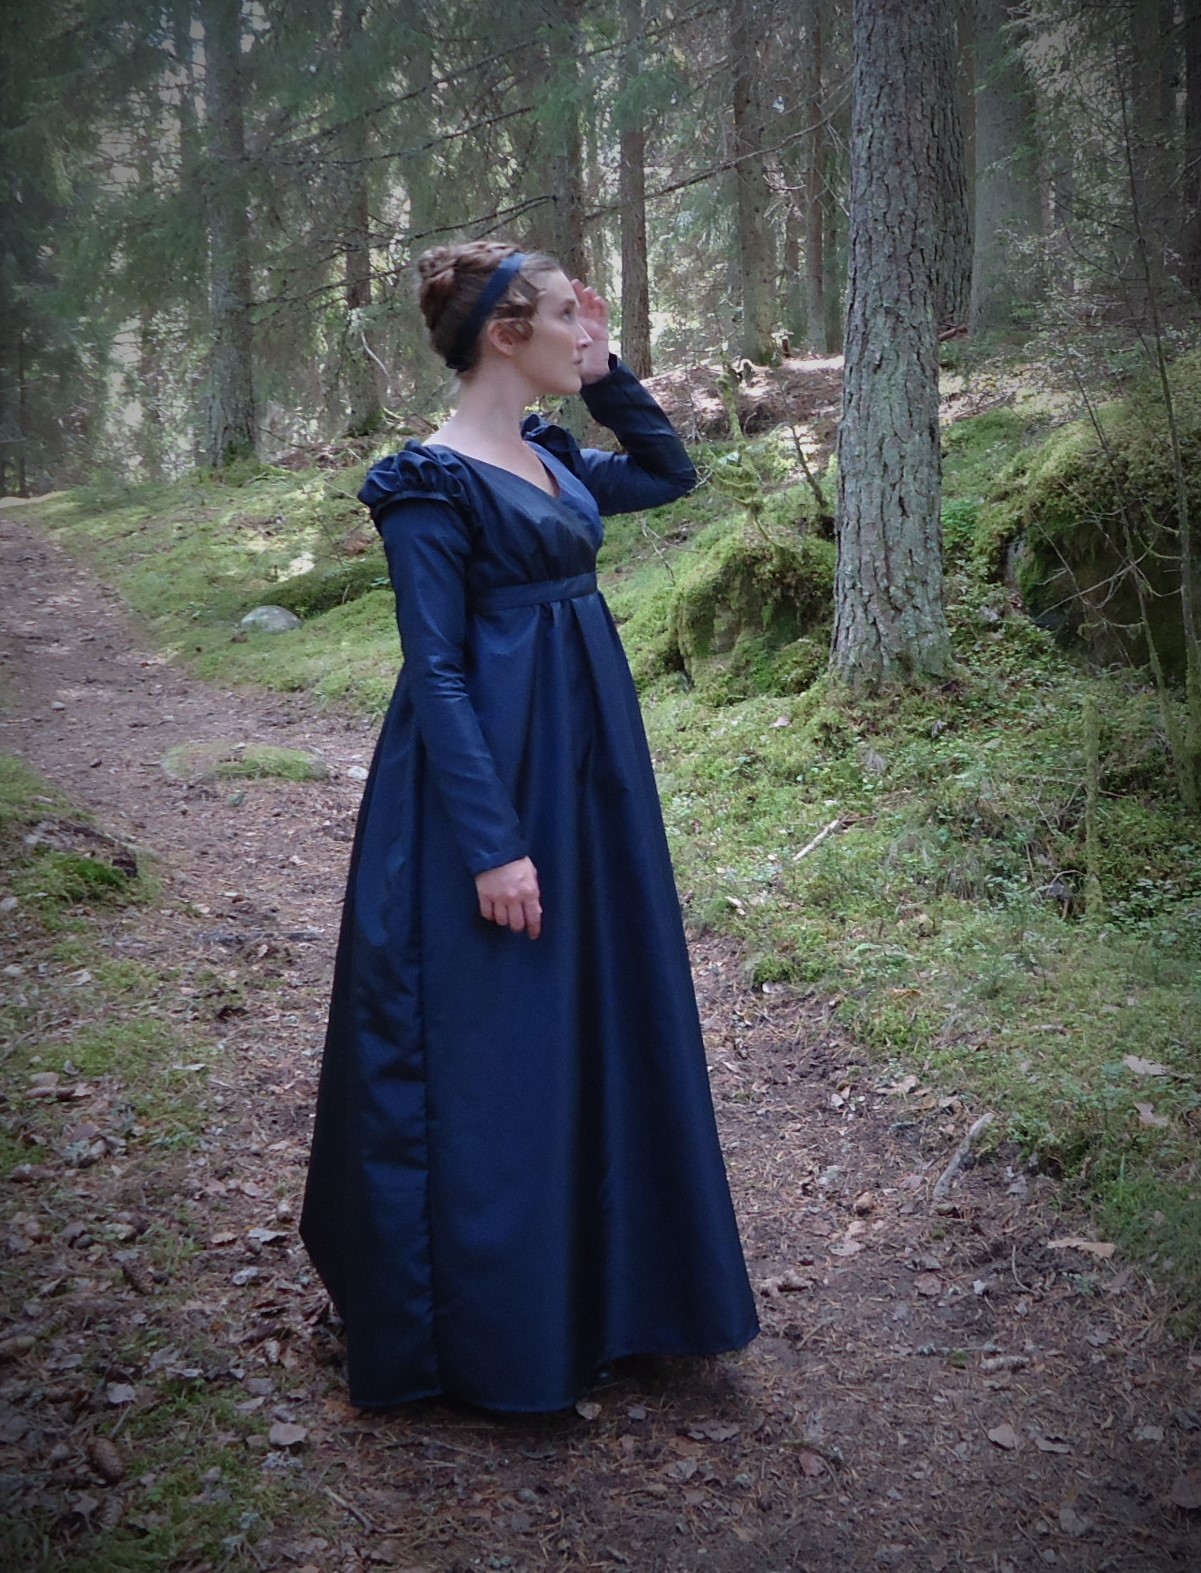
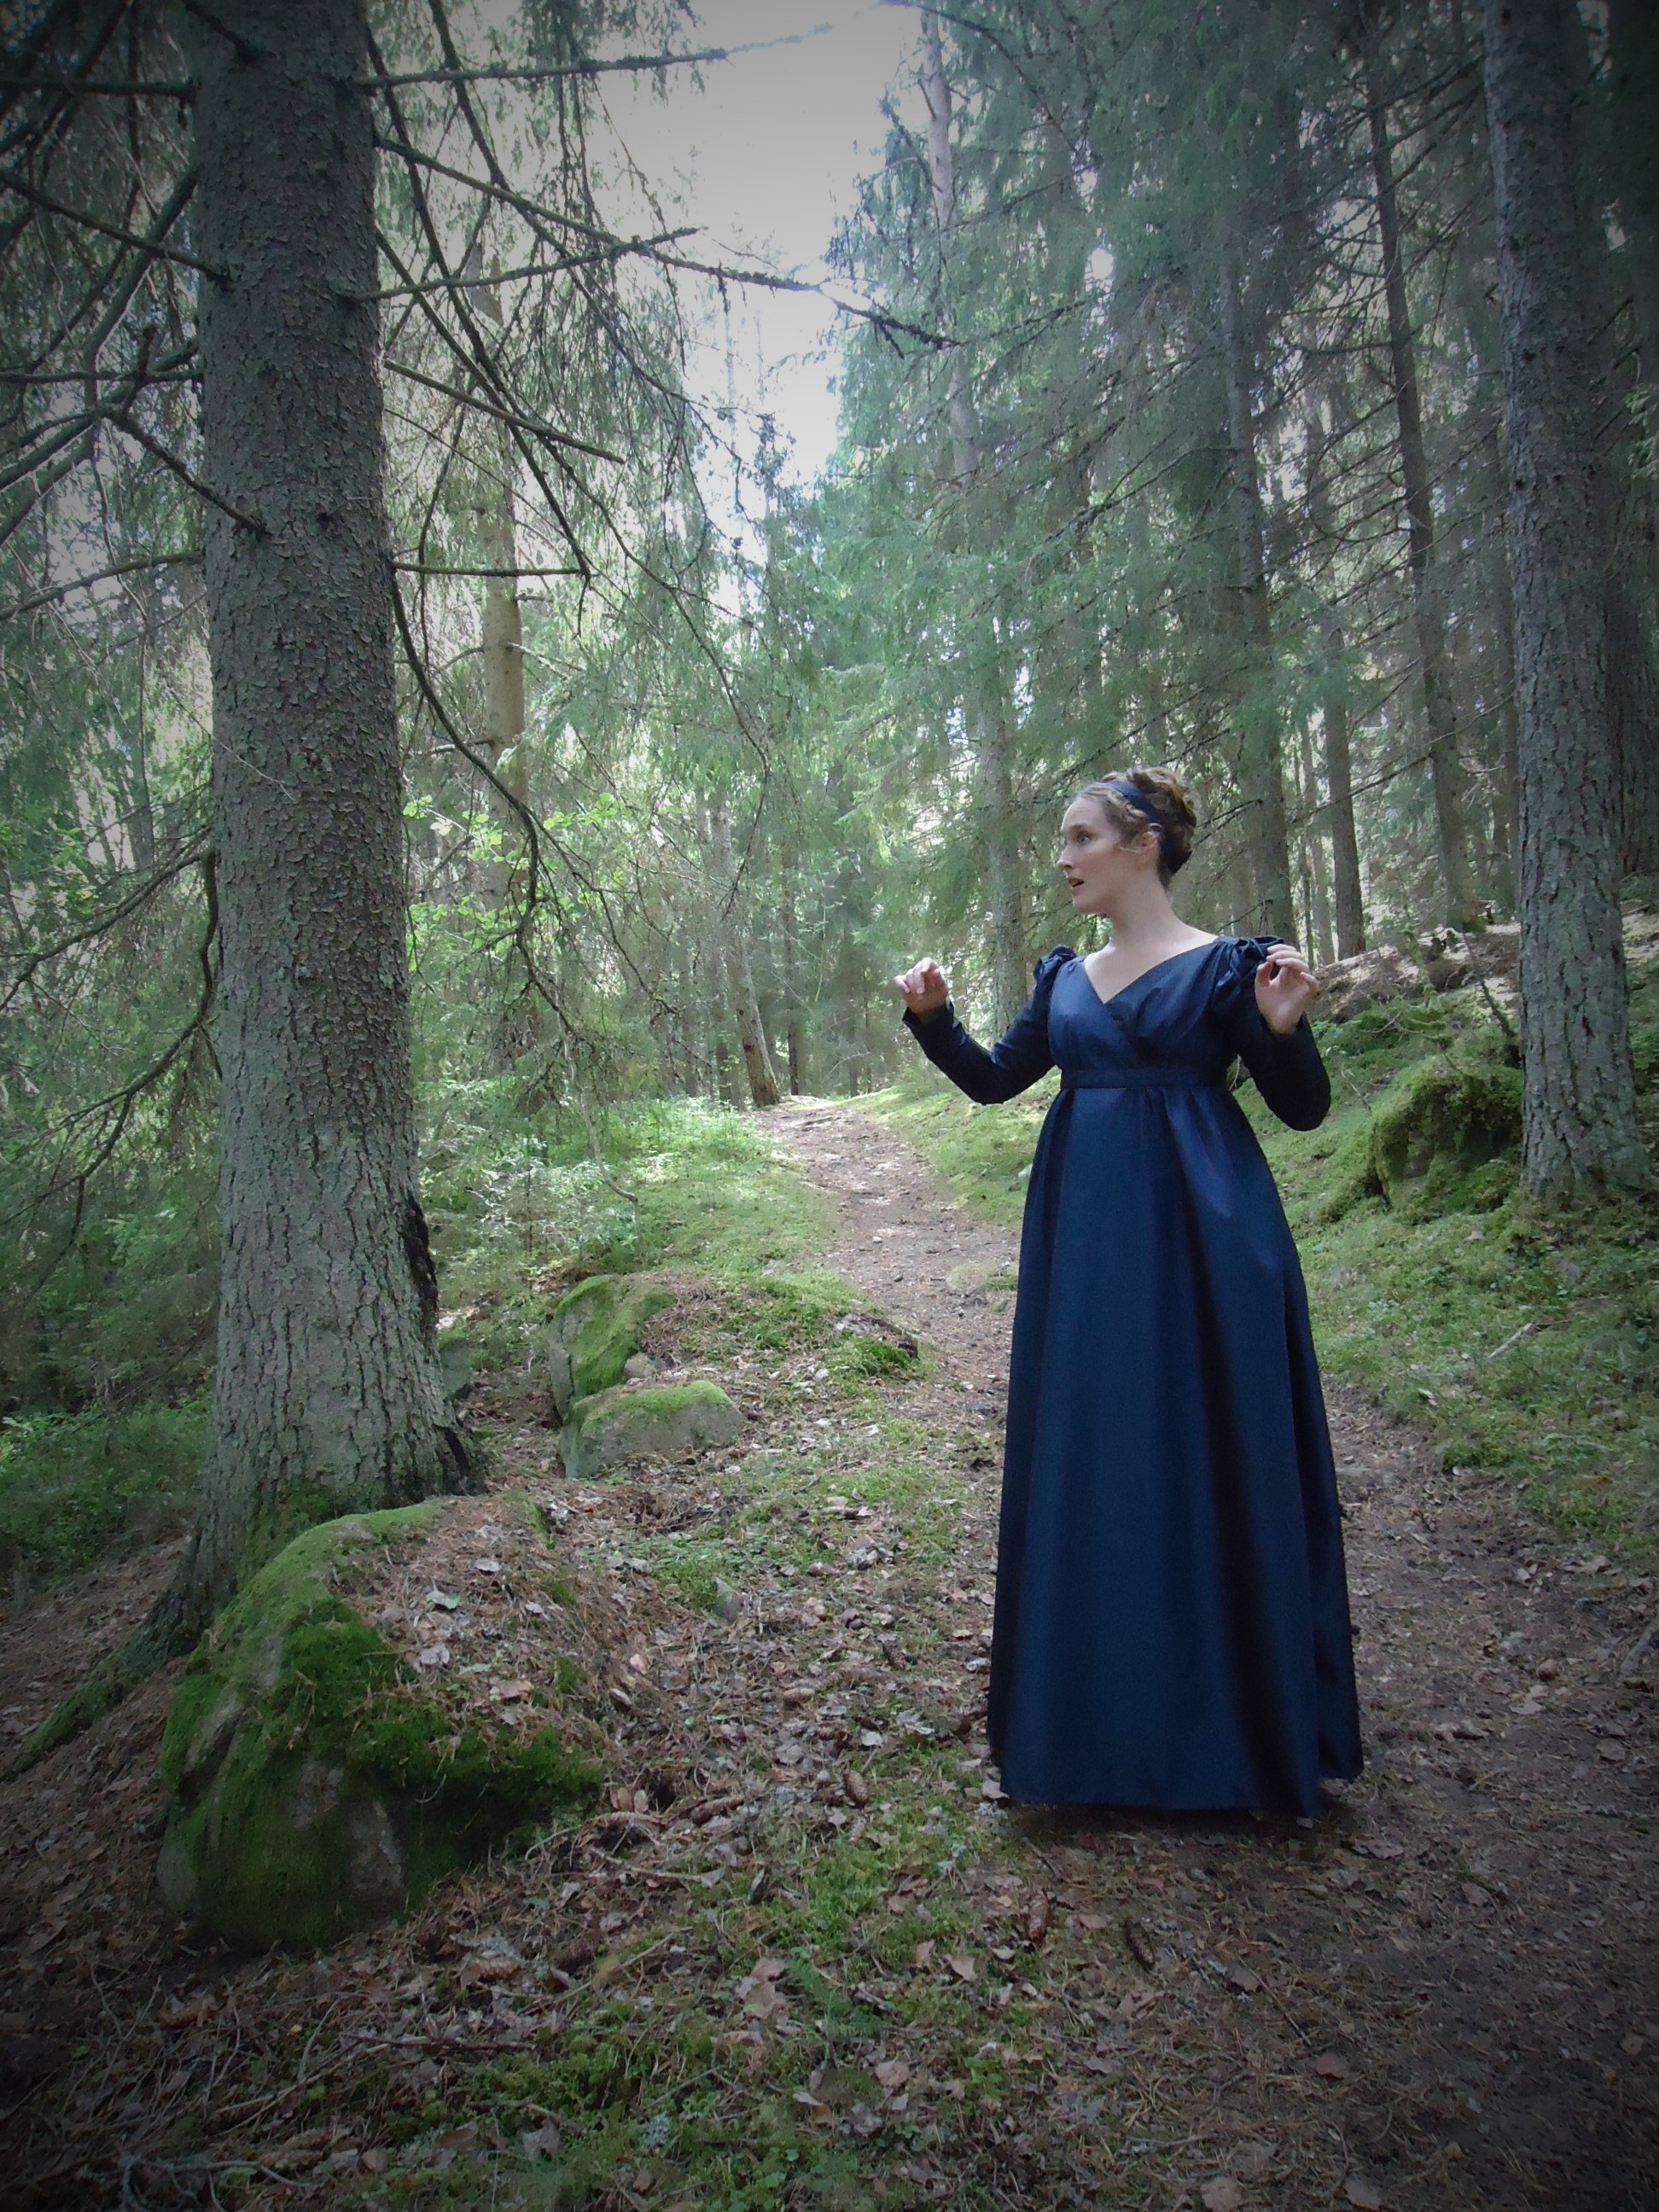
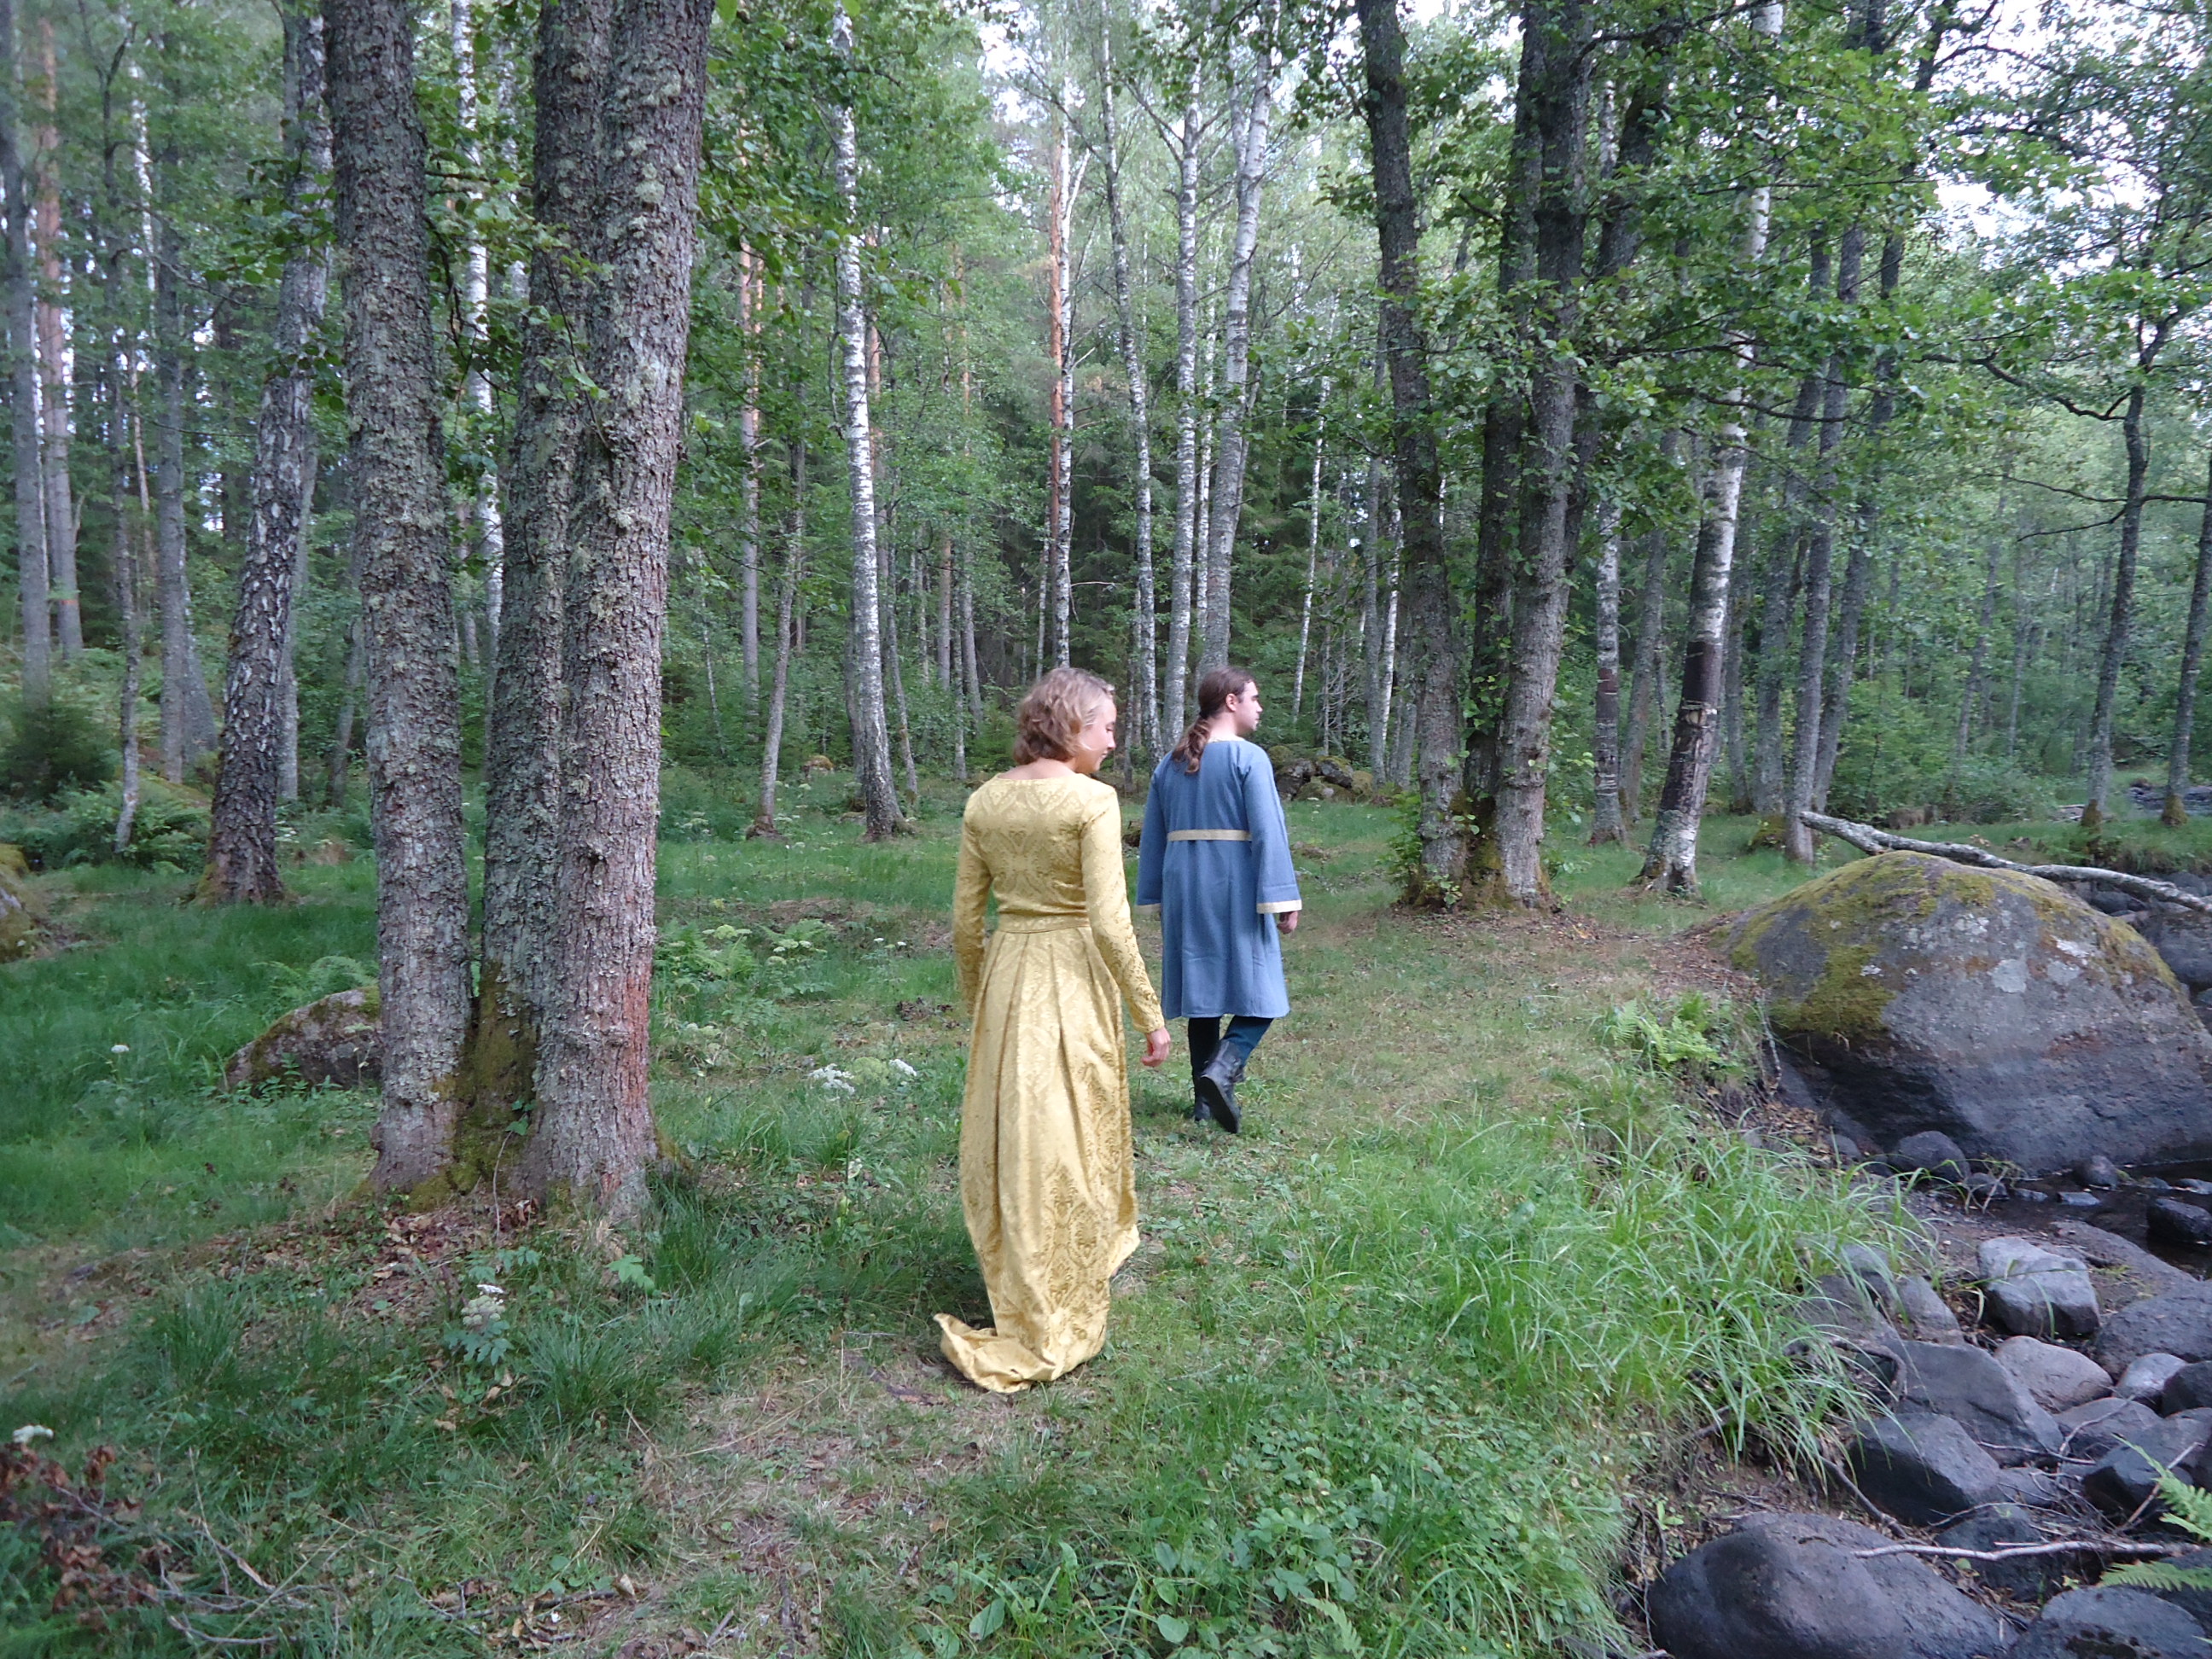
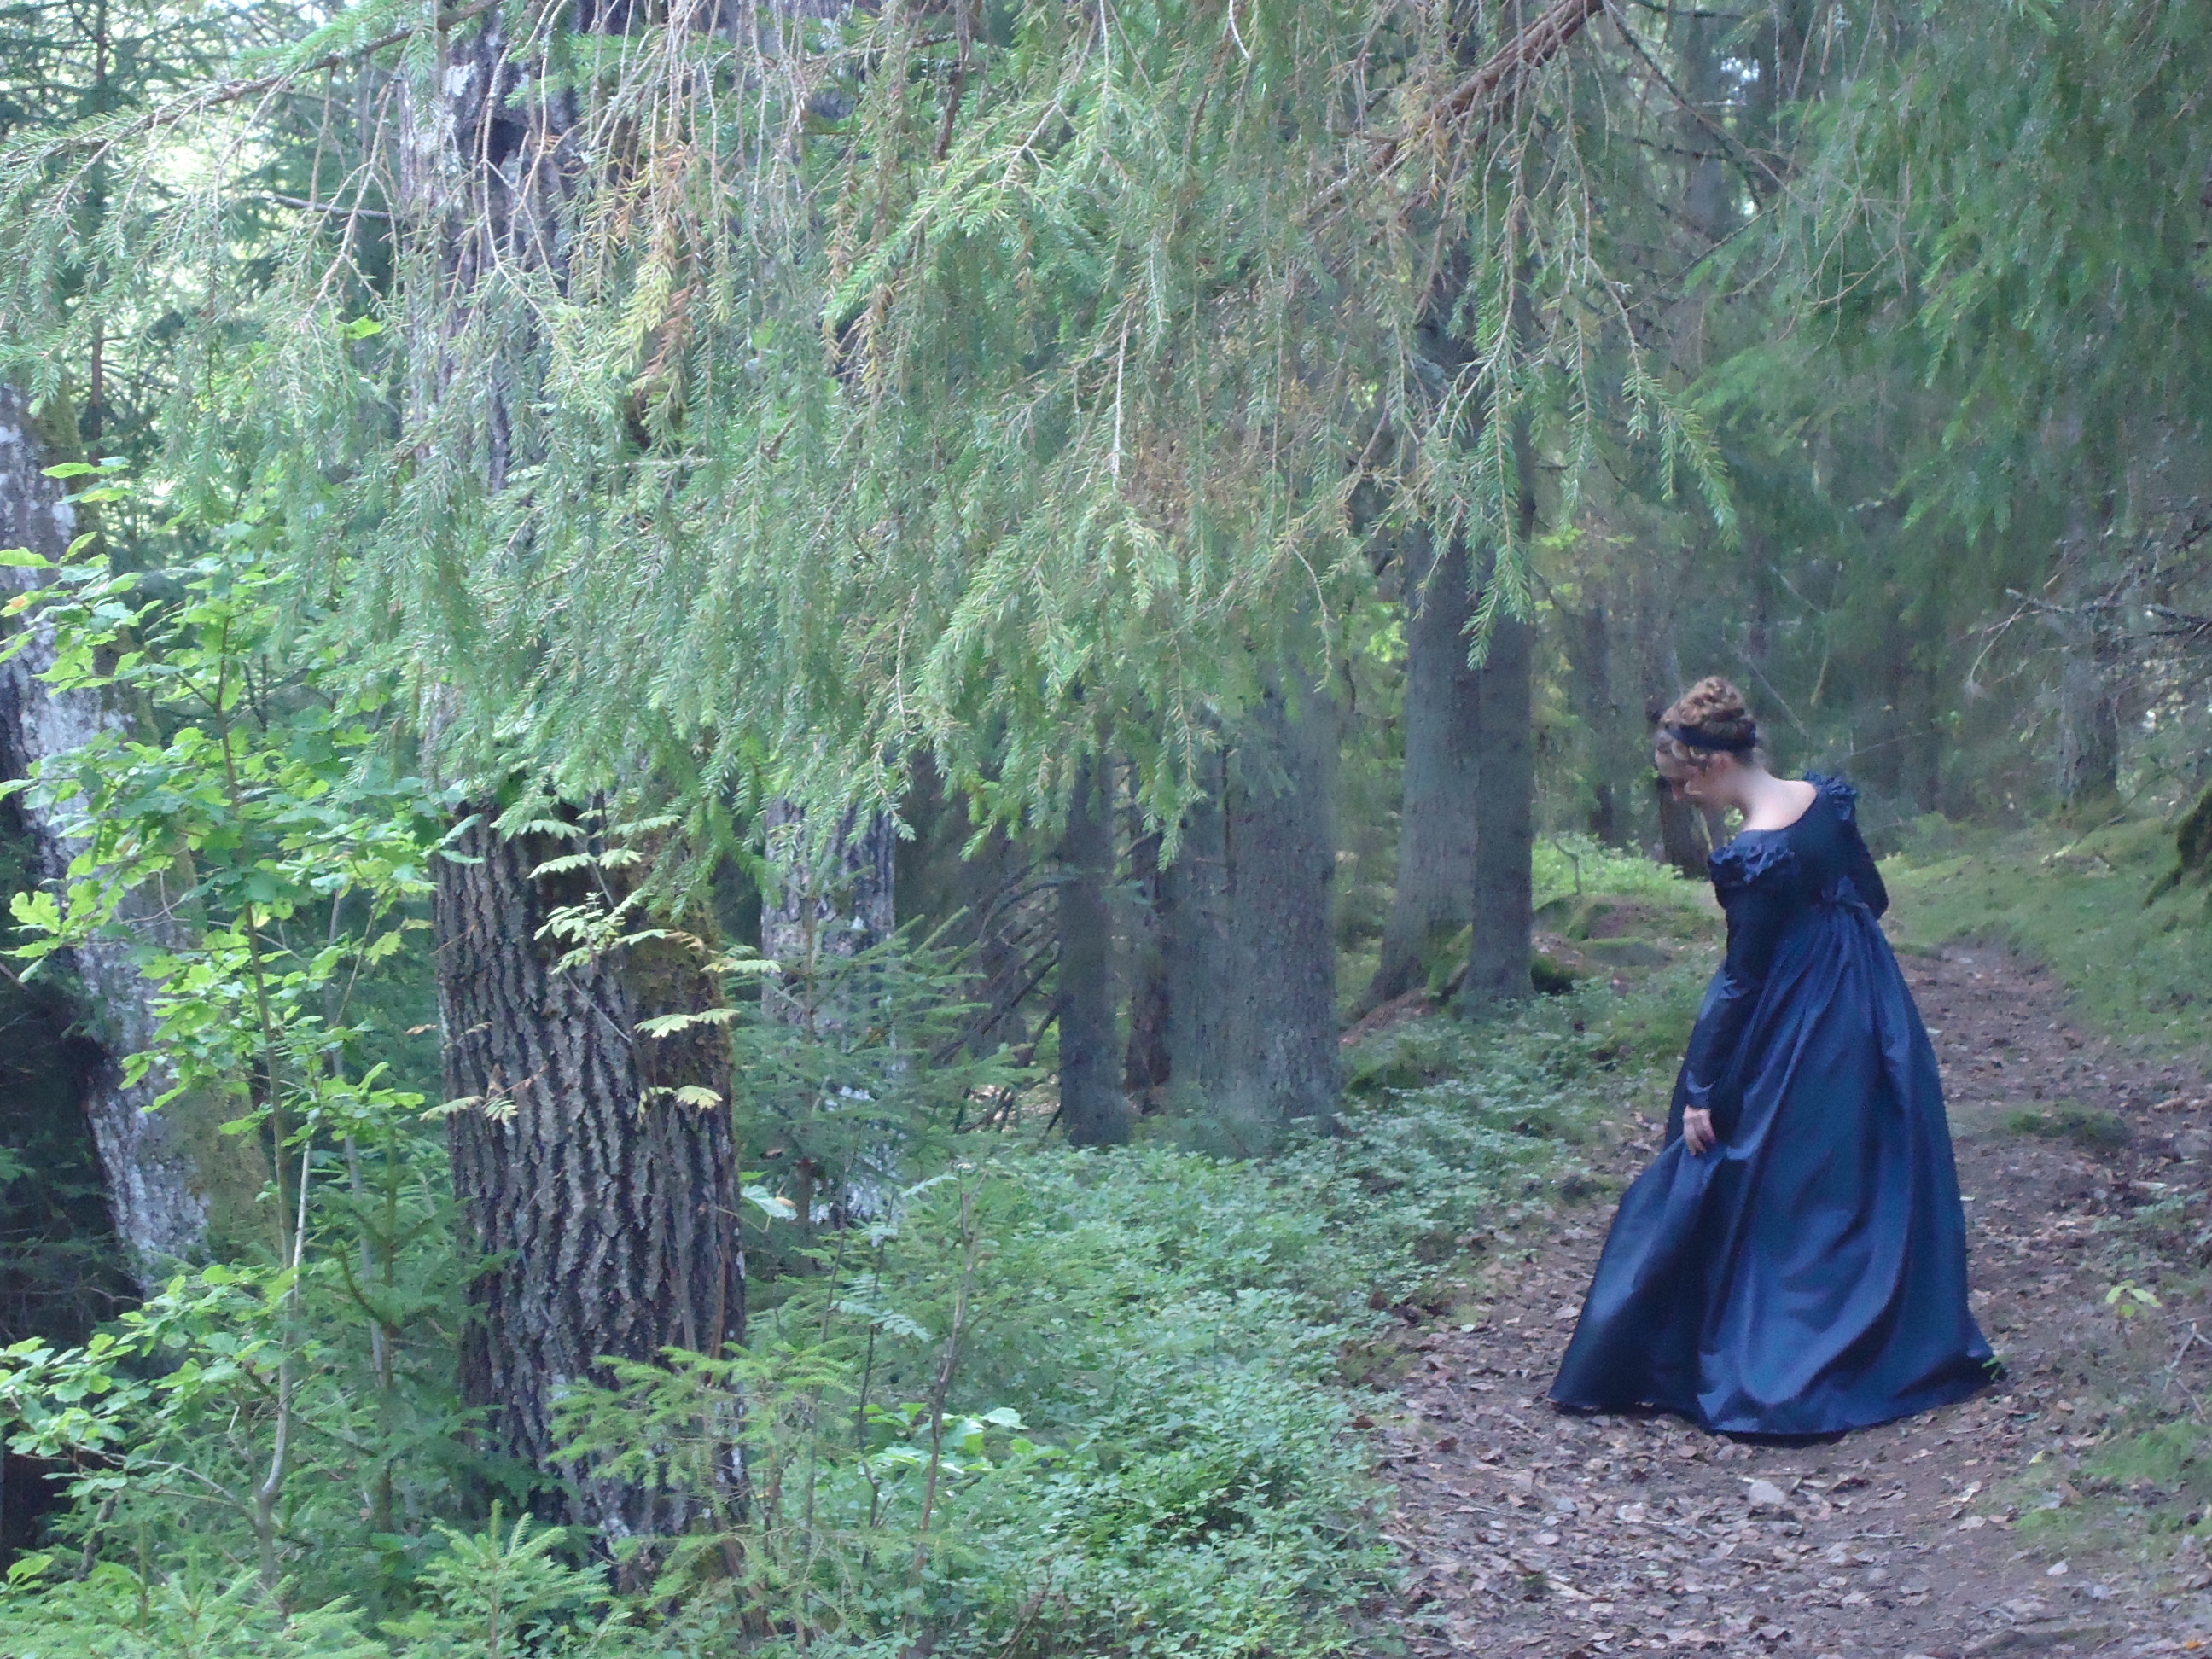
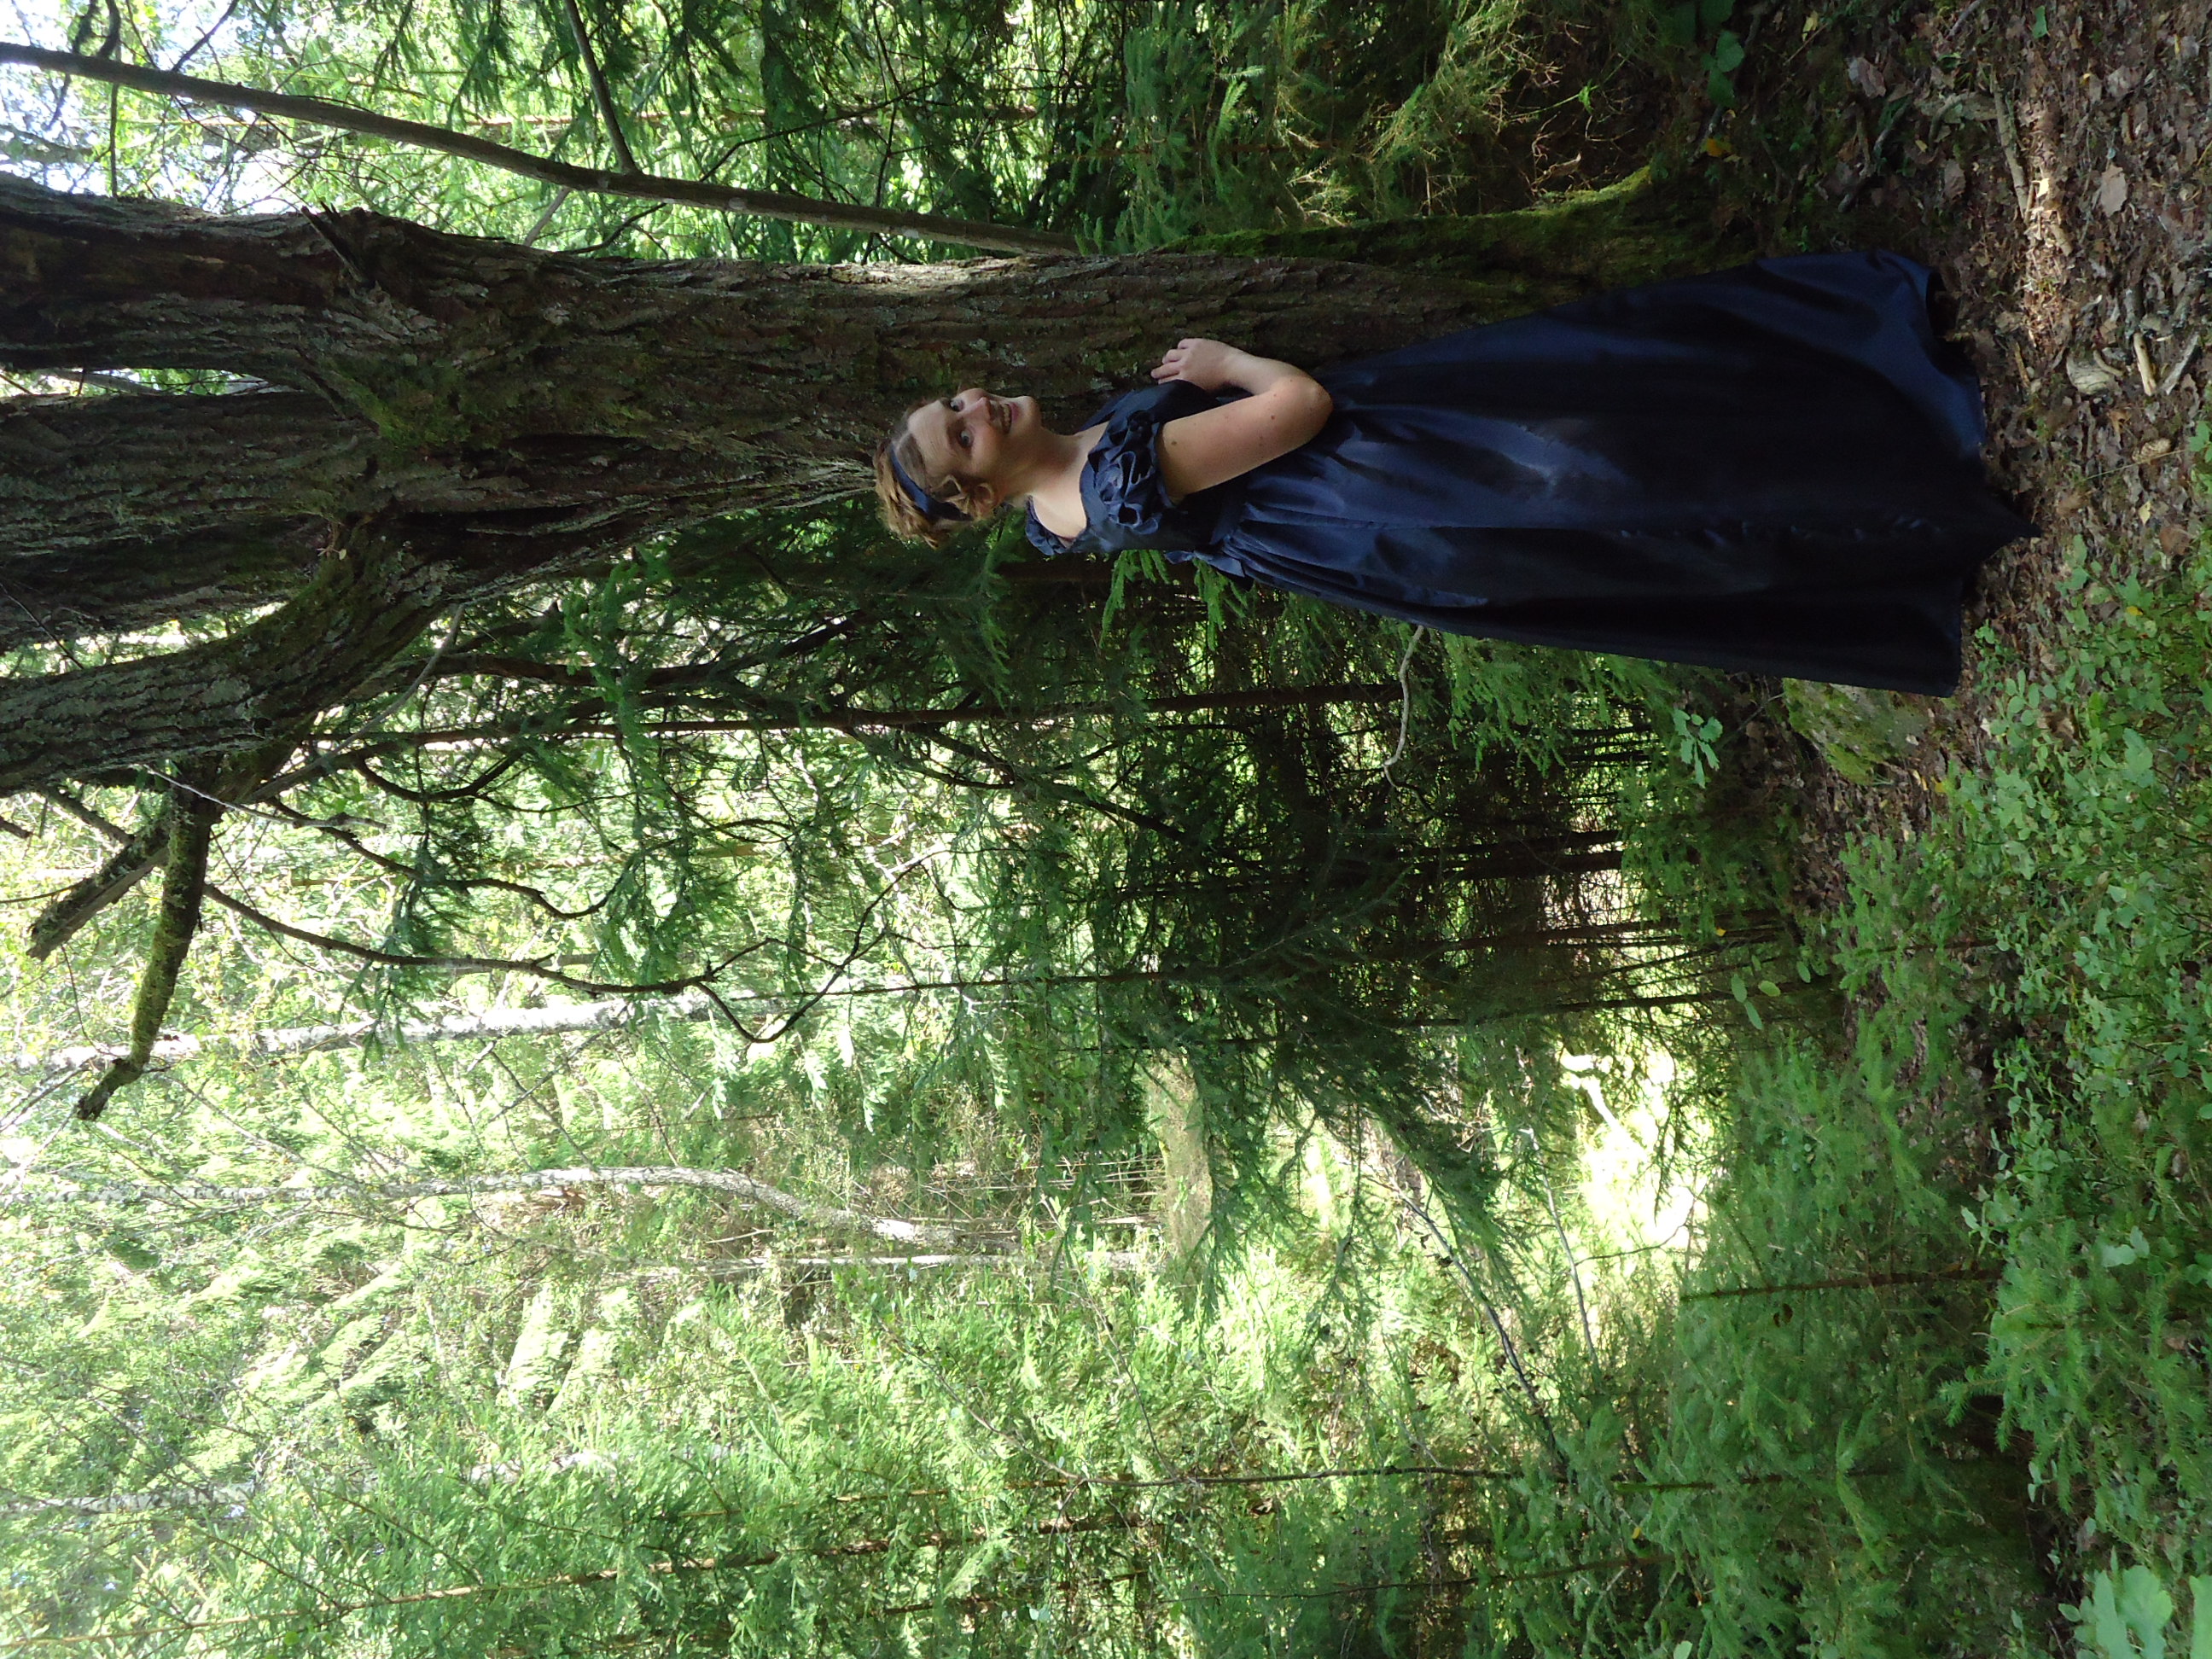
Taking the gown for a walk
In the woods
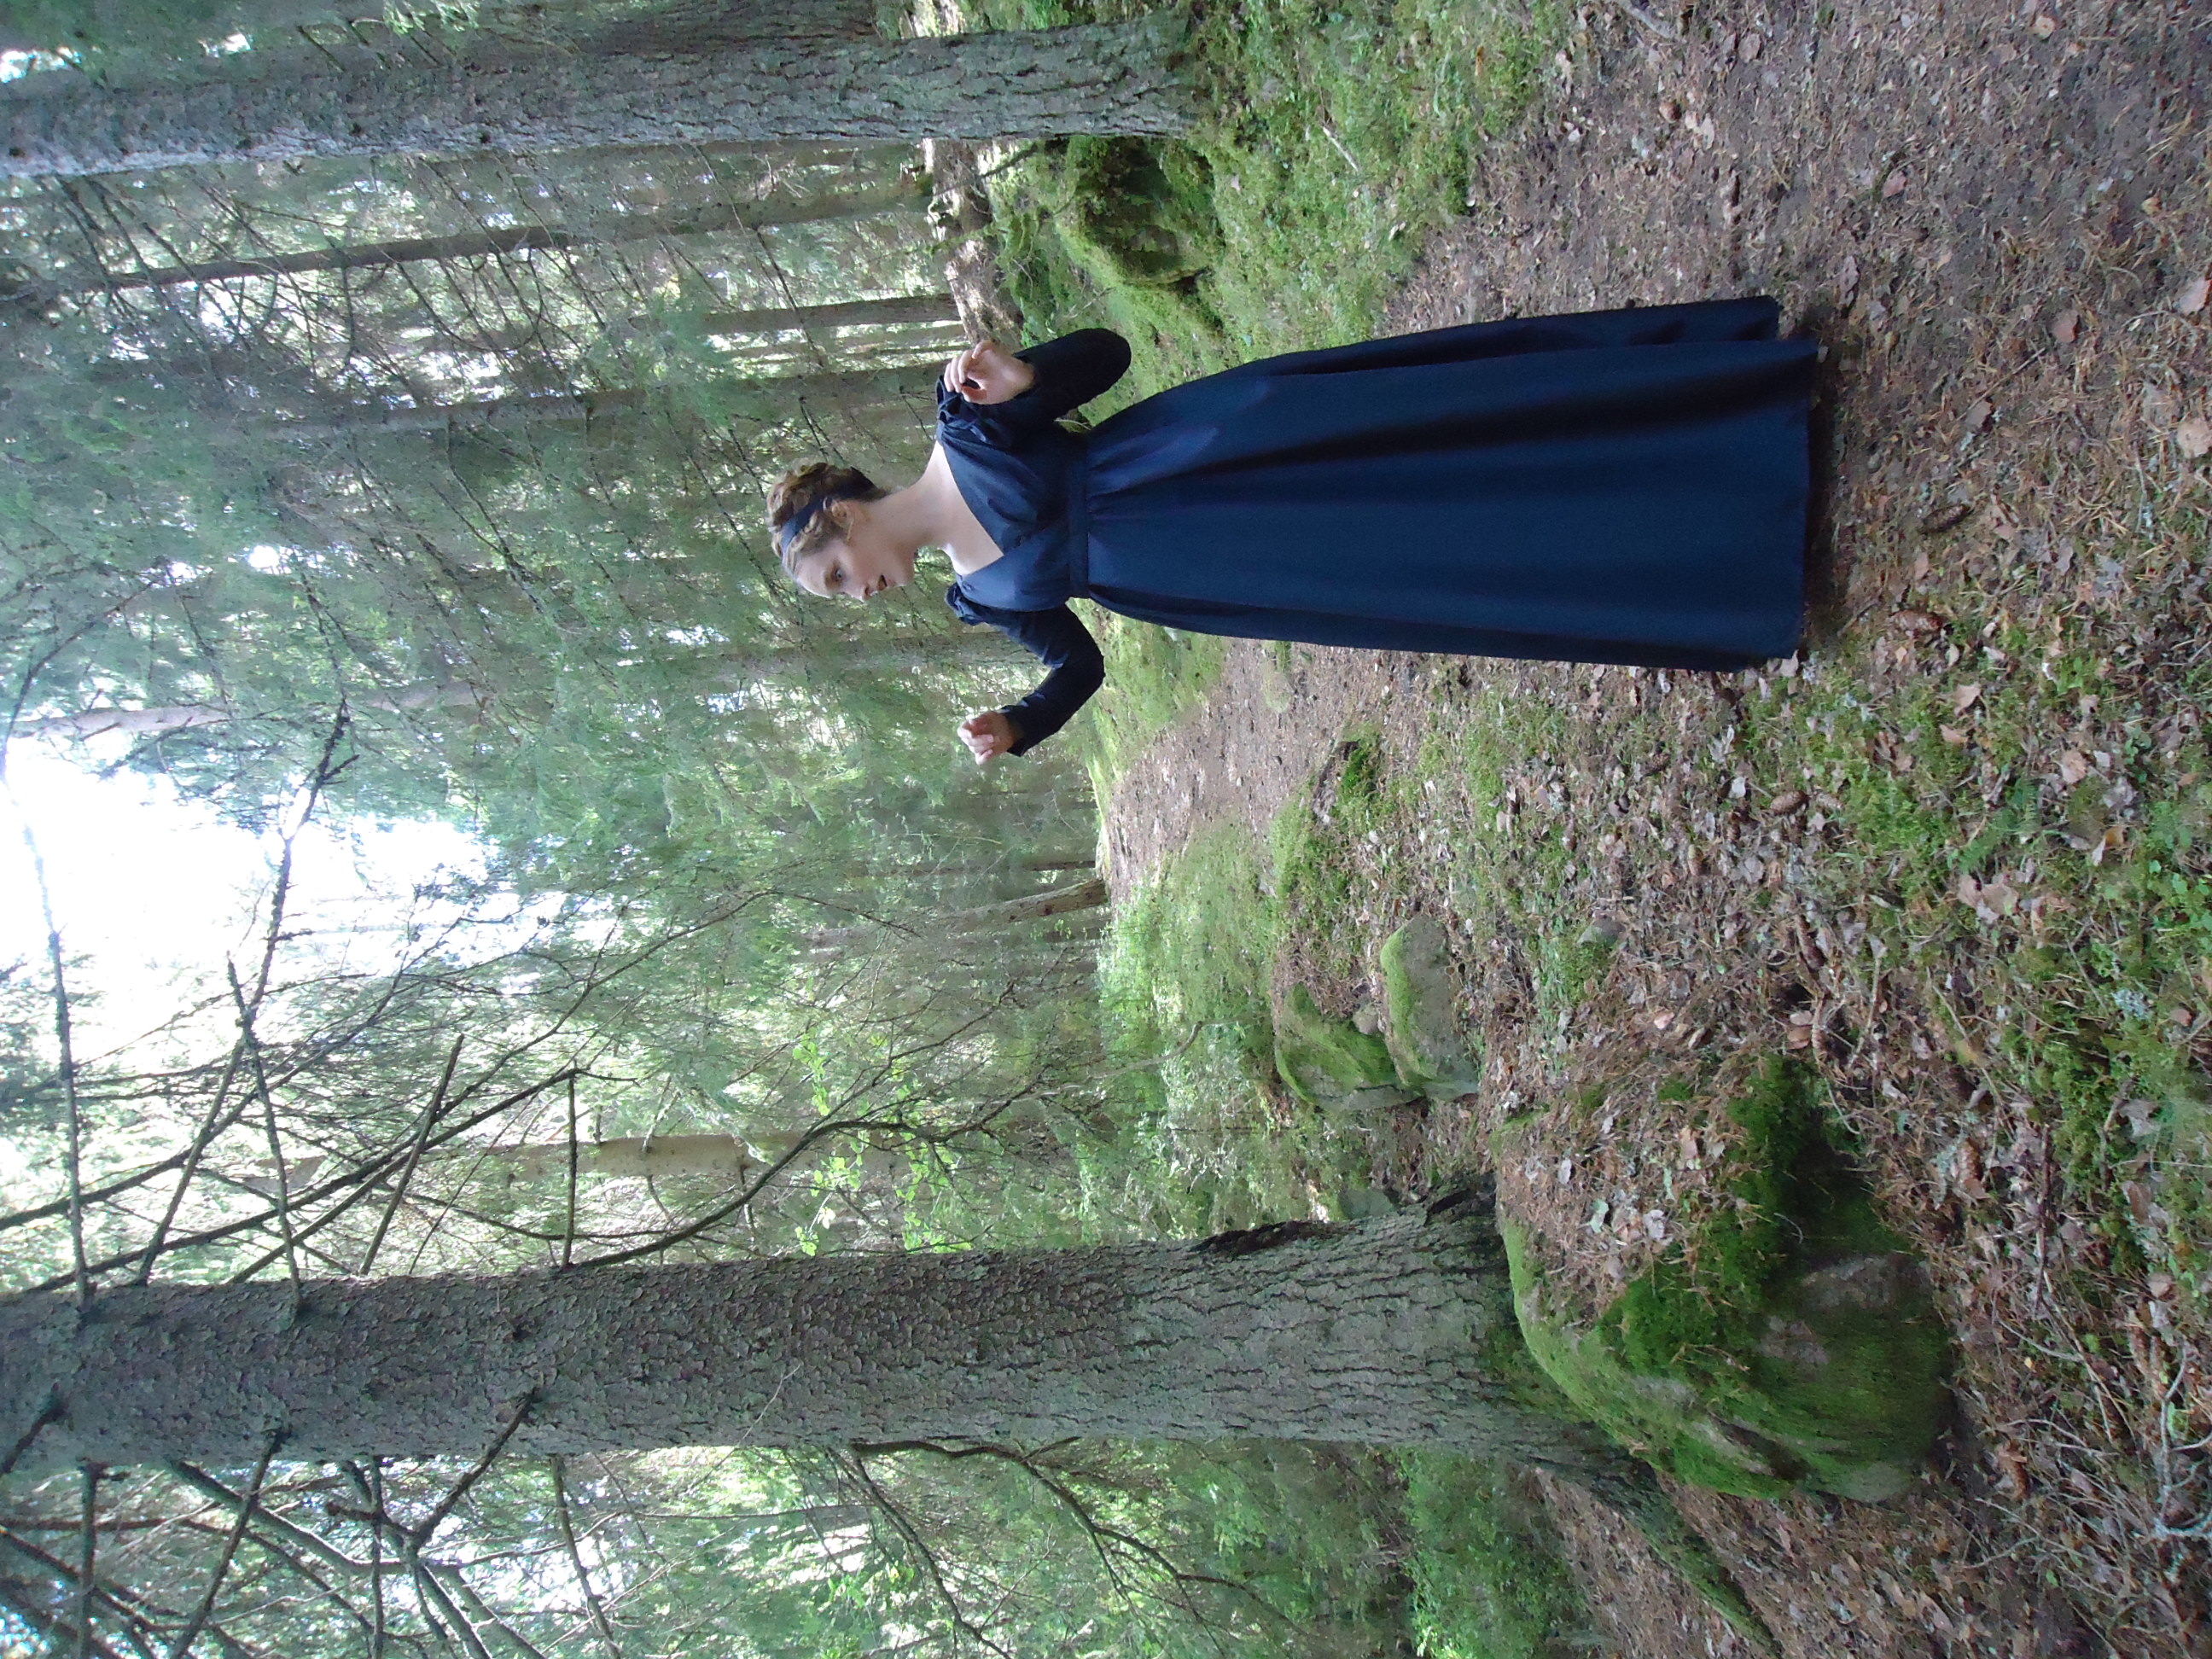
Chasing the mosquitoes, ladylike…
Oh, how terrifying!
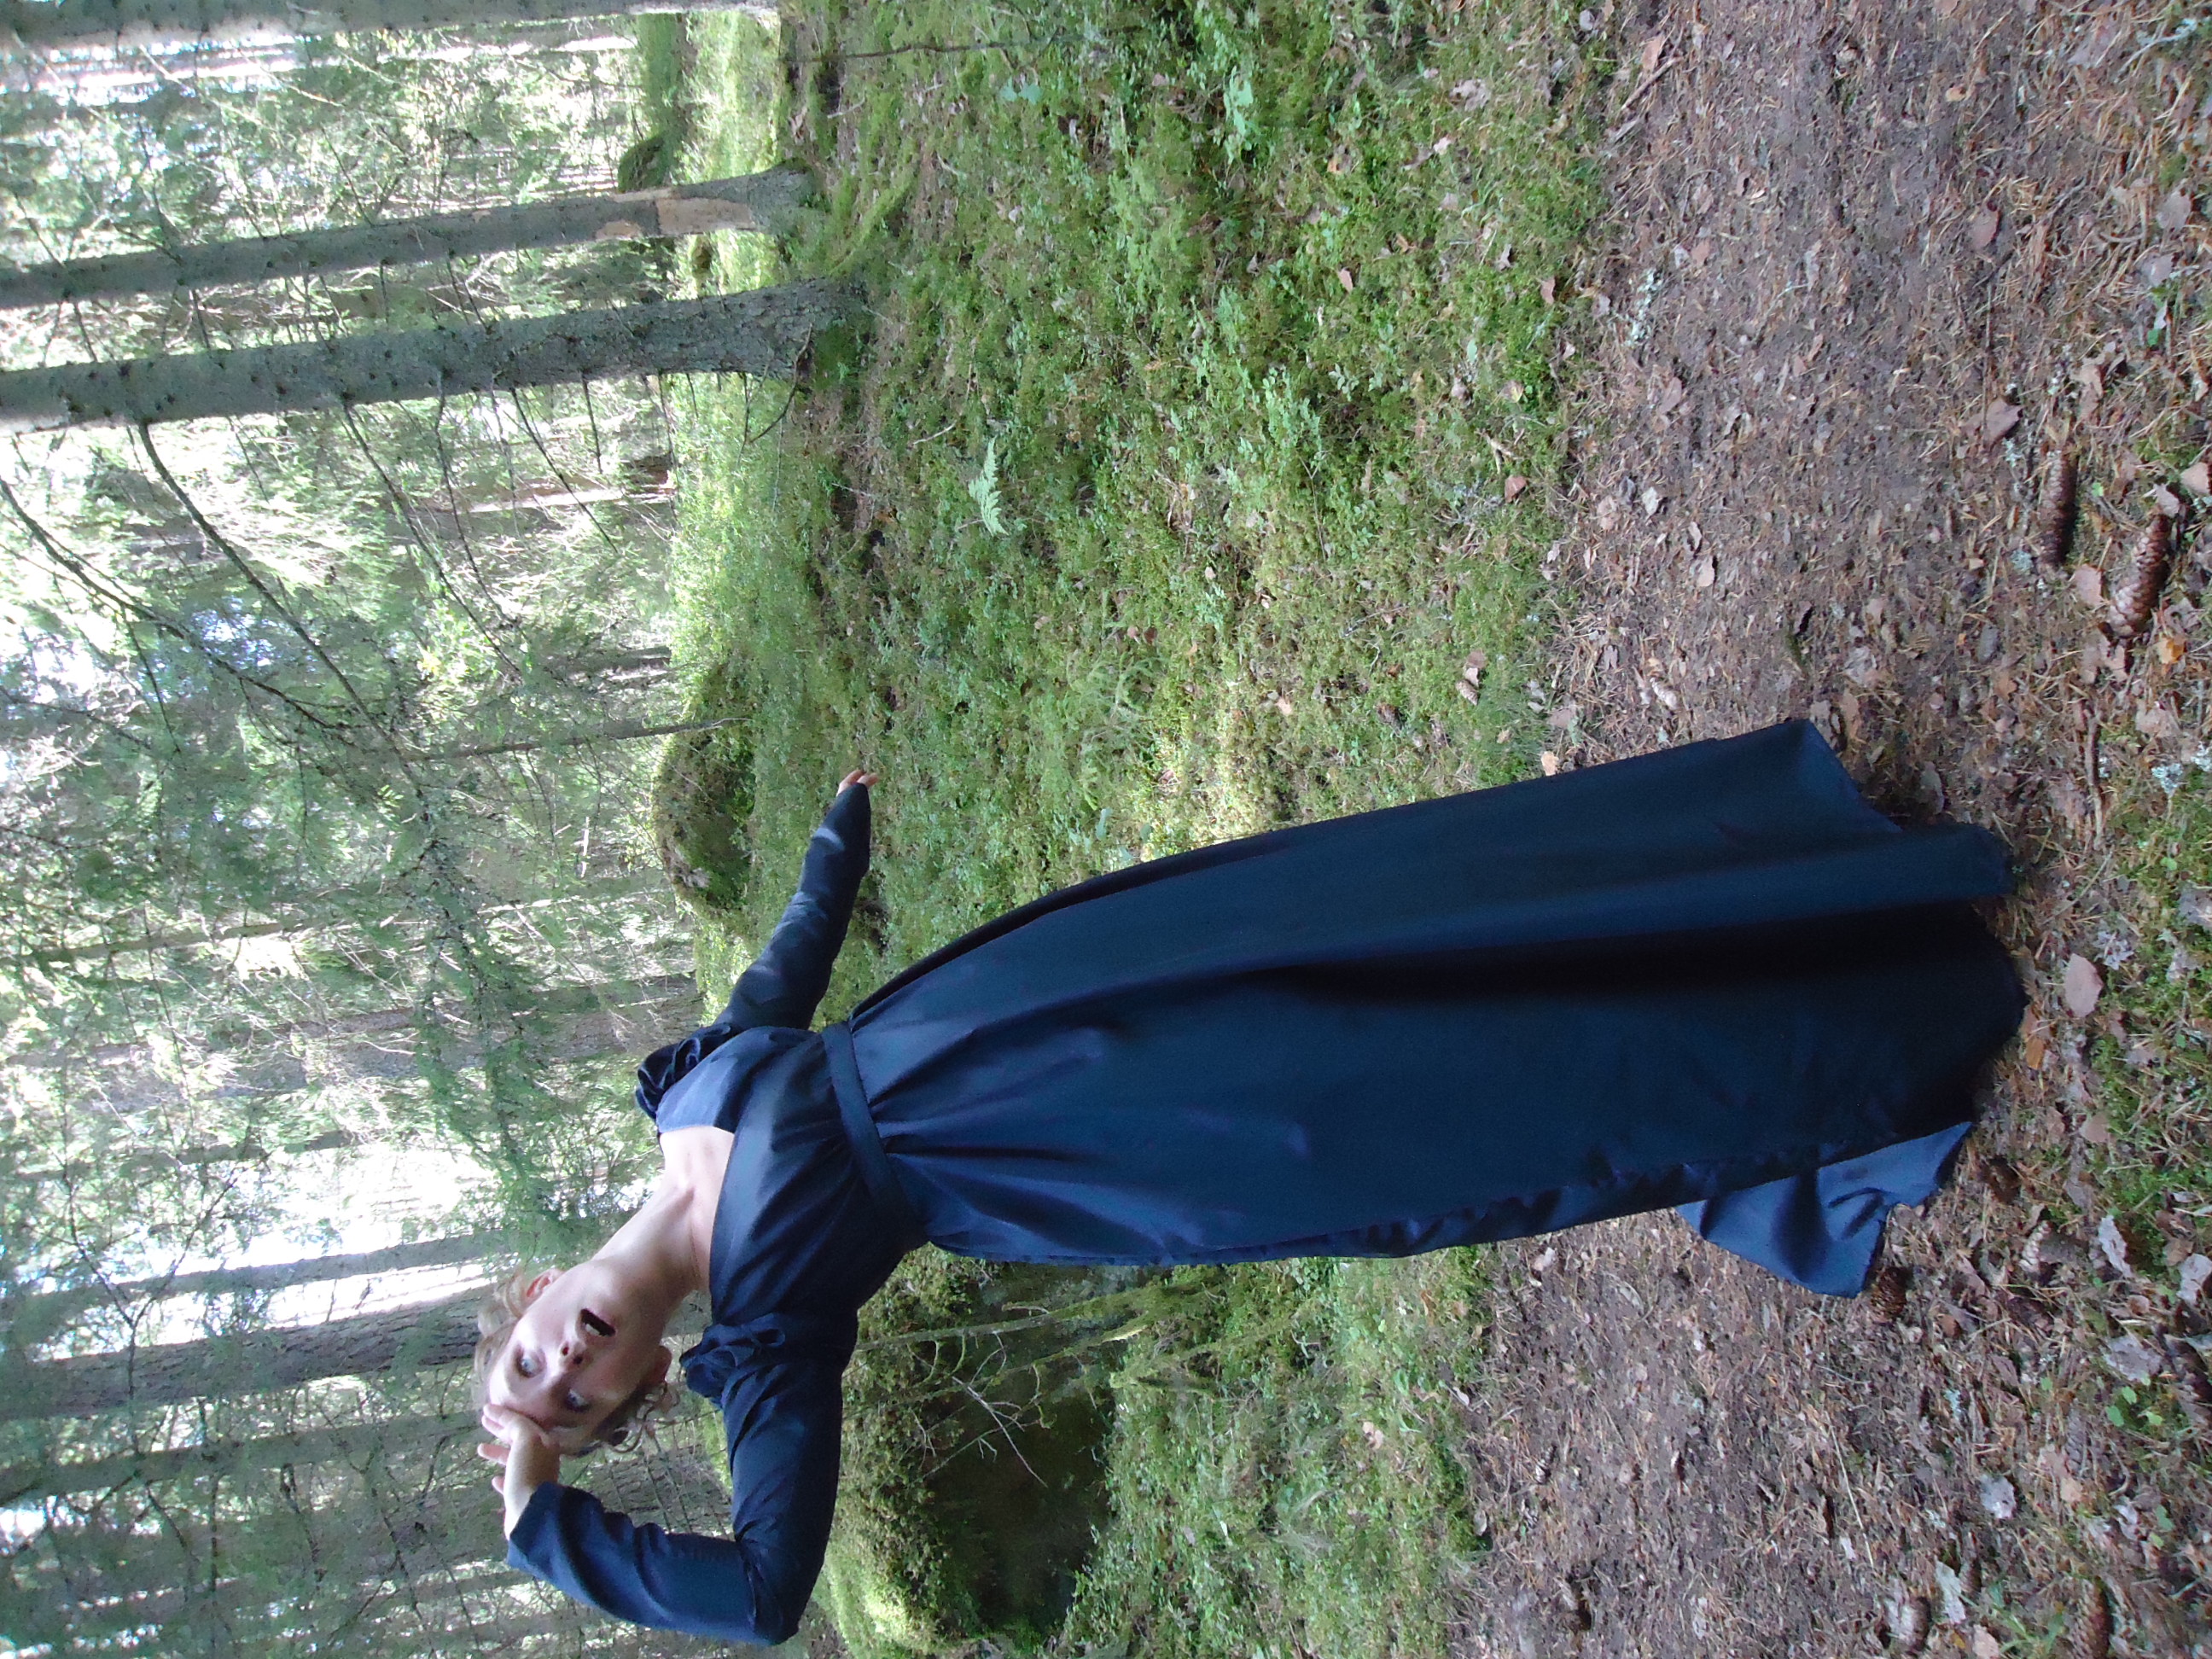
I believe I will faint!
Alas
Happy in the woods. See my detachable arms? Suddenly the day gown is transformed to a ball gown. =)
And thus, the lady wishes you all a good day, while she tries to find her way back home to Denmark.
Så önskar damen eder alla en fin dag, medan hon försöker hitta vägen tillbaka till Danmark.
Som några av er vet, har jag och mina vänner länge planerat att besöka Tjolöholms slott i augusti, för att se deras utställning med dräkter från Jane Austen-filmer. Vi har tänkt passa på att själva klä upp oss i empirdräkter, men för att de ska räcka till oss alla fyra, måste jag sy ytterligare en klänning. När min syster fick höra om utställningen blev hon också väldigt sugen. Därför bestämde vi oss för att göra samma utflykt med dem också. Då uppstod problemet att flera barn inte hade lämpliga kläder.
En natt fick jag en snilleblixt. Jag skulle sy en barnklänning i en modell som tillät åtminstone ett års växt innan den skulle vara urvuxen.
As some of you are well aware, I have planned for a visit to a Swedish castle with my friends, in August. In order to have enough gowns for us all, I had planned to create a new gown for myself. As it happened, my sister became as excited as myself, to see the exhibition of Jane Austen film costumes. Therefore my husband and I decided to go there with them too. Then there was the new problem that my nieces didn’t have any appropriate dresses.
One night, I had an epiphany. I would sew a childs’ dress in a model that would allow for at least one years growth.
Nästa gång jag träffade barnet i fråga (den mest entusiastiska Jane Austen-nörden), klippte jag till delarna för klänningen med henne som provdocka.
Next time I saw the eldest of my nieces (and also the most enthusiastic Jane Austen fan), I cut the dress on her skin.
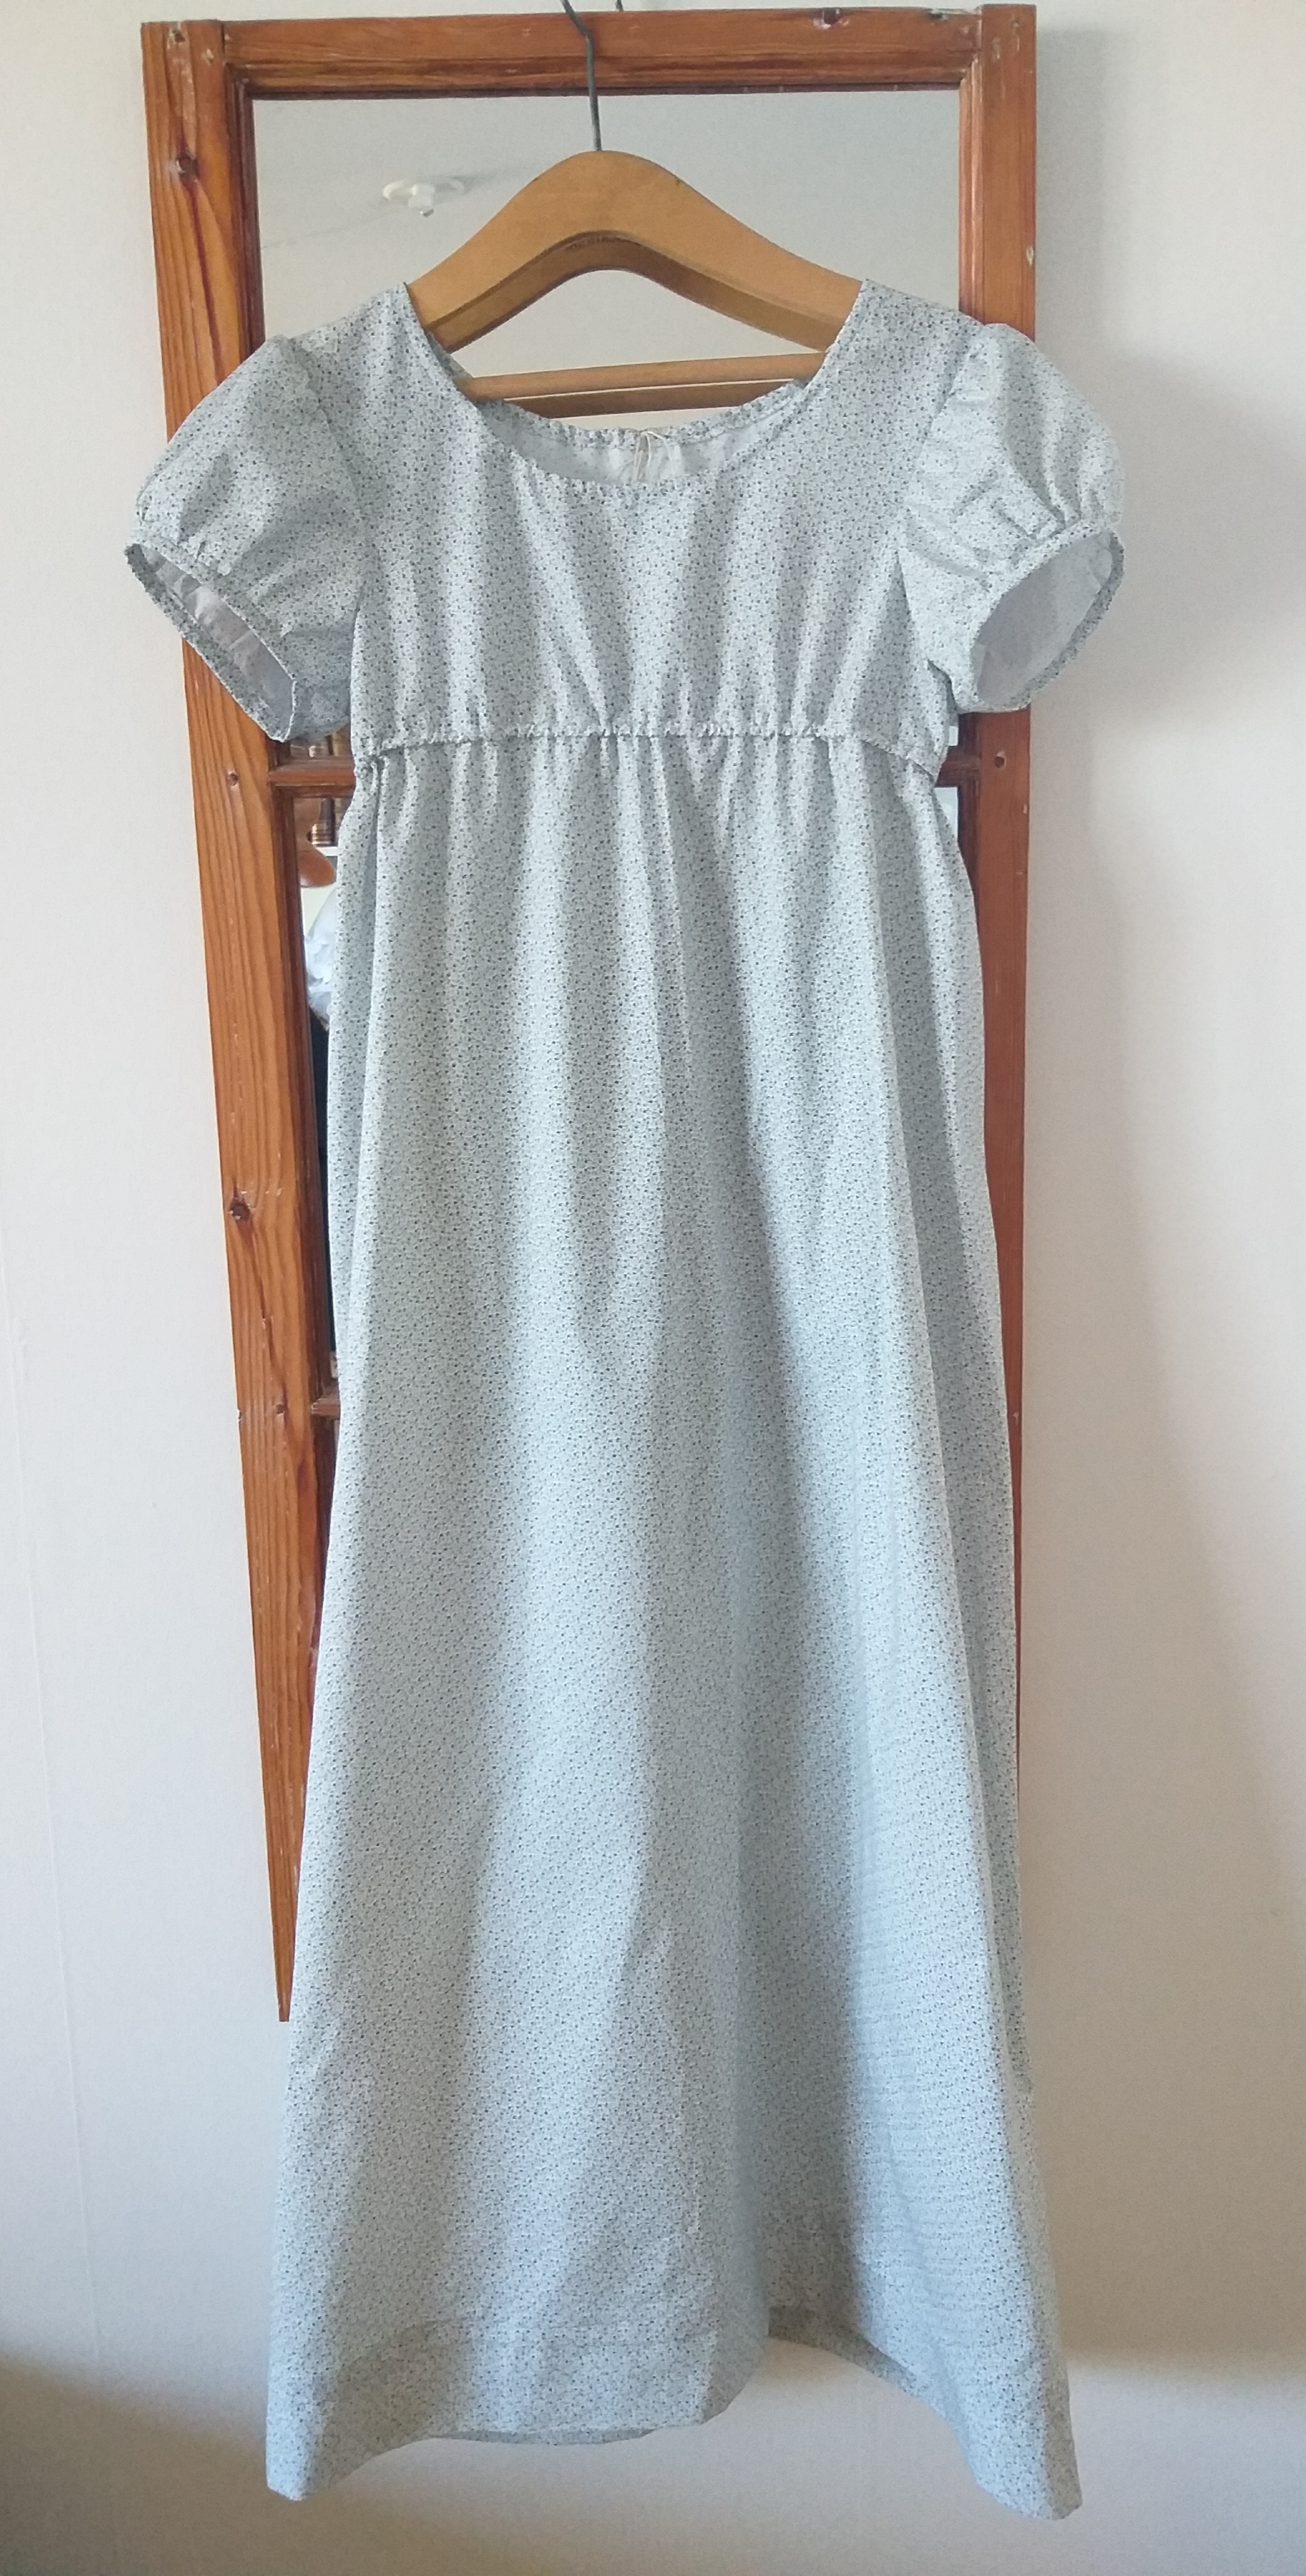
Till klänningen använde jag ett vackert gammalt lakan från Second Hand, med infälld spets:
Livet: Jag gjorde två bitar, två dm större än hennes verkliga mått, för överdelen. Efter att ha klippt hål för huvud och armar, nålade jag samman fram- och bakstycke på henne. Framstycket gjordes 2 dm bredare upptill än nedtill, där det matchade hennes verkliga bröstvidd (för att få till de fina vecken från halslinningen). Bakstycket var 2 dm bredare både upptill och nedtill, eftersom klänningsvidden regleras både i hals- och liv-linningen. Jag satte in en dragsko i halslinningen.
Kjol: Jag rev av en lagom lång del av lakanet för kjolen, och använde delen med spetsen nedtil. Allt var ju redan fållat och klart, så jag behövde bara sy samman långsidorna och nåla fast kjolen i livet. Jag började med att nåla fast sömmen mot en av sidorna på linningen och nålade sedan kjolen mot framsidan, helt slätt. Sedan samlade jag allt överflödigt material baktill i jämnt fördelade veck baktill. Sedan sydde jag ihop kjolen och livet.
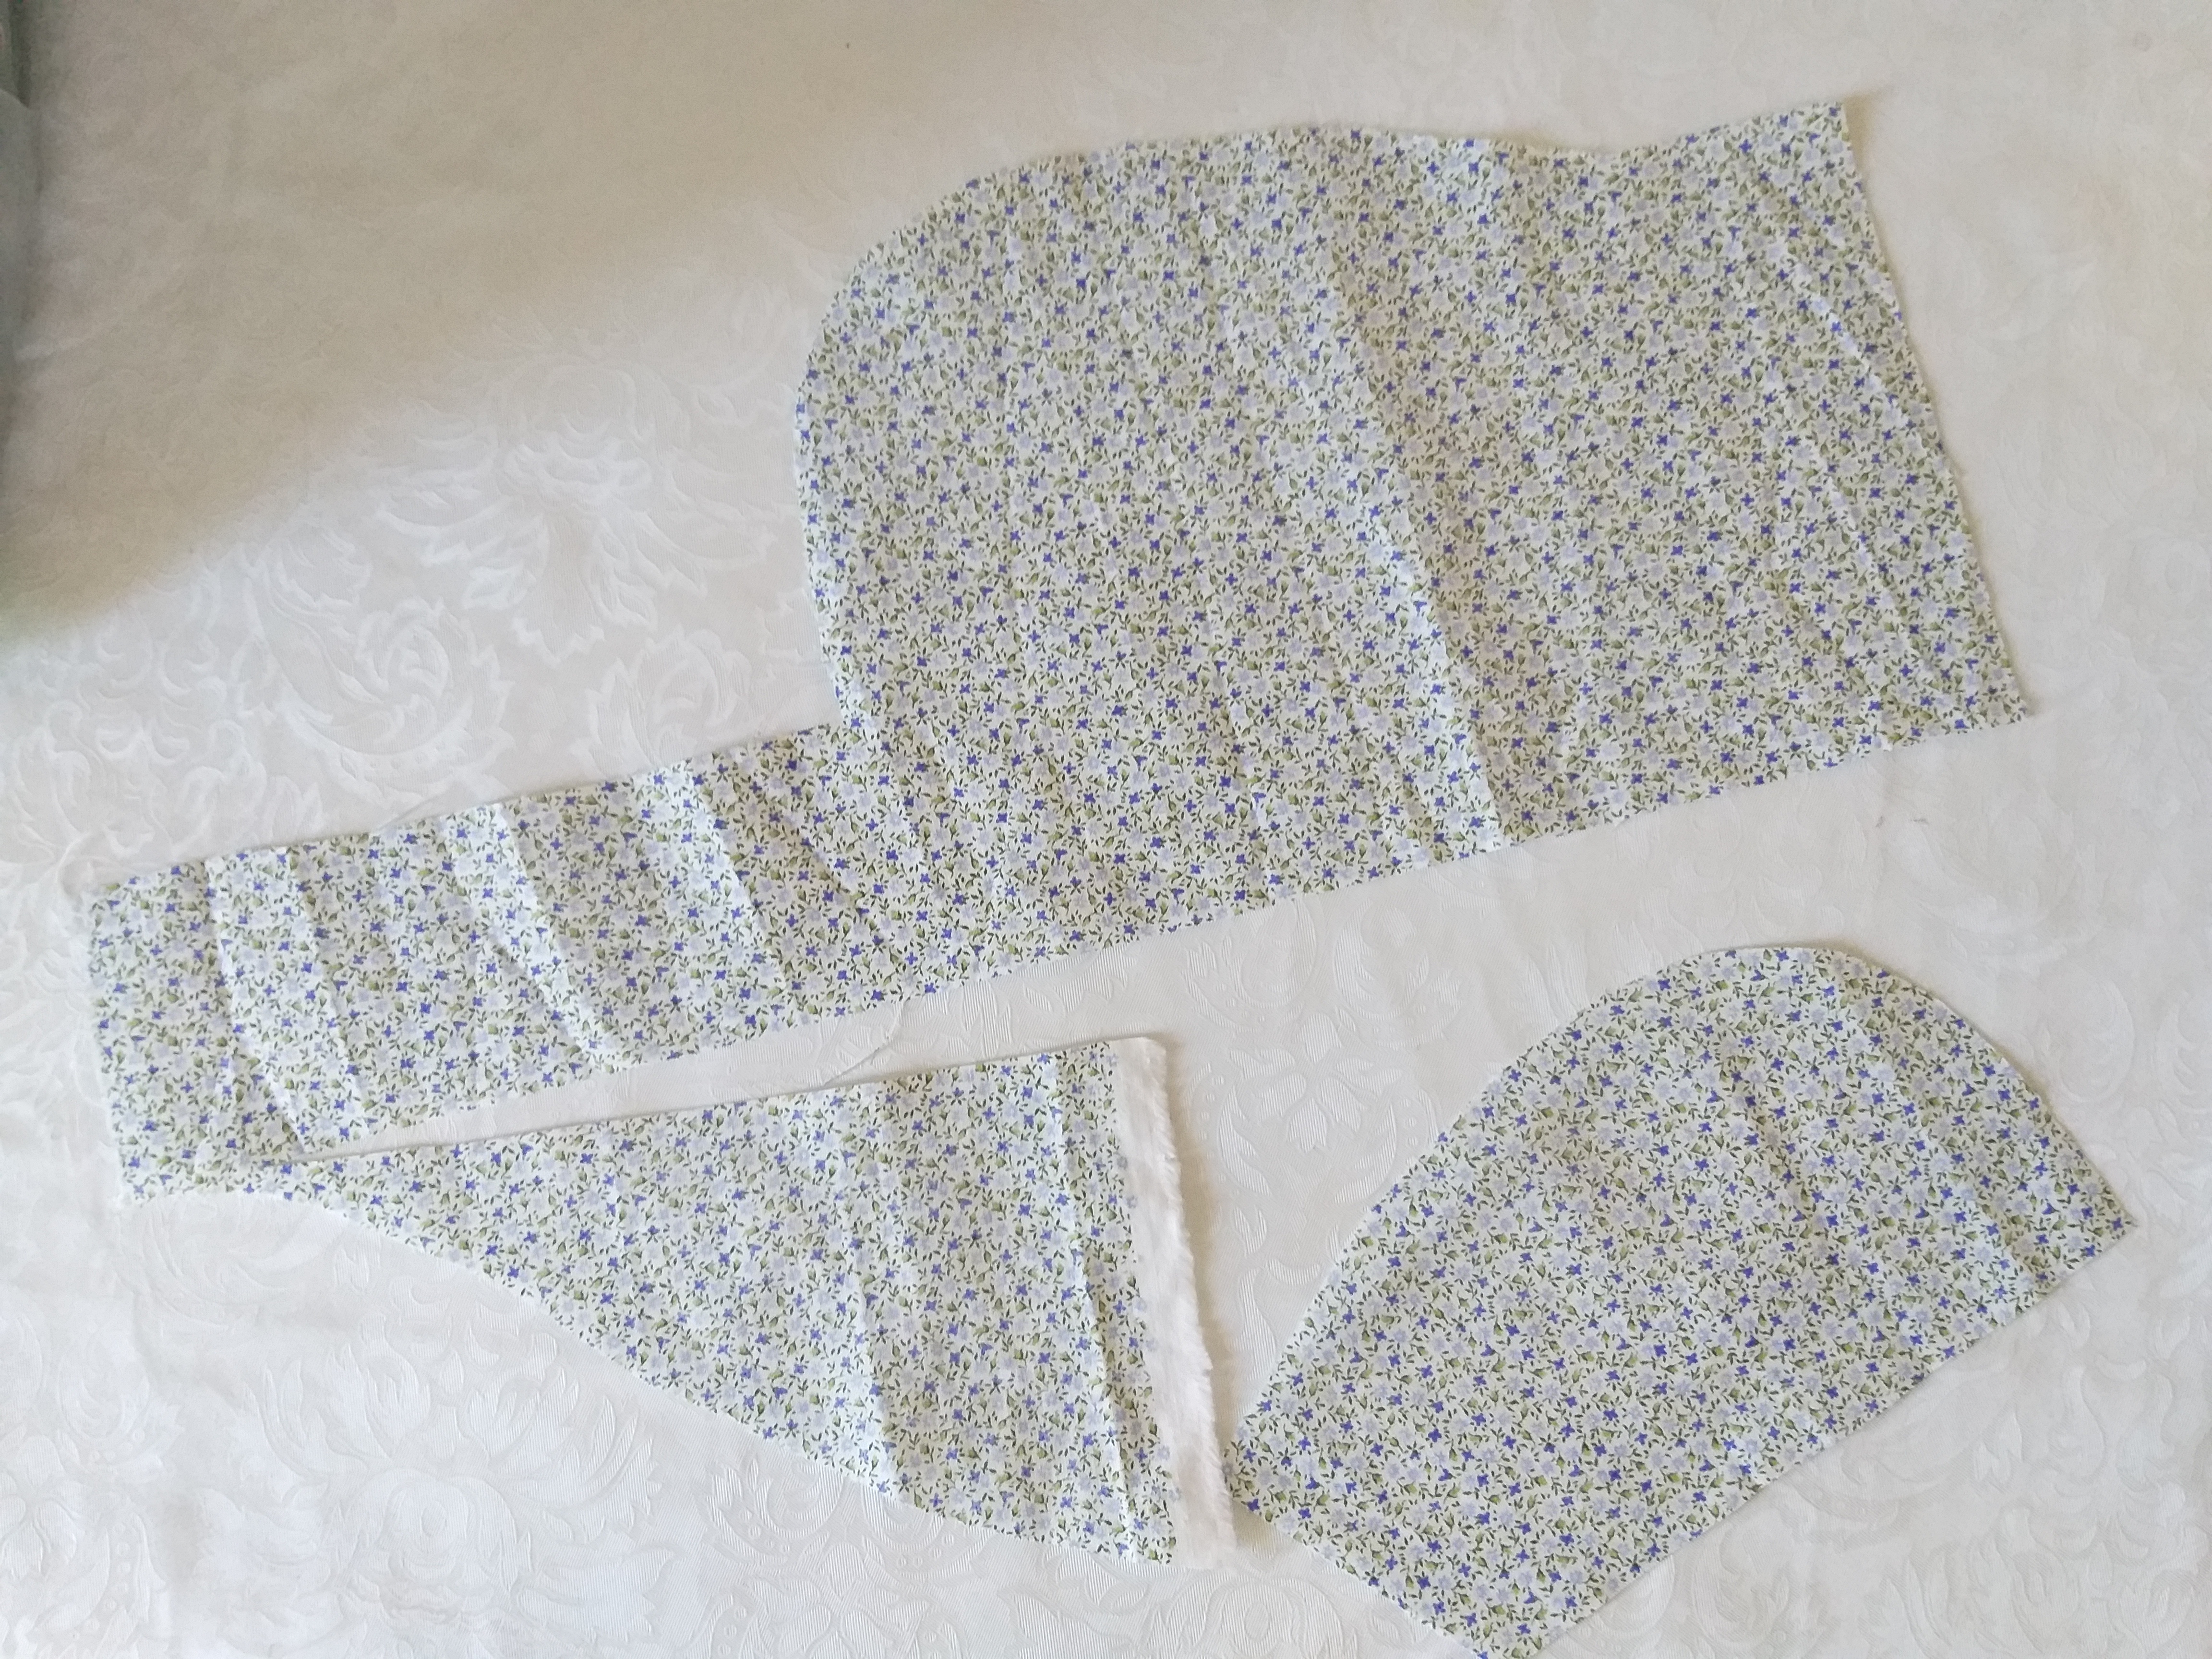
Puffärmar: Jag klippte till två tygbitar, 2 dm bredare än överarmen på min lilla kund. Sedan klippte jag till den som på bilden. Jag sydde “veck-sömmar” för hand längs övre och nedre kanten. Sedan sydde jag ihop sidorna. Jag samlade tyget i veck, på mitten av nedre delen och sydde sedan in kanten i ett kantband. Efter att ha nålat fast ärmet mot lägsta punkten på armhålet, samlade jag det mesta av det överflödiga tyget i veck högst upp på armkullen, men också jämnt fördelat framtill och baktill. Sedan sydde jag.
Sedan var klänningen klar!
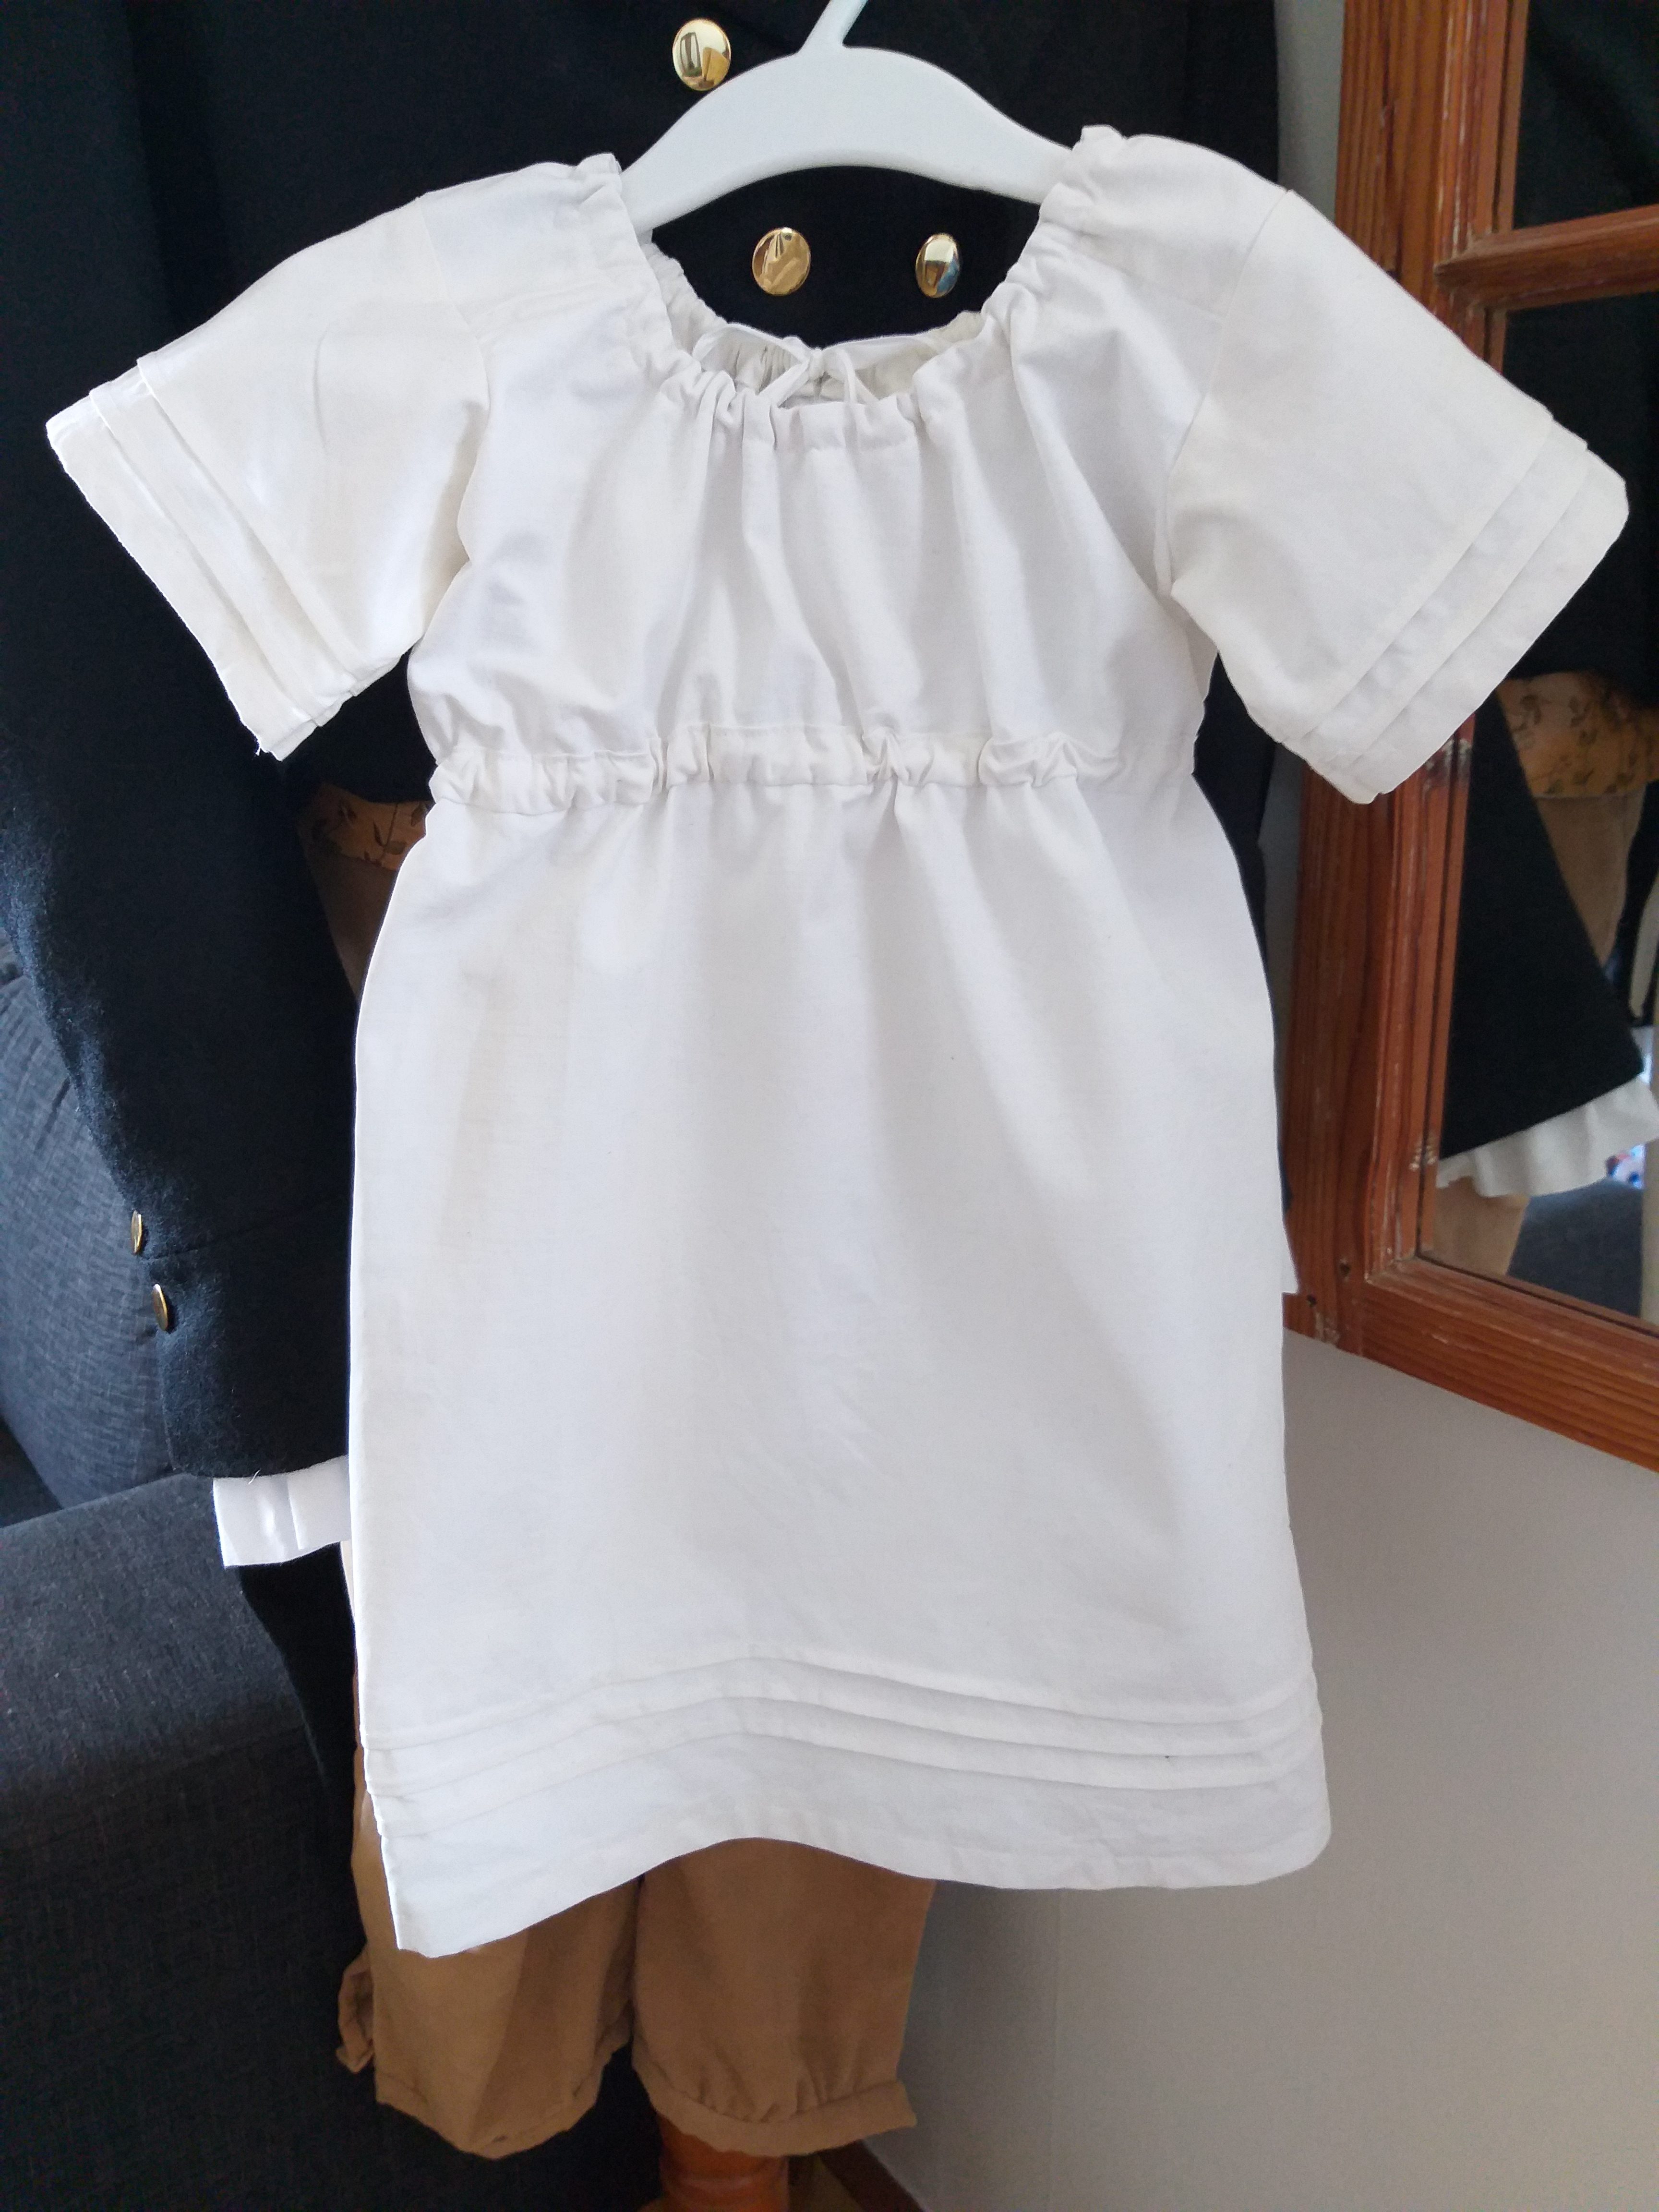
I made the dress from one old bed sheet with fine inserted lace, like this:
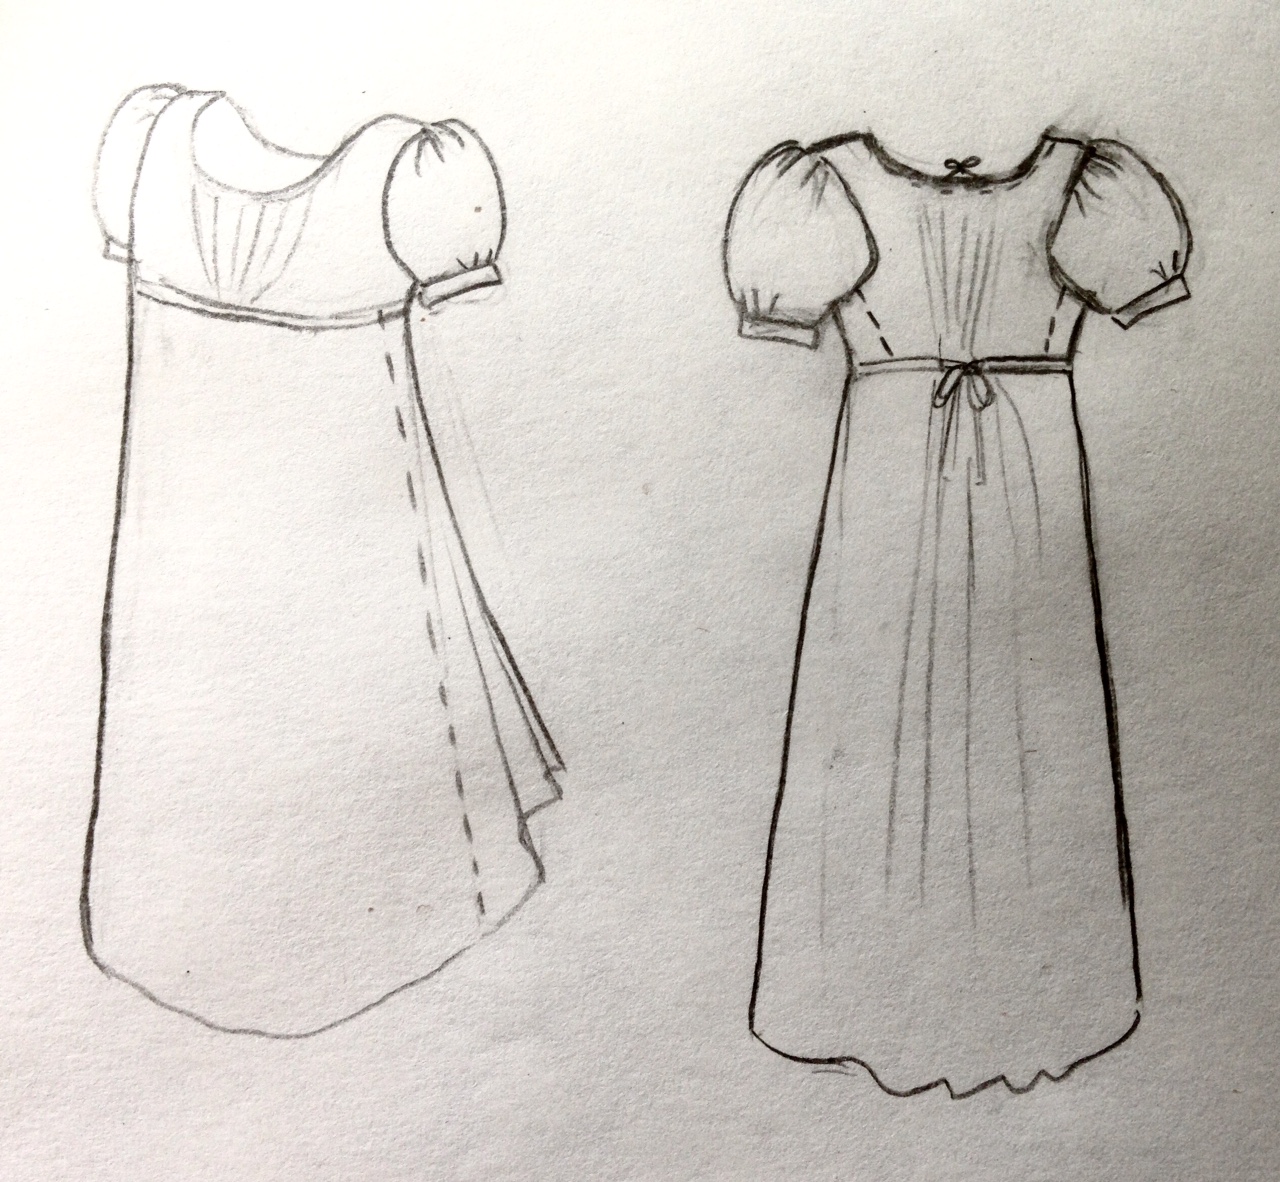
Bodice: I made two pieces, two decimeters bigger than the wanted measures for the dresses upper part. I pinned them to each other at her shoulders and then cut holes for arms and neck and pinned the front and back piece together. The front piece was made 2 dm wider at the top than her real shoulder measure, while the bottom measure correlated with her real measure (in order to create the right pleats). The back was 2 dm wider both at the top and bottom, because this is where the real fullness of the dress is regulated. Then the front and back were sewn together and I put a drawstring in the neckline.
Skirt: I used the part of the sheet, where the lace was inserted, with the lace at the bottom. Then I sew the long sides together and pinned the part with the seam to one of the sides of the bodice. I pinned the skirt flat to the front. In the back I gathered all the excessive fabric in pleats, pointing to the middle. The skirt was sewn to the bodice.
Puffed arms: I cut two pieces of fabric, 2 dm wider than the overarm of my little customer, then I cut it as in the picture. I sew “gathering seams” by hand along the upper and lower side. Then I sew the sides together. I gathered the fabric to the middle of the arm, at the bottom, then attached a tape. After having pinned the arm to the bottom om the armhole on the bodice, I gathered the fabric mostly to the top of the arm, but also evenly in front and back. Then I sew.
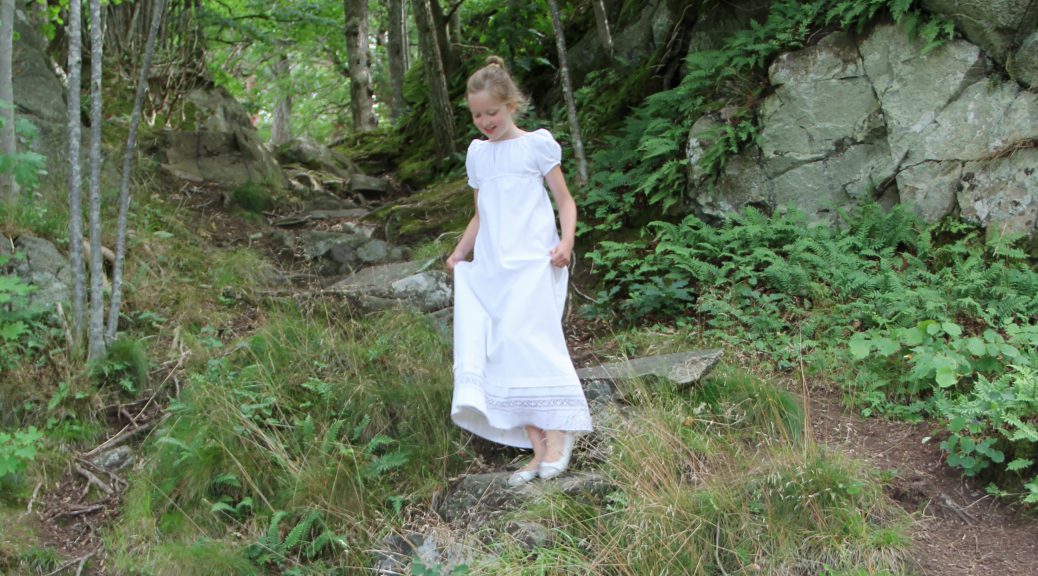
And then, the dress was finished!
“Gathering seams” along the top and bottom of the arms
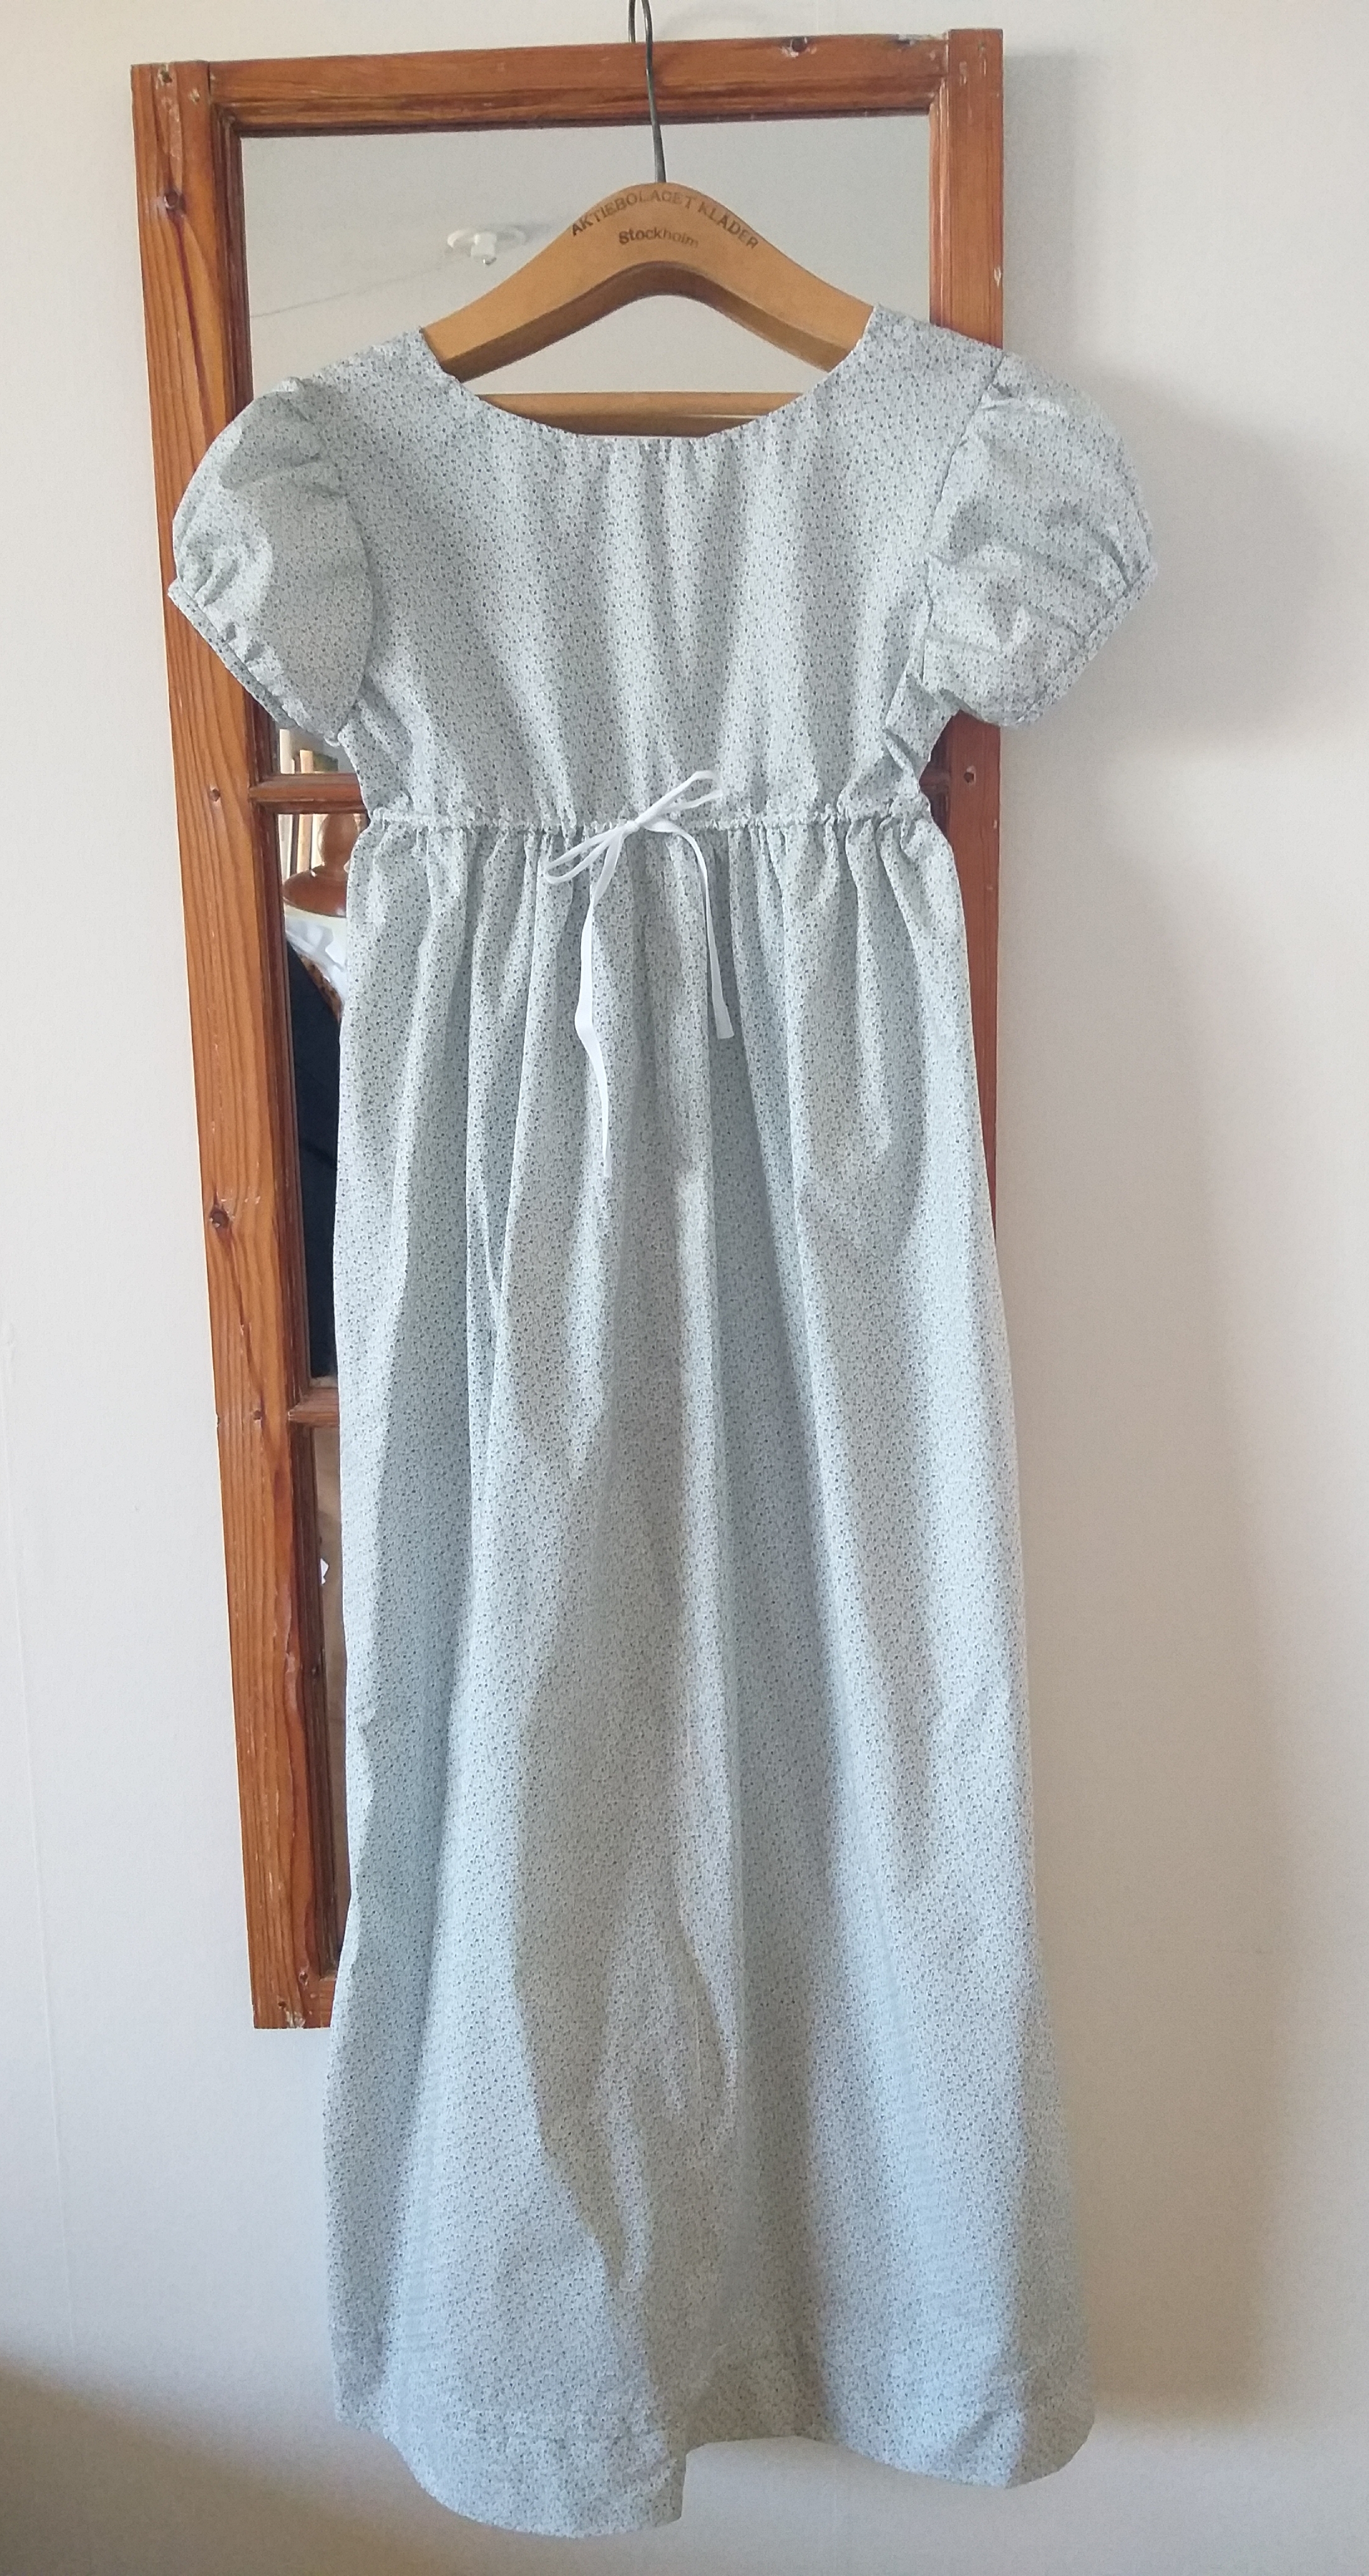
The ribbons attached to the bottom of the poofed arms.Front of the dress.Back of the dress, with gathering drawstring in the neckline and at the bottom of the bodice.Klänningen klipptes till och syddes på 4-6 timmar.
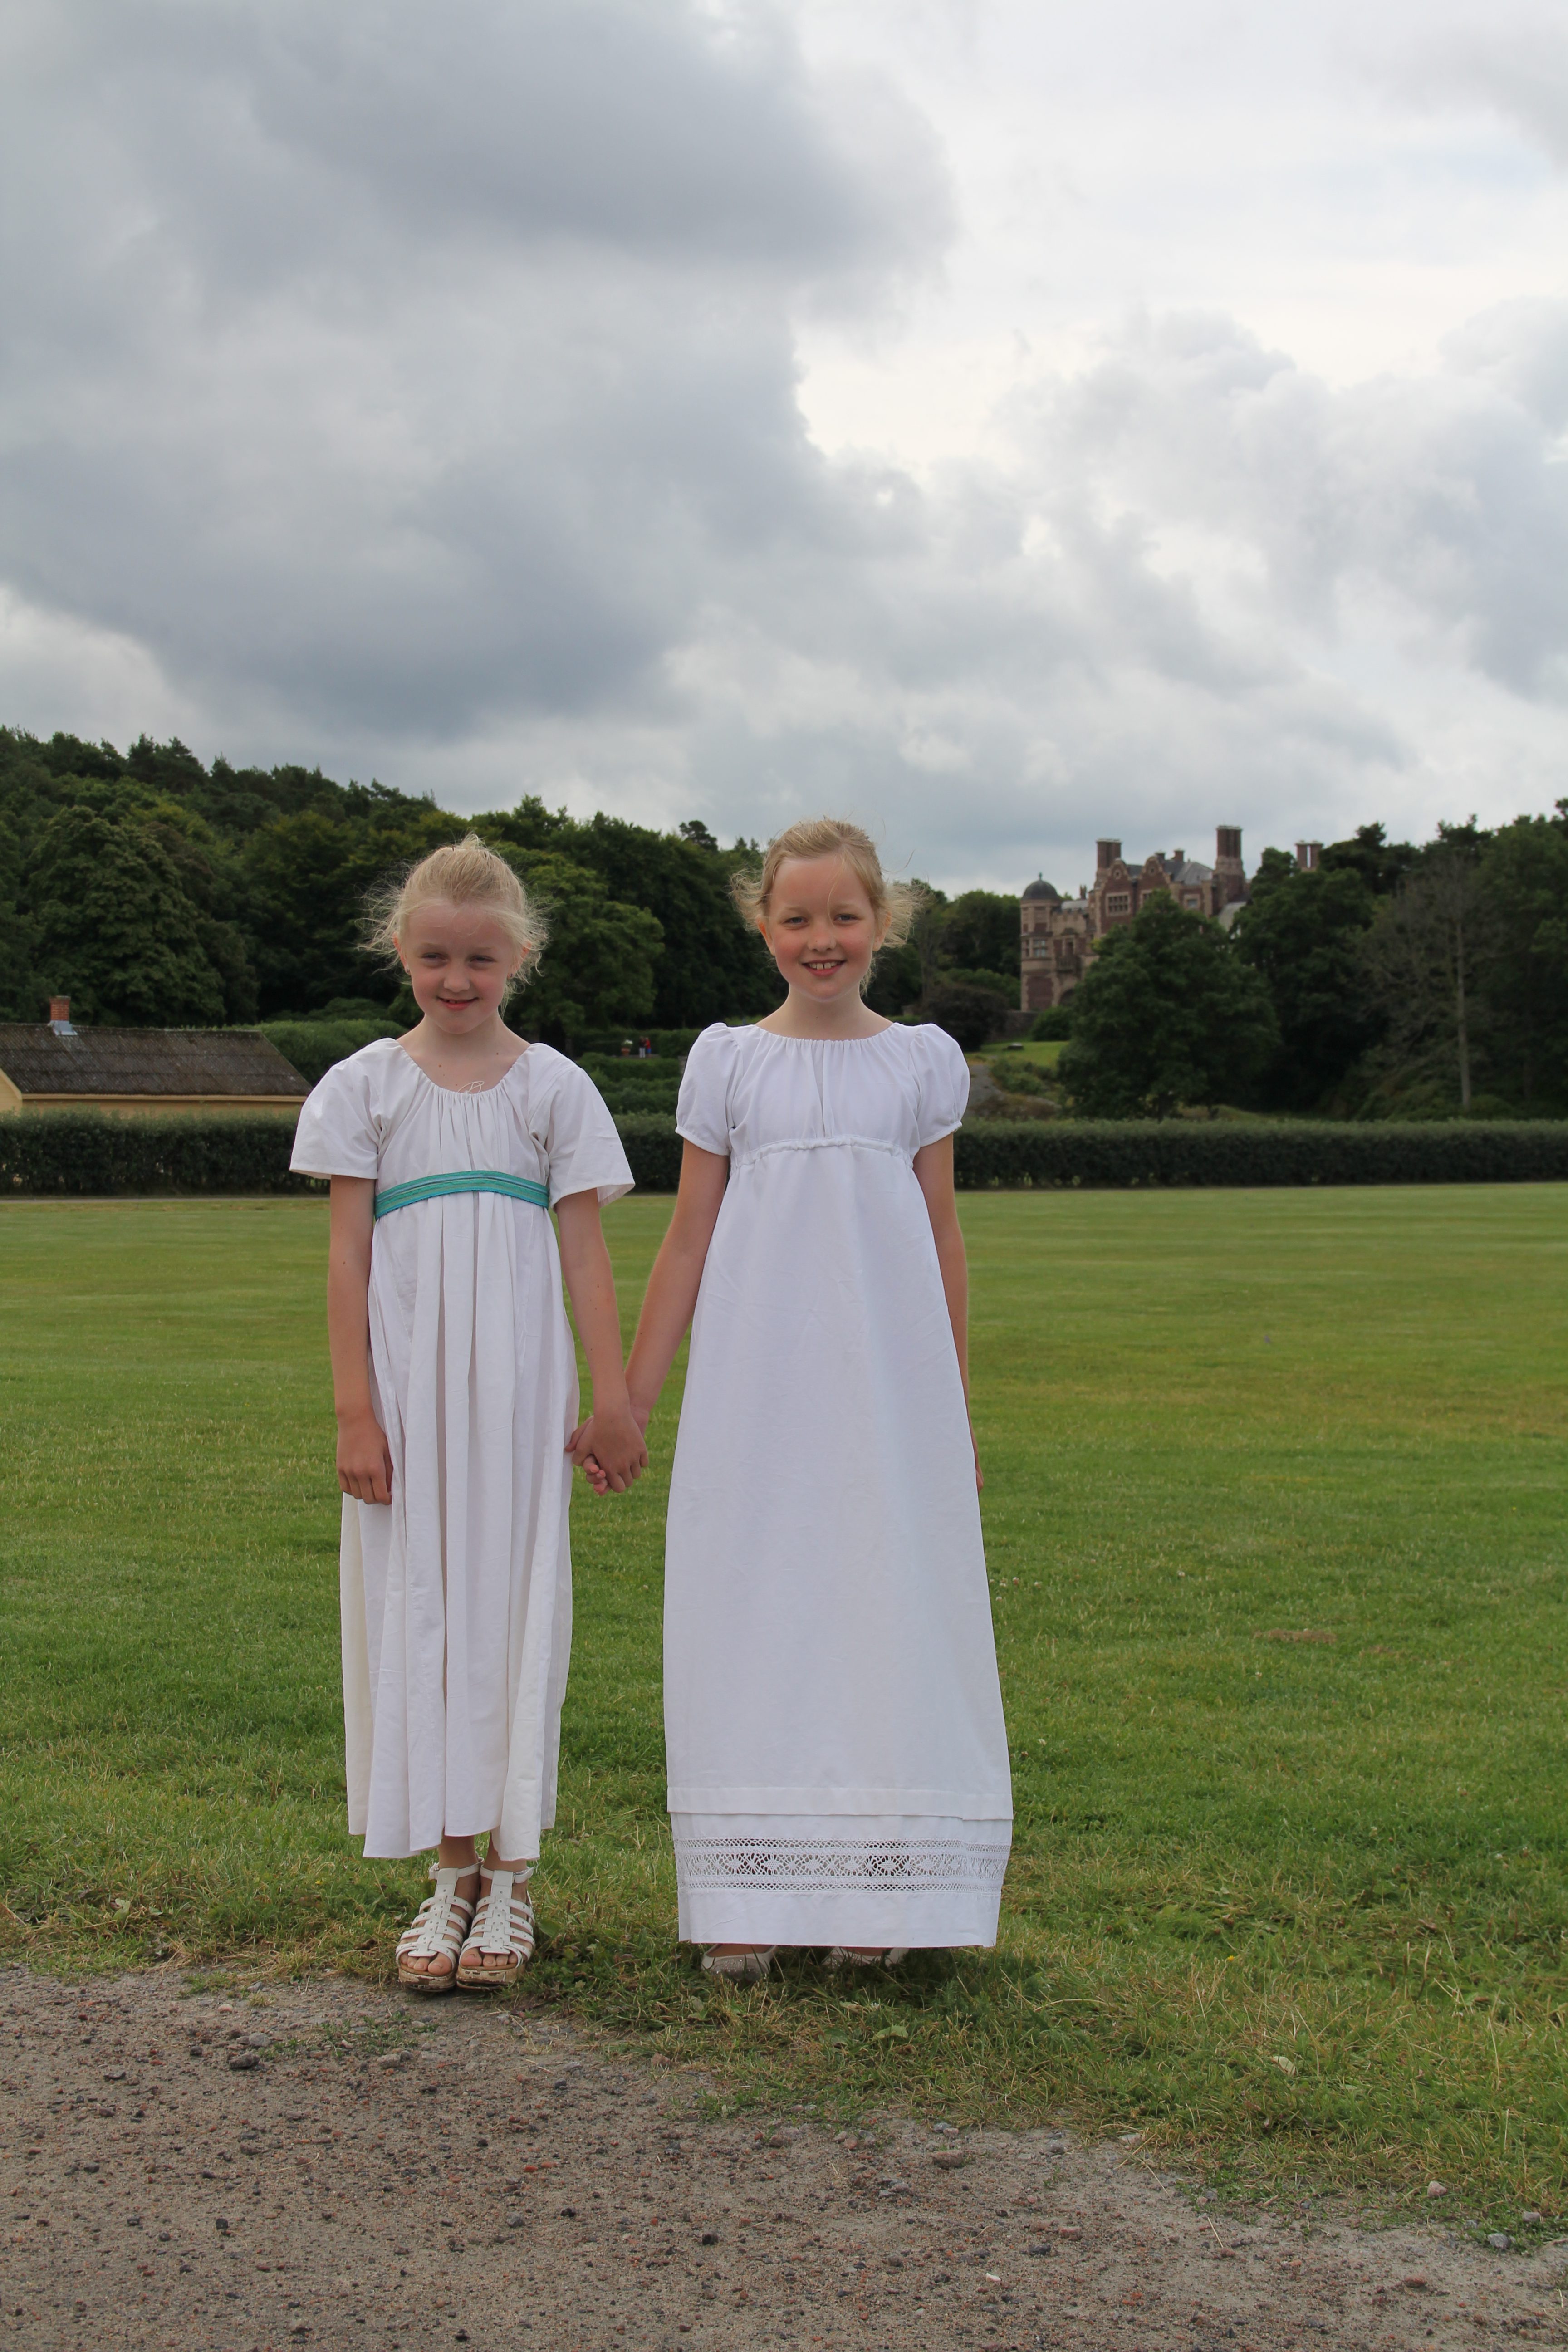
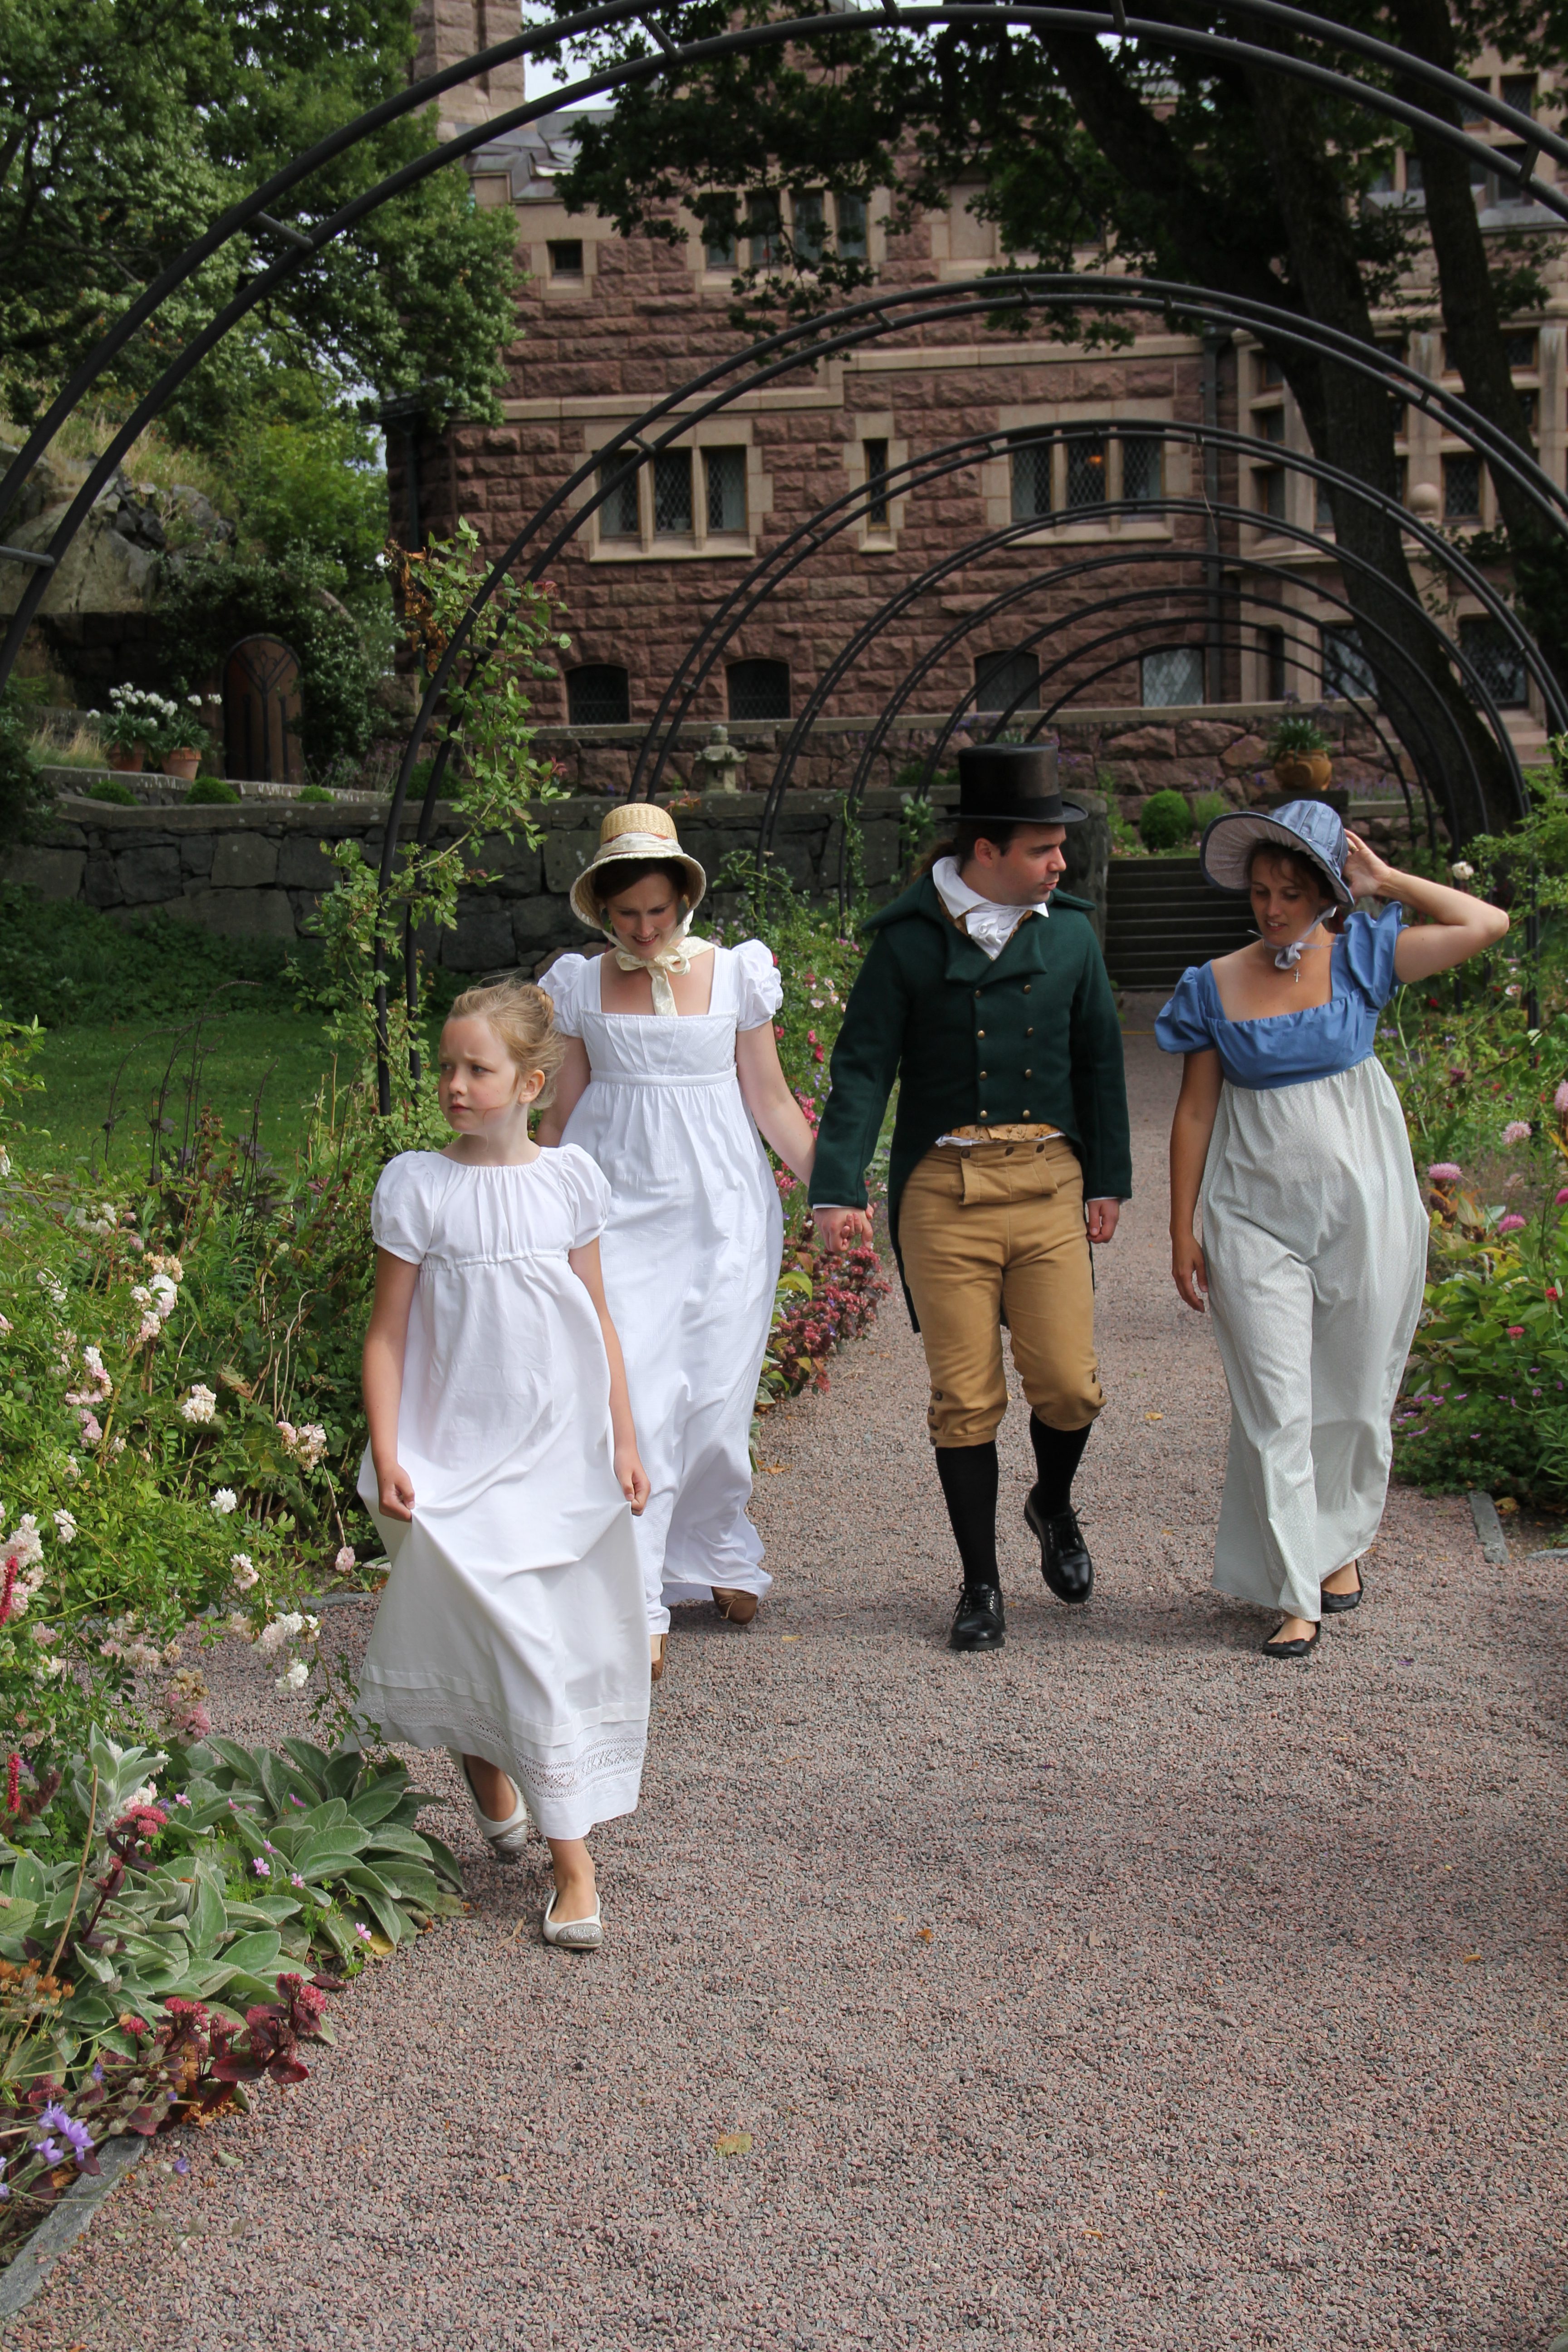
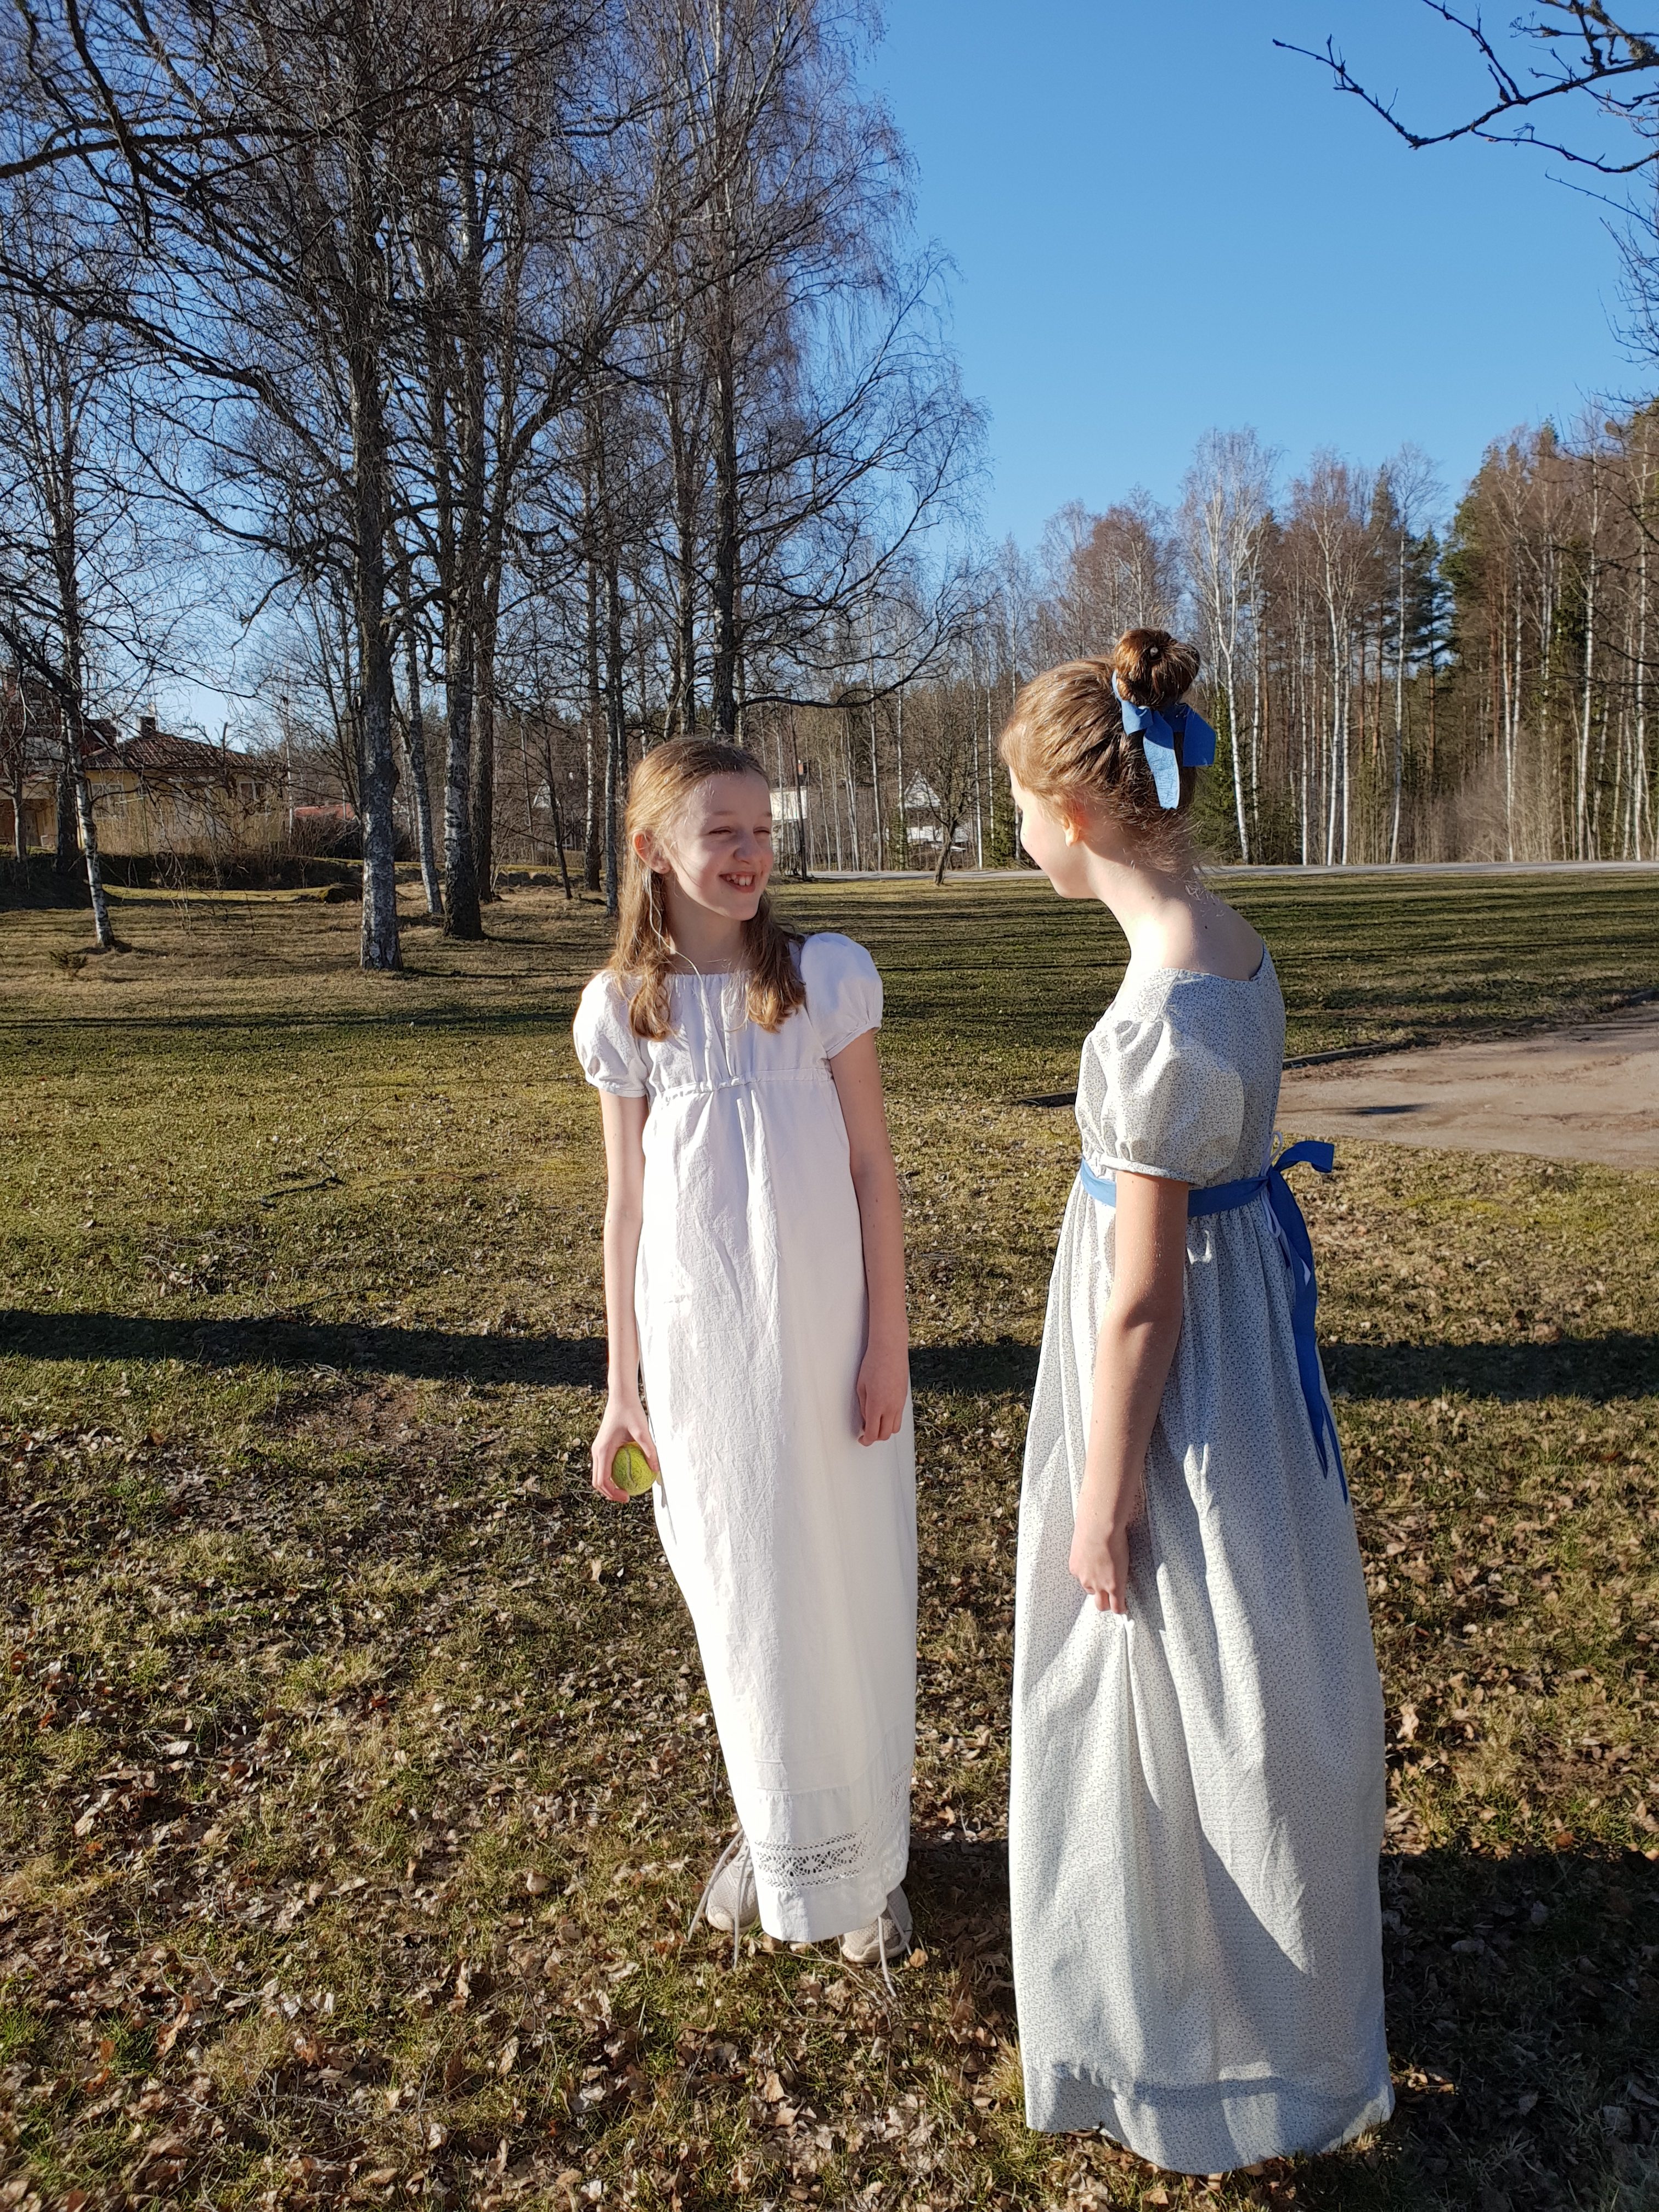
När vi strövade omkring i Tjolöholms slottsträdgård stannade många gäster upp och beundrade oss. Bland annat hörde vi flera kommentera om “prinsessorna”, “de som ska spela teater här” och en kvinna som desperat försökte få sin väninna att vända sig om och fota oss genom att väsa: “Skynda, skynda!”. När vi åkte därifrån tror vi att bortåt hundra personer hade fotat oss. Det känns ju som en underbar bekräftelse på att jag lyckats med våra kläder.
The whole dress was completed in about 6 hours.
We were much admired when we walked through the castle gardens and I believe that at least hundred different people took pictures of us. This is a very good compliment to my efforts with our costumes.
The happy family, preparing for the outing.
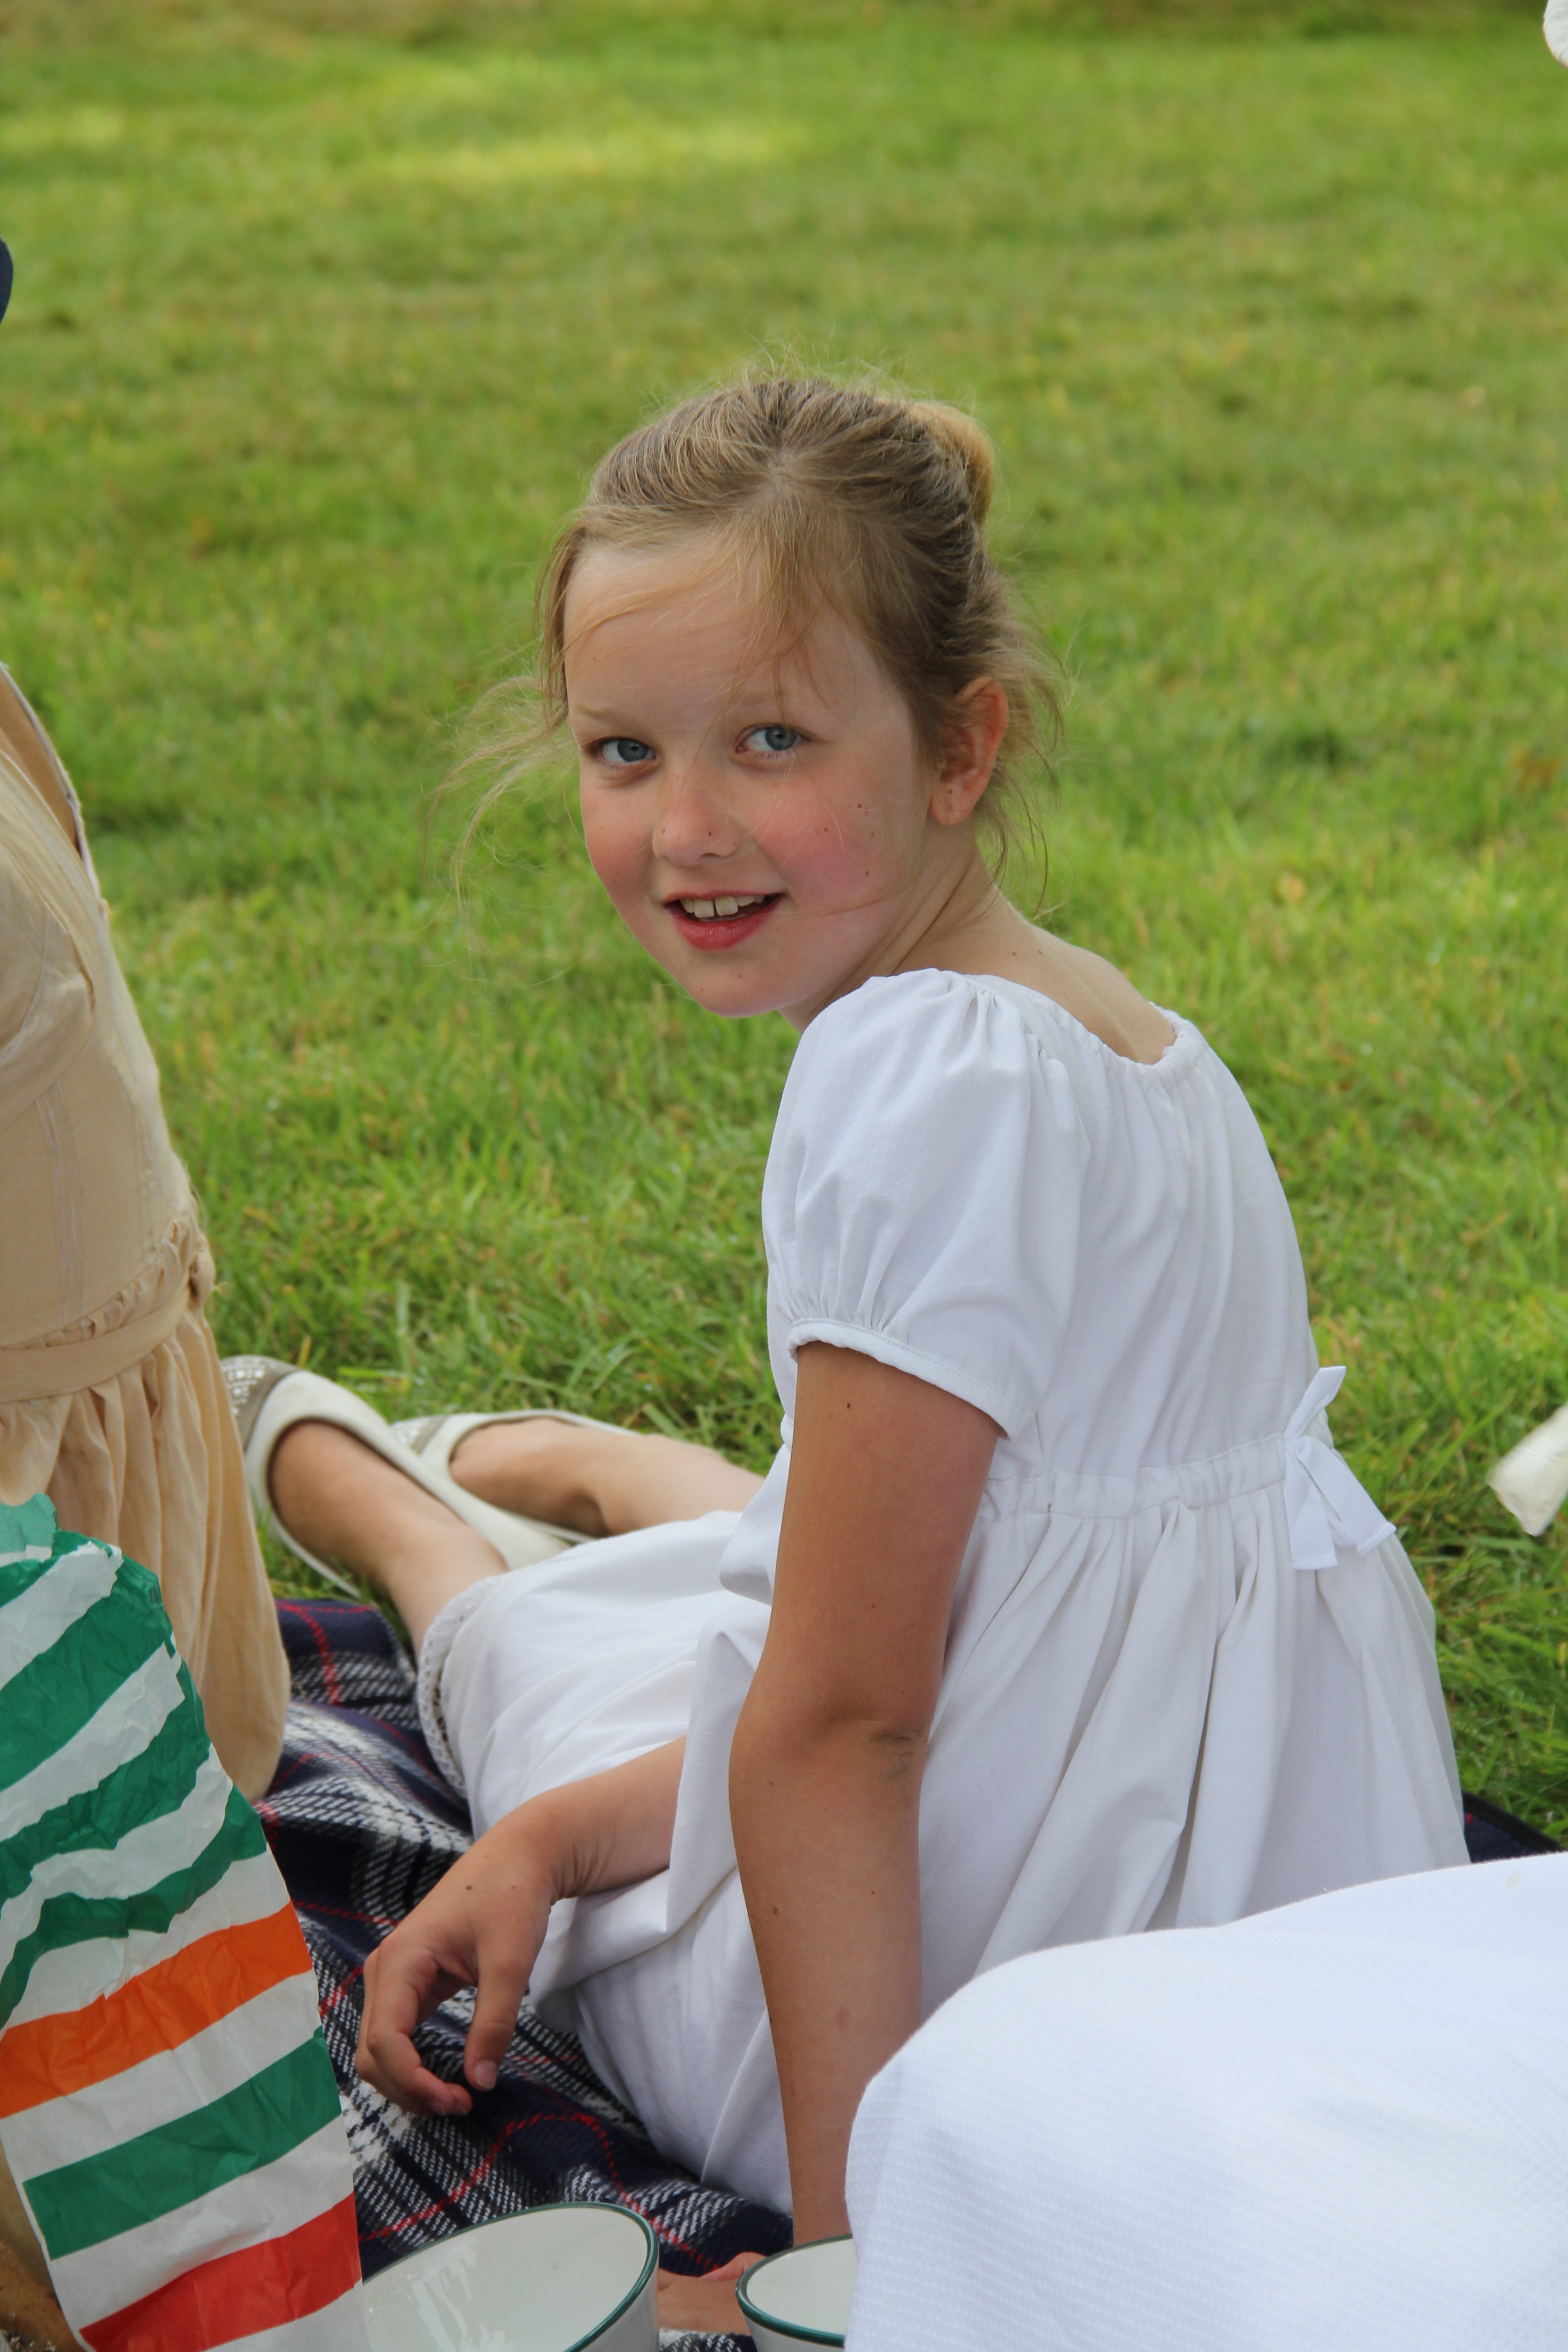
My eldest niece with her beloved new gown and my youngest niece in my chemise with a ribbon around her high regency waist.
I pimped up my sister’s dress before our adventure. I made the hat several years ago.
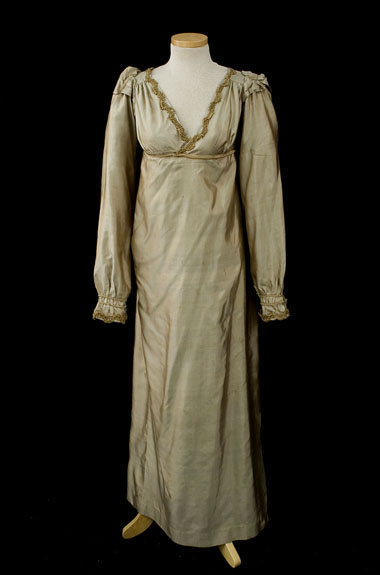
As I am already the proud owner of two bib front dresses, I want to make a V-line this time. I had no idea of how to construct such a piece, but roamed Pinterest for answes and found this gown (with several pictures here):
Eftersom mina två andra empirklänningar är sydda efter modellen med nedfällbar framdel och därmed har fyrkantig urringning, vill jag nu sy en klänning med V-ringning. Jag misstänkte att sådana exempel i BBC:s Stolthet och fördom, med knäppning i ryggen, inte var särskilt representativa. Därför letade jag konstruktions-information på Pinterest och Google och fann slutligen detta representativa exemplar (som det dessutom finns mängder av bra bilder på här):
Since the summer of my wedding, I have a blue silk like (probably polyester) fabric in my stash. I have always wanted to sew a regency dress out of this, so now I just wanted to see if there really existed blue V-line gowns at the time. When I looked at fashion plates, museum pieces and portraits, I found out that the V-line was not by far as common as the square neckline and that blue was not a very common colour neither. At last I found this lovely portrait of Tatyana Borisovna Potemkina from 1820 (by Vigée Le Brun) though:
Ända sedan sommaren jag gifte mig, har jag haft ett blått “sidentyg” (antagligen polyester) liggande. Jag har hela tiden velat, men inte kommit mig för att sy en V-ringad empirklänning av denna, så nu ville jag bara försäkra mig om att det verkligen existerade blå klänningar av denna modell. När jag såg på museiexemplar, modebilder och porträtt insåg jag dels att V-ringningar verkar ha varit relativt ovanligt och dels att blått siden var i extrem minoritet (det finns fler porträtt med blå sammetsklänningar). Till slut hittade jag i alla fall detta underbara porträtt av Tatyana Borisovna Potemkina, målat av Vigée Le Brun 1820:
It isn’t only dark blue, it also seems to have the same construction as the dress above!
Den väna damen behagar inte bara att vara klädd i blått, men verkar dessutom ha en klänning med precis den konstruktion jag bestämt mig för!
Tackar och bockar.
Thus, I will use this construction. Yey!
– where you can see what I do – designing, sewing, singing, creating etc.


![IMG_4383[1]](https://blogging.susannaart.se/wp-content/uploads/2016/08/IMG_43831.jpg)
![IMG_4384[1]](https://blogging.susannaart.se/wp-content/uploads/2016/08/IMG_43841.jpg)
![IMG_4385[1]](https://blogging.susannaart.se/wp-content/uploads/2016/08/IMG_43851.jpg)
![IMG_4387[1]](https://blogging.susannaart.se/wp-content/uploads/2016/08/IMG_43871.jpg)
![IMG_4389[1]](https://blogging.susannaart.se/wp-content/uploads/2016/08/IMG_43891-e1470329062519.jpg)
![IMG_4396[1]](https://blogging.susannaart.se/wp-content/uploads/2016/08/IMG_43961-e1470328999232.jpg)