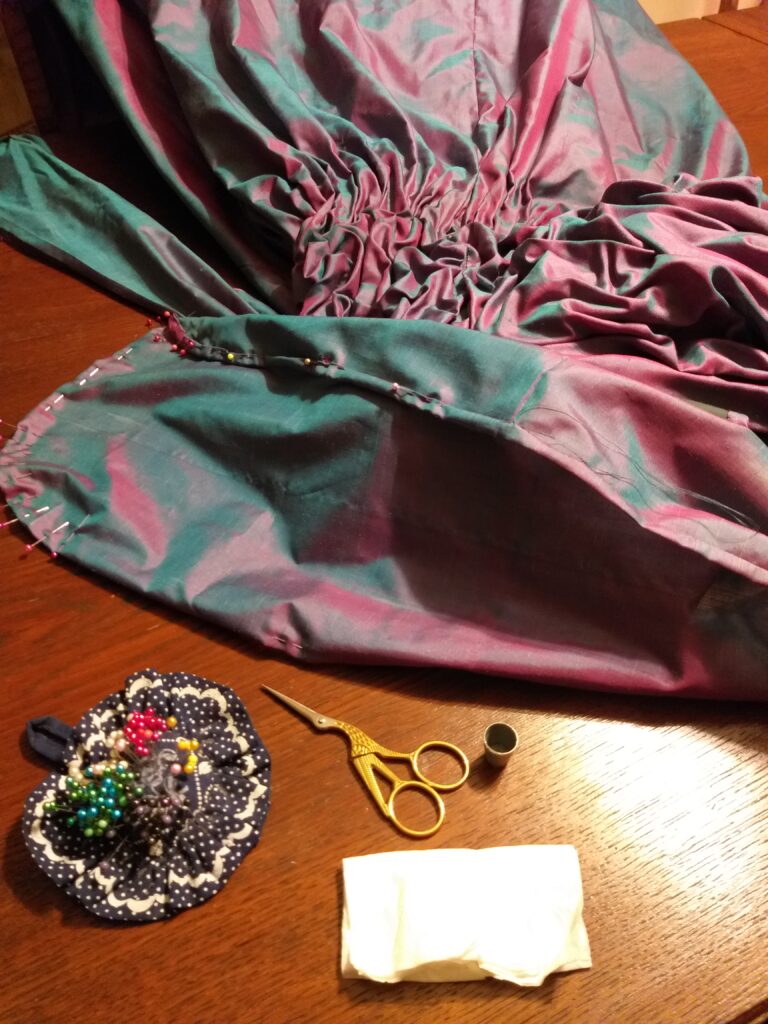
I wanted to try horse hair lining for the hem of the skirt, in order to have a more professional finish. Haha. That did not work out very well, as I had placed the horse hair upside down and the thin fabric was distorted. I had to unpick everything again, start from the beginning and finish it by hand instead.
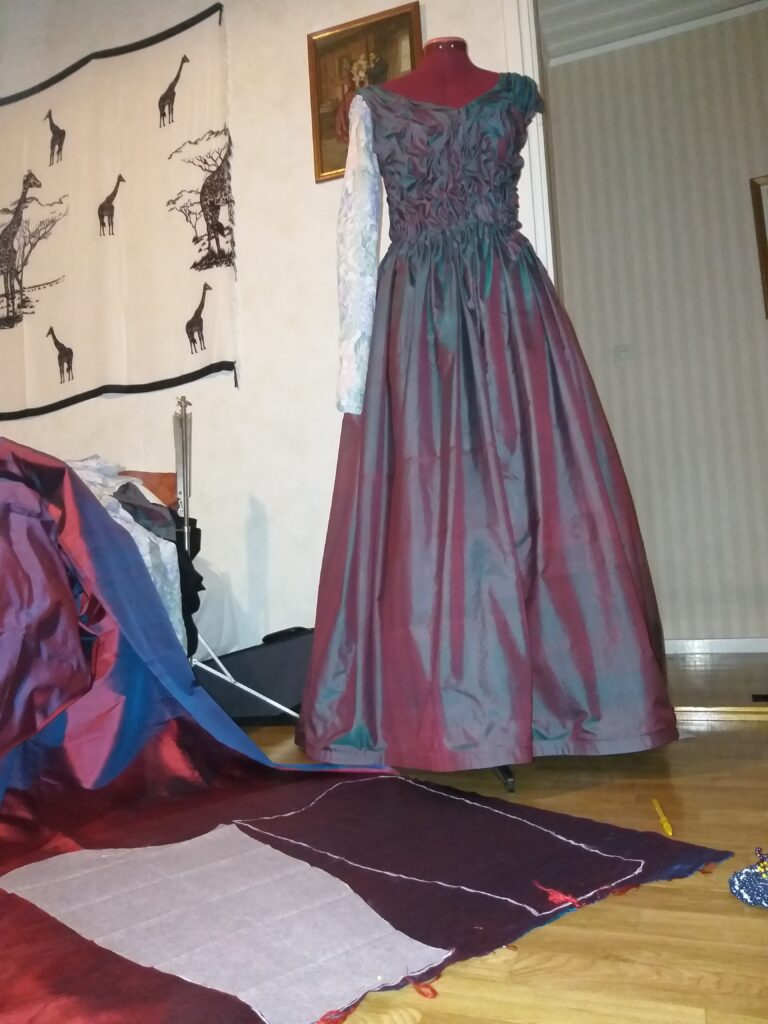
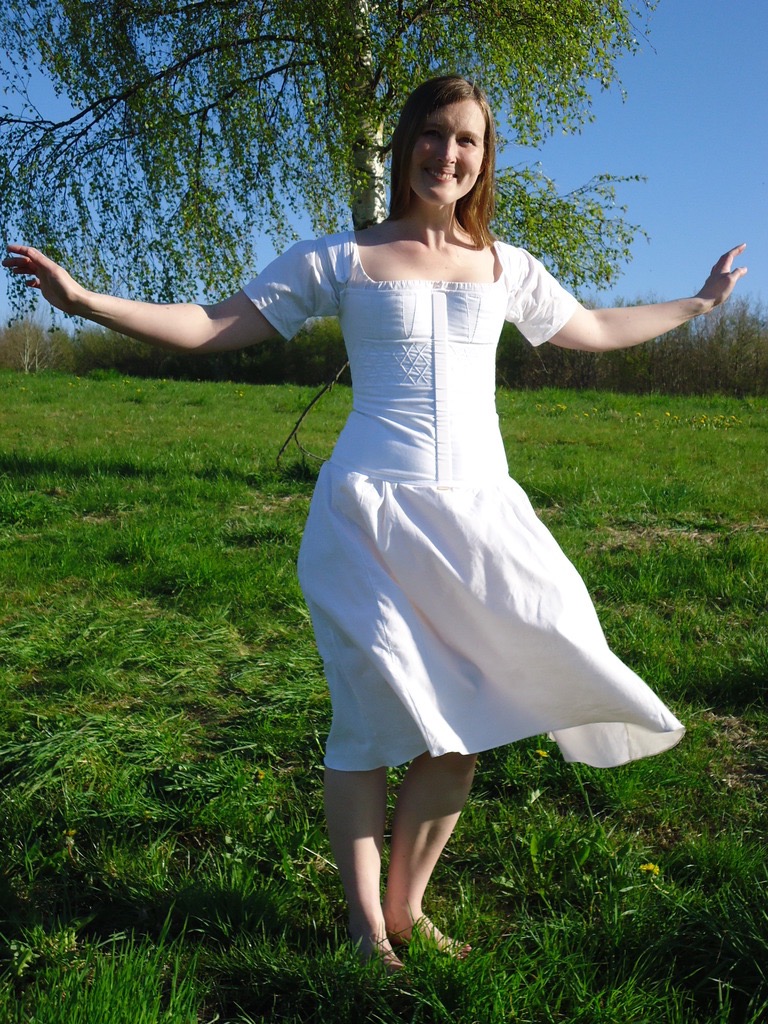
I had pondered on whether to leave the dress without arms or not, but as the skirt was finished, I thought it did not look enough fairytale like. I had a dupioni silk (given by a friend, Carolina Holmström) laying in my stash, matching the gown perfectly.
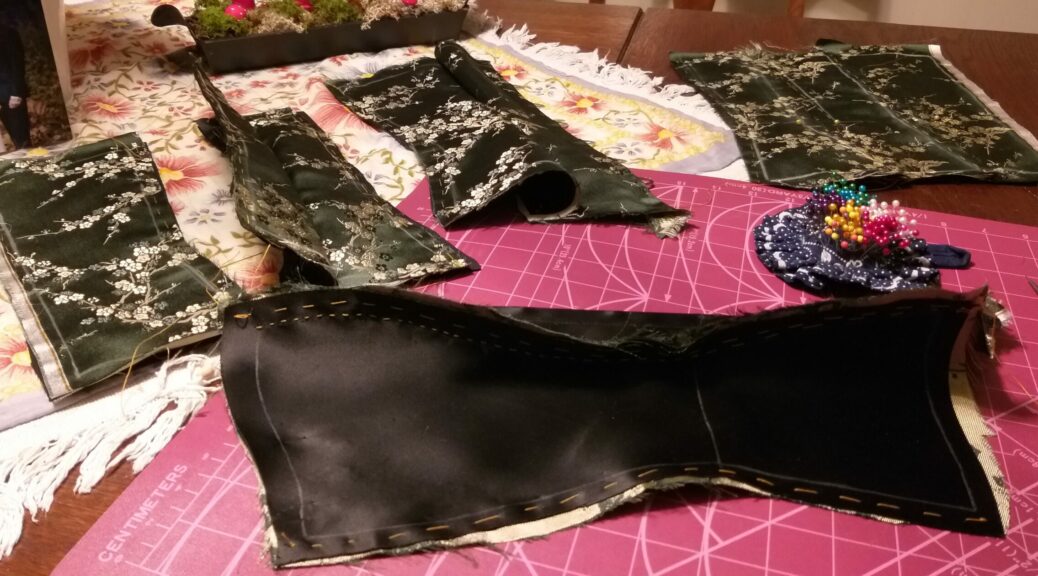
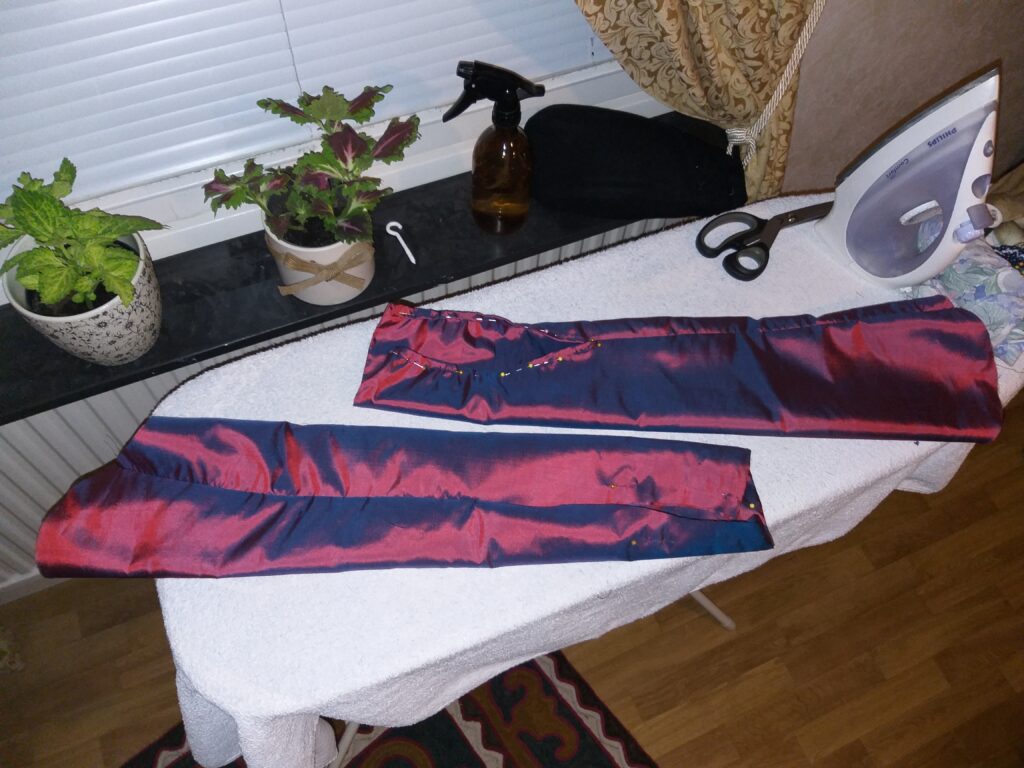
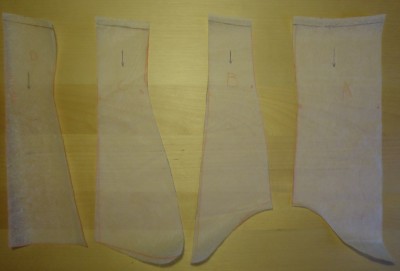
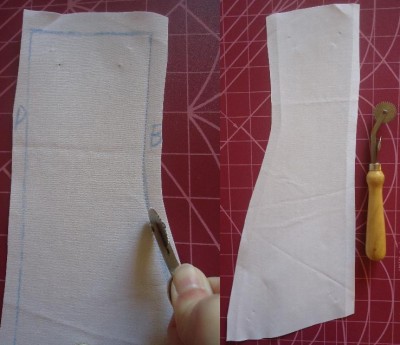
I wanted a late medieval S-arm with shiny buttons, preferably 10 on each arm. I used the pattern from my late 1300s cotehardie. Unfortunately I had only ten buttons totally, so I spaced them out in the best way I could.
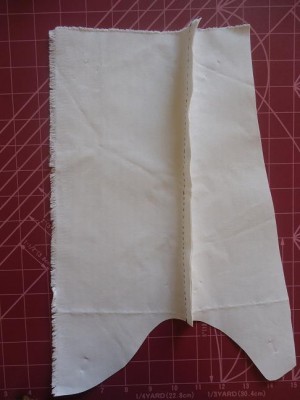
After finishing the cotehardie arms, with handsewn buttonholes and metal buttons, I used the scraps I had left of the dress fabric for the flowy arms. Everything was hemmed by hand. I had time for it, thanks to a nasty cold causing one week of isolation, due to the Covid restrictions.
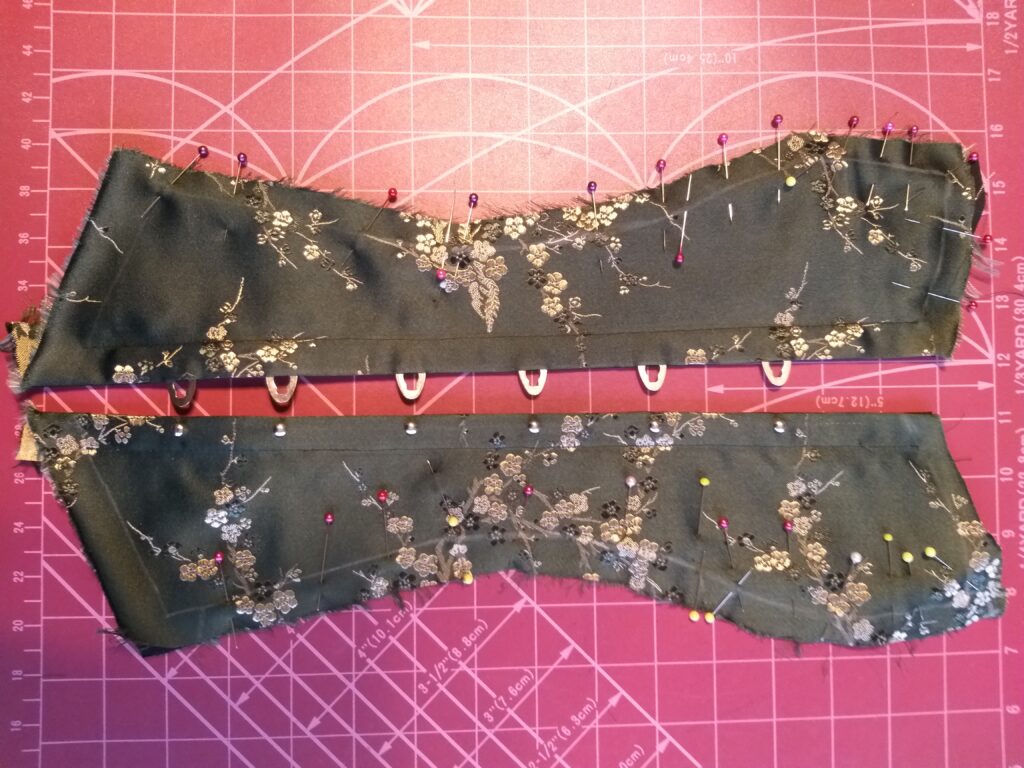
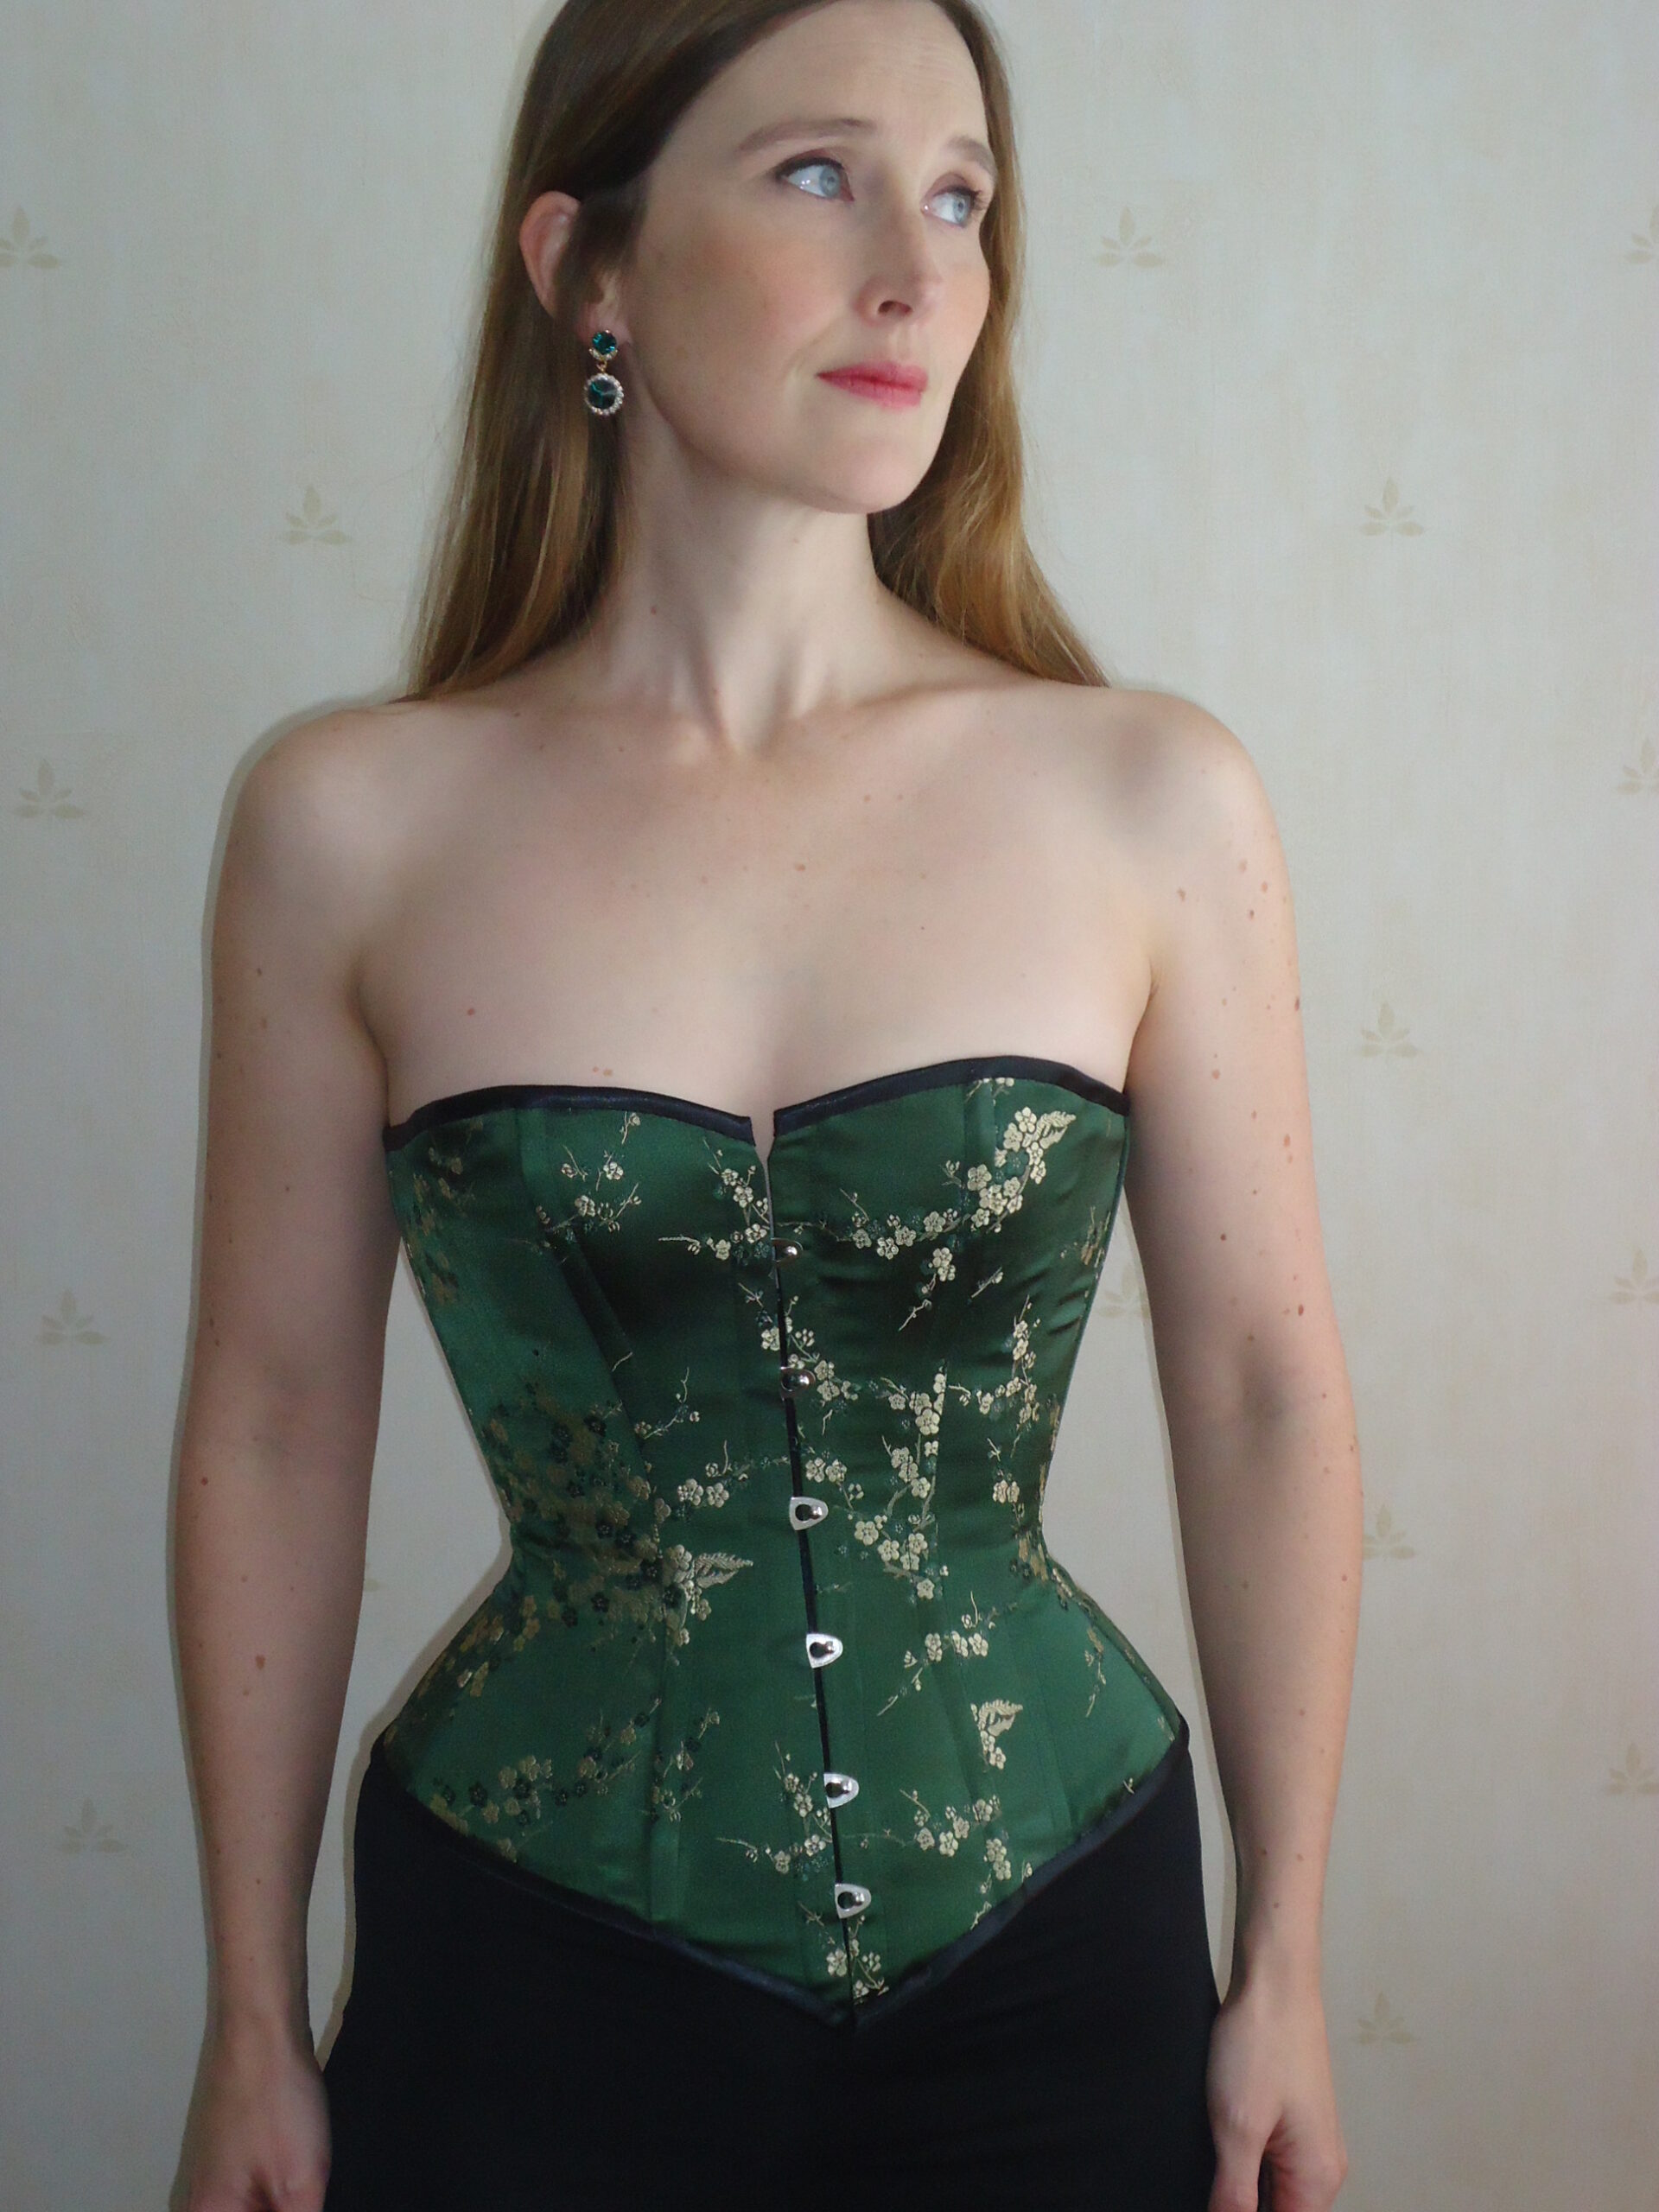
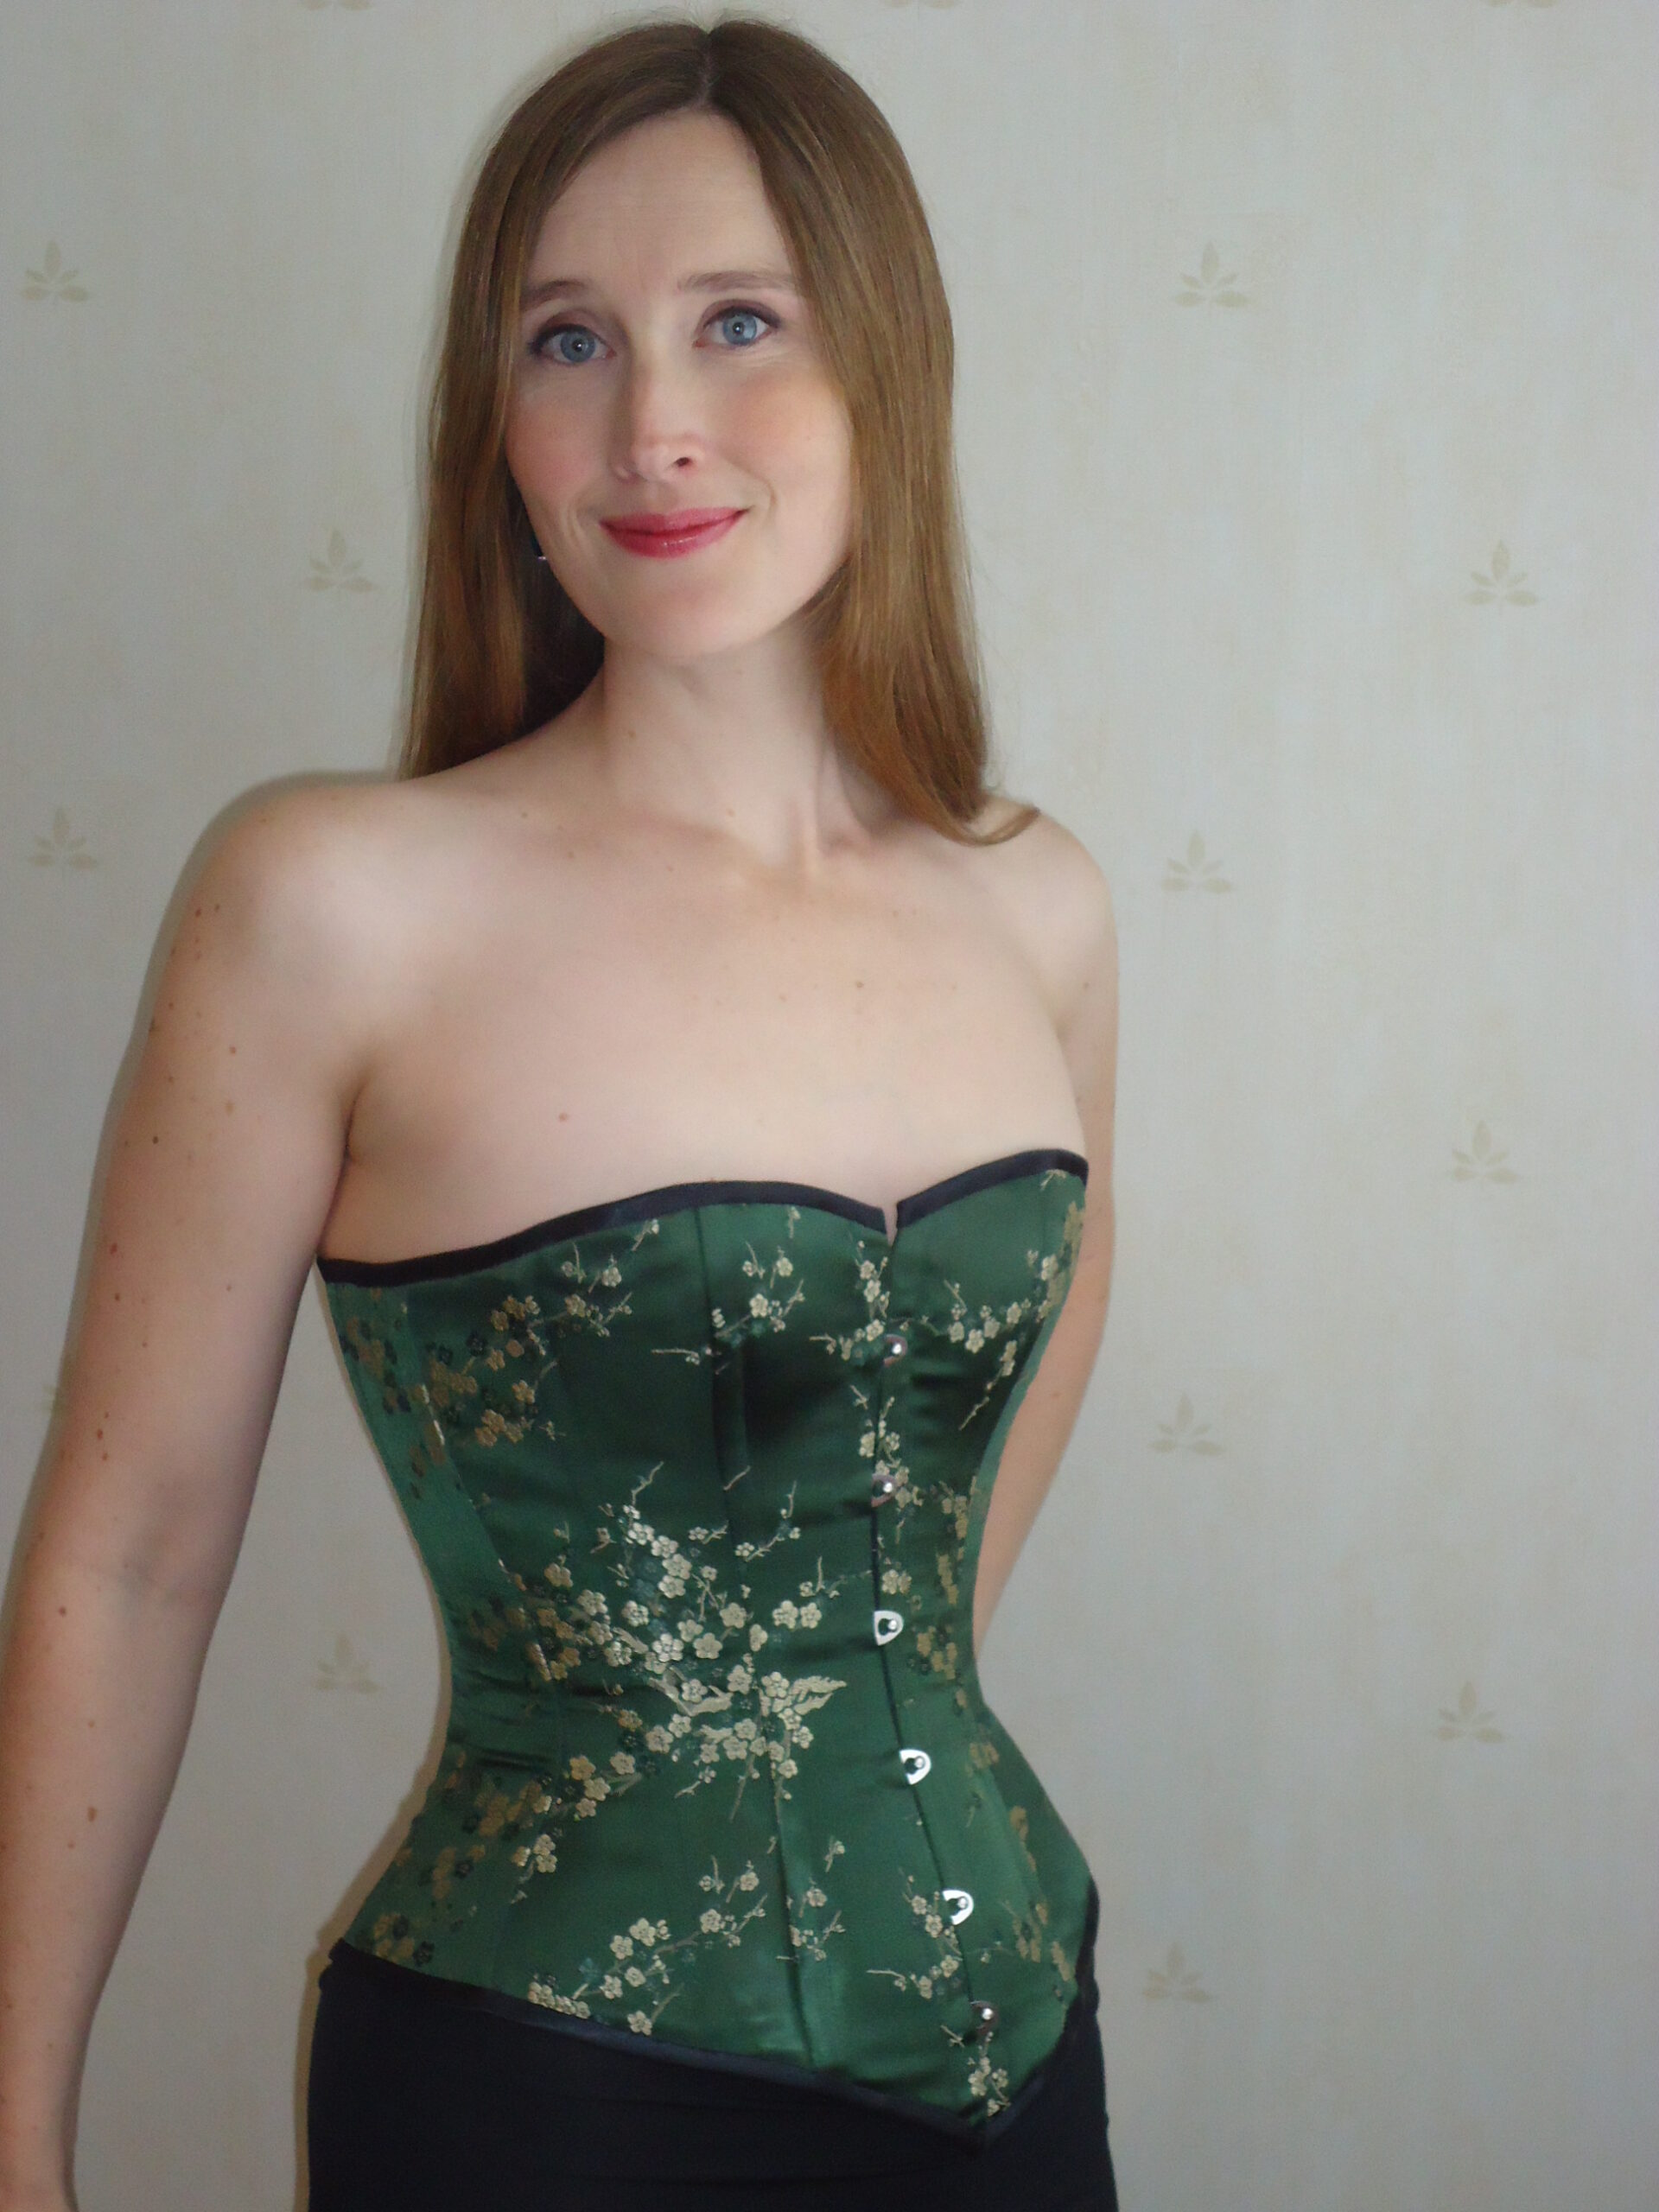
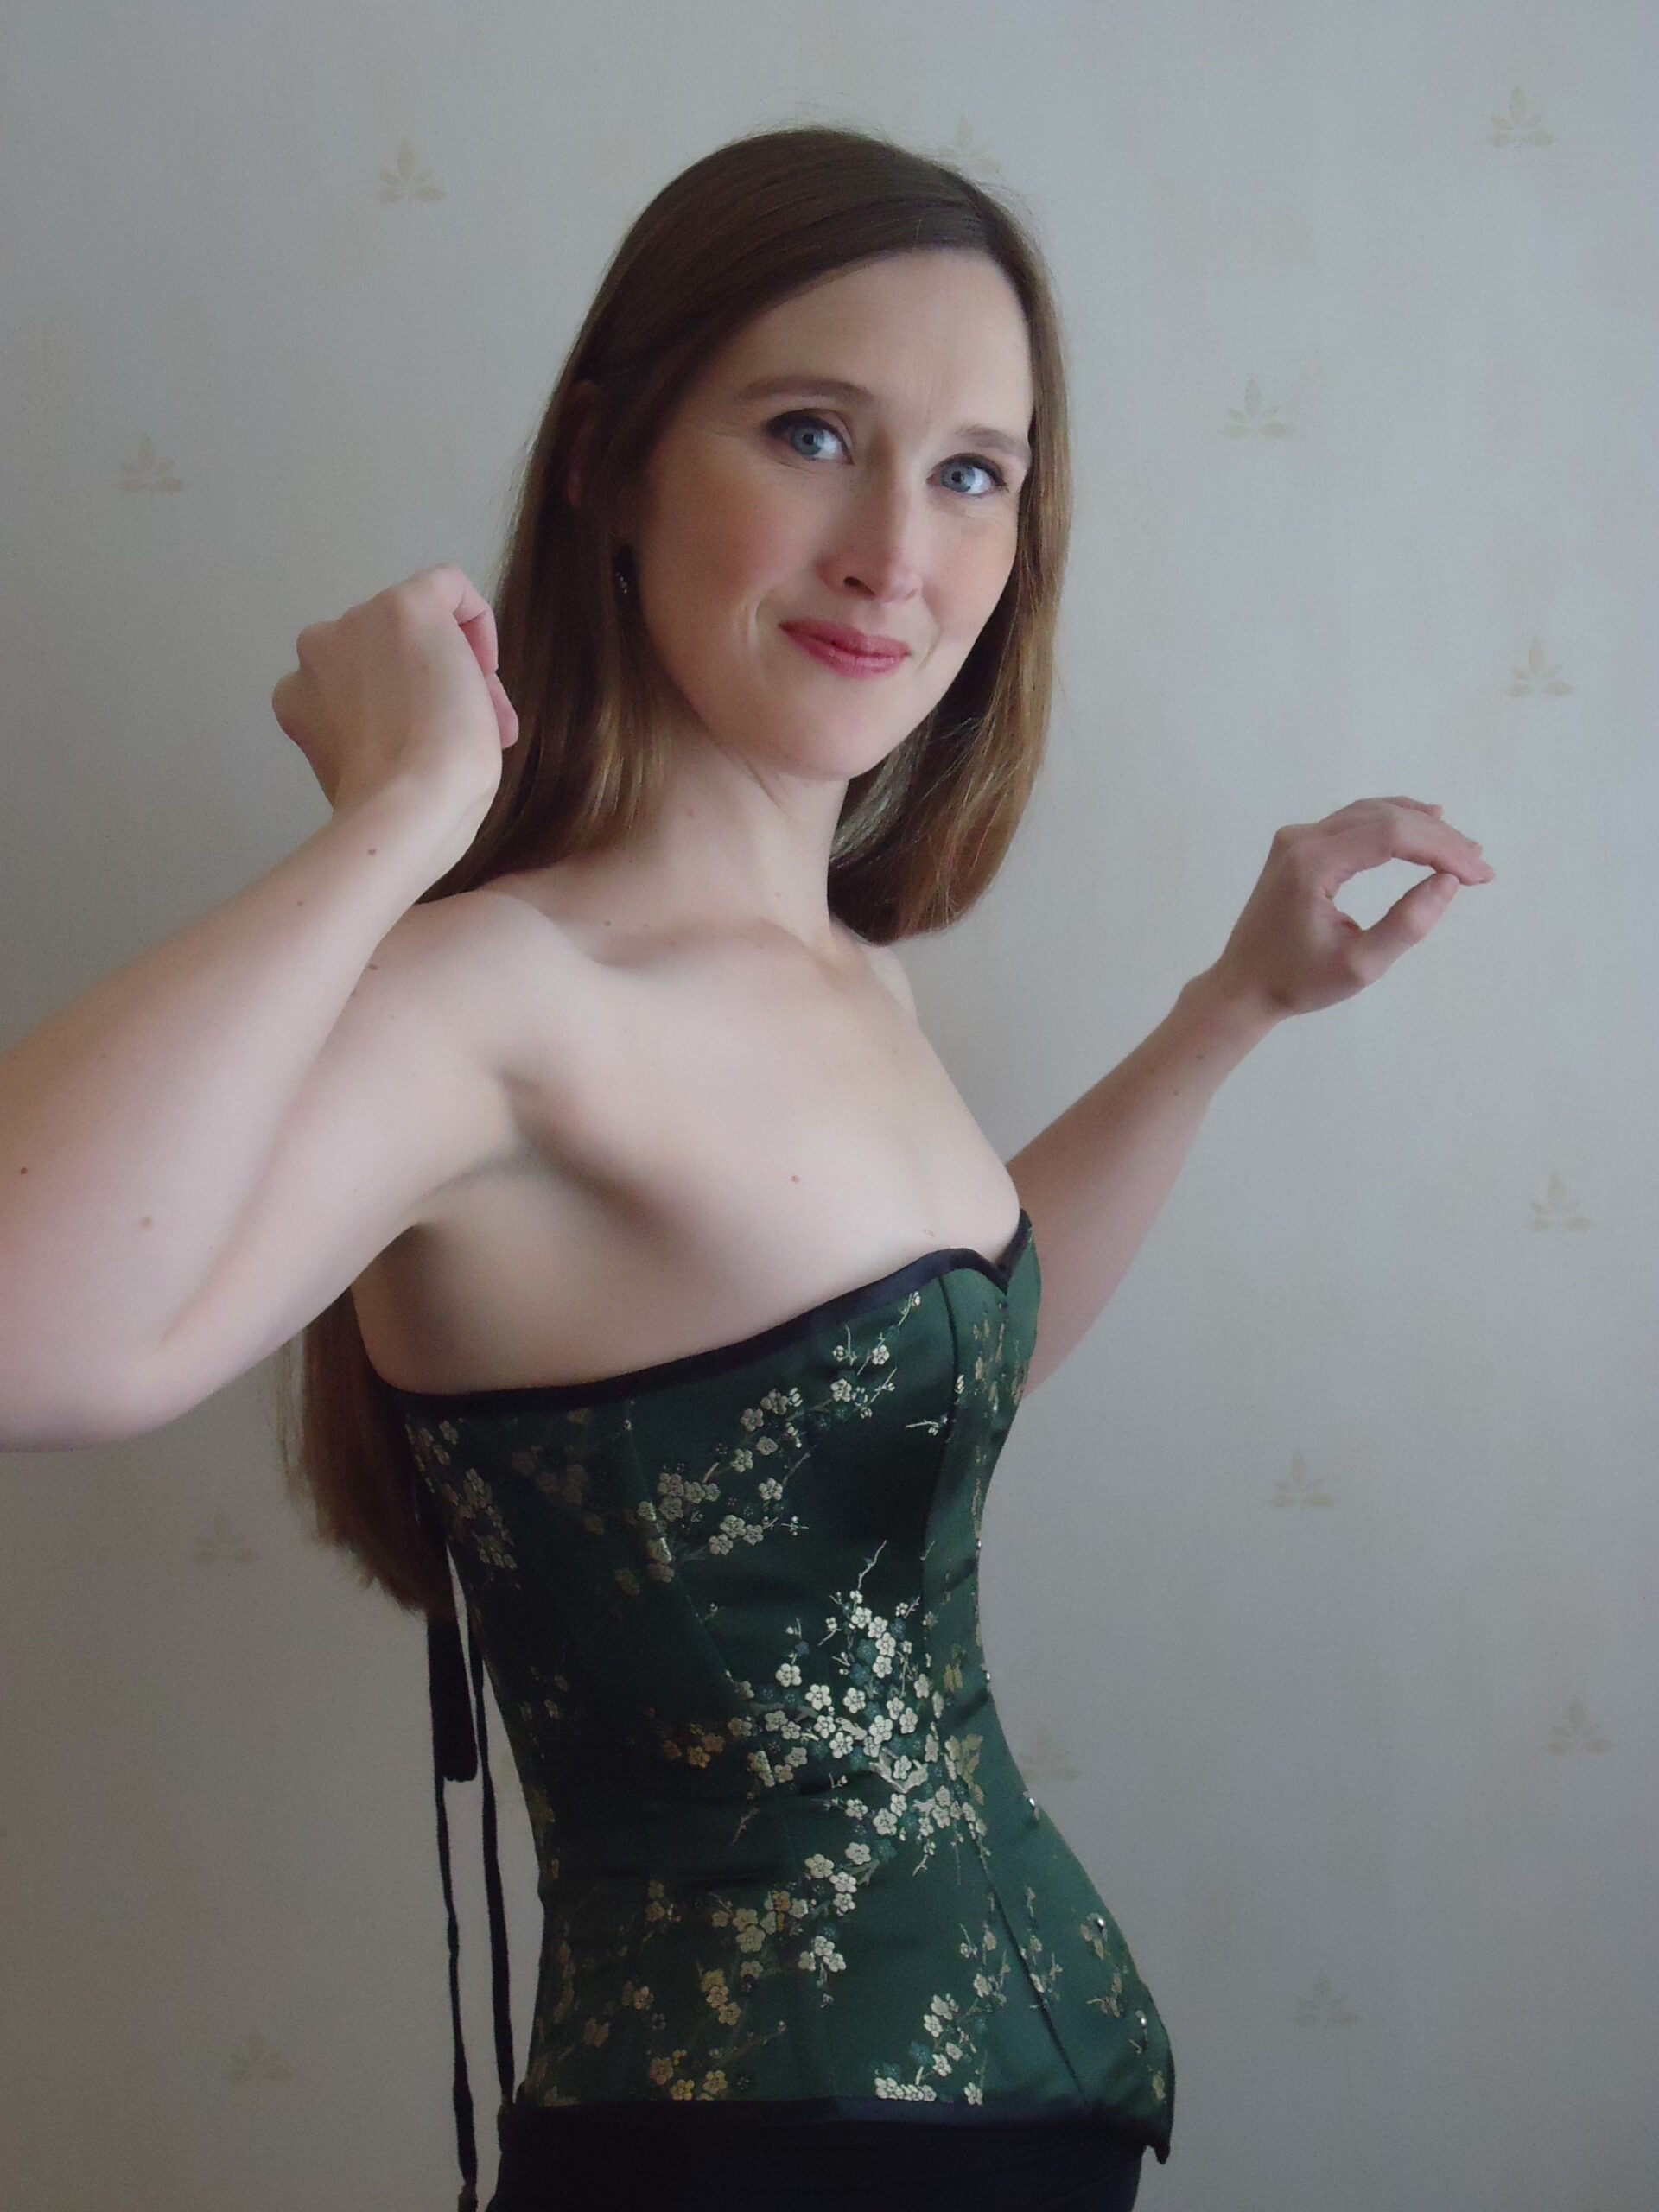
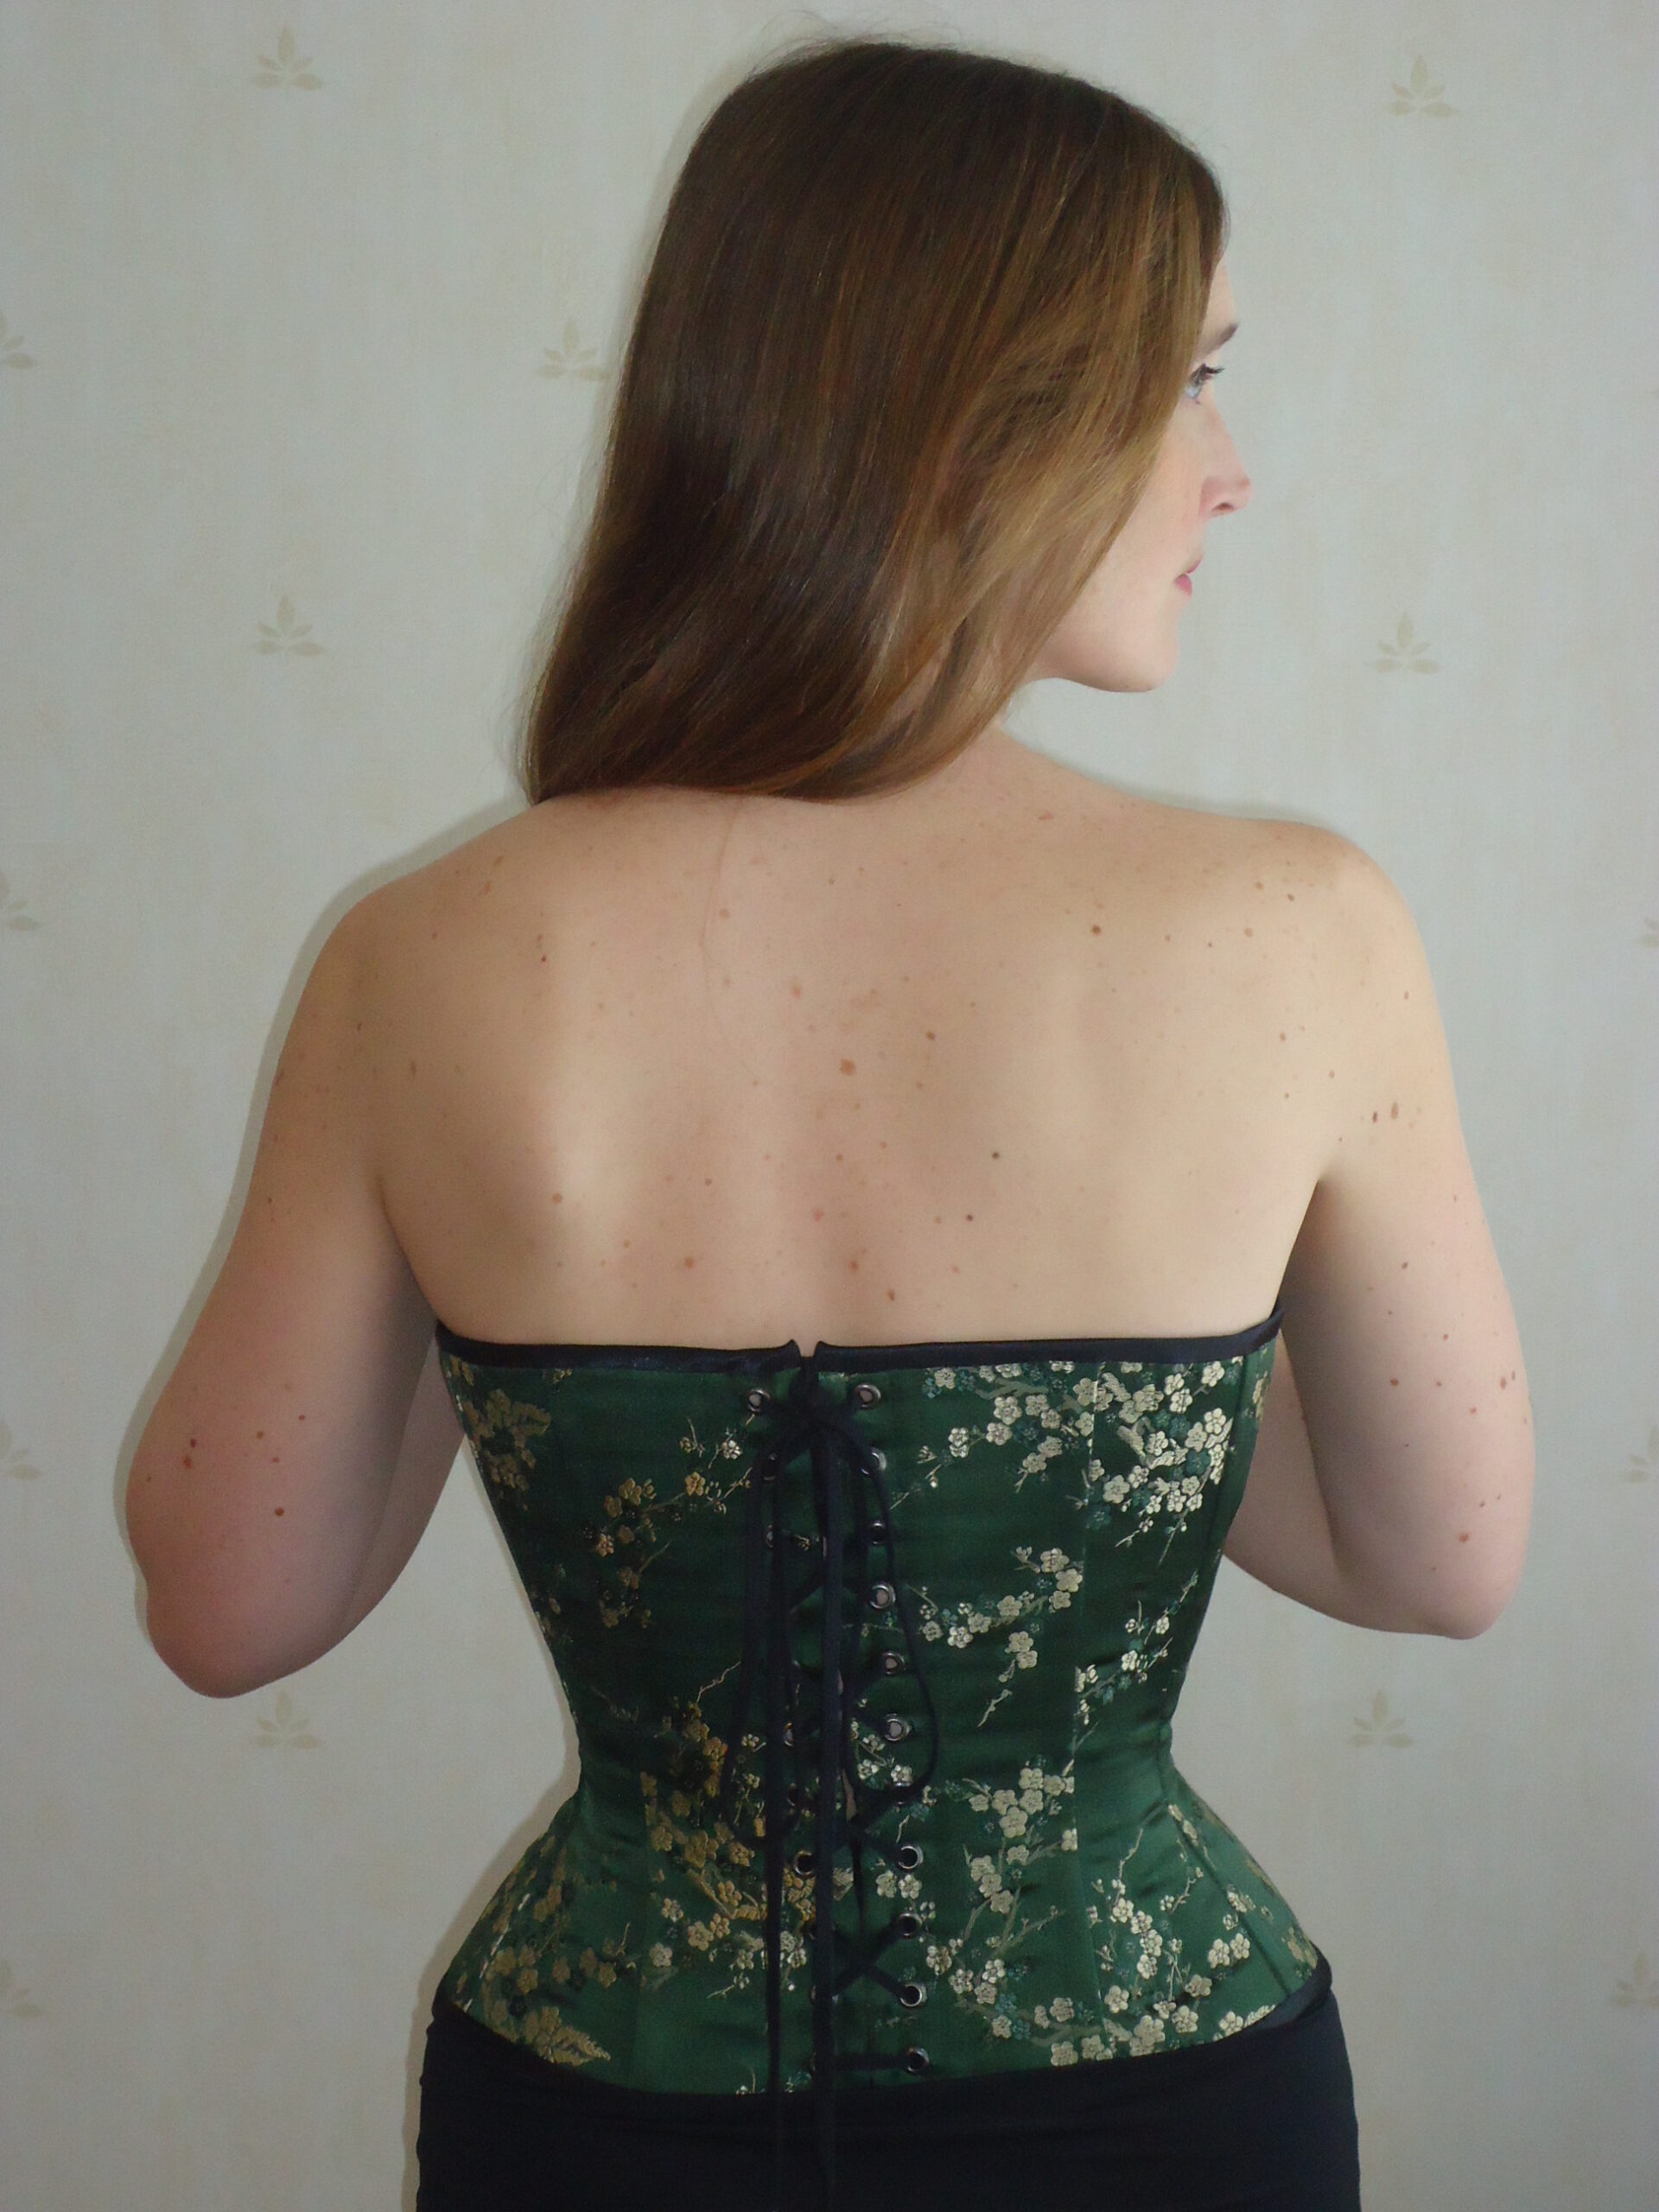
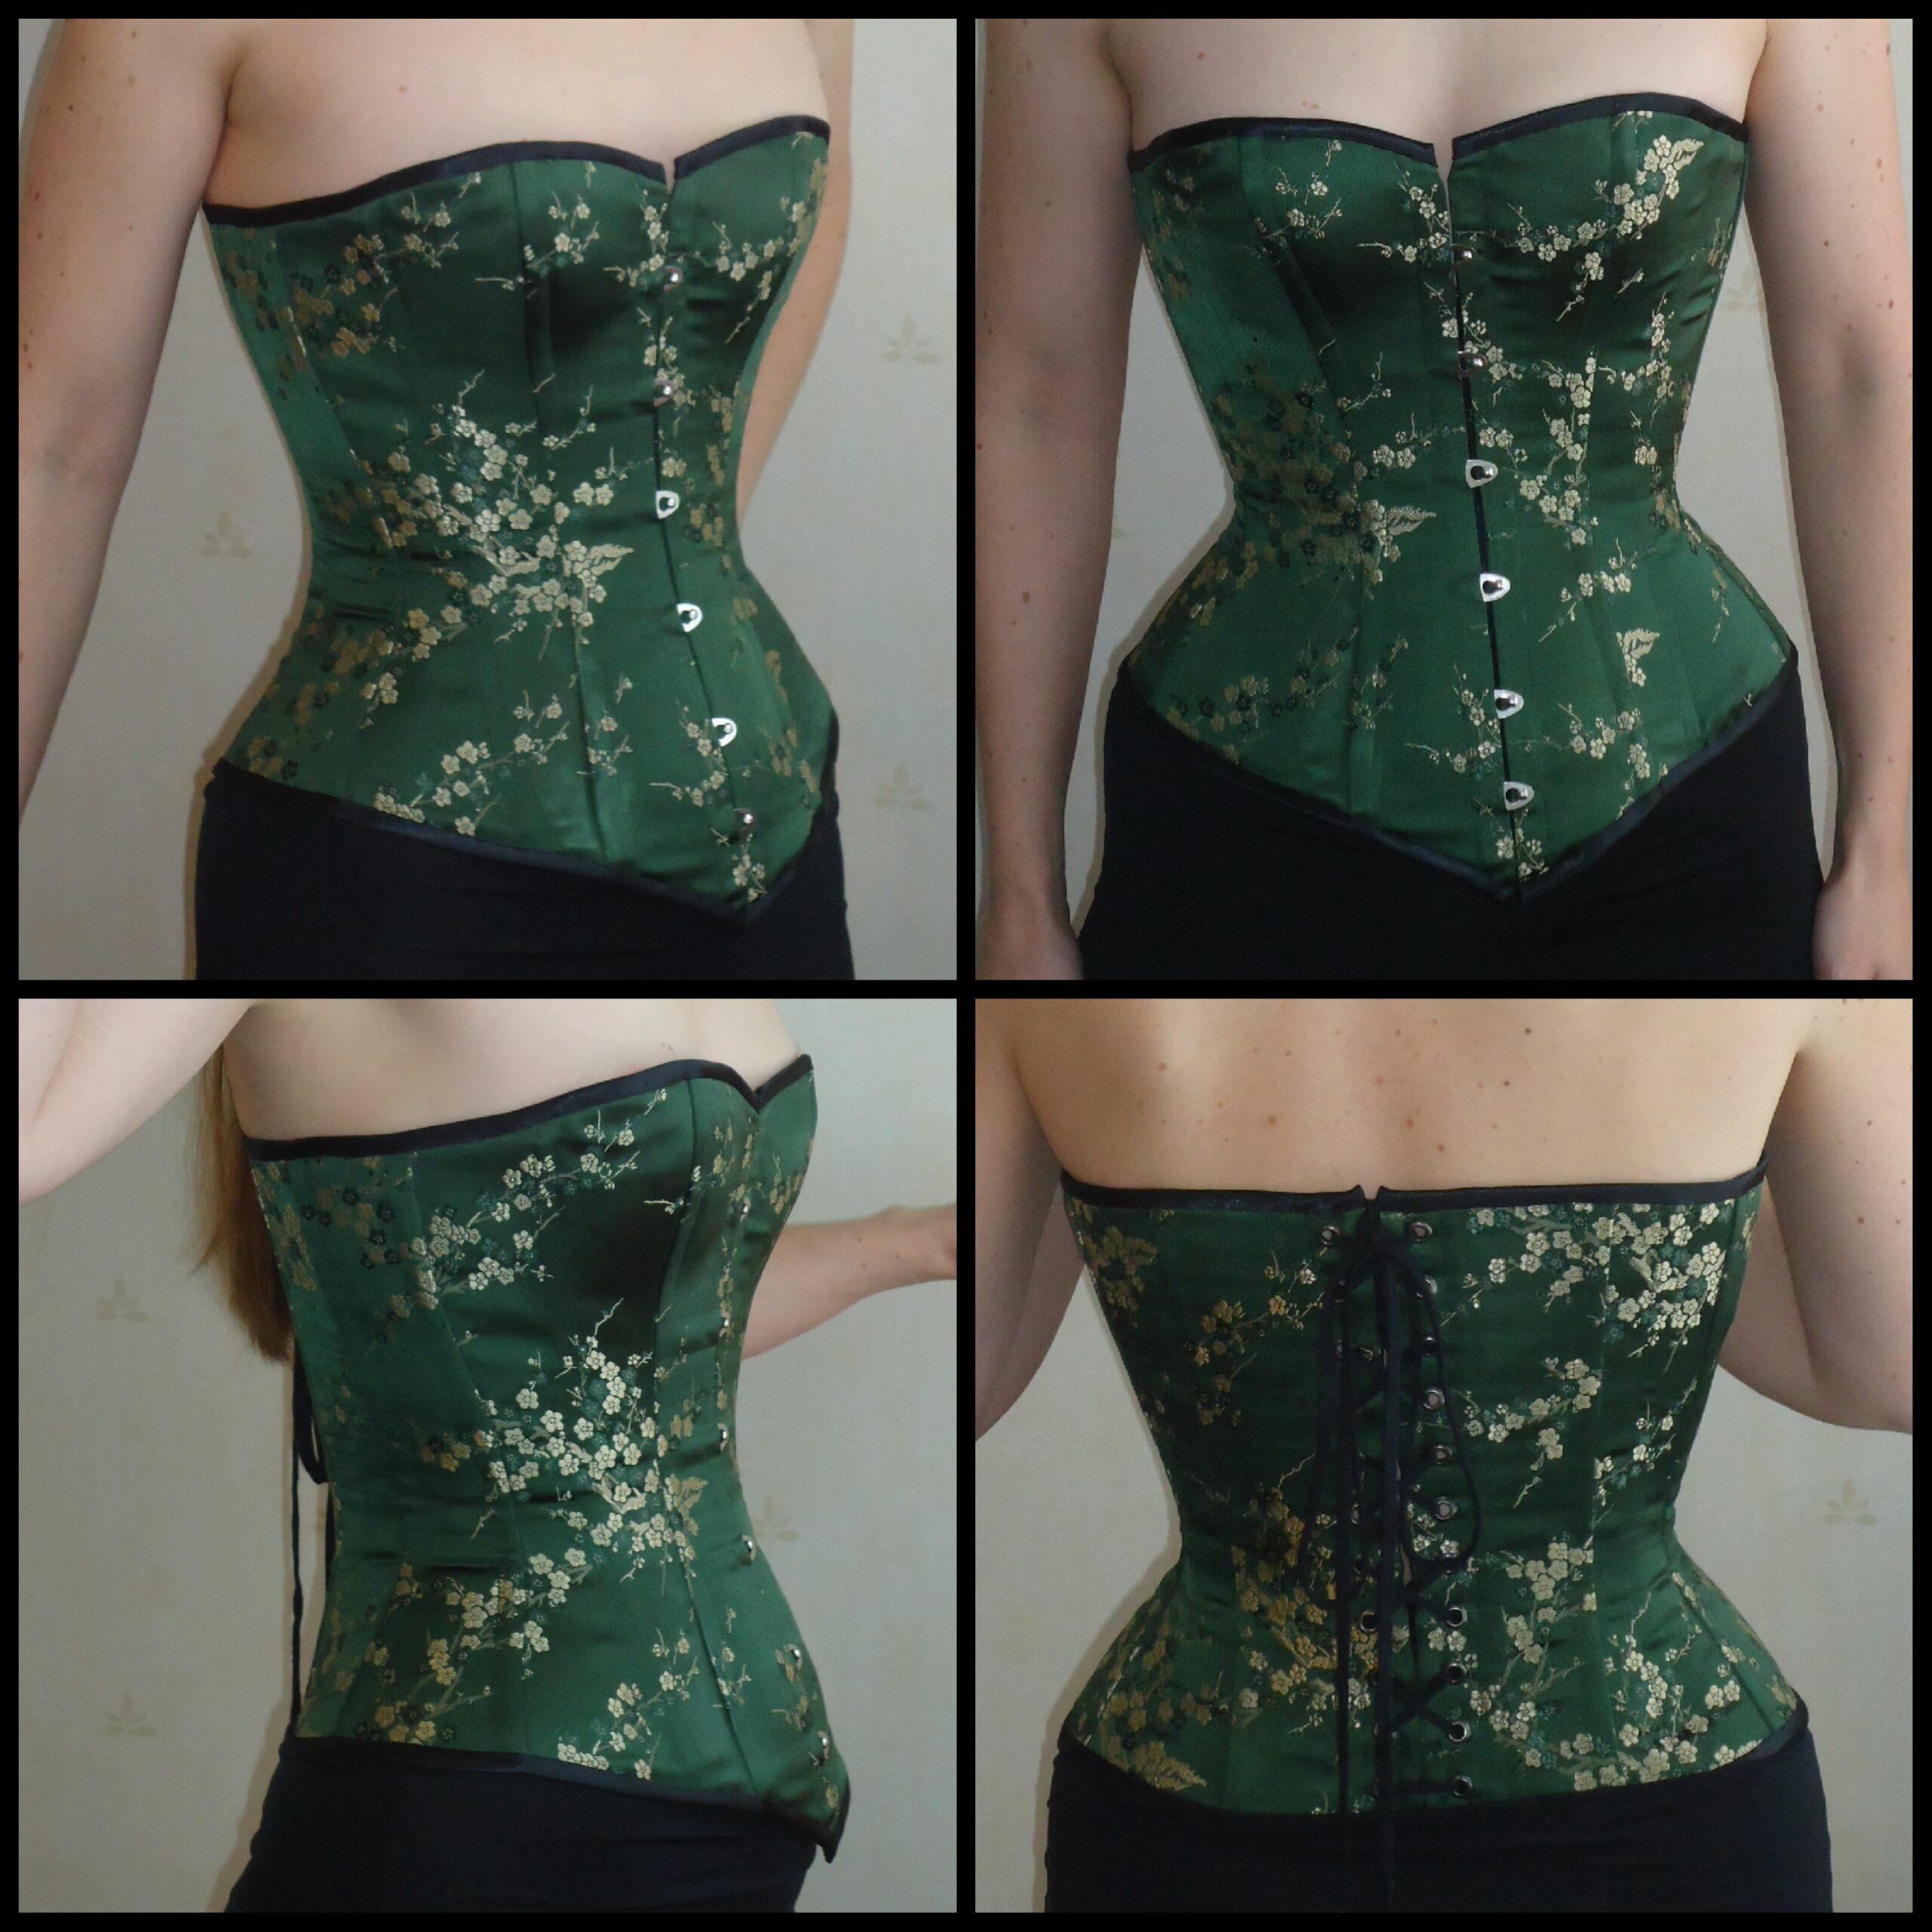
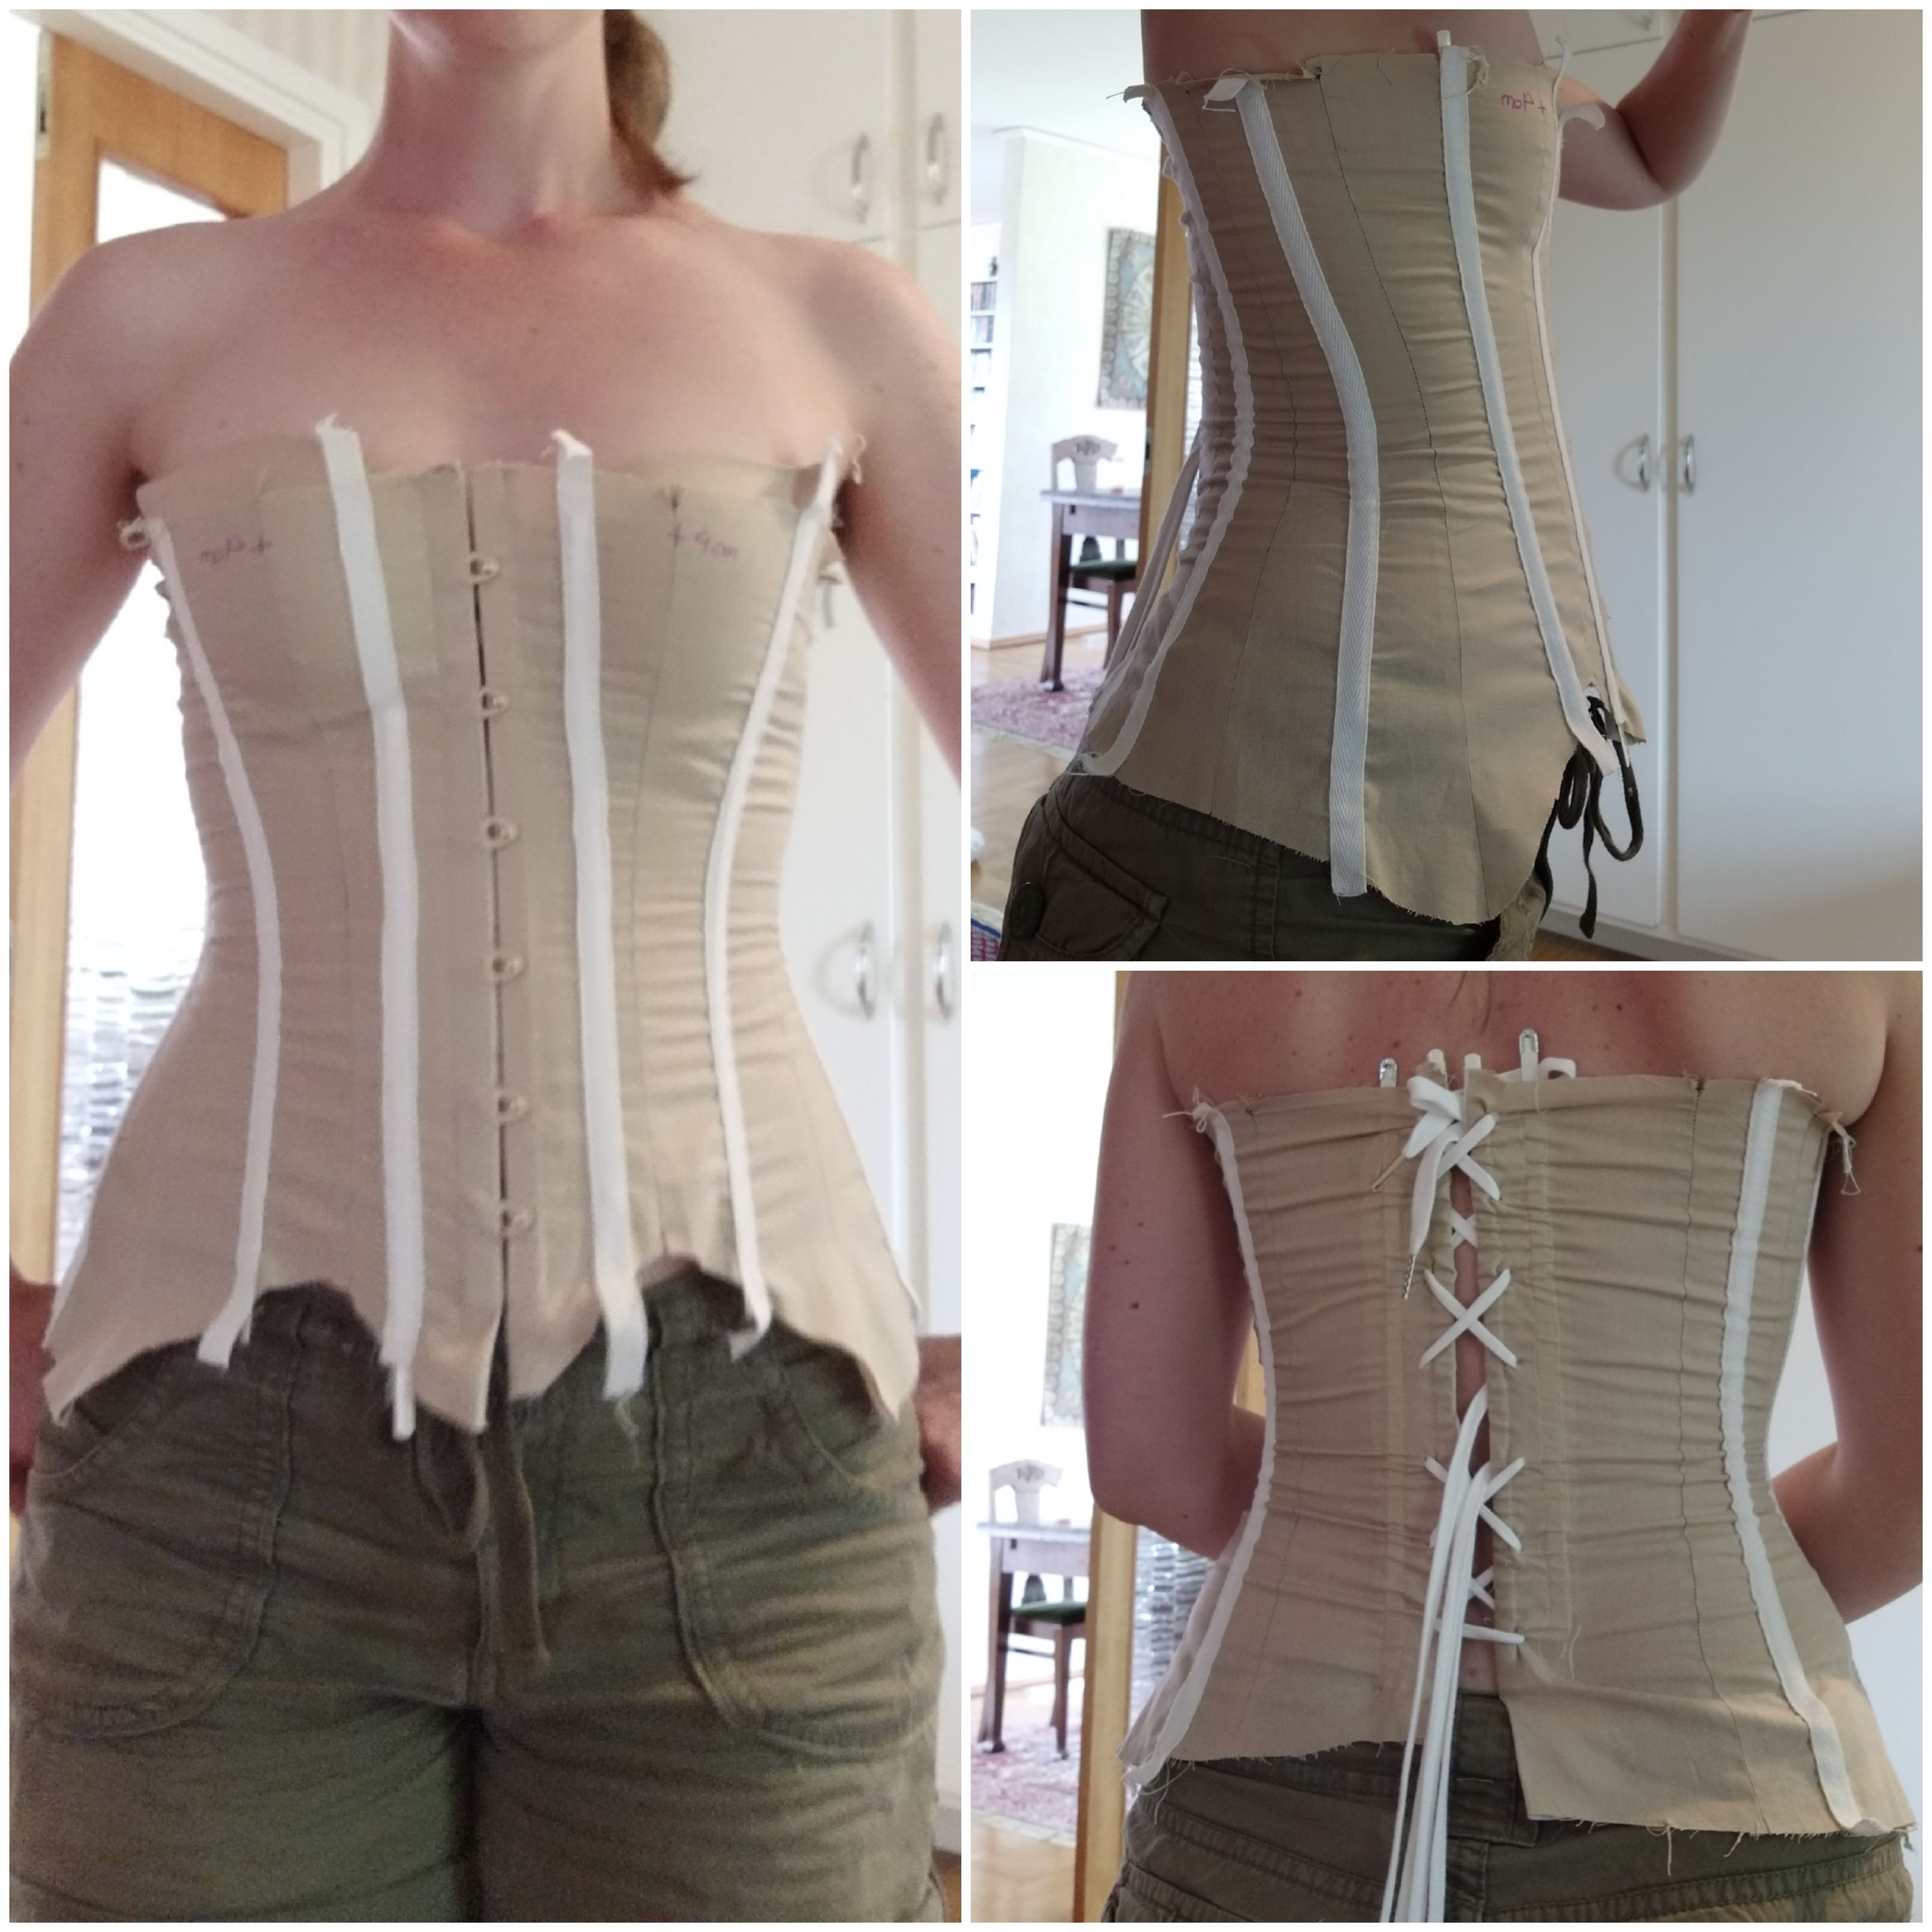
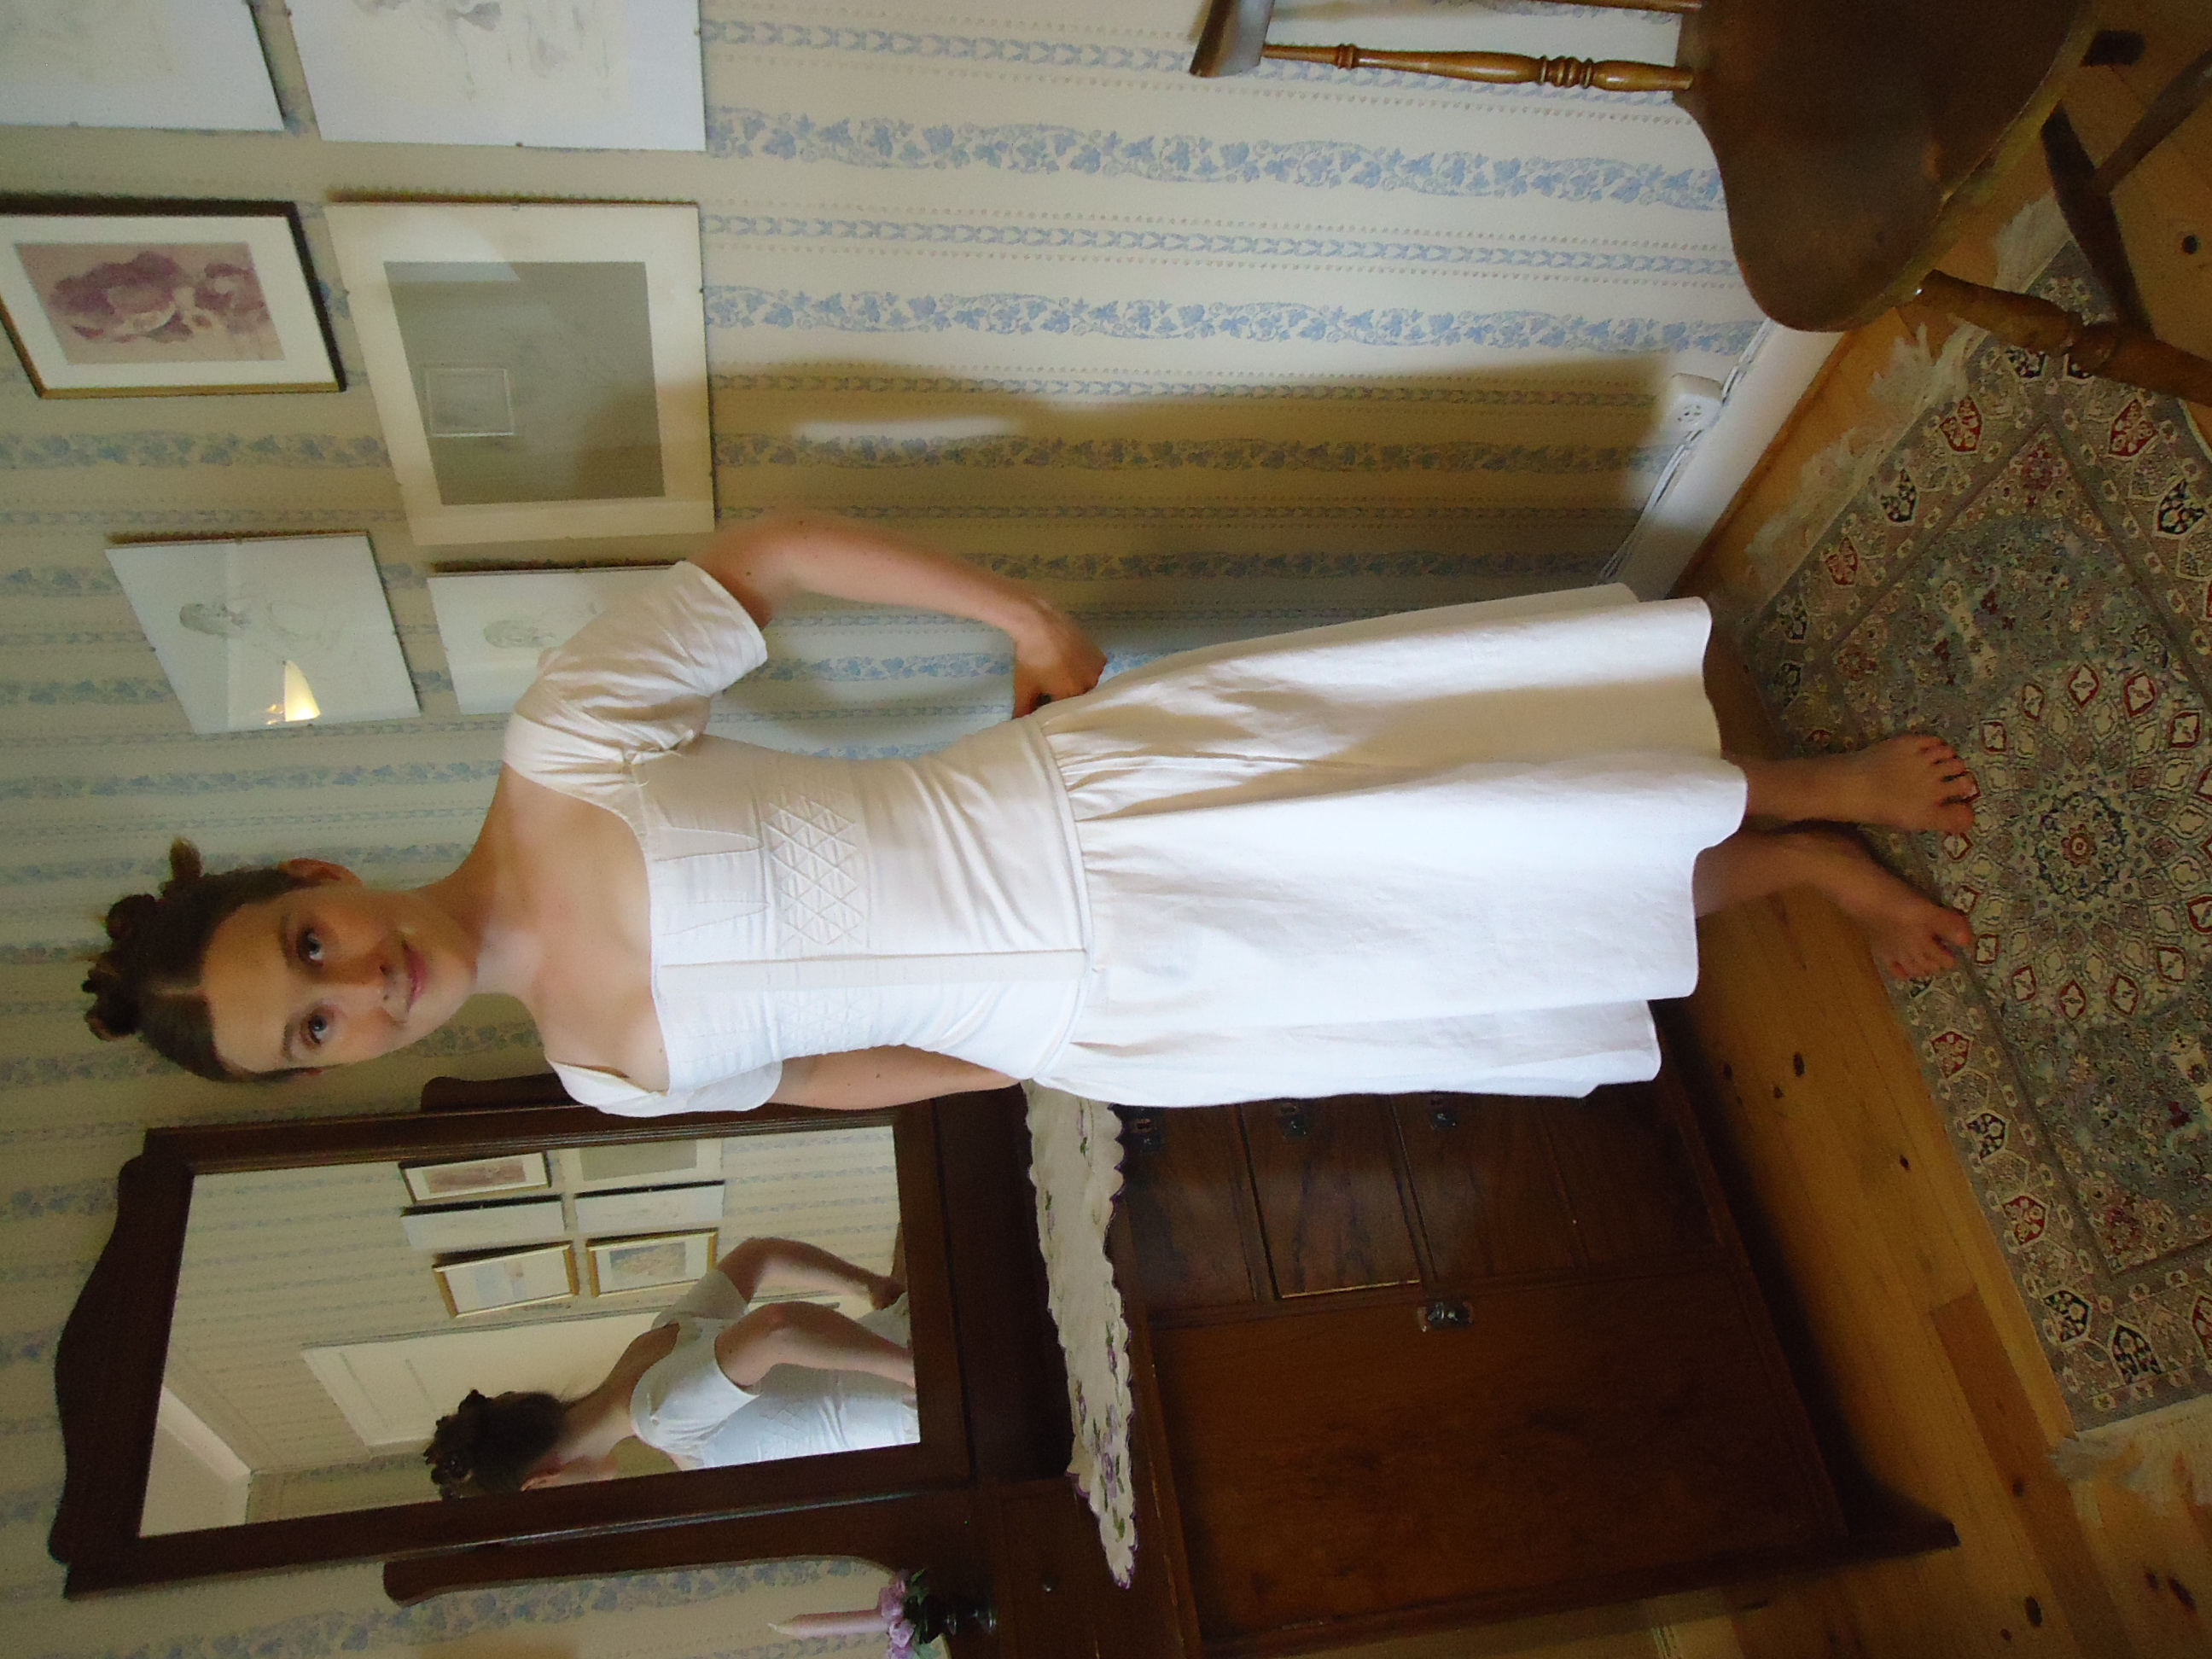
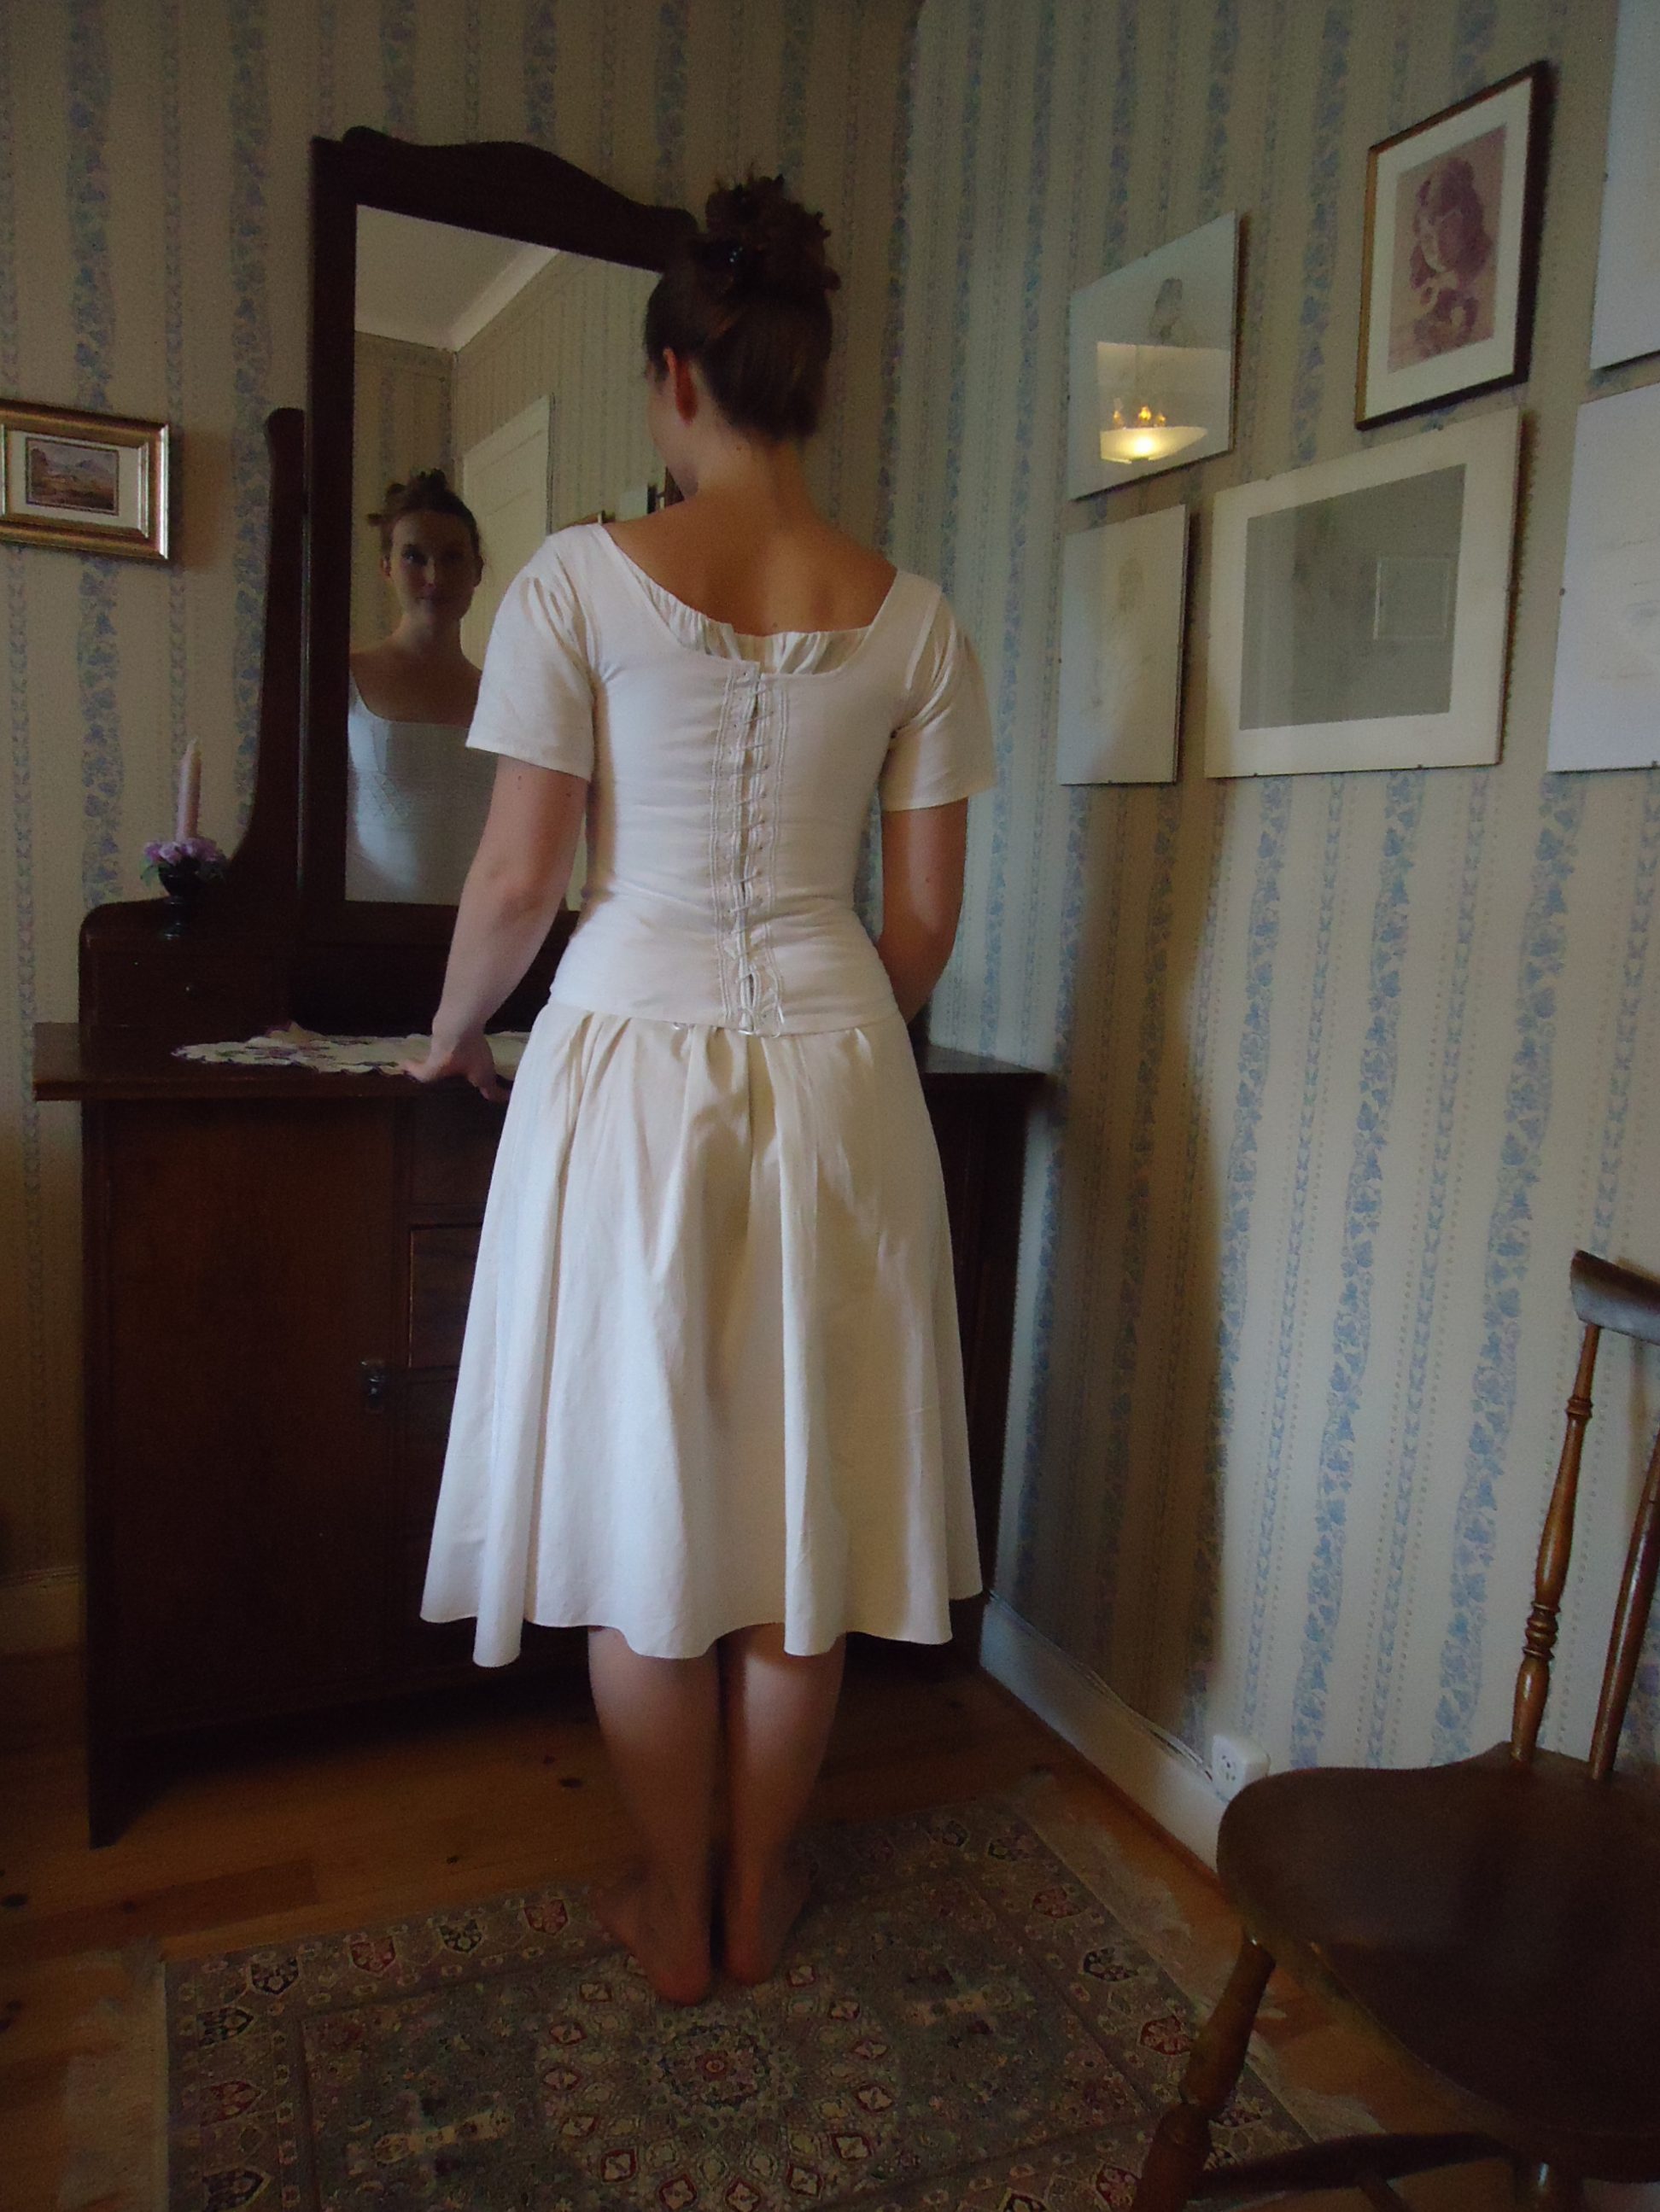
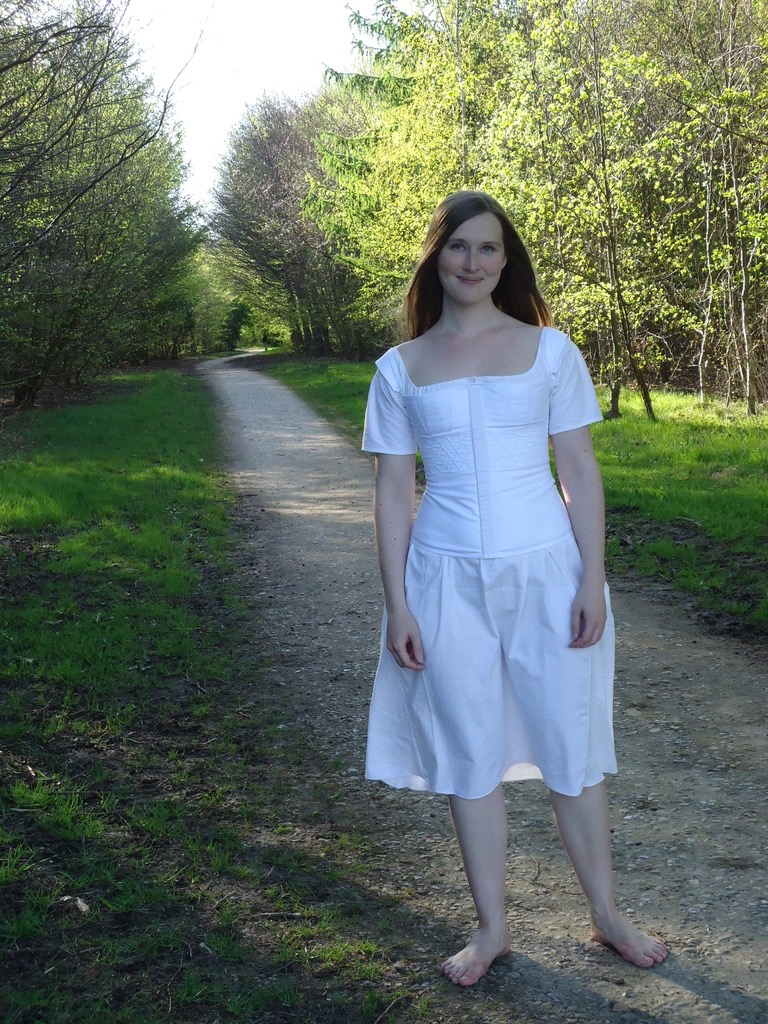
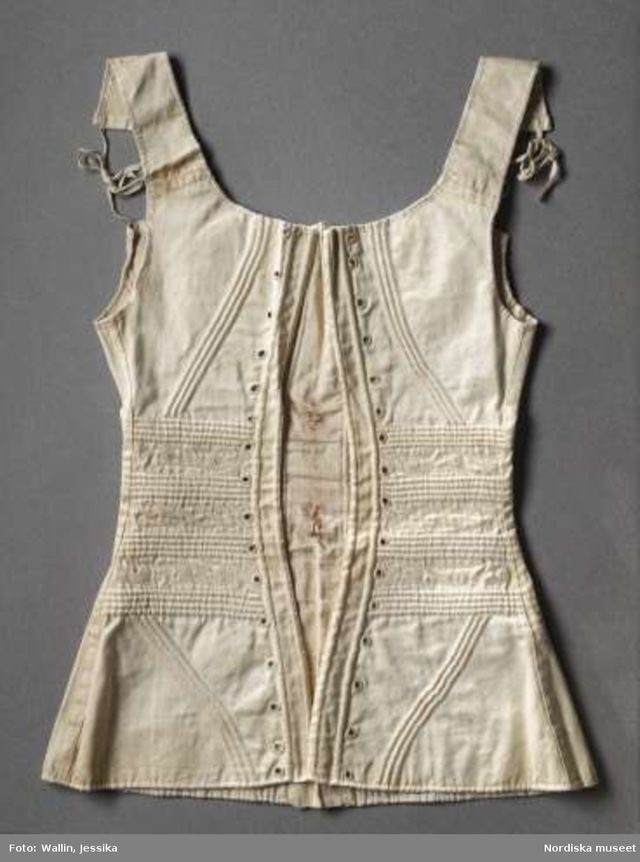
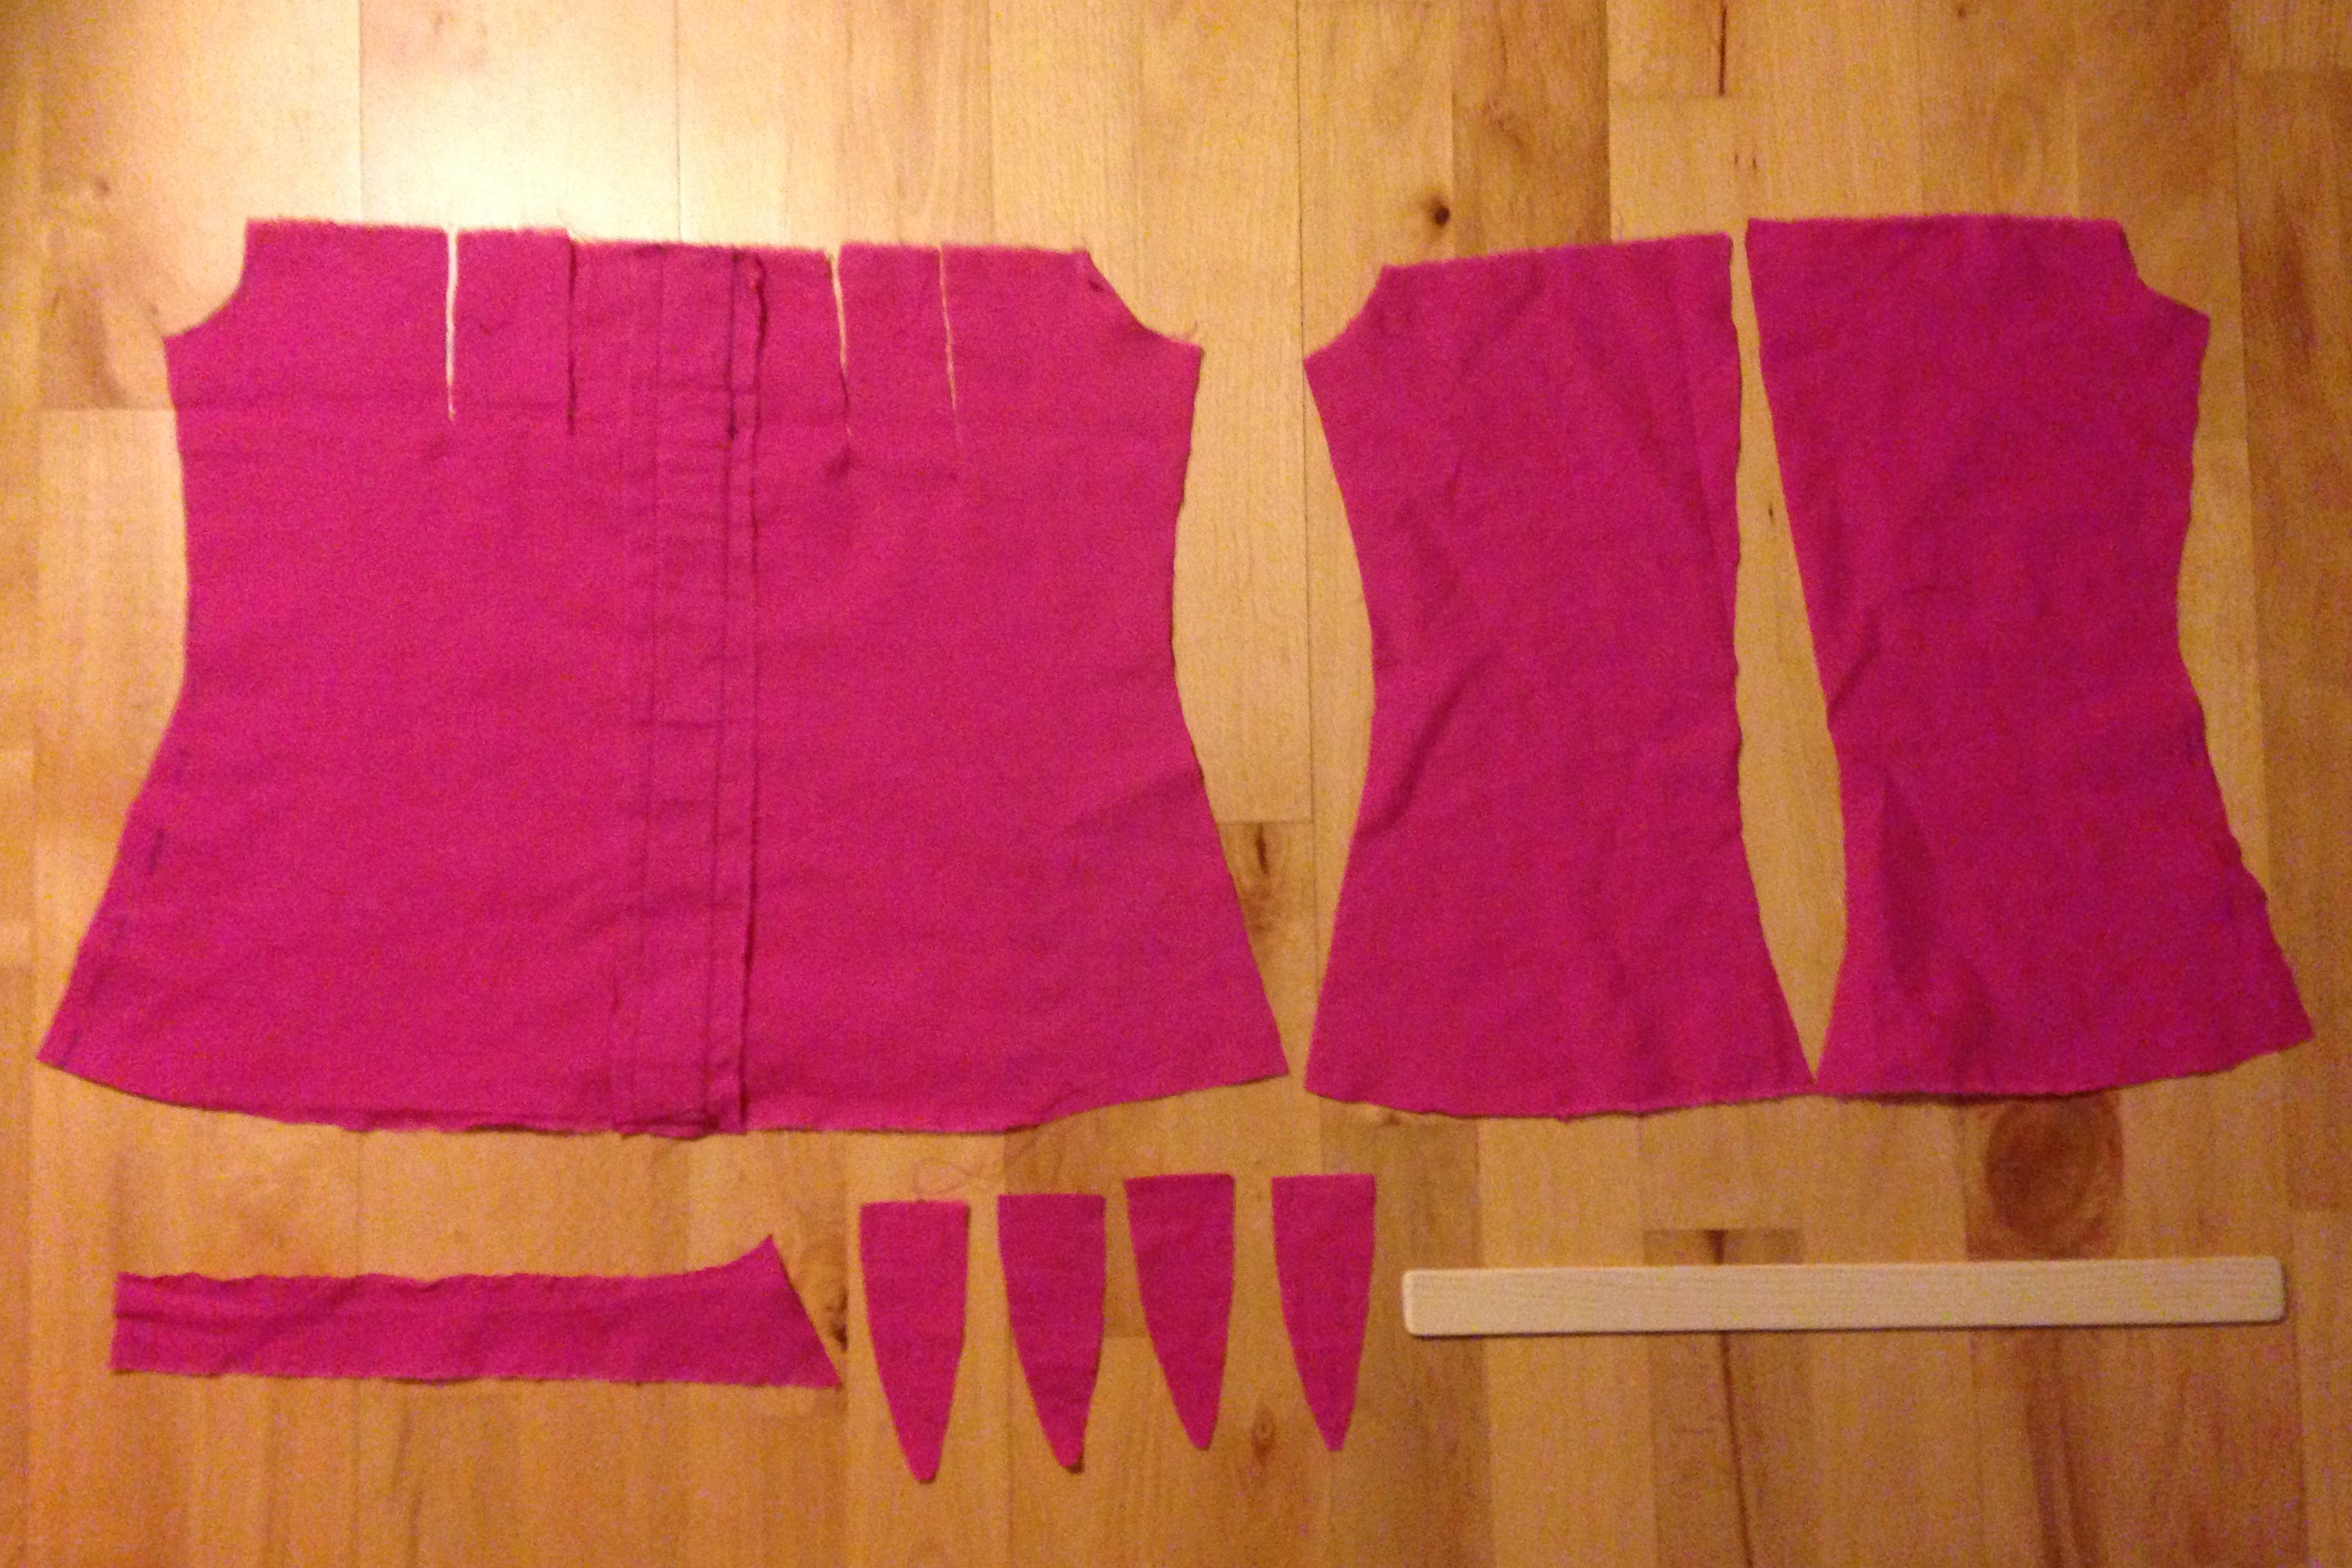
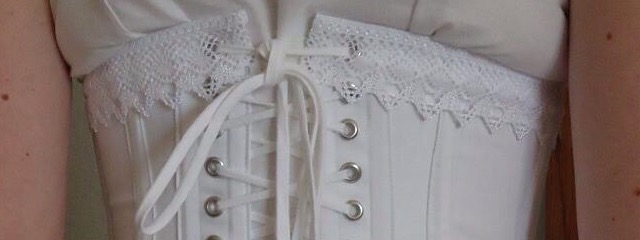
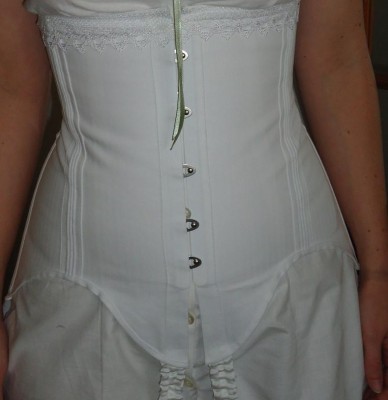
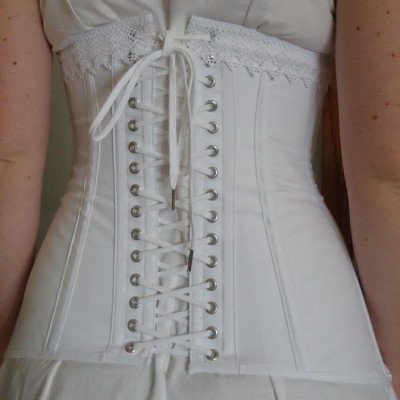
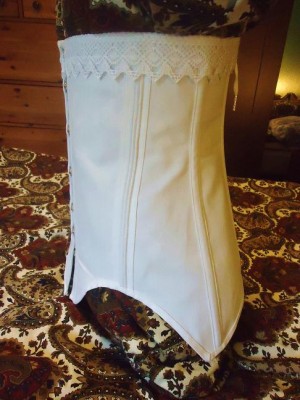
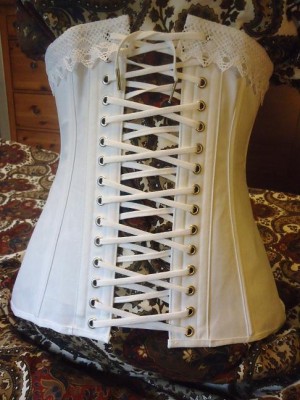
As the dress was finally finished, I tore my corset mockup apart, so that I could use the busk and boning for the real corset. This time, I tried to make everything as precisely as possible – rollpinning, basting, using waist band, fray check, stitching in the ditch etc.
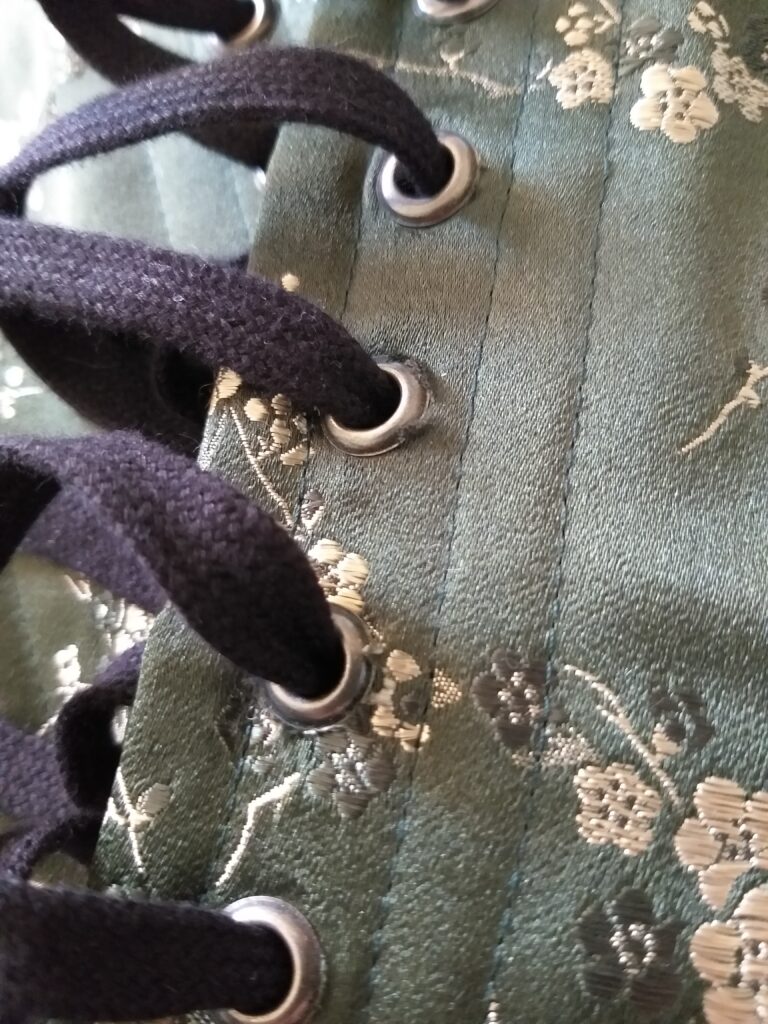
After trying the corset on for only three times, I found out that the wonderful satin was already straying away from the eyelets.
I have got wonderful advice from the mentors and Stitchling members on the Foundations Revealed Community, so that this will not happen again, with the next corset.
There are a lot of new wrinkles, which I suppose depend on the silk behaving different than the mockup material. My uncorseted waist measure is 72 cm, but laced up its 62,5 cm – so almost 10 cm reduction. Overall I am very pleased with the corset. It is so much better than my earlier ones and I have learnt so much that I want to apply on new projects.
Compare this to the first mockup, and you will understand why I am content, even though there are some issues left.
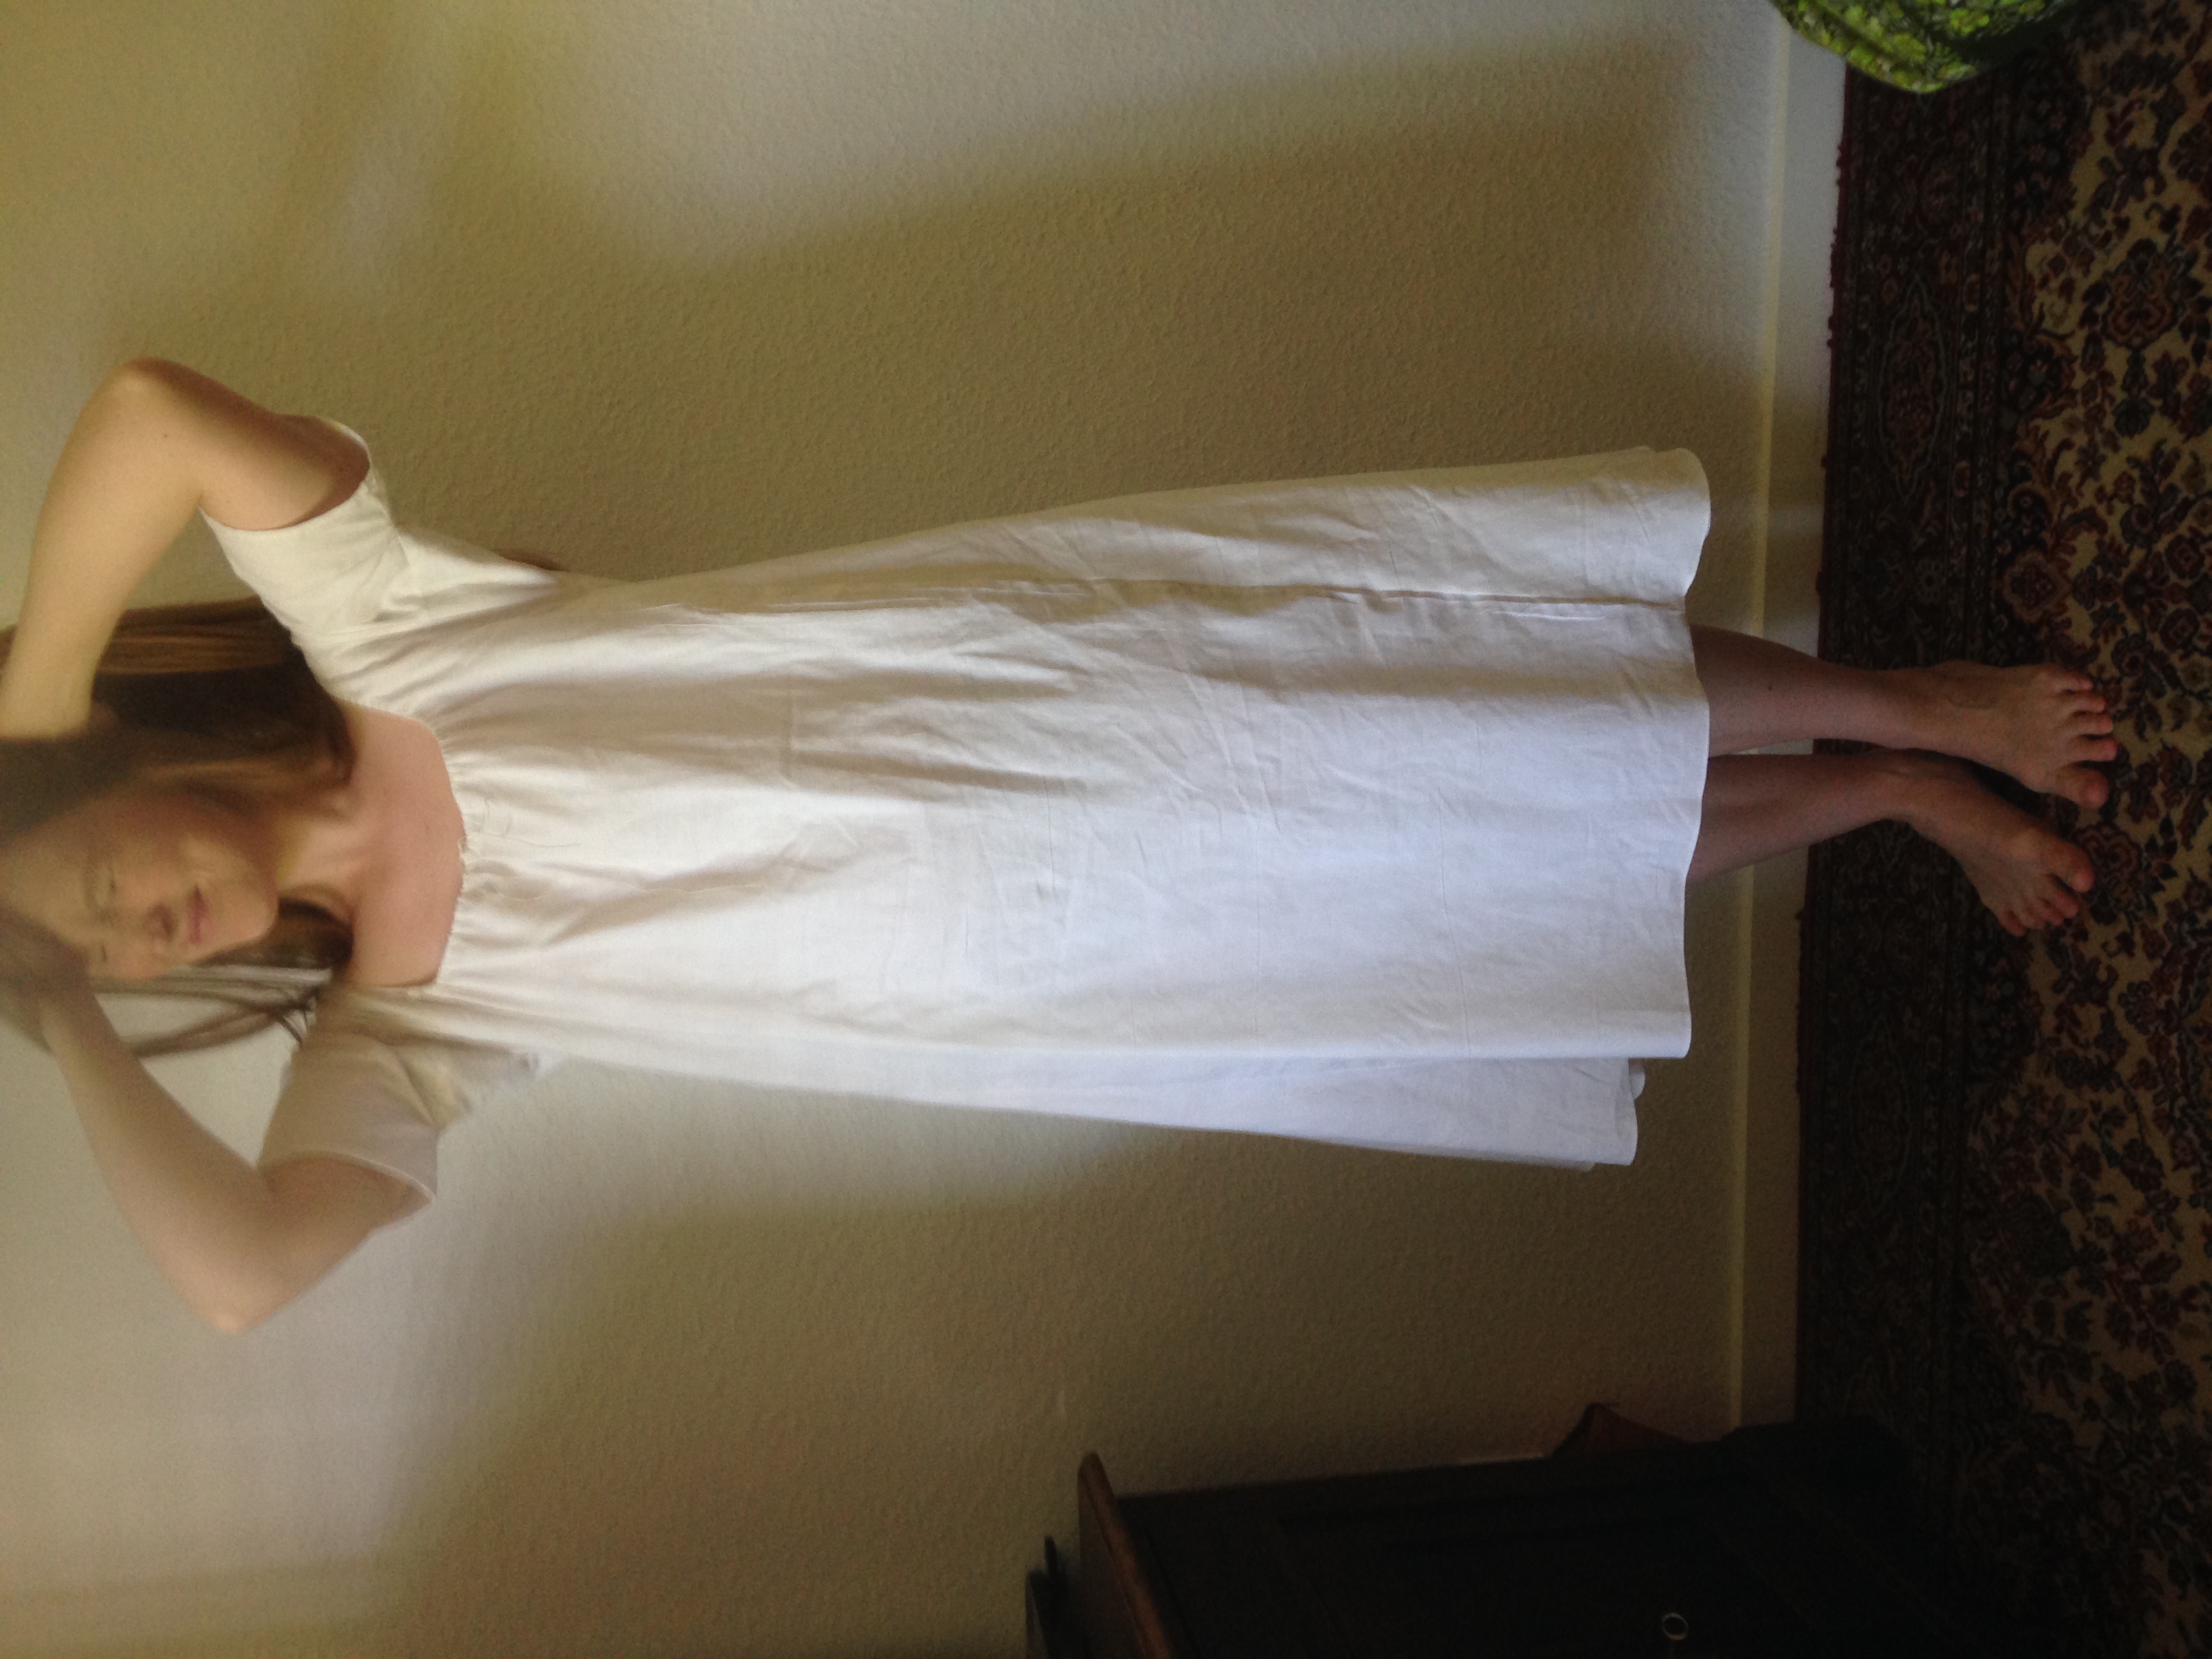
Today, I finished the blue regency gown, which I have thought about during the whole summer! I had planned for wearing it at the castle pick nick with my friends, but this was cancelled, so I had to find some other location for my photo session.
In this post I will first give you a quick look at the construction, then the new underpinnings put on in the right order, the gown put on and last, all of the romantic pictures of the gown.
Idag blev jag äntligen färdig med min nya empirklänning, som jag har tänkt på hela sommaren. Jag hade ju tänkt använda den på Tjolöholmsutflykten, tillsammans med mina vänner, men utflykten blev inställd, så jag var tvungen att hitta ett annat ställe att fota på.
I detta inlägg visar jag först lite av klänningskonstruktionen, sedan alla underklädeslager och sist själva klänningen.
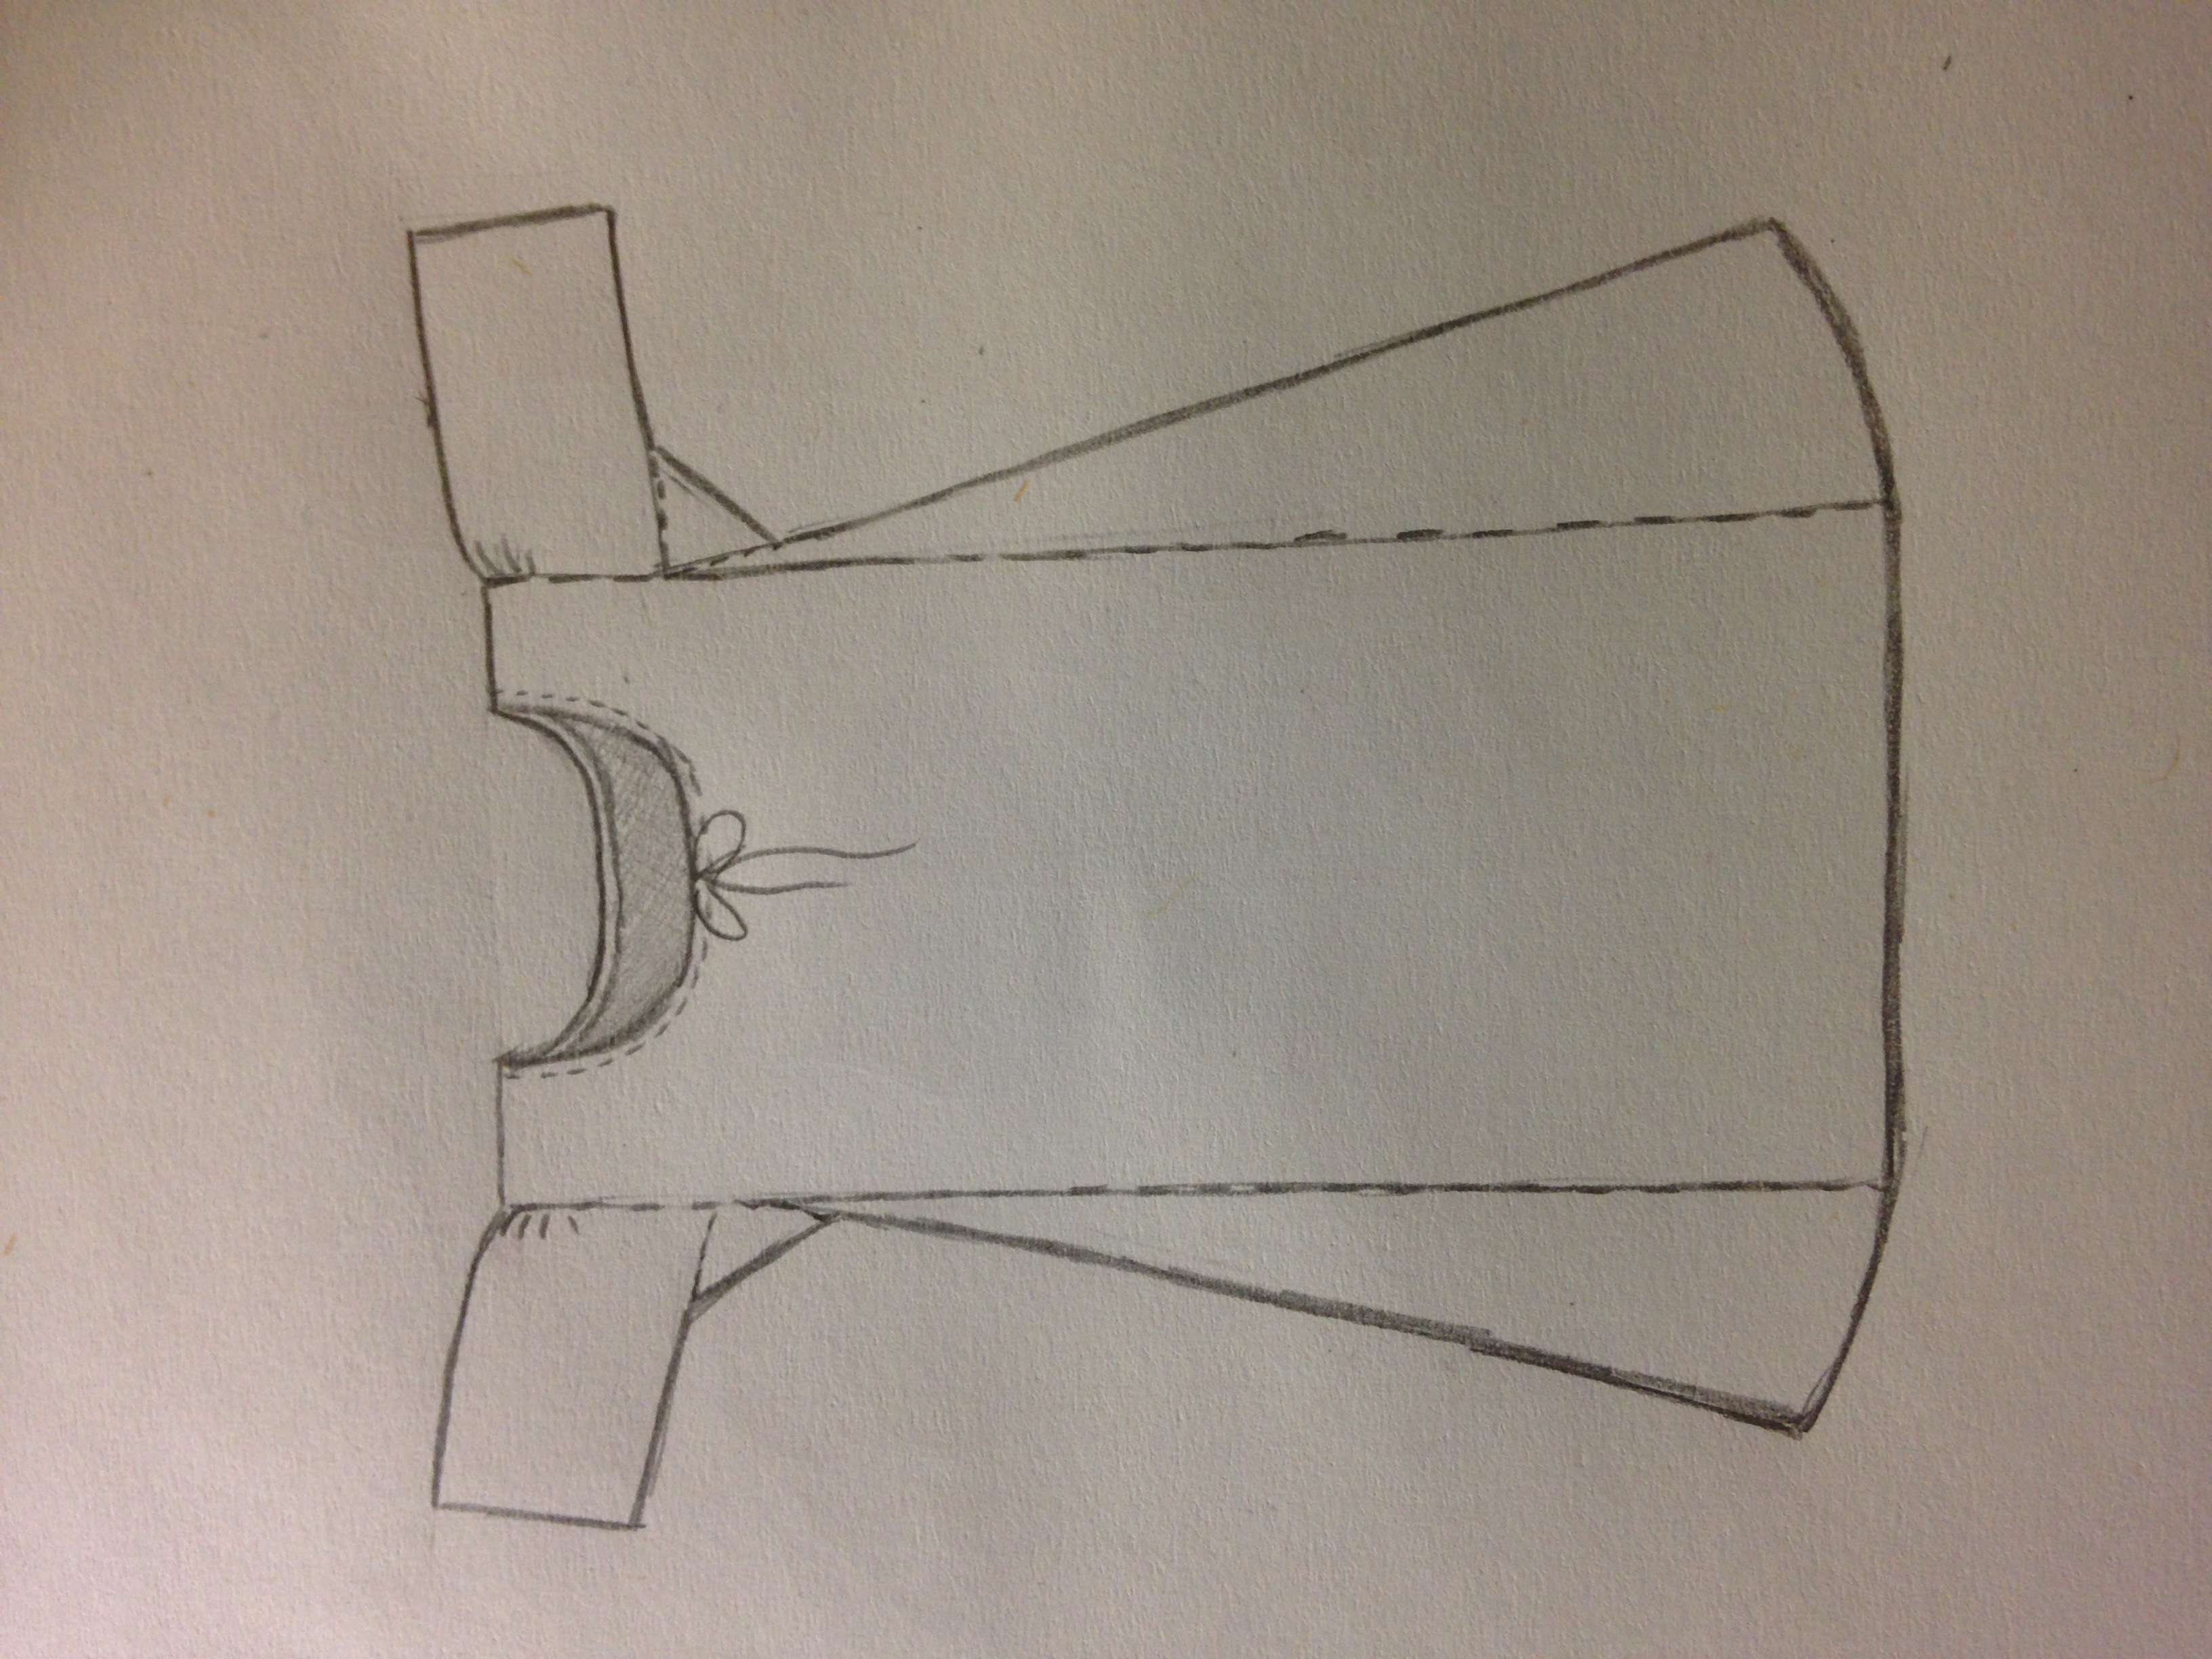
Construction of the gown
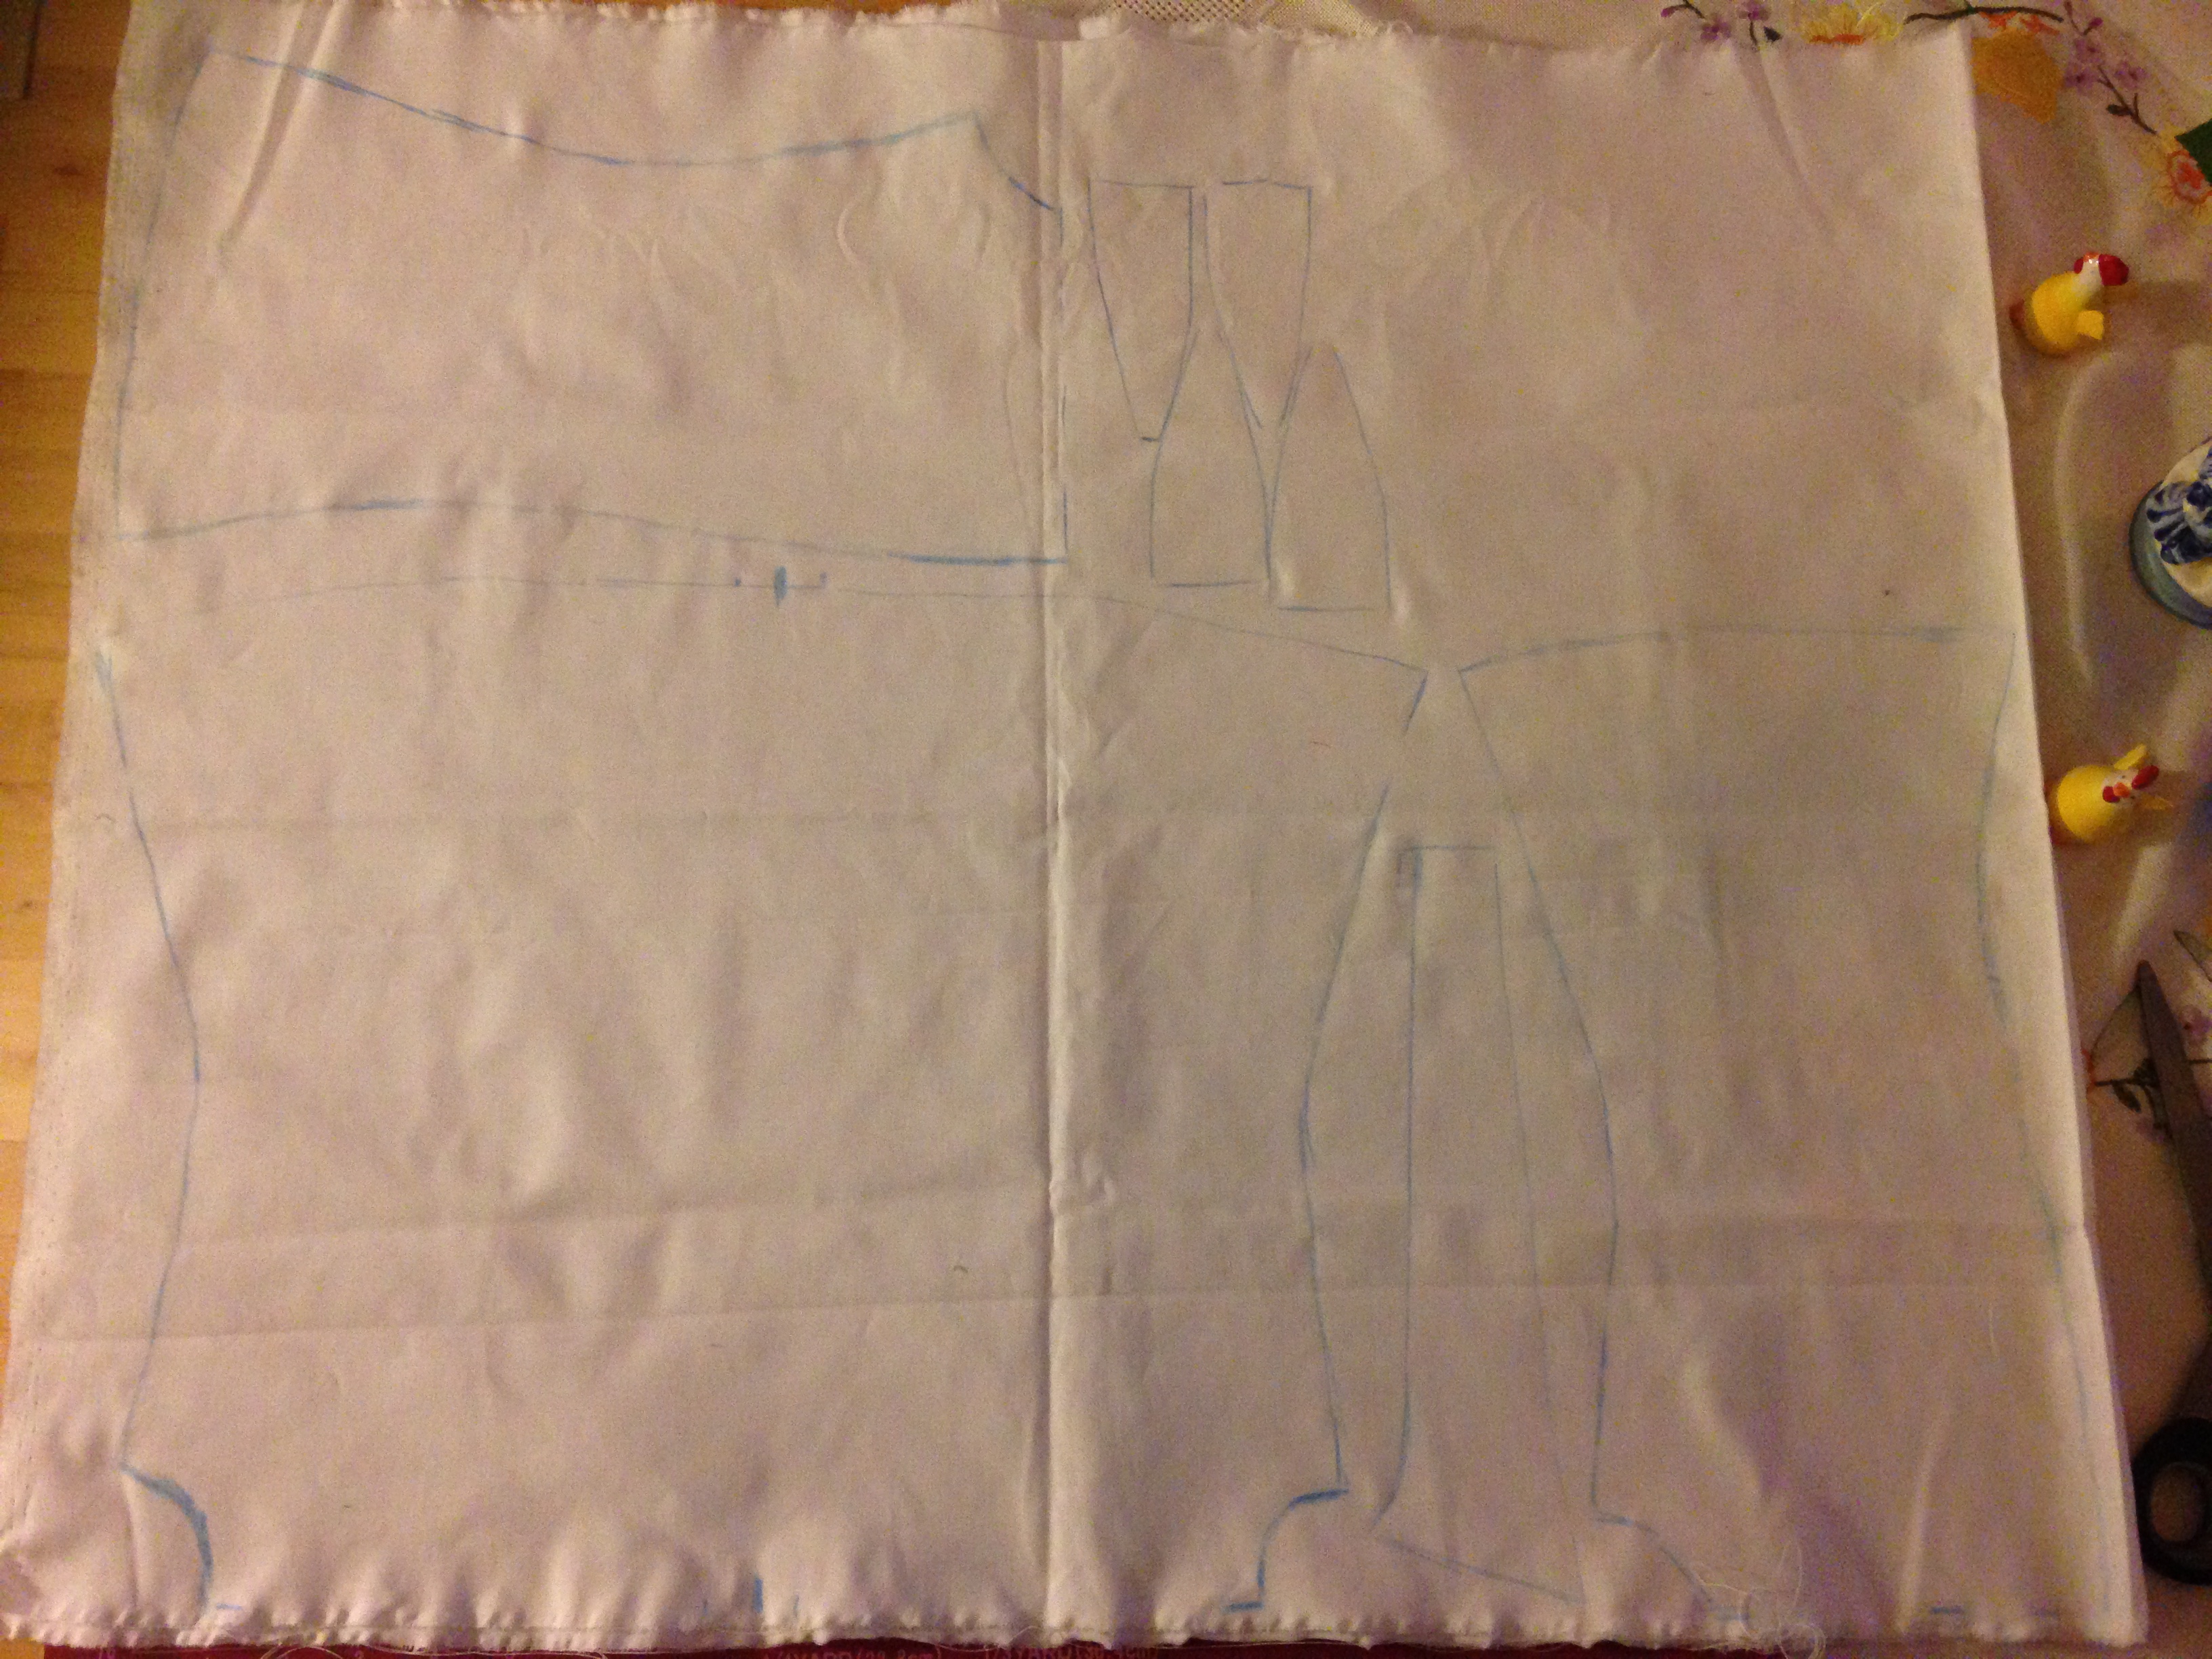
I made a mock-up for the bodice part, on my mannequin before I left it for Sweden. The mock-up was used as a pattern when I cut the fabric.
Jag gjorde en toille på min provdocka i Danmark och använde nu denna som mönster när jag klippte ut tyget.
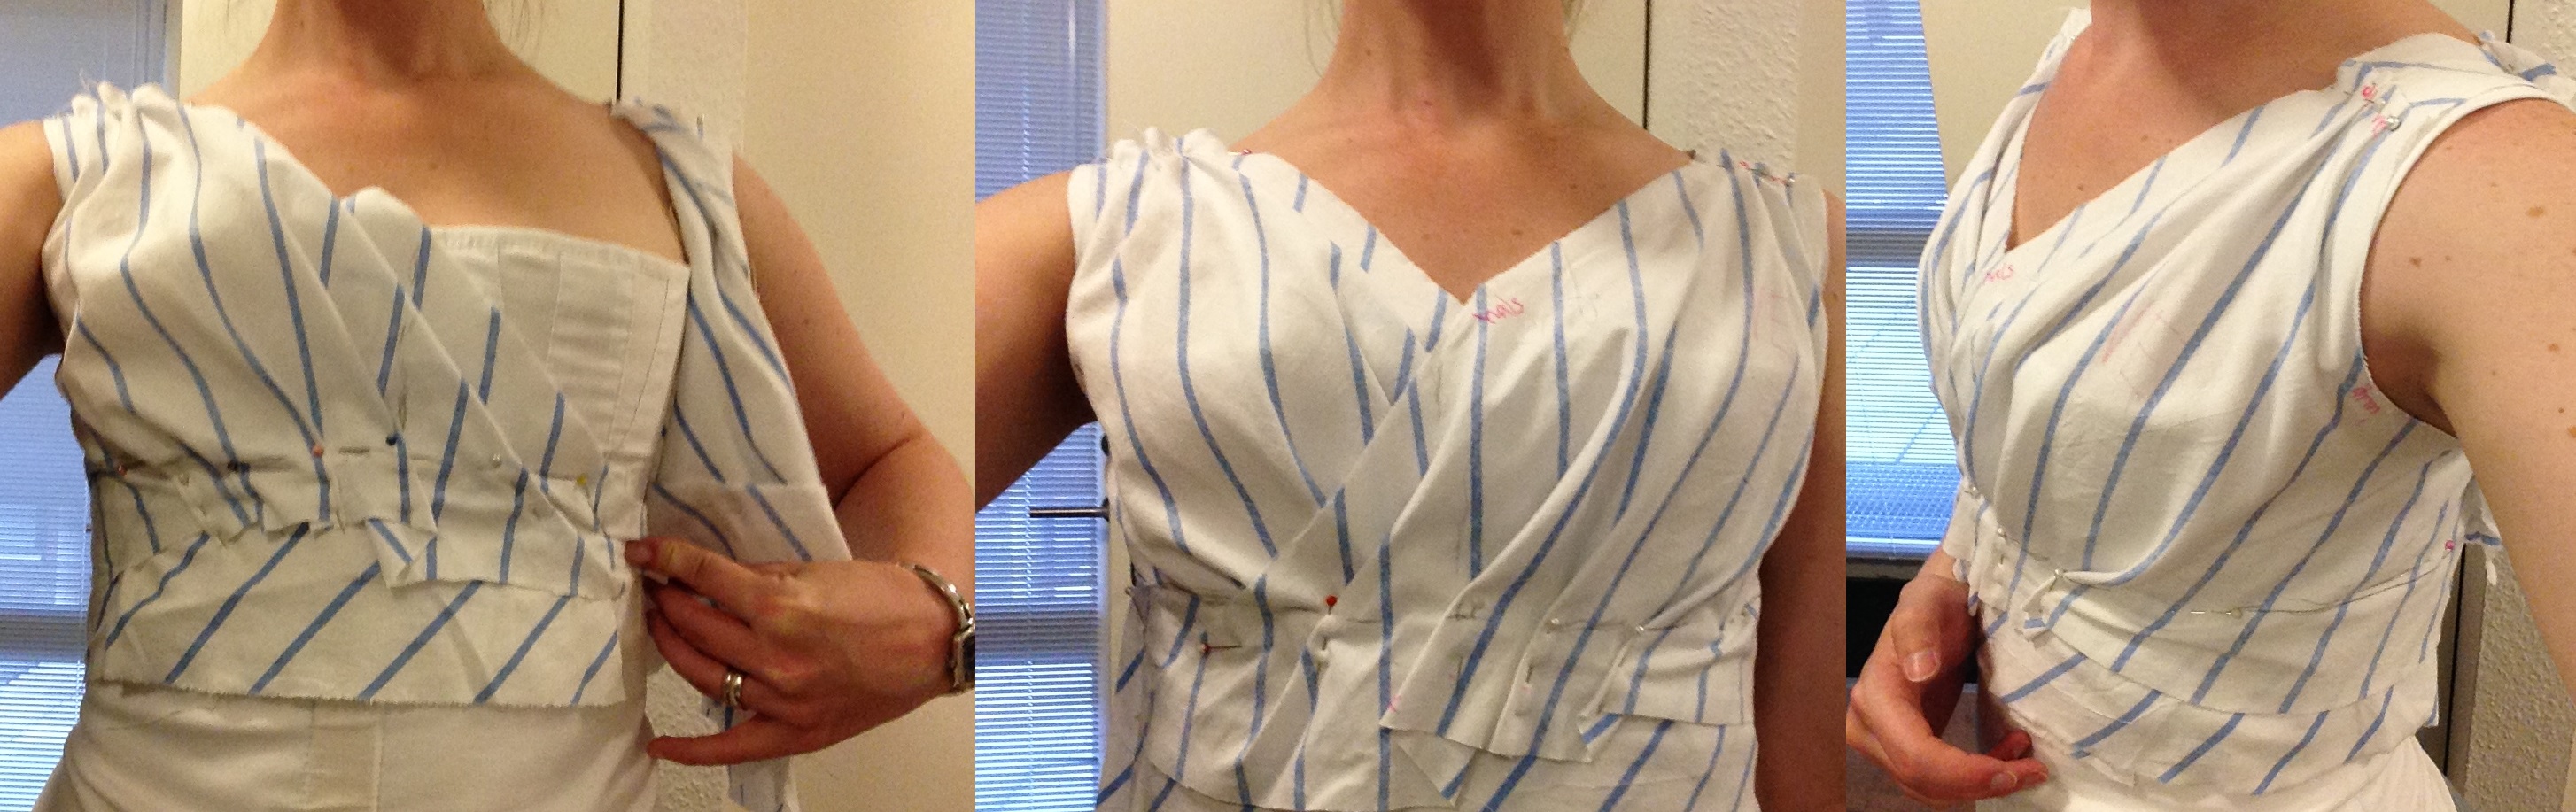
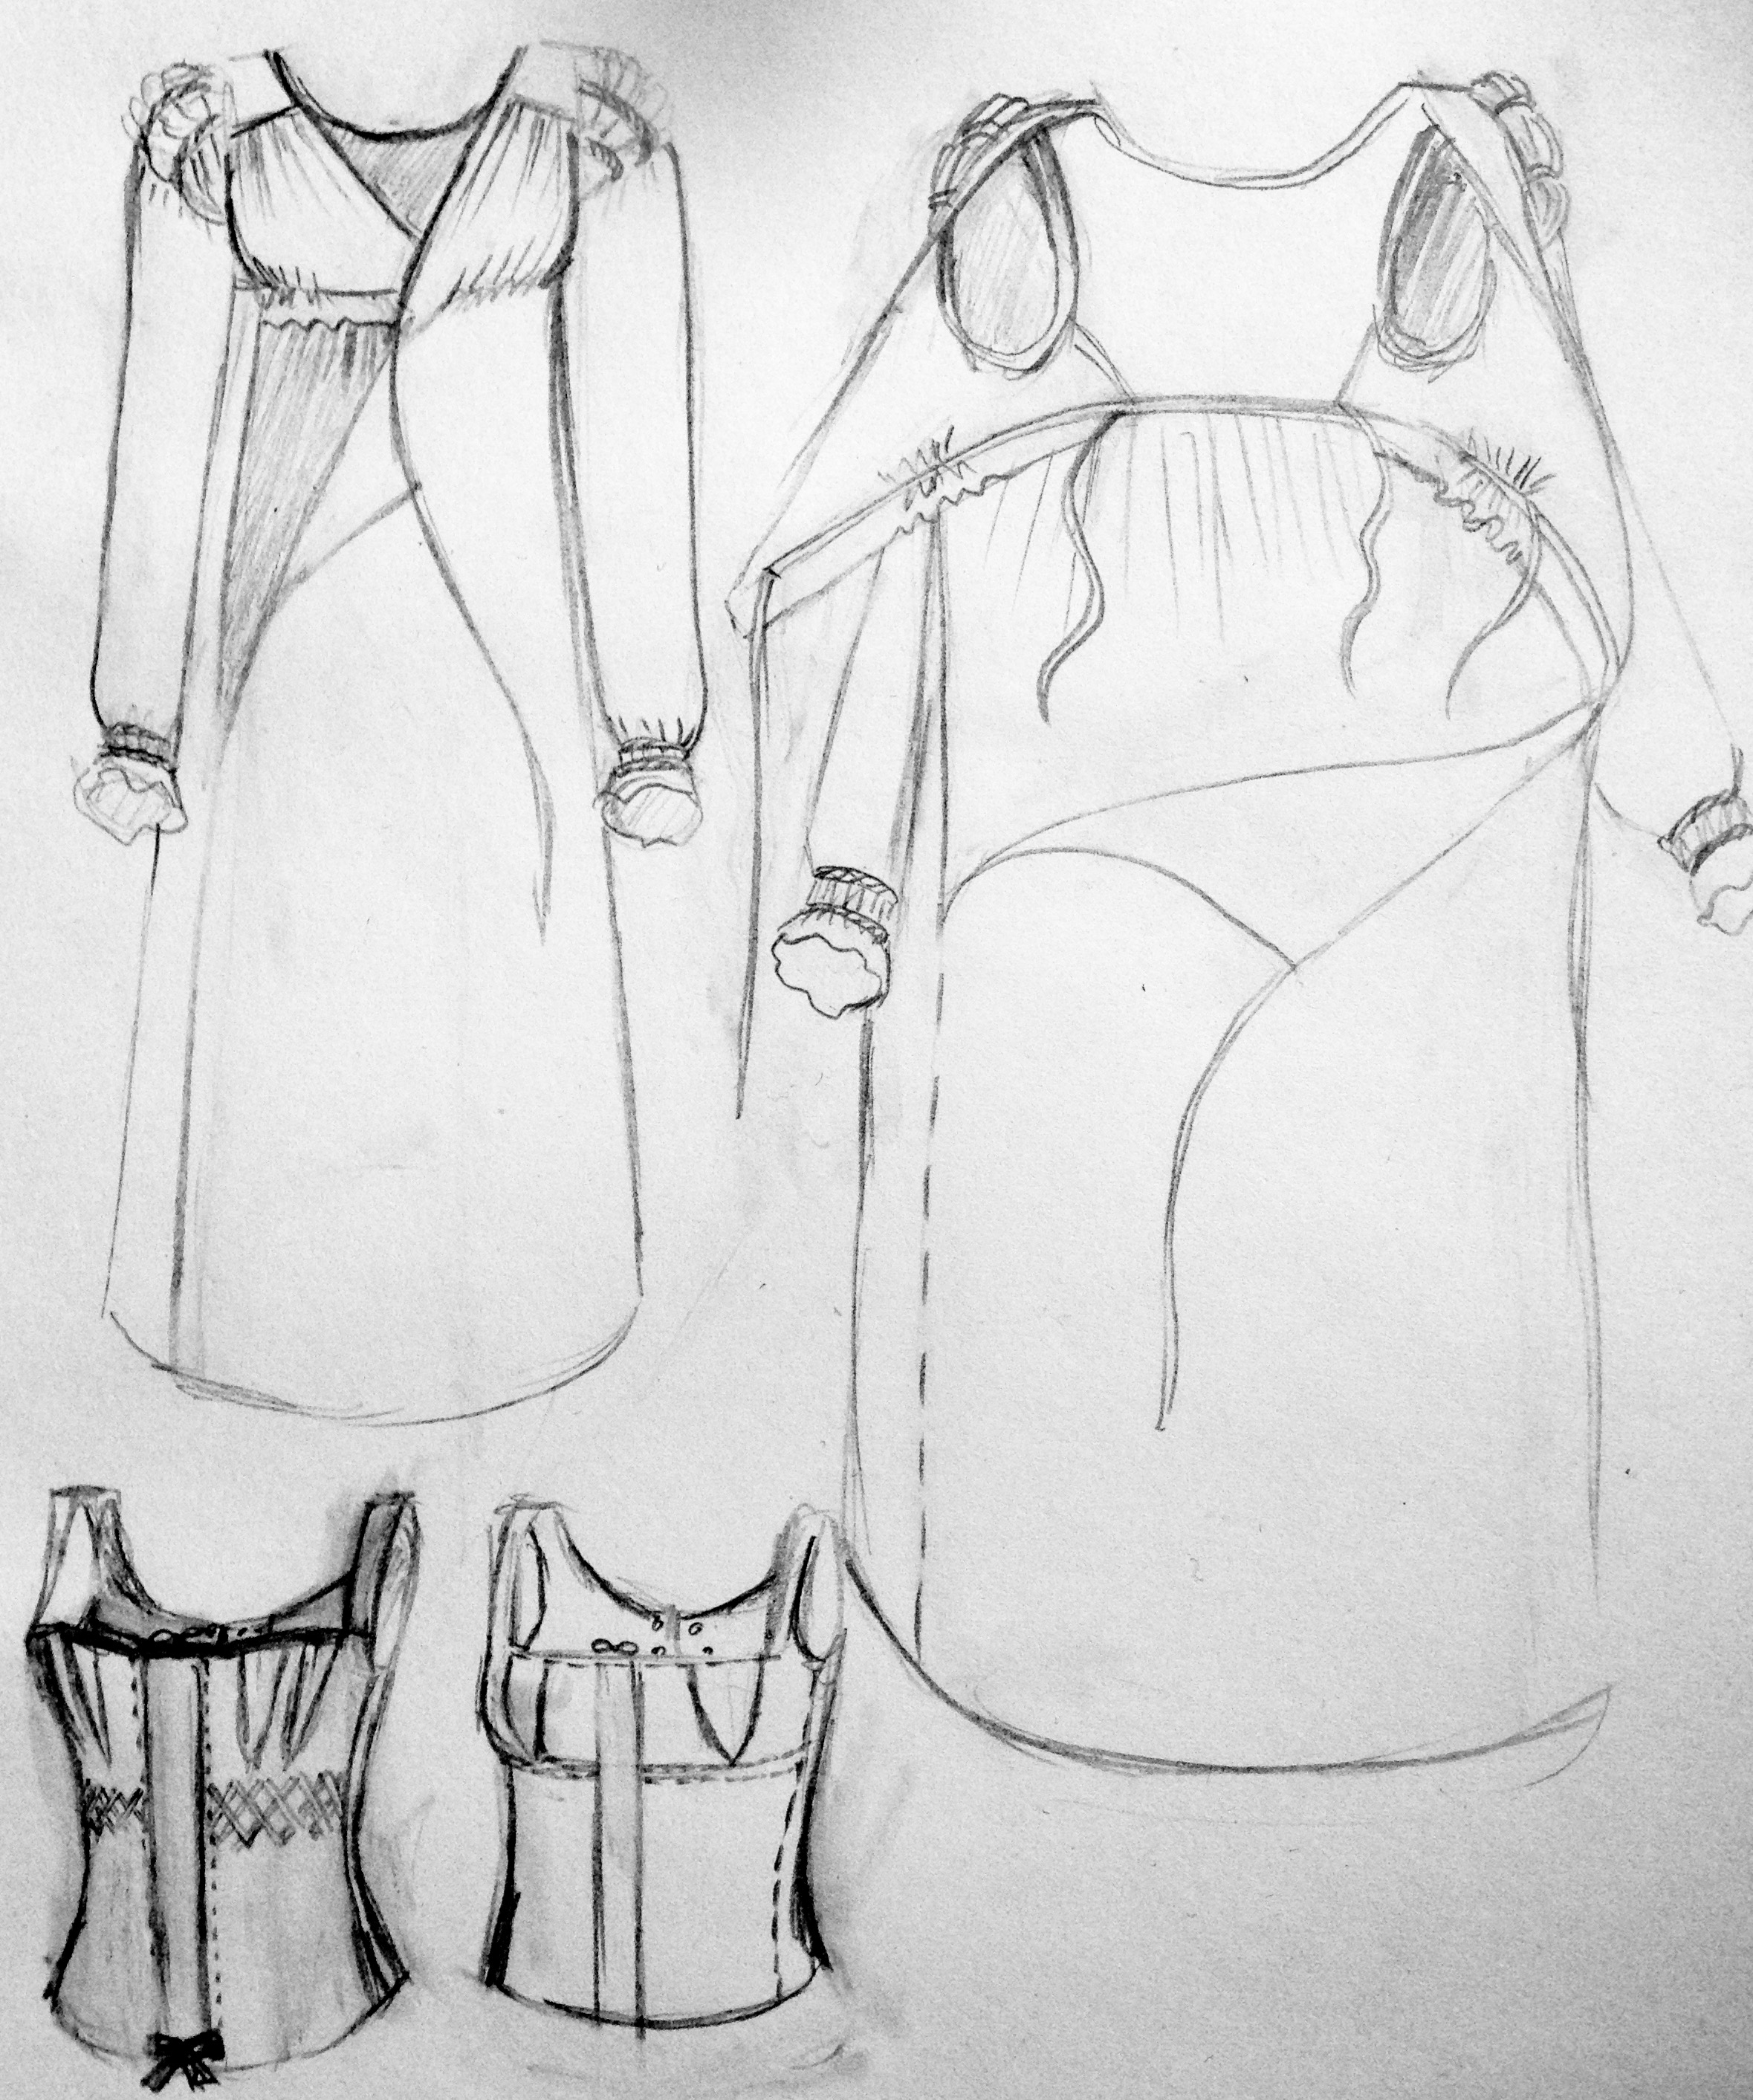
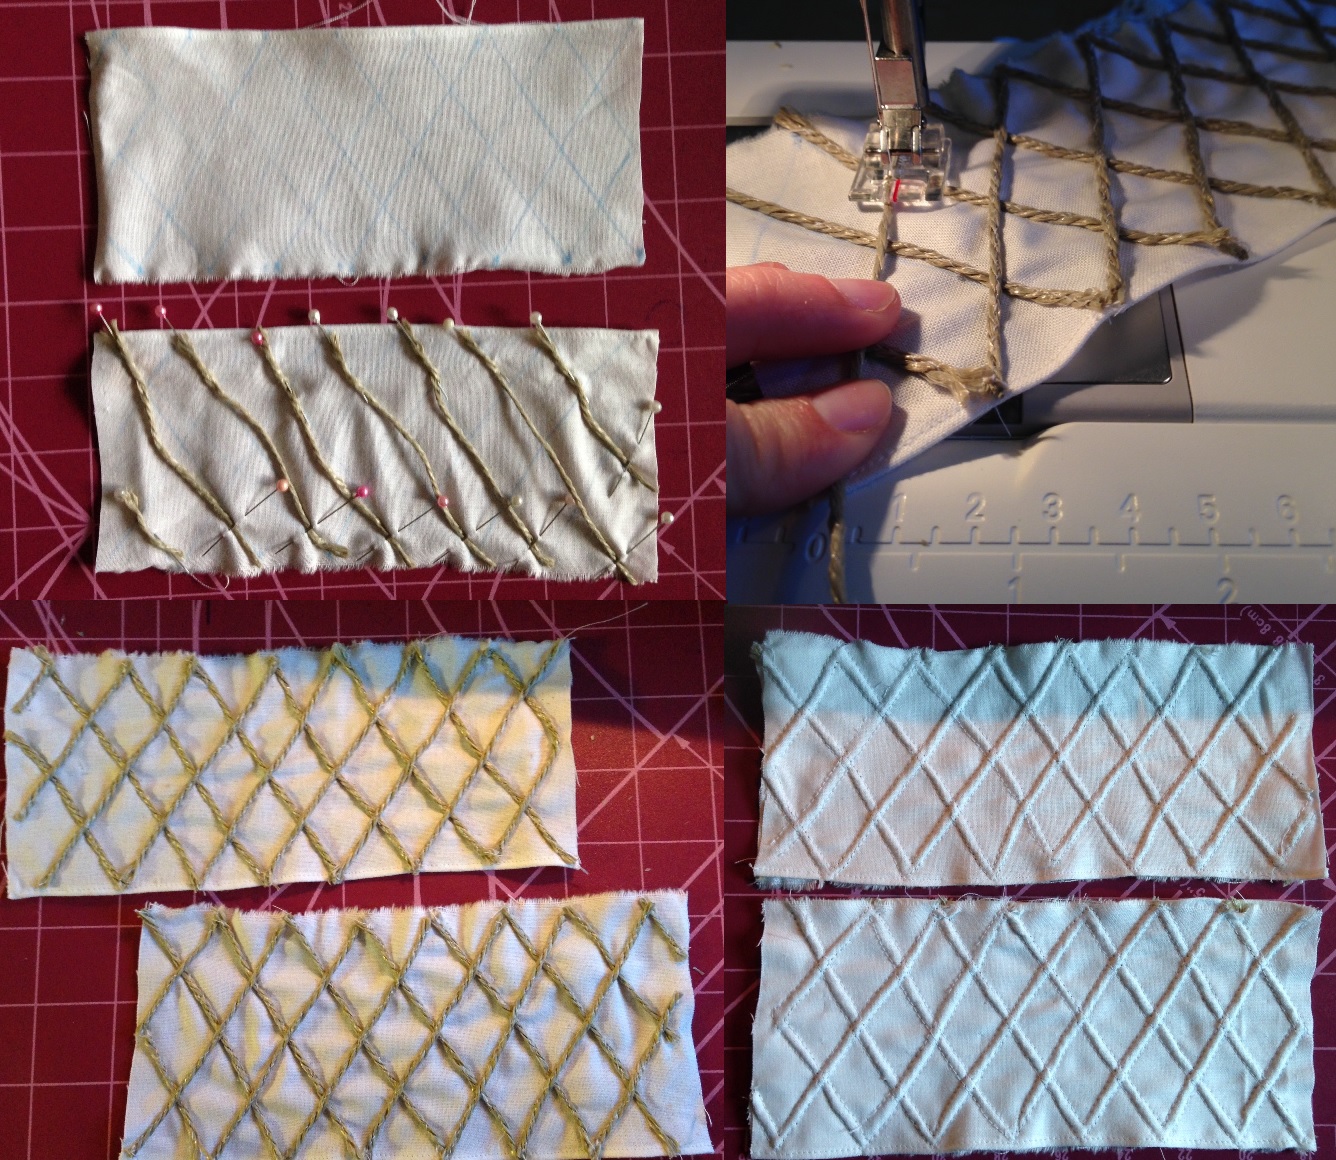
Thus, I constructed the mock-up. The pinned tucks represent the tucks that will be created by drawstrings at the high waist.
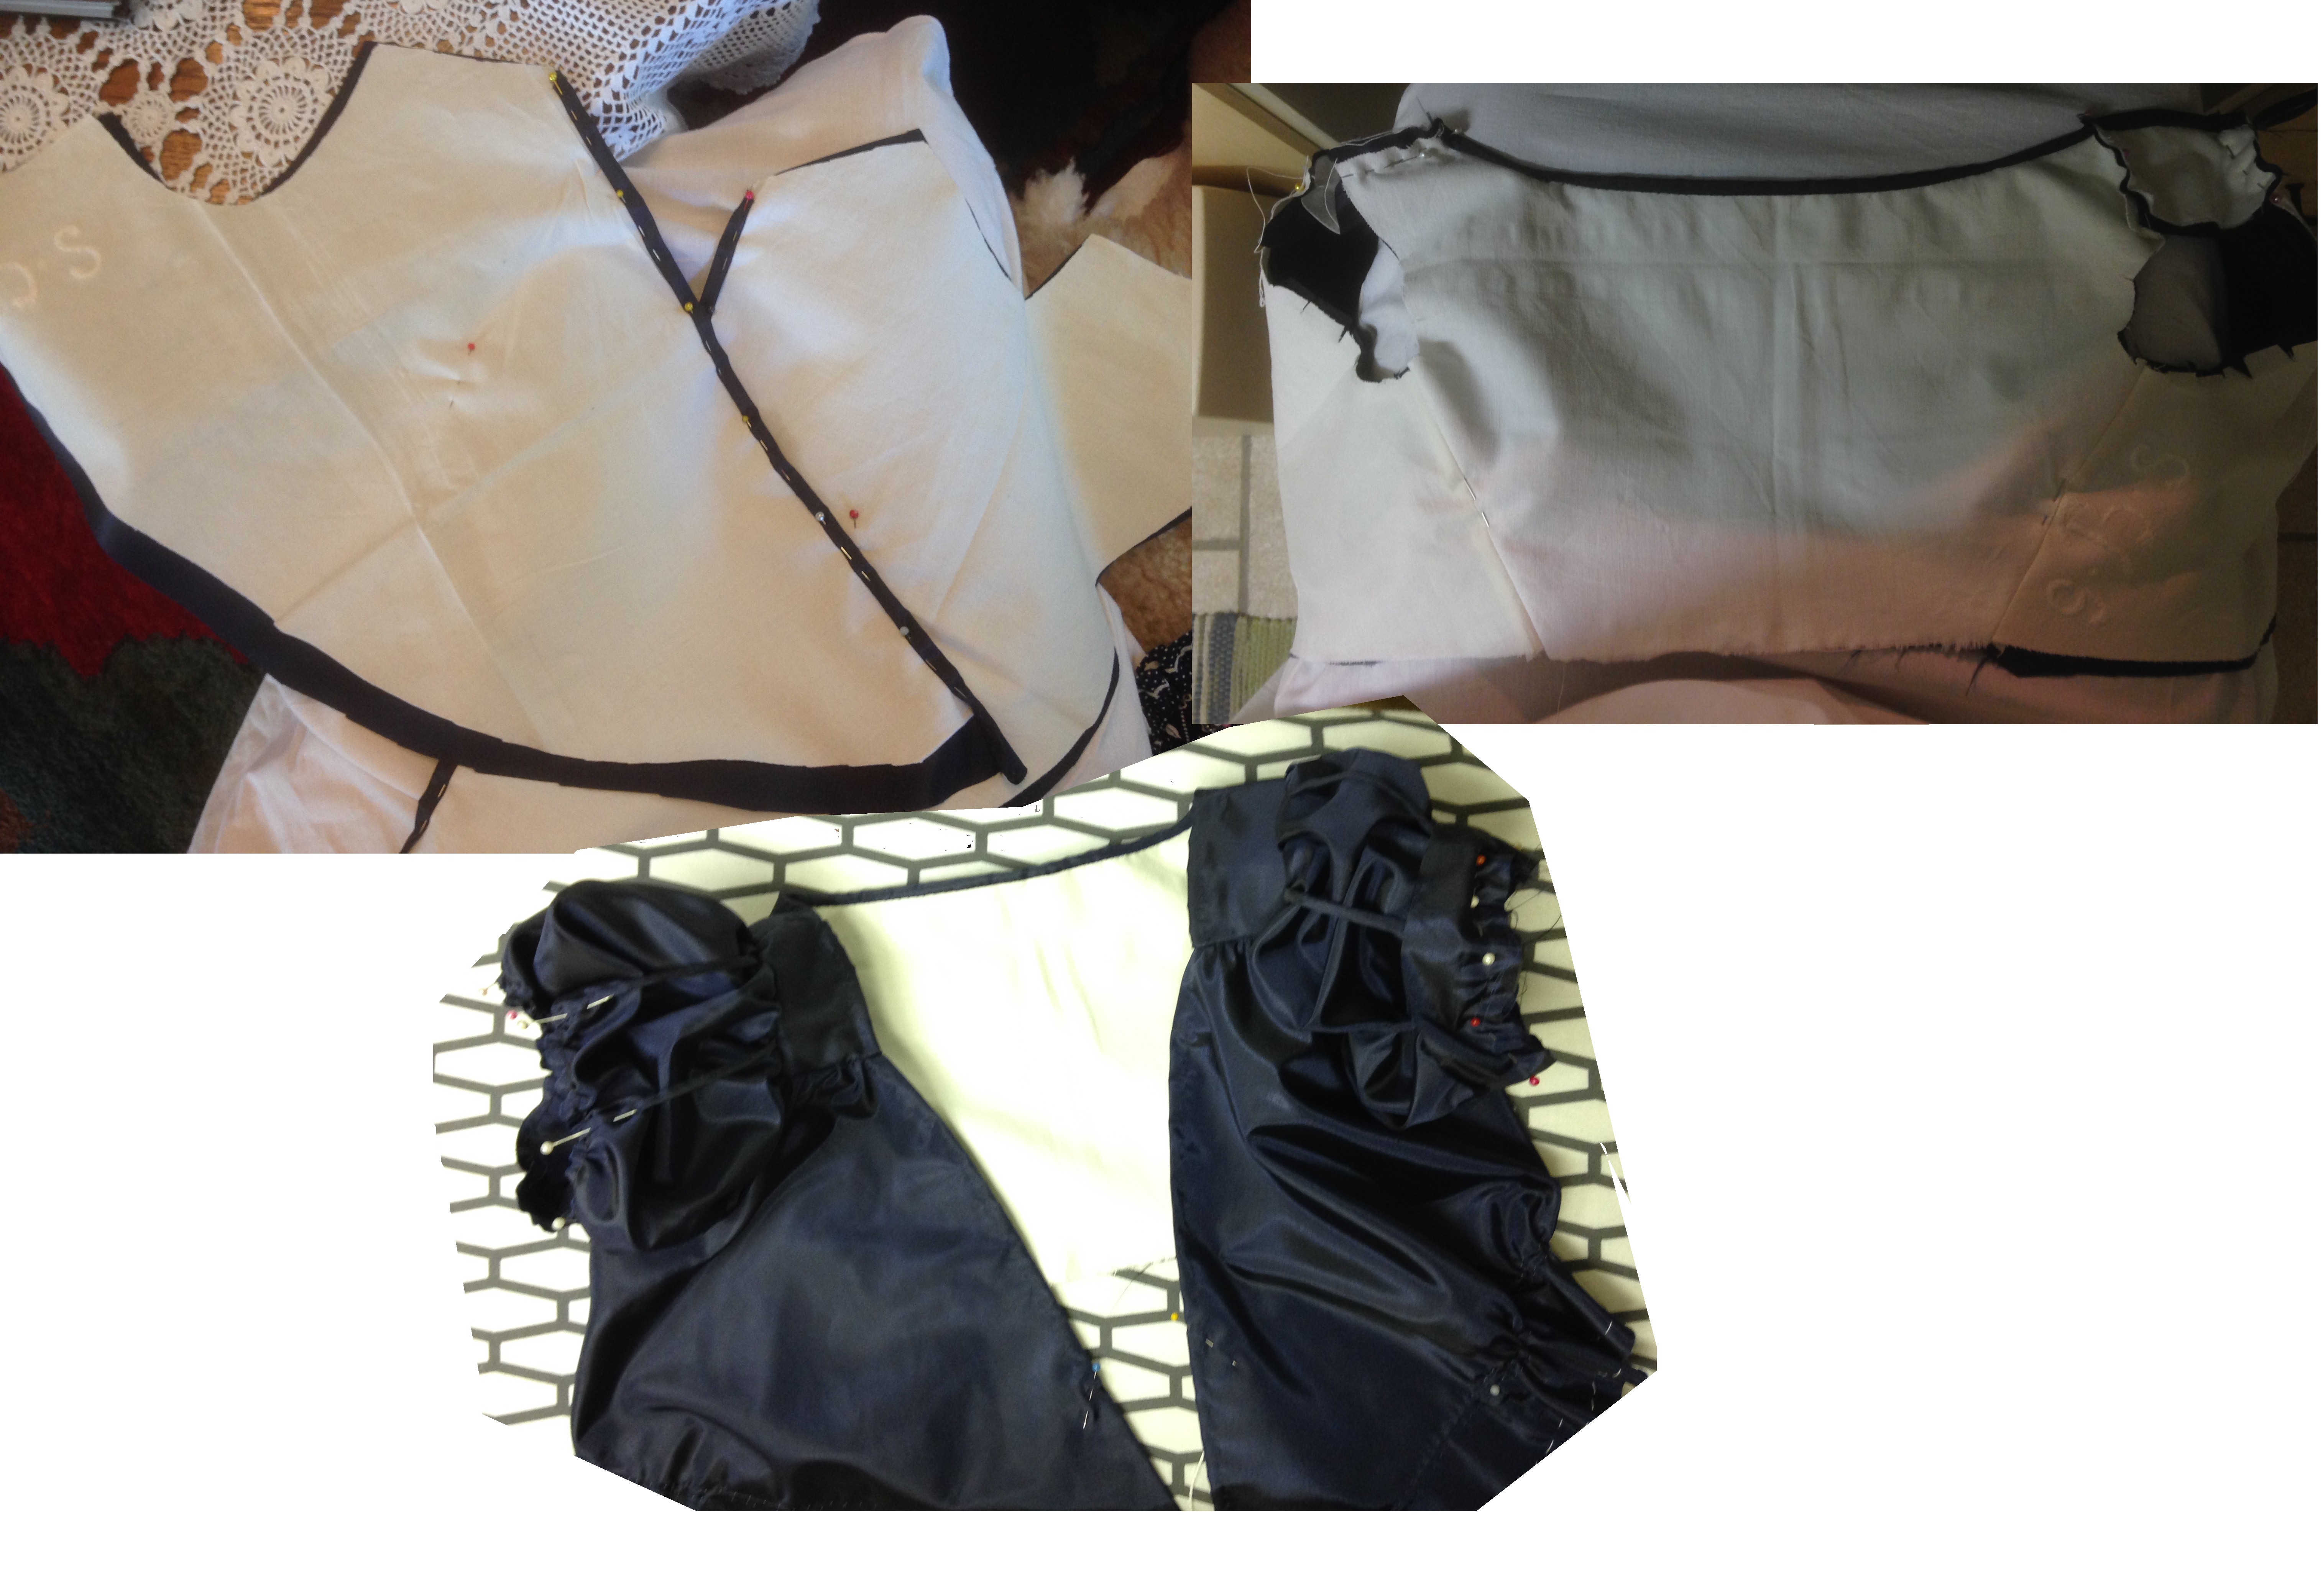
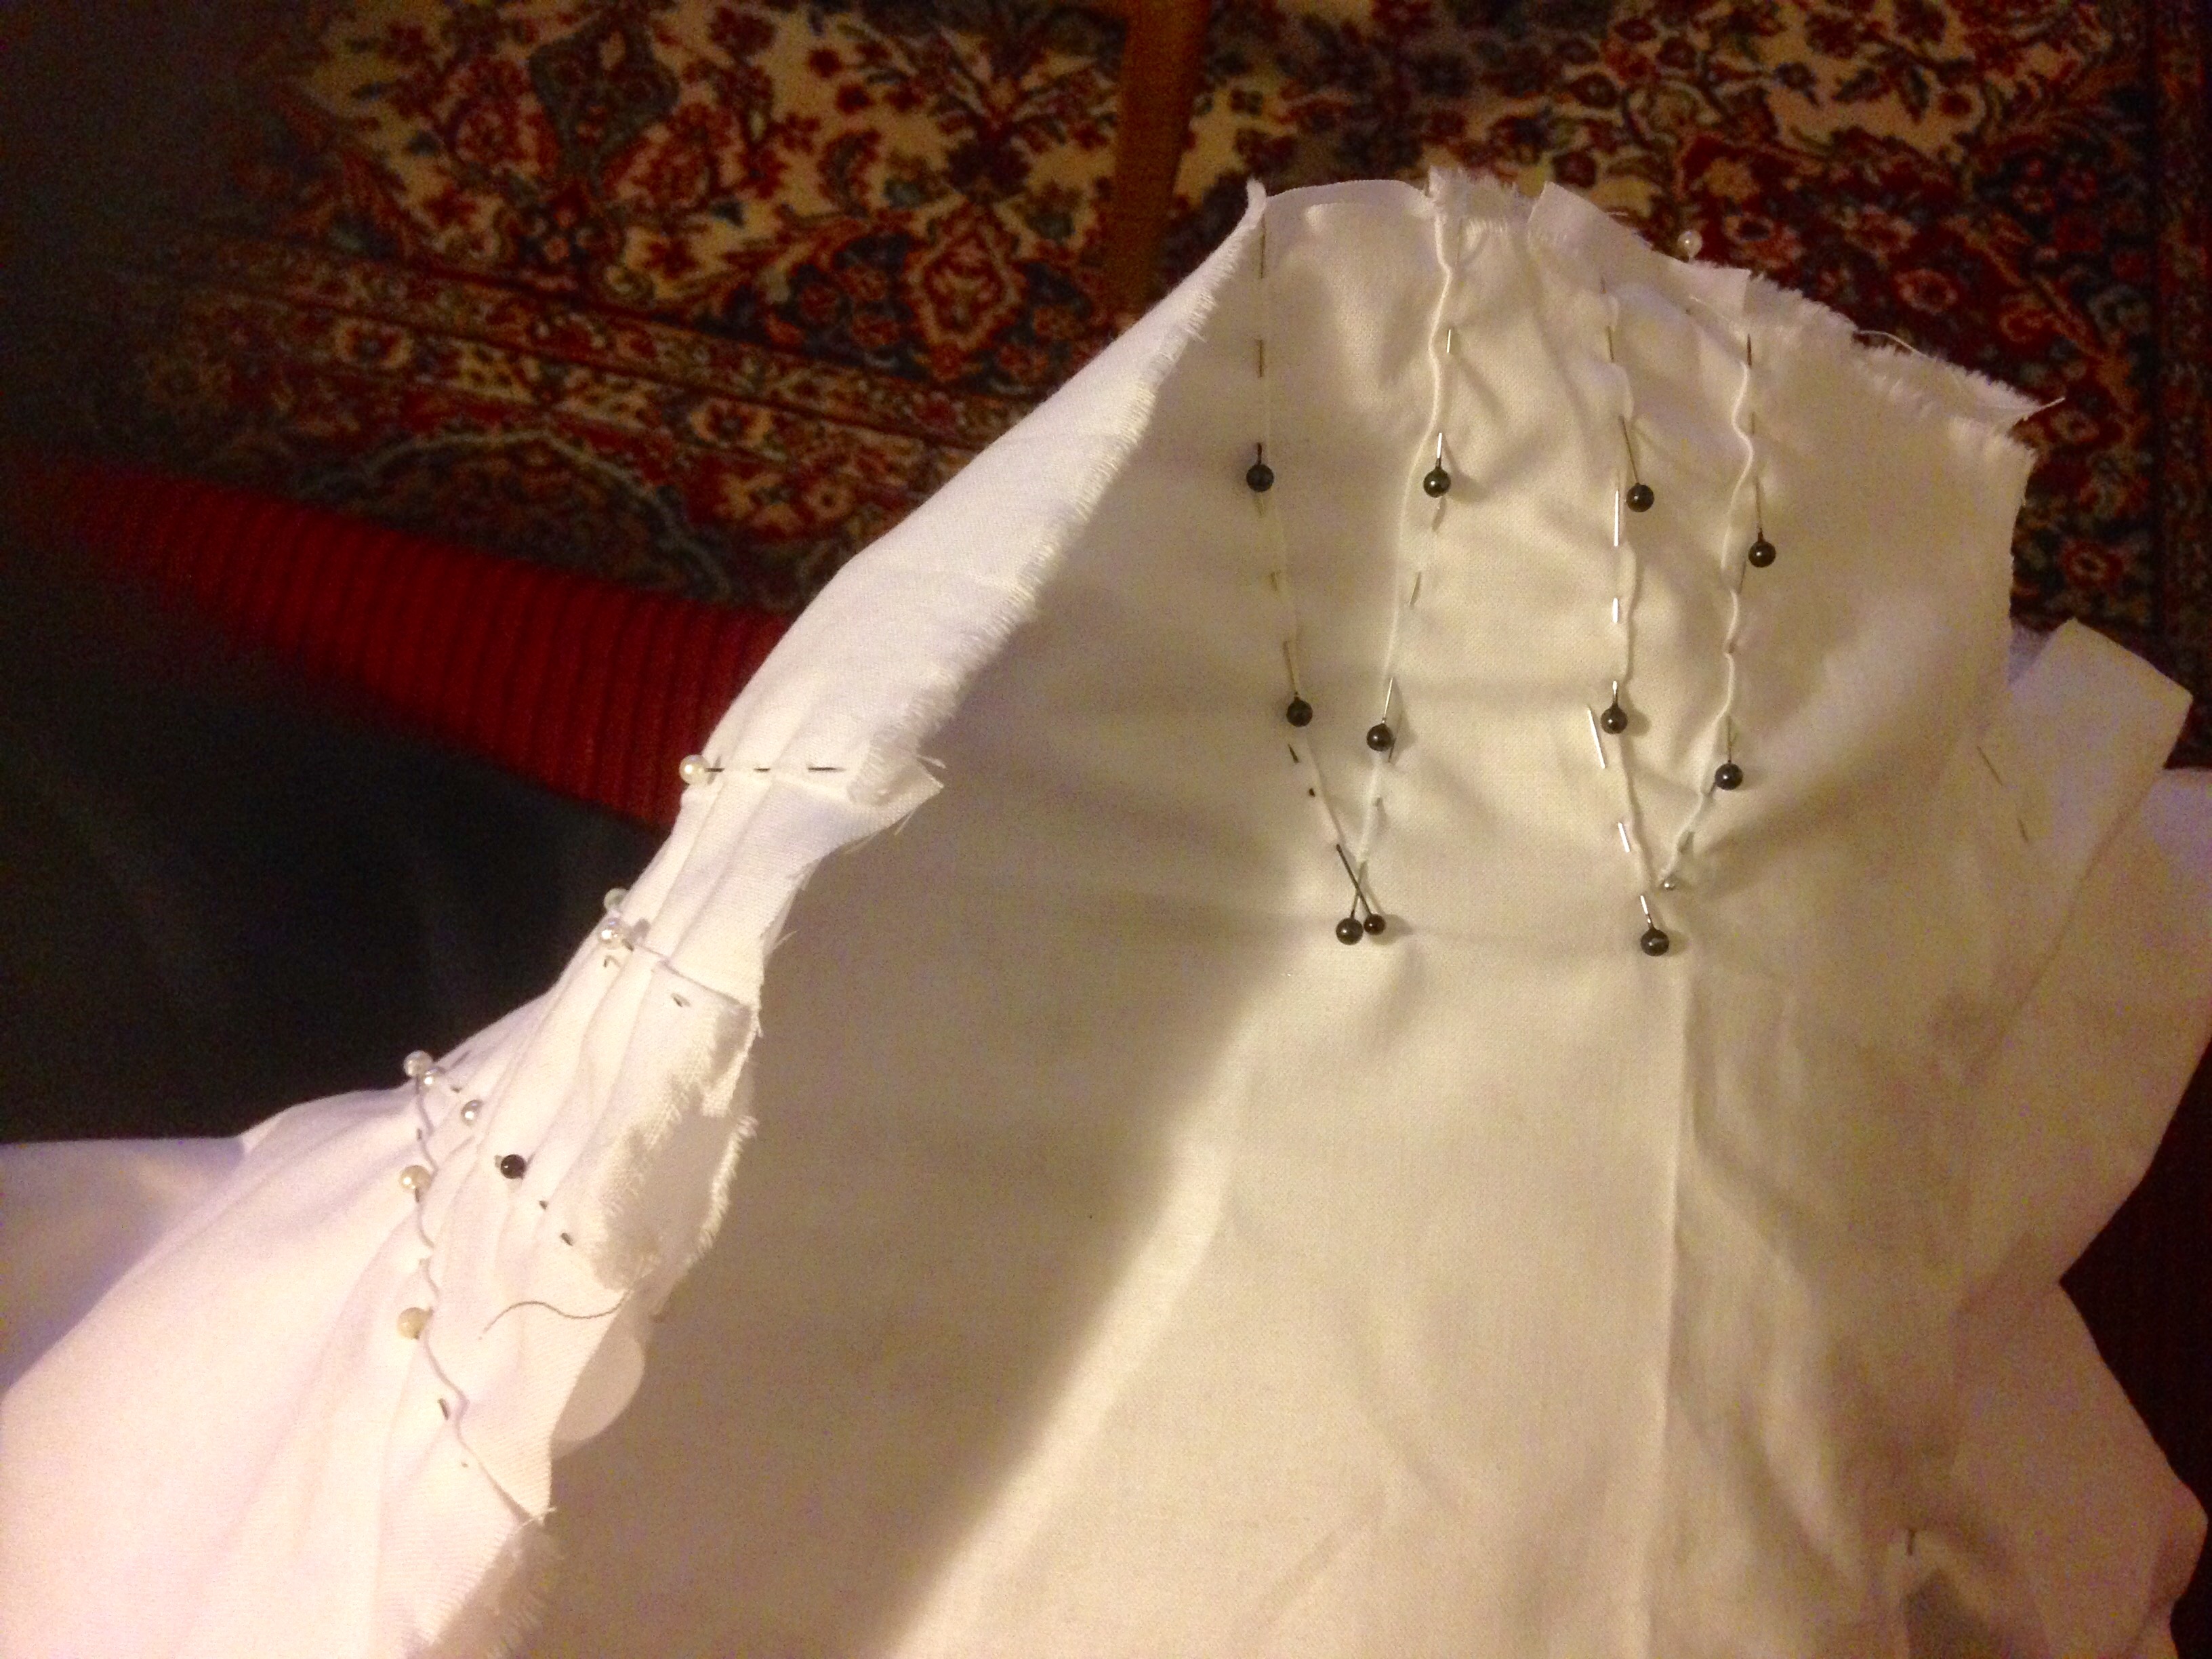
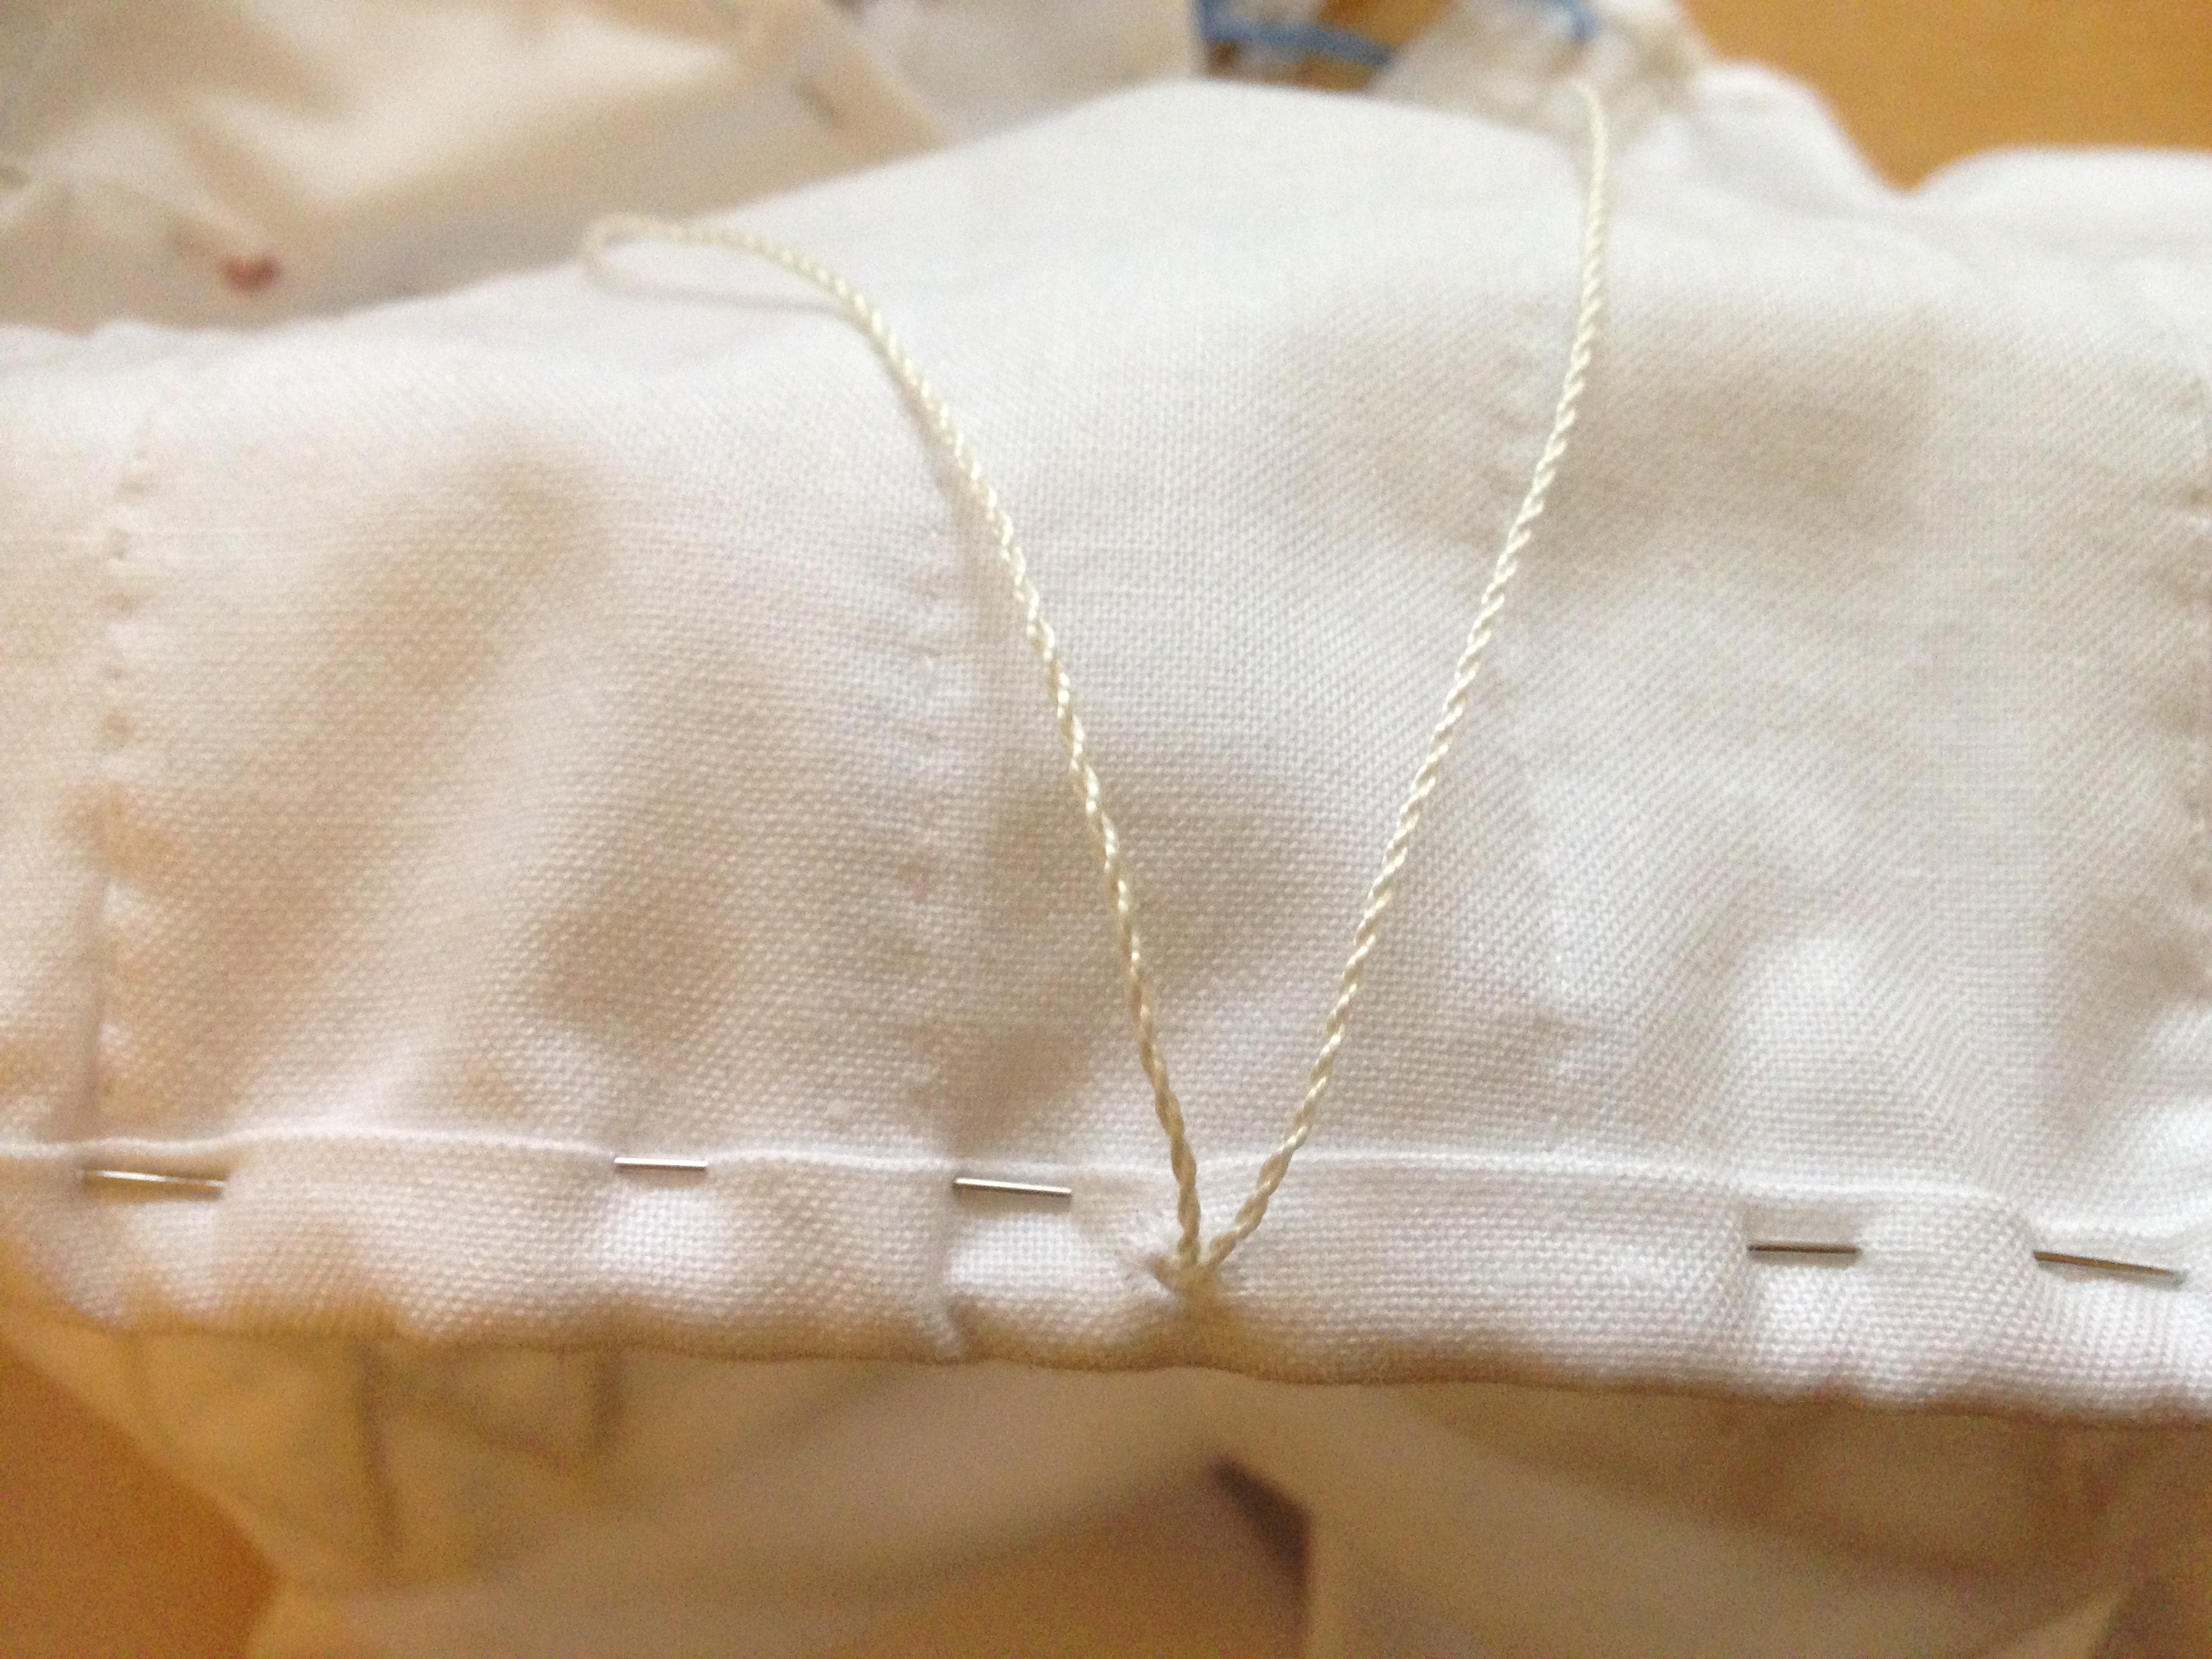
First I put the bodice together and hand stitched the hem in the neckline. Then I put on the arms and last, I made the skirt. I cut some corners by sewing long loose machine seams for gathering the fabric in the arms and skirt.
Först satte jag ihop livet och fållade sömmarna i halsringningen. Sedan fäste jag ärmarna och sist kjolen. Jag struntade i att göra vecksömmar för hand, genom att i stället sy långa lösa raksömmar på symaskinen för att rynka puffärmarna och kjolen.
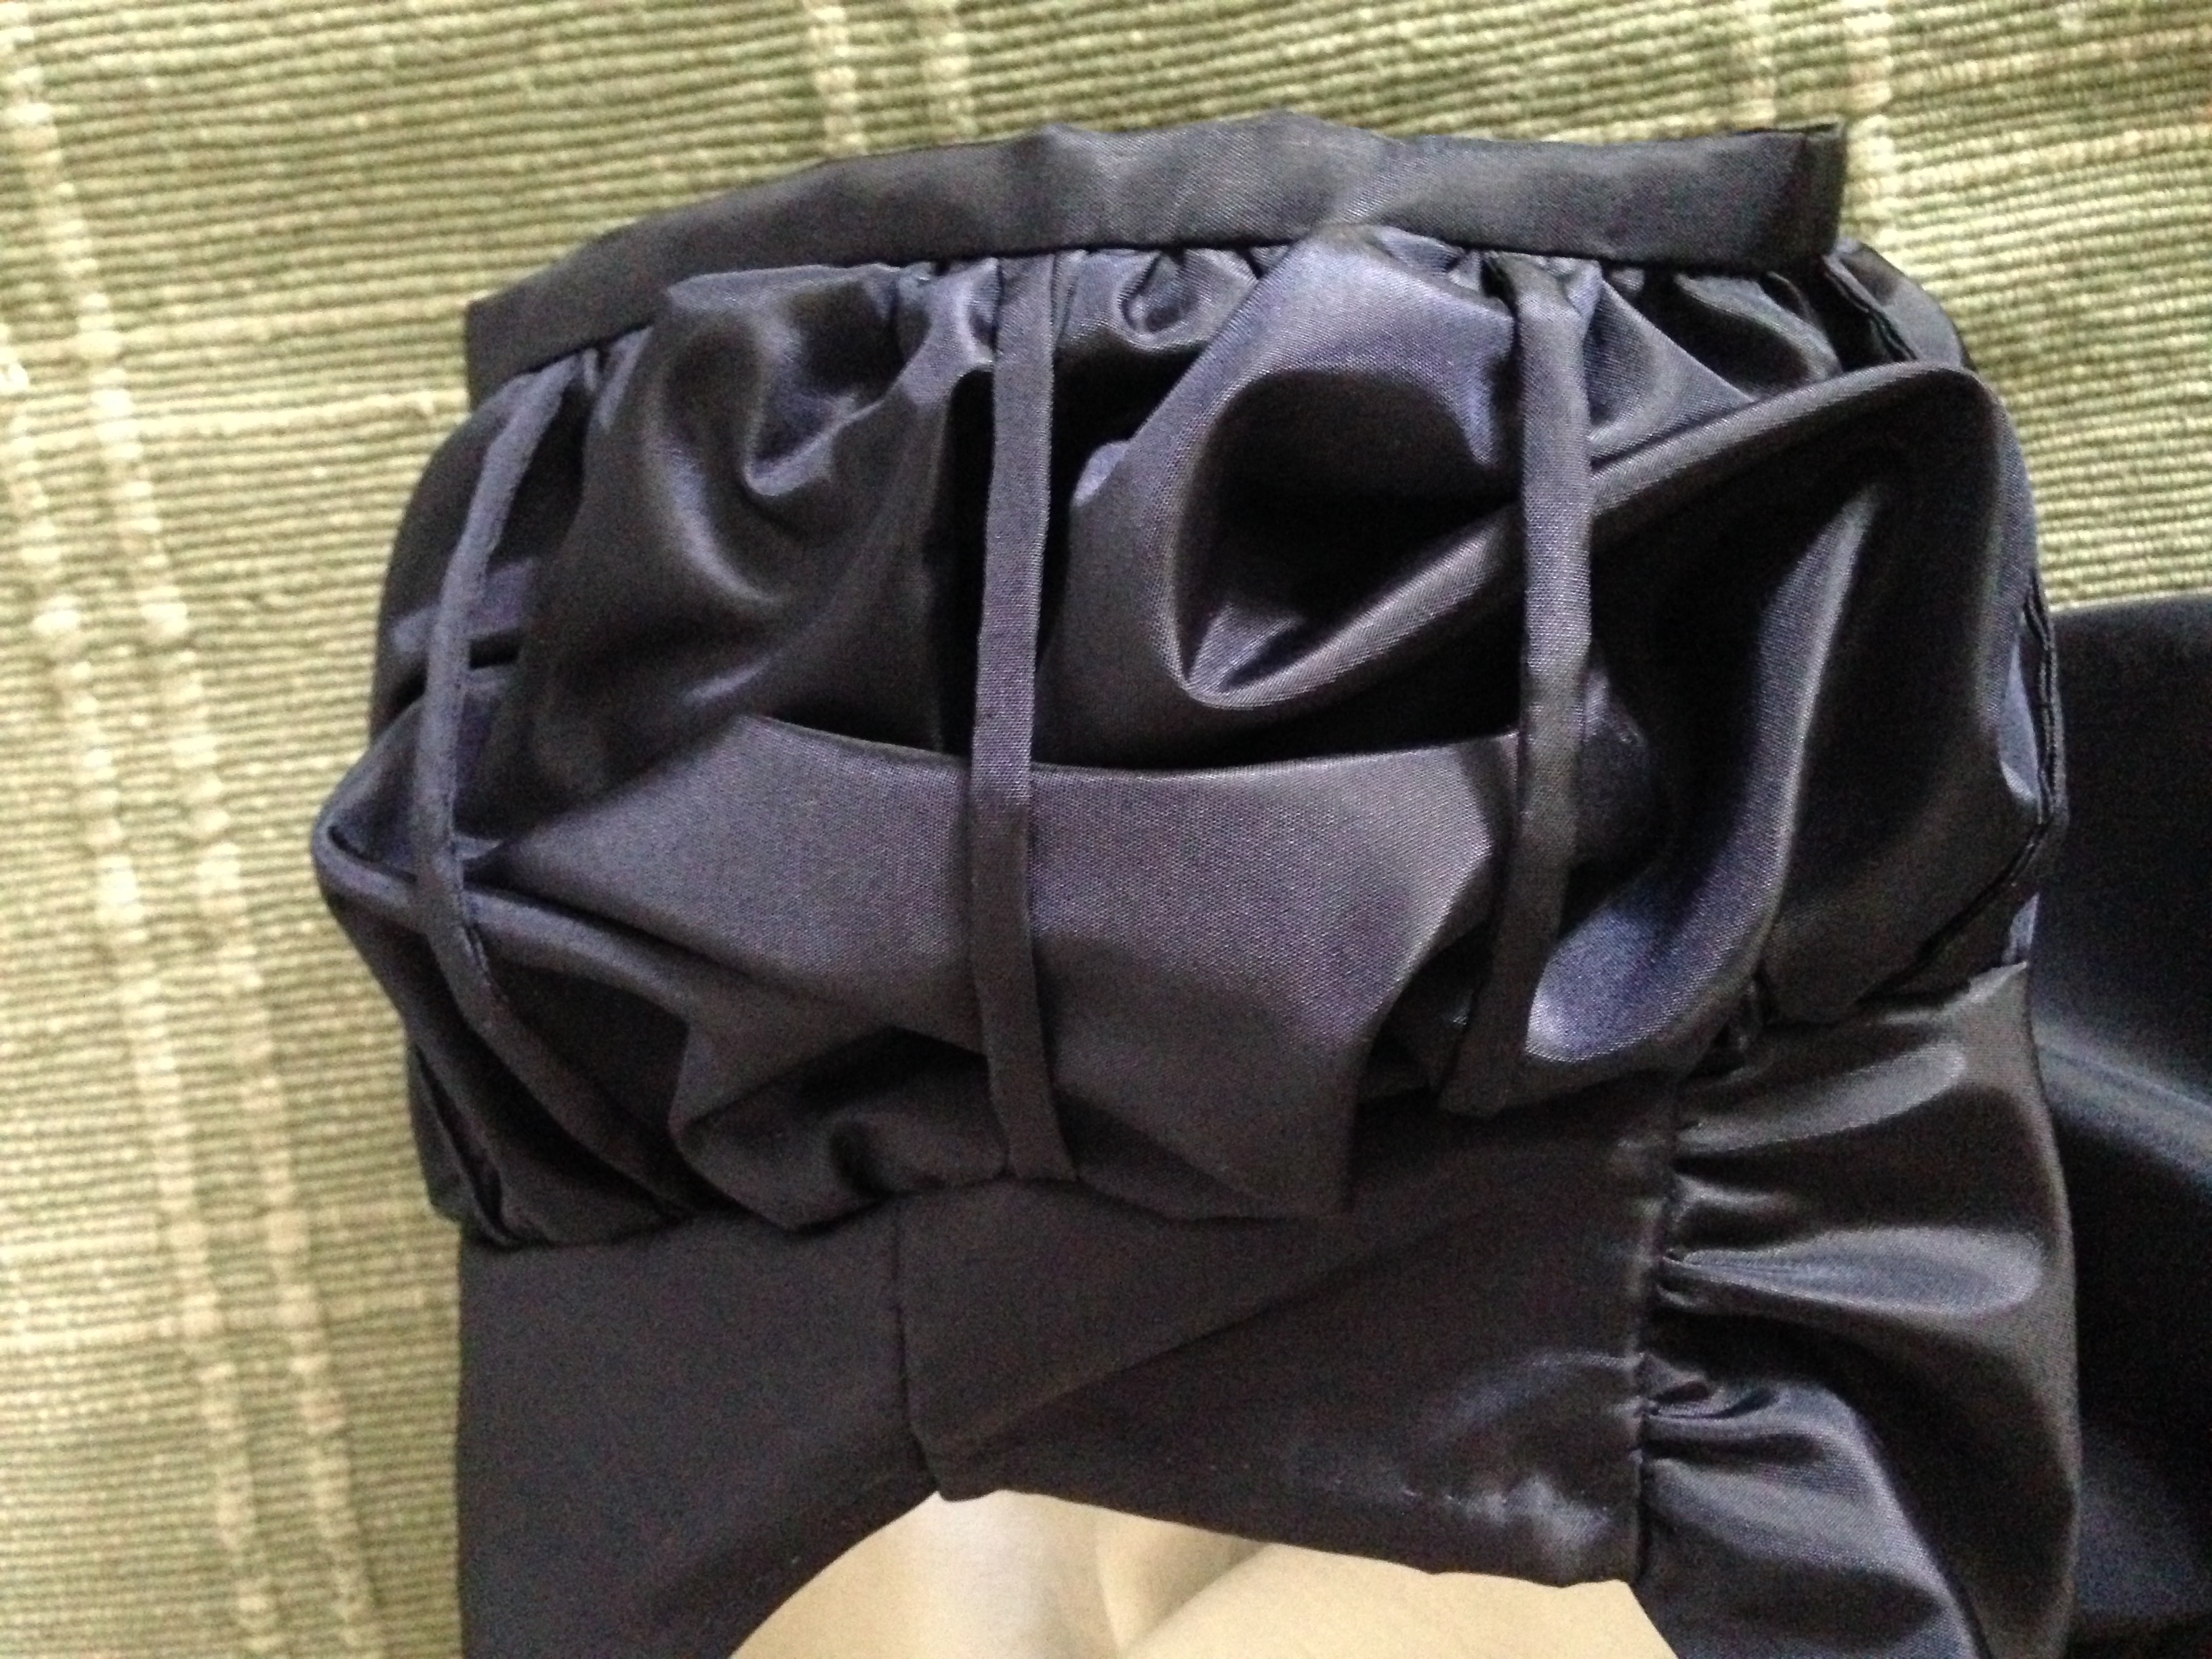
1) The bodice parts are put together after hand stitching all the parts of the neck line. 2) The inside fabric comes from an old pillow case. 3) The fabric of the arms is gathered both at the shoulder and bottom and also vertically by thin strings attatched to the shoulder and tape at the bottom om the arm.
Poofy arm with fabric gathered beneath handsewn strings
Inside the bodice and the closing of it.
The Underpinnings
Here are all the layers of underpinnings (except for stockings and shoes), then the making of the hair and at last comes the wonderful gown:
Här får ni se hur alla underkläder tas på i rätt ordning (utom strumpor och skor), sedan hur frisyren görs i ordning och slutligen den nya klänningen ses i all sin glans:
Chemise
Corset
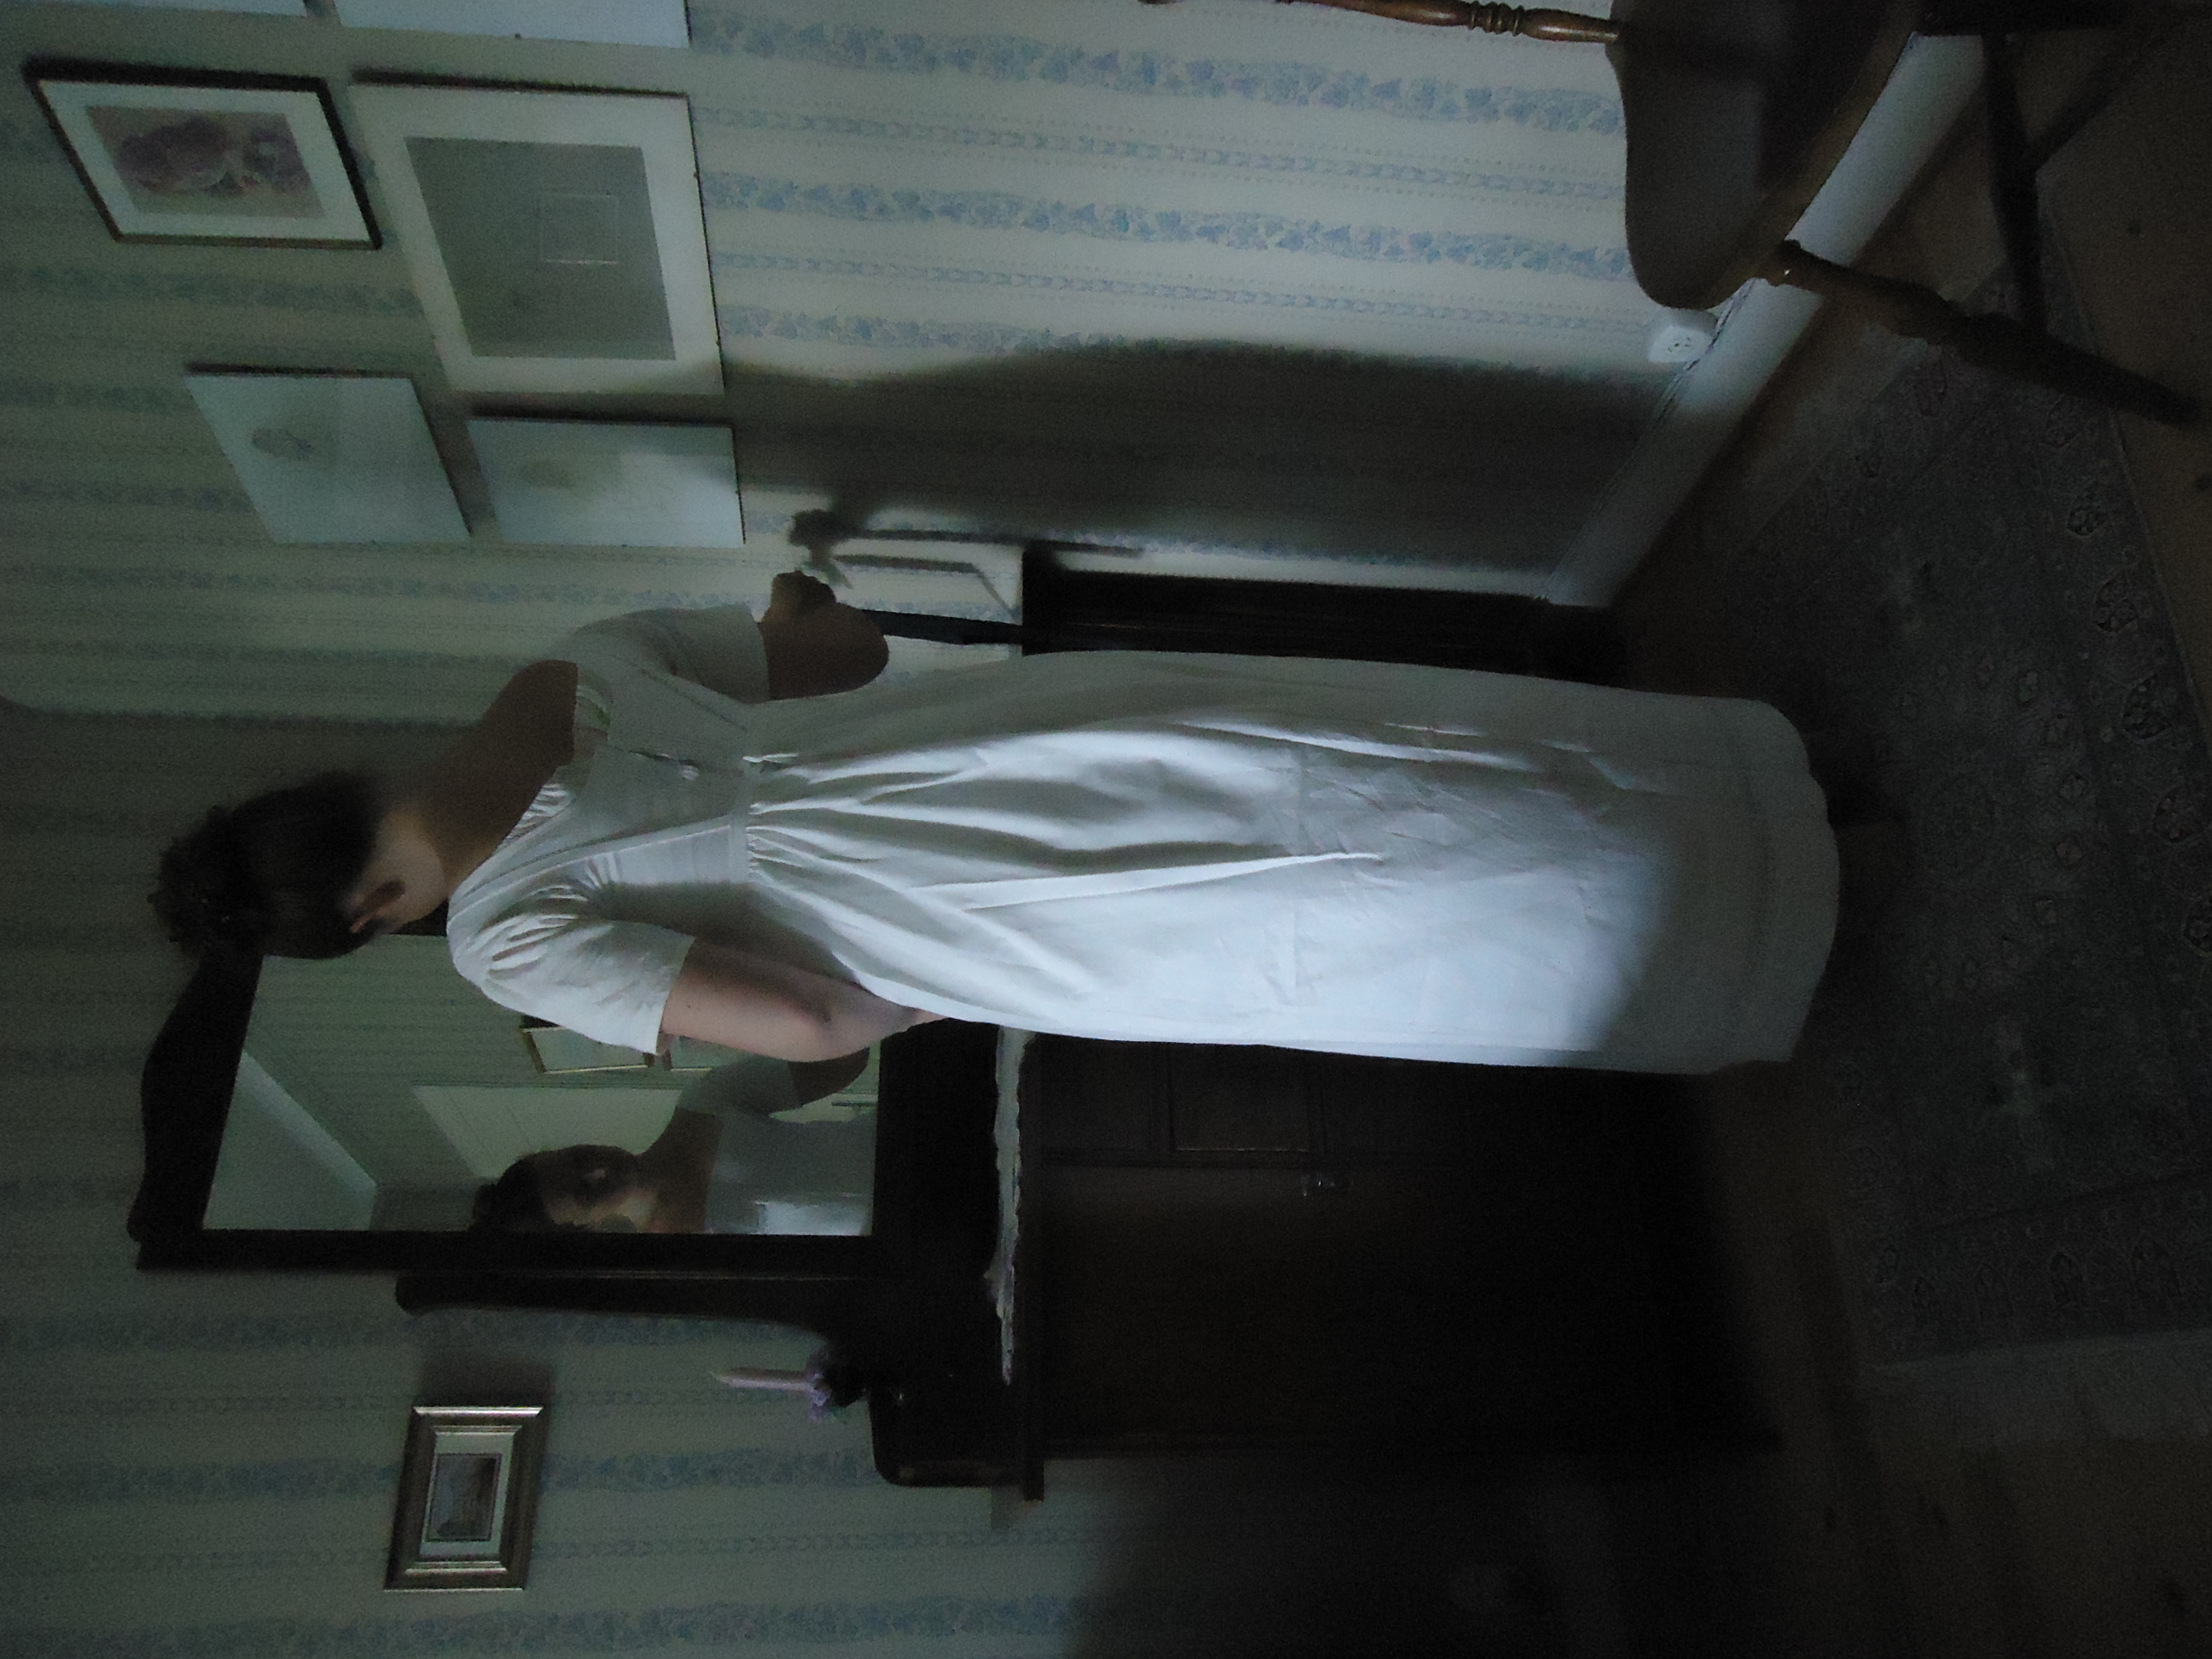
Petticoat sewn from an old bed sheet, closed in the back with hooks and eyes. Held up with suspenders.
The Regency Hair
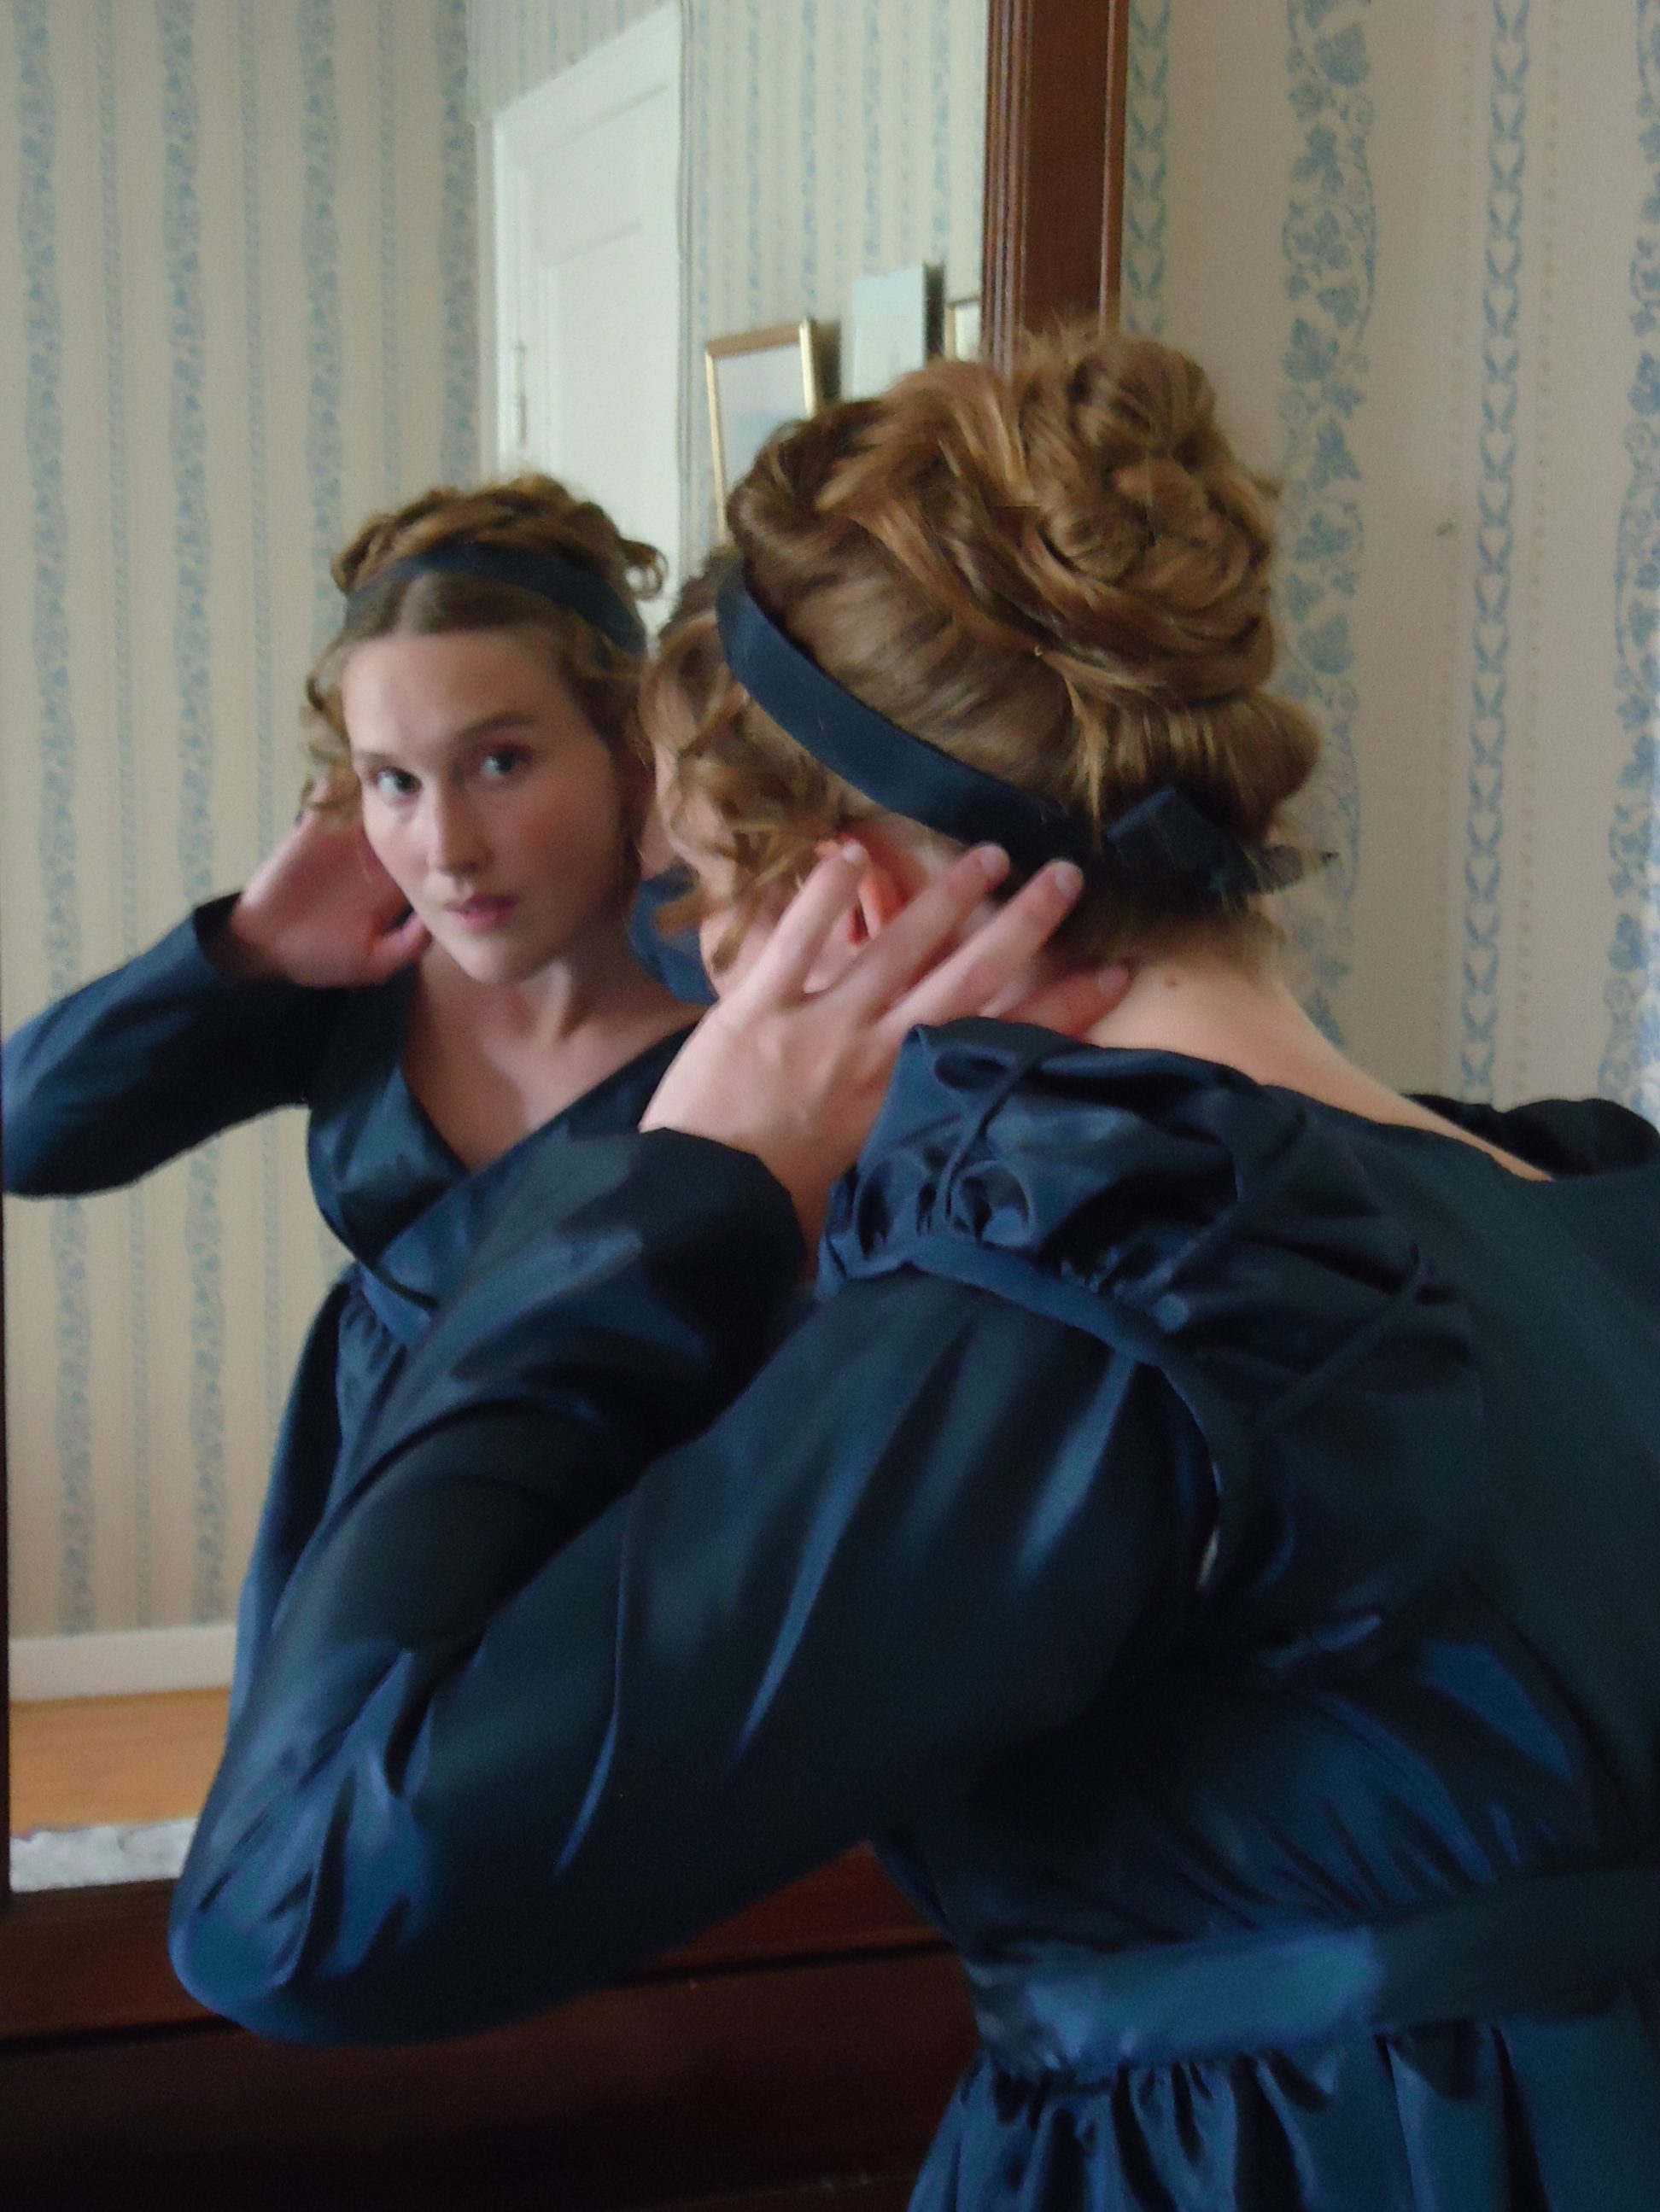
Now it is time for making the hair! I have long, straight hair, that never hold the curls for more than five minutes. After some lovely articles at Your Wardrobe Unlocked and the wonderful blog Places in Time, I have finally gathered up enough courage to make my own hair pieces.
Nu är det dags för att fixa håret! Jag har långt, rakt hår, som aldrig låter lockarna stanna i mer än fem minuter. Efter några uppmuntrande artiklar på Your Wardrobe Unlocked och den underbara bloggen Places in Time, har jag äntligen samlat tillräckligt med mod för att fixa eget löshår!
Using the hair pieces (my own hair glued to barrets). After fastening the hairpieces at my temples, I loosened my “curled hair” from the knot at the back of my head (I had hoped for these to be curly, but off course they were as straight as allways) and destributed this hair forward on the top of my head, in a way that made it look a little bit curly. Then I hid the barrets of the hair pieces under a ribbon.
I am too greedy to buy synthetic wig hair, so… I know some of you will think that this is truly shocking… I harvested all the hair that got stuck in my brush for one month, taped it together and finally glued it to a small piece of fabric and to barrets. Then I wound the hair up around my finger and fastened the curl with hair pins. These new hair pieces were put away for about two weeks before I could use them (I tried them after just one week, but that wouldn’t do at all!).
Jag är för gniden för att köpa syntetiskt löshår, så… jag vet att några av er kommer rygga tillbaka i avsky, men… jag sparade allt hår som fastnade i hårborsten i en månad, tejpade samman det och limmade slutligen fast det på hårspännen, samman med en liten tygbit. Sedan rullade jag upp håret runt fingret och fäste lockarna i hårnålar och la undan allt i två veckor innan fotosessionen (jag testade löshåret efter bara en vecka, men då släppte lockarna på en minut).
I have divided my hair into several parts, that I have twined loosely and layed over each other, in order to make it resemble curls. The barrets of the hair pieces are hidden beneath the ribbon.
For those of you, who have shorter hair, I believe that Diary of a Mantua Maker may be helpful.
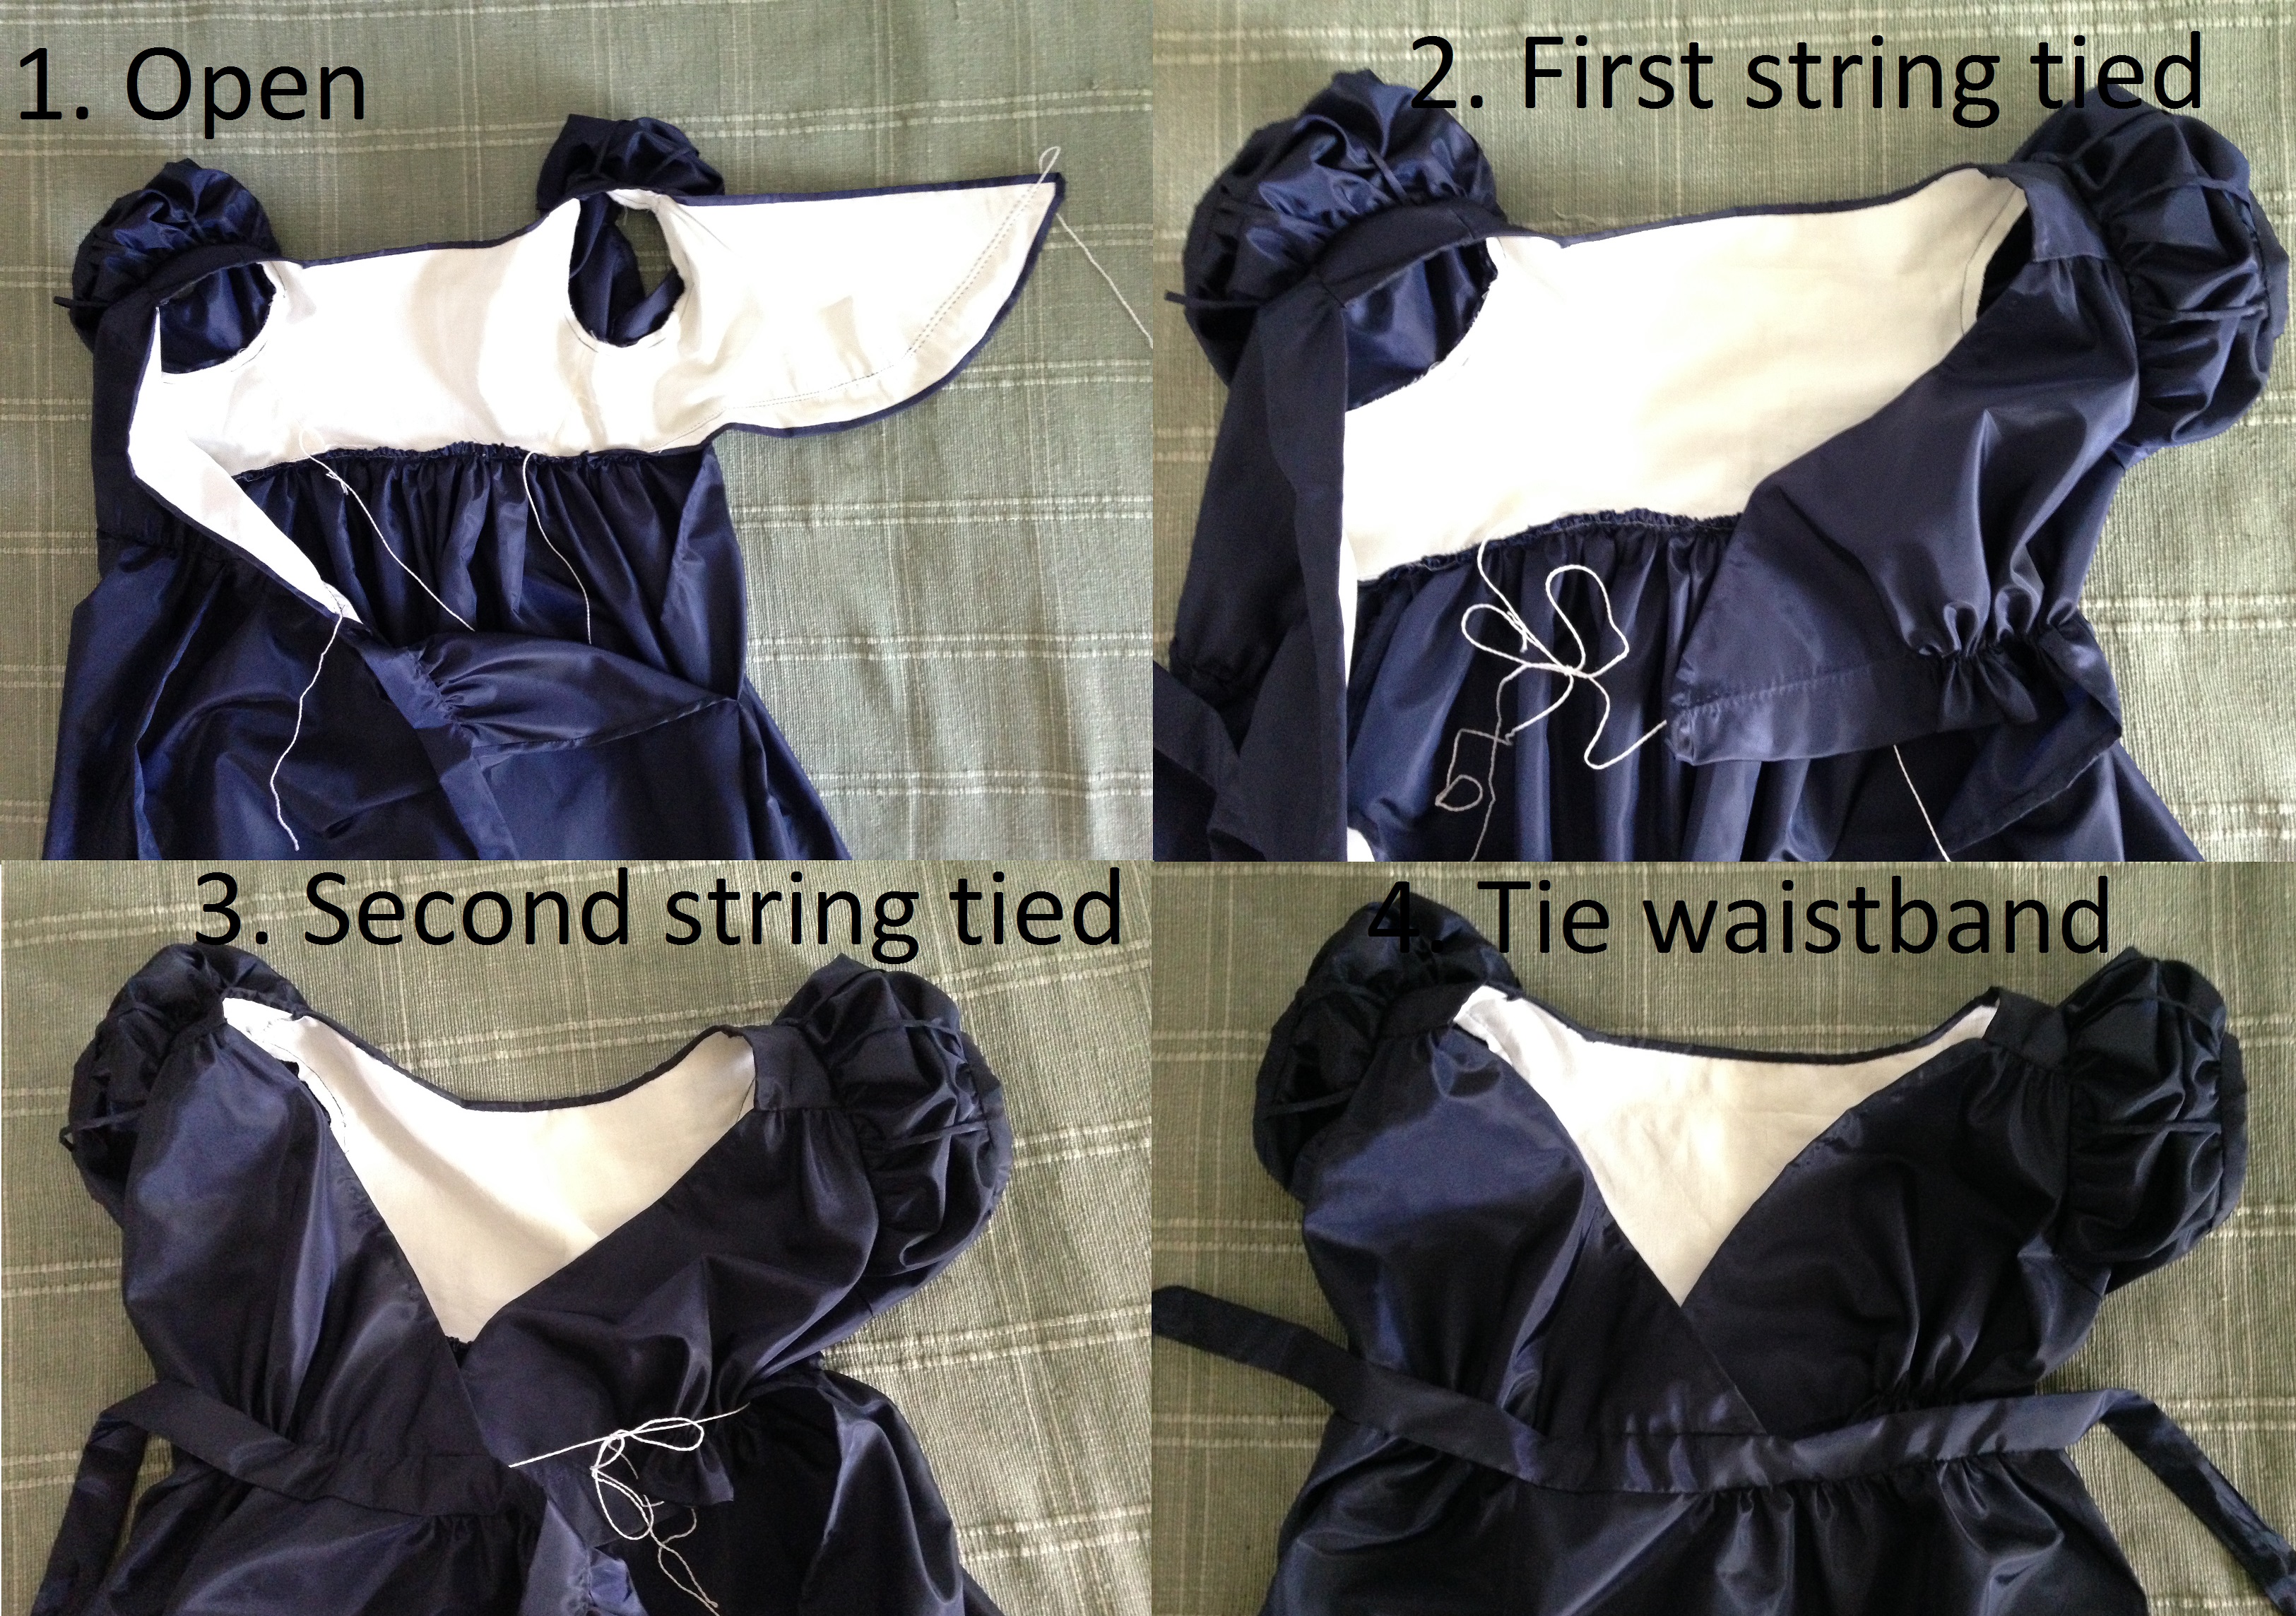
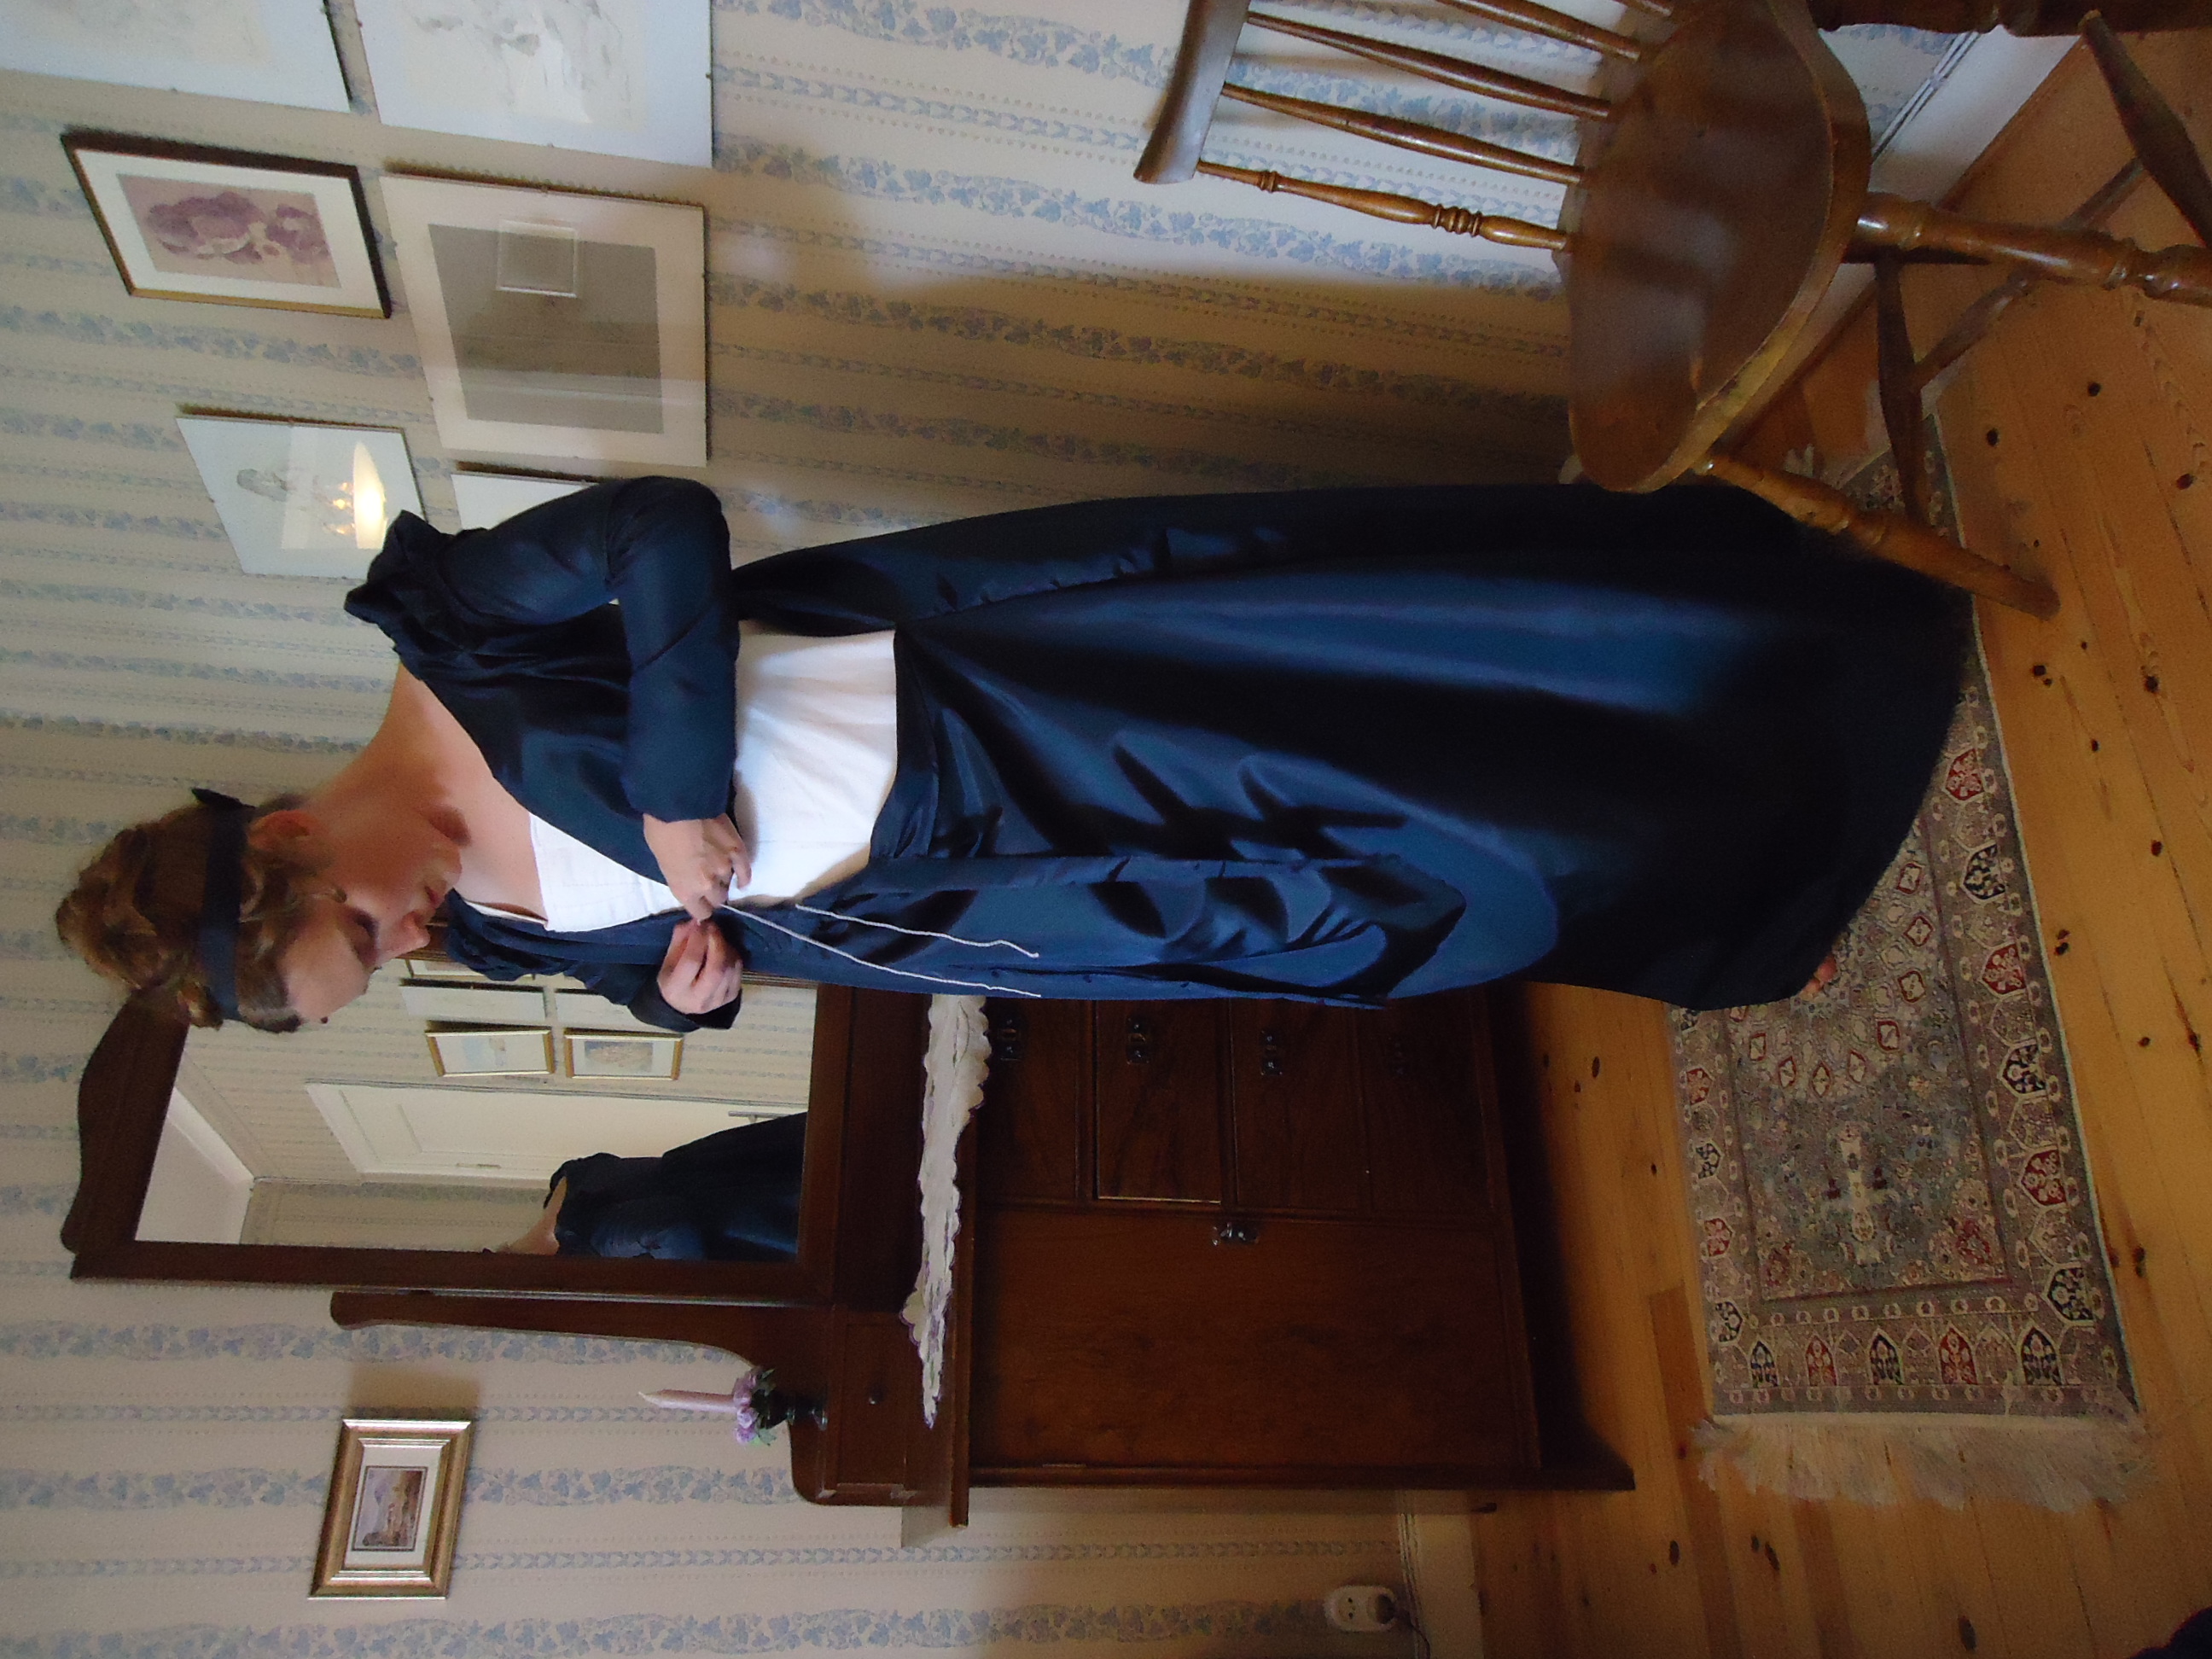
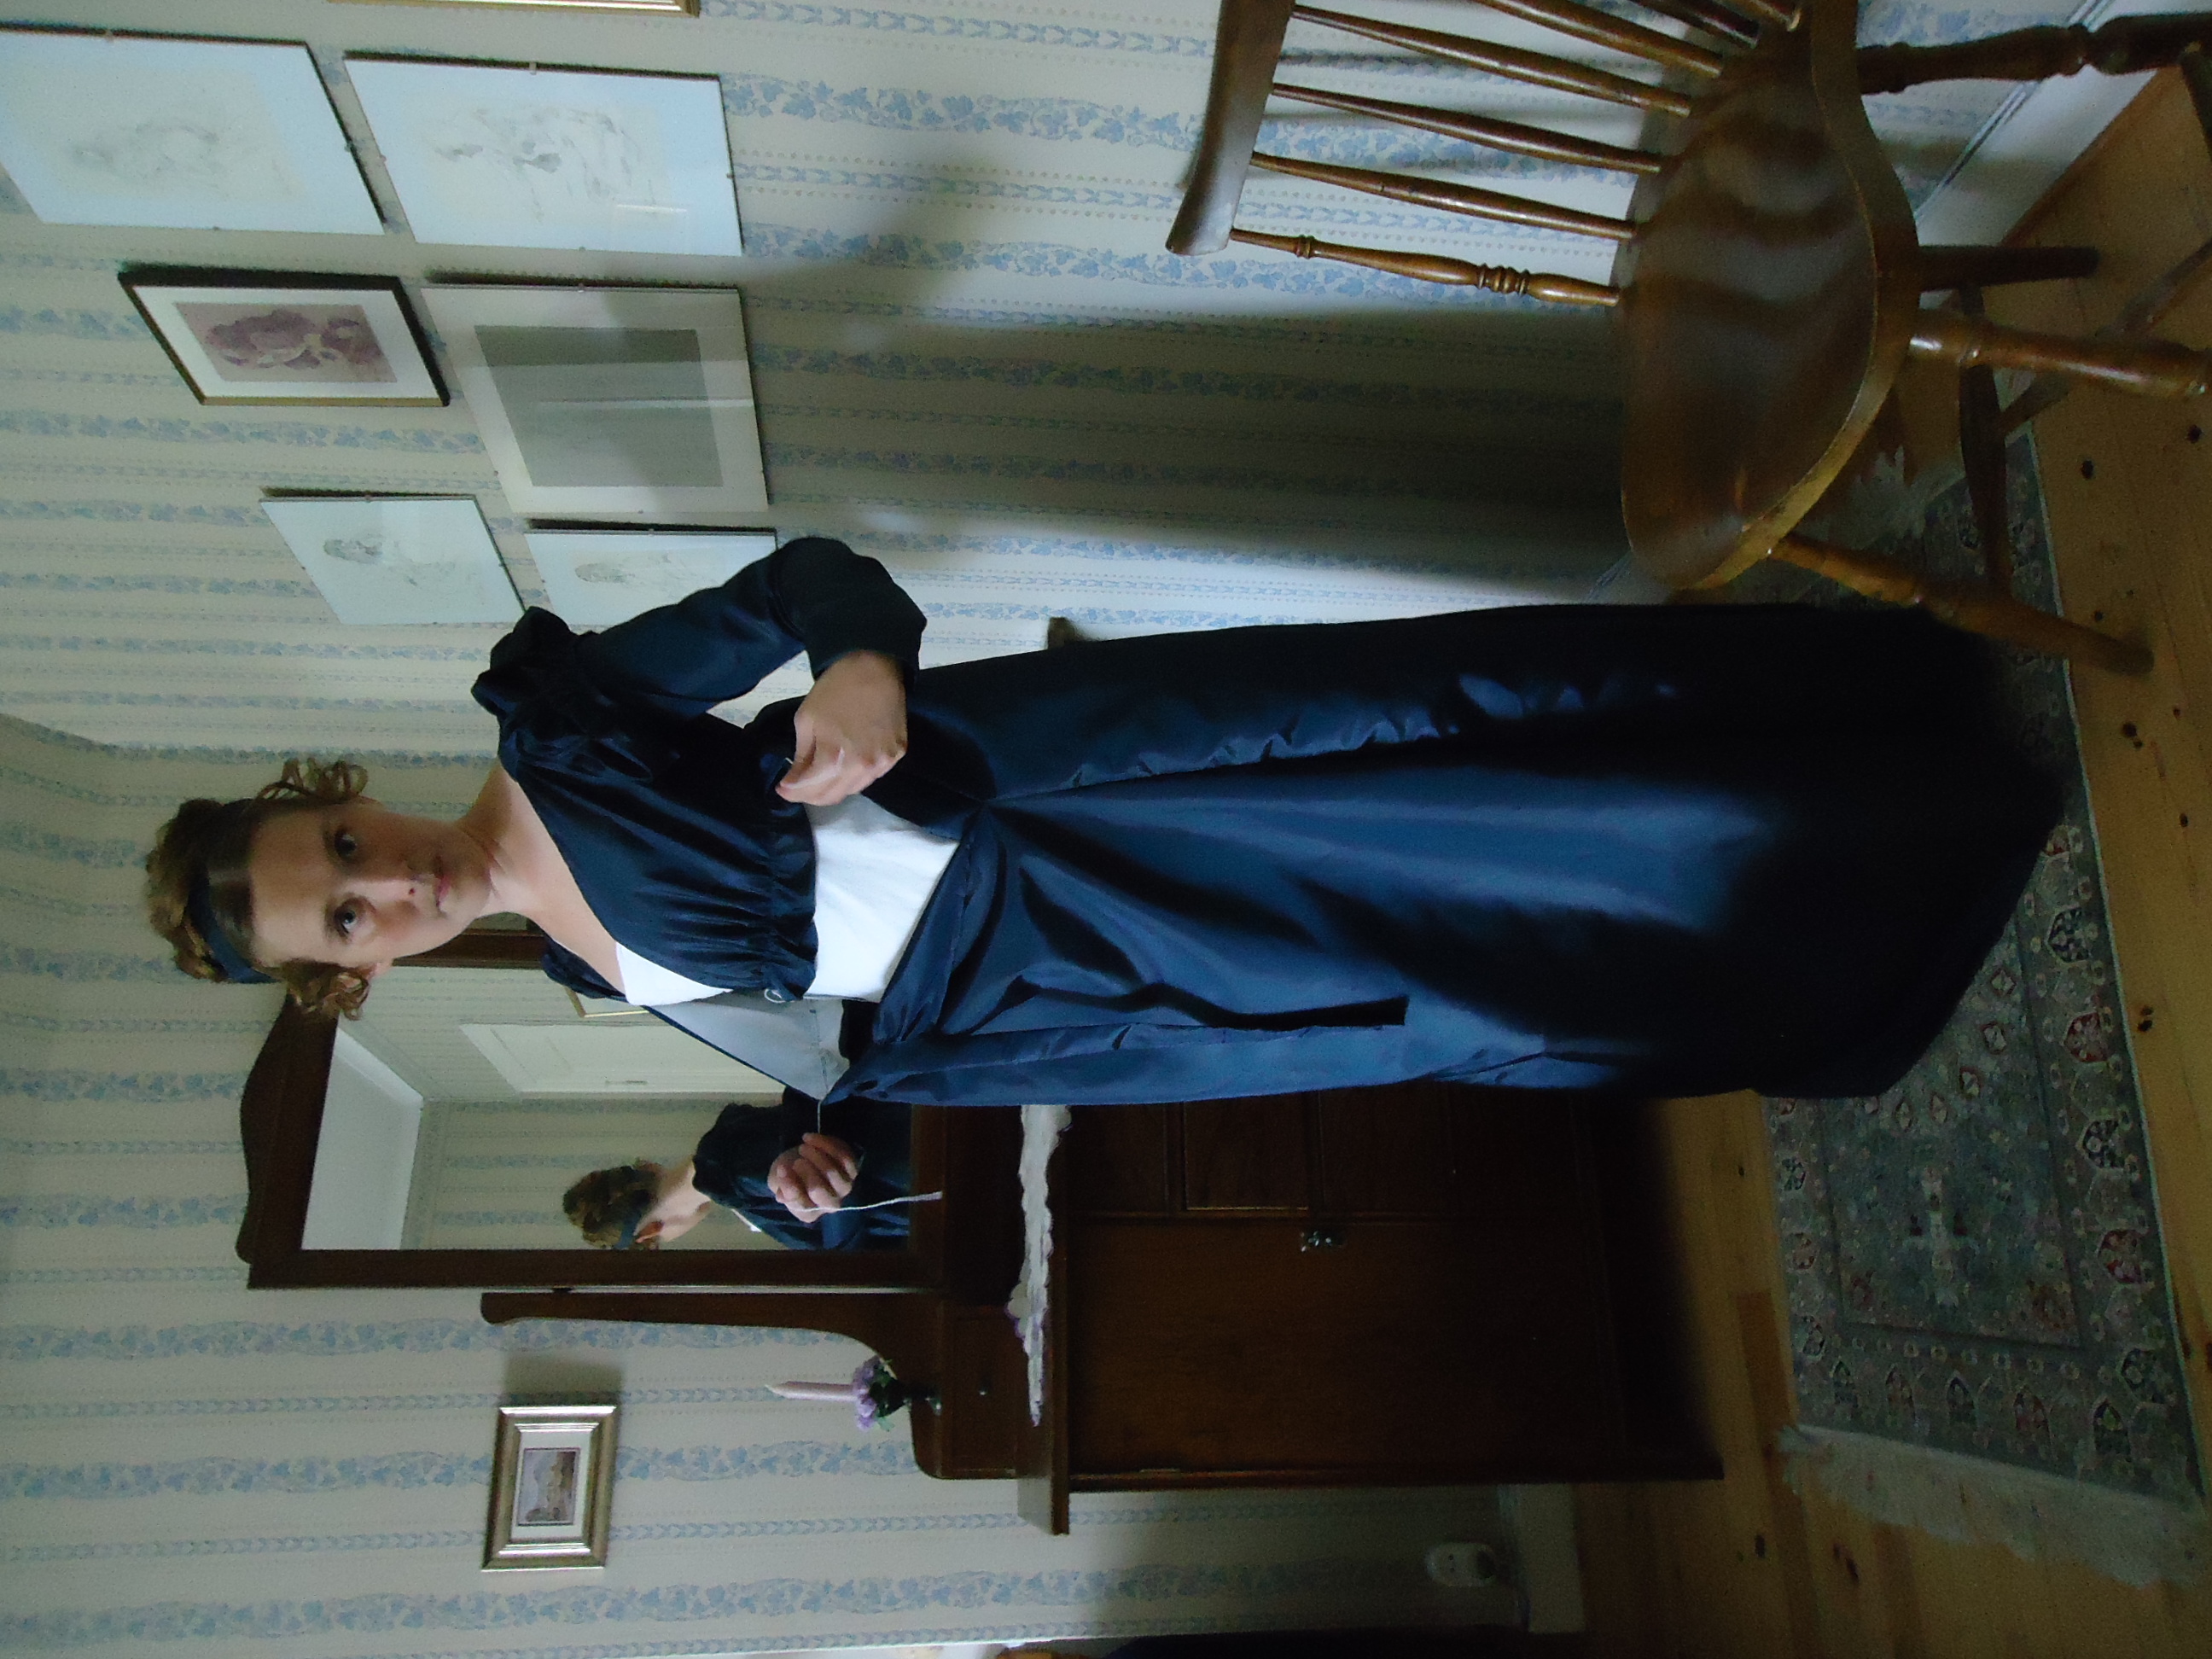
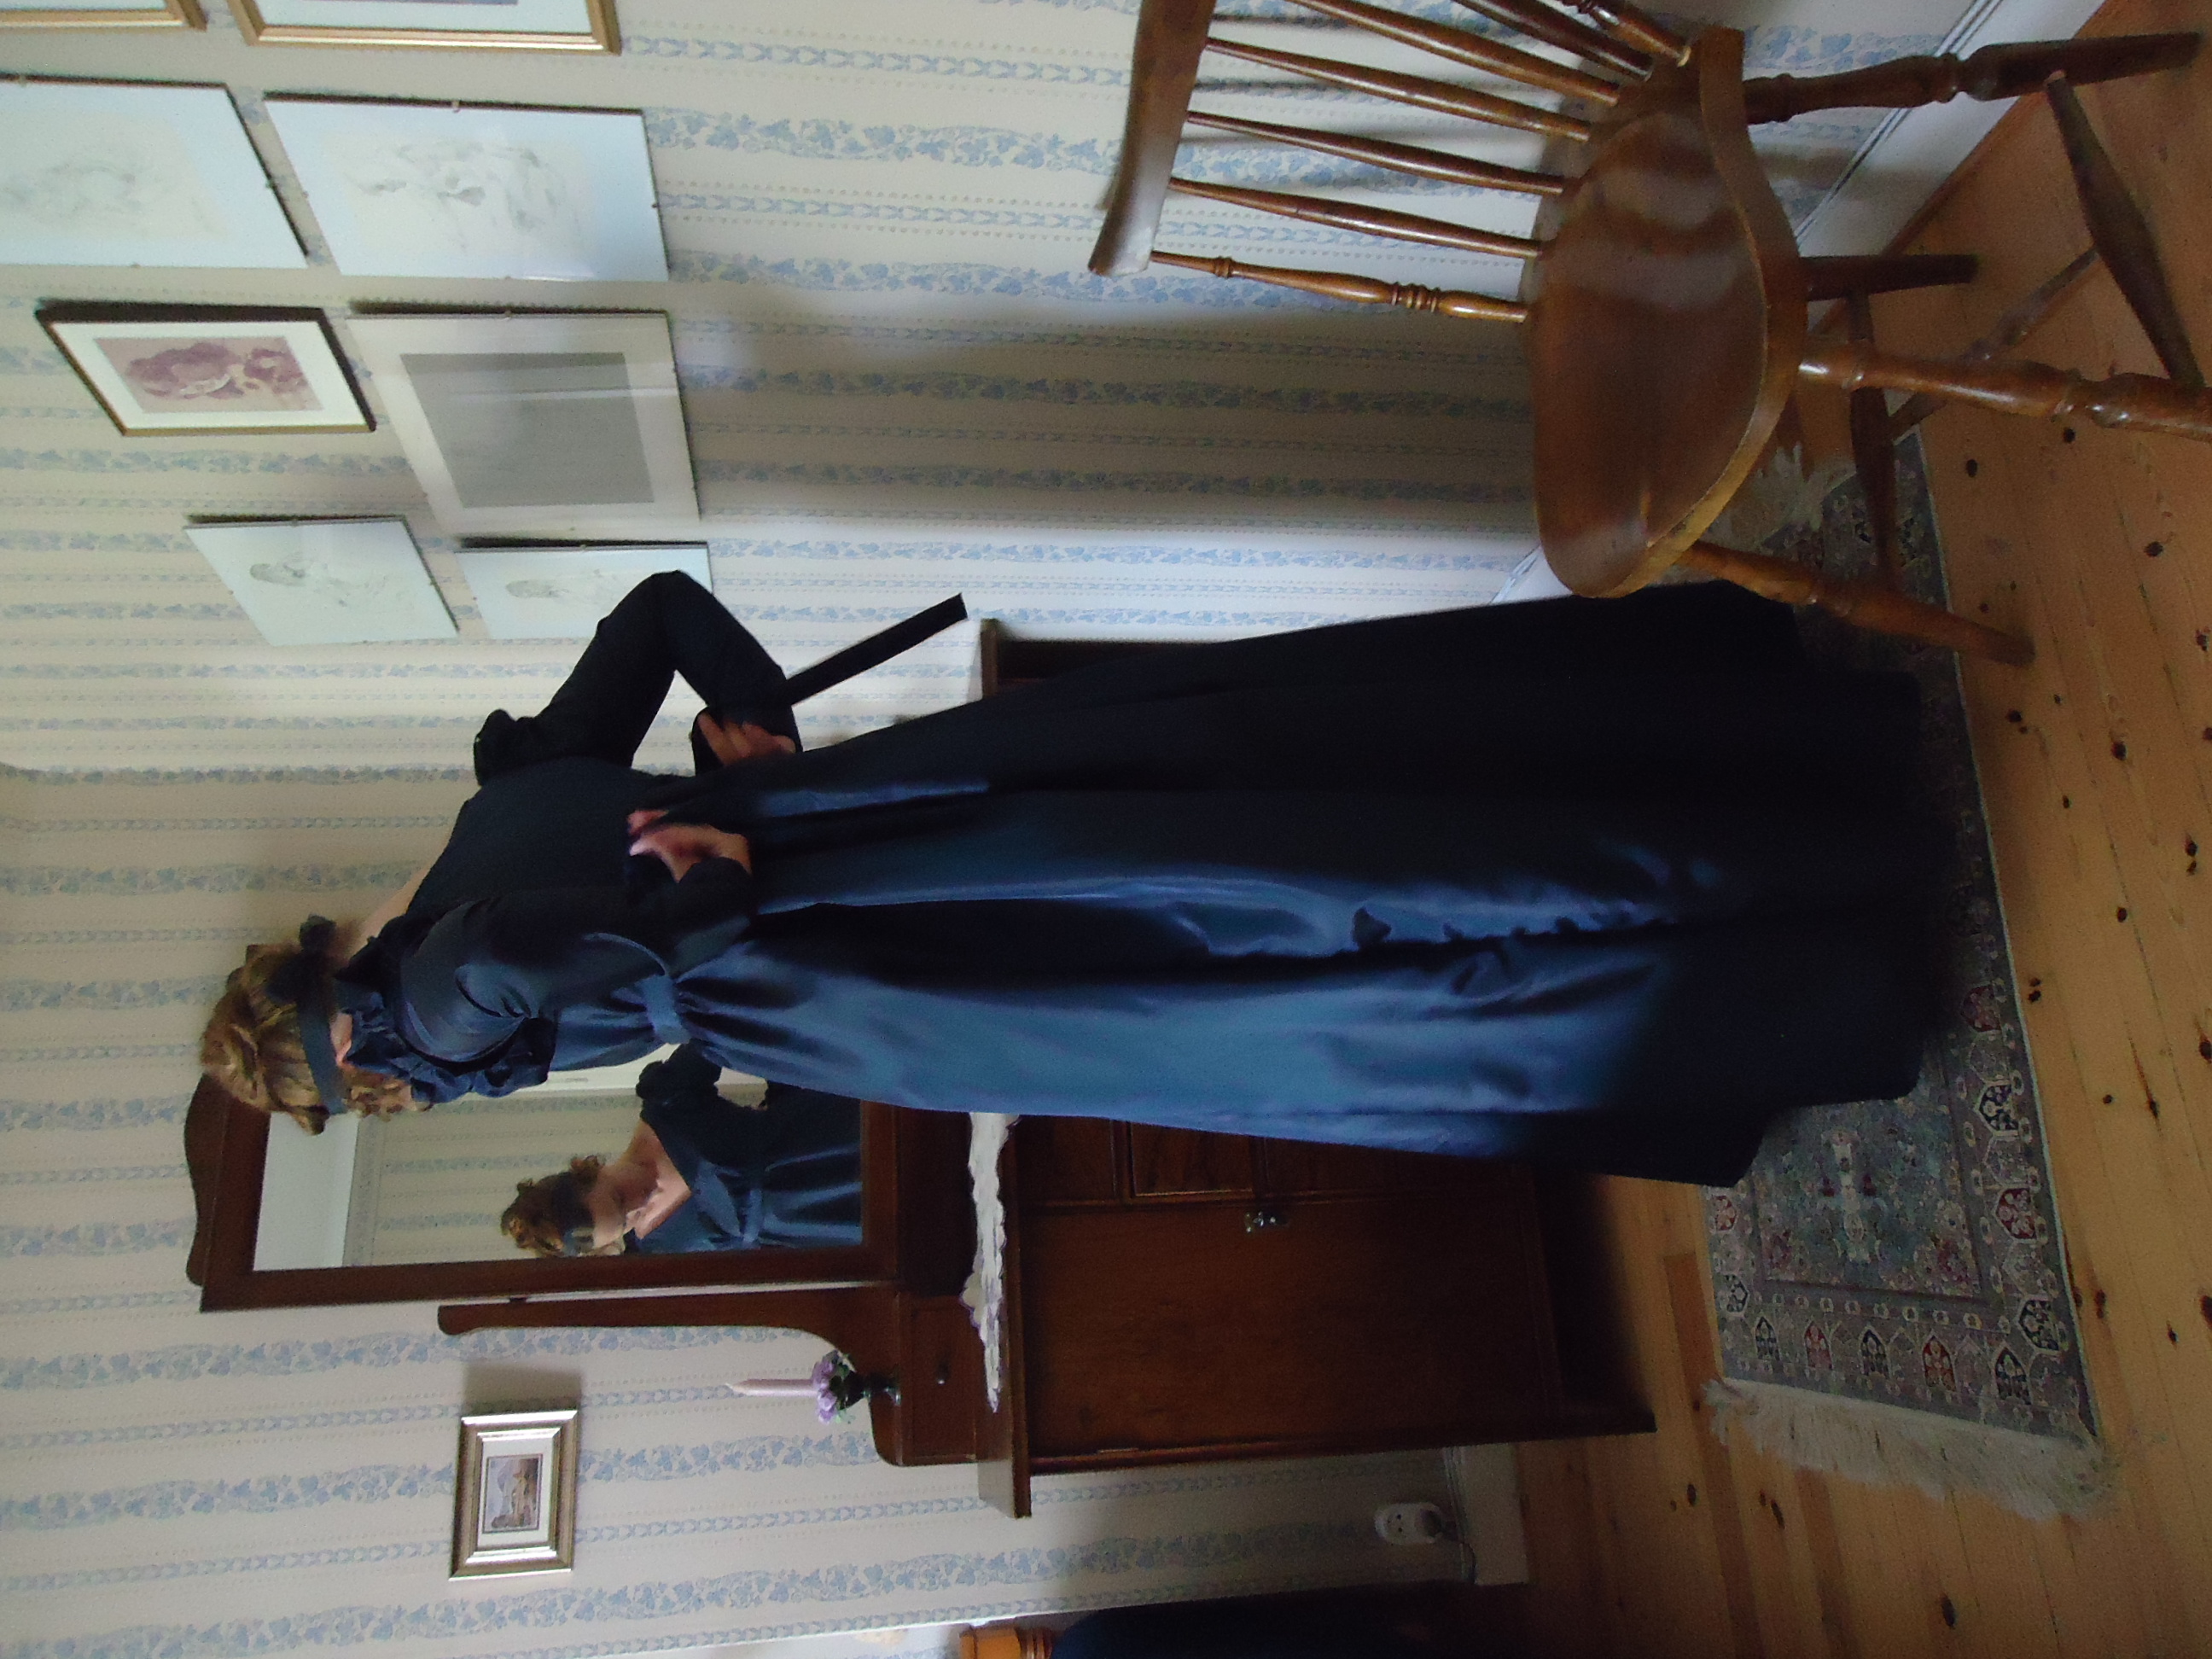
I had to read several blogs and examine many photos of vintage gowns, before I understood how the V-lined gowns are constructed (which is shown in this post), so I will kindly show you how it is put on.
Jag var tvungen att läsa igenom flera bloggar och kolla på många fotografier av vintageklänningar, innan jag förstod hur dessa V-ringade klänningar var konstruerade (vilket syns i detta inlägg). Eftersom kanske fler än jag är förvirrade över detta, visar jag hur man tar på sig den.
Making a knot for one side of the bodice.
Pulling the drawstrings together for making a knot for the other side of the bodice.
Making the last knot.
Pulling the outer ribbon together behind the back.
Obviously, it was impossible for me to tie the bow behind my back, so I got help from my skilled husband.
Finally, I am fully dressed!
By the window
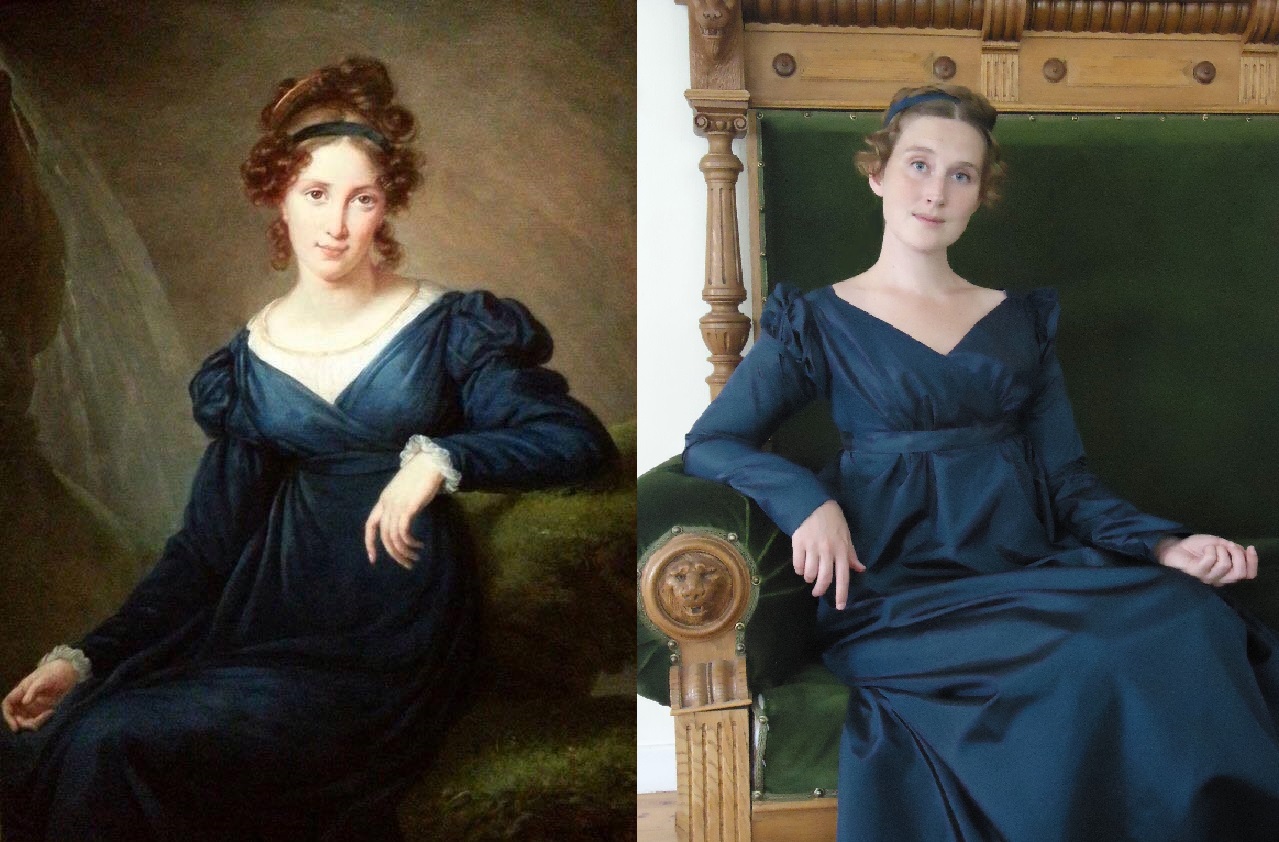
The portrait and myself.
Clearly, we aren’t twins, the lady in the portrait and me, but I am very satisfied with the likeness of the dress. I hope to find a fabric for a similar chemisette with long arms too.
At first, I thought that the lady sat in a velvet sofa, but after a closer look, I think that she is seated in the moss, by a waterfall. Well, I won’t find that in my neighbourhood, so I will make do with the woods of Vimmerby.
Damen i porträttet och jag är kan inte misstas för att vara tvillingar, men jag är väldigt nöjd med hur lika klänningarna blev. Jag hoppas på att hitta ett tyg för en likadan chemisette, med långa ärmar.
Först trodde jag att hon satt i en sammetssoffa (som jag), men när jag tittade närmare på bilden, insåg jag att hon sitter i mossan, intill ett vattenfall. Det finns inte i grannskapet, så jag får nöja mig med mossiga bilder från Vimmerbys skogar.
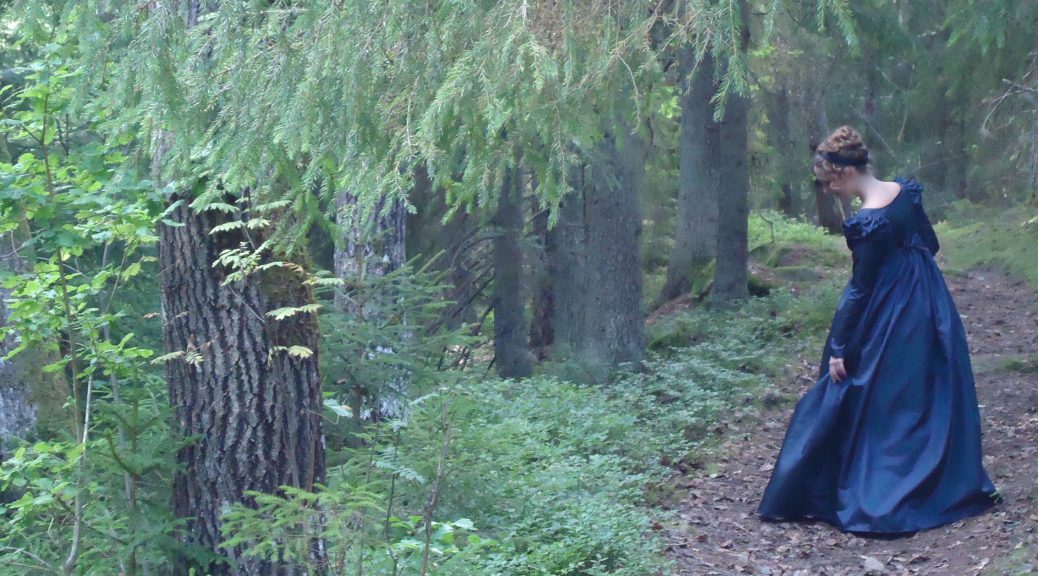
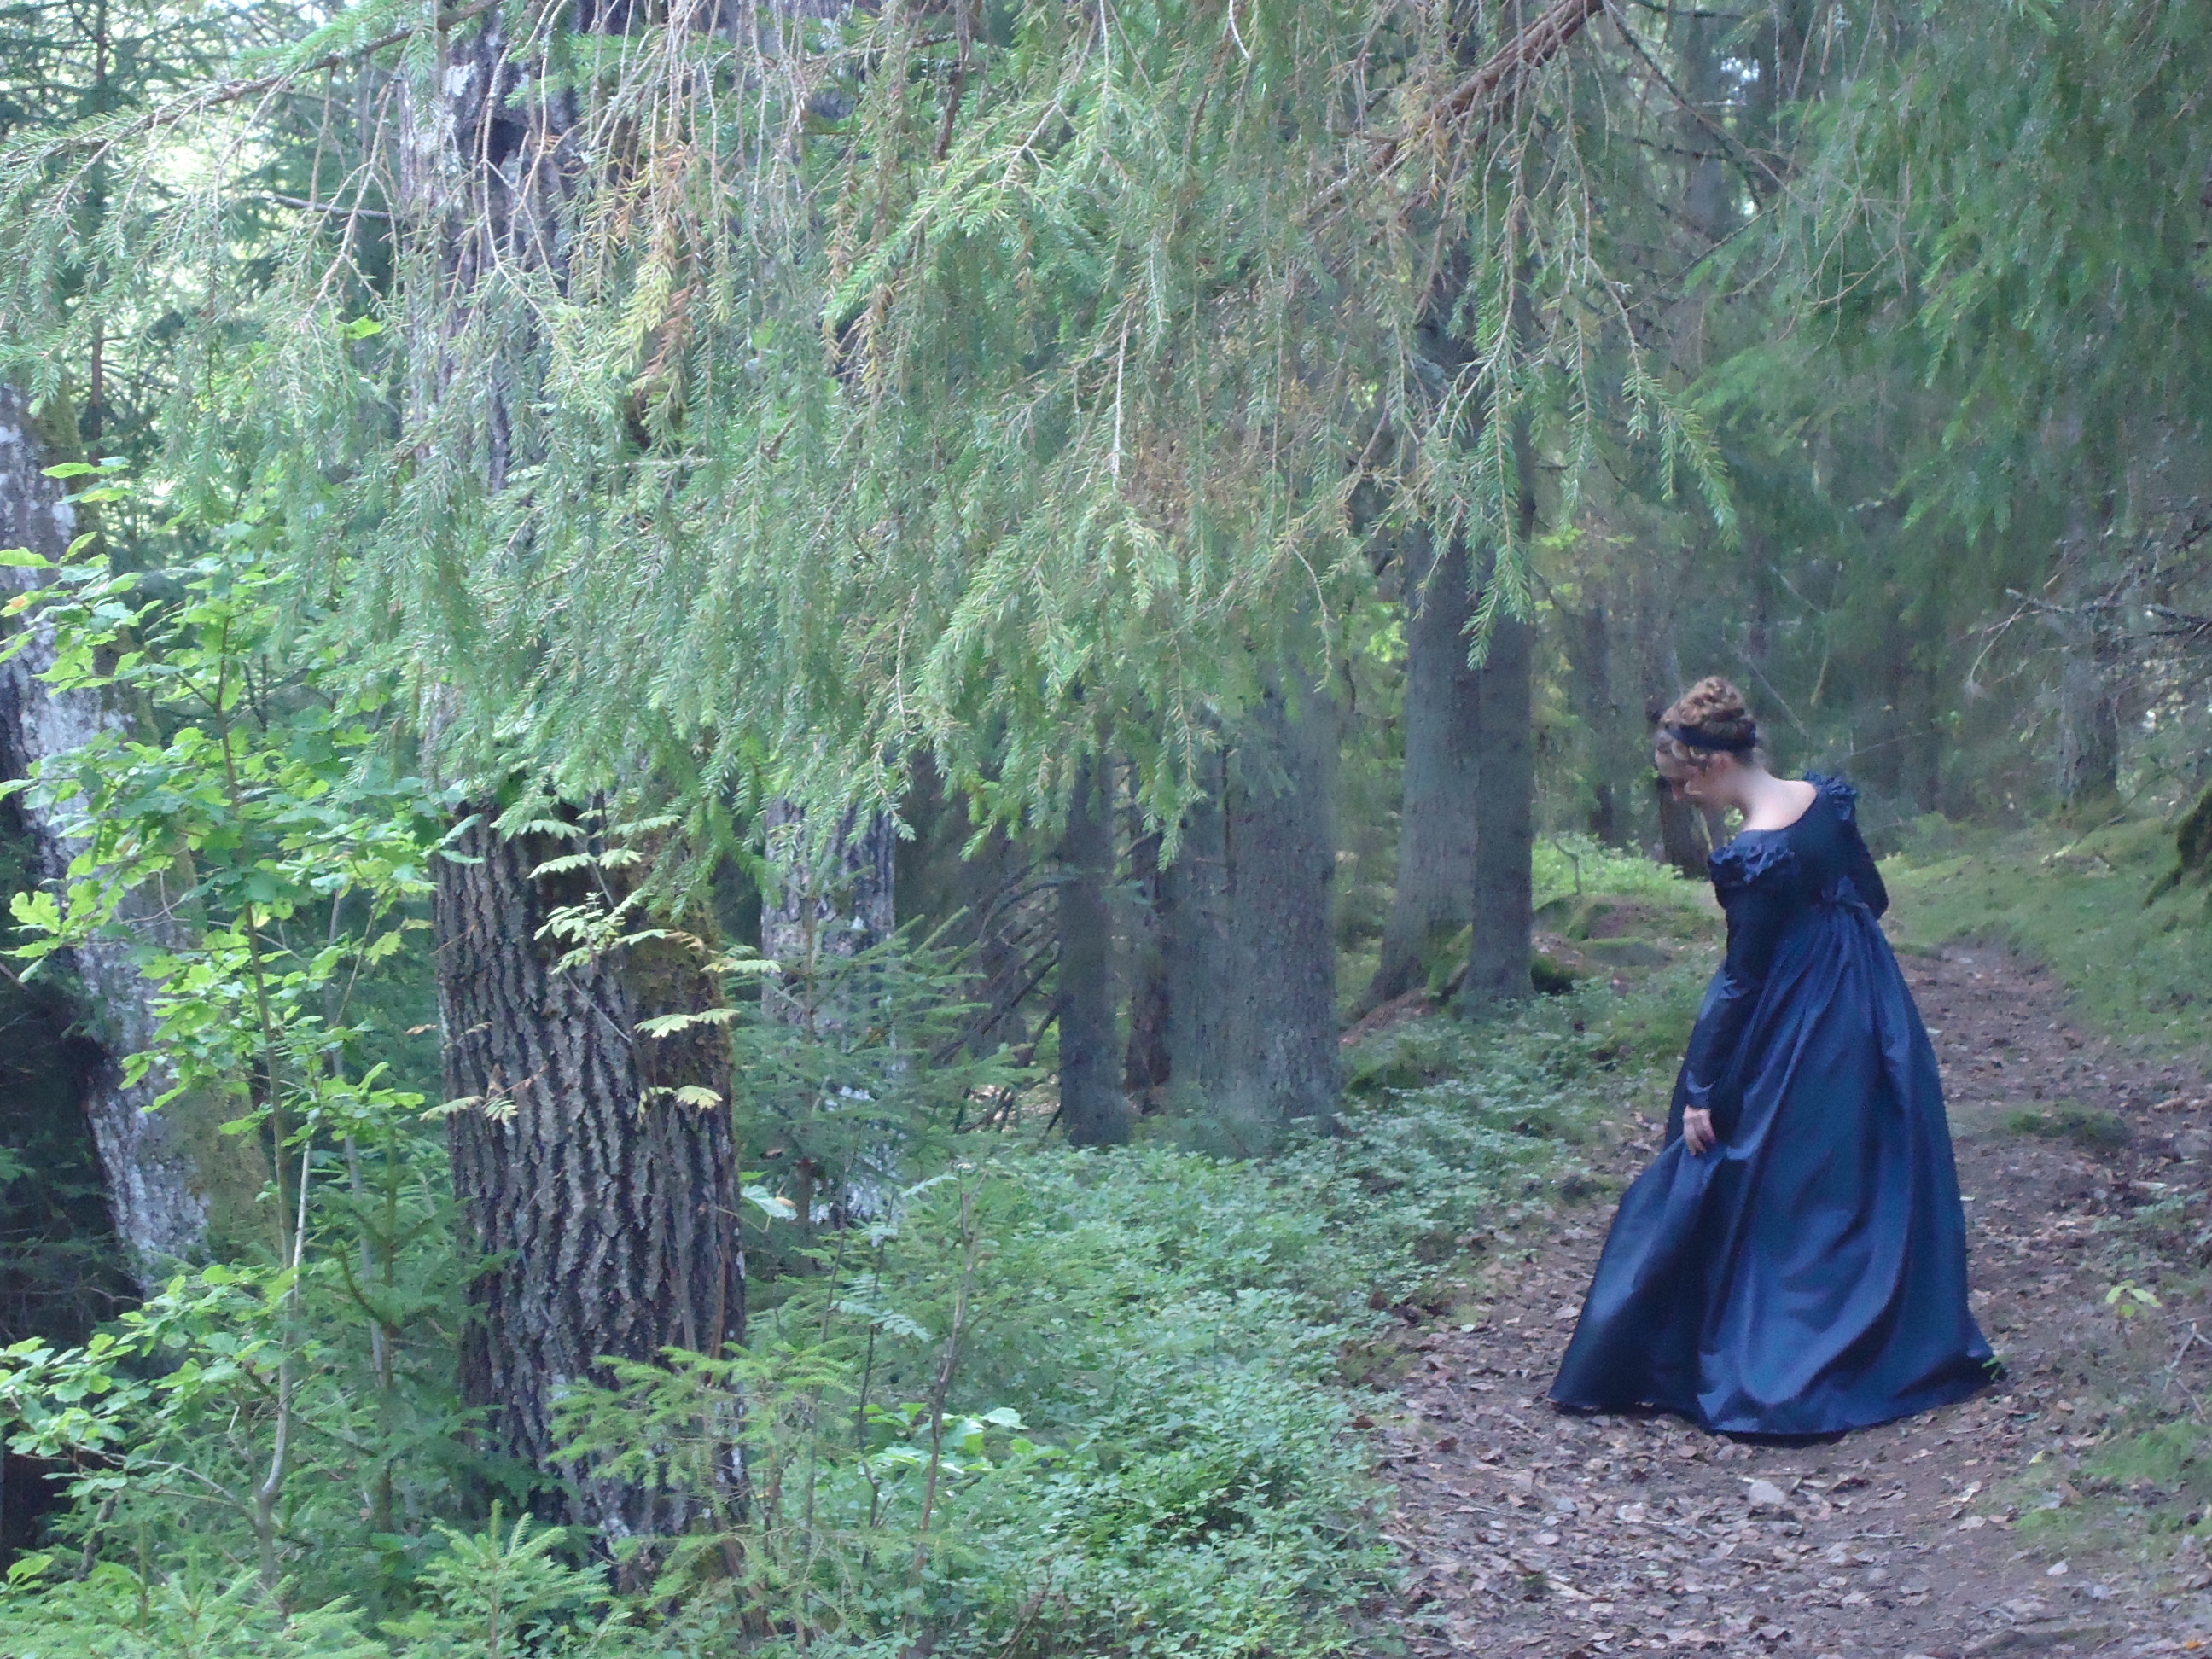
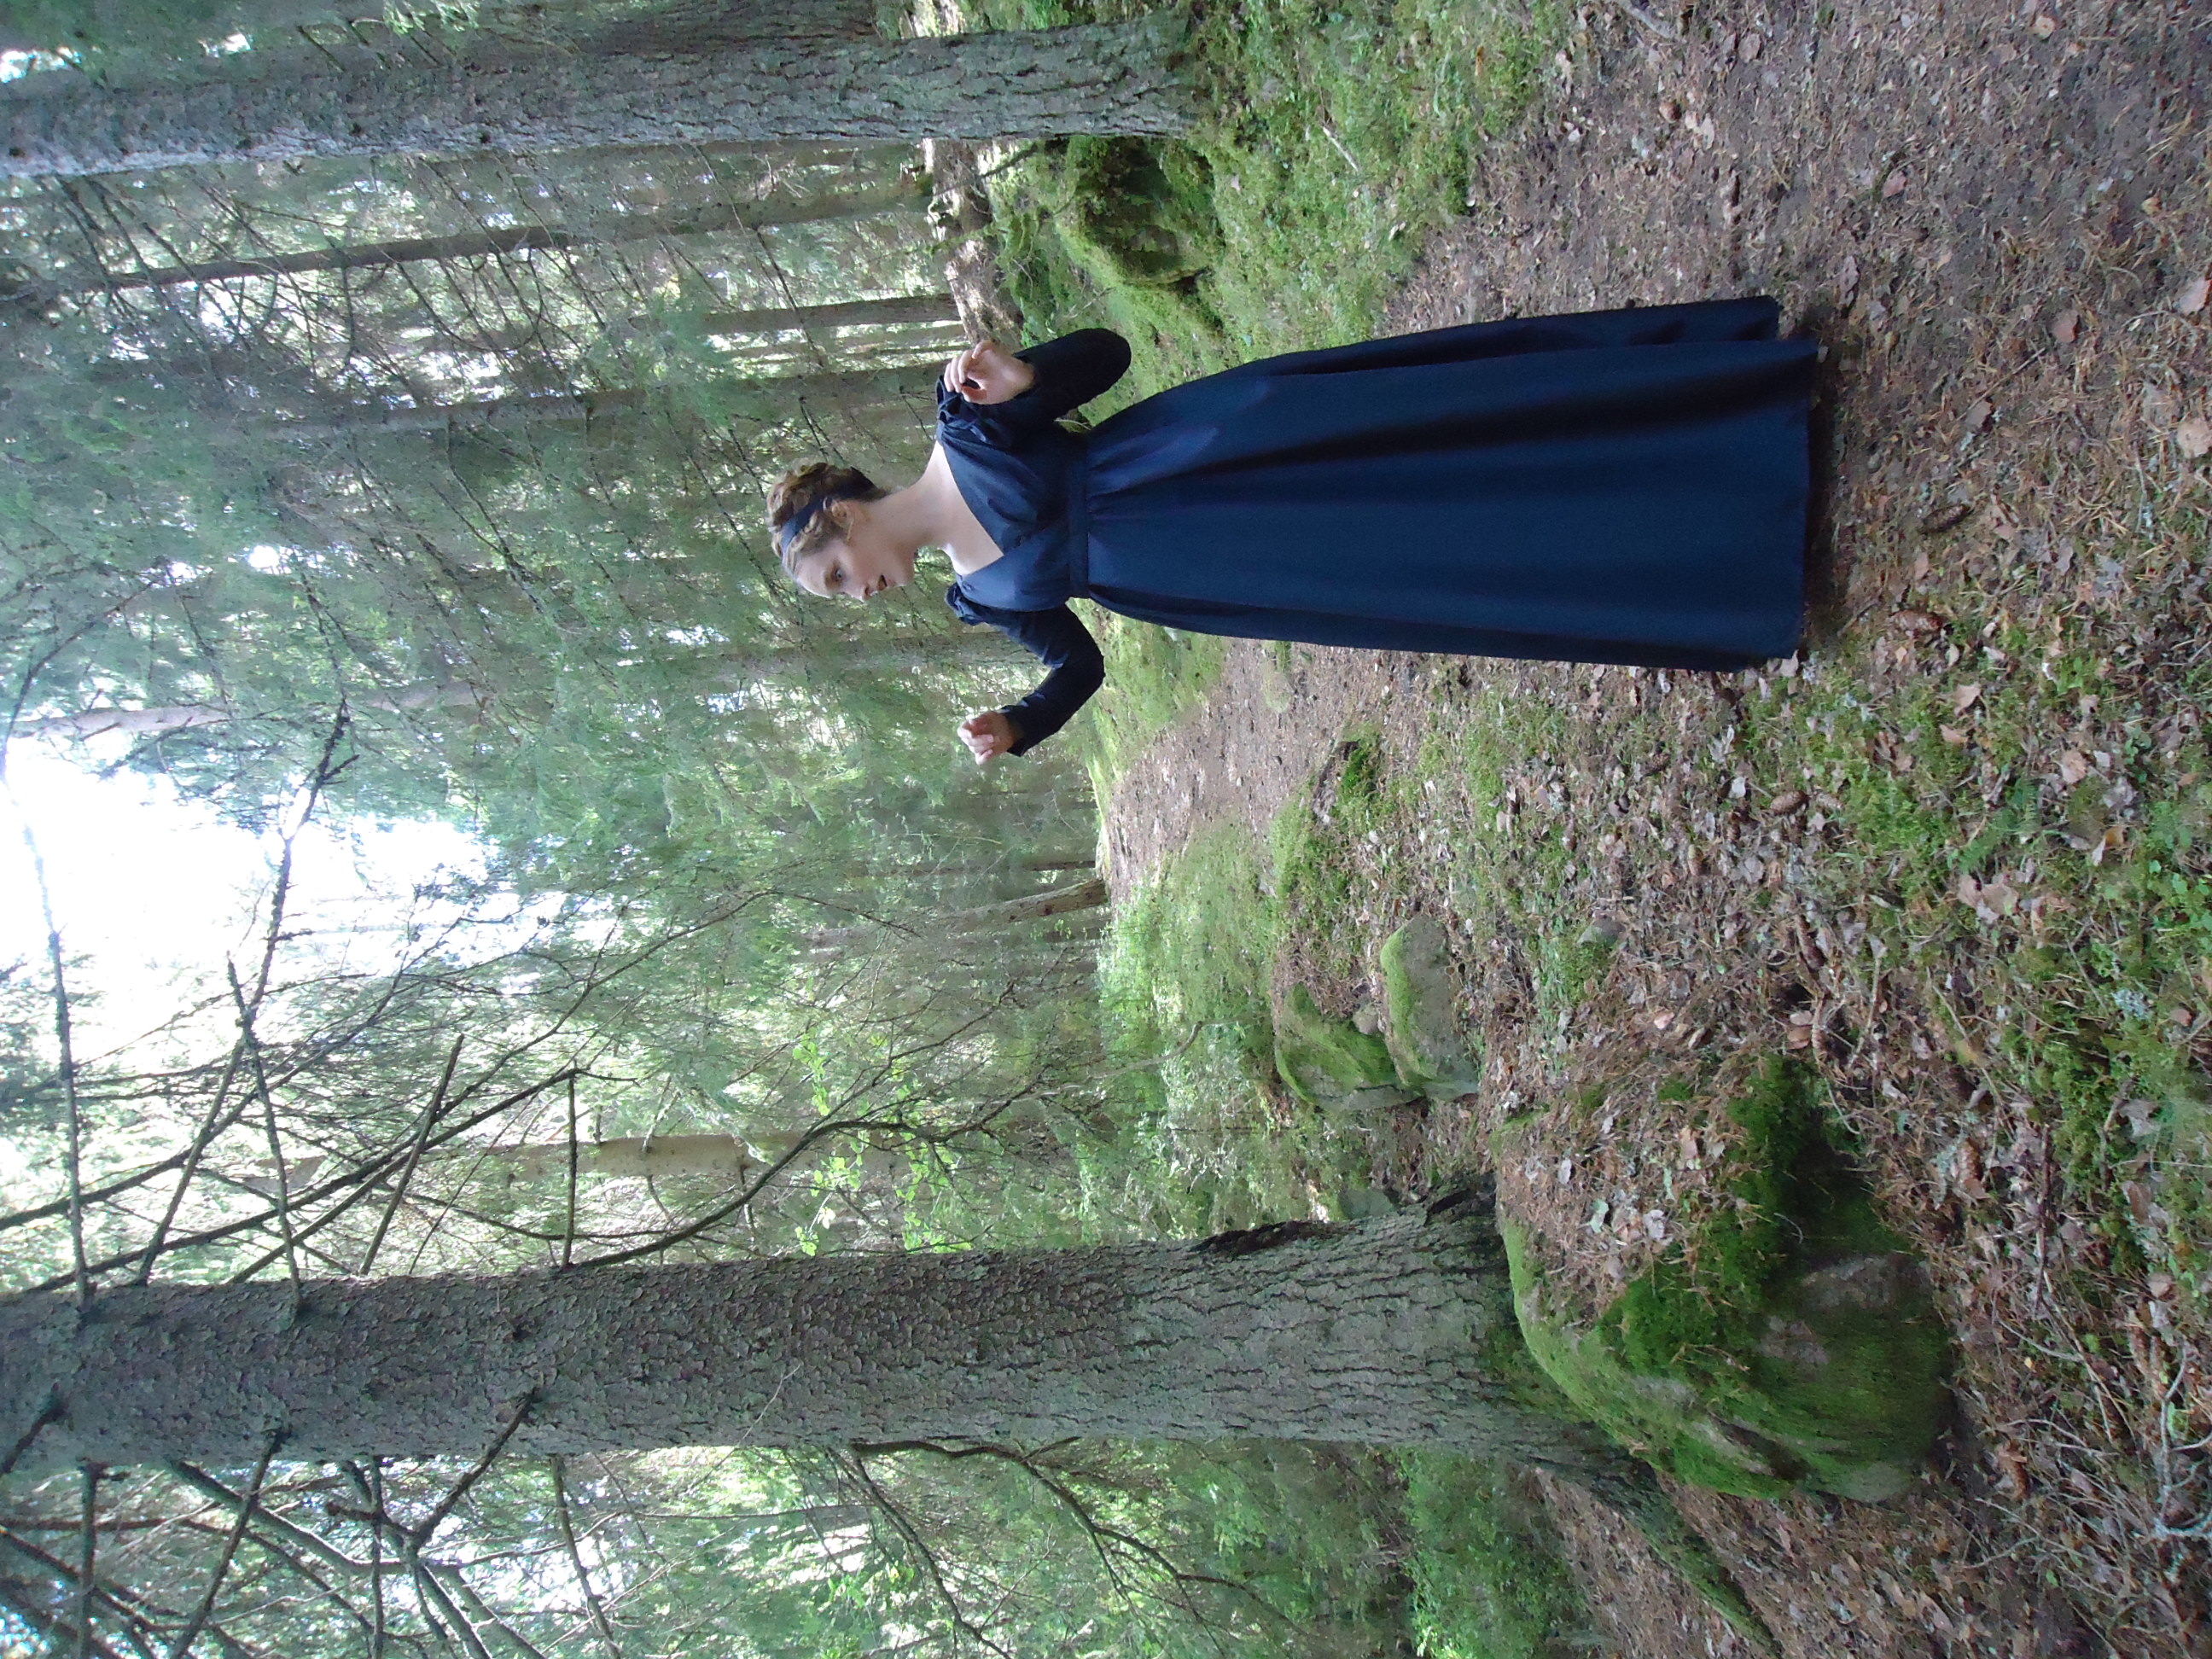
Taking the gown for a walk
In the woods
Chasing the mosquitoes, ladylike…
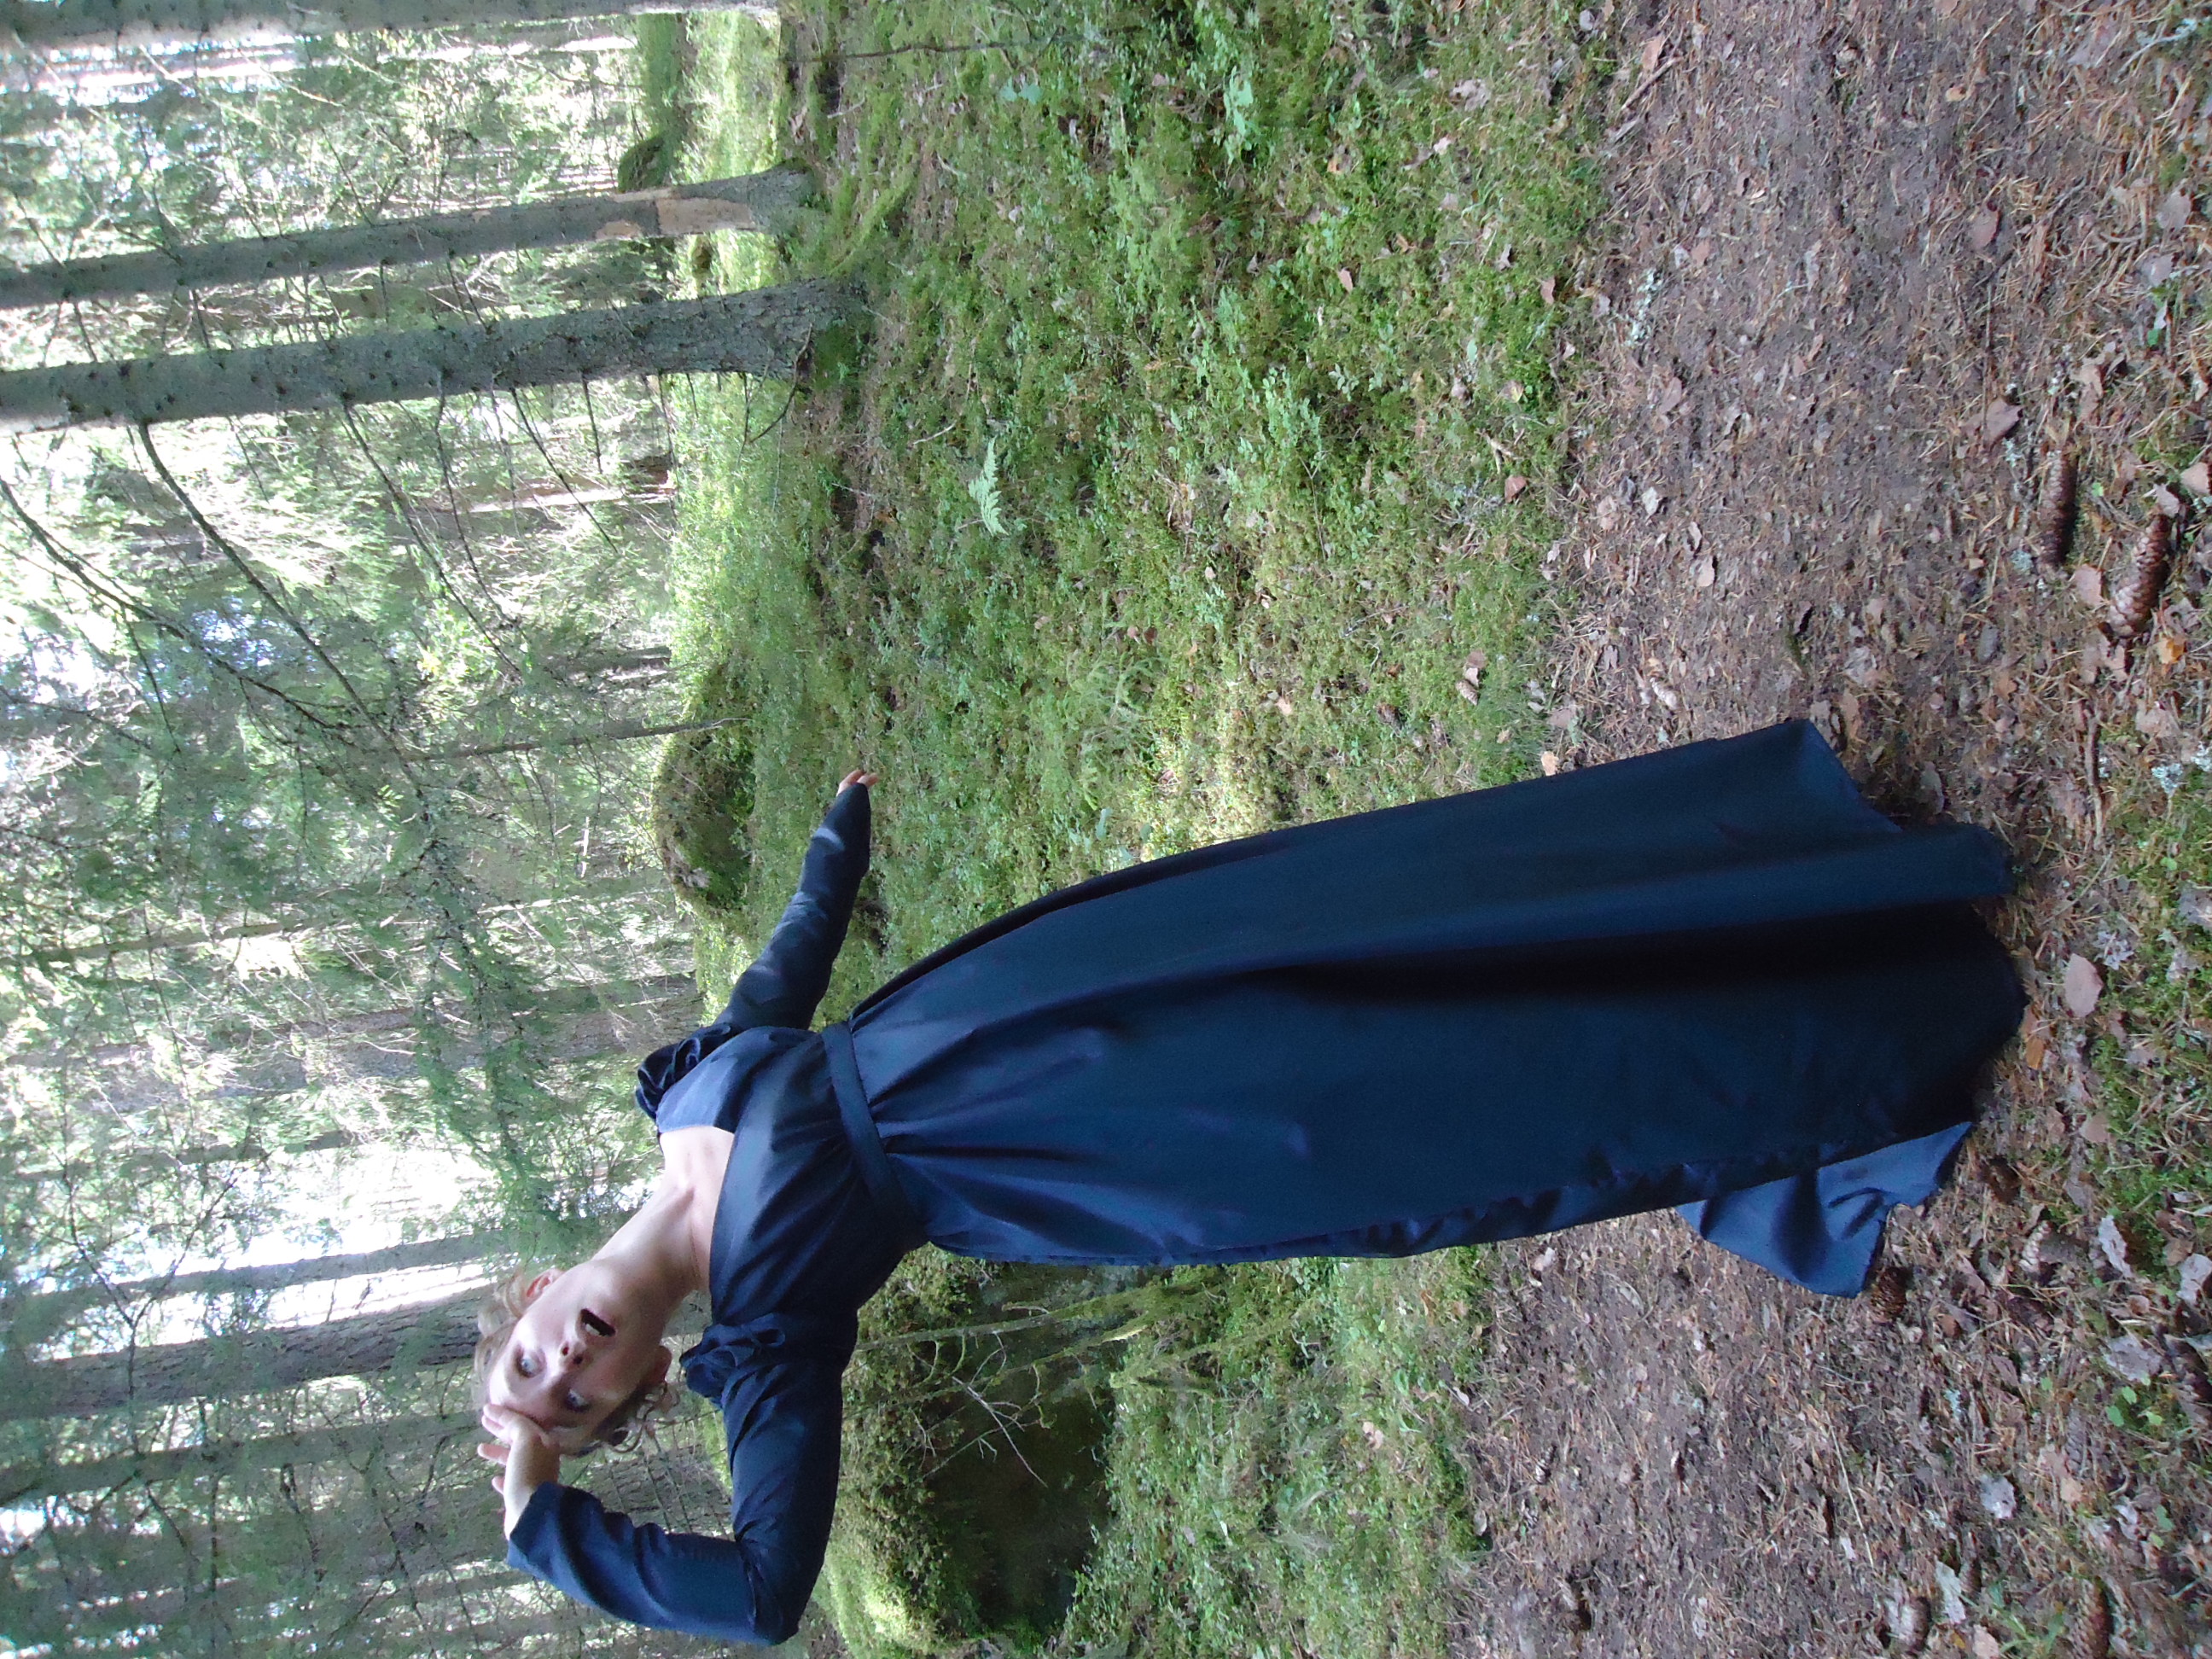
Oh, how terrifying!
I believe I will faint!
Alas
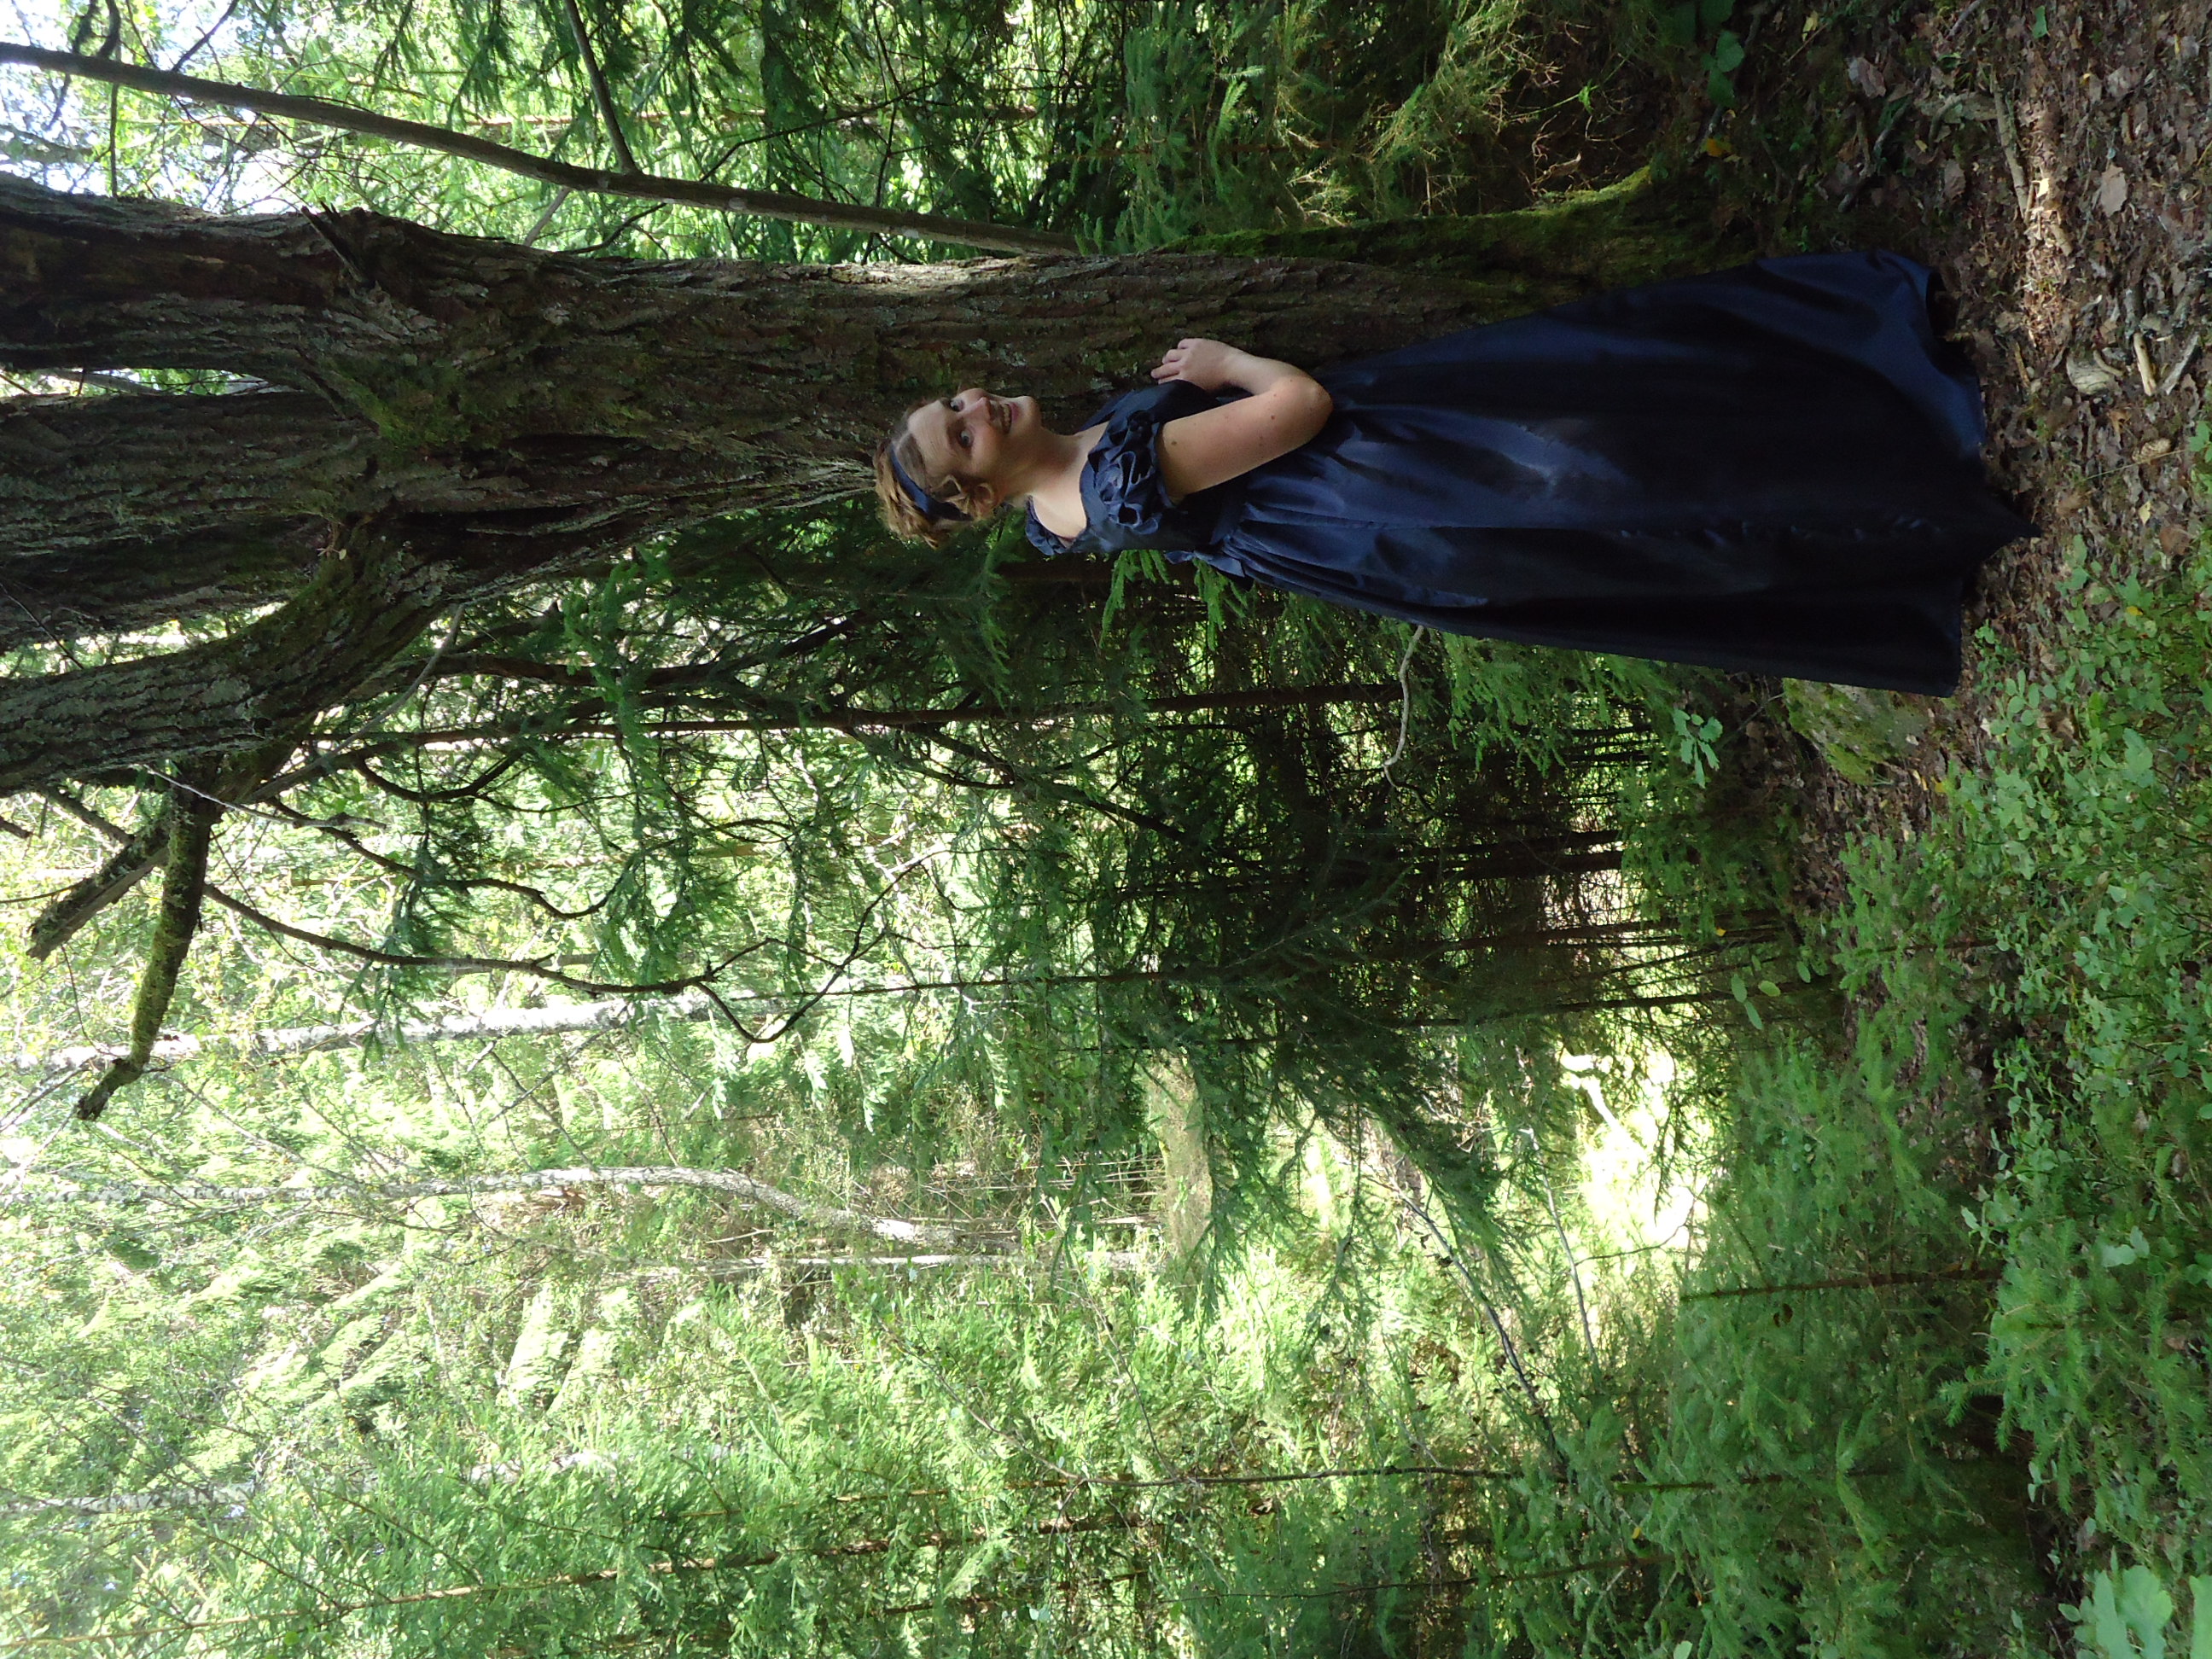
Happy in the woods. See my detachable arms? Suddenly the day gown is transformed to a ball gown. =)
And thus, the lady wishes you all a good day, while she tries to find her way back home to Denmark.
Så önskar damen eder alla en fin dag, medan hon försöker hitta vägen tillbaka till Danmark.
I have dived into a new, big, lovely project: a new regency gown with all the right underpinnings. This lunacy is partly due to a need to escape the far too big study load this term and partly due to the dear problem that I will have two friends to company me at a regency event this summer, but only own two gowns.
Jag har dykt ned i ett nytt, stort och underbart projekt: en ny empirklänning med alla matchande underkläder. Denna galenskap beror dels på att jag behöver en undanflykt från denna termins alldeles för stora läsebörda och dels på ett kärt problem – jag får med mig två kamrater på ett historiskt evenemang men äger bara två empirklänningar.
I aimed for a costume somewhere in between 1810-1820 and was inspired by museum pieces, fashion plates, portraits and several fantastic blogs.
Jag siktar på att sy en dräkt överensstämmande med mode från början av 1810-talet. Inspiration har jag hämtat från museiexemplar, modebilder, porträtt och en massa fantastiska bloggar.
The Corset
In order to have a proper fit of the gown, I started with the corset. Here are some pictures from today’s photo shoot and further down comes the research and construction process.
För att kunna få en bra passform på klänningen började jag med att sy korsetten. Här kommer några bilder från dagens fotosession. Längre ned skriver jag om bakgrundsinformation och konstruktion.
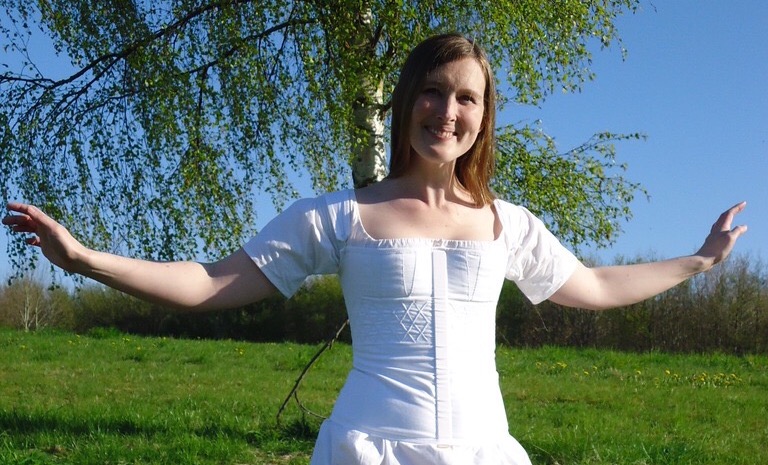
The corset is not boned, as its purpose isn’t to slim the waist, but only to push up the breasts – sideways. This is helped by a thin piece of wood in the front.
Here you see how the piece of wood (a busk) is in its channel. The stability of the corset comes from the chording. I must add that I didn’t try to highlight my push-up, I swear.
The back isn’t very pretty, but it needn’t be, as the outer layers are very loose. The lacing should, off course , be white. I just couldn’t resist the lovely weather, so I will by white cord later.
Here, the busk channel is very evident and so are the gussets and chording.
This is how happy I am for owning a pretty accurate corset, shift and taking springtime walks with my dear.
Inspiration for the corset
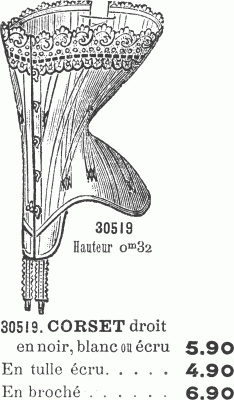
In my regency corset research, was finally most Inpired by these pictures:
Under mina efterforskningar inspirerades jag främst av dessa bilder:
1815-1825 – Met Museum
Ca 1815
Early 19th century – Museum of Fine Arts, Boston
Early 19th century – Nordisk museum
I chose to have the beige one as a model, because it can go under the most part of the regency era and also early 1820’s and even 1830’s costumes, if I may be so bold. It has three panels (one whole front and two in the back) and two shoulder straps.
Jag bestämde mig för att utgå från den beiga korsetten eftersom den fungerar under de flesta empirkläder, tidigt 1820-tal och eventuellt även 1830-tal, om jag skulle vara riktigt djärv. Den består av tre paneler (en hel framsida och två baktill), samt två axelband.
Constructing the corset
I didn’t know if the corsets that inspired me consisted of two or four layers of fabric. The blogs I’ve read to prepare myself for the task, often show four layers, but I didn’t gather whether this was due to the bloggers’ vast knowledge or that they simply preferred the greater sturdiness of four layers. I had less than one meter cotton cloth at home, the choise was easy.
Jag visste inte om mina inspirations-korsetter bestod av två eller fyra lager tyg. Bloggarna som jag läst som förberedelse inför projektet, brukar visa fyra tyglager, men det framgår inte om det är för att de kunniga bloggarna vet att detta är rätt eller för att de bara vill ha ökad stadga. Jag hade bara hemma mindre ön en meter vitt bomullstyg, sp valet blev lätt.
First, I constructed a toille on myself and got these parts. I bought a 1,5 mm thick piece of wood and saw it to about 36 cm.
Jag började med att göra en toille på mig själv och fick dessa bitar. Jag köpte en 1 mm tjock träpinne och sågade till ca 36 cm.
Here are all the pattern pieces on one fold.
Jag fick plats med alla mönsterdelar på en vikning.
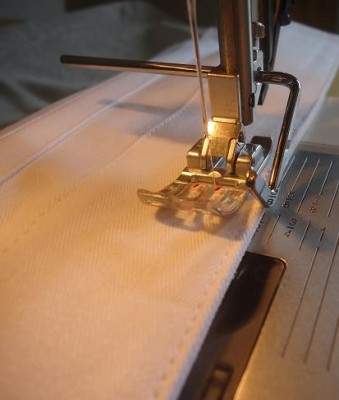
After having put the panels together and then also gathered the inner and outer layer (on machine), I inserted the gussets by hand.
Efter att ha sytt ihop alla paneler och sedan även satt ihop inre och yttre del (på symaskinen), satte jag in kilarna för hand.
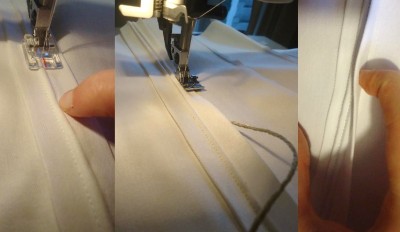
Then I cheeted, badly. I thought that I would save myself time by machine sewing the chords onto another piece of cloth and then put it between the existing layers and make the hand sewing last. I also thought that this would add the needed sturdiness that I otherwise would lack, due to the two layers of fabric. When I tried this, I discovered that my coarse chord showed through the white cotton. Therefore I sewed a piece of cloth to the other side too.
Sedan fuskade jag, mycket fult. Jag trodde att jag skulle bespara mig själv tid och arbete genom att sy fast snöret på en tygbit, som jag sedan skulle stoppa in mellan korsettens båda tyglager. Dessutom hoppades jag att detta skulle kompensera för min bortprioritering av de två inre lagren tyg. Jag upptäckte dock att snöret syntes igenom tyget, så jag fick sy fast en bit tyg på andra sidan också (med passpoalpressarfoten).
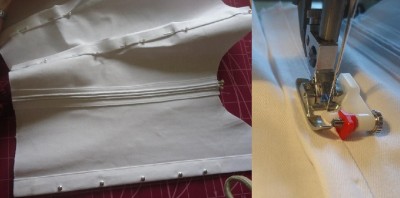
Then, after having sewn the channel for the busk, I could at last put the chorded pieces in between the layers. I hand stitched around the chords, so that it at least looked right…
I also chorded in the back, oround the hand stitched lacing holes.
Sedan, efter att ha sytt en kanal för pinnen, kunde jag äntligen sätta in snördelarna. Jag sydde för hand runt snöret, så att det åtminstone skulle se rätt ut.
Jag sydde in snören baktill också, på båda sidor om de handsydda snörhålen.
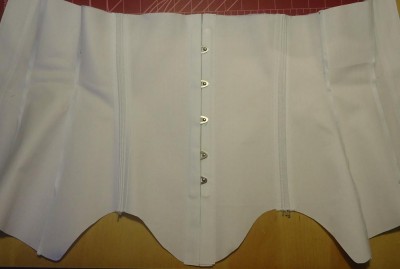
At last, I made matching baning out of the same fabric and put in a thick thread in the front, so that it can be gather if needed.
Sist gjorde jag egna kantband i samma tyg och tvinnade mormors gamla brodertråd till lagom tjocka snören att dra till upptill, vid behov.
Here is a view of the inside, with the threads coming out of the lacinghole.
Här syns mitt lilla snörhål med snörena som kommer ut.
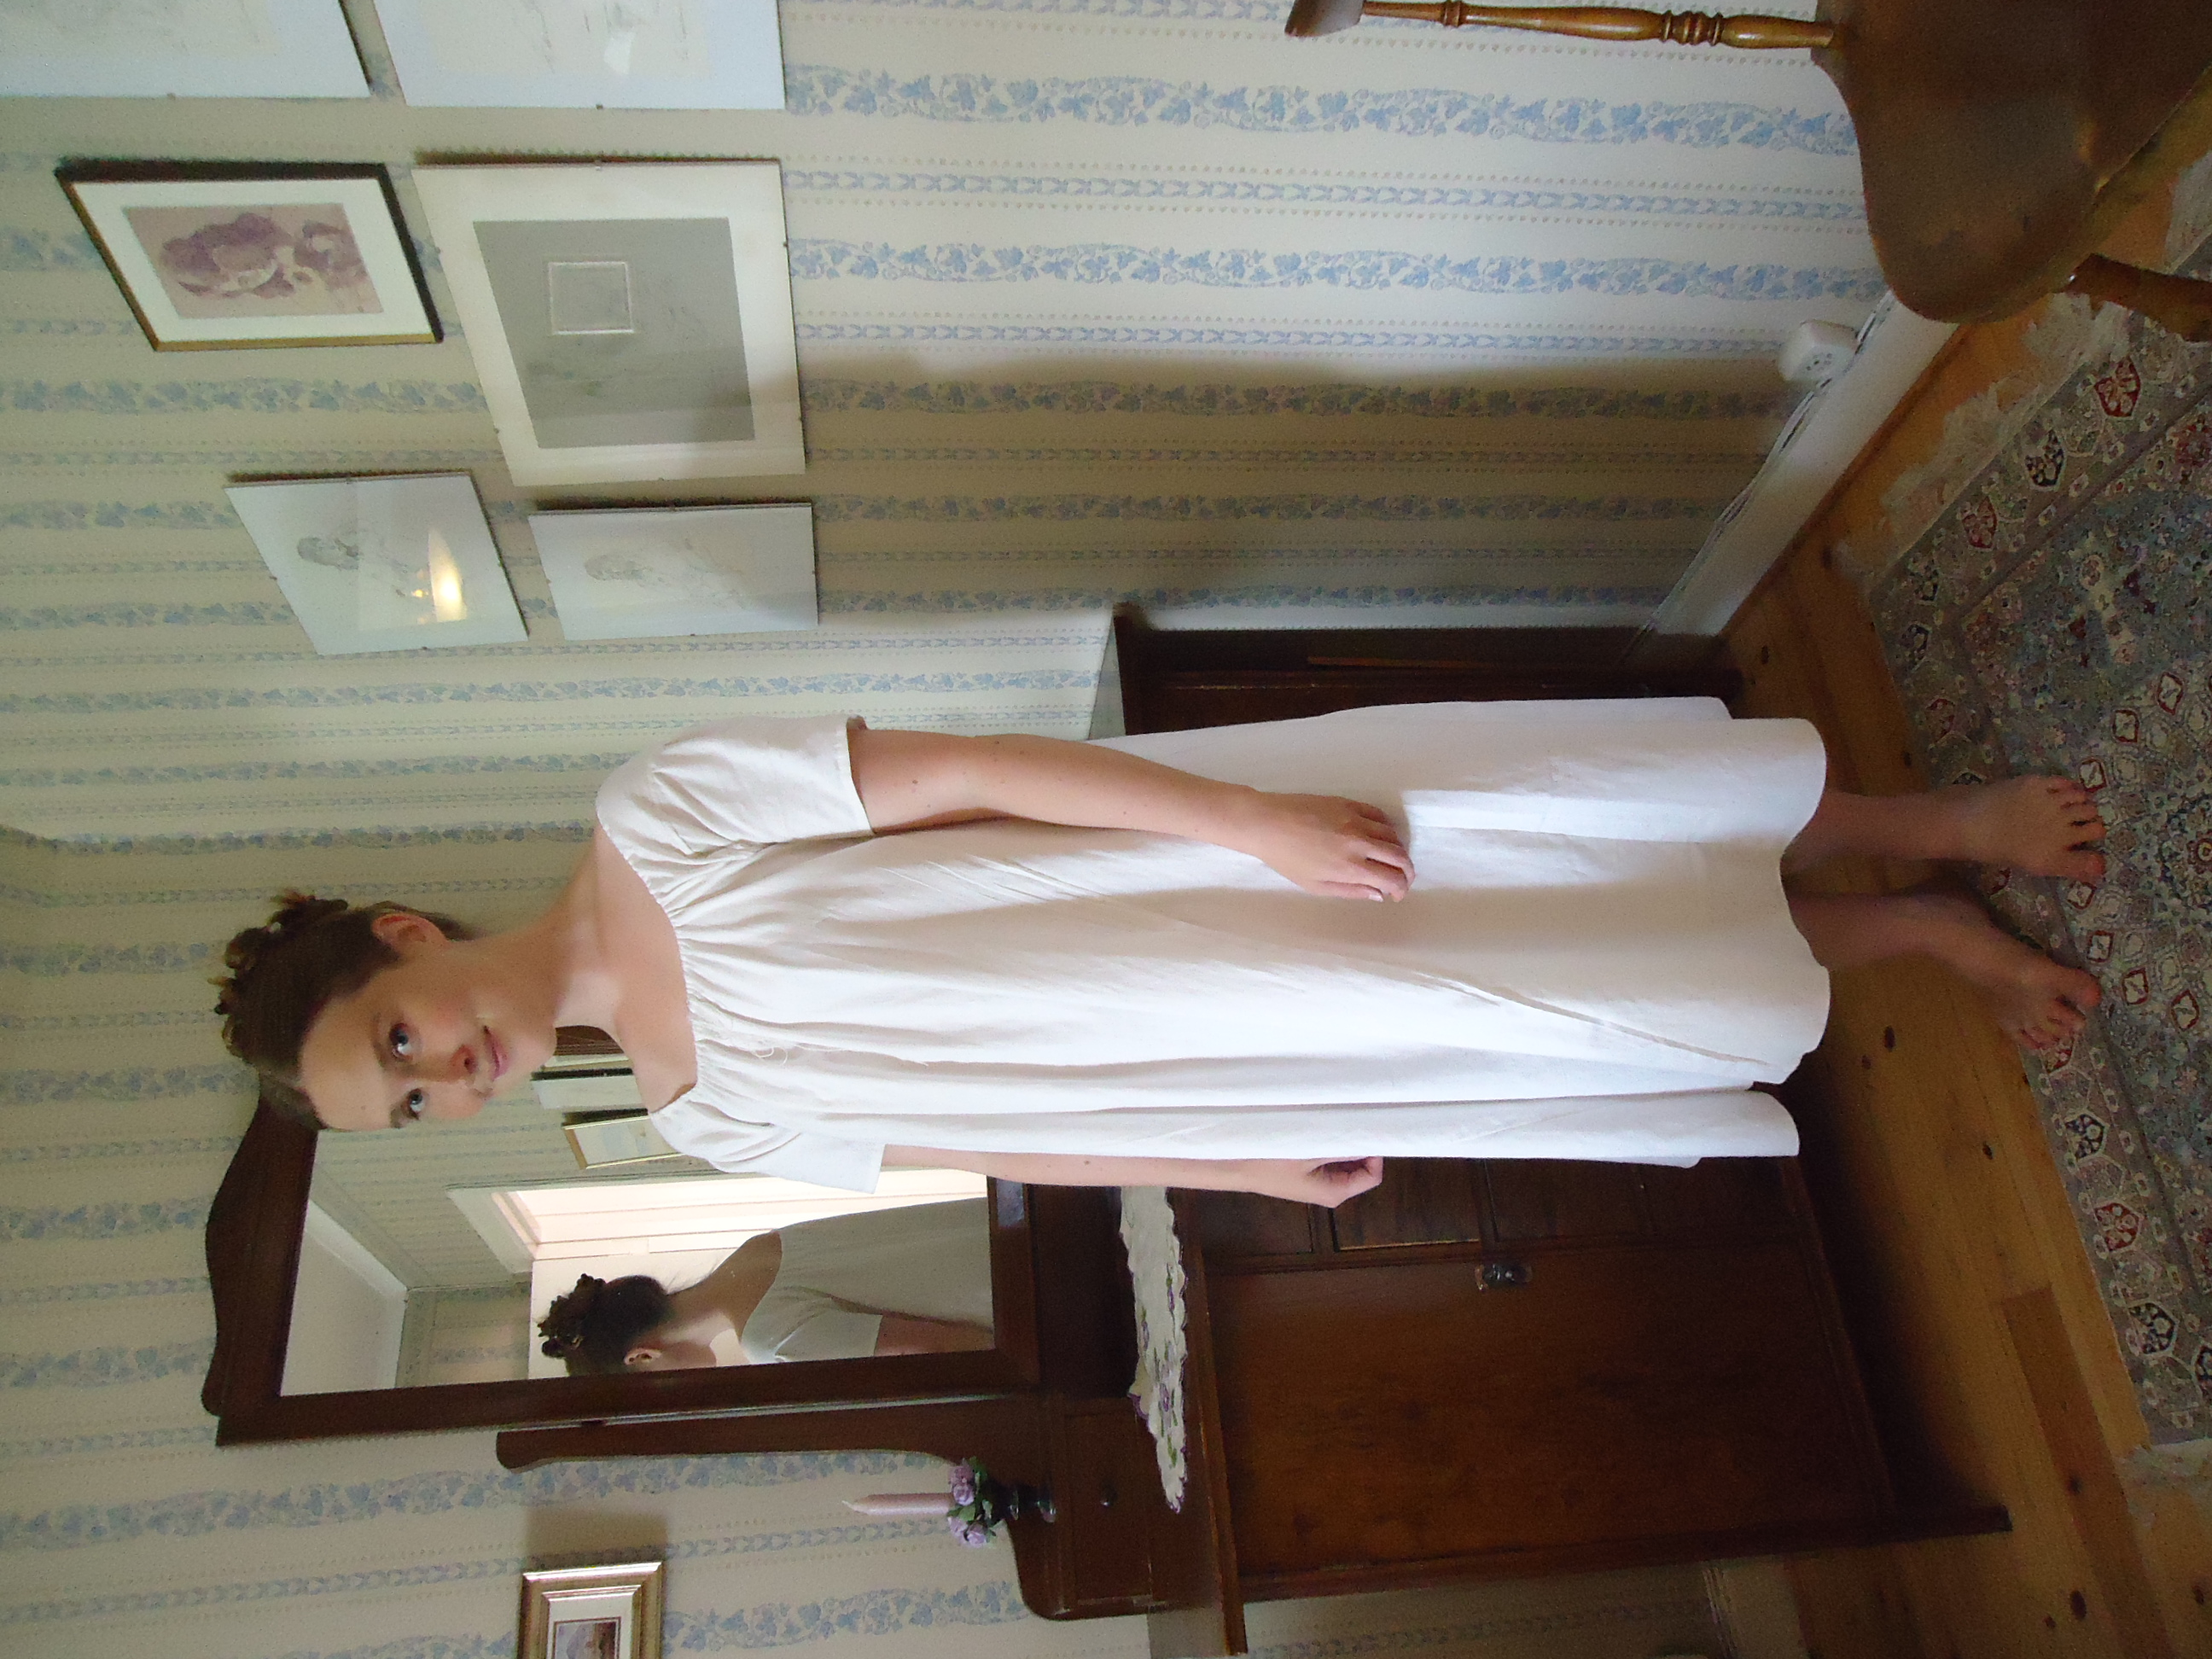
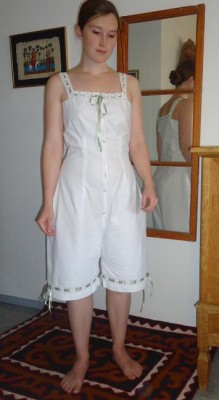
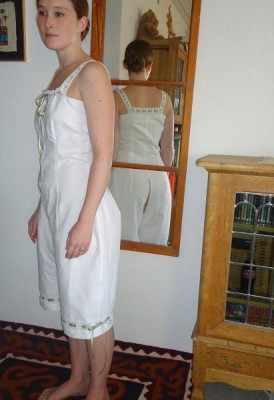
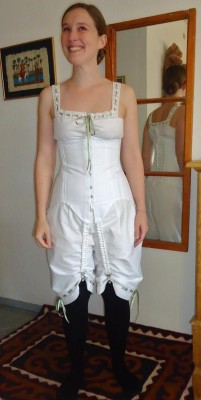
The shift
I made a shift in two hours (mostly by machine, off course). The construction is very simple and is just like it was at the 11th century: One panel in front and one in the back, gussets in the sides of the skirt and between the skirt and arms:
Jag sydde en särk på två timmar (mestadels på maskin, så klart). Konstruktionen är väldigt enkel och är densamma som den var på 1100-talet: en panel fram och en bak, triangulära kilar i kjolens sidor och fyrkantiga kilar mellan klänningsdelen och ärmarna:
Eftersom jag känner mig föga presentabel i mina vågade underkläder, ville jag inte fotografera dem utomhus, så ni får hålla till godo med dessa bilder. Här ser du också i vilken ordning man ska klä på sig de olika plaggen.
As I don’t feel quite decent in my daring underwear, I didn’t want to take the pictures outdoors, so you have to be contented with these pictures. Here you see in what order the different pieces should be put on.
Kombination av särk och mamelucker – ca 1913
Combination of chemise and drawers
Korsett – ca 1908
Corset
Corset cover kombinerat med särk
Corset cover combined with chemise
Underkjolen – från skattkistan – 1905-1920
The original petticoat from the treasure chestSedan är det bara de “riktiga” kläderna som fattas.
Now I only have the “real” outer clothes left.
Visdomar från “Kvinnans bokskatt”
När jag skulle sätta igång med detta projekt, skickade den omtänksamma Ulrika ett utdrag till mig, ur Kvinnans bokskatt från 1913. Boken är läsvärd, både för att författarinnan skriver underhållande och för att boken ger god inblick i sin tids resonemang och vardagsliv. Jag kan inte låta bli att dela med mig av några favoritstycken:
Jag må vara gammal och bakåtsträvande, men låter inte detta ganska bekant?
”Ett mod må för övrigt vara aldrig så löjligt, det finner i alla fall sina anhängare, och sömmerskor och modister äro dess trogna förkämpar.”
Något jag får tänka på, när jag ska välja kläder som matchar min enkla lärarinna:
”Den kvinna förblir alltid bäst klädd, som förstår att förena enkelheten med prydlighet, att välja sina färger efter sitt ansikte och sina kläder efter sin figur. Den enkla, väl skurna, omsorgsfult sydda och välsittande klänningen, som naturligt och smidigt följer figuren, blir alltid elegant utan alla garnityr eller tillsatser och verkar alltid förnämt, allra helst om tygets kvalitet är av bättre slag.”
Är inte detta uttalande fantastiskt likt Miss Bingly’s uttalande, när hon vill belysa Lizzy’s svagheter och framhäva sin egen överlägsenhet inför Mr. Darcy?
” … det enda mål, som är eftersträvansvärt, är detta outsägligt tilldragande behag hos kvinnan, som ligger i ett `distingerat´ väsen, denna sammanfattning av harmoniska rörelser, tal, ton, sätt att vara, kläda och föra sig, som man genast märker och känner, men som är nästan omöjligt att beskriva.”
Med denna underbara iakttagelse, vill jag avsluta dagens blogginlägg:
”Krinolinen var på sin tid ett förskräckligt plagg och drog i sin fulländning så mycket tyg, att en stackars familjeförsörjare med fru och flera giftasvuxna döttrar såg nära nog en hel förmögenhet gå åt till tyg, kappor och volanger, som skulle kläda dessa förskräckliga underplagg av band och stålfjädrar, till vilka mönstret tycktes vara taget från stommen till en kafferkraal i södra Afrika. Och ändå kan man knappast säga, att den tidens kvinnor togo sig på långt när så löjliga ut som nutidens damer
med sina smala kjolar och ofantliga hattar, som komma dem att likna vandrande champinjoner, där icke den över huvudet neddragna hatten i krukfacon gör, att de likna ett vandrande spöke utan huvud alls.”
I förra inlägget berättade jag om skattgömman, där denna korsett hittades. Den tillhörde förmodligen min farmors faster.
In the last blog post, I told about the treasure chest where this Corset was hidden for over half a century. Probably it belonged to my grandmother’s aunt.
Korsetten framifrån
Korsetten bakifrån
Korsetten är välsydd och har en märkning på insidan, som jag tolkar som att den måste ha köpts. Den är välanvänd, vilket syns på ett enormt slitage av tyget, fläckar, åtskilliga fula lagningar och den brutna planschetten. Strumpebanden är fastsatta i efterhand, av samma slarviga sömmerska.
The corset is well sewn and has a marking on the inside, indicating that it’s bought. It is much used, which can be seen on the enormous wear and tear, stains, several ill made mendings and the broken planchette. The garters are sewn onto the corset by the same careless seamstress that made the mendings.
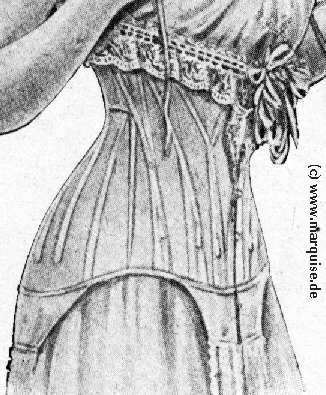
Denna bild är hämtad från ett parisiskt modemagasin från 1908 och jag tycker att konturerna matchar mycket bra, även om min korsett har en extremt mycket enklare konstruktion, med mycket mindre påverkan av kroppsformen.
This picture is from a Parisian fashion magazine from 1908 and I think the silhouette reminds a bit of my corset, though mine is much more simple in construction and thus gives less shaping.
Den typen av korsetter slutade alltså under bysten, men höll in midjan.
This type of corset used to end under the bust, but kept the waist more or less tiny.
Rekonstruktion
Min målsättning var att slutresultatet skulle bli så likt orginalet som möjligt. Först hade jag tänkt sy korsetten på min symaskin från samma tid, men den maskinen står i grannlandet, så jag fick nöja mig med min moderna maskin. Därför valde jag också att ta till alla moderna hjälpmedel som fanns till hands. Eftersom jag inte hann få tag i strumpebandstillbehören under denna process, valde jag att sy färdigt korsetten, så kan jag sätta dit dem i efterhand, liksom det ser ut att vara fallet även på orginalkorsetten.
My goal was to copy the original corset as closely as possible. At first, I had planned to sew the corset on my machine from the same era, but that sewing machine is in my home country, so I had to make do with my modern machine. Therefore I also chose to use modern methods. Because I didn’t get what I needed for making the garters in time, I chose to finish the corset and fasten them afterwards, just as in the original corset.
Det första steget i rekonstruktionsprocessen var att kopiera mönstret. Jag la mönsterpapper ovanpå korsetten och ritade försiktigt med blyerts längs sömmarna. För säkerhets skull testade jag sedan att jämföra fram- och baksidan och justerade då mönstret, med en annan färg. Jag förlängde korsetten med ca en centimeter upptill, samt la till en millimeter upptill på var sida av varje mönsterdel, för att korsetten skulle passa min ovanligt långa torso bättre och ge lite mer midja.
The first step in the reconstruction process was to copy the pattern. I lay the pattern paper on top of the corset and carefully draw a line aong the seams. To make sure that it was correct, I compared the outside with the inside and made adjustments in a different colour. I have an unusually long torso, so I extended the corset with about one cm at the top. I also added one mm at the top of both sides, on every panel, in order to get a little more shape for the waist.
Sedan ritade jag av mönstret på ett stadigt tyg (coutille från Vena Cava Design) och klippte ut bitarna. Orginalkorsetten är sydd i ett lager och sömmarna sitter utvändigt, dolda i tygkanaler. Jag insåg efter att ha ritat upp mönstret, att tyget faktiskt hade en rät- och en avigsida och att jag naturligtvis hade ritat på fel sida. För att slippa rita upp allt igen, följde jag linjerna med en sporre, så linjerna alltså syns som prickar på andra sidan av tyget.
Then I copied the pattern to a coutille from Vena Cava Design and then cut. The original corset has only one fabric layer and all ruff edges are hidden in fabric channels on the outside. After I had copied the pattern pieces to the fabric, I realised that the fabric had a right and a wrong side and that I, of course, had made the makings on the right side. I didn’t want to draw everything on the other side too, so now I used a tracing wheel, following the markings, so I could see the dotted lines on the other side of the fabric.
Jag tråcklade ihop delarna med björntråd, så att jag skulle kunna testa korsetten och lätt ta upp sömmen om passformen inte var bra. Passformen var perfekt, så jag gick vidare till nästa moment.
I basted the parts together so that I could test the corset and easily unpick the seams for adjustments. The fit was perfect from the start though, so I moved on to the next step.
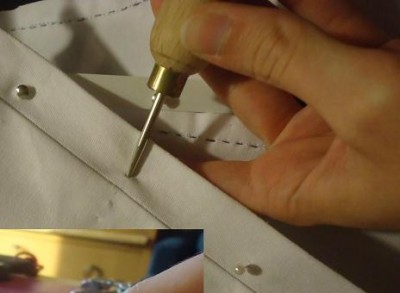
Planschetter är breda korsettstål med knäppningsanordning, som man vanligtvis har på senare korsetter. I min orginalkorsett ligger planschetterna i tygkanaler, som är bredare än dem jag klippte ut av misstag.
Planchettes are broad corset steels with attached fastening device, often used in corsets after the 1850’s. In my original corset, these planchettes are placed in channels broader than what I had accidentally cut.
Jag sydde först in planschetten med öglorna. Därefter sydde jag fast en likadan kanal på motsvarande korsettdel, men sydde bara sömmen mot mitten. Sedan la jag korsettdelarna över varandra och märkte ut var planschetten med “knapparna” skulle placeras sin kanal, så att de båda planschetterna skulle hamna på matchande höjd.
First, I put the planchette with the loops. In its channel. Then I made a matching channel for the corresponding side, but only made the seam “at the middle”. I put the corset parts on top of each other and marked where in the channel the planchette with the buttons should be placed, in order for the planchettes to end on the same level.
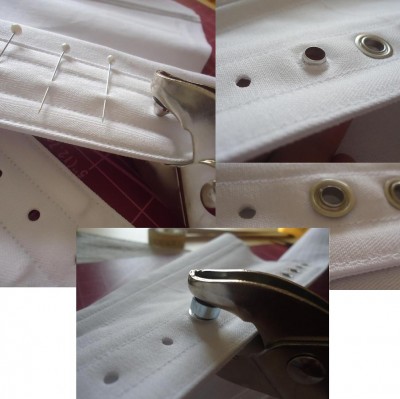
Här är den översta (eller egentligen nedersta) planschettknappen redan på plats i kanalen, medan jag med hjälp av en syl gör ett tillräckligt stort hål för att pressa igenom nästa knapp. Nedanför sitter en nål där nästa knapp ska komma upp genom tyget.
Here the first planchette button is in place and the next still lays underneath the channel fabric, while I make a hole in the fabric with an awl, before pressing the button through the hole. Next to this button, there is a needle, marking where the next buttonhole should be made.
Här är båda planschetterna på plats och kanalerna är fastsydda på båda sidor.
Here, both planchettes are in place and the channels are stitched on each side.
Jag kunde nu testa om korsetten passade någorlunda, vilket den faktiskt gjorde. Därför sydde jag med maskin längs de tråcklade sömmarna, varpå jag sprättade bort dessa. Sedan pressade jag sömsmånerna bort från mitten, såsom det även är gjort på orginalkorsetten.
Now I was able to test the corset fit properly and it still was good. Thus I sewed on machine along the basting, which I afterwards unpicked and removed. Then I pressed the seam allowances to each side, just as on the original corset.
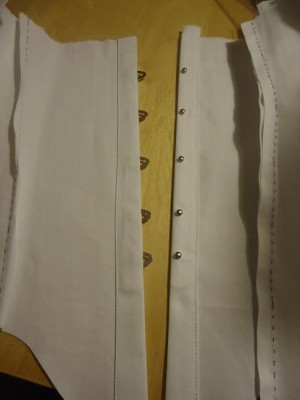
Nu var det dags att ge korsetten stadga. Jag startade med “snör-kanalerna” mitt fram. Det första steget var att sy en söm precis vid sidan av kanalens mitt, matchande sömmen som håller samman korsettens paneler.
Then it was time to make the corset more robust. I started in the front with making channels for chording. The first step was to make a seam almost in the middle of the channel, right on top of the seam keeping the corset panels together.
Sedan använde jag mig av passpoalpressarfoten för att sy in det mittersta snöret och dragkedjepressarfoten för att sy in de båda yttersta snörena. För att det styva tyget skulle kunna ligga tätare runt snörena, pressade jag upp kanalens tyg längs intilliggande söm, innan jag la in nästa snöre.
Then it was time to make the corset more robust. I started in the front with making channels for chording. The first step was to make a seam almost in the middle of the channel, right on top of the seam keeping the corset panels together.
Så här såg korsetten ut med snörkanalerna på plats.
This is what the corset looked like when the chording channels were finished.
Därefter nålade jag fast kanalerna för korsettstålet och sydde fast dem. För att få en jämn söm tätt inpå kanten, använde jag blindsömspressarfoten.
Then I pinned the channels for the corset boning and stitched. Here I used the blindhem presser foot (?), making it easier to sew an even seam close to the border of the channel.
På orginalkorsetten omges snörningens öljetter på båda sidor av korsettstål. För att lyckas få stålets kanaler raka, använde jag mig av symaskinens egen linjal.
The original corset has its cording eyelets in between two boning channels. I used the machine’s own ruler to get the channels straight.
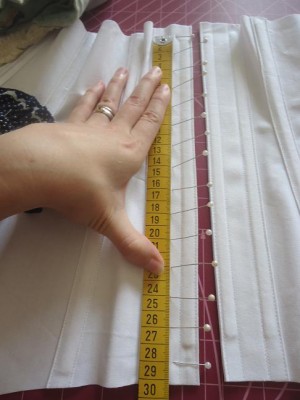
Sedan var det dags för att få öljetterna på plats. Originalkorsettens öljetter har en spridning på 2 cm, så jag gjorde likadant.
Next step was to put the eyelets in place. On the original corset the eyelets are placed with 2 cm space in between, so I copied this.
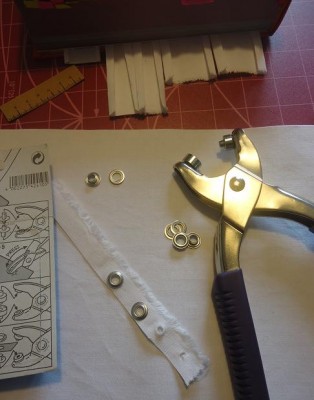
Förra gången jag sydde en korsett, använde jag mig av de små verktyg som kommer med i öljettförpackningen. Till dessa måste man använda hammare och jag hade så dåligt samvete för att jag var tvungen att störa grannarna både när jag skulle slå hål i tyget och när jag skulle forma öljetterna. Inför detta projekt köpte jag detta underbara multiverktyg, som kan användas både som hålslagare och öljettpress (?). Det har jag inte ångrat.
Last time I made a corset, I used the small tools that came with the eyelets. These require the using of a hammer and I remember having a very bad conscience for disturbing our neighbour with the noise, for each new eyelet. Therefore I prepared myself this time, buying this wonderful multi tool, that can be used for both making holes, pressing eyelets and certainly even more. I am so glad for it.
Jag slog hål mitt imellan kanalerna. Sedan vidgade jag hålet med hjälp av en stiftpenna, så att det gick att pressa igenom öljettens framstycke (som du ser från korsettens aviga. Därefter träddes öljettens bakstycke över framstycket (åter från avigan) och sedan pressades de samman. Det sista som skulle ordnas, var att sy på kantband (samma coutil som i korsetten), sätta i snörningen och sy fast en lämplig spets.
I made holes between the channels and expanded them with a pen, making it possible to push the eyelets through from the inside. Then the eyelet’s back part was put over the front part (again from the inside) and then I pressed them together. The only thing left to do now was to sew the taping (made from the same coutille), put in the lacing and decorate the corset with a suitable lace.
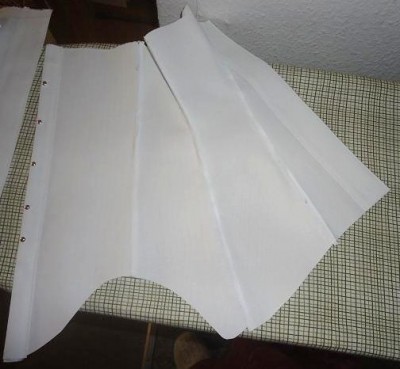
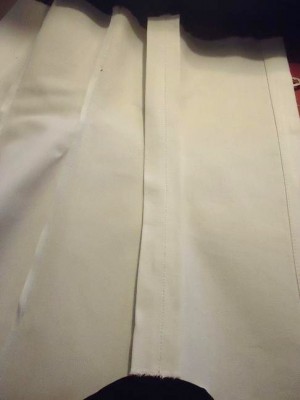
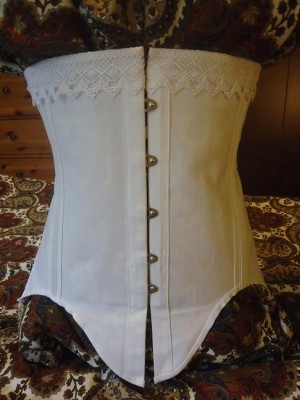
ResultatSå här blev slutresultatet – framifrån…
… från sidan…
… och bakifrån.
När alla underkläder till dräkten är klara, ska jag även lägga upp bilder på korsetten, när den sitter på sin ägarinna.
When I have made all of the underwear pieces, I will give you pictures of the corset on its mistress.
Material
Till korsetten har jag främst använt material, som jag har köpt från Vena Cava Design.
½ m coutille
2 st spiralstål
4 st korsettstål, 7 mm breda
1 paket öljetter, 4 mm i diameter
1 m spets
I have mostly used material bought from Vena Cava Design.
* ½ m coutille
* 2 st spiral boning
* 4 st boning steel, 7 mm
* 1 package of eyelets, 4 mm
* 1 m lace
– where you can see what I do – designing, sewing, singing, creating etc.