Category Archives: Barnkläder

CHILDREN’S shirts and a REPURPOSED dress

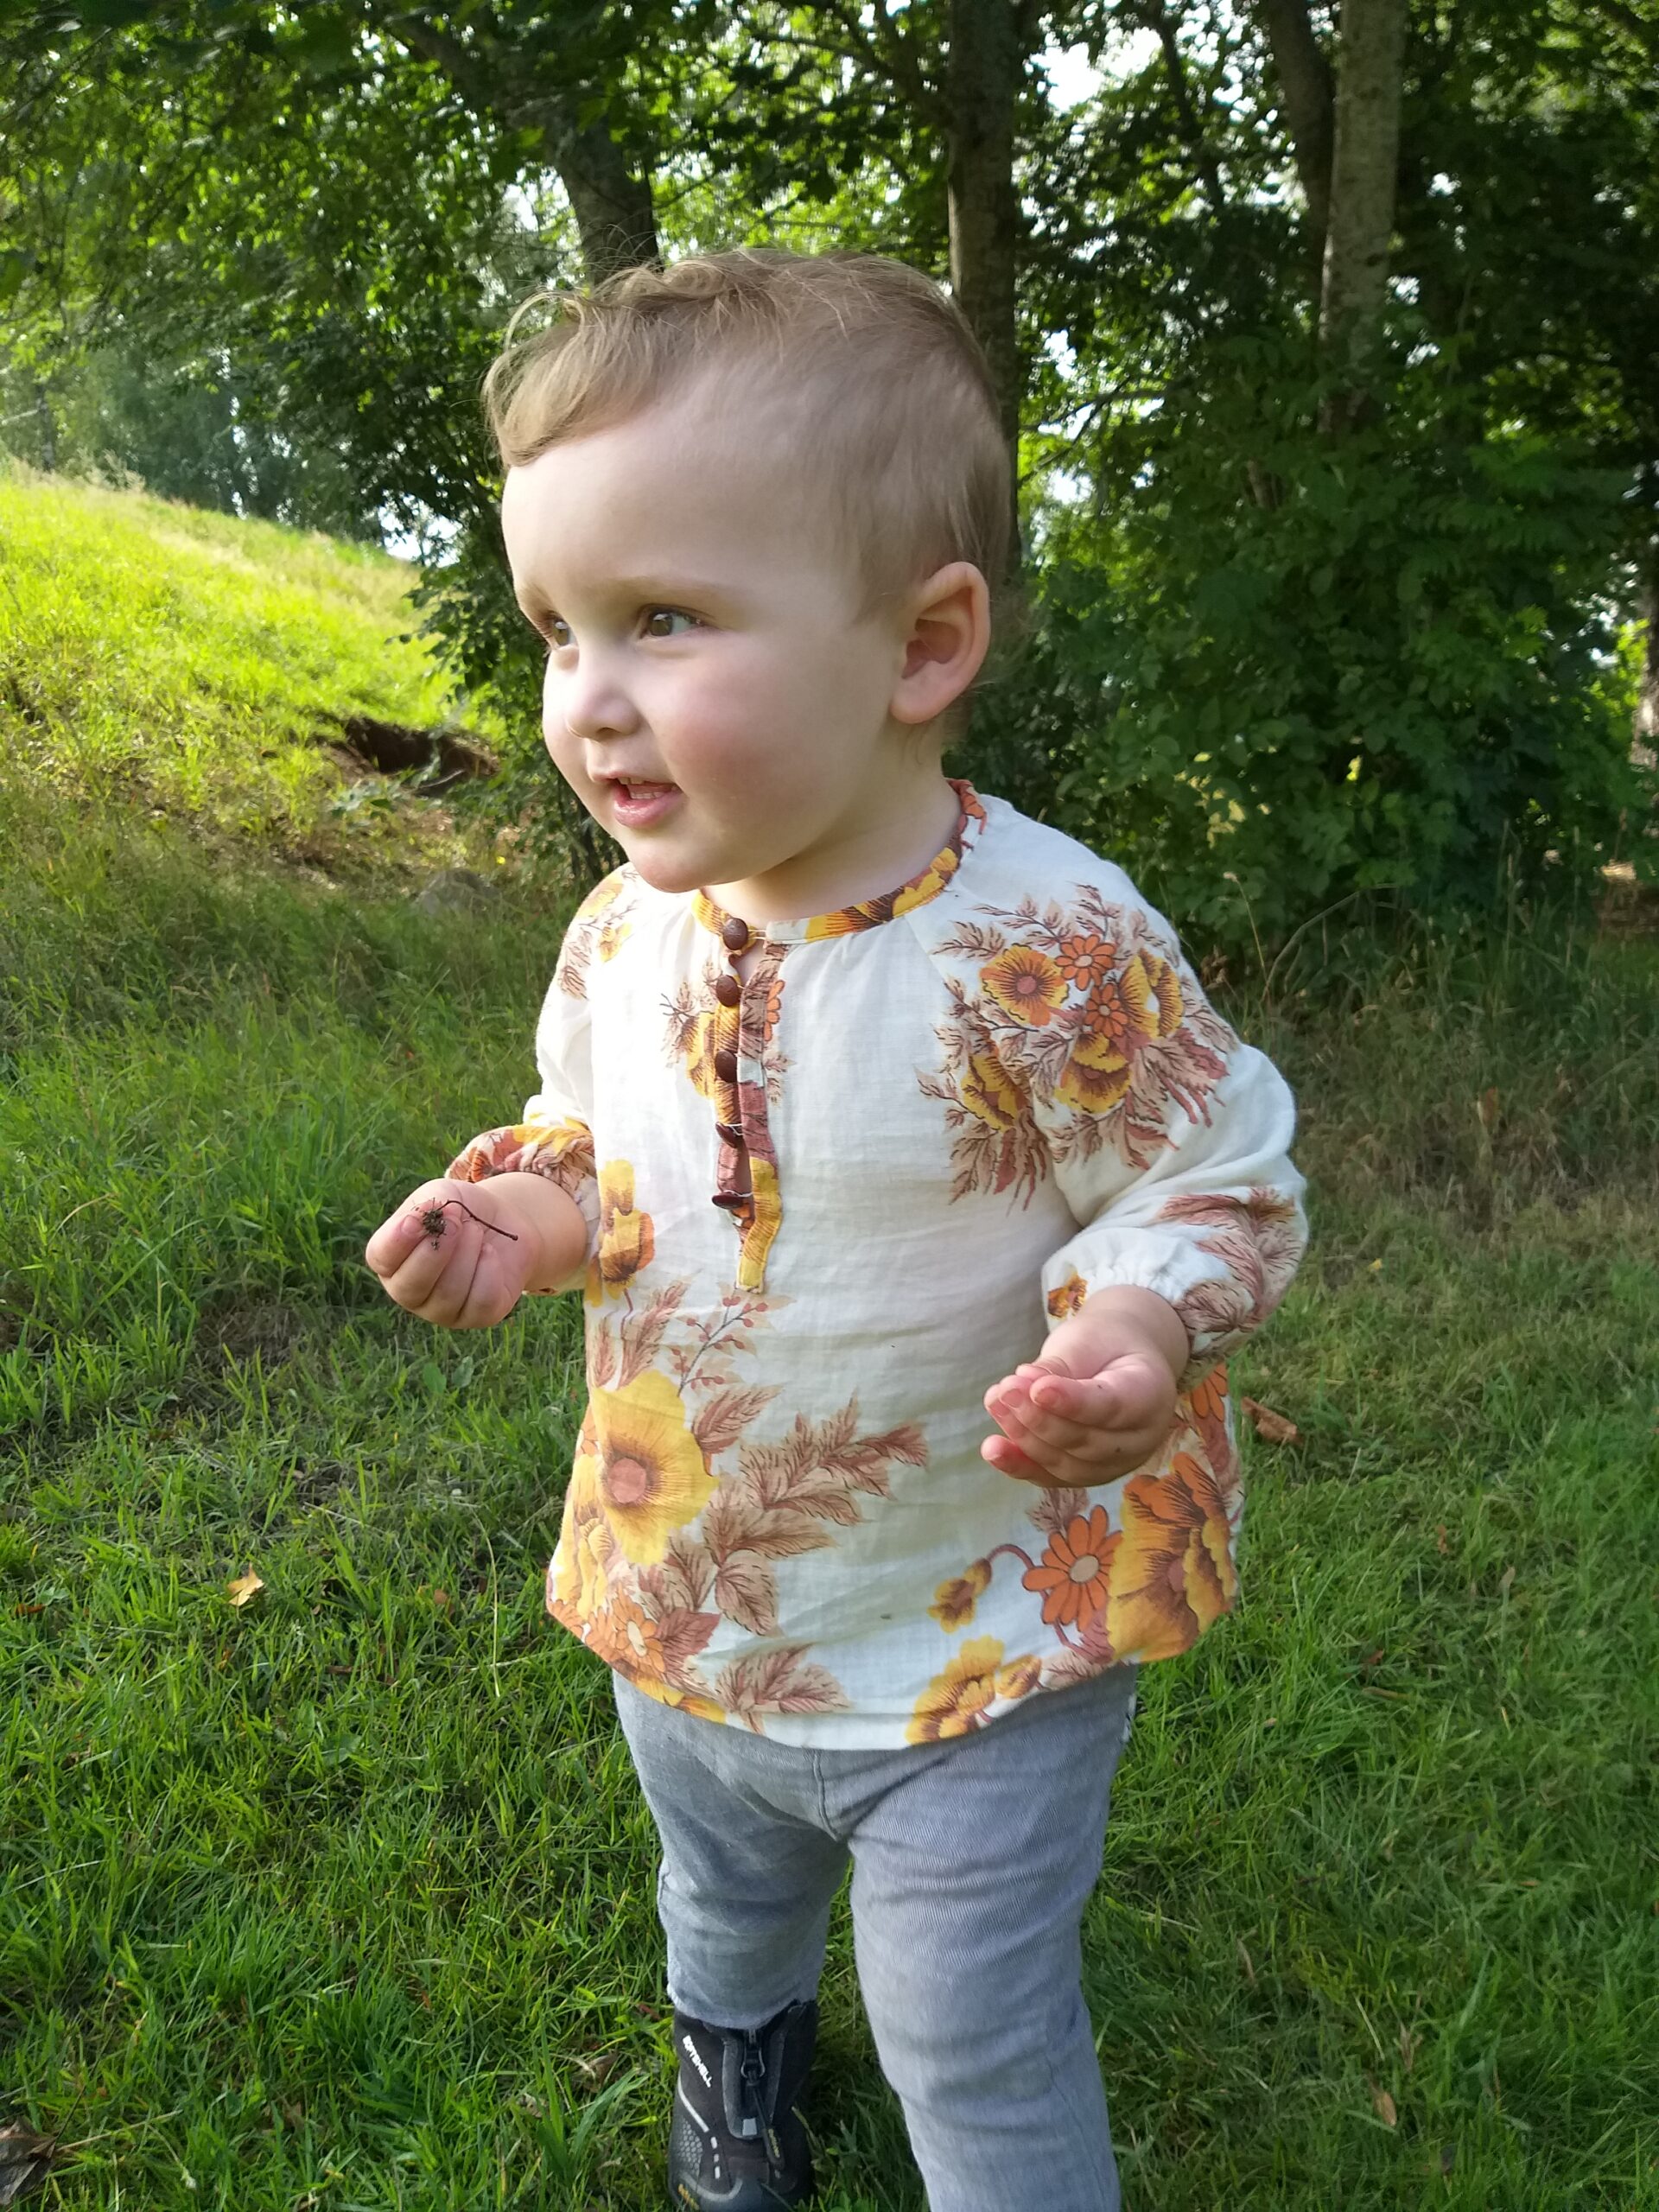
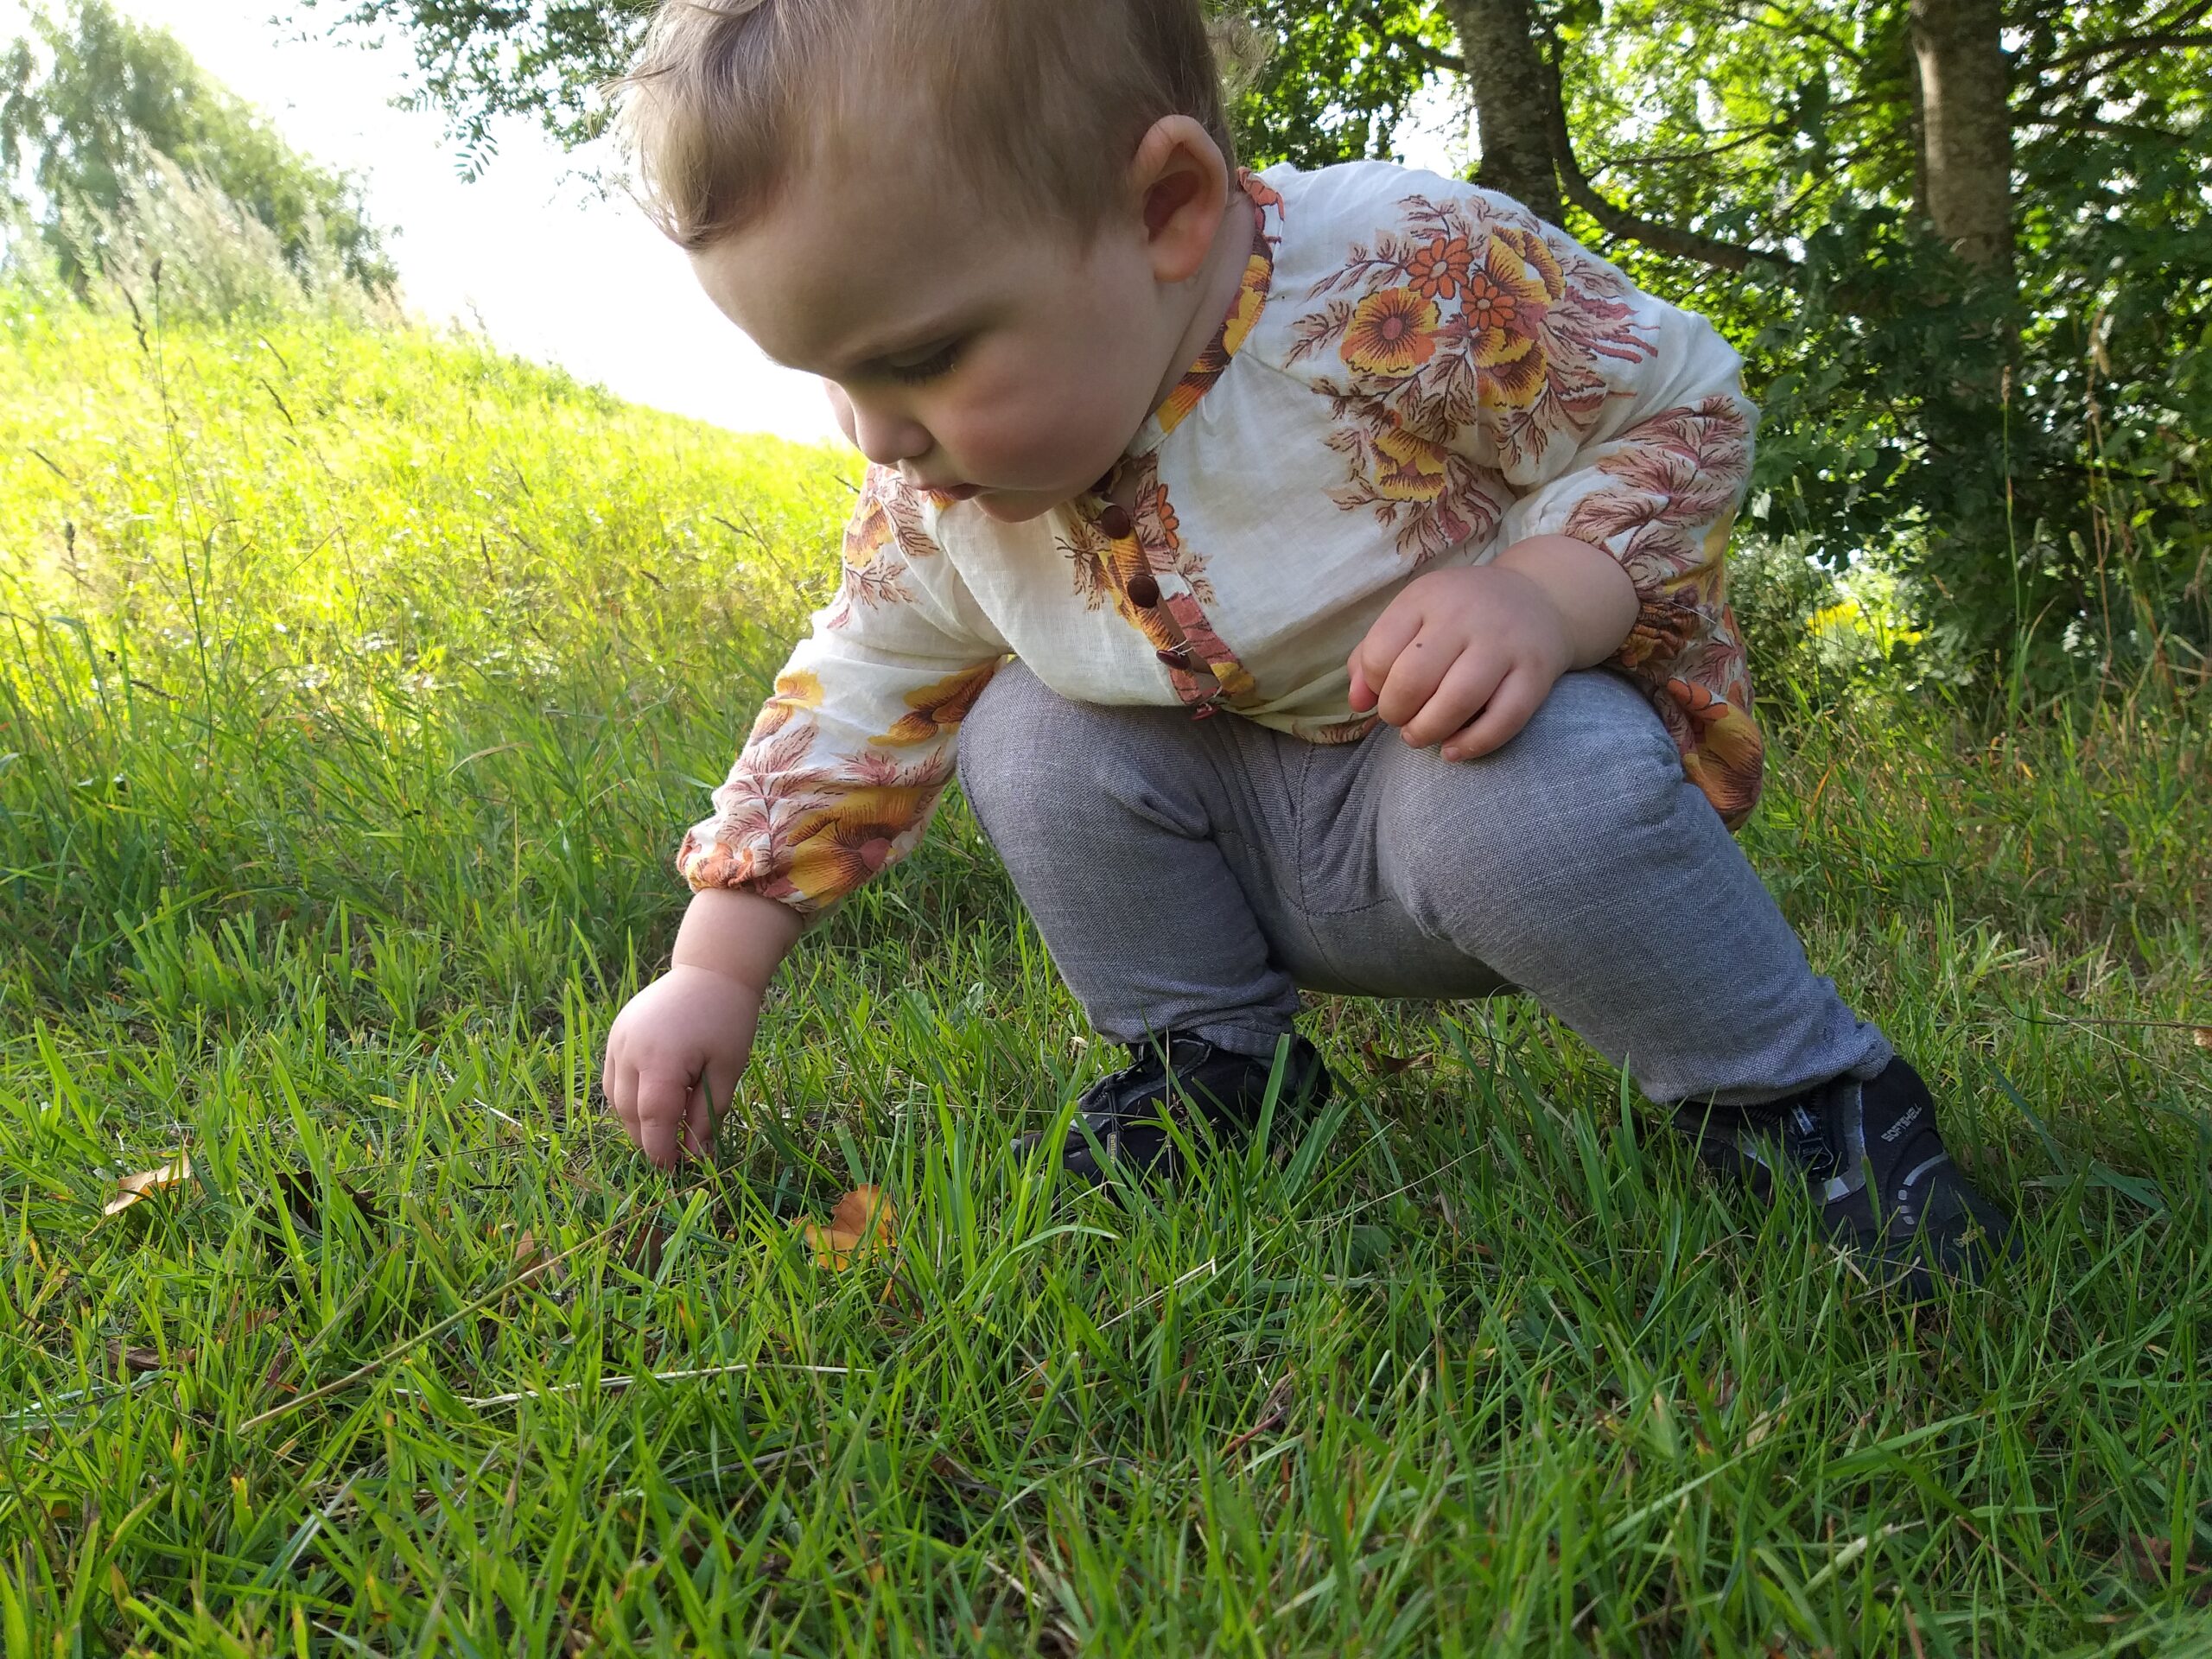
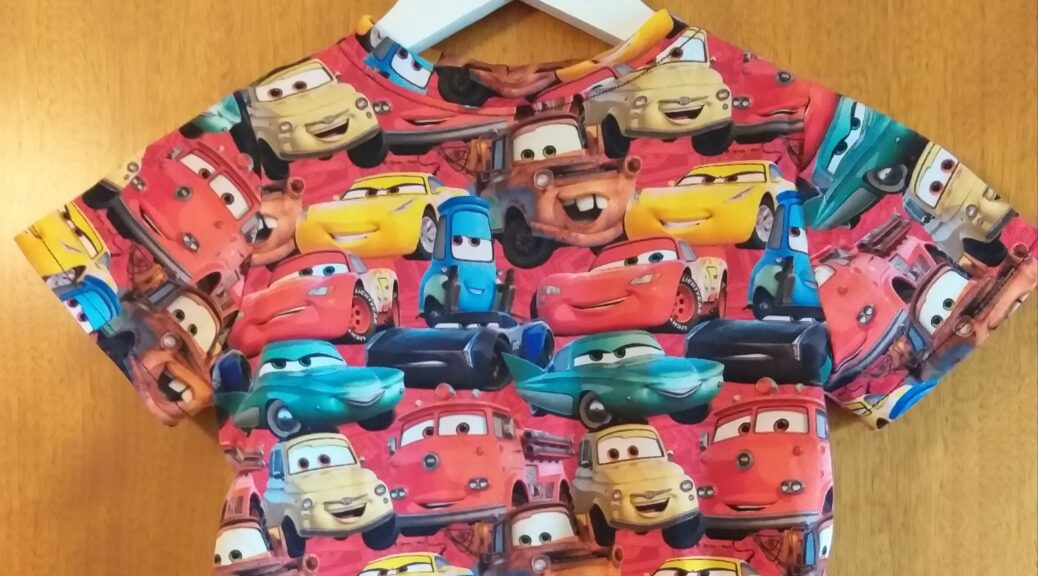
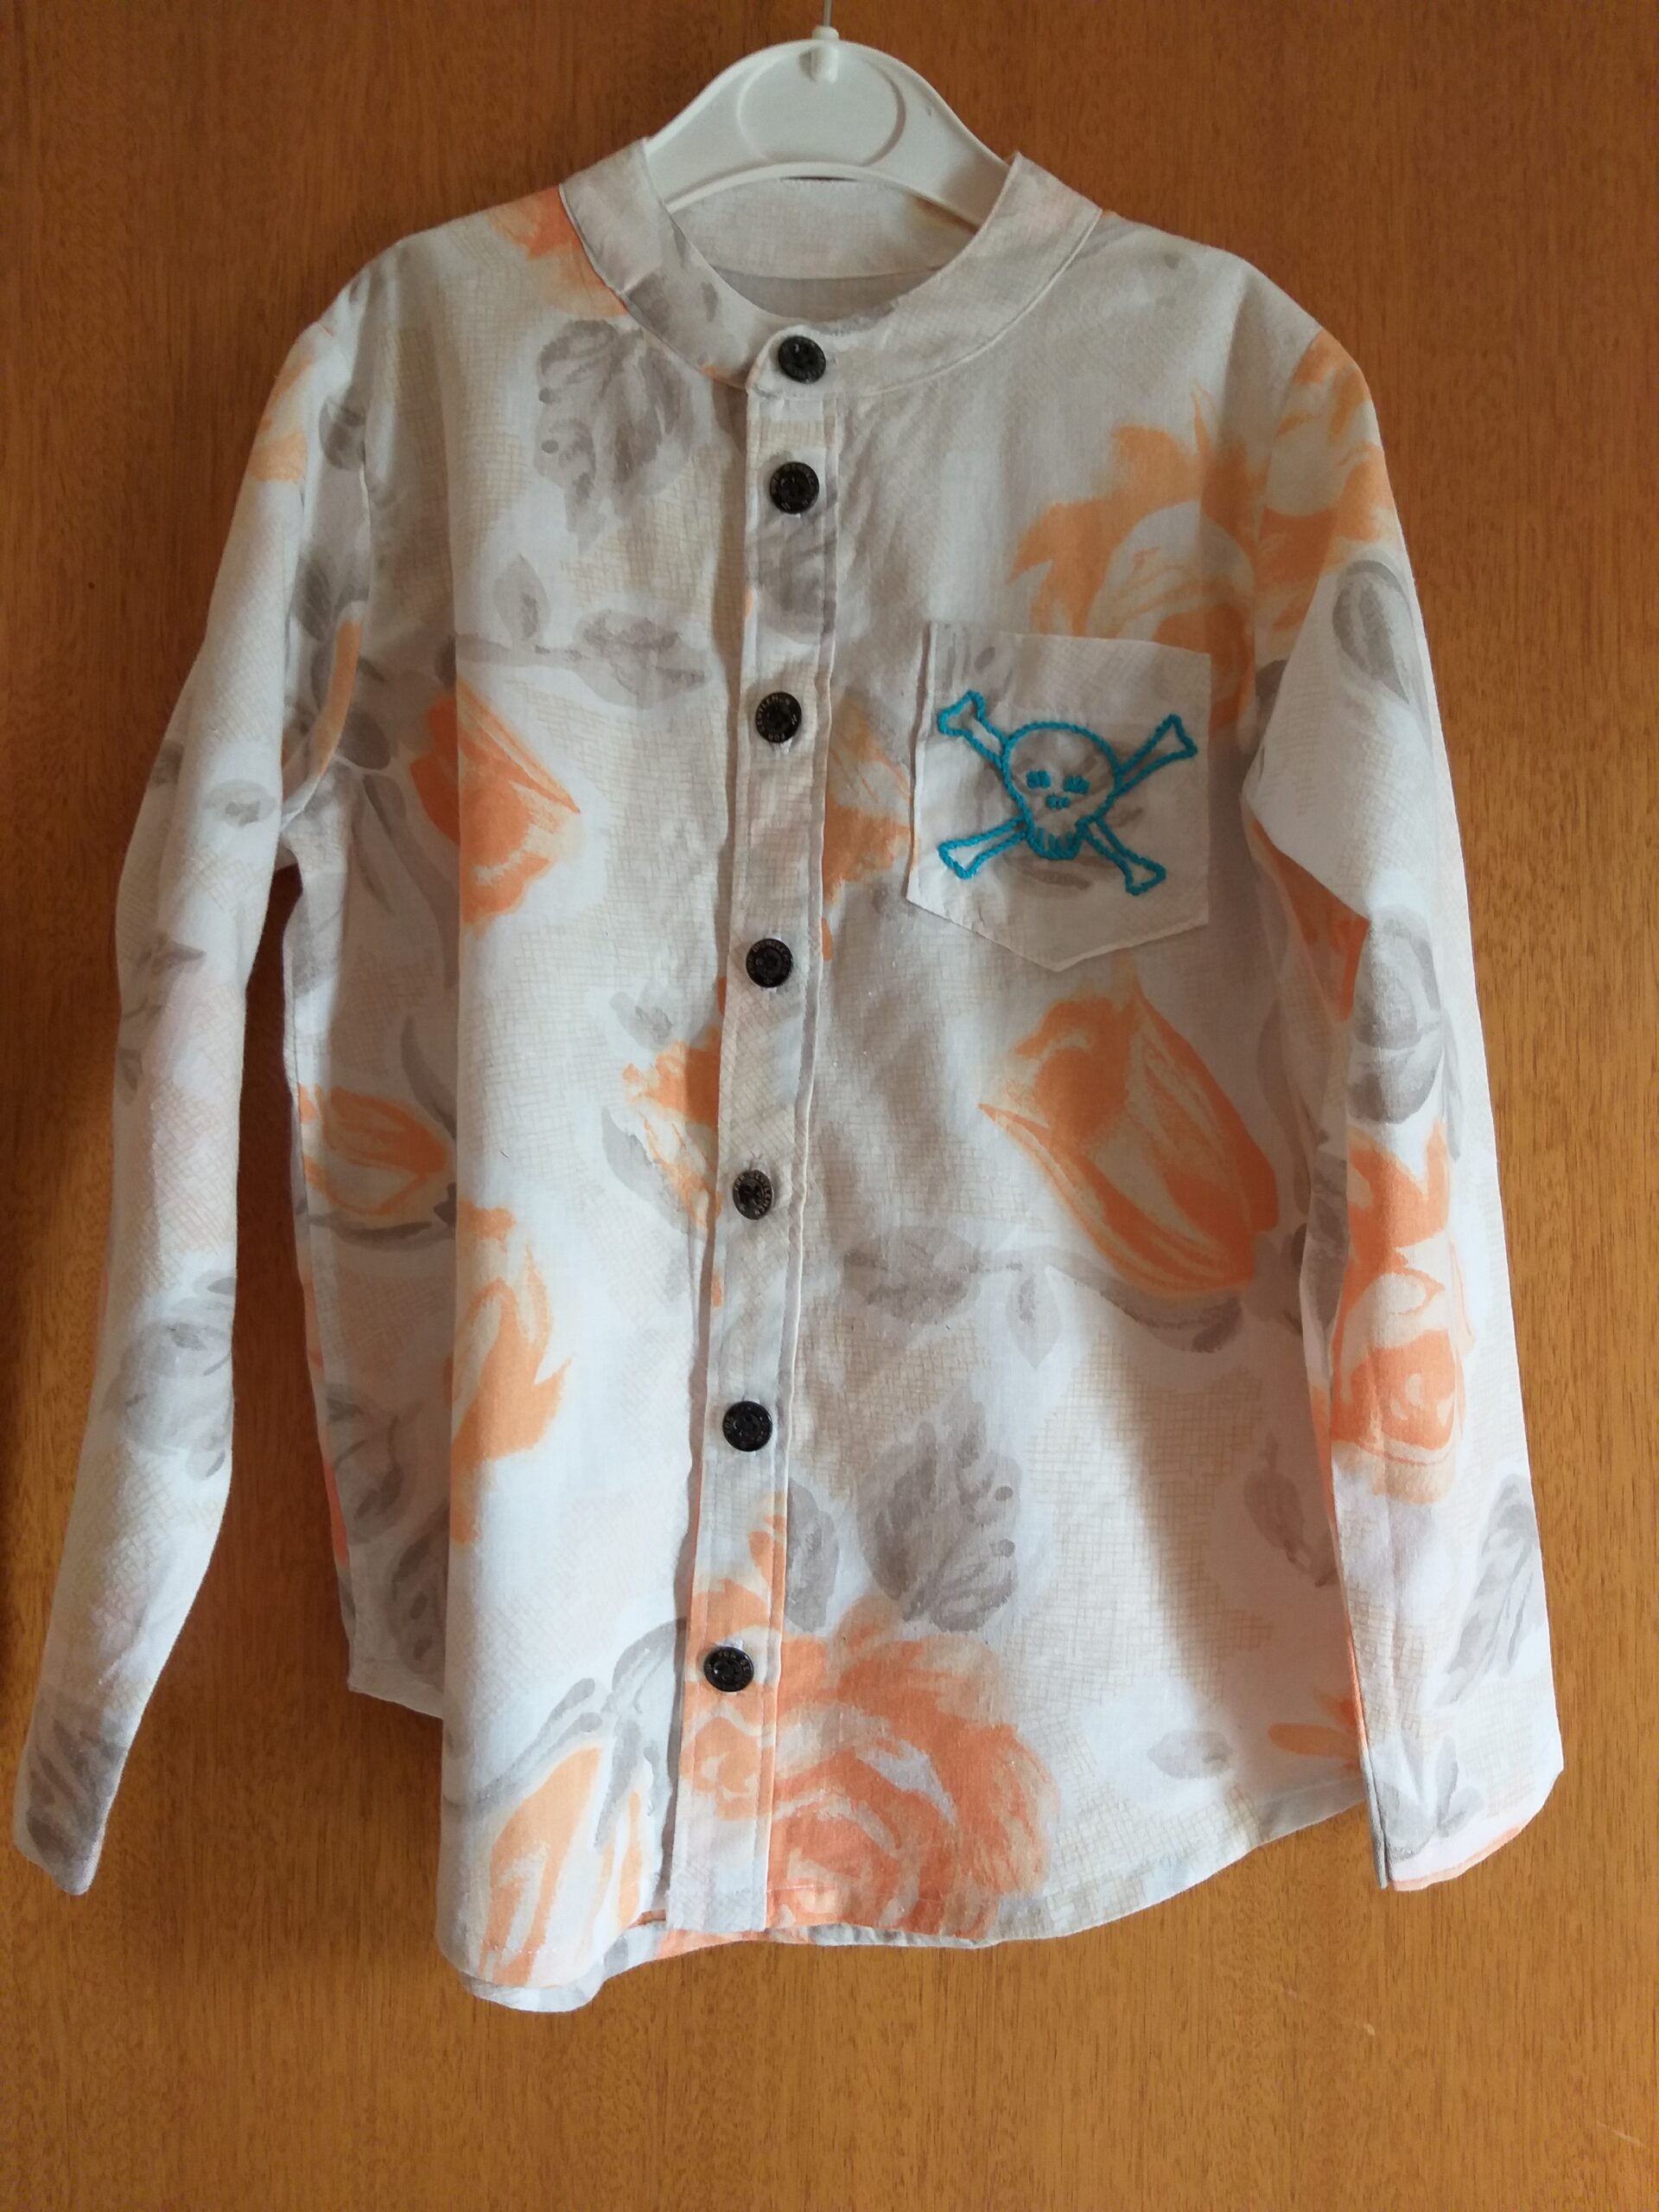
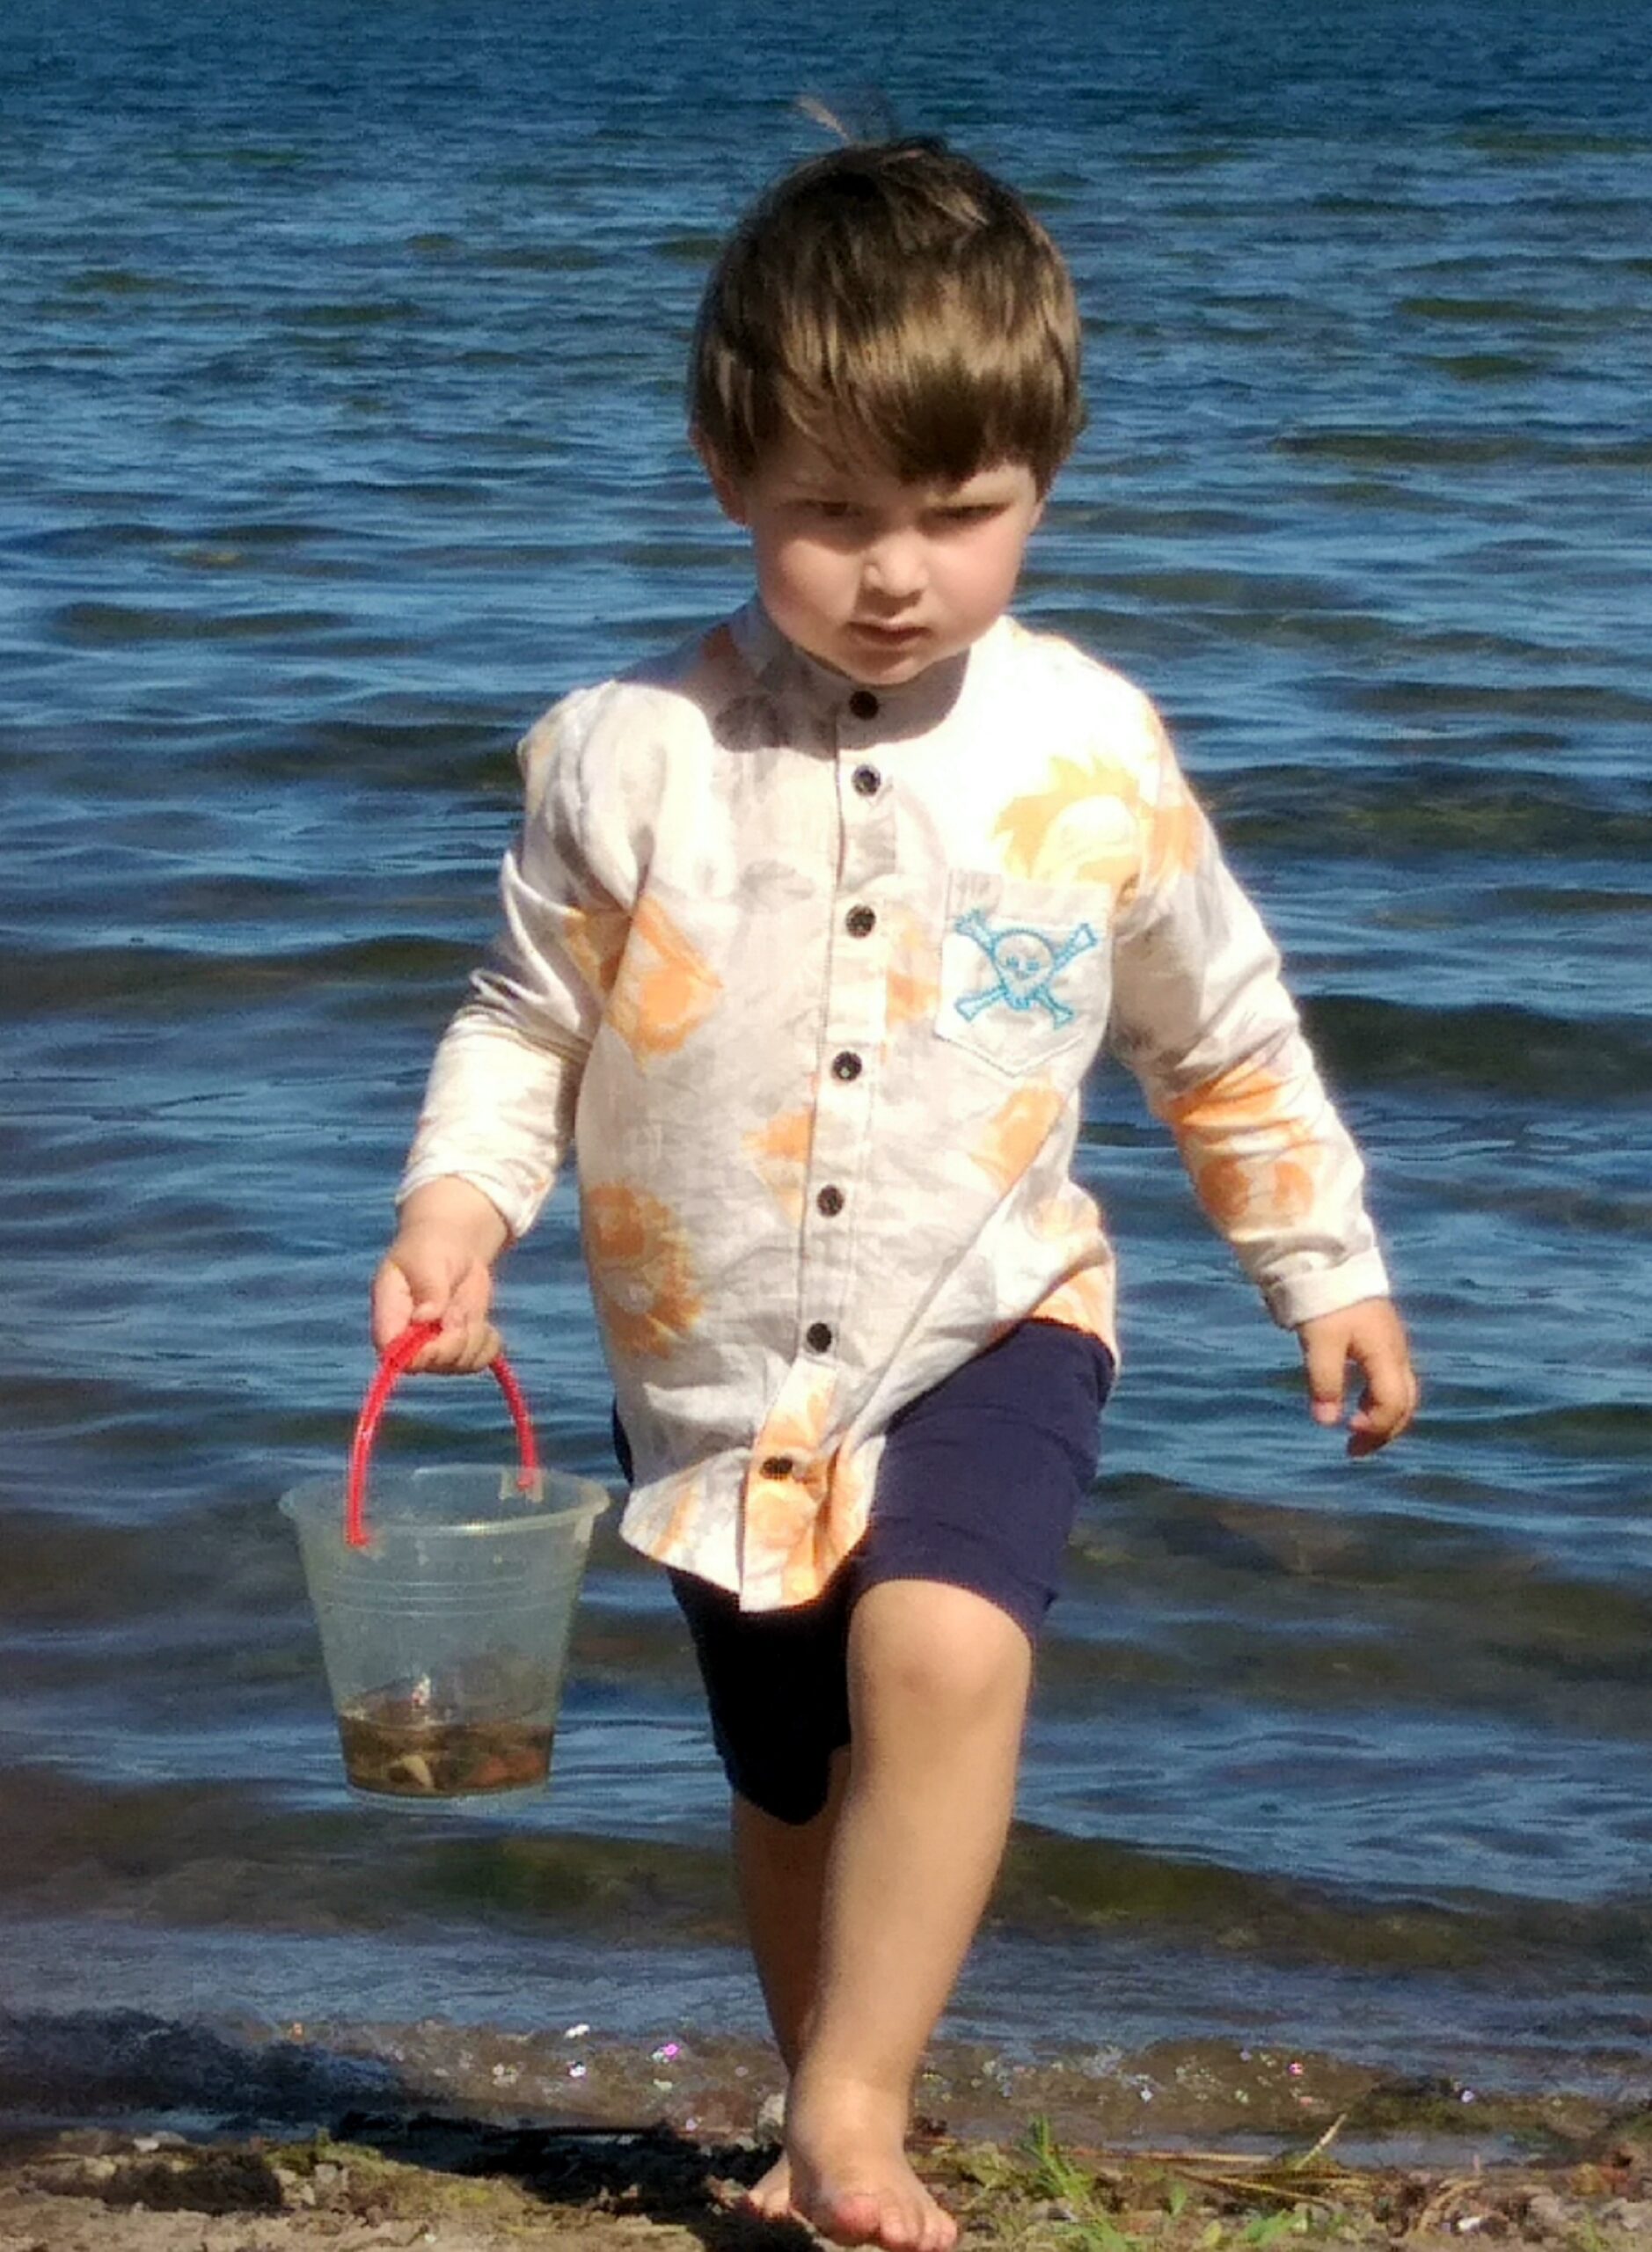
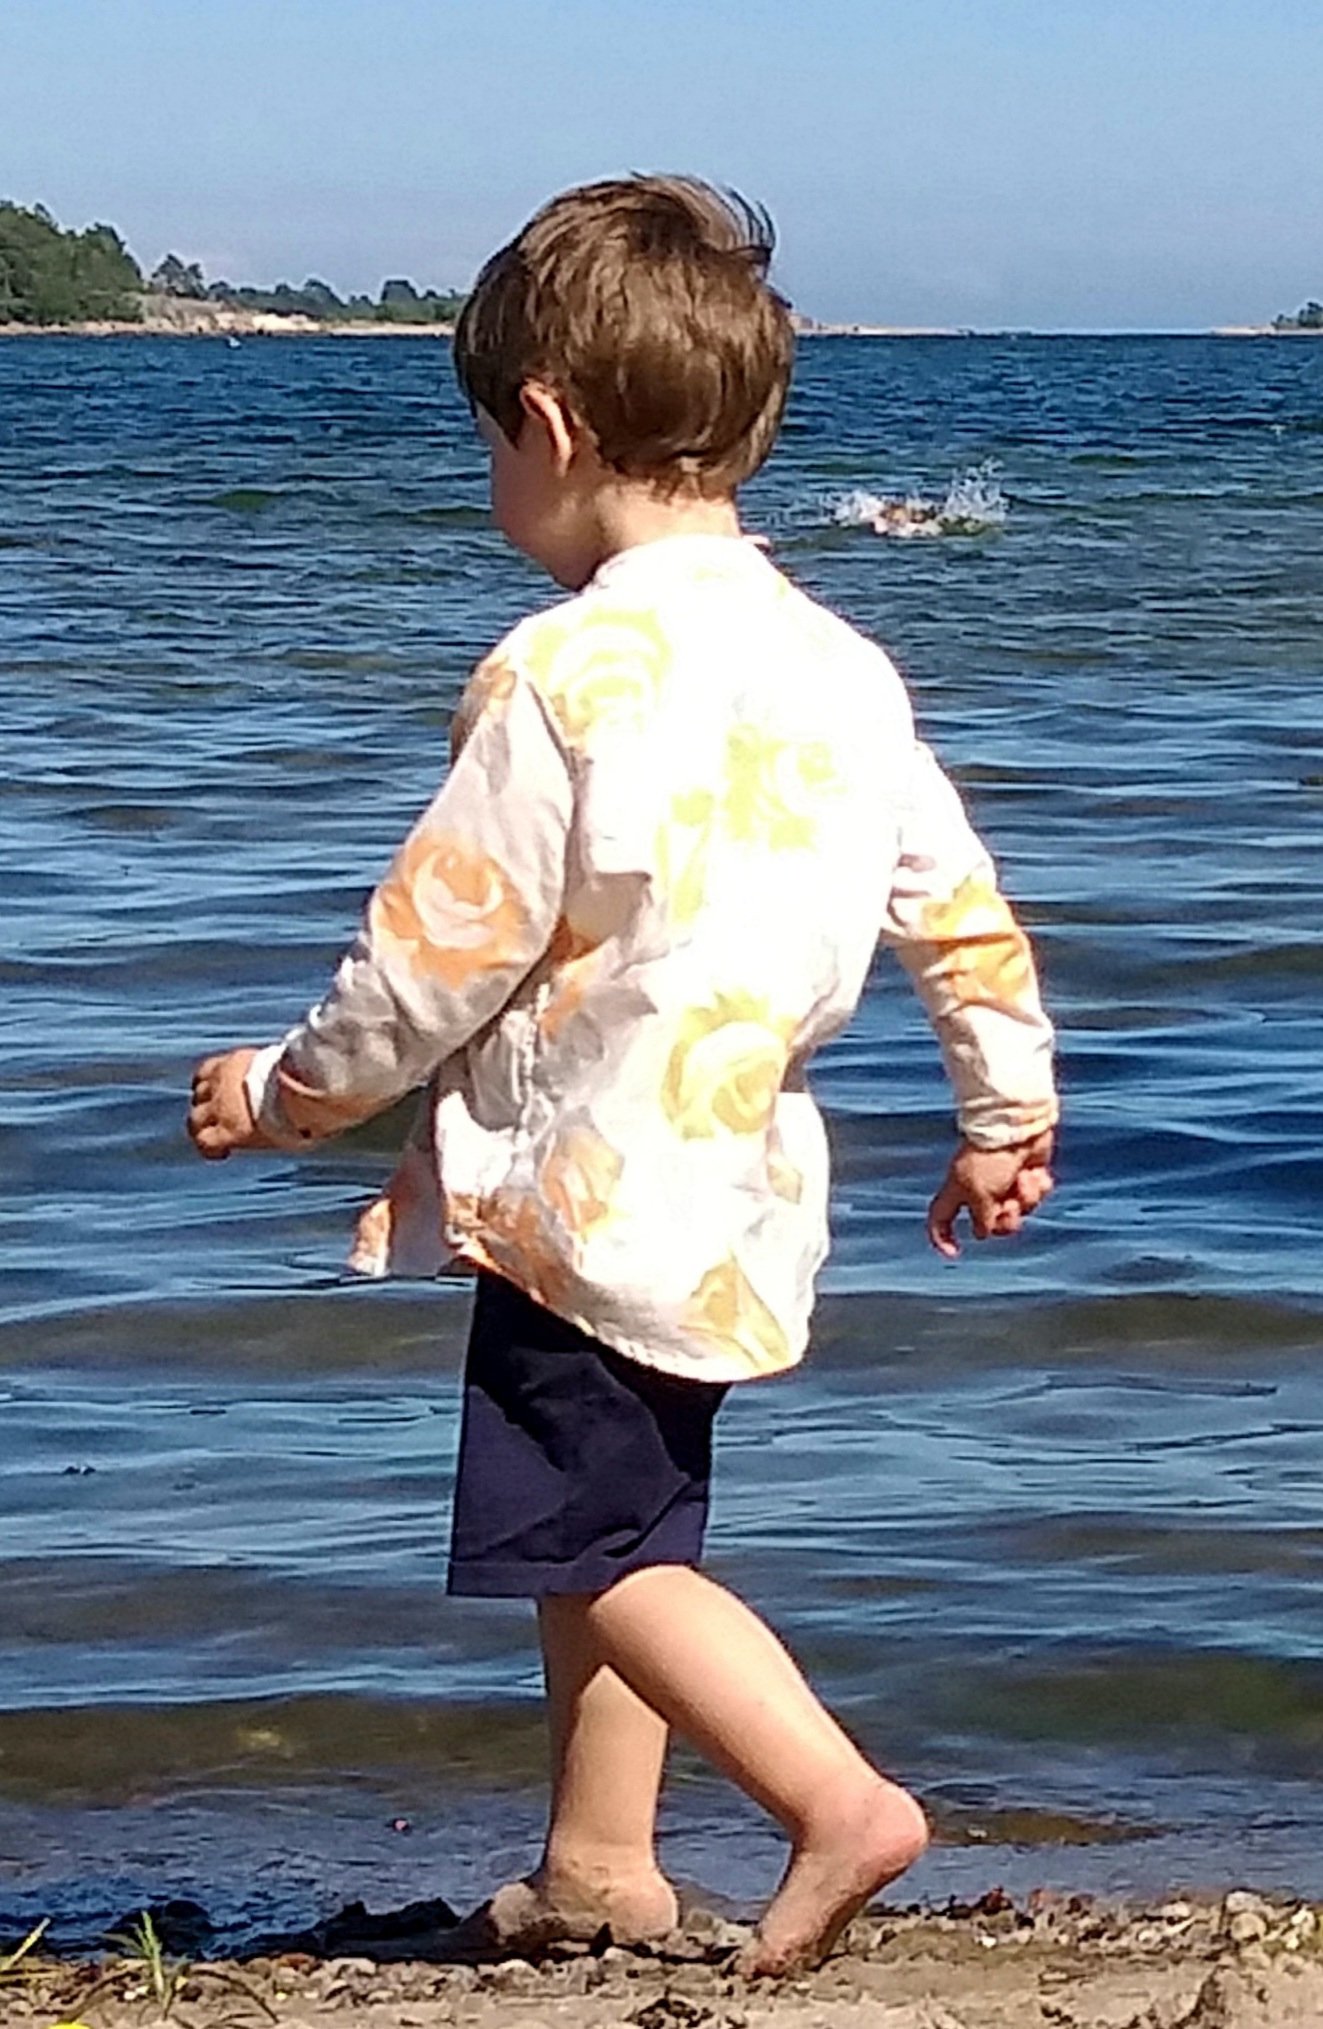
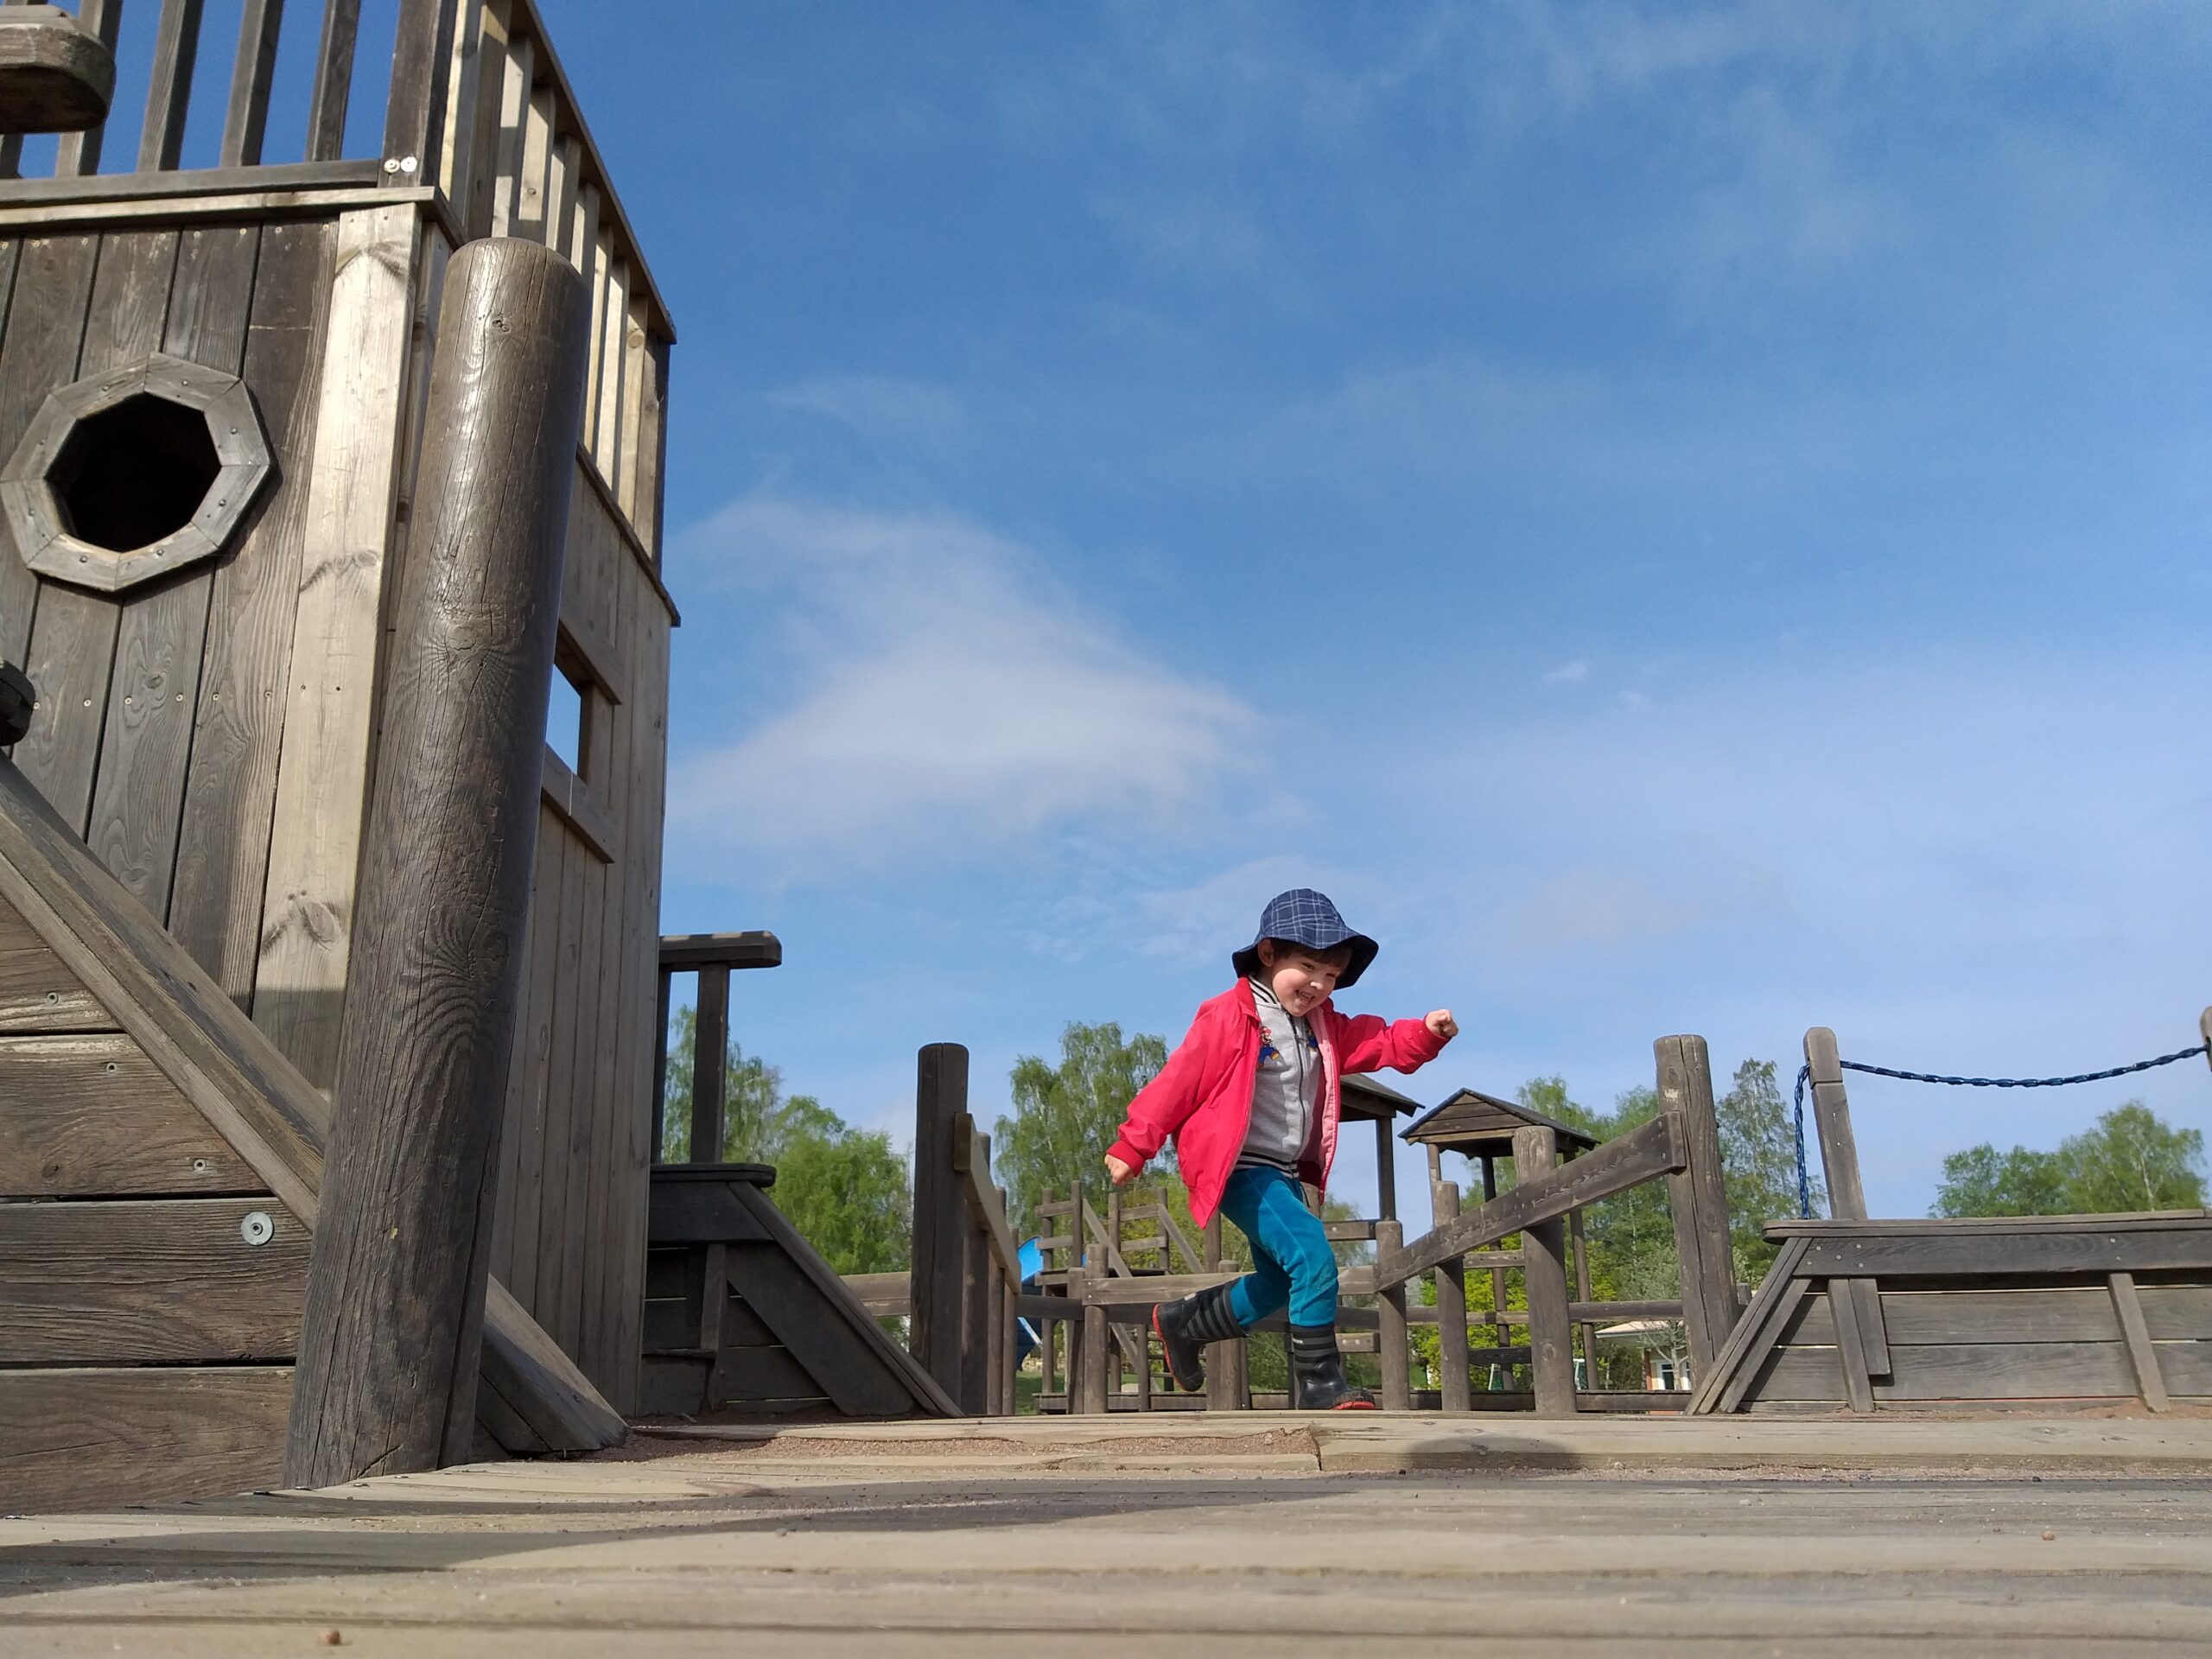
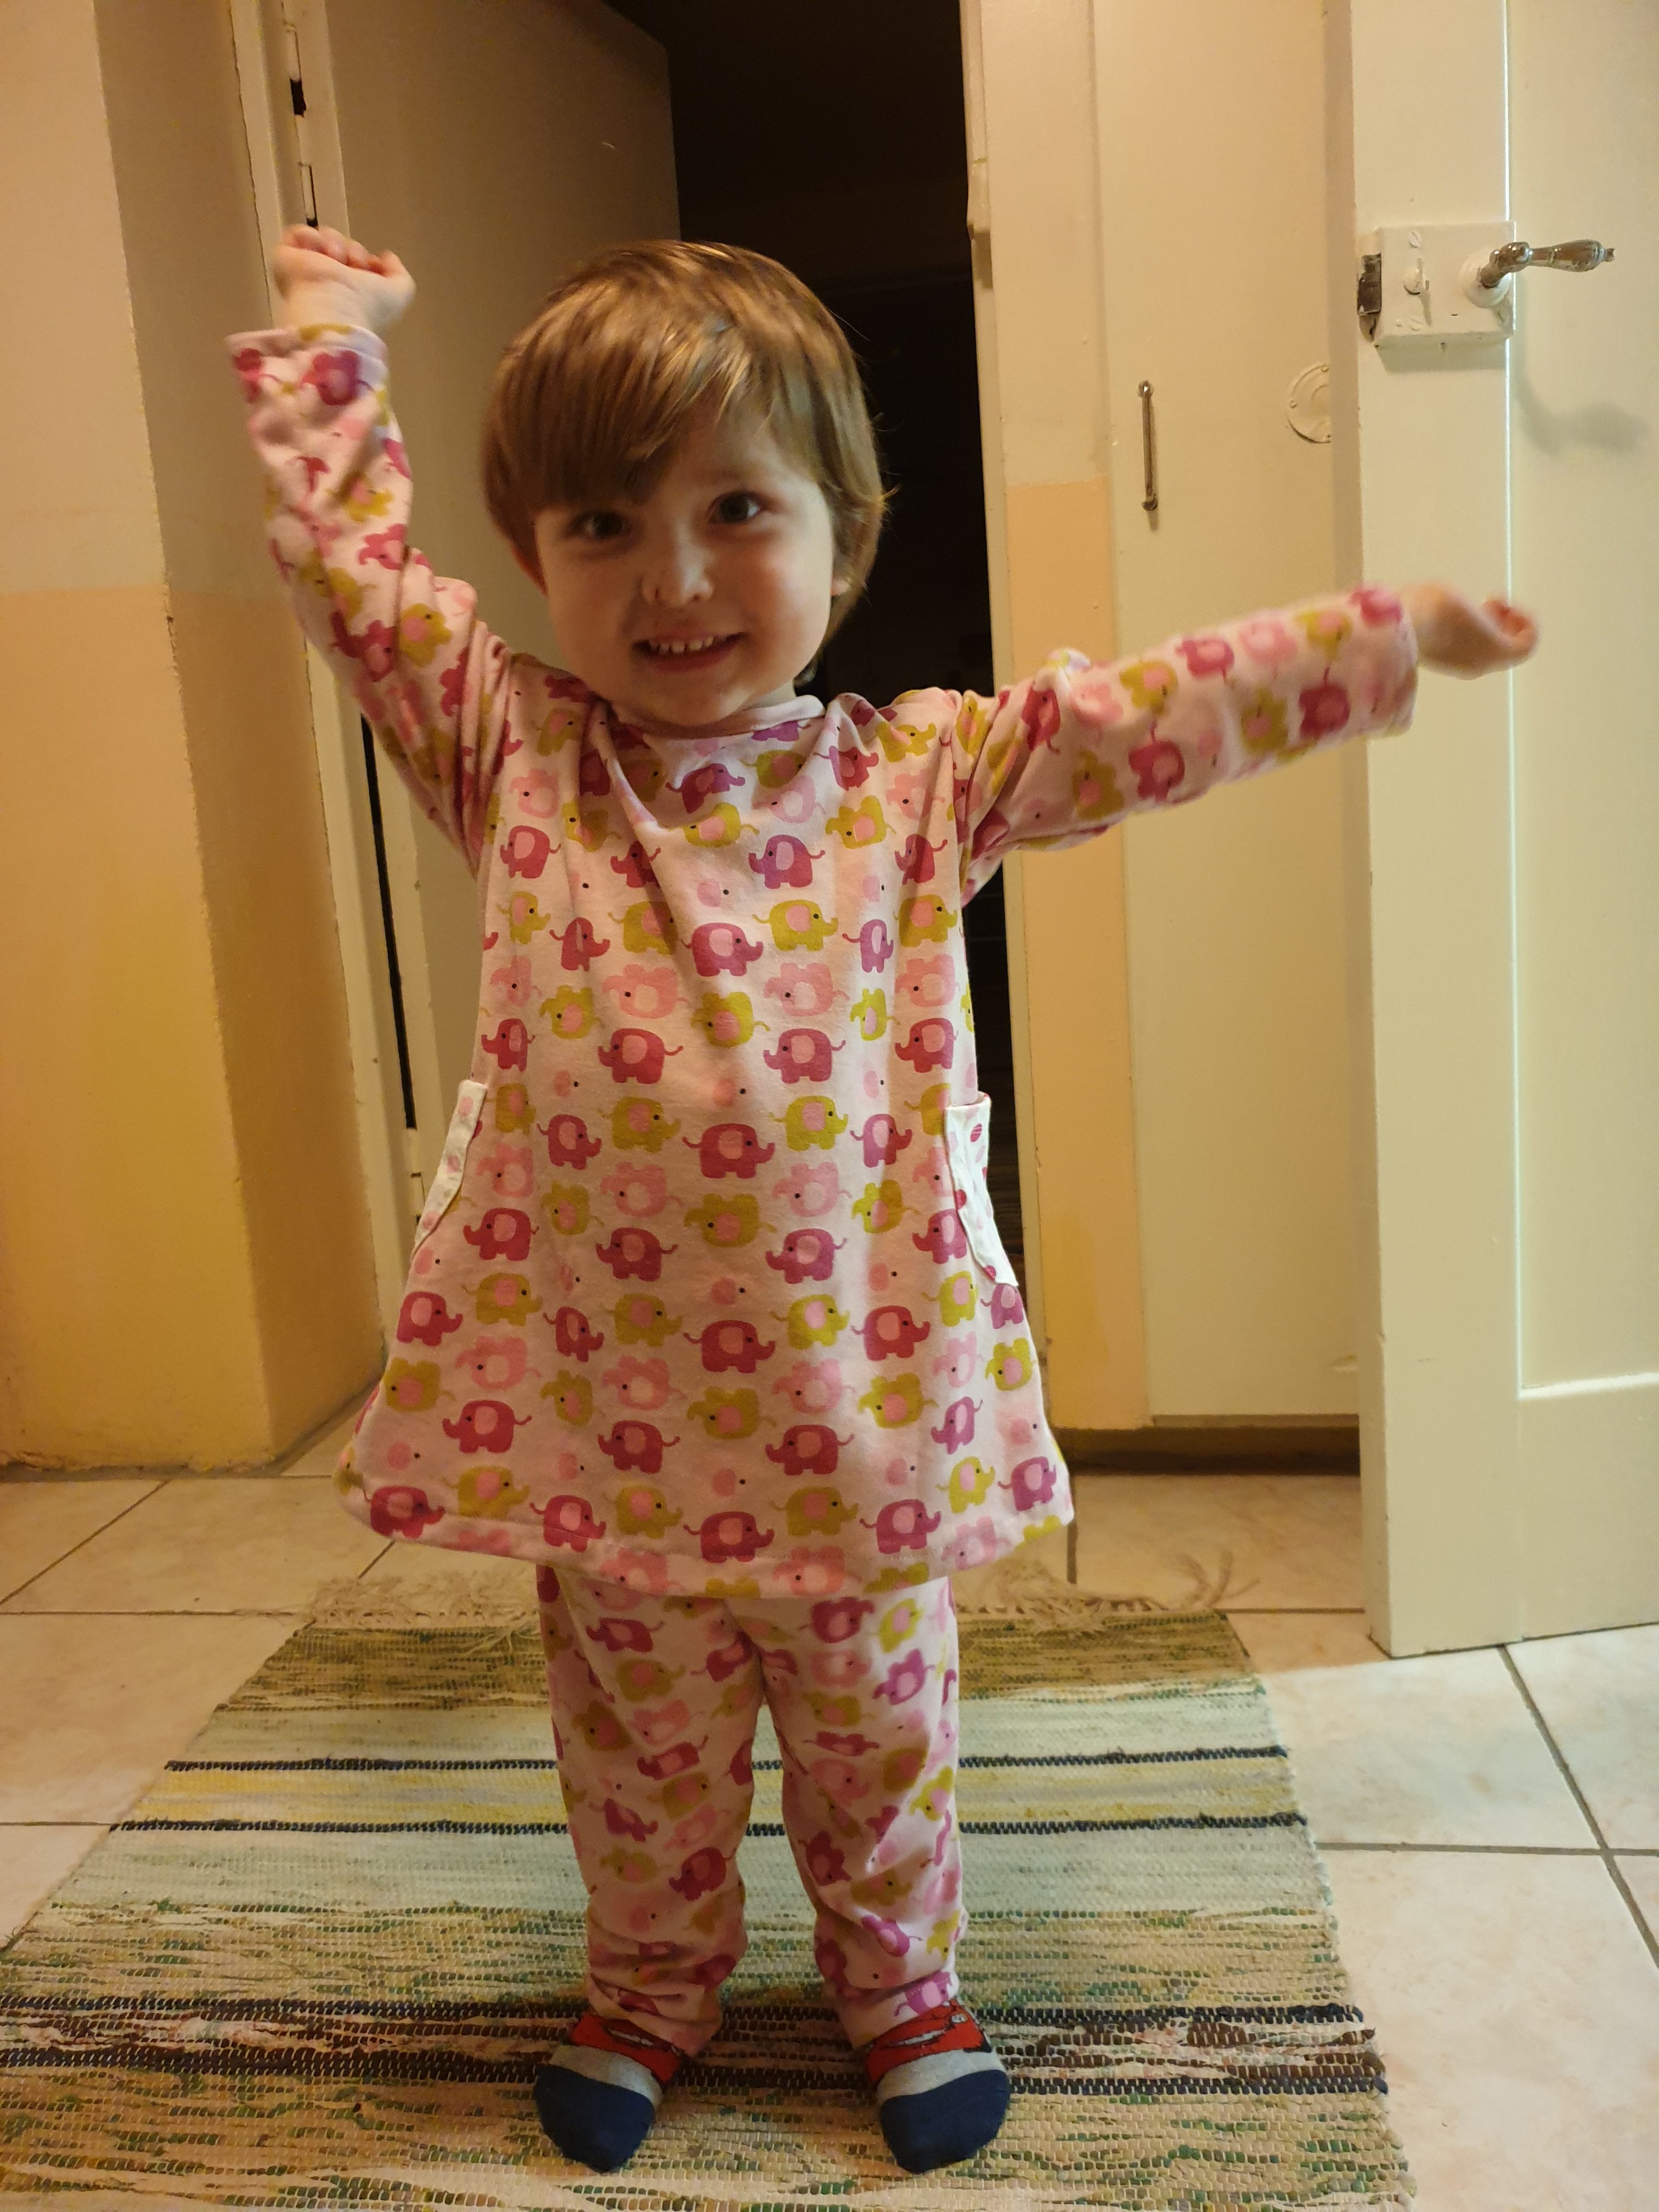
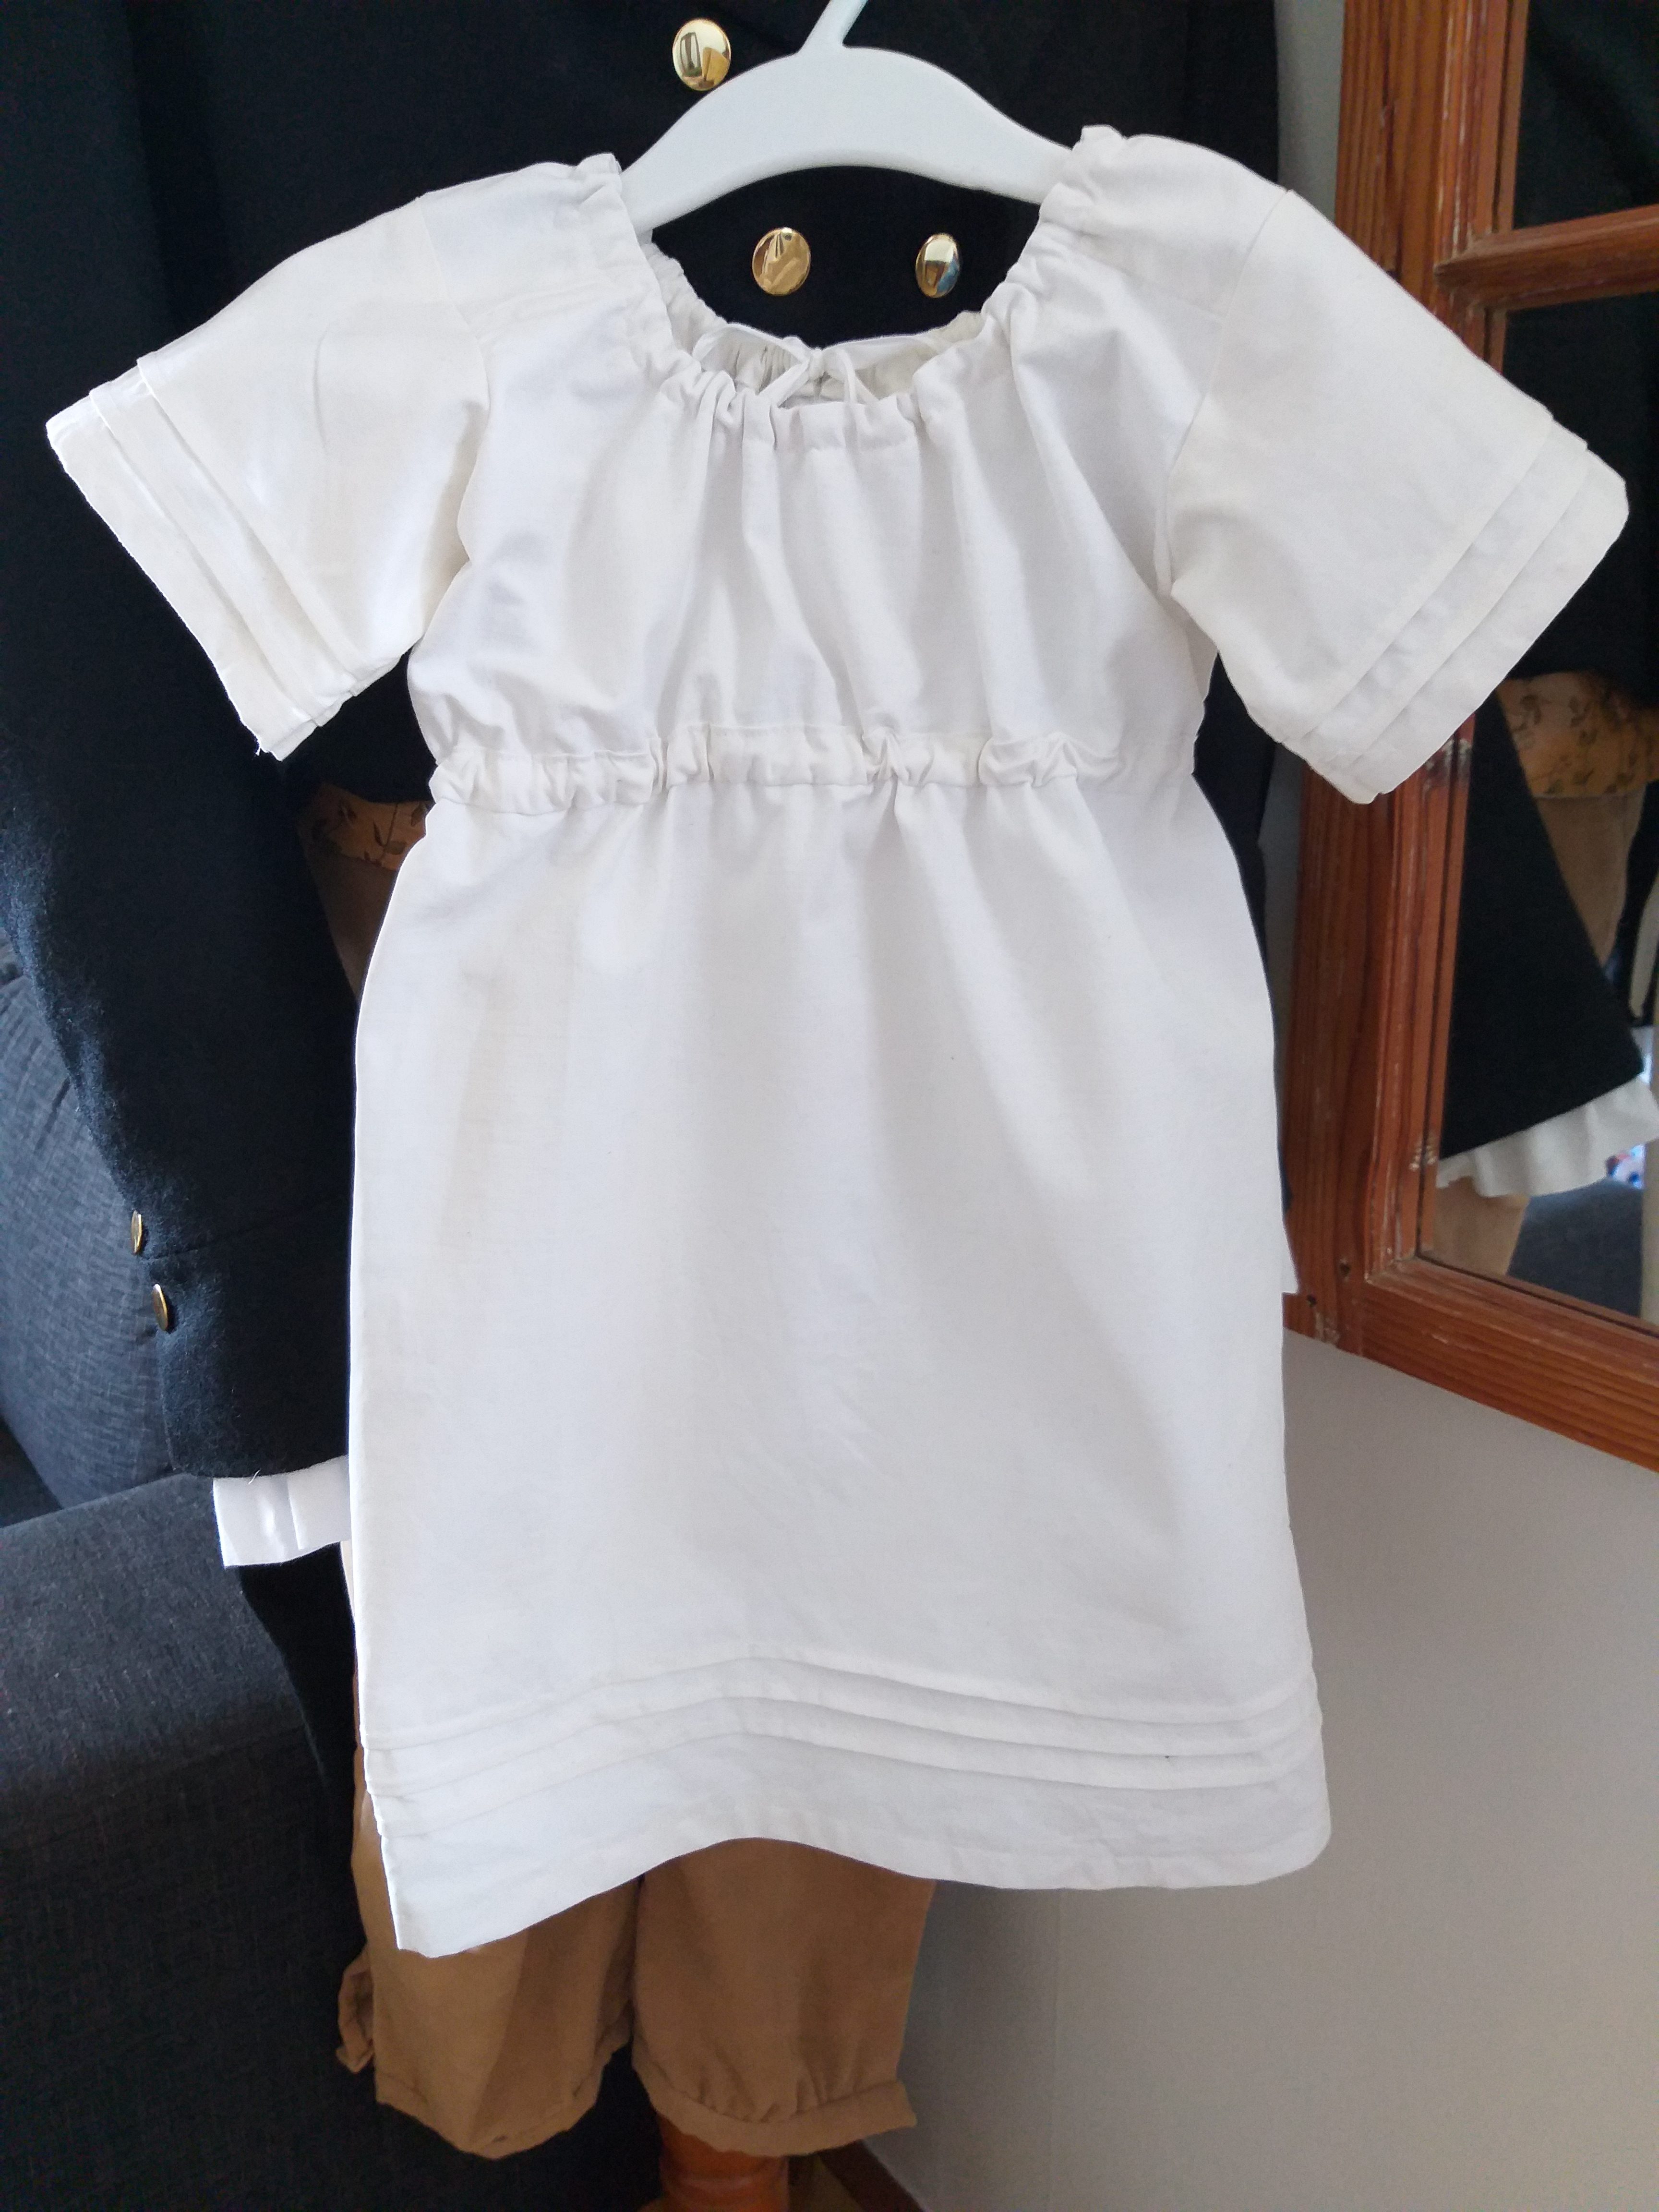
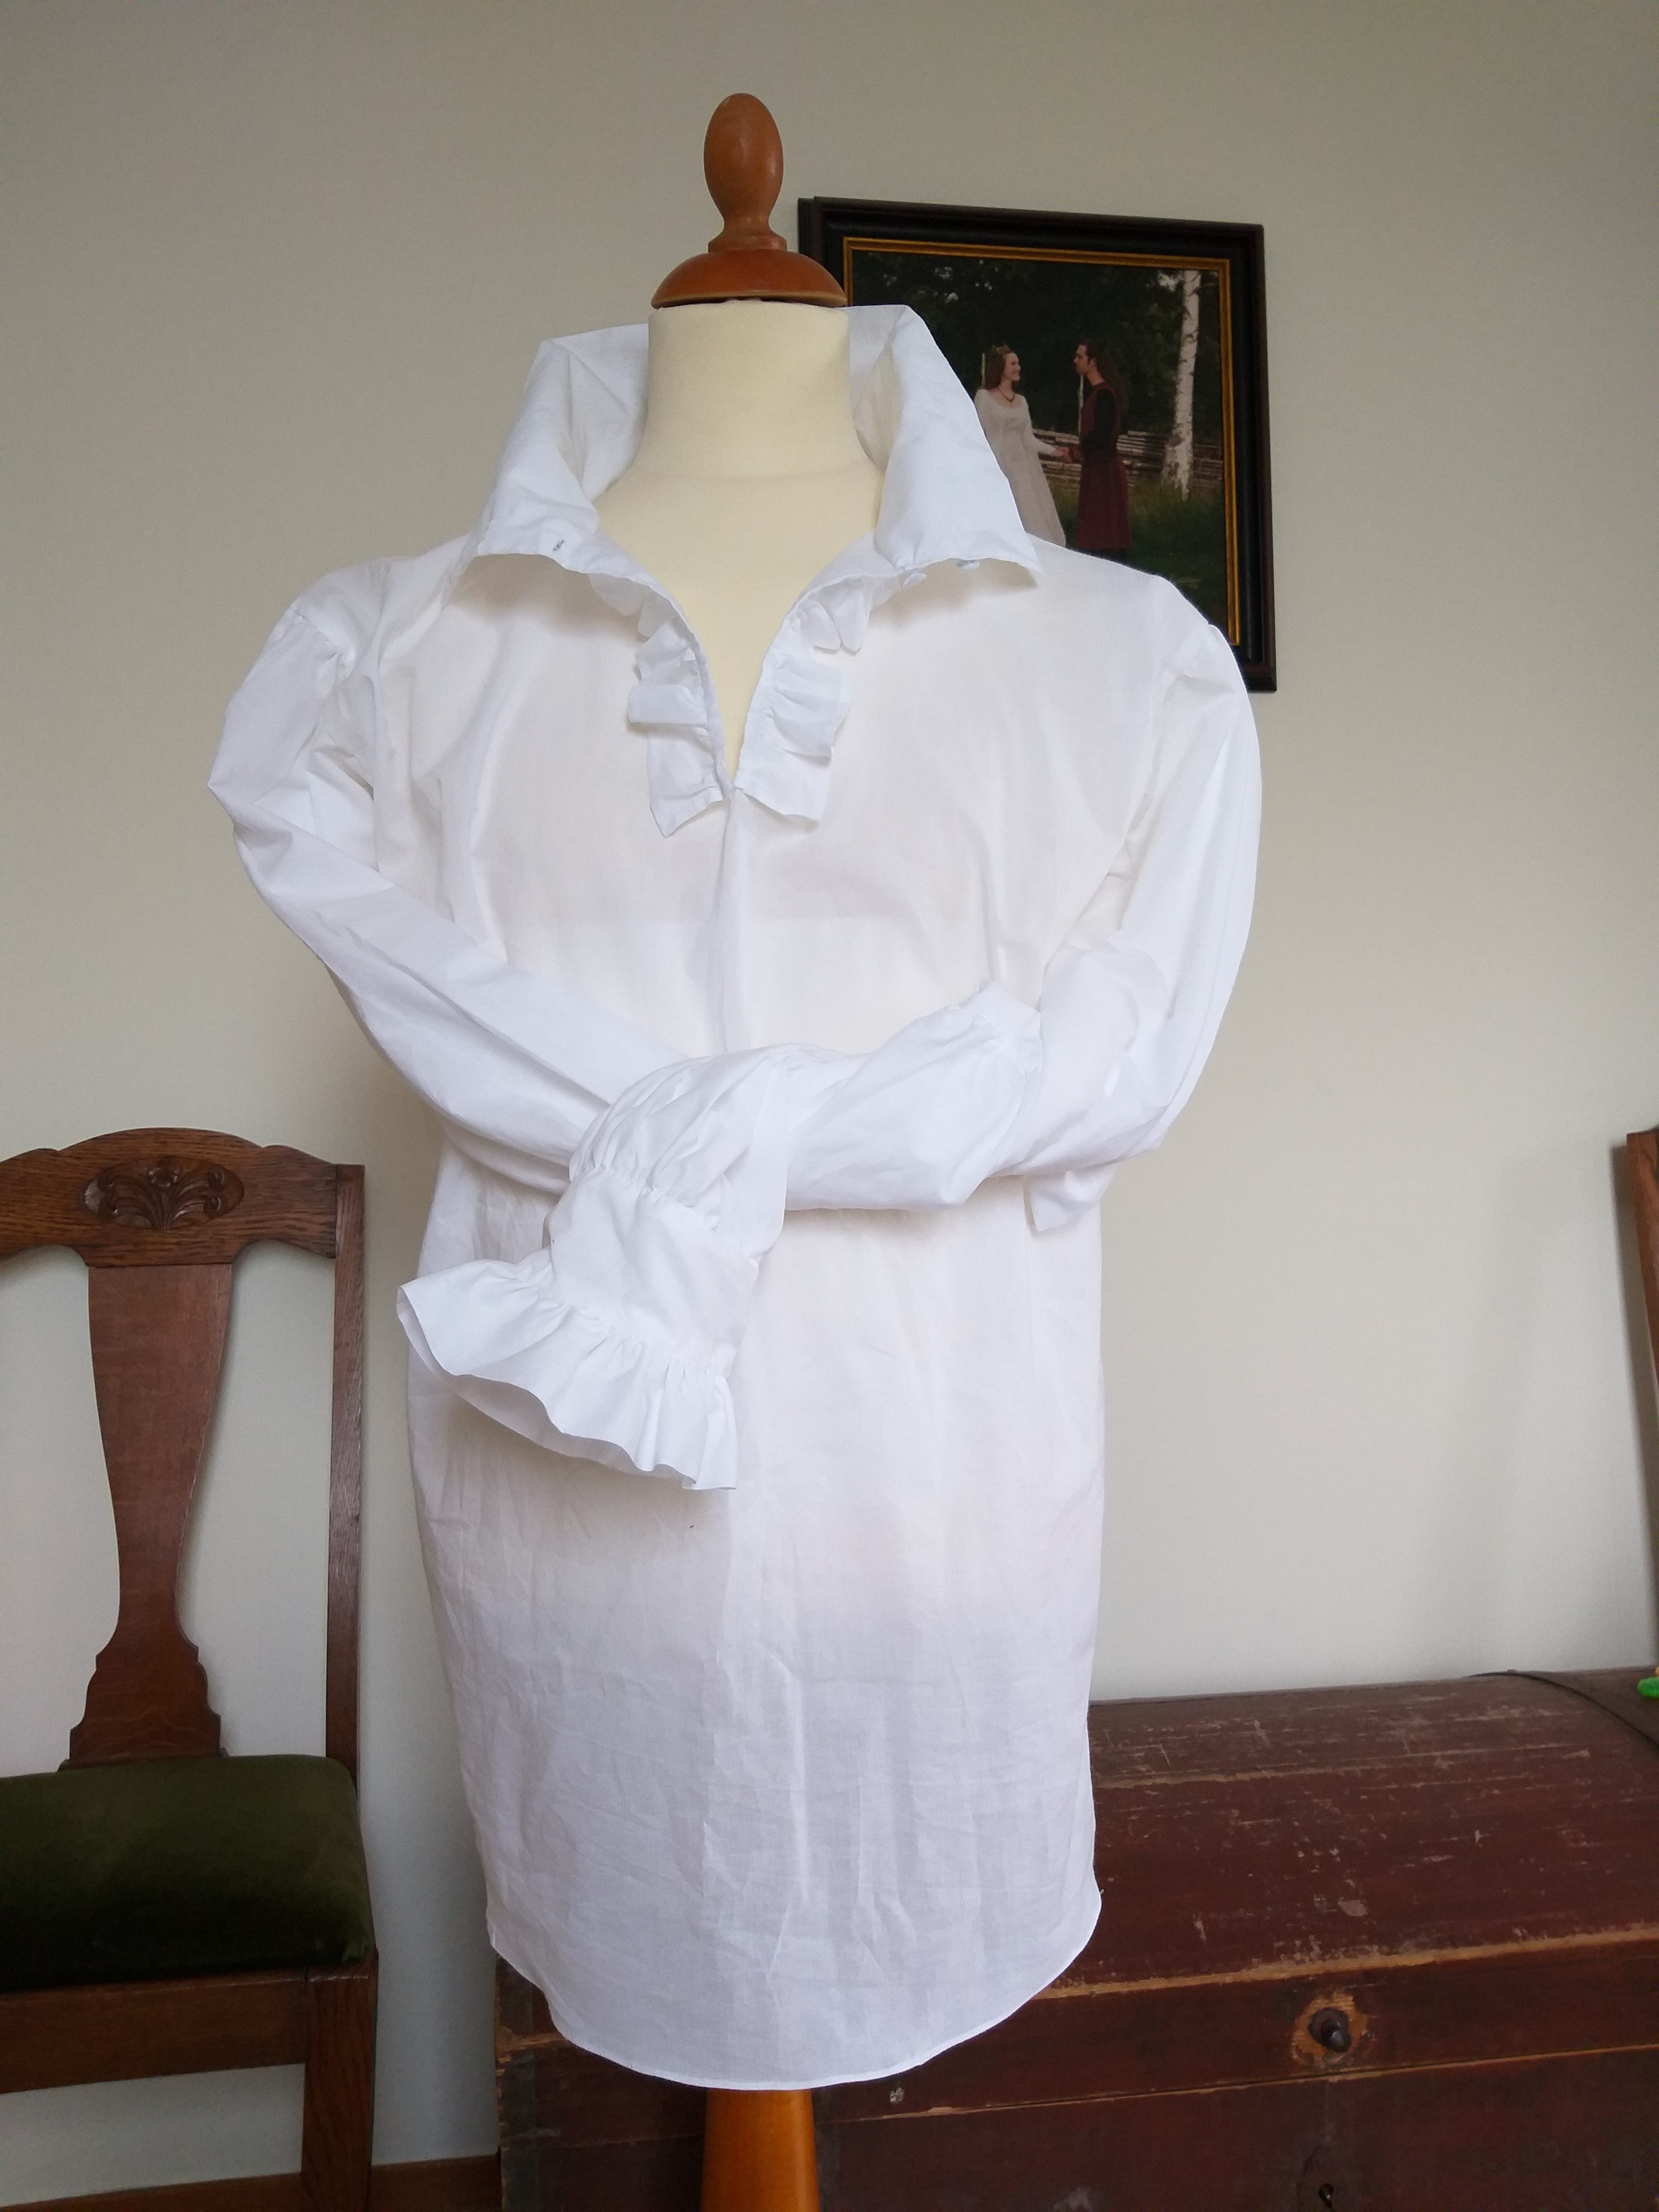
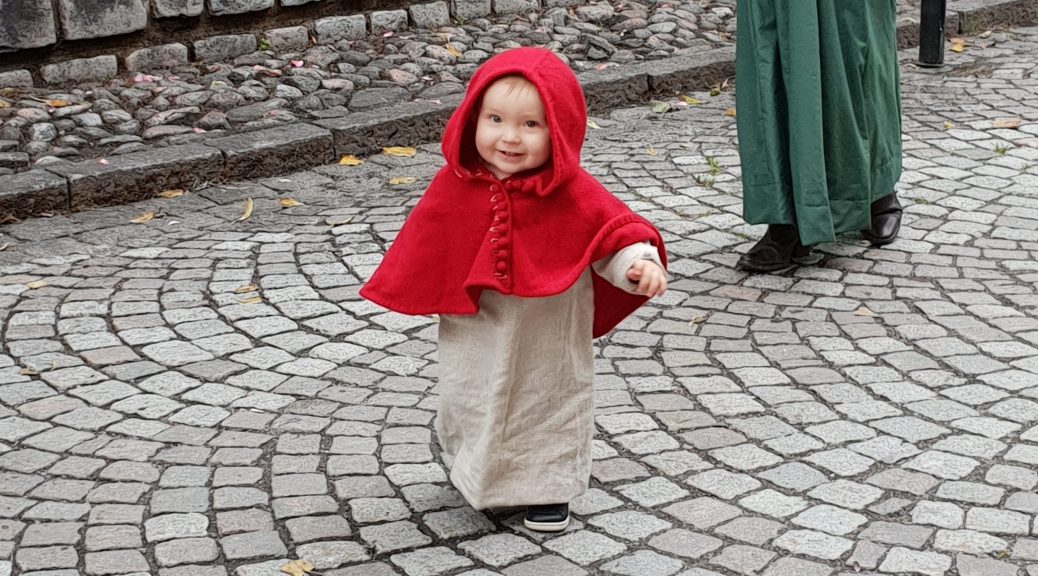
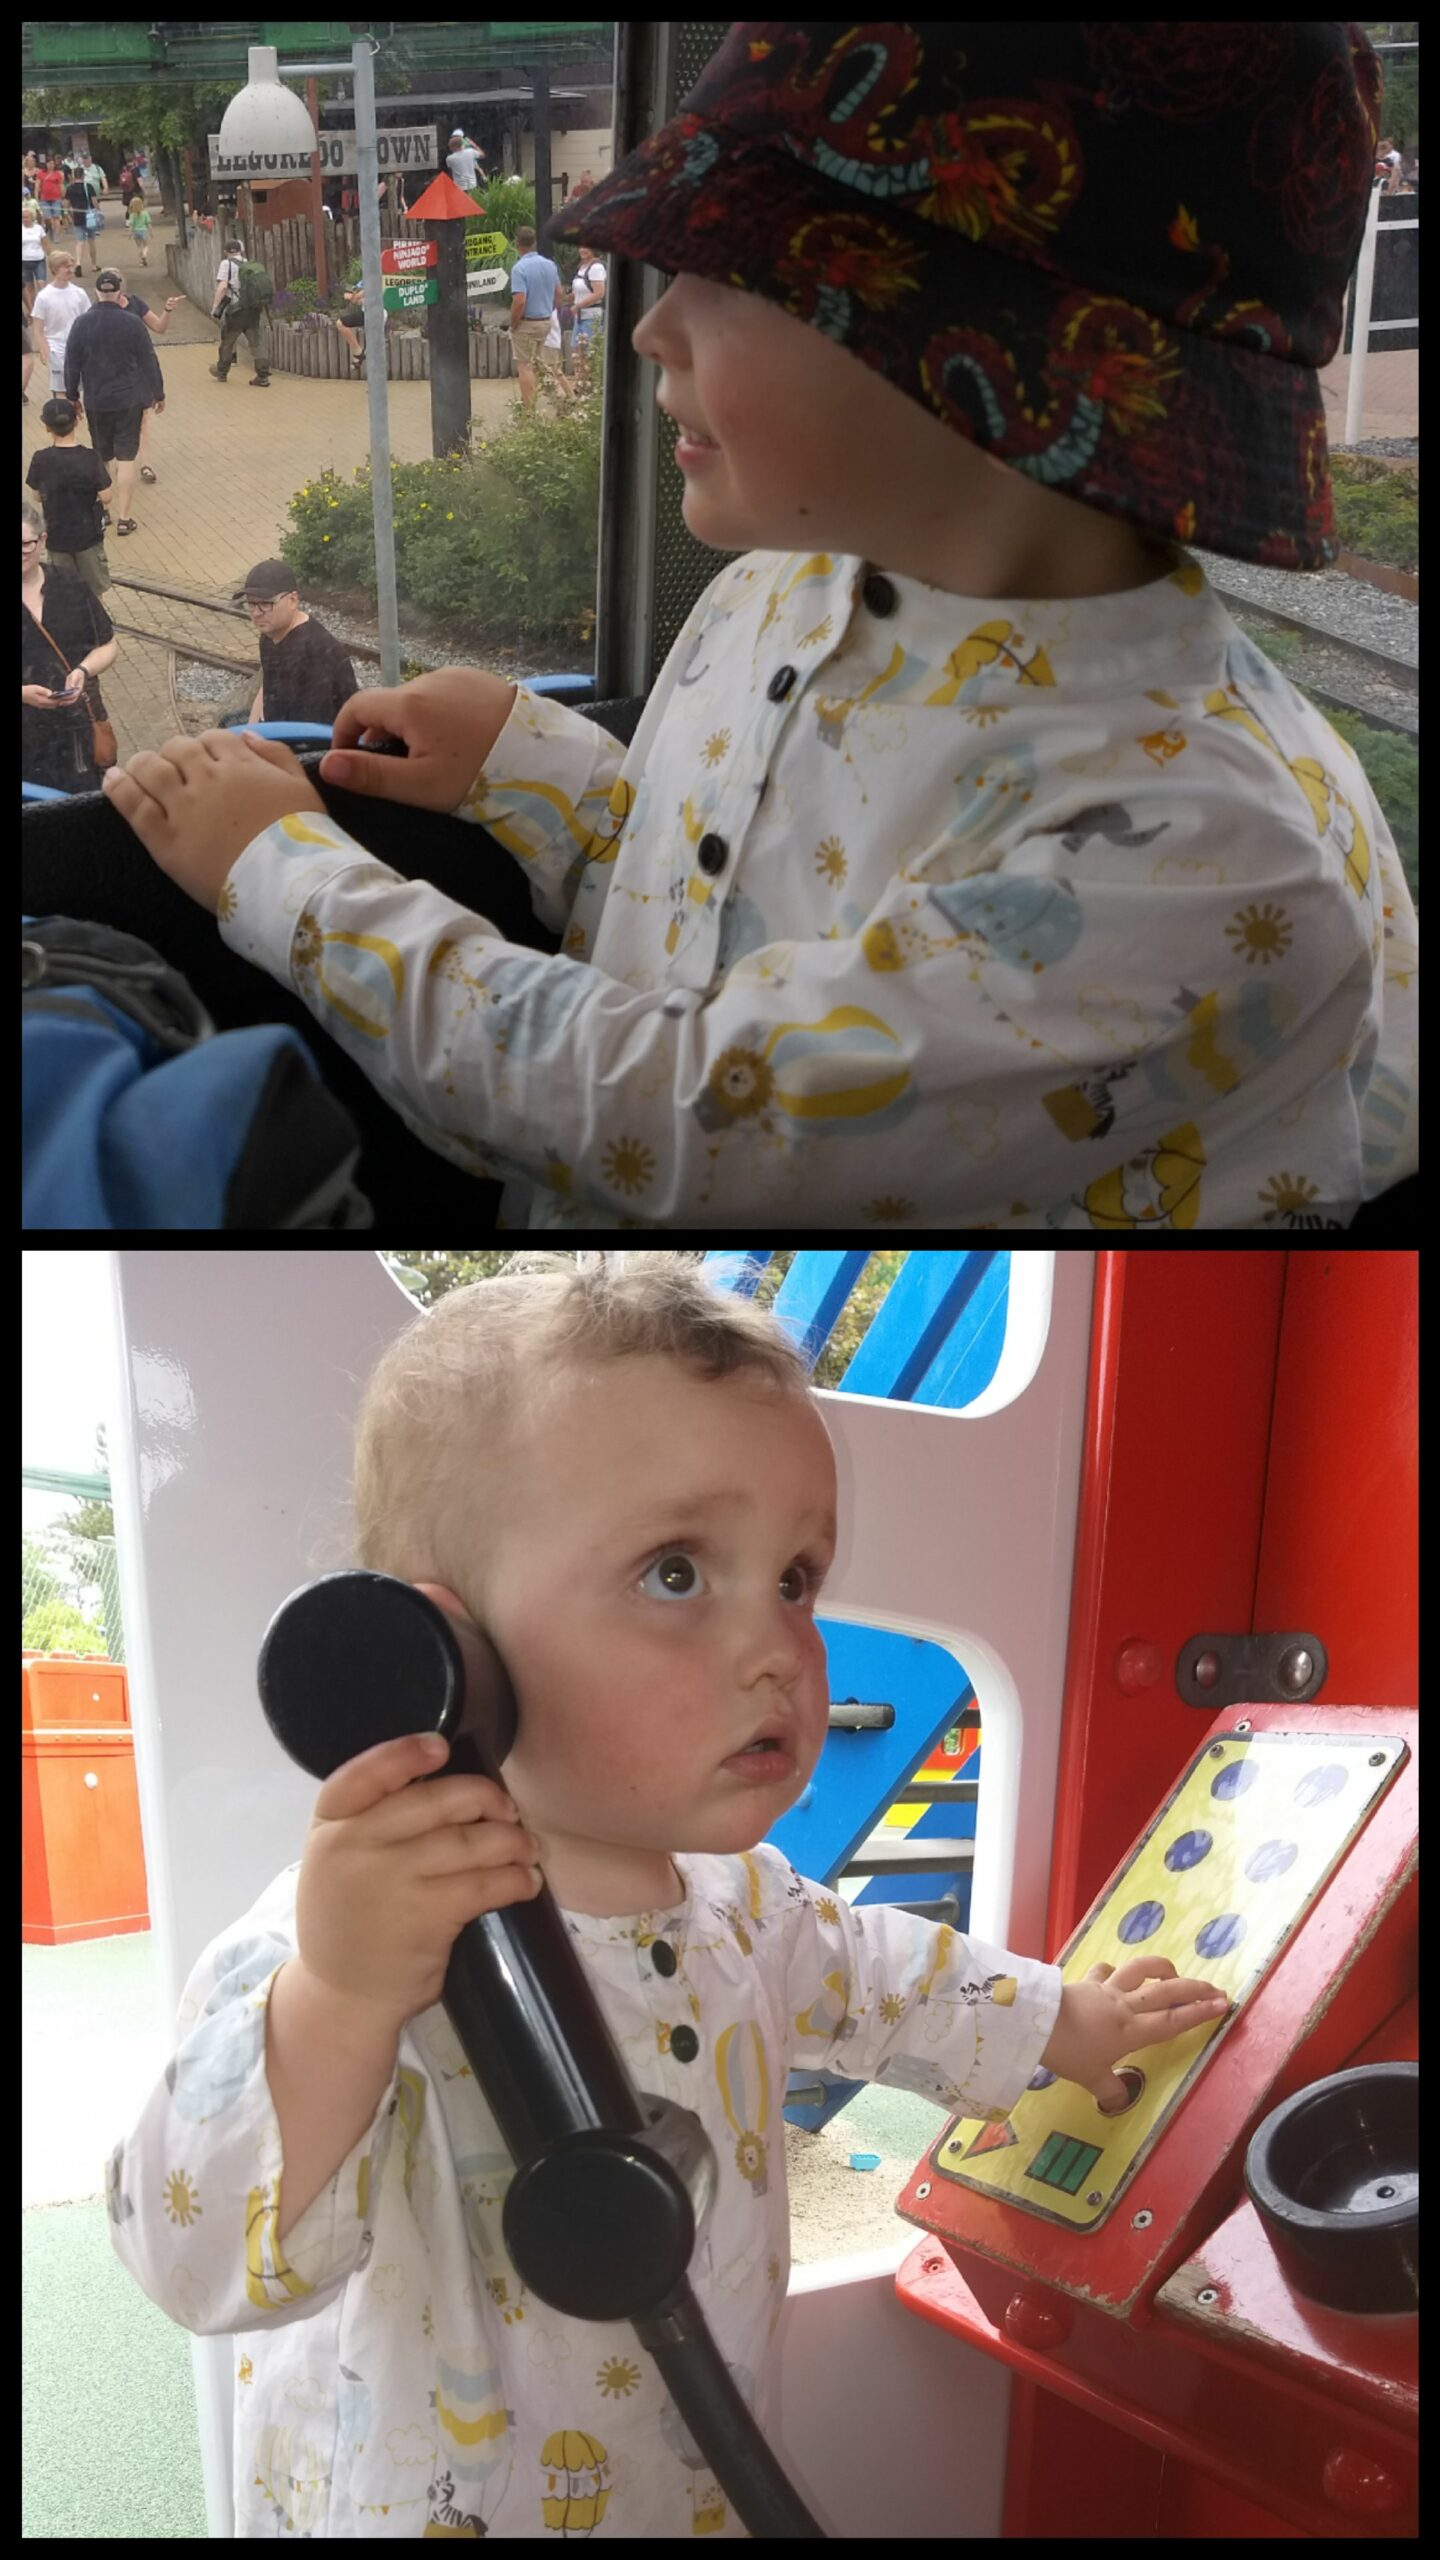
As this spring was hot, I decided to sew a cool shirt for our youngest, as a protection from the sun. I would finally use the pretty fabric that his brother chose when I was pregnant, two years ago. ❤ As I made this shirt, big brother asked if he could have one too, and if course I couldn’t resist.

Eftersom det var riktigt varmt redan under våren så ville jag sy en sval skjorta åt minstingen, att använda som solskydd. Jag använde tyget som storebror valde medan lillebror låg i magen för två år sedan. ❤ När storebror såg skjortan bad han om att få en likadan och jag kunde naturligtvis inte neka honom detta.

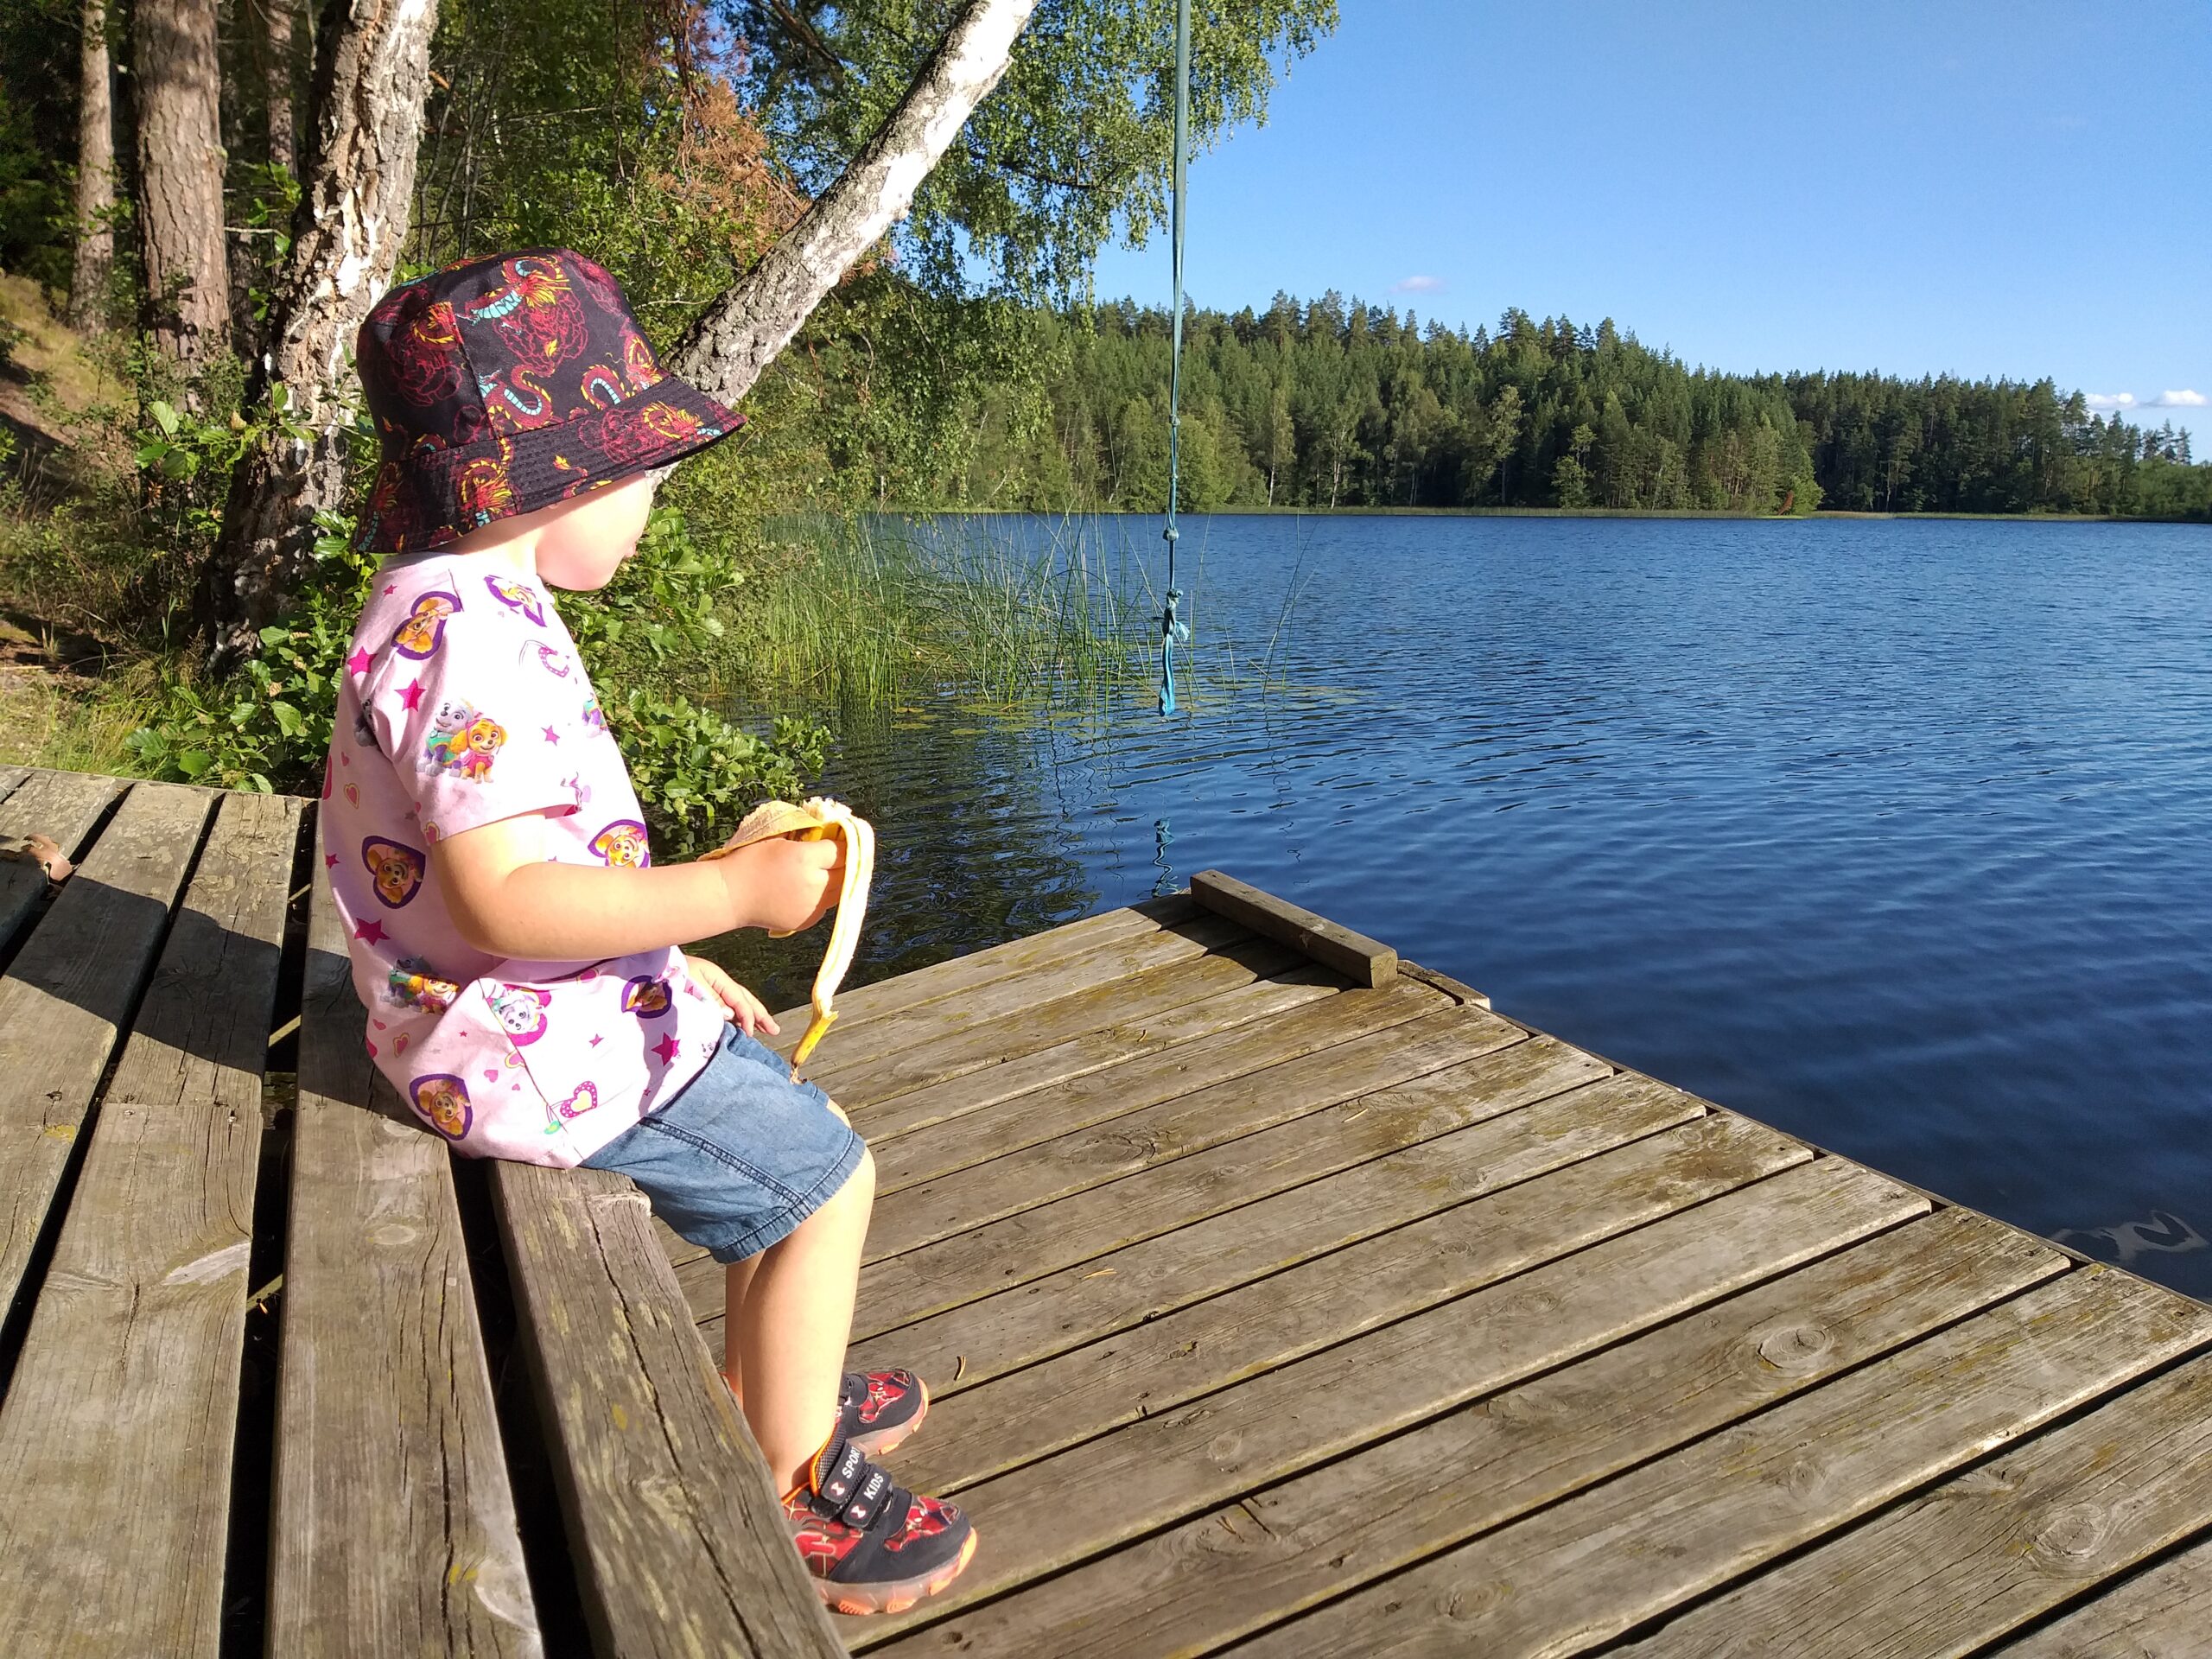
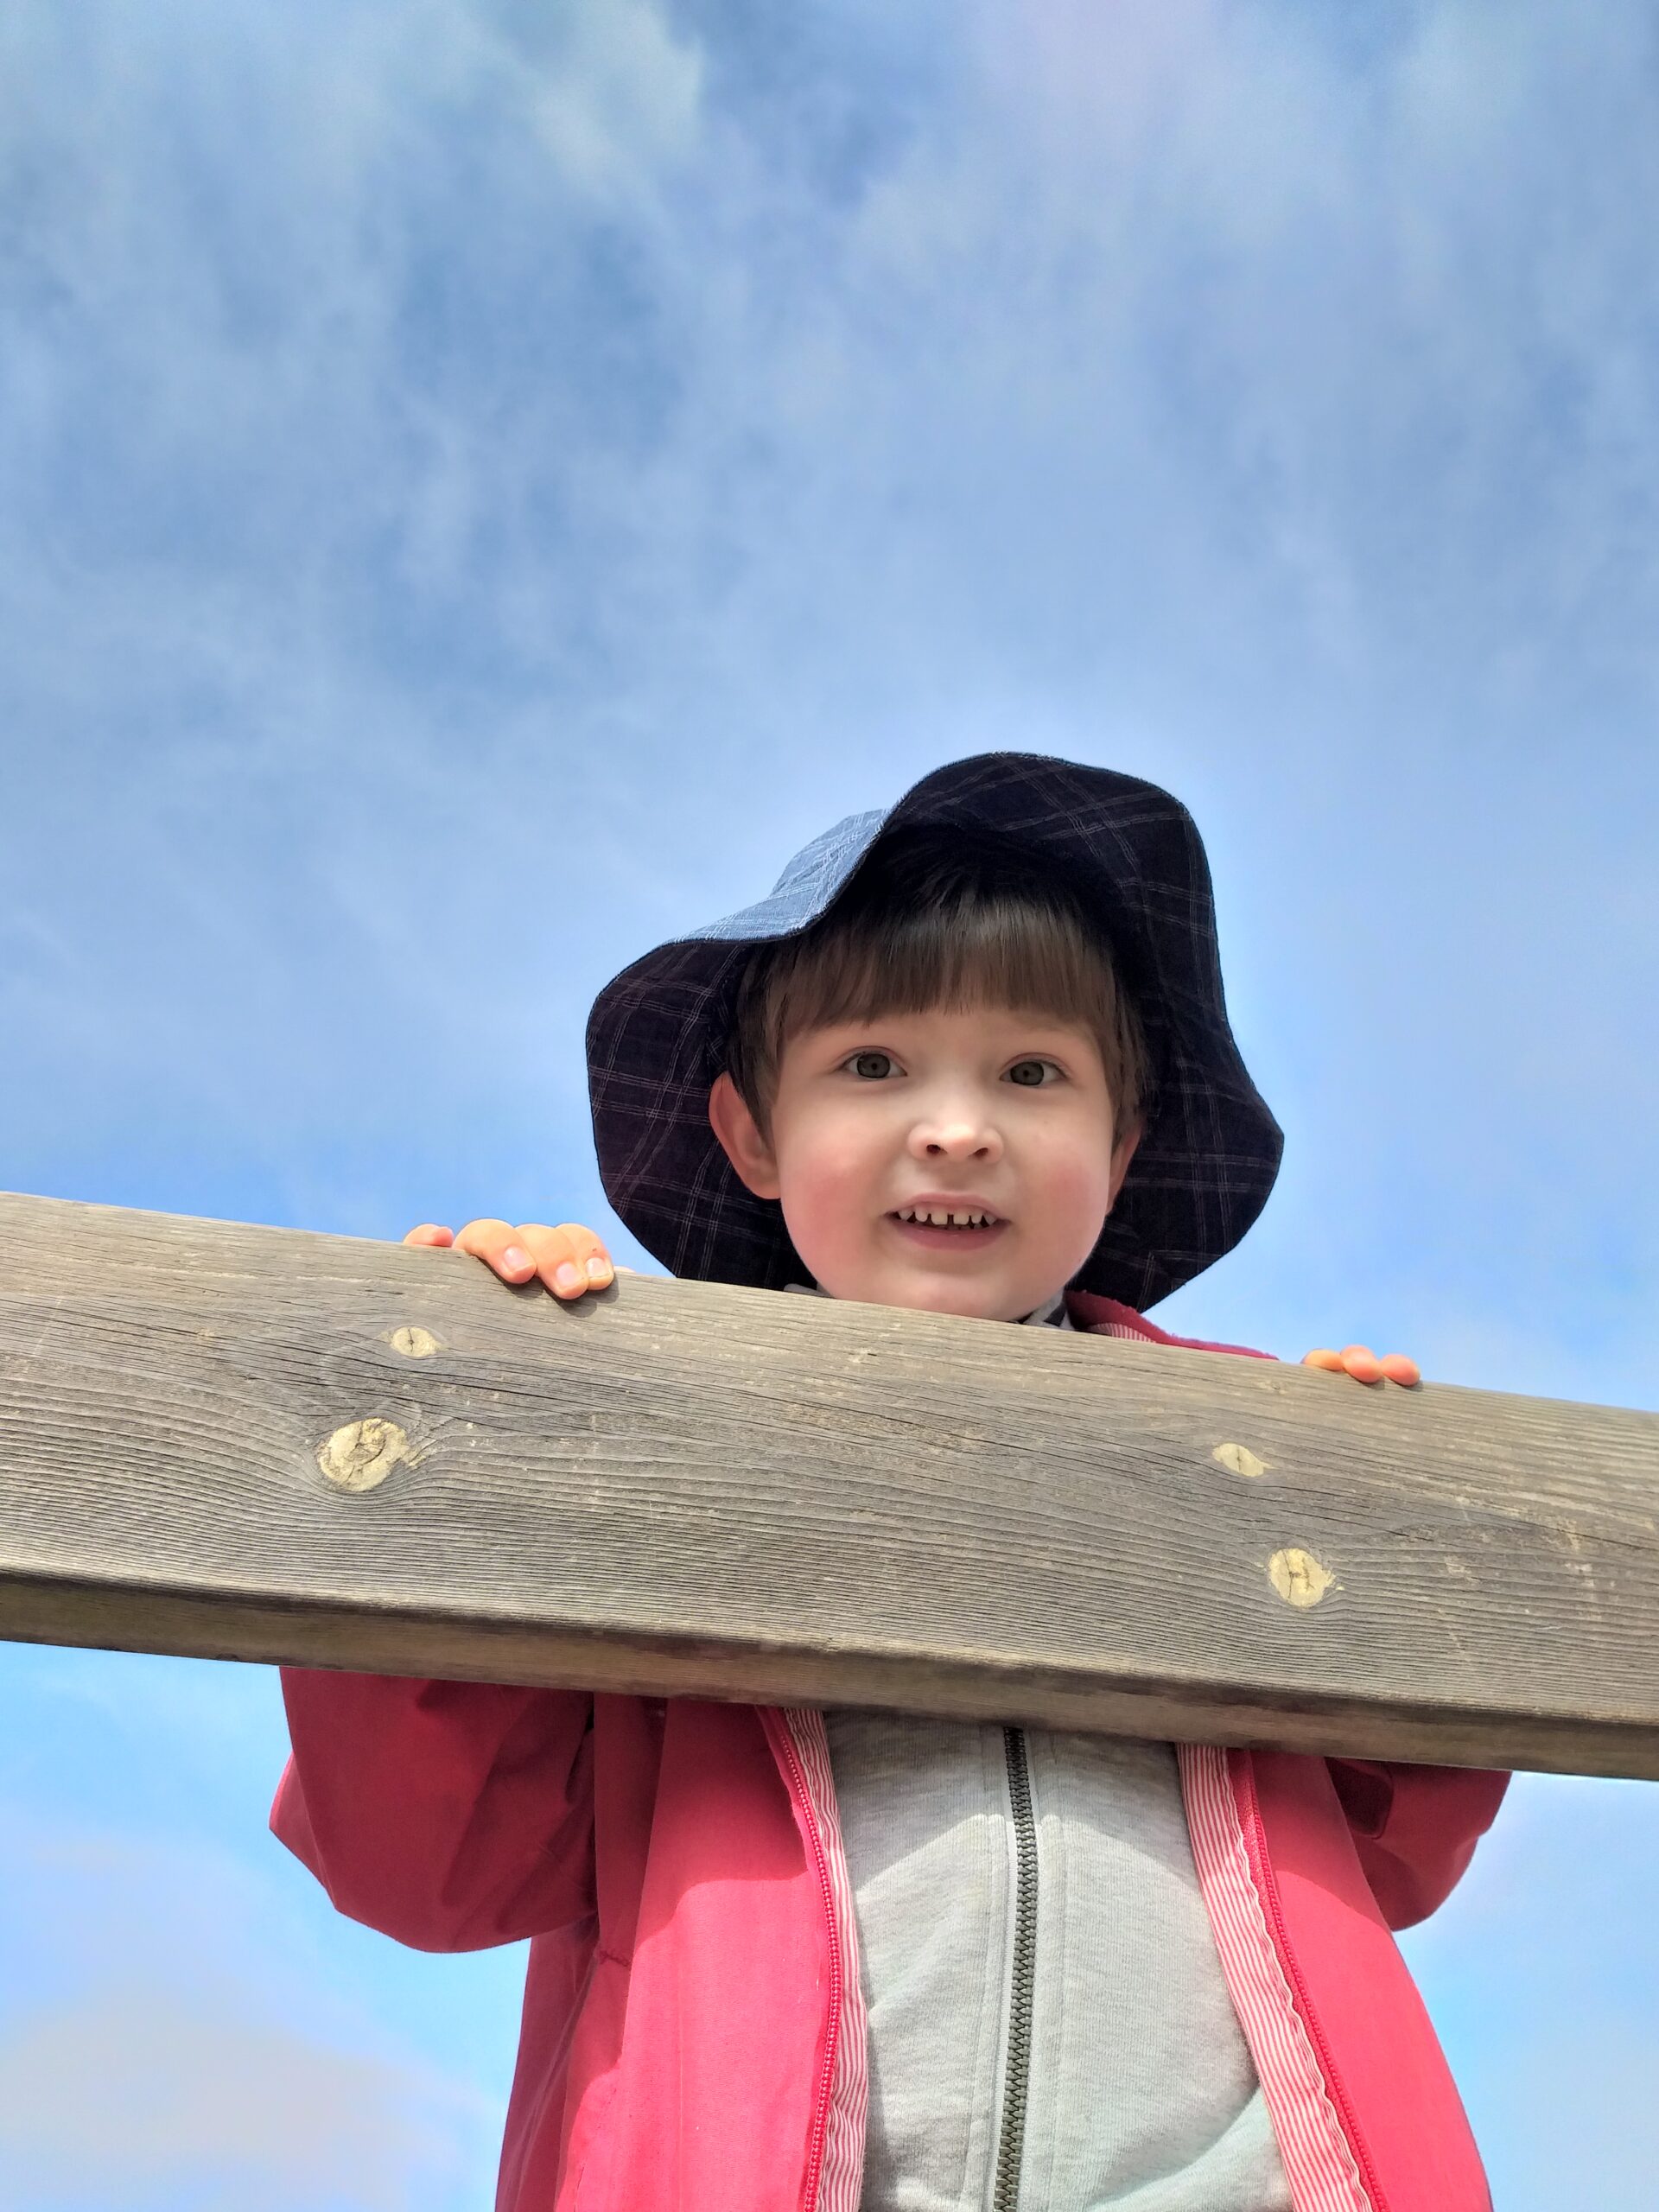
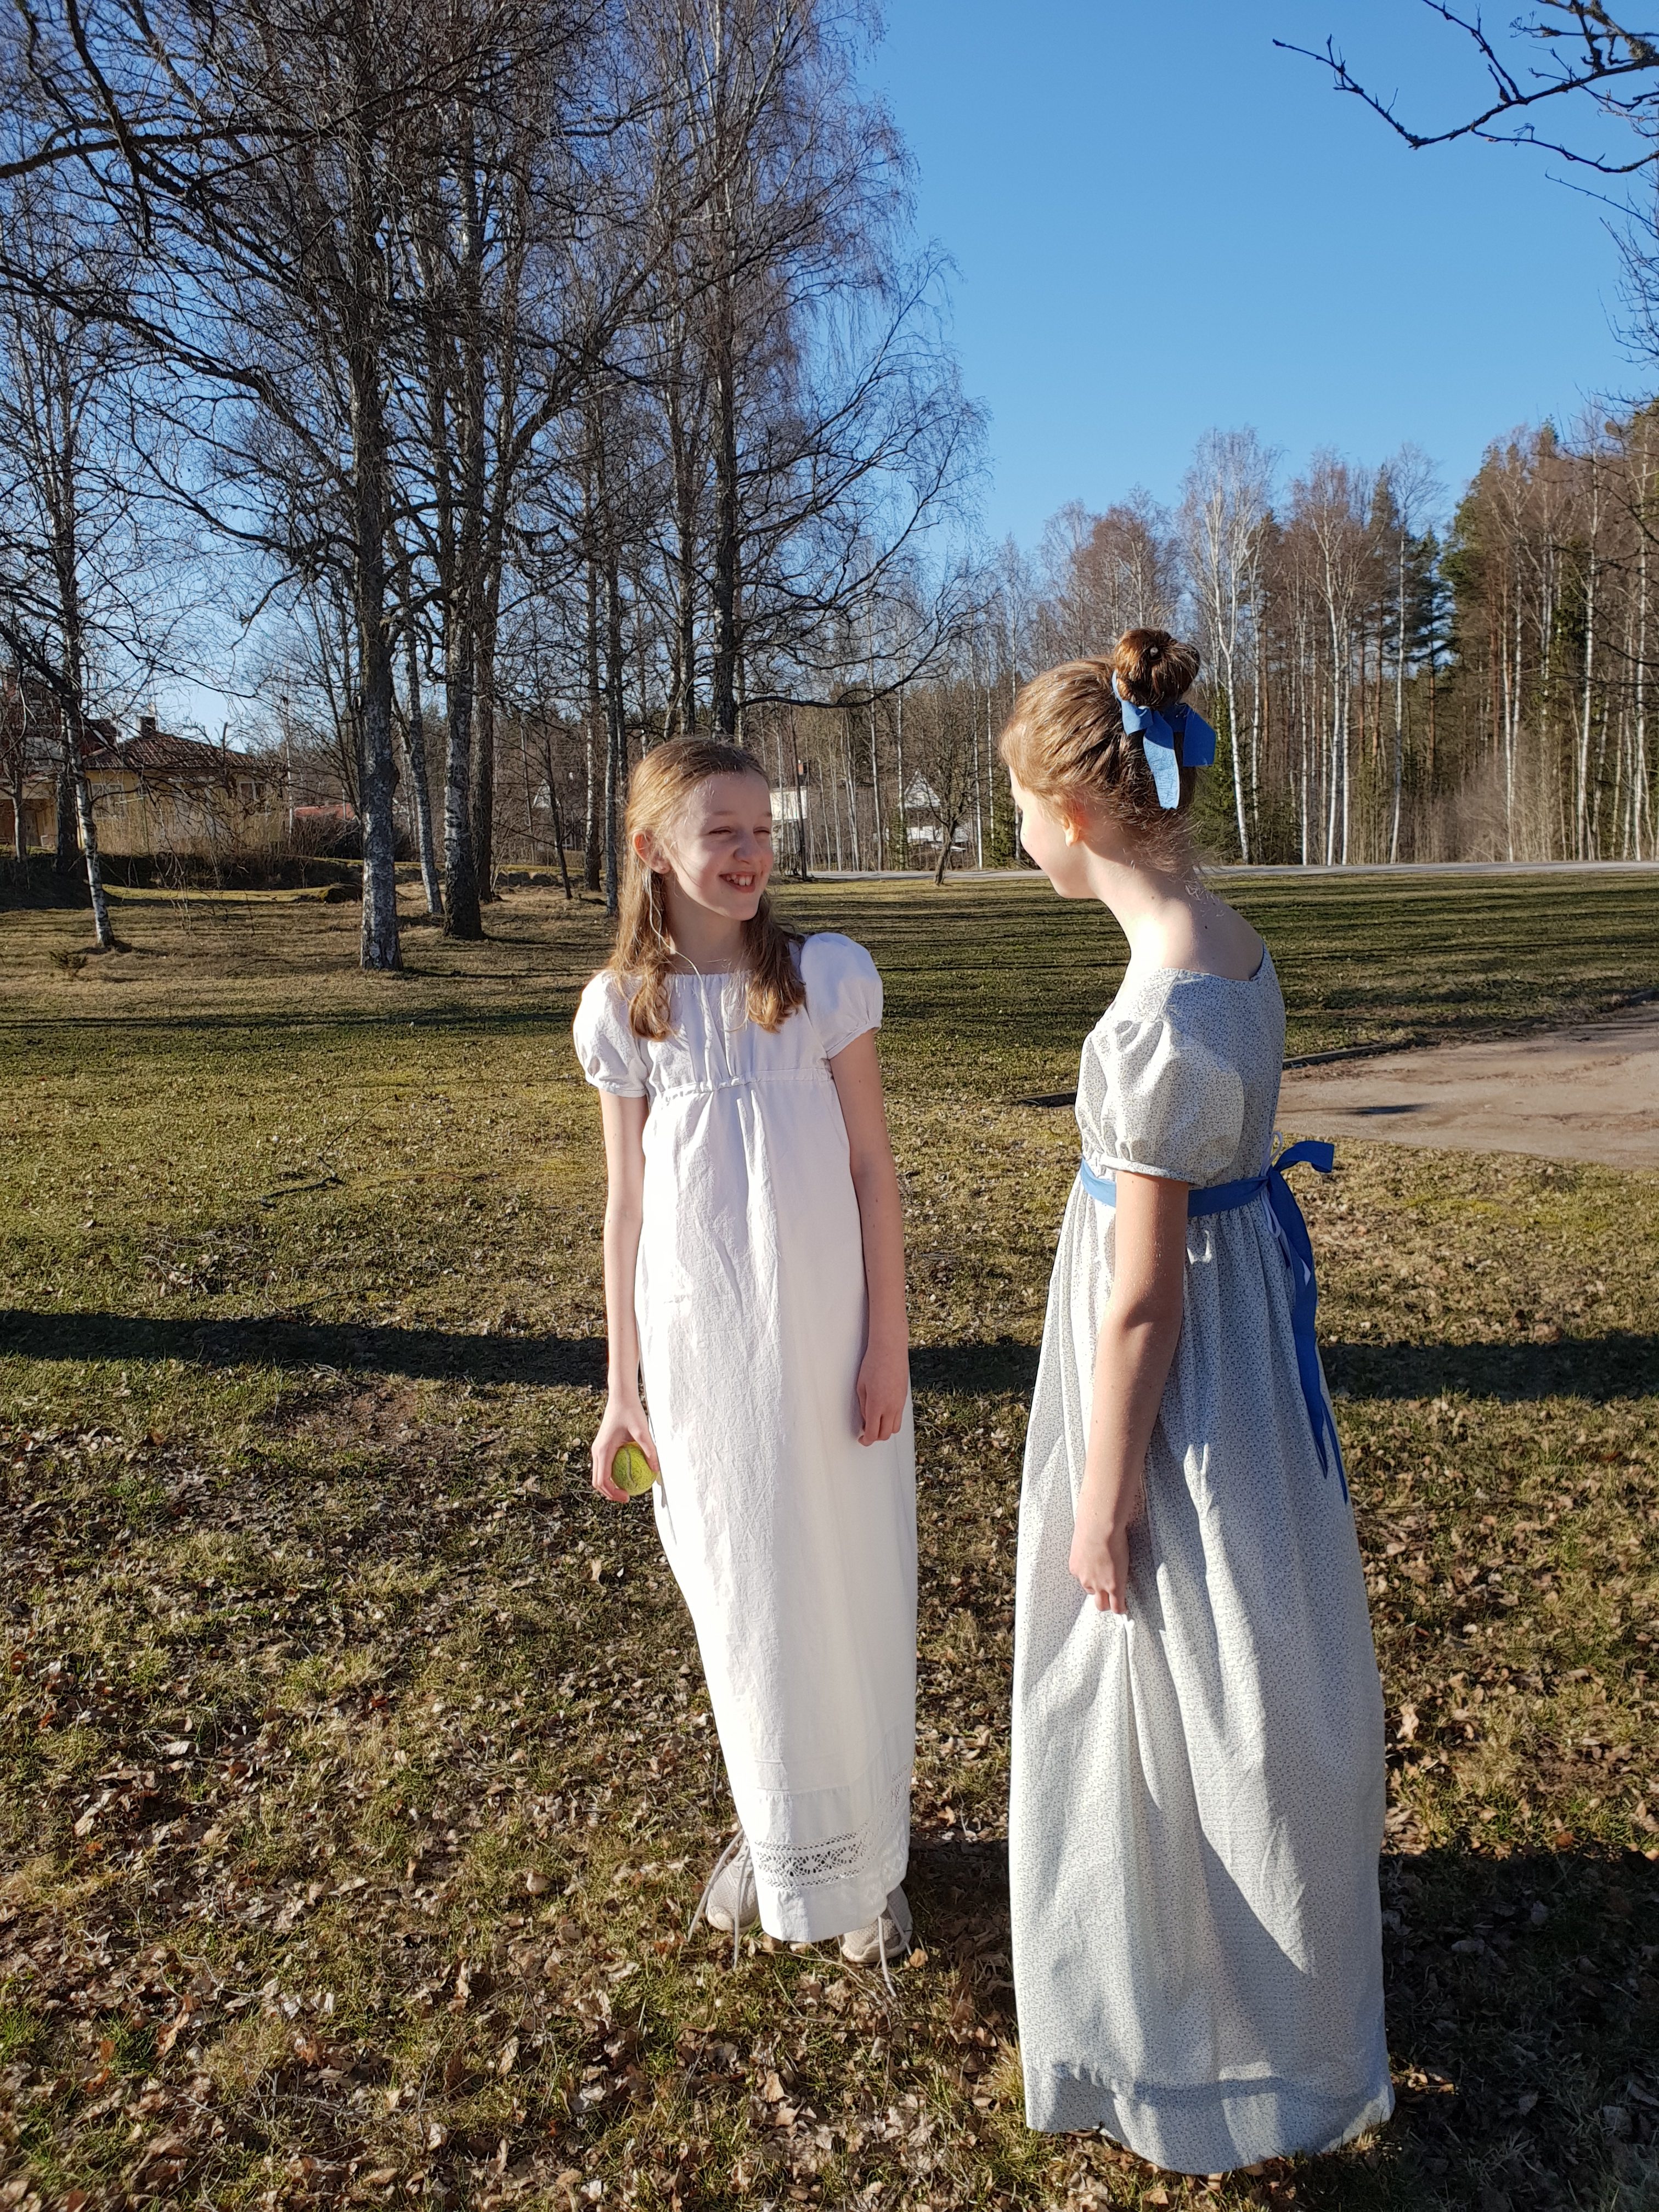
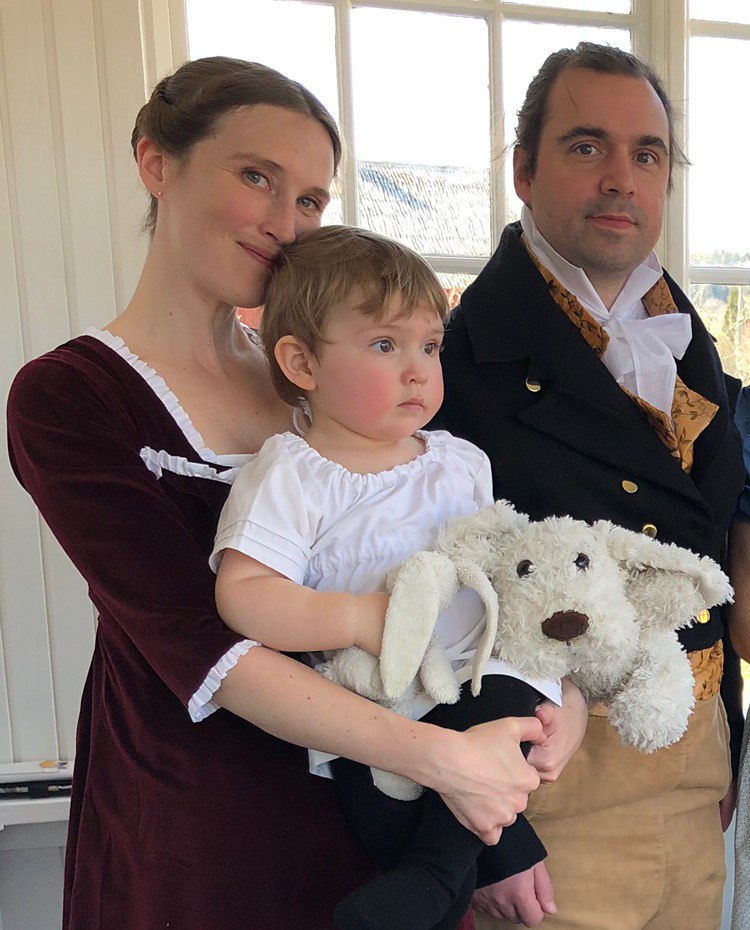
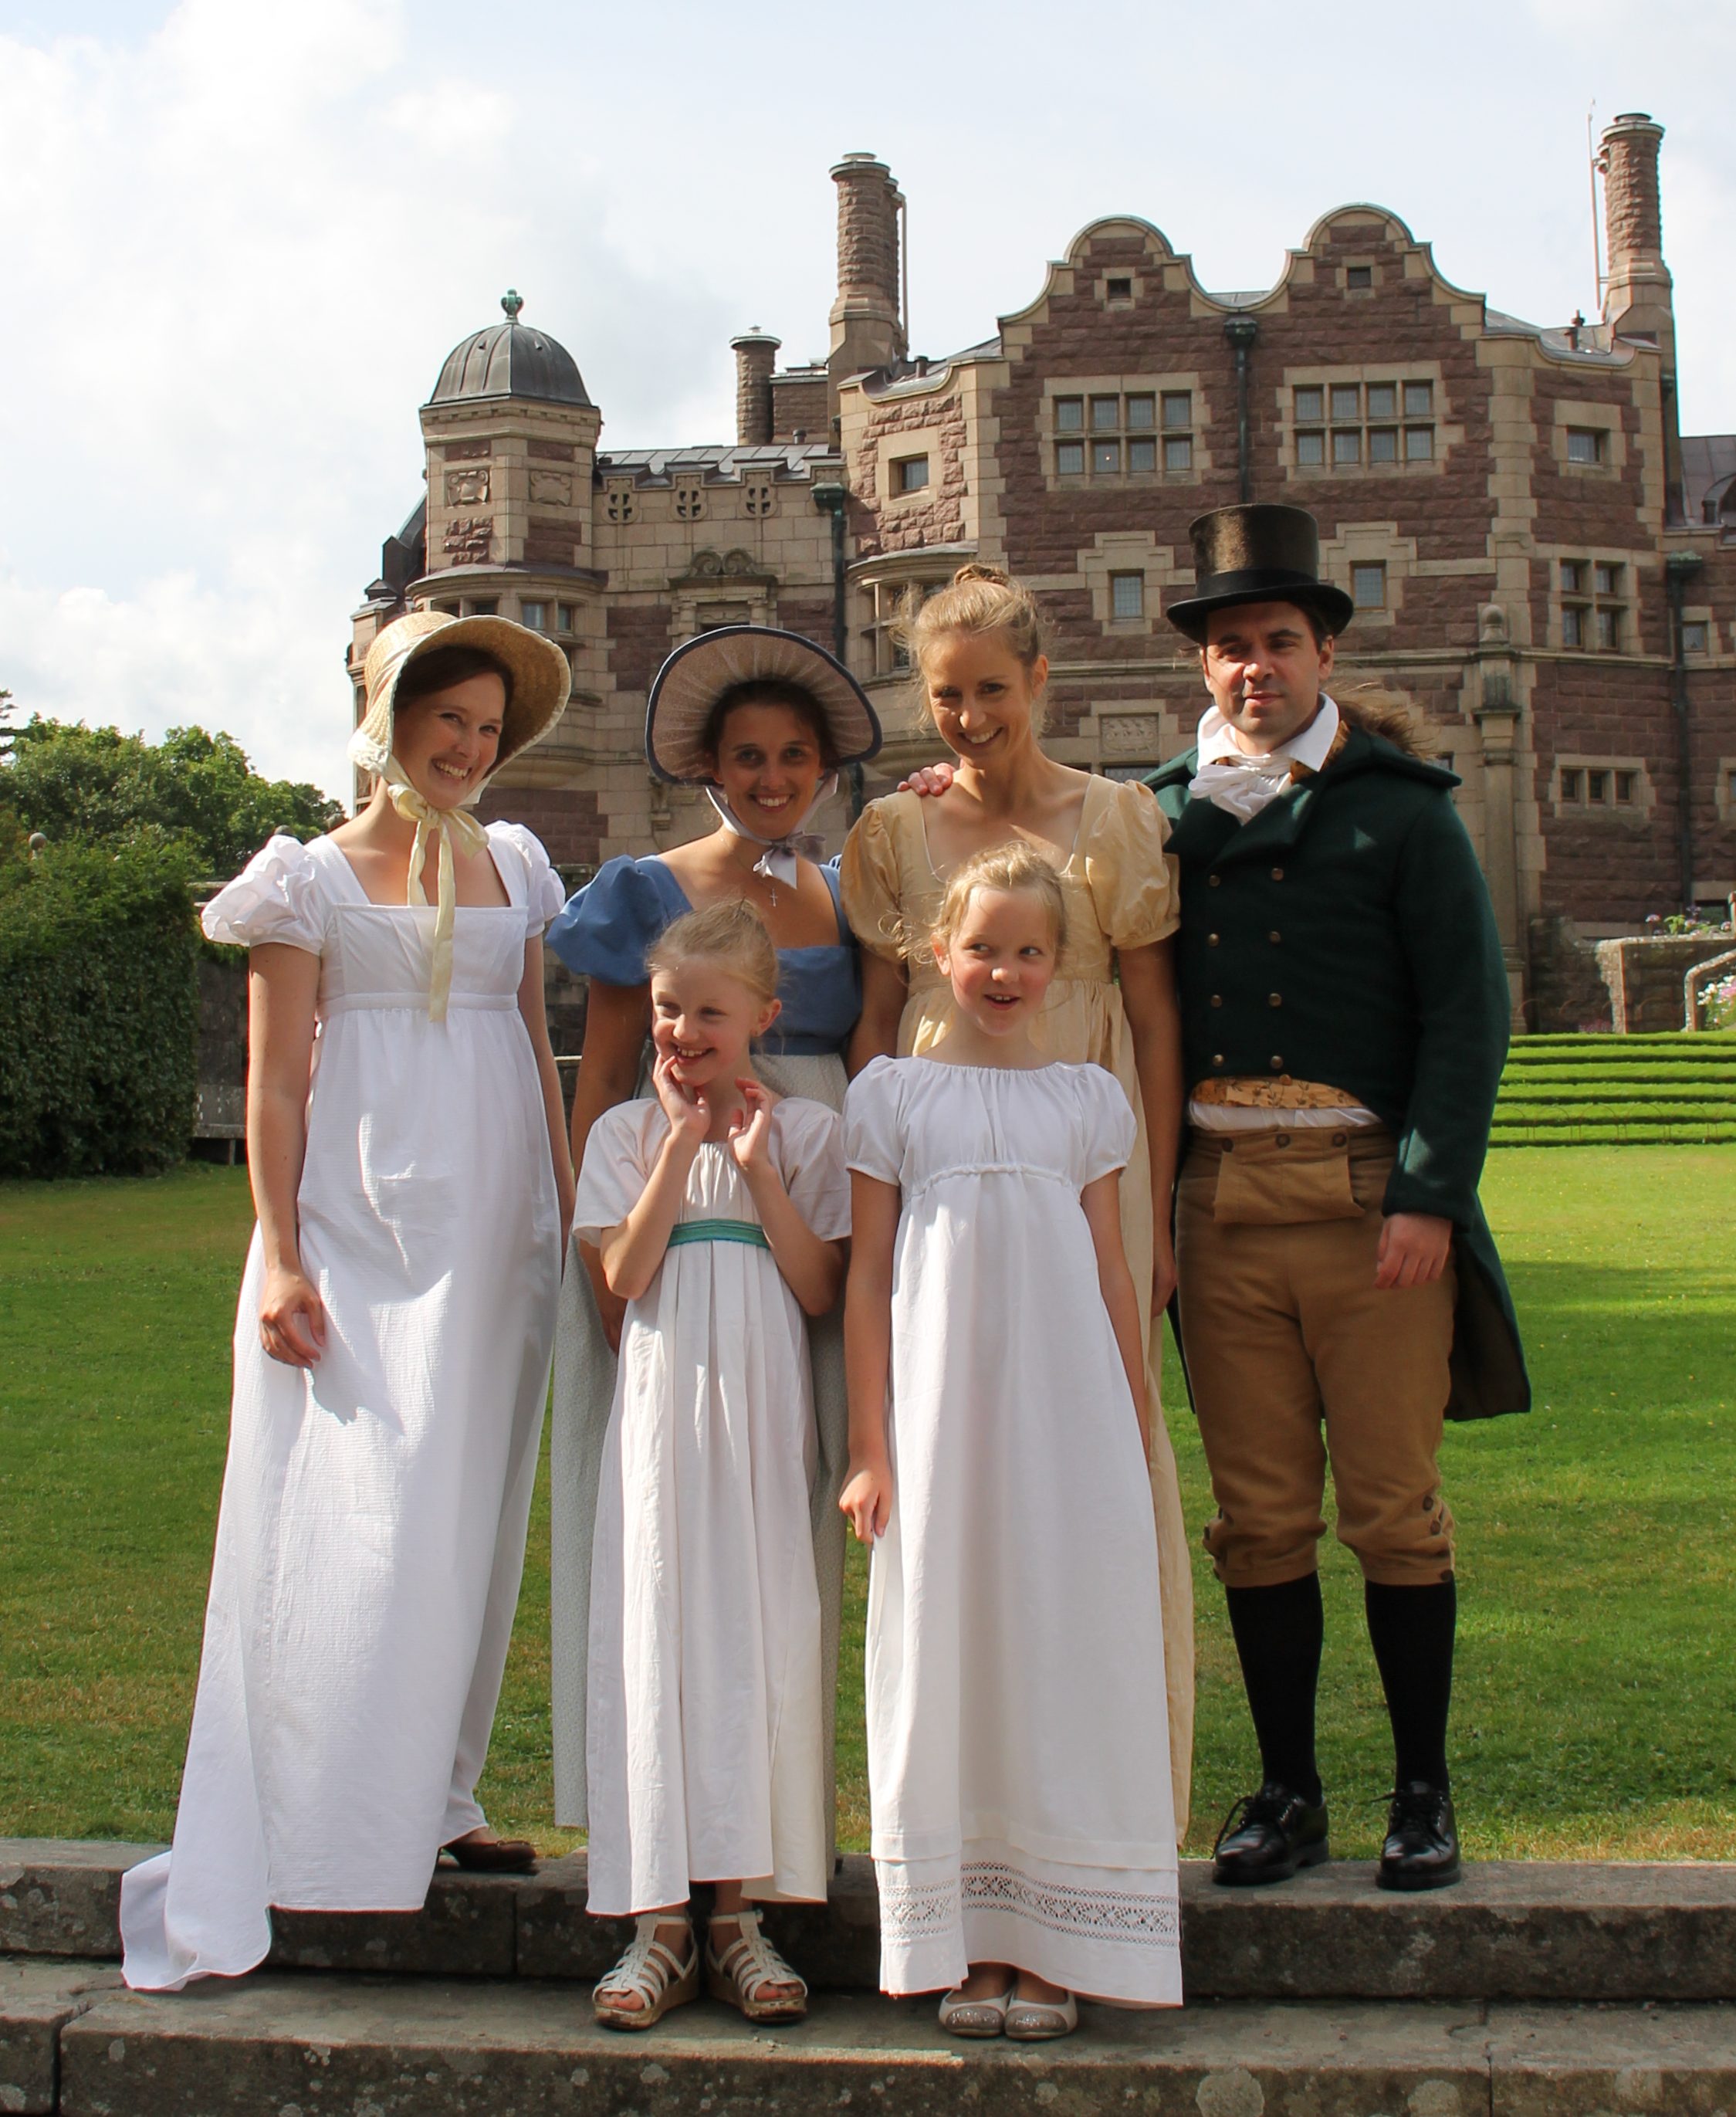
Dear Bonna captured this lovely photo after the sunday service (as I wore another of my earlier creations). Thank you so much for the picture!

Fina Bonna fotograferade oss efter gudstjänsten (på bilden bär jag en annan tidig kreation). Tack så mycket för bilden, Bonna!

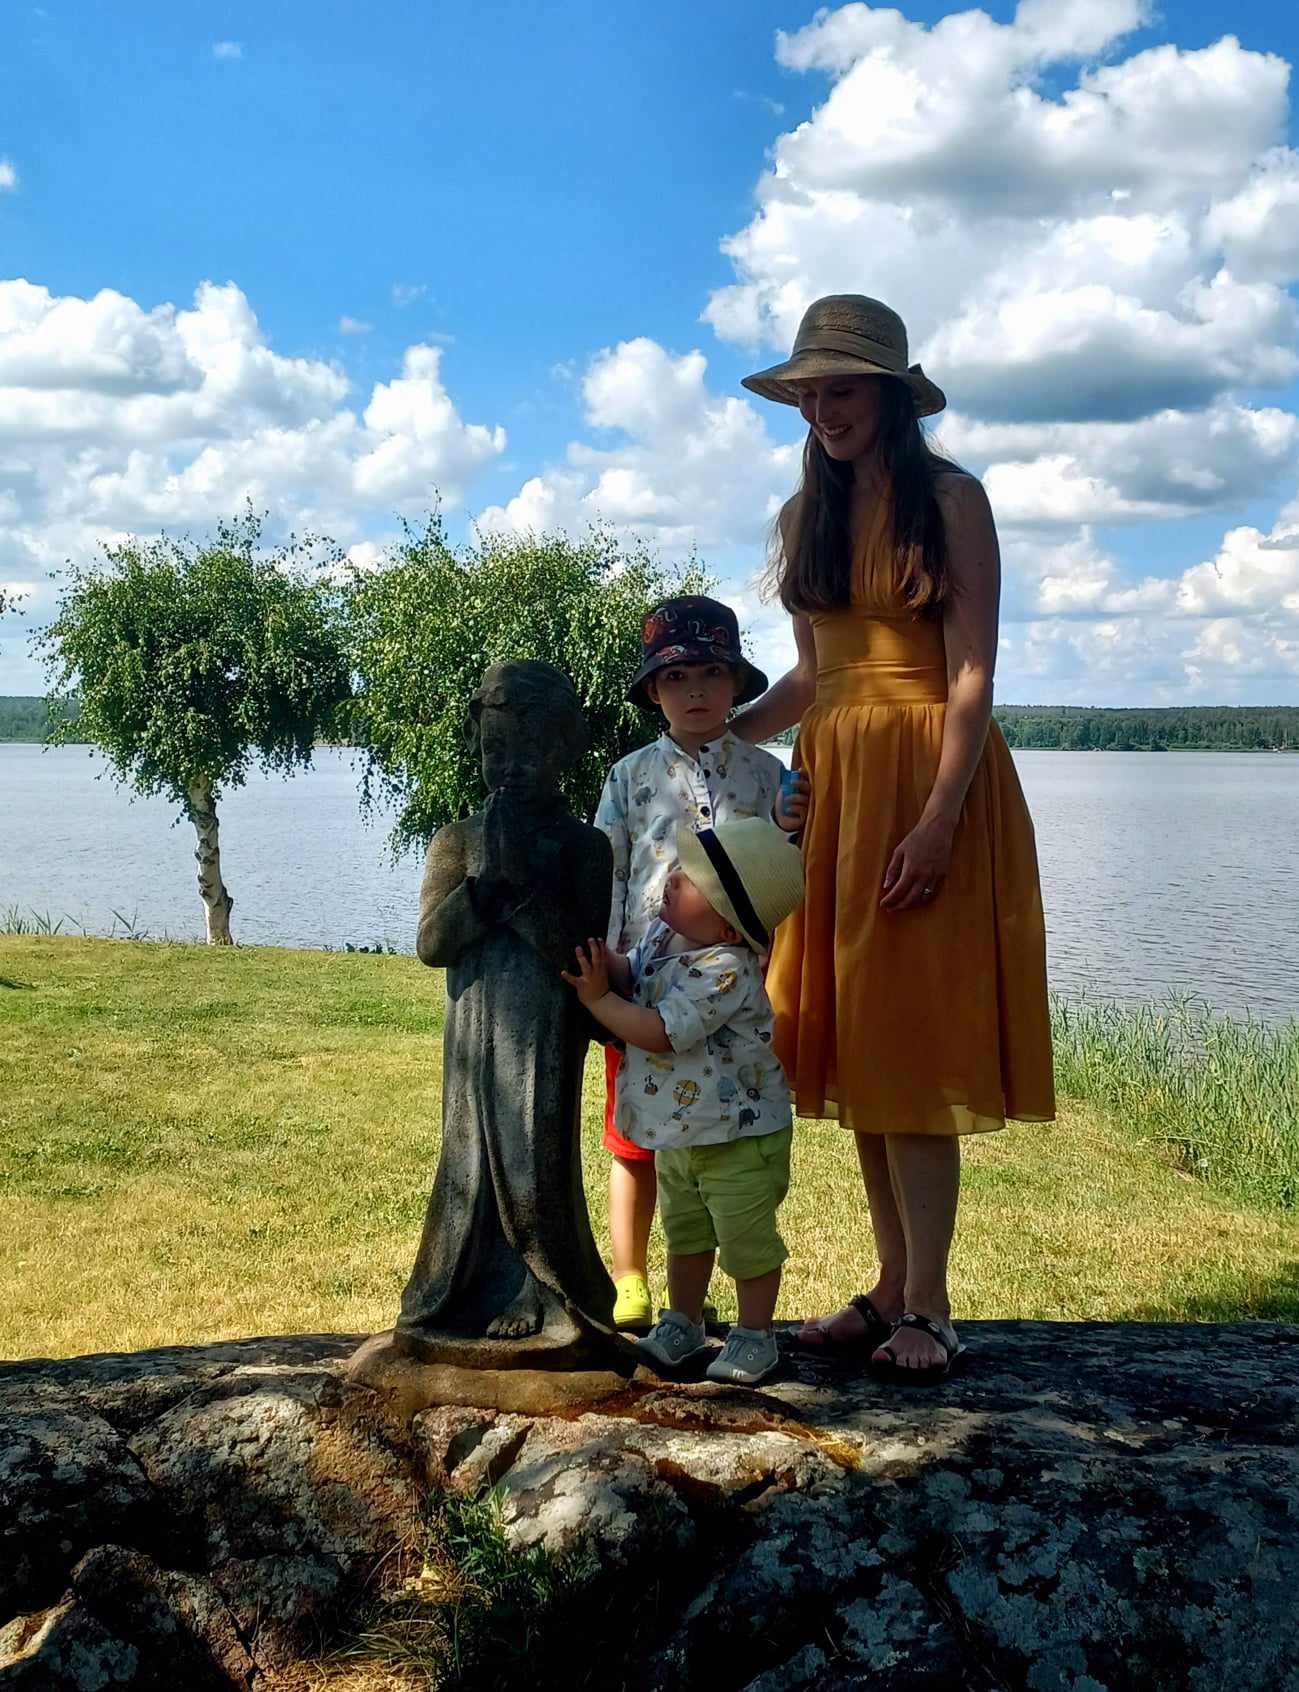
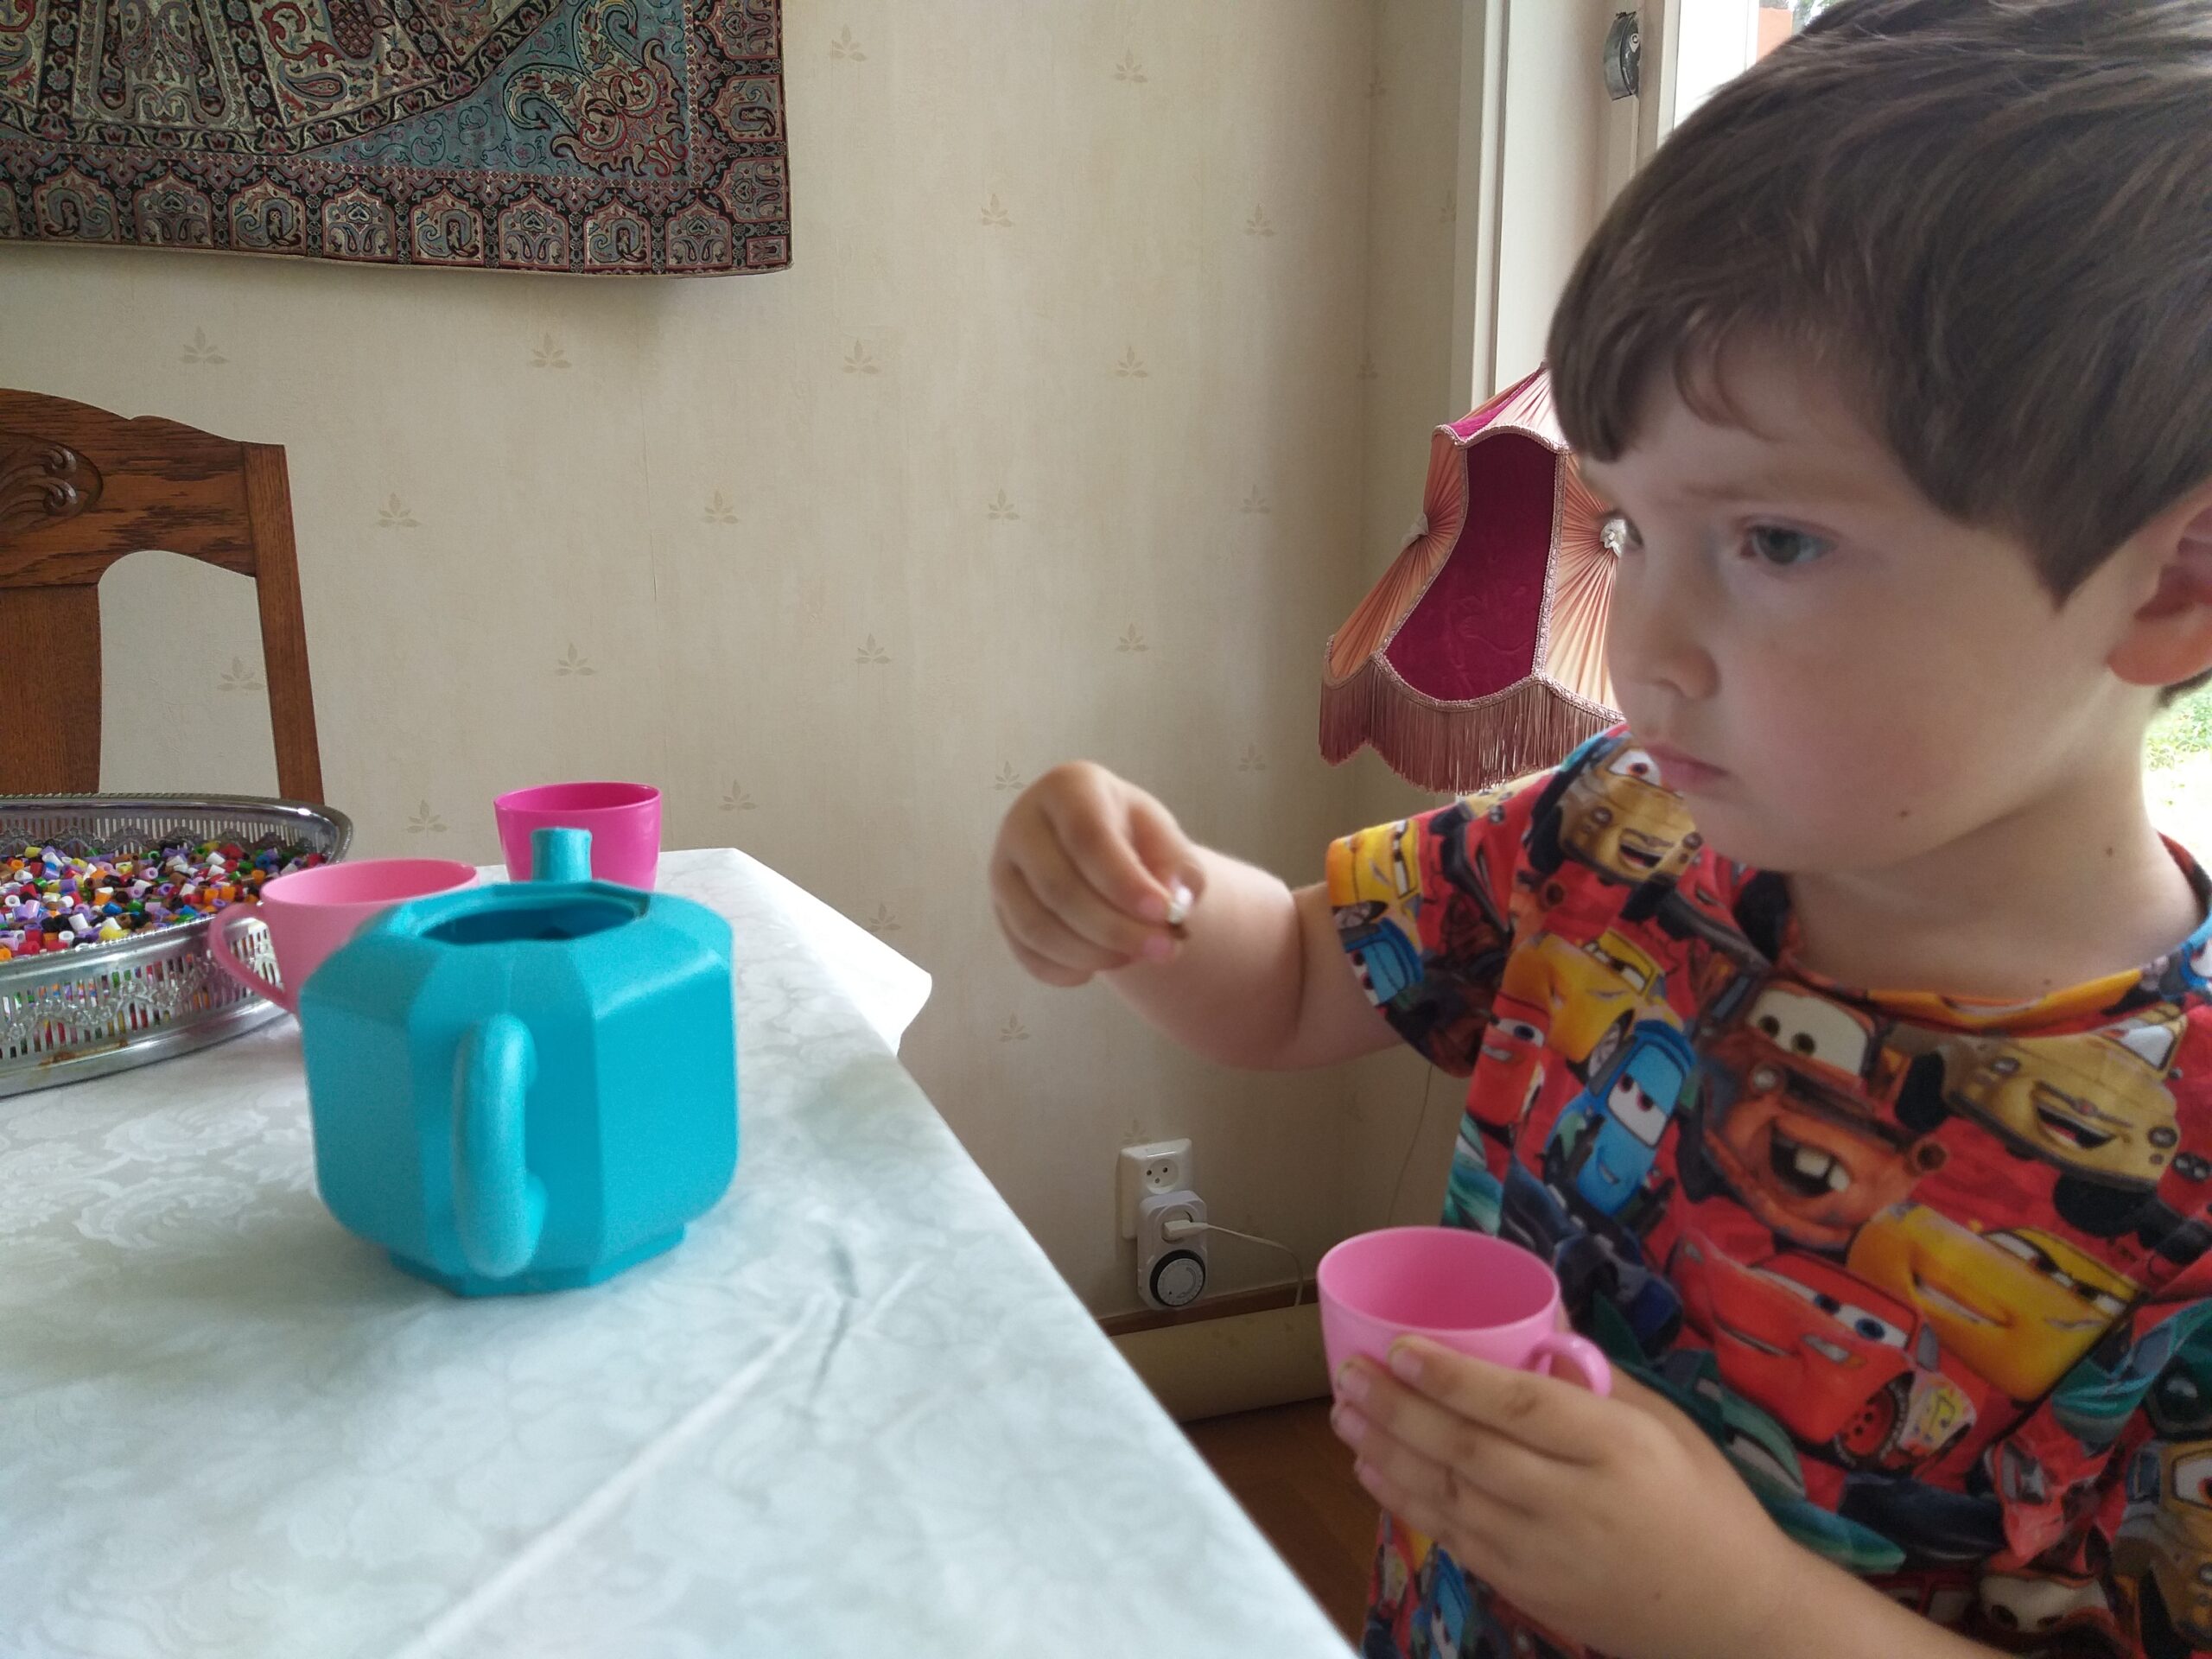
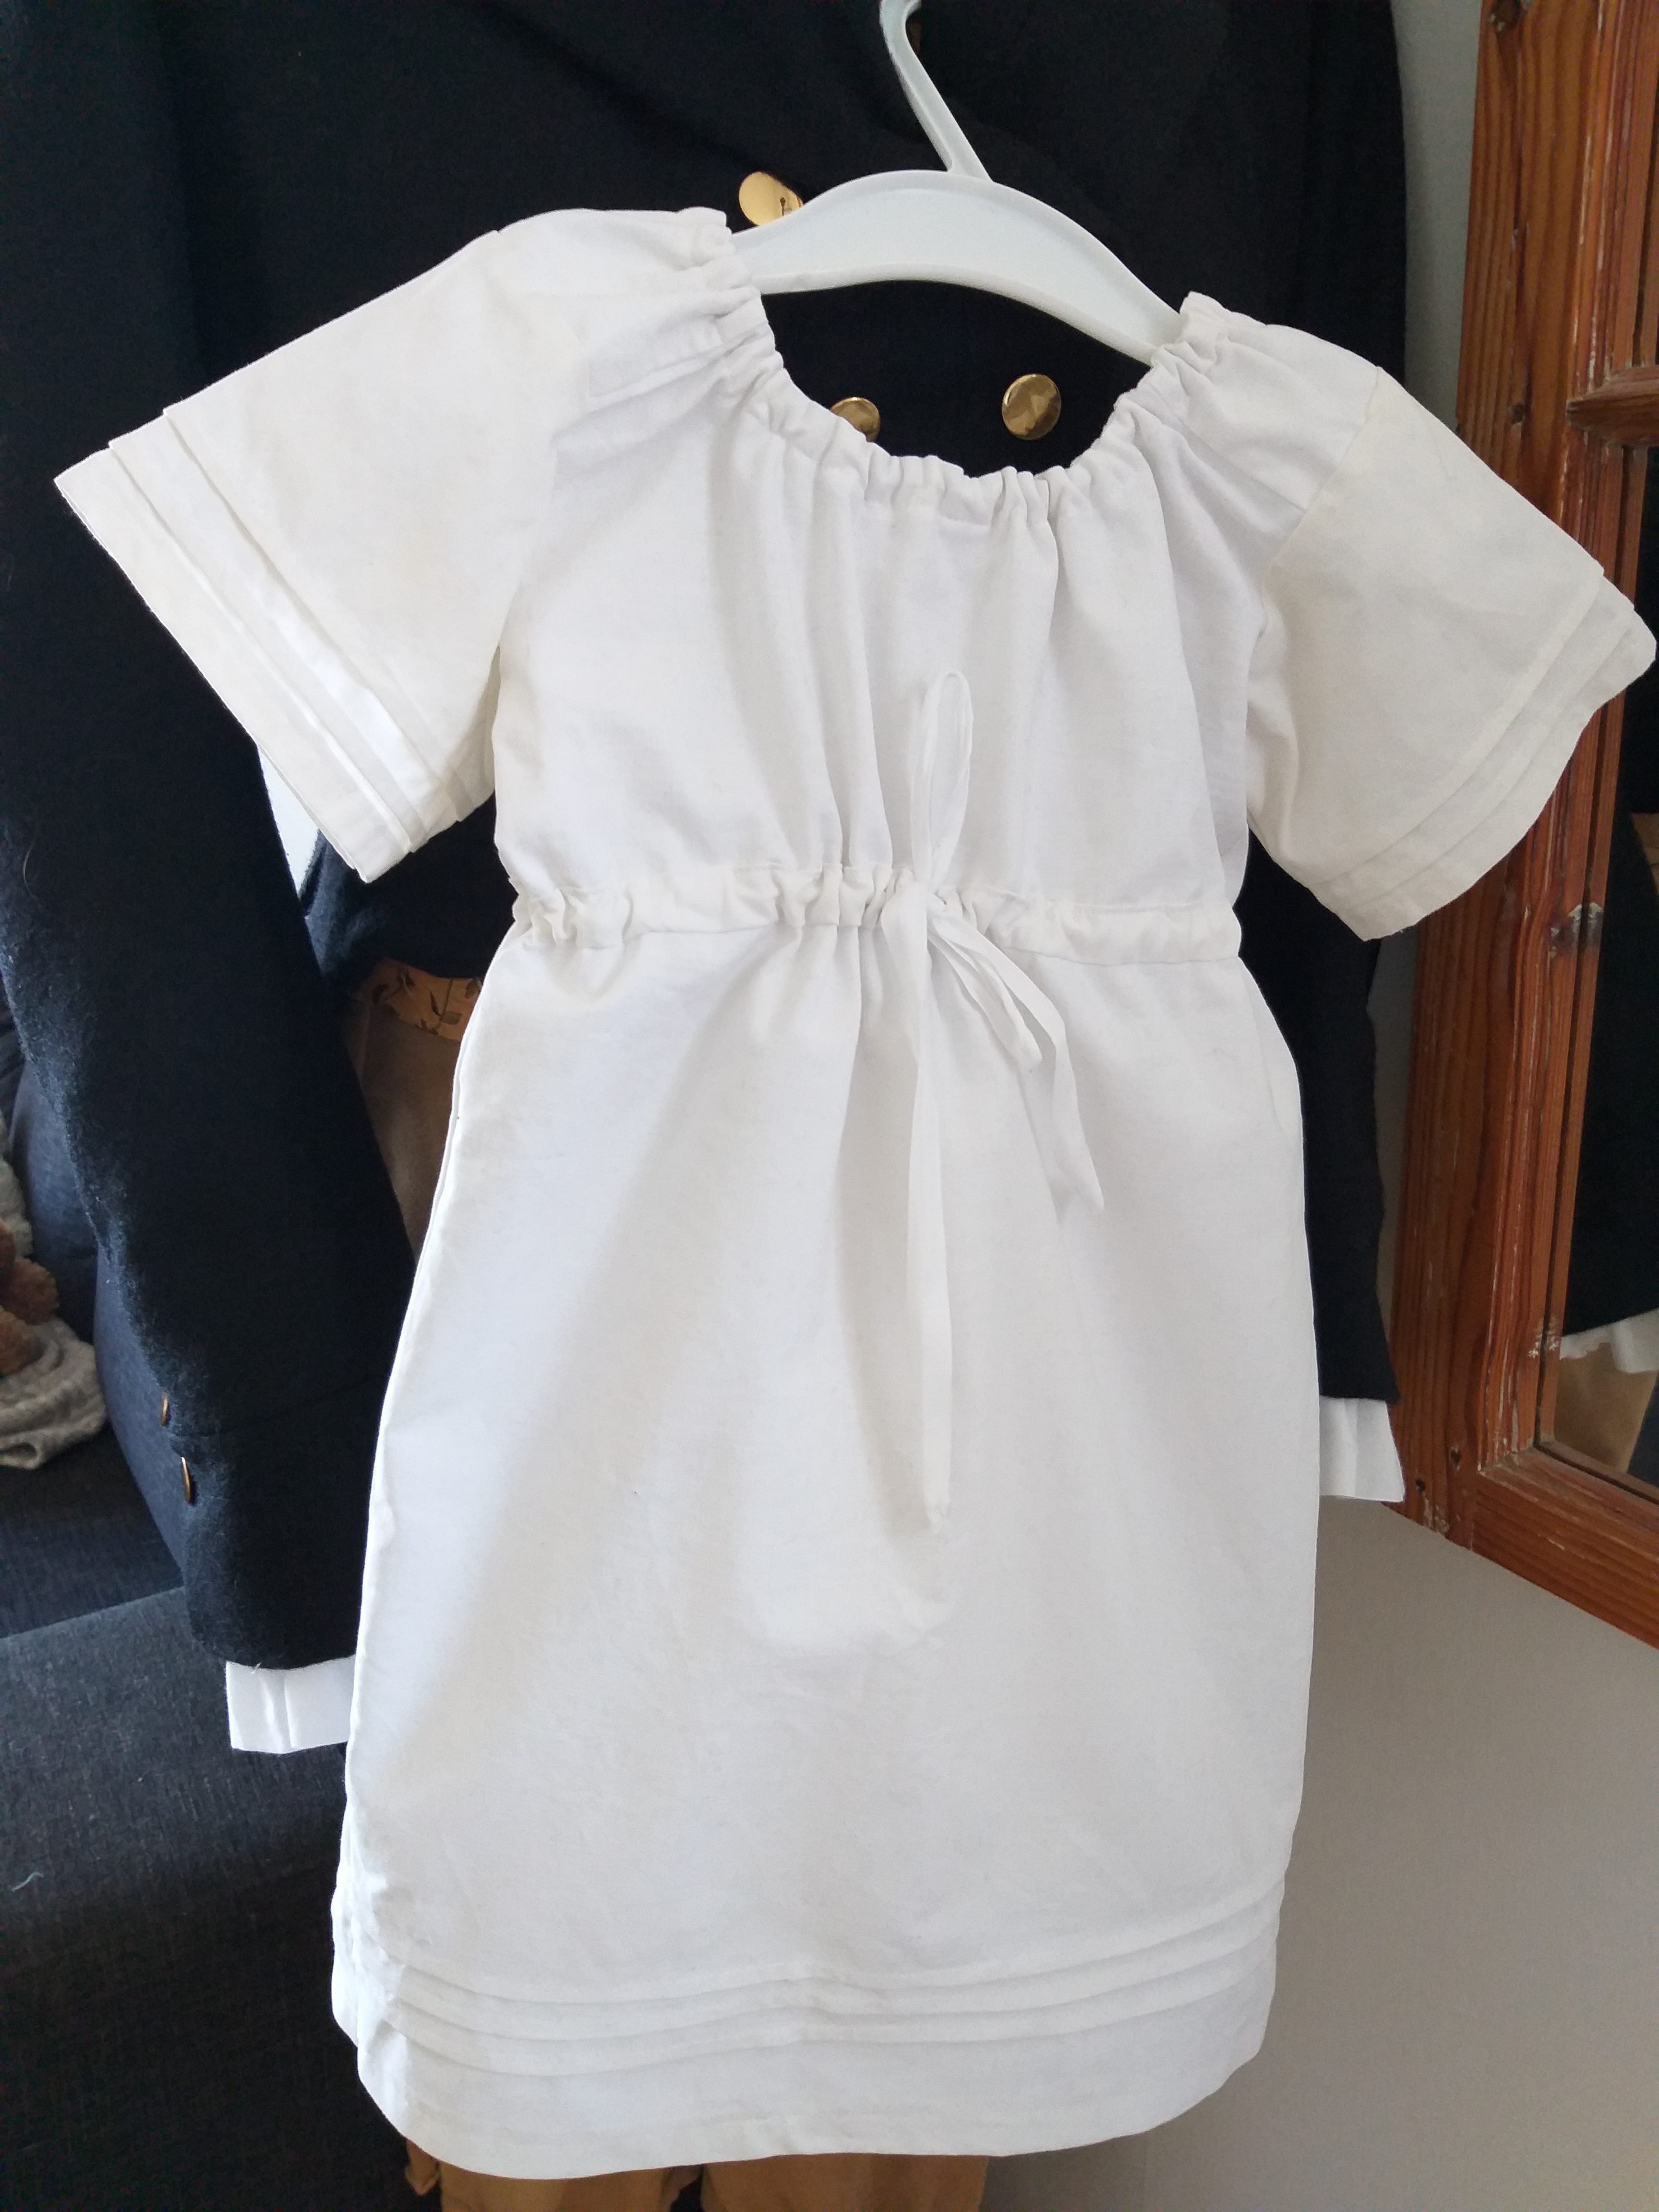
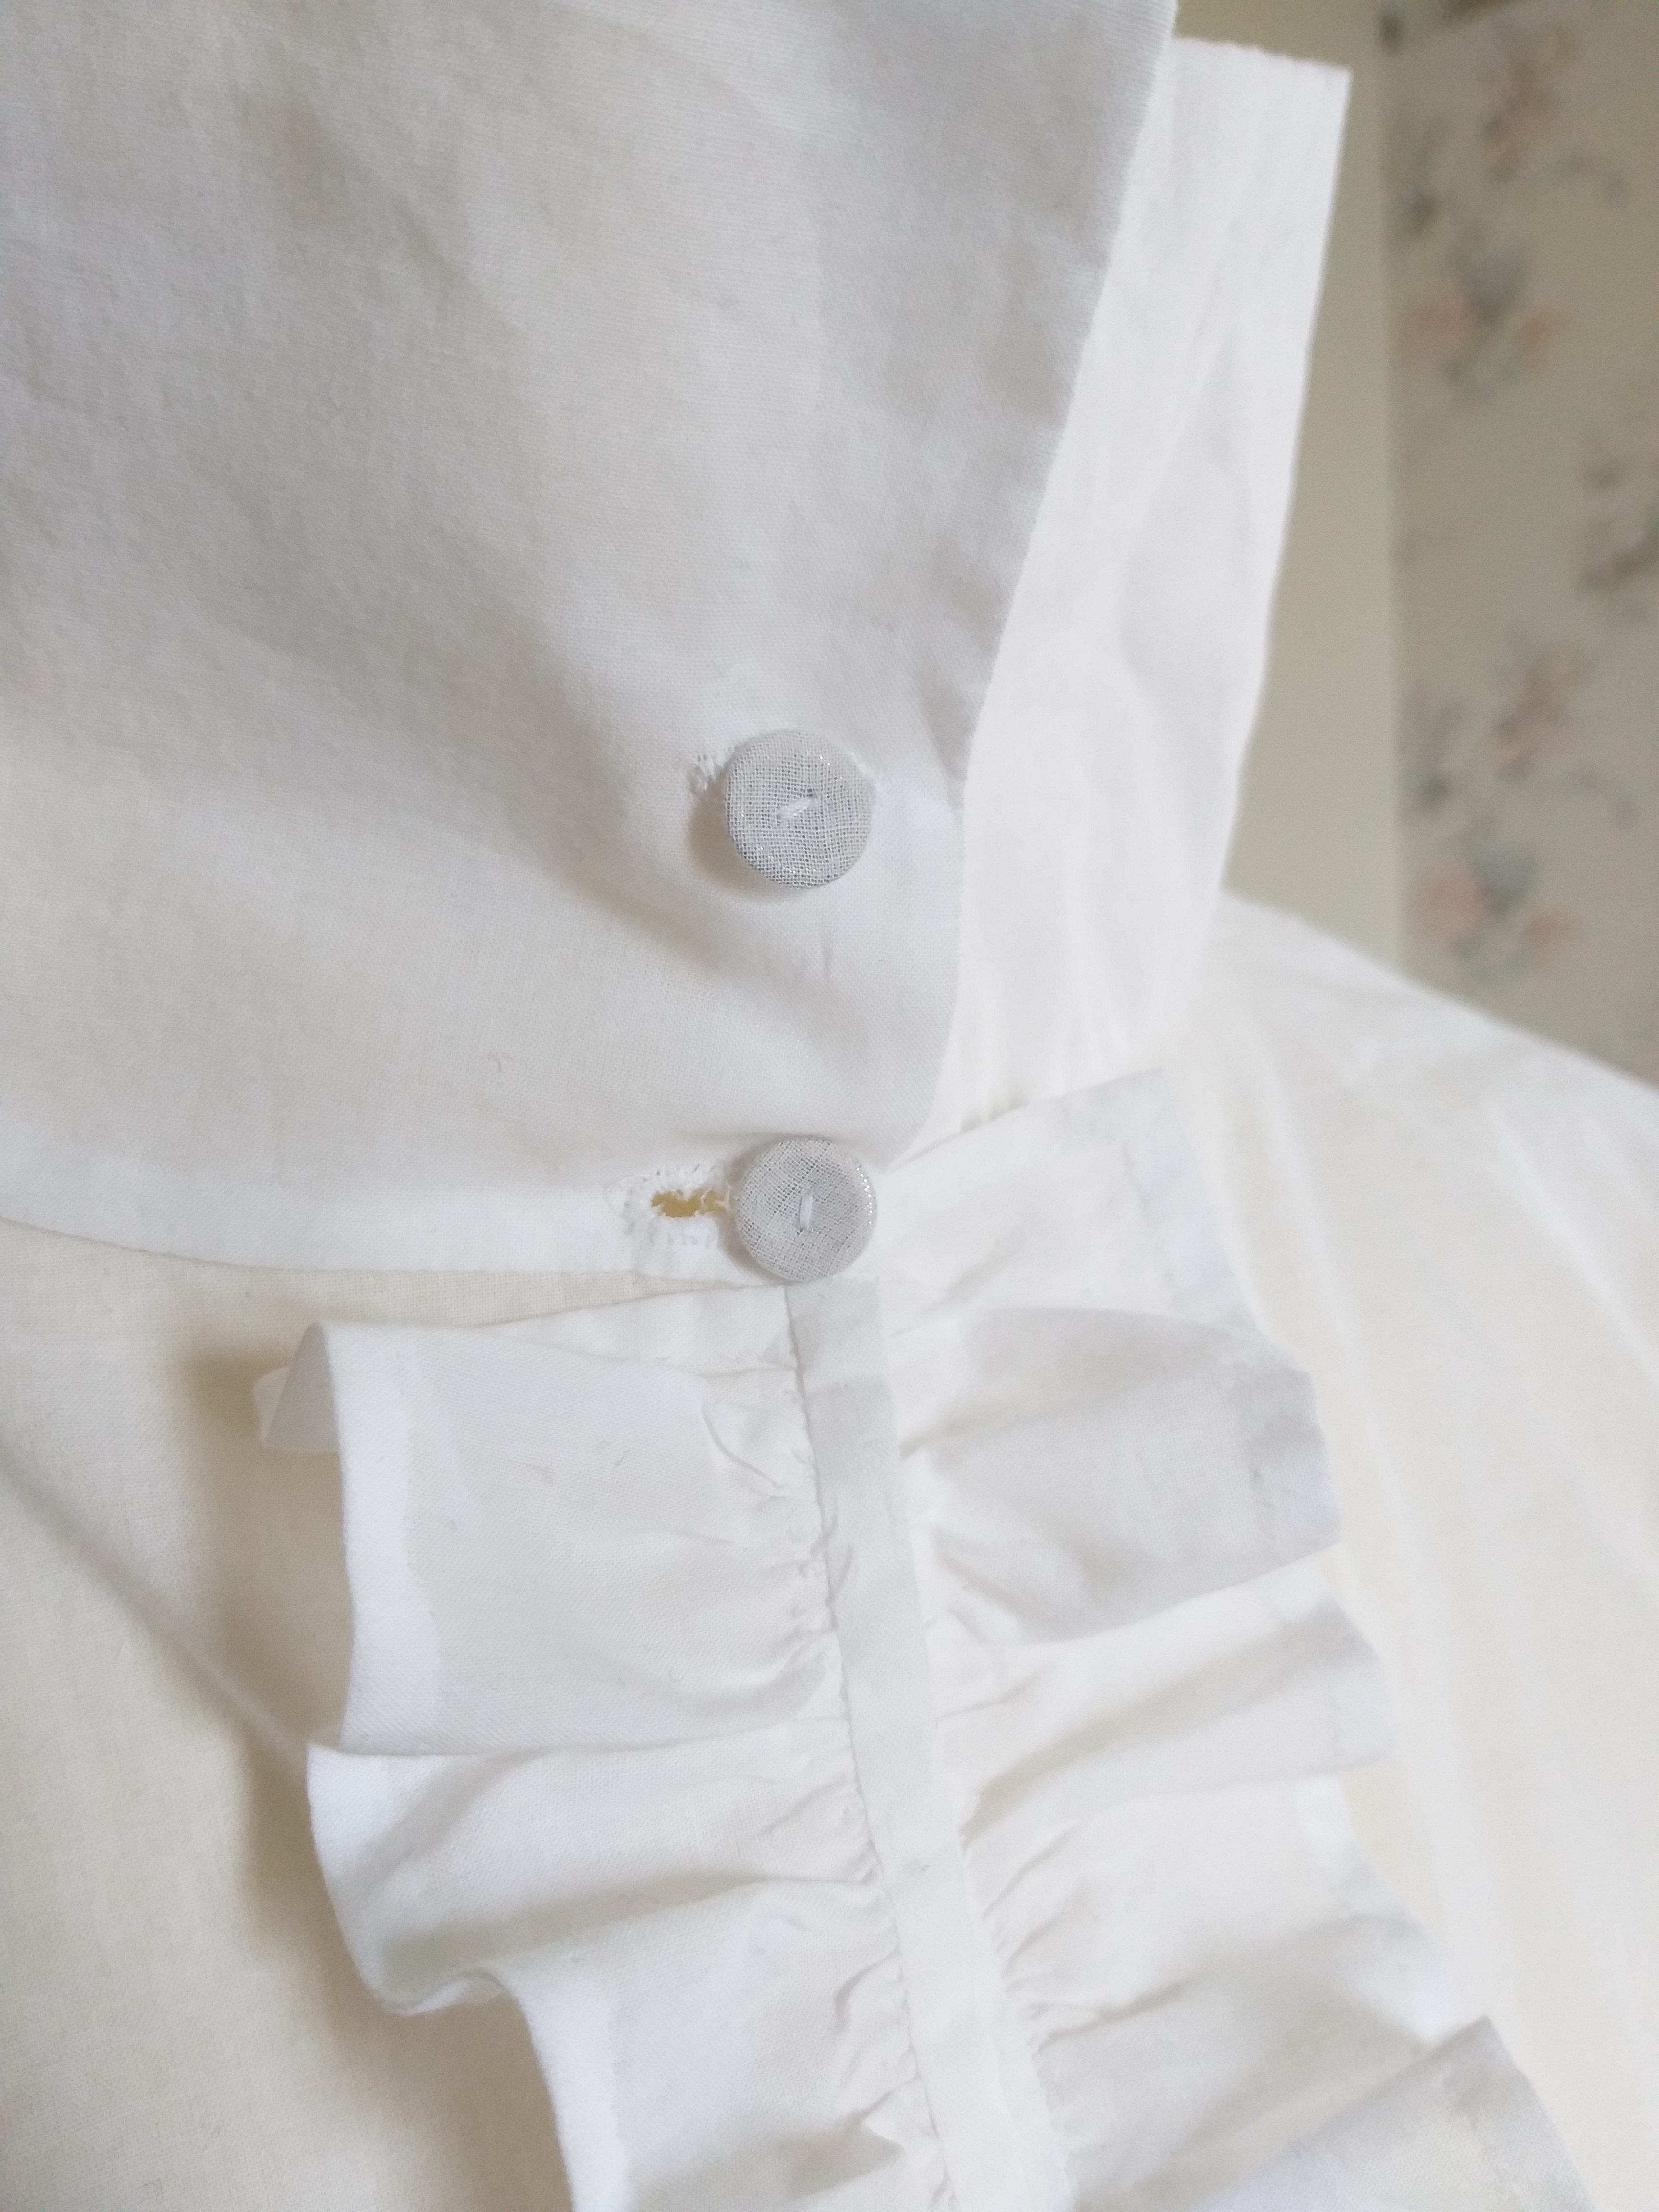
Here is a closer view of both shirts. Här kan man se skjortorna på närmare håll.

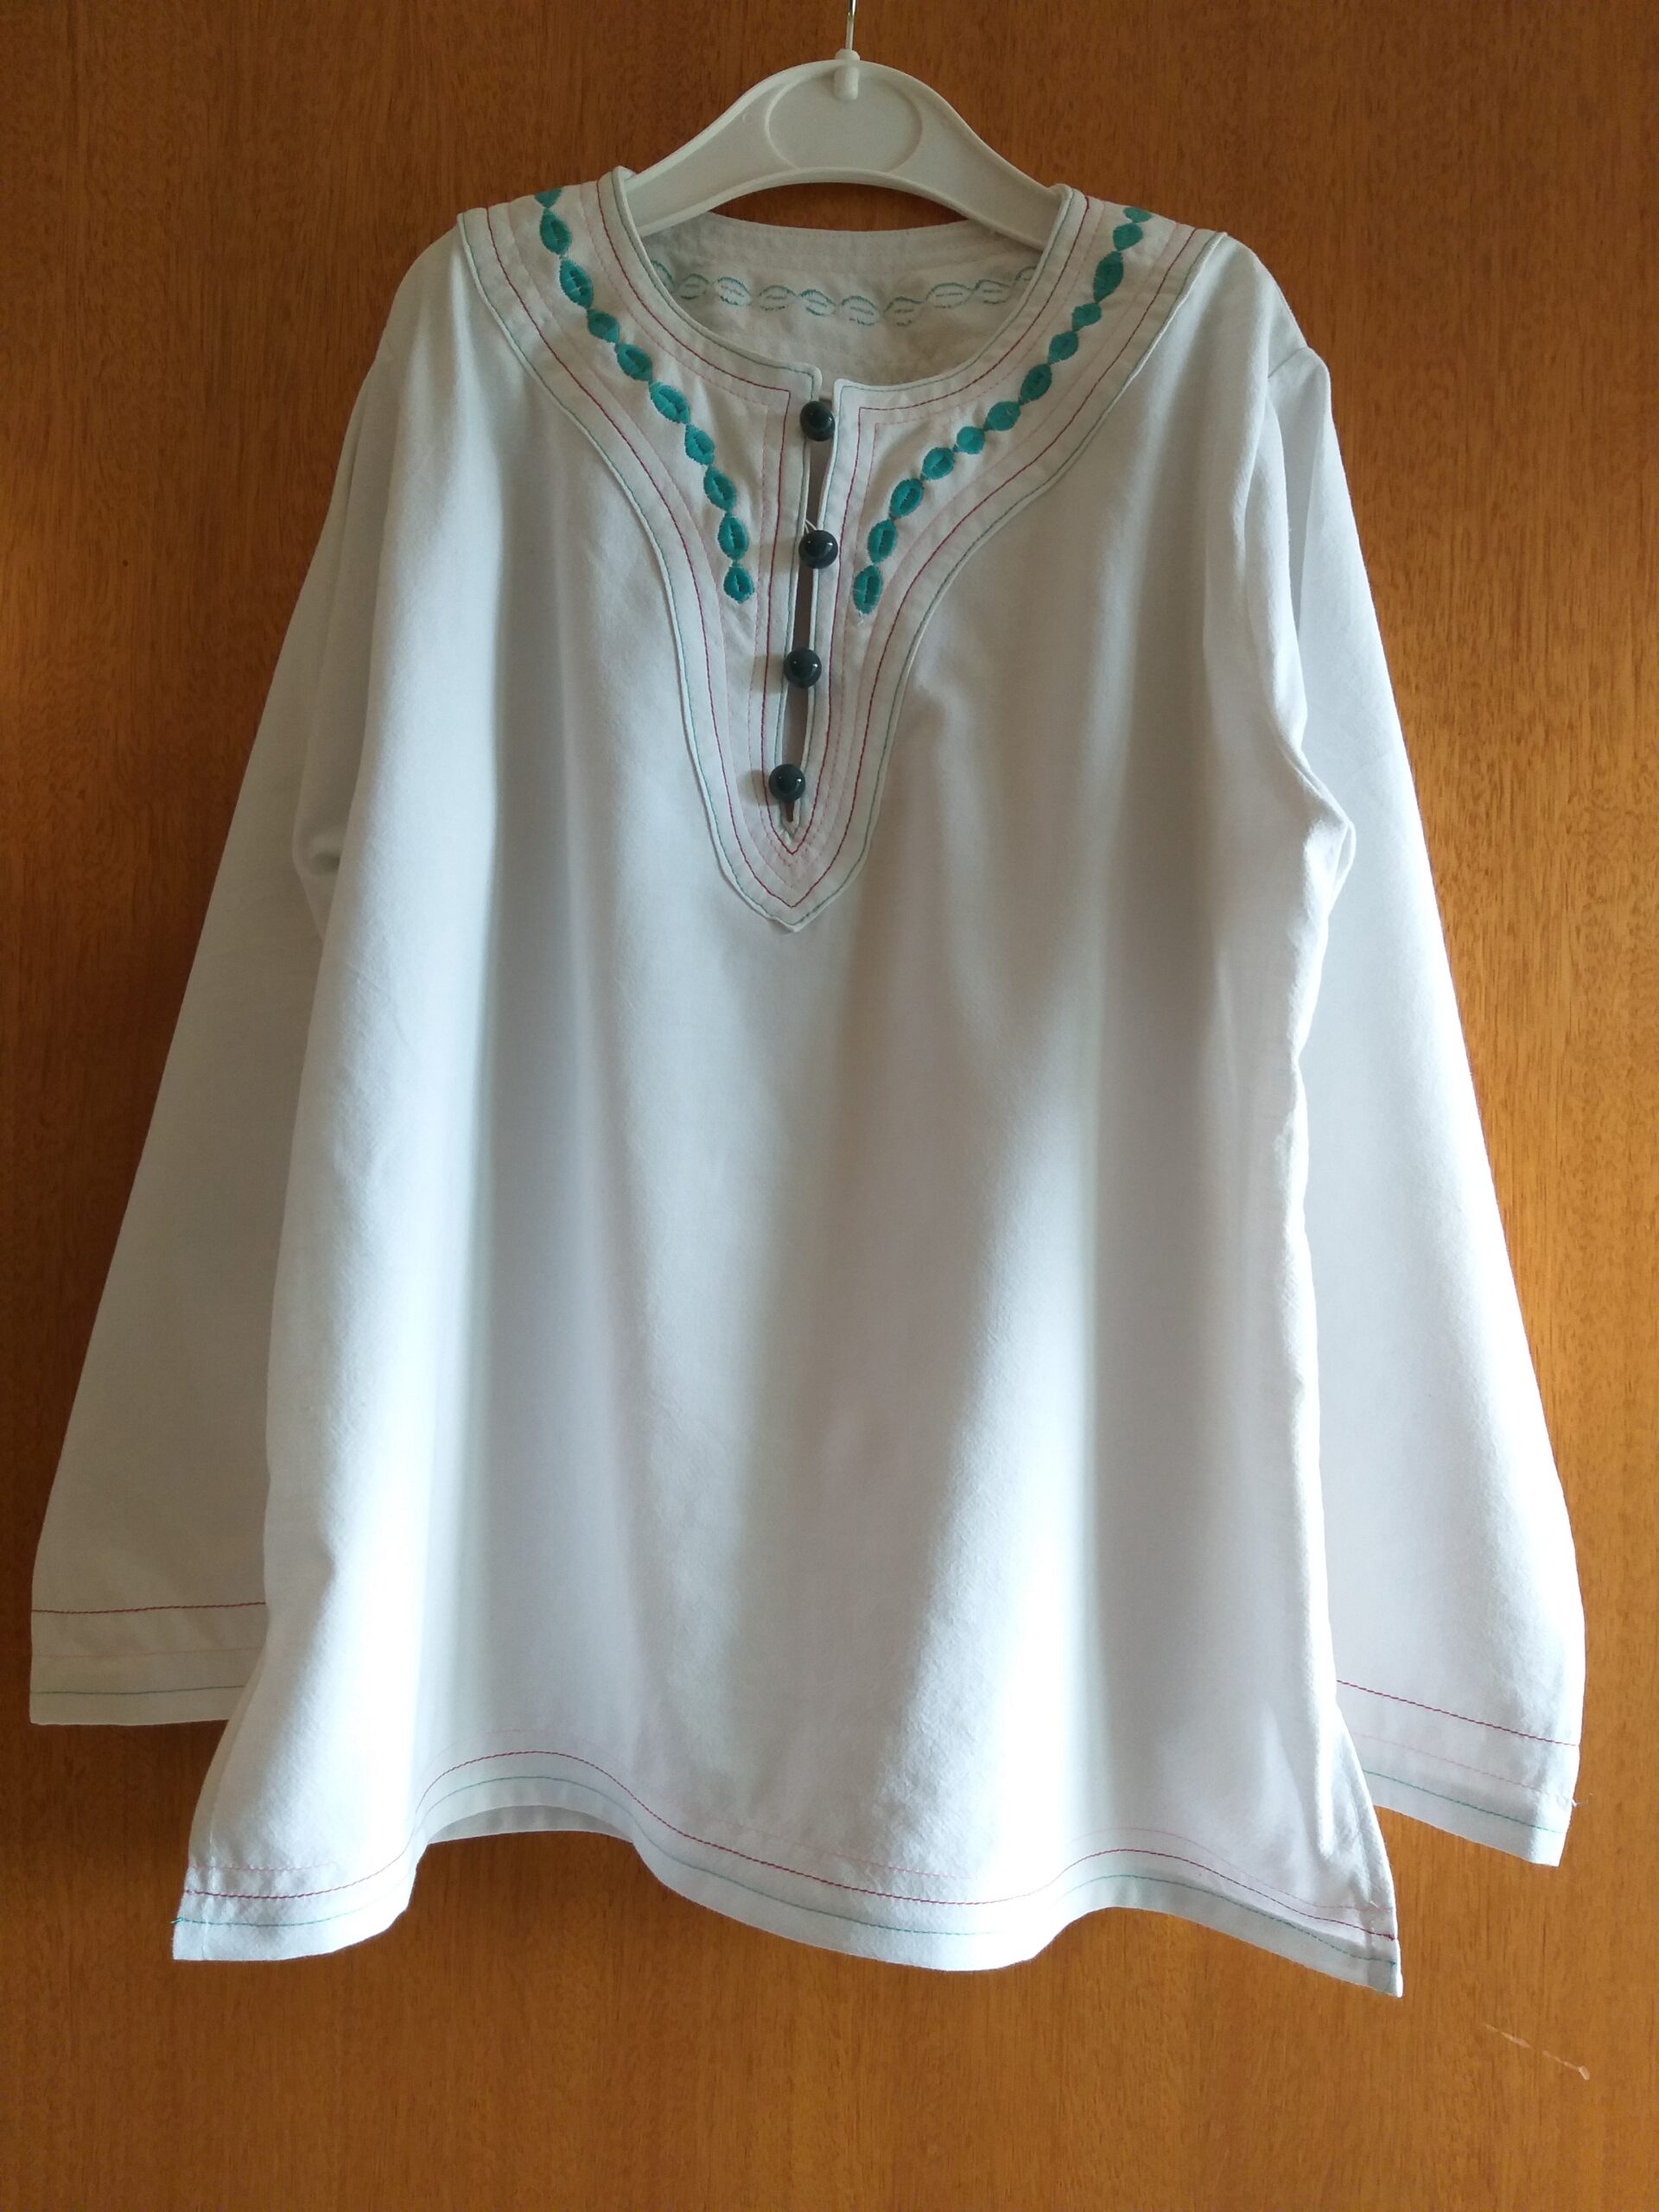
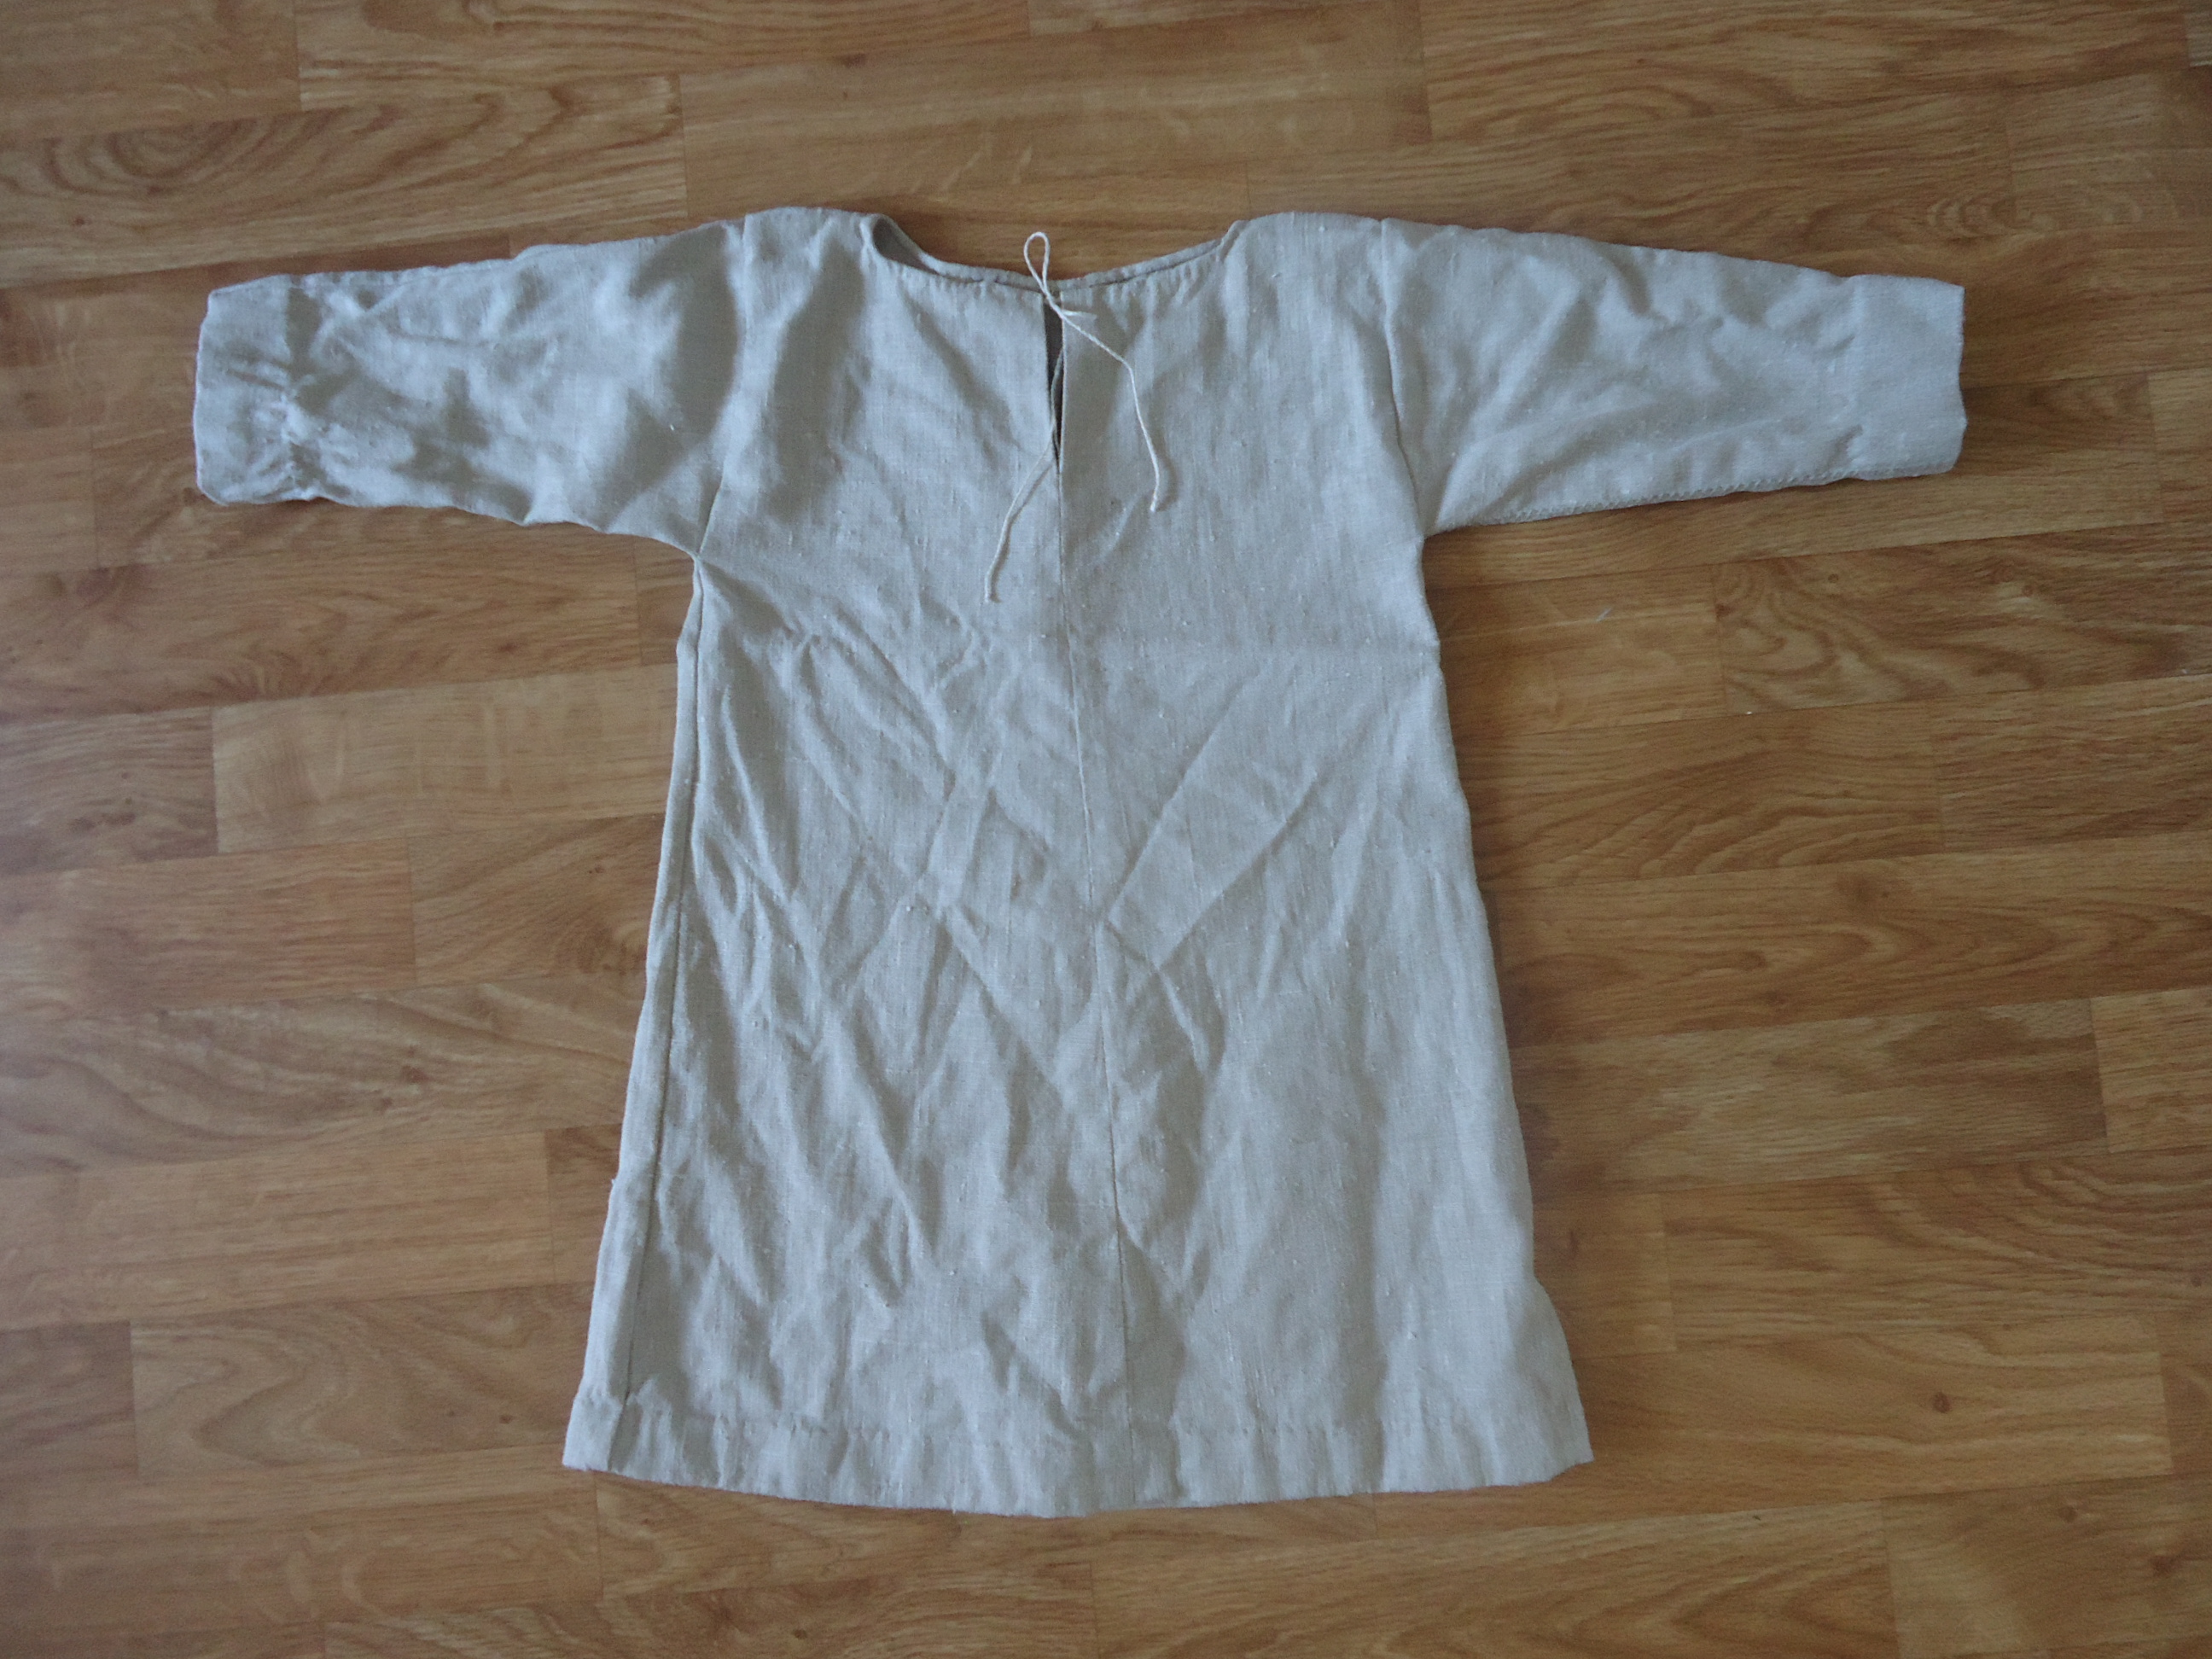
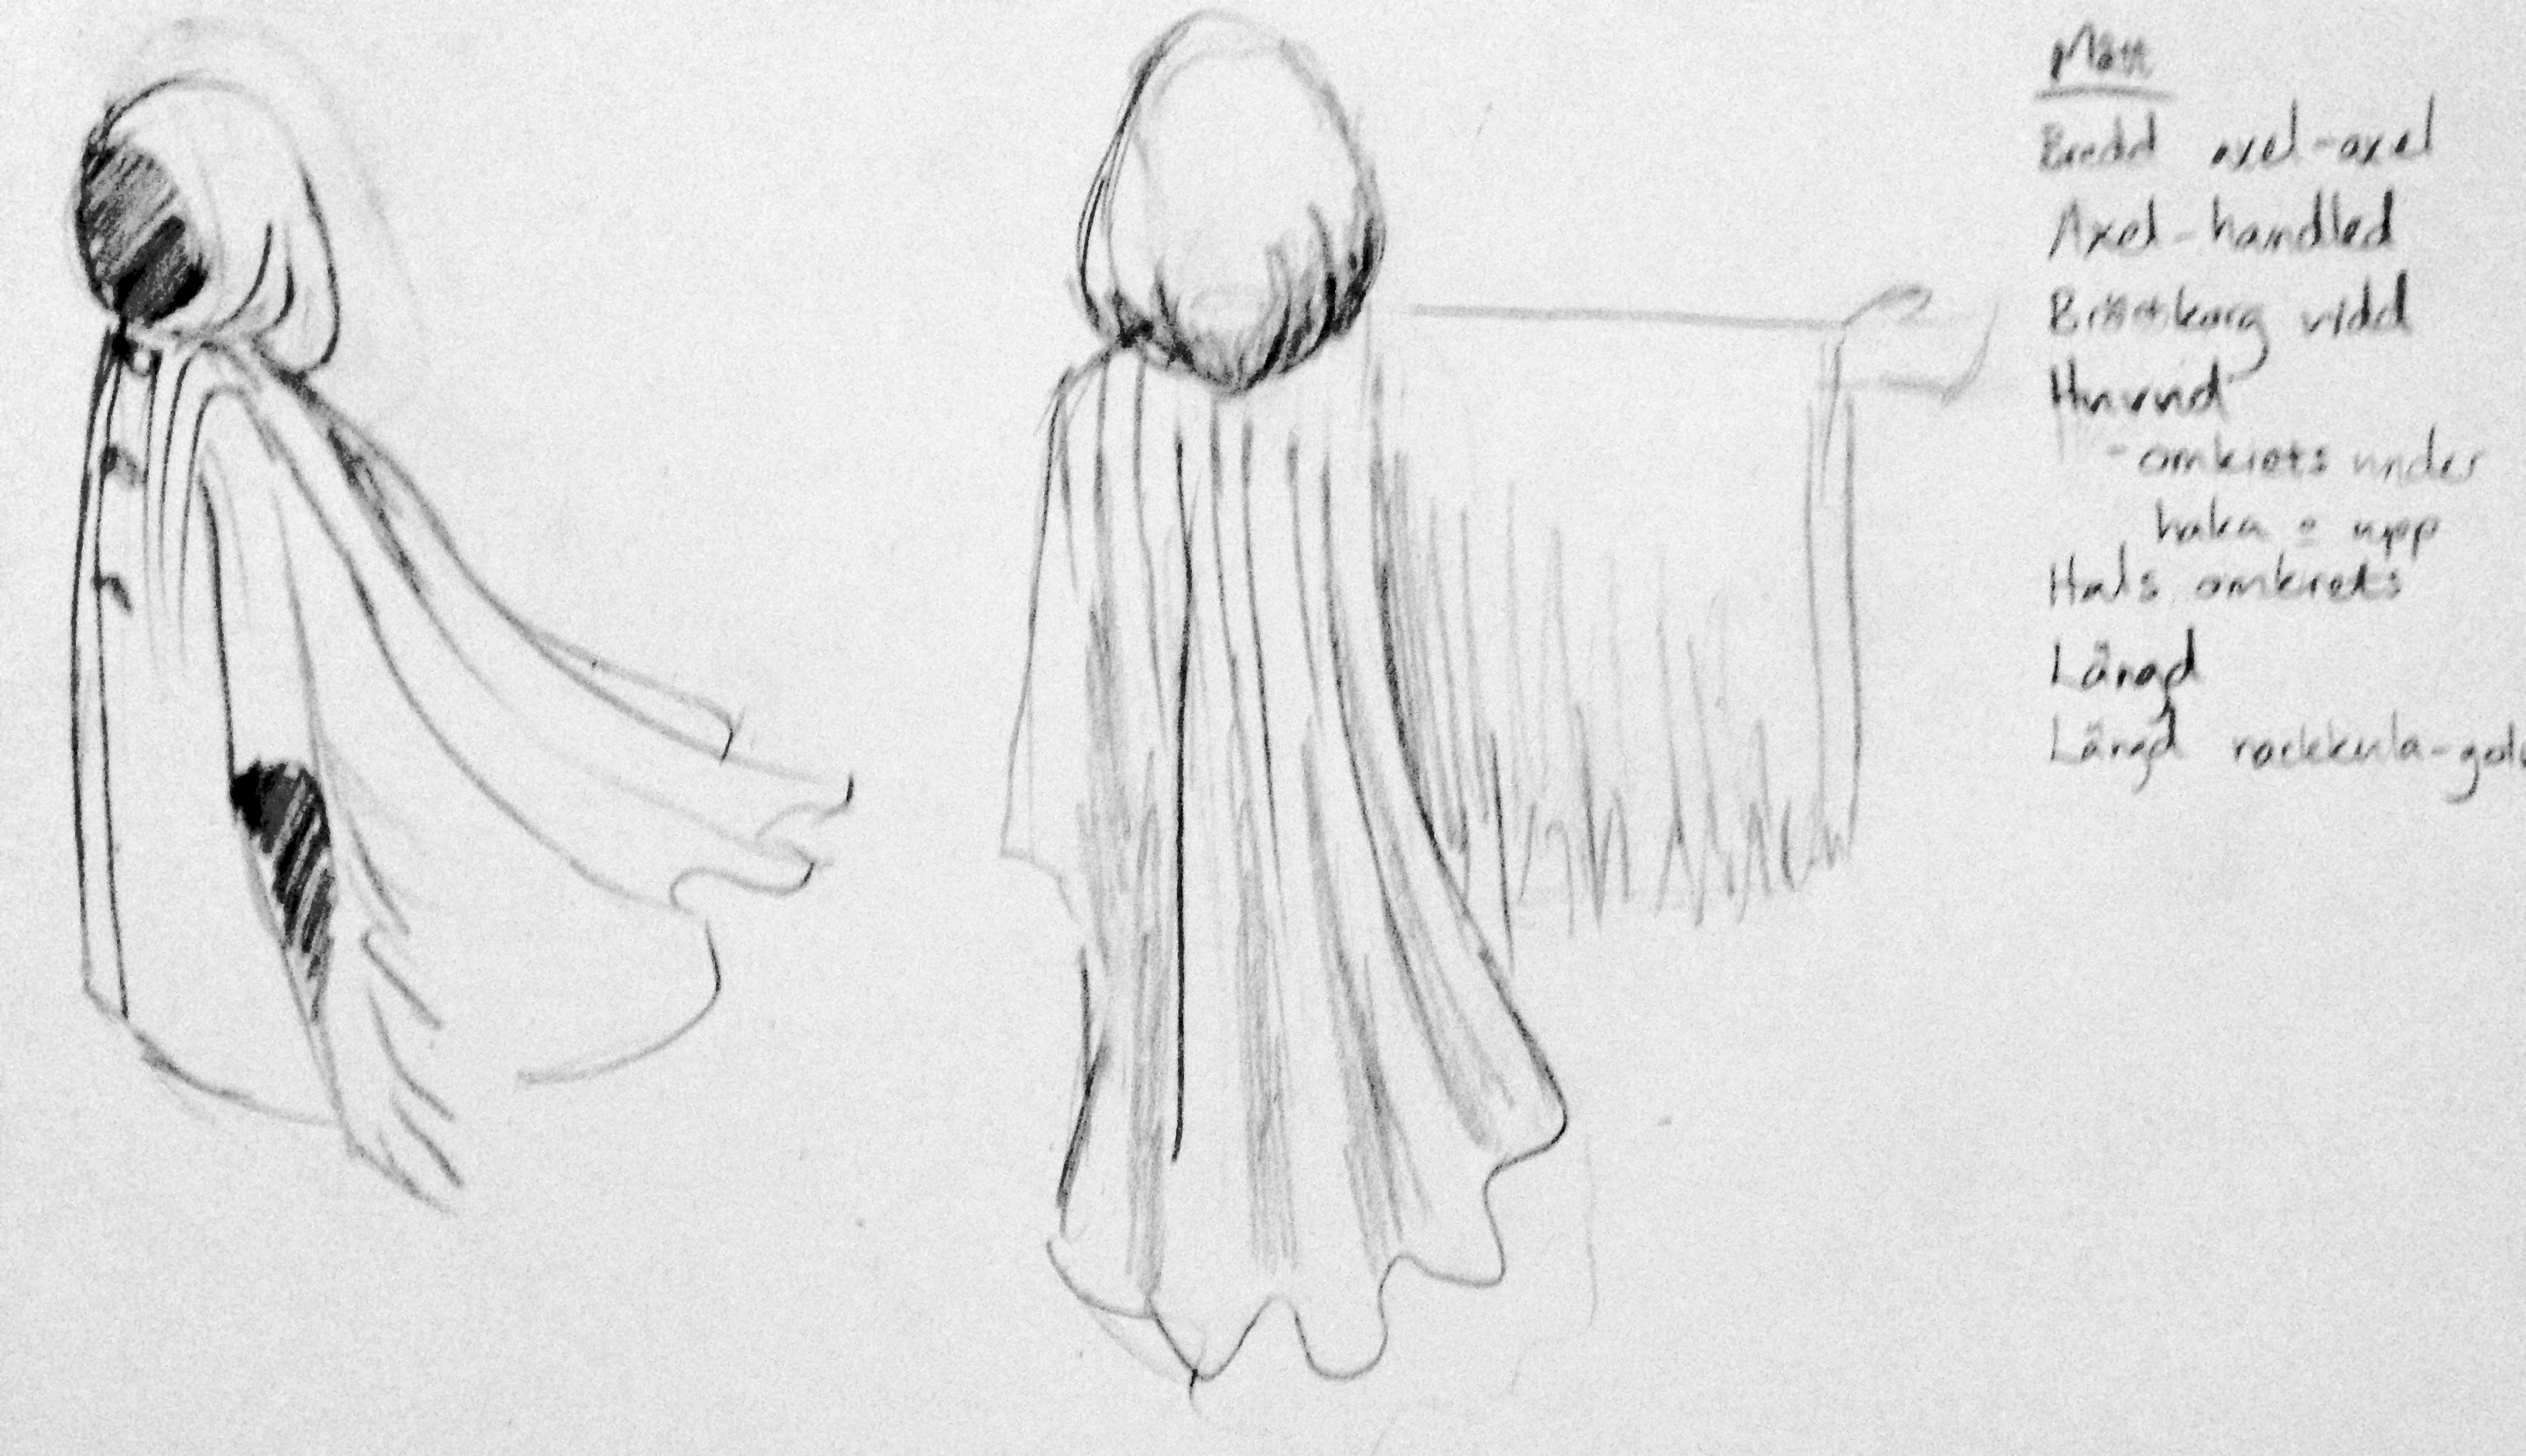
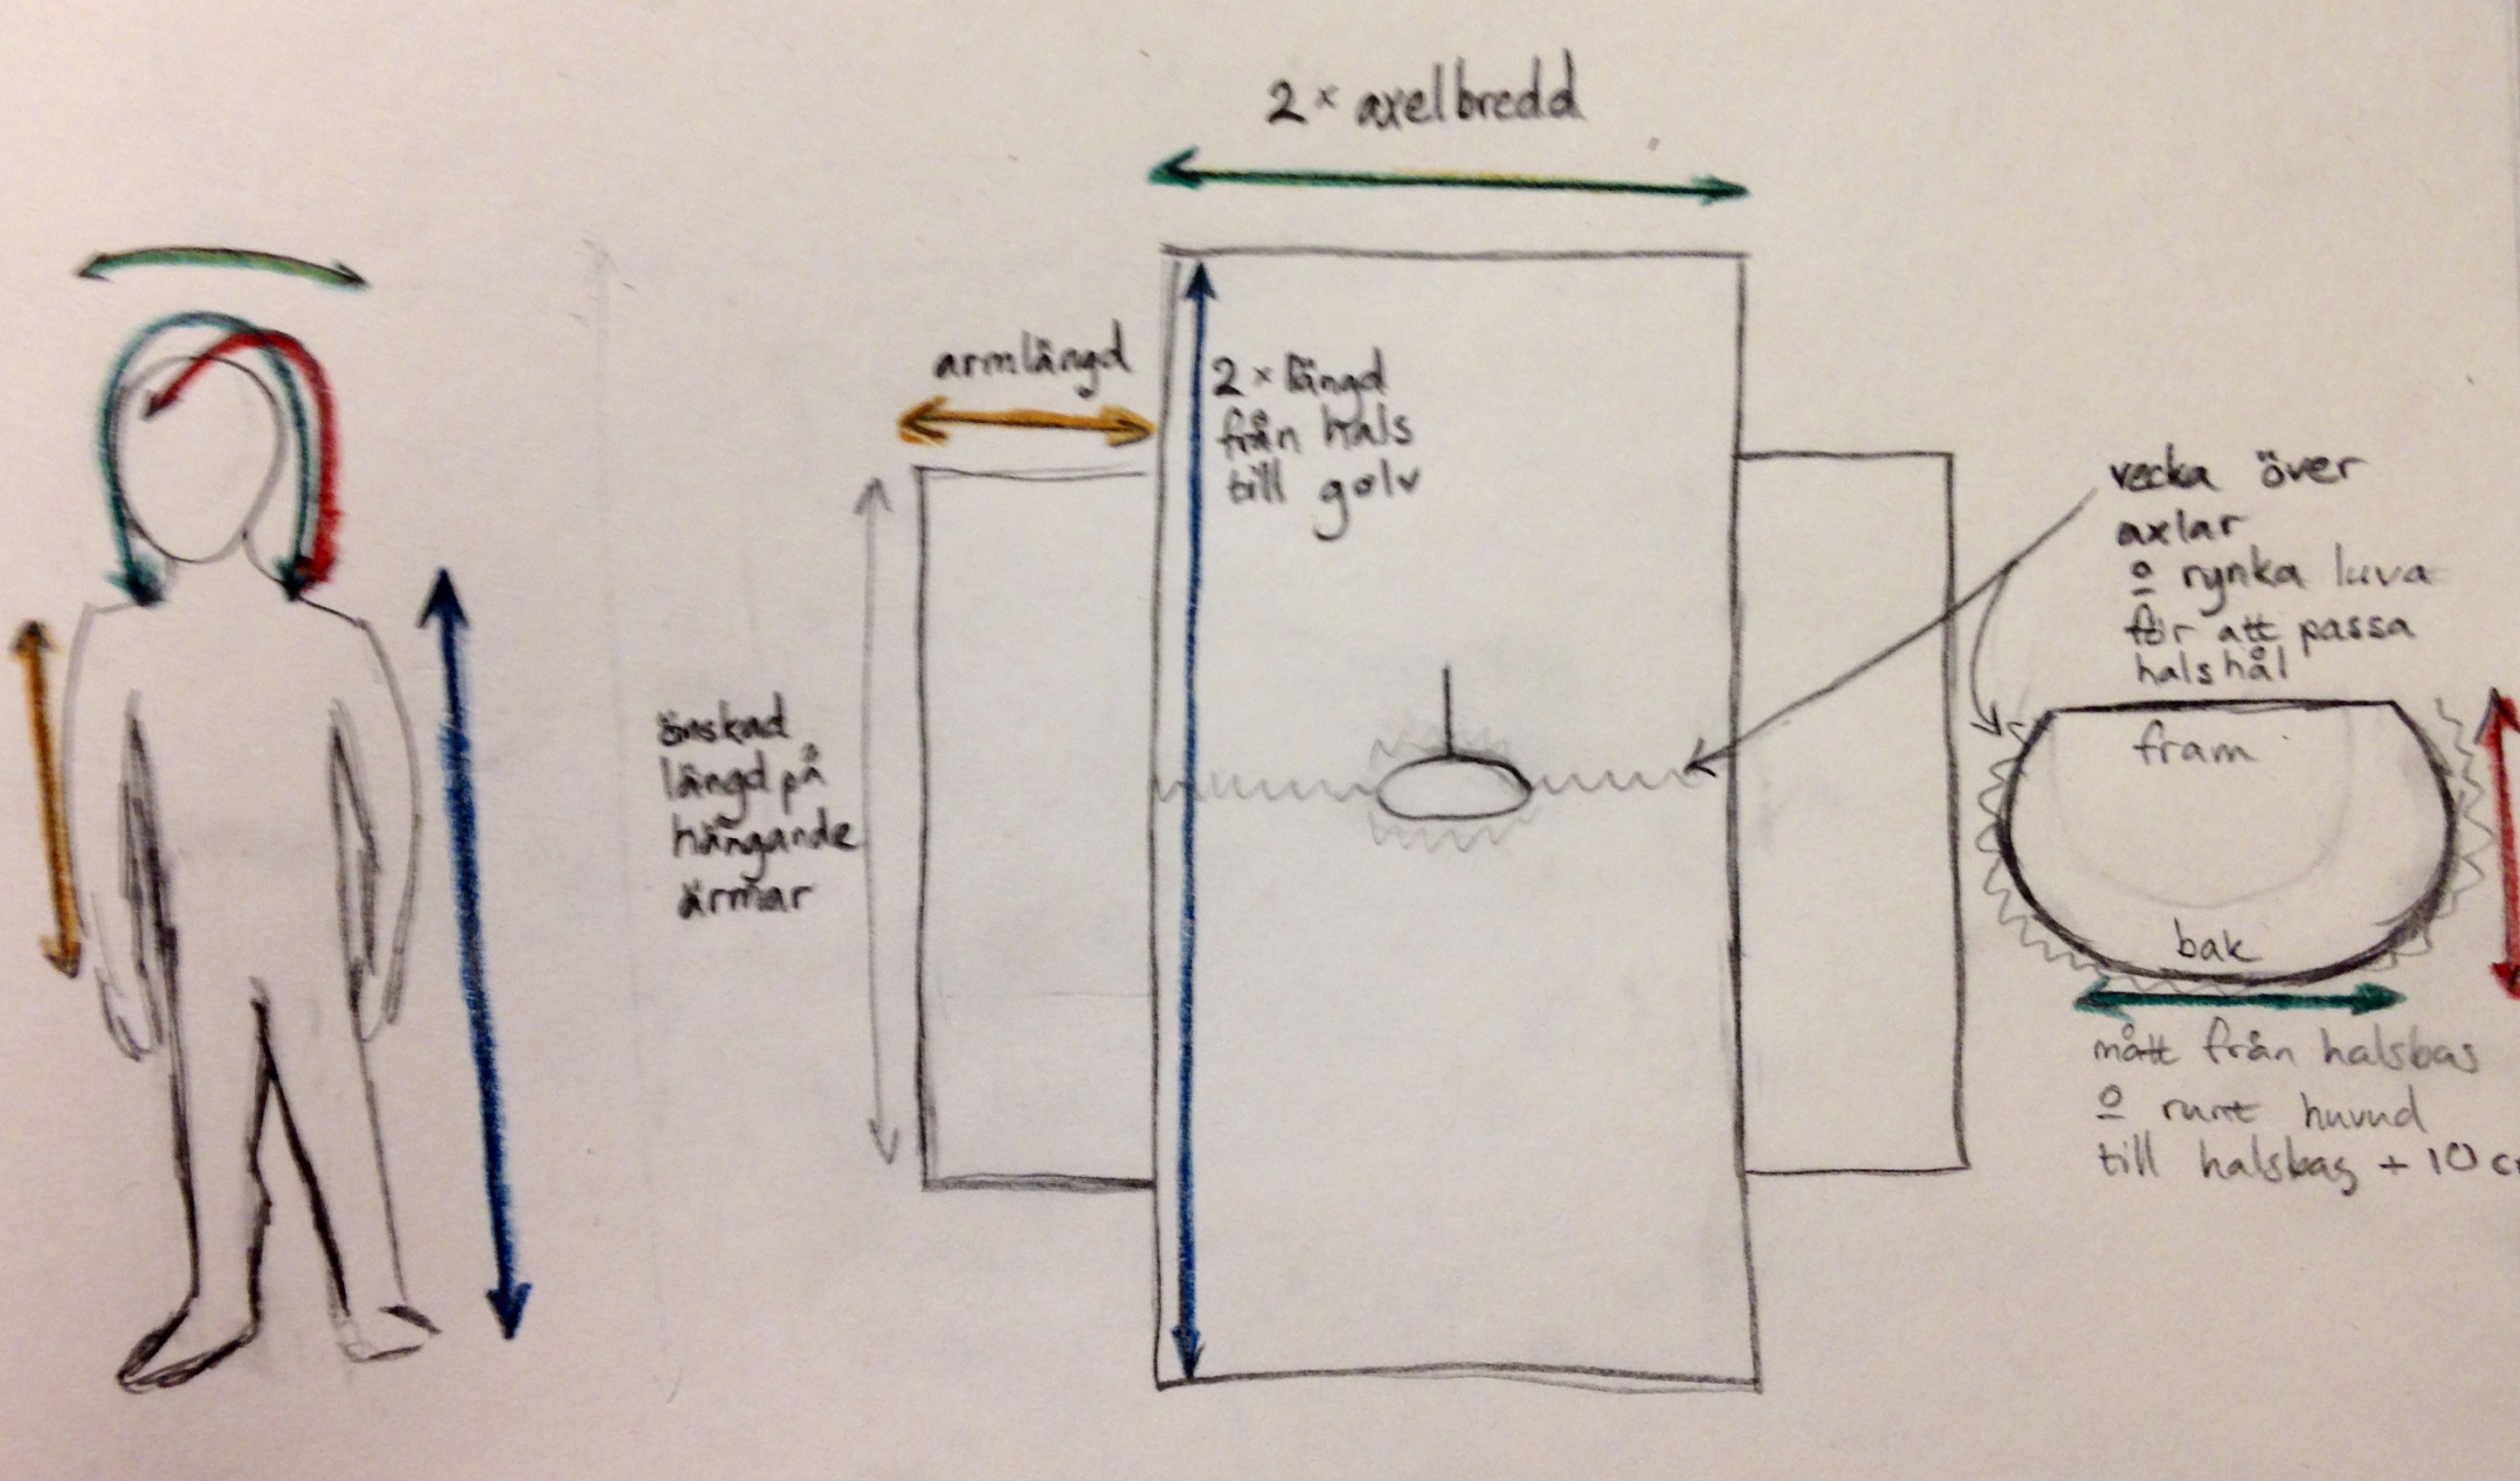
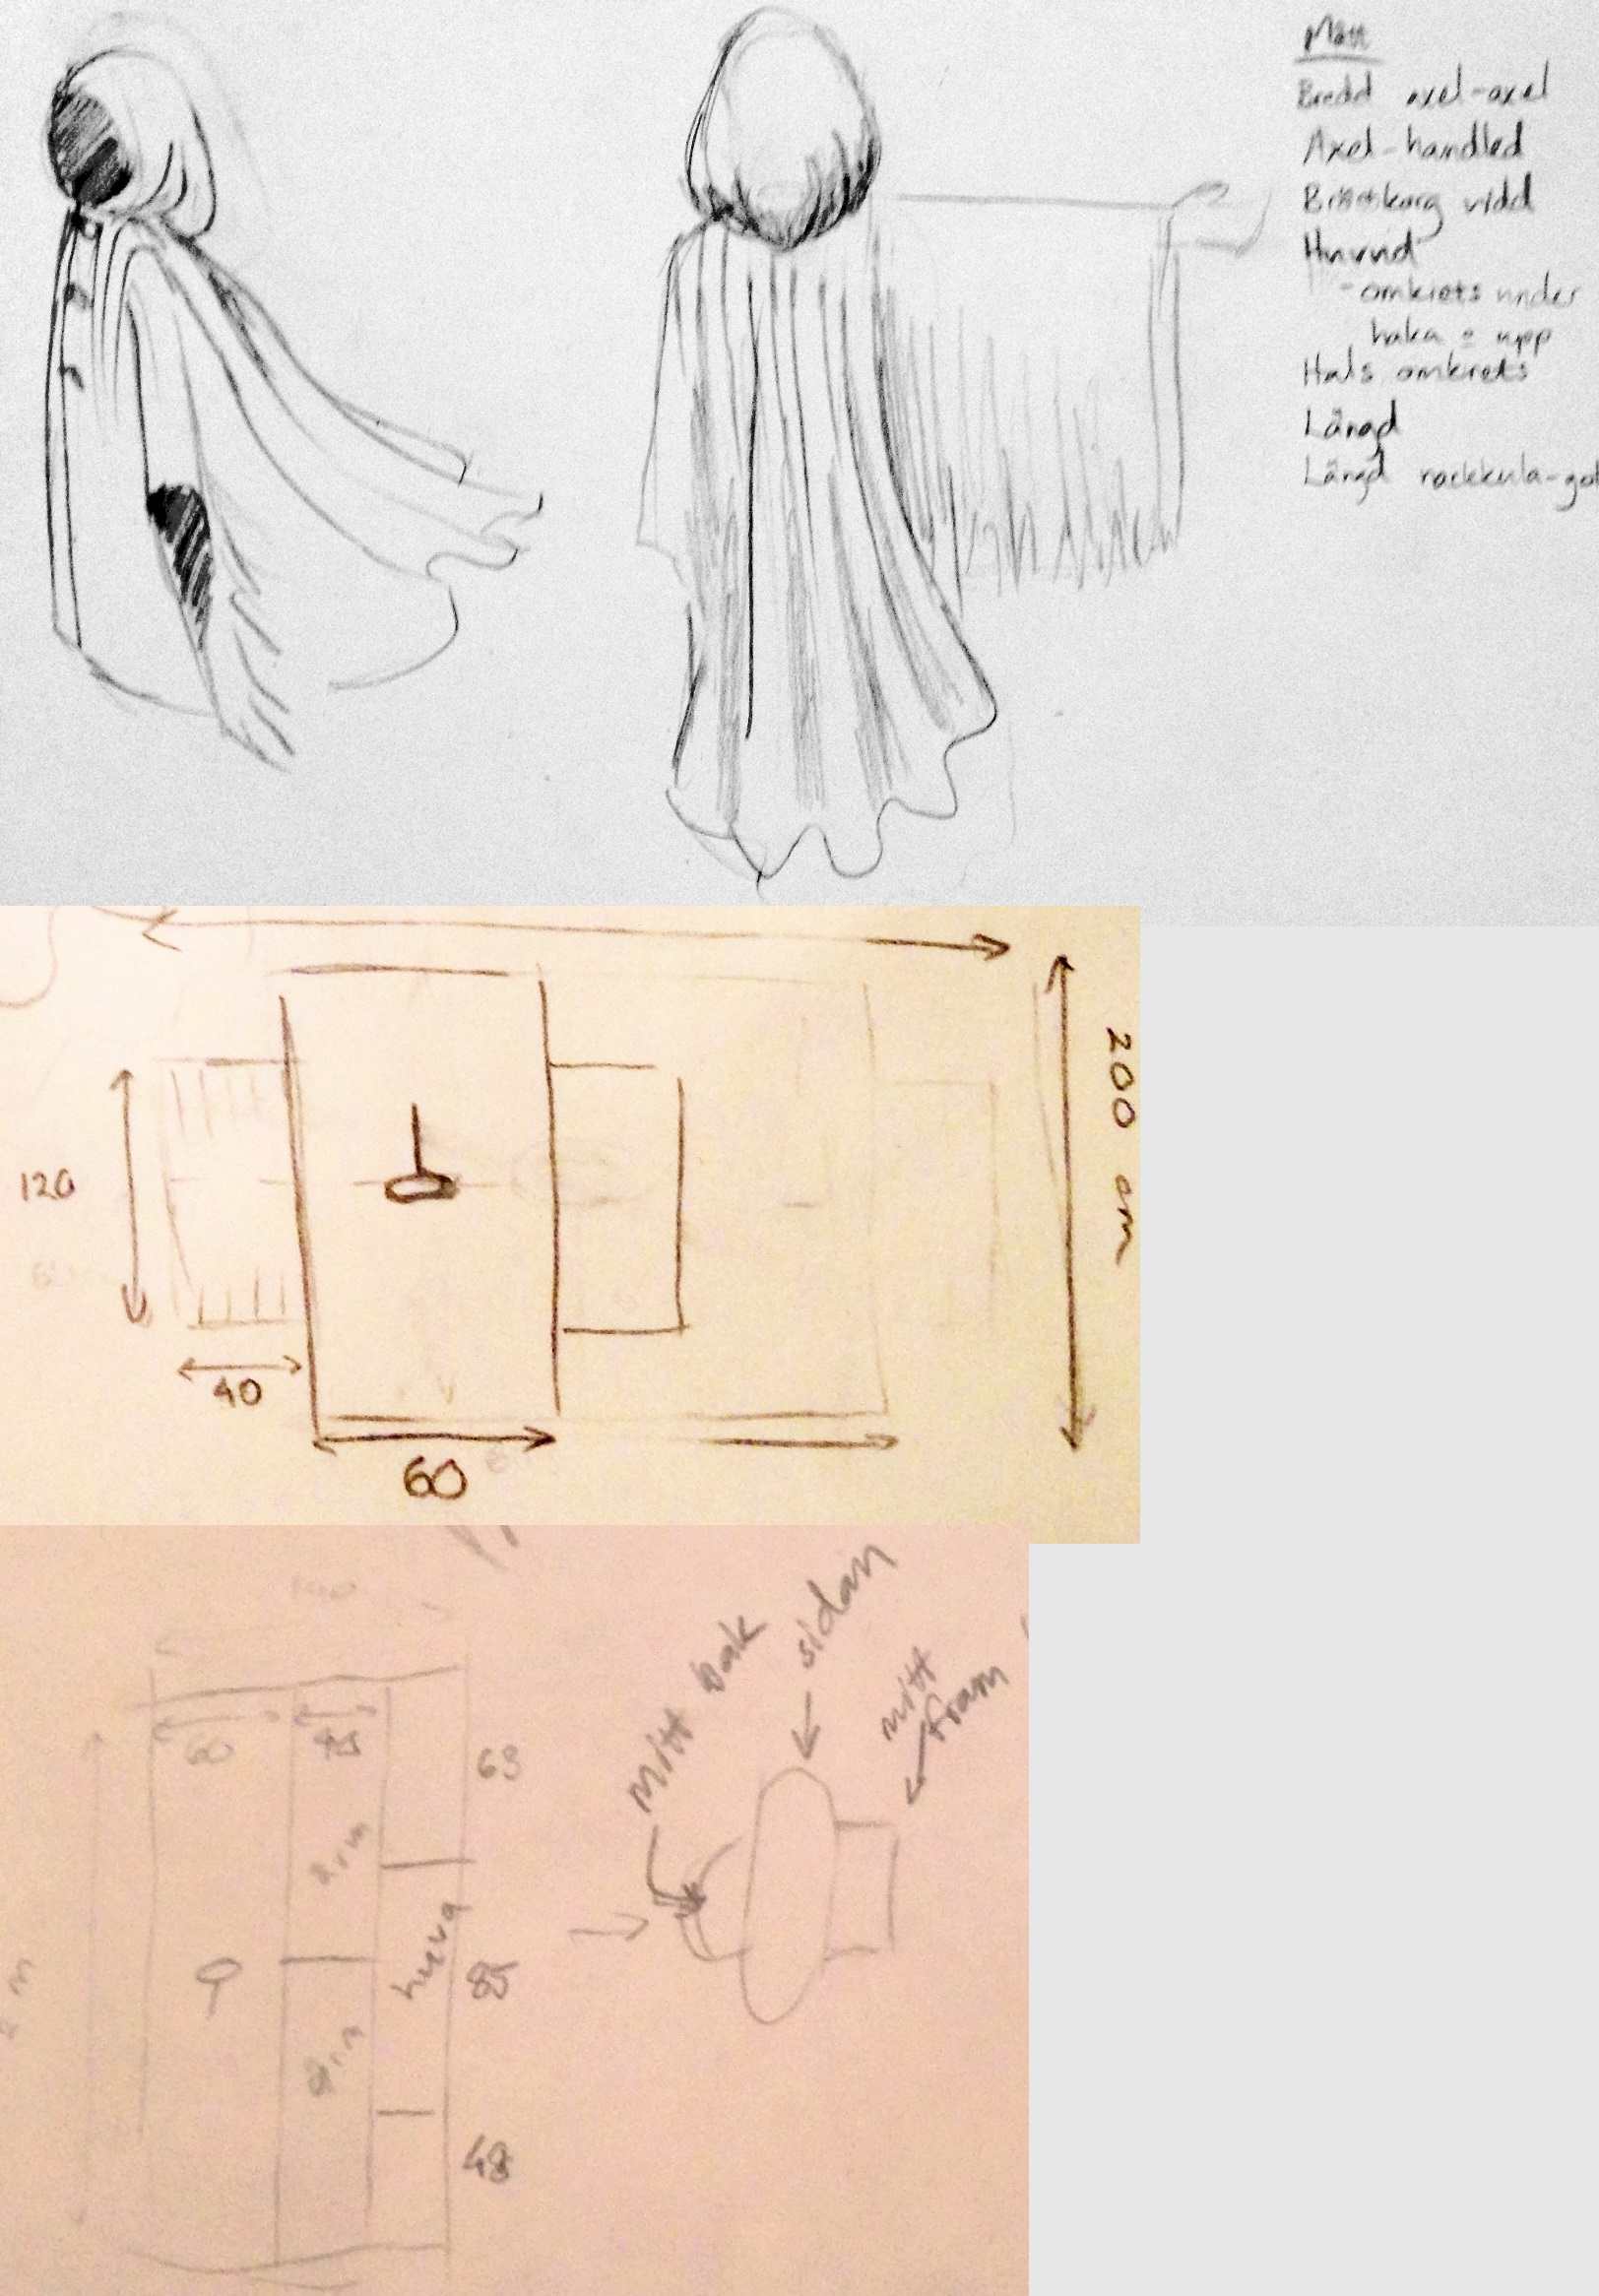
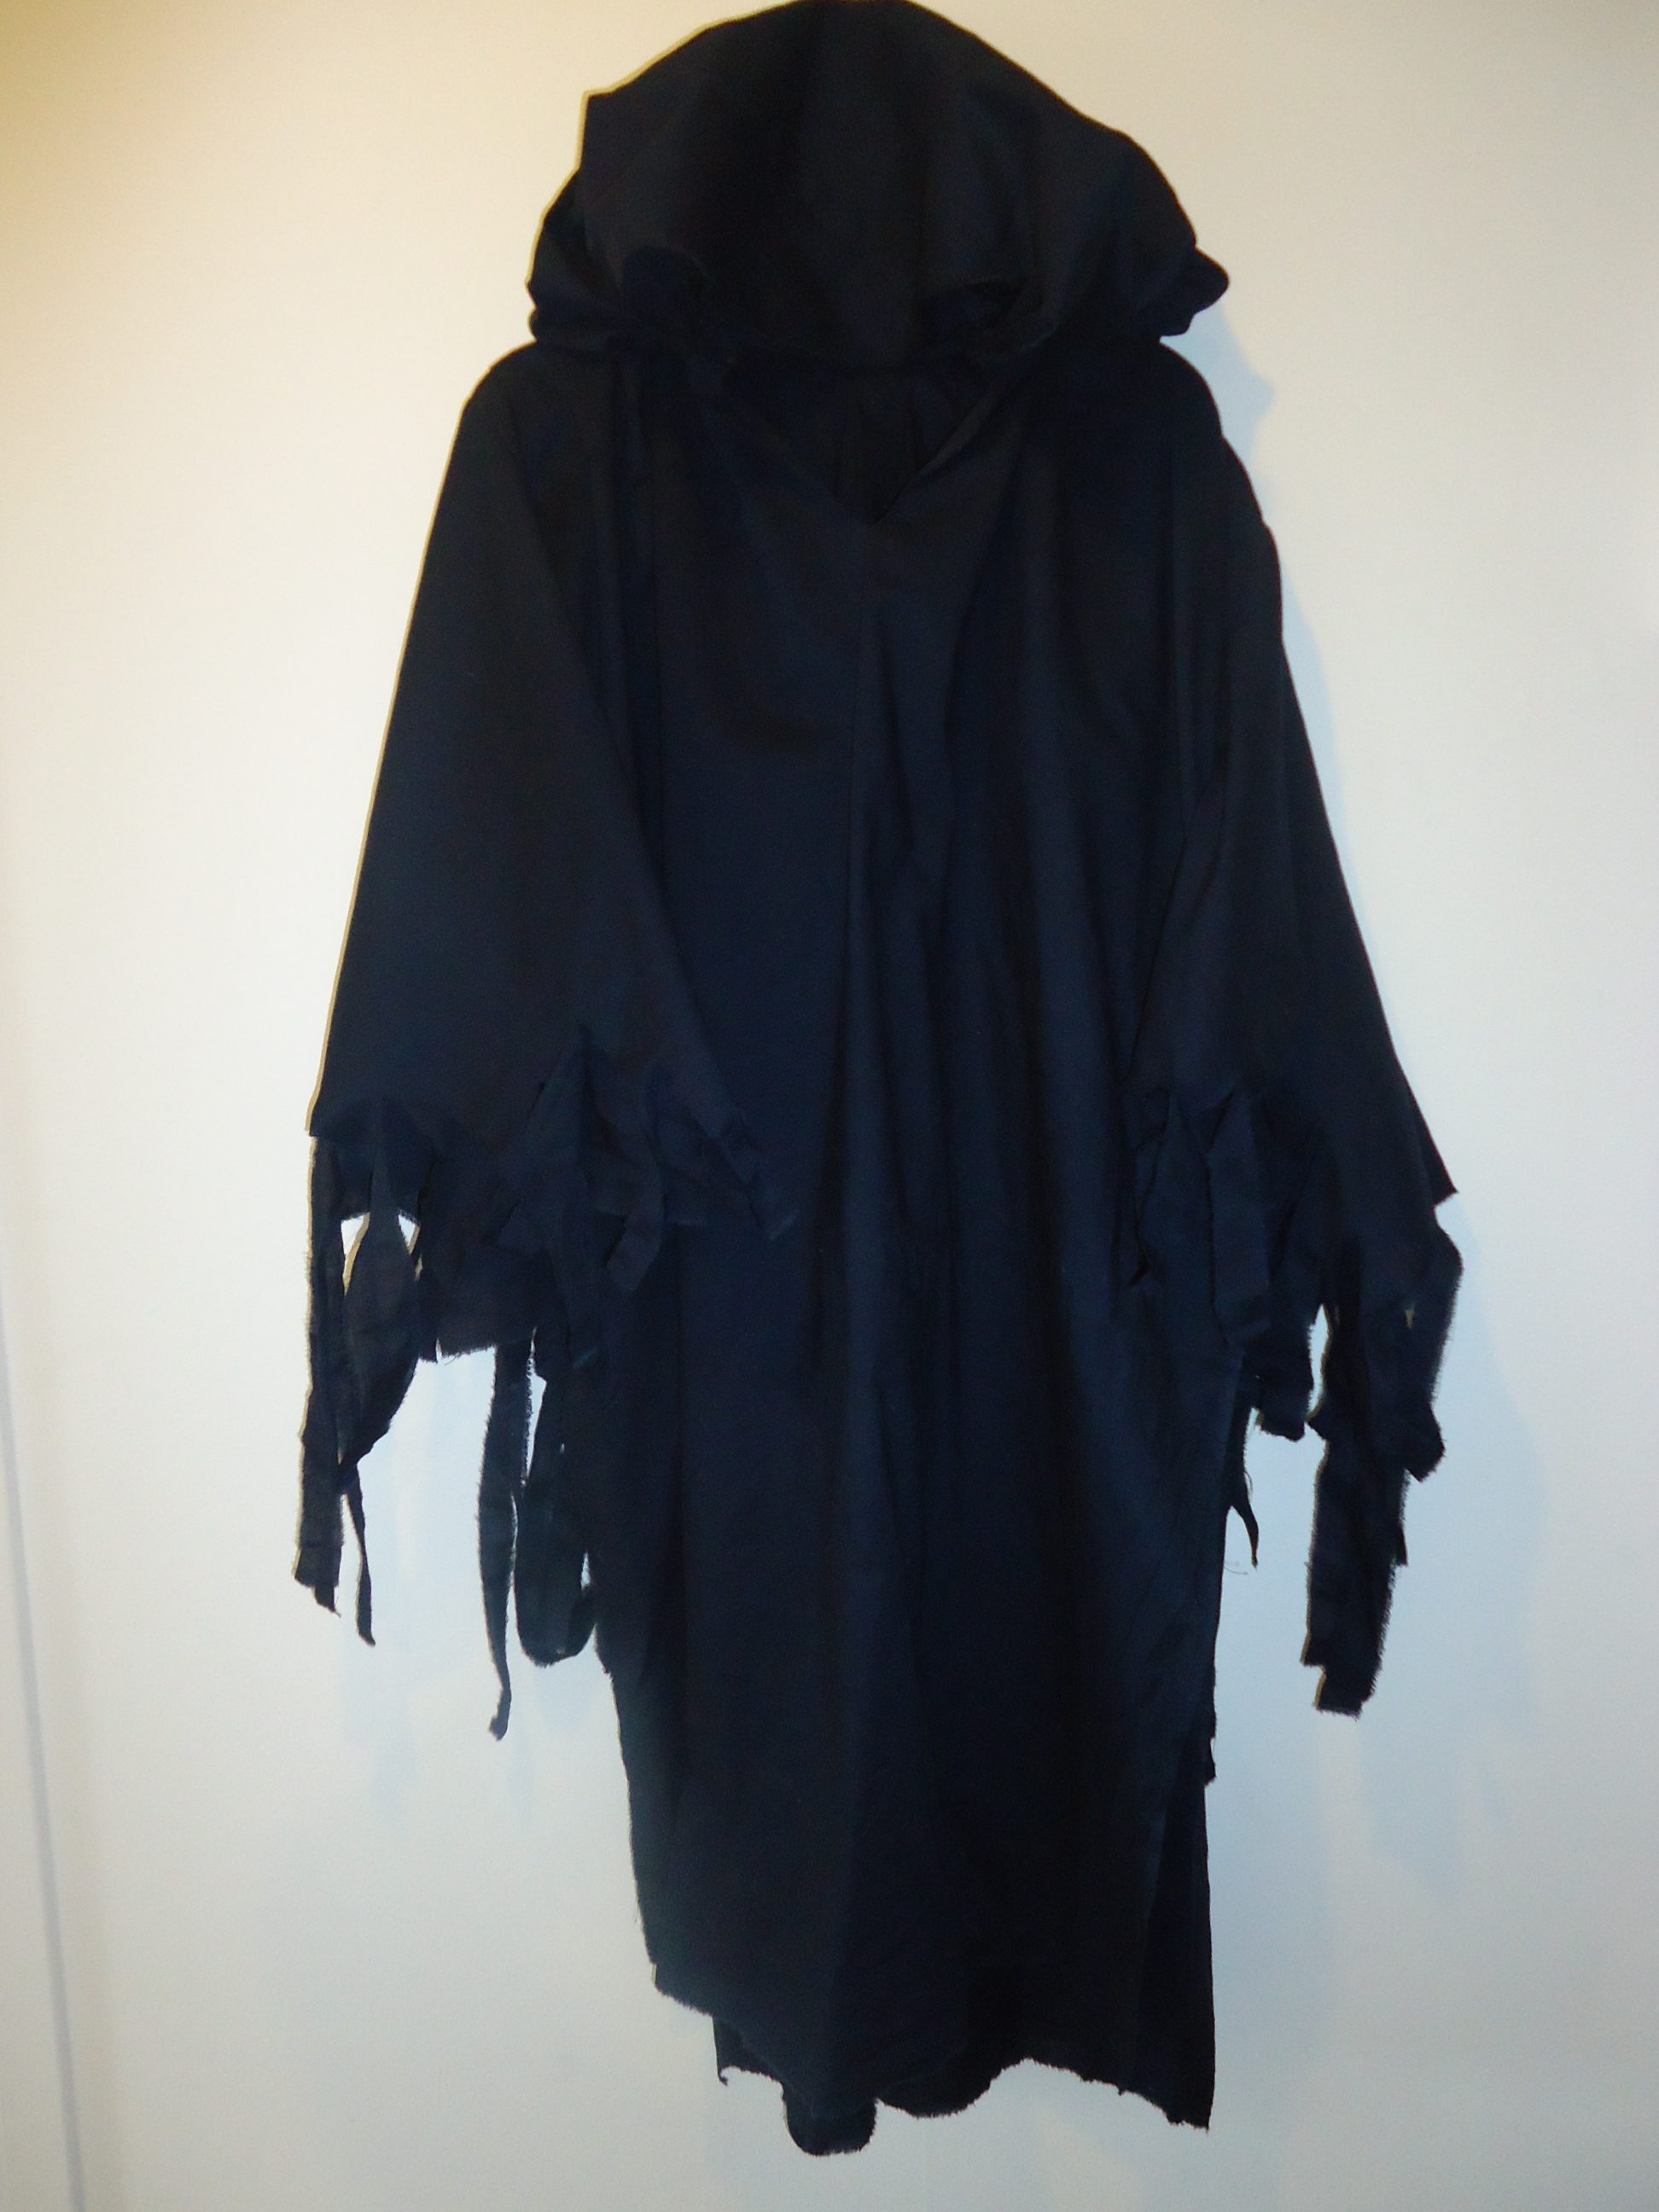
Tutorial for toddler’s shirt

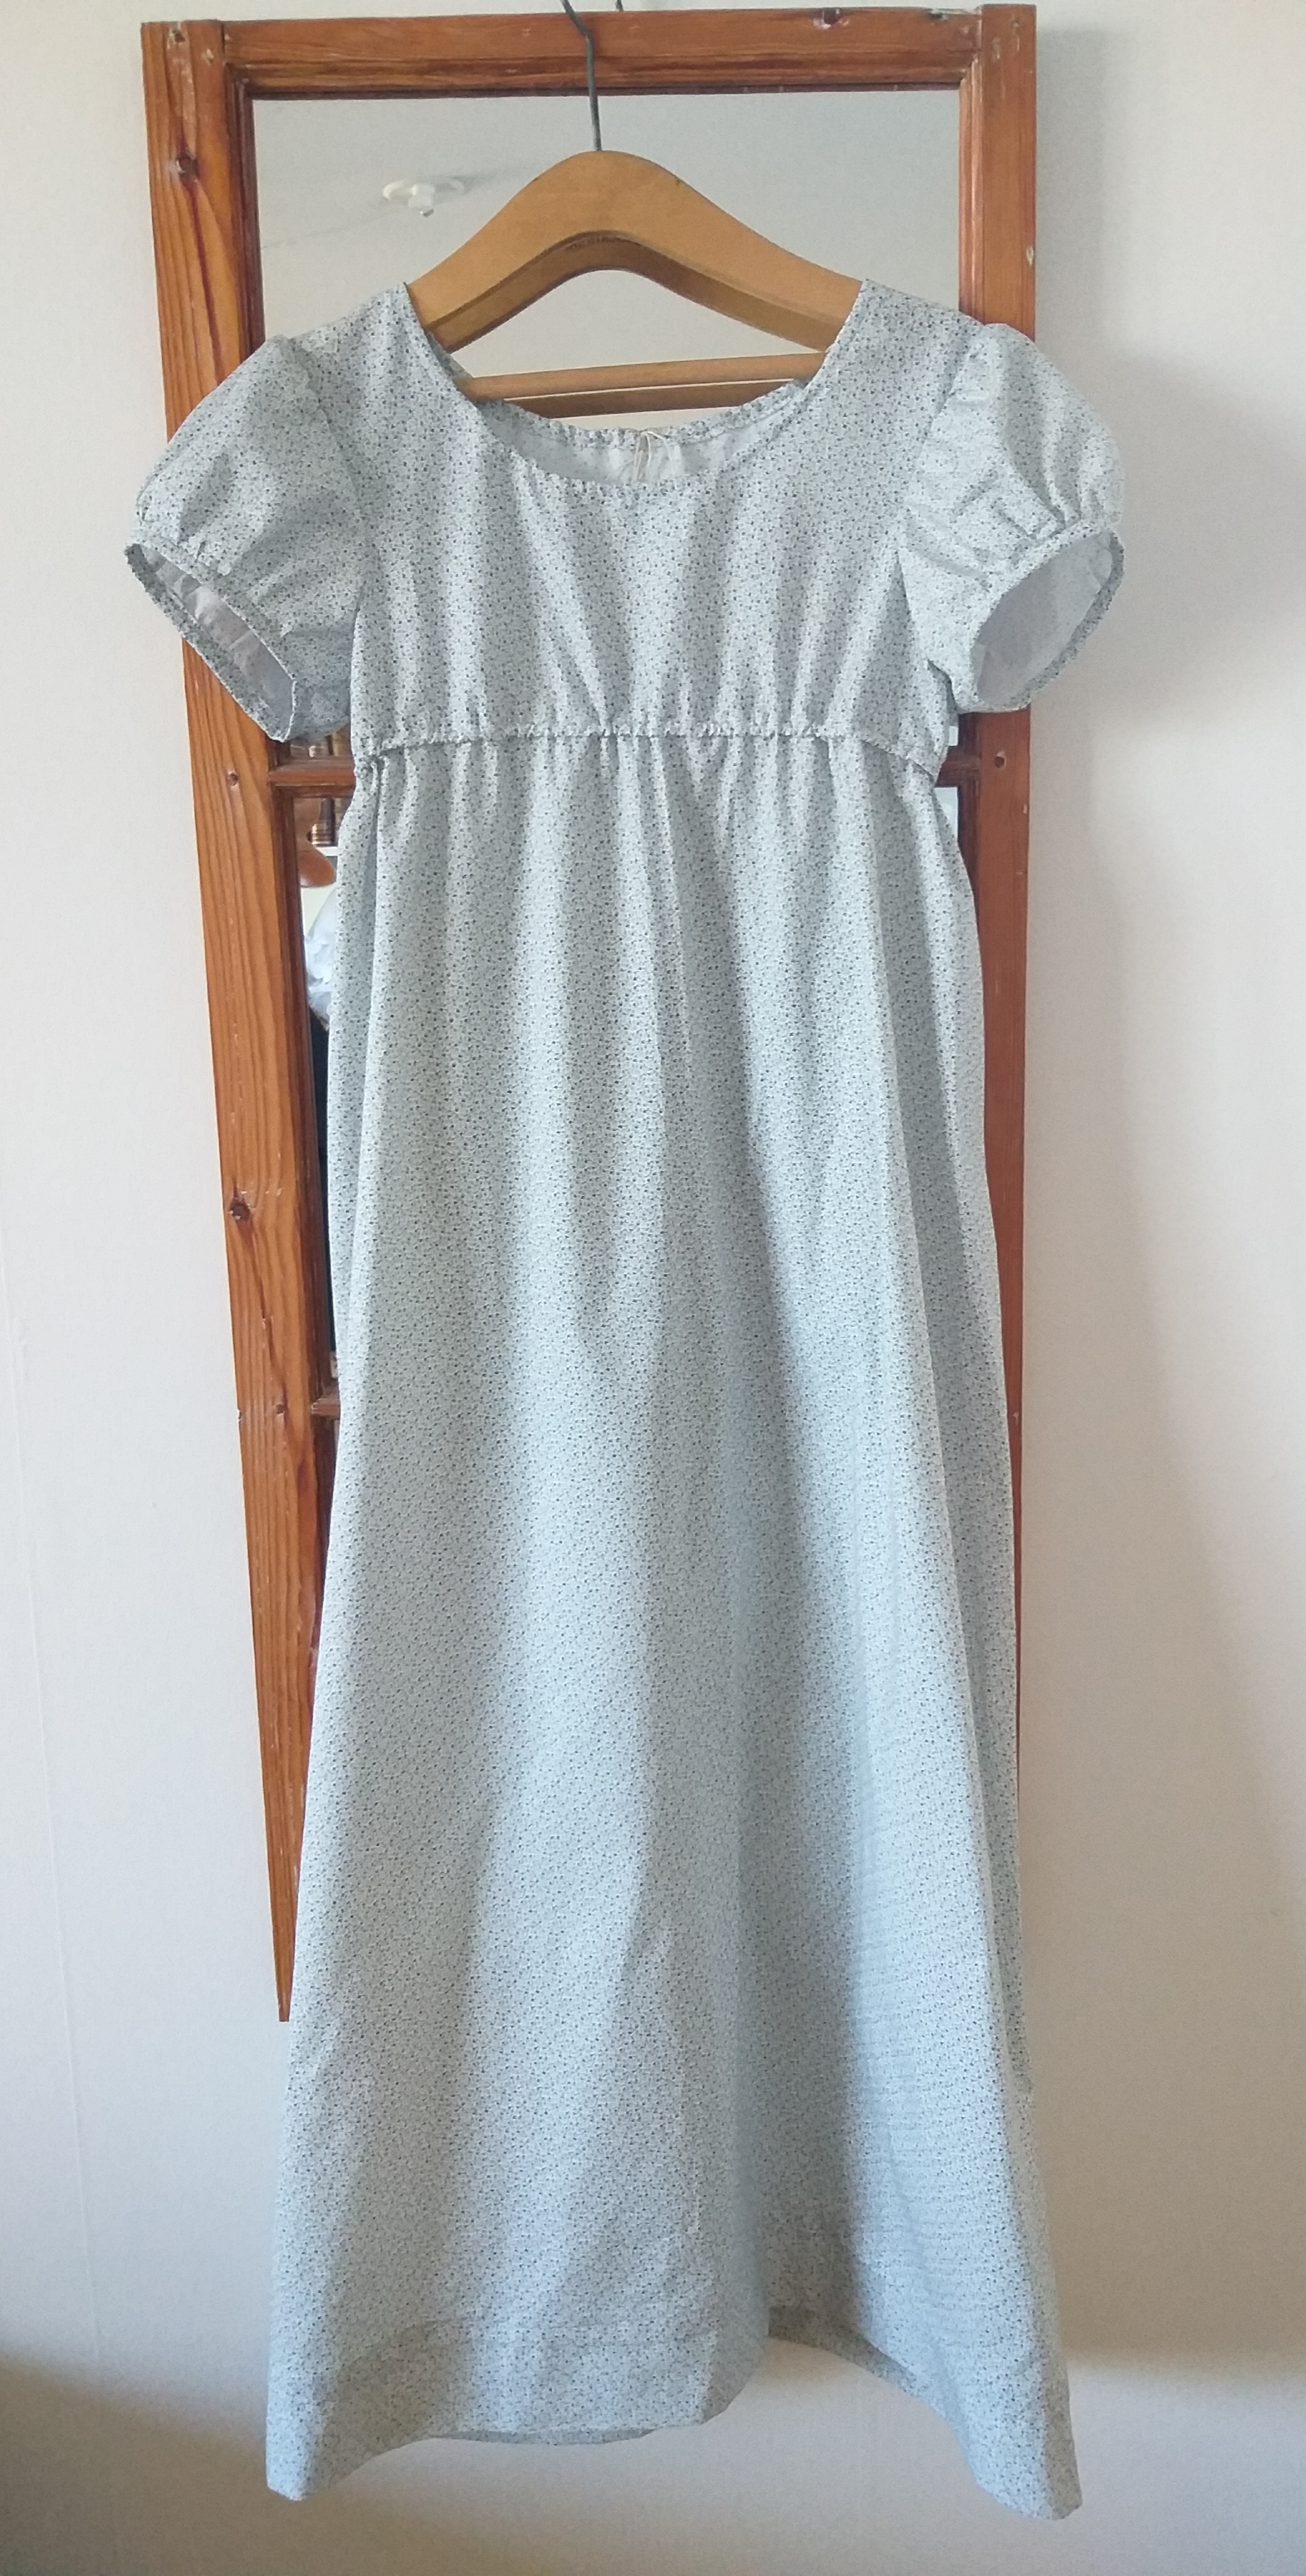
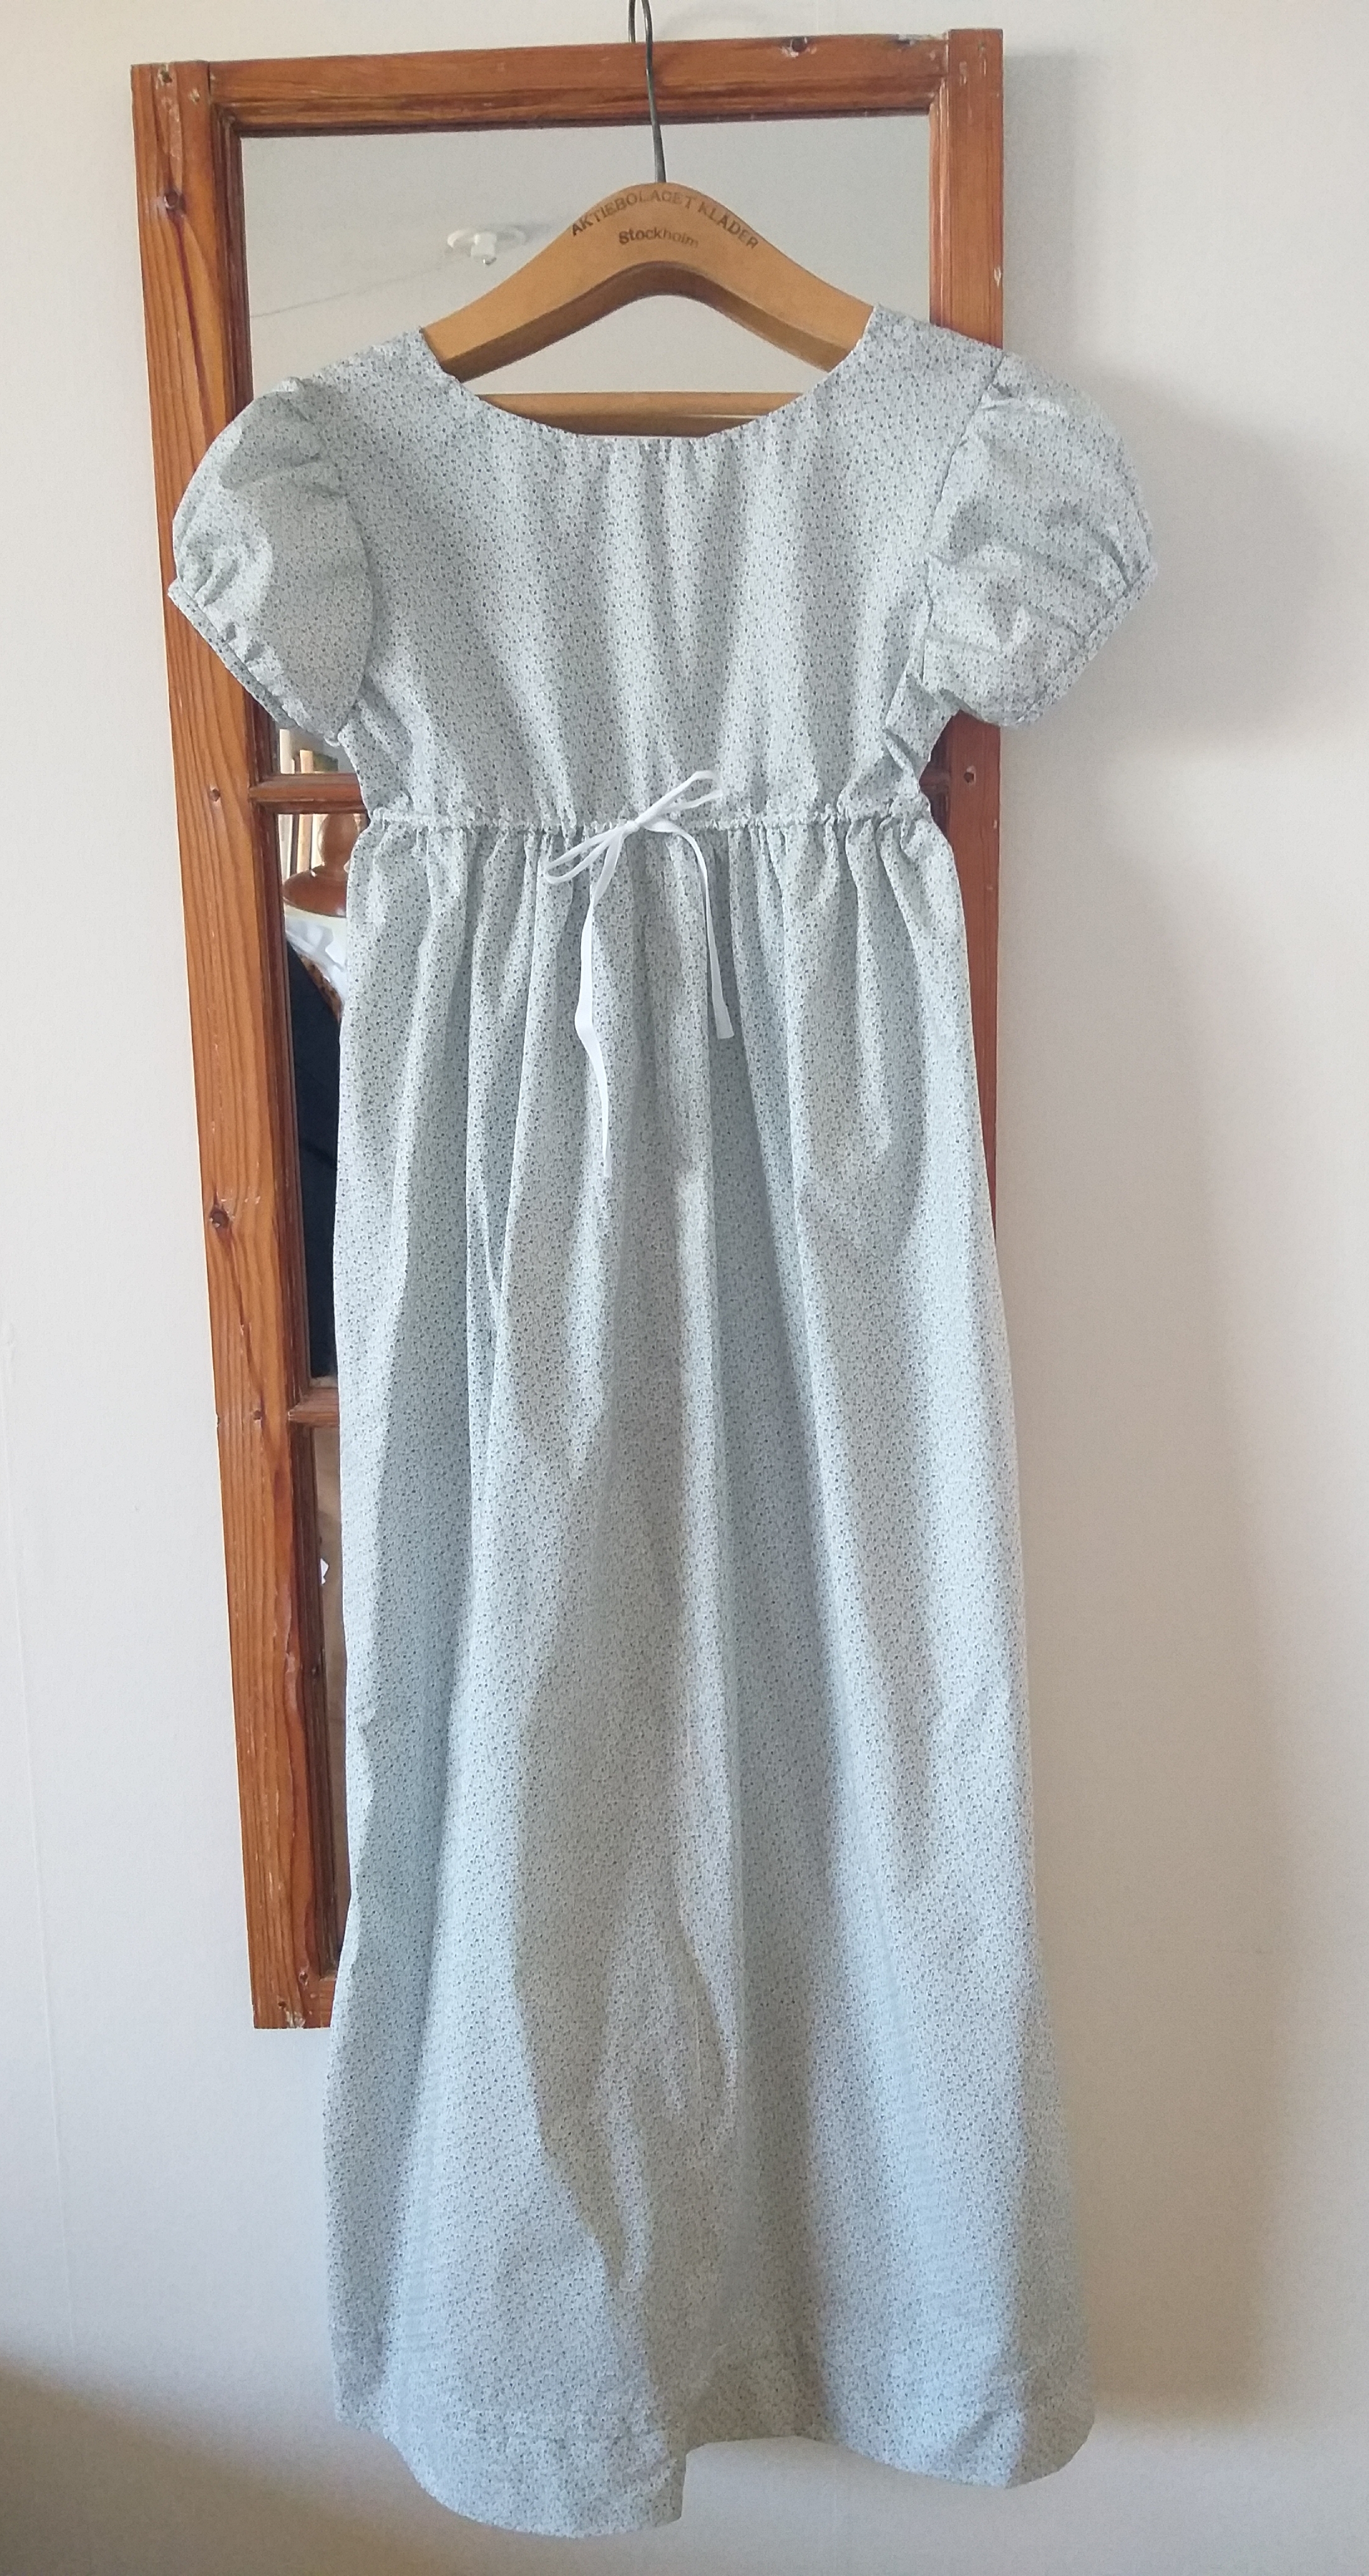
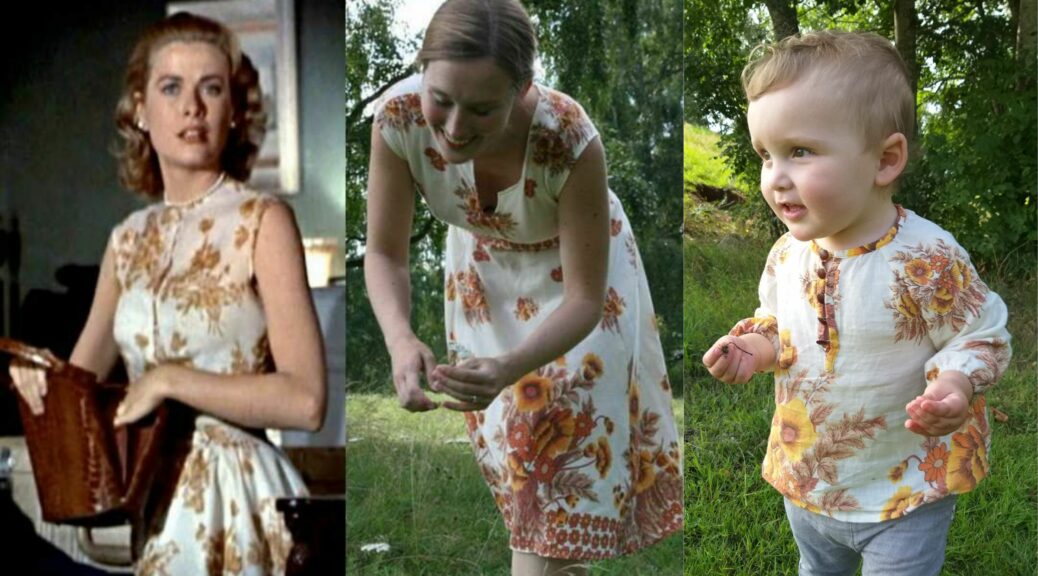
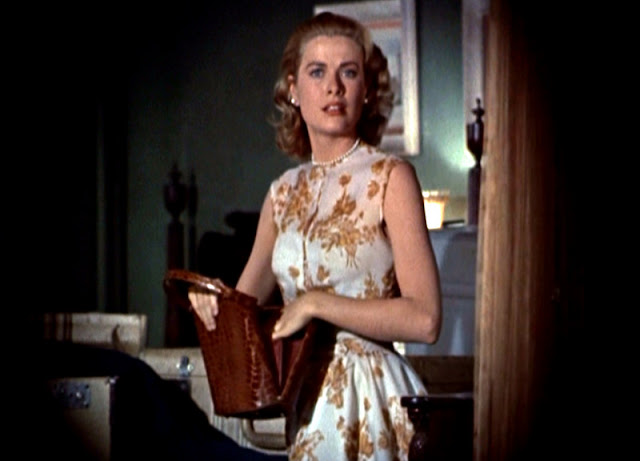
About ten years ago I found a soft, lightweight bedsheet from the 70s, with a floral print that reminded me of a beautiful dress worn by Grace Kelly in Hitchcock’s Rear Window.

För ungefär tio år sedan hittade jag ett underbart tunnslitet 70-talslakan med blomstermönster som påminde mig om Grace Kellys klänning i Hitchcocks Rear Window.

I made a more simple version, with a loose fit, tied with a bow at the waist.

Jag sydde en enklare variant, med luftig passform, sammanhållen med en rosett i midjan.

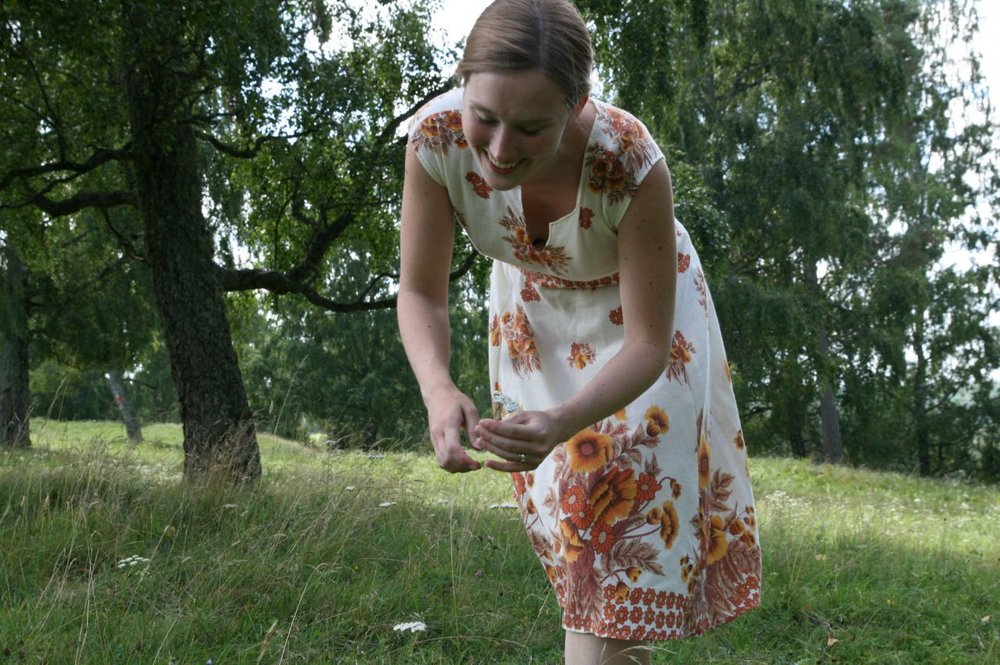
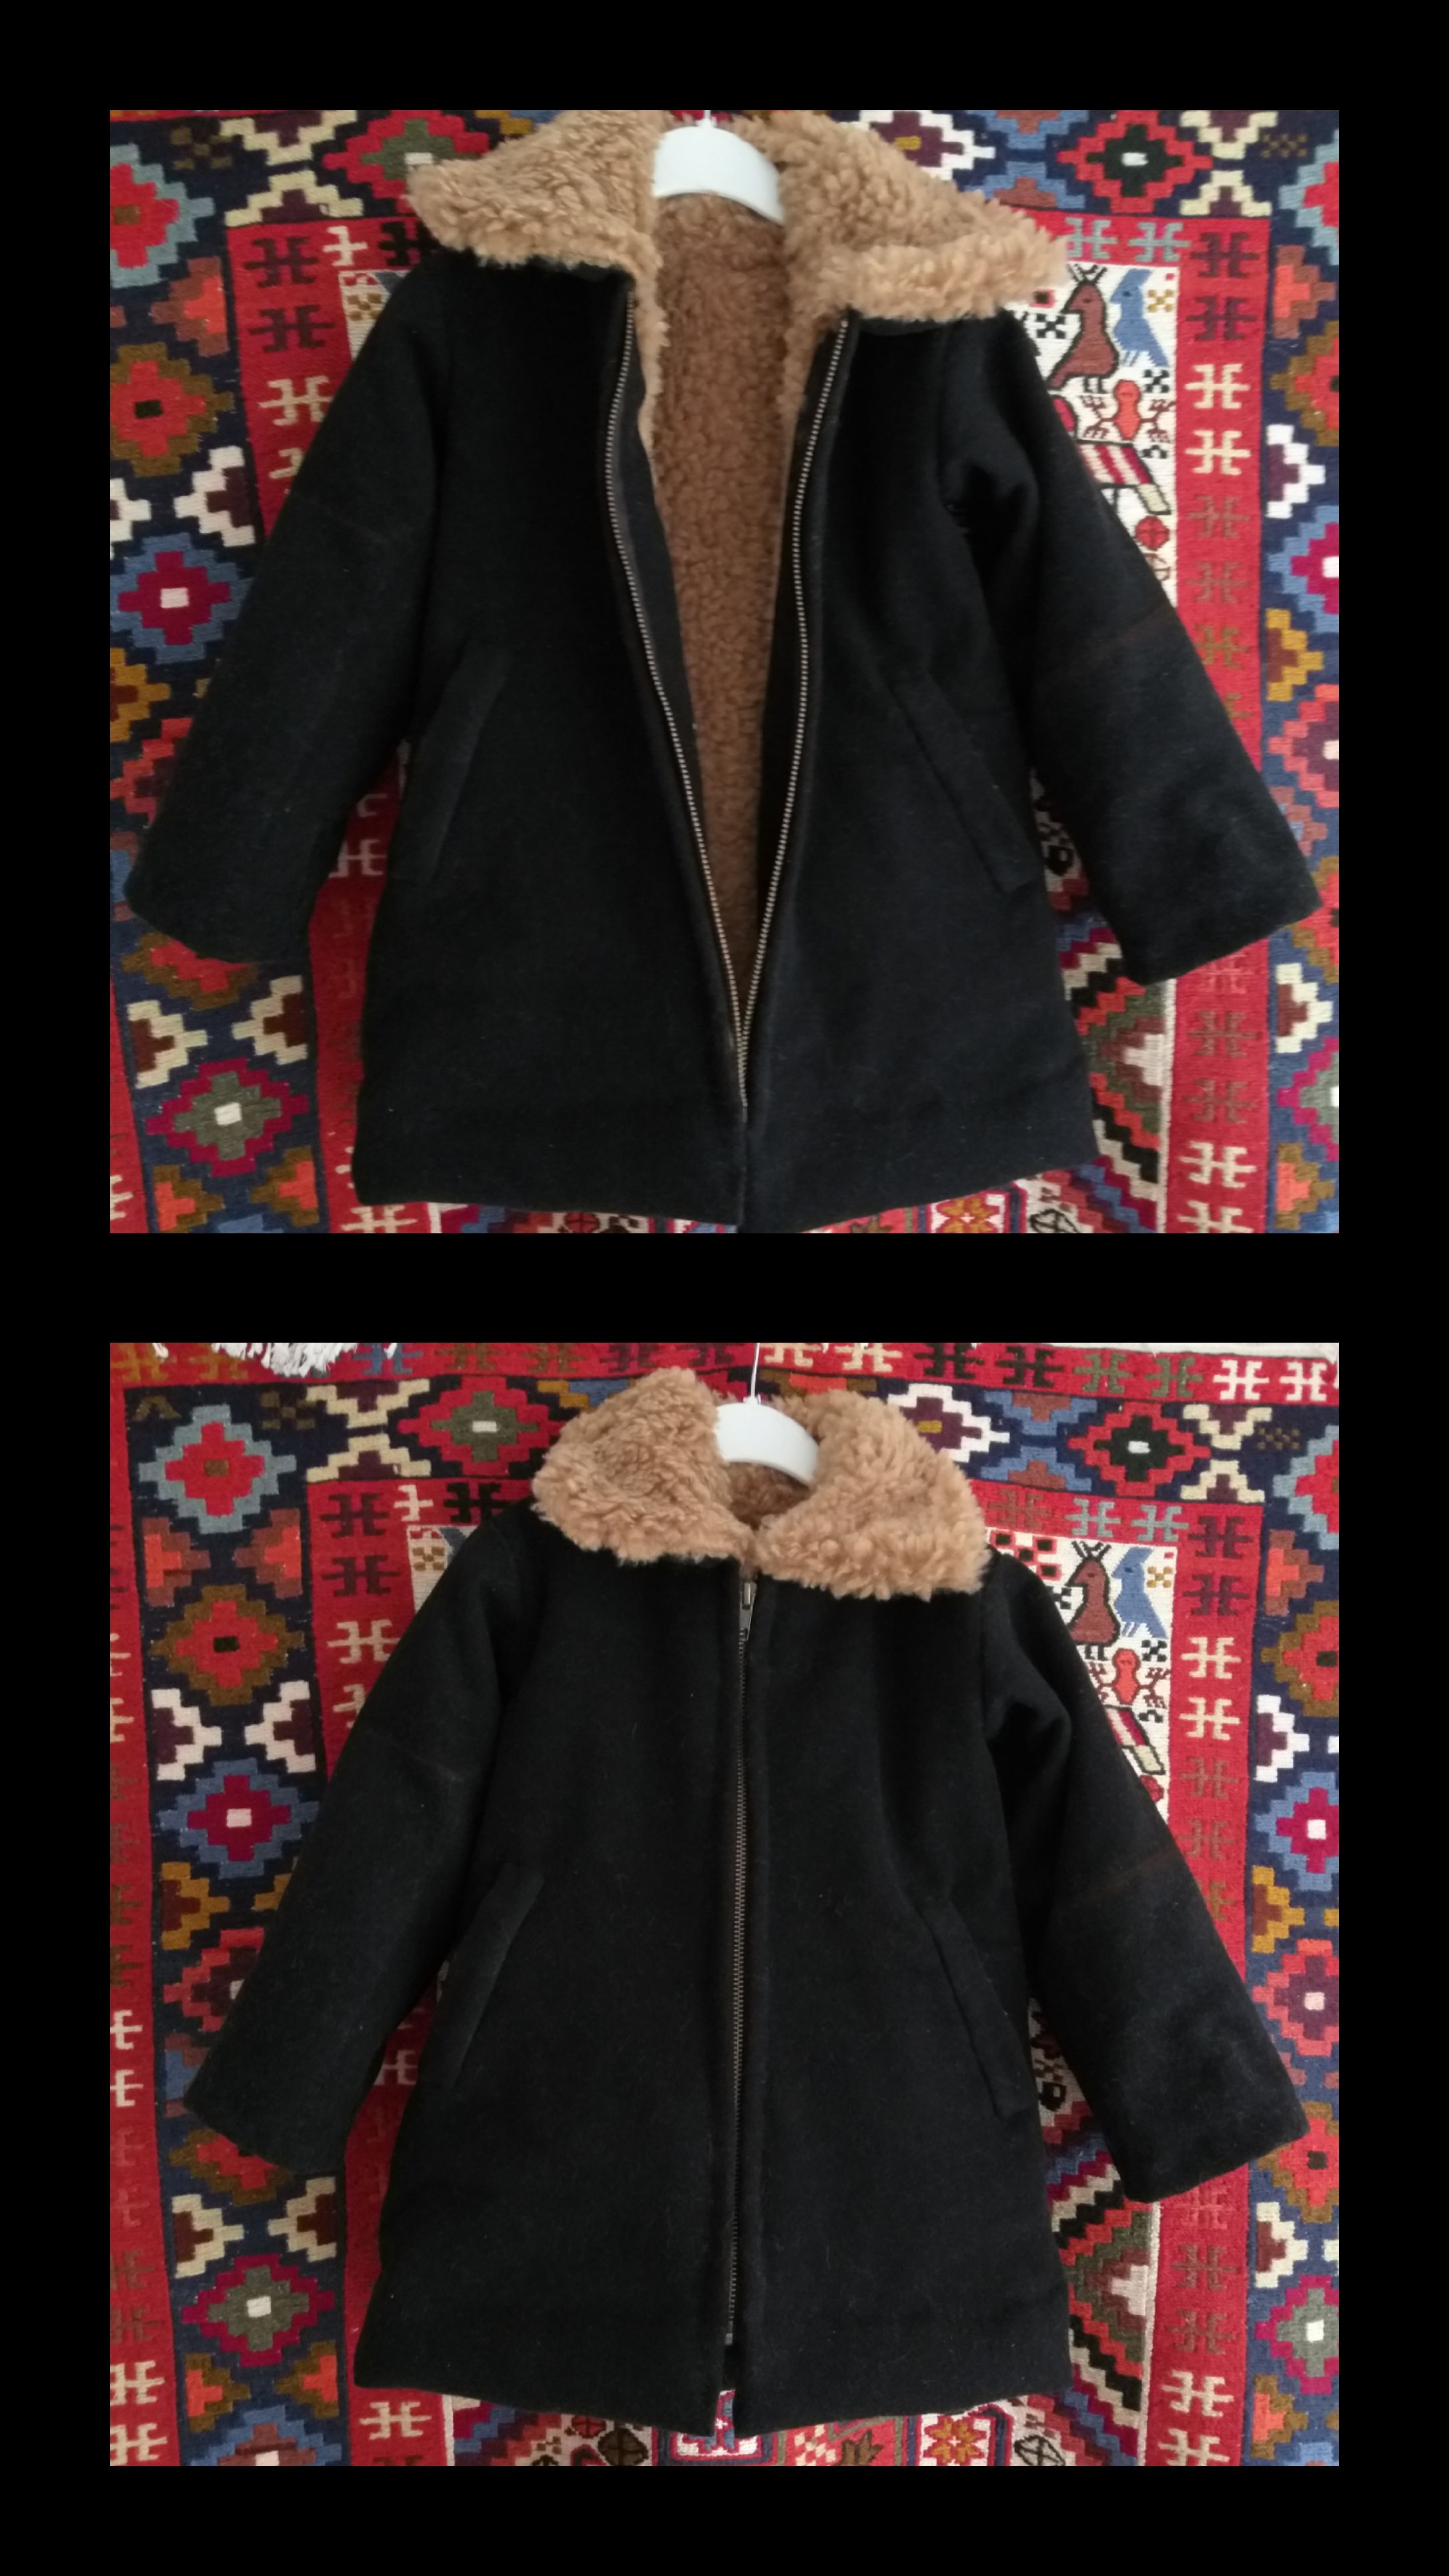
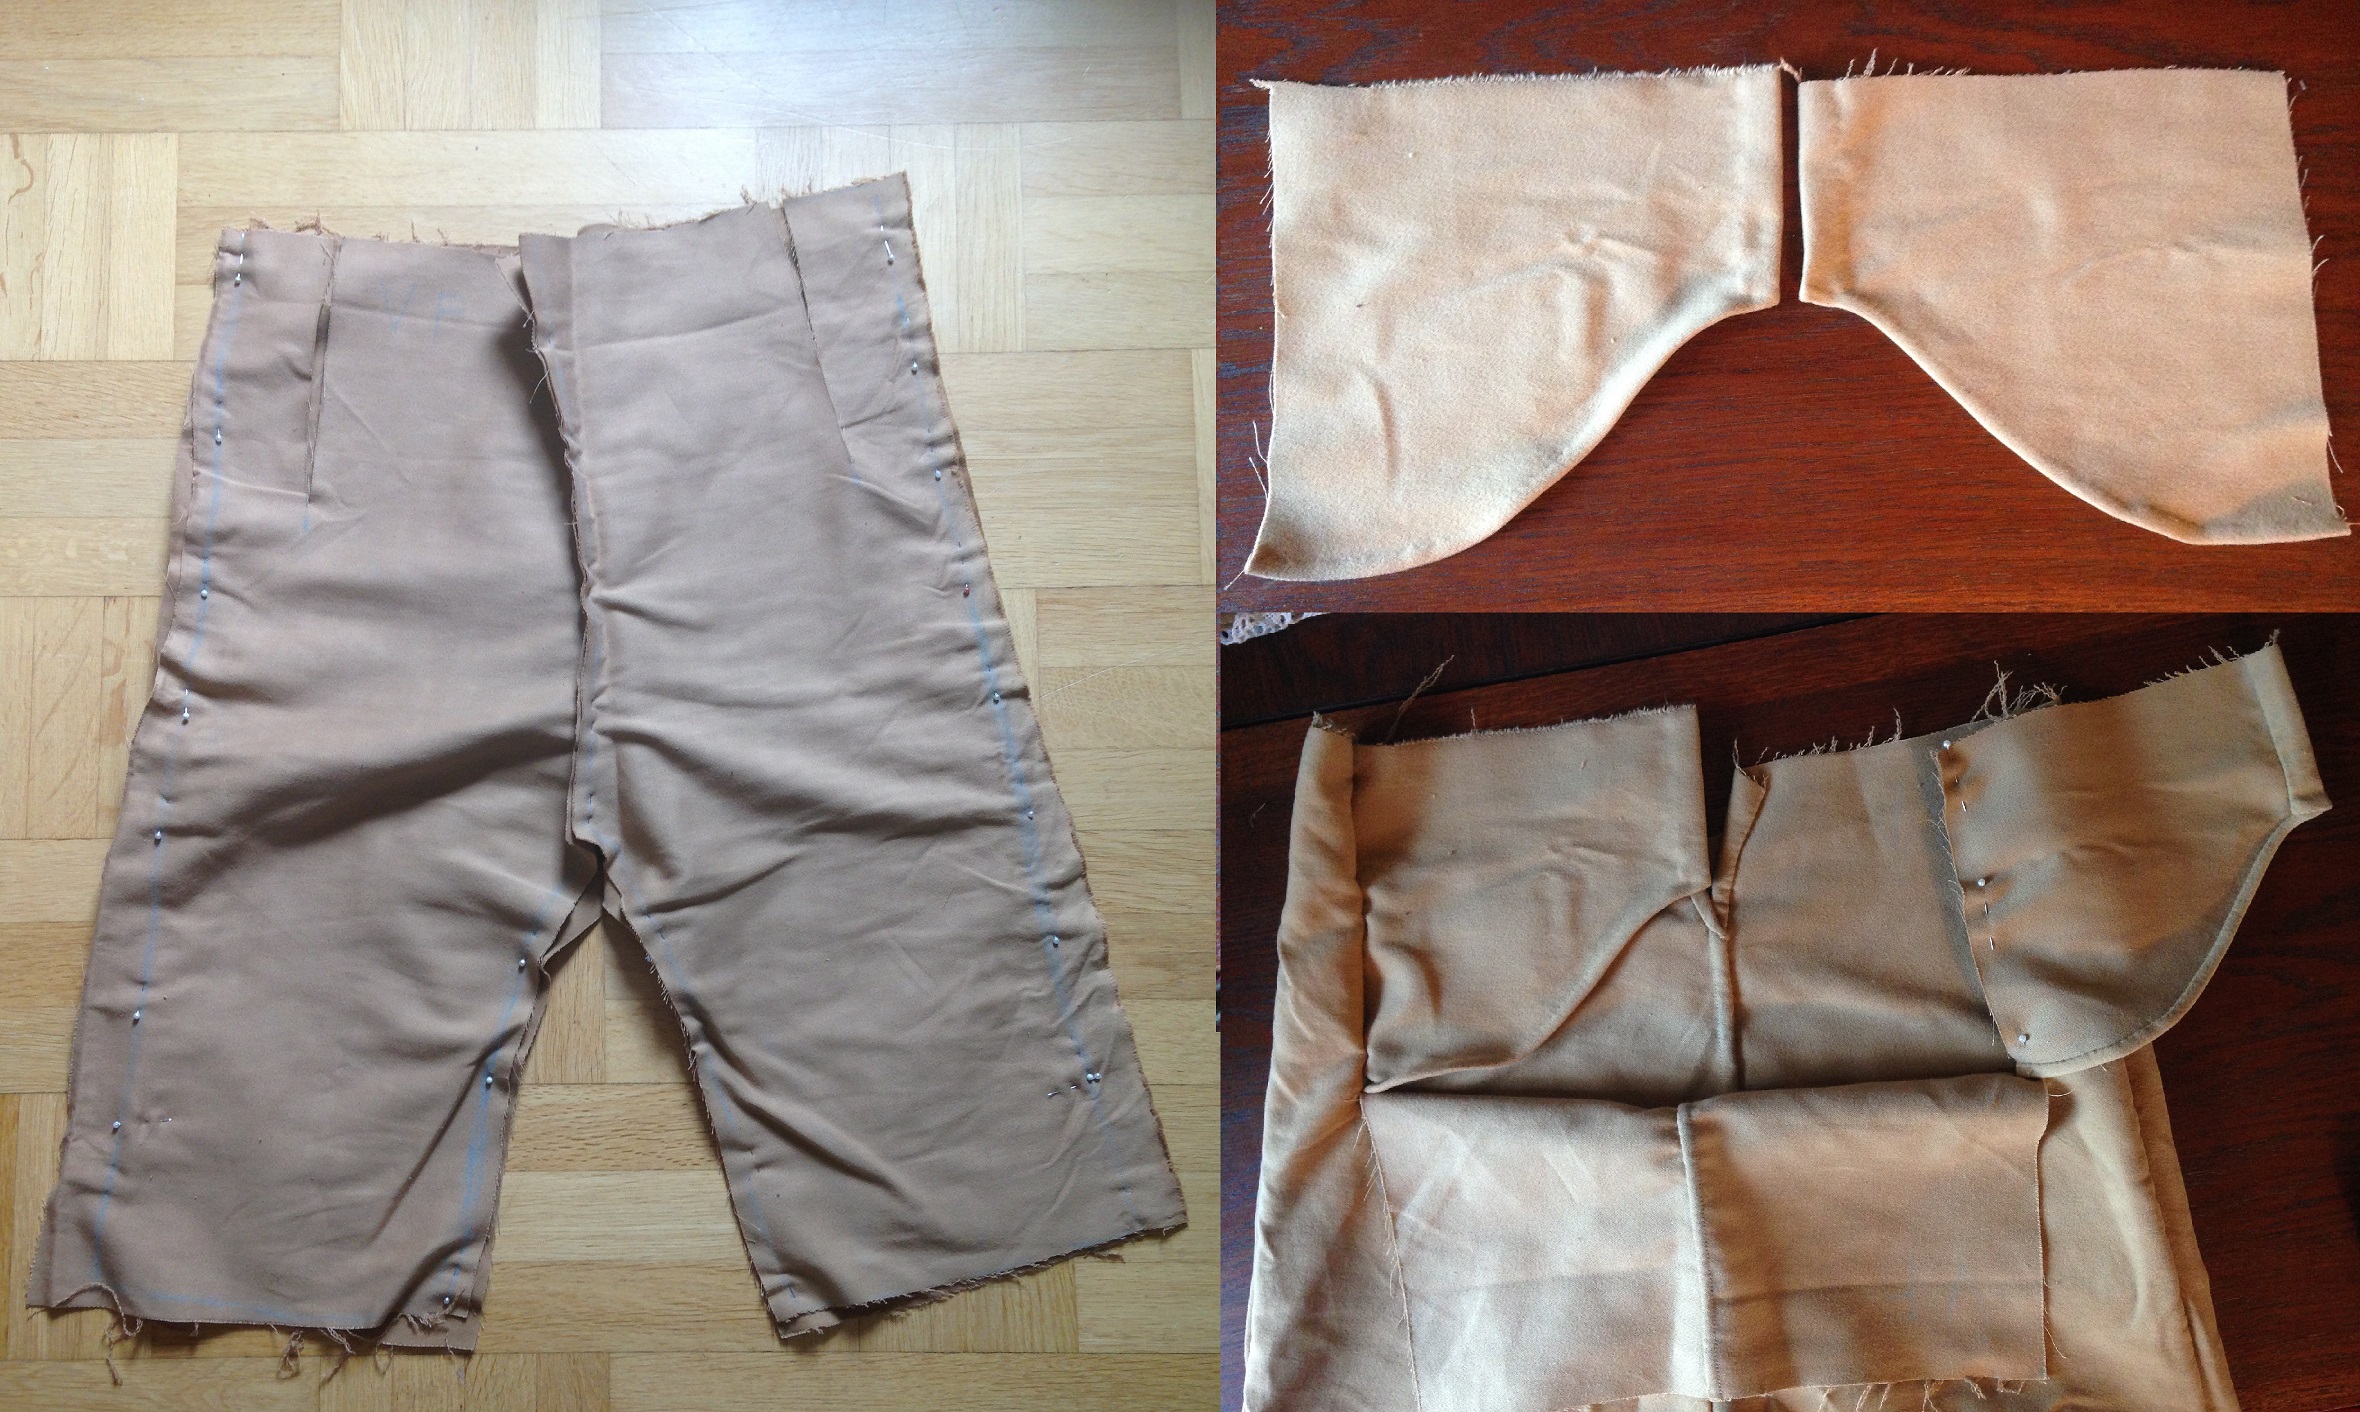
This dress was so incredibly comfy that I used a lot until it suddenly tore as I played with the kids the other day. I mourned it for a couple of hours until I found comfort in that it could be transformed into a shirt for the little one.

Denna klänning var så otroligt skön att jag använde den väldigt mycket, tills den slutligen sprack medan jag lekte med barnen. Jag sörjde den under ett par timmar, tills jag insåg att den kunde bli ytteligare en skjorta till minstingen.

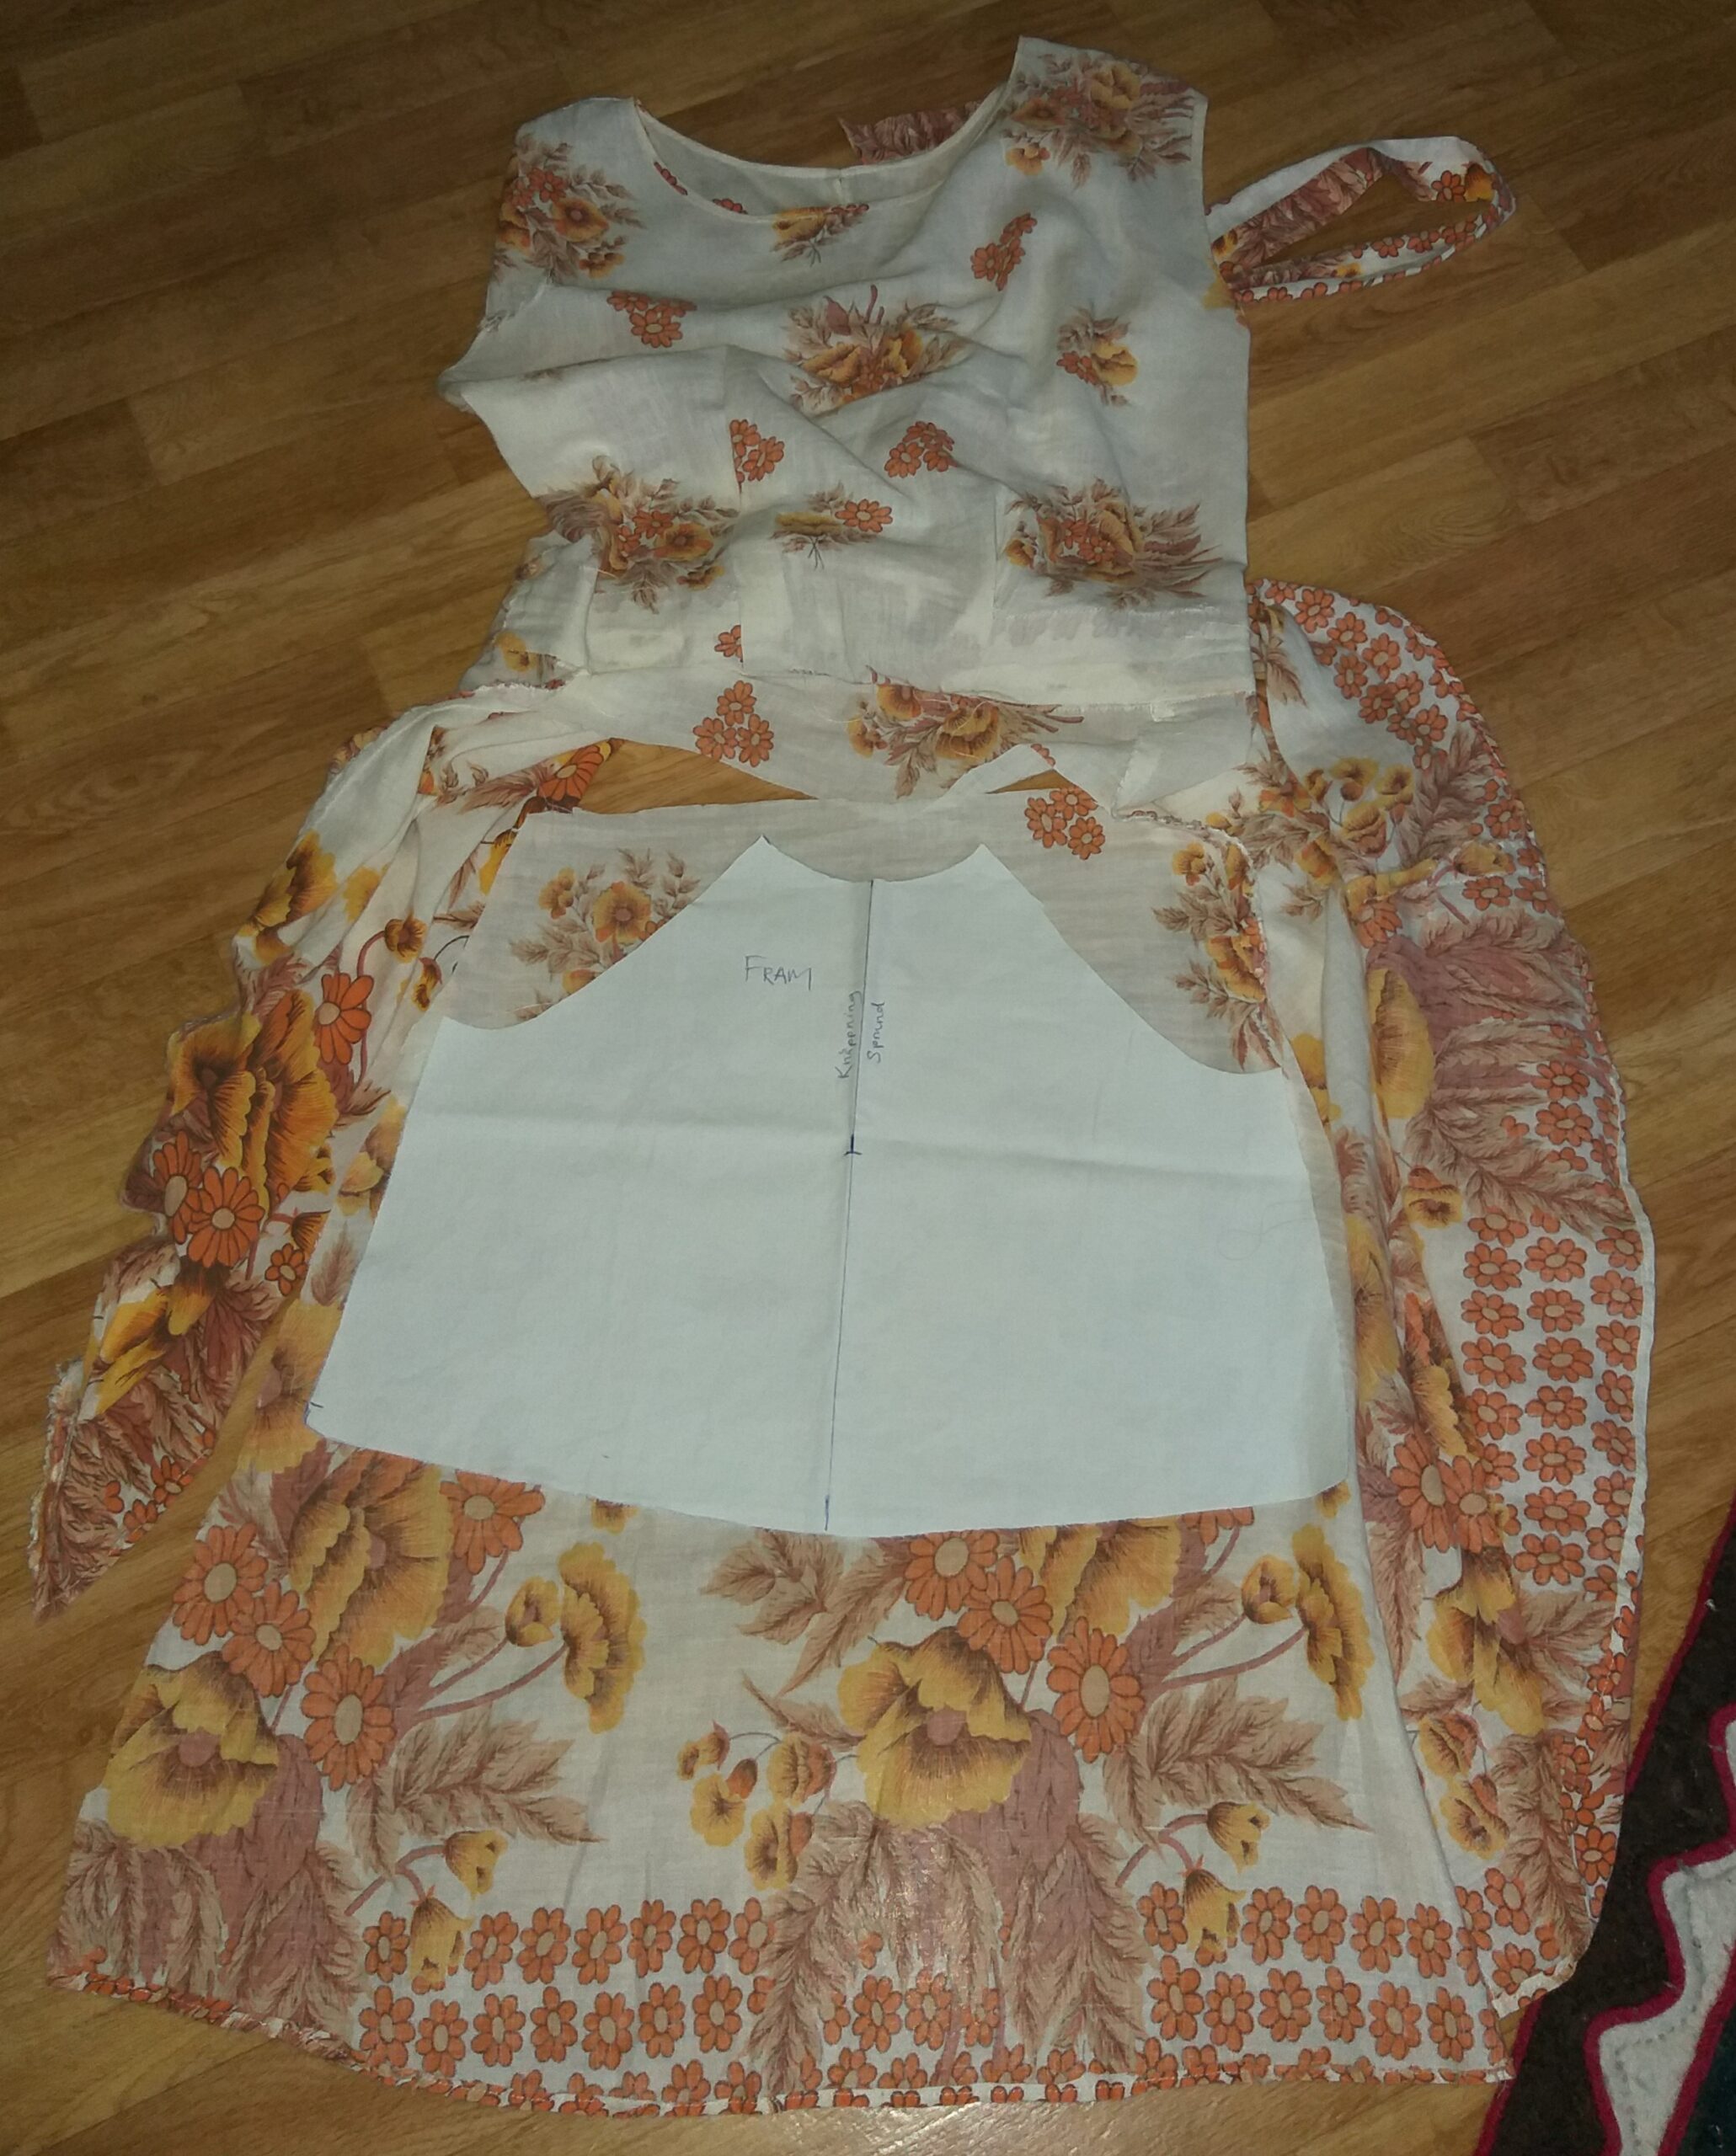
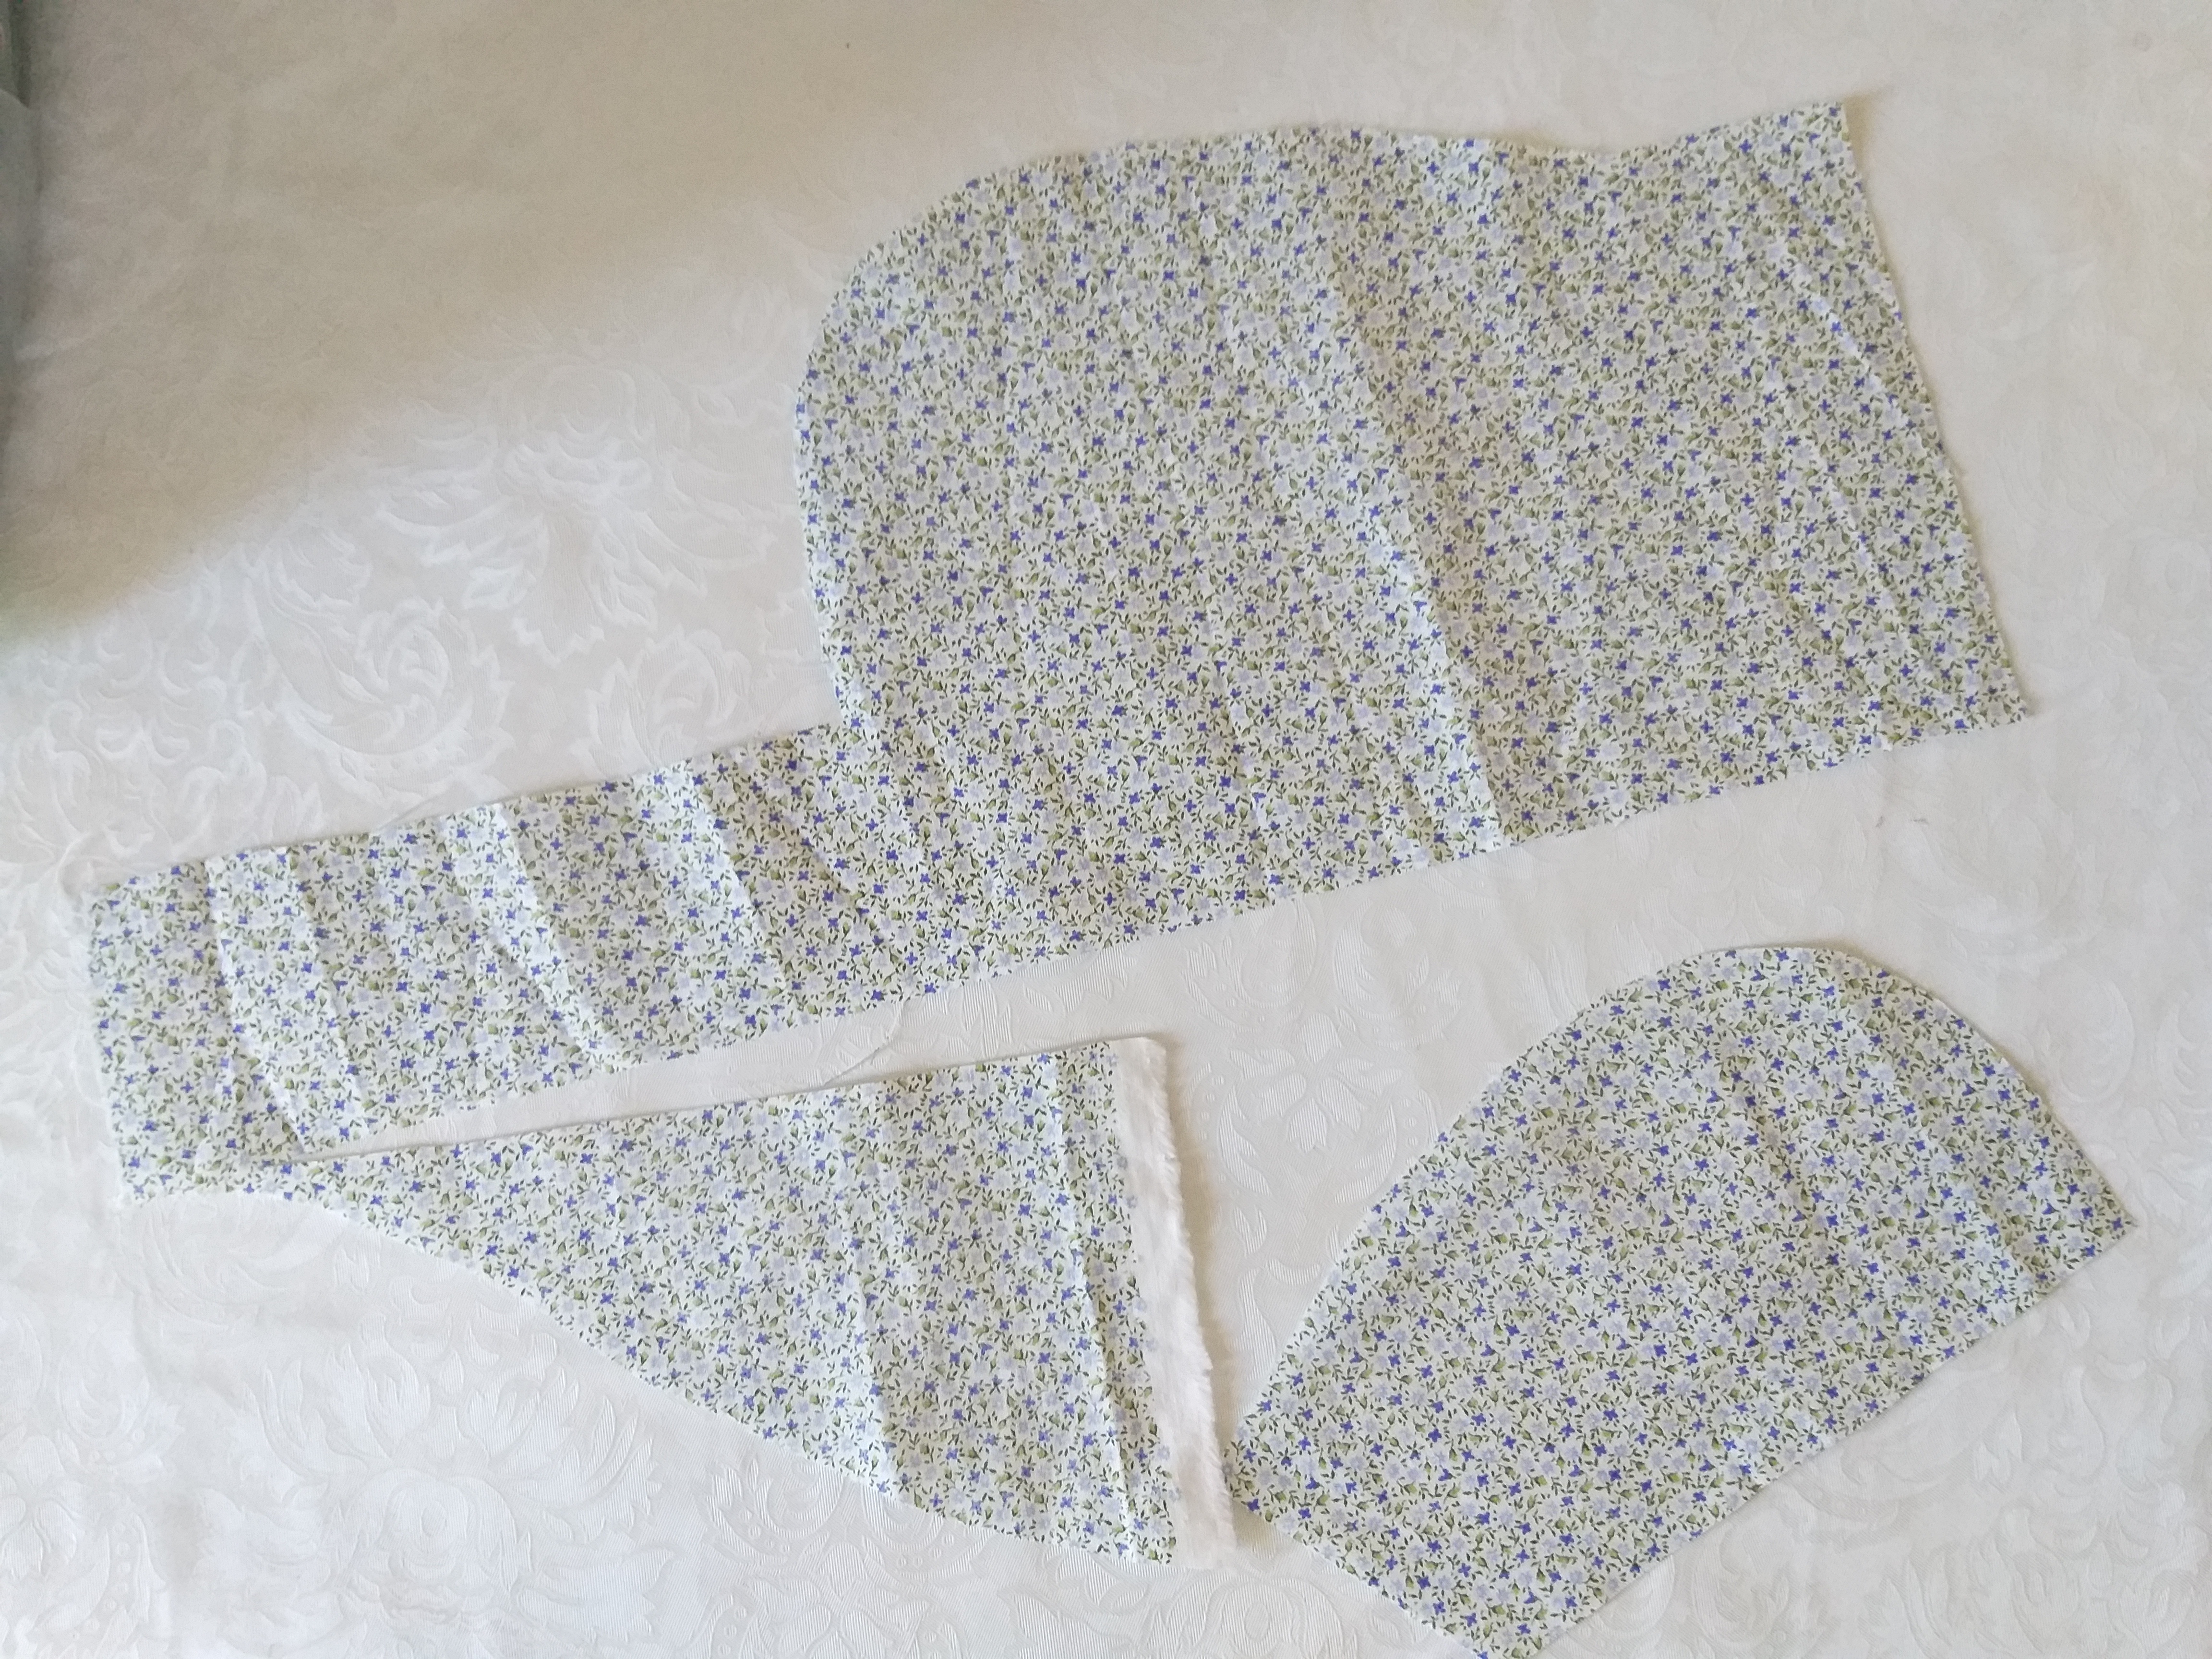
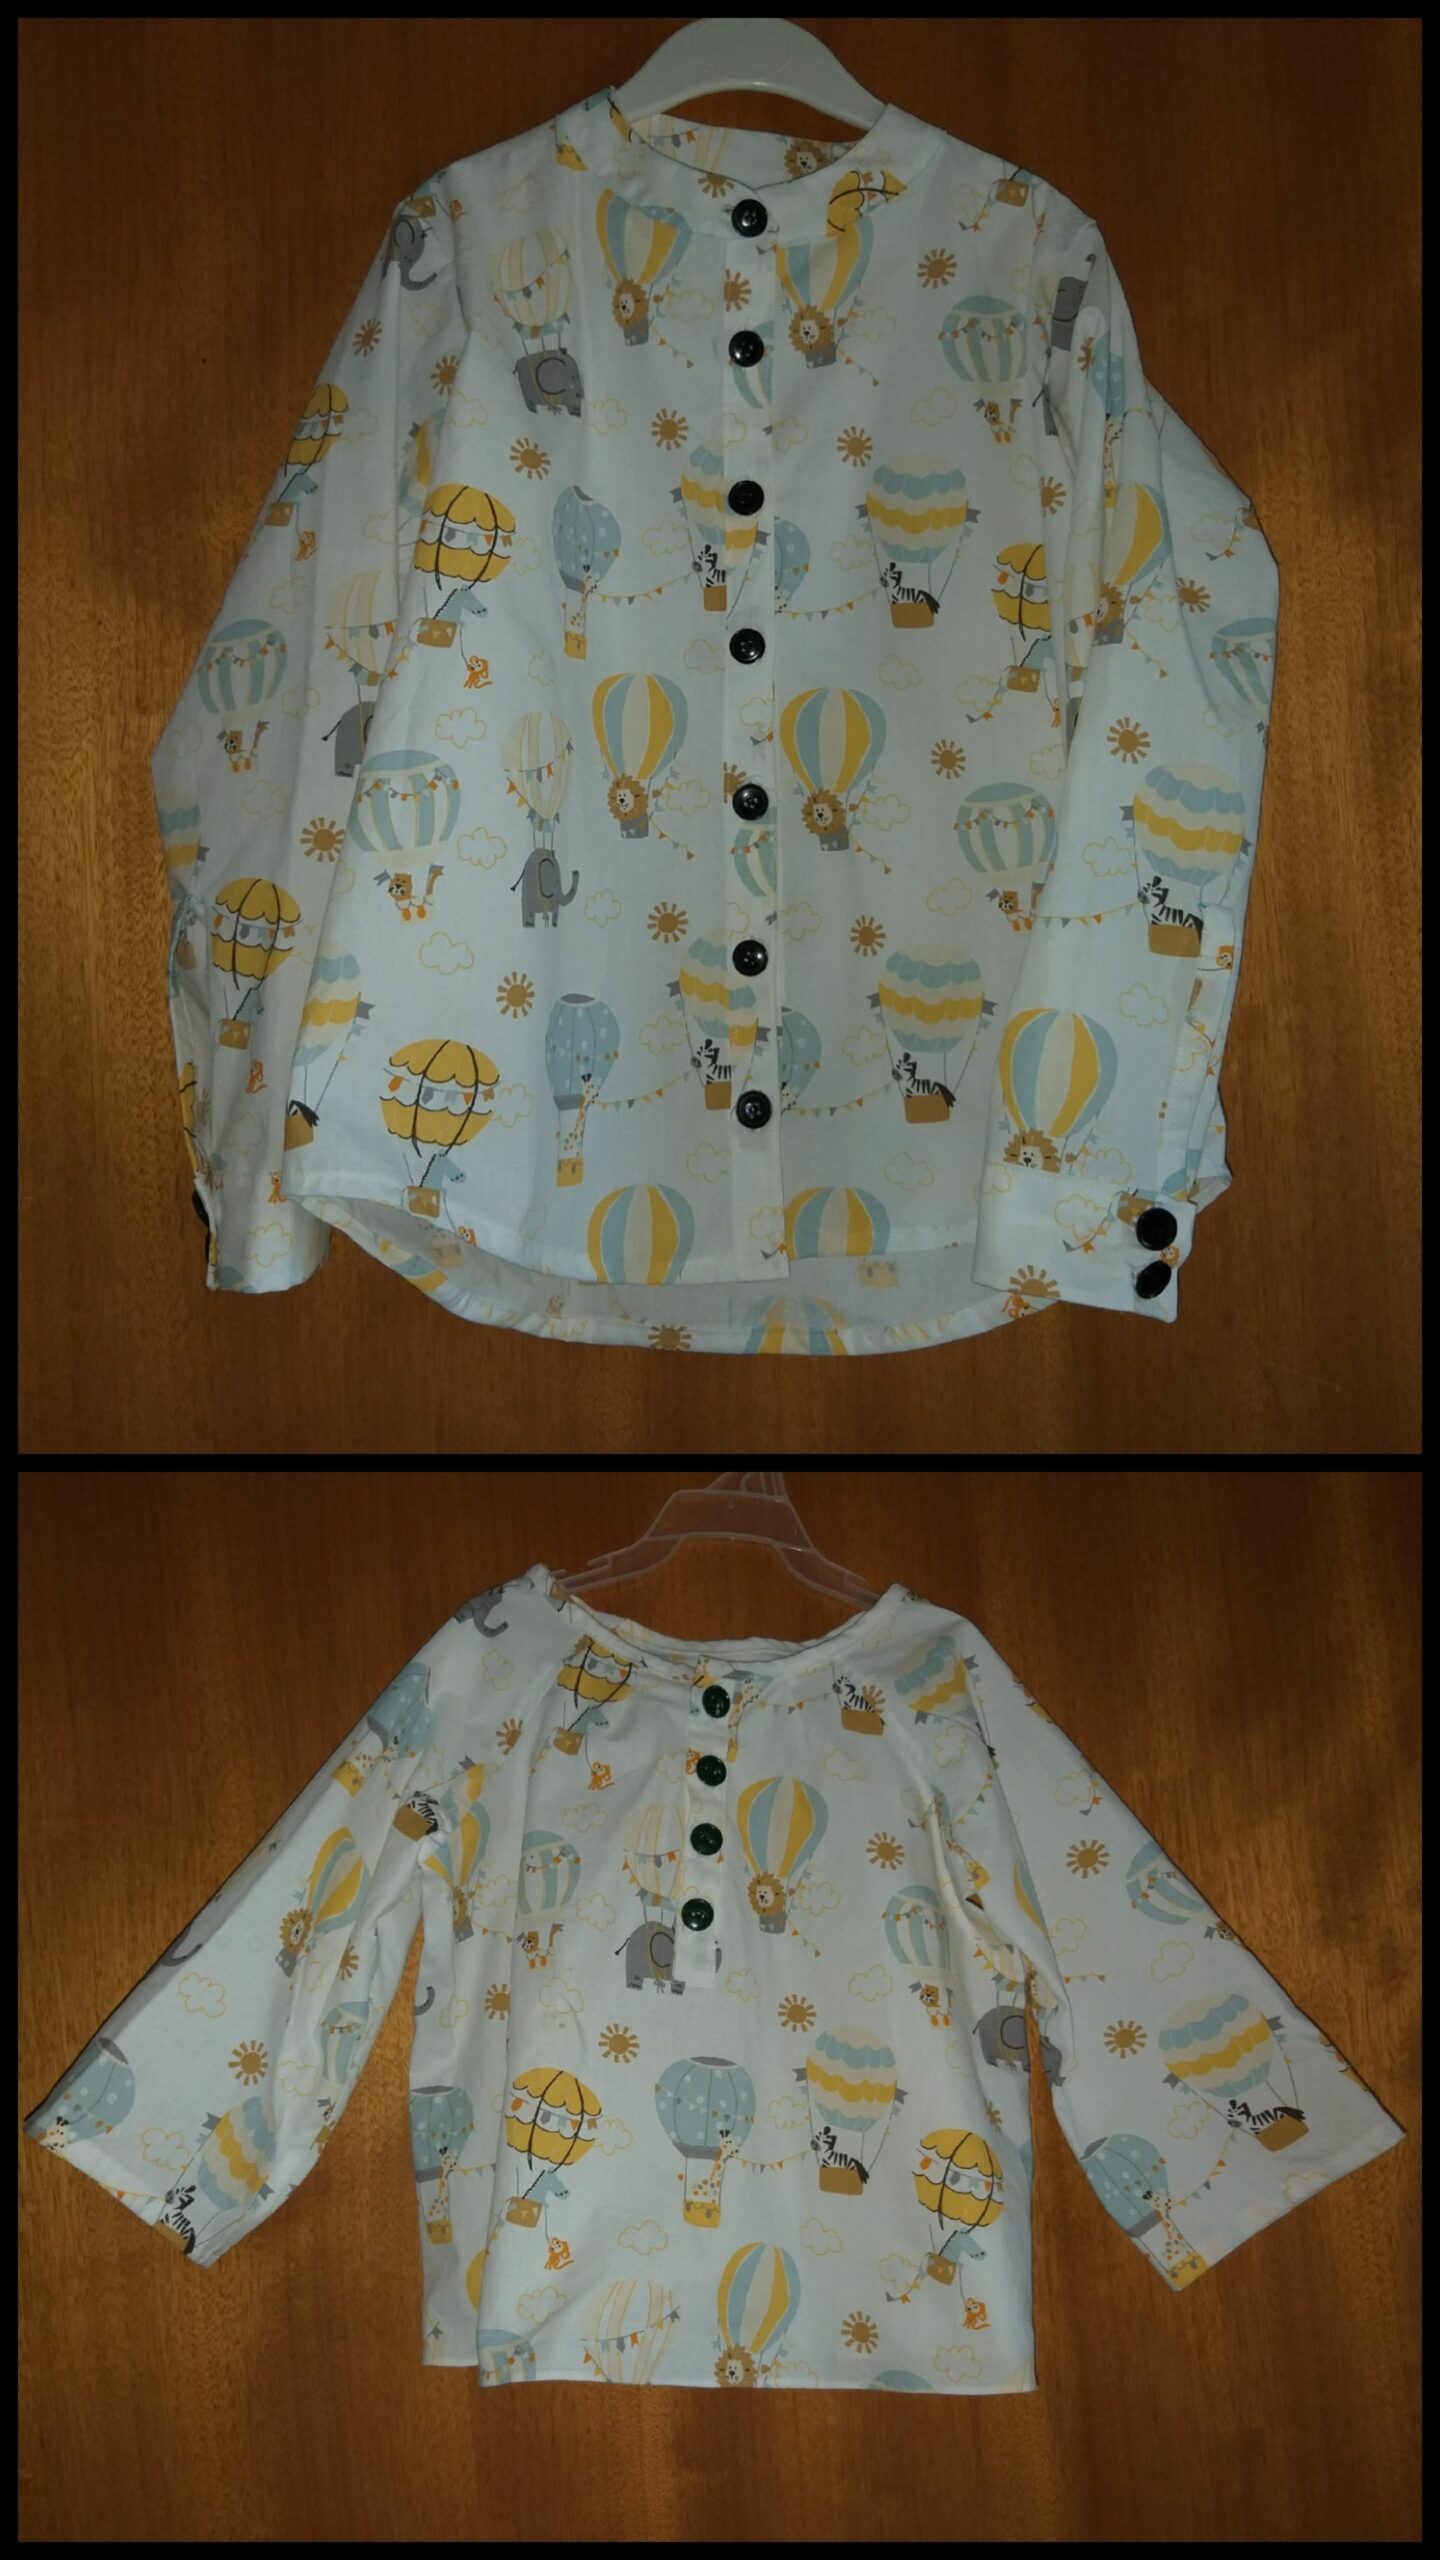
I used the same pattern as for the first shirt, which was copied from his beloved strawberry shirt.

Jag använde samma mönster som till den första skjortan, vilket jag kopierade från minstingens älskade jordgubbsskjorta.

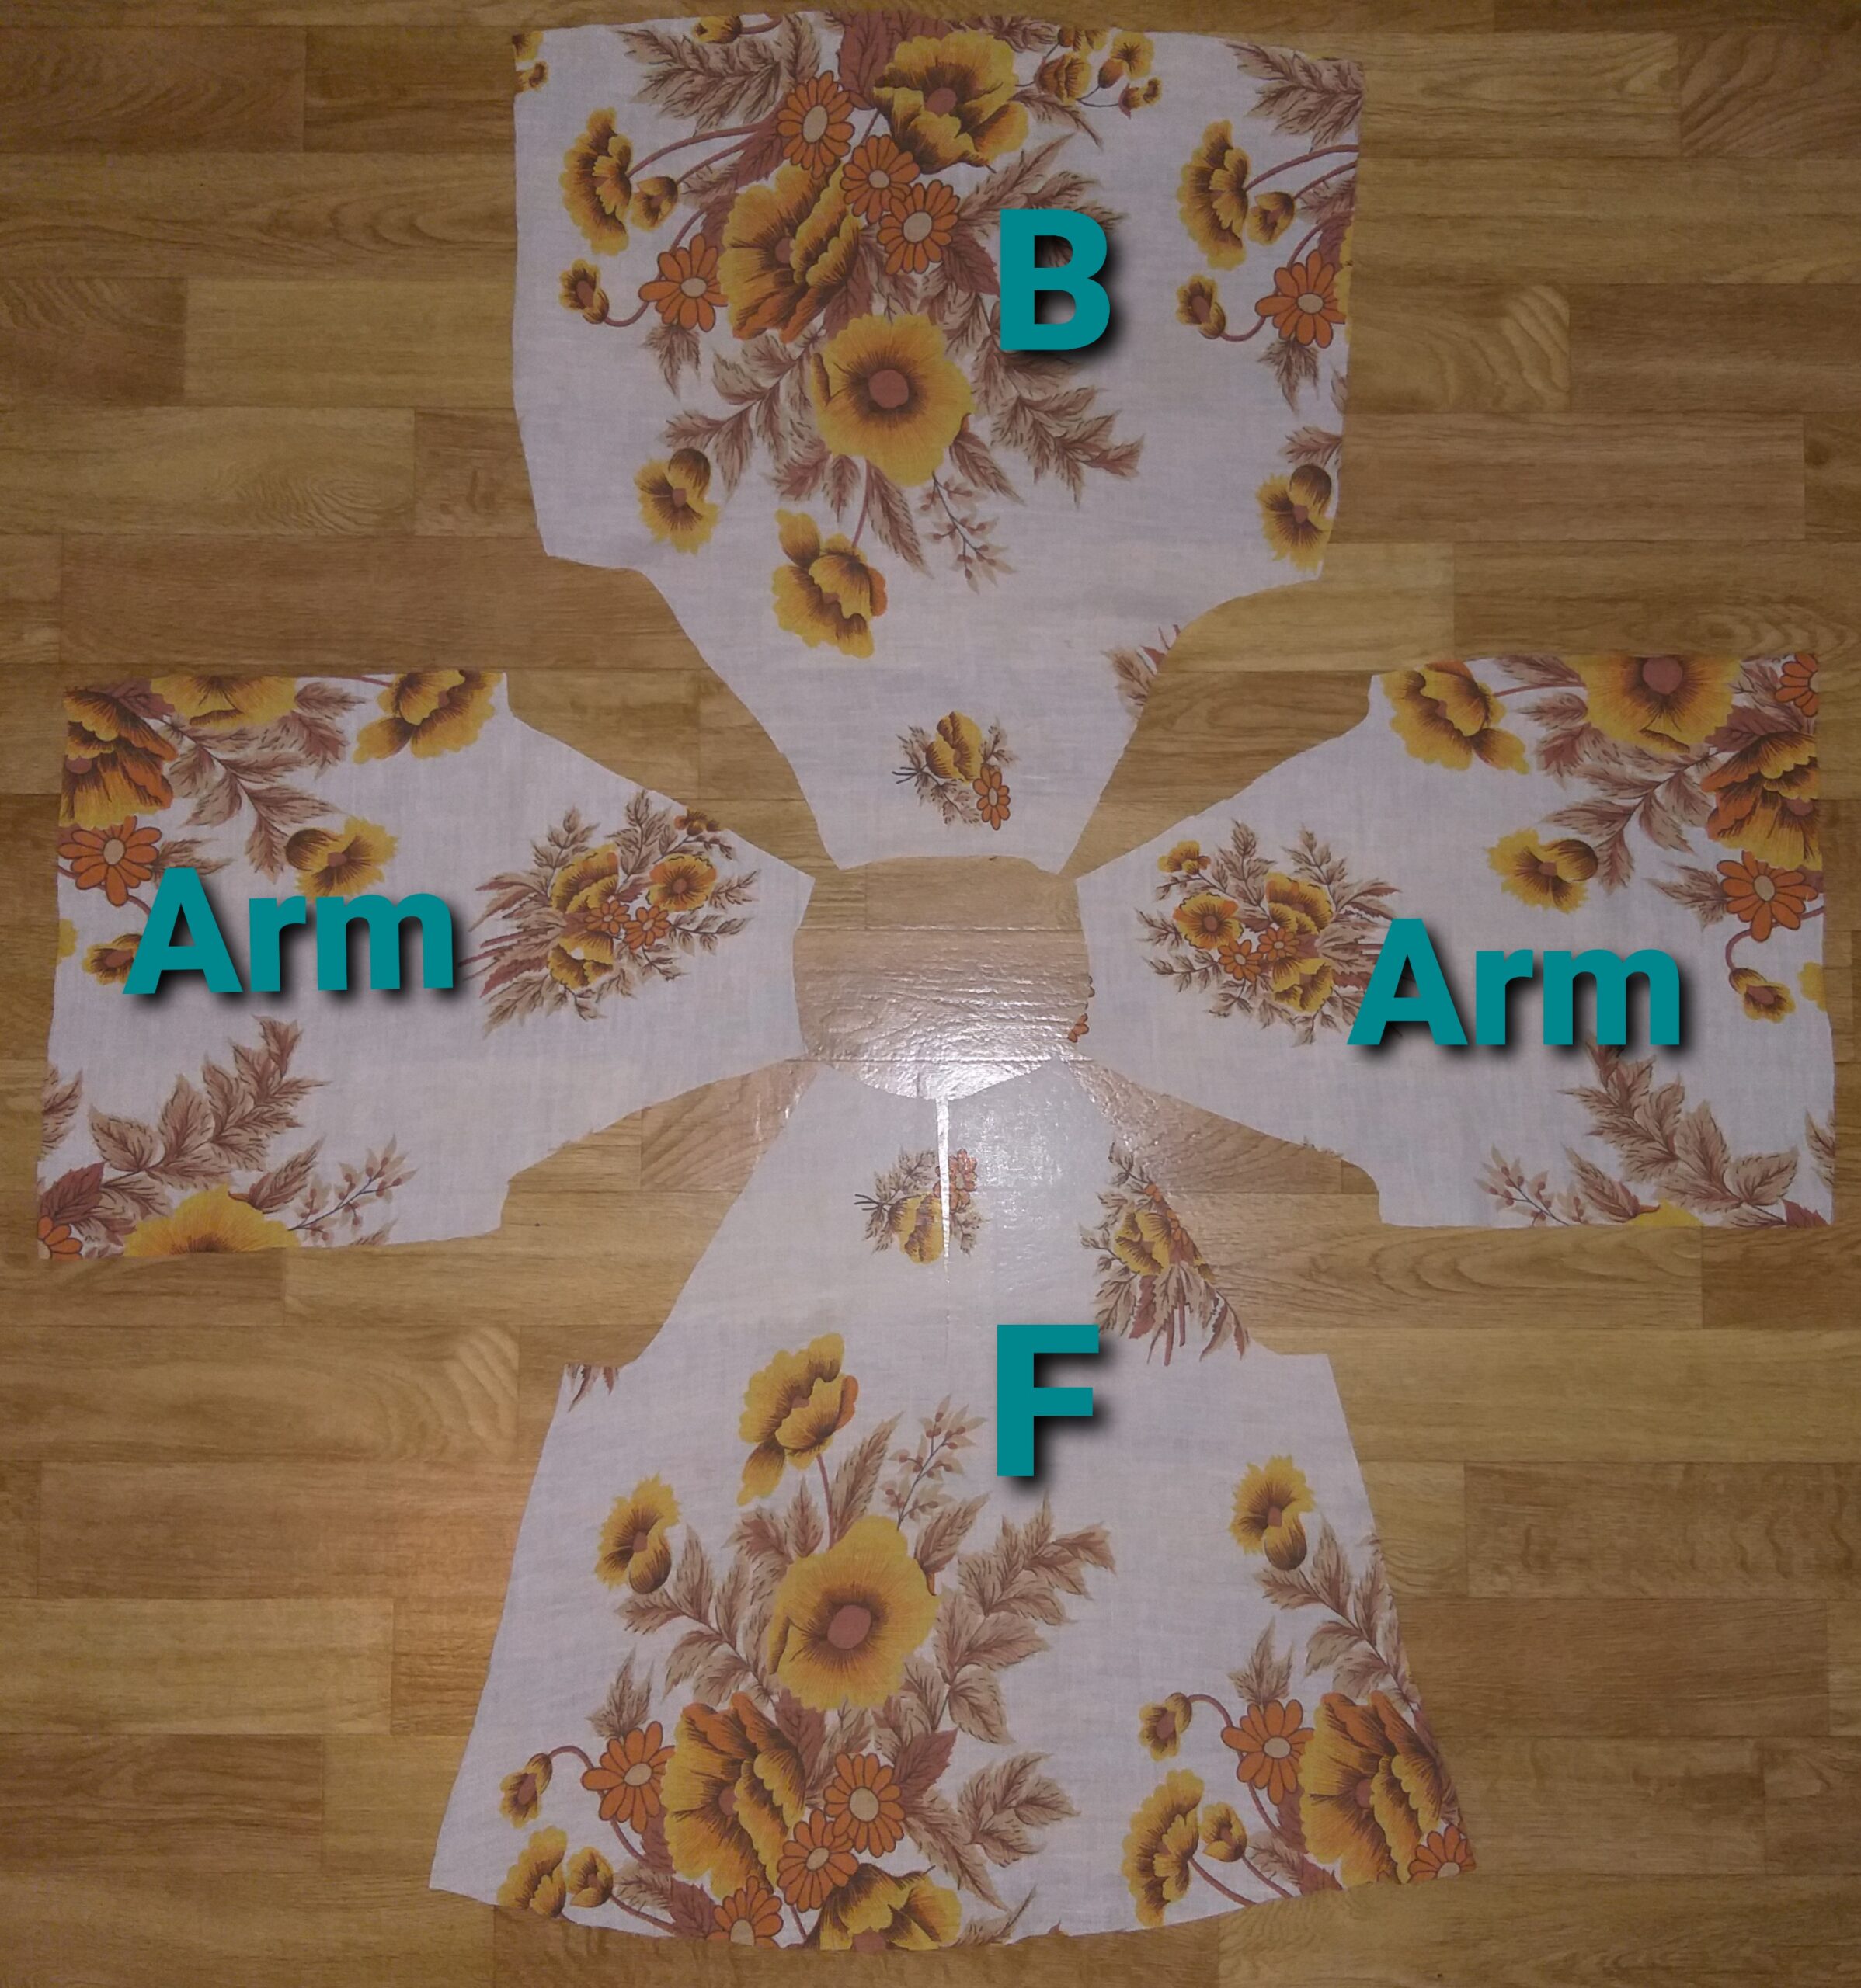
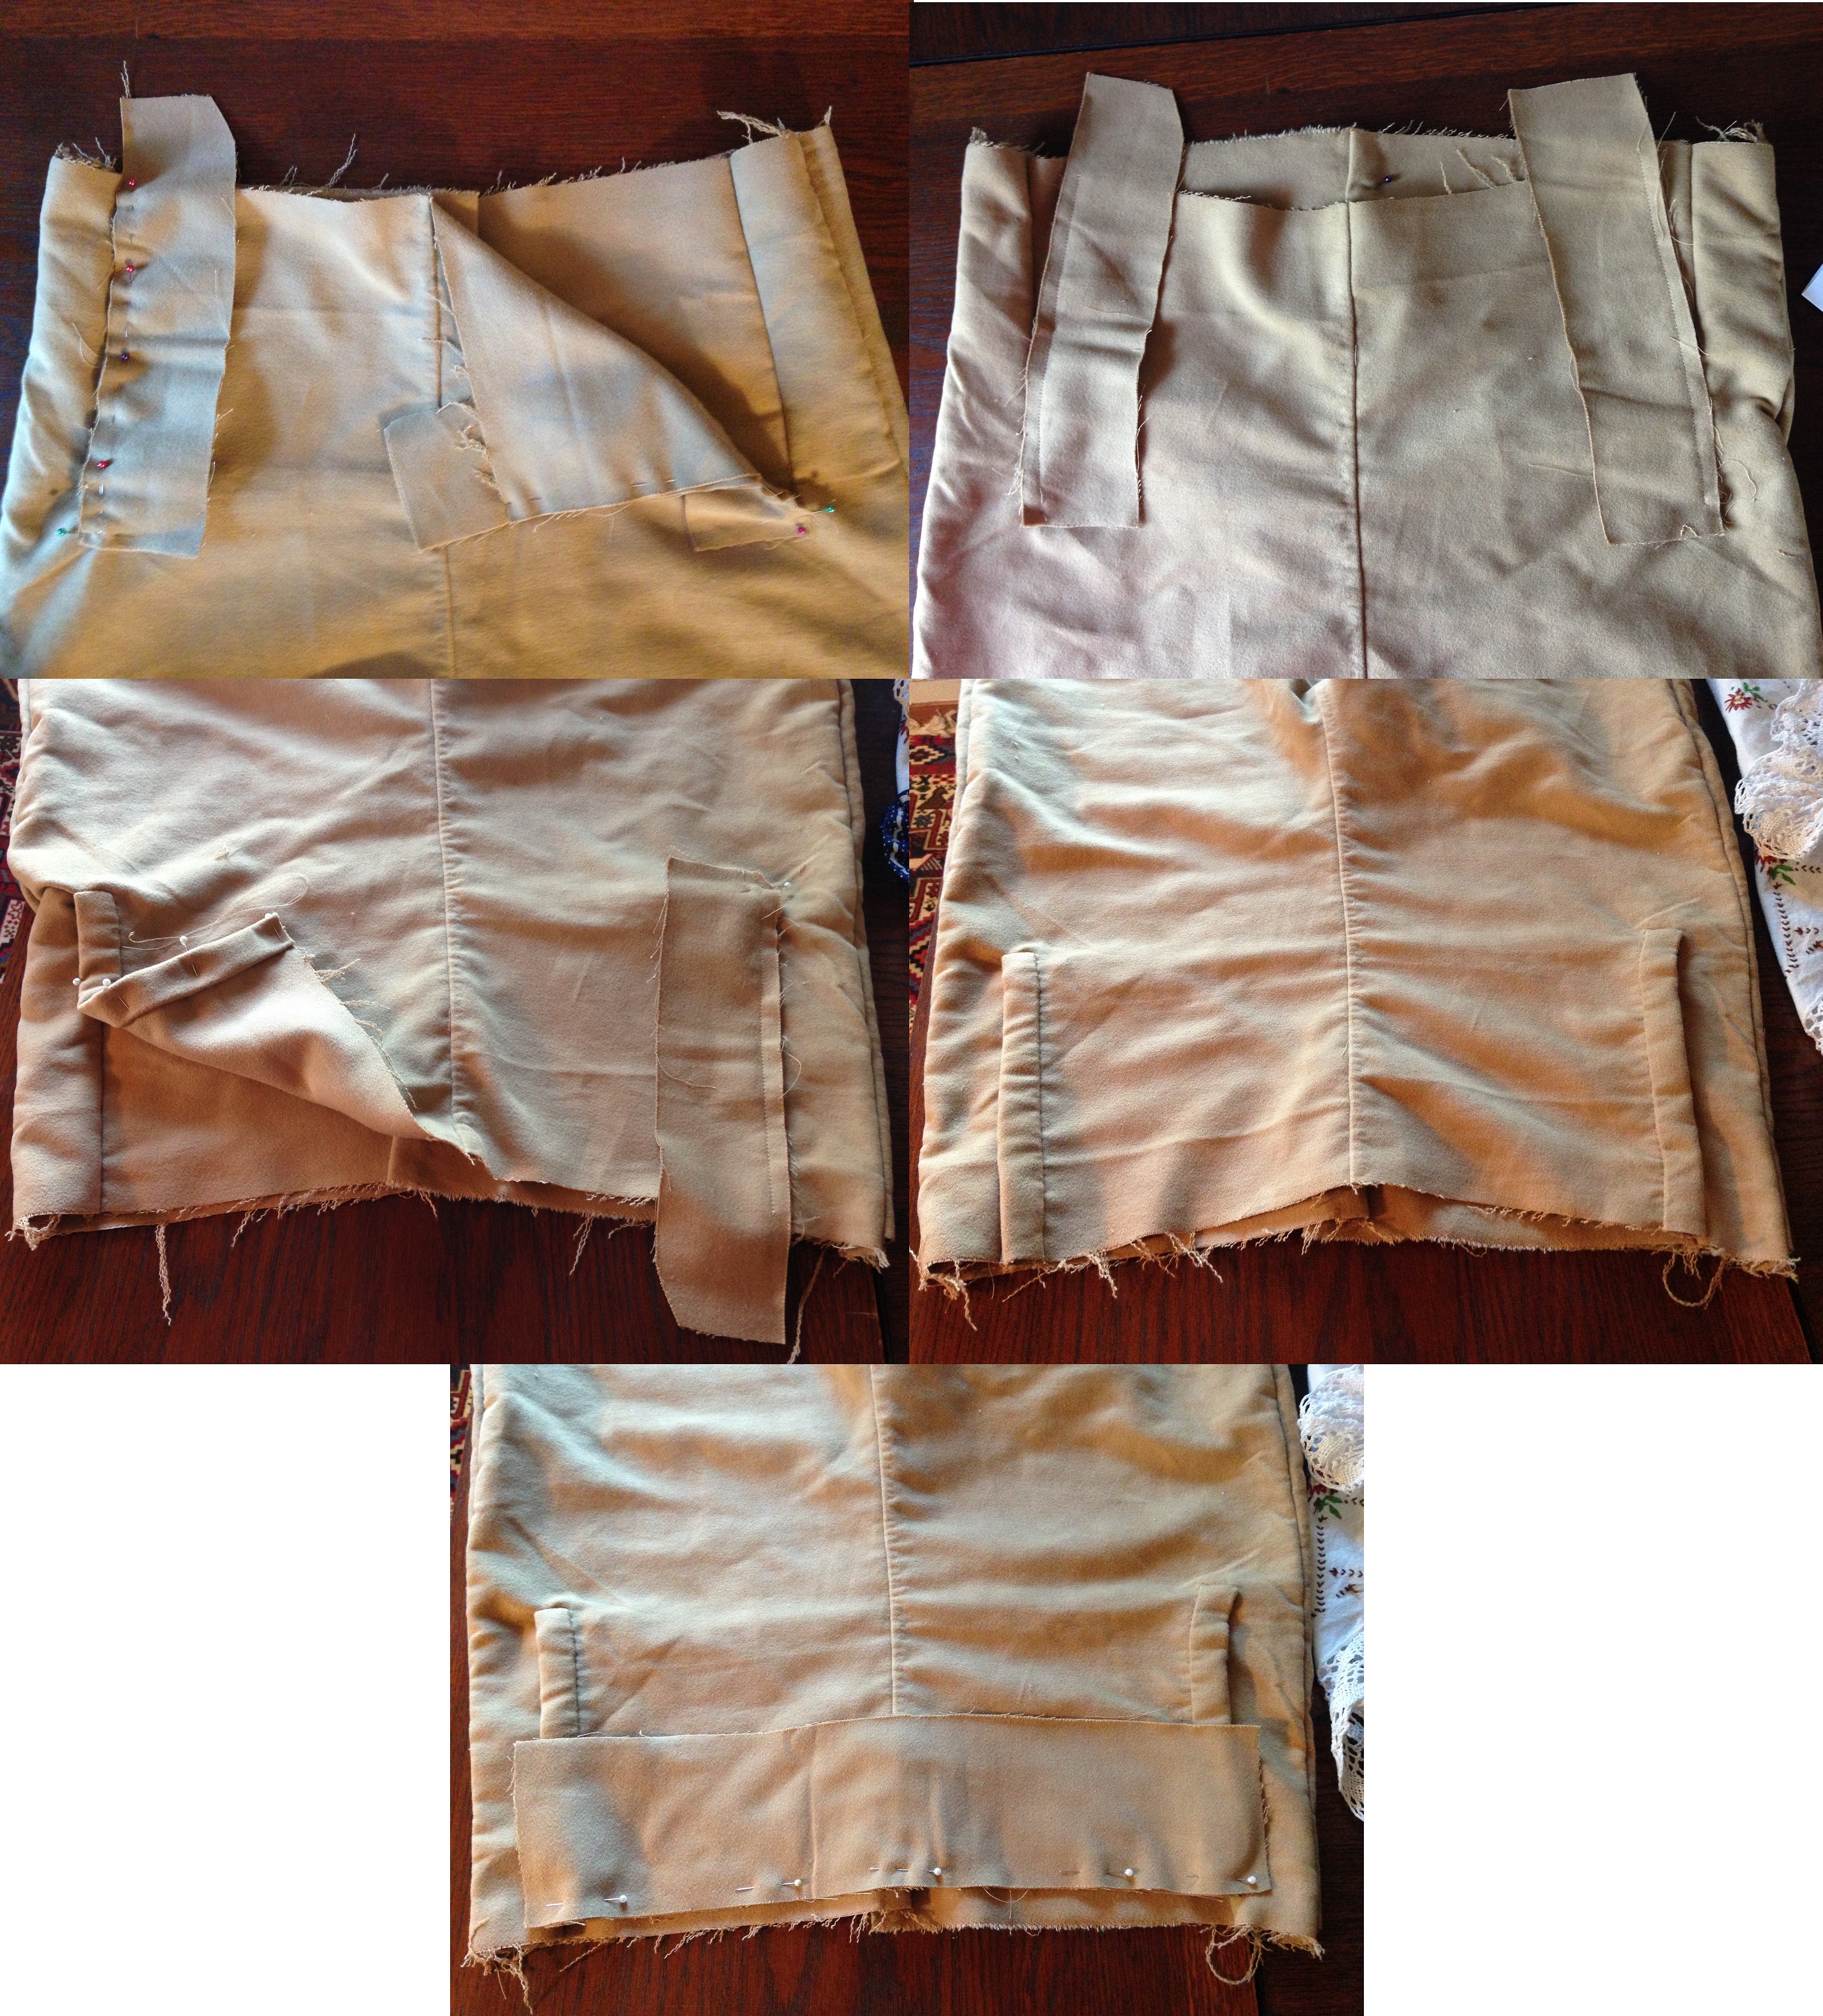
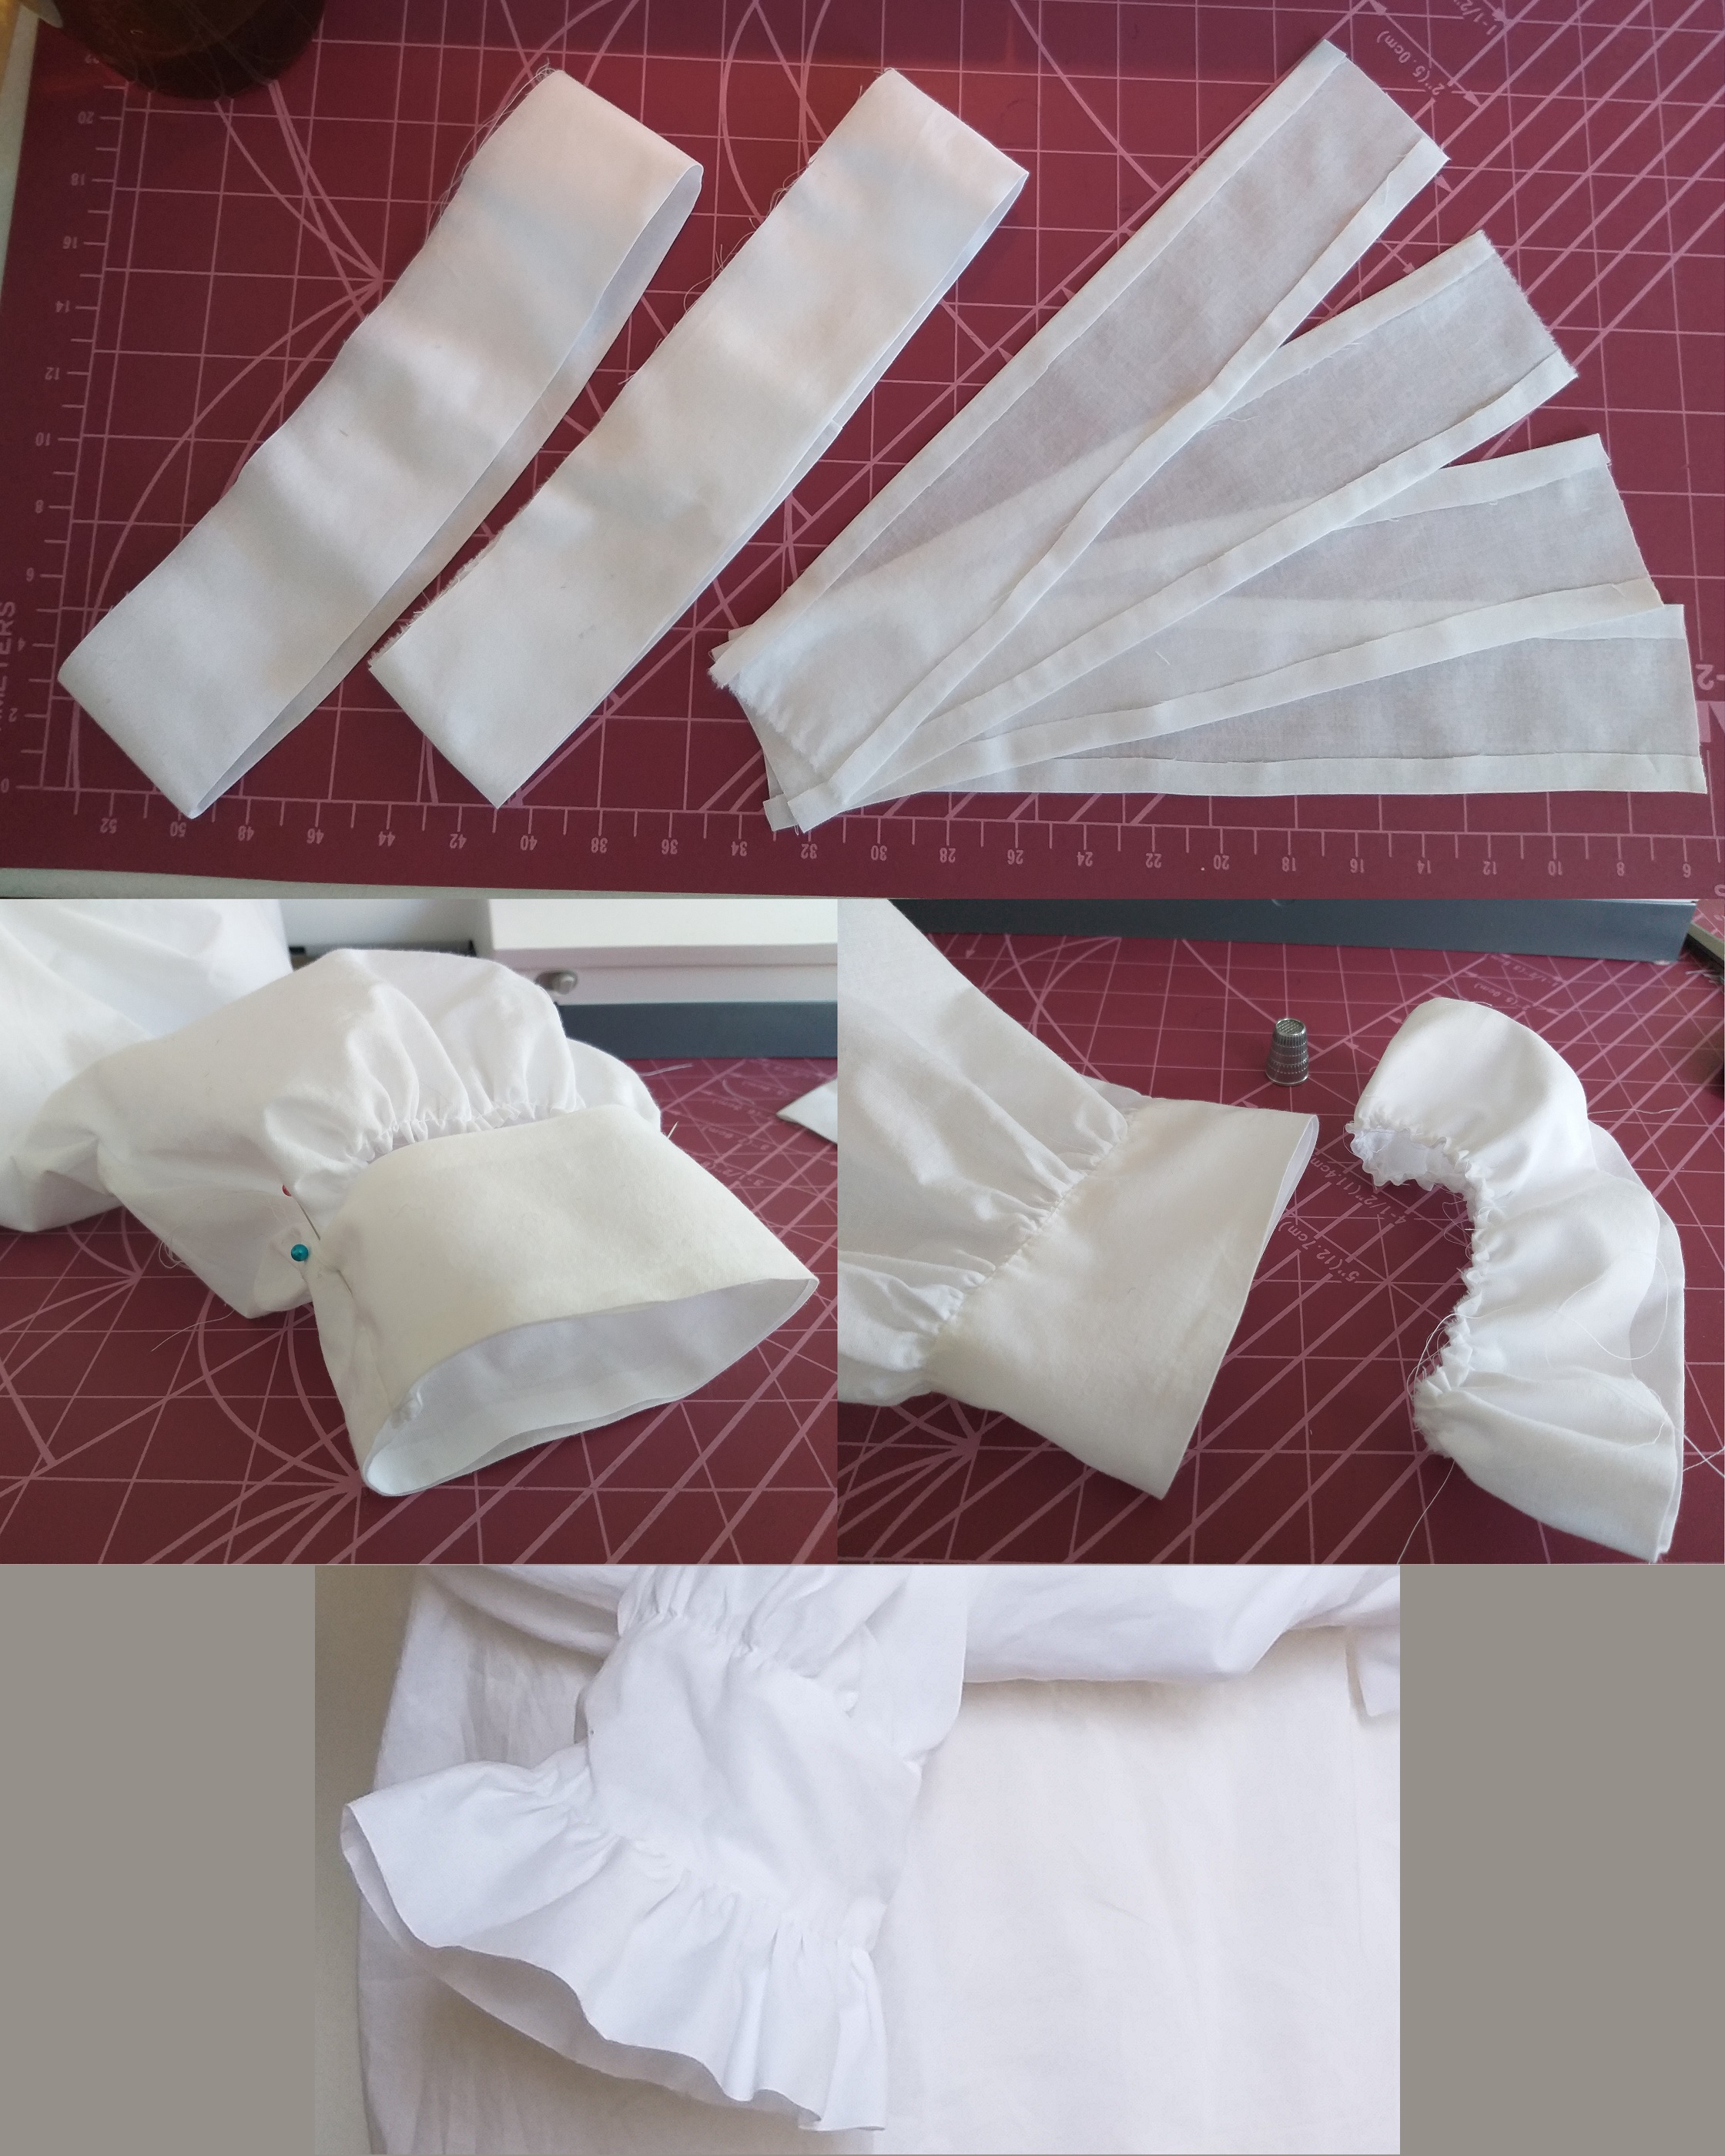
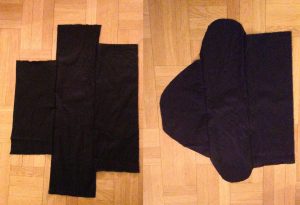
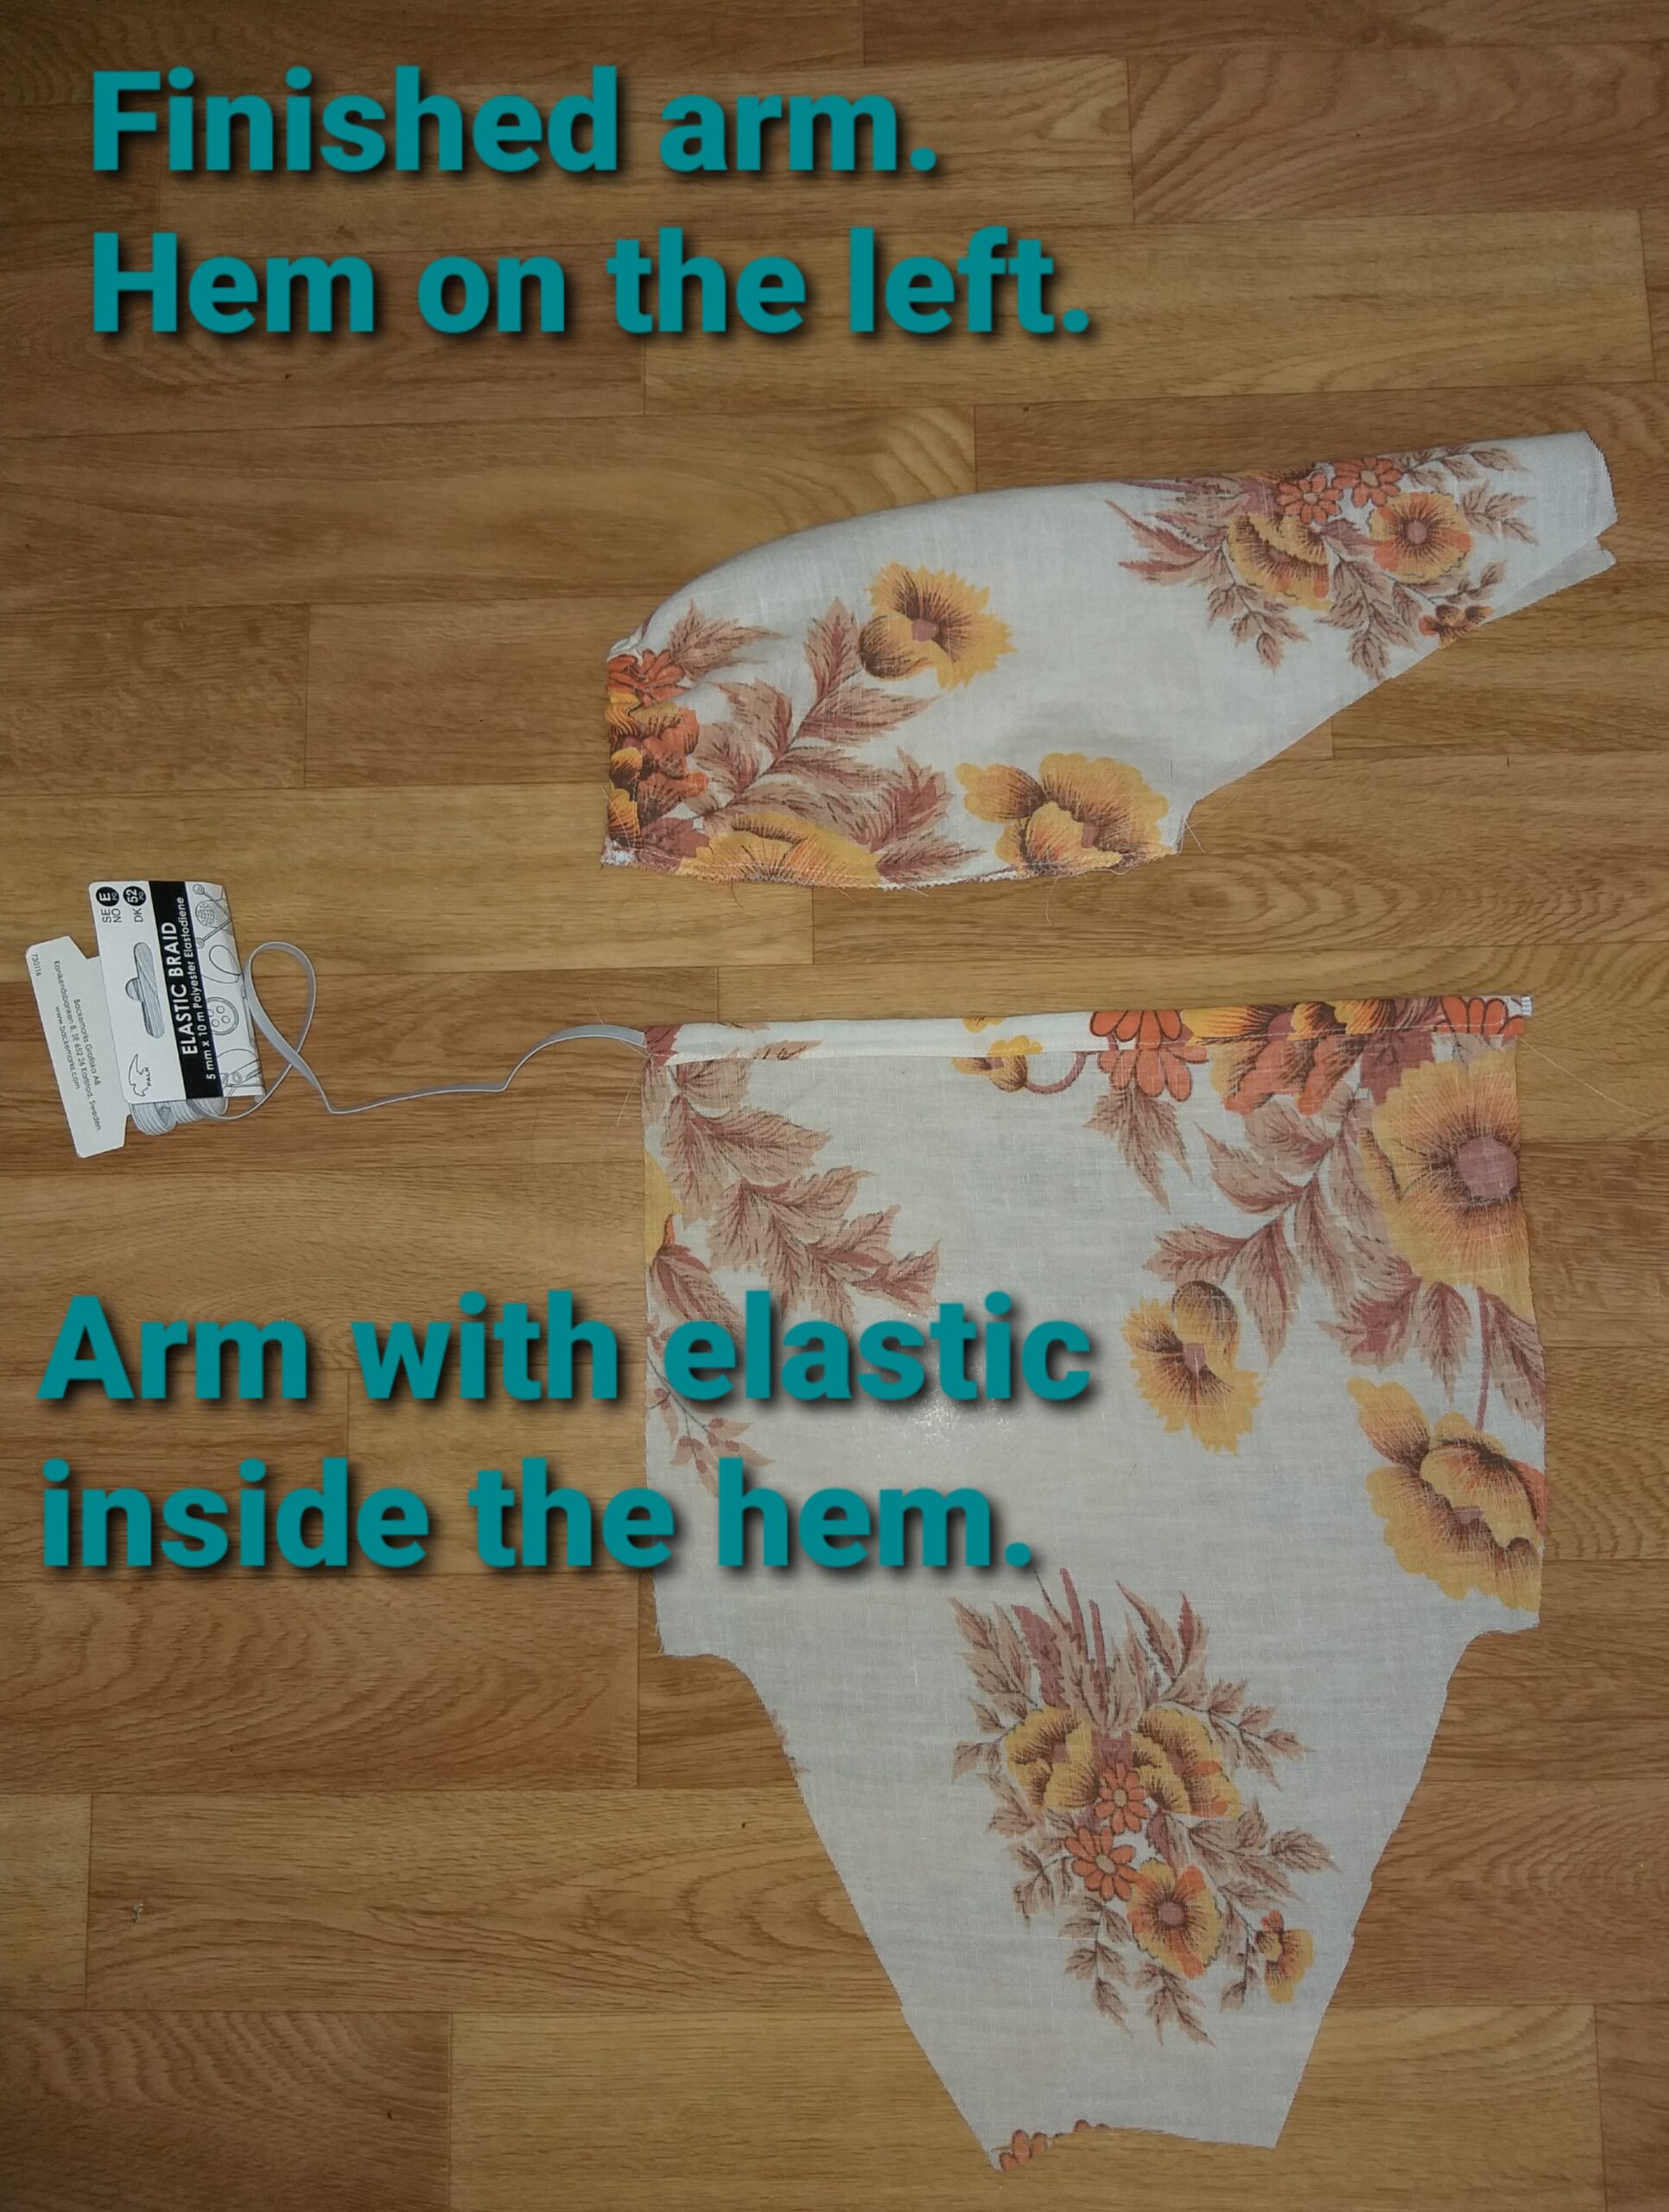
After cutting the four pieces, sew elastic inside the hem of the arms, then pulled the fabric to the right fit before making the seam along the arm.

Efter att ha klippt ut de fyra delarna, sydde jag in ett elastiskt band i ärmfållen. Sedan drog jag åt bander tills det var tillräckligt tight. Därefter sydde jag armlängden.

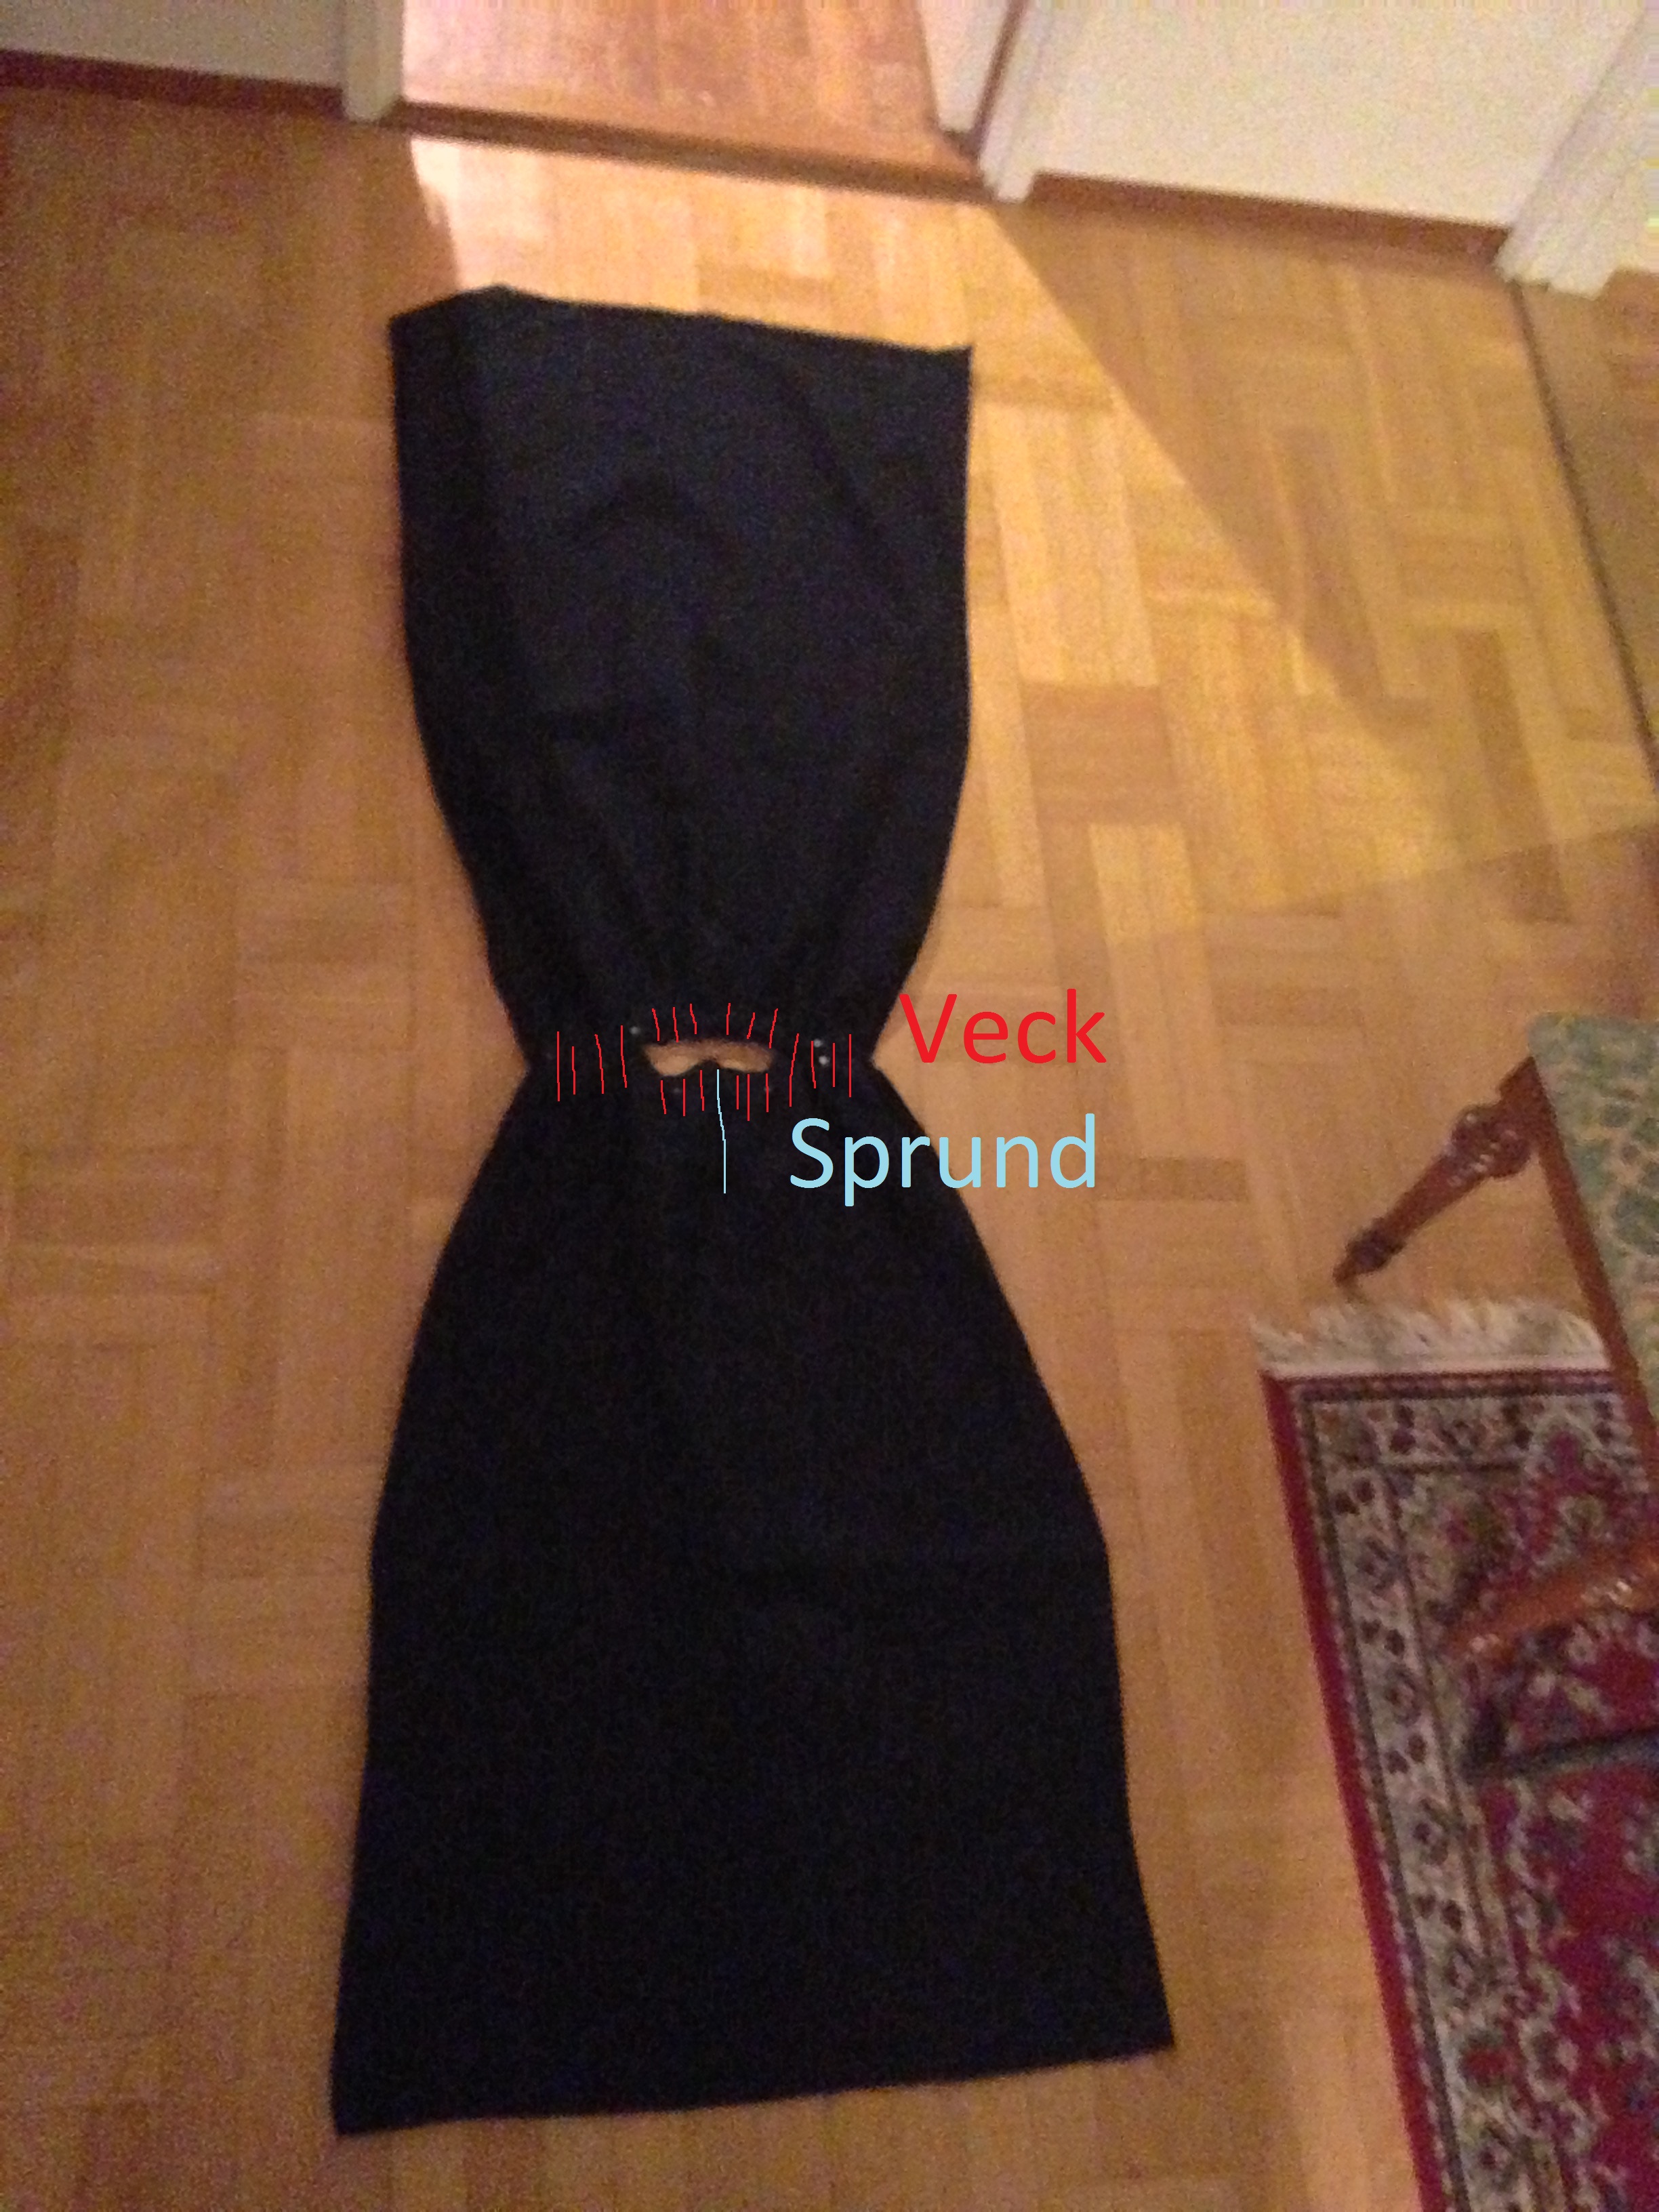
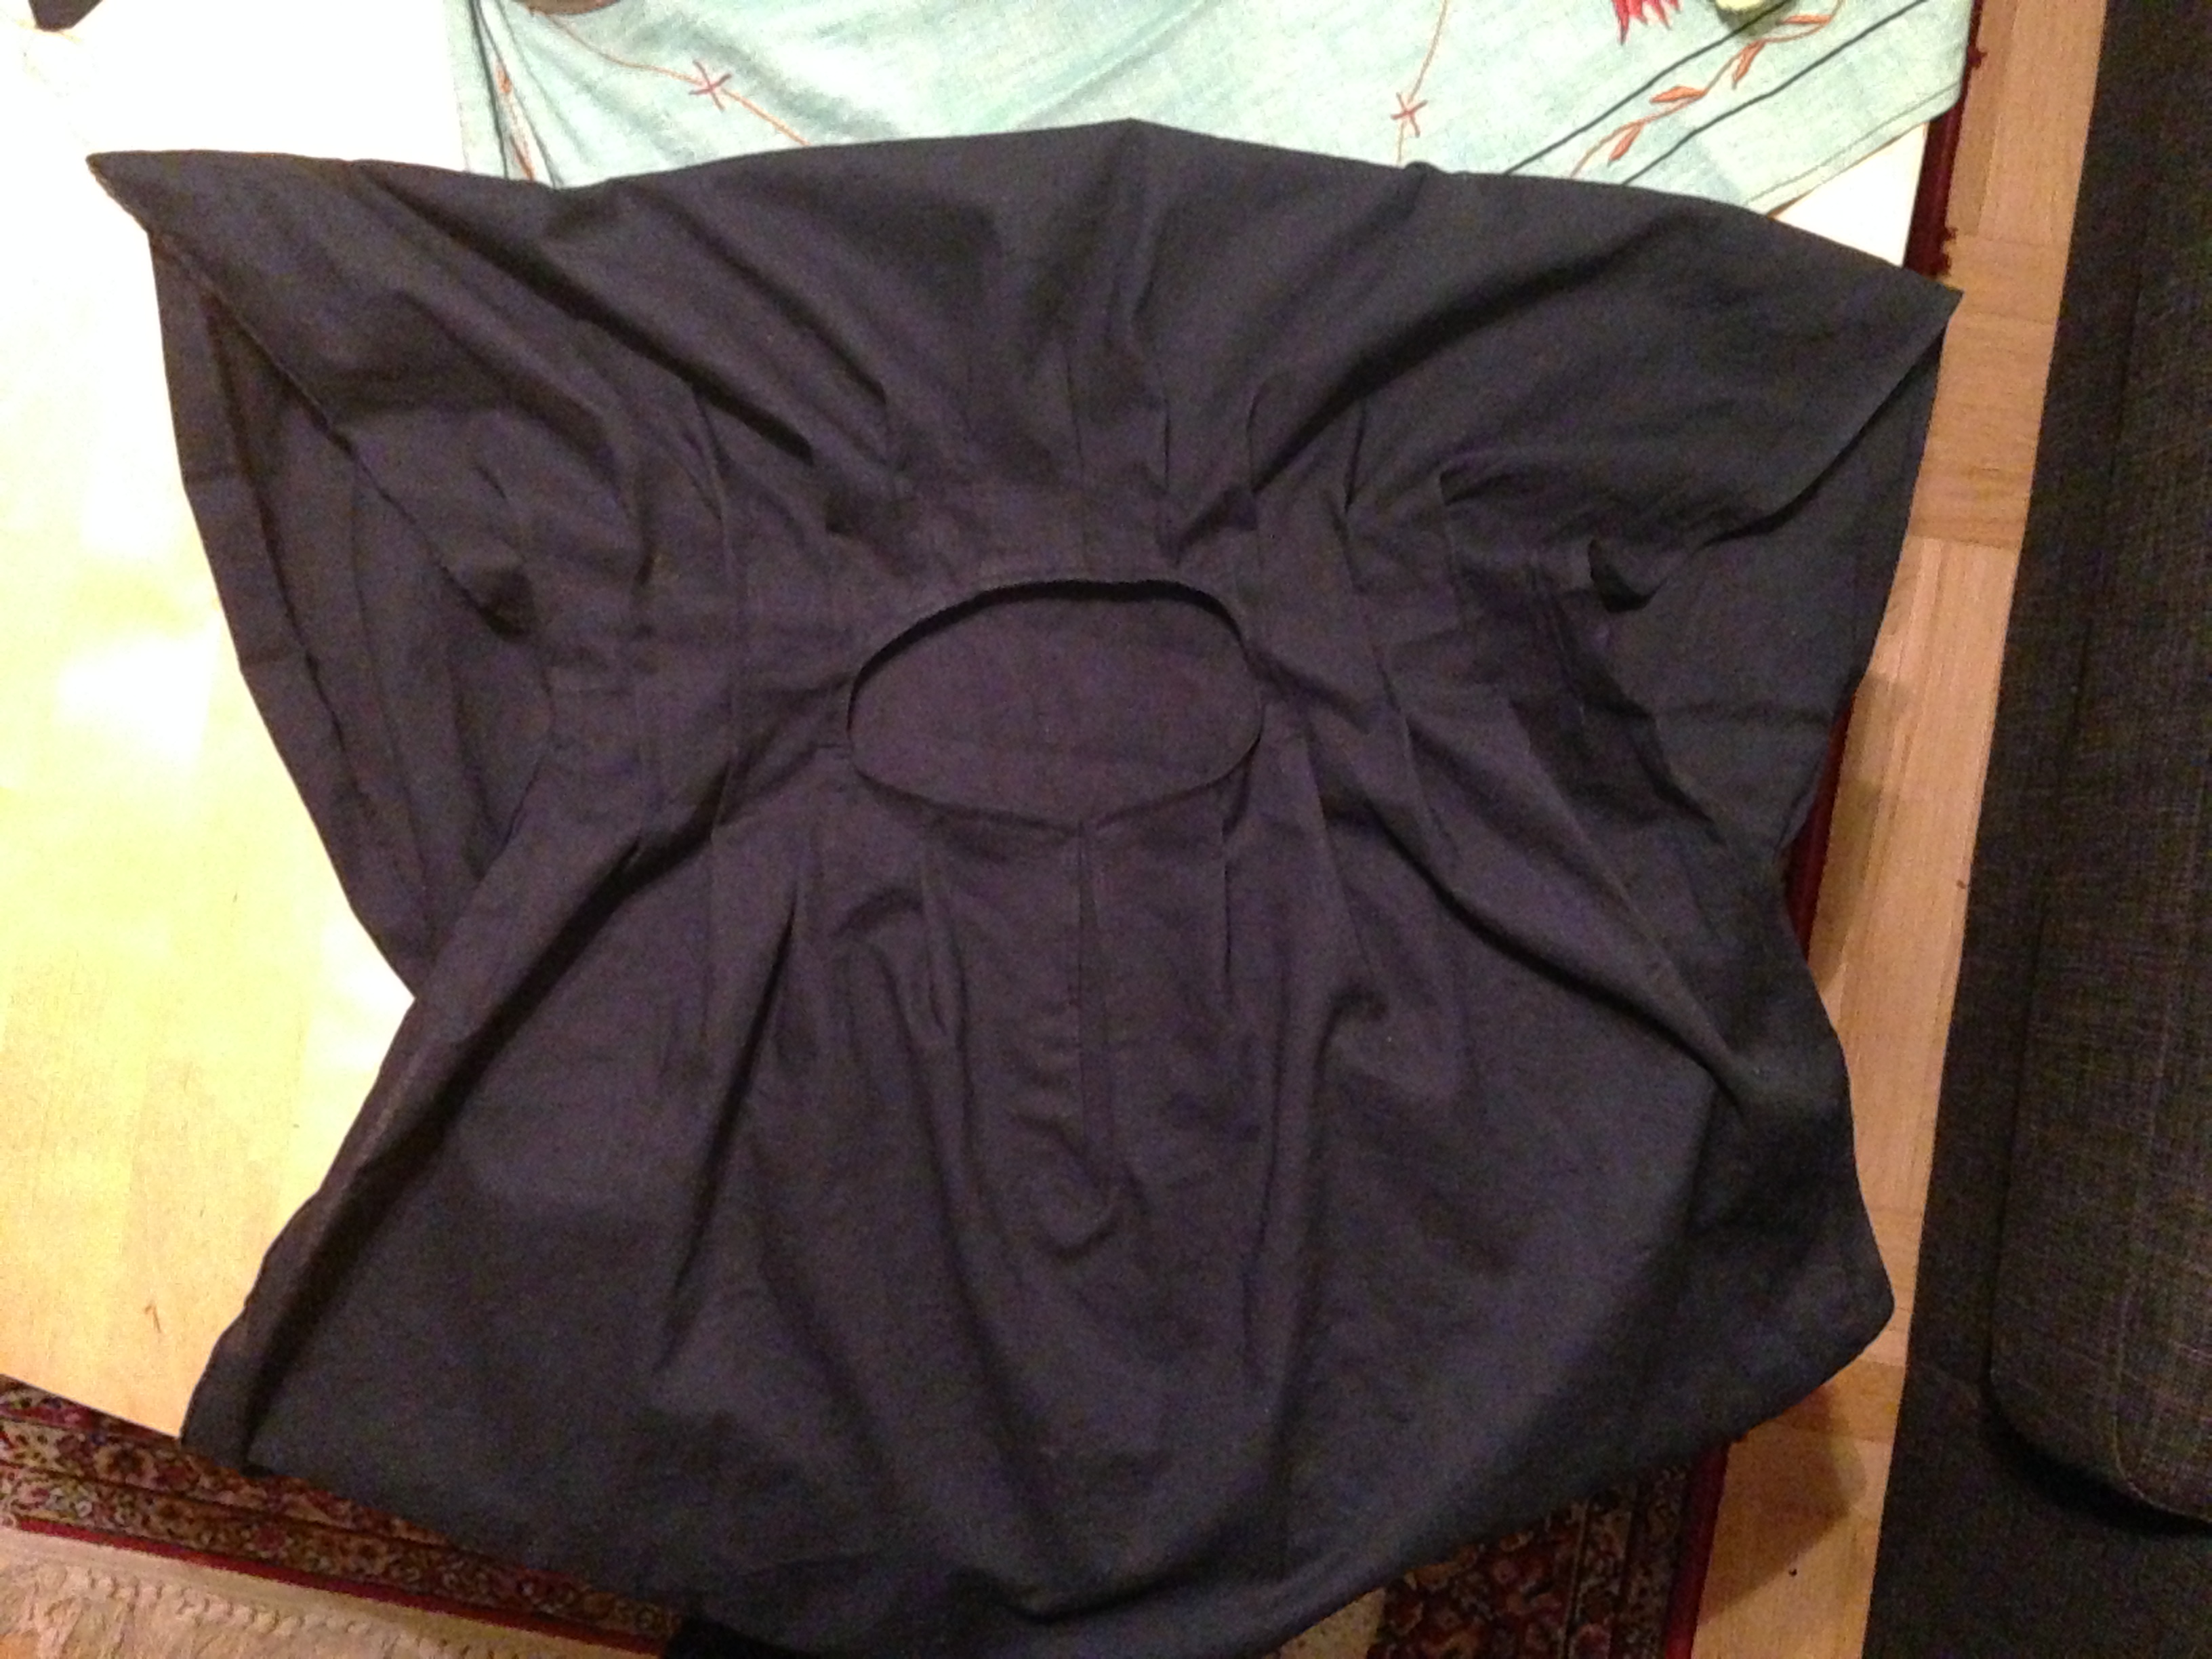
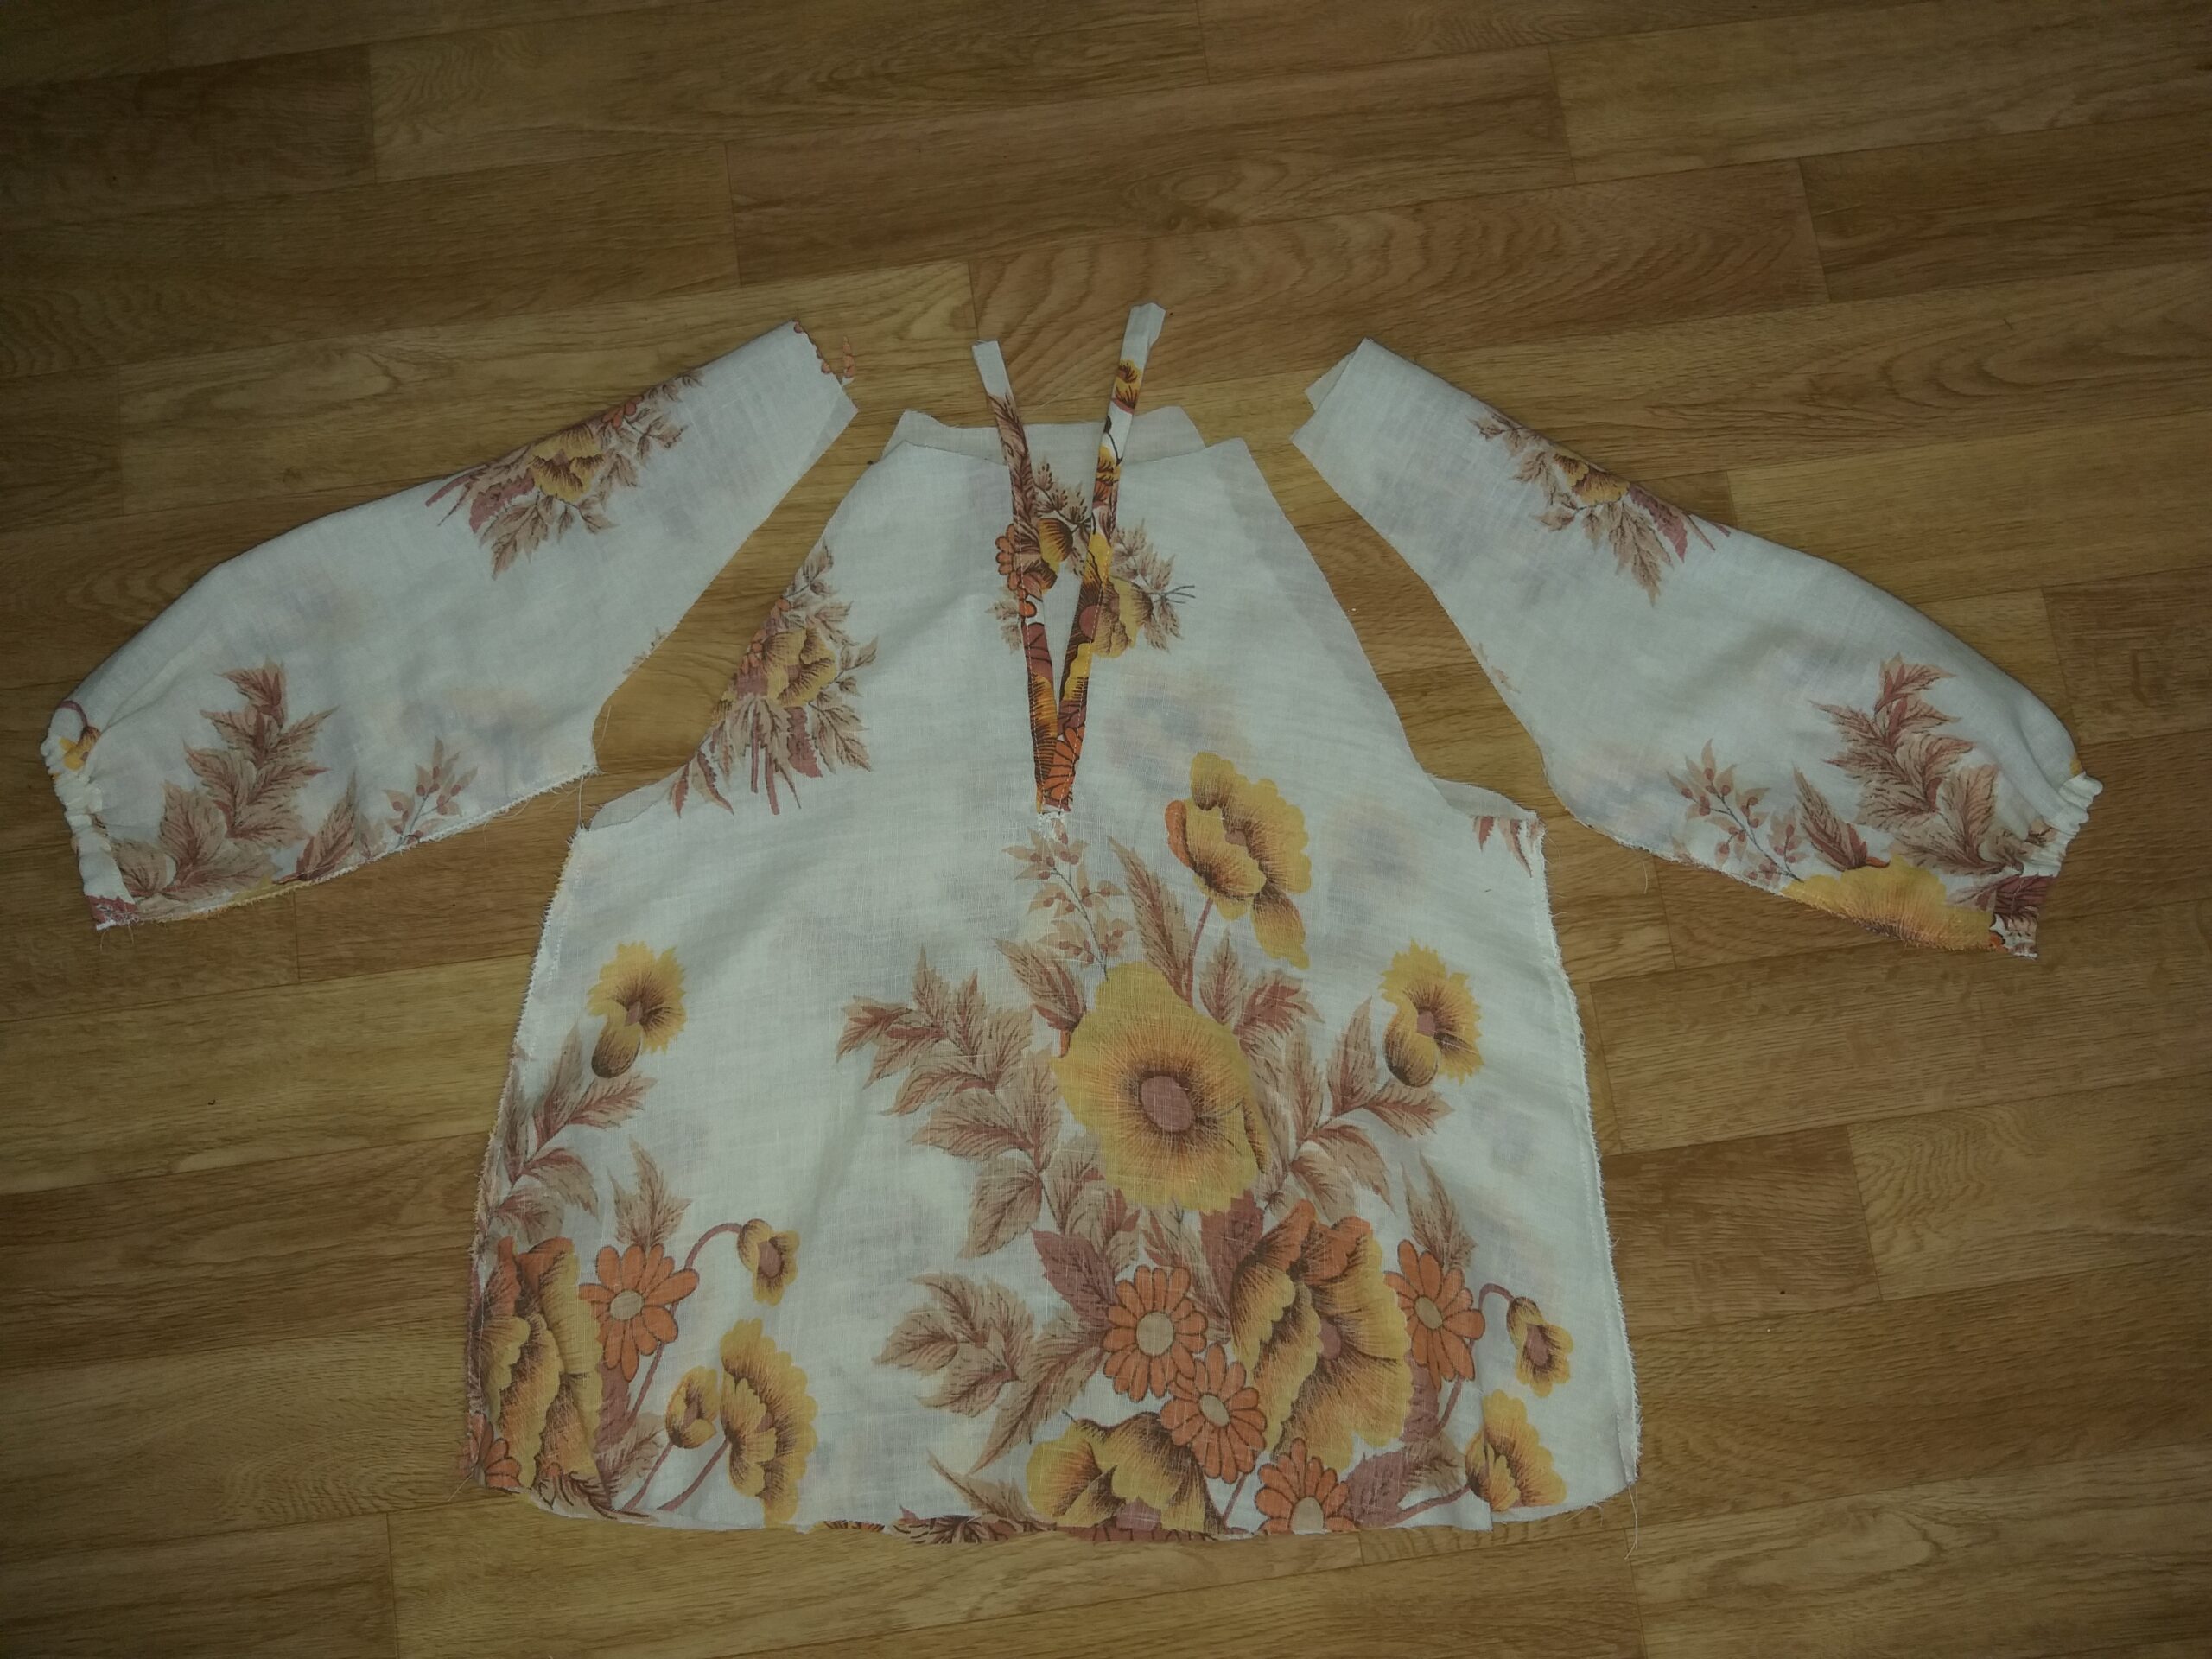
Then I moved on to the front opening of the shirt, before stiching the arms in place, binding the edges and making the bottom hem.

Därefter tog jag itu med öppningen i halsringningen och sedan sydde jag fast ärmarna. Sist sydde jag kantband i halslinningen och fållade botten.

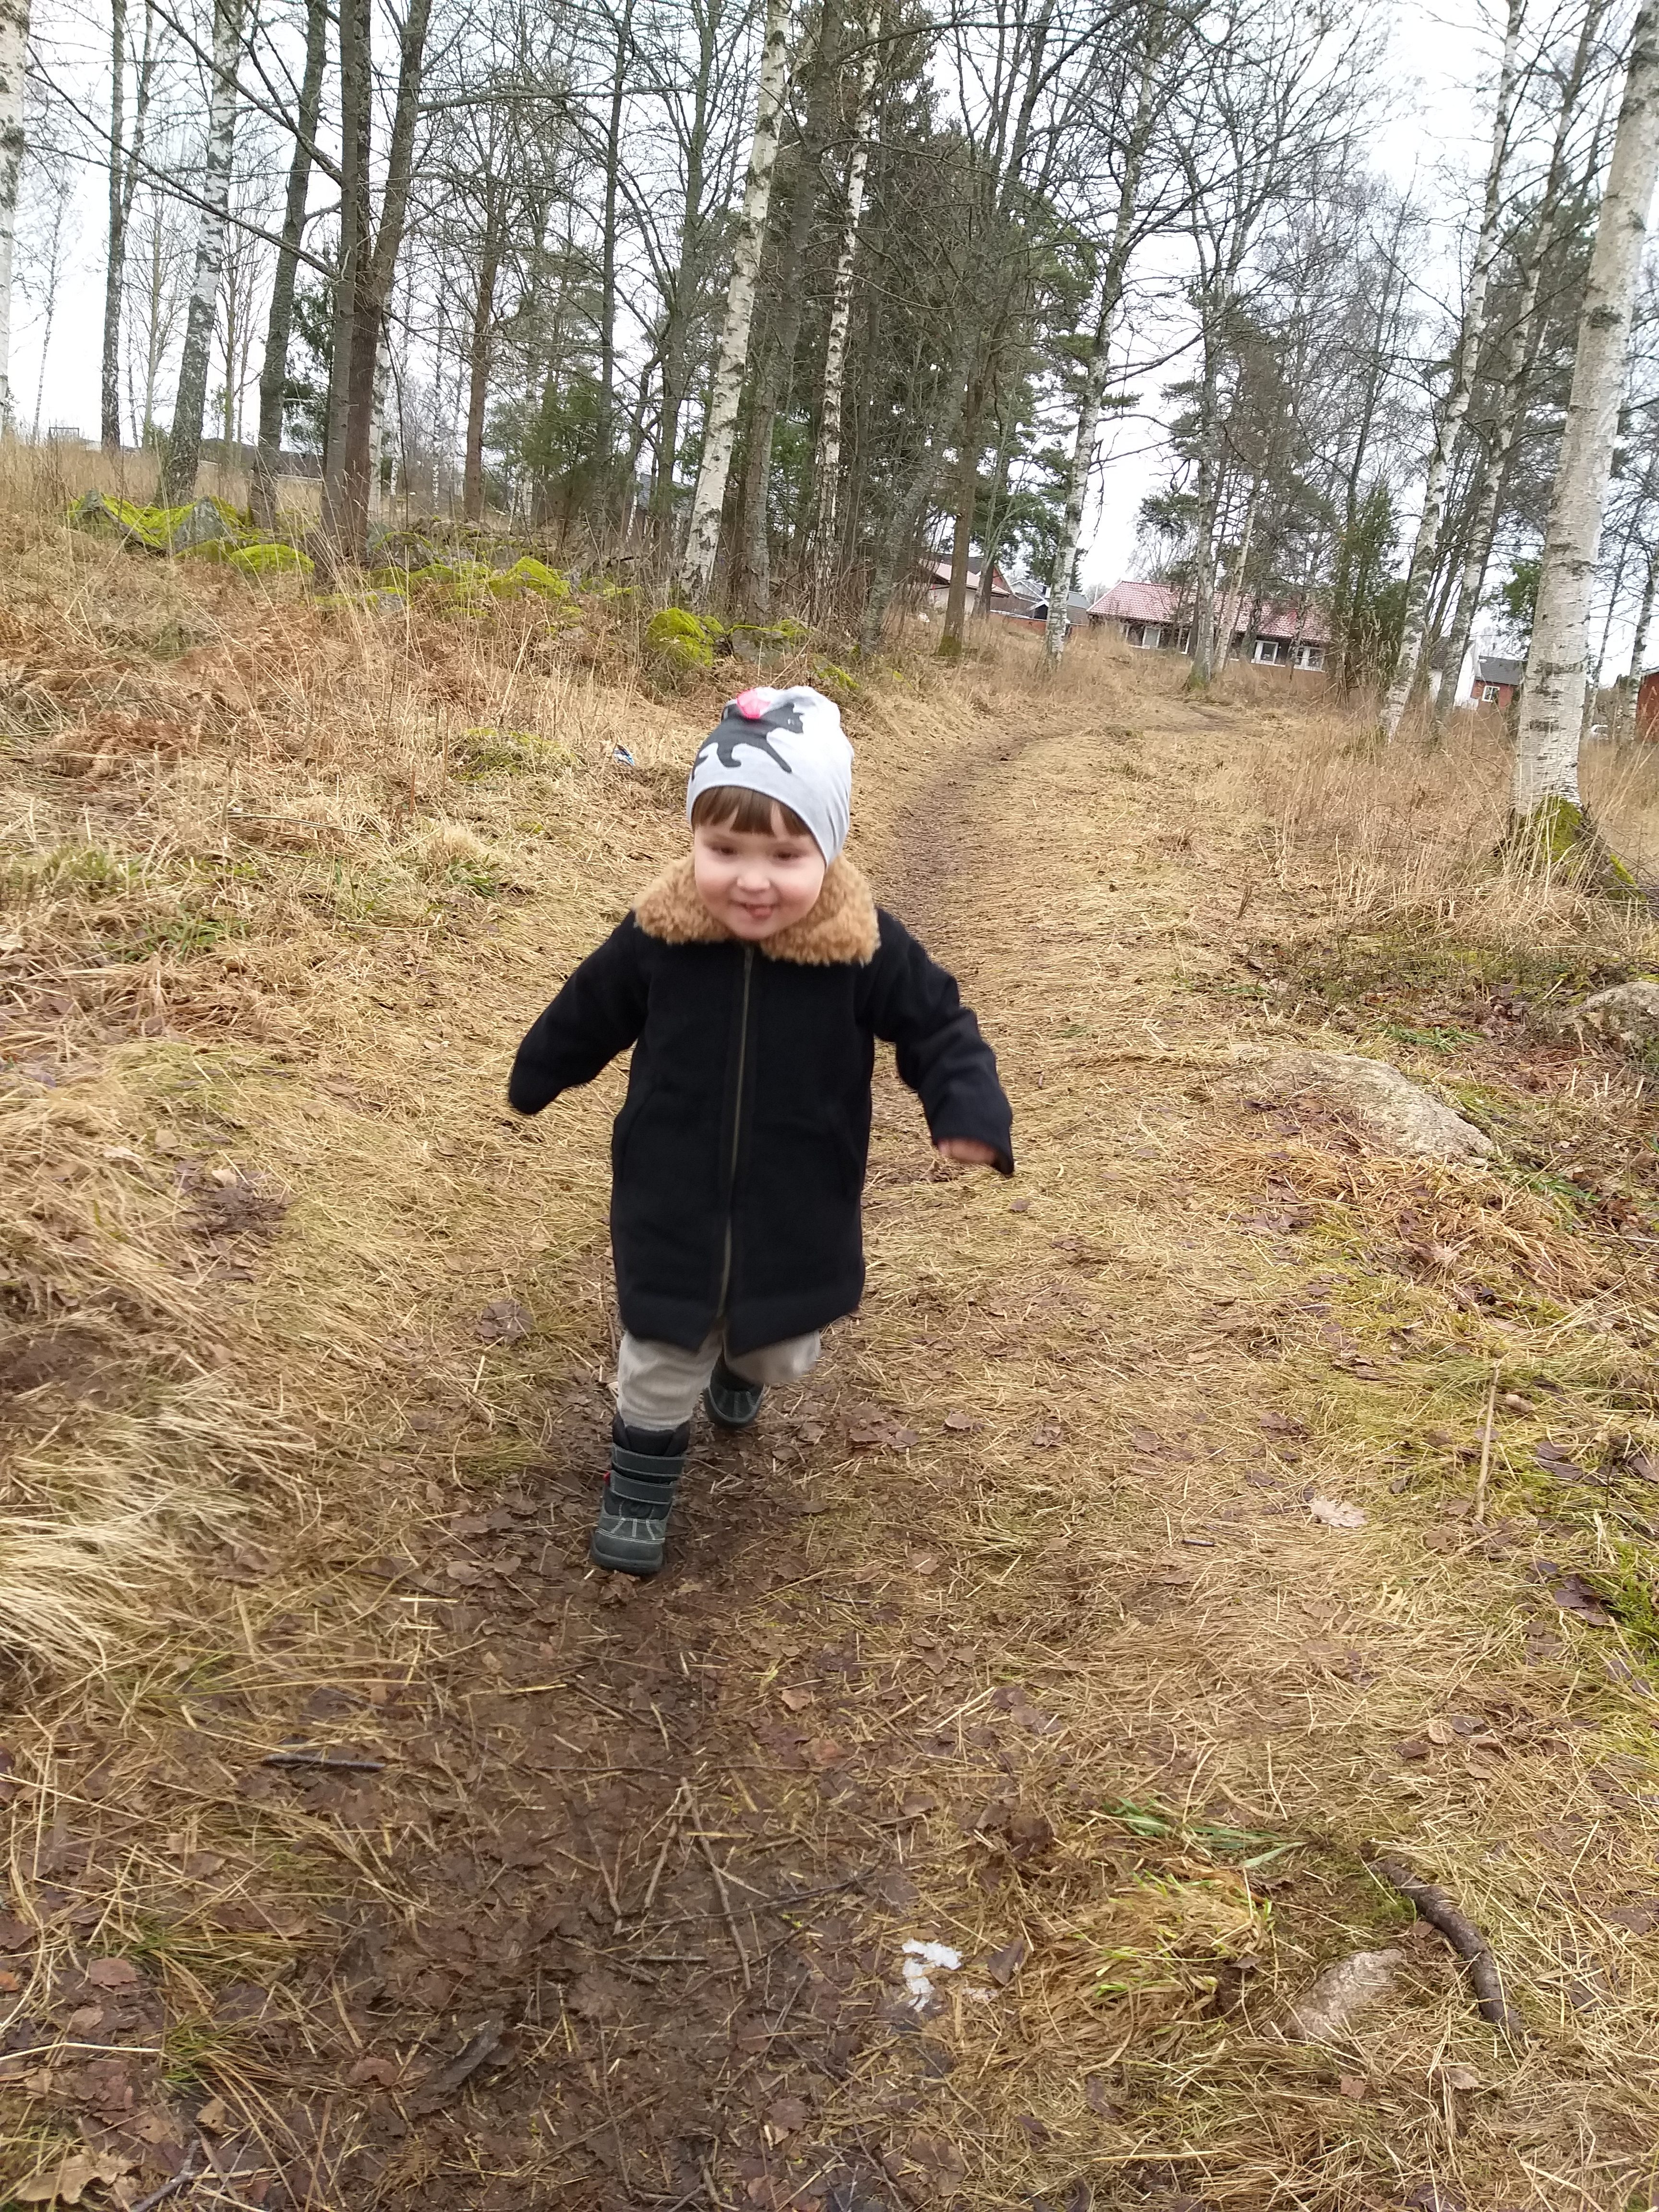
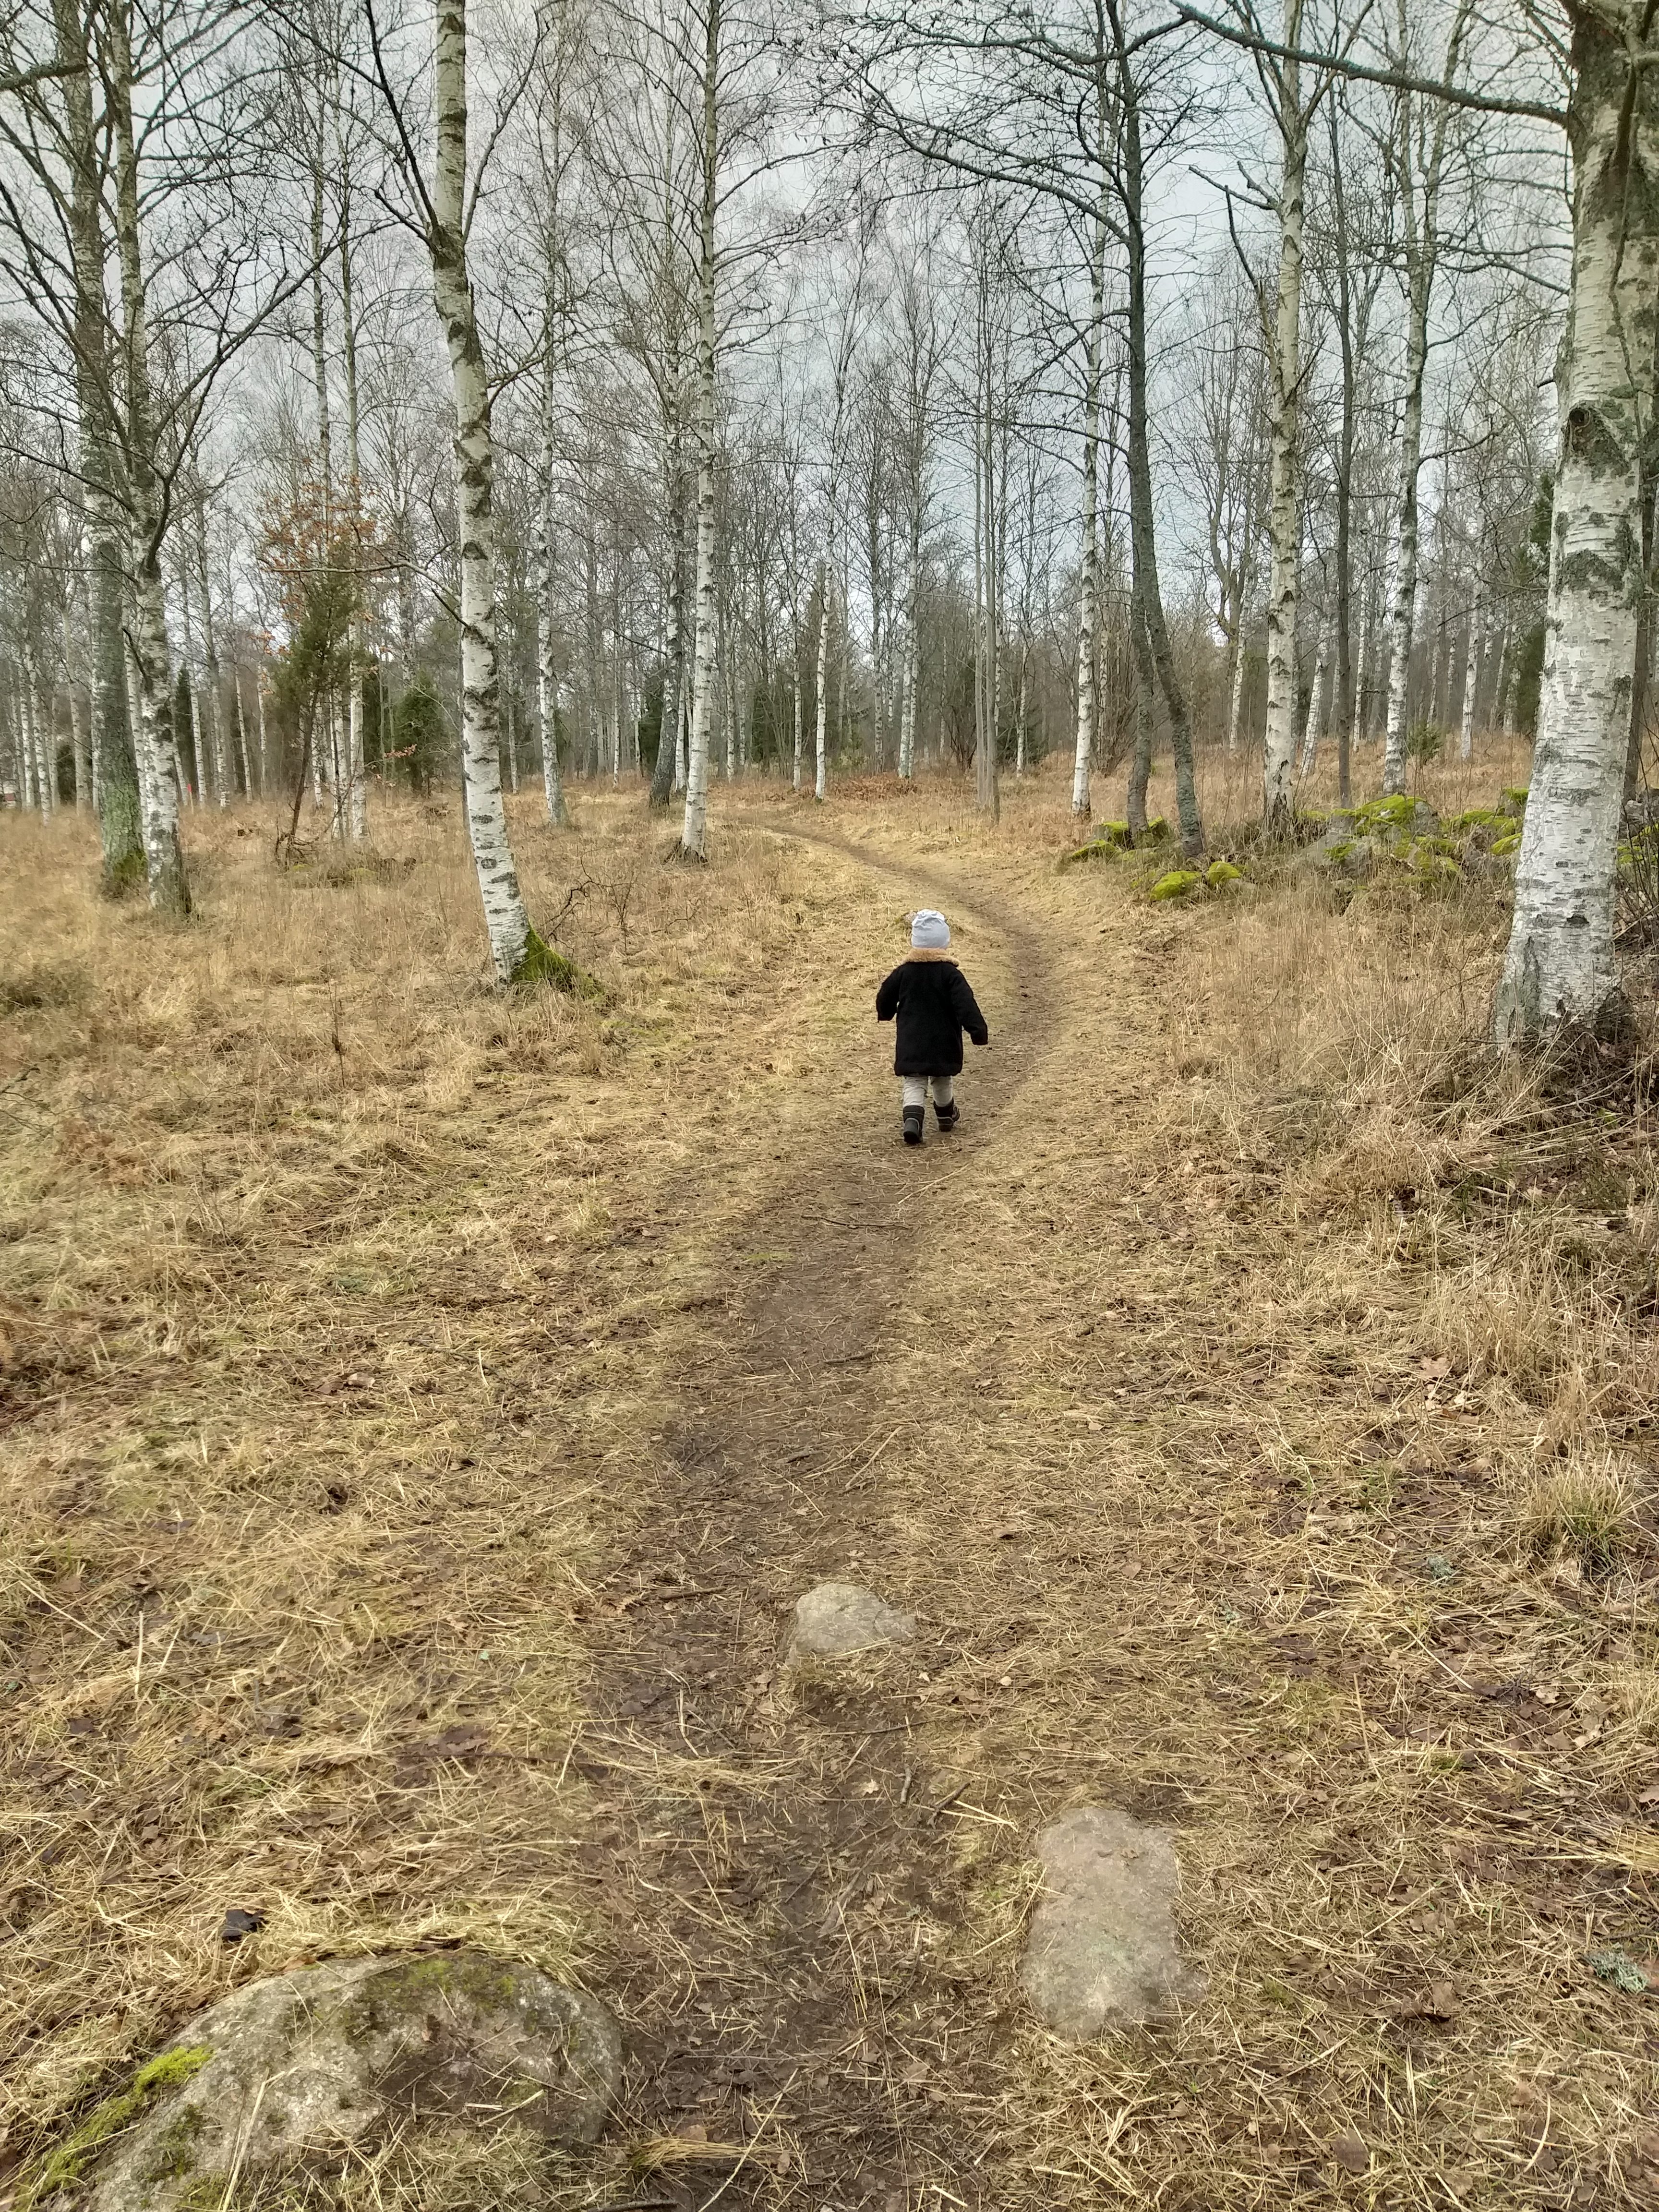
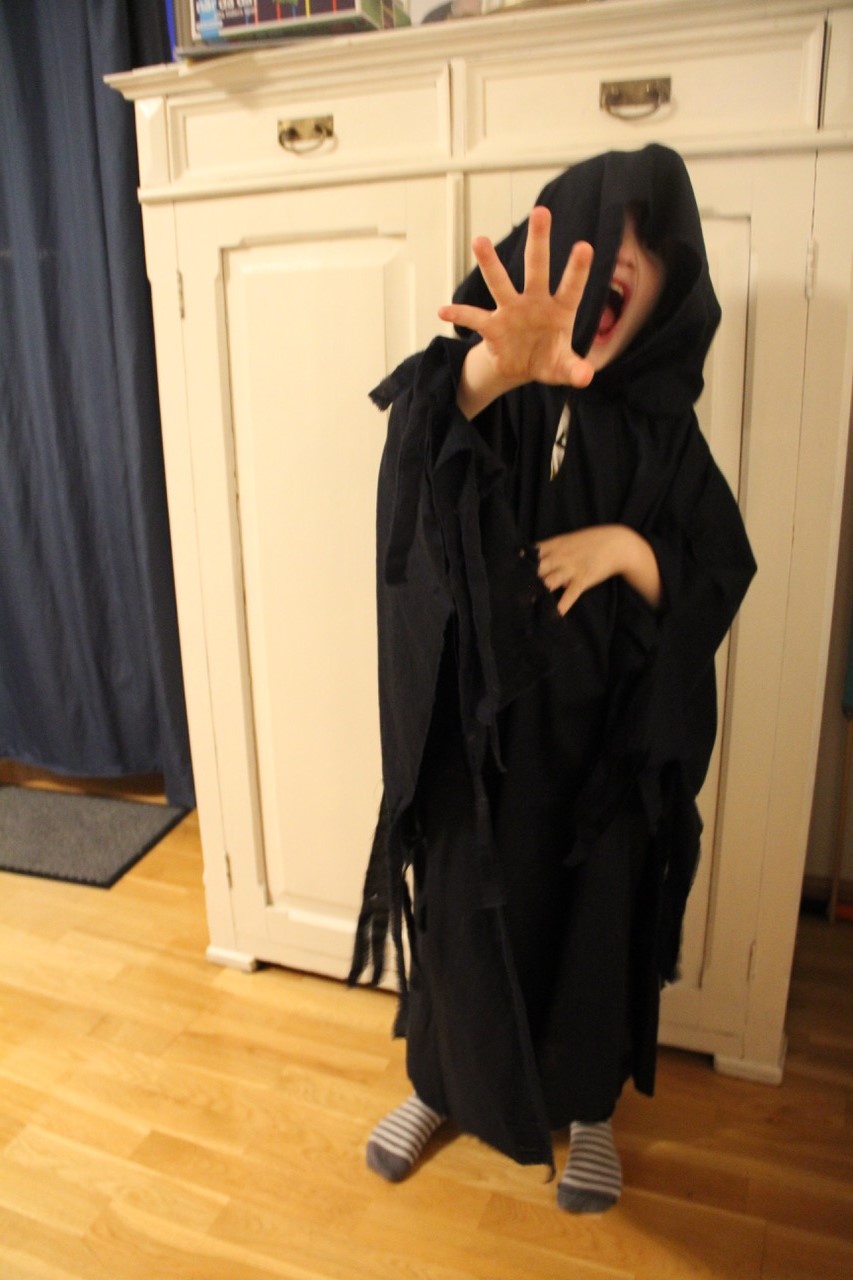
Today he tried it on and I believe he finds it just as comfy as I did my dress.

Idag testade han skjortan och jag tror faktiskt att han tycker att den är lika skön som jag upplevde klänningen.

Share

Art for Ukraine

One month has passed since Russia started the horrible war against Ukraine, seemingly aiming at obliterating the whole country with its citizens. Karin Faaij Hultgren, has started an admirable project, where people auction out their art pieces in the Facebook group Konstauktioner för Ukraina and the money goes to UNHCR’s work in Ukraine. At the moment I believe this has generated more than 100.000 Swedish kronor to the help organisation.

I had an UFO (unfinished object) in my art stash, which I dedicated to this project. I completed the regency family portrait, improving the shadows and adding some typical furniture. Now I hope someone will like it as much as I do, so it brings in some more money to the suffering people of Ukraine. You may place your bid on it here.

Nu har det gått en månad sedan Ryssland invaderade Ukraina och de tycks ha som mål att totalt tillintetgöra hela landet med dess invånare. Karin Faaij Hultgren har startat ett beundransvärt projekt, där folk får skänka sin konst, som sedan auktioneras ut och pengarna går oavkortat till UNHCR och Röda korsets arbete i Ukraina. För tillfället tror jag att detta projekt har inbringat över 100 000 kronor till hjälporganisationerna.

Jag hade ett UFO (unfinished objects) liggande bland mina konstgrejer och detta ville jag nu dedikera till konstauktionen. Jag fullbordade porträttet av empirfamiljen genom att förbättra skuggor och lägga till lite tidstypisk inredning. Nu hoppas jag att någon kommer att tycka lika mycket om bilden som jag gör, så att det drar in lite mer pengar till den lidande ukrainska befolkningen. Du kan lägga ditt bud här.


We have a constantly drooling baby, who also has a growing appetite for colourful food. Thus, the clothes are always either wet of drool or stained by food and accordingly every minute of my spare time has been dedicated to the production of “drool napkins”(?!). They are made of worn out clothes. Only the push buttons are new. These are the latest napkins.

Vår bebis dreglar konstant och har också en växande aptit för färgglad mat. Därför är kläderna alltid antingen blöta eller missfärgade av mat och därmed har alla lugna stunder gått åt till att sy nya dregellappar. Jag använder utslitna kläder. Endast tryckknapparna är nya. Här är de senaste alstren.

Share

Boy’s T-shirts

We went to a fabric shop, Jofotex tyger, on one of our few trips this summer. I was hoping to secure some fabric for myself, but my boy fell in love with some fabrics and suddenly there was neither time, nor budget for me to buy anything for myself. As for the shirts, I simply drew a new pattern from the outer lines of one of his existing T-shirts. This time I actually read the manual for my sewing machine and used the right seams for the jersey fabrics. I had also ordered special fabric for neck and wrists from tygdrömmar.se. My boy got these T-shirts for birthday present and was really pleased, especially with the one with Paw Patrol motif.

På en av våra få dagsutflykter denna Covid-sommar, besökte vi Jofotex tyger. Jag hoppades på att hitta lite tyger till mig själv, men sonen blev själv förälskad i några tyger och plötsligt räckte varken tiden eller budgeten till för inköp till mig själv.

Som med skjortorna, använde jag mig av en existerande T-shirt för att göra ett nytt mönster. Denna gång läste jag faktiskt symaskinens instruktionsbok och använde rätt slags sömmar för trikåtygerna. Jag hade också beställt muddtyg från tygdrömmar.se. Sonen fick T-shirtarna i födelsedagspresent och blev väldigt glad, särskilt för den med motiv från Paw Patrol.

Share

Boy’s Shirts

After a cold and rainy spring, the summer heat hit us hard. It soon became clear that my dear, growing boy was in urgent need of a thin shirt, protecting his skin from the sun at the same time as it had to be cool and airy. As no such shirts were to be found in the stores, I had to make my own shirt pattern, using his wellfitting, warmer shirt as skabelon. I thought the shirt making process would be very difficult, but it was not nearly as trying as I had imagined.

Efter en kall och regnig vår, slog sommarvärmen till hårt. Snabbt förstod jag att min växande pojke behövde en tunn skjorta för att skydda huden mot solen, samtidigt som den måste vara luftig och sval. Eftersom jag inte kunde finna några sådana skjortor i butikerna, insåg jag att jag nog måste sy skjortan själv. Jag gjorde ett nytt mönster, utifrån en av hans välsittande, varma skjortor. Jag hade föreställt mig att det skulle vara jätteknepigt att sy en skjorta, men det var faktiskt rätt enkelt när jag väl kom igång. 

The fabric is from an old curtain and the buttons are reused too. In order to win his approval, I embroidered a pirate skull on the shirt pocket.
The fabric is comes from an old blanket and the buttons are also reused. I stiched decorative seams in his favourite colours.

Both the shirts have proven to be both practical, cool and protective against insects. And most importantly – my son loves them.

Båda skjortorna har visat sig vara både praktiska, svala och skydda väl mot insekter. Och viktigast av allt – sonen älskar dem!

Share

Solhatt

Sonen behövde en ny solhatt, men det var helt omöjligt att hitta en hatt i rätt storlek, så jag fick helt enkelt göra en själv. Först gjorde jag ett mönster av papper.

Jag använde dubbla tyglager, med förstärkning (?) i brättet.

När alla delar var sammansydda sydde jag även några cirkulära sömmar kring brättet, för att ge extra stadga.

Resultatet blev helt ok. Får se hur hatten tål väder och vind framöver.

Share

Child’s Winter Coat

Last year I disintegrated my sister’s old wool winter jacket (she let me, I promise) in order to reuse the lining for my red winter coat. Originally, I planned to use the wool for my nephew’s medieval clothes, but when I had the vlieseline (?) removed, it was too sticky on the wrong side. So I saved it in my stash. When I found this fluffy faux fur at Panduro, I knew just what to use it for! It’s so fluffy I’m gonna die!

Förra året sprättade jag upp min systers gamla vinterjacka (hon tillät det, jag lovar), för att kunna återanvända jackans foder till min  röda kappa. Jag sparade yttertyget, som var ett fint ylle. Jag tänkte använda tyget till min systersons medeltidskläder, men det när jag hade tagit bort det stadgande materialet (vlieseline?) var det alldeles för sticksigt, så det fick ligga kvar i tyglagret. När jag hittade denna fluffiga fuskpäls visste jag precis vad jag skulle använda yllet till! Det är så fluffigt att jag dör!

I made a new pattern, tracing the outer lines from my son’s favourite jacket, but adding one centimeter at every side, except at the bottom, where I added one decimeter.  I thought about hiding a zipper behind a flap (?) and adding fancy metal buttons, that my son adores, but it seemed too intricate to sew and for a child to put on by himself.

Jag ritade ett nytt mönster genom att rita en centimeter utanför varje kant på hans favoritjacka. Nertill la jag till en decimeter. Jag funderade över att ha en dragkedja dold under en flärp med fina metallknappar, som han älskar, men det verkade vara för knepigt både att sy och för en tvååring att hantera. 

I removed the old pockets and used this part for arms. Unfortunately the fabric behind the pocket seams had a lighter colour, which I unsuccessfully tried covering up with black ink. Obviously the ink reflects sunlight very well… I had to make some piecing together, as you see.

Jag sprättade bort de gamla fickorna och använde dessa tygstycken till ärmarna. Tyvärr visade sig tyget under sömmarna ha blivit ljusare, vilket jag försökte maskera med svart tush. Tushet reflekterar visst solljuset väldigt bra… Som du ser fick jag skarva en del för att få tyget att räcka.

When he first tried the jacket on, he began crying and wouldn’t try it again for a few days. Today, I realized that there was a needle left in the faux fur. After removing it, he loved this jacket. He described it as “Awesome! Cozy!”. I am so pleased!

När han testade jackan första gången började han gråta och vägrade ta på den igen. Idag upptäckte jag att en nål gömt sig i den fluffiga fuskpälsen. Efter att jag tagit bort den älskade han sin nya jacka. Han beskrev den som  “Häftig! Mysig!” Jag är så glad!

For Christmas gift, I made a pyjamah, tracing his favourite pair. He loves the fact that it is a dress with pockets

Jag sydde en pyjamas till honom i julklapp. Hans favoritpyjamas är en klänning med fickor. Denna använde jag som förlaga och han blev väldigt nöjd.

Share

Regency Gentleman, Toddler and Teen

At Tjolöholm Castle 2016

Teenager’s Dress

These last few months have been crazy. I’ve had my internship at the psychiatric ward, which have been both thrilling and exhausting, as I have been working nights a lot more than I tolerate. At the same time I have been preparing clothes for a recency ball. In a weak moment I decided to even participate in dancing sessions before the ball, in order to fully enjoy the historically authentic ball (for those of you who don’t know me, I  am not the dancing type). My dear nieces will accompany us for the dancing lessons and thus, there is need for one more regency dress, for a  slender thirteenyearold. The younger niece will wear this dress which will be long enough after having removed the pin tucks. I made the quickest dress ever, with the least amount of material ever, leaving approximately five square centimetres of scraps. This is the result. 

This is what fabric was left after making the dress. I’m quite proud of myself.

The new dress with floral print and the old white dress which has now been successfully lengthened by removing the pin tucks.

Toddler’s Dress

Our toddler will join the dancing sessions, off course. So he needs a kirtle. I made one in a few hours by machine. He should have a pair of trousers and a hat too, but there is no time and what does it matter, really? If you want some background about children’s clothing, see this lovely page.

Tired boy in the company of his best friends

Fall Front Breeches

I have been working on a new pair of breeches for my husband for some years, moments at a time. Now only the buttons remain. I have tried to solve the mystery of the construction of the elusive fall front breeches and drafted the pattern myself. This is how I have interpreted what I have seen in pictures.

1) putting together front, back and both sides 2) cutting slits by the sides for narrow or broad fall front 3) adding the pieces behind the fall front

5) adding fabric pieces to the fall front sides 6) folding the pieces around the sides in order to hide the raw edges 7) adding one piece more to the top of the fall front in the same way

After I stopped documenting this process – why, in heavens name? – I added a waistband to hide the raw edges at the rest of the top of the breeches. I hid the raw edges of the end of the legs in the same way. And at the very last I will add buttons and make button holes!

Shirt with Ruffles

I thought that he also needed a nicer shirt and cravat than the first set of clothes, so I made a new shirt with ruffles in the neckline and by the cuffs. Afterwards, I have found excellent tutorials for period regency shirt construction, as in Fabric and Fiction and at Your Wardrobe Unlocked. This one is obviously wrong in many ways.

I started by cutting the double length wished for, folded and cut a whole for the head and a slit at the mid front. Then I added two square arms with square gussets at the arm pits, with gathering at the shoulder and at the end of the arms. I also added ruffles at the slit in the front, although I found out later that the slit should probably have been 3-4 dm long and the ruffles should have been in one continuing piece, instead of one on each side.

I have no idea how this should be done, but this was my way of making the ruffles at the end of the arms: I had two pieces of fabrics in which I hid the raw edge of the arm gathering. After having stitched this in place, I added a folded piece of fabric with gathering, which I tucked in between the two layers in the same way as the arm gathering.

I believe that the opening in the from should have been longer, but then there would not have been enough of fabric for ruffles.

Ruffles sewn by hand and self covered buttons for the collar.

Tailcoat

My most time consuming sewing project ever must be his new tailcoat. I have used historical methods and made all of the interlining by hand – hundreds of stitches that no one will ever see… ? I used the fantastic pattern of Laughing Moon that I bought for the prize money for my win in the 2017 competition of Your Wardrobe Unlocked.

Now there is only a new waistcoat left to make the suit complete. And a pair of shoes, stockings, pocket watch, new hair etc… When starting to update the historical wardrobe, there is no end to it, especially as the family expands.

If I’m still alive by the end of the week, after two more nights at work, I look forward to see all of these clothes during the dancing session.

The dance training was featured in the local newspaper, with some nice pictures. This was what our family looked like. Alas, it was all too obvious that I had not made adjustments for the tail coat during the process, for it did not fit as well as I had hoped for.

Share

Medievalish

Two years ago, we planned on going to the Medieval Week at Visby together with my brother and my sisters family.  At the eleventh hour, I noticed that we had booked the ferry ticket and hotel nights for the wrong week.  Oh, the horror.  We comforted ourselves by going to the beautiful castle of Tjolöholm instead, where there was a Jane Austen display. My nieces have been very keen on experiencing the Medieval week though. I had no vacation this summer, so Visby was out of the question, but I had time for a day at the medieval fair at Söderköpings gästabud.

With a tiny bit of help from me, my nieces made their own gowns – all from cutting to sewing. I am so proud of them! We used fabric from my stash. The green cotton was initially blue, but became green when I was trying to dye it black for the Scary Robe. The pink linen was a huge table cloth. The dresses are made from rectangles and triangles. As the fabric is so unmedieval, the girls went all in by using Tanzanian wooden belts fort decoration. I think that they look like fantasy princesses!

Linen kirtle and liripipe hood out of soft wool

They asked me several times what our boy would wear. Eventually I could not resist making a little kirtle for him, out of an old linen skirt.

Earlier, we worn the cheapest underwear, made out of old cotton bed sheets. At our last stay at the Medieval week though, I bought linnen. During my internships far away from home, I spent the lonely evenings hand stitching a new shirt and a pair of breeches for my husband. I made a new chemise for myself the last night, on machine. I am quite proud of that I succeeded in making alterations for my husbands cotehardie. I made it for him ten years ago, when he was quite slender. Since he began bodybuilding, he has not been able to get into these clothes again. Astonishingly, I seem to have been wise enough to save broad seam allowances, so that I could make both the torso and sleeves wider. After adding sleeve gussets at the shoulders, he was even able to move!

New underwear: linen chemise, shirt, breeches and a little kirtle for the boy

The day at Söderköping was cosy. Off course, it could not compare with Visby, but our boy was happy in the clothes (he had my liripipe hood because of the cold weather) and my nieces were happy to play with him for a whole day.  The city is beautiful; the main part consists of pretty wooden houses from the 19th and early 20th century. The market was nice and I found a nice fabric for a new modern coat. All together, it was a nice day, in great company. Thank you, dear nieces!

Share

Scary Robe for Child

Some weeks ago, I heard something that made my heart melt. A seven year old boy said that I am the best seamstress in the world. I tried to explain that this was not the case, but he insisted. Because

“You are even better at sewing than my own mother!”

This dear boy asked me if I could help him sew a robe that he could wear together with his Scream mask, or perhaps help him making his own gym bag? Because of my baby, I do not know how much time there will be for teaching him how to sew, so I decided to make the robe as a birthday gift.

För några veckor sedan fick jag höra något som fick mitt hjärta att smälta. En sjuåring sa att jag var bäst på att sy i hela världen. Jag försökte förklara att det nog inte var riktigt sant, men han höll fast vid sitt påstående, för

“Du är till och med bättre än min mamma på att sy!”

Denne fine pojke undrade om jag inte kunde hjälpa honom att sy en jättehäftig dräkt, som han kunde ha tillsammans med sin Scream-mask, eller om jag kanske en gympapåse? På grund av min bebis visste jag inte hur mycket tid det skulle bli över för att lära ut sömnad, så jag bestämde mig för att sy dräkten till hans födelsedag.

This is what I envisioned – a dramatic robe with a lot of fabric that would fly behind the boy as he ran around scaring everybody. I did not have any black fabric, but I had recently been given some colored cotton fabrics, that I thought were exactly the same kind, except for the green and blue color. I dyed the fabrics black, but discovered that only the blue fabric became fully black. The green took a darker shade, but was still very green. I could not use that piece, so I had to make do with much less fabric than I had intended to use.

Så här såg min vision ut – en dramatisk rock med massor av tyg, som skulle flyga bakom pojken när han sprang runt och skrämde folk. Jag hade inget svart tyg hemma, men hade nyligen fått färgade bomullstyger, som jag trodde var av samma sort. Jag färgade det blå och gröna tyget med svart textilfärg, men upptäckte att bara det blå tyget blev helt svart. Det gröna hade antagit en mörkare nyans, men var fortfarande väldigt grönt. Jag kunde inte använda det tyget, så jag fick försöka klara mig med mindre tyg än jag hade planerat för.This is the very simple construction of the scary robe. I used the following measurements:

  • height
  • length from shoulders to floor
  • arm length
  • neck circumference
  • length from base of the neck over the head to the other side
  • length from forehead to backside of the base of the neck

All this with some extra cm, especially for the hood.

Detta är den extremt enkla konstruktionen av den läskiga rocken. Jag använde följande mått:

  • längd
  • längd från axlar till golv
  • armlängd
  • nackens omkrets
  • längd från nackens bas över huvudet och ned på andra sidan
  • längd från pannan till baksidan av nackens bas

Alla dessa mått med några centimeter extra, särskilt för luvan.

I gathered the double shoulder measurement in pleats and cut a hole for the neck and made a vent at the front. The vent kloses with a hook and eye.

Jag samlade det dubbla skuldermåttet i veck över axlarna och klippte ett hål för huvudet och ett sprund mitt fram. Sprundet stängs med en hyska och hake.

This is how it looked after making the hems. The pleats were secured with 5 centimeter machine stitches.

Så här såg det ut efter att jag fållat halslinningen. Vecken sydde jag fast med 5 cm långa maskinsömmar.

As I did not have enough fabric for following my own pattern, I used the fabric as is seen on the picture to the right. I had to join three pieces for the hood. I tore away threads lenghtwise, in order to give a rugged edge to the hood and arms. At the bottom of the arms, I also shreded the fabric at the bottom by hand. I stitched the front and back together with some few stitches just beneath the armpits.

Eftersom jag inte hade tillräckligt mycket tyg för att följa mitt eget mönster, använde jag tyget som ses på skissen här till höger. Jag skarvade ihop tre bitar till luvan. Jag rev bort trådar för att få kanterna på luvan och ärmarna att se slitna ut. Längst ned på ärmarna rev jag sönder tyget för hand. Jag sydde ihop fram- och bakstycket med några få stygn precis under armålorna.

This is how it came out.

Så här såg det ut till slut.

The boy was very pleased with his gift and I believe that I am still his seamstress idol.

Pojken var mycket nöjd med sin present och jag tror att jag fortfarande är hans sömmerske-idol.

Share

Small Clothes

During my pregnancy we bought fabrics for the baby nest and childrens clothes. From these, I have sewn a pajama, a bodysuit that is already too tiny for my big boy and a nightgown for a threeyearold girl. All three were quickly cut out – for the baby clothes I used well fitting clothes as template and for the nightgown, I cut rectangles with standard measurements according to the girls age, with slanting shoulders and a tad more width at the bottom at the skirt than at the waistline.  I used the wrong side of the fabric as tape for arms and legs. The push buttons were a bit tricky to attach at sites with many layers of fabric, so I had to sew the bottom of the pajama legs together.

Under graviditeten köpte jag två tyger till nästet och barnkläder. Av dessa  tyger har jag nu även sytt en pyjamas, en body, vilken redan är för trång för min stora pojke och ett nattlinne till en treåring. Alla tre plagg klipptes snabbt till – till nattlinnet använde jag mig av rektanglar med standardmått för flickans ålder, med lätt utsvängning av kjoldelen och sluttande axlar, och till min bebis använde välsittande kläder som mall. För att få matchande kantband använde jag mig av avigan på tygerna. Tryckknapparna var lite knepiga att fästa där det var många tyglager att tränga igenom, så jag var tvungen att istället sy ihop nedre delen av pyjamasbenen.

Over all, I am happy with the result. My boy has slept well in the pajama and the girl seems to be happy for the nightgown. Off course, I would rather have made the bodysuit big enough for him to use more than once, but now I have learnt always to add a lot of fabric in order to fit this little giant.

Jag är i stort sett nöjd med resultatet. Min bebis har sovit gott i sin pyjamas och flickan verkar vara glad för sitt nattlinne. Det är så klart retligt bodyn blev för liten, men nu har jag lärt mig att jag alltid ska plussa på rejält för att det ska passa detta lilla matvrak.

Share