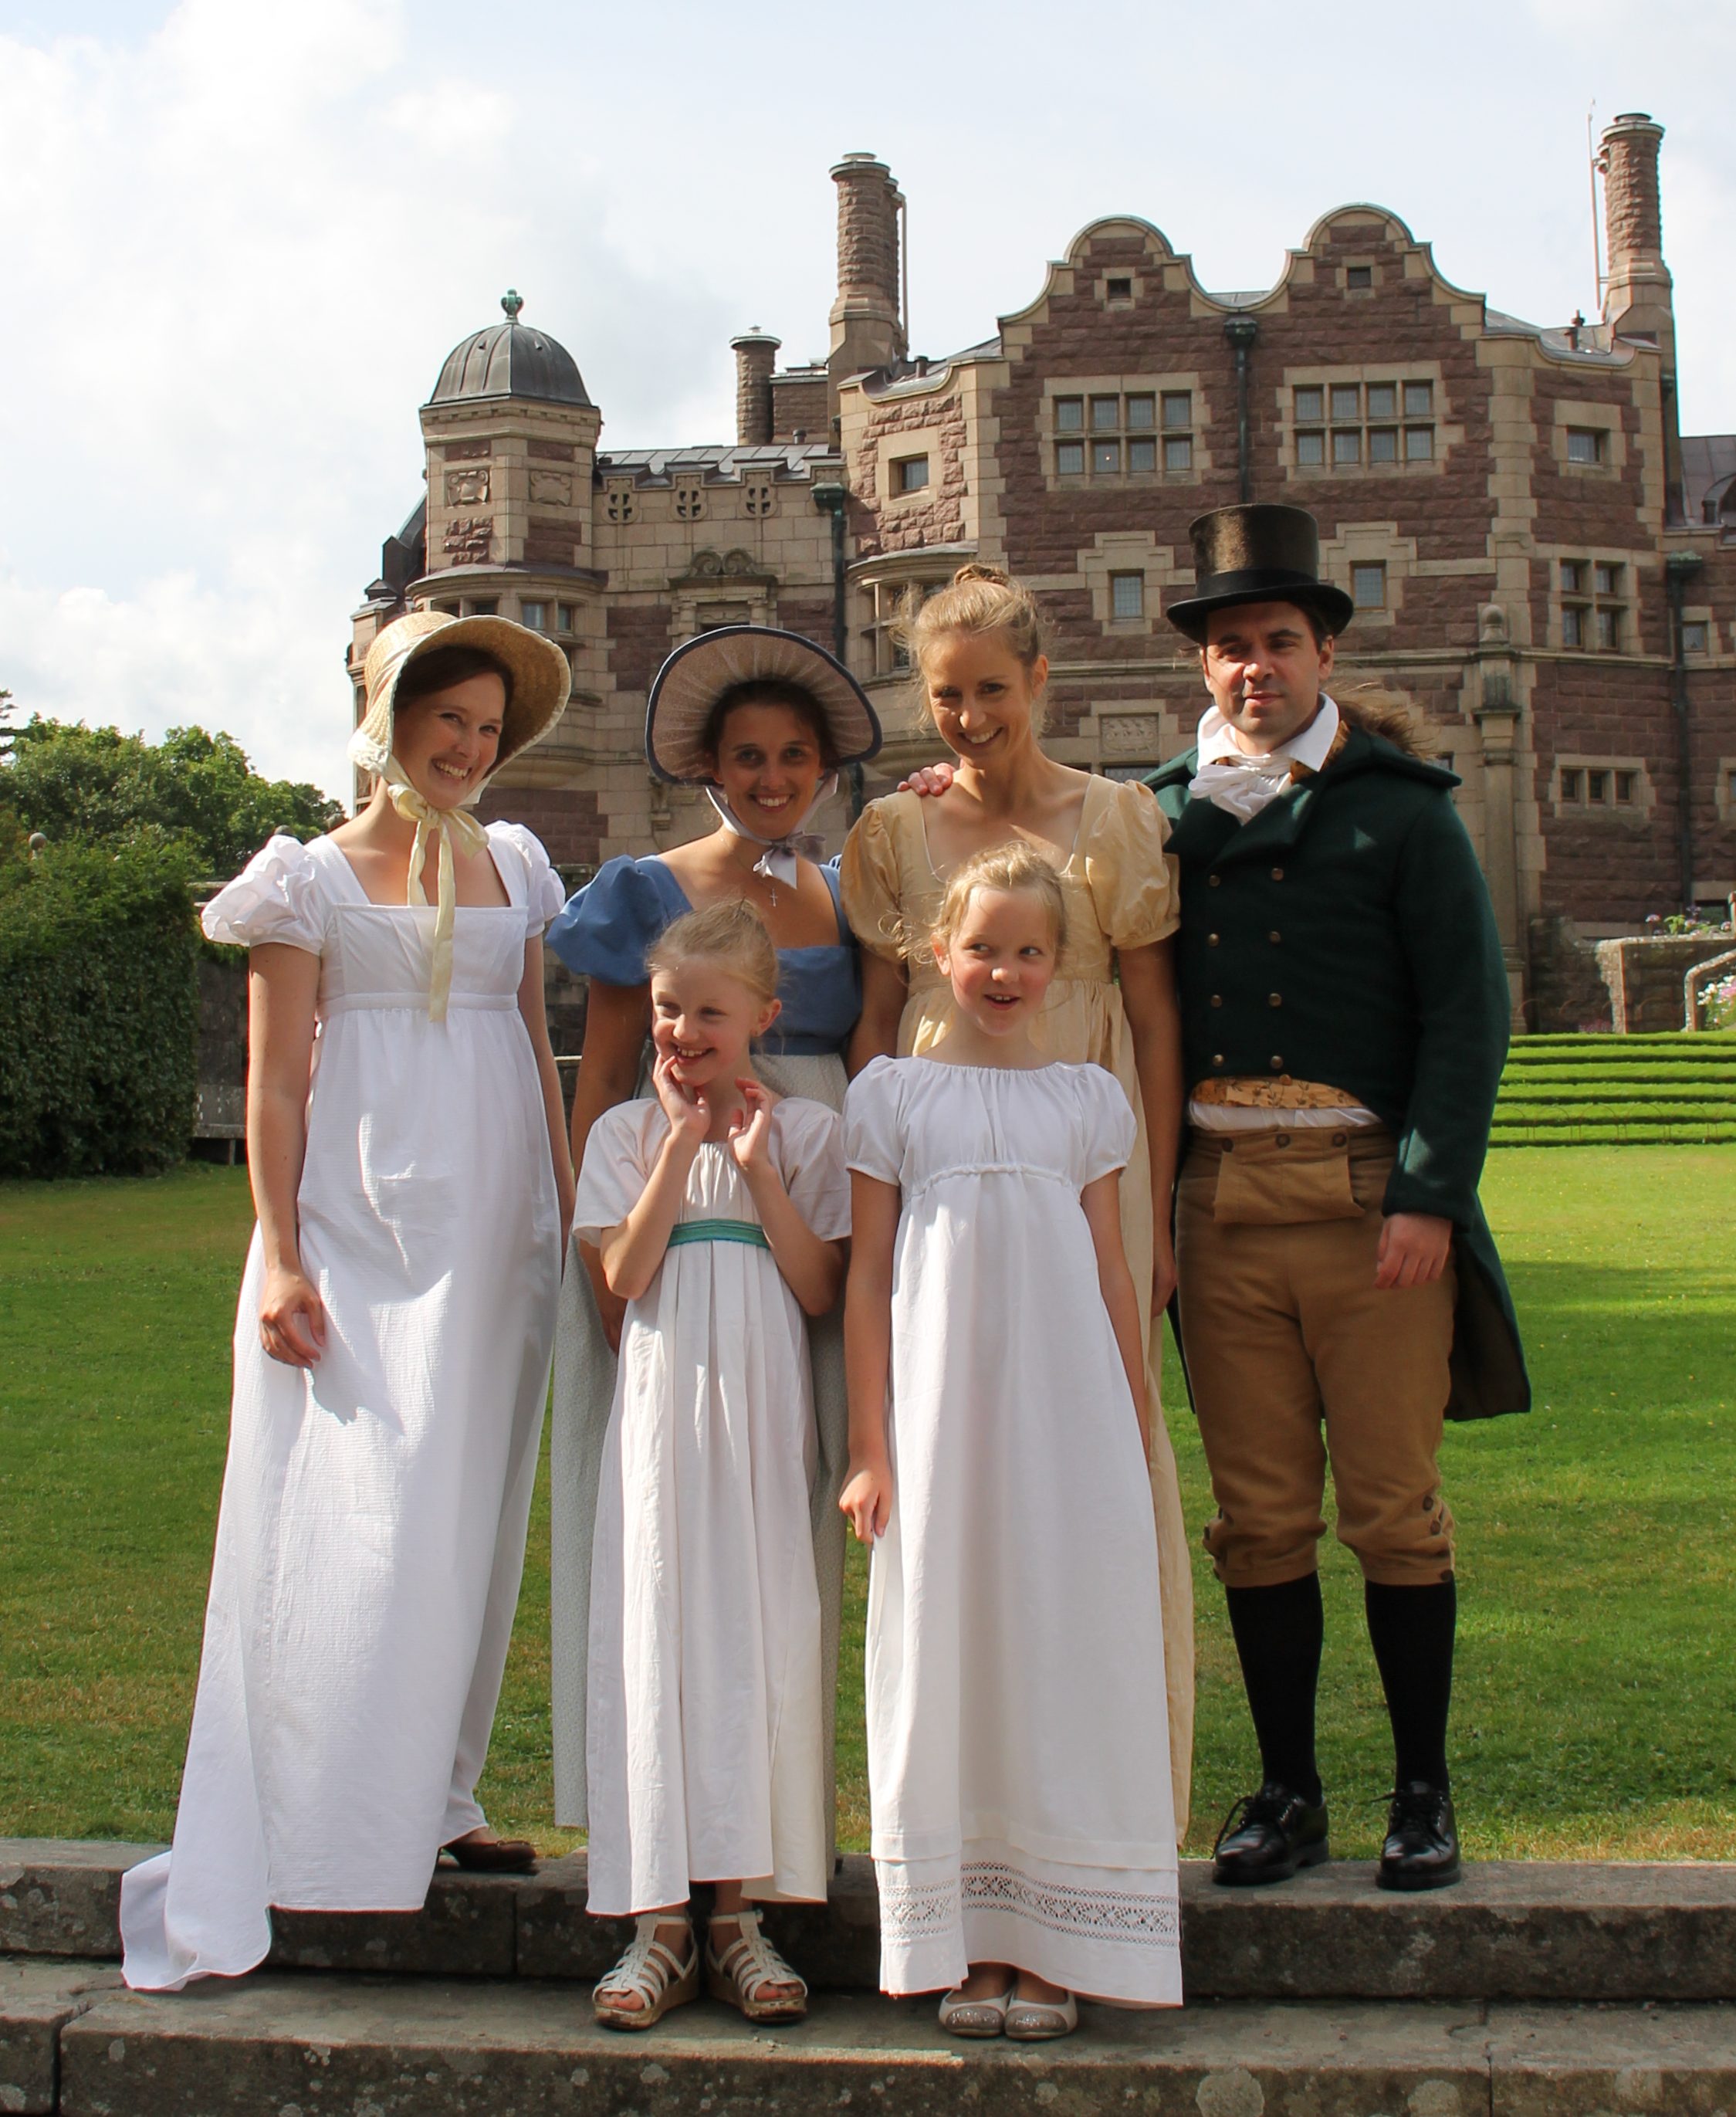
Two years ago, we planned on going to the Medieval Week at Visby together with my brother and my sisters family. At the eleventh hour, I noticed that we had booked the ferry ticket and hotel nights for the wrong week. Oh, the horror. We comforted ourselves by going to the beautiful castle of Tjolöholm instead, where there was a Jane Austen display. My nieces have been very keen on experiencing the Medieval week though. I had no vacation this summer, so Visby was out of the question, but I had time for a day at the medieval fair at Söderköpings gästabud.
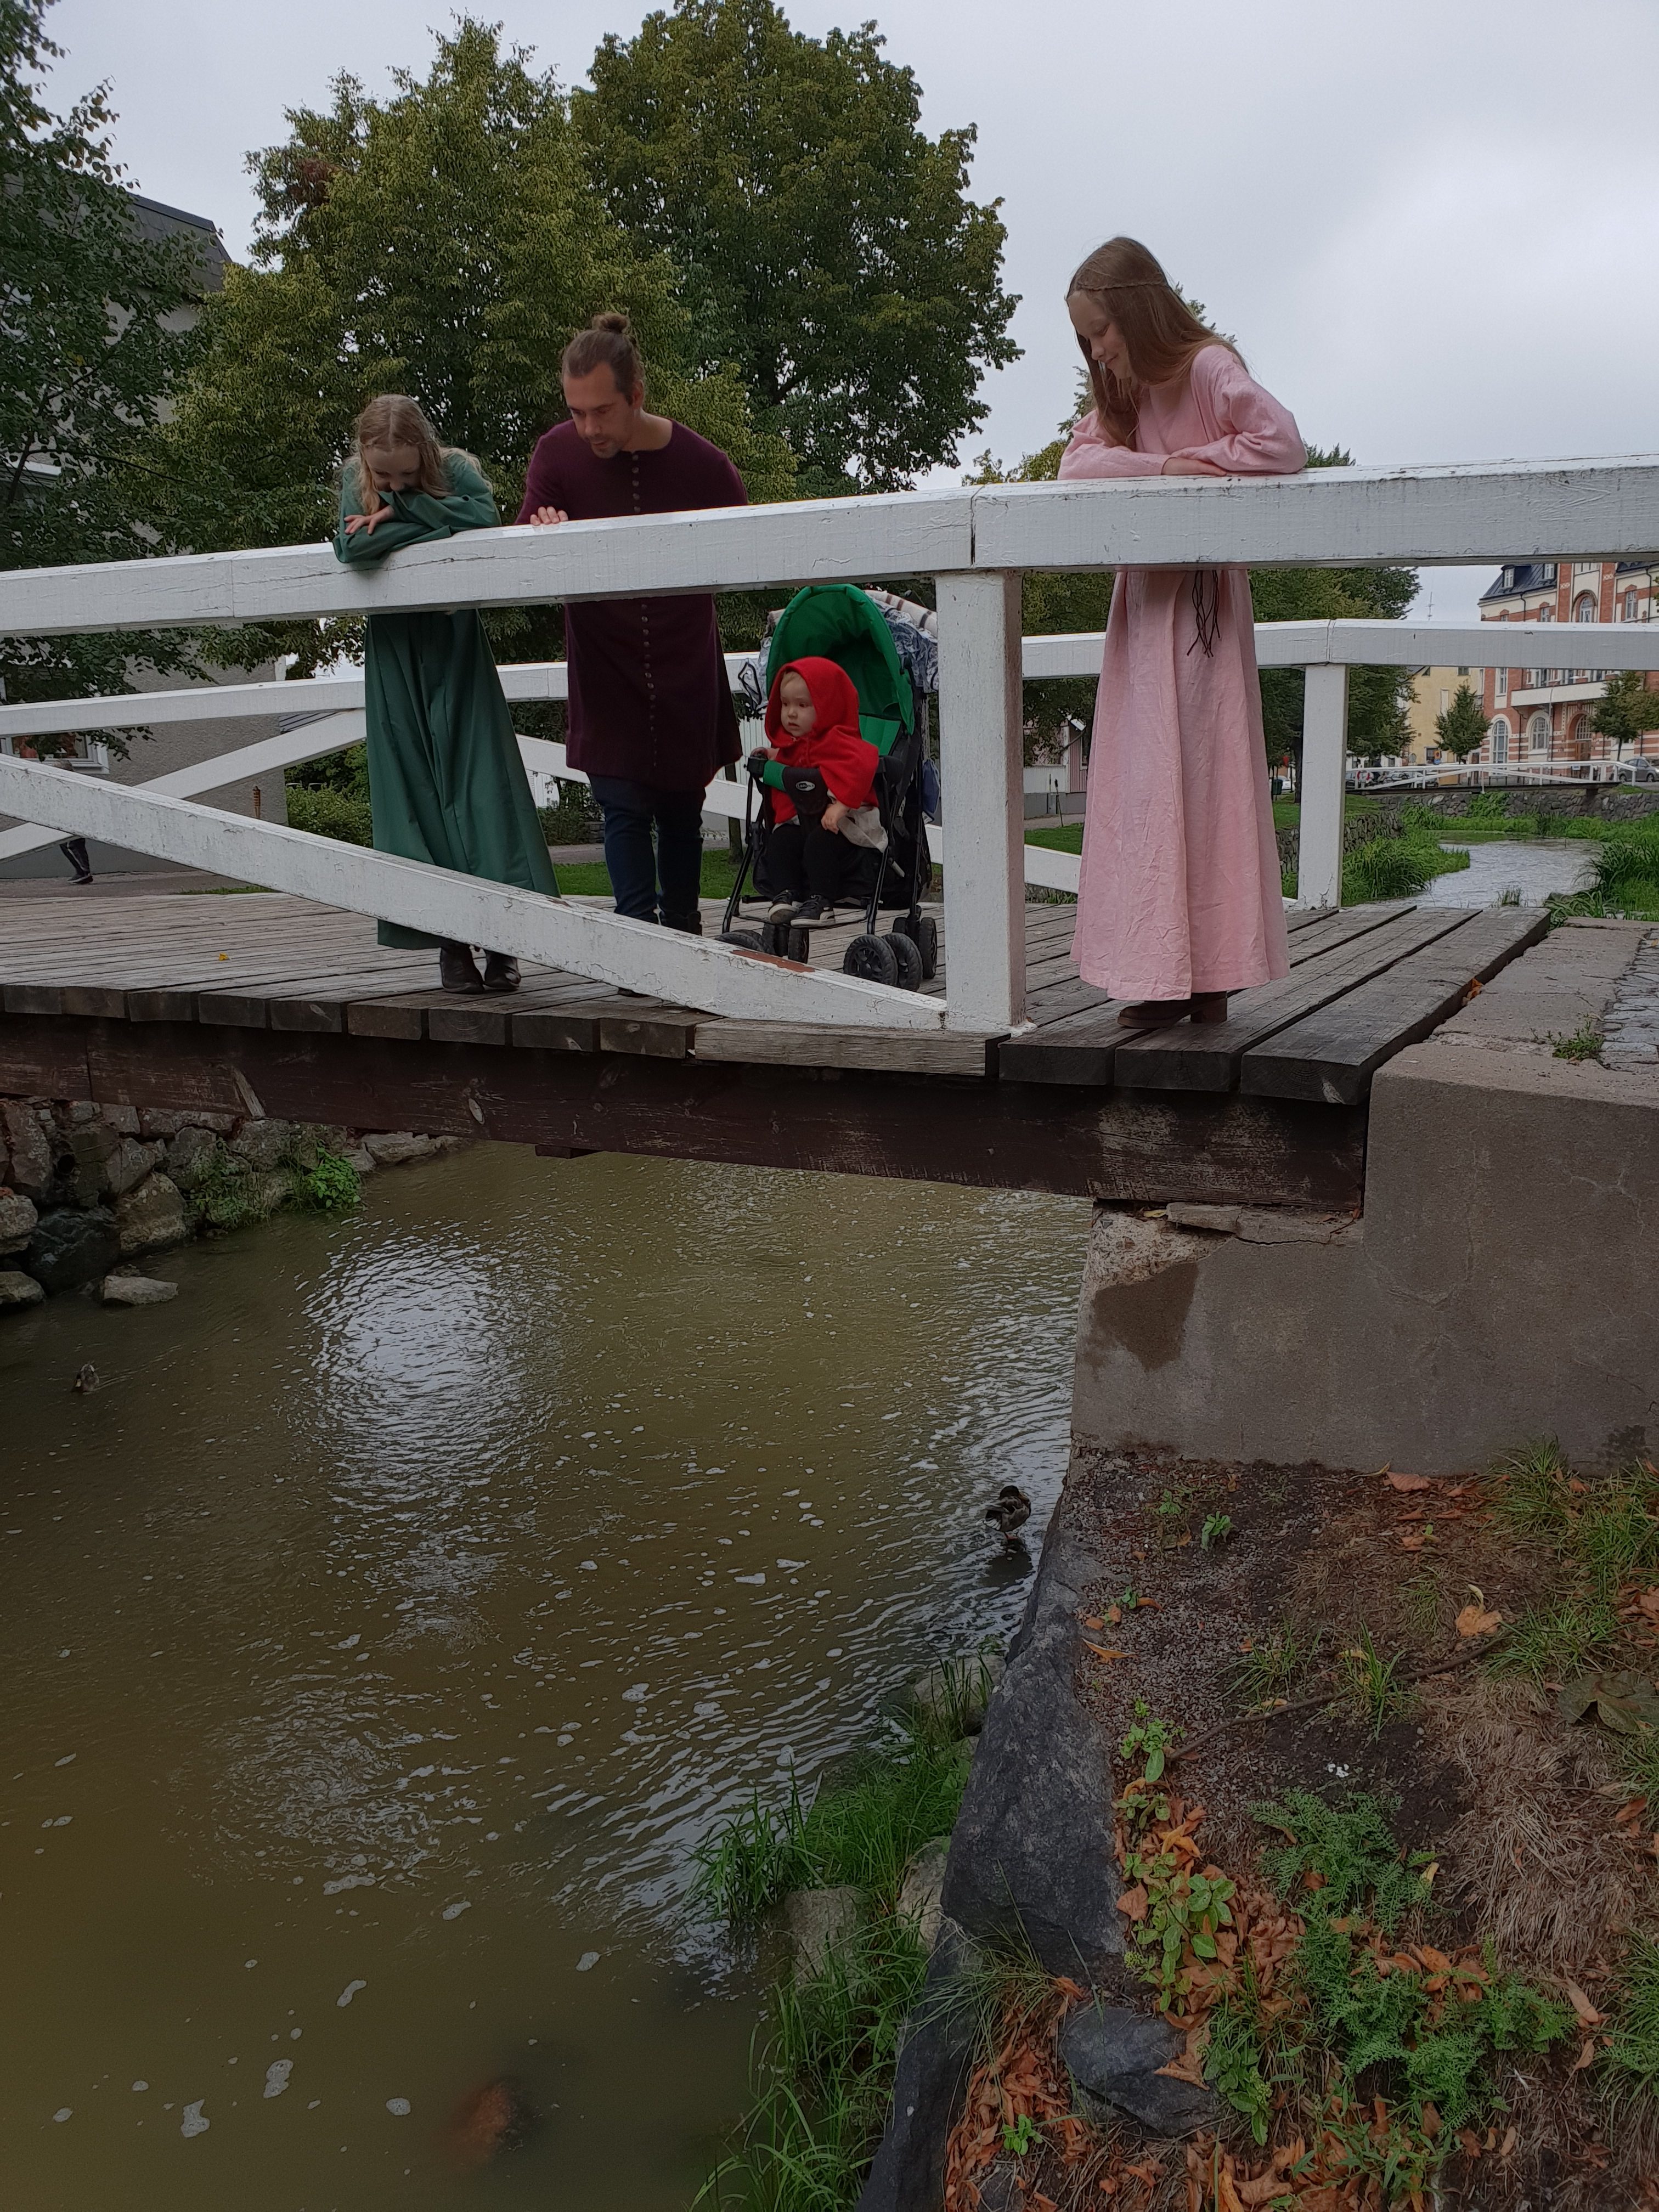
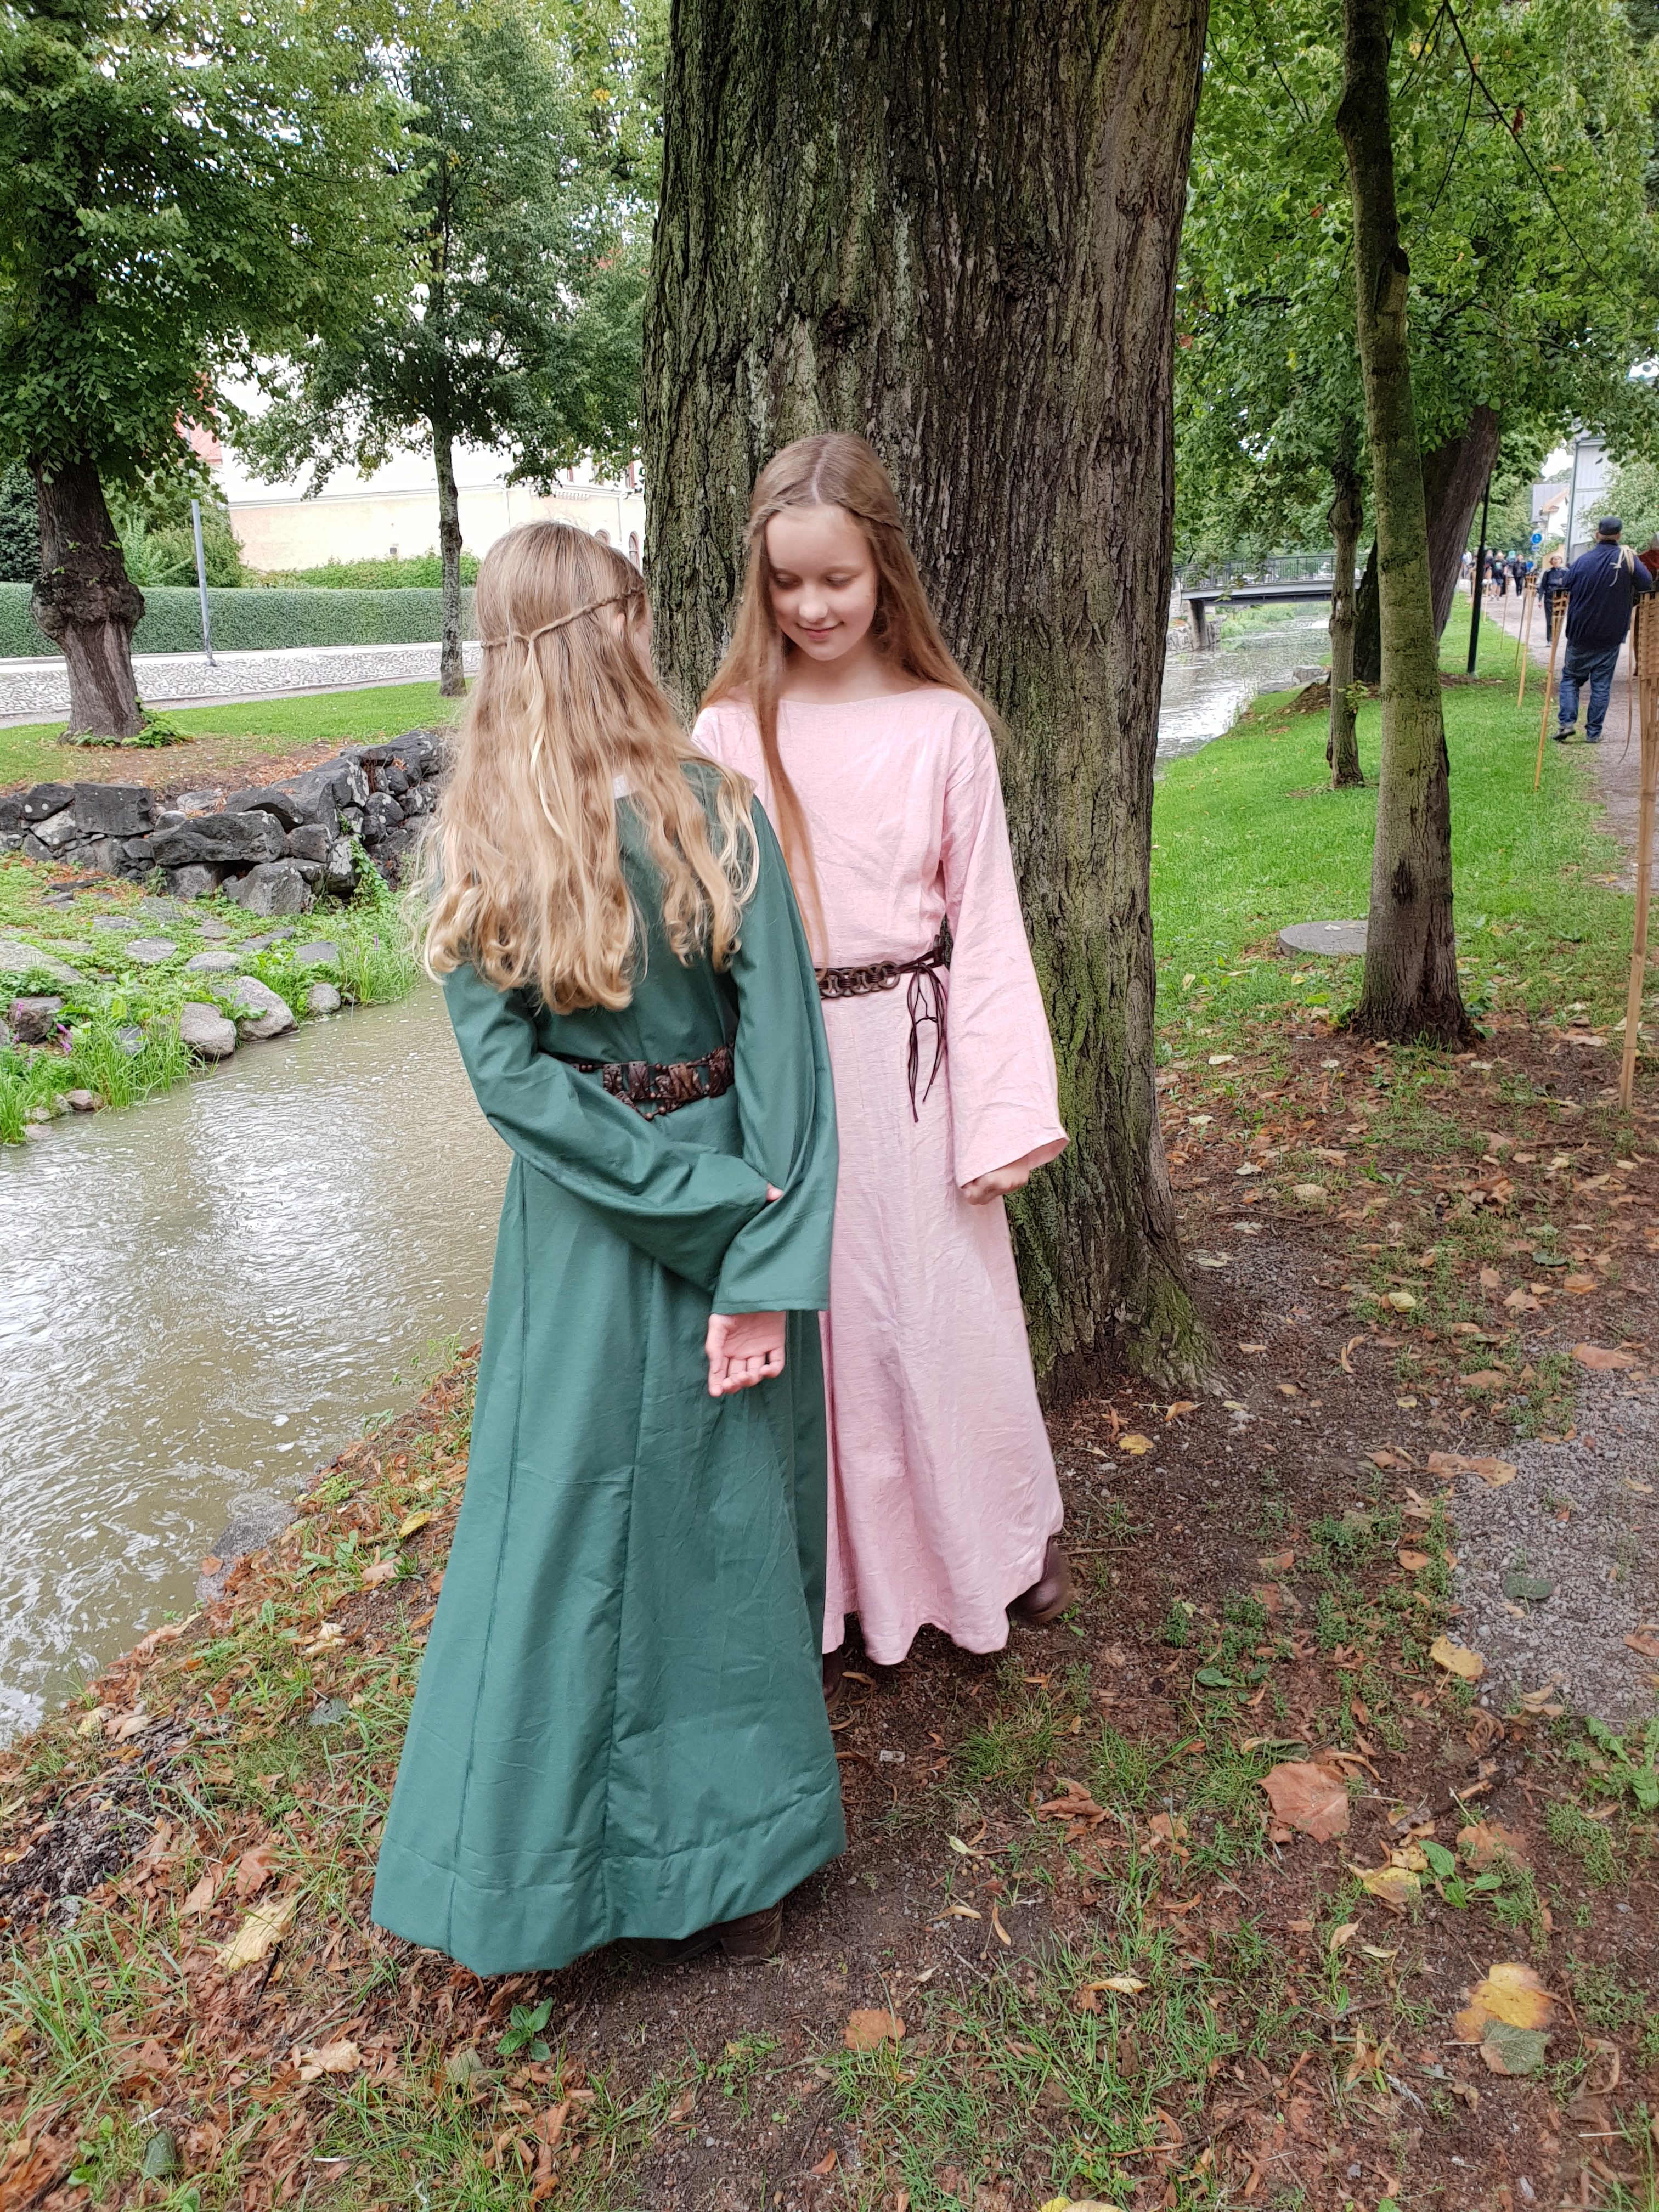
With a tiny bit of help from me, my nieces made their own gowns – all from cutting to sewing. I am so proud of them! We used fabric from my stash. The green cotton was initially blue, but became green when I was trying to dye it black for the Scary Robe. The pink linen was a huge table cloth. The dresses are made from rectangles and triangles. As the fabric is so unmedieval, the girls went all in by using Tanzanian wooden belts fort decoration. I think that they look like fantasy princesses!
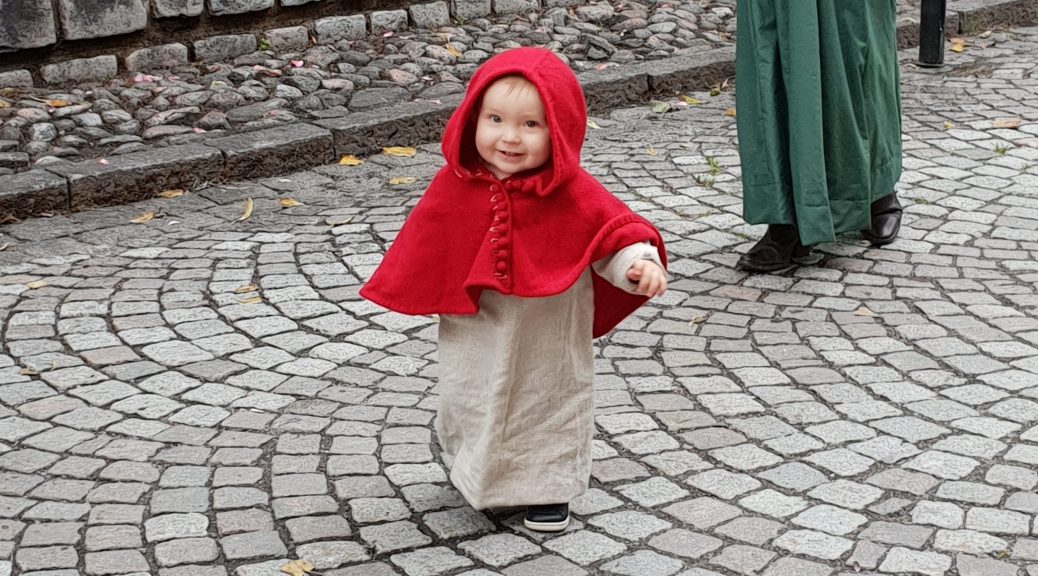
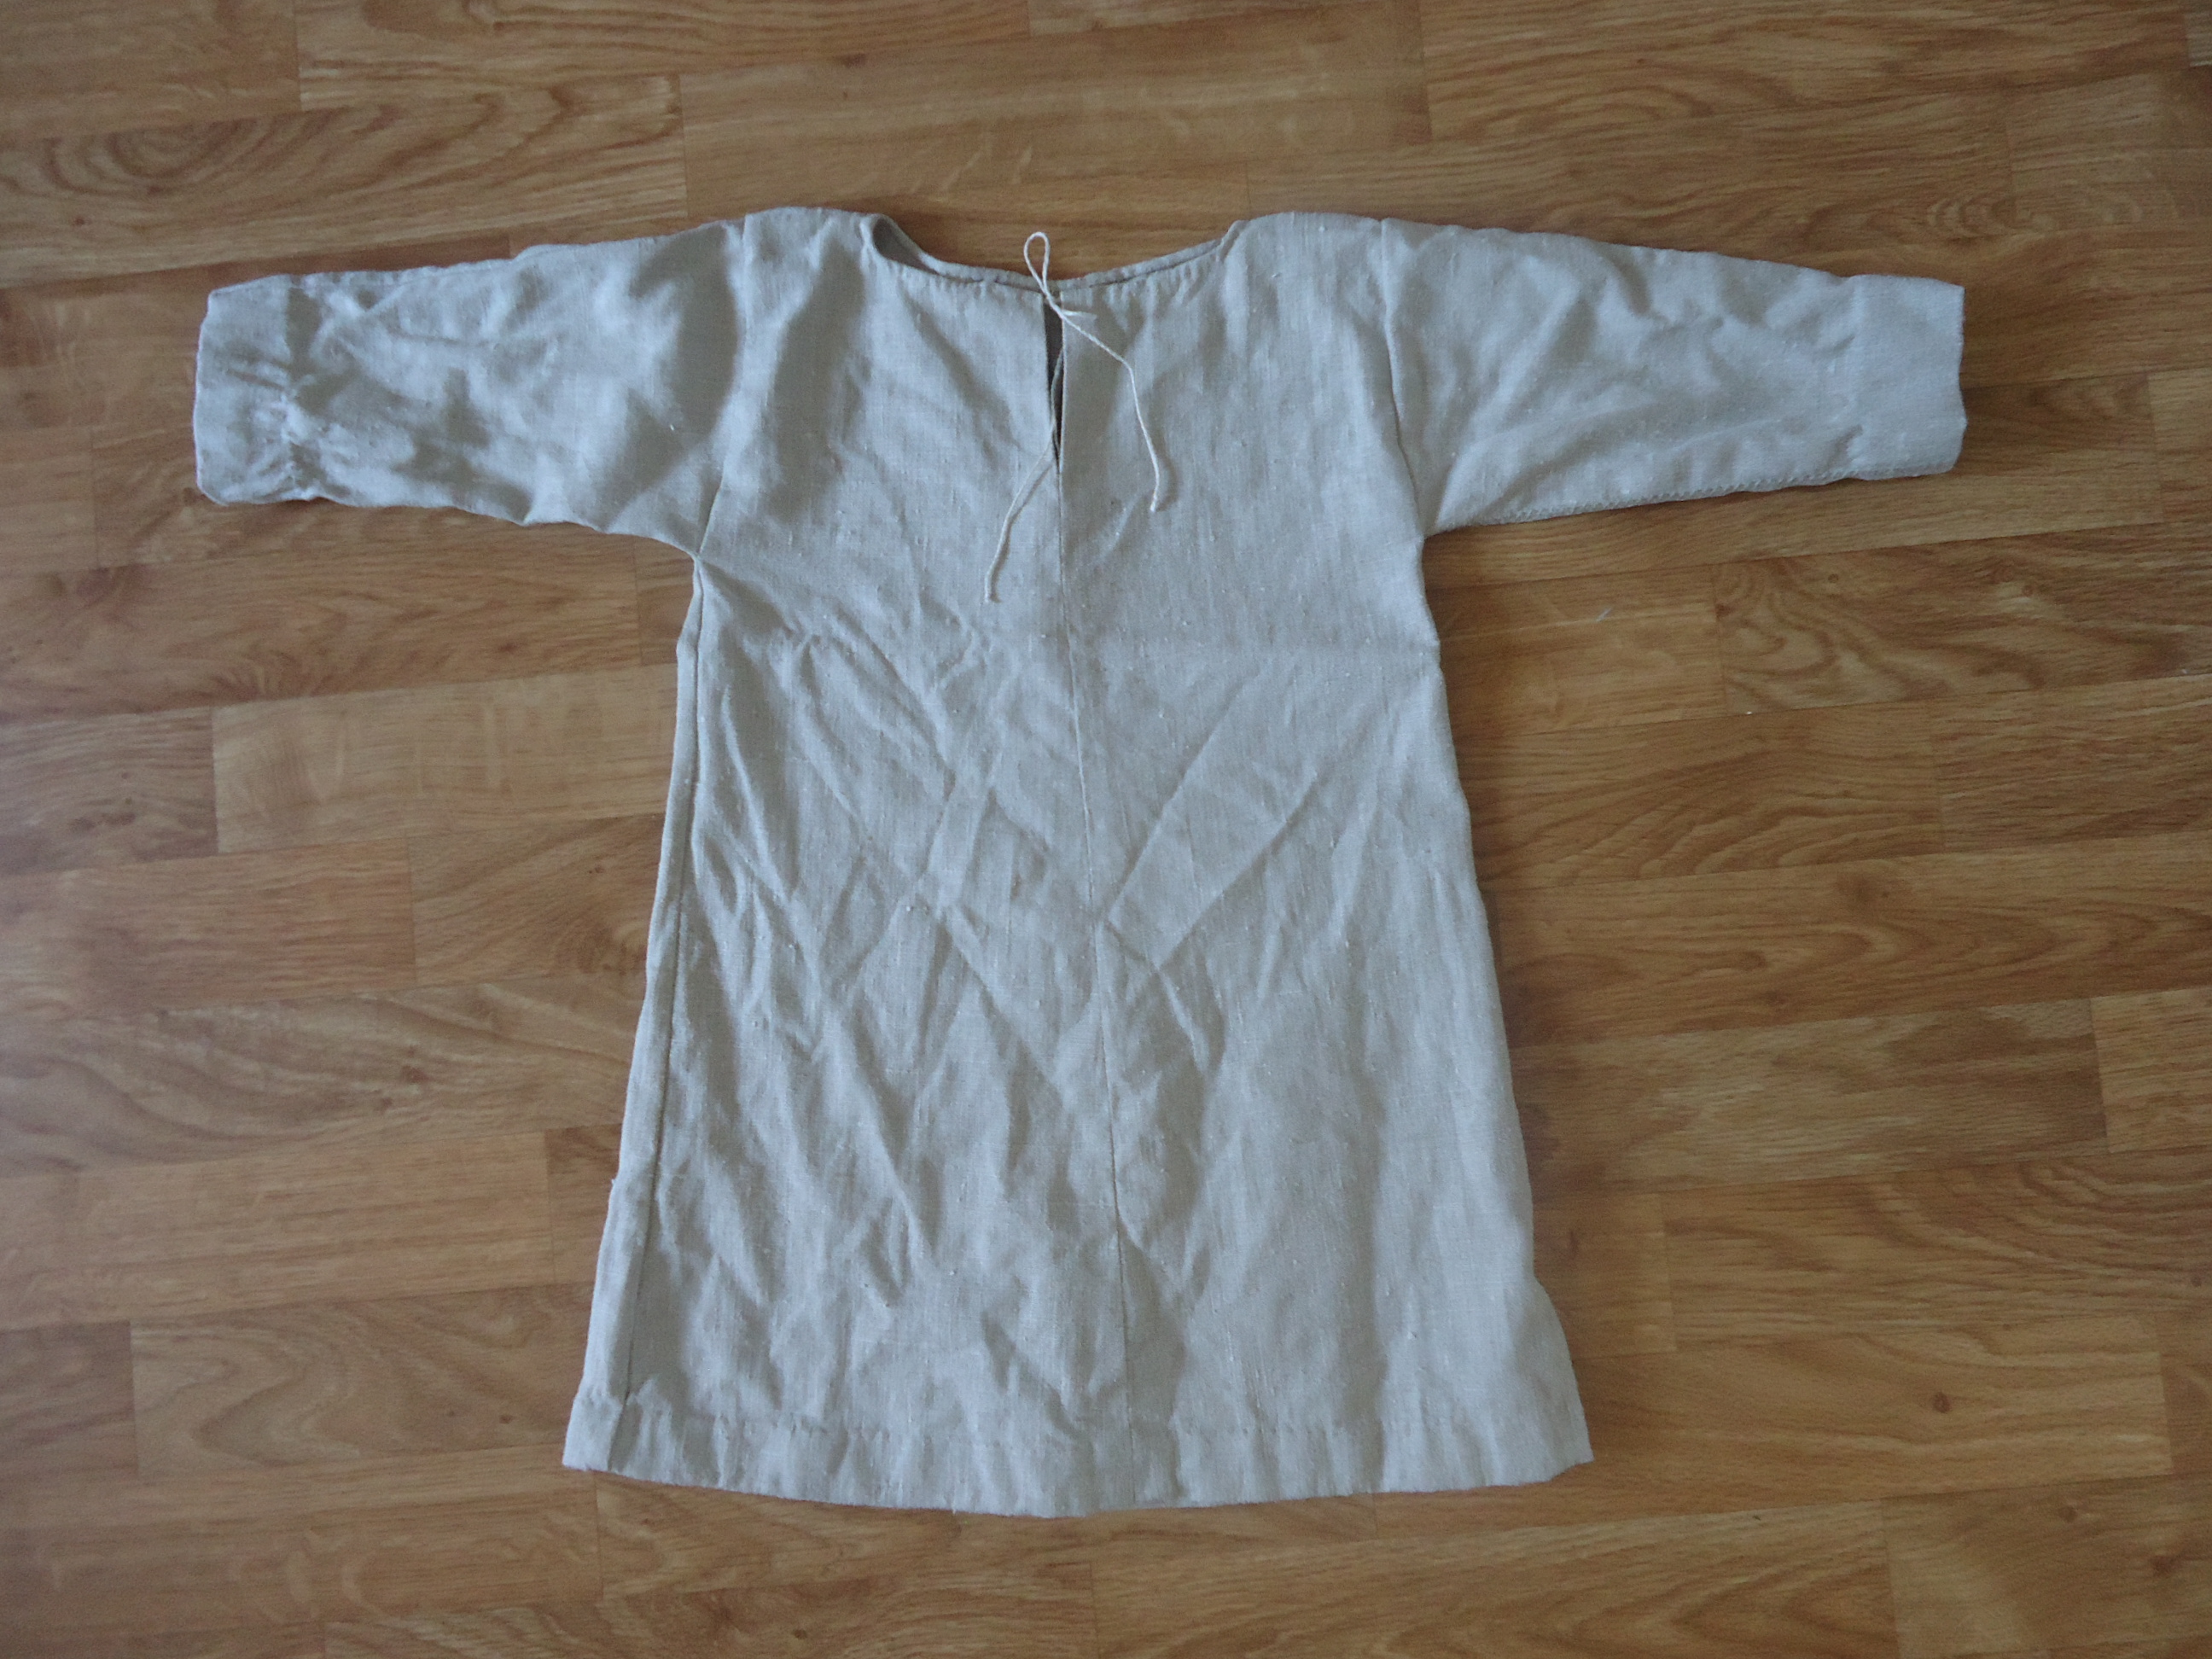
Linen kirtle and liripipe hood out of soft wool
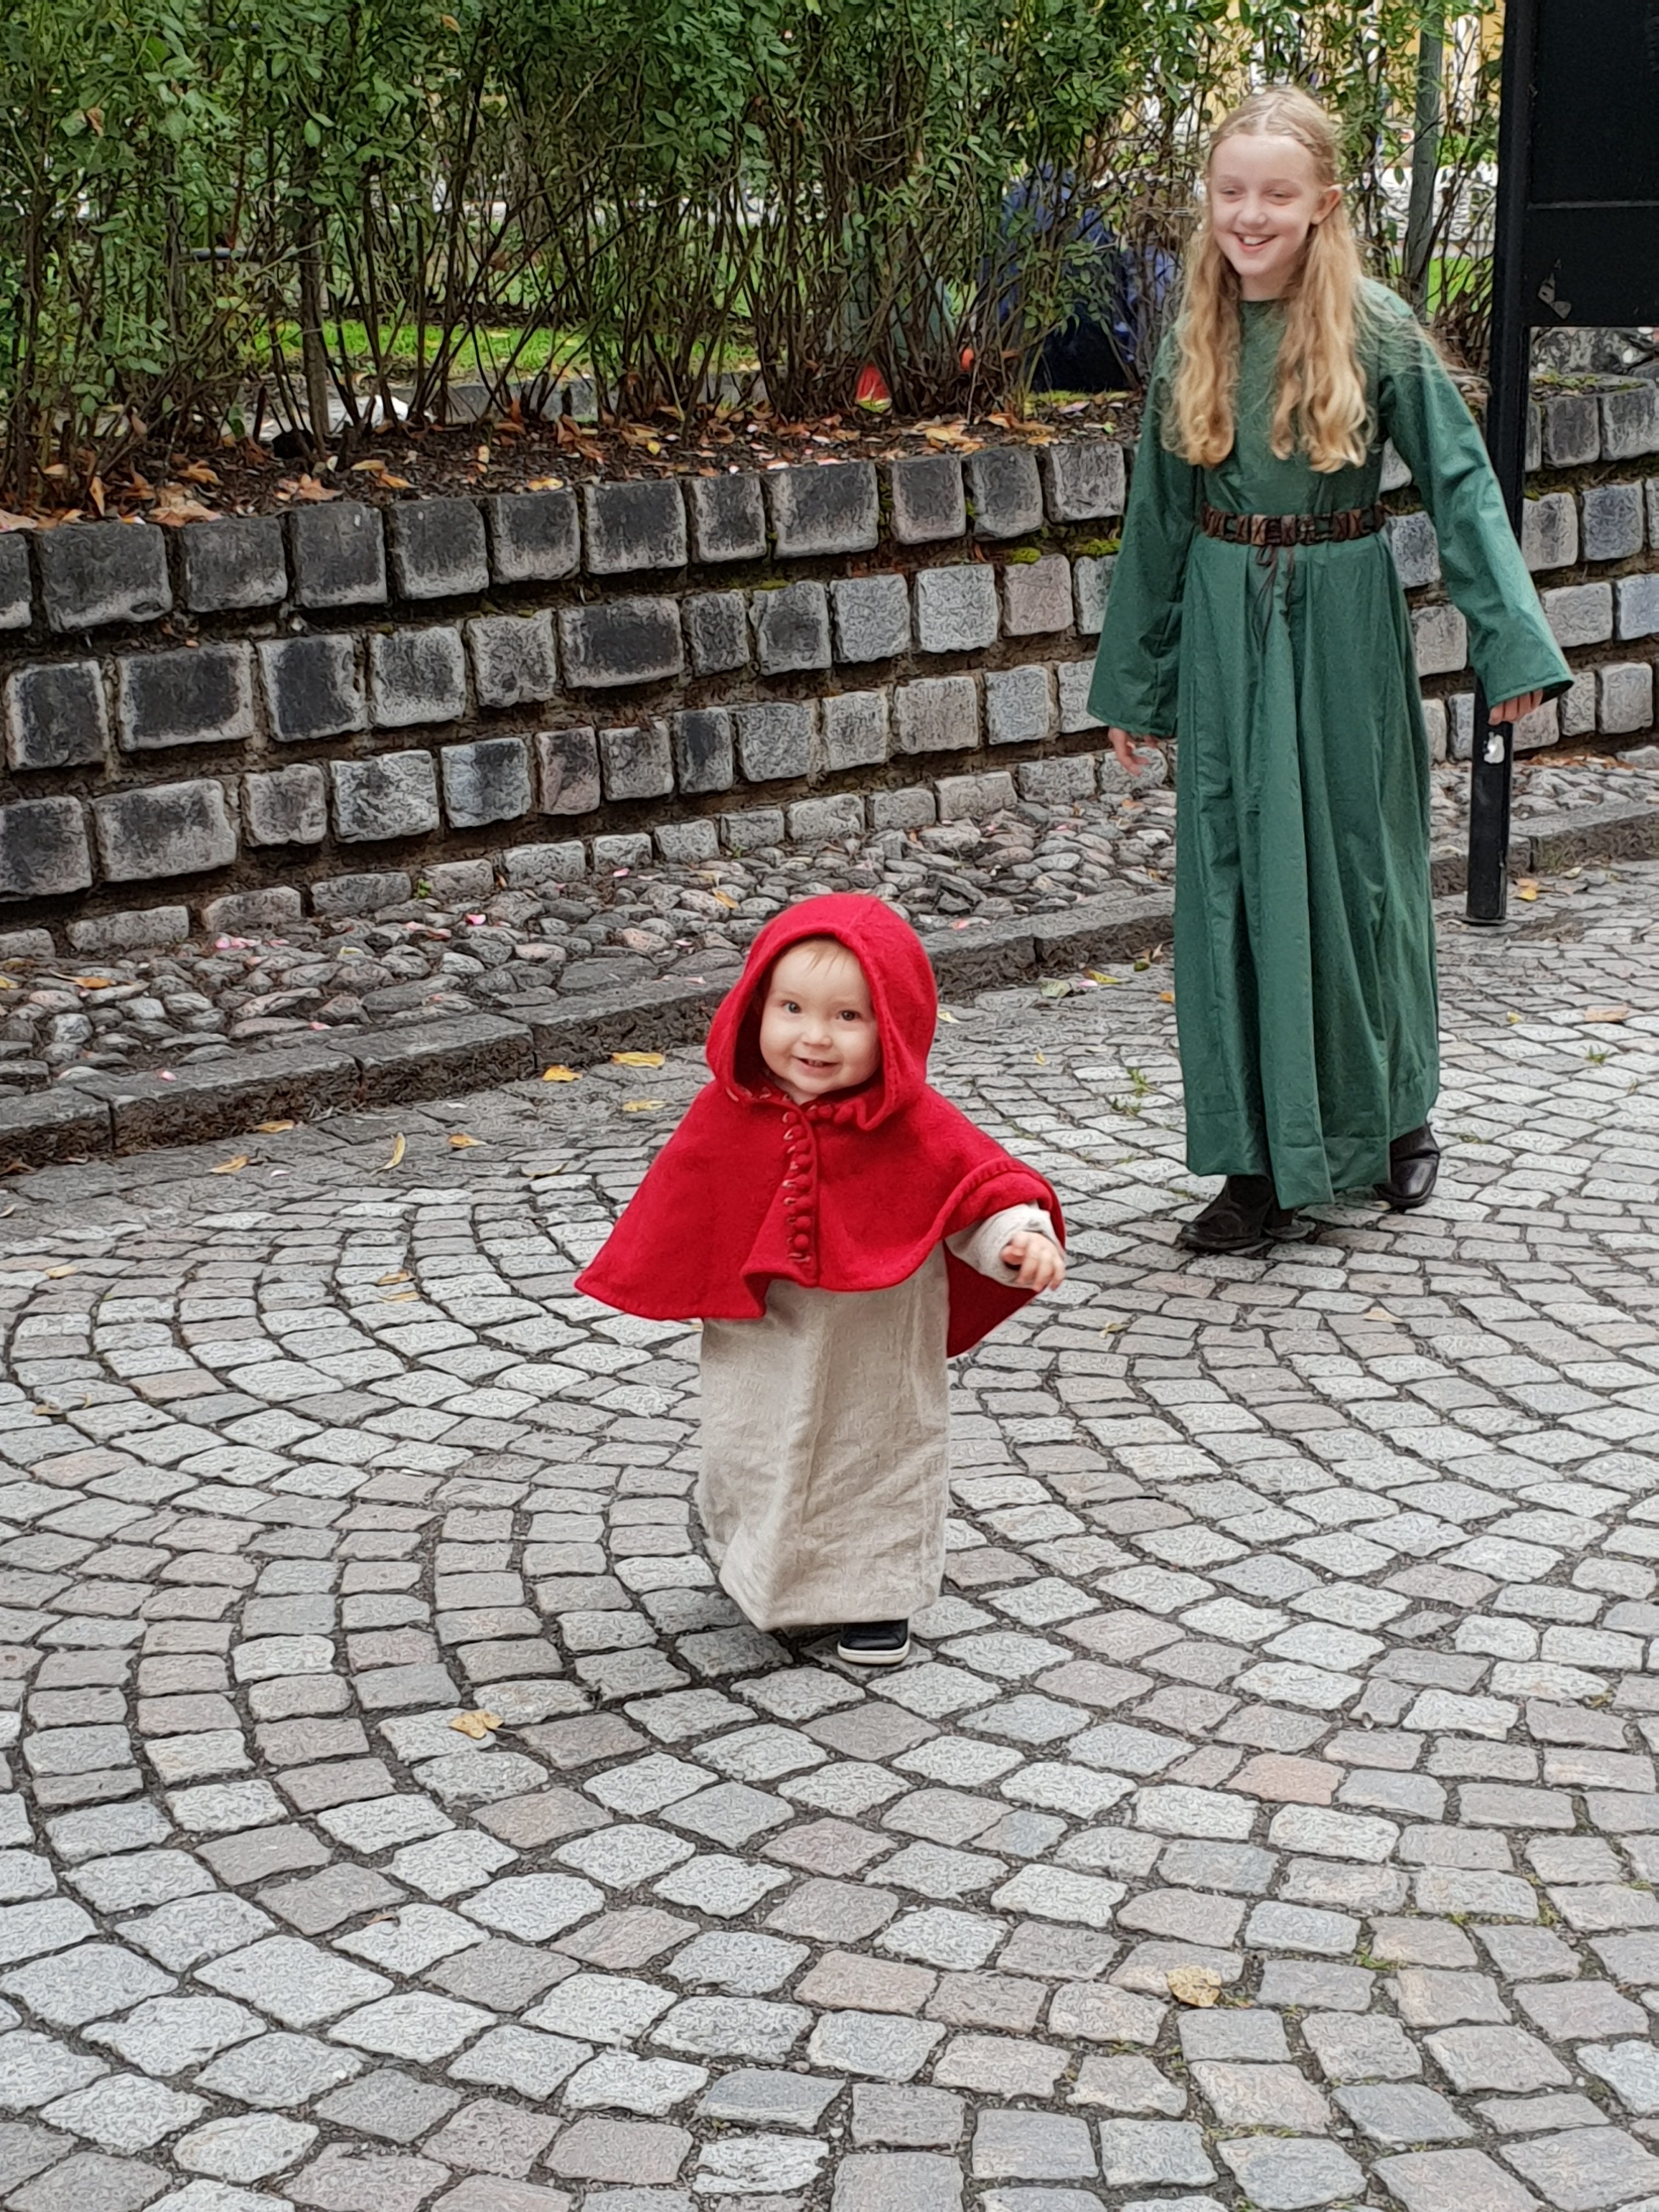
They asked me several times what our boy would wear. Eventually I could not resist making a little kirtle for him, out of an old linen skirt.
Earlier, we worn the cheapest underwear, made out of old cotton bed sheets. At our last stay at the Medieval week though, I bought linnen. During my internships far away from home, I spent the lonely evenings hand stitching a new shirt and a pair of breeches for my husband. I made a new chemise for myself the last night, on machine. I am quite proud of that I succeeded in making alterations for my husbands cotehardie. I made it for him ten years ago, when he was quite slender. Since he began bodybuilding, he has not been able to get into these clothes again. Astonishingly, I seem to have been wise enough to save broad seam allowances, so that I could make both the torso and sleeves wider. After adding sleeve gussets at the shoulders, he was even able to move!
New underwear: linen chemise, shirt, breeches and a little kirtle for the boy
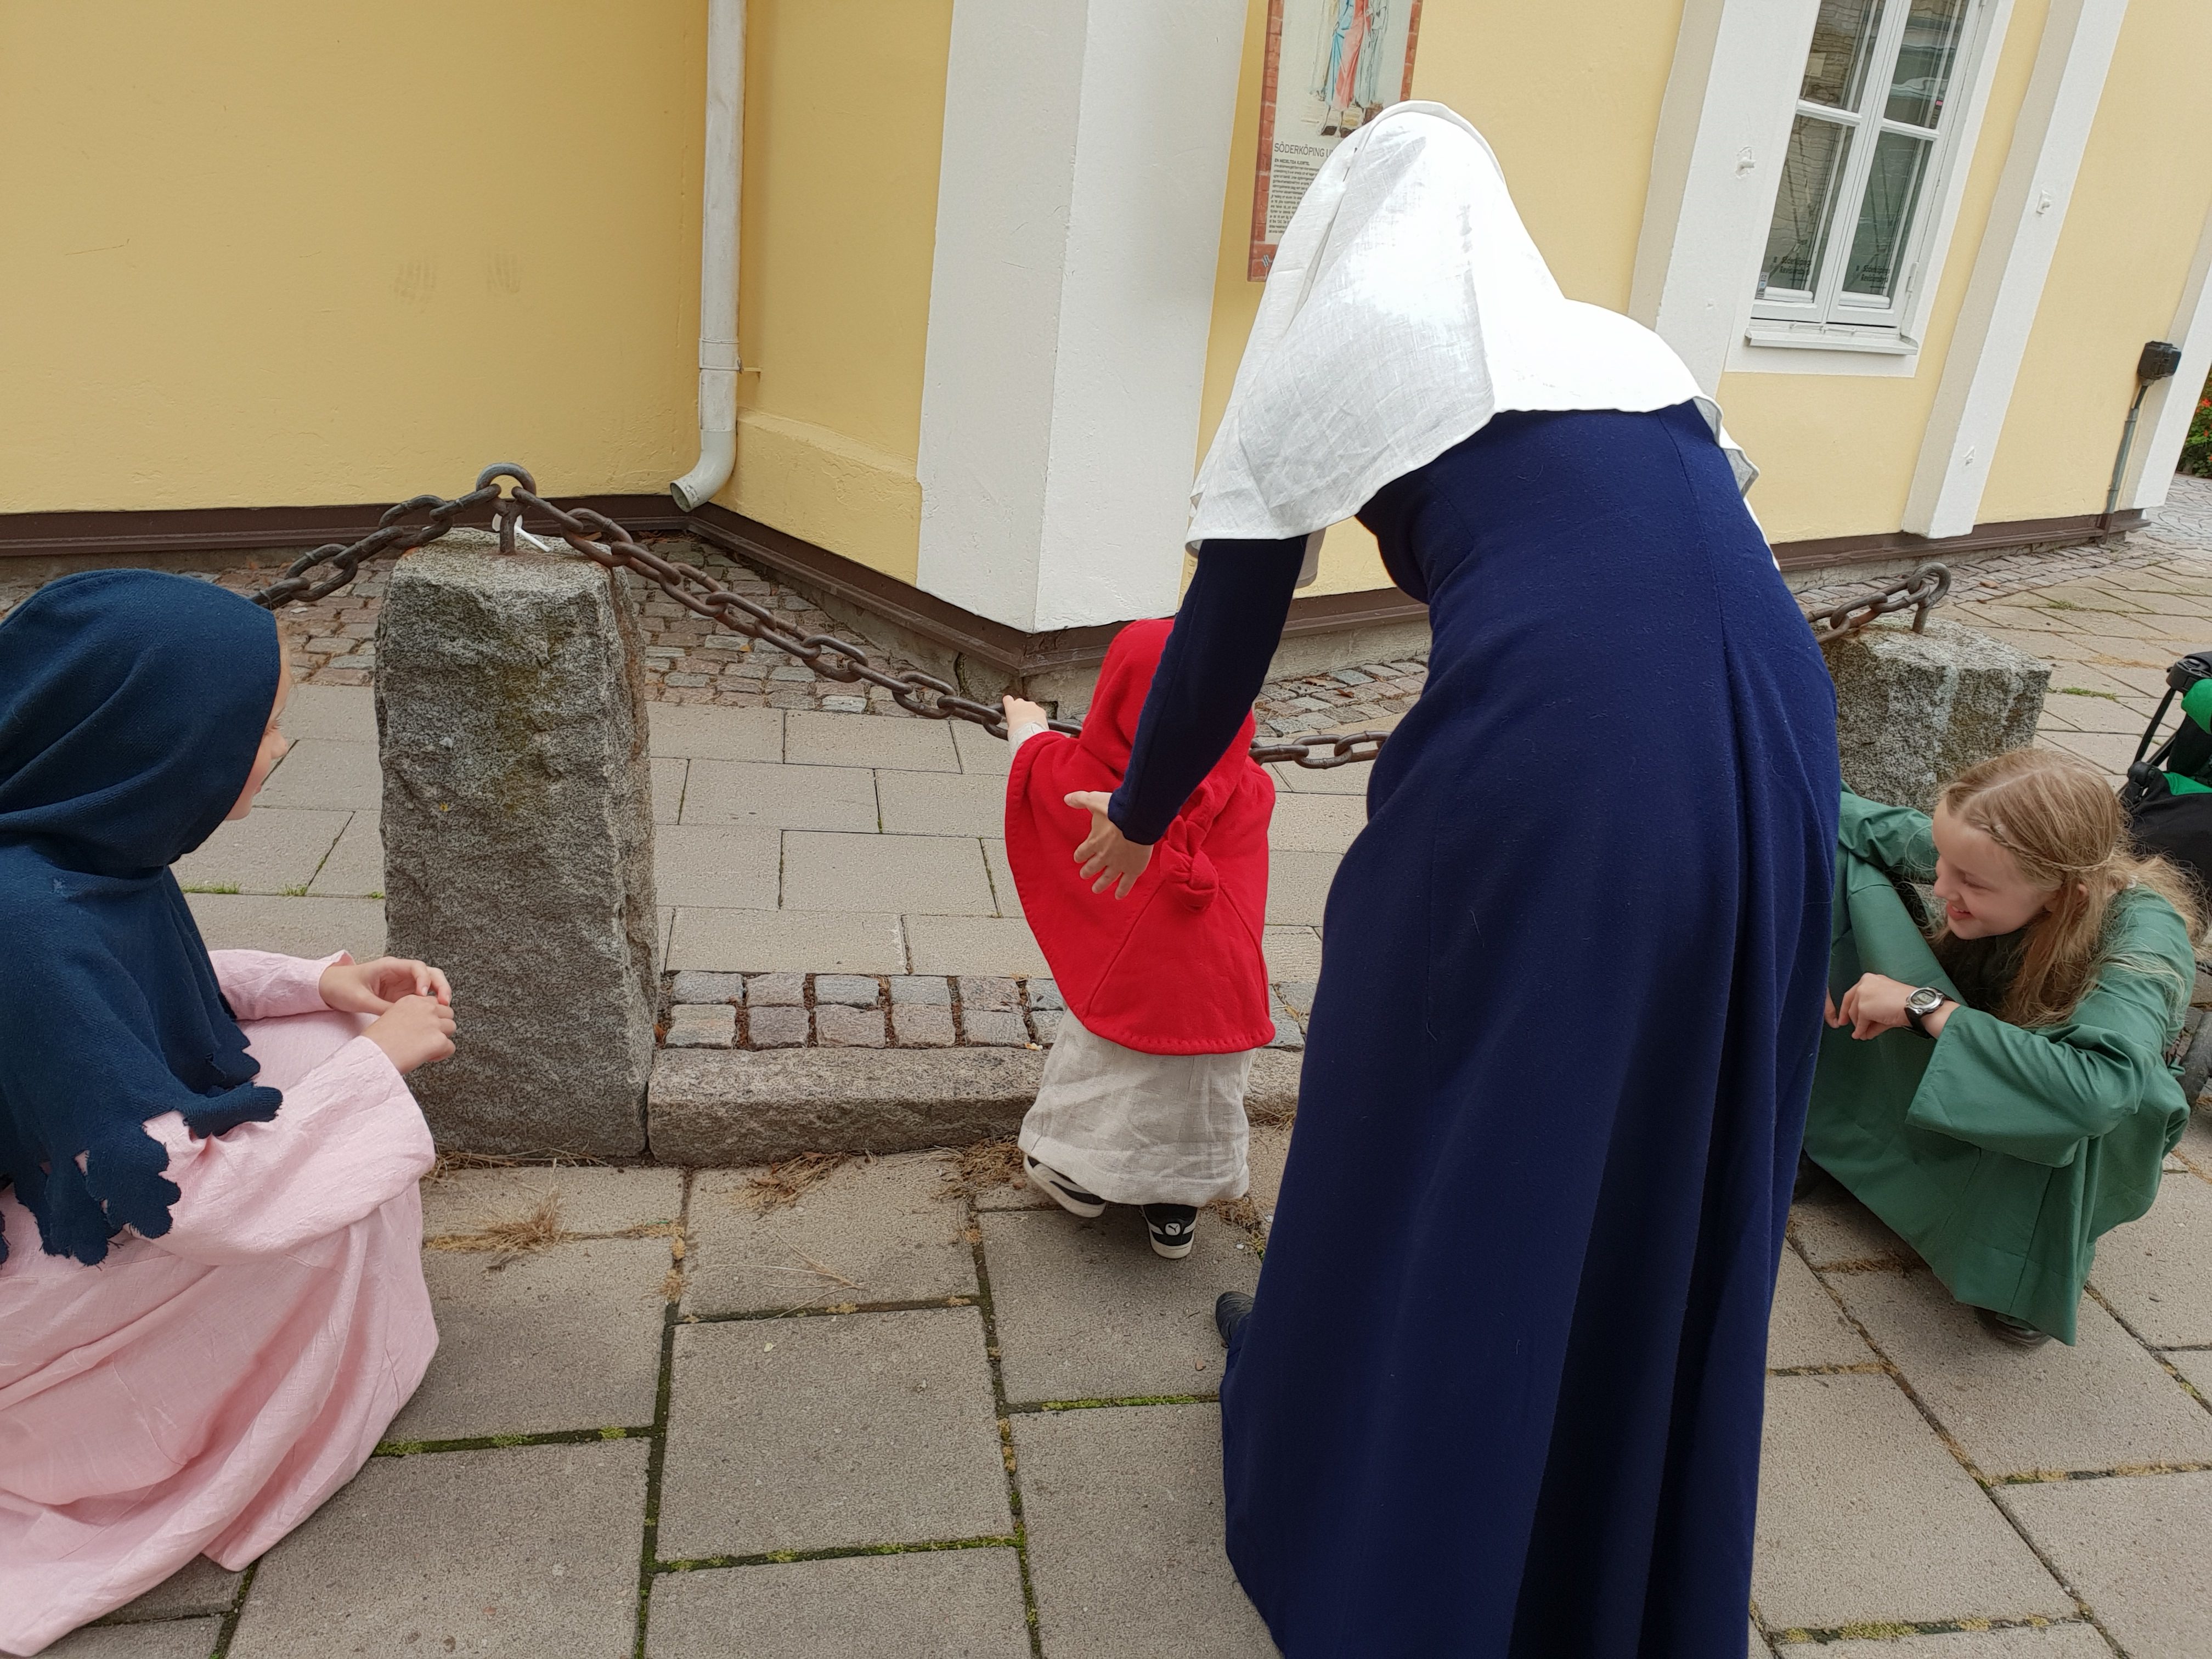
The day at Söderköping was cosy. Off course, it could not compare with Visby, but our boy was happy in the clothes (he had my liripipe hood because of the cold weather) and my nieces were happy to play with him for a whole day. The city is beautiful; the main part consists of pretty wooden houses from the 19th and early 20th century. The market was nice and I found a nice fabric for a new modern coat. All together, it was a nice day, in great company. Thank you, dear nieces!
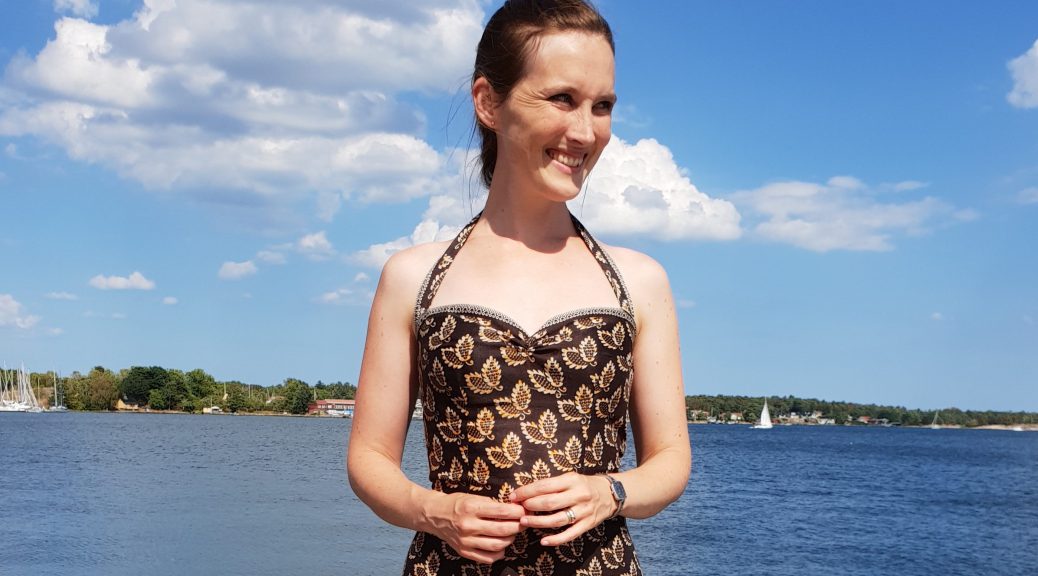
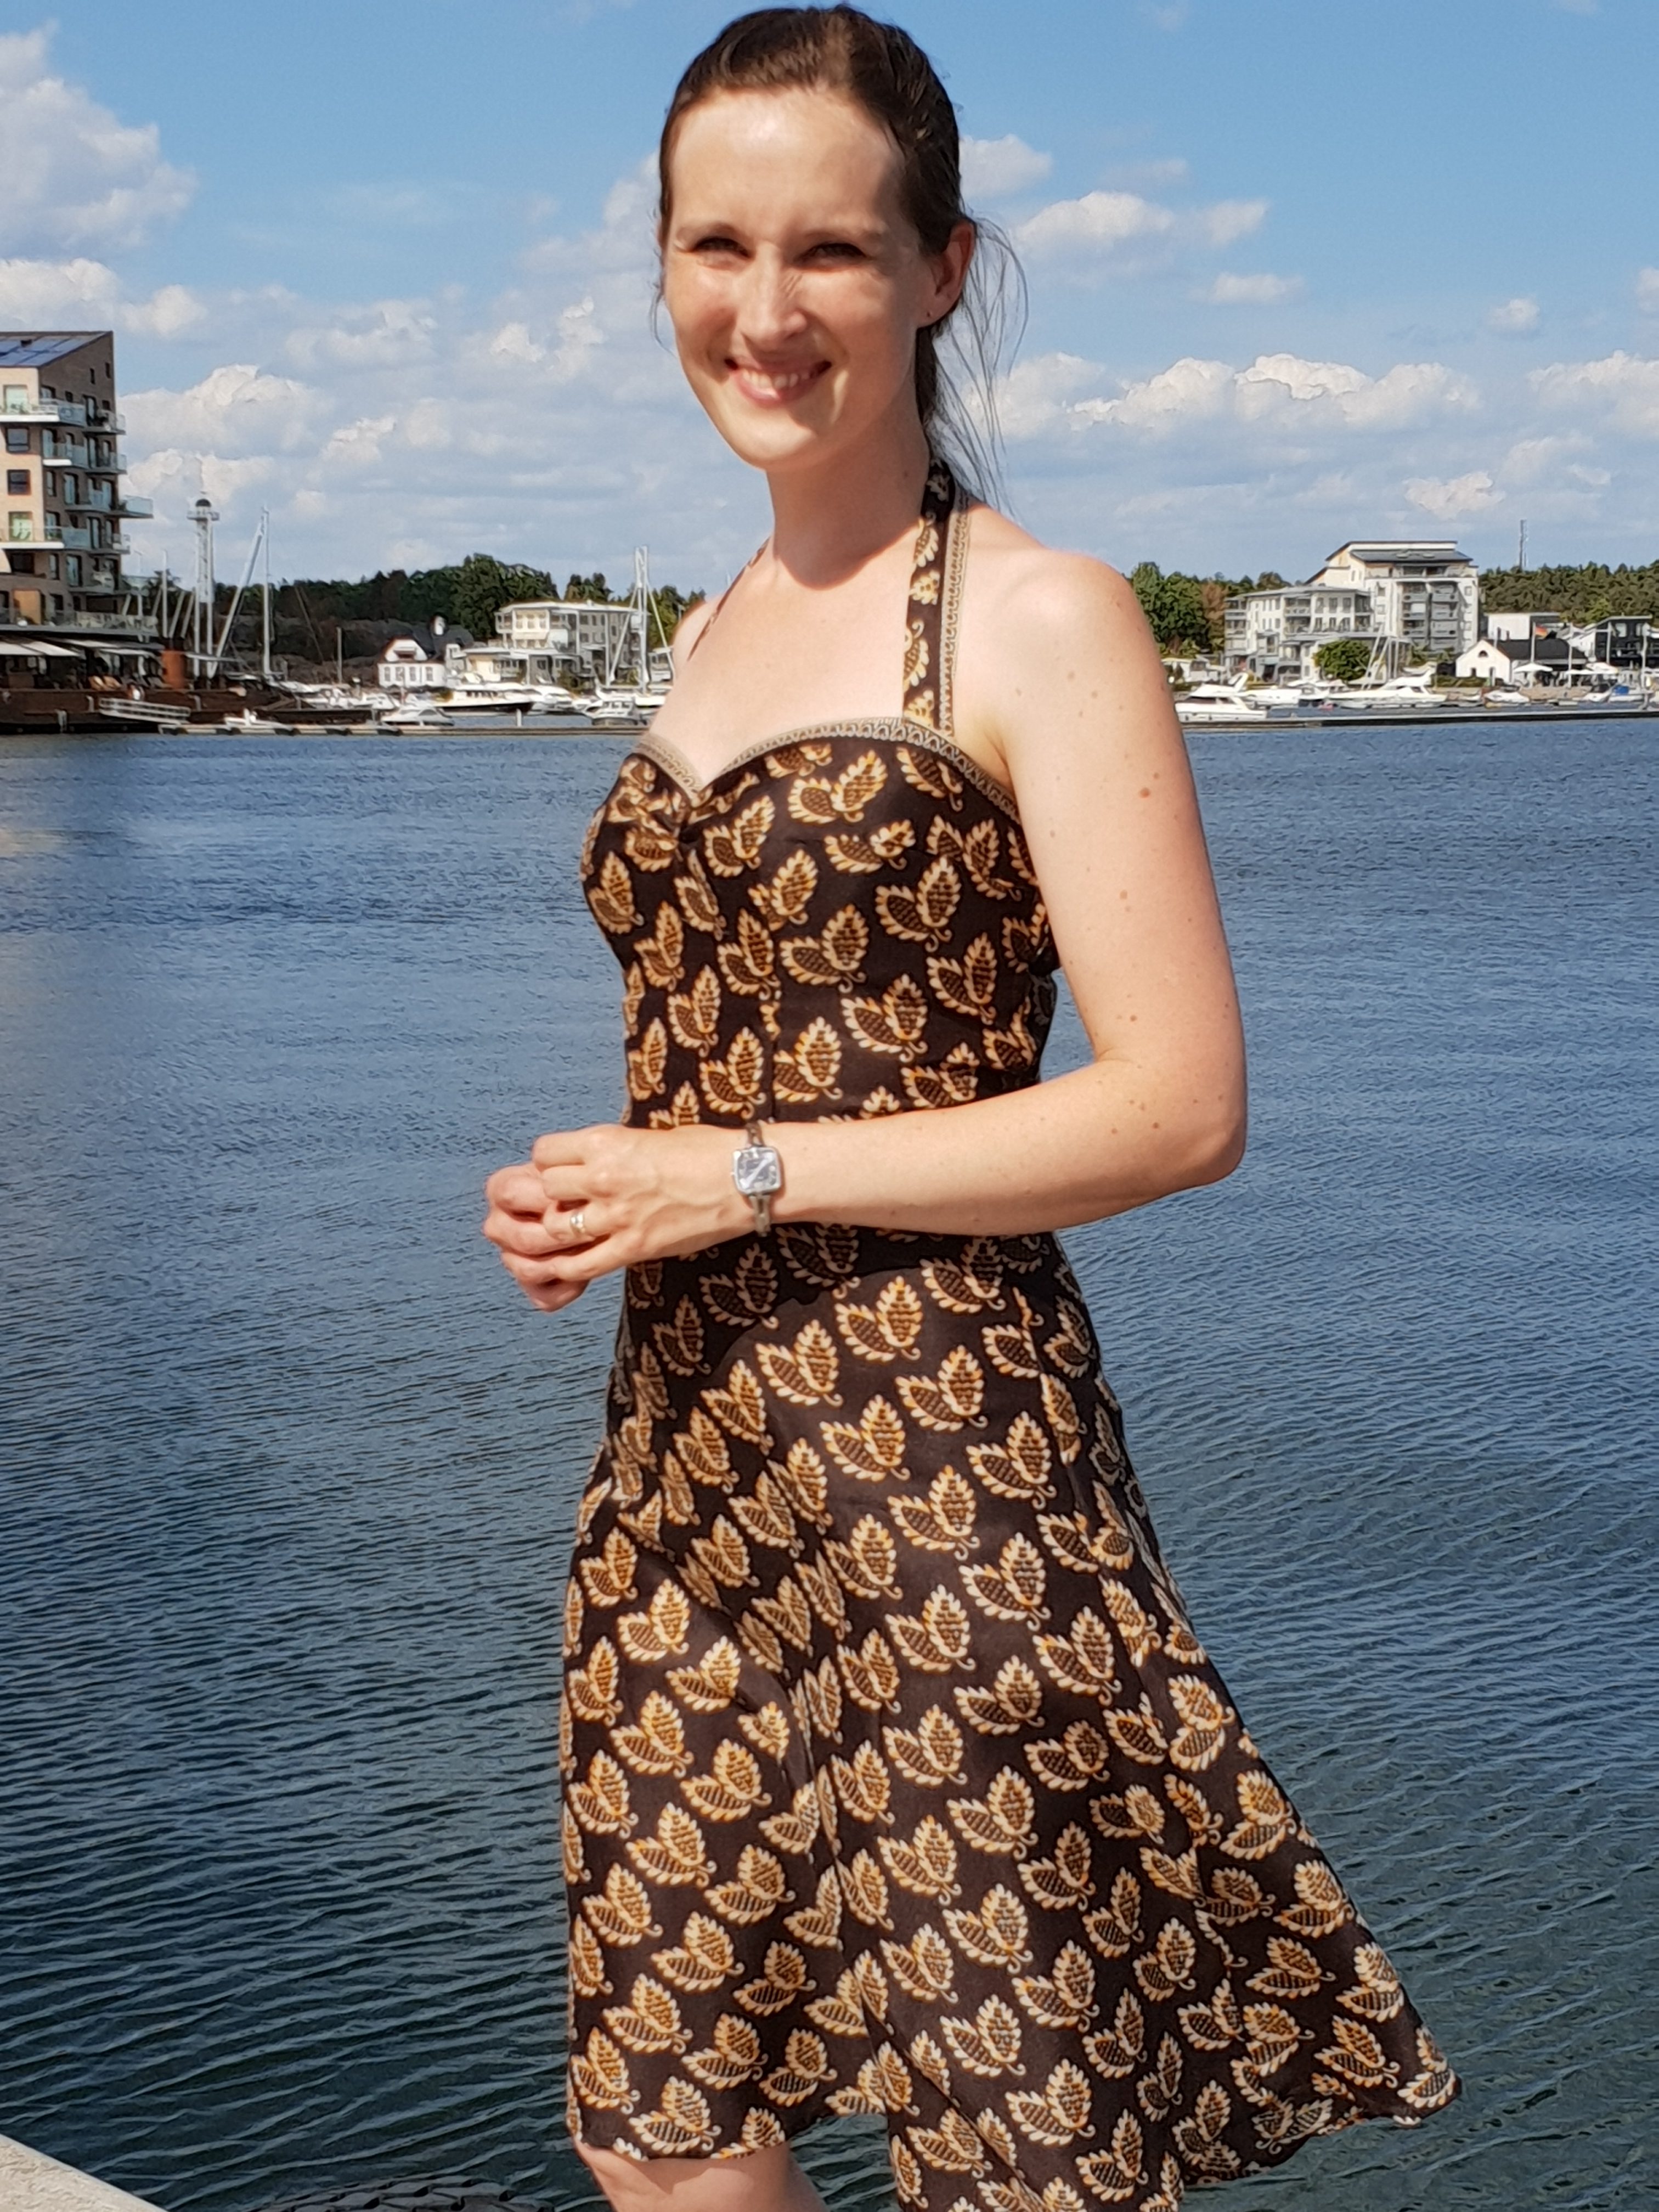
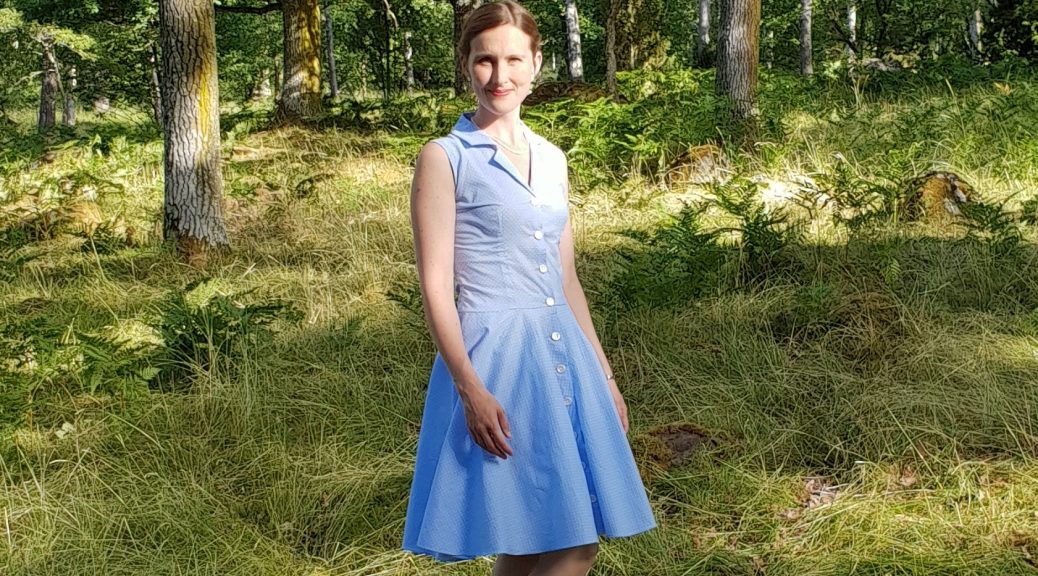
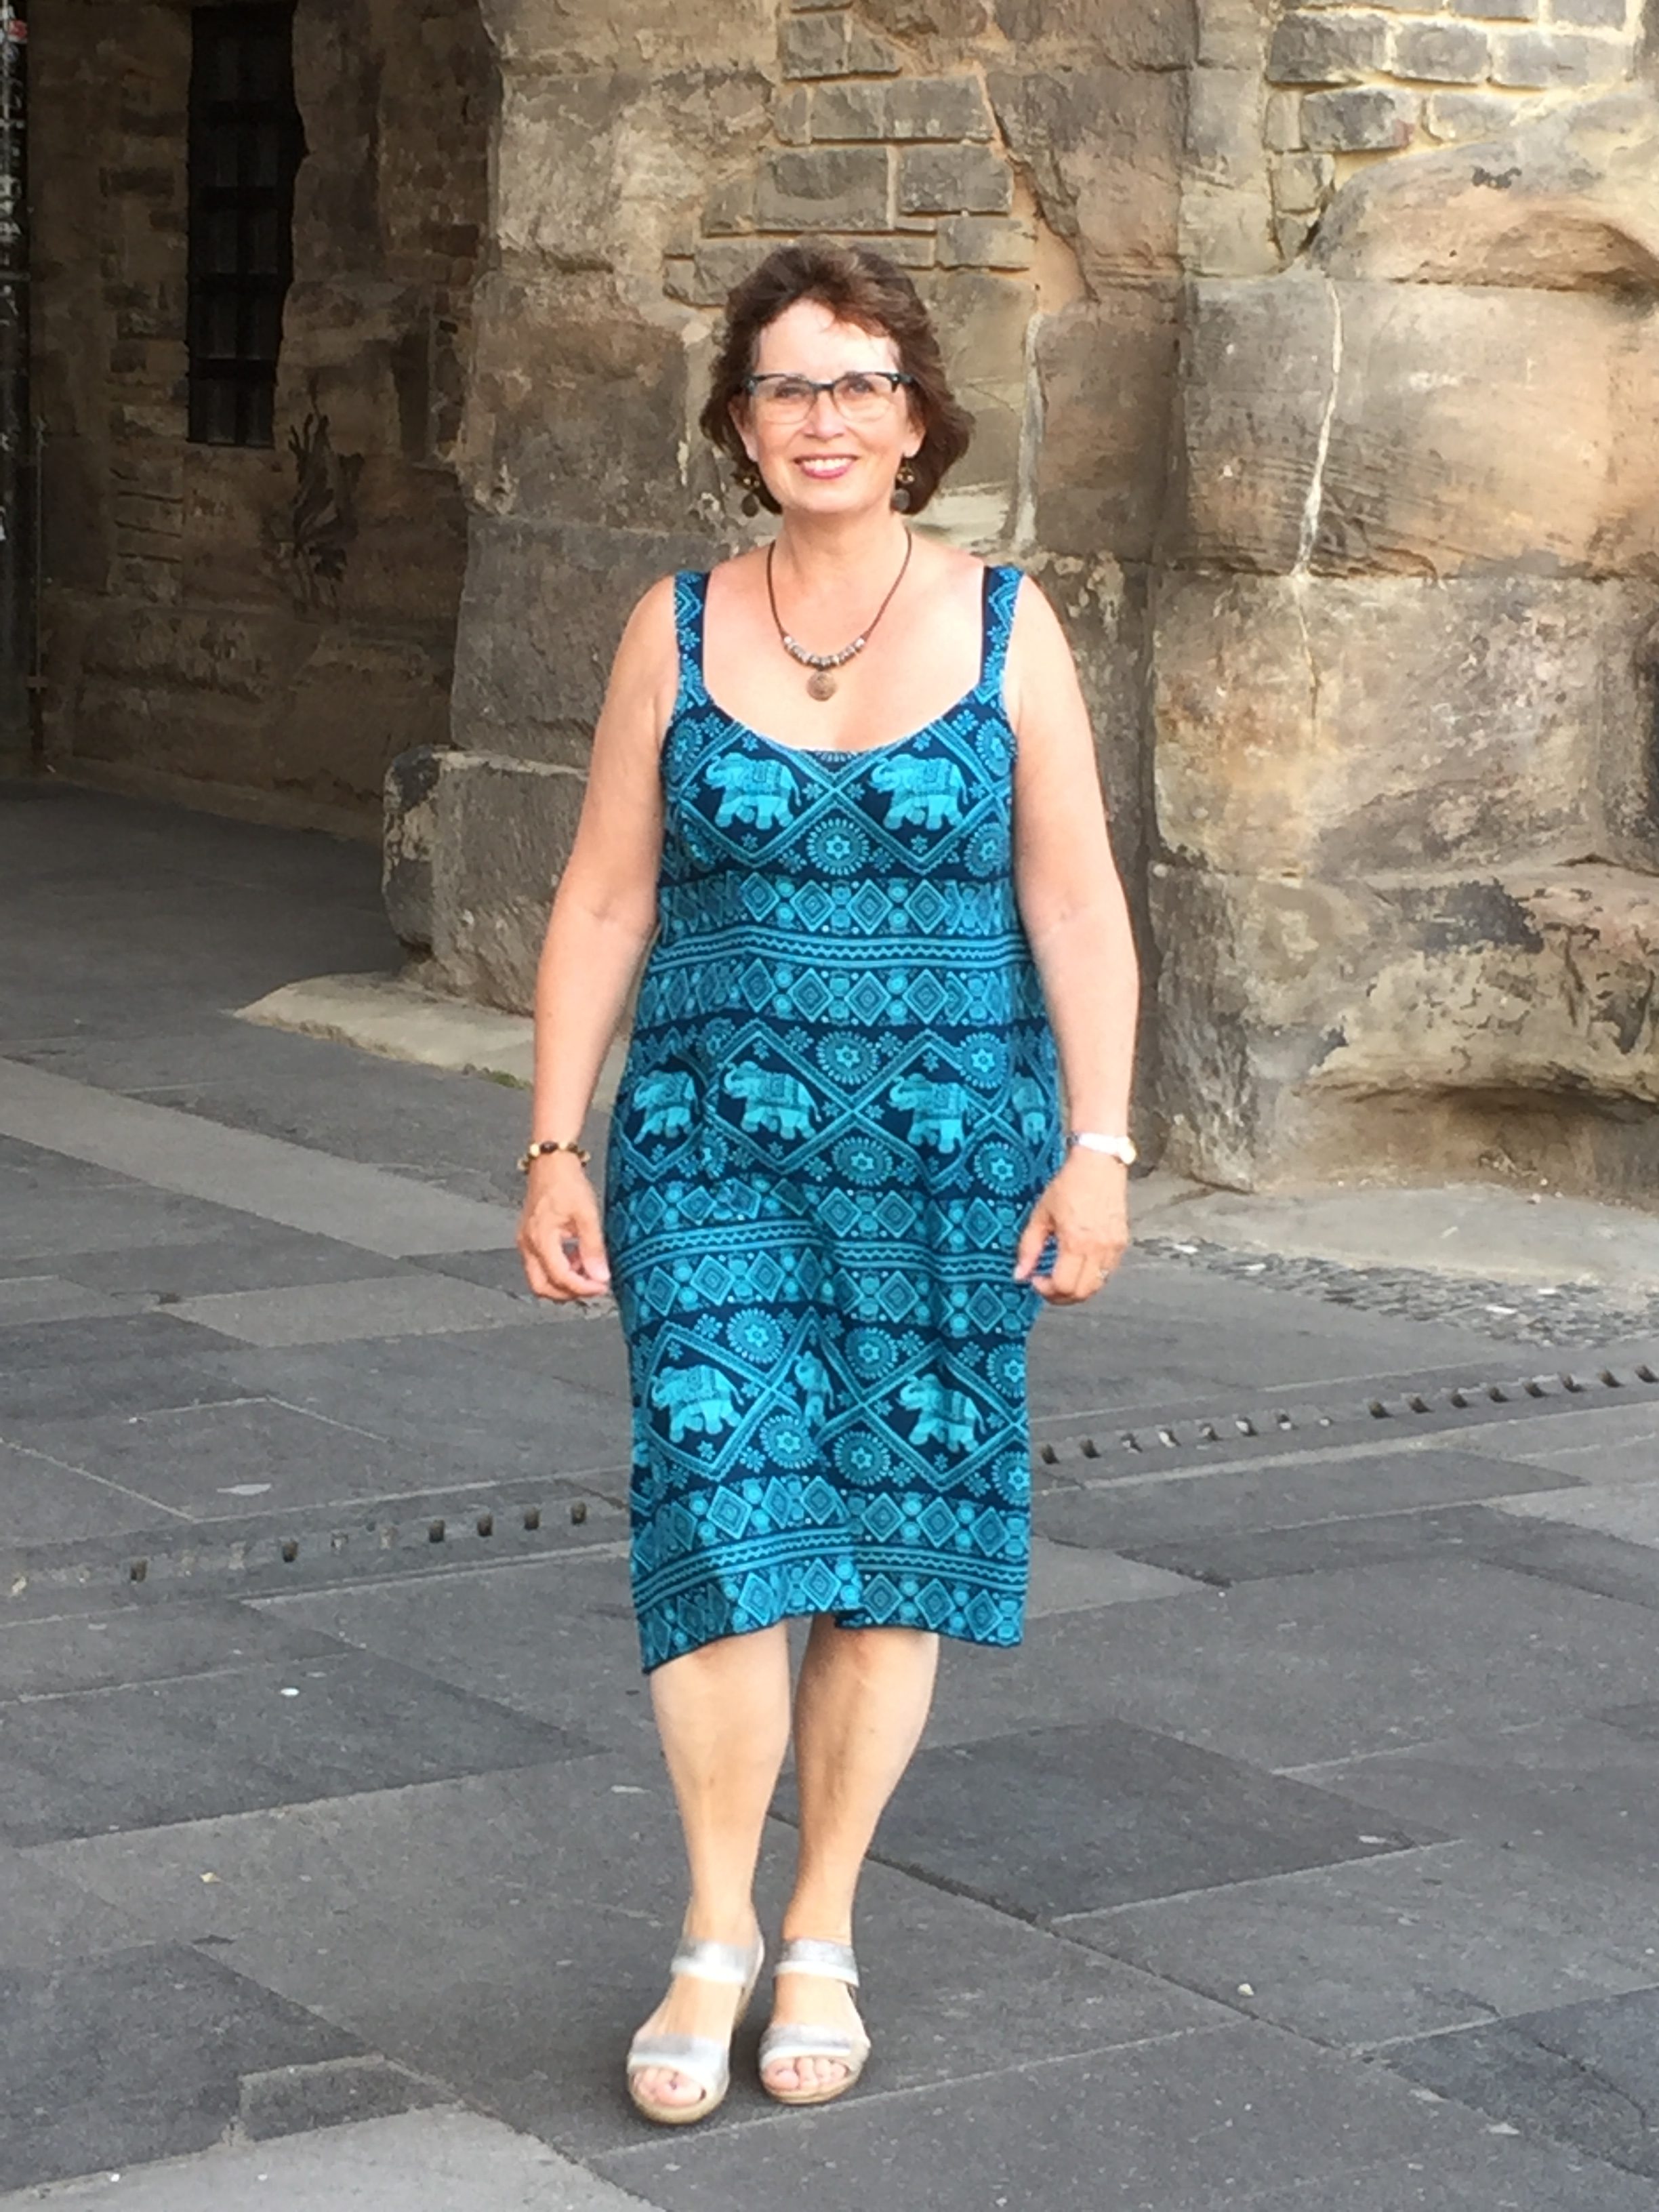
My latest creation is a very much needed summer dress – maybe you have heard of this years brutal Swedish summer with week after week with unusual heat and fires spreading all over the country. Since I have shrunk since before the pregnancy, only one of my old dresses fit well now. This new dress is made by fabric from Tanzania, an old zipper and thread from an old project – things that have been in my stash for years. Unfortunately, the zipper is too short and ends at the waist, so that I have to snake my way into the dress without bra.
Senaste skapelsen – tyg från Tanzania, brun tråd från ett gammalt projkt och en gammal dragkedja – allt sådant som redan låg i mina gömmor. Tyvärr går dragkedjan bara ned till midjan, så jag kan bara åla mig in i klänningen utan BH. Jag ska byta ut dragkedjan så snart jag kan.
Since I got back to work, I have been struggling to reach my former level. Therefor I have dedicated the free moments during my baby’s naps to reading medical literature again. This last week, I decided to give myself a treat instead, by making a well needed dress; my body has changed a lot during the past year.
På sistone har jag ägnat alla min bebis tupplurar åt att läsa gammal studielitteratur, för att komma tillbaka till samma nivå som jag hade innan jag gick på mammaledighet. Senaste veckan bestämde jag mig dock för att sy en ny klänning till mig själv i stället, eftersom min kropp har ändrats så mycket under året så att mina kläder generellt inte sitter särskilt bra längre.
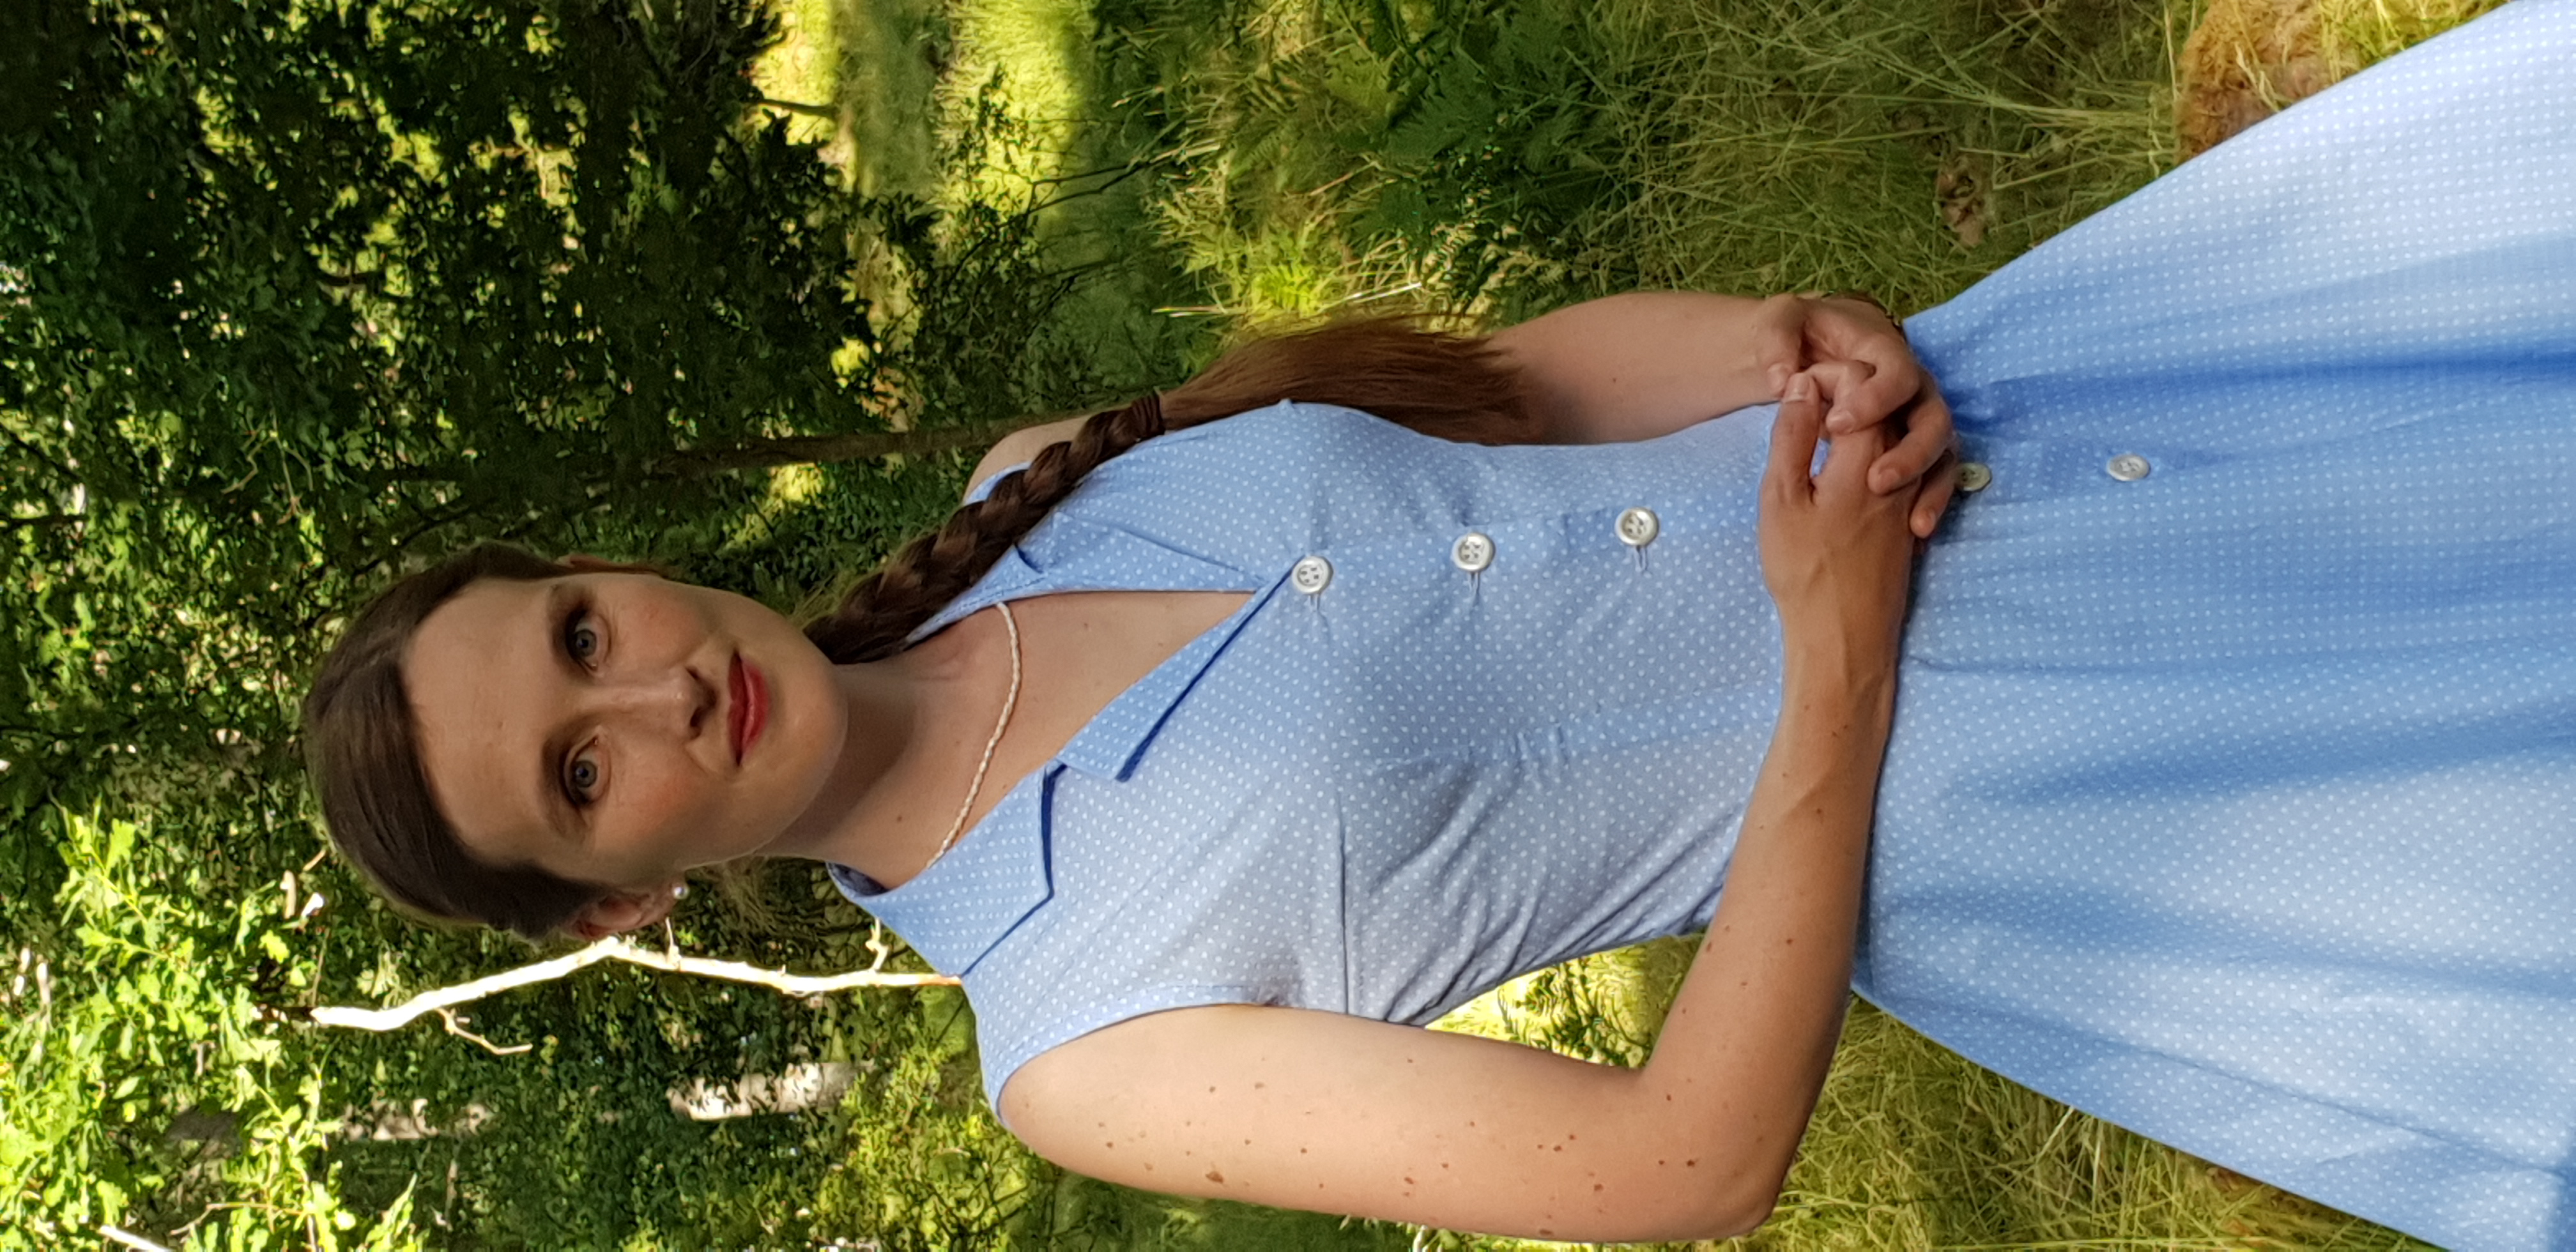
Alas, I live in a town without any fabric store. I bought this fabric last year in Söderköping, some days before the expected child birth. I did not have any matching buttons, so I asked for it on Facebook. A friend of mine had a box full of buttons, inherited from her grand mother, and she kindly gave these to me. After painting them with nail polish, they came out well, I think.This is the first time I have made this kind of collar and I am quite pleased with how it came out. I am less pleased with finding out that my bust has sunken down below the placement on my mannequin, so that the darts are subsequently placed too high on the dress. This I found out during the photo shoot. Then I also found out that the fabric gets wrinkled by anything; the wrinkles that you see on the pictures formed during the five minute travel by car. Super annoying.
Märkligt nog bor jag i en stad utan tygaffär. Det här tyget köpte jag förra året i Söderköping, några dagar innan beräknat förlossningsdatum. Jag hade inga matchande knappar, så jag frågade på Facebook. En av mina vänner har ärvt en hel knapplåda av sin farmor, och gav dessa knappar till mig. Det är första gången som jag gör denna slags krage, men jag tycker att det blev helt ok. Jag är mindre nöjd med att inse att min stackars byst har sjunkit ned under brovdockans nivå, så att inprovningarna i sidan sitter för högt. Detta insåg jag när jag såg bilderna. Dessutom blir tyget skrynkligt bara man tittar på det. Überirriterande.
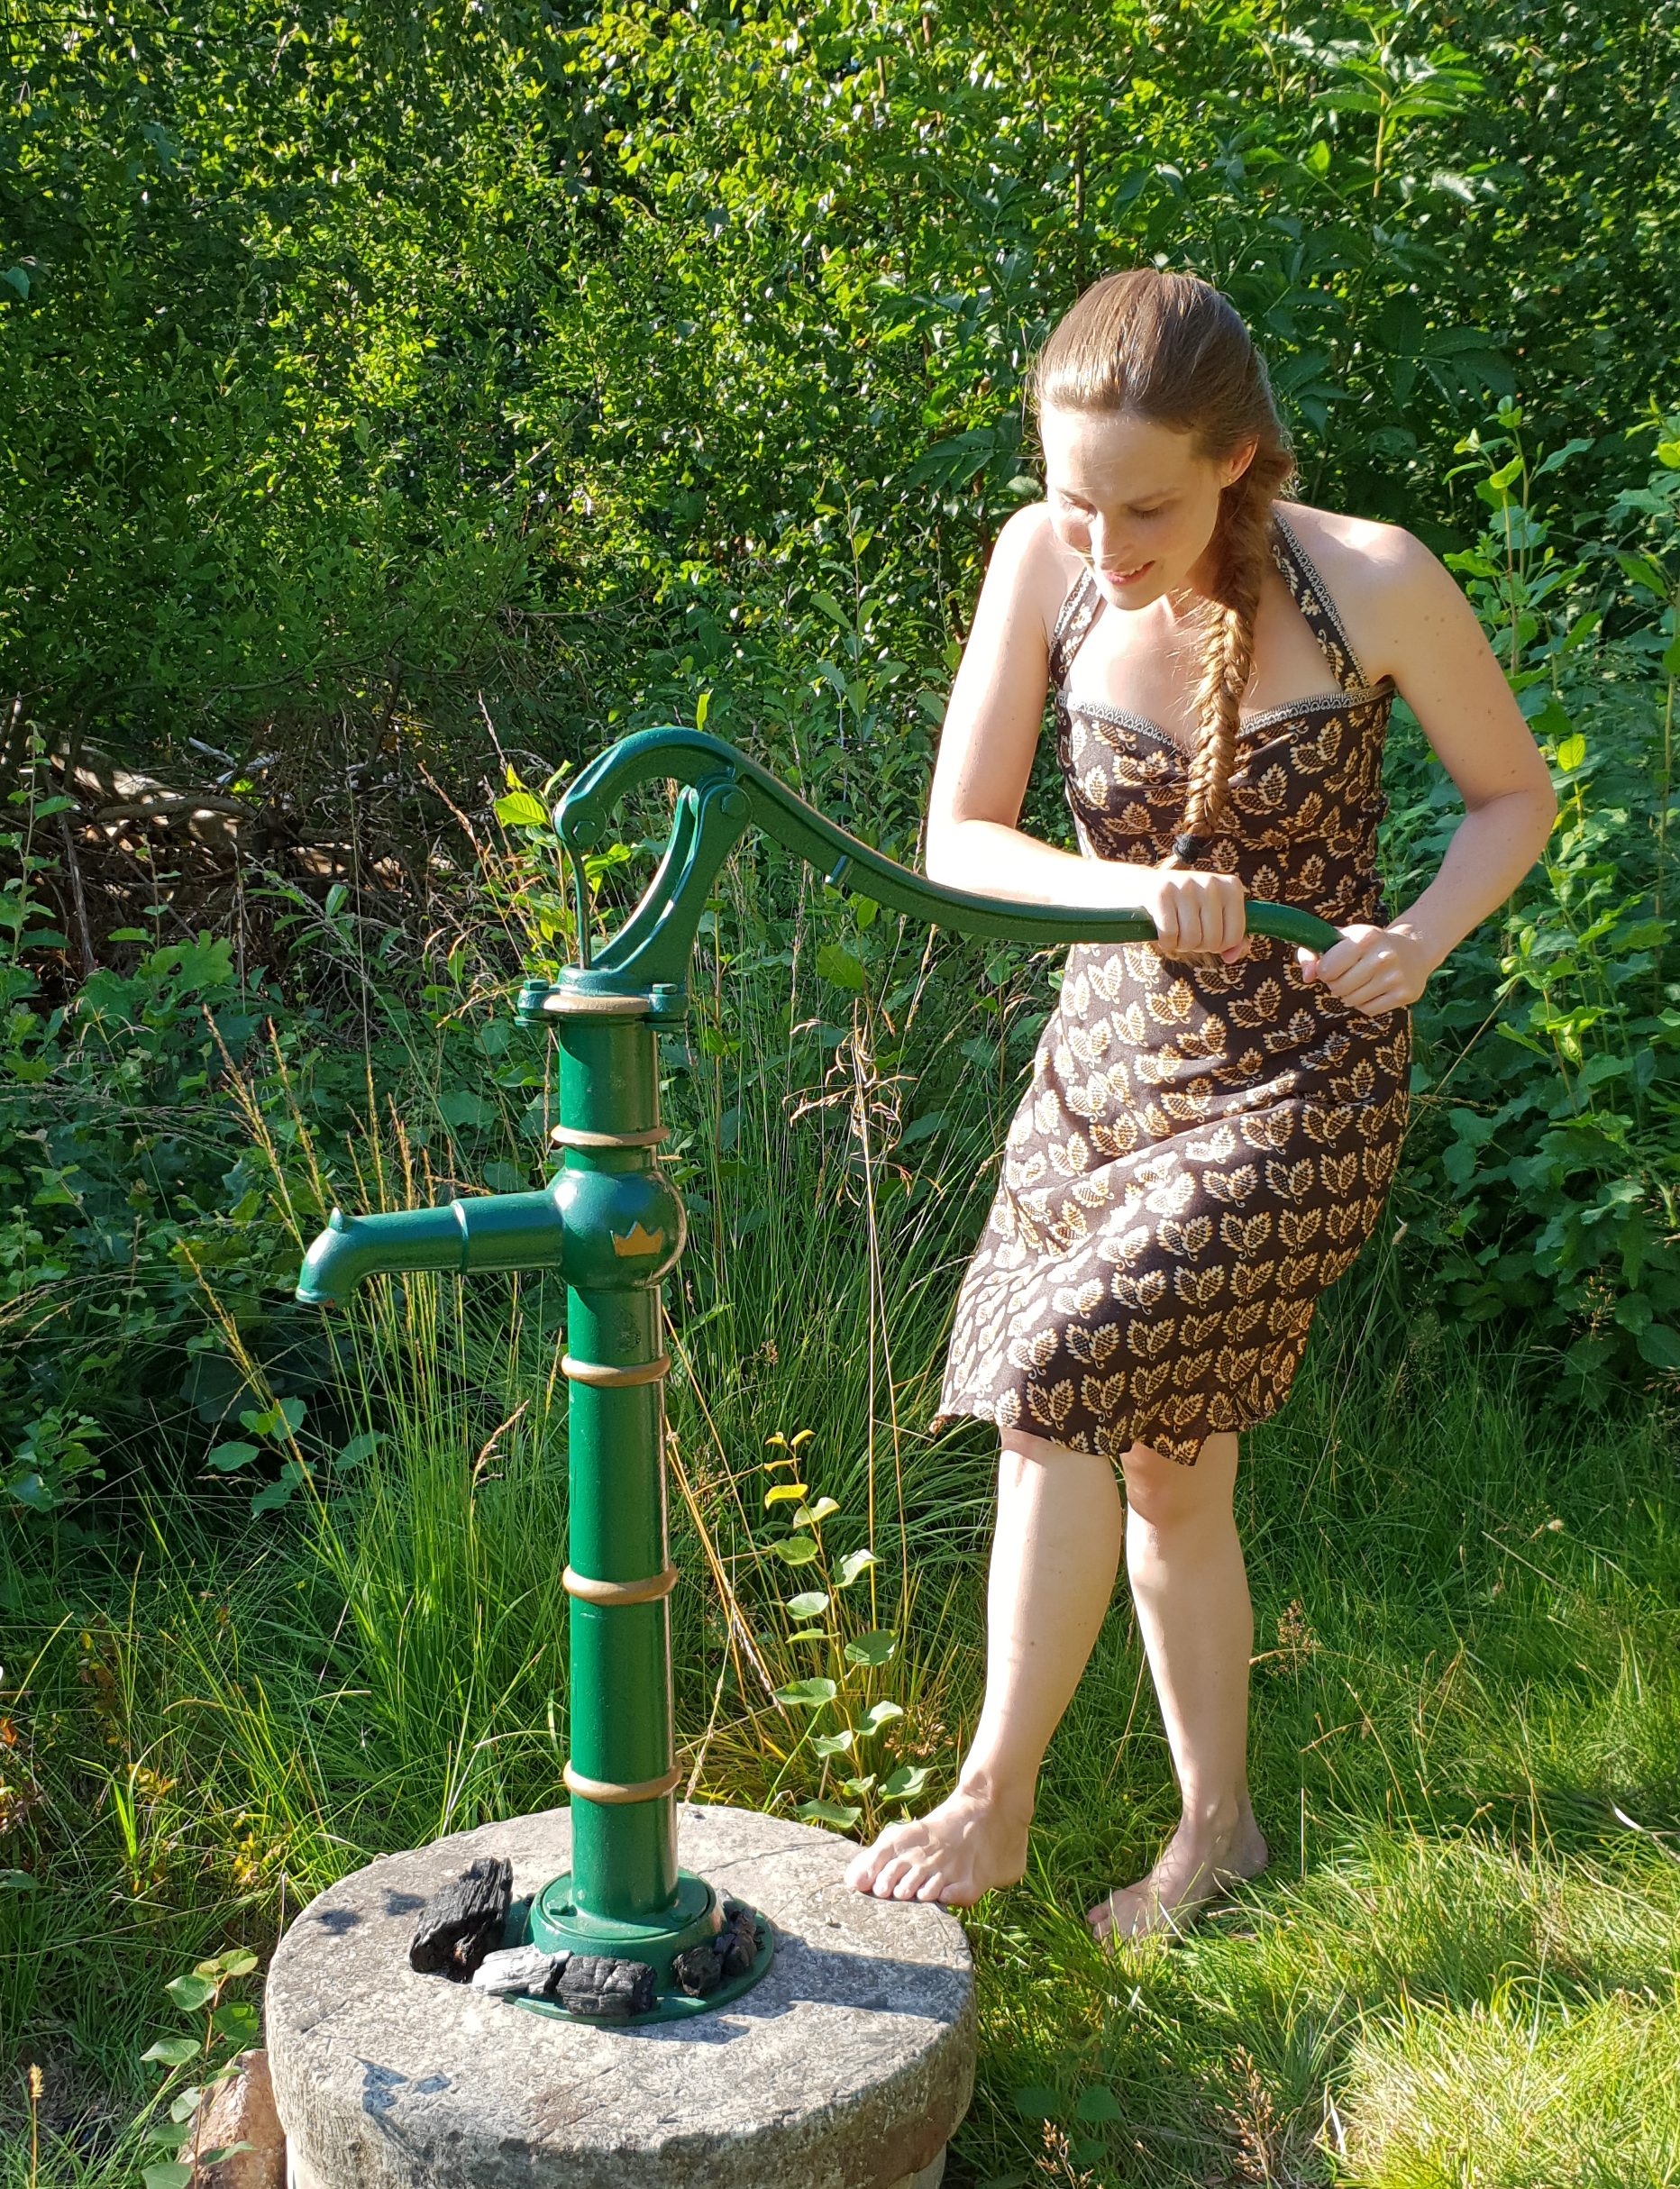
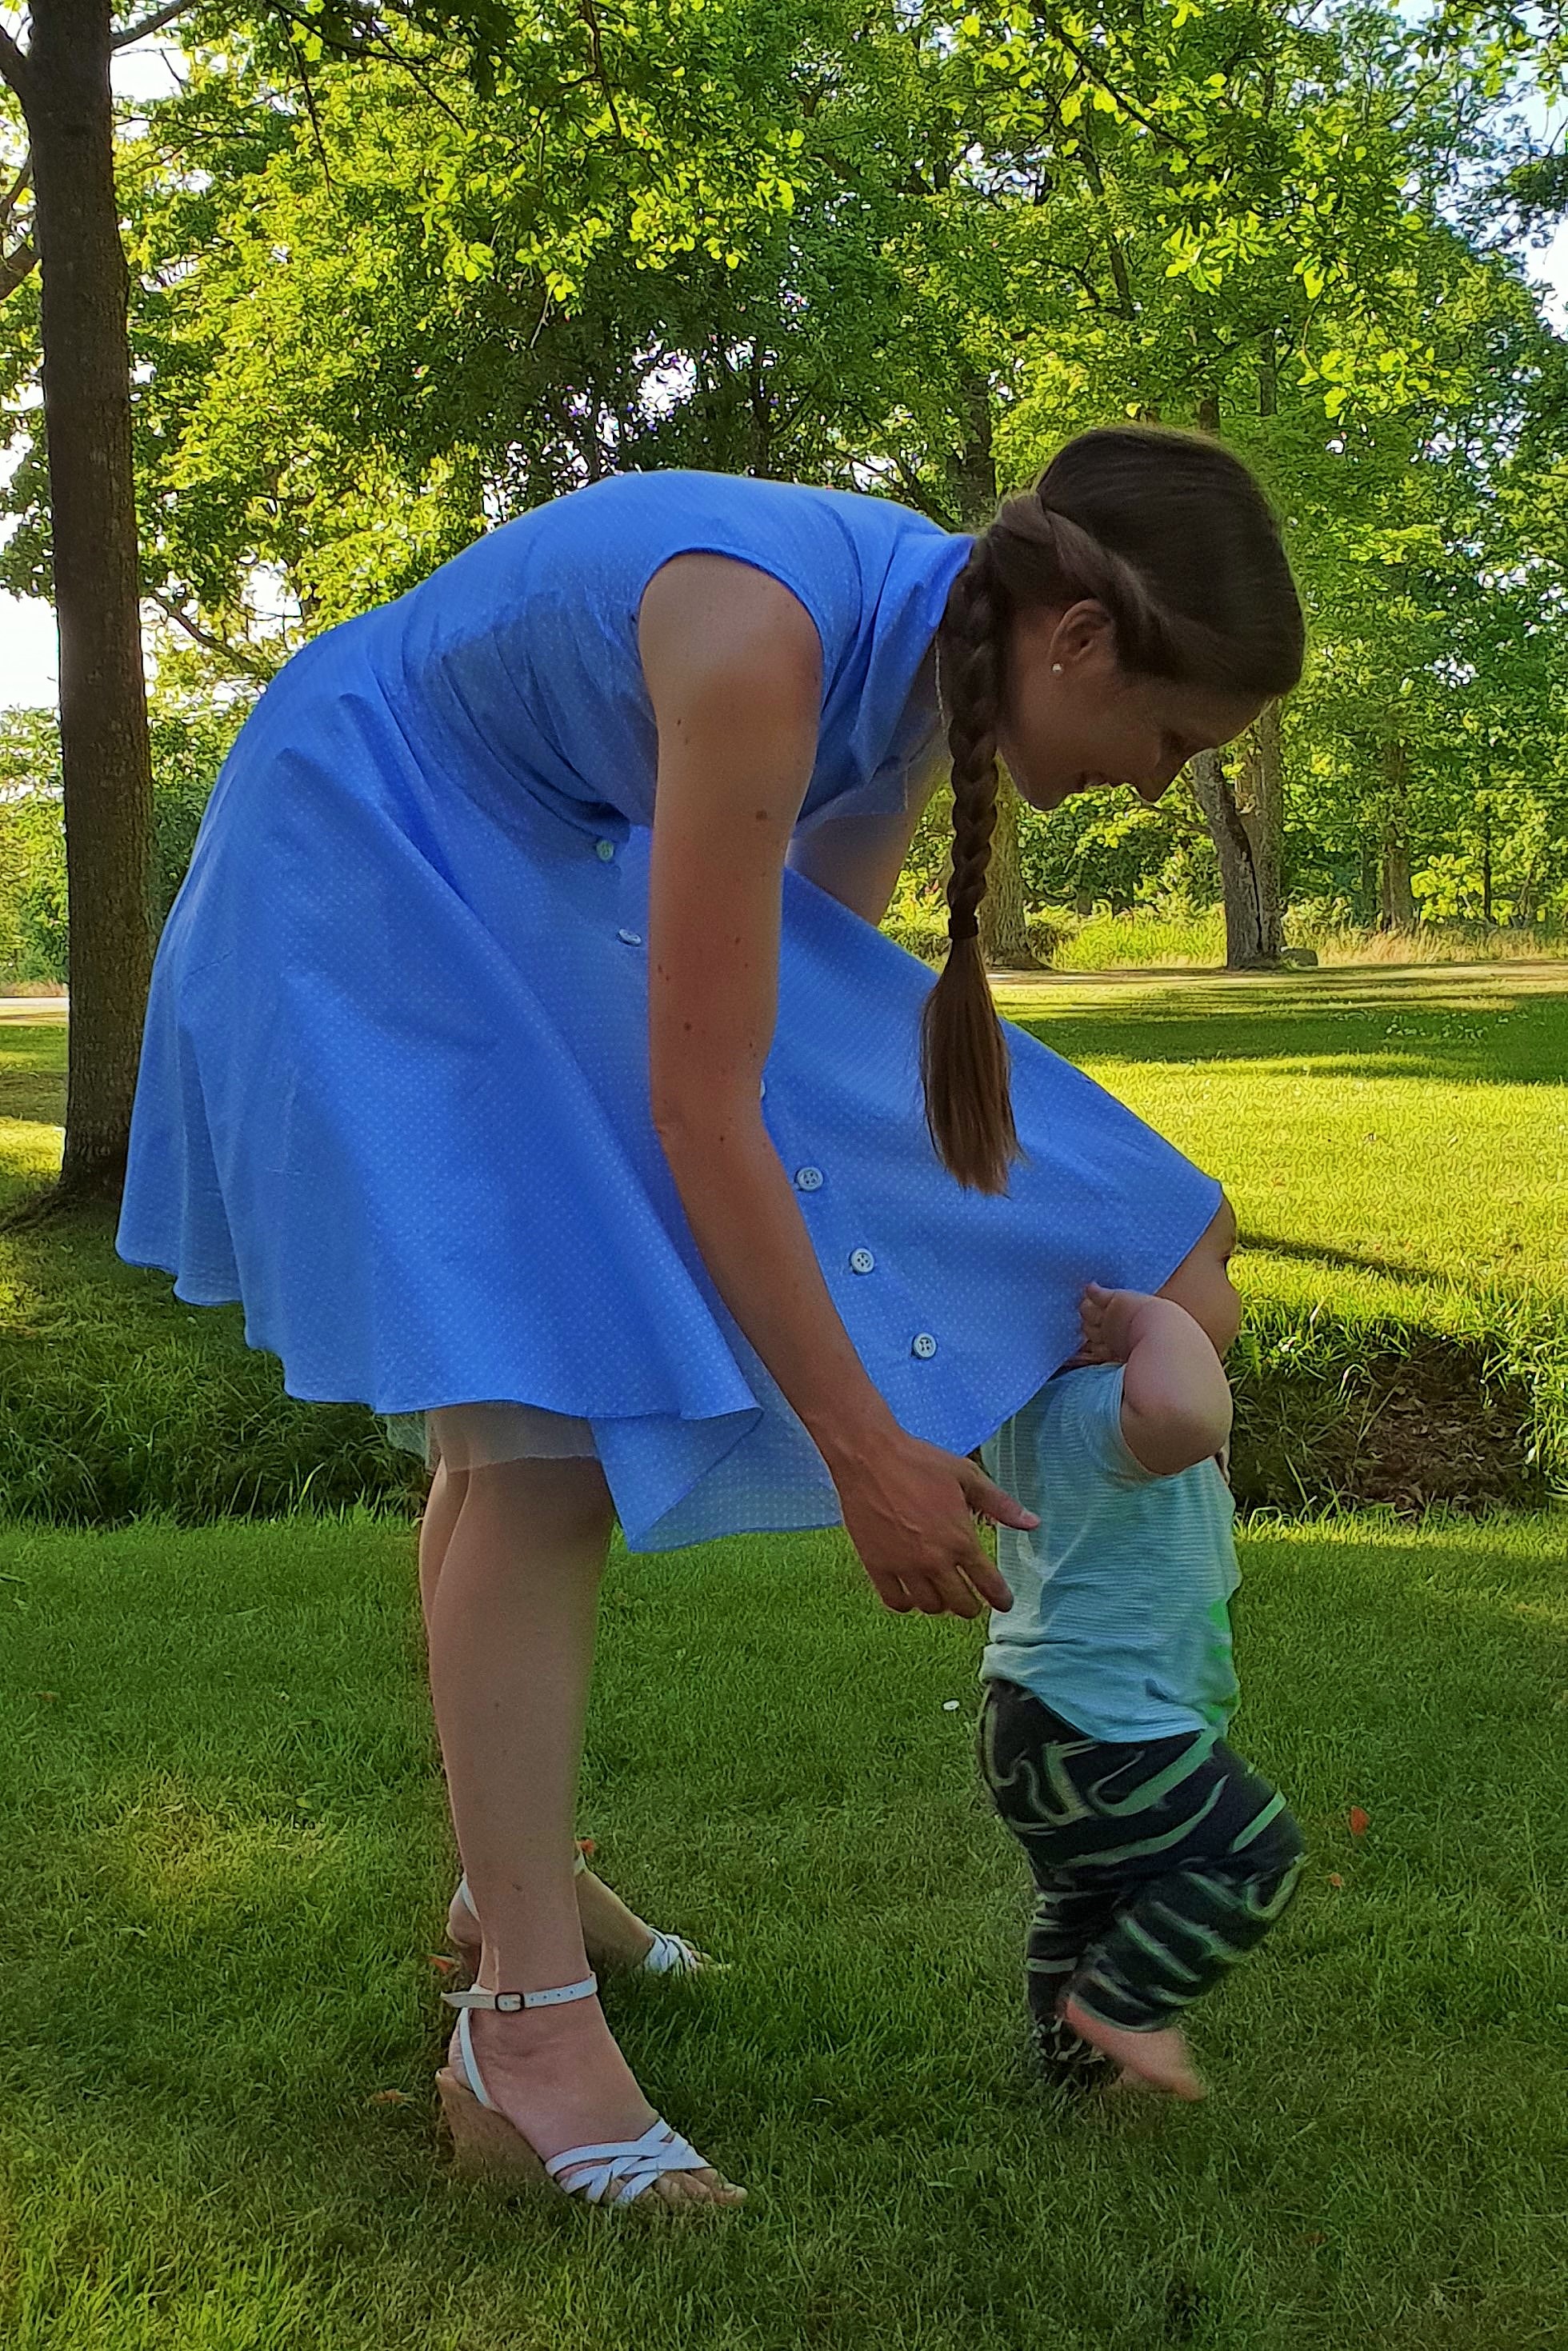
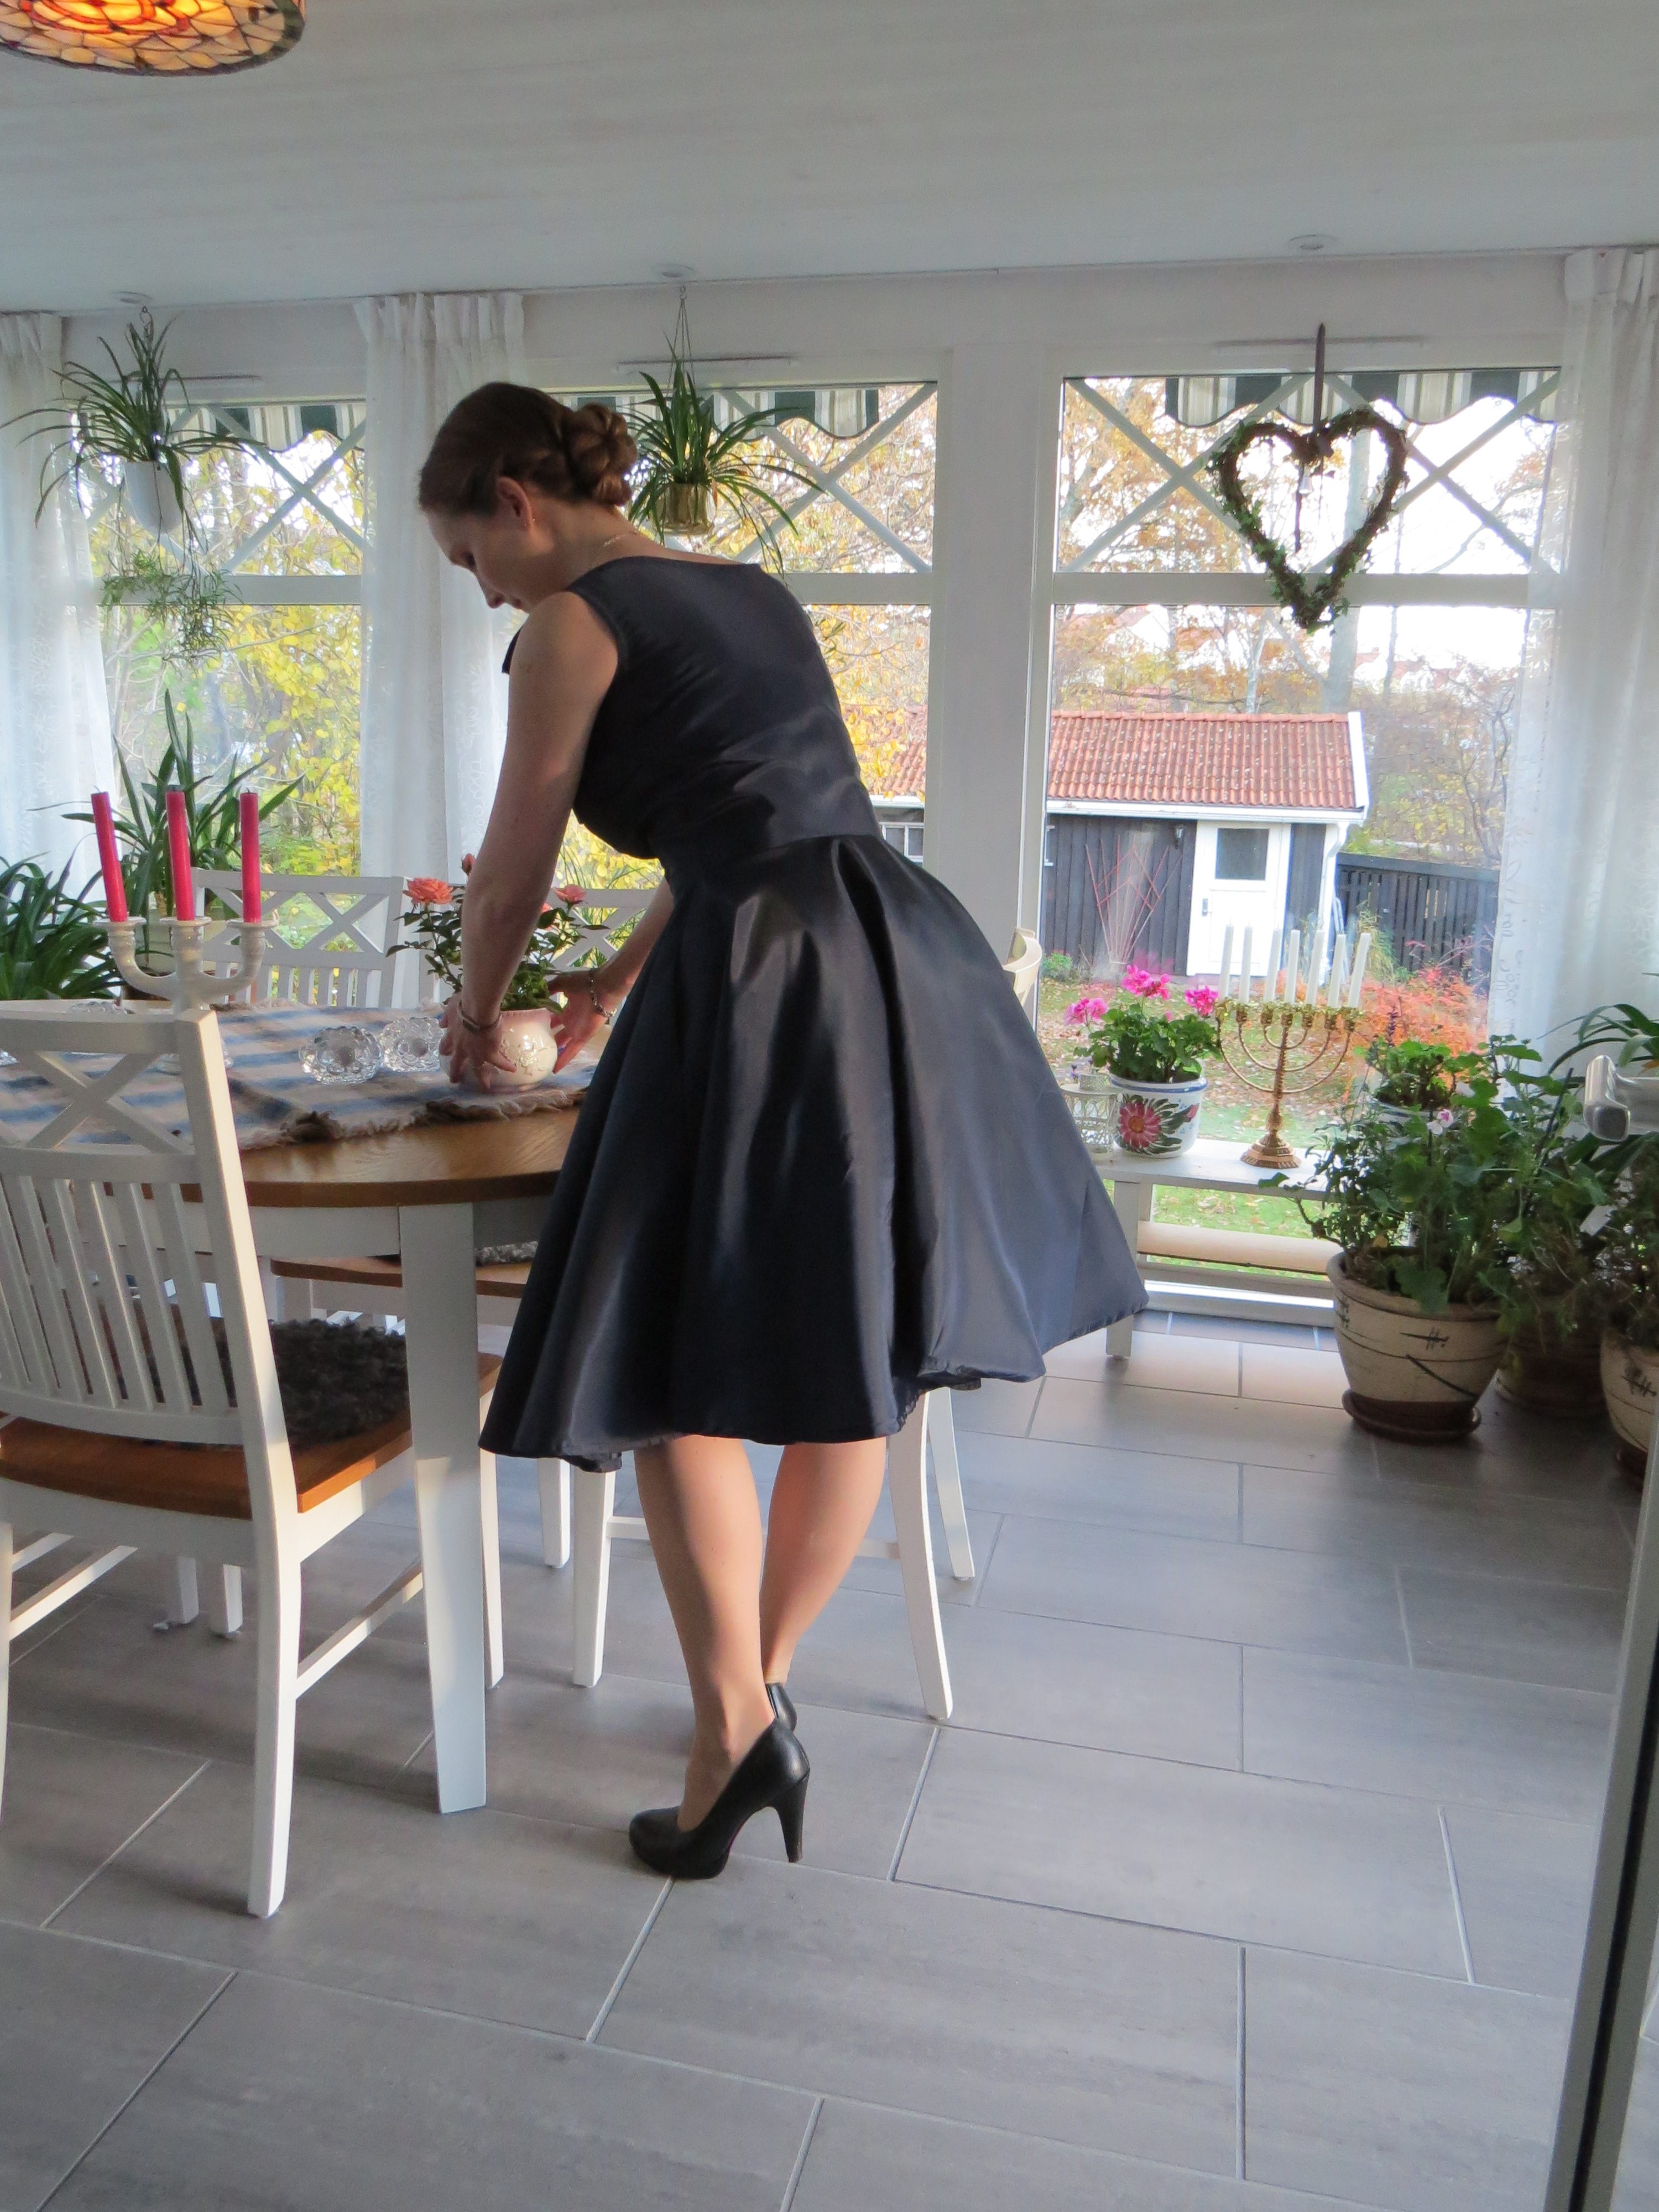
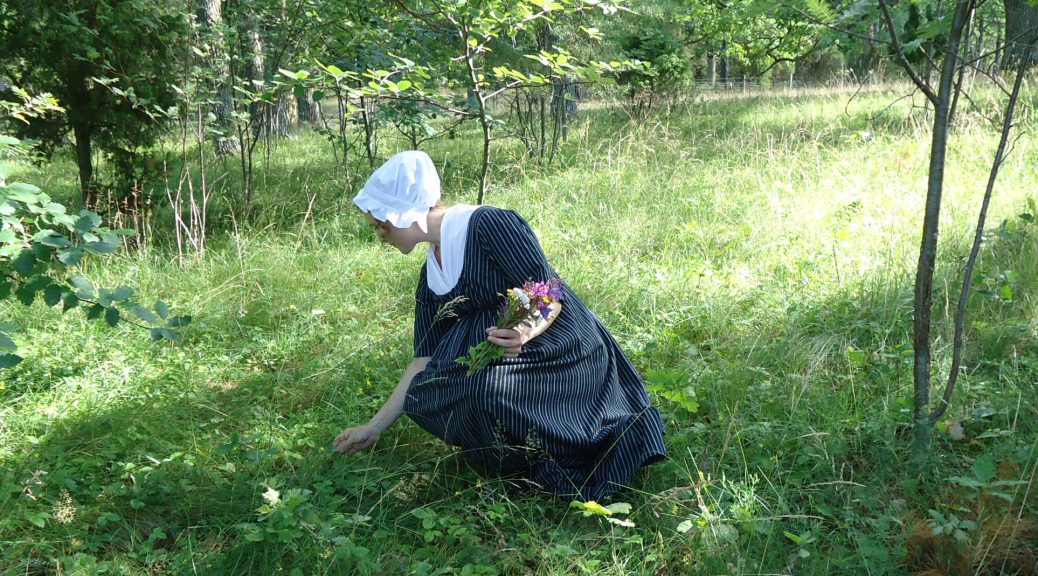
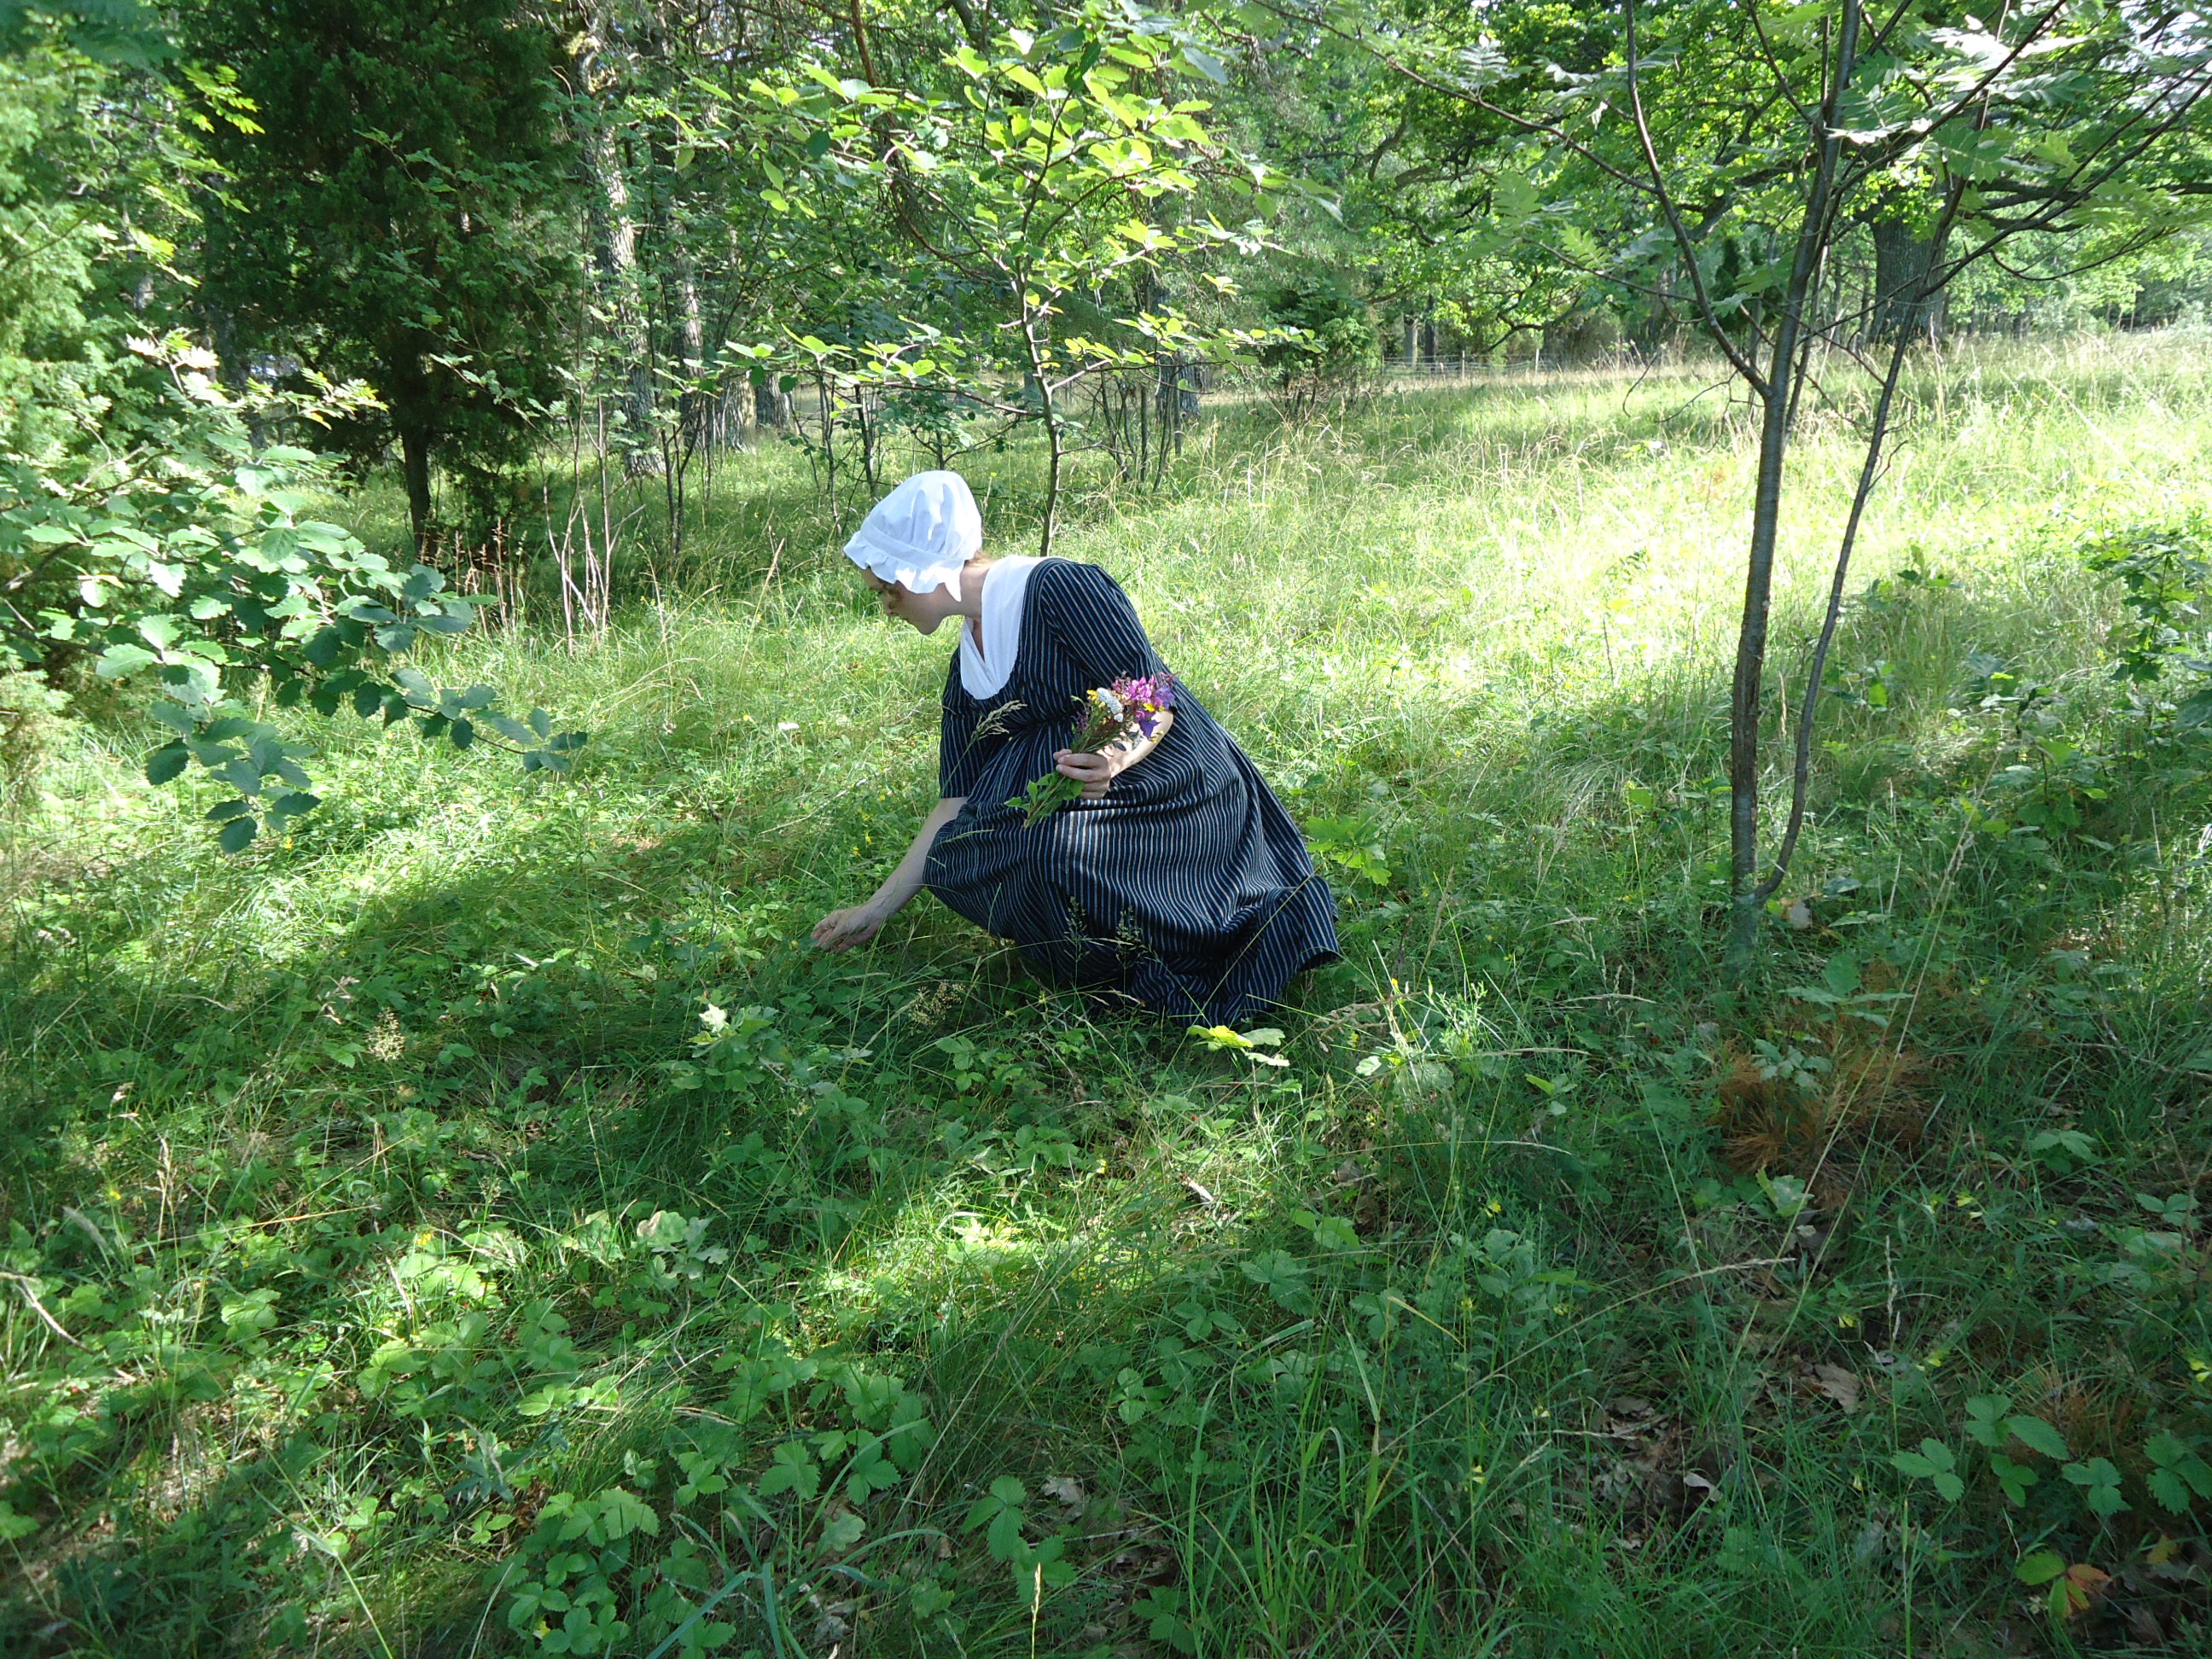
Very well. Except for these nuisances, I am quite pleased with the pattern and the dress as a whole. It feels so good to wear a dress that fits well and that does not become totally indecent as I lean forward to help my offspring challange forward through the vegetation.
Ja, ja. Förutom alla dessa irritationsmoment är jag nöjd med mönstret och klänningen över lag. Det är grymt skönt att ha en klänning som både sitter ok och inte blir totalt oanständig när man böjer sig fram för att hjälpa sin avkomma att ta sig fram genom vegetationen.
Some weeks ago, I heard something that made my heart melt. A seven year old boy said that I am the best seamstress in the world. I tried to explain that this was not the case, but he insisted. Because
“You are even better at sewing than my own mother!”
This dear boy asked me if I could help him sew a robe that he could wear together with his Scream mask, or perhaps help him making his own gym bag? Because of my baby, I do not know how much time there will be for teaching him how to sew, so I decided to make the robe as a birthday gift.
För några veckor sedan fick jag höra något som fick mitt hjärta att smälta. En sjuåring sa att jag var bäst på att sy i hela världen. Jag försökte förklara att det nog inte var riktigt sant, men han höll fast vid sitt påstående, för
“Du är till och med bättre än min mamma på att sy!”
Denne fine pojke undrade om jag inte kunde hjälpa honom att sy en jättehäftig dräkt, som han kunde ha tillsammans med sin Scream-mask, eller om jag kanske en gympapåse? På grund av min bebis visste jag inte hur mycket tid det skulle bli över för att lära ut sömnad, så jag bestämde mig för att sy dräkten till hans födelsedag.
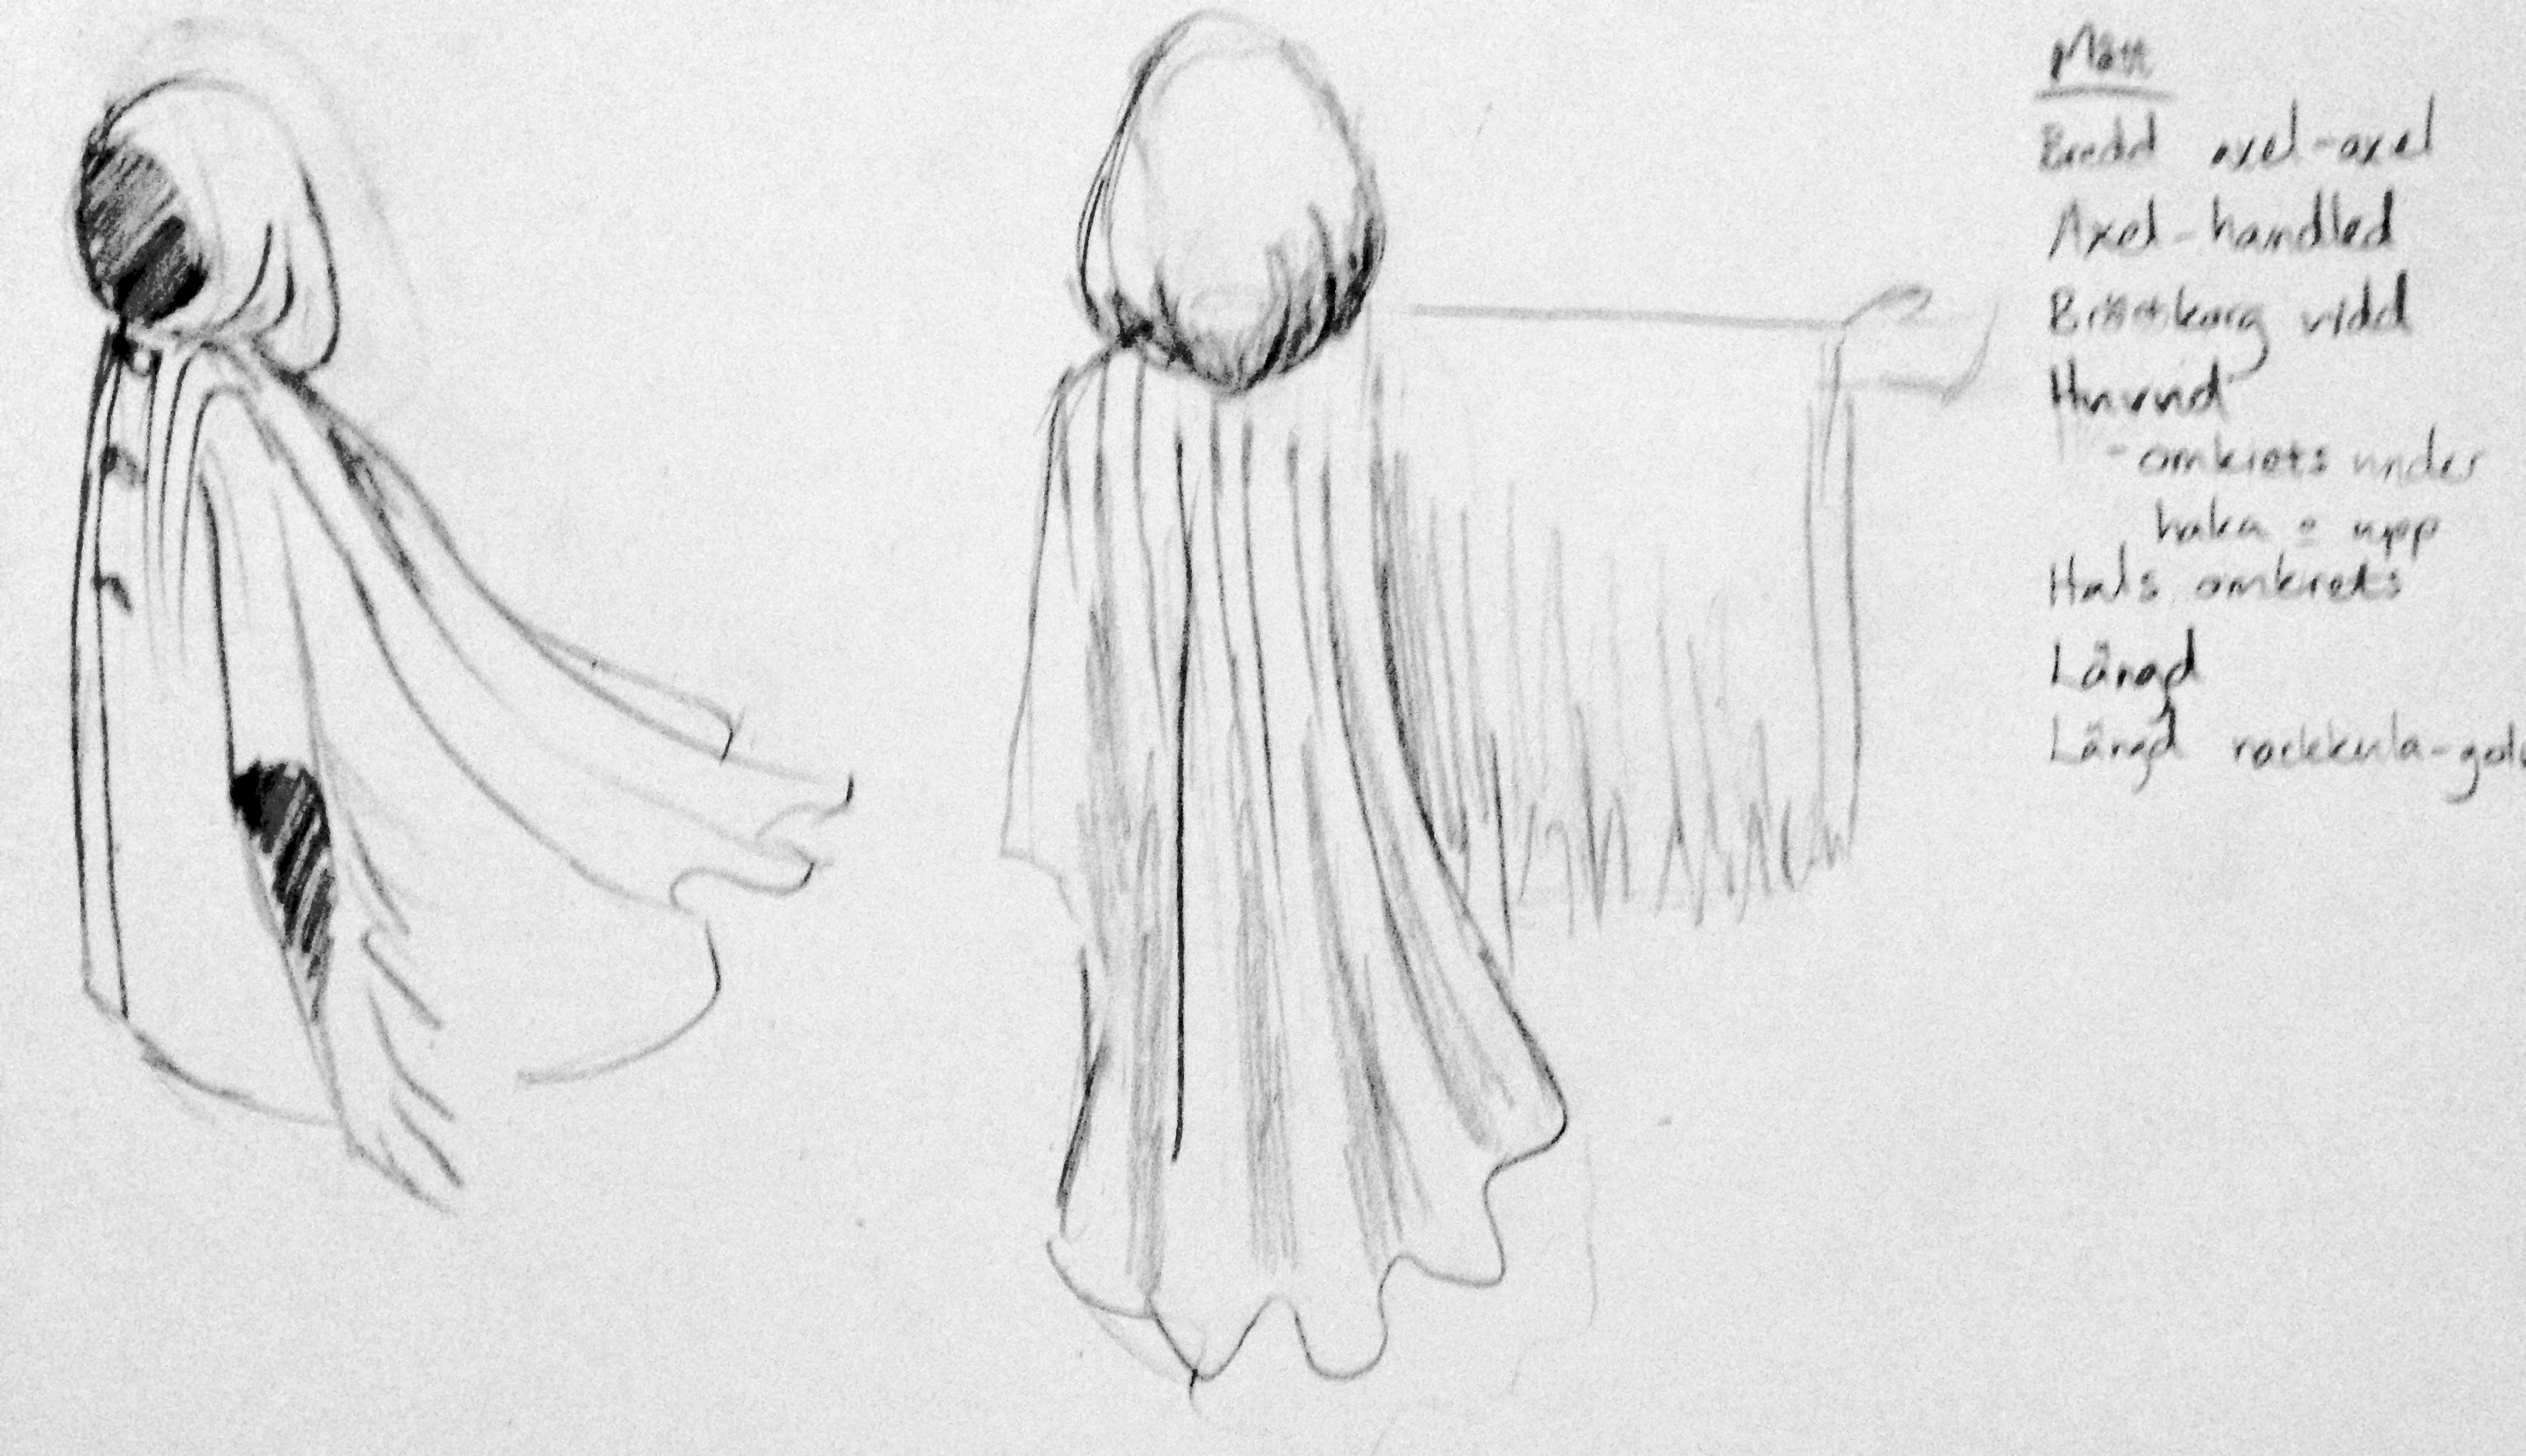
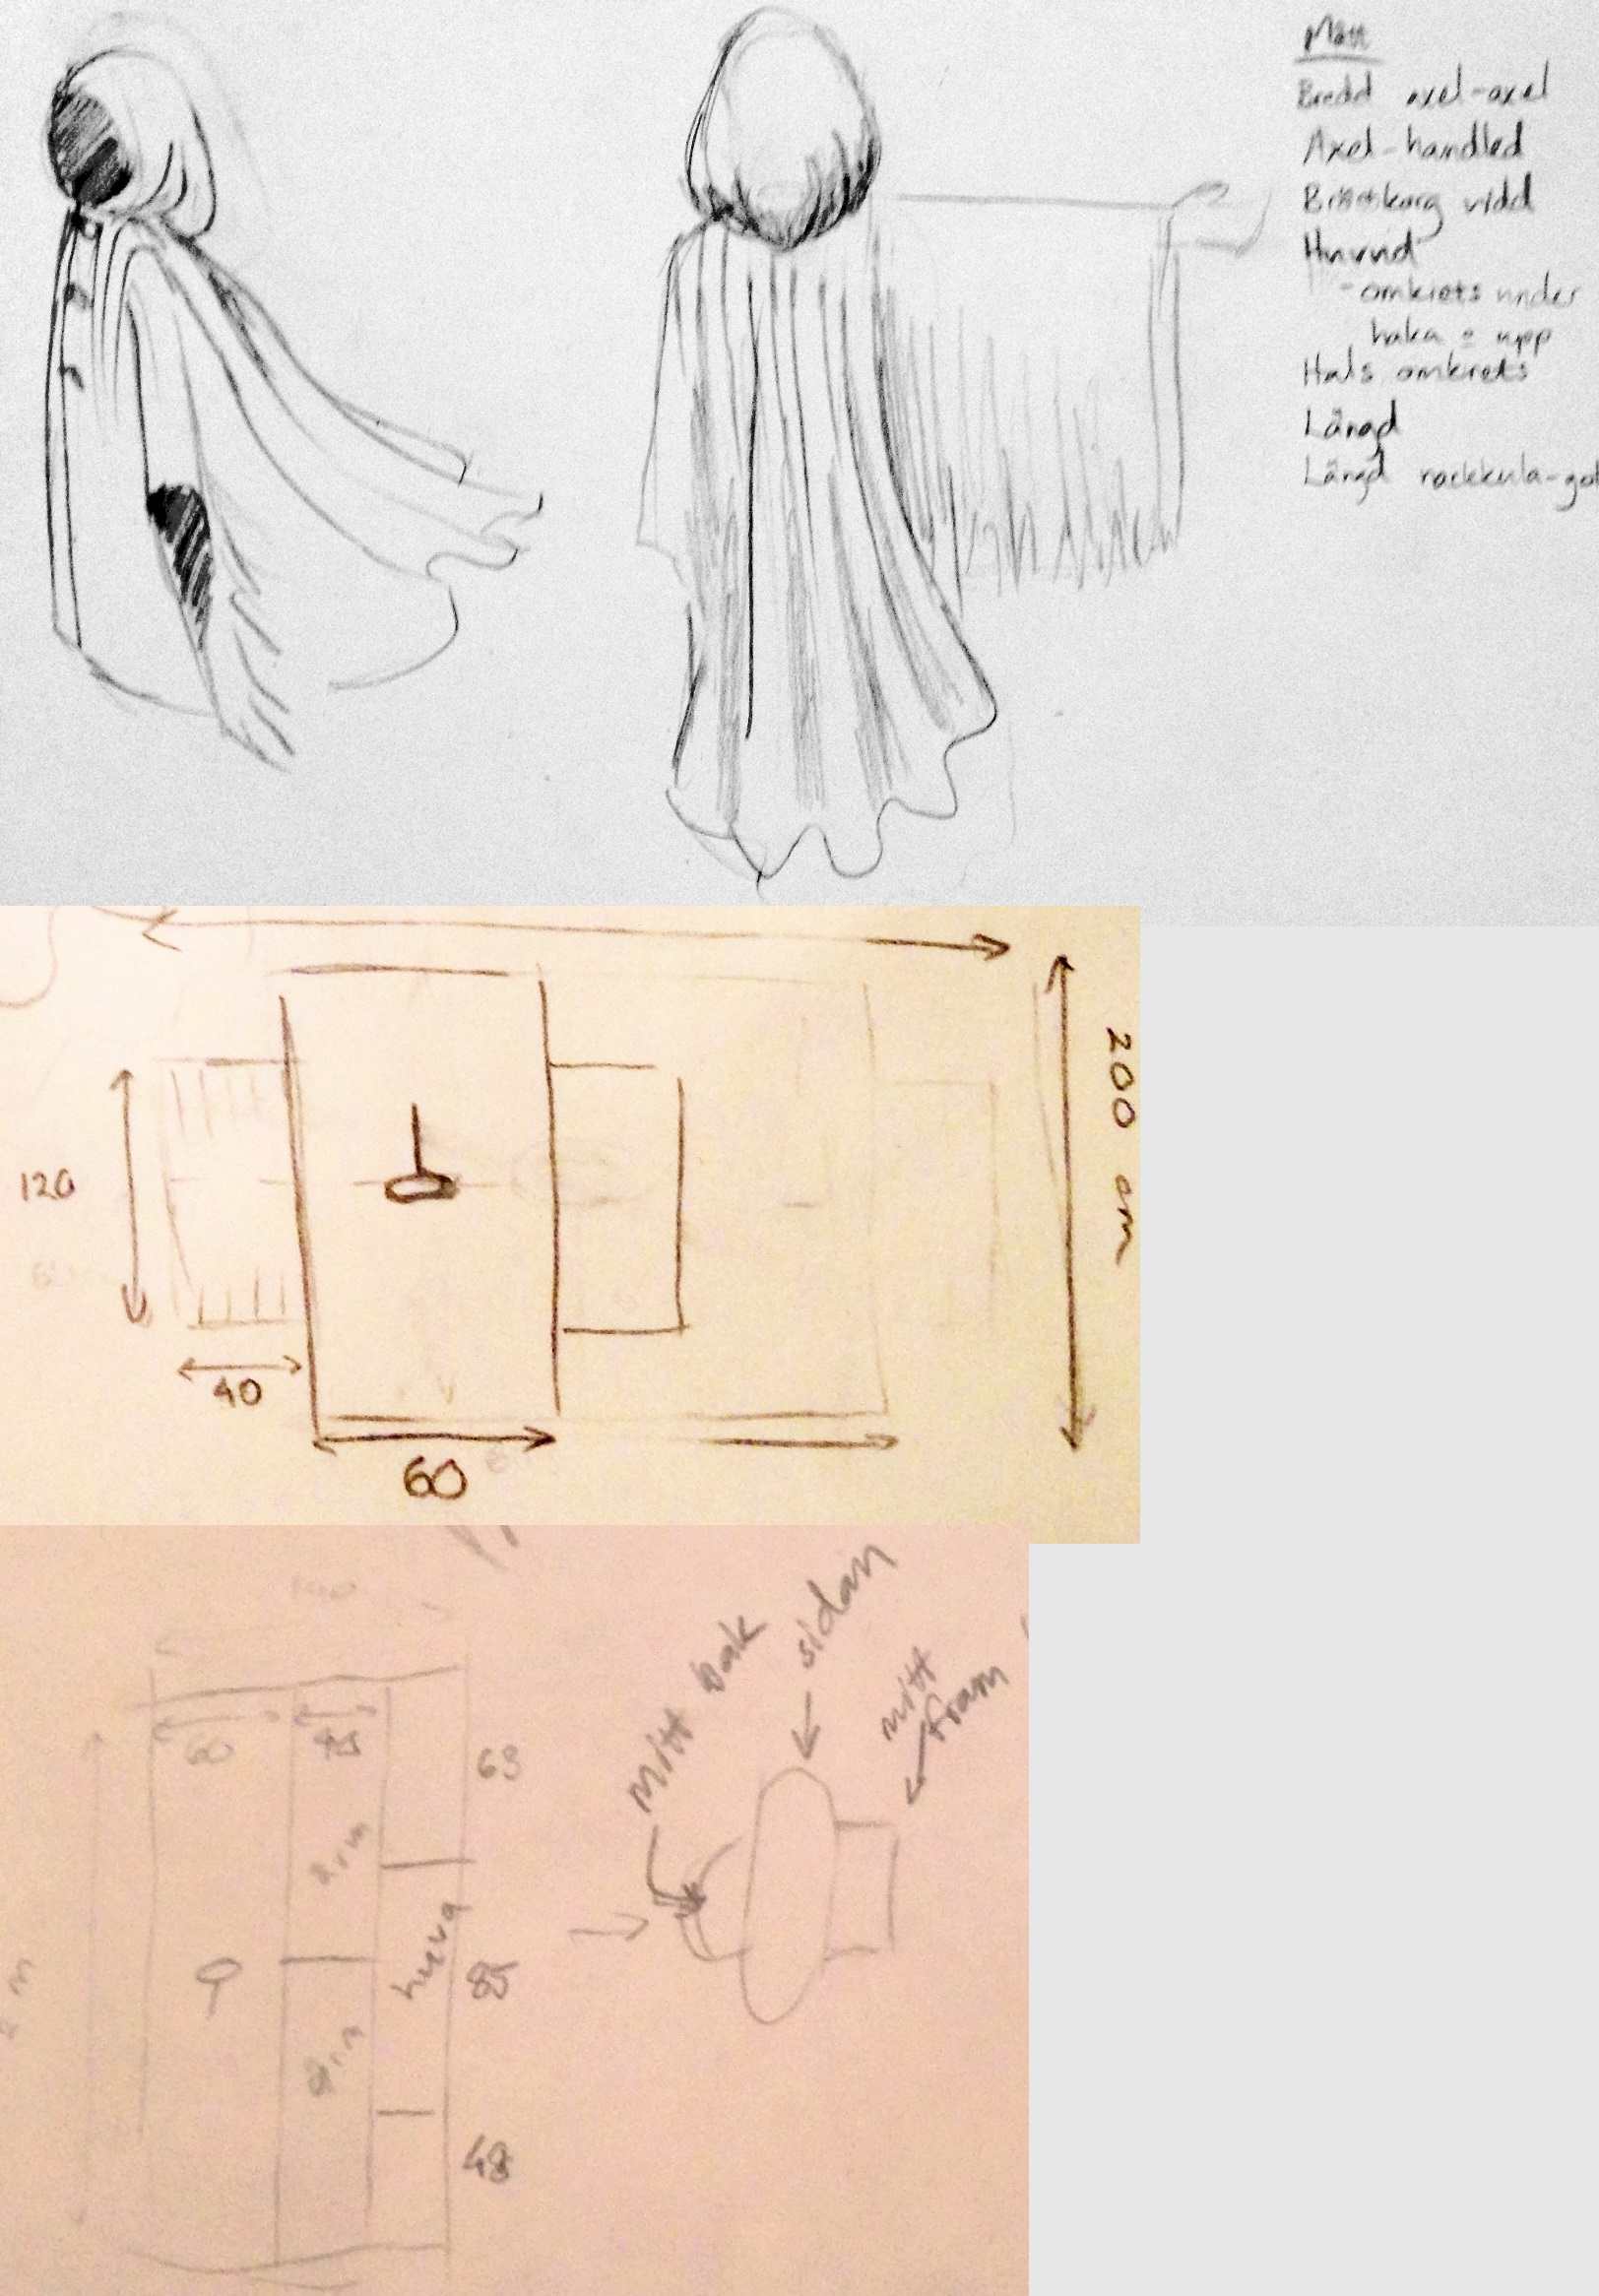
This is what I envisioned – a dramatic robe with a lot of fabric that would fly behind the boy as he ran around scaring everybody. I did not have any black fabric, but I had recently been given some colored cotton fabrics, that I thought were exactly the same kind, except for the green and blue color. I dyed the fabrics black, but discovered that only the blue fabric became fully black. The green took a darker shade, but was still very green. I could not use that piece, so I had to make do with much less fabric than I had intended to use.
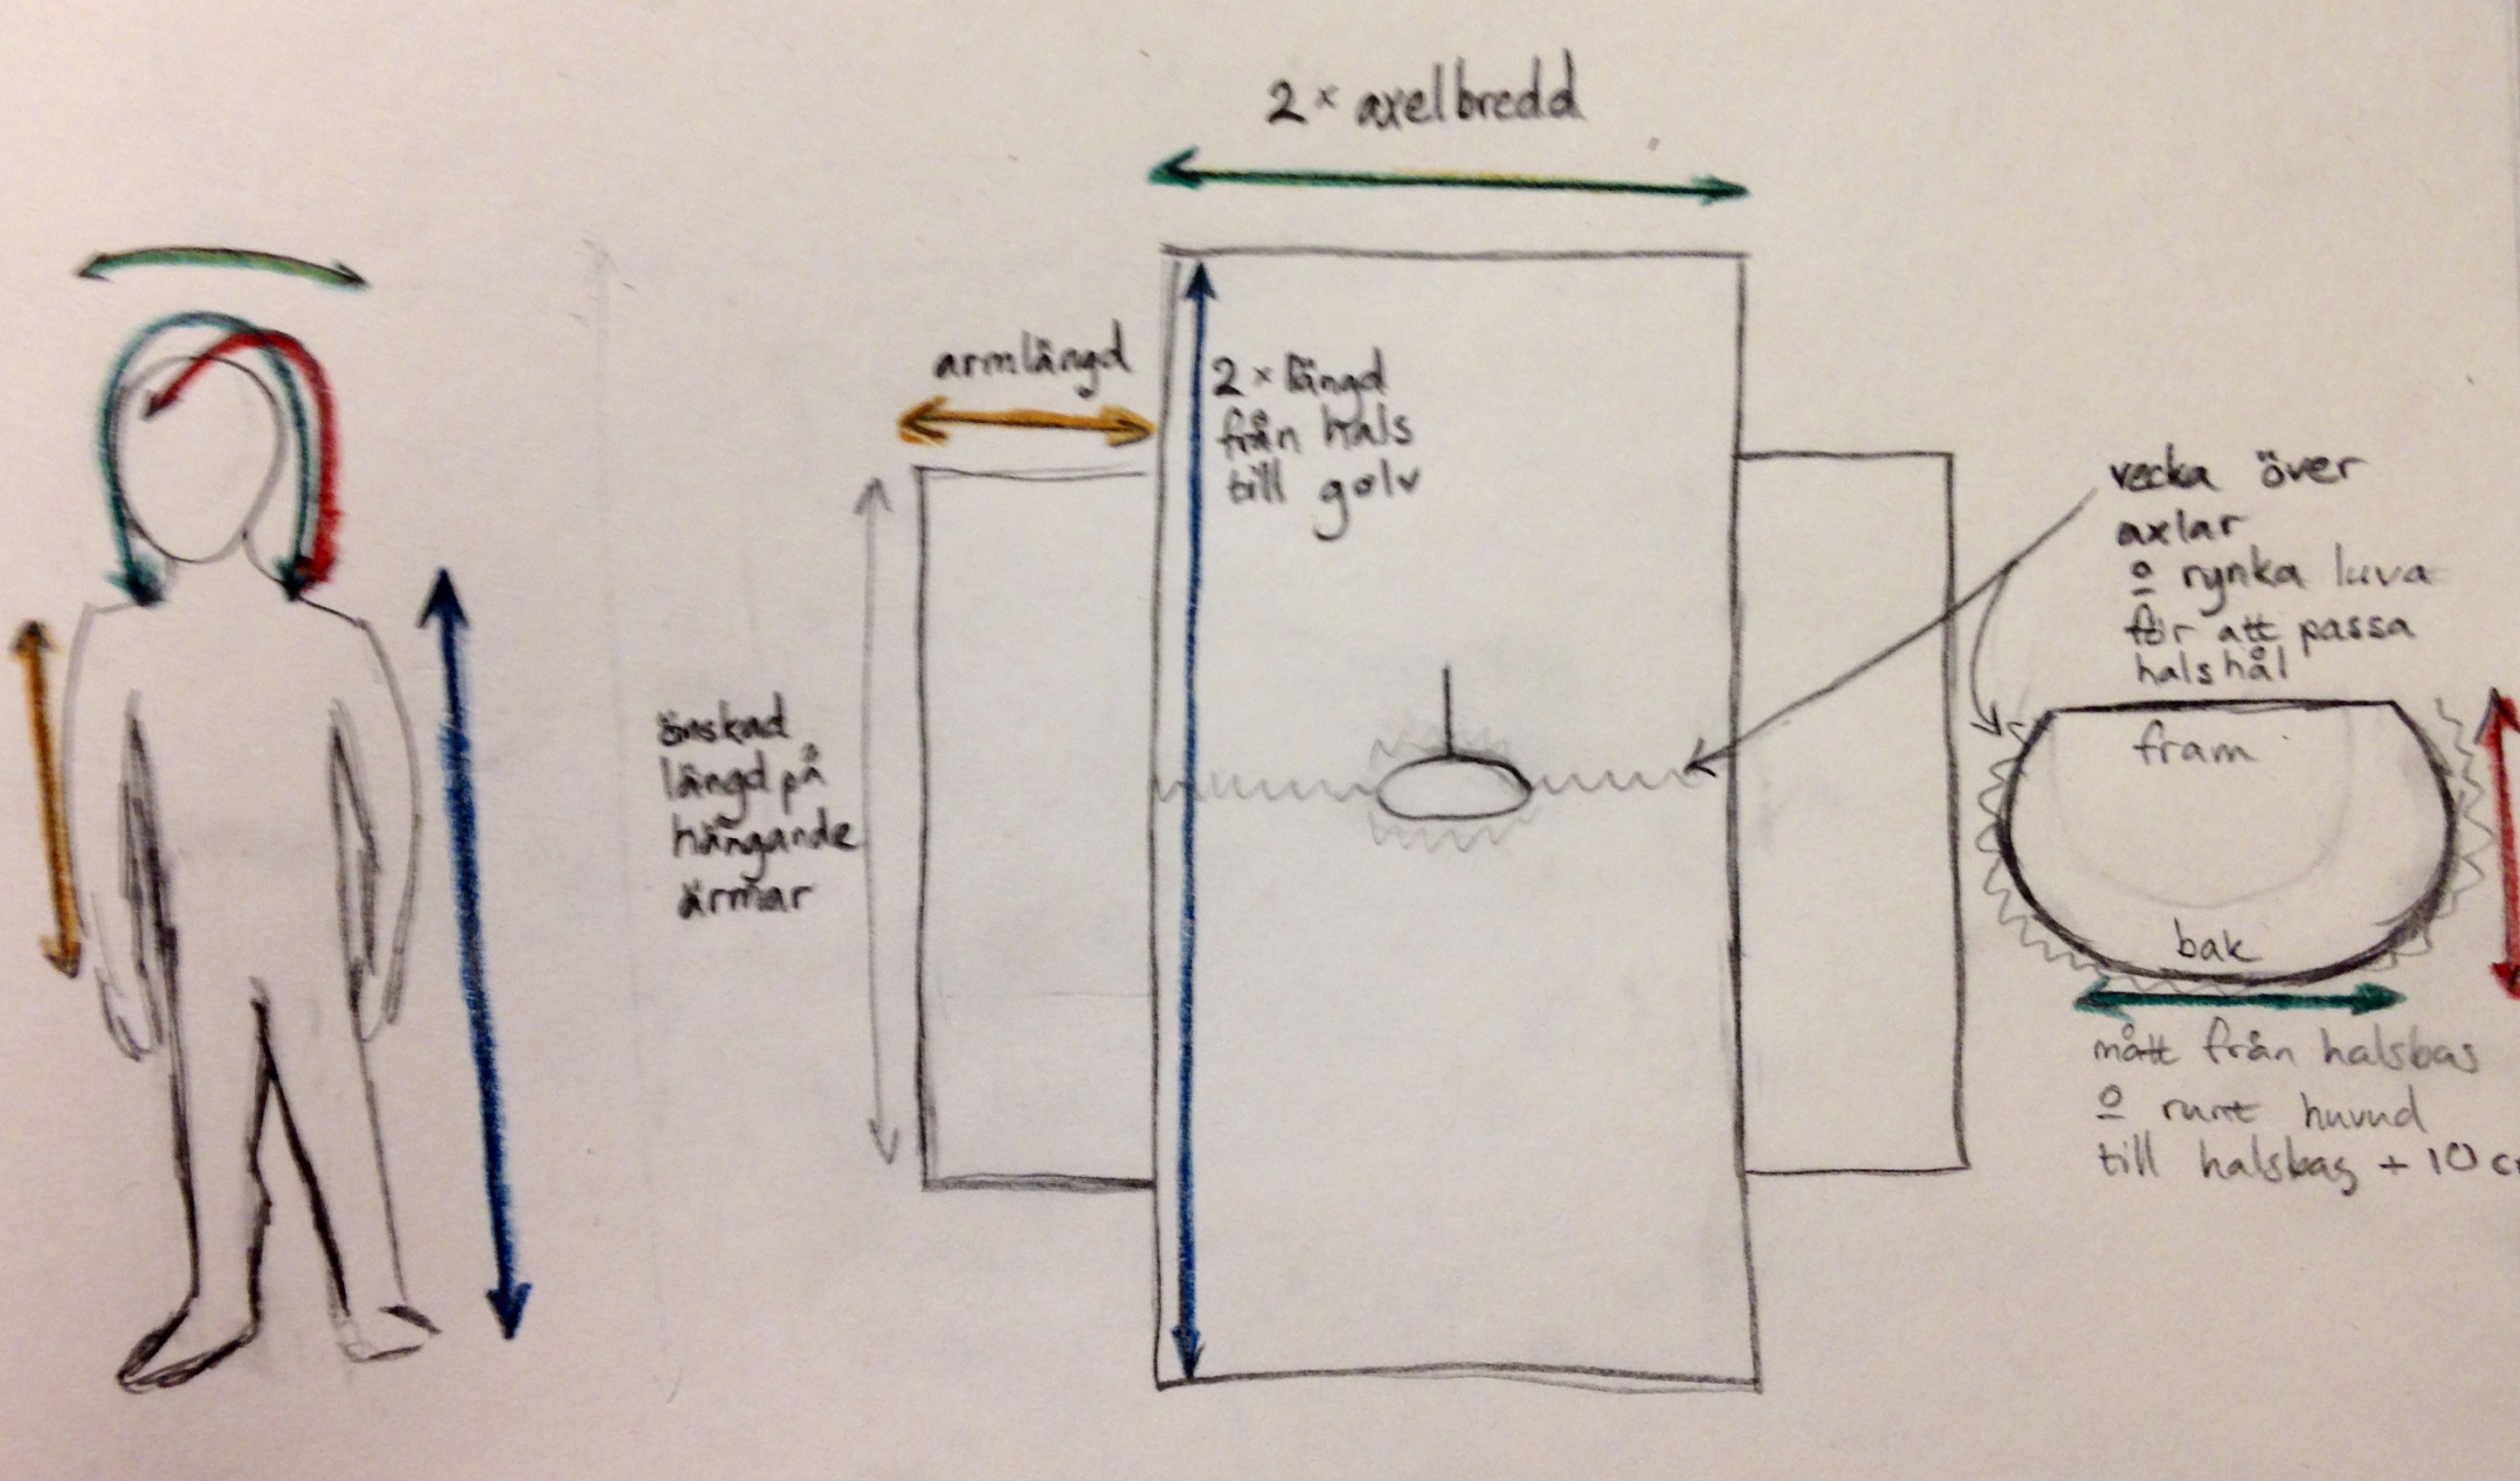
Så här såg min vision ut – en dramatisk rock med massor av tyg, som skulle flyga bakom pojken när han sprang runt och skrämde folk. Jag hade inget svart tyg hemma, men hade nyligen fått färgade bomullstyger, som jag trodde var av samma sort. Jag färgade det blå och gröna tyget med svart textilfärg, men upptäckte att bara det blå tyget blev helt svart. Det gröna hade antagit en mörkare nyans, men var fortfarande väldigt grönt. Jag kunde inte använda det tyget, så jag fick försöka klara mig med mindre tyg än jag hade planerat för.This is the very simple construction of the scary robe. I used the following measurements:
height
length from shoulders to floor
arm length
neck circumference
length from base of the neck over the head to the other side
length from forehead to backside of the base of the neck
All this with some extra cm, especially for the hood.
Detta är den extremt enkla konstruktionen av den läskiga rocken. Jag använde följande mått:
längd
längd från axlar till golv
armlängd
nackens omkrets
längd från nackens bas över huvudet och ned på andra sidan
längd från pannan till baksidan av nackens bas
Alla dessa mått med några centimeter extra, särskilt för luvan.
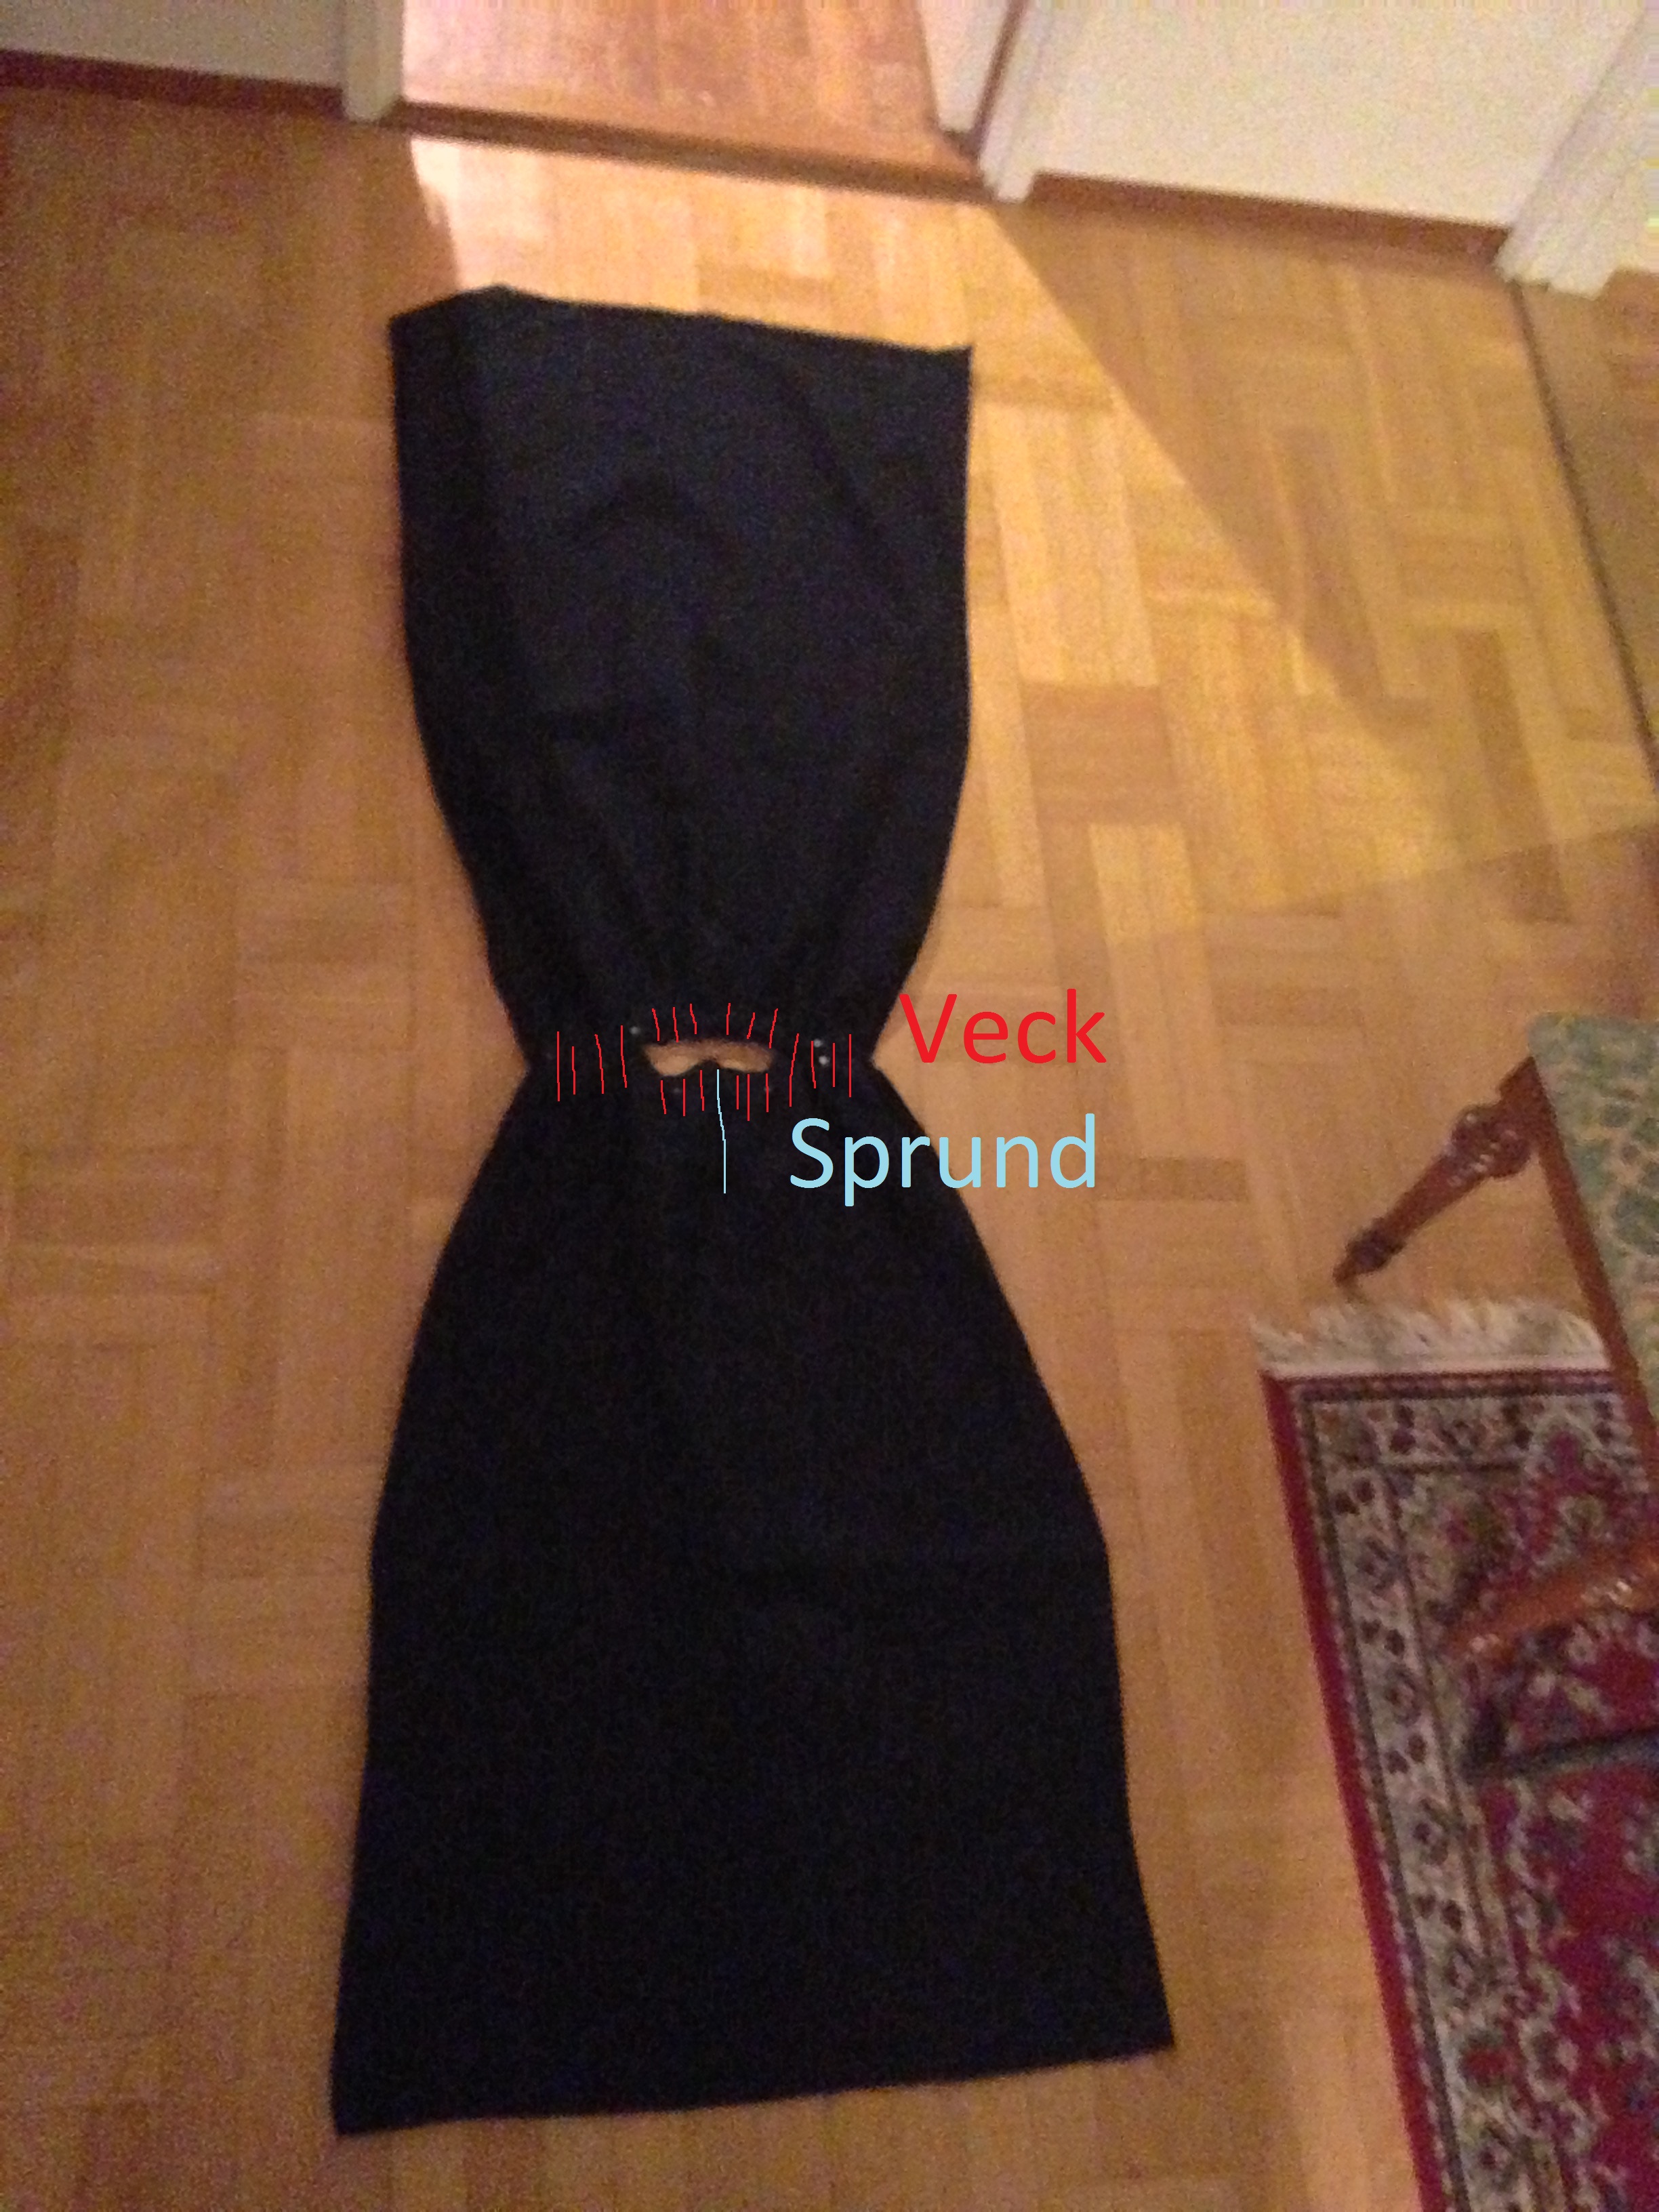
I gathered the double shoulder measurement in pleats and cut a hole for the neck and made a vent at the front. The vent kloses with a hook and eye.
Jag samlade det dubbla skuldermåttet i veck över axlarna och klippte ett hål för huvudet och ett sprund mitt fram. Sprundet stängs med en hyska och hake.
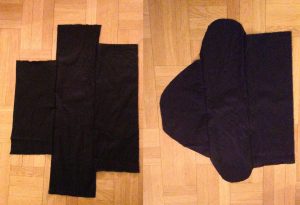
This is how it looked after making the hems. The pleats were secured with 5 centimeter machine stitches.
Så här såg det ut efter att jag fållat halslinningen. Vecken sydde jag fast med 5 cm långa maskinsömmar.
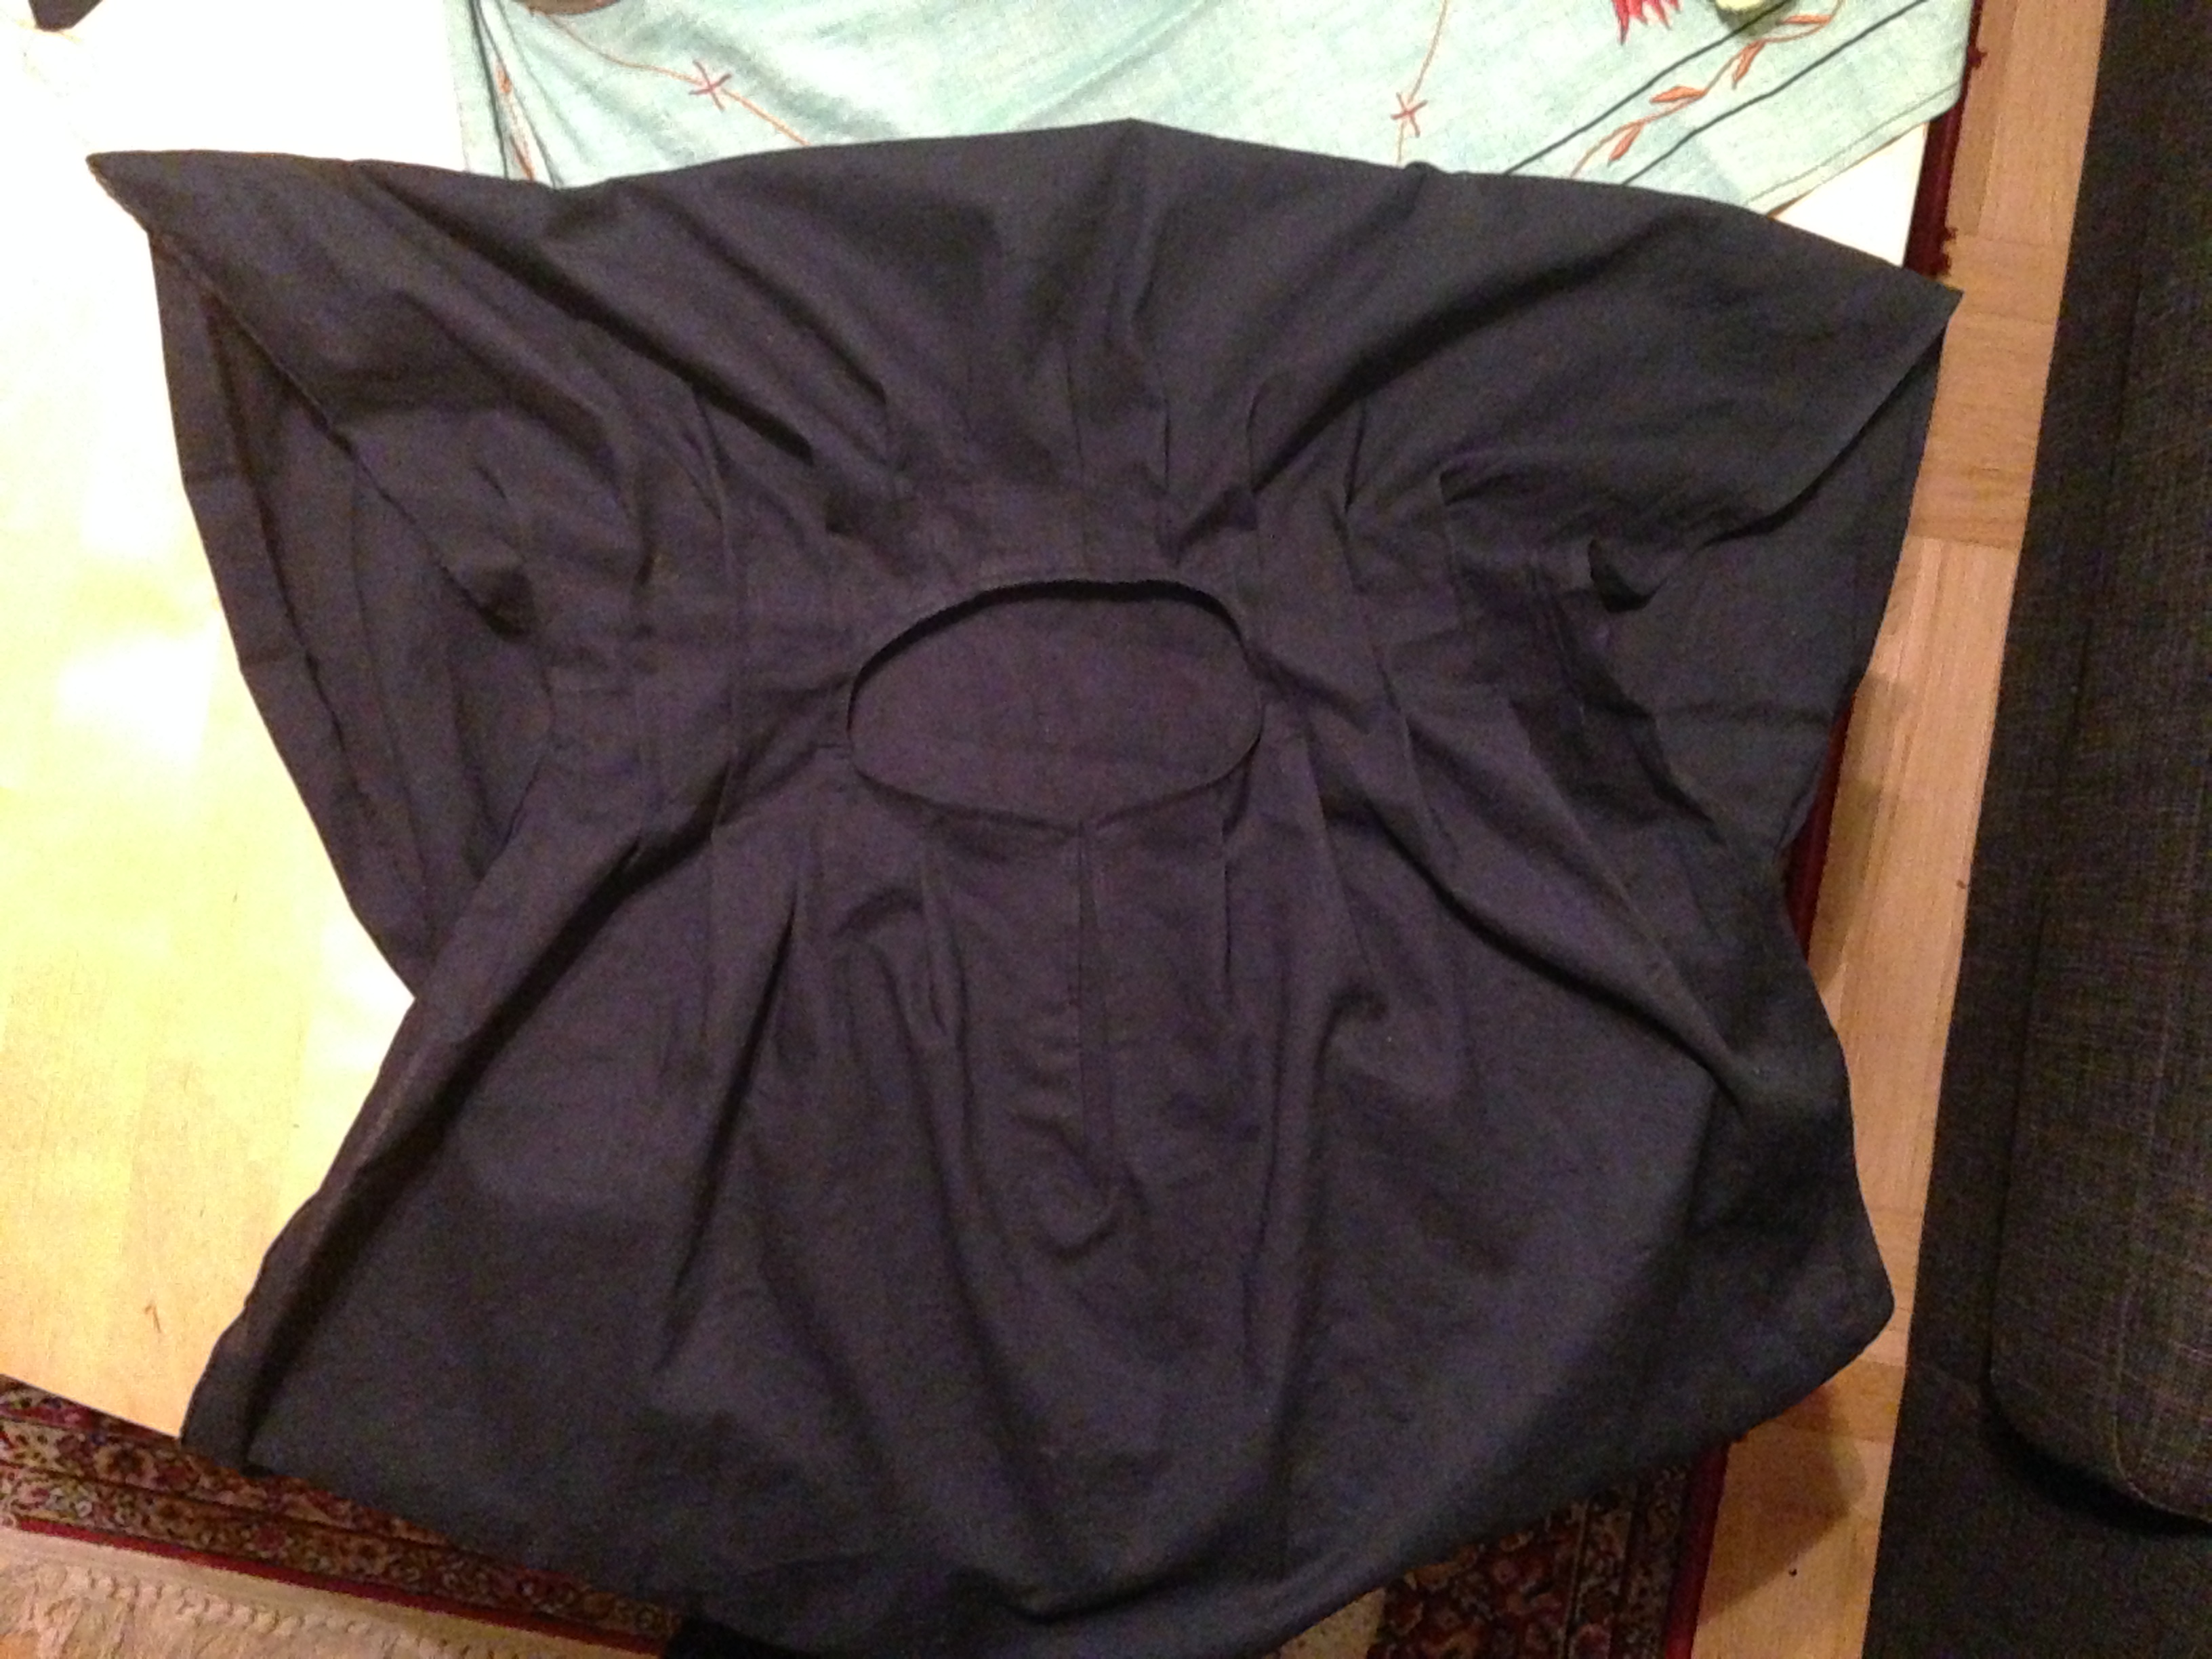
As I did not have enough fabric for following my own pattern, I used the fabric as is seen on the picture to the right. I had to join three pieces for the hood. I tore away threads lenghtwise, in order to give a rugged edge to the hood and arms. At the bottom of the arms, I also shreded the fabric at the bottom by hand. I stitched the front and back together with some few stitches just beneath the armpits.
Eftersom jag inte hade tillräckligt mycket tyg för att följa mitt eget mönster, använde jag tyget som ses på skissen här till höger. Jag skarvade ihop tre bitar till luvan. Jag rev bort trådar för att få kanterna på luvan och ärmarna att se slitna ut. Längst ned på ärmarna rev jag sönder tyget för hand. Jag sydde ihop fram- och bakstycket med några få stygn precis under armålorna.
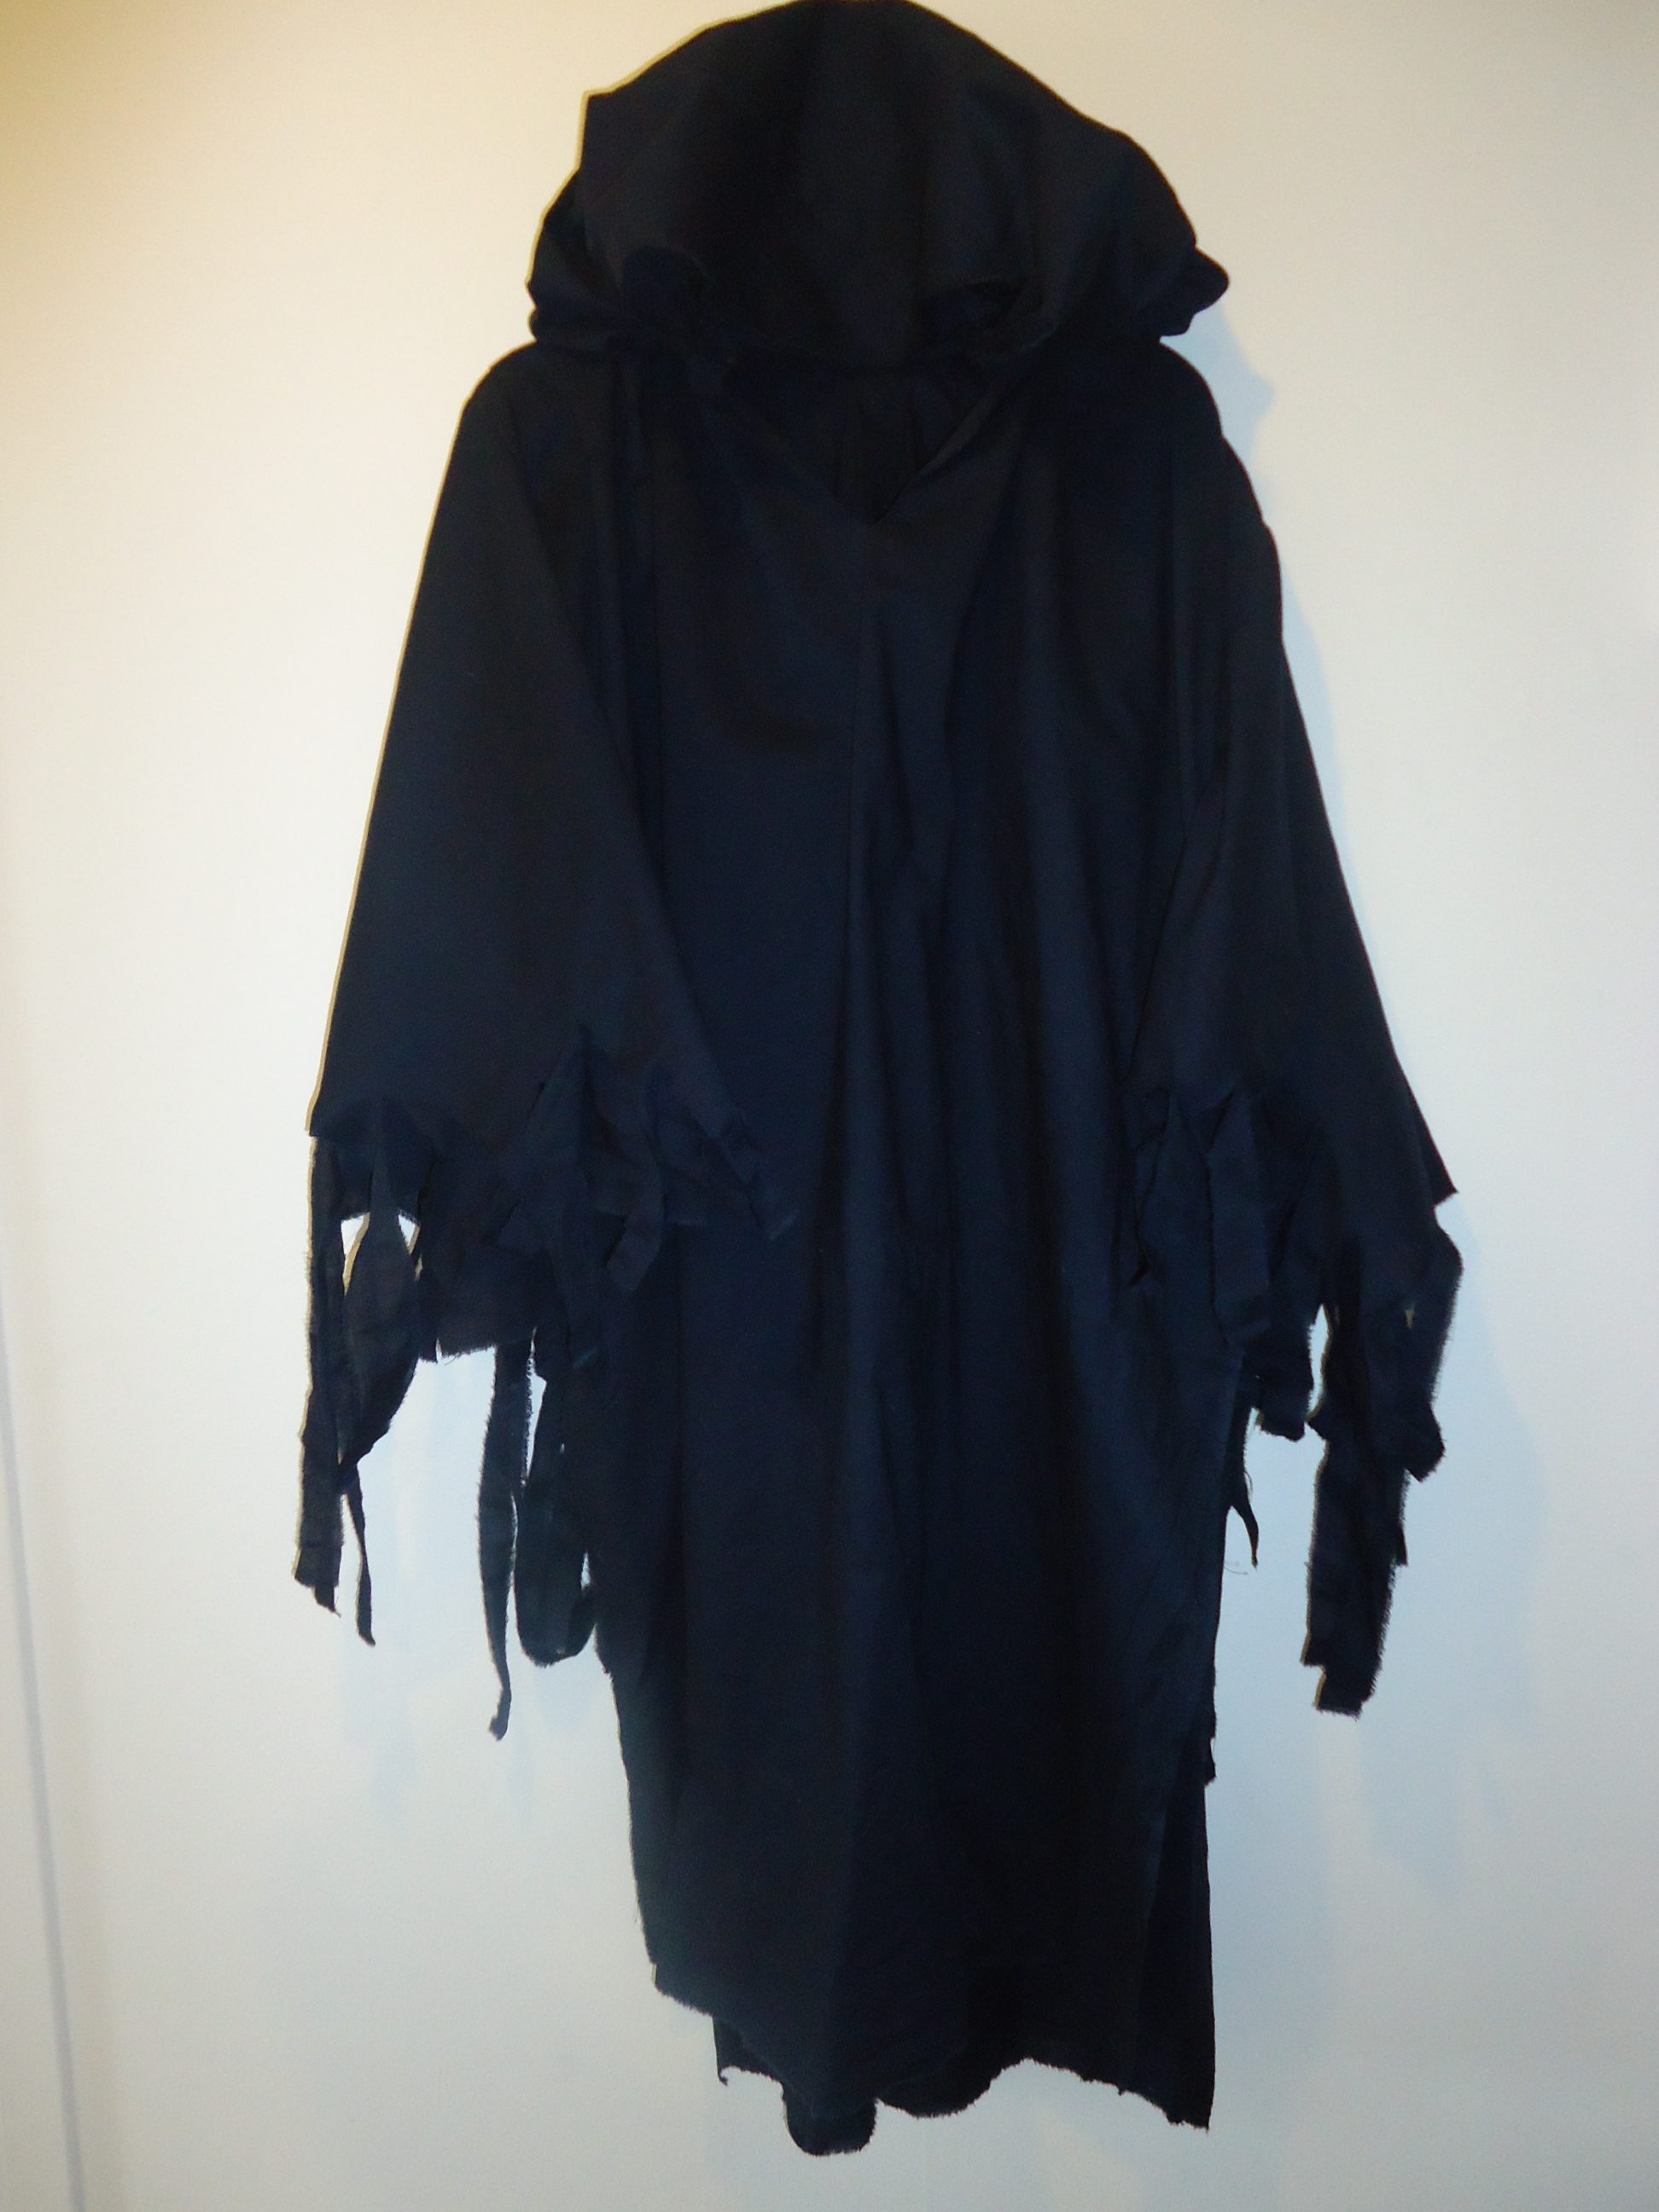
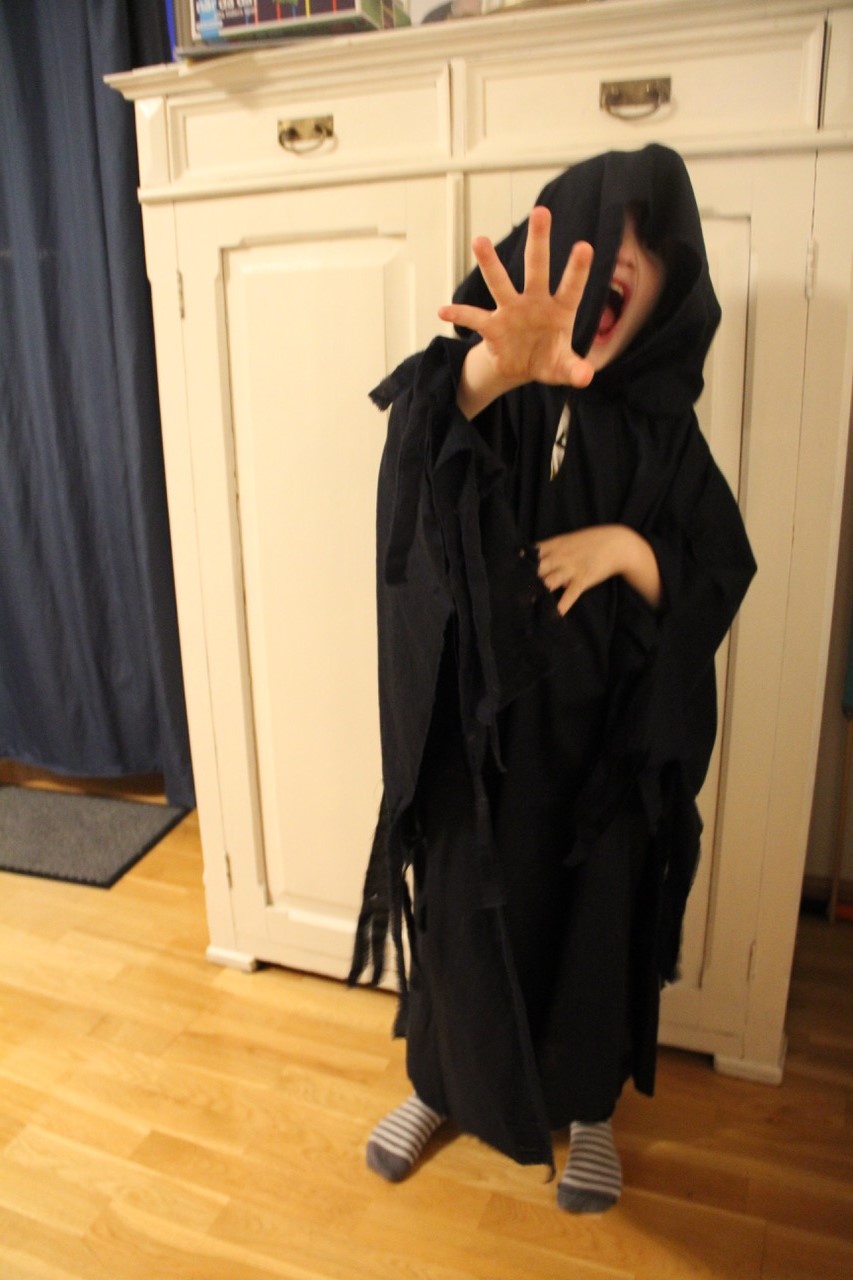
This is how it came out.
Så här såg det ut till slut.
The boy was very pleased with his gift and I believe that I am still his seamstress idol.
Pojken var mycket nöjd med sin present och jag tror att jag fortfarande är hans sömmerske-idol.
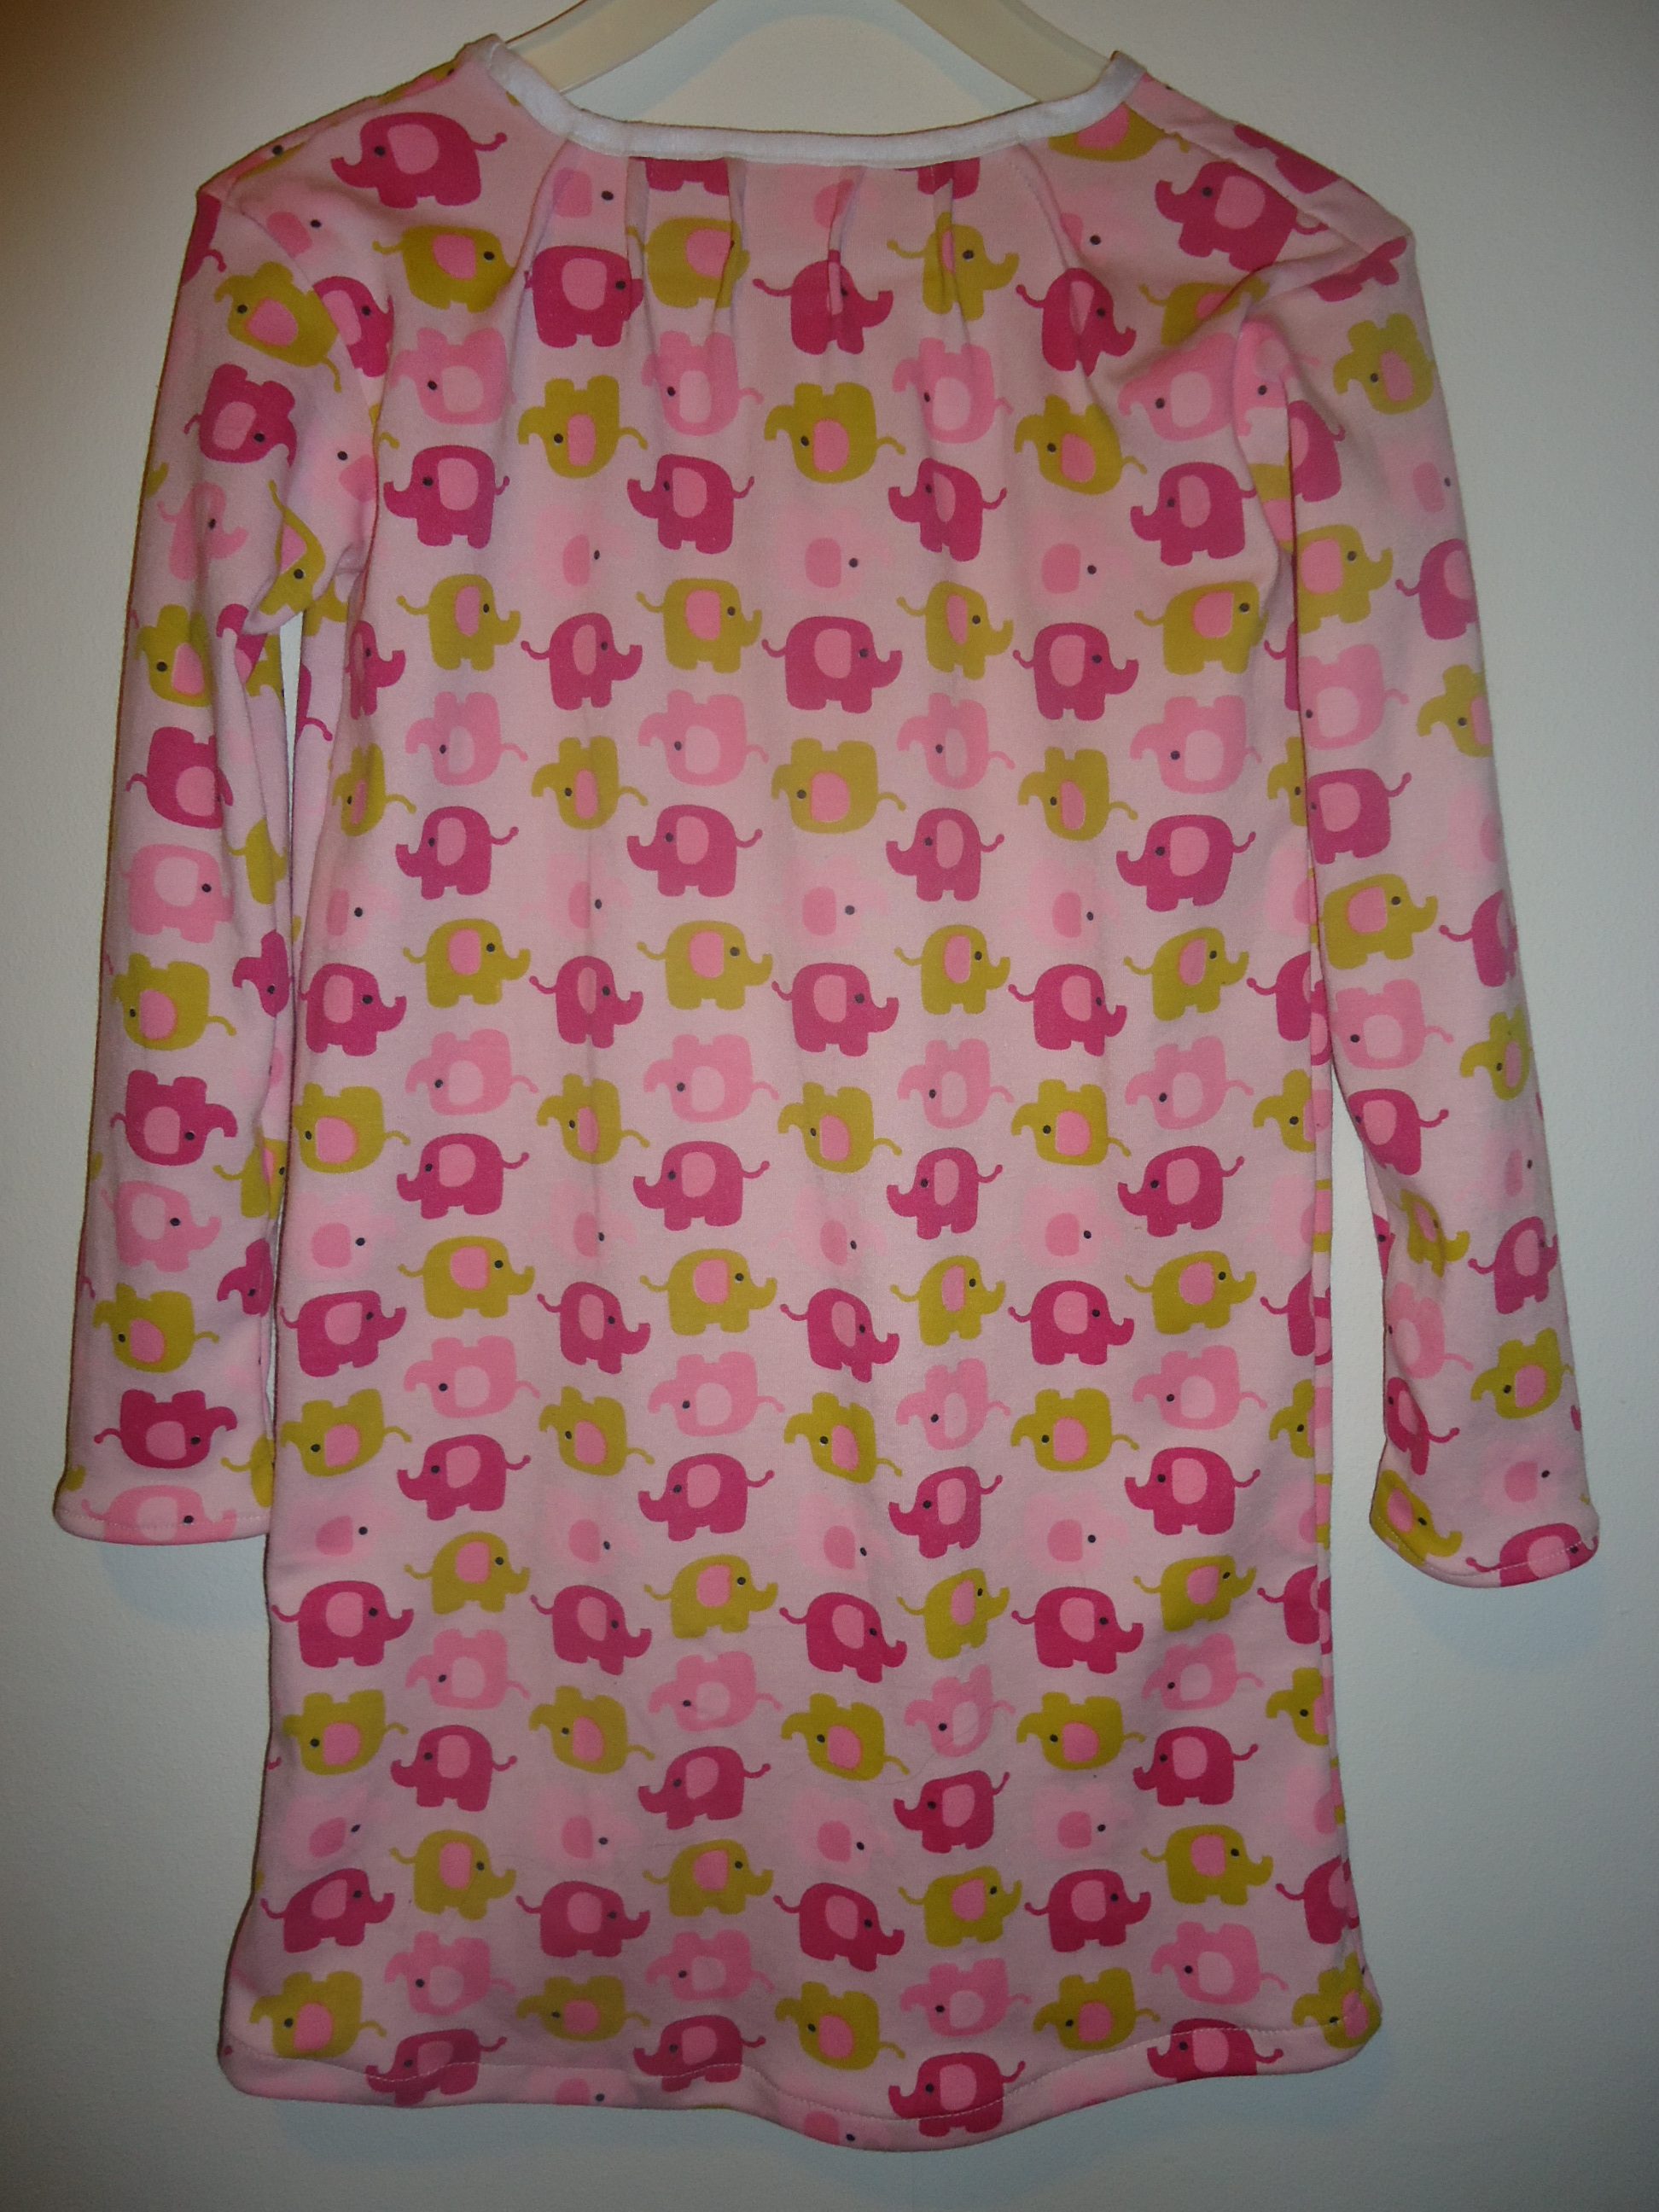
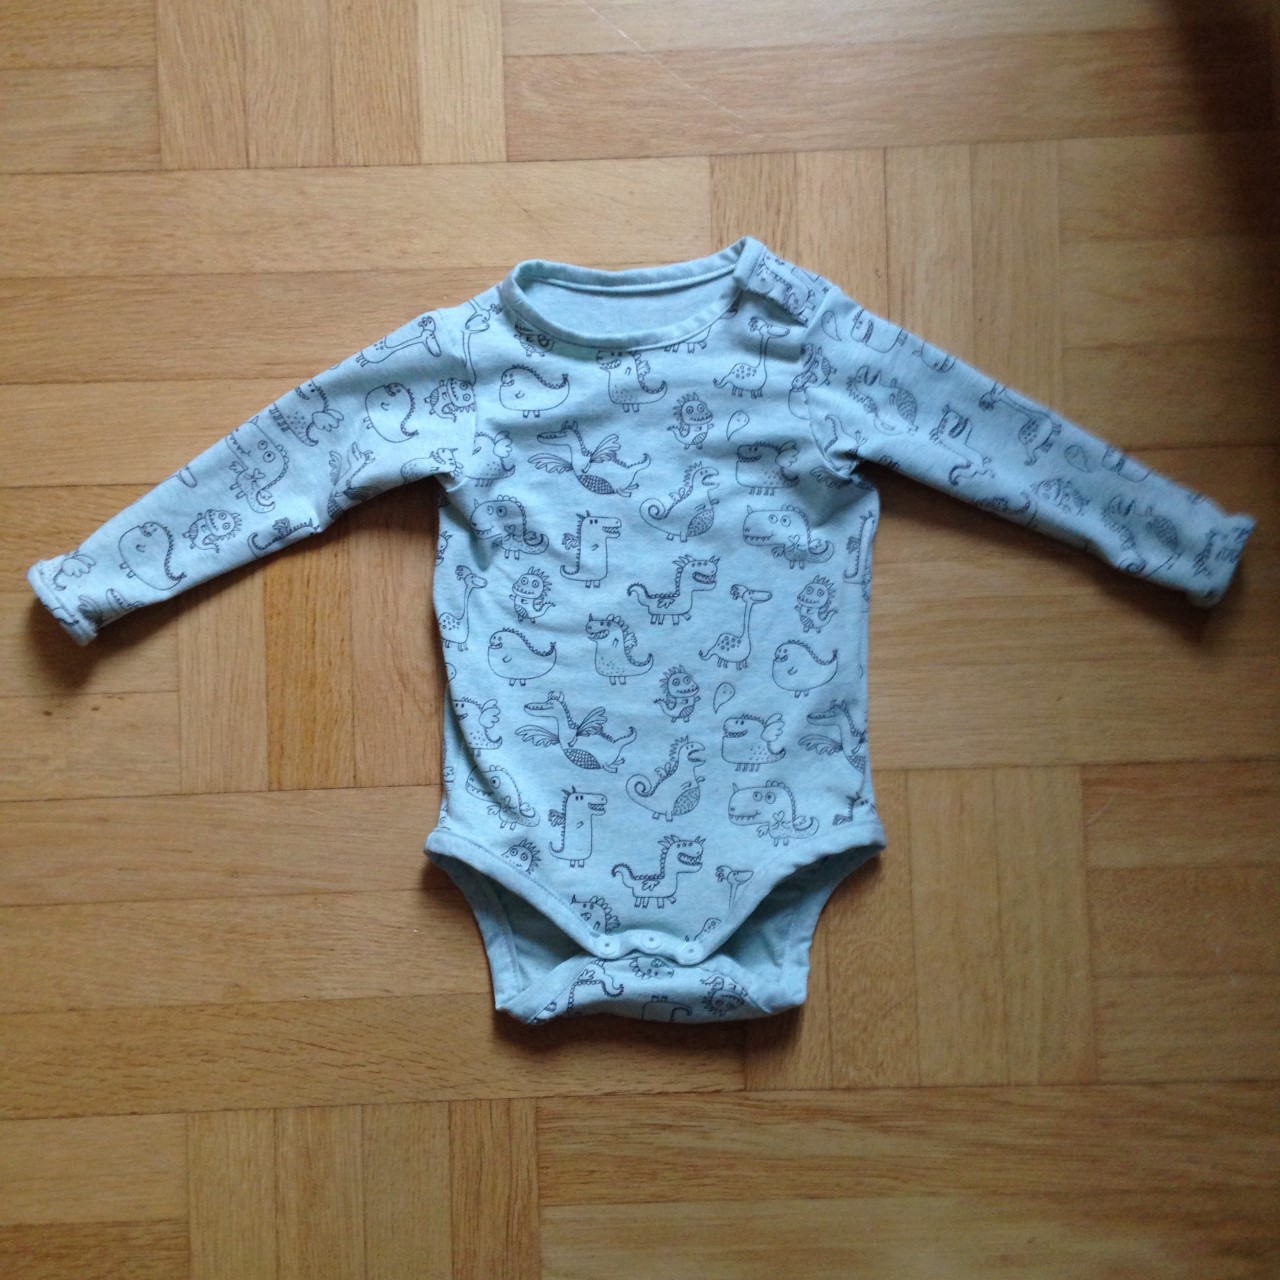
During my pregnancy we bought fabrics for the baby nest and childrens clothes. From these, I have sewn a pajama, a bodysuit that is already too tiny for my big boy and a nightgown for a threeyearold girl. All three were quickly cut out – for the baby clothes I used well fitting clothes as template and for the nightgown, I cut rectangles with standard measurements according to the girls age, with slanting shoulders and a tad more width at the bottom at the skirt than at the waistline. I used the wrong side of the fabric as tape for arms and legs. The push buttons were a bit tricky to attach at sites with many layers of fabric, so I had to sew the bottom of the pajama legs together.
Under graviditeten köpte jag två tyger till nästet och barnkläder. Av dessa tyger har jag nu även sytt en pyjamas, en body, vilken redan är för trång för min stora pojke och ett nattlinne till en treåring. Alla tre plagg klipptes snabbt till – till nattlinnet använde jag mig av rektanglar med standardmått för flickans ålder, med lätt utsvängning av kjoldelen och sluttande axlar, och till min bebis använde välsittande kläder som mall. För att få matchande kantband använde jag mig av avigan på tygerna. Tryckknapparna var lite knepiga att fästa där det var många tyglager att tränga igenom, så jag var tvungen att istället sy ihop nedre delen av pyjamasbenen.
Over all, I am happy with the result. My boy has slept well in the pajama and the girl seems to be happy for the nightgown. Off course, I would rather have made the bodysuit big enough for him to use more than once, but now I have learnt always to add a lot of fabric in order to fit this little giant.
Jag är i stort sett nöjd med resultatet. Min bebis har sovit gott i sin pyjamas och flickan verkar vara glad för sitt nattlinne. Det är så klart retligt bodyn blev för liten, men nu har jag lärt mig att jag alltid ska plussa på rejält för att det ska passa detta lilla matvrak.
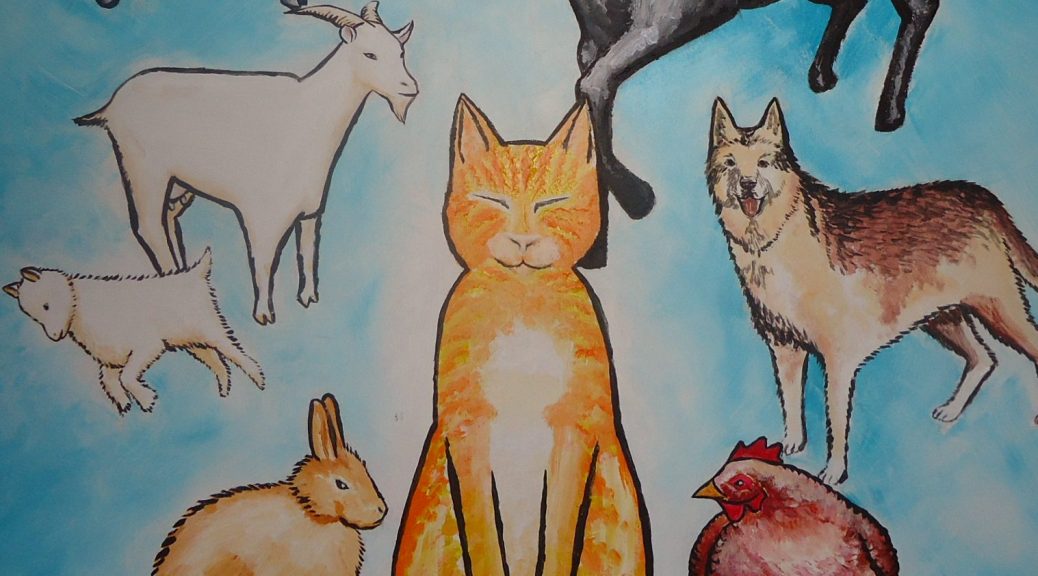
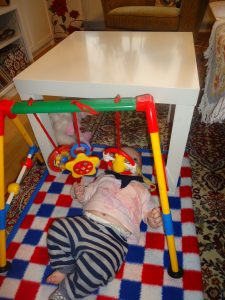
As we noticed that our baby was the happiest when laying on the changing table underneath the shelf that I painted for him, my husband suggested that I should paint something movable, so that we could hang out with our baby at other places than just in the bathroom. Said and done – we bought a small IKEA table in our local second hand shop. It was not painted underneath, so I had to put a white layer of paint first. I googled the cute animals that you see on the picture. Unfortunately, so many things came in between, that I could only paint one body part at a time and was not able to finish the table until this week. The baby likes it, but does not communicate with the animals as he did with the shelf animals when he was younger.
I början var vår bebis gladast när han fick ligga på skötbordet, under hyllan som jag målade åt honom. Därfr föreslog min man att jag skulle måla något motsvarande på en flyttbar möbel. Sagt och gjort – vi köpte ett litet IKEA-bord i second hand-affären. Undersidan var obehandlad, så jag fick börja med att måla den vit. Jag googlade fram några söta djur, som du ser på bilden. Tyvärr kom så mycket i vägen för detta projekt att det blev färdigt frst denna vecka. Bebisen gillar djuren, men han pratar inte med dem, så som han gjorde med djuren på hyllan när han var yngre.
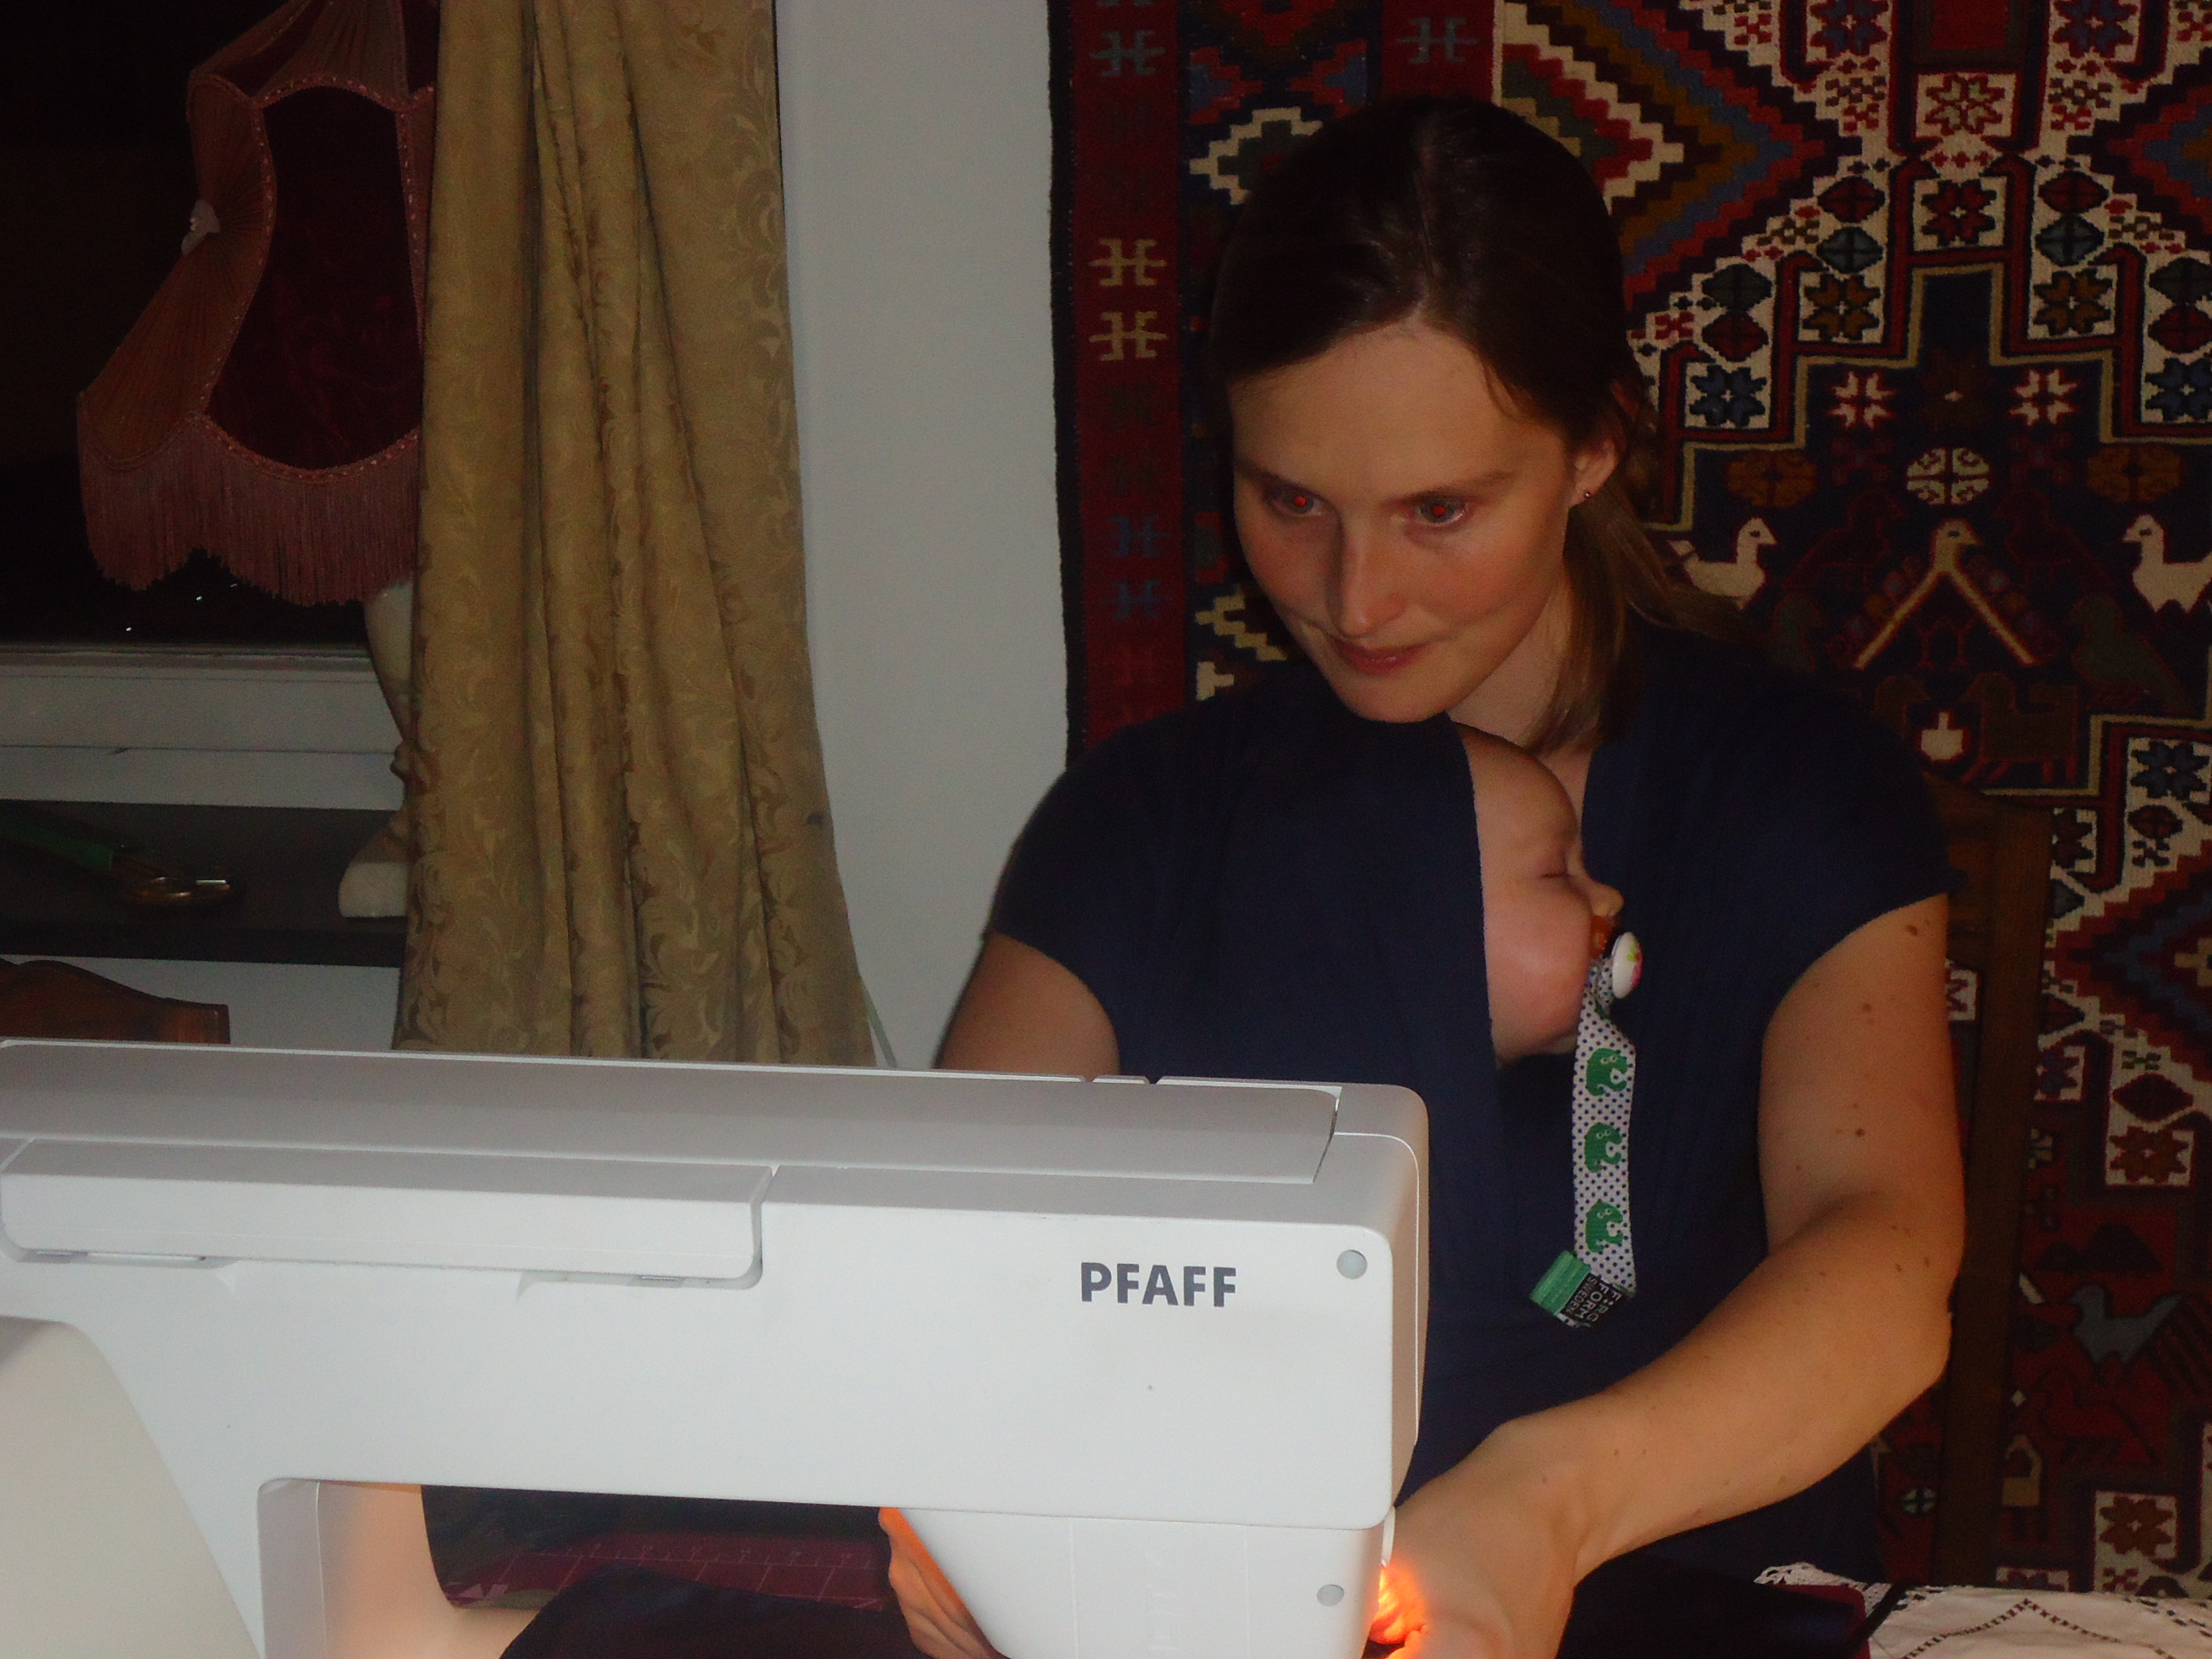
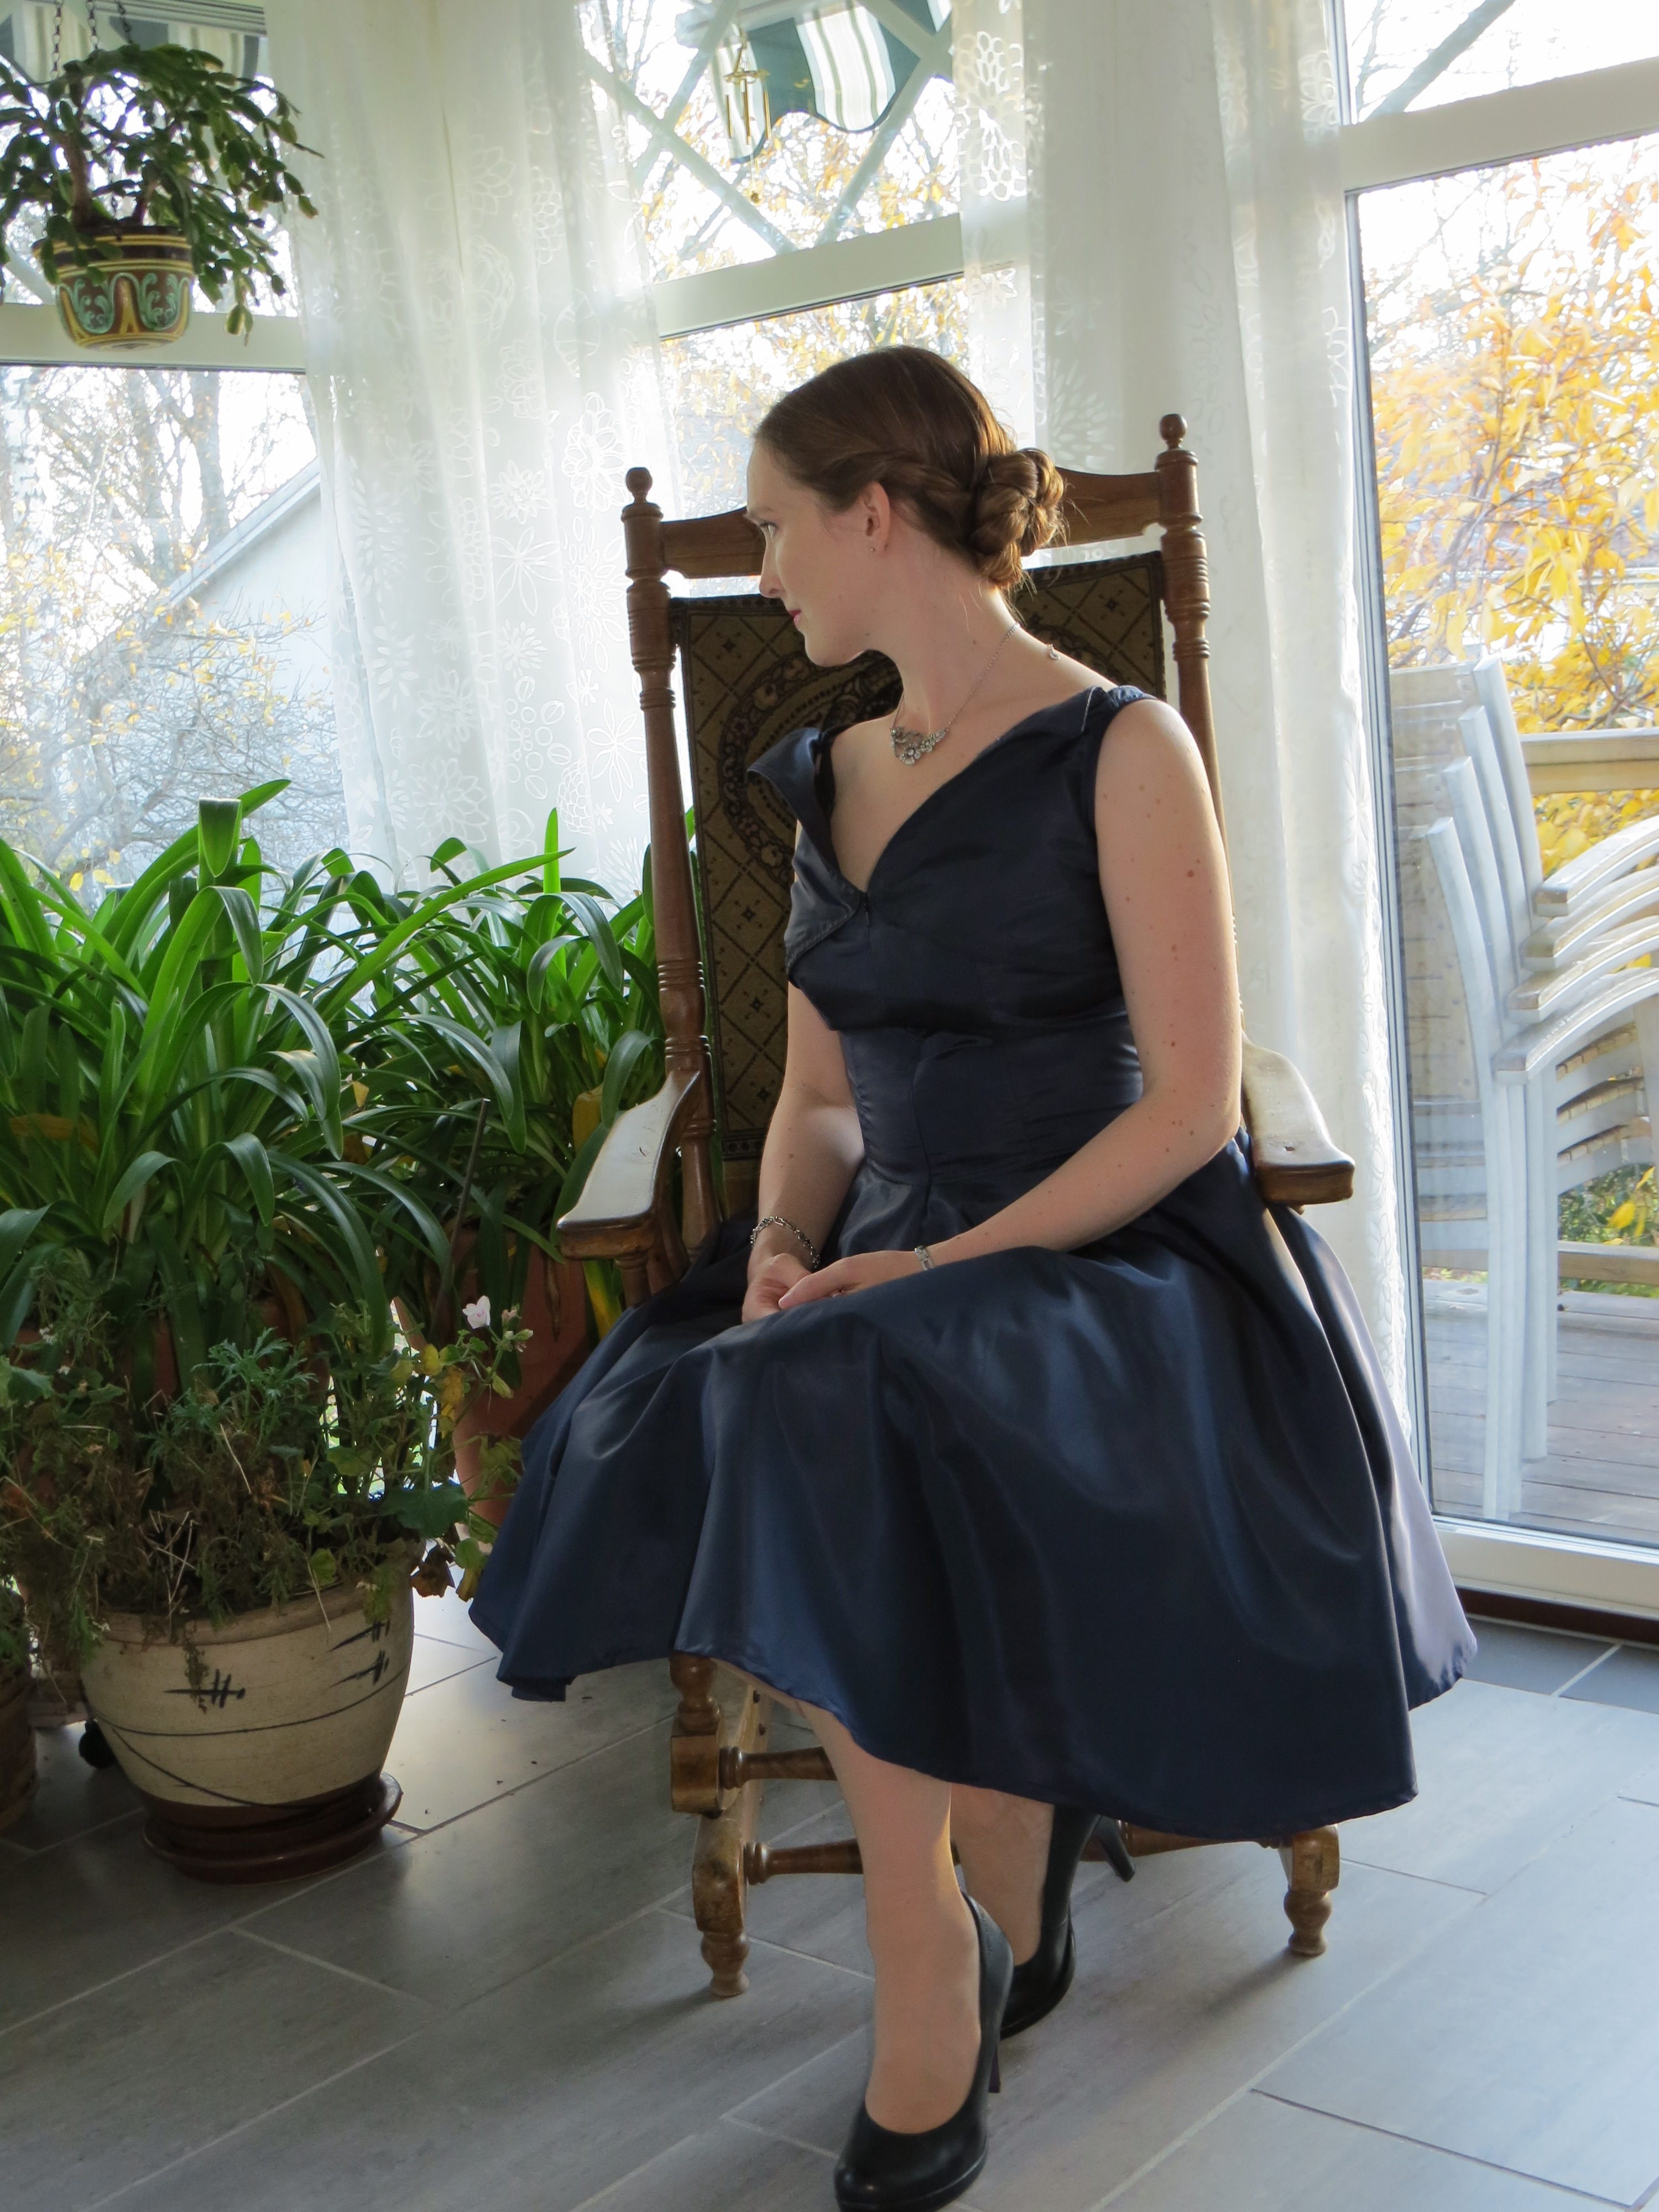
My dear mother turned 60 years old this weekend and threw a big party. Since she has been so kind as to buy dresses from me and then proudly has shown them to the world, I felt that it would be sad to show up in the ragged clothes I otherwise use while nursing my baby. For her sake, I really wanted to make something pretty. Luckily, for the first time in months, I actually had both time and energy for sewing something for myself! Sewing with the baby asleep in the slen, I was able to make this dress in one week, in about five hours. I fitted it two times. When I removed the dress from the dress form for the last time, the dress form broke! I am happy it held together for the whole construction process.
I helgen fyllde min kära mamma sextio år och hade ett stort kalas. Eftersom hon har varit så snäll och låtit mig designa och sy klänningar åt henne, som hon har betalat för och visat upp för omvärlden, kände jag att det skulle vara tråkigt att komma till festen iklädd de slitna kläder som jag annars använder under amningen. För hennes skull ville jag sy något fint. Turligt nog fick jag faktiskt både tid och energi till att sy åt mig själv, för första gången på flera månader. Jag passade på att sy medan bebisen sov i bärsjalen och hann sy färdigt klänningen på en vecka, kanske sammanlagt fem timmar. Jag provade klänningen två gånger. När jag tog av den från provdockan sista gången, gick provdockan sönder! Jag är dock tacksam att den höll under hela konstruktionsprocessen.
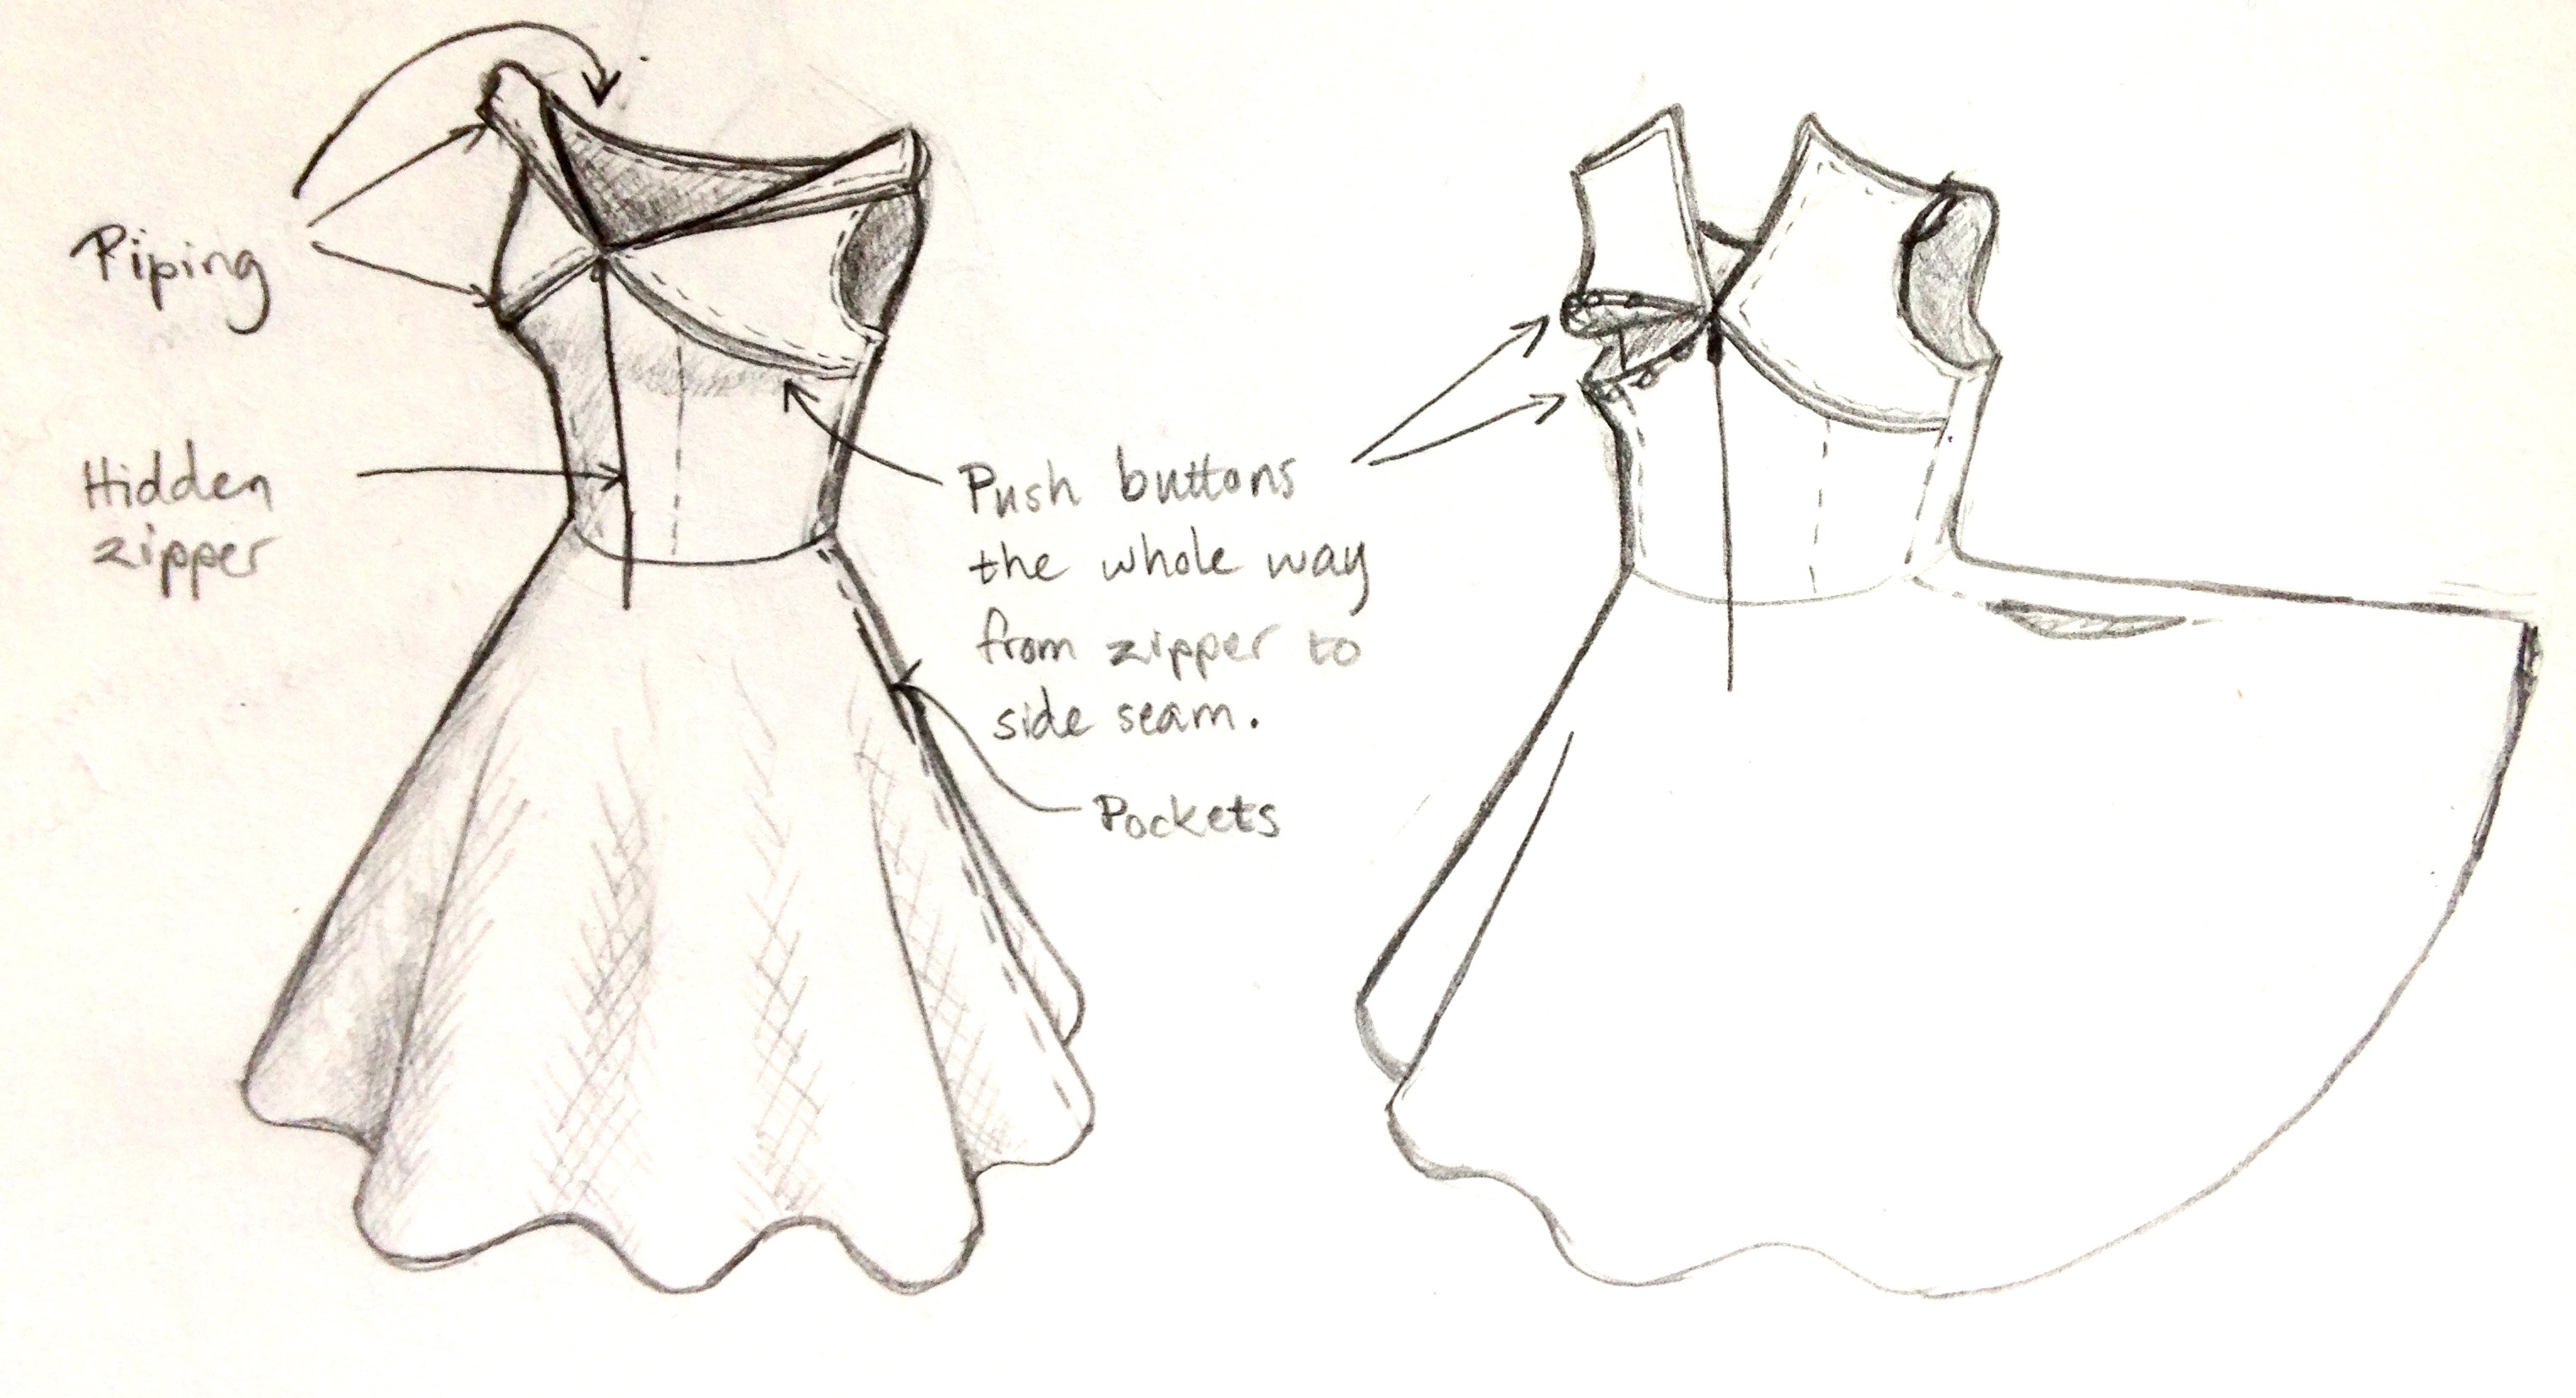
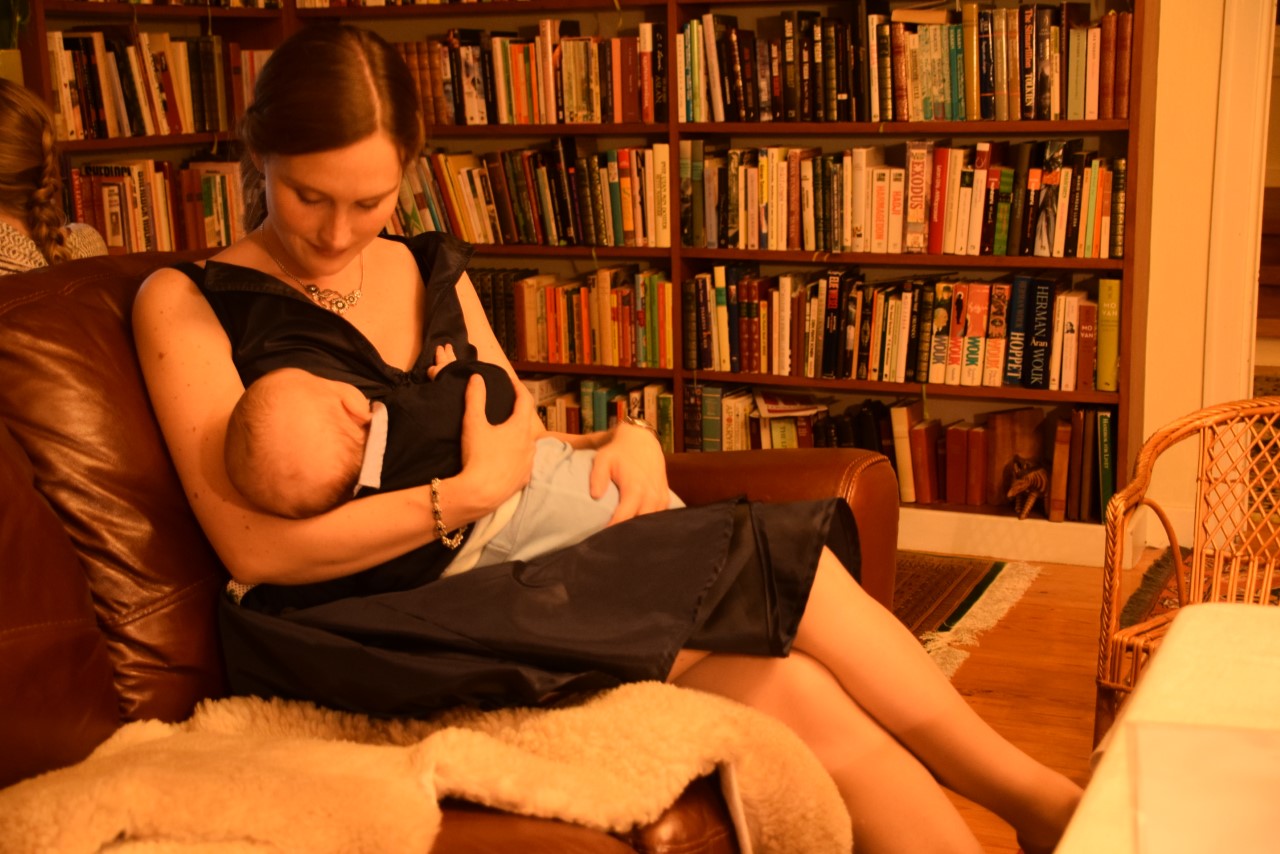
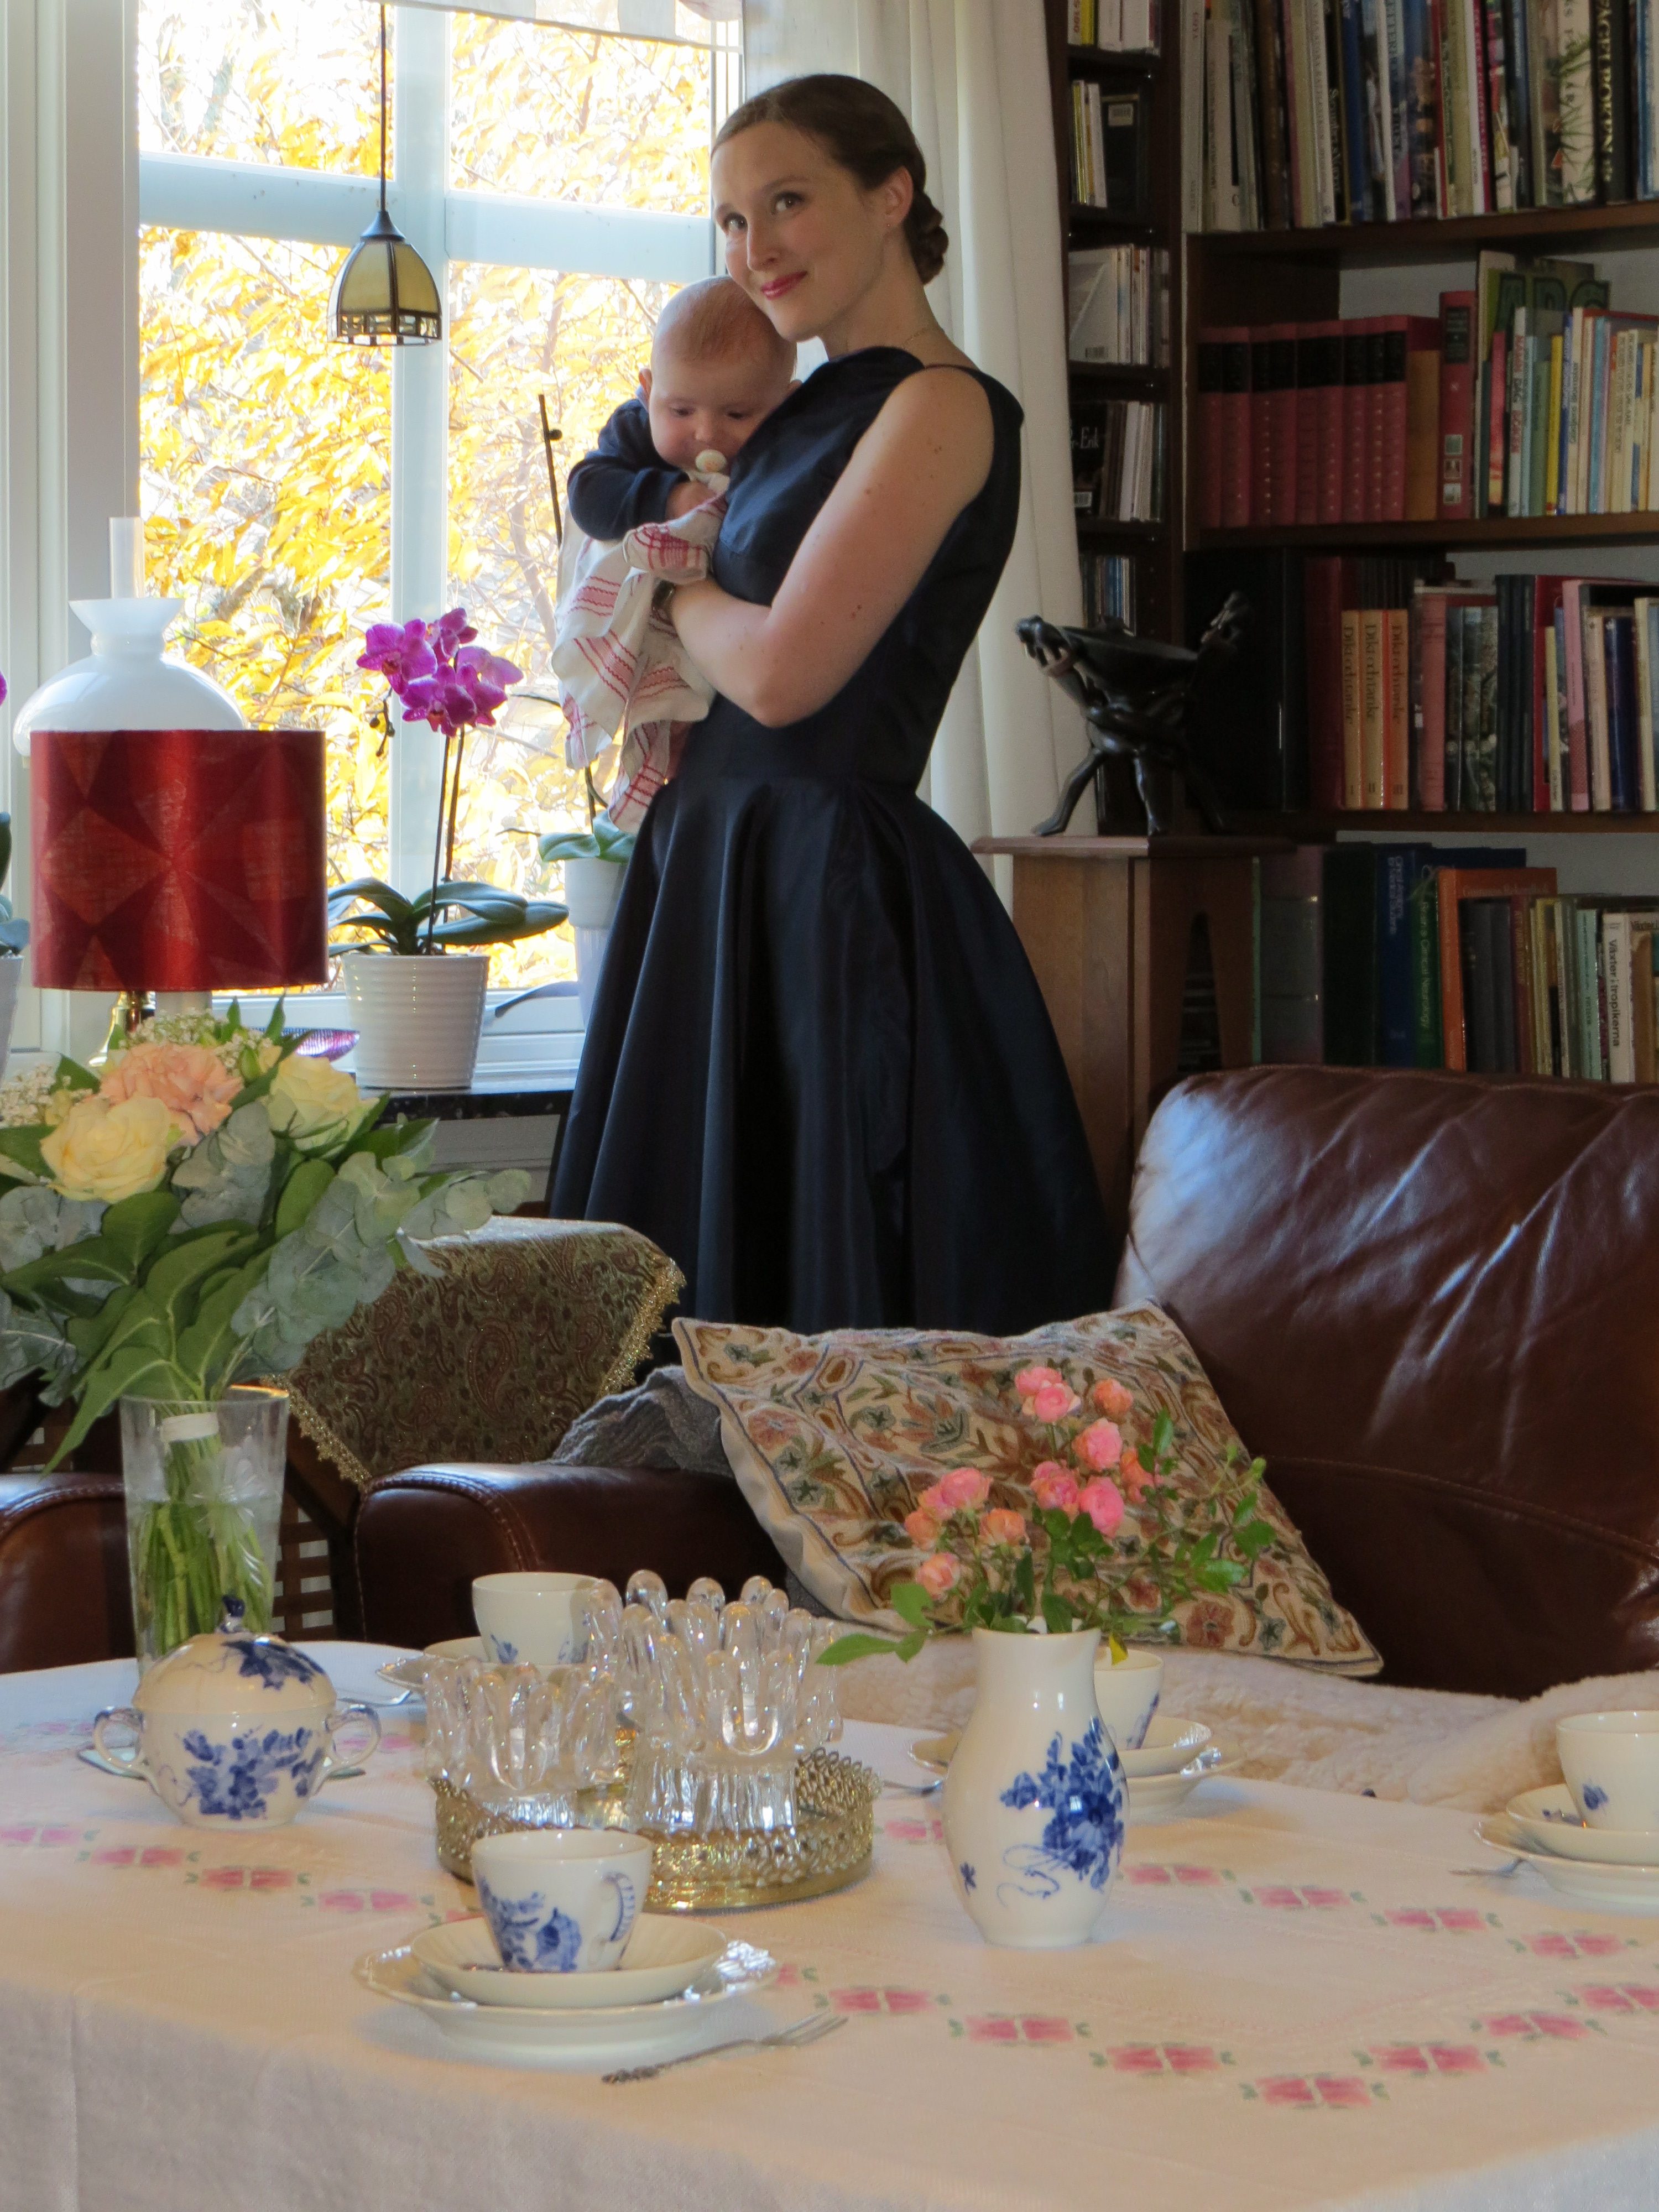
Some years ago, I designed this nursing dress for a friend. It closes in the front and has openings over the bust, closed with push buttons. Afterwards I have understood that the bust openings would have been more practical if they were wider and placed over the apex of the bust.
För några år sedan designade jag den hör amningsklänningen åt en vän. Den stängs mitt fram och har amningsluckor över bysten, som stängs med tryckknappar. Efteråt har jag förstått att amningsluckorna skulle vara mycket mera praktiska om de var vidare och placerade mitt över bystens högsta punkt.
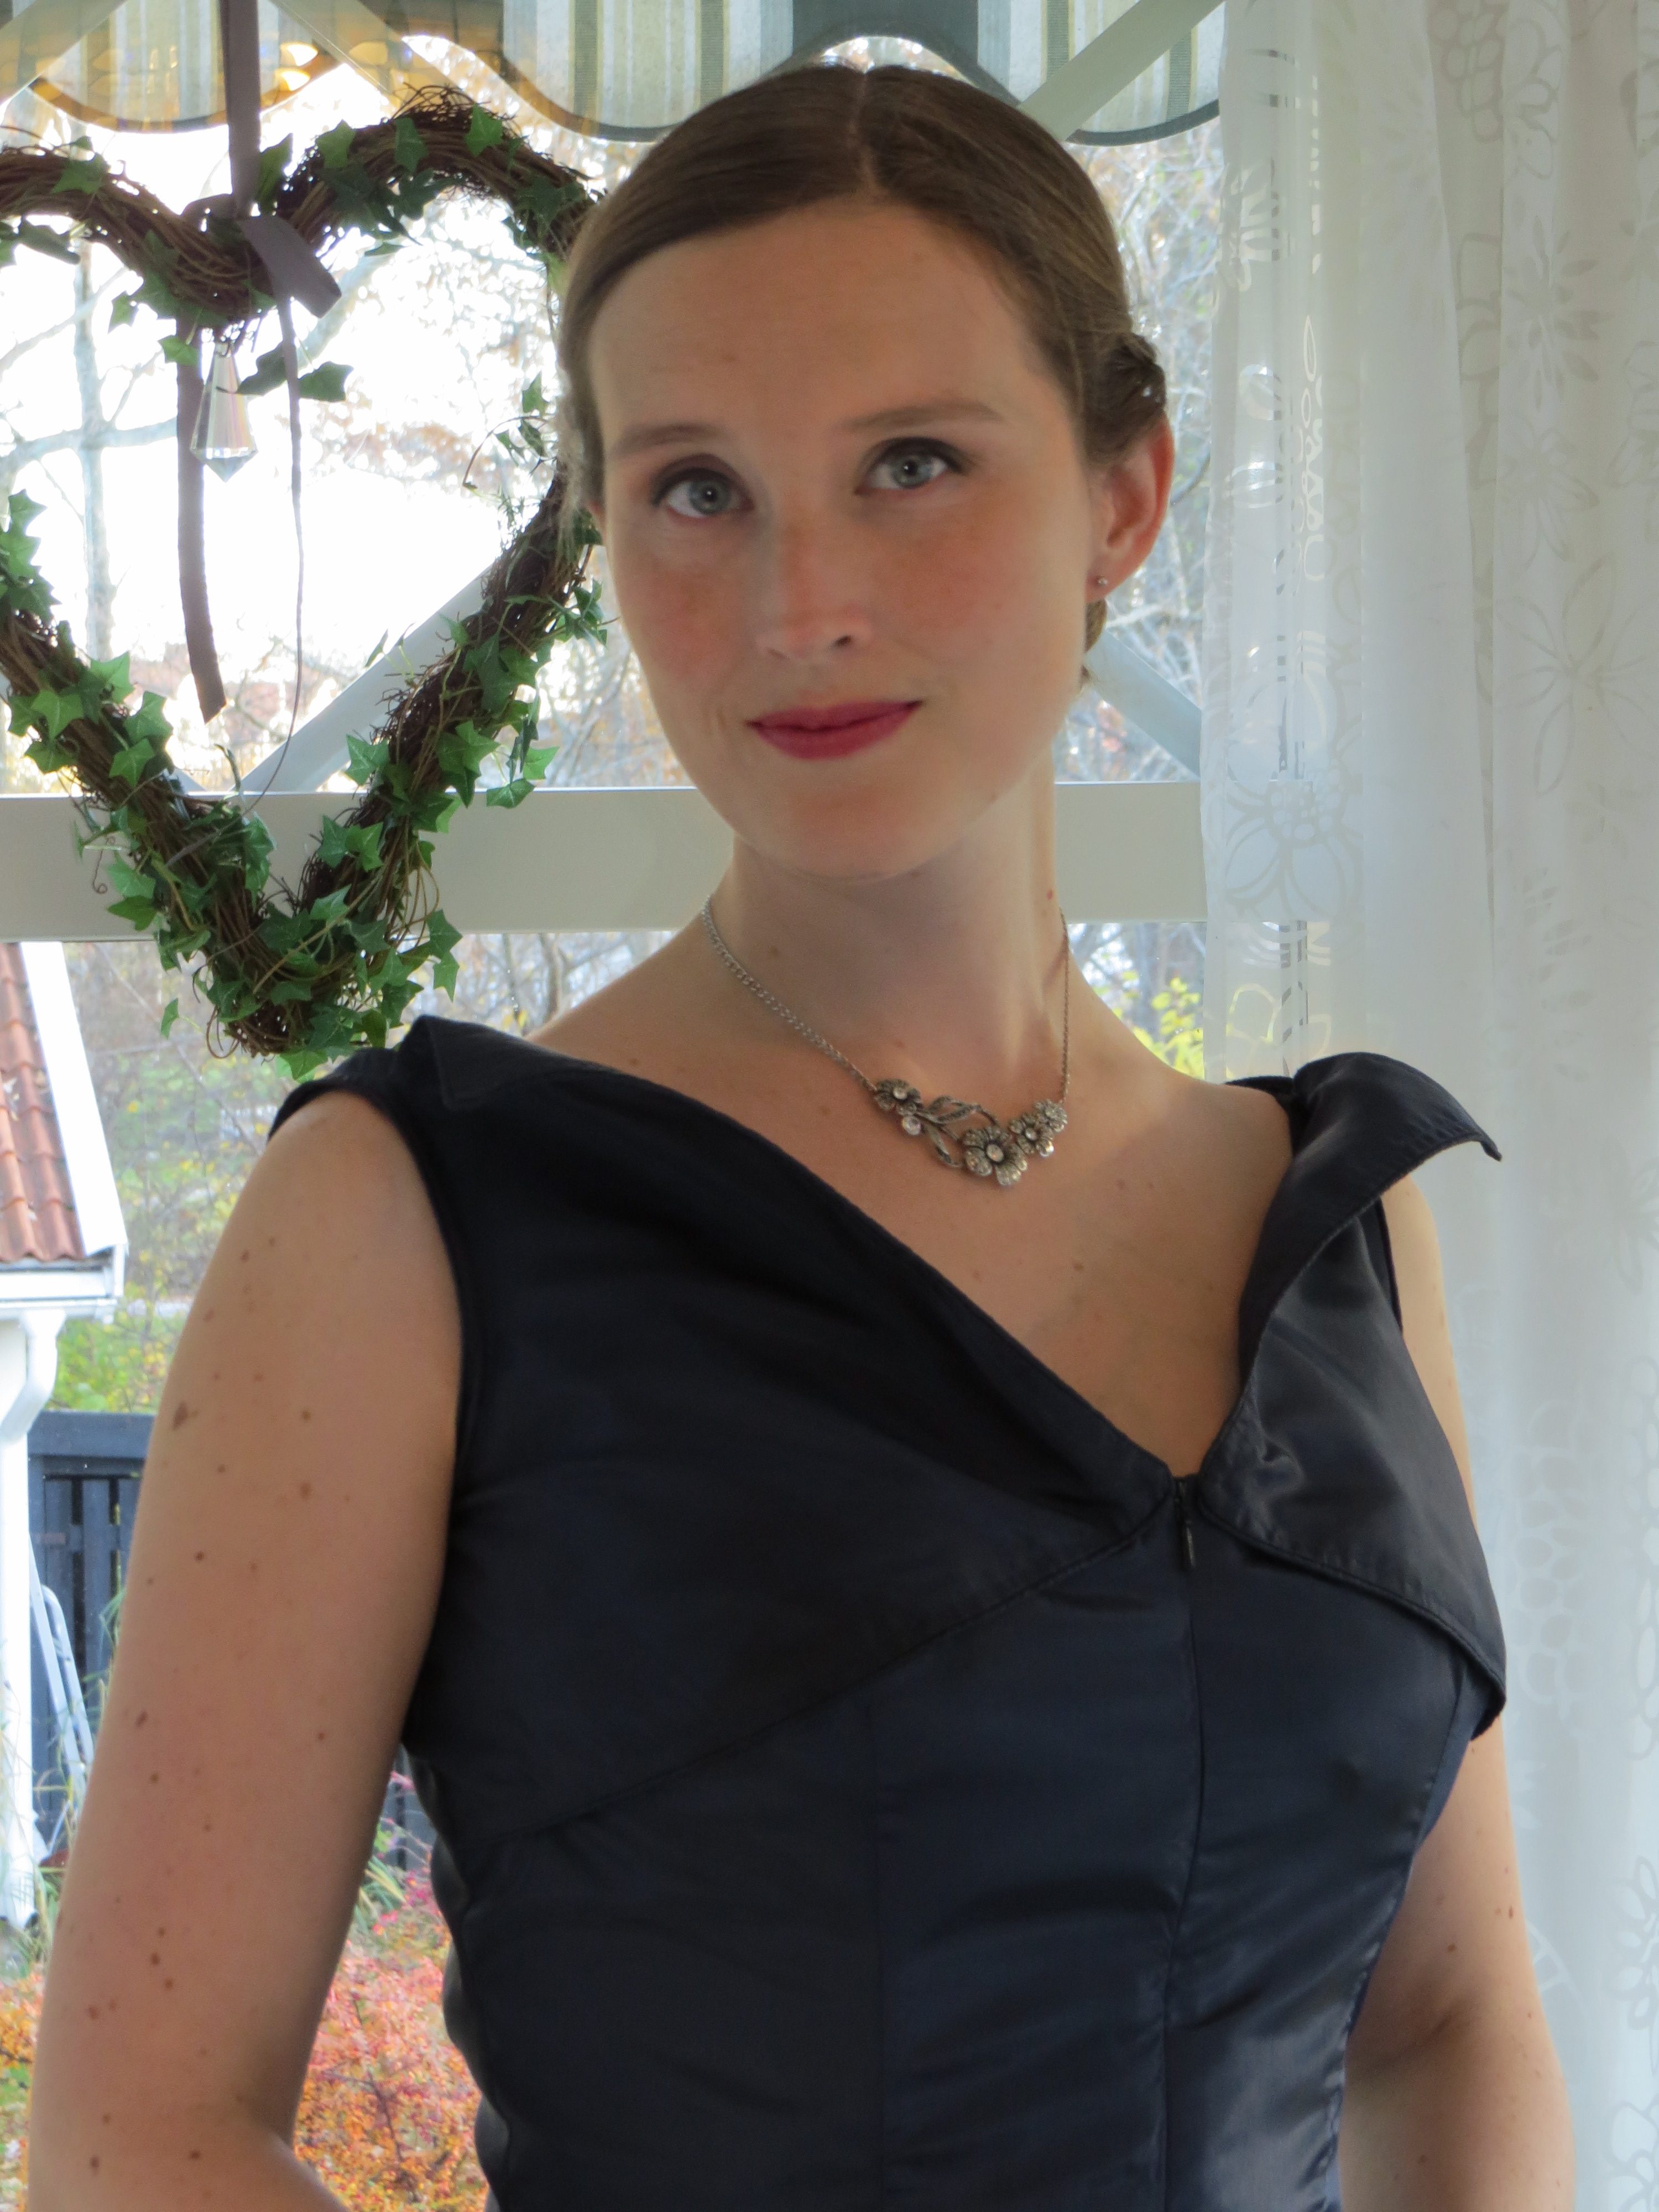
I used this pattern, made the improvements mentioned above and adapted the model for this festive occasion. I wanted something fancy and thought about making bare shoulders. While nursing, though, I find strapless bras very inconvenient, so I used tiny shoulder straps, almost off shoulder. As always, I kept next year’s competition of Your Wardrobe Unlocked in mind – this time with the theme of insects – and was inspired by beautiful blue mint beetles. I had just the right fabric for this, the left overs from my regency gown.
Jag använde detta mönster, gjorde de förbättringar som jag nämnde ovanför och ändrade modellen för att passa till kalaset. Jag ville ha något festligt och övervägde att göra klänningen axelbandslös, men insåg att detta inte skulle gå att lösa om jag ville använda amnings-BH. Som vanligt hade jag även Your Wardrobe Unlocked-tävlingen i åtanke – nästa års tävling har insekter som tema – och inspirerades av blå skalbaggar. Jag hade ju ett tyg i precis rätt nyans, som blivit över efter en empirklänning.
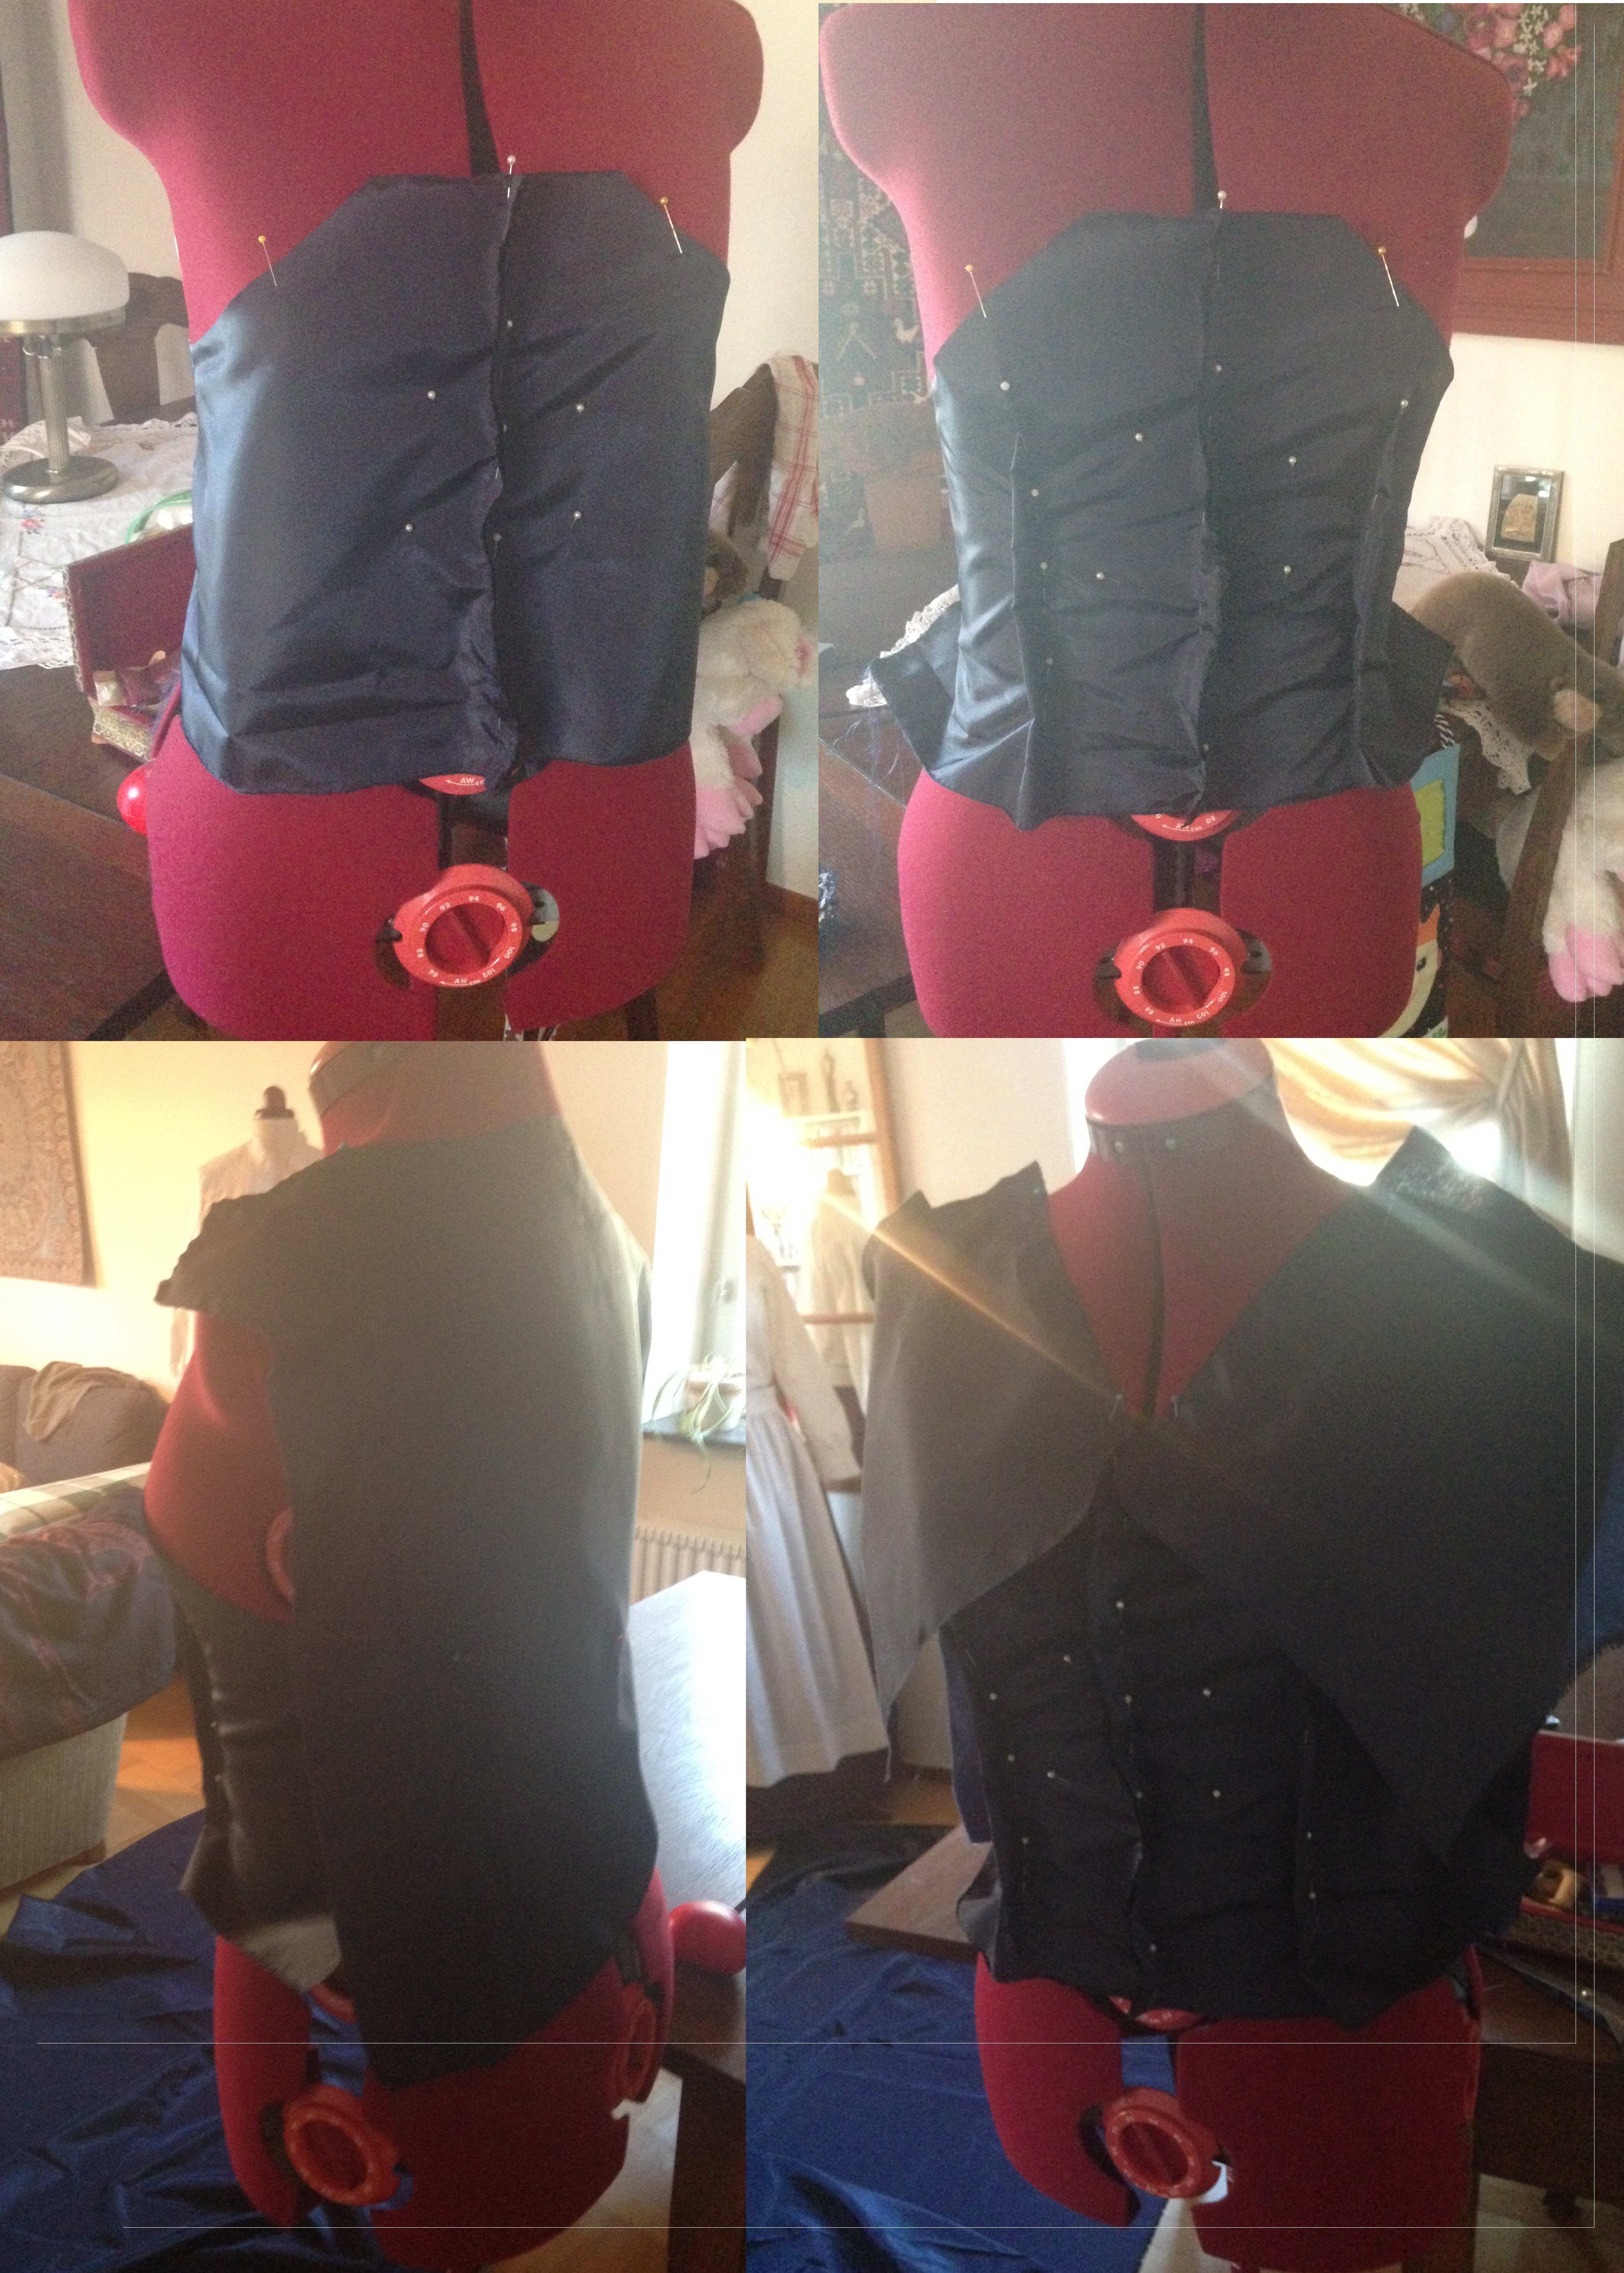
As my friend and I have similar shape on the torso, I did not change the pattern, but cut the fashion fabric with broad seam allowances. Then I draped it on the dress form to make it fit my body.
Eftersom jag och min vän har liknande kroppsform upptill, behövde jag inte ändra på mönstret, utan klippte bara till tygbitarna med extra bred sömsmån. Sedan draperade jag dem på provdockan för att fixa min egen passform.
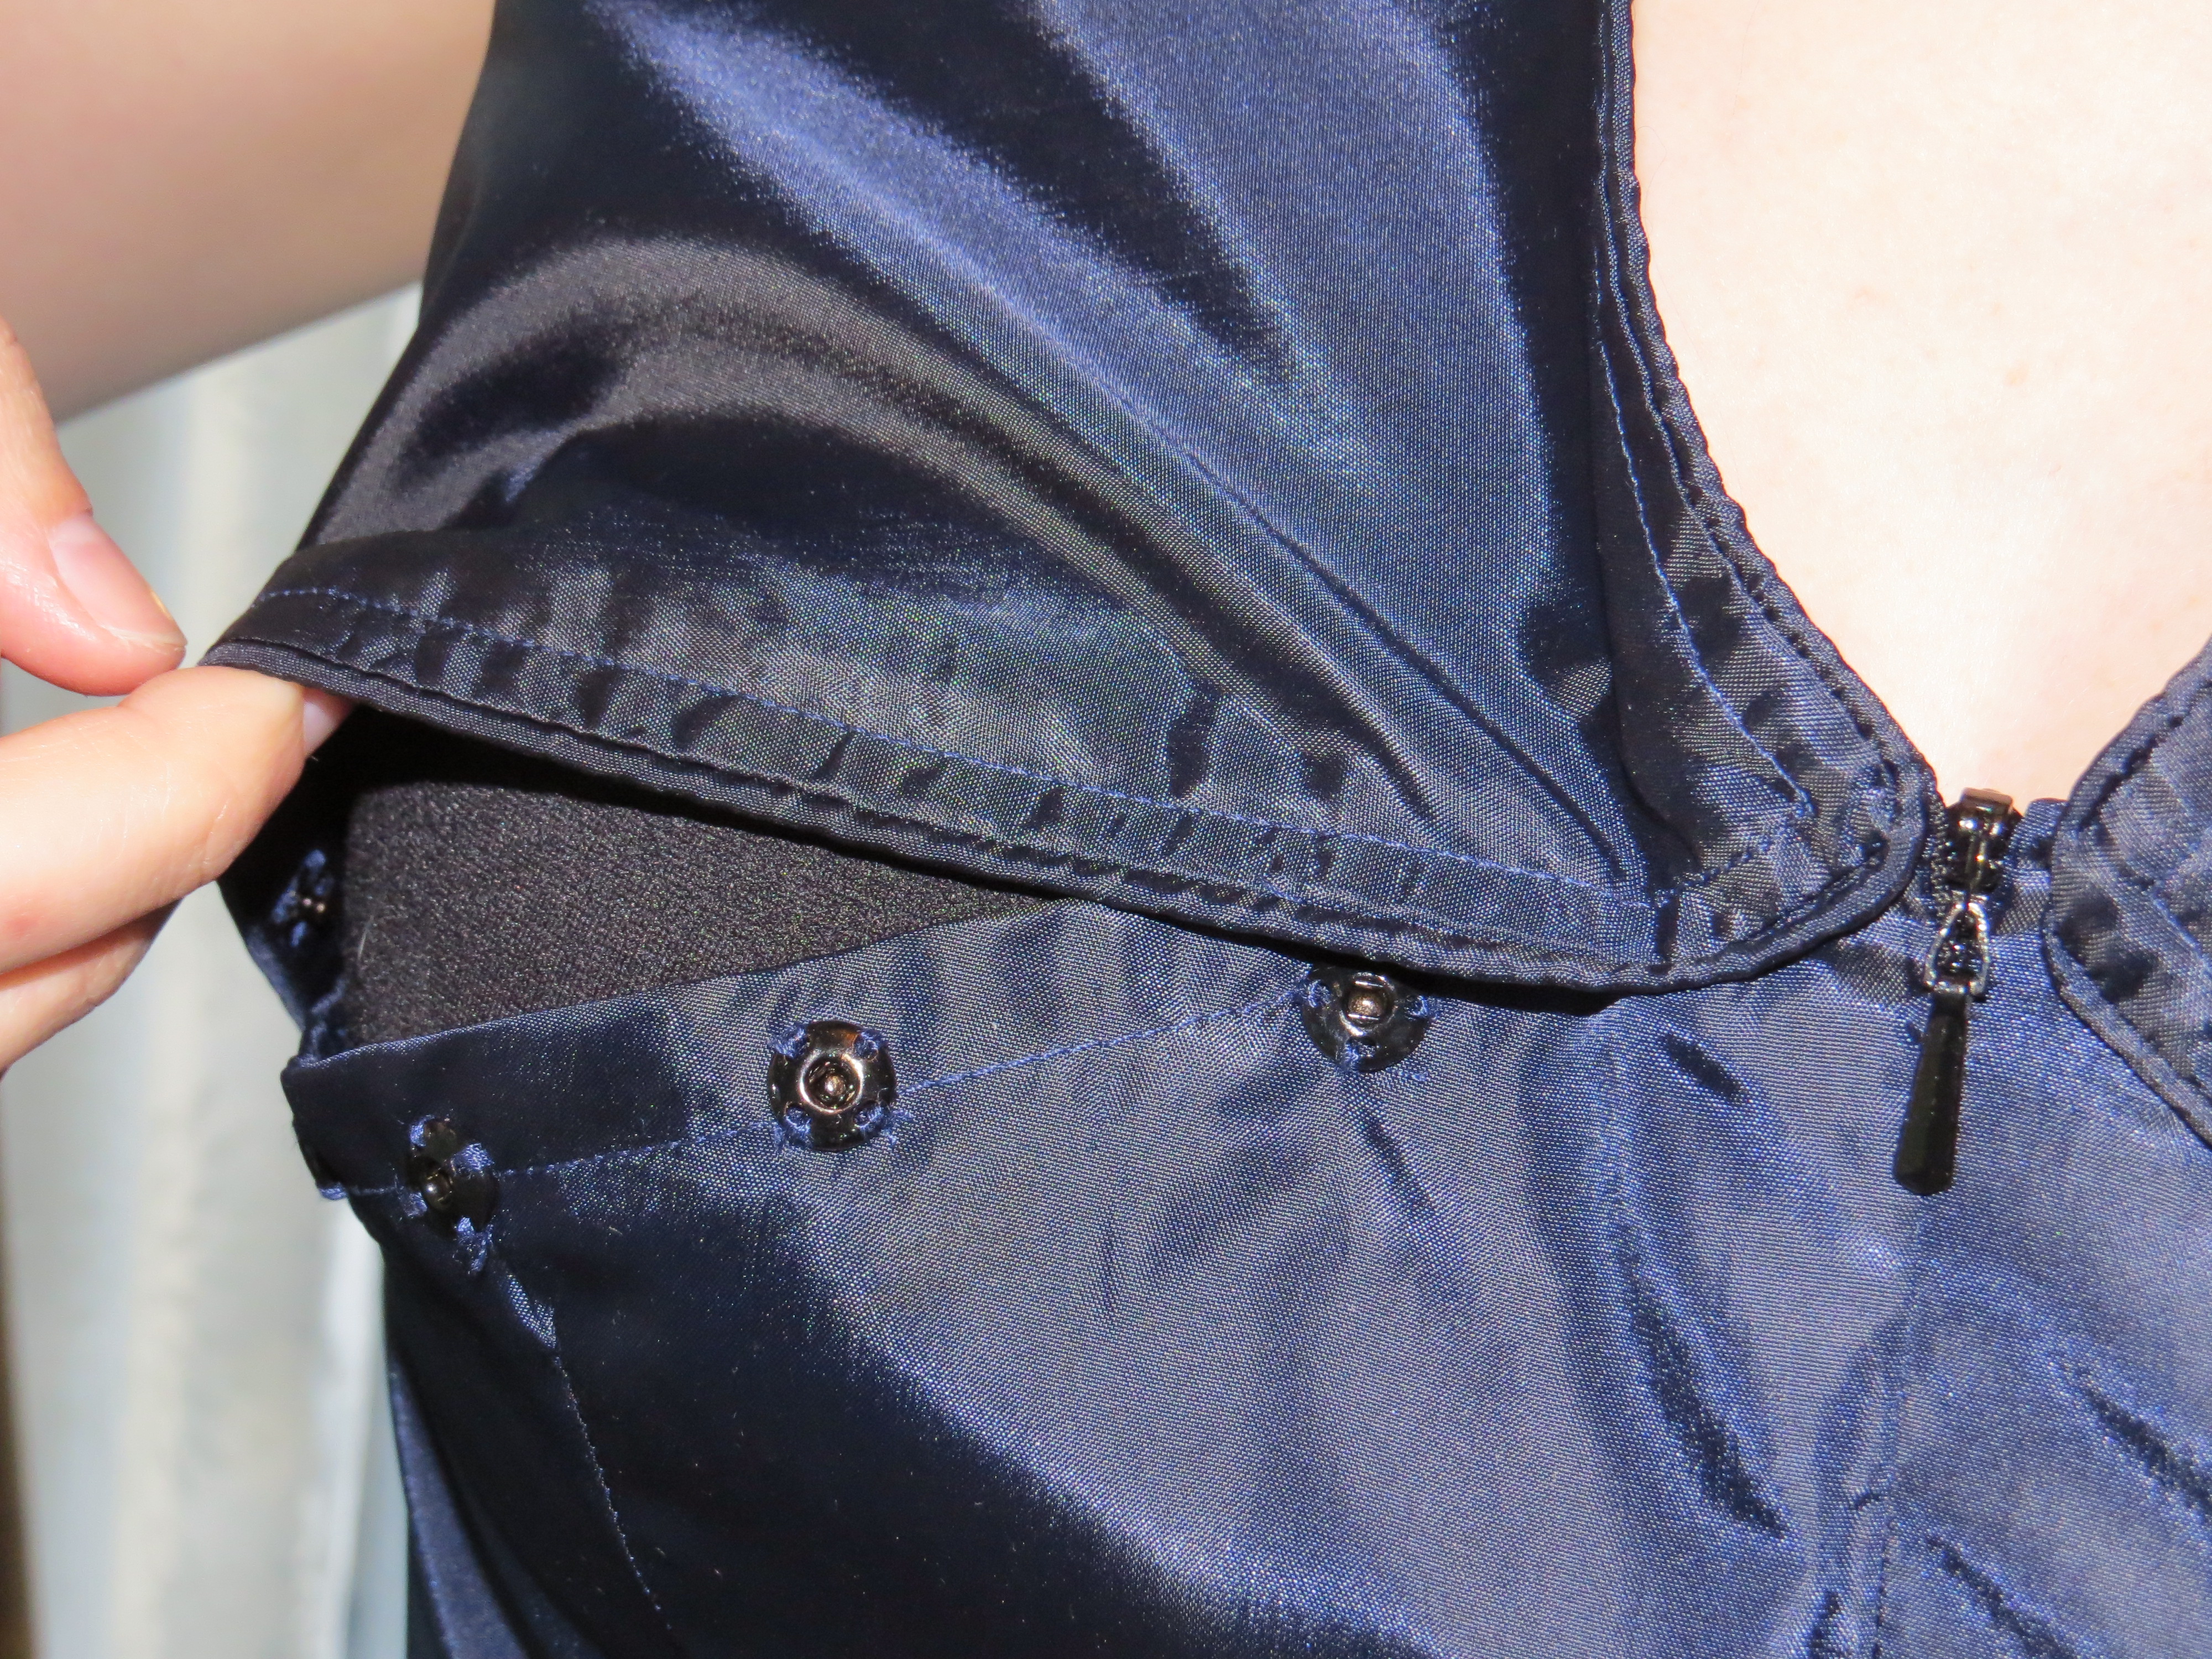
I wanted a sturdy construction, so that the bust openings would not gap when closed with push buttons. Therefore I used piping and two layers of fabric.
Jag ville ha en stadig konstruktion, så att amningsluckorna inte skulle glipa när de stängdes med tryckknapparna. Därför använde jag passpoaler och dubbla tyglager.
The piping was put in between the two layers of fashion fabric, so that this piece then could be everted and function both as a fancy collar and a sturdy bust opening.
I stitched darts and made a broad multi layer hem at the bust line, before putting all pieces back on the dress form, in order to pin them in place before stitching them together.
Jag sydde inprovningar och gjorde en många lager tjock fåll vid bystlinjen på klänningslivet. Sedan satte jag upp alla delar på provdockan och nålade fast dem för rätt passform.
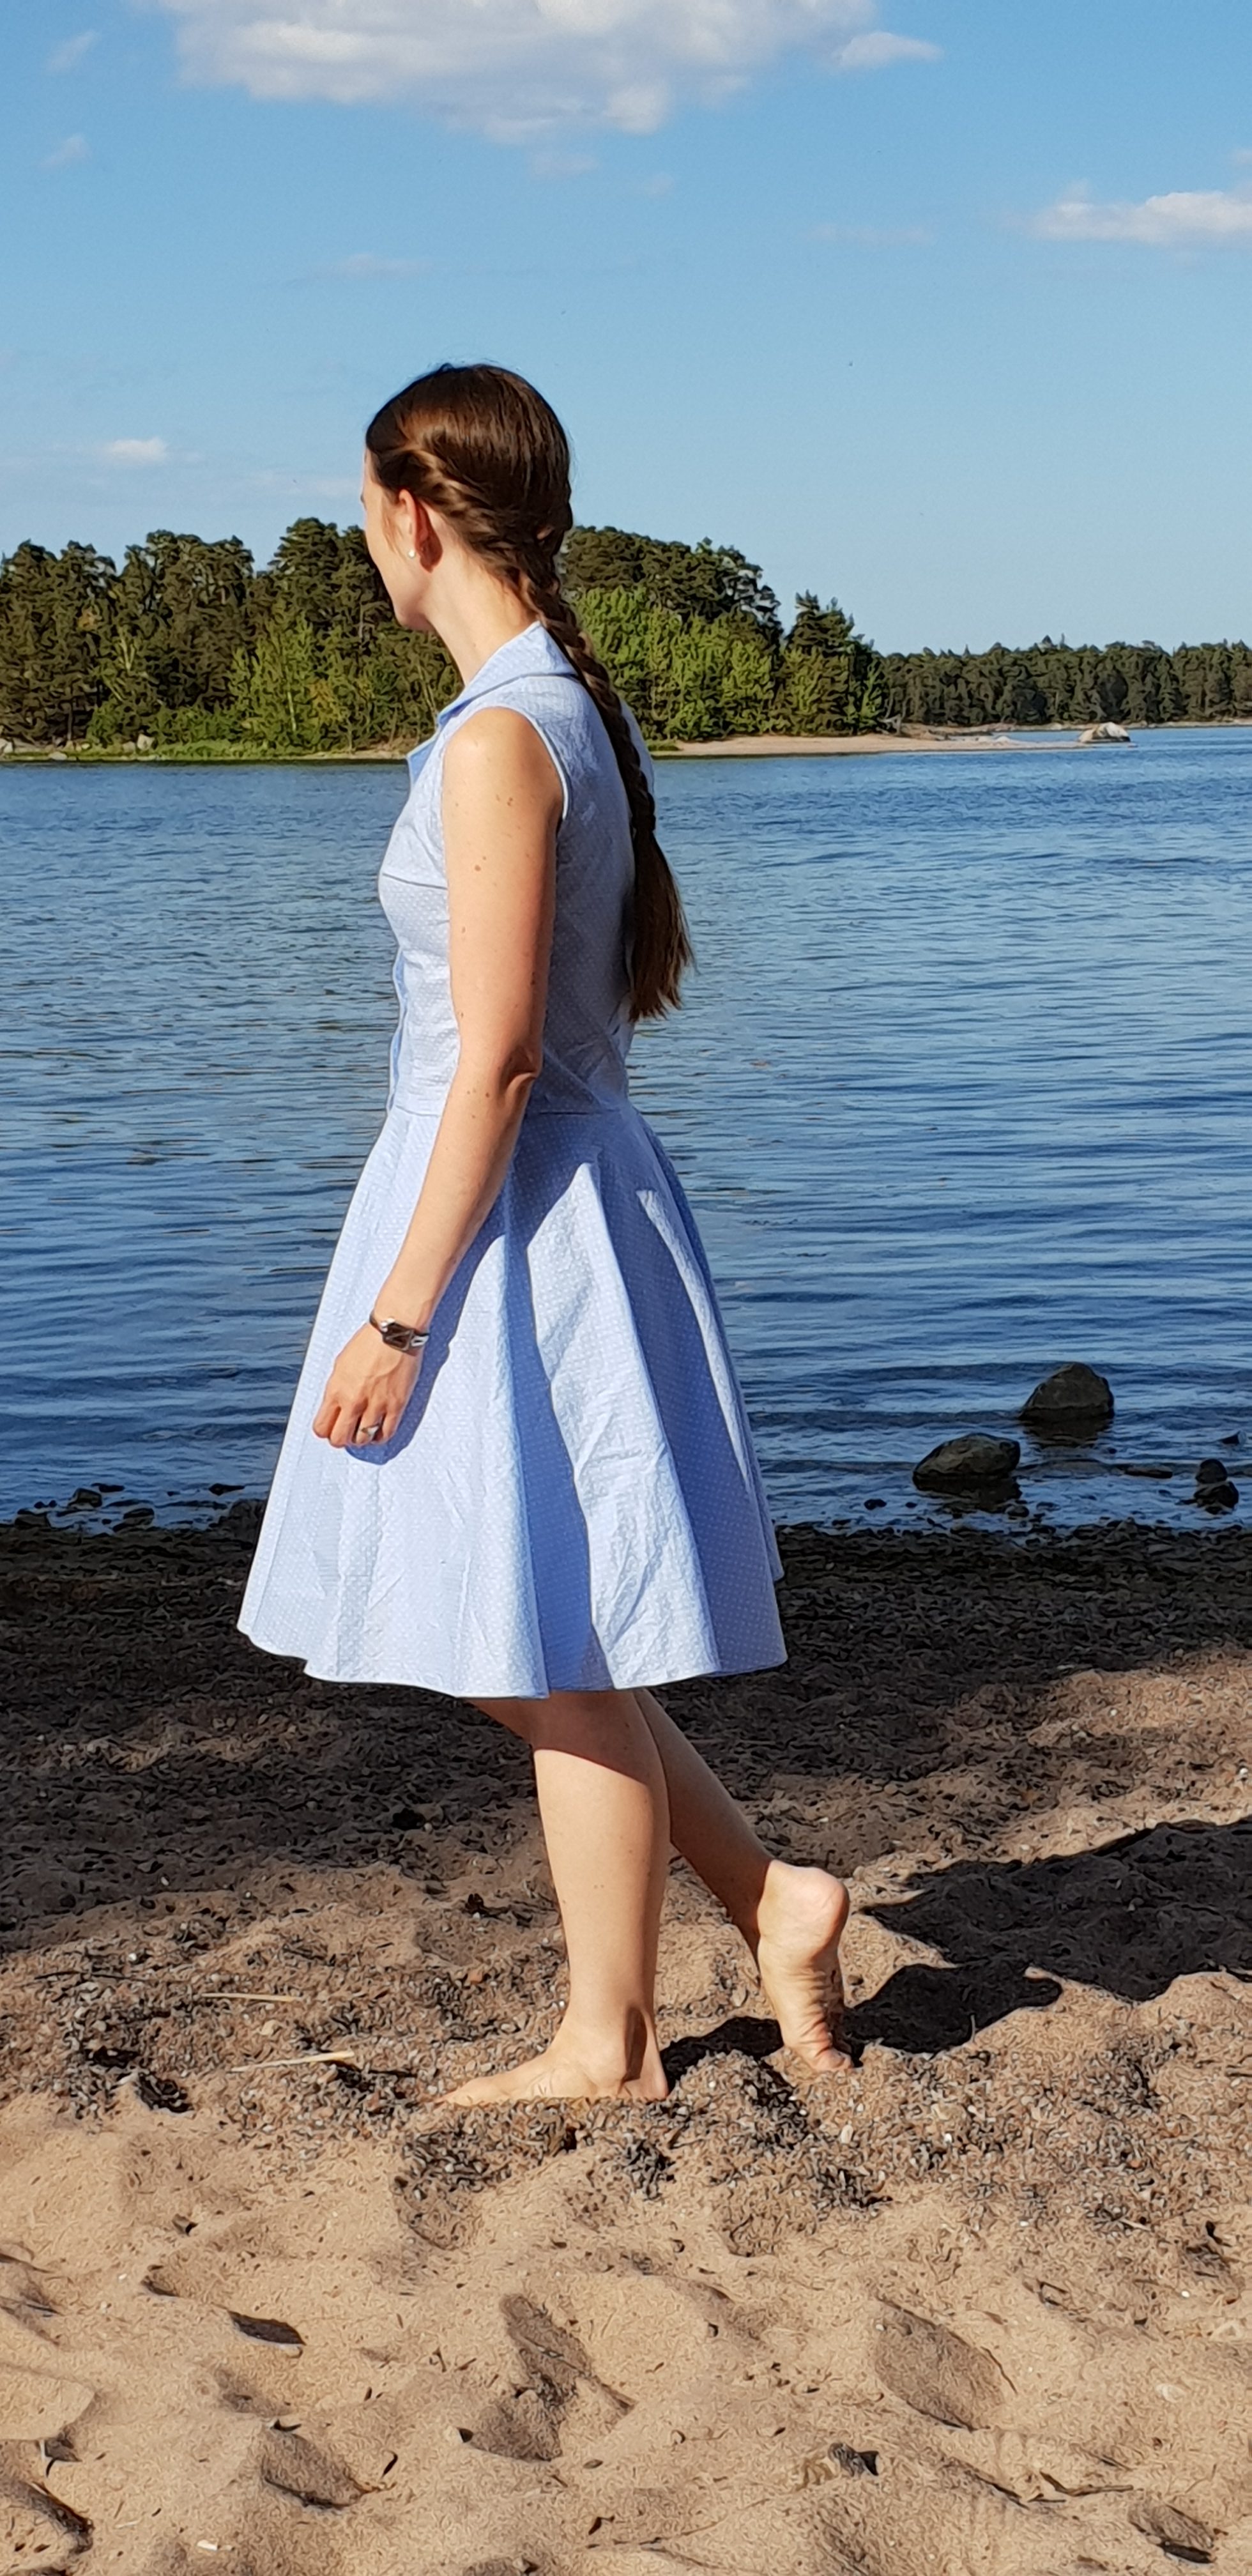
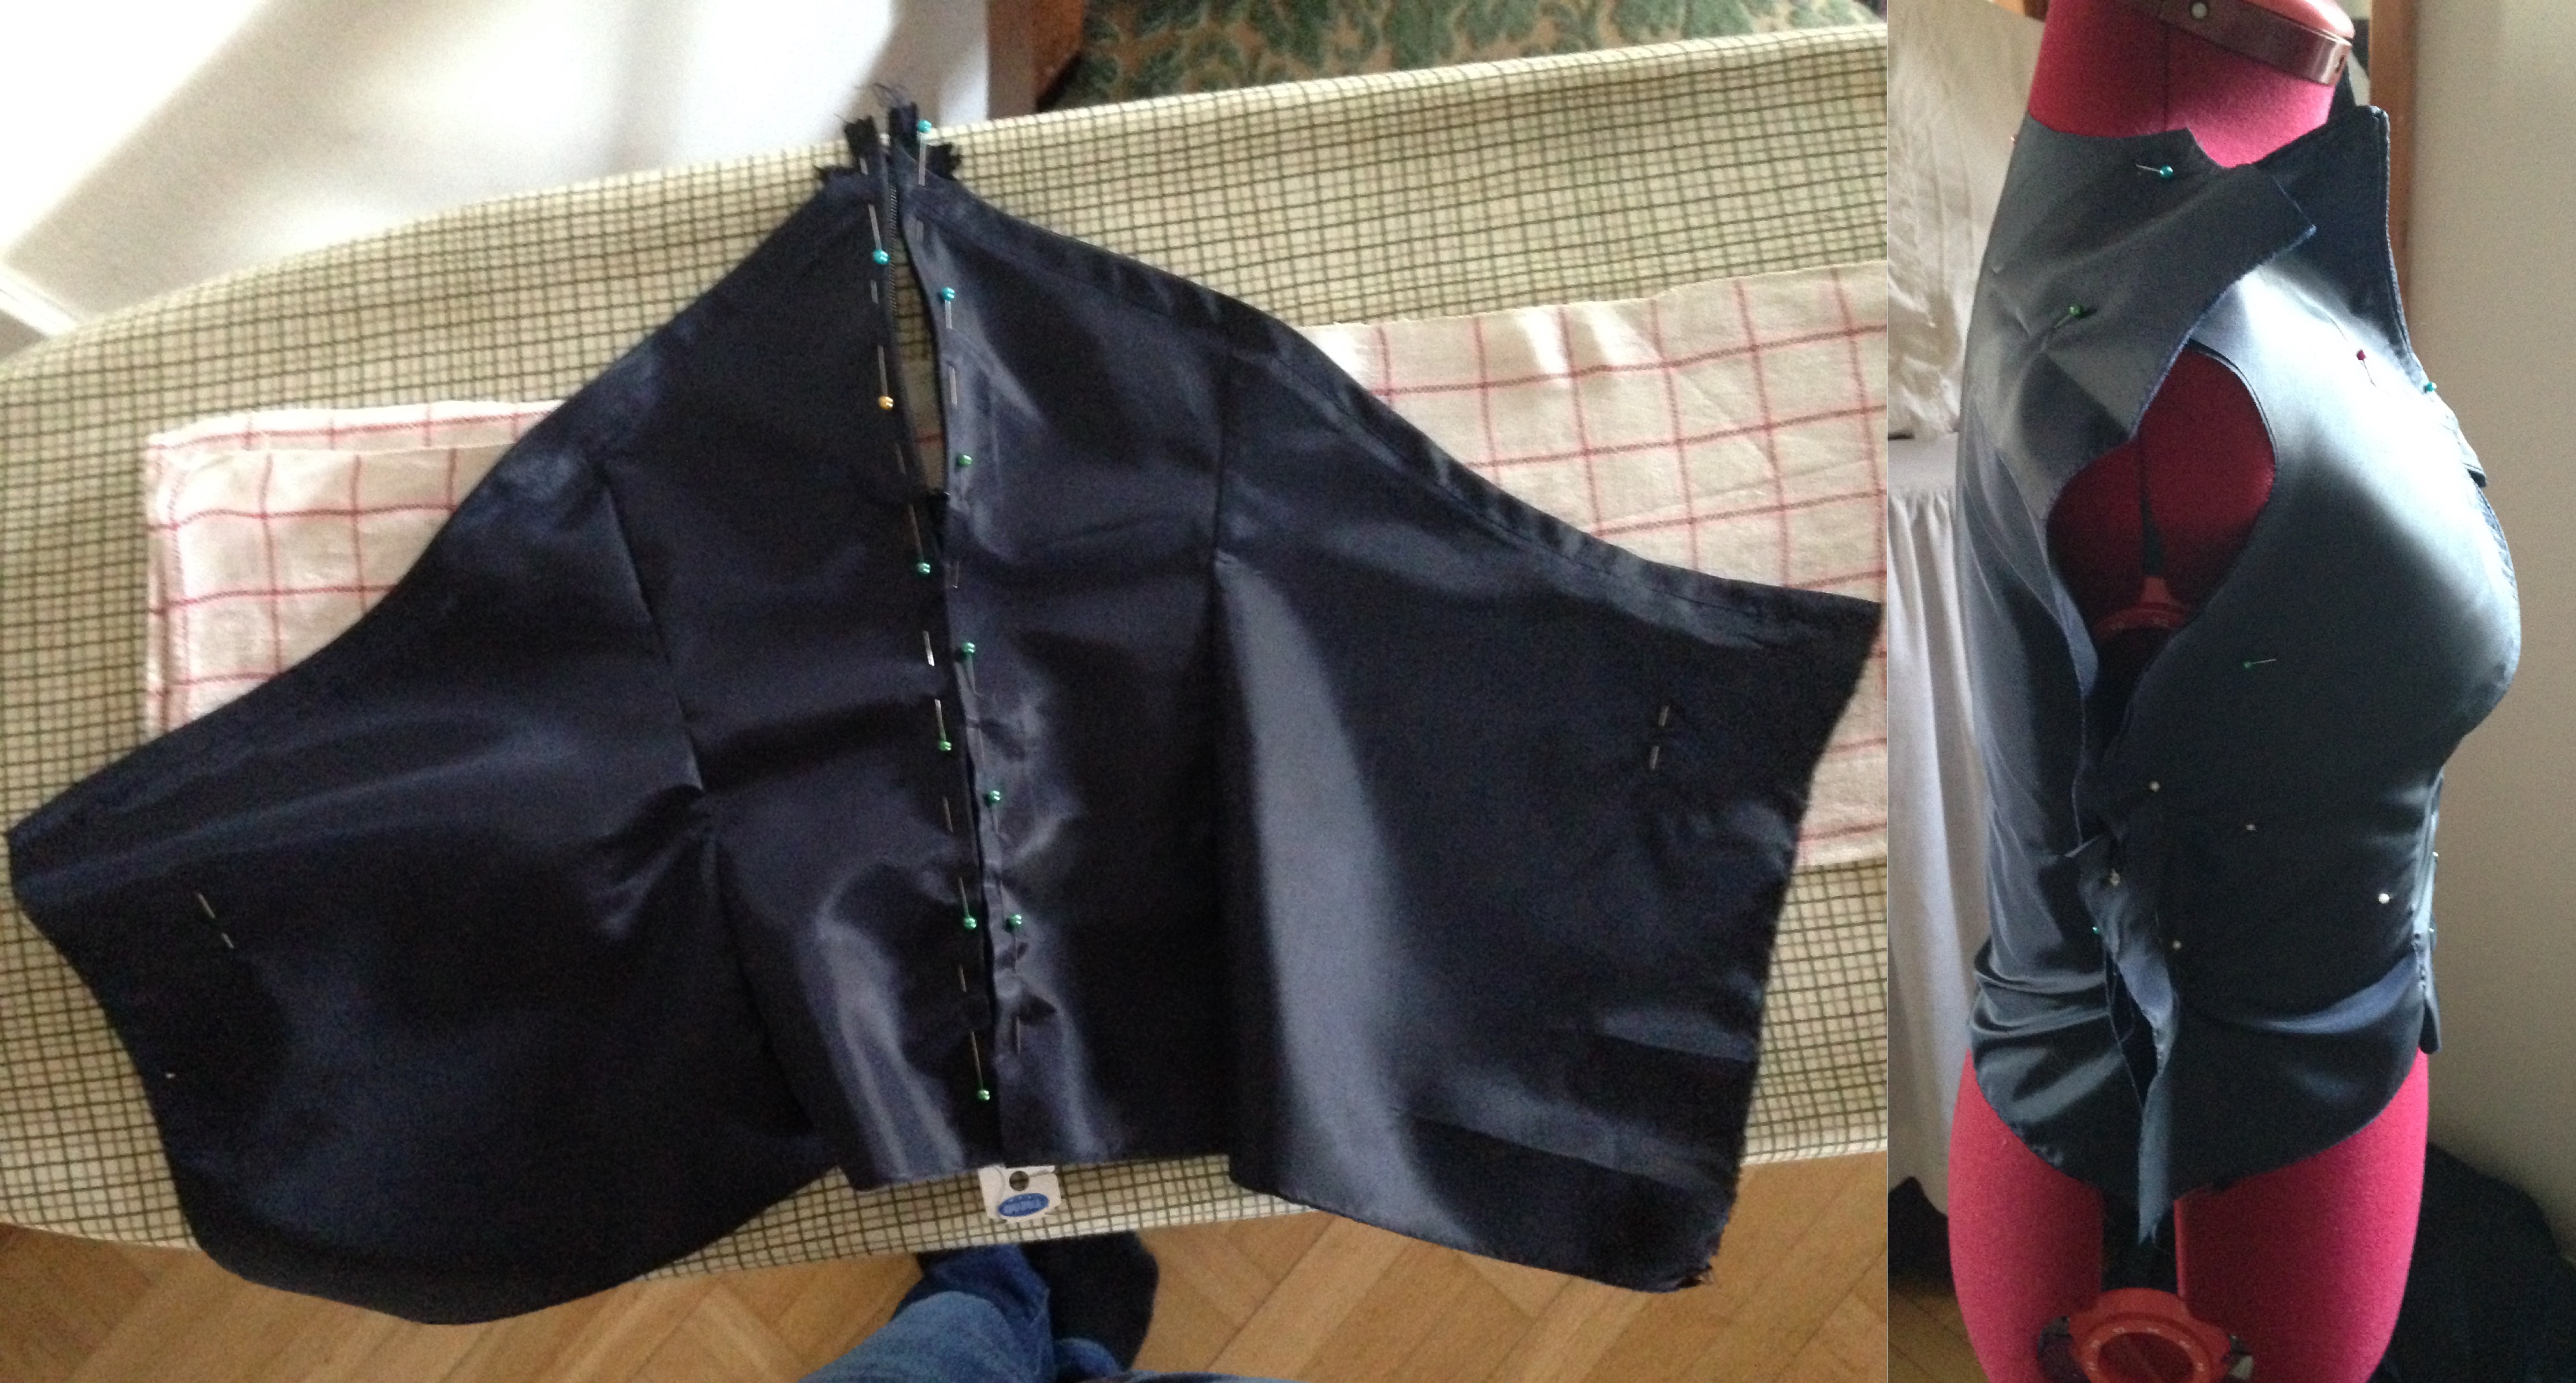
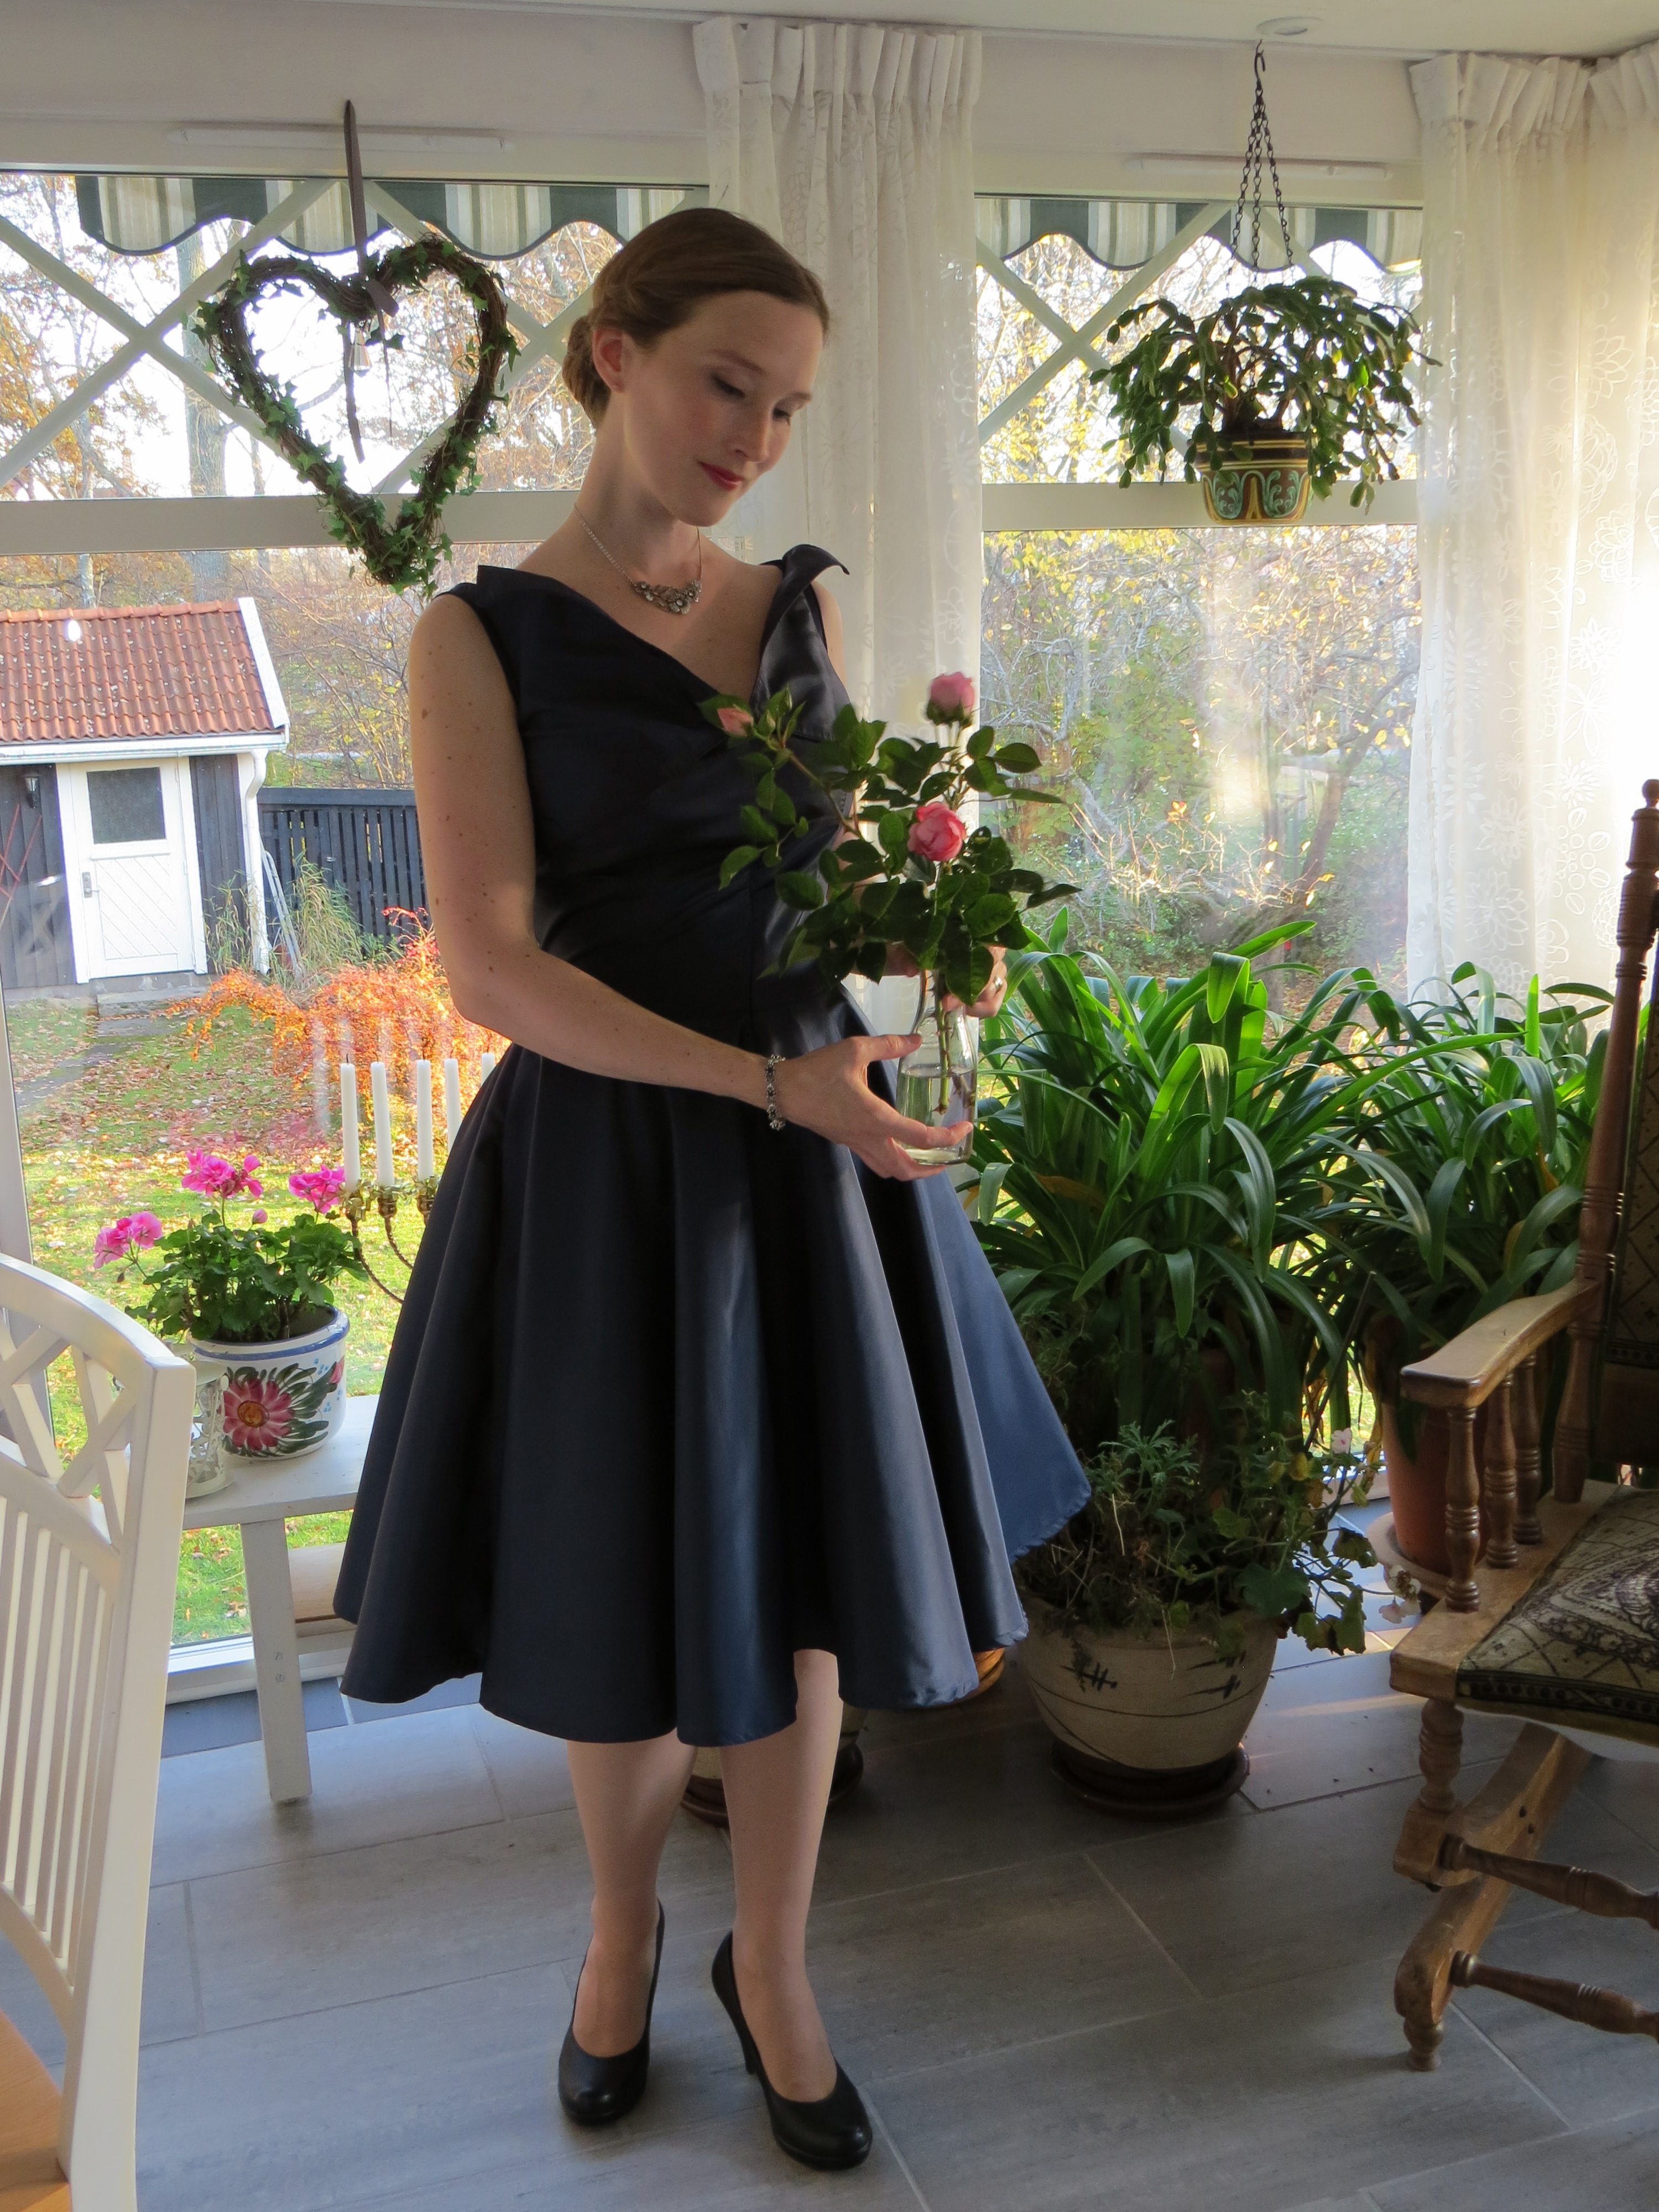
I put piping in the back of the neckline too. After having fitted the dress one last time, I stitched the hidden zipper and all of the pieces together. The skirt is a cirkle skirt.
Jag sydde en passpoal baktil i halsringningen också. Efter att ha testat klänningen en sista gång, sydde jag fast den dolda dragkedjan och sydde samman alla de olika delarna. Kjolen är en helcirkelkjol.Then I put six push buttons in each bust opening.
Sedan sydde jag fast sex tryckknappar i de båda amningsluckorna.
I also added tiny strings with push buttons, for holding the shoulder straps in place.
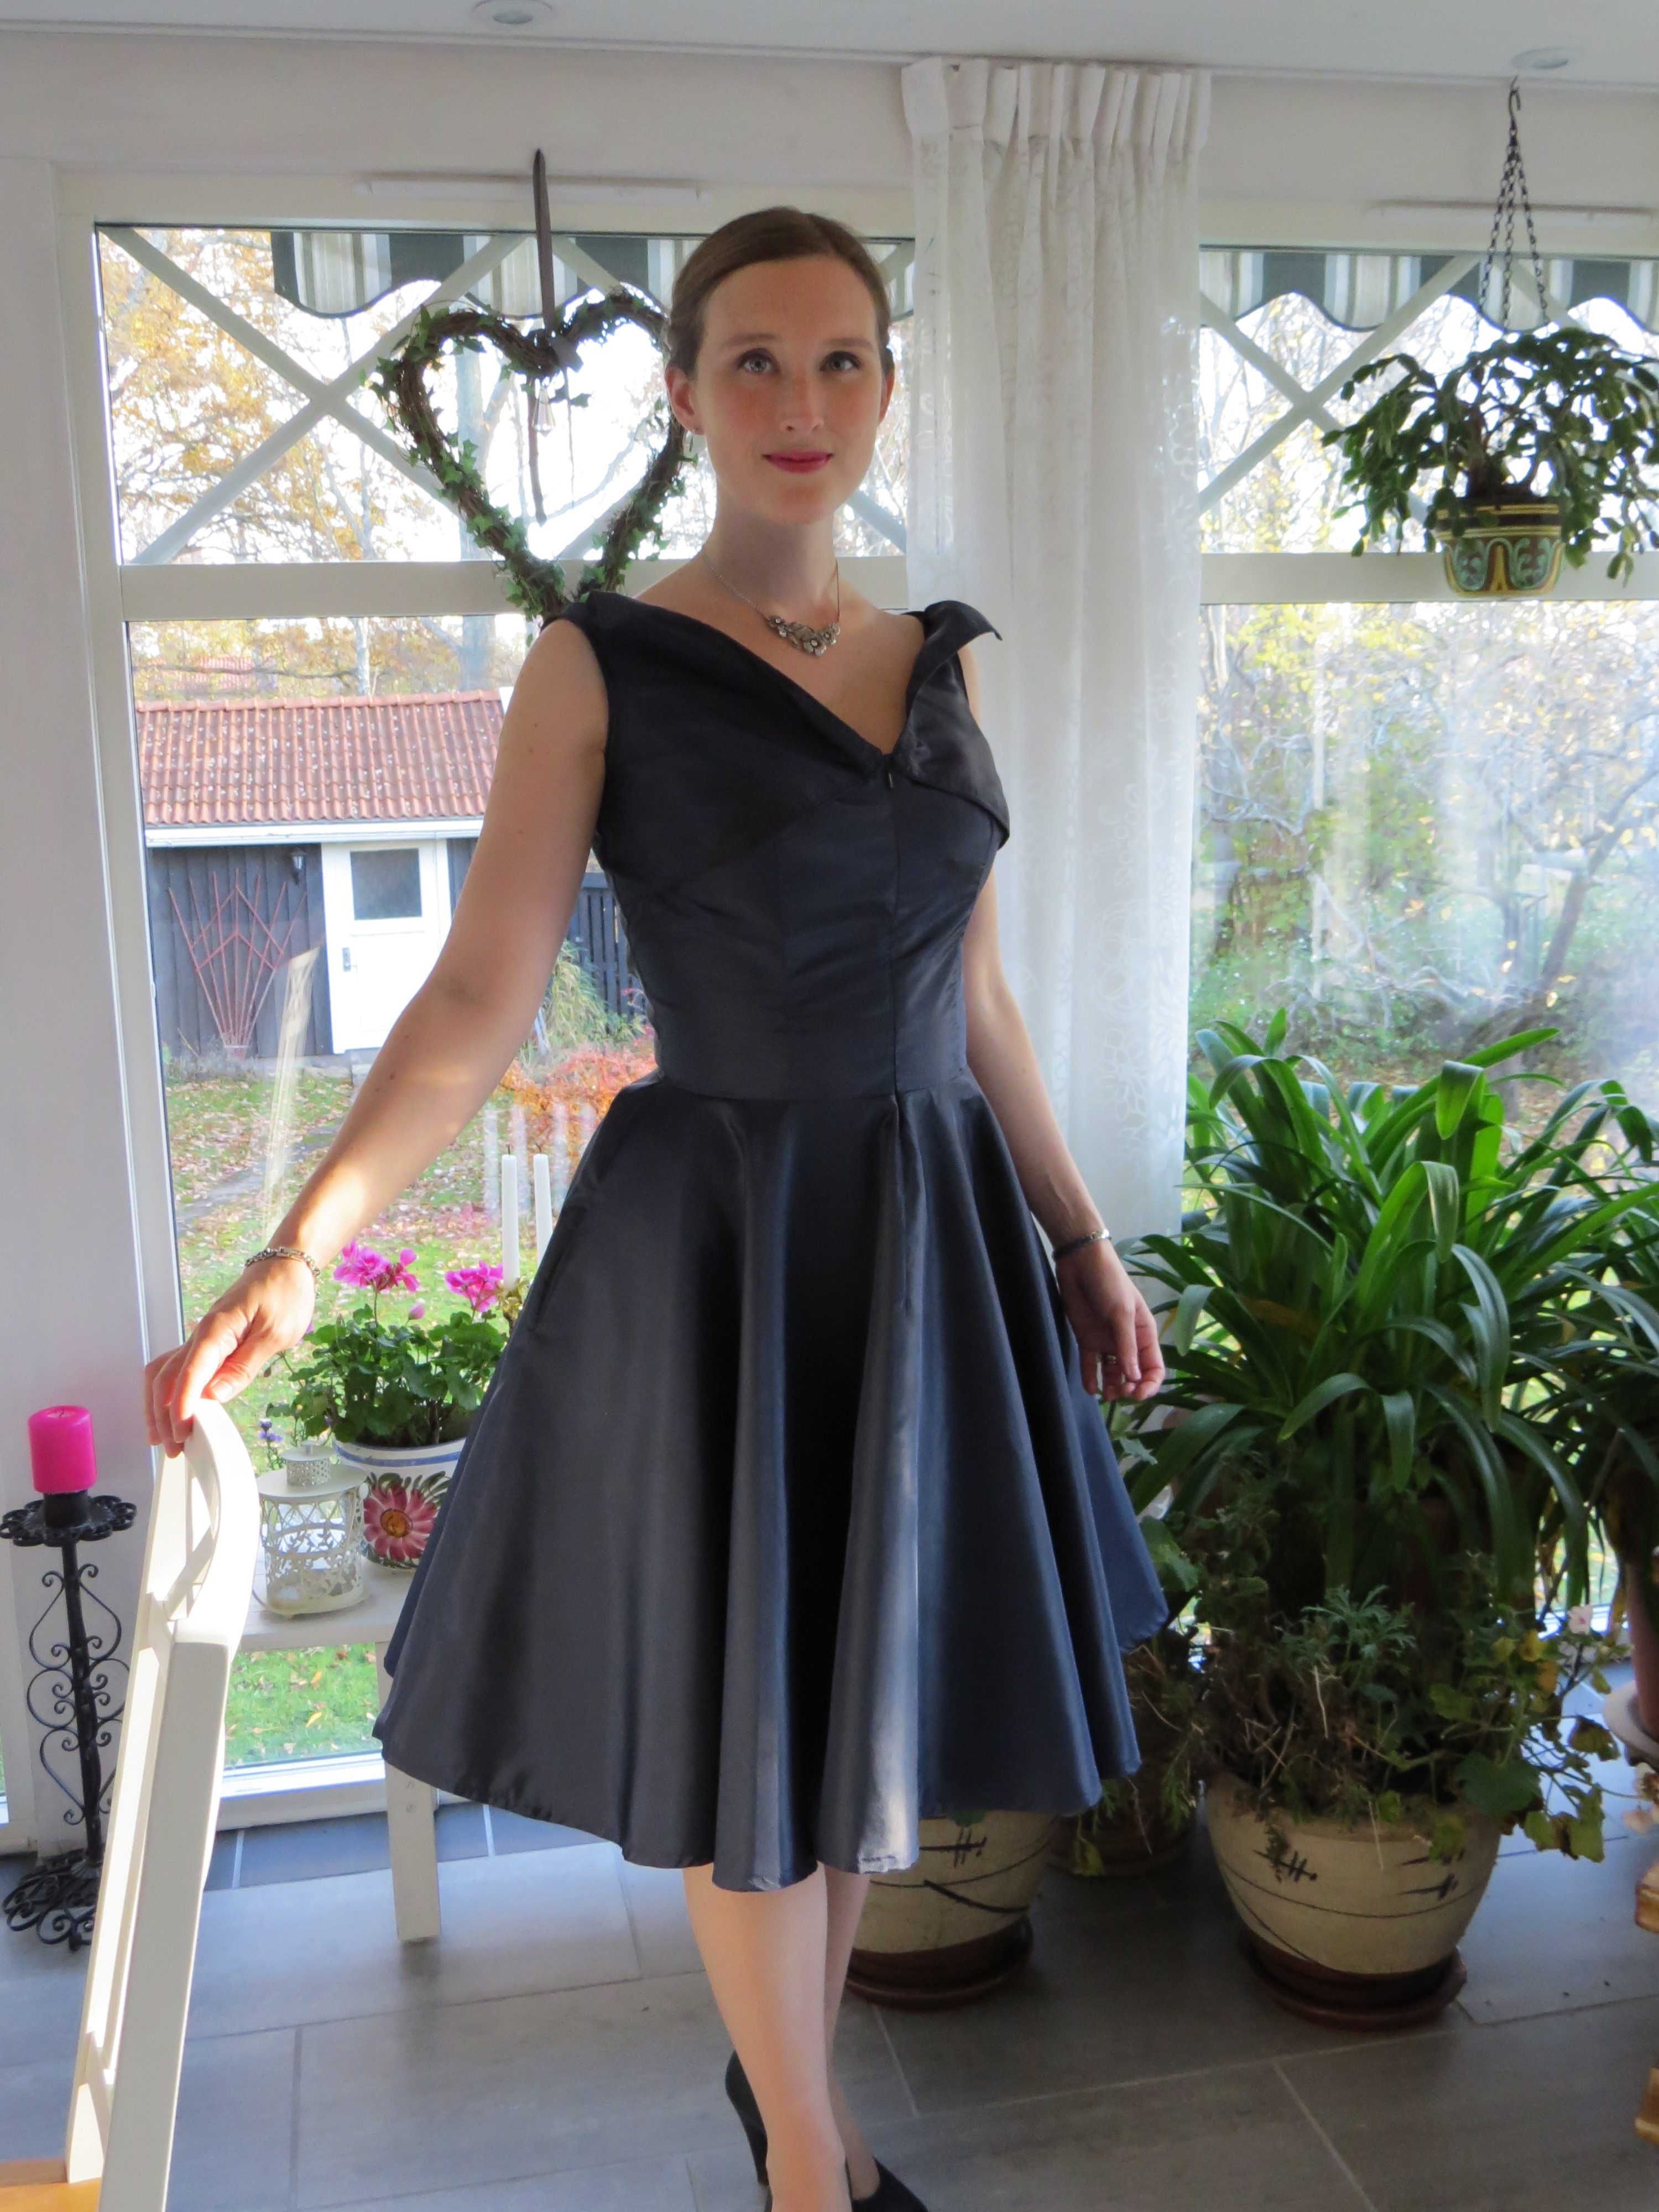
Jag sydde också fast små band med tryckknappar inunder axelbanden, så att man kan hålla BH:ns axelband på plats.I am very happy with the result. In spite of its hasty genesis, it fits fairly well and it is really functional. I received such nice response at the party! Most of the women that I talked to mentioned the dress, and my two favorite comments were these:
“You look so beautiful, just like a flower”
“Have you had that dress sewn up for yourself? Such beautiful dresses cannot be found in shops”
Jag är väldigt nöjd med resultatet. Trots klänningens hastiga tillblivelse och få provningar passar den faktiskt ganska bra och är riktigt funktionell. Jag fick så fin respons på kalaset. De flesta kvinnor som jag talade med nämnde klänningen och några av de kommentarer som värmde mest var dessa:
“Du är så vacker, du ser ut som en blomma”
“Har du sytt upp den där kläningen? Så där vackra klänningar kan man inte hitta i affärer”
These pictures were taken the day after the party and you might see that it is stained and wrinkled, while I look as tired underneath all makeup.
De här bilderna togs dagen efter festen och du kanske ser att klänningen har blivit fläckig av mjölk, spyor och tårta, samt skrynklats av en trött bebis. Jag ser visst själv lika illa åtgången ut.
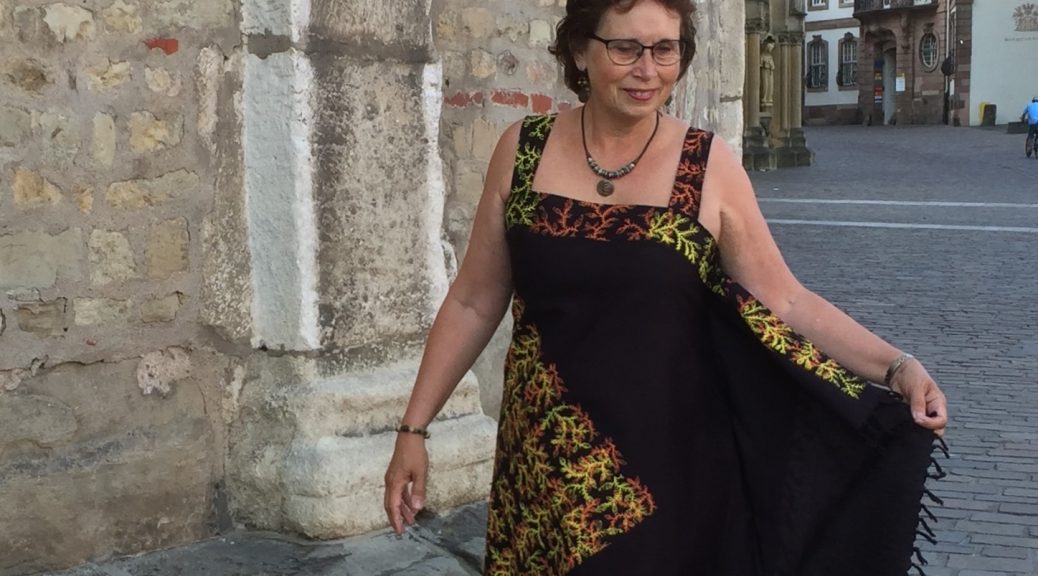
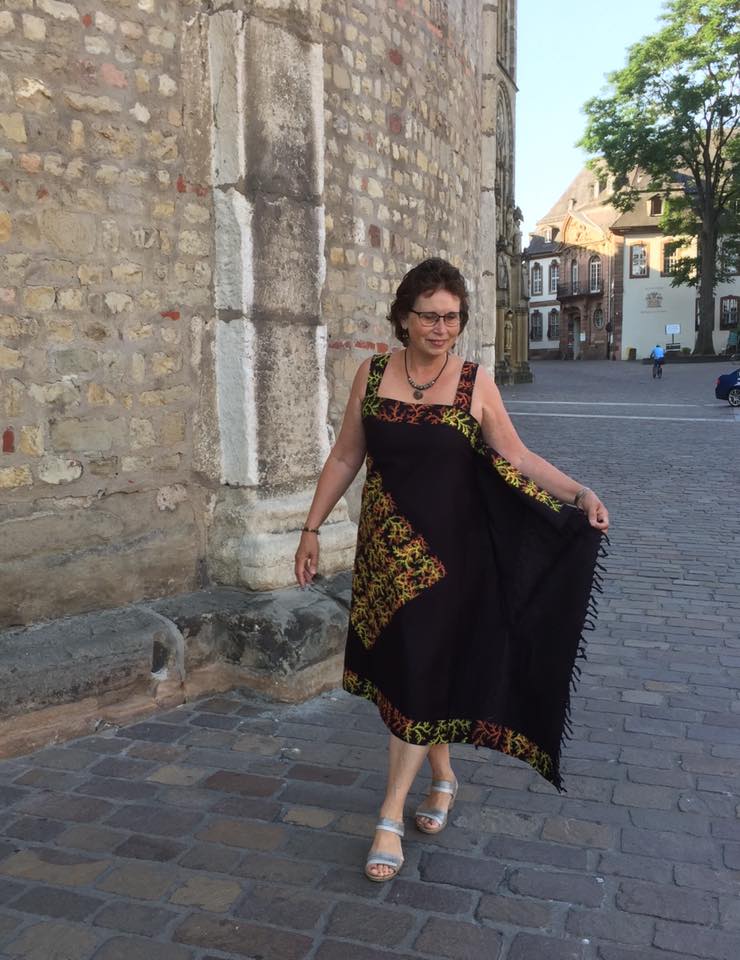
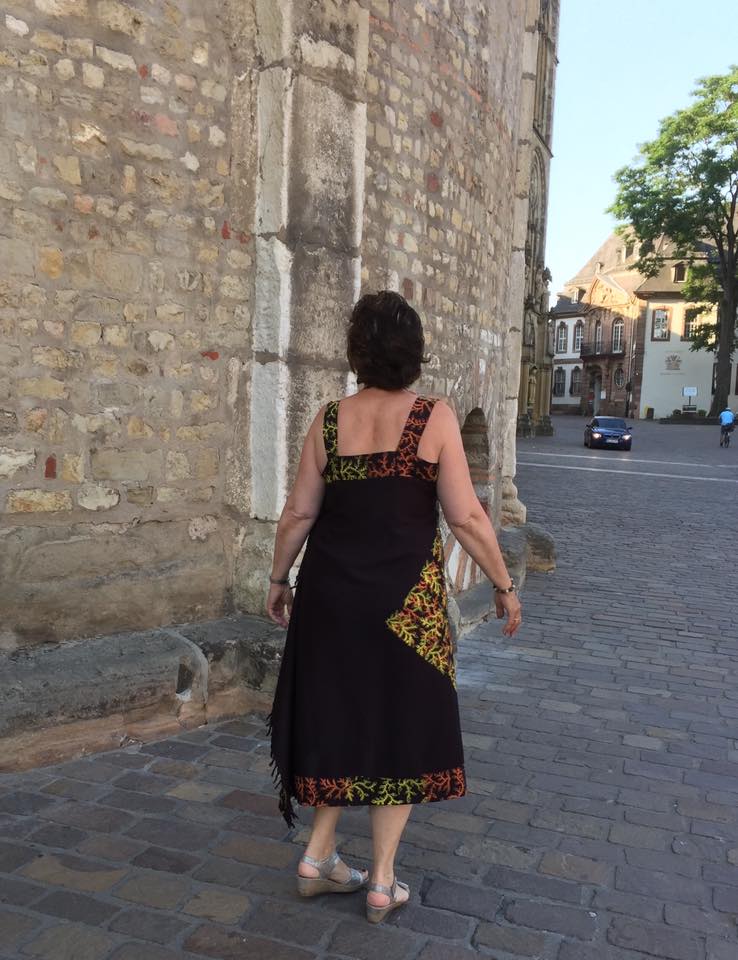
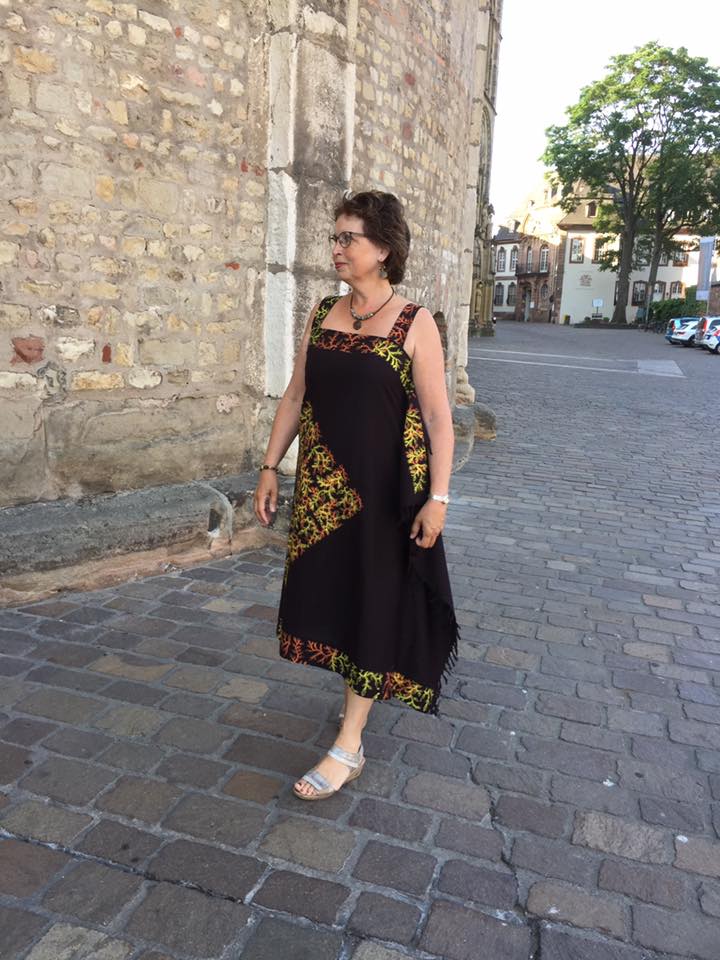
I have been so fortunate as to get new commissions from my benevolent mother. She had three wonderful fabrics from earlier trips, laying around and waiting for being transformed into dresses. In order to preserve the beautiful pattern, I had to make some unorthodox construction solutions, especially for the black dress. This has the traditional side darts at the bust, but no darts under the bust and no regular side seam on one side. Here I had to make a diagonal side dart instead, following the line of the pattern.
It all turned out well and after only a few hours on facebook, there has been huge response.
Thank you, dear mum!
Jag har haft lyckan att få tre klänningsbeställningar från min mamma. Hon hade underbara tyger från tidigare resor, som låg och väntade på att förvandlas till klänningar. För att ta vara på de fina mönstren var jag tvungen att hitta några oortodoxa konstruktionslösningar, särskilt för den svarta klänningen. Den har de traditionella insnitten vid bystens sidor, men inga insnitt under och inga normala sidsömmar. Istället har den ett svängt insnitt från byst-insnittet och ned till stussen på ena sidan.
Det blev lyckat och efter bara några timmar på facebook, har bilderna hon lagt upp på klänningen redan fått stor respons.
Tack, snälla mamma!
I have also got at least two new customers. For the first one, we have made a draft for the Edwardian skirt and shirtwaist. Now I wait for the fabric to be delivered, so that I can perhaps get it ready before the baby comes out.
Sista veckorna har jag även fått åtminstone två nya kunder. Till den första kunden har vi tagit fram en skiss på en Edwardiansk kjol och blus. Nu väntar jag på tygleveransen, så att dräkten kanske kan bli klar innan barnet anländer.
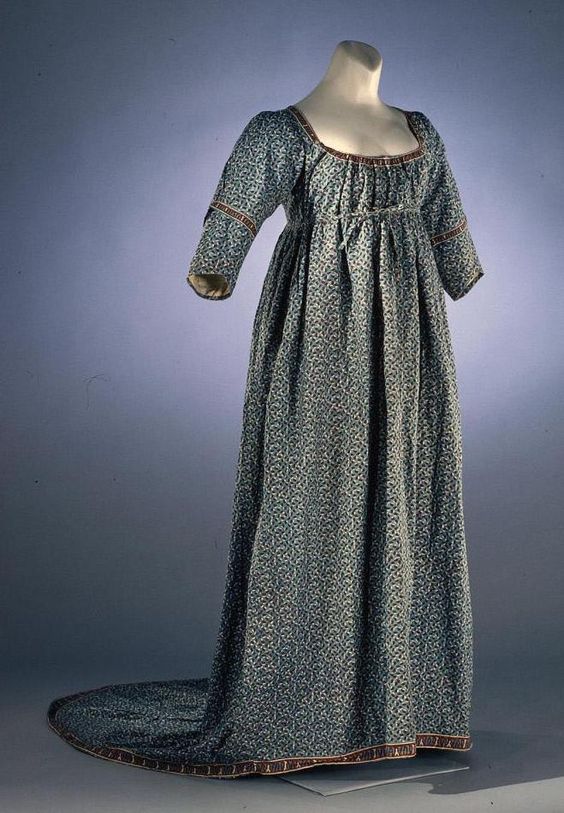
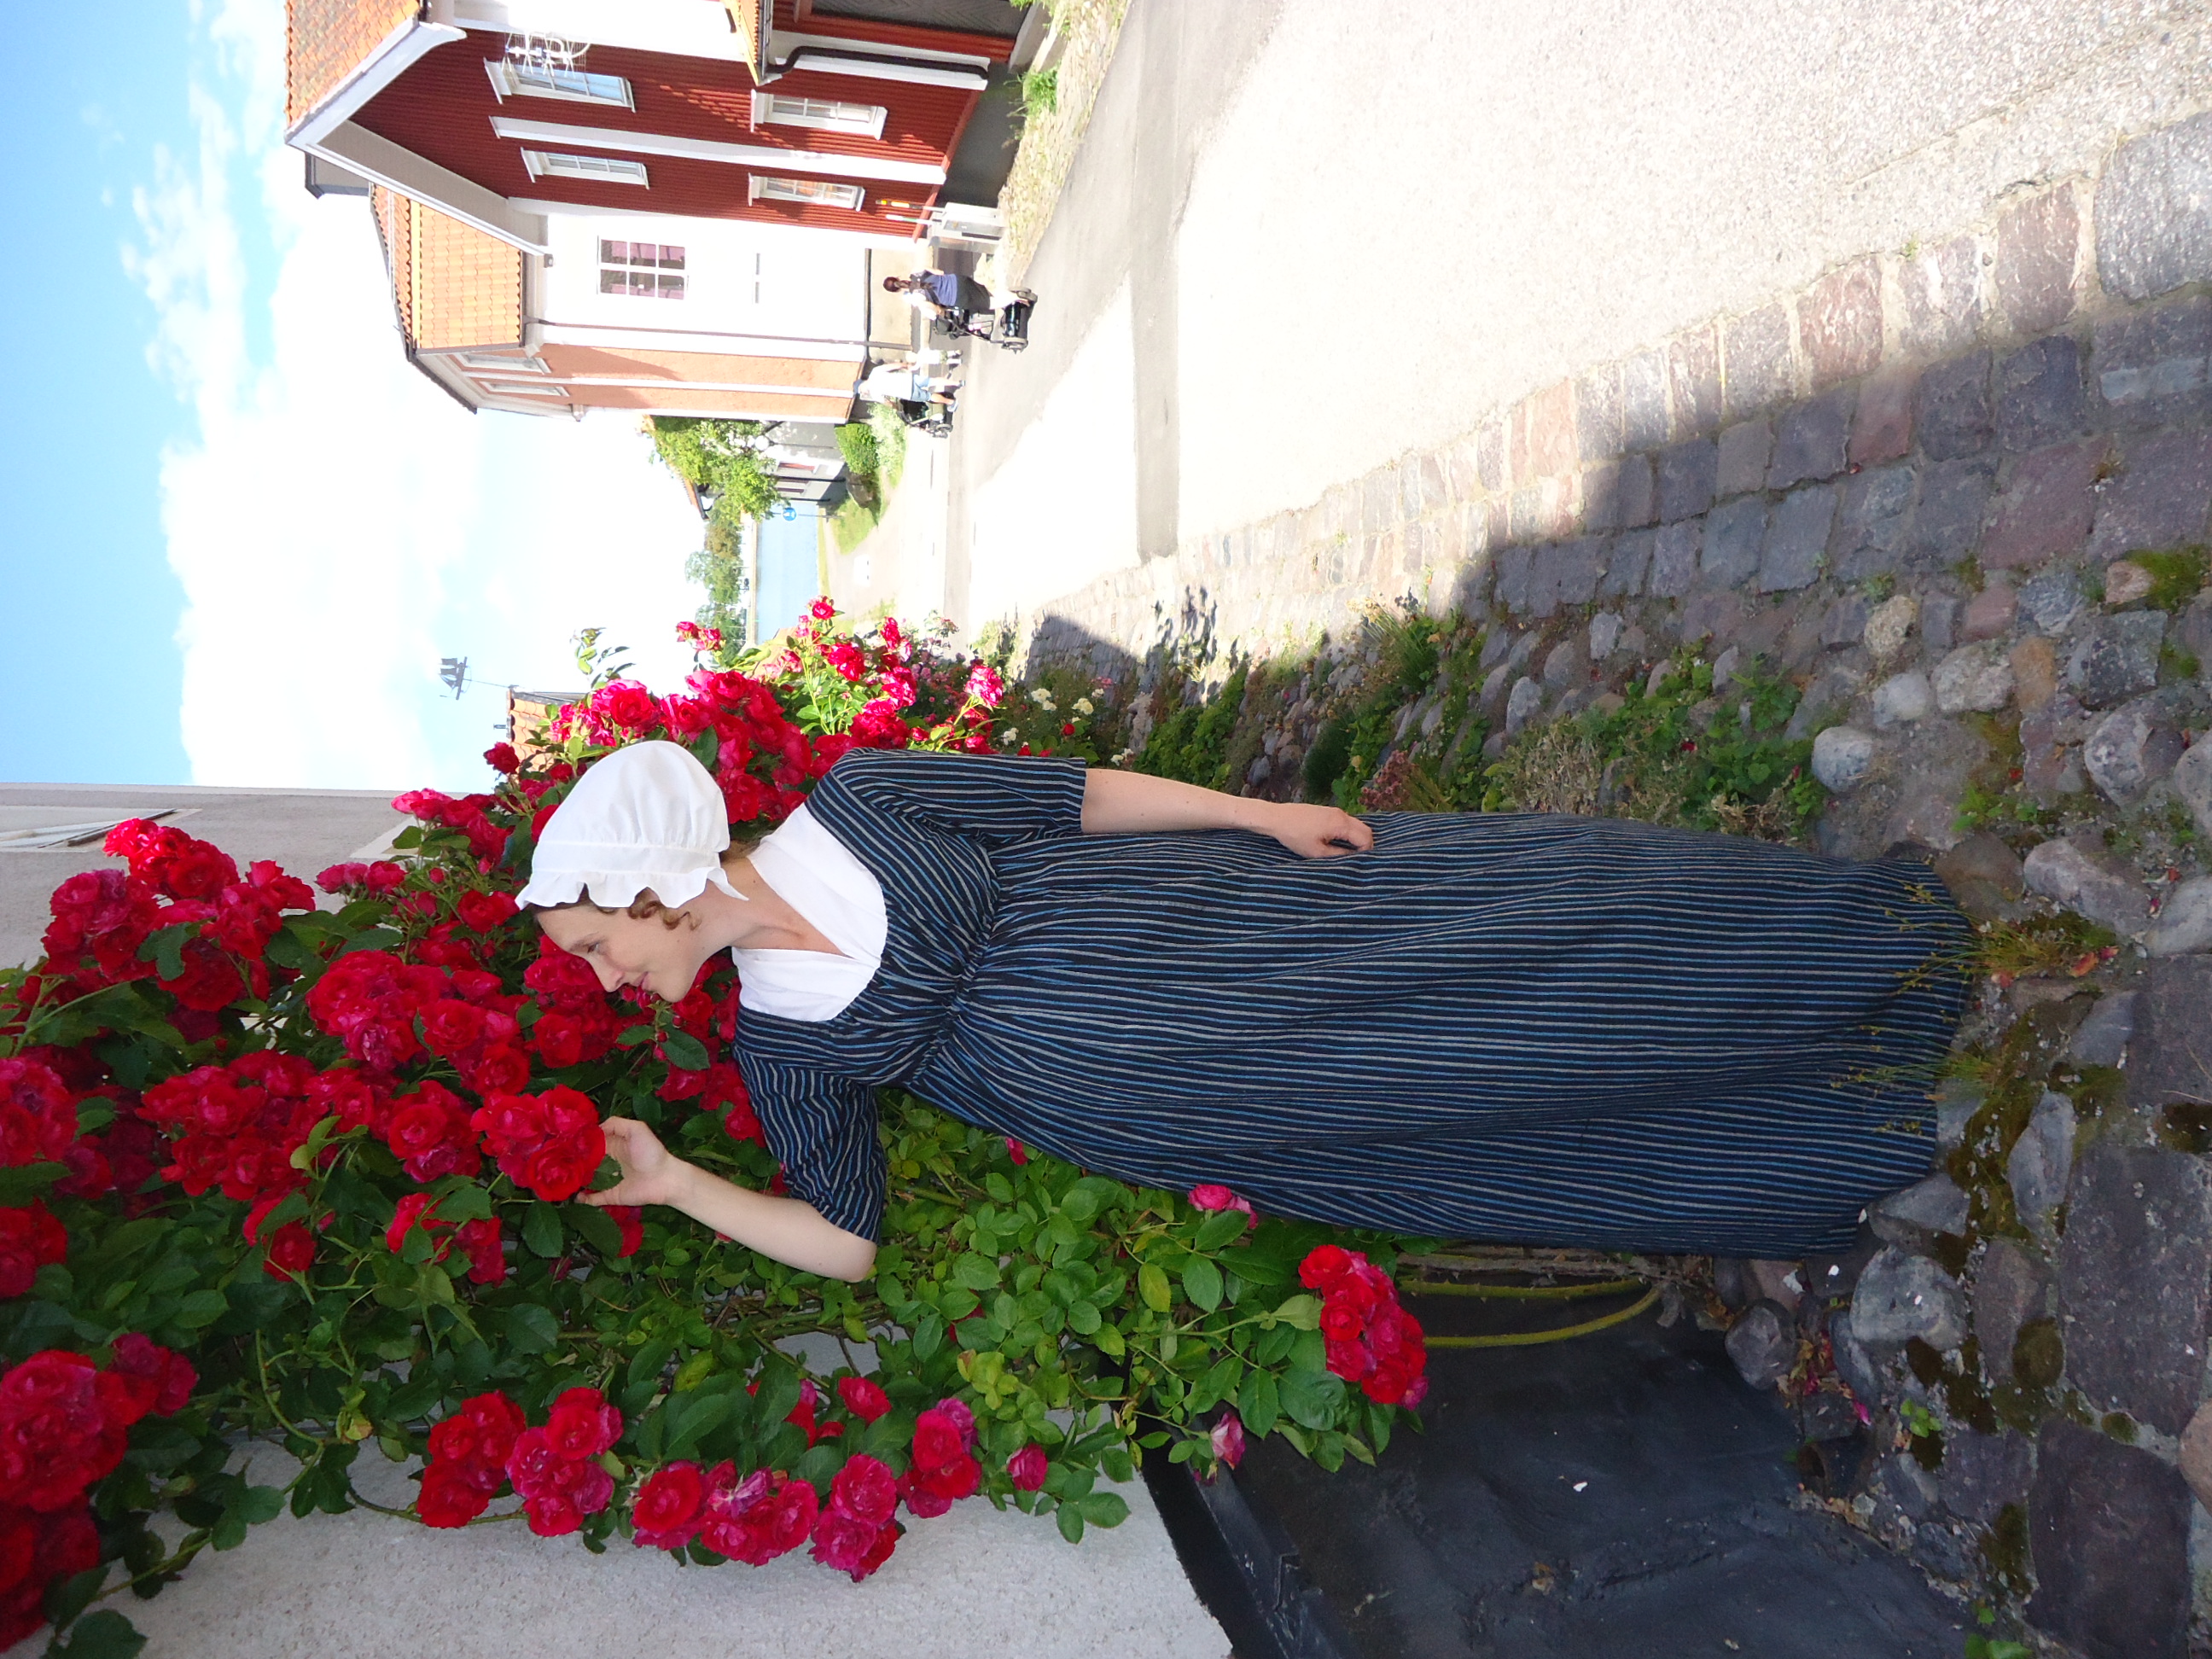
As I suppose that my body shape will not be what it used to be for a long time, I wanted to make a modest gown for the last part of my pregnancy and the nursing period. I do not know if the fabric is accurate for regency fashion, but as I still have several metres left, I used the striped cotton fabric yet again!
Eftersom jag är medveten om att min kropp förmodligen inte kommer vara sig lik på väldigt lång tid framöer, ville jag sy en vardagsklänning att använda under sluttampen på graviditeten och under amningsperioden. Jag vet inte om tyget är korrekt för empirmodet, men jag har ju fortfarande tiotals meter kvar, så jag använde samma tyg igen.
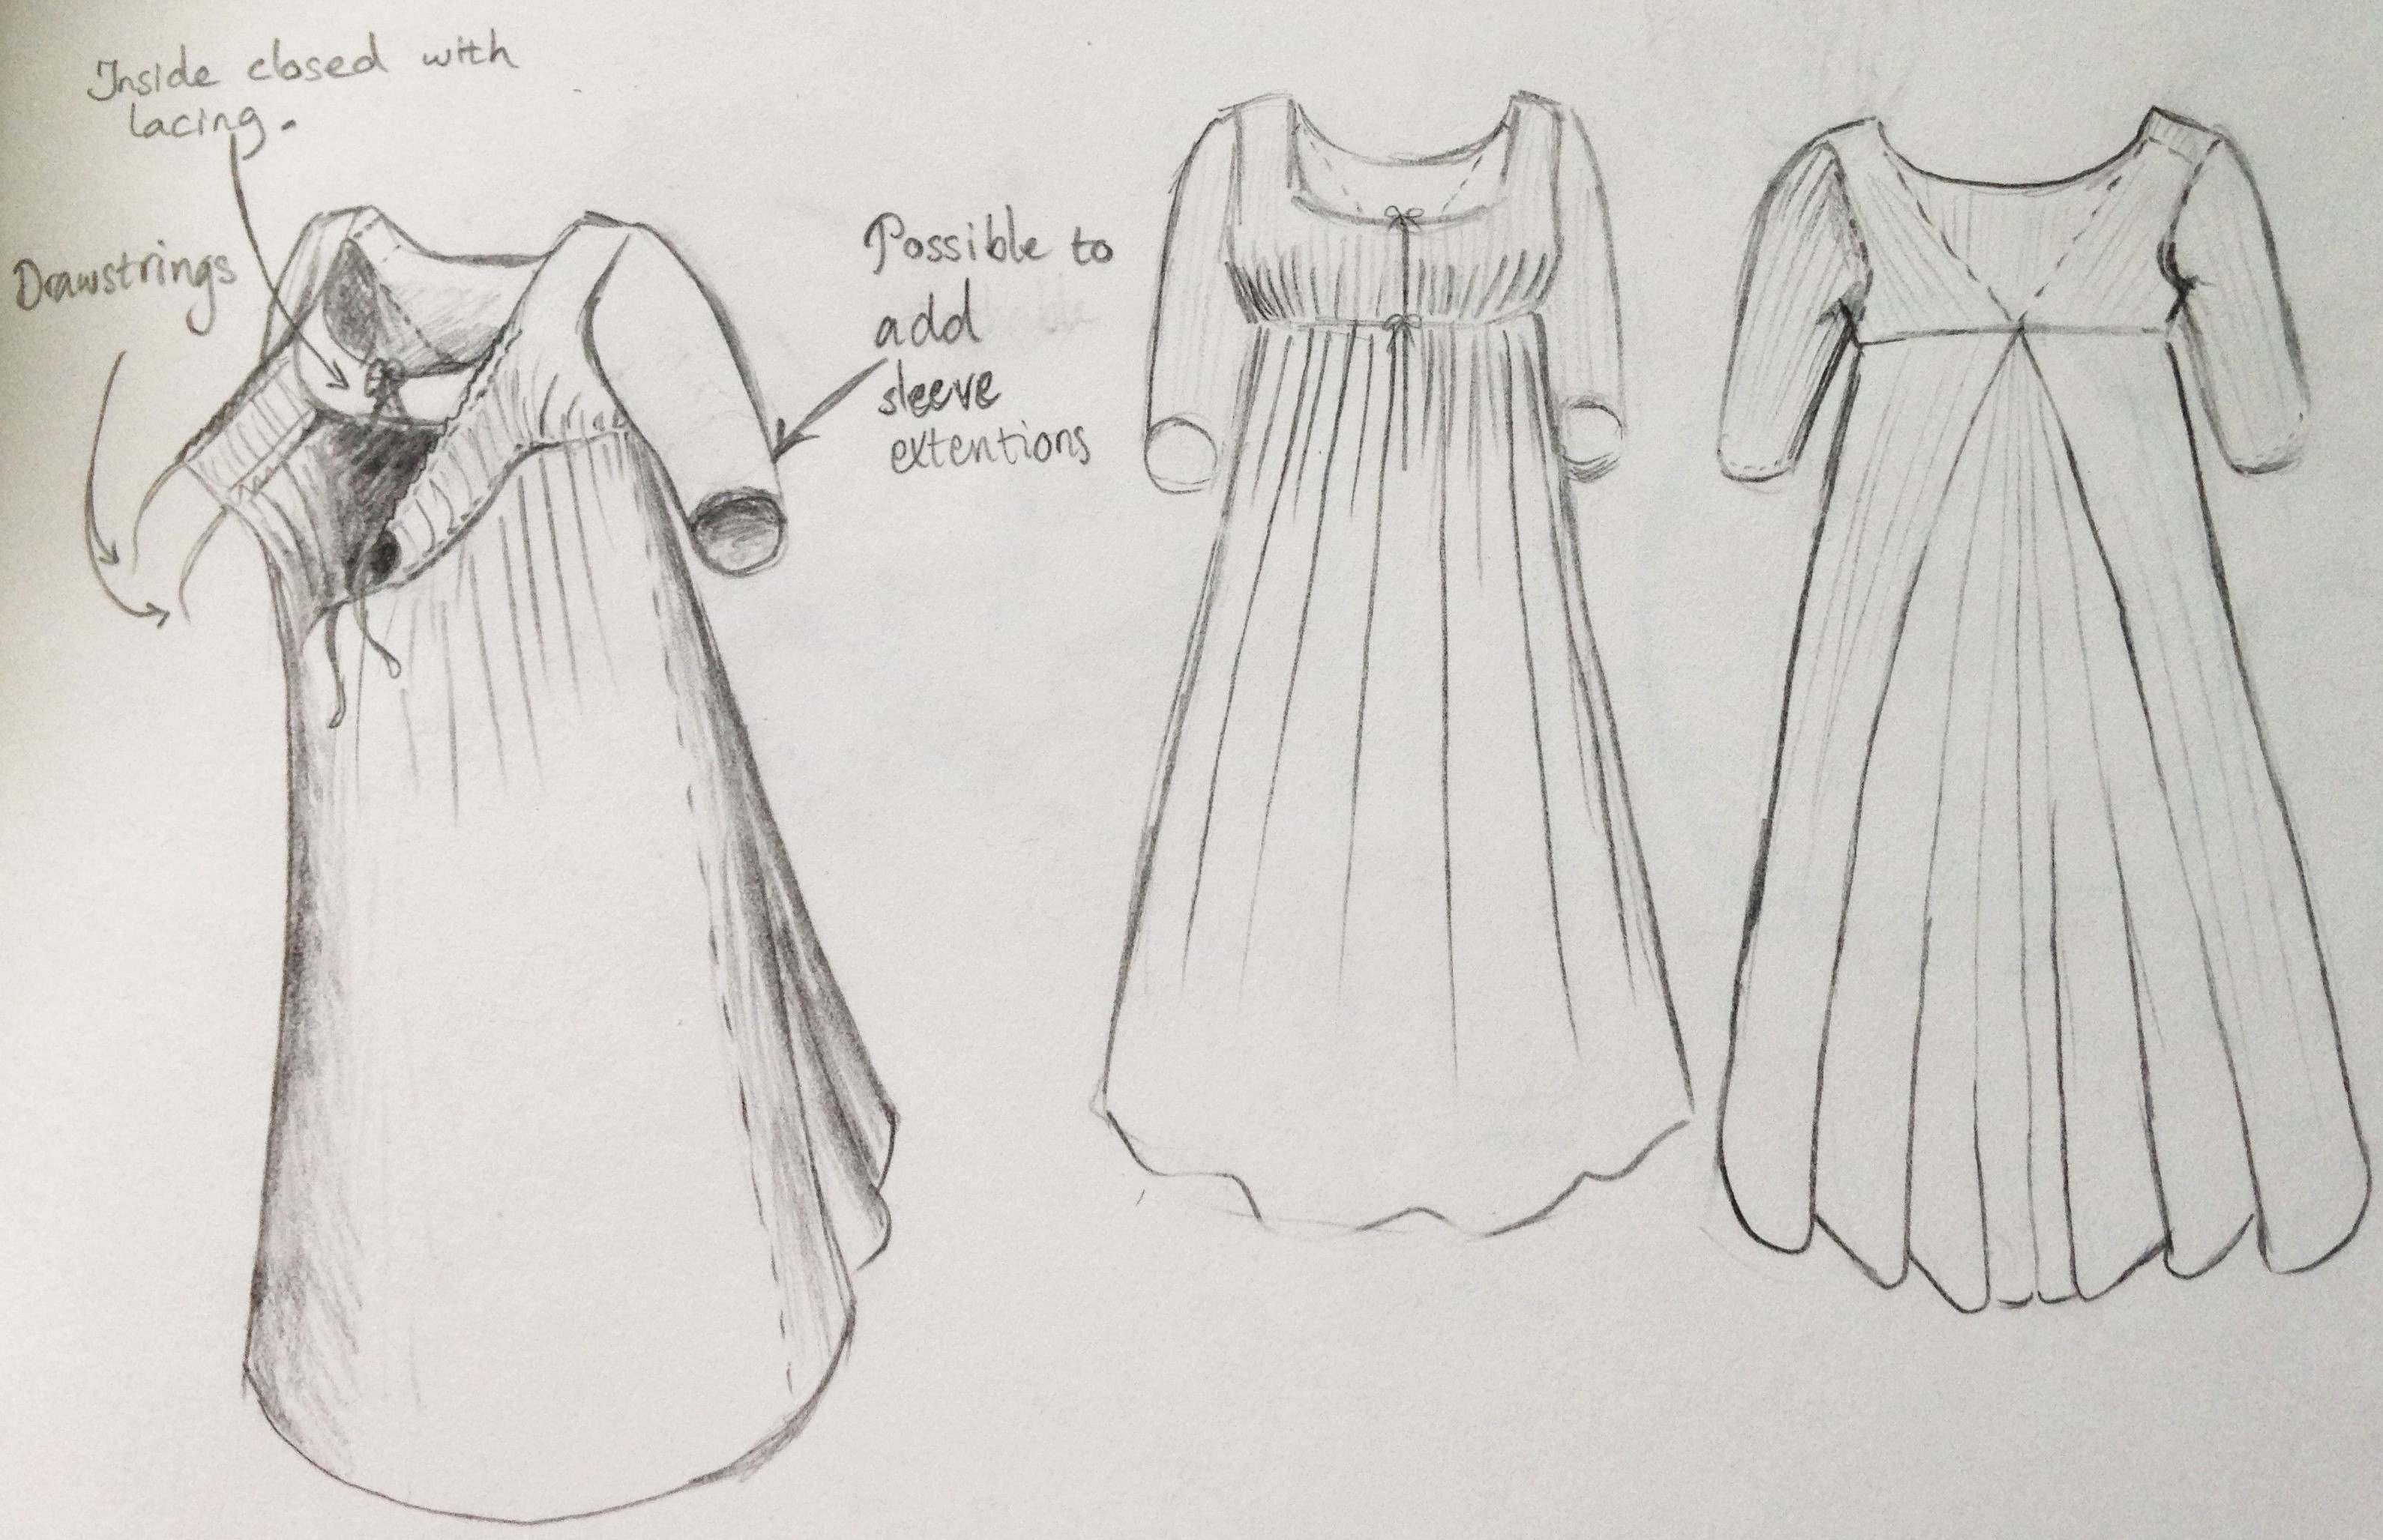
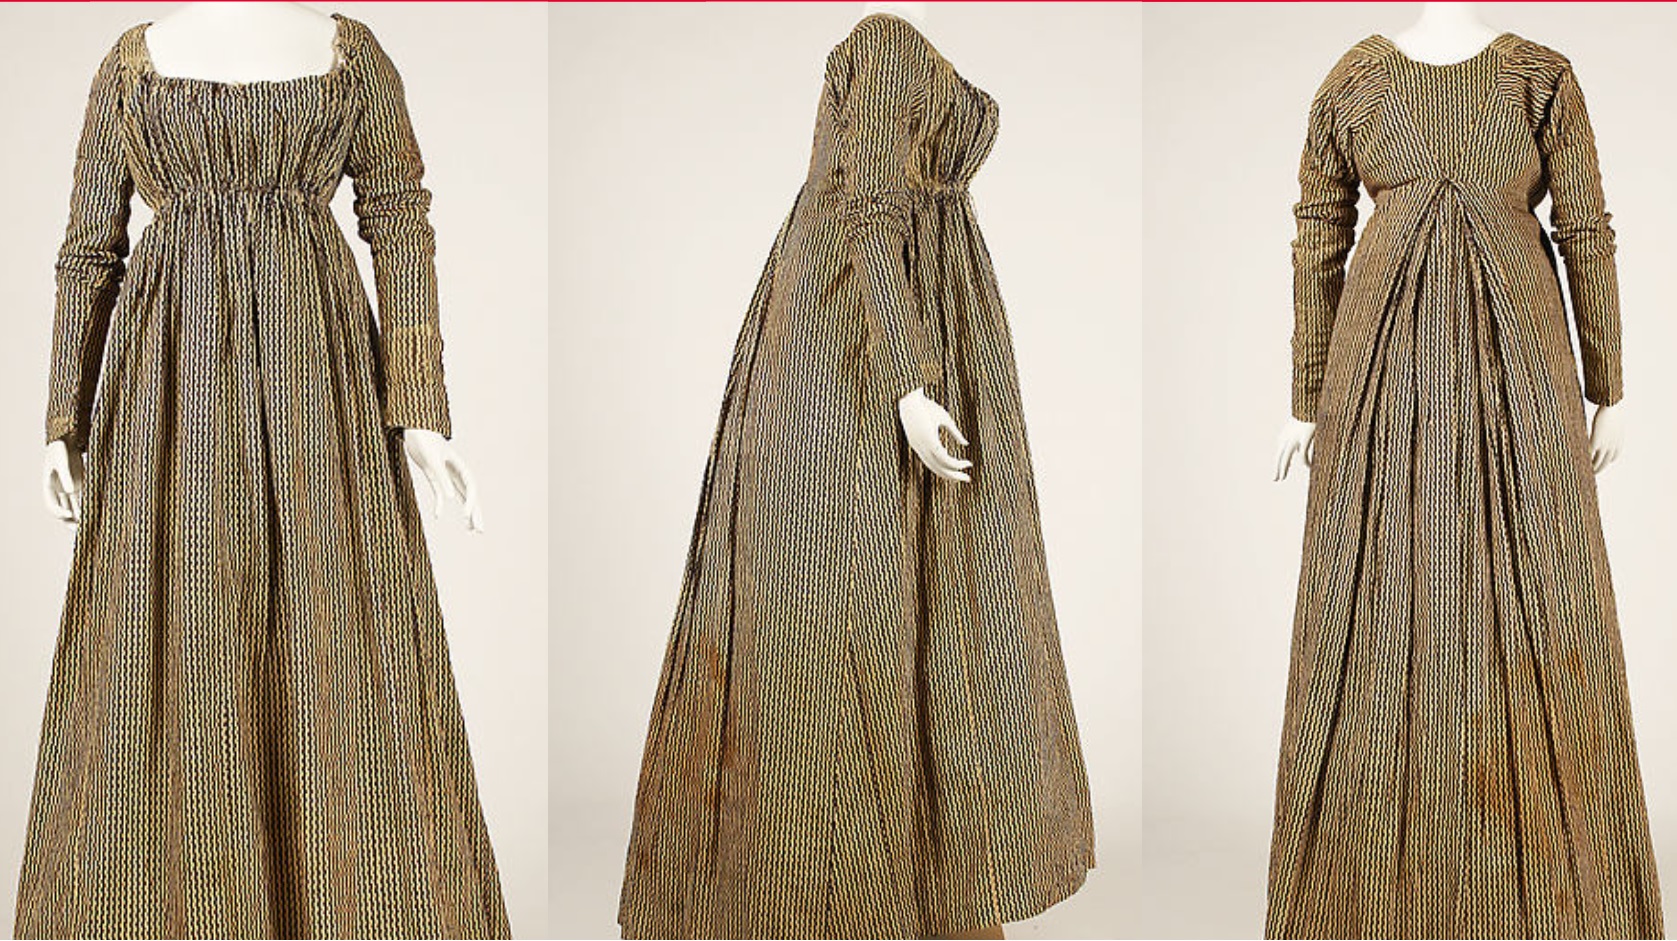
I used a bodice, where the lining is laced in the front and the dress fabric is gathered with drawstrings. I was inspired by many different vintage gowns, among which are these:
Jag valde en konstruktion där livet är fodrat och insidan snörs samman framtill och själva klänningstyget samlas med dragsko över och under bysten.
Striped gown found at the Metropolitan Museum of Art. Unfortunately, I cannot find the link again.Gown with detachable sleeve extentions, closed in the front with drawstrings. Colonial Williamsburg Education
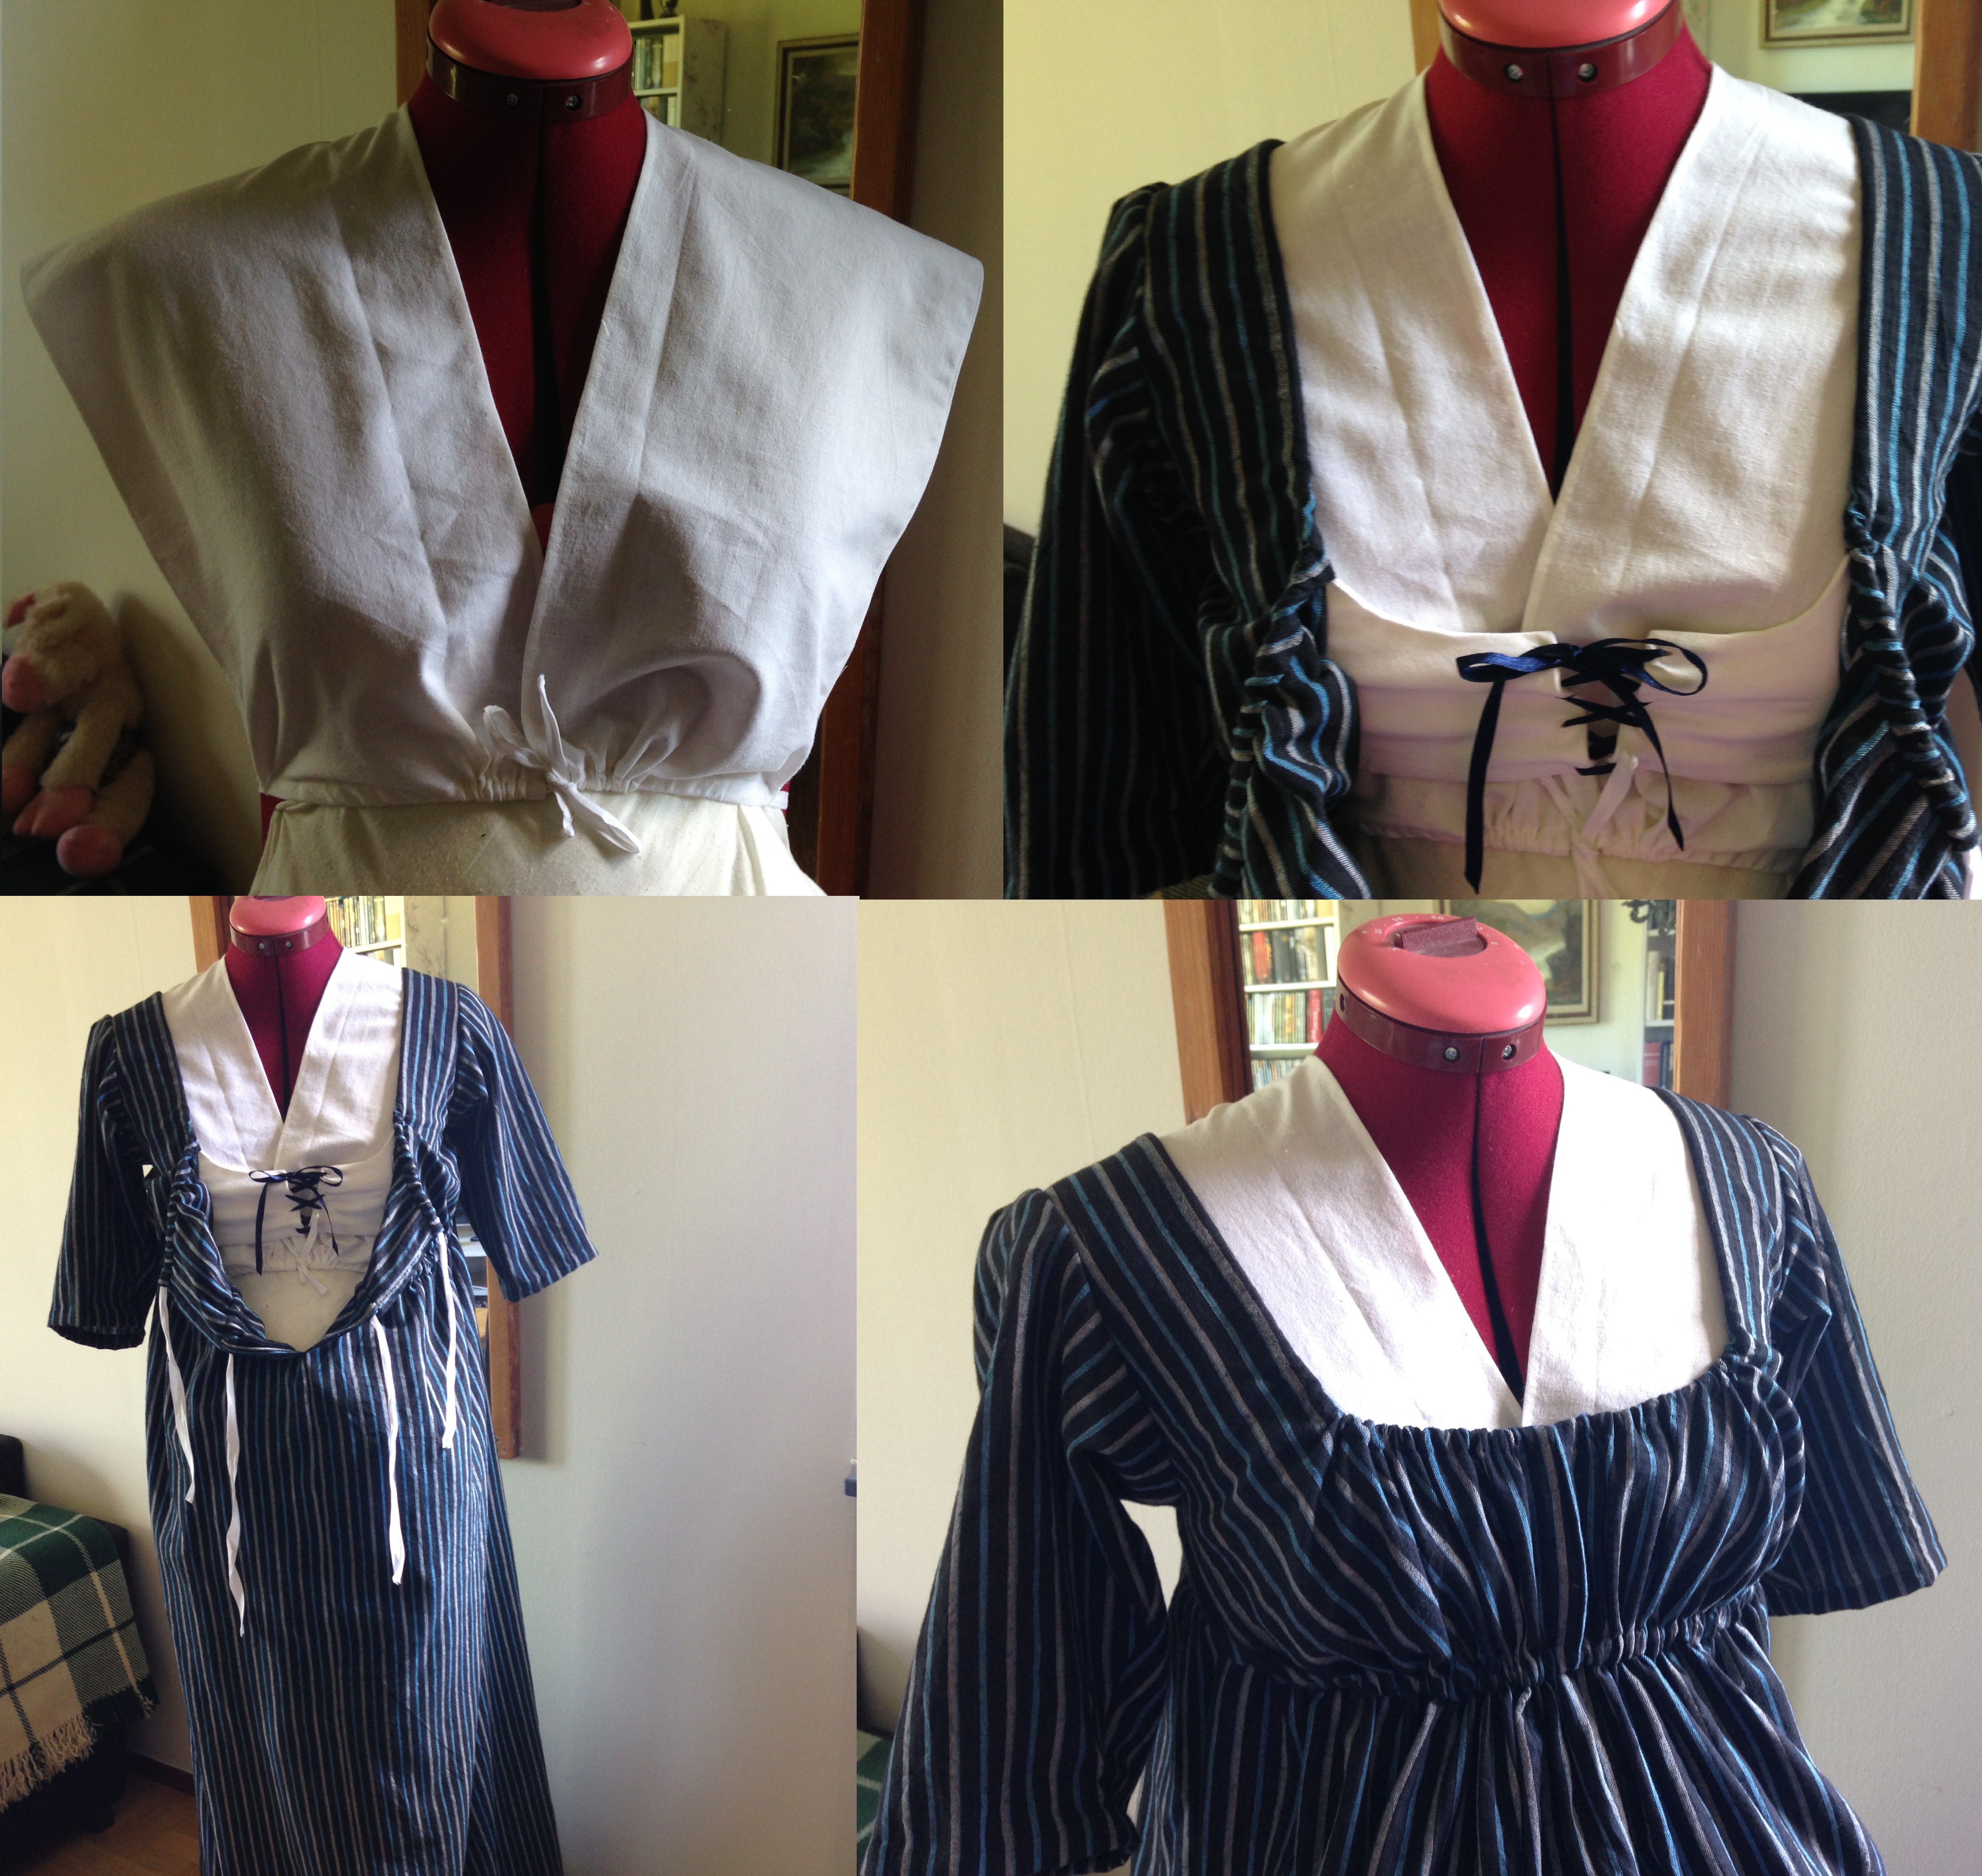
Fishu and Cap
For the modest motherly look, I needed a fishu for the neck line and a cap. The fishu will go well together with many of my regency dresses. There is a fantastic blog post about fishus here.
För den anspråkslösa, moderliga looken, behövde jag en chemisette till urringningen och en mössa. Chemisetten kommer passa till flera av mina empirklänningar. Här är ett jättebra blogginlägg om olika typer av chemisetter och schalar.
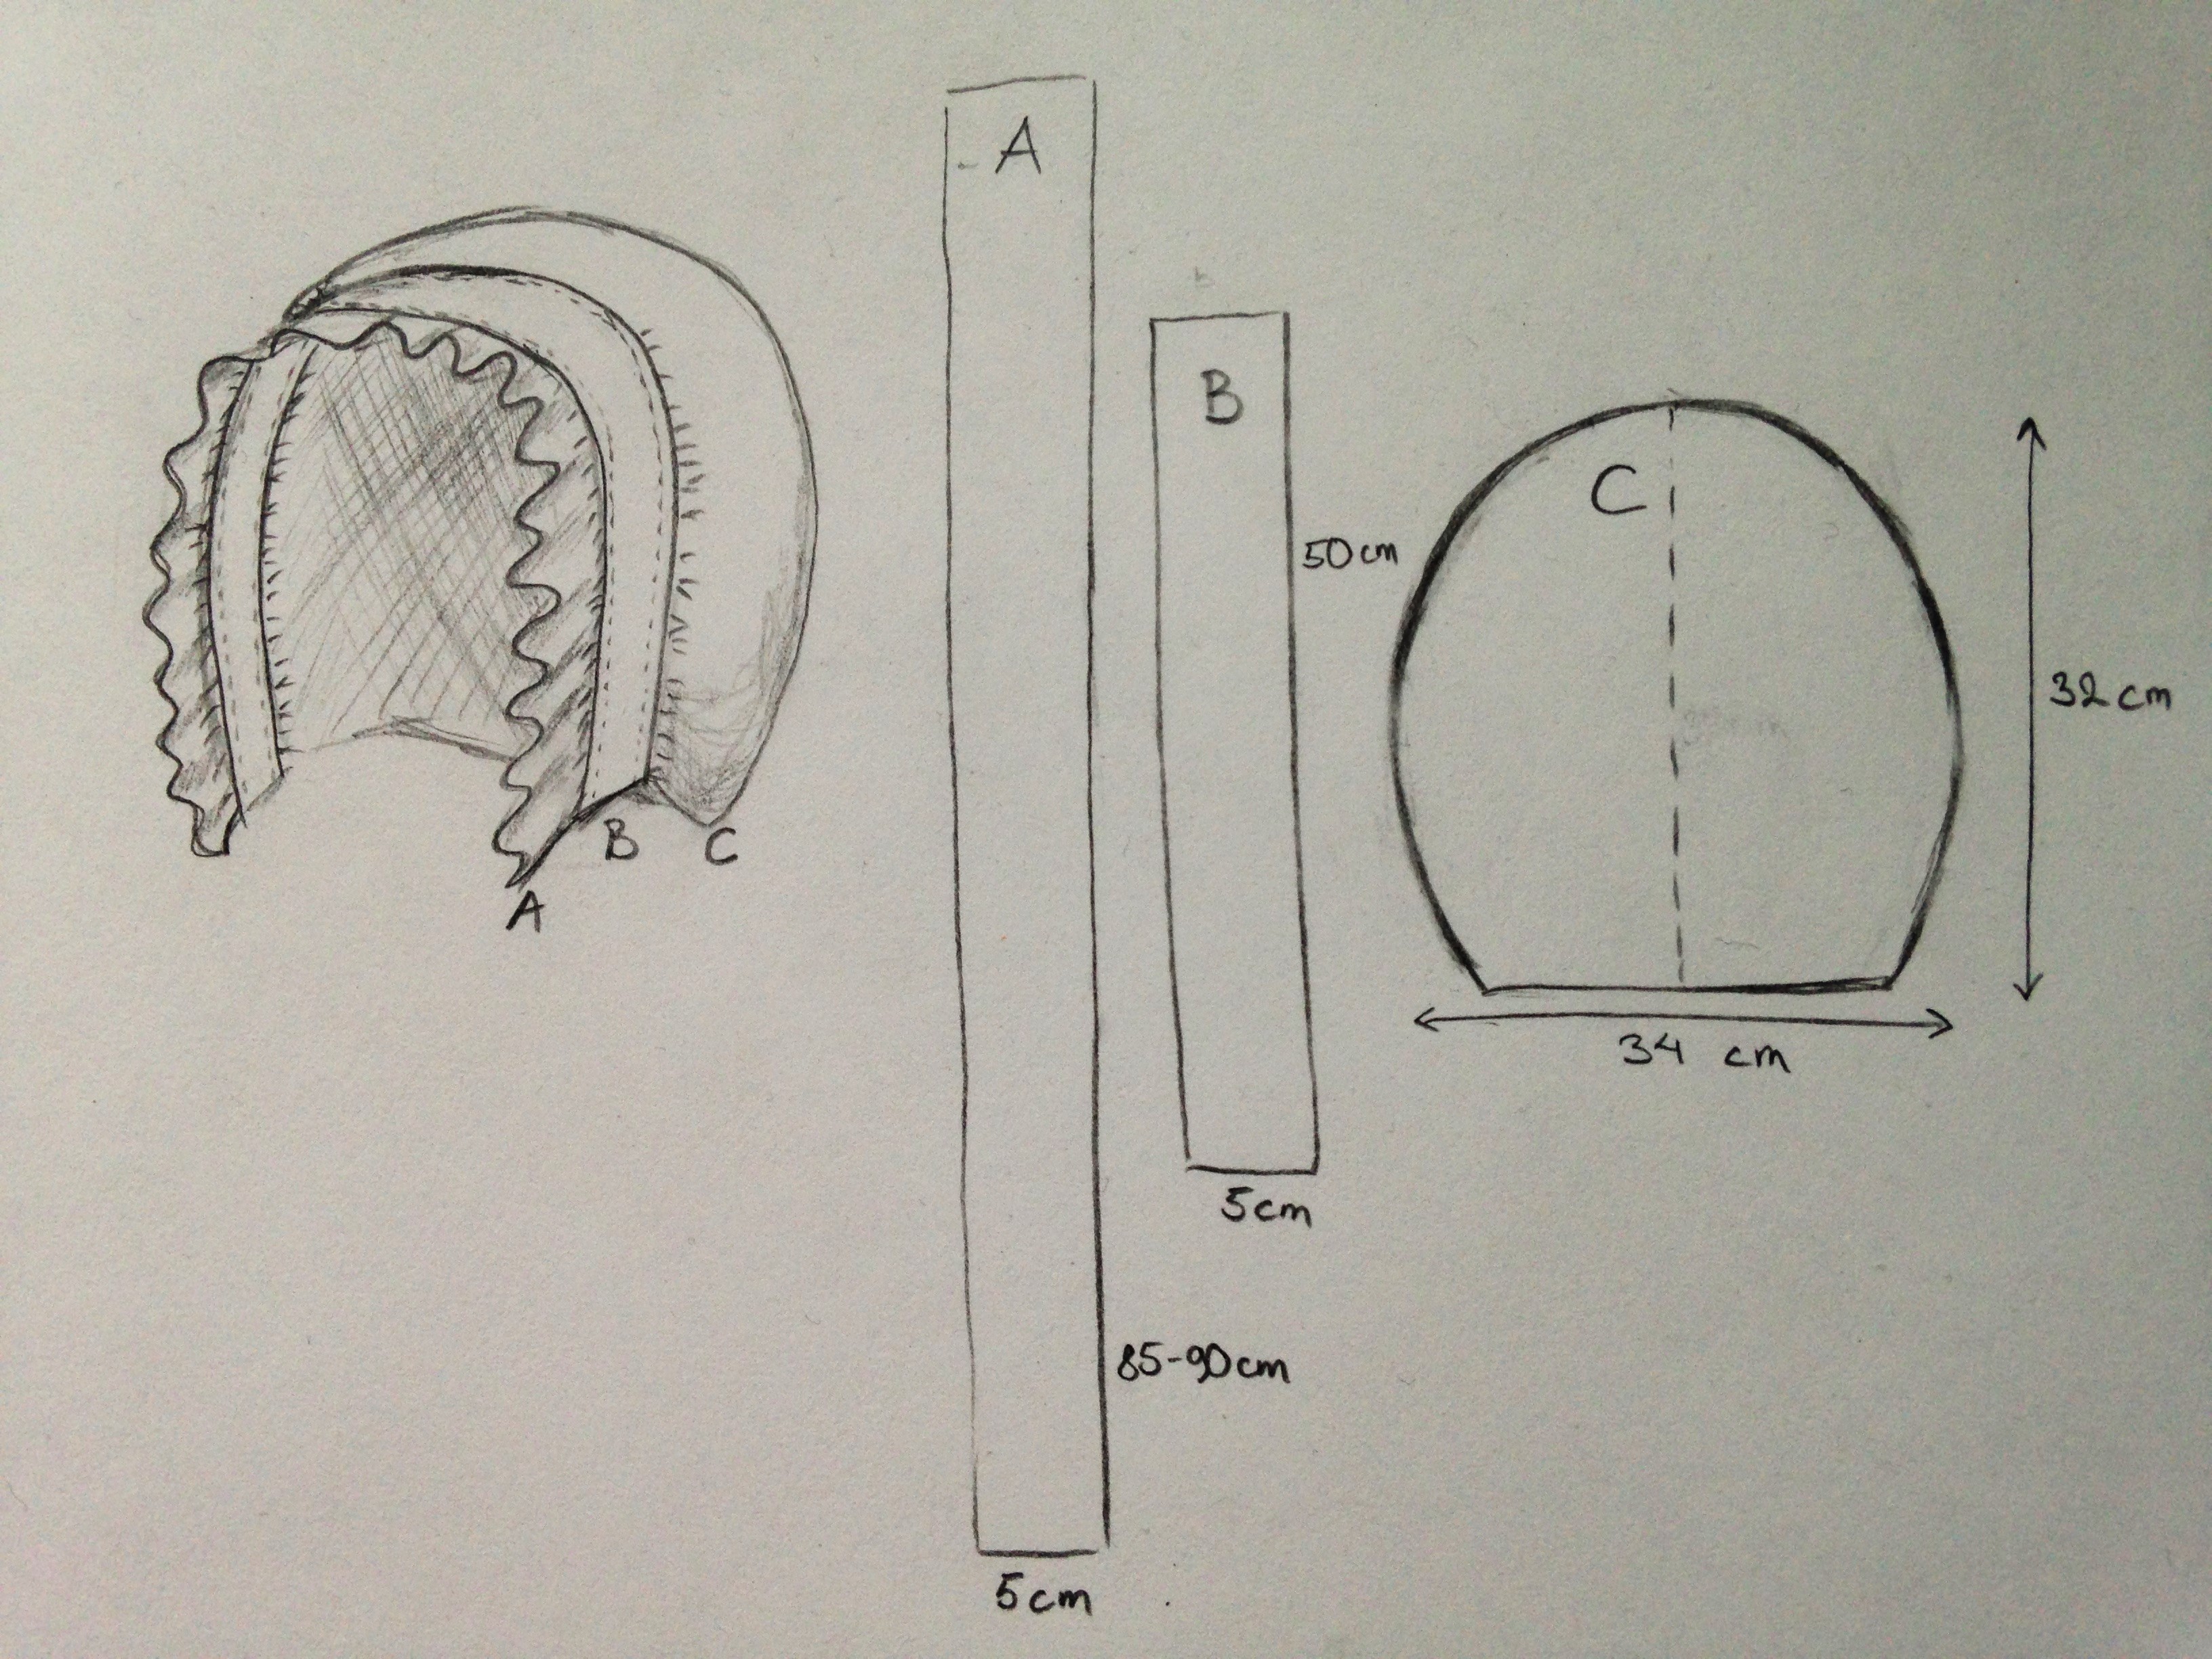
Cap construction/Mössans konstruktion
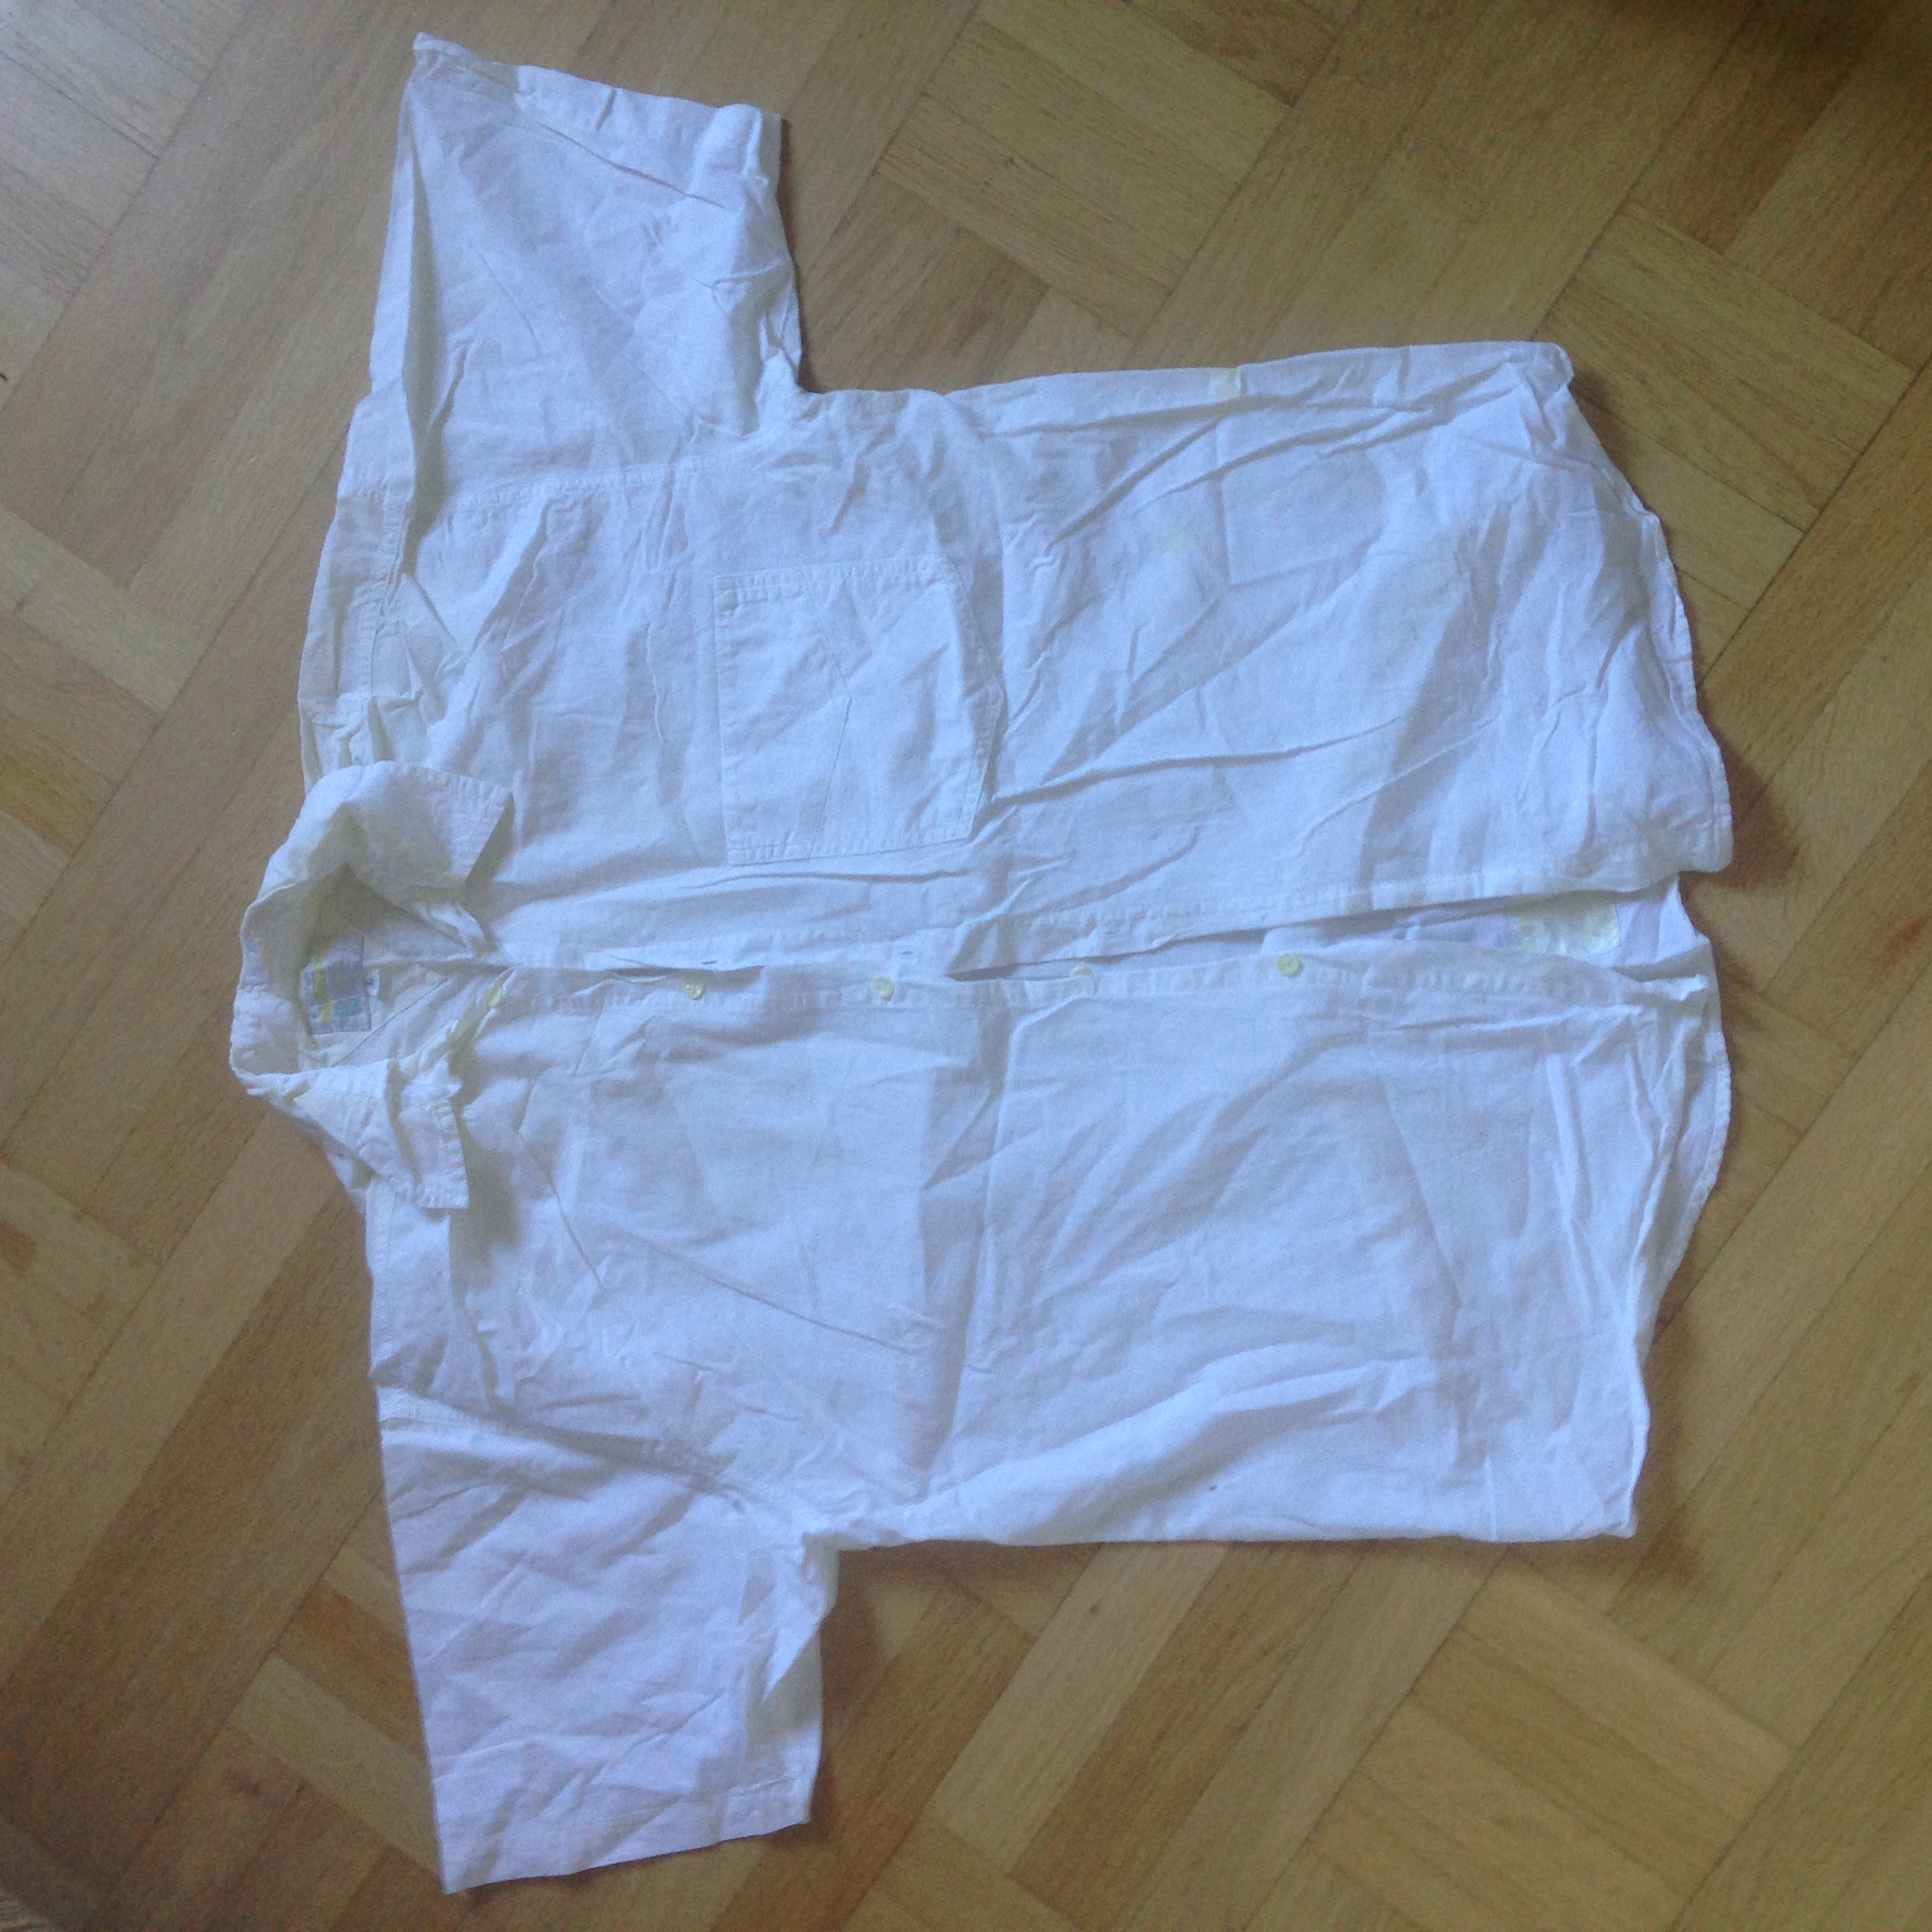
My main inspiration for the cap was this one, as it has no laces or expensive fabrics that would match poorly with my crude dress fabric. In my parents basement, there is a cupboard where they put old clothes, curtains and bed sheets, which have forfeited their purpose but could perhaps find a new use later on. Last week I dug deep and found an old, stained shirt with just enough unstained fabric for making a cap and a fishu!
Inspirationen för mössan kommer huvudsakligen från denna, eftersom den inte är gjord i något dyrt tyg eller har någon spets, vilket skulle matcha mitt grova bomullstyg väldigt dåligt. I mina föräldrars källare finns det en garderob full av gamla undanlagda gardiner, kläder och sängkläder. Där grävde jag runt förra veckan och hittade faktiskt en gammal fläckig skjorta, som hade precis lagom med rent tyg över för att räcka till mössan och chemisetten.
This is how it came out. I think that you can figure out how it is done by yourselves, so I will not linger at that.
Så här blev det. Jag tror att ni själva kan räkna ut hur man gör dessa enkla plagg, så jag går hastigt vidare.
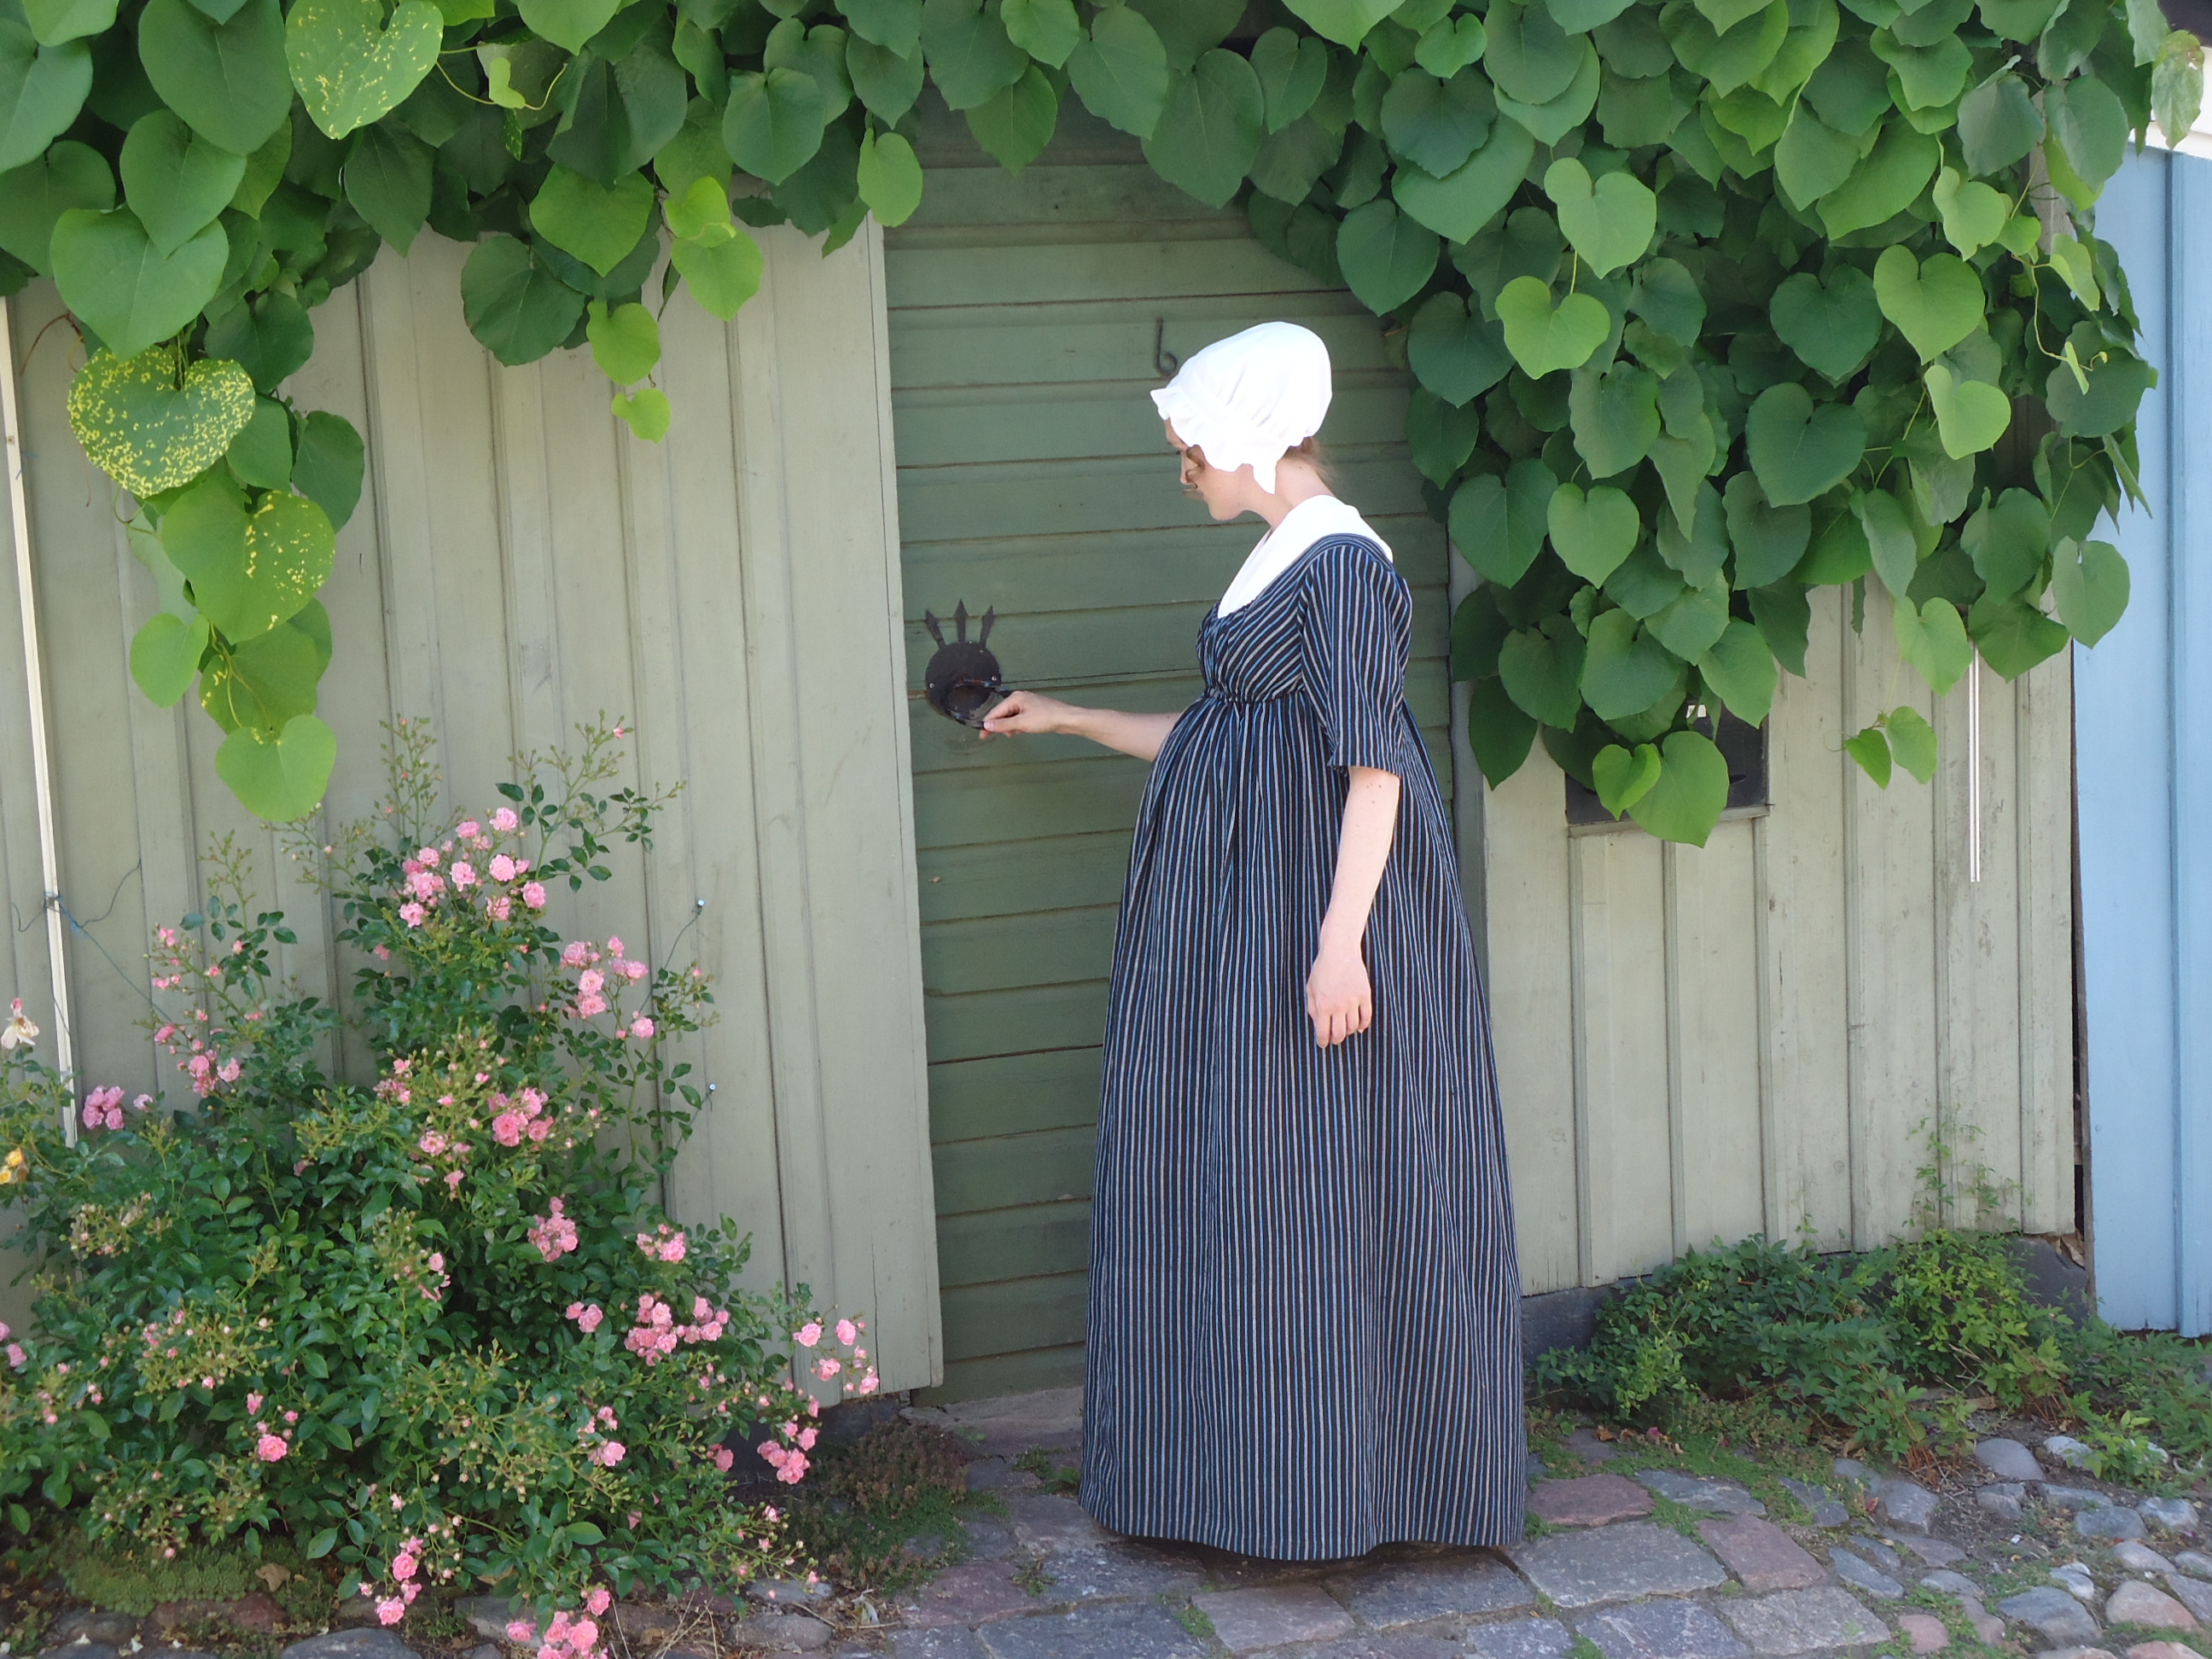
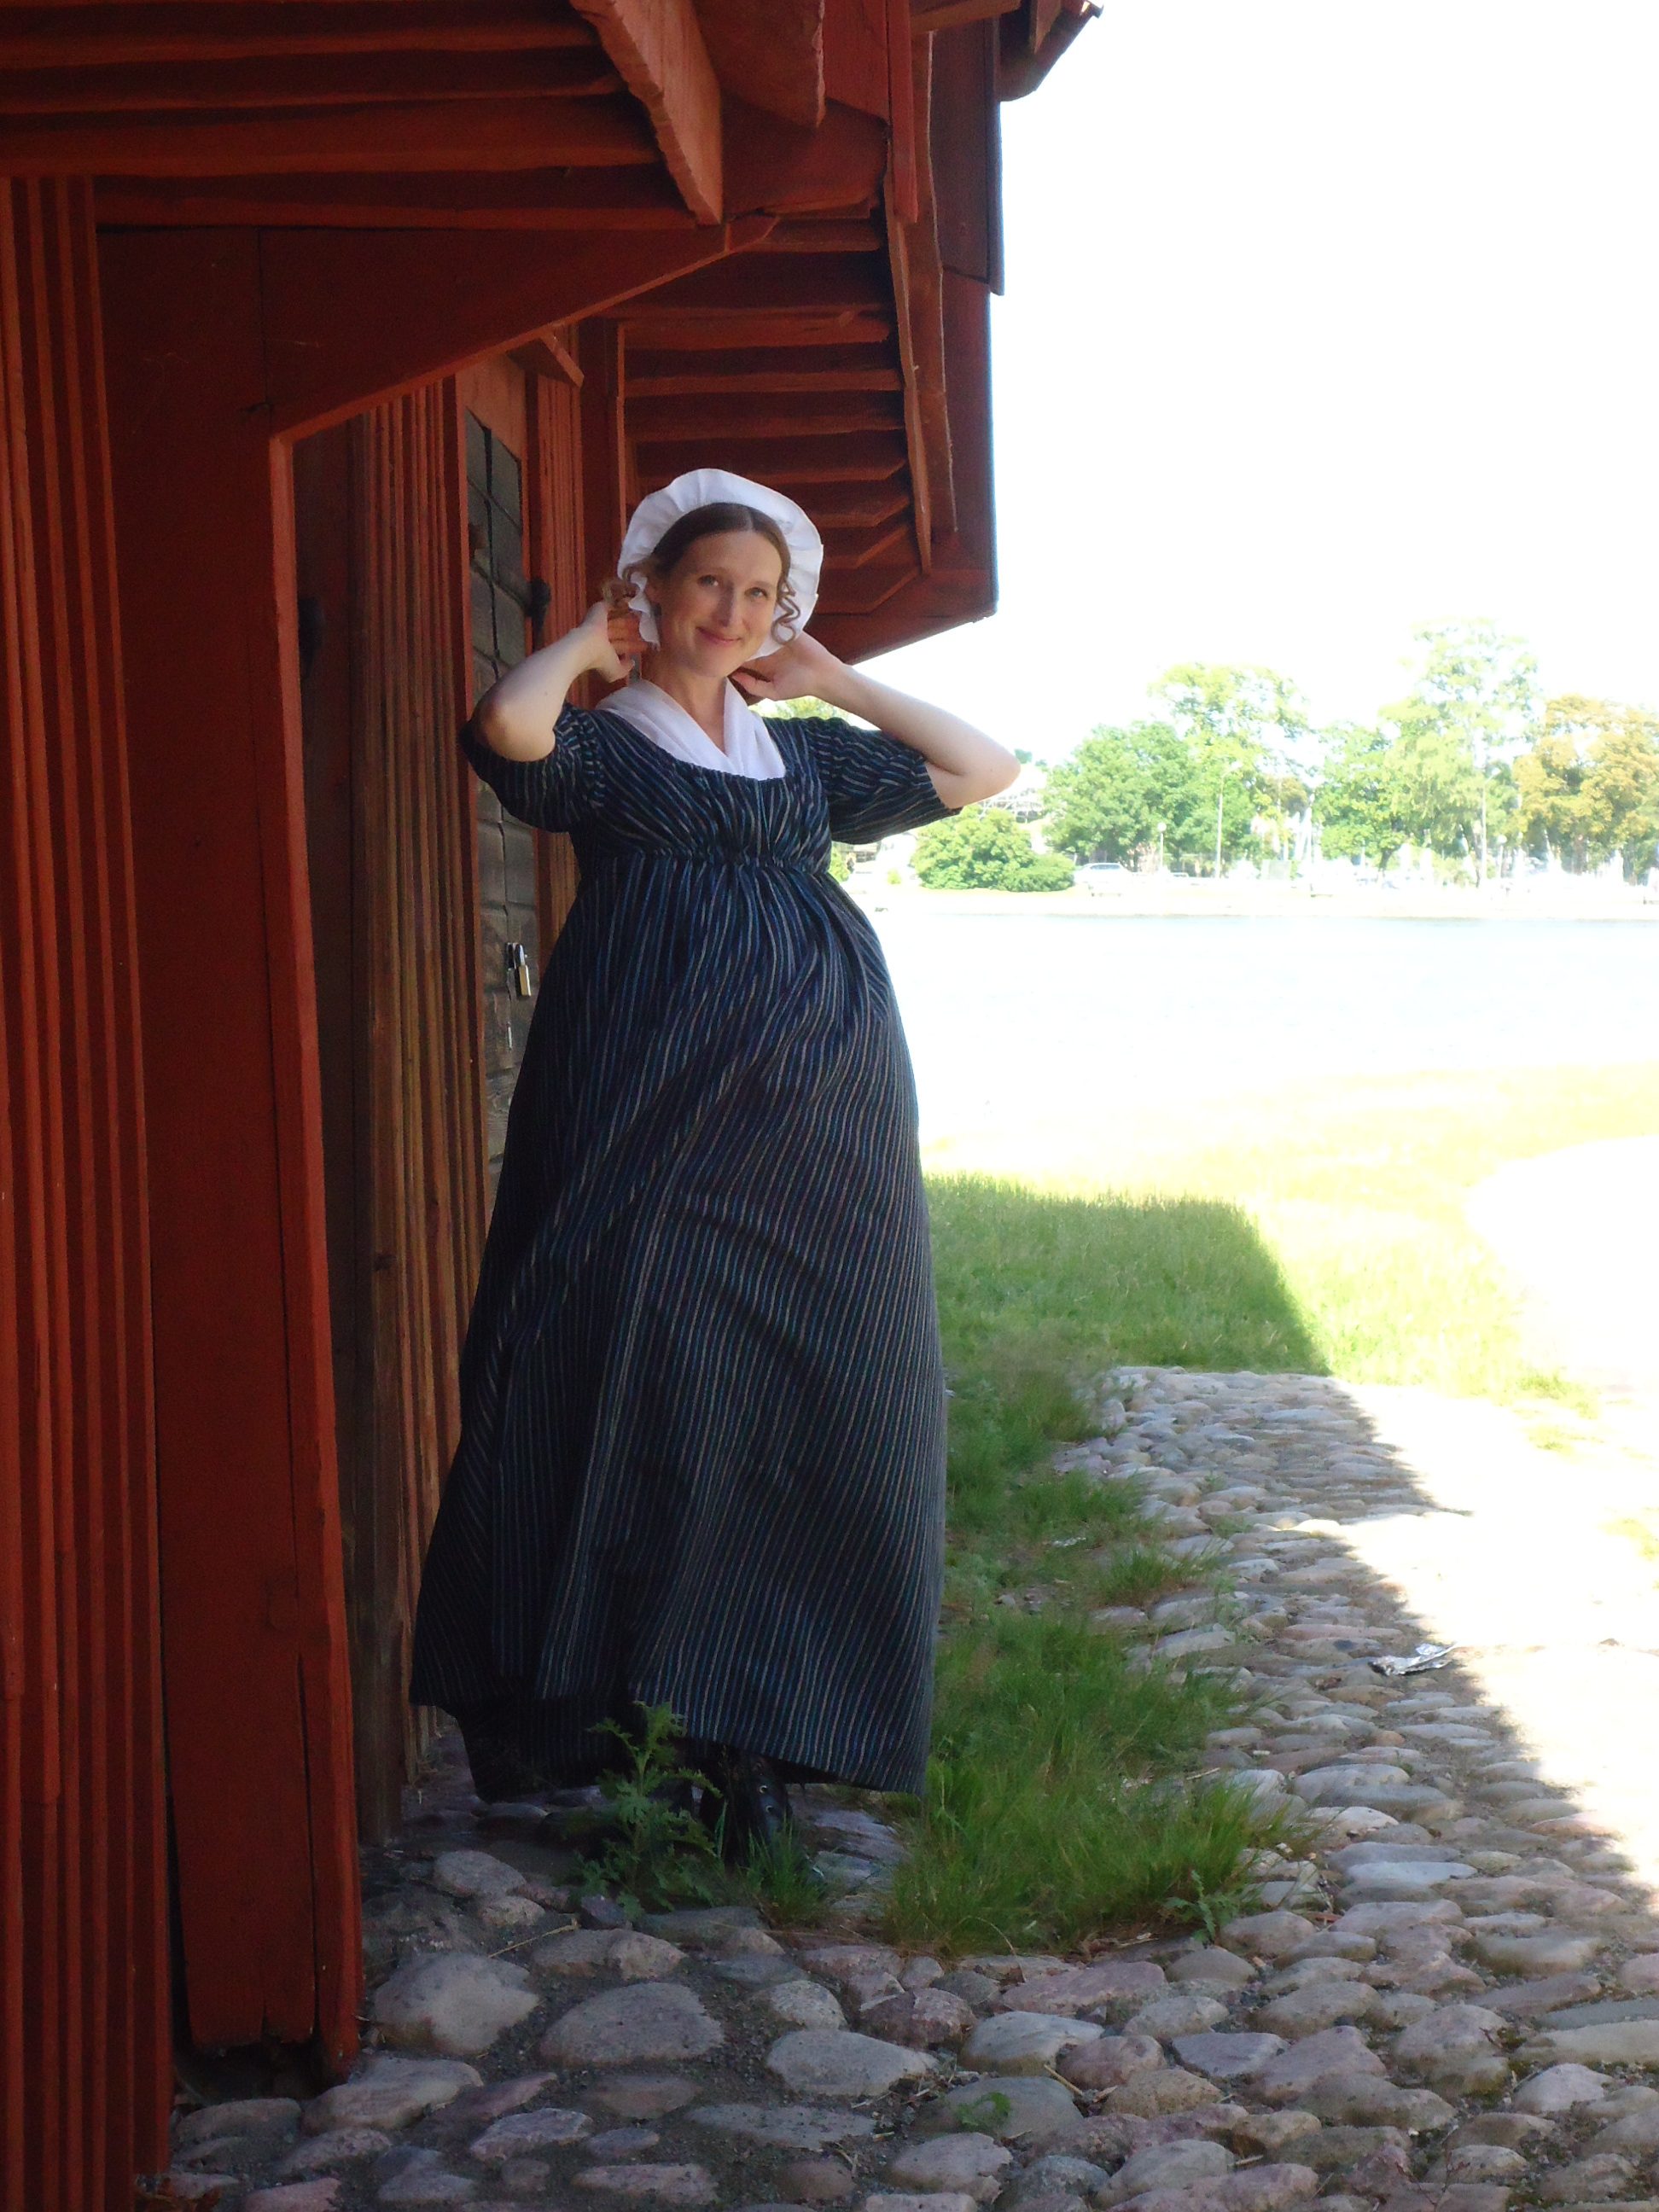
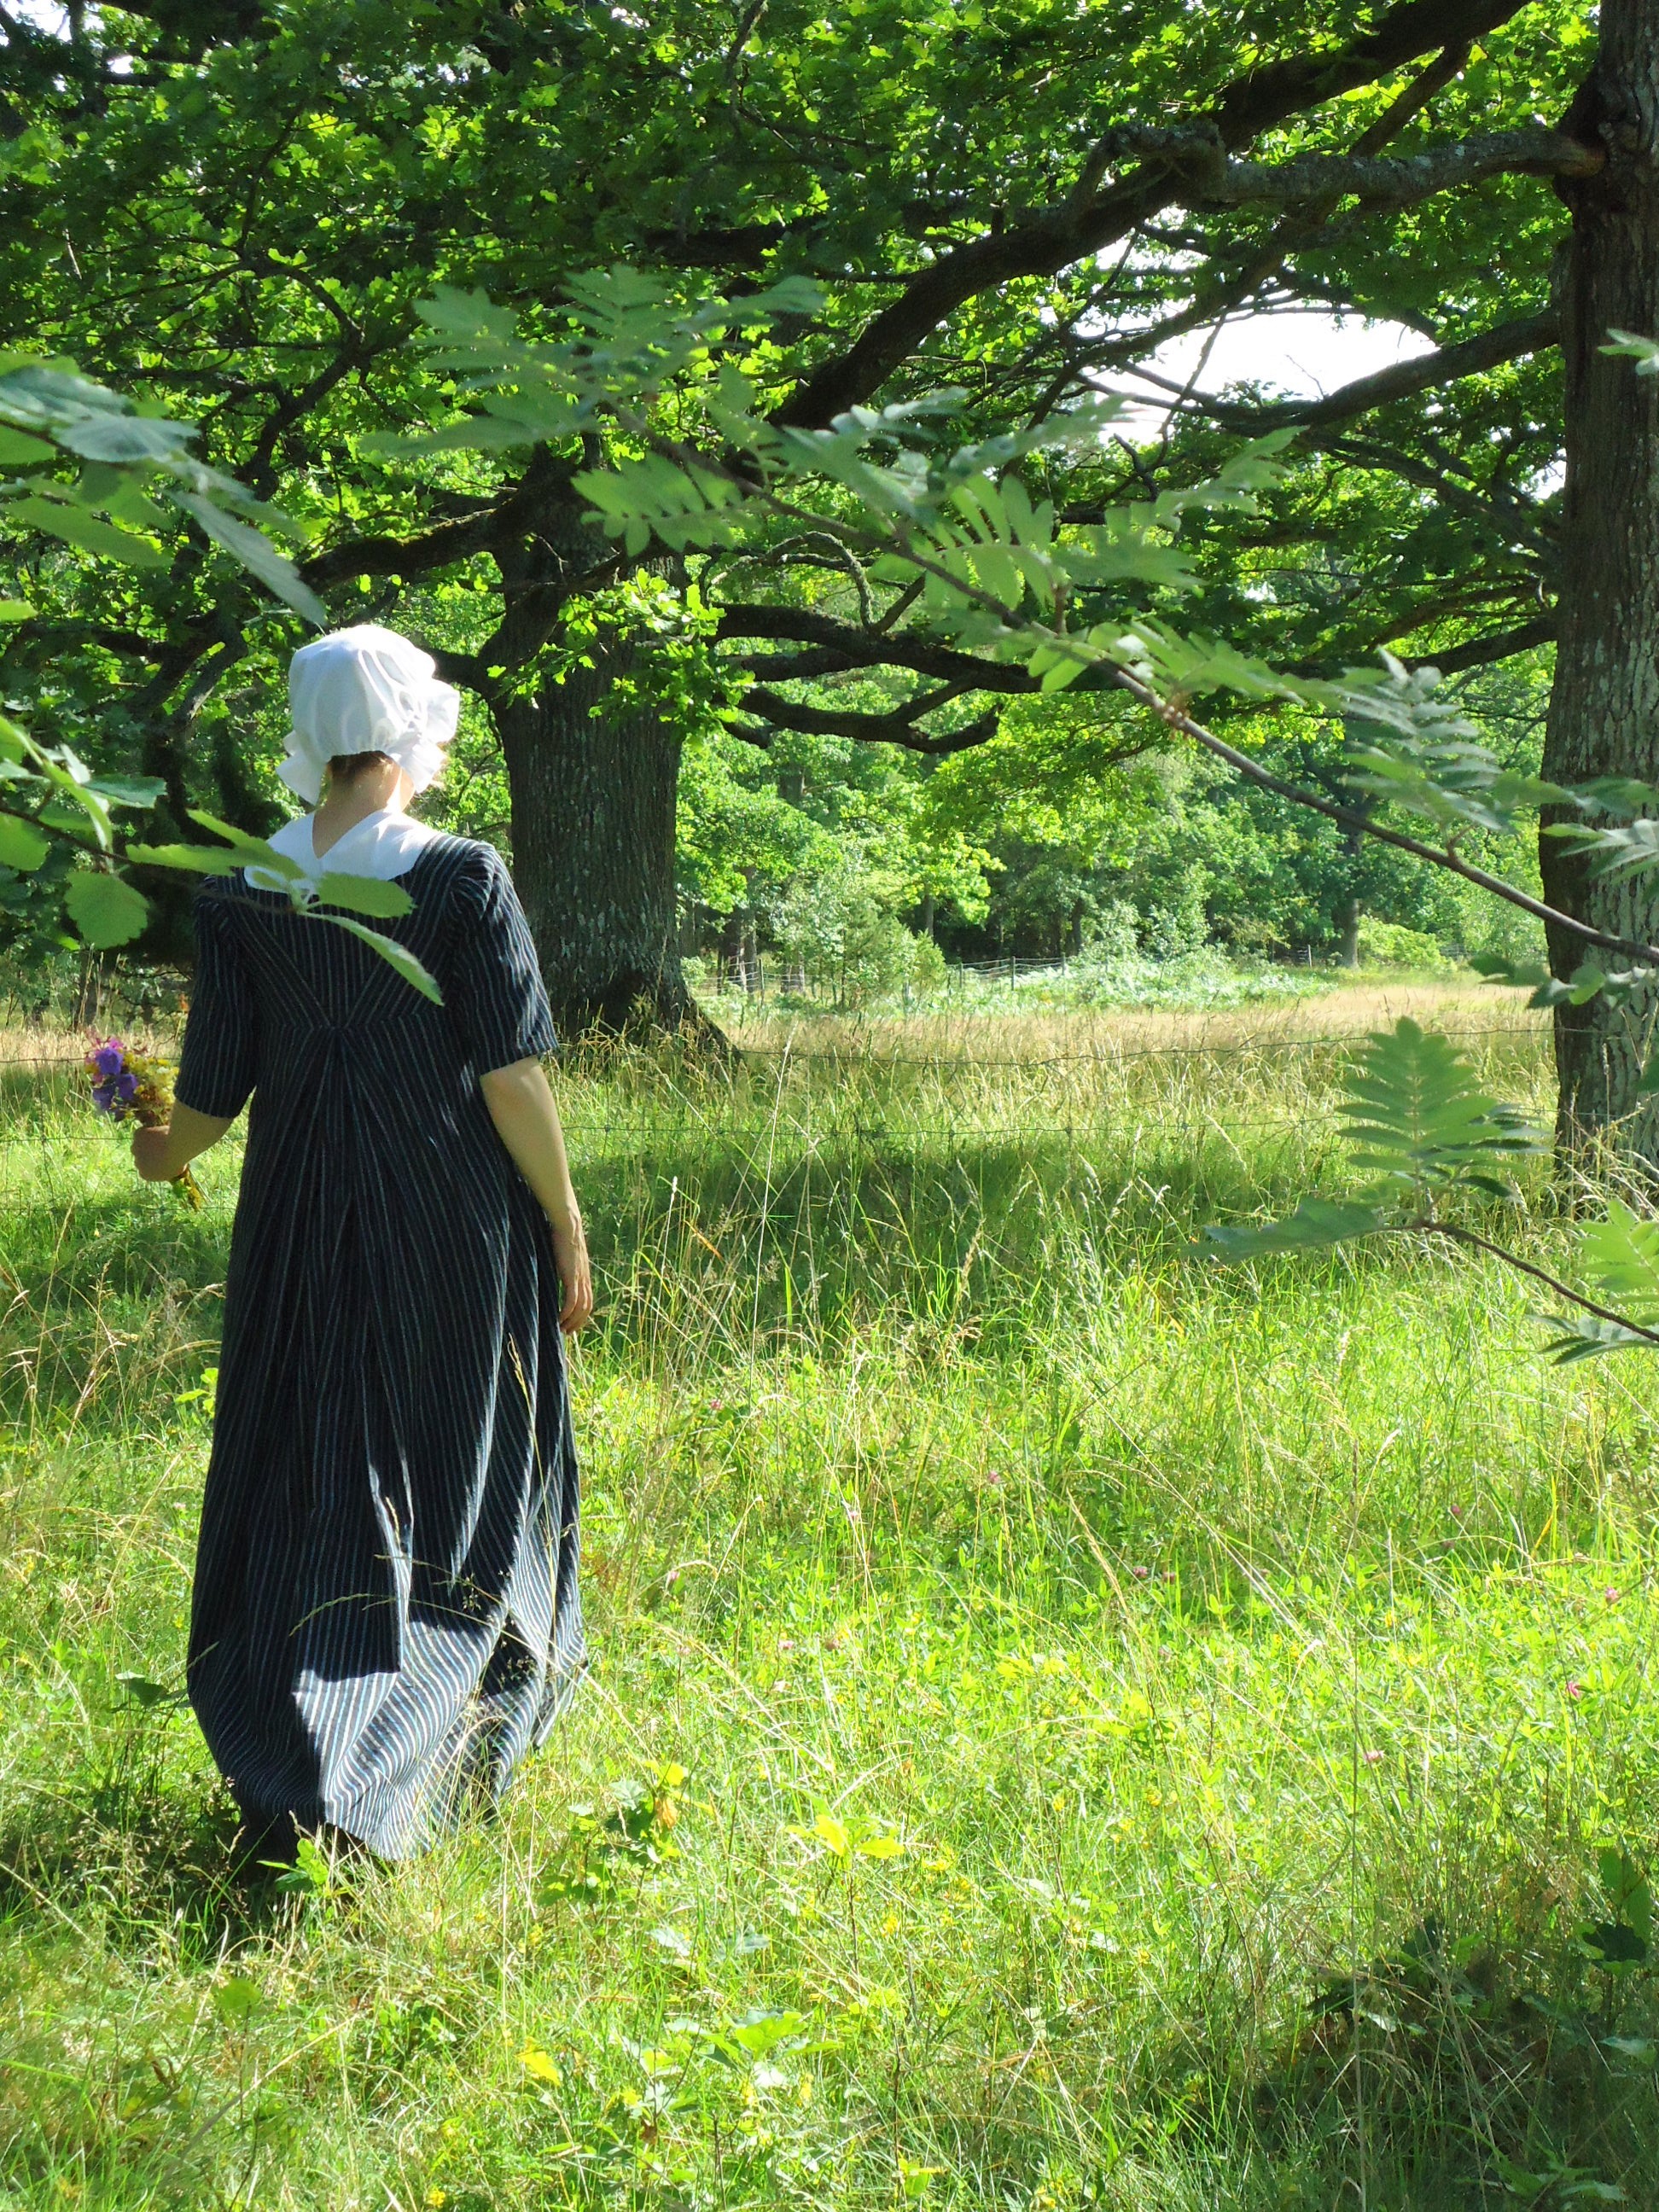
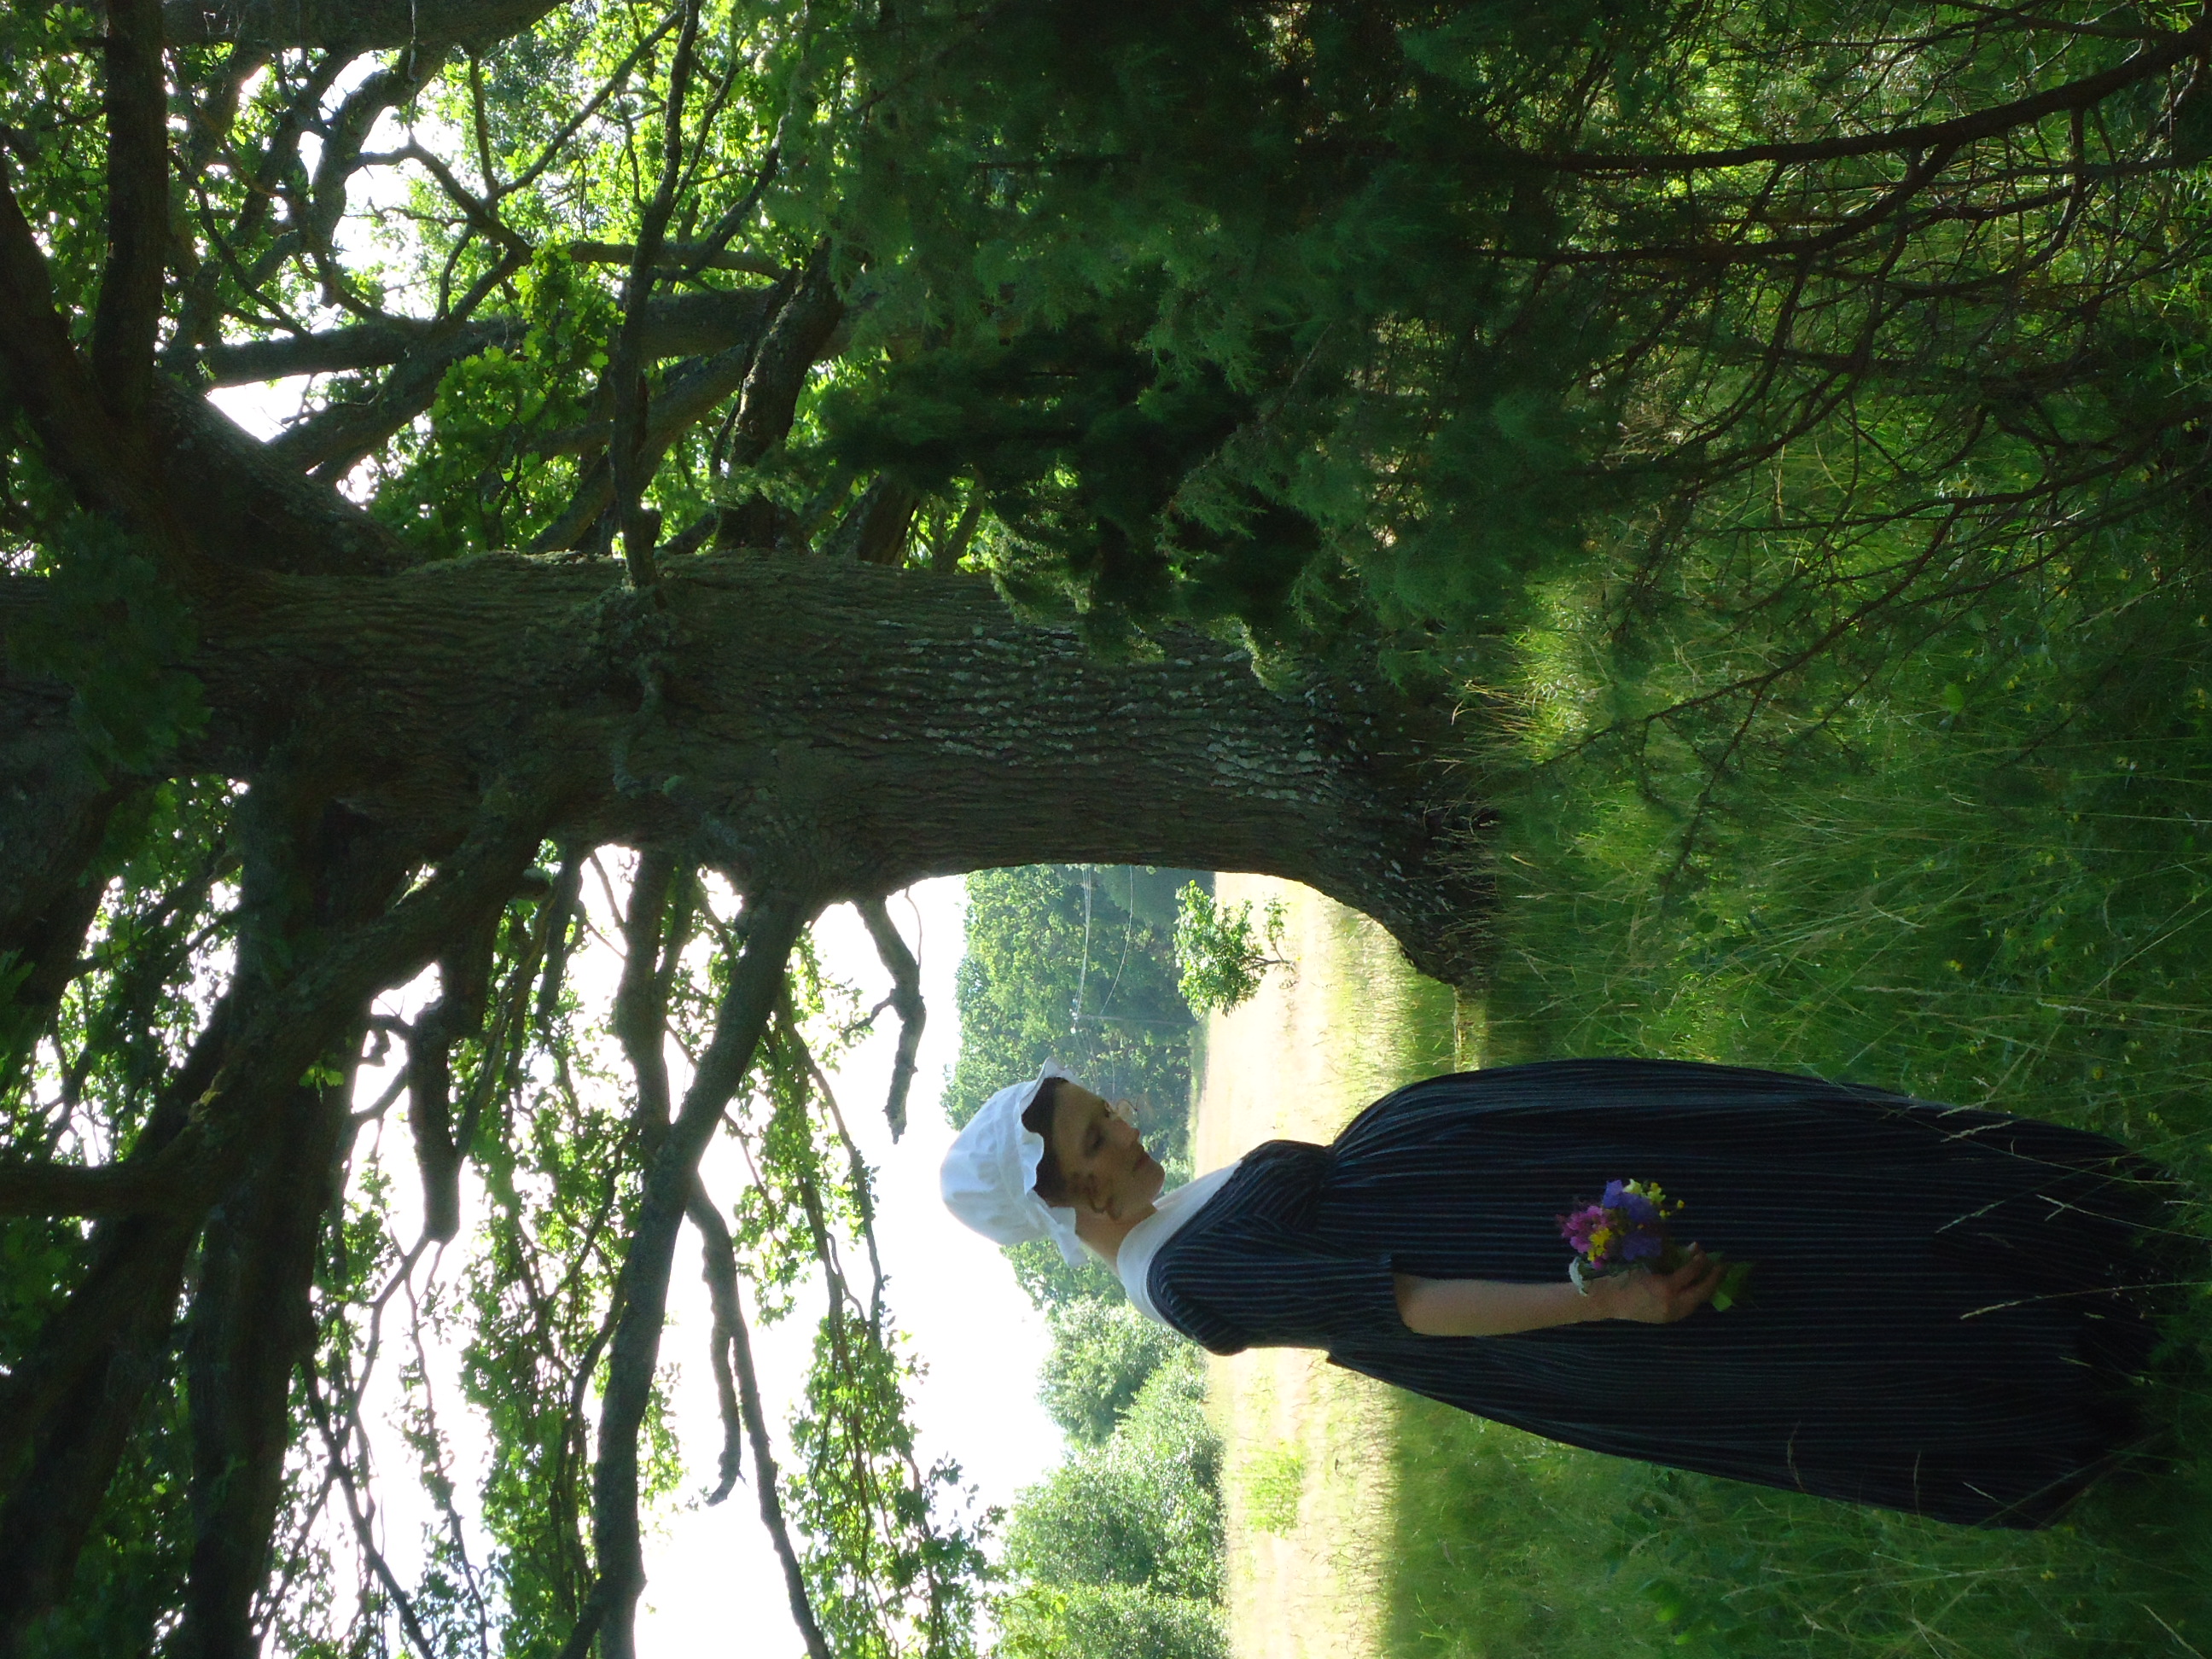
The finished gown with fishu and cap
I did not believe that you were interested in construction process of this one, as it is very similar to my other regency gowns. Here is how it is put on, anyway.
Jag trodde inte att ni var intresserade av att se hur denna klänning syddes, eftersom den påminner om de jag har gjort tidigare. Här ser ni åtminstone hur den tas på, över chemisetten.
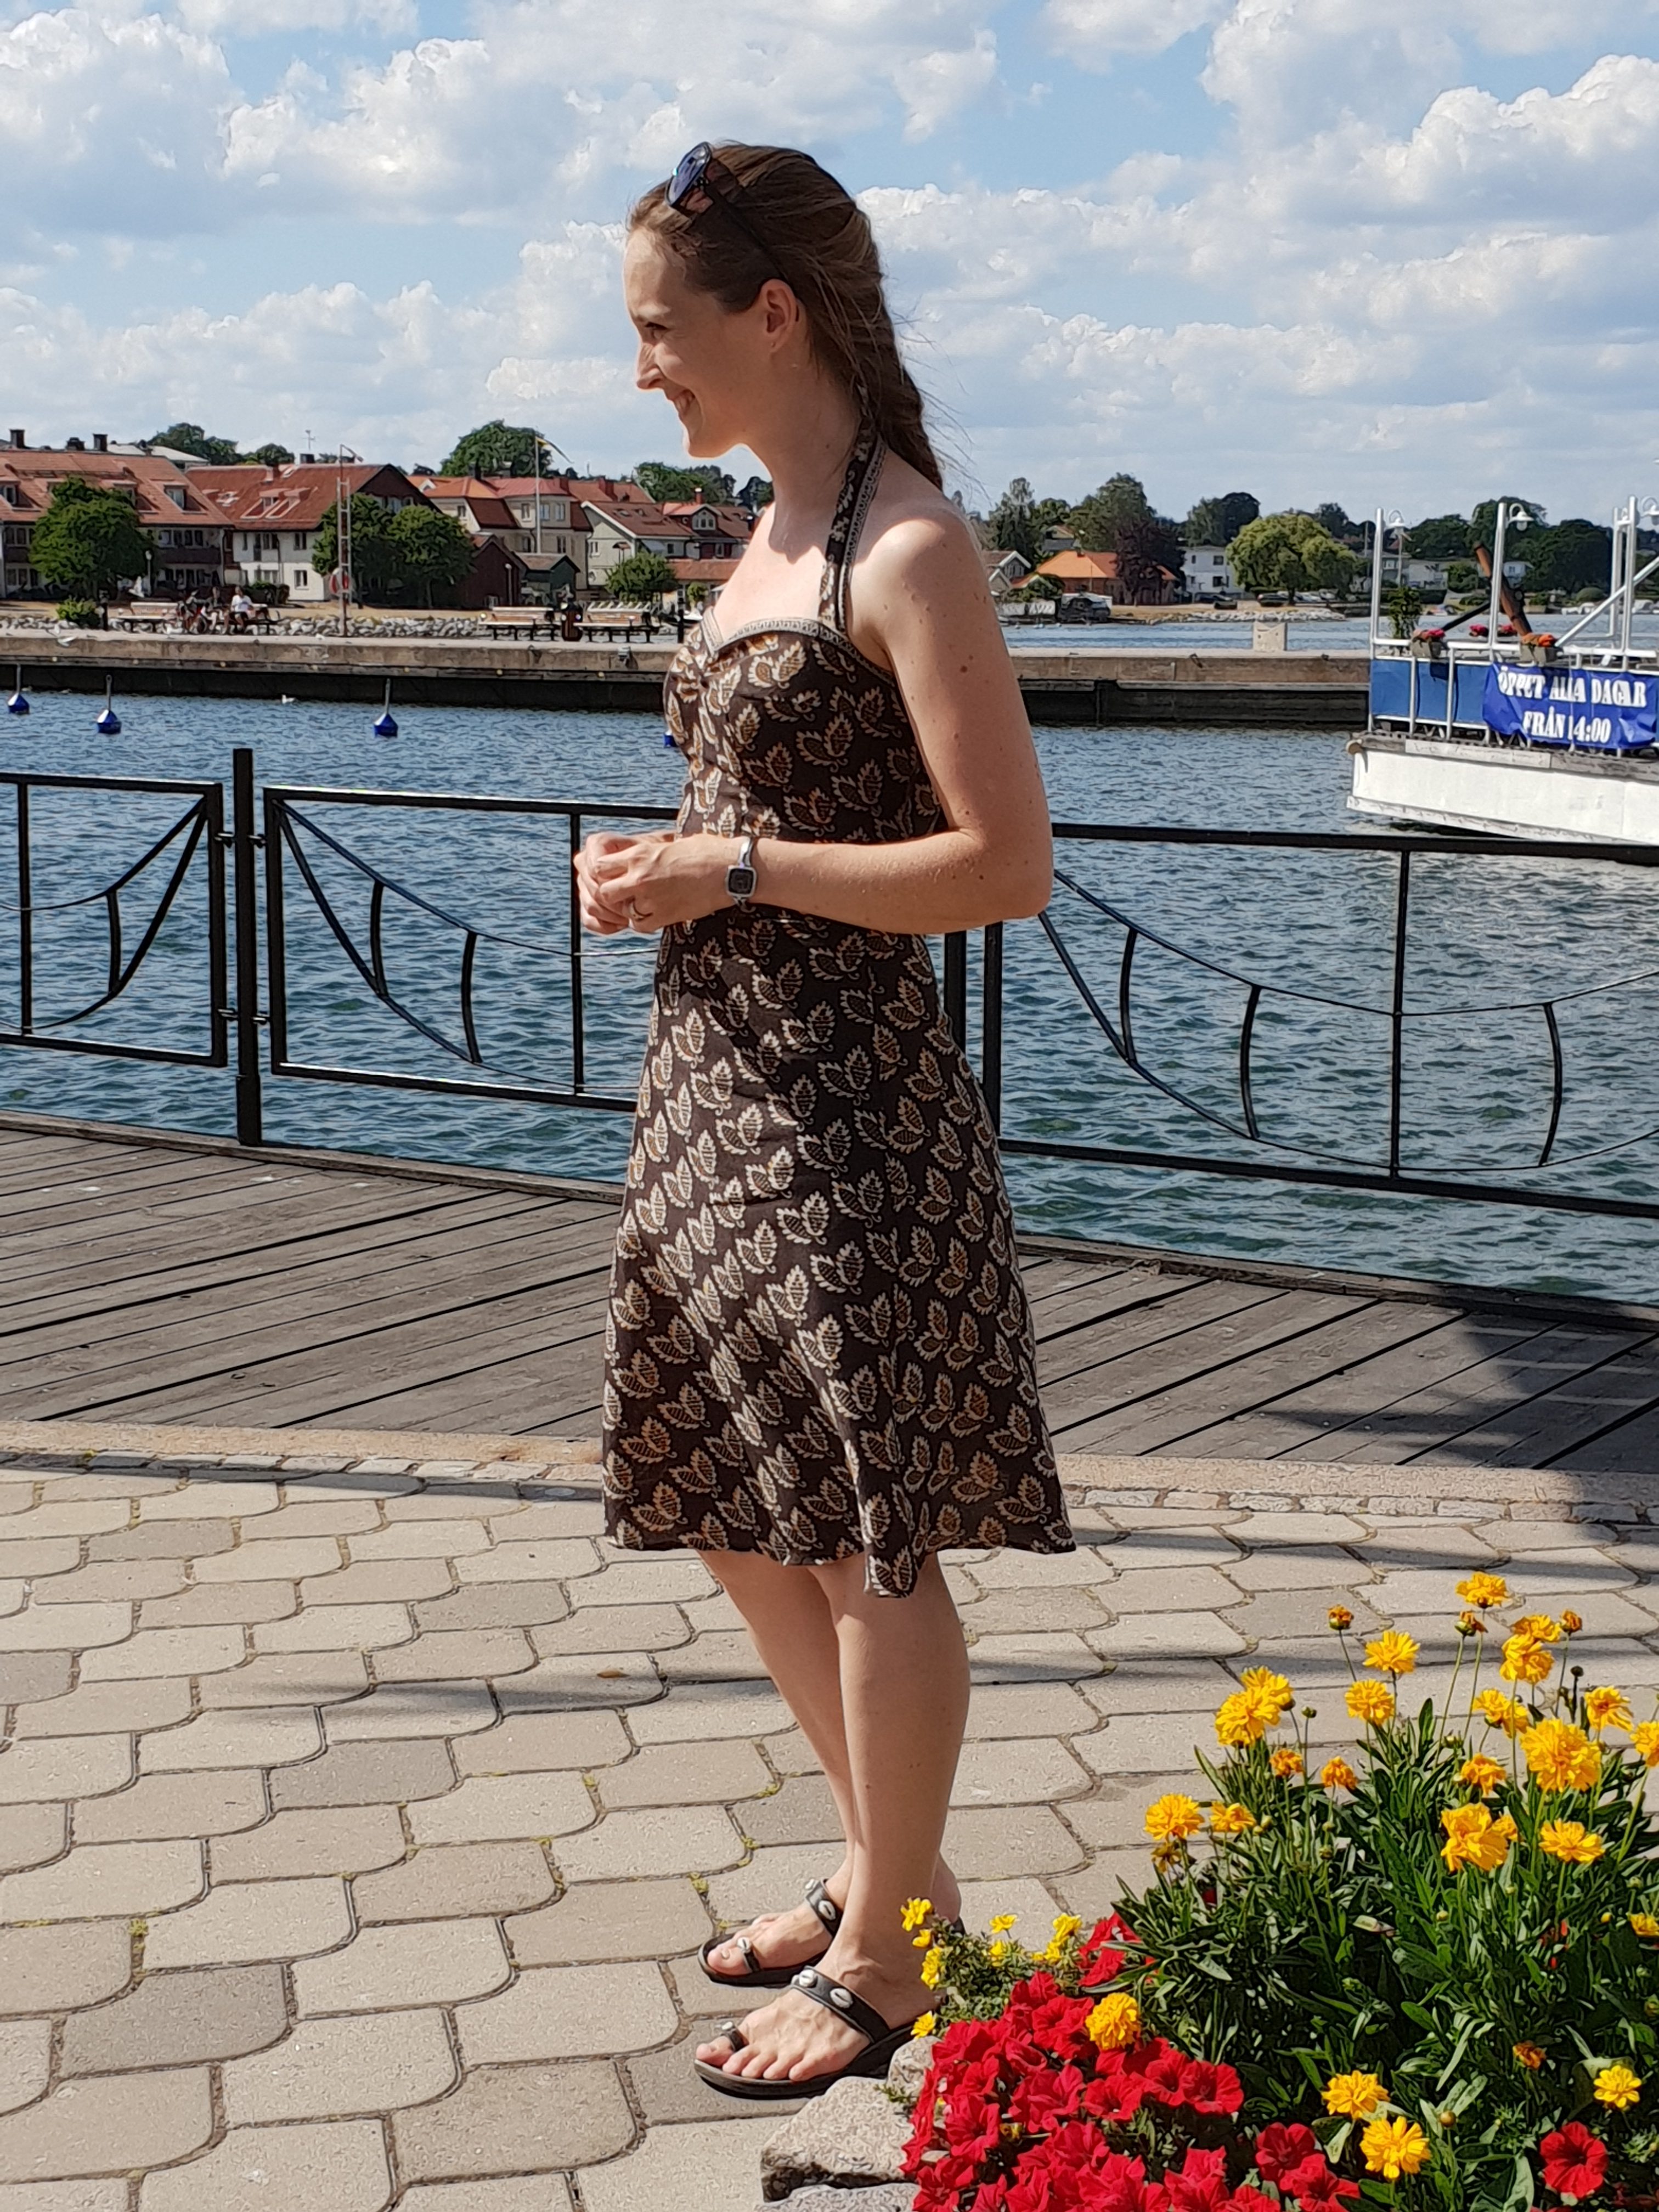
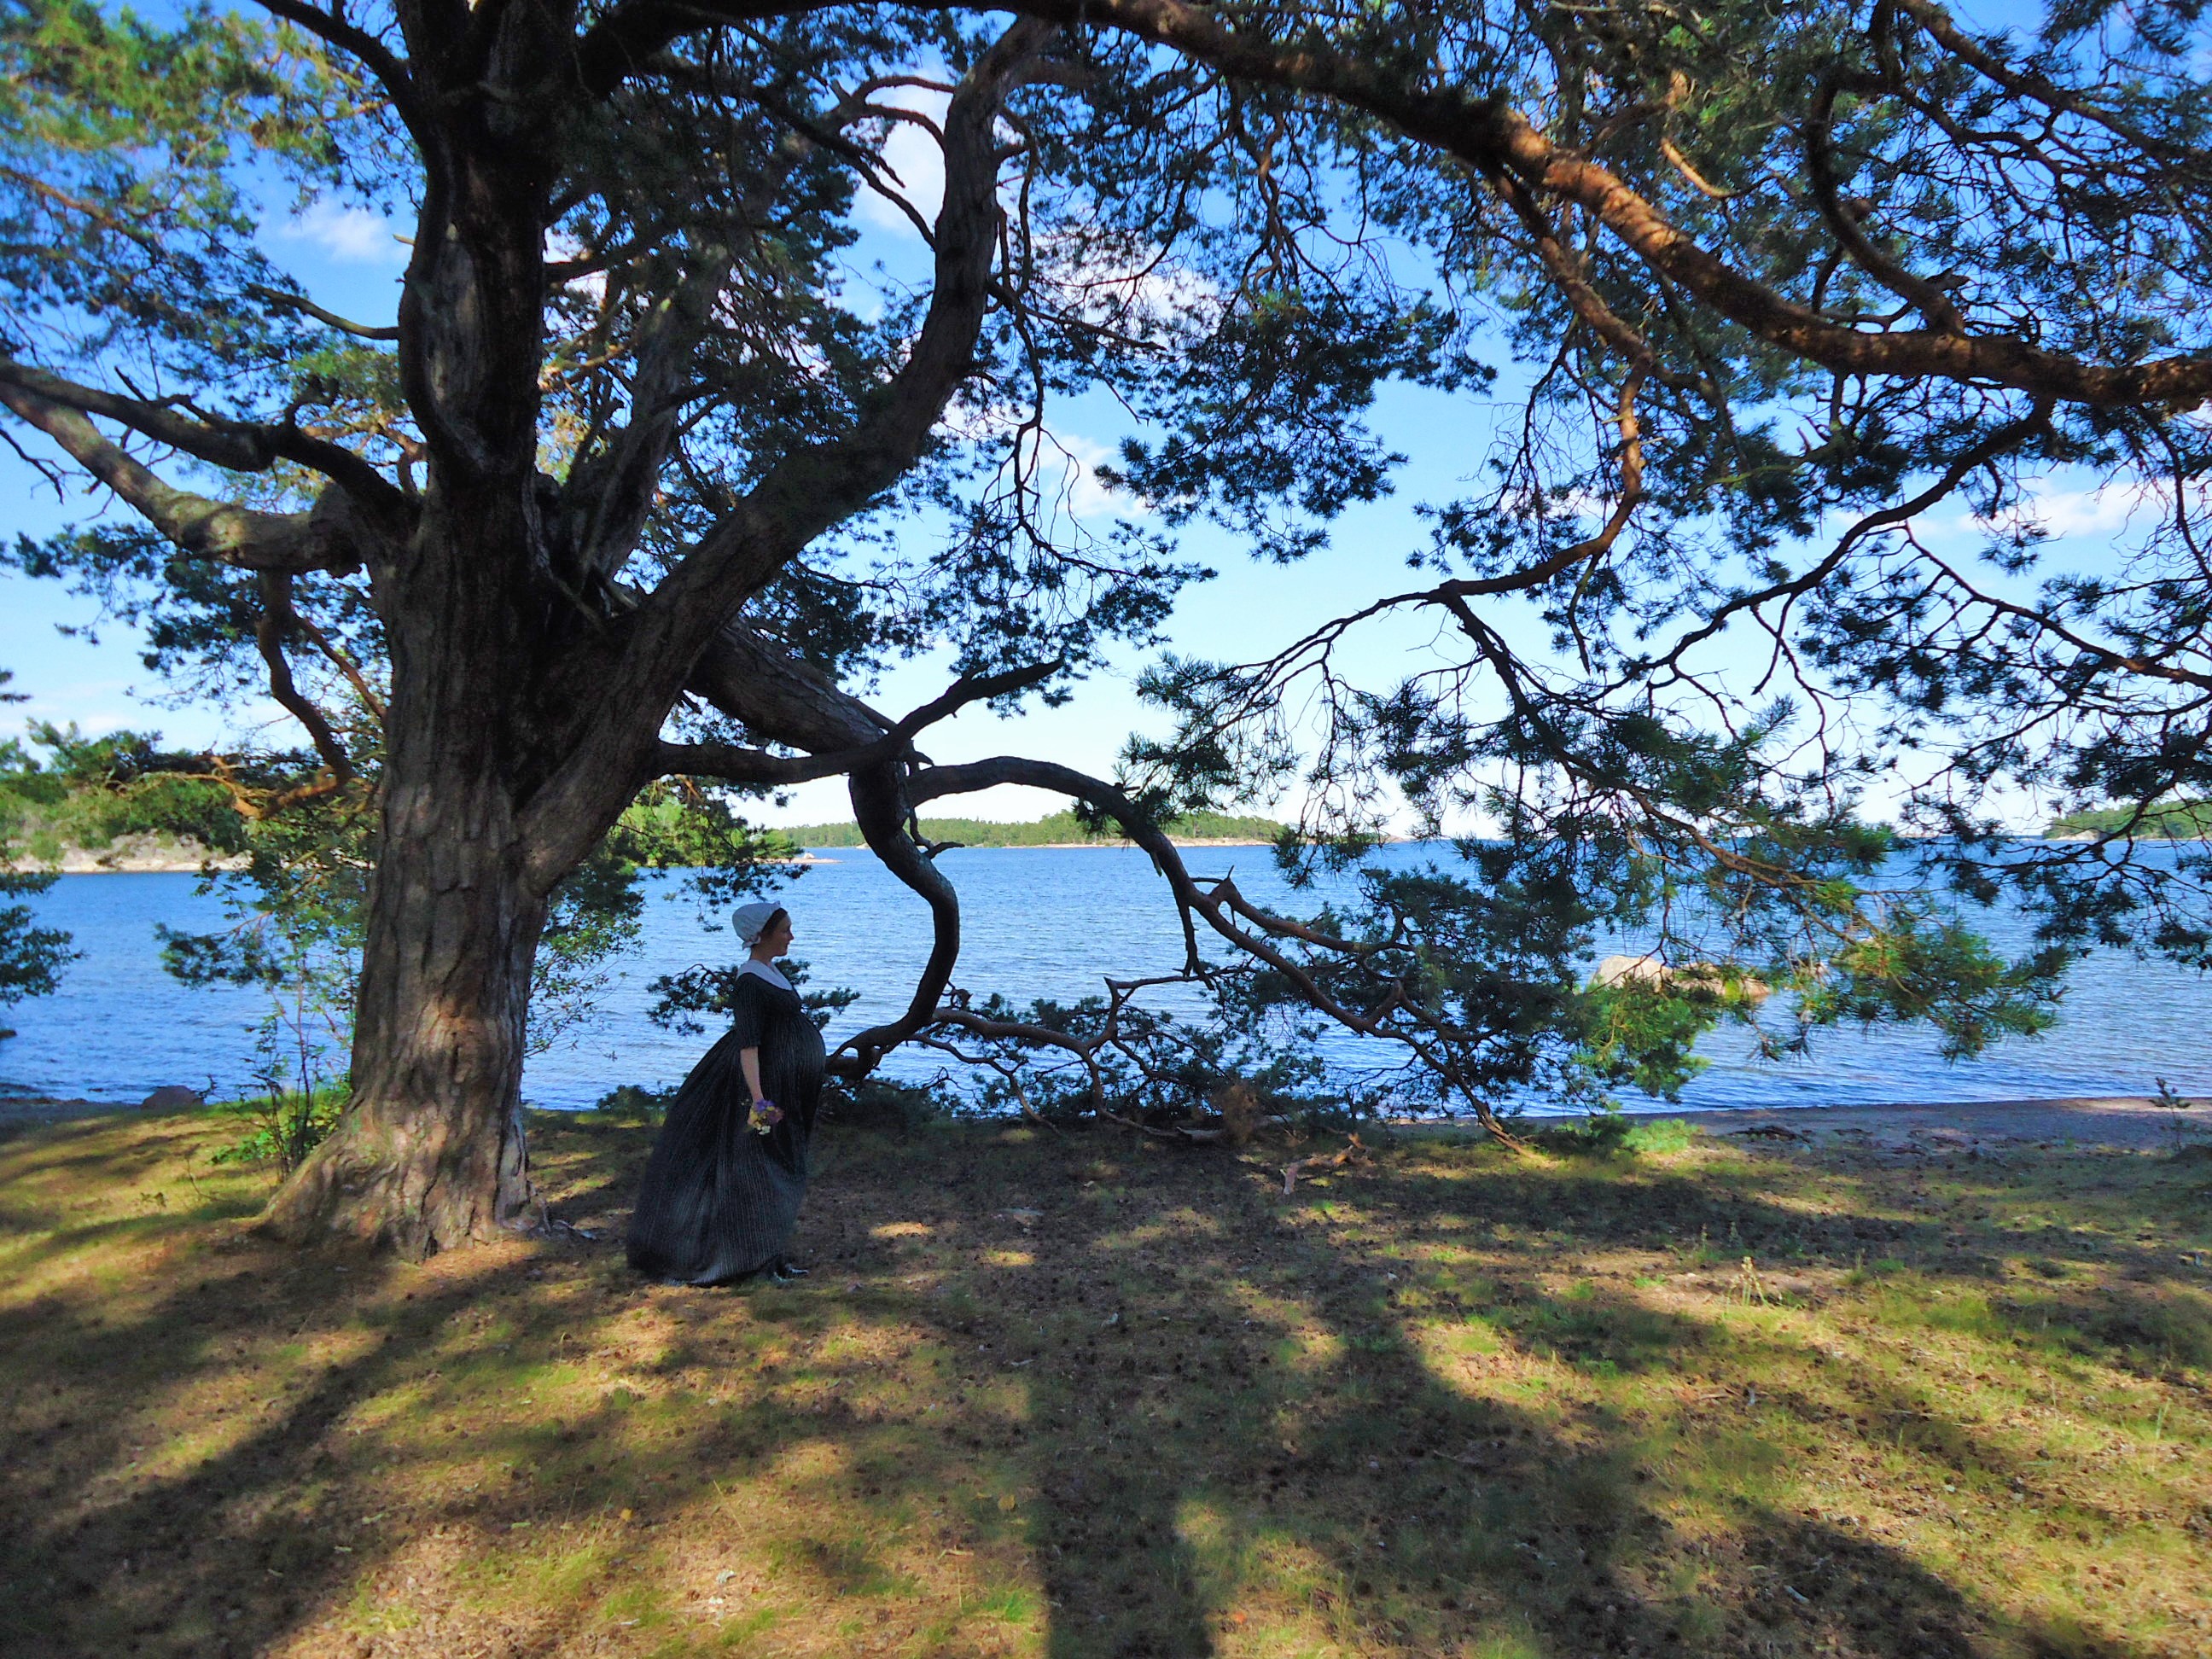
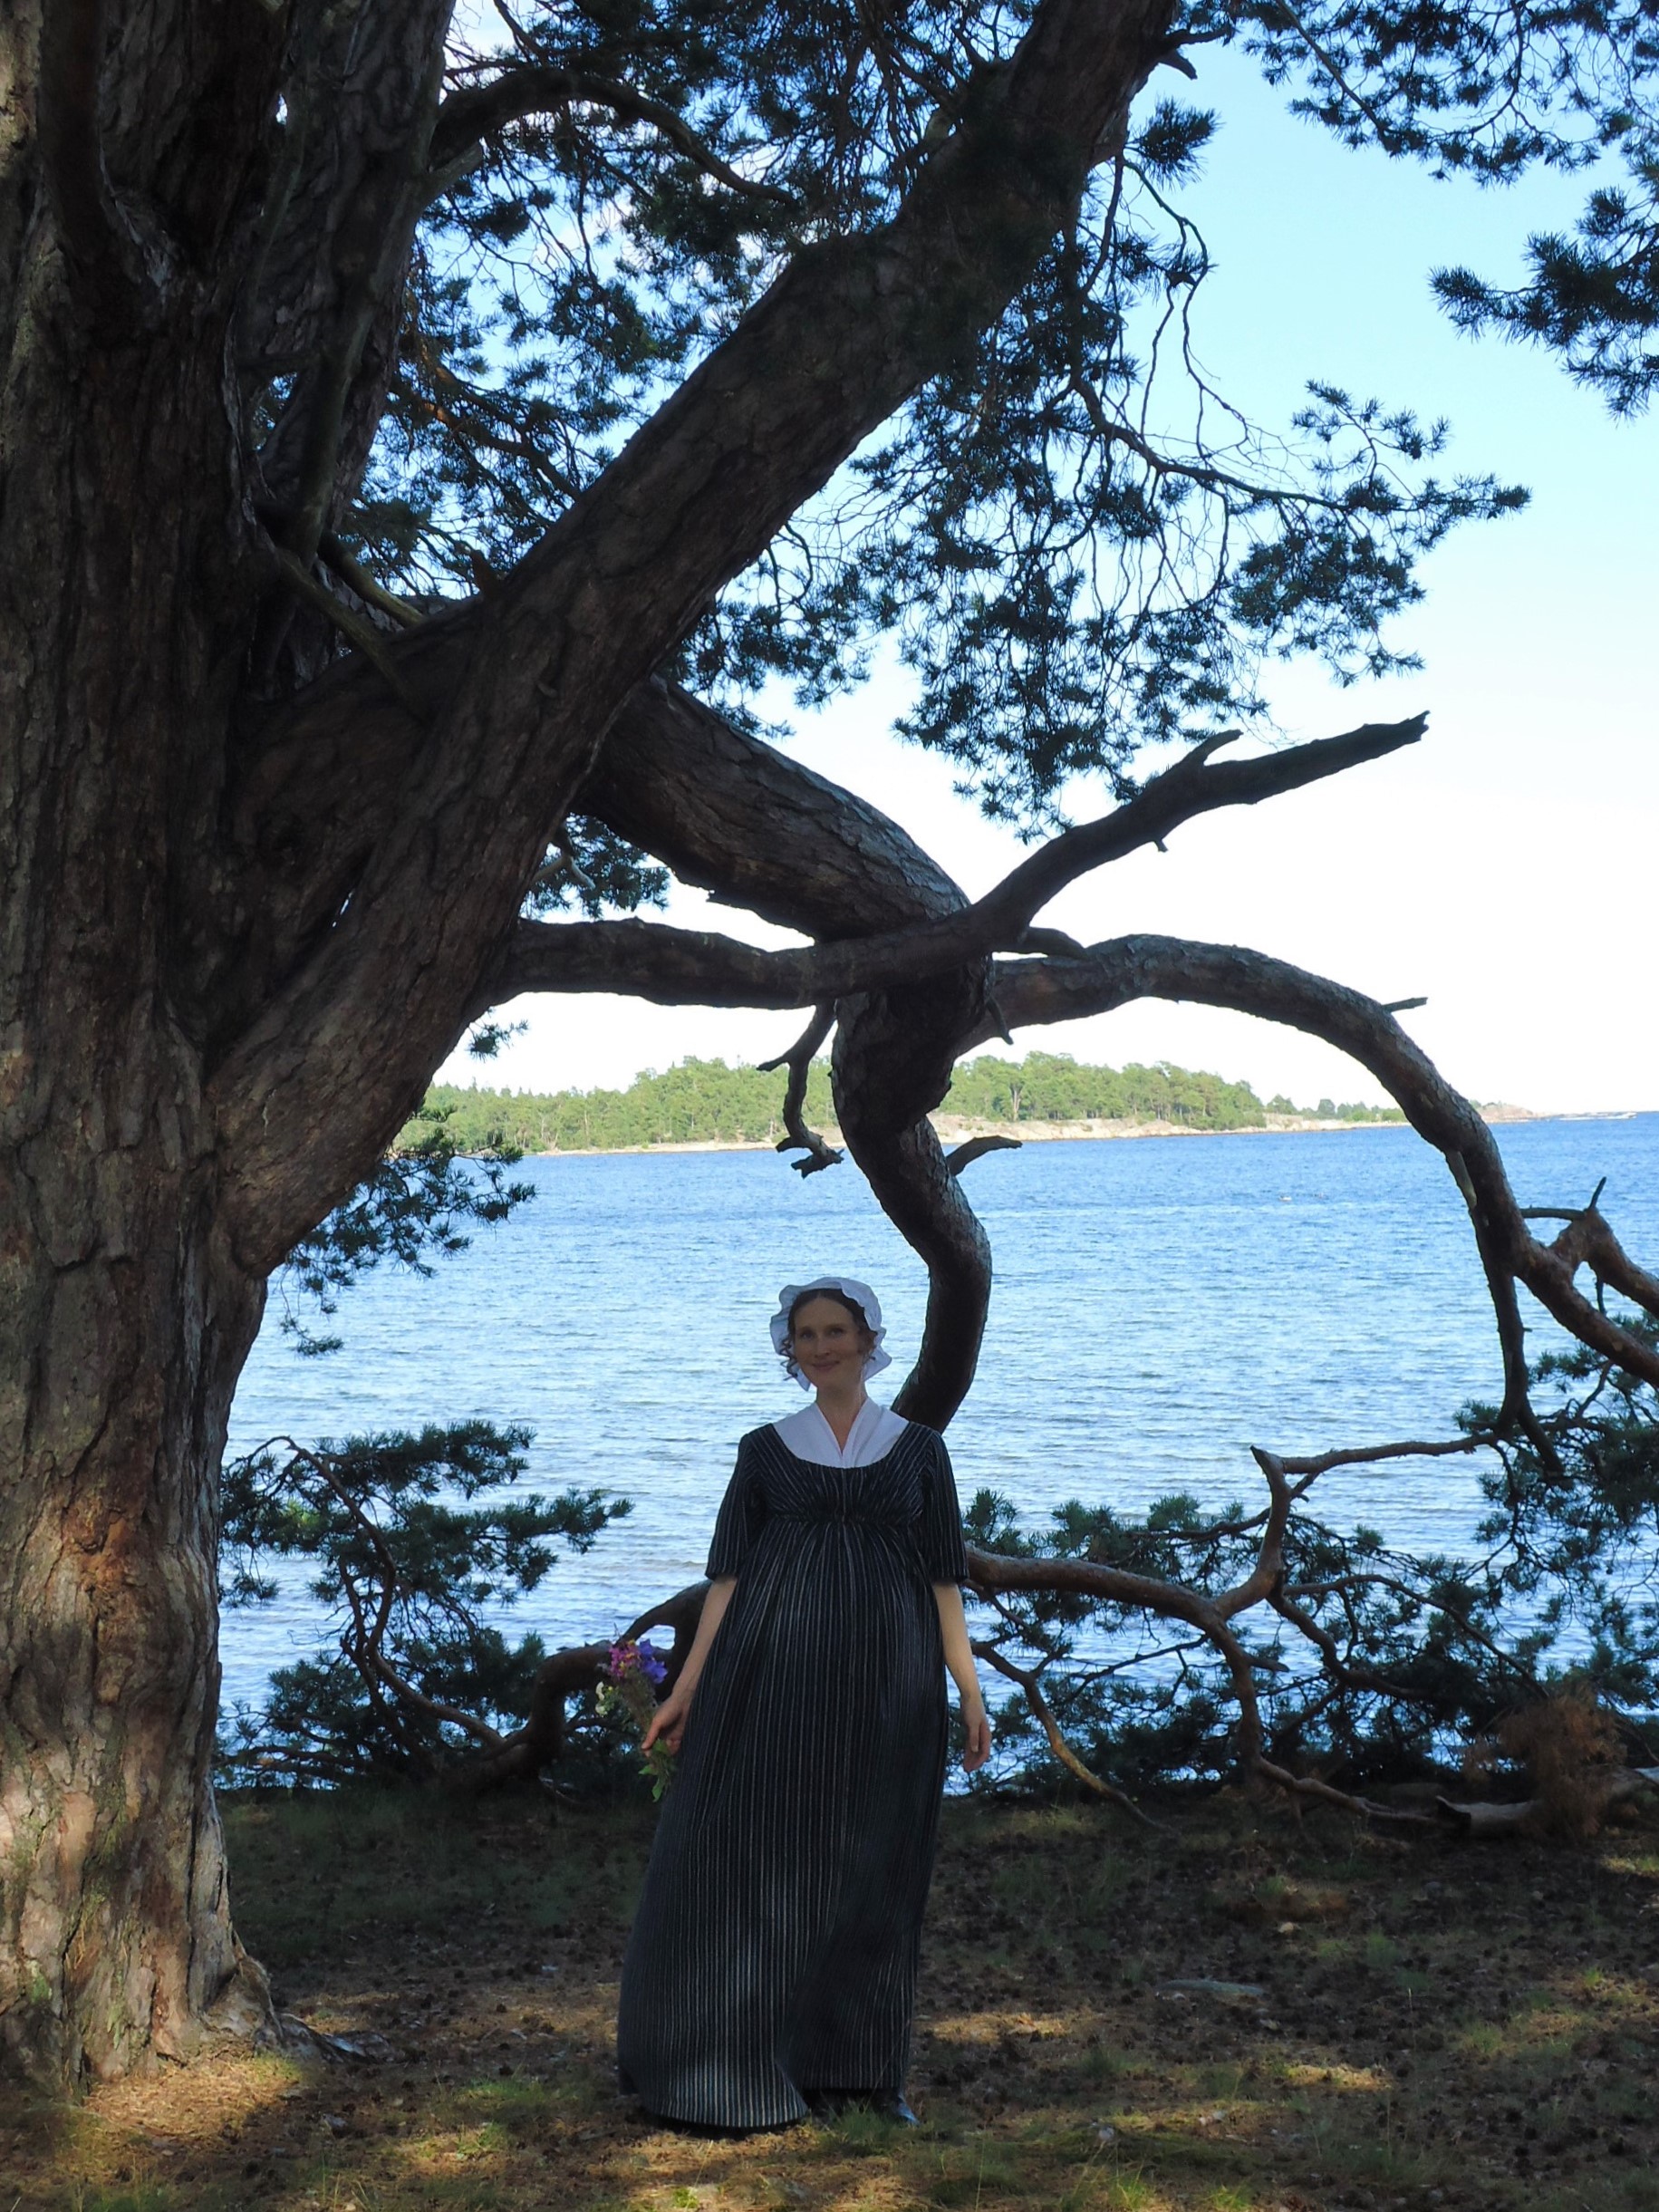
My new hometown, Västervik, is really beautiful this time of year. Maybe these pictures might tempt you to come and visit this dear part of Sweden?
Min nya hemstad, Västervik, är så vackert vid den här tiden på året. Kanske kan dessa bilder locka dig att besöka den här delen av Sverige?
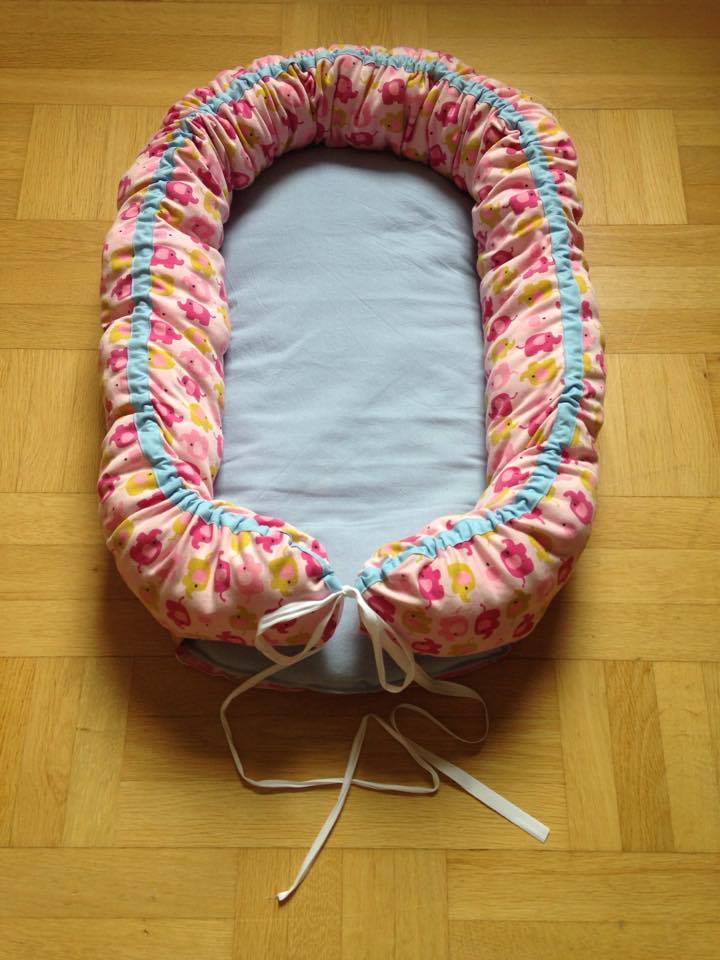
Since the last post, I have finished a dress for my mother, a pillow case and a baby nest. Unfortunately, the baby nest is the only thing I have remembered to take a picture of.
Sedan sista inlägget har jag sytt färdigt en klänning till min mamma, sytt ett nytt kuddfodral utav gamla lakan med farmors fina monogram, samt gjort ett babynäste. Tyvärr är det bara babynästet som jag har kommit ihåg att fotografera.As I copied the pattern and construction from another very pedagogic blog, I will not repeat it here.
Eftersom jag kopierade mönstret och konstruktionen från en annan väldigt pedagogisk blogg, tänker jag inte upprepa det här.
– where you can see what I do – designing, sewing, singing, creating etc.

 Two years ago, we planned on going to the Medieval Week at Visby together with my brother and my sisters family. At the eleventh hour, I noticed that we had booked the ferry ticket and hotel nights for the wrong week. Oh, the horror. We comforted ourselves by going to the beautiful castle of Tjolöholm instead, where there was a Jane Austen display. My nieces have been very keen on experiencing the Medieval week though. I had no vacation this summer, so Visby was out of the question, but I had time for a day at the medieval fair at Söderköpings gästabud.
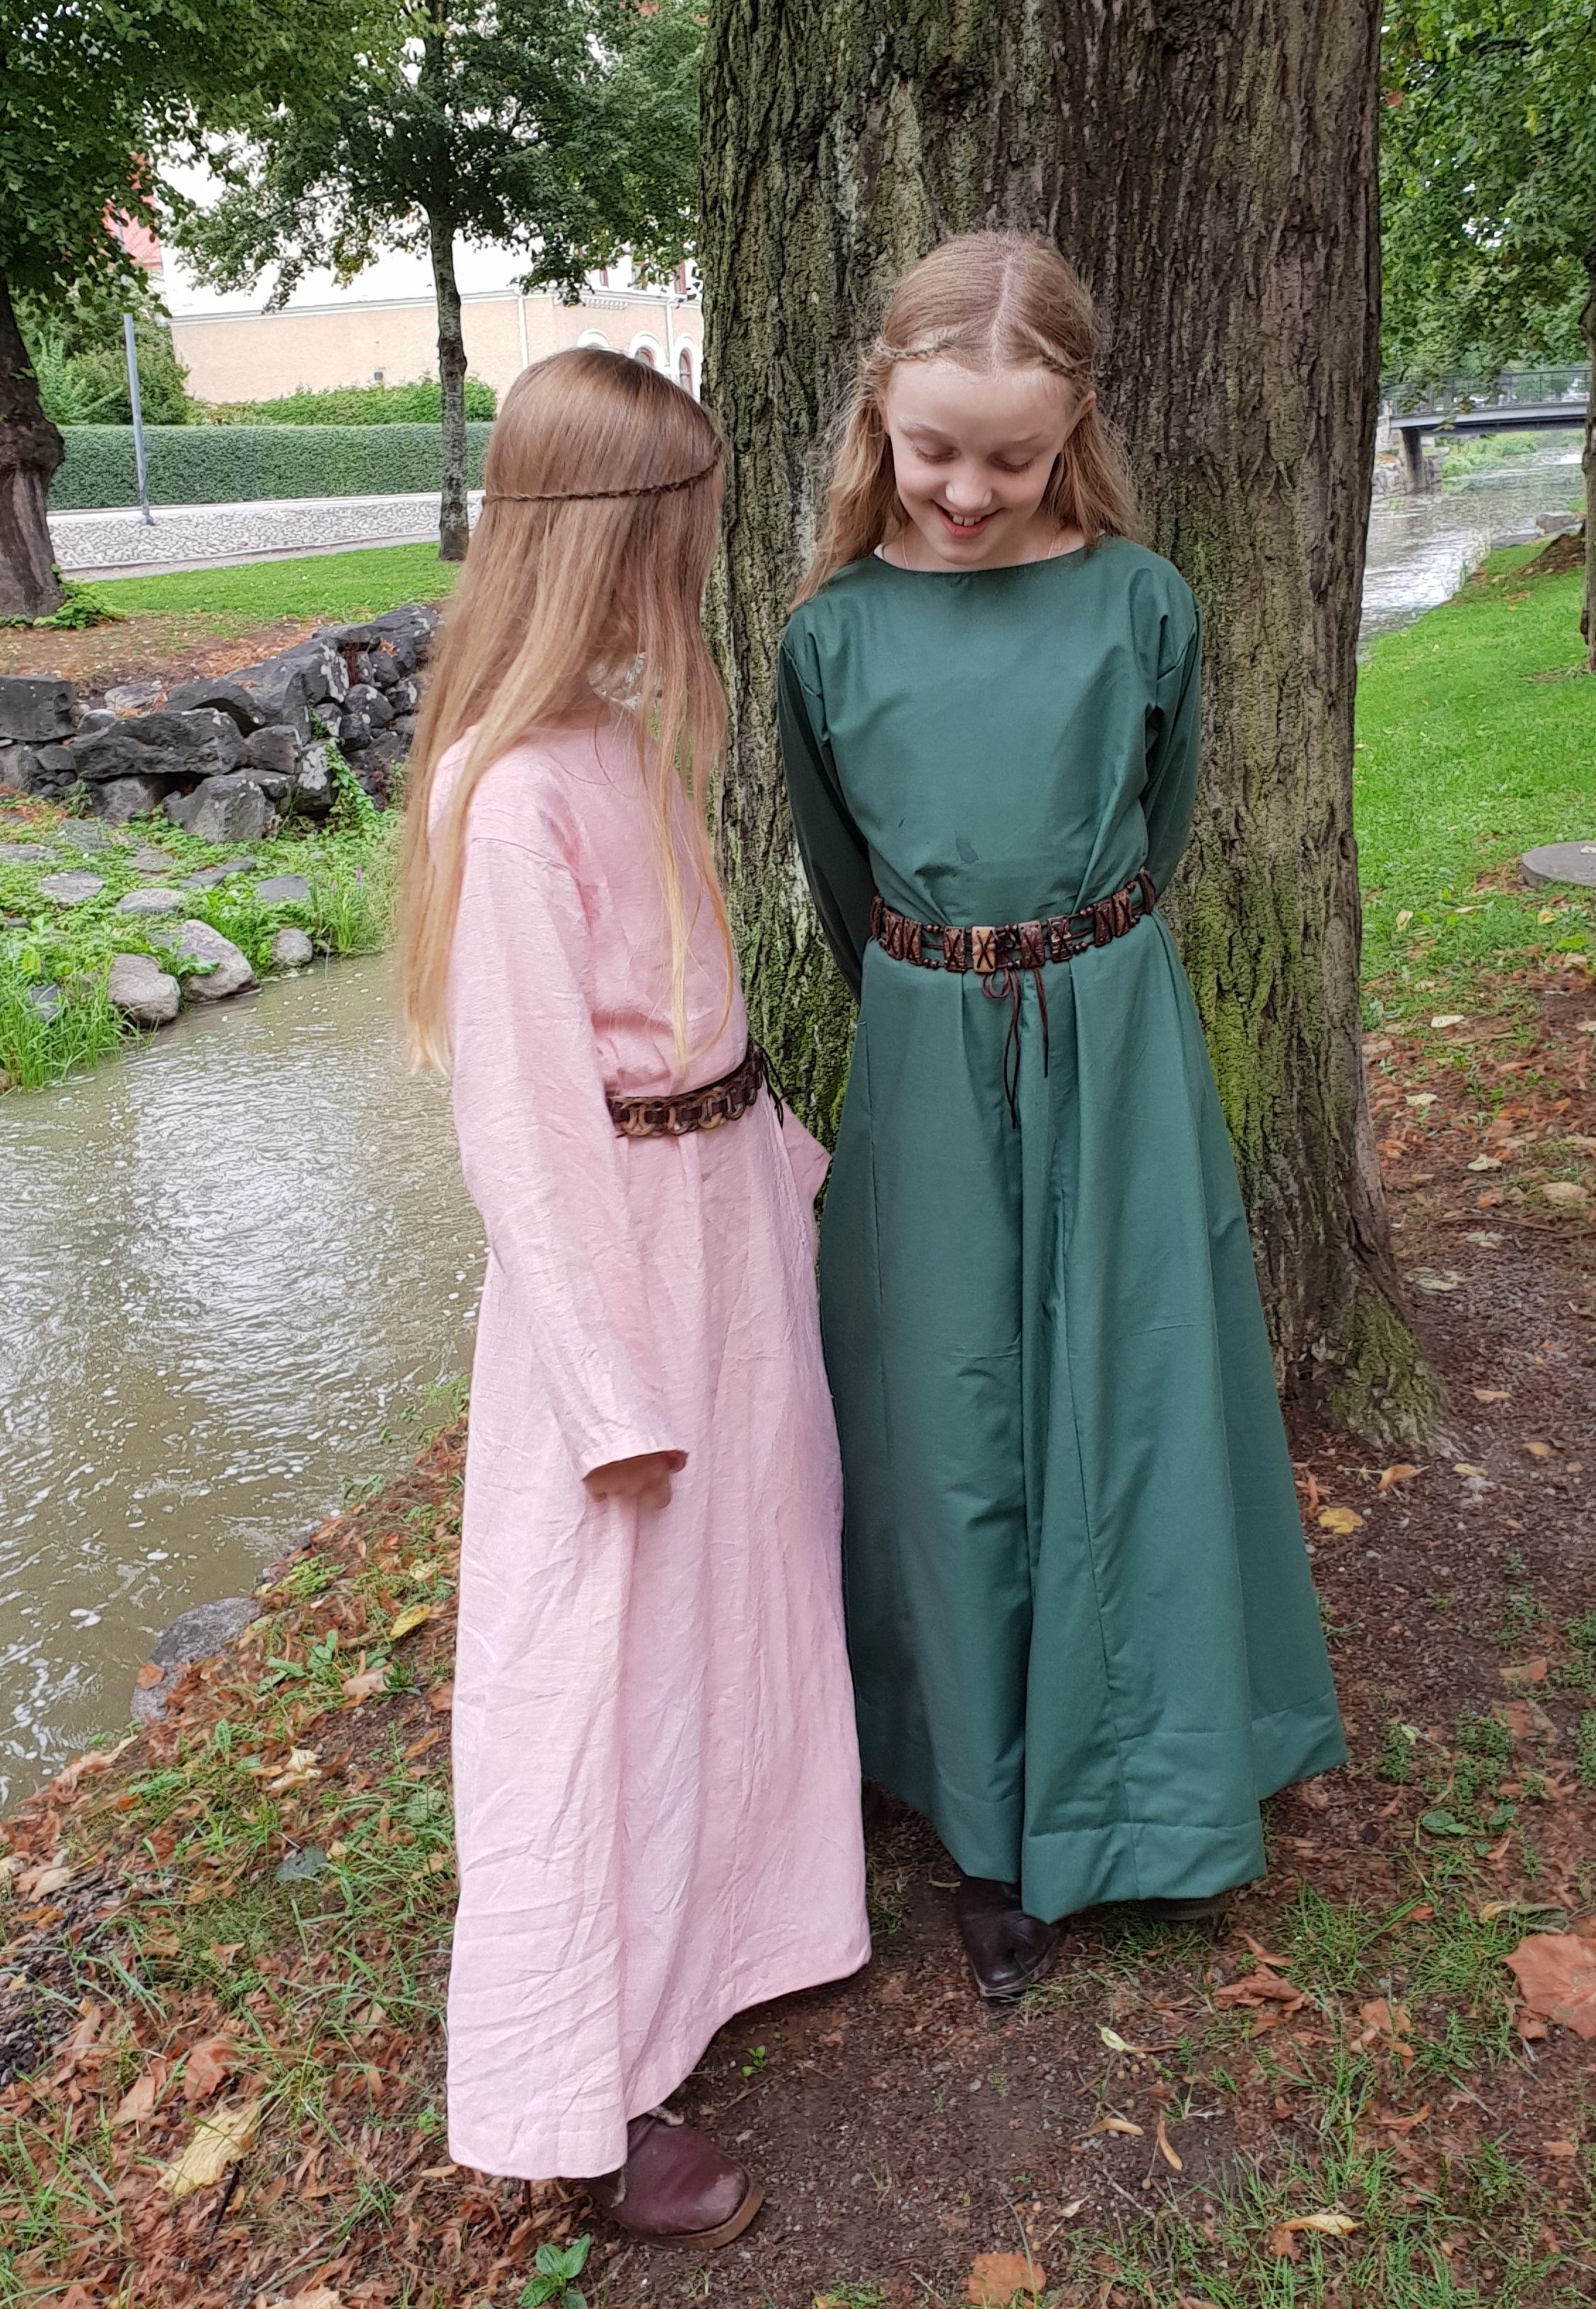


 As we noticed that our baby was the happiest when laying on the changing table underneath the shelf that I painted for him, my husband suggested that I should paint something movable, so that we could hang out with our baby at other places than just in the bathroom. Said and done – we bought a small IKEA table in our local second hand shop. It was not painted underneath, so I had to put a white layer of paint first. I googled the cute animals that you see on the picture. Unfortunately, so many things came in between, that I could only paint one body part at a time and was not able to finish the table until this week. The baby likes it, but does not communicate with the animals as he did with the shelf animals when he was younger.


