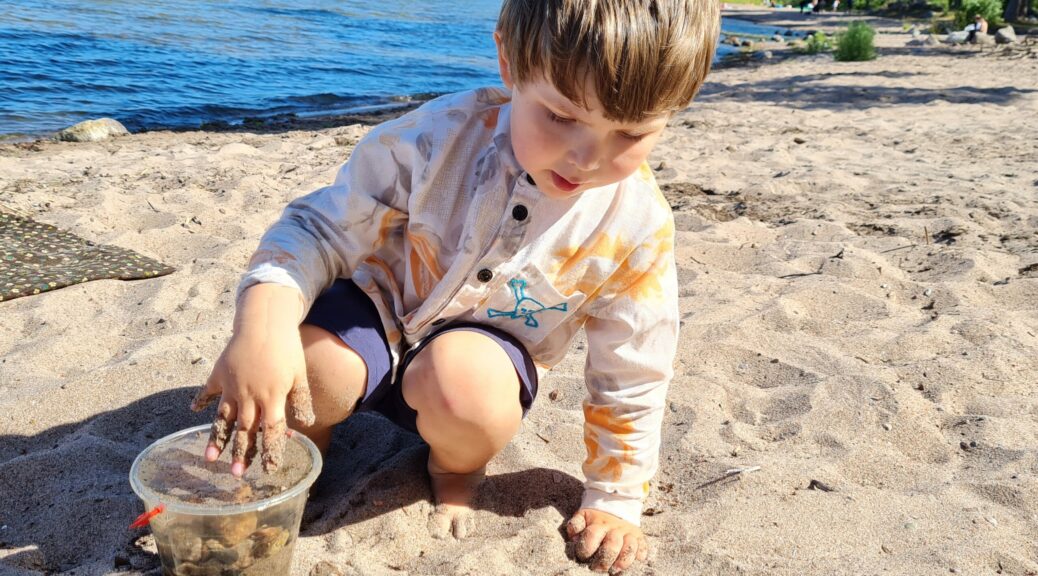
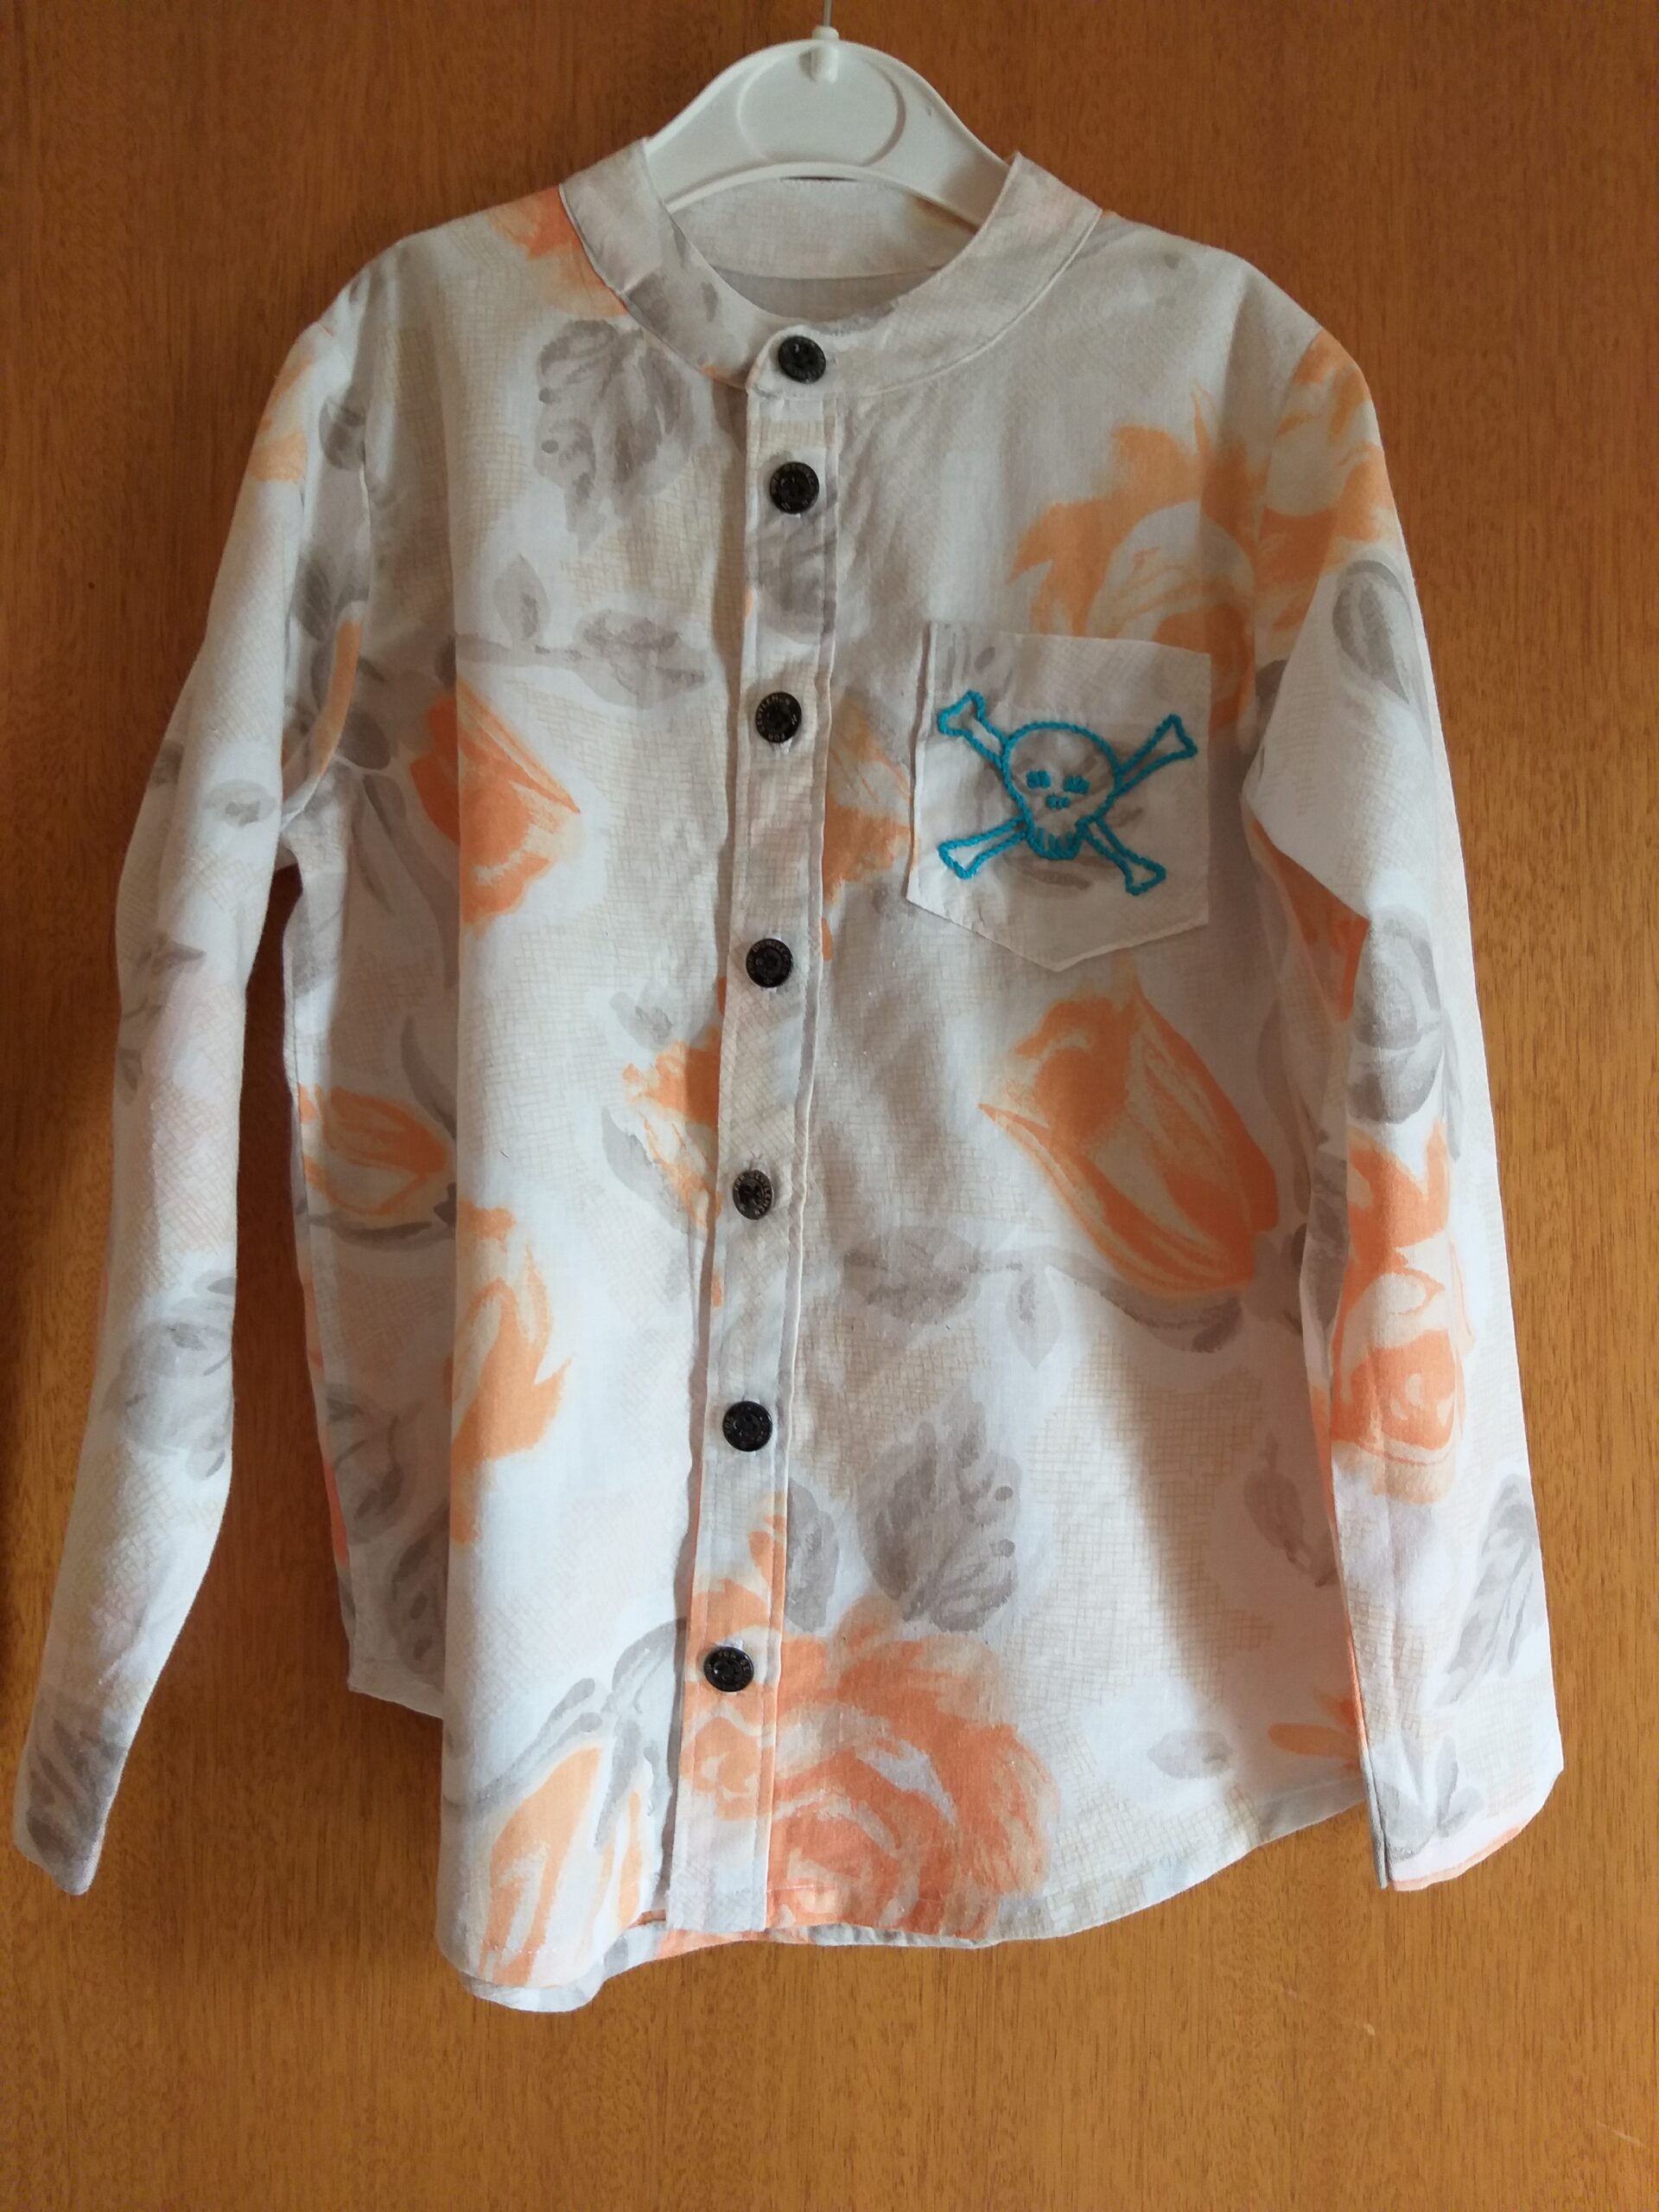
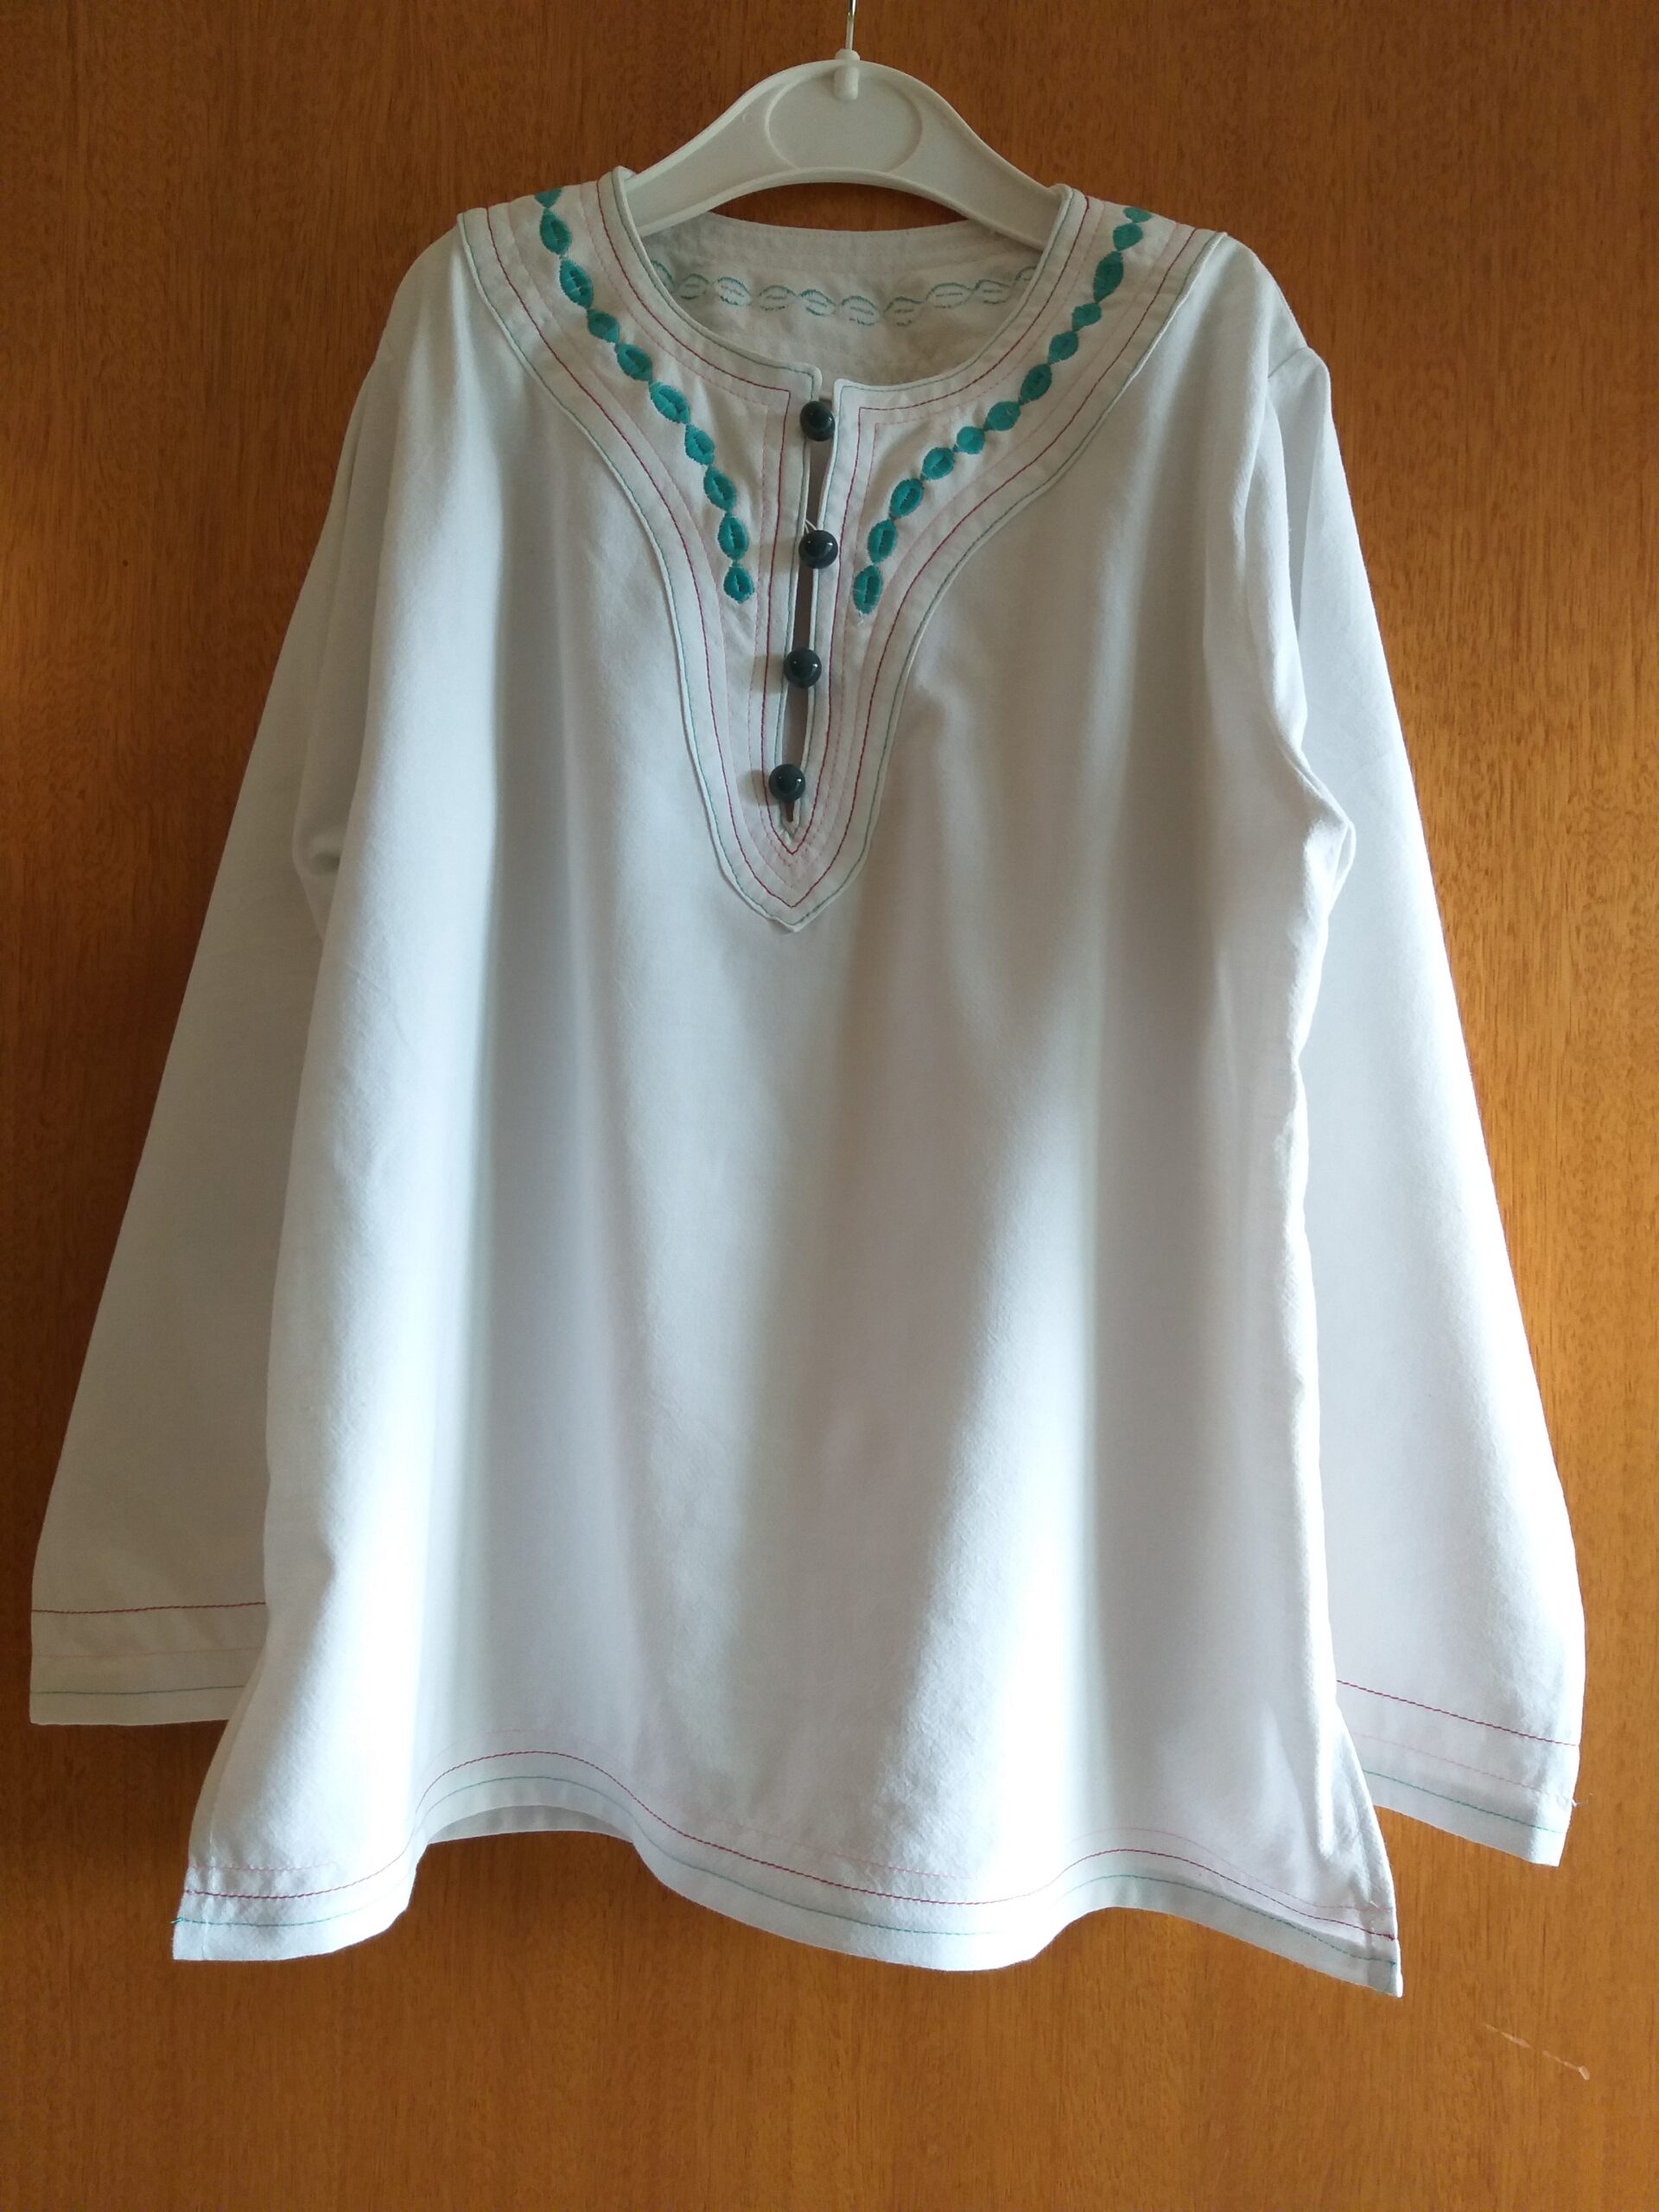
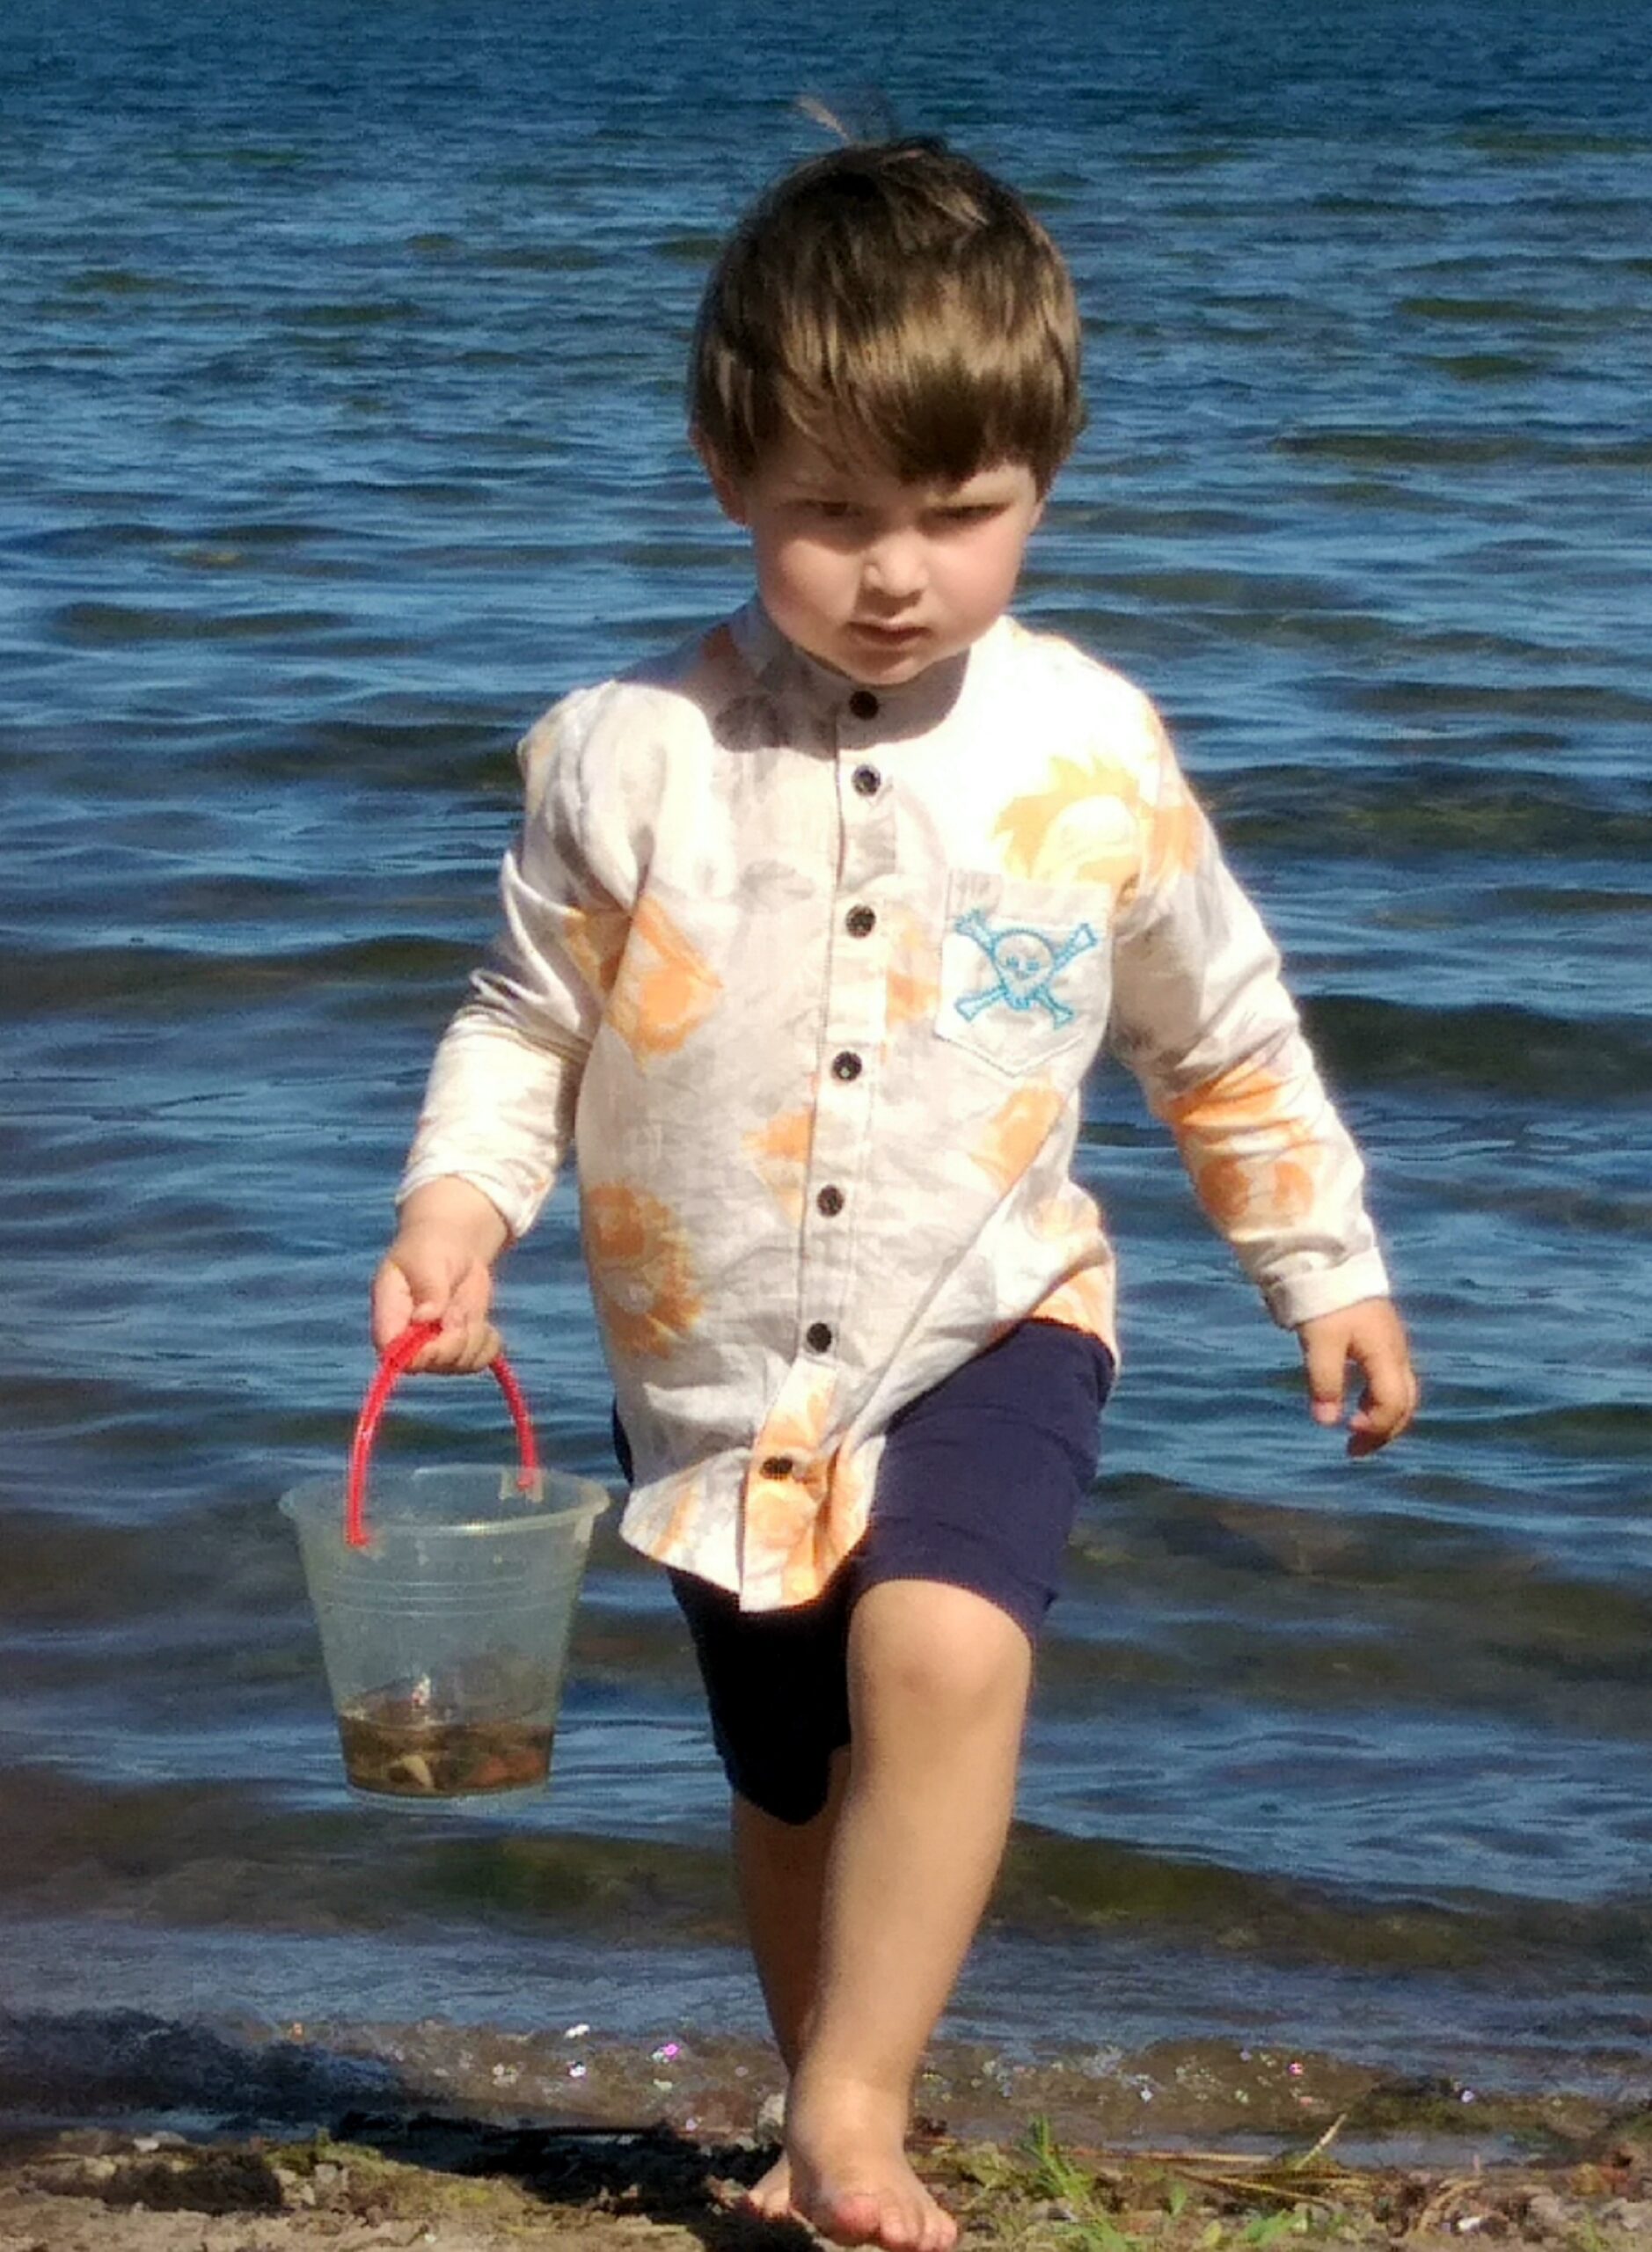
After a cold and rainy spring, the summer heat hit us hard. It soon became clear that my dear, growing boy was in urgent need of a thin shirt, protecting his skin from the sun at the same time as it had to be cool and airy. As no such shirts were to be found in the stores, I had to make my own shirt pattern, using his wellfitting, warmer shirt as skabelon. I thought the shirt making process would be very difficult, but it was not nearly as trying as I had imagined.
Efter en kall och regnig vår, slog sommarvärmen till hårt. Snabbt förstod jag att min växande pojke behövde en tunn skjorta för att skydda huden mot solen, samtidigt som den måste vara luftig och sval. Eftersom jag inte kunde finna några sådana skjortor i butikerna, insåg jag att jag nog måste sy skjortan själv. Jag gjorde ett nytt mönster, utifrån en av hans välsittande, varma skjortor. Jag hade föreställt mig att det skulle vara jätteknepigt att sy en skjorta, men det var faktiskt rätt enkelt när jag väl kom igång.
The fabric is from an old curtain and the buttons are reused too. In order to win his approval, I embroidered a pirate skull on the shirt pocket.The fabric is comes from an old blanket and the buttons are also reused. I stiched decorative seams in his favourite colours.
Both the shirts have proven to be both practical, cool and protective against insects. And most importantly – my son loves them.
Båda skjortorna har visat sig vara både praktiska, svala och skydda väl mot insekter. Och viktigast av allt – sonen älskar dem!
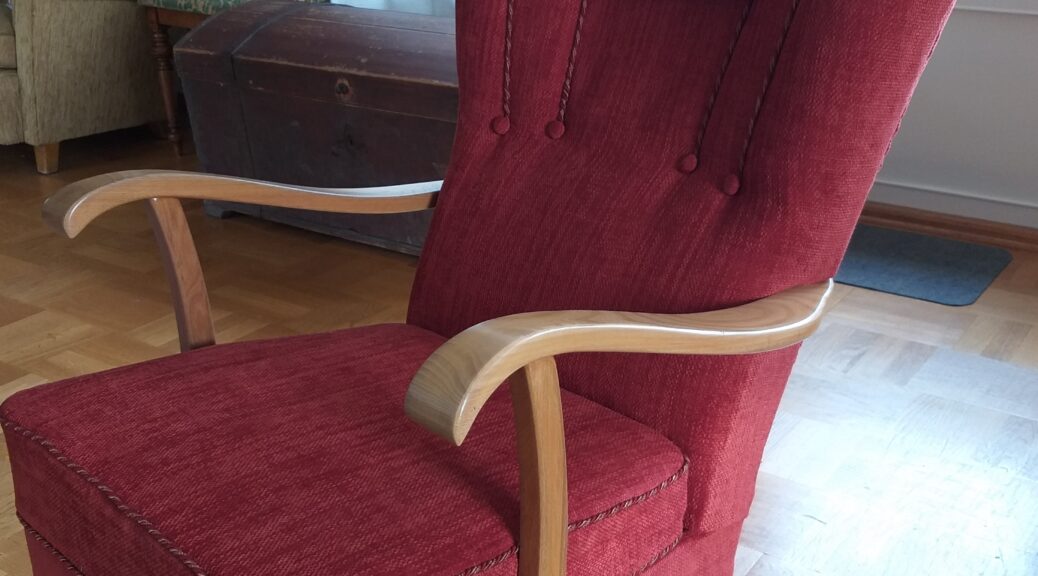
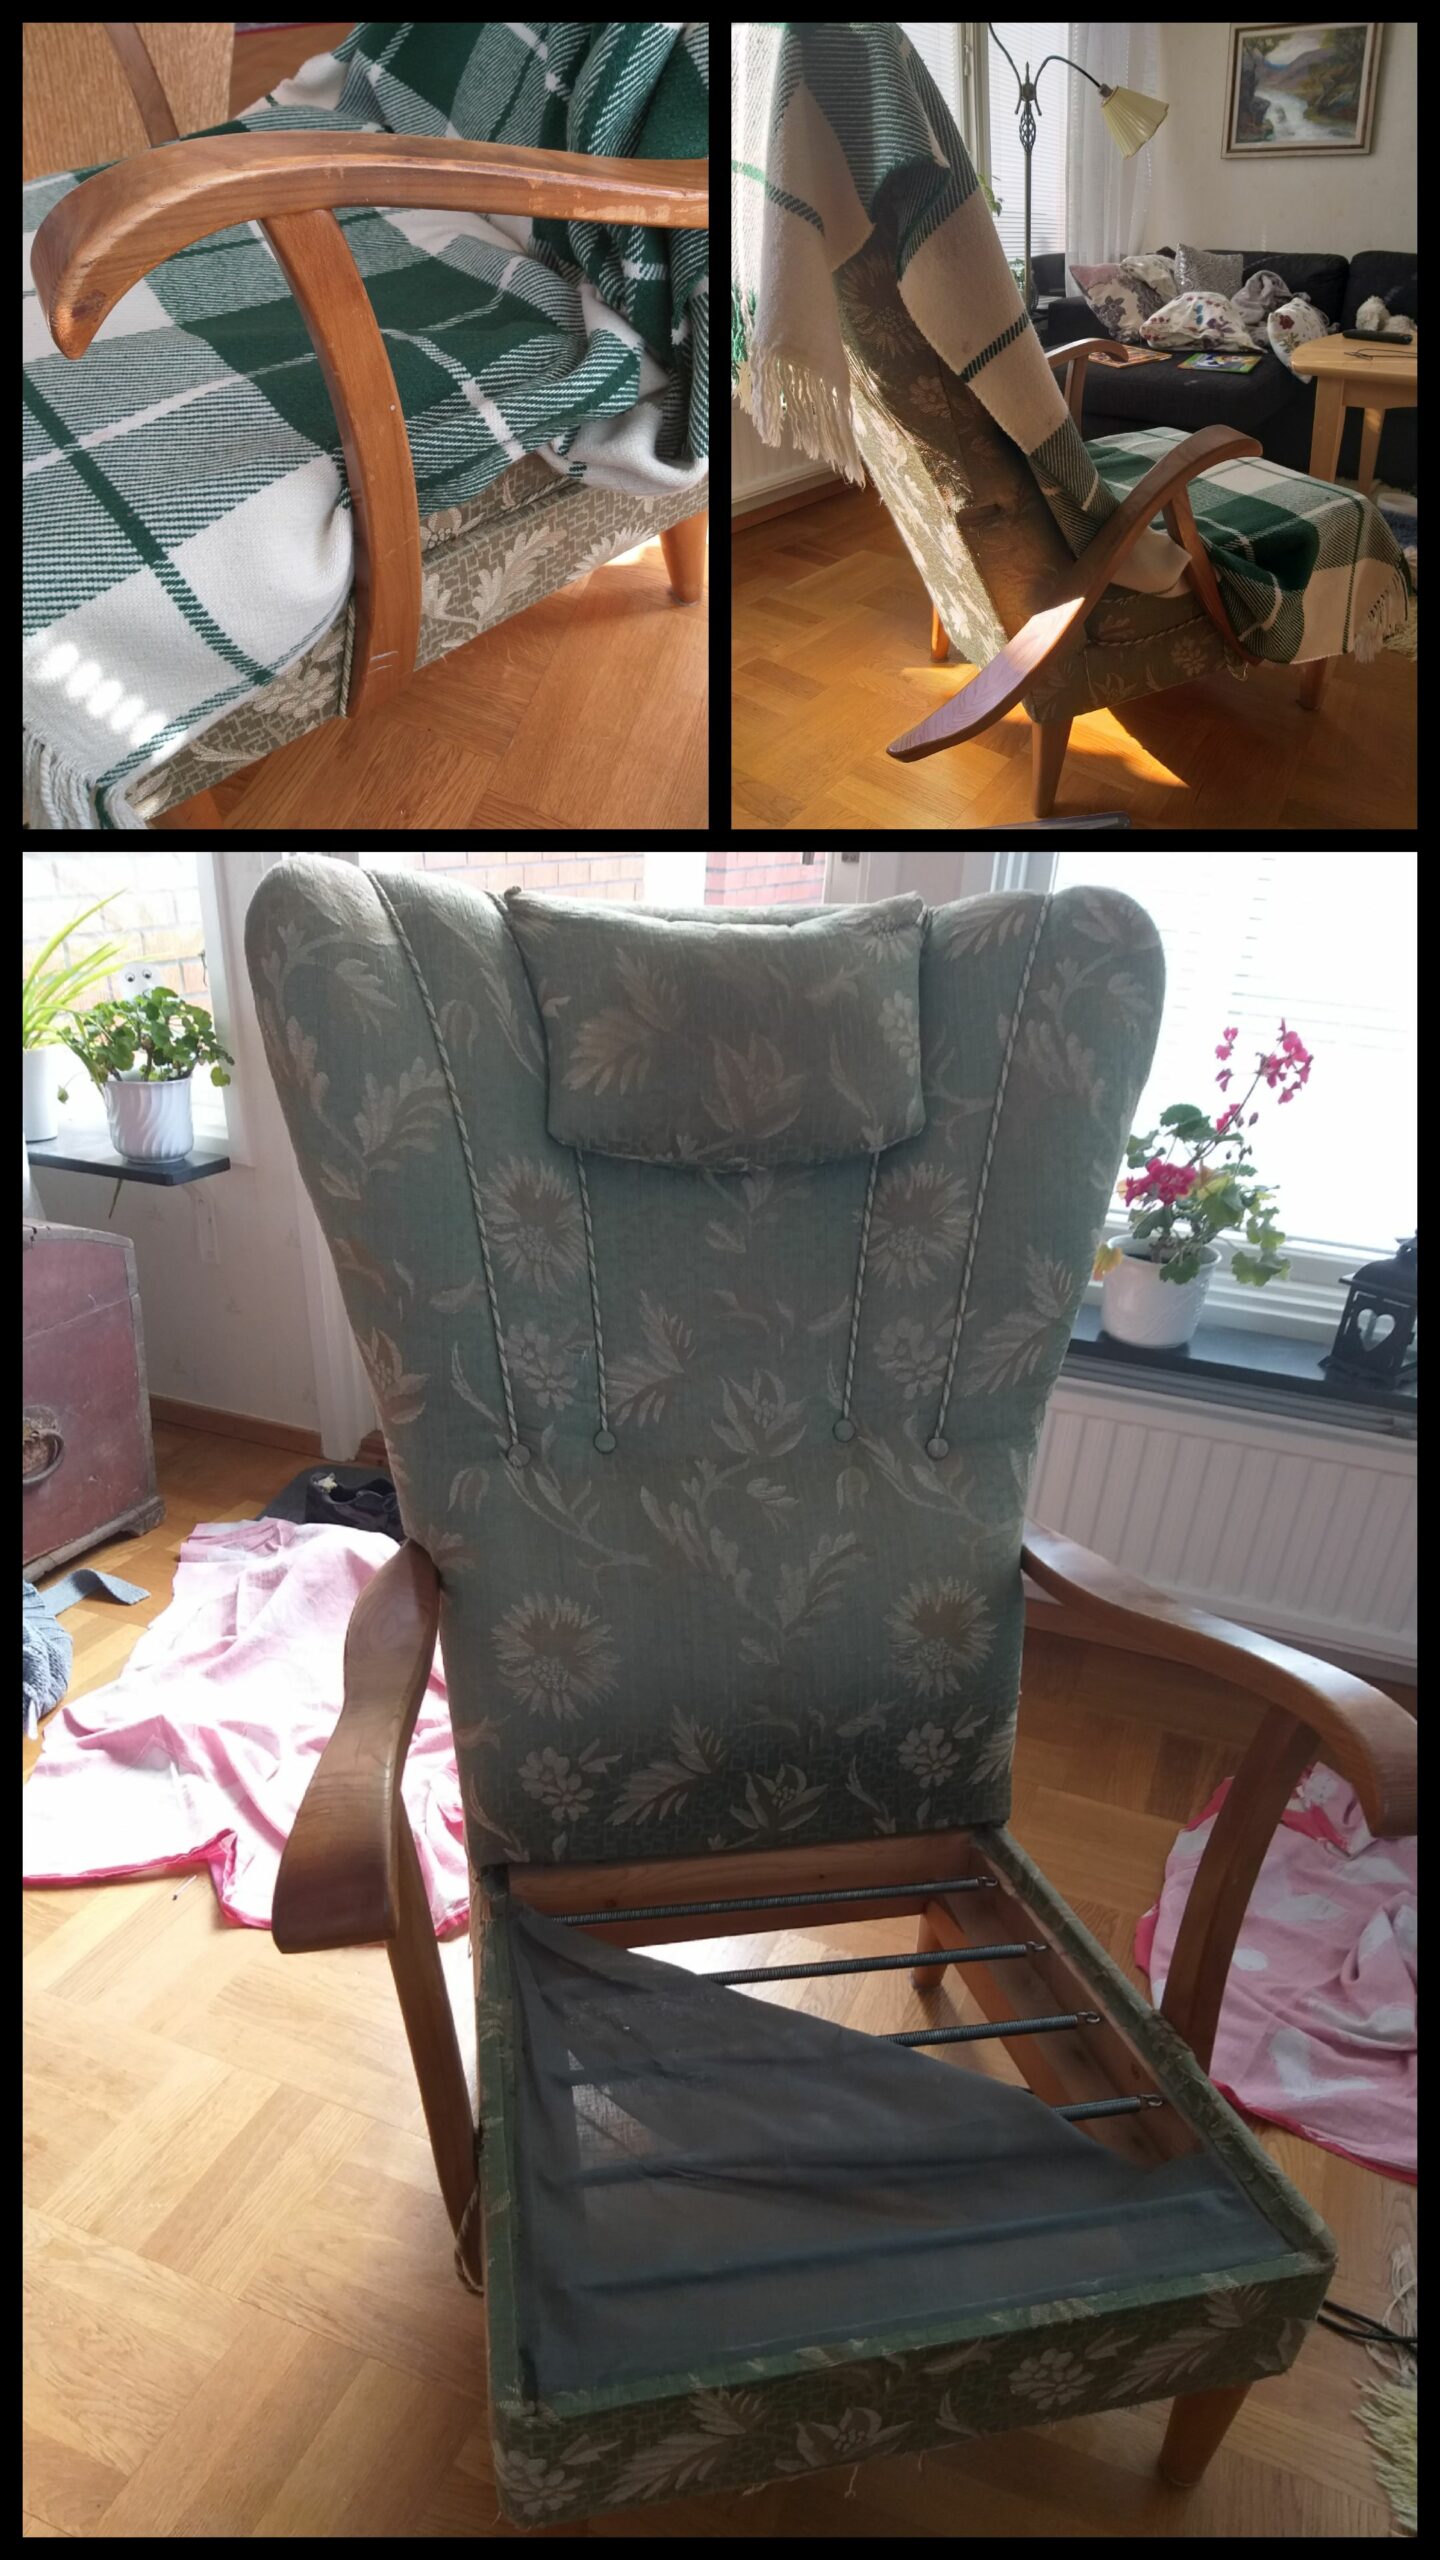
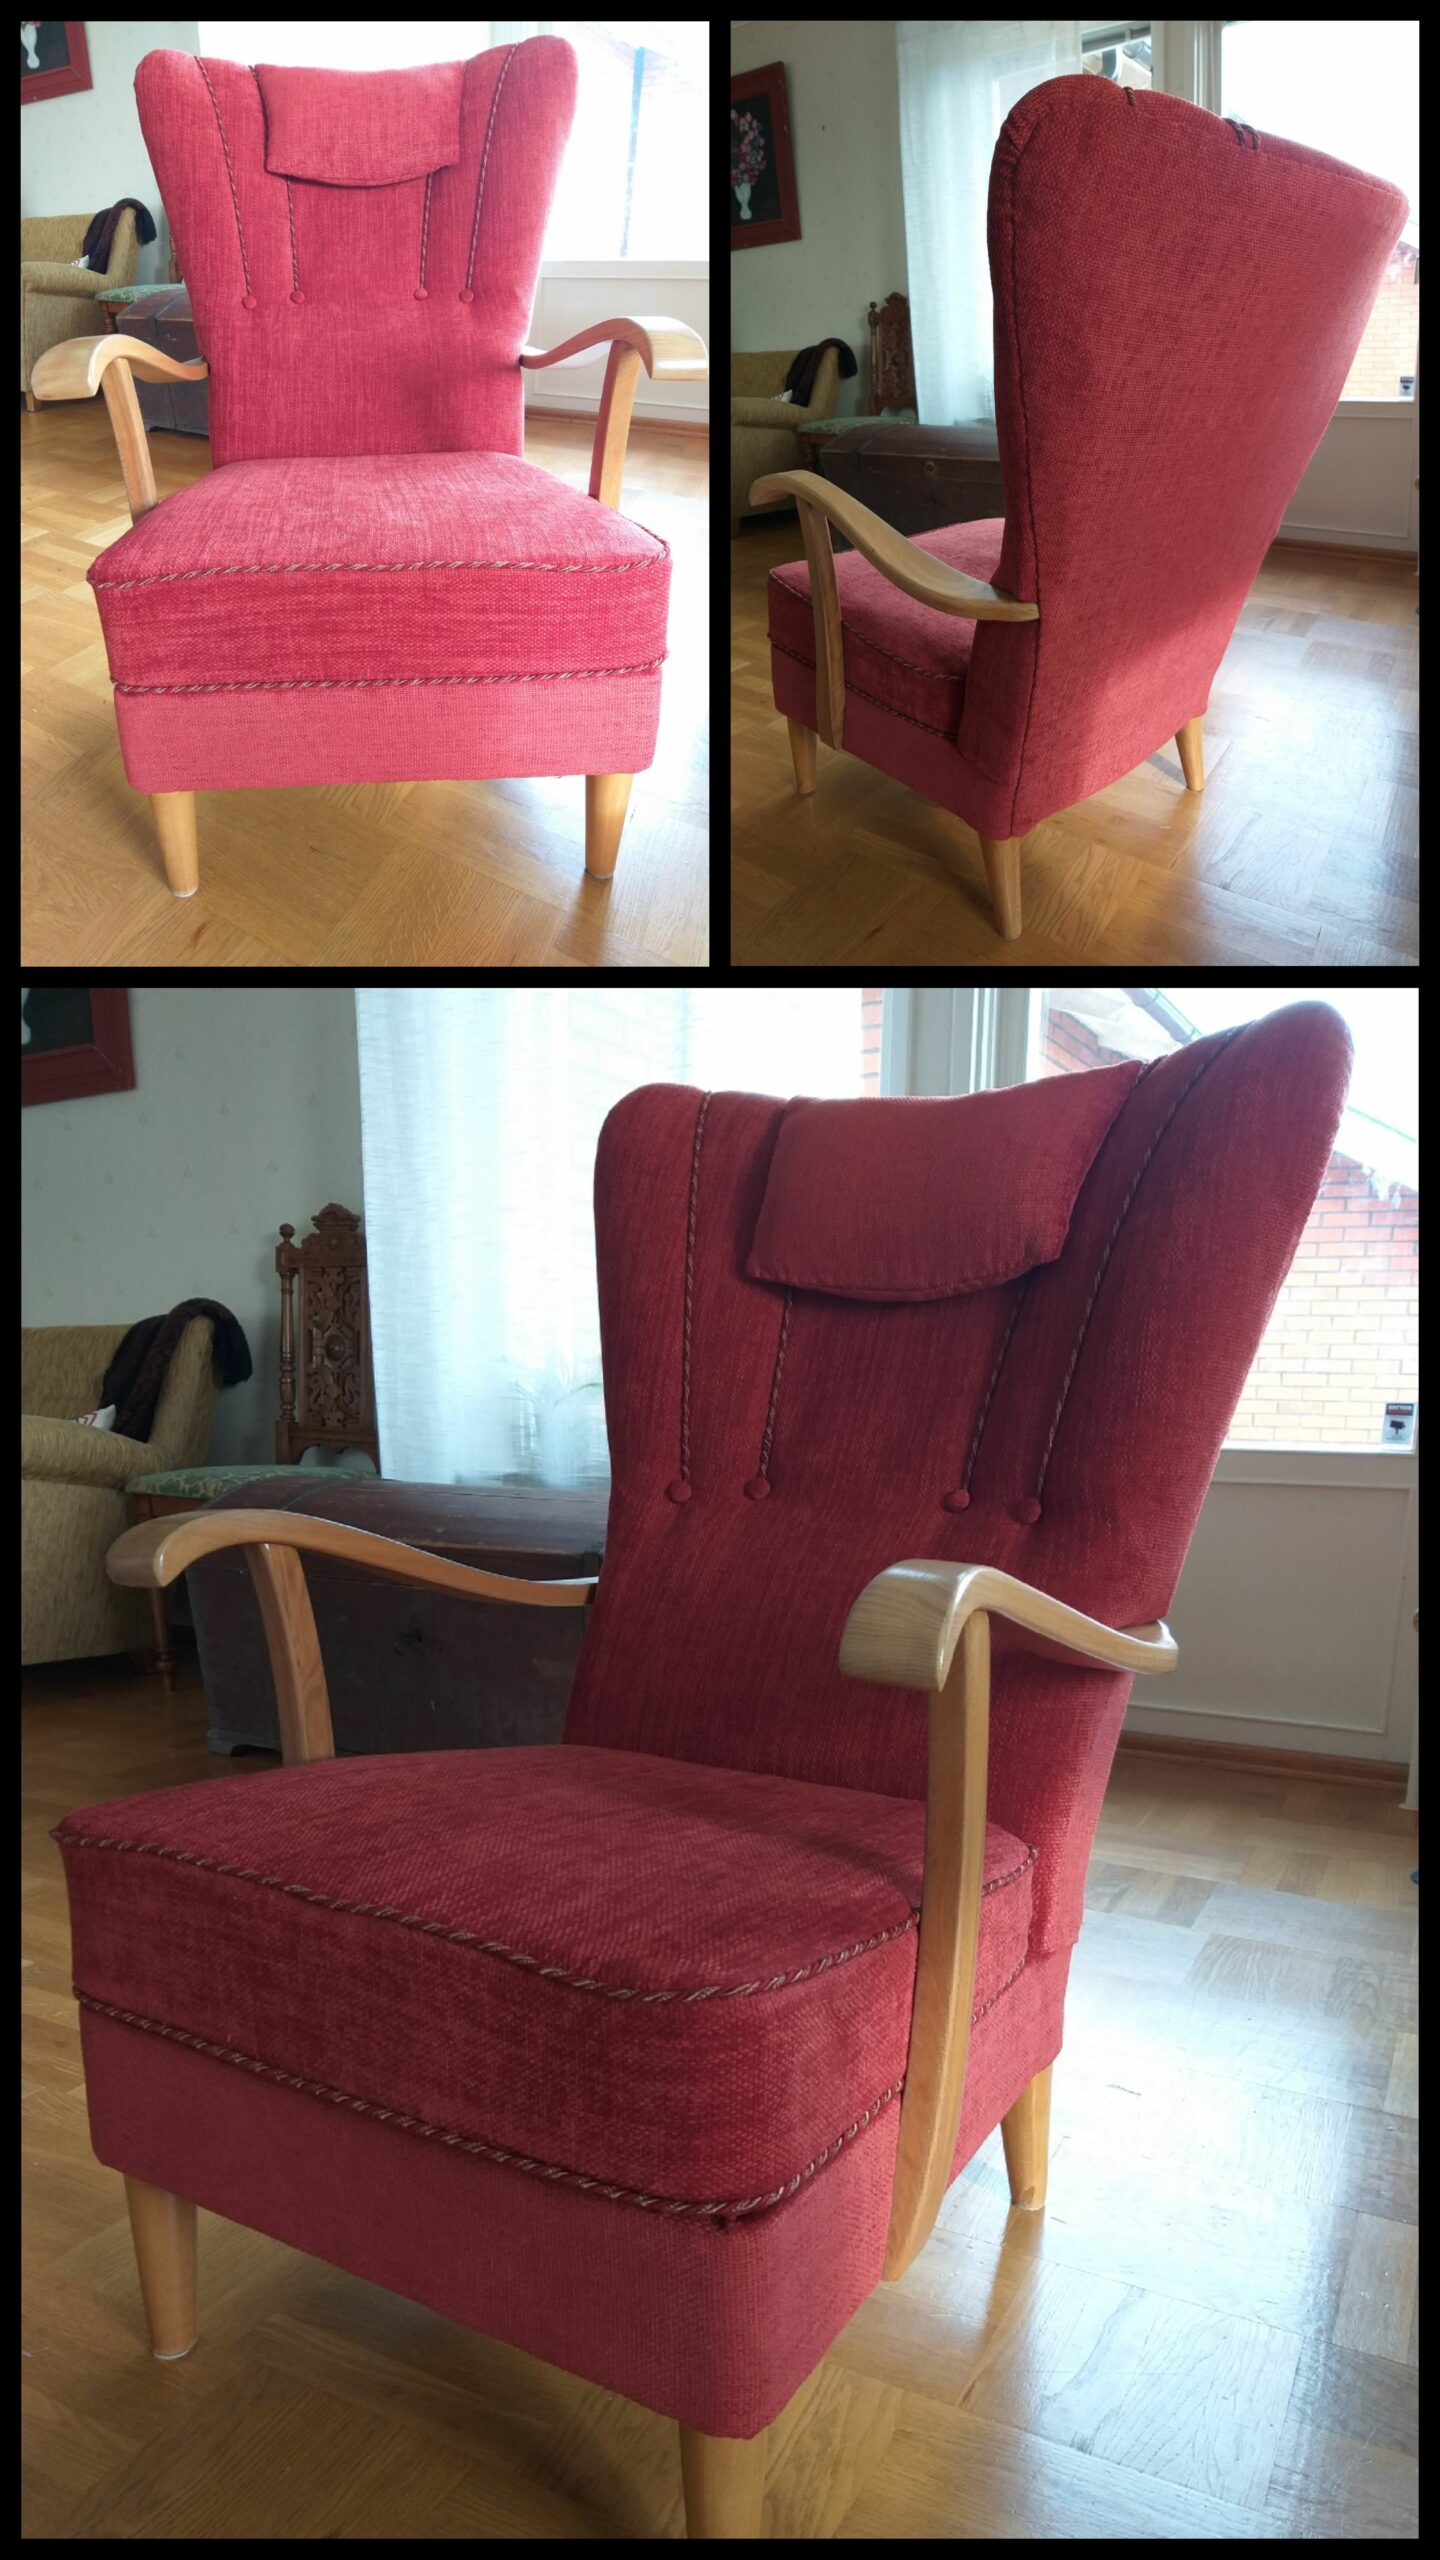
This arm chair was beautiful when I inherited it from my grandparents. After much use, it was in a sad condition, with the fabric in tatters and one of the arms falling off.
Den här fåtöljen var riktigt vacker när jag ärvde den efter mina morföräldrar. Efter några års daglig användning var den dock i ett sorgligt skick, med tyget i trasor och med ett avbrutet armstöd.
For my birthday, I was given fabric for renovating the dear heirloom. As I have never done anything similar before, I picked the armchair apart methodically, so that I would know in which order to put it together again. I sandpapered (?) the wooden parts and put on three layers of varnish (?). Then I put the new fabric on, using both staples and hand stitching. I know that I have probably committed some terrible mistakes but I am very happy with the result.
Jag fick ett fint möbeltyg i födelsedagspresent. Eftersom jag aldrig gjort något liknande tidigare, plockade jag isär fåtöljen metodiskt, så att jag skulle veta i vilken ordning jag sedan skulle sätta ihop allt igen. Jag sandpapprade armstöden och benen innan jag la på tre lager olja. Sedan klädde jag fåtöljen, med hjälp av både häftpistol och handsömnad.Jag är säker på att jag har begått några allvarliga synder inom tapetseringsvärlden, men jag är väldigt nöjdmed slutresultatet.
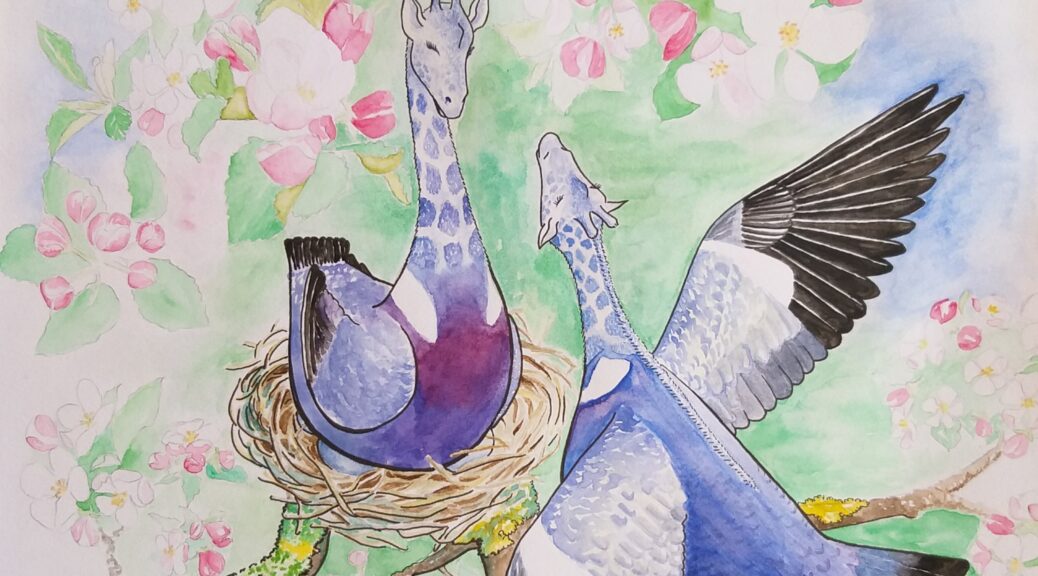
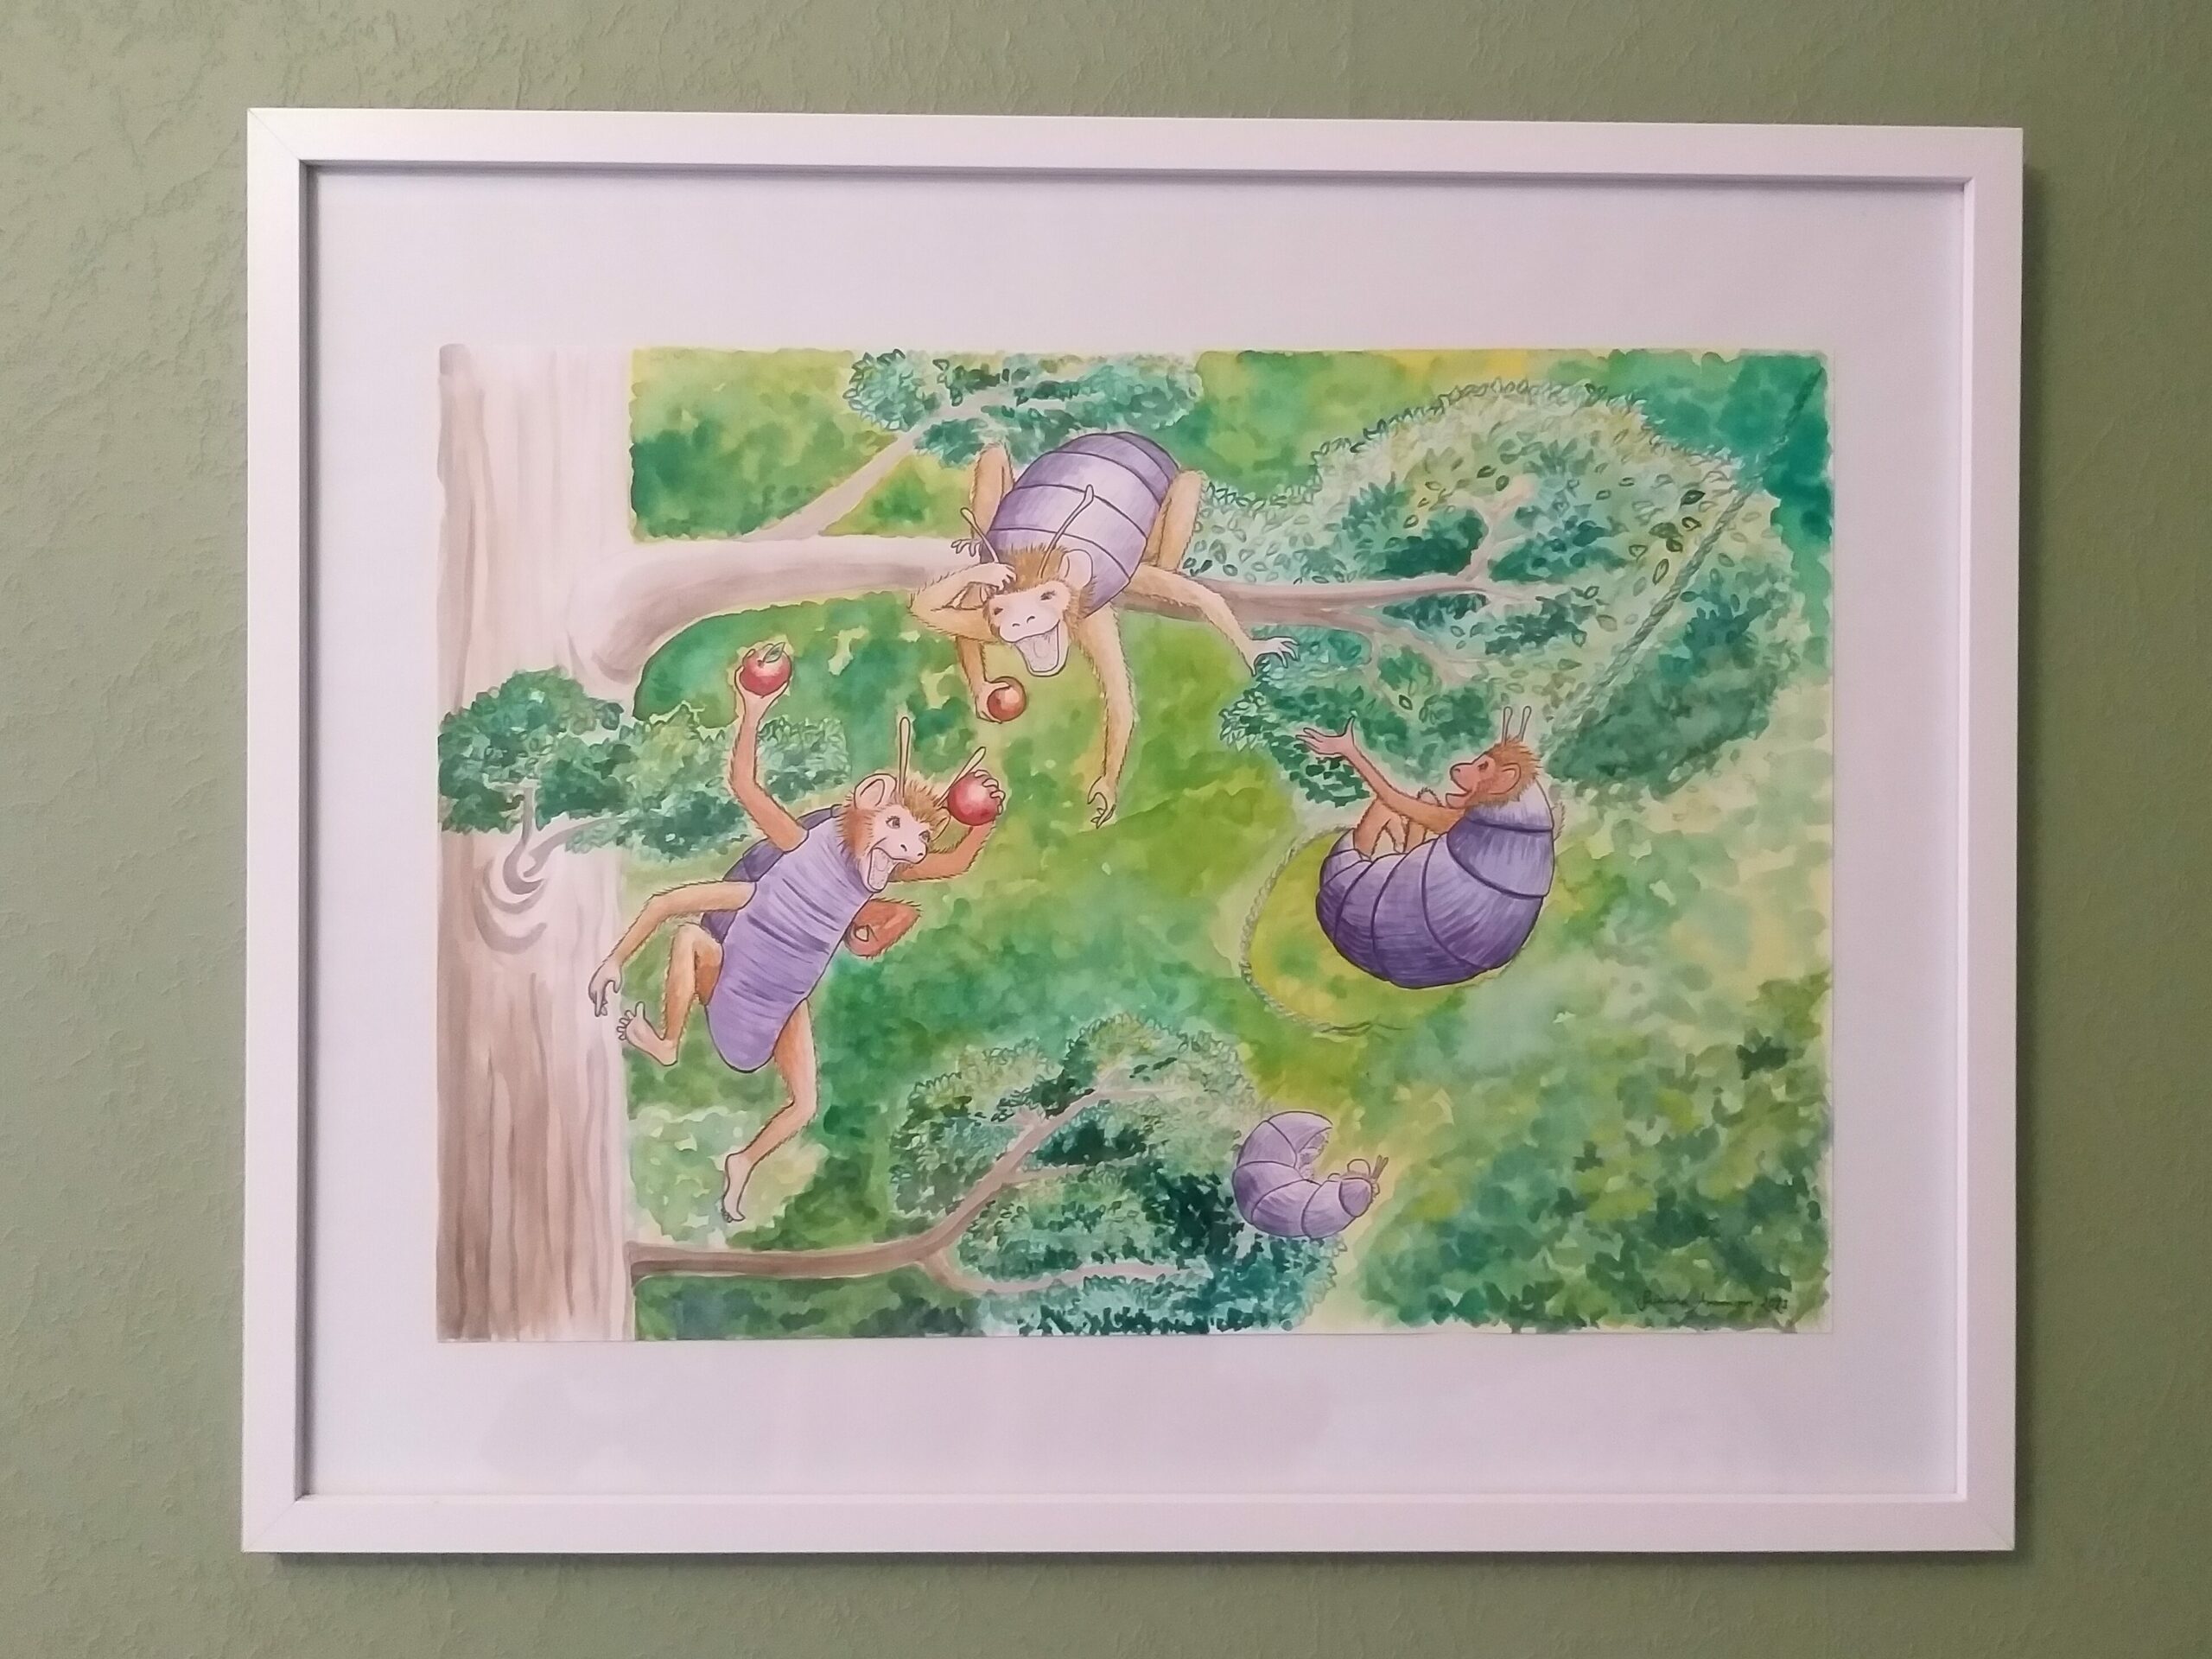
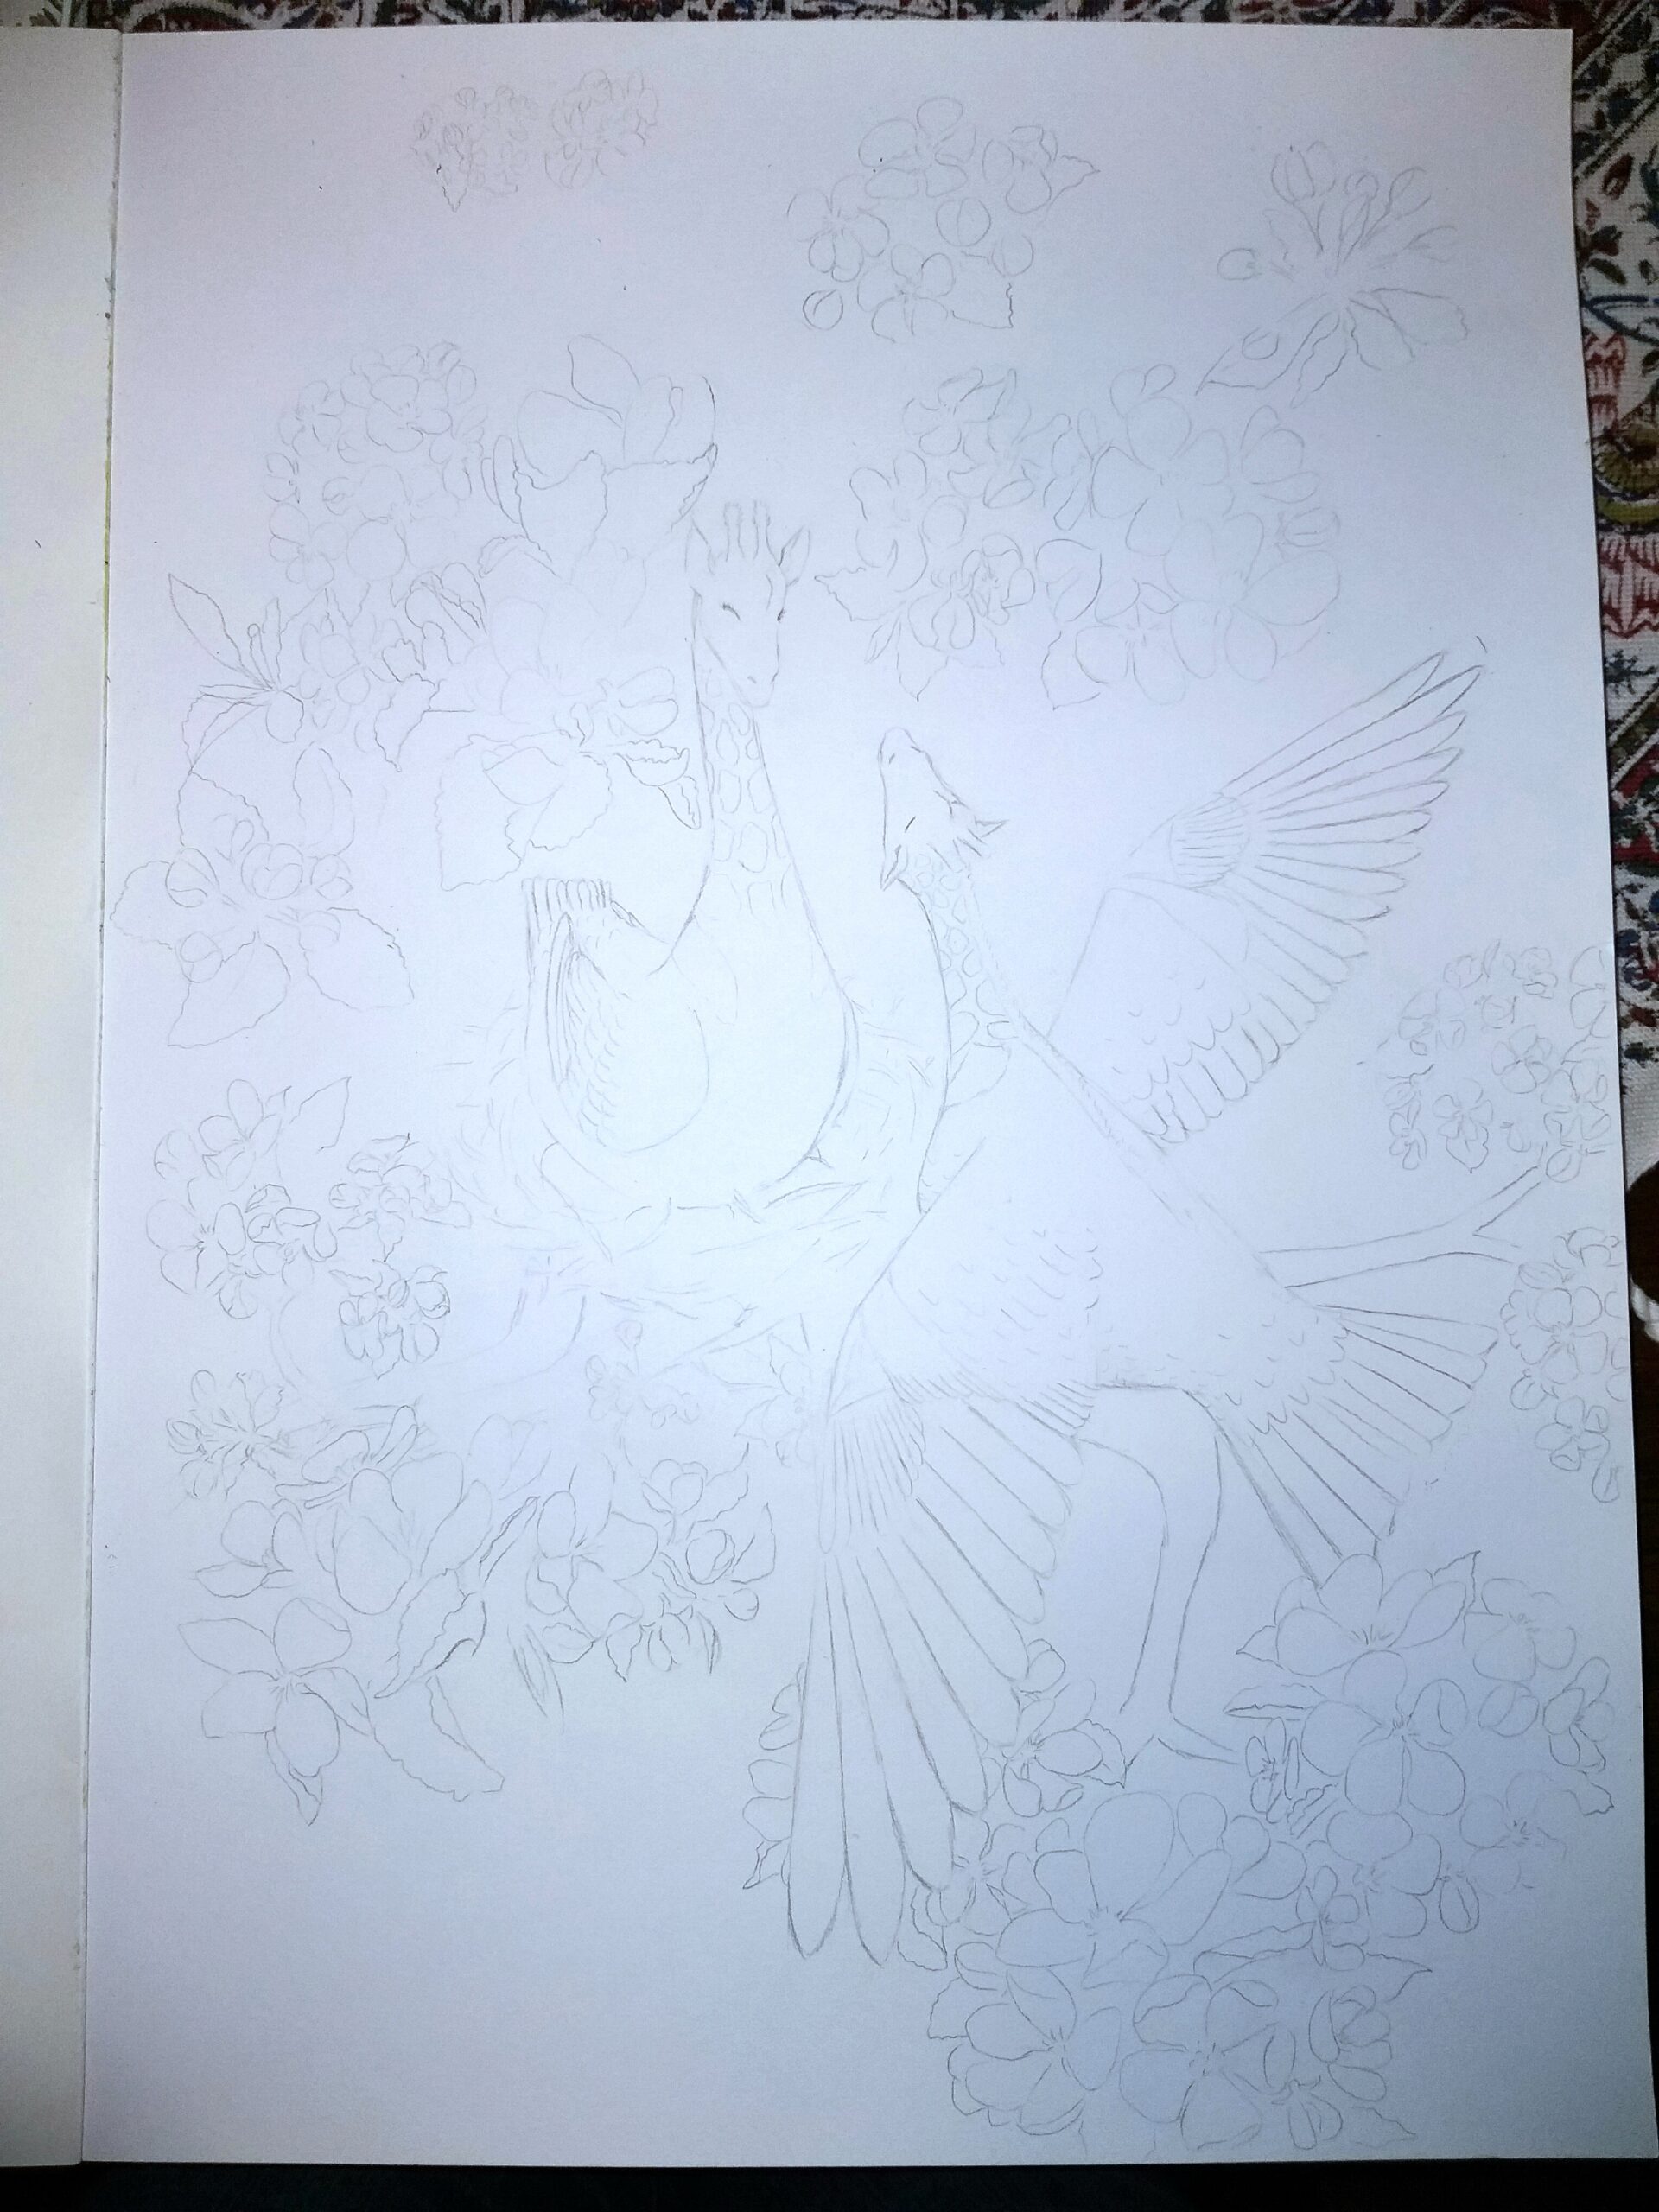
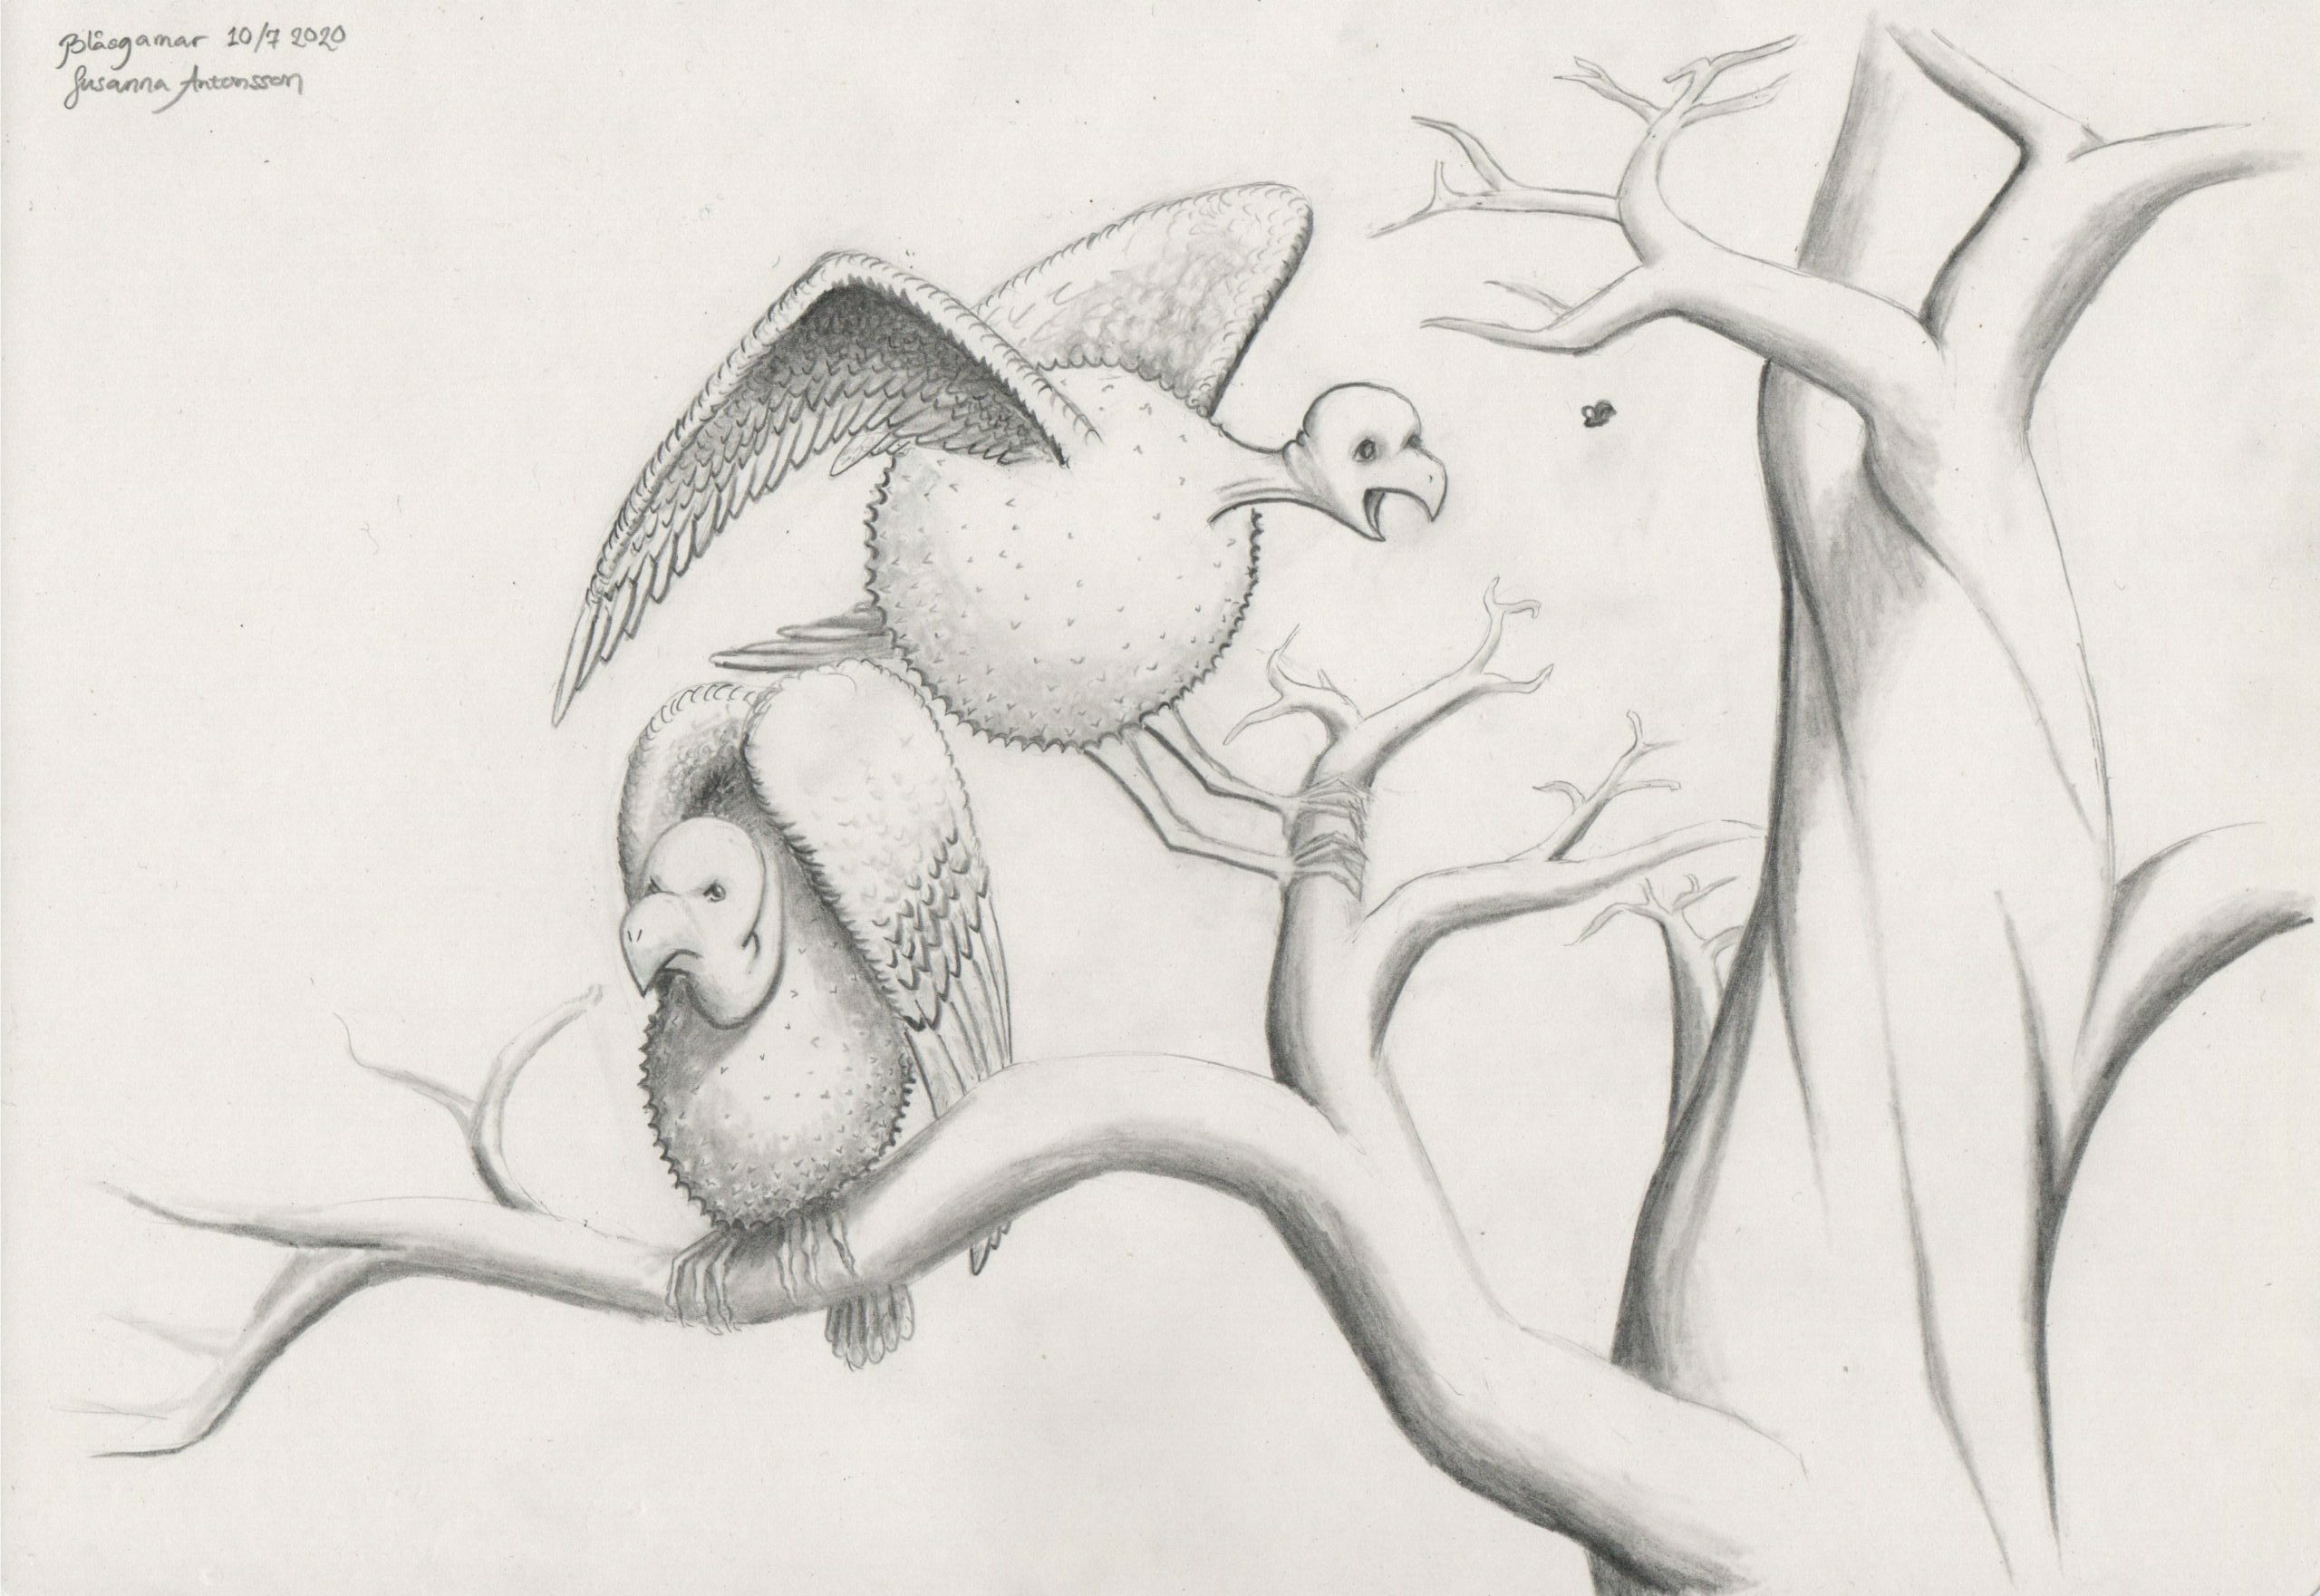
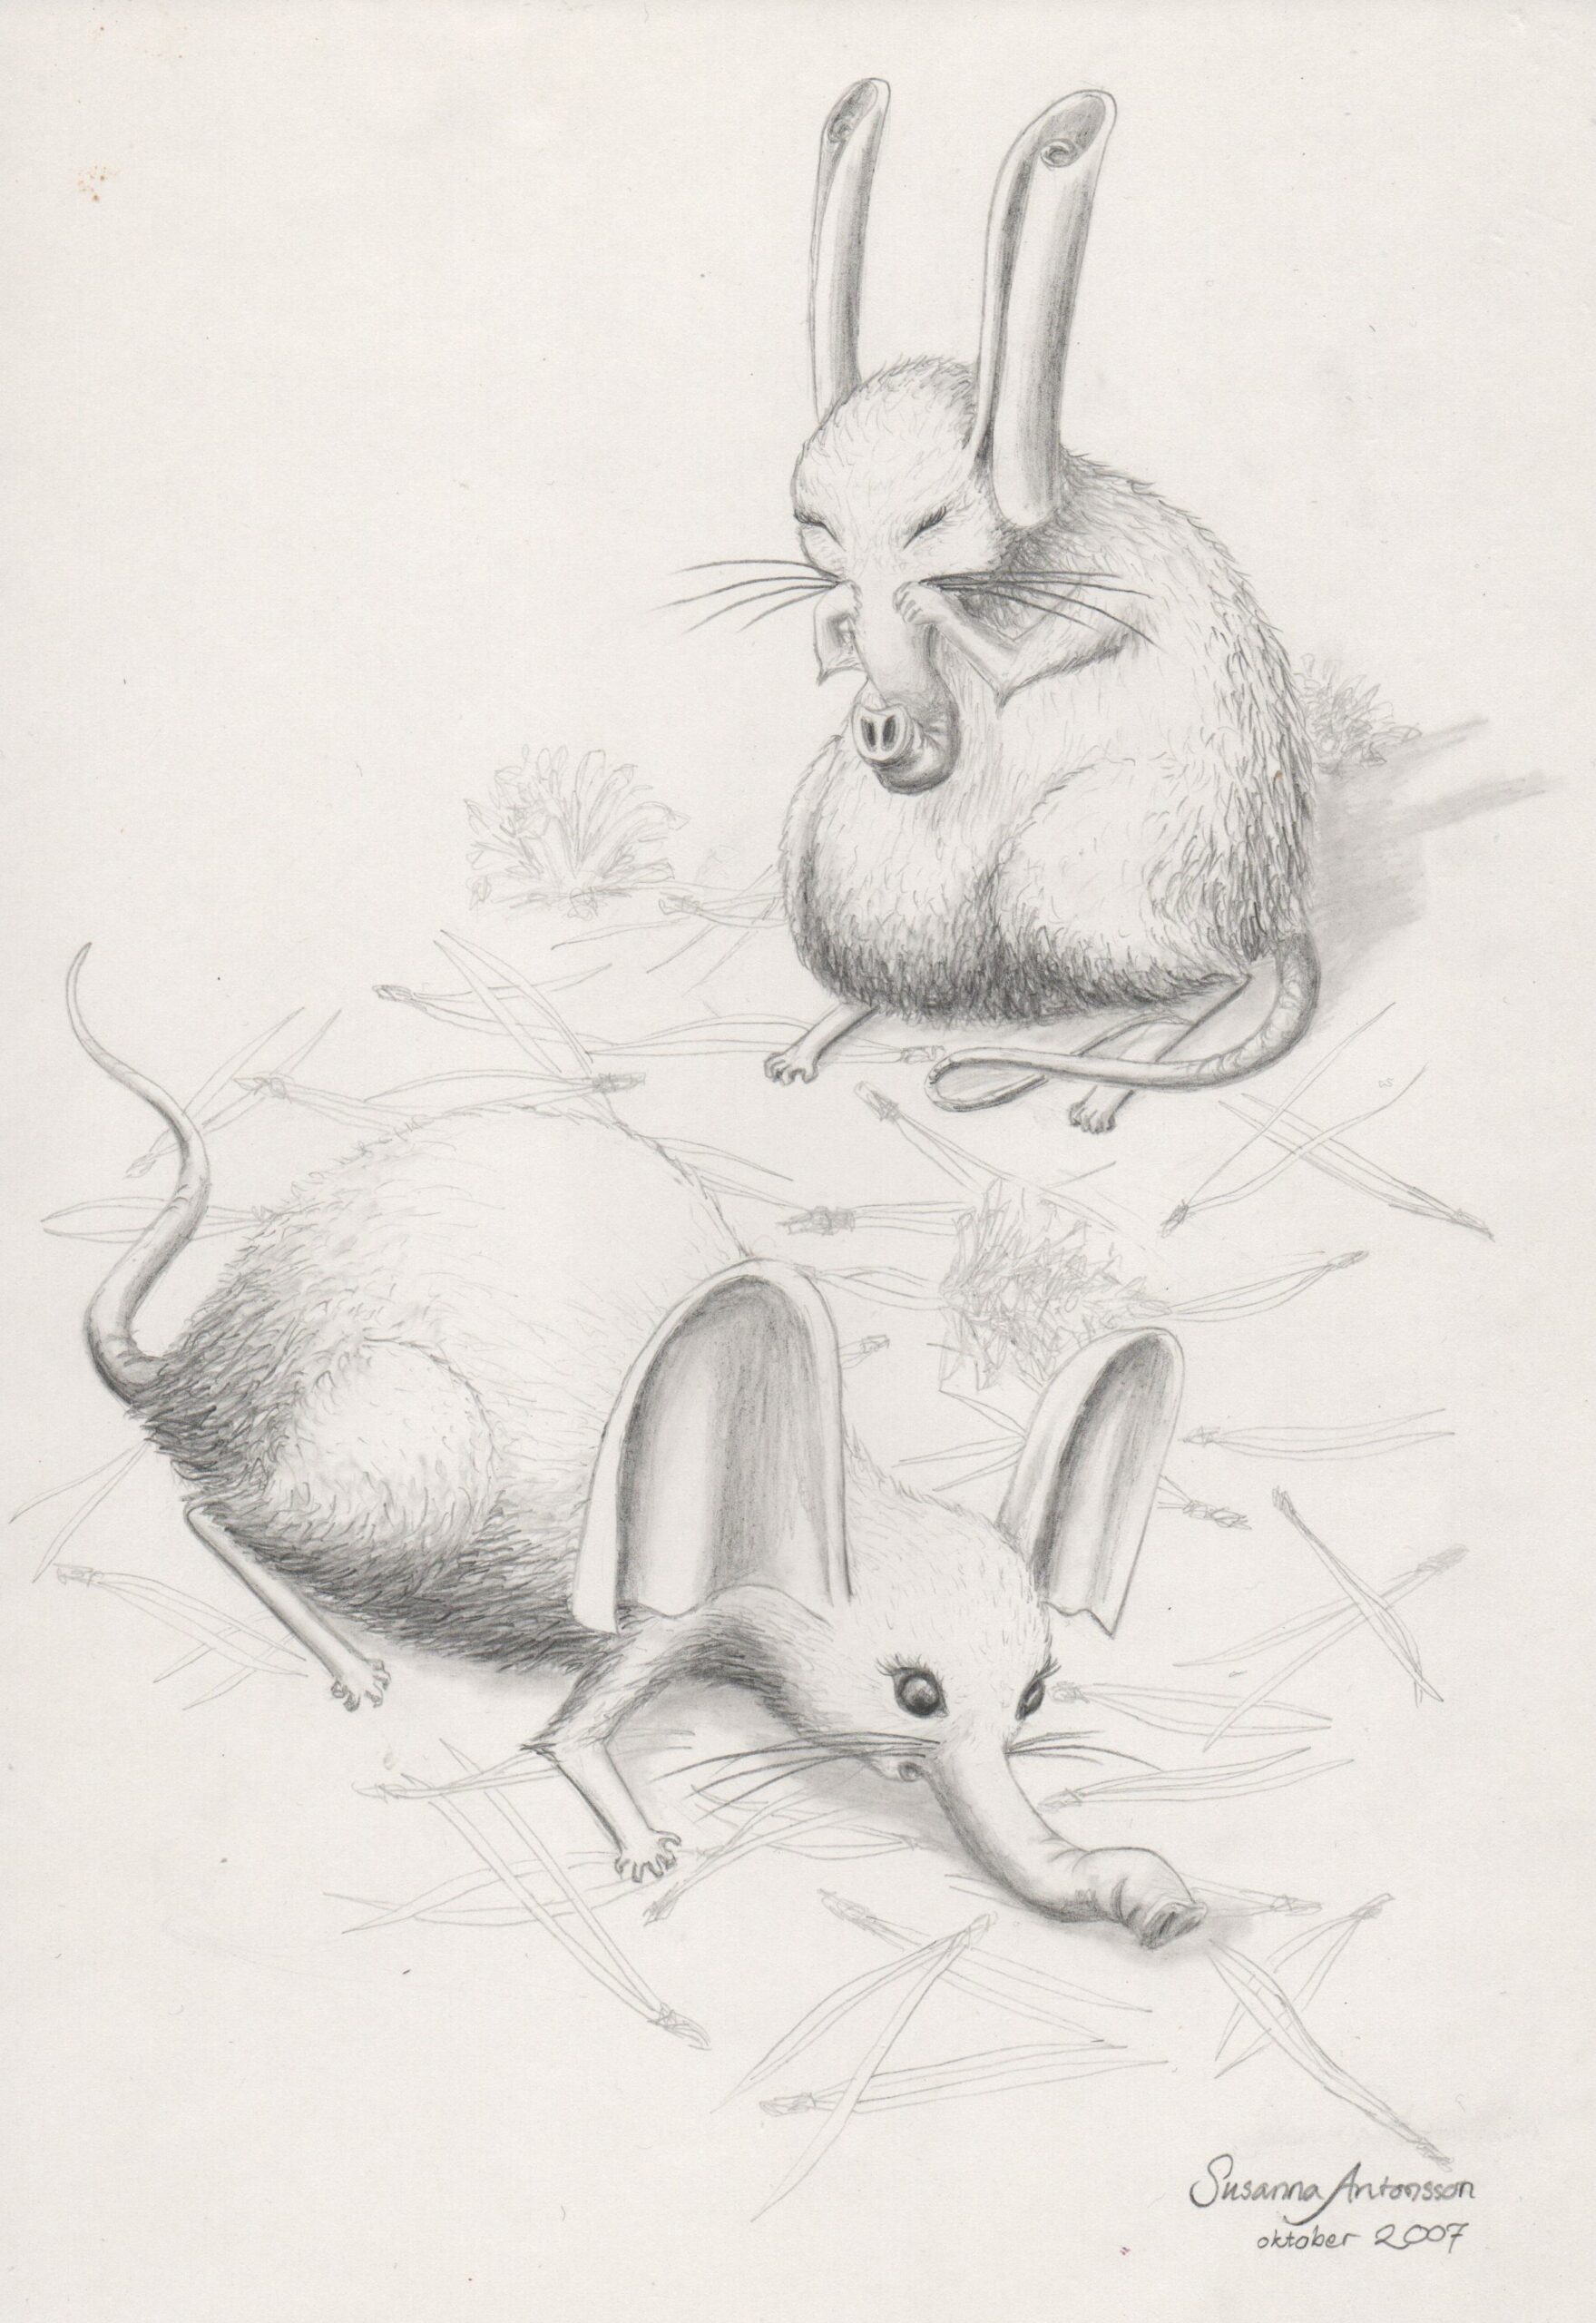
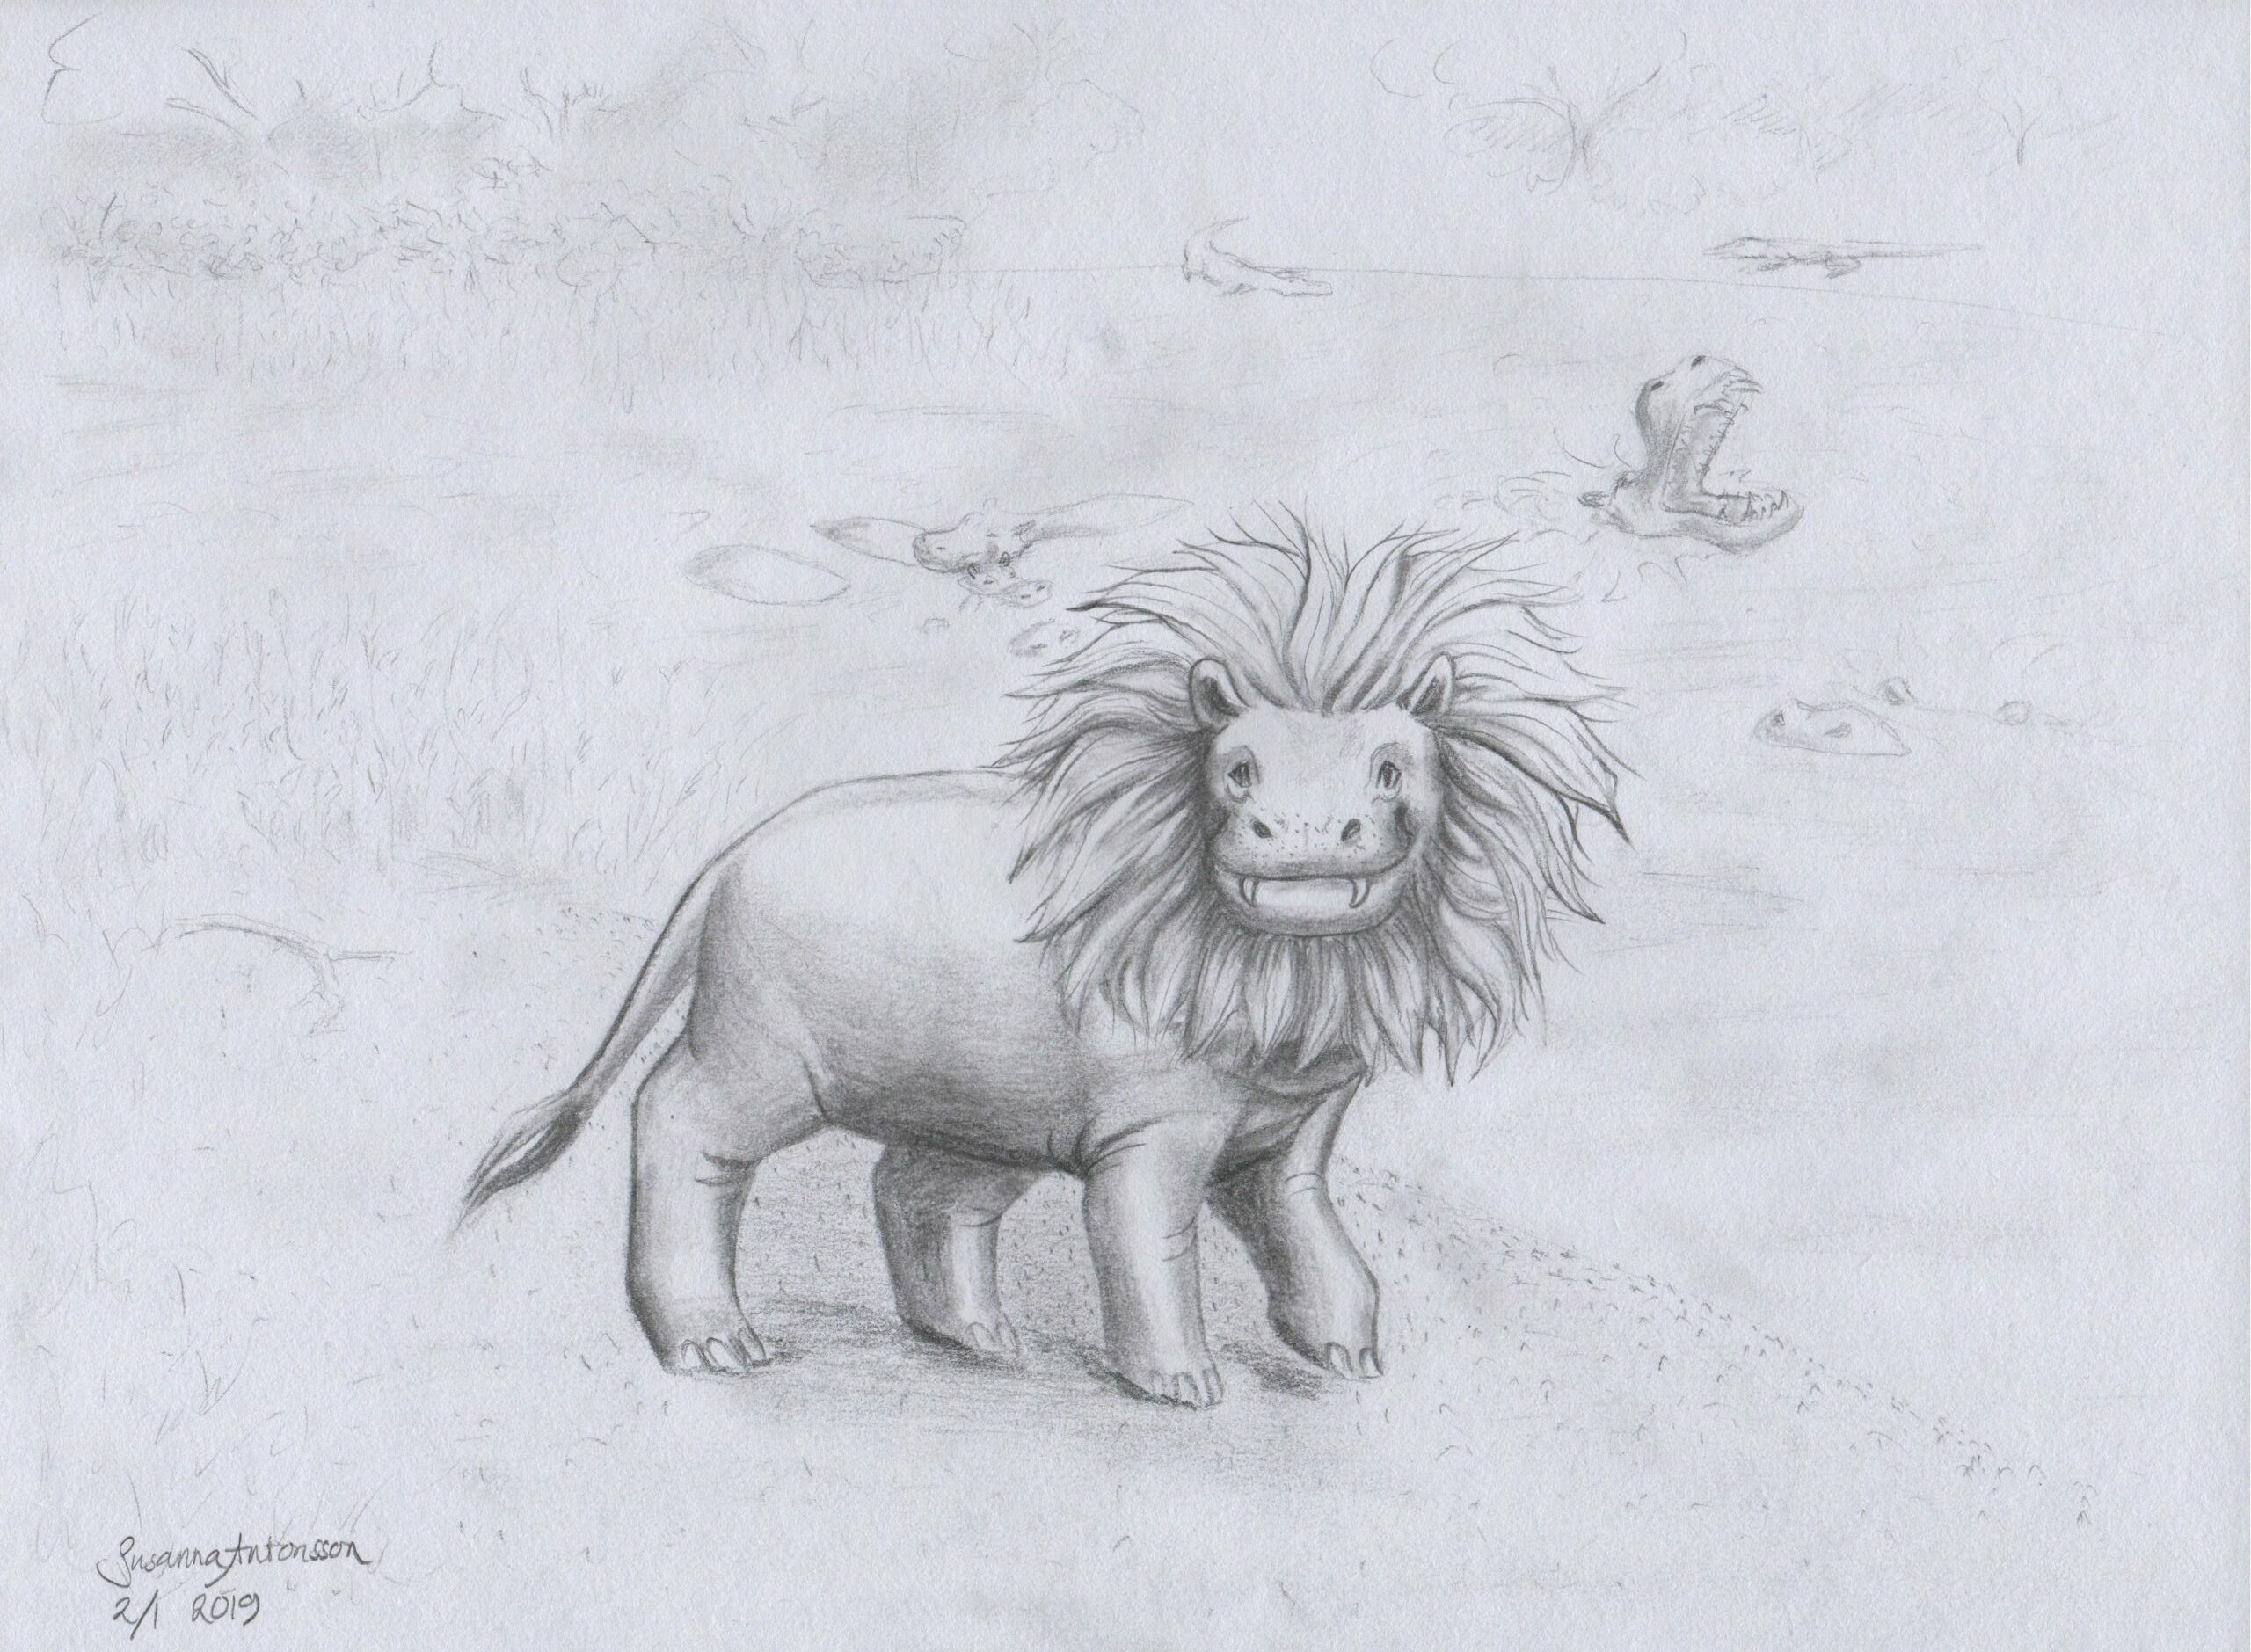
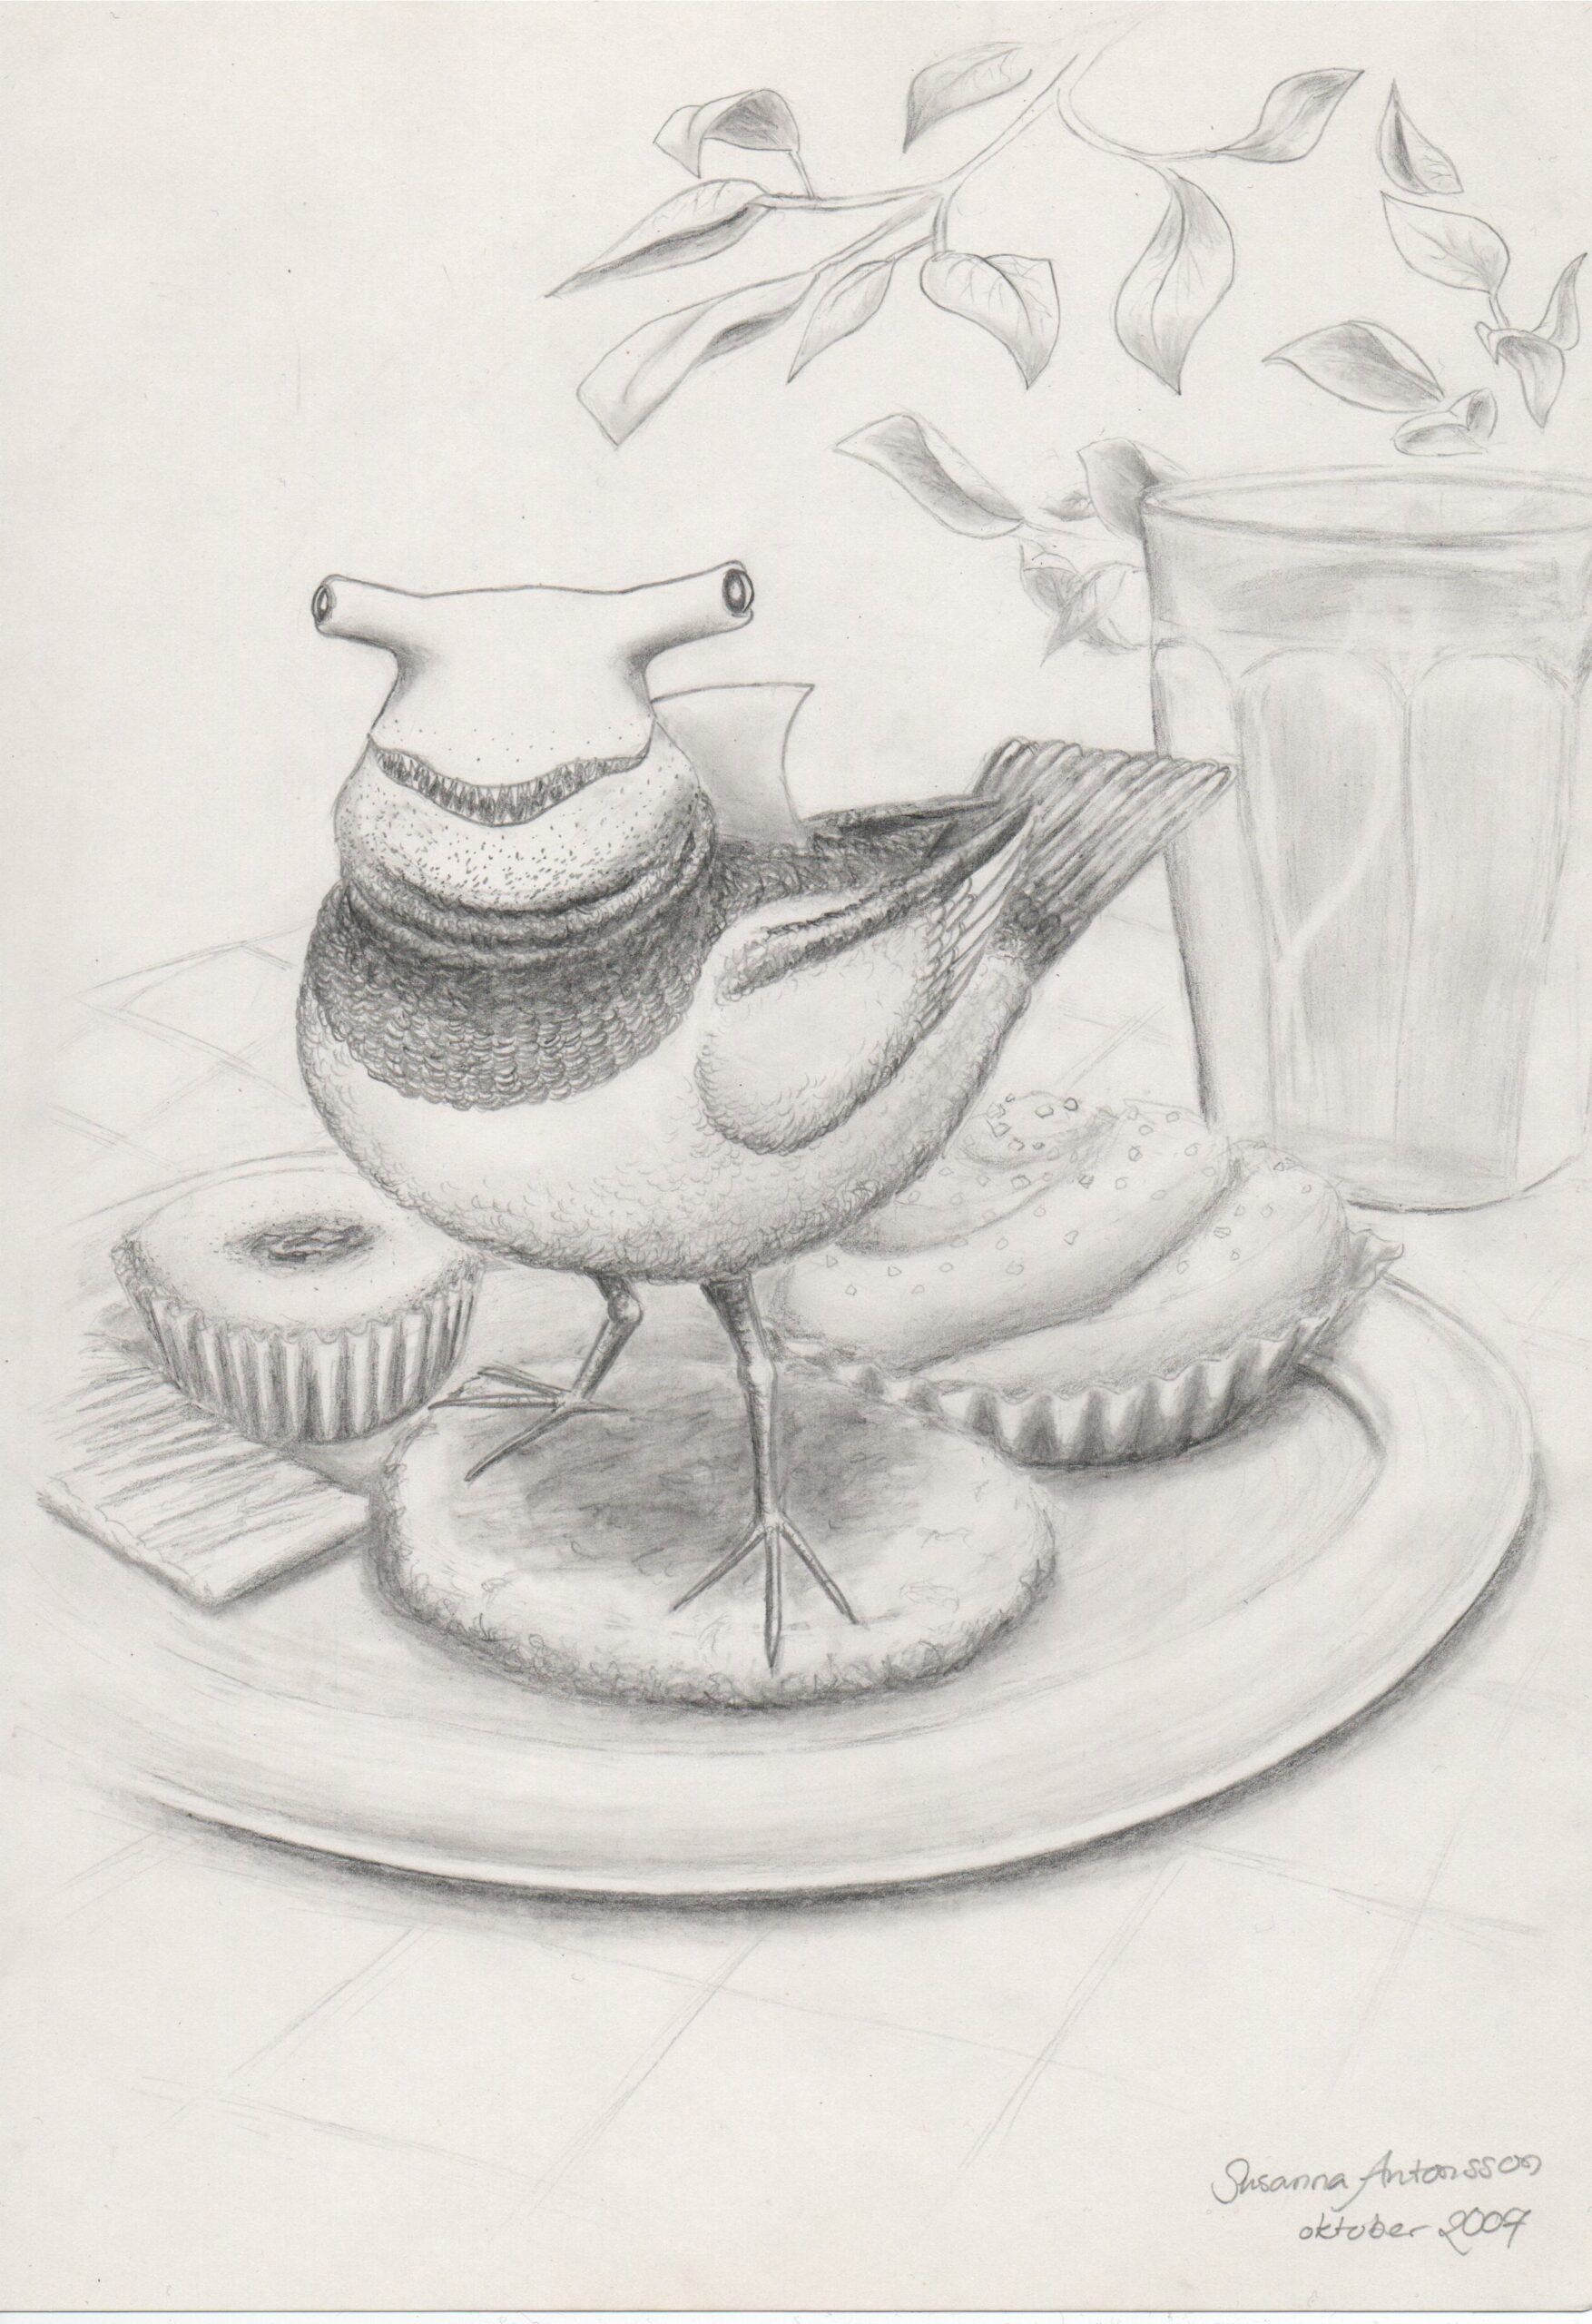
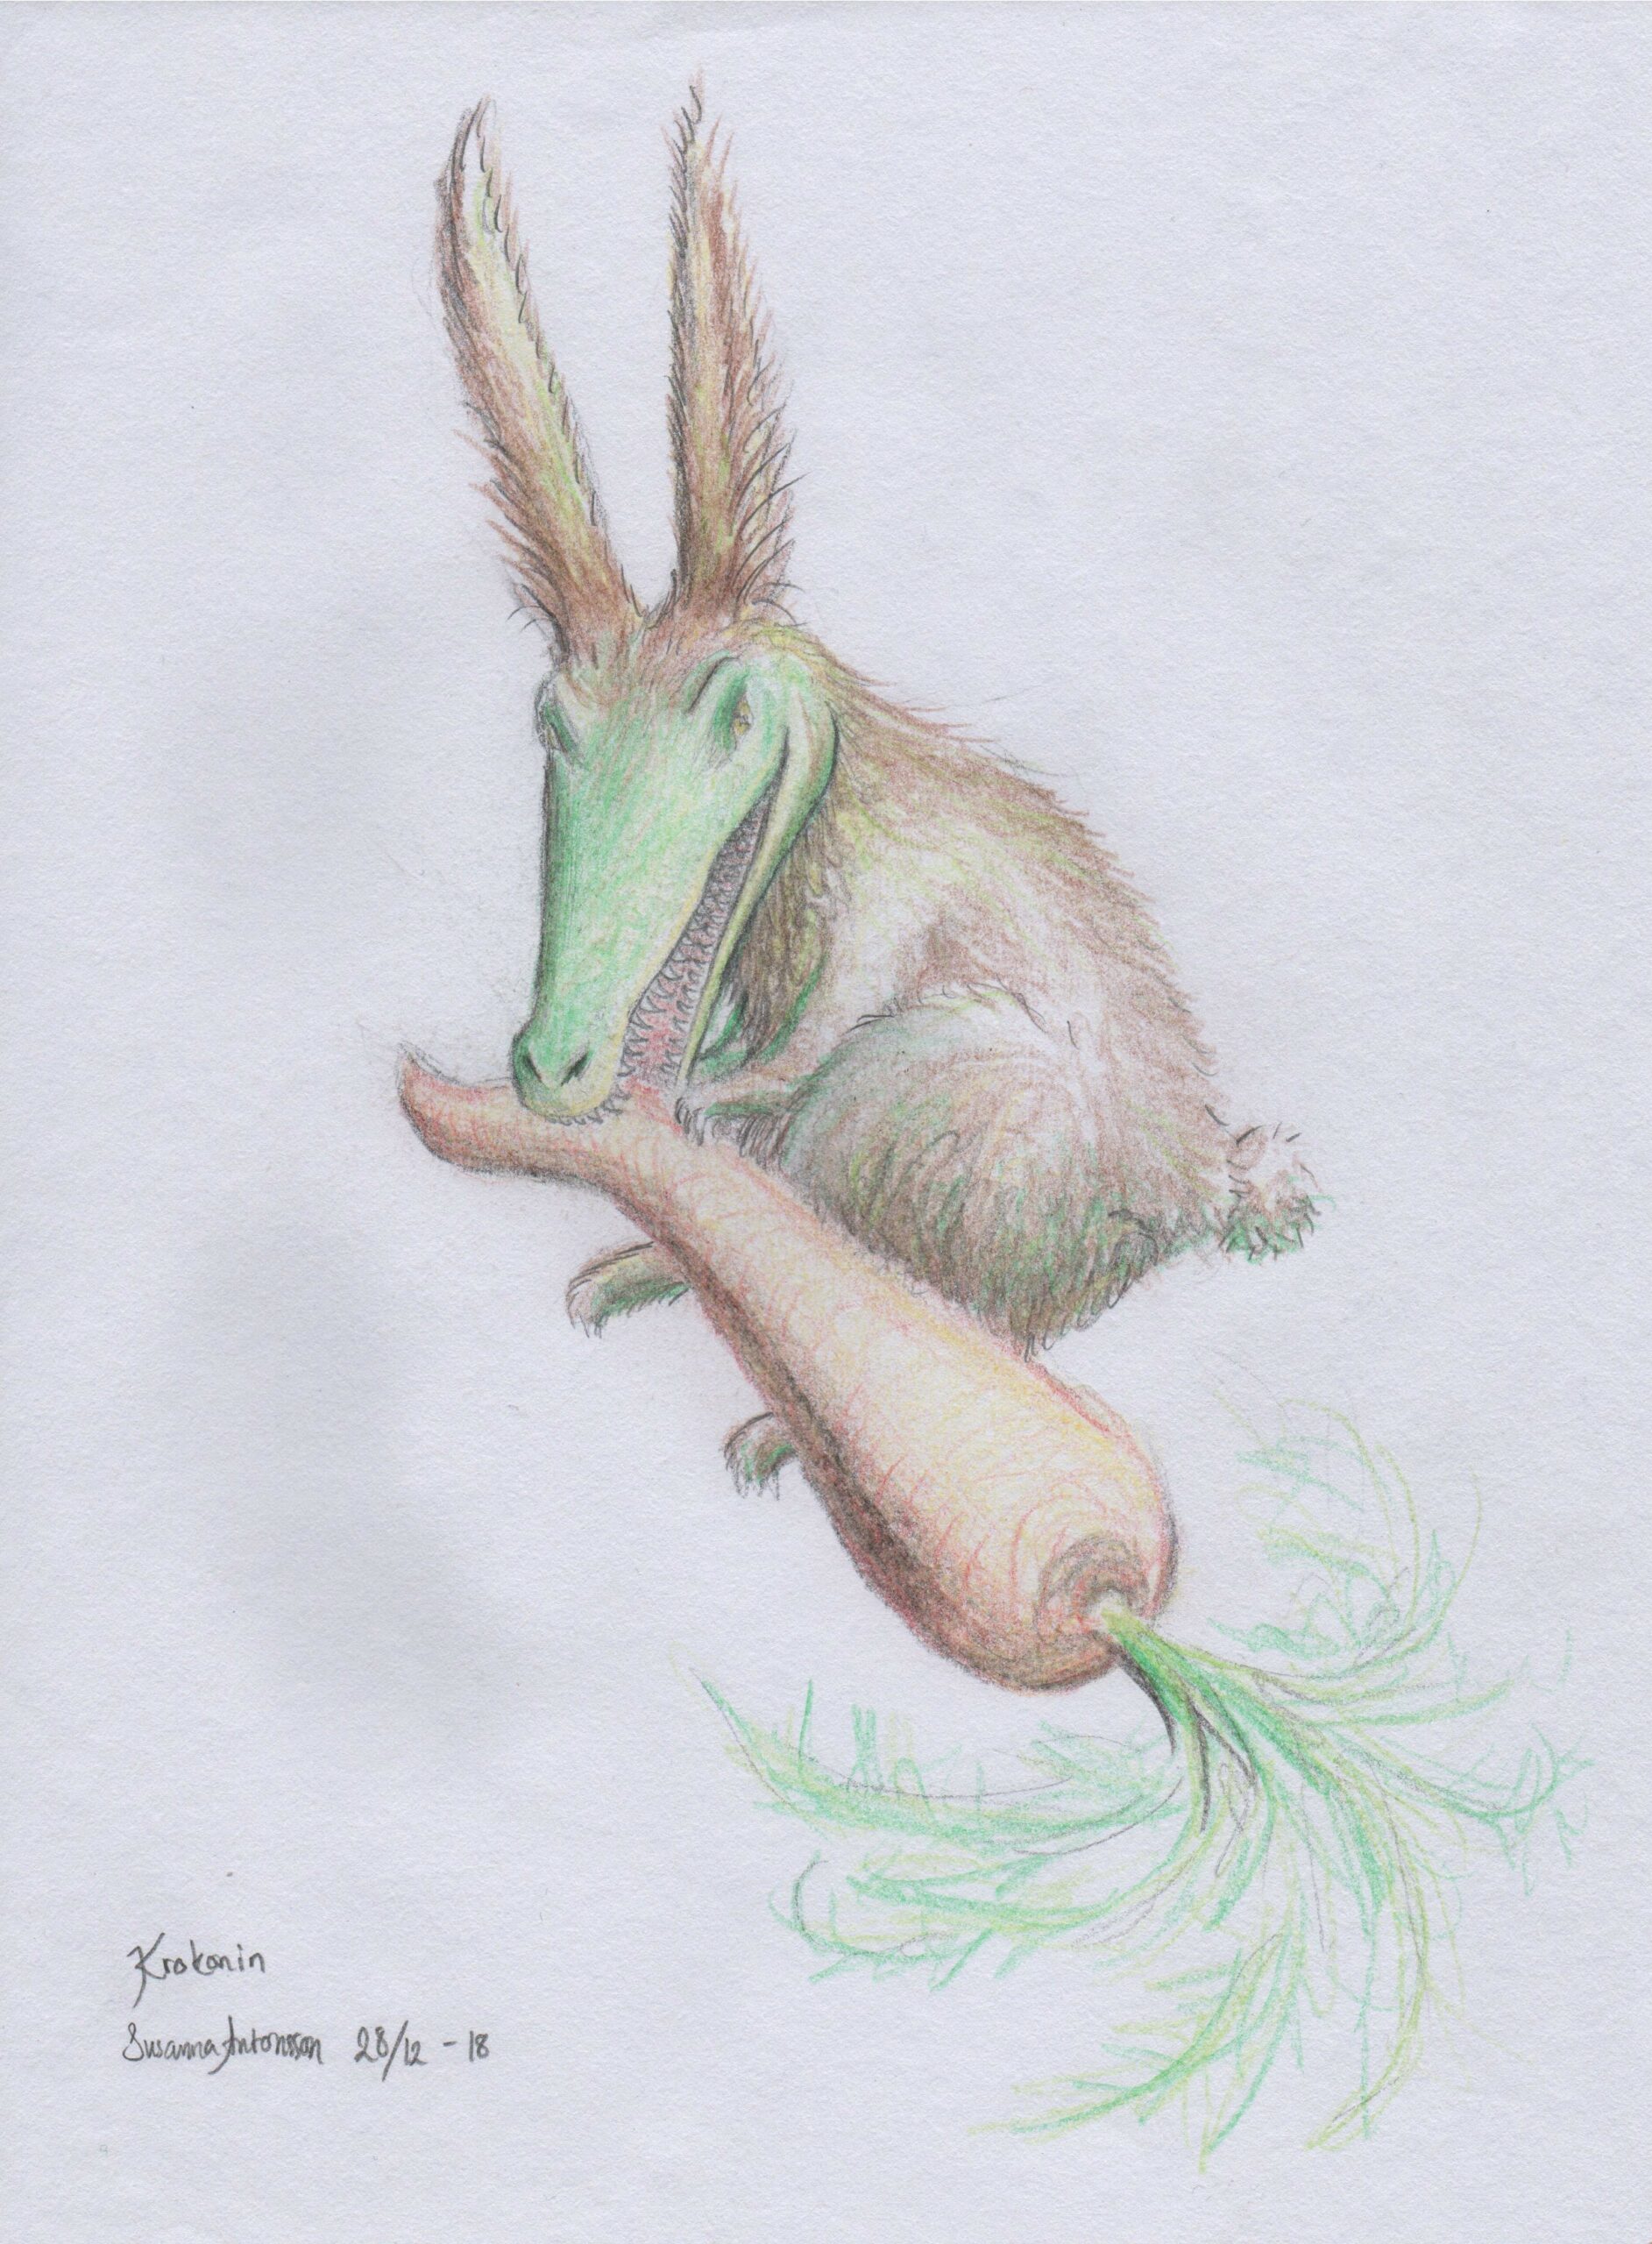
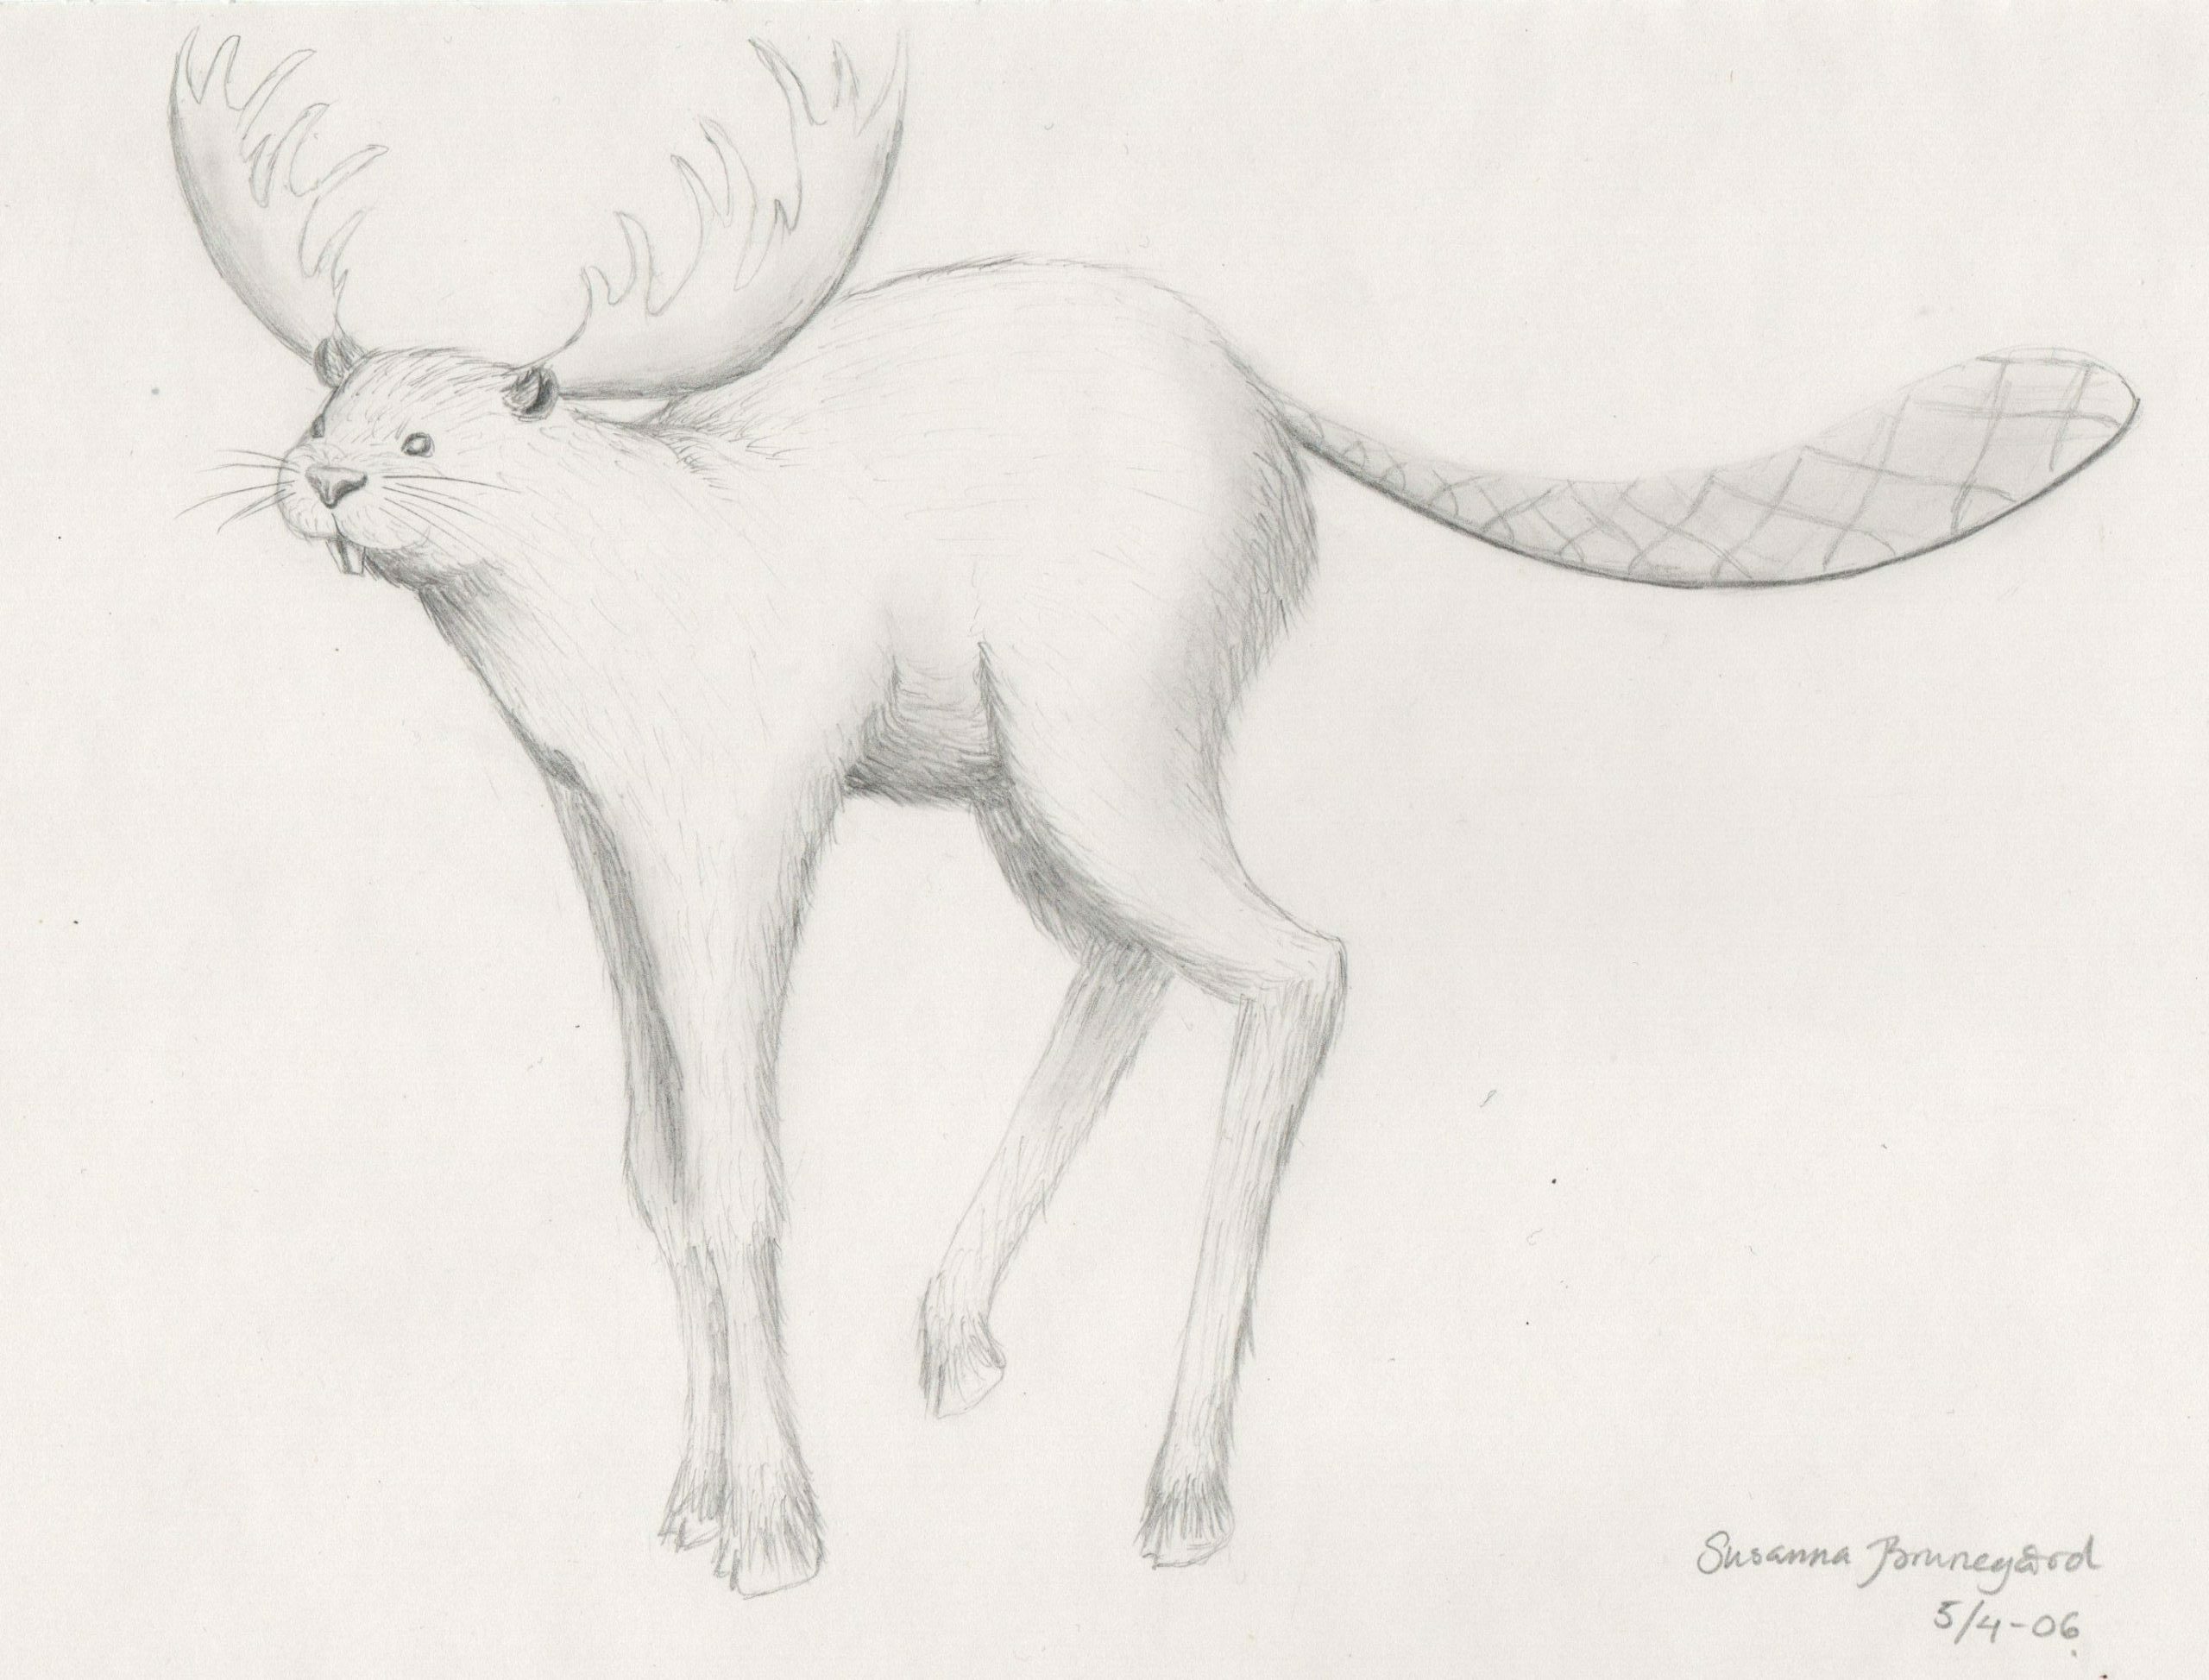
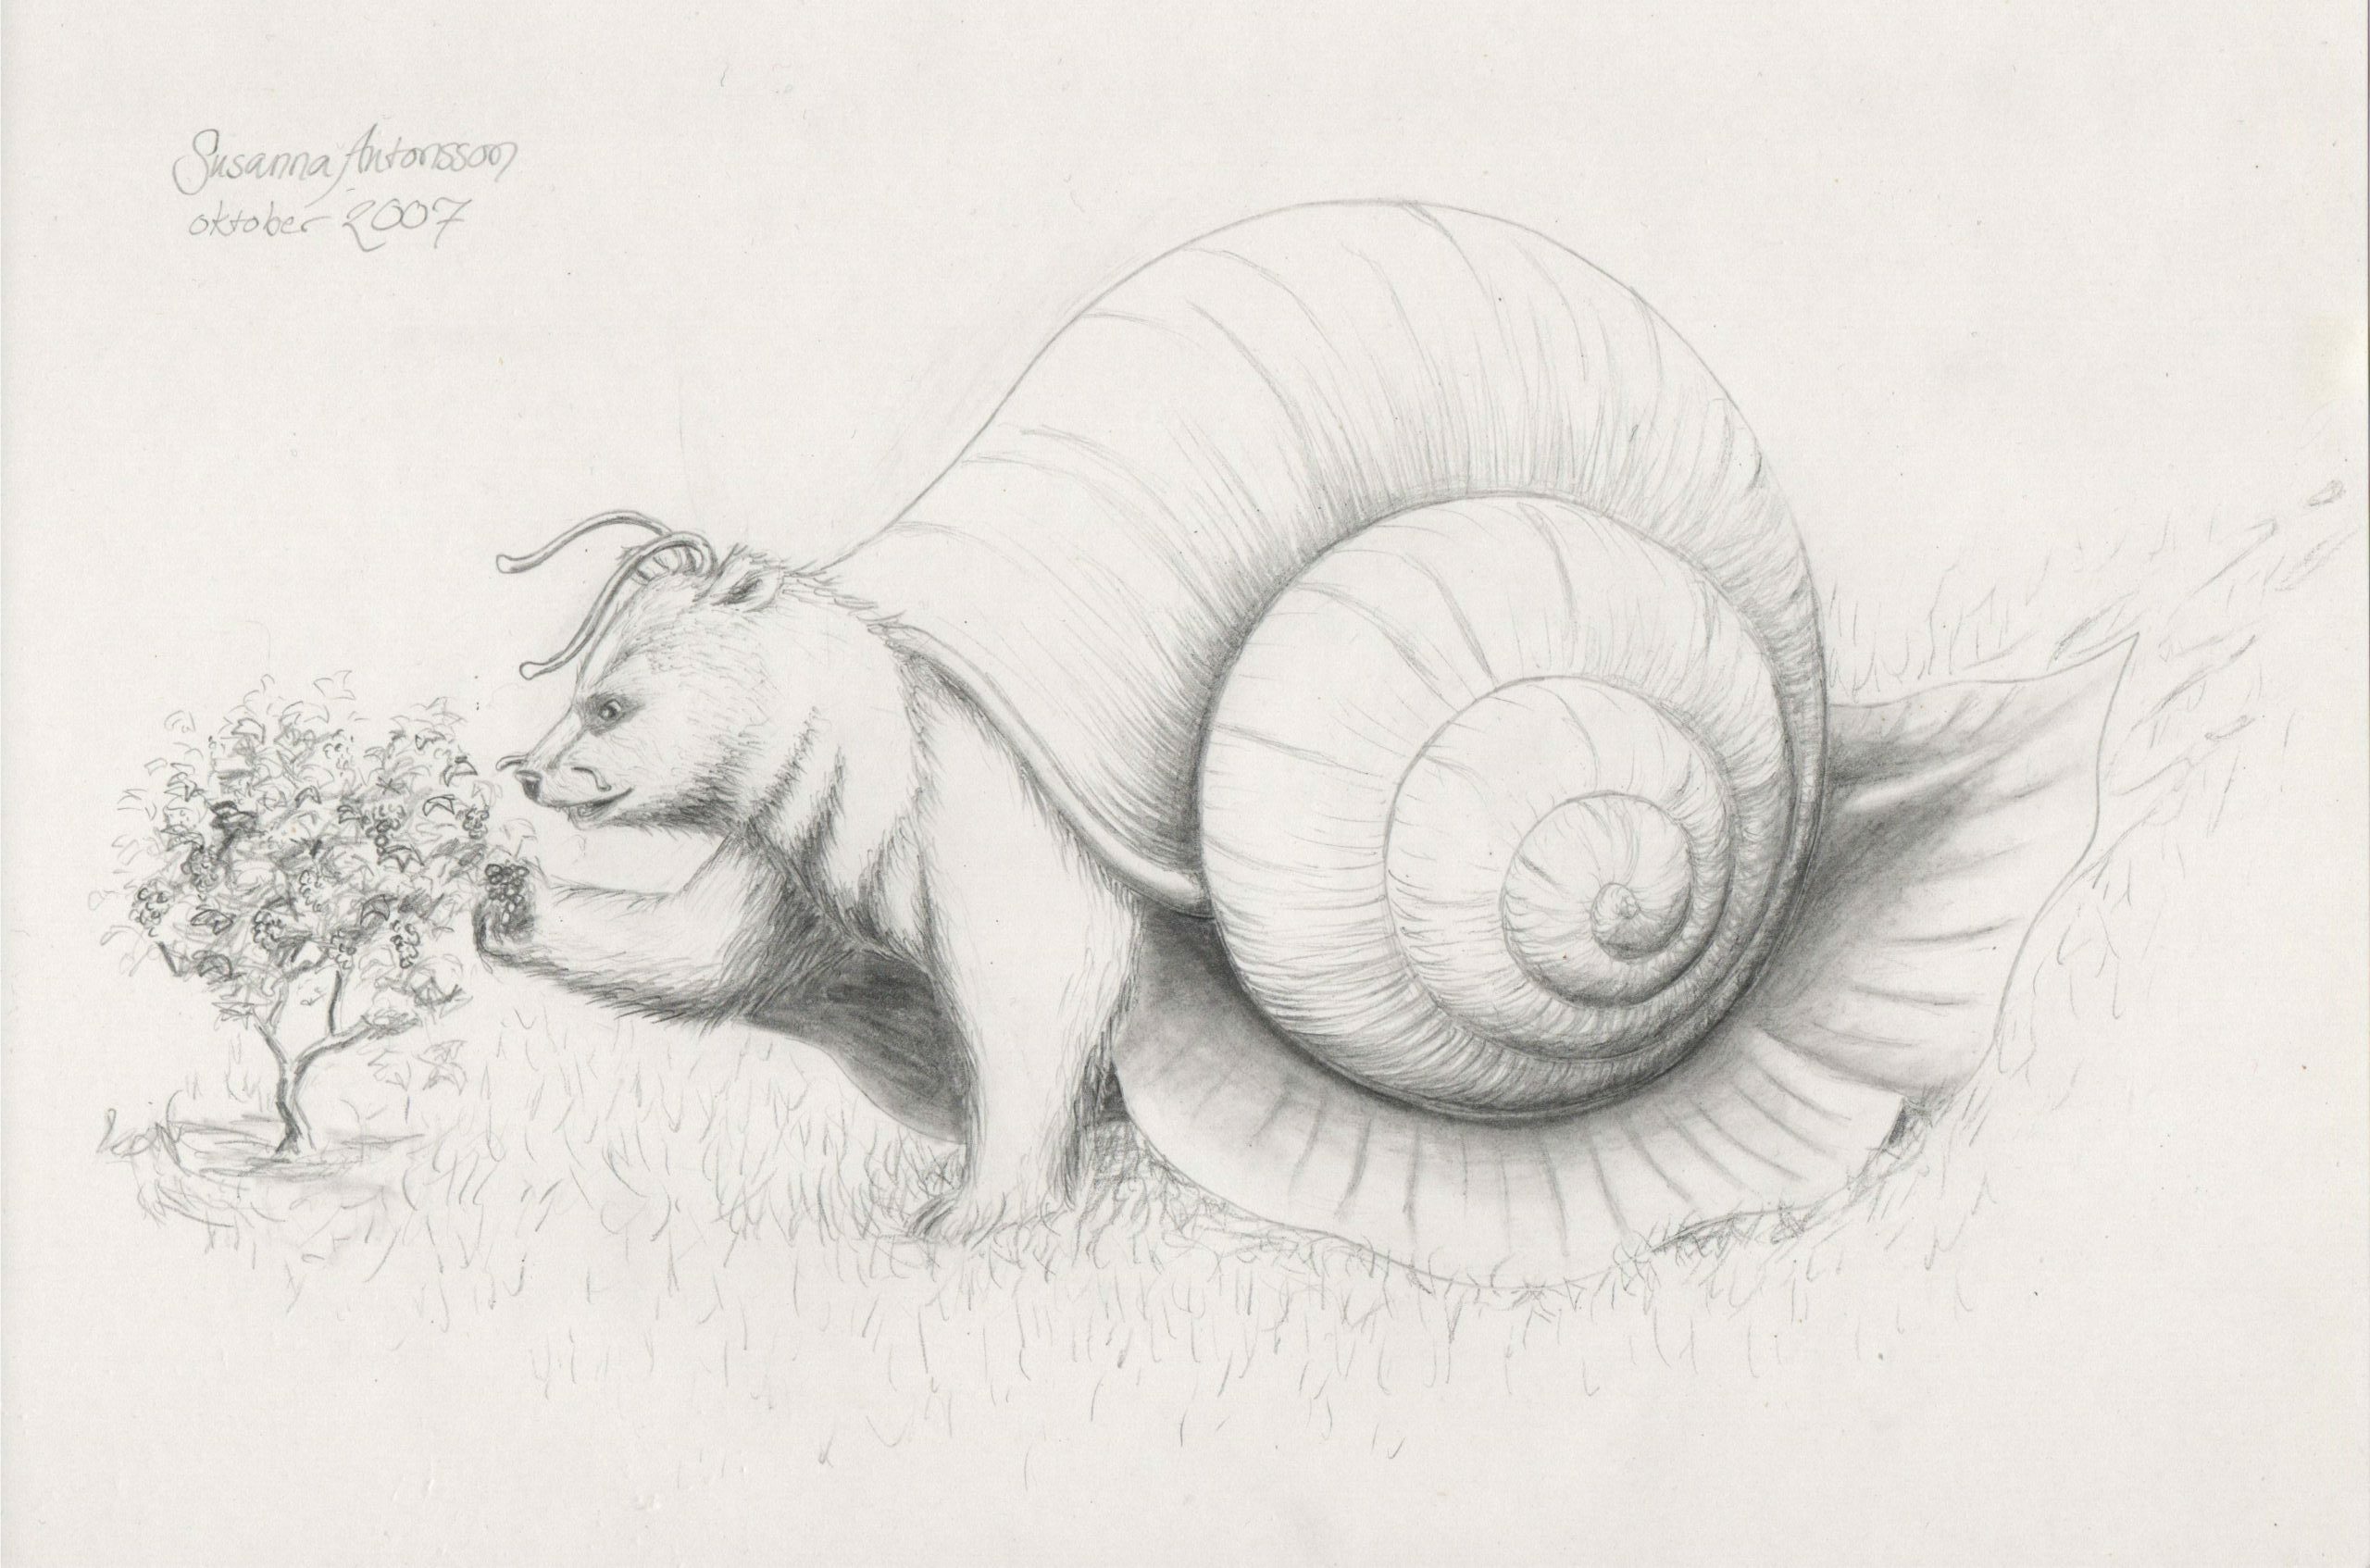
As some of you might have noticed, I am fond of mixing different species into new exciting animal hybrids. Until now, I have only made these as sketches but some years ago I got a commission for a watercolour painting. At last I had inspiration and created two! So, let me introduce the giruves (giraffes and doves) and gråsapor (monkeys and wood louse).
Några av er har säkert lagt märke till att jag är förjust i attskapa djurhybrider. Hittills har det bara blivit blyertsskisser, men för några år sedan blev jag ombedd attgöra en stor bild i vattenfärg. Tre år senare drabbades jag av inspiration och skapade både en tavla med gråsapor som roar sig i djungeln och fridfulla giruvor i äppelblommen. Båda såldes i ett nafs.
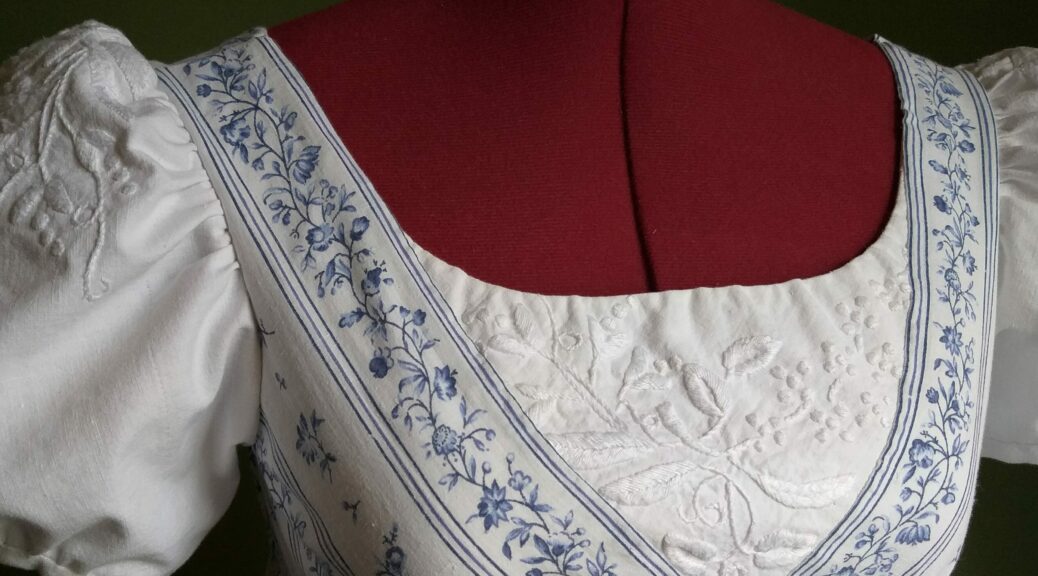
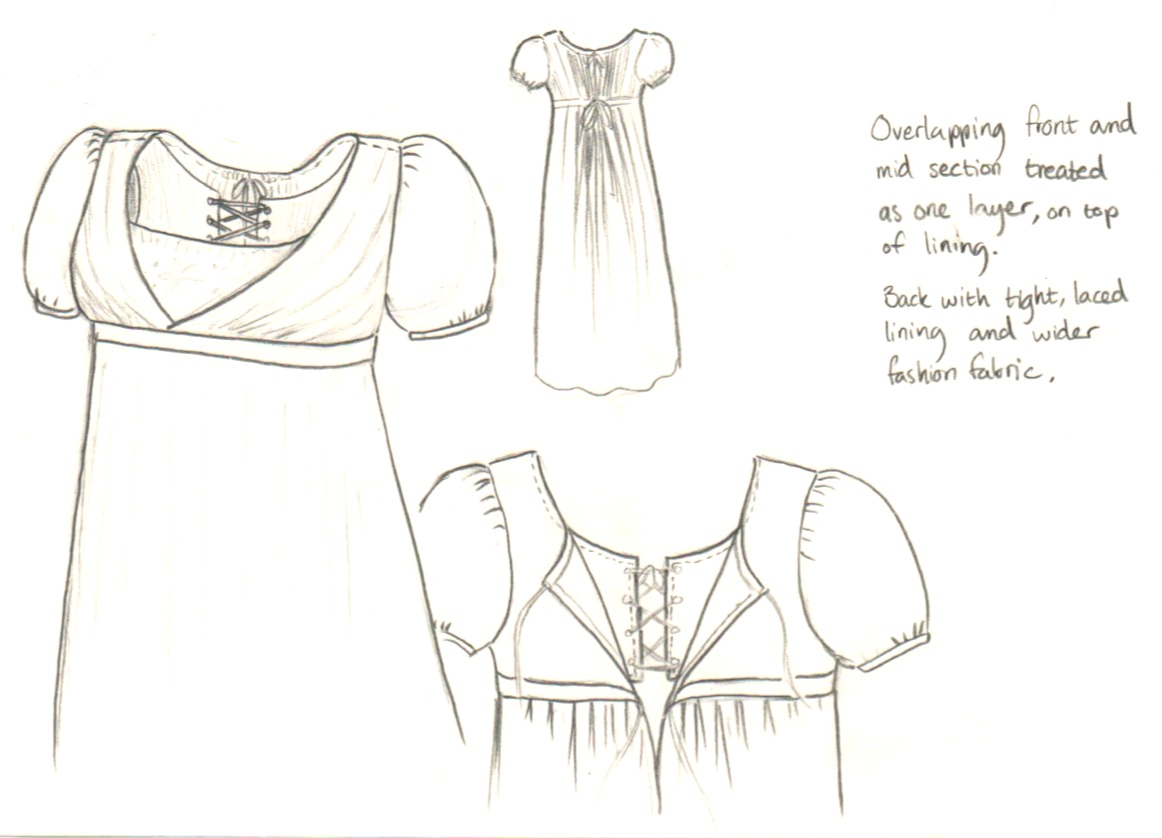
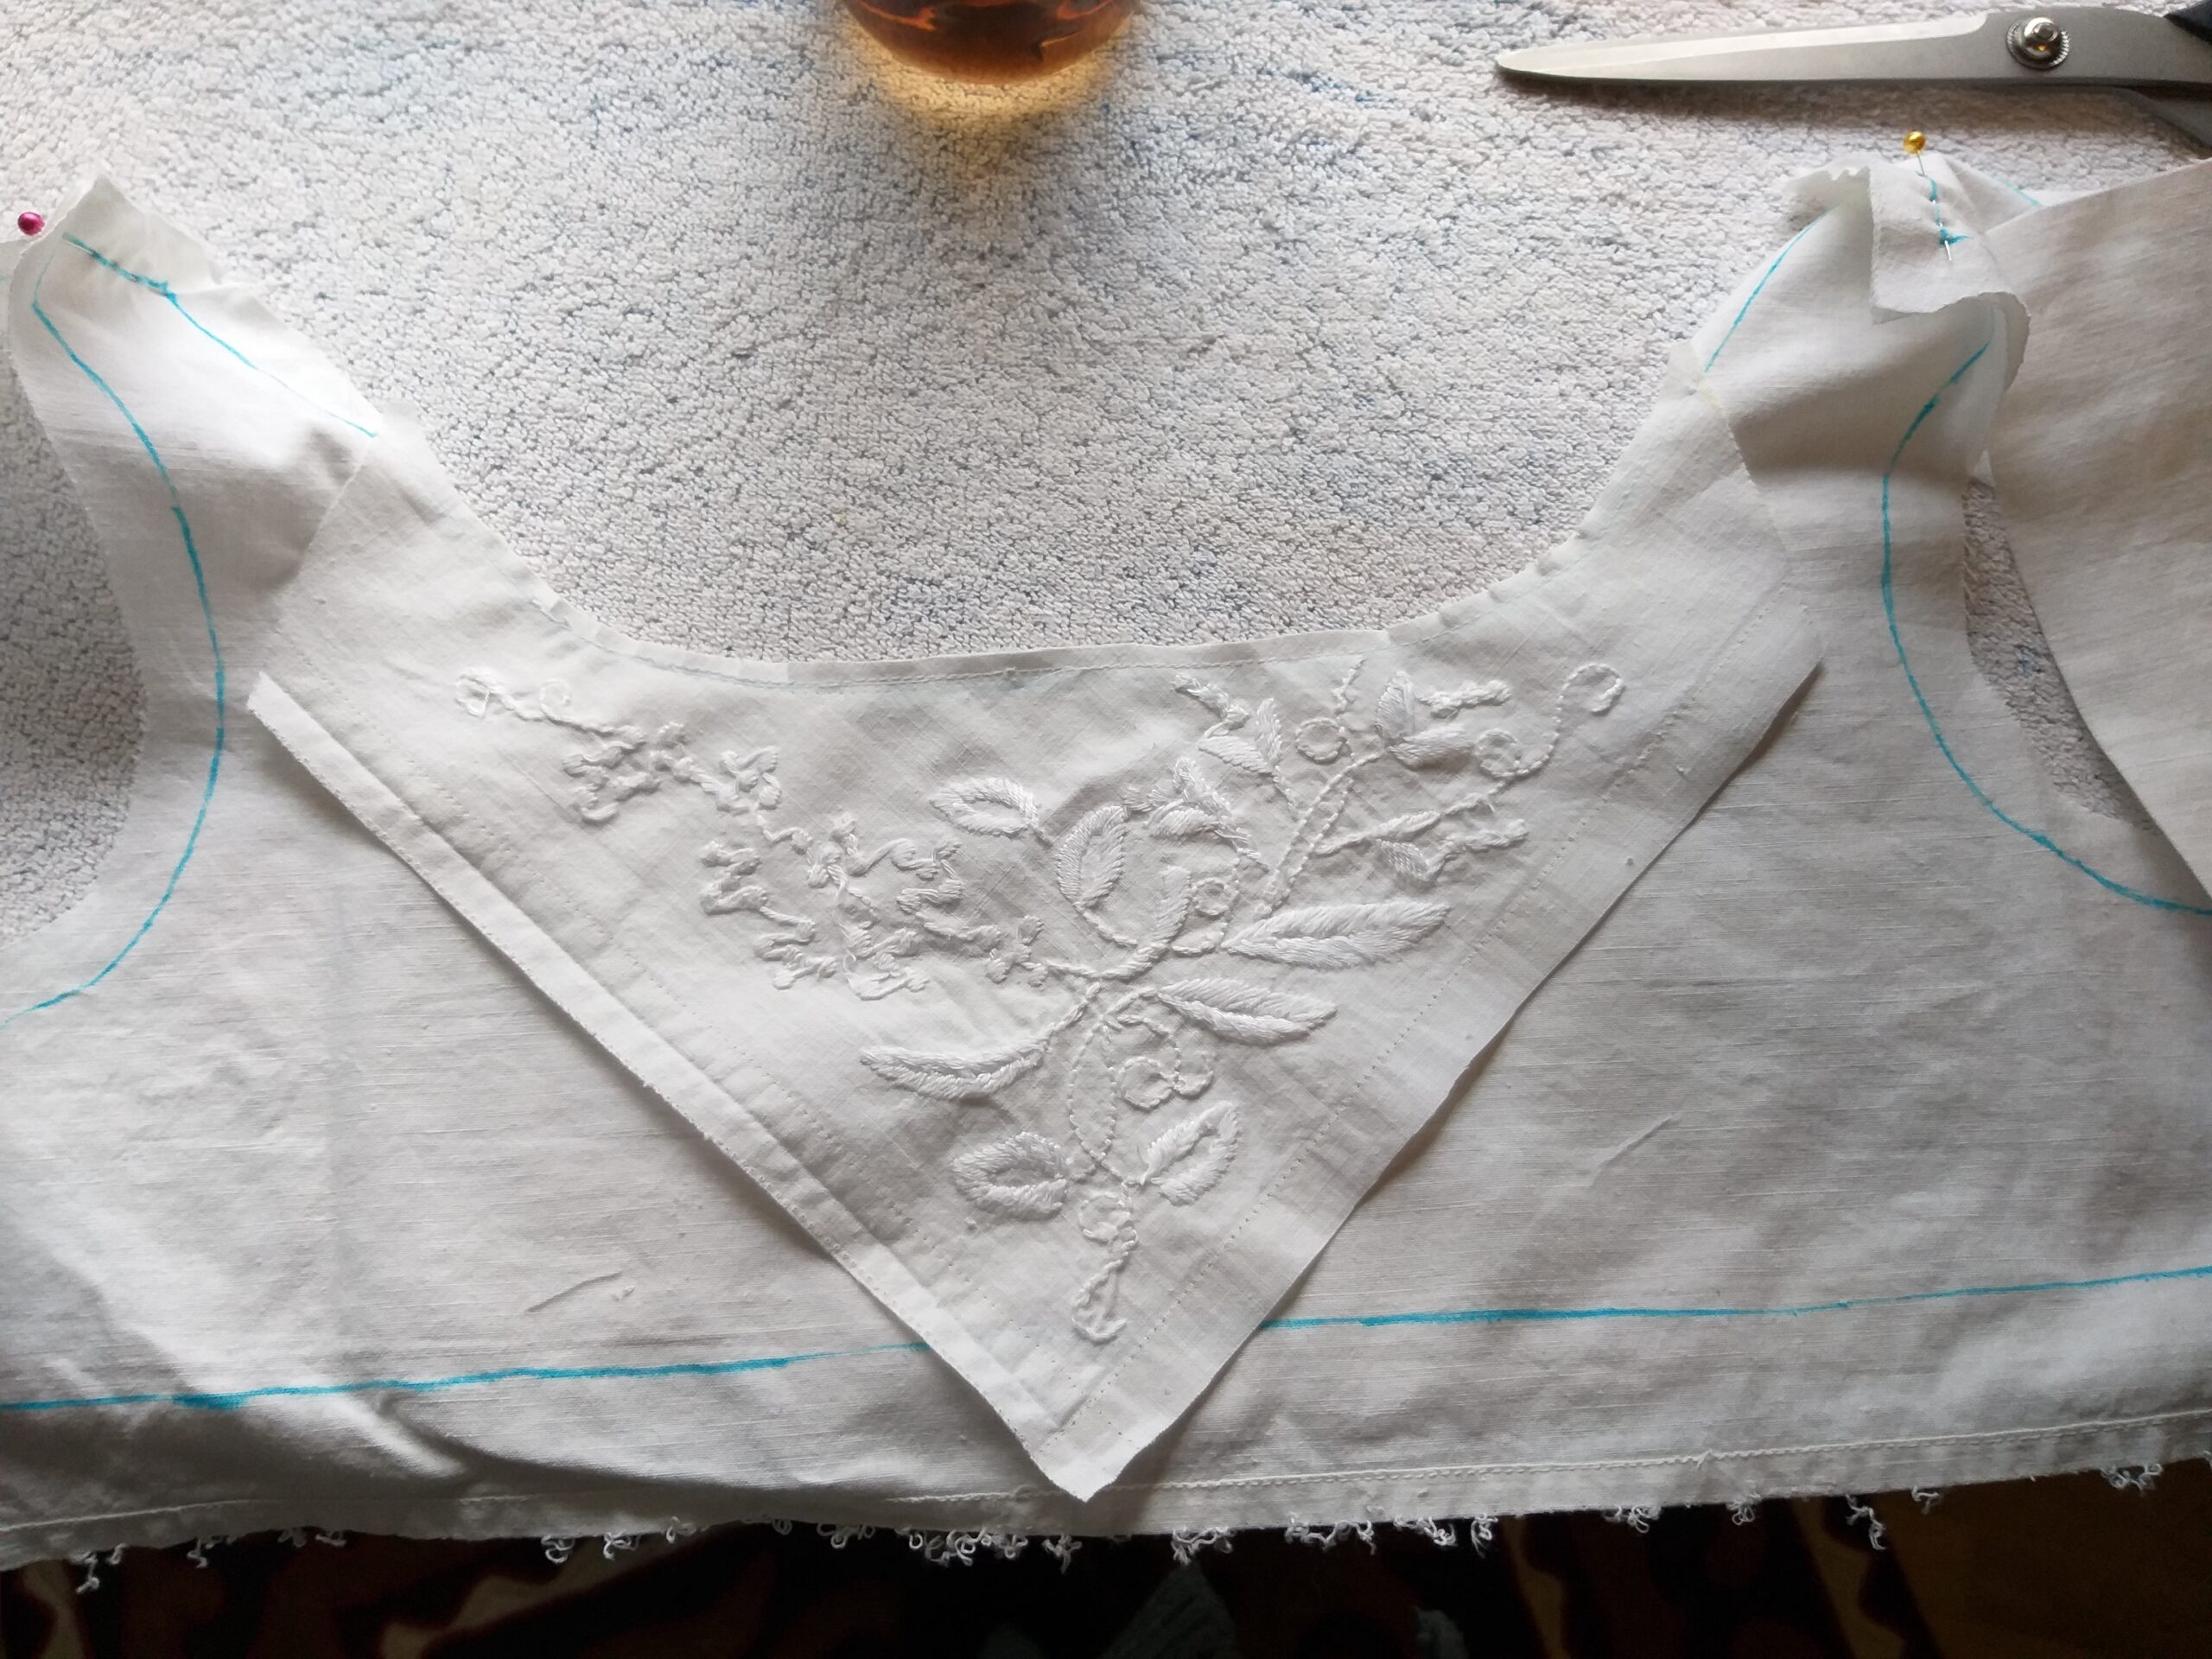
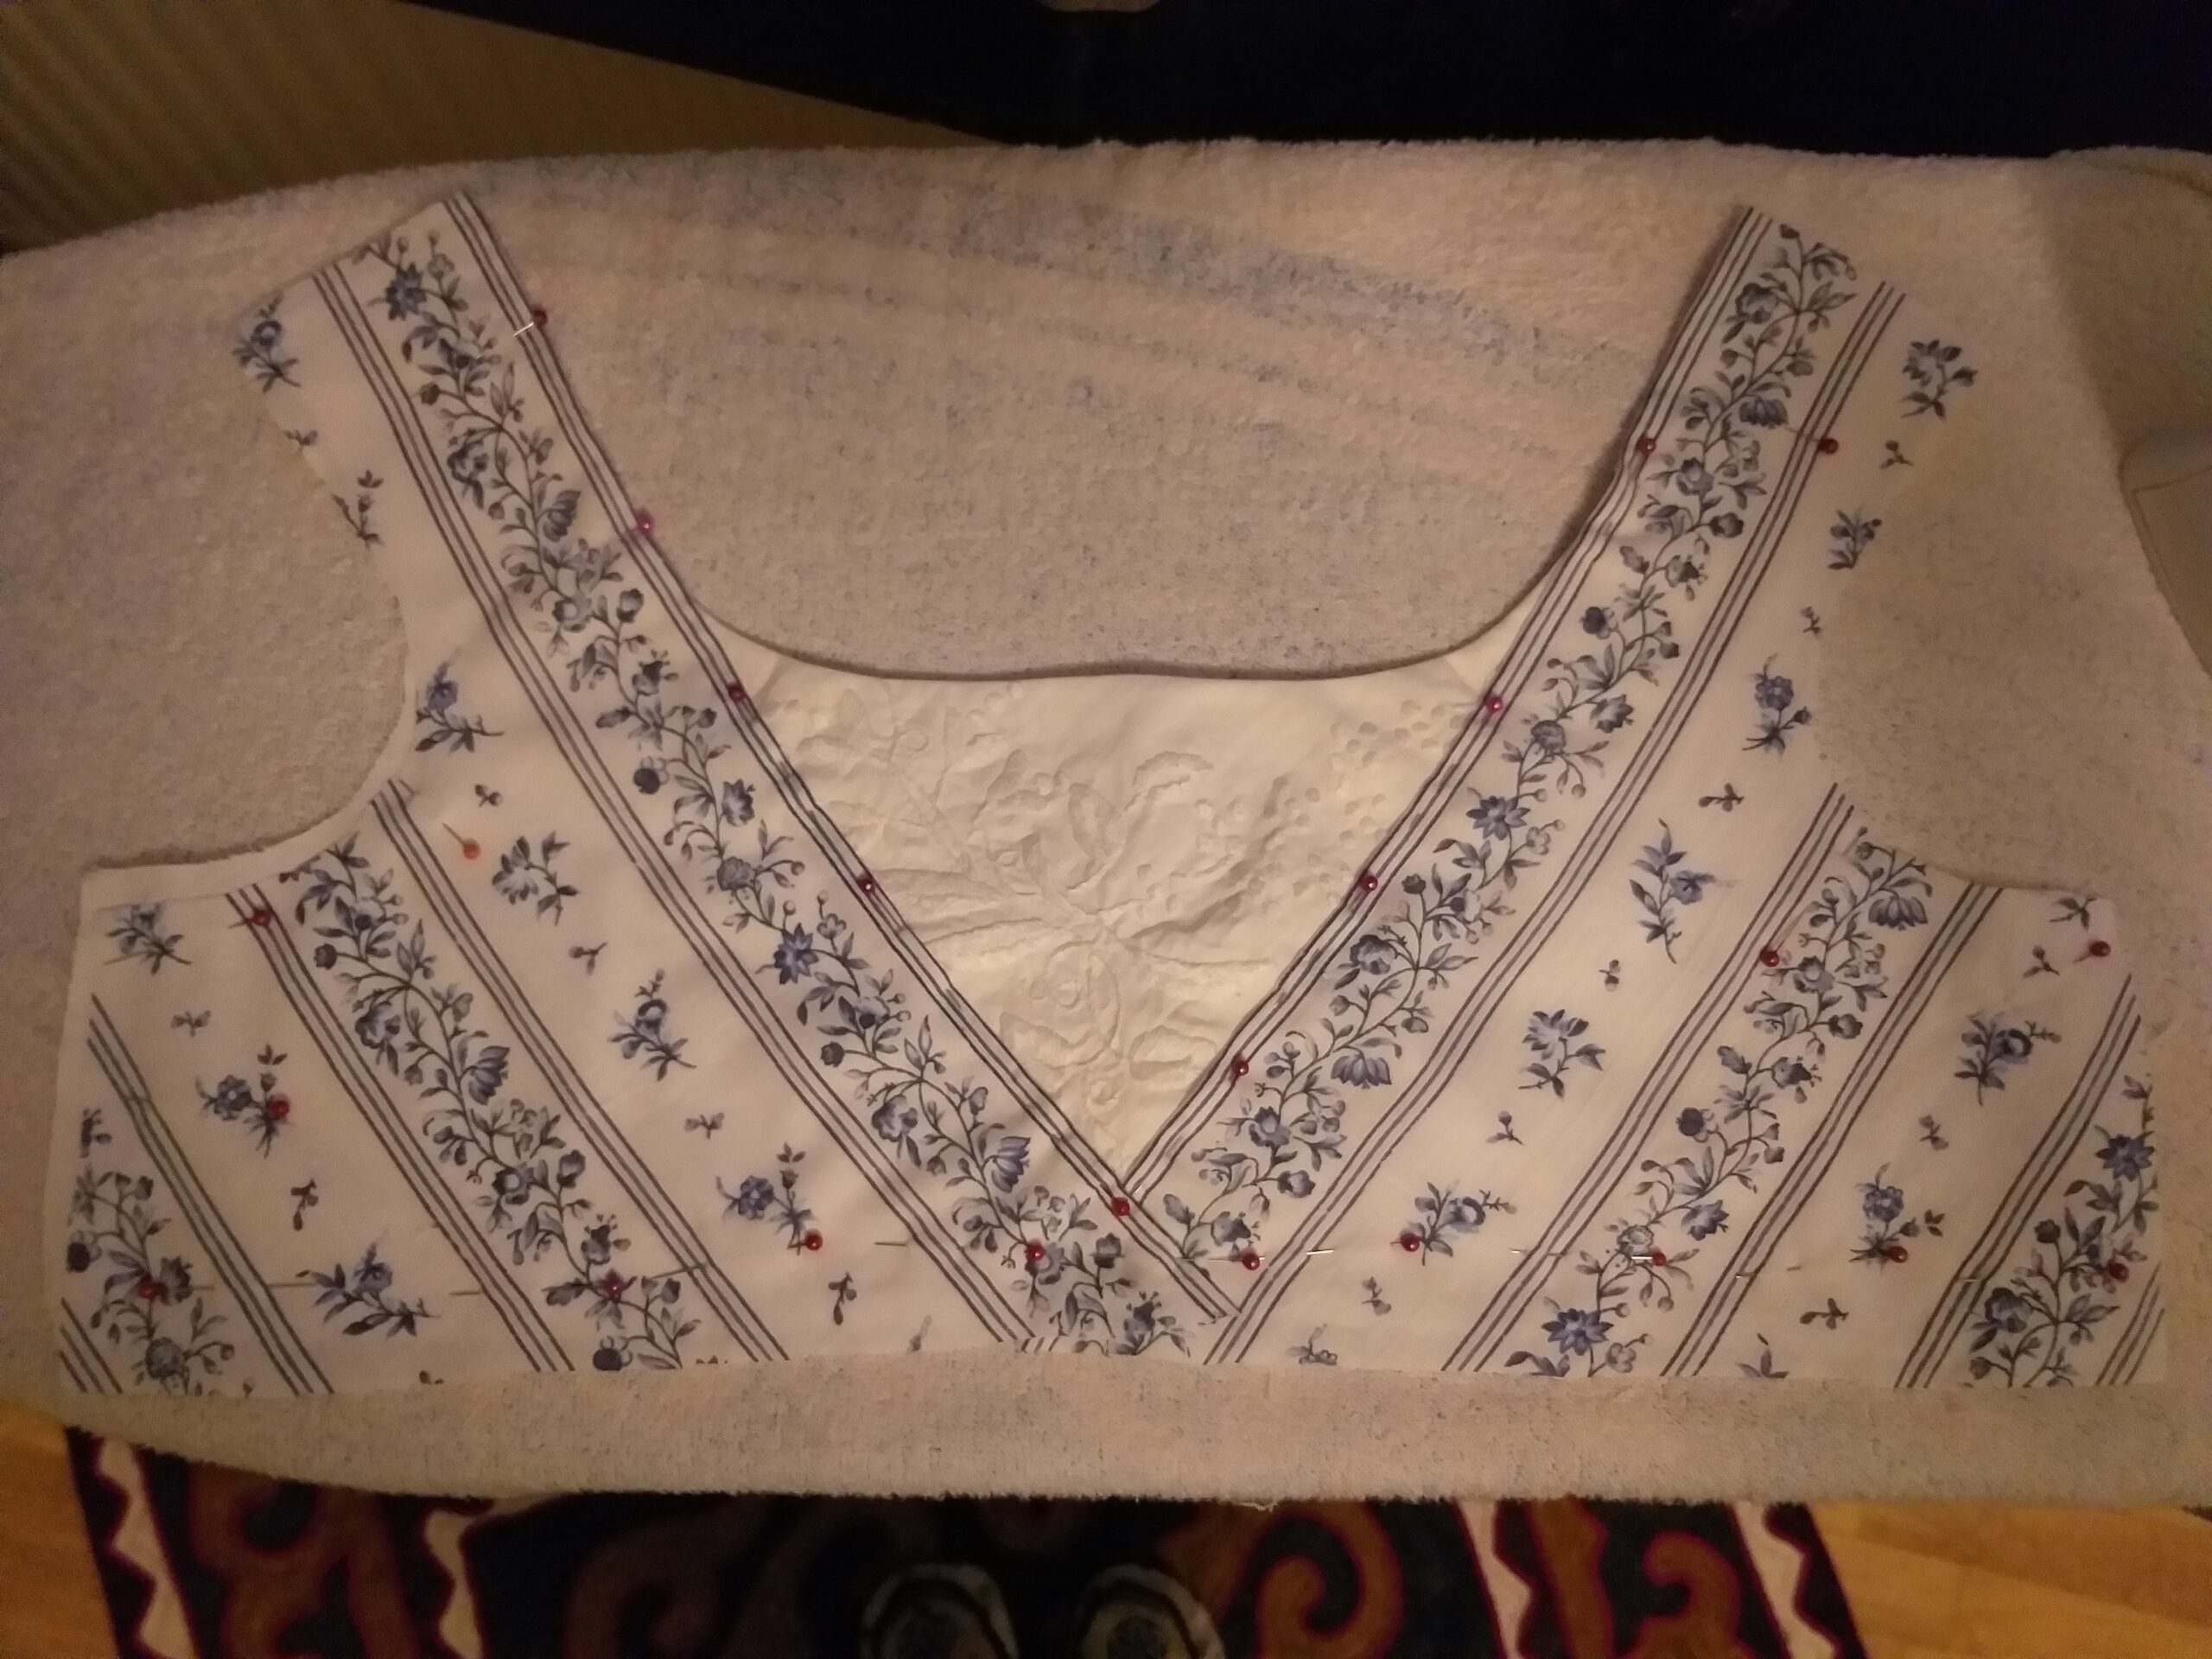
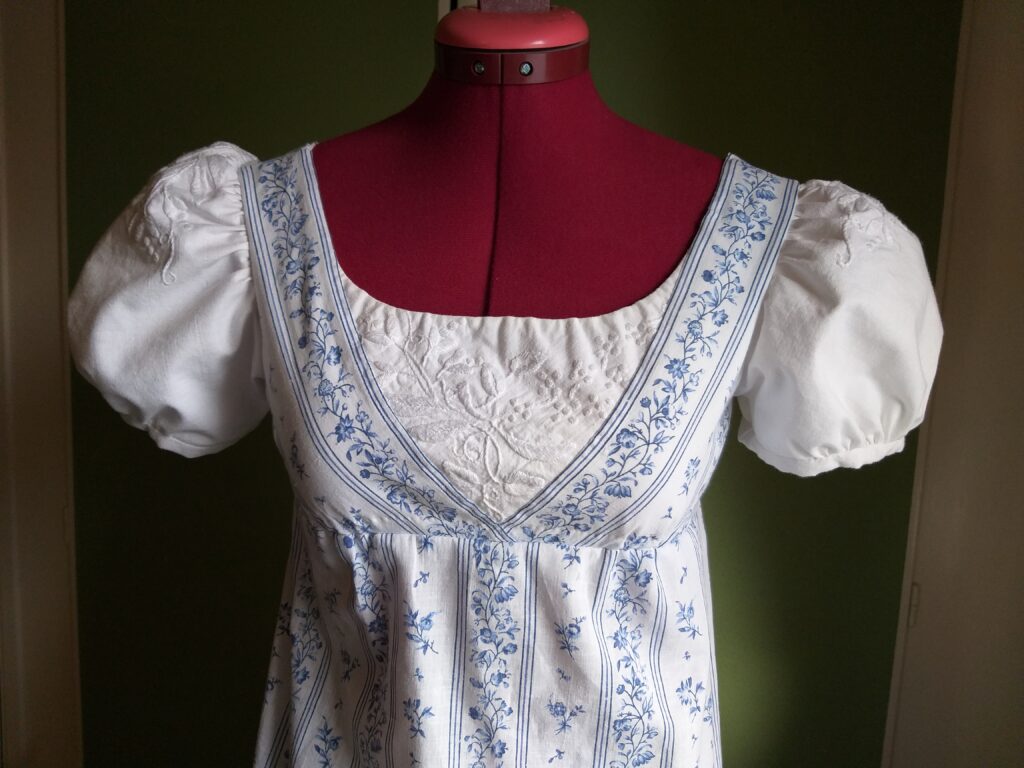
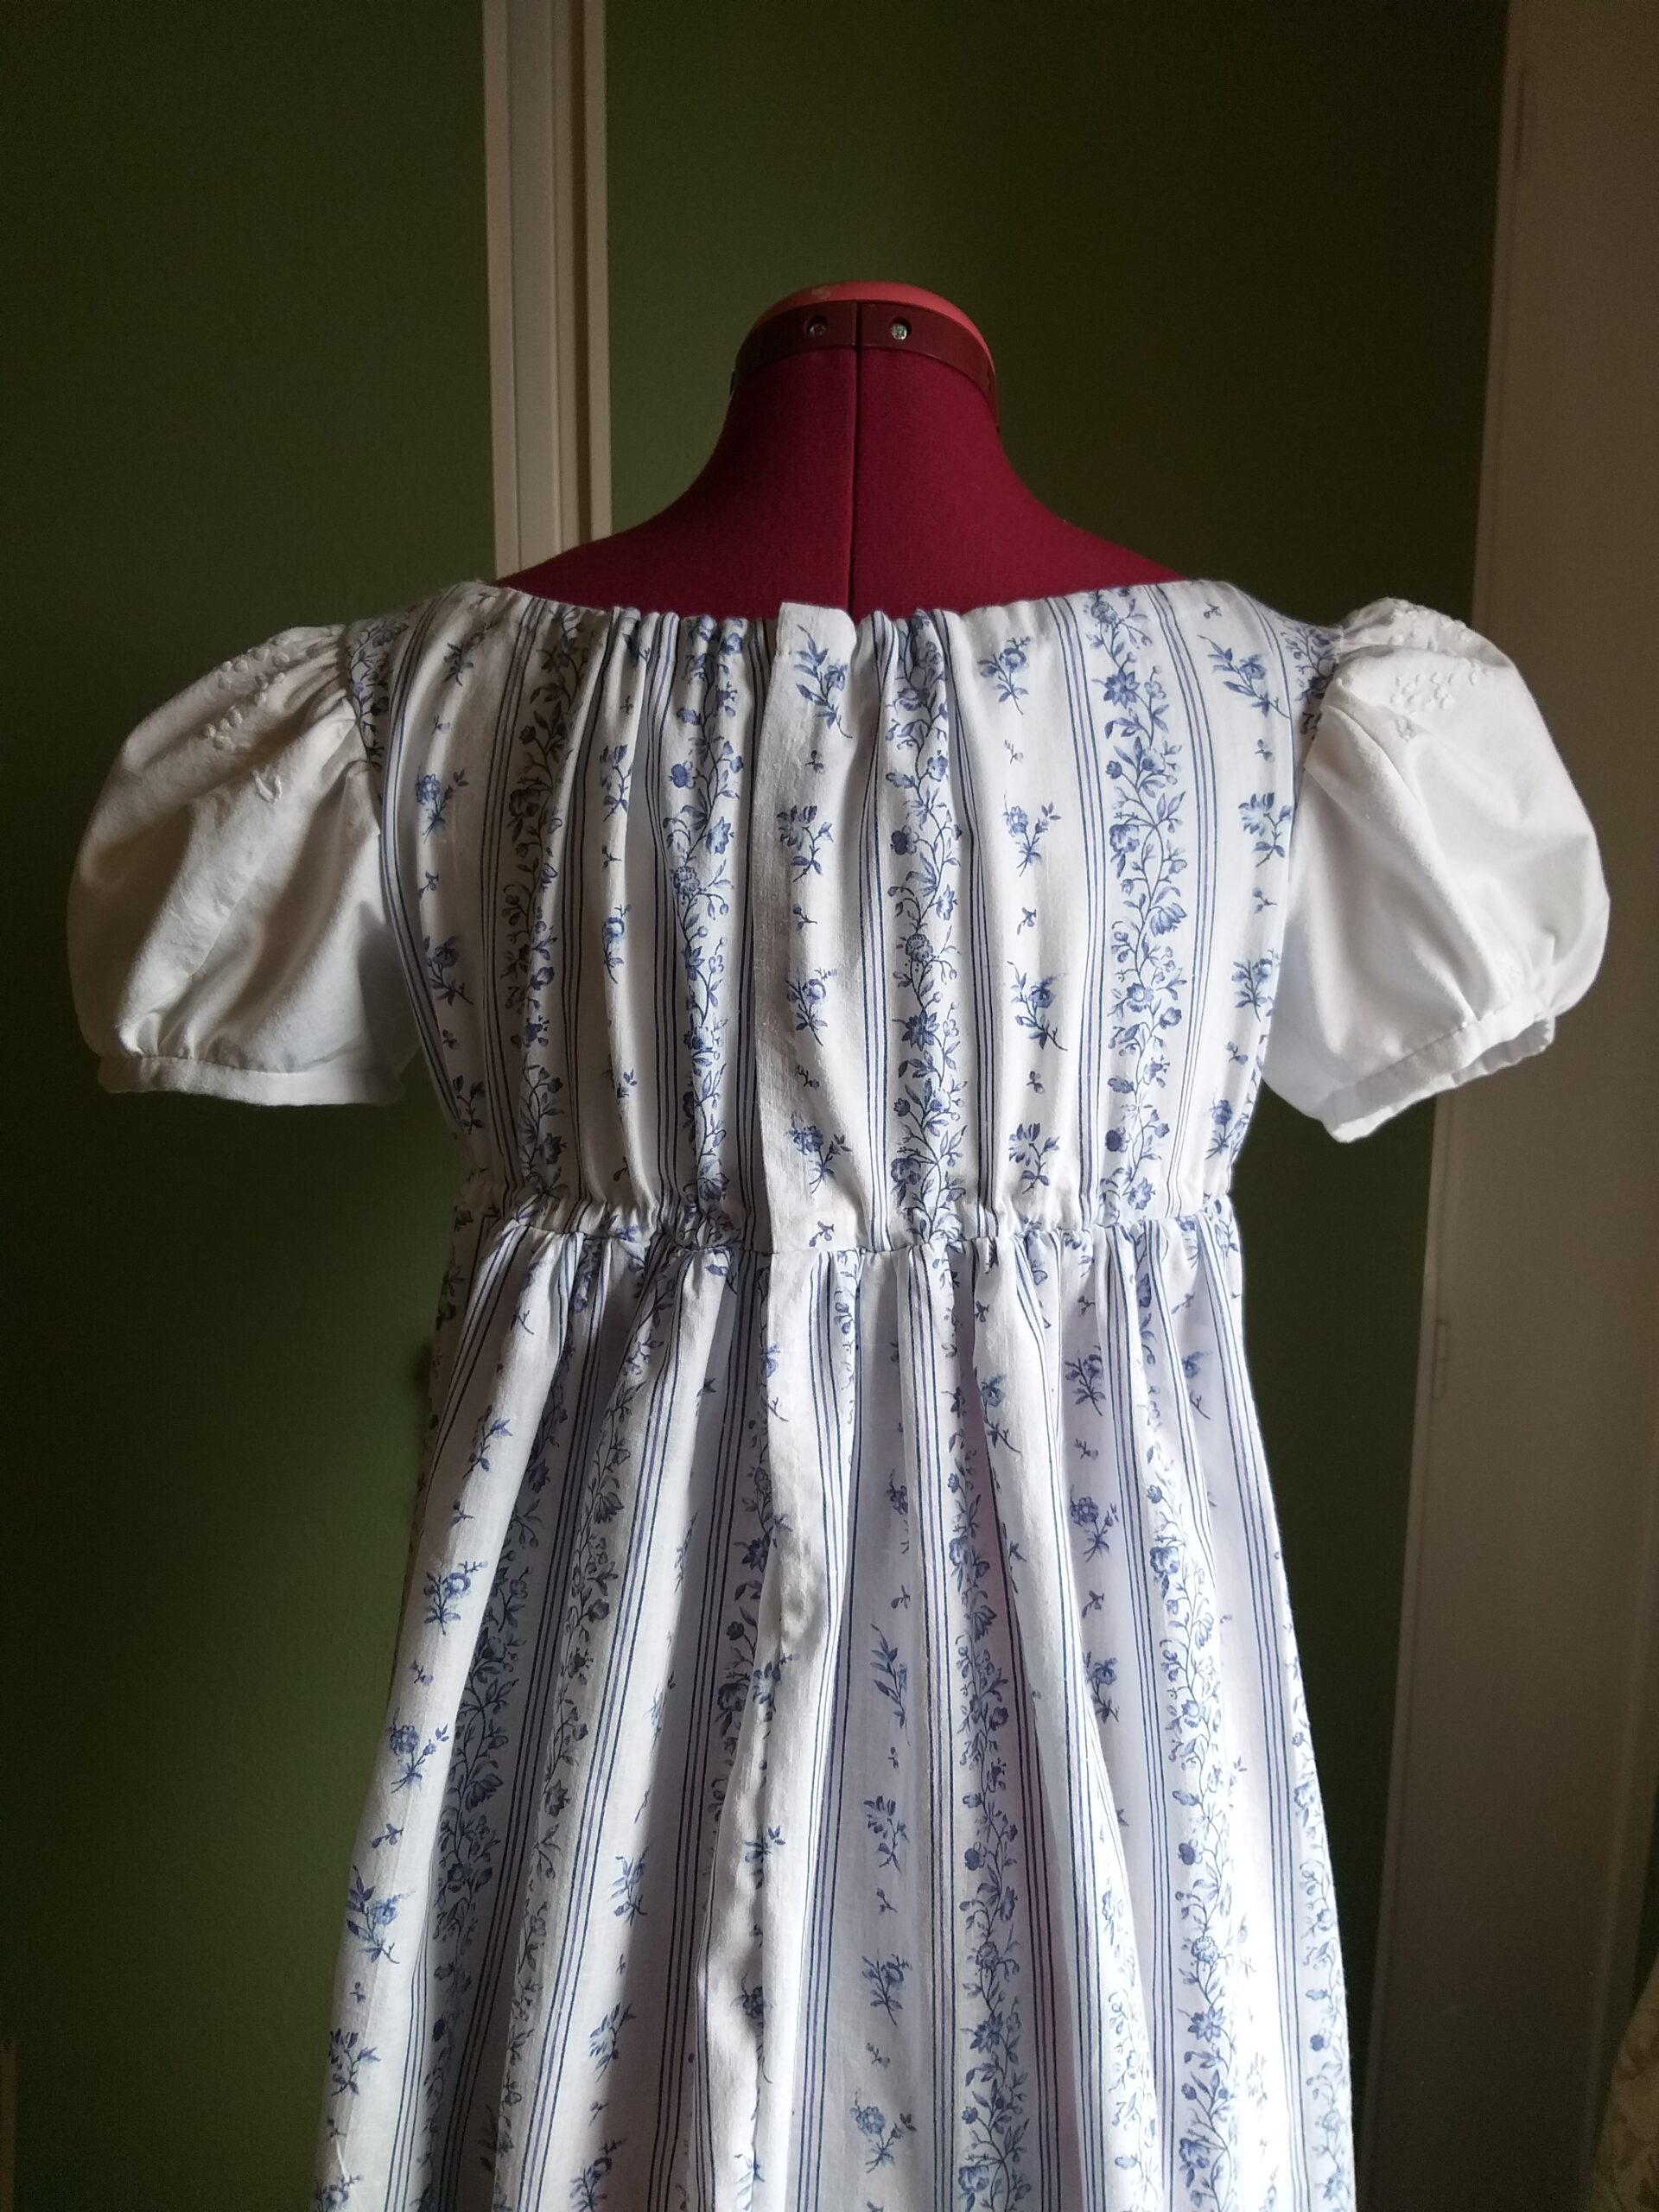
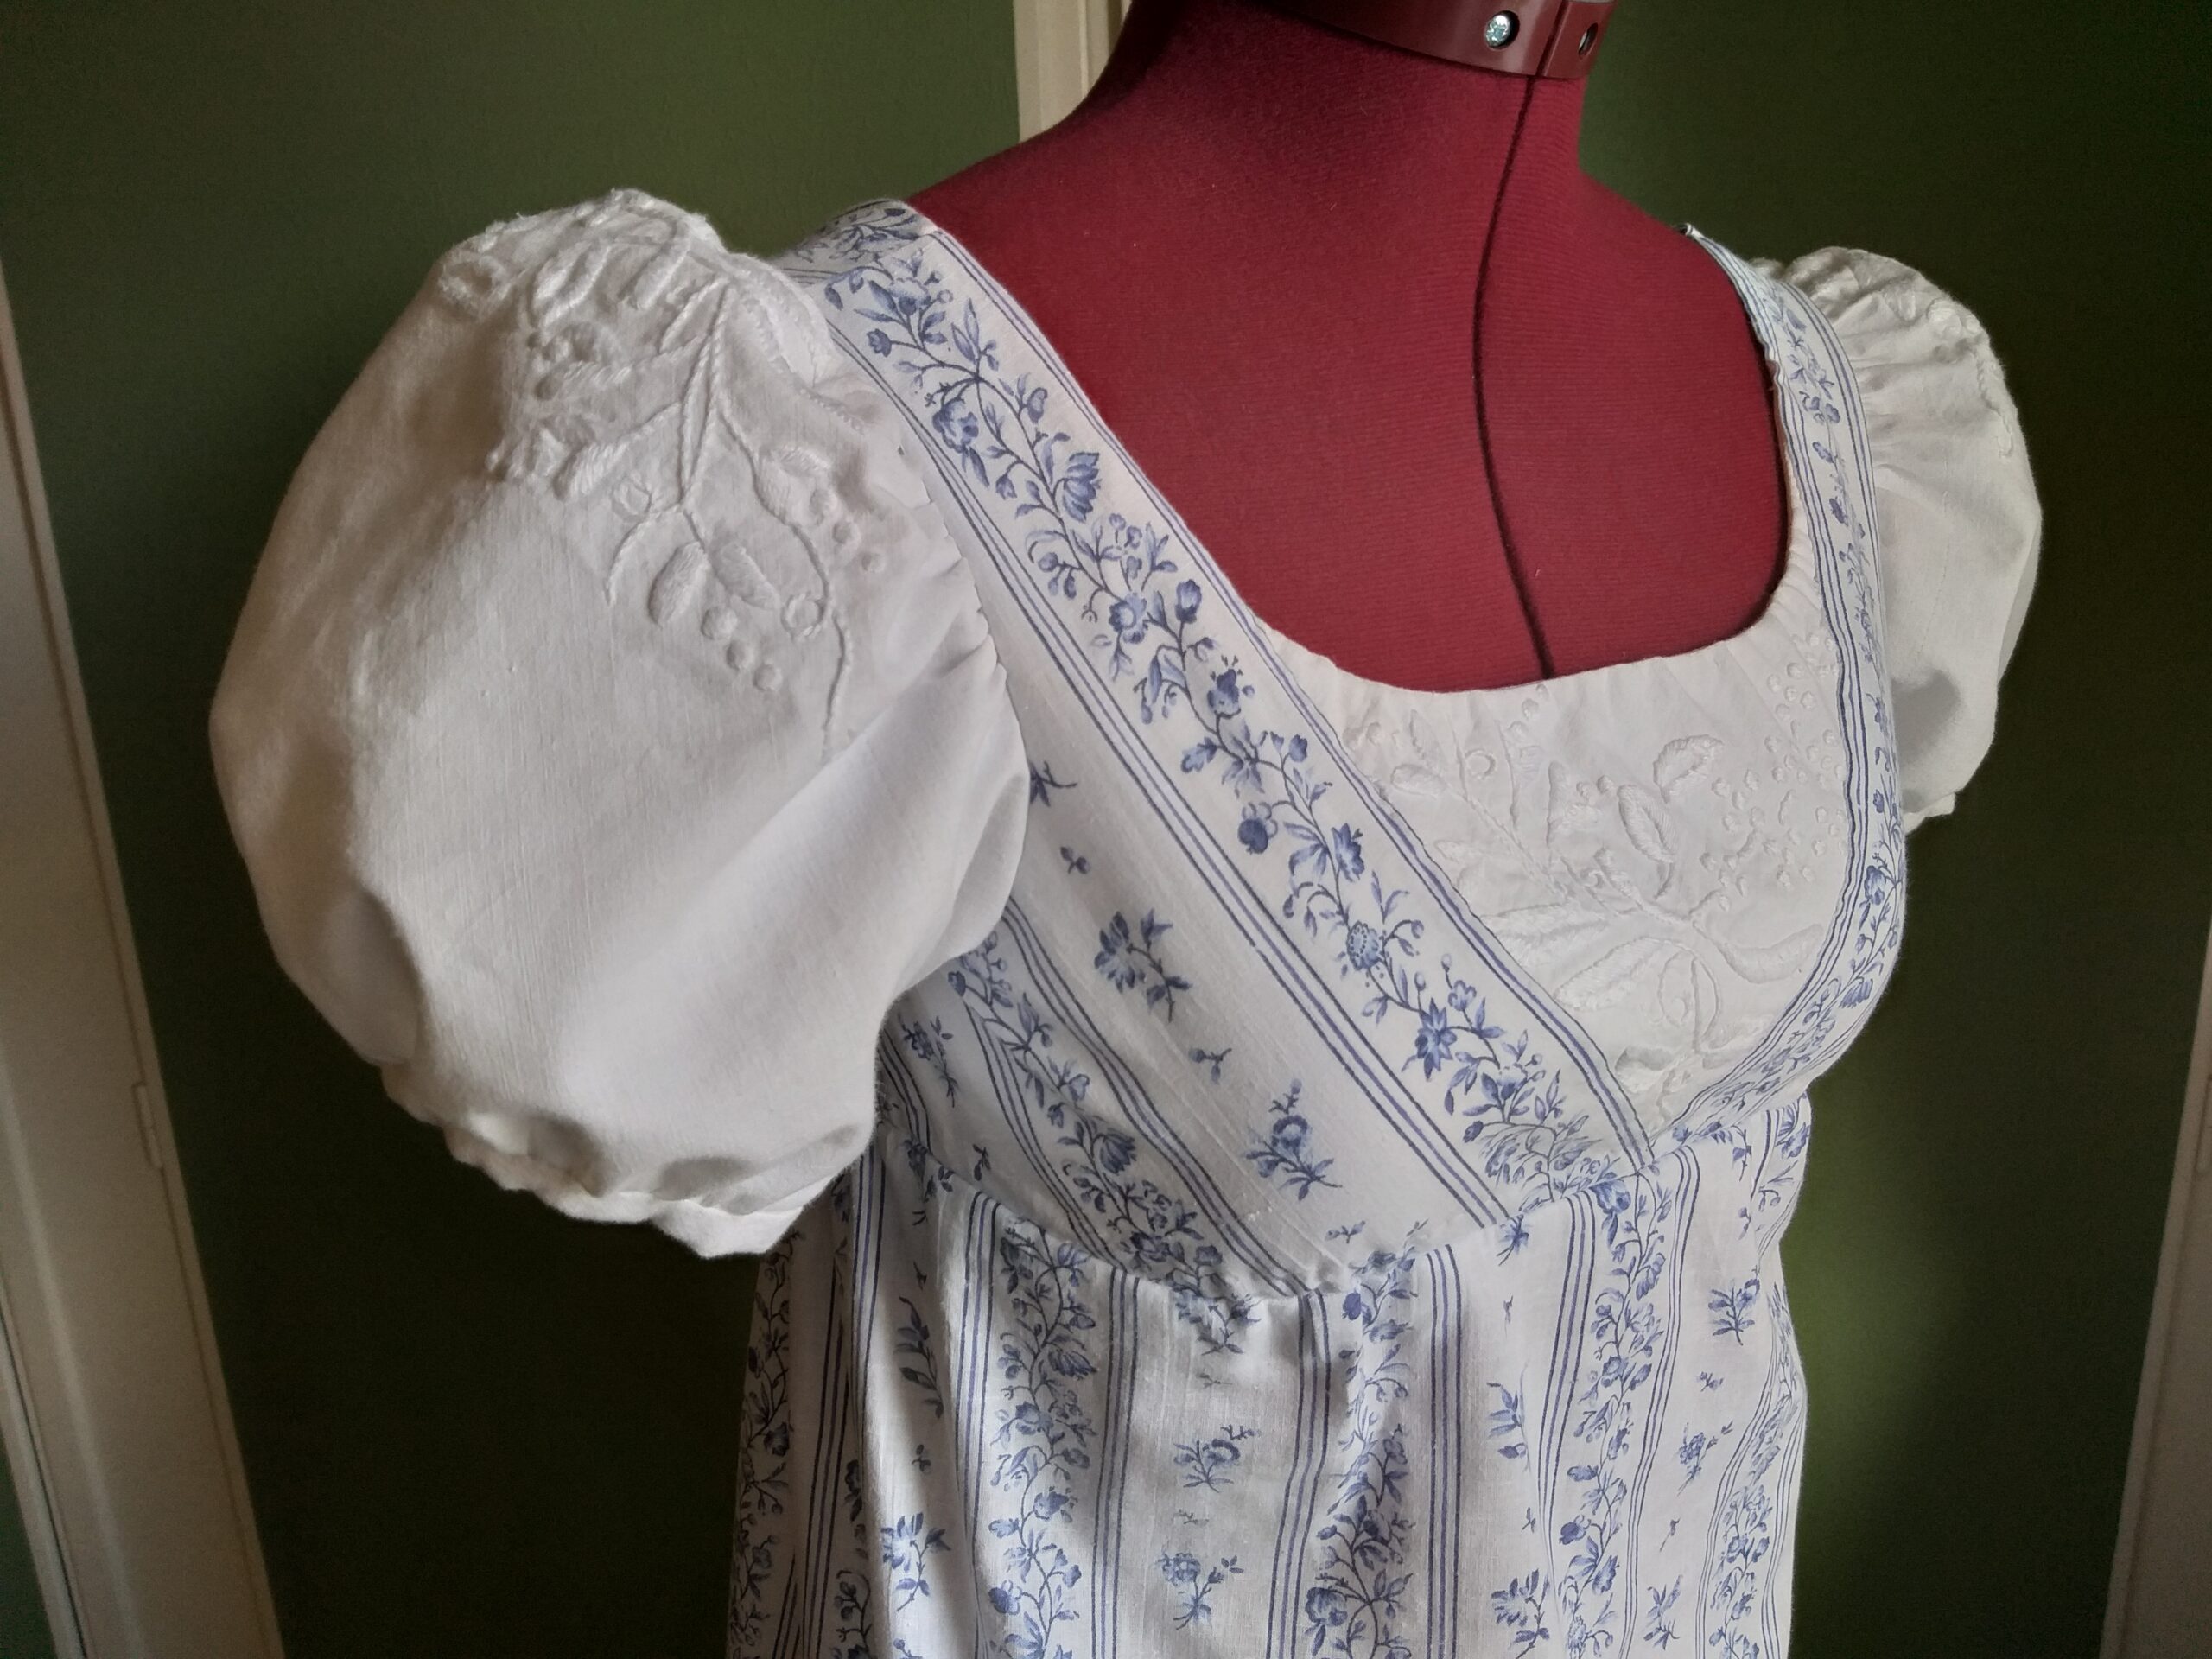
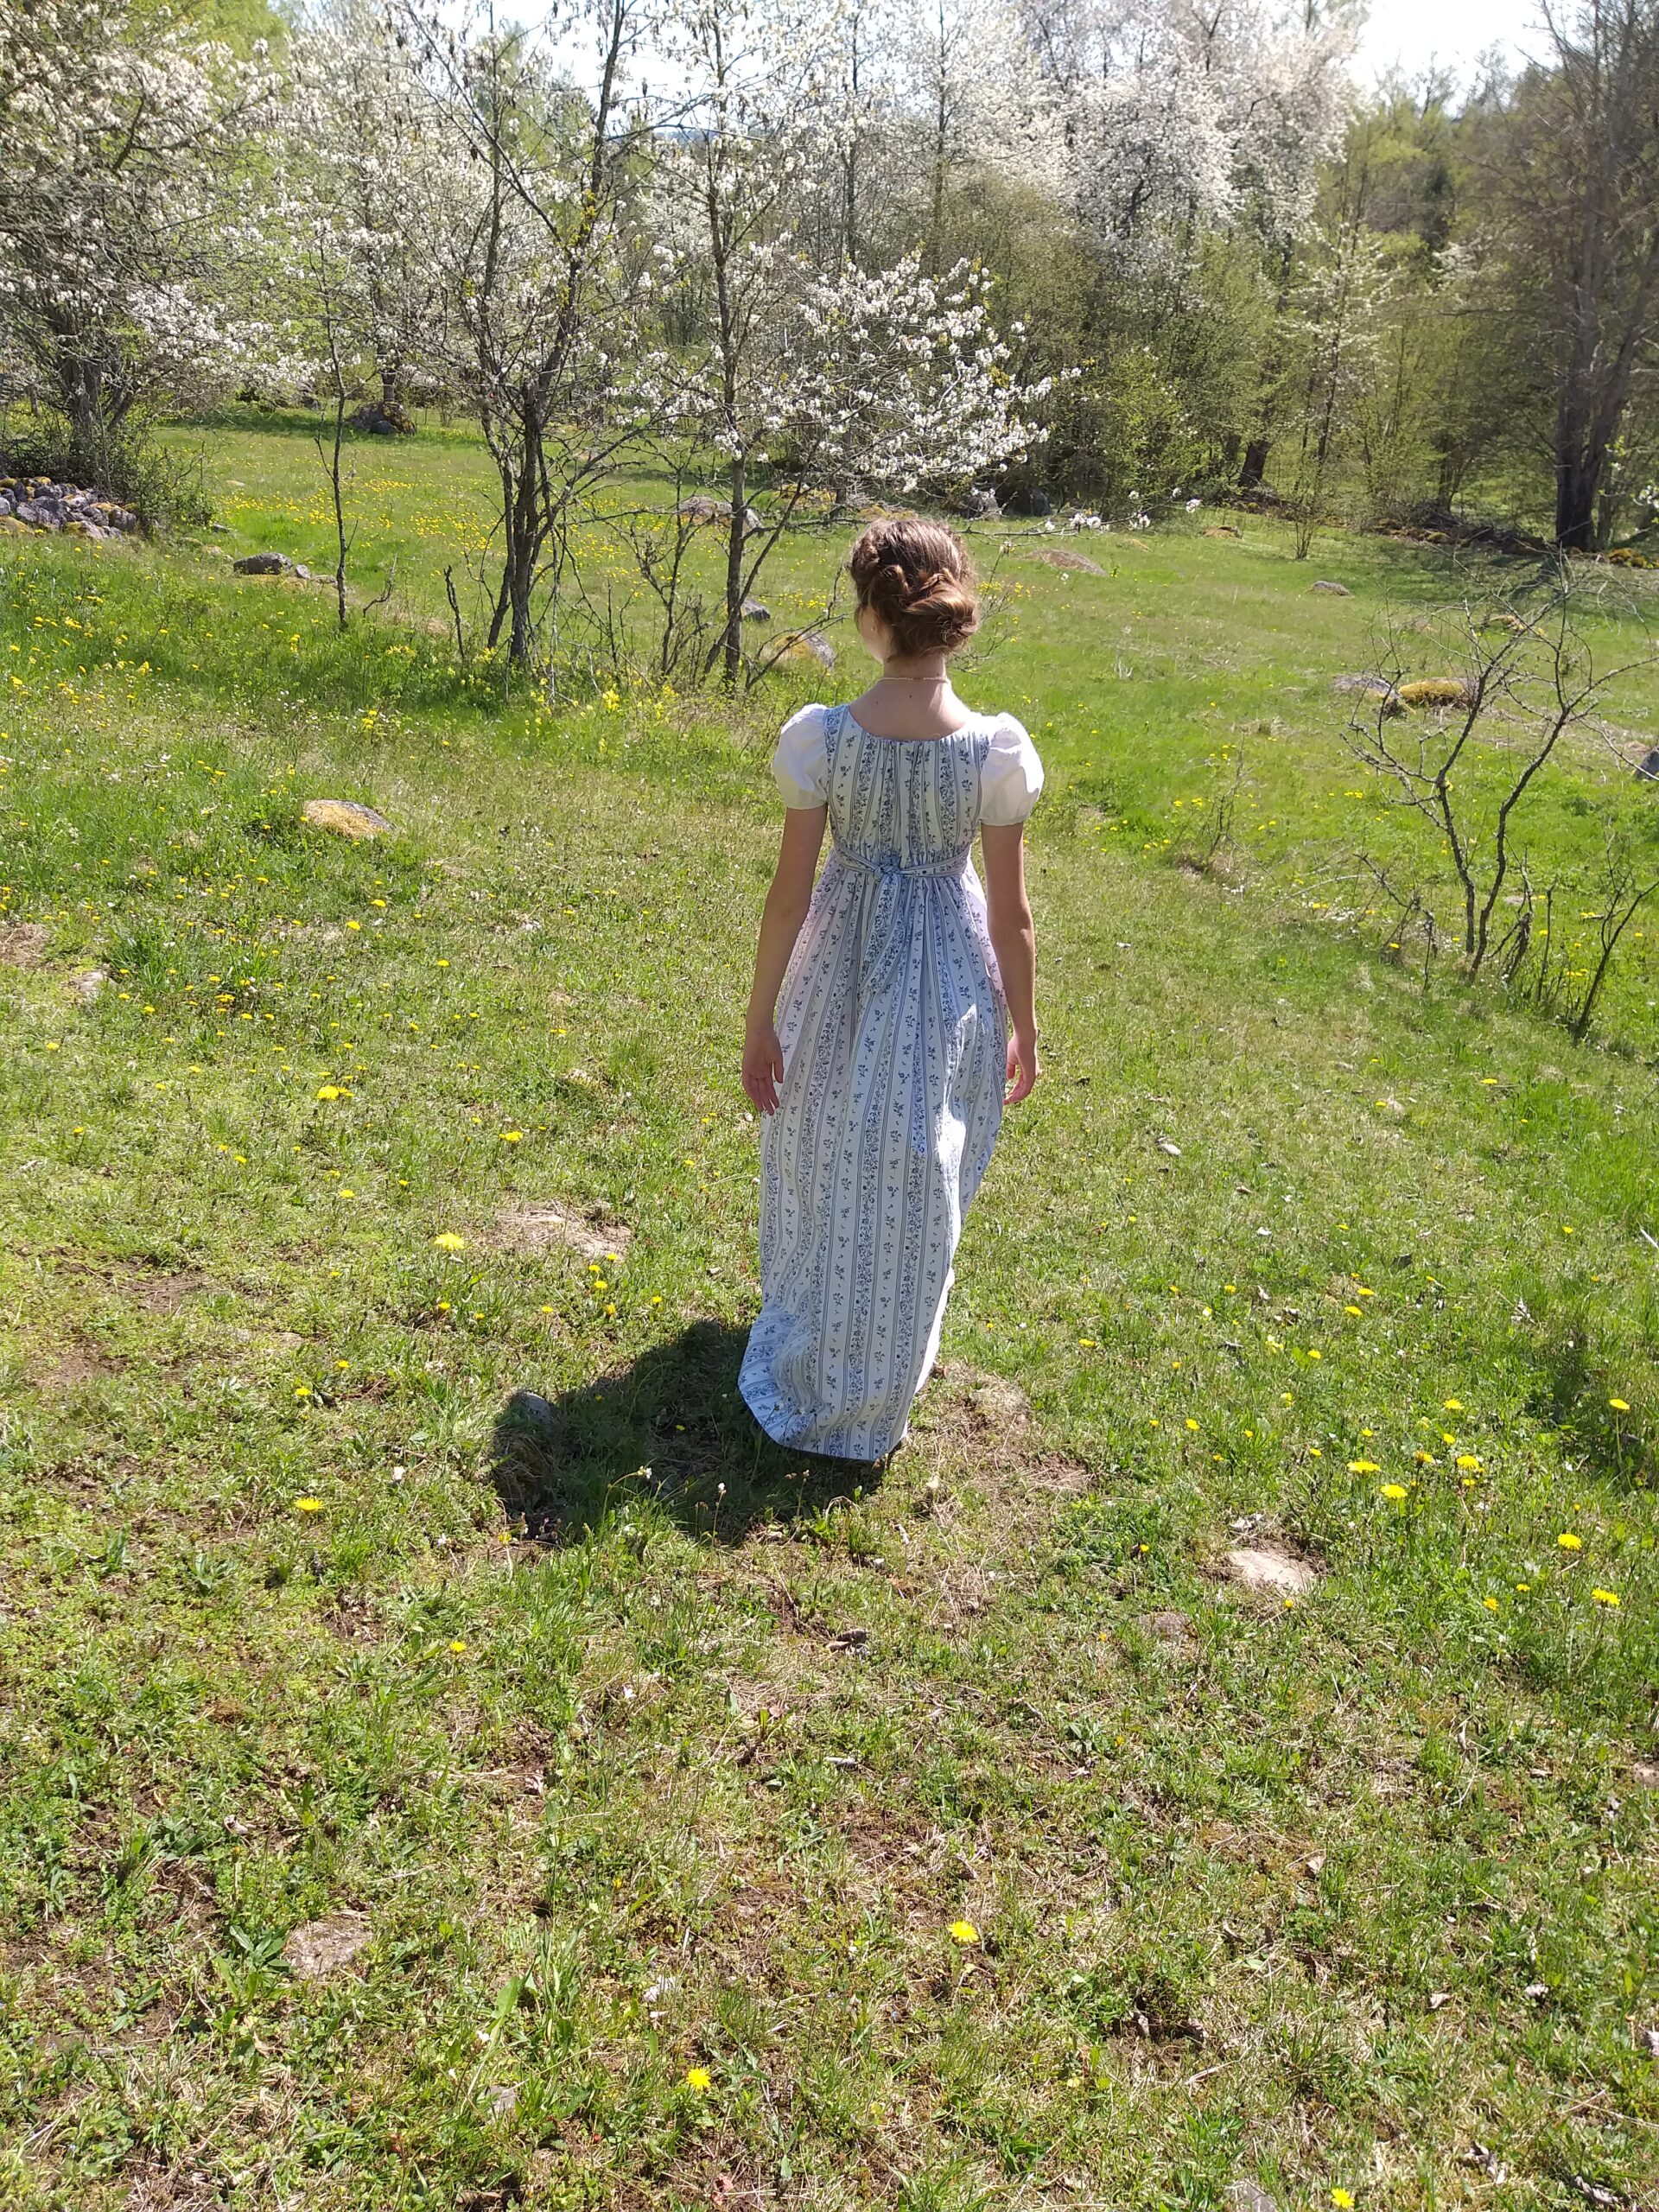
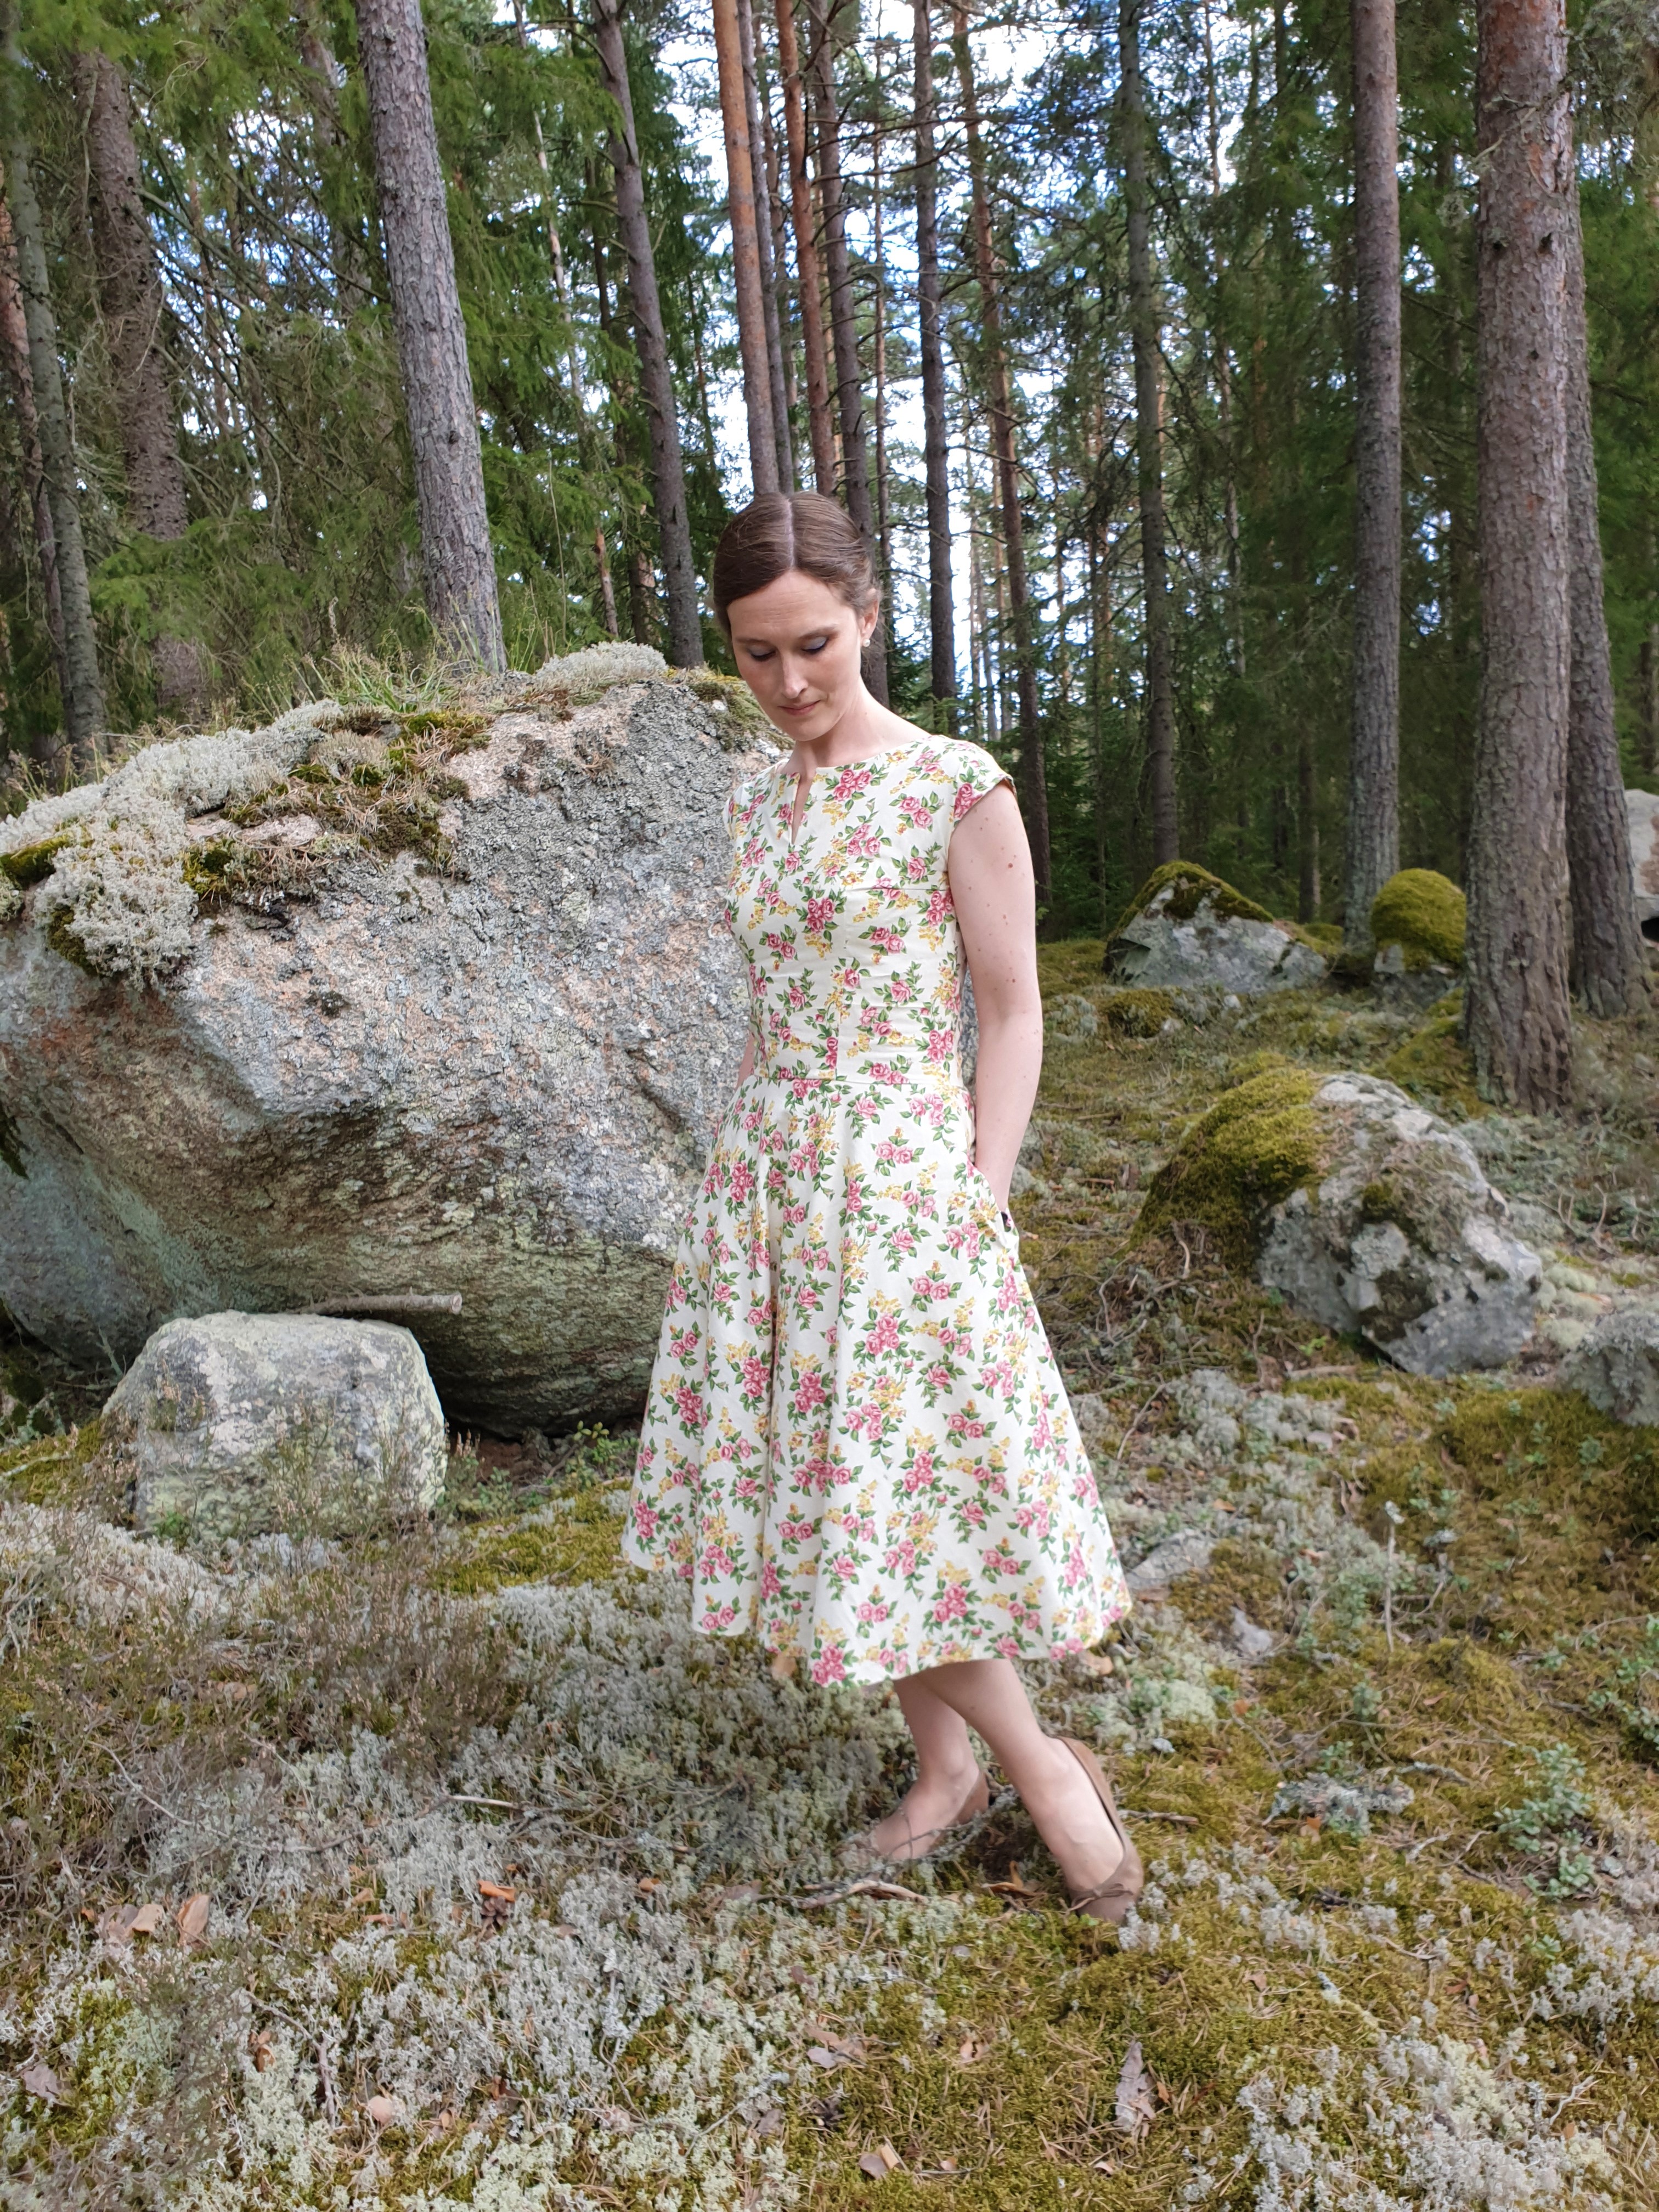
There was a vacuum after the competition gown was finished, so I just had to sew a medieval kirtle for my little niece. She was so happy! This was done in a few hours, so I needed yet another project. I have some beautiful whitework embroidery saved from pillow cases, which I believe were made by my husband’s grandmother. As I also recieved an old curtain with a pretty floral print, screeming Regency, I knew I just had to make a regency dress for another niece.
I incorporated the embroidery in the bodice and the poofy arms.
The embroidery piece is stitched to the bodice piece.Then the fashion fabric (or rather, the old curtain) was sewn onto the front of the bodice piece.Embroideries put in the mid front and in the arms.
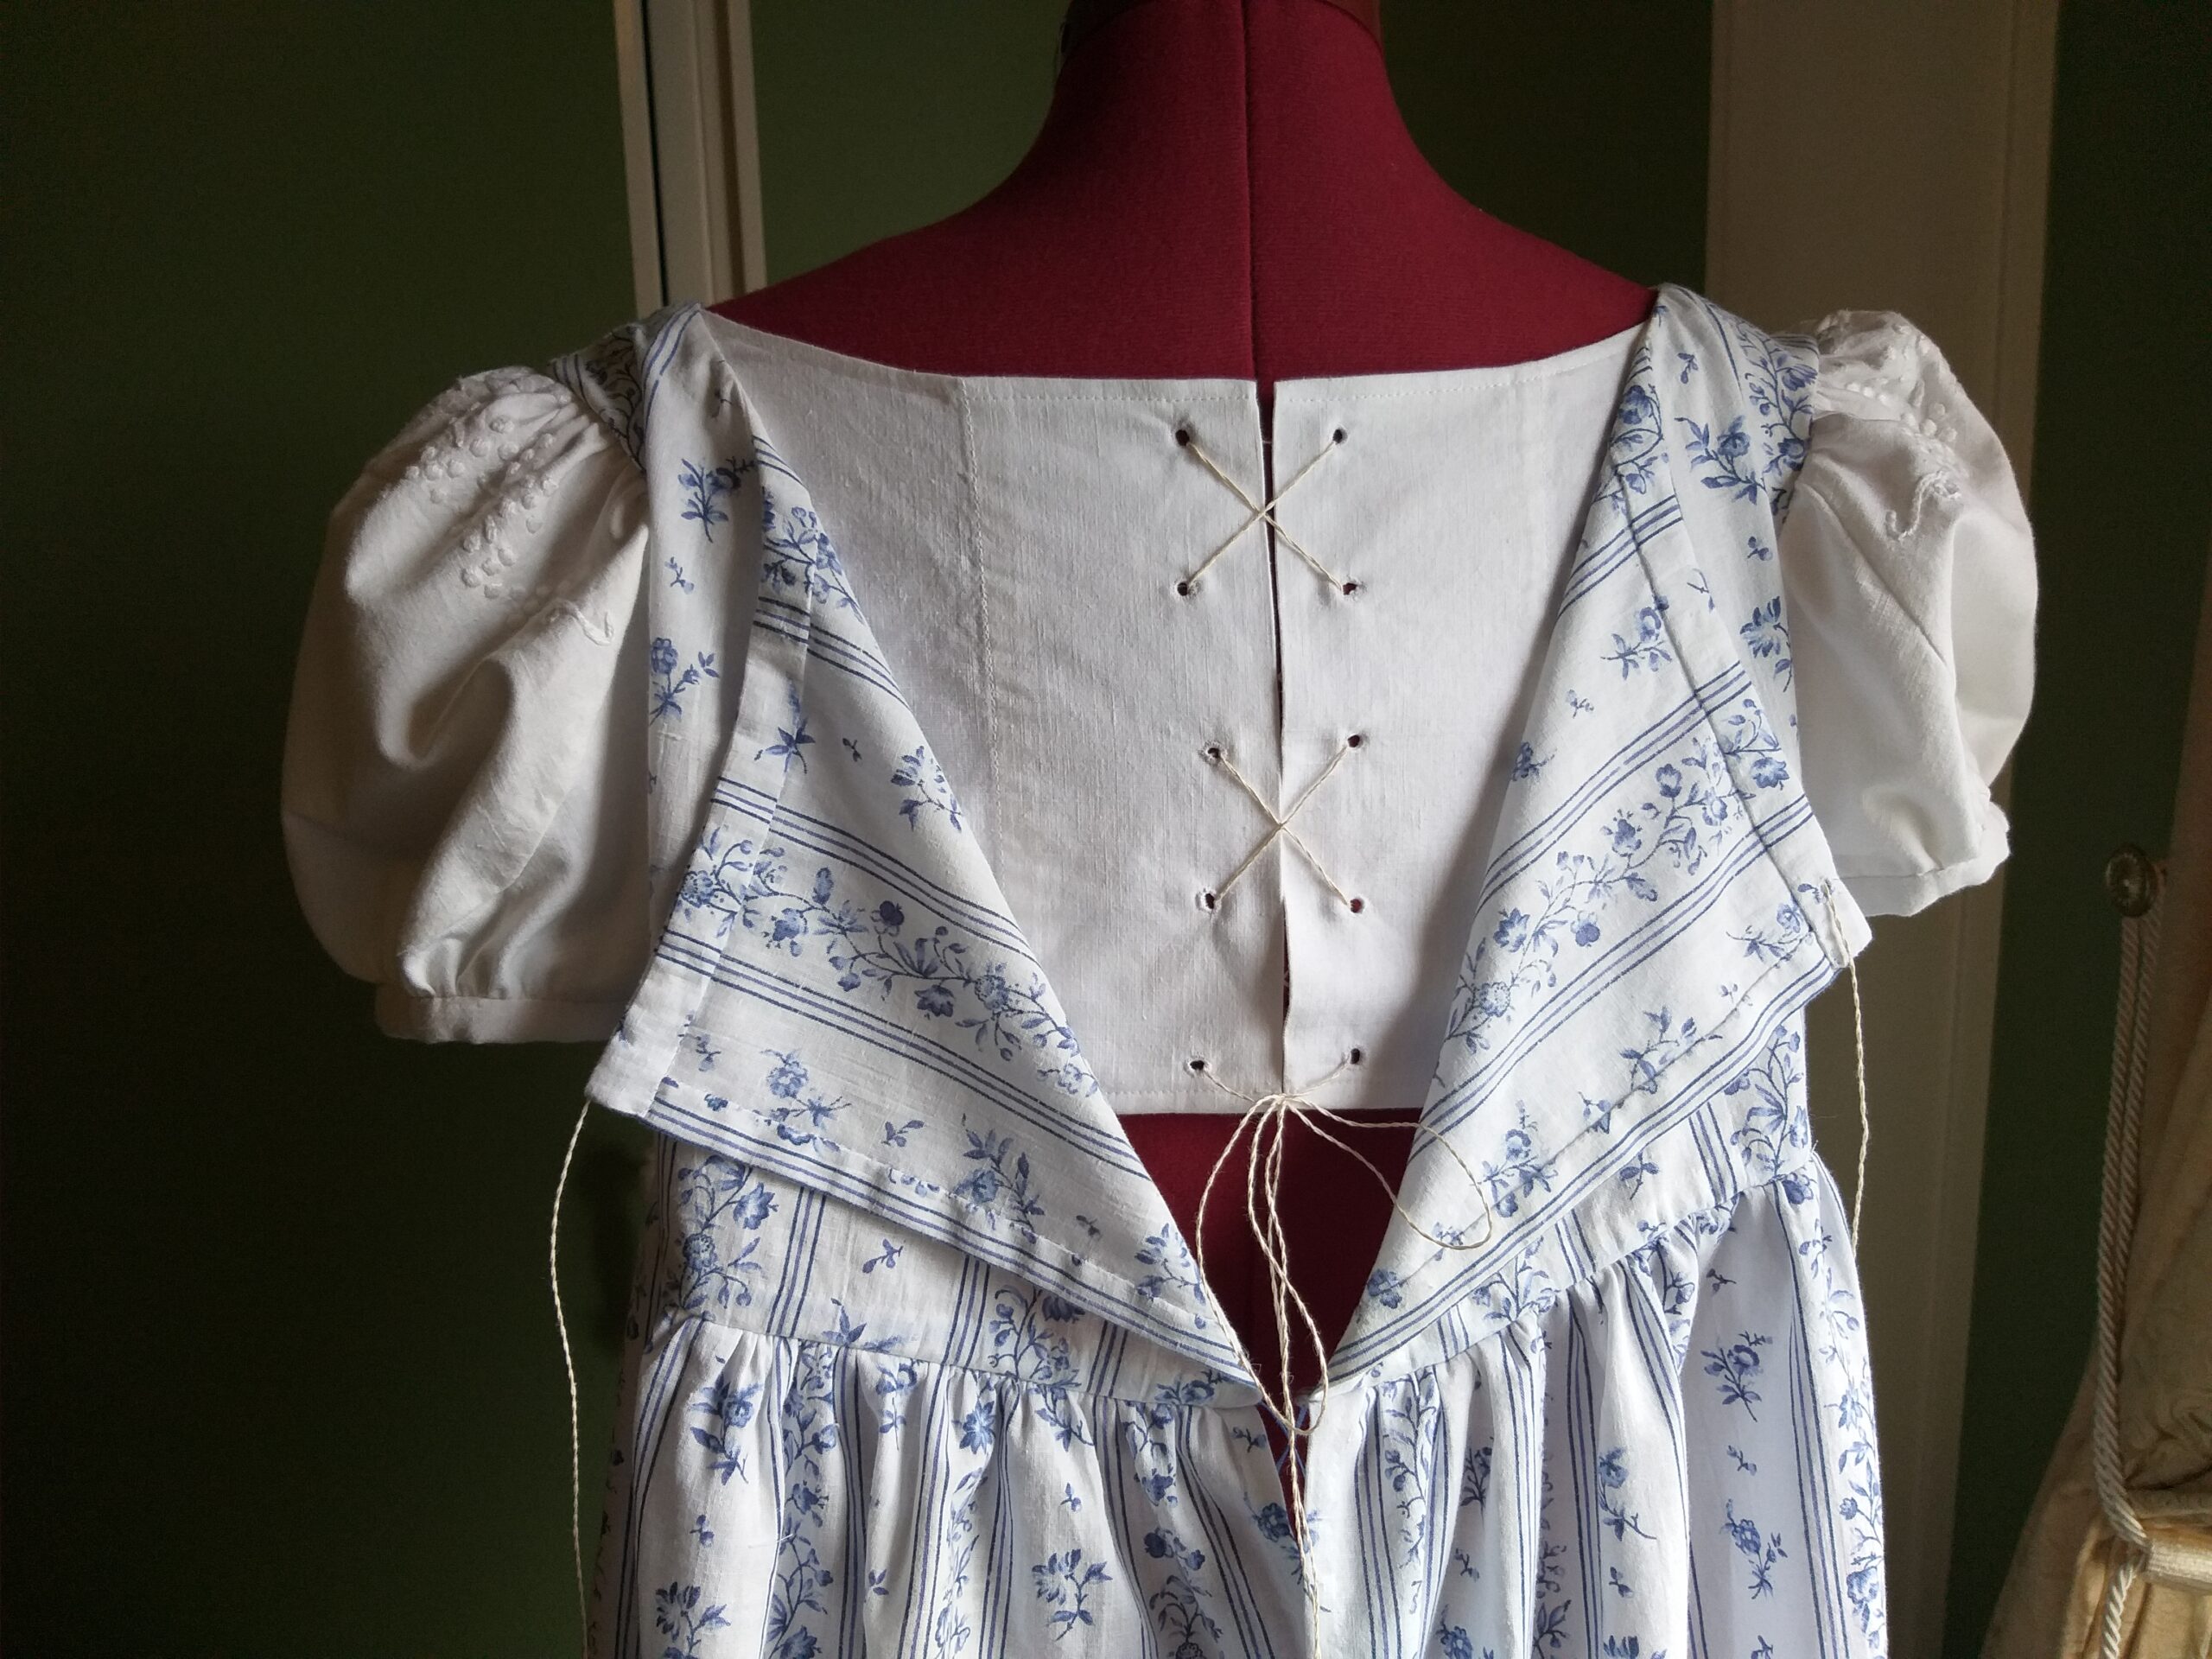
I made an interior bodice with lacing in the back, in order to leave room for some growth. The fashion layer has drawstrings in the neckline and under the bust.
The back lining close with lacing (perhaps there should be boning inside the eyelets?). The eyelets are hand sewn and the strings are also hand made from linen thread.The two sections of the back close with drawstrings in the neckline and under the bust.
Aren’t these embroideries adorable?
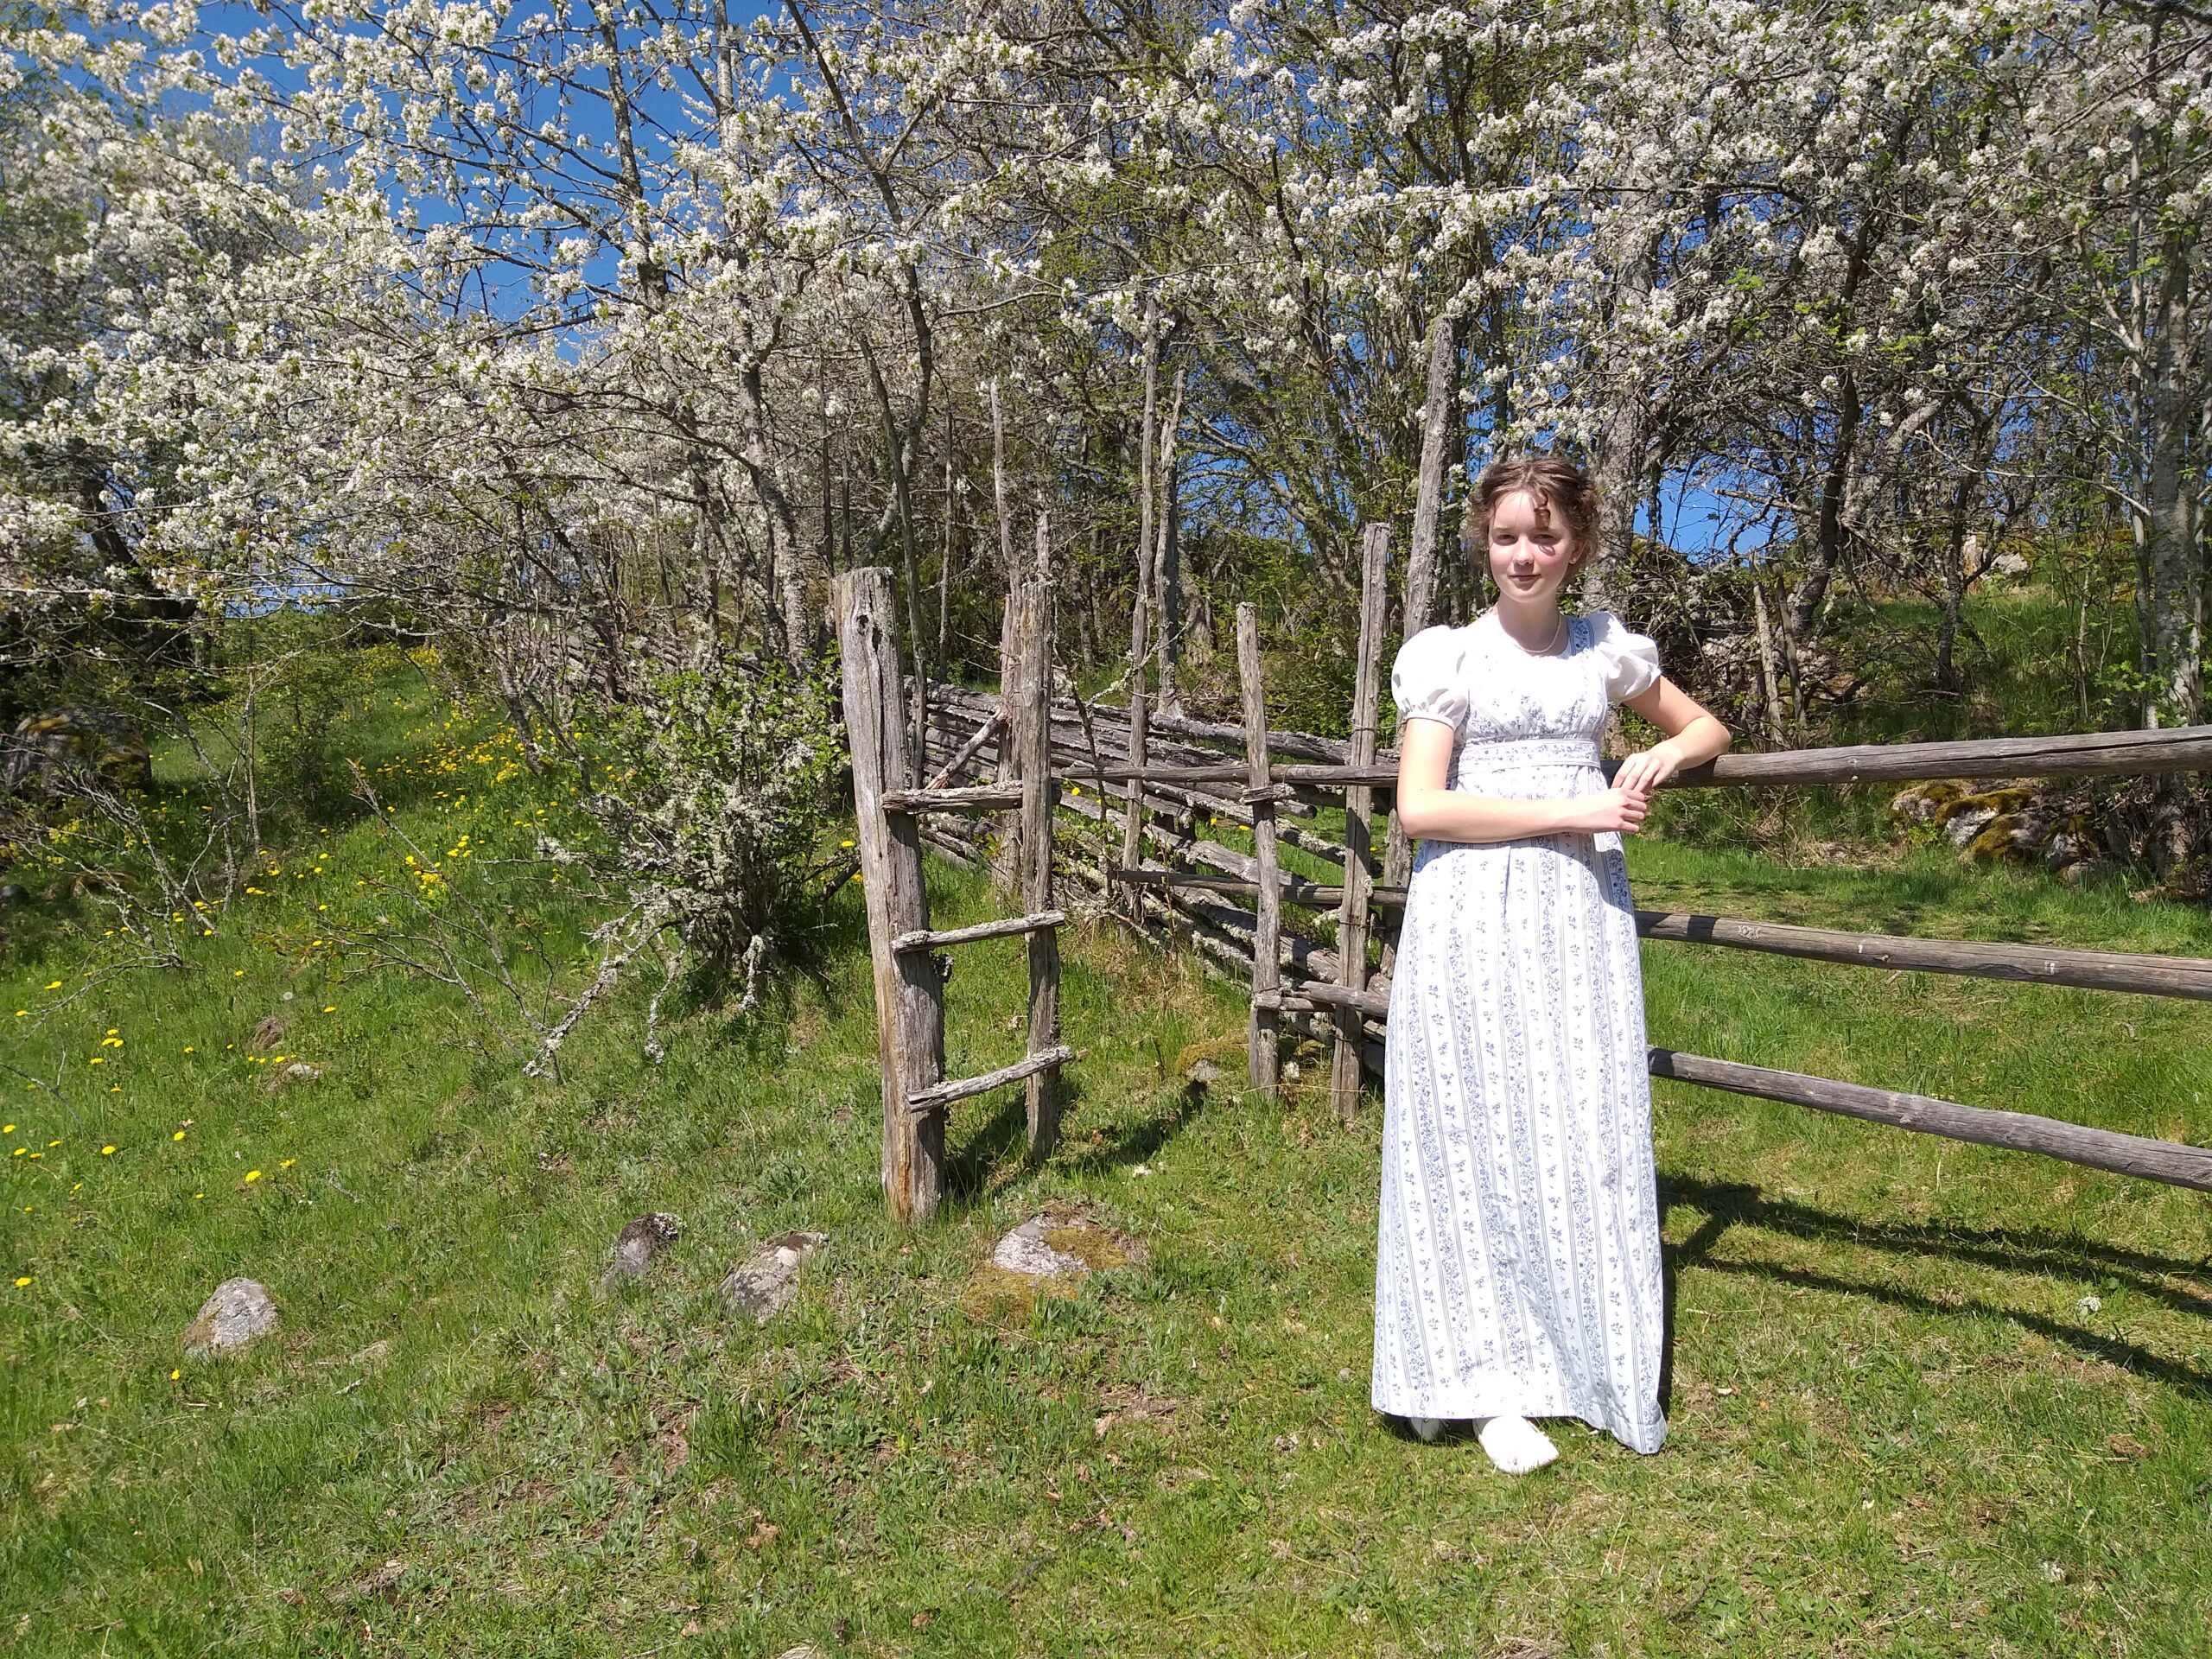
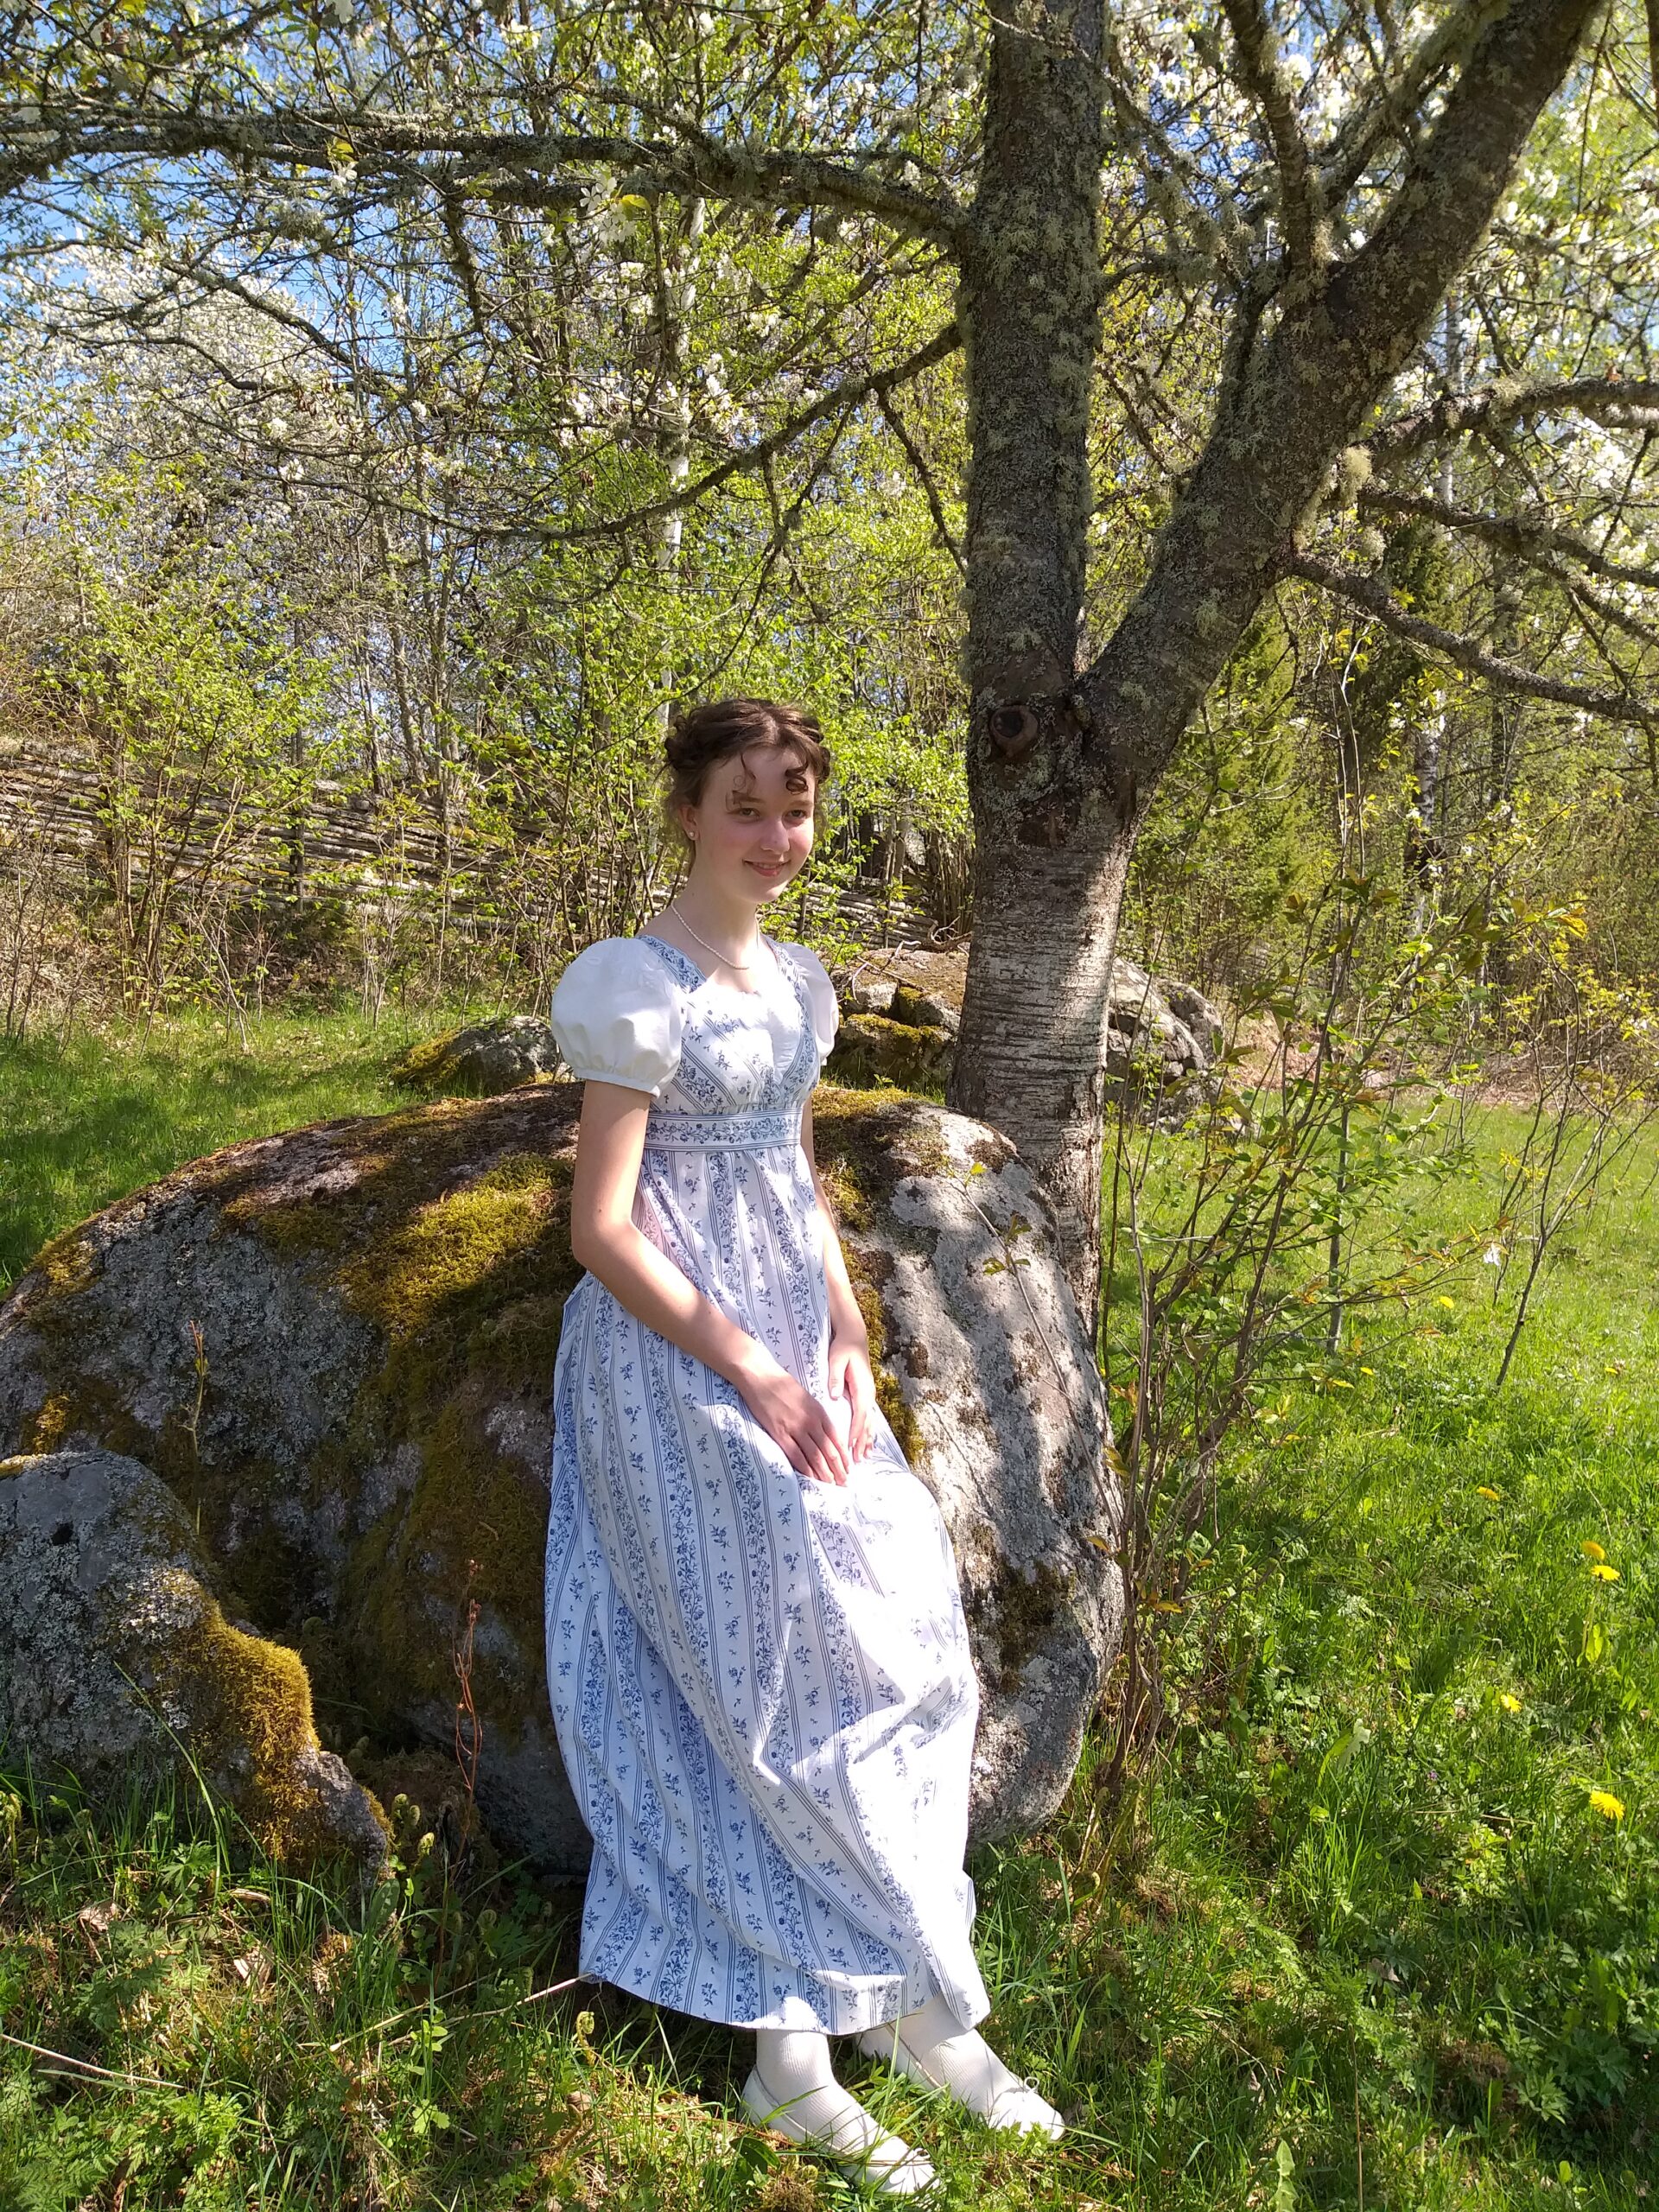
Now I am eager to see whether the dress fits the pretty maiden.
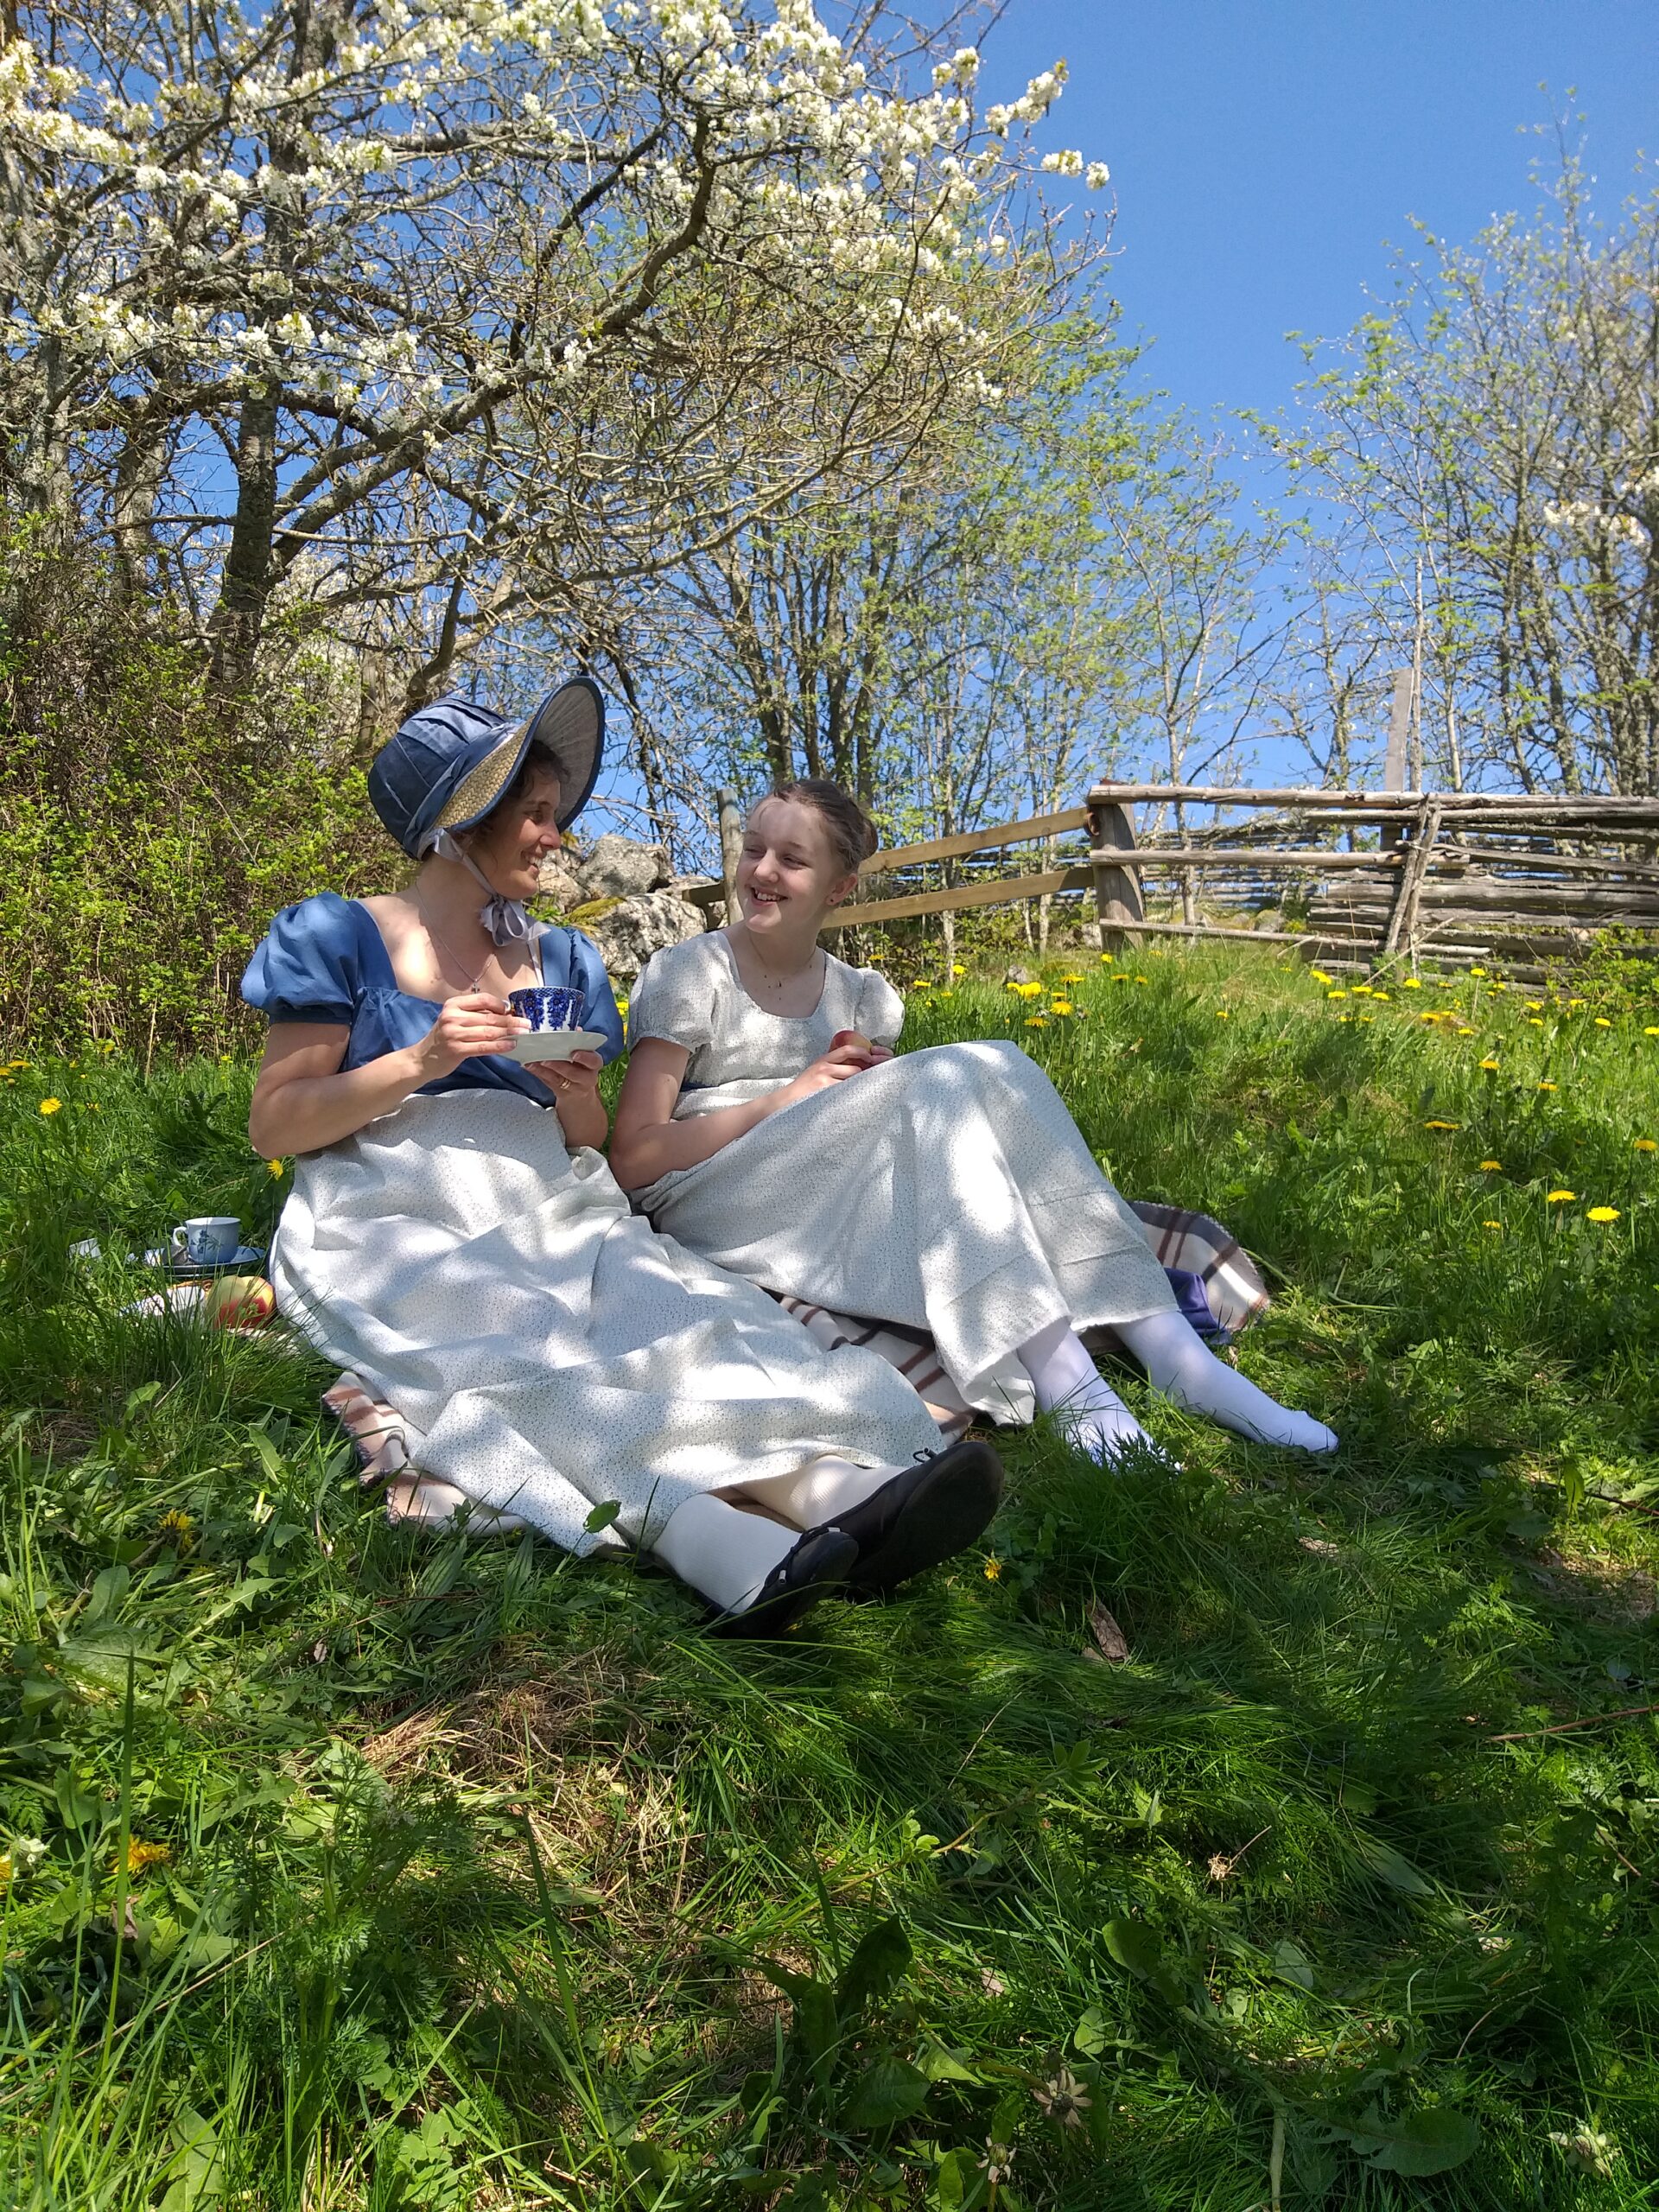
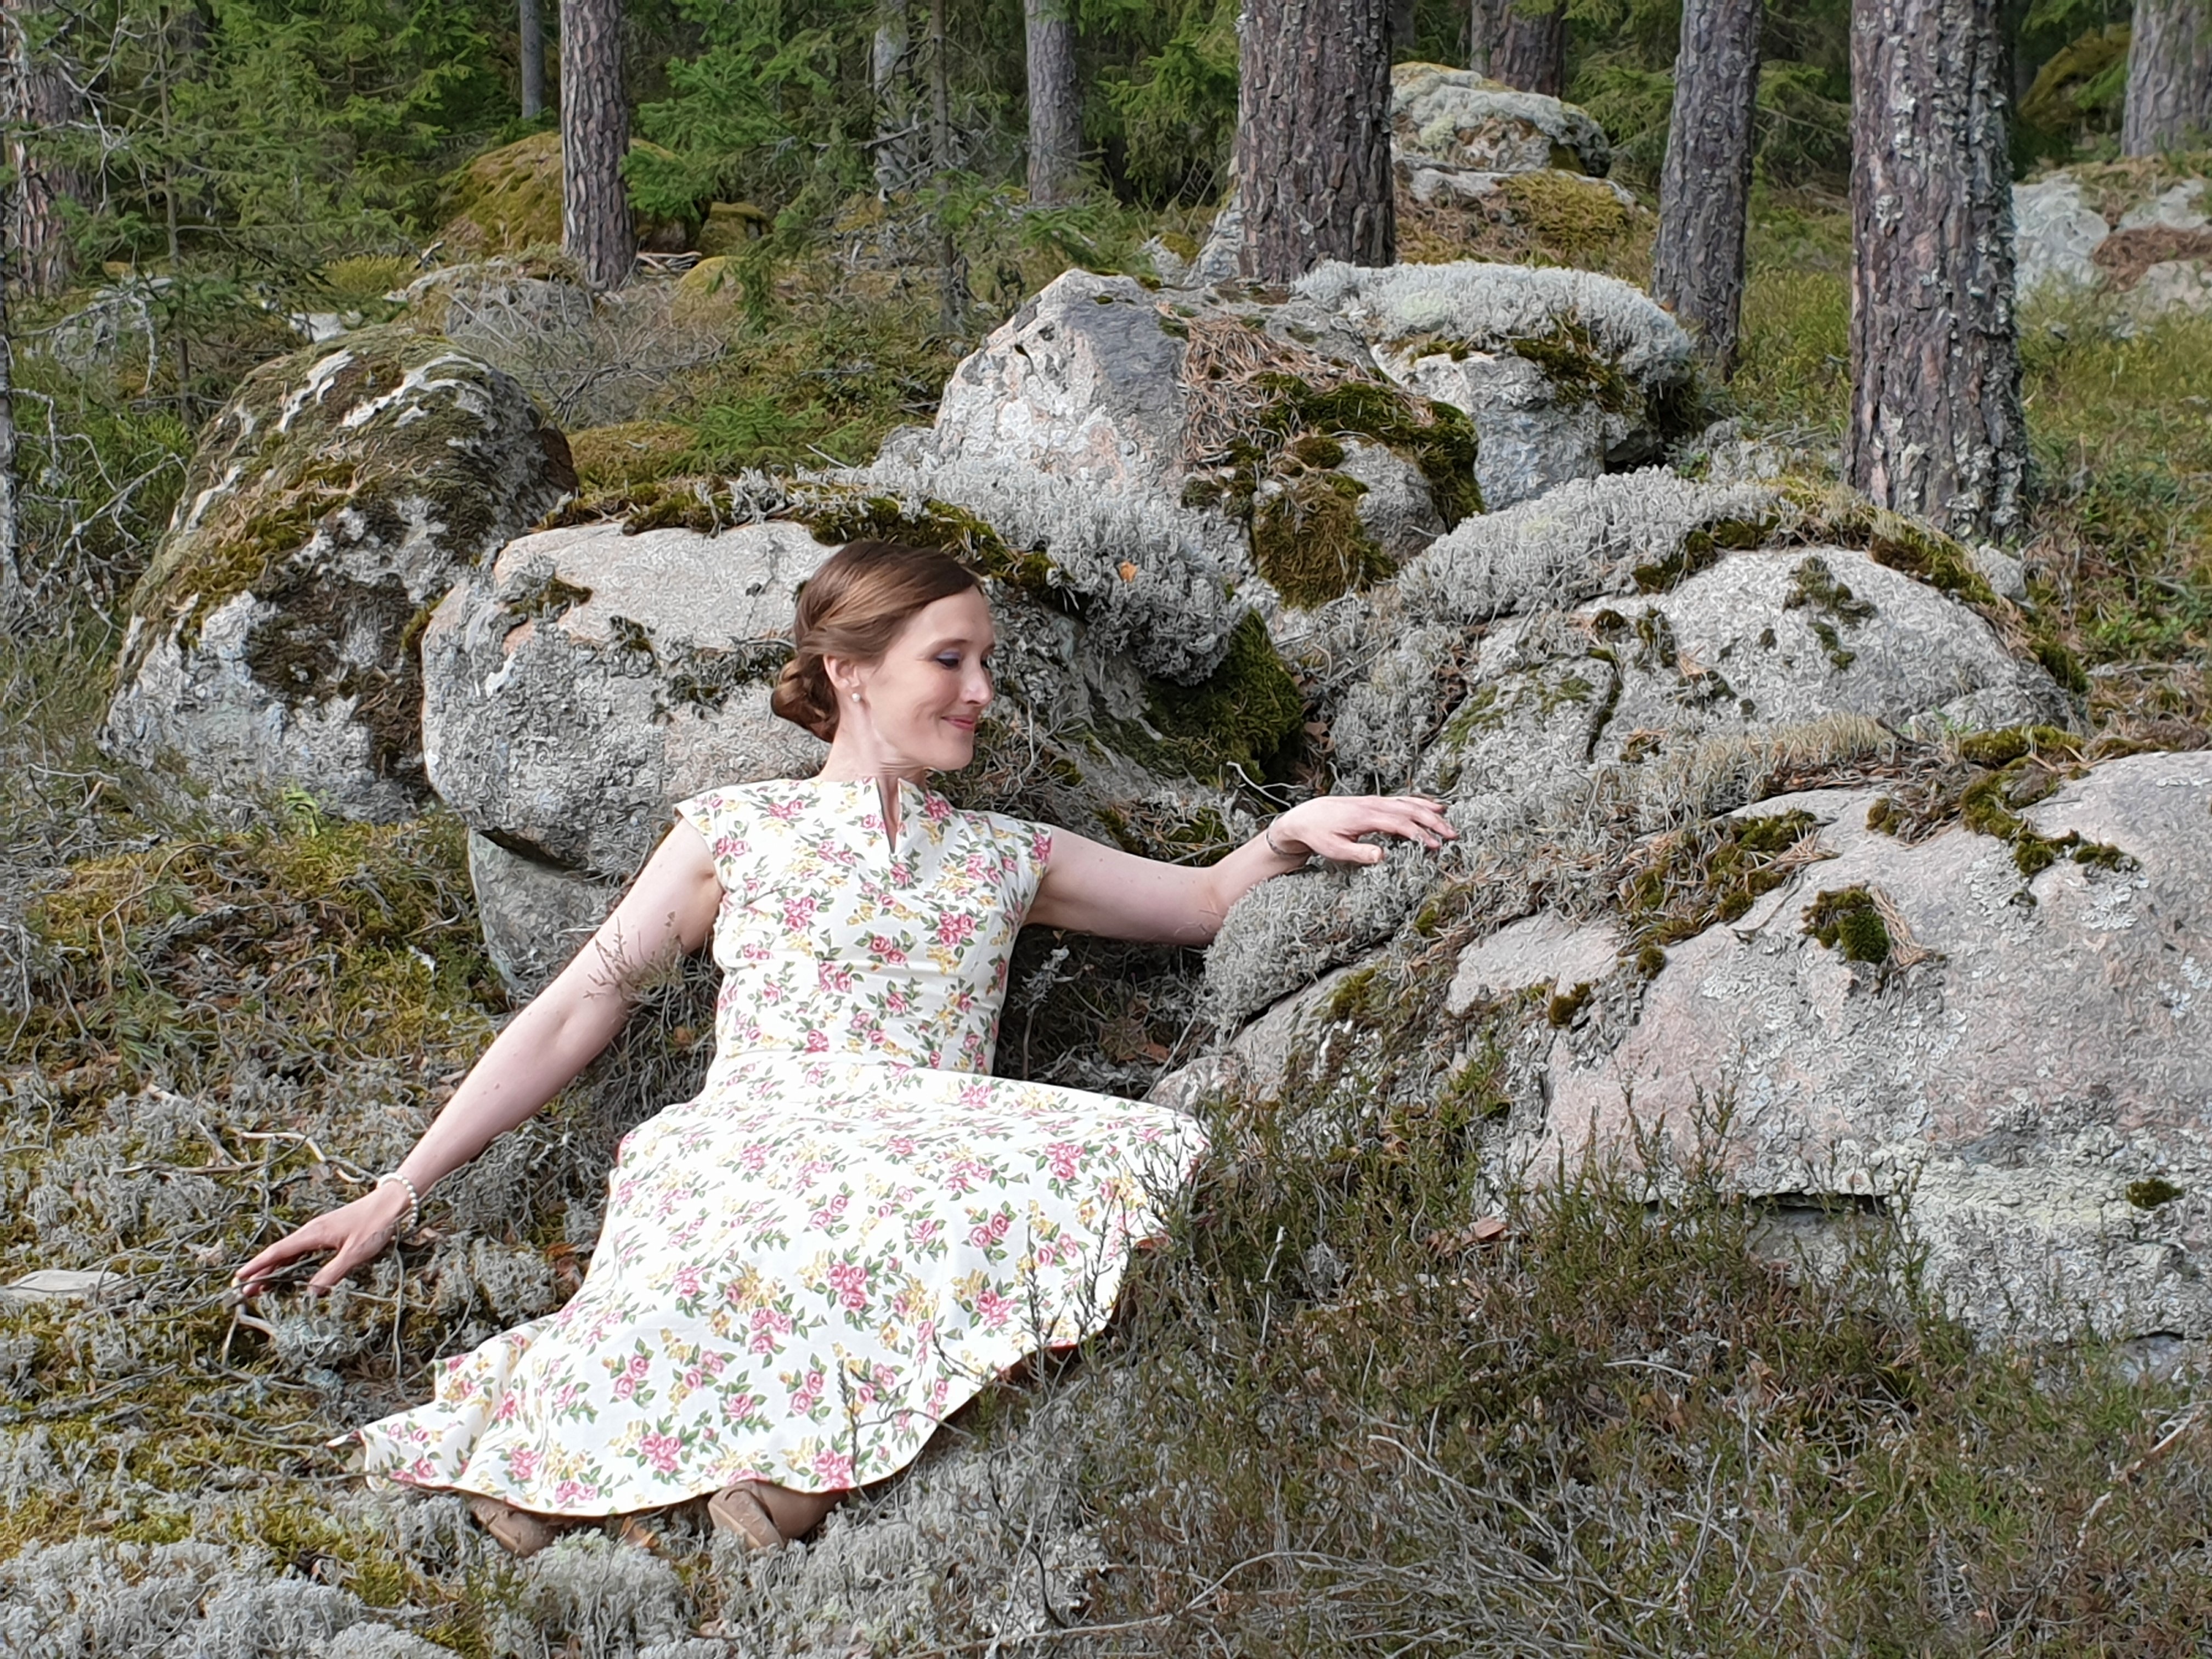
Photo Shoot In The Valley of Cherry Blossoms
The dress fits my niece so well! I’m so proud of this intelligent, pretty young maiden and her wonderful family.
As you might see, there was also a pregnant seamstress lurking around.
Ugnstorp really is the most beautiful place in May
There is seldom time for sewing since we moved to our house. We are so lucky to have a helping family and to know craftsmen, so that all organic material is removed from the cellar, the electicity, plumbing, draining around the house, topographic changes in the garden and the new floor in our washing room is already finished after only four months! The projects in waiting are quite pressing though… I’m proud of having put back the pavingstones, but the ground needs preparation for grass and flowers, and the cellar is still kind of dangerous.
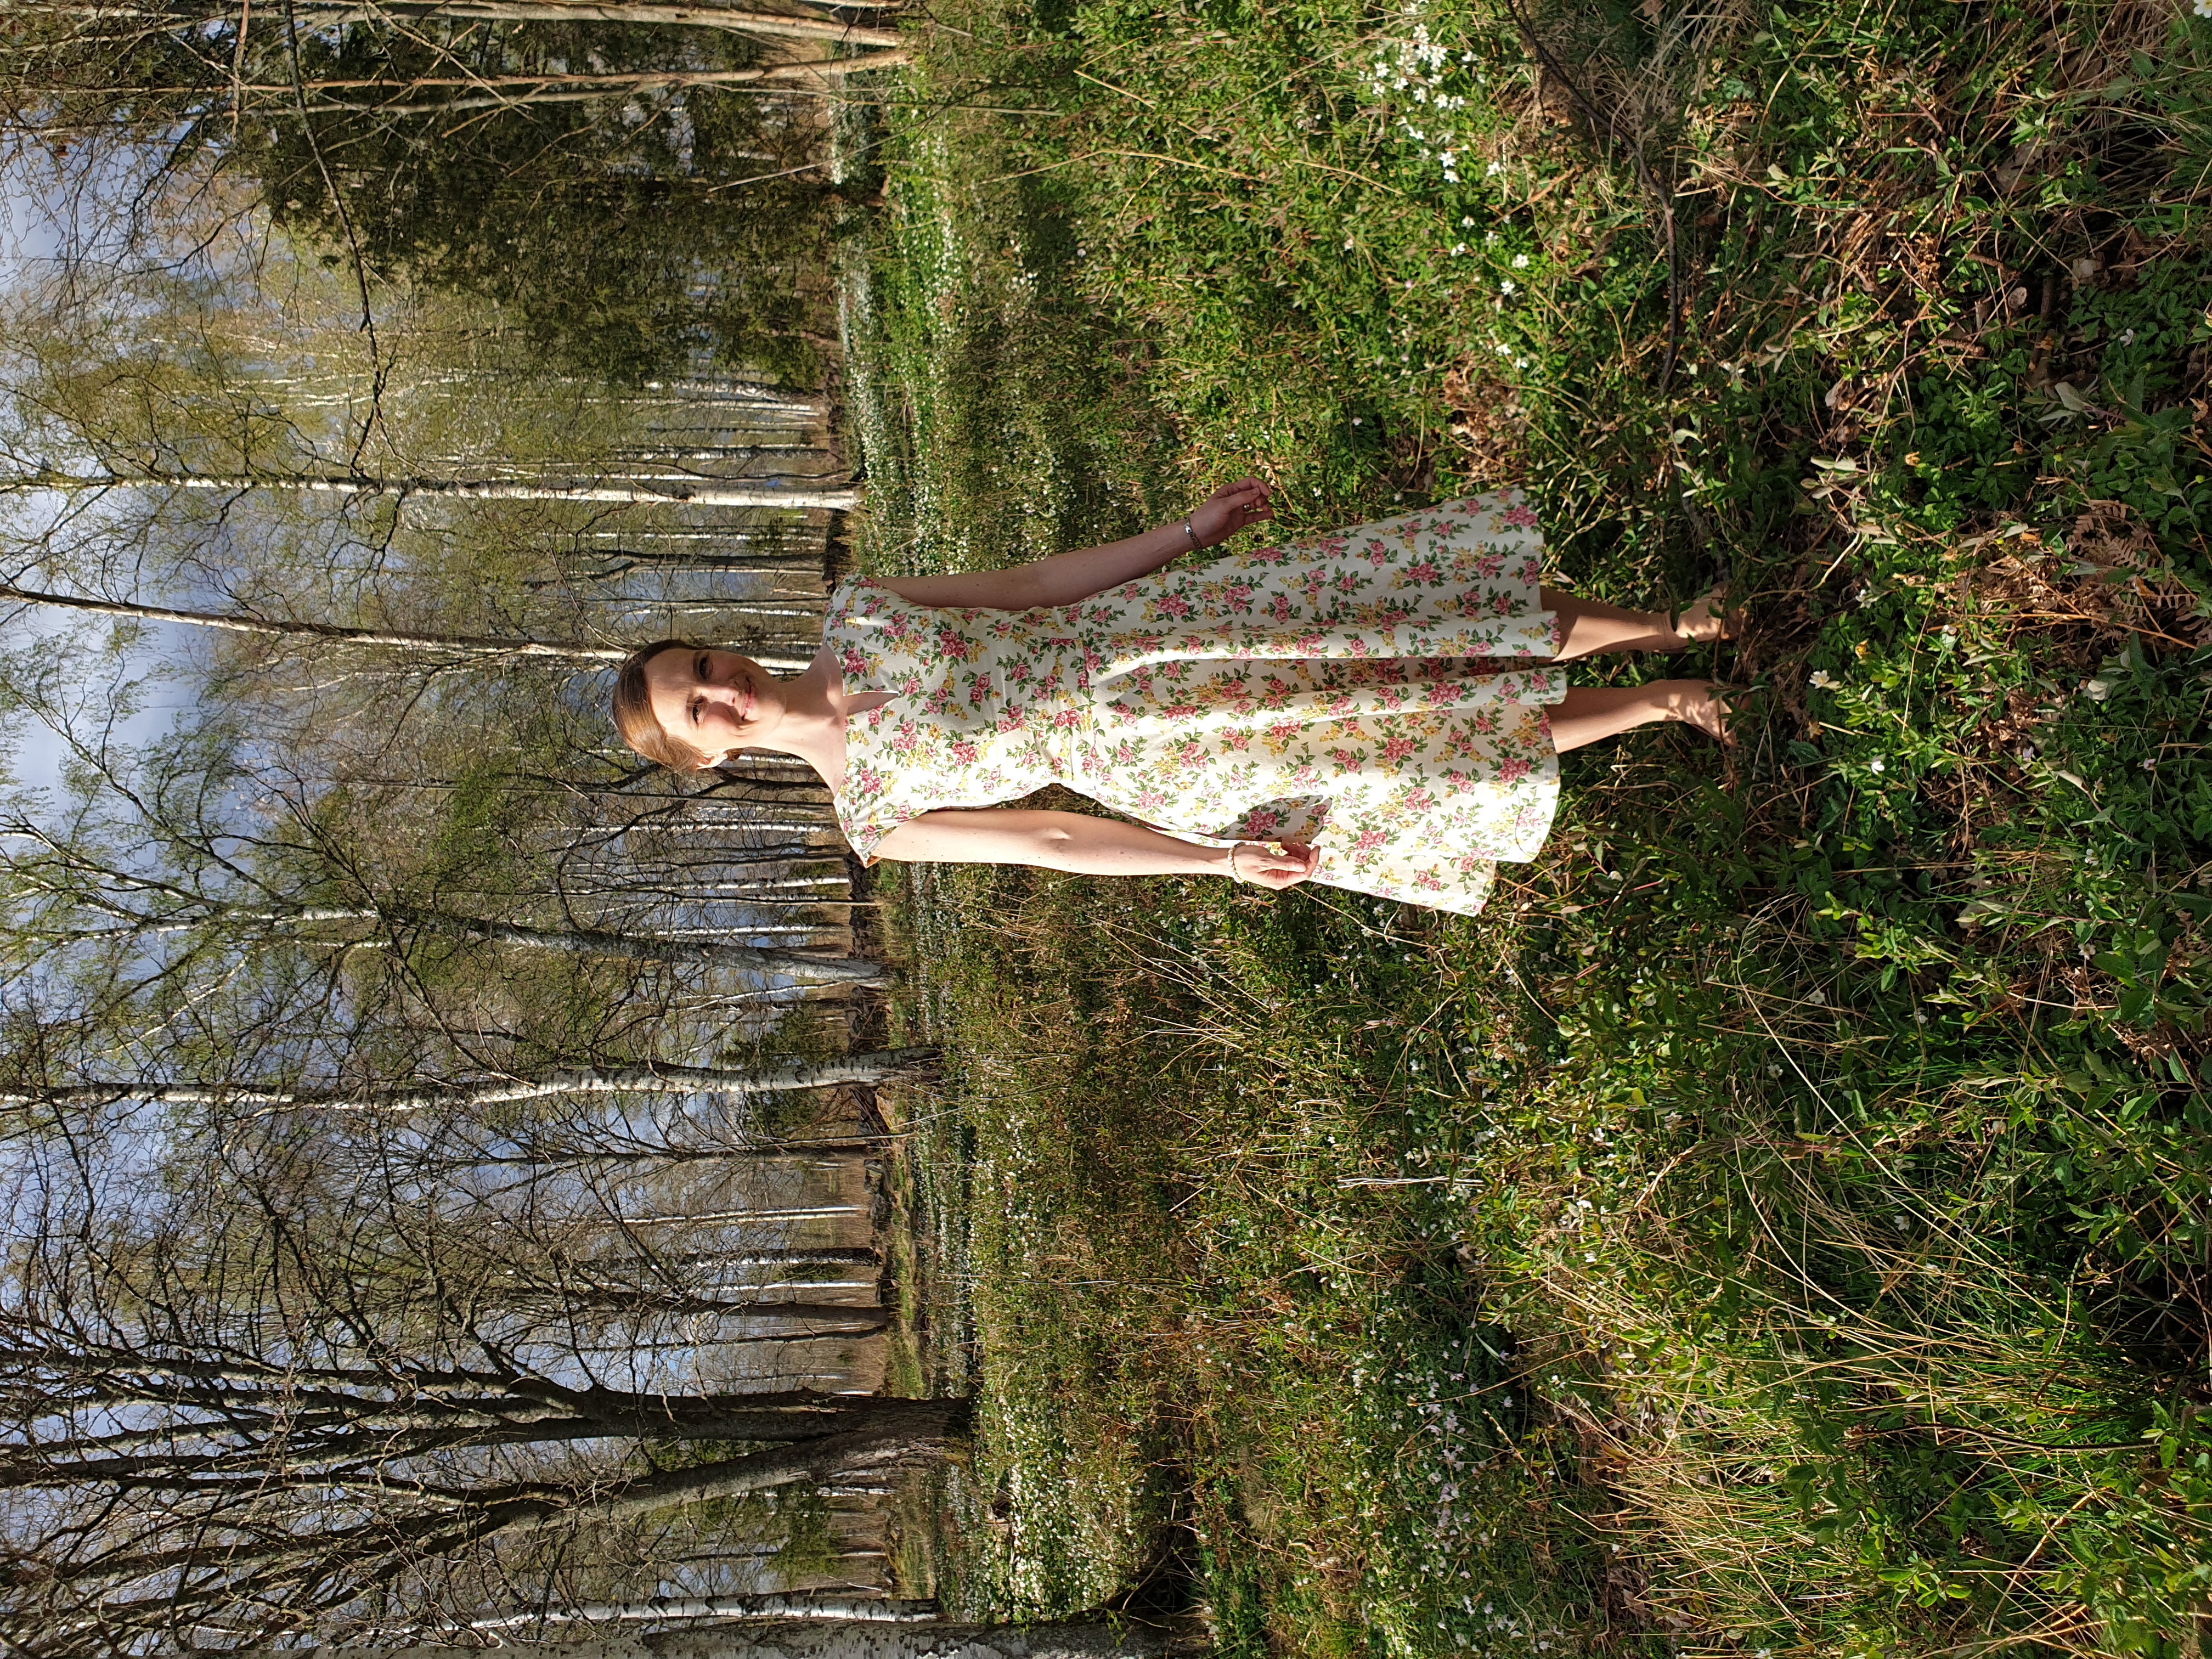
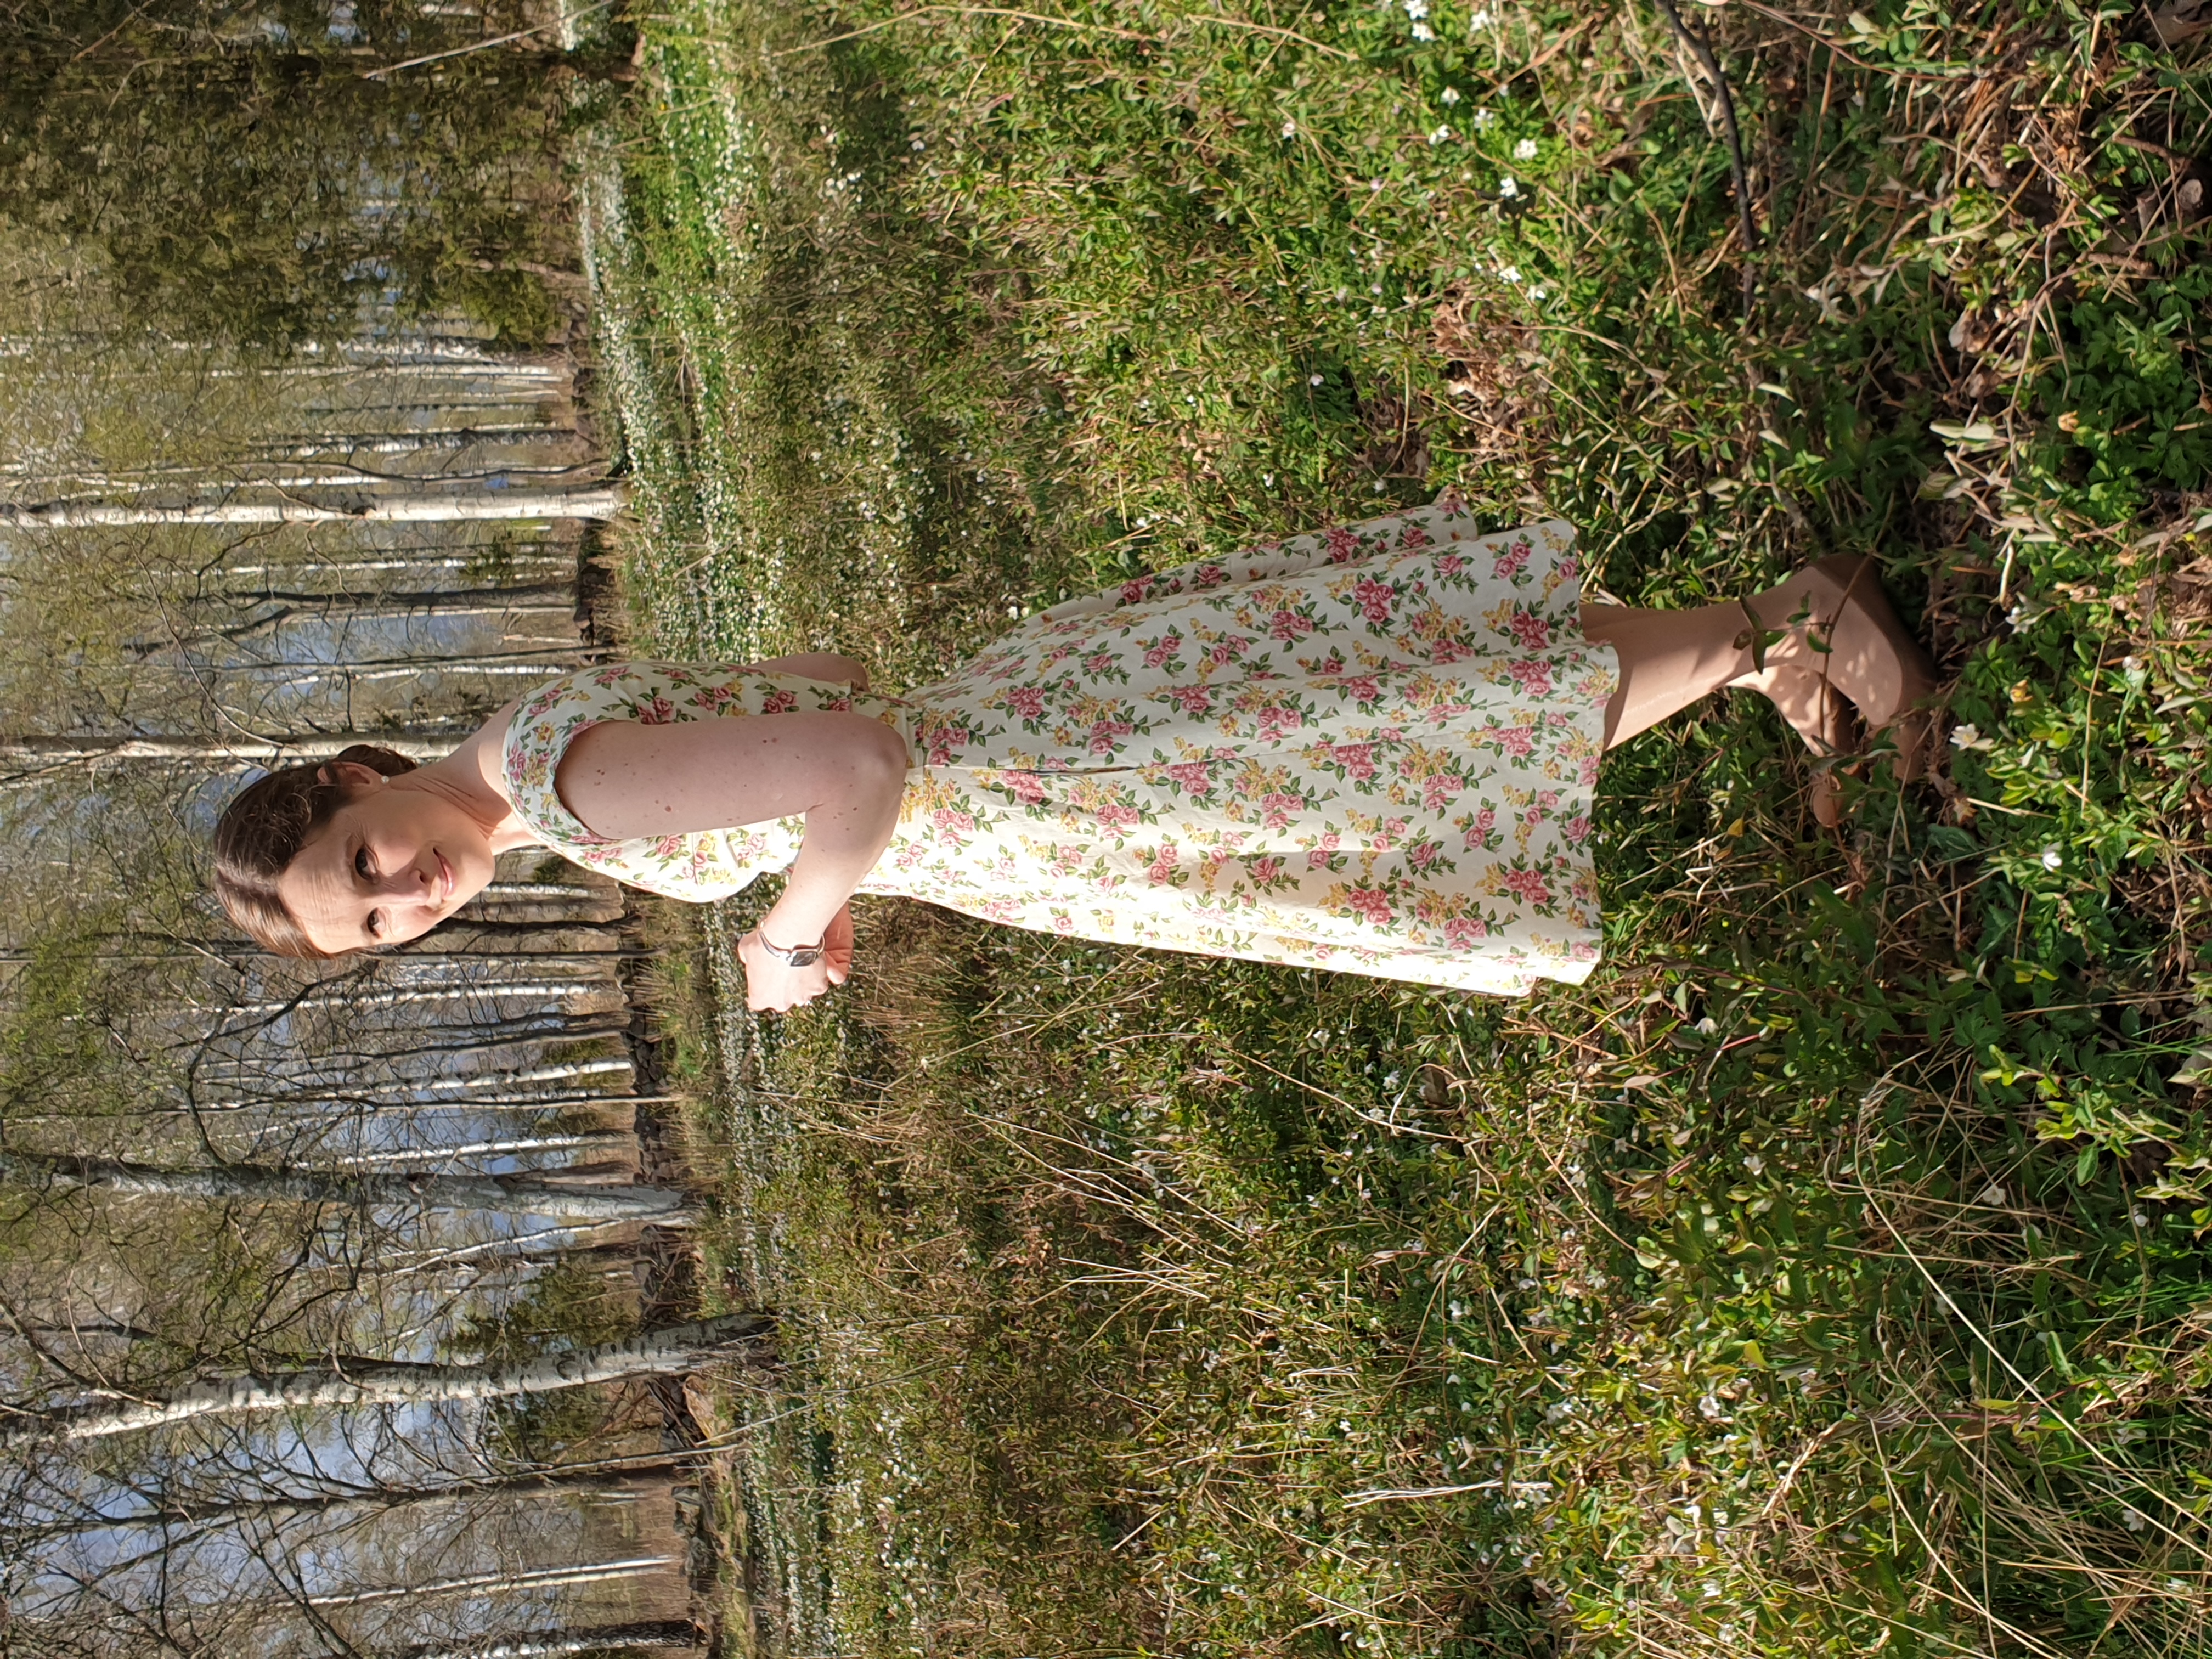
By Christmas, I laid my hands on a pair of pretty curtains with an extreme amount of fluonces at the second hand shop. 30 SEK. What a find! My husband was horrified, thinking that I intended them for the room of our son. ?
A pair of 1 x 1,6 metres of curtains, rounded at the bottom
Last week, the stormy weather at last gave me an excuse for not working in the garden, but delving into a nice little sewing project. I made a really simple and usable dress out of the curtains. My husband was relieved.
I did everything just I use to: I draped the fabric on my mannequin, pinning it so that the grain lines would be straight and putting darts in front and at the bust. Then I stitched it together, leaving one side seem open for a zipper. There was enough fabric for a halfcirkle skirt. I put pockets in the side seams. This time I carefully ironed the hemline as I folded it twice. The bodice was attached to the skirt and the zipper was inserted. Then I finished the neckline and arms.
The dress was finished yesterday and today it had its premier. I was too tired and my dear photographer was too eager to go fishing, so there was no photo shoot today, even though the weather is lovely and the woods are full of anemones.
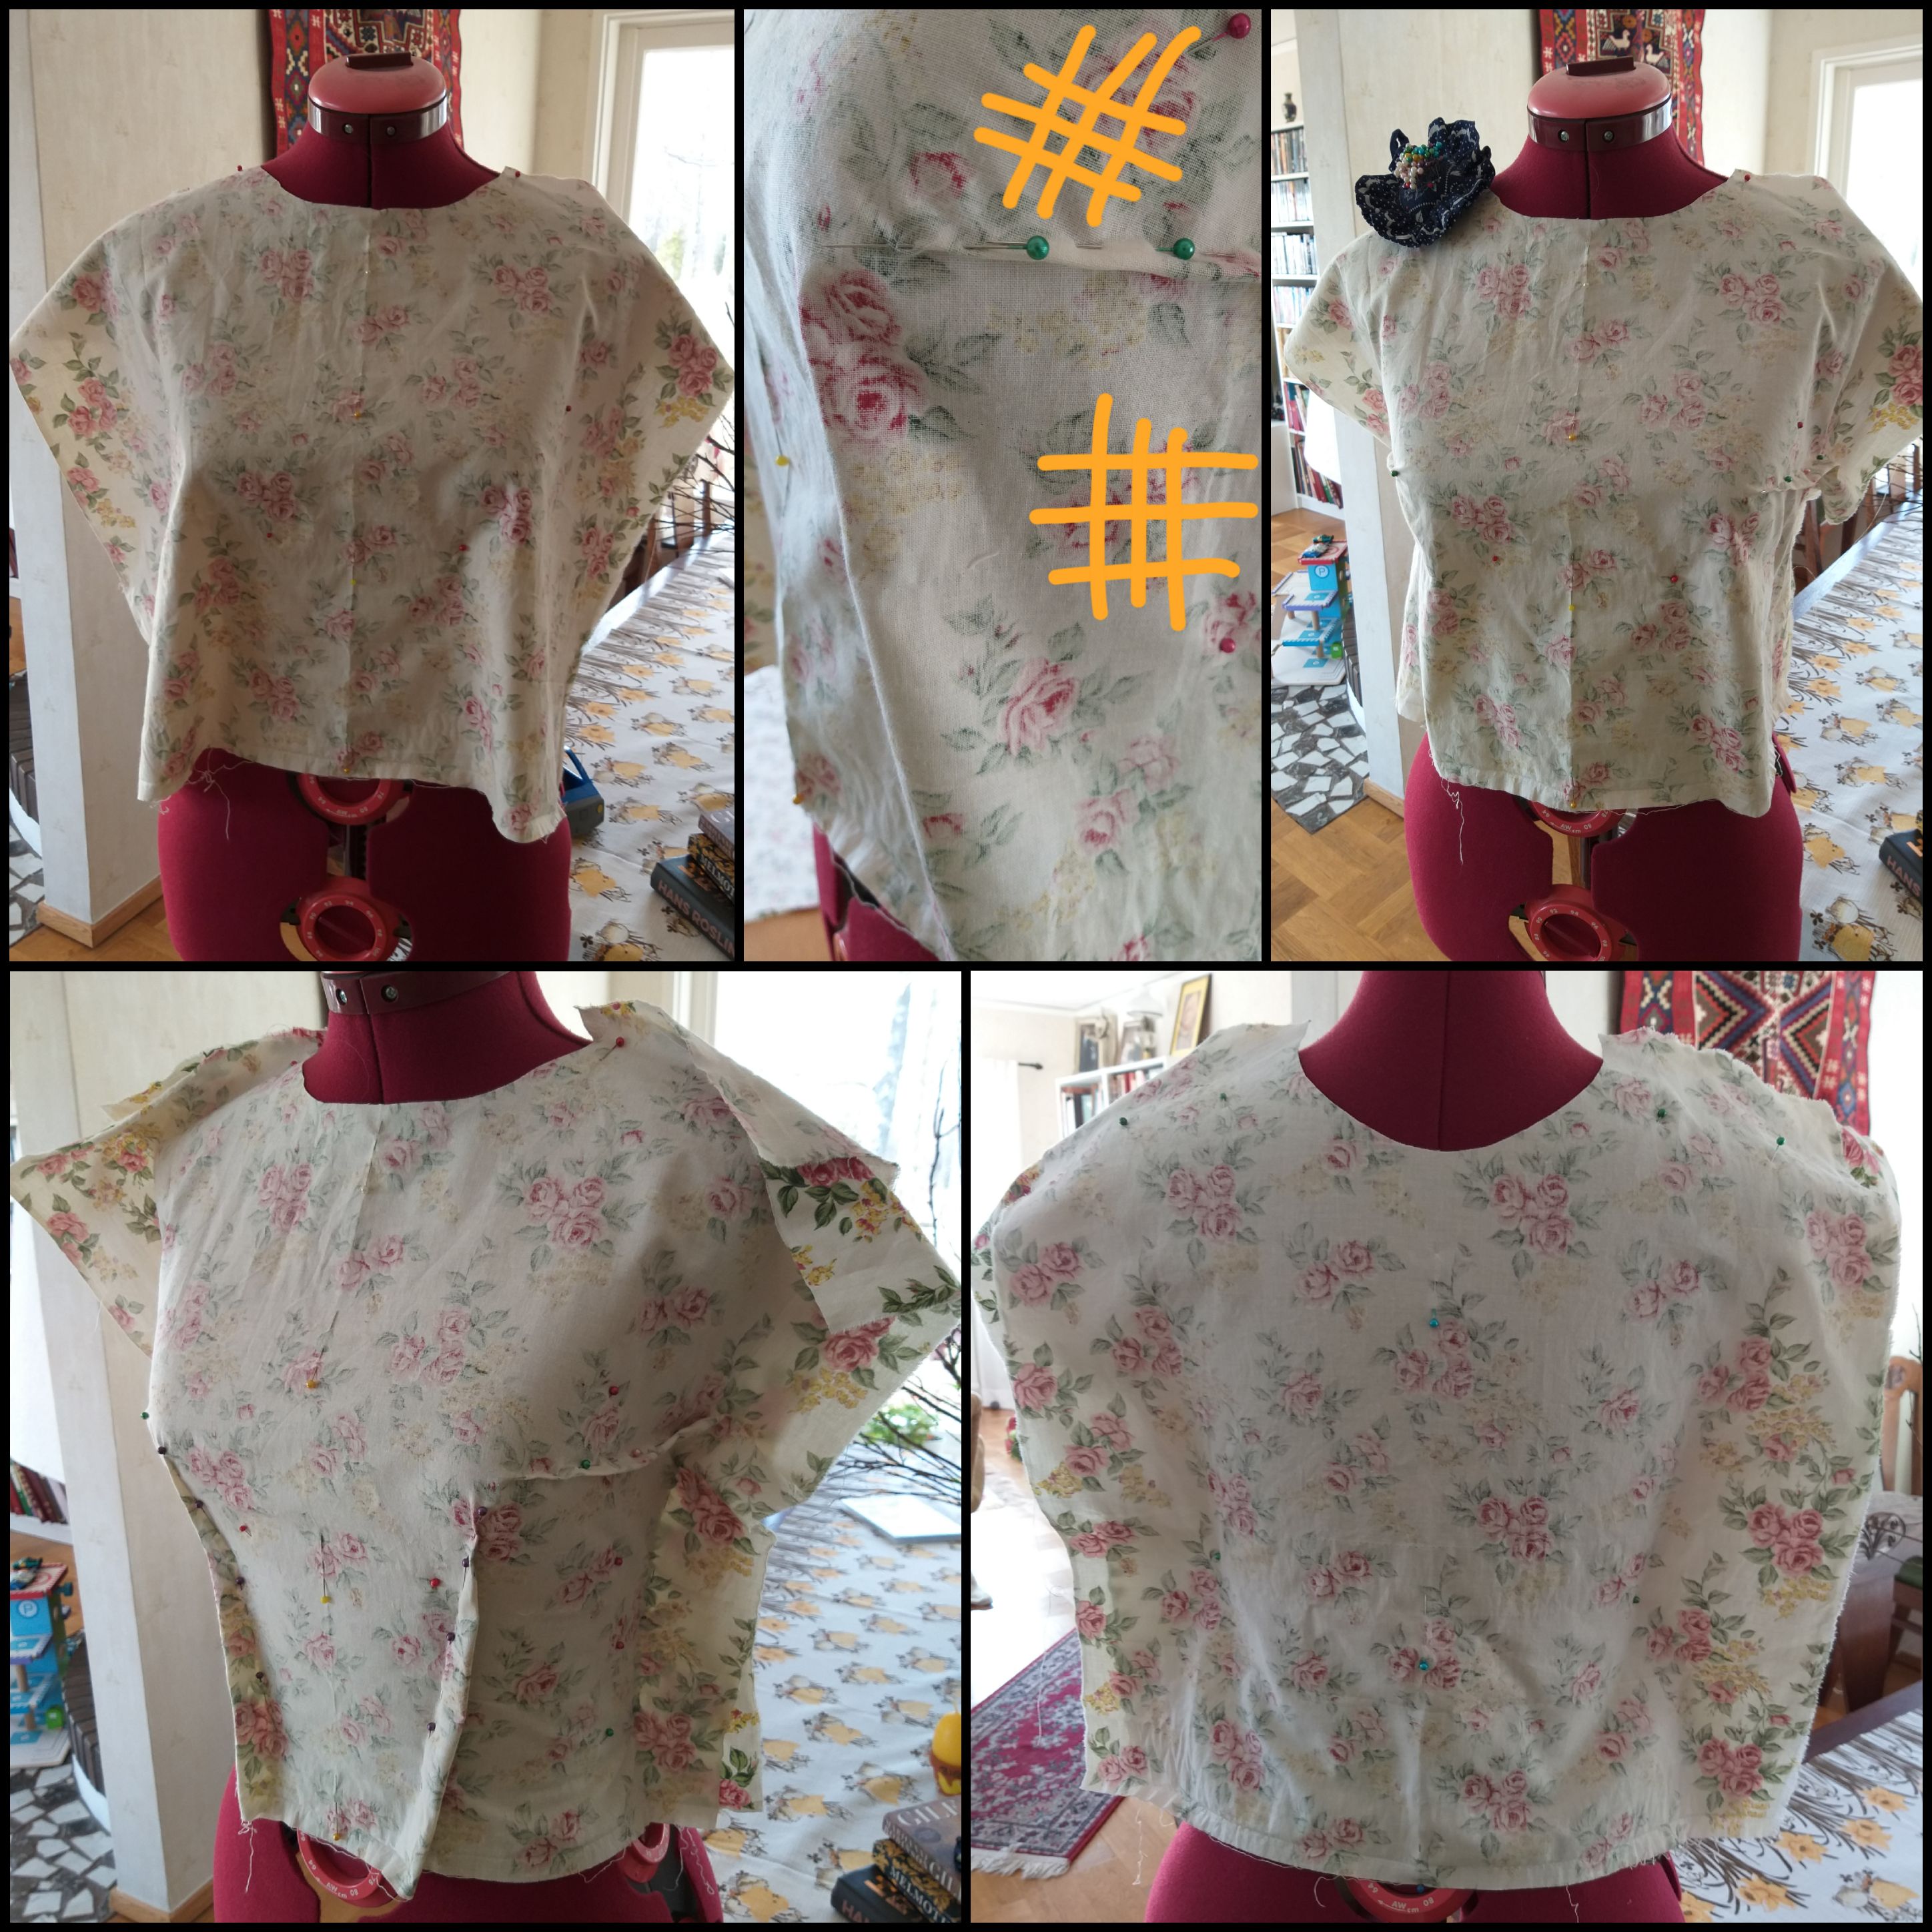
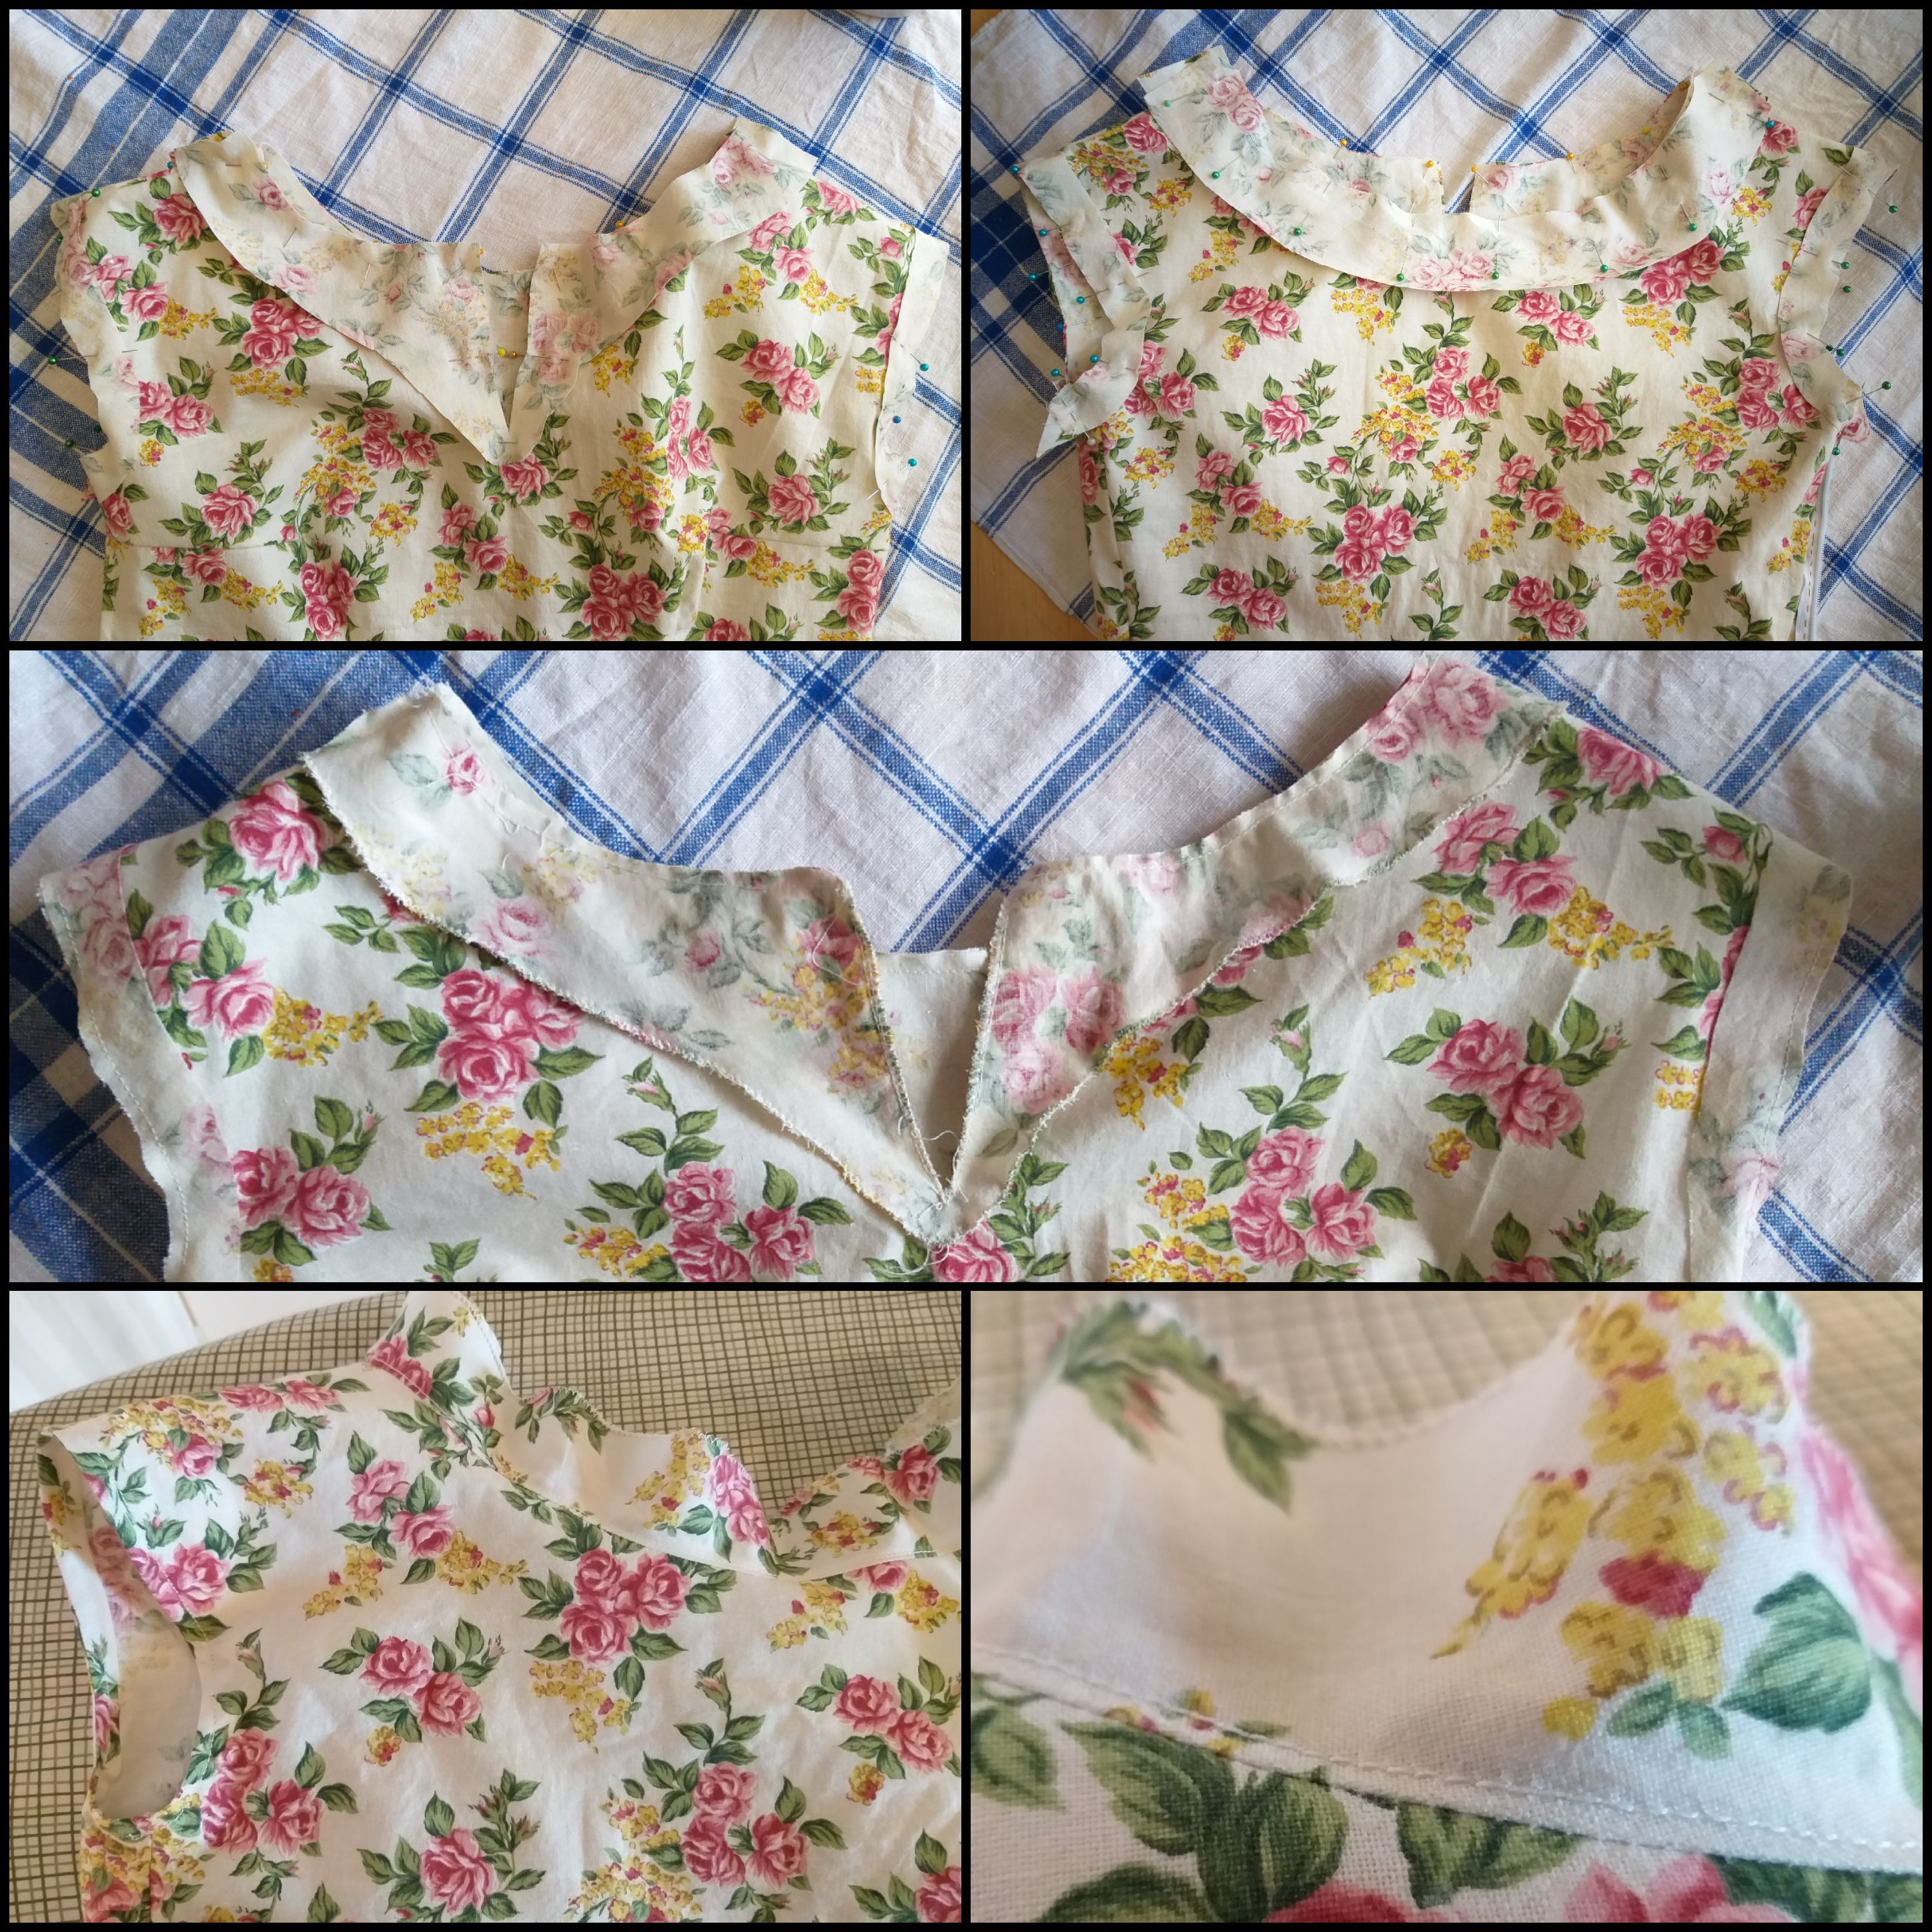
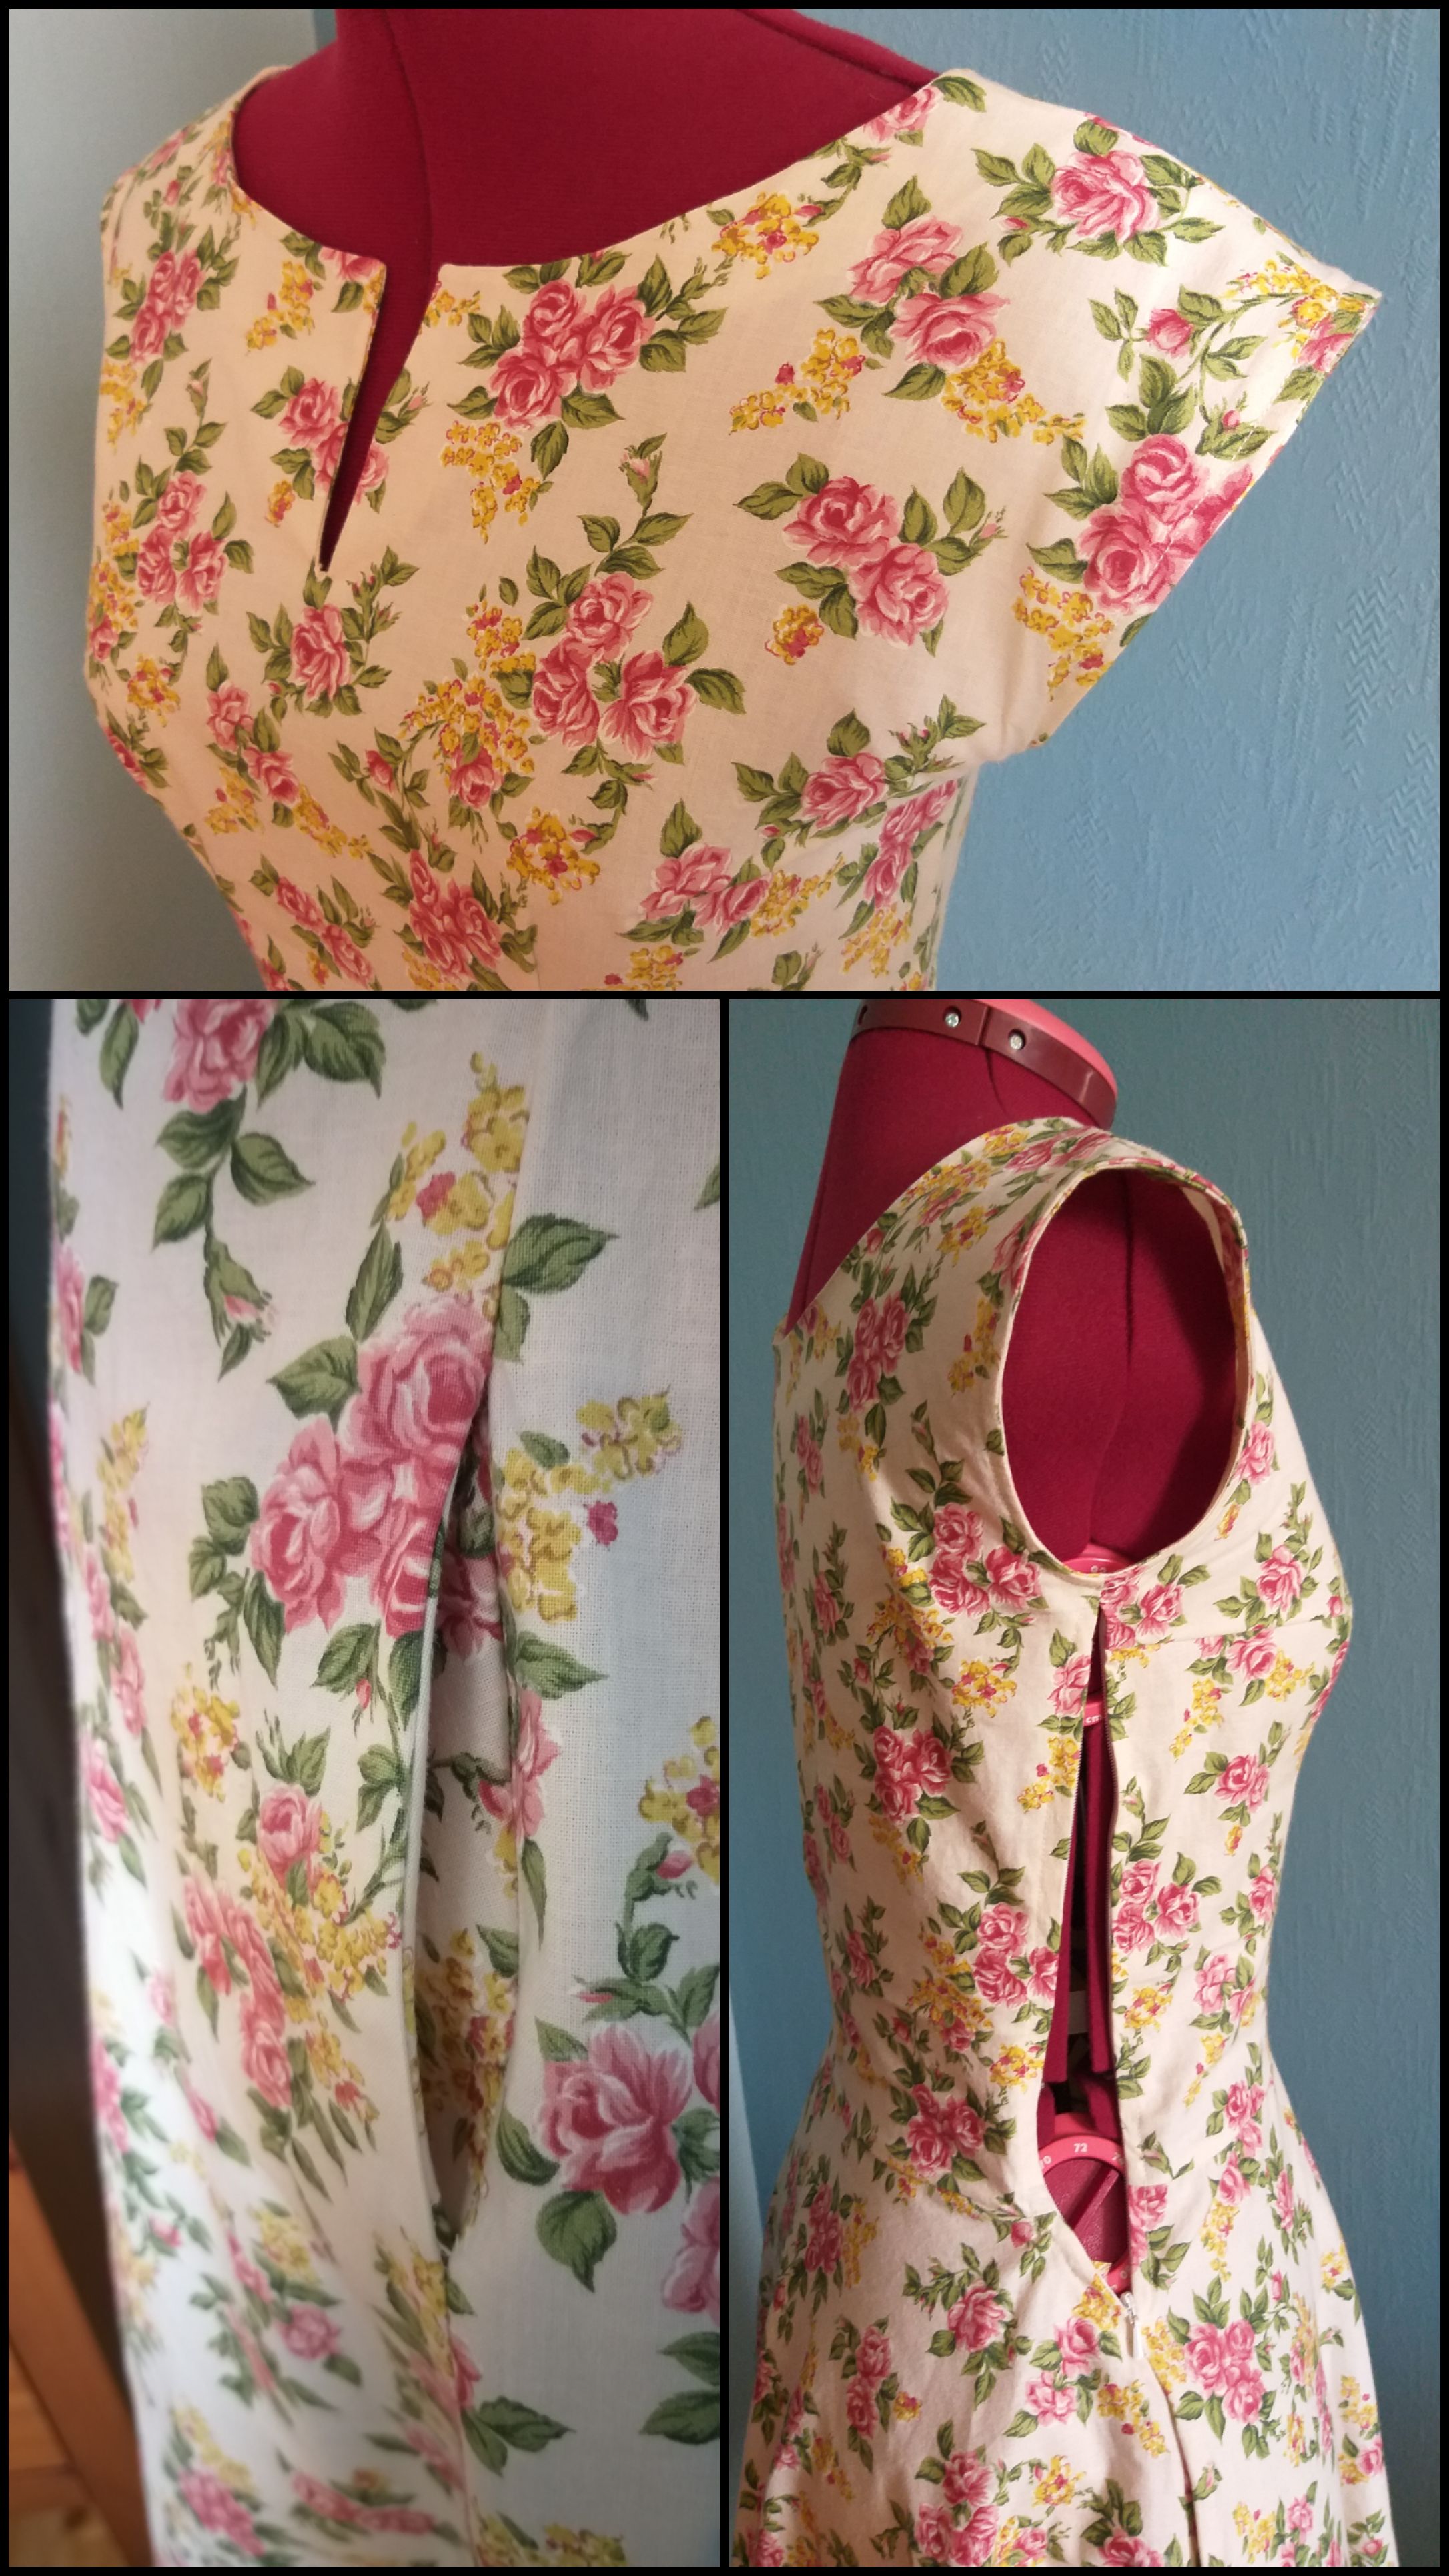
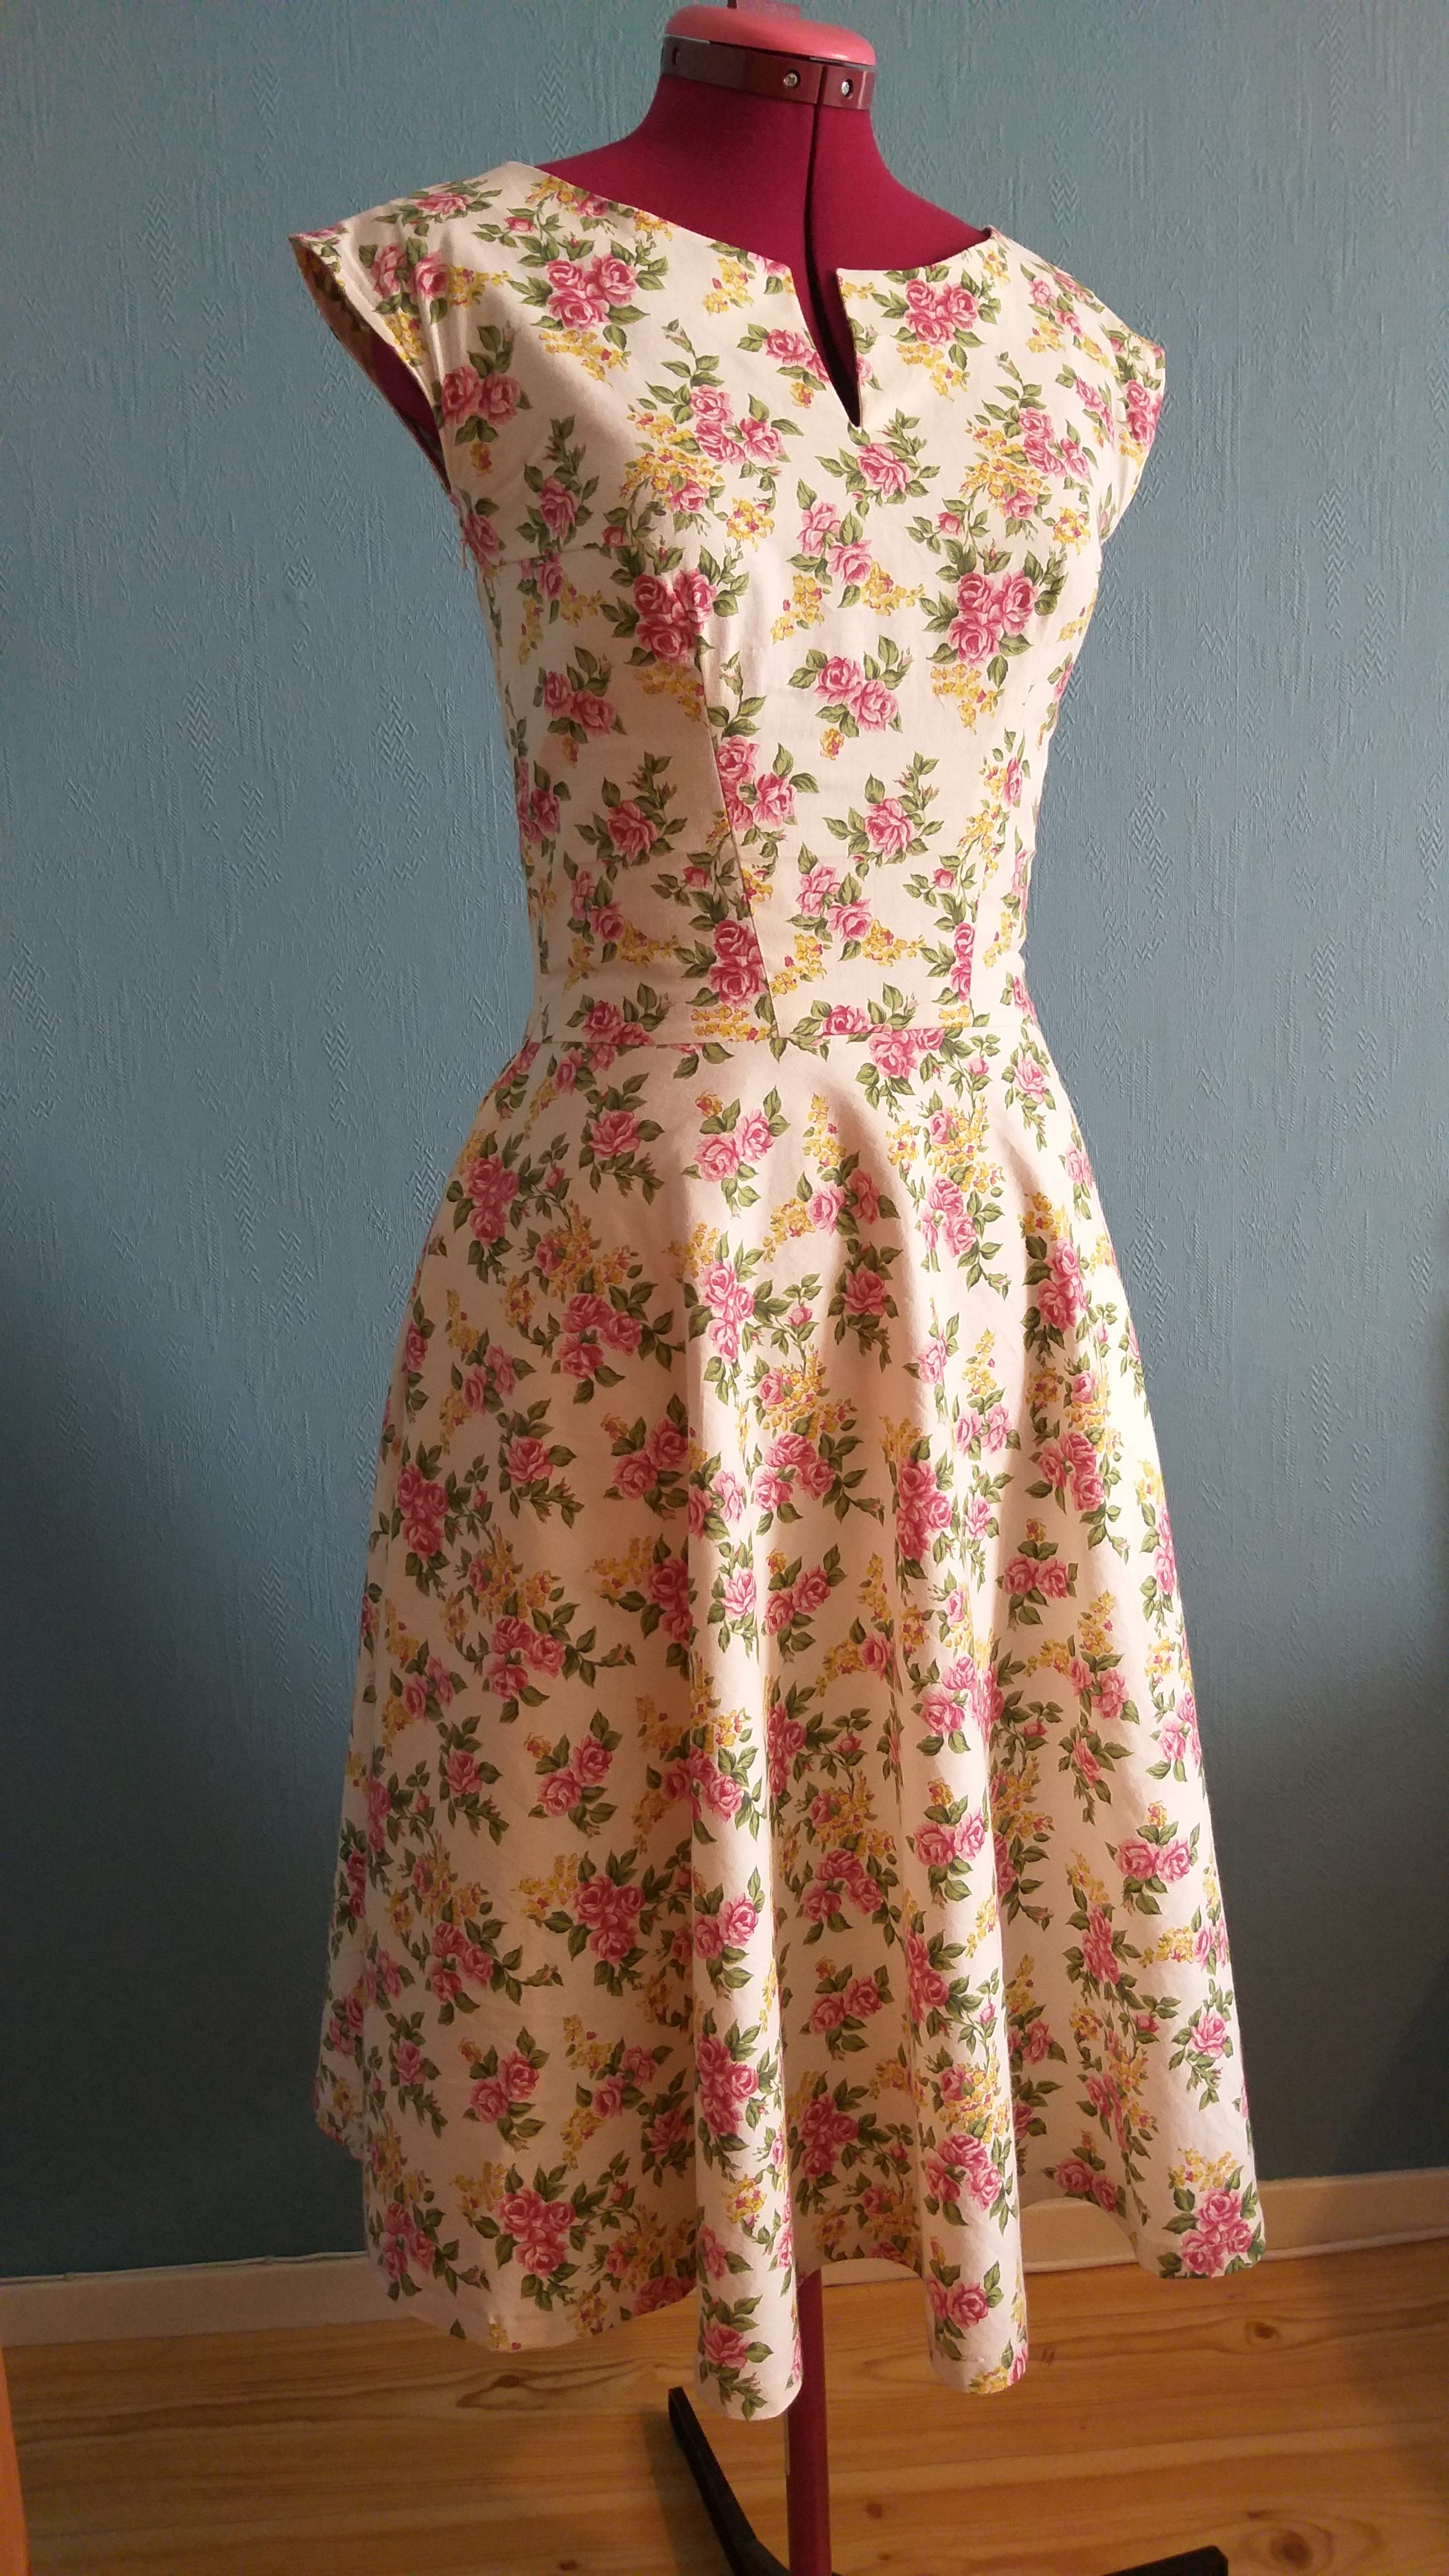
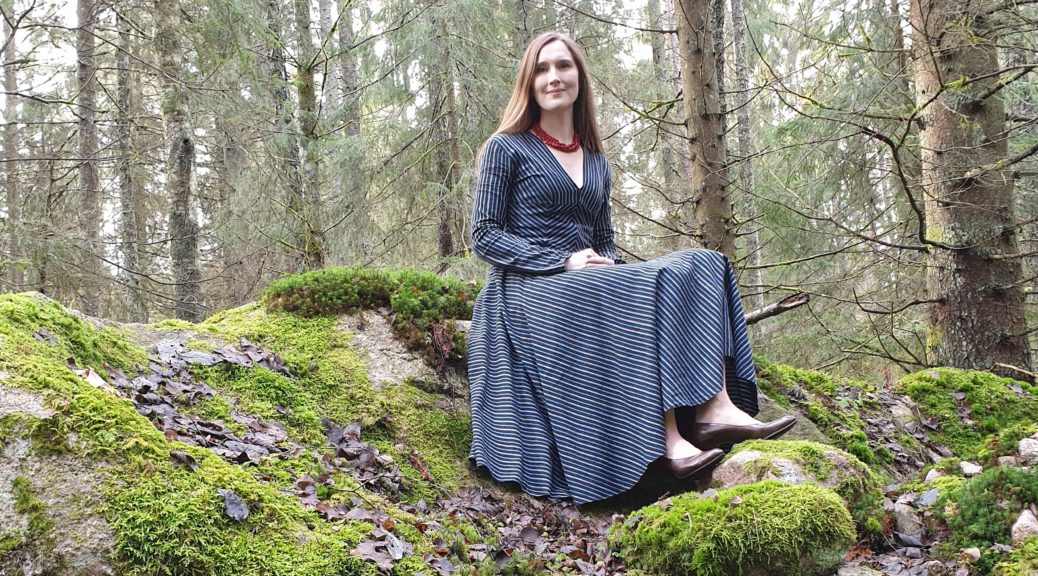
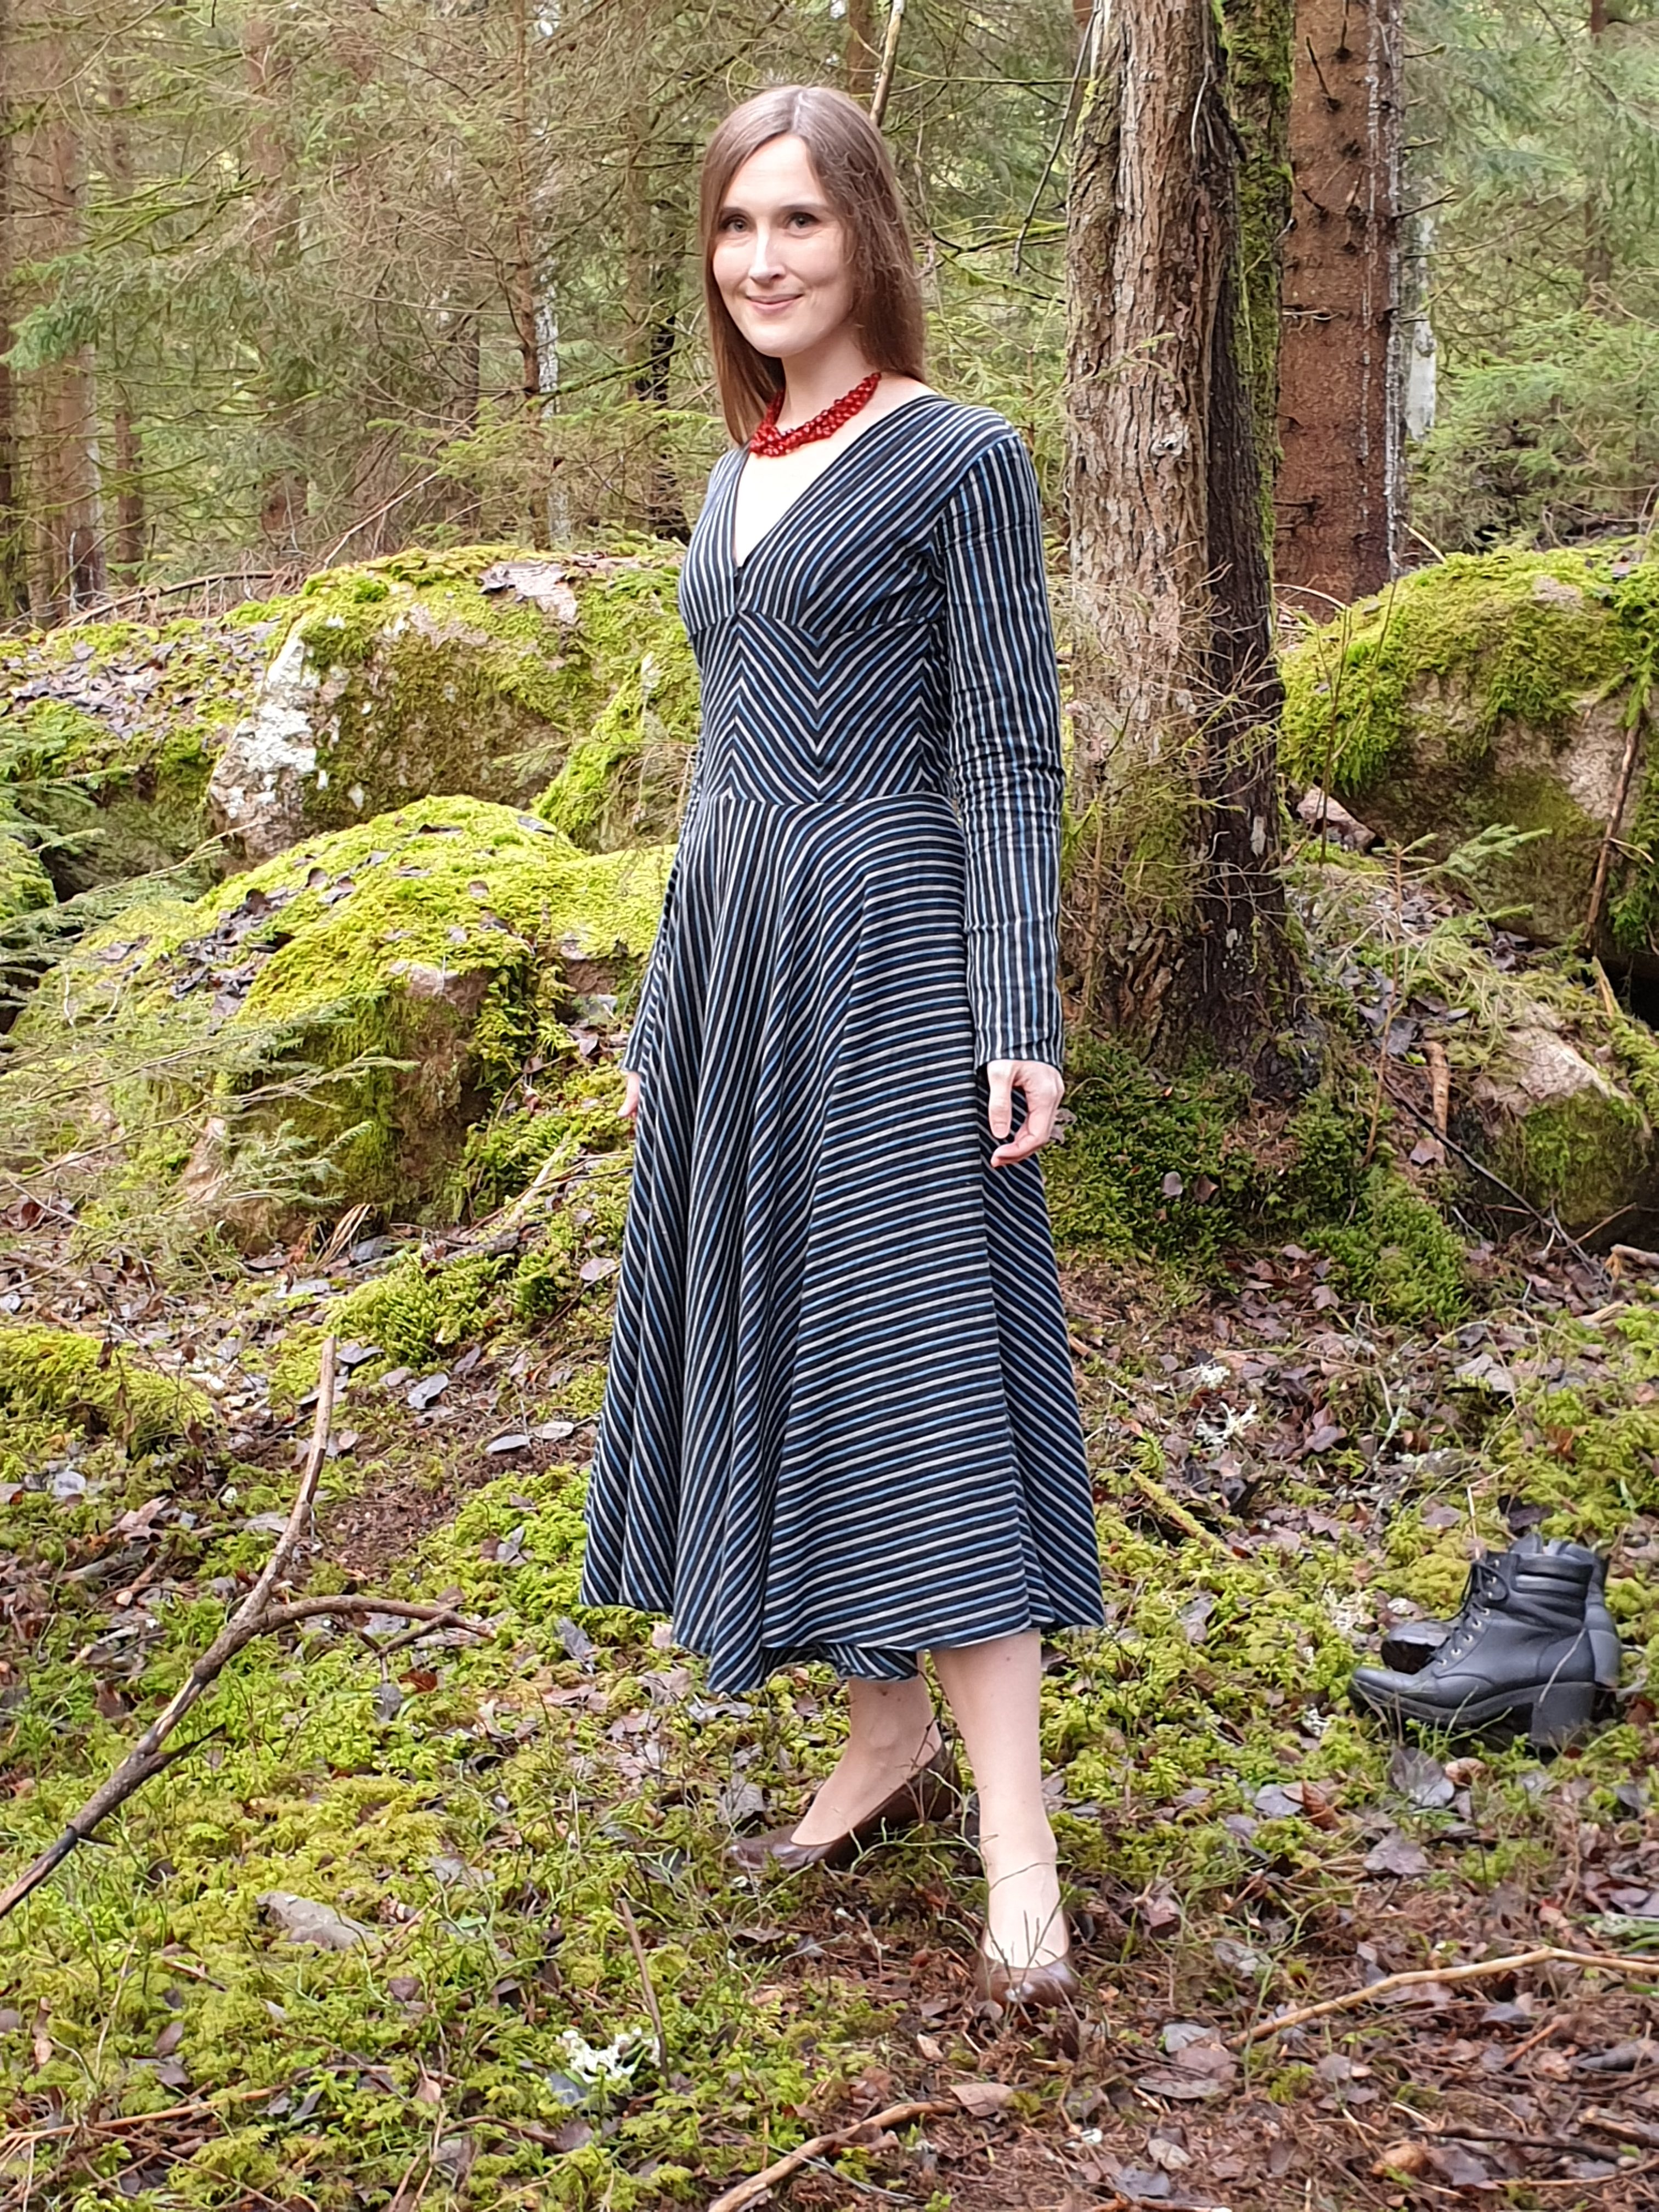
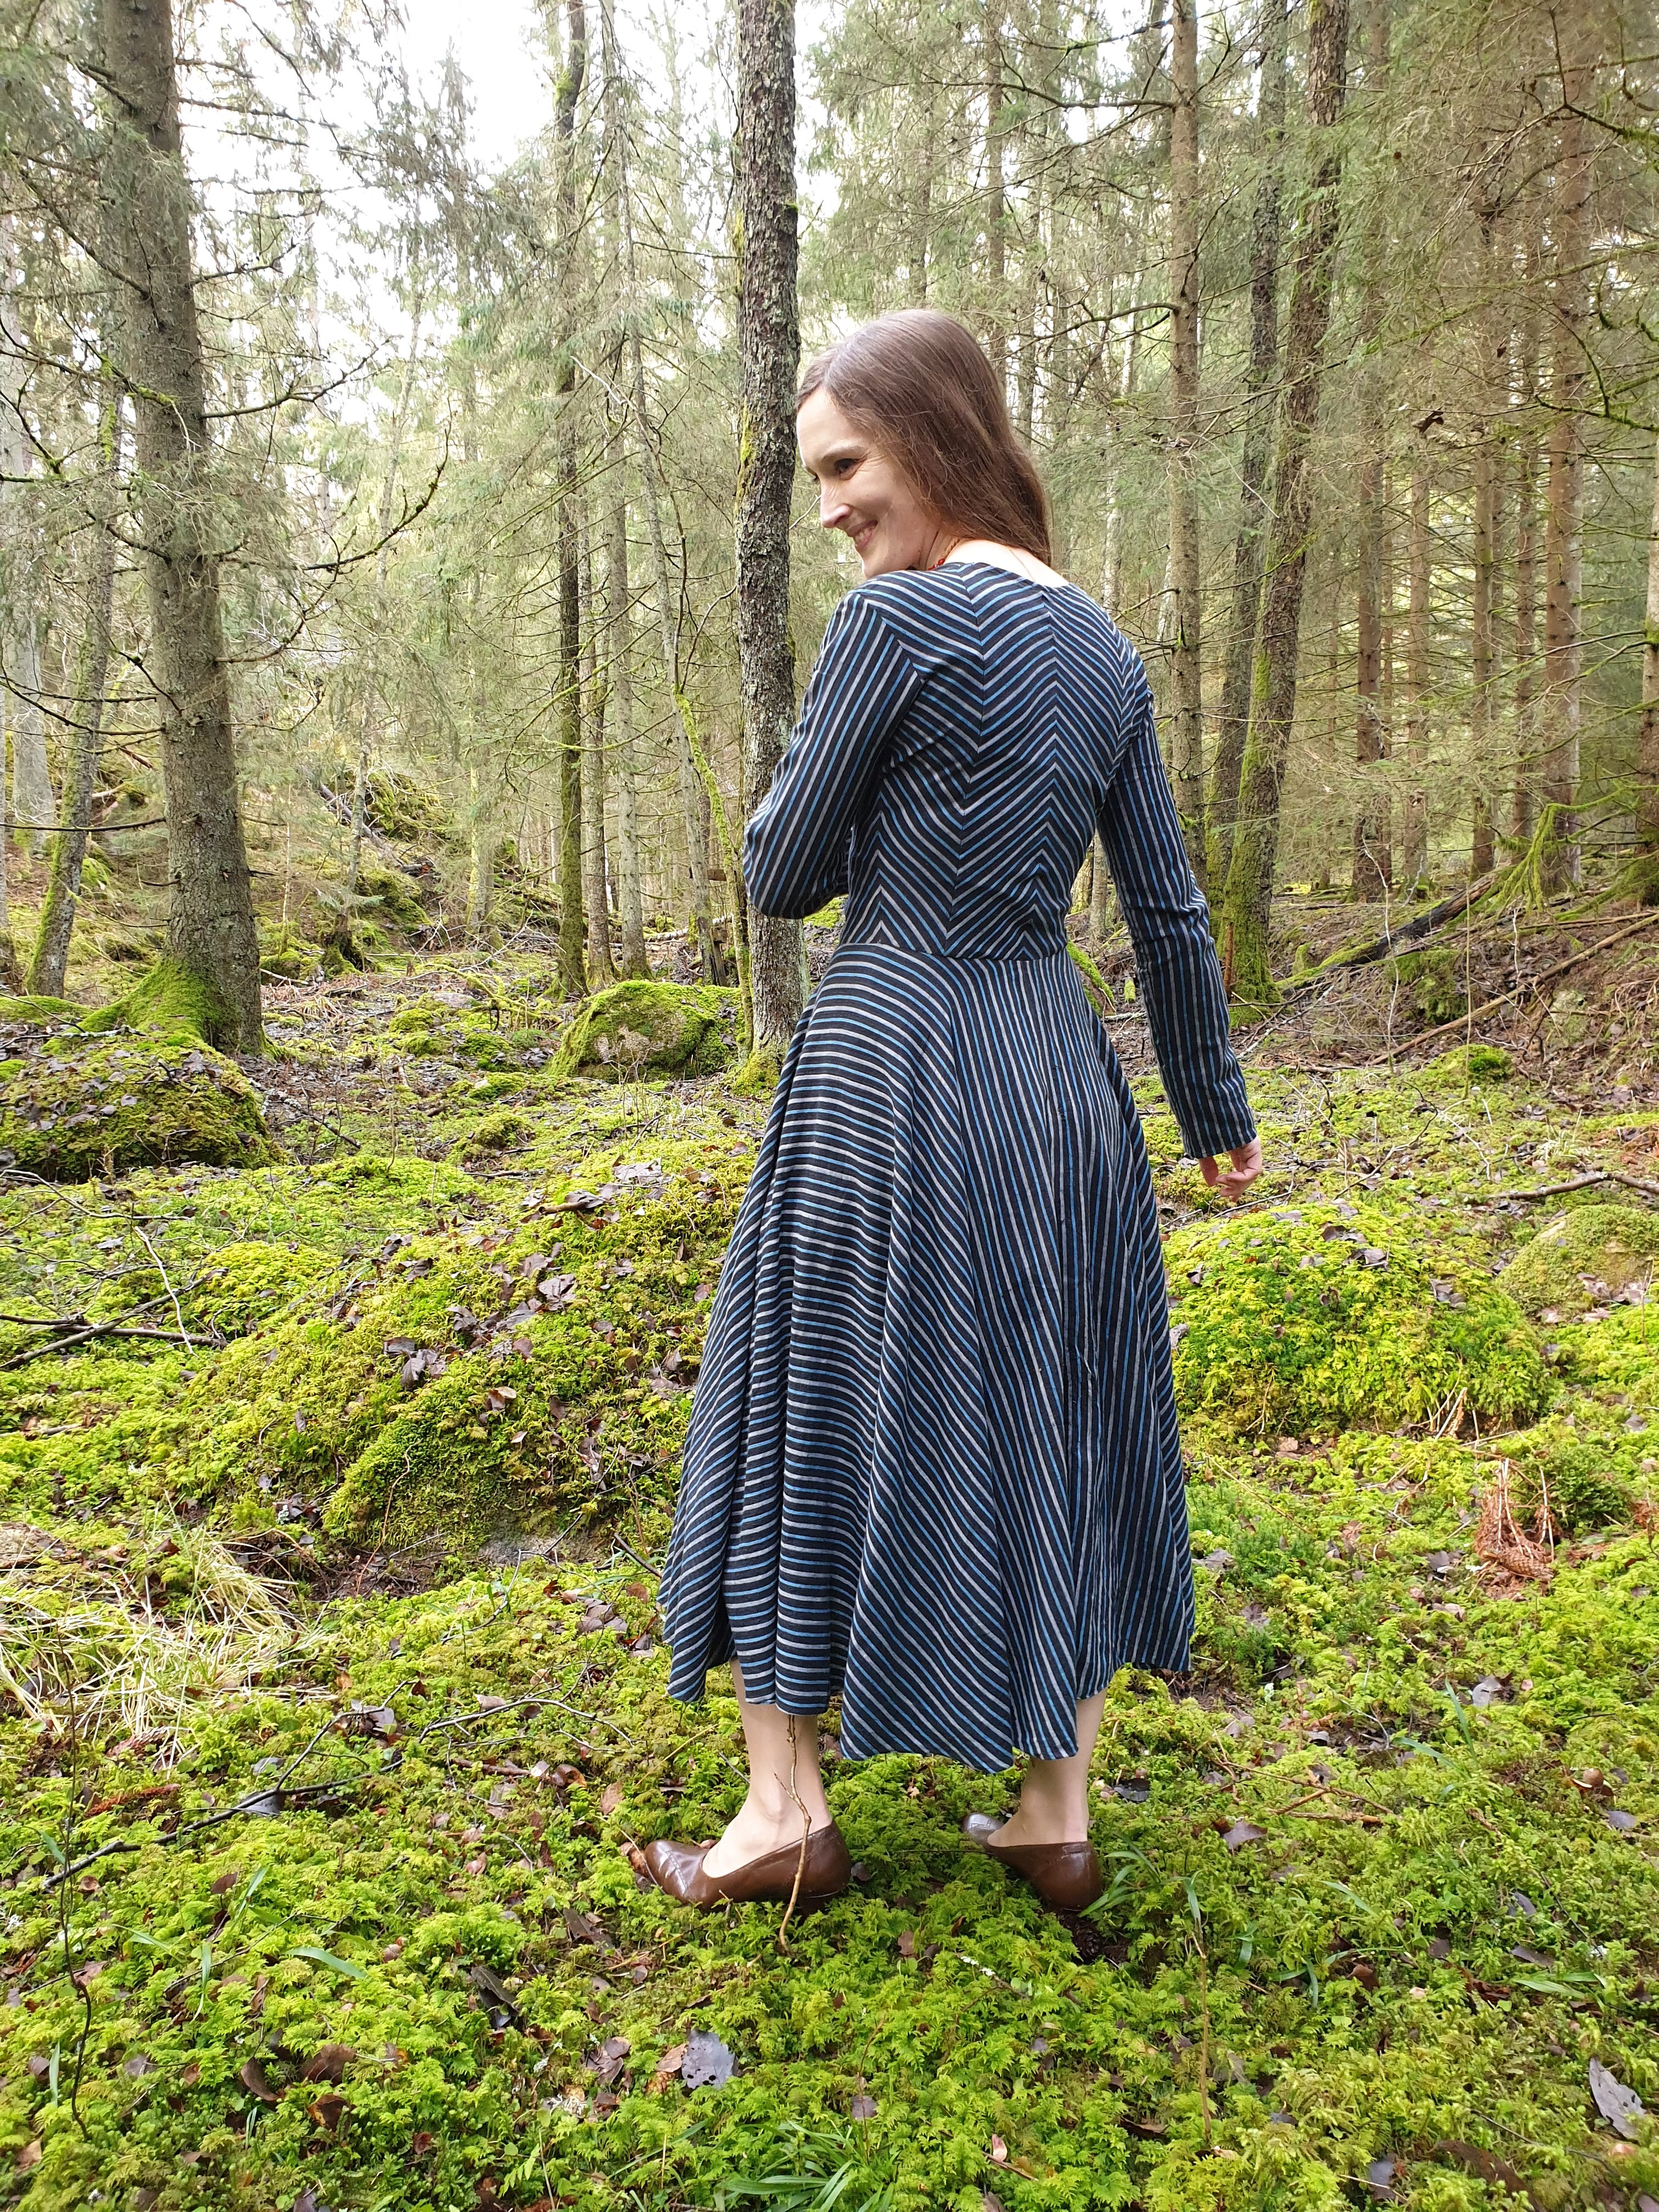
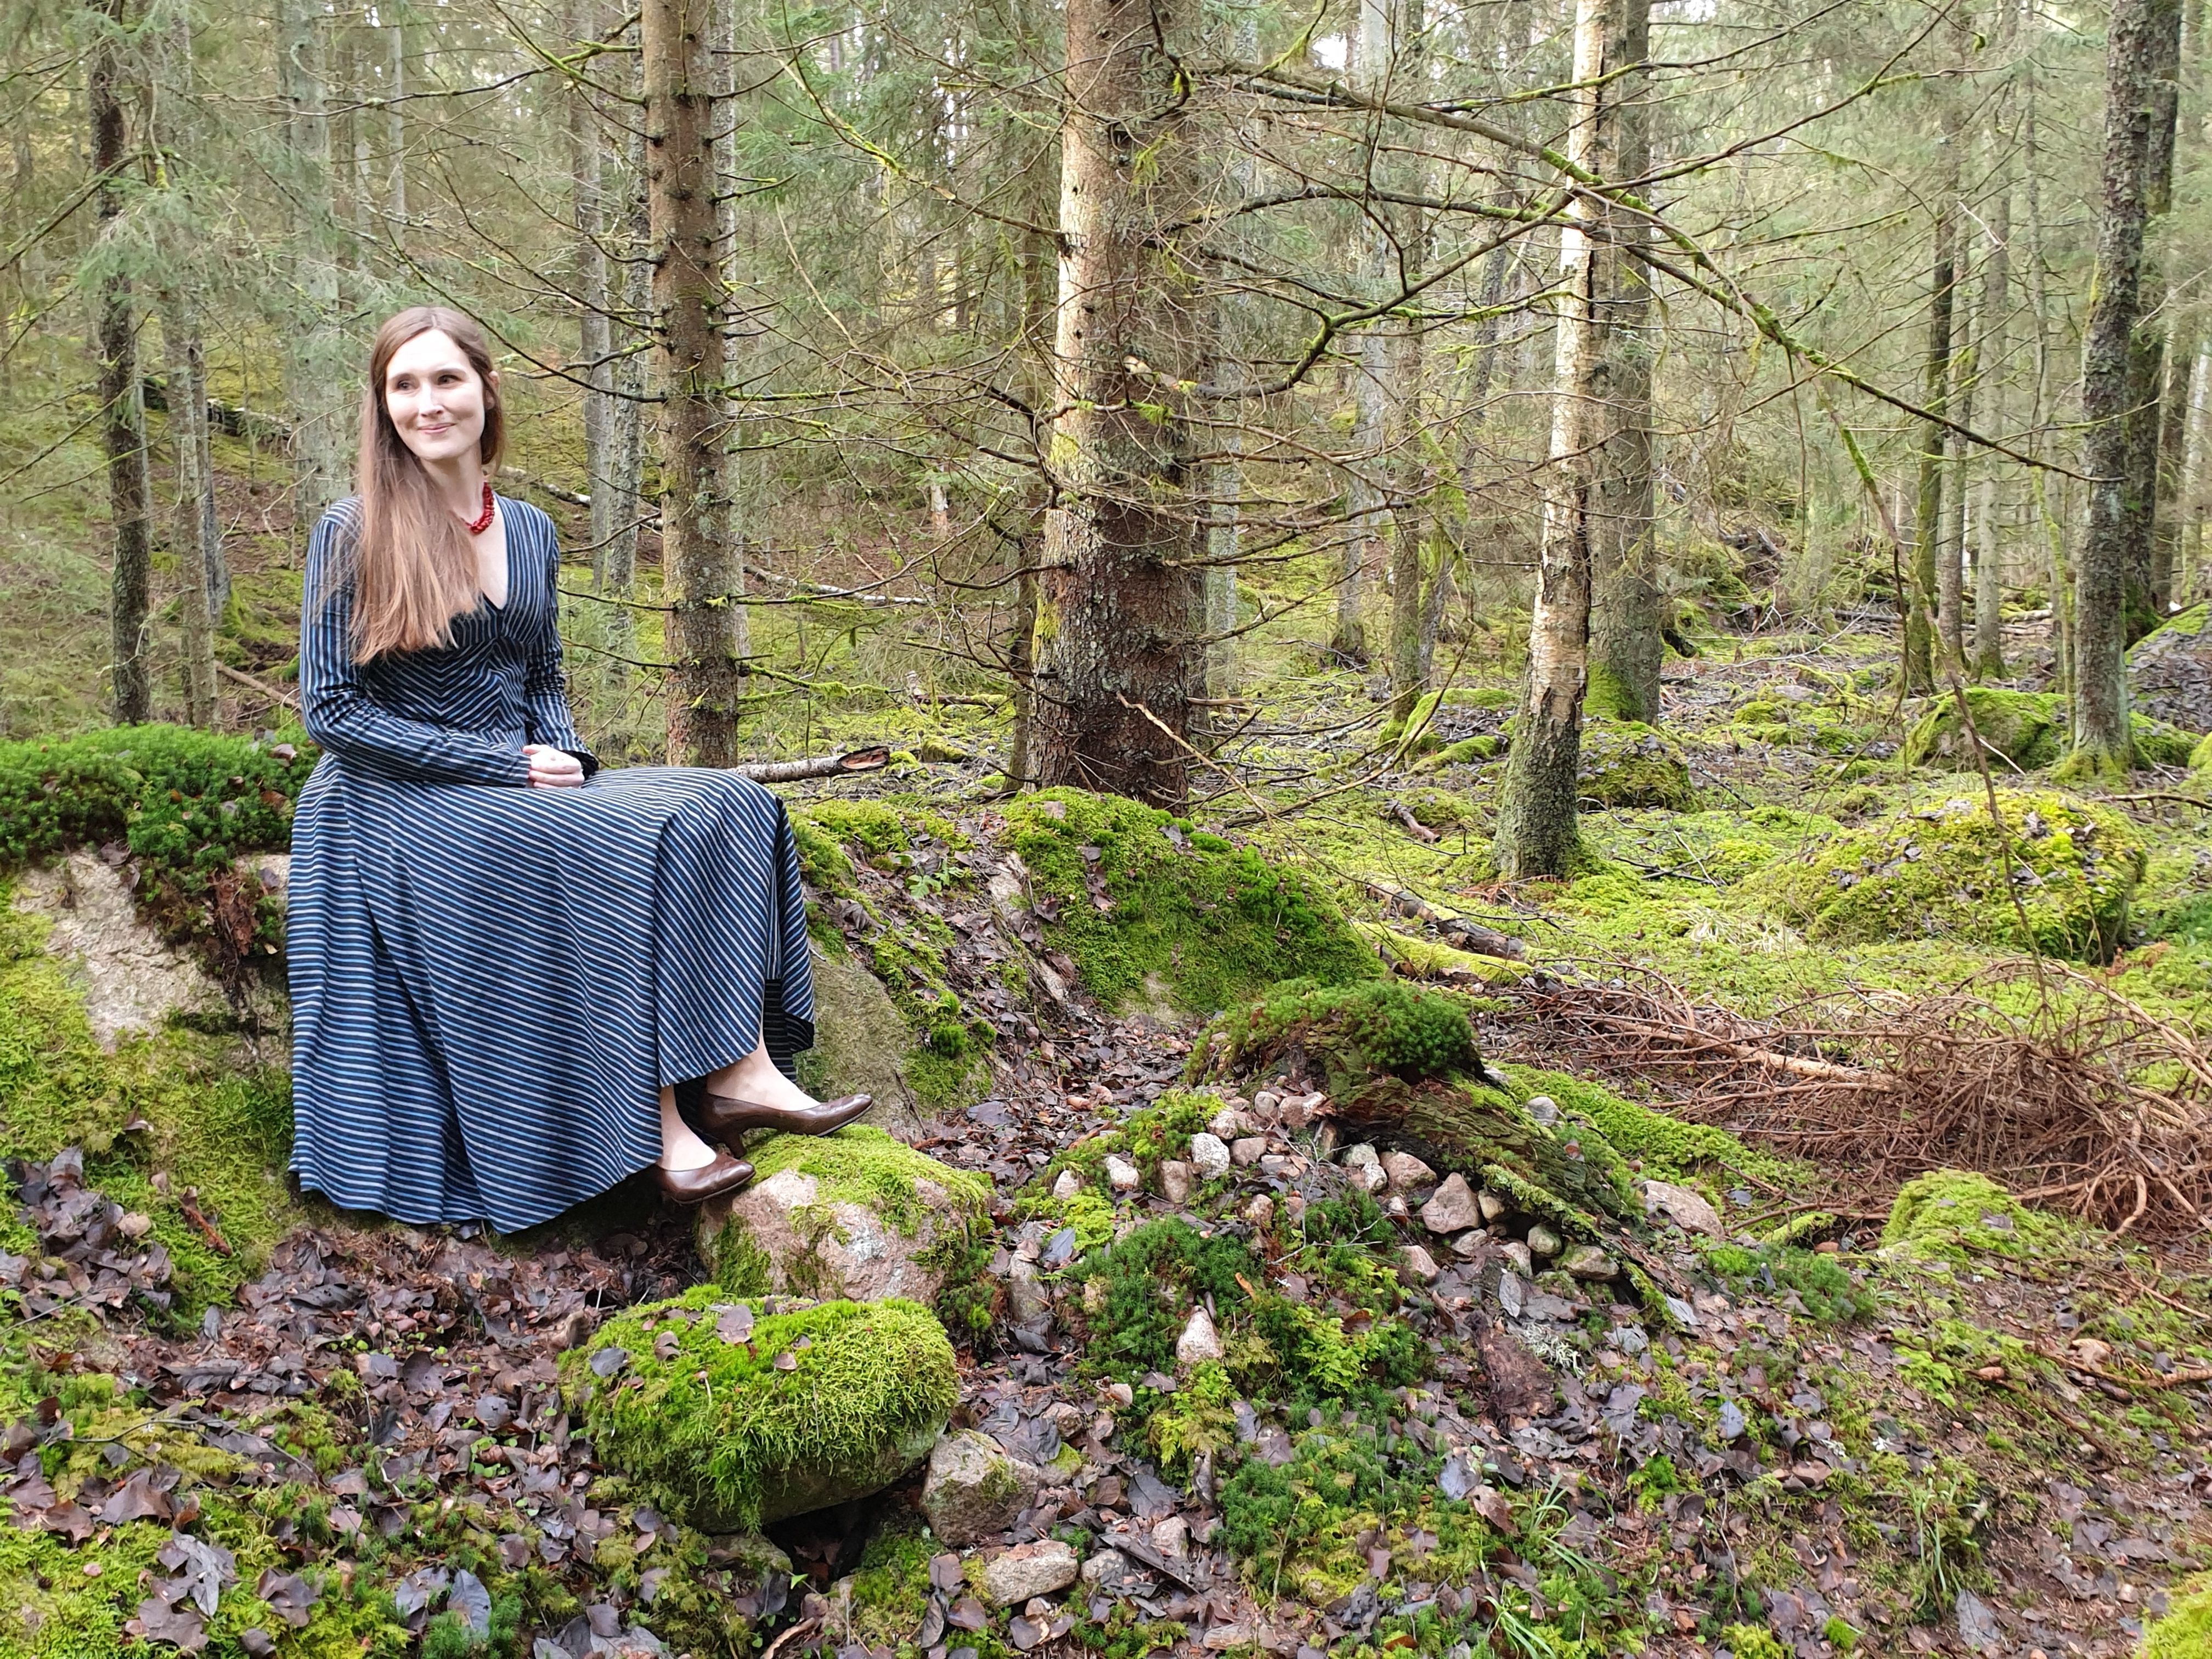
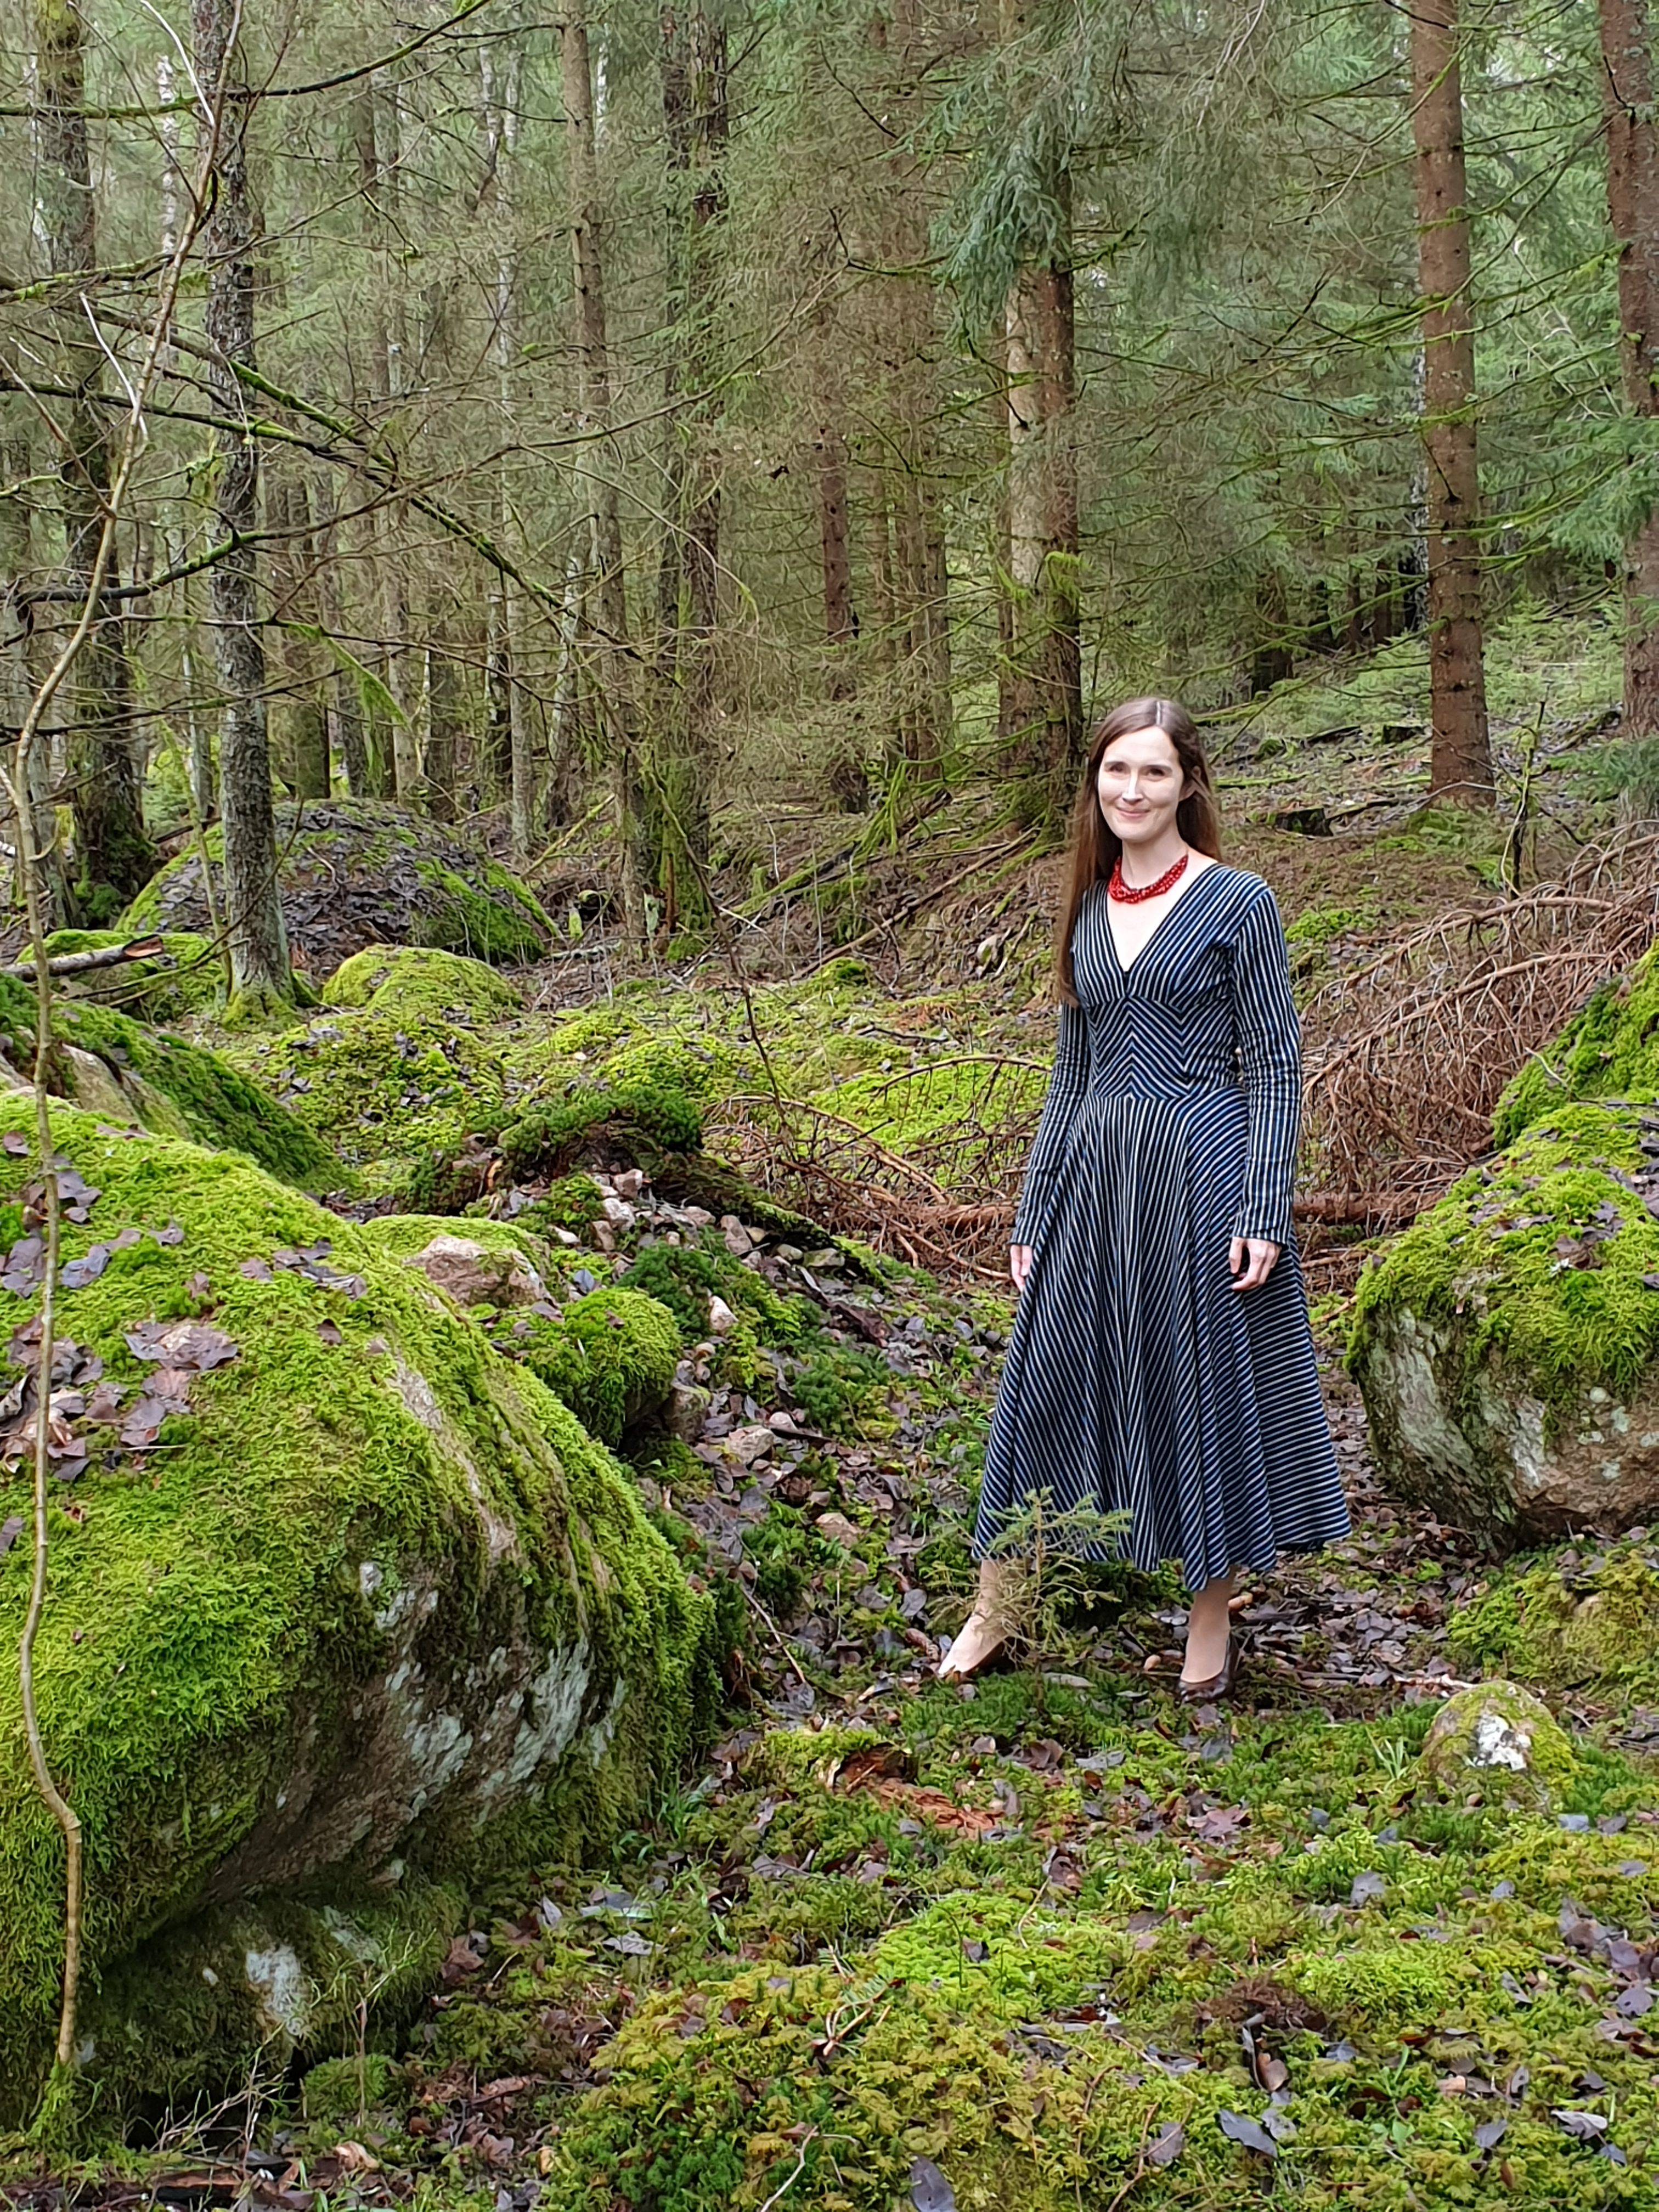
This ought to be my third dress from this same fabric (the others were both pregnancy dresses, one regency and one modern), that I bought for 200 SEK three years ago. Unfortunately, the fabric proves to be as bad quality as the price indicates – it falls apart after only one wash… Anyhow. I was eager to make a winter dress, suiting my less curvy body and I wanted to try something new. As I had plenty left of this striped fabric, I cut several smaller pieces and moved them around on the dress form until I found a combination that I liked. It was awfully time consuming to pattern match the stripes on the diagonal. After having sewn the pieces together, with perfect pattern matching, I found out that the fit was catastrophic. I had to disintegrate most of it and put it together again, with many more fittings. Finally, I had my dress, with good enough fit, but then I found out that the fabric was already falling apart… Well, I have something along the way: first and foremost, there should be a finished pattern before matching the stripes of so many small pieces, as the fit is otherwise bound to suffer at the expense of the pattern matching. What are your experiences with pattern matching?
Detta torde vara min tredje klänning sydd i samma randiga tyg, som jag köpte för 200 kronor för tre år sedan (båda de andra klänningarna var mammaklänningar, en modern och en empir). Tyvärr visar sig tyget ha precis så dålig kvalitet som priset antydde – det börjar falla isär efter bara en tvätt… Ja, ja. Jag var ivrig att sy en vinterklänning som skulle passa min nya, plattare kropp och ville testa något nytt. Jag hade massor kvar av det randiga tyget, så jag klippte till flera mindre tygbitar och flyttade omkring dem på provdockan tills jag hittade en kombination som tilltalade mig. Det tog otroligt lång tid att mönsterpassa de diagonala linjerna. Efter att ha sytt ihop alla delar med perfekt mönsterpassning insåg jag att passformen istället var en katastrof. Jag var tvungen att sprätta upp det mesta och sätta ihop bitarna igen och prova klänningen många gånger innan jag slutligen vågade sy ihop bitarna igen. När min klänning äntligen var klar och hade acceptabel passform insår jag att tyget redan börjat gå sönder… Jag har åtminståne lärt mig något på vägen: först och främst bör man ha ett färdigt mönster innan man börjar experimentera med mönsterpassningen av så många små bitar, annars kommer passformen försämras till förmån för en perfekt mönsterpassning. Vad har du för erfarenheter av mönsterpassning?
The dress consists of four underbust pieces and two bust pieces with darts on the front, with a hidden zipper in the mid front. On the back, there are four pieces. The skirt consists of two pieces, forming a whole cirkle skirt. And two arms, off course.
Klänningen består av fyra “underbyst-bitar” och två “bystbitar” med inprovningar och med en dold dragkedja mitt fram. Ryggdelen består av fyra delar. Kjolen består av två delar som samman bildar en hel cirkel. Och så två ärmar, förstås. There are some wrinkles going on, that I do not know whether they depend on the not so sturdy fabric or my bad pattern making. The wrinkles on the sides of the bust were impossible to get rid of without cutting new pieces of fabric after my dreadful discovery about the fit. I just try my best not to think about them.
Det är små veck överallt på klänningen, som jag inte vet om de beror på det veka tyget eller min slarviga tillskärning. Vecken på sidorna av bysten beror definitivt på tillskärningen och var omöjliga att bli av med utan att klippa ut nya bitar, vilket var uteslutet för en rastlös själ som jag, eftersom bitarna redan var sammanfogade med ärmarna och de knepiga ryggbitarna. Jag gör bara mitt bästa för att inte tänka på vecken.
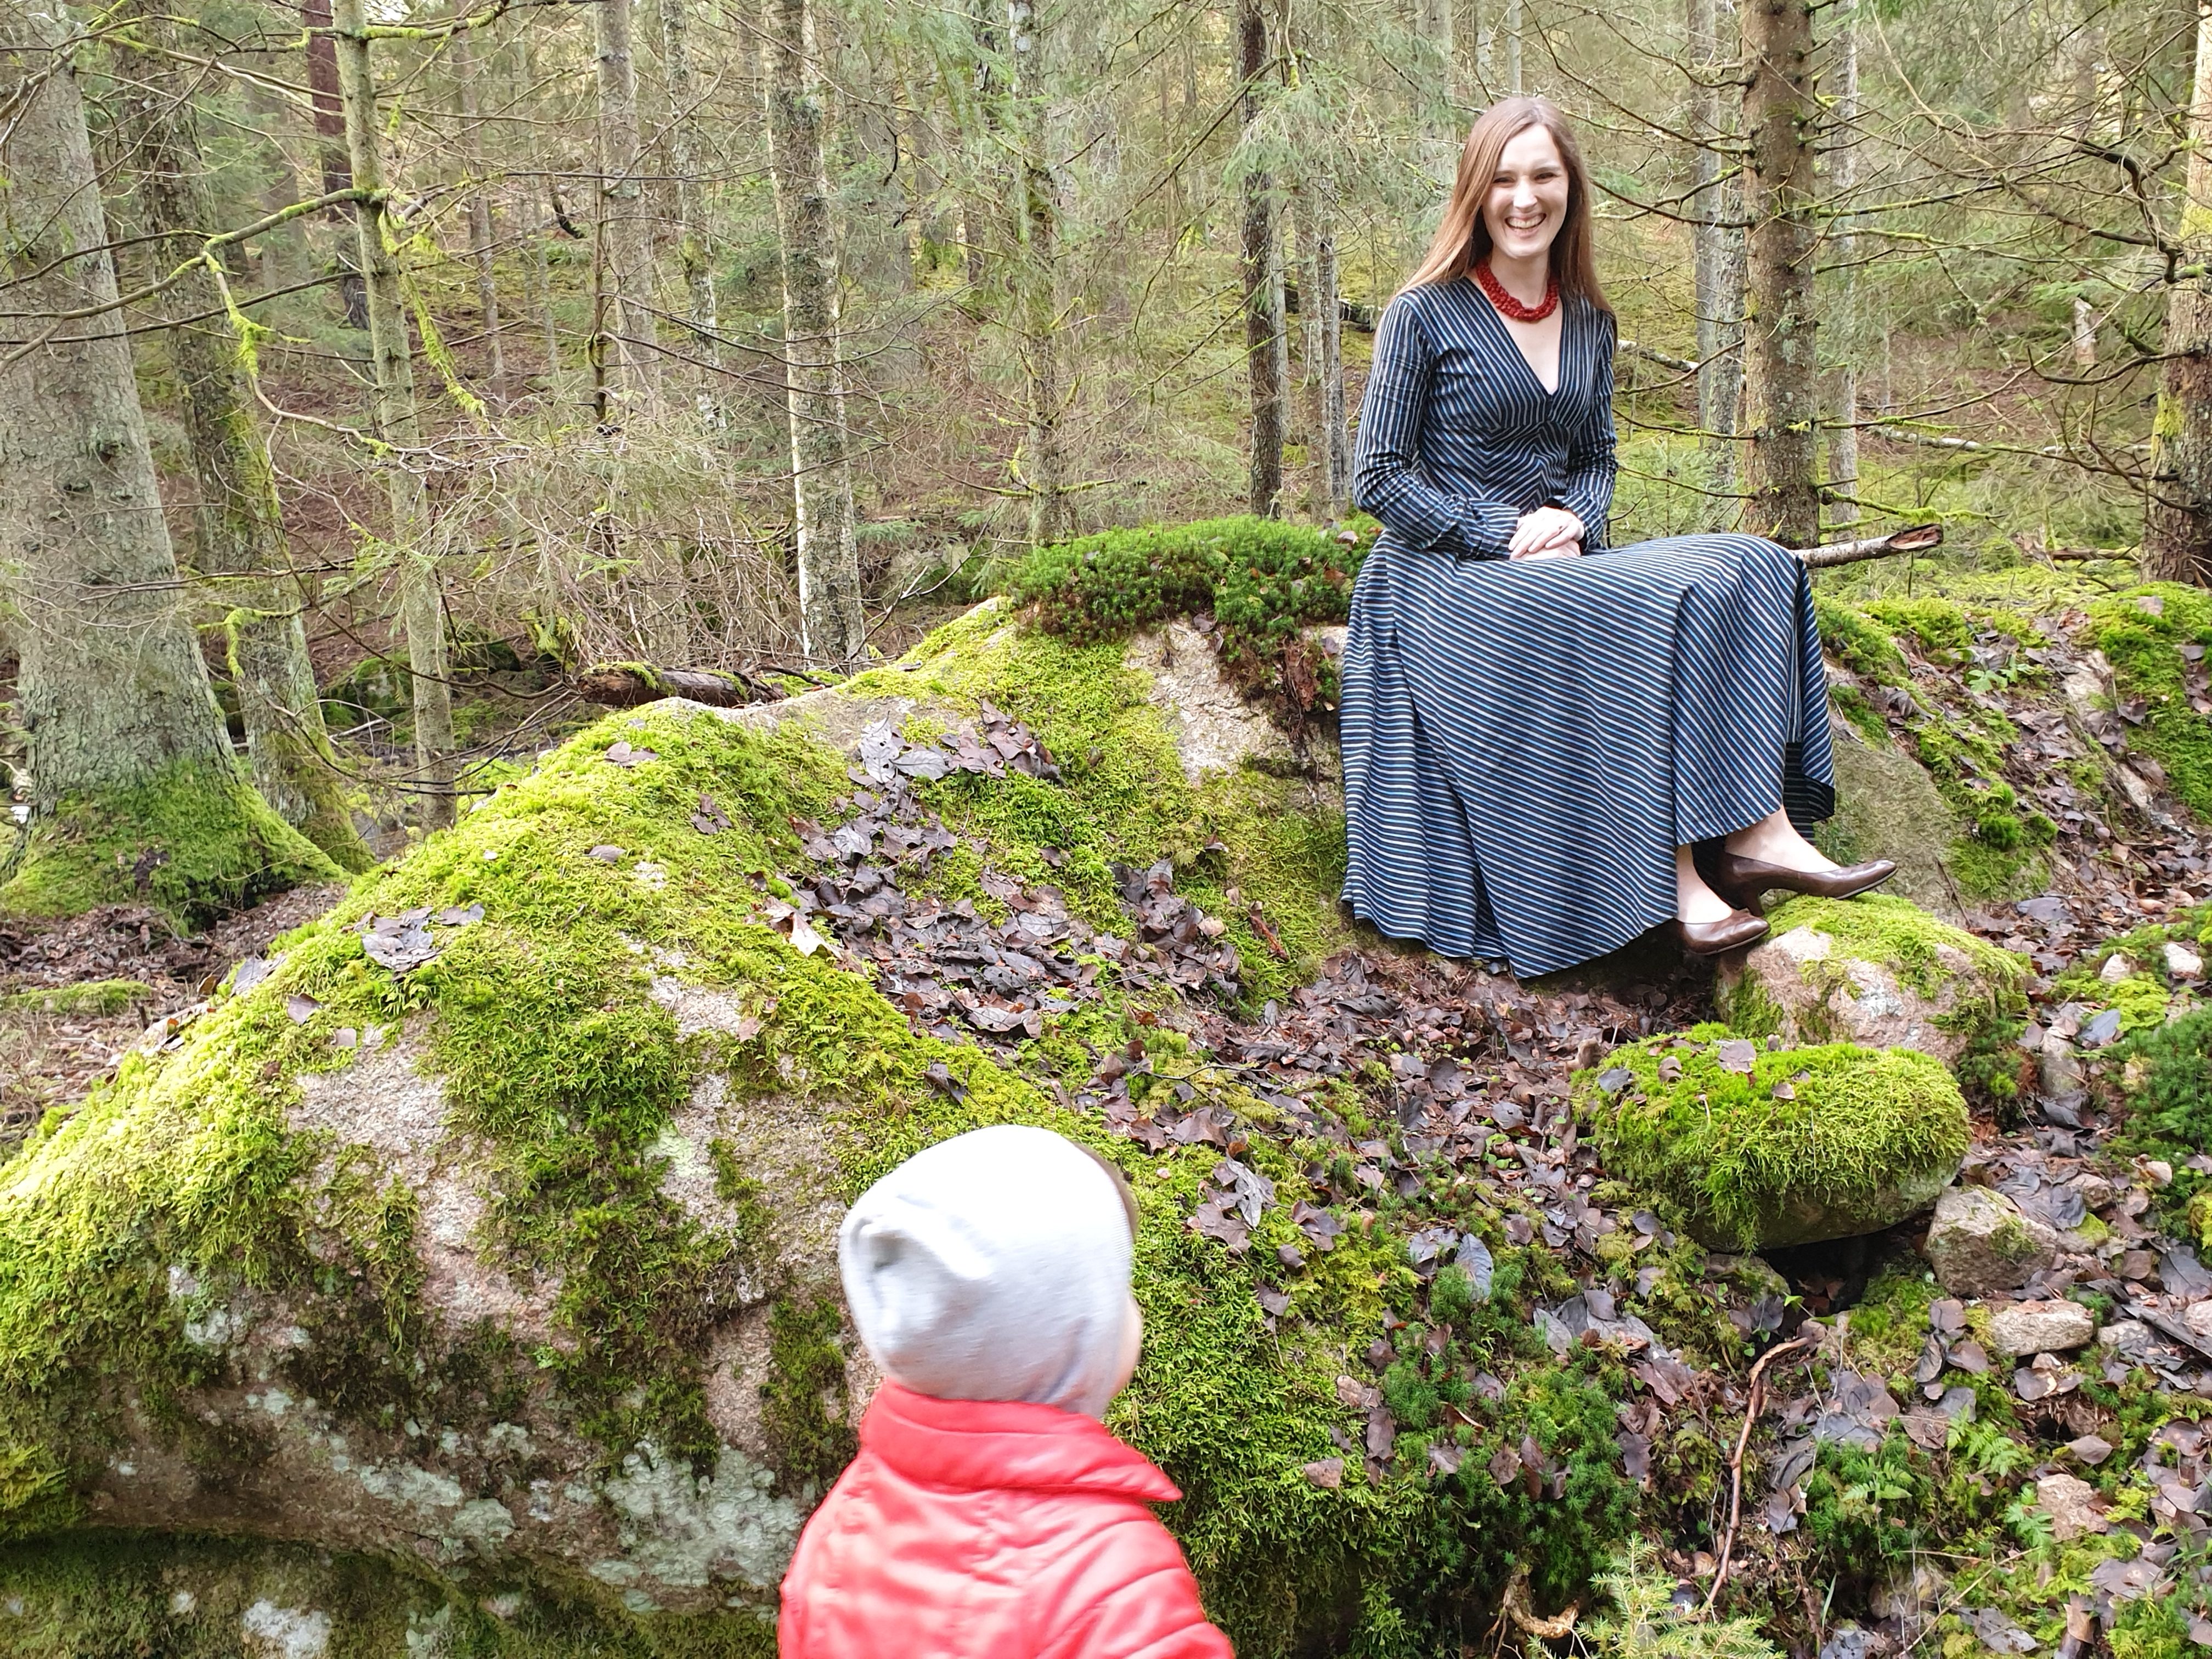
A photobombing child is one of the most effective ways to forget about wrinkles.
Ett barn som stövlar in på fotot är bland de bästa sätten att komma på andra tankar.
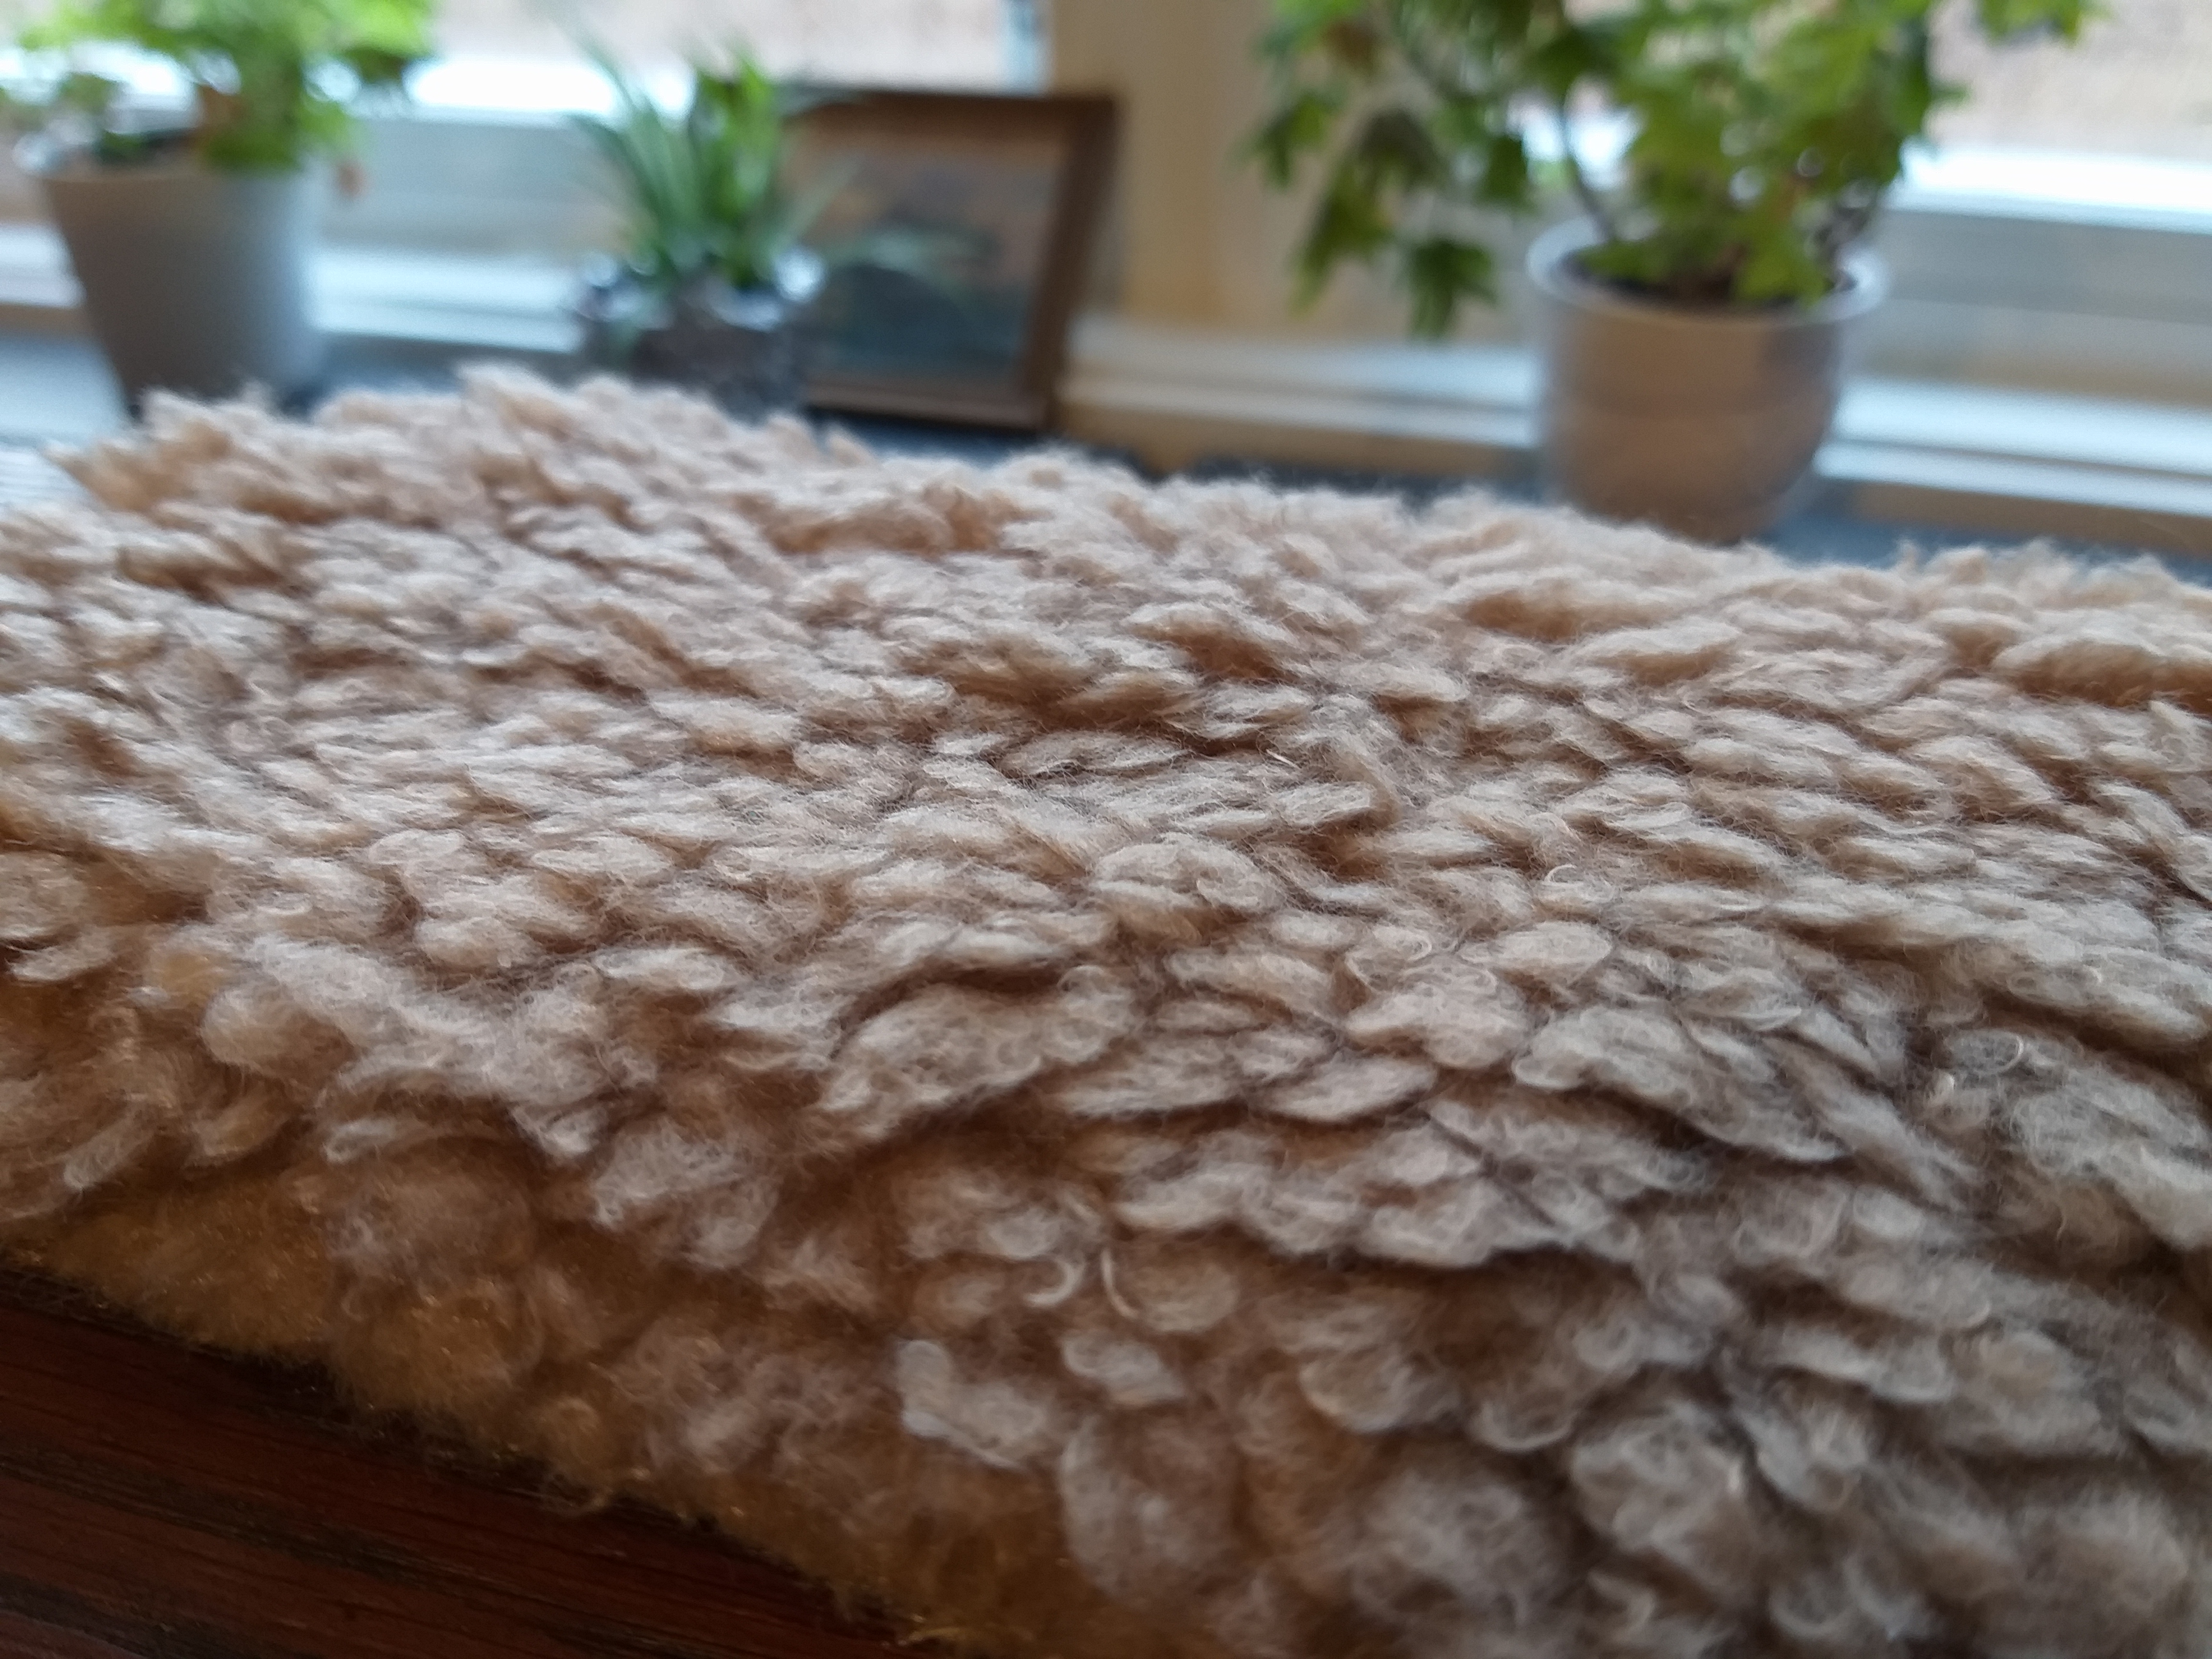
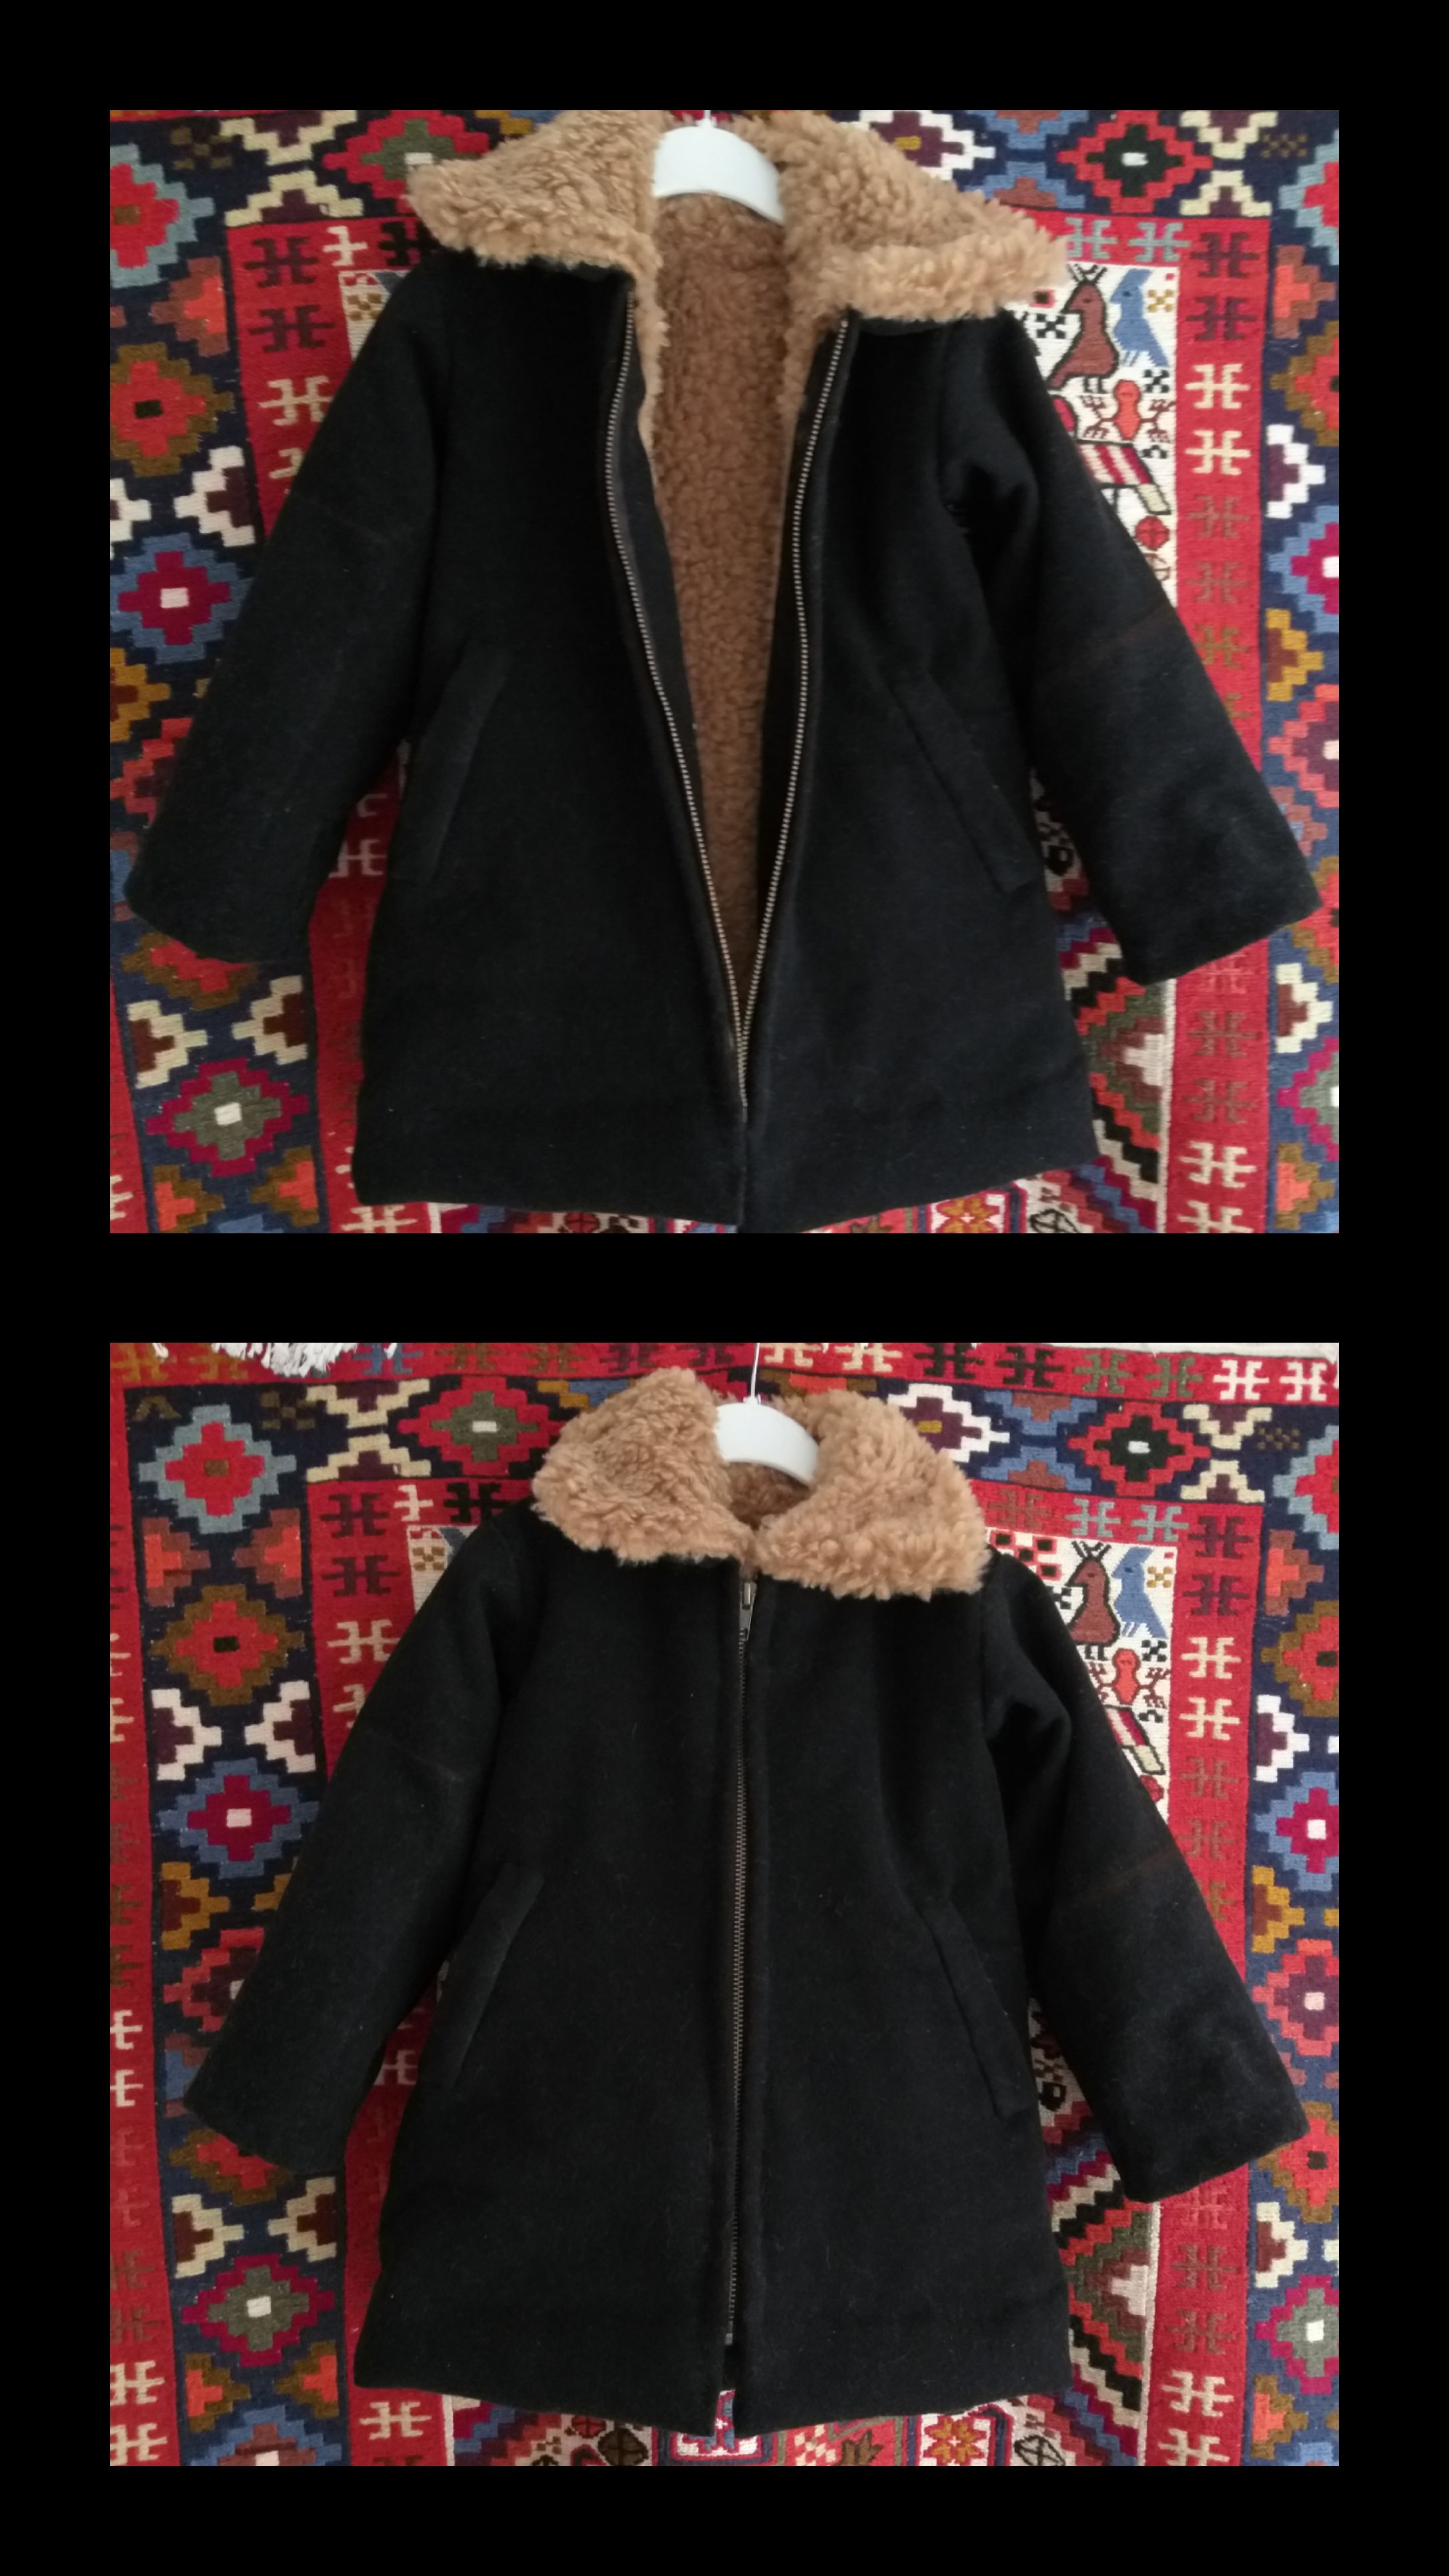
Last year I disintegrated my sister’s old wool winter jacket (she let me, I promise) in order to reuse the lining for my red winter coat. Originally, I planned to use the wool for my nephew’s medieval clothes, but when I had the vlieseline (?) removed, it was too sticky on the wrong side. So I saved it in my stash. When I found this fluffy faux fur at Panduro, I knew just what to use it for! It’s so fluffy I’m gonna die!
Förra året sprättade jag upp min systers gamla vinterjacka (hon tillät det, jag lovar), för att kunna återanvända jackans foder till min röda kappa. Jag sparade yttertyget, som var ett fint ylle. Jag tänkte använda tyget till min systersons medeltidskläder, men det när jag hade tagit bort det stadgande materialet (vlieseline?) var det alldeles för sticksigt, så det fick ligga kvar i tyglagret. När jag hittade denna fluffiga fuskpäls visste jag precis vad jag skulle använda yllet till! Det är så fluffigt att jag dör!
I made a new pattern, tracing the outer lines from my son’s favourite jacket, but adding one centimeter at every side, except at the bottom, where I added one decimeter. I thought about hiding a zipper behind a flap (?) and adding fancy metal buttons, that my son adores, but it seemed too intricate to sew and for a child to put on by himself.
Jag ritade ett nytt mönster genom att rita en centimeter utanför varje kant på hans favoritjacka. Nertill la jag till en decimeter. Jag funderade över att ha en dragkedja dold under en flärp med fina metallknappar, som han älskar, men det verkade vara för knepigt både att sy och för en tvååring att hantera.
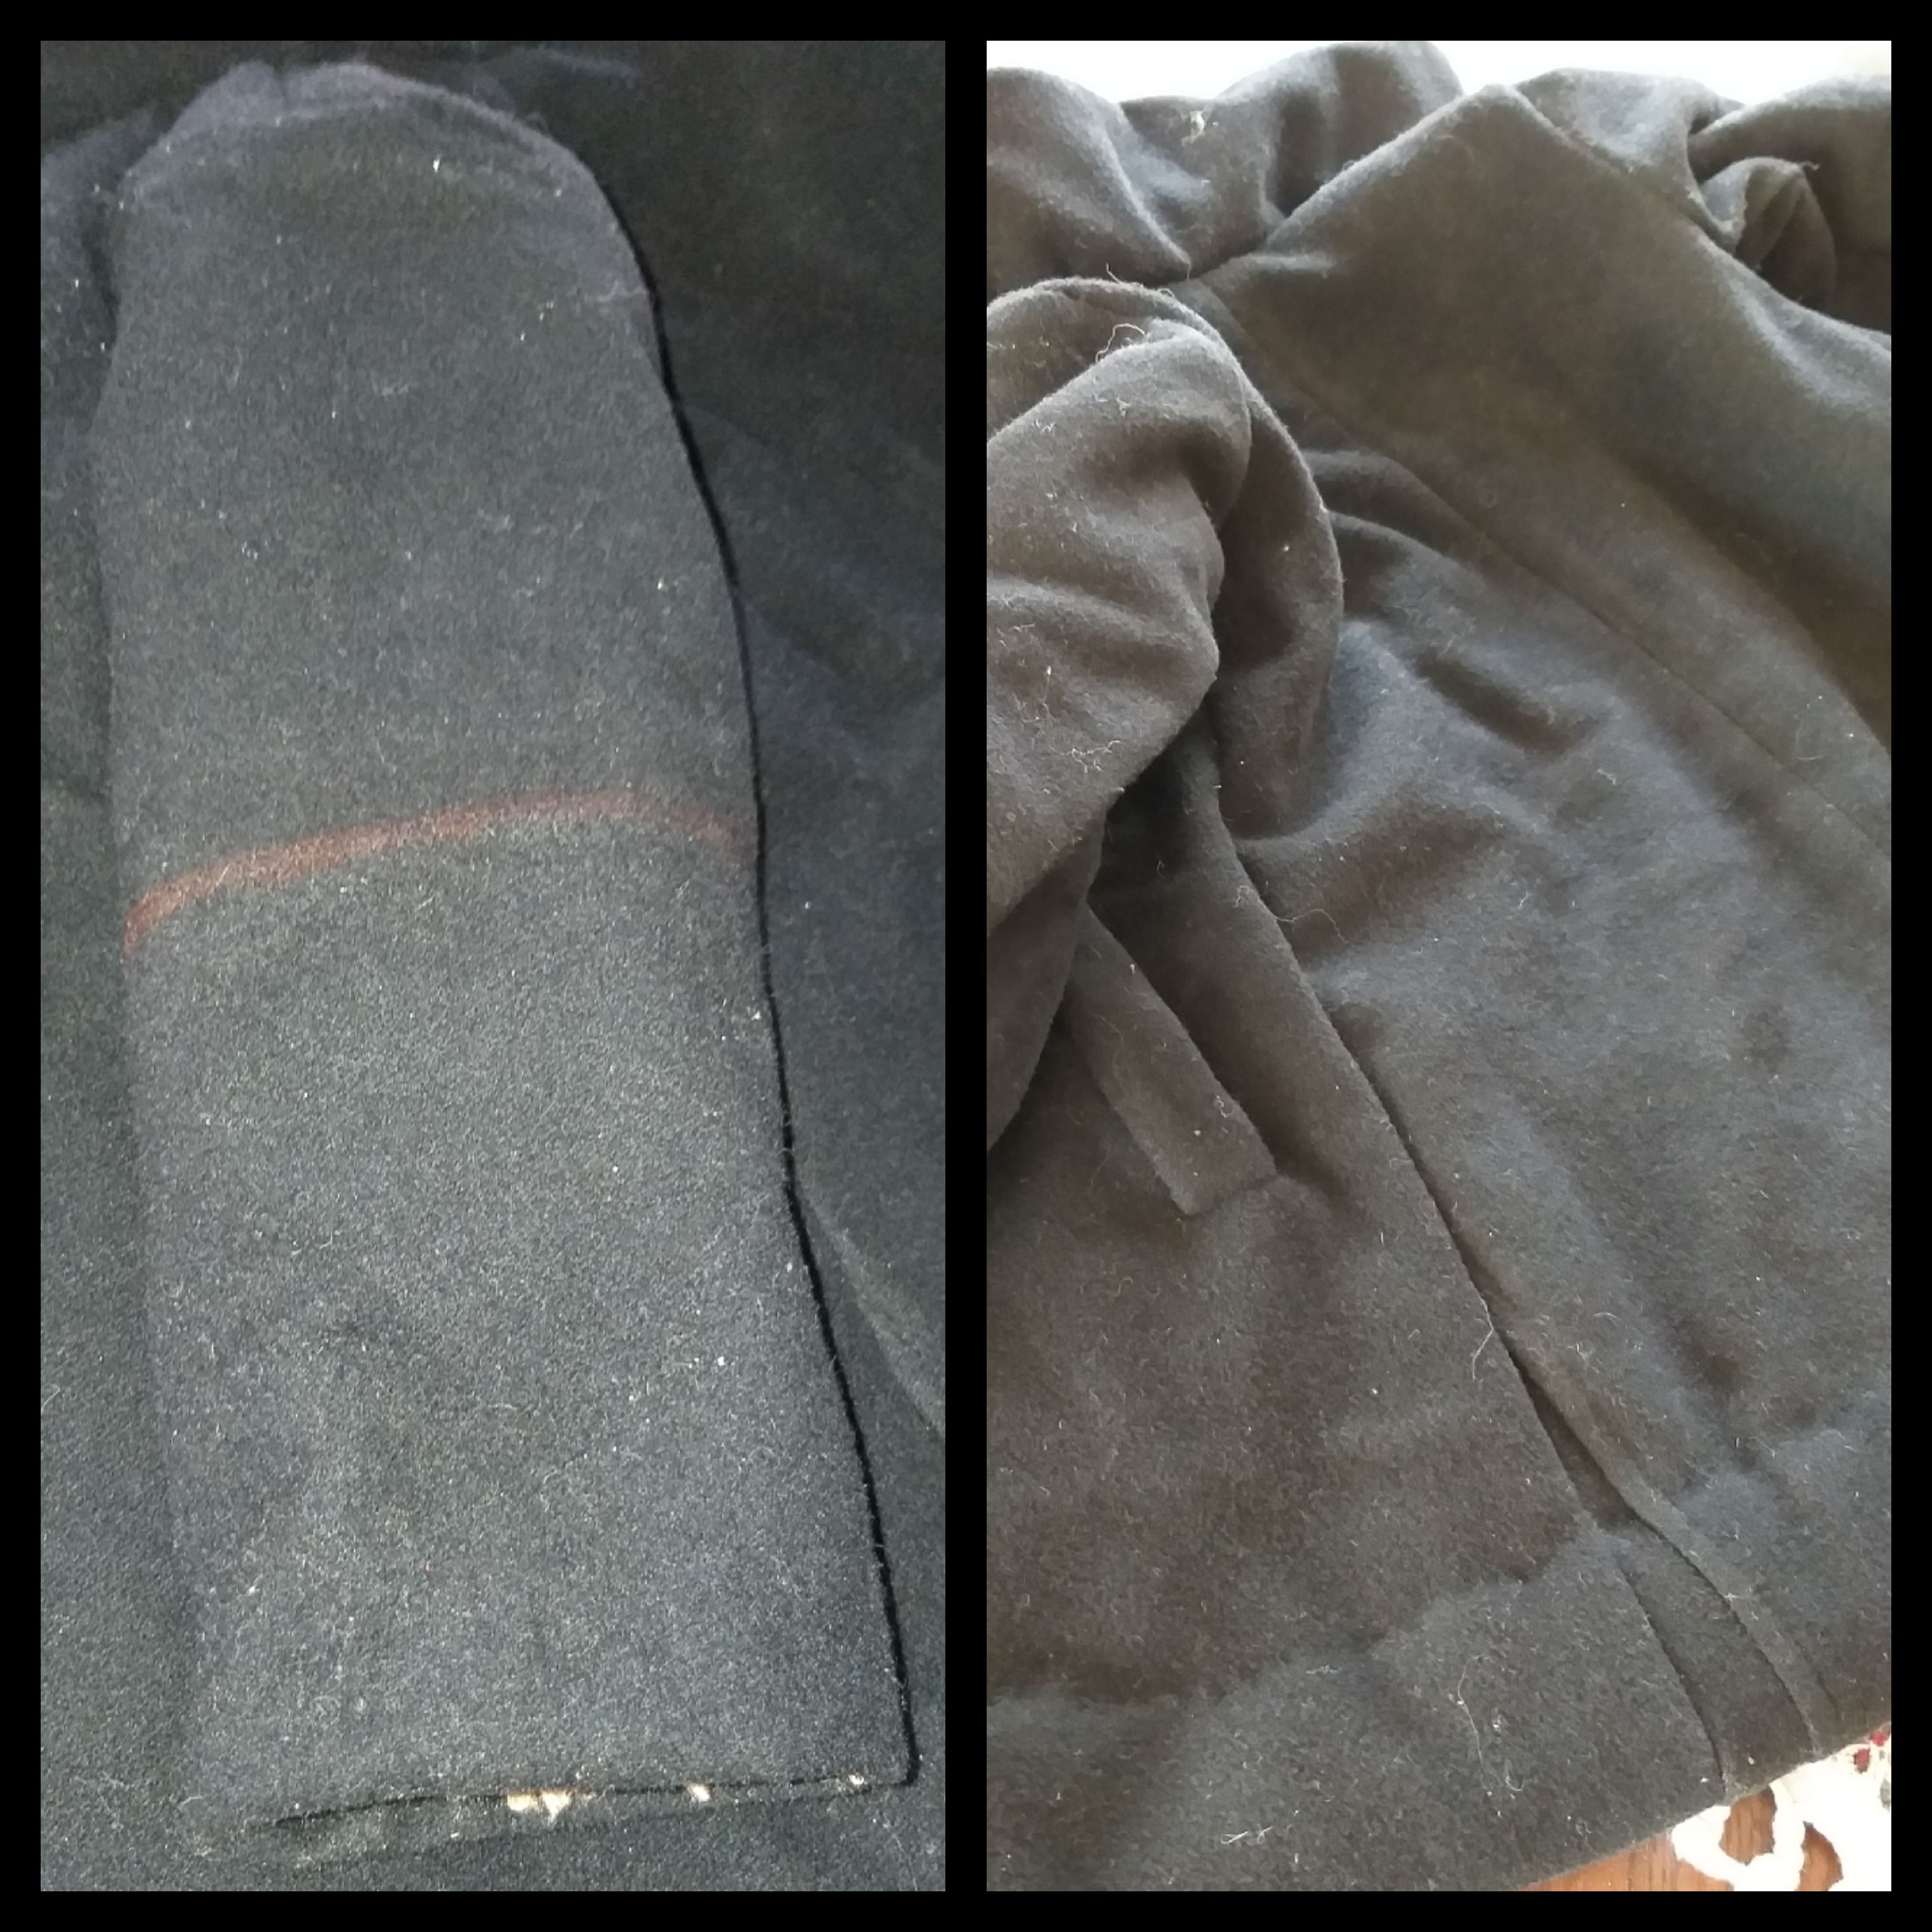
I removed the old pockets and used this part for arms. Unfortunately the fabric behind the pocket seams had a lighter colour, which I unsuccessfully tried covering up with black ink. Obviously the ink reflects sunlight very well… I had to make some piecing together, as you see.
Jag sprättade bort de gamla fickorna och använde dessa tygstycken till ärmarna. Tyvärr visade sig tyget under sömmarna ha blivit ljusare, vilket jag försökte maskera med svart tush. Tushet reflekterar visst solljuset väldigt bra… Som du ser fick jag skarva en del för att få tyget att räcka.
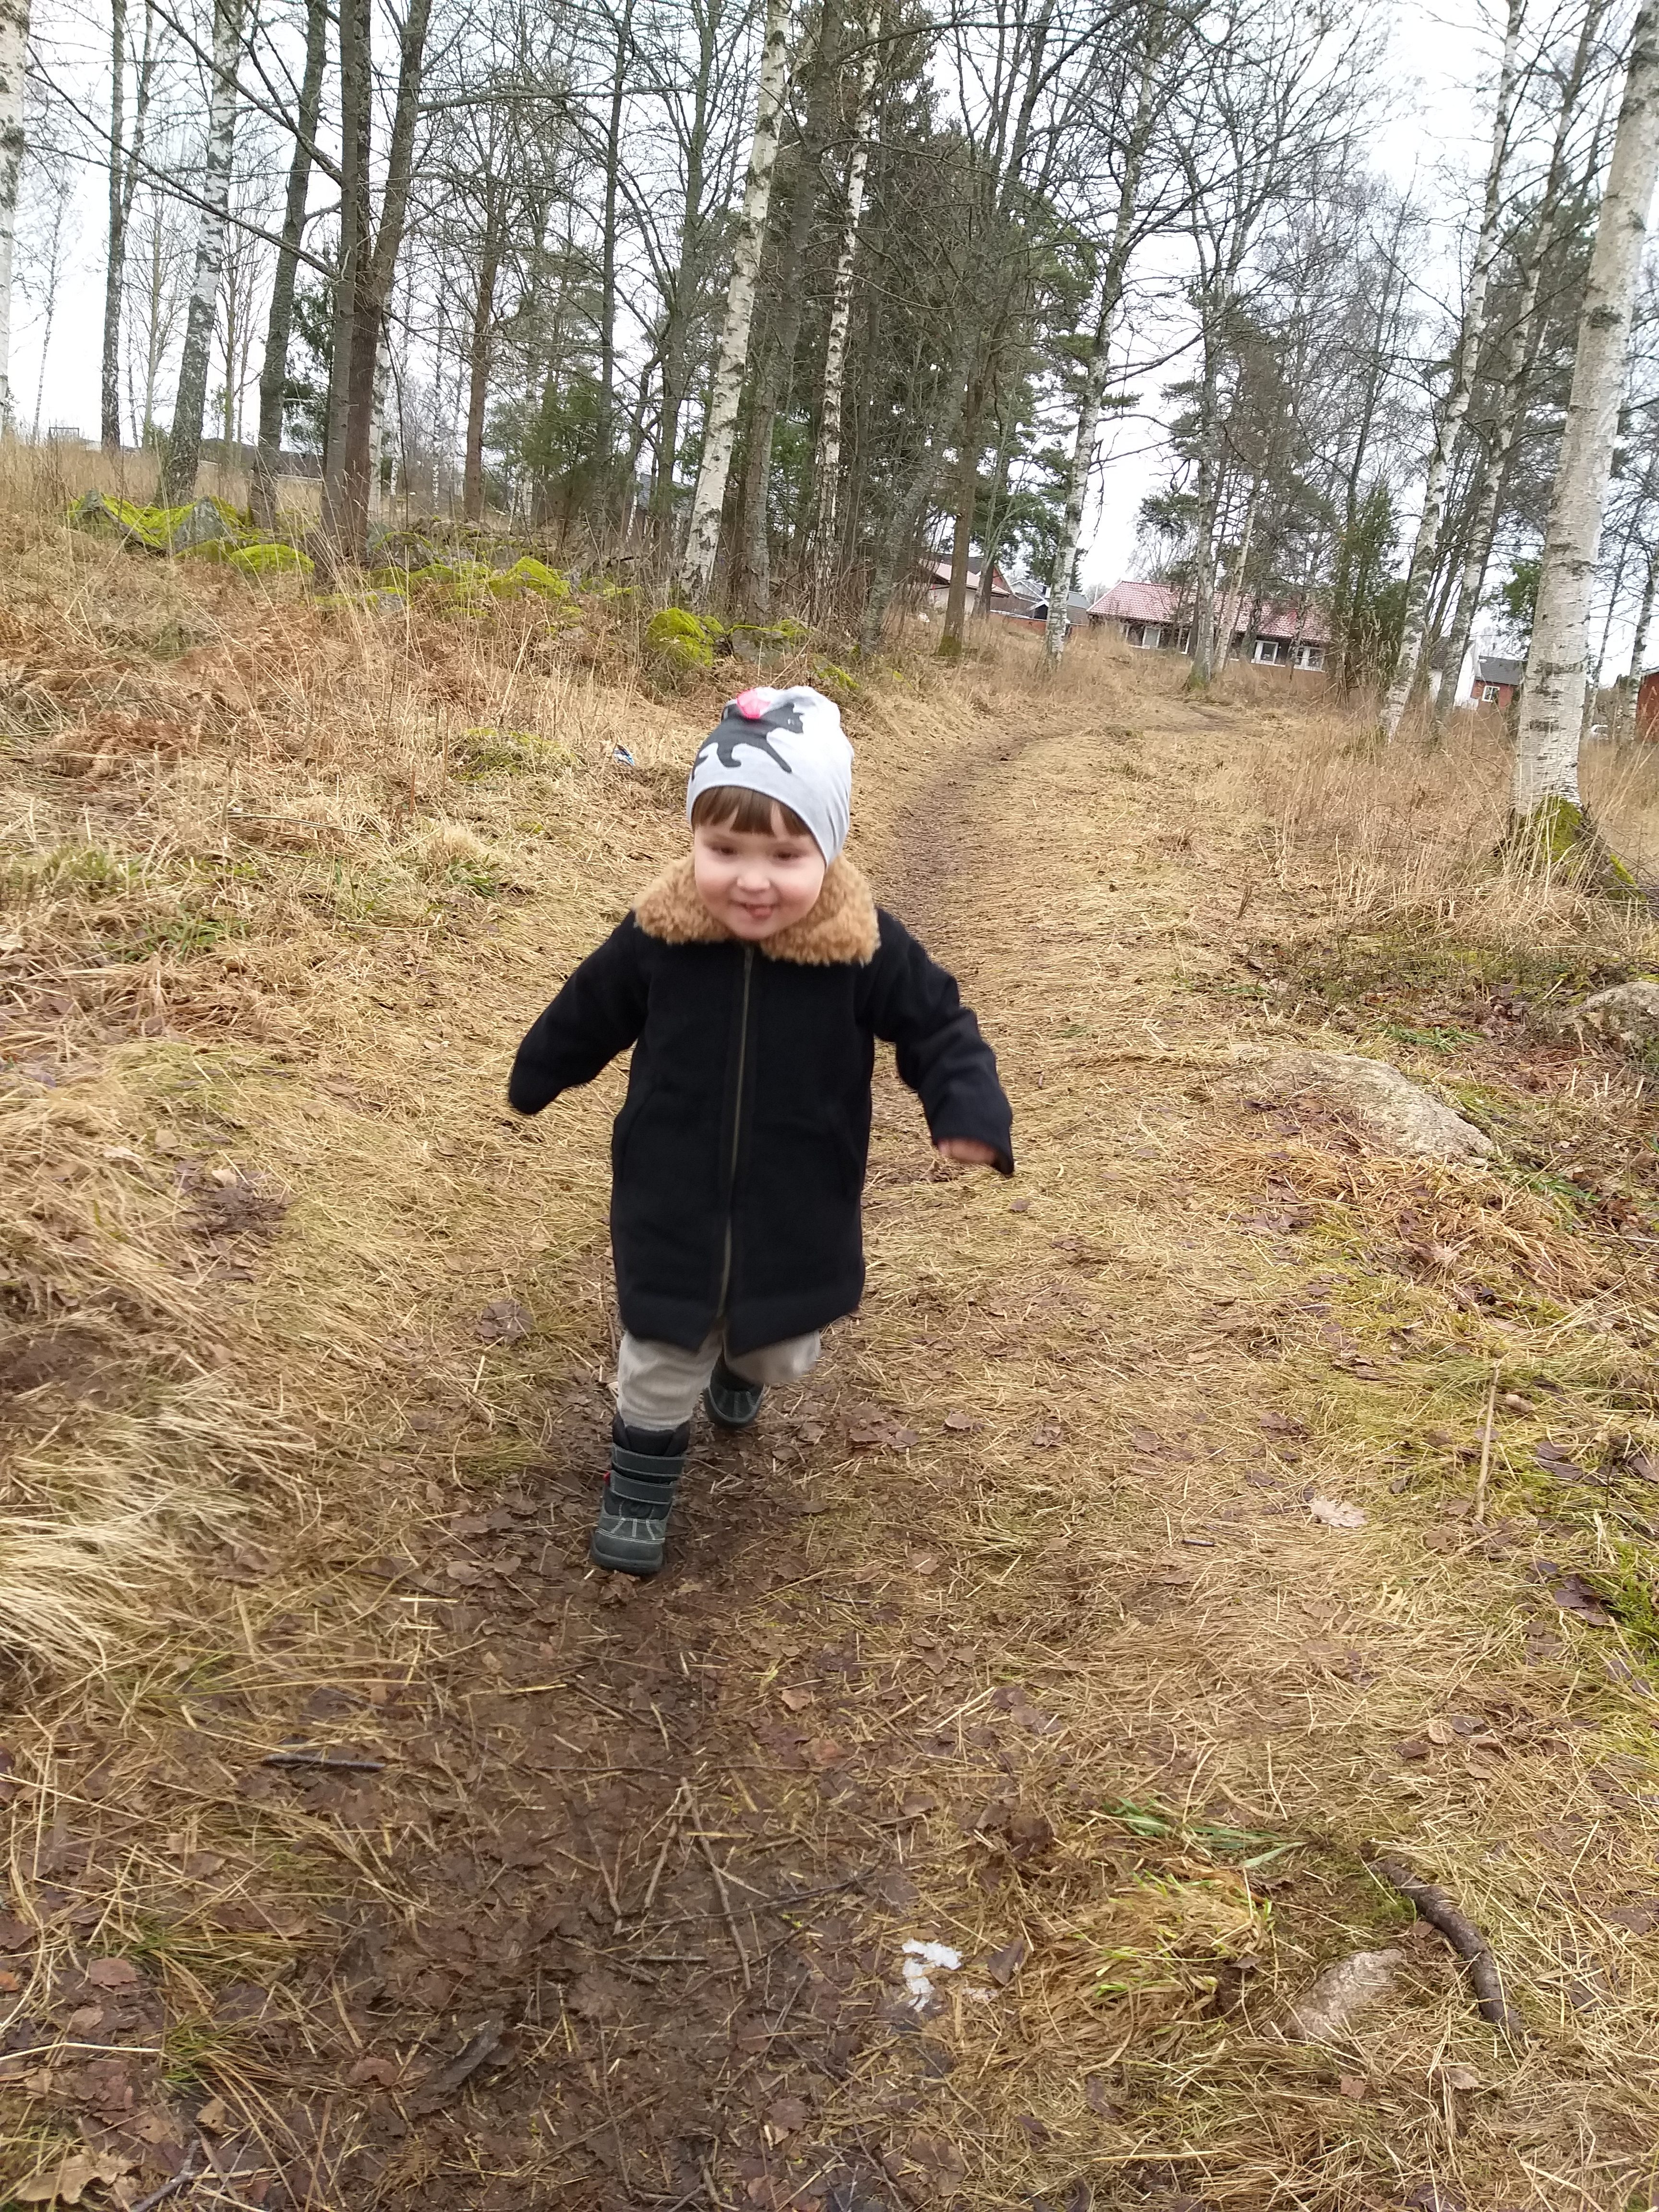
When he first tried the jacket on, he began crying and wouldn’t try it again for a few days. Today, I realized that there was a needle left in the faux fur. After removing it, he loved this jacket. He described it as “Awesome! Cozy!”. I am so pleased!
När han testade jackan första gången började han gråta och vägrade ta på den igen. Idag upptäckte jag att en nål gömt sig i den fluffiga fuskpälsen. Efter att jag tagit bort den älskade han sin nya jacka. Han beskrev den som “Häftig! Mysig!” Jag är så glad!
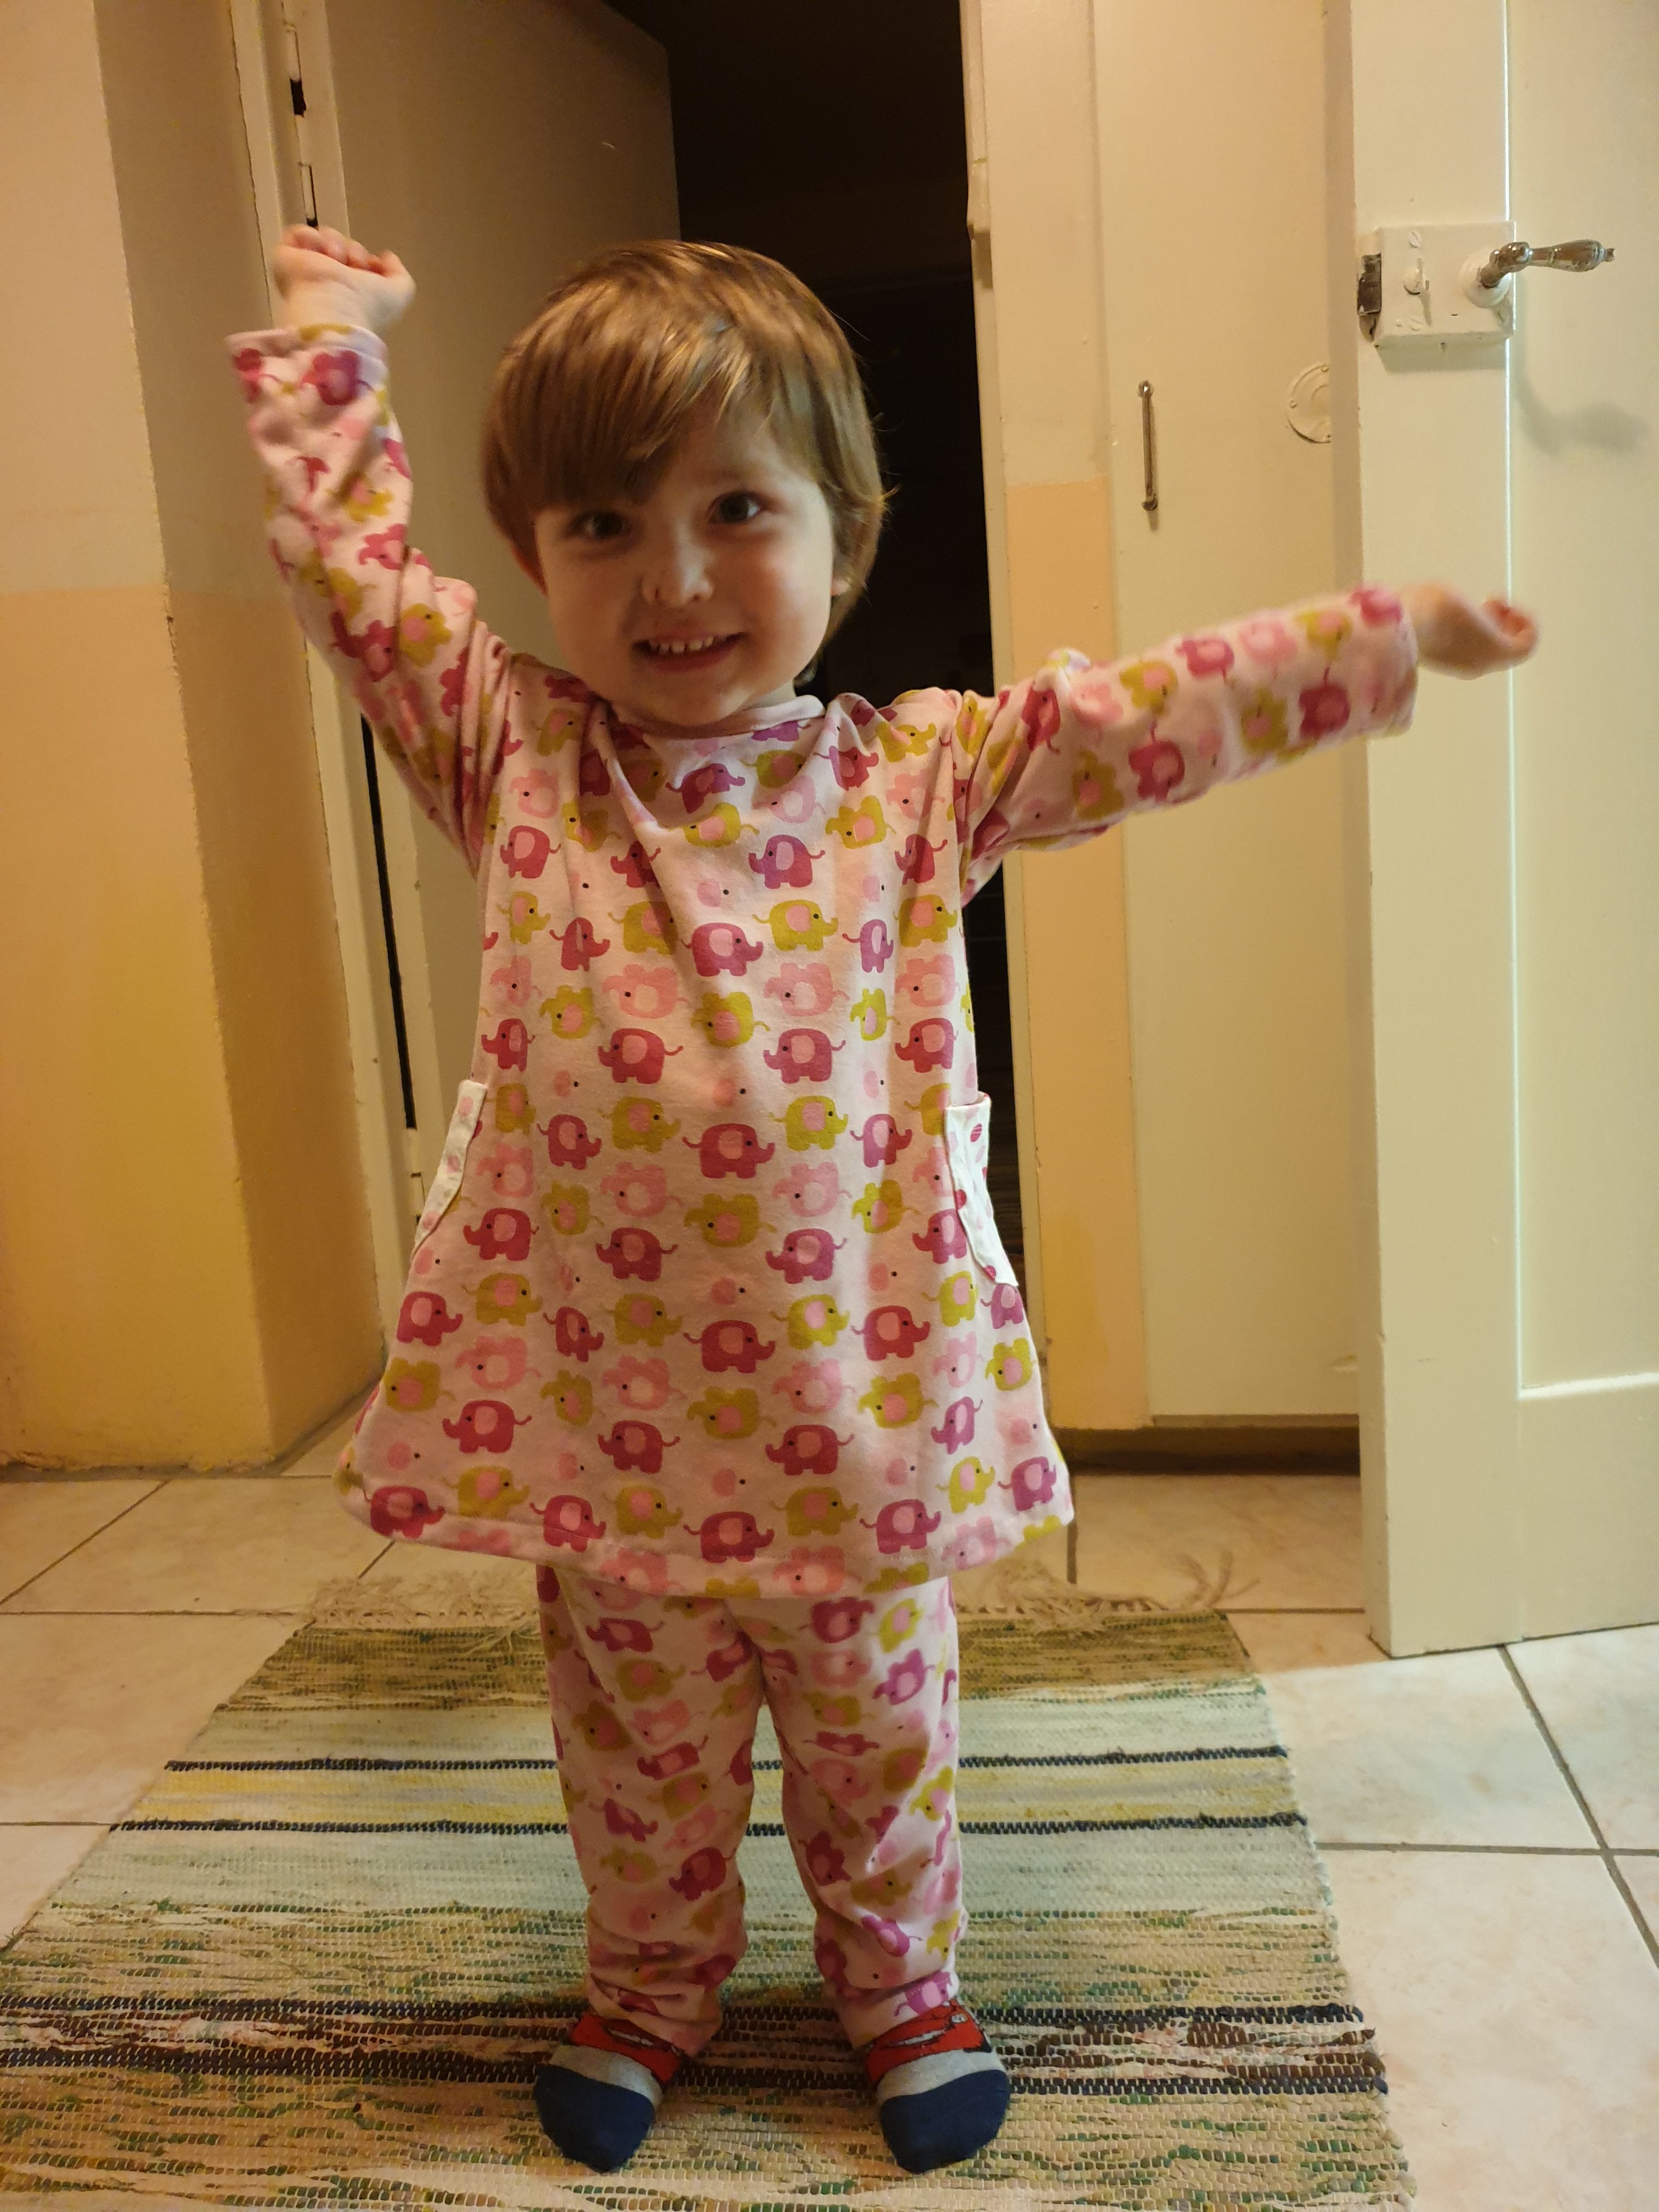
For Christmas gift, I made a pyjamah, tracing his favourite pair. He loves the fact that it is a dress with pockets
Jag sydde en pyjamas till honom i julklapp. Hans favoritpyjamas är en klänning med fickor. Denna använde jag som förlaga och han blev väldigt nöjd.
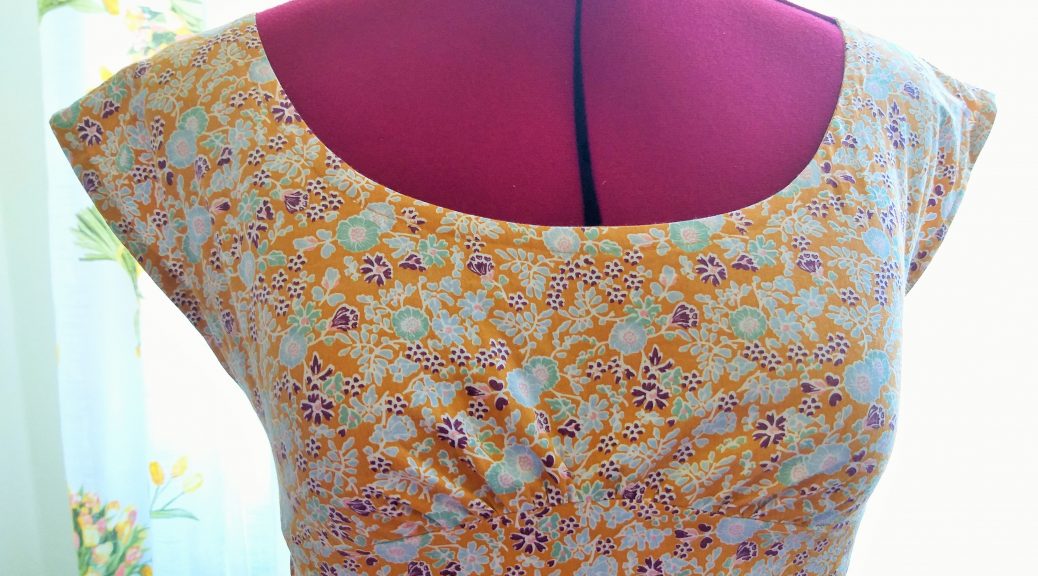
A friend of mine had a cotton fabric, with floral print, waiting for becoming a dress. She asked me whether I would like to make a dress for her and showed me some pictures of models that she liked. This was was what I came up with.
En av mina vänner hade ett bomullstyg med blommigt mönster, som låg och väntade på att få bli en klänning. Hon frågade mig om jag skulle vilja sy upp klänningen åt henne och visade mig vilka modeller hon gillade. Så här blev det.
I draped the fabric directly on the dress form. We had two fittings before I finished it and gave it to her at one of my concerts.
Jag draperade tyget direkt på provdockan. Vi testade klänningen på henne två gånger innan jag i all hast sydde färdigt den och överlämnade den, i samband med en av mina konserter.
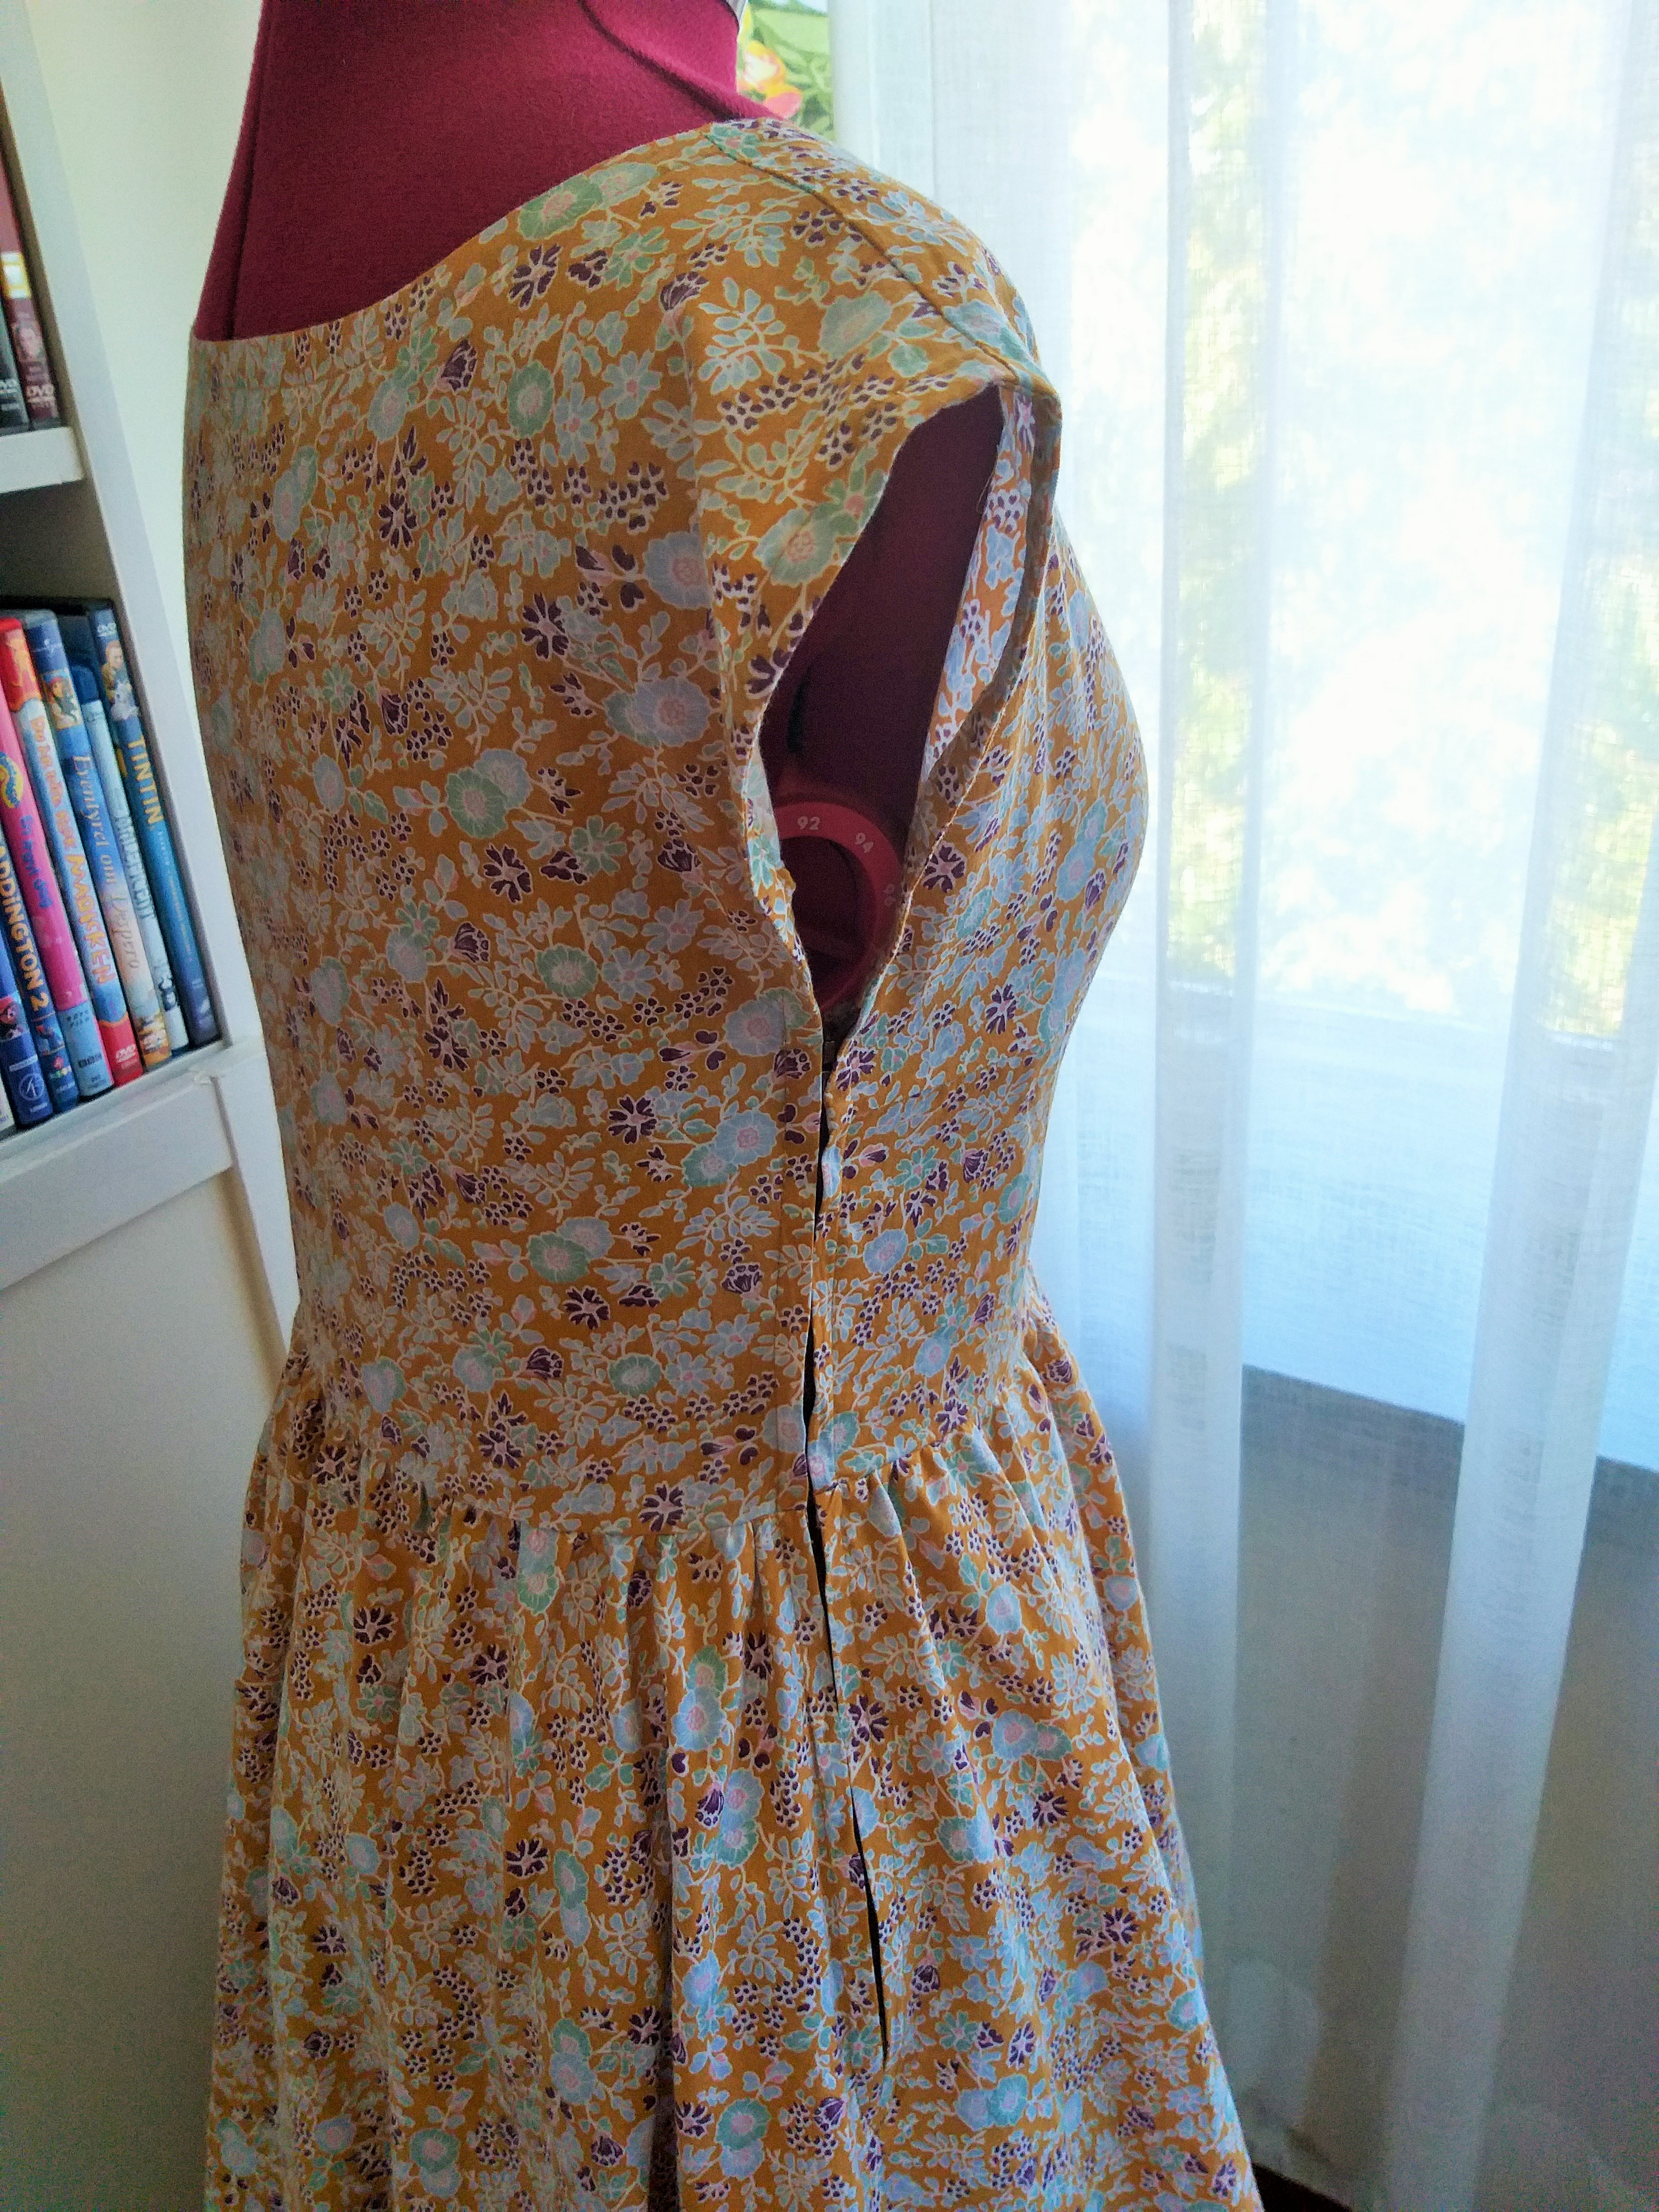
The dress consists of only five pieces of fabric – upper and lower part of the bodice front and the bodice back, front and back of the skirt. The skirt is a gathered half circle. The arms are just an extension of the bodice. At one side, I have hidden an old zipper.
Klänningen består bara av fyra tygstycken – övre och nedre del av livets framsida och livets baksida (låter fyndigt, mot min vilja), fram och bak på kjolen. Kjolen är en rynkad halvcirkelkjol. Ärmarna är bara en liten förlängning av livdelen. I ena sidan har jag gömt en gammal dragkedja.
I hope to show the dress on its rightful owner soon!
Jag hoppas på att även kunna visa upp ägaren i hennes klänning snart!
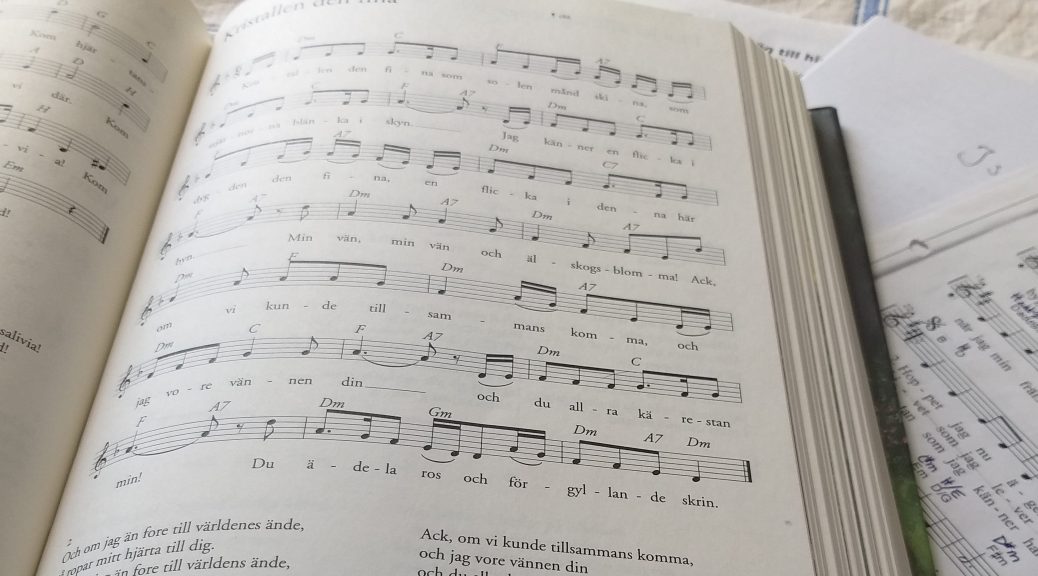
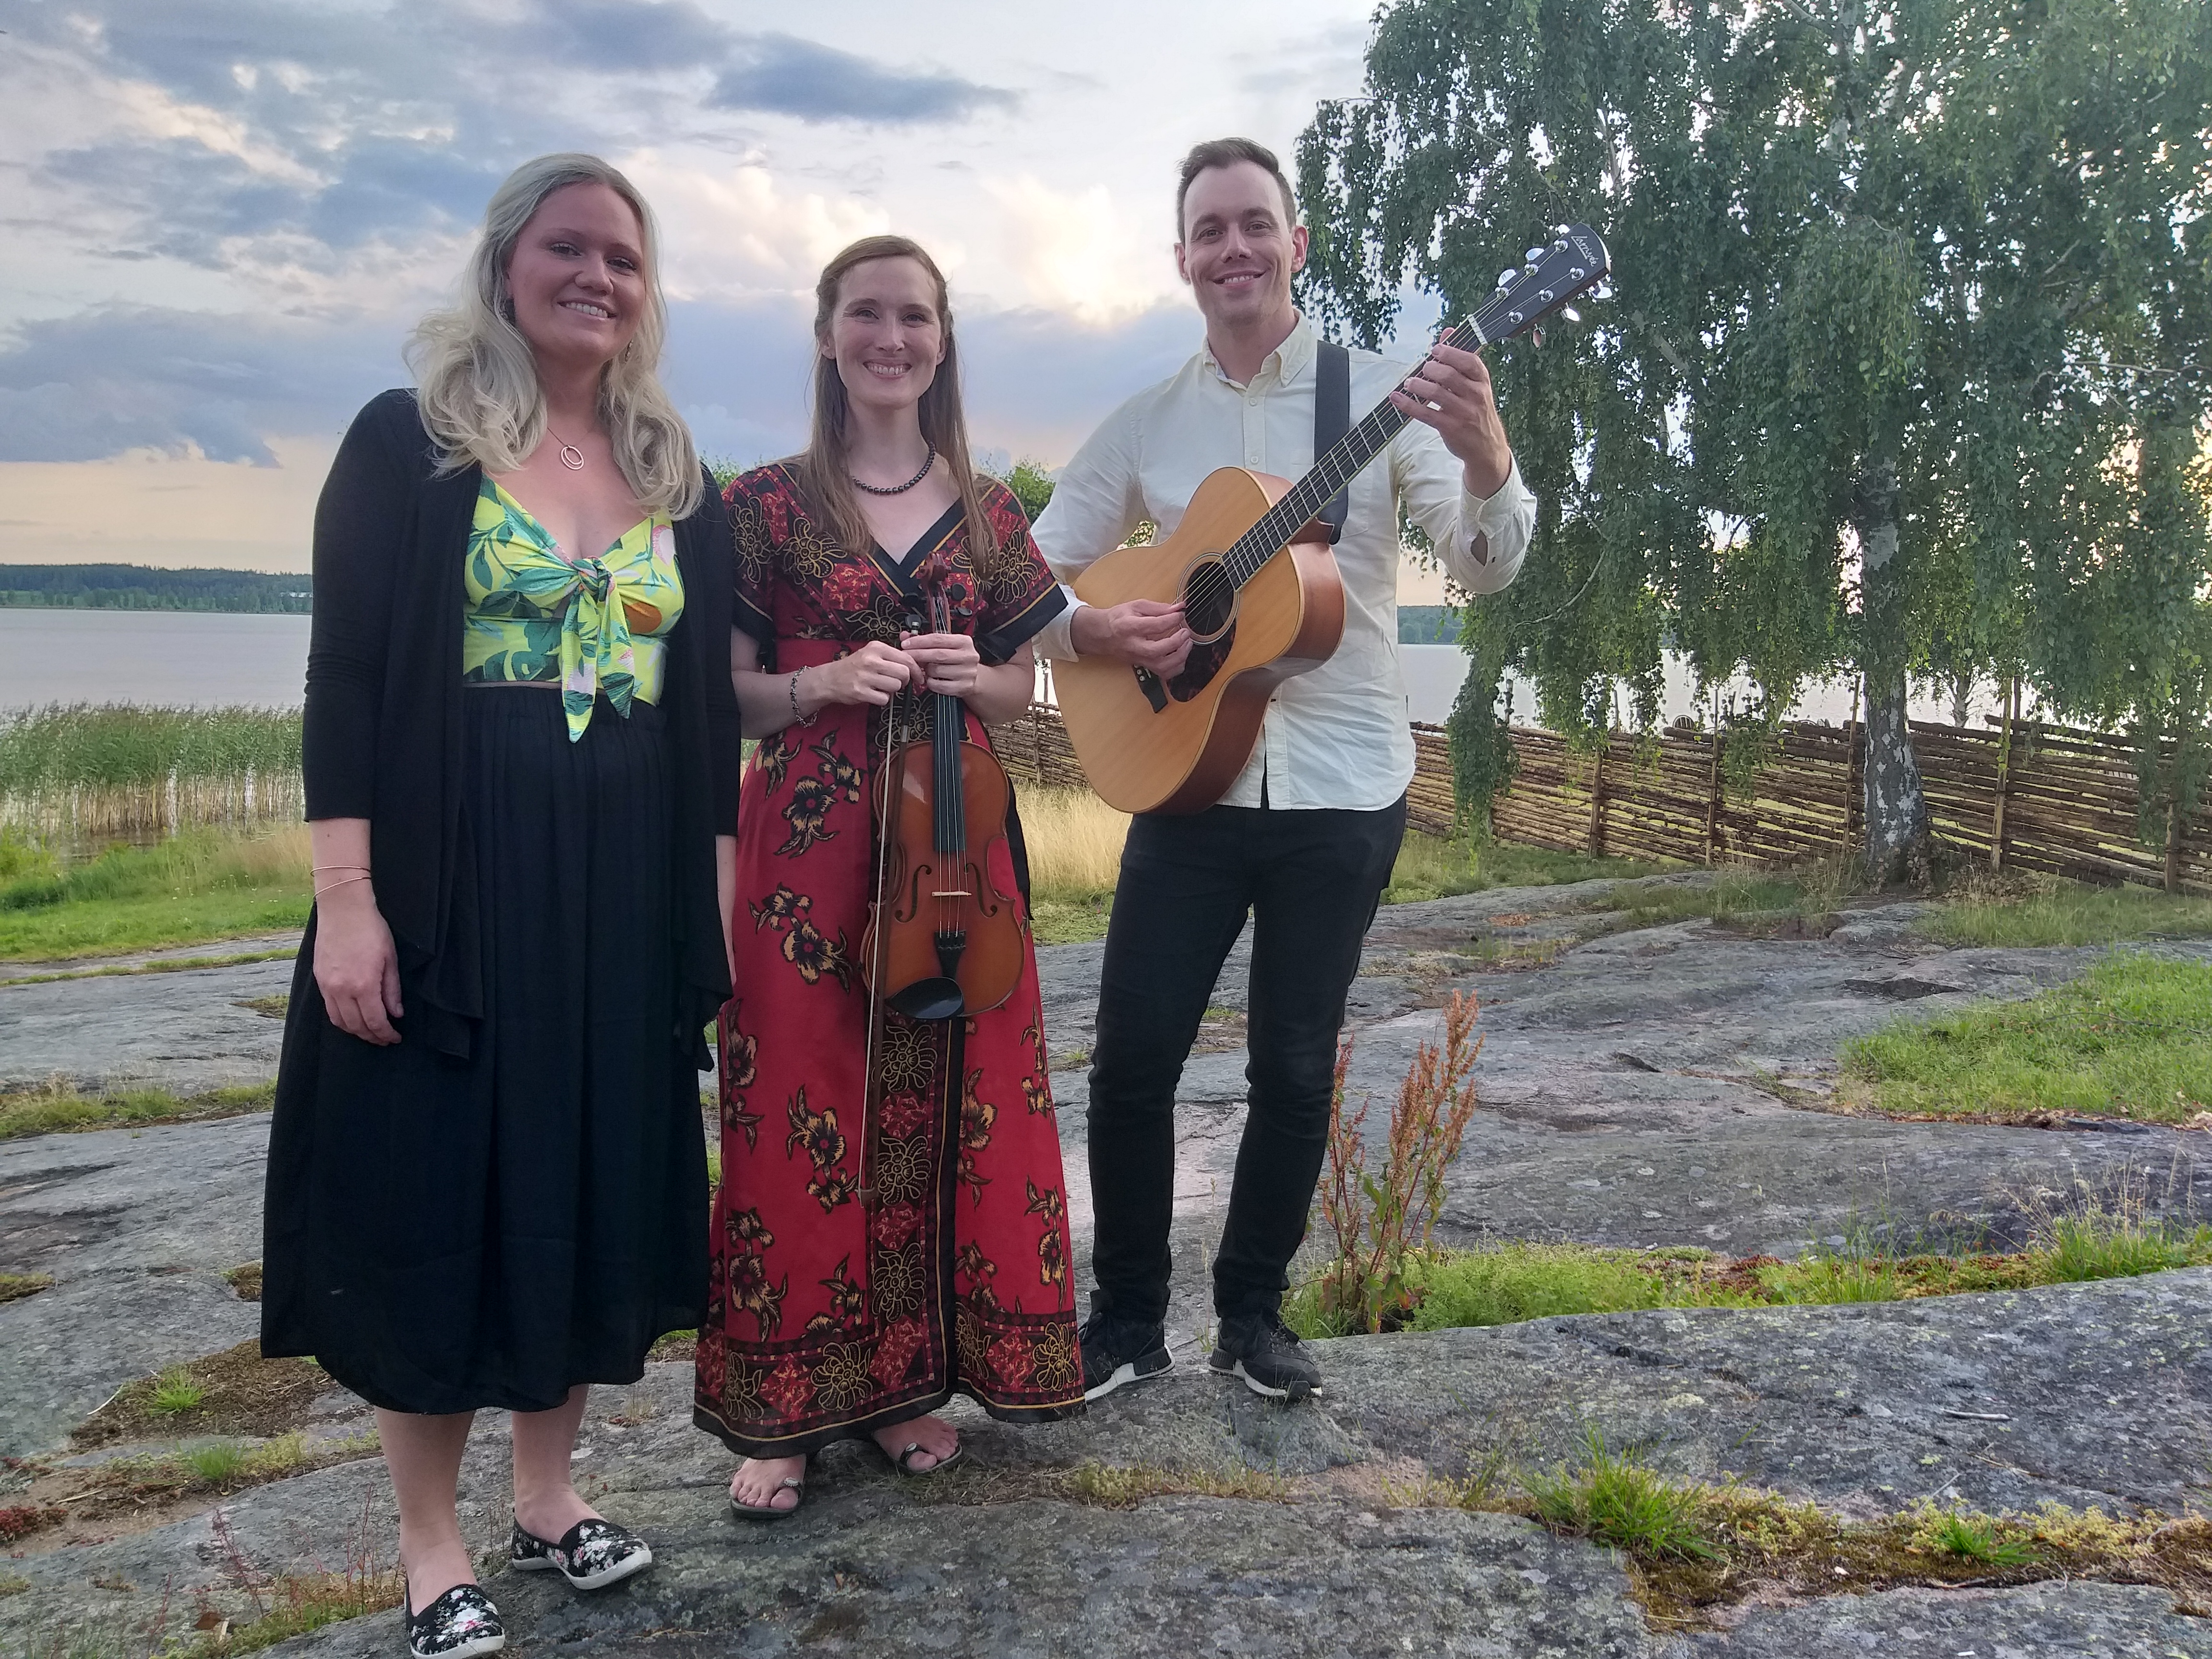
I’m thrilled to inform you that there will be music this summer! All of the events is together with the lovely singer Hanna Karlsson and there will be different, exciting constellations for the instrument part. ?
Jag är så glad över att få berätta att det blir musik i sommar! Alla tillfällen blir tillsammans med den fantastiska sångerskan Hanna Karlsson, och på den instrumentala fronten kommer konstellationerna variera. ?
18 juli kl 19 – Mariannelunds torg – sångerska Hanna Karlsson, gitarrist Martin Karlsson, sångerska and violinist Susanna Antonsson
19 juli kl19 – Kröngården – Hanna Karlsson, Martin Karlsson, Susanna Antonsson
27 juli kl 18 – Vallersvik, Mariannelund – Hanna Karlsson, Susanna Antonsson och Marianne Nilsson vid pianot
3 augusti kl 19 – Nyllinge bränneri – gitarrist and sångare Kalle Sellbrink, Hanna Karlsson och en hel drös med fina musiker
You are most welcome!
Afterwards…
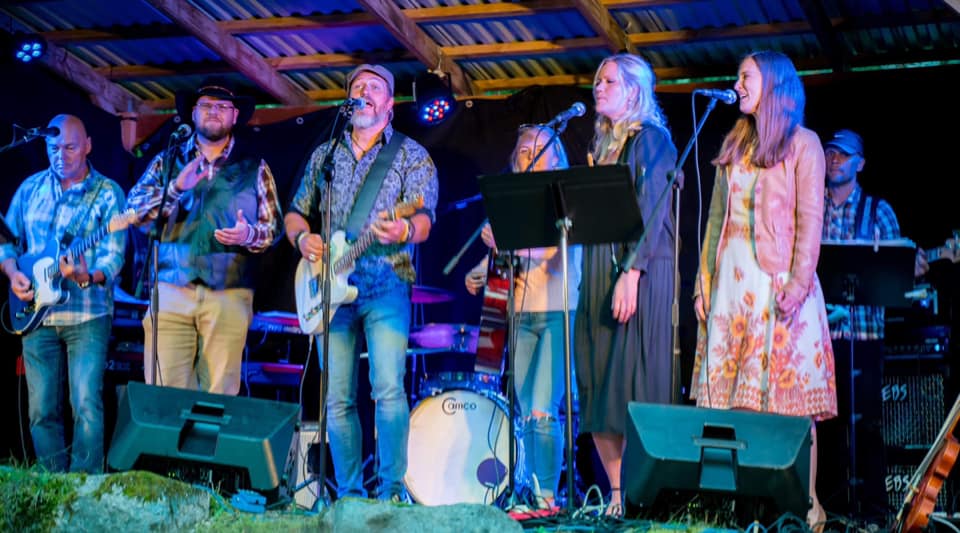
How wonderful it has been to make music once more. Our first concert, at the square of Mariannelund felt a little bit as a rehearsal before the concert at Kröngården, which was awesome! Alas, I have no really good pictures or whole songs recorded from that. My and Hanna’s stop at Vallersvik was also very appreciated. The concert at Nyllinge was great fun – I was not very pleased with my own achievement, but it was so great to sing together with a whole band, full of accomplished musicians. And I made my debute as a 80s metal singer, singing Eye of the Tiger and Made for Loving You! ? Here are some photos that I have stolen from others.
Singing together with Hanna Karlsson and Martin Carlsson at Kröngården
Greatest group ever? Love singing and playing with these folks
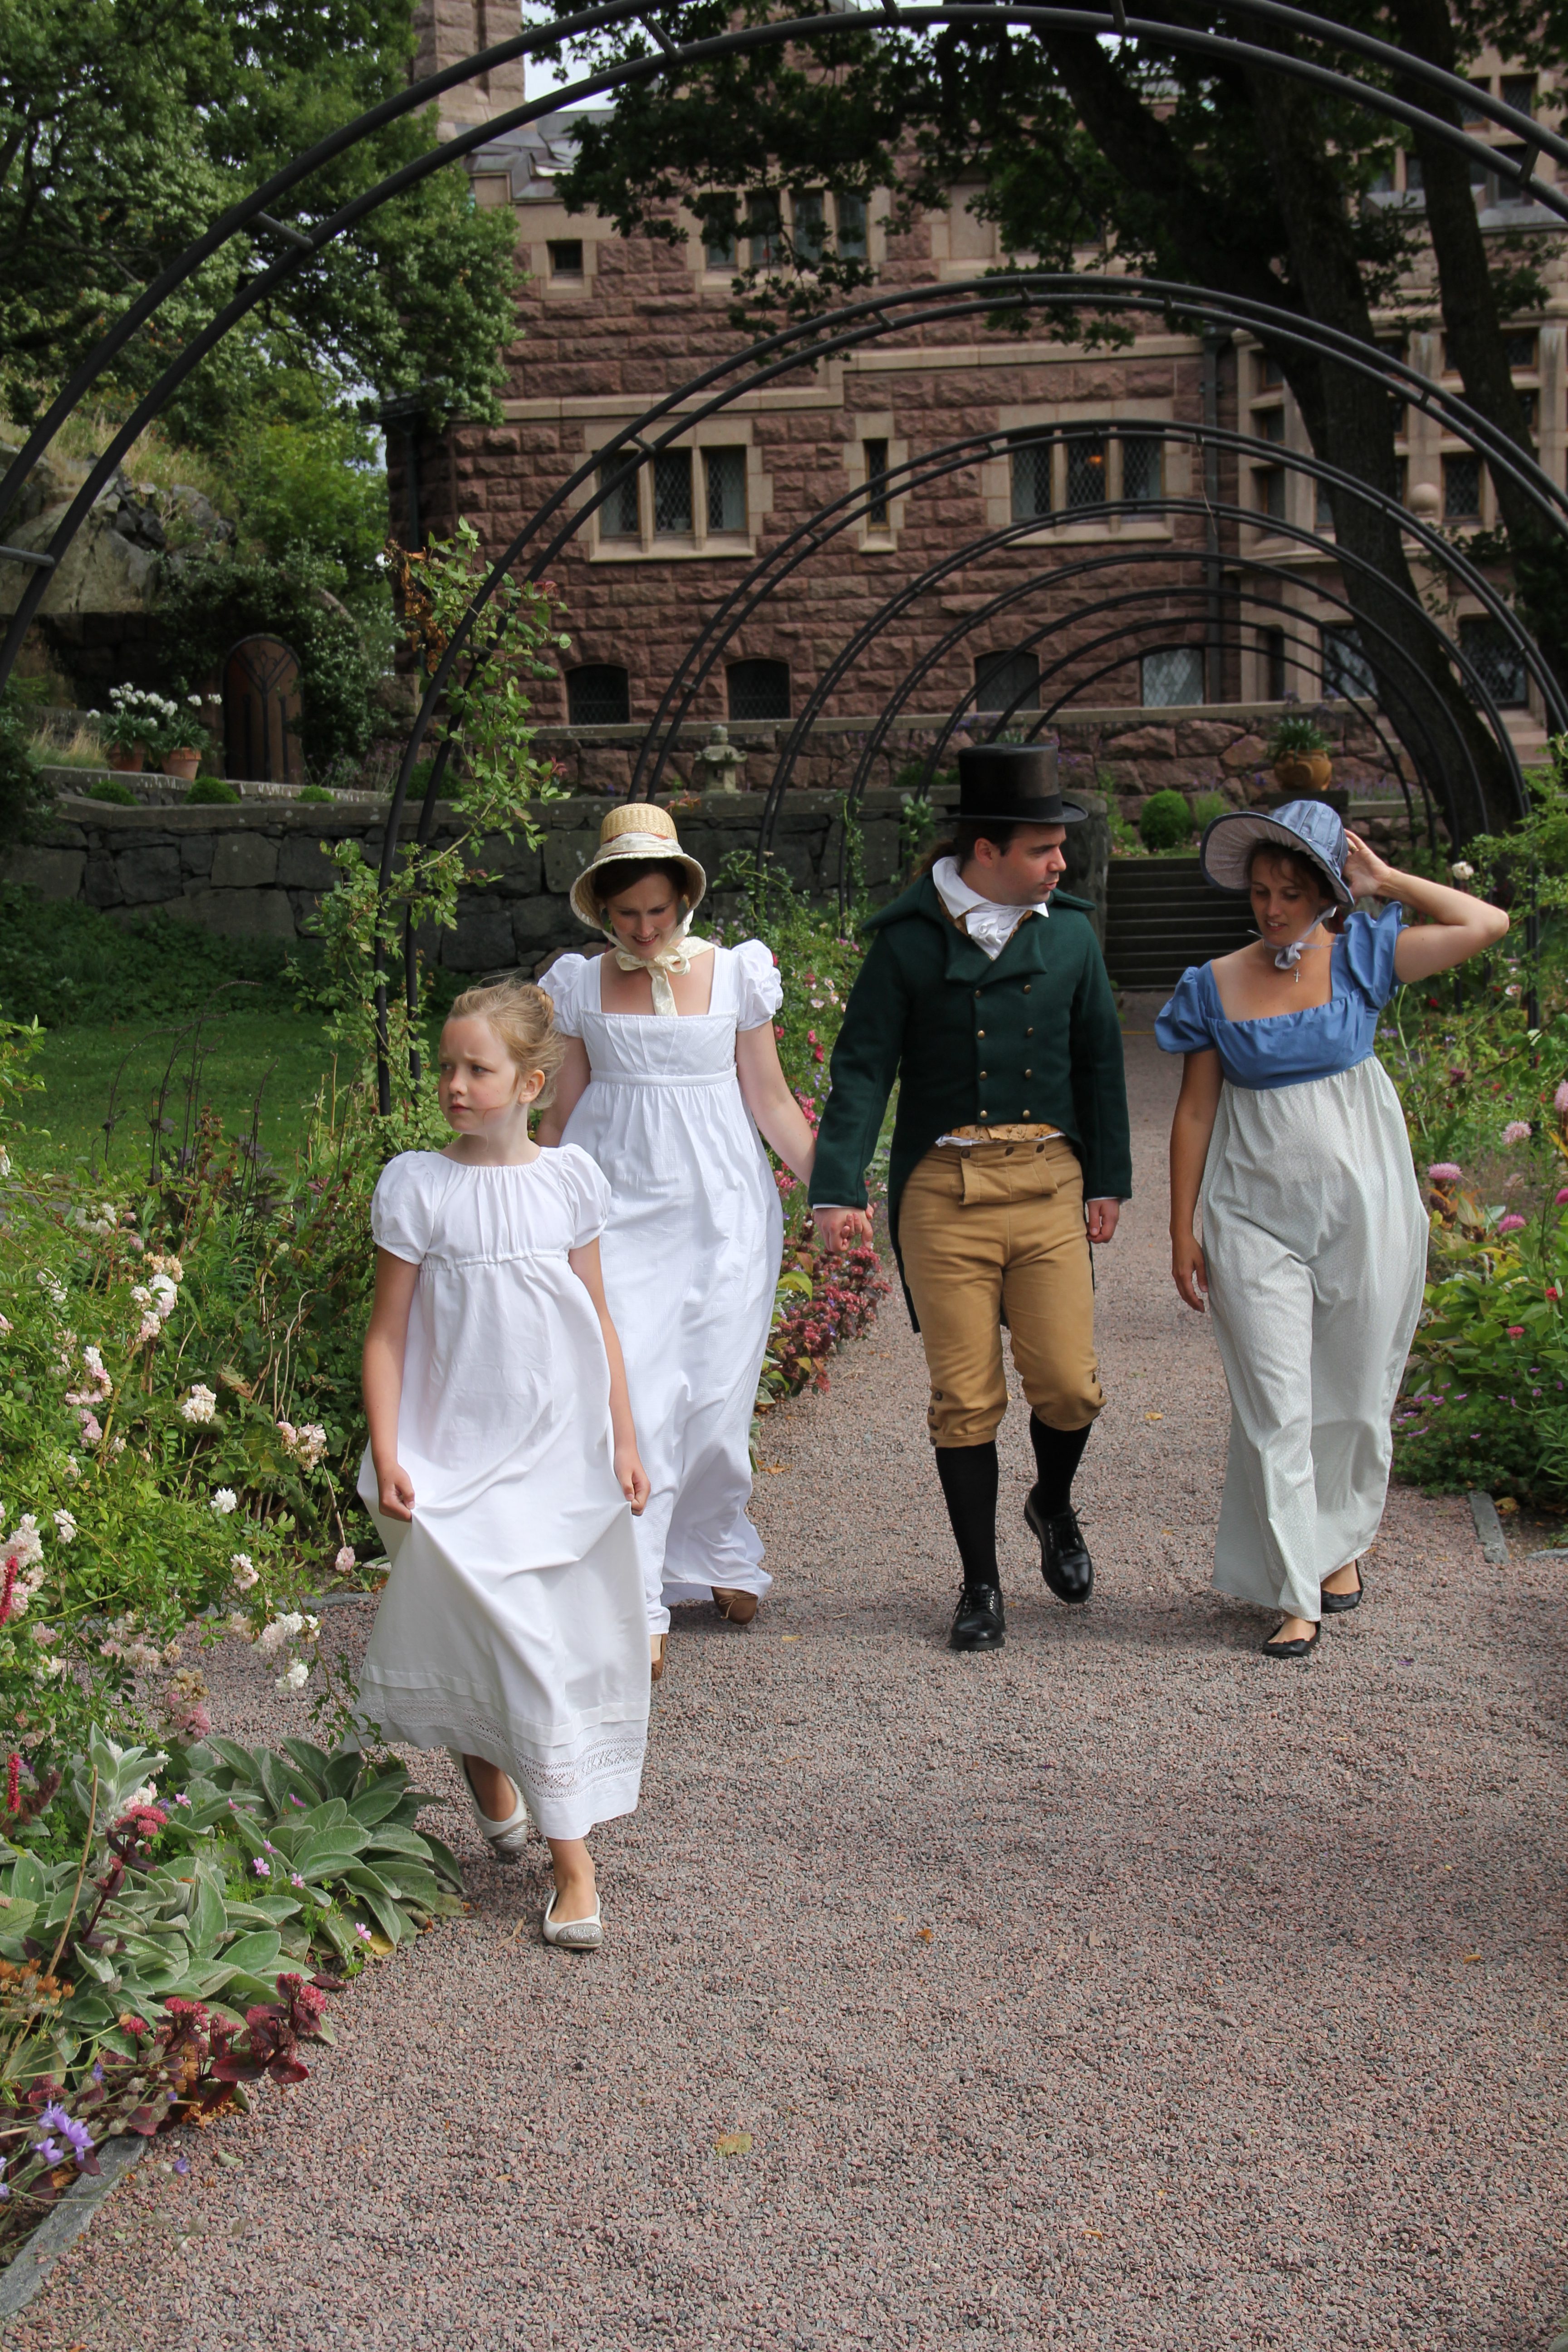
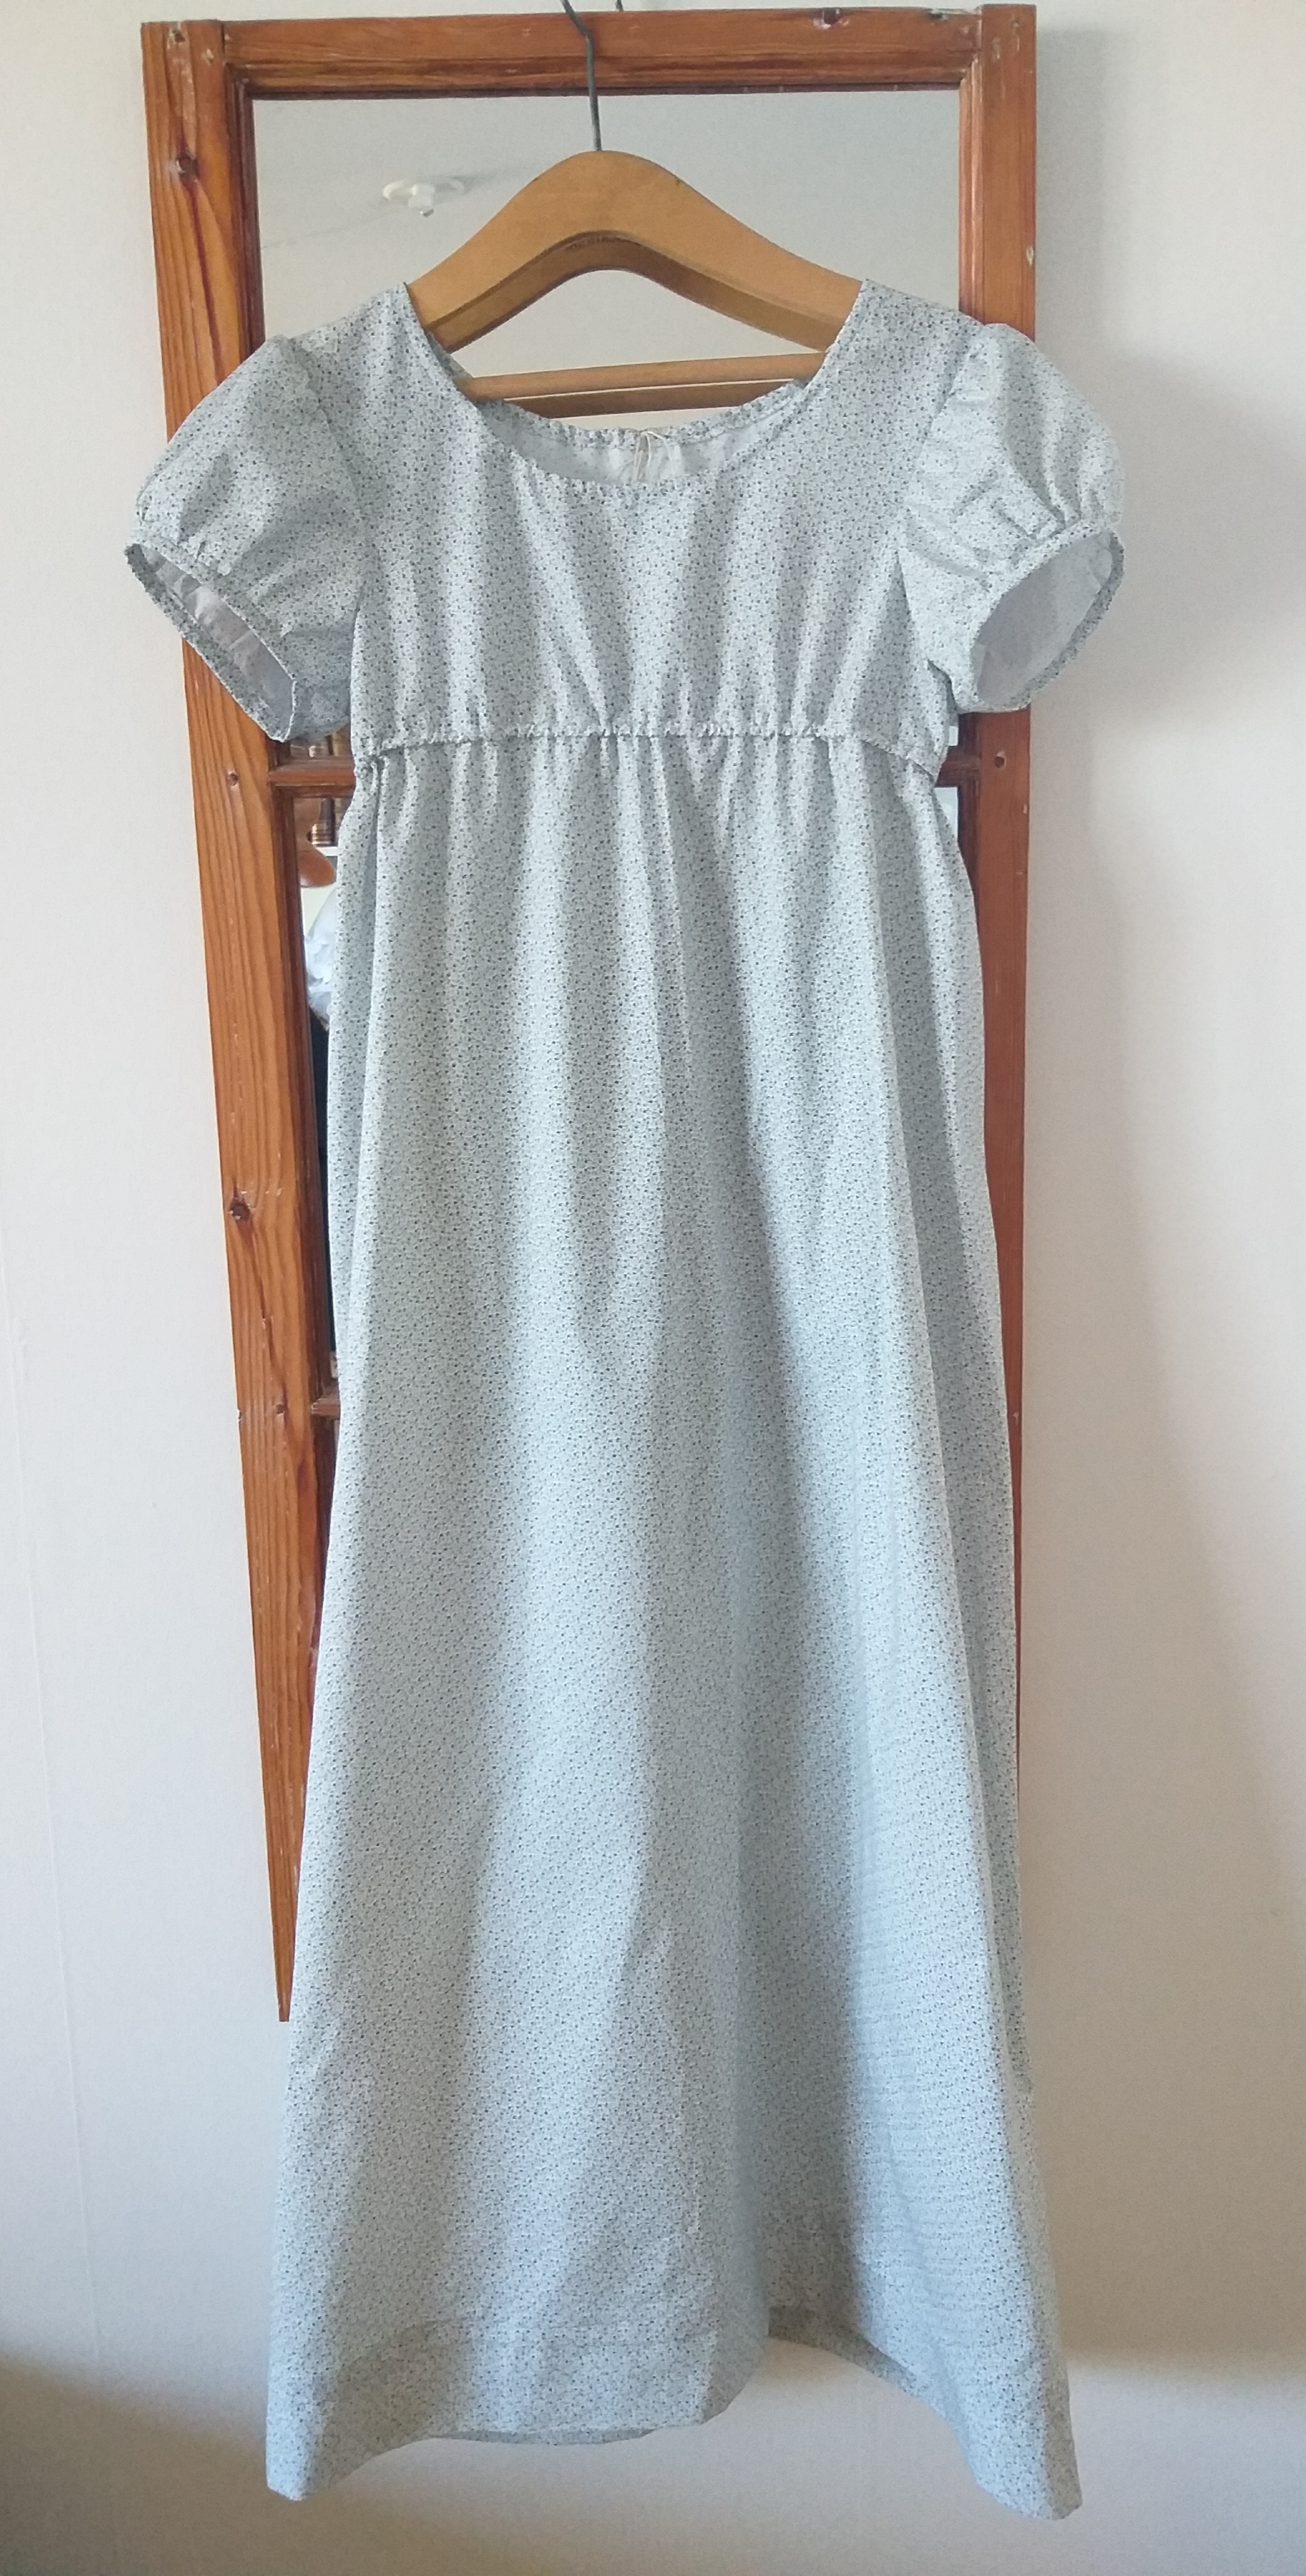
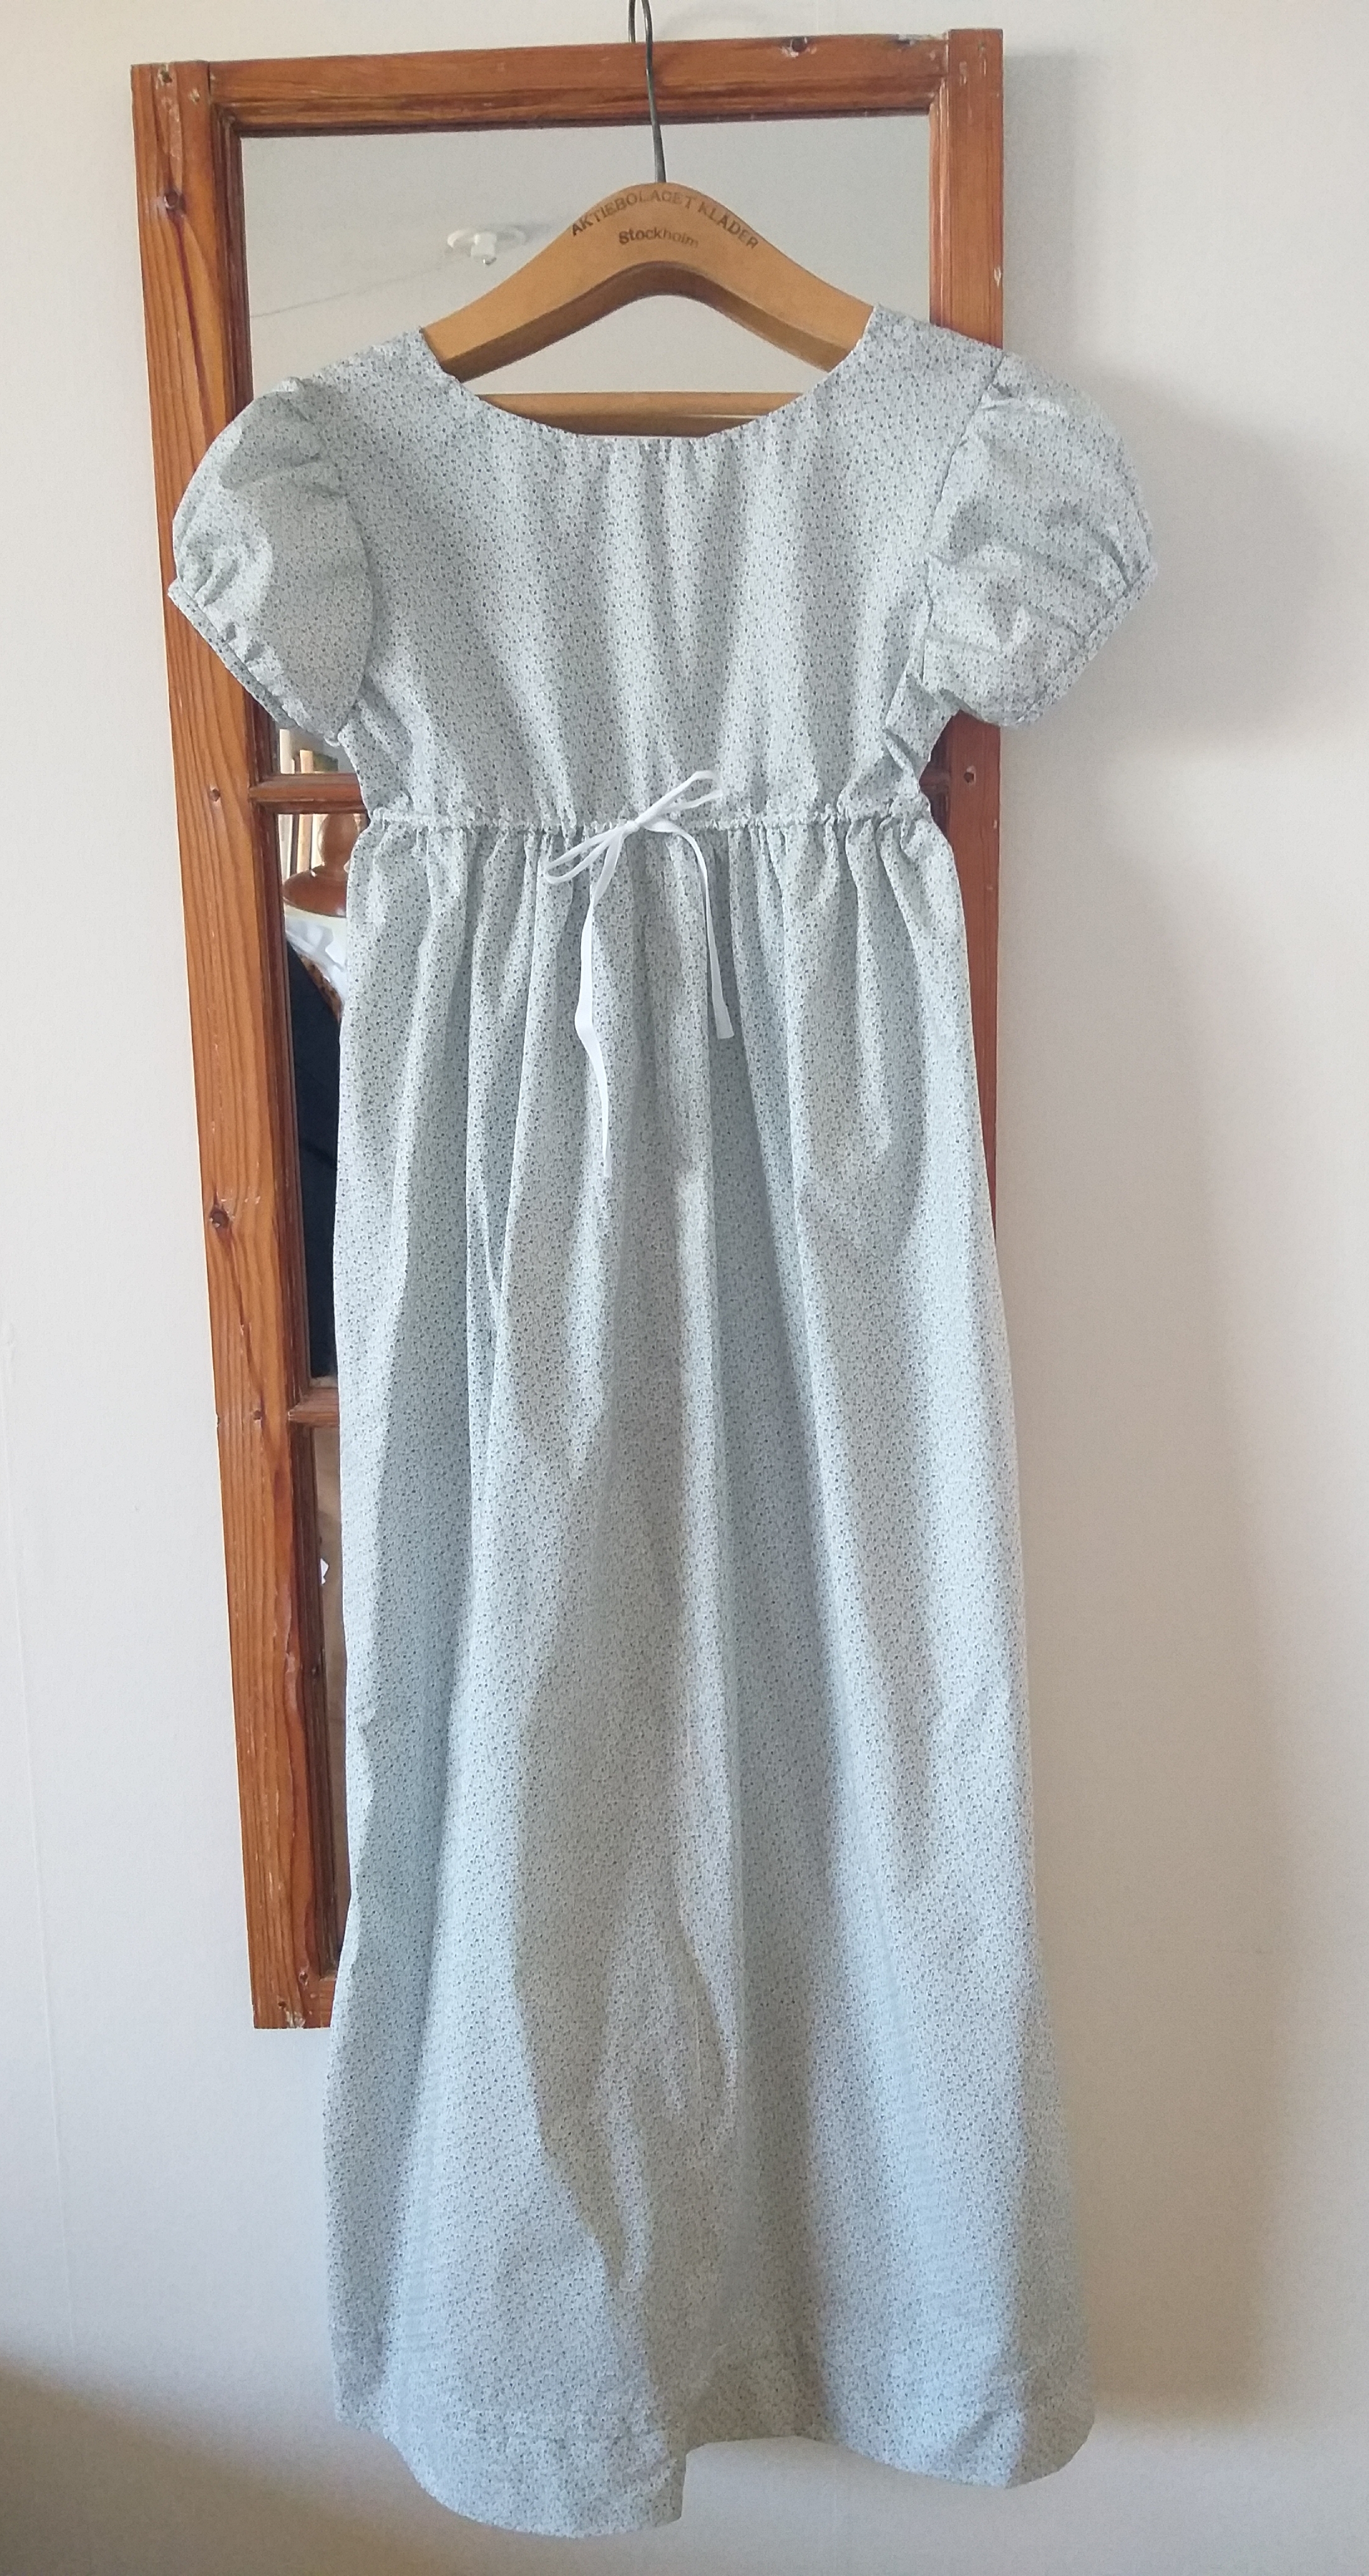
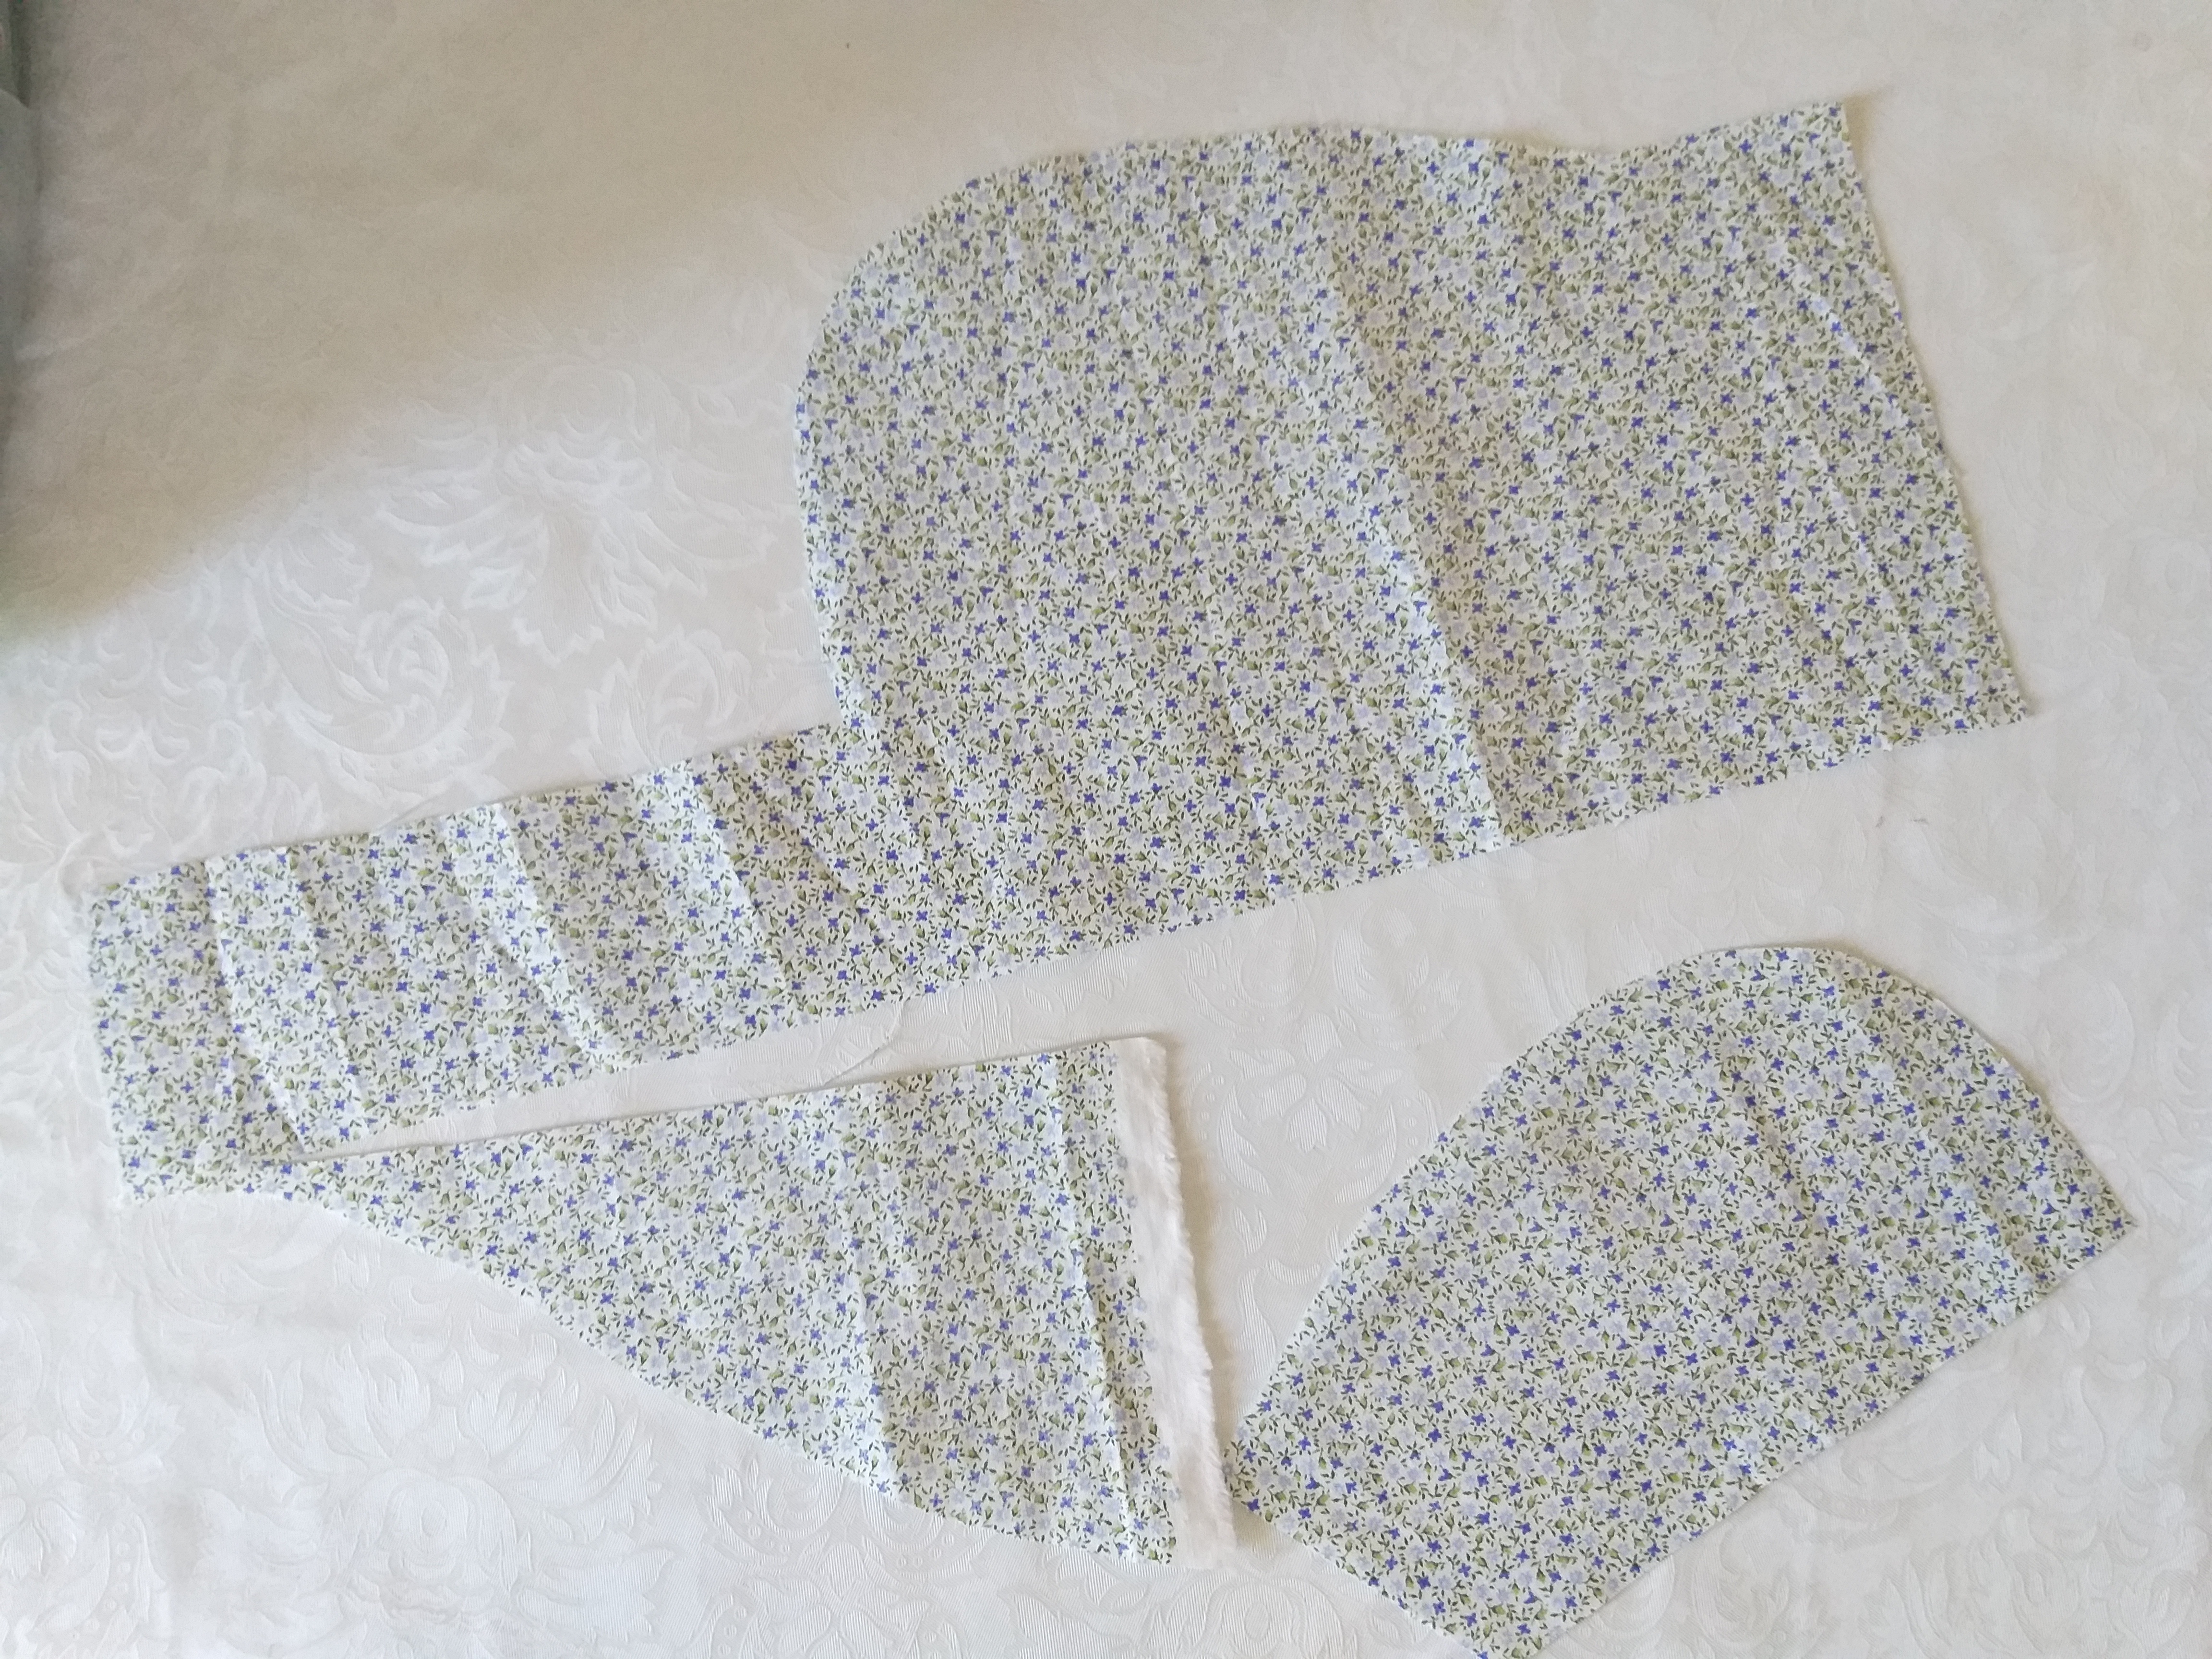
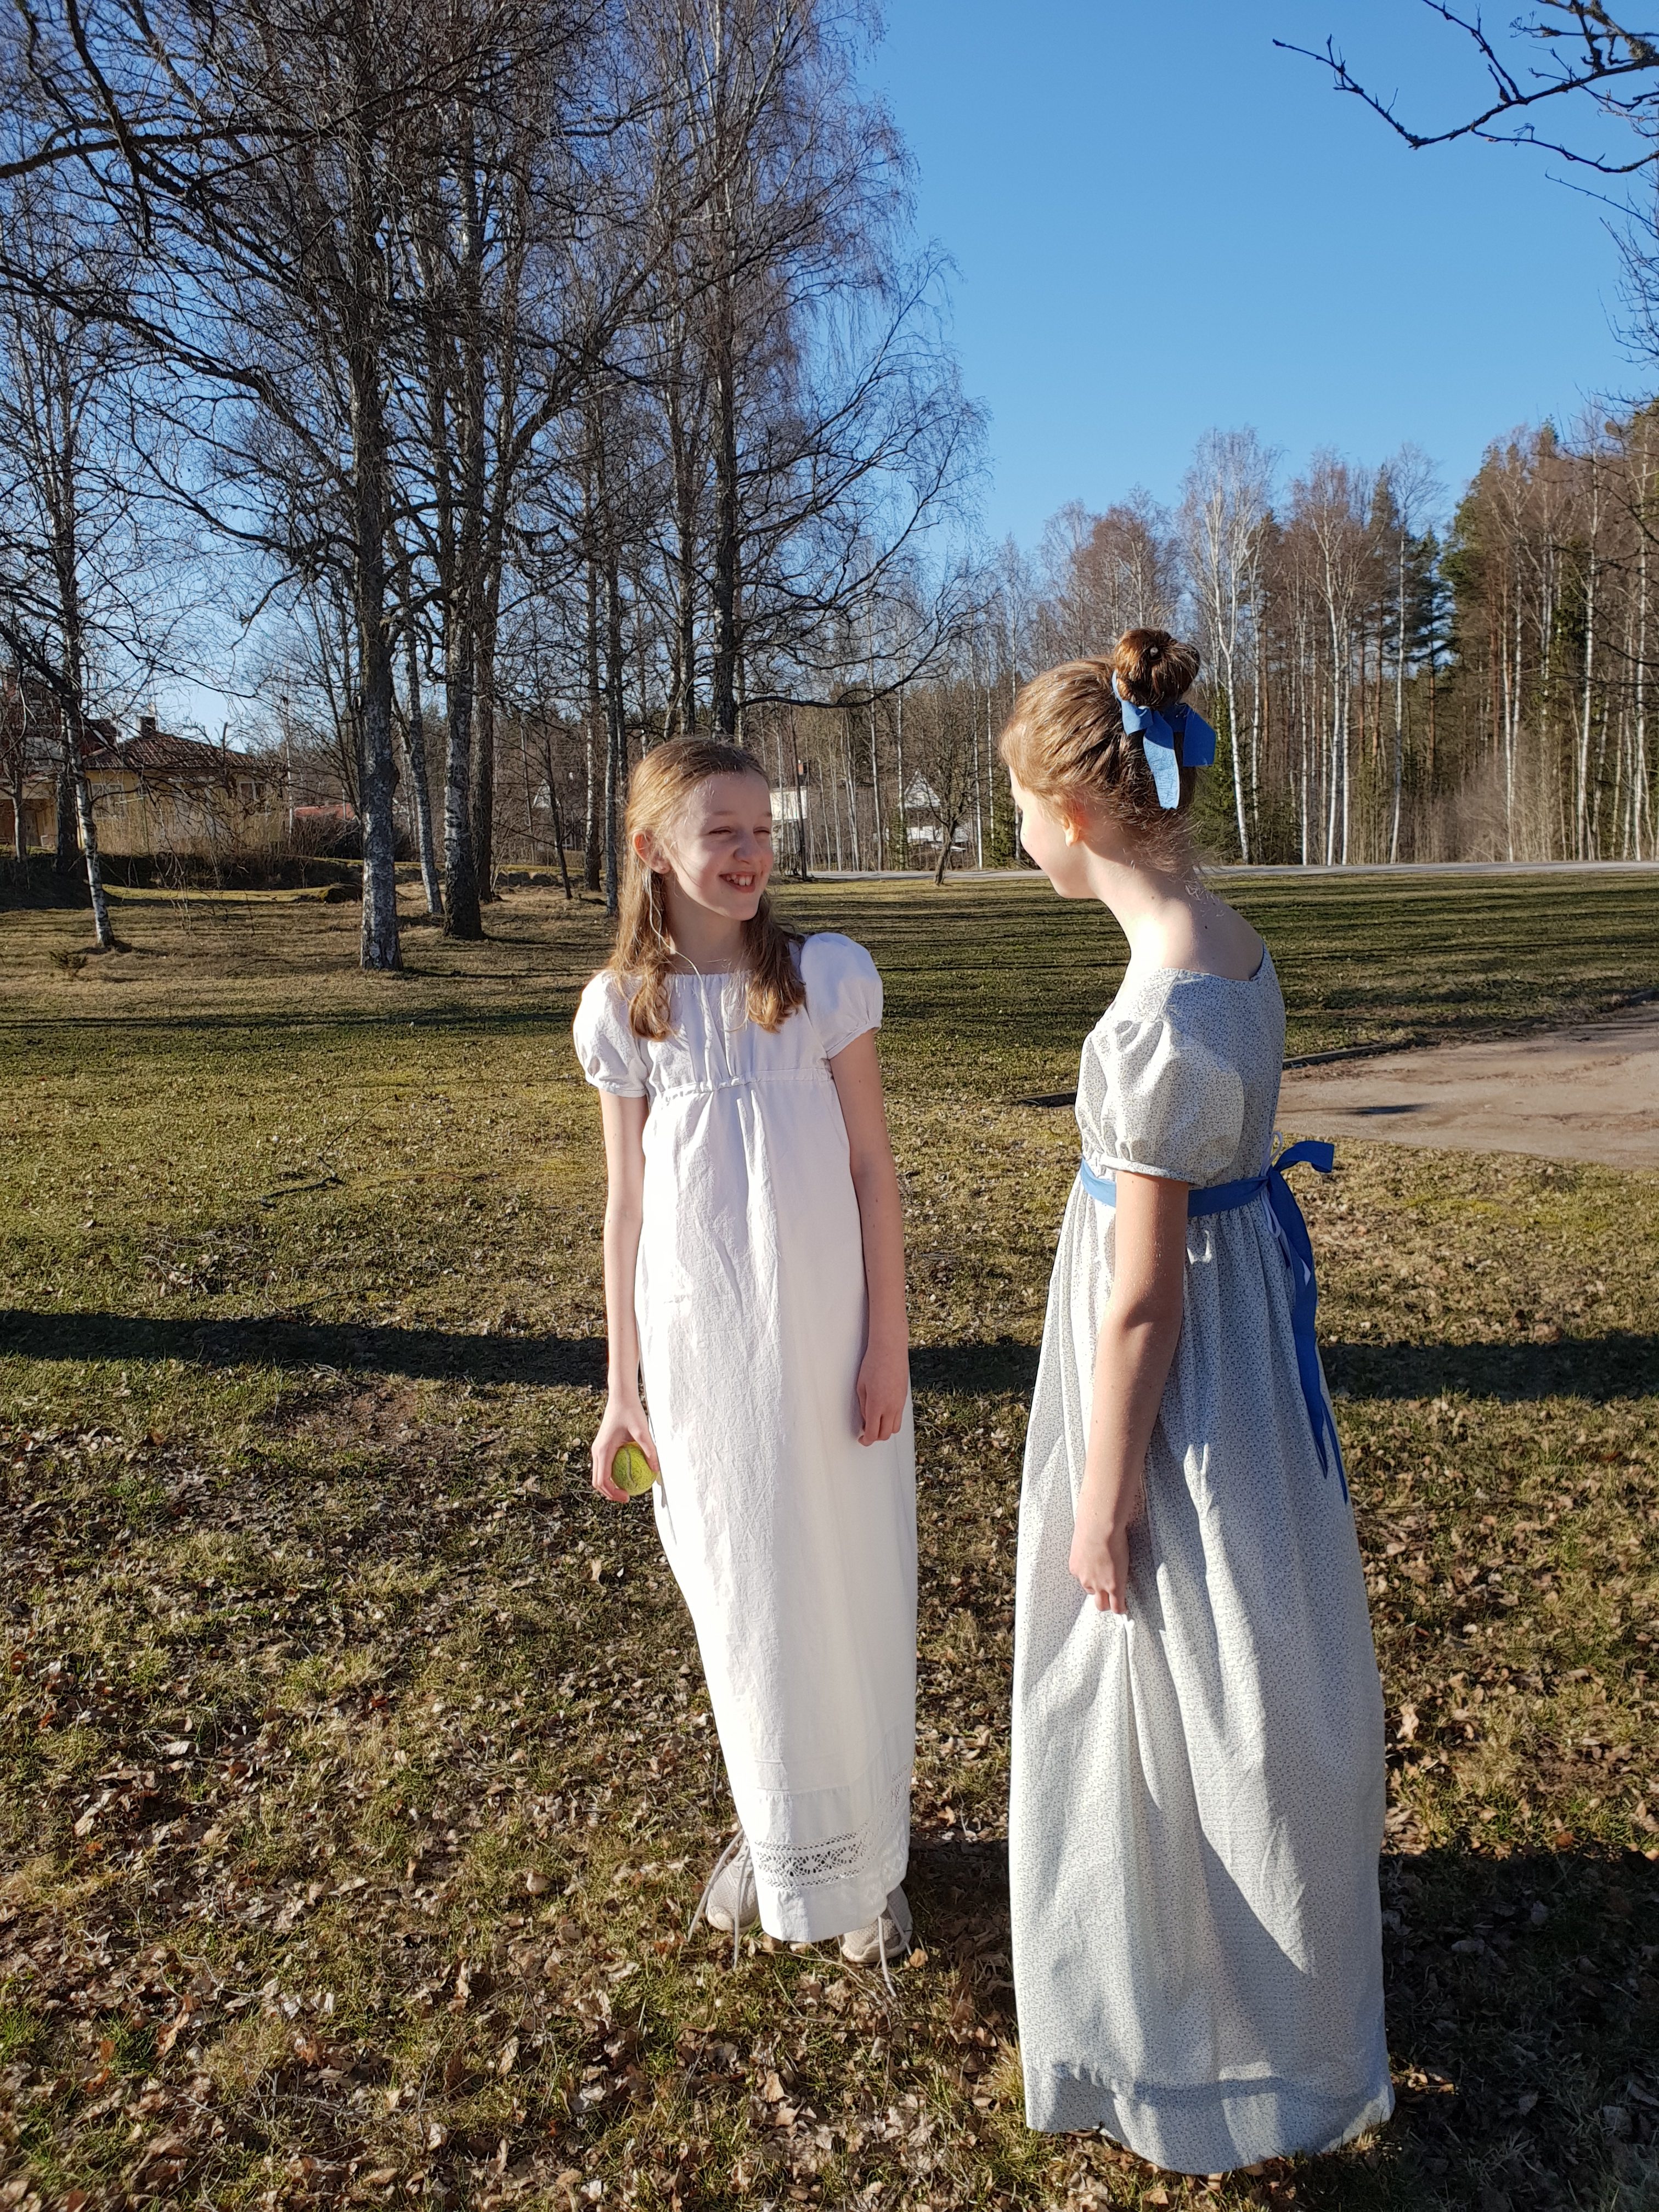
These last few months have been crazy. I’ve had my internship at the psychiatric ward, which have been both thrilling and exhausting, as I have been working nights a lot more than I tolerate. At the same time I have been preparing clothes for a recency ball. In a weak moment I decided to even participate in dancing sessions before the ball, in order to fully enjoy the historically authentic ball (for those of you who don’t know me, I am not the dancing type). My dear nieces will accompany us for the dancing lessons and thus, there is need for one more regency dress, for a slender thirteenyearold. The younger niece will wear this dress which will be long enough after having removed the pin tucks. I made the quickest dress ever, with the least amount of material ever, leaving approximately five square centimetres of scraps. This is the result.
This is what fabric was left after making the dress. I’m quite proud of myself.
The new dress with floral print and the old white dress which has now been successfully lengthened by removing the pin tucks.
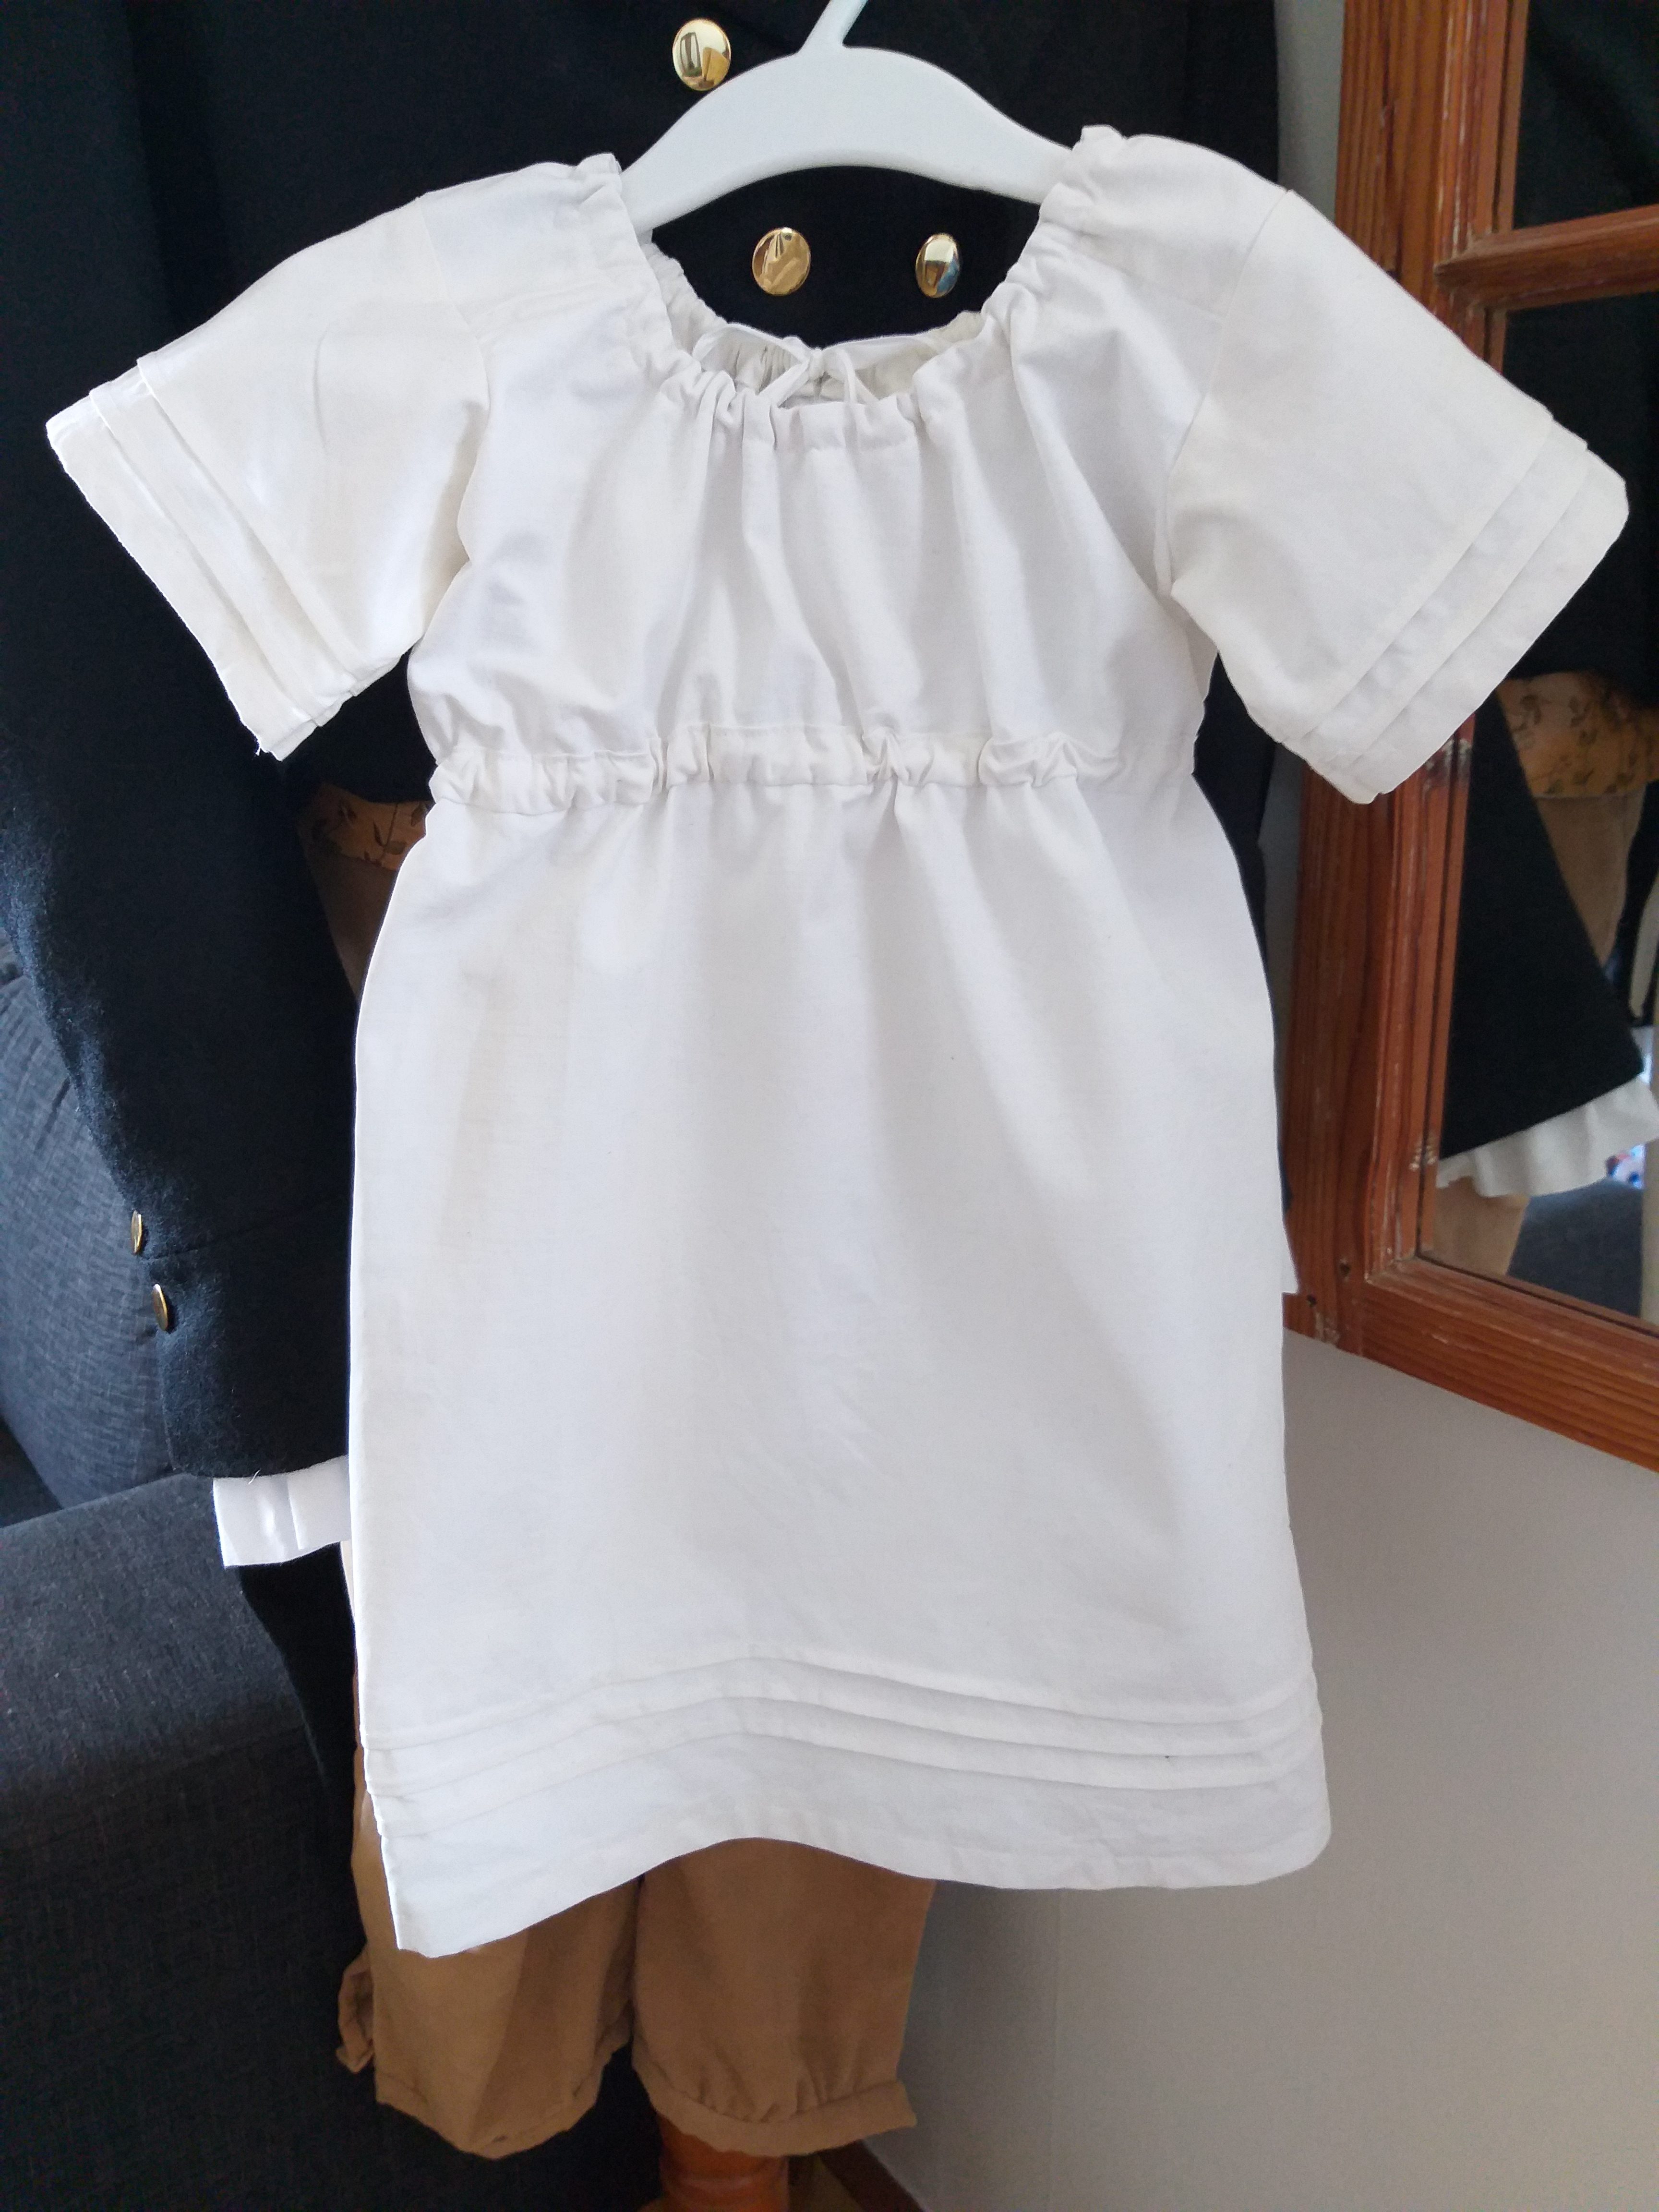
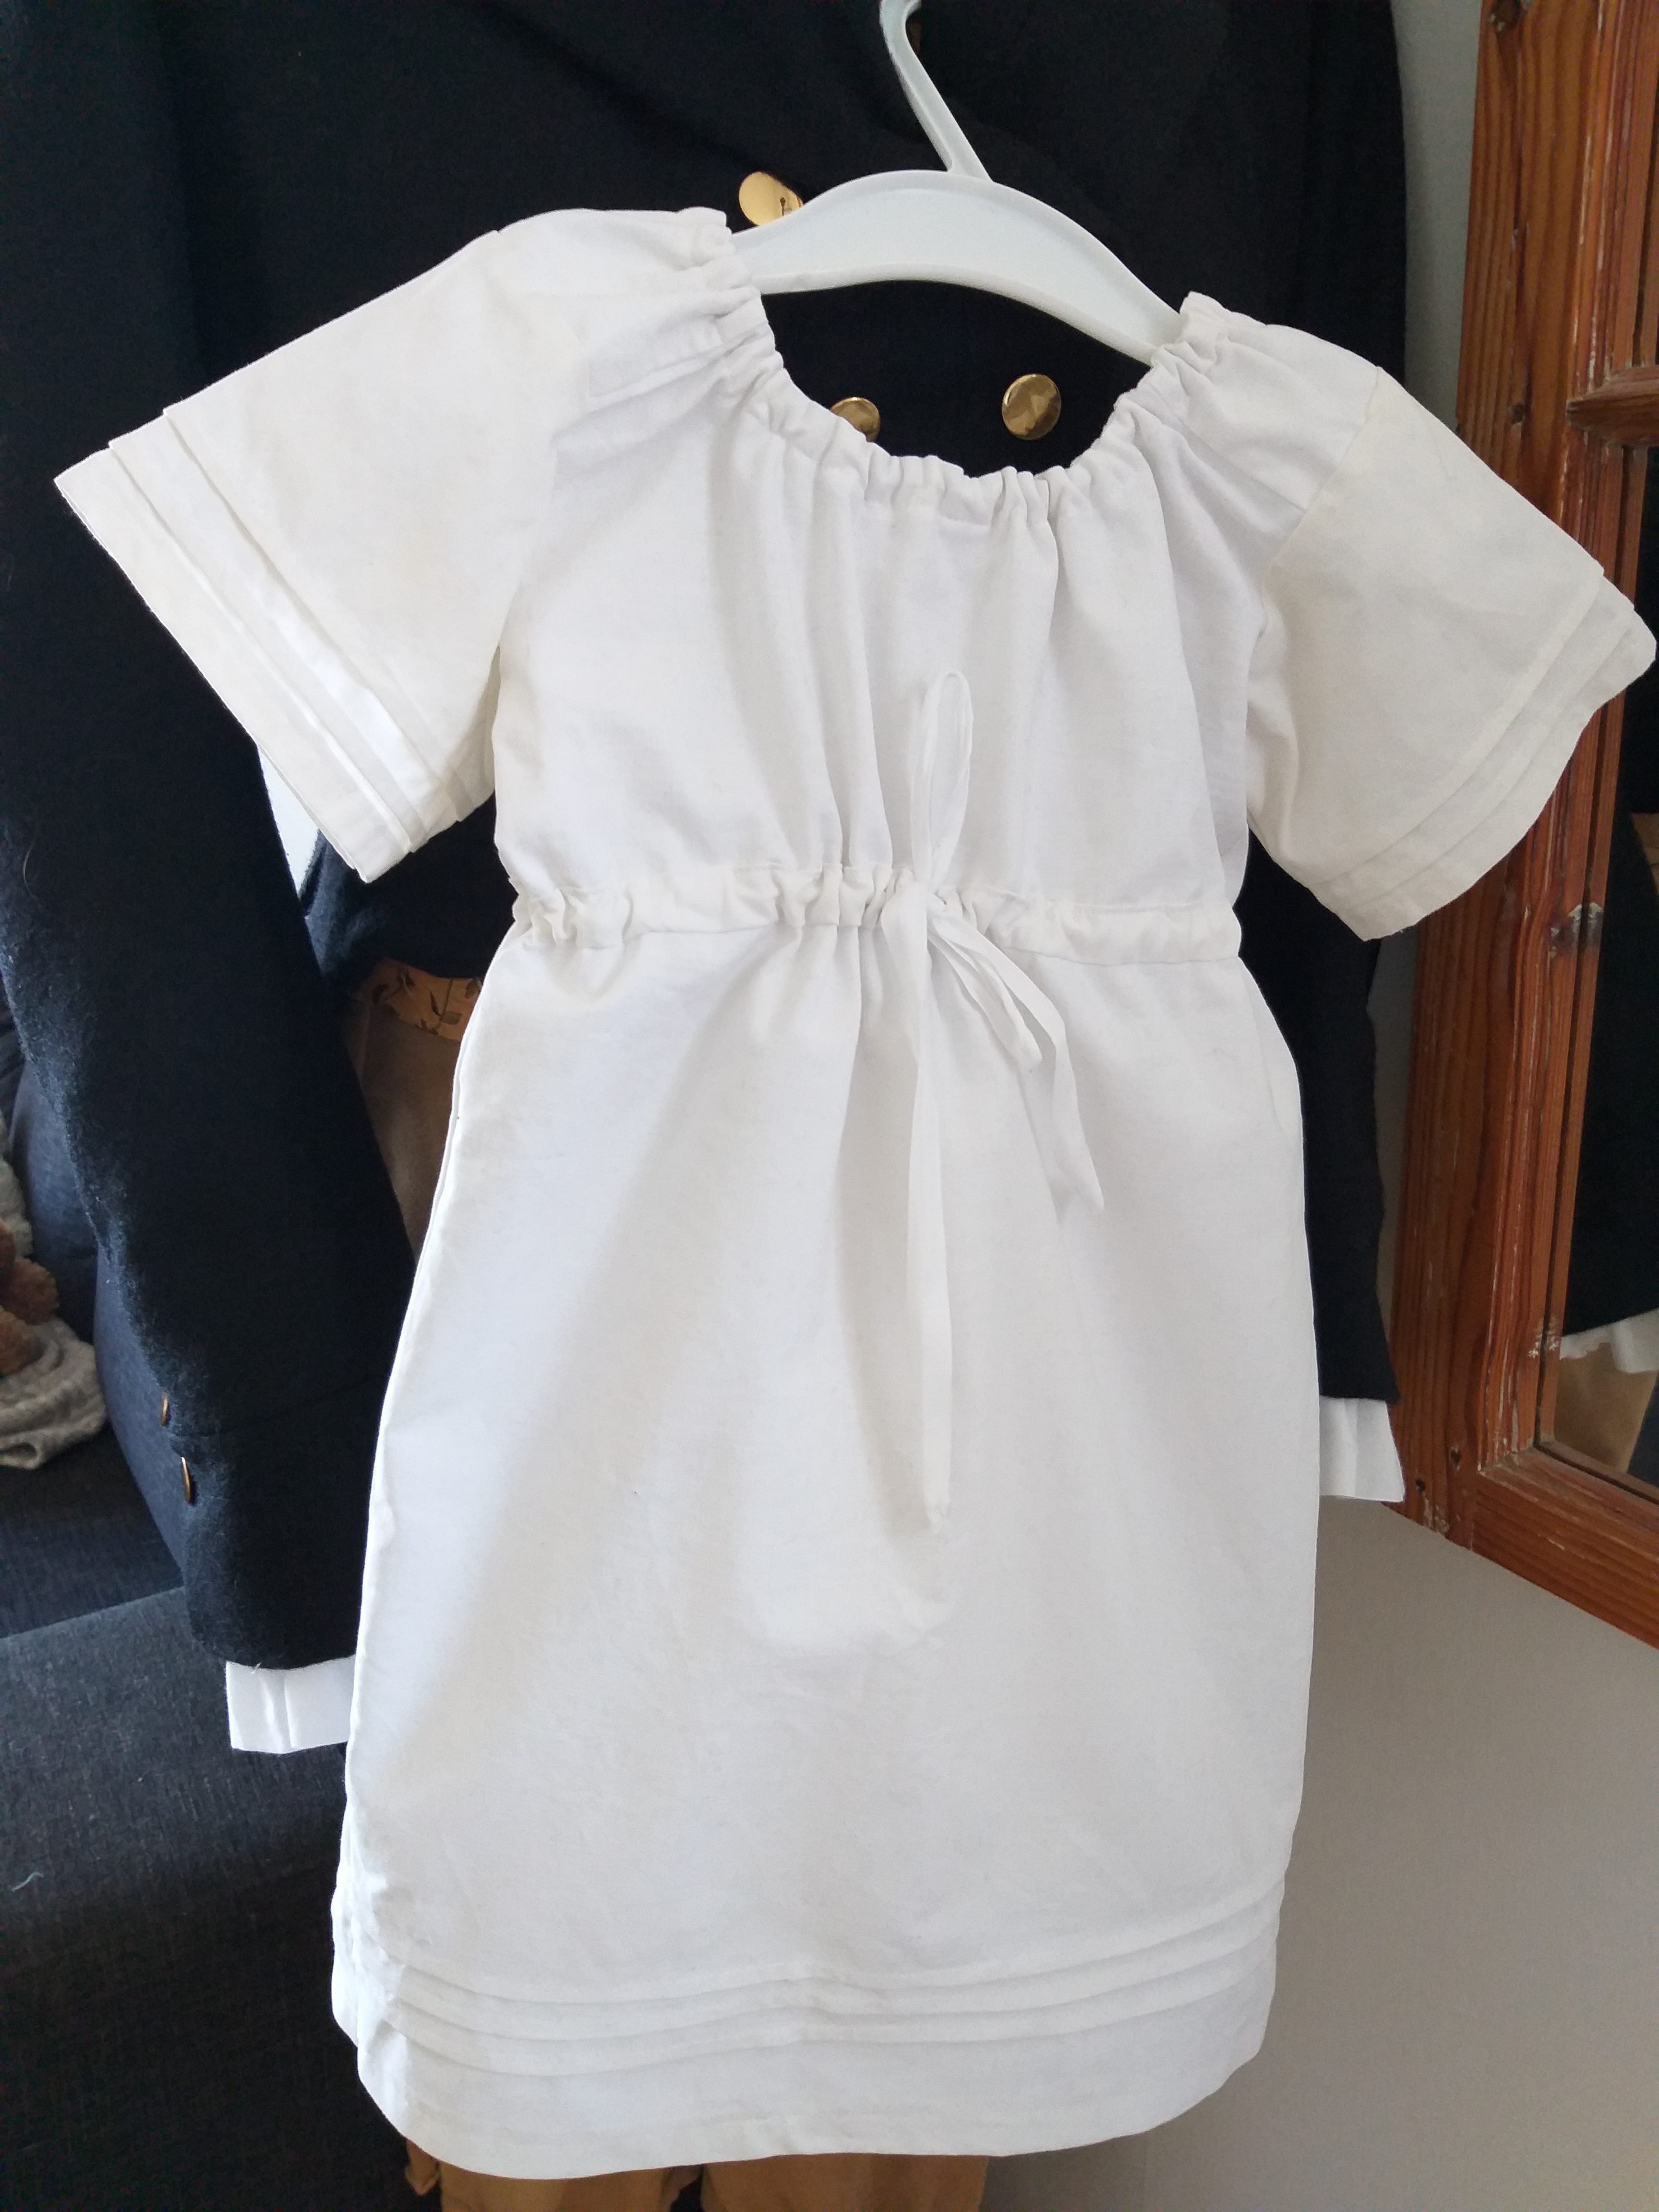
Toddler’s Dress
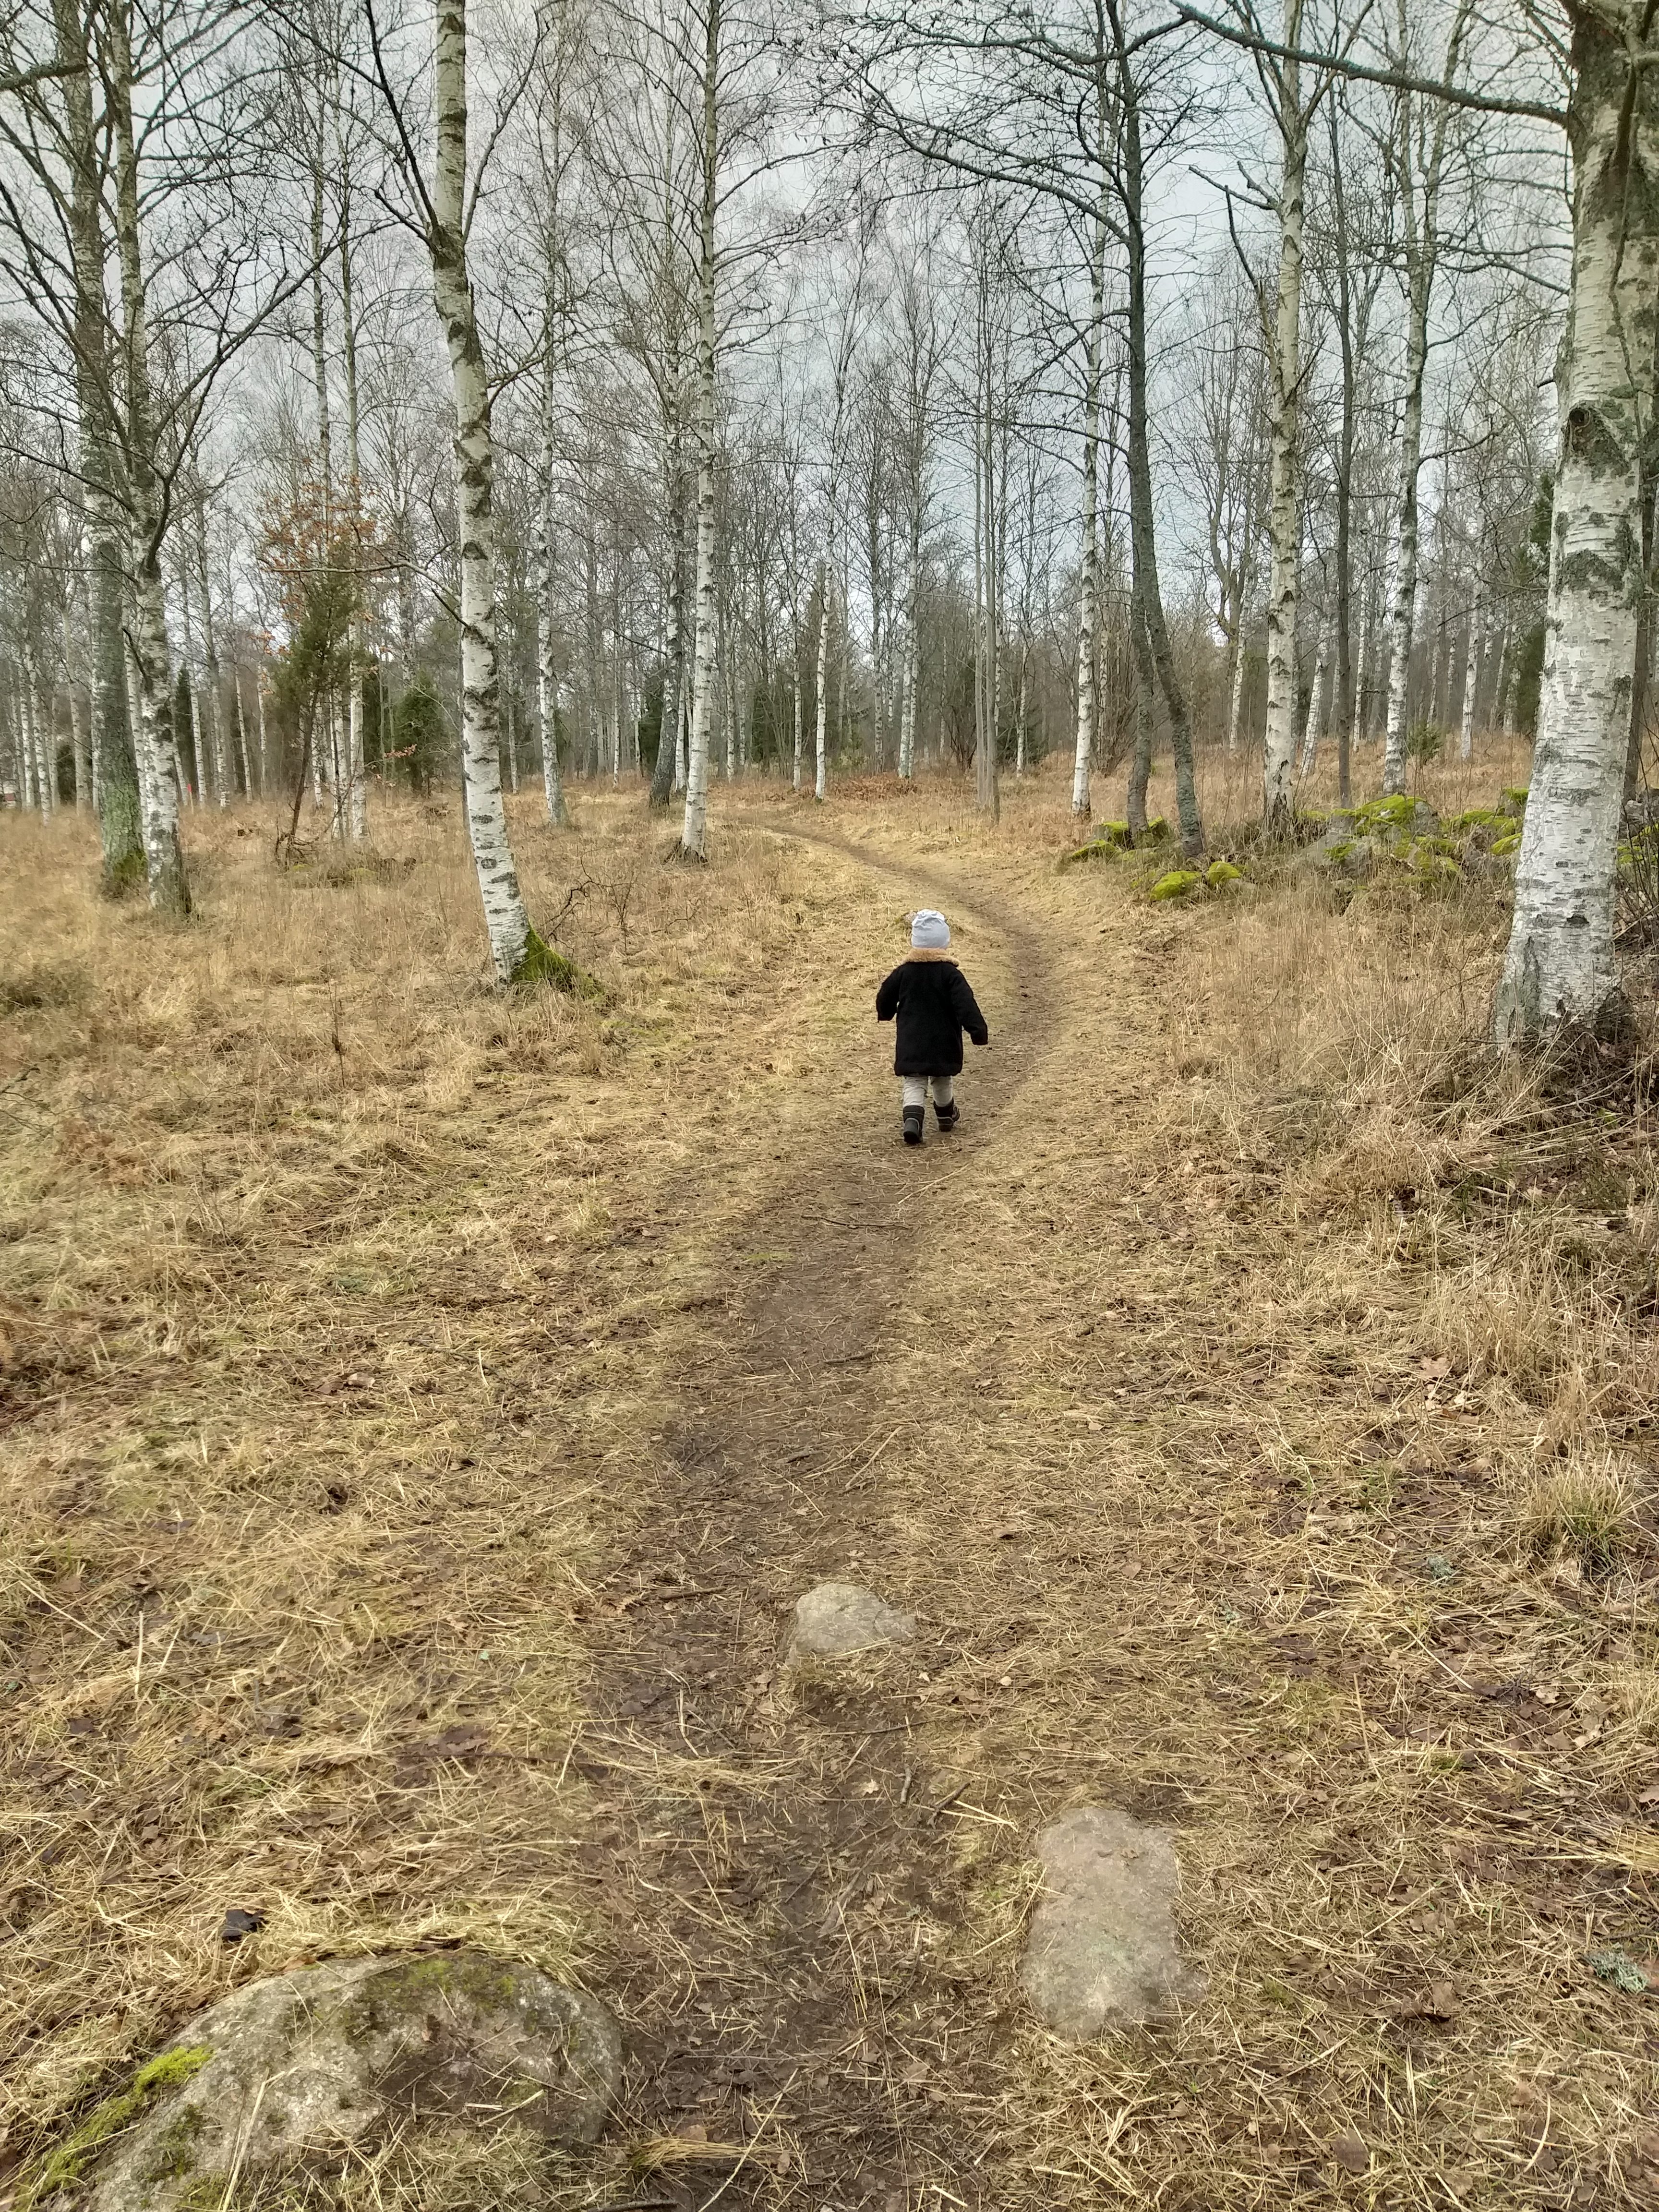
Our toddler will join the dancing sessions, off course. So he needs a kirtle. I made one in a few hours by machine. He should have a pair of trousers and a hat too, but there is no time and what does it matter, really? If you want some background about children’s clothing, see this lovely page.
Tired boy in the company of his best friends
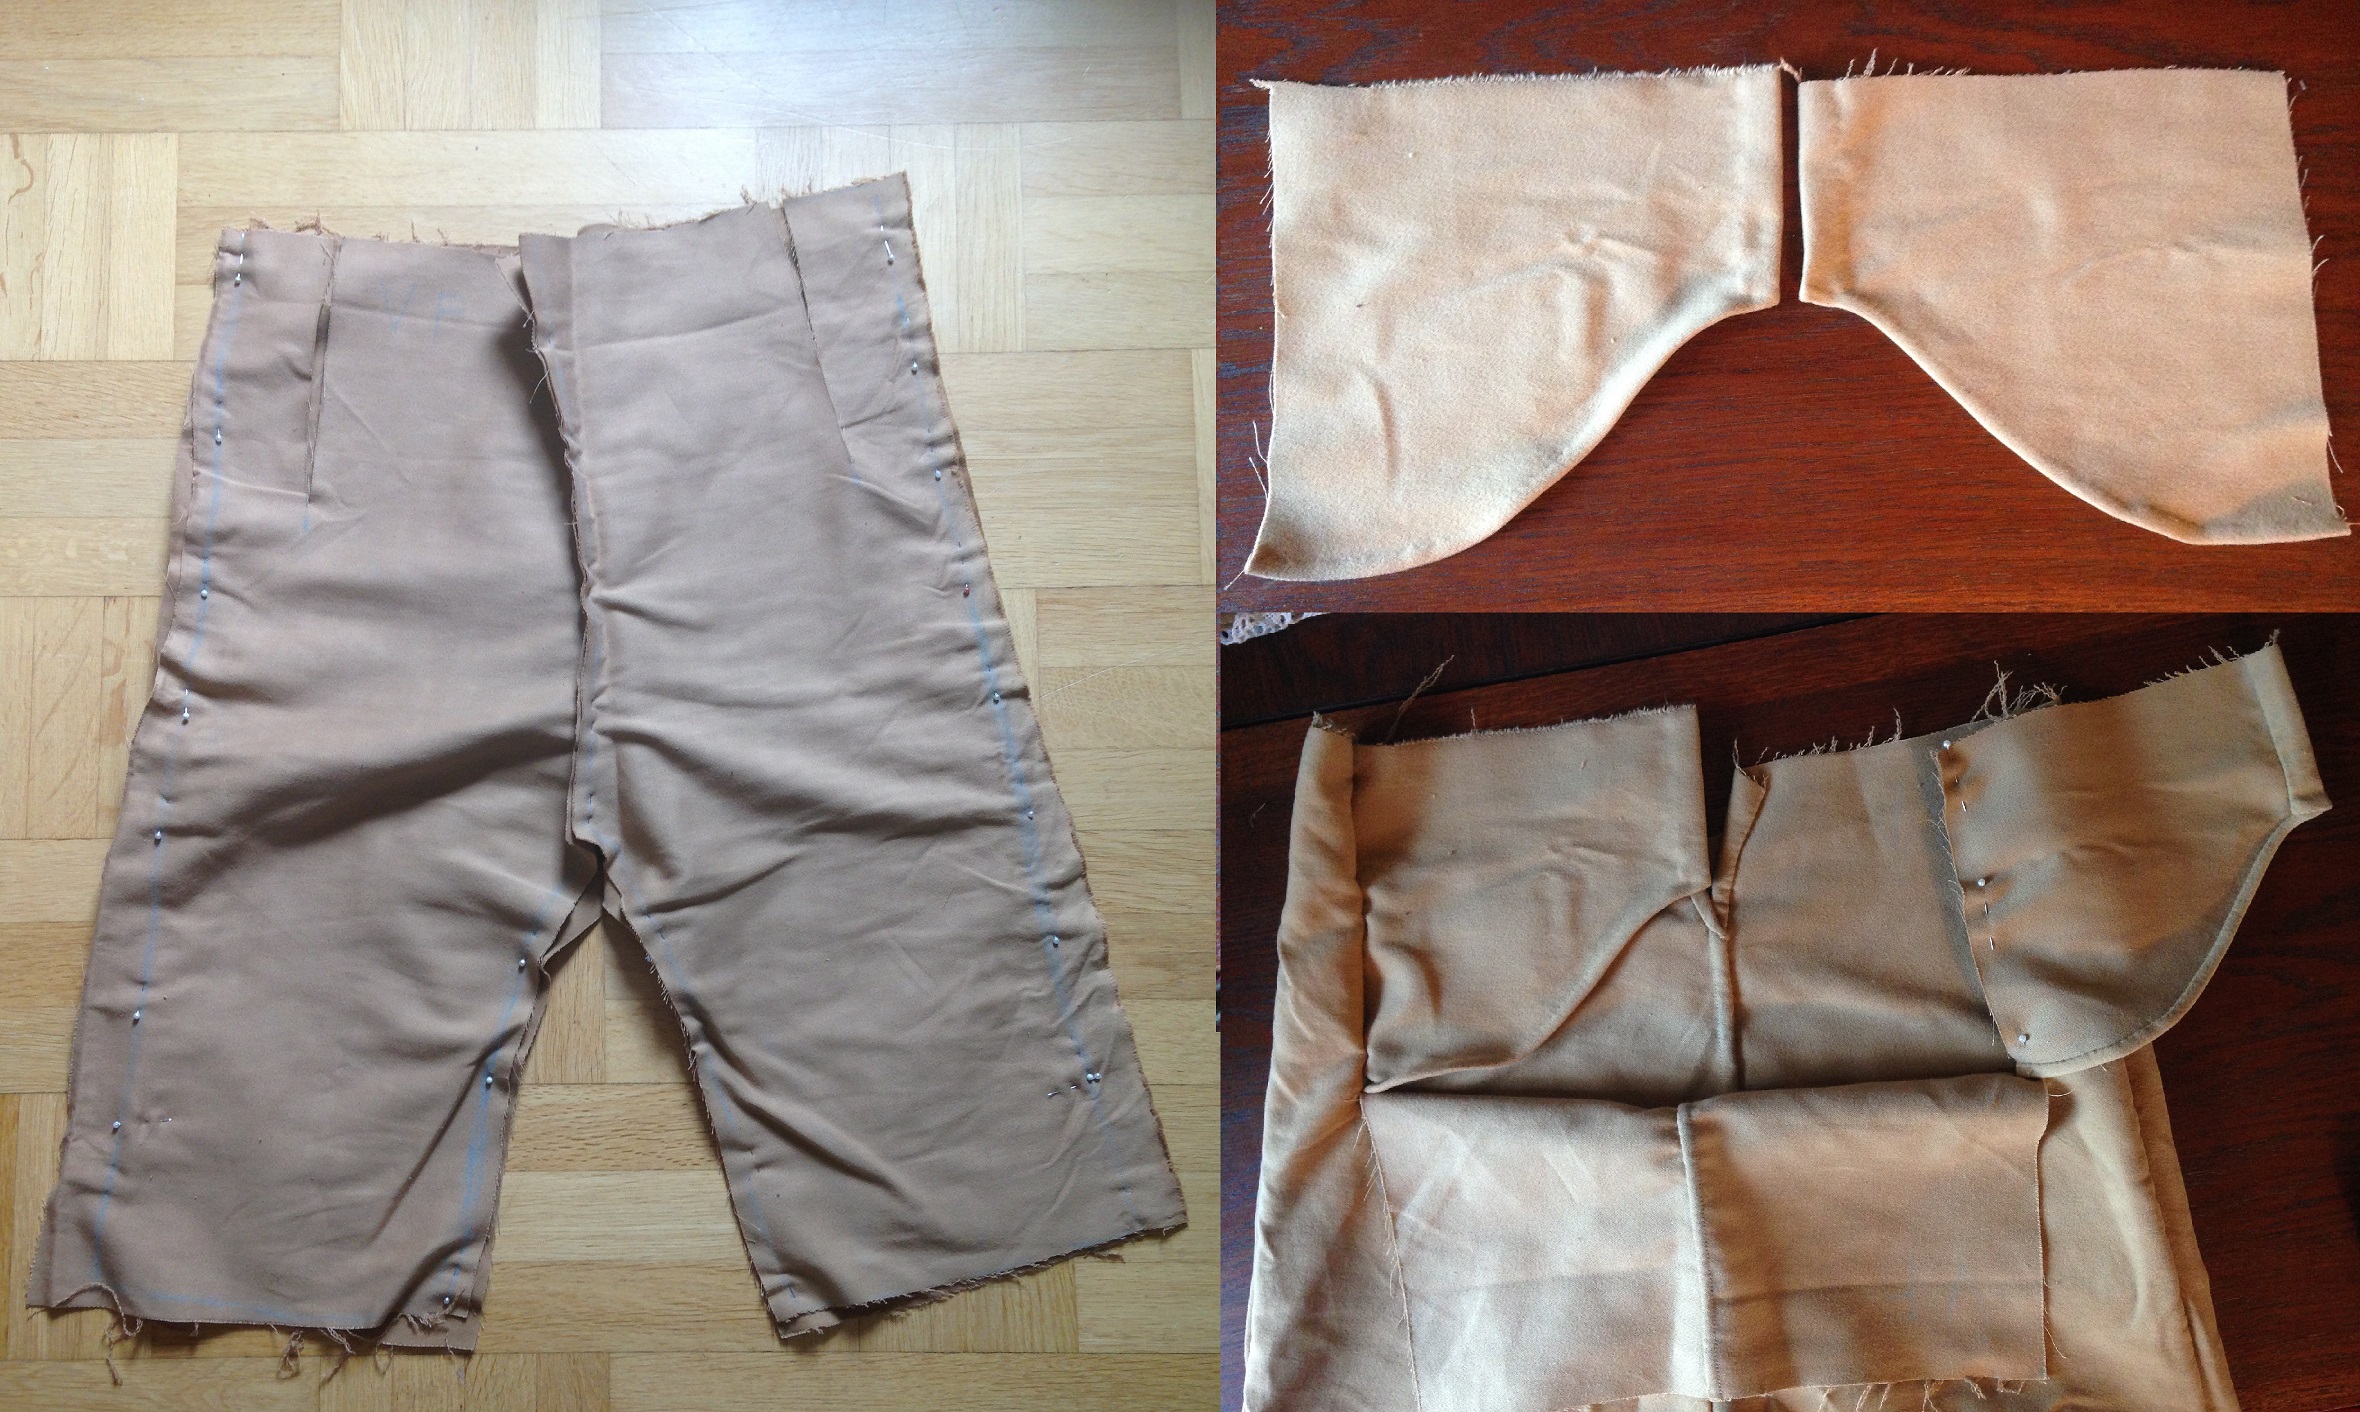
Fall Front Breeches
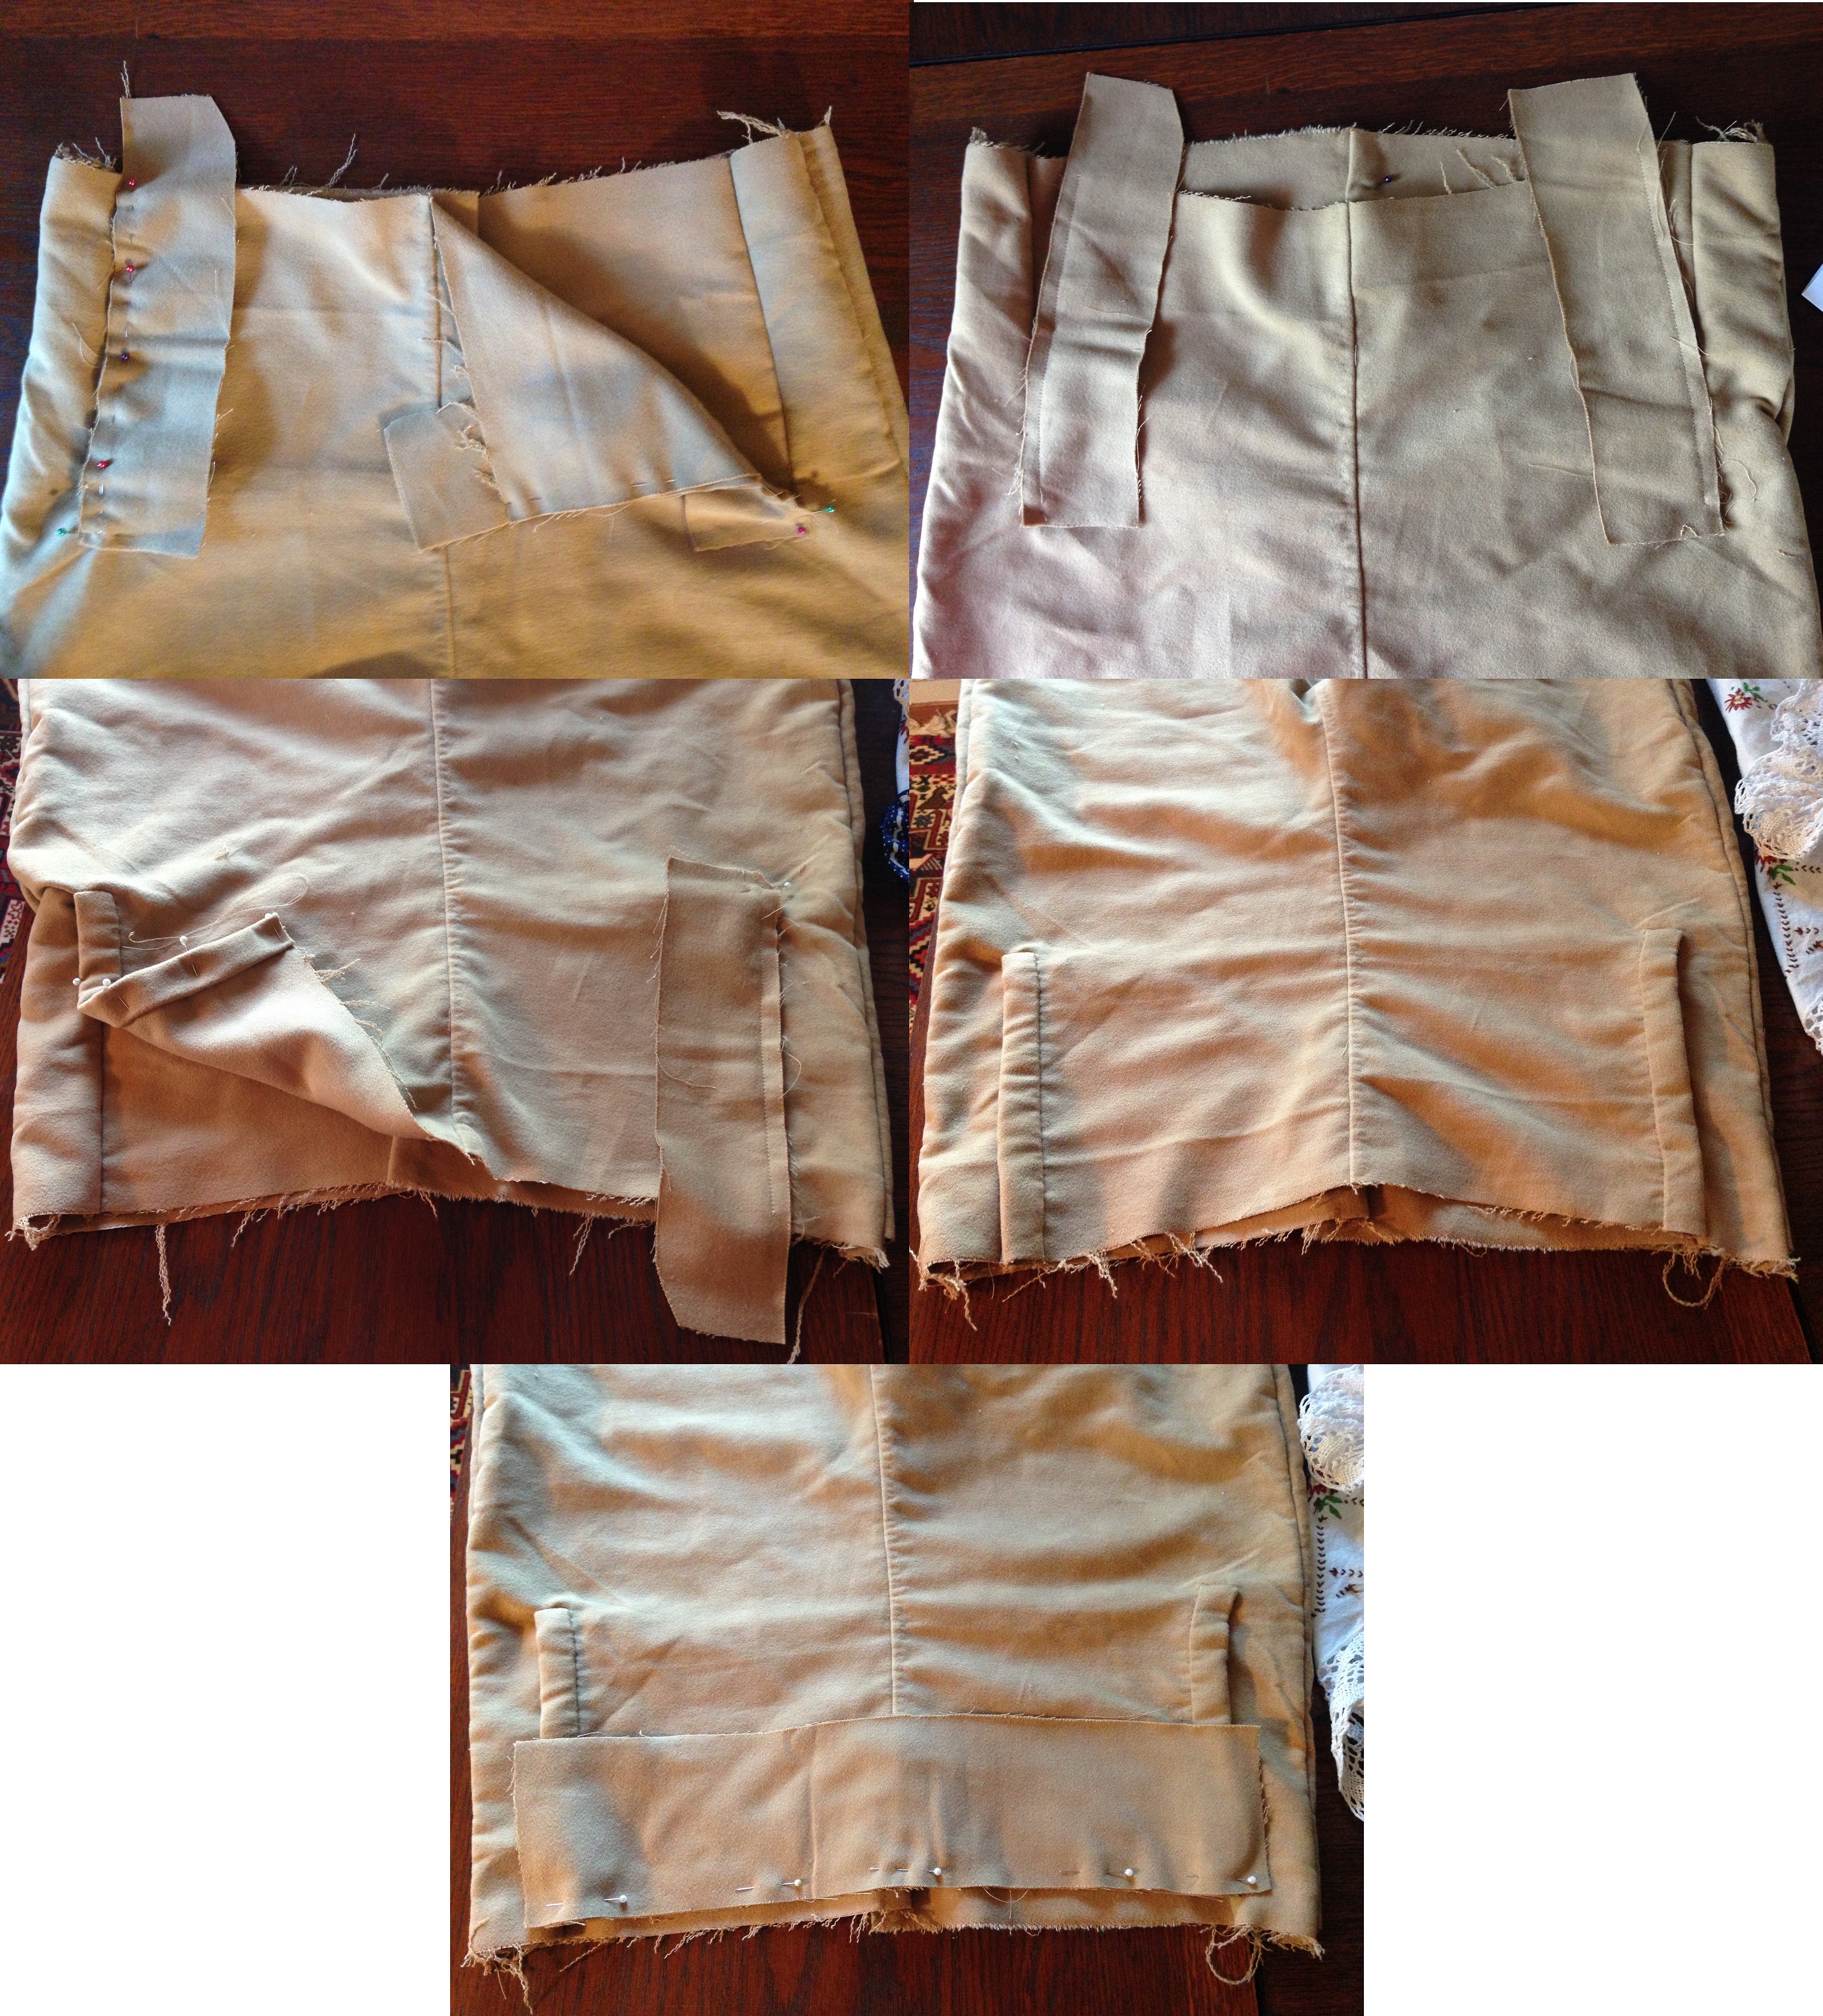
I have been working on a new pair of breeches for my husband for some years, moments at a time. Now only the buttons remain. I have tried to solve the mystery of the construction of the elusive fall front breeches and drafted the pattern myself. This is how I have interpreted what I have seen in pictures.
1) putting together front, back and both sides 2) cutting slits by the sides for narrow or broad fall front 3) adding the pieces behind the fall front
5) adding fabric pieces to the fall front sides 6) folding the pieces around the sides in order to hide the raw edges 7) adding one piece more to the top of the fall front in the same way
After I stopped documenting this process – why, in heavens name? – I added a waistband to hide the raw edges at the rest of the top of the breeches. I hid the raw edges of the end of the legs in the same way. And at the very last I will add buttons and make button holes!
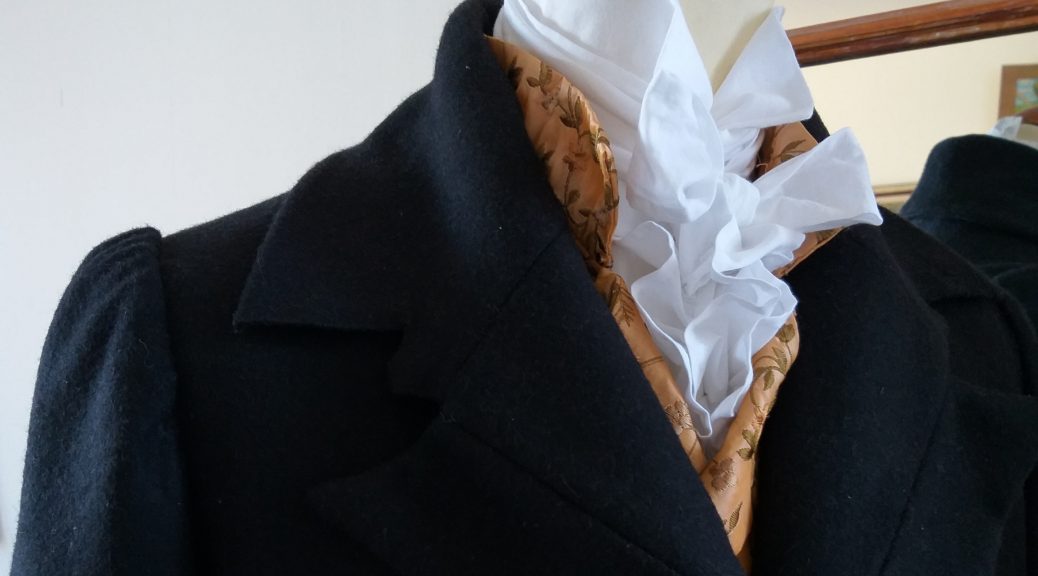
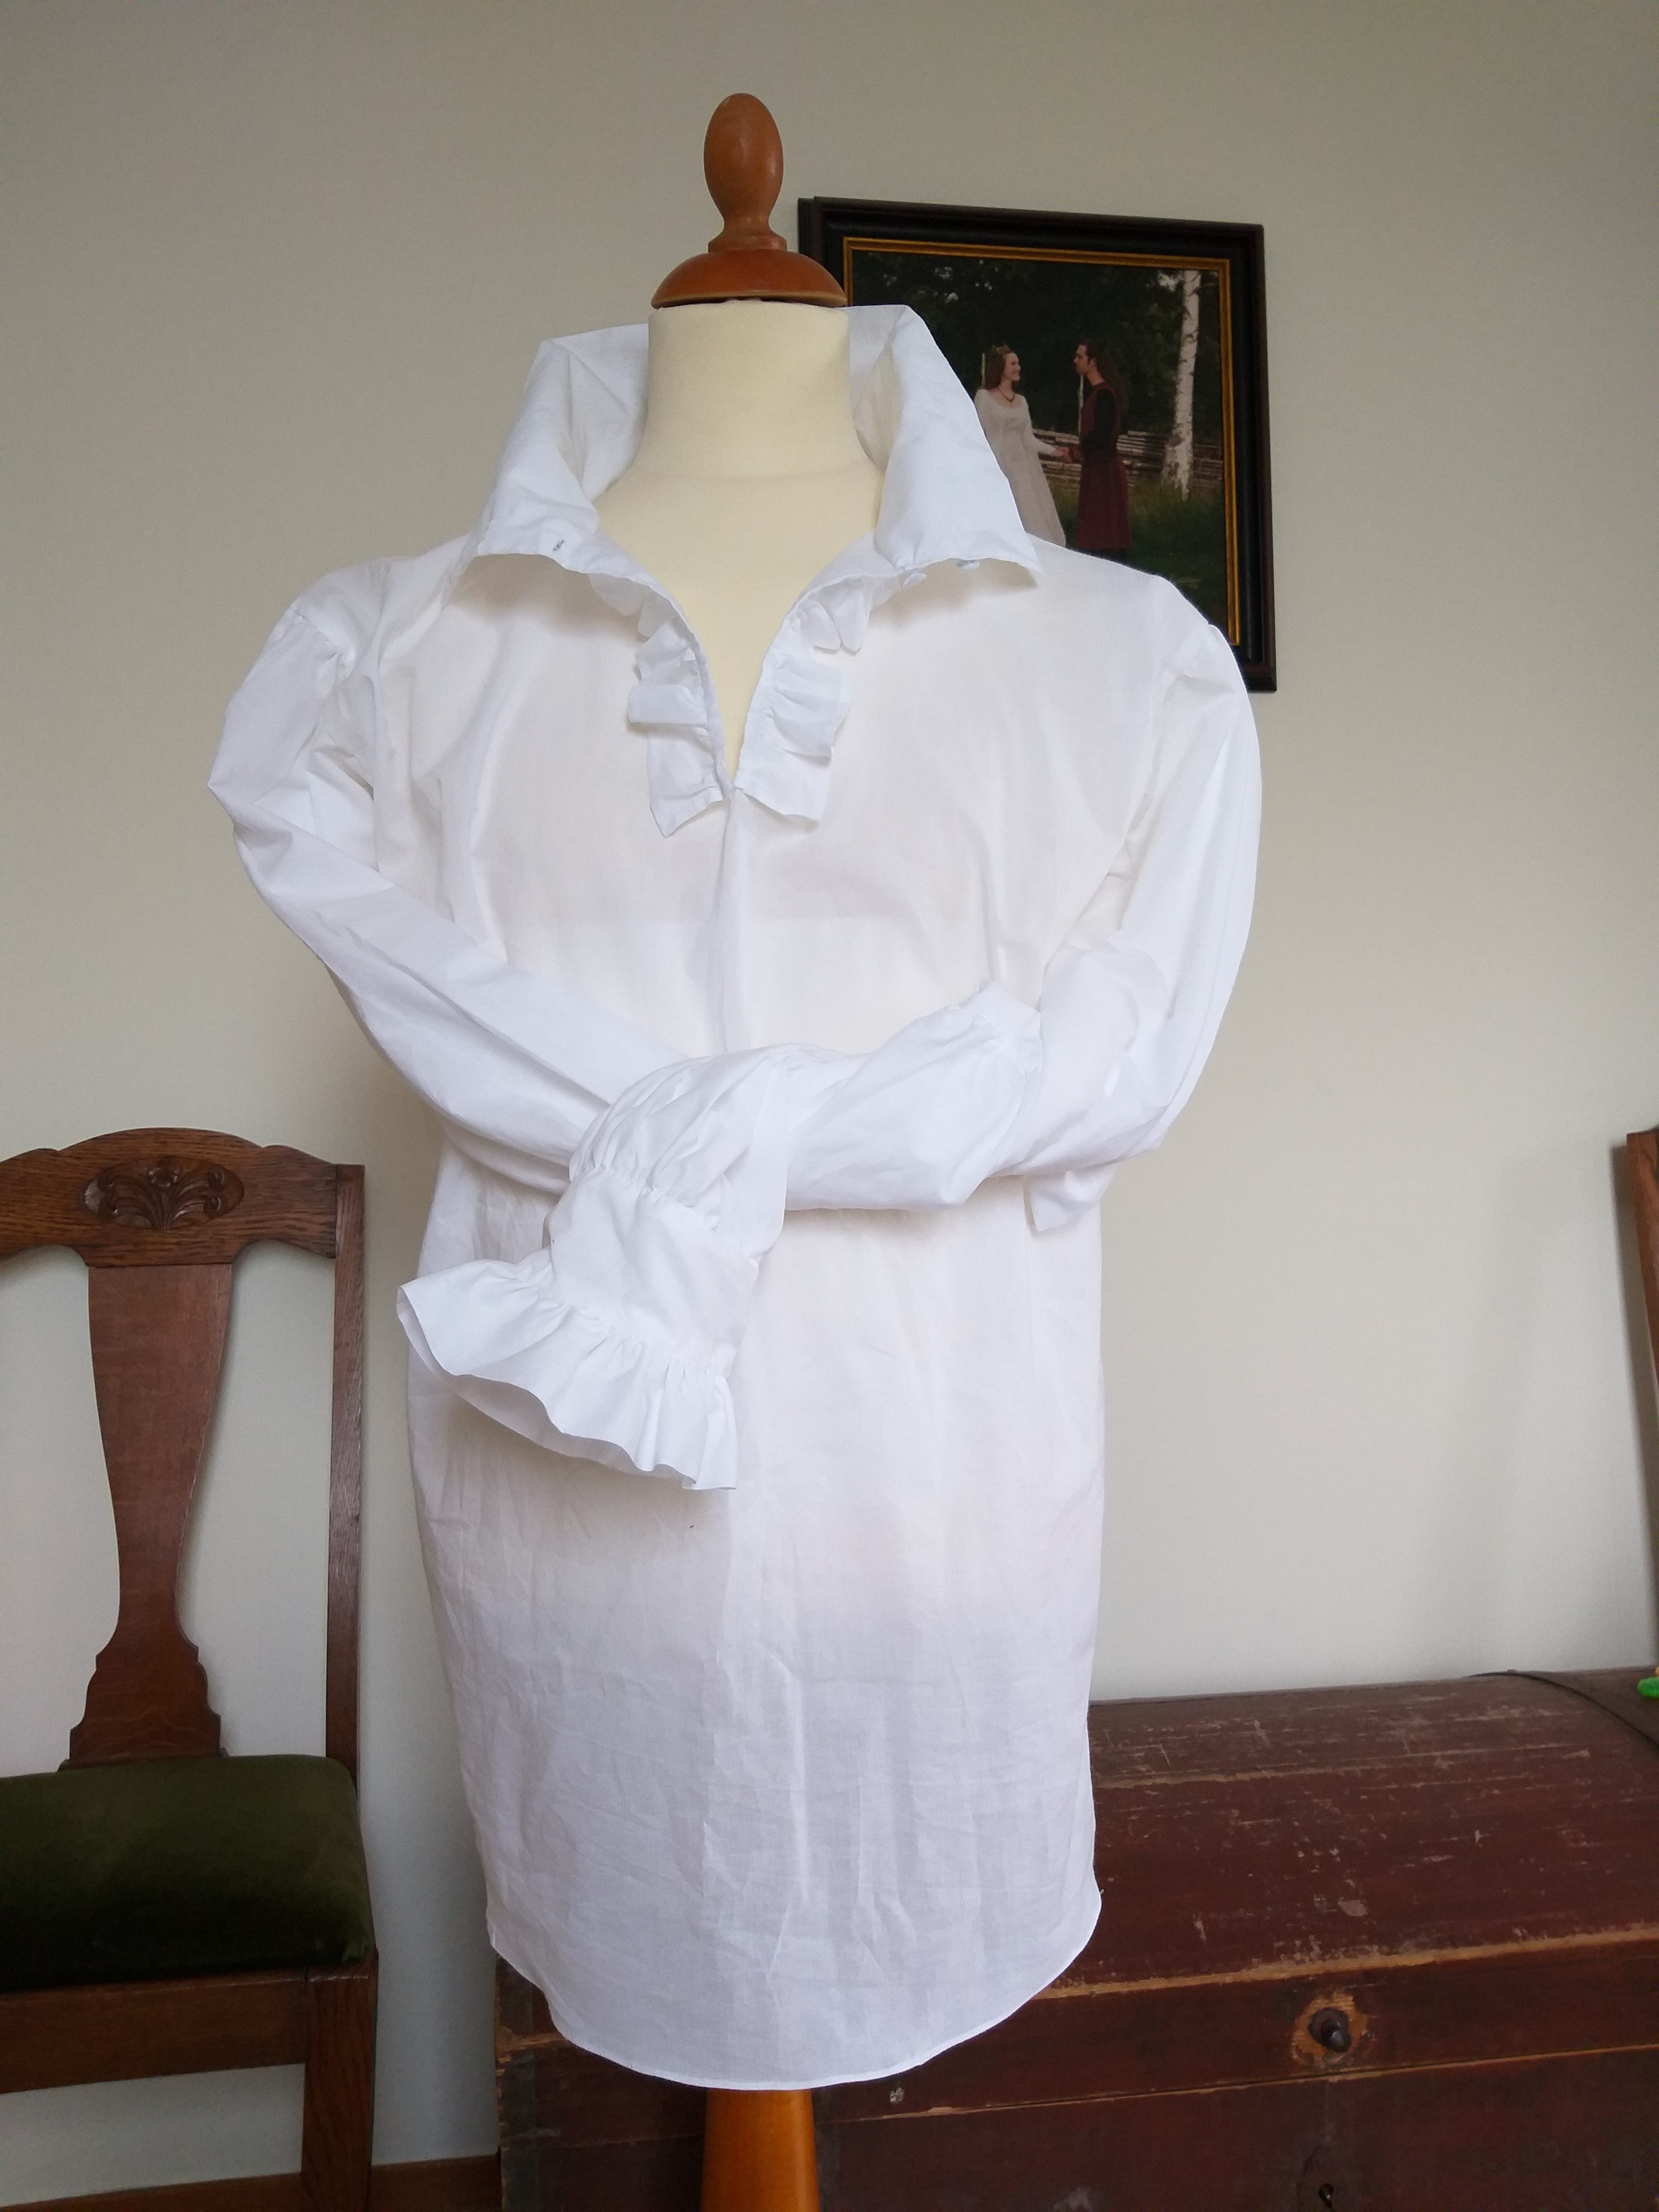
Shirt with Ruffles
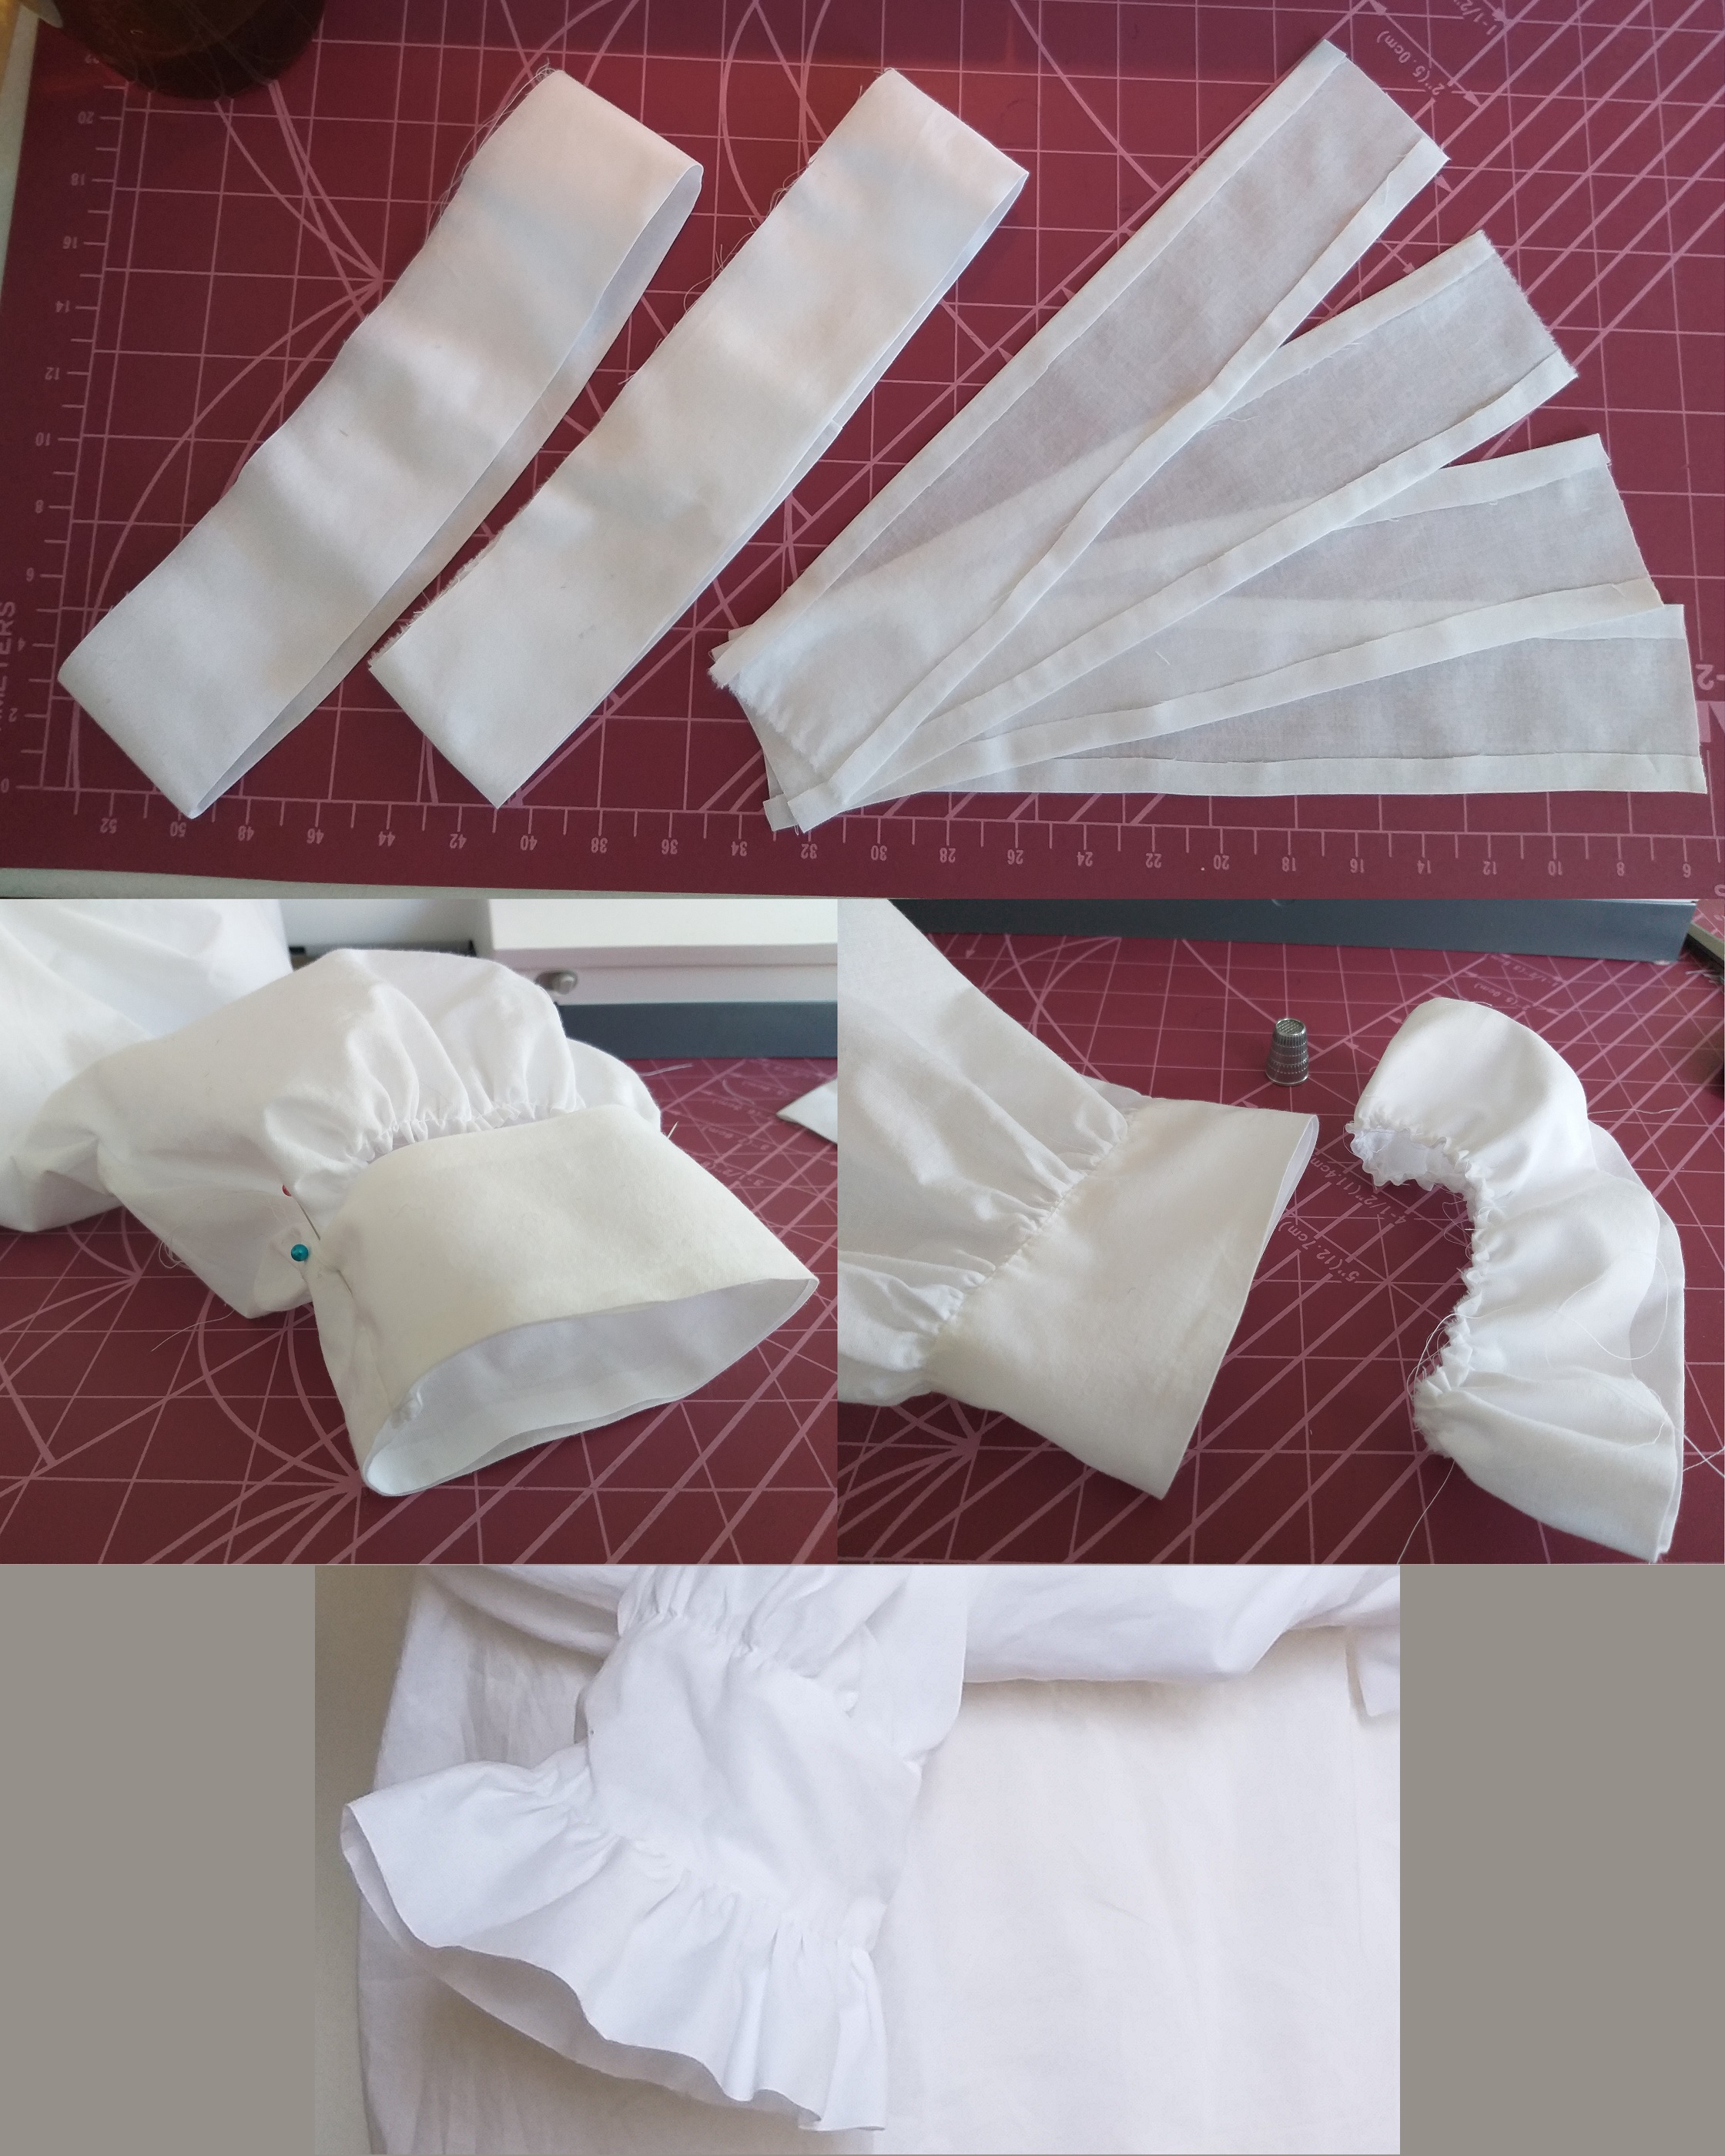
I thought that he also needed a nicer shirt and cravat than the first set of clothes, so I made a new shirt with ruffles in the neckline and by the cuffs. Afterwards, I have found excellent tutorials for period regency shirt construction, as in Fabric and Fiction and at Your Wardrobe Unlocked. This one is obviously wrong in many ways.
I started by cutting the double length wished for, folded and cut a whole for the head and a slit at the mid front. Then I added two square arms with square gussets at the arm pits, with gathering at the shoulder and at the end of the arms. I also added ruffles at the slit in the front, although I found out later that the slit should probably have been 3-4 dm long and the ruffles should have been in one continuing piece, instead of one on each side.
I have no idea how this should be done, but this was my way of making the ruffles at the end of the arms: I had two pieces of fabrics in which I hid the raw edge of the arm gathering. After having stitched this in place, I added a folded piece of fabric with gathering, which I tucked in between the two layers in the same way as the arm gathering.
I believe that the opening in the from should have been longer, but then there would not have been enough of fabric for ruffles.
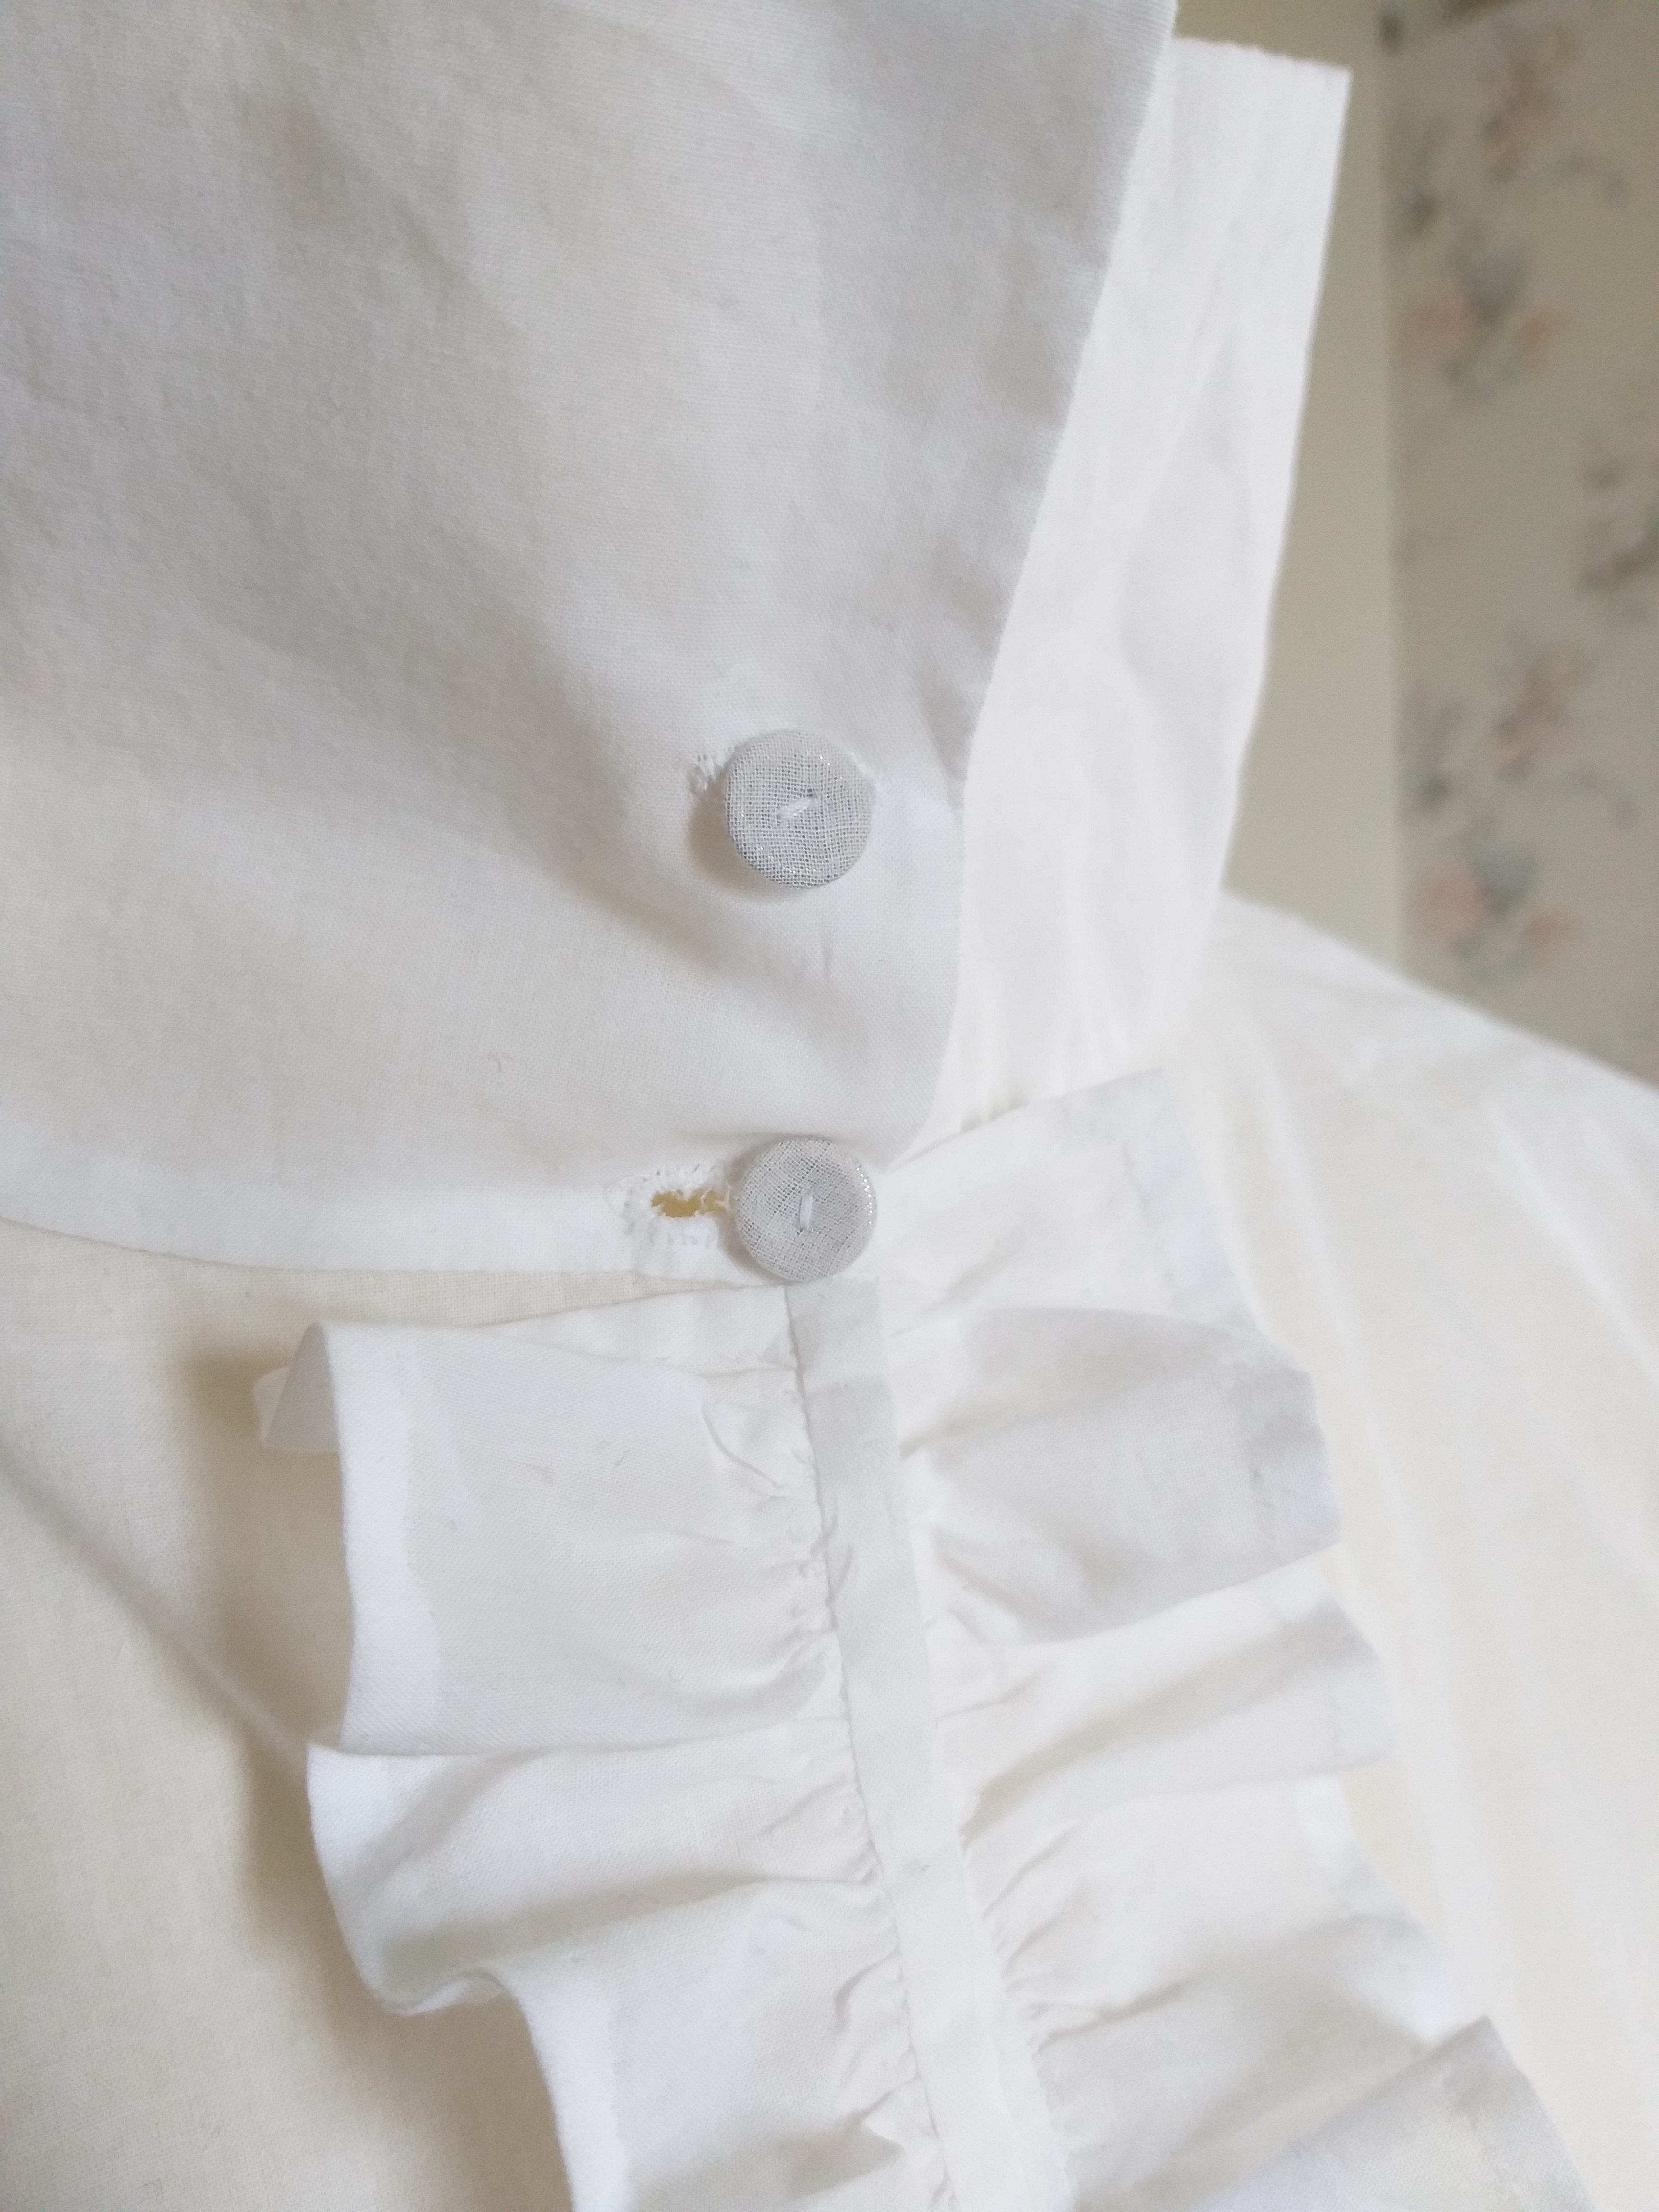
Ruffles sewn by hand and self covered buttons for the collar.
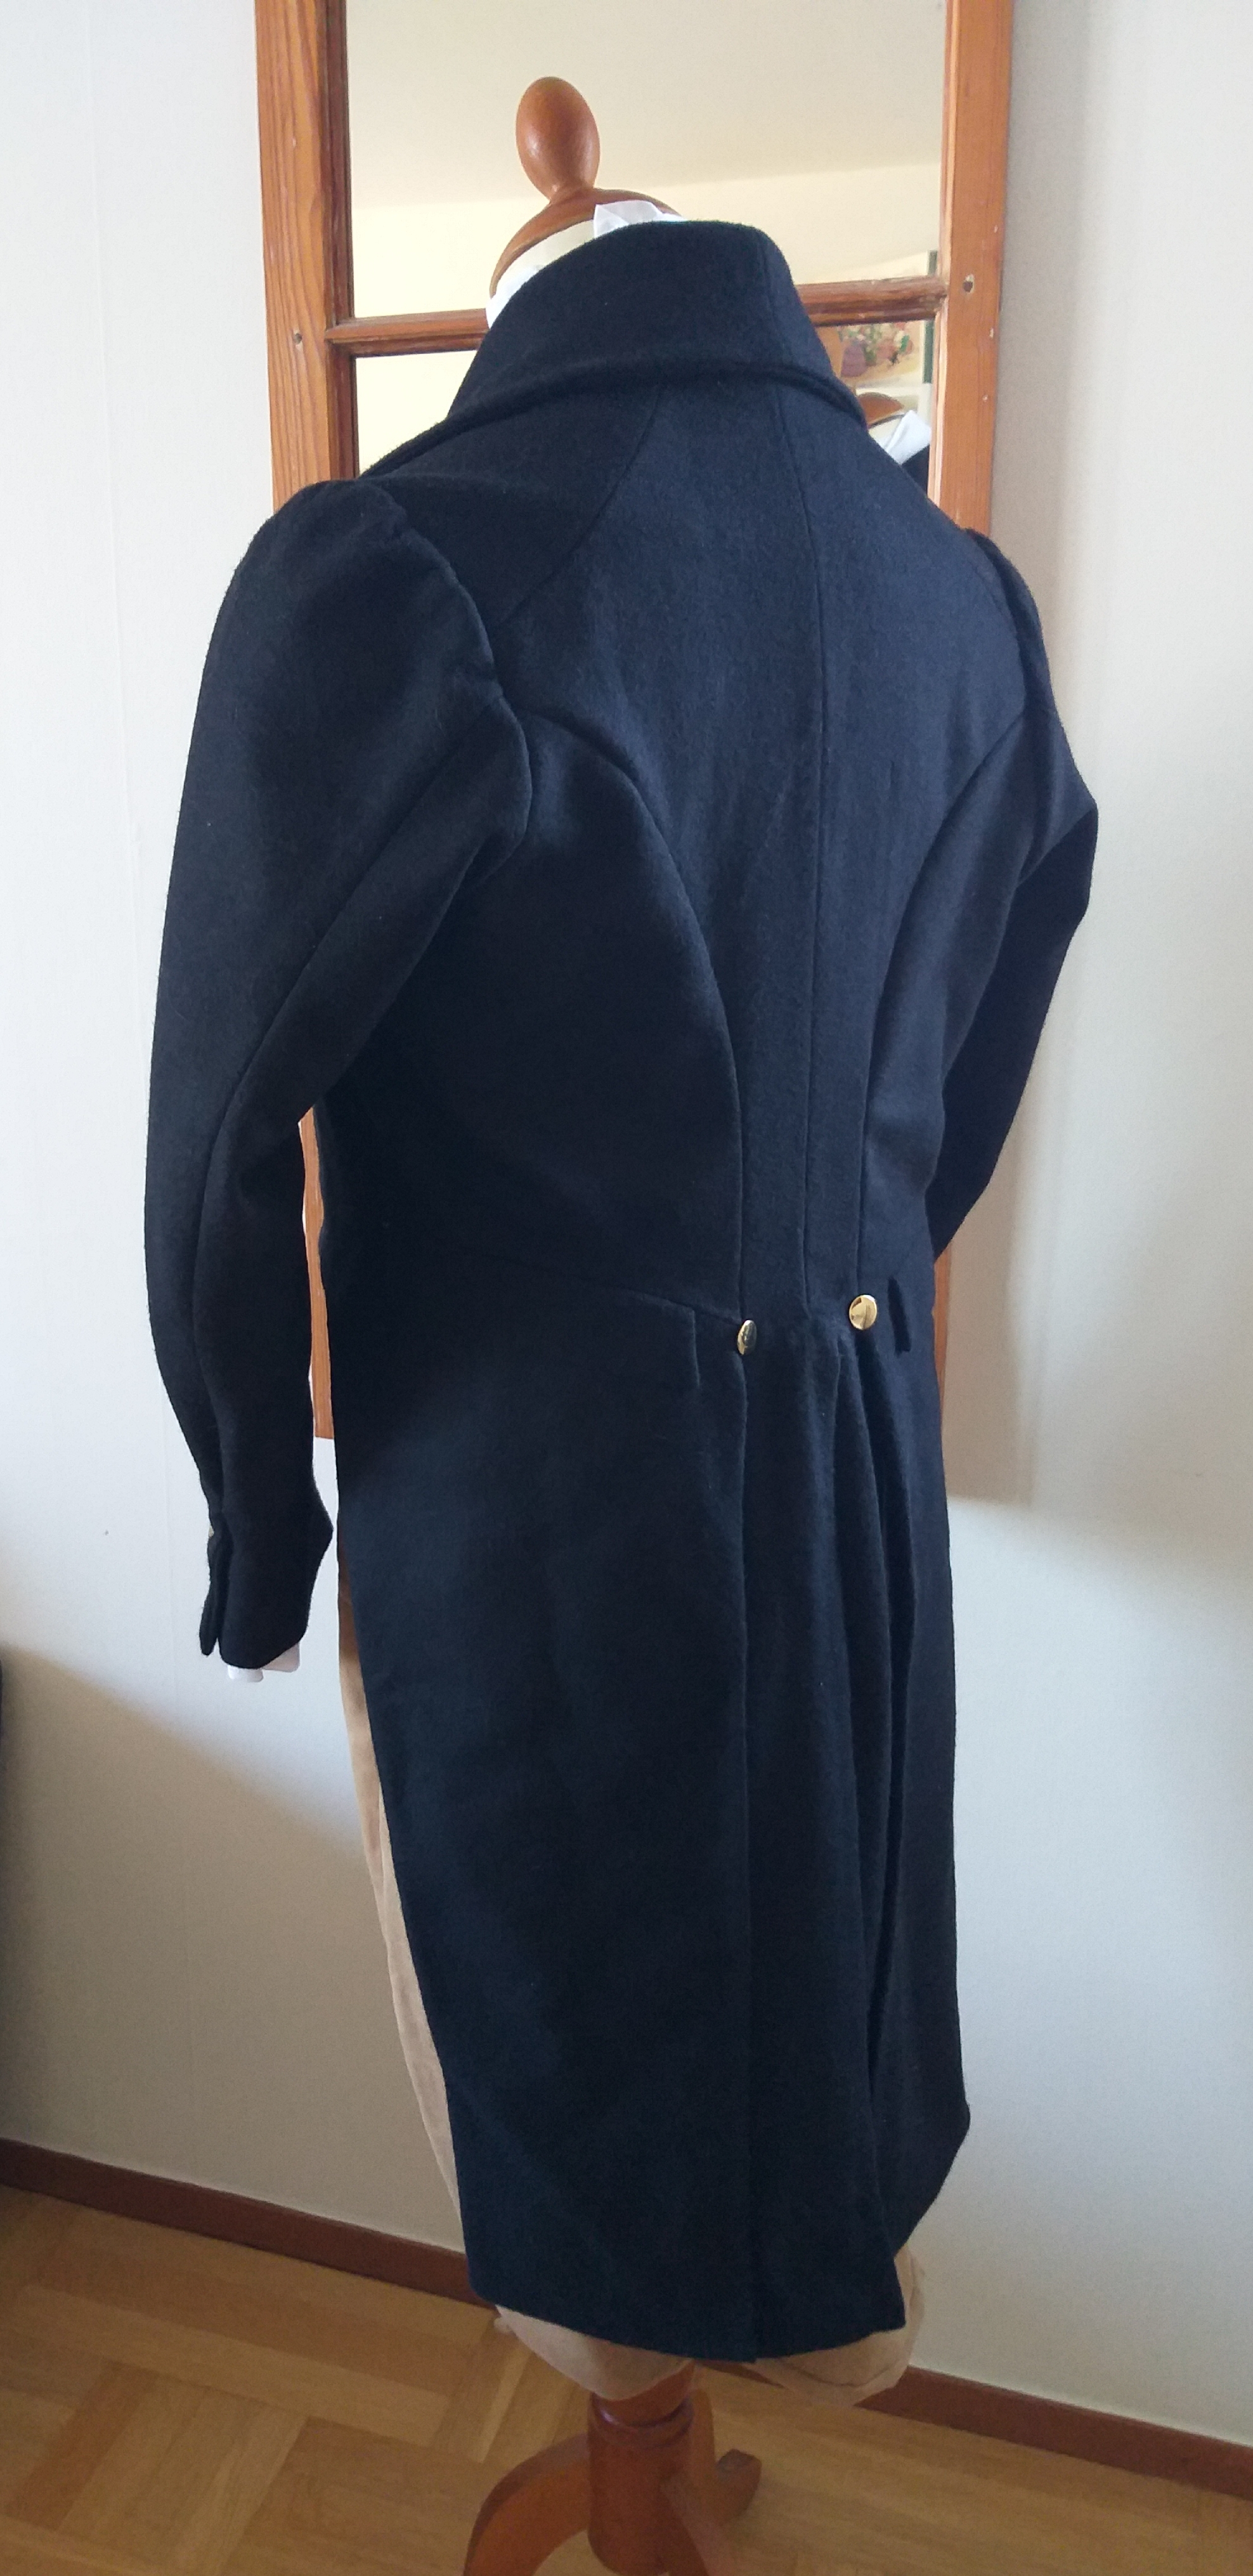
Tailcoat
My most time consuming sewing project ever must be his new tailcoat. I have used historical methods and made all of the interlining by hand – hundreds of stitches that no one will ever see… ? I used the fantastic pattern of Laughing Moon that I bought for the prize money for my win in the 2017 competition of Your Wardrobe Unlocked.
Now there is only a new waistcoat left to make the suit complete. And a pair of shoes, stockings, pocket watch, new hair etc… When starting to update the historical wardrobe, there is no end to it, especially as the family expands.
If I’m still alive by the end of the week, after two more nights at work, I look forward to see all of these clothes during the dancing session.
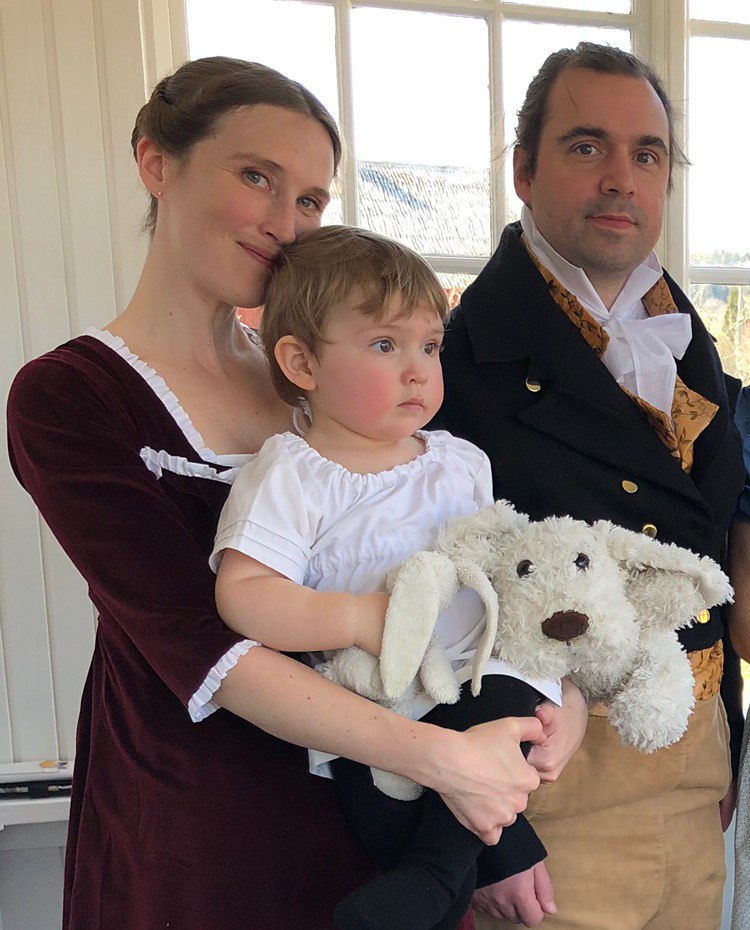
The dance training was featured in the local newspaper, with some nice pictures. This was what our family looked like. Alas, it was all too obvious that I had not made adjustments for the tail coat during the process, for it did not fit as well as I had hoped for.
– where you can see what I do – designing, sewing, singing, creating etc.