Category Archives: Sy om

Tanzanian Robe Reconstructed

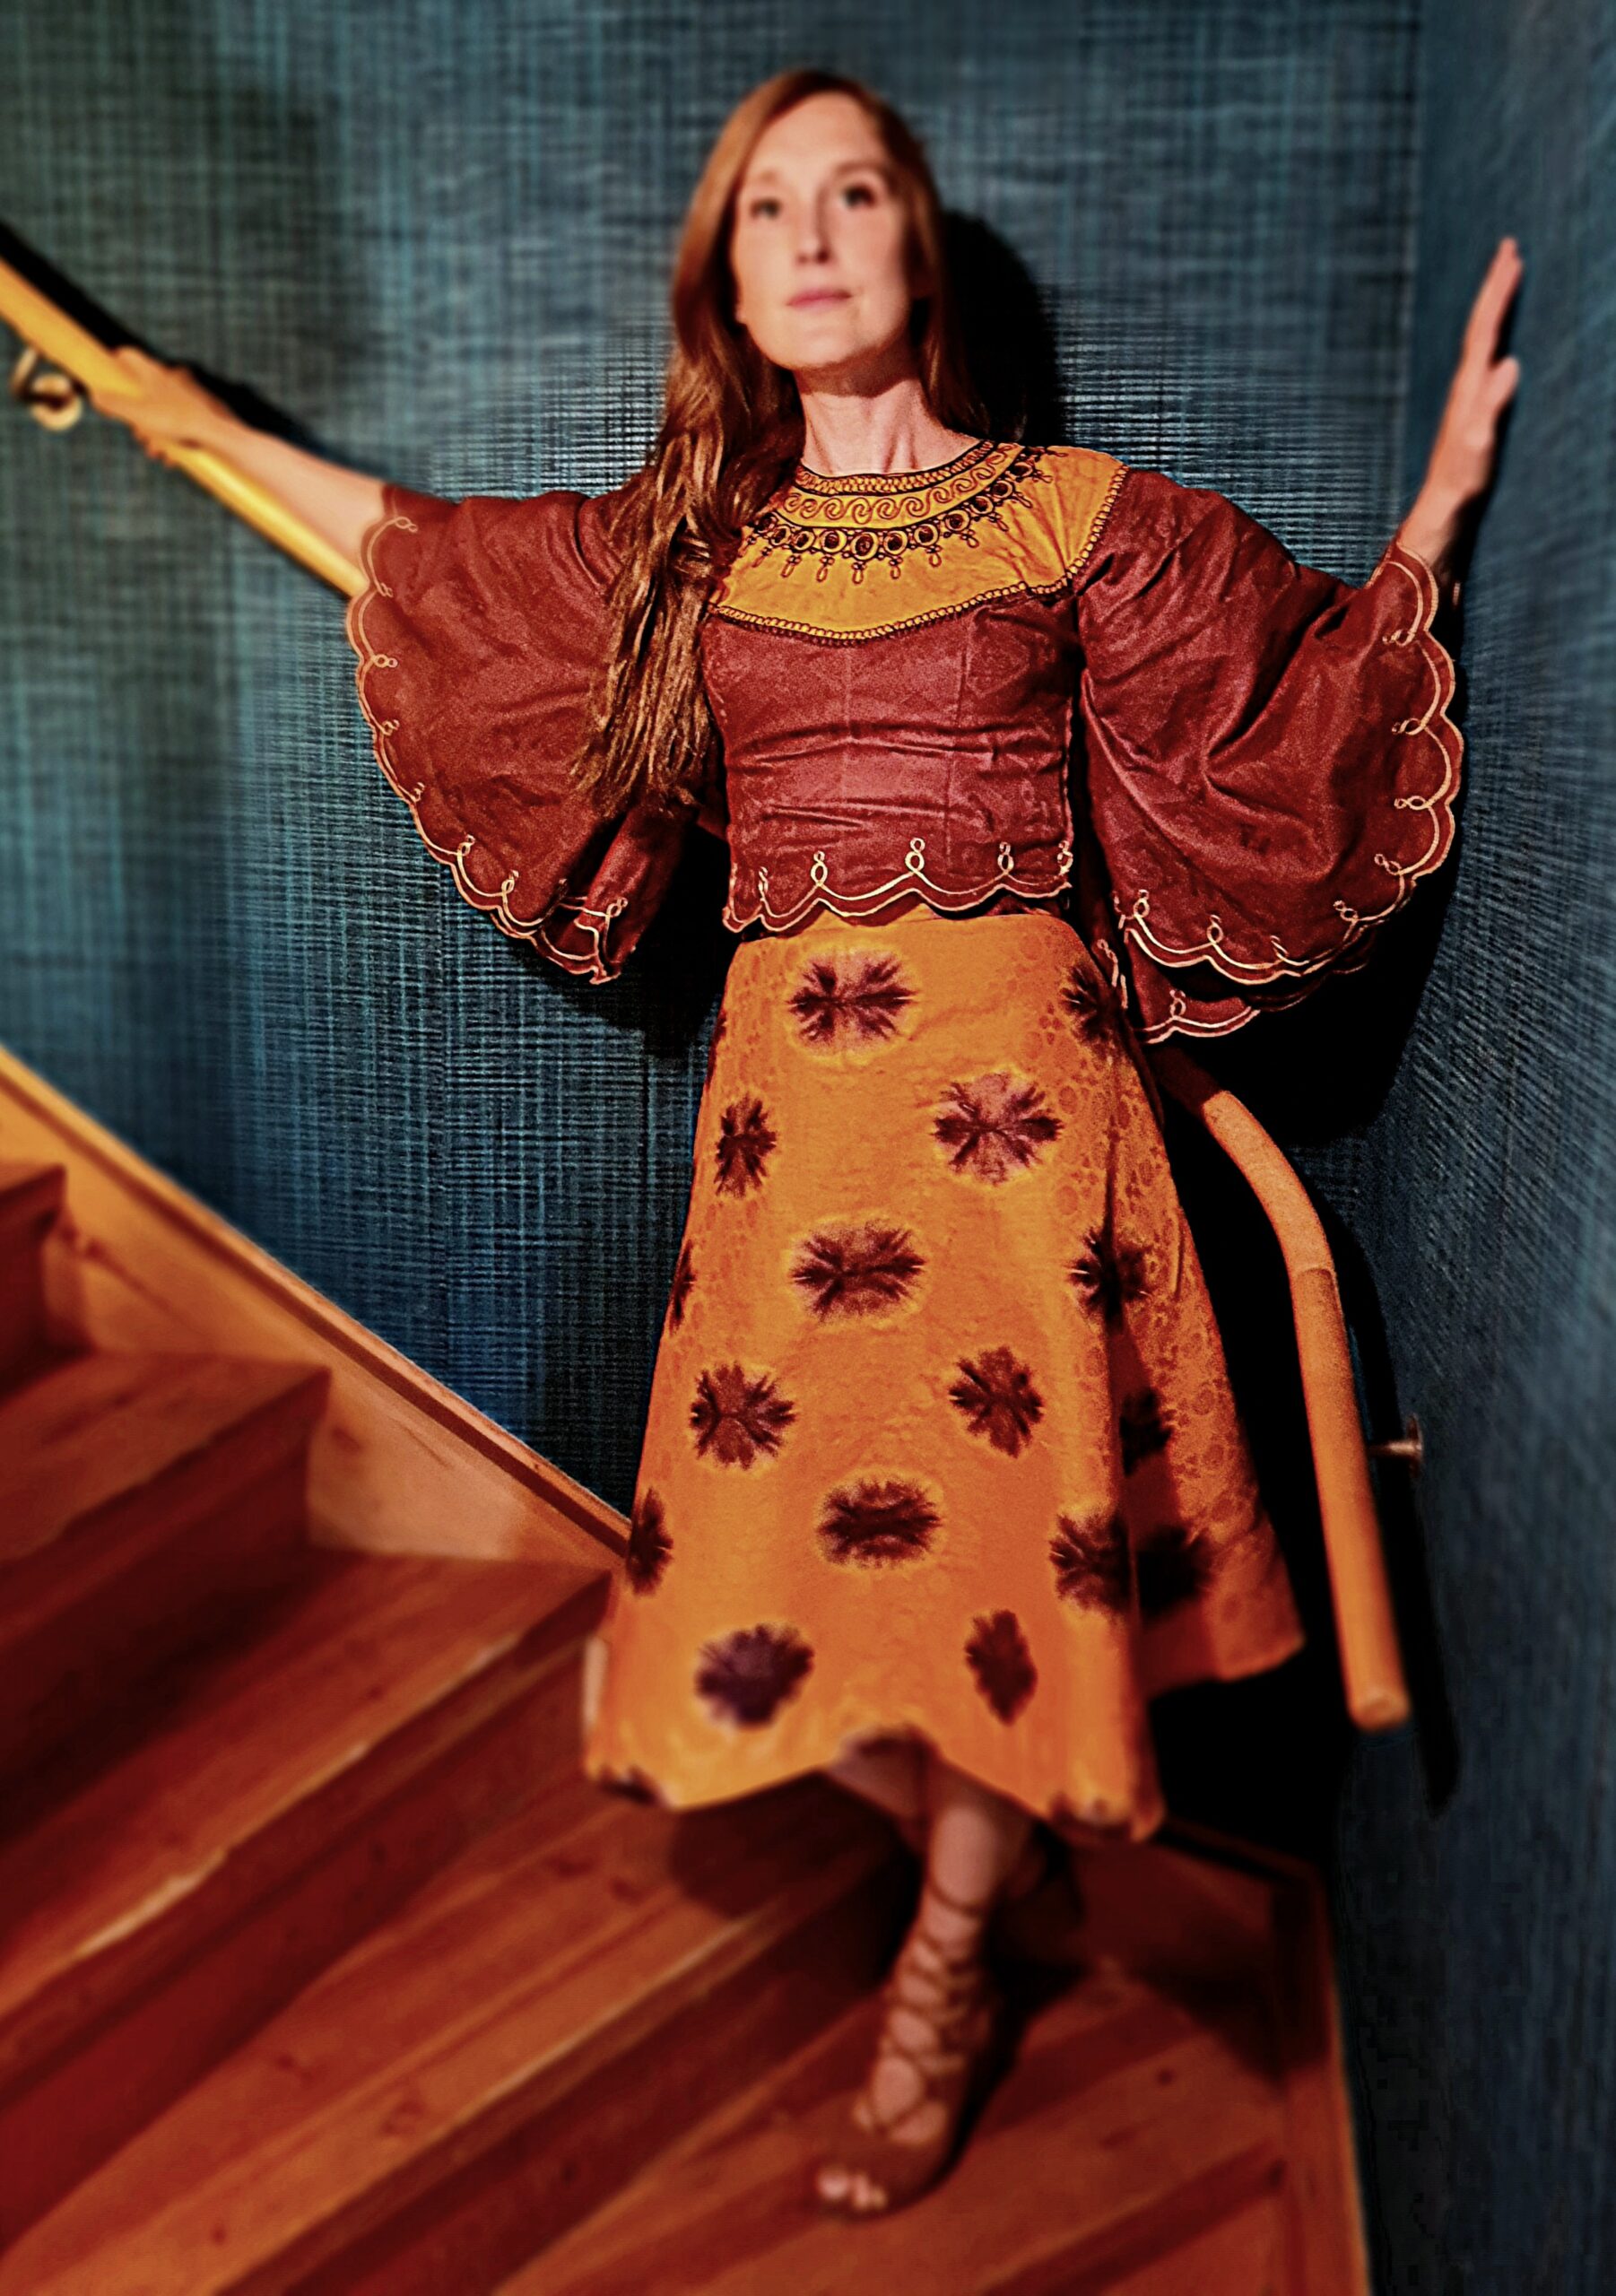
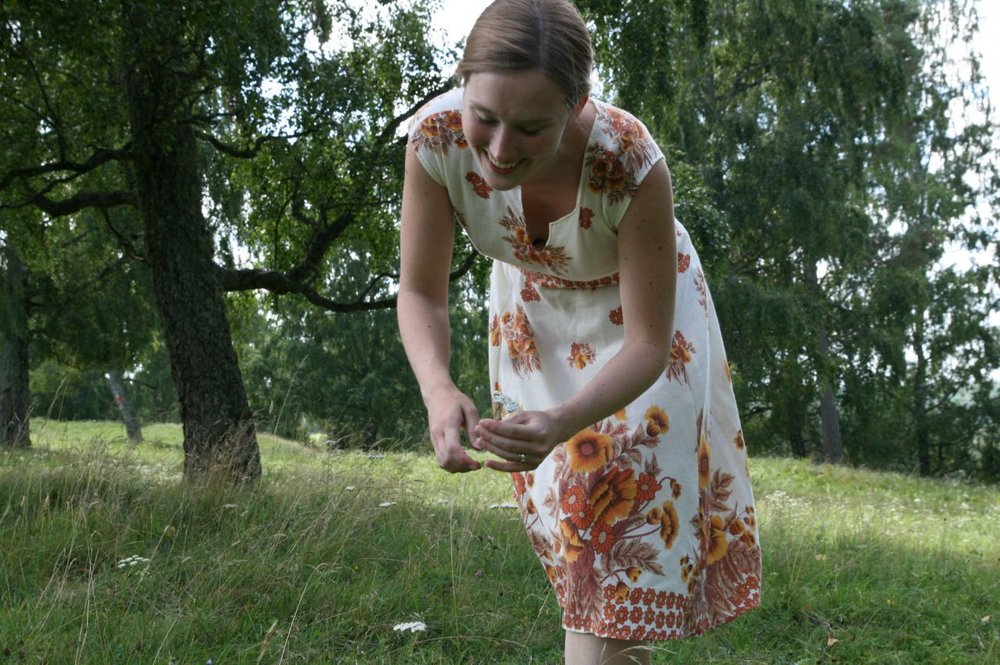
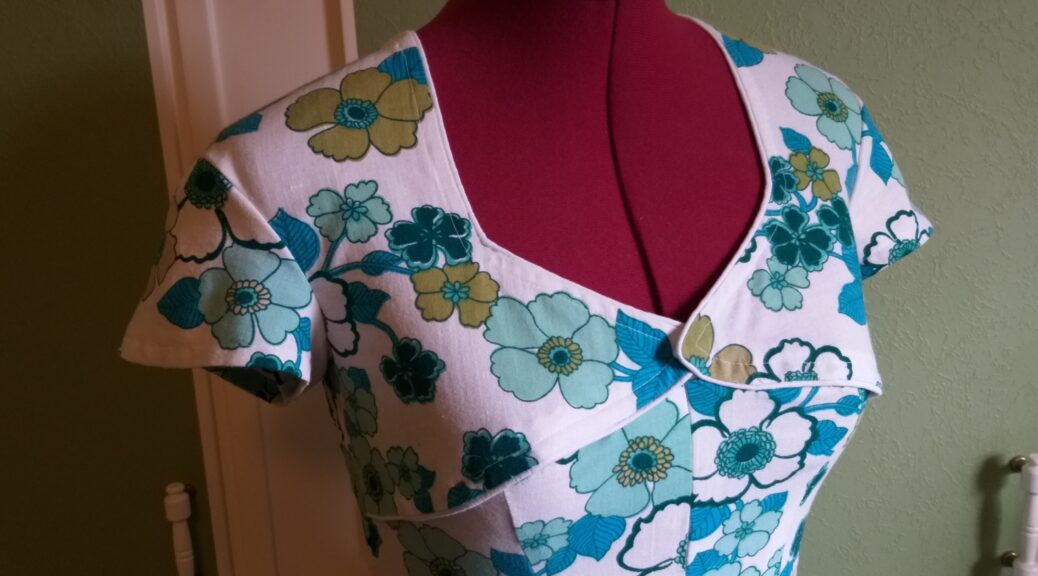
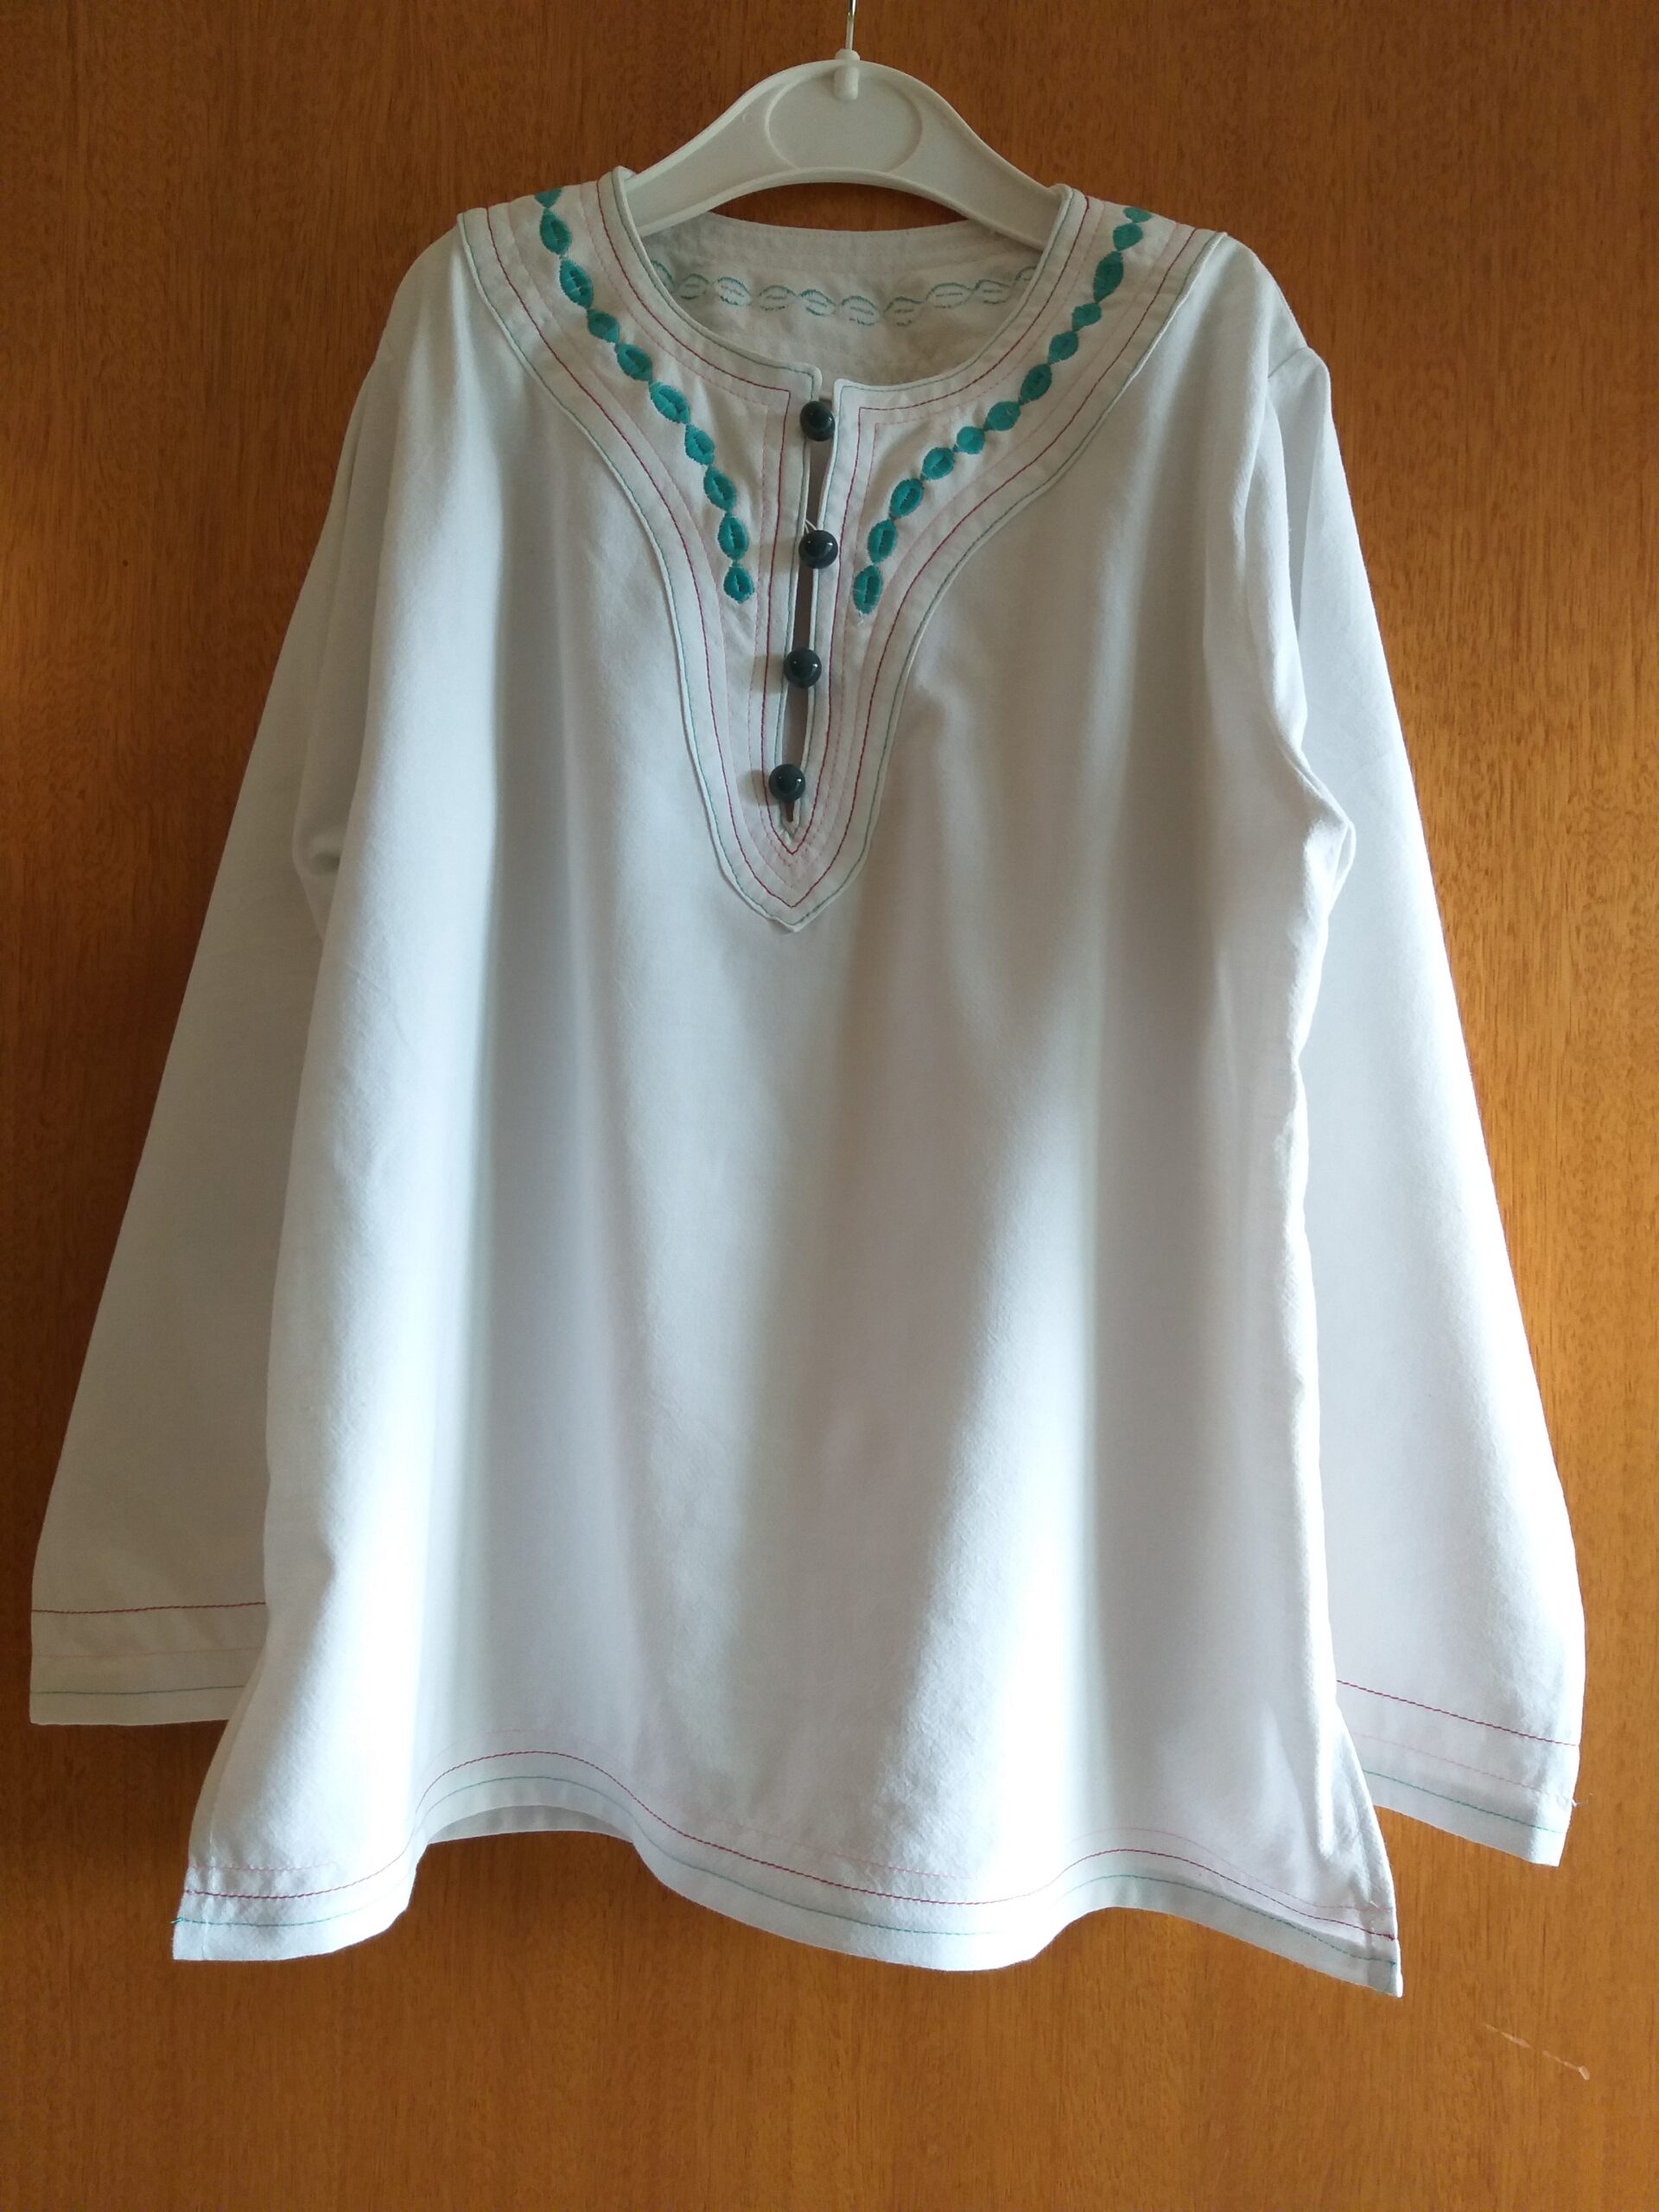
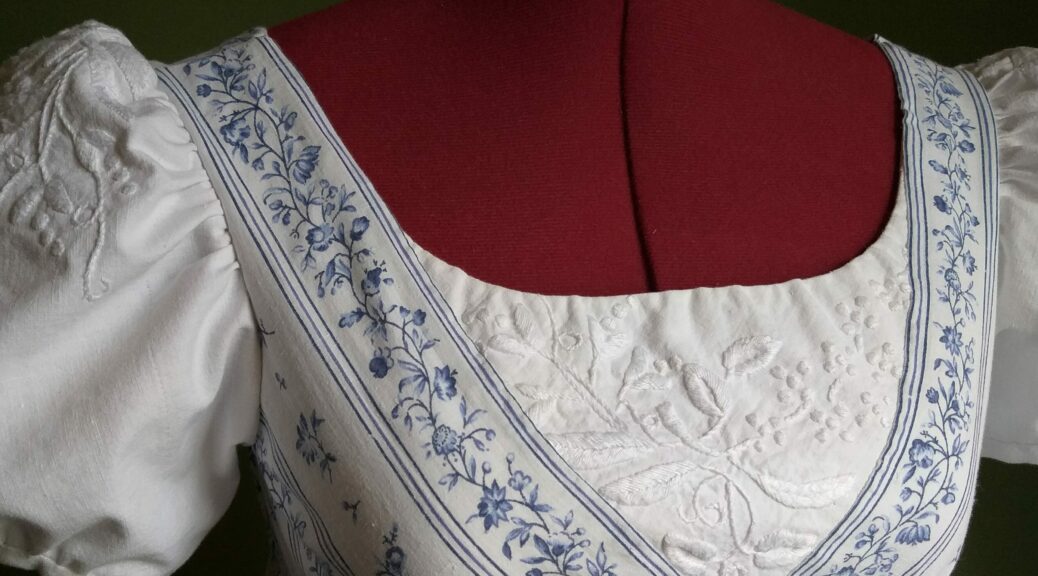
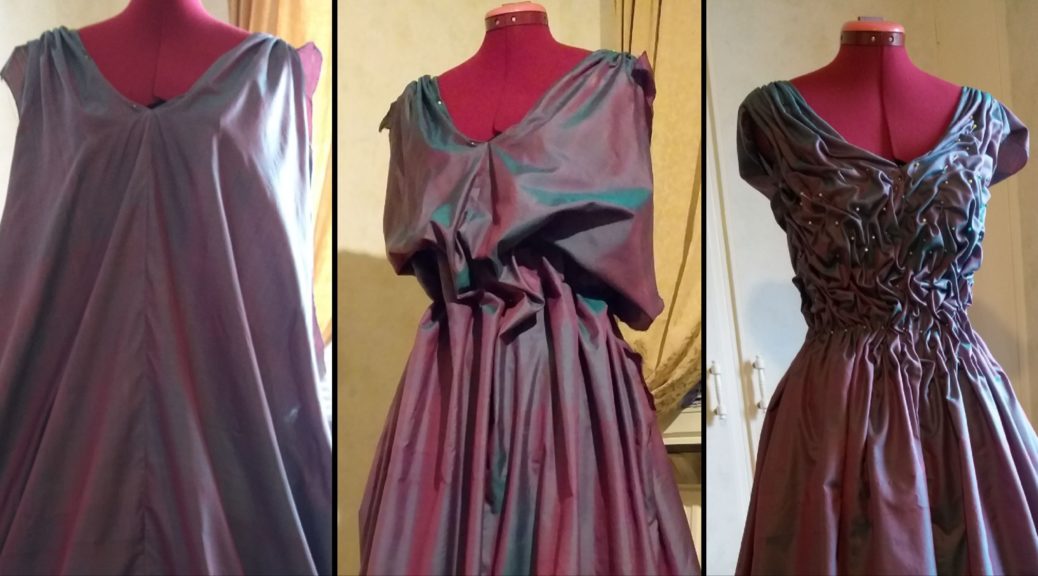
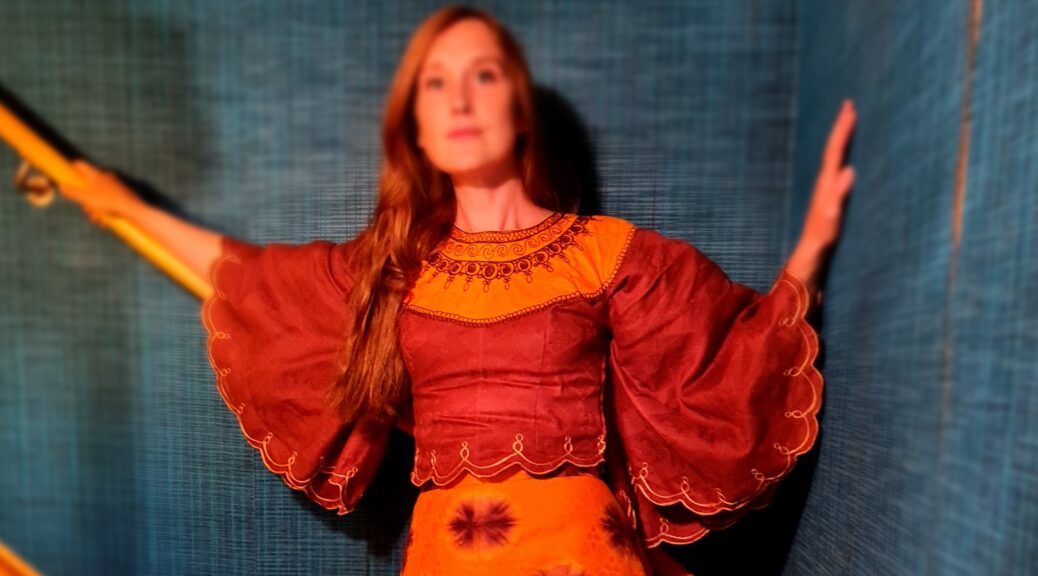
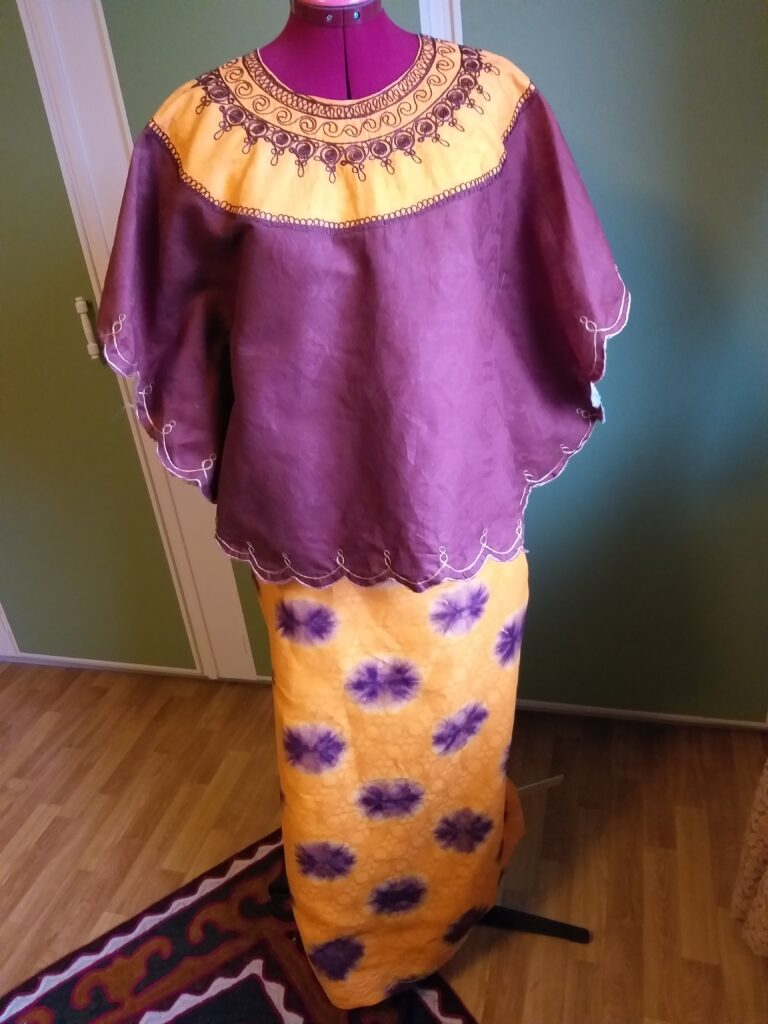
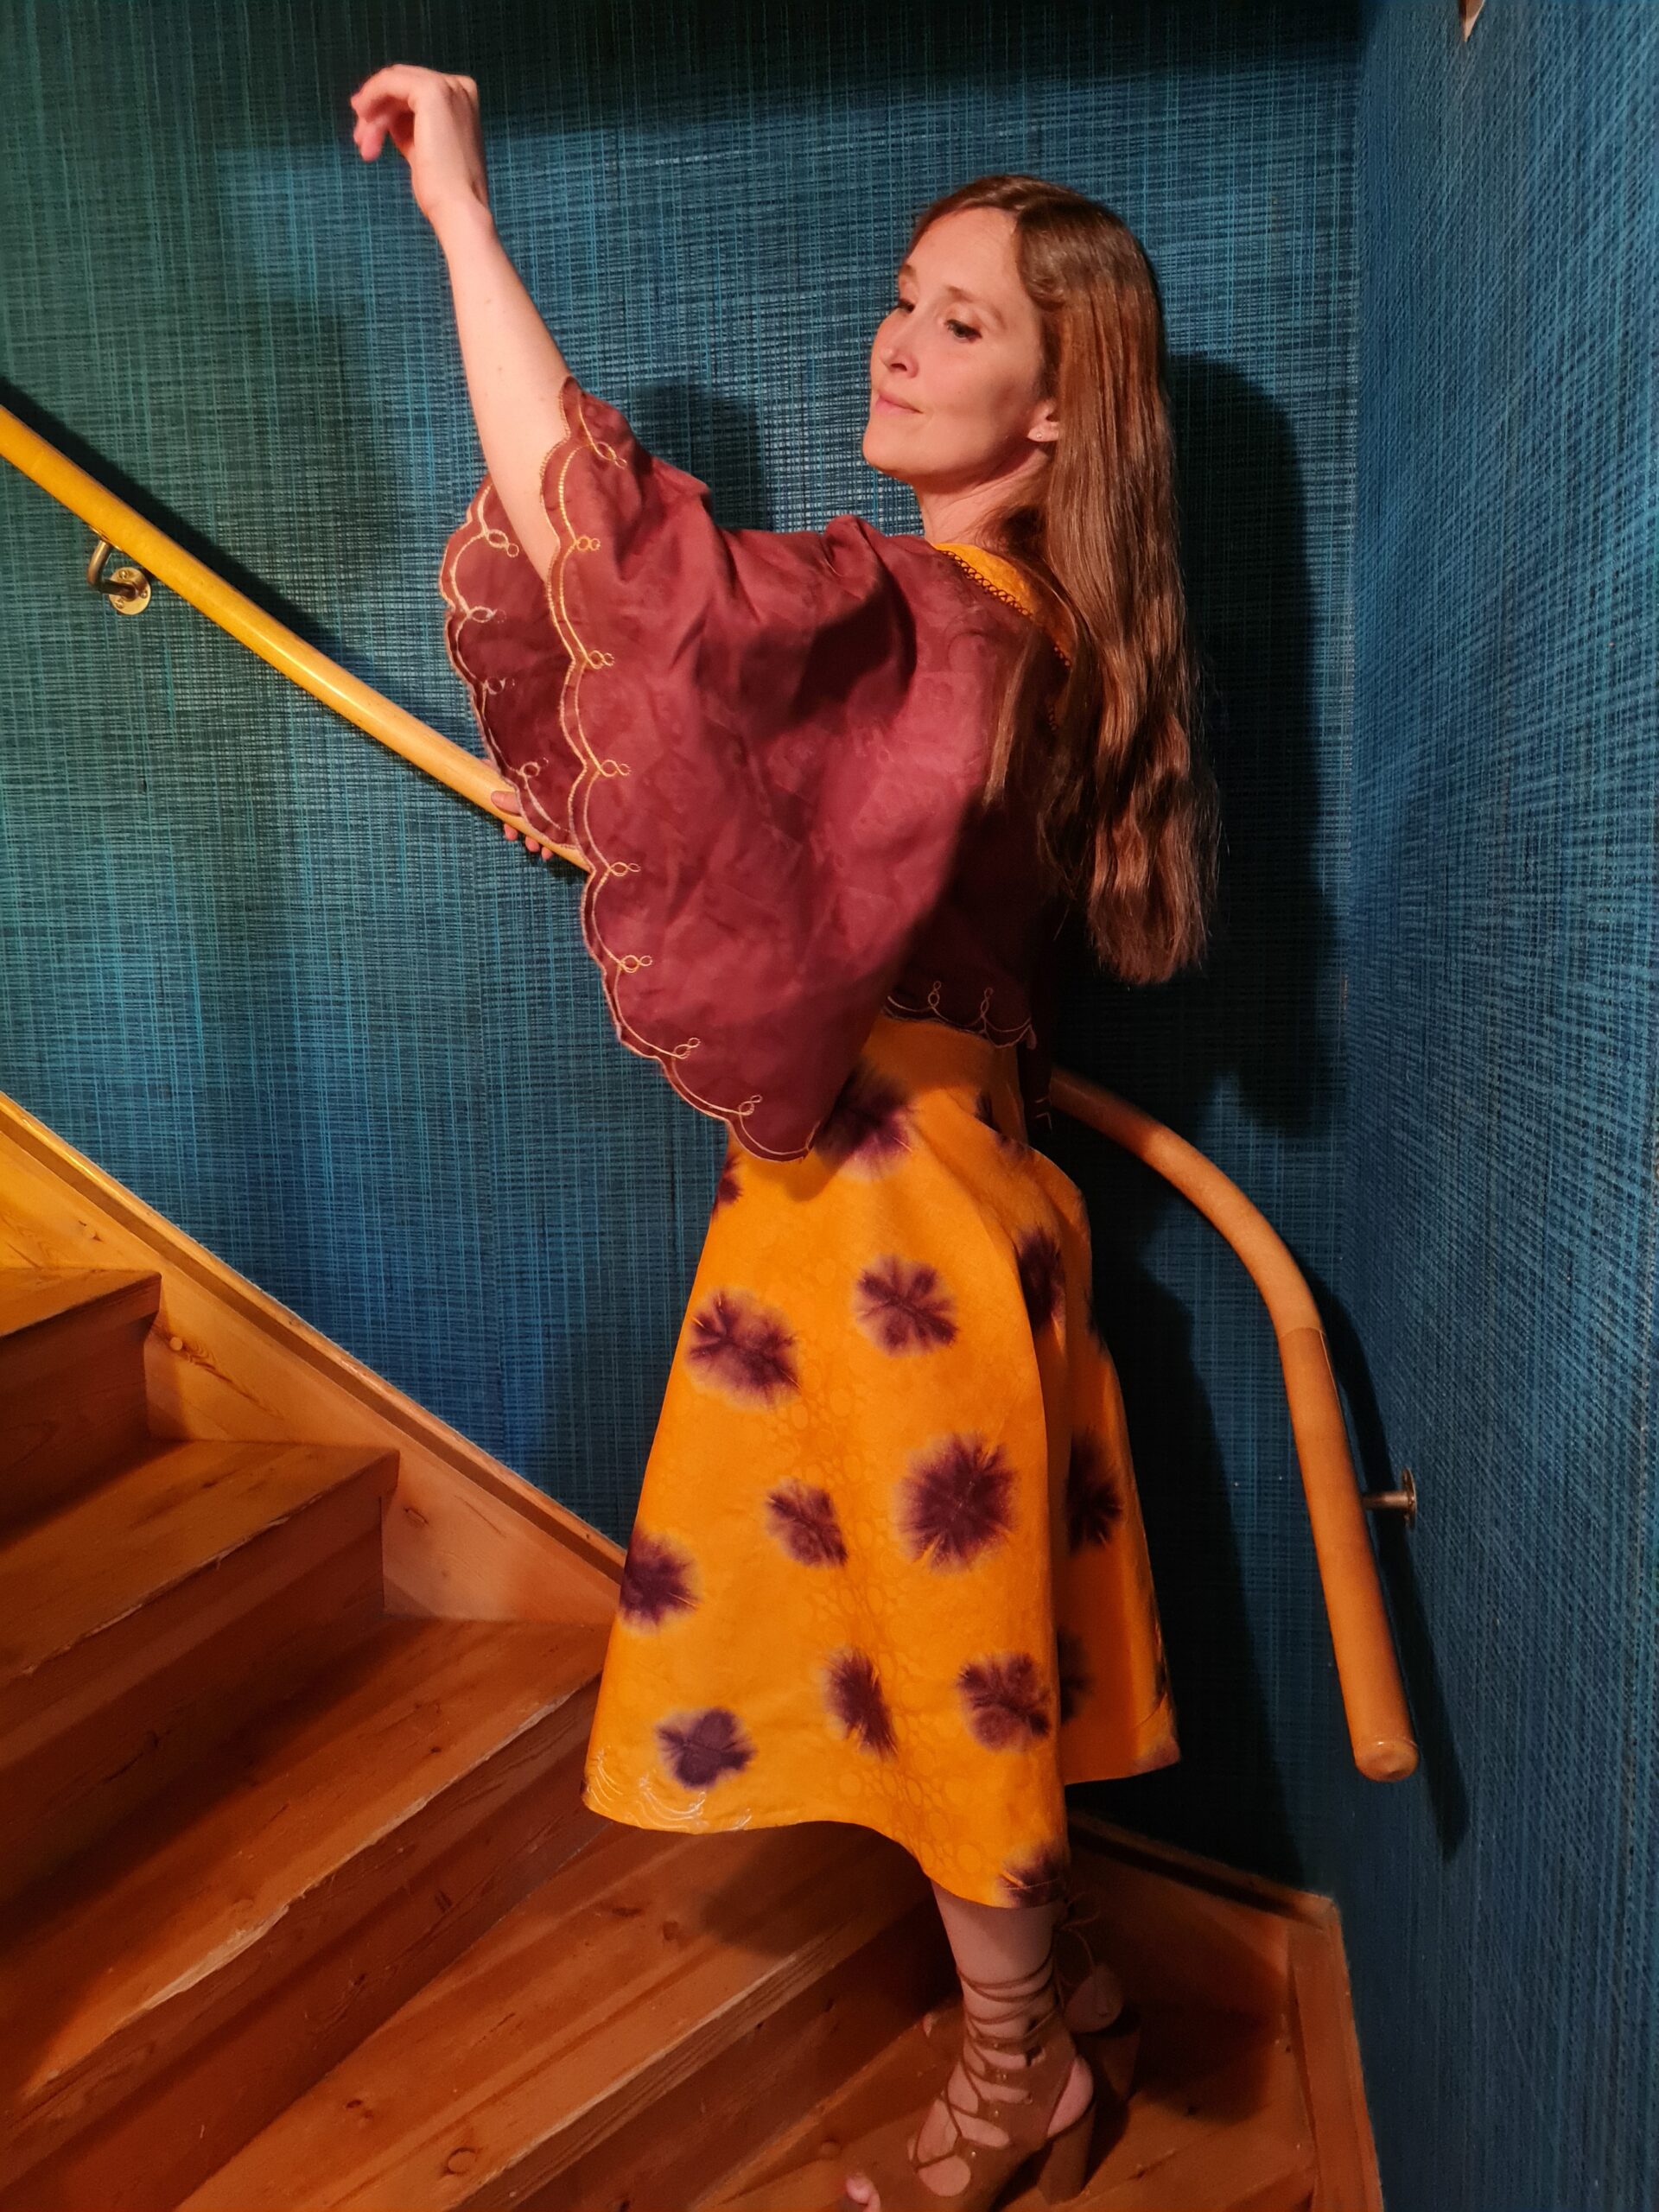
18 years ago, I found this robe at a Tanzanian market place. I loved the colours and the embroideries, but as the model was quite unflattering, I only used it once. The top consists of a complete circle, sewn together below the armpits. The skirt is a rectangular wrap skirt.

För 18 år sedan hittade jag denna dräkt på en tanzaniansk maknad. Jag älskade färgerna och broderierna, men insåg att modellen var väldigt osmickrande (åtminstone med vårat nuvarande kroppsideal), så jag använde den bara en gång. Toppen består av en stor cirkel, hopsydd under armarna, och kjolen är en stor rektangel som knyts omlott med en snodd.

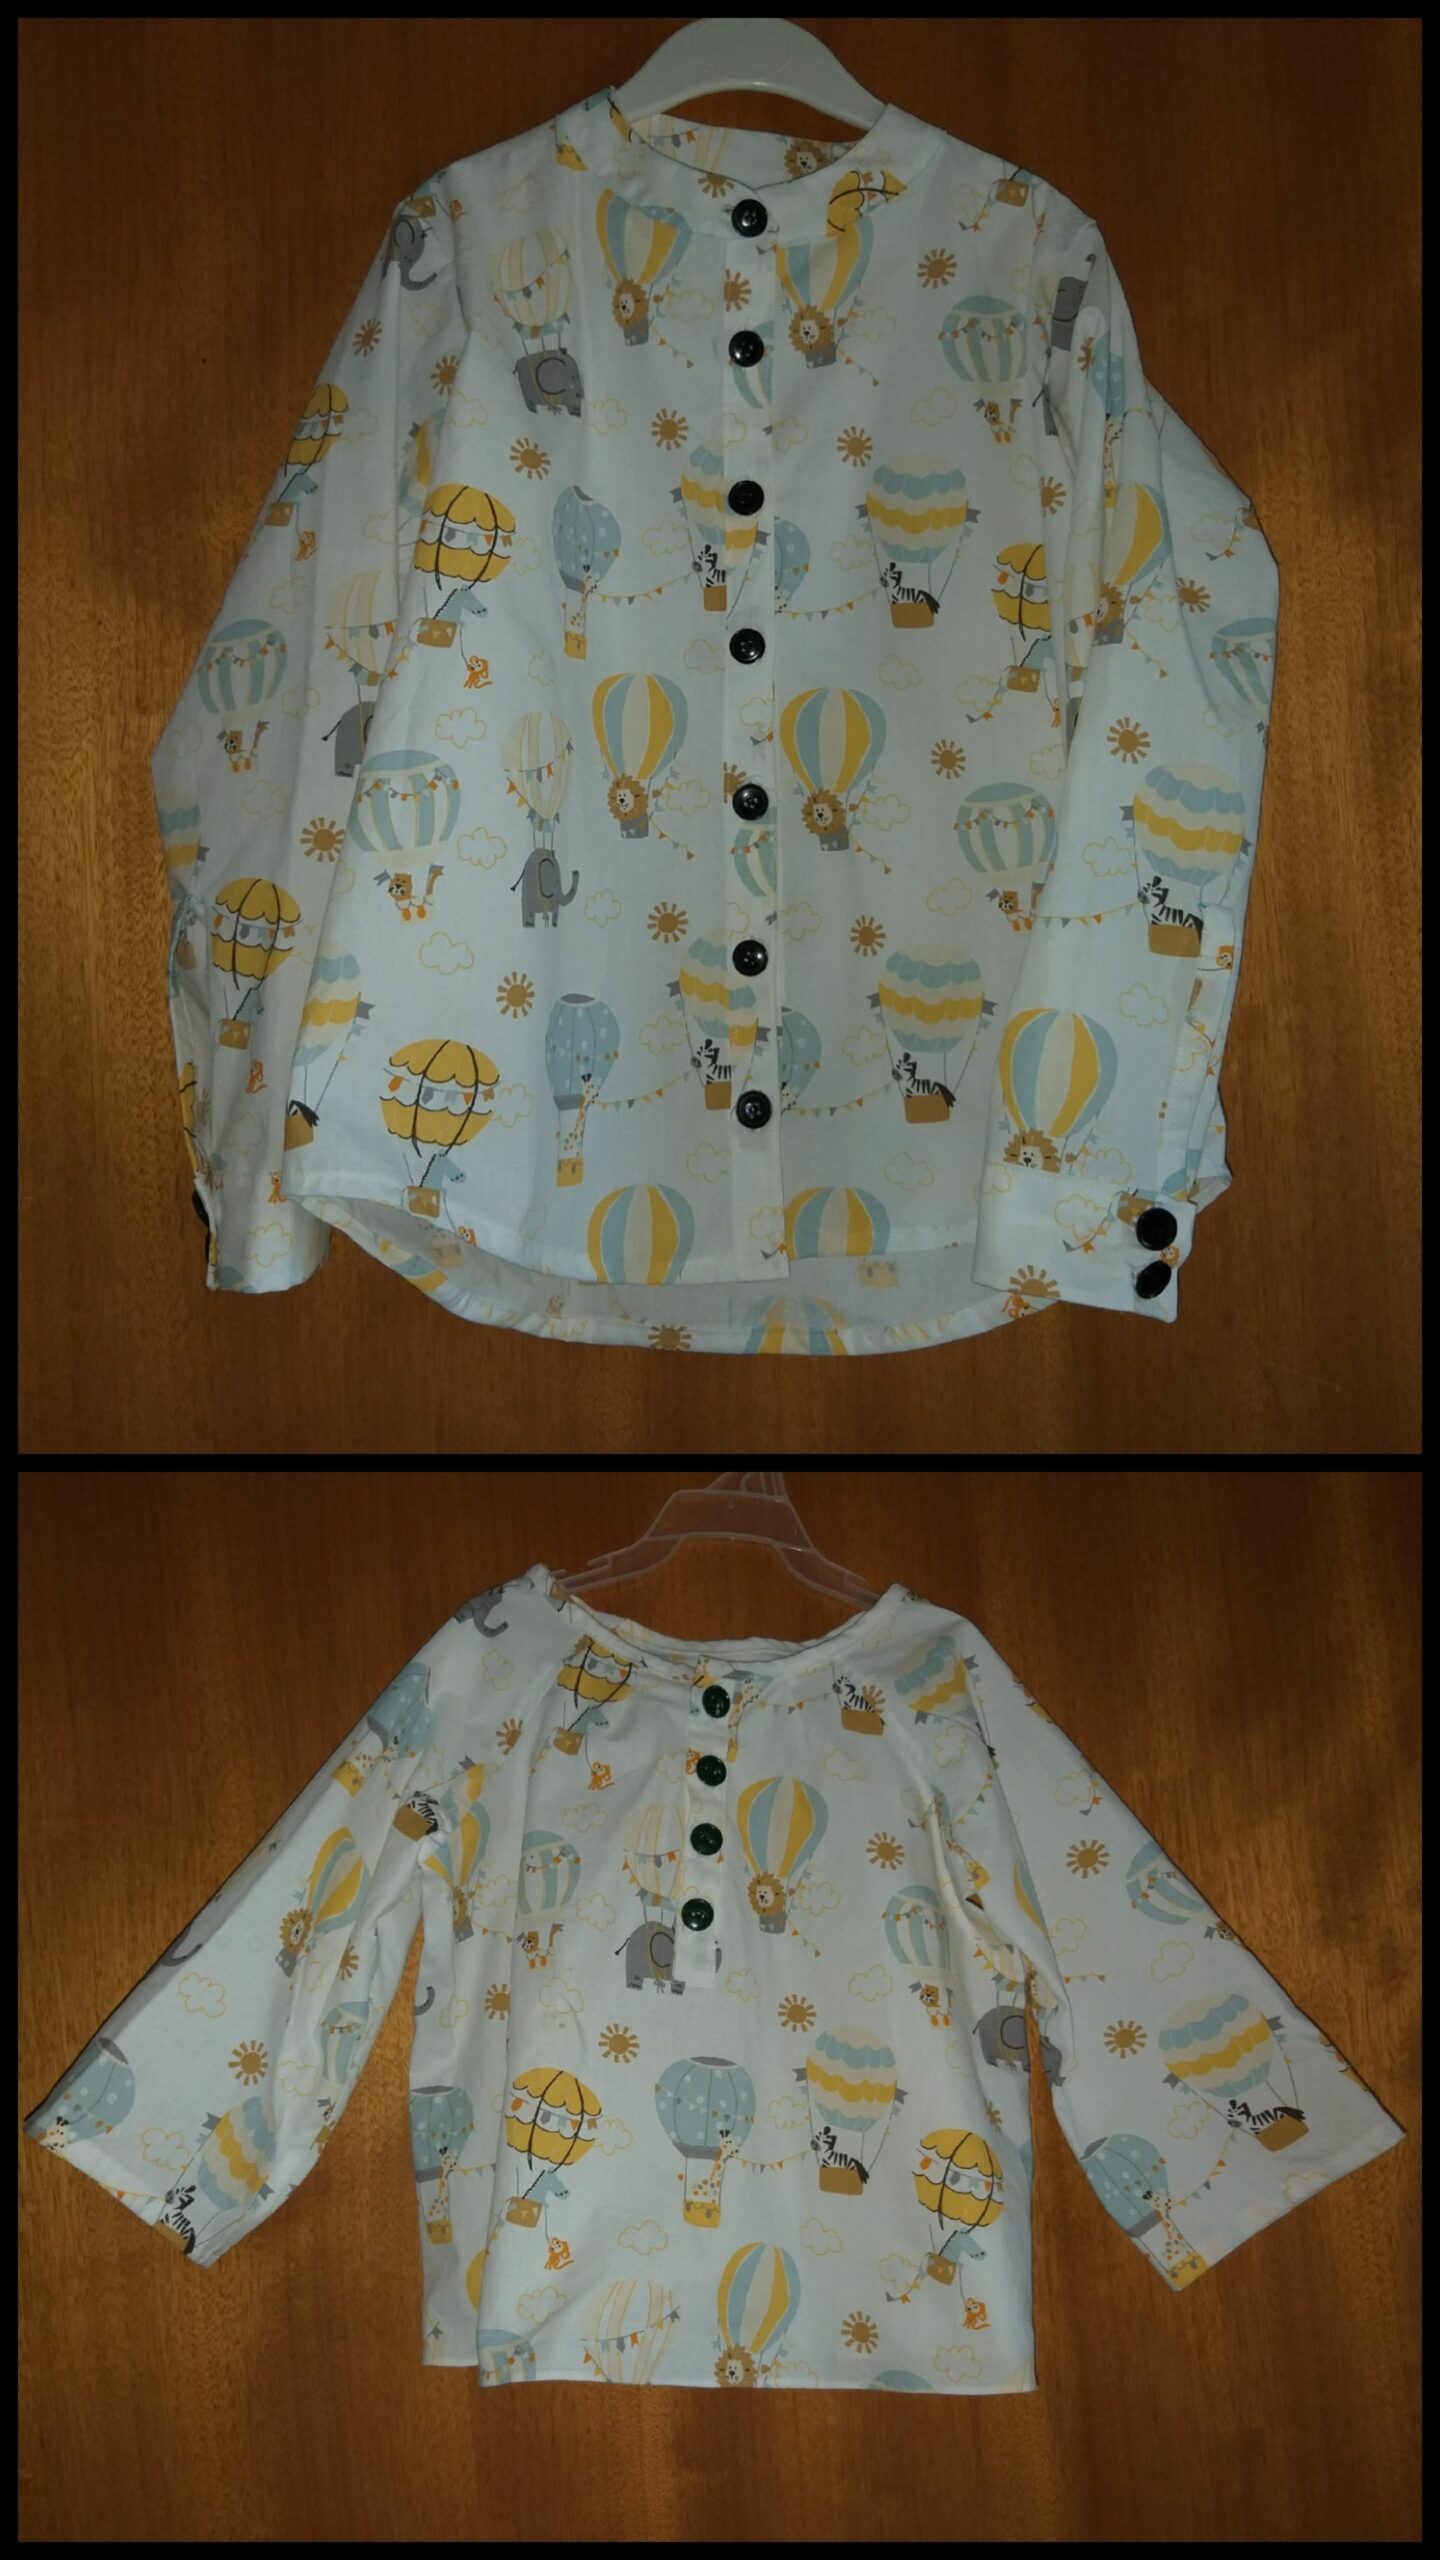
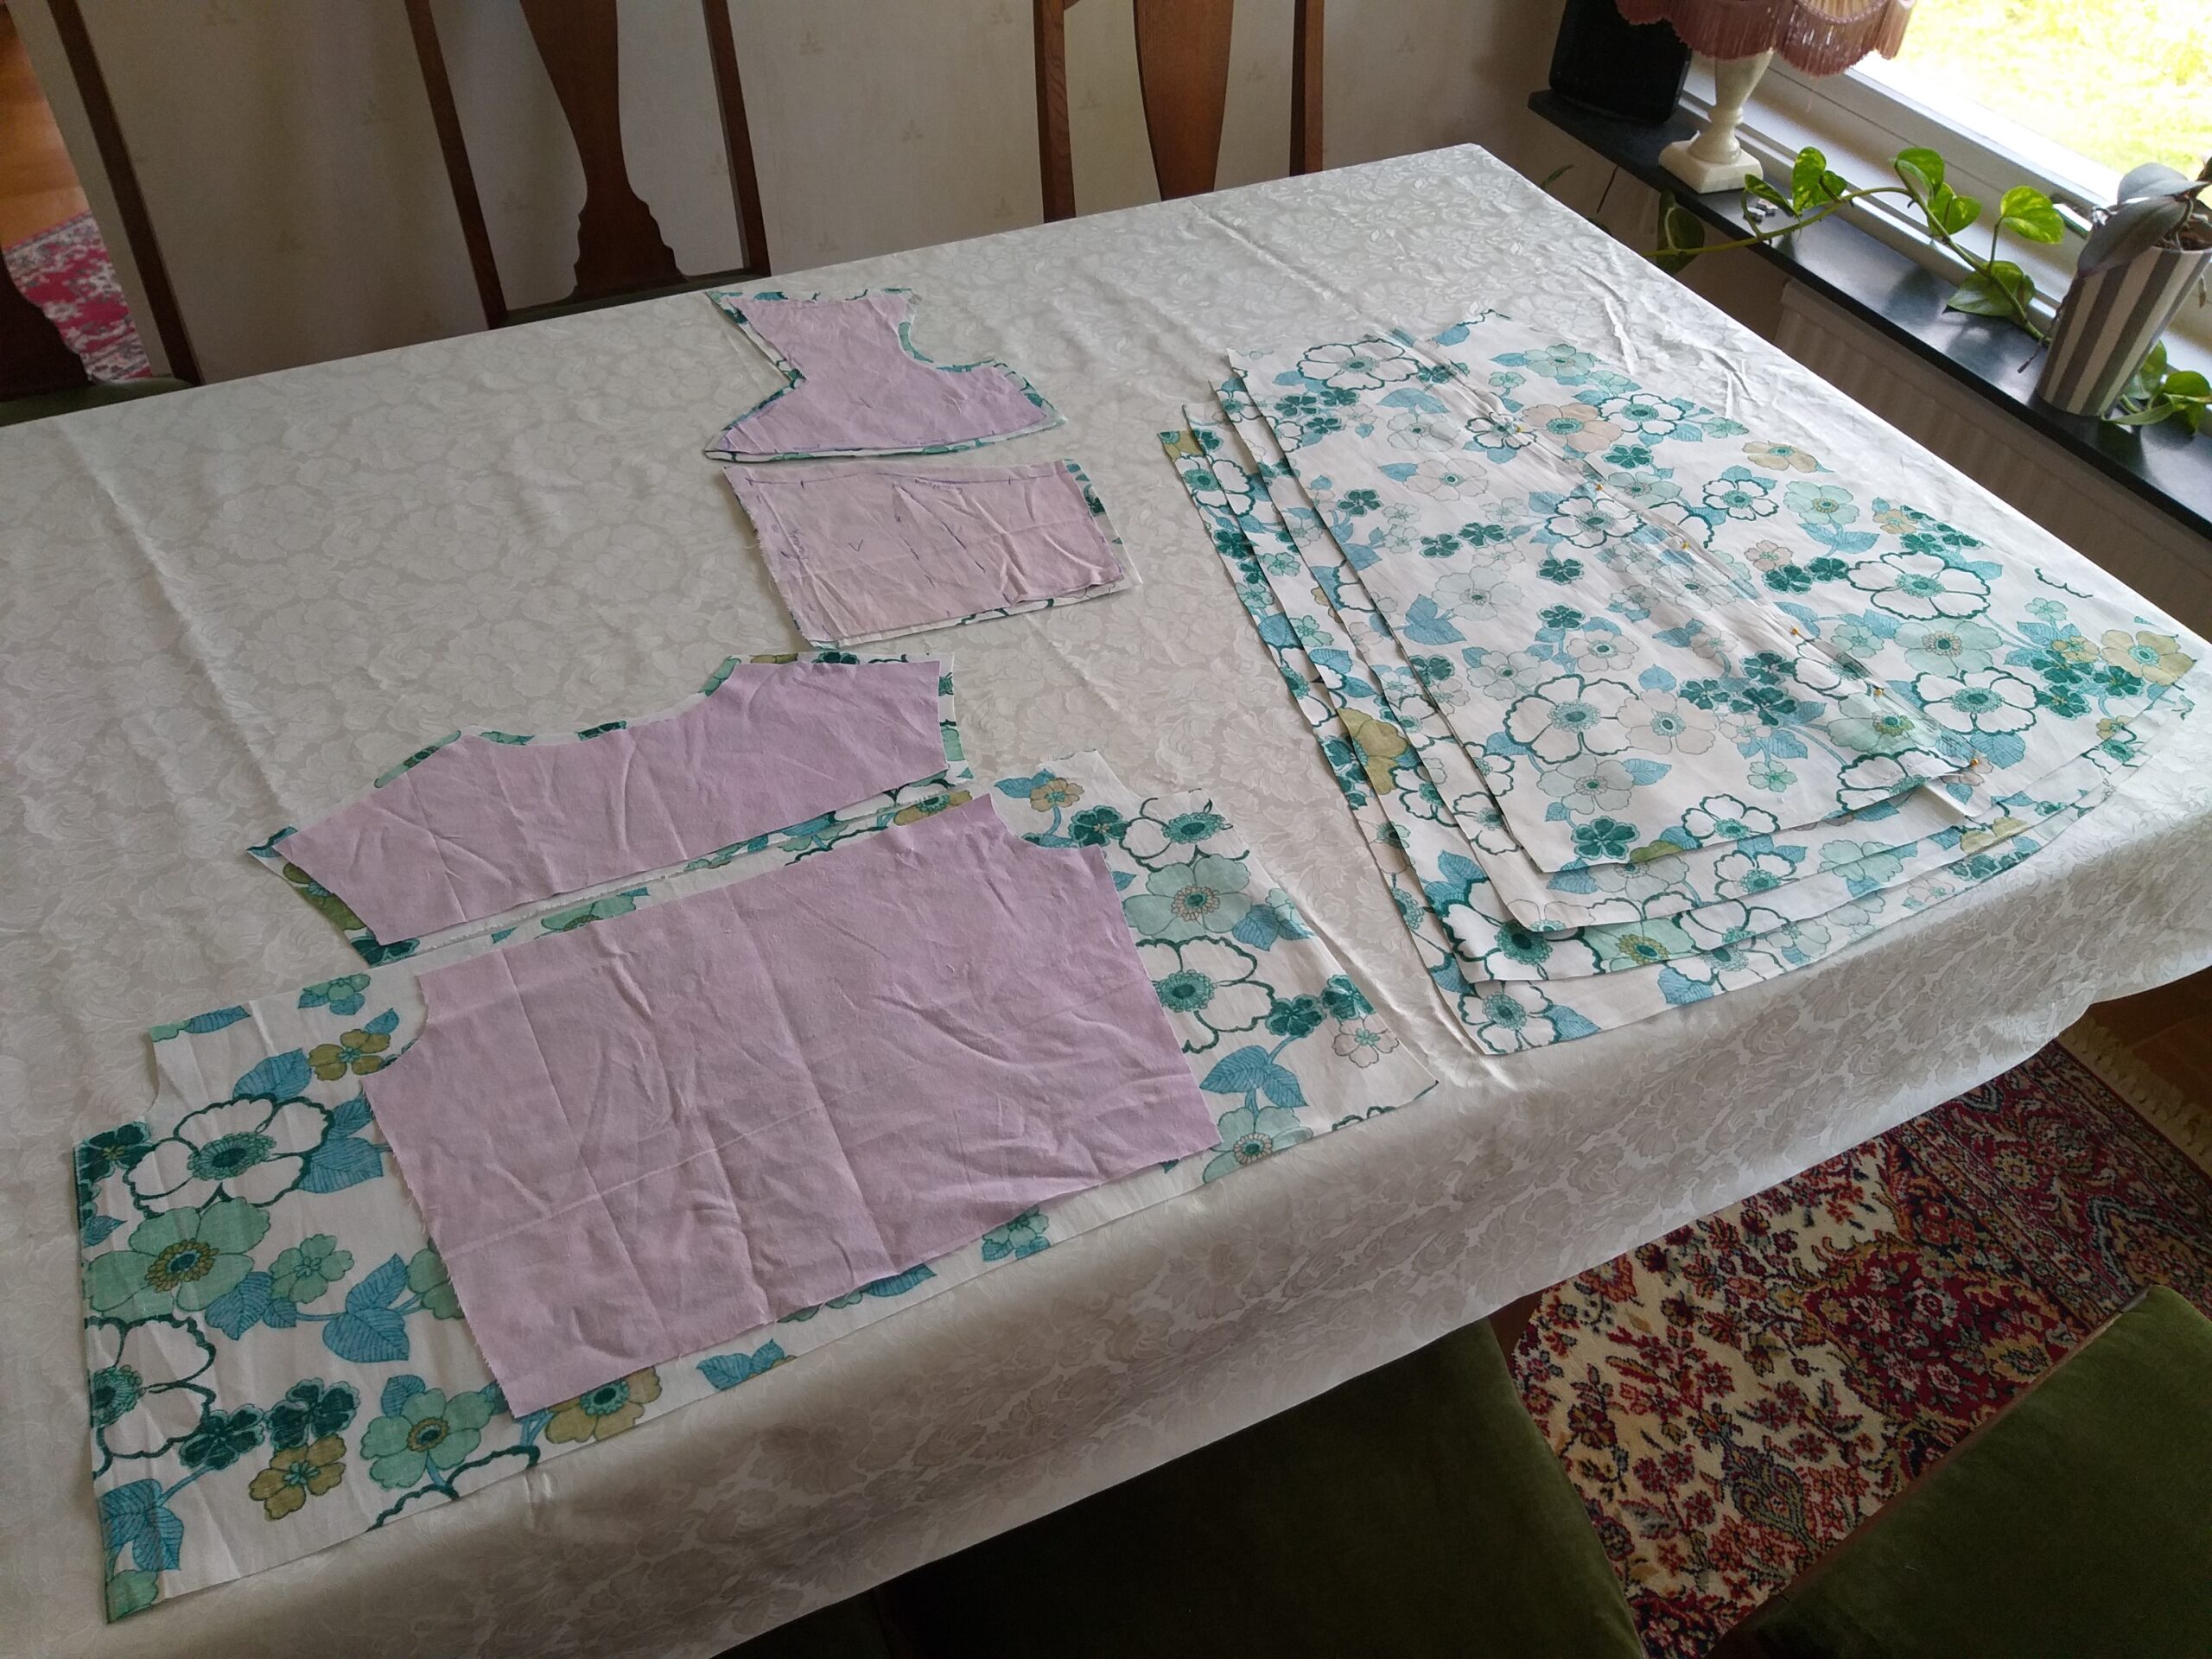
During this past year I have had it hanging on my mannequin, pulling the fabric a few inches backward and forward every now and then. By the start of my vacation, I was finally able to decide on a design, cutting the fabric and sewing it together.

Senaste året har dräkten hängt på min provdocka. Jag har dragit tyget några cm hit och dit då och då. I början av semestern bestämde jag mig äntligen för design, klippte tyget och sydde klart.

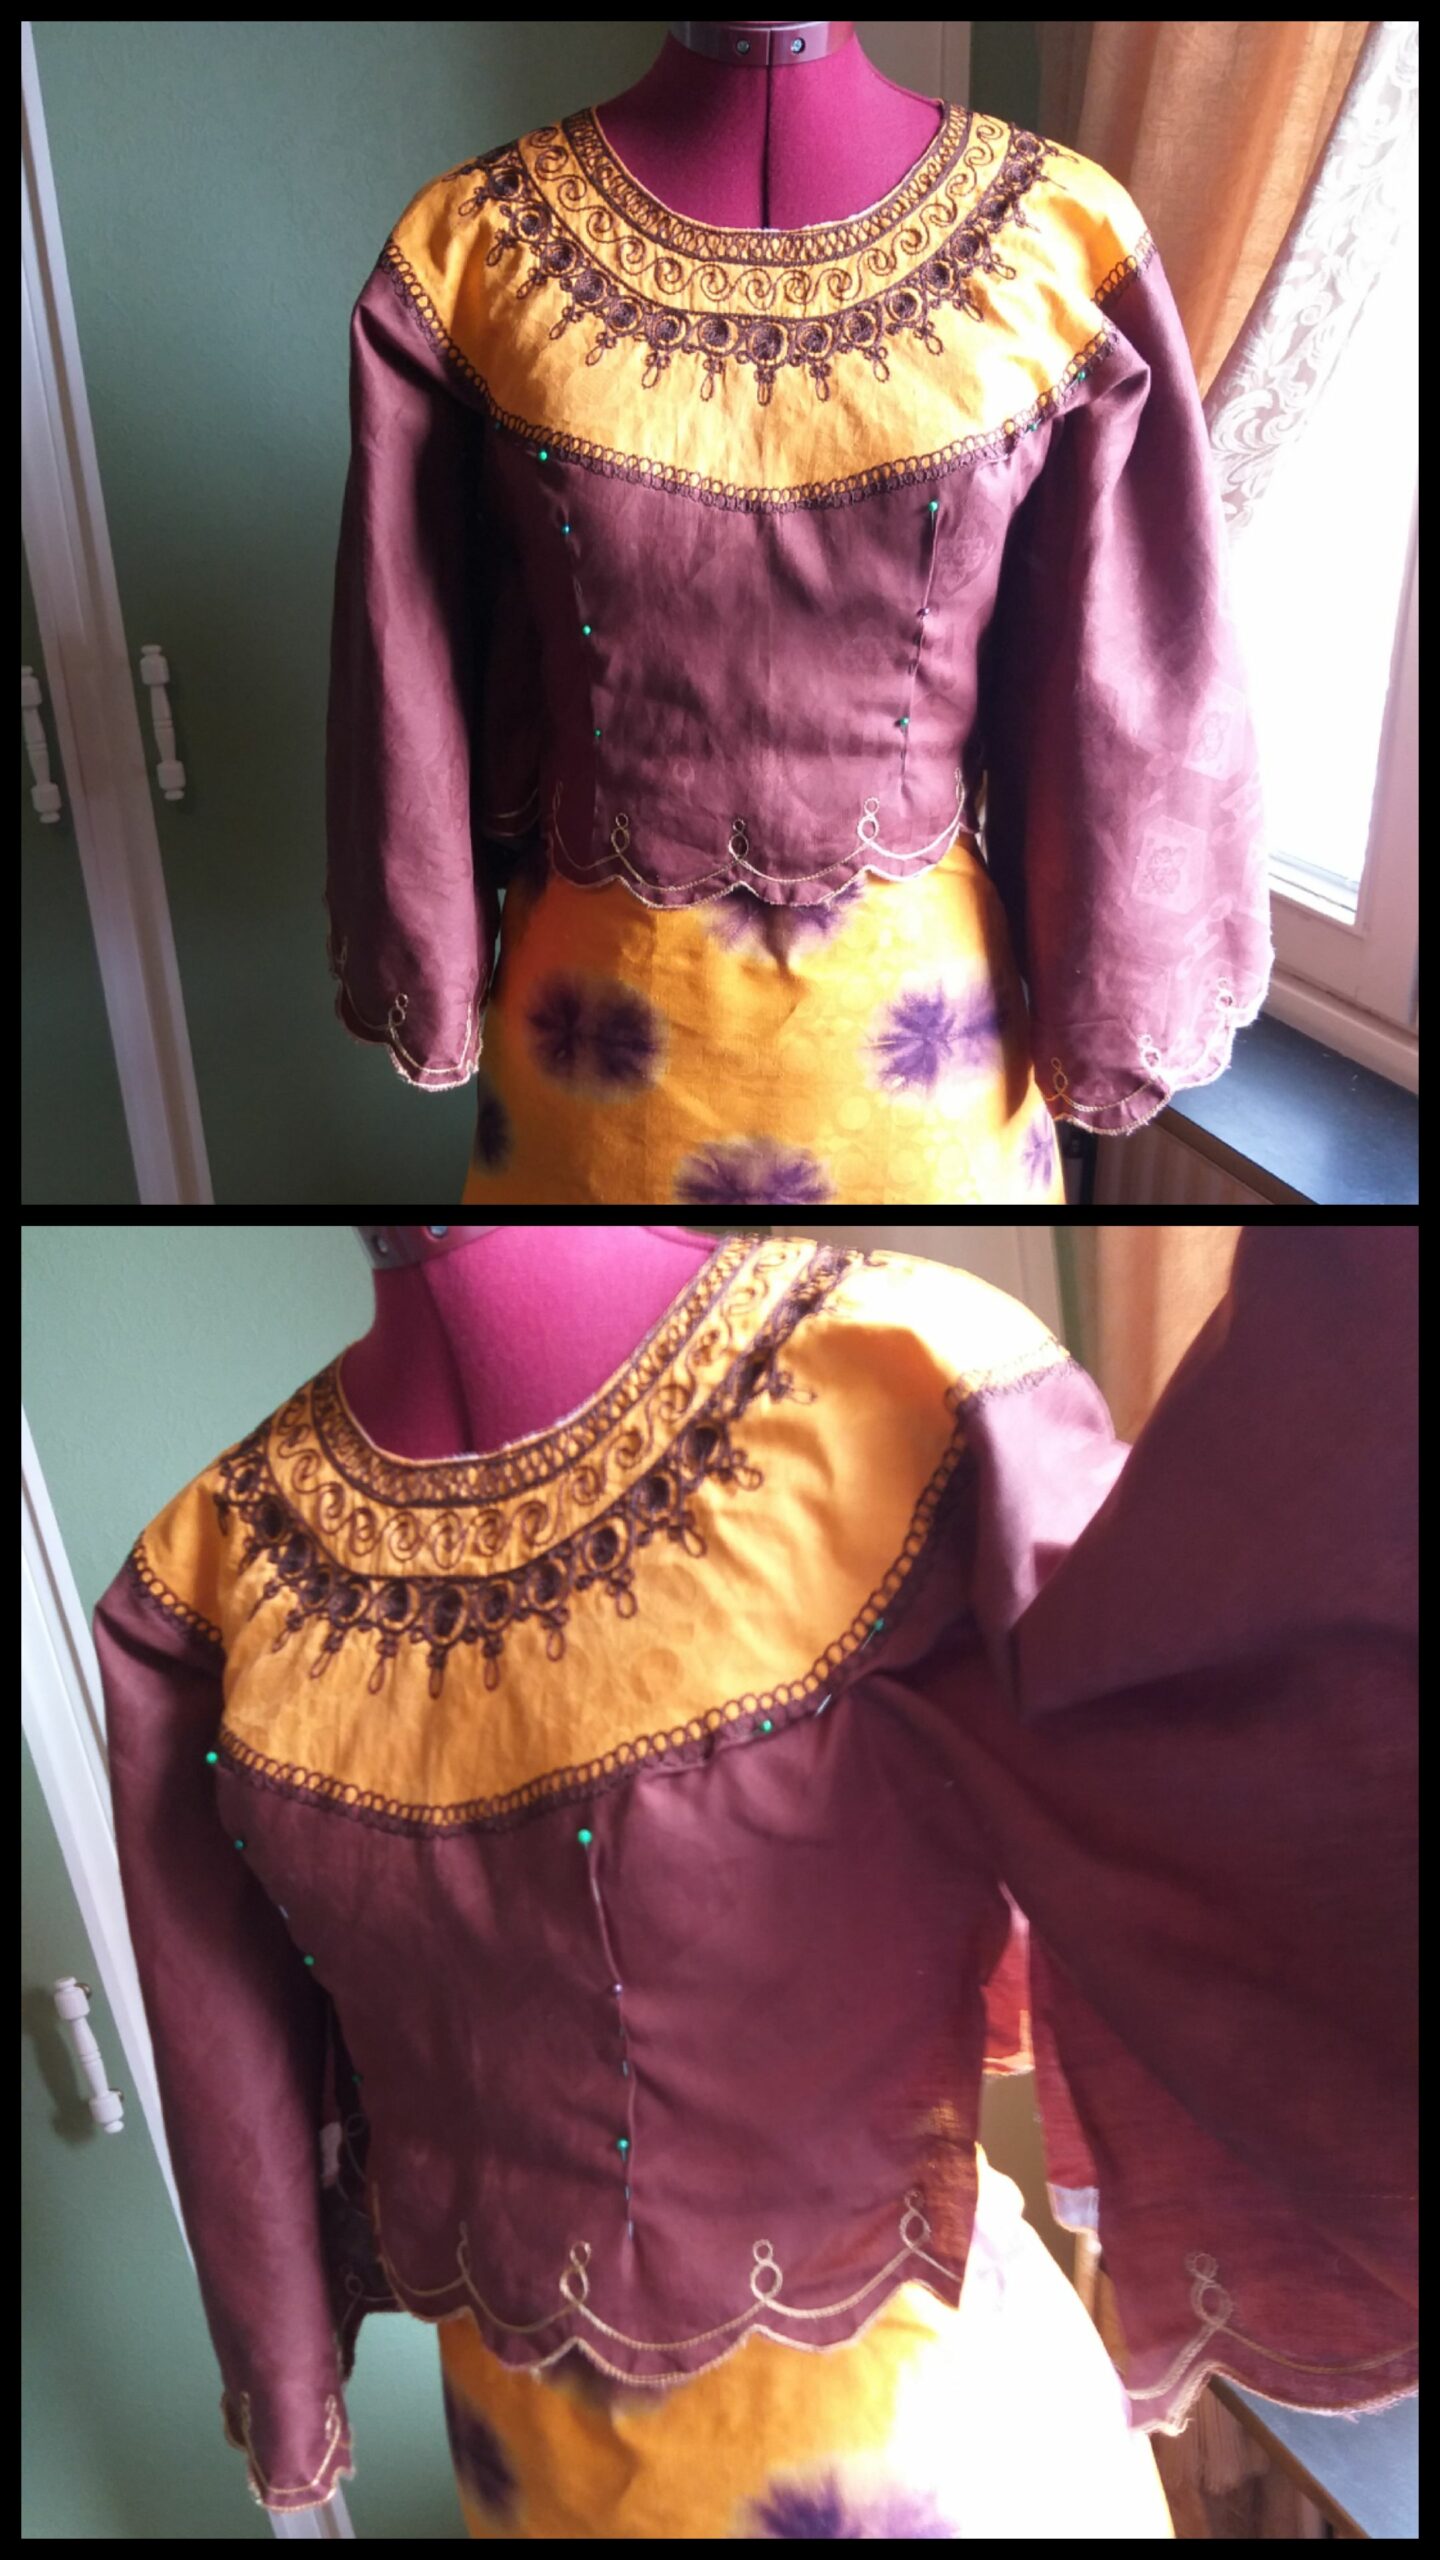
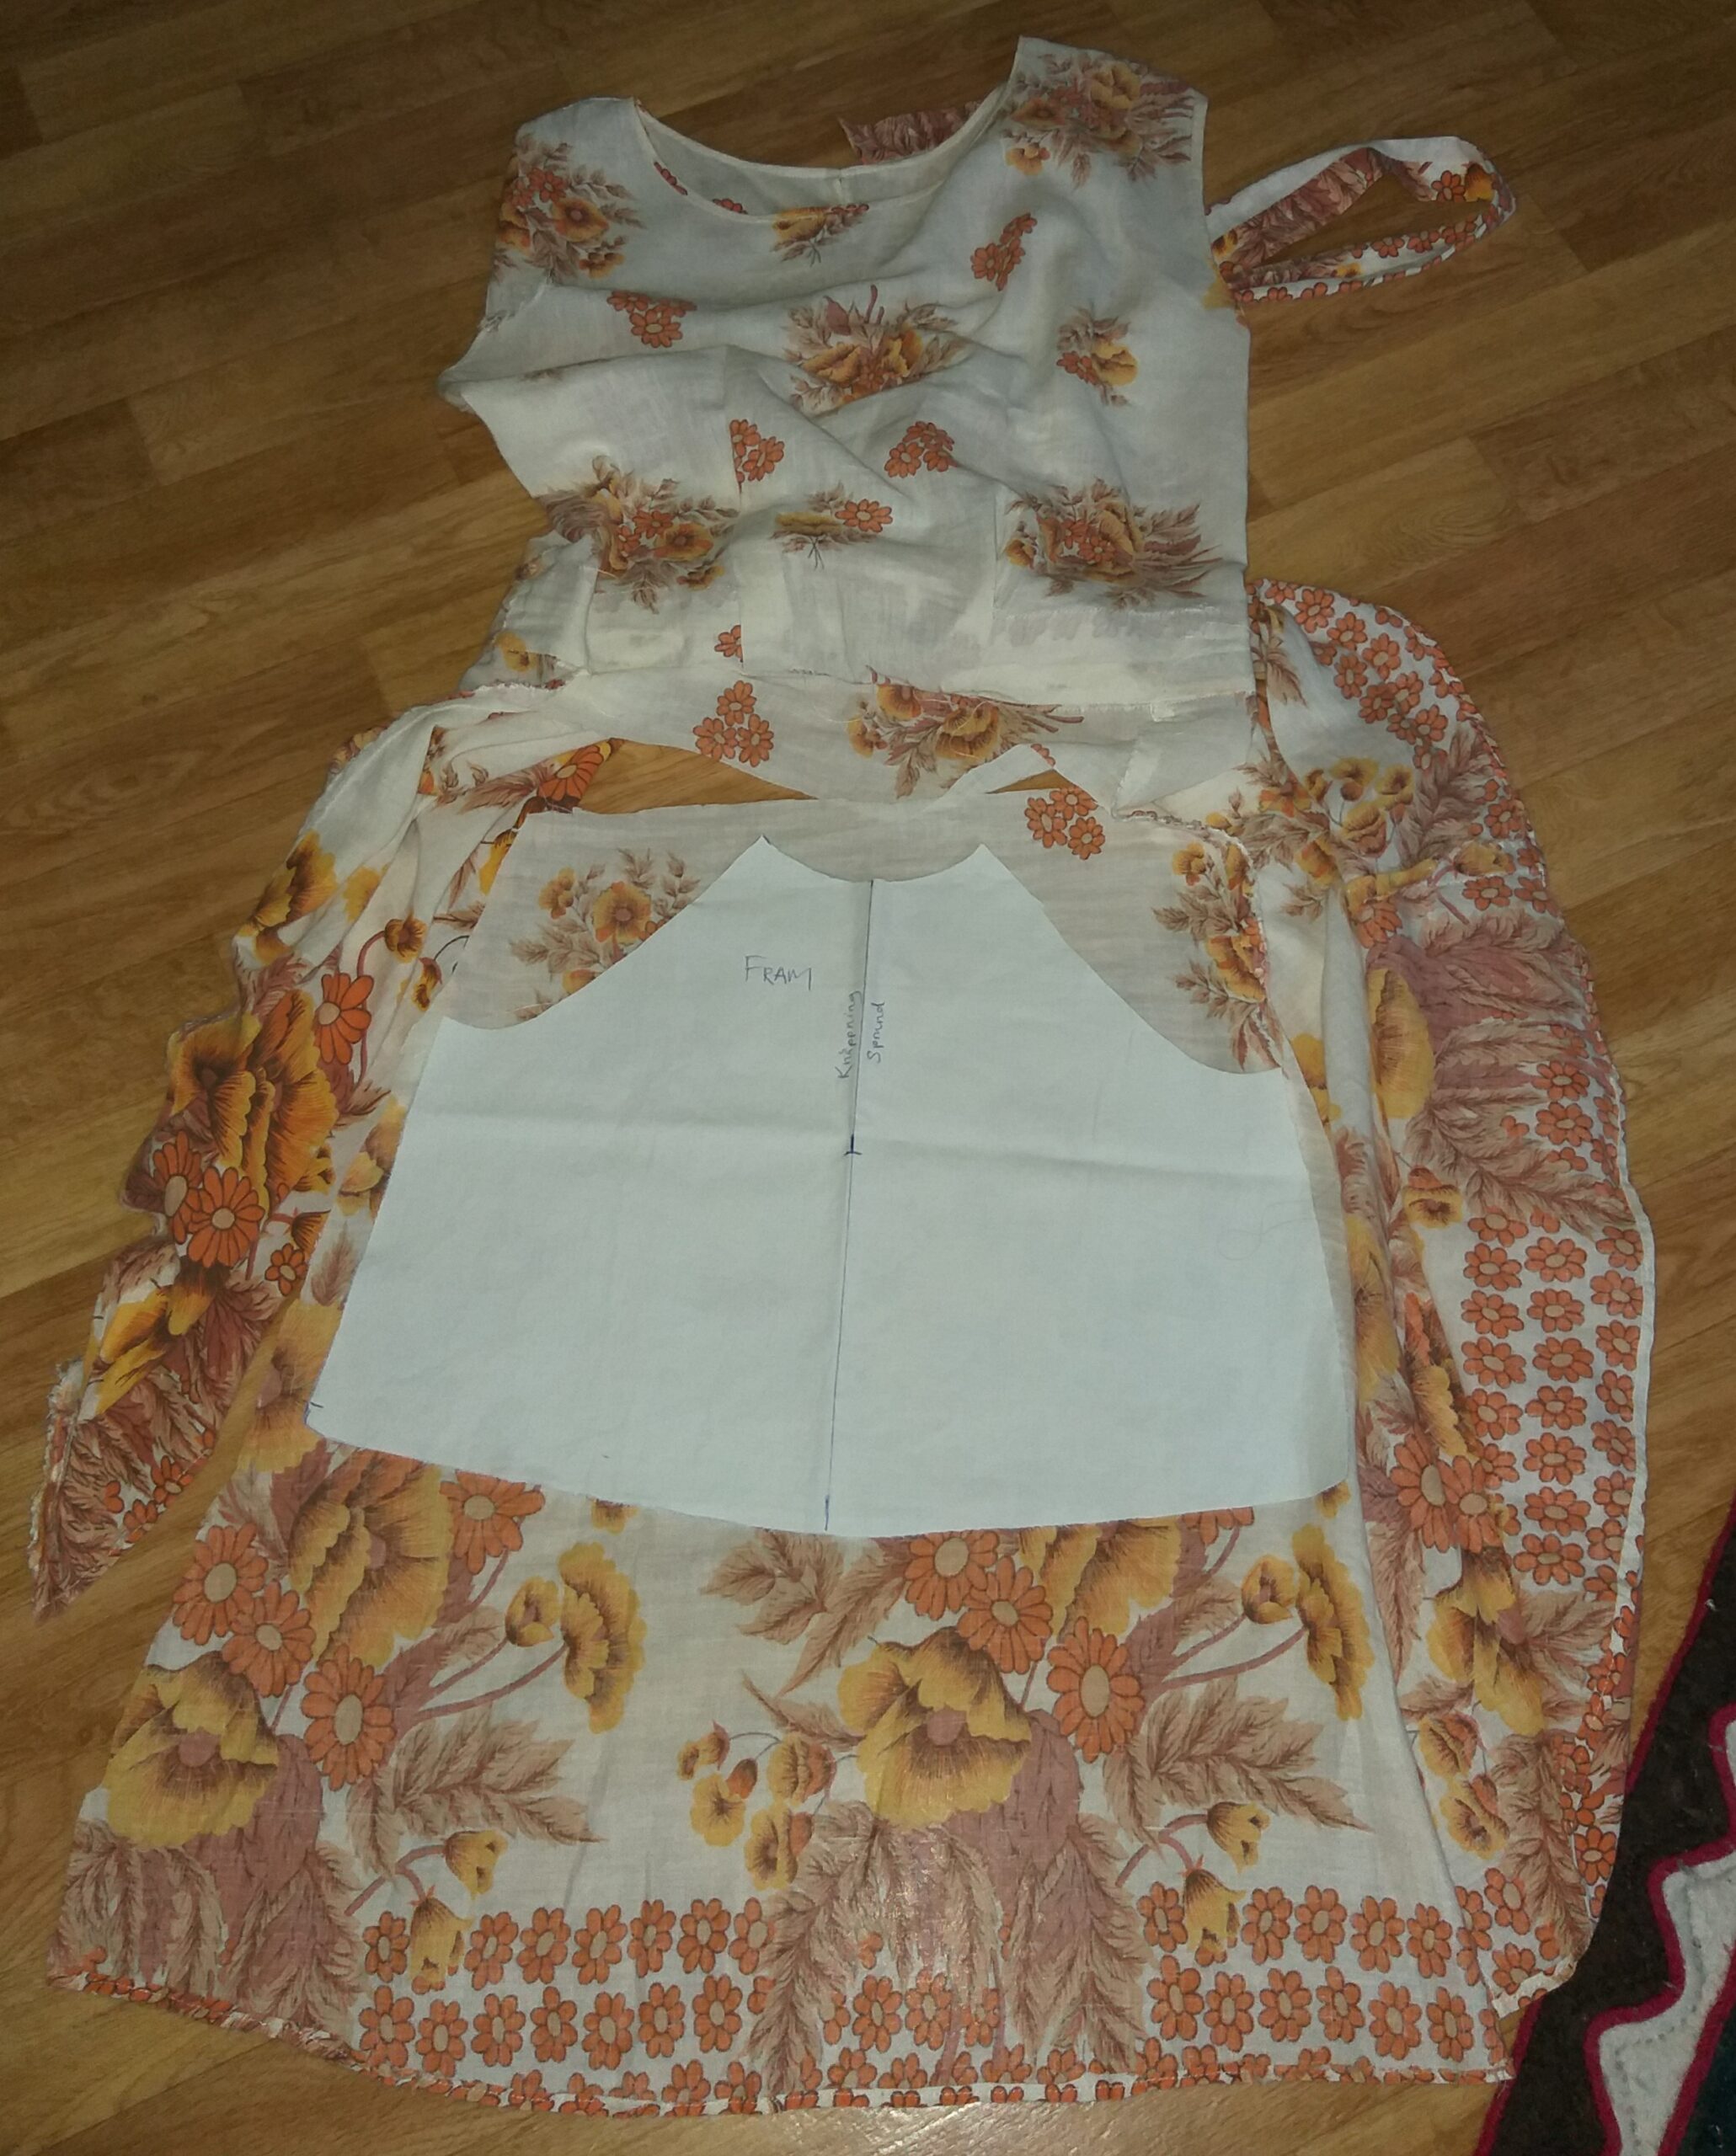
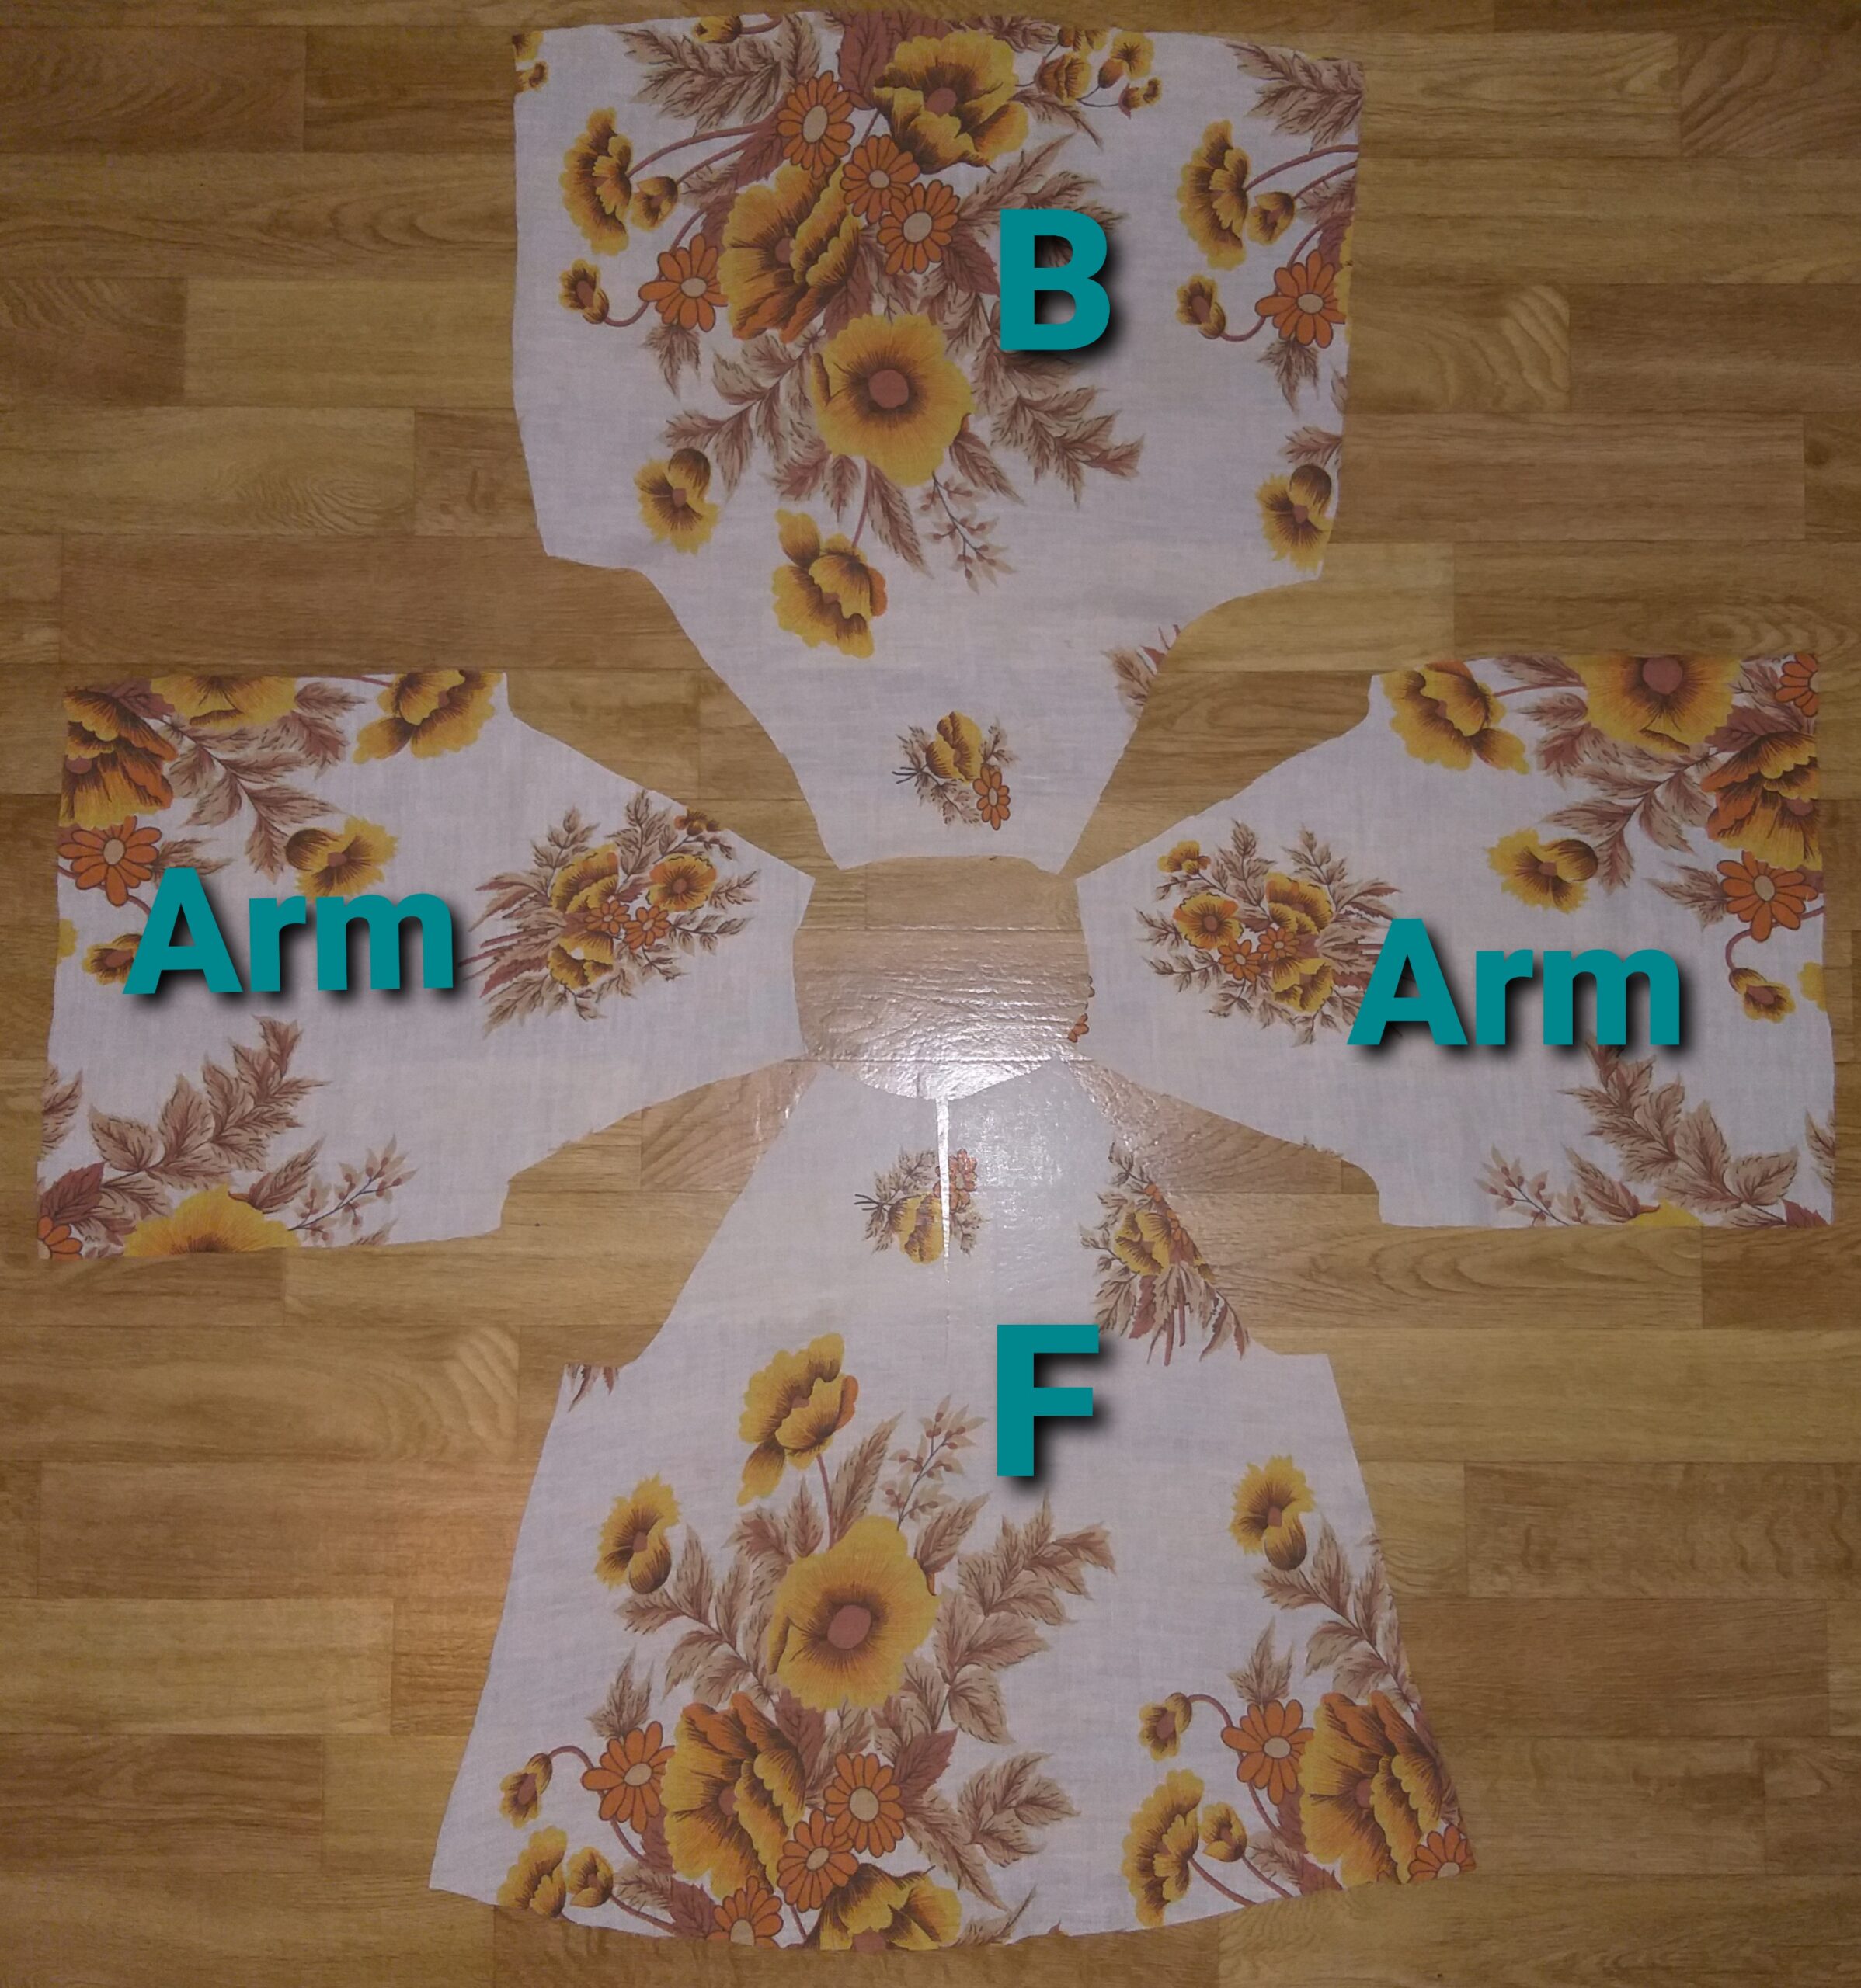
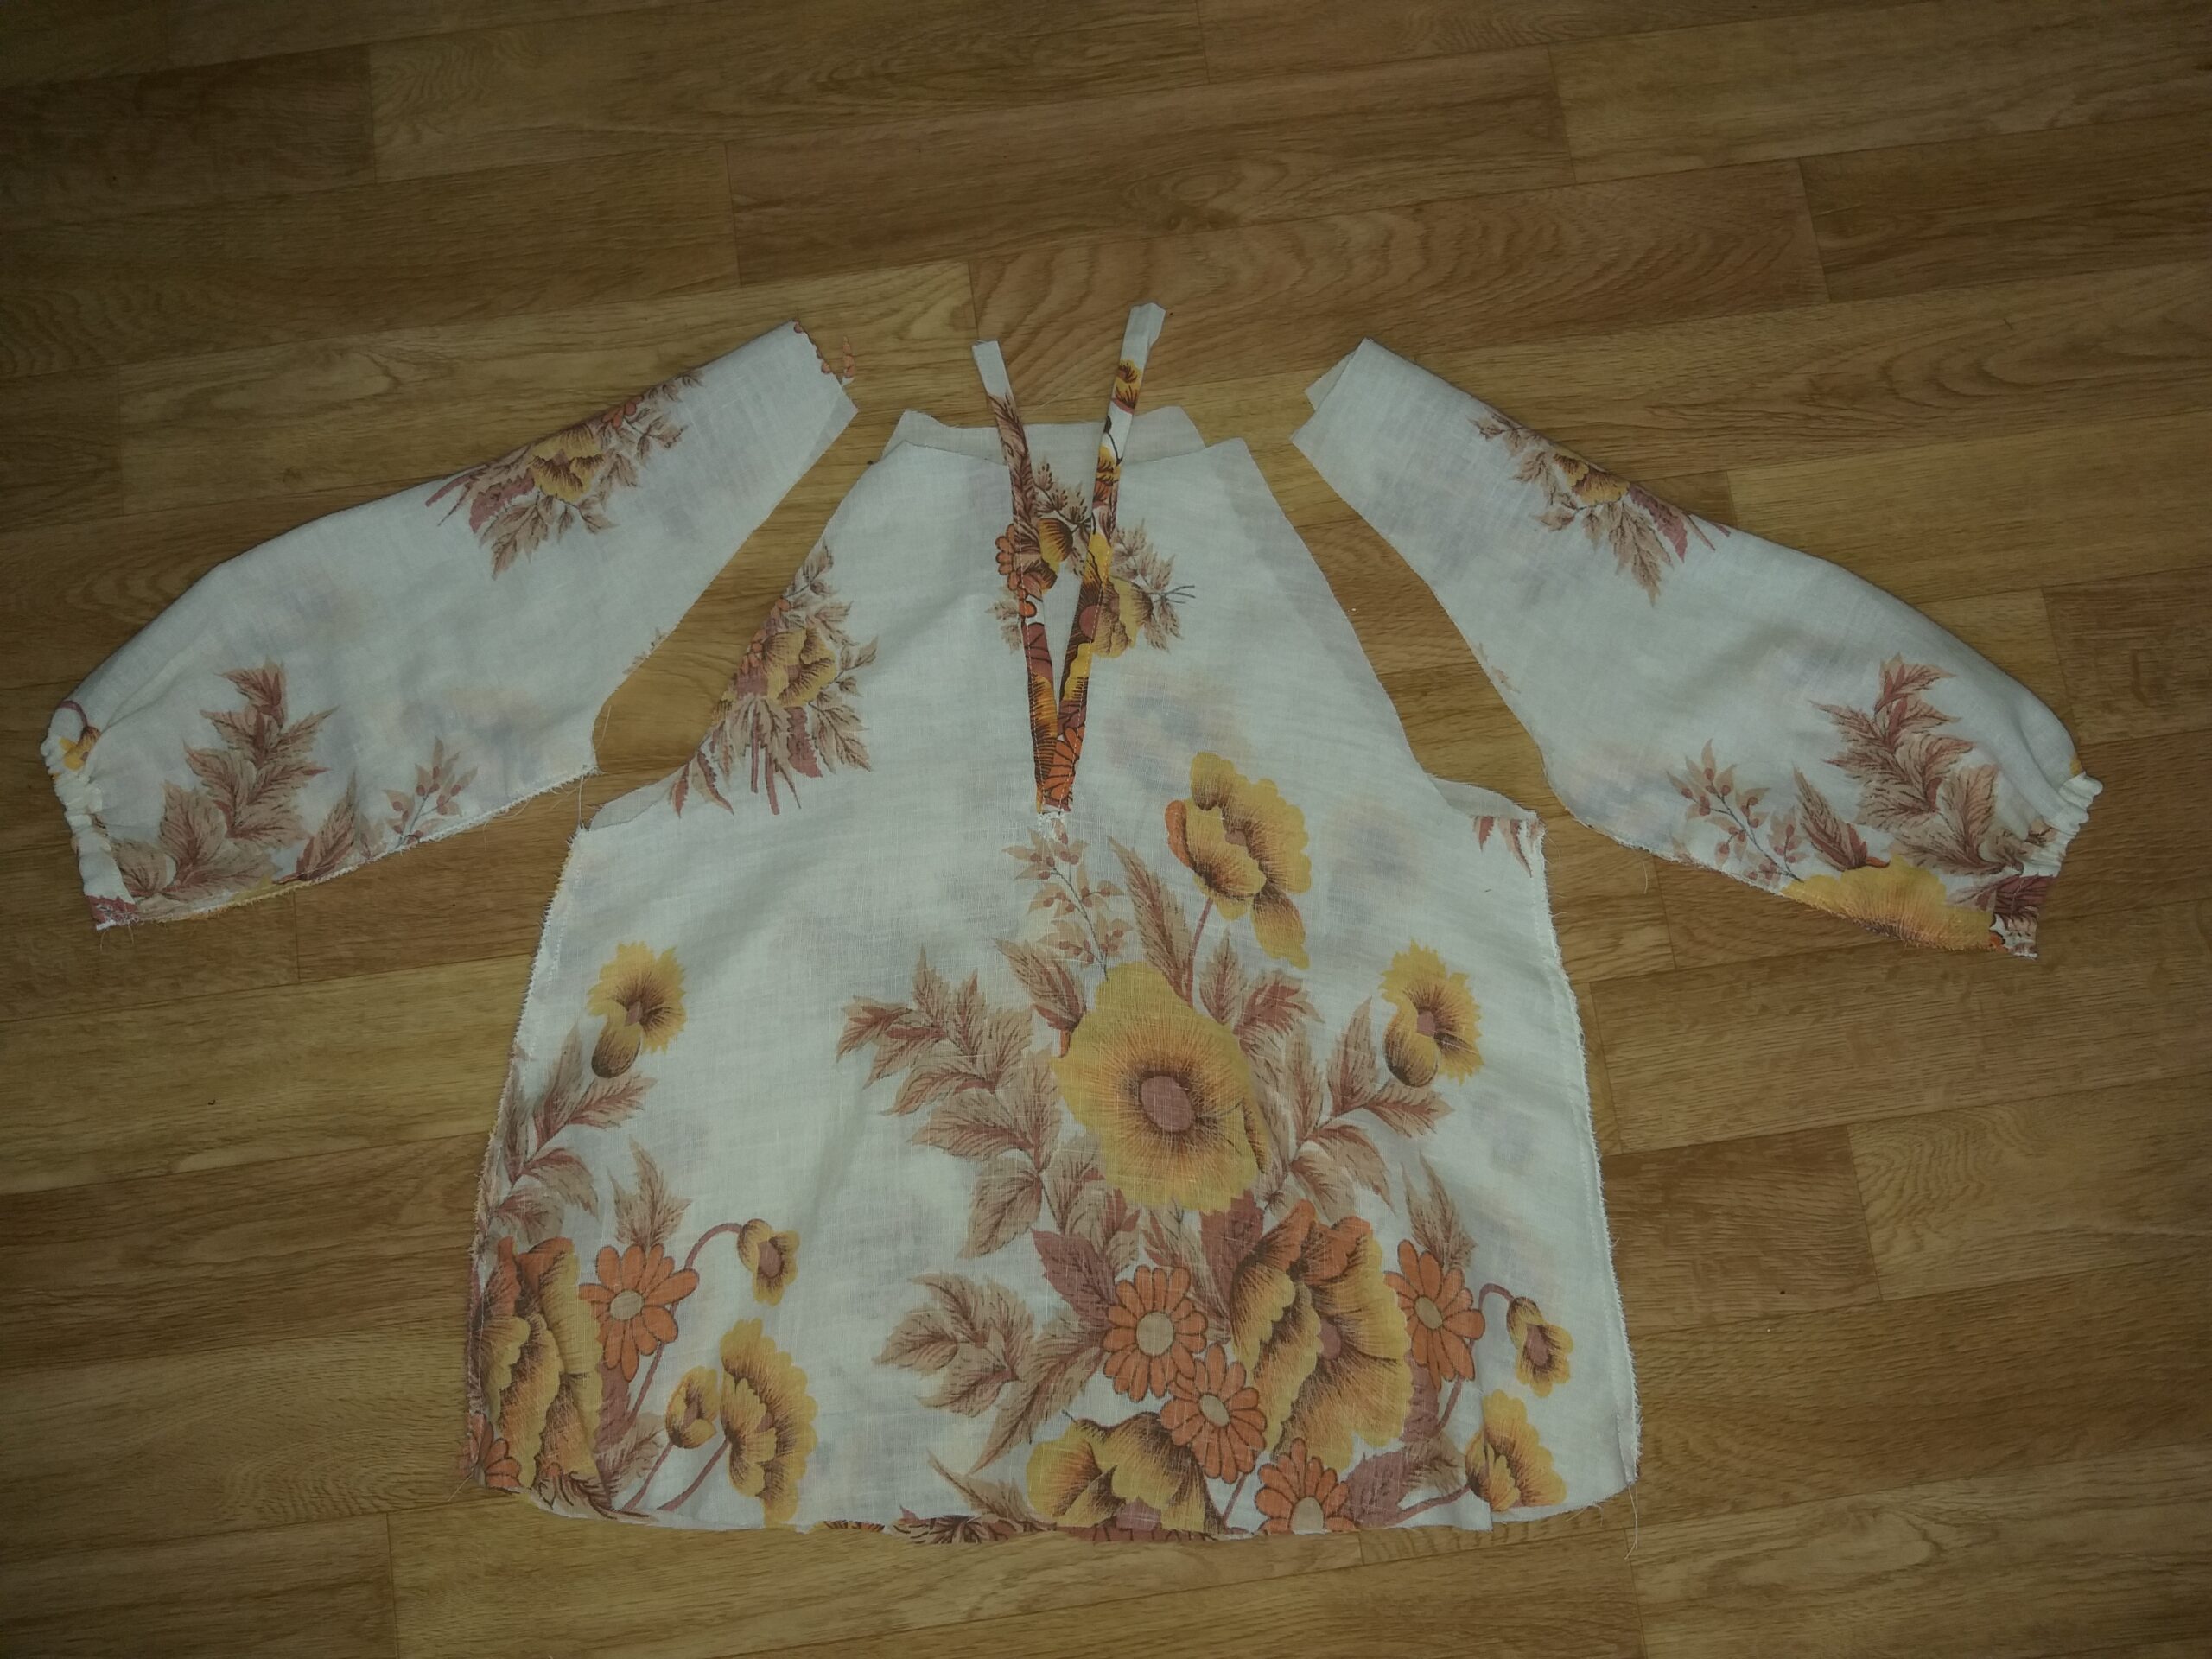
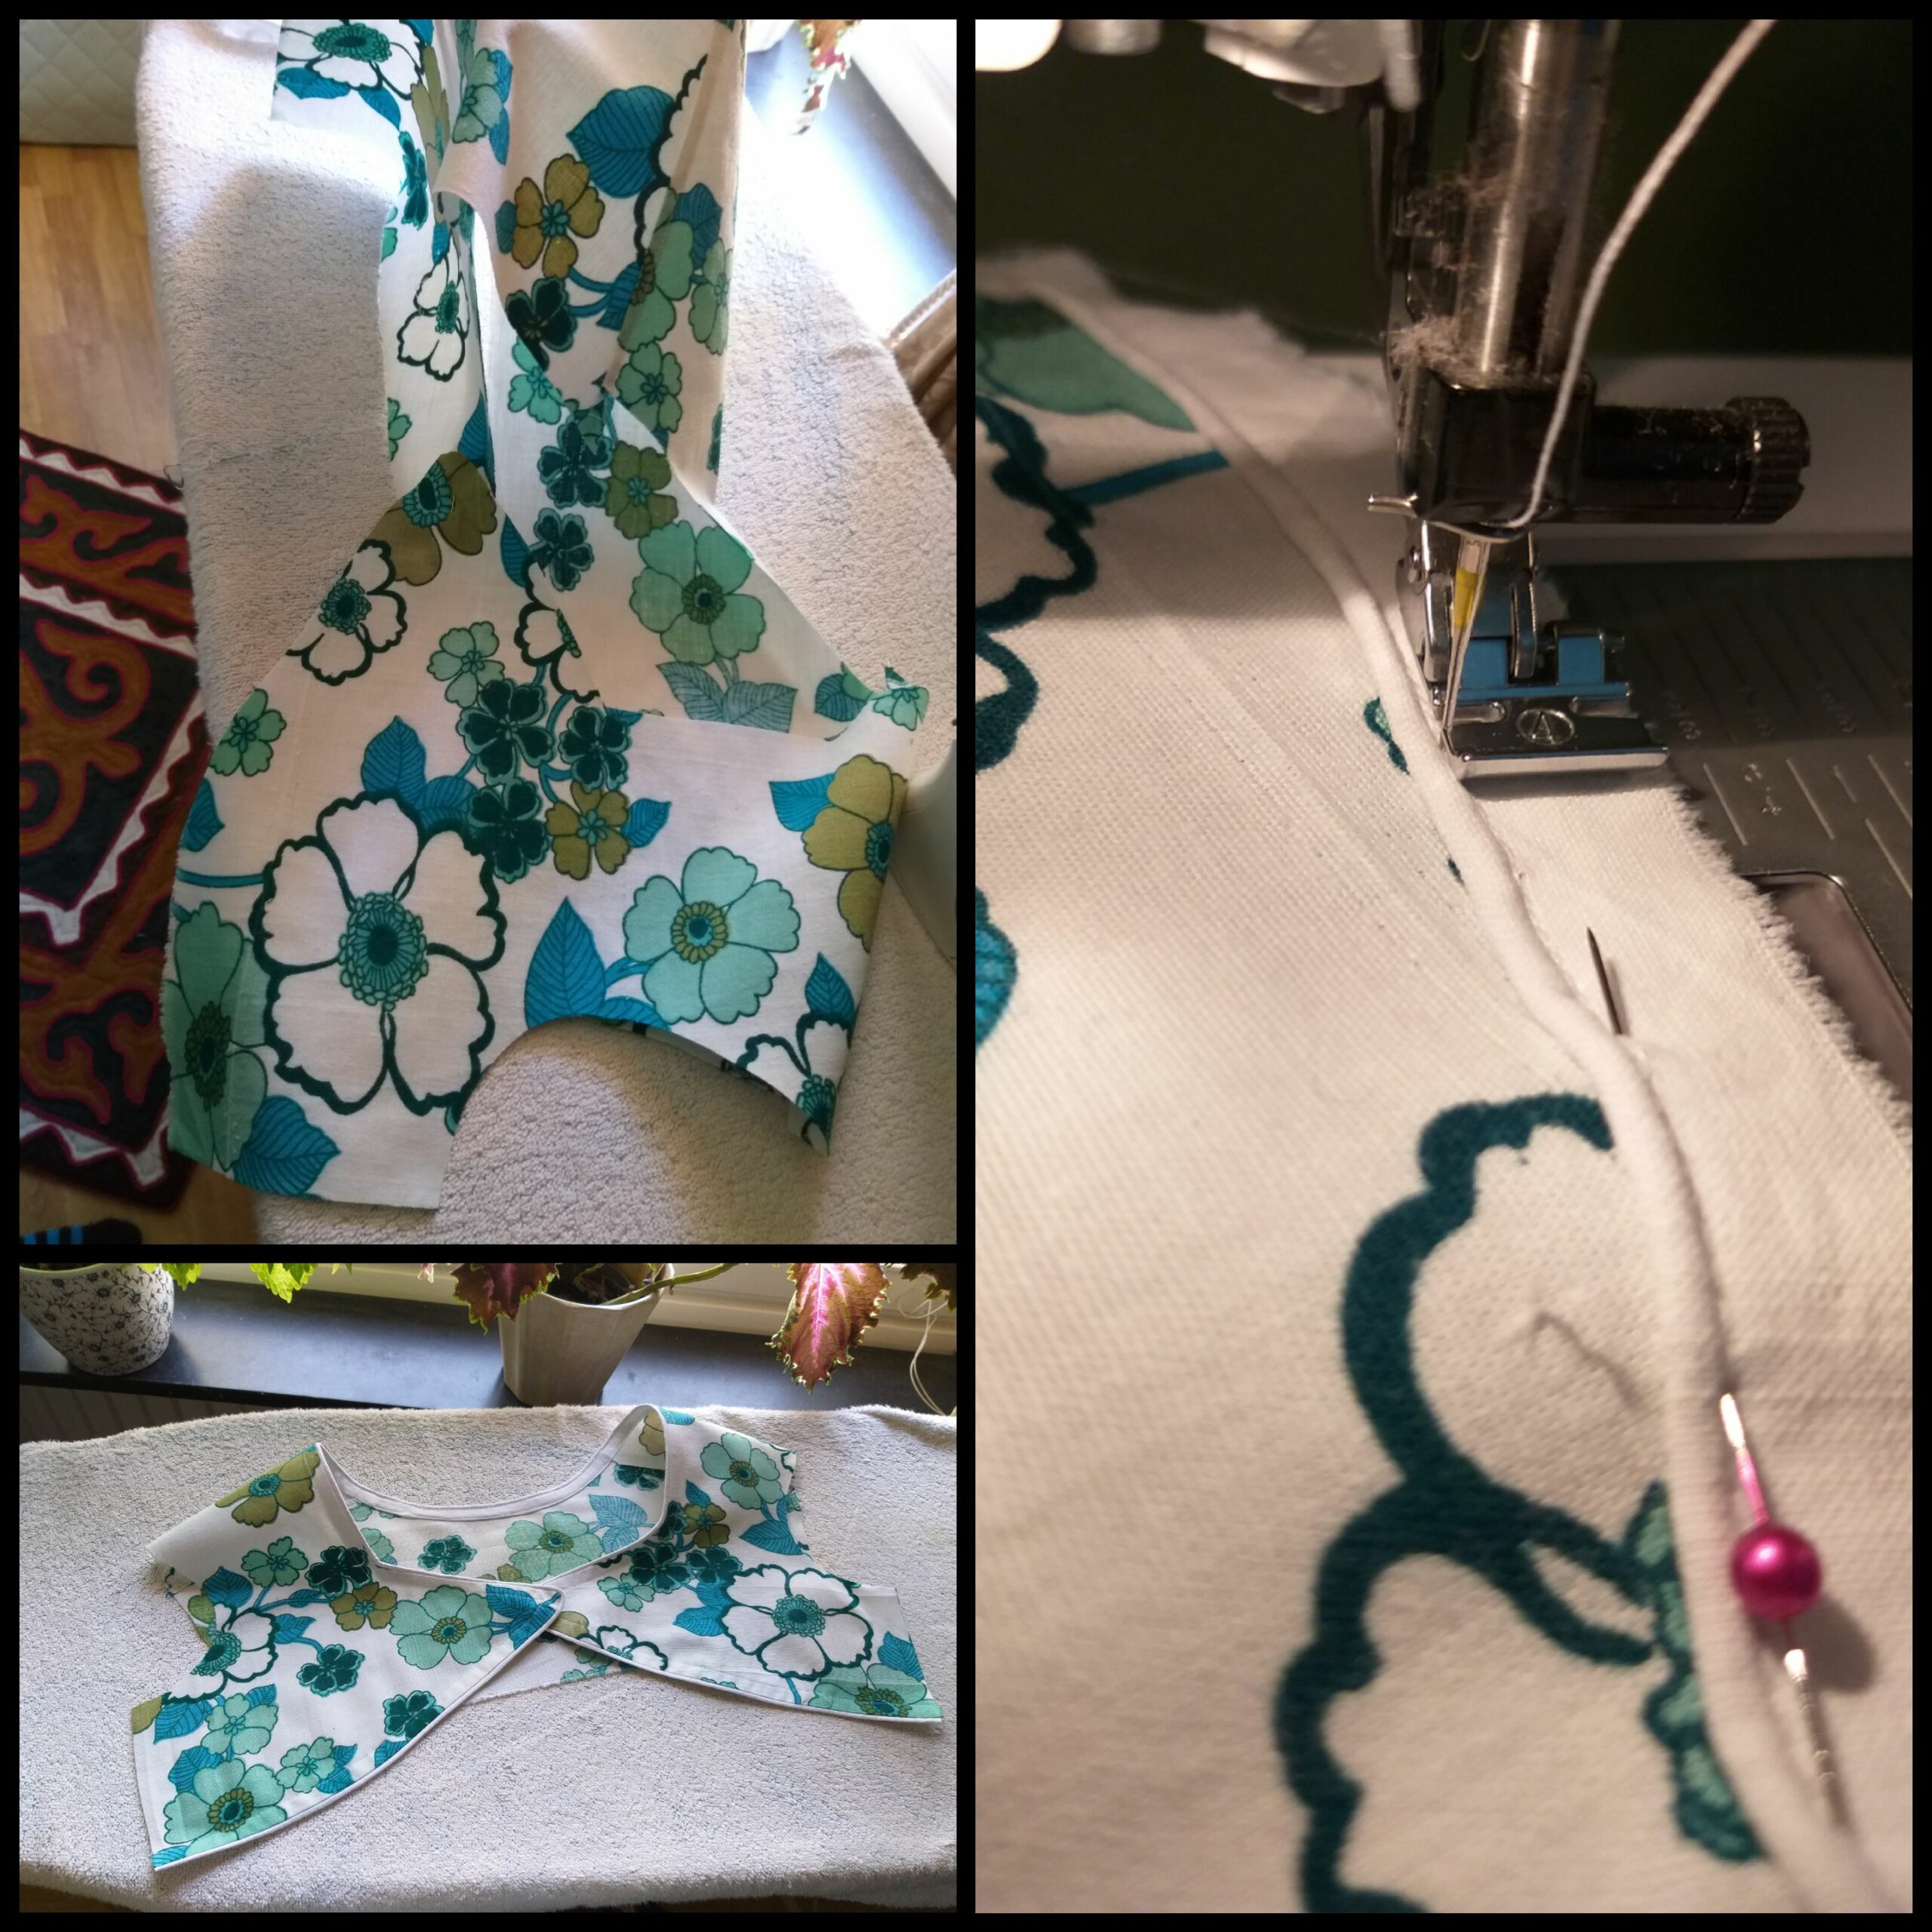
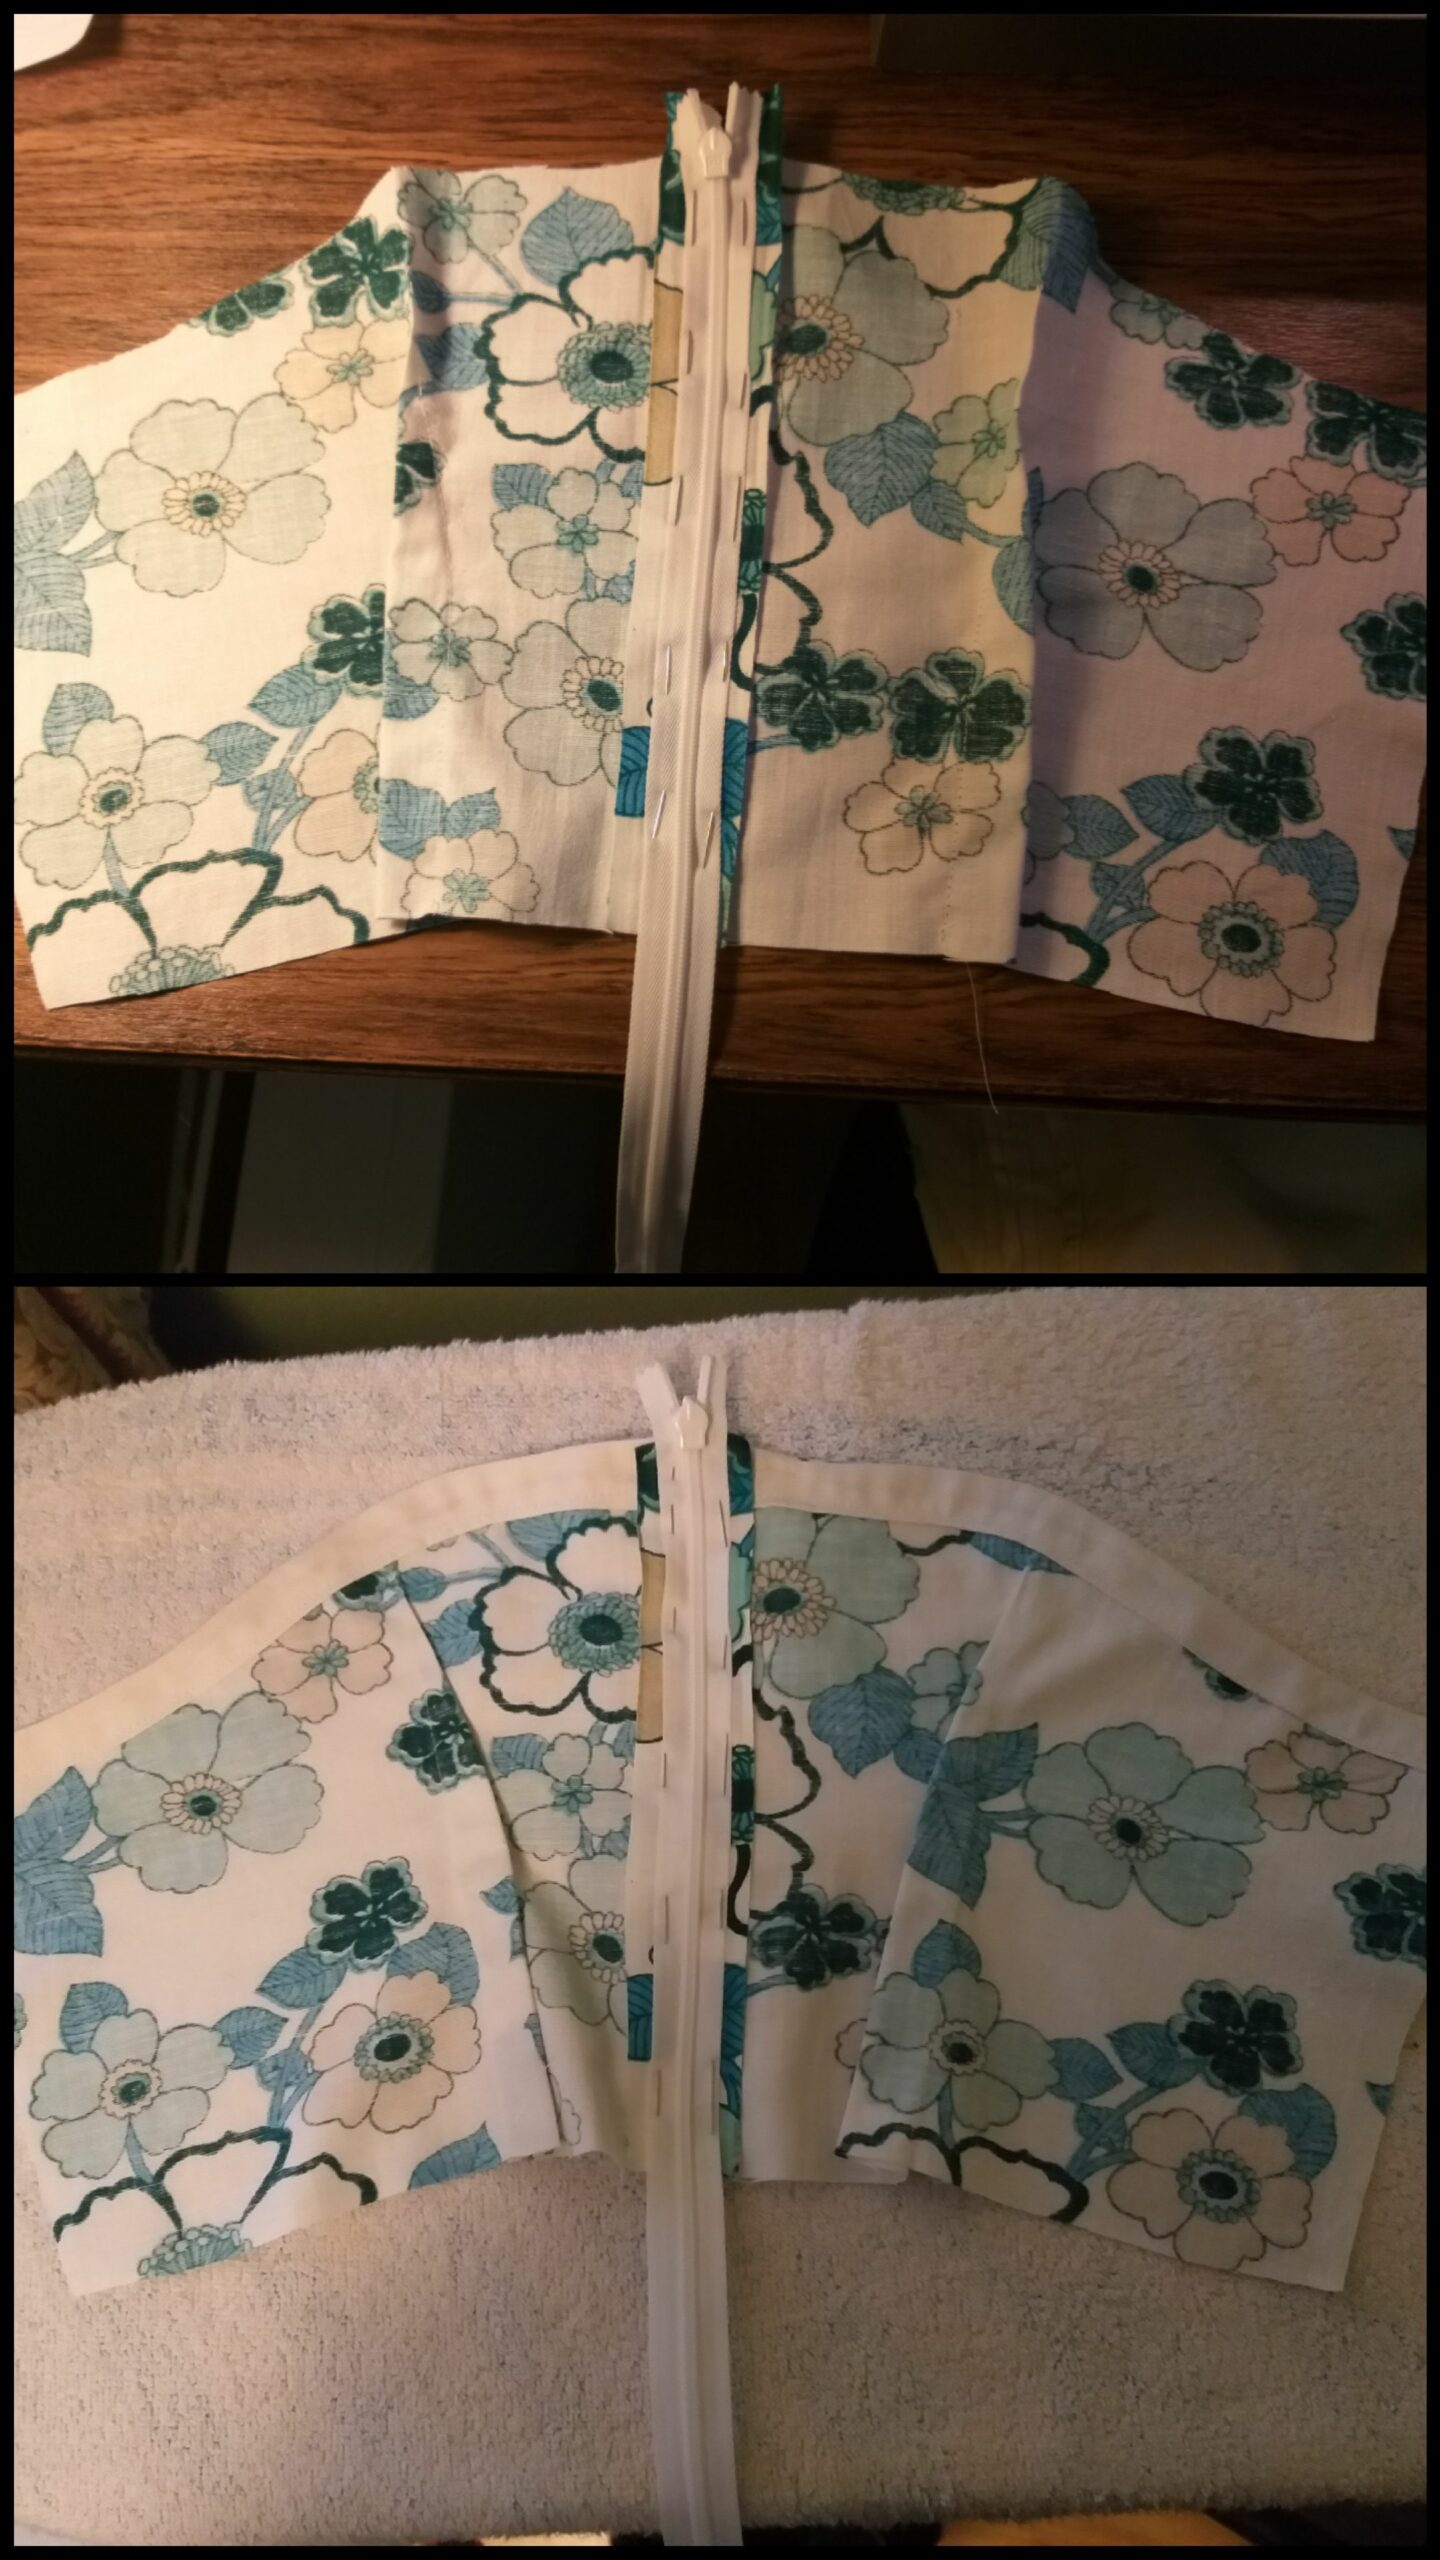
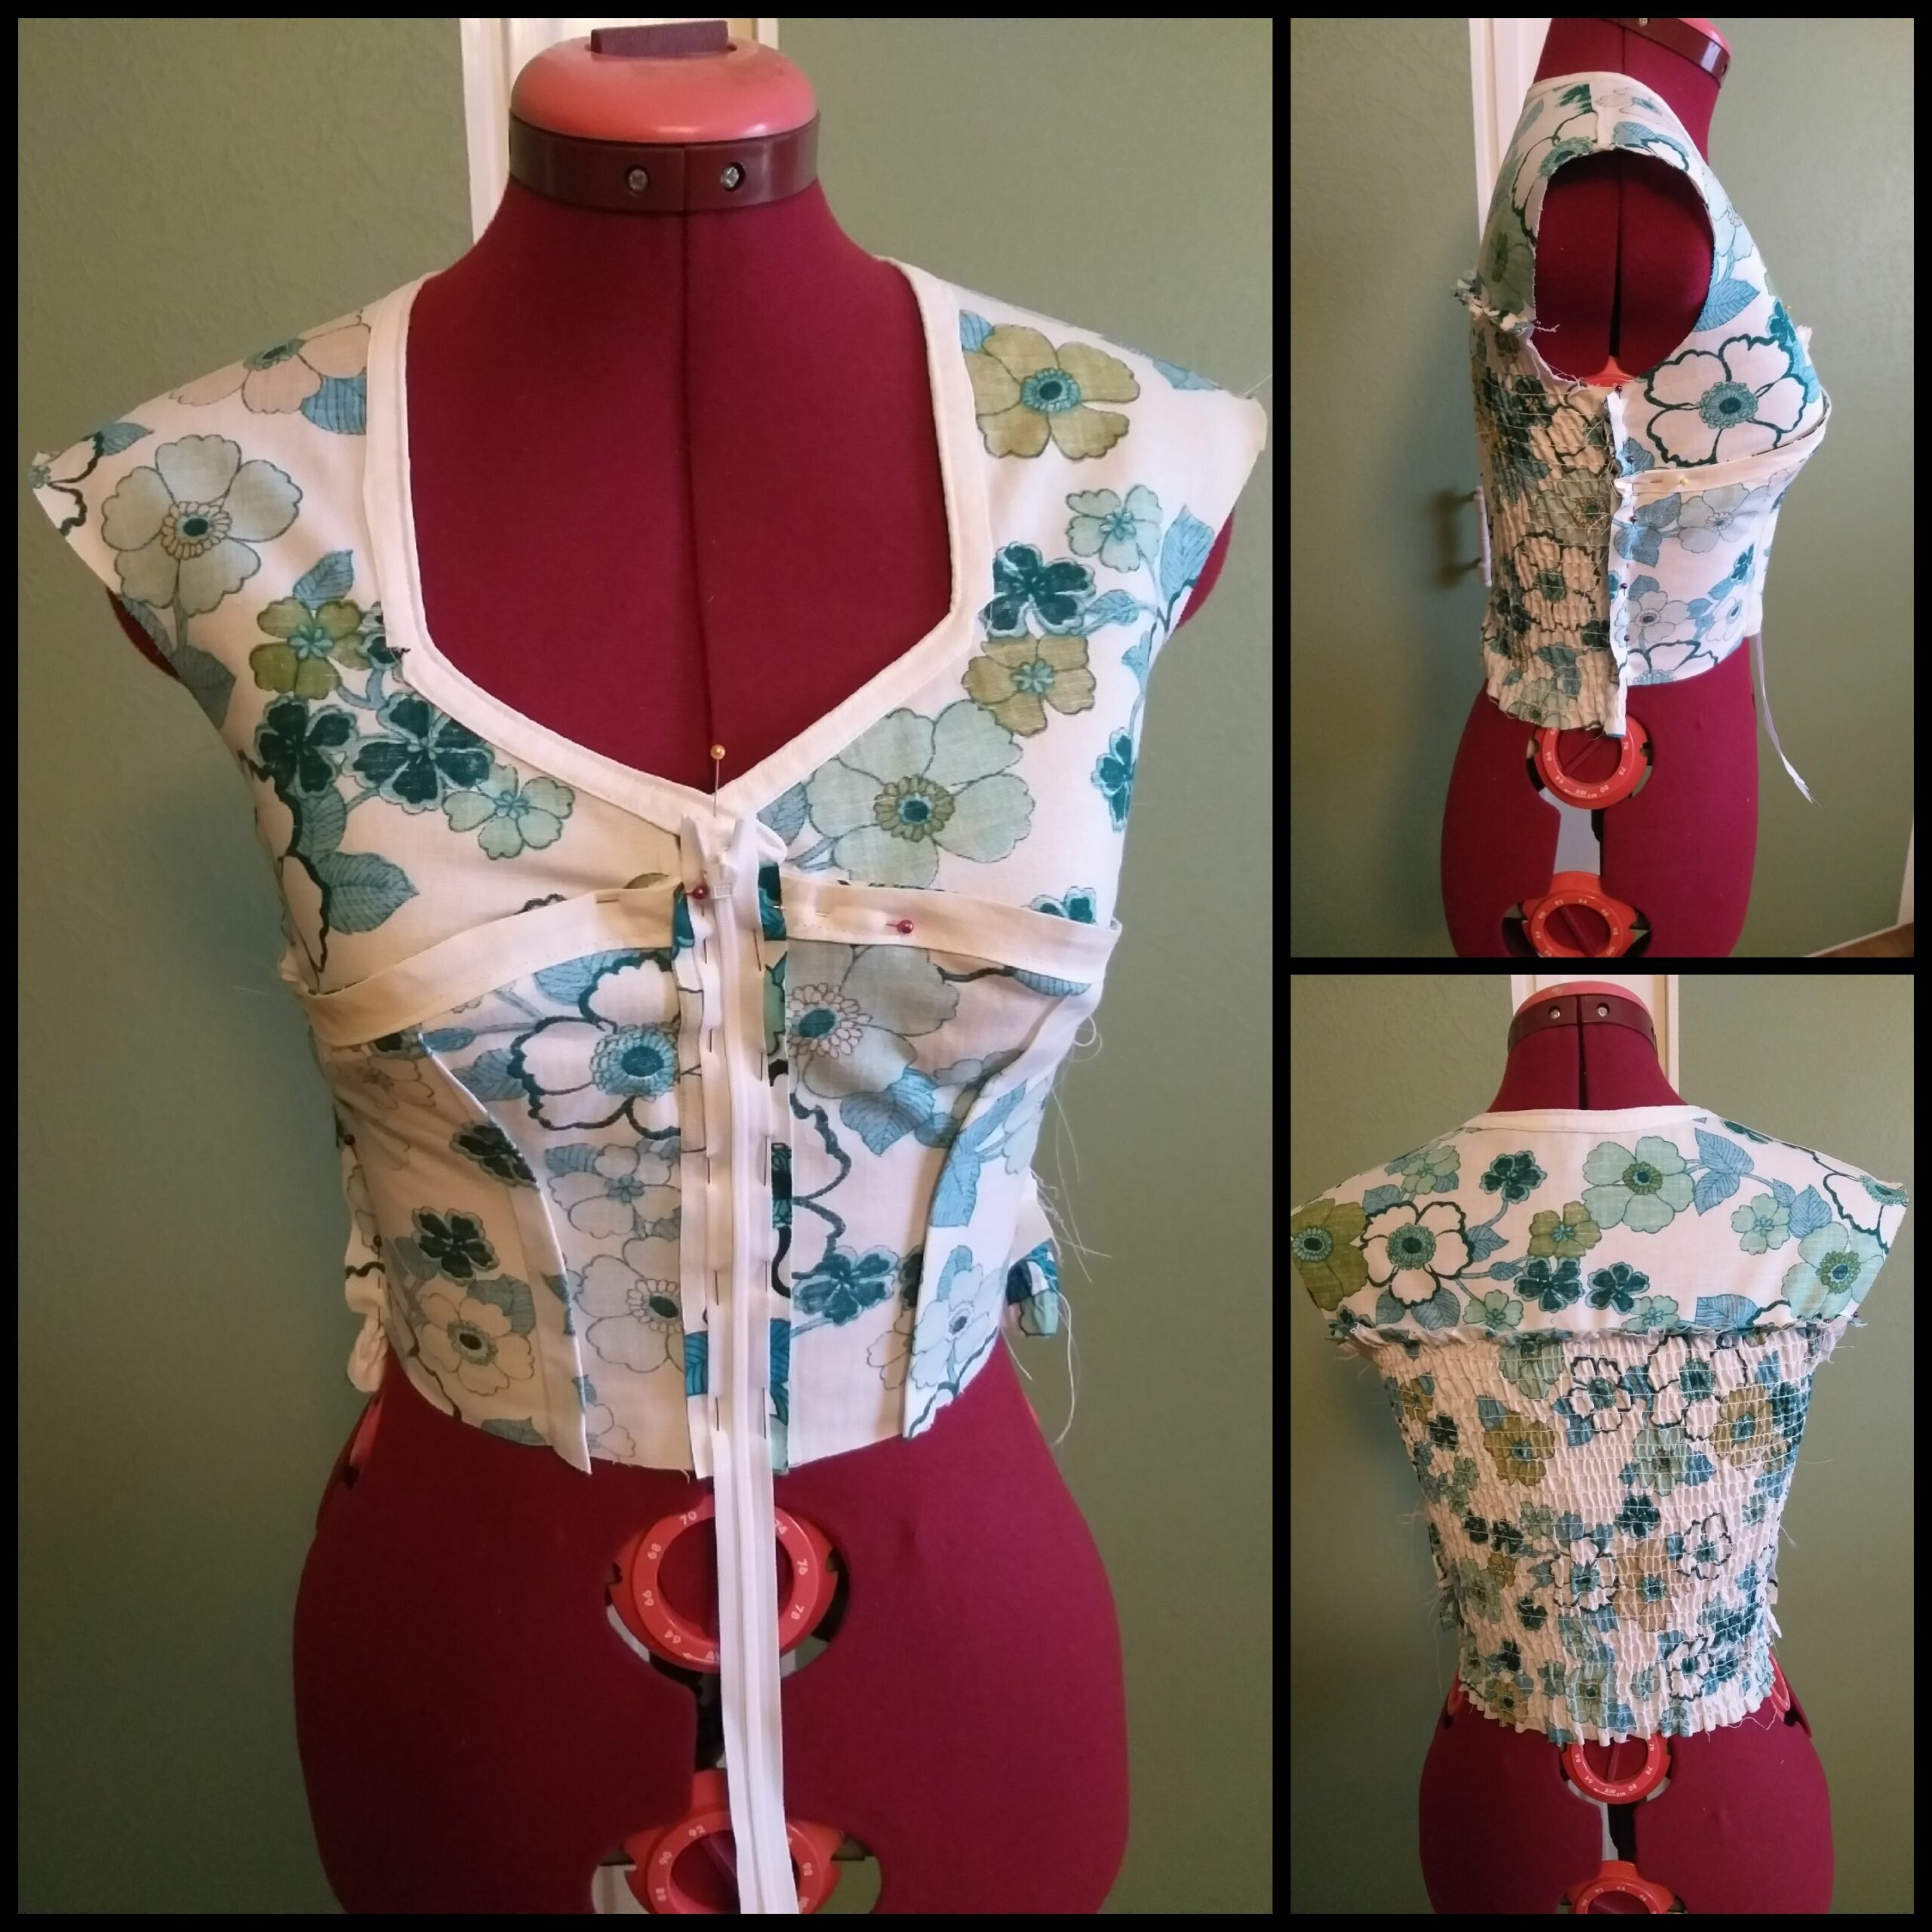
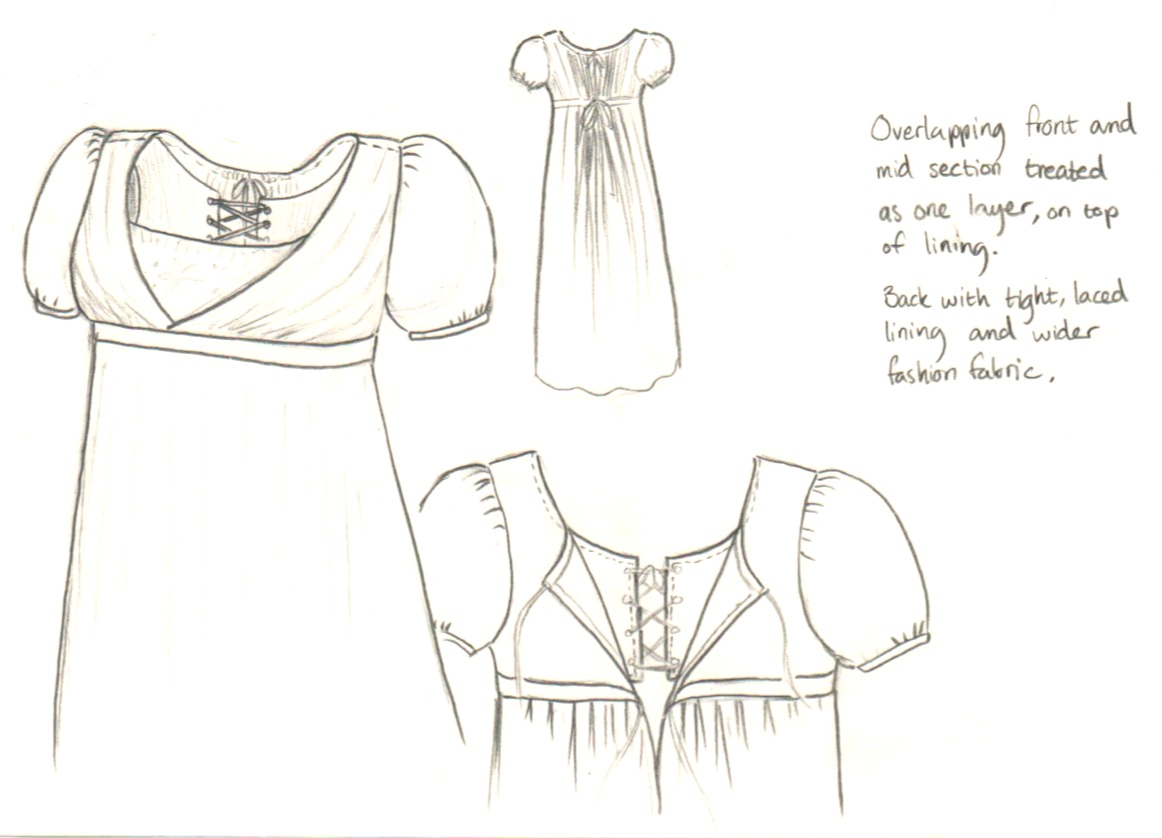
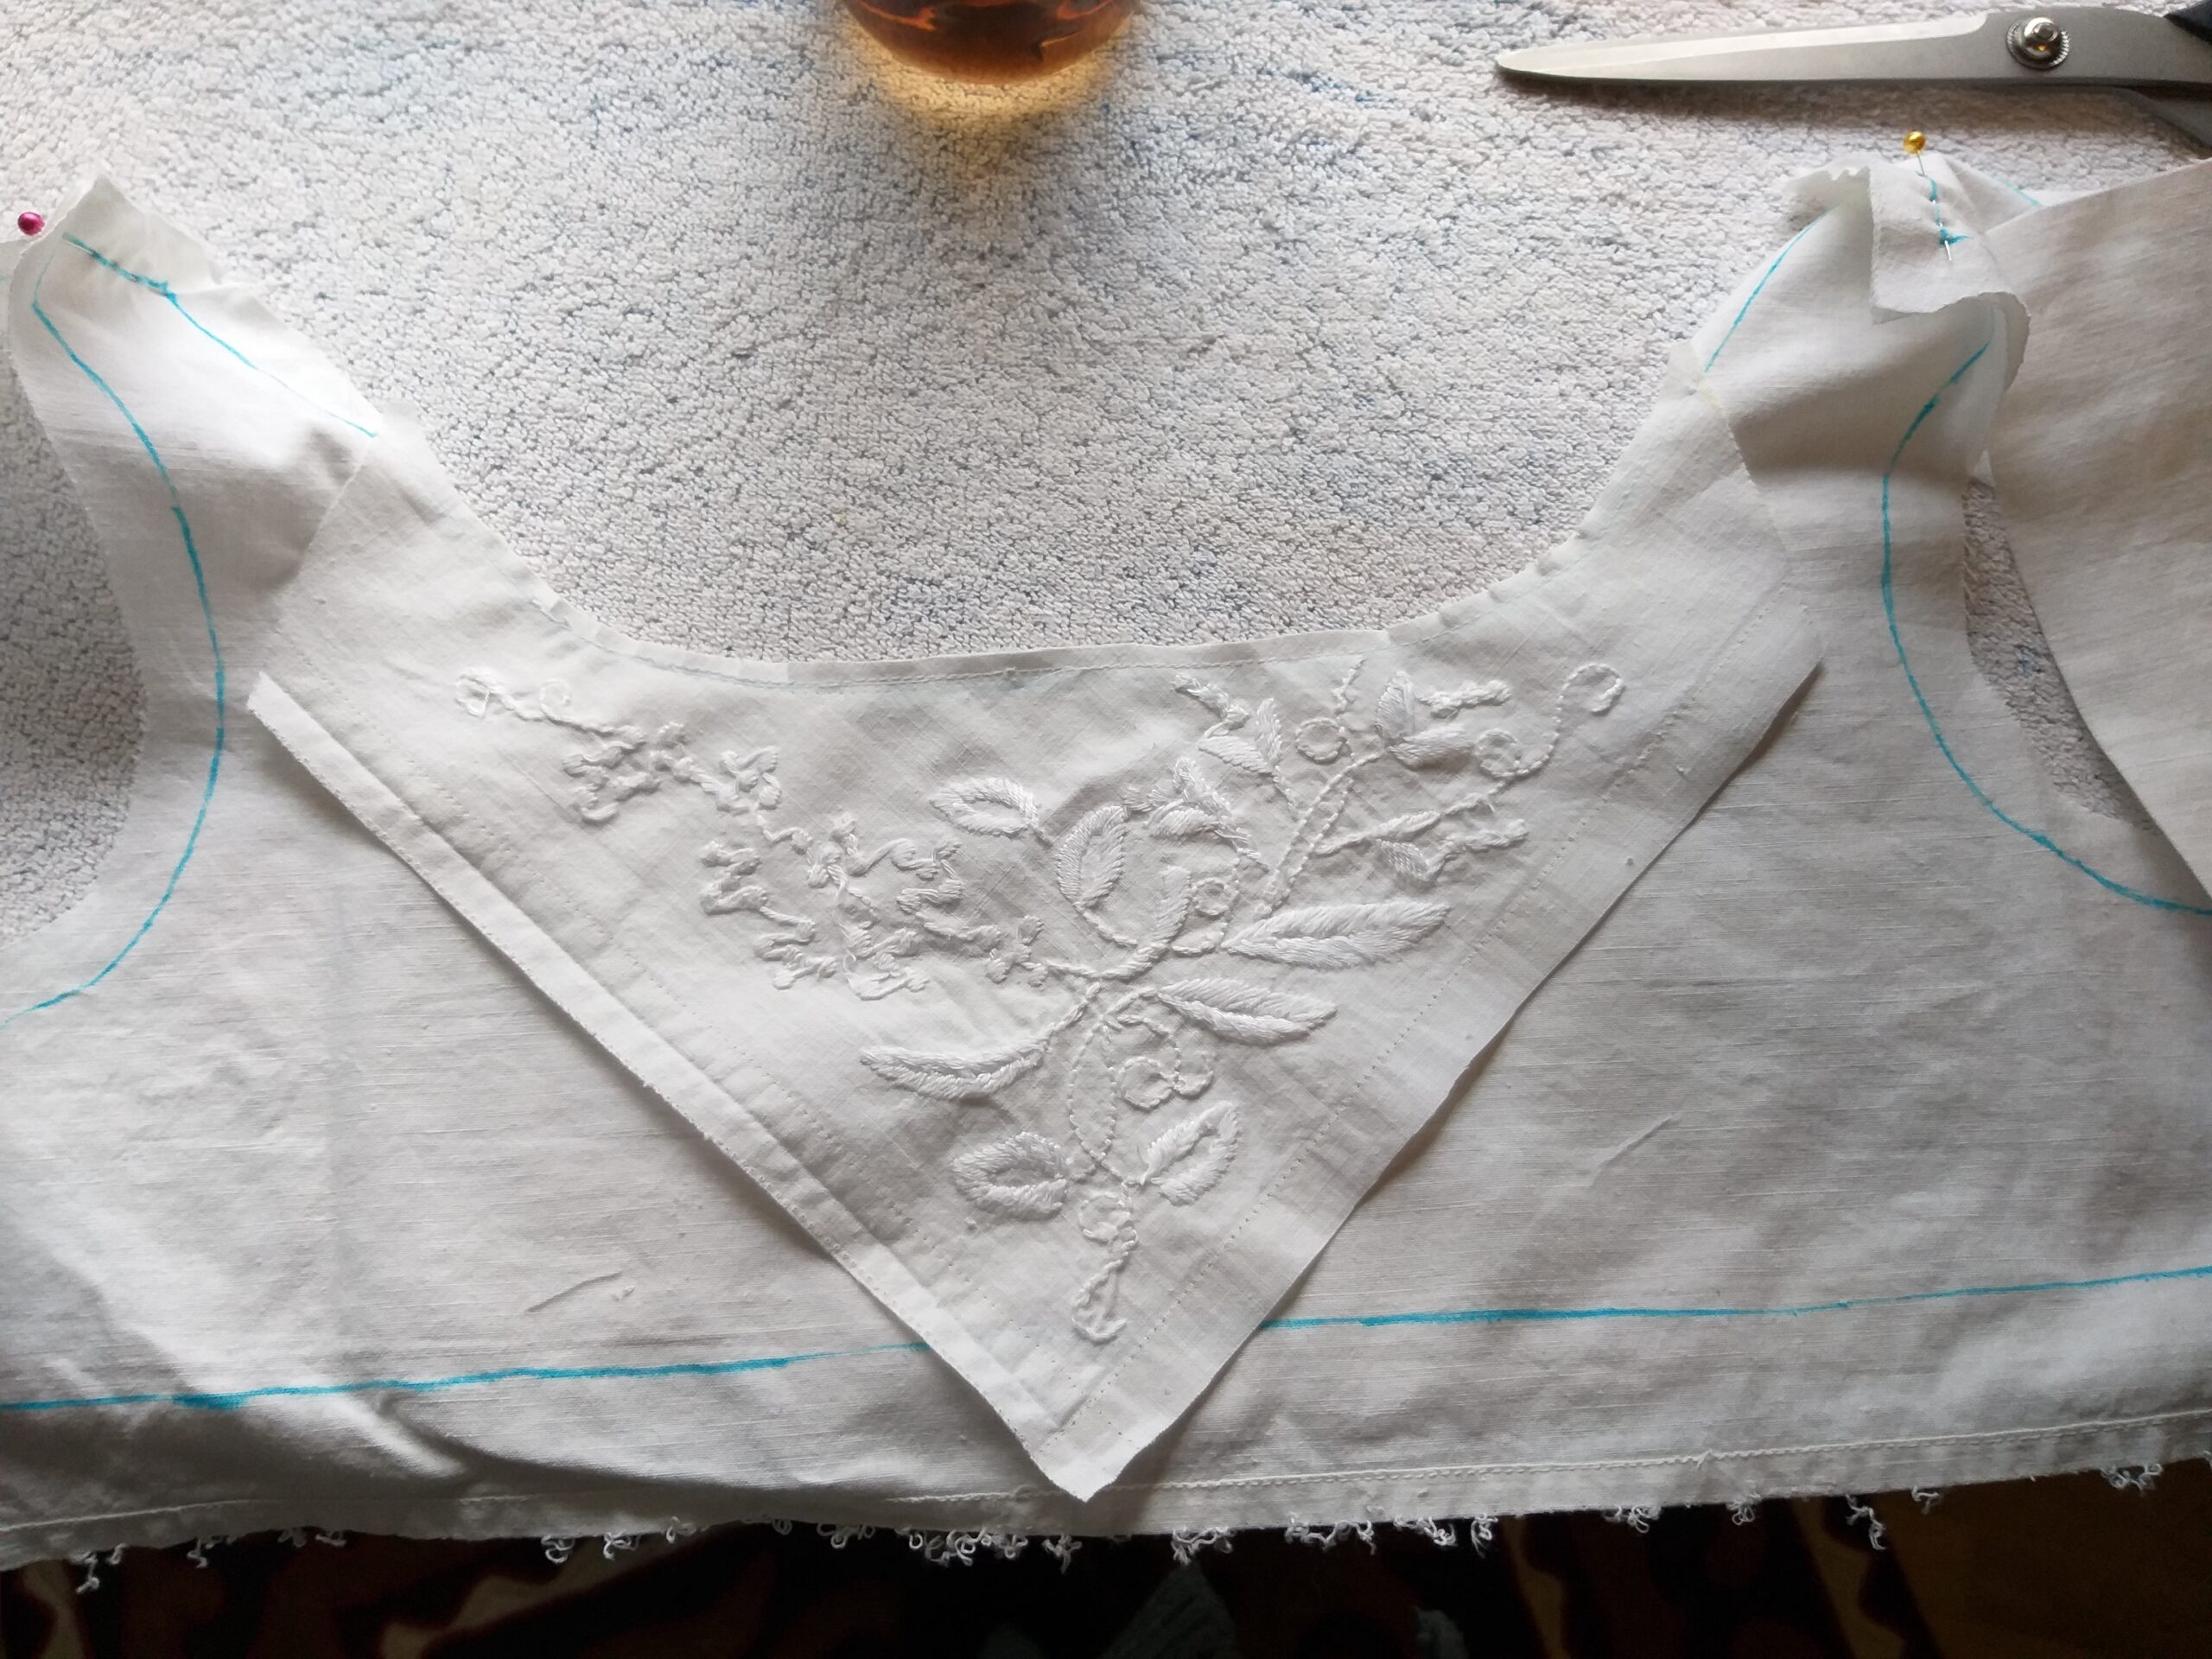
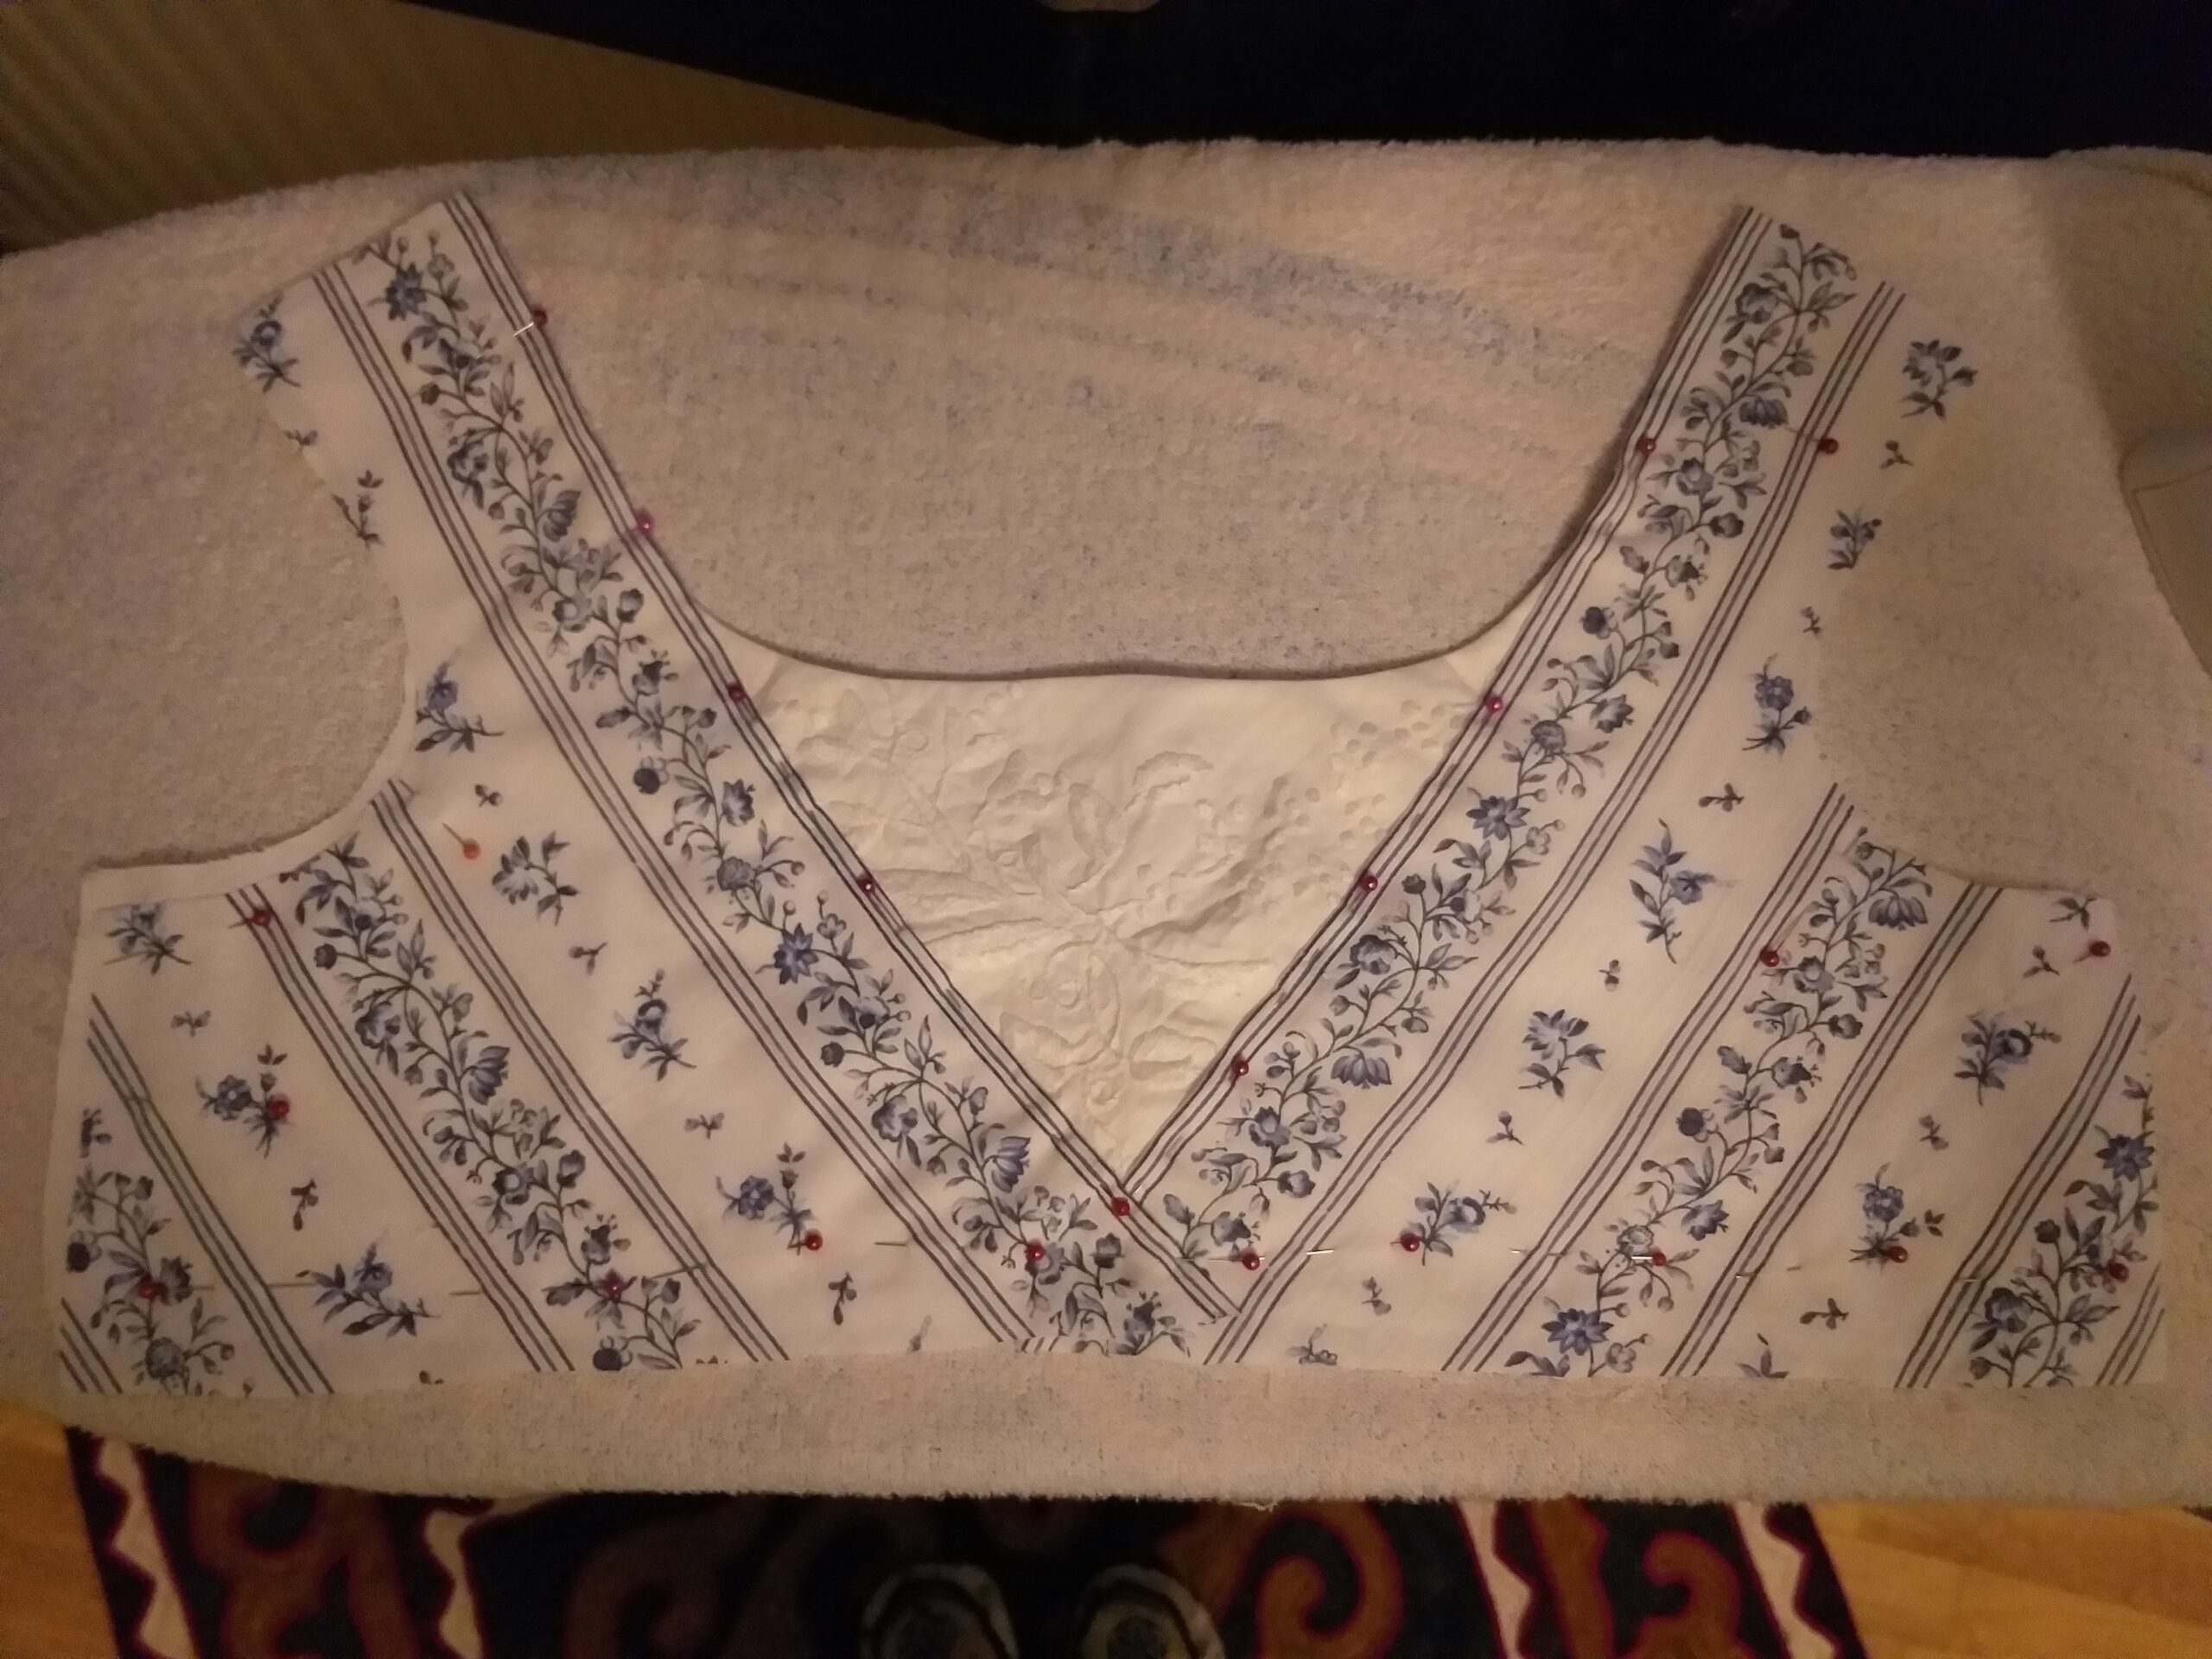
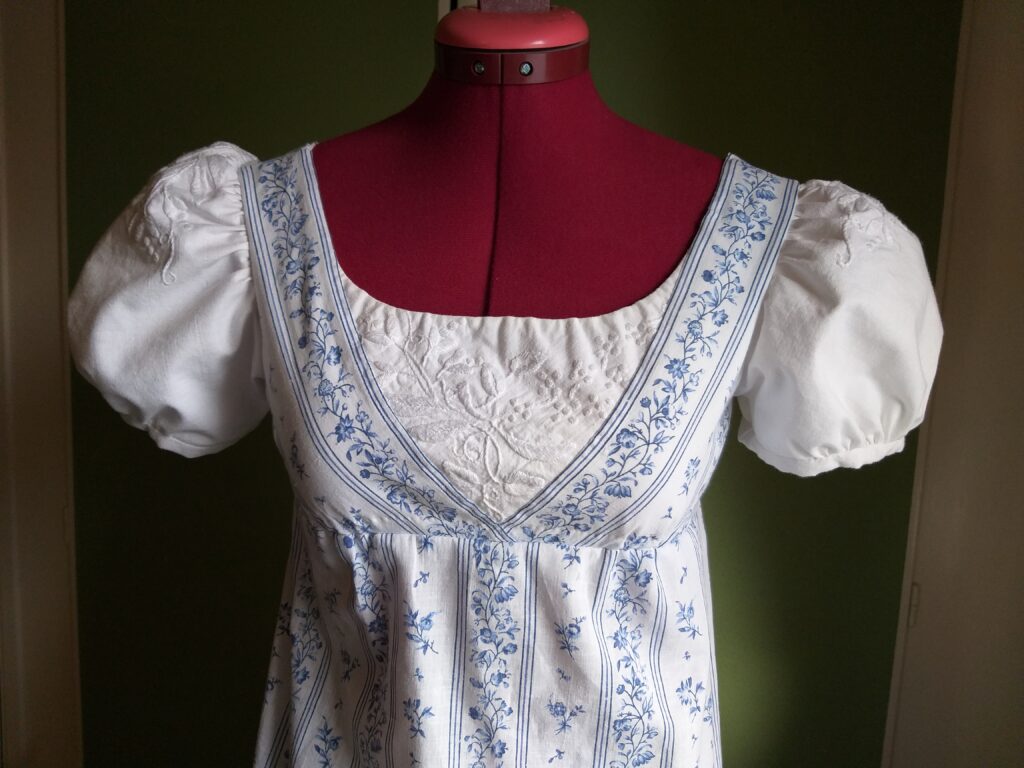
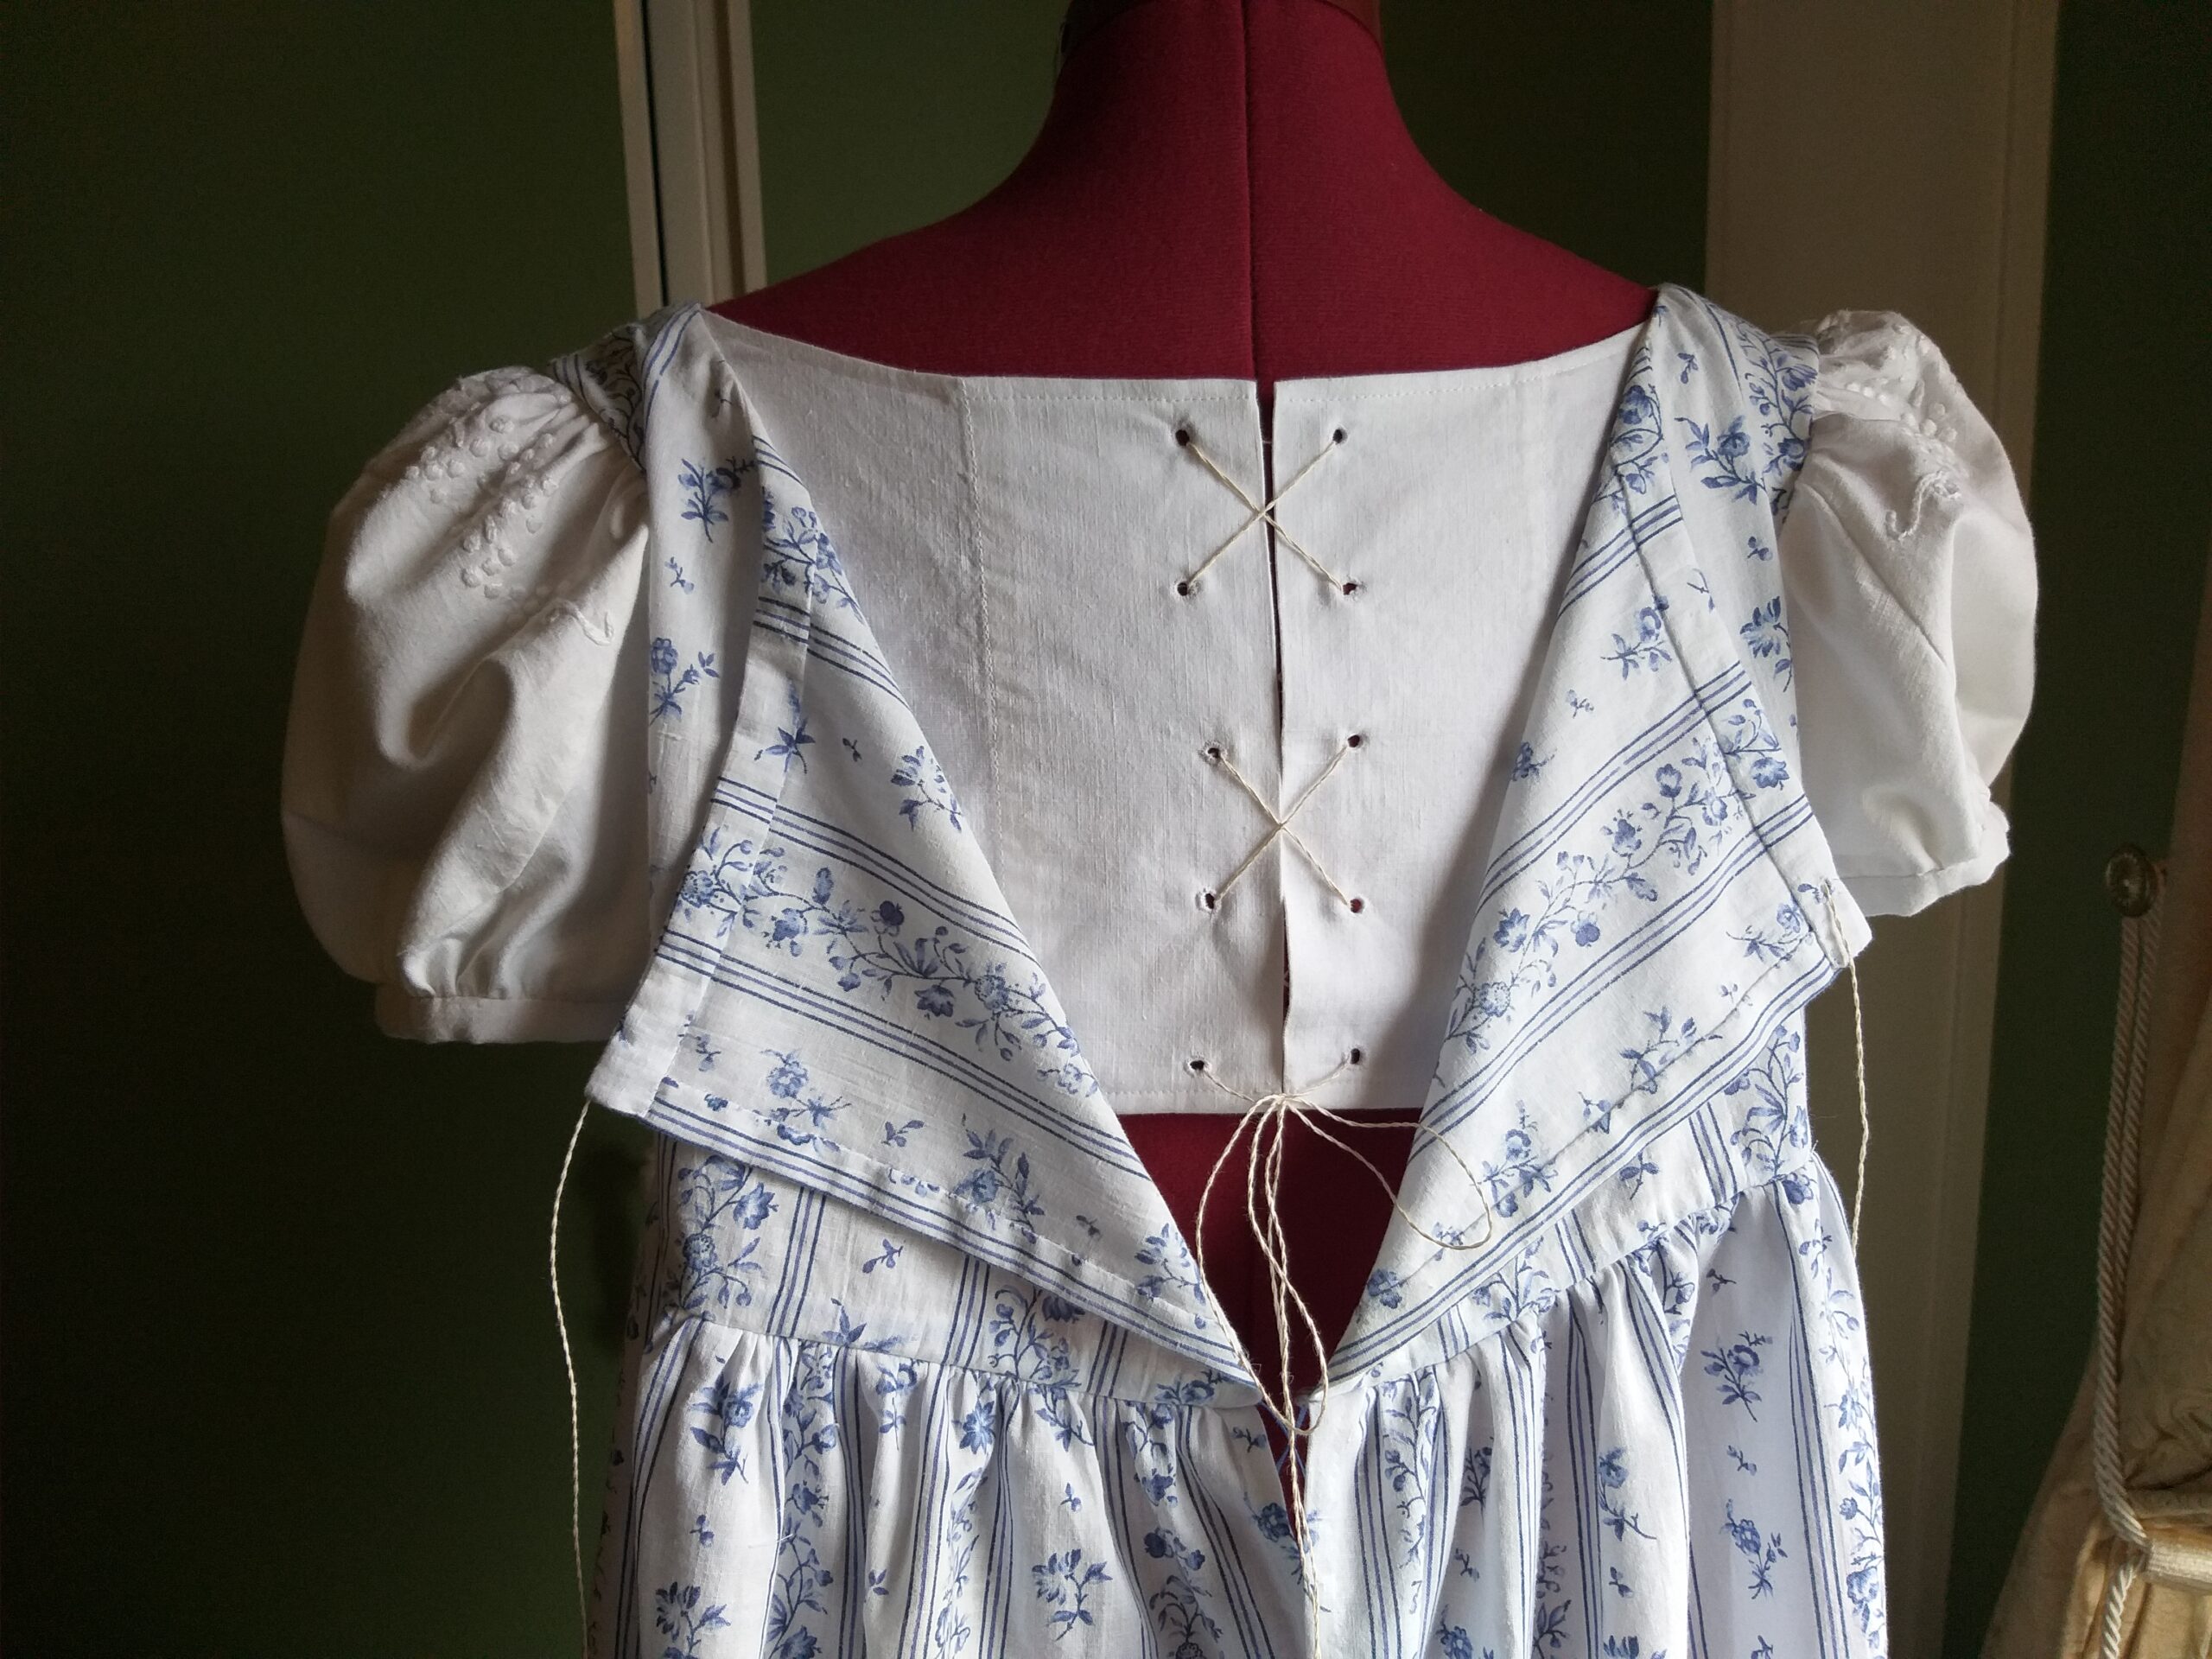
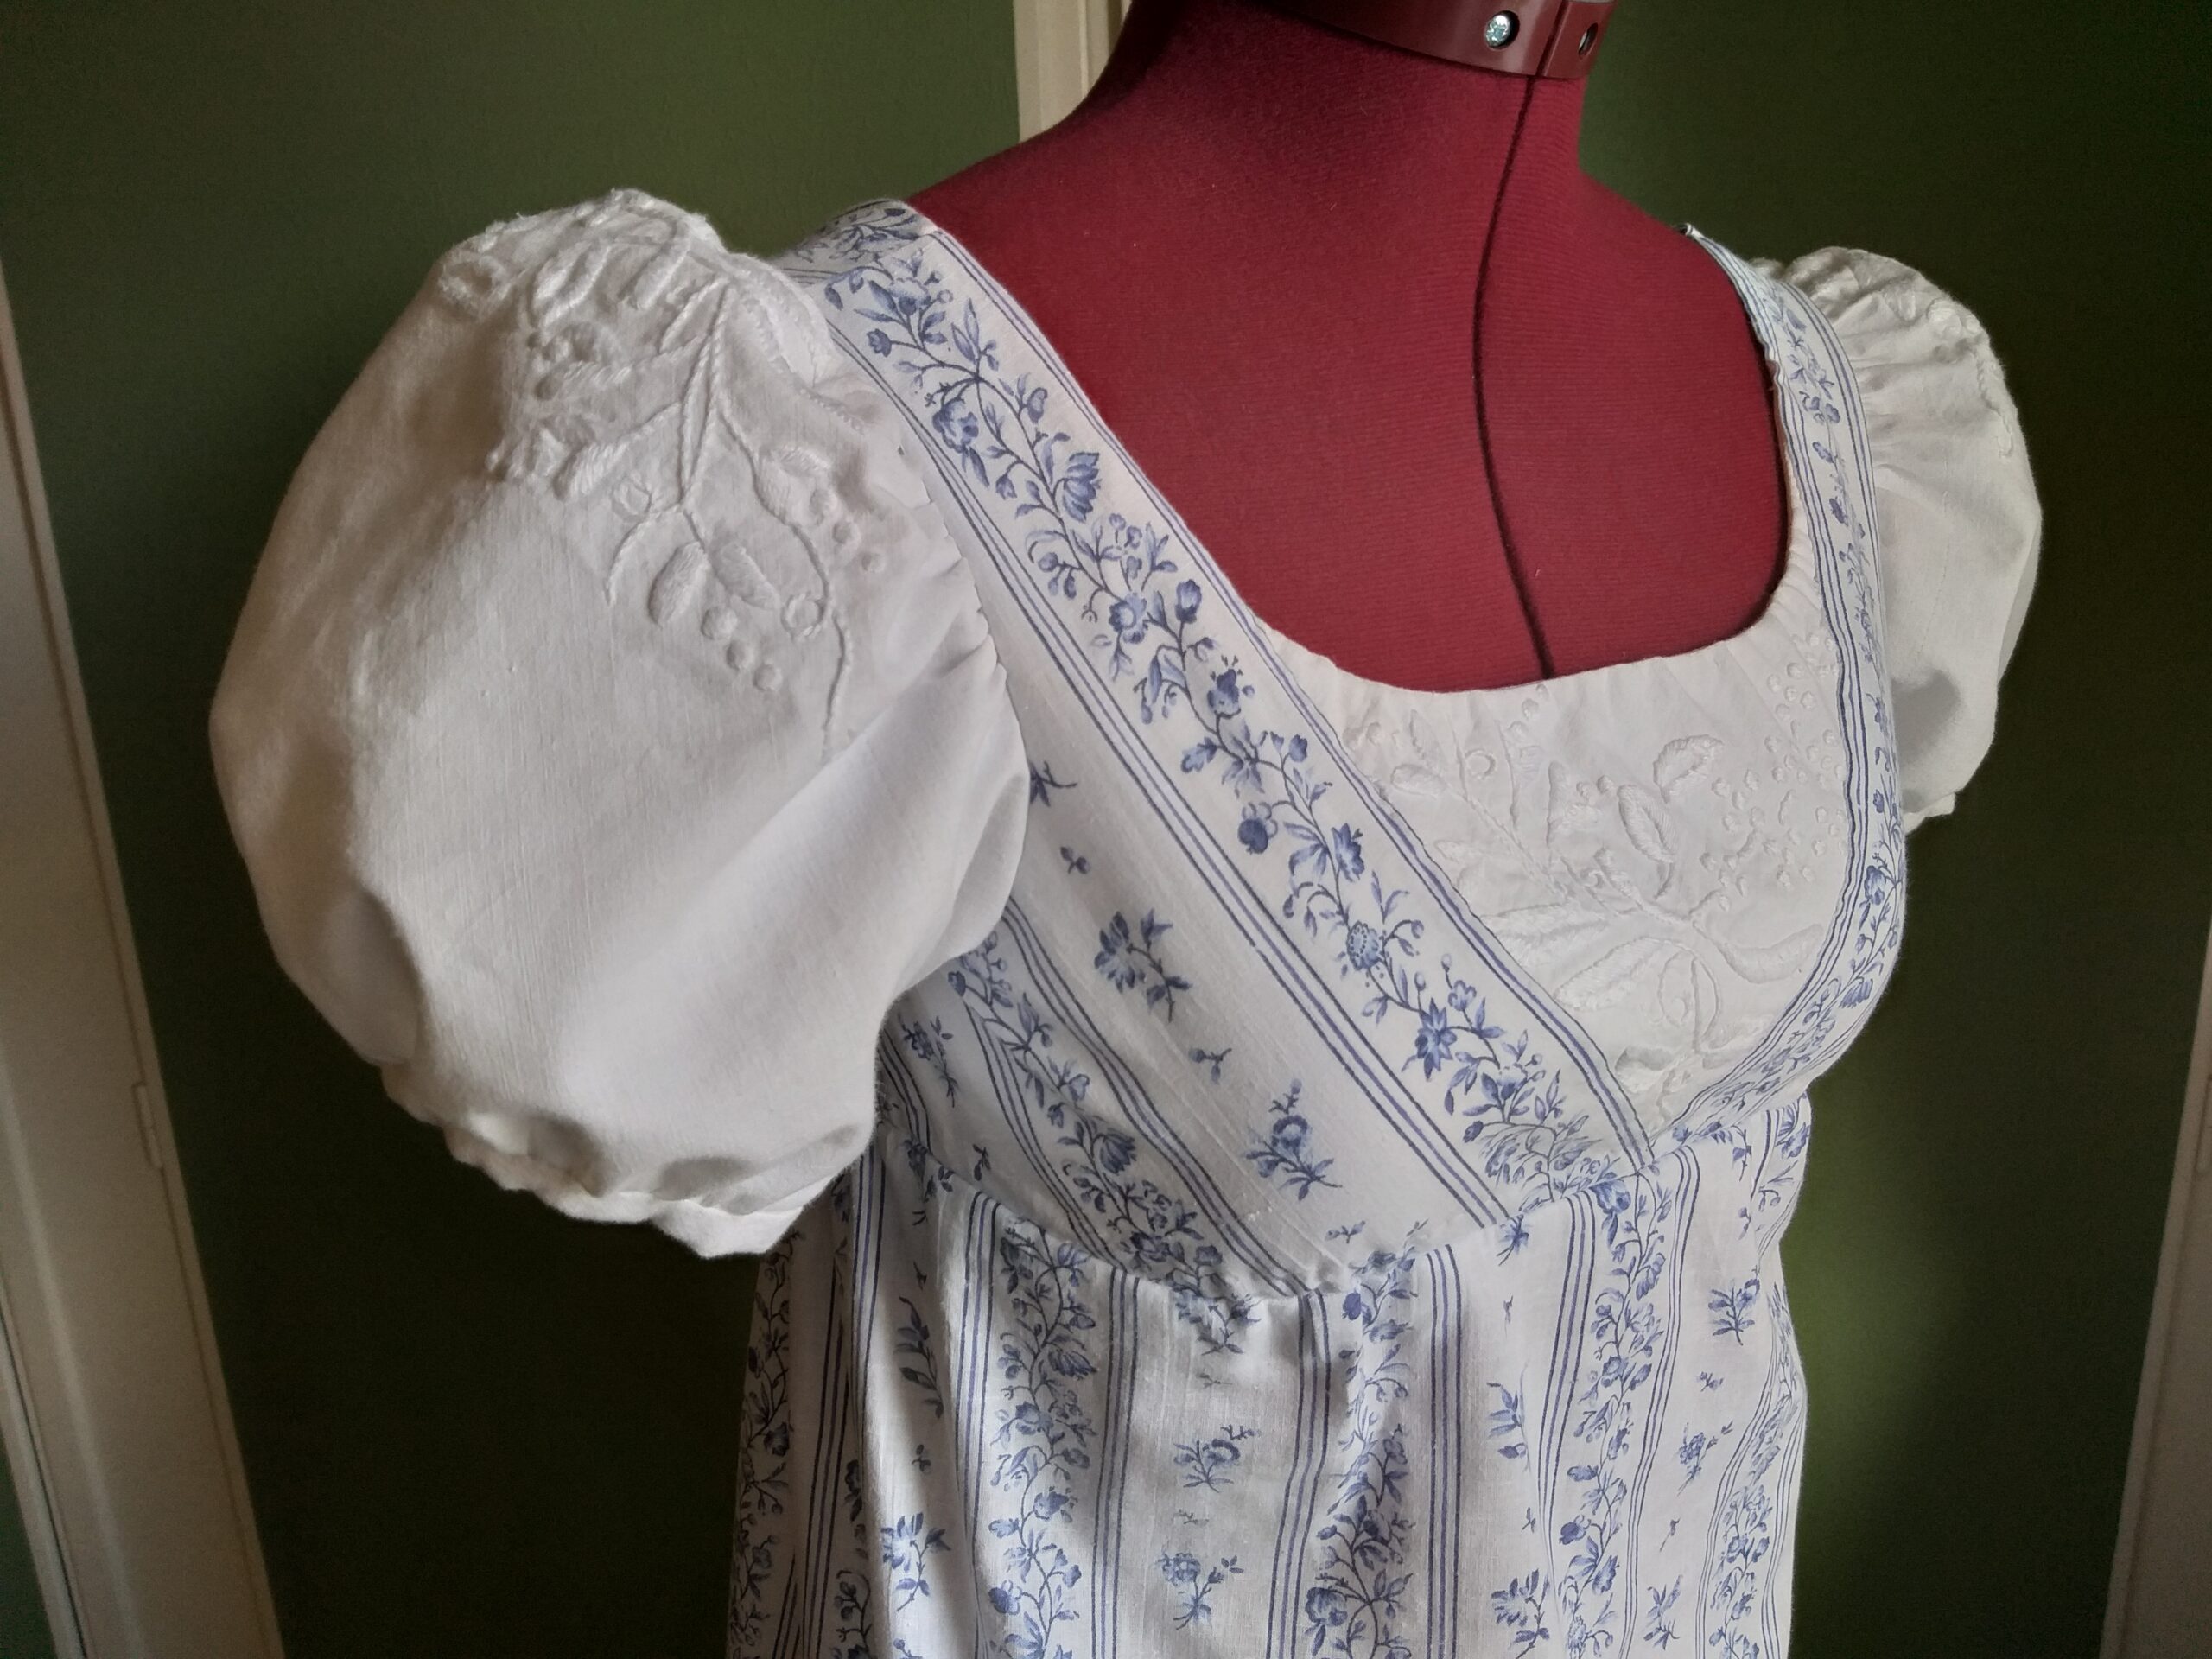
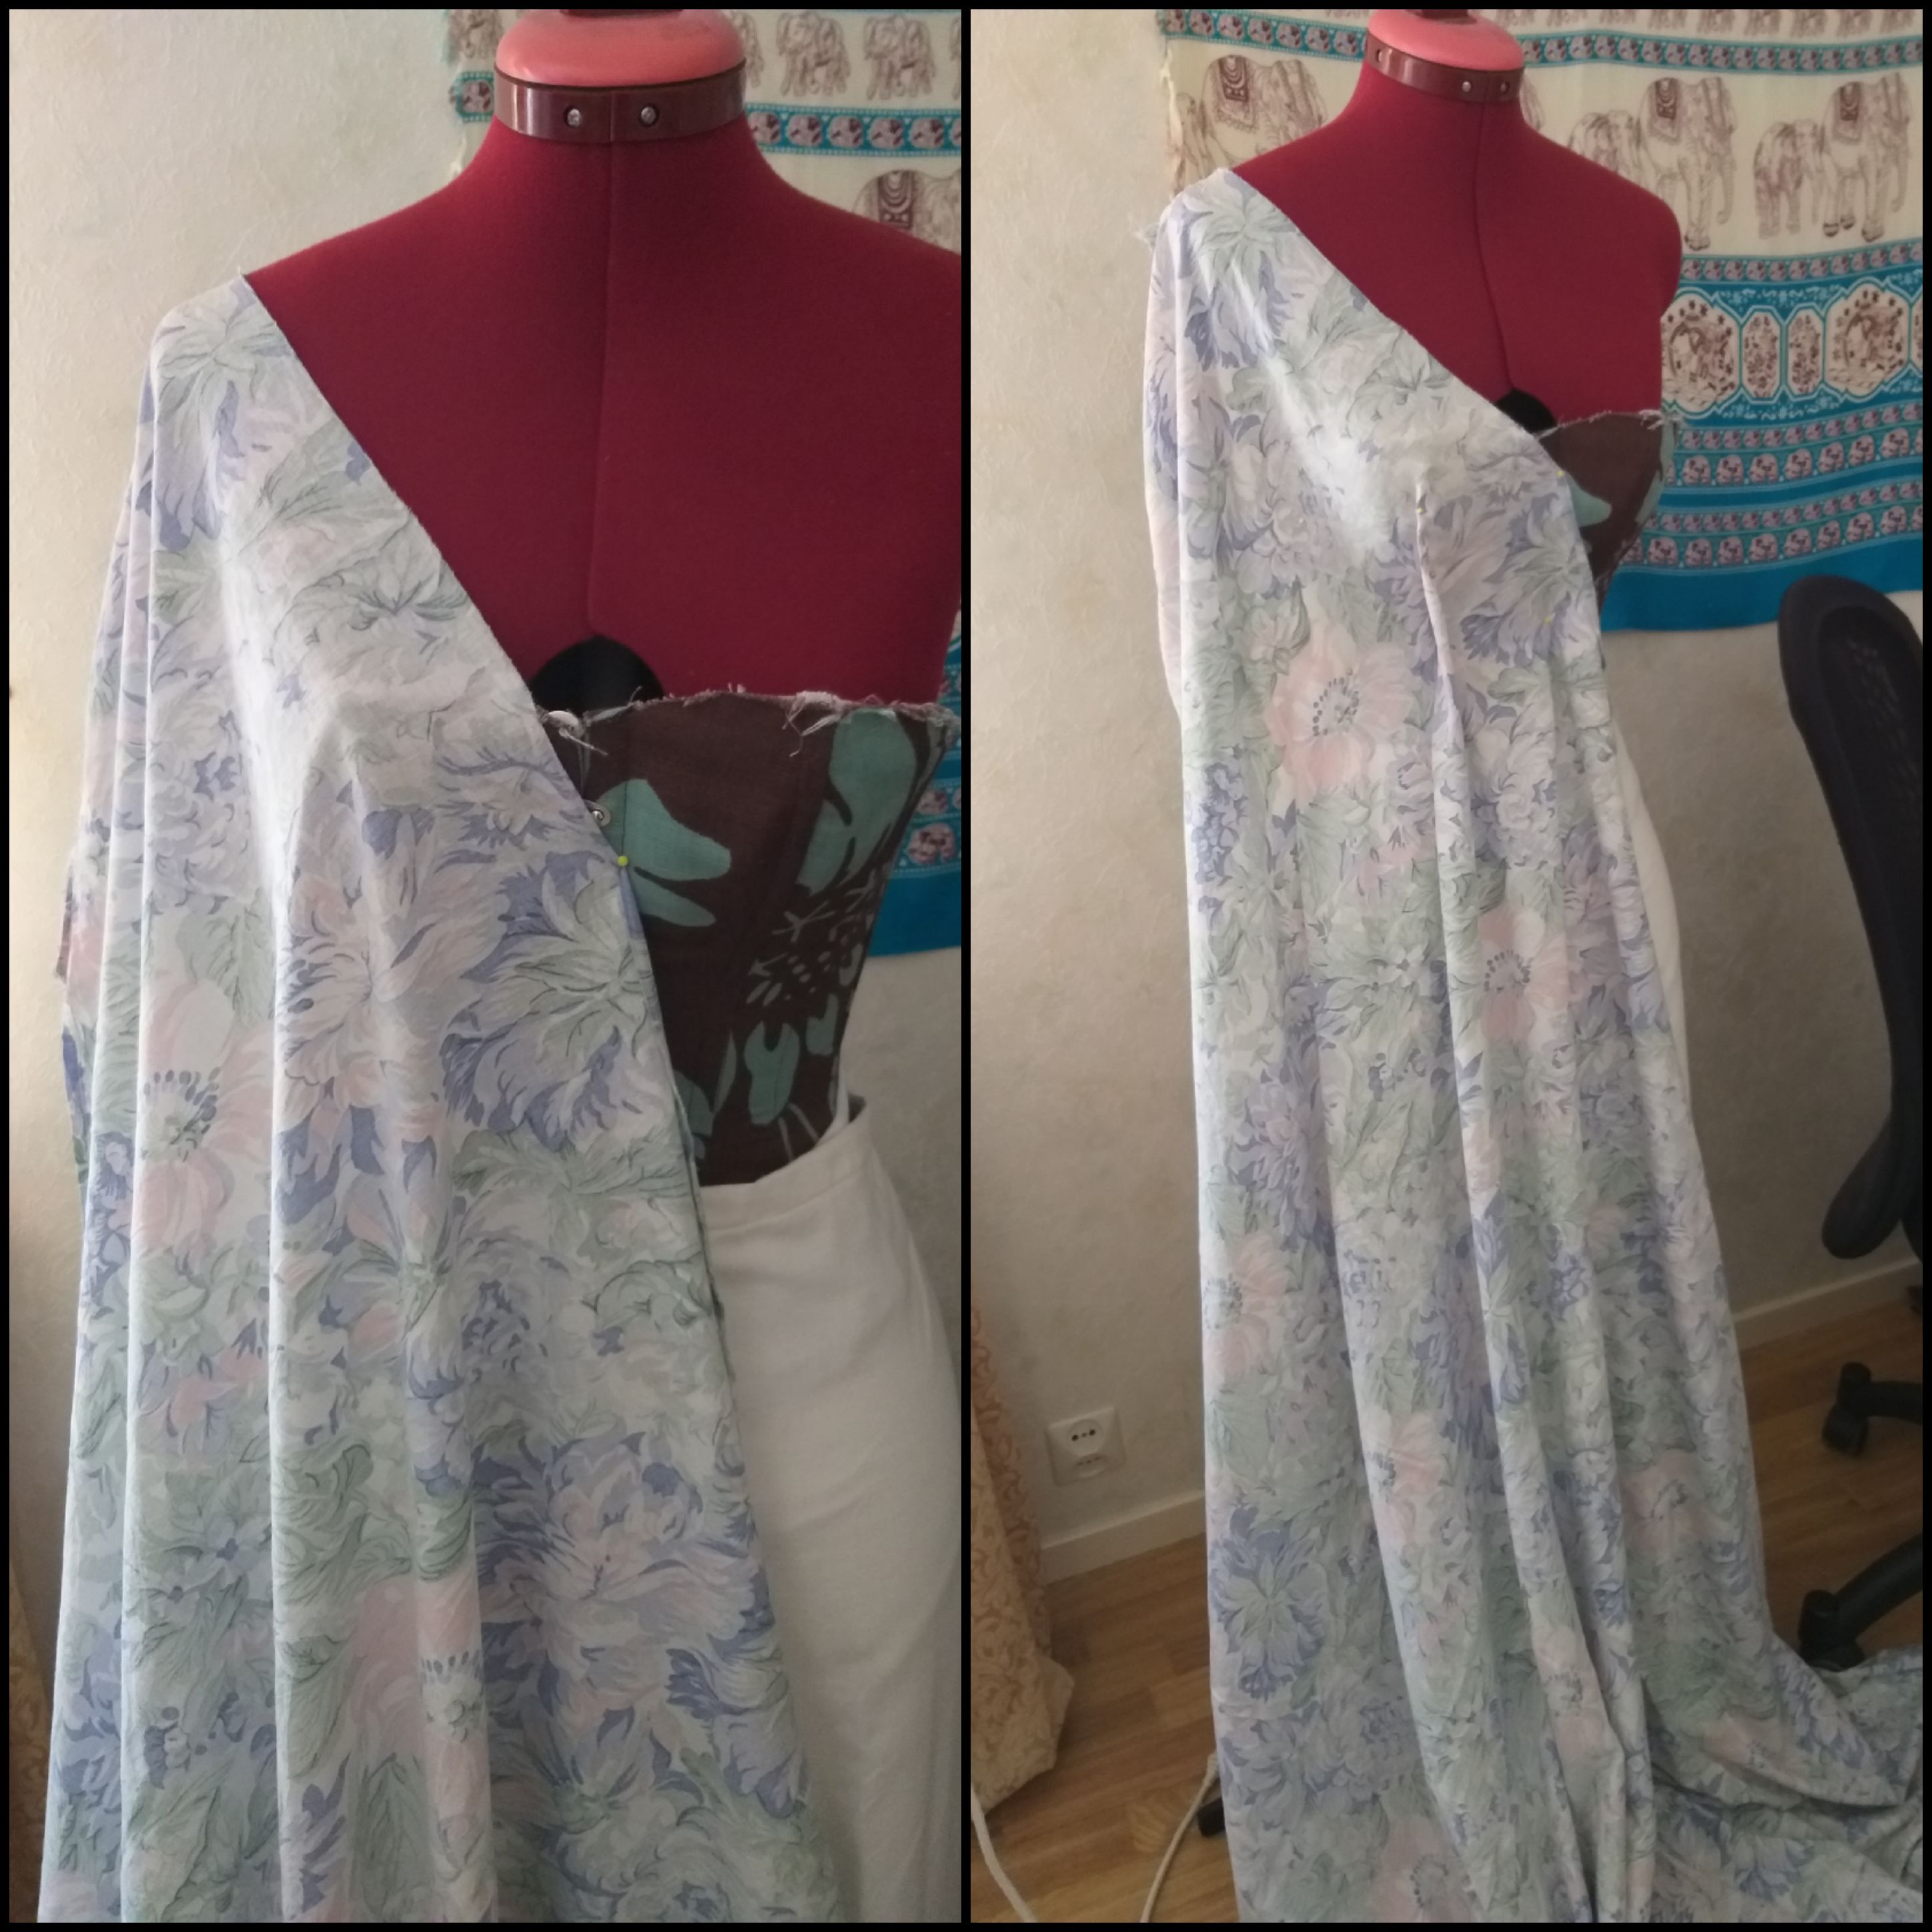
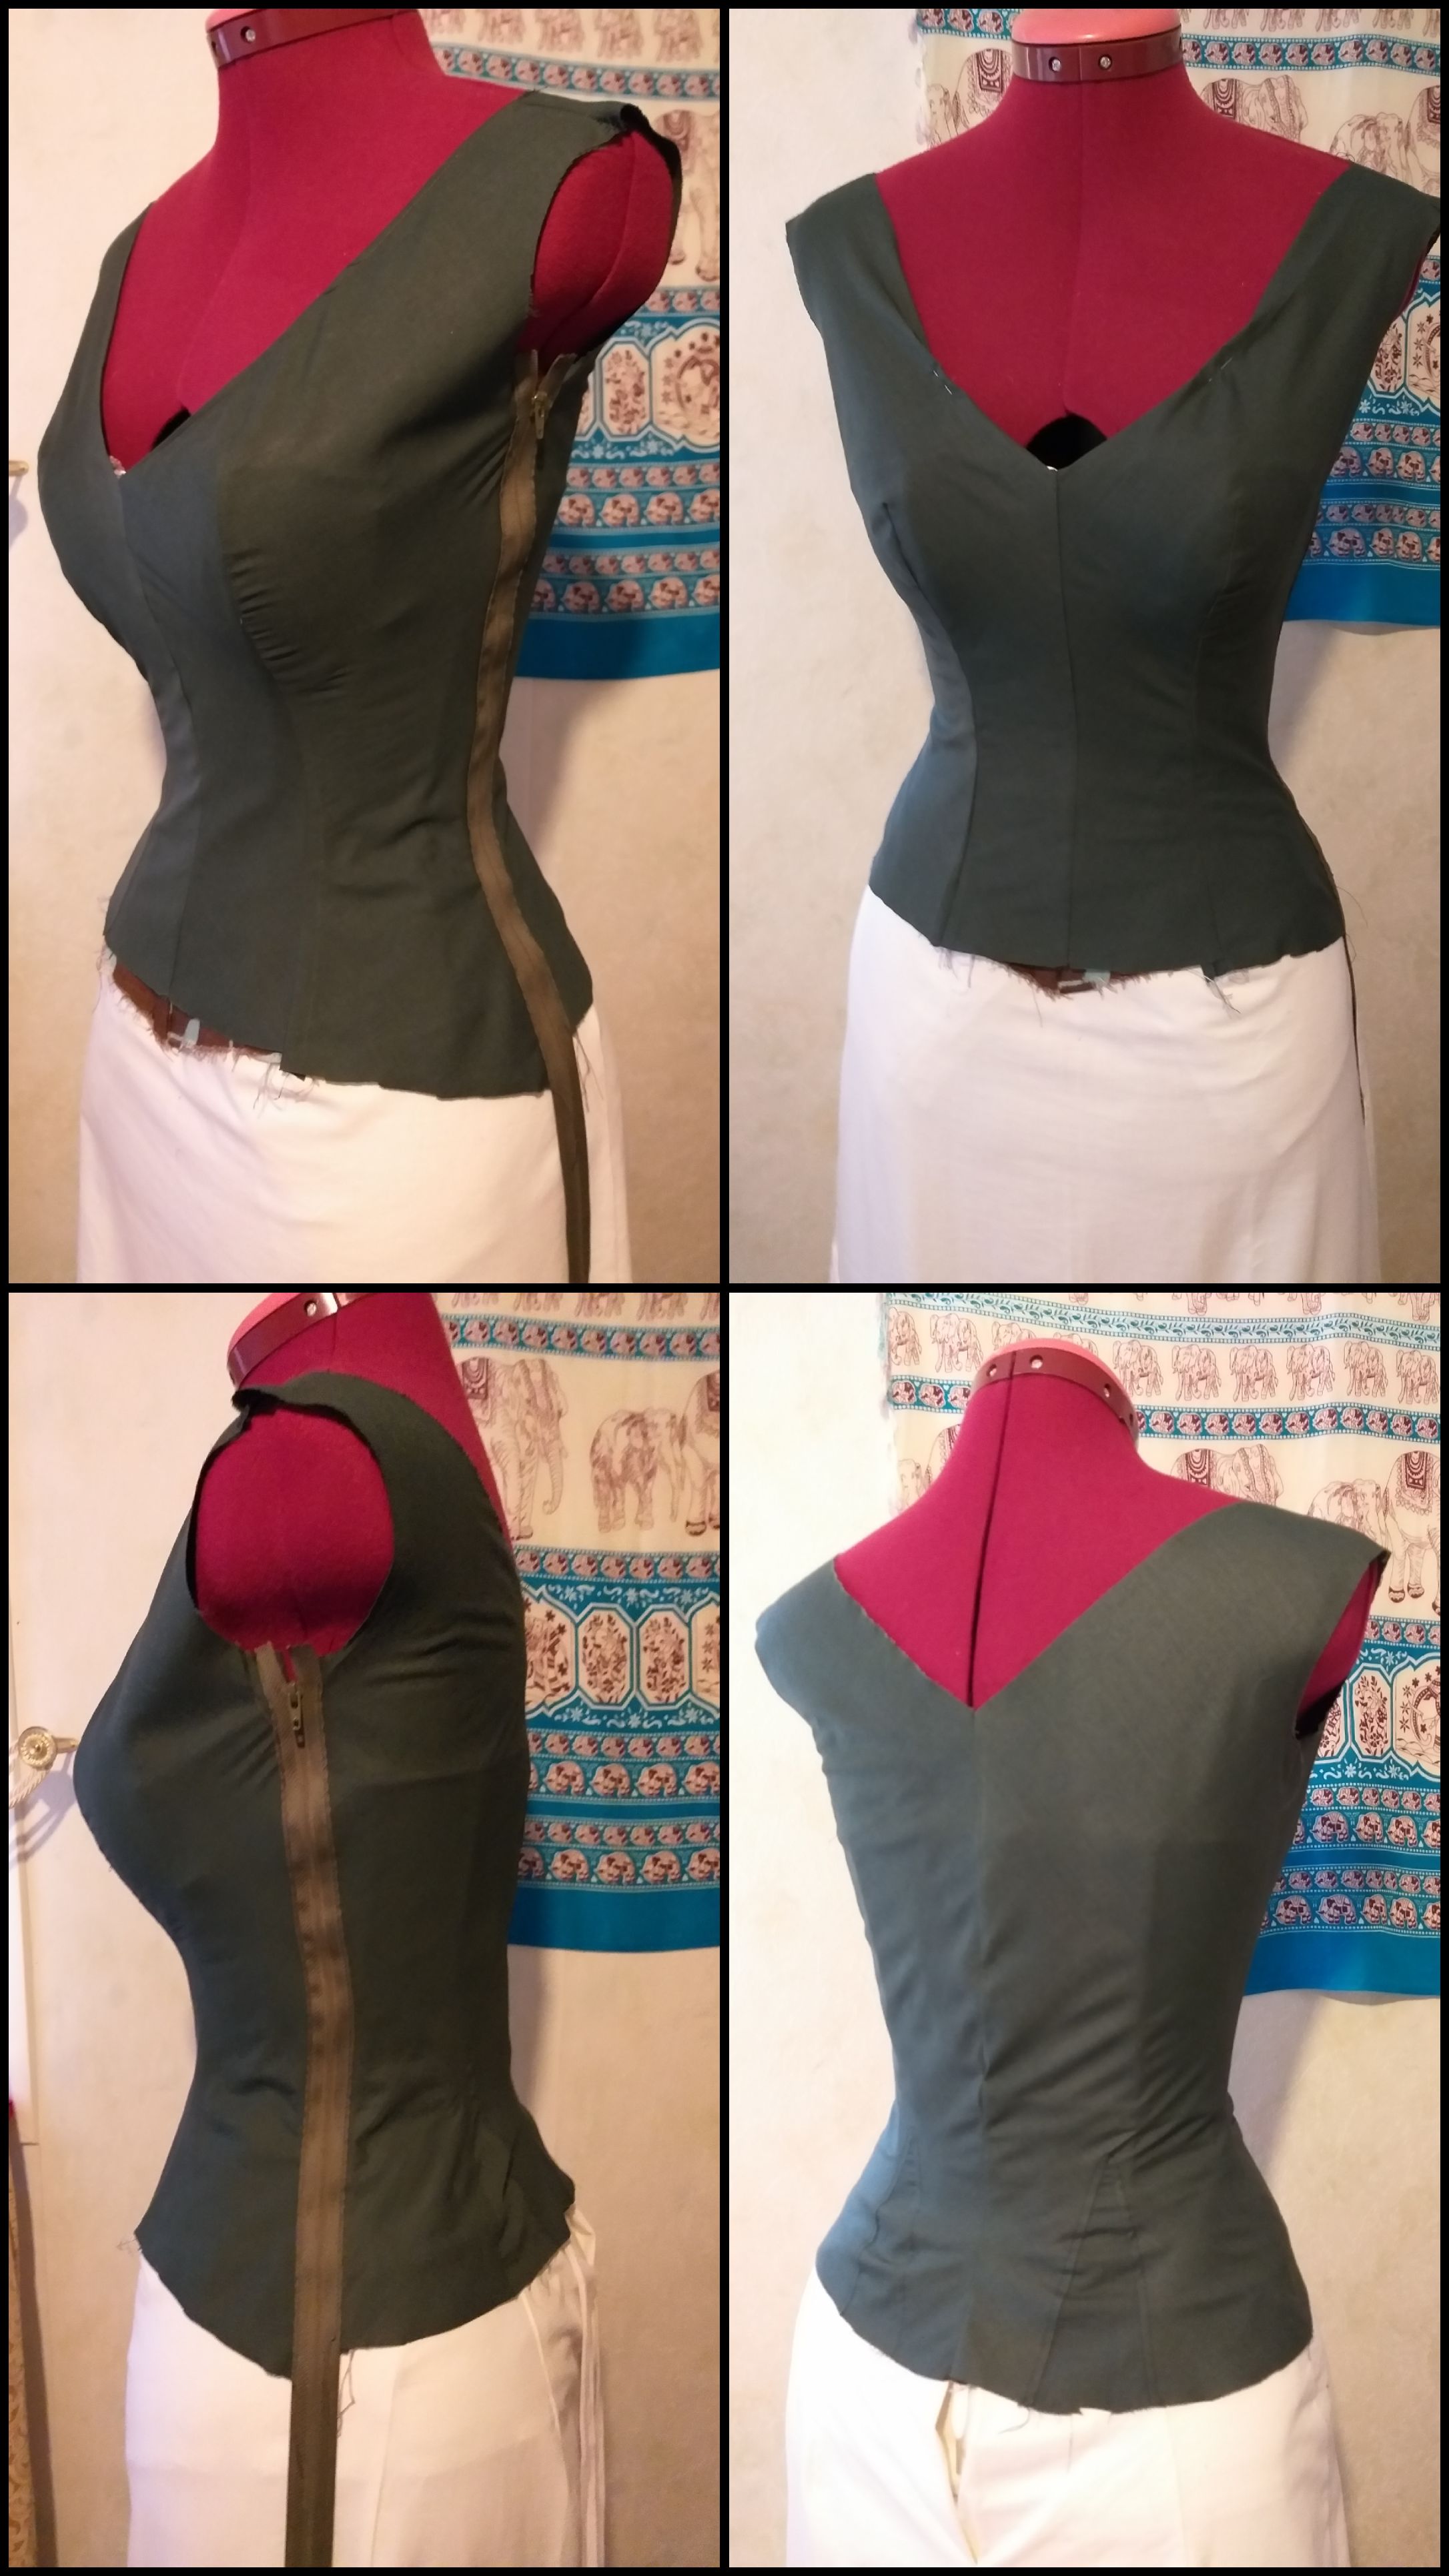
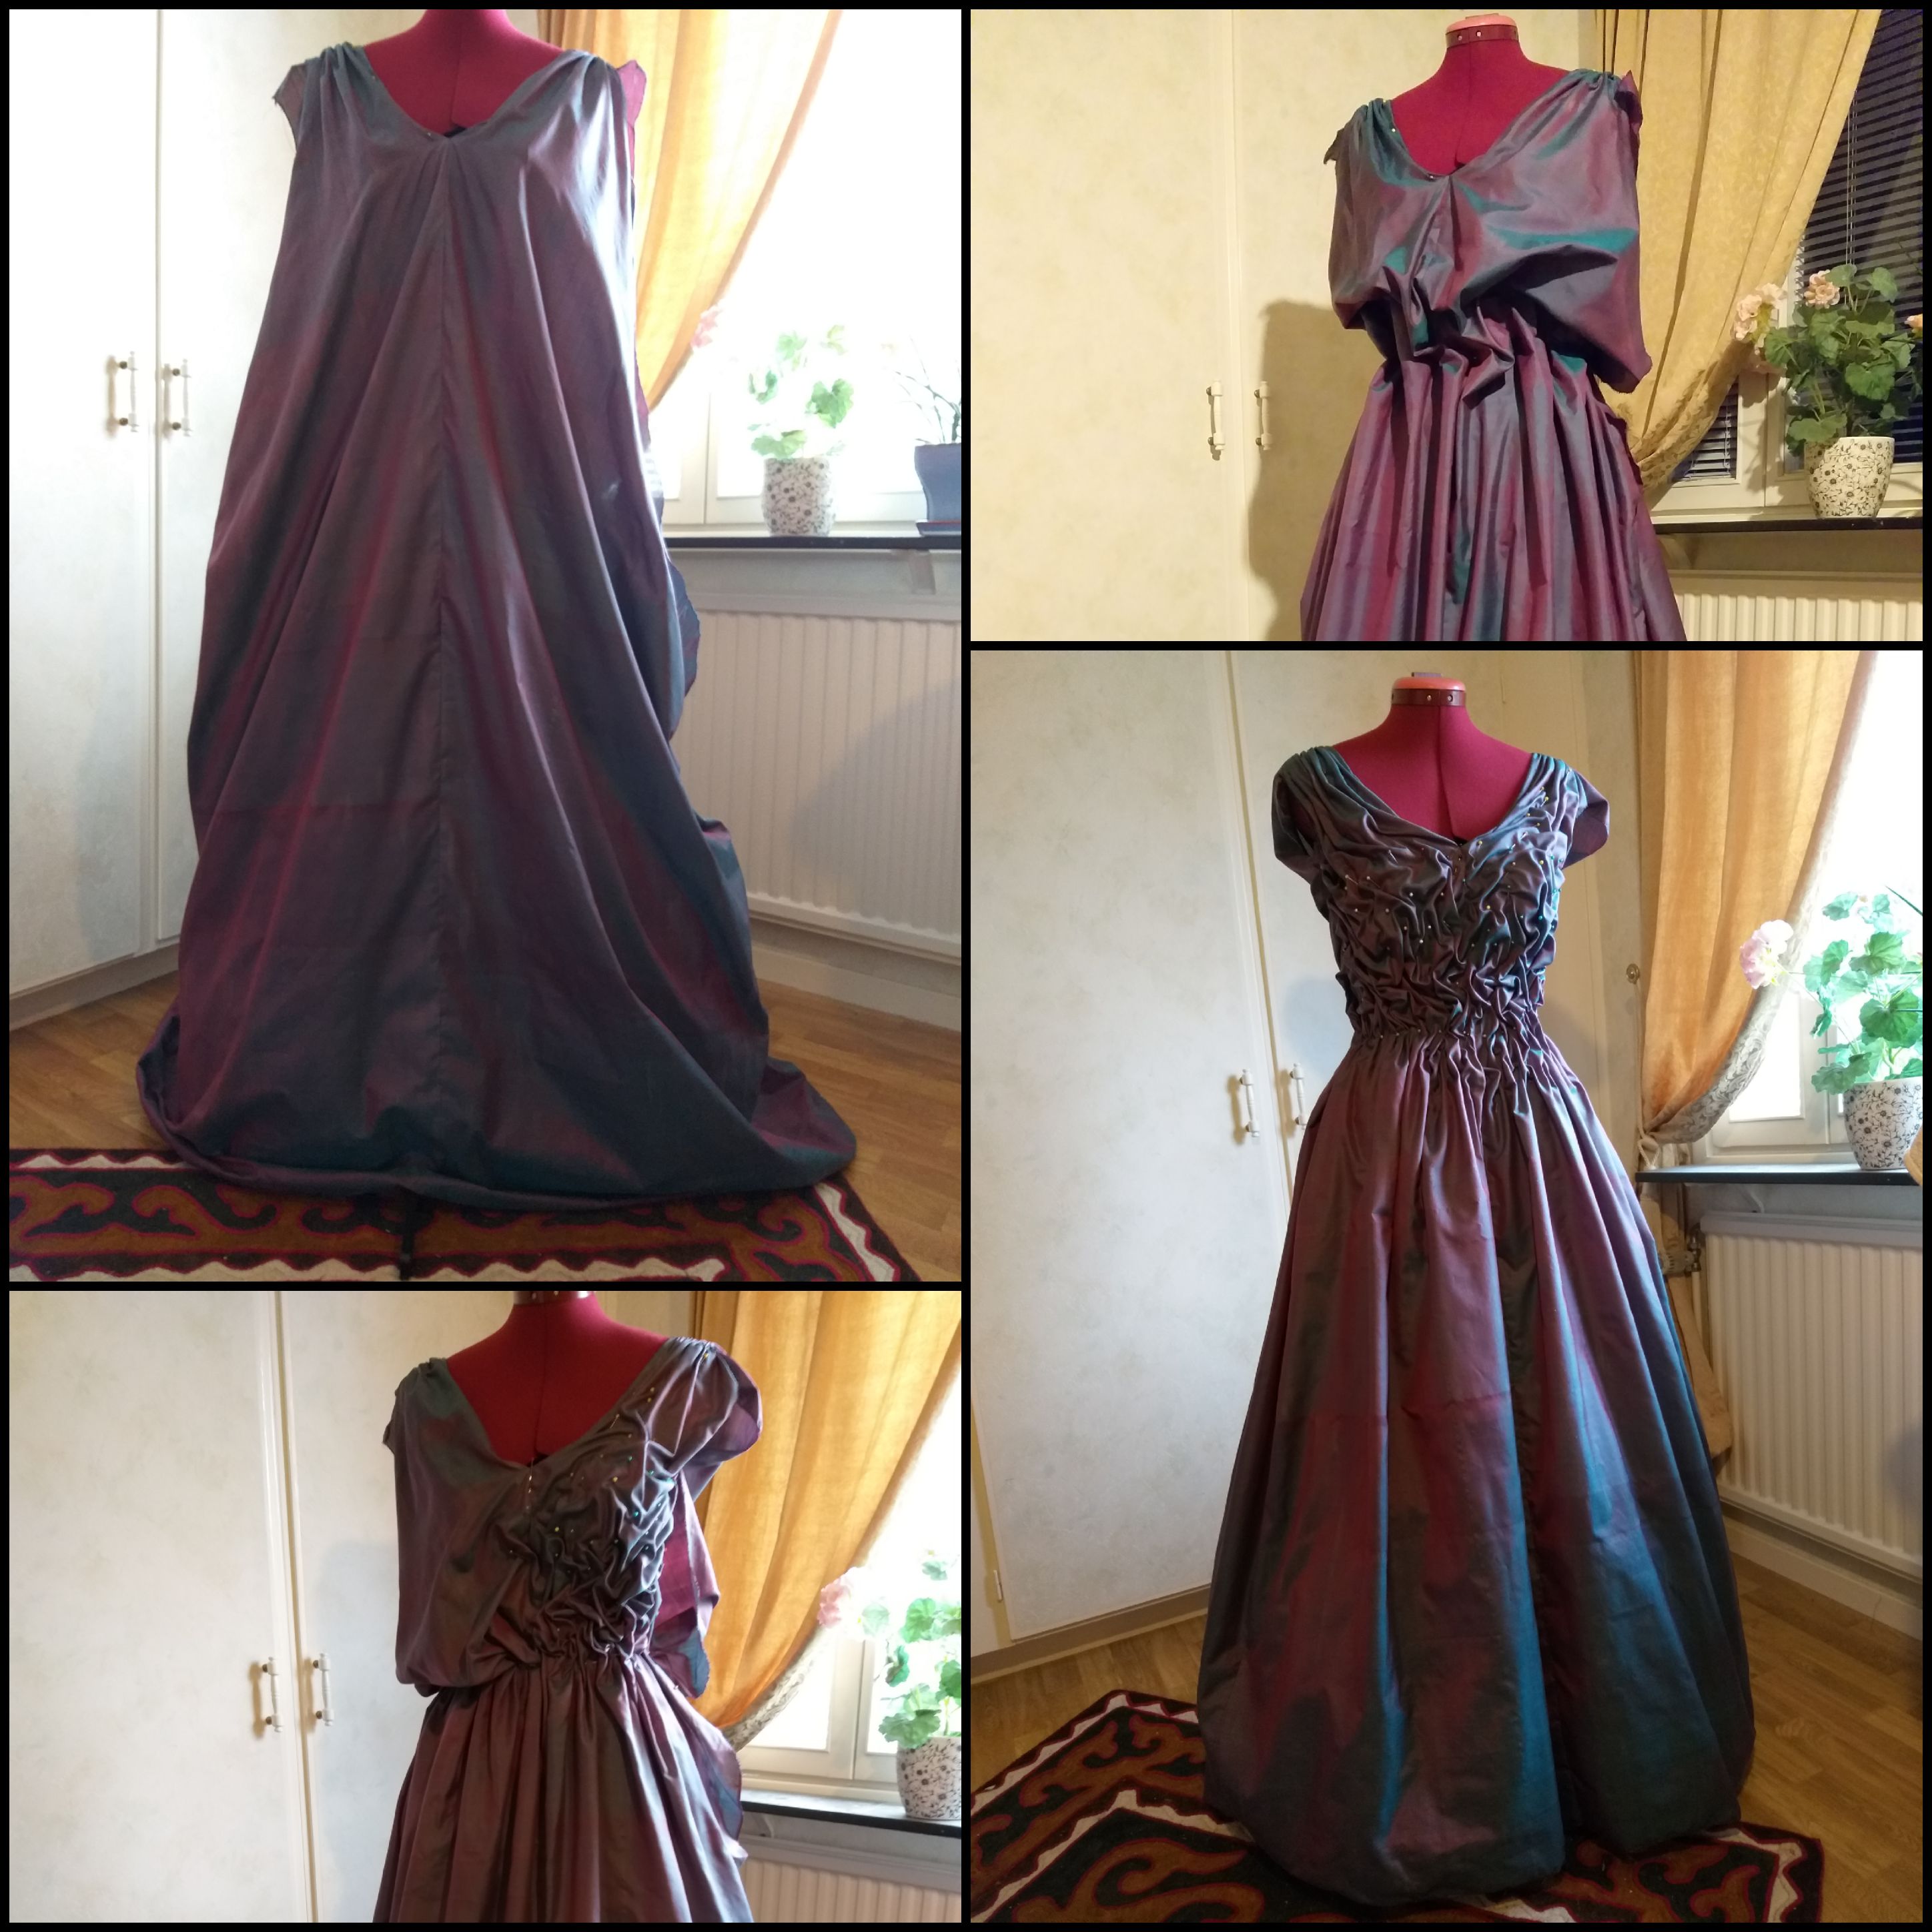
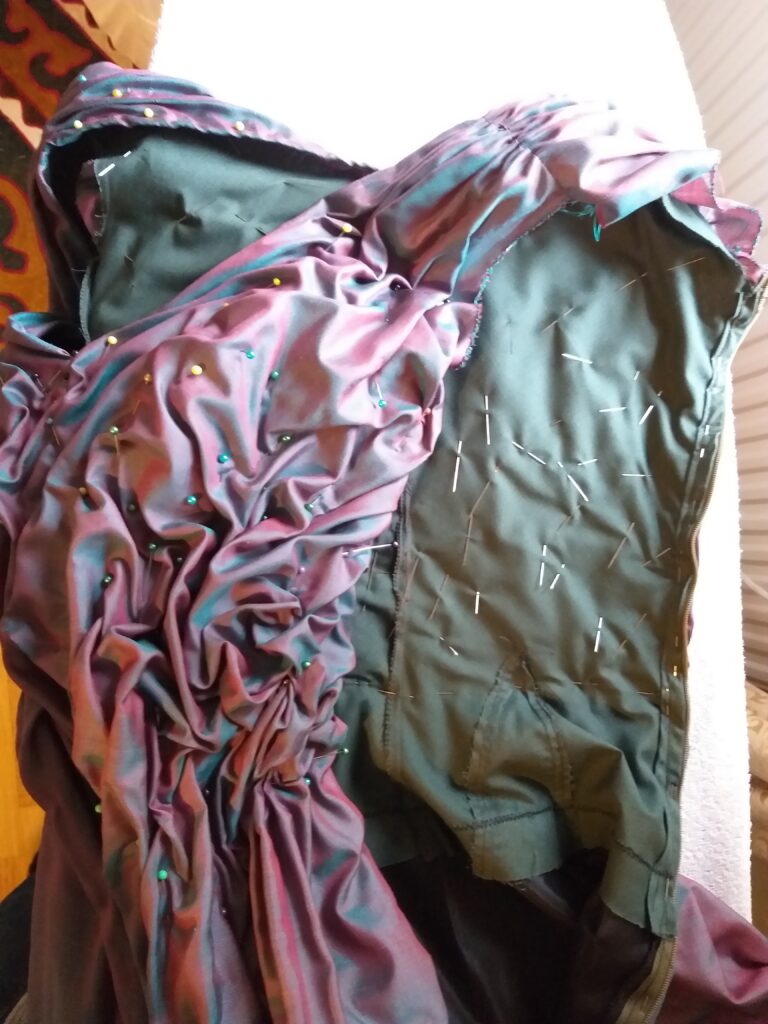
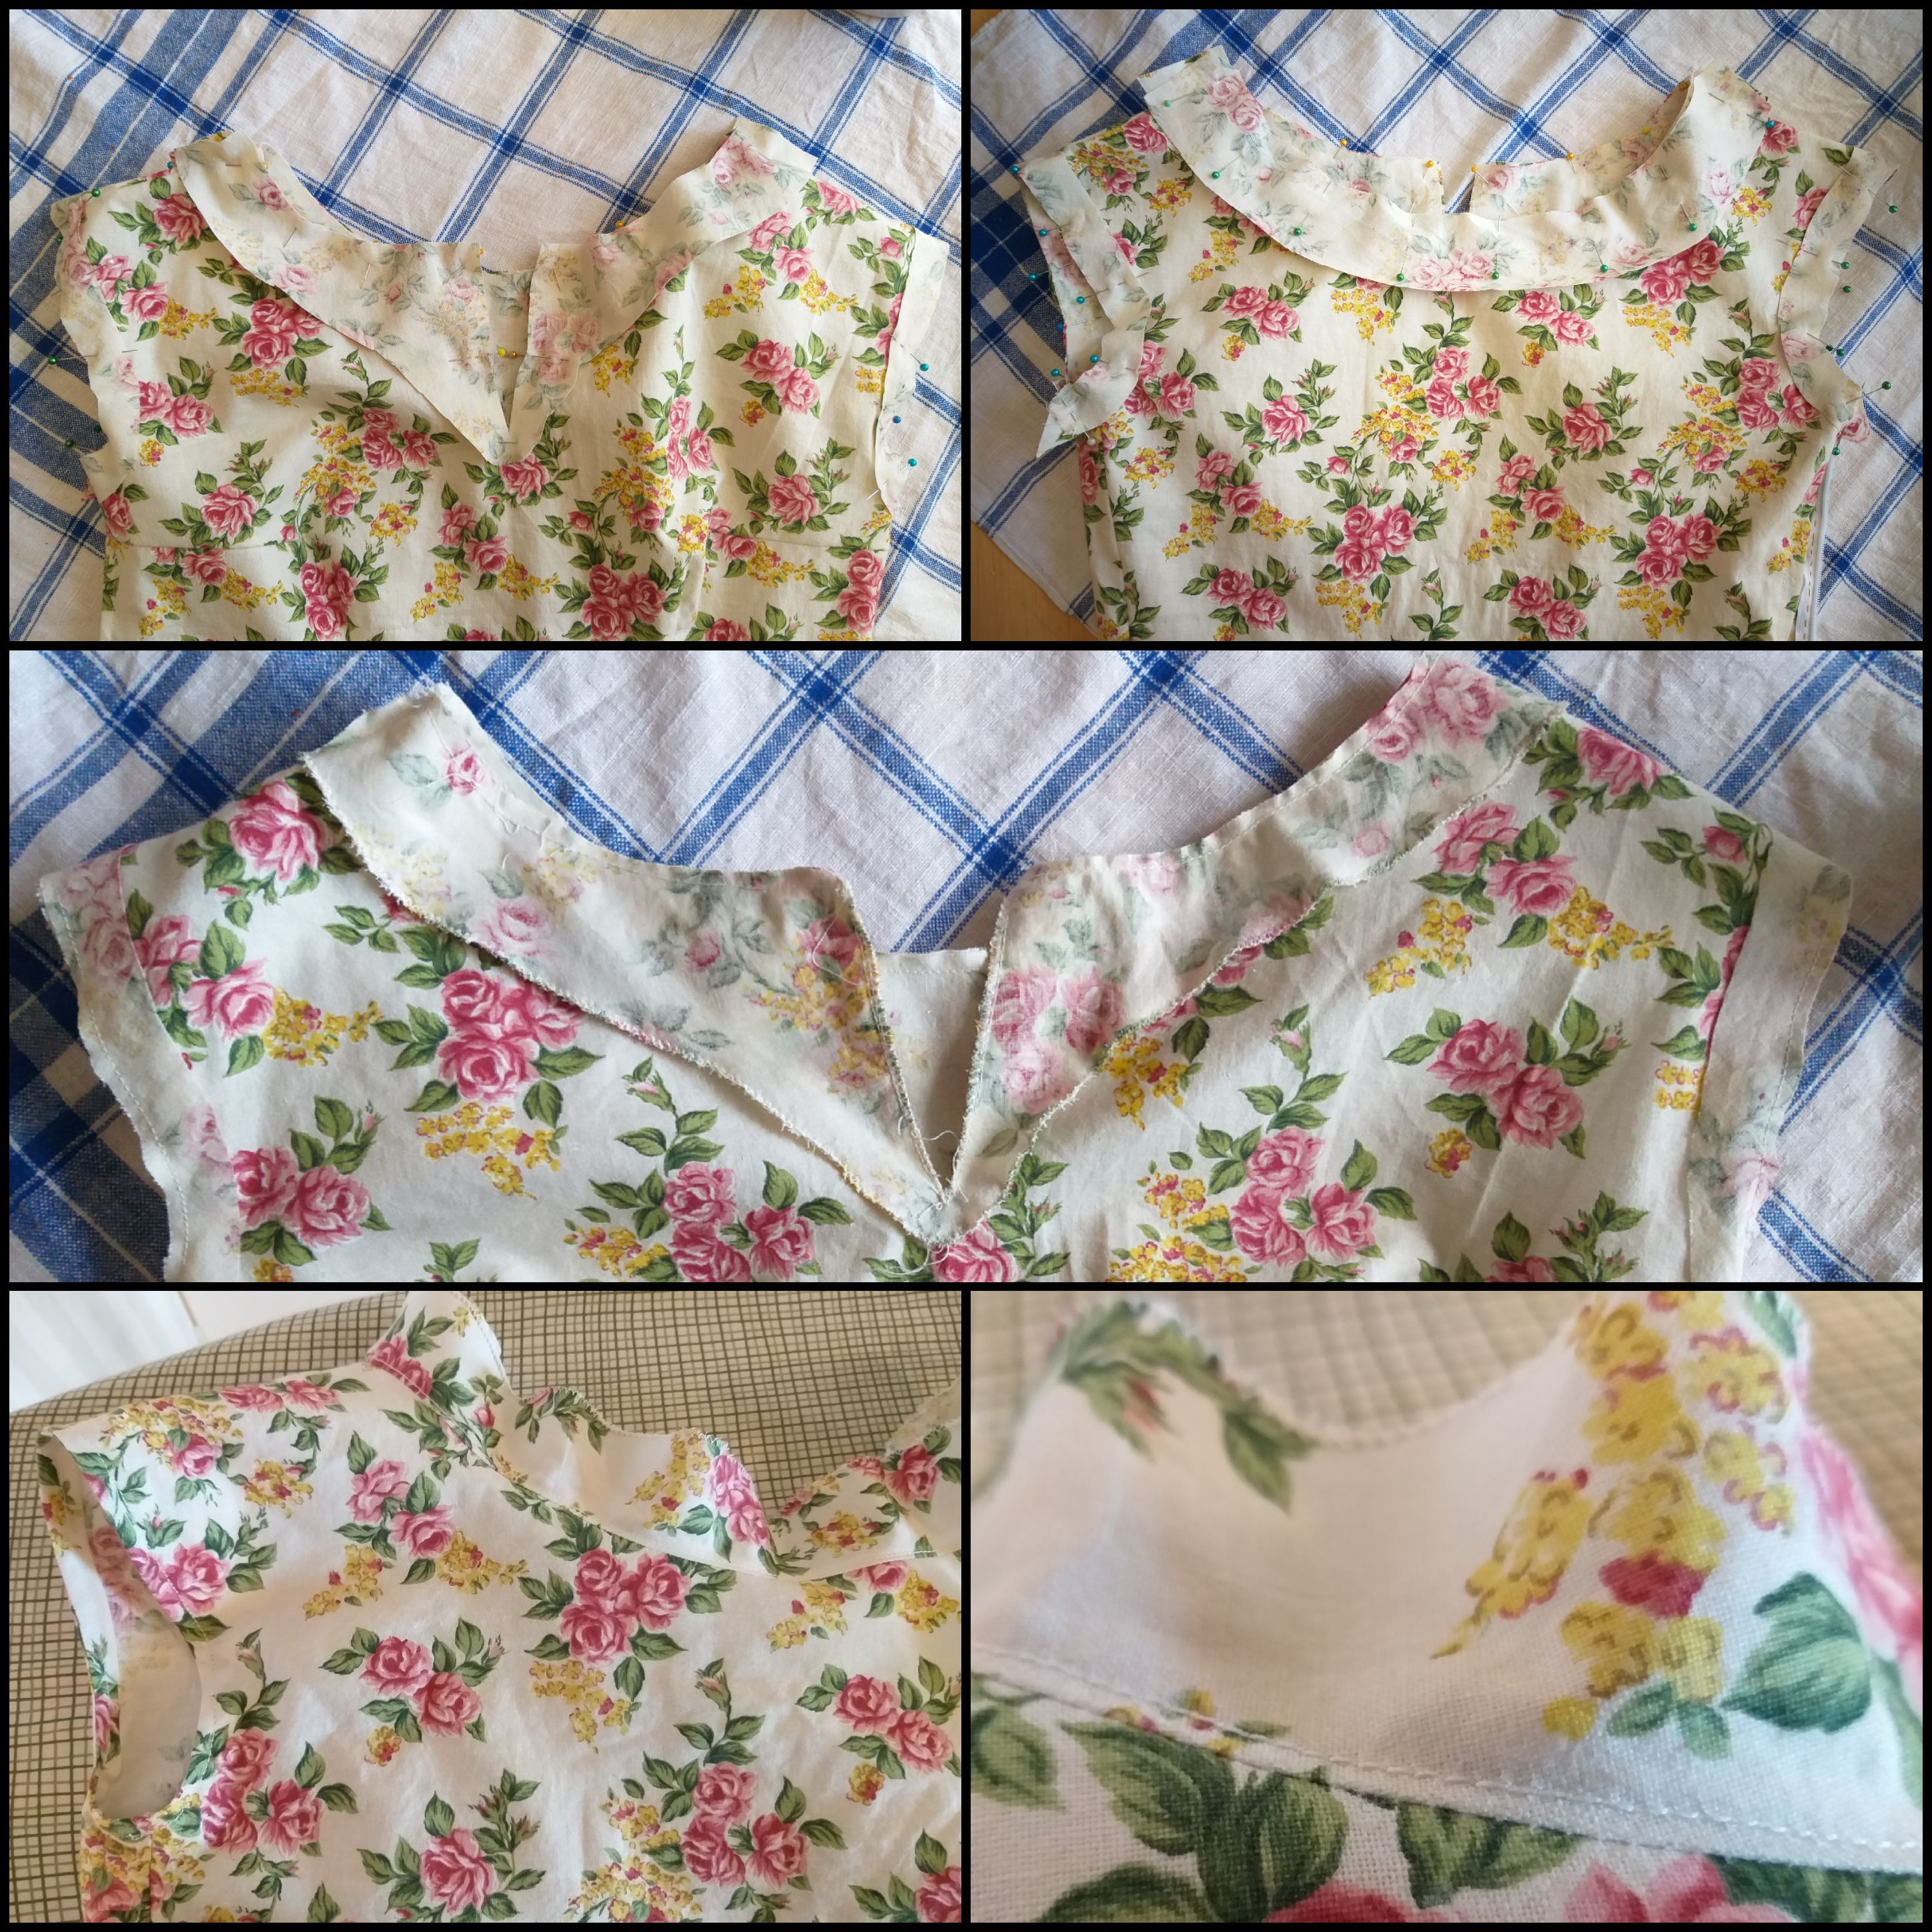
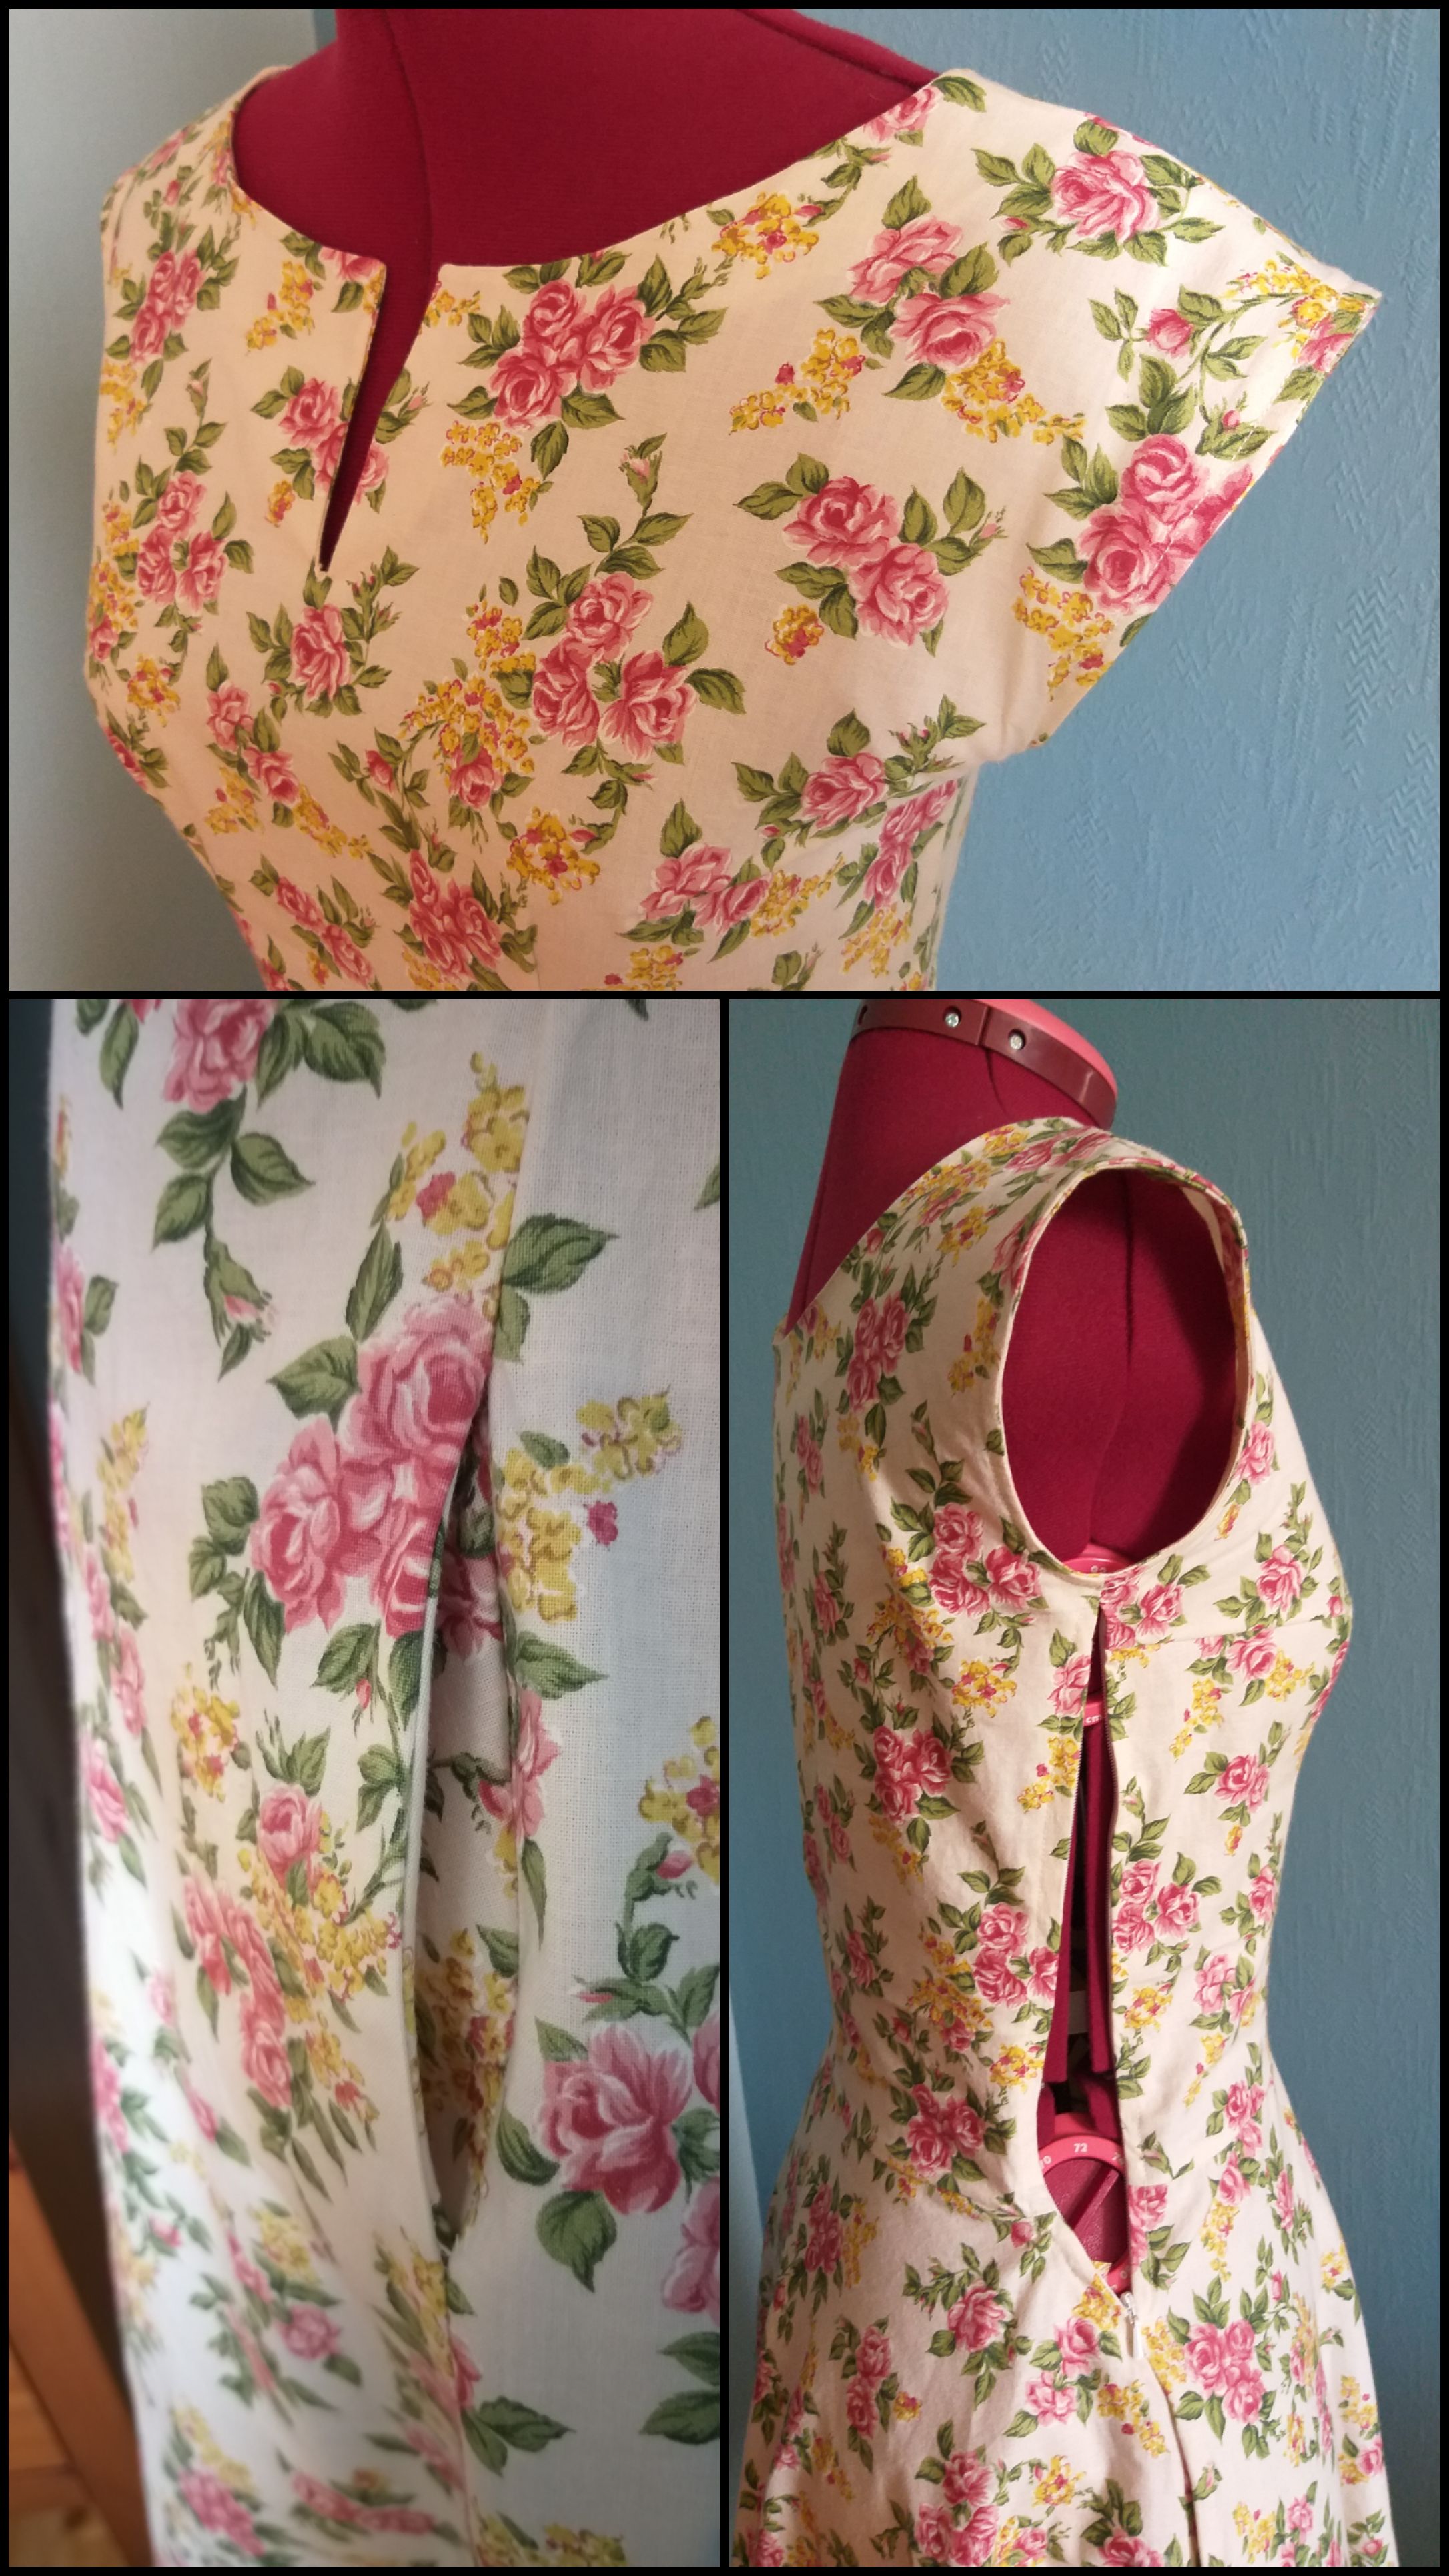
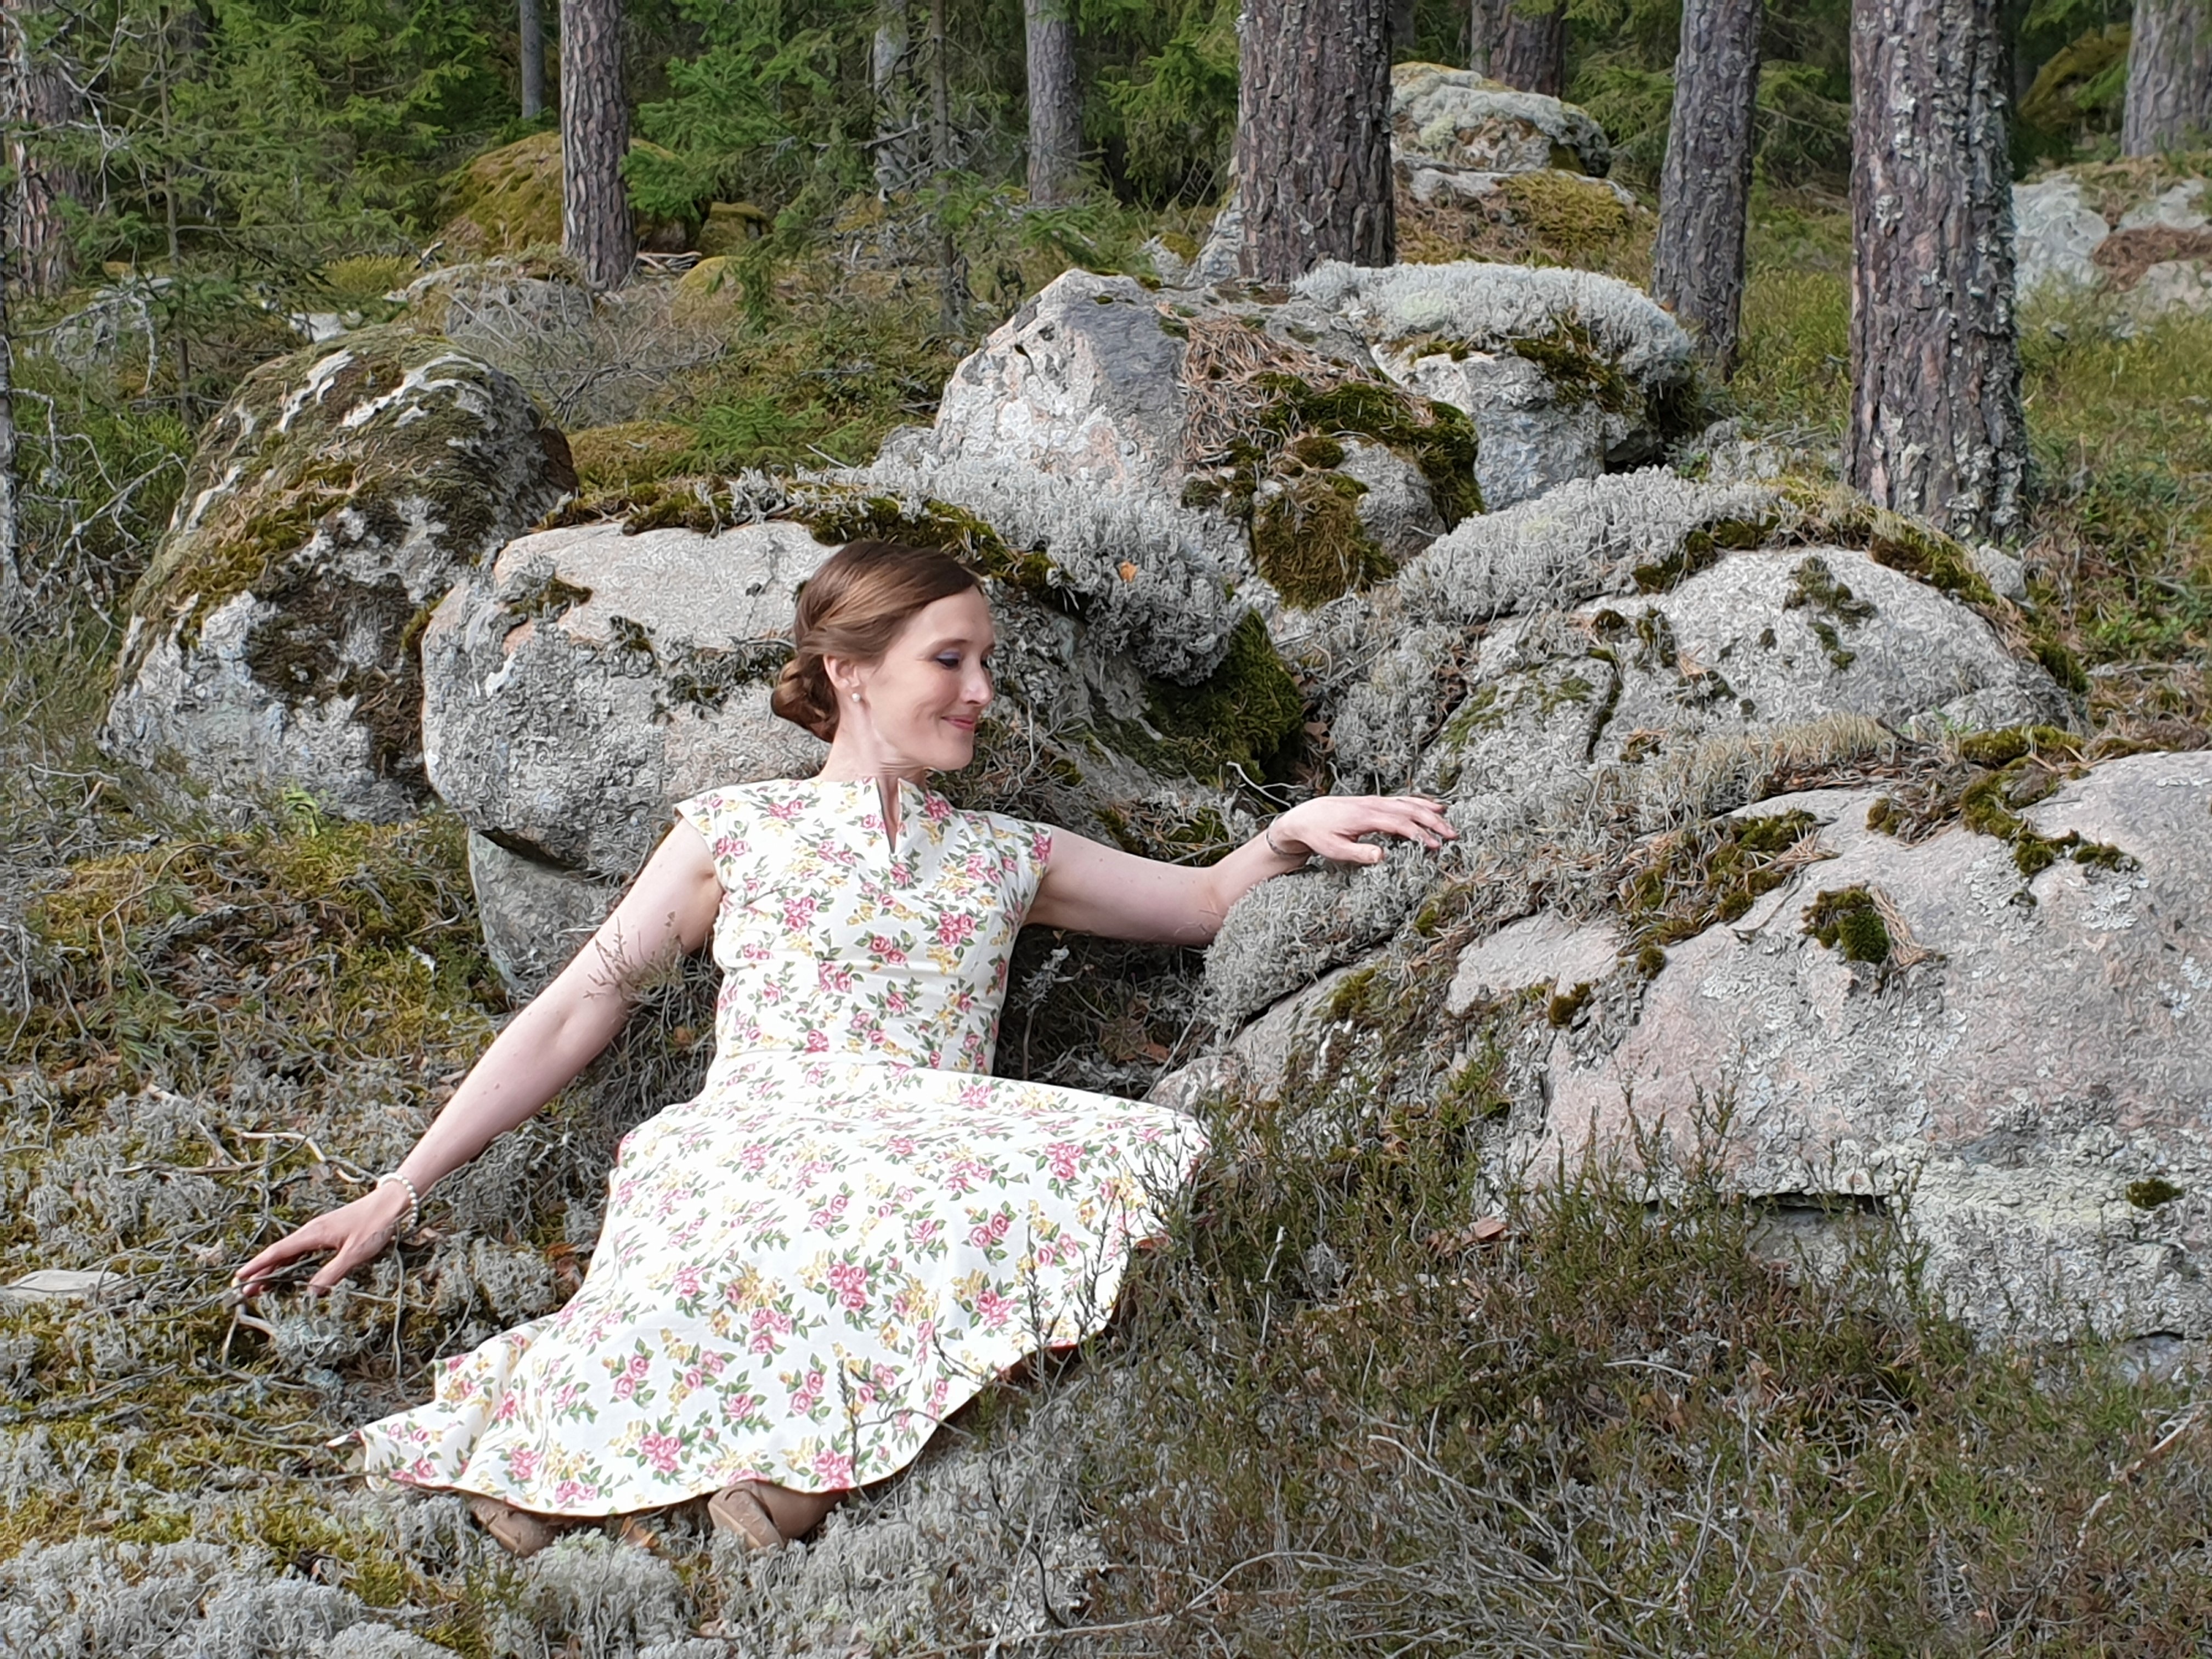
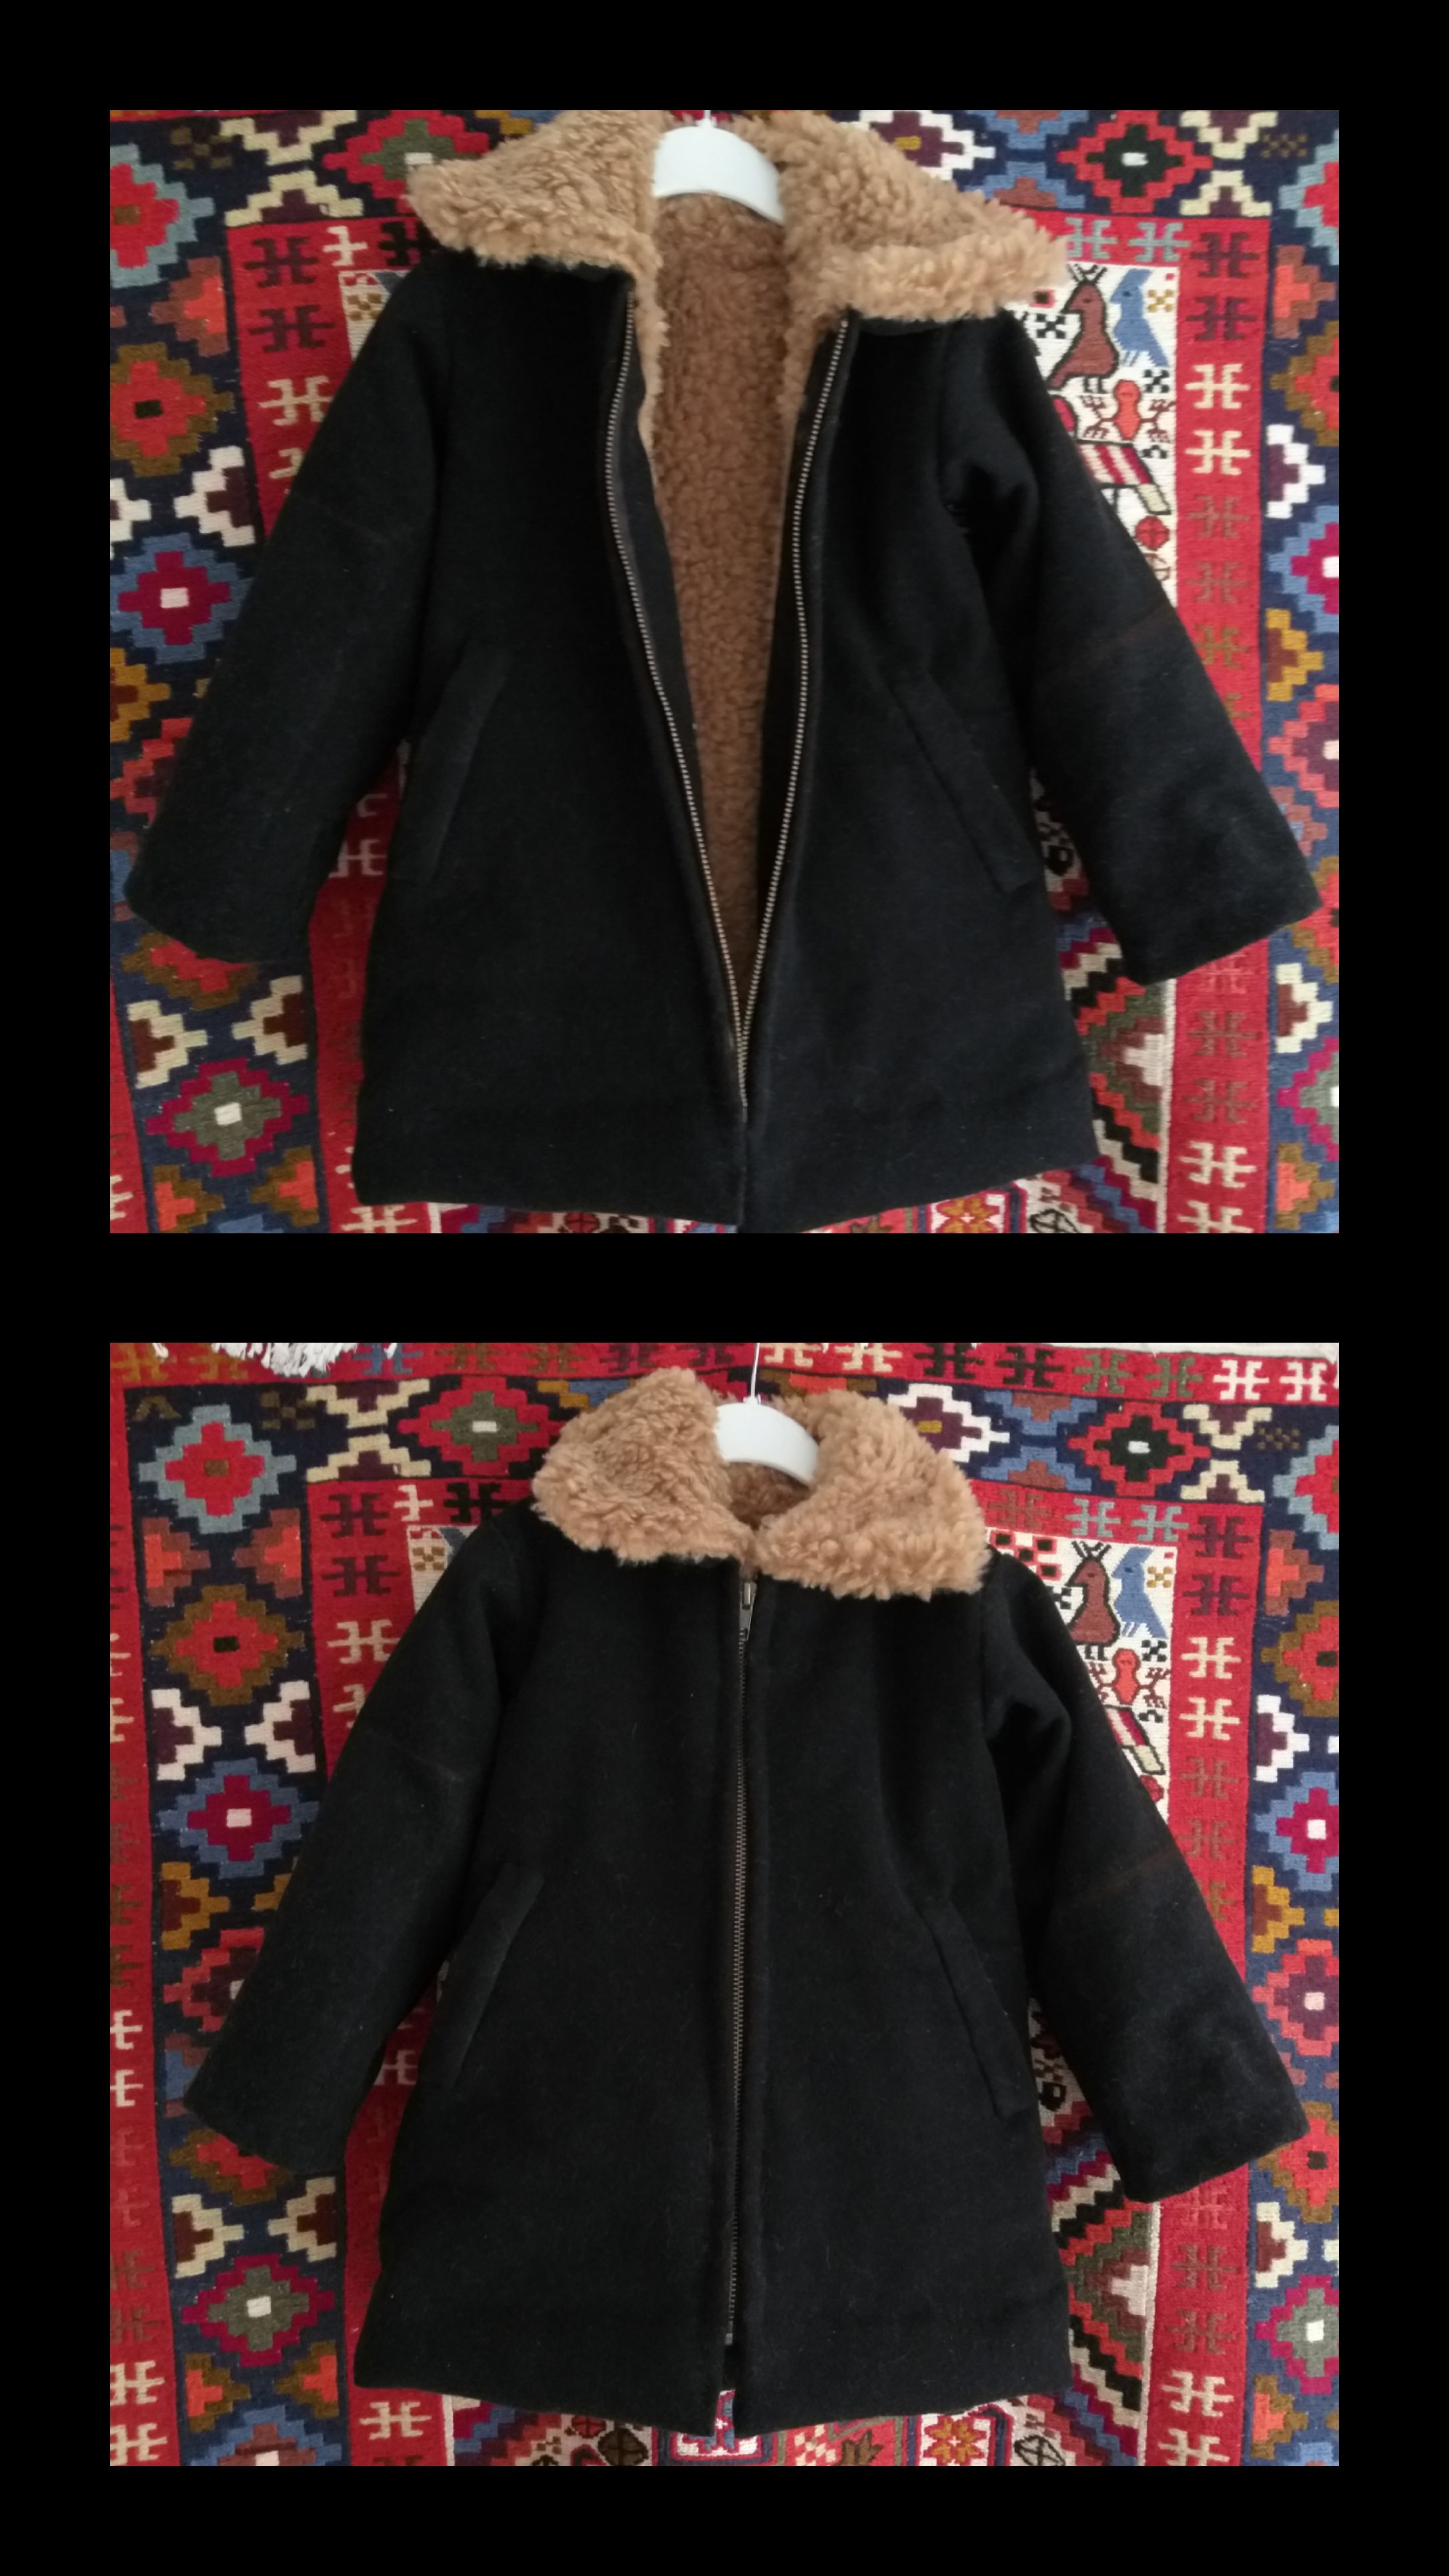
I believe the embroideries are made by a machine program but managed by hand (?), as they vary all over. I rotated the top one quarter, as the embroideries looked the best there. With darts below and at the sides of the bust, the bodice recieved tighter fit. I put two seams in the neckline at the back, in order to make it narrower and make the bodice a tad shorter. When the bodice had the right shape, I cut the fabric, dividing the bodice from the arms, but keeping it intact above the armpits. Because of the bust darts, there is some bulk at the armpits, but I don’t think it’s too obvious. A zipper closes under the left arm.

Jag tror att boderierna har gjorts med brodermaskin, men matats fram för hand (?) eftersom broderierna varierar över hela plagget. Jag roterade toppen ett kvarts varv för att få de finaste broderierna mitt fram. Med infodringar under och vid sidan om bysten blev lìvet tight. Med ett par sömmar baktill i halslinningen blev den mindre urringad och toppen blev lite kortare. När livet fått rätt passform klippte jag upp sidorna och separerade livet från ärmarna. På grund av infodringen vid bysten är det extra mycket tyg vid ärmen, men jag tycker ändå att det ser ok ut.

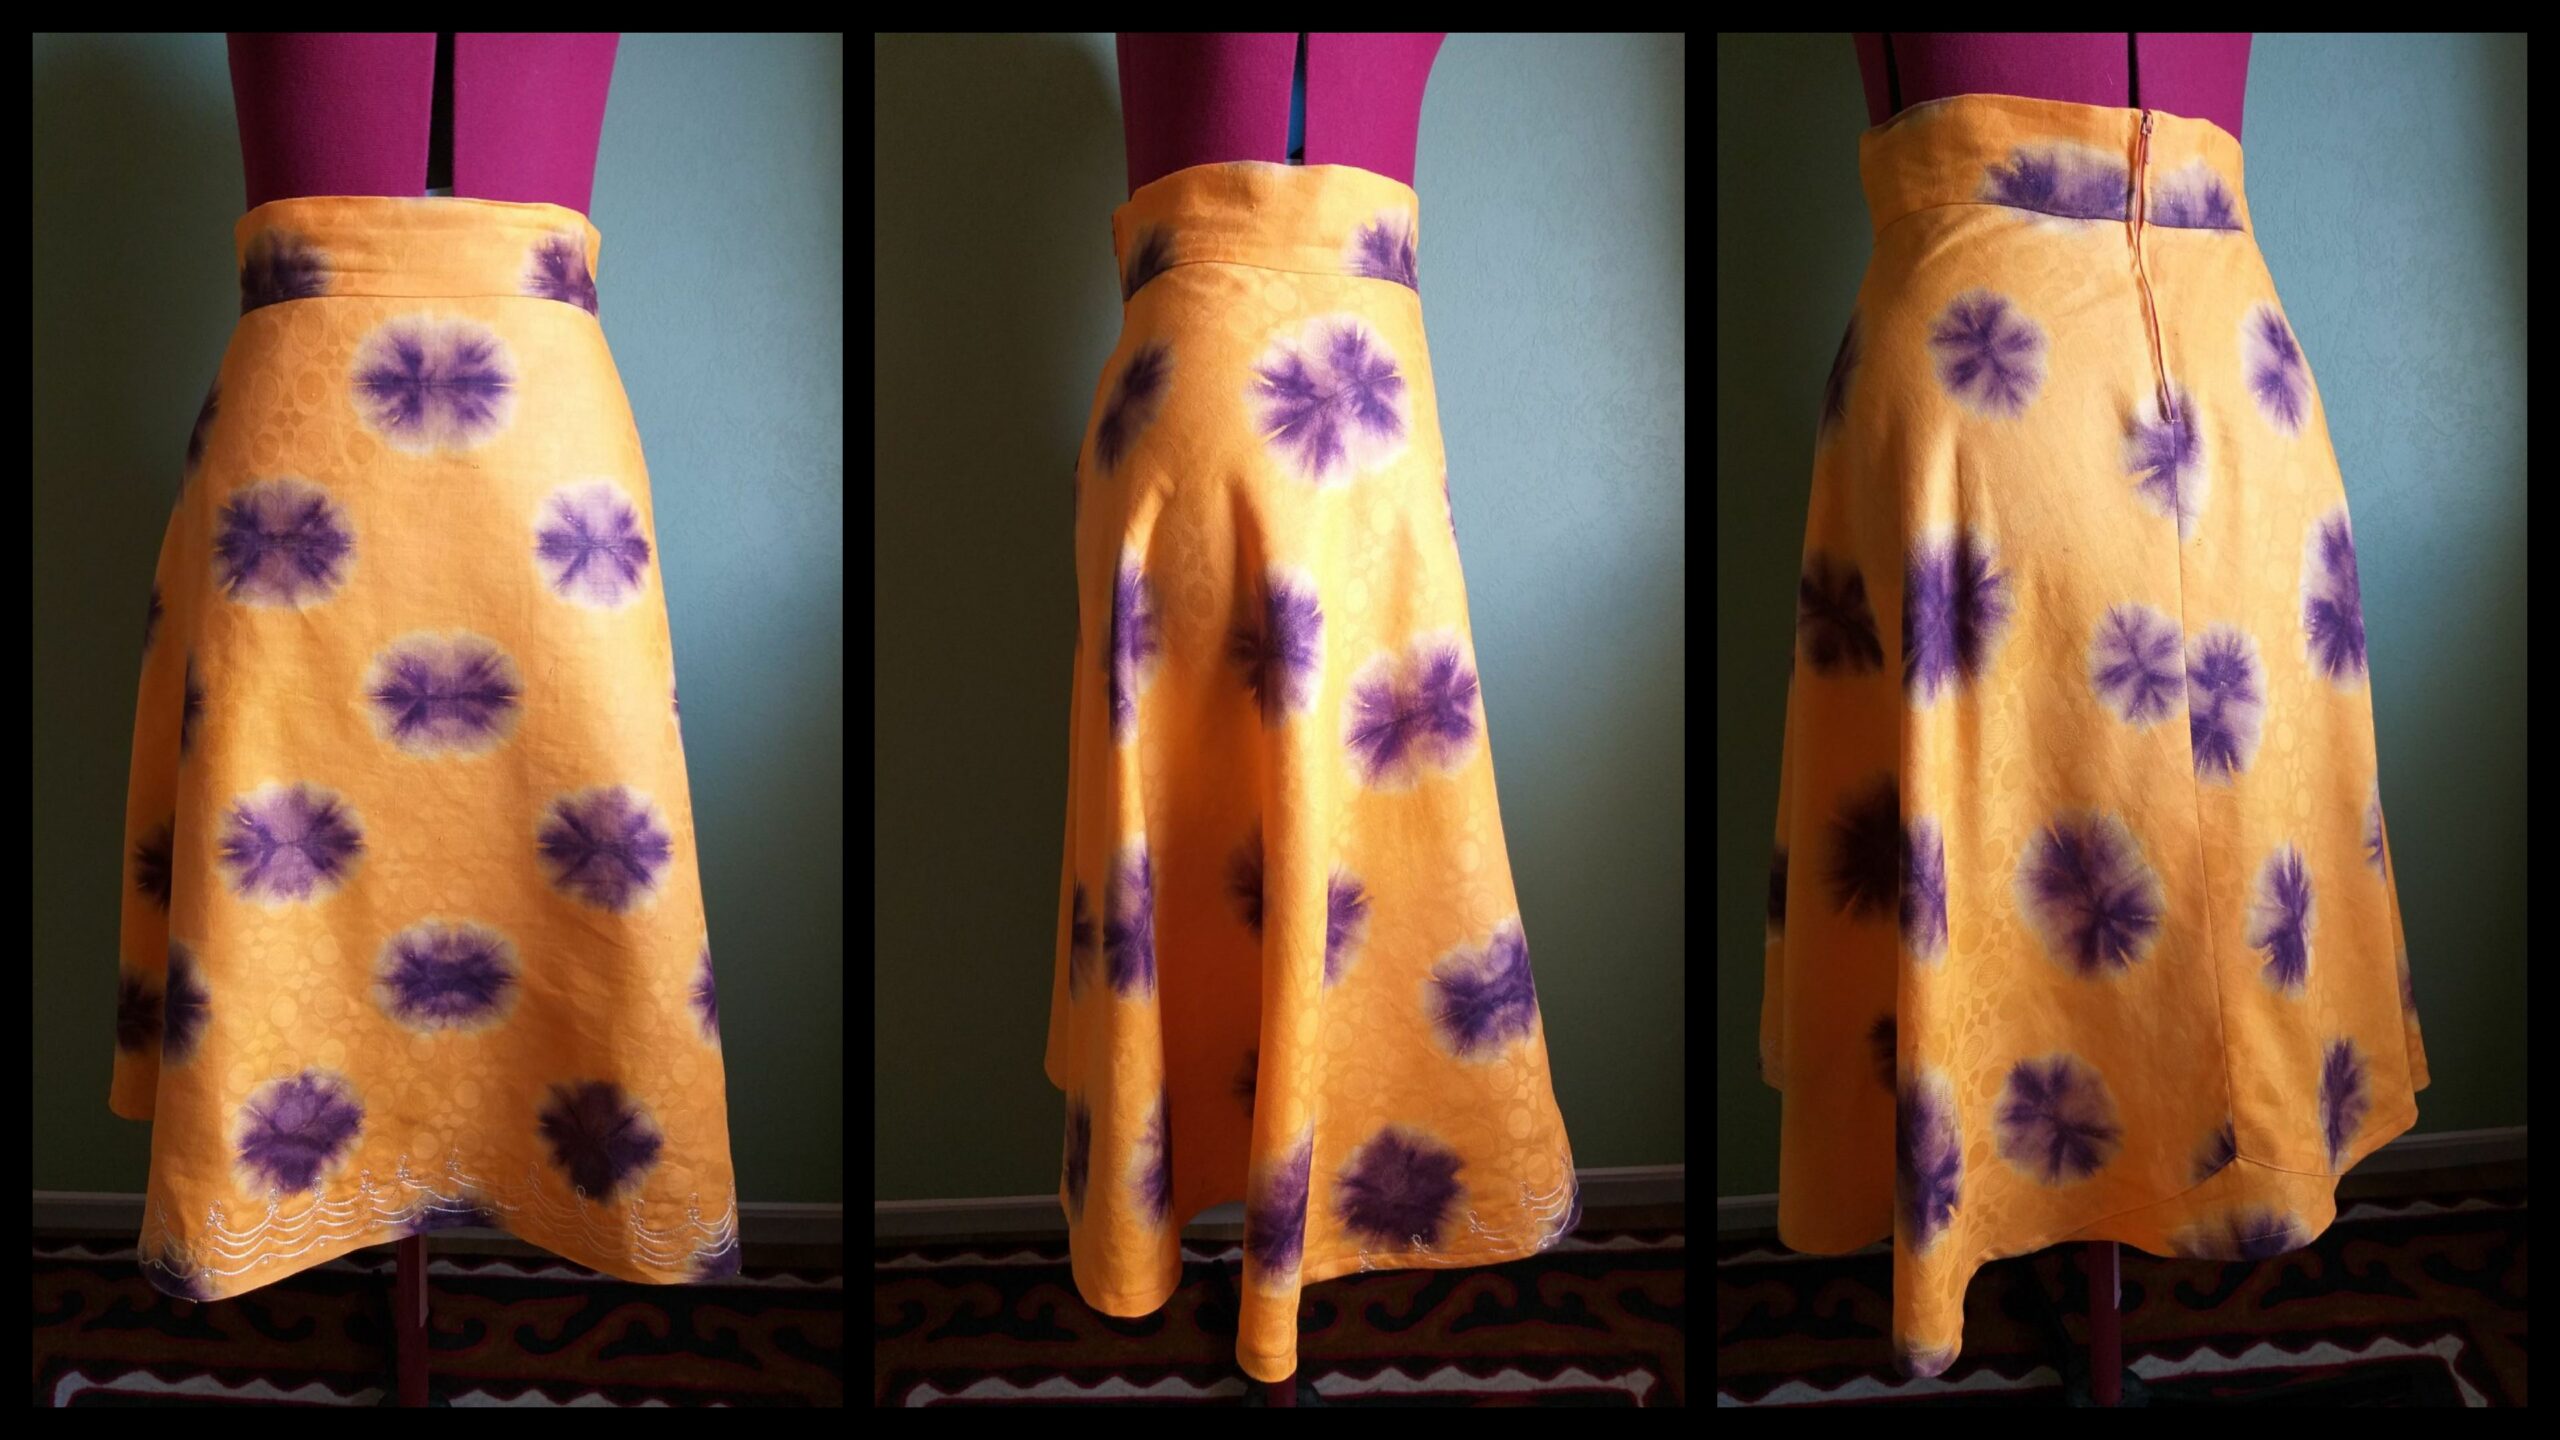
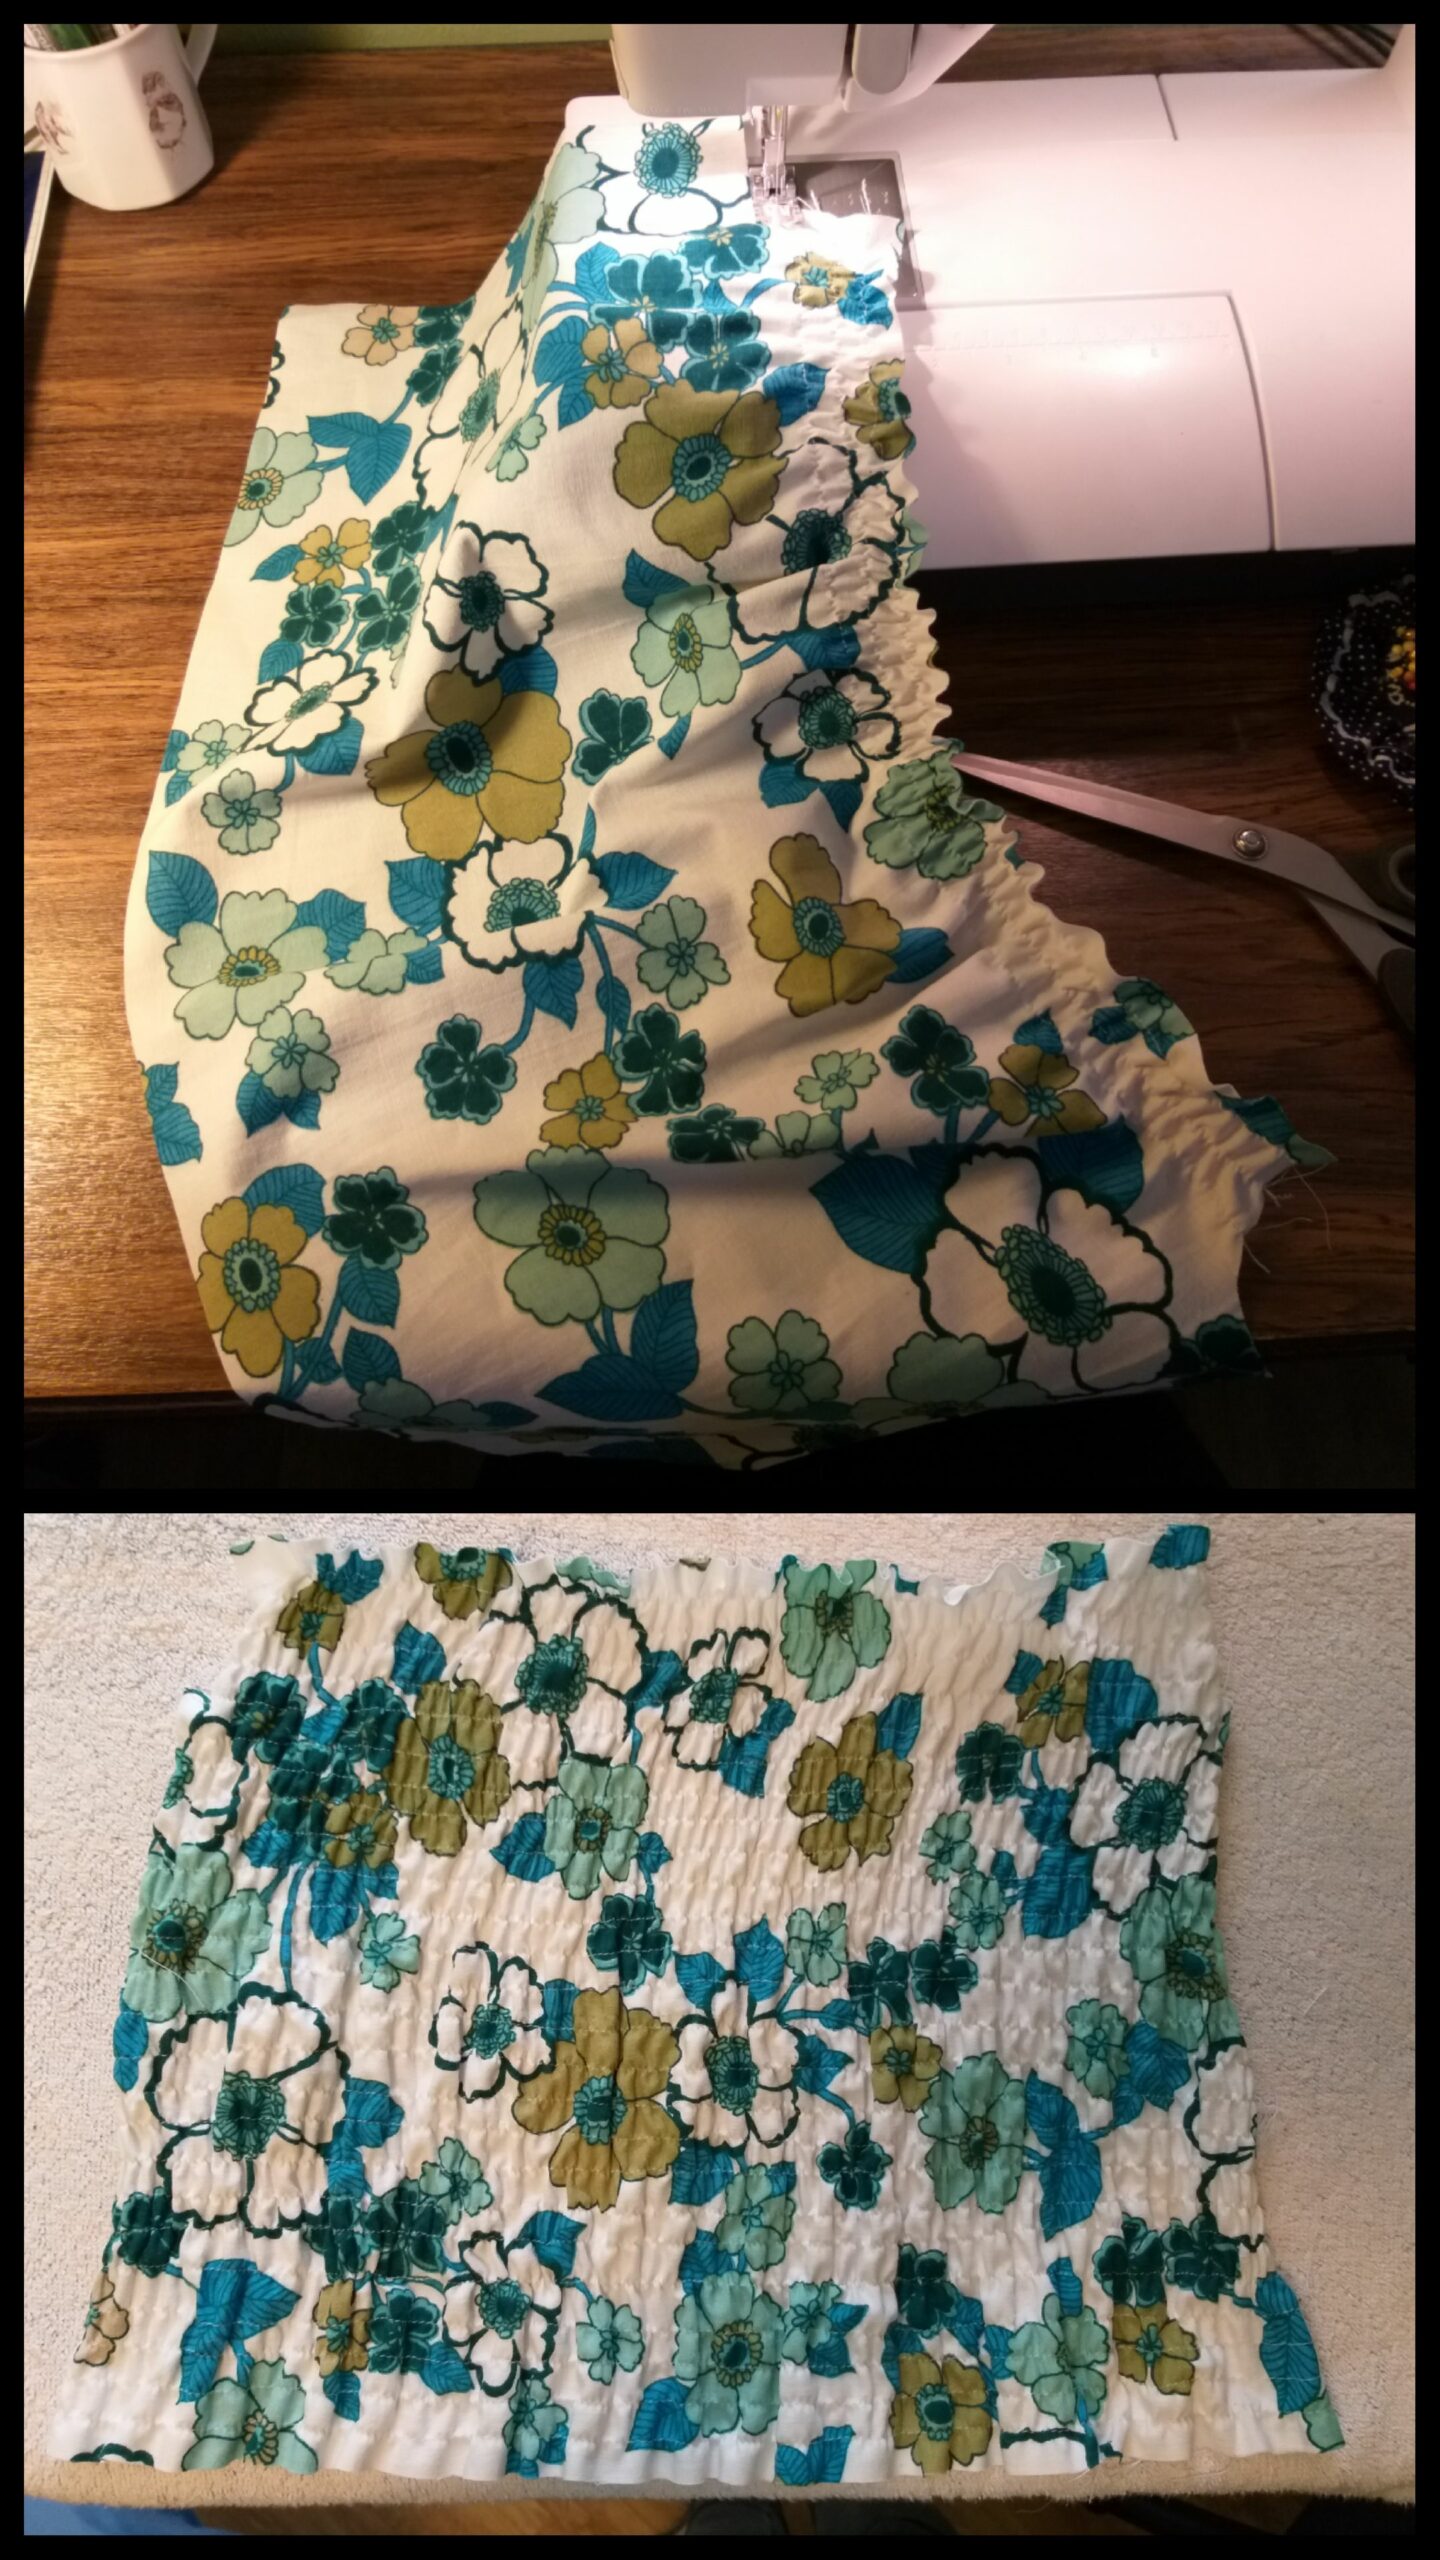
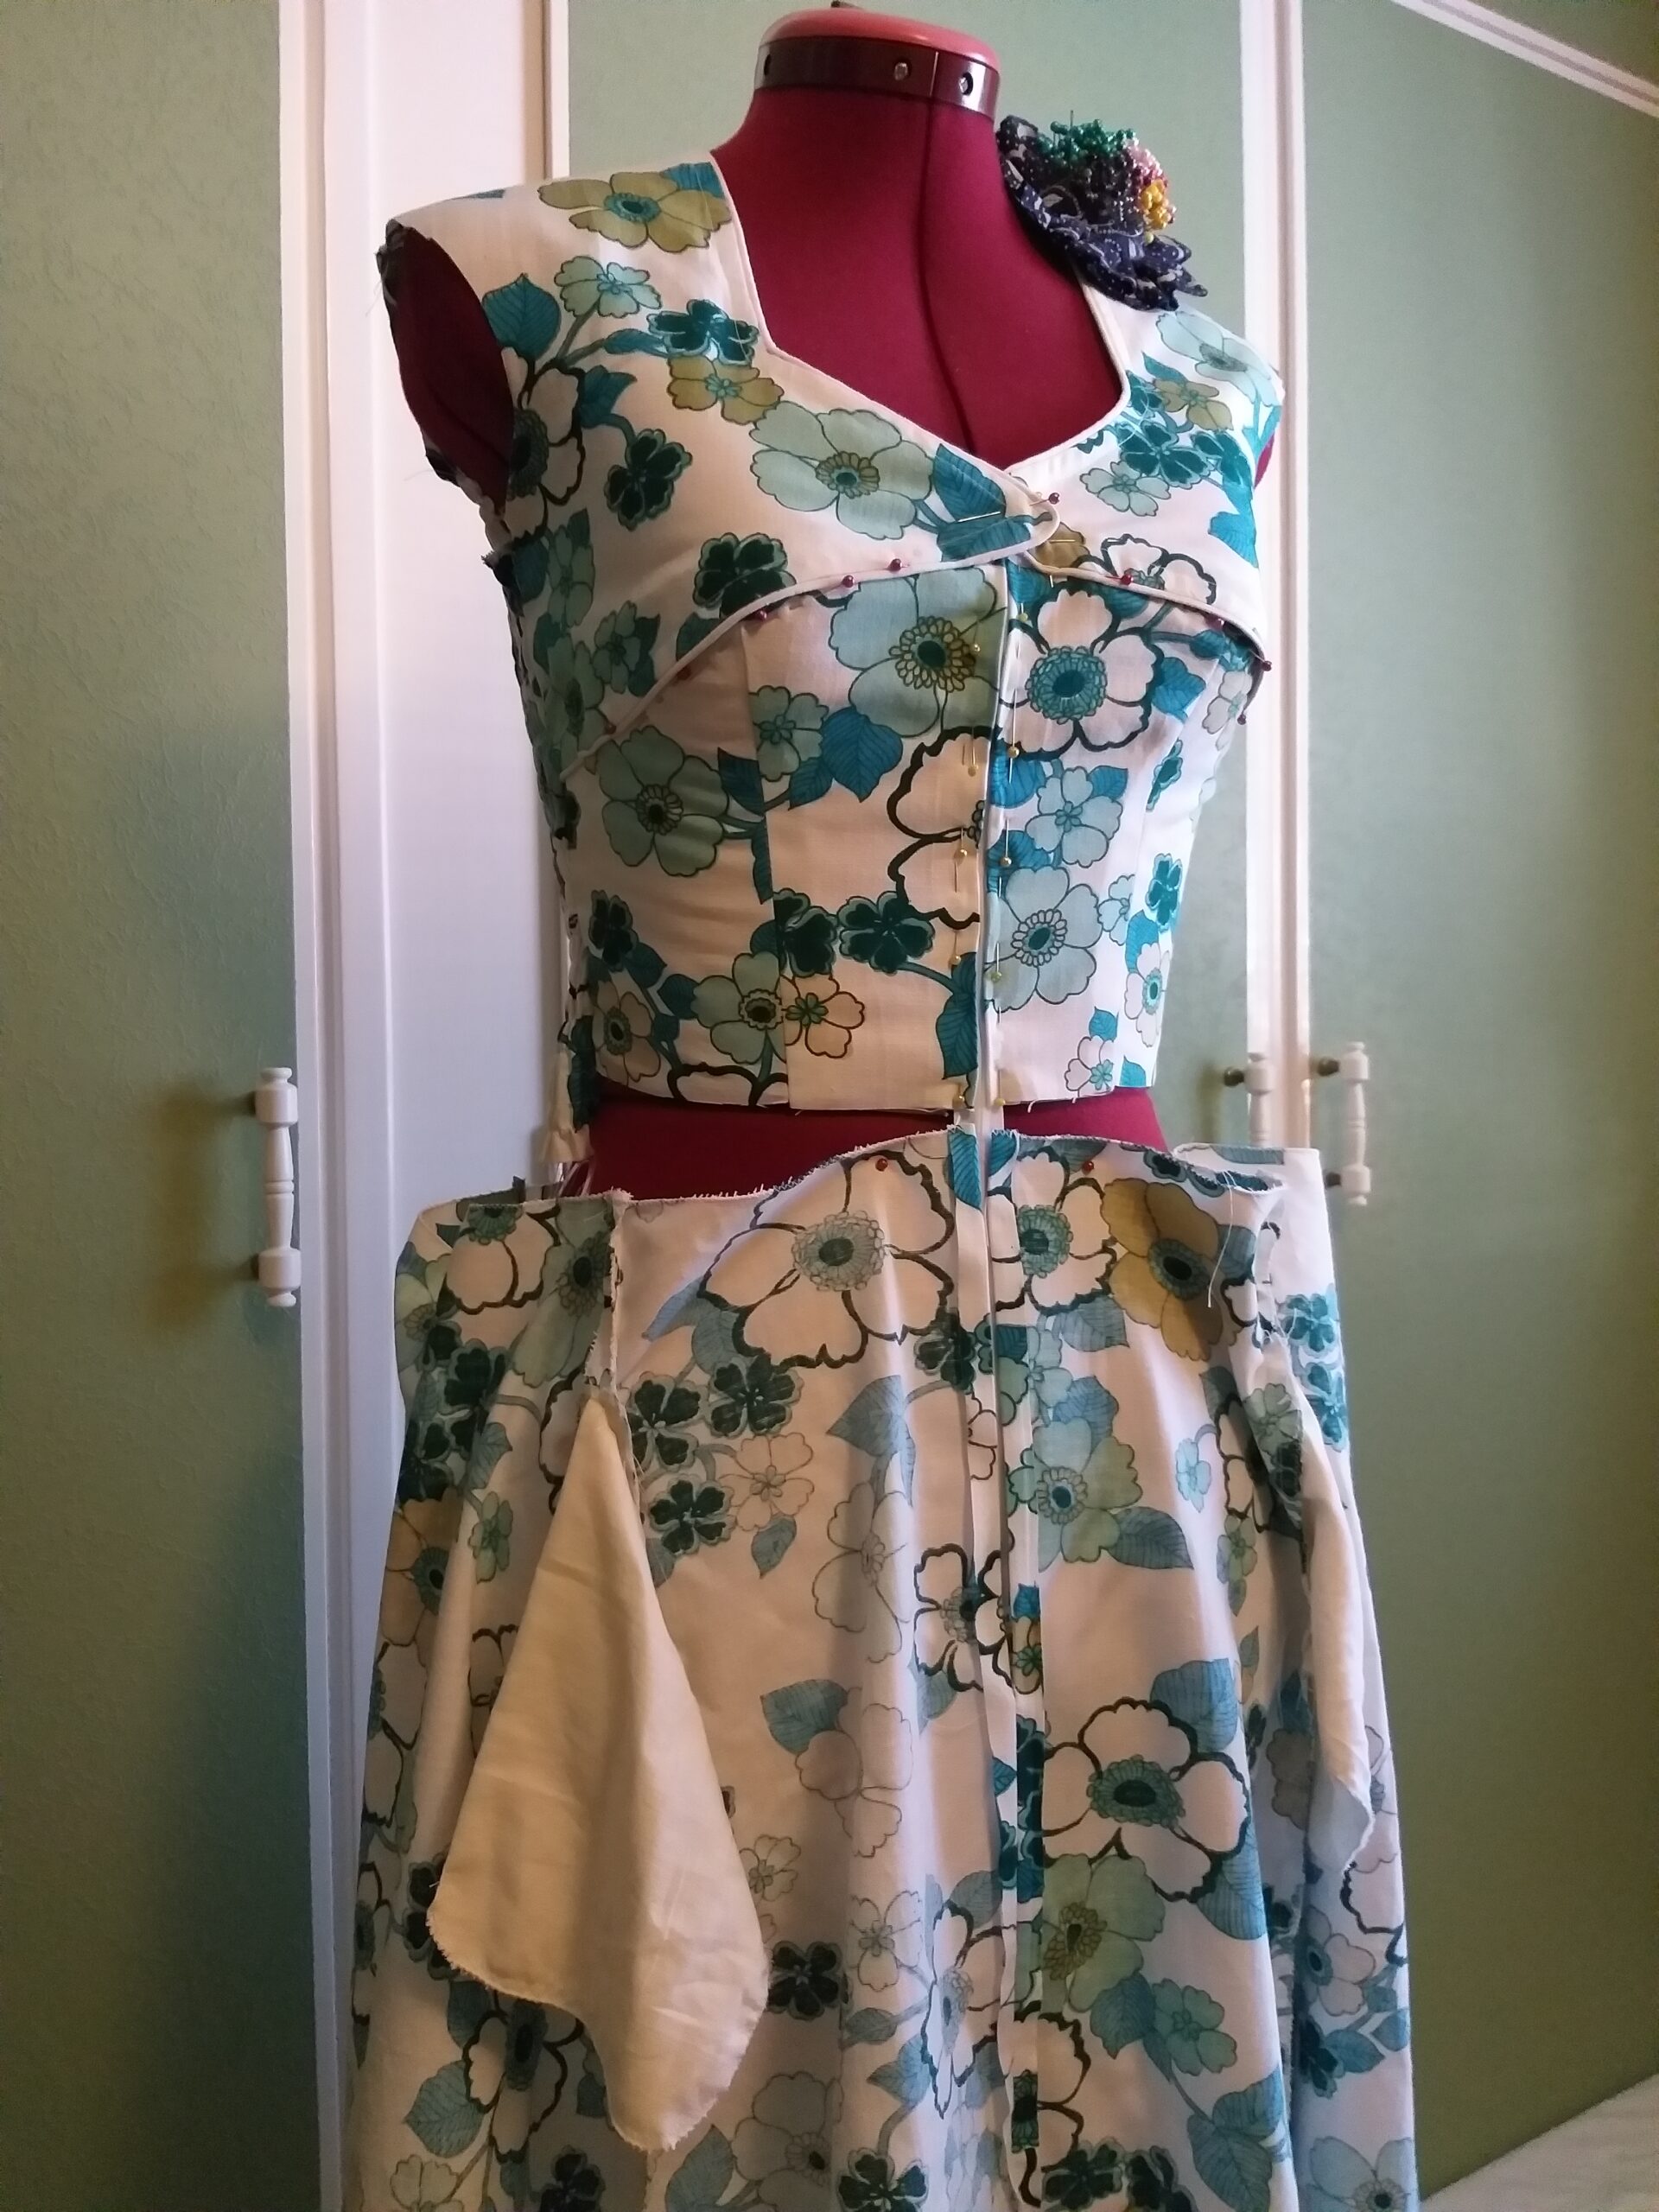
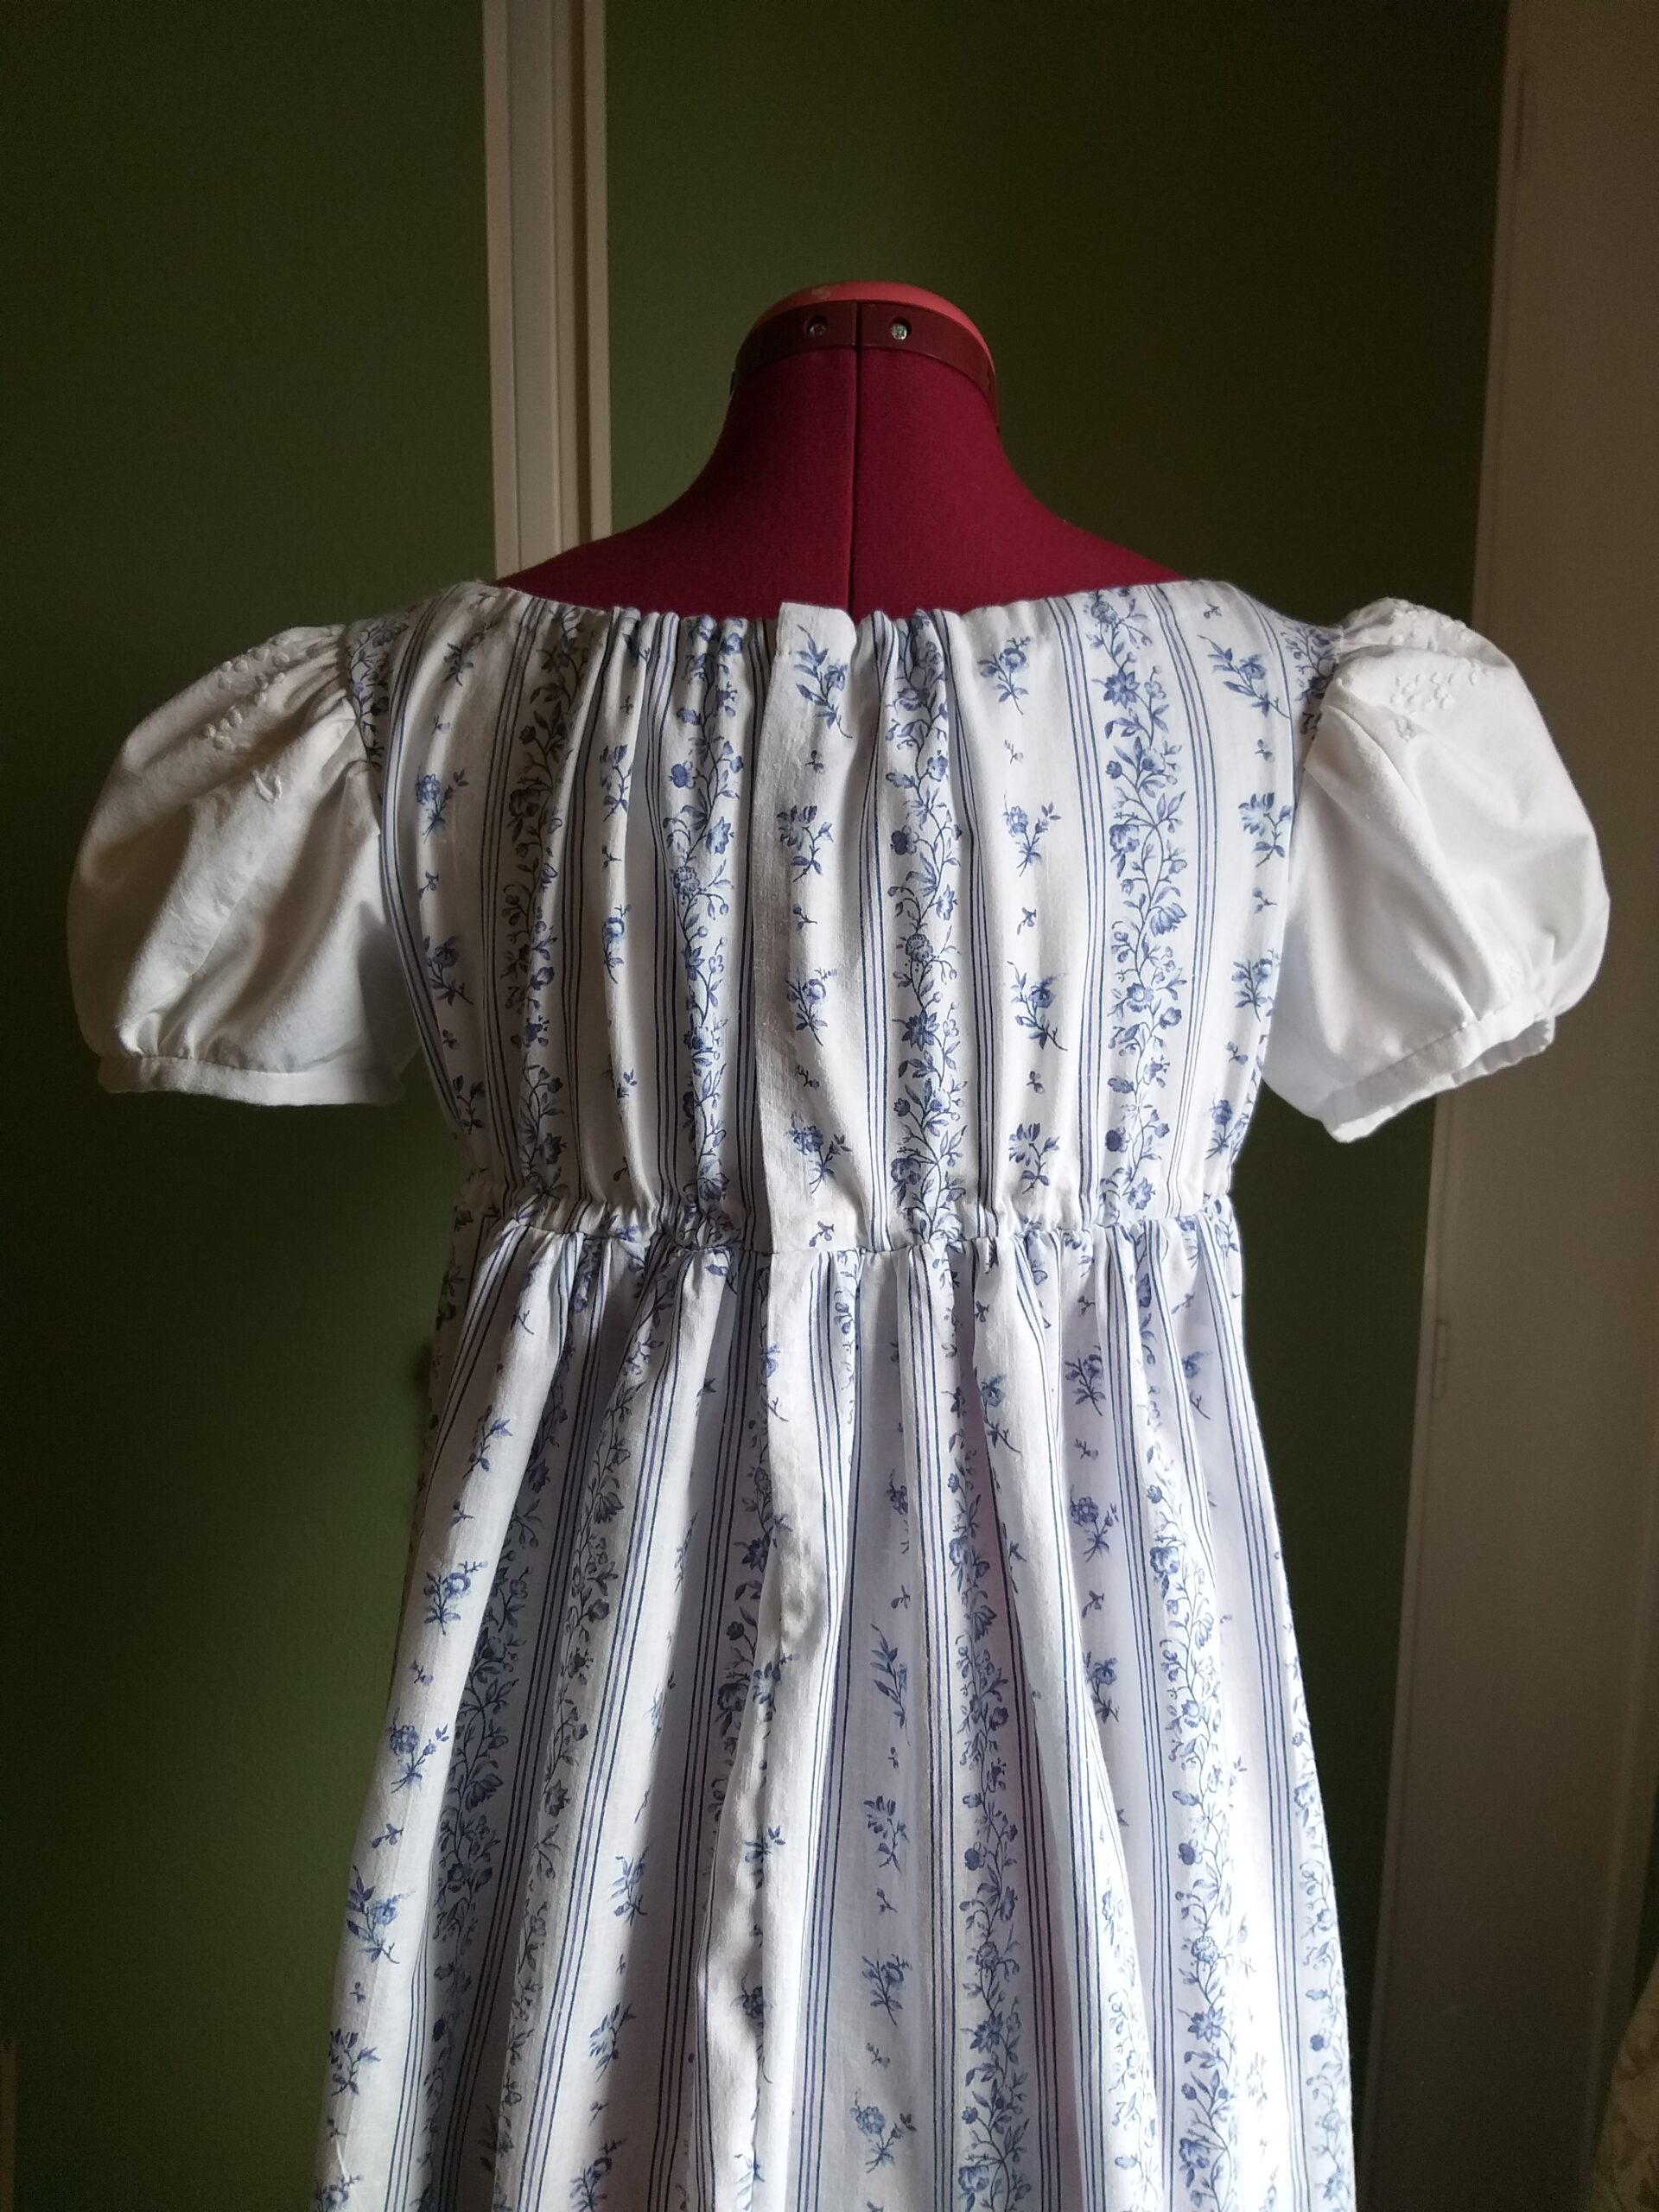
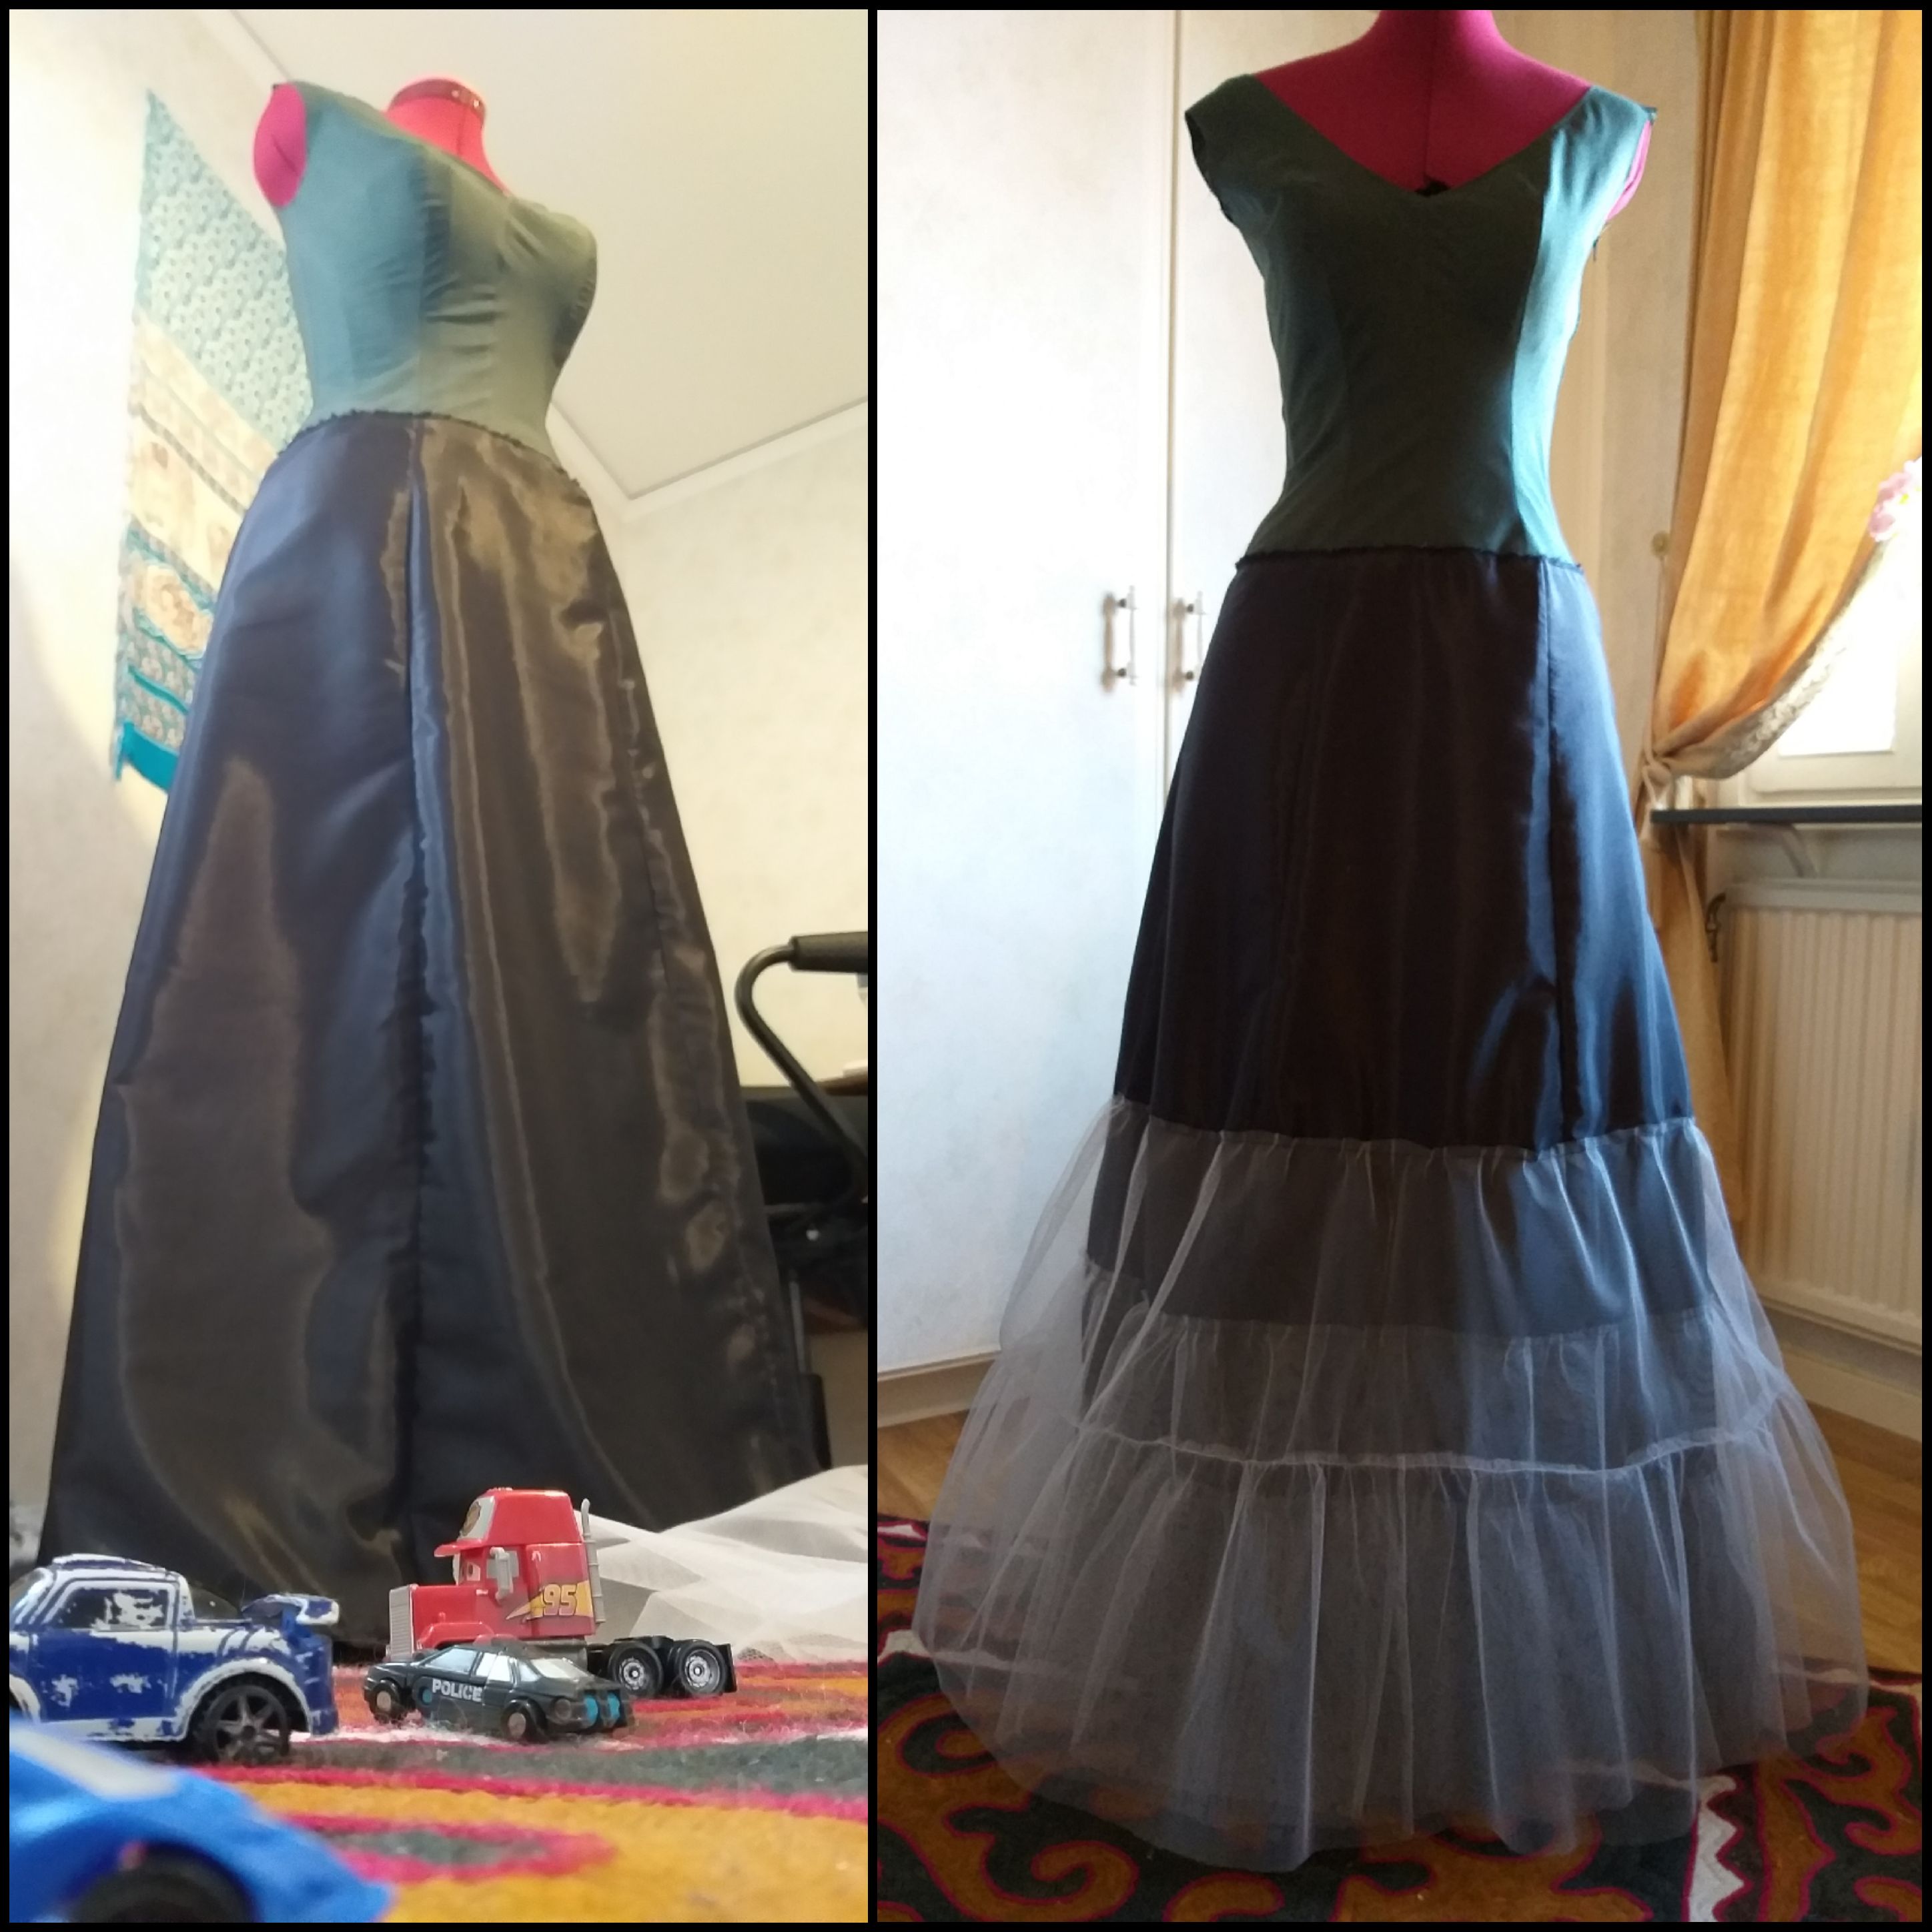
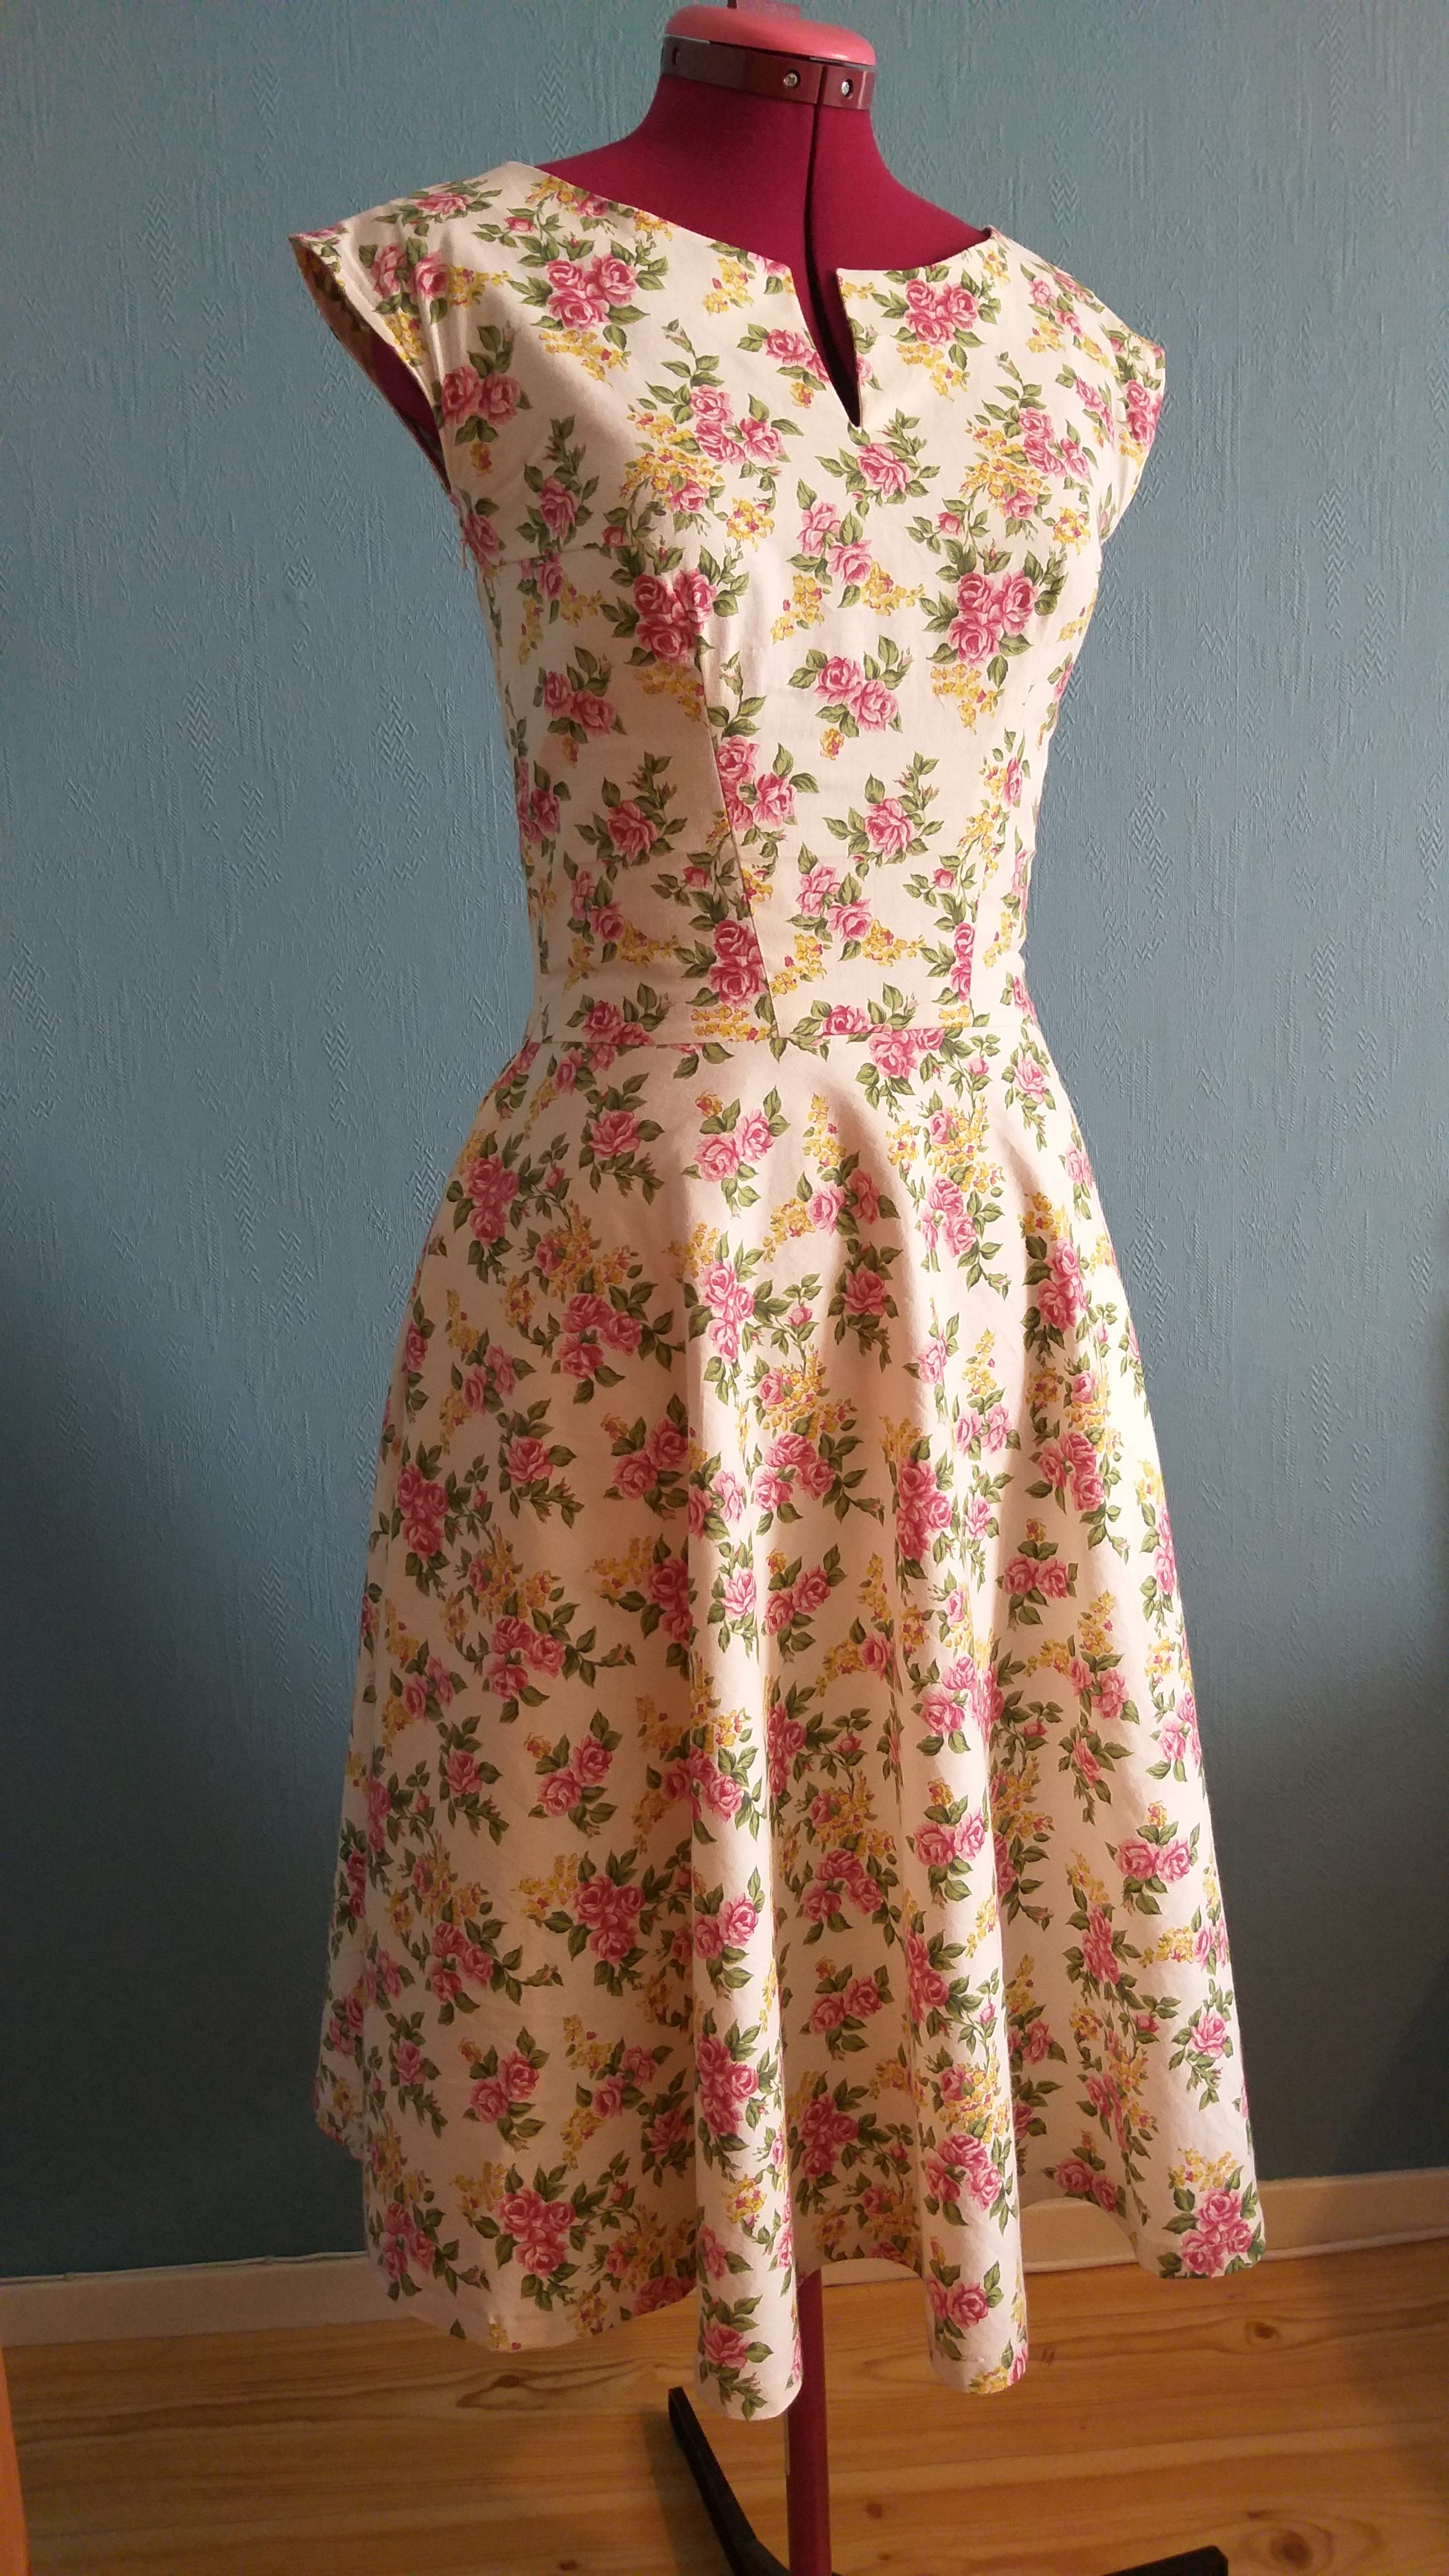
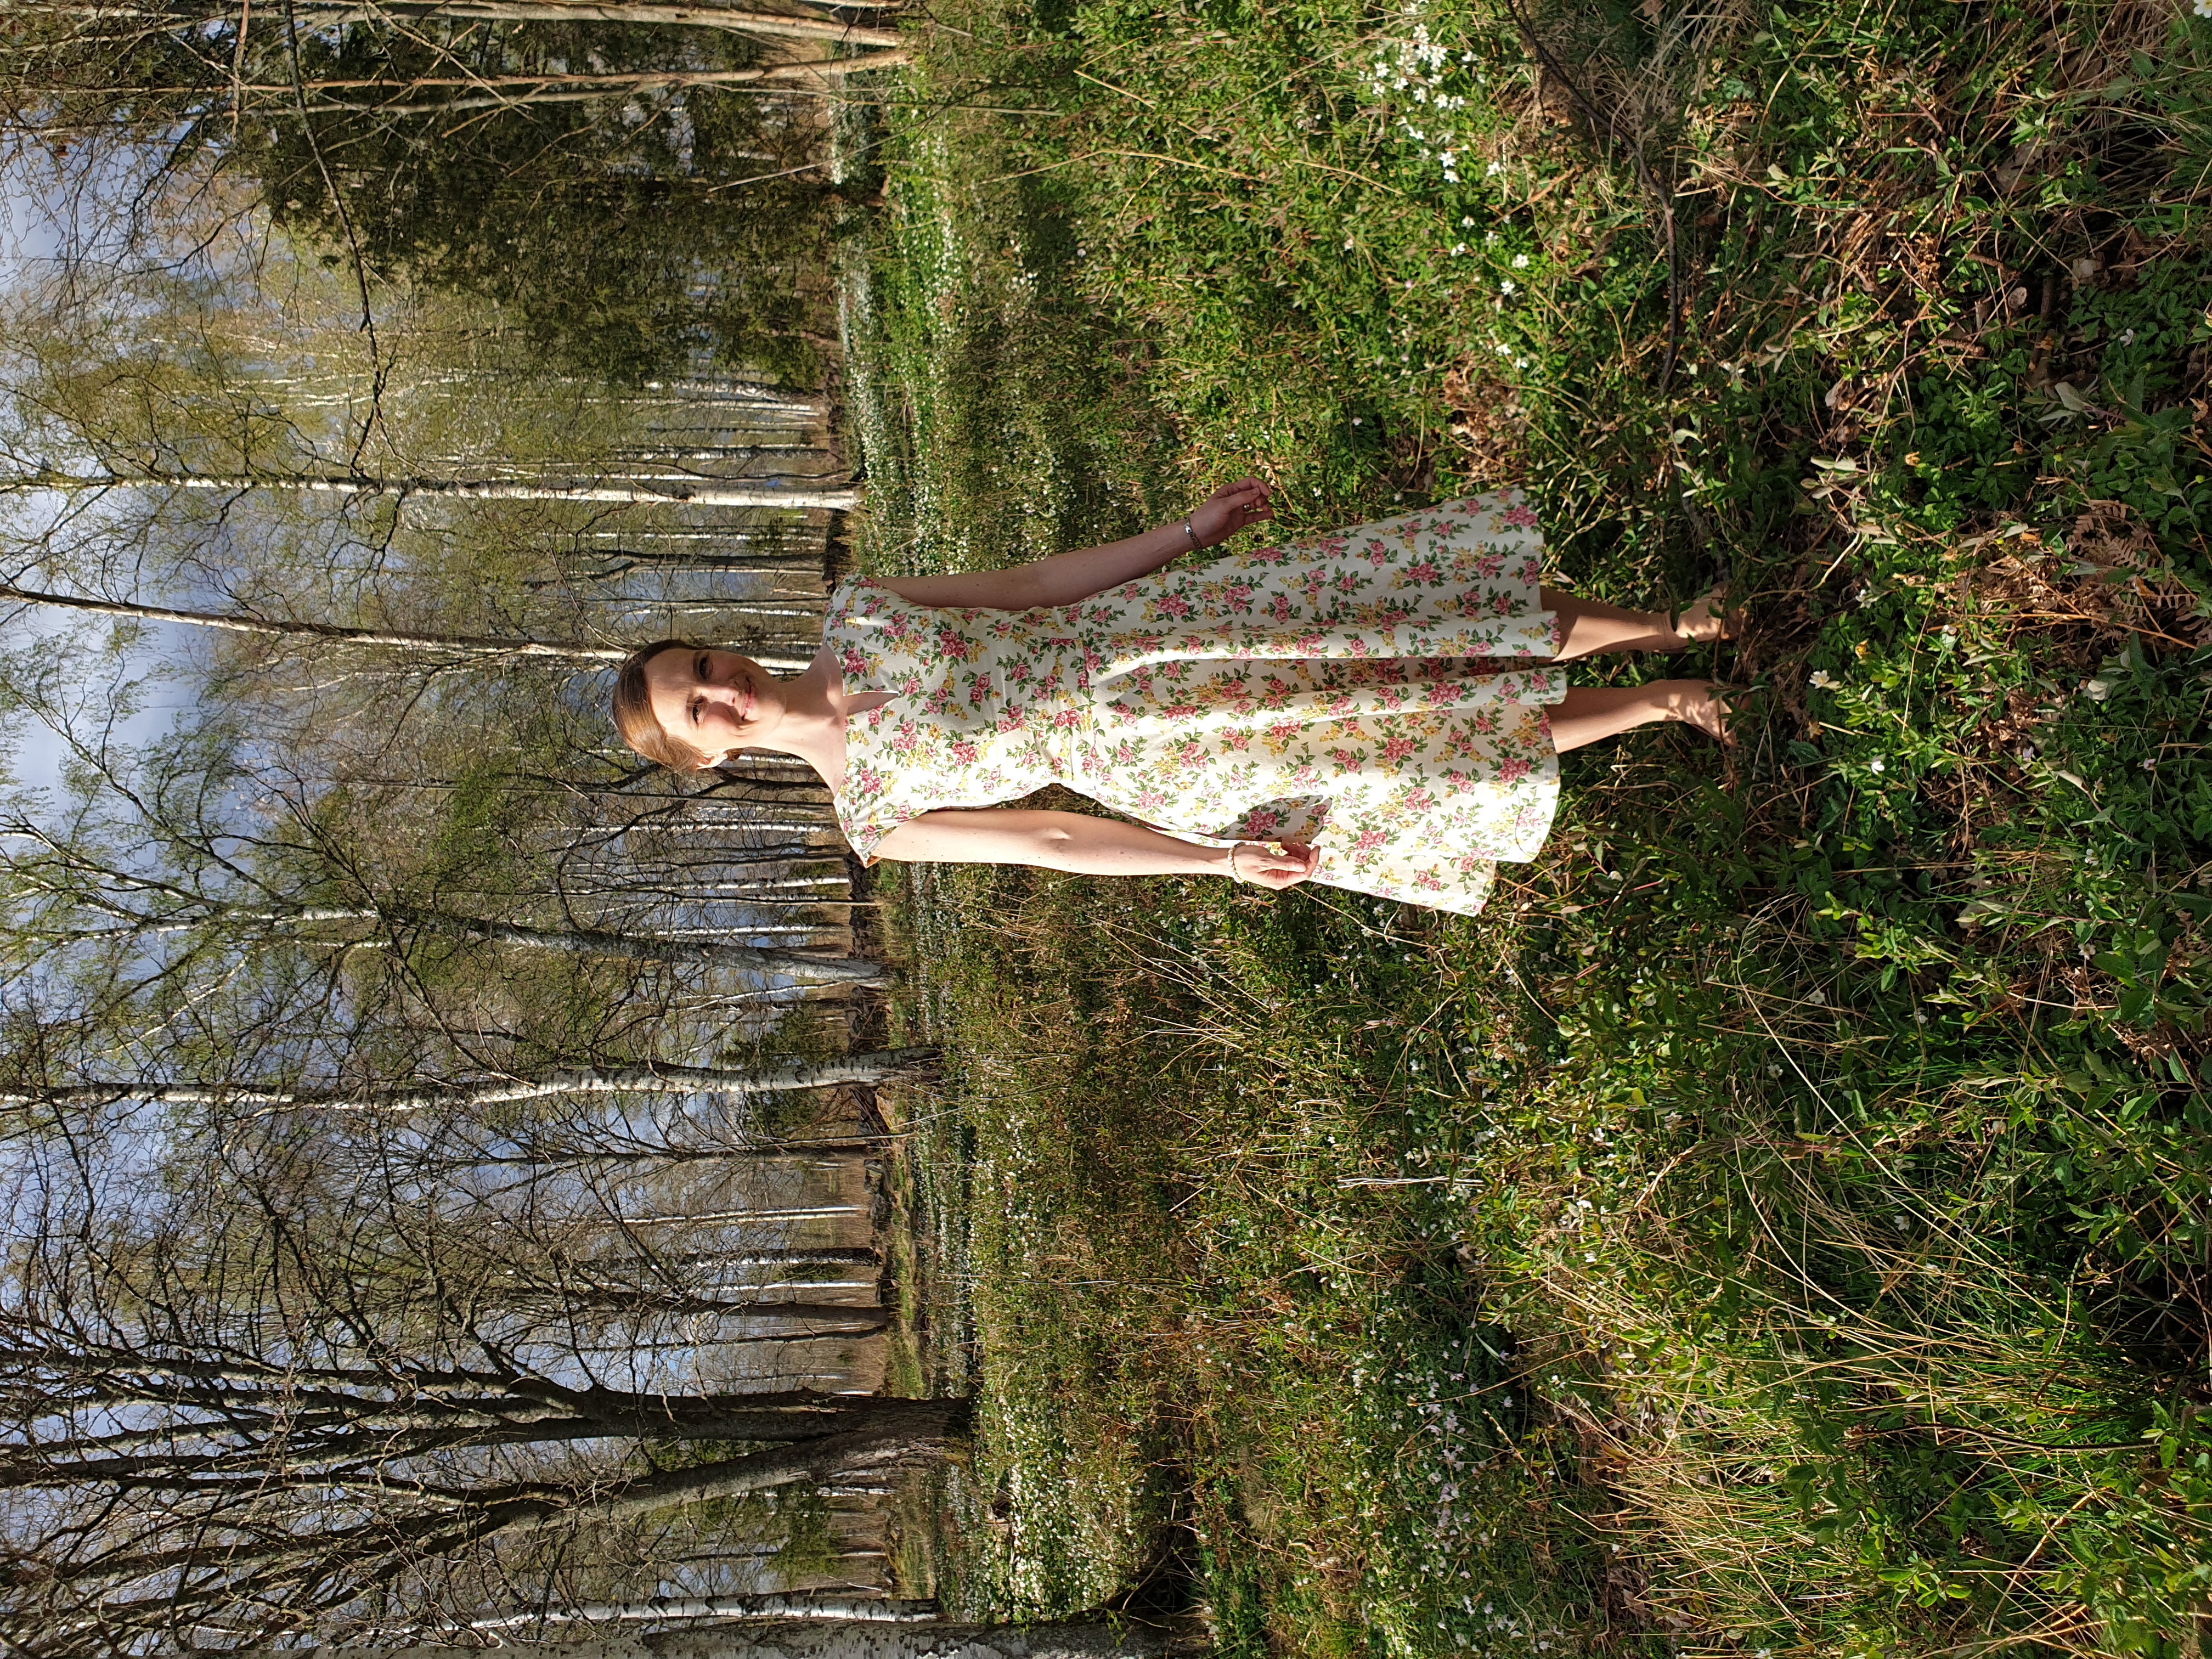
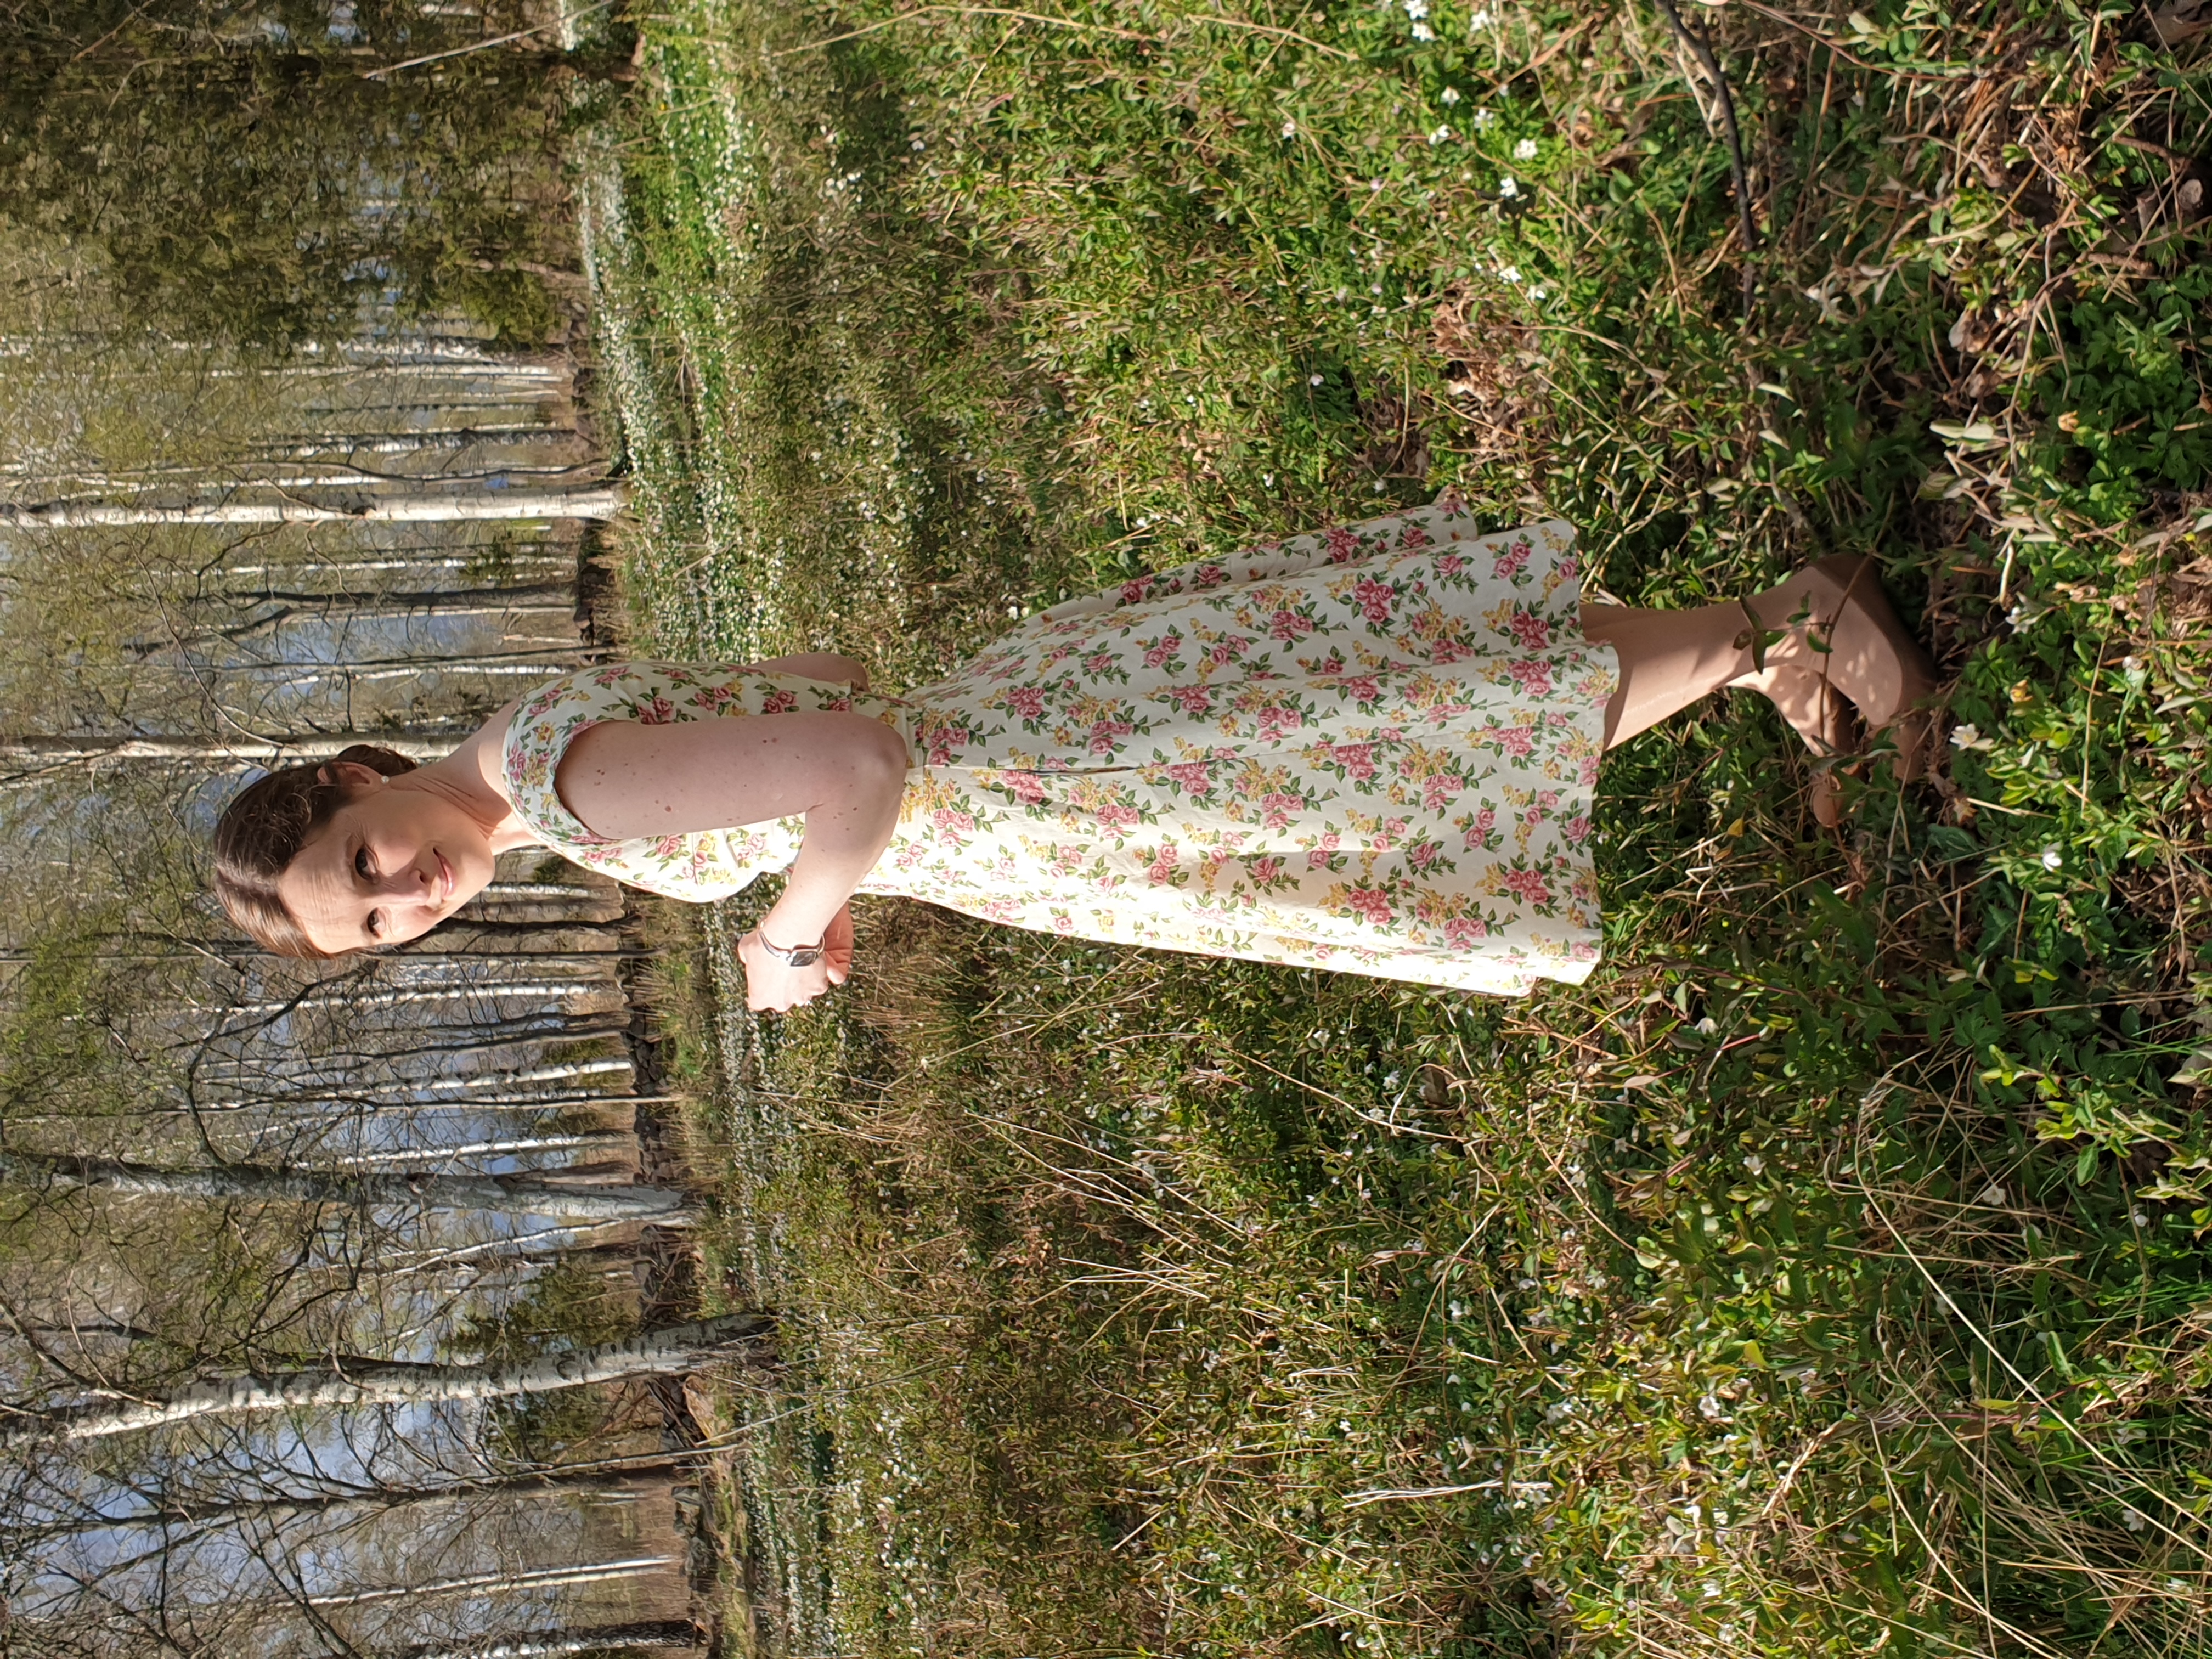
The model of the skirt required wider fabric, but I managed to piece it together.

Kjolens modell krävde egentligen ett vidare tygstycke, men jag kunde lappa ihop den.

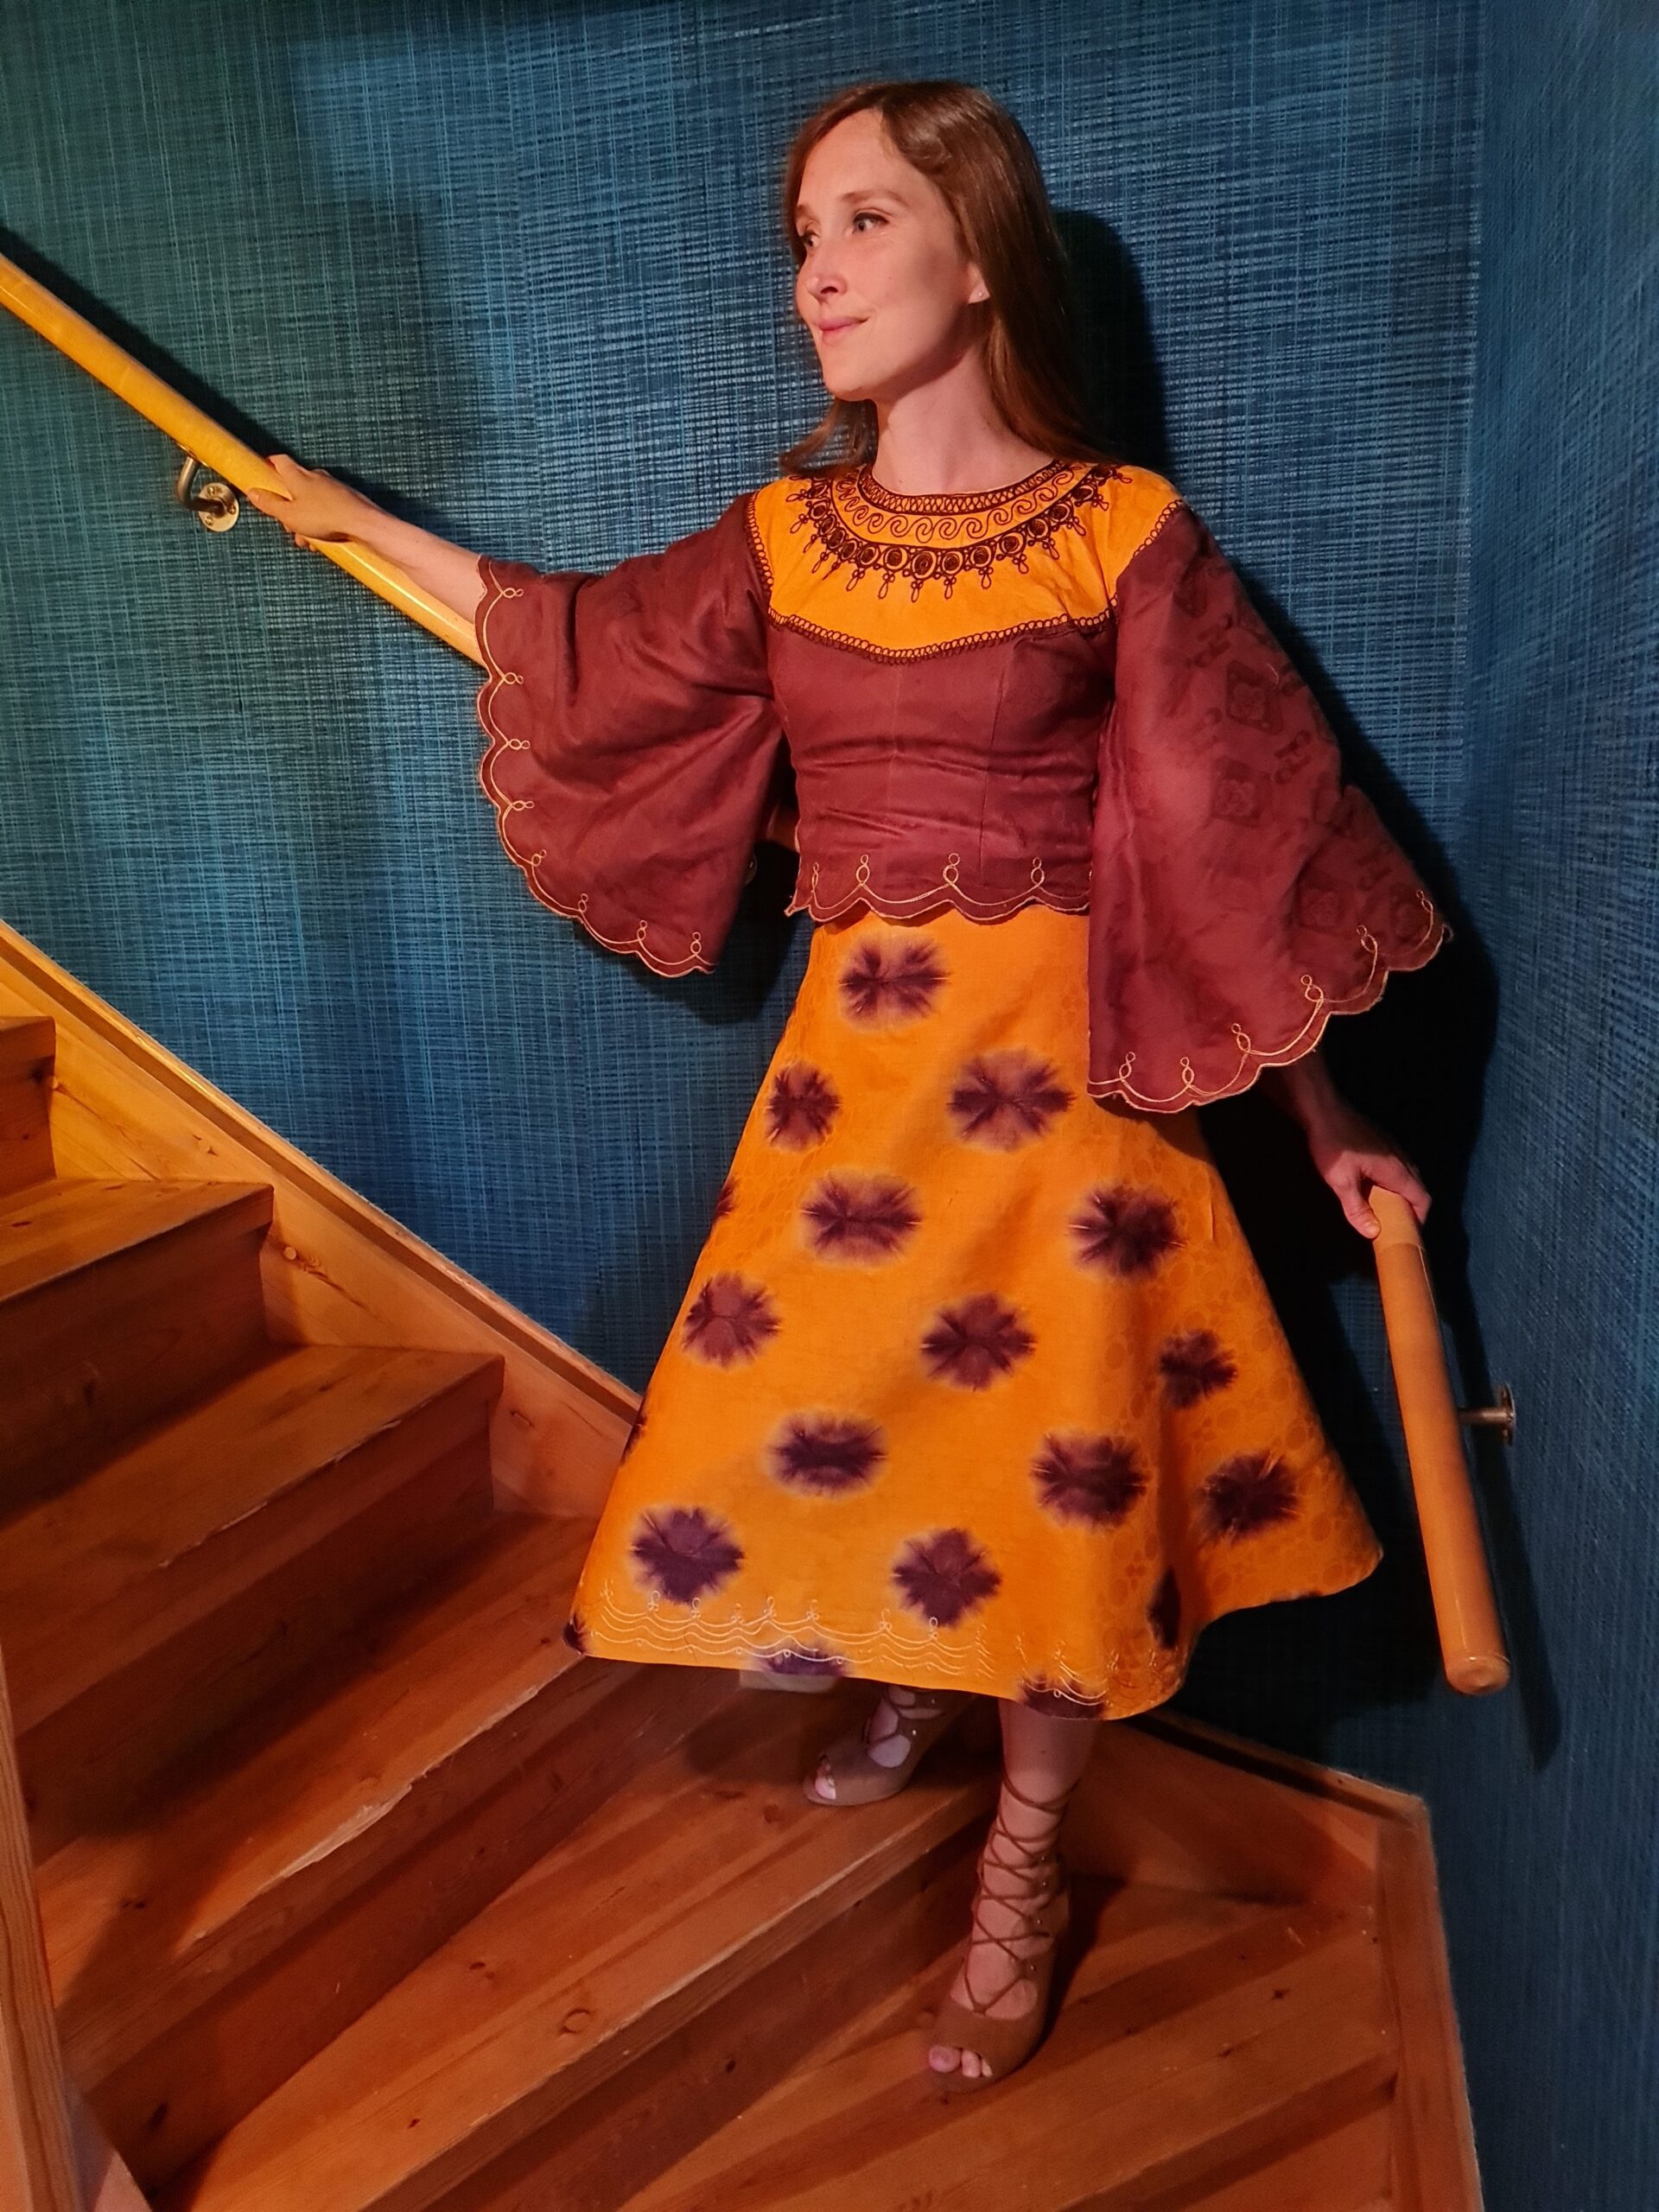
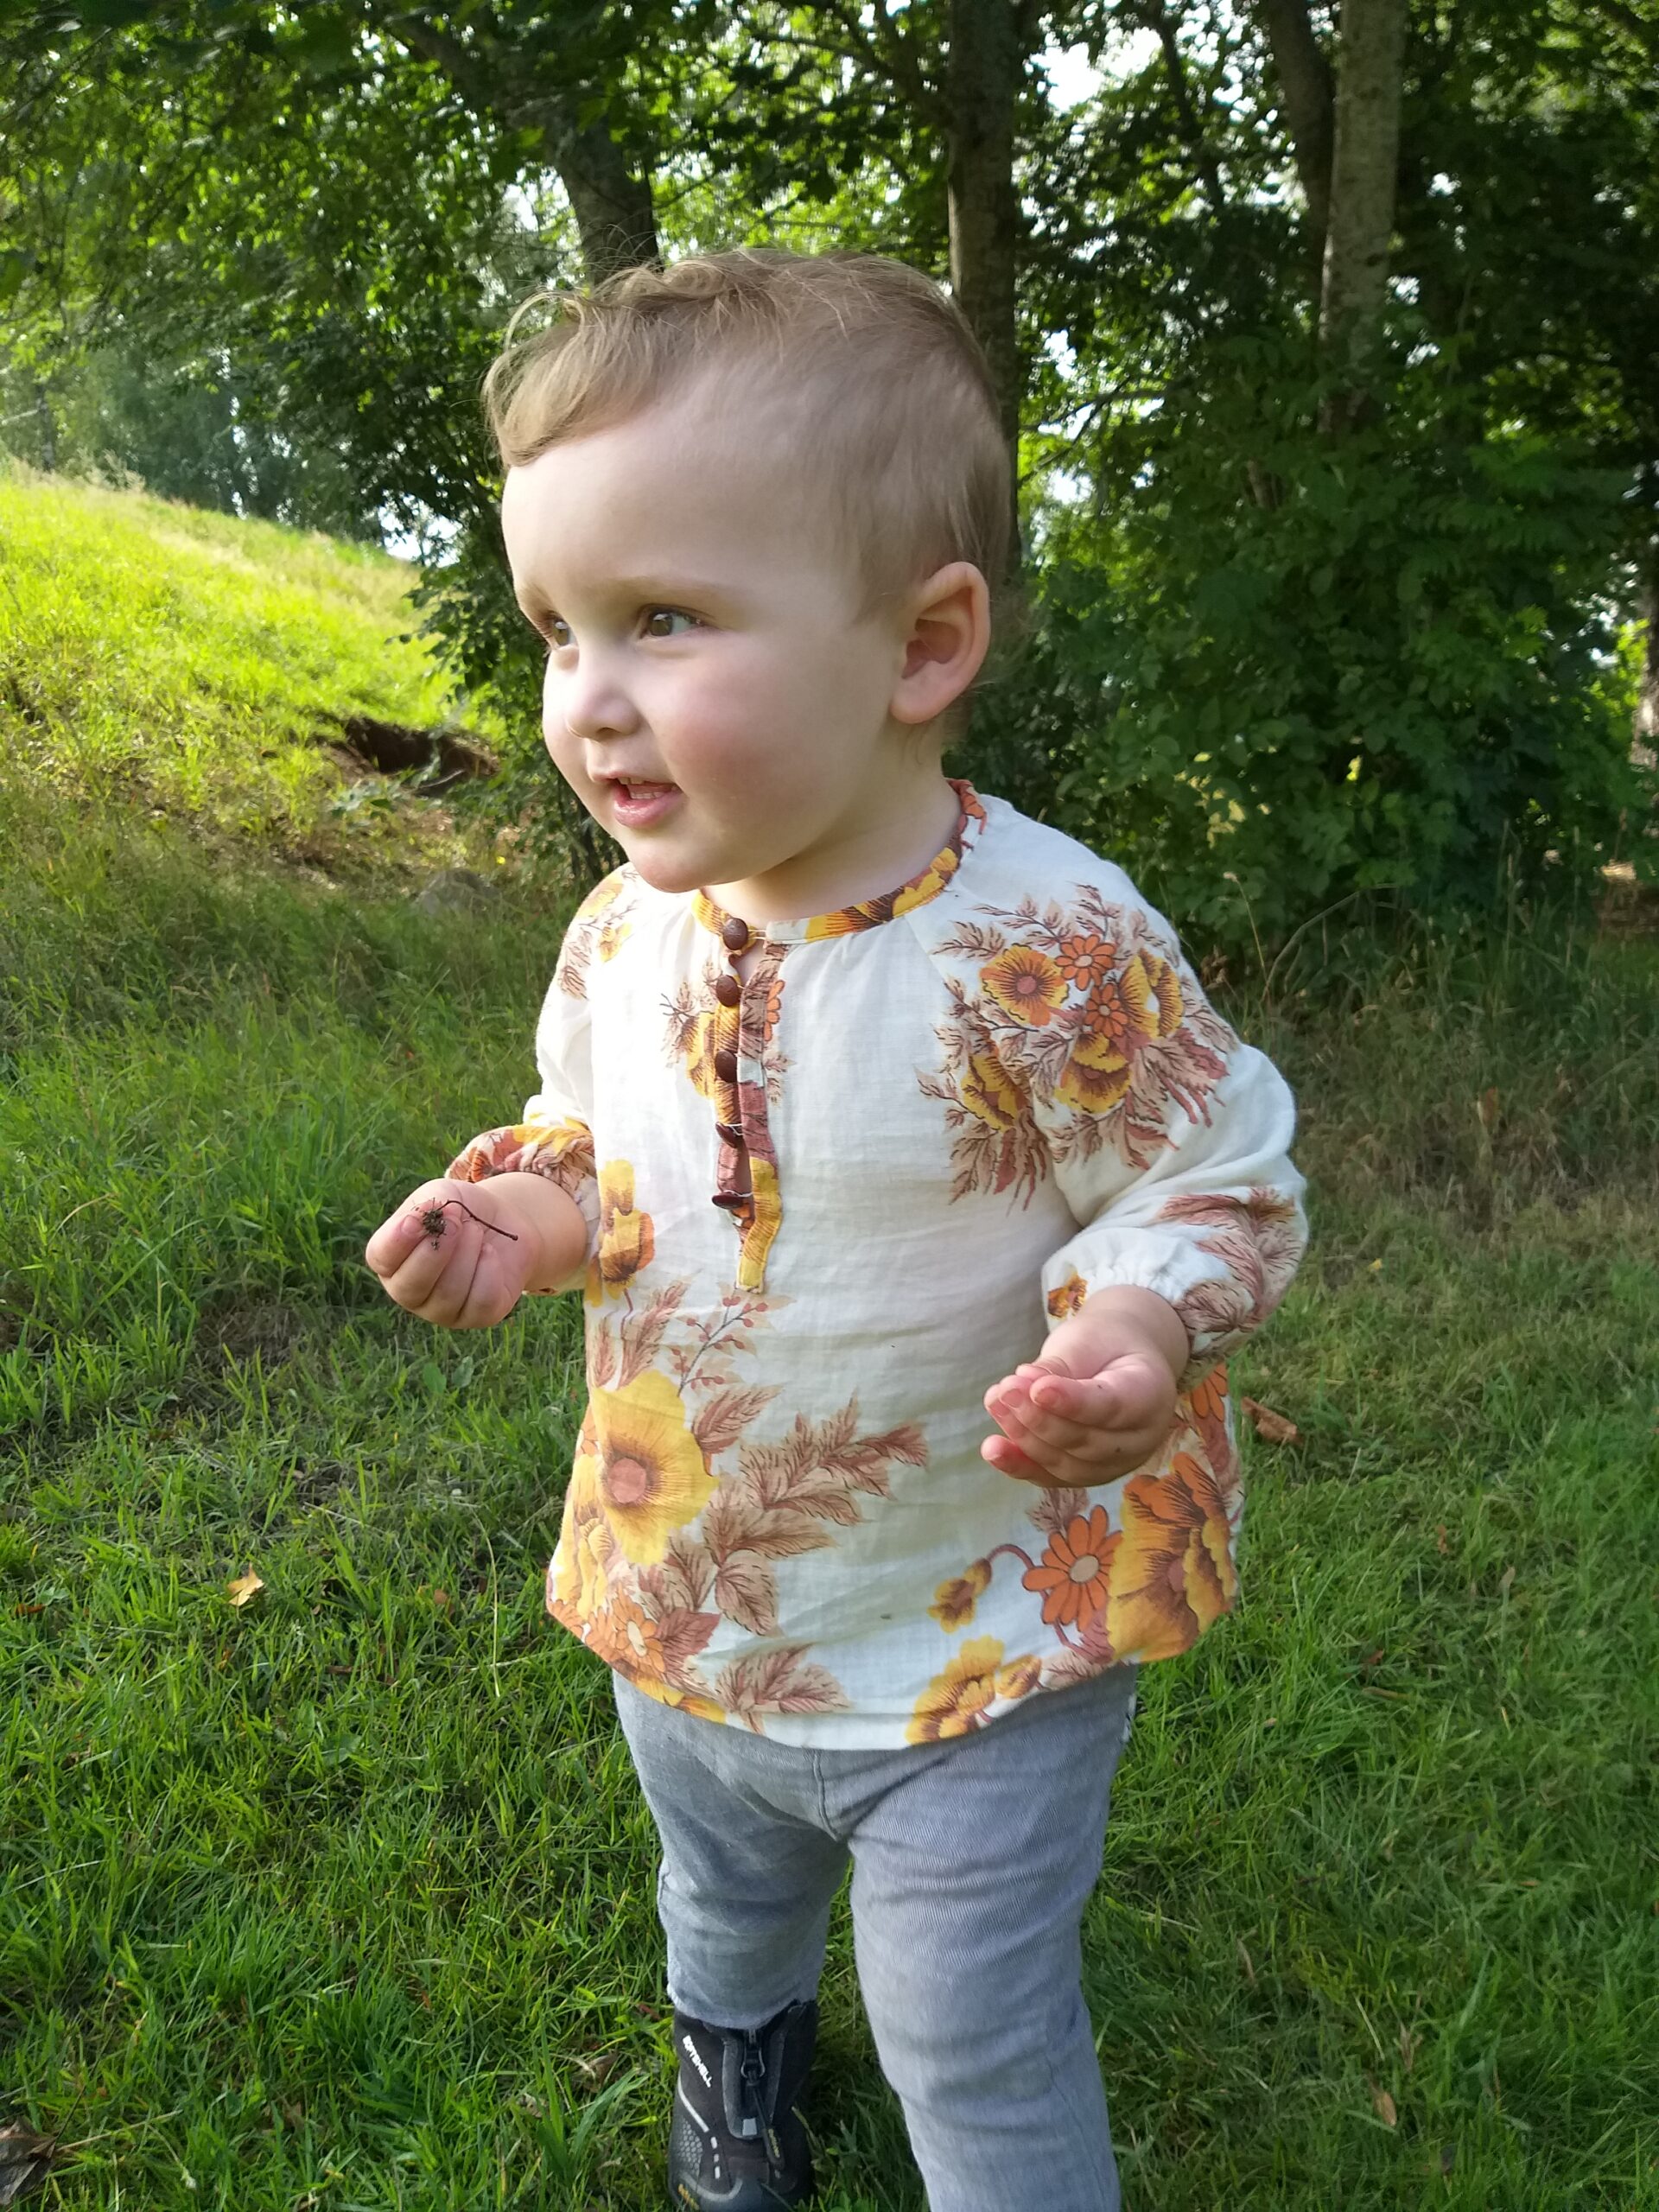
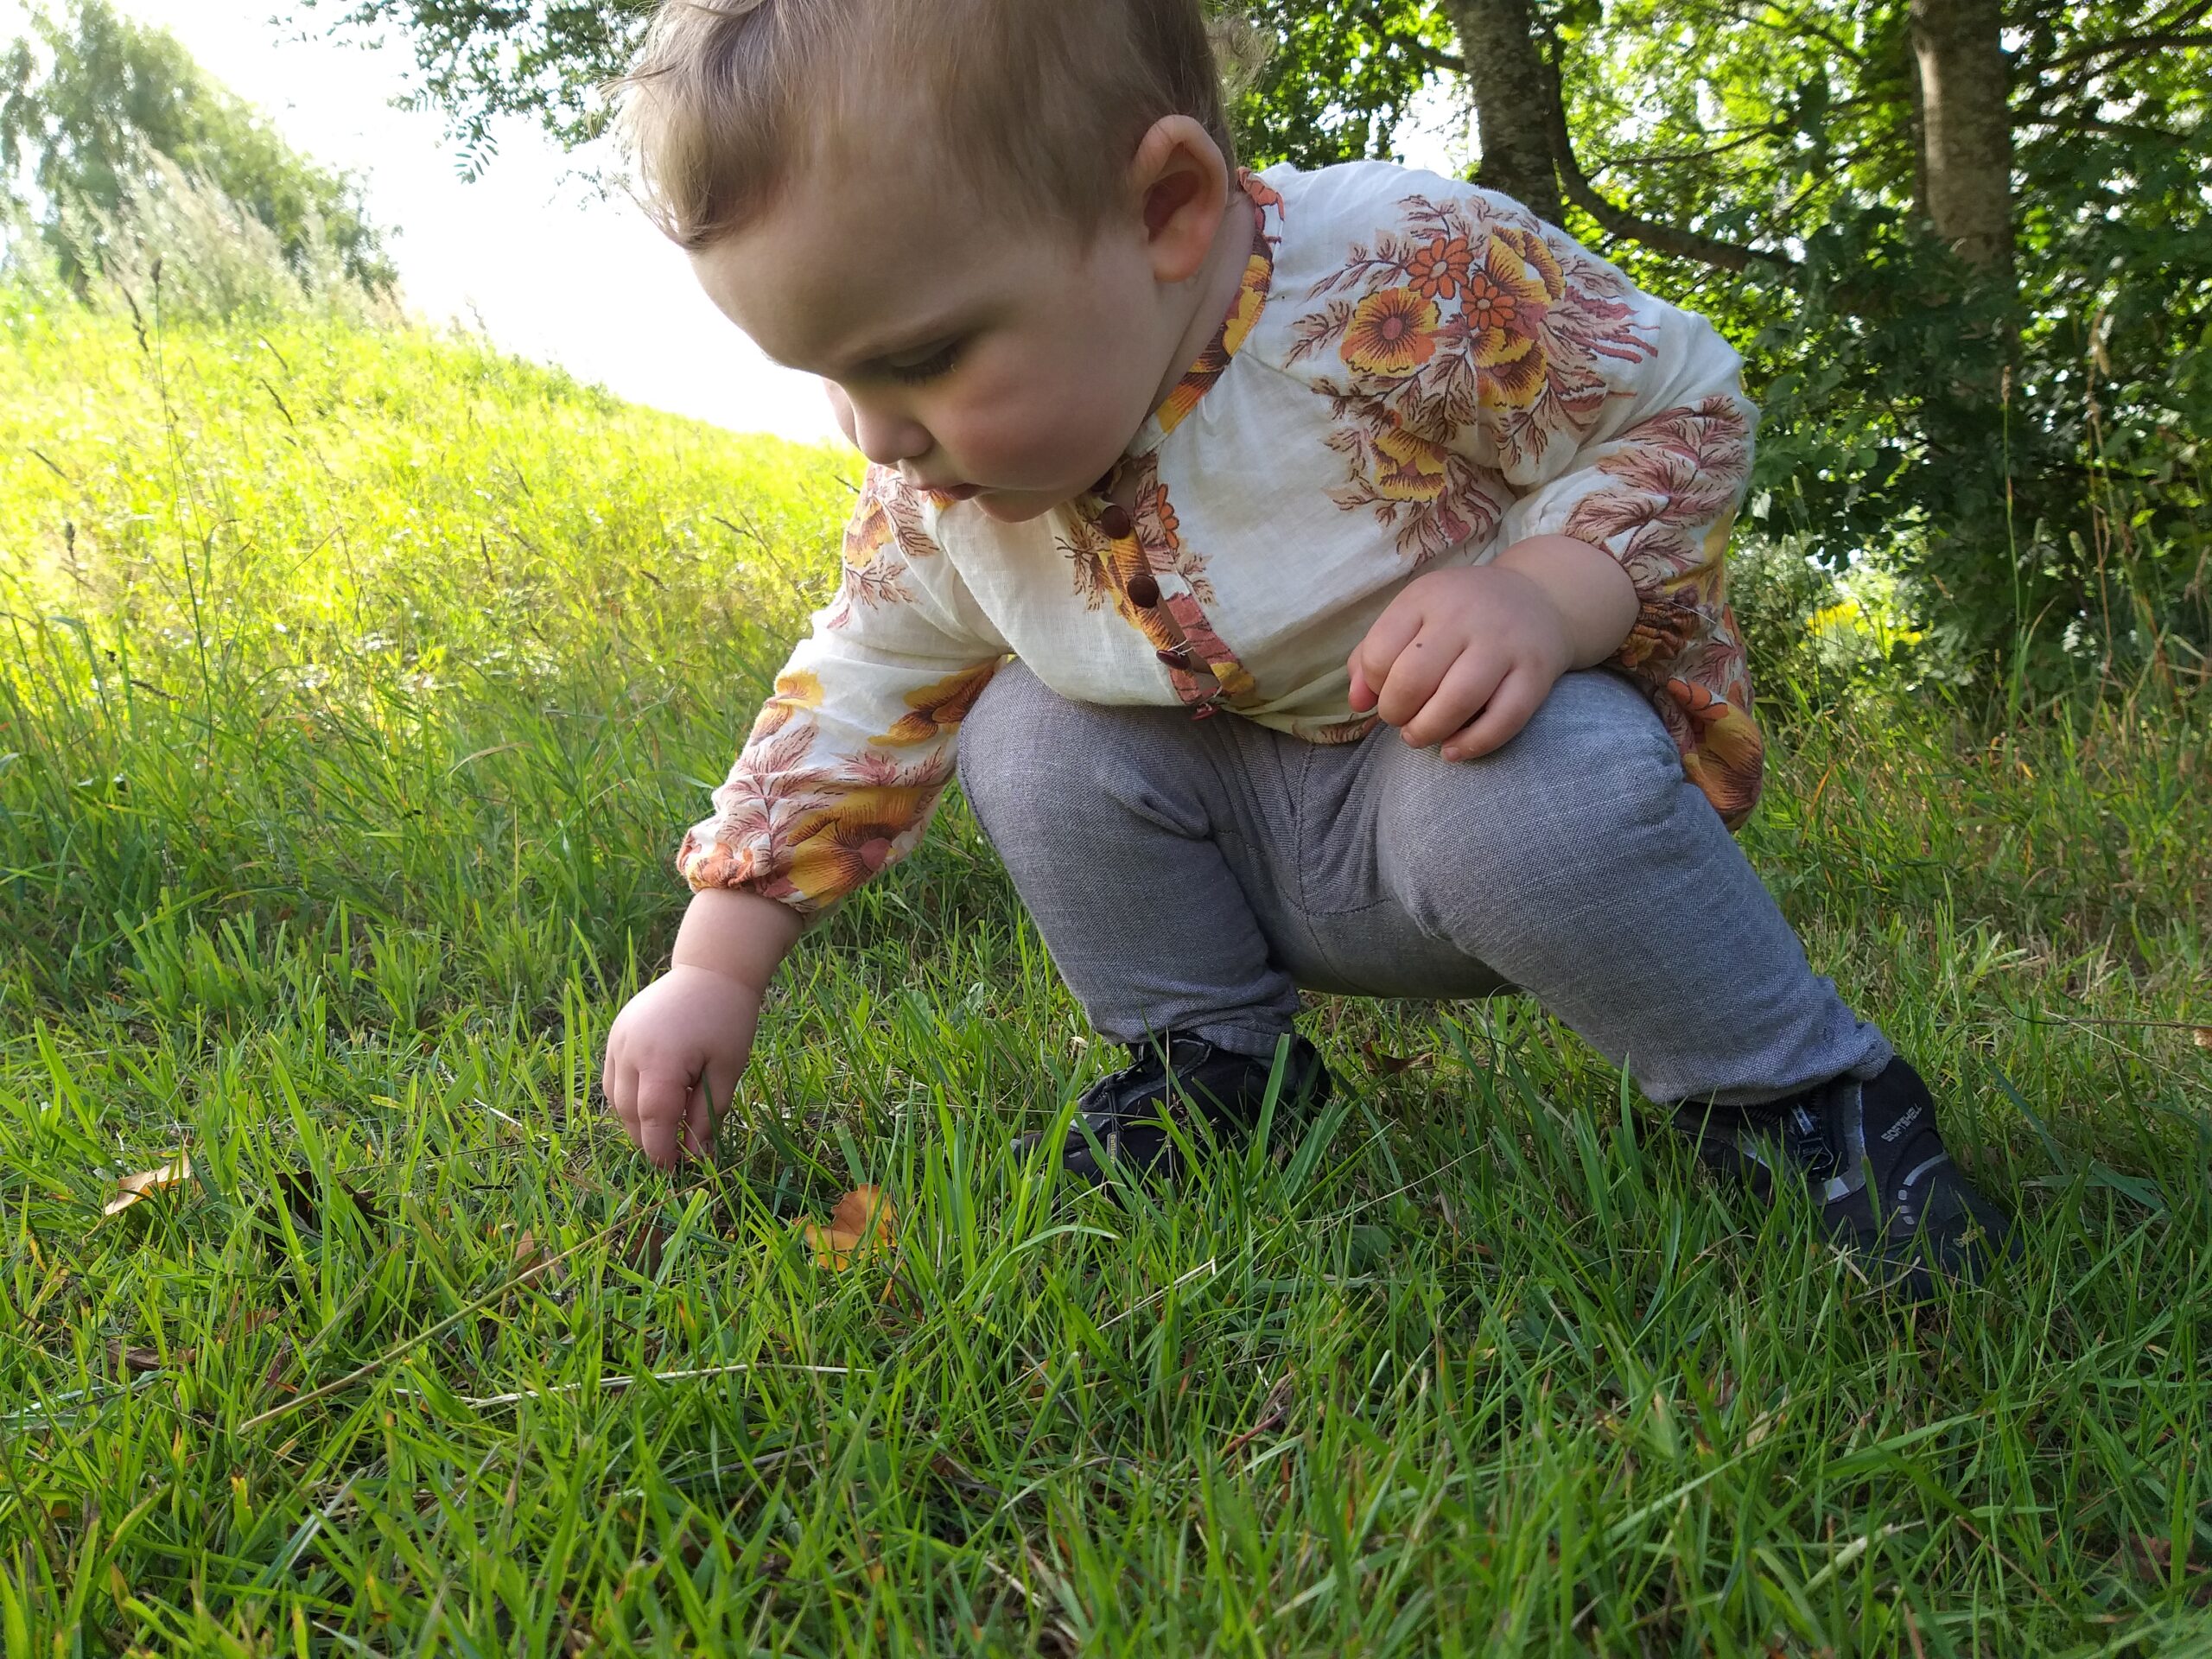
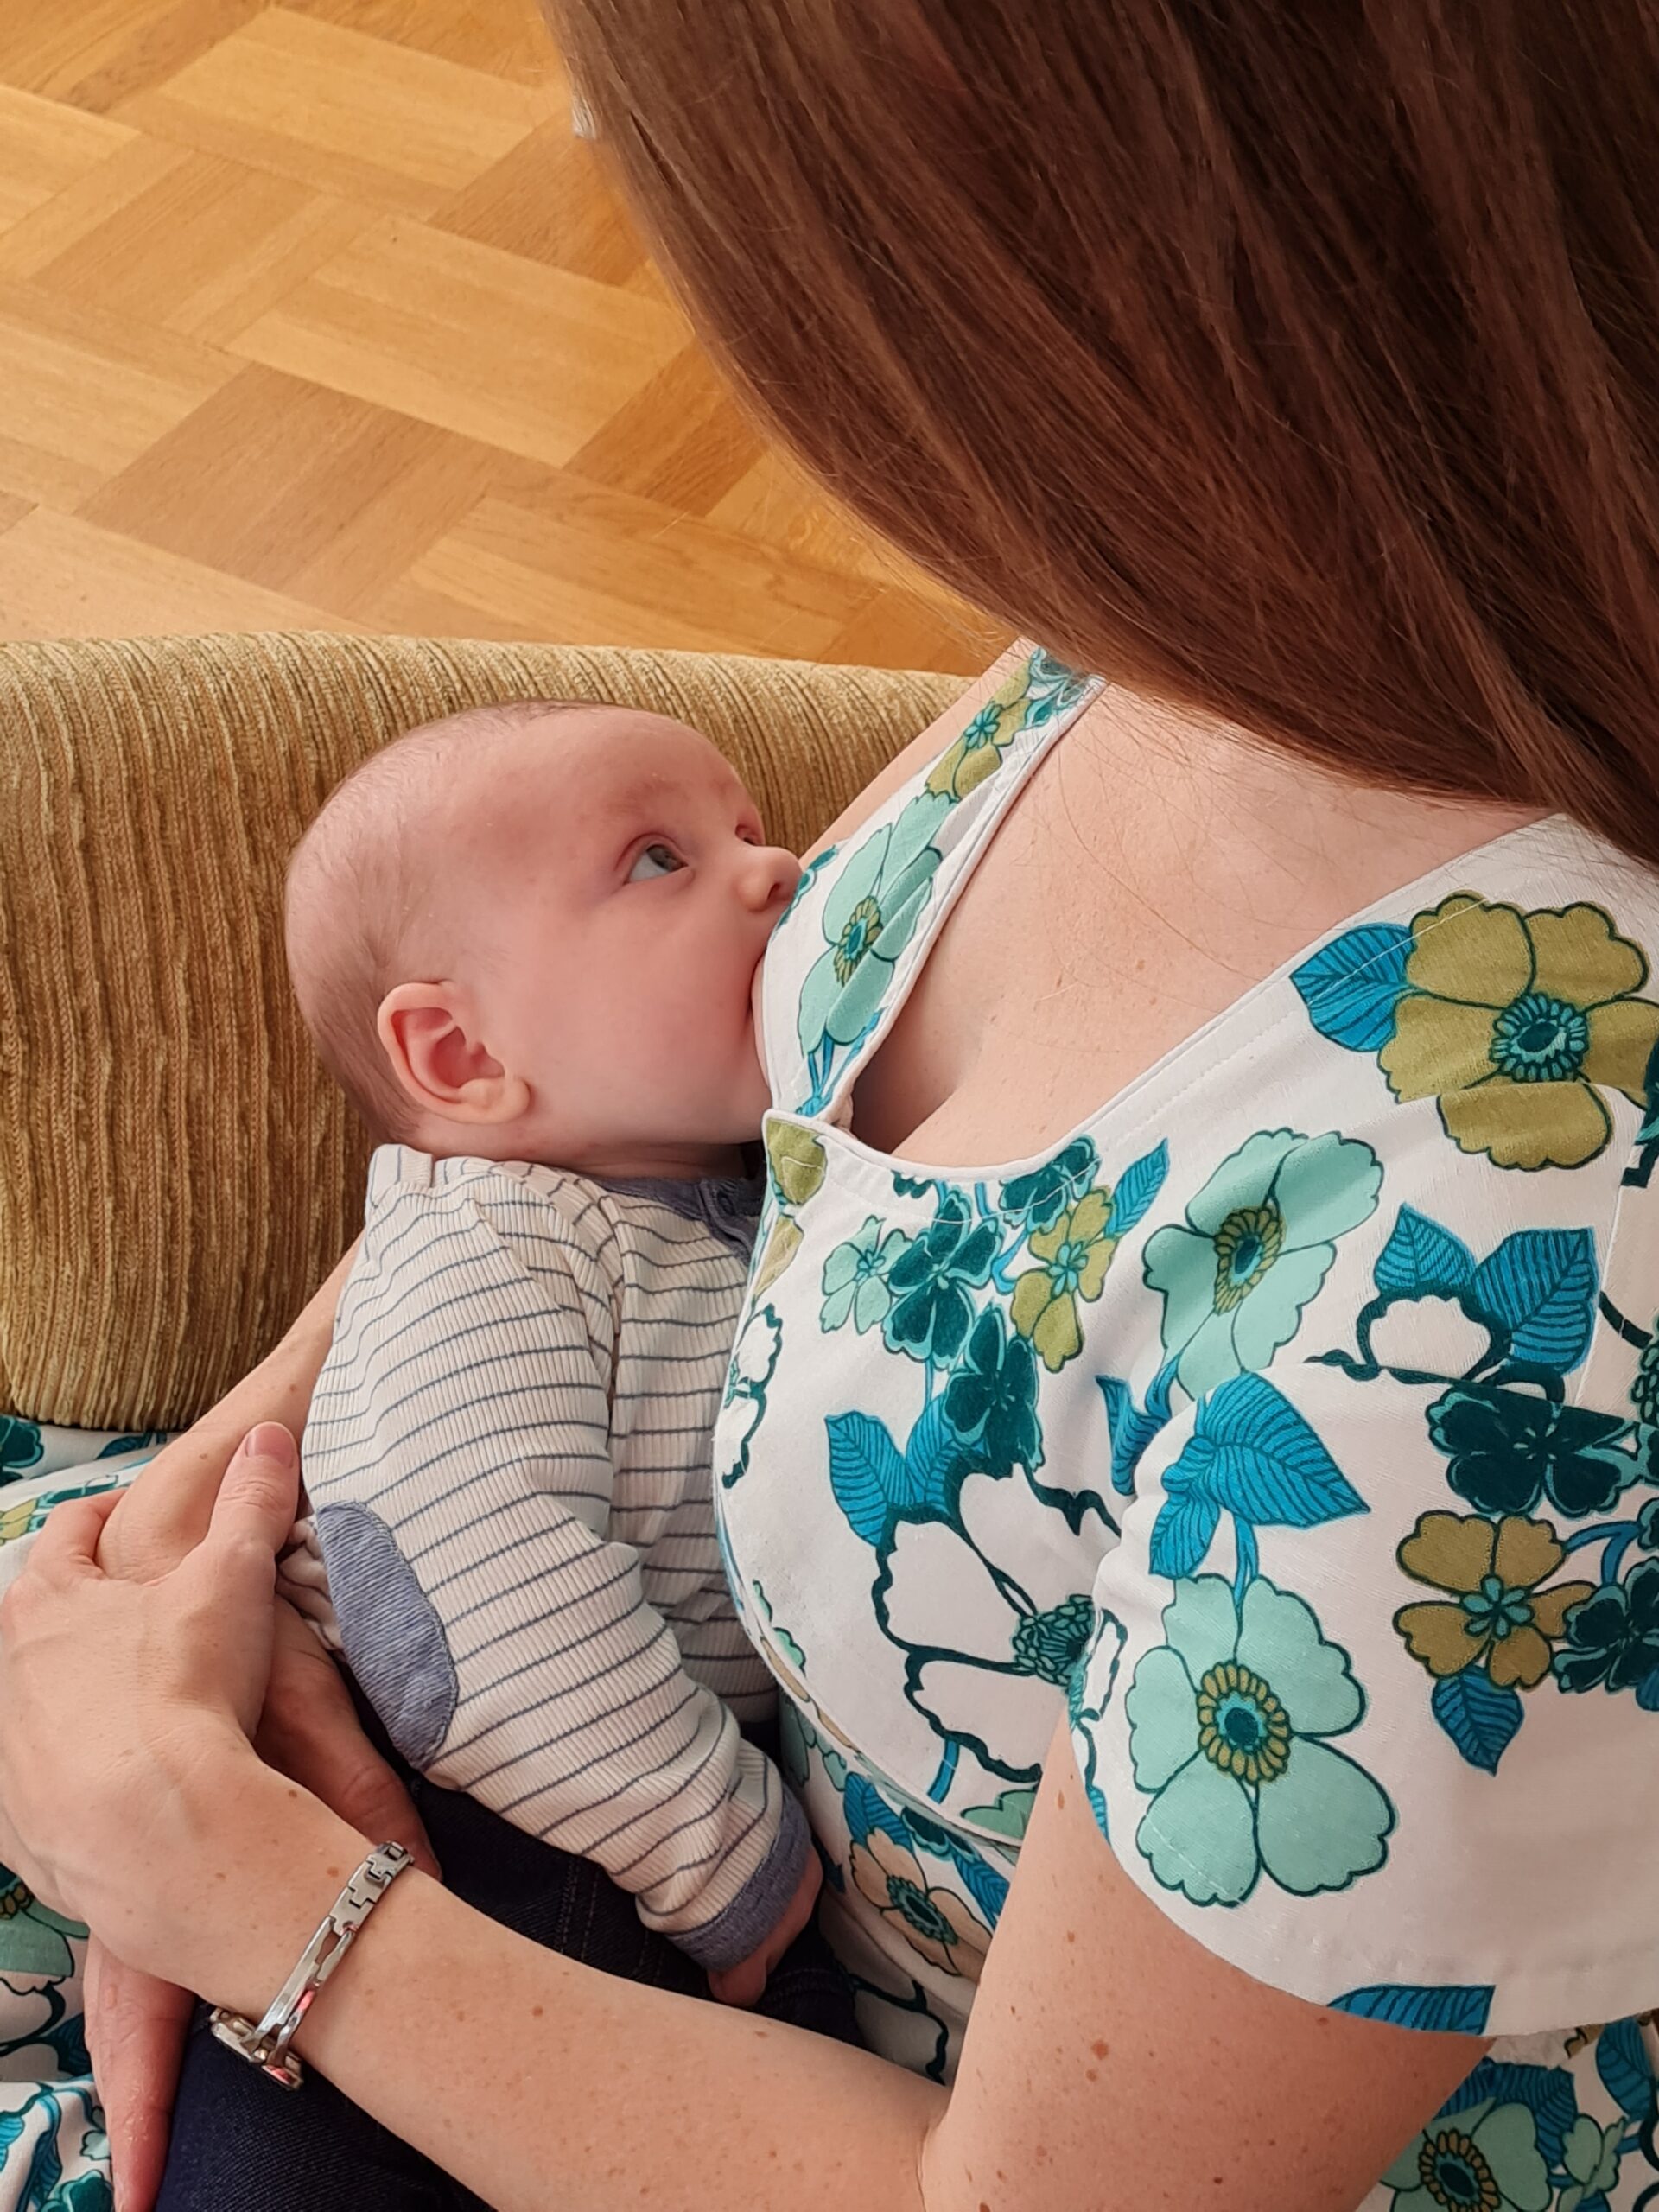
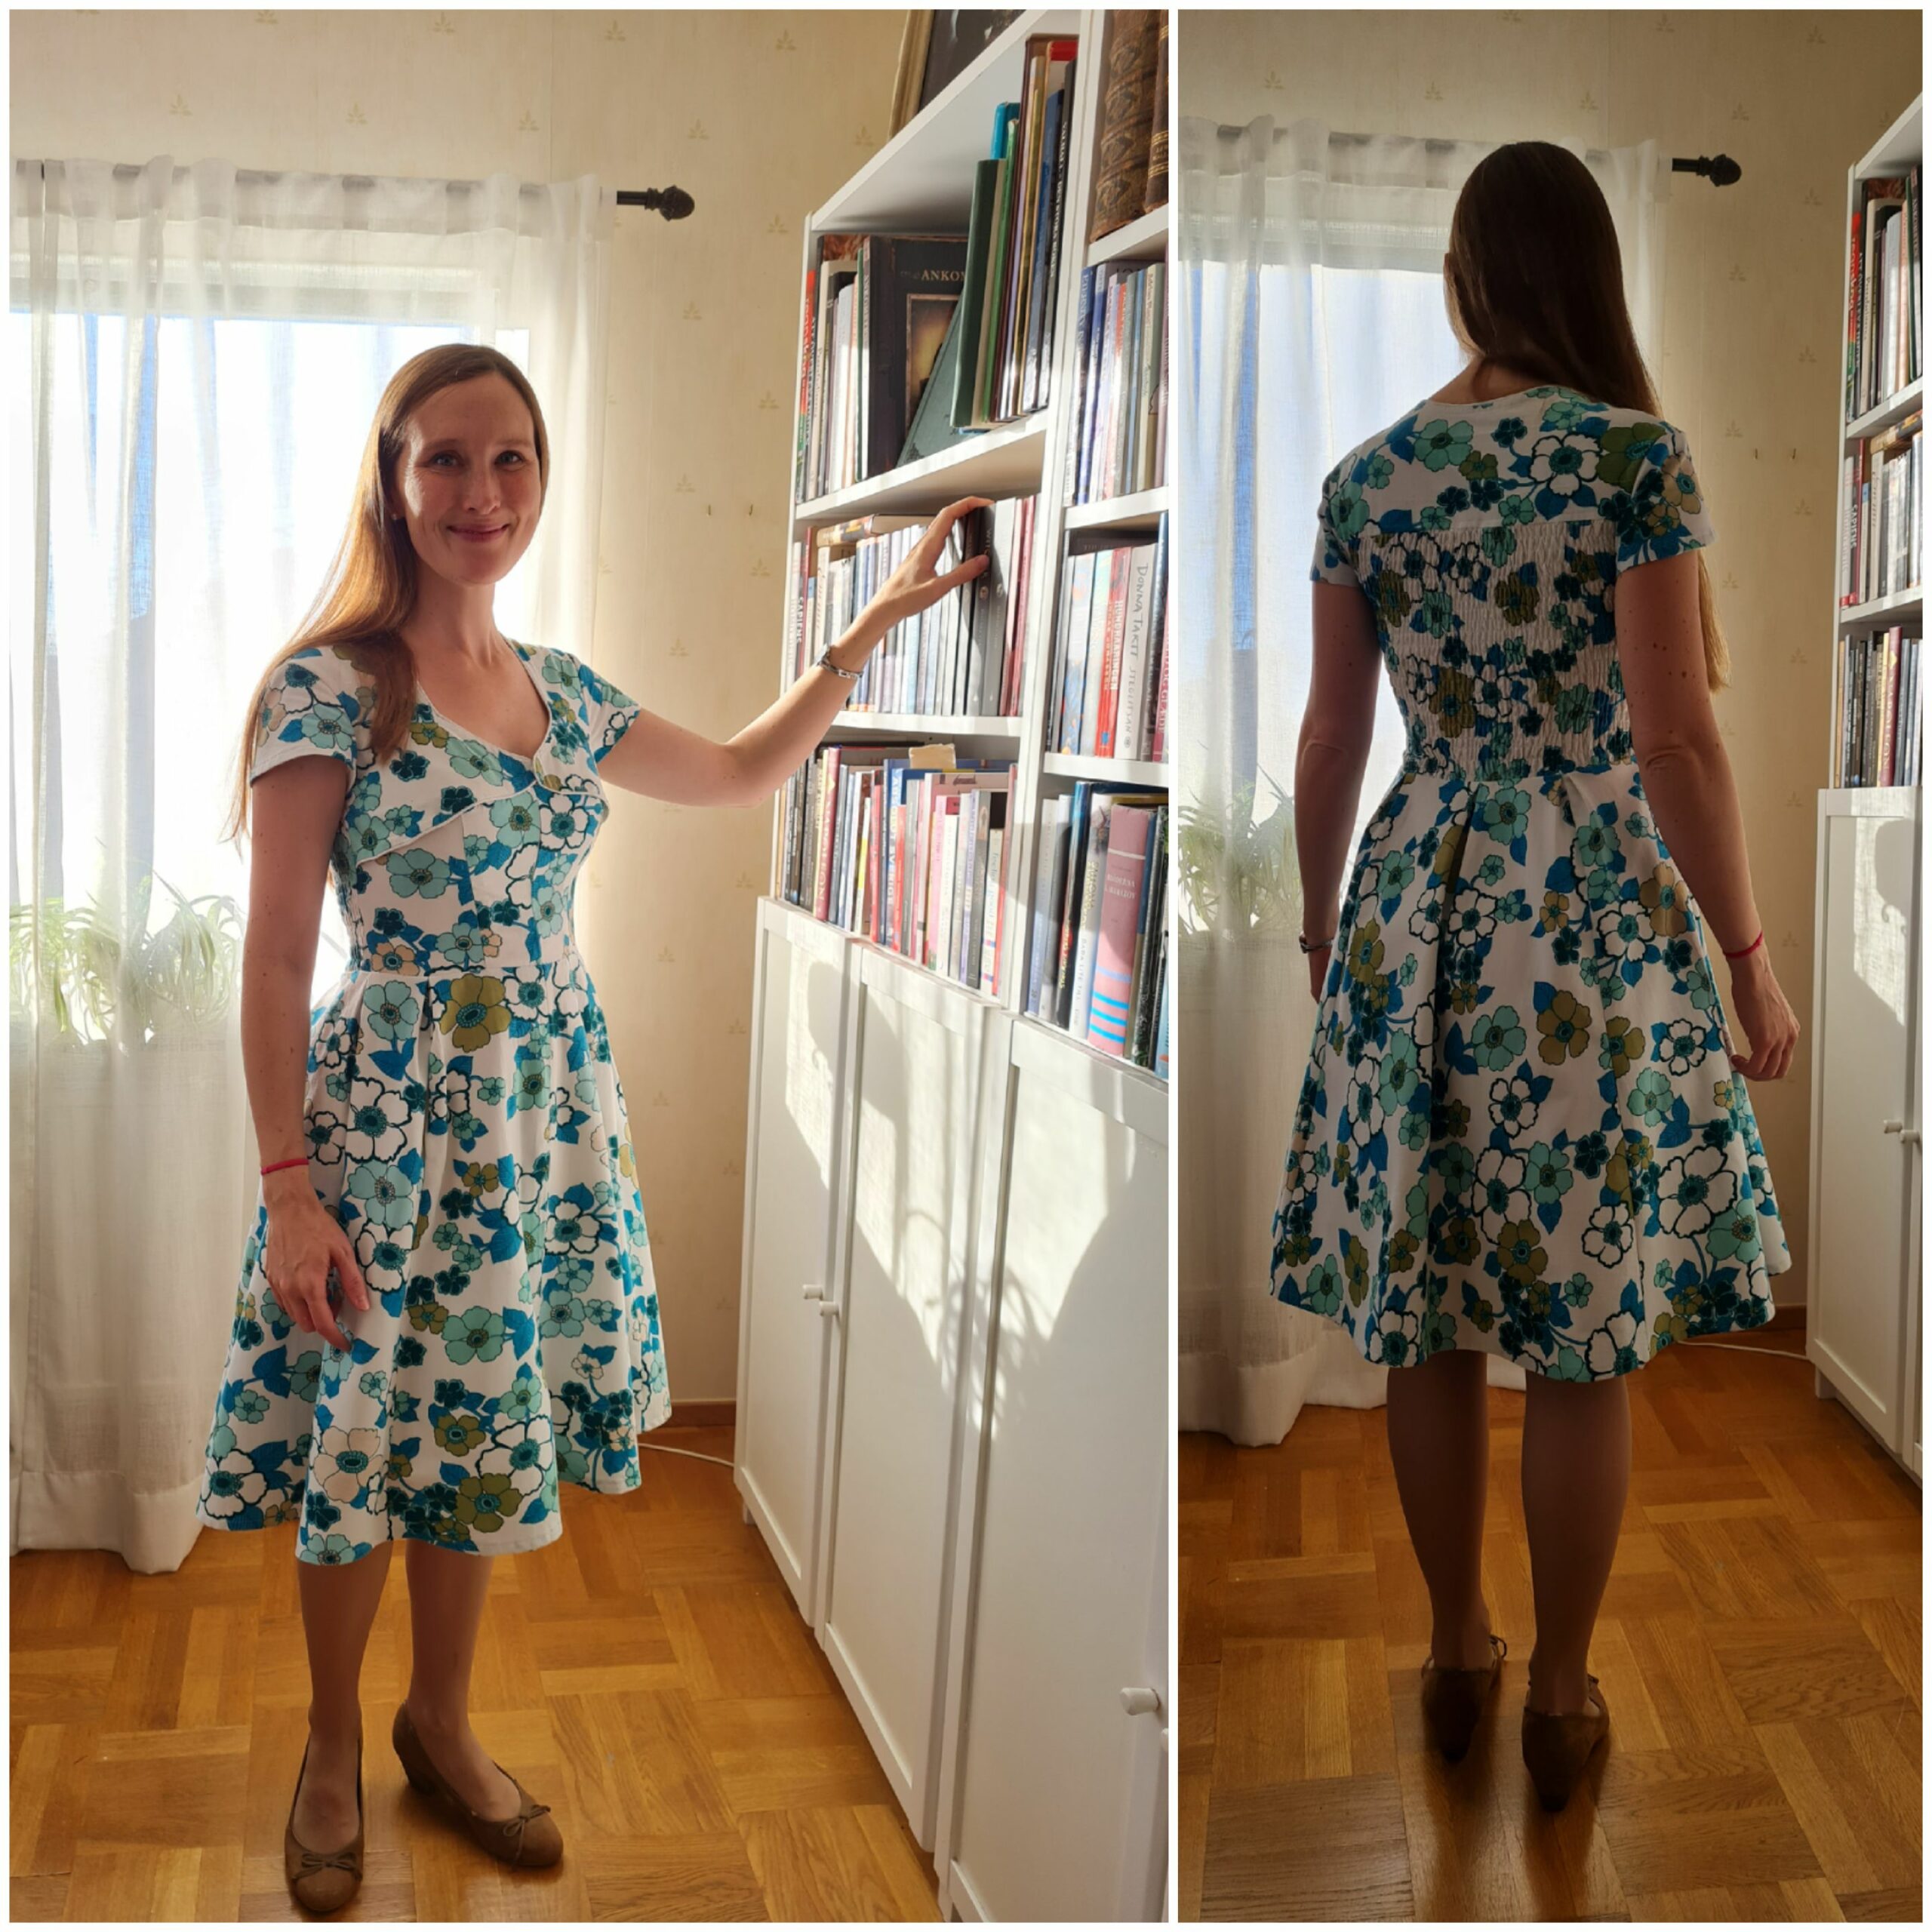
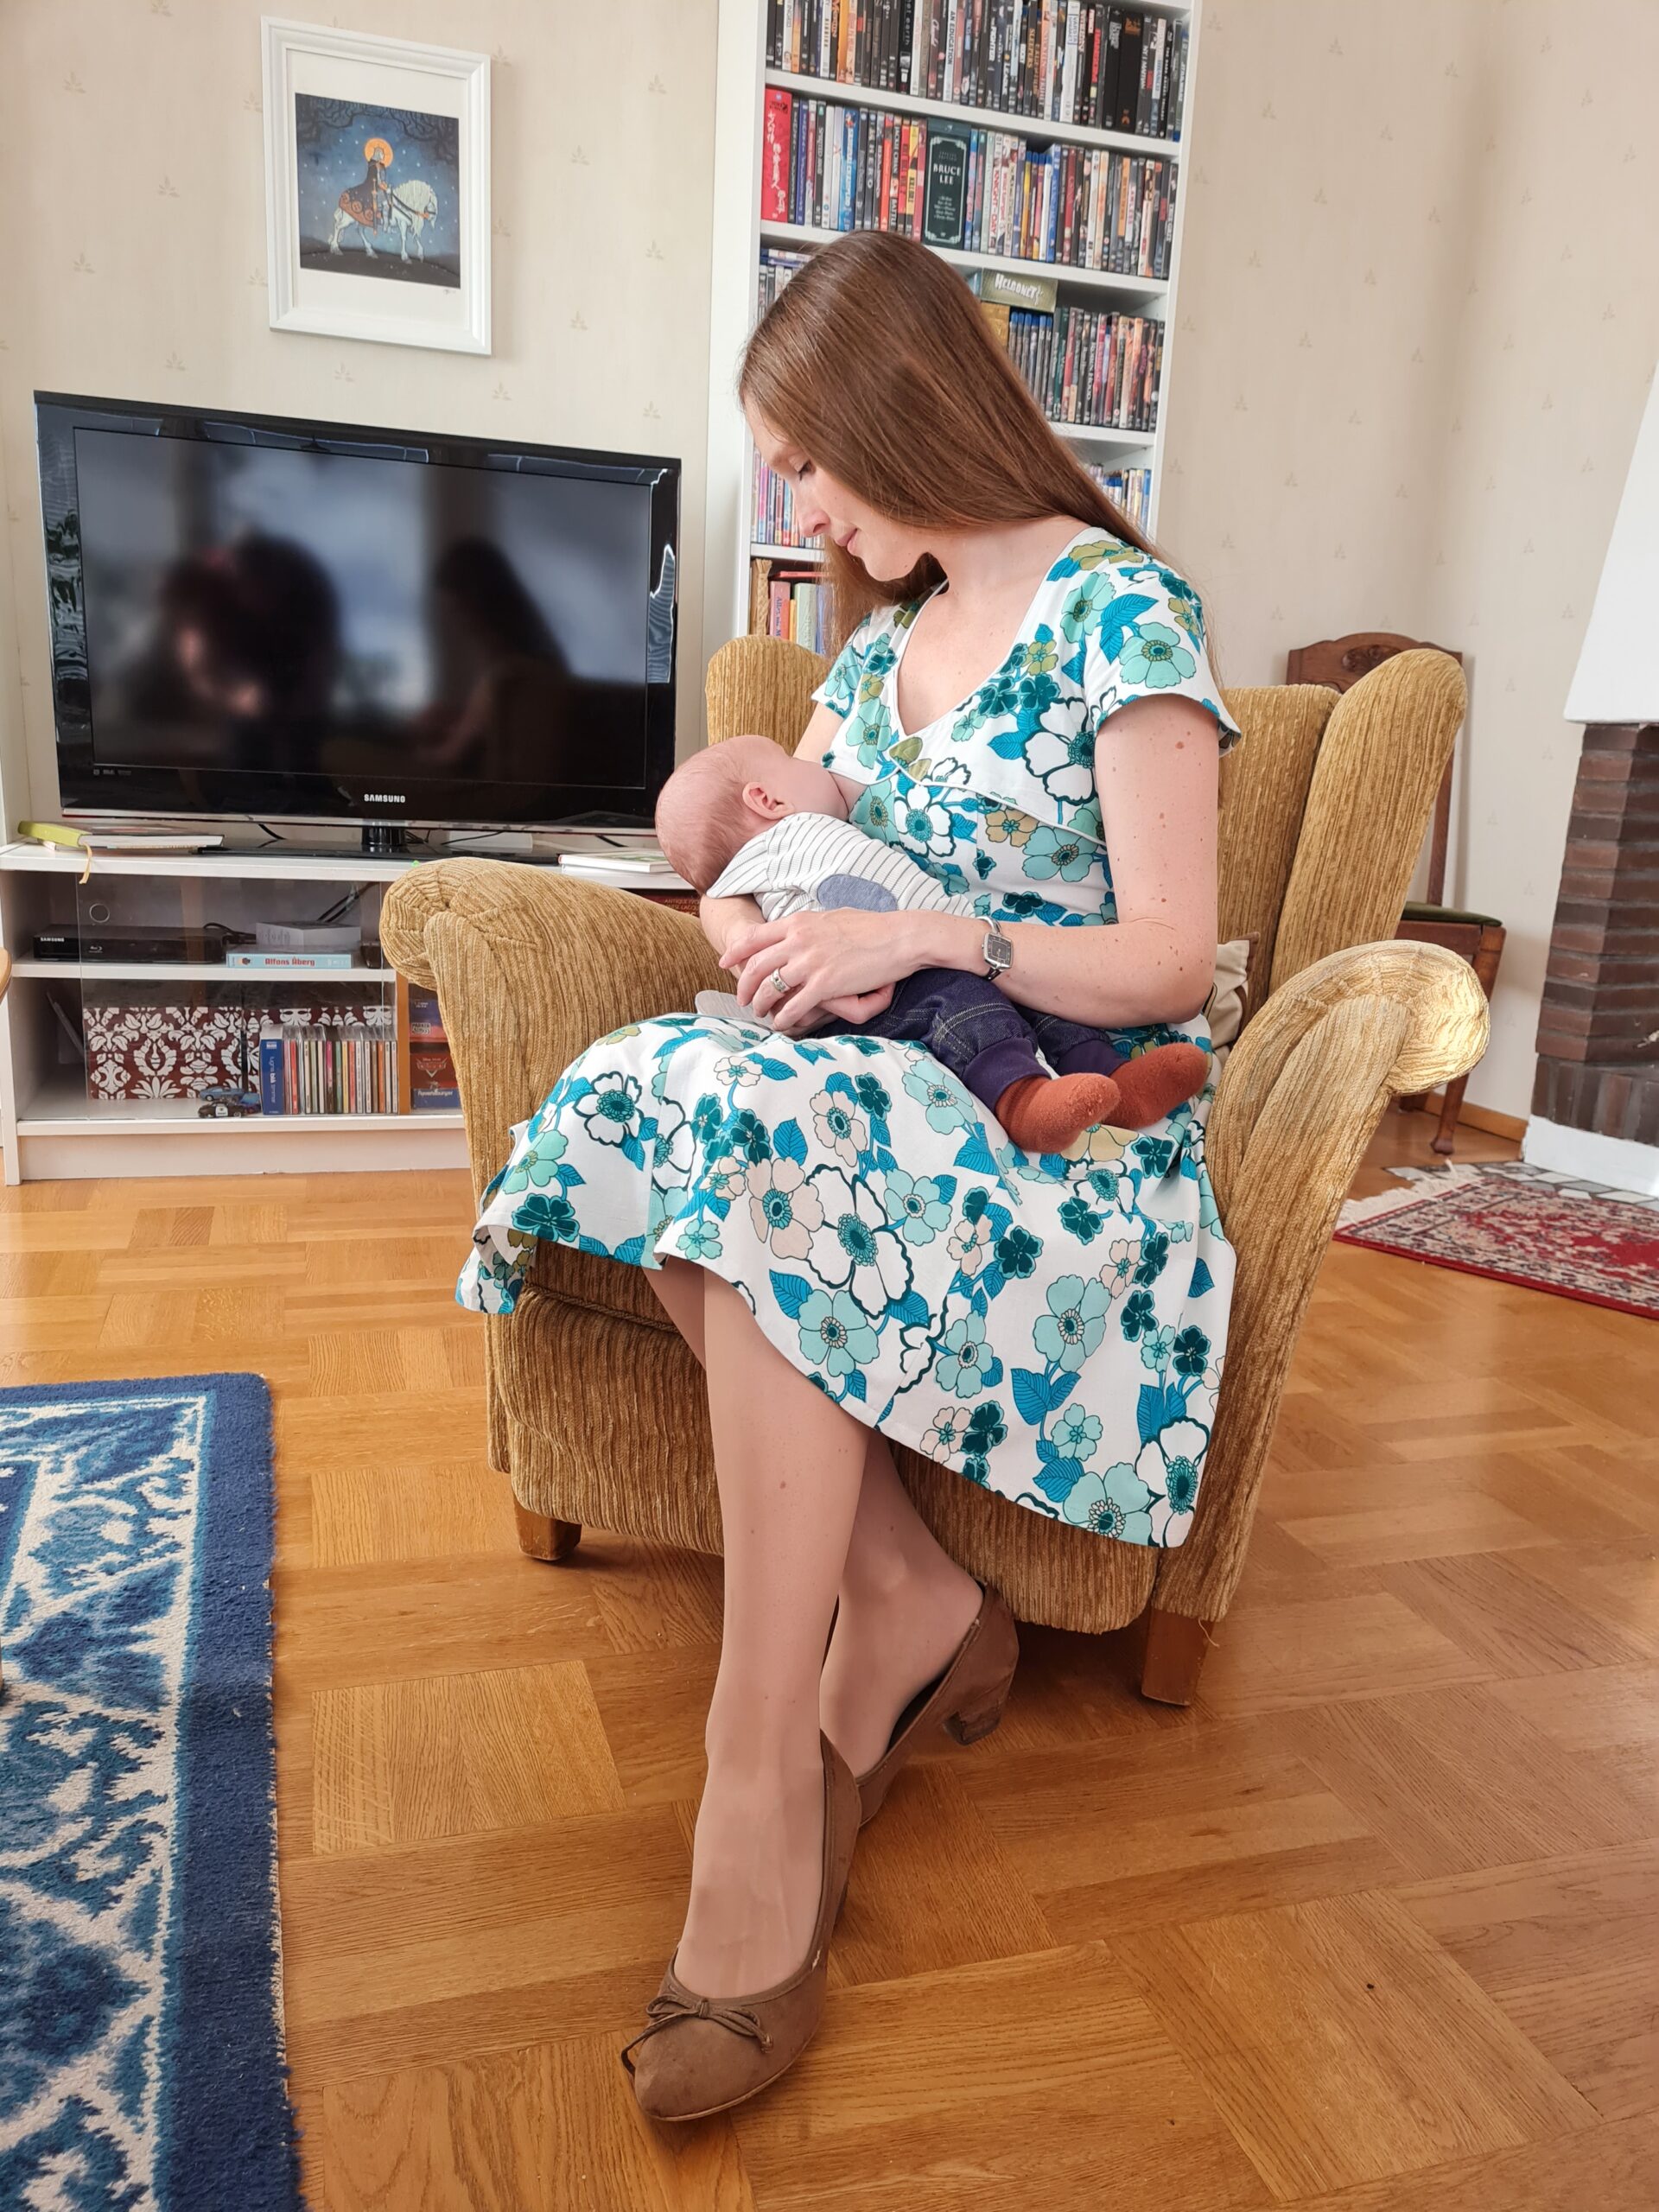
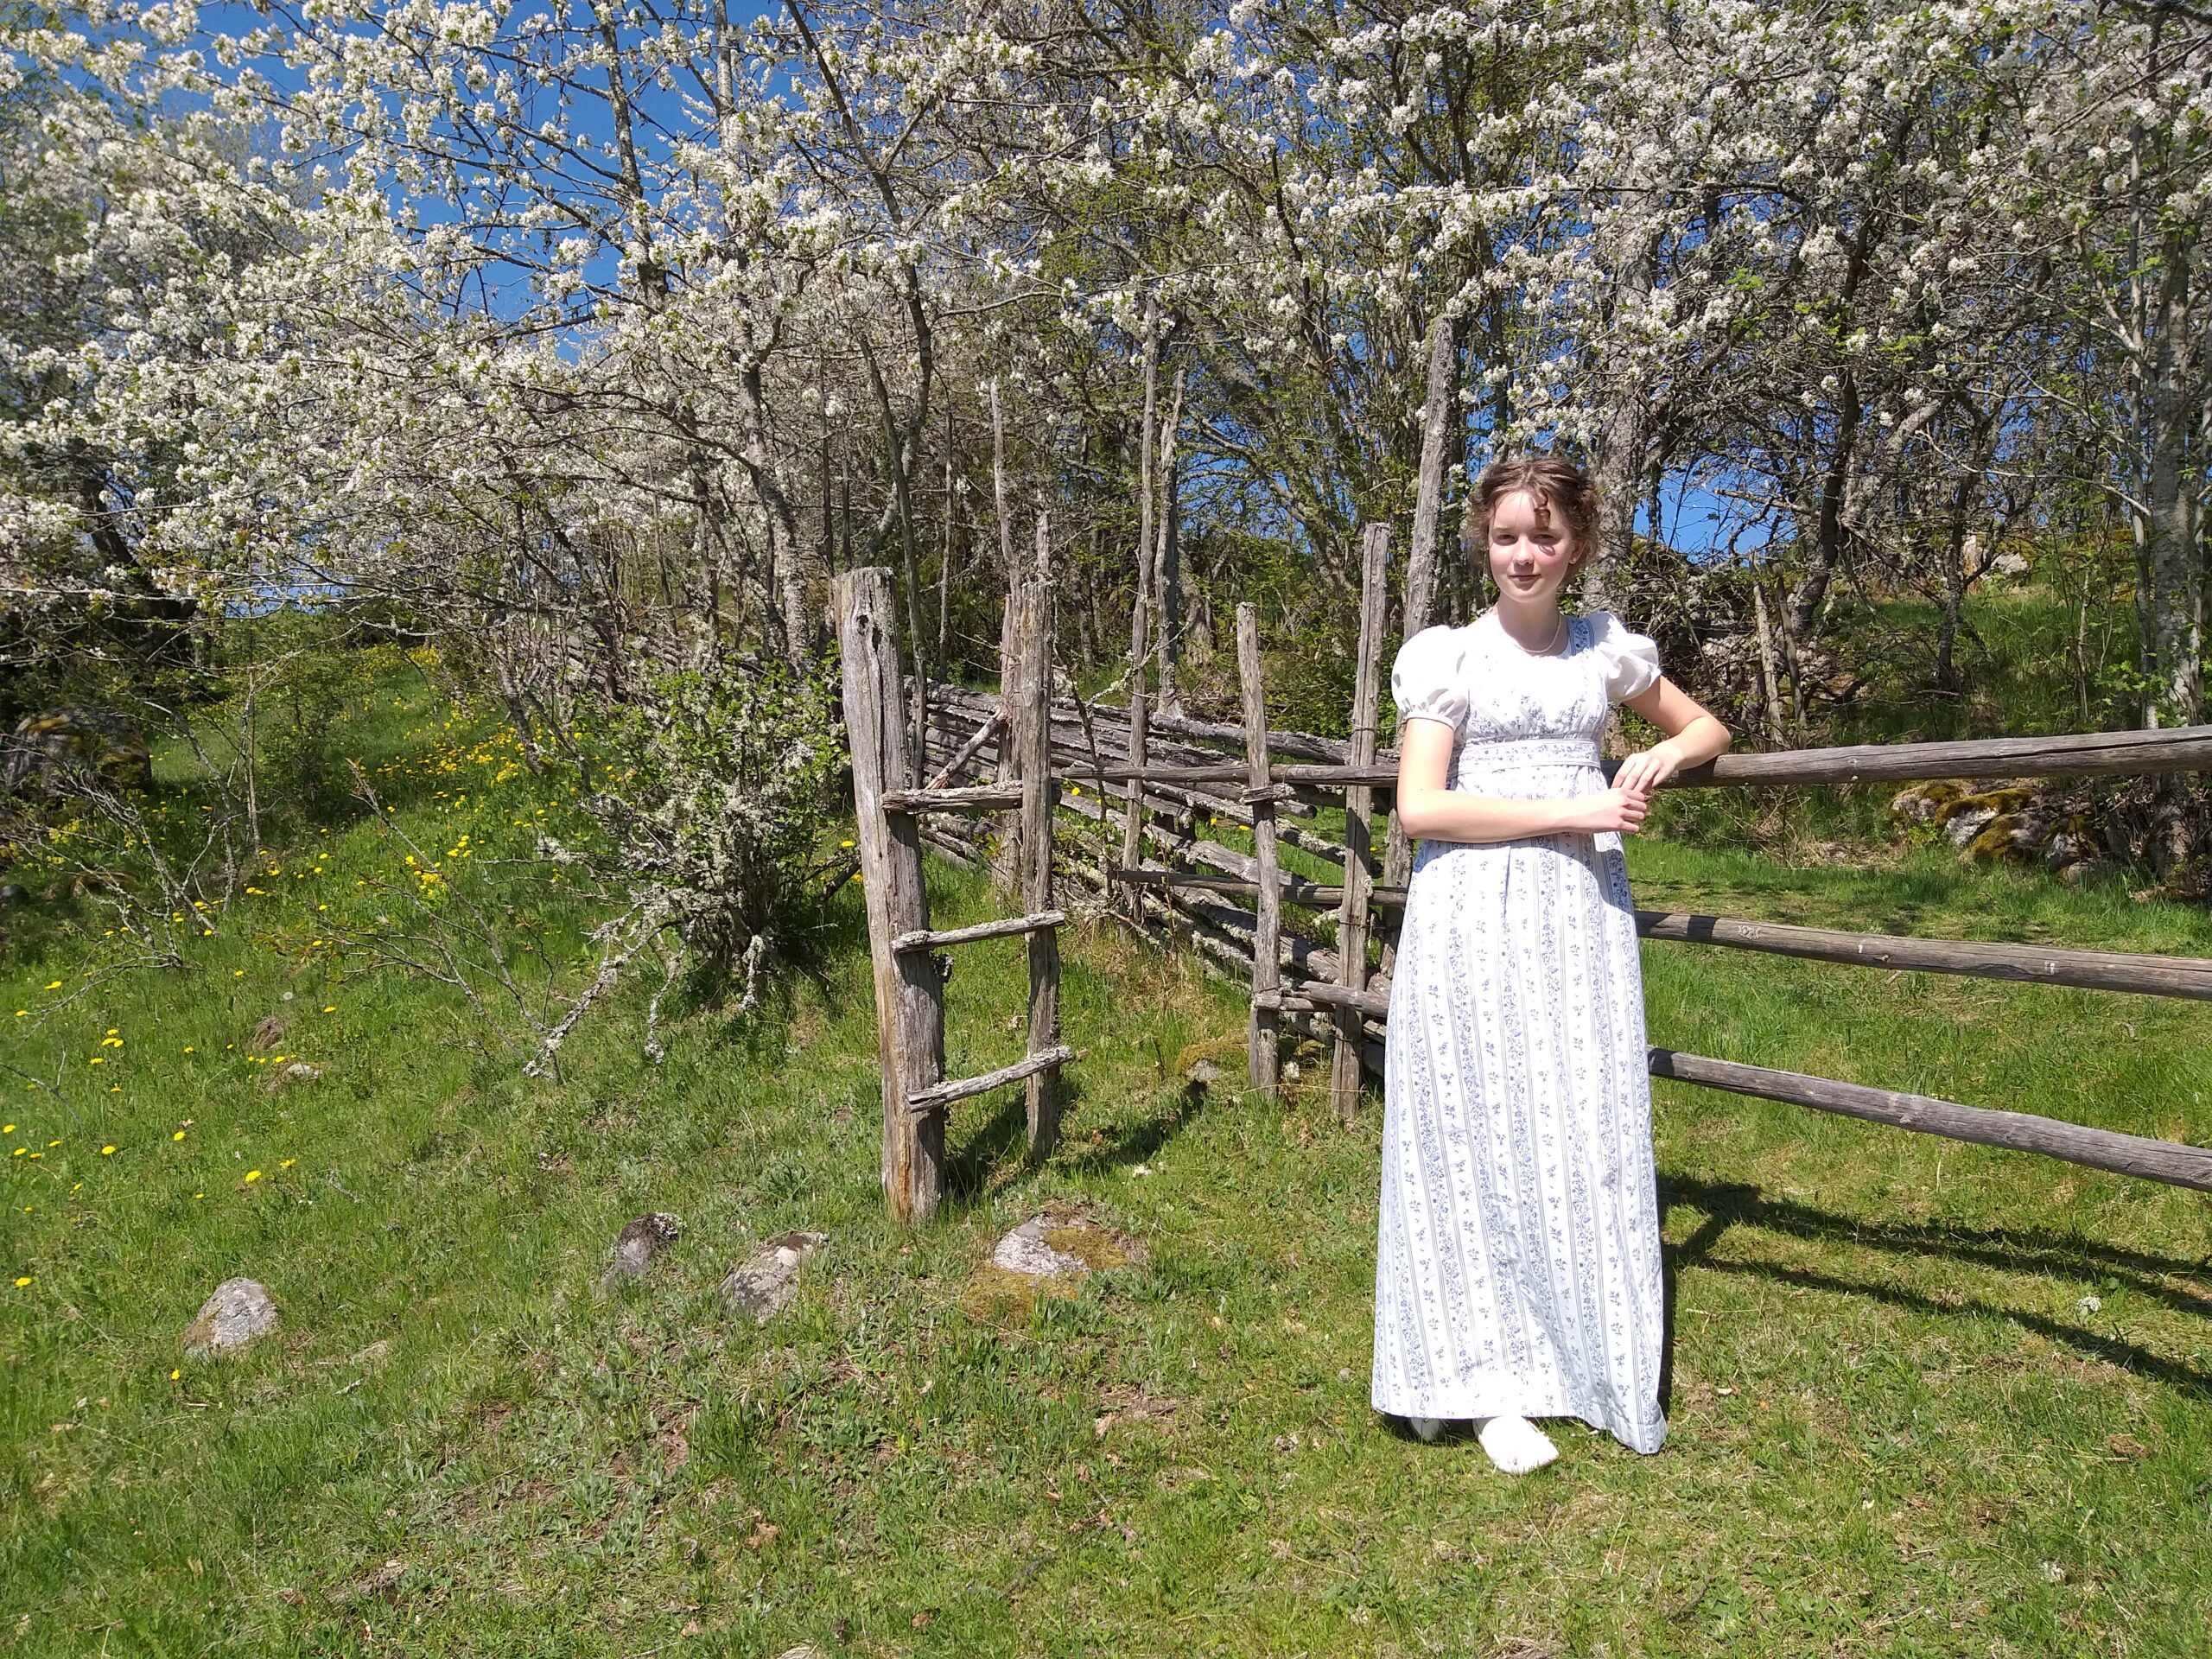
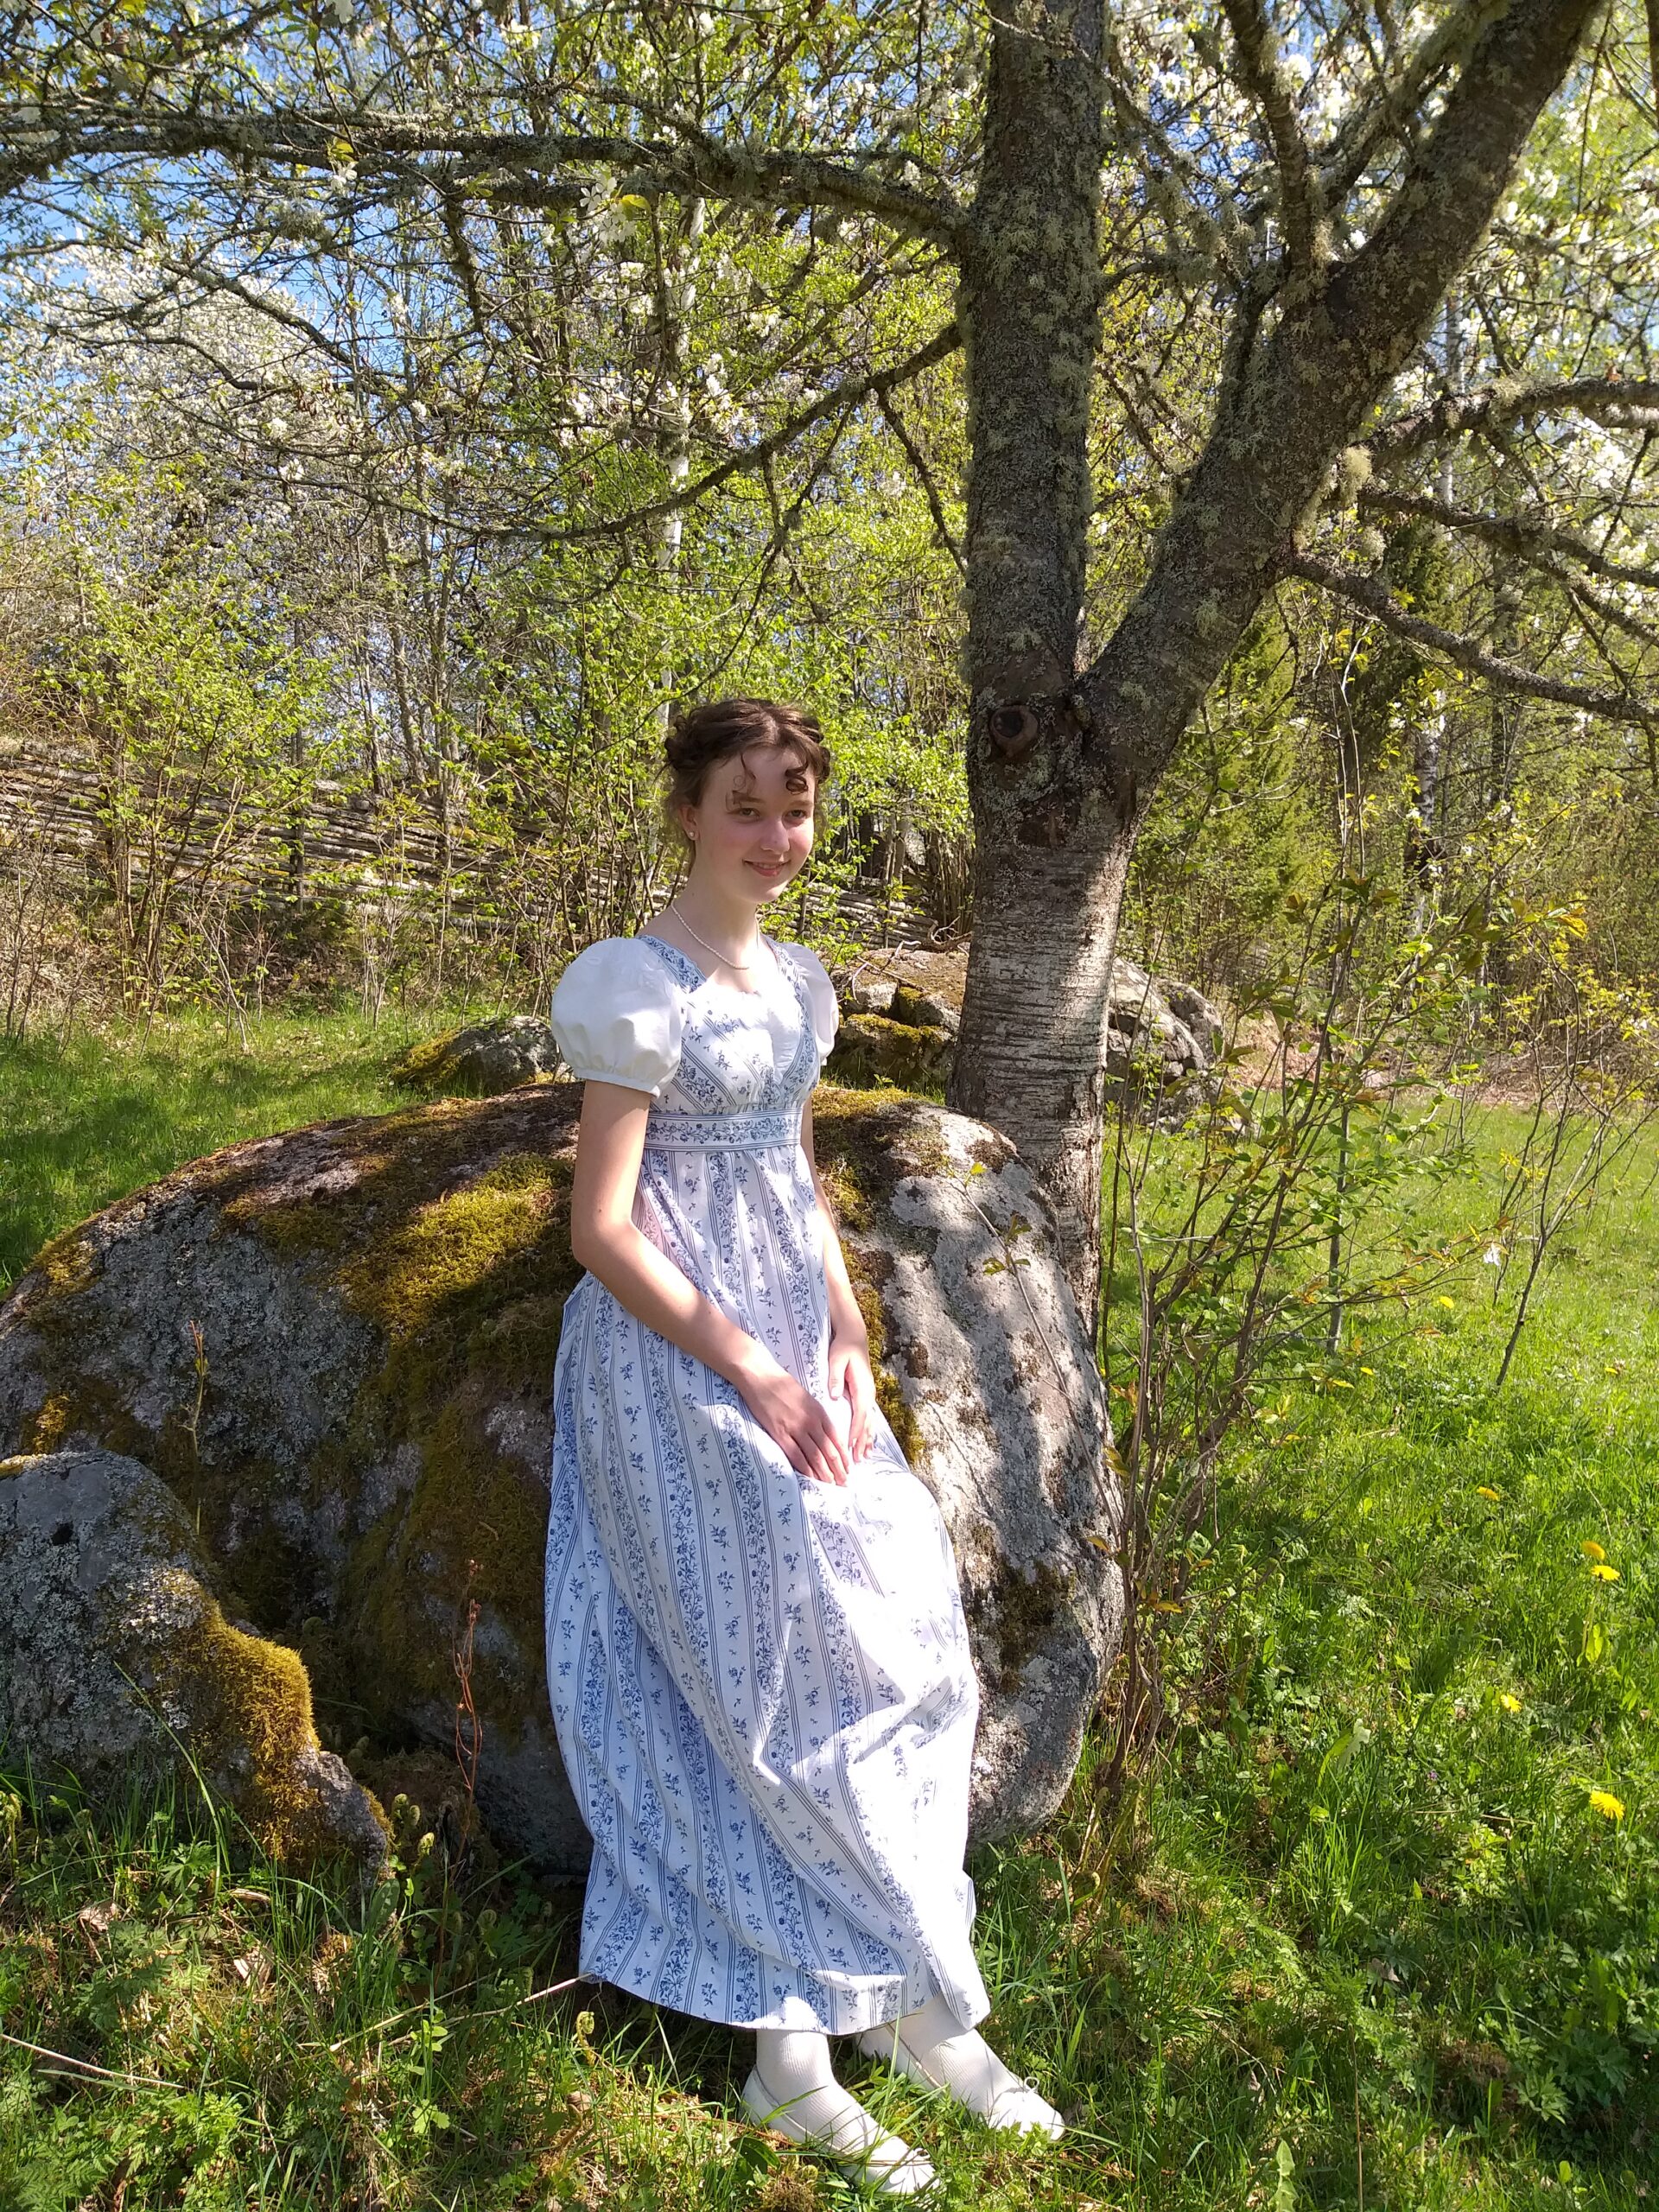
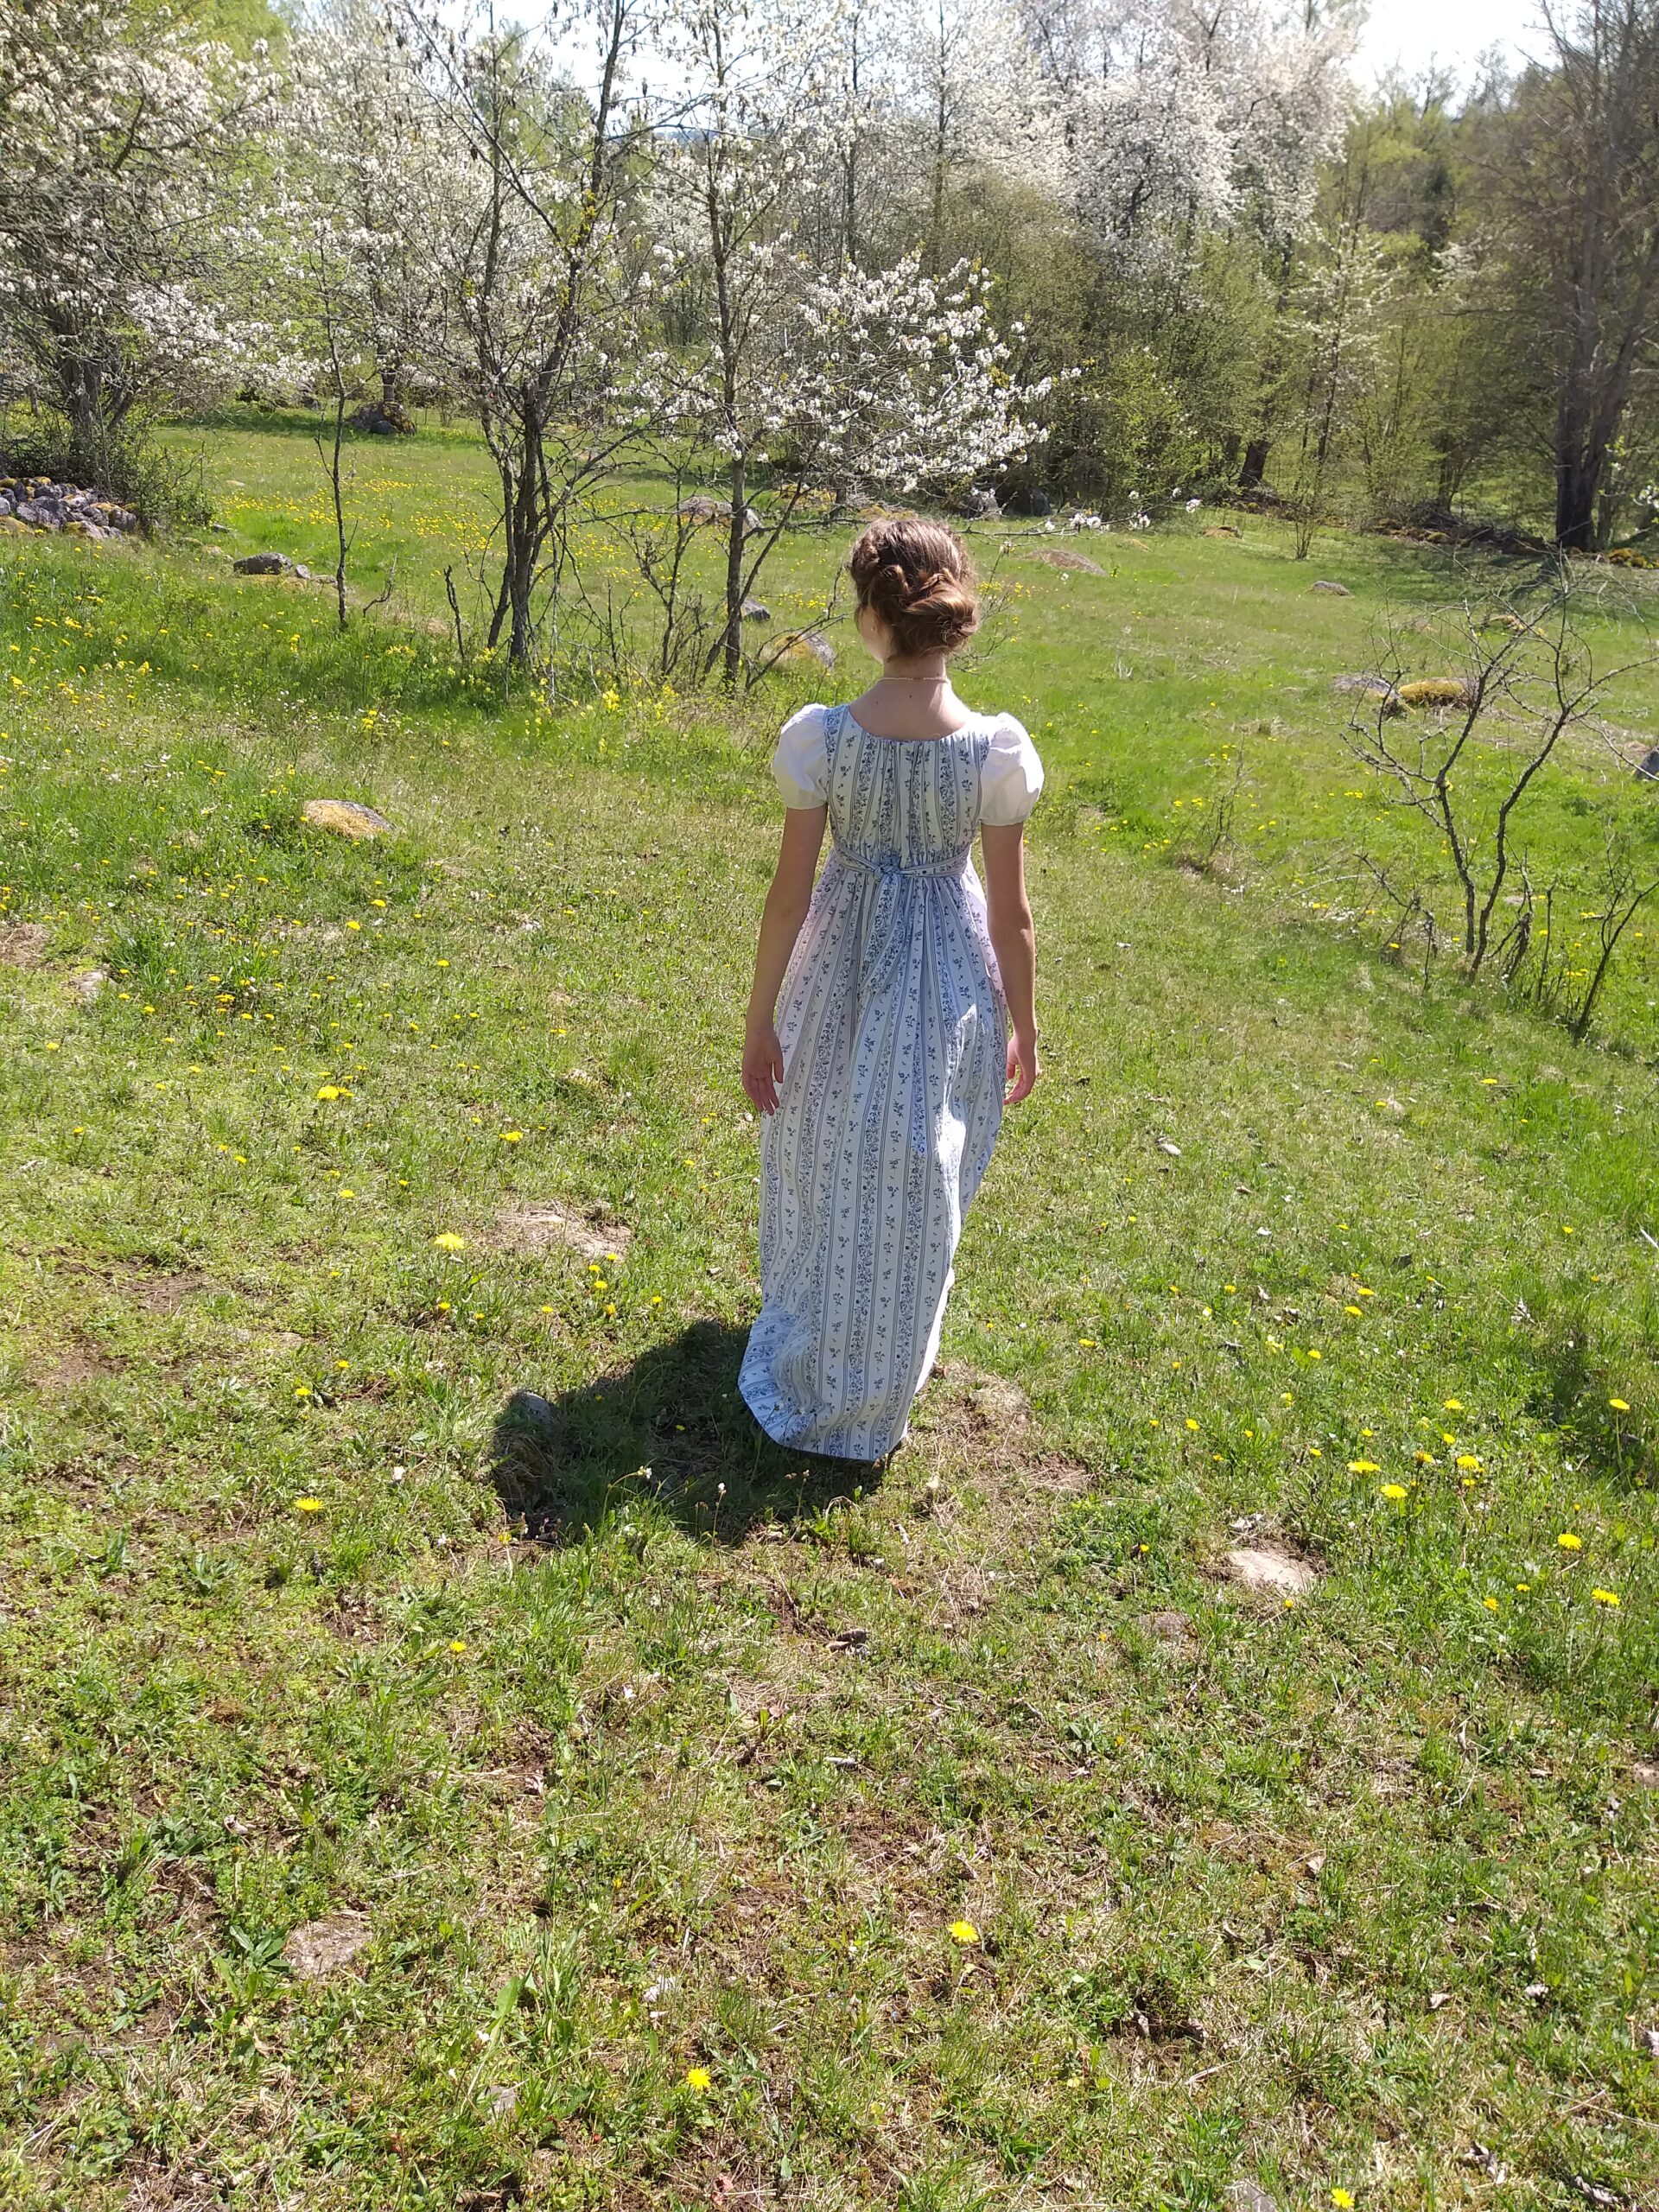
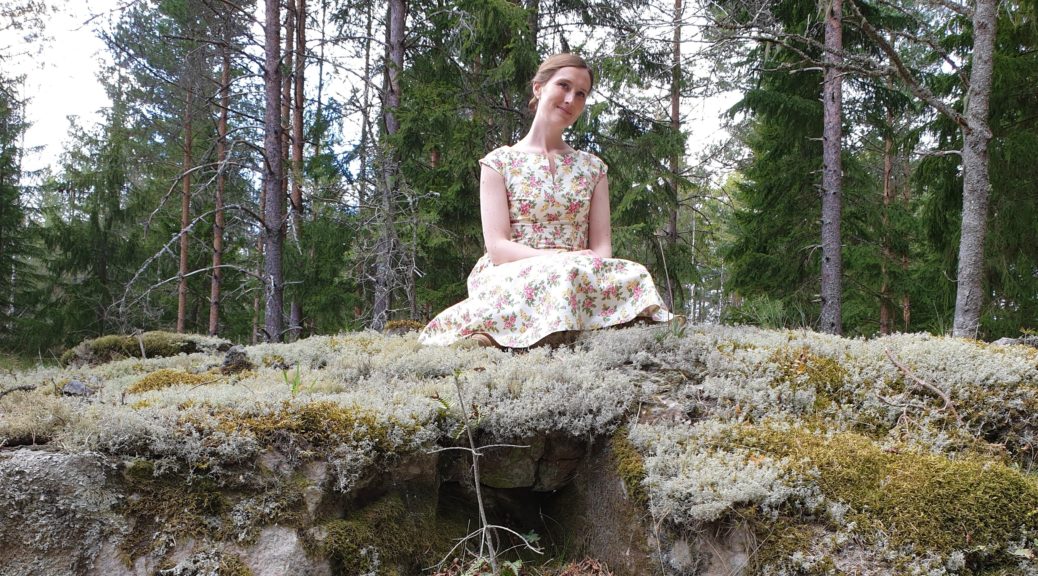
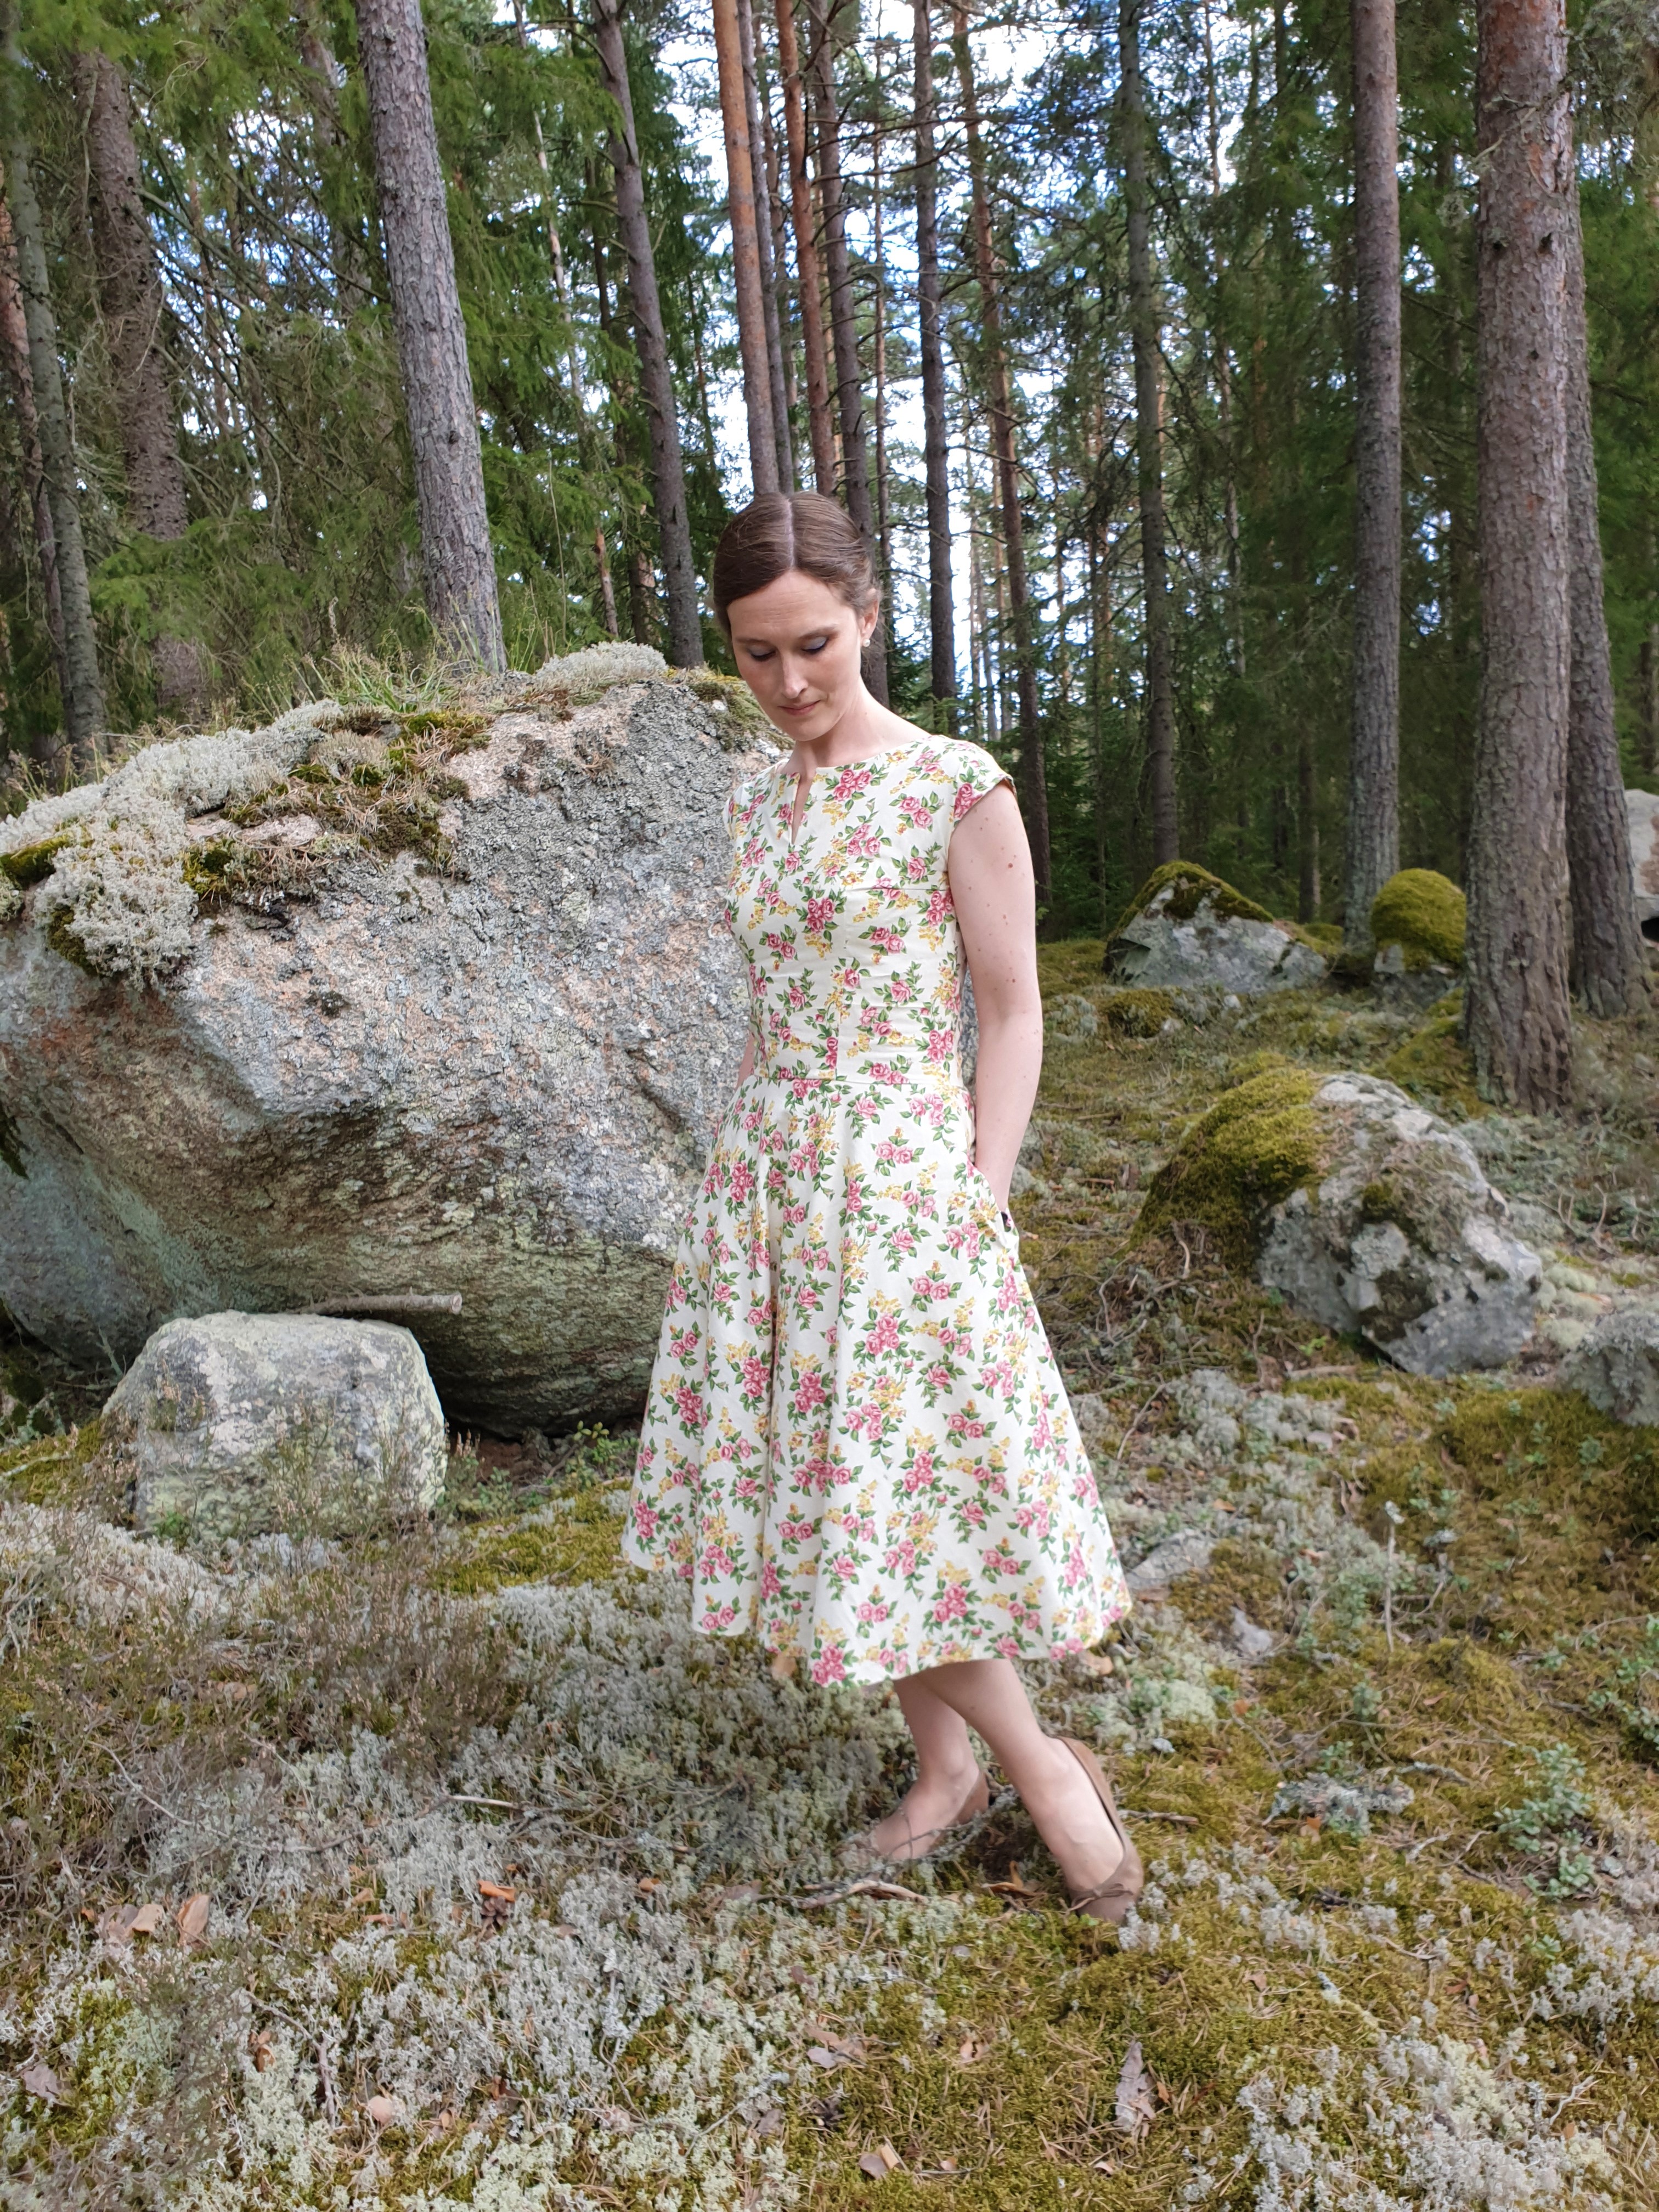
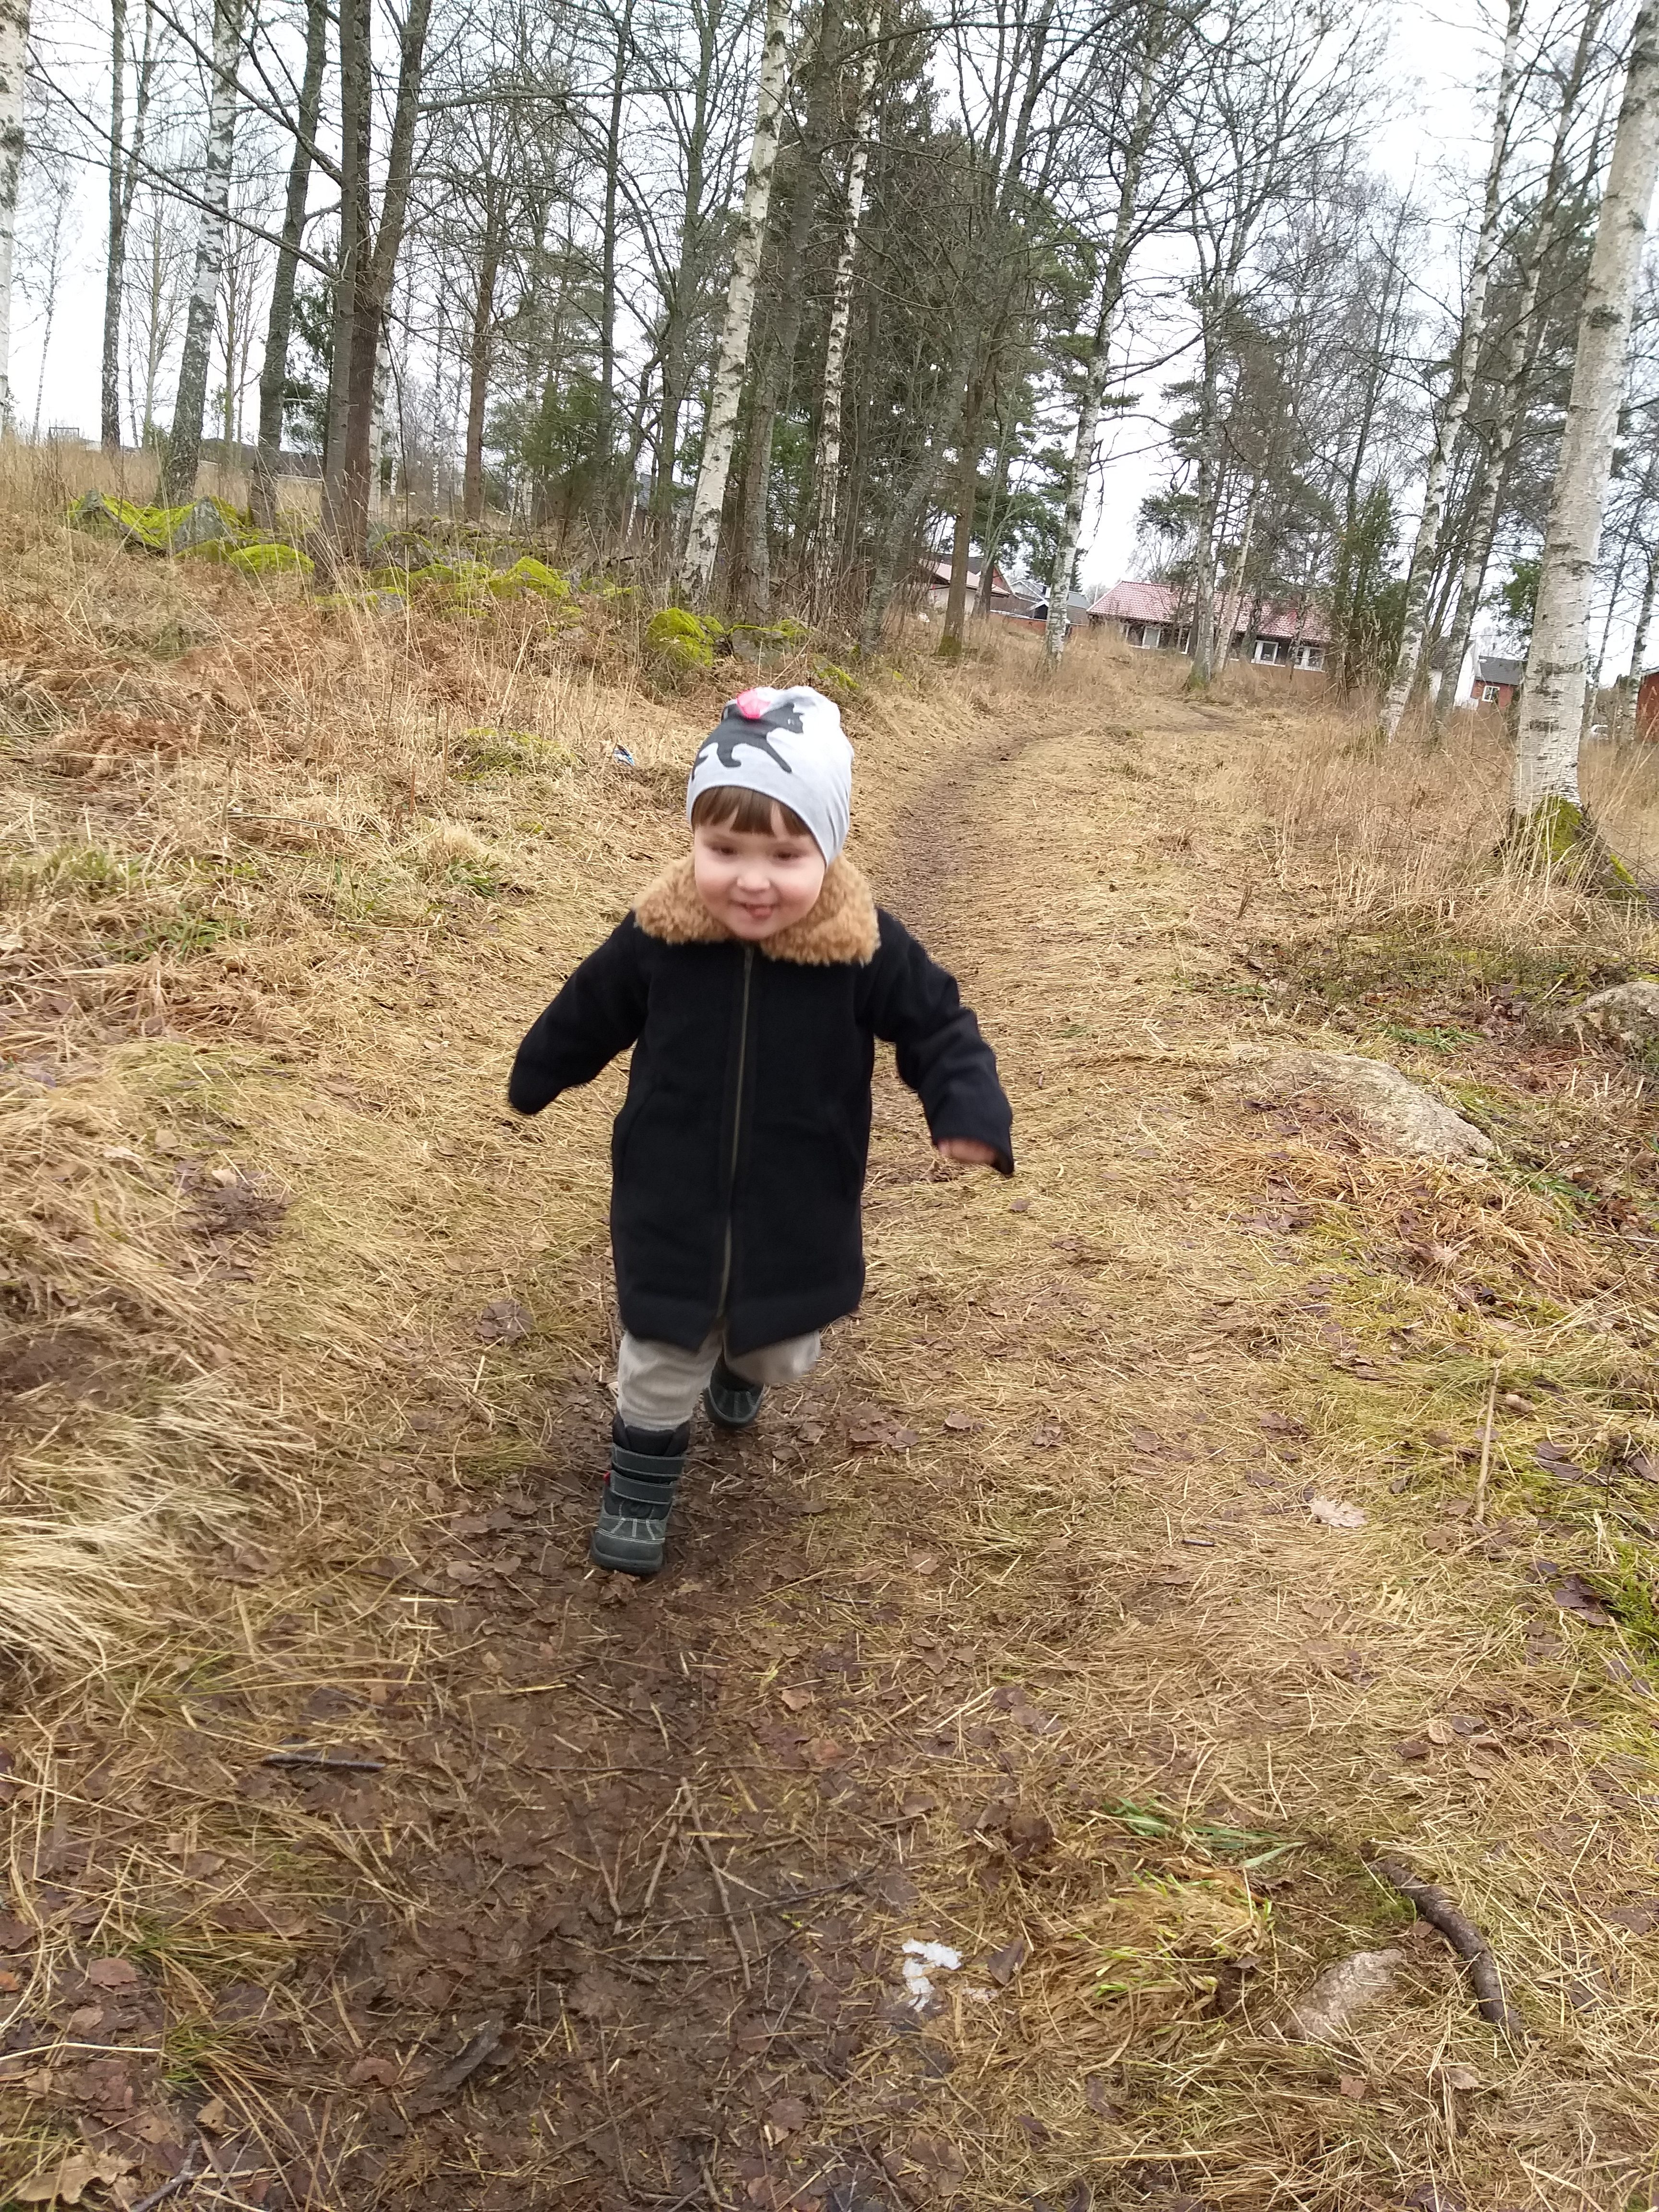
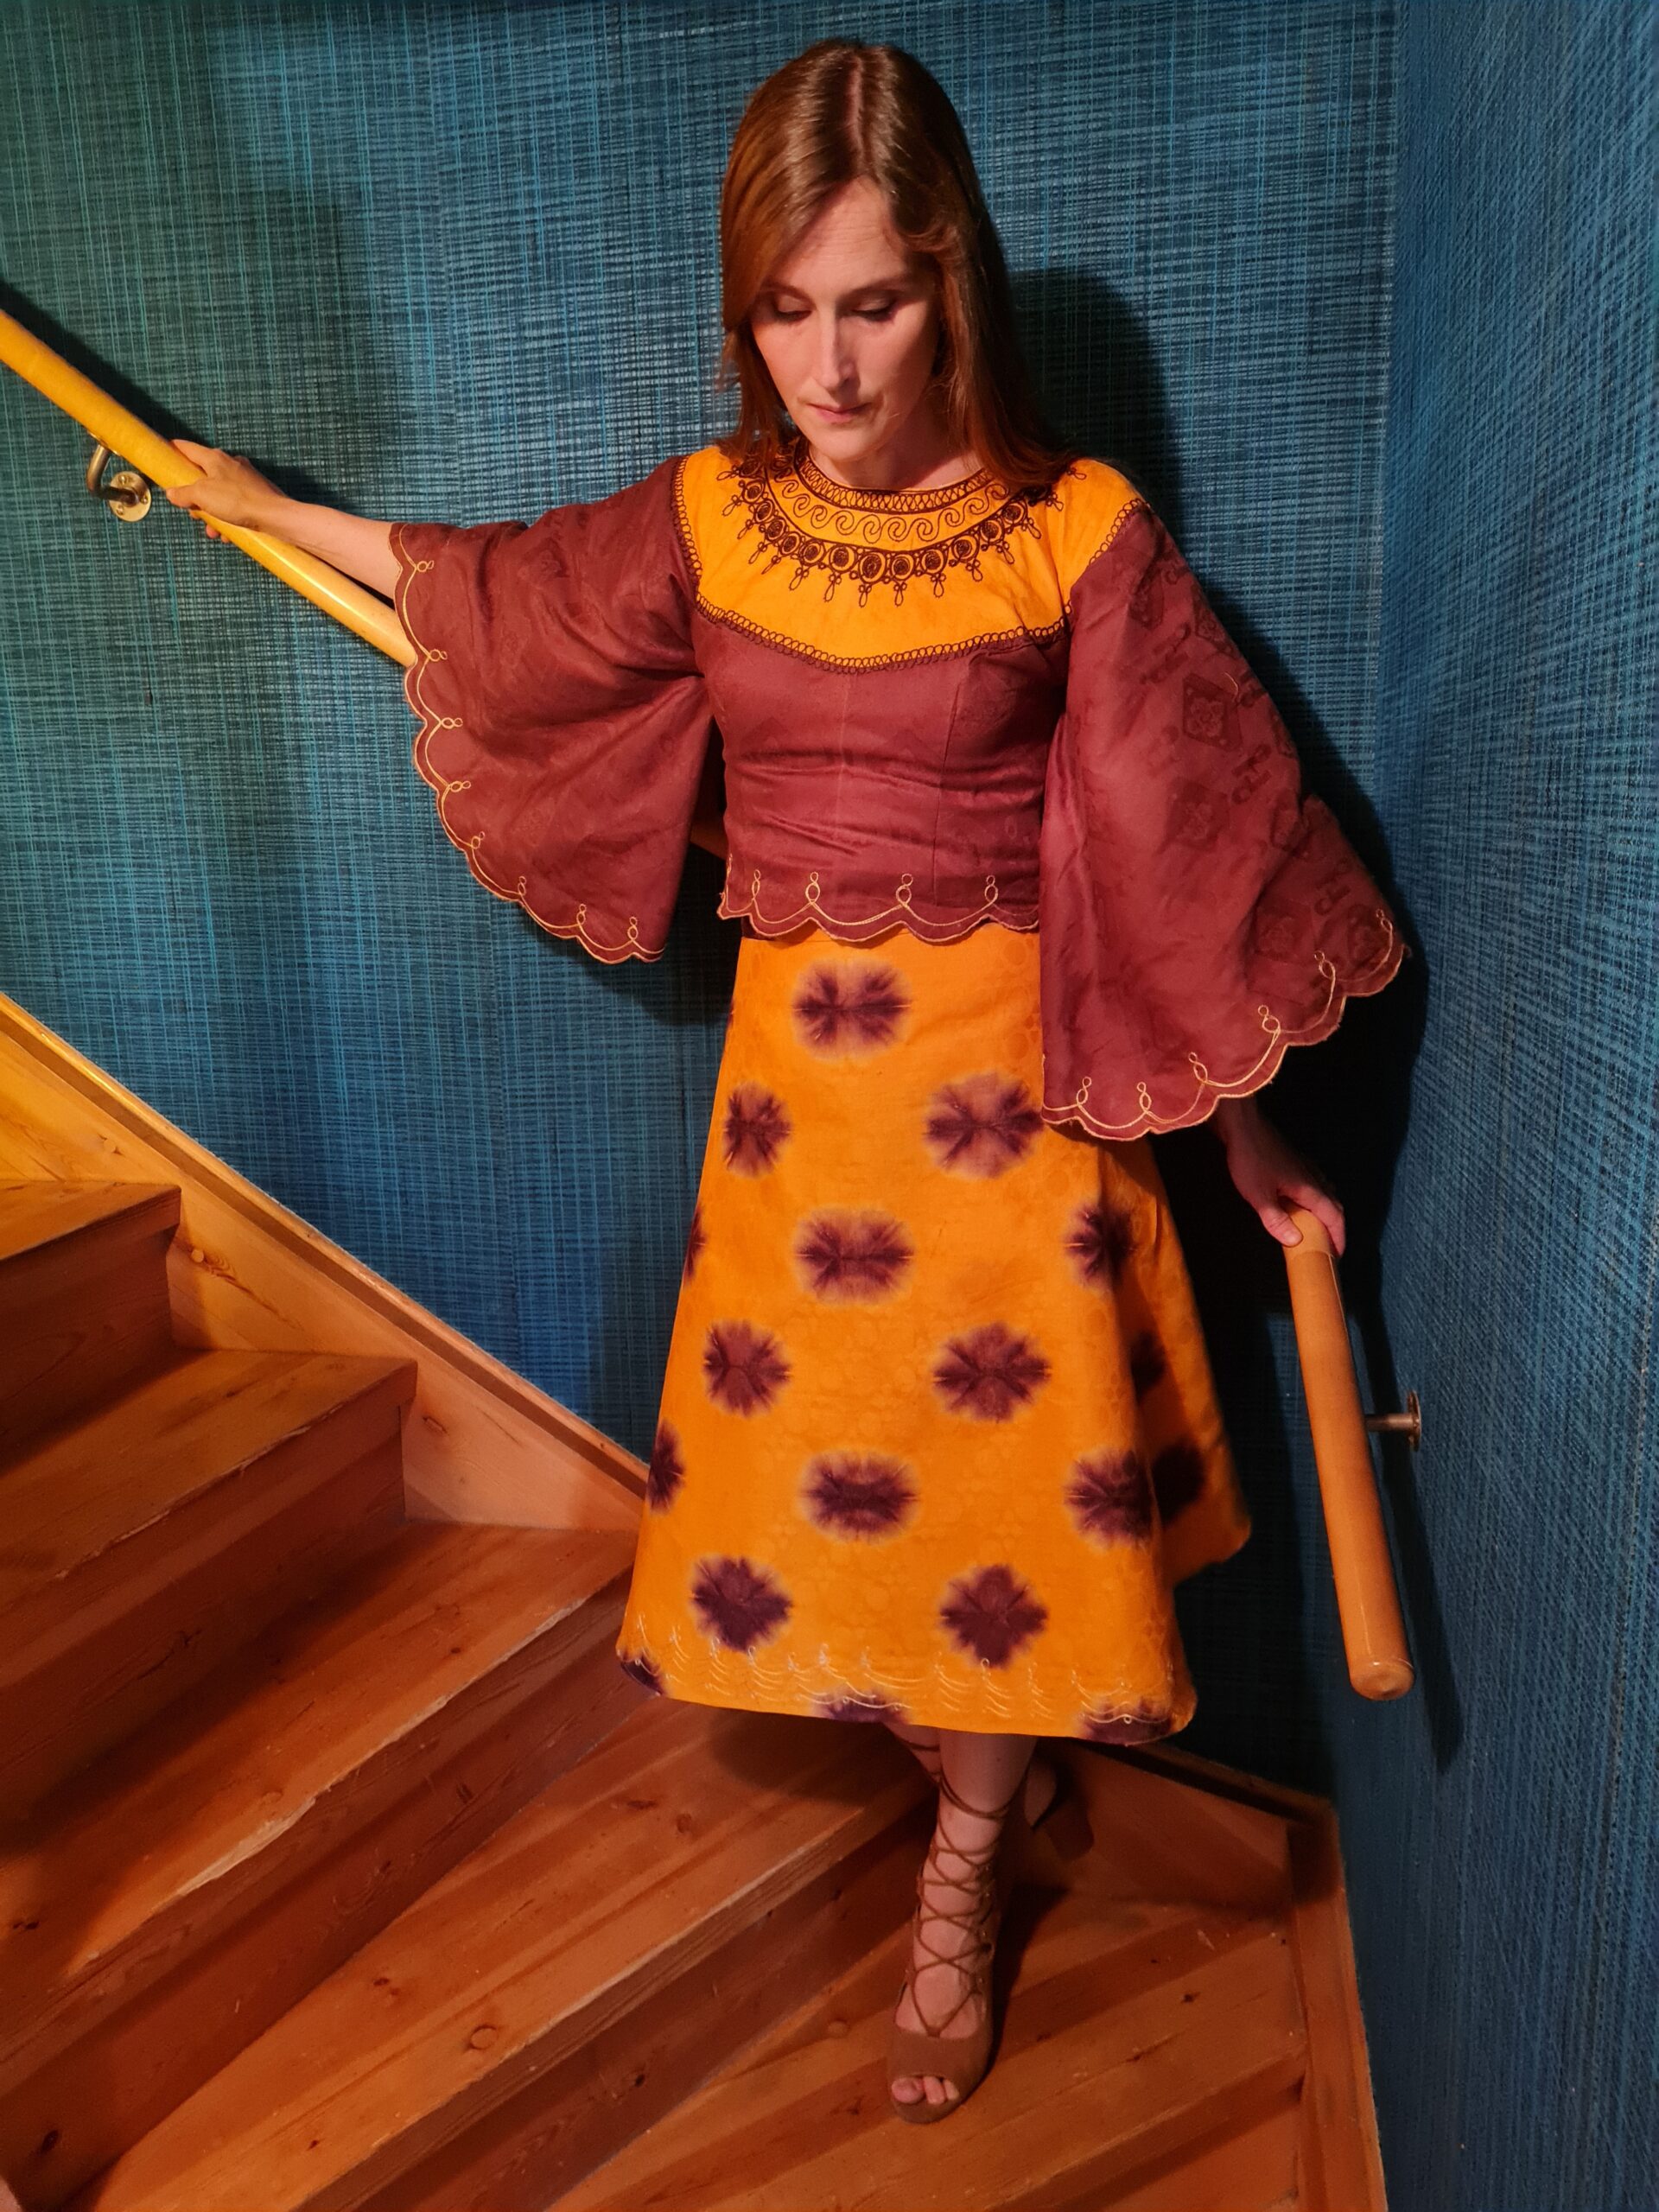
Today, by the end of the summer, we took pictures while little brother slept. I think it seems to belong here, at our 60s staircase.

Idag, i slutet av sommaren, tog vi bilder medan lillebror sov. Jag tycker att dräkten ser ut att höra hemma här, i vår 60-talstrappa.

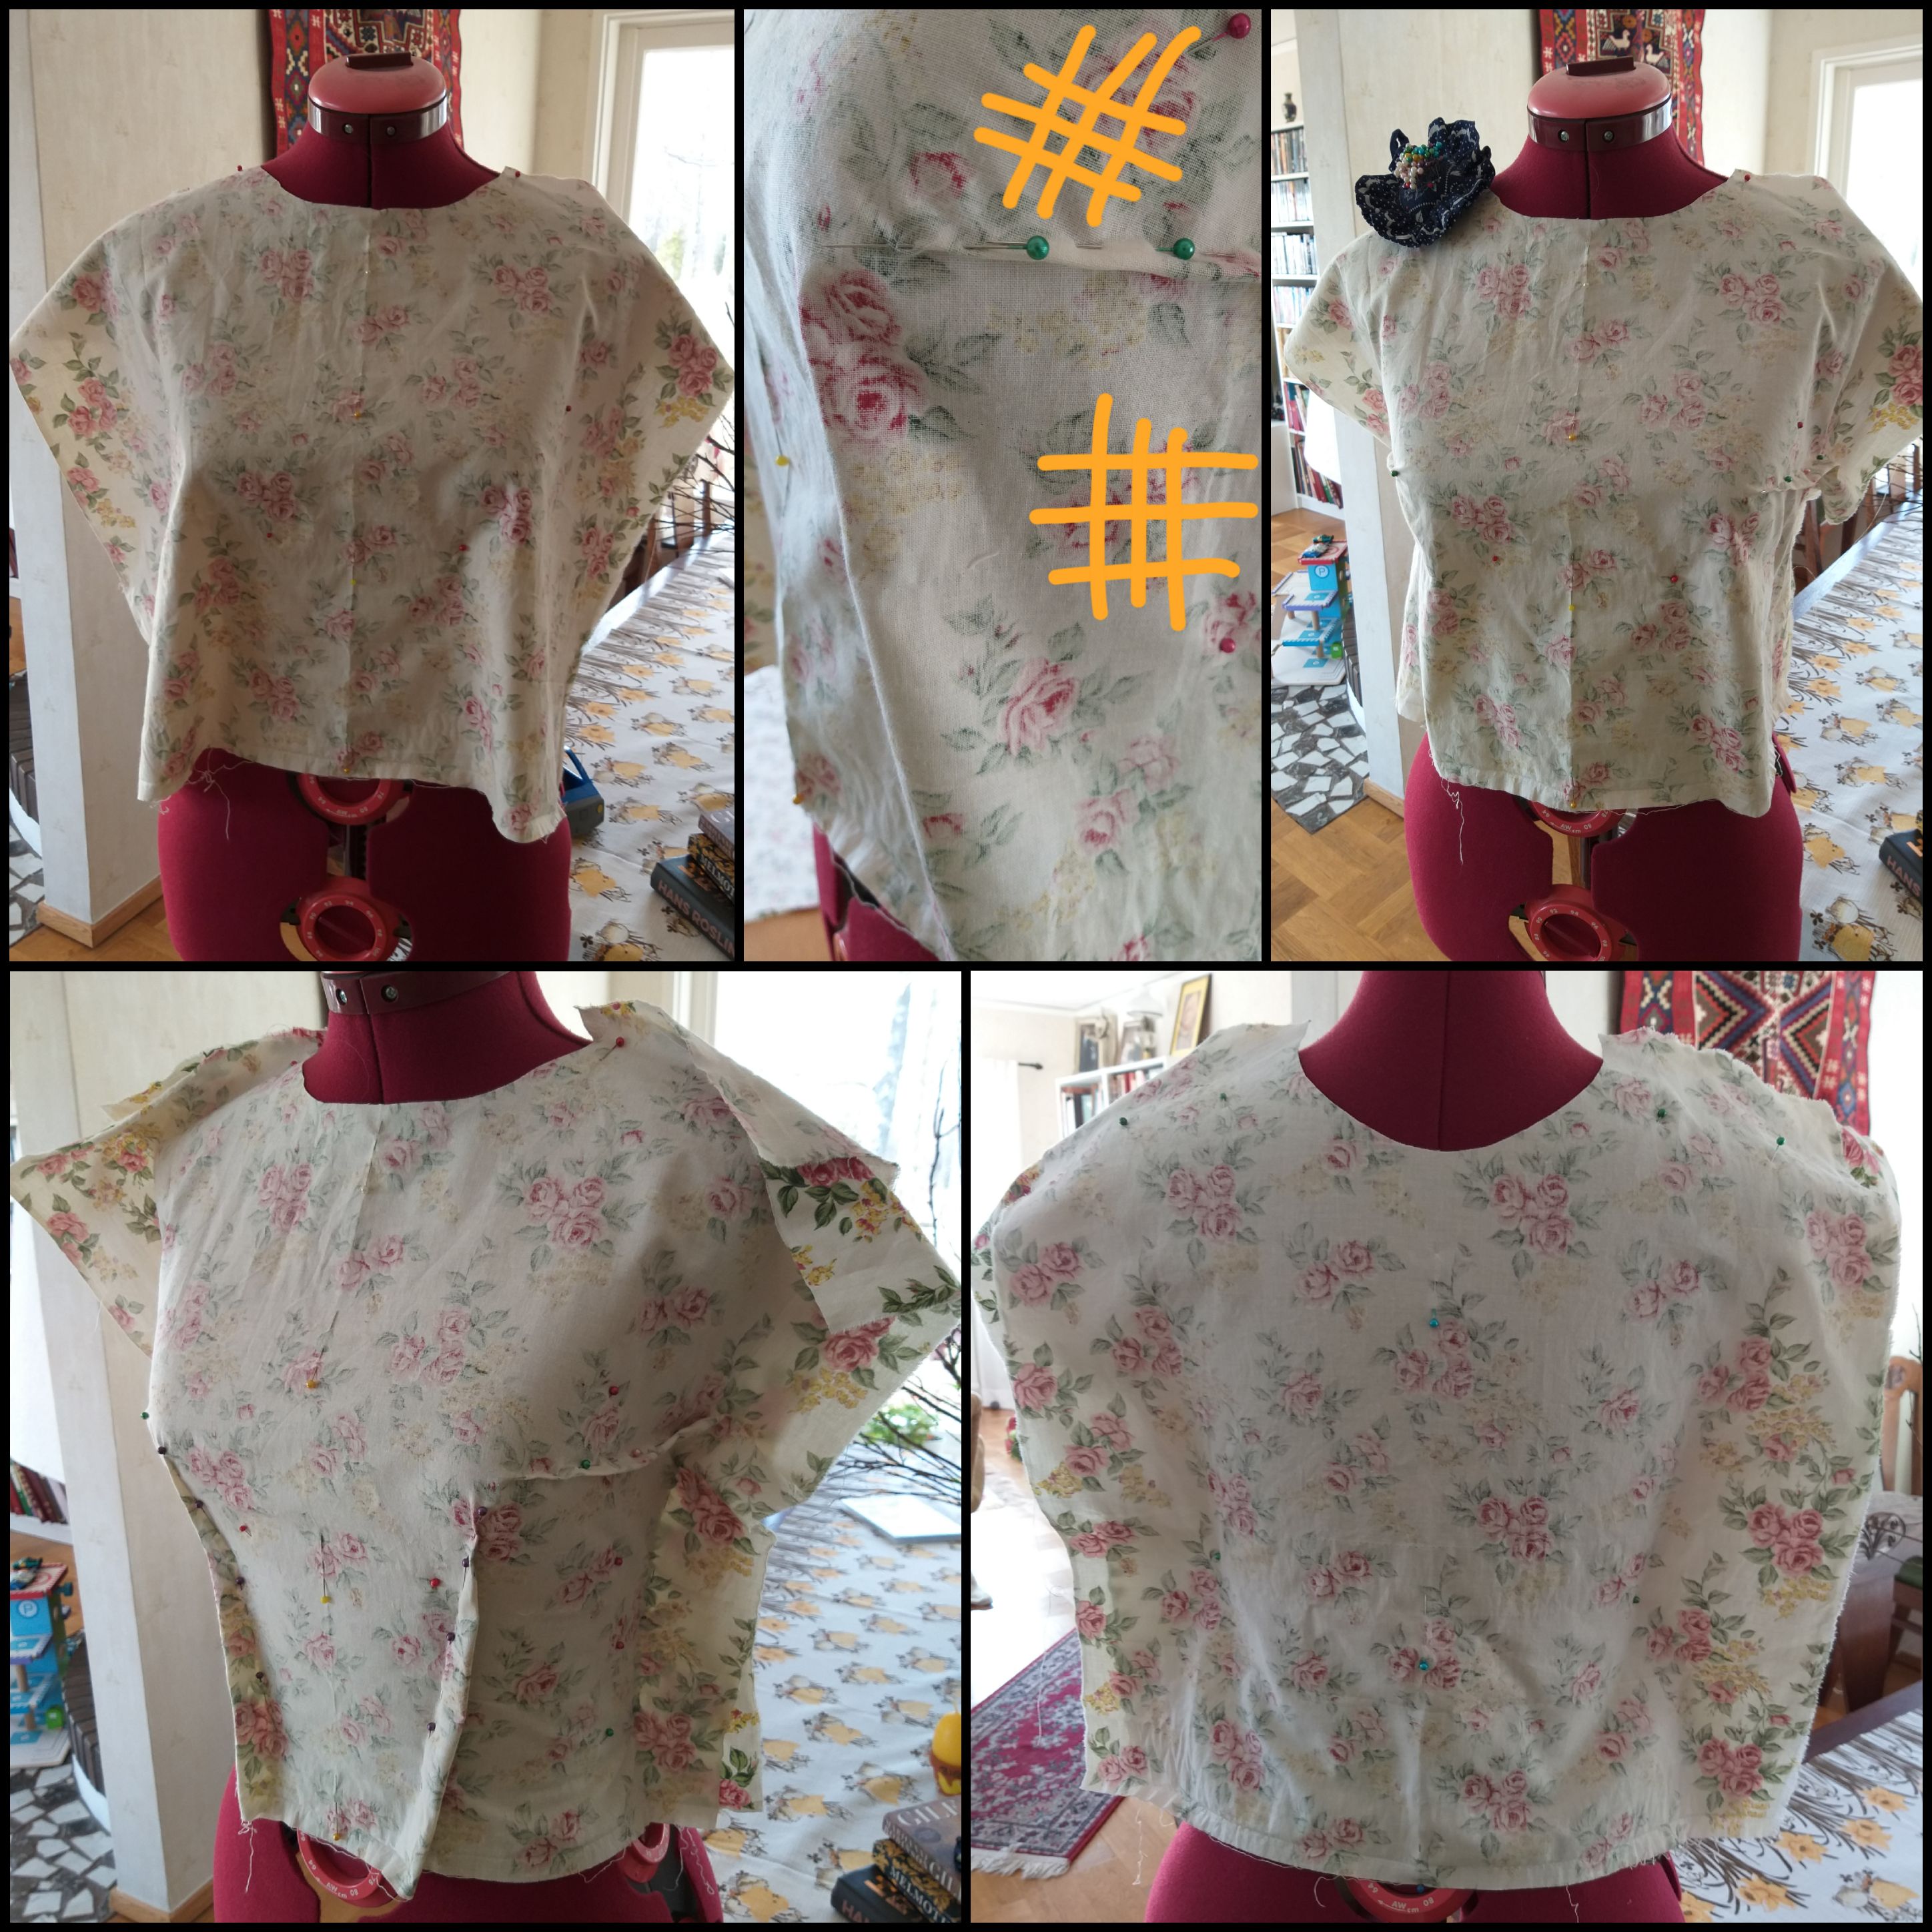
Tyvärr insåg jag först efter att ha krupit runt på golvet med toppen på och fixat med mönster inför nästa projekt, att detta tyg blir skrynkligt bara man tittar på det. 😅

Share

CHILDREN’S shirts and a REPURPOSED dress

As this spring was hot, I decided to sew a cool shirt for our youngest, as a protection from the sun. I would finally use the pretty fabric that his brother chose when I was pregnant, two years ago. ❤ As I made this shirt, big brother asked if he could have one too, and if course I couldn’t resist.

Eftersom det var riktigt varmt redan under våren så ville jag sy en sval skjorta åt minstingen, att använda som solskydd. Jag använde tyget som storebror valde medan lillebror låg i magen för två år sedan. ❤ När storebror såg skjortan bad han om att få en likadan och jag kunde naturligtvis inte neka honom detta.

Dear Bonna captured this lovely photo after the sunday service (as I wore another of my earlier creations). Thank you so much for the picture!

Fina Bonna fotograferade oss efter gudstjänsten (på bilden bär jag en annan tidig kreation). Tack så mycket för bilden, Bonna!

Here is a closer view of both shirts. Här kan man se skjortorna på närmare håll.

Tutorial for toddler’s shirt

About ten years ago I found a soft, lightweight bedsheet from the 70s, with a floral print that reminded me of a beautiful dress worn by Grace Kelly in Hitchcock’s Rear Window.

För ungefär tio år sedan hittade jag ett underbart tunnslitet 70-talslakan med blomstermönster som påminde mig om Grace Kellys klänning i Hitchcocks Rear Window.

I made a more simple version, with a loose fit, tied with a bow at the waist.

Jag sydde en enklare variant, med luftig passform, sammanhållen med en rosett i midjan.

This dress was so incredibly comfy that I used a lot until it suddenly tore as I played with the kids the other day. I mourned it for a couple of hours until I found comfort in that it could be transformed into a shirt for the little one.

Denna klänning var så otroligt skön att jag använde den väldigt mycket, tills den slutligen sprack medan jag lekte med barnen. Jag sörjde den under ett par timmar, tills jag insåg att den kunde bli ytteligare en skjorta till minstingen.

I used the same pattern as for the first shirt, which was copied from his beloved strawberry shirt.

Jag använde samma mönster som till den första skjortan, vilket jag kopierade från minstingens älskade jordgubbsskjorta.

After cutting the four pieces, sew elastic inside the hem of the arms, then pulled the fabric to the right fit before making the seam along the arm.

Efter att ha klippt ut de fyra delarna, sydde jag in ett elastiskt band i ärmfållen. Sedan drog jag åt bander tills det var tillräckligt tight. Därefter sydde jag armlängden.

Then I moved on to the front opening of the shirt, before stiching the arms in place, binding the edges and making the bottom hem.

Därefter tog jag itu med öppningen i halsringningen och sedan sydde jag fast ärmarna. Sist sydde jag kantband i halslinningen och fållade botten.

Today he tried it on and I believe he finds it just as comfy as I did my dress.

Idag testade han skjortan och jag tror faktiskt att han tycker att den är lika skön som jag upplevde klänningen.

Share

Art for Ukraine

One month has passed since Russia started the horrible war against Ukraine, seemingly aiming at obliterating the whole country with its citizens. Karin Faaij Hultgren, has started an admirable project, where people auction out their art pieces in the Facebook group Konstauktioner för Ukraina and the money goes to UNHCR’s work in Ukraine. At the moment I believe this has generated more than 100.000 Swedish kronor to the help organisation.

I had an UFO (unfinished object) in my art stash, which I dedicated to this project. I completed the regency family portrait, improving the shadows and adding some typical furniture. Now I hope someone will like it as much as I do, so it brings in some more money to the suffering people of Ukraine. You may place your bid on it here.

Nu har det gått en månad sedan Ryssland invaderade Ukraina och de tycks ha som mål att totalt tillintetgöra hela landet med dess invånare. Karin Faaij Hultgren har startat ett beundransvärt projekt, där folk får skänka sin konst, som sedan auktioneras ut och pengarna går oavkortat till UNHCR och Röda korsets arbete i Ukraina. För tillfället tror jag att detta projekt har inbringat över 100 000 kronor till hjälporganisationerna.

Jag hade ett UFO (unfinished objects) liggande bland mina konstgrejer och detta ville jag nu dedikera till konstauktionen. Jag fullbordade porträttet av empirfamiljen genom att förbättra skuggor och lägga till lite tidstypisk inredning. Nu hoppas jag att någon kommer att tycka lika mycket om bilden som jag gör, så att det drar in lite mer pengar till den lidande ukrainska befolkningen. Du kan lägga ditt bud här.


We have a constantly drooling baby, who also has a growing appetite for colourful food. Thus, the clothes are always either wet of drool or stained by food and accordingly every minute of my spare time has been dedicated to the production of “drool napkins”(?!). They are made of worn out clothes. Only the push buttons are new. These are the latest napkins.

Vår bebis dreglar konstant och har också en växande aptit för färgglad mat. Därför är kläderna alltid antingen blöta eller missfärgade av mat och därmed har alla lugna stunder gått åt till att sy nya dregellappar. Jag använder utslitna kläder. Endast tryckknapparna är nya. Här är de senaste alstren.

Share

Floral Dress for Breastfeeding

During my pregnancy I got more and more frustrated for not being able to sew anything for my rapidly changing body. I fell in love with the costumes of Queen’s Gambit and decided to make a dress with a waist, for my post pregnancy body. As I knew from before that the breastfeeding body can also change from week to week, I decided to try smocking. I made a few changes on the same pattern that I developed for my friend and my cocktail nursing dress. I had a pair of curtains with pretty floral print in my stash, that would be long enough, had I only cut it right! 😭 My pregnant, sleep deprived brain was not up for neither math, nor cutting. I had to rethink the model for the fabric to suffice (less fabric in the skirt, with more shallow pleats and only smocking on the top of the back, instead of the whole back) and I had to use bits with old seams visible. I guessed at what my measurements would be and sewed the dress without any other fitting than using my mannequin. Scary! You might imagine my surprise when I tried it on and it actually fit.

Under graviditeten blev jag allt mer frustrerad, då jag inte kunde sy något åt min hastigt förändrande kropp. Jag blev helt betagen av dräkterna i Queen’s Gambit och bestämde mig för att sy en klänning med midja, tillägnad min kropp efter förlossningen. Eftersom jag visste att även ammande kroppar kan förändras från vecka till vecka, tänkte jag testa smock. Jag gjorde några ändringar av det mönster som jag ritade till min väns klänning och min festliga amningsklänning. Jag hade ett par gamla gardiner med trevligt blommönster och det skulle ha räckt om jag bara hade klippt ut rätt… Min gravida, sömnlösa hjärna var inte i form för att vare sig räkna eller klippa. Jag var tvungen att tänka om med modellen för att få tyget att räcka (mindre tyg i kjolen och dess veck och endast smock i övre delen av ryggen istället för hela ryggen) och jag var tvungen att använda tygstycken där de gamla sömmarna syntes. Jag gissade vad jag skulle få för mått och sydde utan annan provning än på min provdocka. Läskigt! Du kan föreställa dig hur förvånad jag blev när jag testade klänningen och den faktiskt passade.

Construction

This was what the pattern looked like in the end.
Så här såg det slutgiltiga mönstret ut.
Piping around the edges of the bodice.
Passpoal kring livets kanter.
Smocking of the upper part of the back.
Smock av ryggens övre tygstycke.
Putting the lower front parts together with an invisible zipper and facing at the top edge.
Livets nedre del fogas samman, med dold dragkedja och förstärkande tygbit upptill (facing?).
Each part of the bodice put together.
Livets alla delar har sammanfogats.
Making the skirt with pockets and (unevenly distributed) pleats.
Kjolens fyra våder sys samman, fickor sätts in och väck läggs inte särskilt snyggt…
Making a pattern and the final sleeves.
Mönster till ärmarna.
The final dress with push buttons and hidden zipper. It has many faults – it wrinkles really easily, the opening for breastfeeding is slightly wrong placed and there are some issues with the arms – but it is very practical and will serve me well, I think.

Den färdiga klänningen, med tryckknappar och dold dragkedja. Den har många fel och brister – den blir skrynklig vid blotta anblicken, amningsöppningen är lite felplacerad och därmed lite svåranvänd och ärmarna är inte perfekta – men jag tror att jag få mycket användning av den.

These photos were shot in panic after ironing the dress while preparing lunch, putting on makeup while playing, tidying up the particular spots that would be visible (in fact, I am surrounded by seas of toys and mountains of pillows), while hearing the baby starting to signal that he very much wants to test the purpose of the dress.

Dessa foton togs i panik efter att jag strukit klänningen medan jag lagade mat, städat de ställen som skulle synas i bild (i själva verket omges jag av kuddberg och hav av leksaker), alltmedan bebisen började signalera att han ville testa om klänningen verkligen fyllde sin funktion).

Share

Boy’s Shirts

After a cold and rainy spring, the summer heat hit us hard. It soon became clear that my dear, growing boy was in urgent need of a thin shirt, protecting his skin from the sun at the same time as it had to be cool and airy. As no such shirts were to be found in the stores, I had to make my own shirt pattern, using his wellfitting, warmer shirt as skabelon. I thought the shirt making process would be very difficult, but it was not nearly as trying as I had imagined.

Efter en kall och regnig vår, slog sommarvärmen till hårt. Snabbt förstod jag att min växande pojke behövde en tunn skjorta för att skydda huden mot solen, samtidigt som den måste vara luftig och sval. Eftersom jag inte kunde finna några sådana skjortor i butikerna, insåg jag att jag nog måste sy skjortan själv. Jag gjorde ett nytt mönster, utifrån en av hans välsittande, varma skjortor. Jag hade föreställt mig att det skulle vara jätteknepigt att sy en skjorta, men det var faktiskt rätt enkelt när jag väl kom igång. 

The fabric is from an old curtain and the buttons are reused too. In order to win his approval, I embroidered a pirate skull on the shirt pocket.
The fabric is comes from an old blanket and the buttons are also reused. I stiched decorative seams in his favourite colours.

Both the shirts have proven to be both practical, cool and protective against insects. And most importantly – my son loves them.

Båda skjortorna har visat sig vara både praktiska, svala och skydda väl mot insekter. Och viktigast av allt – sonen älskar dem!

Share

Arm Chair

This arm chair was beautiful when I inherited it from my grandparents. After much use, it was in a sad condition, with the fabric in tatters and one of the arms falling off.

Den här fåtöljen var riktigt vacker när jag ärvde den efter mina morföräldrar. Efter några års daglig användning var den dock i ett sorgligt skick, med tyget i trasor och med ett avbrutet armstöd.

For my birthday, I was given fabric for renovating the dear heirloom. As I have never done anything similar before, I picked the armchair apart methodically, so that I would know in which order to put it together again. I sandpapered (?) the wooden parts and put on three layers of varnish (?). Then I put the new fabric on, using both staples and hand stitching. I know that I have probably committed some terrible mistakes but I am very happy with the result.

Jag fick ett fint möbeltyg i födelsedagspresent. Eftersom jag aldrig gjort något liknande tidigare, plockade jag isär fåtöljen metodiskt, så att jag skulle veta i vilken ordning jag sedan skulle sätta ihop allt igen. Jag sandpapprade armstöden och benen innan jag la på tre lager olja. Sedan klädde jag fåtöljen, med hjälp av både häftpistol och handsömnad. Jag är säker på att jag har begått några allvarliga synder inom tapetseringsvärlden, men jag är väldigt nöjd med slutresultatet.

Share

Embroidered Regency Dress

There was a vacuum after the competition gown was finished, so I just had to sew a medieval kirtle for my little niece. She was so happy! This was done in a few hours, so I needed yet another project. I have some beautiful whitework embroidery saved from pillow cases, which I believe were made by my husband’s grandmother. As I also recieved an old curtain with a pretty floral print, screeming Regency, I knew I just had to make a regency dress for another niece.

I incorporated the embroidery in the bodice and the poofy arms.

The embroidery piece is stitched to the bodice piece.
Then the fashion fabric (or rather, the old curtain) was sewn onto the front of the bodice piece.
Embroideries put in the mid front and in the arms.

I made an interior bodice with lacing in the back, in order to leave room for some growth. The fashion layer has drawstrings in the neckline and under the bust.

The back lining close with lacing (perhaps there should be boning inside the eyelets?). The eyelets are hand sewn and the strings are also hand made from linen thread.
The two sections of the back close with drawstrings in the neckline and under the bust.
Aren’t these embroideries adorable?

Now I am eager to see whether the dress fits the pretty maiden.

Photo Shoot In The Valley of Cherry Blossoms

The dress fits my niece so well! I’m so proud of this intelligent, pretty young maiden and her wonderful family.

As you might see, there was also a pregnant seamstress lurking around.

Ugnstorp really is the most beautiful place in May
Share

Serpent Witch – Part 2 – draping the blob into a fairytale gown

After achieving the right shape for the corset mockup, I have aimed at making the smoothest foundation possible, to go underneath the lightweight silk. A few minutes at a time, I sketch, measure and sew. Tiny steps, over and over again. At last it begins to look like a dress.

Efter att uppnått rätt silhuett på korsetttoillen, försöke jag skapa den jämnaste grunden jag kunde, för det tunna sidenet som ska vara ytterst.  Jag har skissat, mätt och sytt några minuter åt gången. Små steg i taget, om och om igen. Till slut börjar det likna en klänning.

Draping and finding out that it will be best to use a bodice and then an attatched skirt

First, I made the bodice part, from a lightweight cotton, that I got from Birgitta. It has a long zipper under the arm. It has two darts in front and, mistortunately two gussets at the lower back (don’t ask me why). Then I added a skirt, made from a synthetic lining fabric, that I got amongst the most beautiful fabrics from Sollan, through Carolina Holmström. In order to get the right  flowy shape, I have added tulle in several rows, smother in the front and more gathered in the back.

Creating a bodice pattern from the draped fabric

Först sydde jag klänningslivet av rester från ett tunt bomullstyg som jag fått av Birgitta. Livet har en lång dragkedja under armhålet, två inprovningar framtill och två sprund i ländryggen (fråga inte varför). Sedan sydde jag fast en underkjol, av tyg som jag fått tillsammans med flera fantastiska tyger från Sollan, genom Carolina Holmström. För att få till den perfekta böljande formen, fäste jag sedan tyll i flera rader nedtill på kjolen – mest rynkade baktill.

Finished bodice with zipper
Petticoat with tulle, to get the right shape

The fashion fabric is a very lightweight dupioni ikat from Khiva (an ancient city along the Silk road), that I got from my mother years ago. Since it doesn’t fit the historical fashions that I use to do and is too beautiful to use for any project, it has just layed in my stash, to be taken out and be stared at for a while every year. I was thrilled when I finally found out that it would suit my serpent witch!

Klänningstyget är ett tunt ikatmönstrat dupionsiden från Khiva (en uråldrig stad längs sidenvägen), som mamma gav mig för många år sedan. Eftersom sådana tyger inte förekommer under de historiska moden som jag sysslar med, har tyget legat i en låda för att bli framplockat och stirrat på med jämna mellanrum. Jag blev så glad när jag kom på att det skulle passa fint på ormhäxan!

It is 60 cm wide and good 9 m long. I have measured and counted so many times, trying to figure out how to cut the fabric and have something left for the sleeves. Finally I have decided to just finish the dress and see what I can come up with with, using what fabric is left afterwards. Oh, the horror.

Tyget är 60 cm brett och drygt 9 m långt. Jag har mätt och räknat så många gånger, för att lista ut hur tyget ska klippas och ändå få något över till ärmarna. Till slut har jag bestämt mig för att göra klart klänningen först och se om det sedan klura ut hur ärmarna ska se ut, utifrån hur mycket tyg jag har kvar då. Kära hjärtanes.

Draping the blob into a fairytale gown

Now I have started draping. It is great fun! But it is challenging to save the hemline at the right height as I  manipulate the fabric. I put a pin in every wrinkle and will then secure all of this stiching by hand with my finest needle. This will take maaaany hours.

Nu har jag börjat drapera tyget. Det är superkul! Men det är knepigt att bevara rätt höjd på kjolfållen medan jag manipulerar tyget. Jag sätter en nål i varje veck och ska sedan fästa allt detta med handsömnad. Detta kommer ta mååååånga timmar.

Share

Curtain Dress

There is seldom time for sewing since we moved to our house. We are so lucky to have a helping family and to know craftsmen, so that all organic material is removed from the cellar, the electicity,  plumbing, draining around the house, topographic changes in the garden and the new floor in our washing room is already finished after only four months! The projects in waiting are quite pressing though…  I’m proud of having put back the pavingstones, but the ground needs preparation for grass and flowers, and the cellar is still kind of dangerous.

By Christmas, I laid my hands on a pair of pretty curtains with an extreme amount of fluonces at the second hand shop. 30 SEK. What a find! My husband was horrified, thinking that I intended them for the room of our son. ?

A pair of 1 x 1,6 metres of curtains, rounded at the bottom

Last week, the stormy weather at last gave me an excuse for not working in the garden, but delving into a nice little sewing project. I made a really simple and usable dress out of the curtains. My husband was relieved.

I did everything just I use to: I draped the fabric on my mannequin, pinning it so that the grain lines would be straight and putting darts in front and at the bust. Then I stitched it together, leaving one side seem open for a zipper.  There was enough fabric for a halfcirkle skirt.  I put pockets in the side seams. This time I carefully ironed the hemline as I folded it twice. The bodice was attached to the skirt and the zipper was inserted. Then I finished the neckline and arms. 

The dress was finished yesterday and today it had its premier. I was too tired and my dear photographer was too eager to go fishing, so there was no photo shoot today, even though the weather is lovely and the woods are full of anemones.

Zipper and pockets in the side seams


The Photoshoot(s)

Share

Child’s Winter Coat

Last year I disintegrated my sister’s old wool winter jacket (she let me, I promise) in order to reuse the lining for my red winter coat. Originally, I planned to use the wool for my nephew’s medieval clothes, but when I had the vlieseline (?) removed, it was too sticky on the wrong side. So I saved it in my stash. When I found this fluffy faux fur at Panduro, I knew just what to use it for! It’s so fluffy I’m gonna die!

Förra året sprättade jag upp min systers gamla vinterjacka (hon tillät det, jag lovar), för att kunna återanvända jackans foder till min  röda kappa. Jag sparade yttertyget, som var ett fint ylle. Jag tänkte använda tyget till min systersons medeltidskläder, men det när jag hade tagit bort det stadgande materialet (vlieseline?) var det alldeles för sticksigt, så det fick ligga kvar i tyglagret. När jag hittade denna fluffiga fuskpäls visste jag precis vad jag skulle använda yllet till! Det är så fluffigt att jag dör!

I made a new pattern, tracing the outer lines from my son’s favourite jacket, but adding one centimeter at every side, except at the bottom, where I added one decimeter.  I thought about hiding a zipper behind a flap (?) and adding fancy metal buttons, that my son adores, but it seemed too intricate to sew and for a child to put on by himself.

Jag ritade ett nytt mönster genom att rita en centimeter utanför varje kant på hans favoritjacka. Nertill la jag till en decimeter. Jag funderade över att ha en dragkedja dold under en flärp med fina metallknappar, som han älskar, men det verkade vara för knepigt både att sy och för en tvååring att hantera. 

I removed the old pockets and used this part for arms. Unfortunately the fabric behind the pocket seams had a lighter colour, which I unsuccessfully tried covering up with black ink. Obviously the ink reflects sunlight very well… I had to make some piecing together, as you see.

Jag sprättade bort de gamla fickorna och använde dessa tygstycken till ärmarna. Tyvärr visade sig tyget under sömmarna ha blivit ljusare, vilket jag försökte maskera med svart tush. Tushet reflekterar visst solljuset väldigt bra… Som du ser fick jag skarva en del för att få tyget att räcka.

When he first tried the jacket on, he began crying and wouldn’t try it again for a few days. Today, I realized that there was a needle left in the faux fur. After removing it, he loved this jacket. He described it as “Awesome! Cozy!”. I am so pleased!

När han testade jackan första gången började han gråta och vägrade ta på den igen. Idag upptäckte jag att en nål gömt sig i den fluffiga fuskpälsen. Efter att jag tagit bort den älskade han sin nya jacka. Han beskrev den som  “Häftig! Mysig!” Jag är så glad!

For Christmas gift, I made a pyjamah, tracing his favourite pair. He loves the fact that it is a dress with pockets

Jag sydde en pyjamas till honom i julklapp. Hans favoritpyjamas är en klänning med fickor. Denna använde jag som förlaga och han blev väldigt nöjd.

Share