
I have dived into a new, big, lovely project: a new regency gown with all the right underpinnings. This lunacy is partly due to a need to escape the far too big study load this term and partly due to the dear problem that I will have two friends to company me at a regency event this summer, but only own two gowns.
Jag har dykt ned i ett nytt, stort och underbart projekt: en ny empirklänning med alla matchande underkläder. Denna galenskap beror dels på att jag behöver en undanflykt från denna termins alldeles för stora läsebörda och dels på ett kärt problem – jag får med mig två kamrater på ett historiskt evenemang men äger bara två empirklänningar.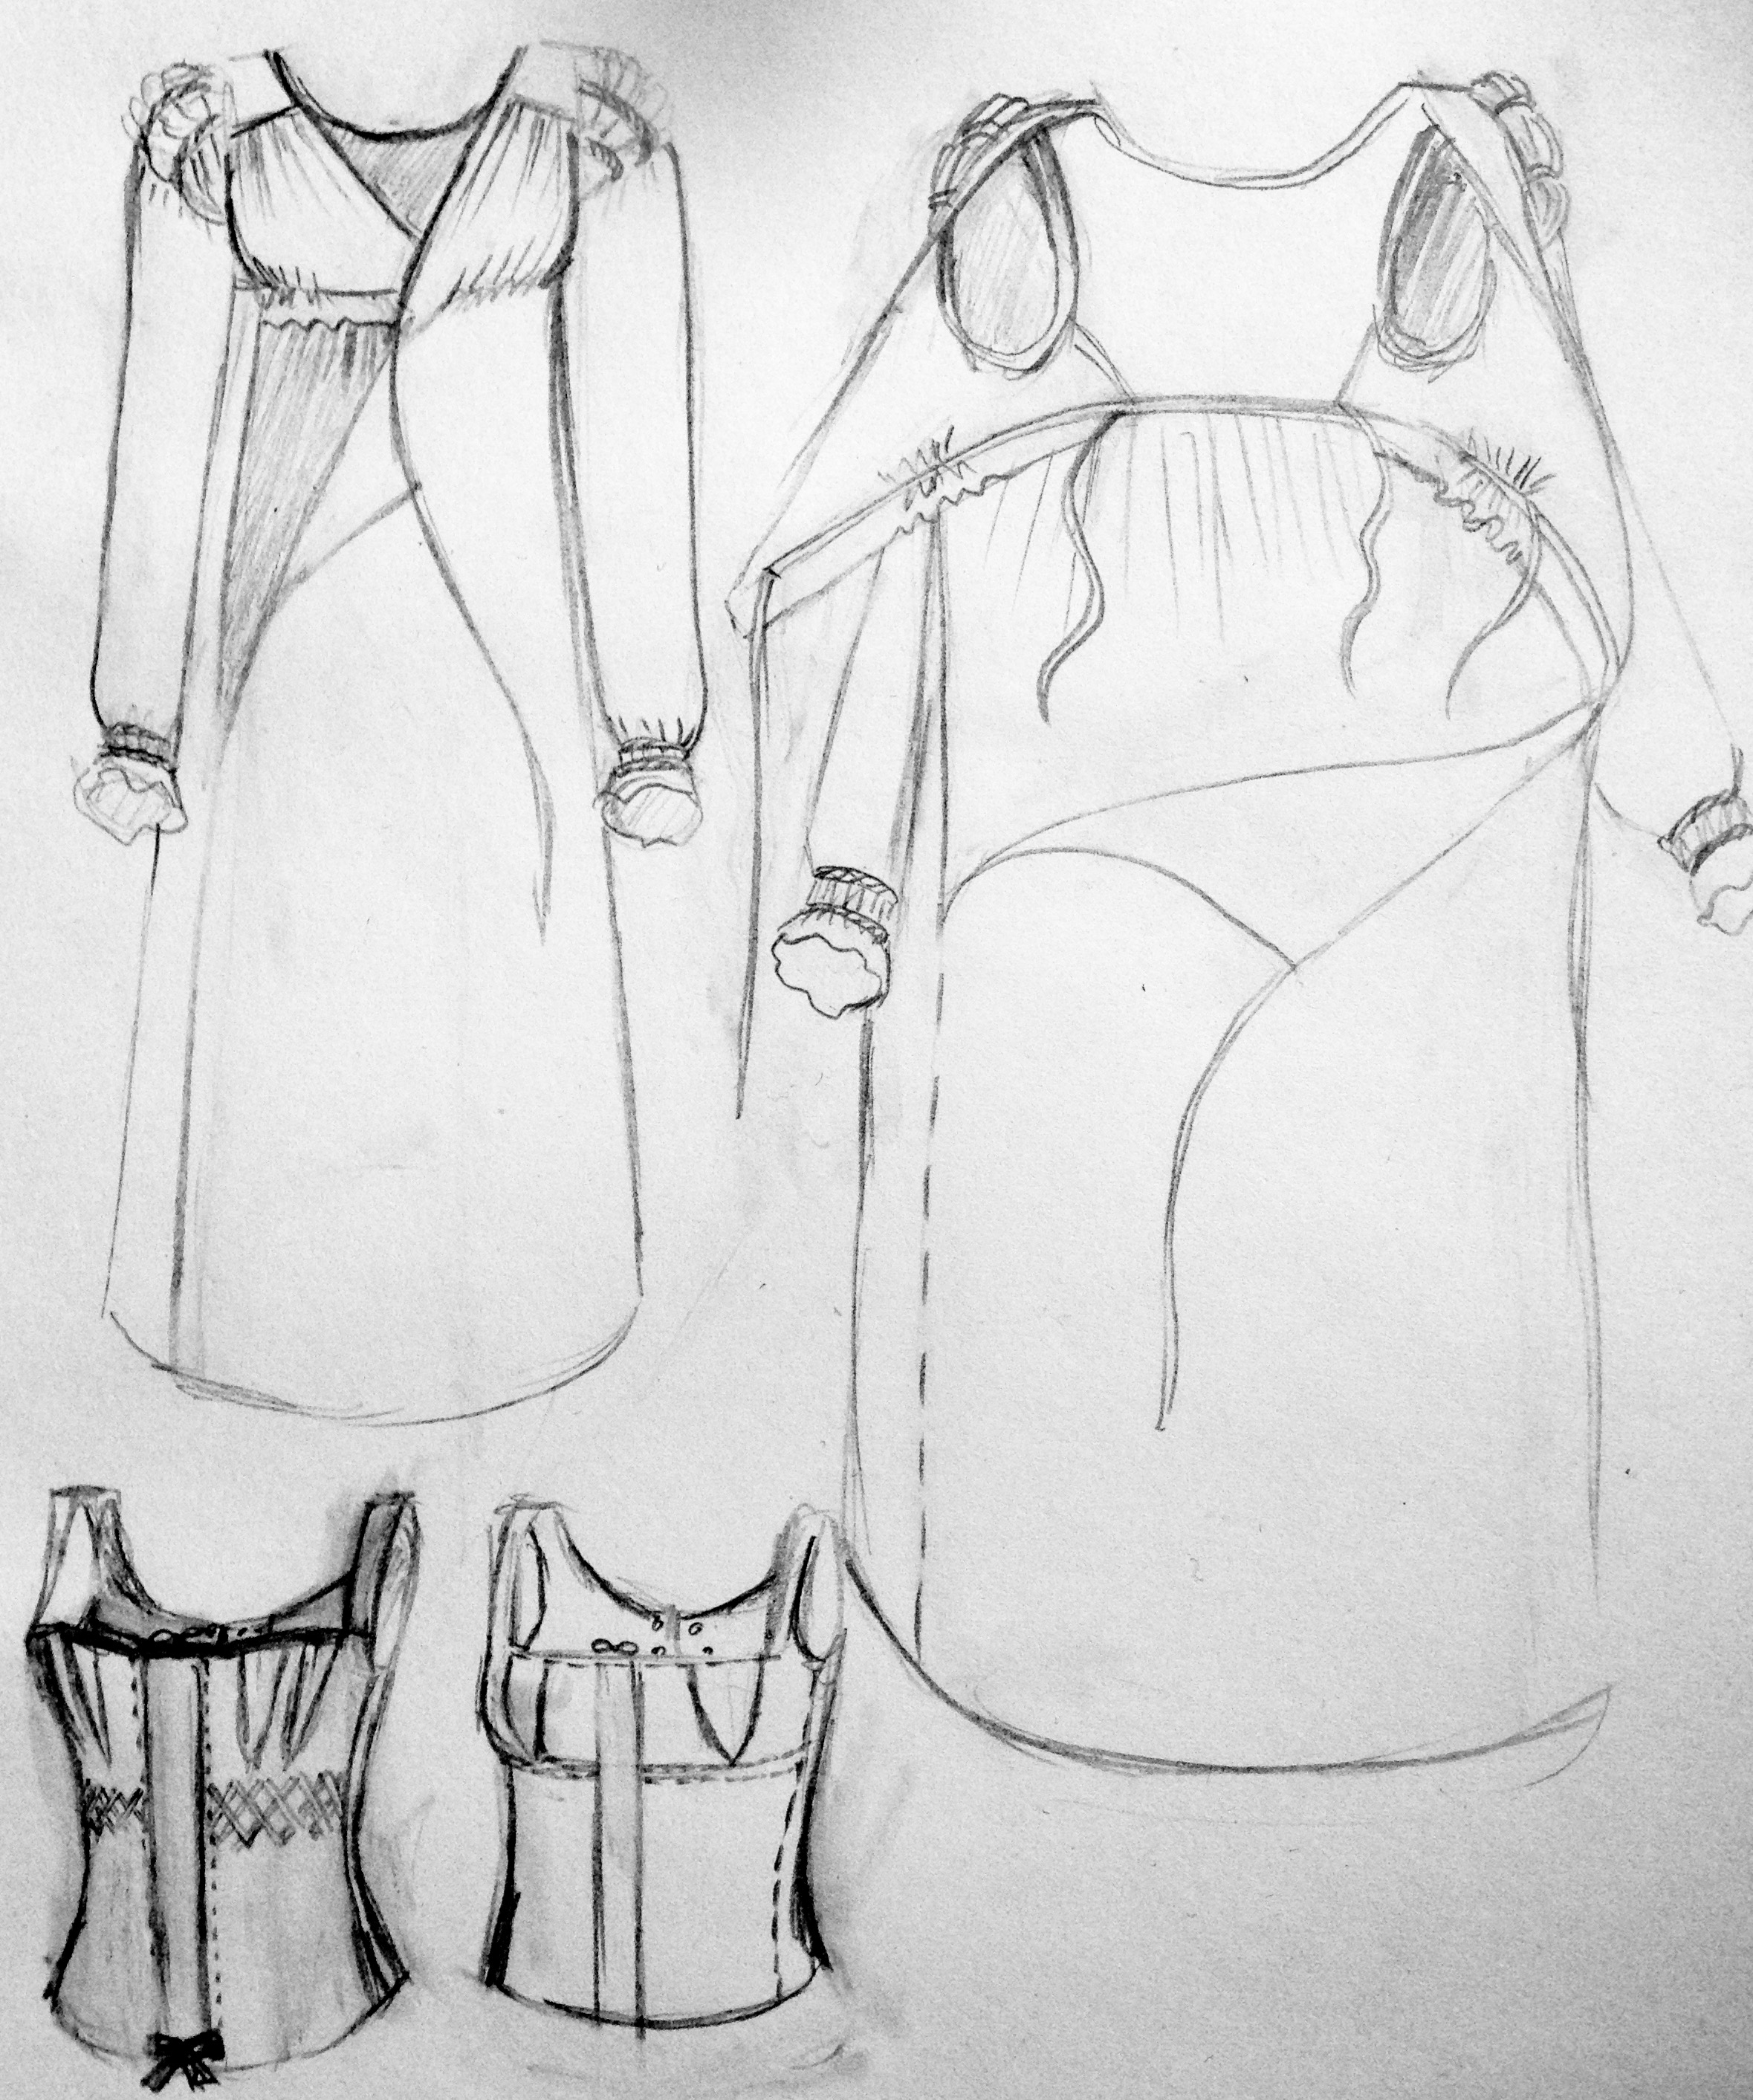
I aimed for a costume somewhere in between 1810-1820 and was inspired by museum pieces, fashion plates, portraits and several fantastic blogs.
Jag siktar på att sy en dräkt överensstämmande med mode från början av 1810-talet. Inspiration har jag hämtat från museiexemplar, modebilder, porträtt och en massa fantastiska bloggar.
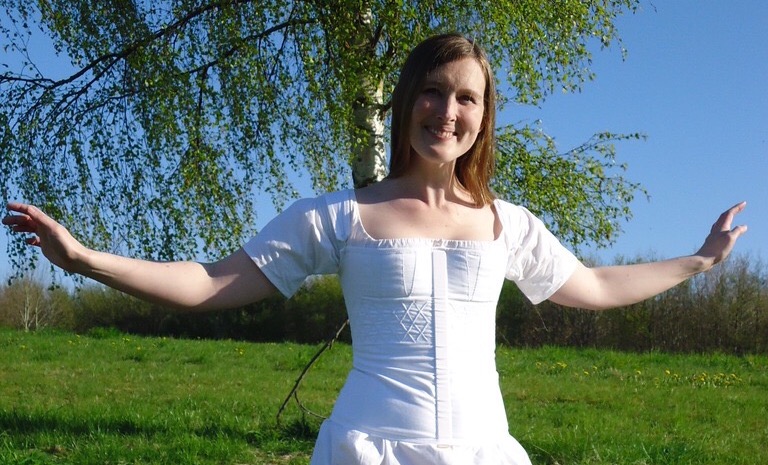
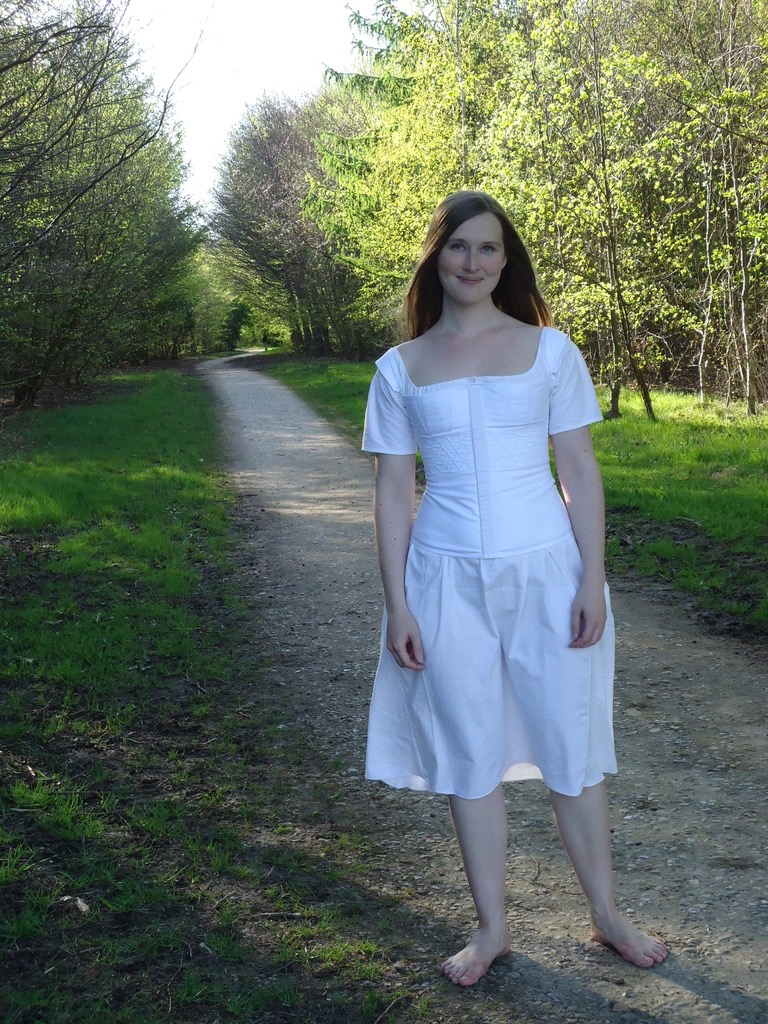
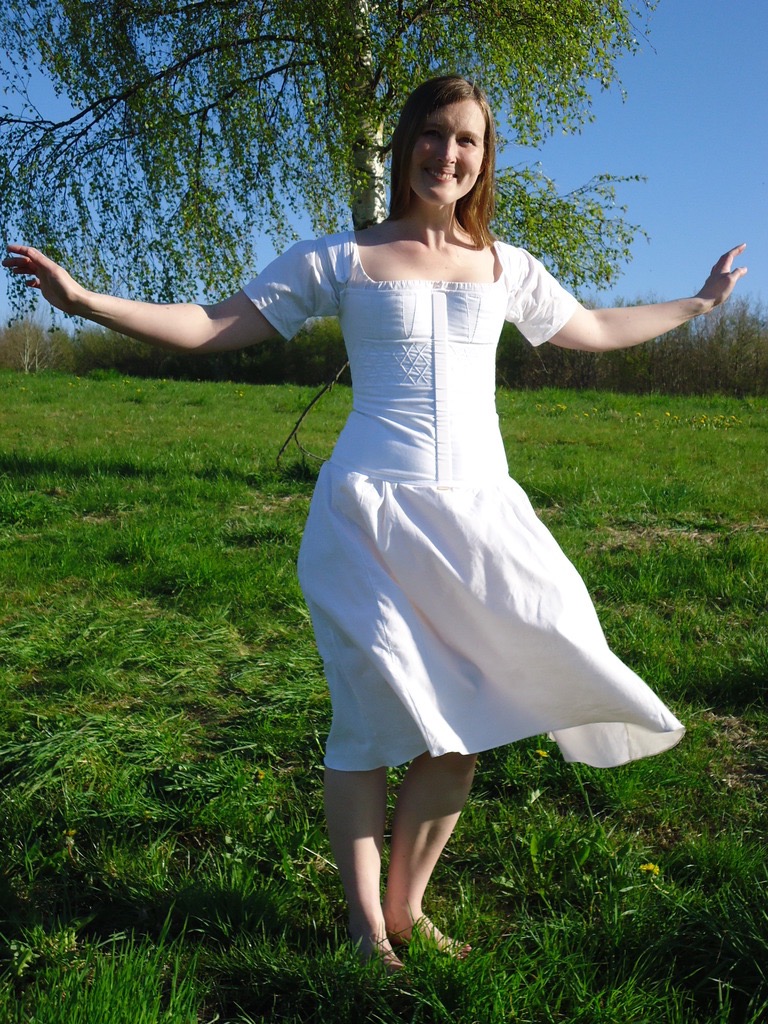
The Corset
In order to have a proper fit of the gown, I started with the corset. Here are some pictures from today’s photo shoot and further down comes the research and construction process.
För att kunna få en bra passform på klänningen började jag med att sy korsetten. Här kommer några bilder från dagens fotosession. Längre ned skriver jag om bakgrundsinformation och konstruktion.


Inspiration for the corset
In my regency corset research, was finally most Inpired by these pictures:
Under mina efterforskningar inspirerades jag främst av dessa bilder:


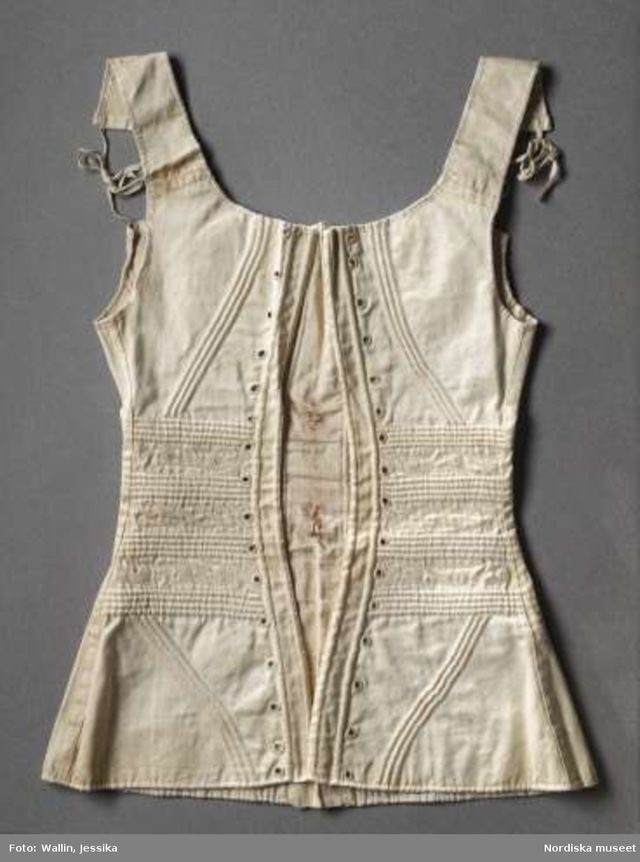
I chose to have the beige one as a model, because it can go under the most part of the regency era and also early 1820’s and even 1830’s costumes, if I may be so bold. It has three panels (one whole front and two in the back) and two shoulder straps.
Jag bestämde mig för att utgå från den beiga korsetten eftersom den fungerar under de flesta empirkläder, tidigt 1820-tal och eventuellt även 1830-tal, om jag skulle vara riktigt djärv. Den består av tre paneler (en hel framsida och två baktill), samt två axelband.
Constructing the corset
I didn’t know if the corsets that inspired me consisted of two or four layers of fabric. The blogs I’ve read to prepare myself for the task, often show four layers, but I didn’t gather whether this was due to the bloggers’ vast knowledge or that they simply preferred the greater sturdiness of four layers. I had less than one meter cotton cloth at home, the choise was easy.
Jag visste inte om mina inspirations-korsetter bestod av två eller fyra lager tyg. Bloggarna som jag läst som förberedelse inför projektet, brukar visa fyra tyglager, men det framgår inte om det är för att de kunniga bloggarna vet att detta är rätt eller för att de bara vill ha ökad stadga. Jag hade bara hemma mindre ön en meter vitt bomullstyg, sp valet blev lätt.
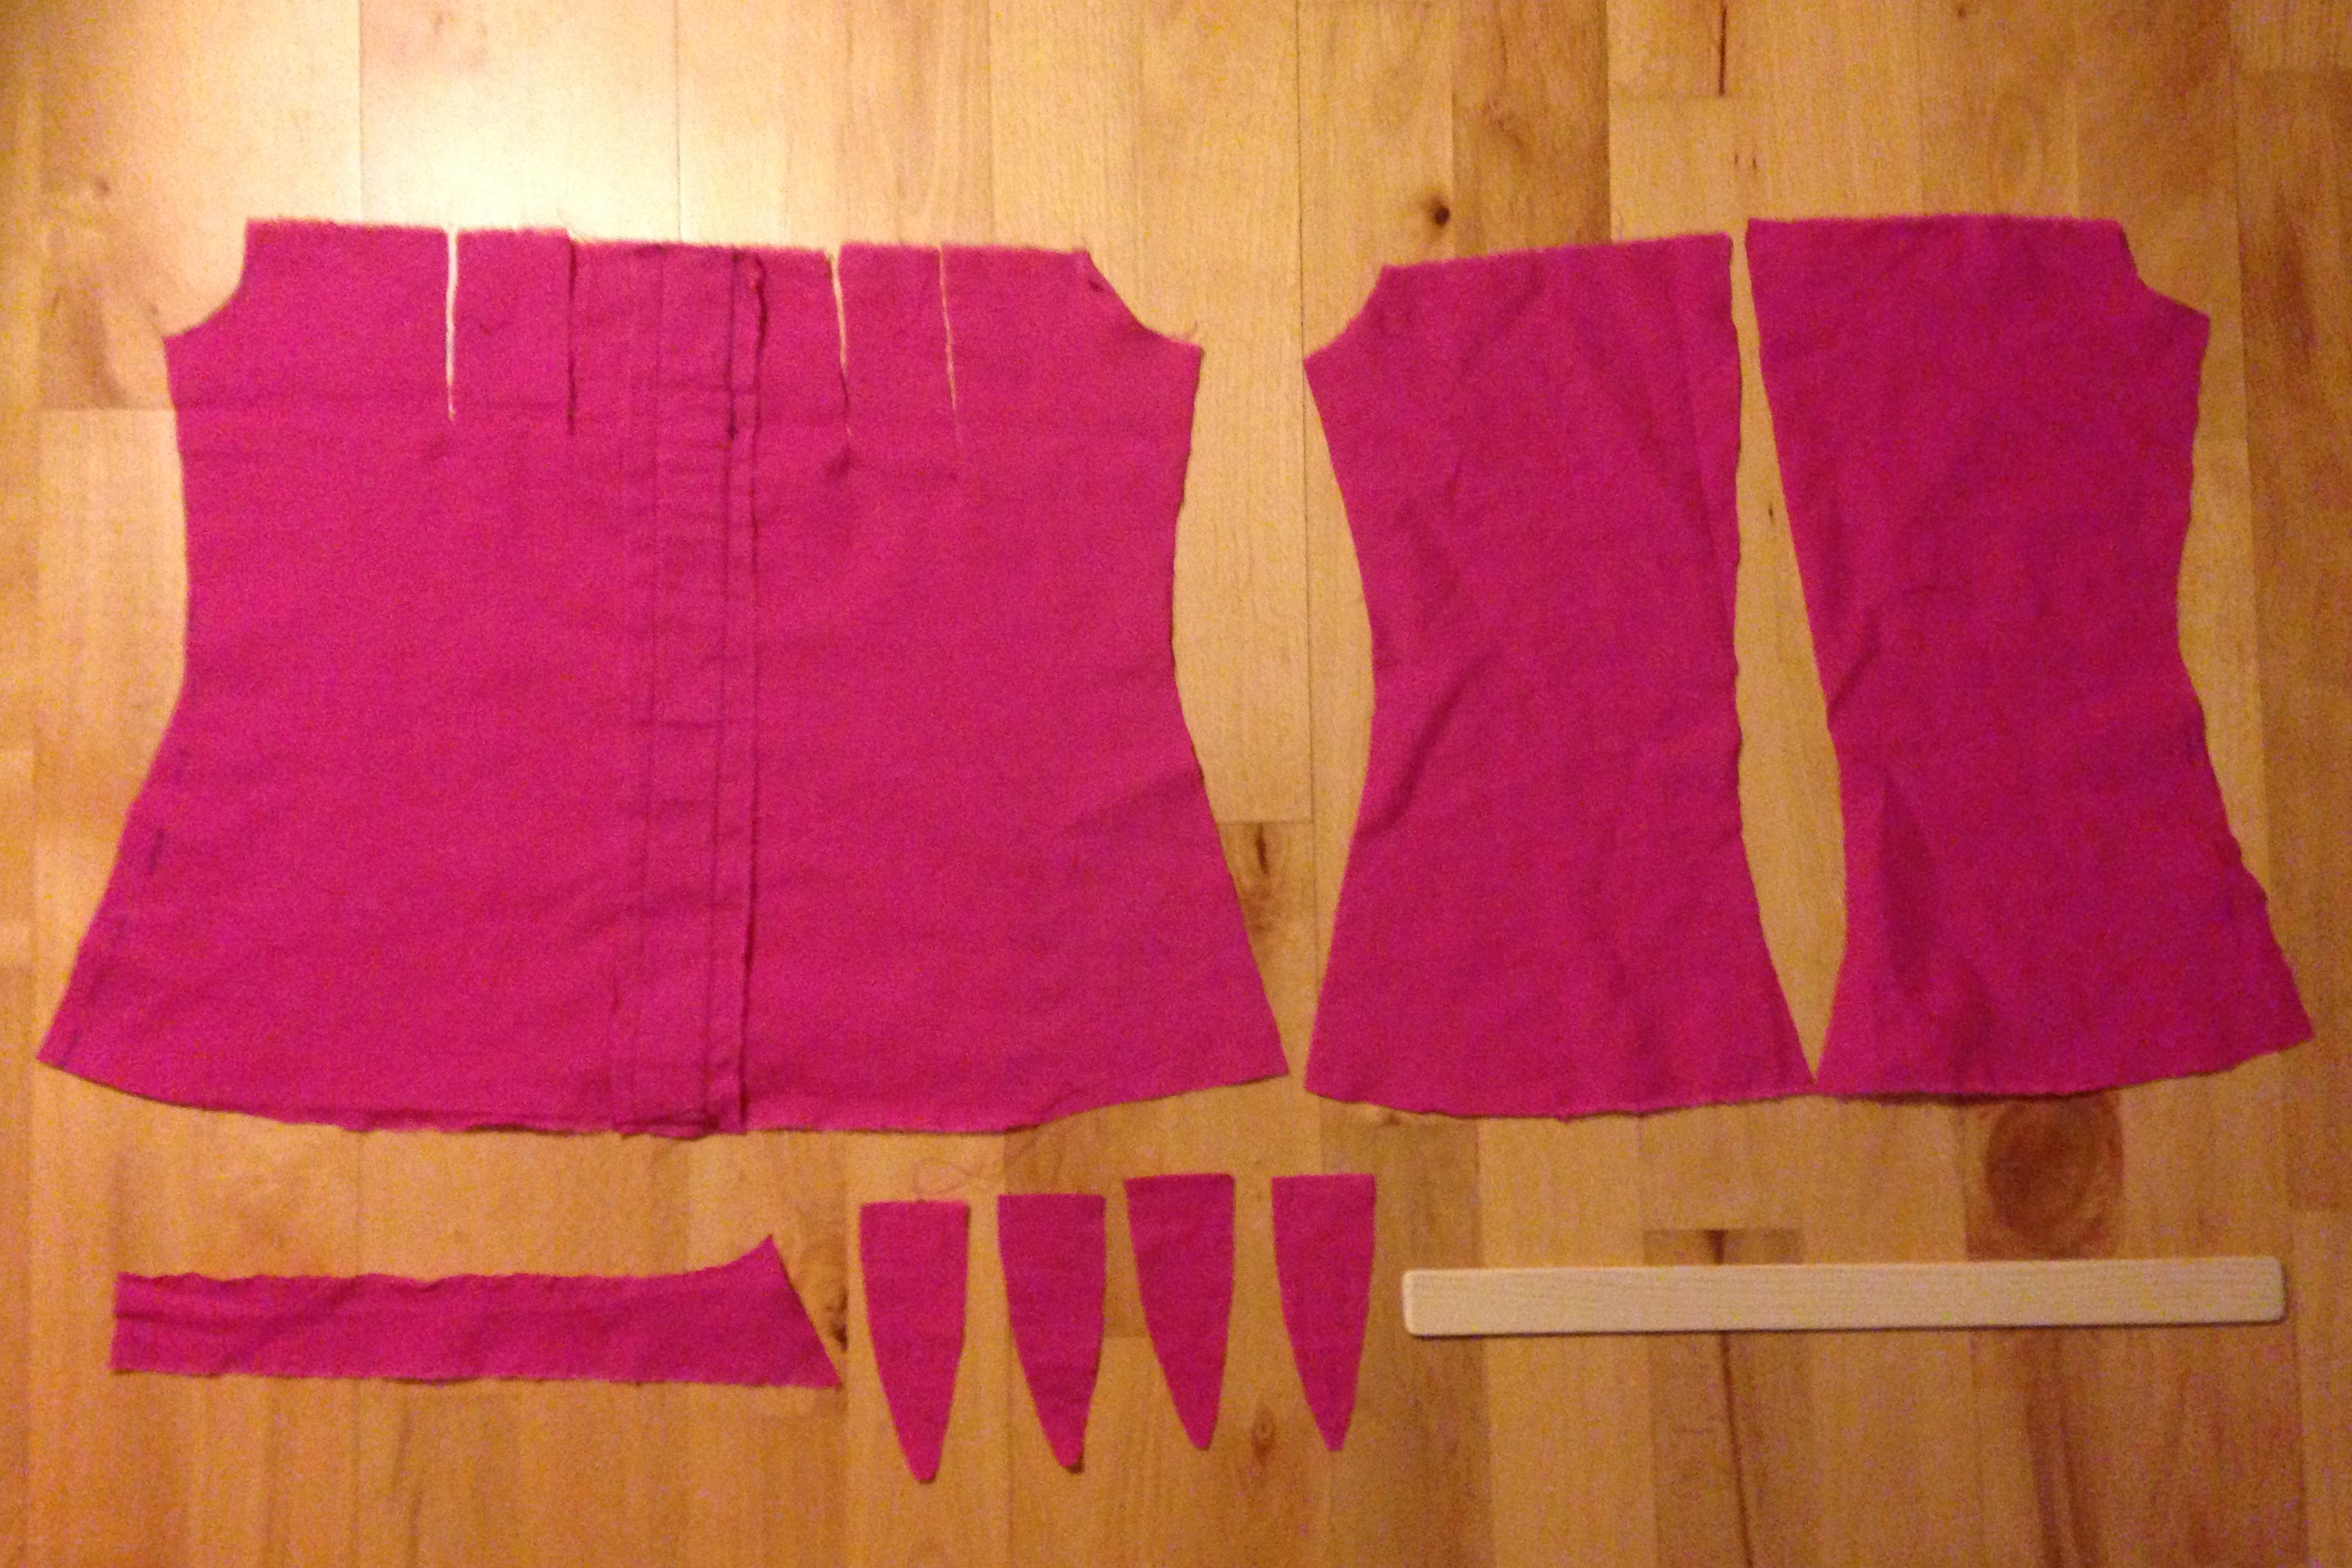
First, I constructed a toille on myself and got these parts. I bought a 1,5 mm thick piece of wood and saw it to about 36 cm.
Jag började med att göra en toille på mig själv och fick dessa bitar. Jag köpte en 1 mm tjock träpinne och sågade till ca 36 cm.
Here are all the pattern pieces on one fold.
Jag fick plats med alla mönsterdelar på en vikning.
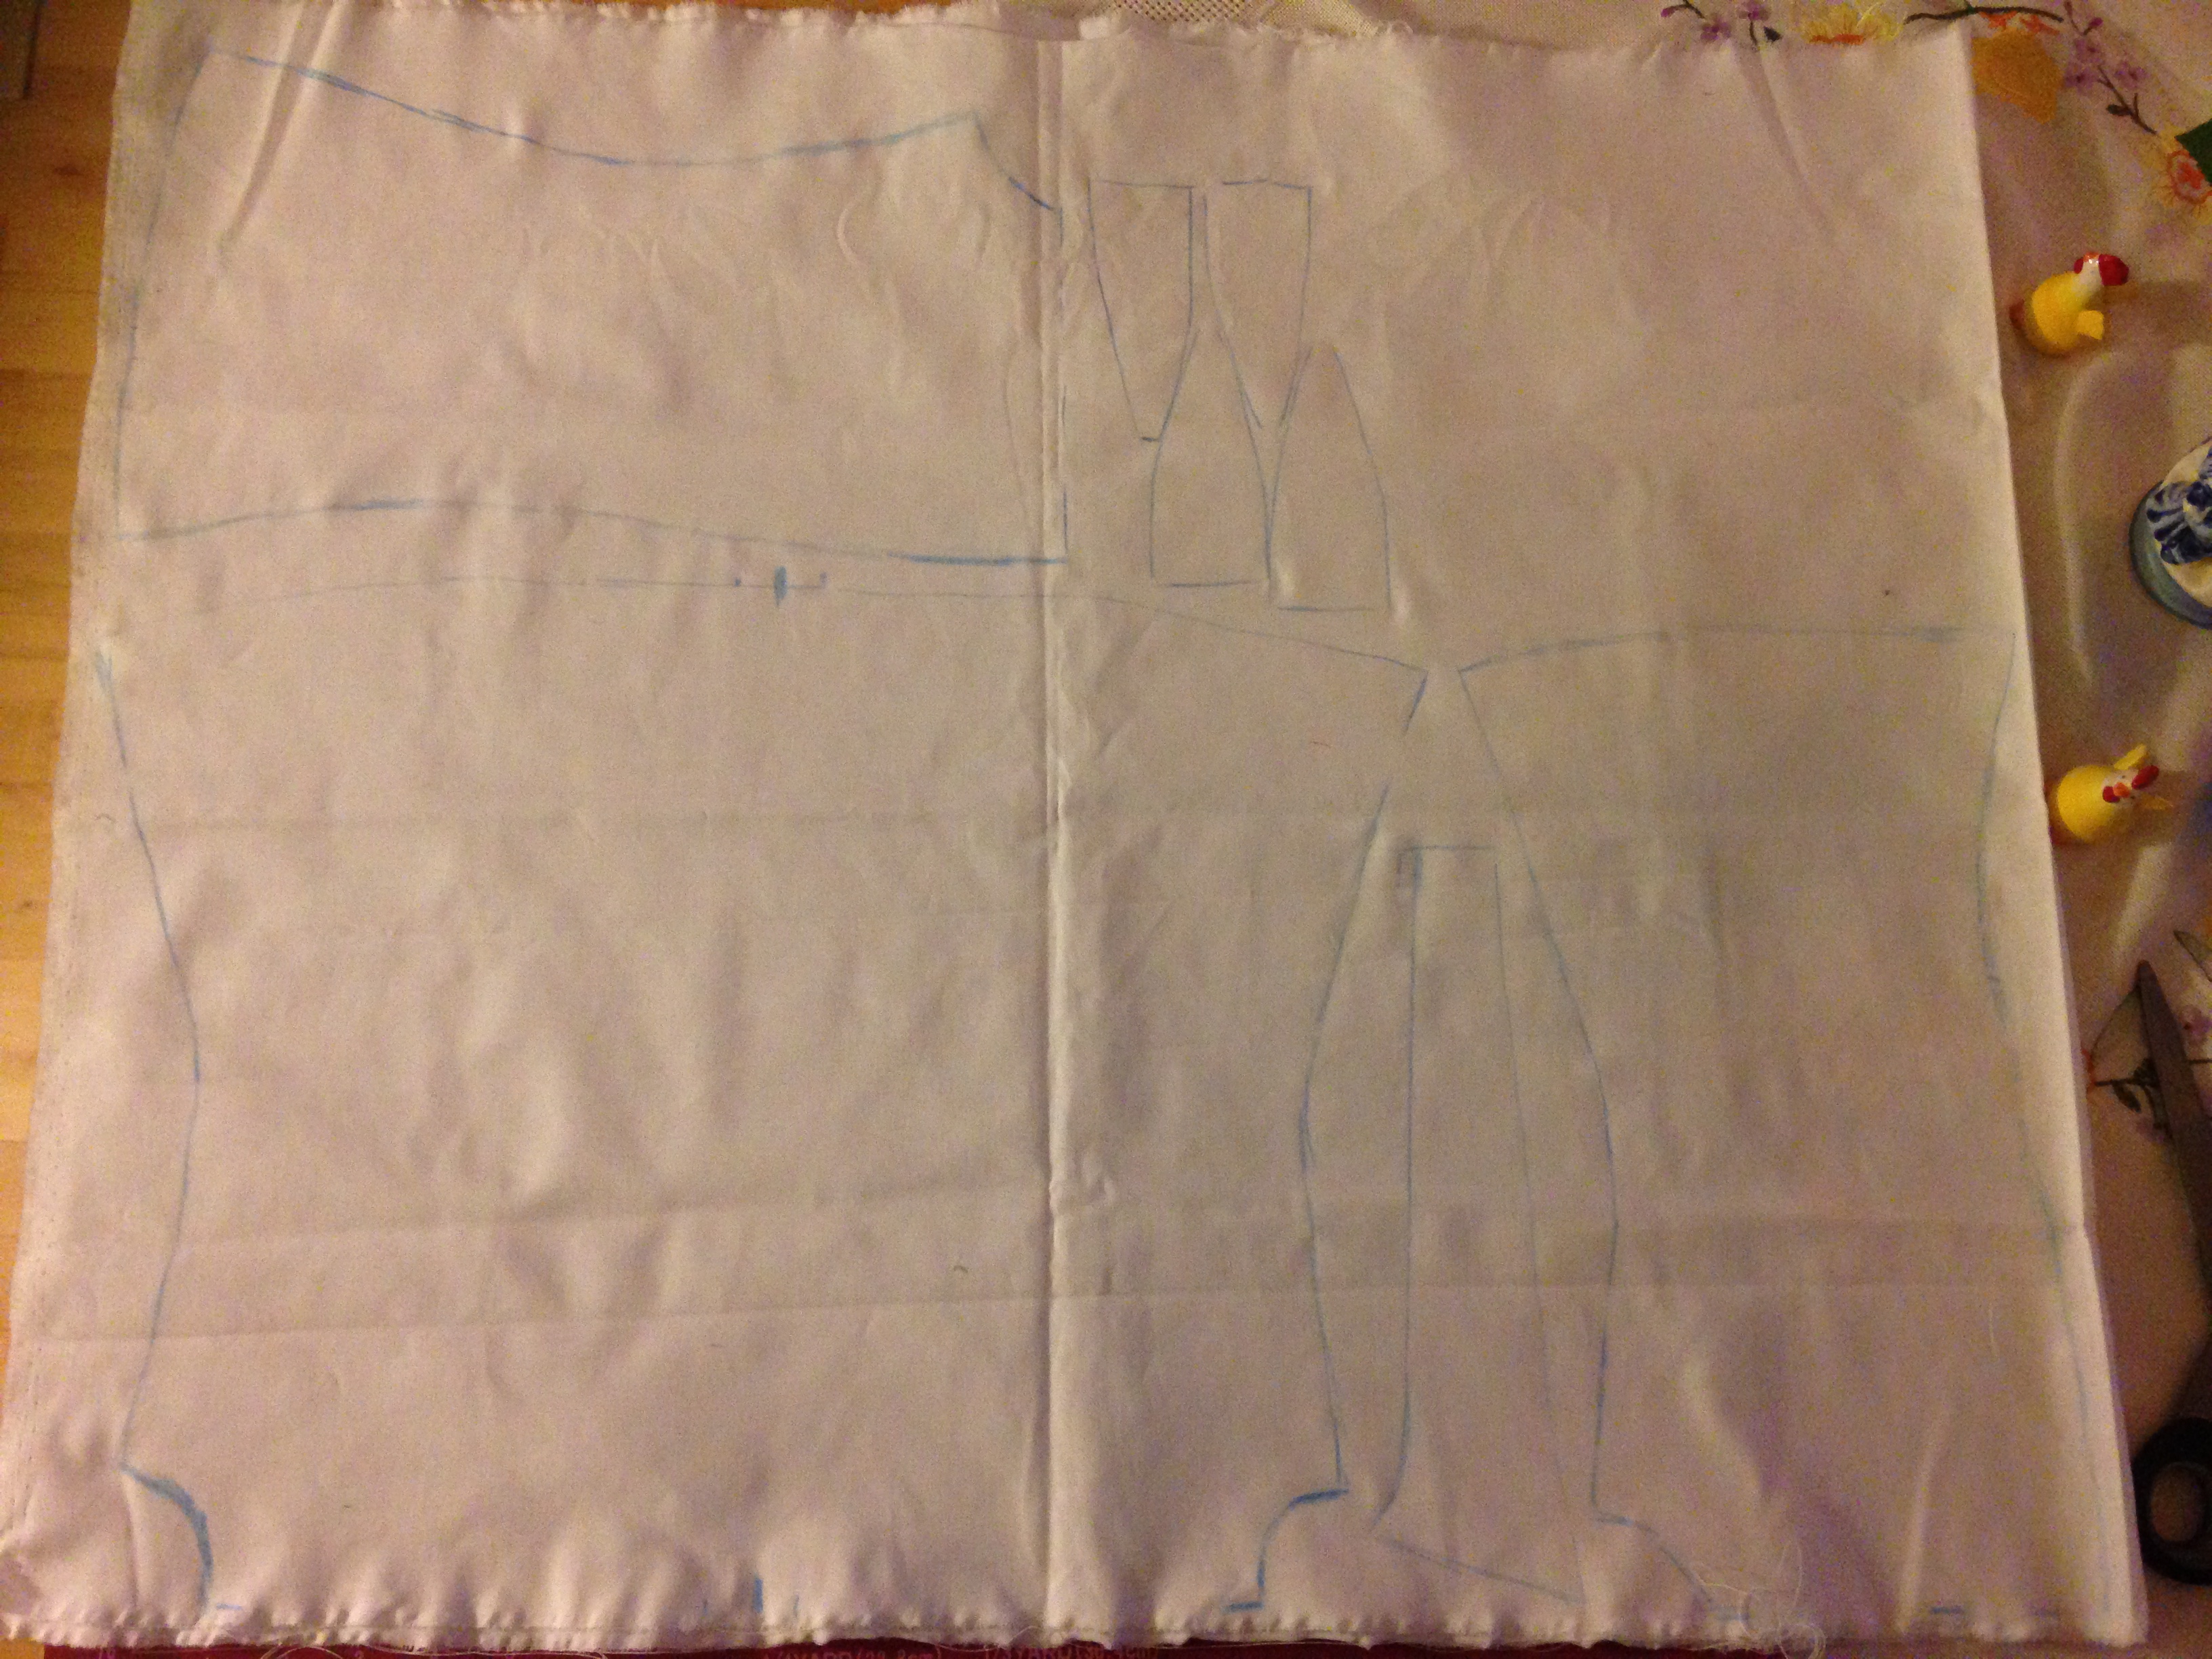
After having put the panels together and then also gathered the inner and outer layer (on machine), I inserted the gussets by hand.
Efter att ha sytt ihop alla paneler och sedan även satt ihop inre och yttre del (på symaskinen), satte jag in kilarna för hand.
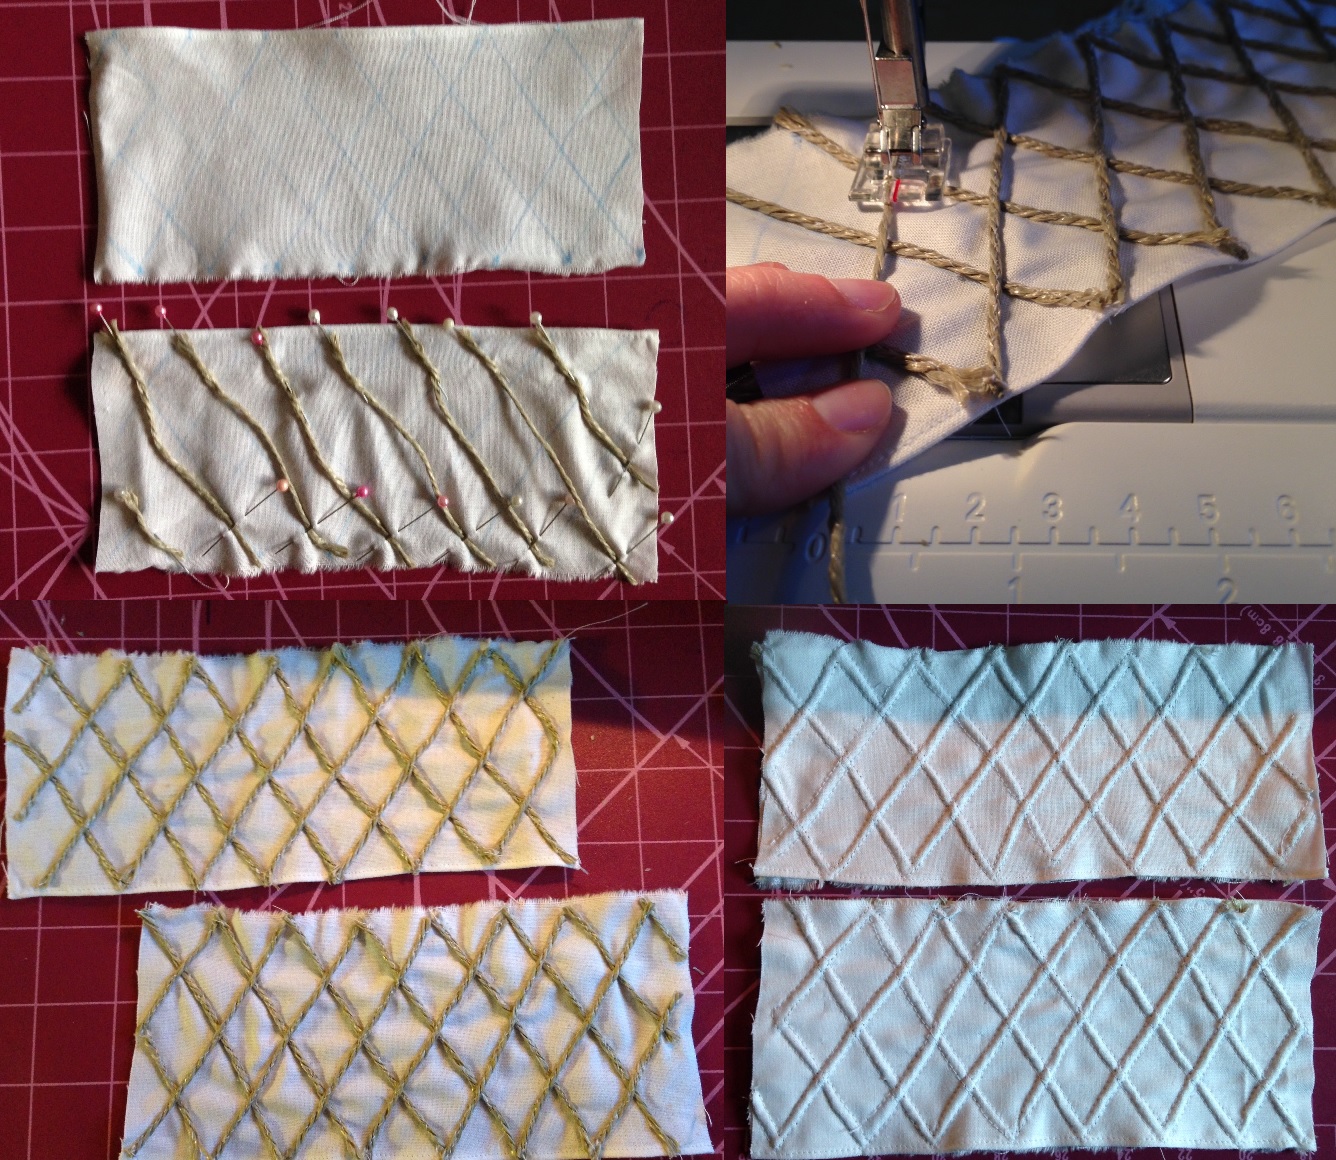
Then I cheeted, badly. I thought that I would save myself time by machine sewing the chords onto another piece of cloth and then put it between the existing layers and make the hand sewing last. I also thought that this would add the needed sturdiness that I otherwise would lack, due to the two layers of fabric. When I tried this, I discovered that my coarse chord showed through the white cotton. Therefore I sewed a piece of cloth to the other side too.
Sedan fuskade jag, mycket fult. Jag trodde att jag skulle bespara mig själv tid och arbete genom att sy fast snöret på en tygbit, som jag sedan skulle stoppa in mellan korsettens båda tyglager. Dessutom hoppades jag att detta skulle kompensera för min bortprioritering av de två inre lagren tyg. Jag upptäckte dock att snöret syntes igenom tyget, så jag fick sy fast en bit tyg på andra sidan också (med passpoalpressarfoten).

Then, after having sewn the channel for the busk, I could at last put the chorded pieces in between the layers. I hand stitched around the chords, so that it at least looked right…
I also chorded in the back, oround the hand stitched lacing holes.
Sedan, efter att ha sytt en kanal för pinnen, kunde jag äntligen sätta in snördelarna. Jag sydde för hand runt snöret, så att det åtminstone skulle se rätt ut.
Jag sydde in snören baktill också, på båda sidor om de handsydda snörhålen.

At last, I made matching baning out of the same fabric and put in a thick thread in the front, so that it can be gather if needed.
Sist gjorde jag egna kantband i samma tyg och tvinnade mormors gamla brodertråd till lagom tjocka snören att dra till upptill, vid behov.
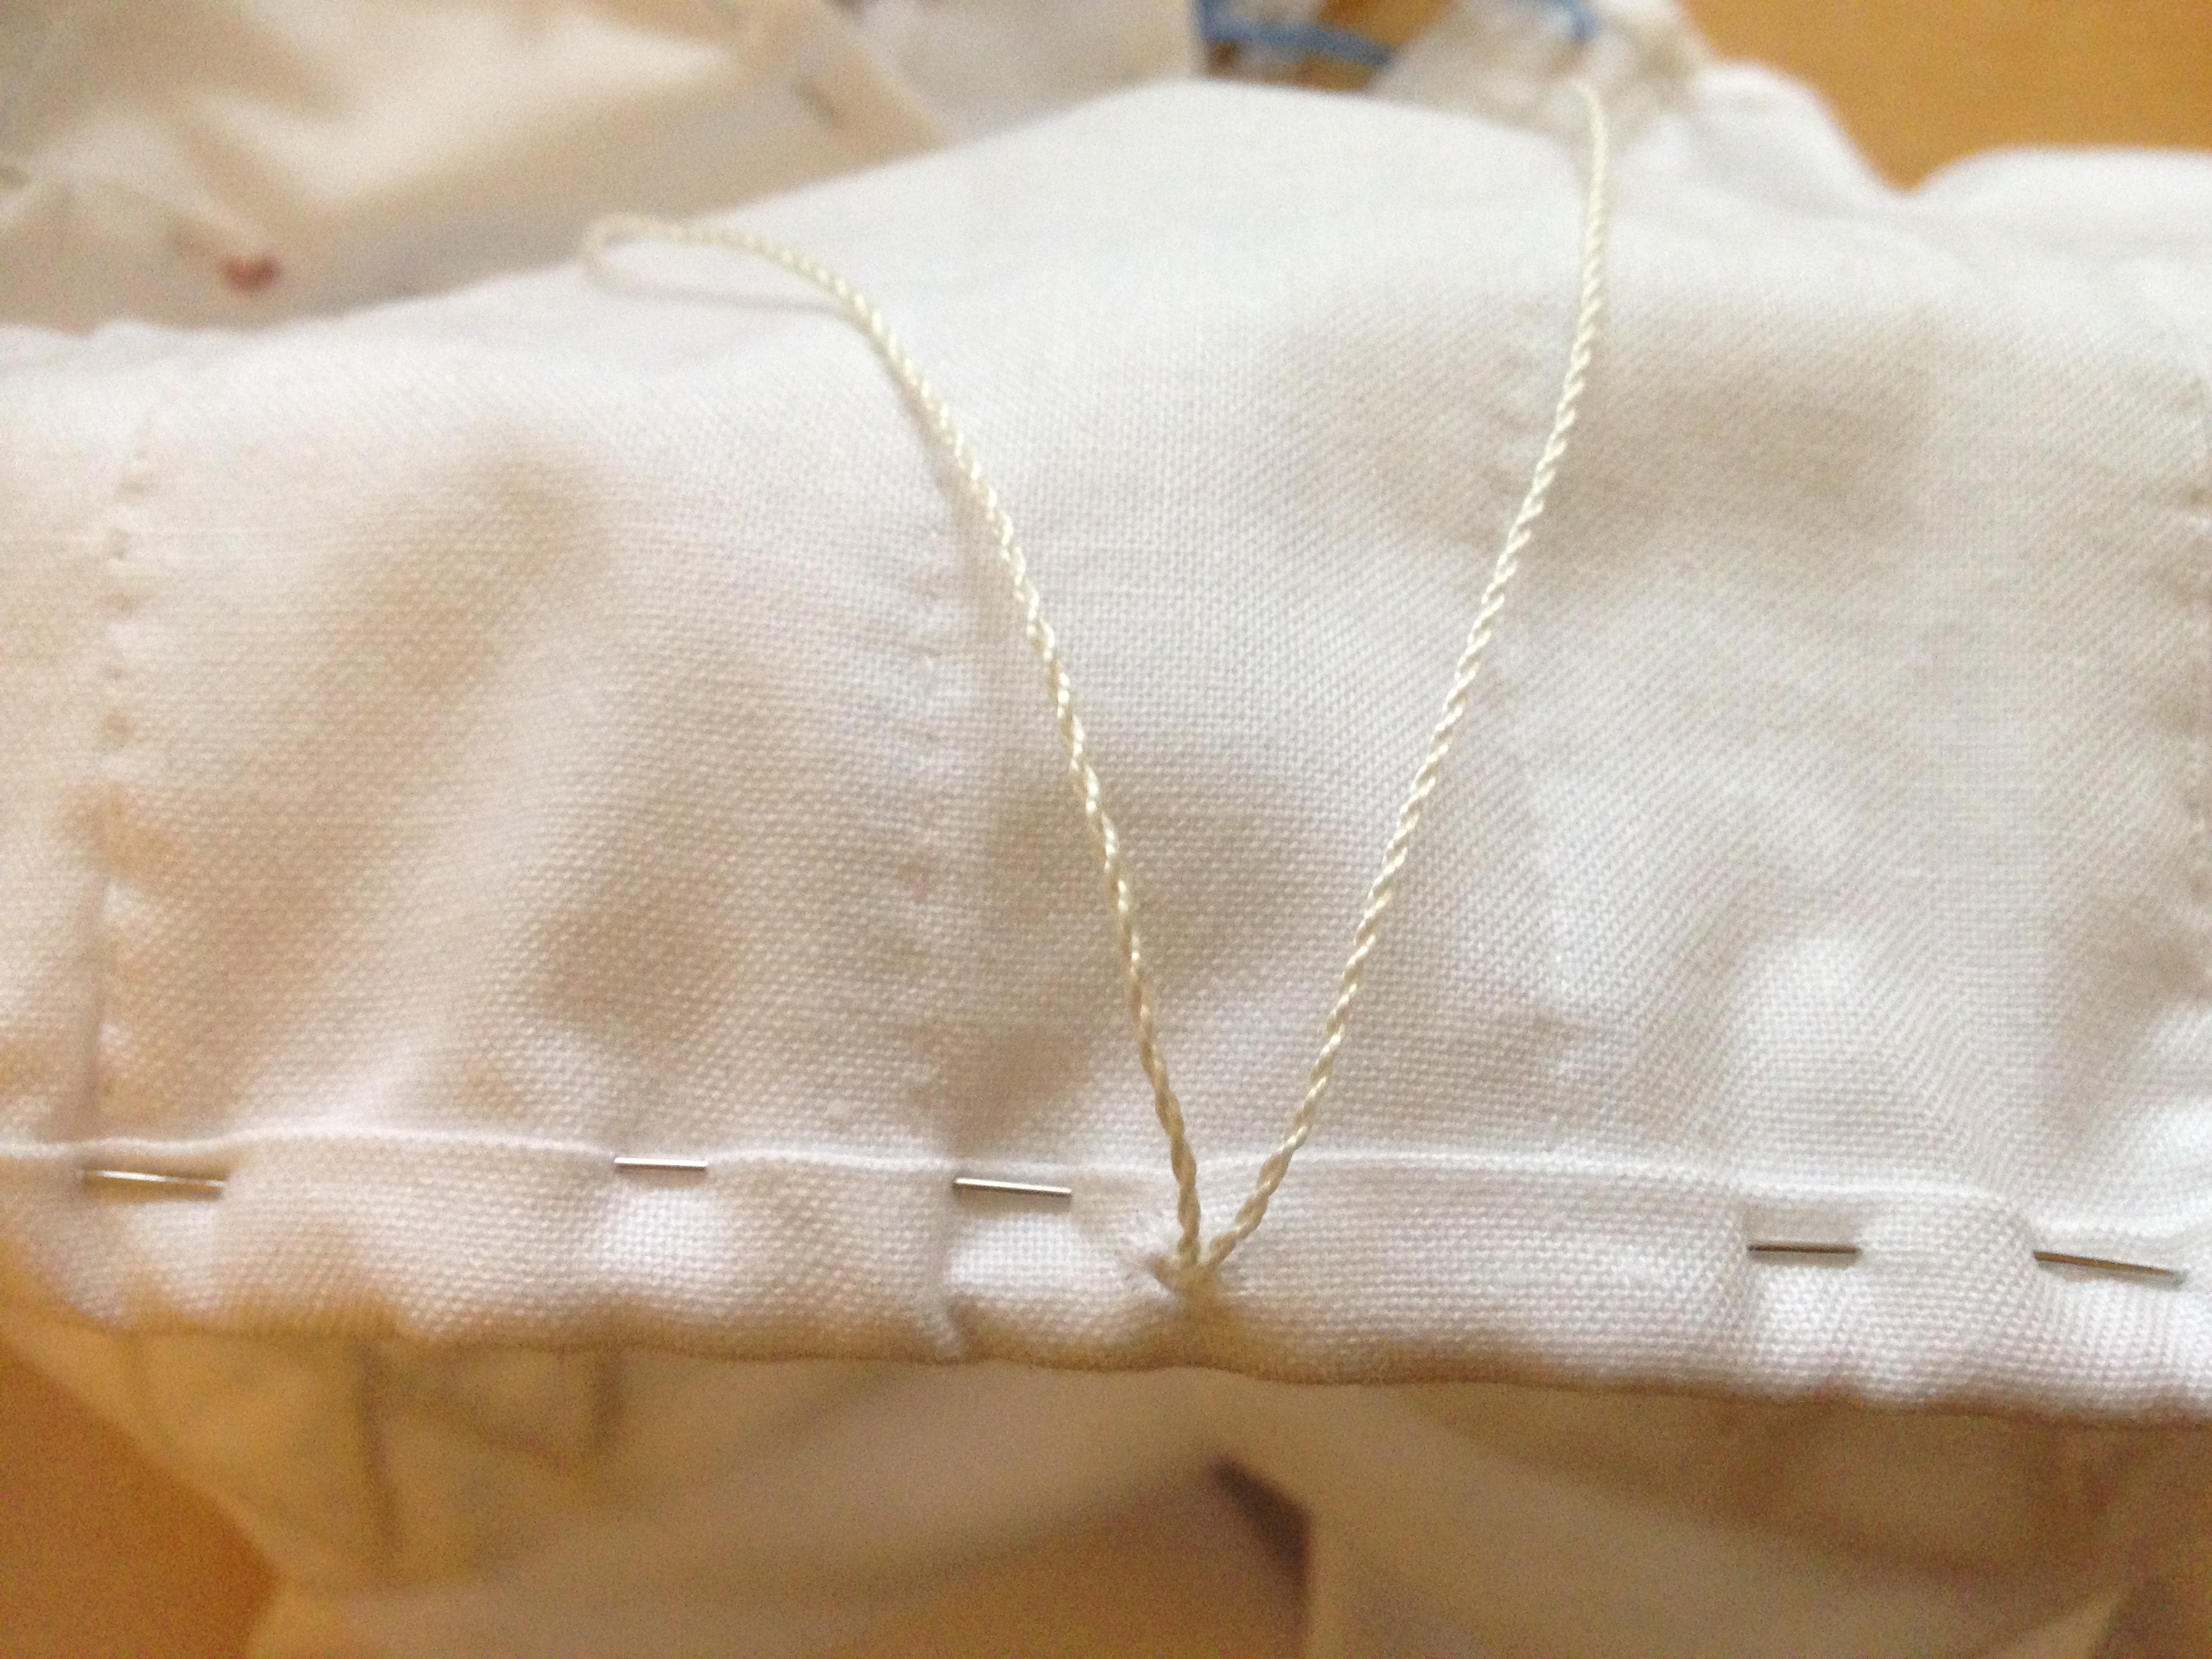
Here is a view of the inside, with the threads coming out of the lacinghole.
Här syns mitt lilla snörhål med snörena som kommer ut.
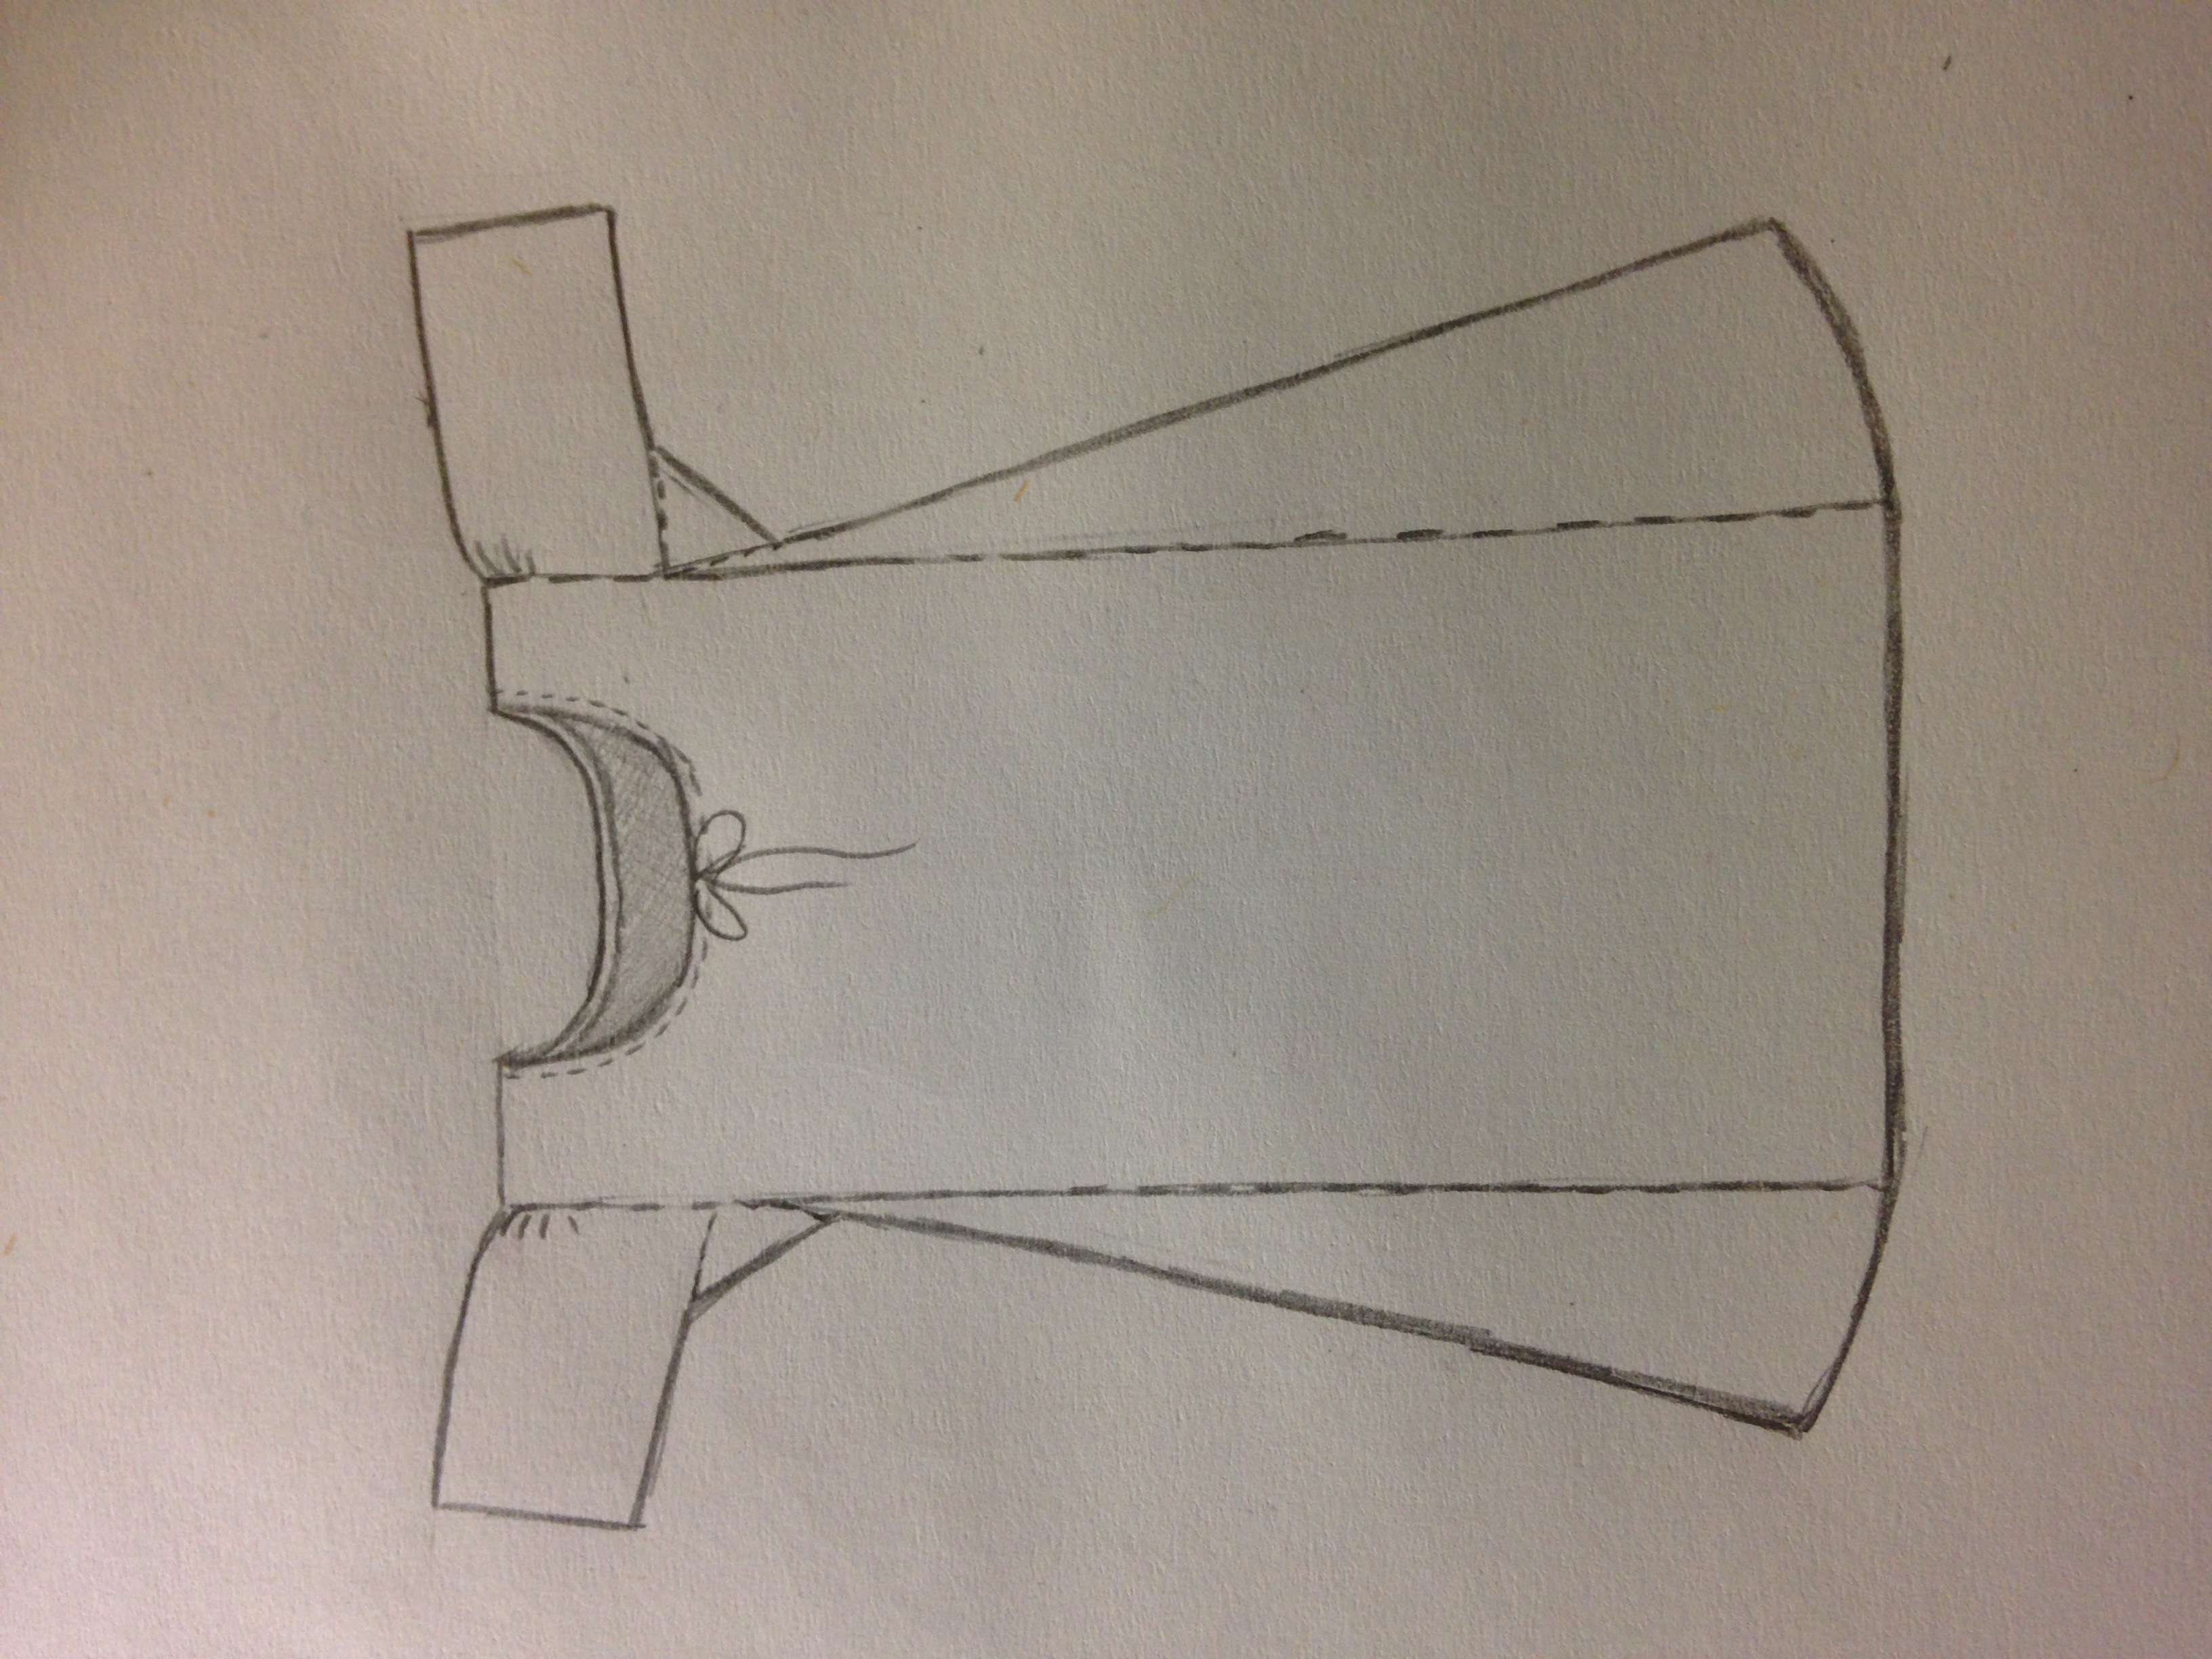
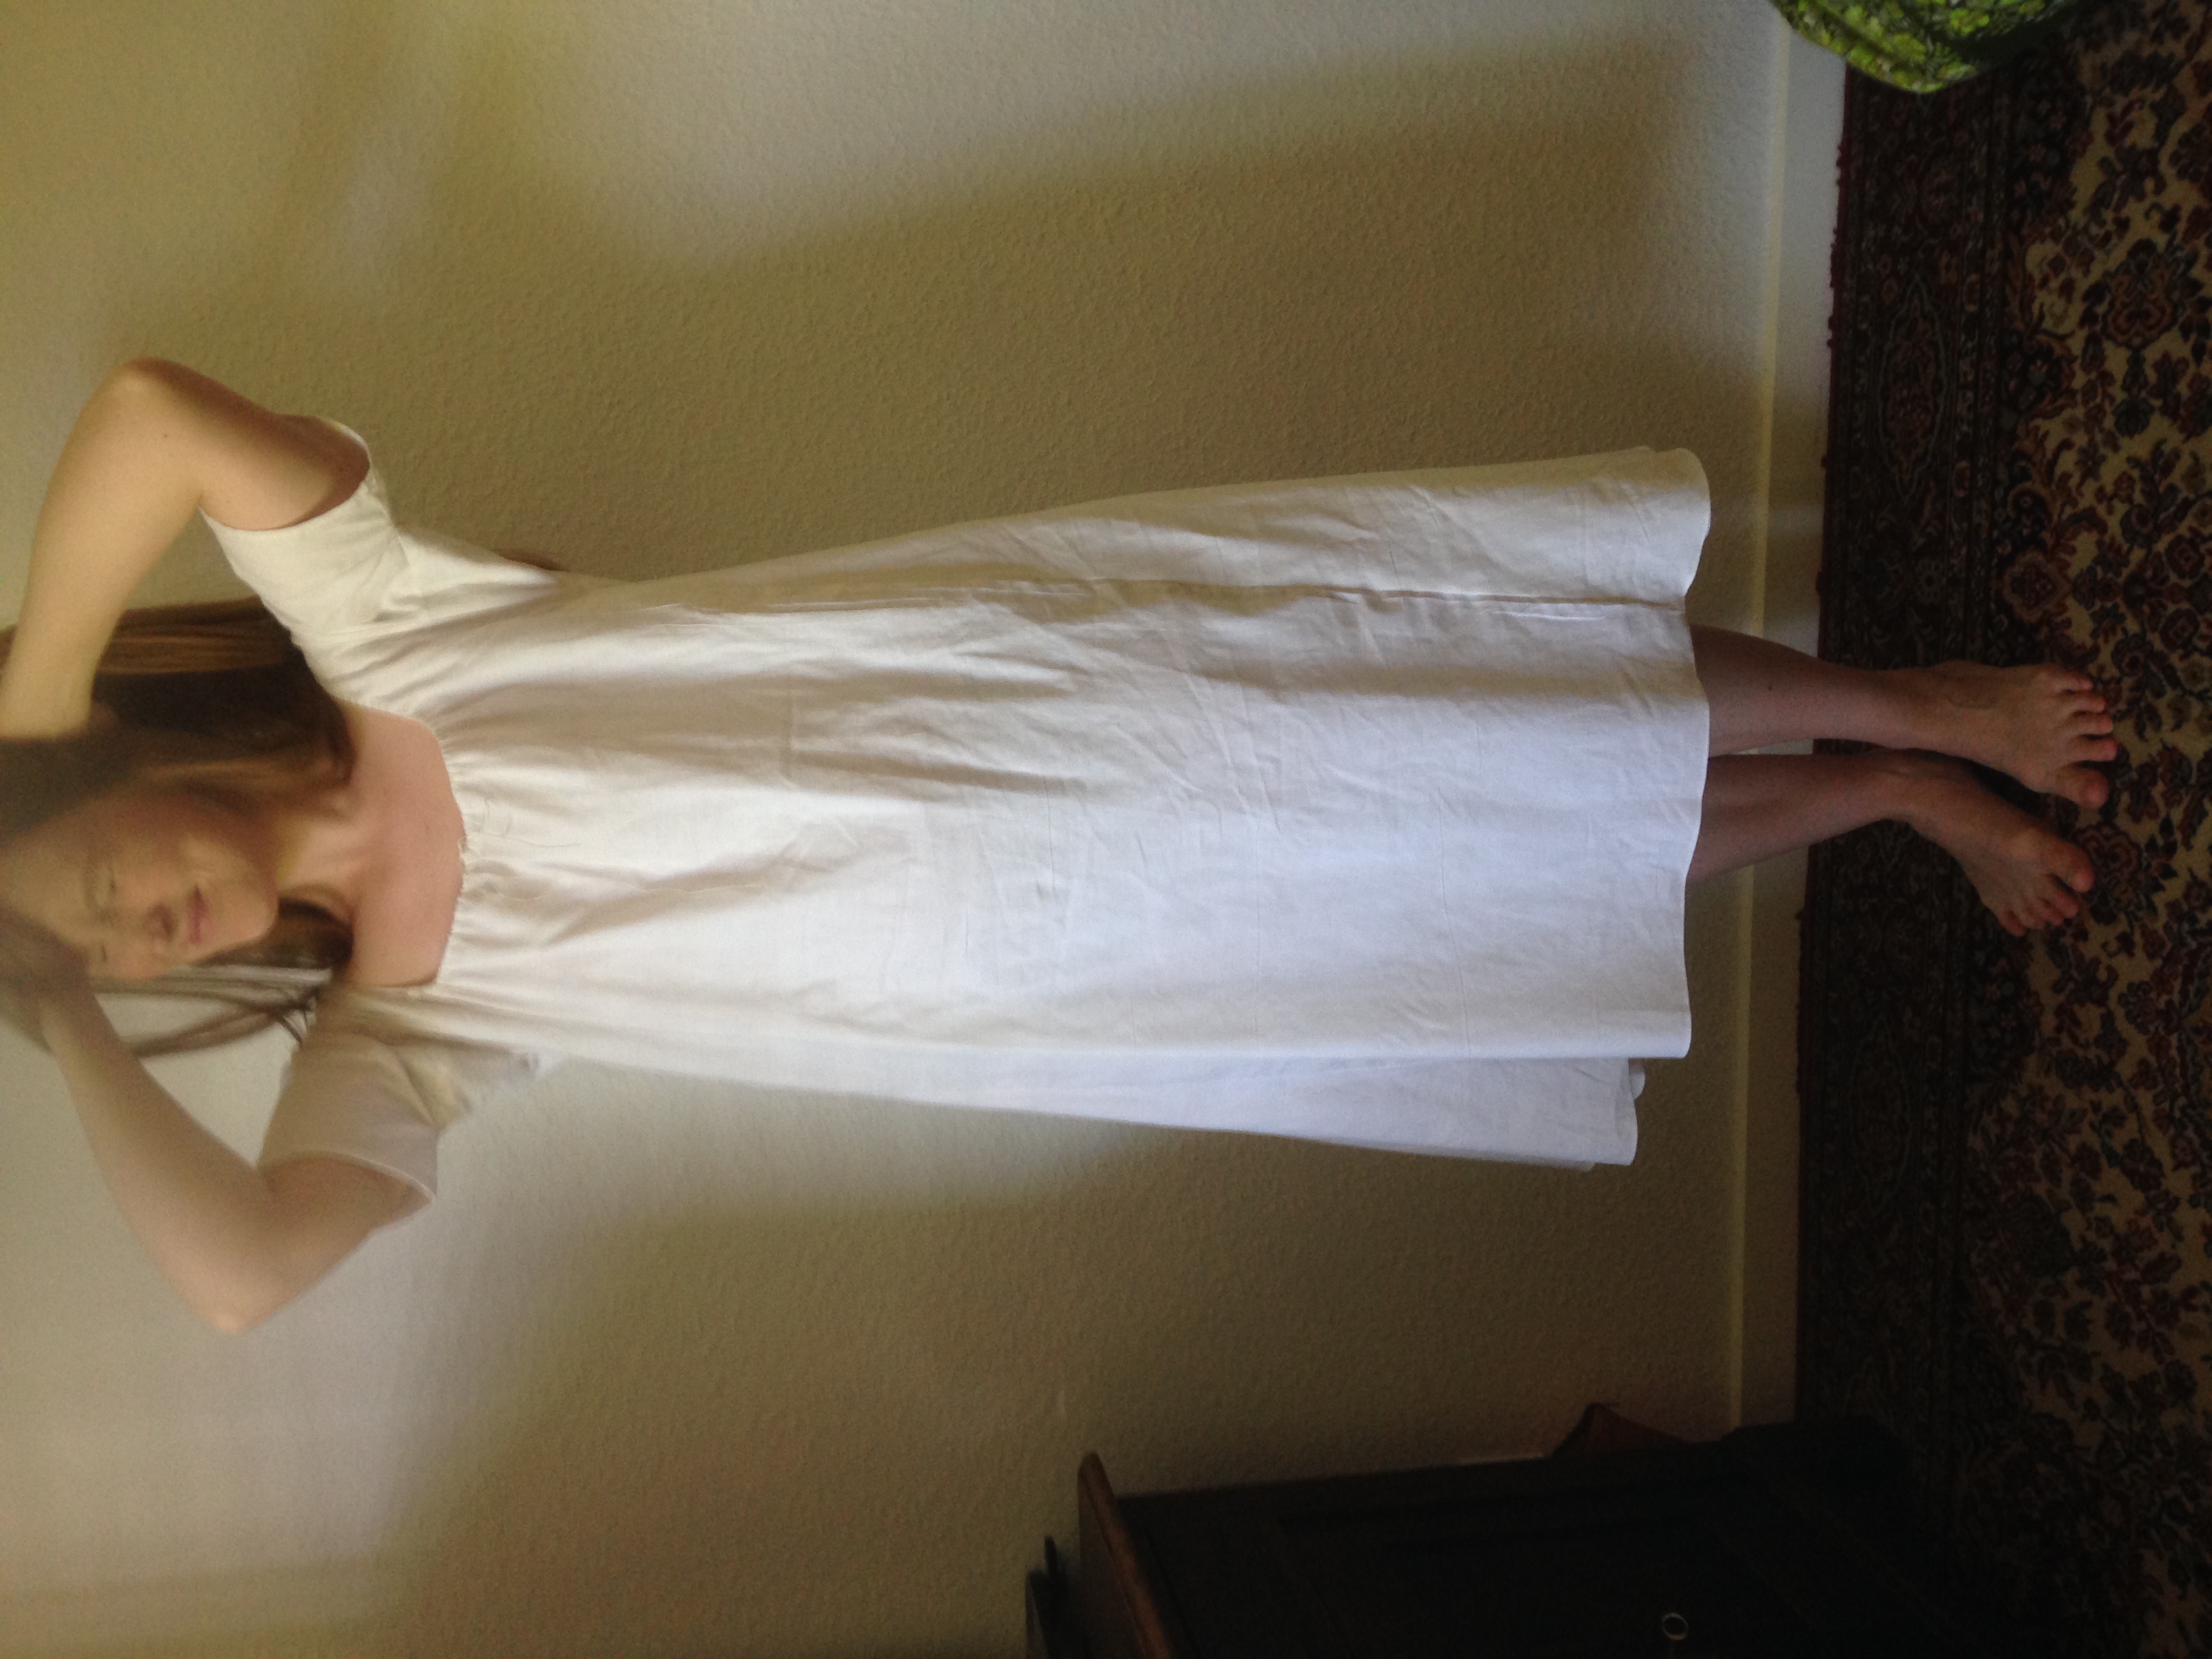
The shift
I made a shift in two hours (mostly by machine, off course). The construction is very simple and is just like it was at the 11th century: One panel in front and one in the back, gussets in the sides of the skirt and between the skirt and arms:
Jag sydde en särk på två timmar (mestadels på maskin, så klart). Konstruktionen är väldigt enkel och är densamma som den var på 1100-talet: en panel fram och en bak, triangulära kilar i kjolens sidor och fyrkantiga kilar mellan klänningsdelen och ärmarna:
Good morning to you!
