Category Archives: Period clothing

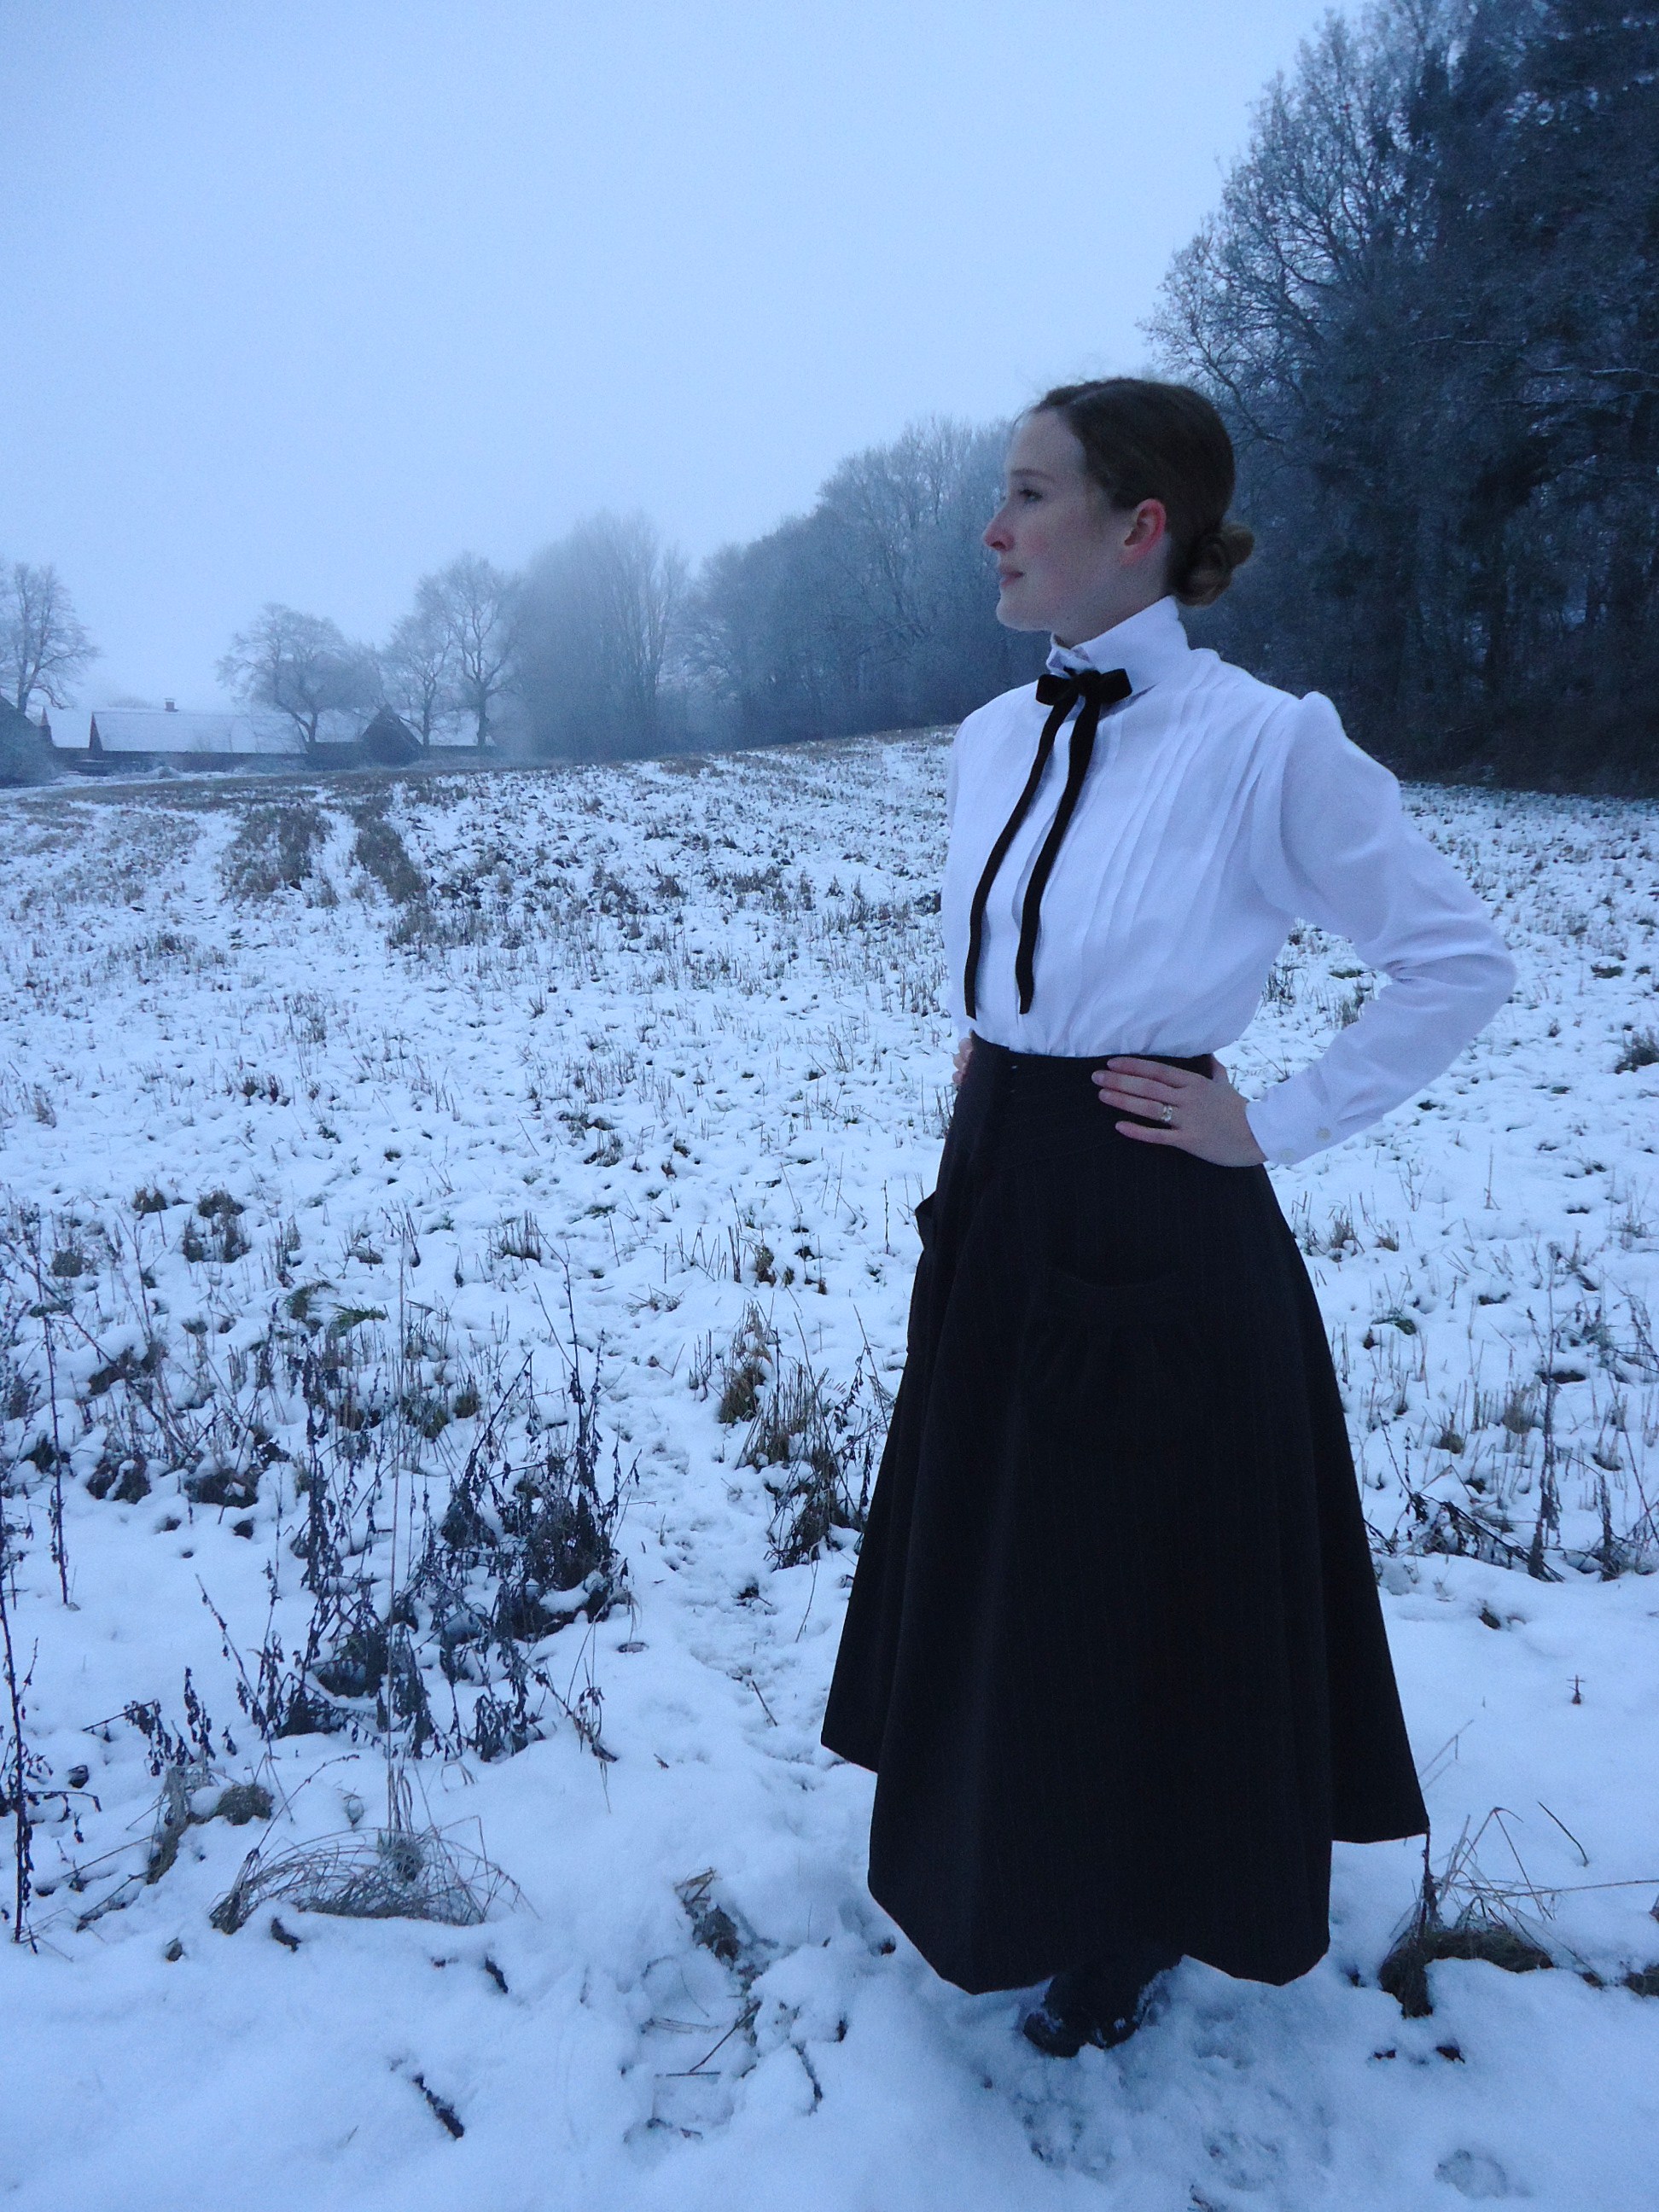
Kjol och blus – 1903

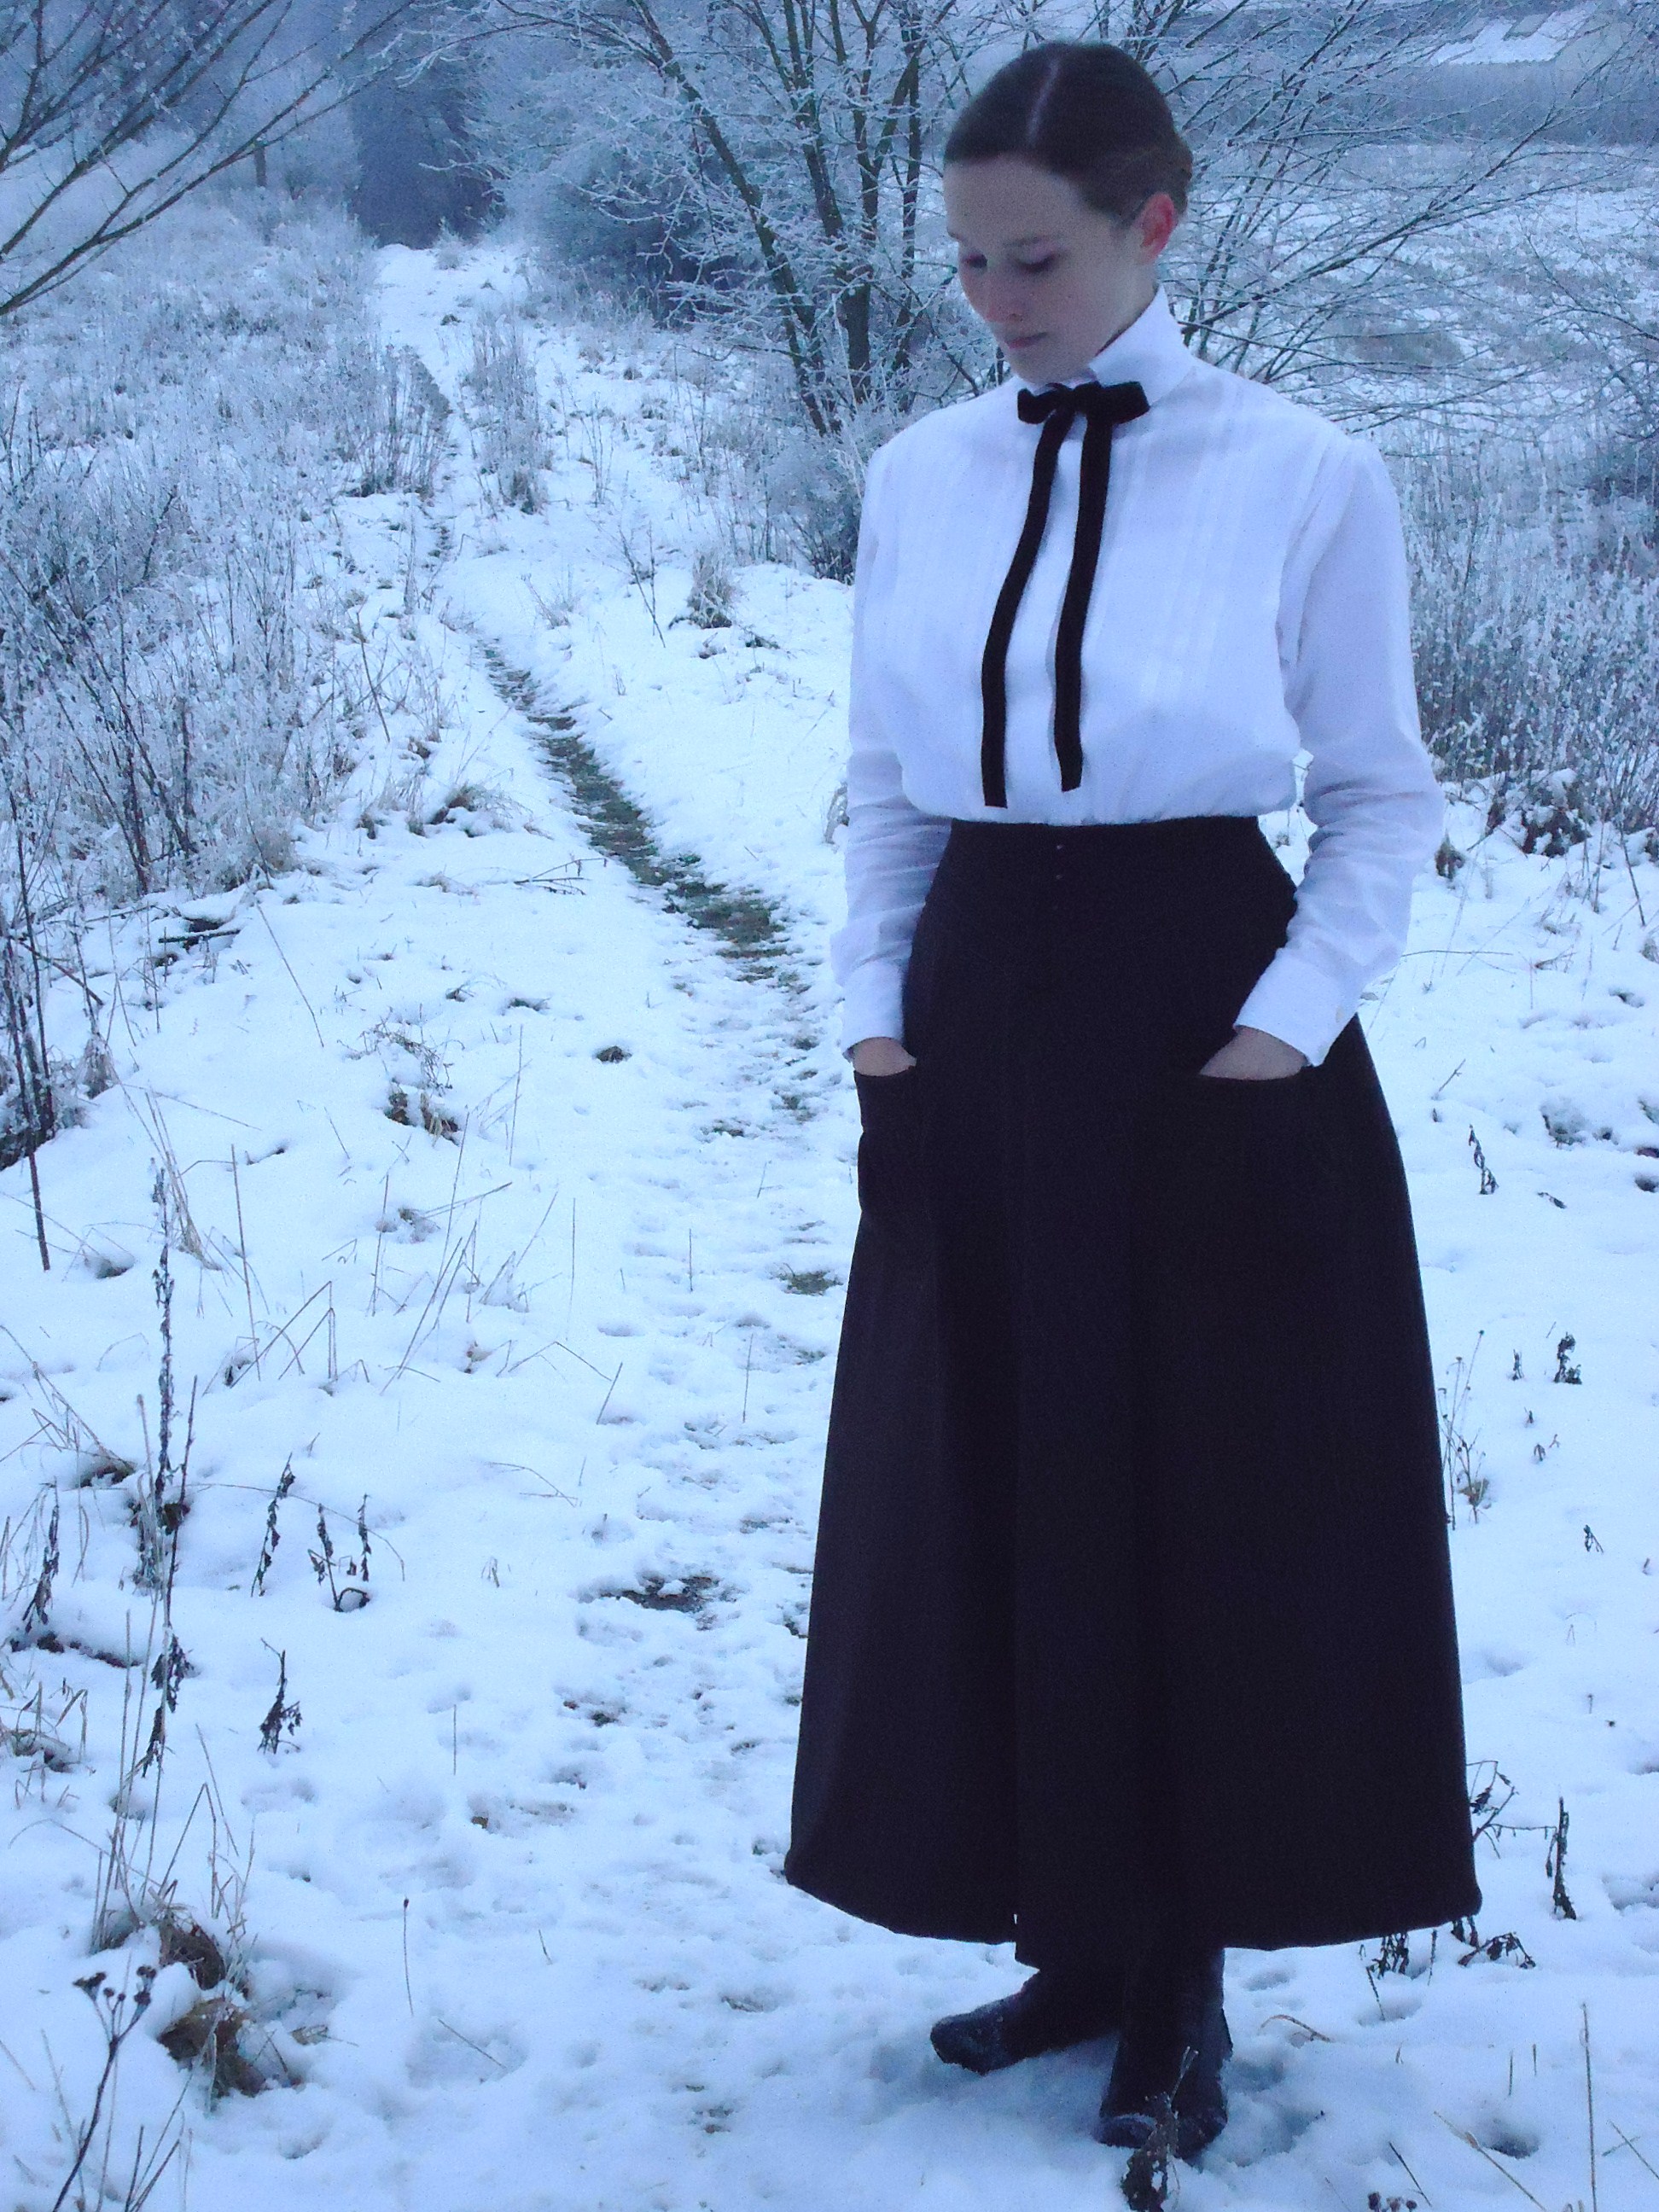
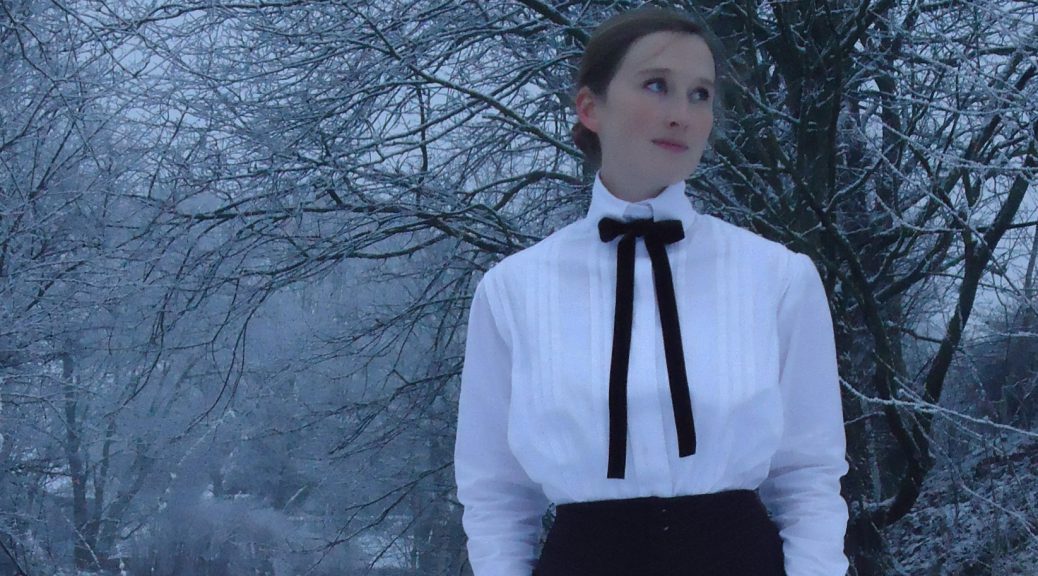
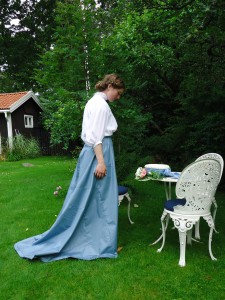
Dräkt med bomullsblus och kjol
Dräkten, fotograferad efter att jag kört hem i upphettad bil. // The outfit, photographed after driving home in the heated car…

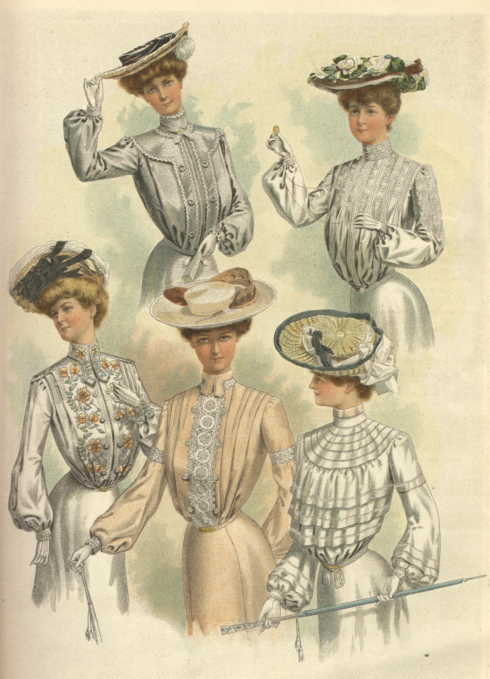
Ni som har läst förra inlägget, om hatten, vet att jag skulle sy en dräkt till 1800-talsdagen i Kisa, 19 juli. Jag ville ha en snoffsig dräkt för en dam från sekelskiftet. I “Patterns of Fashion” hade jag redan sett en del trevliga blus- och kjolmönster. Dessutom kikade jag runt på historiska kläder på Pinterest. Där hittade jag inspiration bland annat från denna dräkt:

Those who have read my last blog post, about my Rose Hat, know that I was about to sew a costume for the “19th century days” in Kisa, 19th of July. I wanted a swanky suit for a lady at the very start of the 20th century. In “Patterns of fashion 2” I had already spotted some nice skirt and shirtwaist patterns. I also roamed Pinterest’s vast plains of vintage garments. There I found inspiration in this shirtwaist.
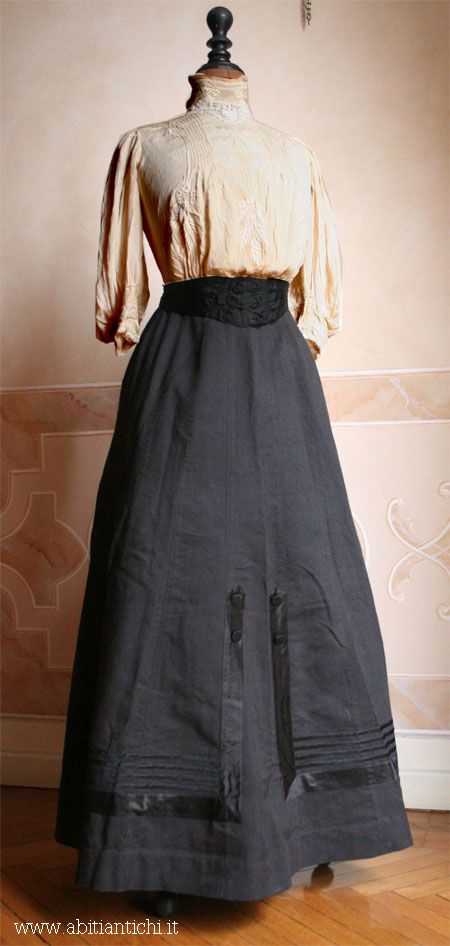
Dräkt från Pinterest - ca 1904 - med stråveck och broderier
Dräkt från Pinterest – ca 1904 – med stråveck och broderier. // Pinterest clothes – ca 1904 – with pin tucks and white work.

Kjolen

I två månader snokade jag runt på Erikshjälpen, i jakt på ett vettigt kjoltyg. Till slut, helgen innan eventet, hittade jag en blå gardin för 69 kr.

For two months I snooped around at the town’s second hand shop, in hopes to find an appropriate skirt fabric. Finally I found a blue curtain for 69 SEK.
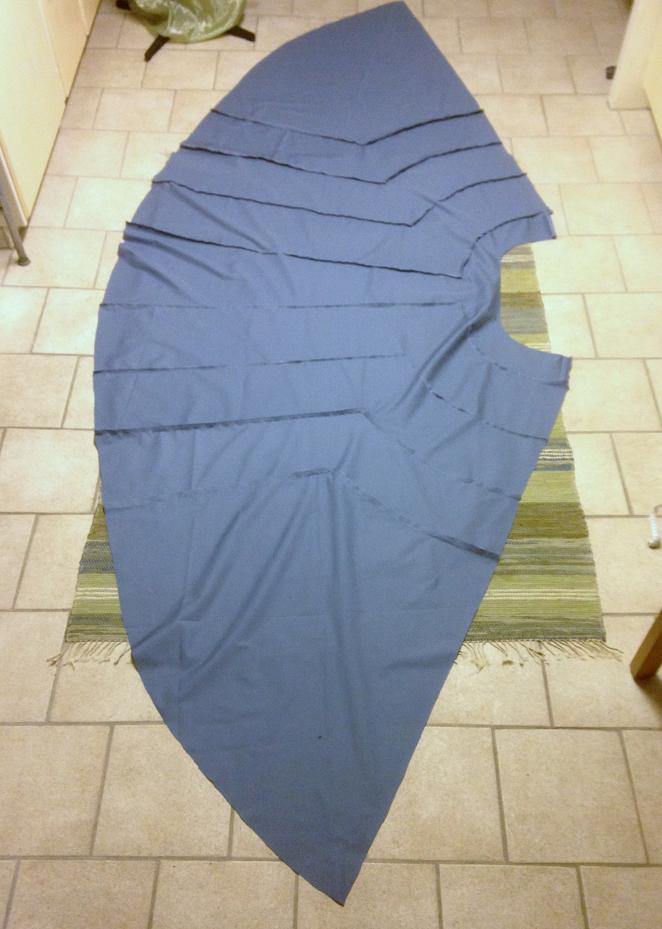
Kjolen, på avigan, innan den sytts samman baktill.
Kjolen, på avigan, innan den sytts samman baktill. // The skirt, from the wrong side, before sewn together in the back.

Jag vet inte hur det är med rättigheterna för mönstret, så jag lägger inte ut bilden här, men ni får i alla fall se hur kjolen ser ut innan den är hopsydd baktill.

I don’t know how the copyright works for this skirt pattern, so I won’t show it here. Anyhow, this what the skirt looks like from the wrong side, before it’s sewn together.
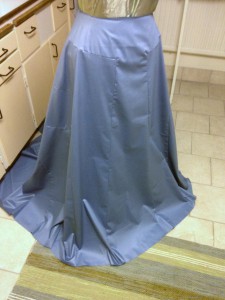
Kjolen innan den fållats och pressats.
Kjolen innan den fållats och pressats. // The skirt before hemmed and ironed.

Kjolen knäpps baktill med hyskor och hakar. Den har fortfarande inte fått de dekorativa banden, som ska täcka sömmarna, men i väntan på att jag hittar lämpligt material, tycker jag att den ser helt ok ut som den är.

The skirt is closed with hooks and eyes in the back. It still hasn’t got the decorative ribbons, that should be on top of the seams. Until I find the optimal material for this, I think it looks alright though.

Blusen

Jag var osedvanligt förberedd när jag anlände till Sverige i år. Förutom att redan ha letat reda på lämpliga mönster, hade jag även hittat fina broderifiler på internet, som jag köpt, en snäll bekant hjälpt att konvertera till rätt filtyp, och sedan hade jag maskinbroderat mönstren på tyll.

I was unusually well prepared when I arrived in Sweden this year. Except for having found patterns, I had also bought appropriate machine embroidery files, got help from my sewing machine guru to convert them to the right file type, and had even sewn the embroidery on tulle leftovers.
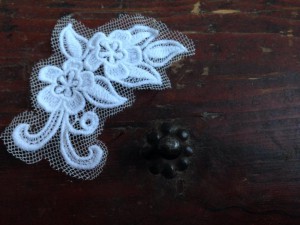
Maskinbrodyr på tyll
Maskinbrodyr på tyll. // Machine embroidery on tulle.

Dessutom hade jag köpt ett tunt bomullstyg, medan jag praktiserade i Viborg, så därmed hade jag alla ingredienser som jag behövde för min blus.

Furthermore, I had bought a lightweight cotton fabric, while making my internship in Viborg. Hence, I had all the necessary ingredients for th shirtwaist.

Experiment
Stråveck och brodyr fastnålad. // Pin tucks and white work pinned to the shirtwaist.

Jag experimenterade med placering av veck och broderier på provdockan, innan jag började sy. Sedan började jag med stråvecken.

I experimented with the placement of the pin tucks and embroideries before I started sewing. Then I obviously made the pin tucks.
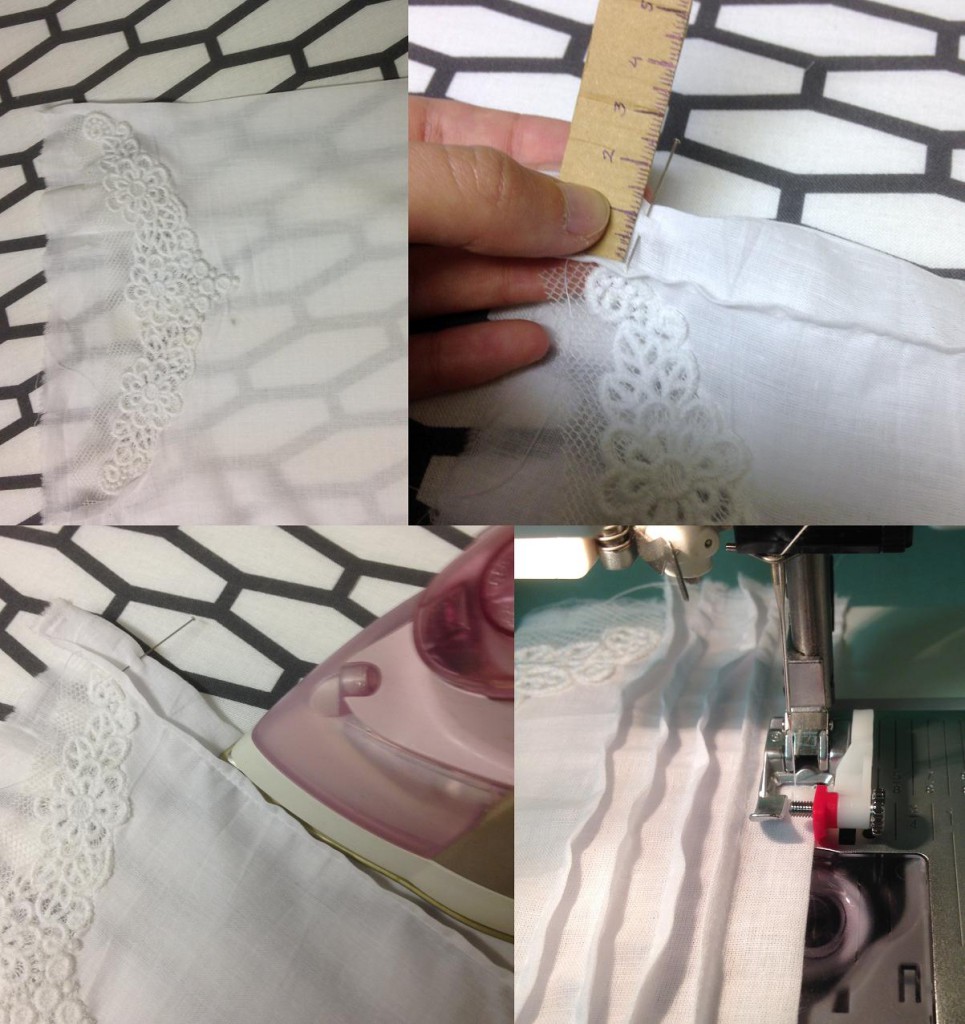
Stråveck: 1) Stryk vid första vecket och sy önskad vidd 2) Mät ut nästa veck + mått mellan vecken 3) Stryk vecket 4) Sy vecket... om och om igen
Stråveck: 1) Stryk vid första vecket och sy önskad vidd 2) Mät ut nästa veck + mått mellan vecken 3) Stryk vecket 4) Sy vecket… om och om igen. // Pin tucks: 1) Iron the first fold and sew at the wanted breadth of the pleat 2) Measure the distance to the next pleat + the breadth of the pleat 3) Iron the fold 4) Sew the fold as in the first step and repeat the process for as many times as you want.

När detta var klart var det dags för placering av övriga broderier. Dessa nålade jag noga fast, hela vägen runt. Sedan klippte jag upp tyget bakom och fållade samtidigt som jag sydde fast broderiet i blusen.

When this was done, it was time for placing the embroideries. These I pinned down carefully, the whole way around. Then I cut superfluous fabric away as I hemmed and fastened the embroidery to the shirtwaist, from the wrong side.
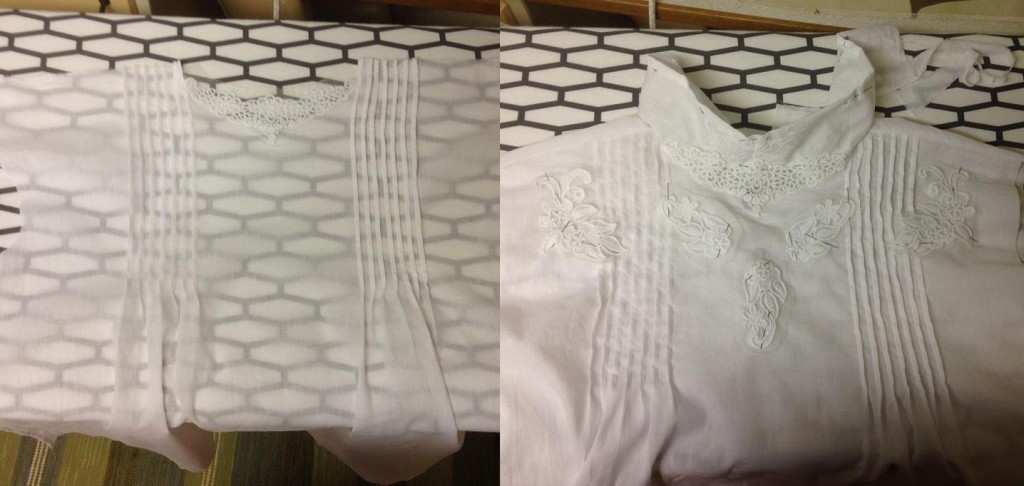
Placering av broderier, även över stråvecken
Placering av broderier, även över stråvecken. // Placement of the white work, partly on top of the pin tucks.

Därefter skulle ärmarna fästas i blusen. Eftersom det är sommar och det 1903 verkar ha varit populärt med armbågslånga ärmar, gjorde jag dem korta. Innan jag sydde fast dem i blusen, gjorde jag en raksöm upptill och nedtill, med långa stygn, så att jag enkelt kunde dra åt tråden och rynka vid ärmkullen och runt armbågen. När ärmarna var fastsydda, gjode jag ett kantband i samma tyg och sydde fast nedtill.

Then the turn had come to the arms. As it is summer and elbow length of the arms seem to have been popular in 1903, I decided to go for short arms. Before attaching them, I made a “long, loose machine seam” at the top and the bottom and then gathered the fabric at the shoulder and elbow. Then I attached the arms to the shirtwaist and covered the raw edges with binding in the same fabric.
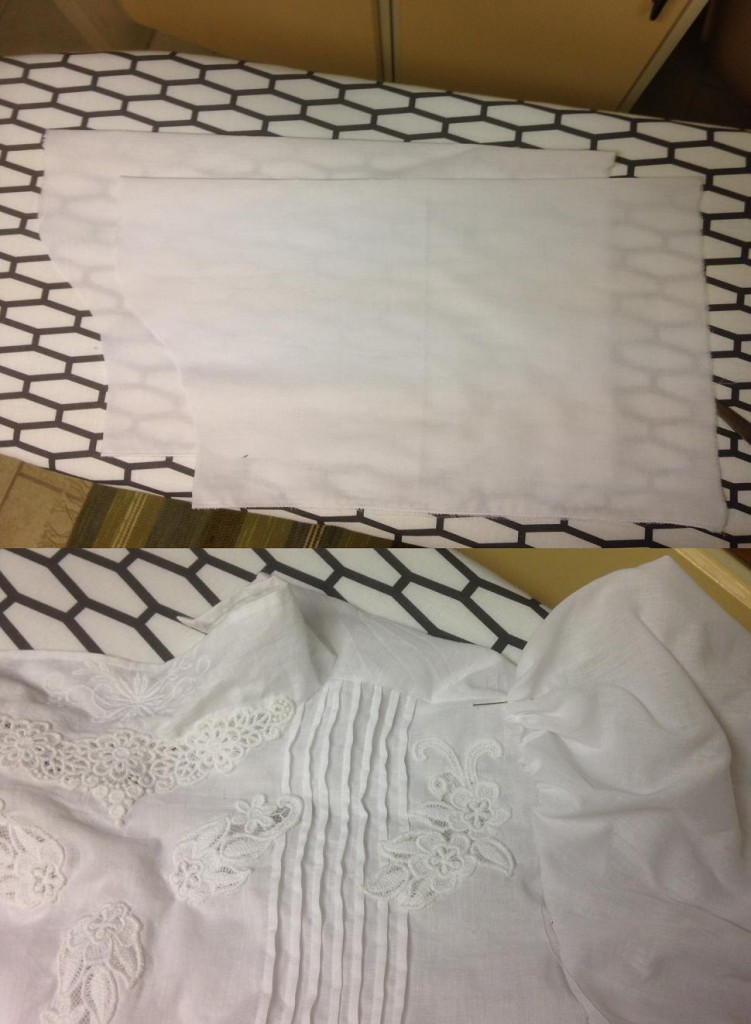
Två ärmar, 2 dm längre än armbågslängd. Veckas vid ärmkullen och nedtill.
Två ärmar, 2 dm längre än armbågslängd. Veckas vid ärmkullen och nedtill. // Two arms, two decimetres longer than shoulder-elbow length. Gather fabric at the top of the shoulder and at the elbow.

Sedan var det bara knäppningen kvar. Blusen är bara öppen halvvägs ner, så i nacken sydde jag fast dekorativa fuskpärlor med öglor i samma bomullstyg och nedanför knäppning med sydda hyskor och silverhakar.

Then there was nothing left but the closing in the back. It is sewn together at the bottom half. At the neck, I used pearl buttons and loops made from the same fabric. The rest was closed with silver hooks and eyes. This later proved to be a horrible solution, as the unusually big hairstyles use to get stuck in the hooks. Well, it looks great anyway.
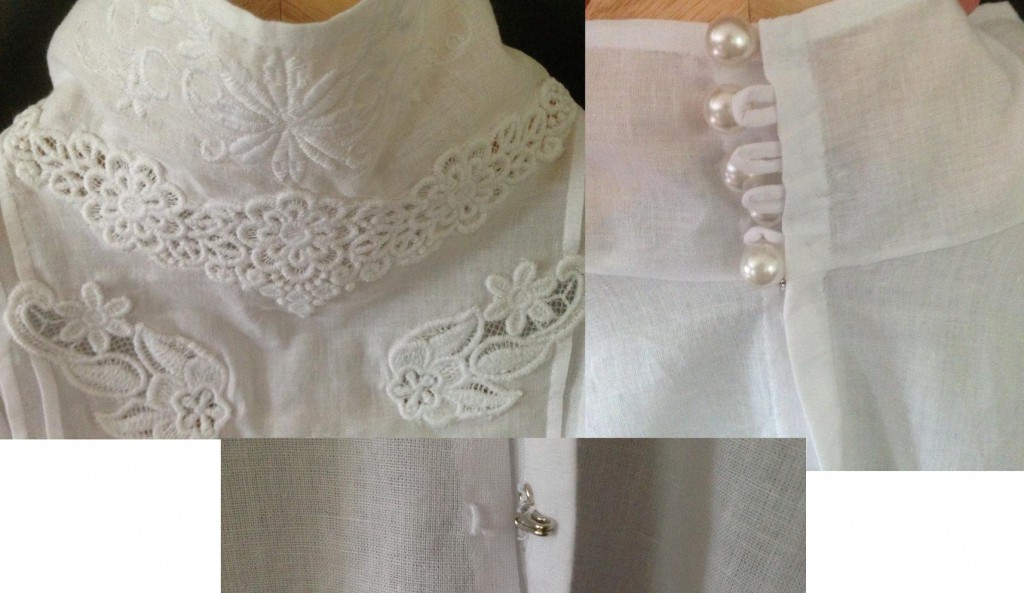
Hals med pärlknäppning och nedanför knäppning med hyskor och hakar.
Hals med pärlknäppning och nedanför knäppning med hyskor och hakar. // High neck closed with buttons and loops. The rest of the back closed with hooks and eyes.

Sedan var blusen faktiskt klar!

And suddenly, the costume was actually complete!
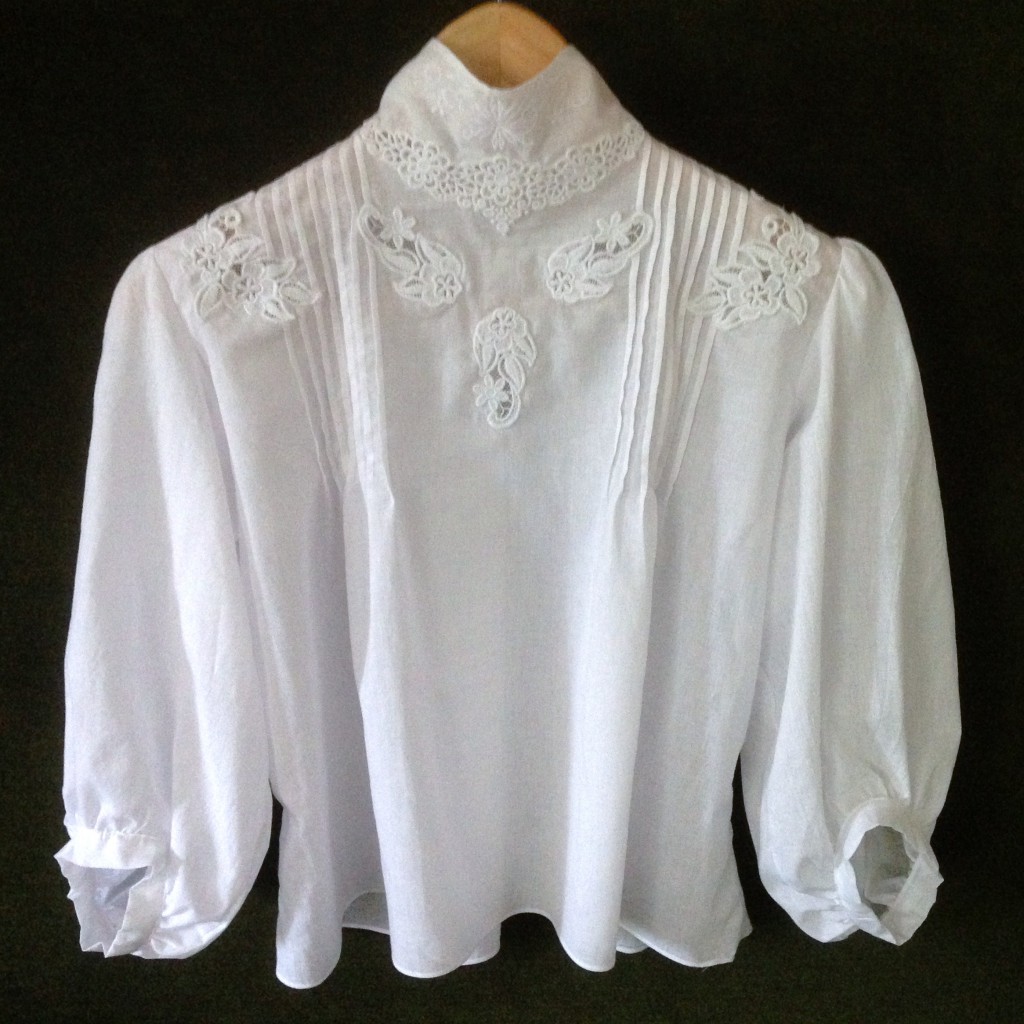
Färdig blus
Färdig blus. Det enda som saknas nu är en kanal för midjebandet. // The finished shirtwaist, only lacking a channel and its waistband.
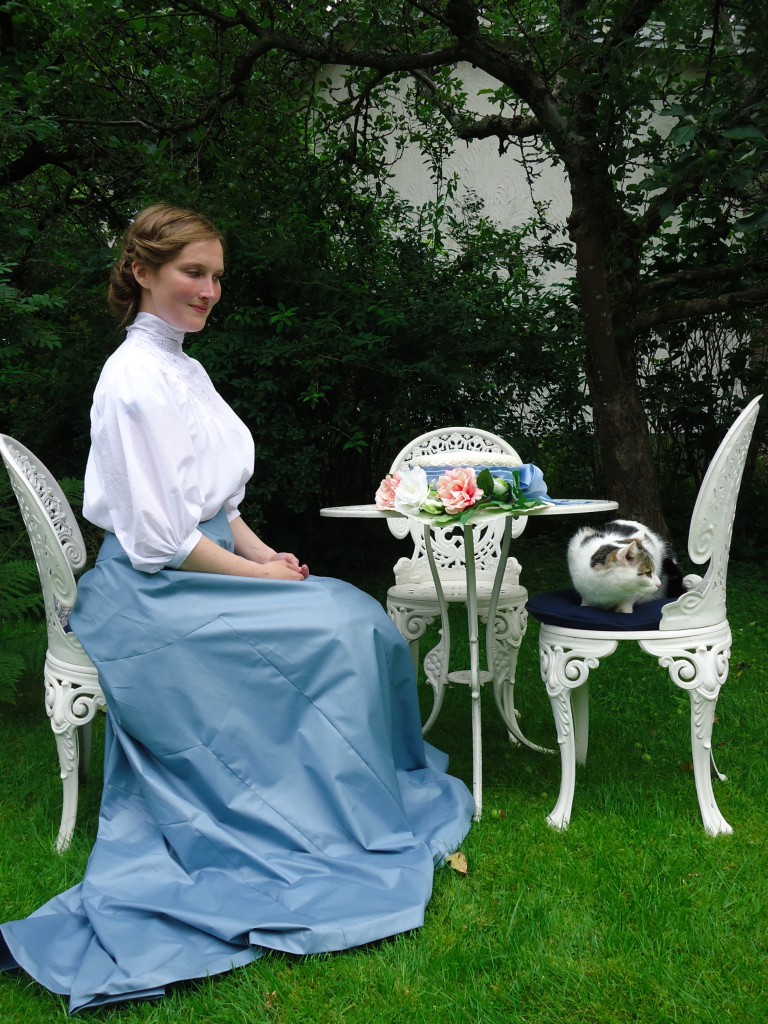
Till bords med katten
Till bords med katten. // At the table with the cat.
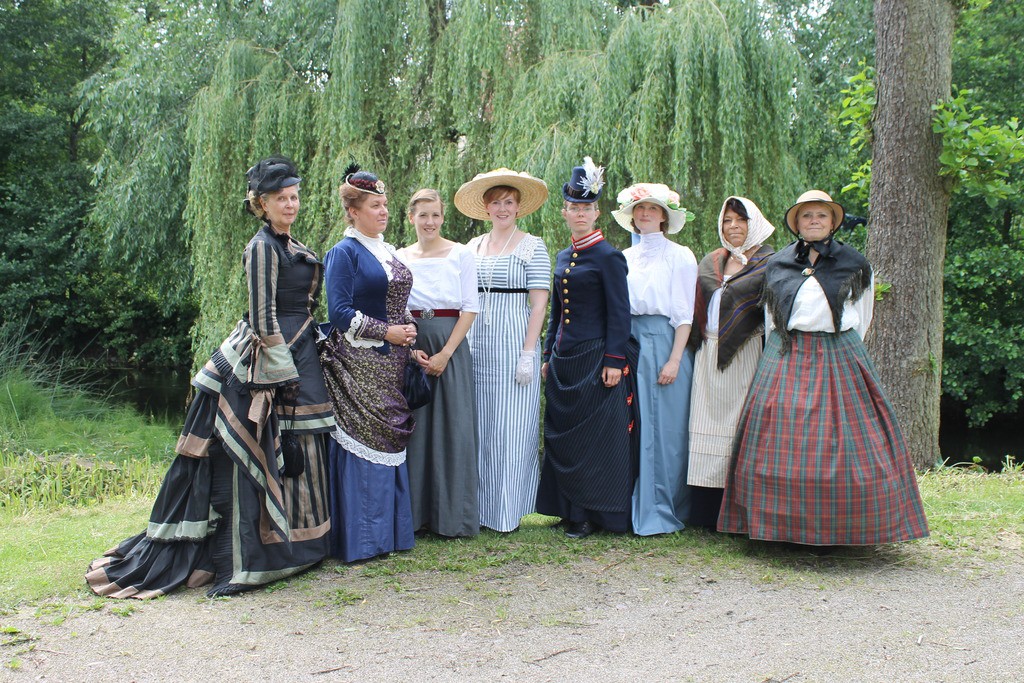
Dagens 1800-talssällskap, i Kisa.
Dagens 1800-talssällskap, i Kisa. Foto: Elin Evaldsdotter // In Kisa with today’s participants from the 19th Century Society. Photo: Elin Evaldsdotter
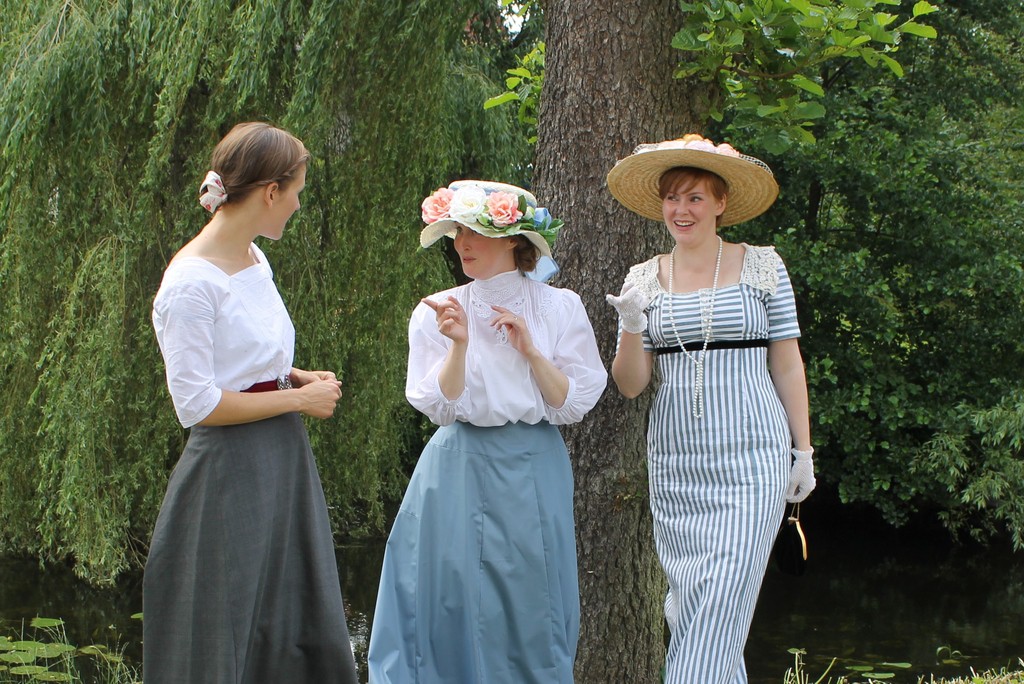
Fotosession med Josefine och Åsa, på 1800-talsdagen.
Fotosession med Josefine (som också bär kläder sydda av mig) och Åsa, på 1800-talsdagen. Foto: Elin Evaldsdotter // Photo session together with Josephine (who also wear my clothes) and Åsa, at the 19th century day in Kisa. Photo: Elin Evaldsdotter.
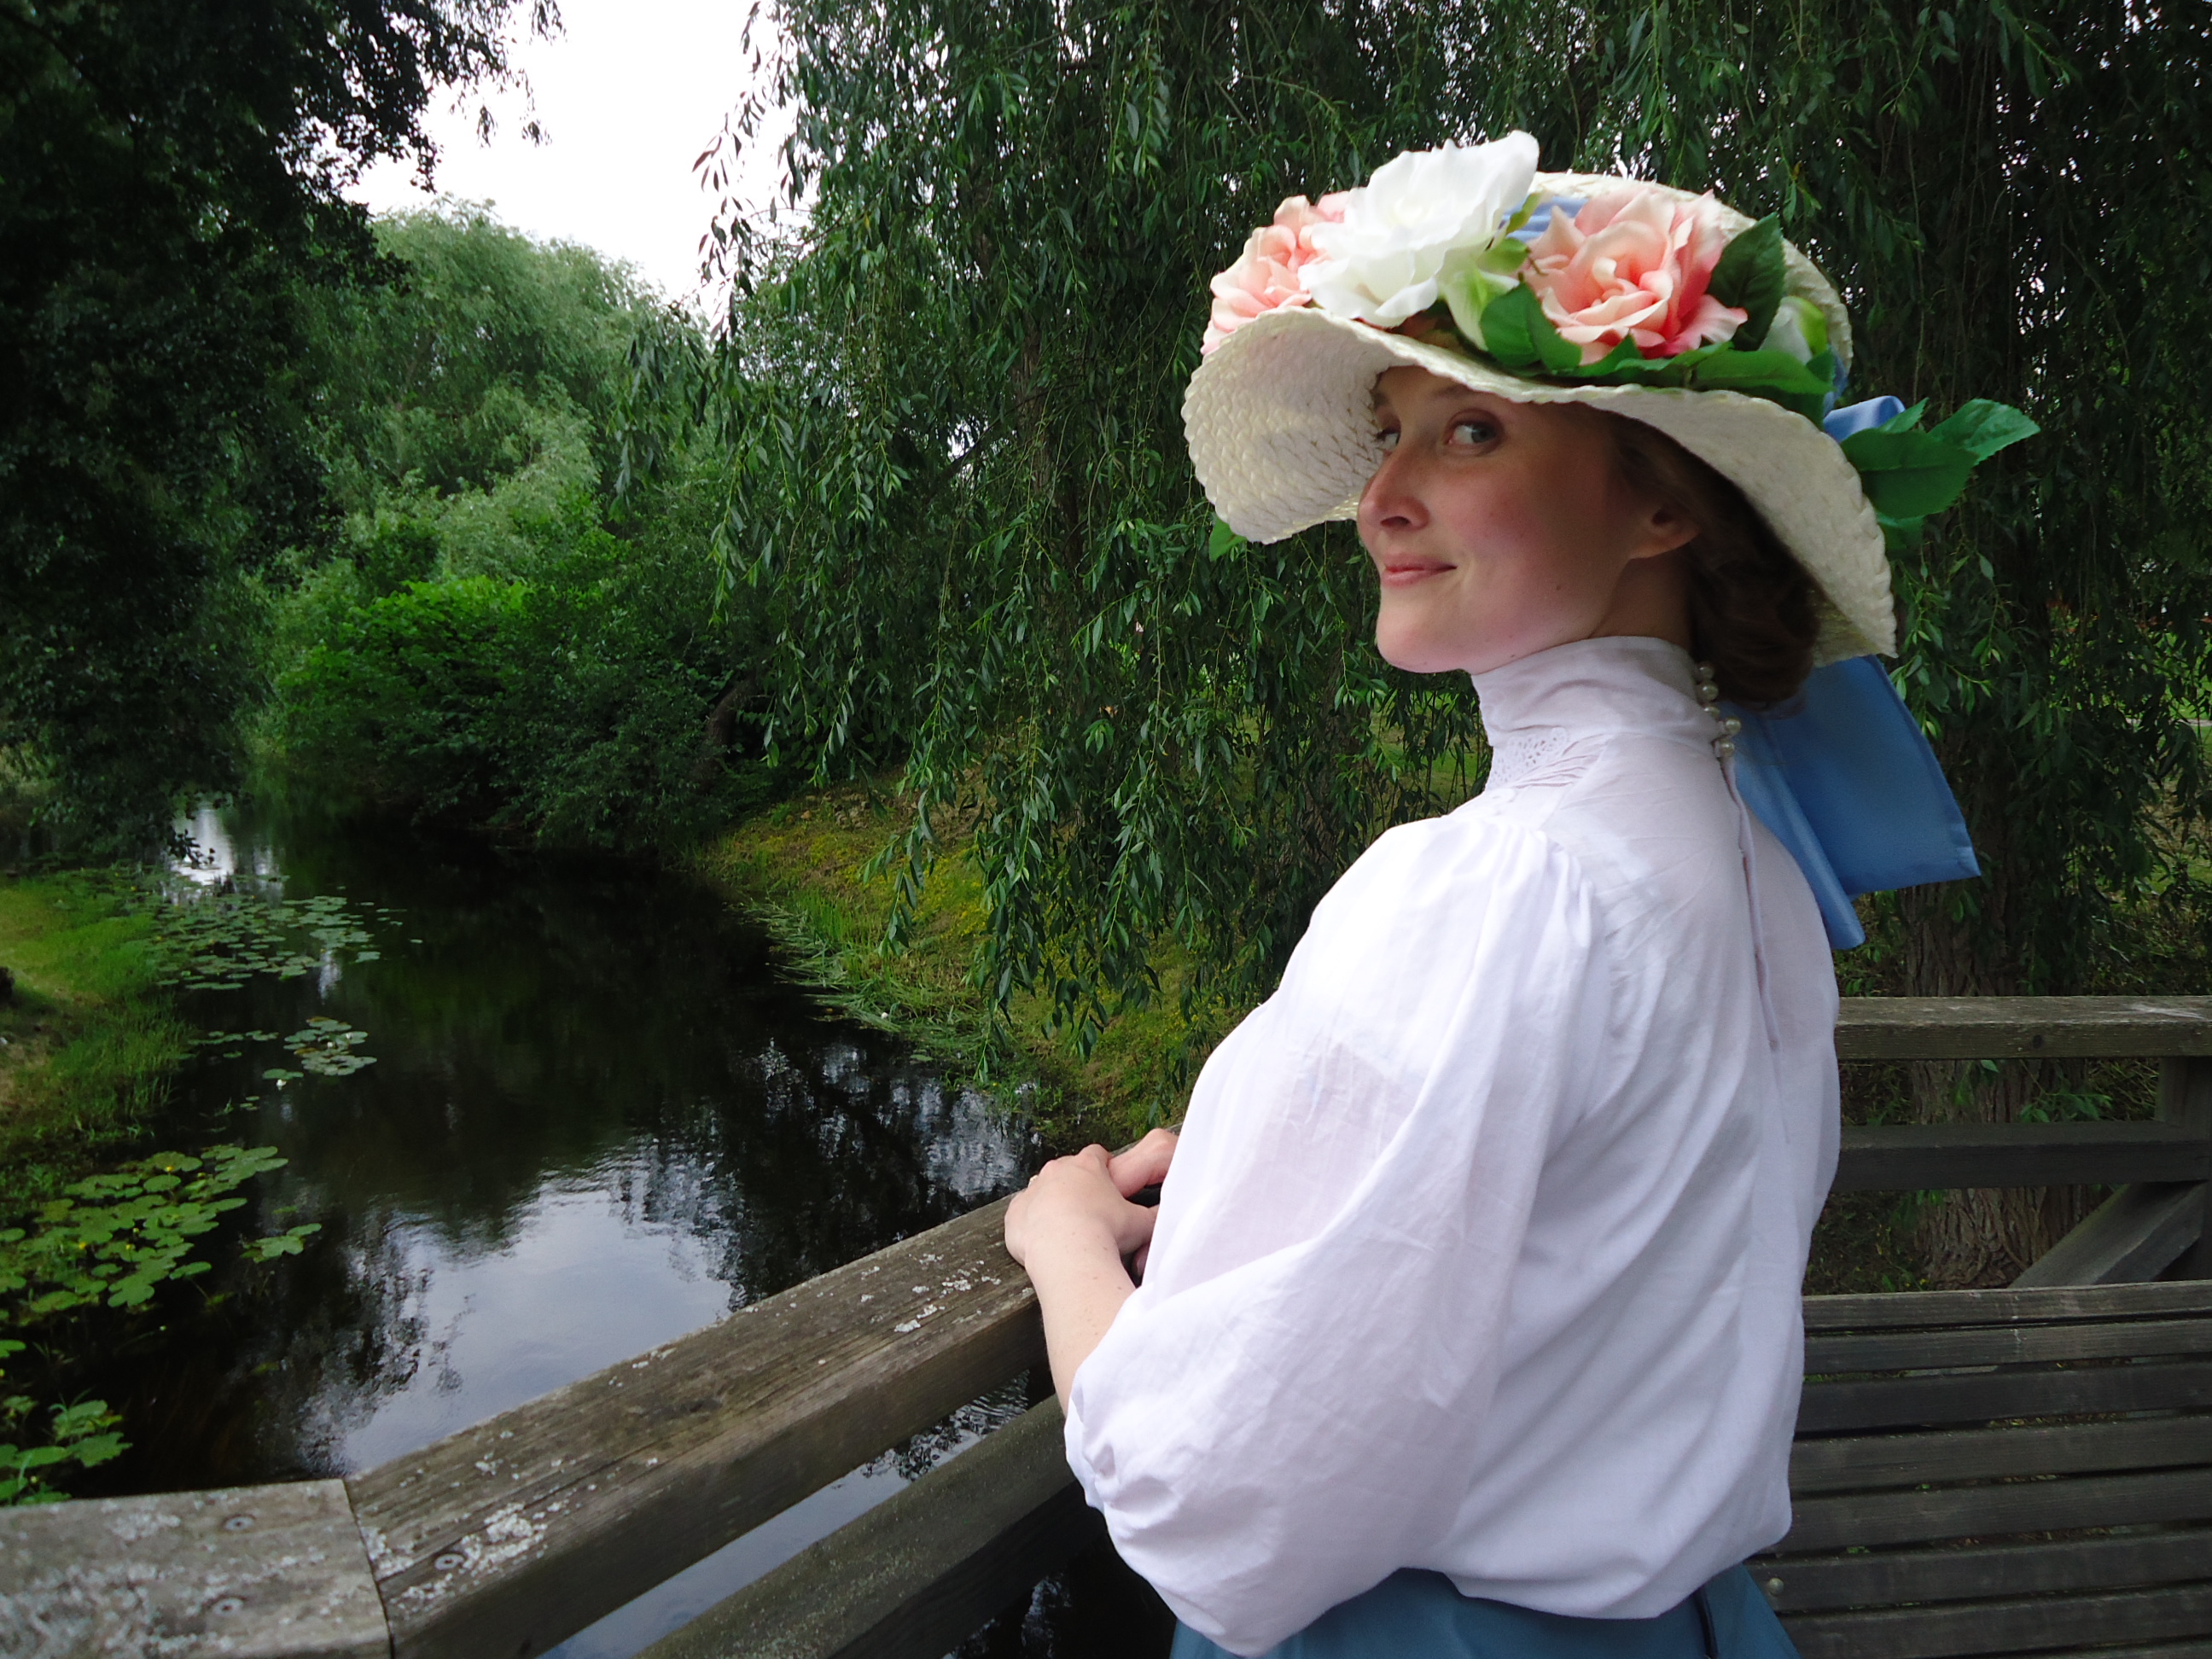
Bakifrån
Med utsikt över Stångån. Foto: Josefine Antonsson // View over Stångån. Photo: Josefine Antonsson.

Rosenhatt i rosengård.

Share

Rosenhatt

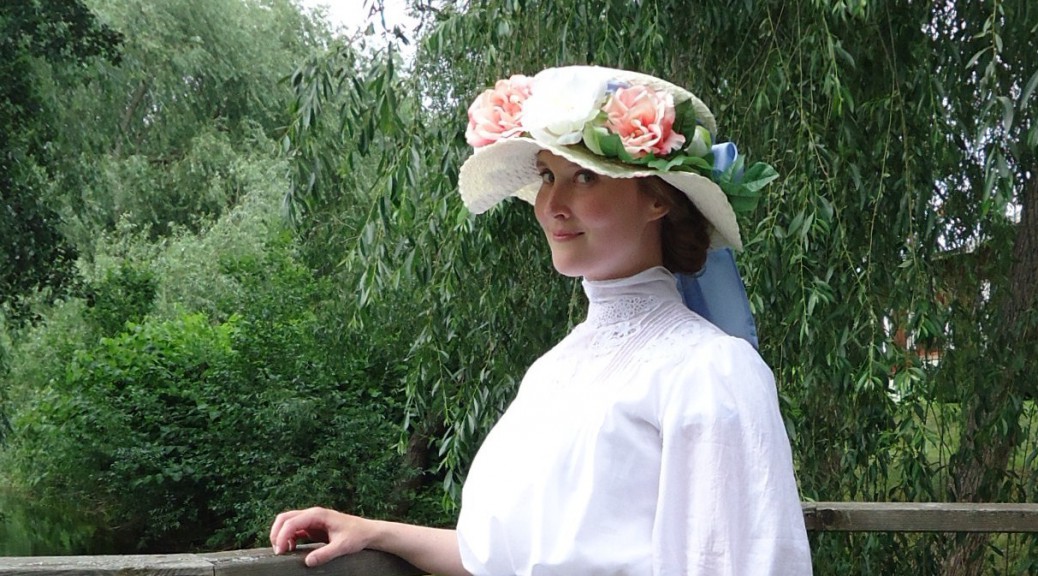
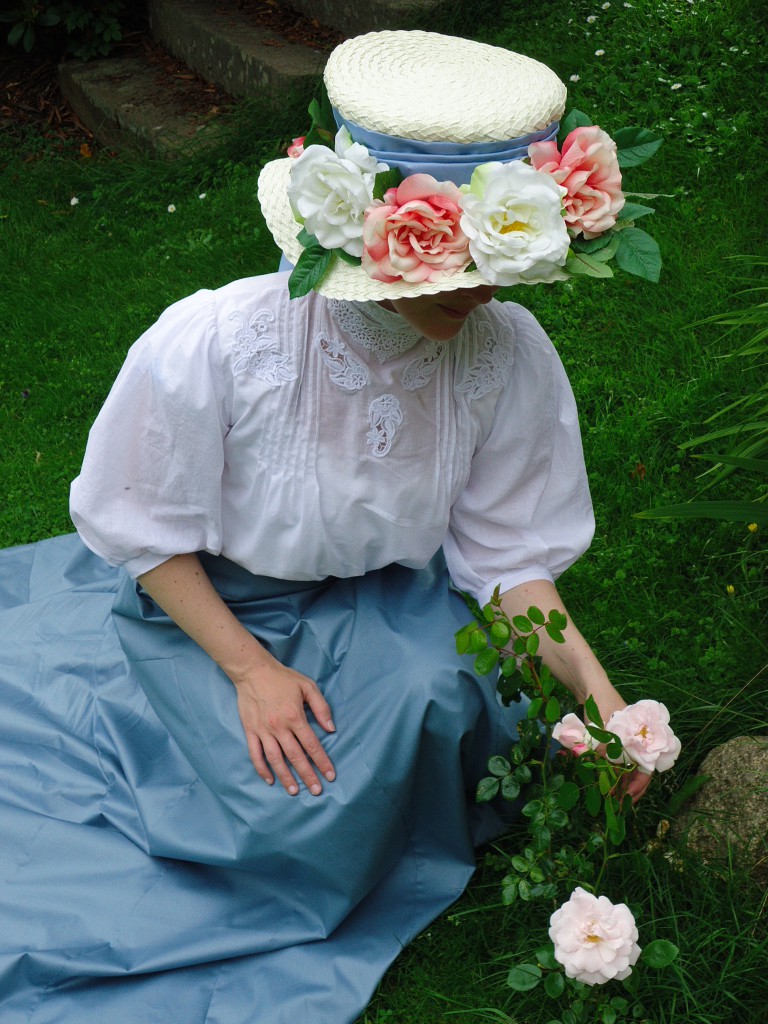
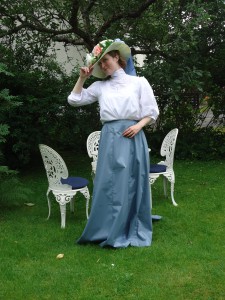
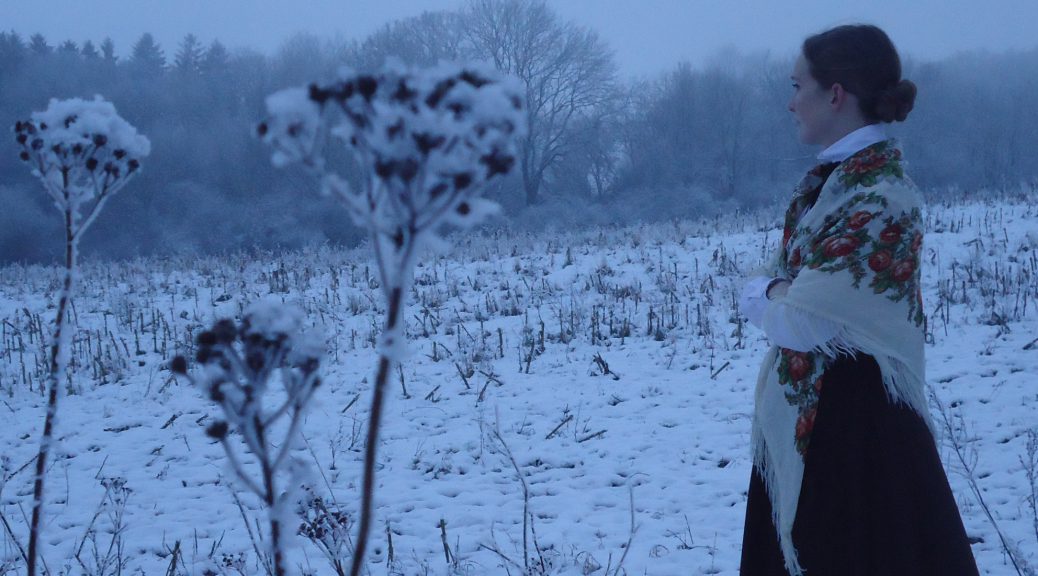
Rosenhatt i rosenträdgård. Dräkten hör hemma runt år 1903.
Rosenhatt i rosengård. Dräkten hör hemma runt år 1903.

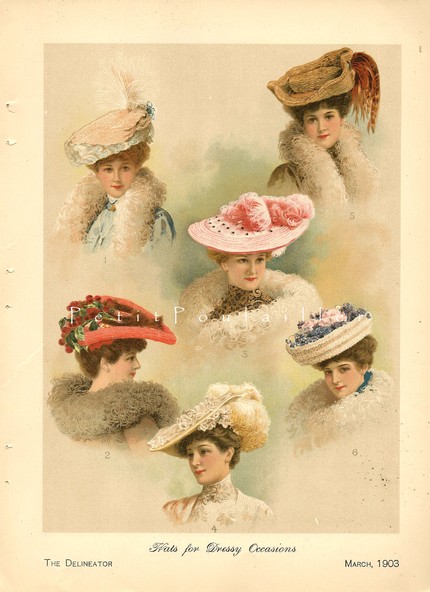
Det enda jag vid terminsslut hade planerat för sommaren (förutom att umgås maximalt med nära och kära) var att hänga på 1800-talssällskapet på aktiviteterna på Amerikadagen, arrangerat av Kisa Wärdshus. Där skulle vara fokus på de rika invånare, som inte var tvungna att emigrera mellan 1850 – tidigt 1900-tal. För detta behövde jag en lite snoffsigare dräkt, med en enorm hatt, som kronan på verket. Jag hann inte göra några ambitiösa efterforskningar på hattar från 1903 då, men har efteråt hittat dessa:

At the end of this semester, the only thing I had planned for the summer was to (except for hanging out with family and friends) join the “19th Century Society” for the “America days” in Kisa, arranged by Kisa Inn. There was supposed to be a focus on those inhabitants that didn’t have to migrate from Sweden during the famines of the 19th century. For this I needed a somewhat posh costume, with a ginormous hat on top of it all. I didn’t have time for making ambitious research on 1903 hats at that point, but later I have found these:

Maj 1903 The Delineator
Hattar från “The Delineator”, maj 1903
The Delineator, May 1903
Hattar från “The Delineator, maj 1903
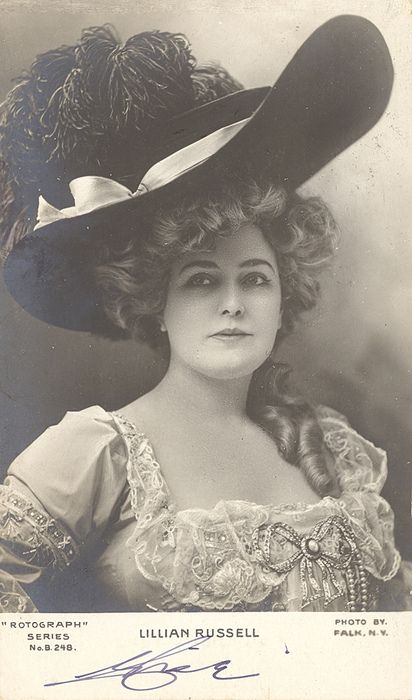
Lillian Russel 1903, american actor known for beauty and style
Lillian Russel – amerikansk skådespelerska, känd för sin skönhet och stil. Foto från 1903. Hon har en underbart stor hatt!

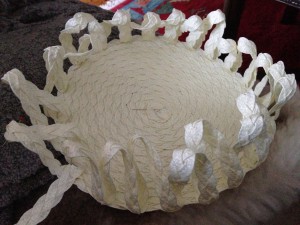
På Coop hittade jag två perfekta, flätade bordstabletter i plastimitation av strå.  Jag sprättade upp inifrån och ut på den bordstablett som skulle bli brättet och utifrån och in på den bordstablett som skulle bli toppen på hatten.

At the grocery I found two perfect table tablets in a plastic straw imitation. I unstitched the circular braids from the middle of the part which was going to be the brim, and from the periphery and inwards on the part that would be the top.

Brättet upplöser jag inifrån och ut, tills det är lagom stort för huvudet.

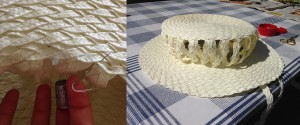
Sedan använde jag de överblivna flätorna till att fästa de båda delarna i varandra.

Then I used the removed braids to fasten the brim and the top in each other.

Längs kanten på hattens topp fäste jag flätan, i sicksack.
Jag fäste toppen i brättet, med den sicksackade flätan och sydde fast.

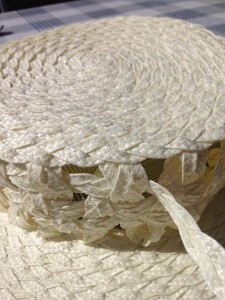
För att ge hatten lite mer stadga, använde jag sedan det som var kvar av flätan till att “väva” det stående partiet. Det skulle ha sett extremt mycket mer professionellt ut om jag istället använt samma teknik som på bordstabletterna och sytt fast flätan varv efter varv, men vertikalt. Pga. tidspress valde jag det andra alternativet.

To give stability to the hat, I then used the rest of the braid to “weav” the vertical part. It would have looked infinitely more professional if this part also had been constructed of circles stitched together, but it would have been too time consuming.

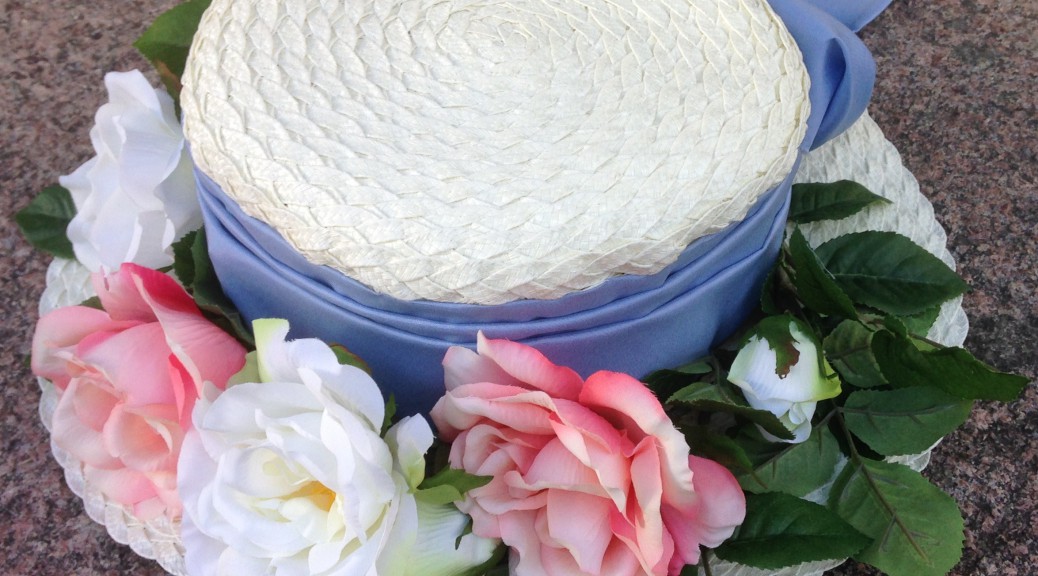
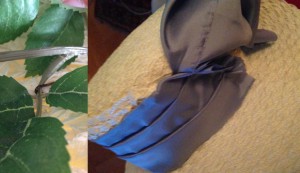
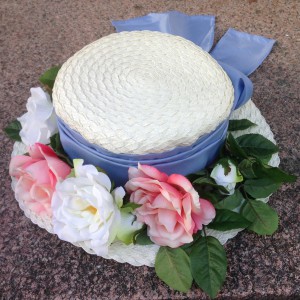
Väva hattDen sista utmaningen var att dekorera hatten. Detta gjorde jag med hjälp av ett blått tunt fodertyg och tygrosor från IKEA. Dessa nålade jag fast med hårnålar, som jag fäste i flätningen.

The last challenge was the decoration of the hat. I used a blue lining fabric as ribbon and fake roses from IKEA, which I fastened with hair pins.

IMG_1775

När jag var klar med hatten fick jag höra av ett entusiastiskt barn, att:

“Detta är den vackraste hatt jag någonsin sett! Och den största!”

When the hat was finished, an enthusiastic child exclaimed: “This is the most beautiful hat I have ever seen! And the largest one too!”

Färdig hatt

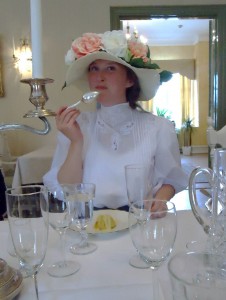
Till min förundran och glädje, visade det sig att Kisa Wärdshus inte bara lät oss vara fin interiör, men också bjöd på en fantastisk, tidsenlig måltid, som tack för att vi var där!

To my great surprise and joy, Kisa Inn didn’t only want us for a decorative interior, but they also offered us a fantastic time appropriate eleven dishes meal for free, as a way of thanking us for being there!

Hatten på middag

Ha en bra dag!

Have a nice day!

Share

Tvåa i dräkttävlingen!

Ni som har följt mitt lärarinneprojekt, kanske gläds med mig, när ni får höra att jag kom tvåa i min kategori, i Your Wardrobe Unlockd’s dräkttävling. Det kryllade av häftiga bidrag, som ni kan se här. Det känns fantastiskt att folk med erfarenhet inom historisk sömnad valde att rösta på lilla mig! Kronan på verket var det fina personliga meddelandet jag fick från YWU (nedanför). Jag är jätteglad! blog

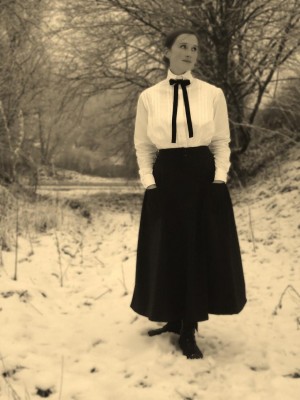
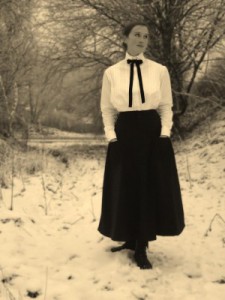
Your entry, A Swedish Edwardian Teacher, was beautiful and very striking. Although simple in style, it was exquisitely made, and you really did look like you had just stepped out of an old sepia photograph. We loved the fact that you’d done the whole outfit from the underwear out – the care you took with the undergarments meant the finished outfit hung and fitted perfectly. We also thought your recykling of older fabric and garments, and combining that with new techniques, gave the whole outfit a fascinating back-story. This entry is a great credit to your craftsmanship and innovation. Well done!

02Ha en bra dag!

Share

YWU Competition Entry – Edwardian Teacher

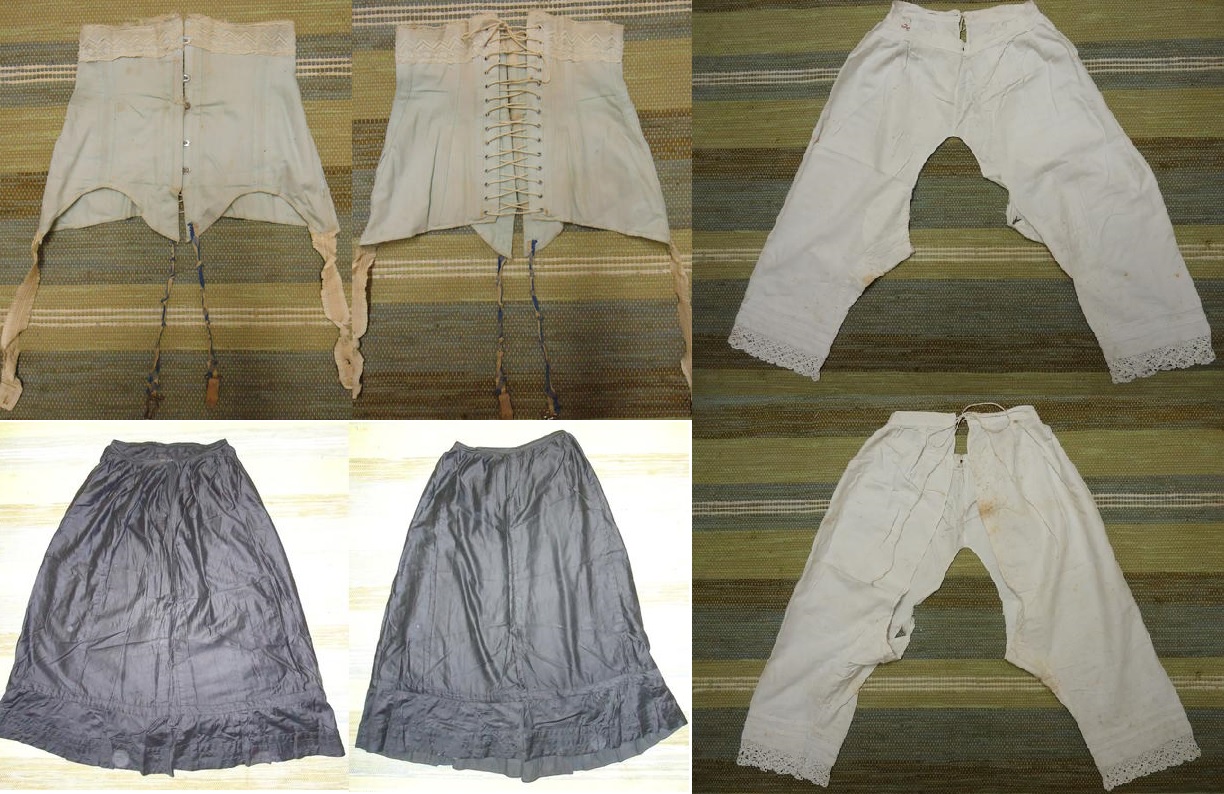
Last year, I received some vintage underpinnings that my parents had found in an old clothes chest, stored in the attic of the family farmhouse. Amongst these clothes, there were a corset, drawers and a petticoat. The same summer, I also got a vintage sewing machine, of the same age, but from my husbands family.underklader

02When the theme for this competition was announced, I decided to sew clothes matching my heirloom, on my vintage machine. I wanted to create something that might actually have been worn by my relative, who owned these clothes, if she would have had my taste and interests. Further, I wanted to find an occupation for this fictional Edwardian self, where my eagerness to learn could be matched with staying on the farm. After some research, I decided to go for a country teacher (I have teachers on both of my parents sides of the family), as this was the primary occupation for ambitious Swedish women of the time, who wanted to study and work. As education is the most powerful weapon against war, I consider this as my contribution against the Great War!underklader-edw
The original corset, that my parents found in a chest, which had been locked for at least sixty years. Dated to about 1908.

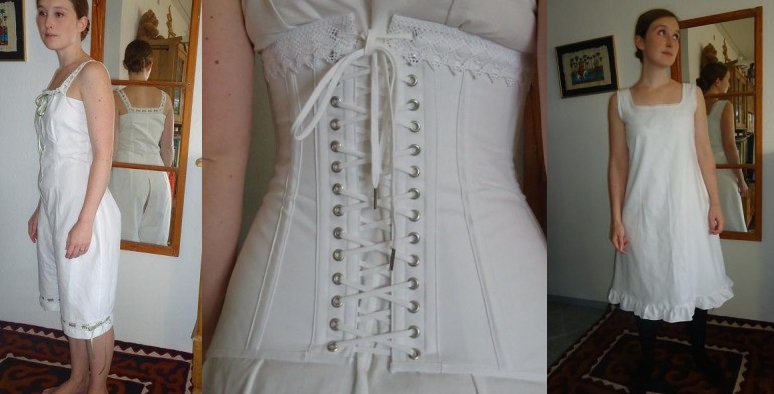
I had already sewn a Victorian chemise and drawers, so now I wanted to make something else and decided upon a combination of chemise and drawers (1913). I translated the lovely, expensive versions I had seen at museum pages, into something affordable for a farmer’s daughter. Except for the green ribbon, I solely used inherited materials, from bed sheet and laces removed from pillow cases, down to the thread and buttons.

Combination of chemise and drawers – closes with buttons, otherwise open up to the back.

When I reconstructed the corset, I used coutil and other material from VenaCavaDesign. The lace reminds of the lace on my vintage drawers. The suspender end grips was a gift from a friend.

After having finished the corset and combination, I had no inspiration left for the corset cover and petticoat. Therefore, I made a simple combined corset cover and chemise (1910-12). In the picture, I wear the corset cover under my inherited petticoat.

Combination of corset cover and chemise. To the right, worn together with my vintage petticoat, from the same clothes chest.

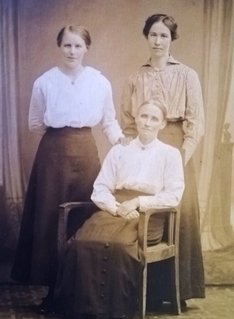
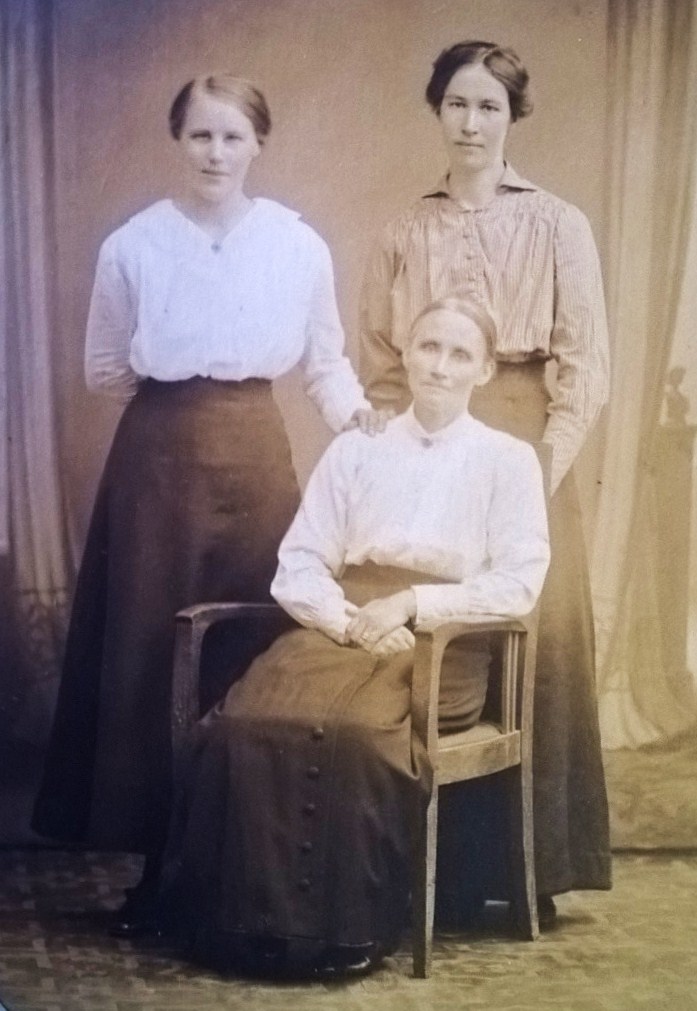
Hilda, the owner of the under-pinnings, was born in 1894. At this photo, from 1915, she stands at the left, together with her older sister and mother Matilda.

The income of country teachers was modest. Swedish literature from this time praises the woman who knows how to dress beautifully without following the fashion too anxiously, and who knows how to keep her clothes in a fine condition. Thus, I can confidently argue for combining the differently dated parts of the costume with each other.

Unfortunately, I was not able to move the sewing machine to my Danish home, so intsead of historically accurate techniques, I used my modern machine and all its advantages. My first project was to recreate the corset, which is supposedly dated to 1908. I ordered the materials needed from England, but forgot the suspender end grips. Last week I received this from a friend, who had inherited them from an old relative.

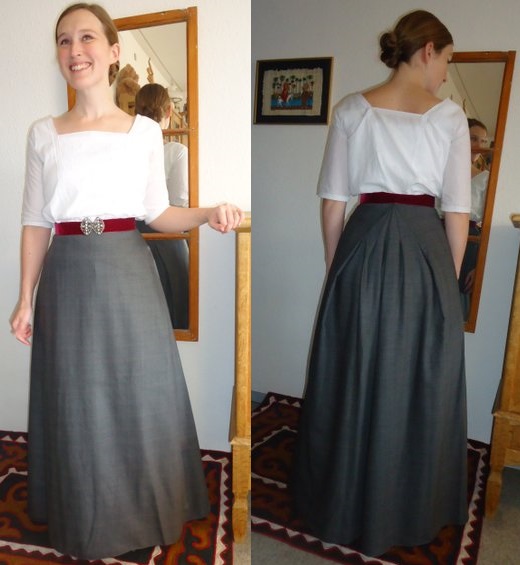
For Sunday wear, my fictional self would wear my previously sewn woollen skirt and machine embroidered cotton blouse (about 1910).edw1

This costume (1910) I sew two years ago, but now it was finally complete, with all the right underwear and the beautiful belt, which clasps I also got from a friend.

The blouse is made of cotton, with machine embroideries. In the back, the skirt closes with hooks and sewn eyes.

The fun part was creating the clothes that the teacher would wear for work. She should look neat and respectable, at the same time as the clothes should be practical and at least a bit modern. After some research, I decided to sew a shirtwaist with pin tucks (about 1910) to combine with a modern skirt (1914). Three days ago, I was worried that I had failed completely, as my husband looked sceptically at my half finished costume, but when the costume was finally finished, both he and I were pleased to see it was all I had planned for my costume to be.

DSC03874 - Kopia DSC03870 DSC03894 29
Share

Hjärtevärmande gåvor och fullbordade verk

01Det händer då och då att jag får fantastiska gåvor, från de mest oväntade håll. Förra hösten kunde jag fullborda min kappa, tack vare en snäll medresenär som skänkte mig en vacker pälskrage. Förra sommaren fick jag flera kassar med tyger av en bekant och för någon månad sedan fick jag, förutom en ny favoritfilm, tillskickat vackra spännen för att dekorera min edwardianska dräkt. De passar inte till lärarinnekjolen, men väldigt bra till min tidigare dräkt! Tack, Ulrika!
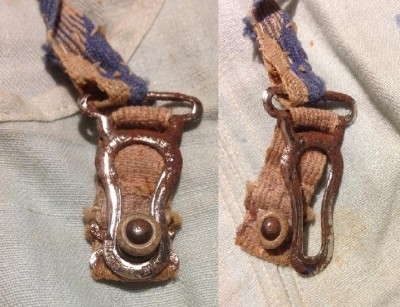
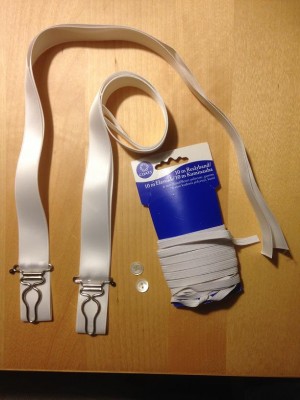
Förra veckan lät en vän mig gå amok i hennes sybord, som hon ärvt efter sin mormorsmor. Dessa skatter fick jag med mig hem!

From time to time it happens that I receive fantastic gifts, out of the blue. Last autumn I was able to complete my winter coat, thanks to a lovely travel companion who thought that I had better use of her old fur collar than her. Last summer I received several bags with fabrics, which have resulted in two dresses yet. About a month ago a dear acquaintance sent a movie (which has already become a new favourite) and a pair of beautiful belt buckles for my Edwardian outfit. They don’t match the new skirt, but go very well together with my other Edwardian outfit. Thank you, Ulrika!

Last week, another dear friend of mine let me harvest what treasures I could find in her great grandmother’s sewing table.

02

Till höger ligger, vad jag tror har varit, strumpebandshållare, men utan knappdelen. Den vita spetsen har hon själv virkat!

To the left is what I believe have been used in garters, but it lacks its buttons. The white lace, the great grandmother has knitted herself!

03

Jag kunde ju inte fullborda min edwardianska korsett i höstas, eftersom jag saknade strumpebandshållare. Vid fotosessionen promenerade jag utan denna elementära del och fick genast inspiration att använda gåvan från väninnan. Originalkorsettens strumpebandshållare ser ut så här.

I wasn’t able to fully complete my teacher’s outfit last autumn, because I couldn’t get hold of appropriate garters. When I walked around without this elementary piece during our photo session, the stockings went down again and again I got inspiration for using what I had found in that sewing table. The garters of my vintage corset look like this.

Strumpebandshållare – konstruktion

04

Dessa delar använde jag: strumpebandshållare, sidenband, resårband och pärlemorsknappar.

For making the garters, I used: “garter clasps”, broad ribbon, elastics and mother of pearl buttons.

05

Jag sydde fast bandet (dubbelt) för hand och lät den främre delen gå ned som fäste för knappen.

I handstitched two layers of the ribbon together and left one layer longer than the other, for fastening of the button that hooks in the clasp.

06

Sedan fäste jag två resårband nederst och sydde in dem i kanaler.

Then I fastened two elastics in that part of the ribbons sewed channels for them.

07

En stund senare var de redo att fästas i korsetten.

A little while later they were ready for being fastened to the corset.

08

De fungerade utmärkt!

They work perfectly!

09

Originalunderklädernas ägarinna

Mina omtänksamma släktingar, på andra sidan Atlanten, har nu skickat några bilder och information om Hilda, som bland annat bar korsetten som jag har återskapat.

My thoughtful relatives on the other side of the Atlantic Sea have recently sent pictures and information about Hilda, the owner of the vintage clothes in the treasure chest.

Hilda Holmqvist

Hilda var syster till min farmors far, Gottfrid. Hon föddes 1894. På denna bild står hon till vänster, med sin storasyster till höger och sin mor sittande framför sig. Bilden är tagen 1915, året efter vad jag försökte återskapa ur fantasin!

Hilda was the sister of my grandmothers father, Gottfrid. She was born in 1894. In this picture she is the girl on the left, with her sister on the right and their mother sitting in front of them. The picture is from 1915, only one year after what I was trying to recreate clothes for!

Hilda

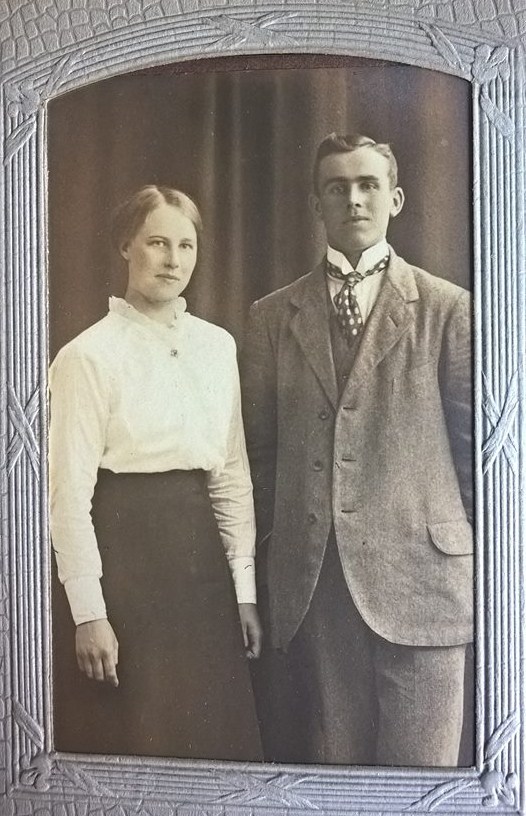
Här är Hilda tillsammans med sin bror Gottfrid. Mina släktingar tycker att vi är hiskeligt lika varandra och jag håller nog med om att vi verkar dela både ansiktsform och klädsmak. Hon var tydligen också en duktig sömmerska.

Here Hilda is seen together with her brother Gottfrid. My relatives think that we remind terribly much of each other. I can agree with that we share the shape of our faces and taste in clothes. She was also known for being a good seamstress.
10

1923 gifte hons sig med göteborgaren Georg. Hon sydde sin bröllopsklänning.

In 1923 she married Georg, from Gothenburg. Of course she made her own dress.

11

Bilden ovan är ett passfoto från 1927, antagligen taget inför flytten till USA.

This picture usher passport photo from 1927, probably before moving to the states.

12

Detta foto är taget runt 1930. Hilda står tillsammans med en av min farmors bästa vänner, kusinen Brita.

This photo is from about 1930. Hilda stands together with one of my grandmother’s best friends, cousin Brita.

13

Hilda bodde i det här trevliga huset, som byggdes under 1700-talet.

Hilda grew up in this nice house that was built in the 18th century.

14

Denna härliga utsikt har man uppifrån vindsrummet, där min farmor har berättat att hon brukade sova om somrarna. I samma rum står den åtråvärda skattkistan.

This is the view from the attic, where my grandmother has told they used to sleep during the summers. The desirable travel chest stands in the same room.

15

Jag avslutar inlägget med en bild från Jämtland, 1914. Denna pittoreska bild visar en lärarinna tillsammans med hennes elever. Det påminner om min egen romantiska bild av den tidens lärarinnor, tack vare Astrid Lindgren…

Åter igen vill jag tacka alla er snälla människor, som har bidragit till mitt projekt med material och inspiration! Tack!

I end this blog post with a photo from the north of Sweden, 1914.
This picturesque photo shows a teacher with her young students. It reminds of my romantic idea of the teachers of that era, and Astrid Lindgren is the one to blame. ? 

Once again, I want to say thanks to all you wonderful people, who have contributed to my project with material and inspiration!

Share

Blus till lärarinna – 1910


Inspiration

02Bilden intill ska föreställa en lärarinna, fotograferad 1914. Detta bekräftade vad jag hade hoppats på, att en proper lärarinna under första världskriget kunde fortsätta ha sina höghalsade blusar från starten av 1910-talet, trots att det verkar ha varit modernt med lägre kragar under 1914-1915.
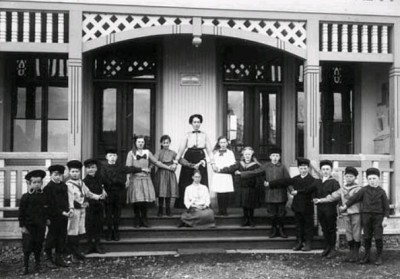
The young lady in the picture, from 1914, is a teacher. This proved my thesis, that a decent teacher during the First World War could continue wearing her high necked shirtwaists, even though lower necklines had come into fashion in 1914-1915.

Ytterligare ett exempel, som gav mig vatten på min kvarn, fick jag nu sänt till mig från en annan som är lika tokig i historiska kläder. Fotografiet är från 1916 och lärarinnans dräkt är faktiskt ganska lik den jag har sytt:

Yet another example that kept my hopes of a high necked shirtwaist up, was sent to me by another dear historic fashion nerd. The photo is from 1916 and the teacher actually wears clothes quite similar to those in my sketch.

02

03
Denna unga dam är också fotograferad 1914. Jag försökte fixa den moderiktiga frisyren igår, men mitt egensinnigt raka hår vägrade.

Som ni förstår, var jag väldigt sugen på att sy just en höghalsad blus, i stil med vad de väna lärarinnorna har i Astrid Lindgren-filmerna. Jag lyckades inte hitta något mönstrat tyg i rätt stil, så jag köpte ett tunt vitt bomullstyg och bestämde mig för att dekorera plagget med stråveck (se skissen i förra inlägget). Jag studerade olika varianter och fann inspiration från följande bilder.

As you are probably well aware, I was very into the idea of making a high necked shirtwaist, in the same style as the lovely teachers in the Astrid Lindgren movies. I wasn’t able to find any cotton with the right type of print, so I ended with buying a white cotton and decided to decorate it with pin tucks (see the sketch in the last blog post). I studied different options and was inspired by the following pictures:

04
Den här modebilden är från 1912. Visst ser dräkten lite lärarinneaktig ut?

05

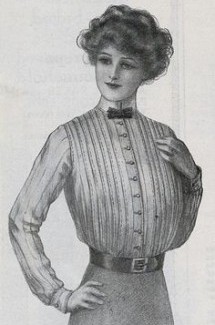
Denna blus (från starten av 1910-talet) vann slutligen mitt hjärta! Jag tycker om hur stråvecken är grupperade och lämnar mer genomskinliga ytor.

This shirtwaist (from the early teens) finally won my heart! I like how the pin tucks are grouped and leave some areas more transparent.

Konstruktionen

06
Detta mönster är till corset cover, men i boken beskrivs hur man anpassar det för blus.
07
Ärmkonstruktionen är helt densamma som på bilden.

08

Med mycket dåligt samvete, valde jag att inte följa bokens instruktioner för hur man ritar det perfekt anpassade mönstret, med hjälp av måttband, linjal och penna. Istället tog jag den snabba vägen och hängde upp tyget på provdockan och klippte ut rätt form och justerade tills det motsvarade befintliga mönster.

My conscience was very heavy indeed when I chose not to follow the book’s instructions for making the perfectly fitted pattern with the help of measuring tape, ruler and pencil. Instead I took a shortcut, hanging the mockup fabric on the mannequin and cutting the appropriate form and adjusting until it looked like the book’s pattern.

09

Baktill klippte jag fram passande form på ena halvdelen och kopierade denna till andra halvdelen.

In the back I cut an appropriate form at one side and then copied this to the other side.

10

Så här såg alla mönsterdelar ut. Den knubbiga rektangeln (manschett) ska klippas ut gånger 2 och den långsmala (krage) gånger 4.

The pattern pieces looked like this. There shall be cut two shubby rectangles (cuff) and four long ones (collar).

11

Problemen började när jag skulle klippa ut blusens framsida. Först klippte den sömnlösa enligt mönstret, men detta är inte anpassat till stråveckens extra tygåtgång. Sedan räknade jag stråvecken på favoritblusen och kom fram till att det var 9 st på var sida och att de var ungefär 1 cm breda. Därmed la jag till 18 cm över vardera axeln (9*2). Senare insåg jag att inspirationskällans stråveck måste vara smalare, för med 1 cm breda veck fick det inte plats 9 st över mina medelbreda skuldror. Därmed sprättade jag upp dessa yttre veck. Alltså tror jag att man gott kan nöja sig med att lägga till 14-16 cm över skuldrorna. Dessutom skulle jag ha lagt till ytterligare en decimeter mitt fram, på höger framsida, till dekorationen som döljer knäppningen.

The problems came when I started cutting the from of the shirtwaist. First, the sleepless seamstress cut just like the pattern, although this wasn’t adjusted to the extra amount of fabric for the pin tucks. Then I counted the pin tucks on my favourite Pinterest shirtwaist and got nine at each side, about one cm wide. Thus I added 18 cm at the shoulders (9*2). After cutting the fabric, I realised that the pleats of the inspiration source must have been thinner, because the with my one cm wide pleats, the whole width was now too wide for my regular broad shoulders. So I unpicked the peripheral pin tucks. I believe that 14-16 cm extra over the shoulders would suffice. Yet another misstep, was that I should have added one dm at the right part’s front, for the decorative “button hiding place”.

12

Så här vek jag tyget över knäppningen. Knapphålen sitter i det undre lagret.

This is how I folded the fabric that covers the buttons in the front. The button holes are placed in the lowest layer.

13

Utecklad, ser viknings-dekorationen, över knäppningen, ut så här. “2 cm-delen” är alltså den del som ligger längst fram. Bredden blir totalt 14 cm från “mitt fram”.

Folded out, the decoration looks like this. The “2 cm part” is the one that is the top layer. The width adds up to 14 cm.

14

Här syr och stryker jag dekorationen som döljer knäppningen.

Here, I sew and iron the decorative button hiding place.

15

Här stryker och syr jag stråvecken. Jag tyckte att det var fint att ha 0,5 cm mellanrum mellan de grupperade stråvecken, så avståndet från befintligt veck till nästa vikning är alltså 1,5 cm. Detta stryks och sedan sys med vanlig raksöm 1 cm från den vikta kanten.

Here, I iron and sew the pin tucks. I thought it looked nice with 1/2 cm space between the pleats, so from one pin tuck to the next fold, there is 1,5 cm. This fold is ironed and then stitched with a regular straight seam 1 cm from the fold.
16

För att blusen inte skulle bli helt oformlig, satte jag in en inpassning, från bysten till botten, ca 2 cm djupt. Till höger ser du vänster framsida innan den sätts ihop med de andra delarna. Vecket längst till höger sprättades upp senare och det överflödiga tyget klipptes bort.

In order to prevent the shirtwaist from becoming totally shapeless, I made a dart from the bust to the bottom, about 2 cm deep. To the right, you see the left front part, before it is put together with the other parts. The pleat at the very right was later unpicked and the superfluous fabric was cut away.

17

Så här såg det ut när fram- och baksida nålades samman.

This is what it looked like when I had pinned the front panels to the back panel.

18

Här är ärmar fastnålade och jag experimenterar med kragen, som jag konstaterade faktiskt inte behövde rundas, men kunde vara helt rektangulär, eftersom den skulle sluta tätt runt halsen. Bredden är lika med halsens omkrets plus någon centimeters överlapp, så att man kan knäppa.

Here, the arms are pinned to the bodice and I experiment with the collar – I had expected a need for making the collar rounded, but found out that it actually would fit nicely round the neck when just left rectangular. The collar width is the same as the neck width plus some cm overlap for buttoning.

19

Jag sydde först längs kanterna på den nerfällda delen av kragen, vrängde, strök och la in mellan de båda styckena närmast halsen. Sedan sydde jag längs vikningskanten. Därefter strök jag igen och sedan kunde jag fästa kragen på blusen.

First I sewed along the borders of the collar on the wrong side, then turned the right side ought, ironed it and put the collar in between the standing part of the collar, closest to the neck. Then I stitched these parts together. I ironed again and then I attached the collar to the shirtwaist.

20

Jag märkte ut knapphålens placering med 4,5 cm avstånd, från kragens topp ned till botten.

I marked the placement of the button holes, 4,5 cm apart, from the top of the collar to the hemline.

21

Sedan sydde jag knapphålen på maskin och fäste gamla ärvda plastknappar med motsvarande placering.

Then I sewed the button holes on machine and fastened some inherited plastic buttons accordingly.

22

Sist av allt fållade jag nederkanten och fäste manschetterna. Jag använde ärvda knappar även till dessa, men här är de av pärlemor.

Last of all, I hemmed the bottom of the bodice and attached the cuffs. I used inherited buttons here too, but these were mother of pearl.

Dräkten

23 24

Självaste lärarinnanDSC03874 - Kopia

DSC03883

DSC03894

DSC03876

DSC03870

DSC03928

Share

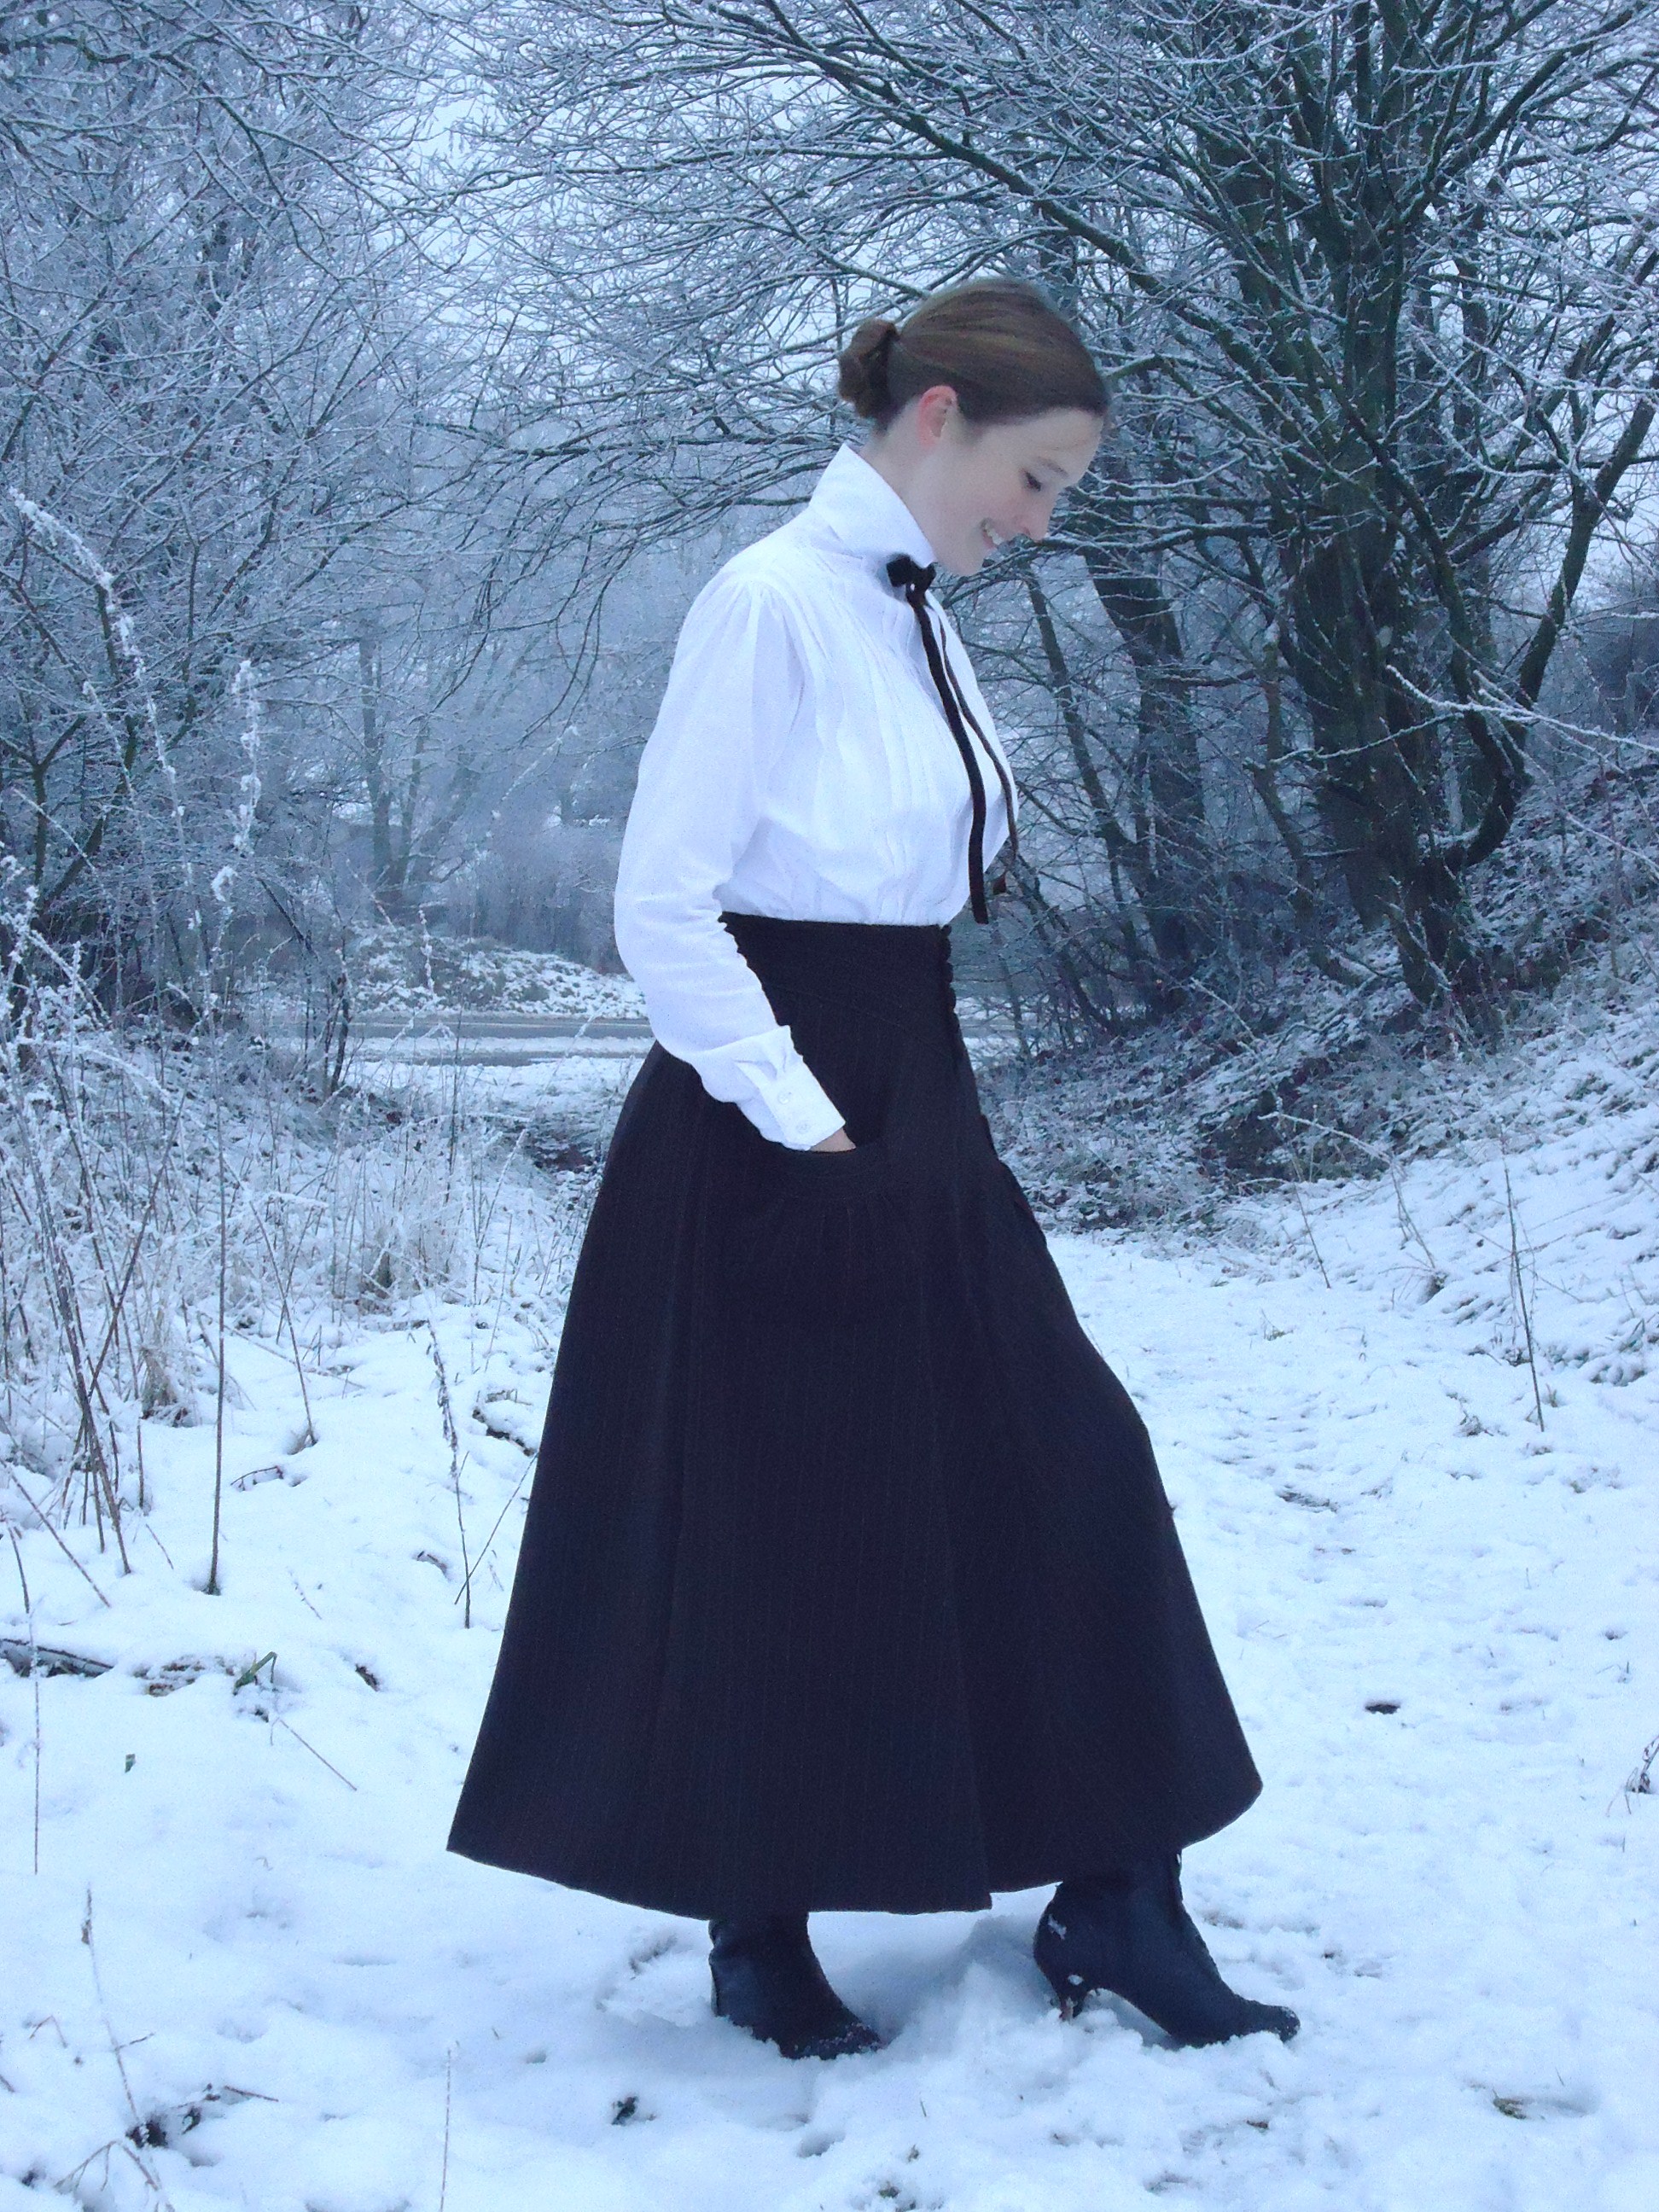
Kjol 1914

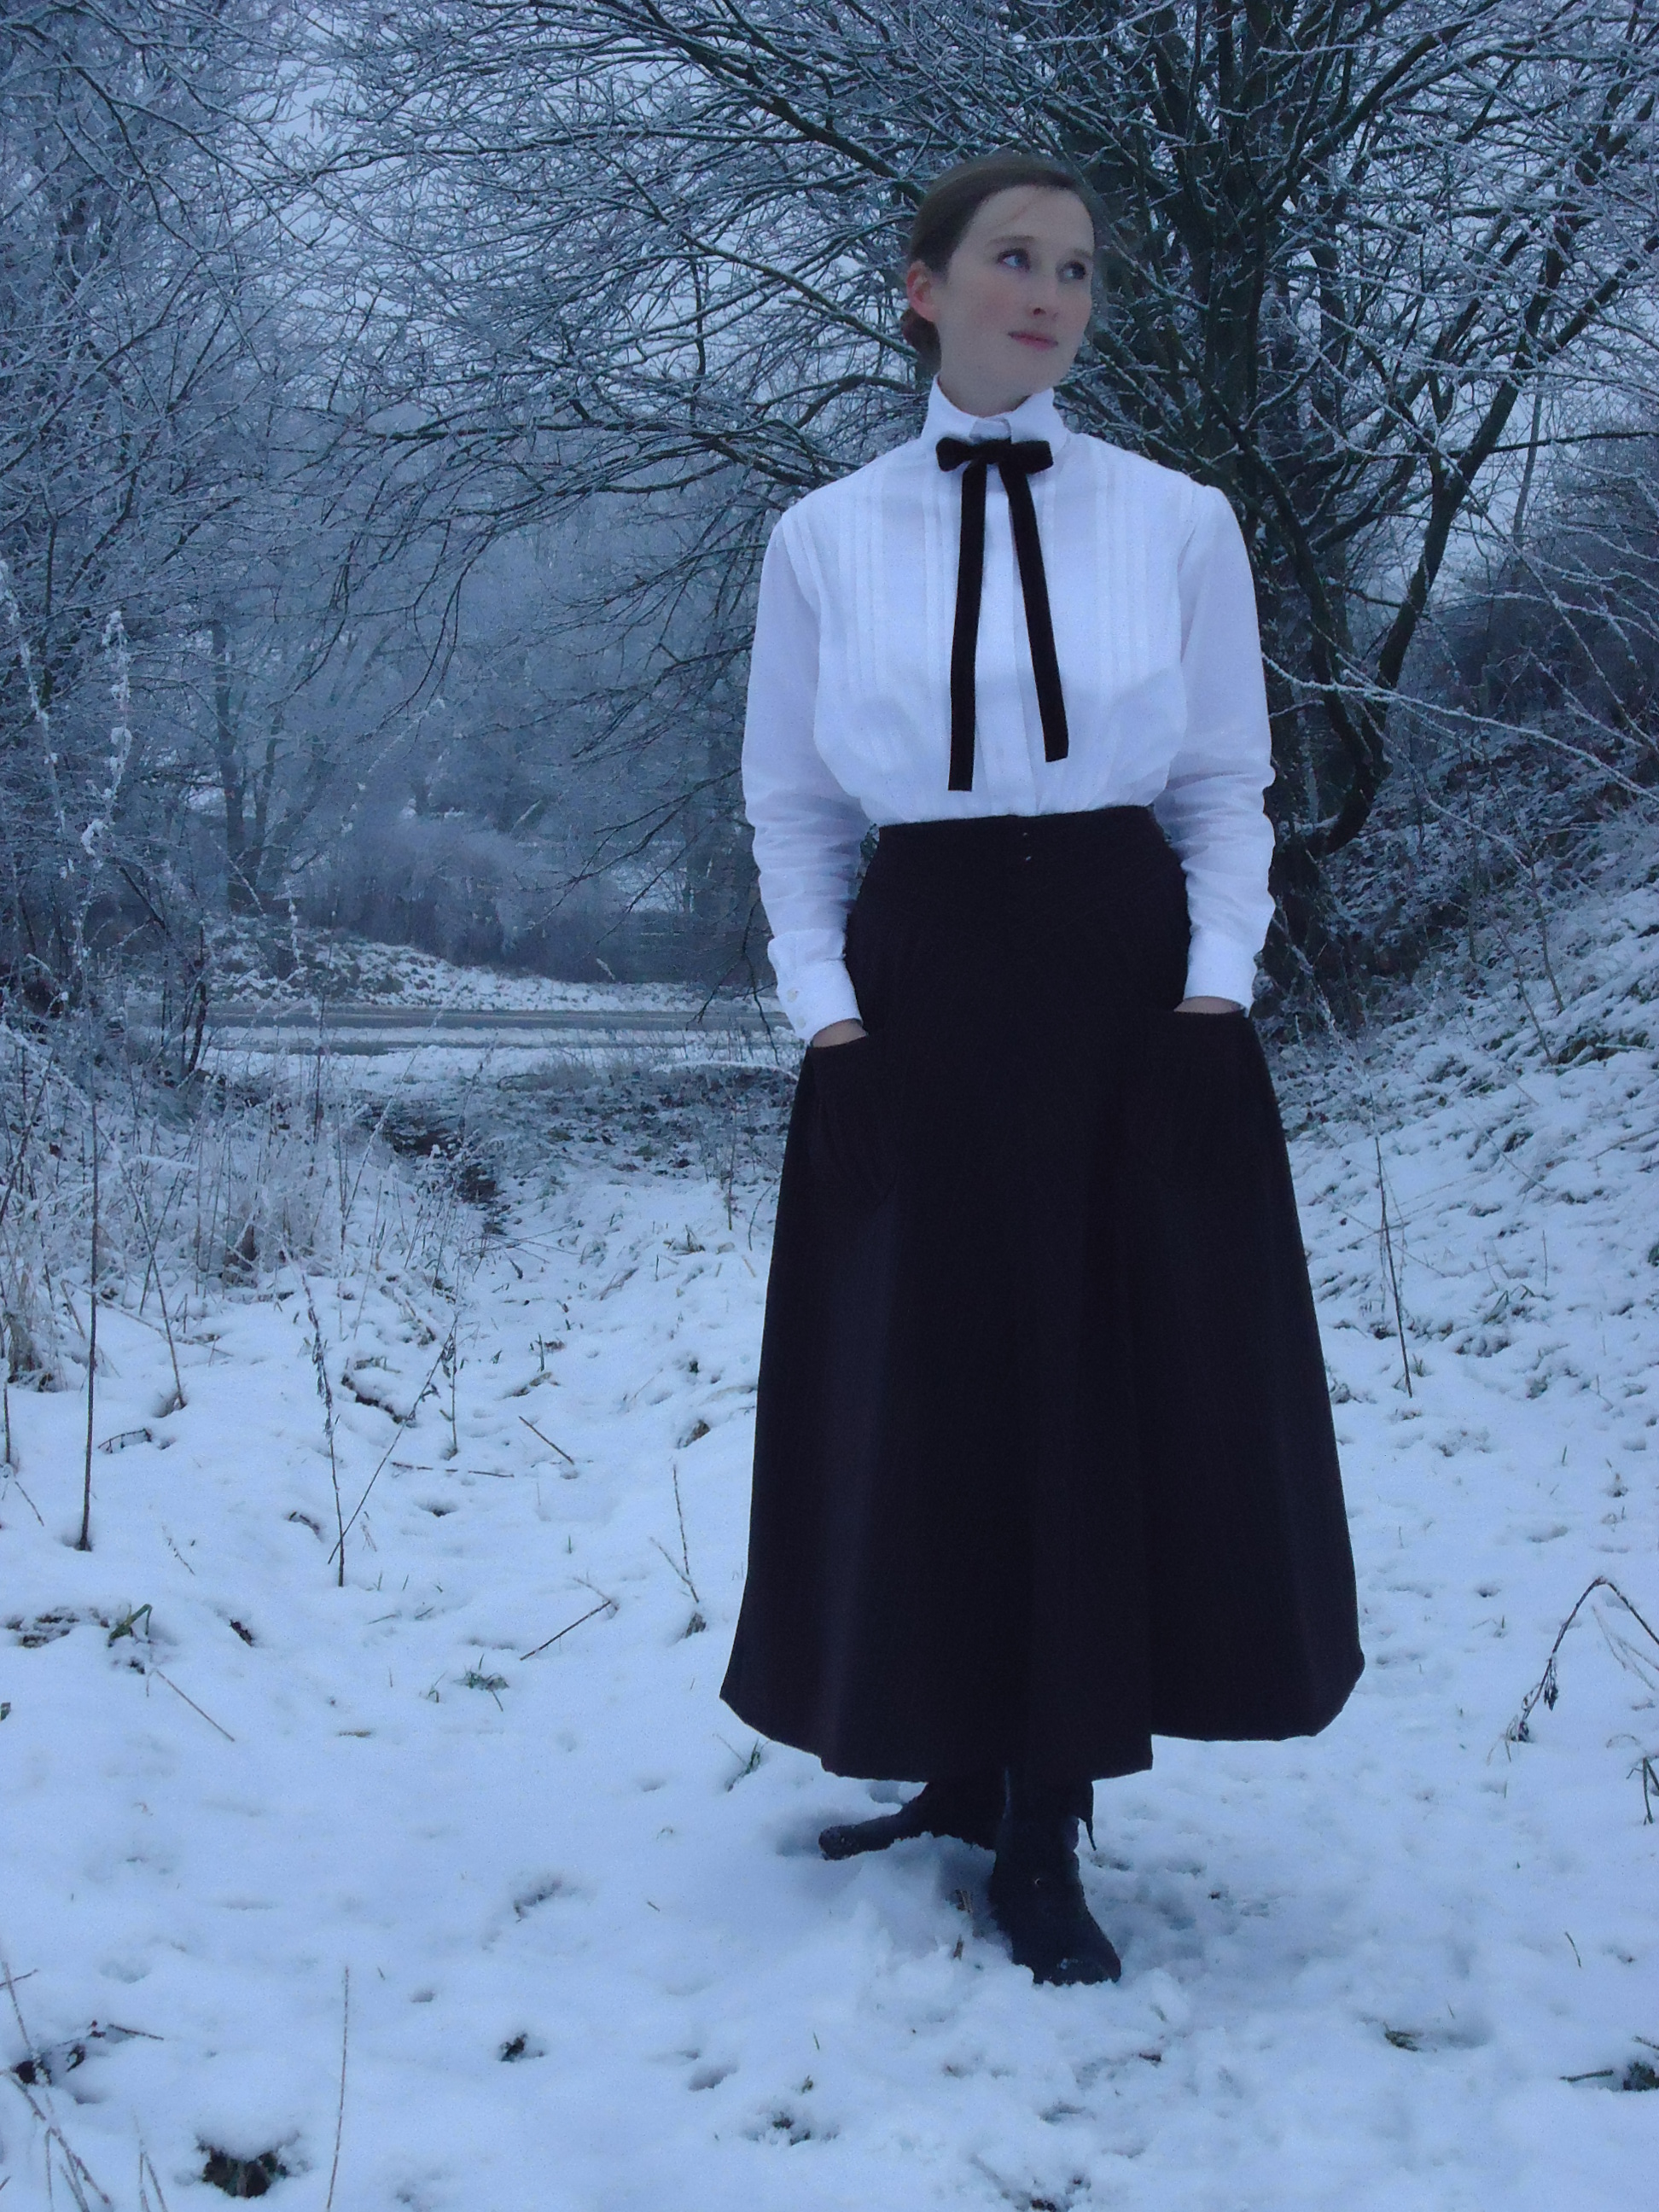
01När jag bestämde mig för design på kjolen, försökte jag väga in både att kjolen skulle bäras av en modeintresserad kvinna, men även att hennes ekonomi skulle vara begränsad och att hon gärna skulle kunna cykla i den. Alltså fick den inte vara för uppseendeväckande och säsongsbunden, och helst ganska kort, men gärna med en “modern” siluett.

When I decided what design I would use for the skirt, I tried to consider that it would be worn by a fashion forward young woman, who had a strained economy and used her bicycle on her way to work. Thus it mustn’t be too fancy, but more decent and timeless and with that shorter, more bicycle friendly length that had recently come into fashion.

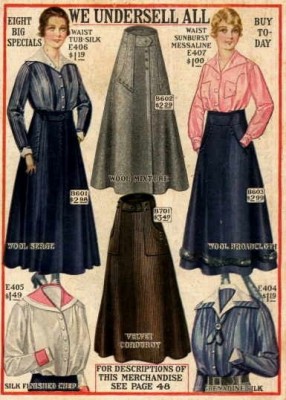
Modetidningen intill är från 1916, men liknande modeller på kjolar finns redan 1914. Skissen, härunder, baserar jag på en kombination av flera kjolmodeller, som jag har sett på modebilder och i klädkataloger. Samma kjollängd, har jag dessutom sett på “street fashion”-bilder från 1906. Sent omsider beslutade jag mig för att även sätta fickor på kjolen, eftersom det ändå är en praktisk lärarinna som ska bära den.

This fashion plate is from 1916, but I have seen similar skirt models from as early as 1914. The sketch shows a combination of several skirts that I have seen on fashion plates and in catalogs. This length I have also seen in photos of street fashion from 1906. I also added pockets, as it would be very practical for the teacher who would wear it.

02
Skiss på hur jag vill sy kjolen.

Toille

Som vanligt, när jag har en begränsad mängd tyg, börjar jag med att göra en toille.

As usual, when I have a limited amount of fabric and no pattern, I start with making a mockup.

03

Till vänster ser du midjedelen, medan själva kjoldelen syns till höger. Den är inte på långa vägar klar, men man kan se vilket fall kjolen får, med den rundning kjolen har i midjan, på denna bild.

To the left you see the “waist part”, while the skirt is at the right. It isn’t even close to finished, but at least you get an idea of how the skirt falls (?) with the current shape of the waistline.

Kjolen

Jag tog en bild av när alla delar var urklippta ur tyglängden, men insåg sedan att jag behövde justera avsevärt, så att det inte var värt att förvirra er med den bilden. Så här ser i alla fall framsidans bitar ut, innan de har sytts samman. Ovanför ligger också baksidans midjedel.

I took a picture when all parts were cut out of the proper fabric, but then I realised that I had to adjust many things, so let’s not confuse you with that picture. Anyhow, this is what the front parts look like, before put together. Above them, there lays also the back “waist part”.

04

Jag började med att nåla de fyra våderna samman, testa och justera. Sedan sydde jag dem samman, men lämnade de översta decimeterna öppna framtill. Därefter nålade jag fast midjedelen fram och bak.

I started with pinning the four panels together, test and adjust. Then I sewed them together, but left the upper decimetres open. Then I pinned the waist parts to the front and back of the skirt.

05

Så här såg midjedelen ut framtill. Sedan sydde jag knapphål för hand och klädde knappar (ärvda efter svärfarmor Saga), i en rasande fart, sista kvällen innan vi åkte till Svea rike över jul.

The waist part looked like this in the front. I hand stitched the buttonholes and made covered buttons (inherited) in a great hurry, at the last evening before going home to Sweden for Christmas.

06

Kjolen saknade alltså endast fåll och fickor, när vi återvände till verkligheten.

The skirt only lacked hemming and the pockets, when we returned to the grave reality.

Fickor

07

08När jag började med fickorna, hade jag fortfarande inte helt bestämt mig för hur de skulle se ut. Jag klippte ut några tyglappar och började experimentera. Jag hade sett flera trevliga veckade fick-varianter, bland annat på denna modebild från 1915:

When I began making the pockets, I still hadn’t figured out exactly how they would look. I cut some bits of fabric and experimented with these. I had seen many different types of pockets, for example in this nice fashion plate from 1915:

Jag testade några olika varianter på kjolen och bestämde mig för att göra något liknande bilden intill, men utan knappar och volanger upptill.

I tested some different variants on the skirt and decided to go for something similar to the one in the picture, but without buttons and flounce.

09

Jag insåg att det skulle krävas väldigt mycket arbete för att få till en rynkad, men ändå rät nedre kant på fickorna, så jag testade mig fram till denna variant.

I realised that it would take some work in order to get that ruffled but at the same time straight bottom edge, so I ended up with this alternative.

10

Man ser ganska rolig ut, när man försöker föreviga processen, från topp till tå.

One looks kind of funny when trying to document the process, from top to toe.

11

Sedan var det bara att sy fast fickorna med raksöm och fålla kjolen.

Then all that remained was to stitch down the pockets with a straight seam and hem the skirt.

Den färdiga kjolen

12 13 14

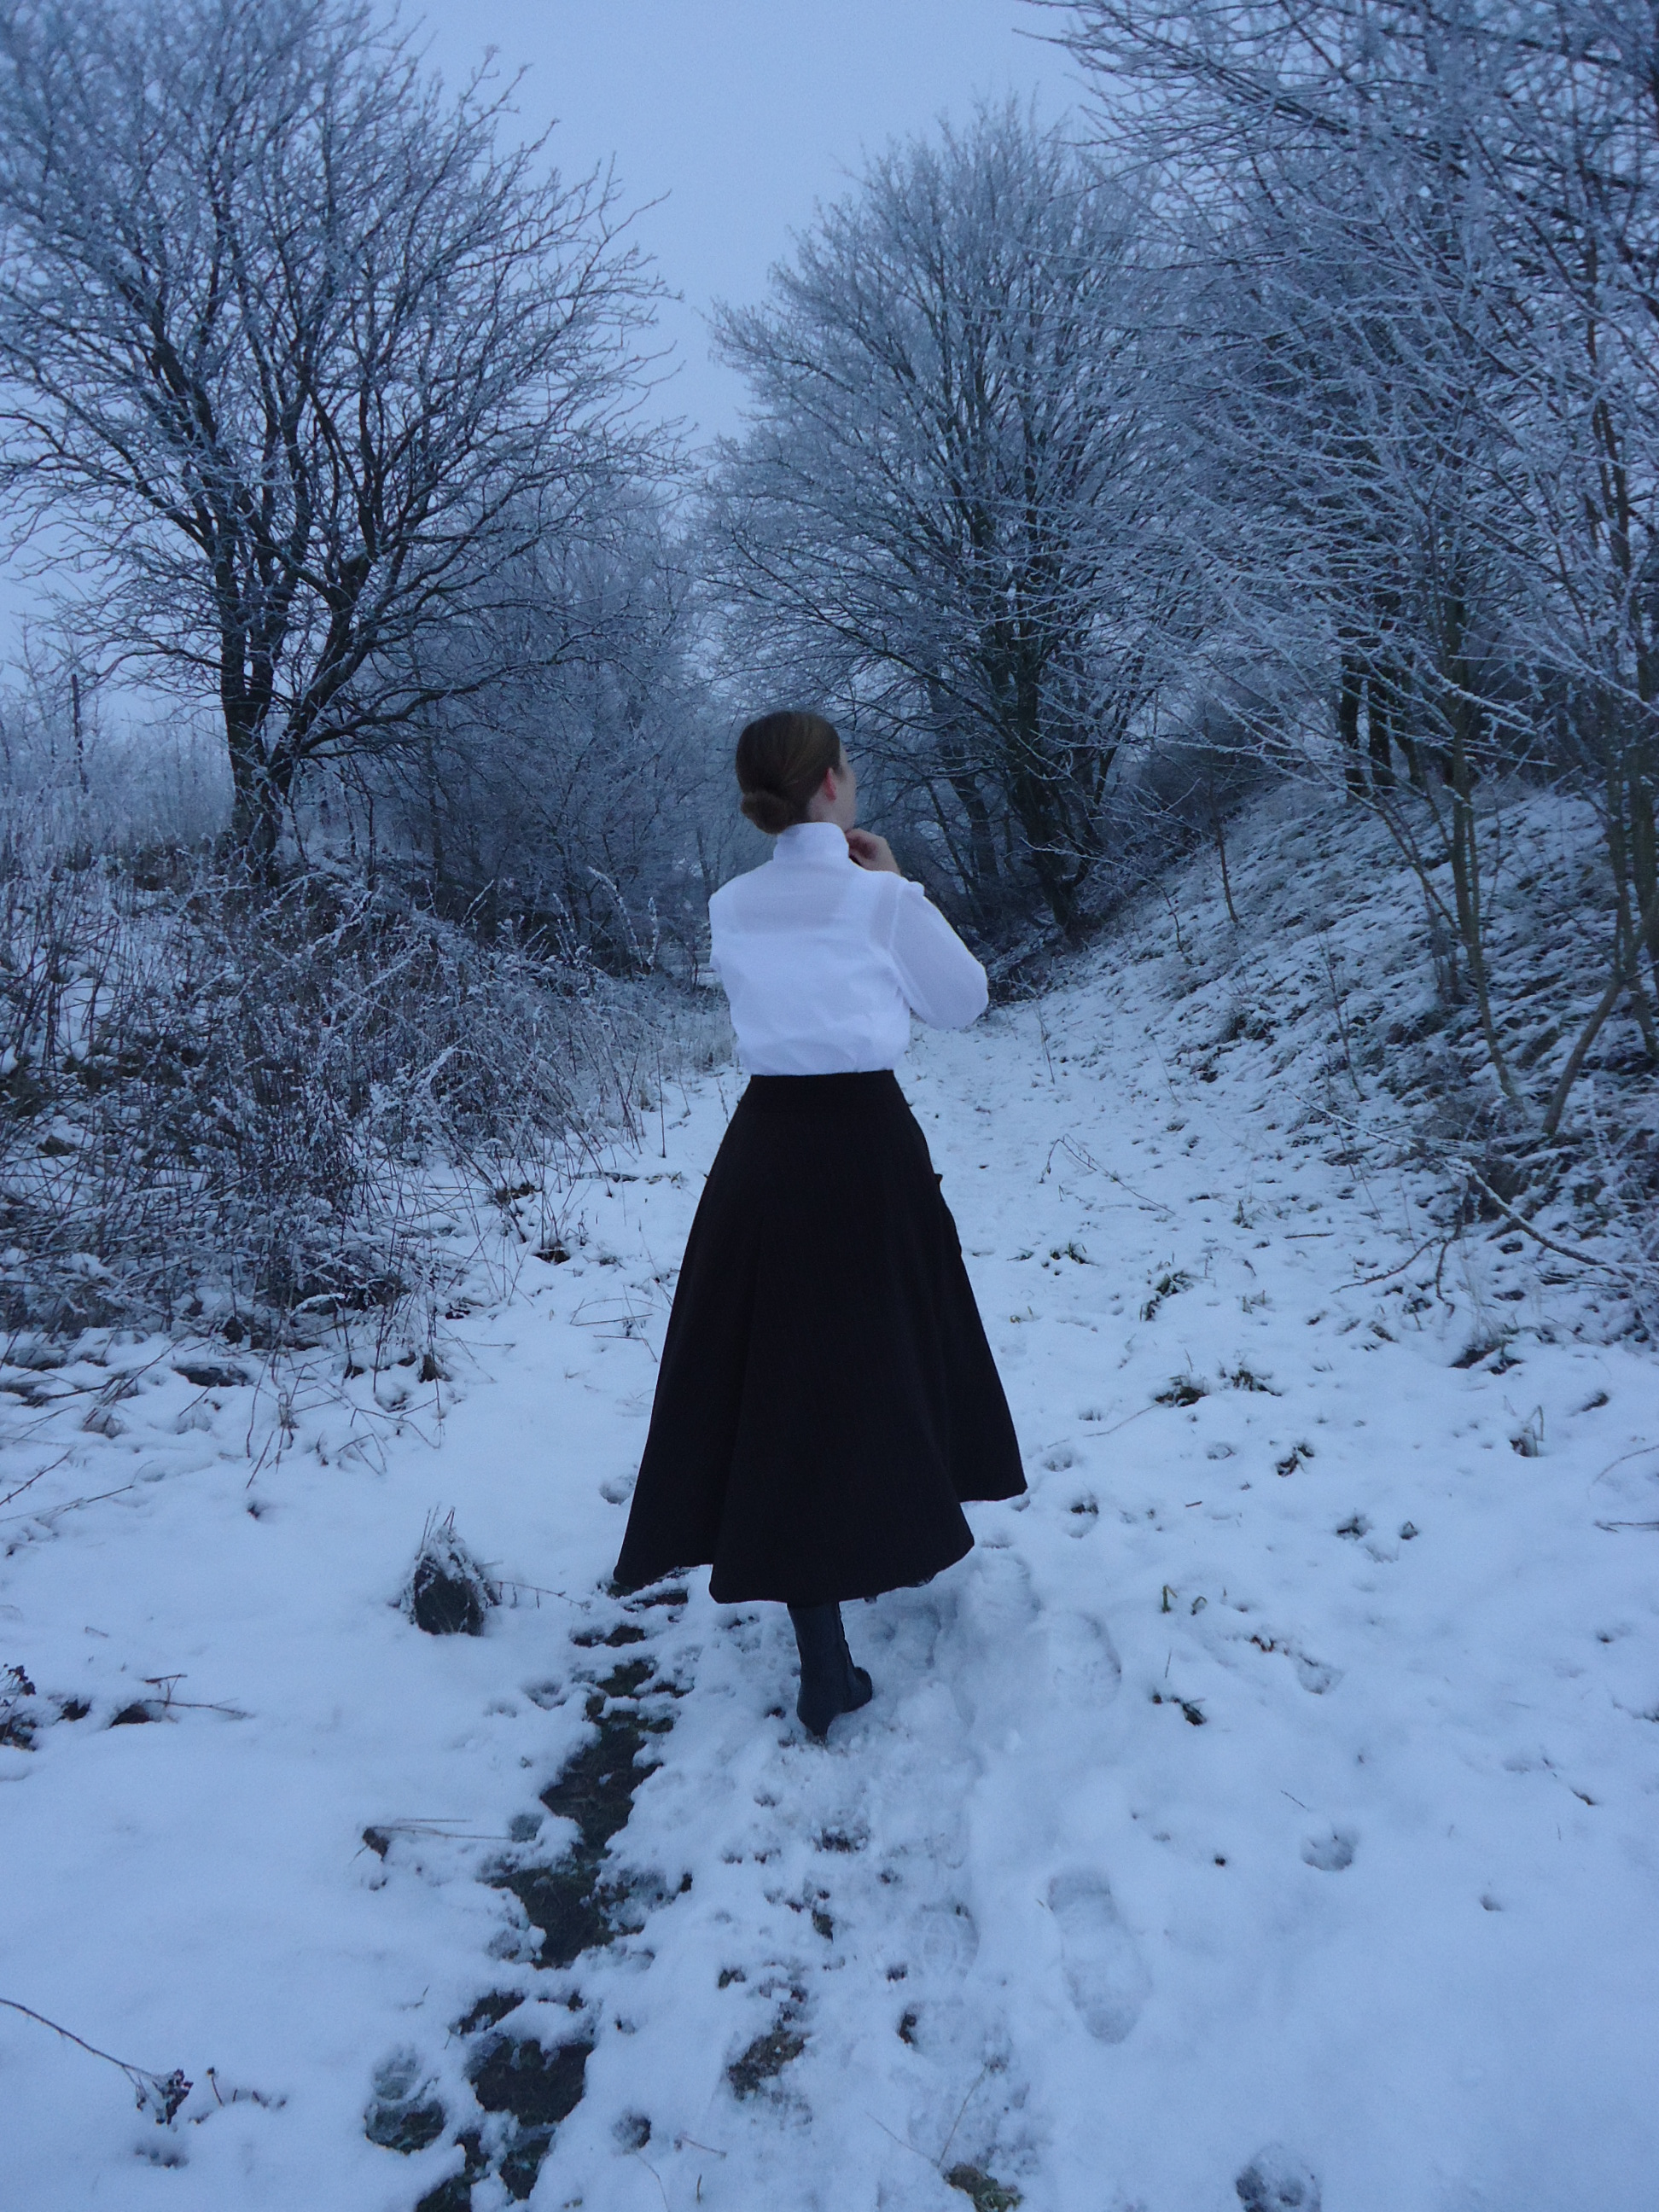
Dags att dra med min hängivne fotograf ut i naturen för en kylig fotosession!

Time to take my dedicated photographer out for a refreshing photo session.

15

Share

De färdiga underkläderna

Eftersom jag känner mig föga presentabel i mina vågade underkläder, ville jag inte fotografera dem utomhus, så ni får hålla till godo med dessa bilder. Här ser du också i vilken ordning man ska klä på sig de olika plaggen.

As I don’t feel quite decent in my daring underwear, I didn’t want to take the pictures outdoors, so you have to be contented with these pictures. Here you see in what order the different pieces should be put on.

Kombination av särk och mamelucker – ca 1913

Combination of chemise and drawers

01 02

Korsett – ca 1908

Corset03 04 05 06

Corset cover kombinerat med särk

Corset cover combined with chemise07

Underkjolen – från skattkistan – 1905-1920

The original petticoat from the treasure chest08Sedan är det bara de “riktiga” kläderna som fattas. smiley

Now I only have the “real” outer clothes left.

Visdomar från “Kvinnans bokskatt”

När jag skulle sätta igång med detta projekt, skickade den omtänksamma Ulrika ett utdrag till mig, ur Kvinnans bokskatt från 1913. Boken är läsvärd, både för att författarinnan skriver underhållande och för att boken ger god inblick i sin tids resonemang och vardagsliv. Jag kan inte låta bli att dela med mig av några favoritstycken:

Jag må vara gammal och bakåtsträvande, men låter inte detta ganska bekant?

”Ett mod må för övrigt vara aldrig så löjligt, det finner i alla fall sina anhängare, och sömmerskor och modister äro dess trogna förkämpar.”

Något jag får tänka på, när jag ska välja kläder som matchar min enkla lärarinna:

”Den kvinna förblir alltid bäst klädd, som förstår att förena enkelheten med prydlighet, att välja sina färger efter sitt ansikte och sina kläder efter sin figur. Den  enkla, väl skurna, omsorgsfult sydda och välsittande klänningen, som naturligt och  smidigt följer figuren, blir alltid elegant utan alla garnityr eller tillsatser och verkar  alltid förnämt, allra helst om tygets kvalitet är av bättre slag.”

Är inte detta uttalande fantastiskt likt Miss Bingly’s uttalande, när hon vill belysa Lizzy’s svagheter och framhäva sin egen överlägsenhet inför Mr. Darcy?

” … det enda mål, som är eftersträvansvärt, är detta outsägligt tilldragande behag  hos kvinnan, som ligger i ett `distingerat´ väsen, denna sammanfattning av harmoniska rörelser, tal, ton, sätt att vara, kläda och föra sig, som man genast märker och känner, men som är nästan omöjligt att beskriva.”

Med denna underbara iakttagelse, vill jag avsluta dagens blogginlägg:

”Krinolinen var på sin tid ett förskräckligt plagg och drog i sin fulländning så mycket tyg, att en stackars familjeförsörjare med fru och flera giftasvuxna döttrar såg nära nog en hel förmögenhet gå åt till tyg, kappor och volanger, som skulle kläda dessa förskräckliga underplagg av band och stålfjädrar, till vilka mönstret tycktes vara taget från stommen till en kafferkraal i södra Afrika. Och ändå kan man knappast säga, att den tidens kvinnor togo sig på långt när så löjliga ut som nutidens damer
med sina smala kjolar och ofantliga hattar, som komma dem att likna vandrande champinjoner, där icke den över huvudet neddragna hatten i krukfacon gör, att de likna ett vandrande spöke utan huvud alls.”

Share

Särk/corset cover

01

Hu. Detta plagg hade jag verkligen noll inspiration inför, så det gick undan och blev inte optimalt. smiley

Oh dear. I truly had non inspiration whatsoever for making this piece, so I made it ultra quickly and the result wasn’t optimal.

Här ser du en förnäm variant av “corset cover combined with chemise”, från 1910-1912. De flesta “corset covers” täckte bara just korsetten, eftersom deras främsta syfte var att skydda kläderna utanpå från slitage. Jag ville dock ha ytterligare ett lager nedtill, så jag valde denna variant. Eftersom plagget ska passa en person utan pengar till övers för krimskrams, gjorde jag en mycket enkel variant.

In this picture, from a fashion magazine from 1910-1912, you see an elegant version of a “corset cover combined with chemise”. Most corset covers obviously used to cover just the corset and a little bit more, because it’s purpose was to protect the clothes from the wear of the corset. Because of my combination underneath the corset, I needed another layer under the petticoat, so I chose to make this long version of corset cover. As the cloths should suit a person without much ready money, I set for a very simple model.

Särken är sydd i bomull, med raksömmarna sydda på maskin. När jag orkar och får tillbaka lusten, ska jag fälla sömmarna för hand. Eventuellt lägger jag till en kanal för en snodd, runt midjan.

The chemise/long corset cover is made of cotton and all straight seams are made on the sewing machine. When the inspiration returns, I will fell the seams by hand. Perhaps I will also add a channel for a gathering drawstring at the waist.

02Detta är formen på särken.

This is the corset cover’s outlines.

03

För att ge mer stöd till underkjolen, sydde jag volanger längst ned. Om jag hade lyckats uppamma lite mer motivation, hade jag även sytt ett par stråveck.

In order to give more support to the petticoat, I made flounces at the hemline. If I had been able to muster a greater motivation, I’d even added some pin tucks.

04I halsringningen och runt ärmhålen fäste jag en smal spets.

In the neckline and around the armholes I put lace.

Efterkloka tankar: tyget borde ha varit mindre kritvitt – detta plagg ska ju helst inte synas så tydligt genom kläderna – och ännu tunnare, eller figursytt med knäppning. Nu ger det extra tyget i midjan tyvärr en förstorande effekt.

In hindsight, I see that the fabric should have been of lighter weight and less white, as it now shines through the outer layer. It would also have been a good idea to make it more fitted, maybe even buttoned. As it is now, the extra fabric adds some unflattering weight at waist.

Share

Kombination – 1913

Inspiration

Närmast kroppen, valde jag mellan att ha en särk, eller en så kallad “kombination” – ett plagg där särk och mamelucker kombineras i ett. Det slutade med kombinationen, eftersom jag ville prova att sy något nytt.

Closest to the body, I chose to between having a chemise and drawers or a combination of the two. As I already had the former, I went for the combination, so I could try something new.

01

Jag är osäker på om jag kommer ha tid till att slutföra detta stora projekt och sy en ny blus och kjol. Eftersom jag redan har en Edwardiansk blus med fyrkantig urringning, bestämde jag mig för att sy en kombination med matchande urringning, så jag utgick från kombinationen till vänster på modebilden.

I am not certain of whether I will be able to finish this big project with a new blouse and skirt. I already have an Edwardian shirtwaist with a rectangular neckline, so I decided to make a combination with a matching neckline and used the one to the left in the fashion plate as a model.

02

Innan jag satte igång, ville jag gärna se hemmasömnadsteknikerna på ett motsvarande plagg, så jag tog vad jag hade till hands – mameluckerna från skattkistan! Benen är endast sammanfogade mitt fram. För övrigt är grenen öppen hela vägen. Mitt bak högst upp, på båda ben, sitter långa snören, som snos runt midjan och kan träs genom hålet framtill i linningen och knytas ihop där.

Before starting, I wanted to study the home sewing techniques on a similar cloth piece, so I took what I had at hand – the drawers from the treasure chest! The legs are only sewn together in the front. Otherwise the crotch is open all the way and is only closed with drawstrings in the back of the waist. These strings are long enough for winding around the waist and then threaded through a hole in the front and be tied there.

03

Baktill ser de ut så här. De är sydda i två fram- och två bakstycken, med en linning upptill, som går hela vägen runt. På “innanlåren” är det infogat trekantiga kilar. Nedtill är finns två stråveck och en spets. Mameluckerna är blandat maskin- och handsydda.

In the back the drawers look like this. They consist of two front and two back panels, all held together by a waistband. There are triangular gussets on the inside of the thighs. At the bottom there are pin tucks and lace. The drawers are both sewn on machine and by hand.

Sy plagget

Jag utgick från 4 likaformiga rektanglar, med tyg från ett utslitet lakan. Tygstyckenas mått var:

Bredd = (största bredd över höfterna / 4 ) + 4 cm
Höjd = övre kant ned till knä

I started out with four similar fabric rectangles, out of an old bed sheet. The measures for the panels were:

  • Width = greatest circumference of body (mine is below the hips) / 4 + 4 cm
  • Height = upper line to knee

När jag hade rivit itu lakanet till 4 delar med ovanstående mått, nålade jag dem samman mitt fram och mitt bak i en rät linje till höjd med grenen, där jag lät linjen böja utåt mot tygets kant. Benen nålade jag också samman.

OBS: Om du inte har sytt byxor förr, kan det vara en hjälp att kika på ett par och se hur styckena är sammanfogade runt torson och benen. Jag minns att jag tyckte detta var ganska svårbegripligt första gången jag testade.

When I had ripped the bed sheet into four similar pieces, I pinned them together in a straight line both in the front and the back, down to the crotch. There the line was evenly out. The legs were then also pinned together.
If you’ve never made trousers before, I recommend you to study a pair and figure out how they are out together around torso and legs. I remember being quite confused the first time I tried this.

04

Jag hängde upp fram- och bakstyckena på dockan i önskad höjd, och nålade i sidorna på sådant vis att tyget inte bildade konstiga veck.

I pinned the front and back to the mannequin at the rises for height of the neckline and then pinned them together in the sides in the way that made the least puckering.

05

Sedan nålade jag inprovningar fram…

Then I pinned darts in the front…

06

… och bak.

… and in the back.

07

Sedan var det dags att prova passformen på min egen kropp. Den gick ju an, så jag gick vidare och sydde längs nålningen – överallt utom framtill och i grenen fram till en bit upp på rumpan. Allt detta gick på mindre än en timme.

Then it was time for fitting on my own body. The fit was tolerable, so I moved on and made seams along the pinned lines – everywhere but in the front and crotch. All this was done in less than an hour.

08

Då såg det ut så här. Jag testade att sätta mig och insåg att jag behövde ta upp ytterligare några centimeter baktill i grenen. Poängen med konstruktionen av mamelucker och kombinationsplagg är ju att grenen ska öppna sig så mycket, när man sätter sig, att tyget inte riskerar att lortas ned när man gör sina behov.

Then it looked like this. I tested sitting down and realised that I’d better unpick some cm more for the crotch in the back. Those who are prudish might want to skip this part: the point of the drawers’ and combinations’ construction is that the crotch opens up when sitting down, so that you don’t have to strip to the skin every time you visit the ladies room. It is actually very clever and clean.

09

Jag bestämde mig även för att sätta kilar på insidan av låren, som på mameluckerna. Sedan började jag fålla och fälla sömmar för hand.

I decided to insert gussets at the insides of the thighs, as on the vintage drawers. Then I hemmed and fell the seams by hand.

10

Till axelband återanvände jag spets från farmors utslitna örngott (i samma stil som på mameluckerna). Sedan mätte jag ut var knapparna skulle sitta…

For shoulder straps I reused old lace from my grandmothers old pillowcases (in the same style as on the drawers). Then I measured and marked the placement of the buttons…

11

… och sydde så knapphålen (med traditionella langettstygn) och fäste knapparna.

… and then I hand stitched all of the button holes and fastened the buttons.

12

Sedan kapade jag benen med en decimeter, sydde fast spets från ytterligare ett örngott och fäste de avkapade benstyckena dubbelvikta längst ned.

Then I cut the lowest dm off of the legs, sewed on some old pillow case lace and stitched the folded cut away part to the lace.

13

Igenom spetsen trädde jag dekorativa band och plötsligt var plagget klart!

Through the lace I threaded decorative ribbons and suddenly, low and behold, there was a finished combination!

Slutresultat 14

Så här ser kombinationen ut framifrån… 15

… bakifrån… 16

… och, ack, ve och fasa… underifrån!


Share