
Inspiration
Närmast kroppen, valde jag mellan att ha en särk, eller en så kallad “kombination” – ett plagg där särk och mamelucker kombineras i ett. Det slutade med kombinationen, eftersom jag ville prova att sy något nytt.
Closest to the body, I chose to between having a chemise and drawers or a combination of the two. As I already had the former, I went for the combination, so I could try something new.
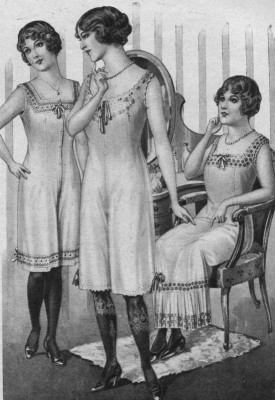
Jag är osäker på om jag kommer ha tid till att slutföra detta stora projekt och sy en ny blus och kjol. Eftersom jag redan har en Edwardiansk blus med fyrkantig urringning, bestämde jag mig för att sy en kombination med matchande urringning, så jag utgick från kombinationen till vänster på modebilden.
I am not certain of whether I will be able to finish this big project with a new blouse and skirt. I already have an Edwardian shirtwaist with a rectangular neckline, so I decided to make a combination with a matching neckline and used the one to the left in the fashion plate as a model.
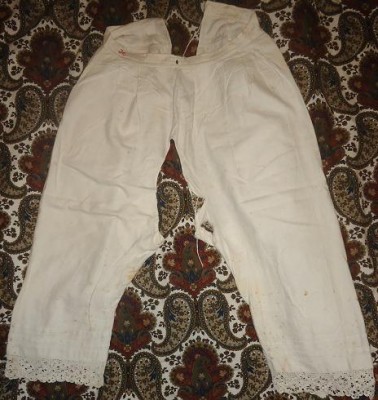
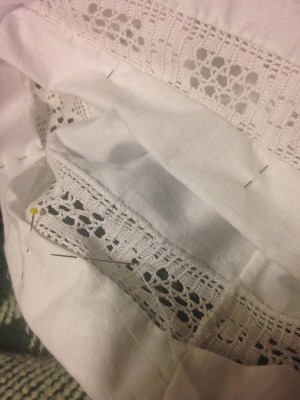
Innan jag satte igång, ville jag gärna se hemmasömnadsteknikerna på ett motsvarande plagg, så jag tog vad jag hade till hands – mameluckerna från skattkistan! Benen är endast sammanfogade mitt fram. För övrigt är grenen öppen hela vägen. Mitt bak högst upp, på båda ben, sitter långa snören, som snos runt midjan och kan träs genom hålet framtill i linningen och knytas ihop där.
Before starting, I wanted to study the home sewing techniques on a similar cloth piece, so I took what I had at hand – the drawers from the treasure chest! The legs are only sewn together in the front. Otherwise the crotch is open all the way and is only closed with drawstrings in the back of the waist. These strings are long enough for winding around the waist and then threaded through a hole in the front and be tied there.
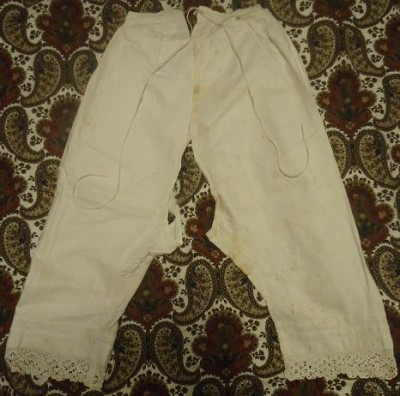
Baktill ser de ut så här. De är sydda i två fram- och två bakstycken, med en linning upptill, som går hela vägen runt. På “innanlåren” är det infogat trekantiga kilar. Nedtill är finns två stråveck och en spets. Mameluckerna är blandat maskin- och handsydda.
In the back the drawers look like this. They consist of two front and two back panels, all held together by a waistband. There are triangular gussets on the inside of the thighs. At the bottom there are pin tucks and lace. The drawers are both sewn on machine and by hand.
Sy plagget
Jag utgick från 4 likaformiga rektanglar, med tyg från ett utslitet lakan. Tygstyckenas mått var:
Bredd = (största bredd över höfterna / 4 ) + 4 cm
Höjd = övre kant ned till knä
I started out with four similar fabric rectangles, out of an old bed sheet. The measures for the panels were:
- Width = greatest circumference of body (mine is below the hips) / 4 + 4 cm
- Height = upper line to knee
När jag hade rivit itu lakanet till 4 delar med ovanstående mått, nålade jag dem samman mitt fram och mitt bak i en rät linje till höjd med grenen, där jag lät linjen böja utåt mot tygets kant. Benen nålade jag också samman.
OBS: Om du inte har sytt byxor förr, kan det vara en hjälp att kika på ett par och se hur styckena är sammanfogade runt torson och benen. Jag minns att jag tyckte detta var ganska svårbegripligt första gången jag testade.
When I had ripped the bed sheet into four similar pieces, I pinned them together in a straight line both in the front and the back, down to the crotch. There the line was evenly out. The legs were then also pinned together.
If you’ve never made trousers before, I recommend you to study a pair and figure out how they are out together around torso and legs. I remember being quite confused the first time I tried this.
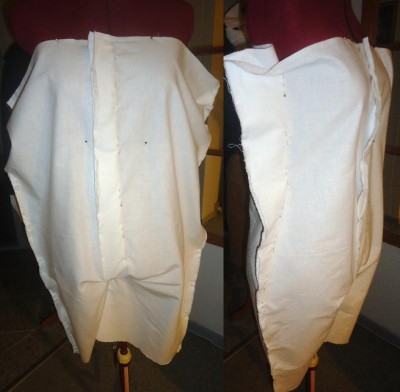
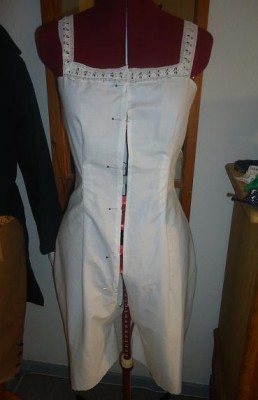
Jag hängde upp fram- och bakstyckena på dockan i önskad höjd, och nålade i sidorna på sådant vis att tyget inte bildade konstiga veck.
I pinned the front and back to the mannequin at the rises for height of the neckline and then pinned them together in the sides in the way that made the least puckering.
Sedan nålade jag inprovningar fram…
Then I pinned darts in the front…
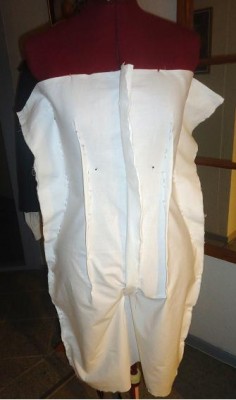
… och bak.
… and in the back.
Sedan var det dags att prova passformen på min egen kropp. Den gick ju an, så jag gick vidare och sydde längs nålningen – överallt utom framtill och i grenen fram till en bit upp på rumpan. Allt detta gick på mindre än en timme.
Then it was time for fitting on my own body. The fit was tolerable, so I moved on and made seams along the pinned lines – everywhere but in the front and crotch. All this was done in less than an hour.
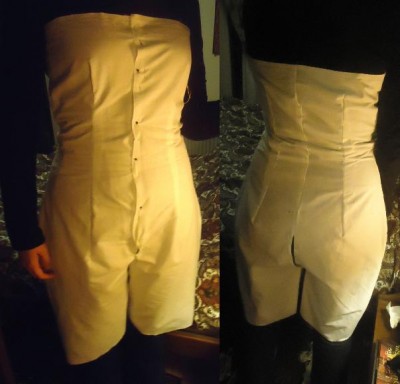
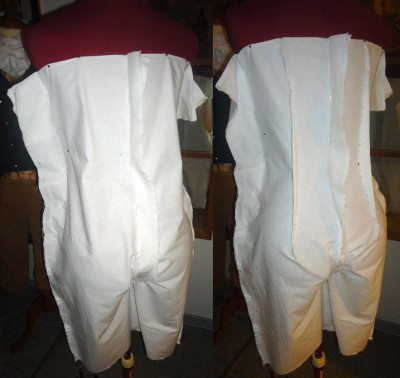
Då såg det ut så här. Jag testade att sätta mig och insåg att jag behövde ta upp ytterligare några centimeter baktill i grenen. Poängen med konstruktionen av mamelucker och kombinationsplagg är ju att grenen ska öppna sig så mycket, när man sätter sig, att tyget inte riskerar att lortas ned när man gör sina behov.
Then it looked like this. I tested sitting down and realised that I’d better unpick some cm more for the crotch in the back. Those who are prudish might want to skip this part: the point of the drawers’ and combinations’ construction is that the crotch opens up when sitting down, so that you don’t have to strip to the skin every time you visit the ladies room. It is actually very clever and clean.

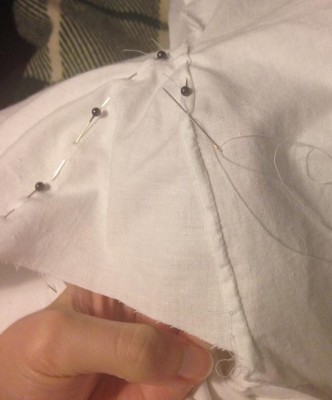
Jag bestämde mig även för att sätta kilar på insidan av låren, som på mameluckerna. Sedan började jag fålla och fälla sömmar för hand.
I decided to insert gussets at the insides of the thighs, as on the vintage drawers. Then I hemmed and fell the seams by hand.
Till axelband återanvände jag spets från farmors utslitna örngott (i samma stil som på mameluckerna). Sedan mätte jag ut var knapparna skulle sitta…
For shoulder straps I reused old lace from my grandmothers old pillowcases (in the same style as on the drawers). Then I measured and marked the placement of the buttons…
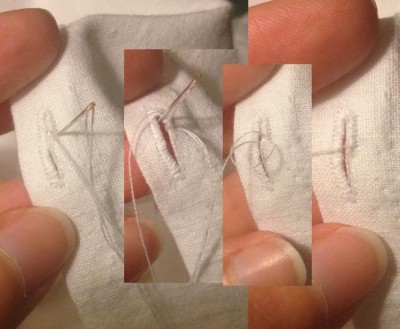
… och sydde så knapphålen (med traditionella langettstygn) och fäste knapparna.
… and then I hand stitched all of the button holes and fastened the buttons.
Sedan kapade jag benen med en decimeter, sydde fast spets från ytterligare ett örngott och fäste de avkapade benstyckena dubbelvikta längst ned.
Then I cut the lowest dm off of the legs, sewed on some old pillow case lace and stitched the folded cut away part to the lace.
Igenom spetsen trädde jag dekorativa band och plötsligt var plagget klart!
Through the lace I threaded decorative ribbons and suddenly, low and behold, there was a finished combination!
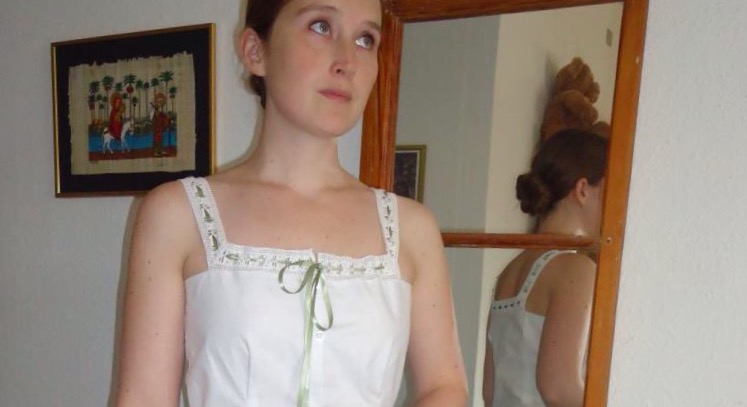
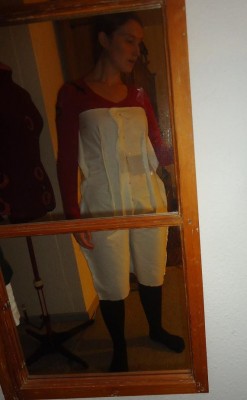
Slutresultat 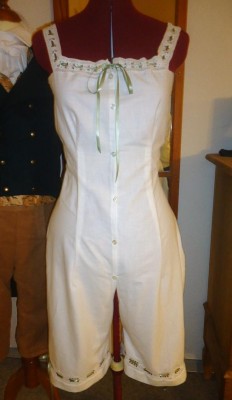
Så här ser kombinationen ut framifrån… 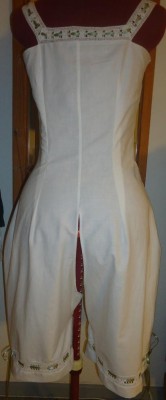
… bakifrån… 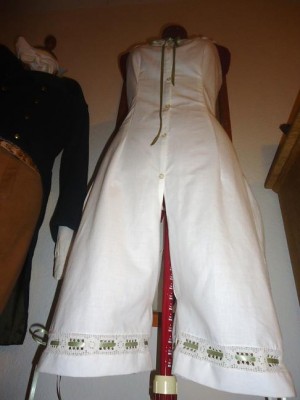
… och, ack, ve och fasa… underifrån!
