I had long promised my sewing niece to help out making a dress of her choice. When my mum brought home a beautiful silk brocade from India, suggesting it suitable for her prom, it was decided.
För ett tag sedan lovade jag min syende systerdotter att hjälpa henne i skapandet av någon klänning. När mamma tog med en vacker sidenbrokad från Indien och föreslog att det skulle passa till studentbalen, var valet självklart.
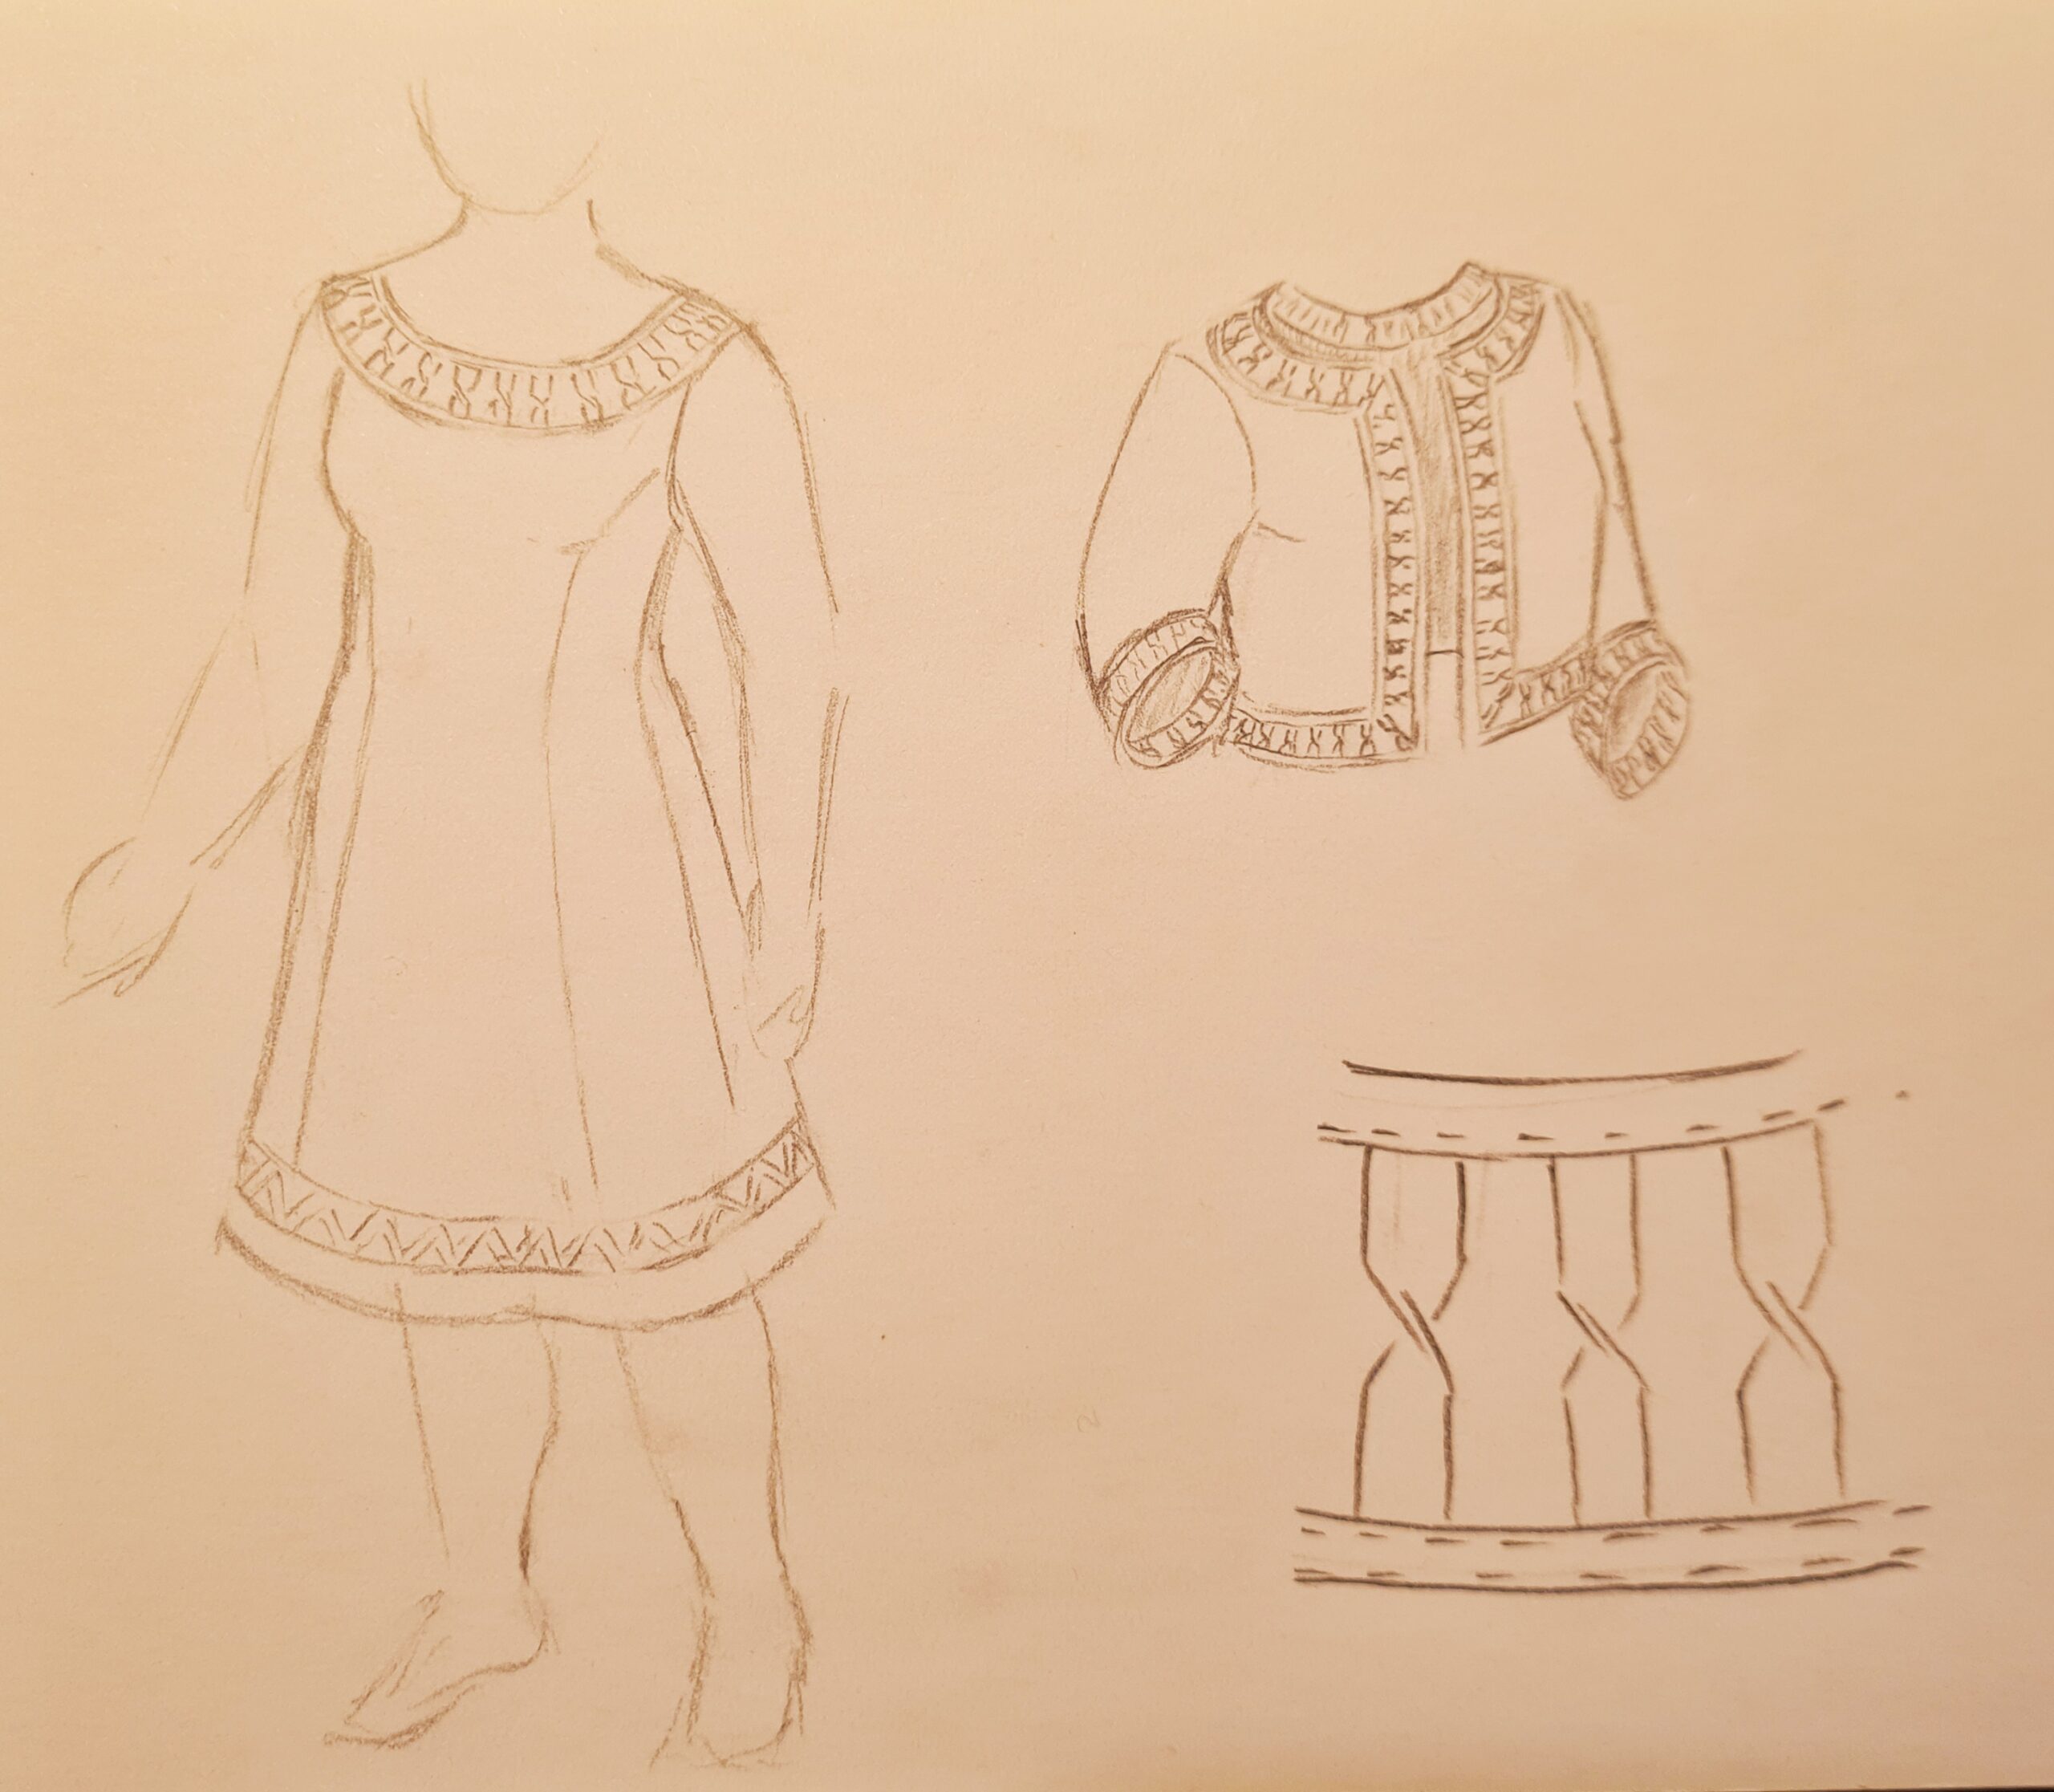
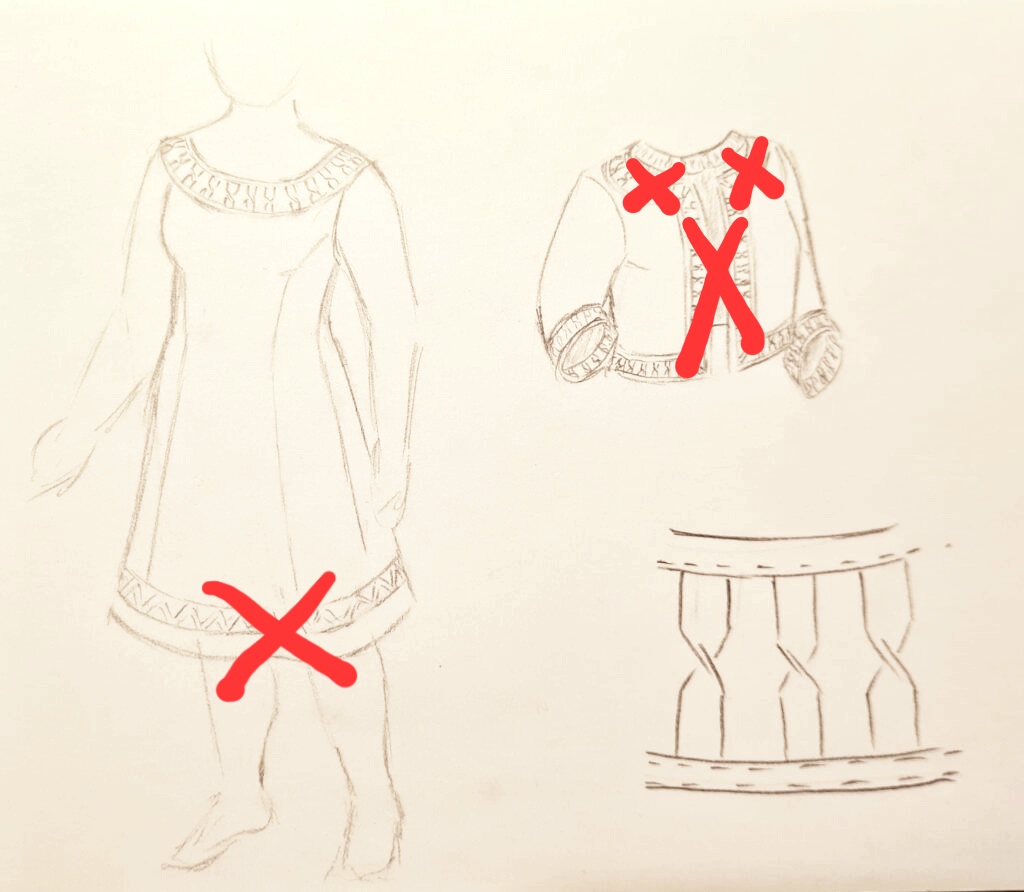
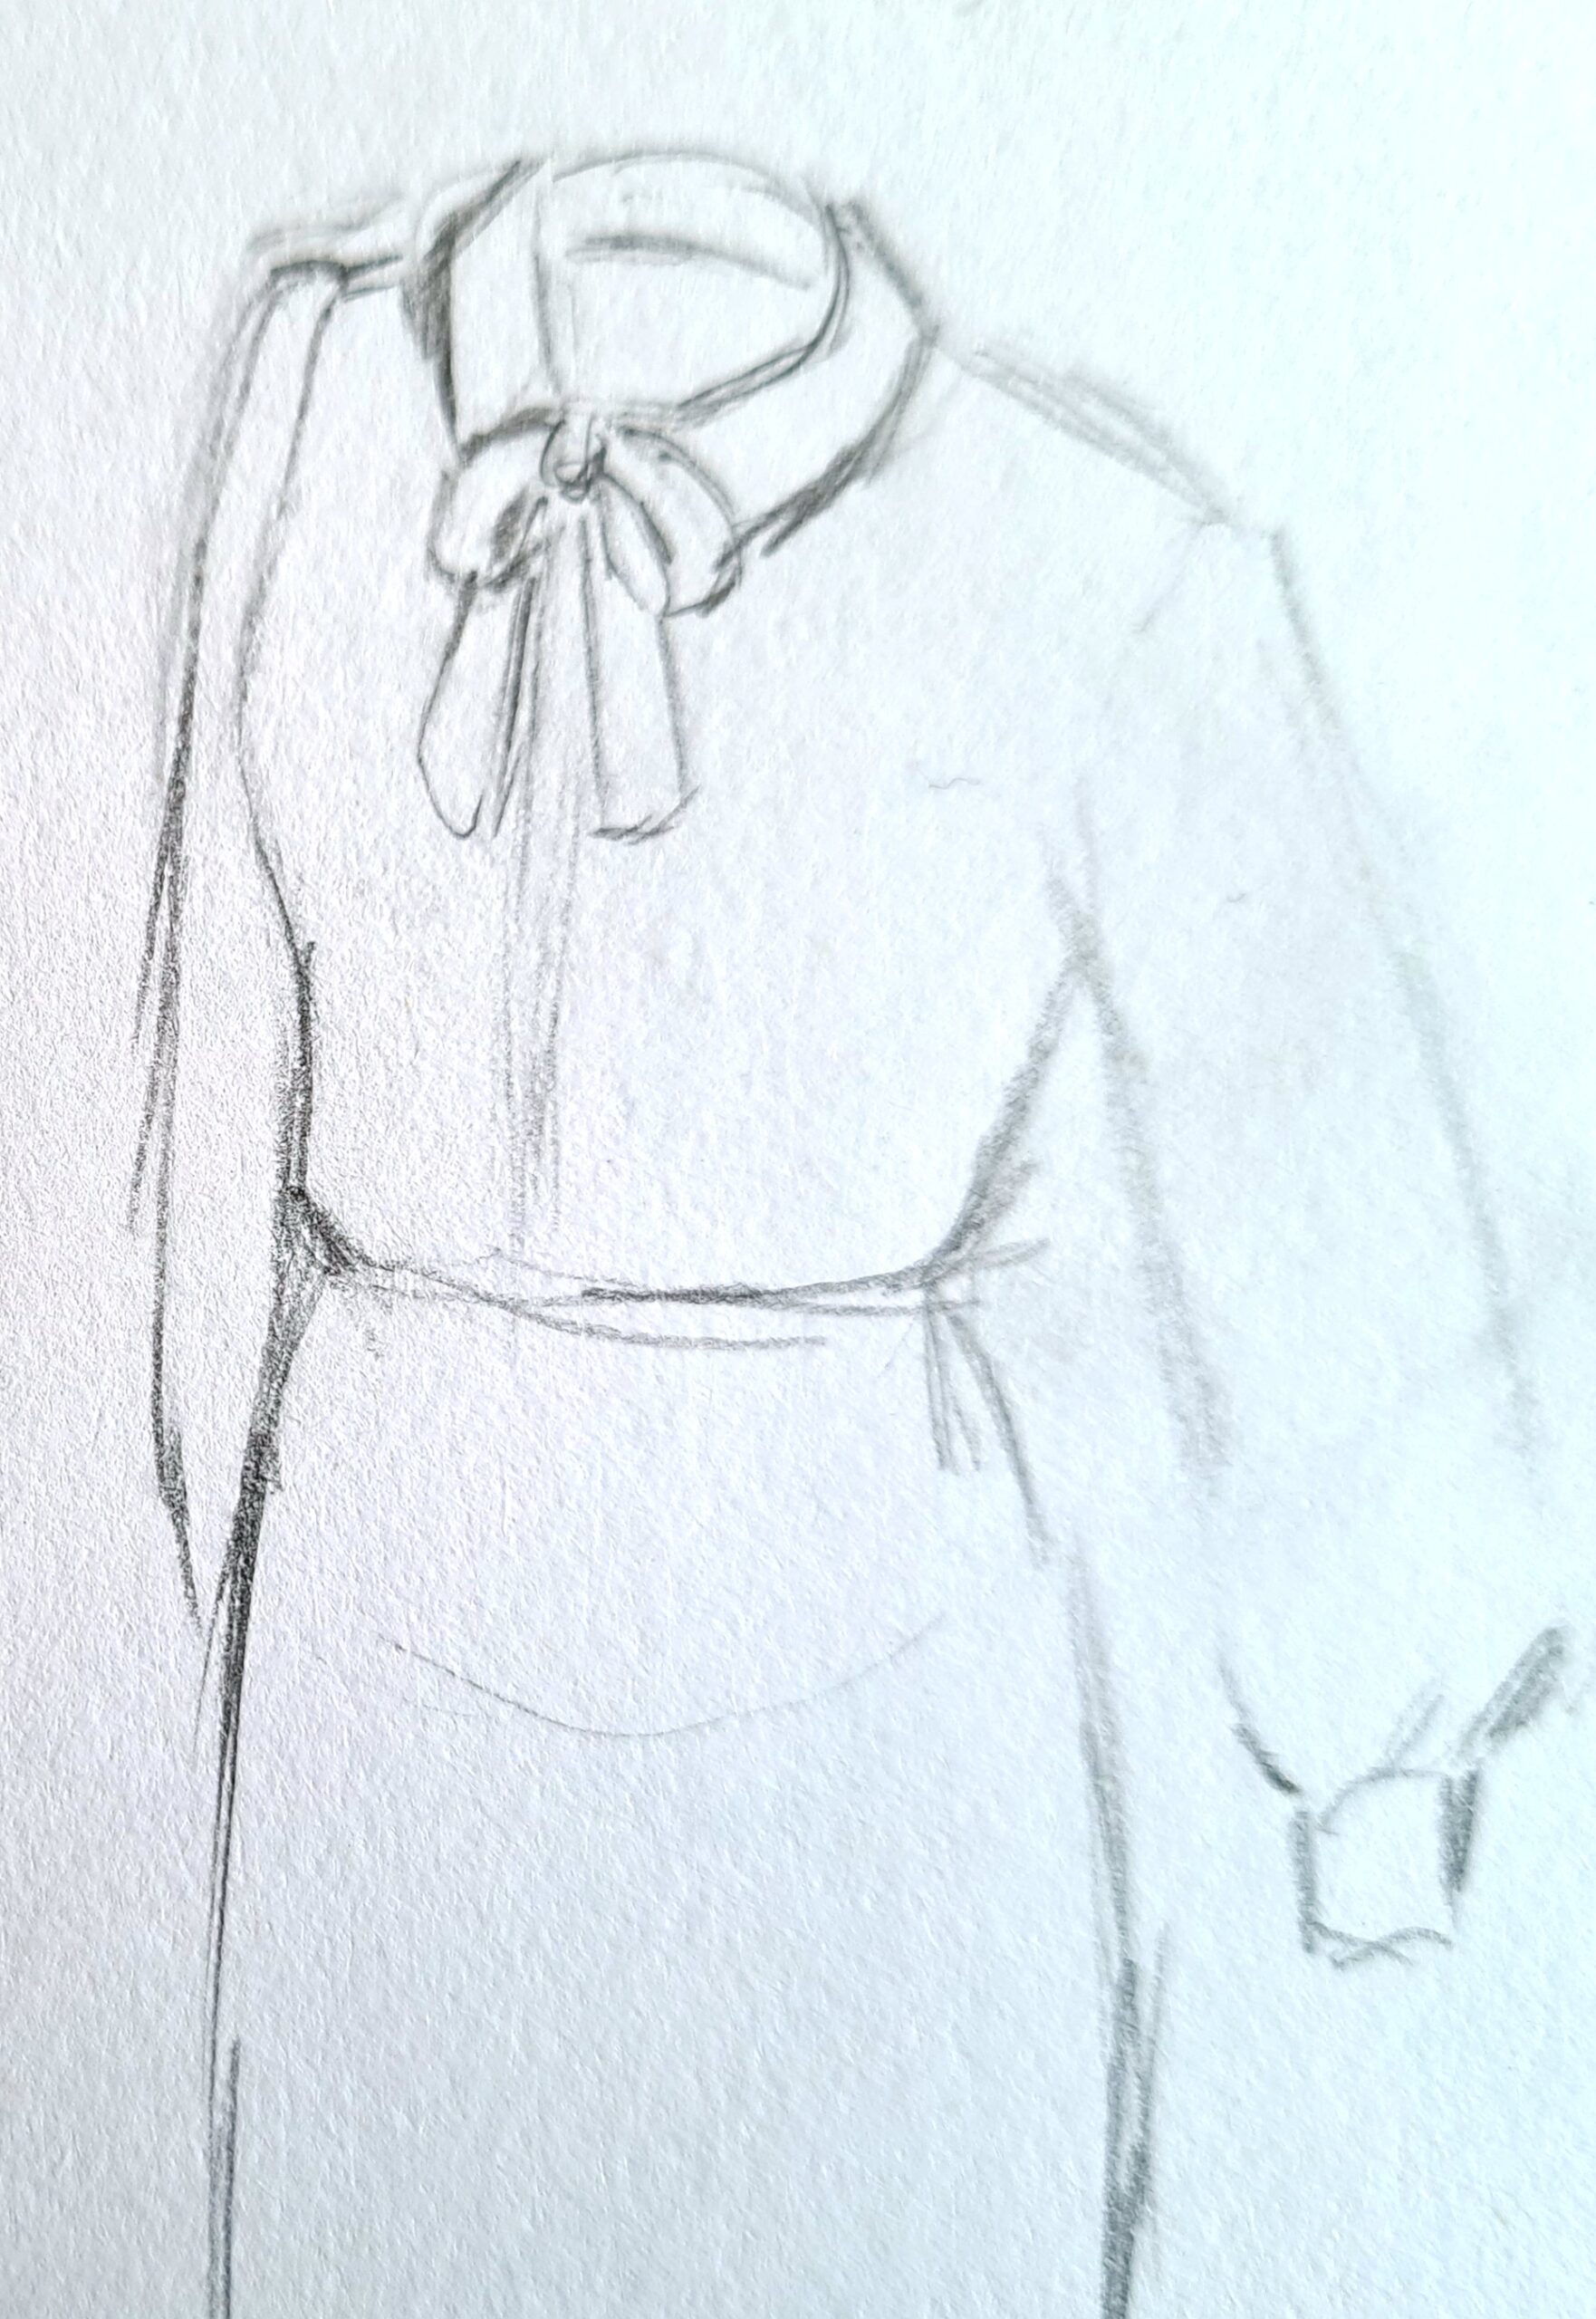
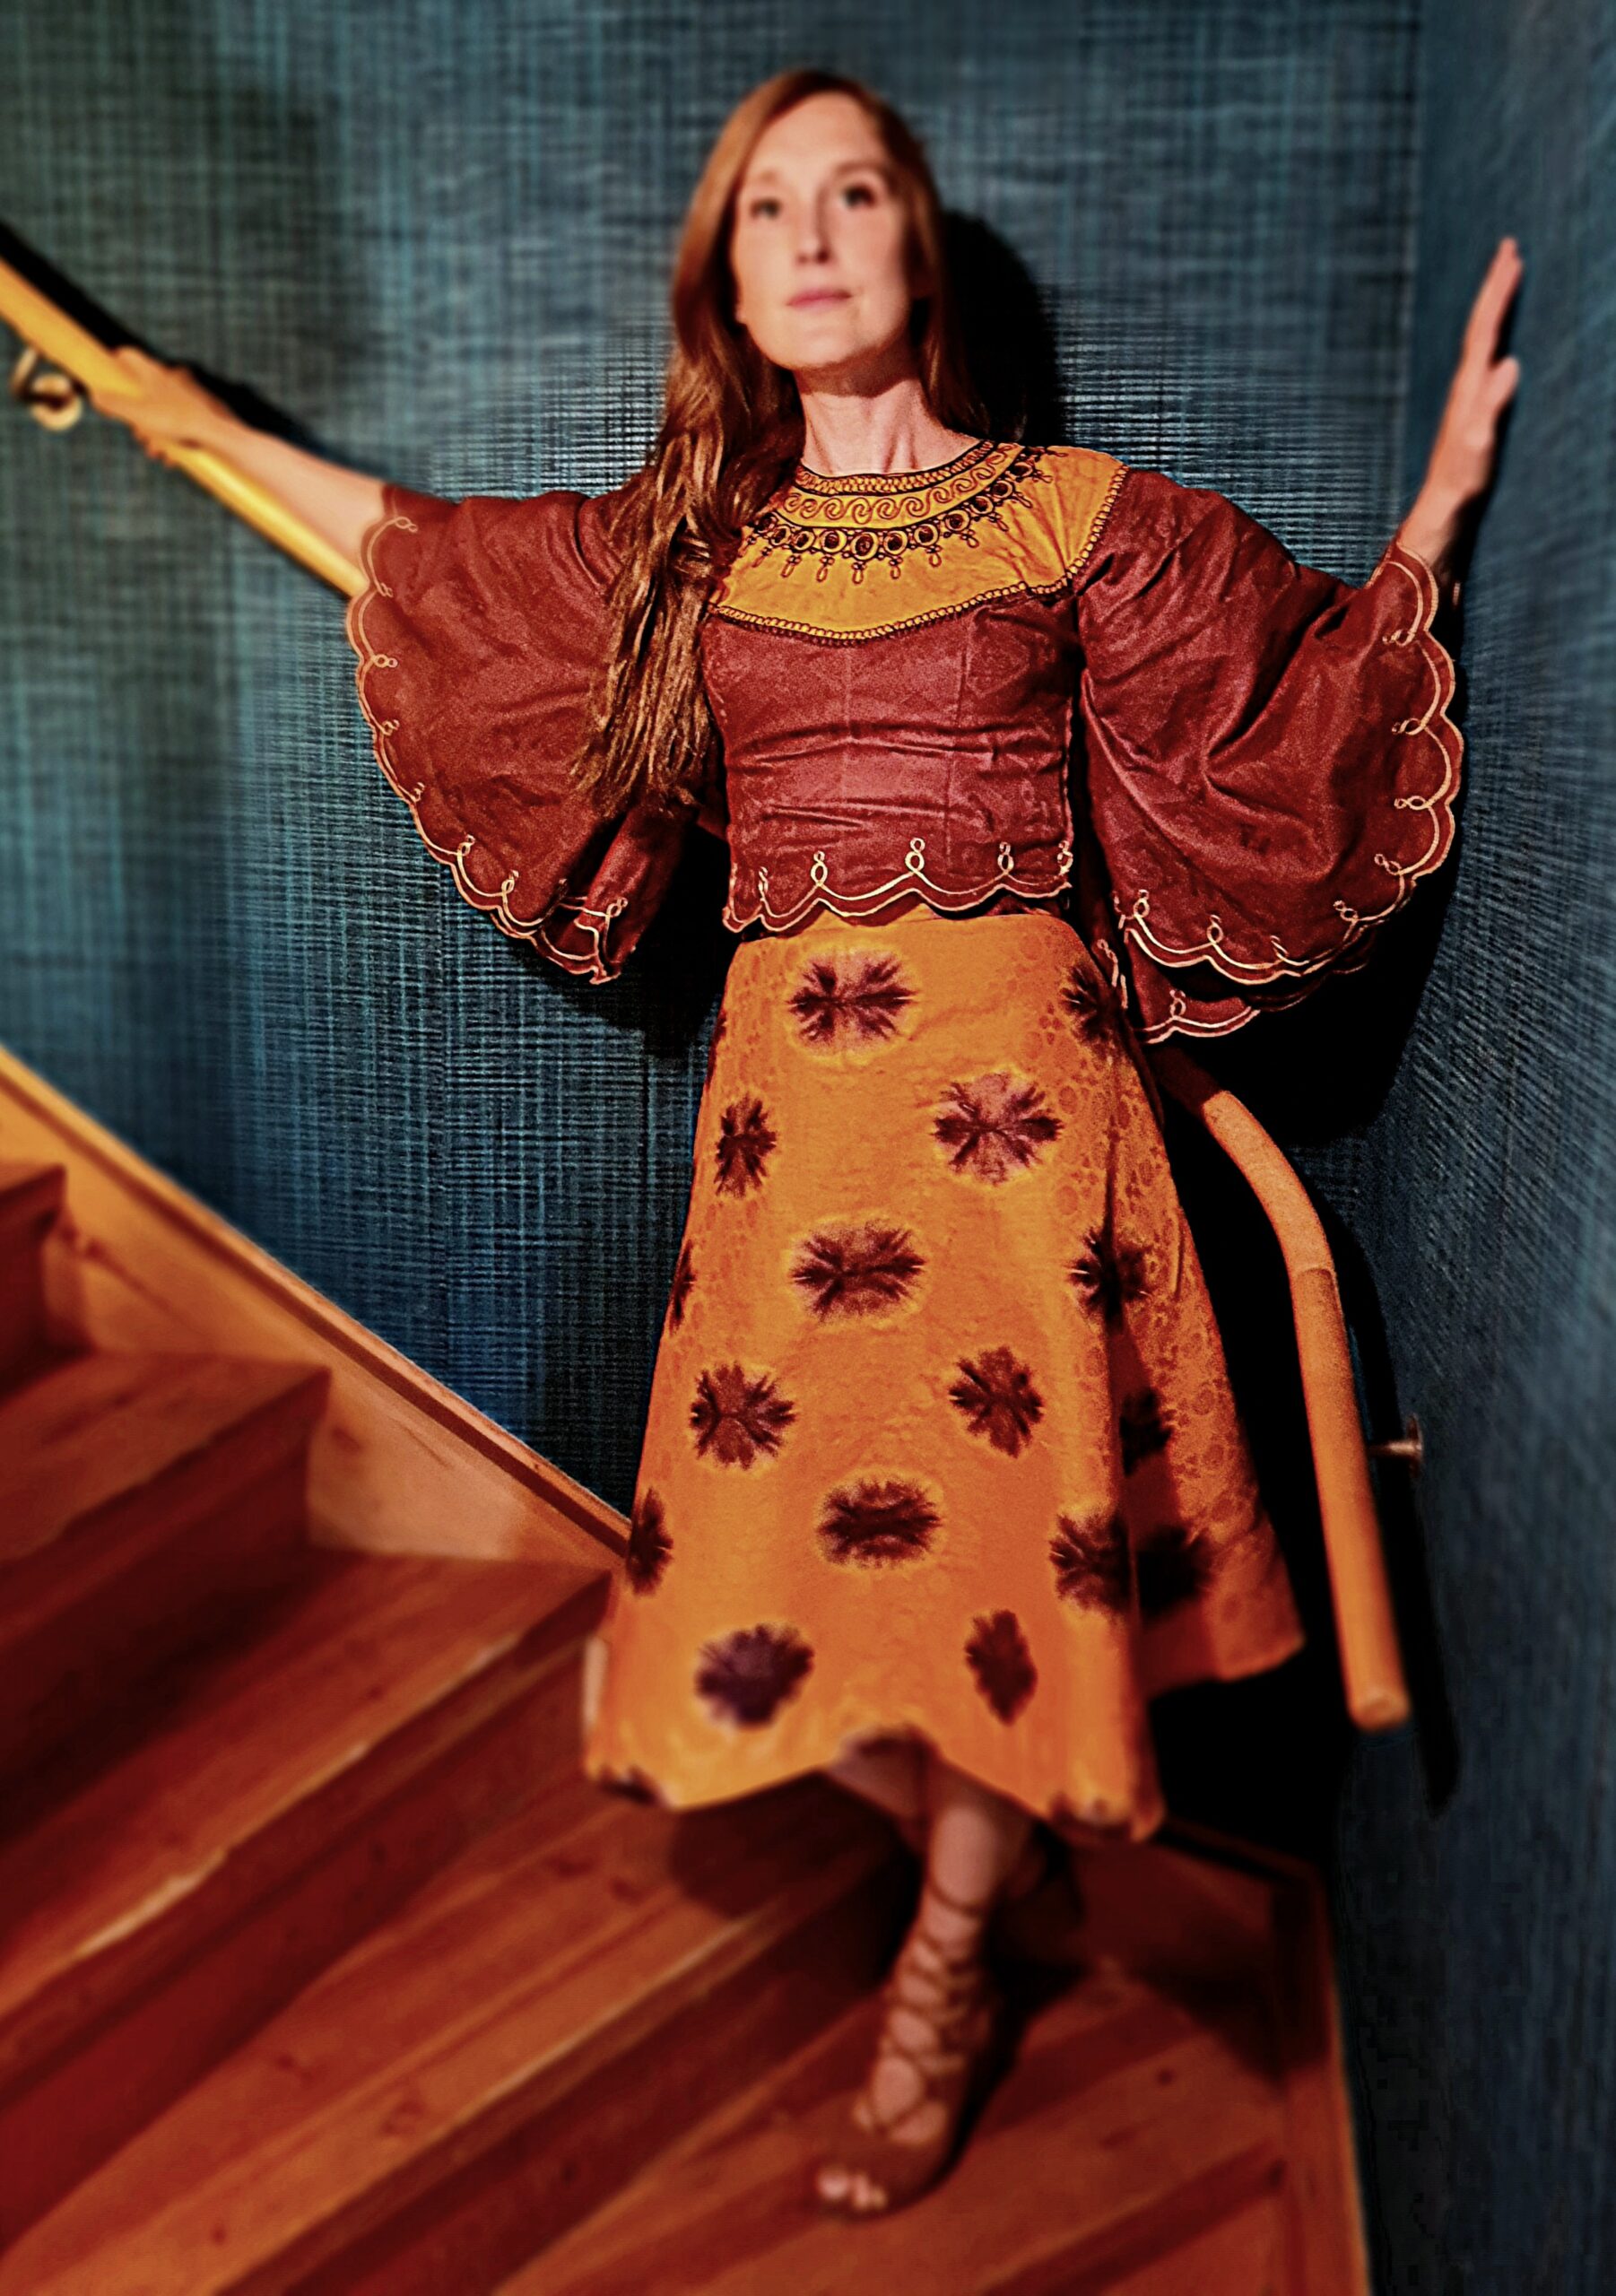
My niece made a Pinterest mood board before our meeting in the September 2024. Together we made our own design, drawing inspiration from both the thirties and modern elements.
Min systerdotter gjorde en fin inspirationssida på Pinterest inför vårt möte i September 2024. Med inspiration från både 1930-tal och moderna element och hennes egen goda smak, landade vi i denna design.
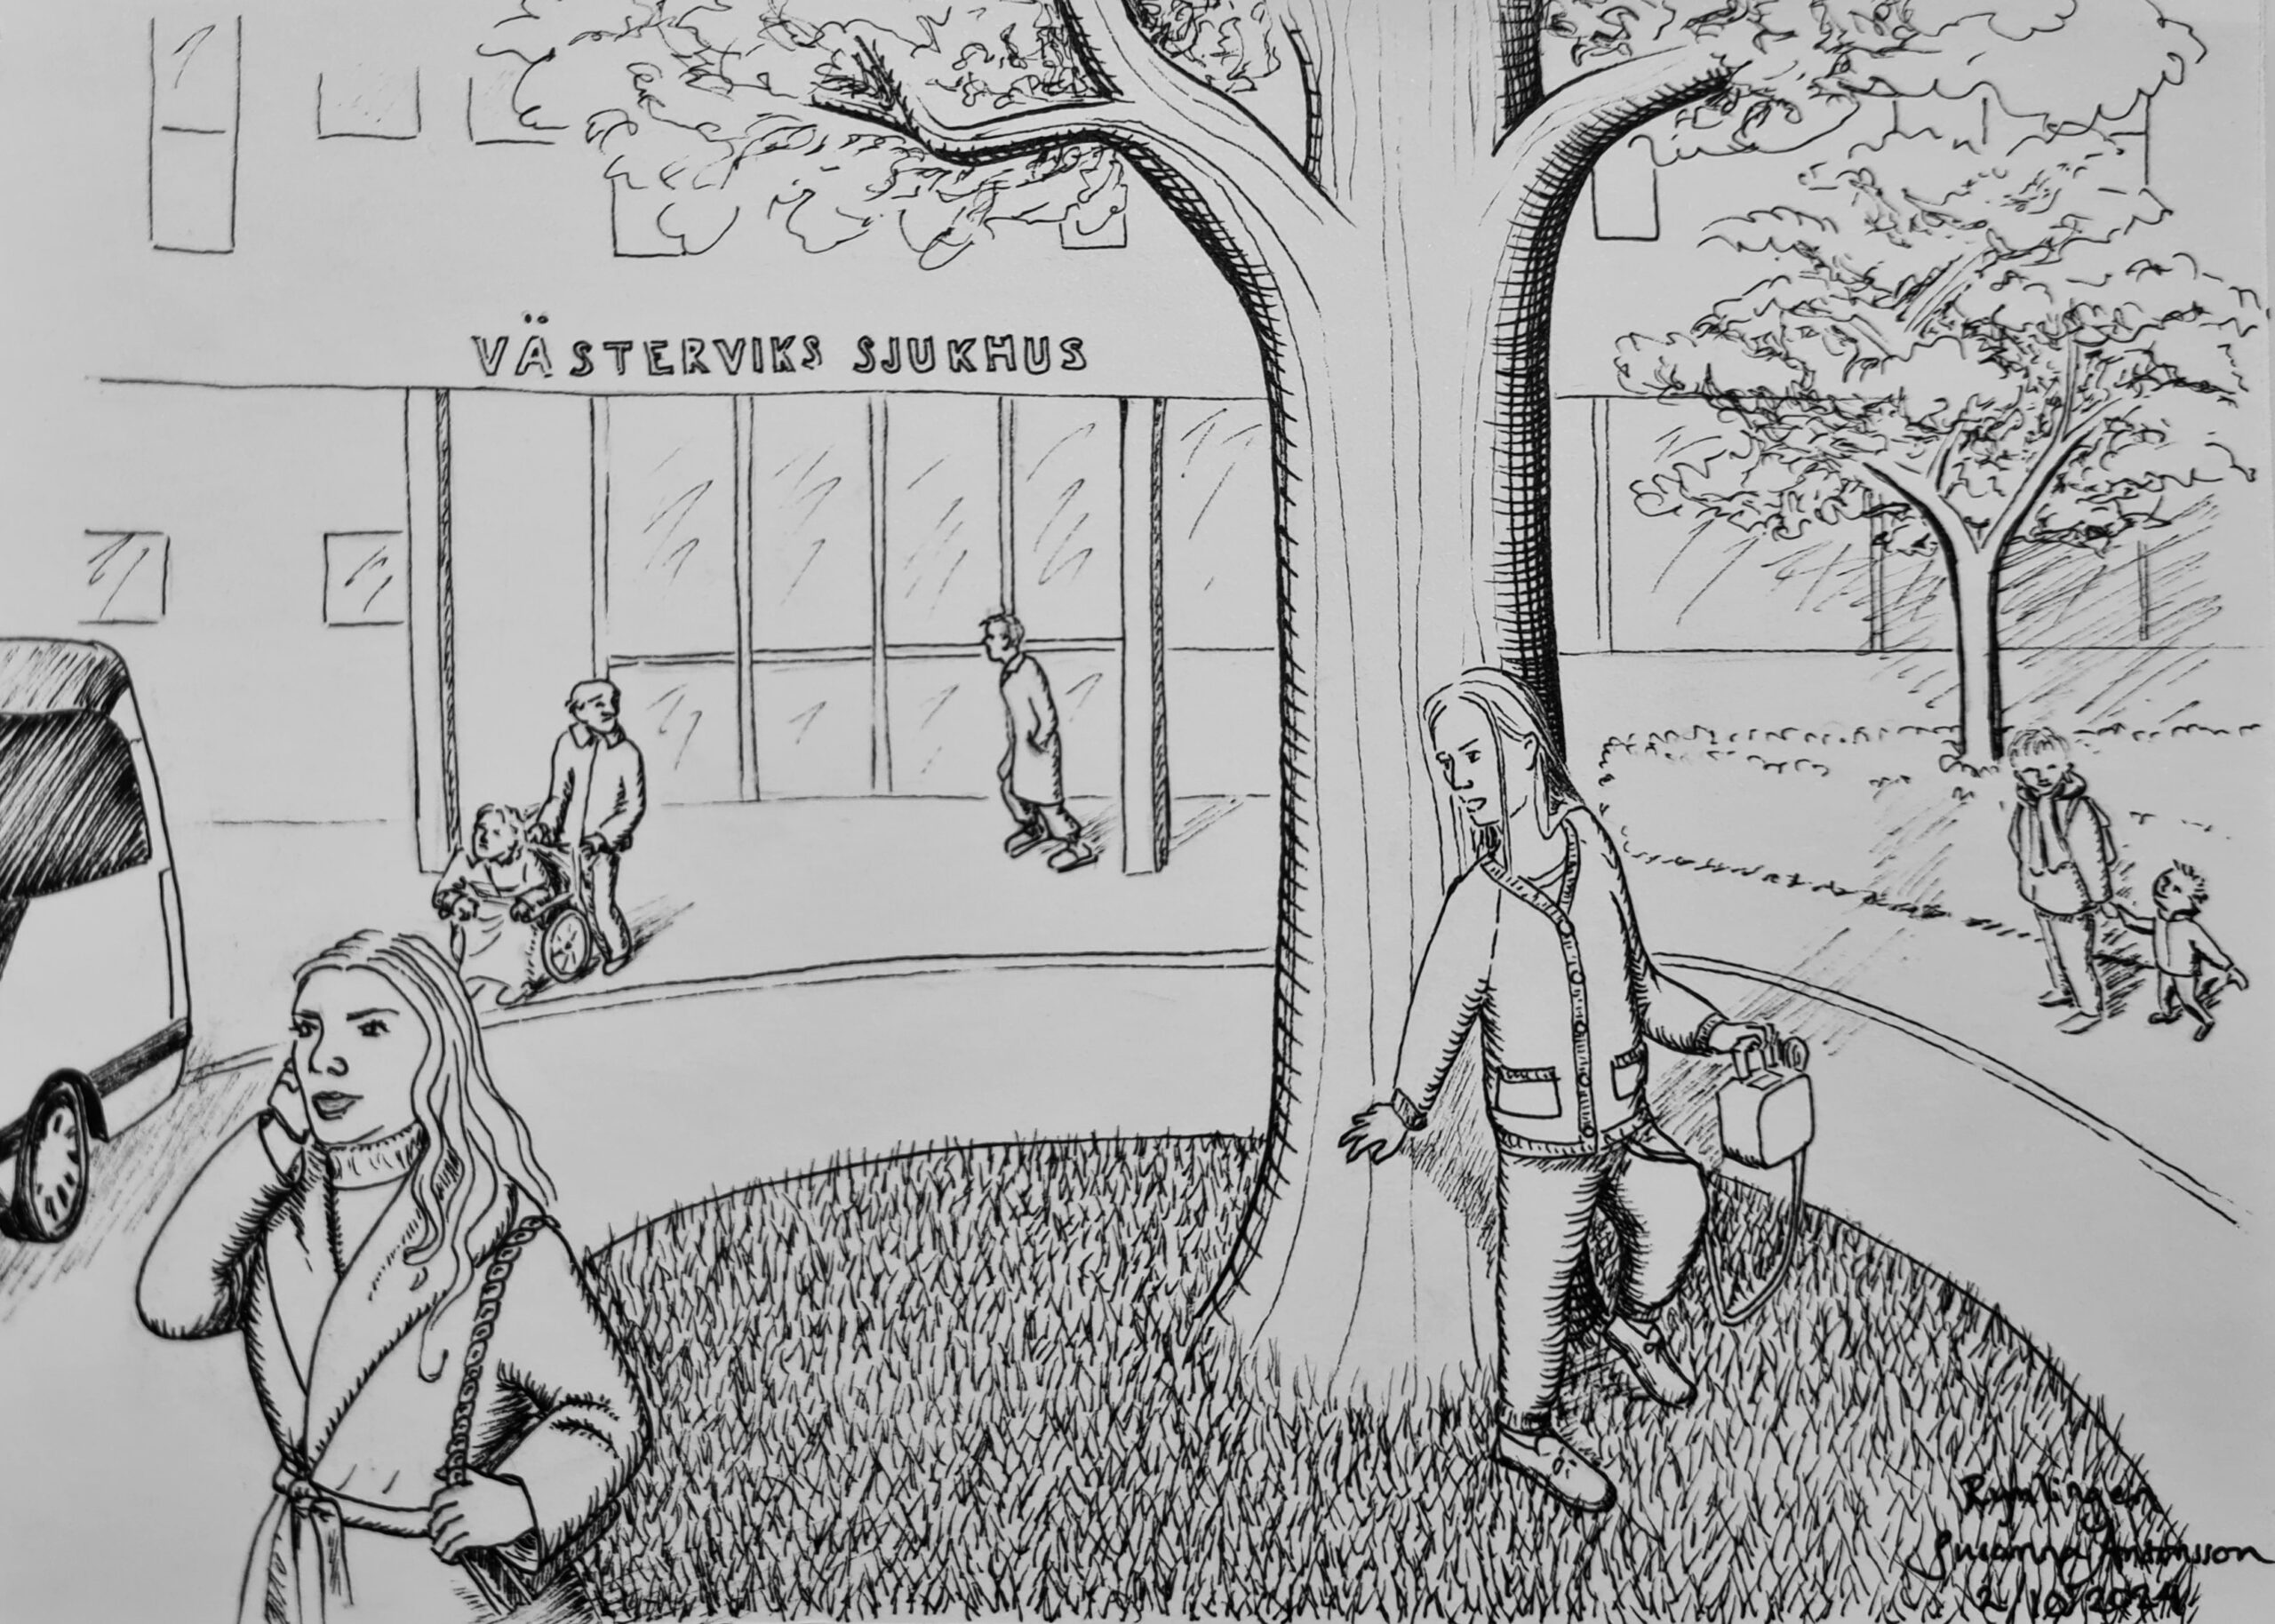
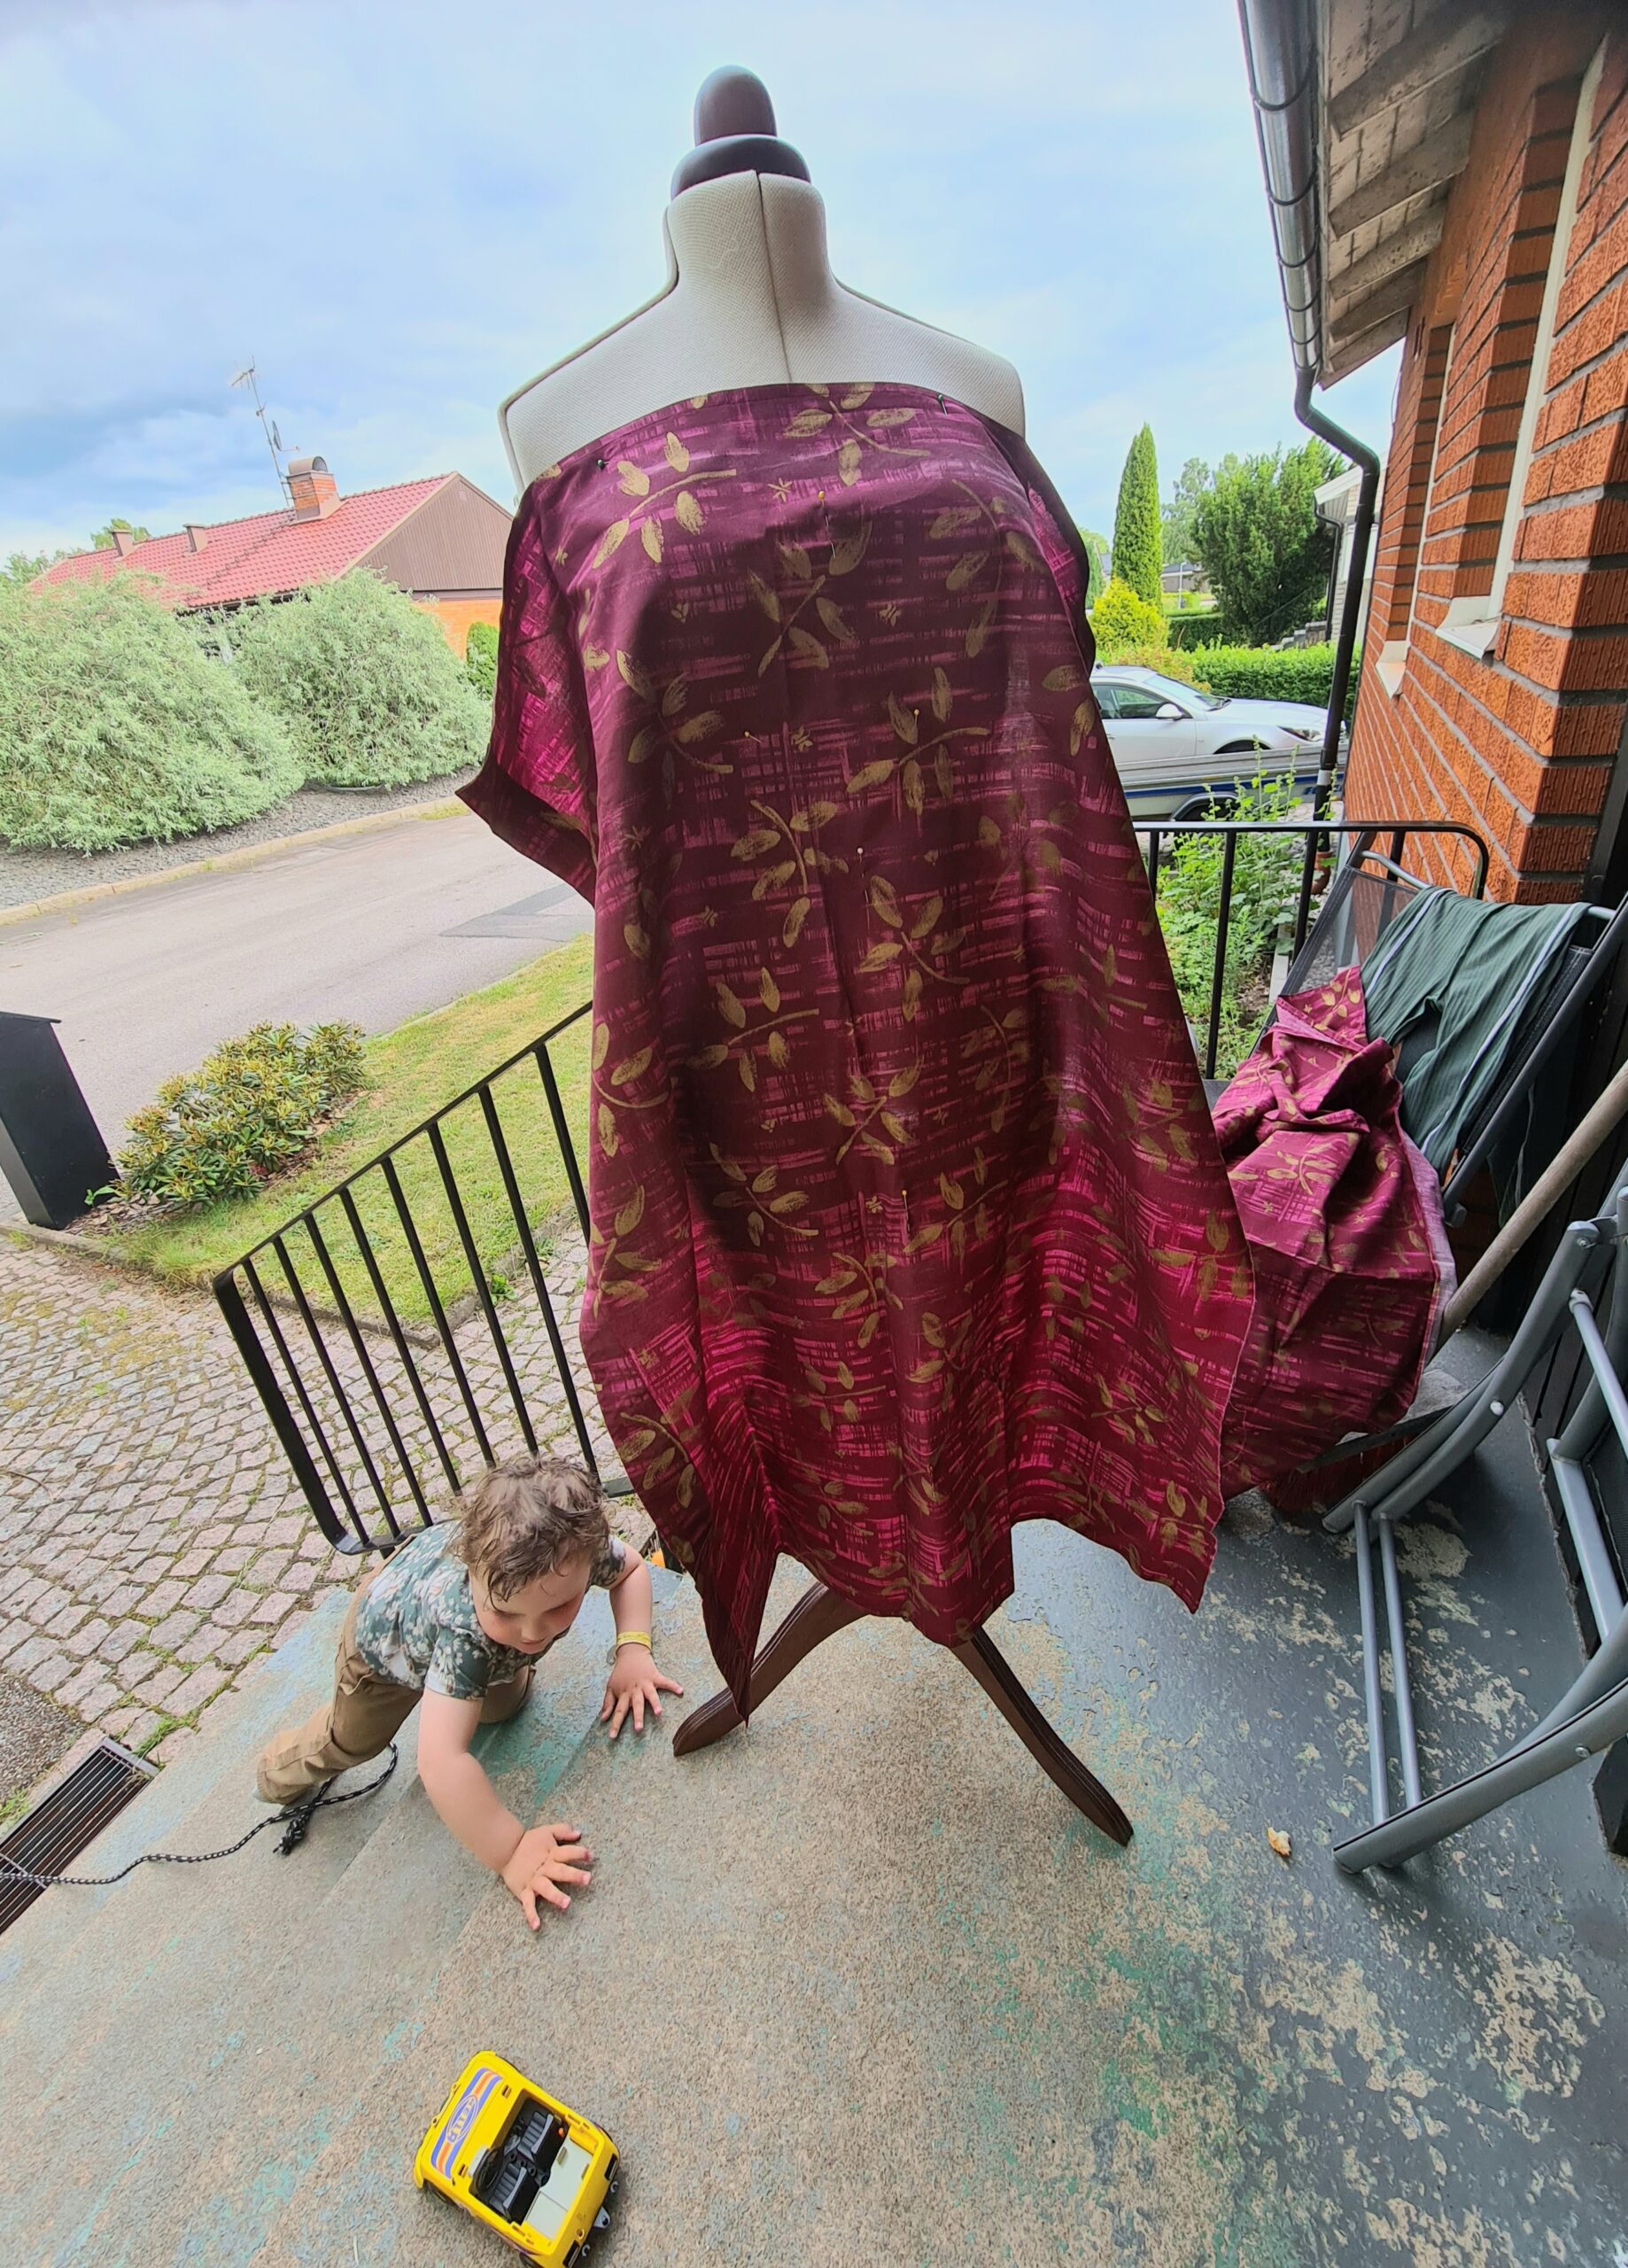
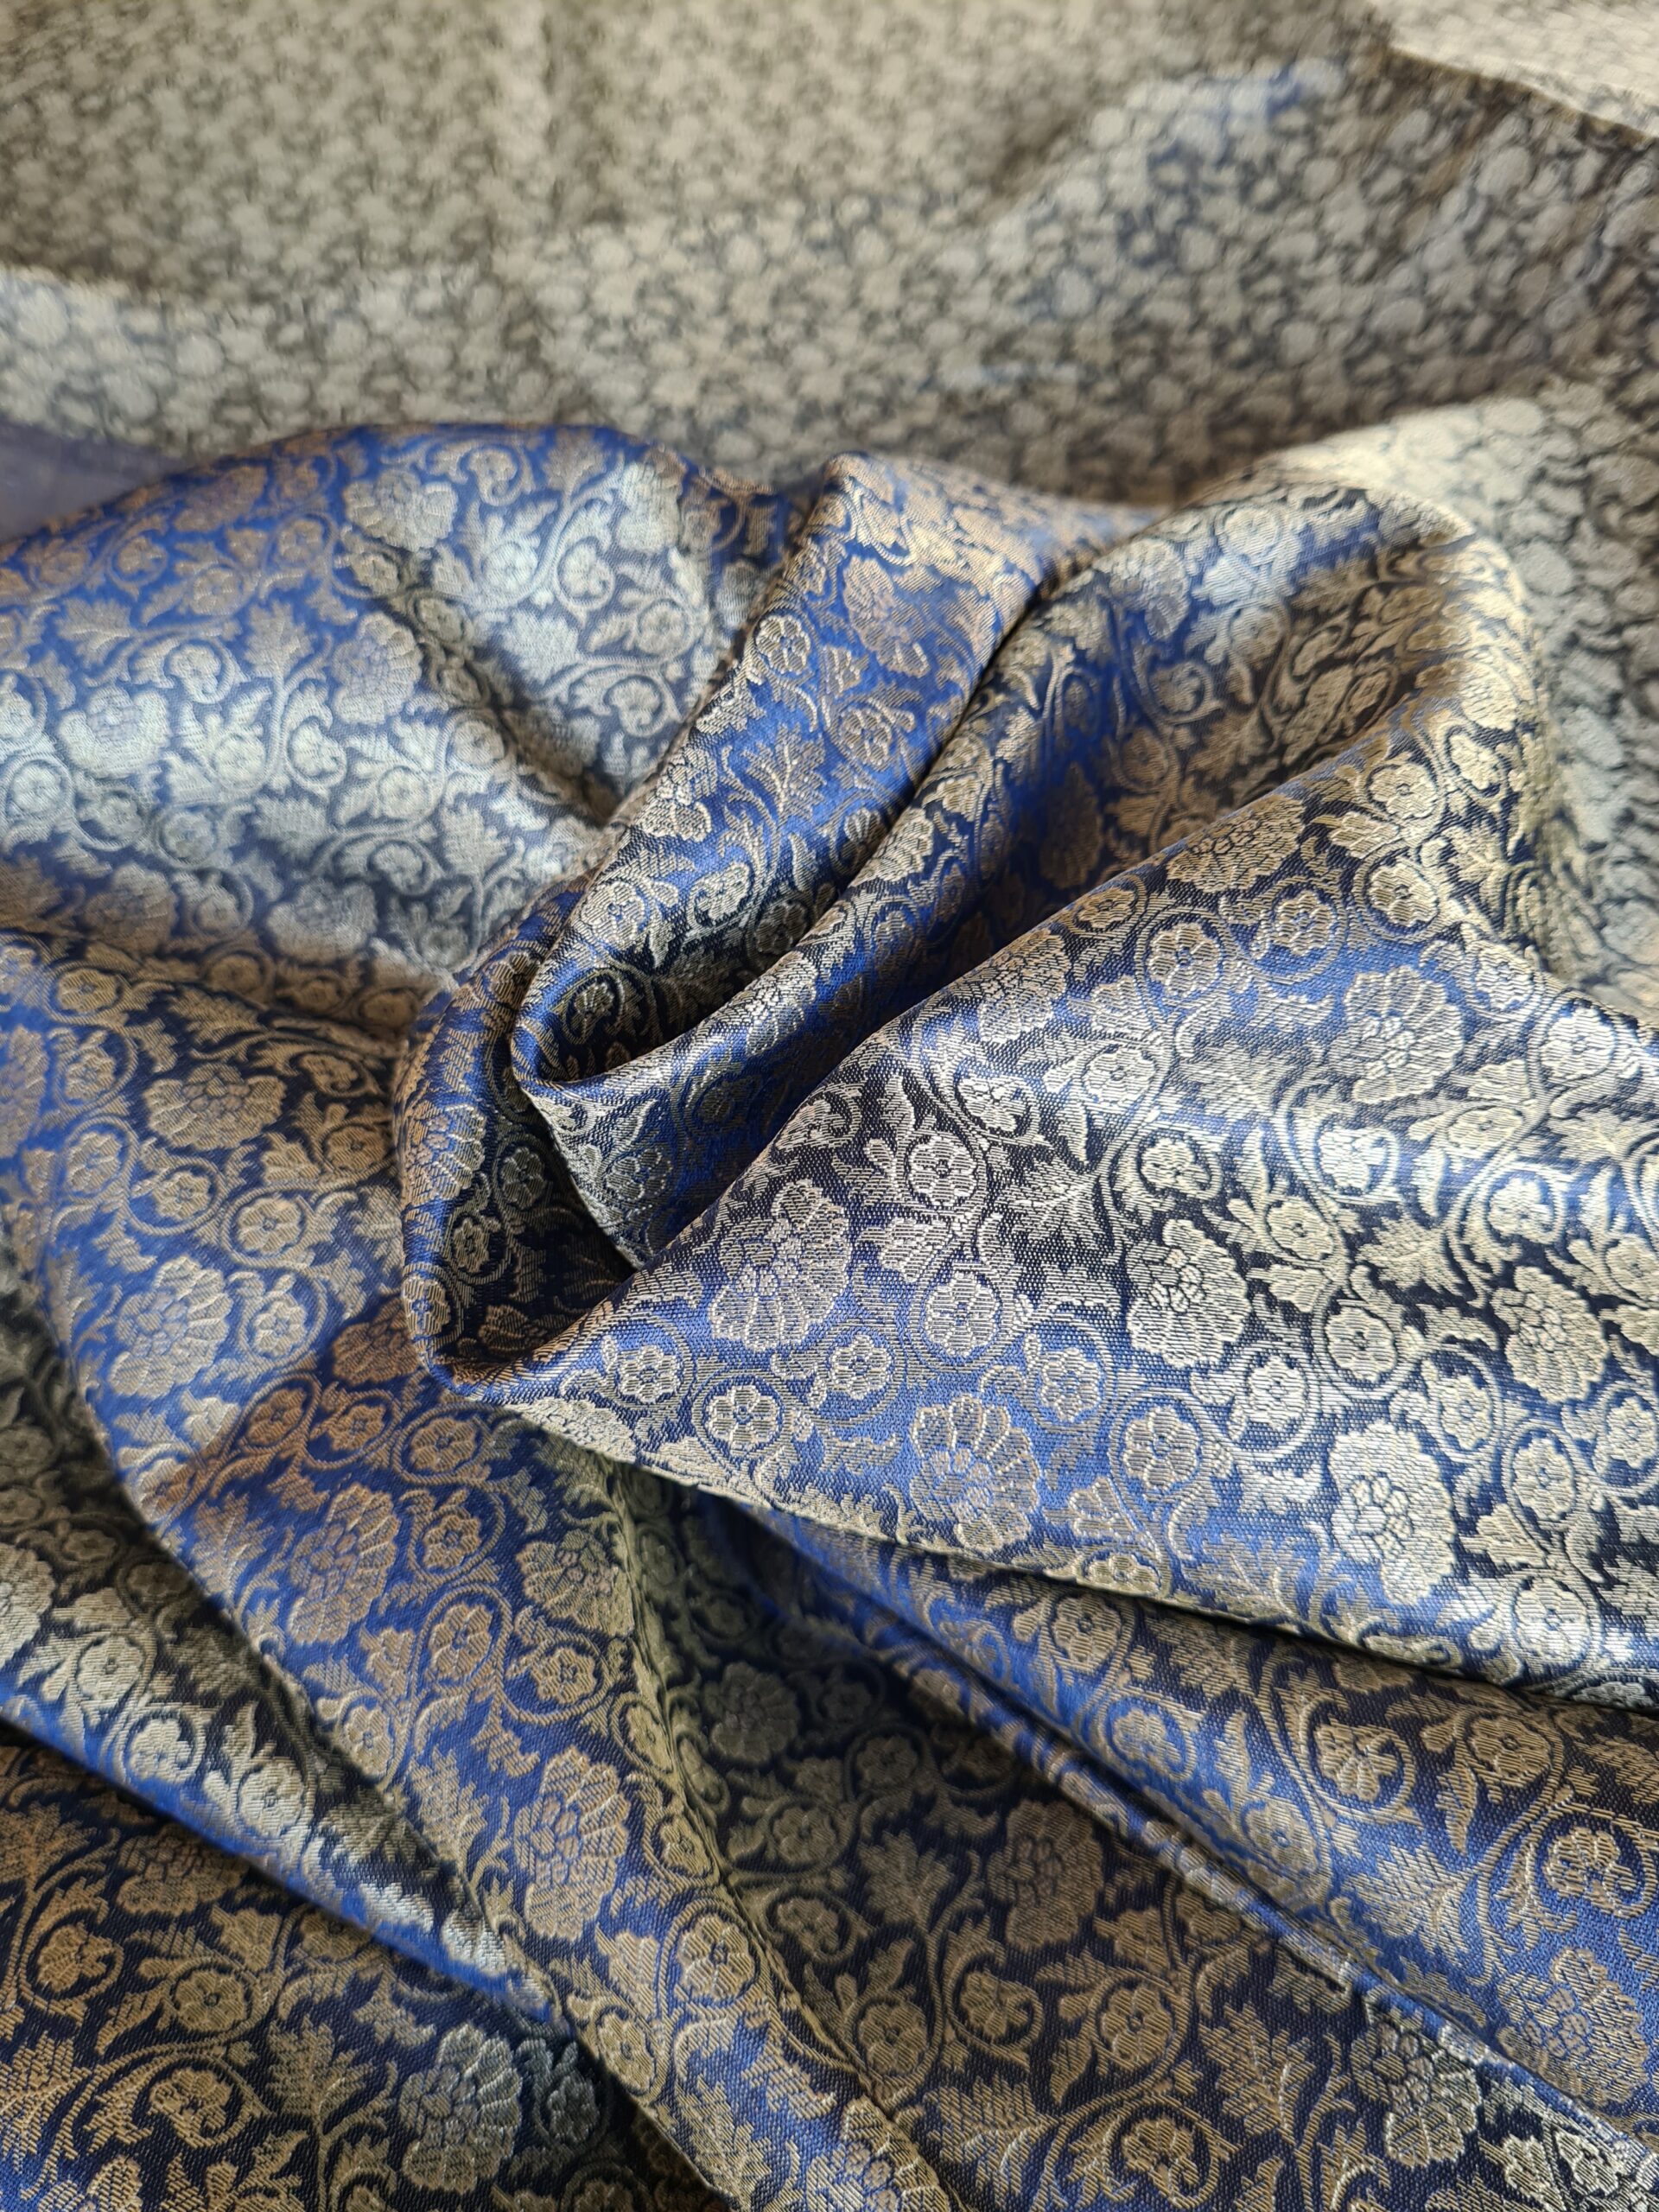
I was uncertain about the use of the same brocade for the draping. As I was biding my time at the Hospital in October, I had time for consulting both the dear staff at the Intensive Care Unite and the my heroes at Foundations Revealed 😍. They were agreed upon that the draping ought to be a different fabric.
Jag var osäker på om det verkligen skulle fungera att använda samma brokad till draperingen också. När jag låg overksam på sjukhuset i oktober, tog jag tillfället i akt att konsultera både den underbara personalen på IVA och mina hjältar på Foundations Revealed 😍. Alla var eniga om att brokaden skulle bli för klumpig för draperingen.
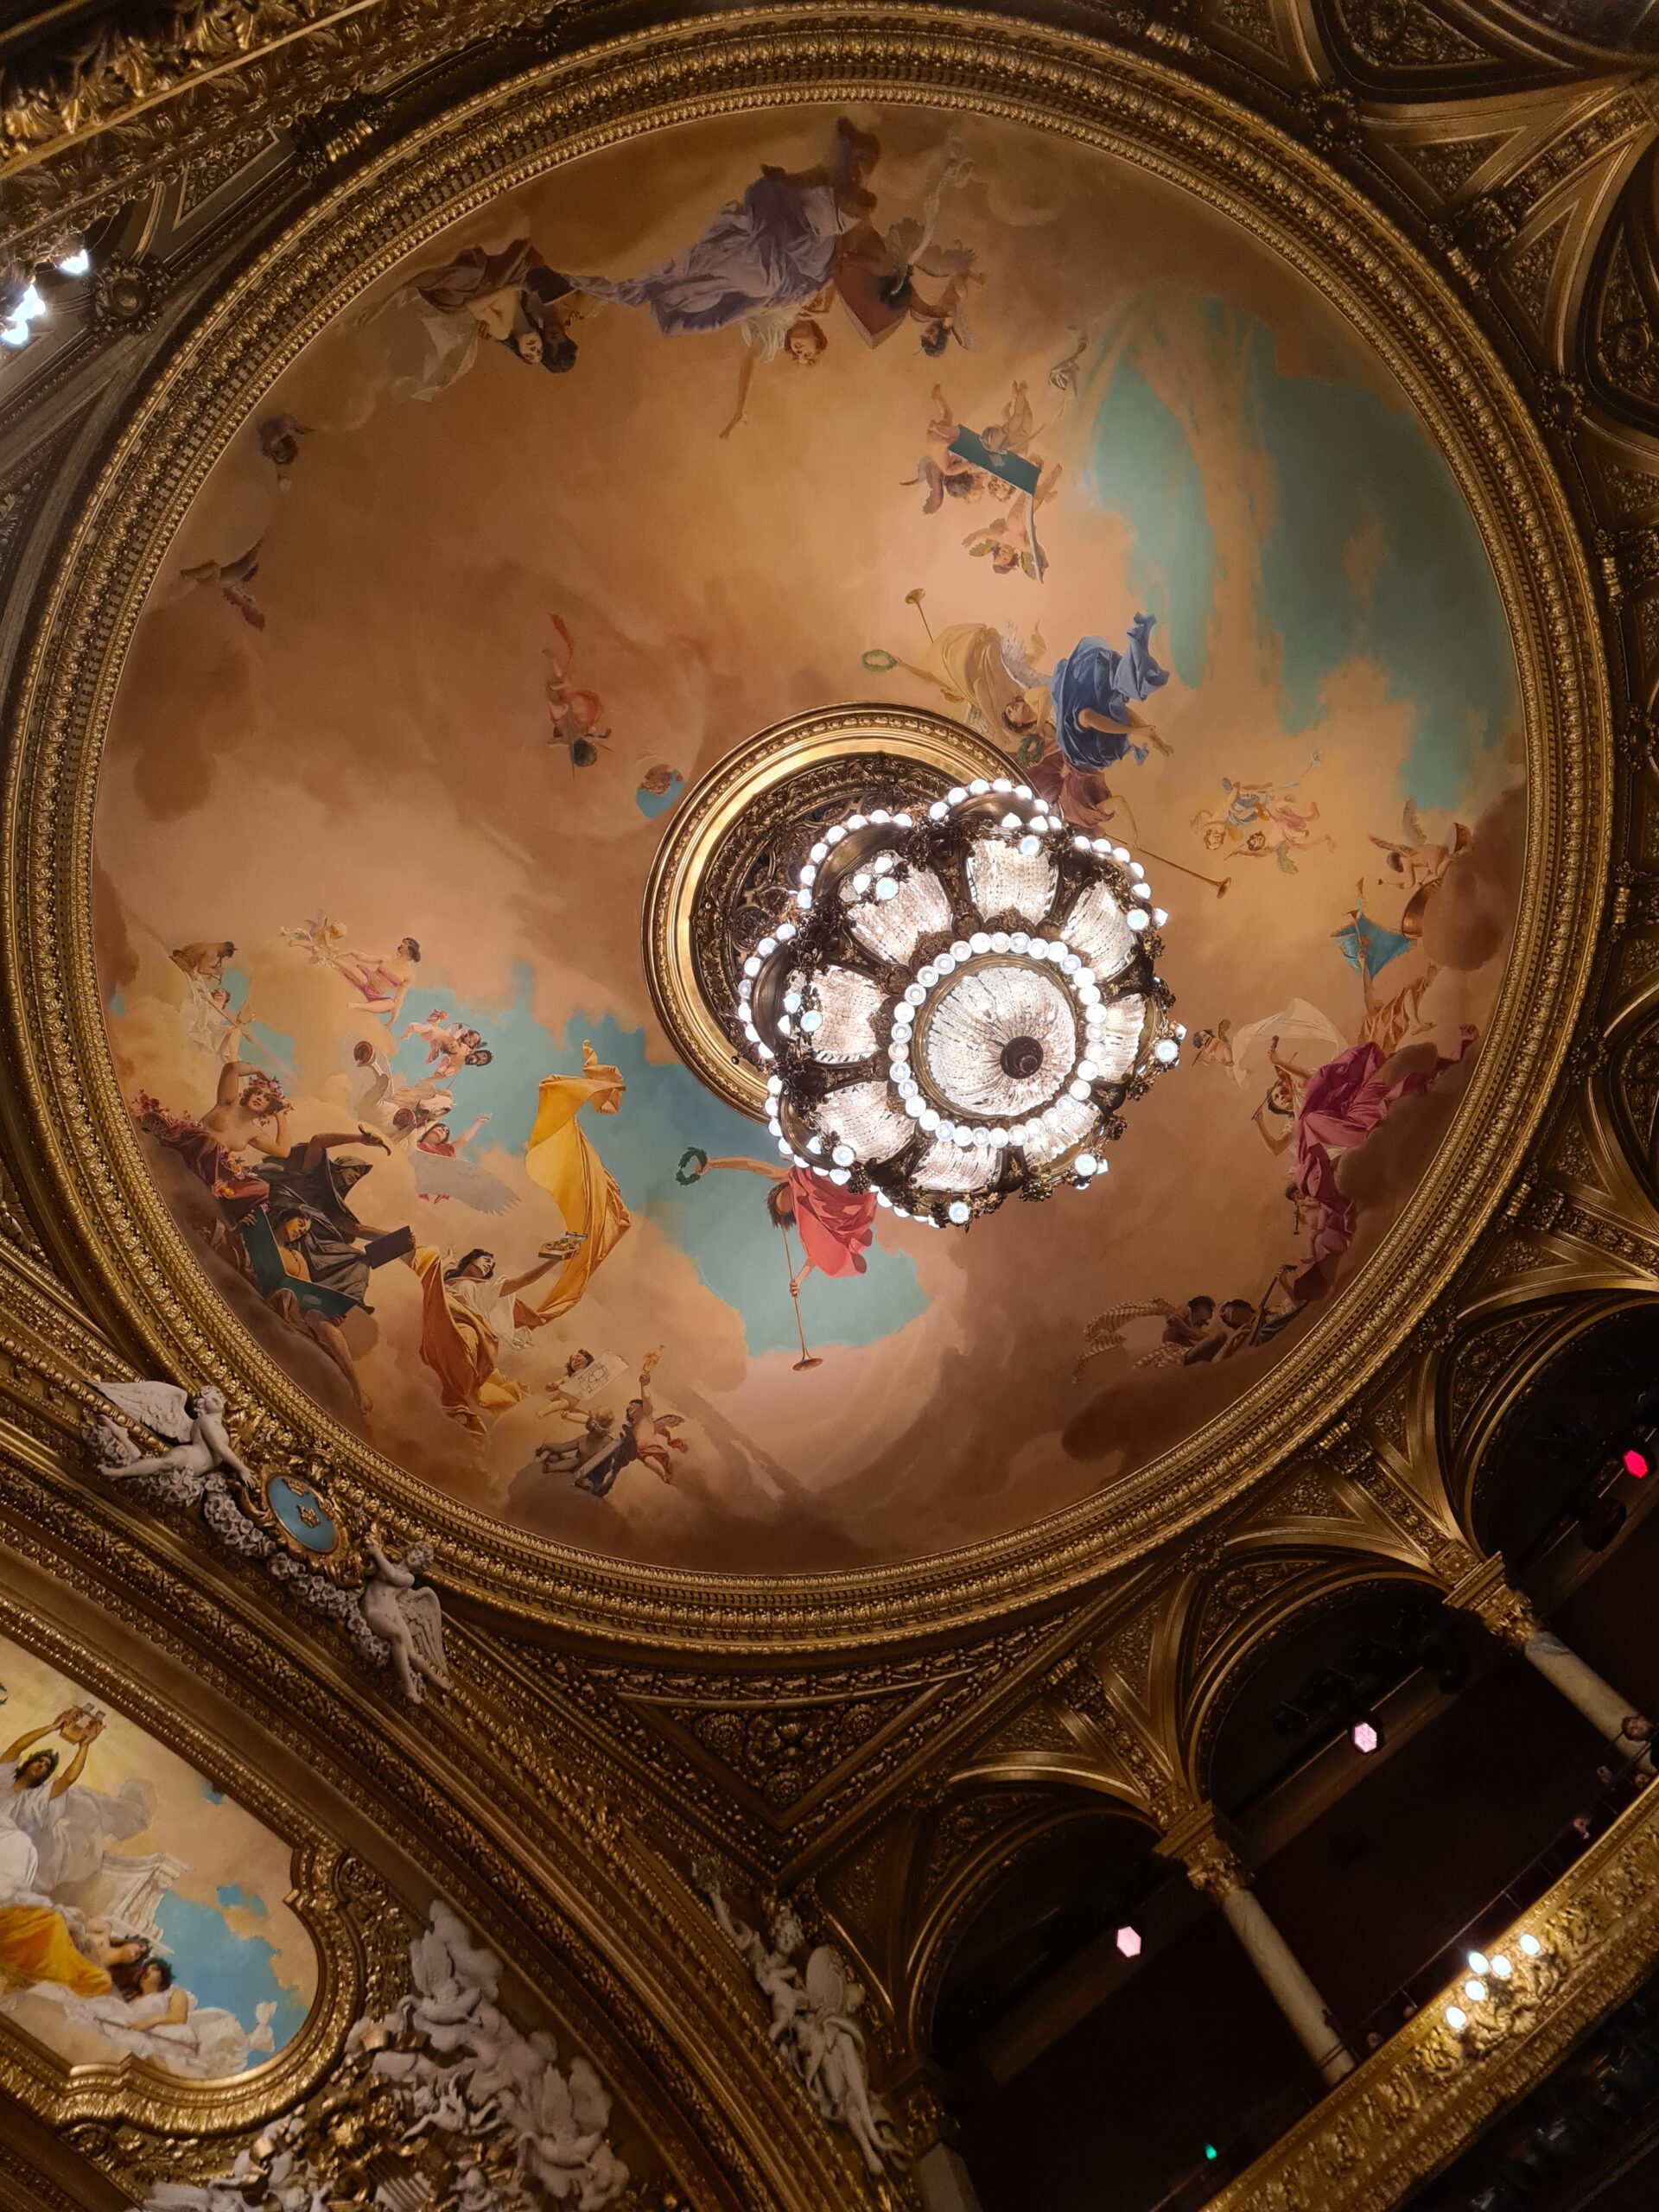
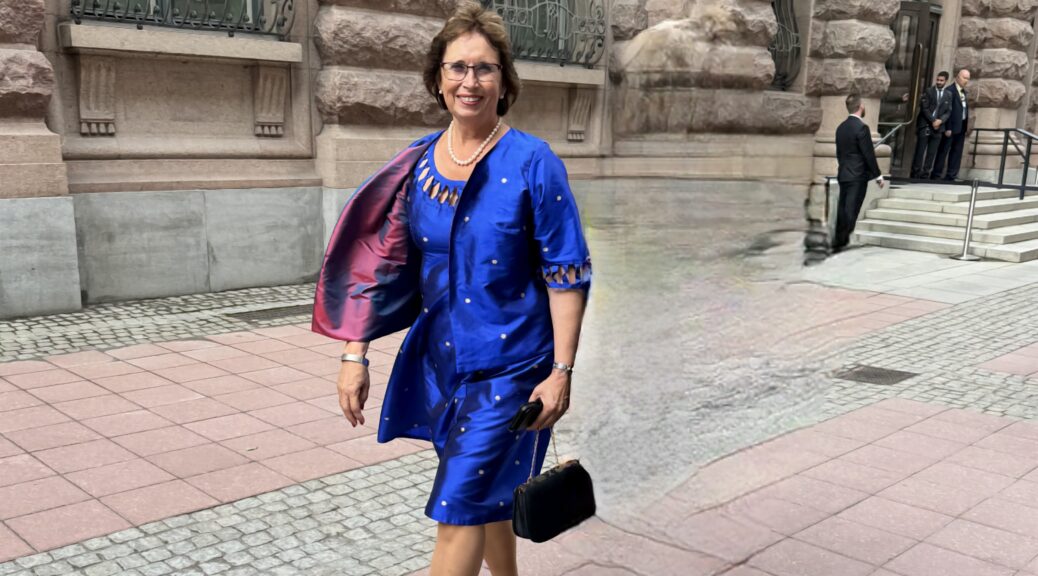
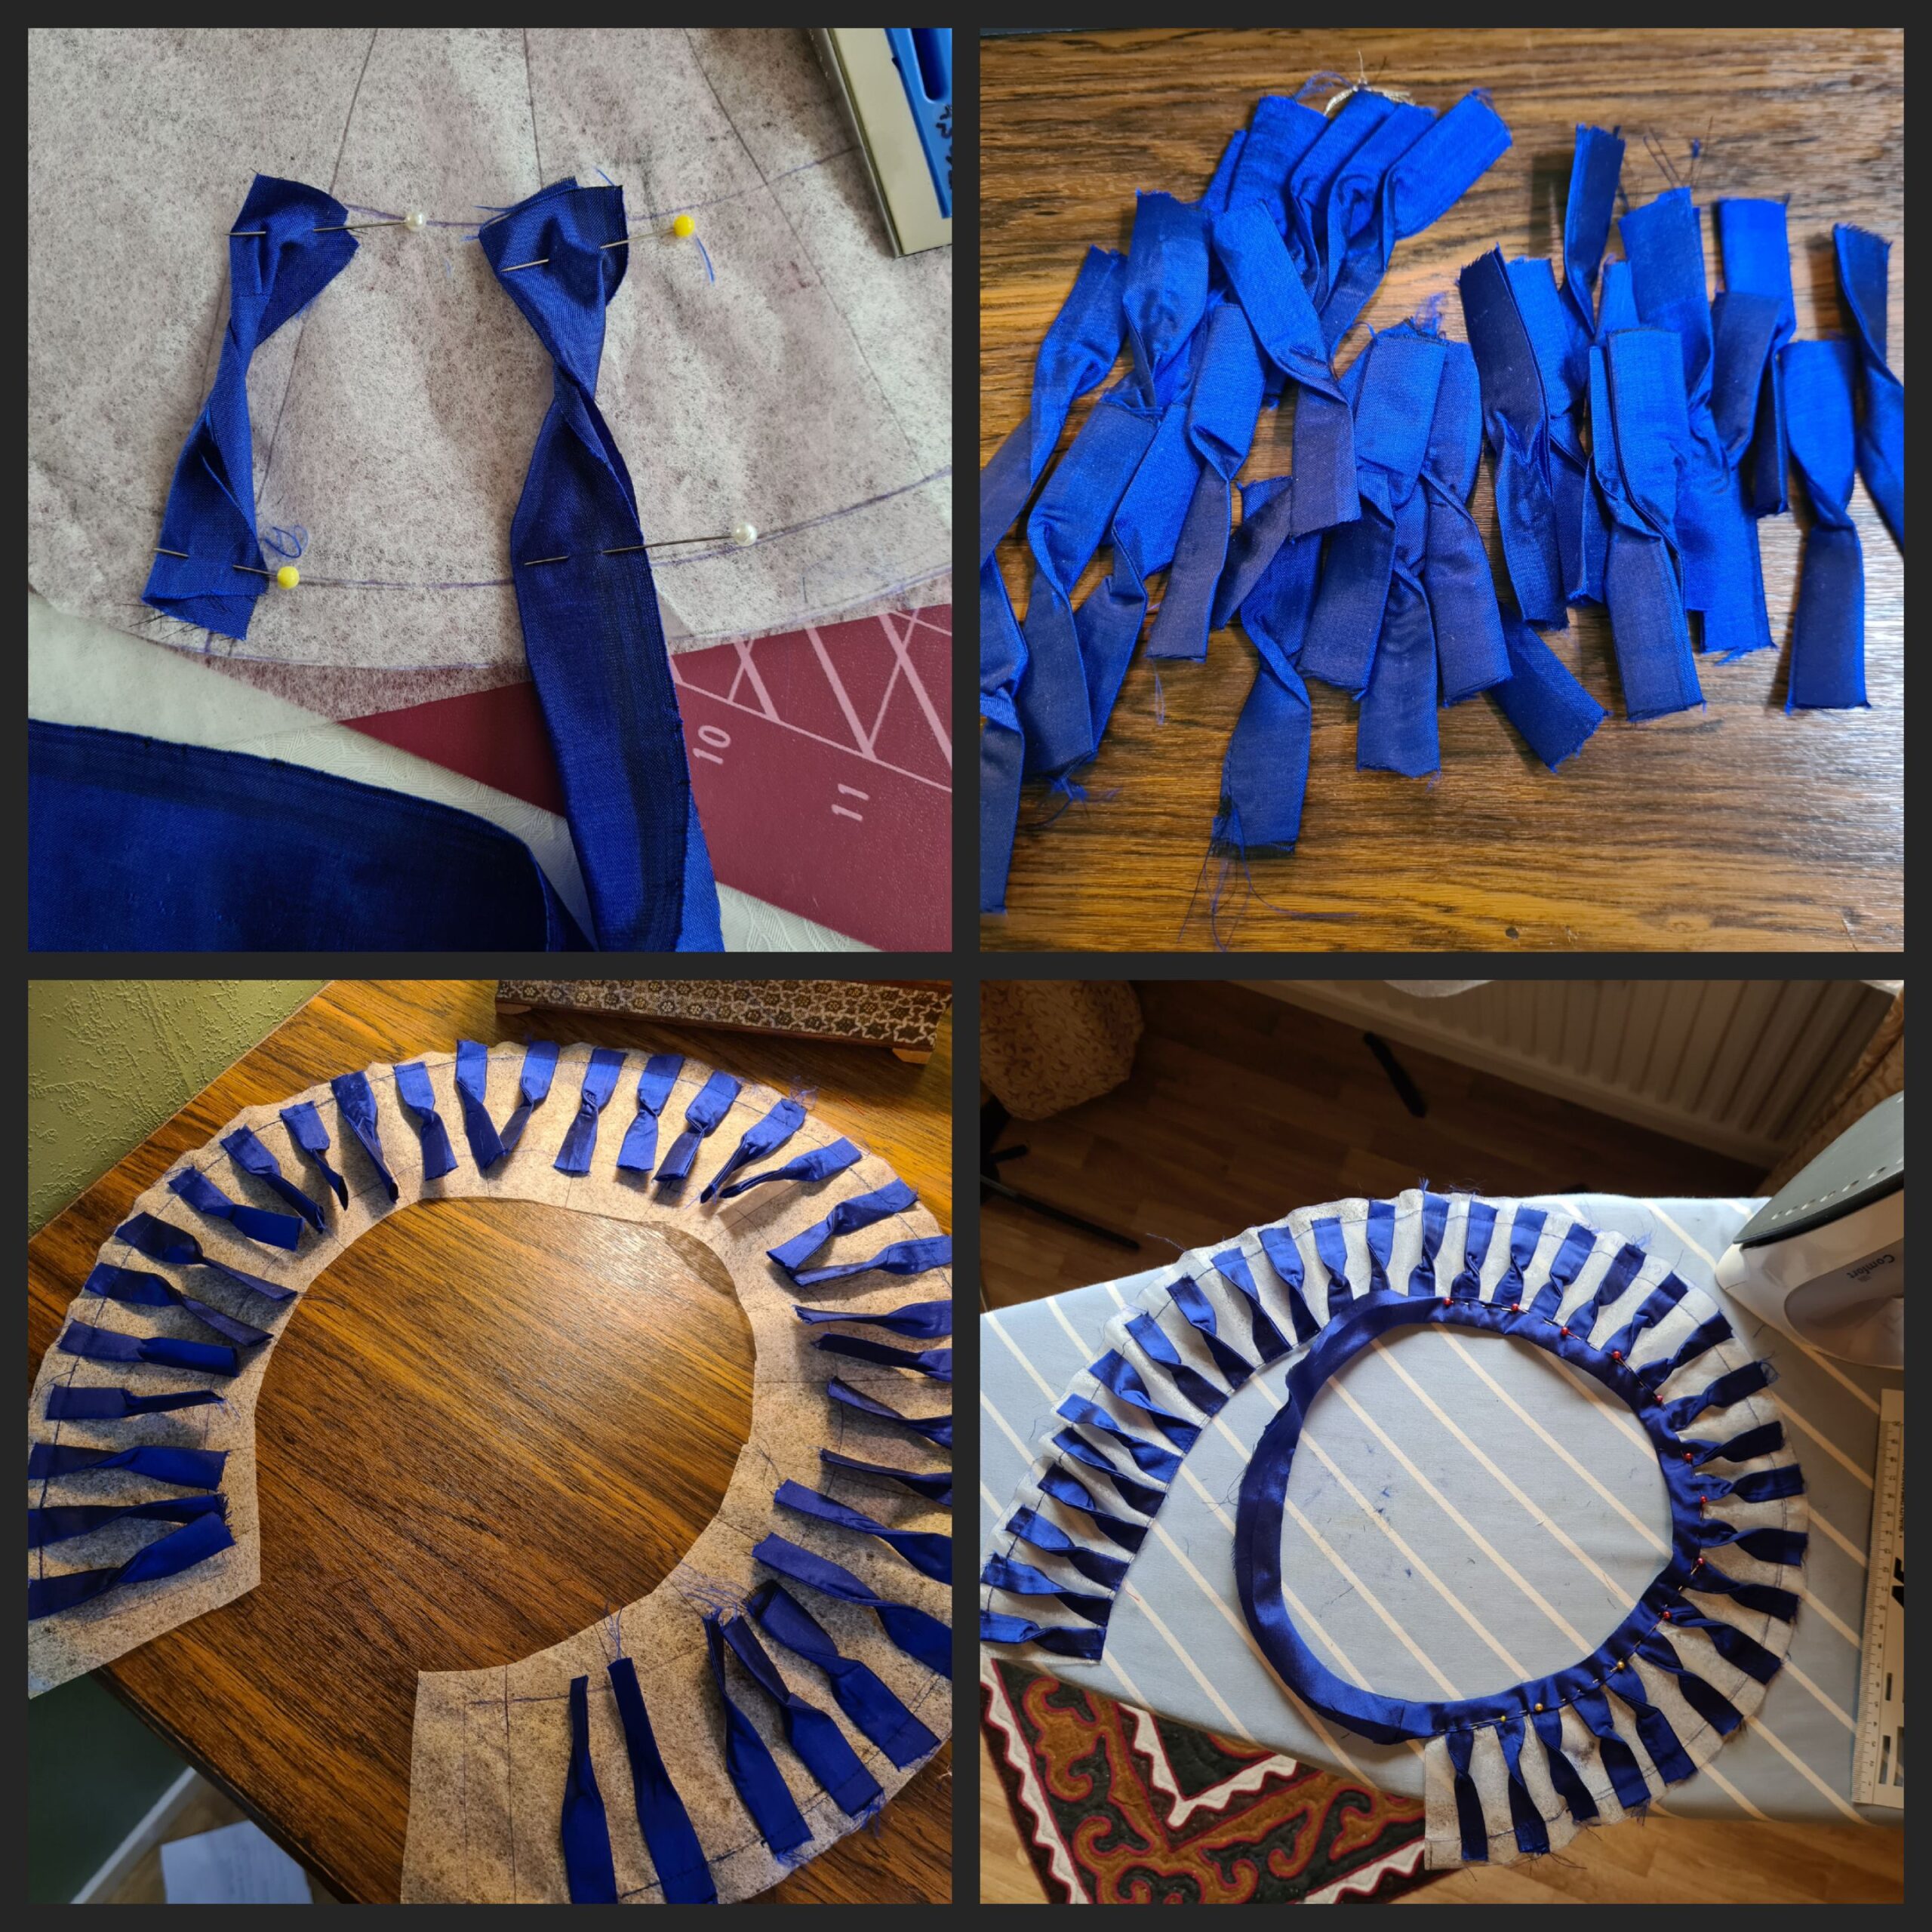
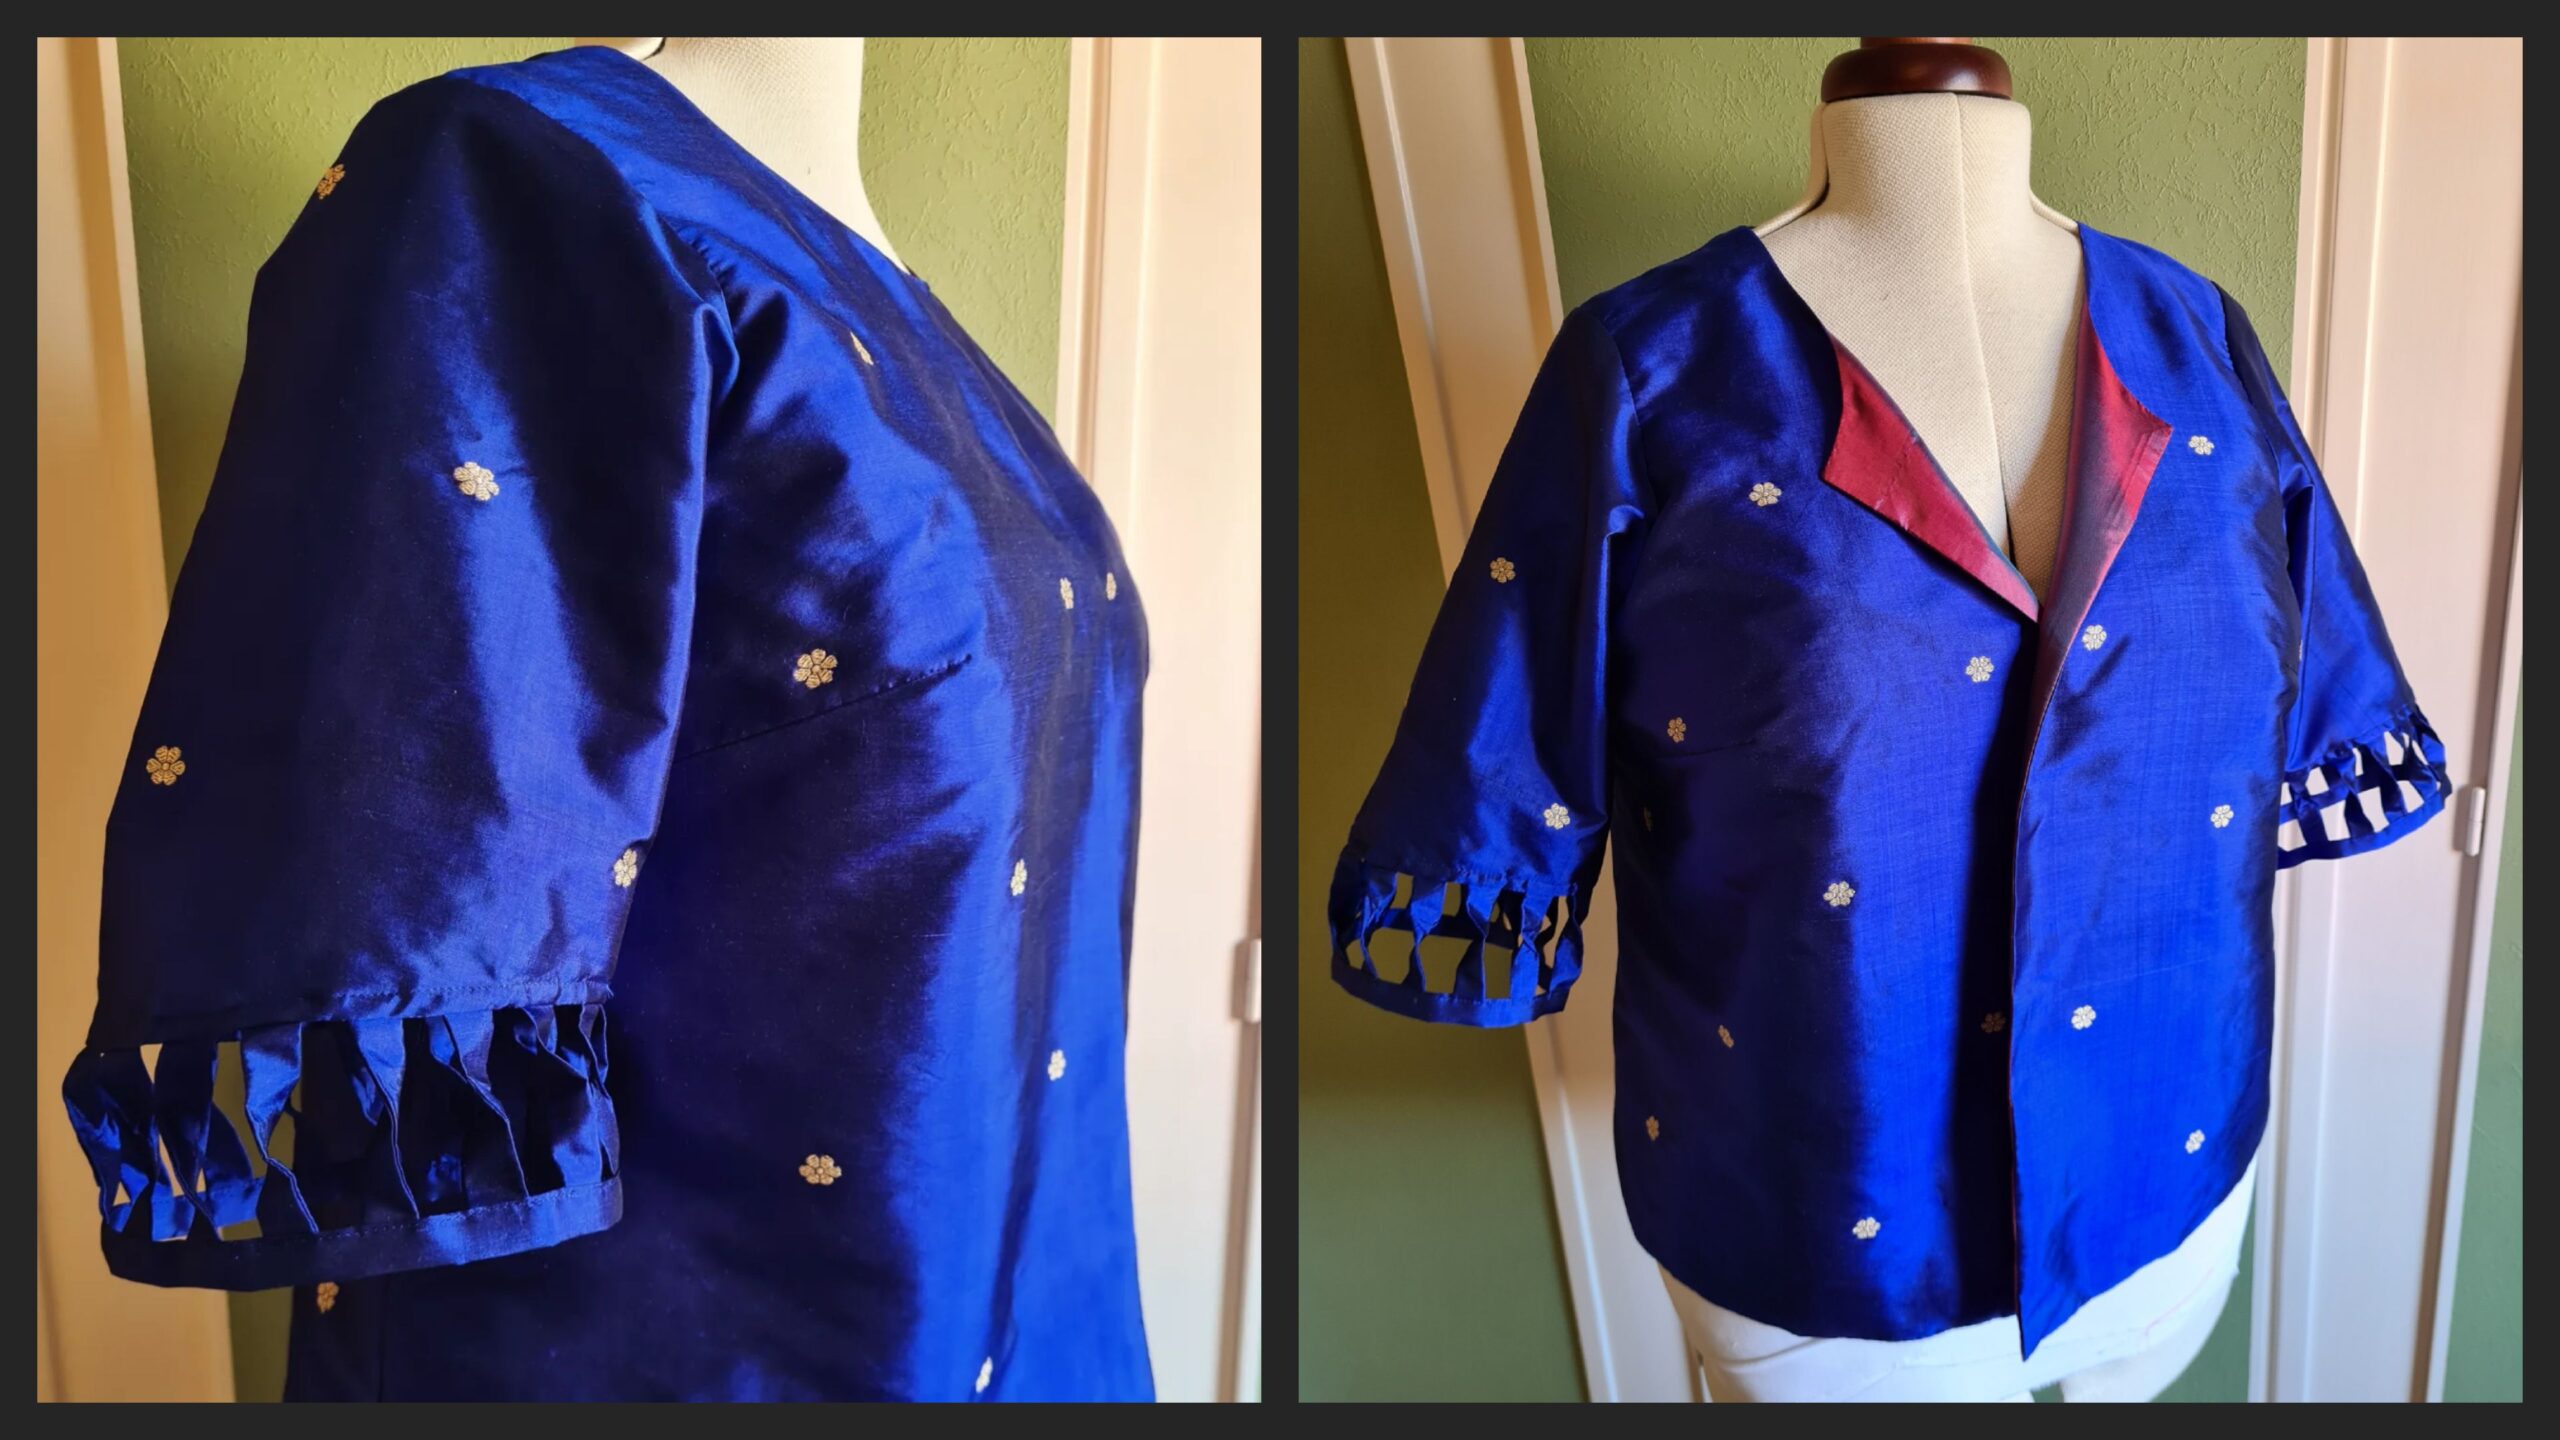
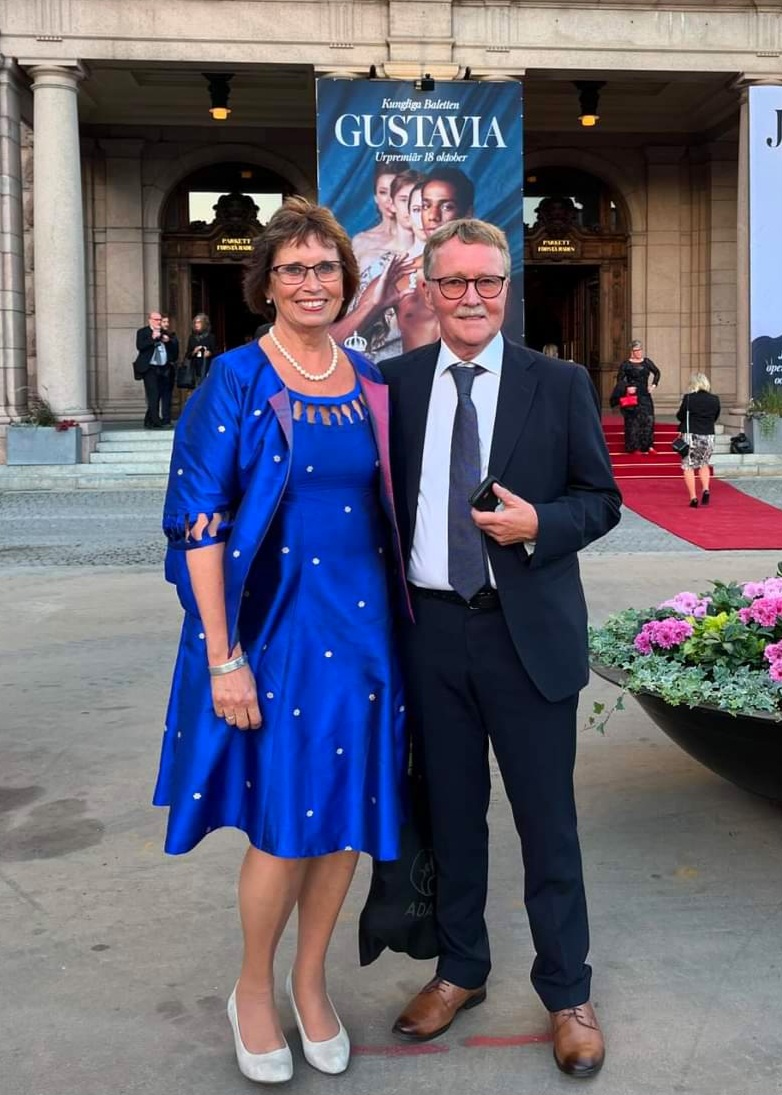
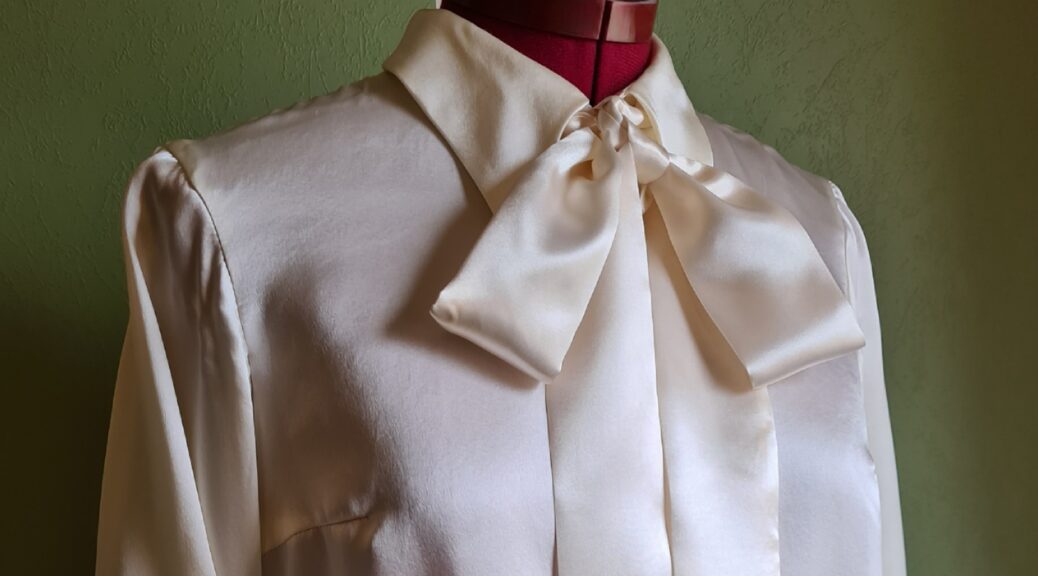
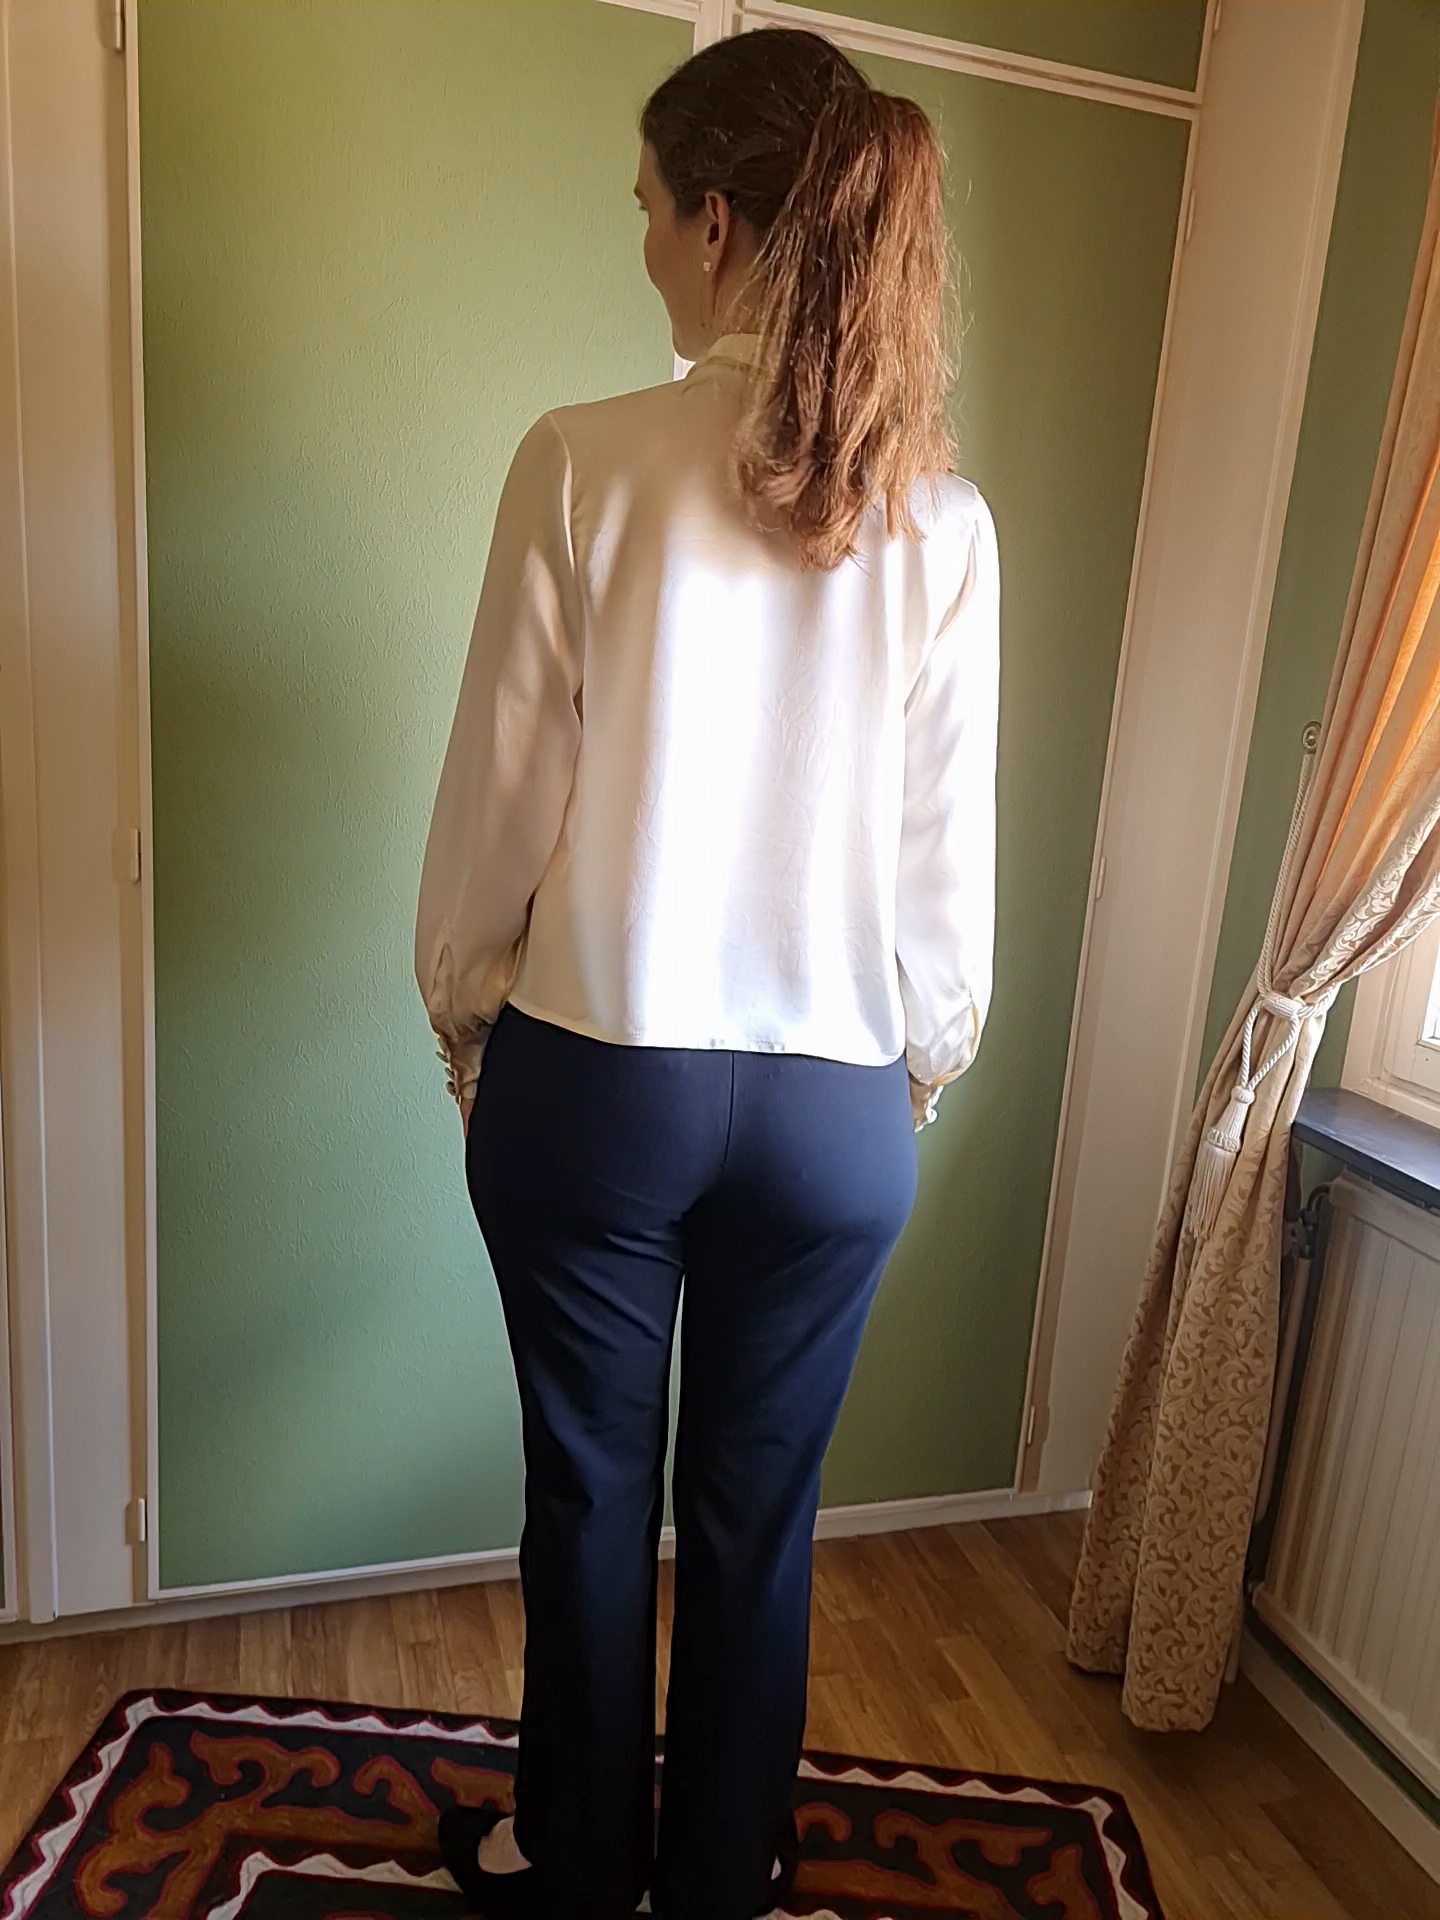
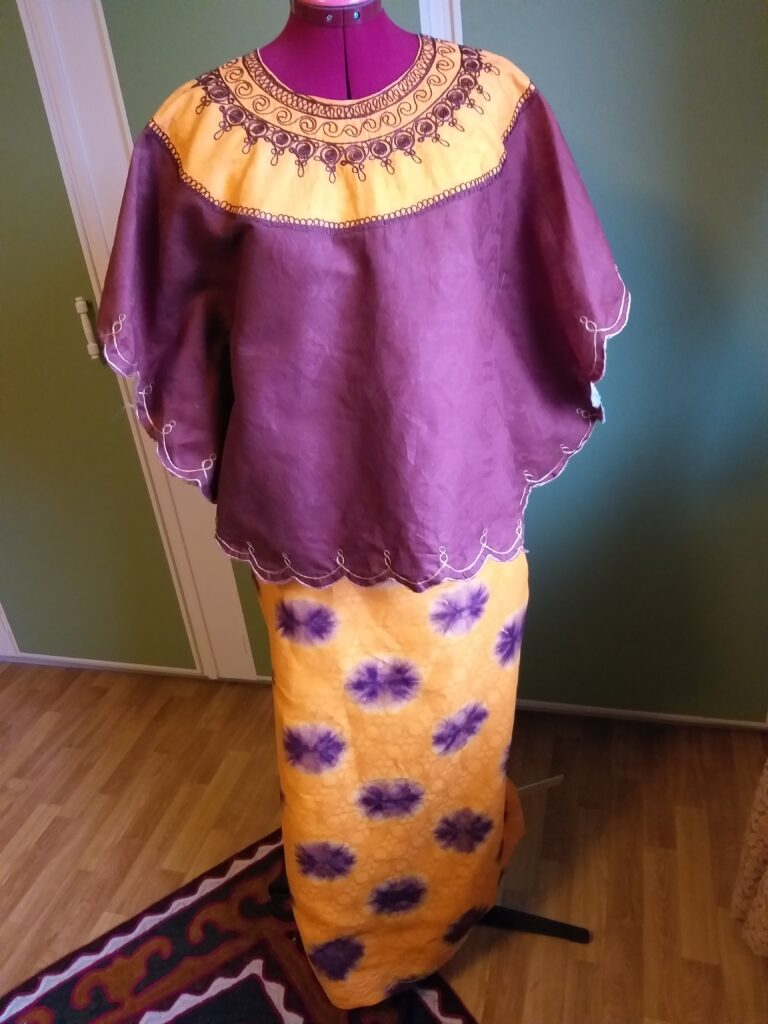
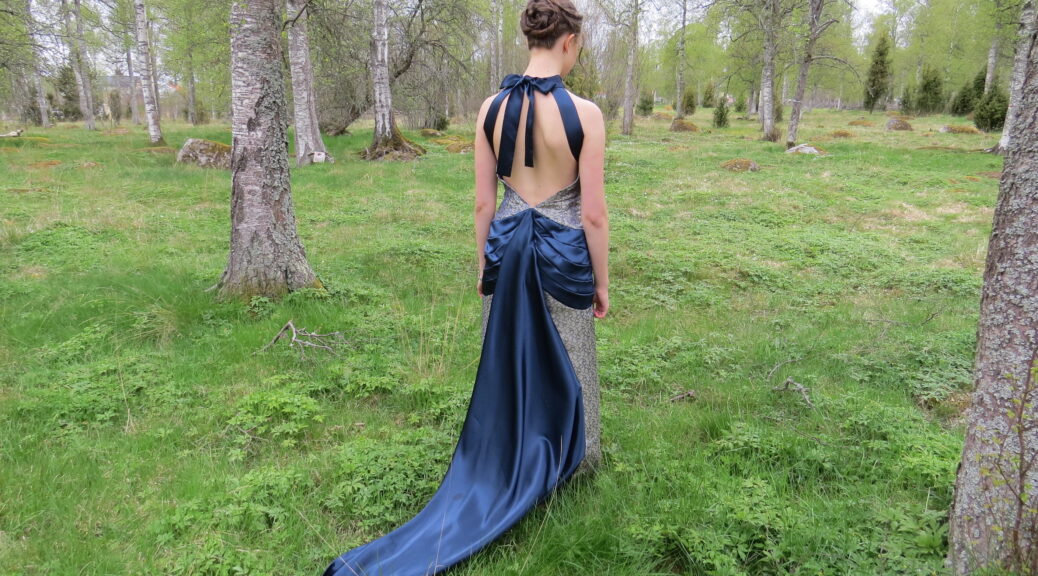
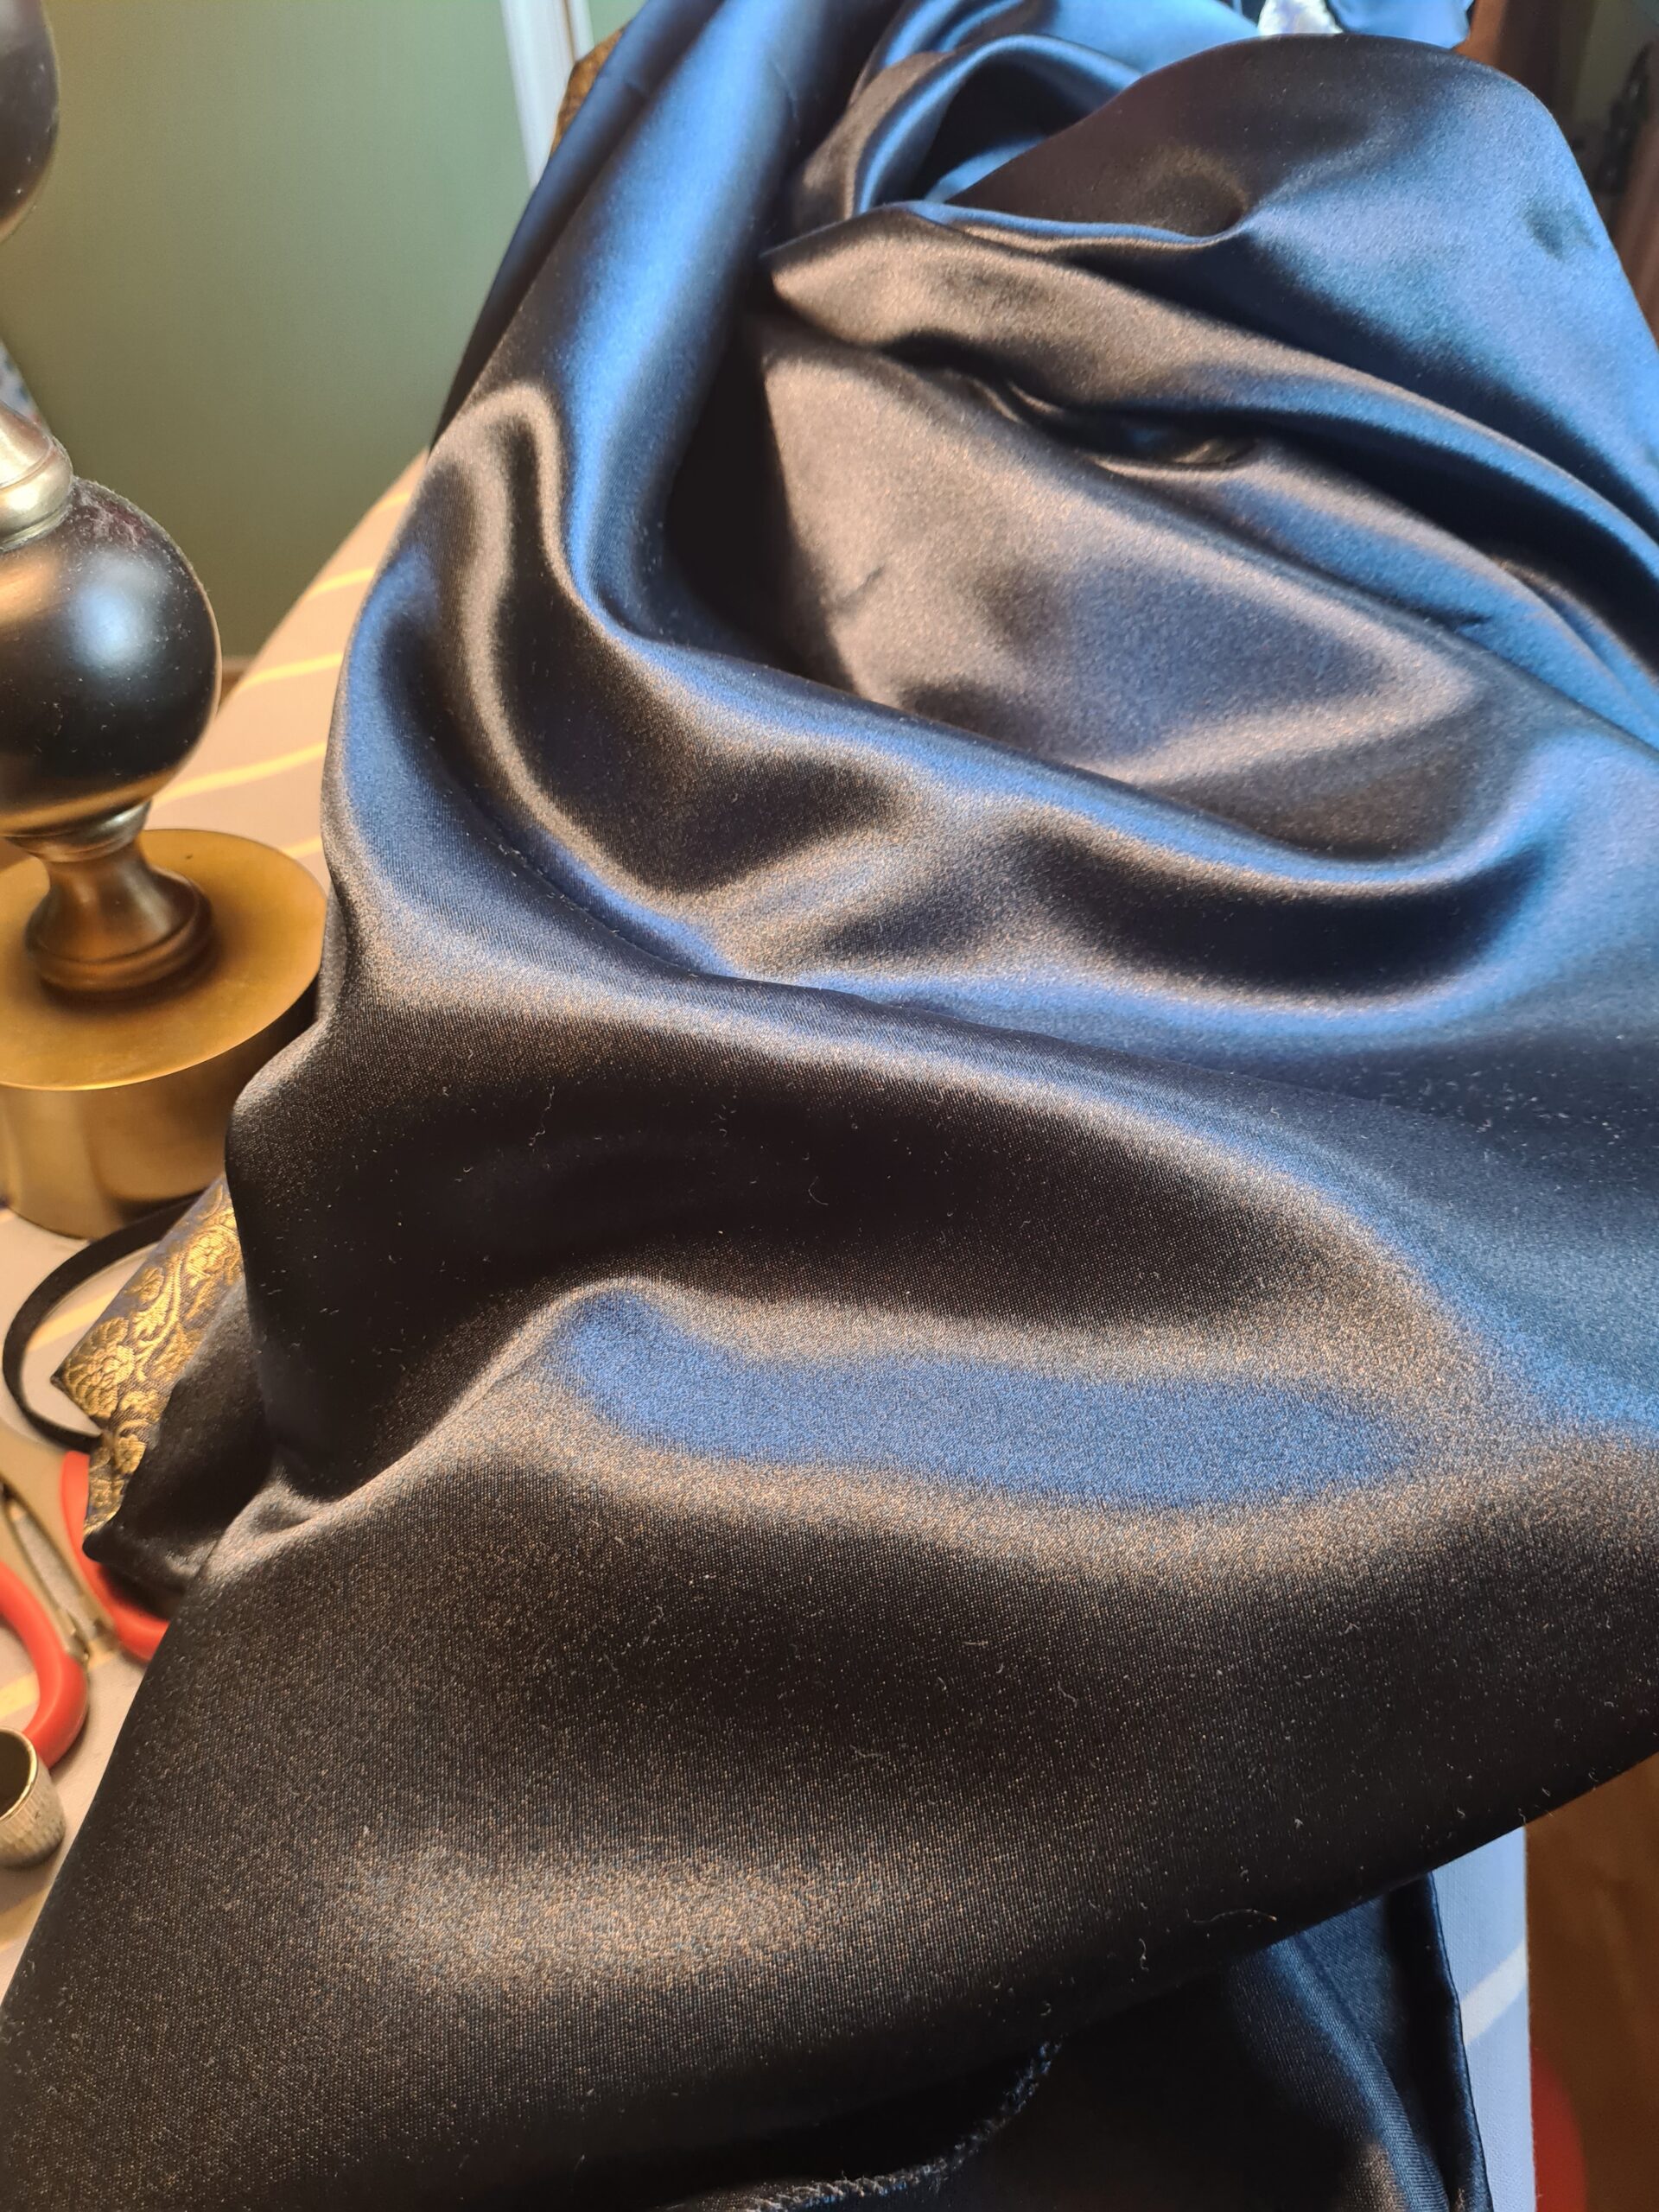
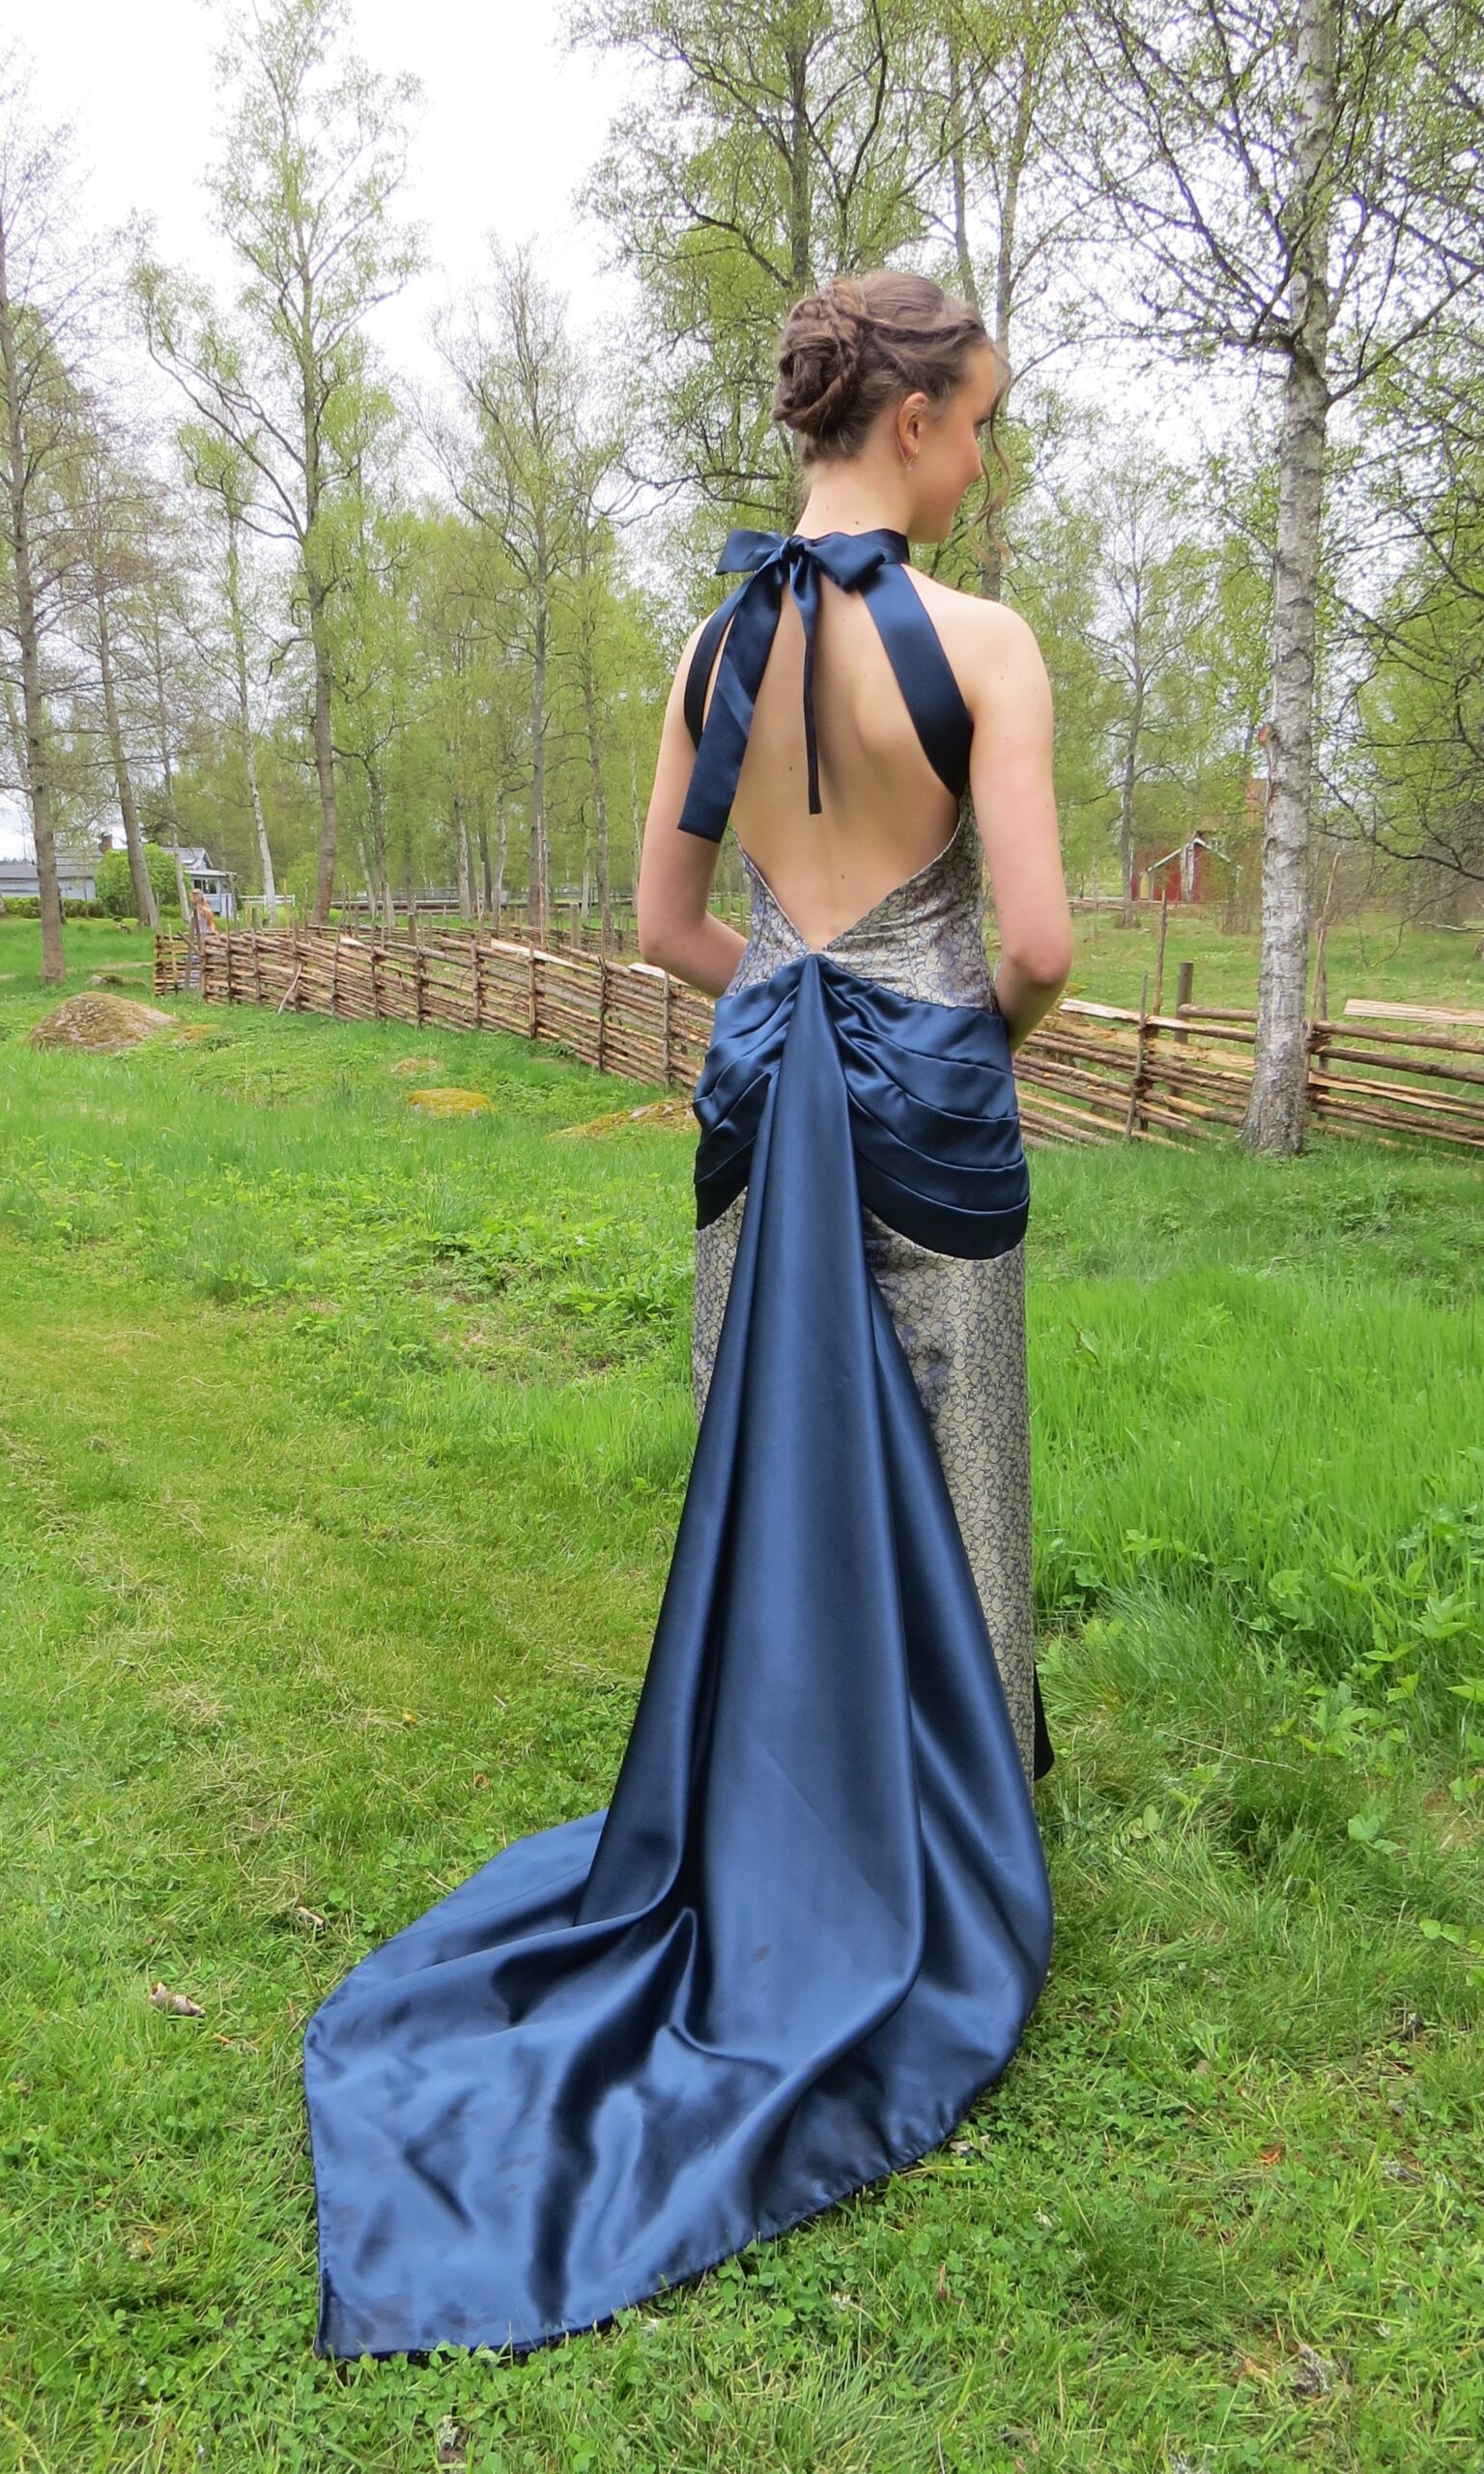
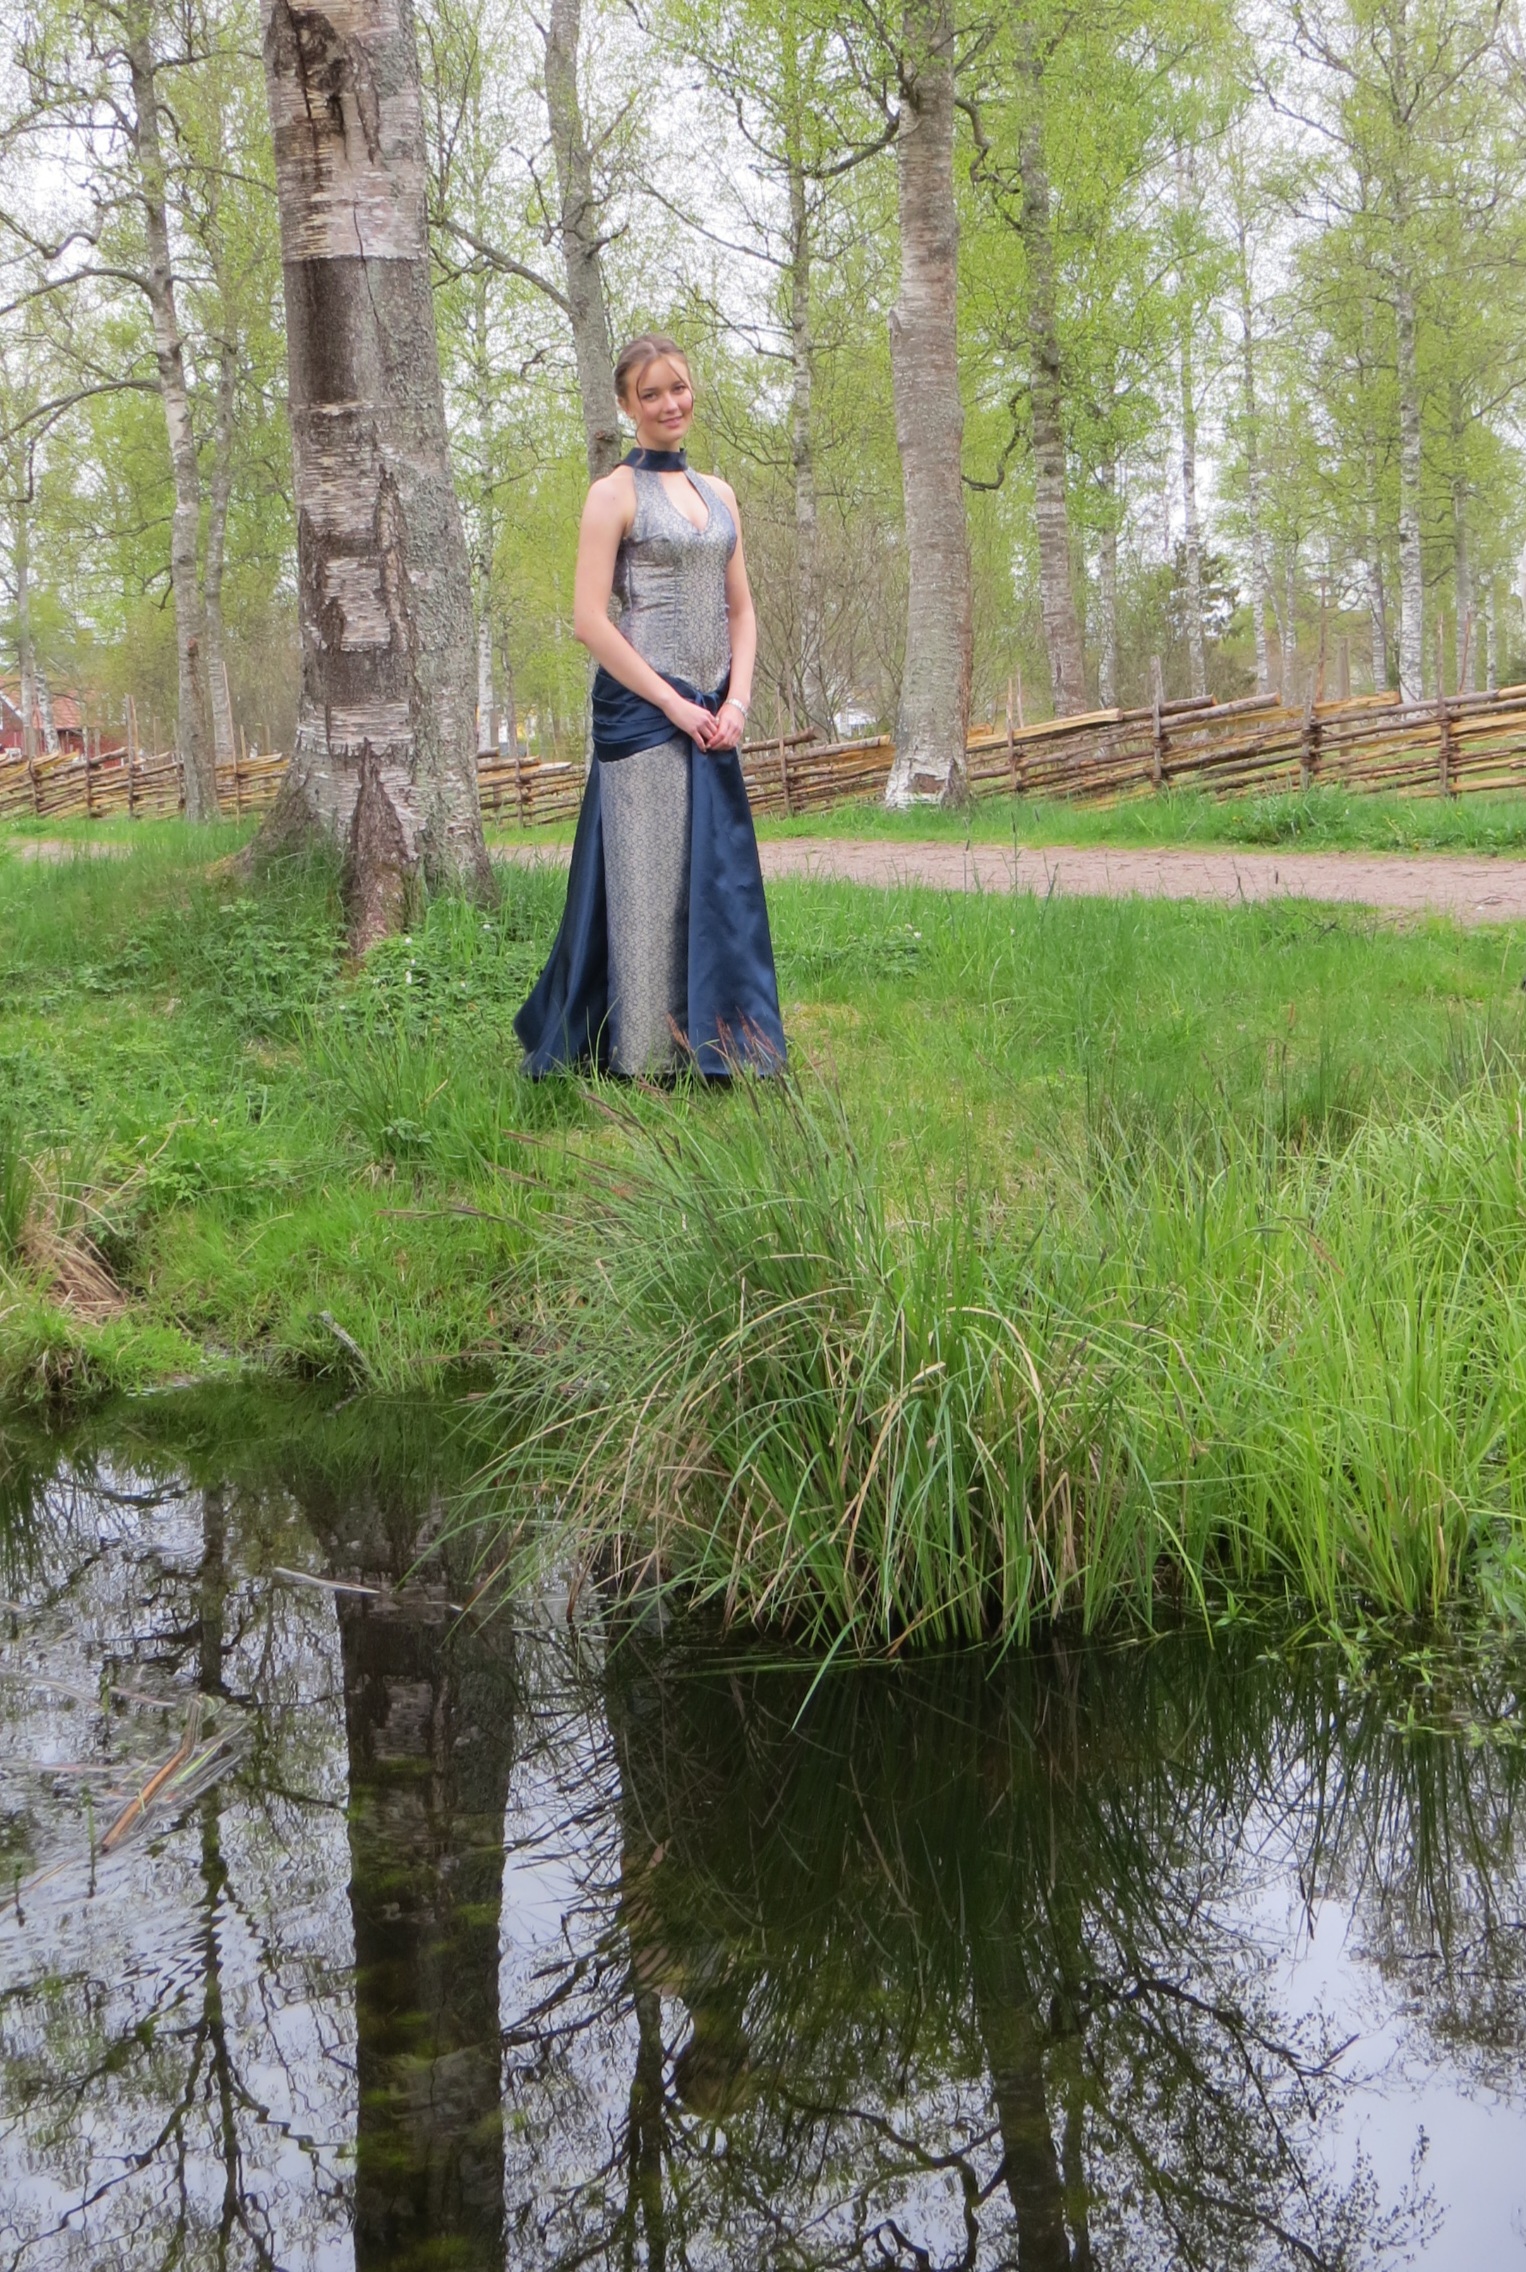
By December the female part of the clan went to Stockholm, for a visit at the Royal Opera. Such stunning dancing performance, costumes, scenography and music! And so satisfying that my sister wore the dress I made for her, my mother wore pants that I had made for her and I wore my favourite design. 😁 We also made a visit to the fabulous Tygverket and found the perfect match – a dark blue duchesse, perfect for draping.
I december åkte den kvinnliga delen av klanen till Stockholm för att avnjuta en kväll på Kungliga Operan 🤩 Vilka fantastiska balettdansöser, kostymer, scenografi och musik. Så tillfredsställande också att tre av oss bar kläder som jag sytt, varav två egen desig. 😁 Vi besökte också Tygverket och hittade det perfekta tyget för draperingen – ett djupblått duchesse.
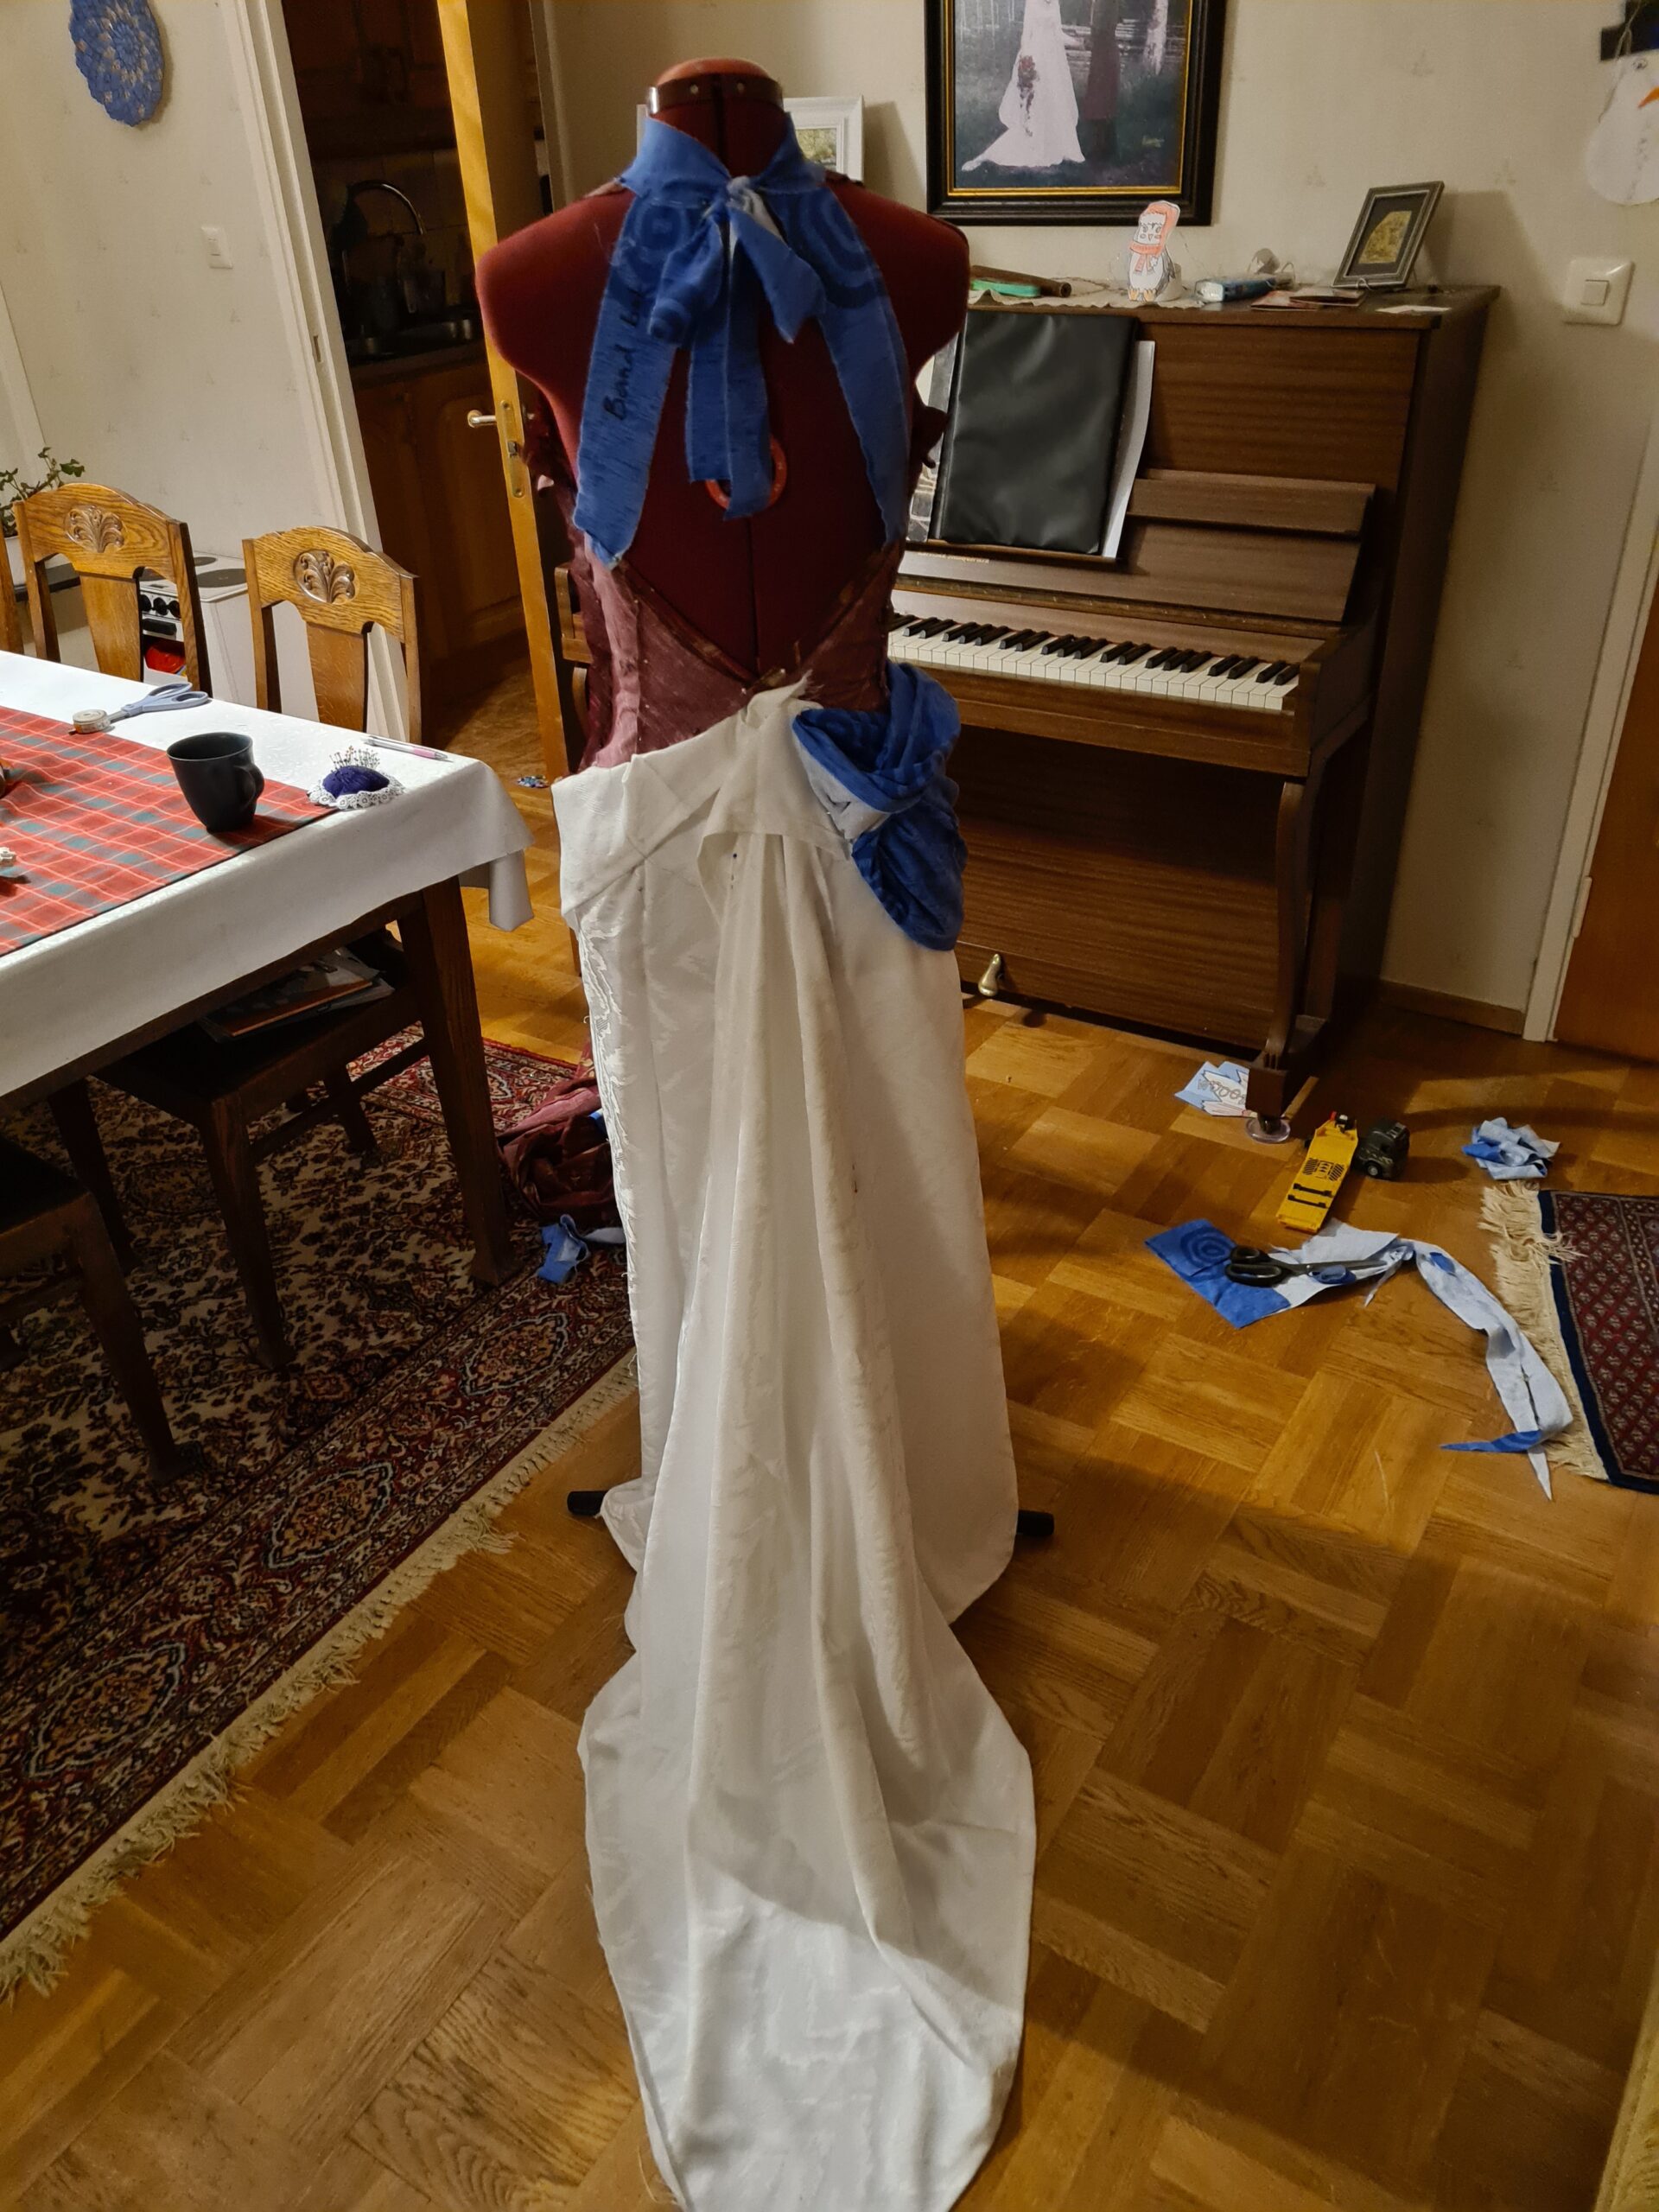
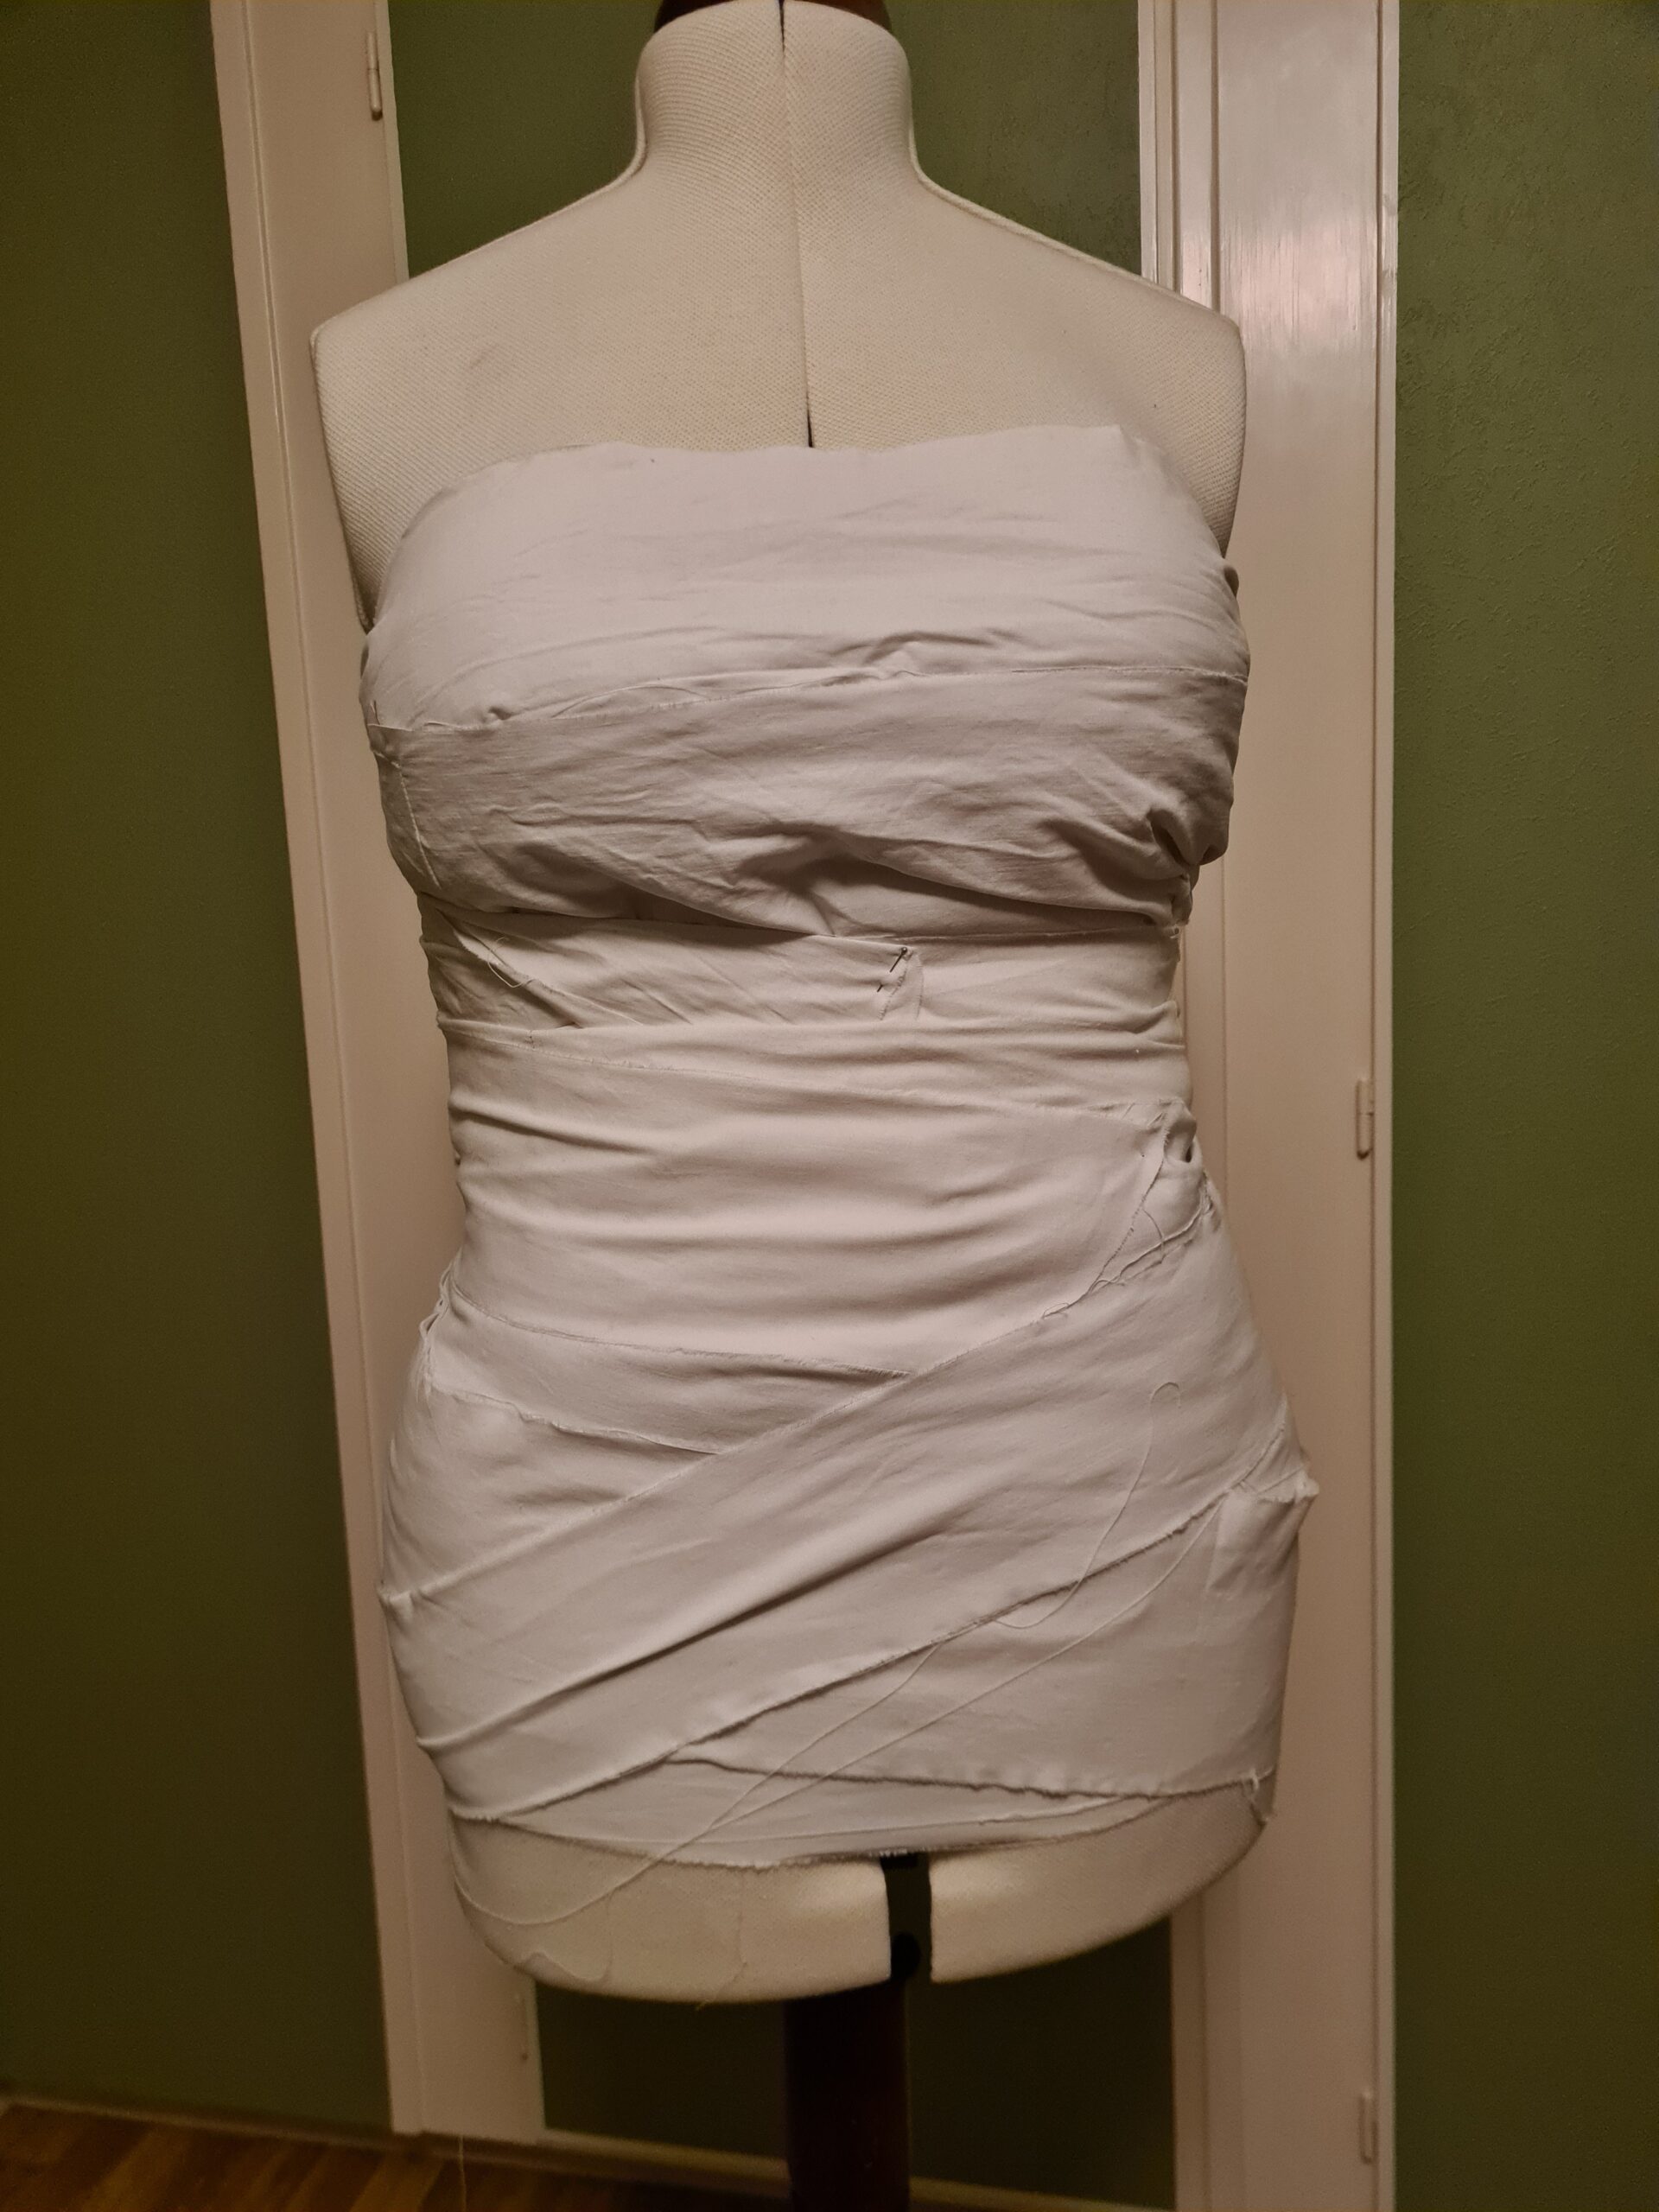
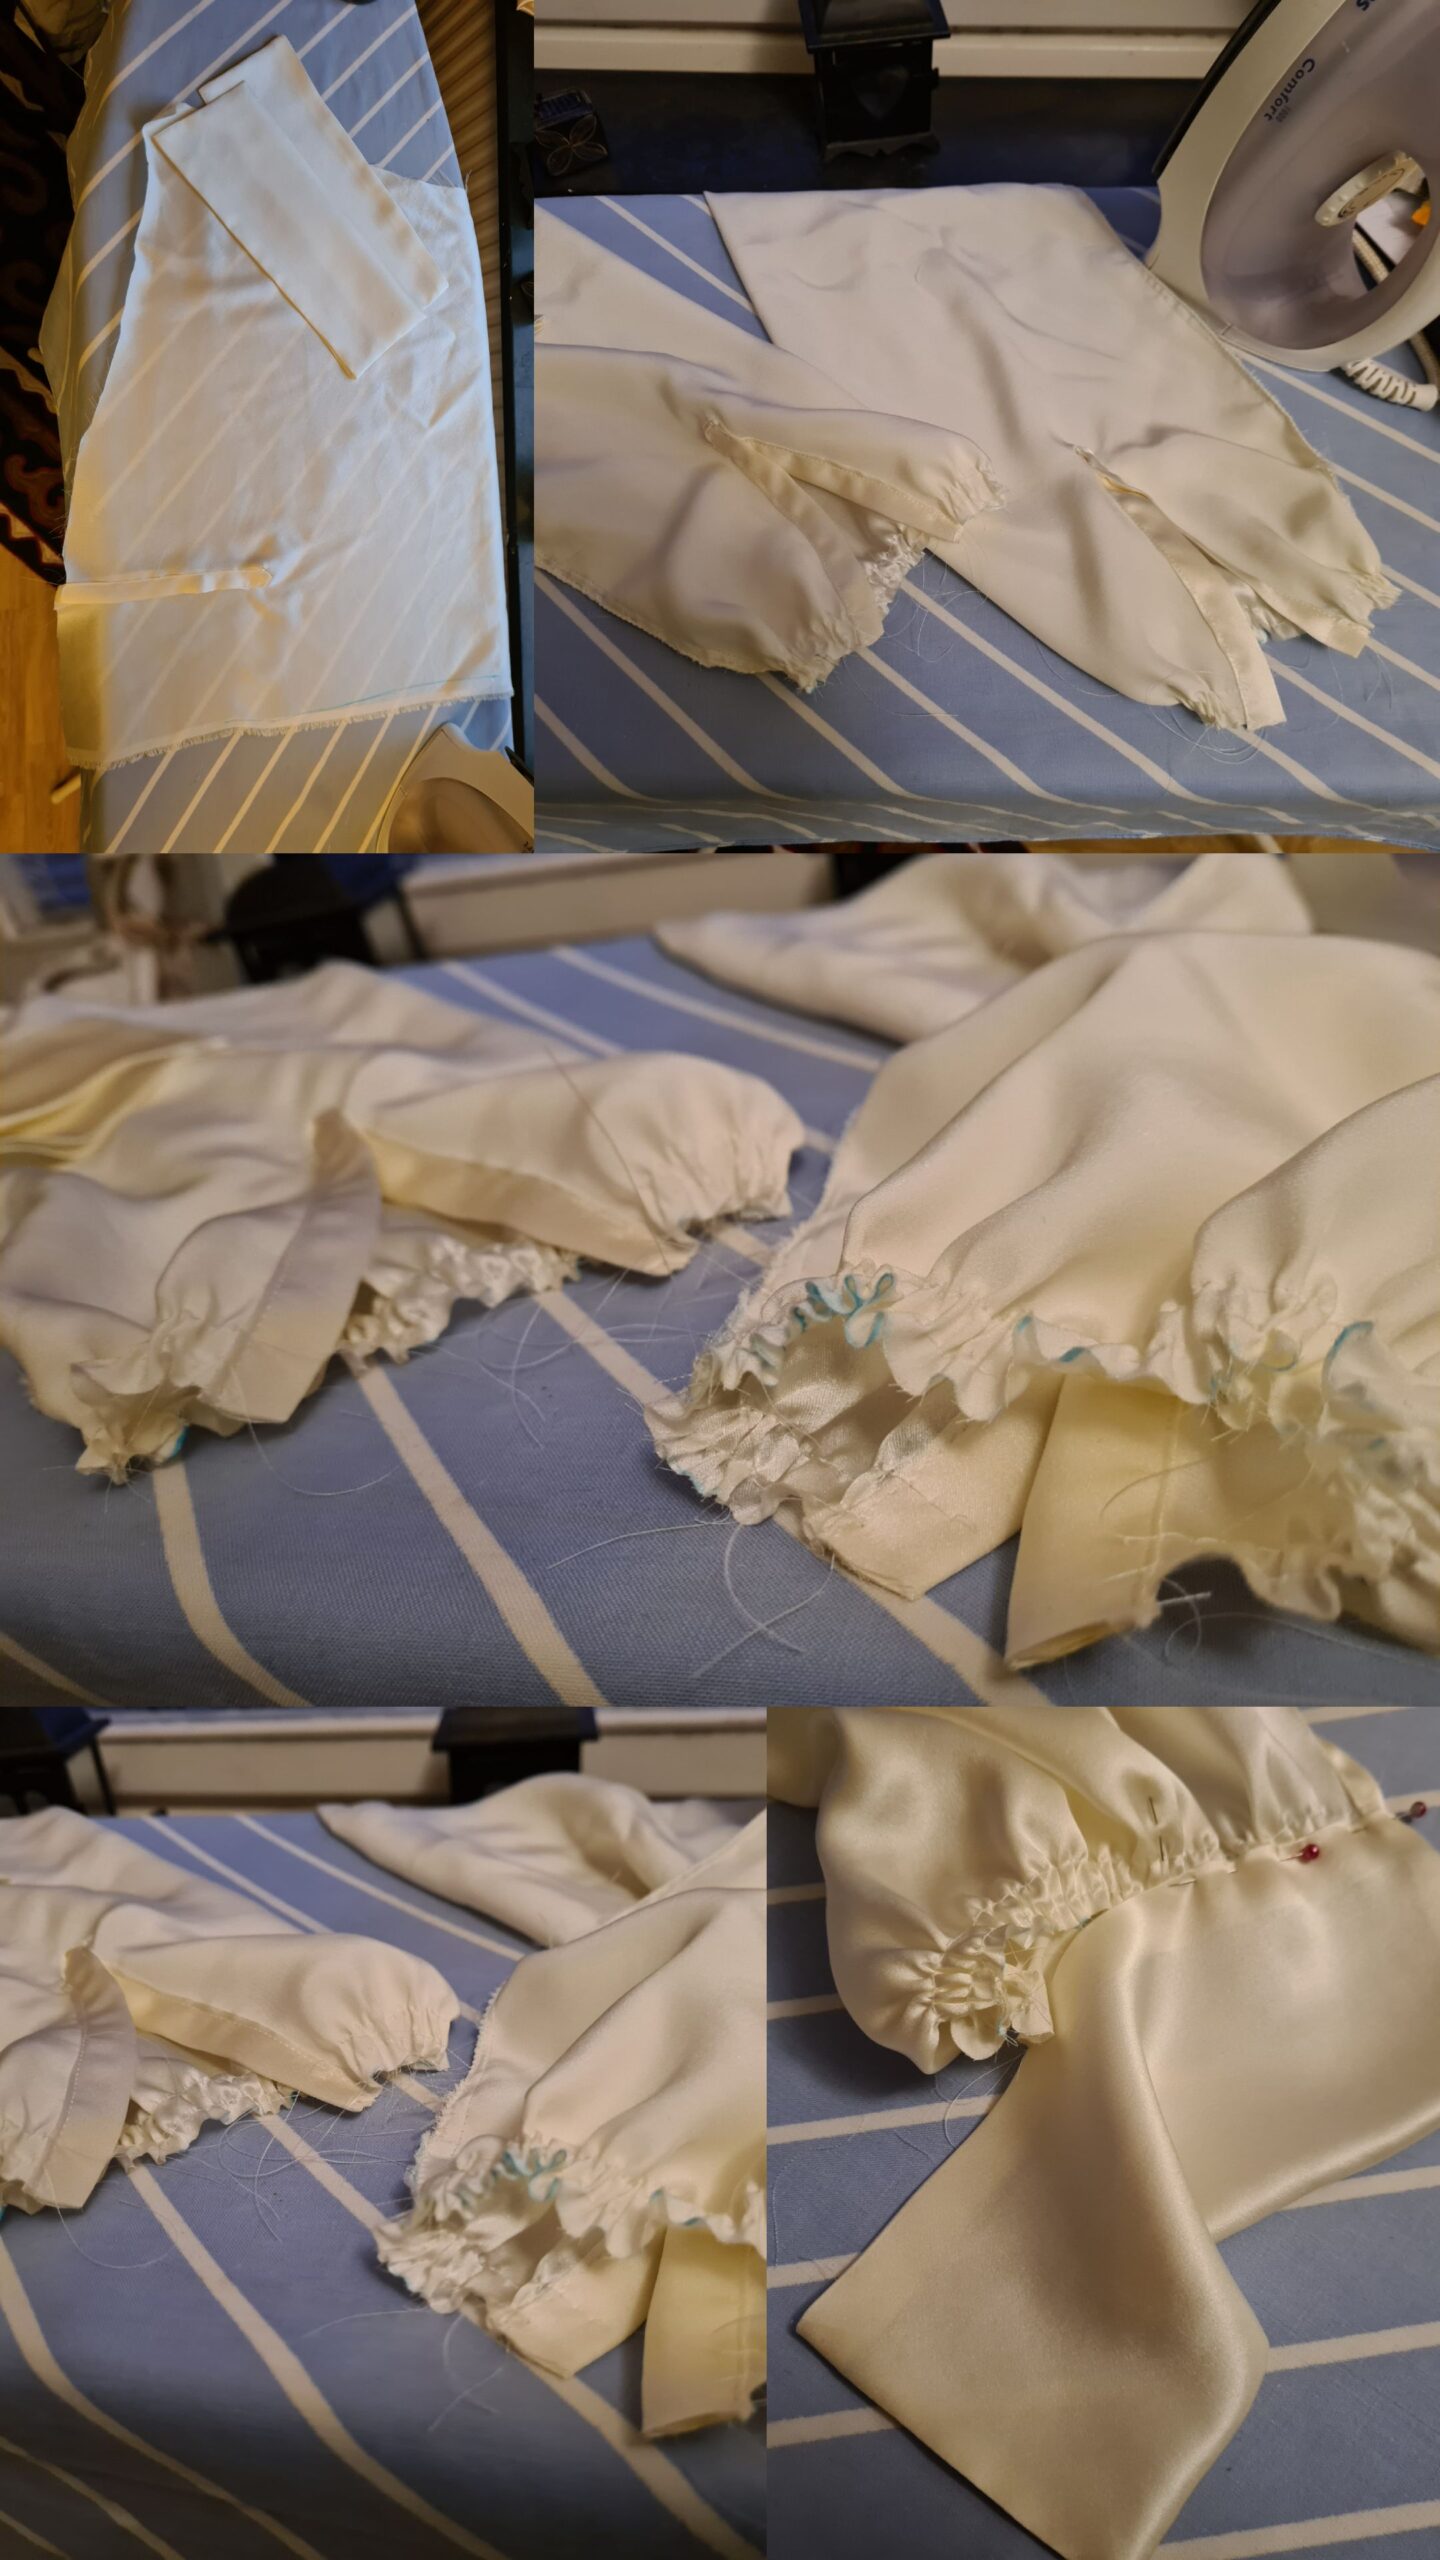
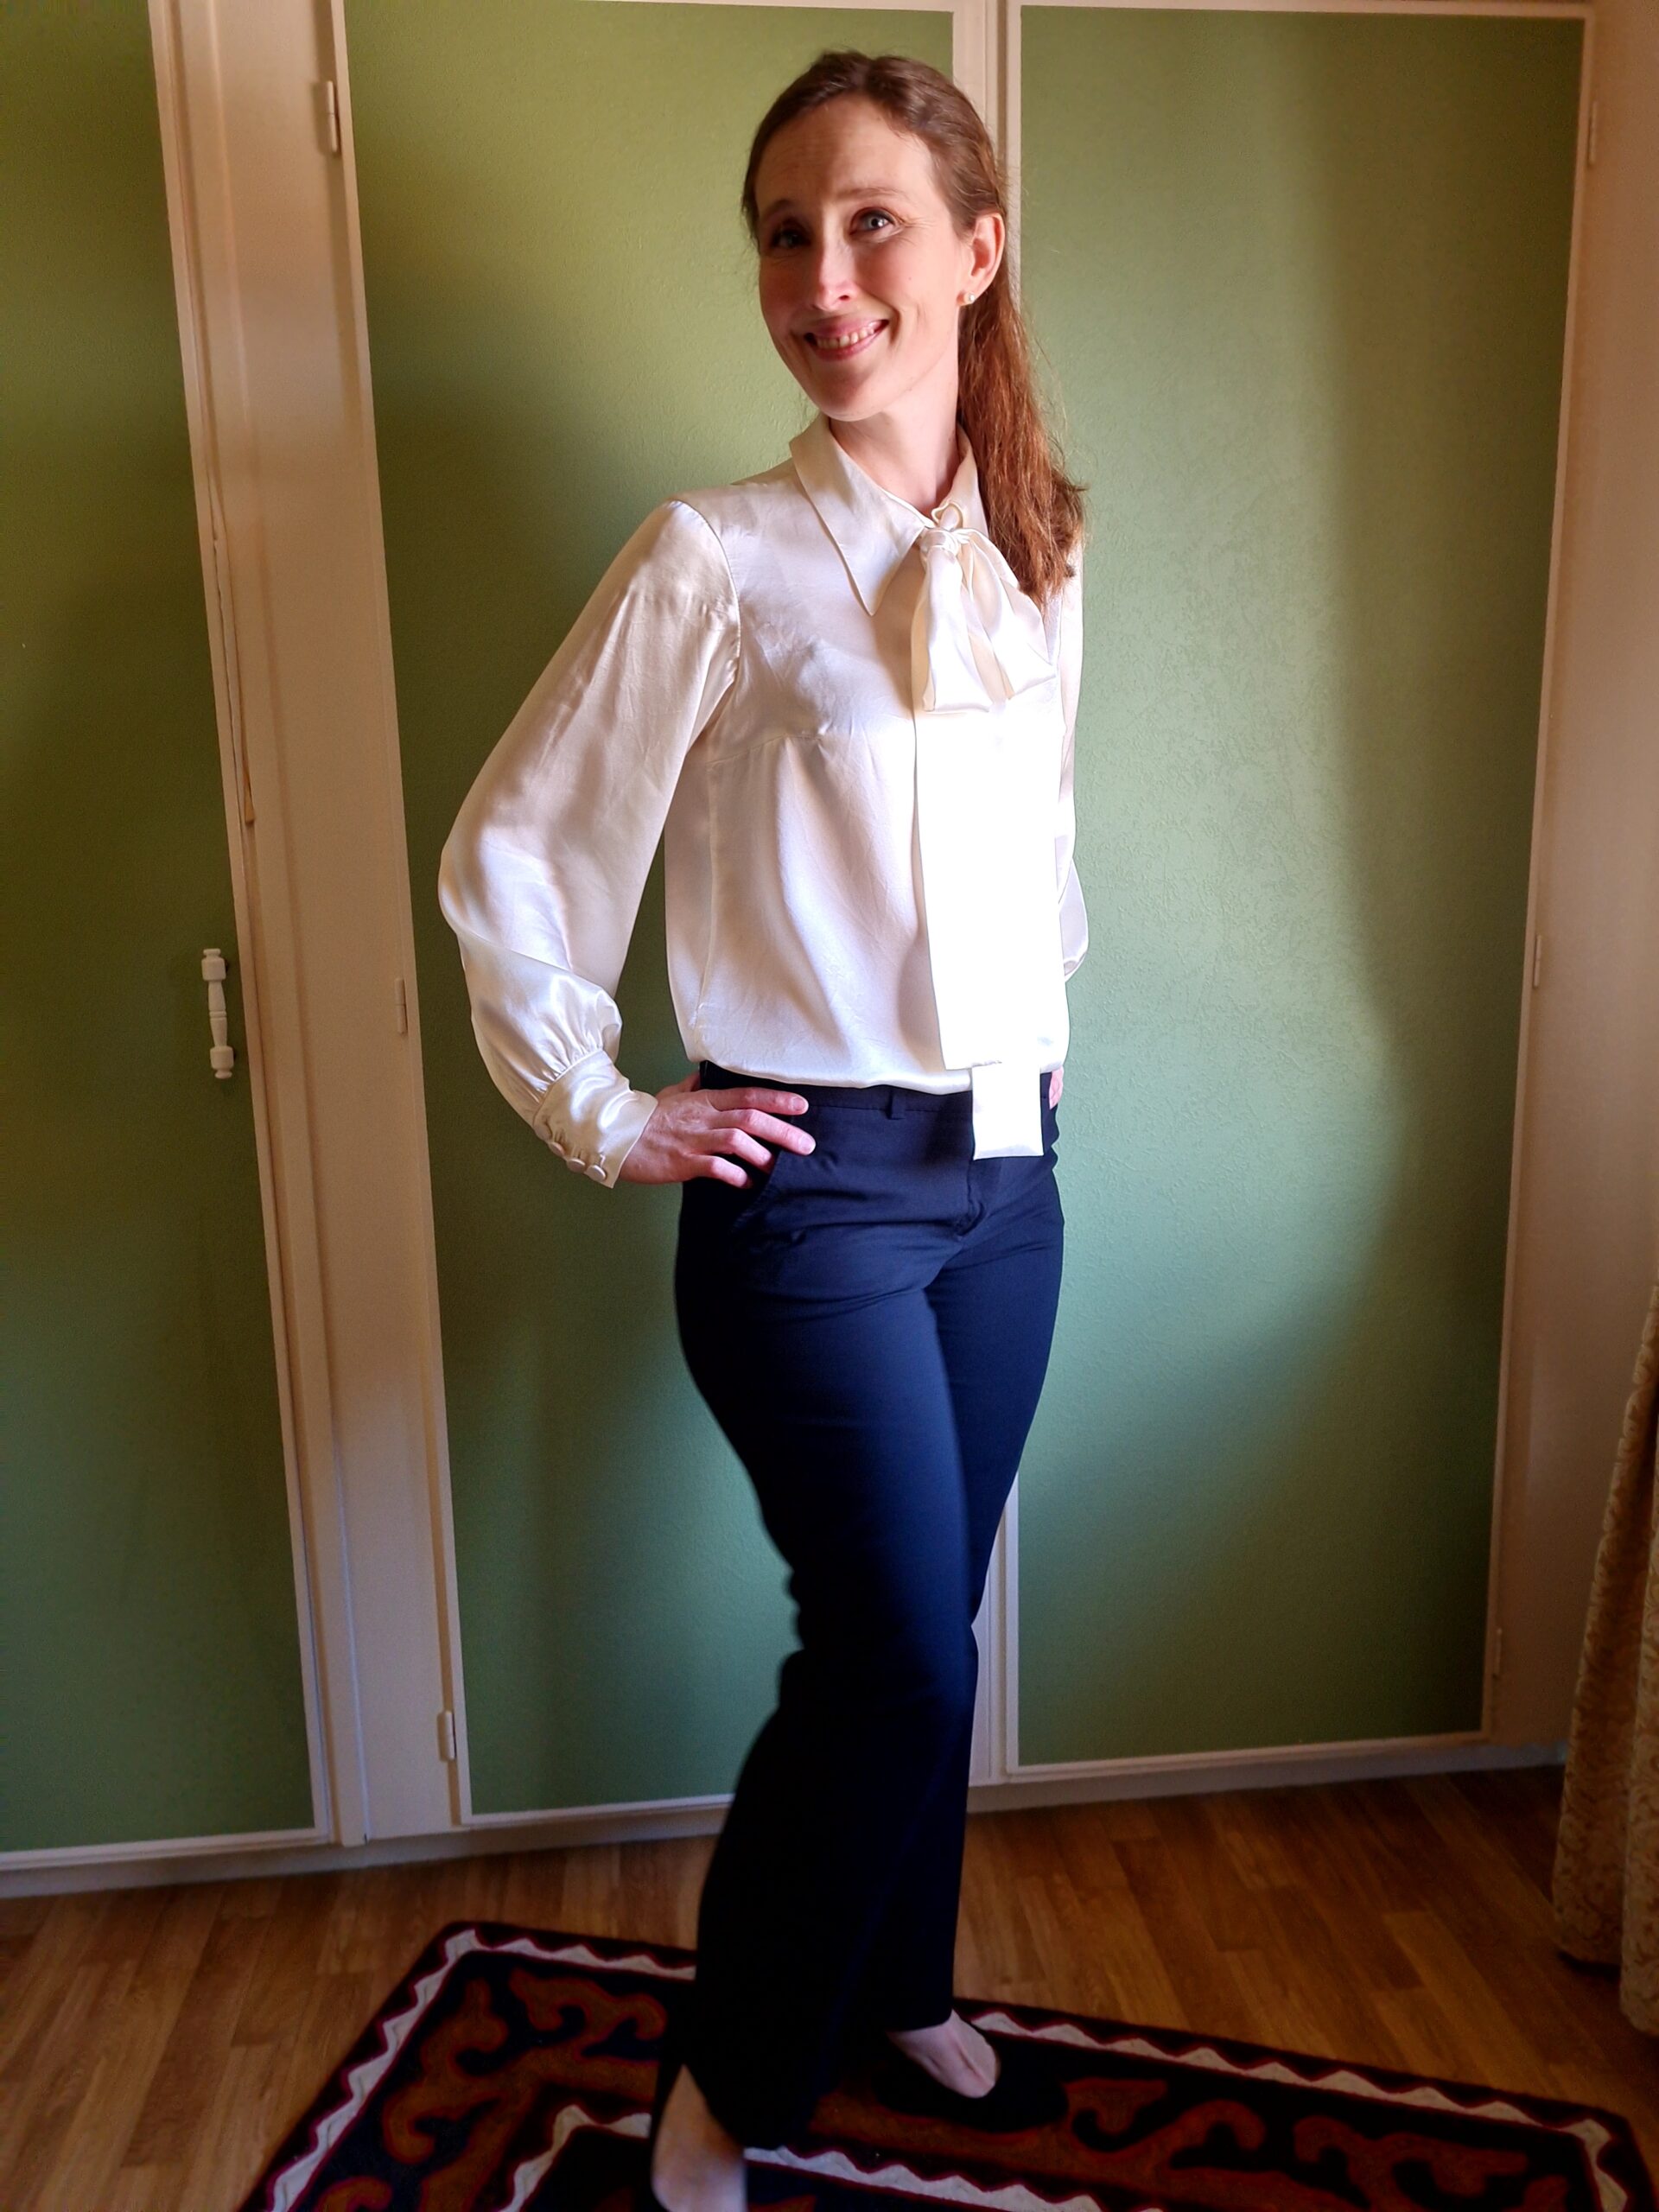
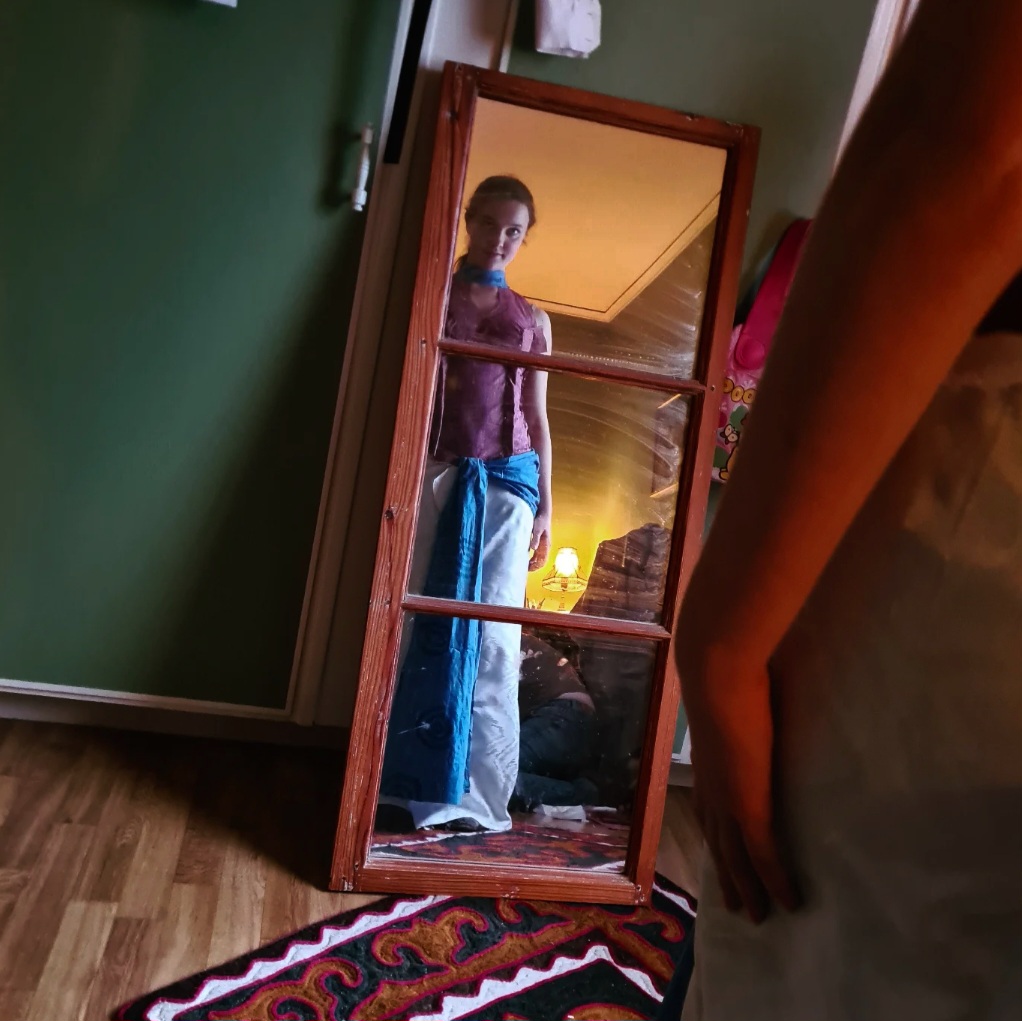
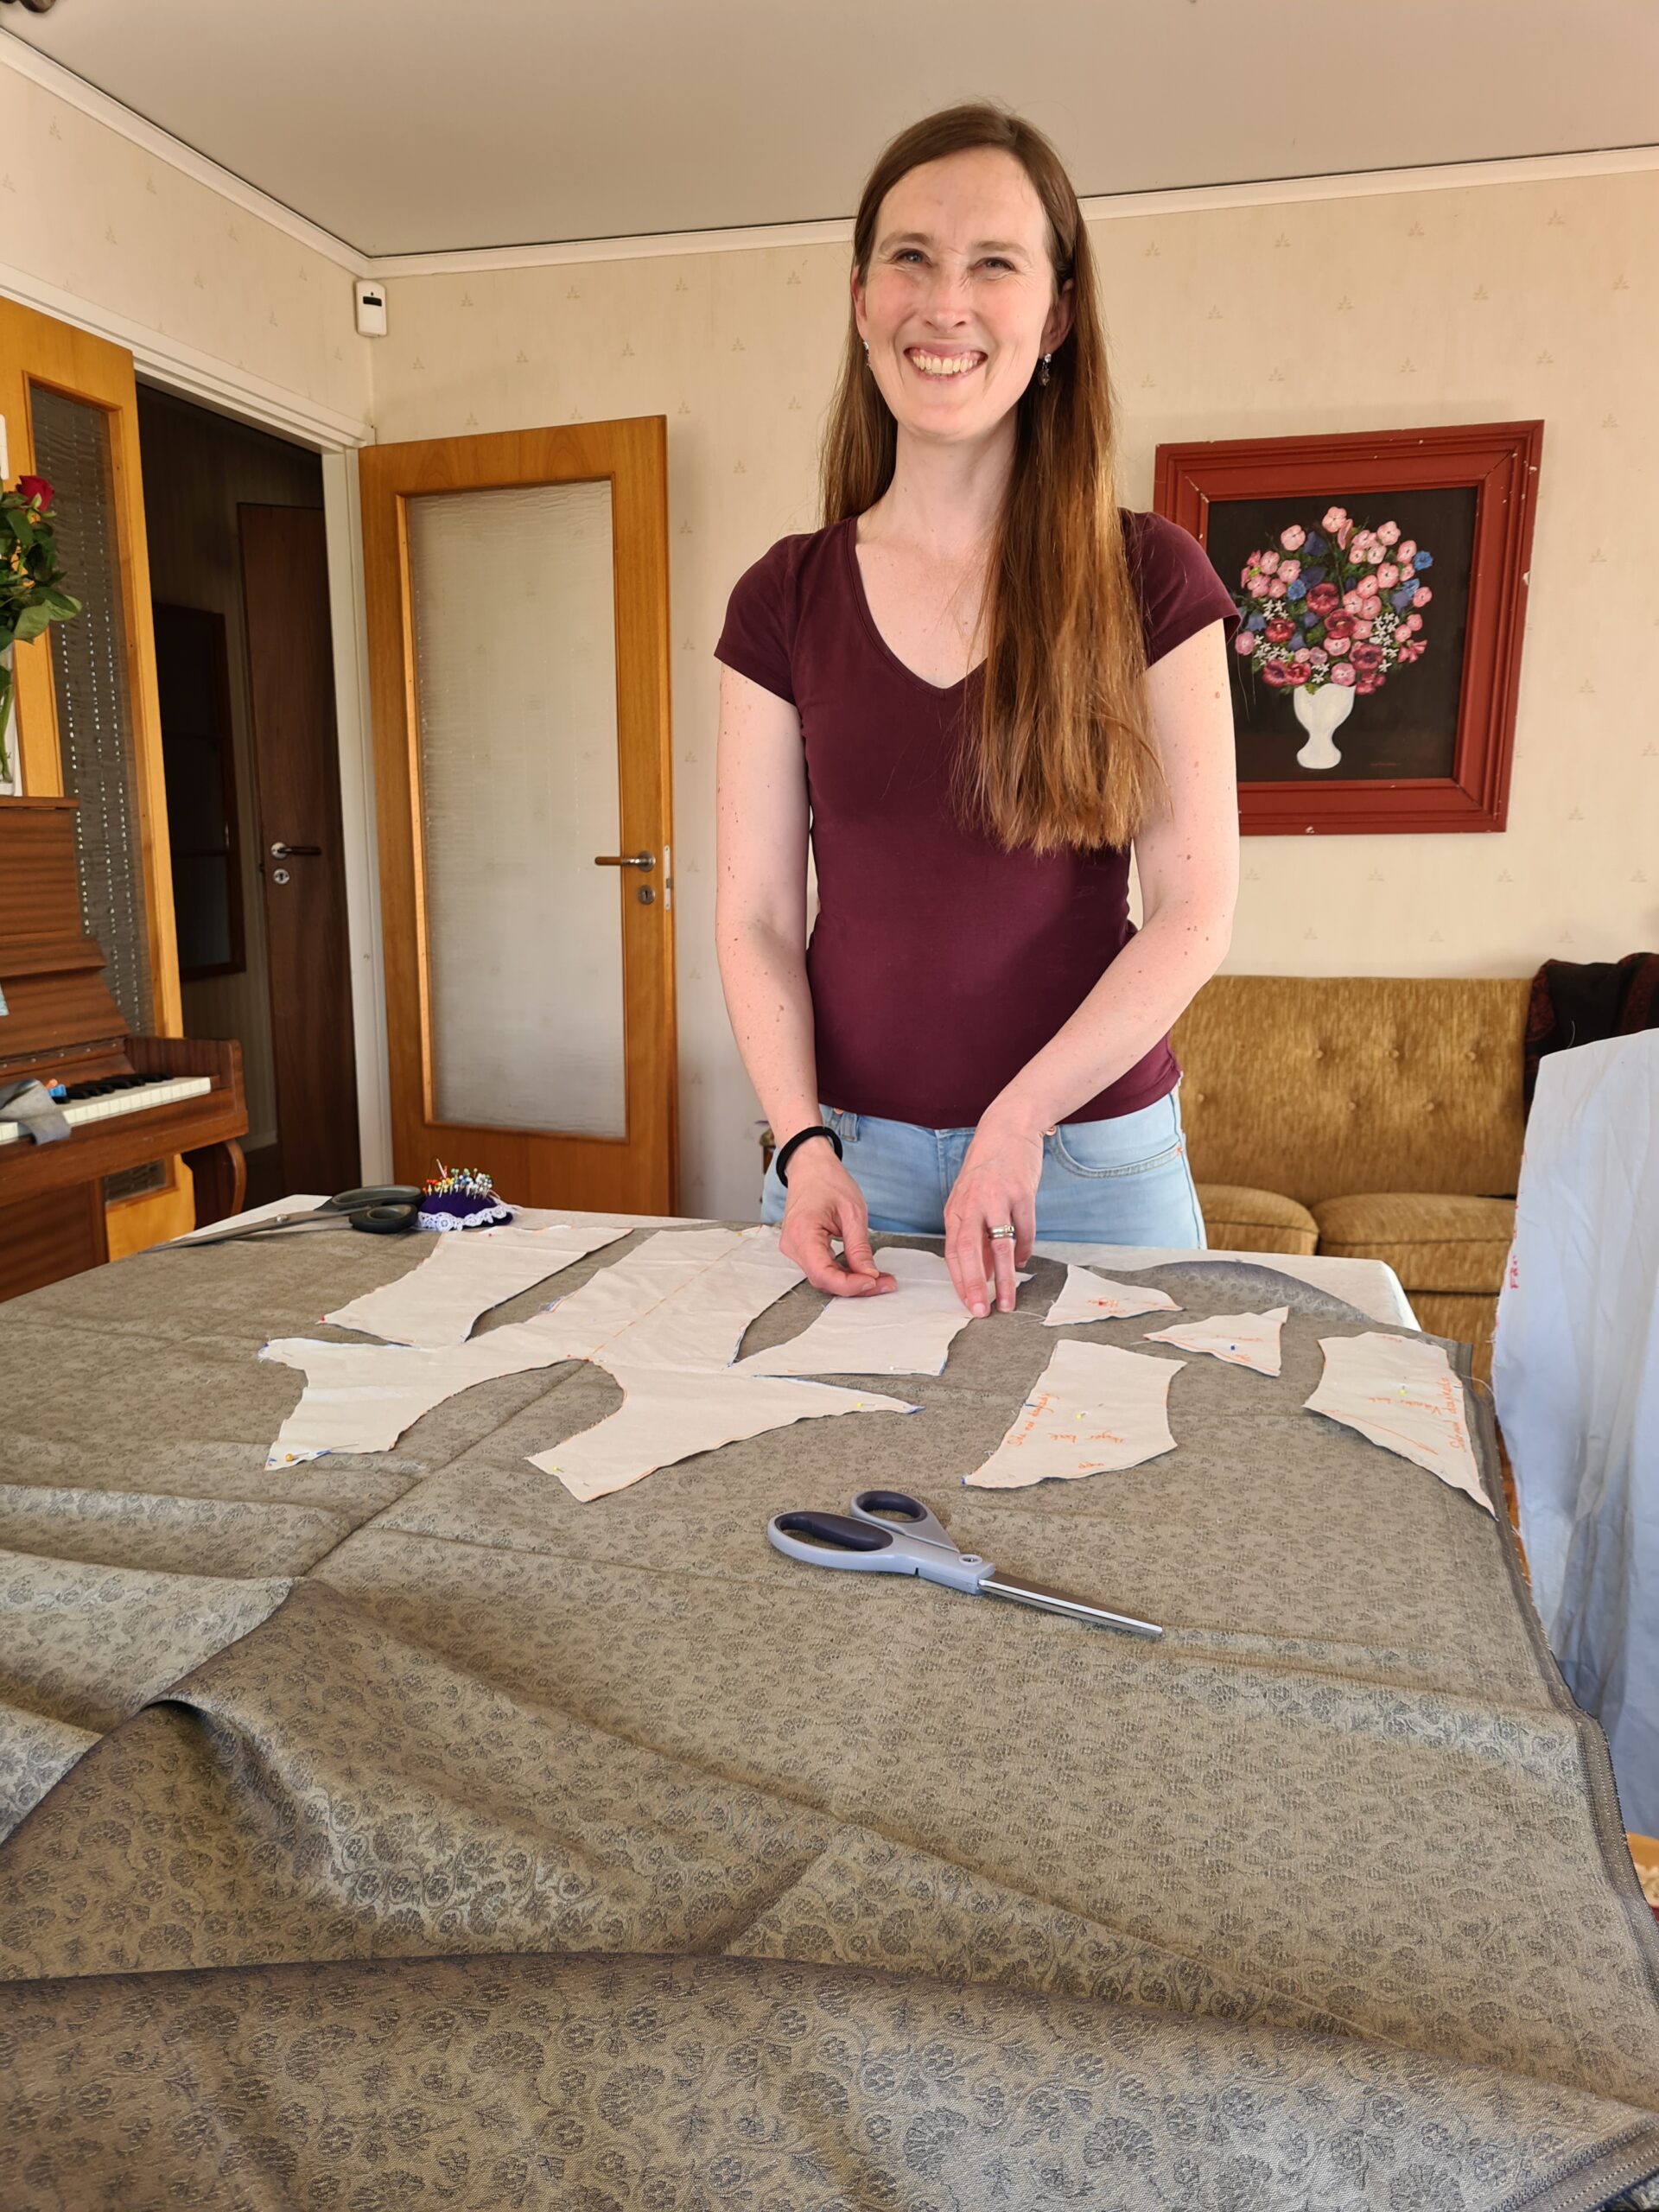
Then the long journey of the toille making started, with little spare time in between work and time with the family. This was my very first shaky attempt, thrown together by the 3rd of January.
Sedan började den långa toille-makar-resan. Det fanns så lite tid över för detta, mellan jobb och familjetid. Detta första förök rafsades ihop 3e januari.

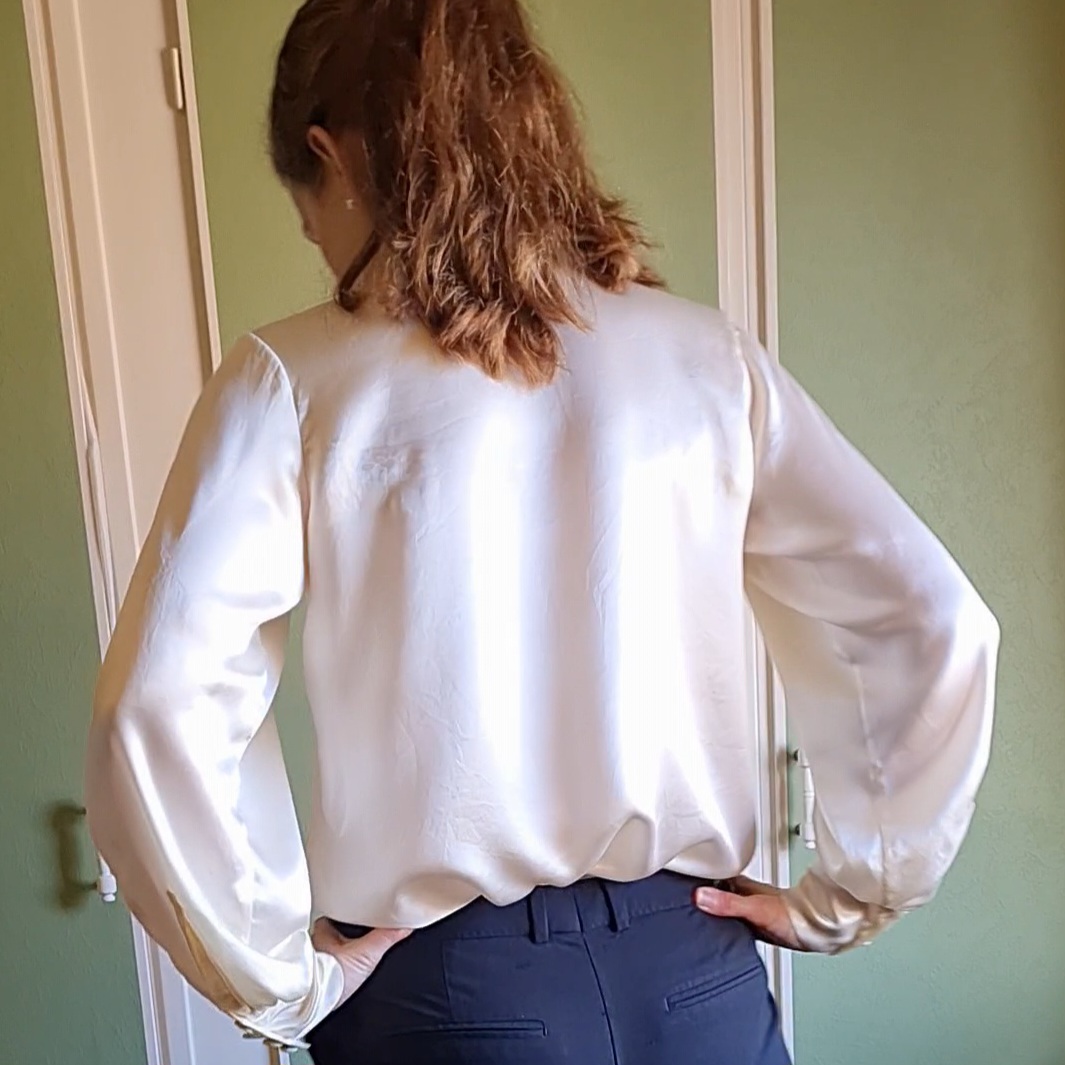
At the first fitting a few days later, my seven year old boy took the responsibility as a fashion photographer and took this great photo!
Vid första provningen, några dagar senare, axlade min sjuåring självmant rollen som modefotograf. Han tog denna häftiga bild!
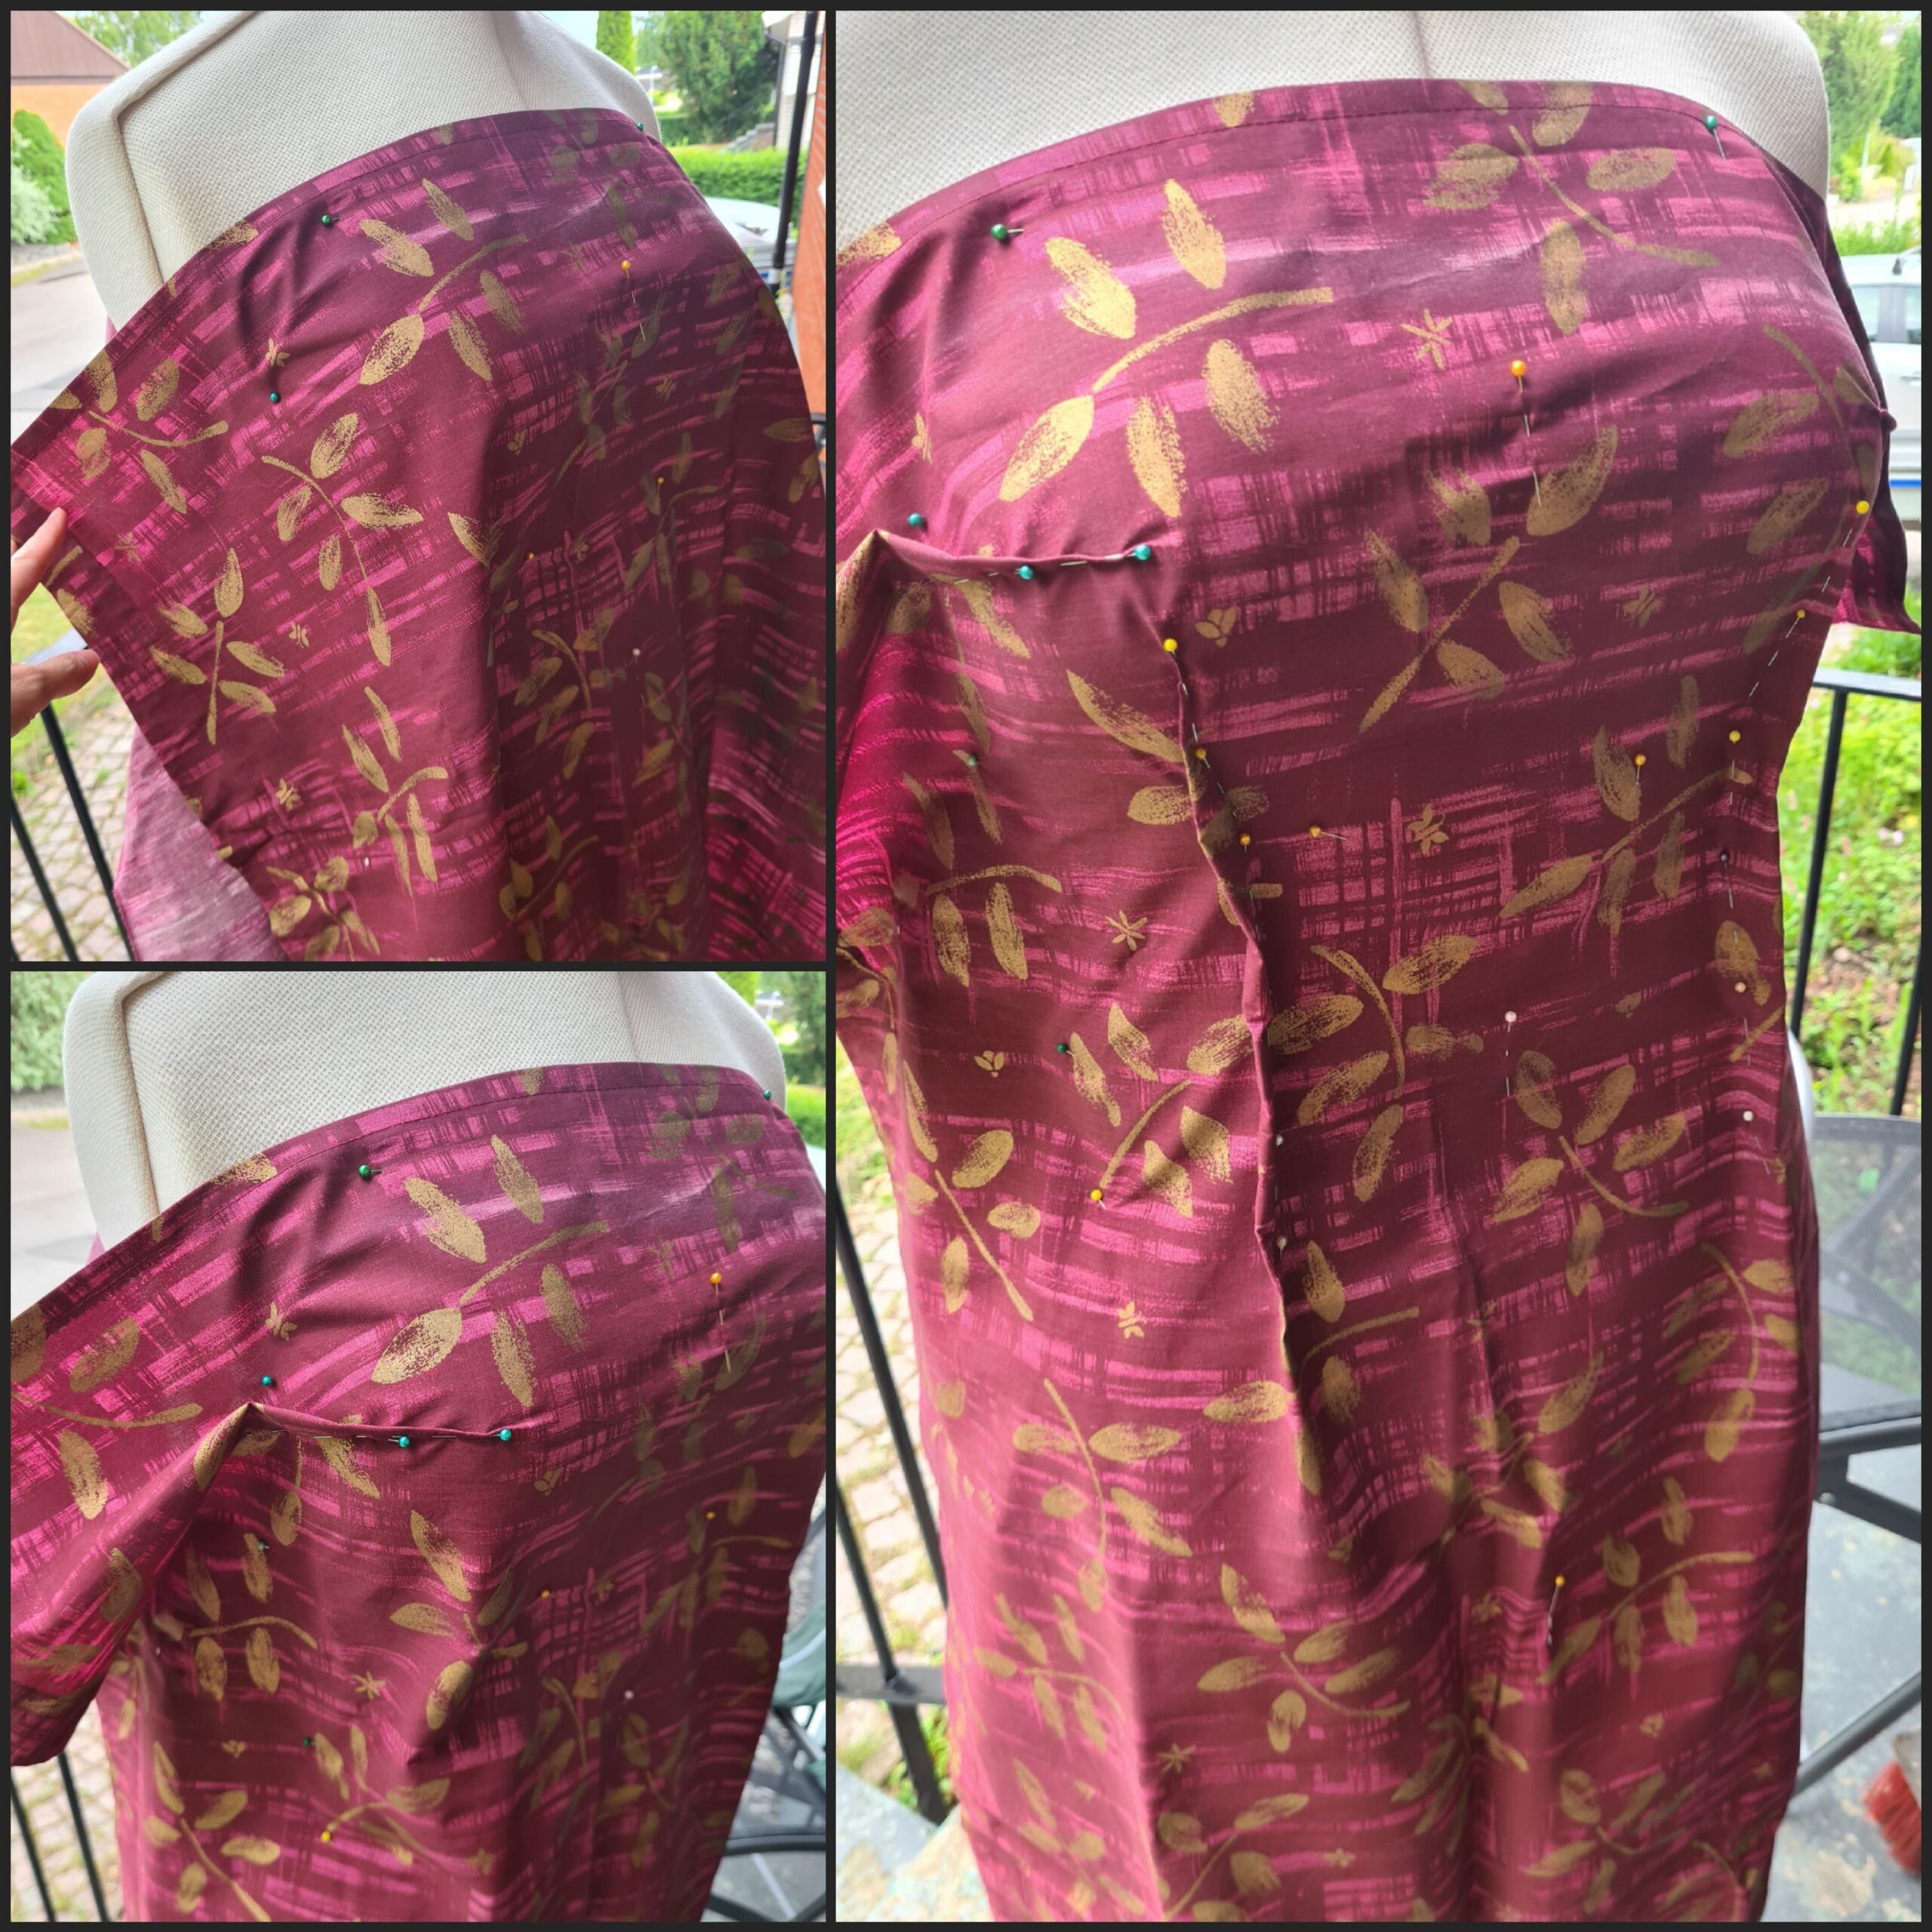
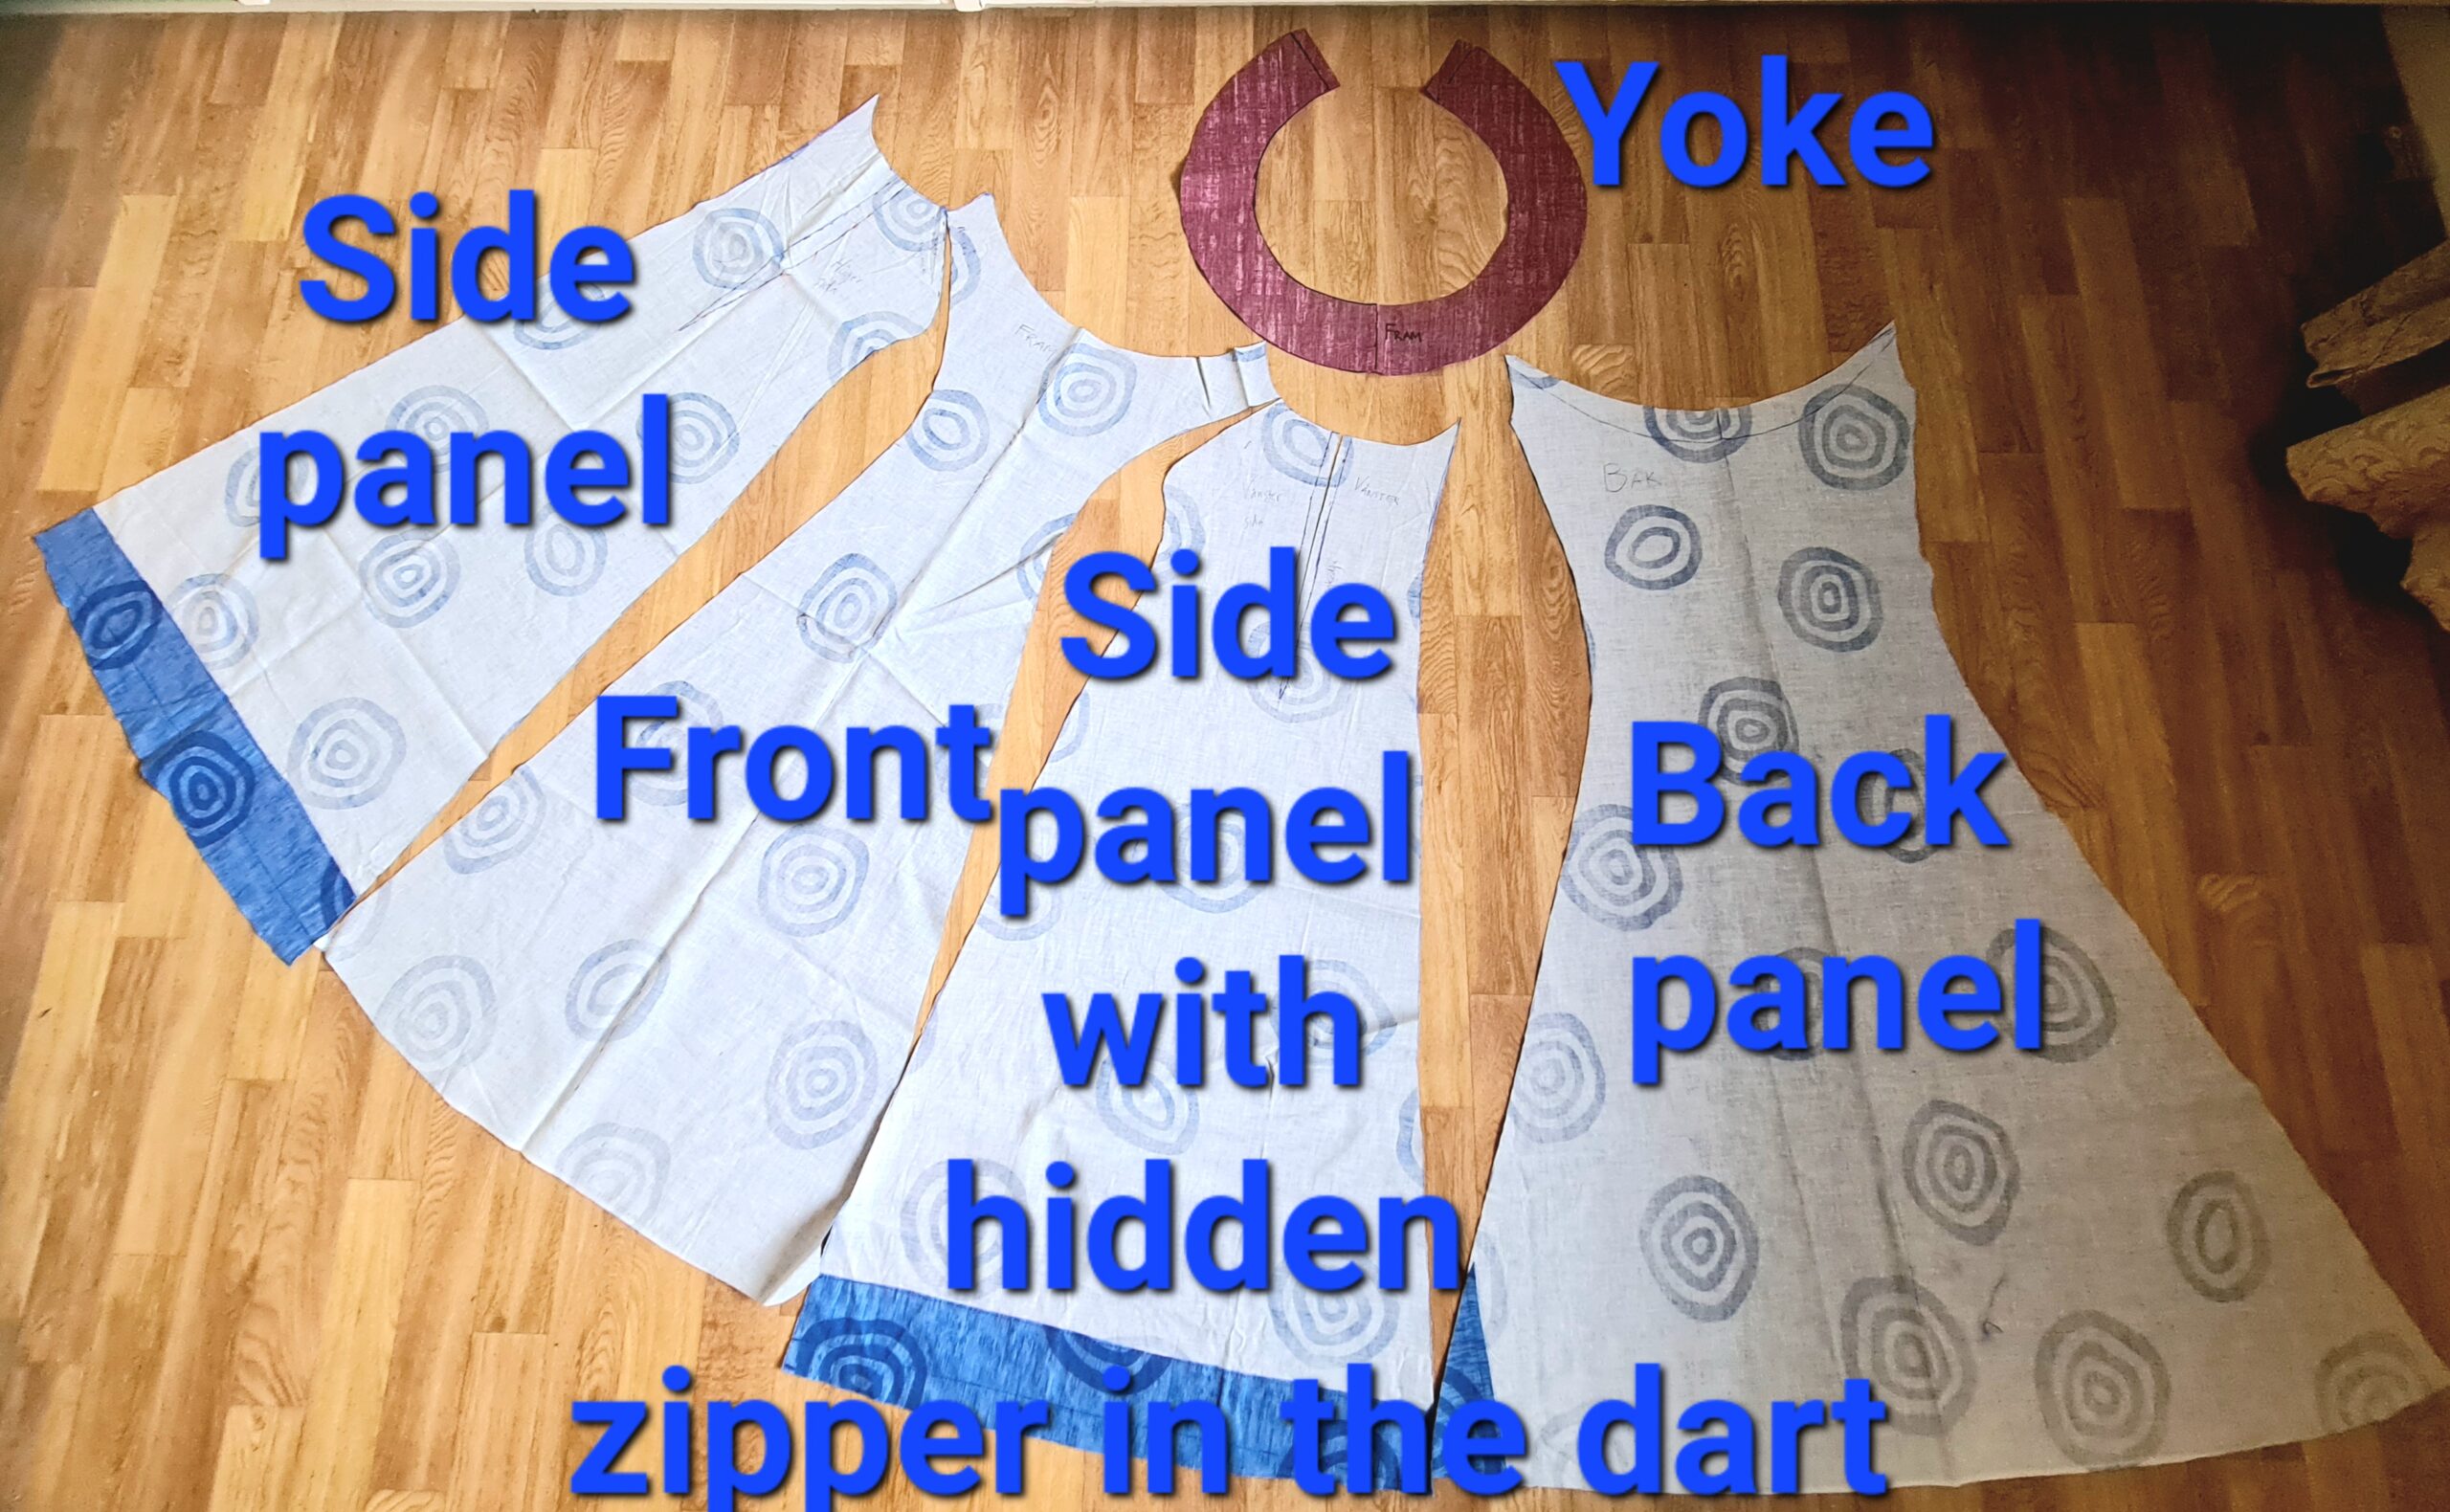
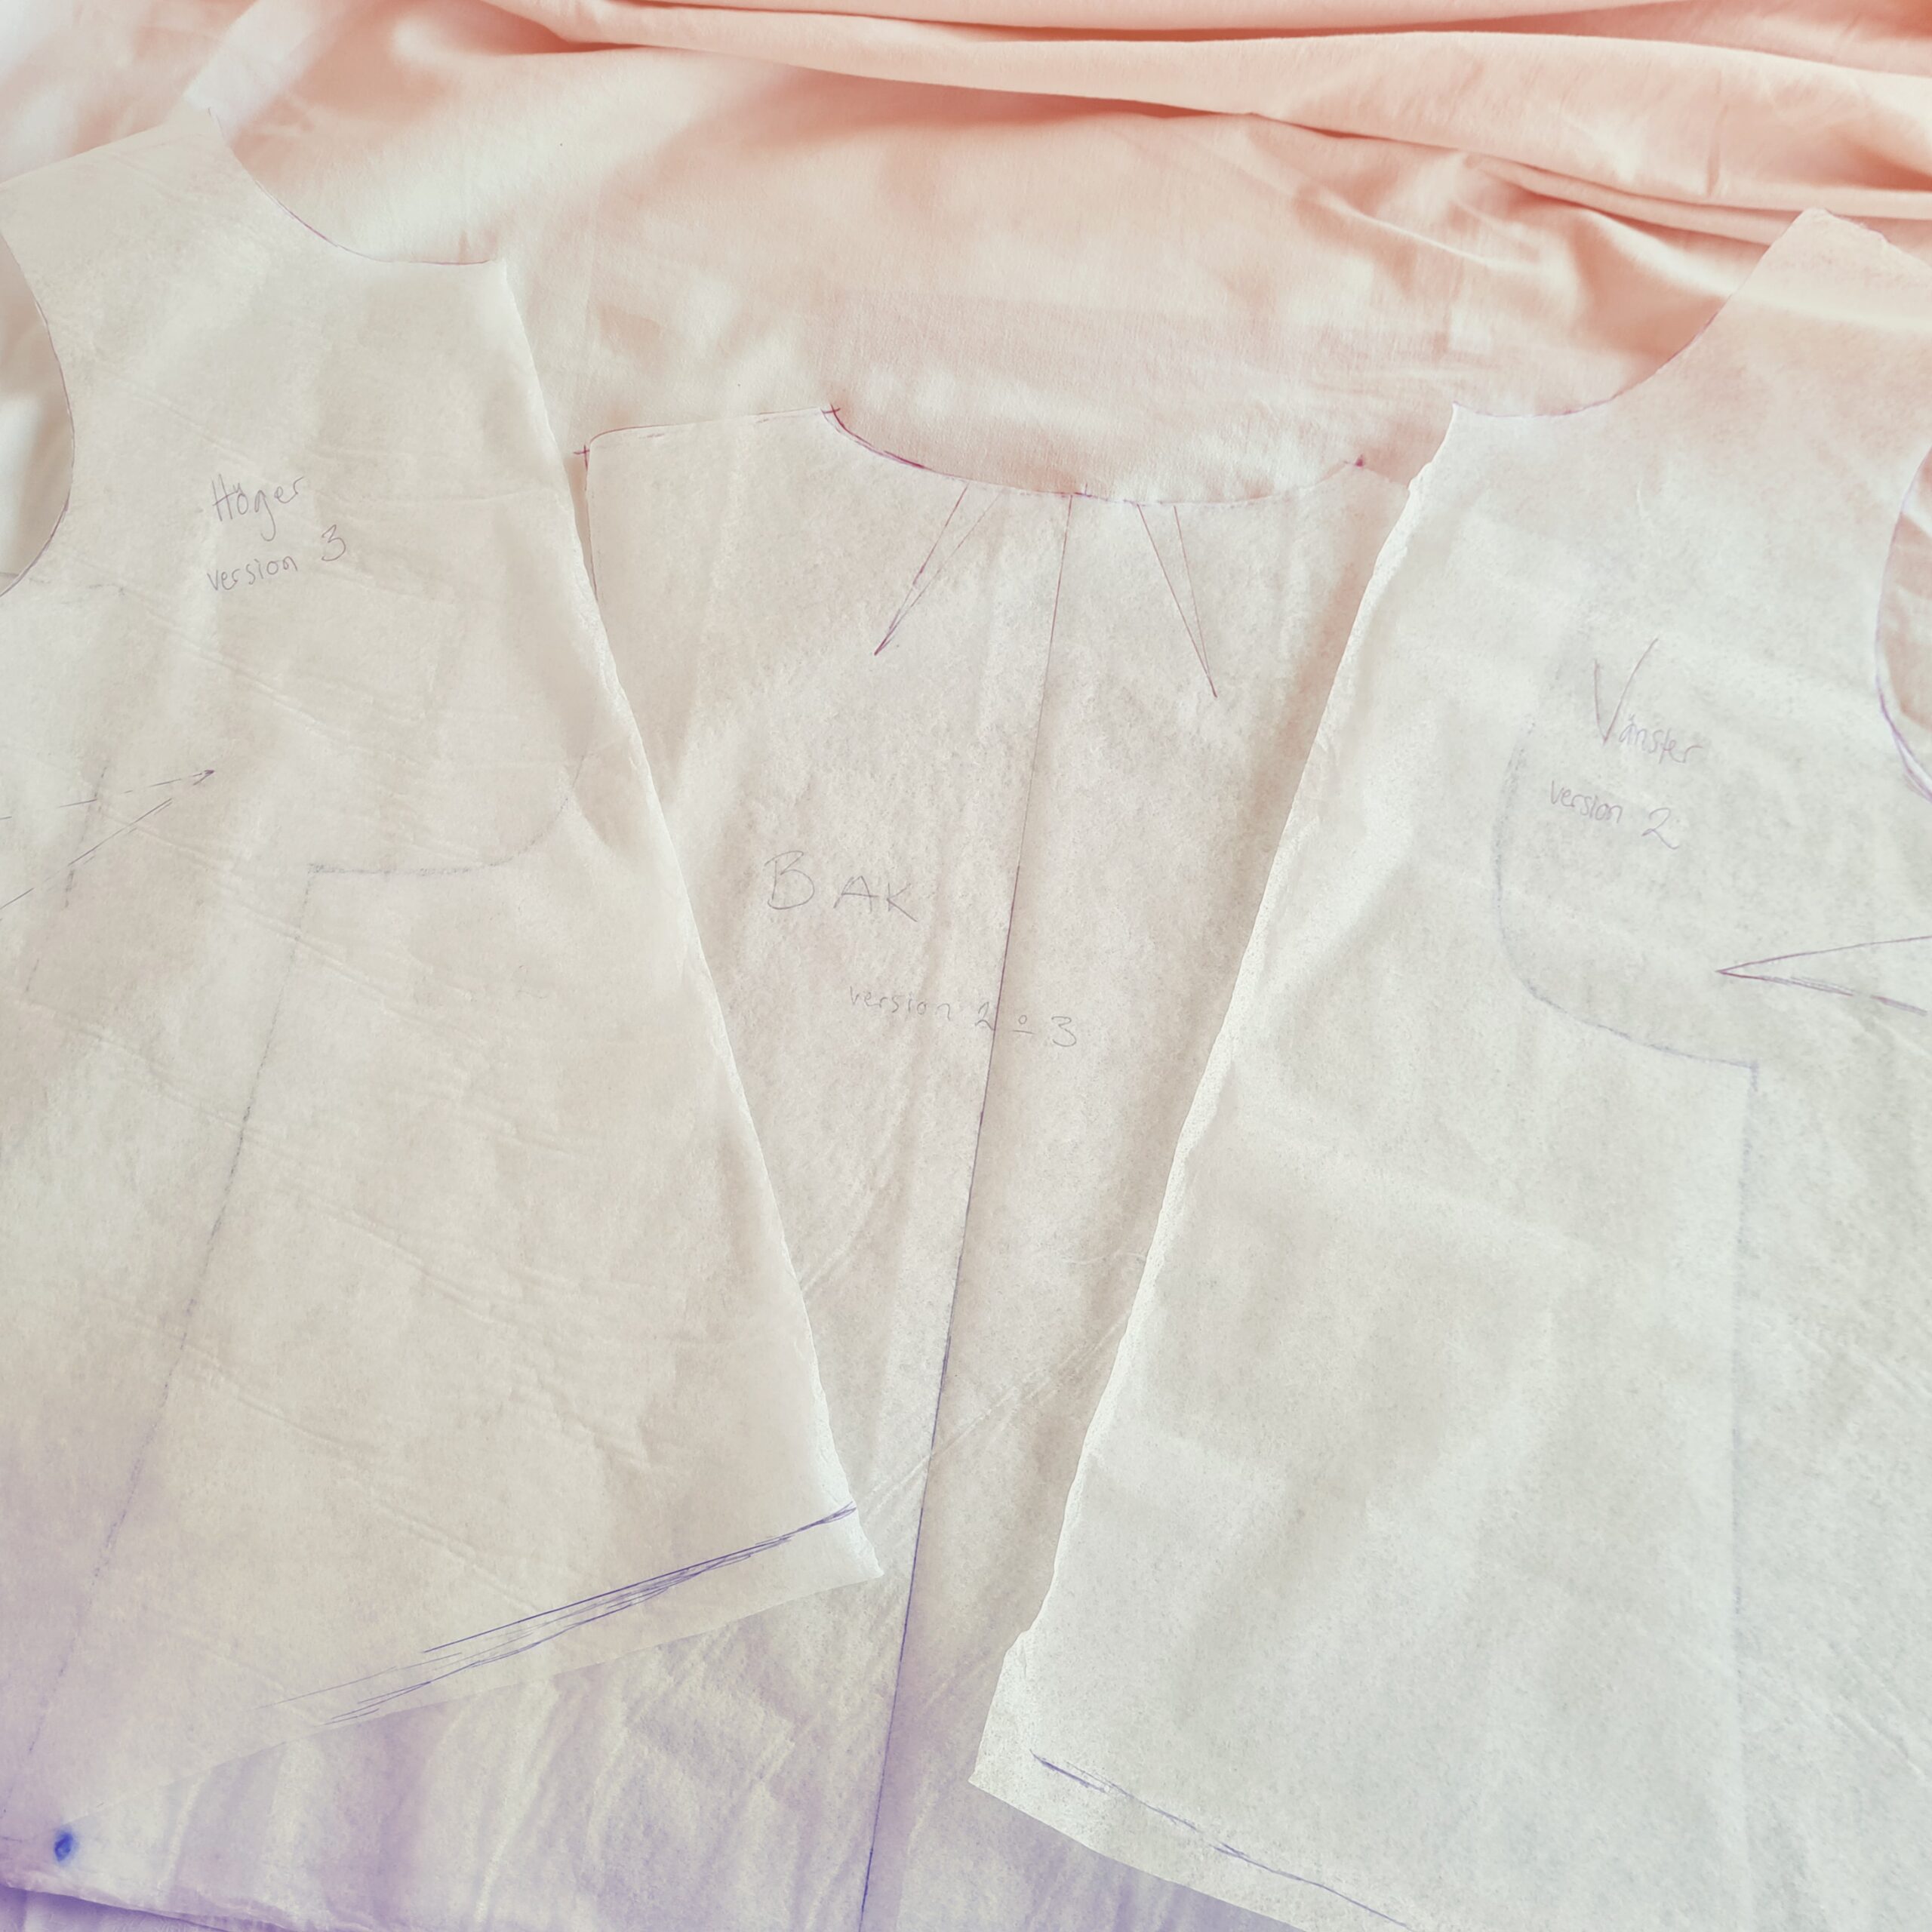
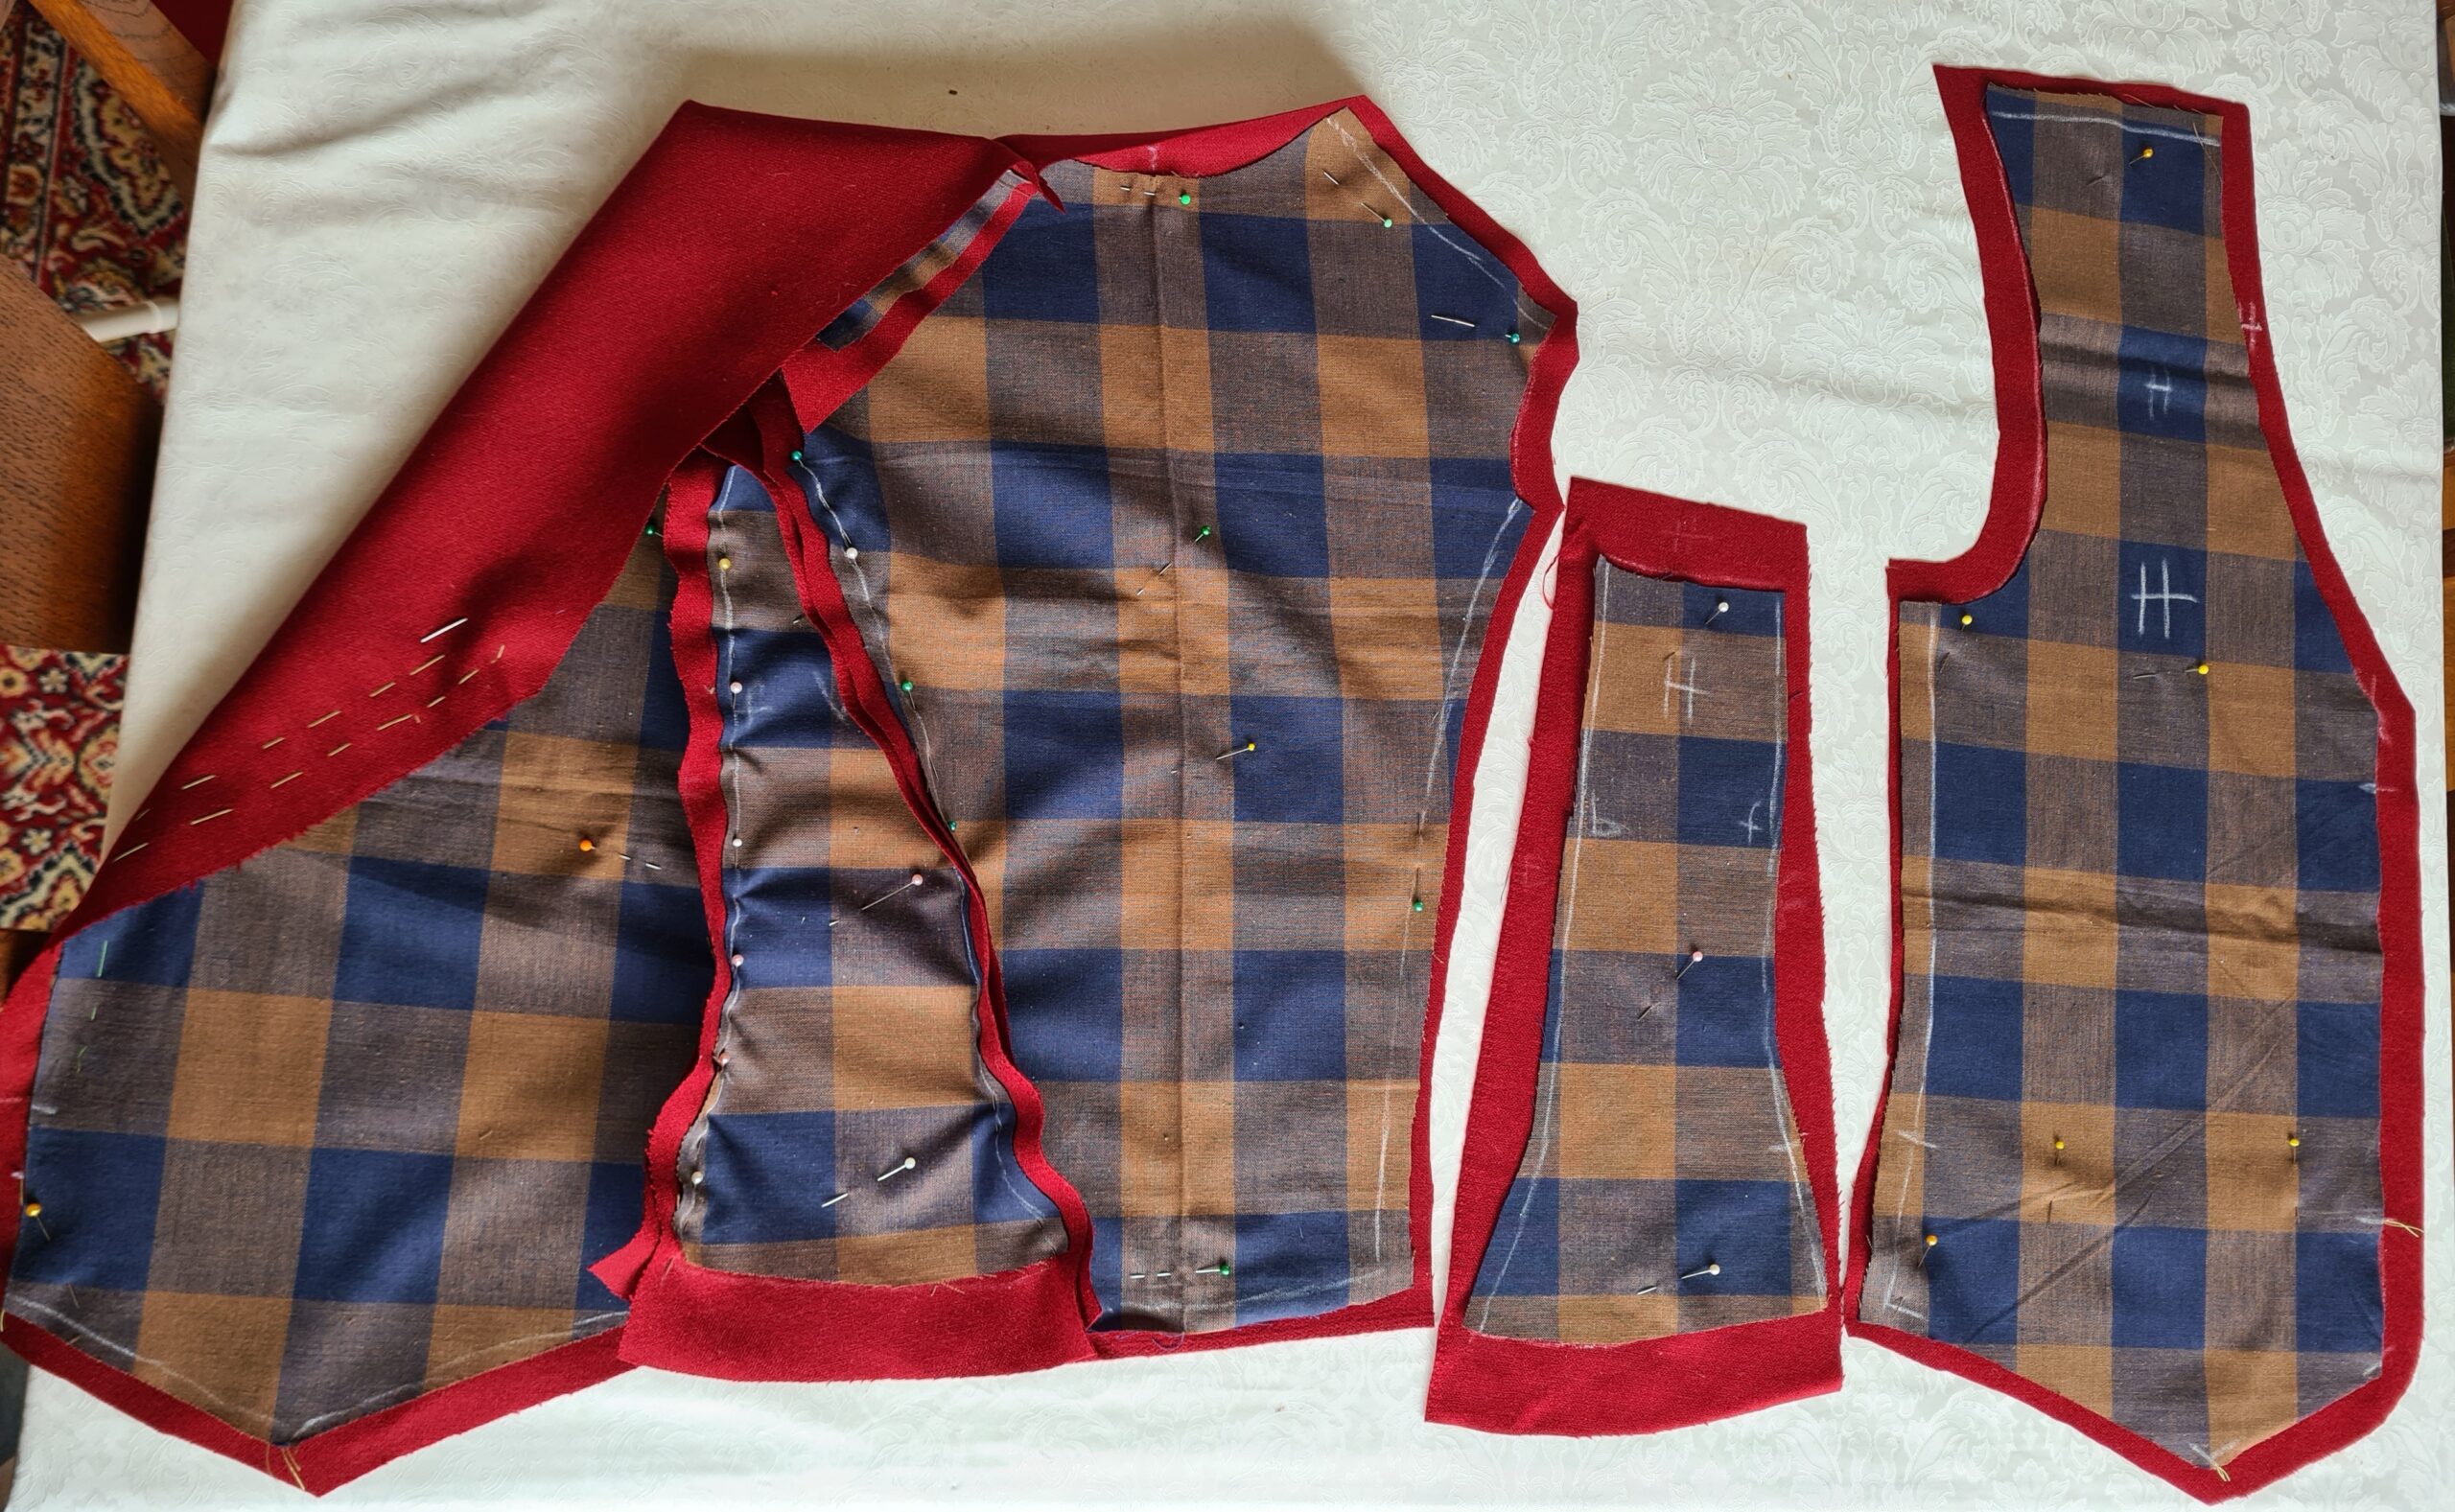
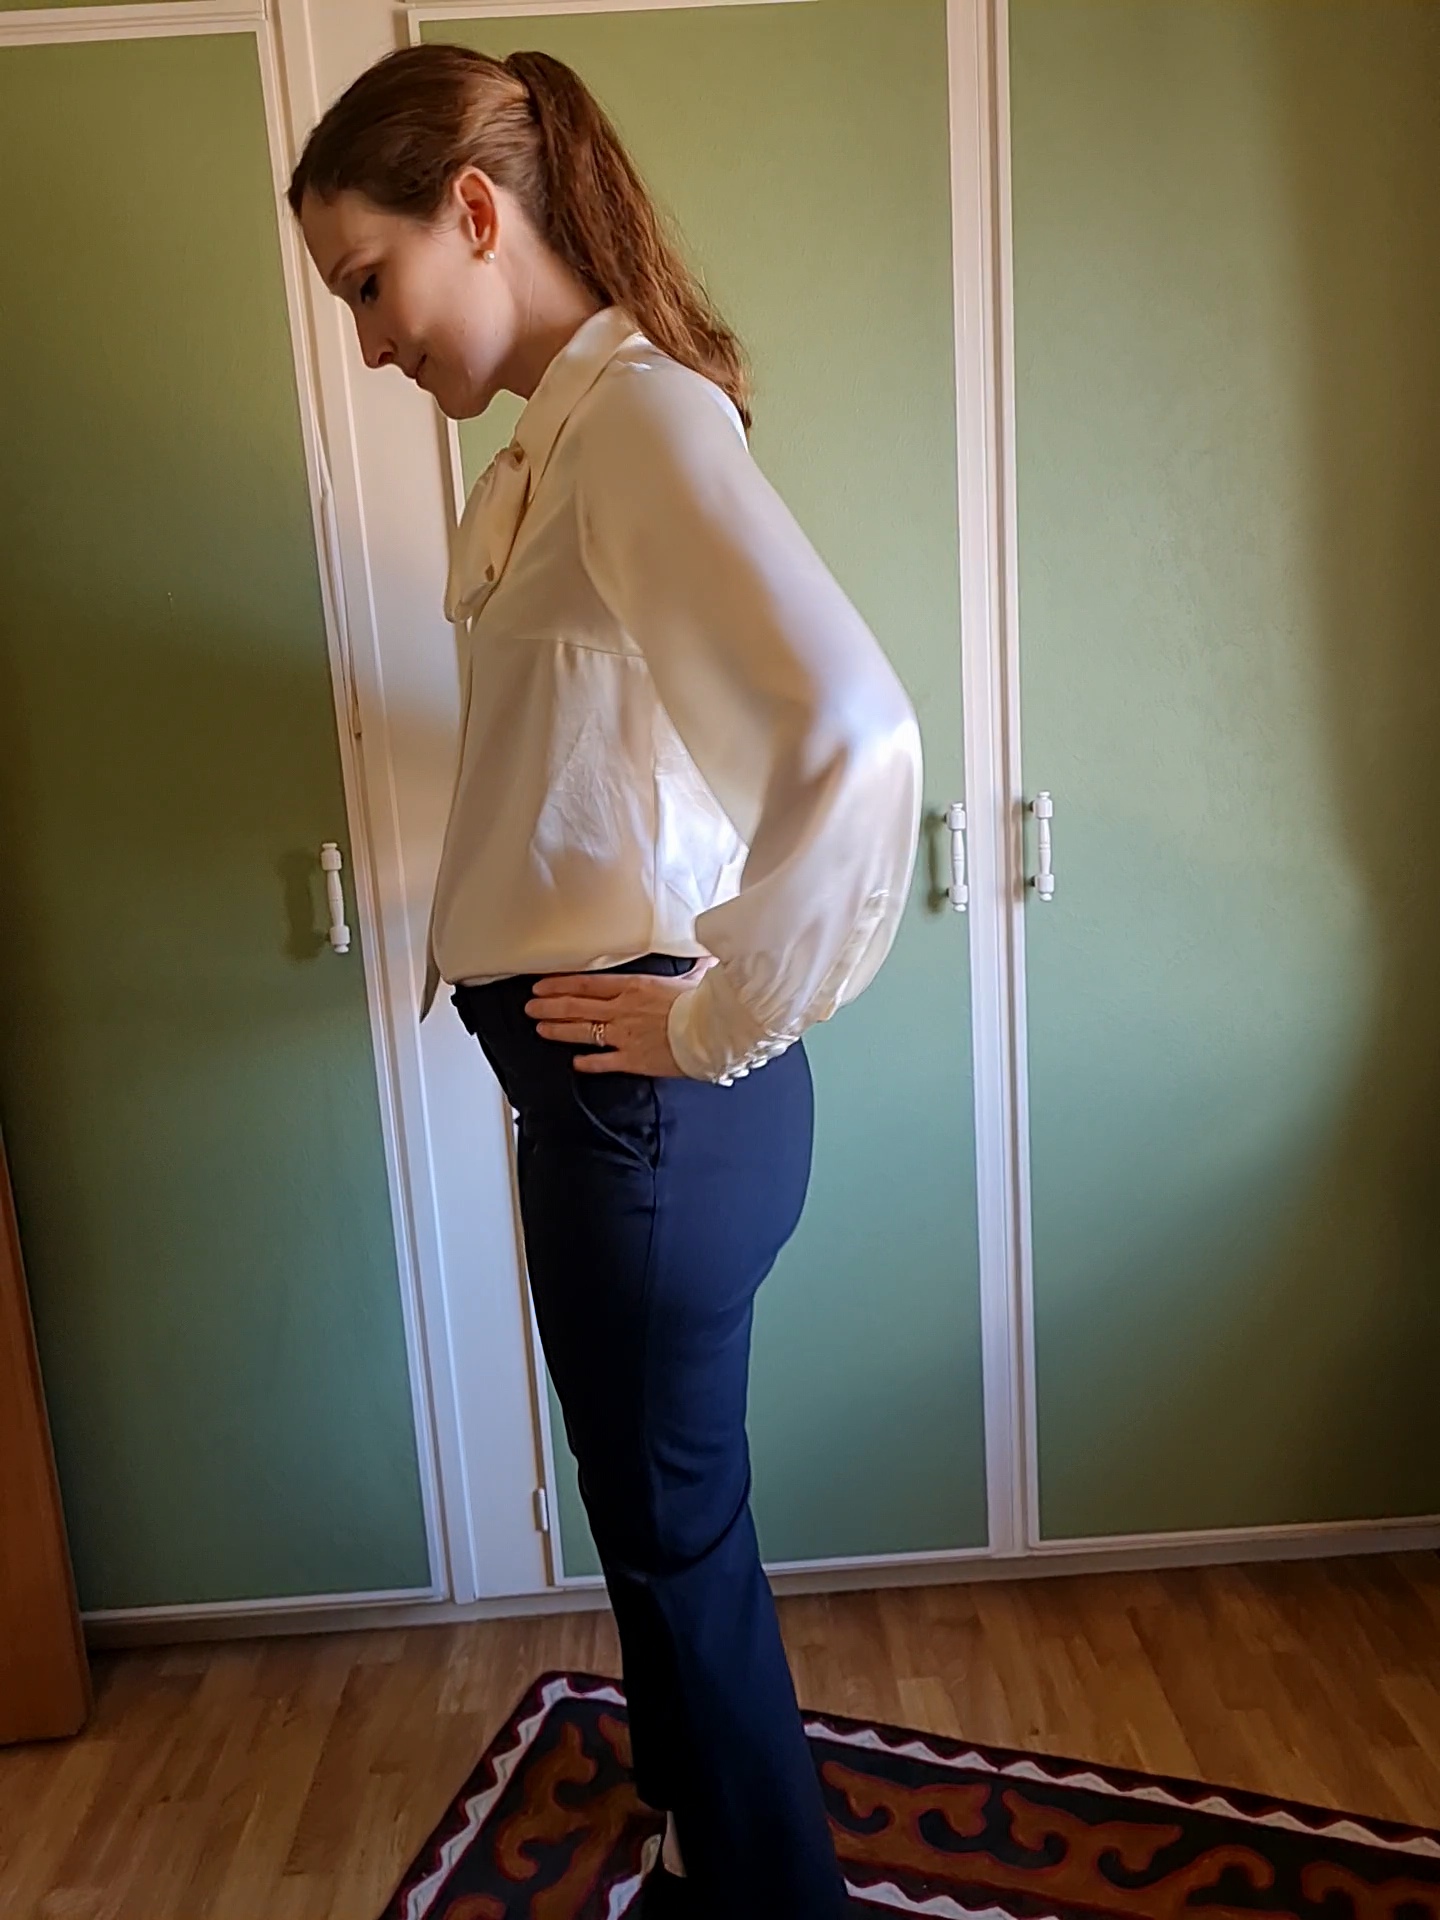
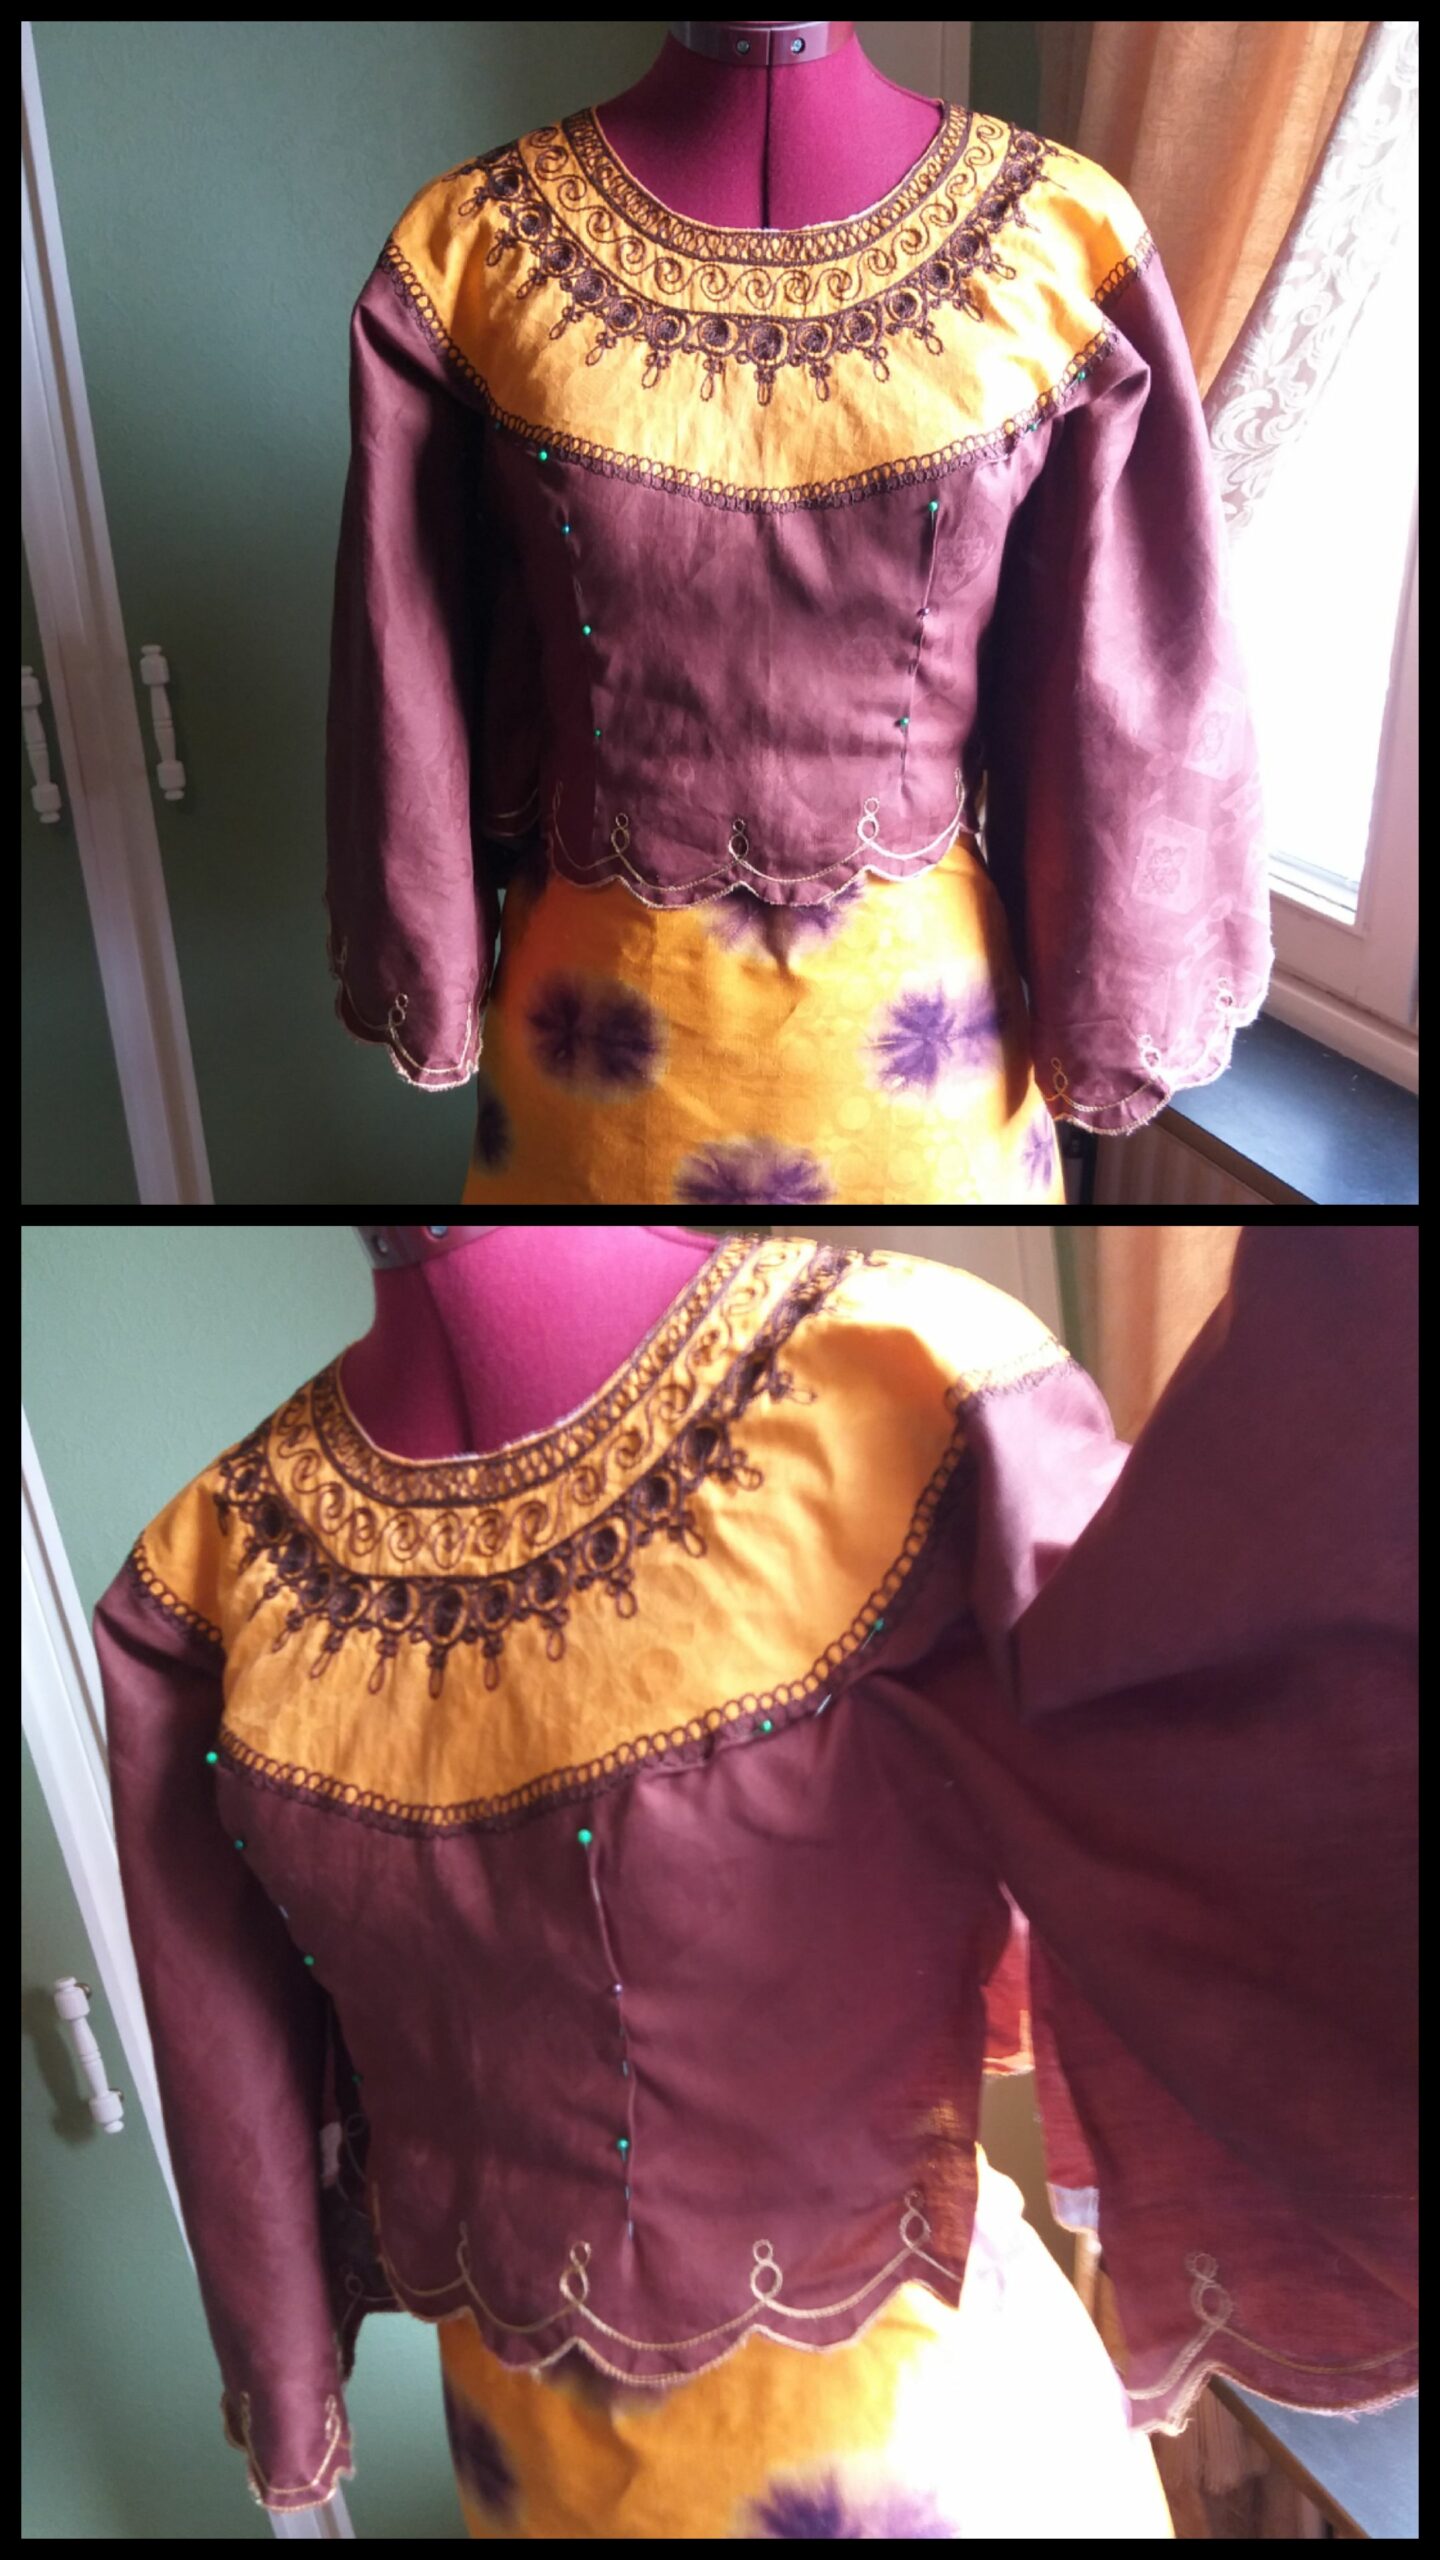
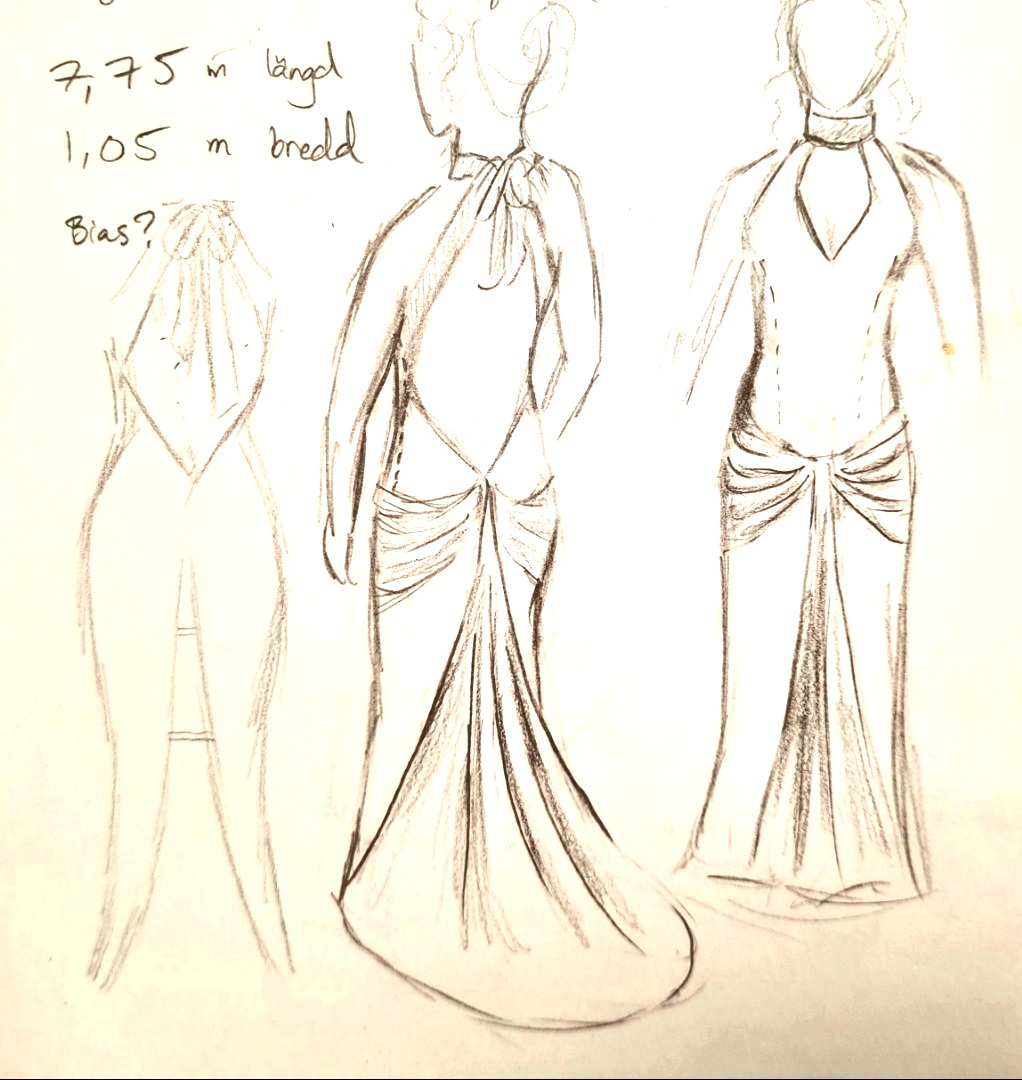
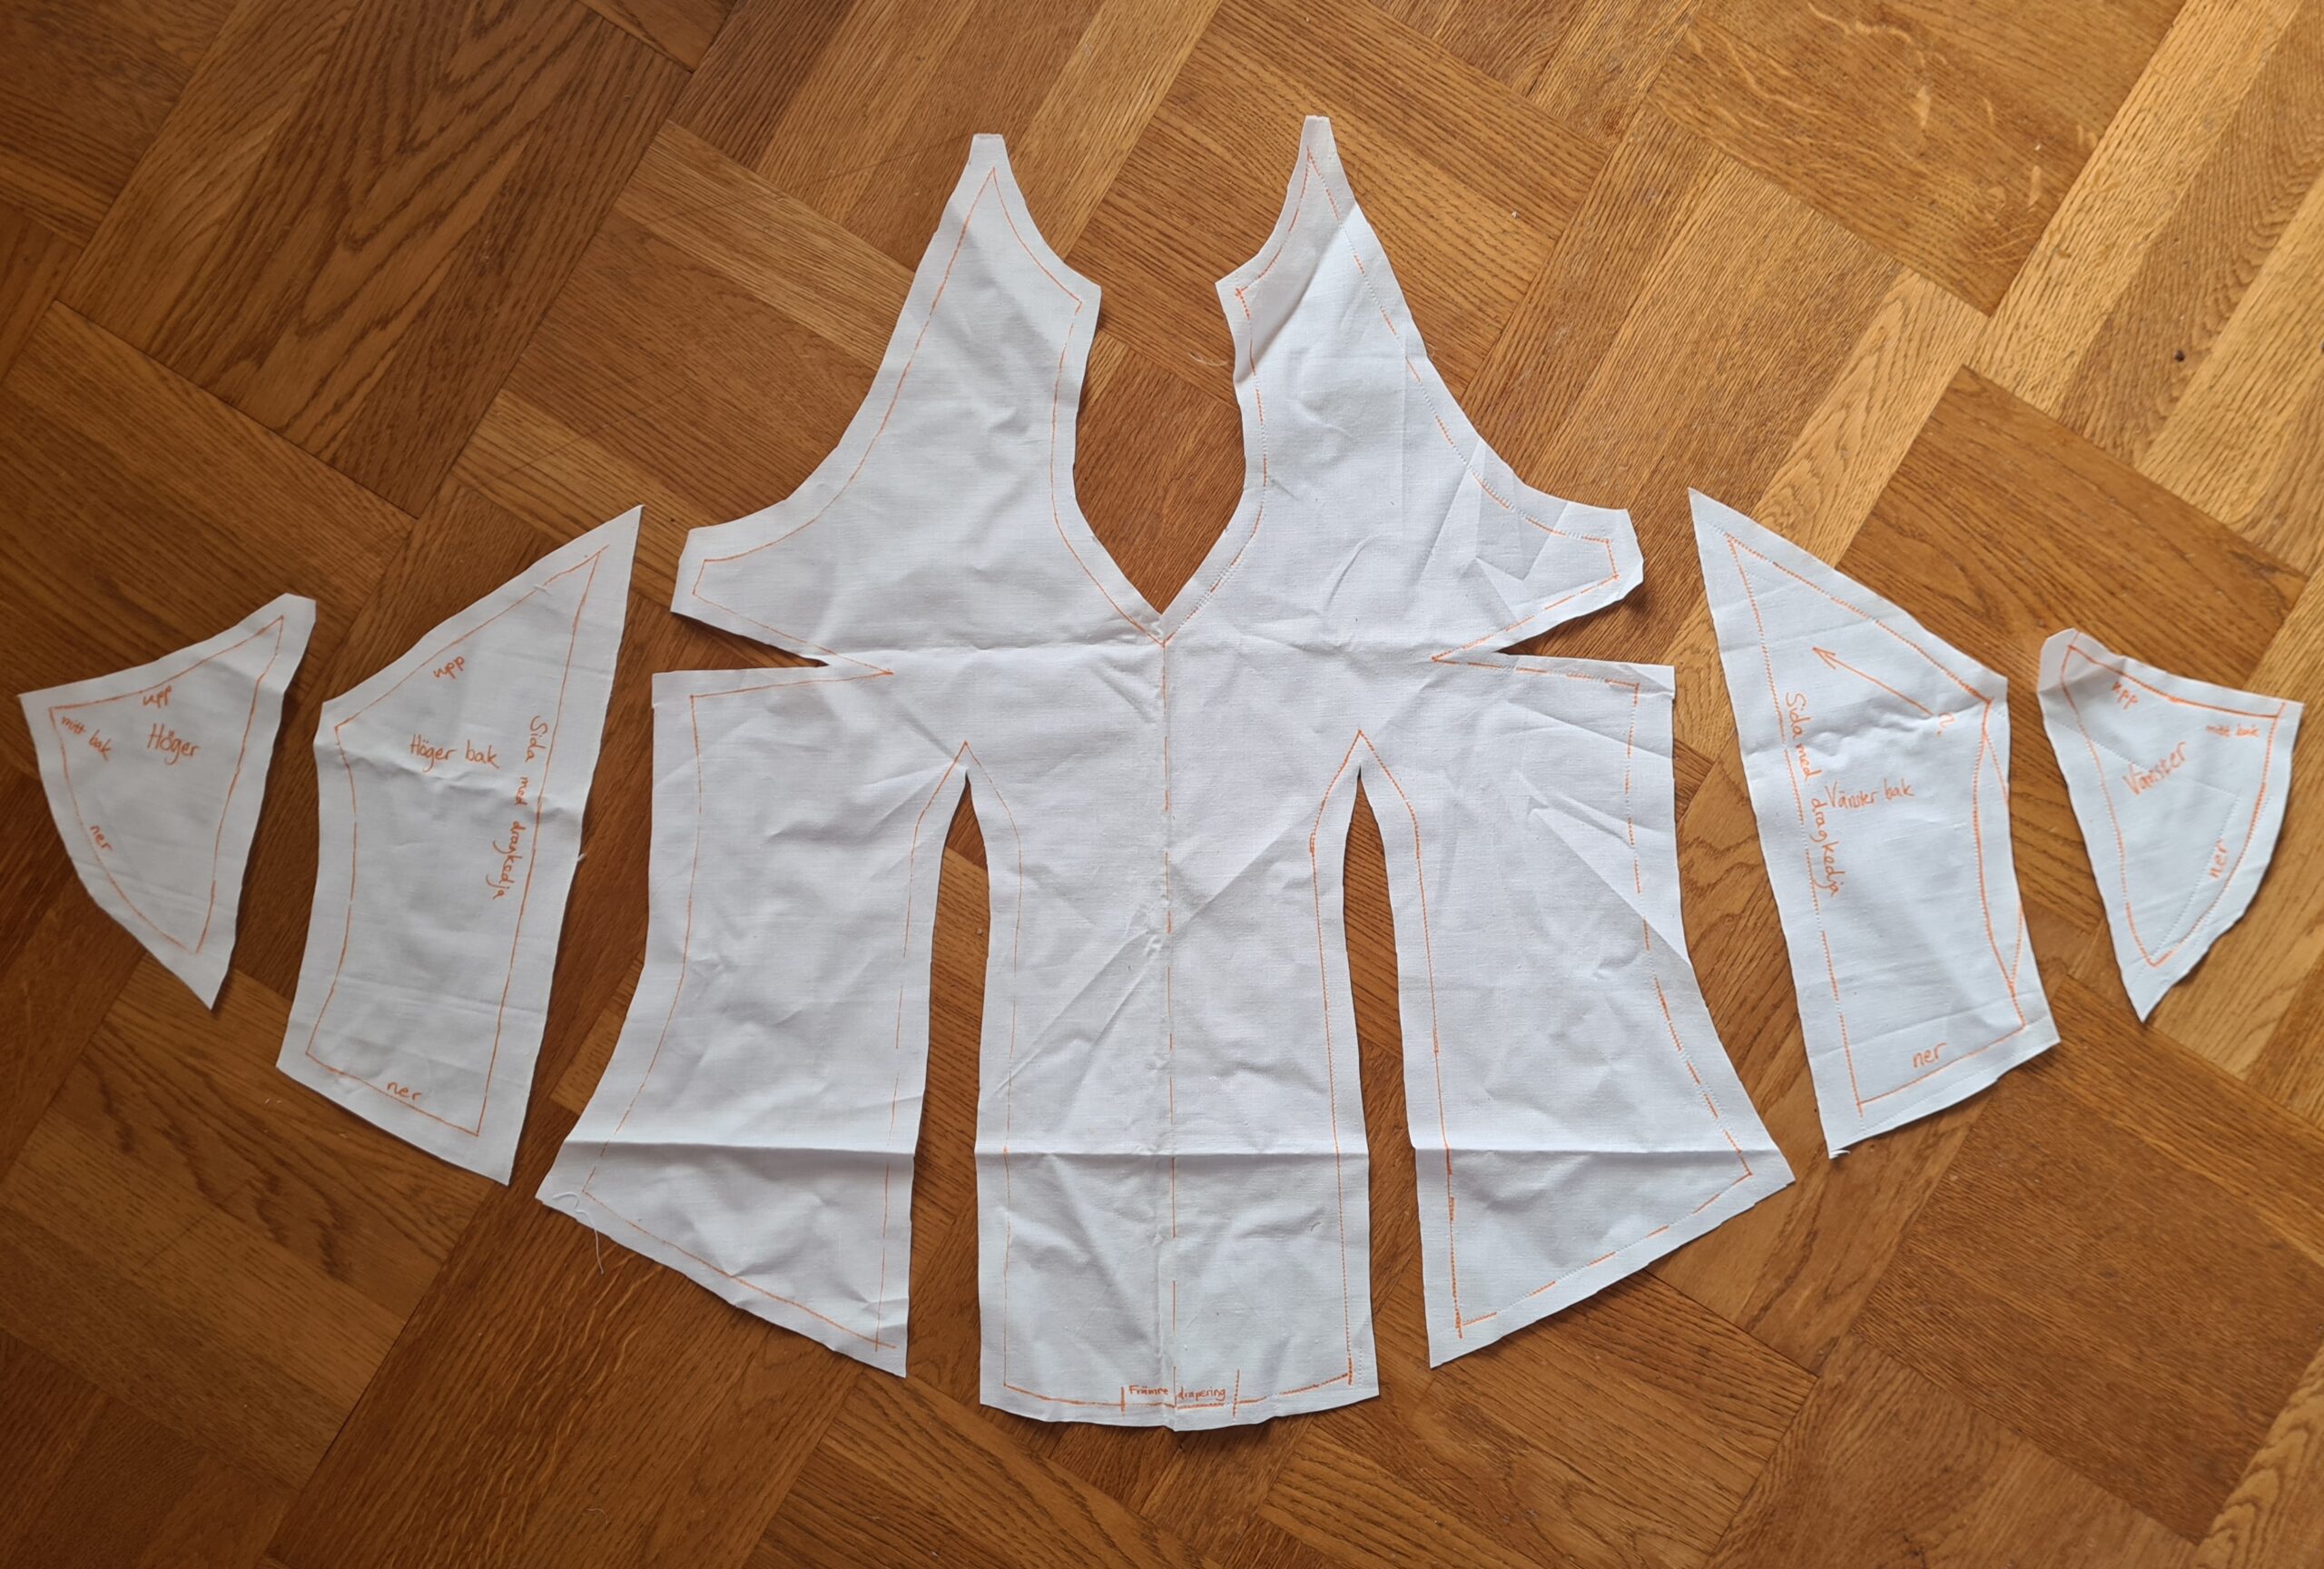
It was impossible to eliminate the wrinkles at the bust and waist with one front panel and two back panels. At last changed the inserts into side panels and the two back panels became four. After the second fitting, we had a almost finished pattern.
Det var omöjligt att eliminera rynkorna kring byst och midja med en panel fram och två bak. Till slut ändrade jag till tre paneler fram och fyra bak. Efter andra provningen var mönstret typ färdigt.
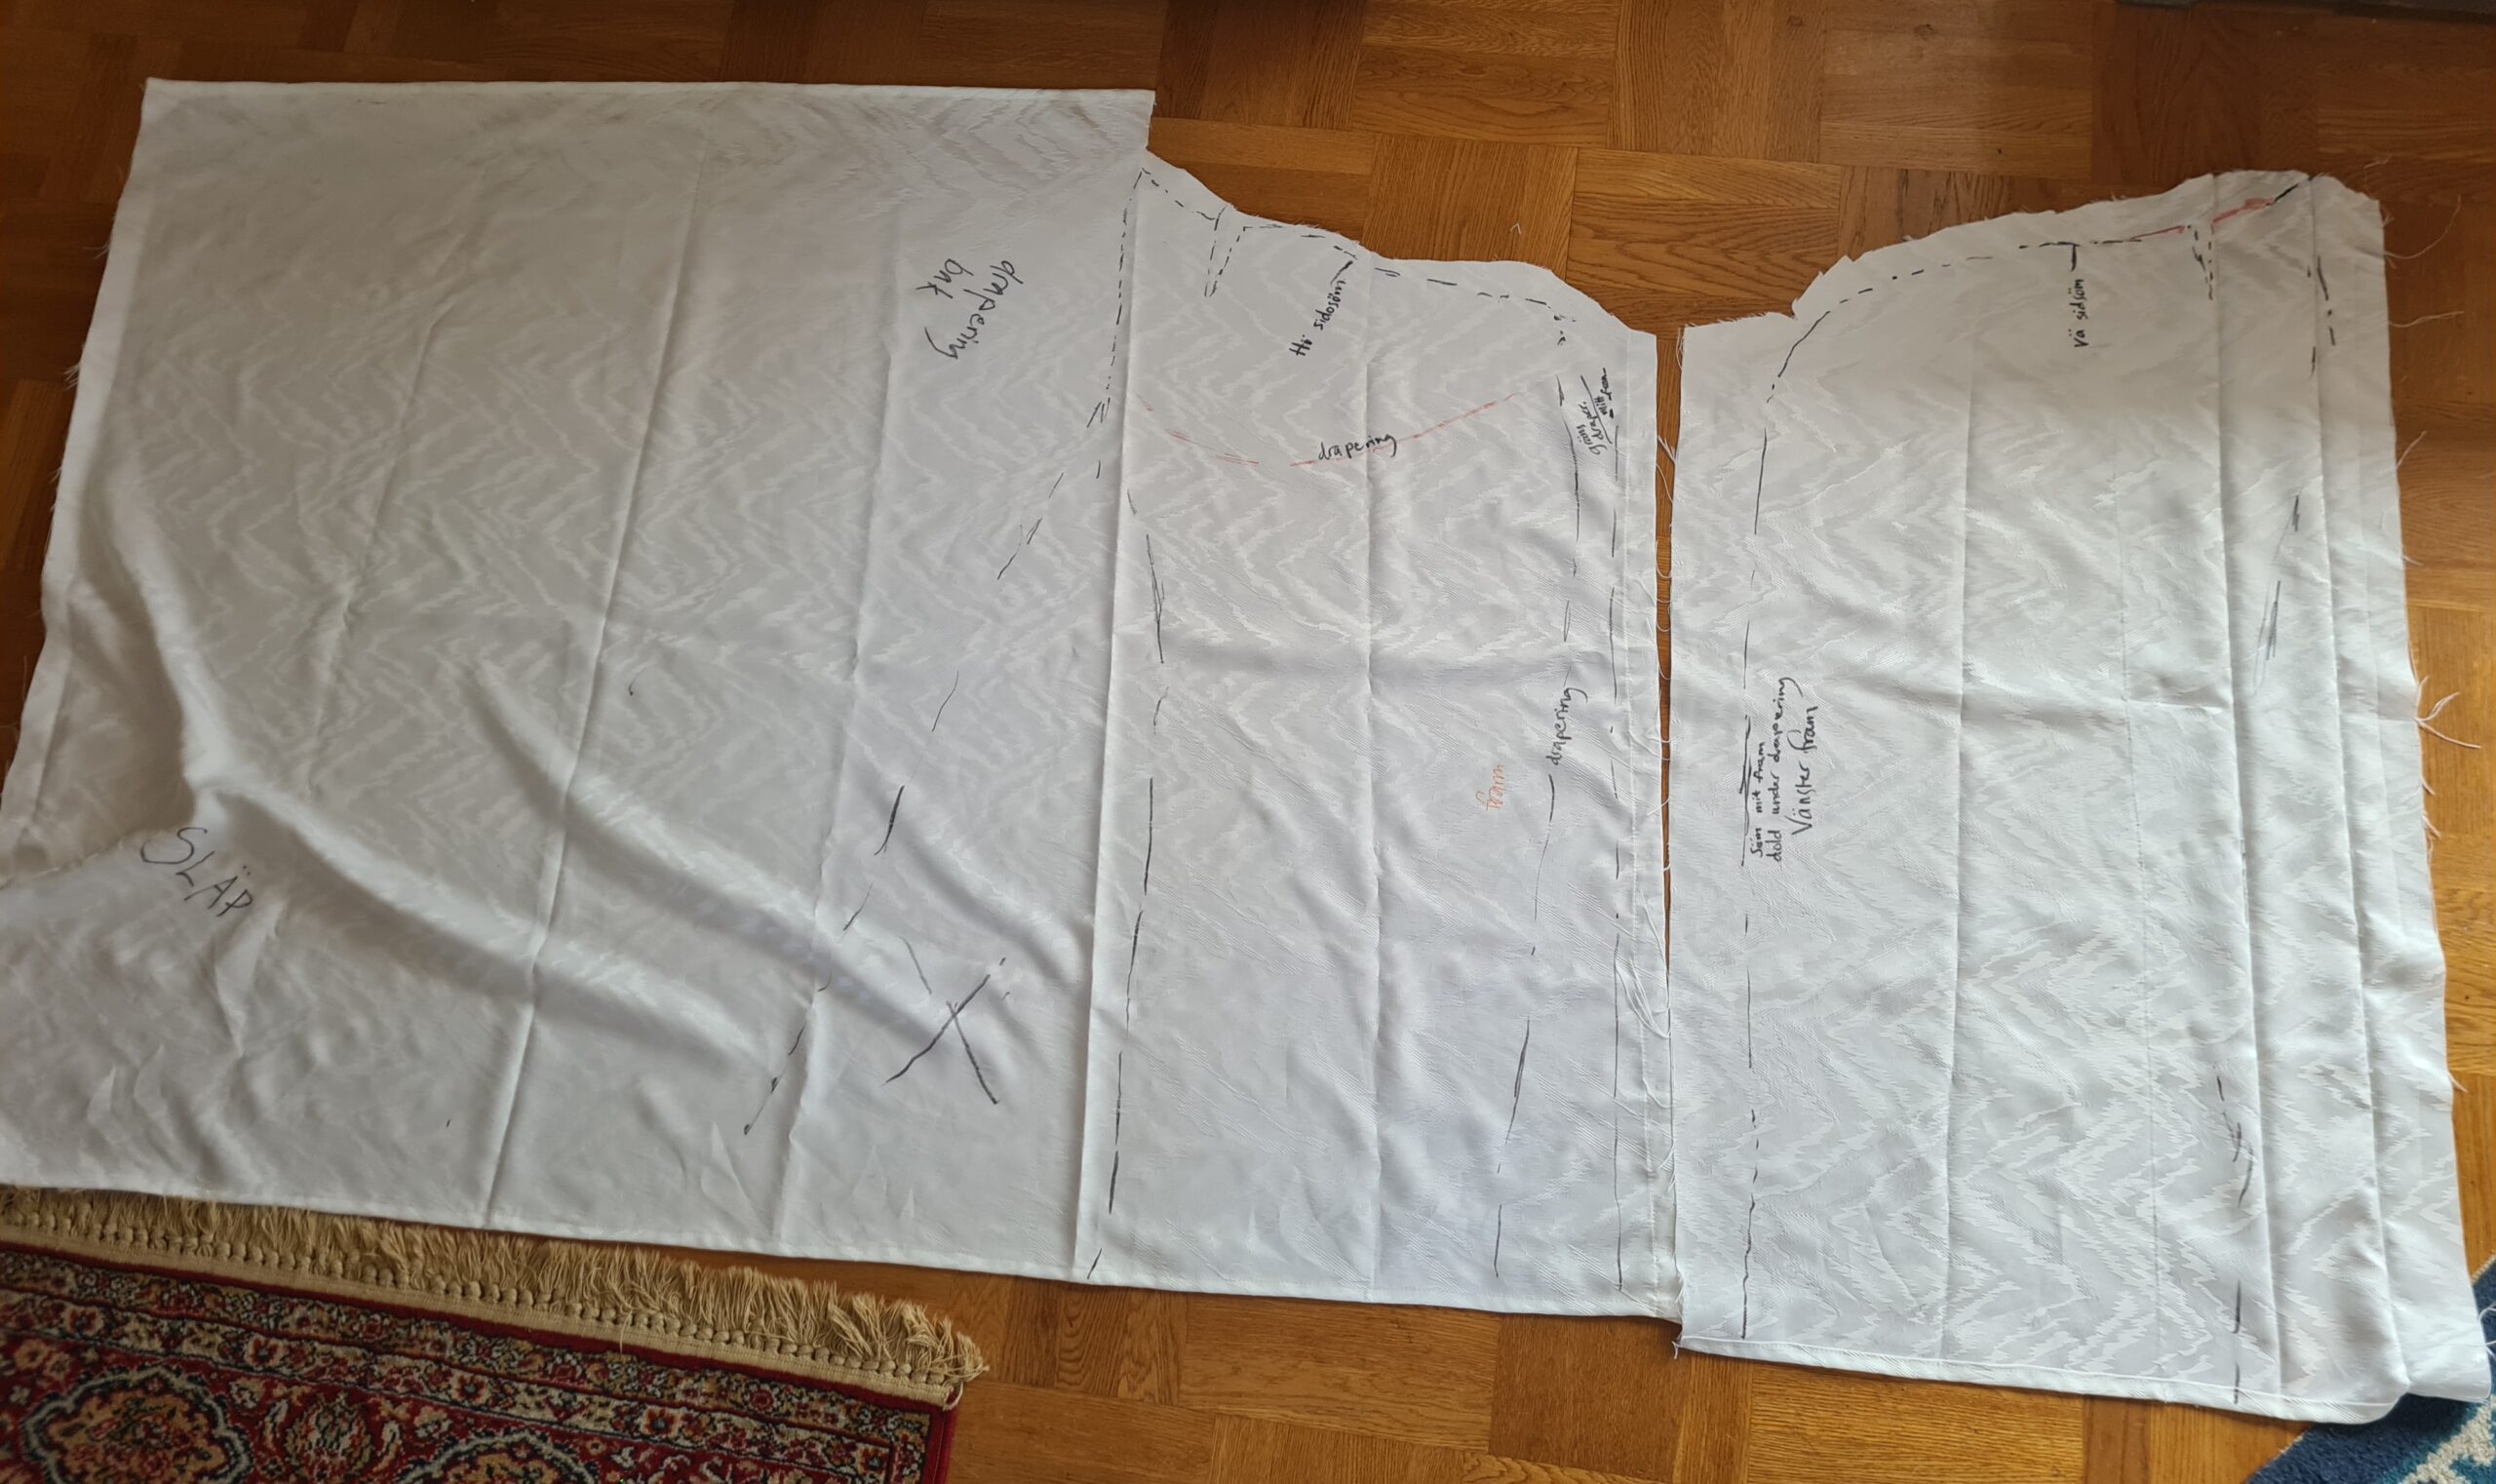
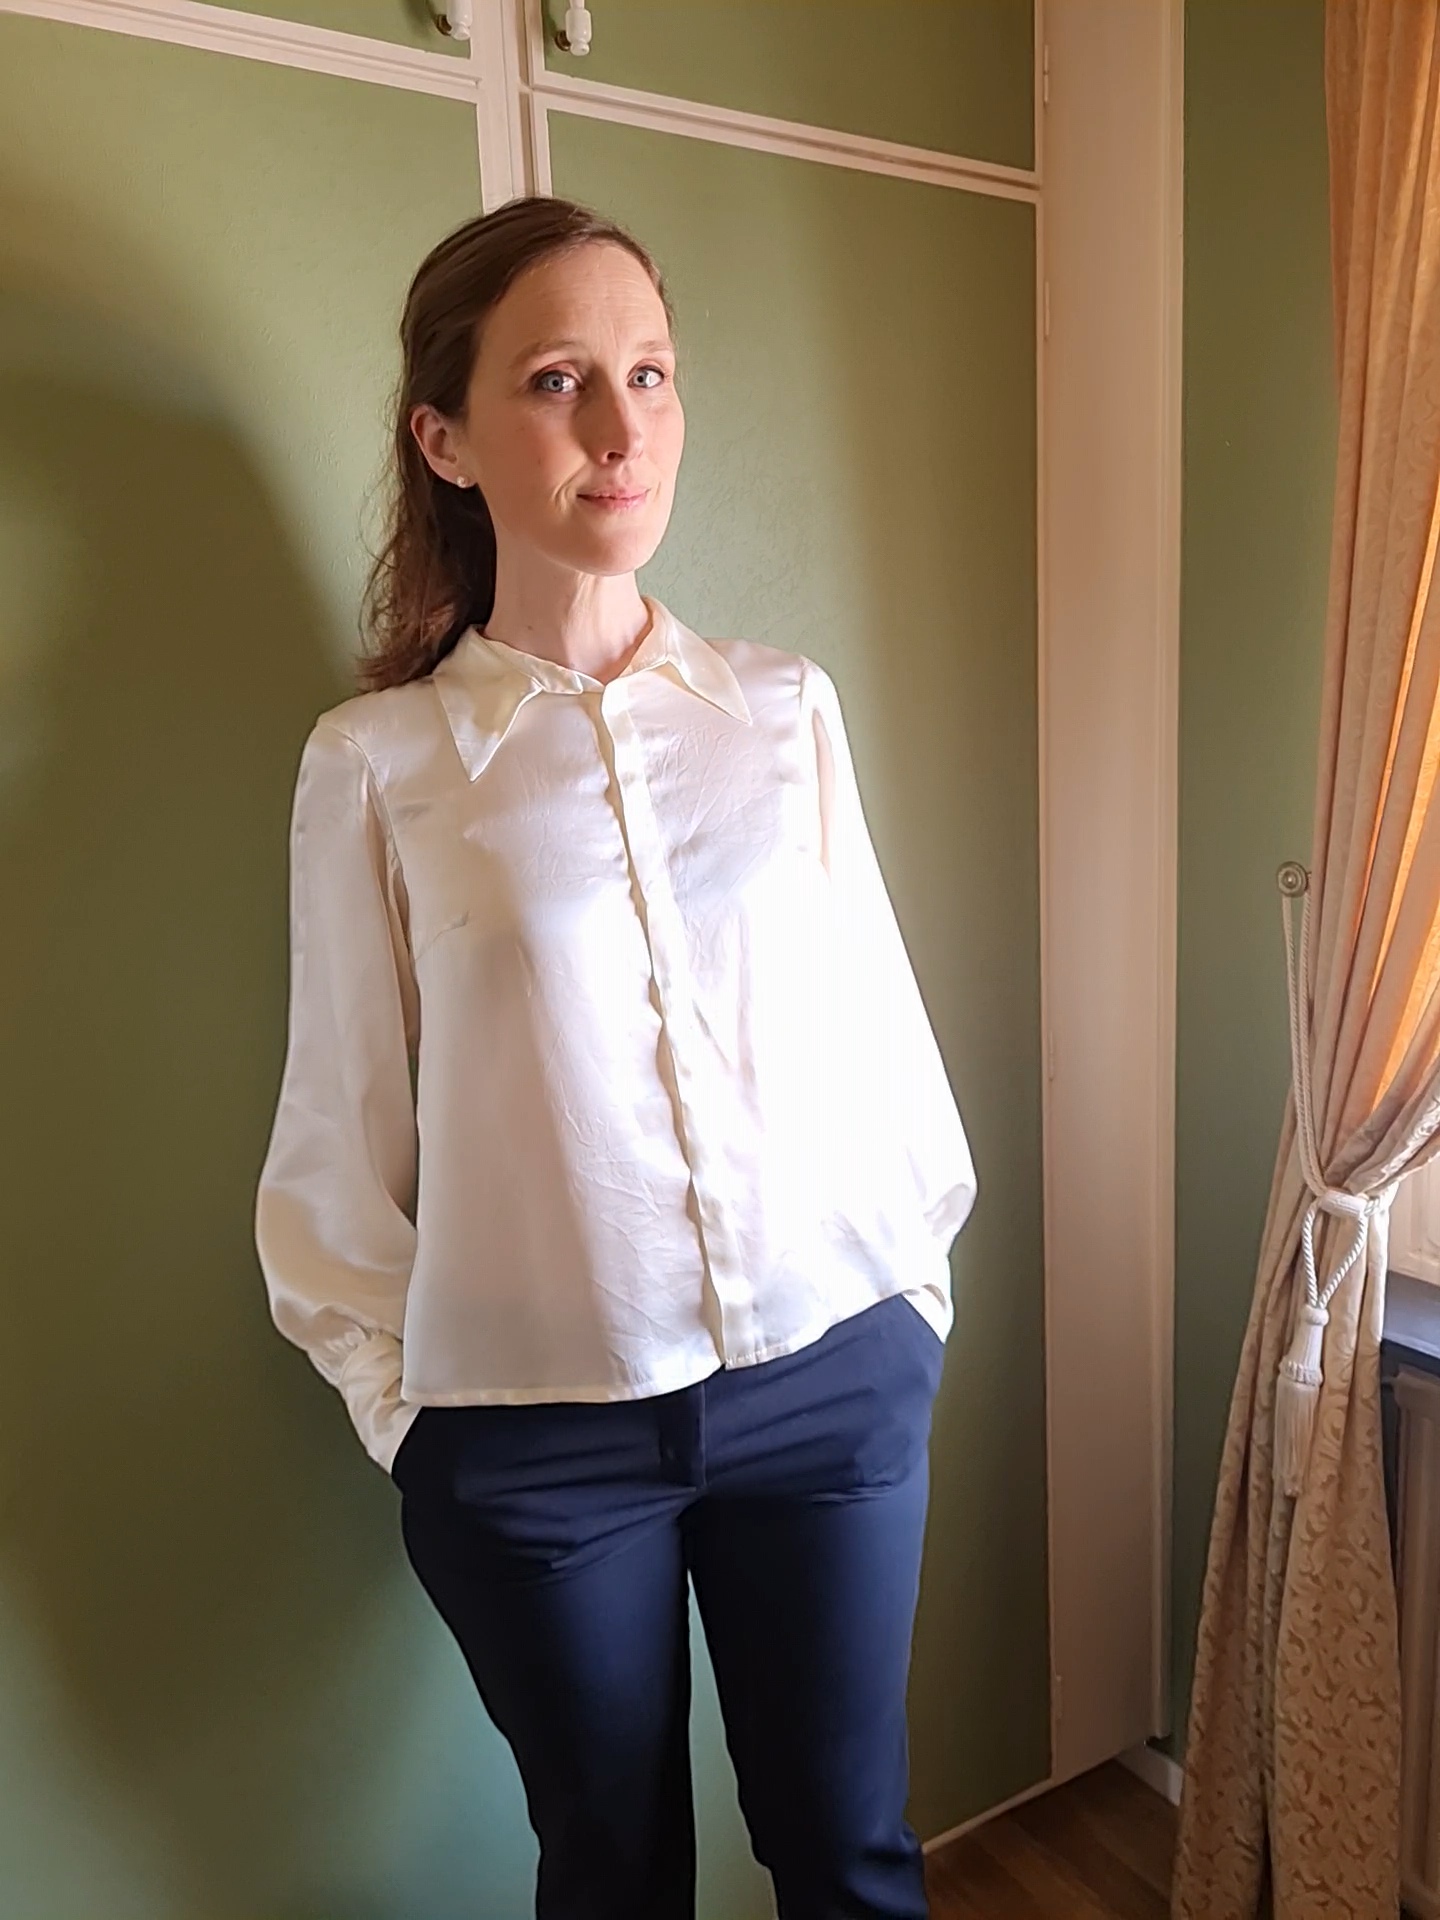
After the third fitting, it was time for cutting the beautiful fabric. 😬
Efter tredje provningen satt allt perfekt och jag var redo att klippa i det vackra tyget. 😬
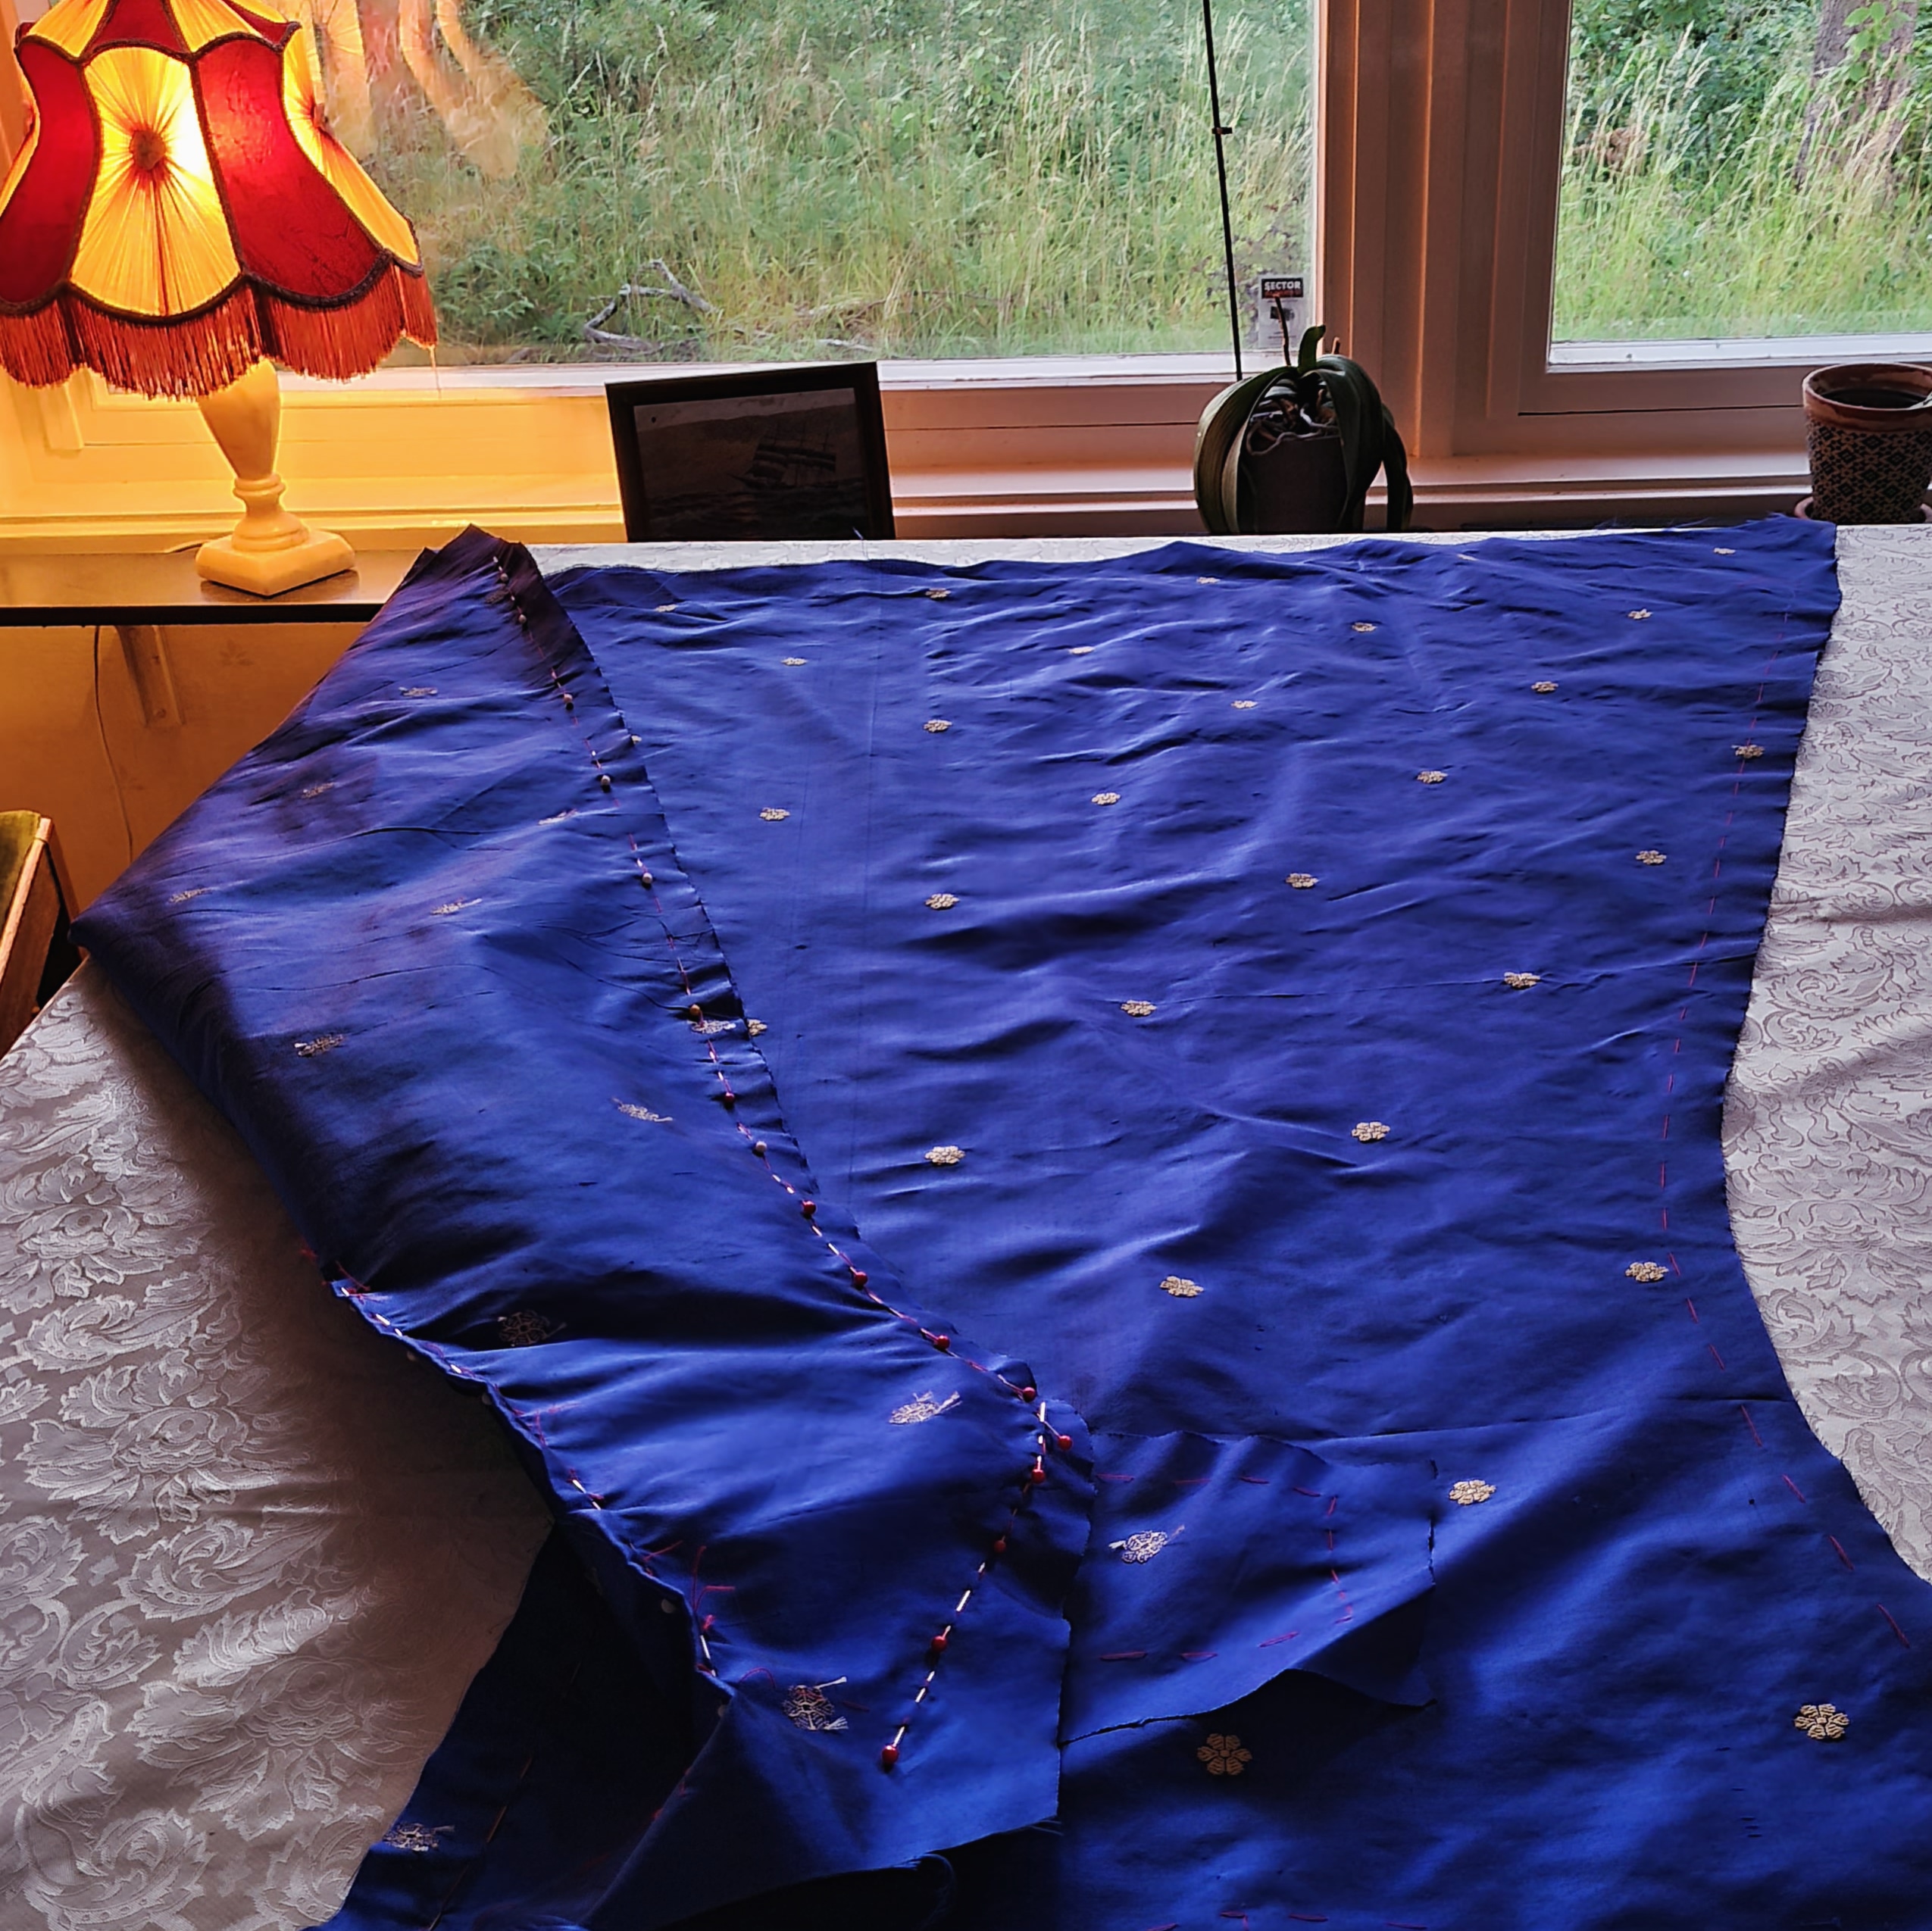
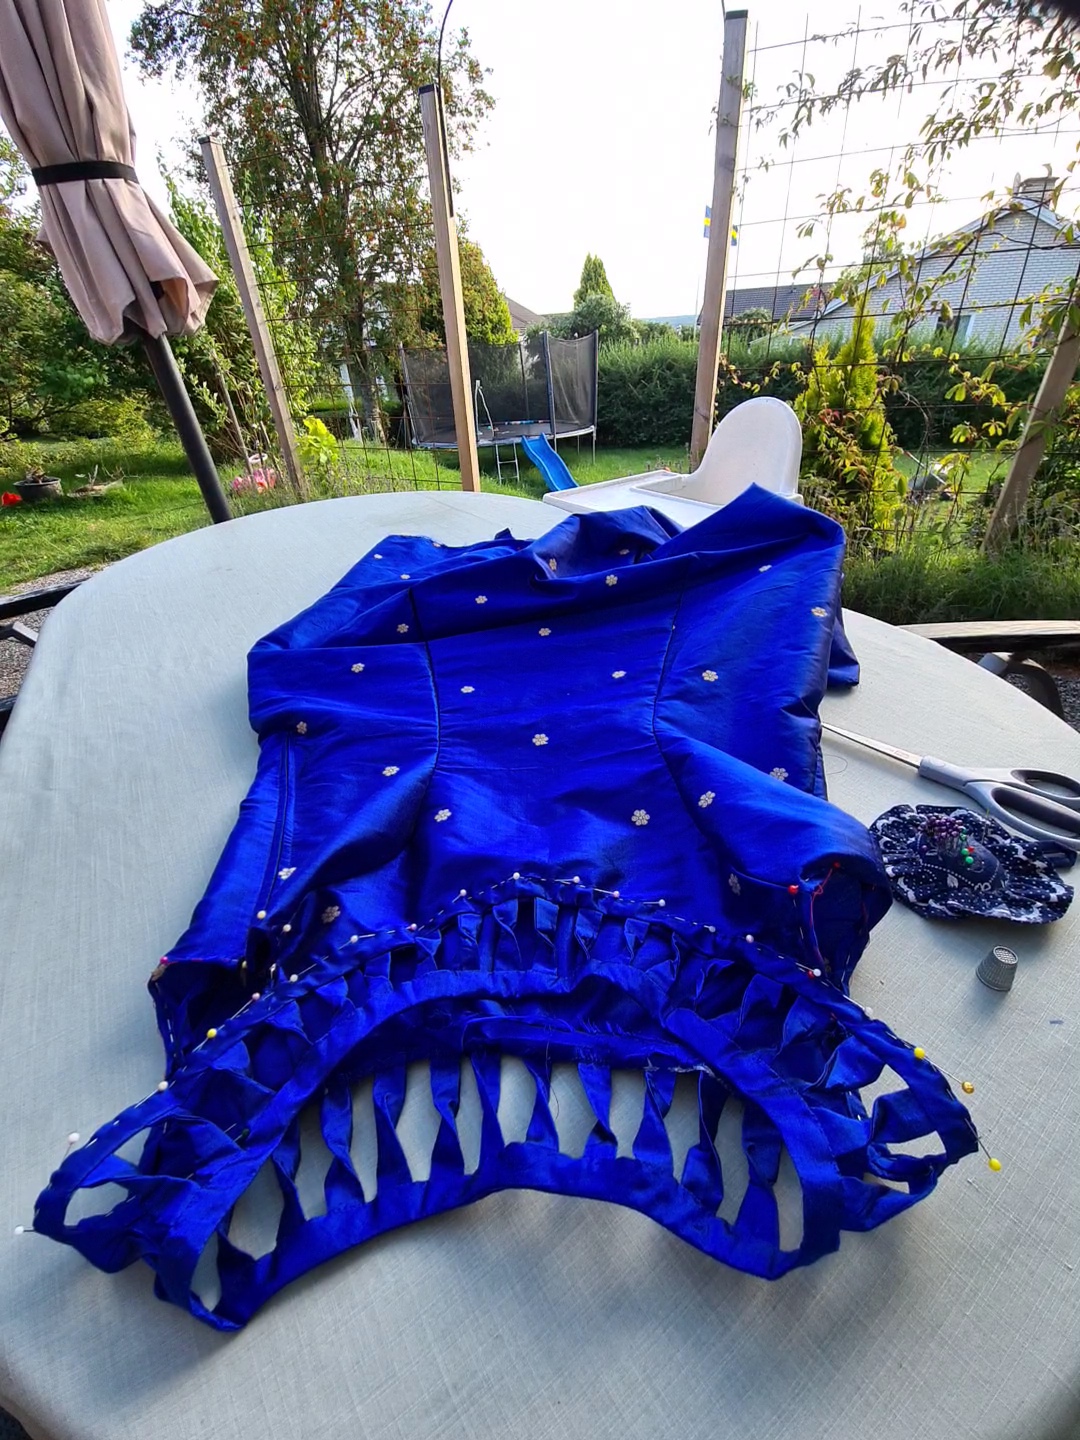
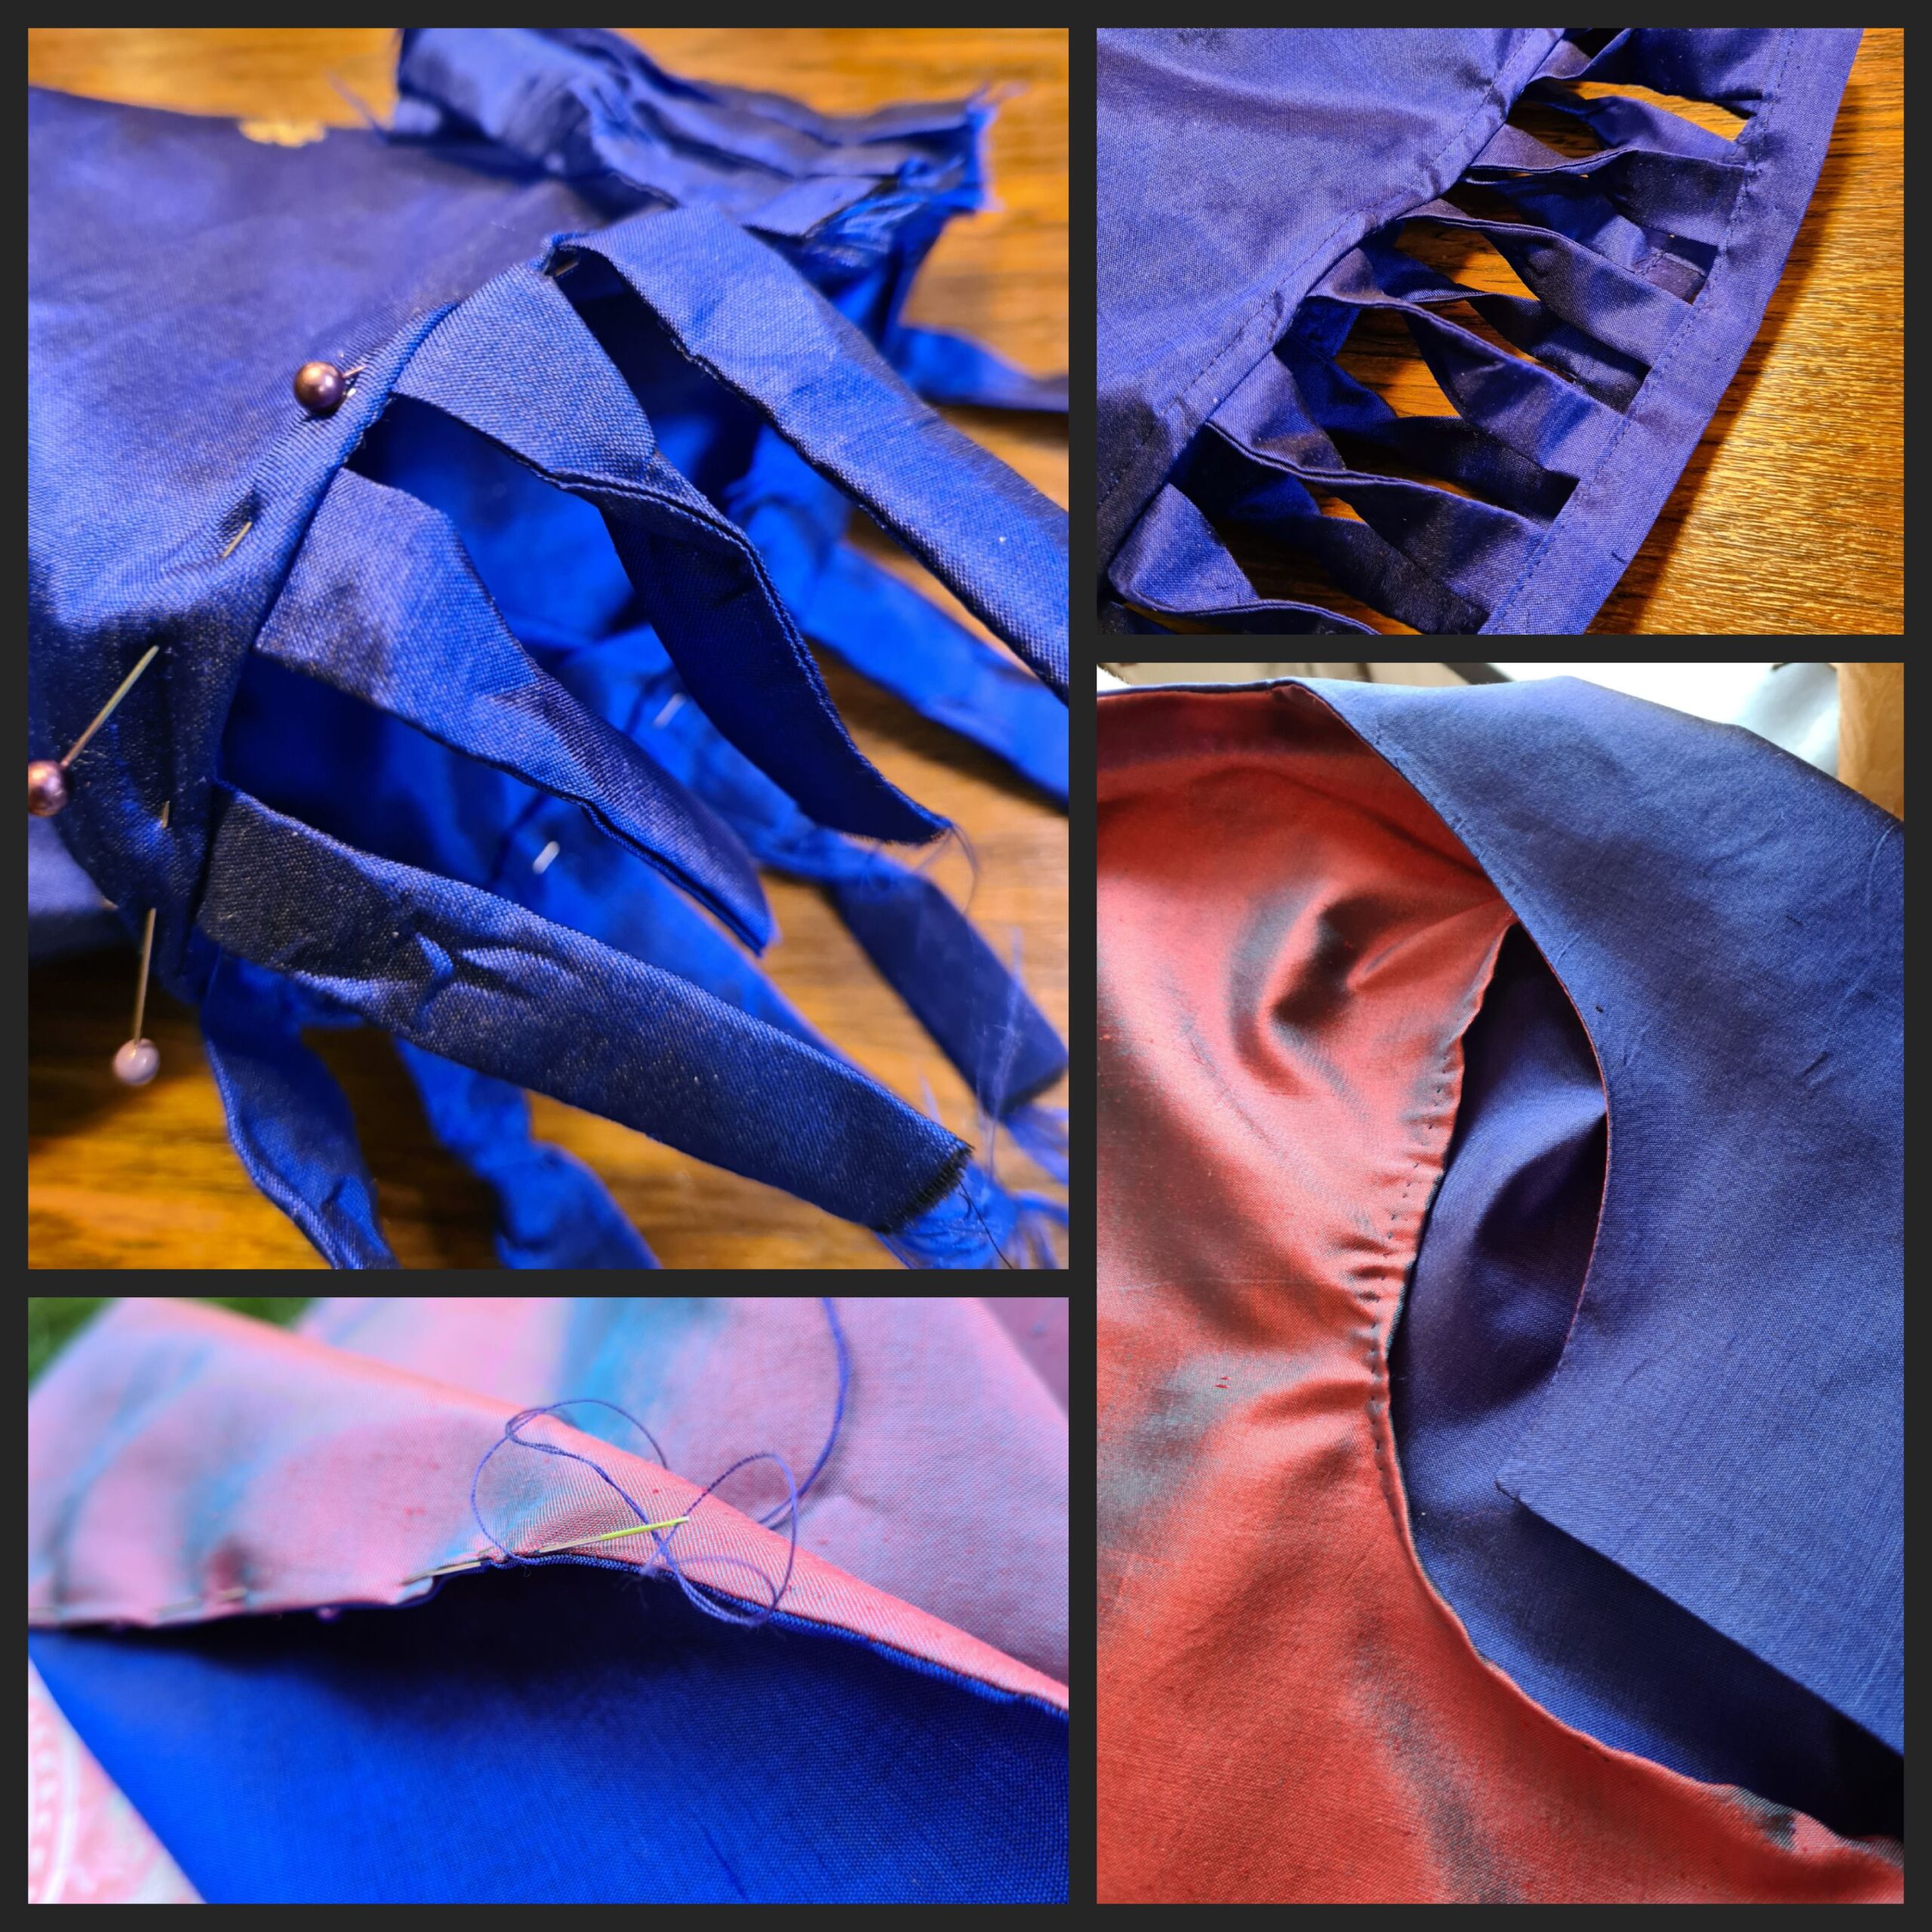
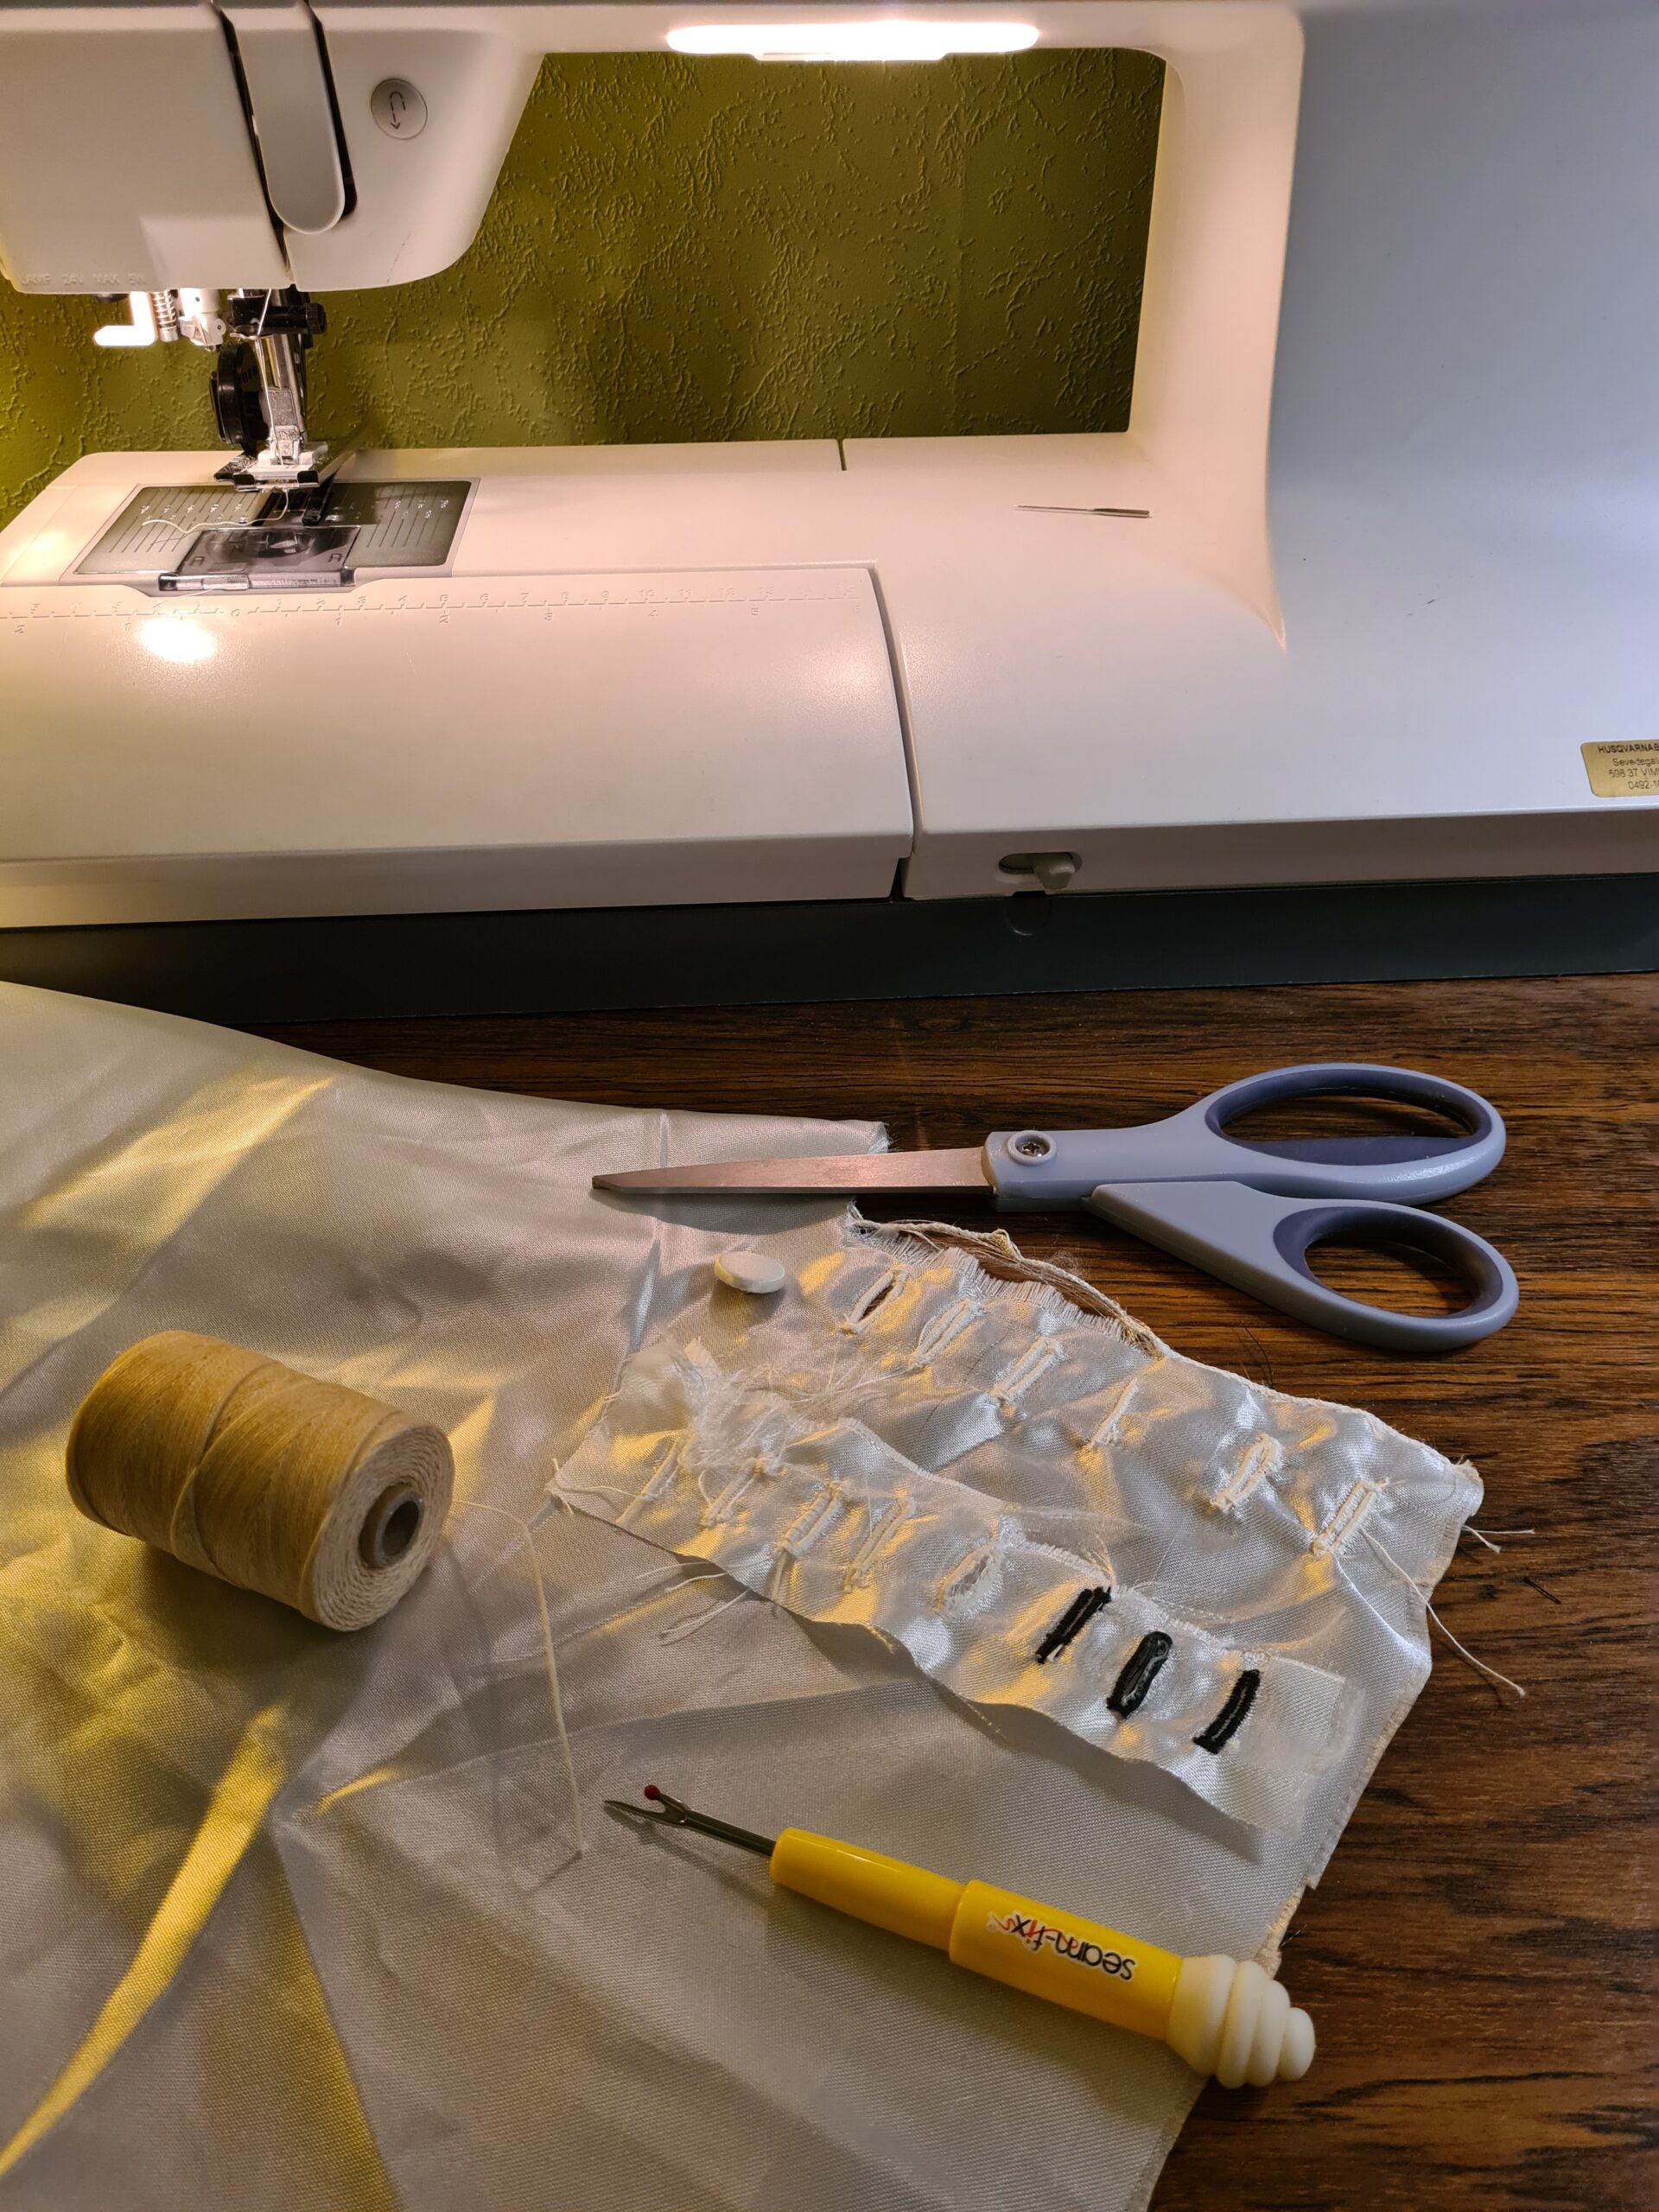
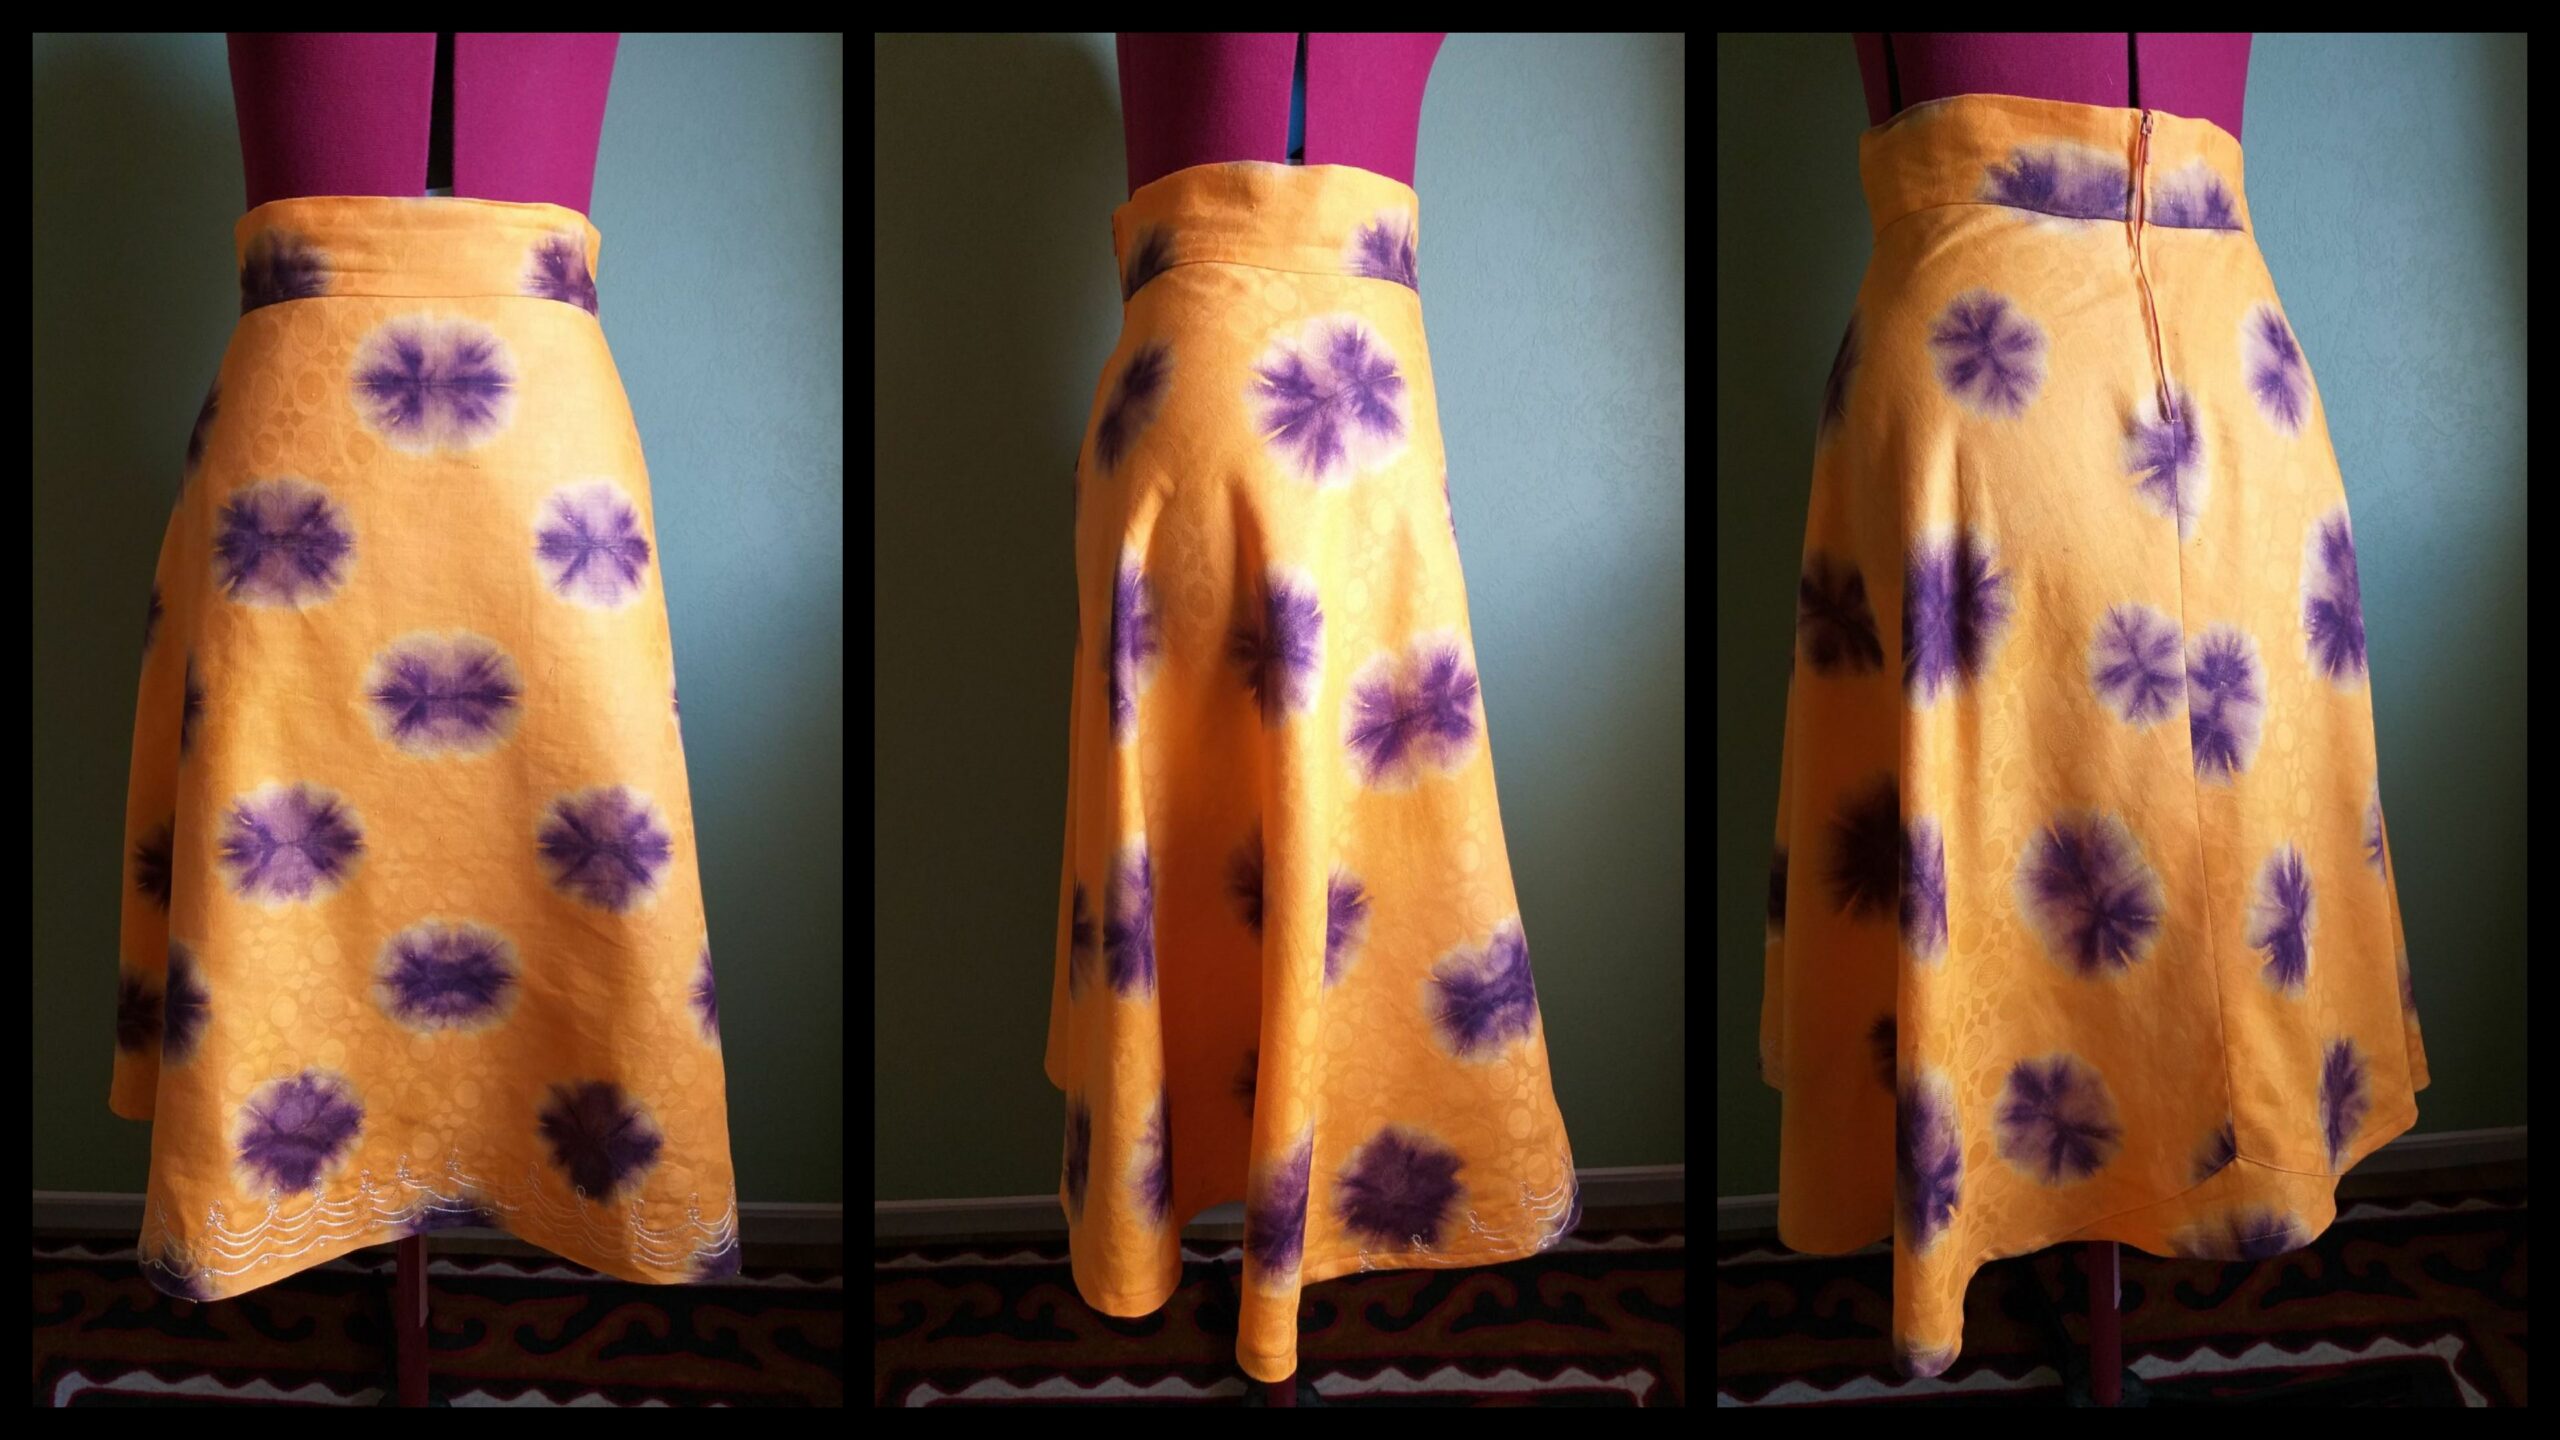
In order not to damage the moody fabric and keep the markings throughout the whole process, I tacked everything except for the lide seams of the skirt.
För att undnvika att förstöra tyget och för att inte markeringarna skulle försvinna under processen, använde jag mig av “tacking” (markera med sömmar, typ).

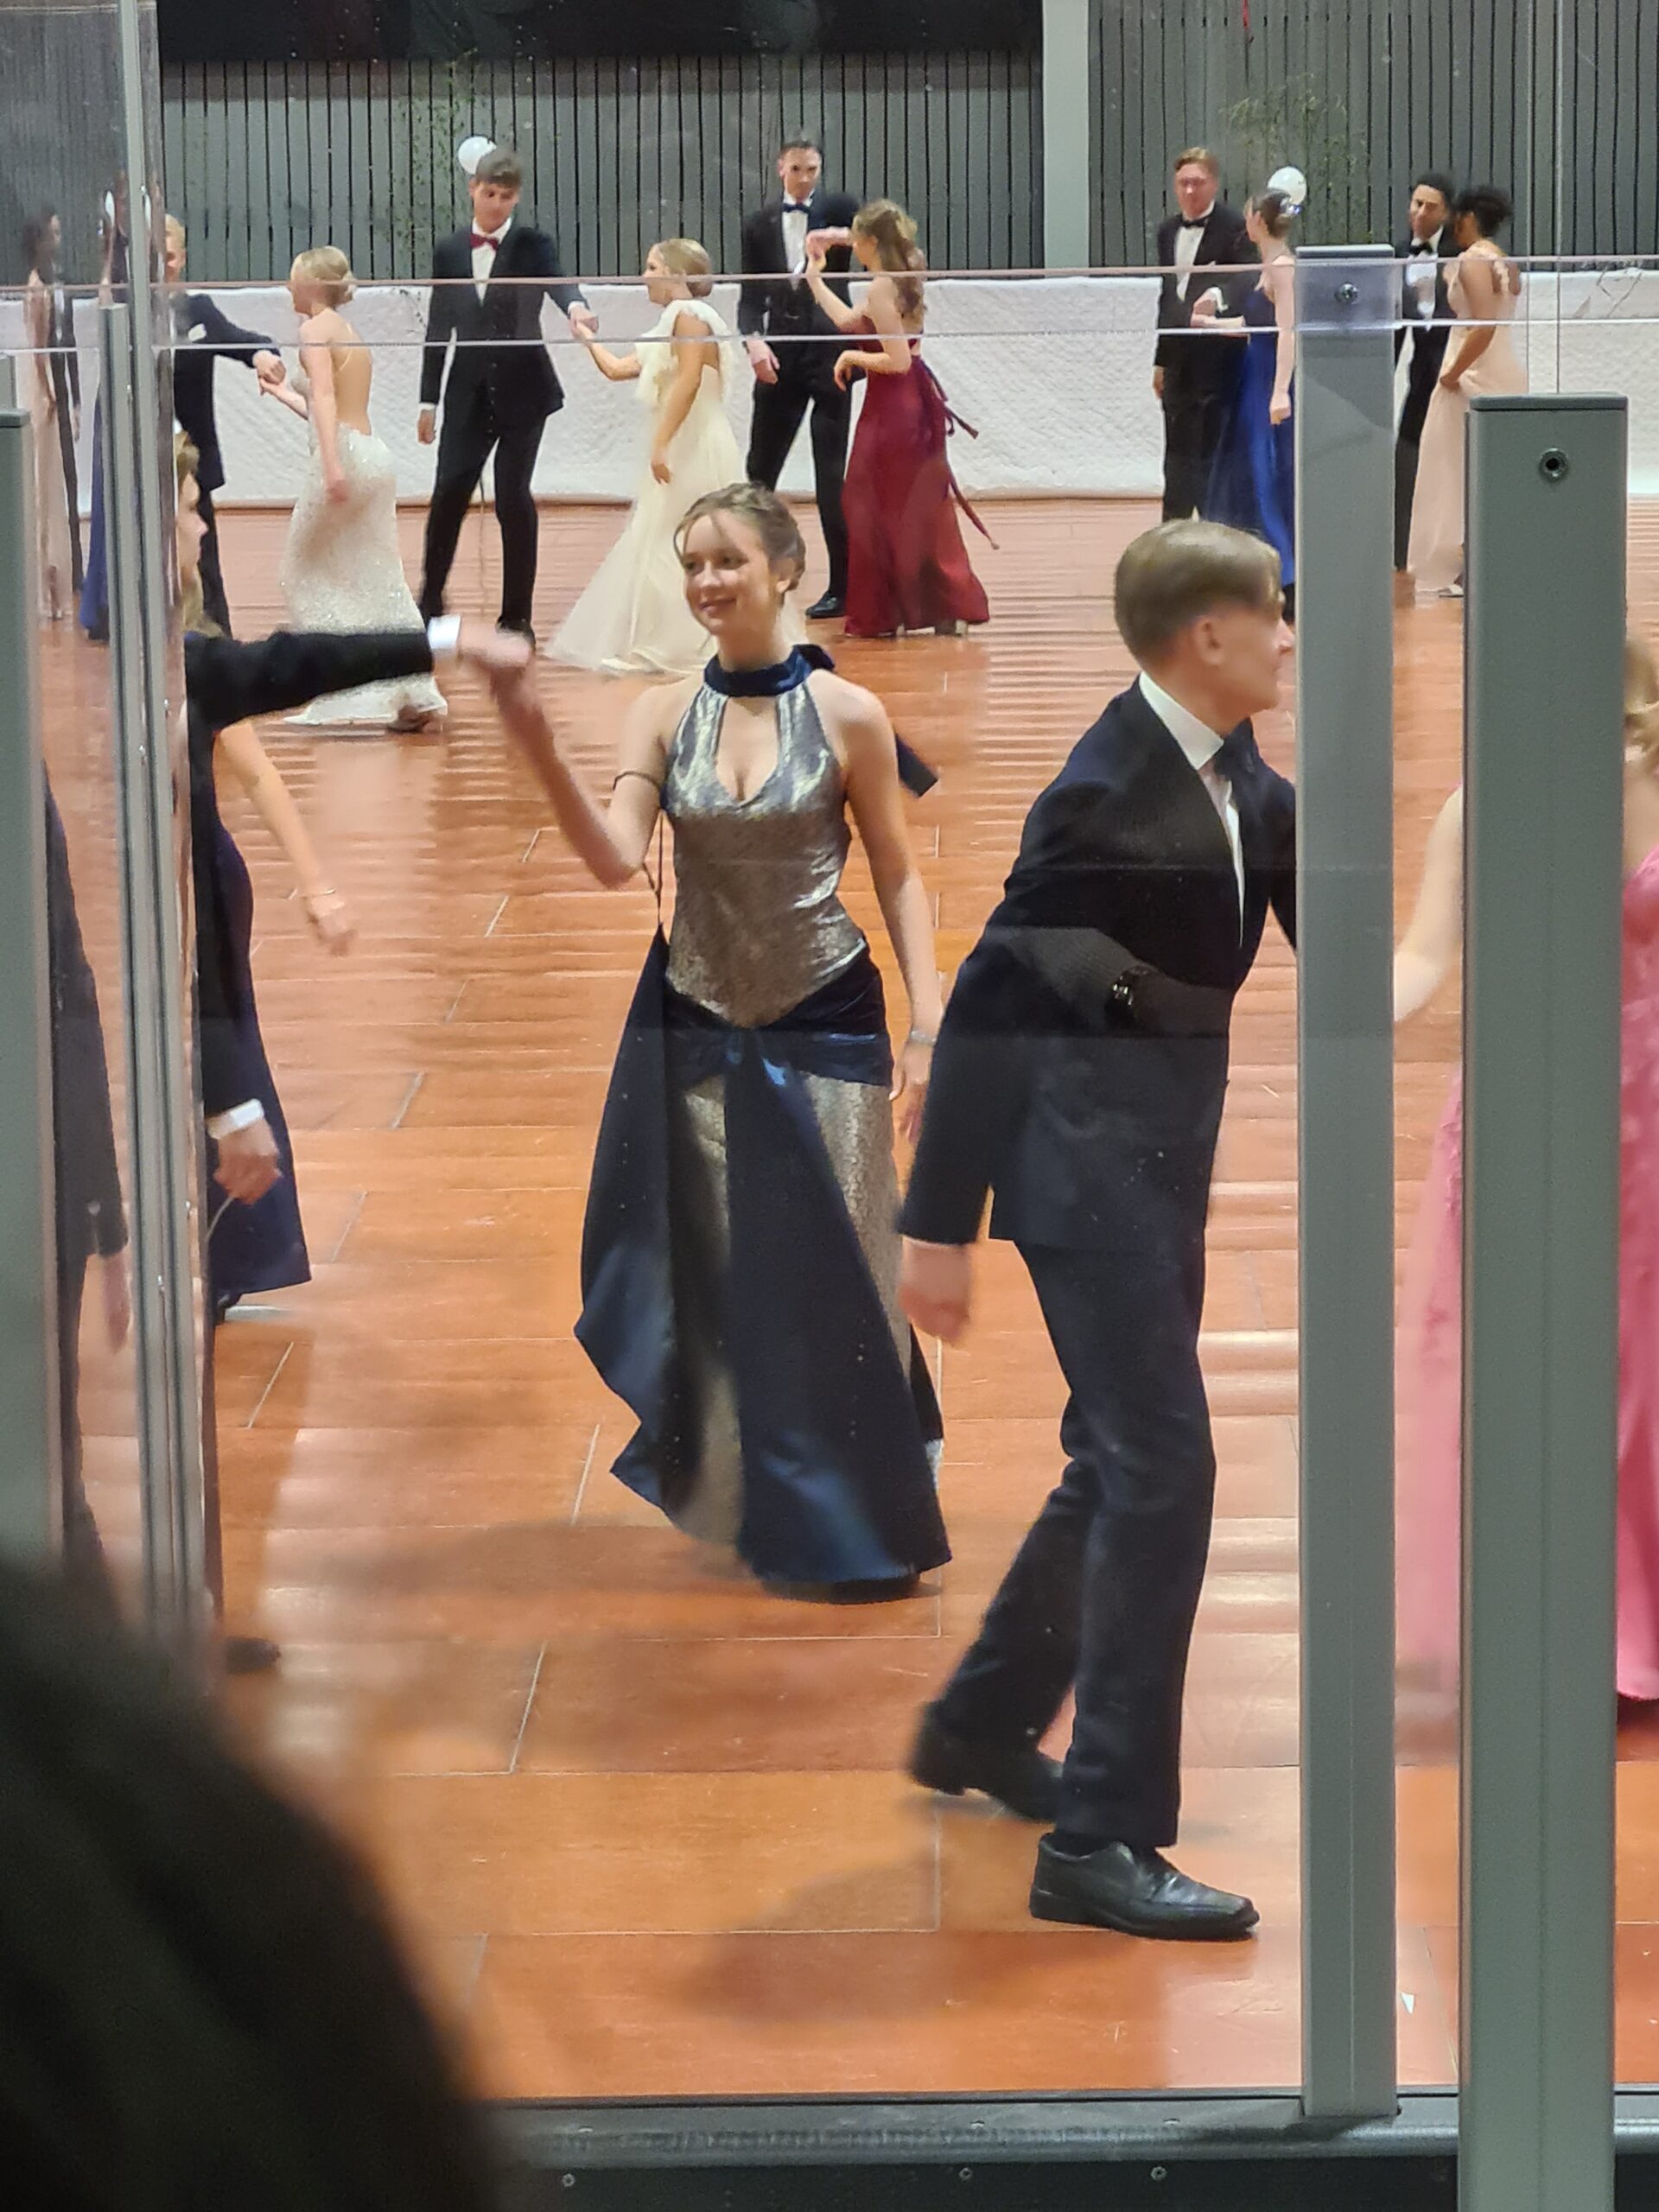
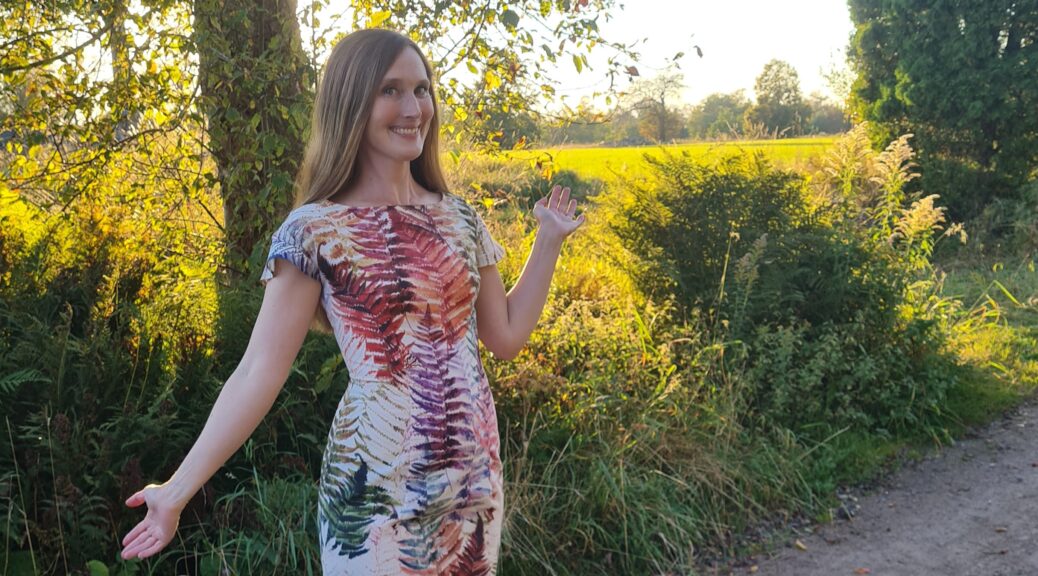
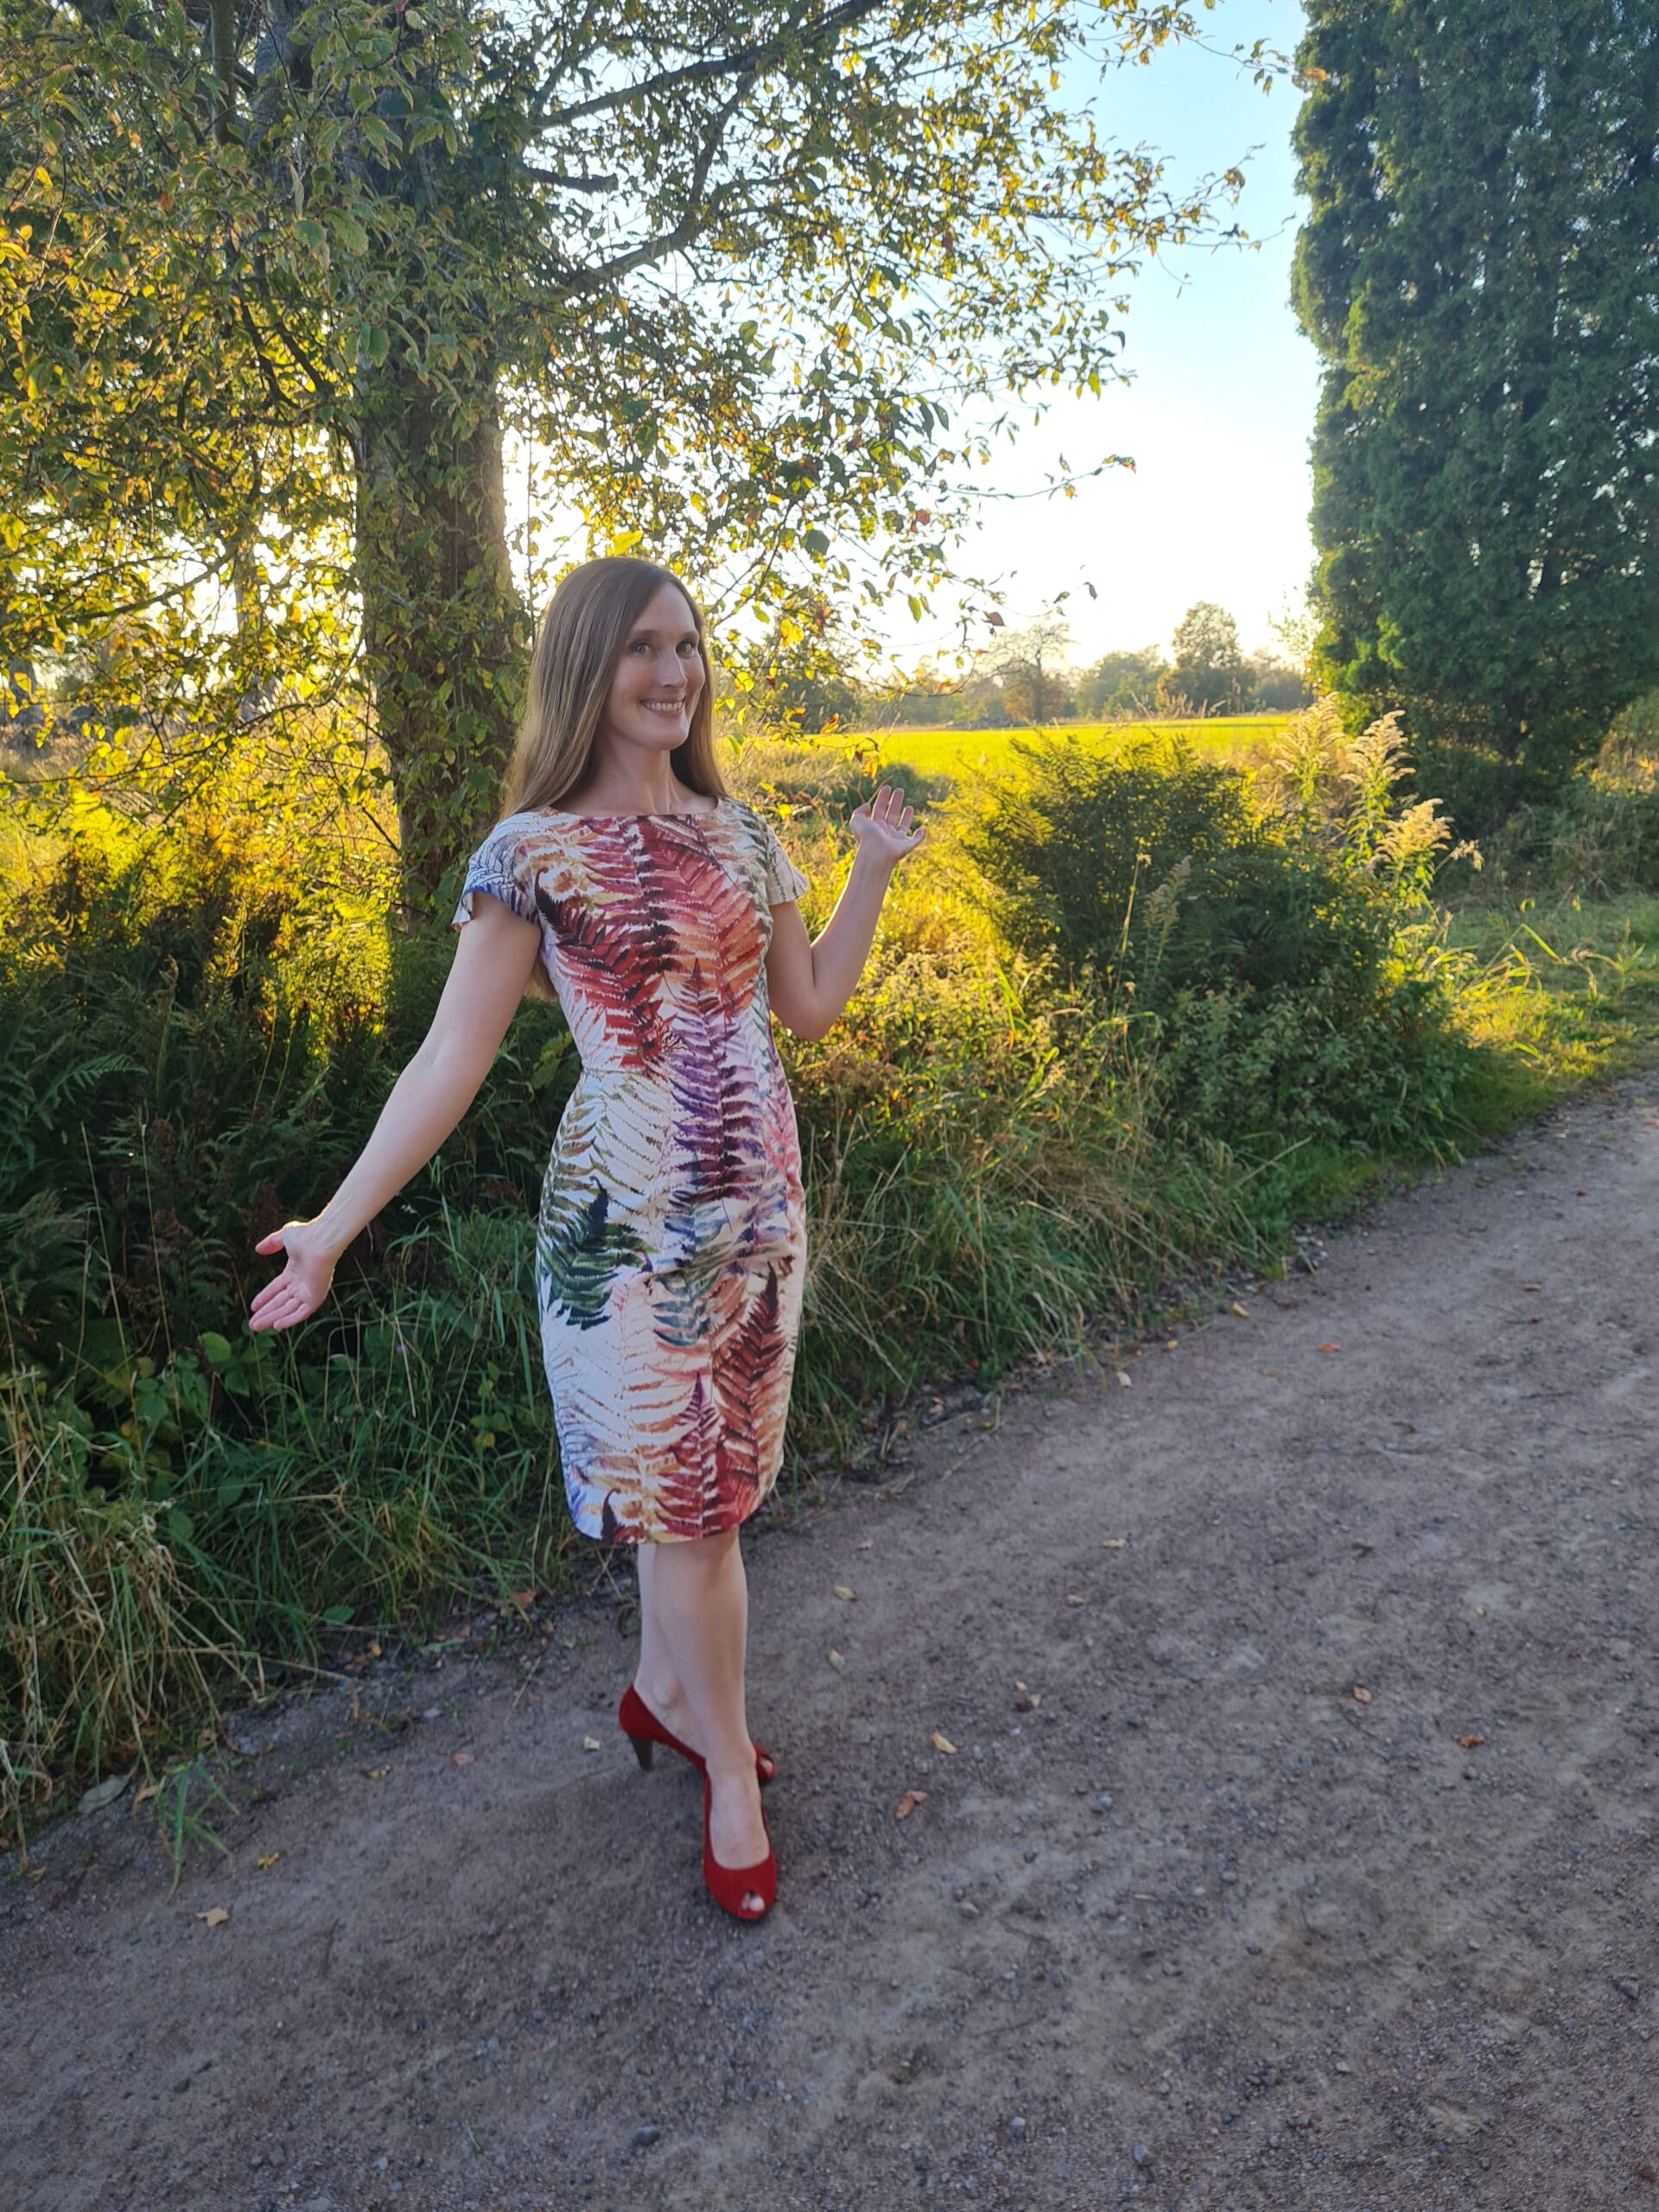
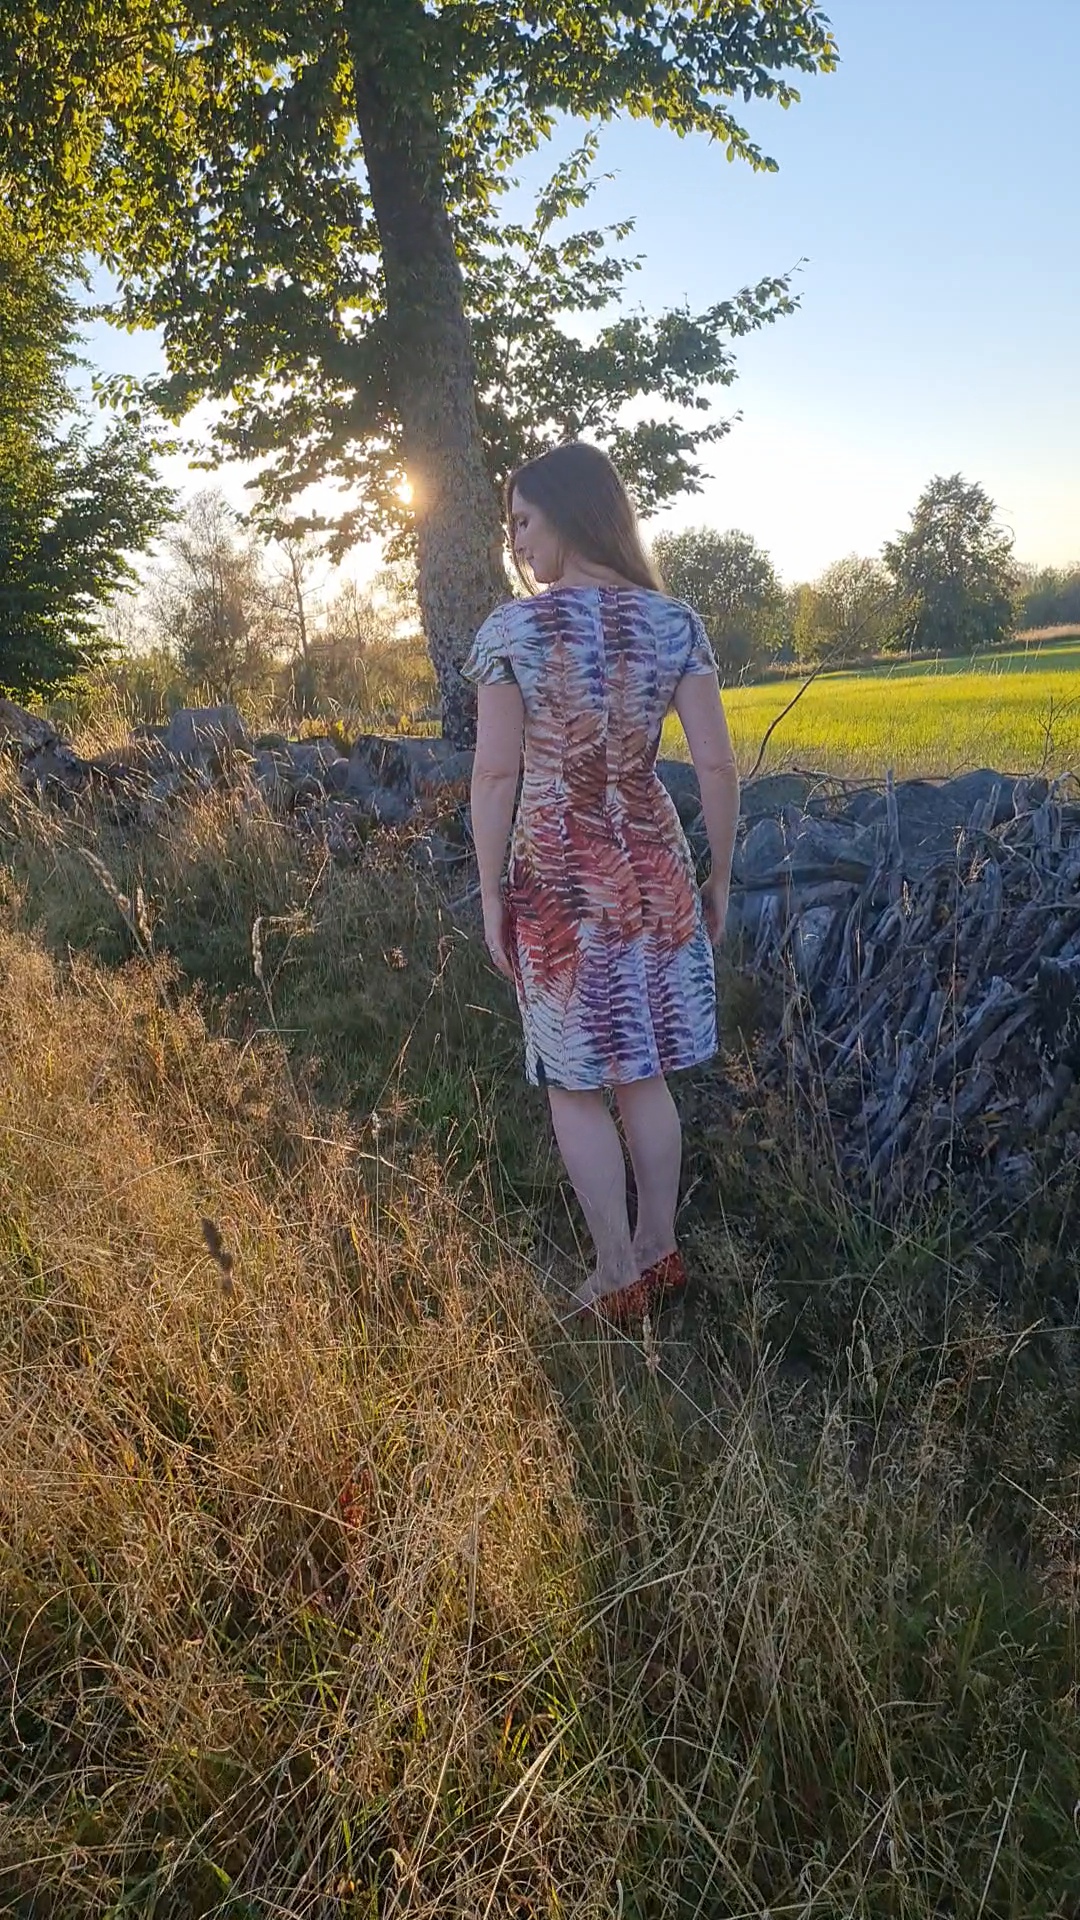
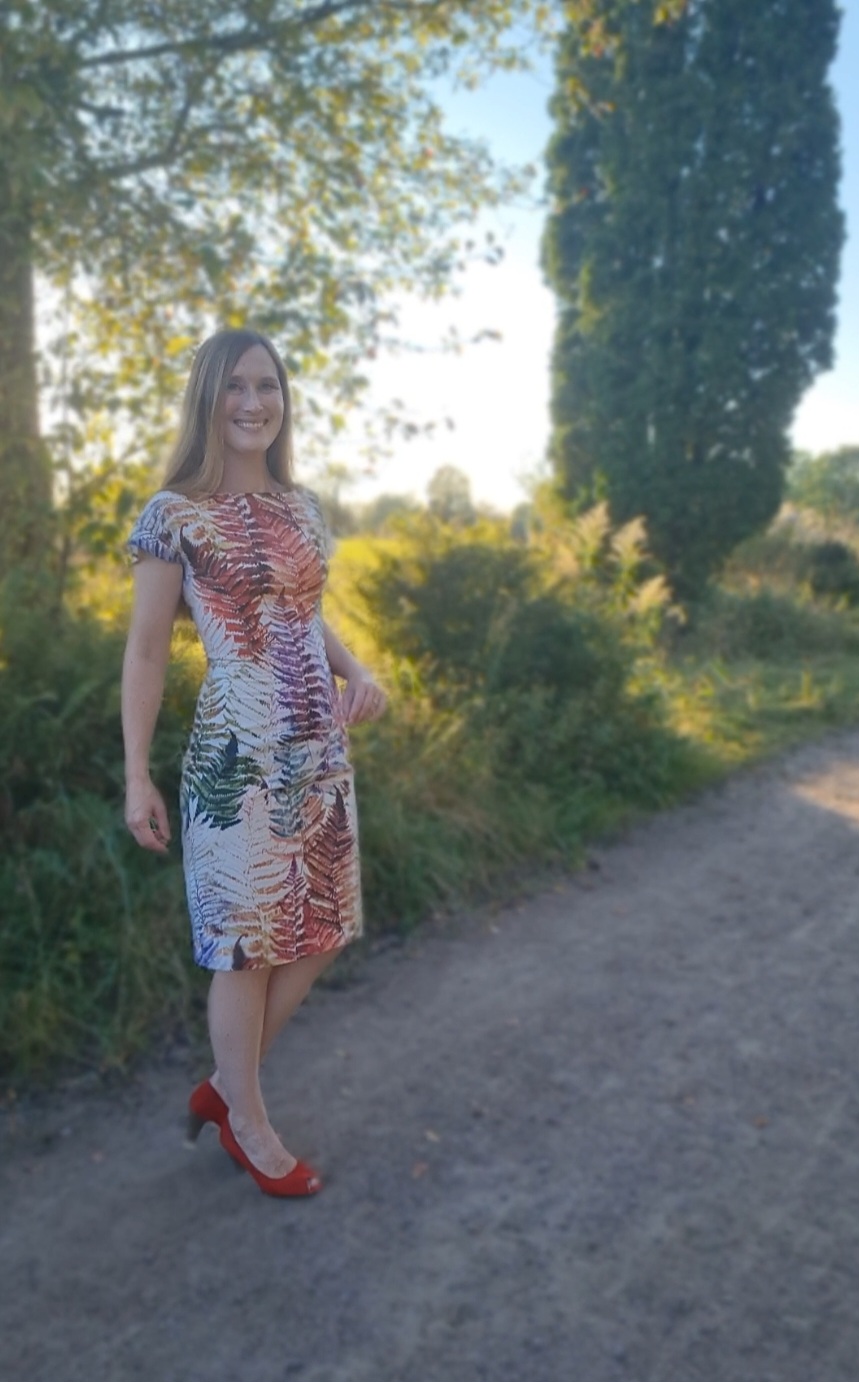
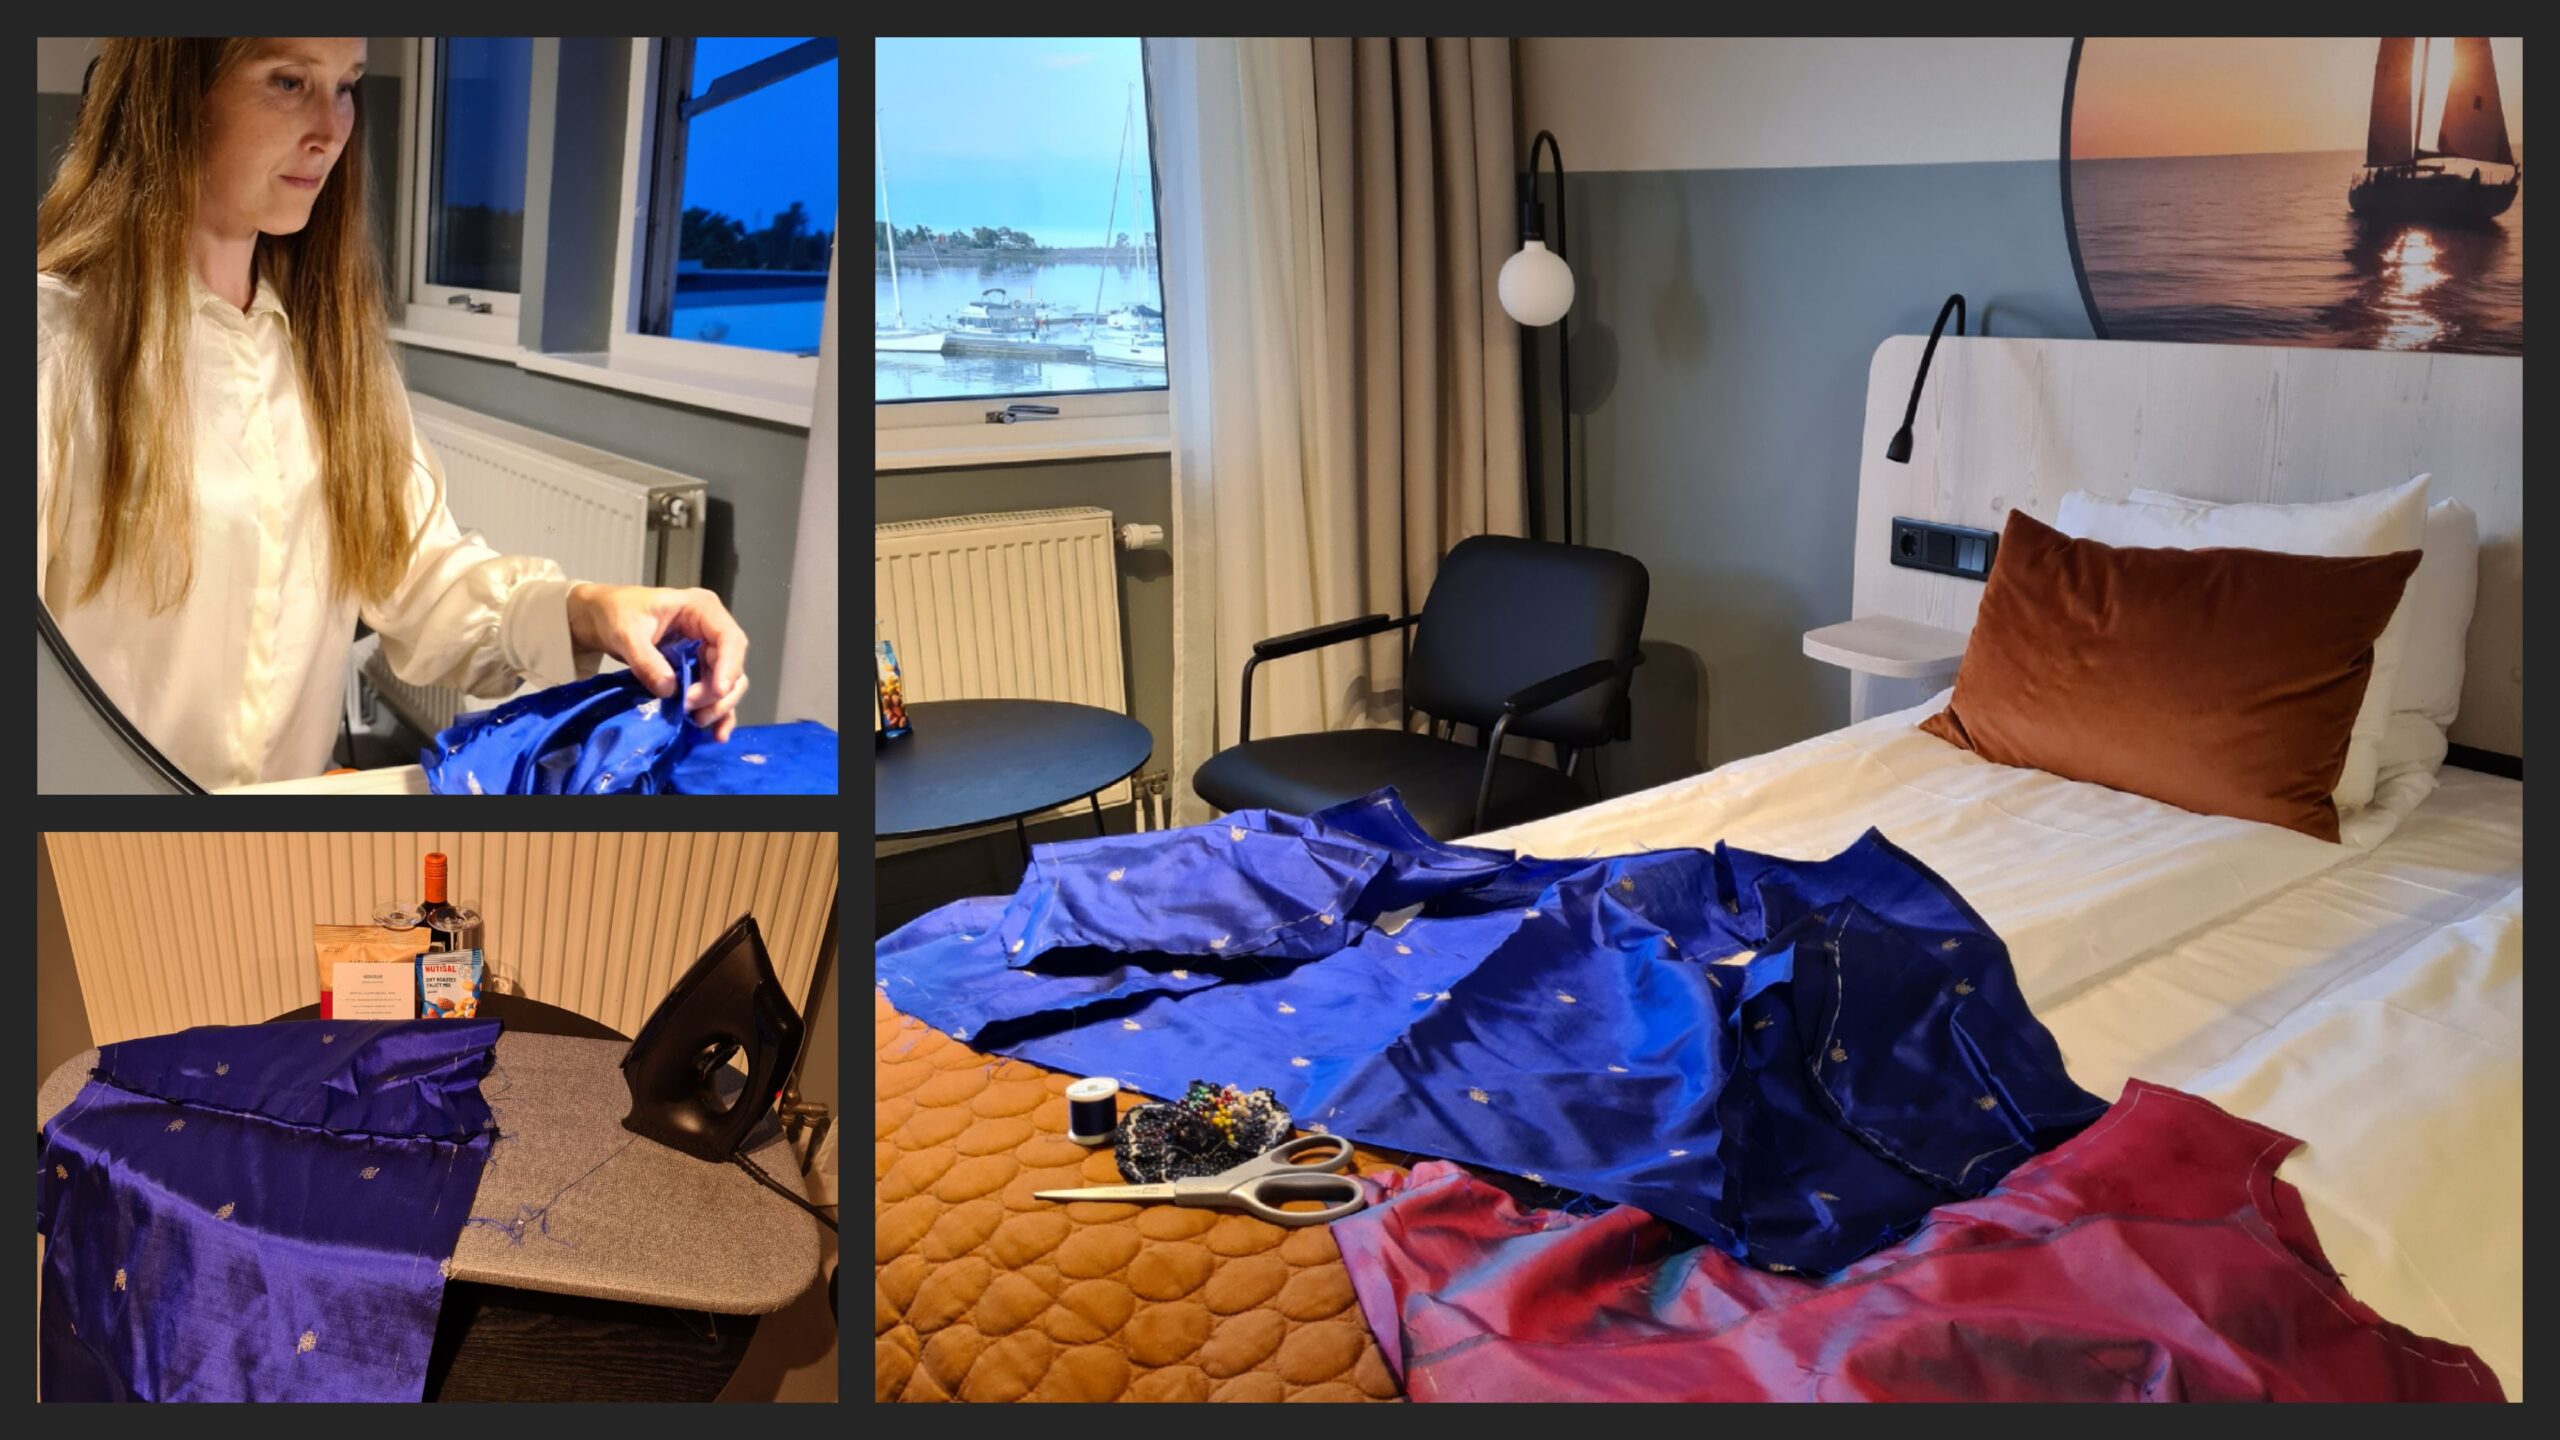
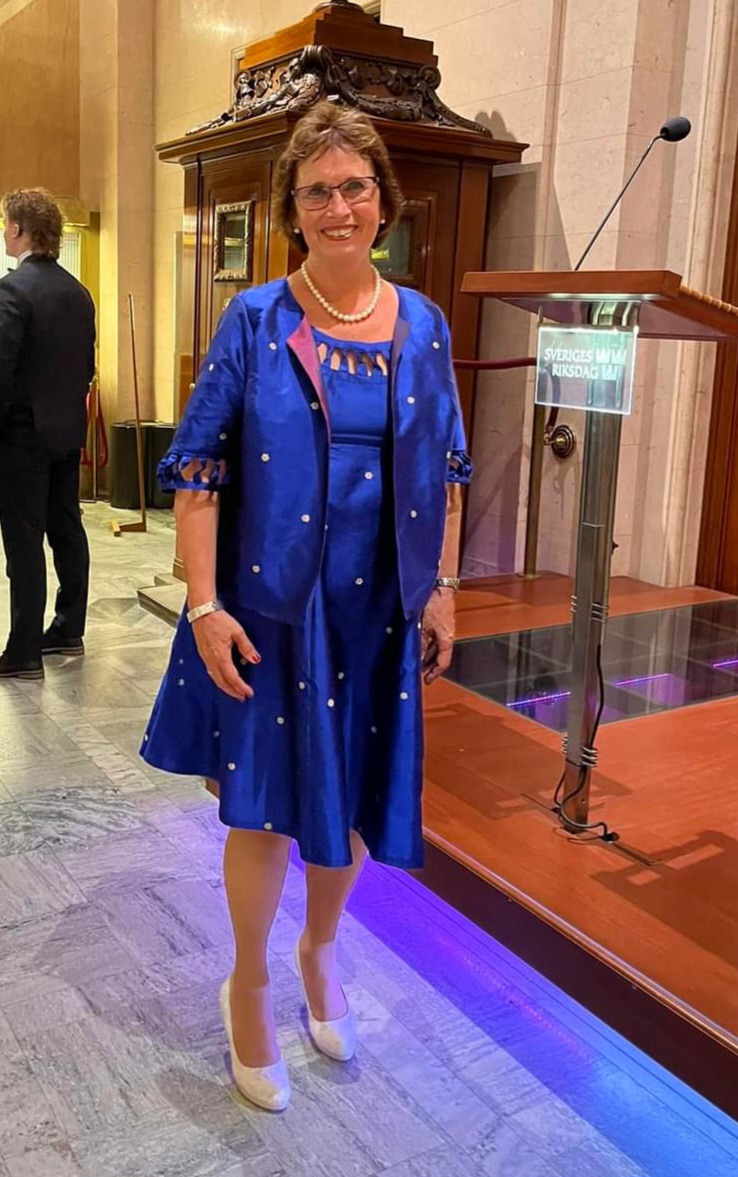
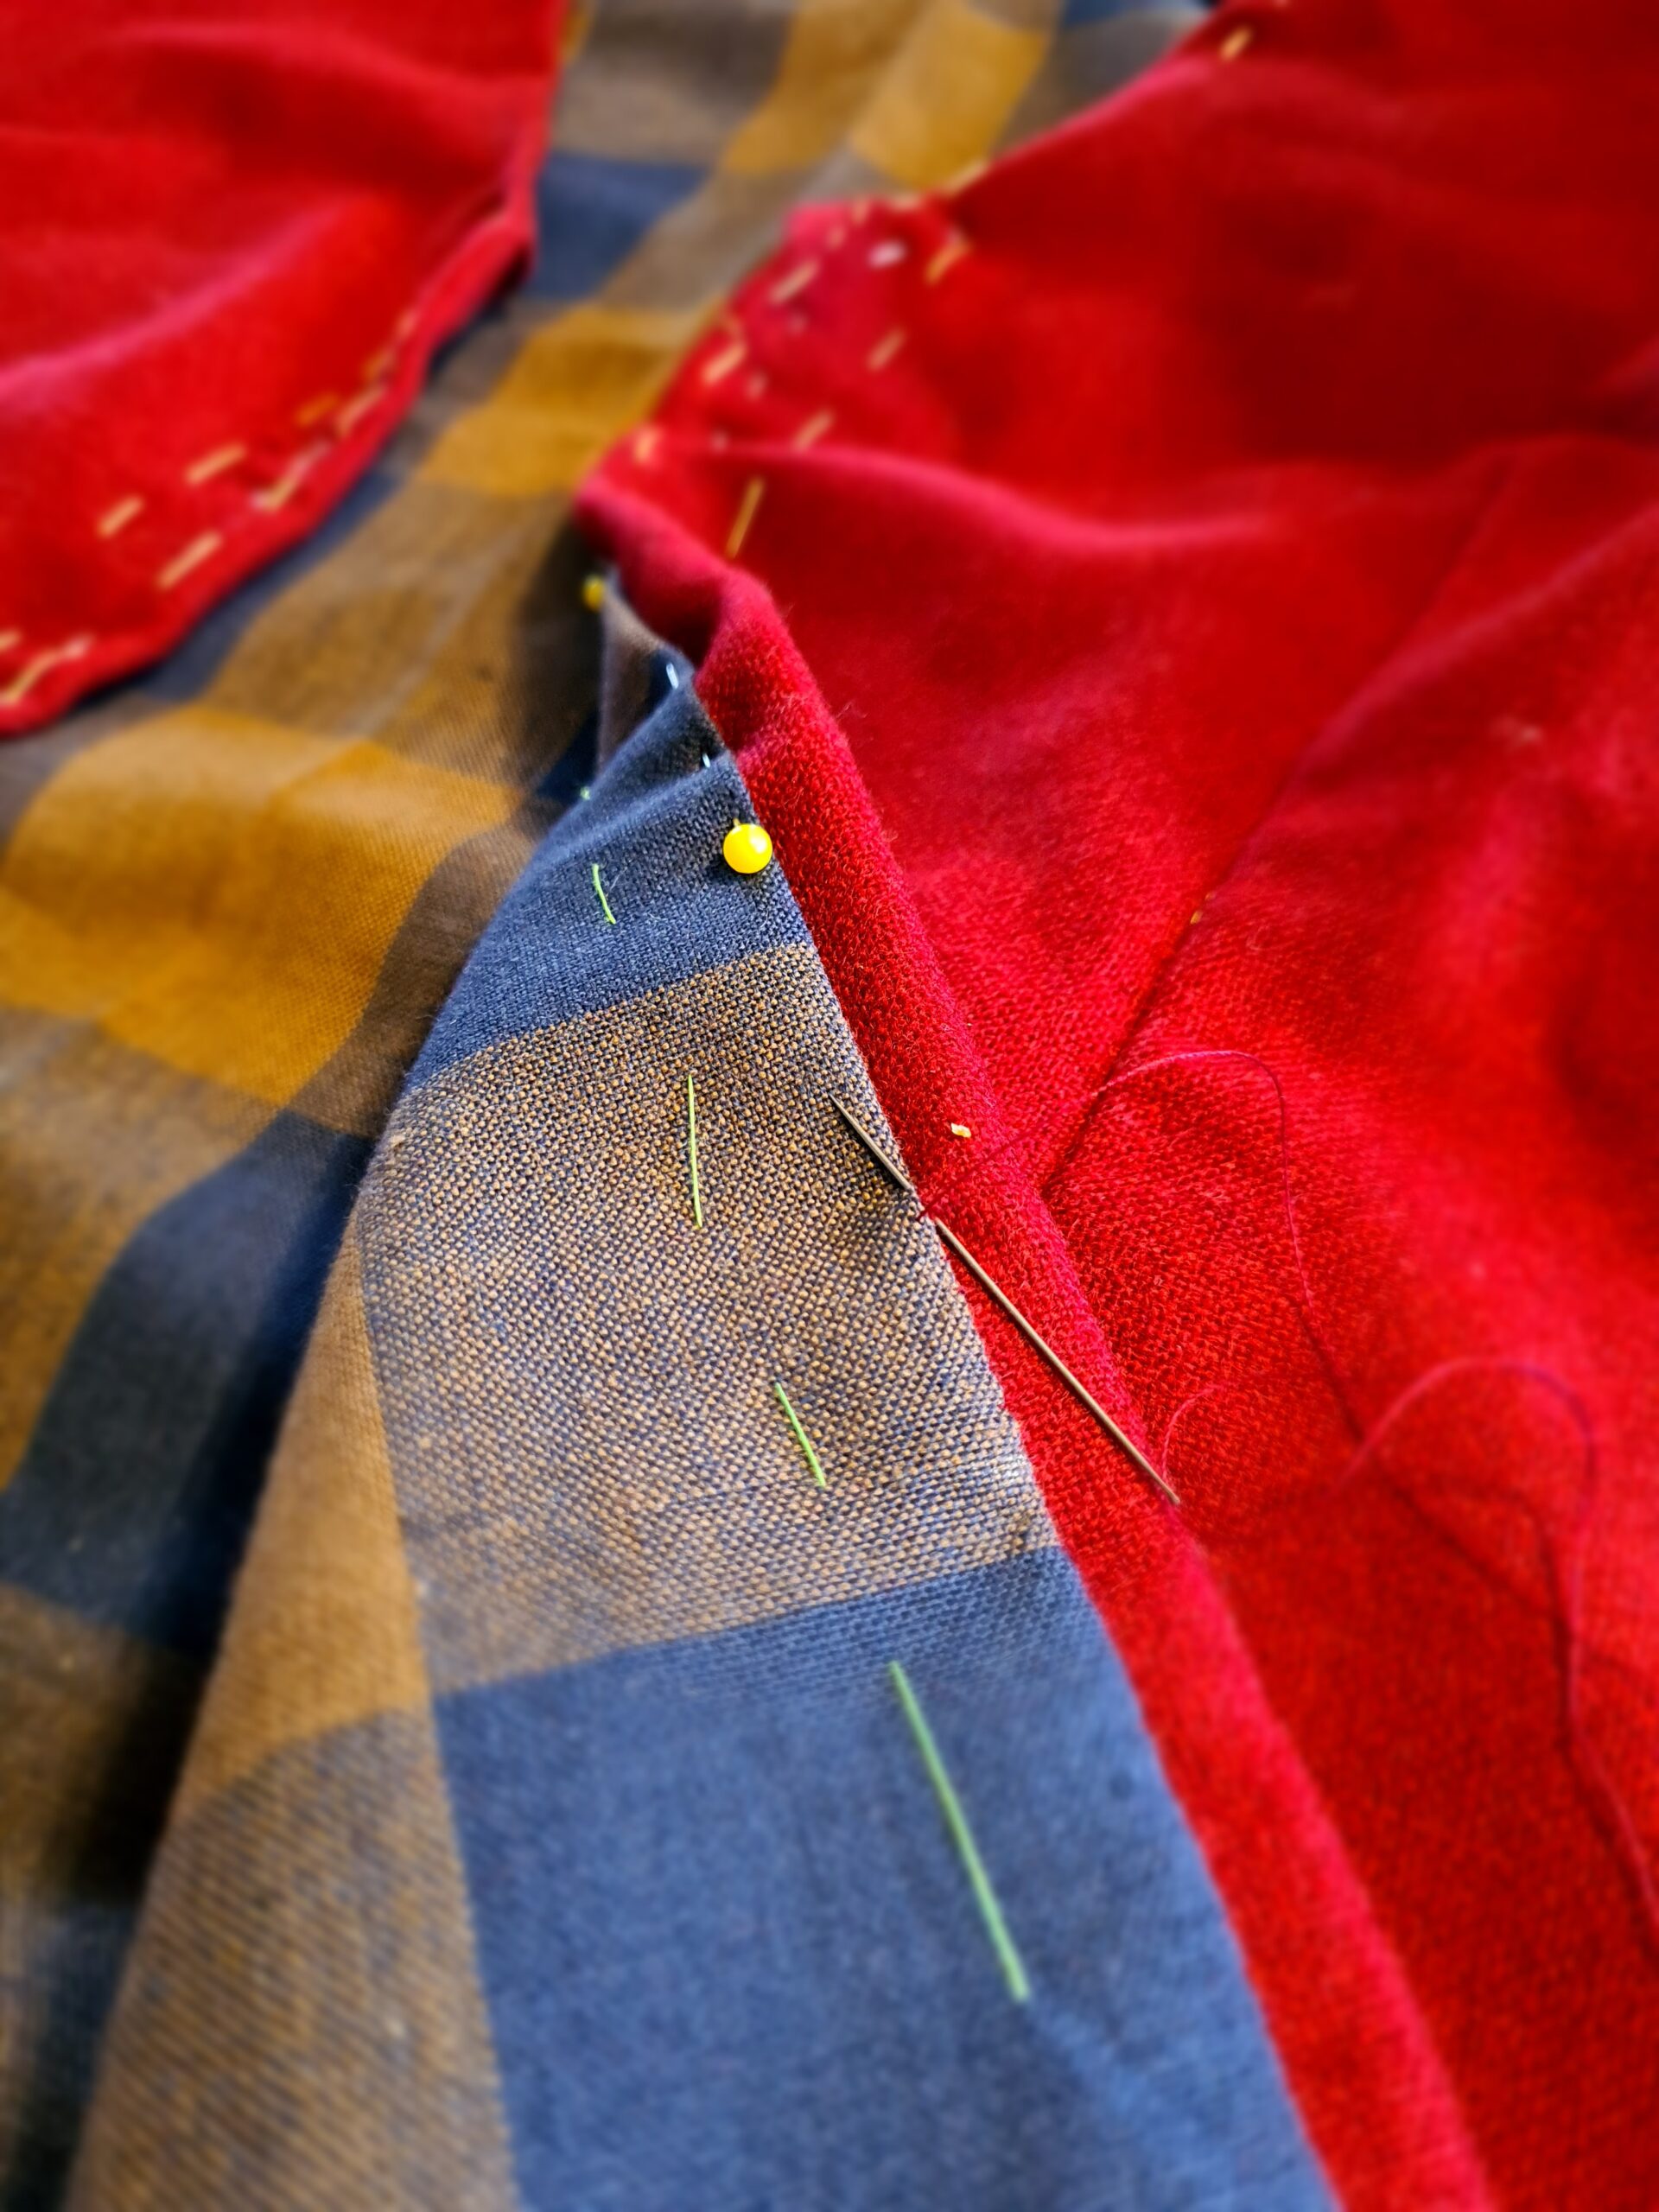
There was need for some more adjustments after basting the parts together, but it was perfect by the second fitting. Then there was another problem – when I made a test seam on my sewing machine I found out that the needle catched the metal threads of the brocade, then pulled them until they broke, even using my finest newly purchased needle. With help from the stichlings at Foundations Revealed, I learnt about Microtex needles, that actually was in stock at the local fabric store. Thank goodness! 😅 It was so easy to sew with these needles! This Sunday I realised that we hadn’t tested whether she would be able to sit. Thankfully, she could. And today, at the prom, she looked absolutely radiant! 🌟
Det behövdes några fler justeringar efter att jag tråcklat ihop delarna, med vid nästa provning satt klänningen perfekt. Sedan uppstod ett nytt problem – när jag provade maskinsömmar på en testbit upptäckte jag att nålen fastnade i brokadens metalltrådar och drog med dem tills de gick av, trots att jag använde helt nyinköpta, supertunna nålar. Tack vare folket på Foundations Revealed fick jag tips om Microtex-nålar, som faktiskt fanns inne hos SyIngrid! Vilken lättnad. 😅 Det var så enkelt att sy sömmarna med dessa nålar. I söndags insåg jag att det var länge sedan vi trstat om hon faktiskt kunde sätta sig ner i klänningen. Tack och lov kunde hon det. Och på studentbalen idag såg hon alldeles strålande ut! 🌟
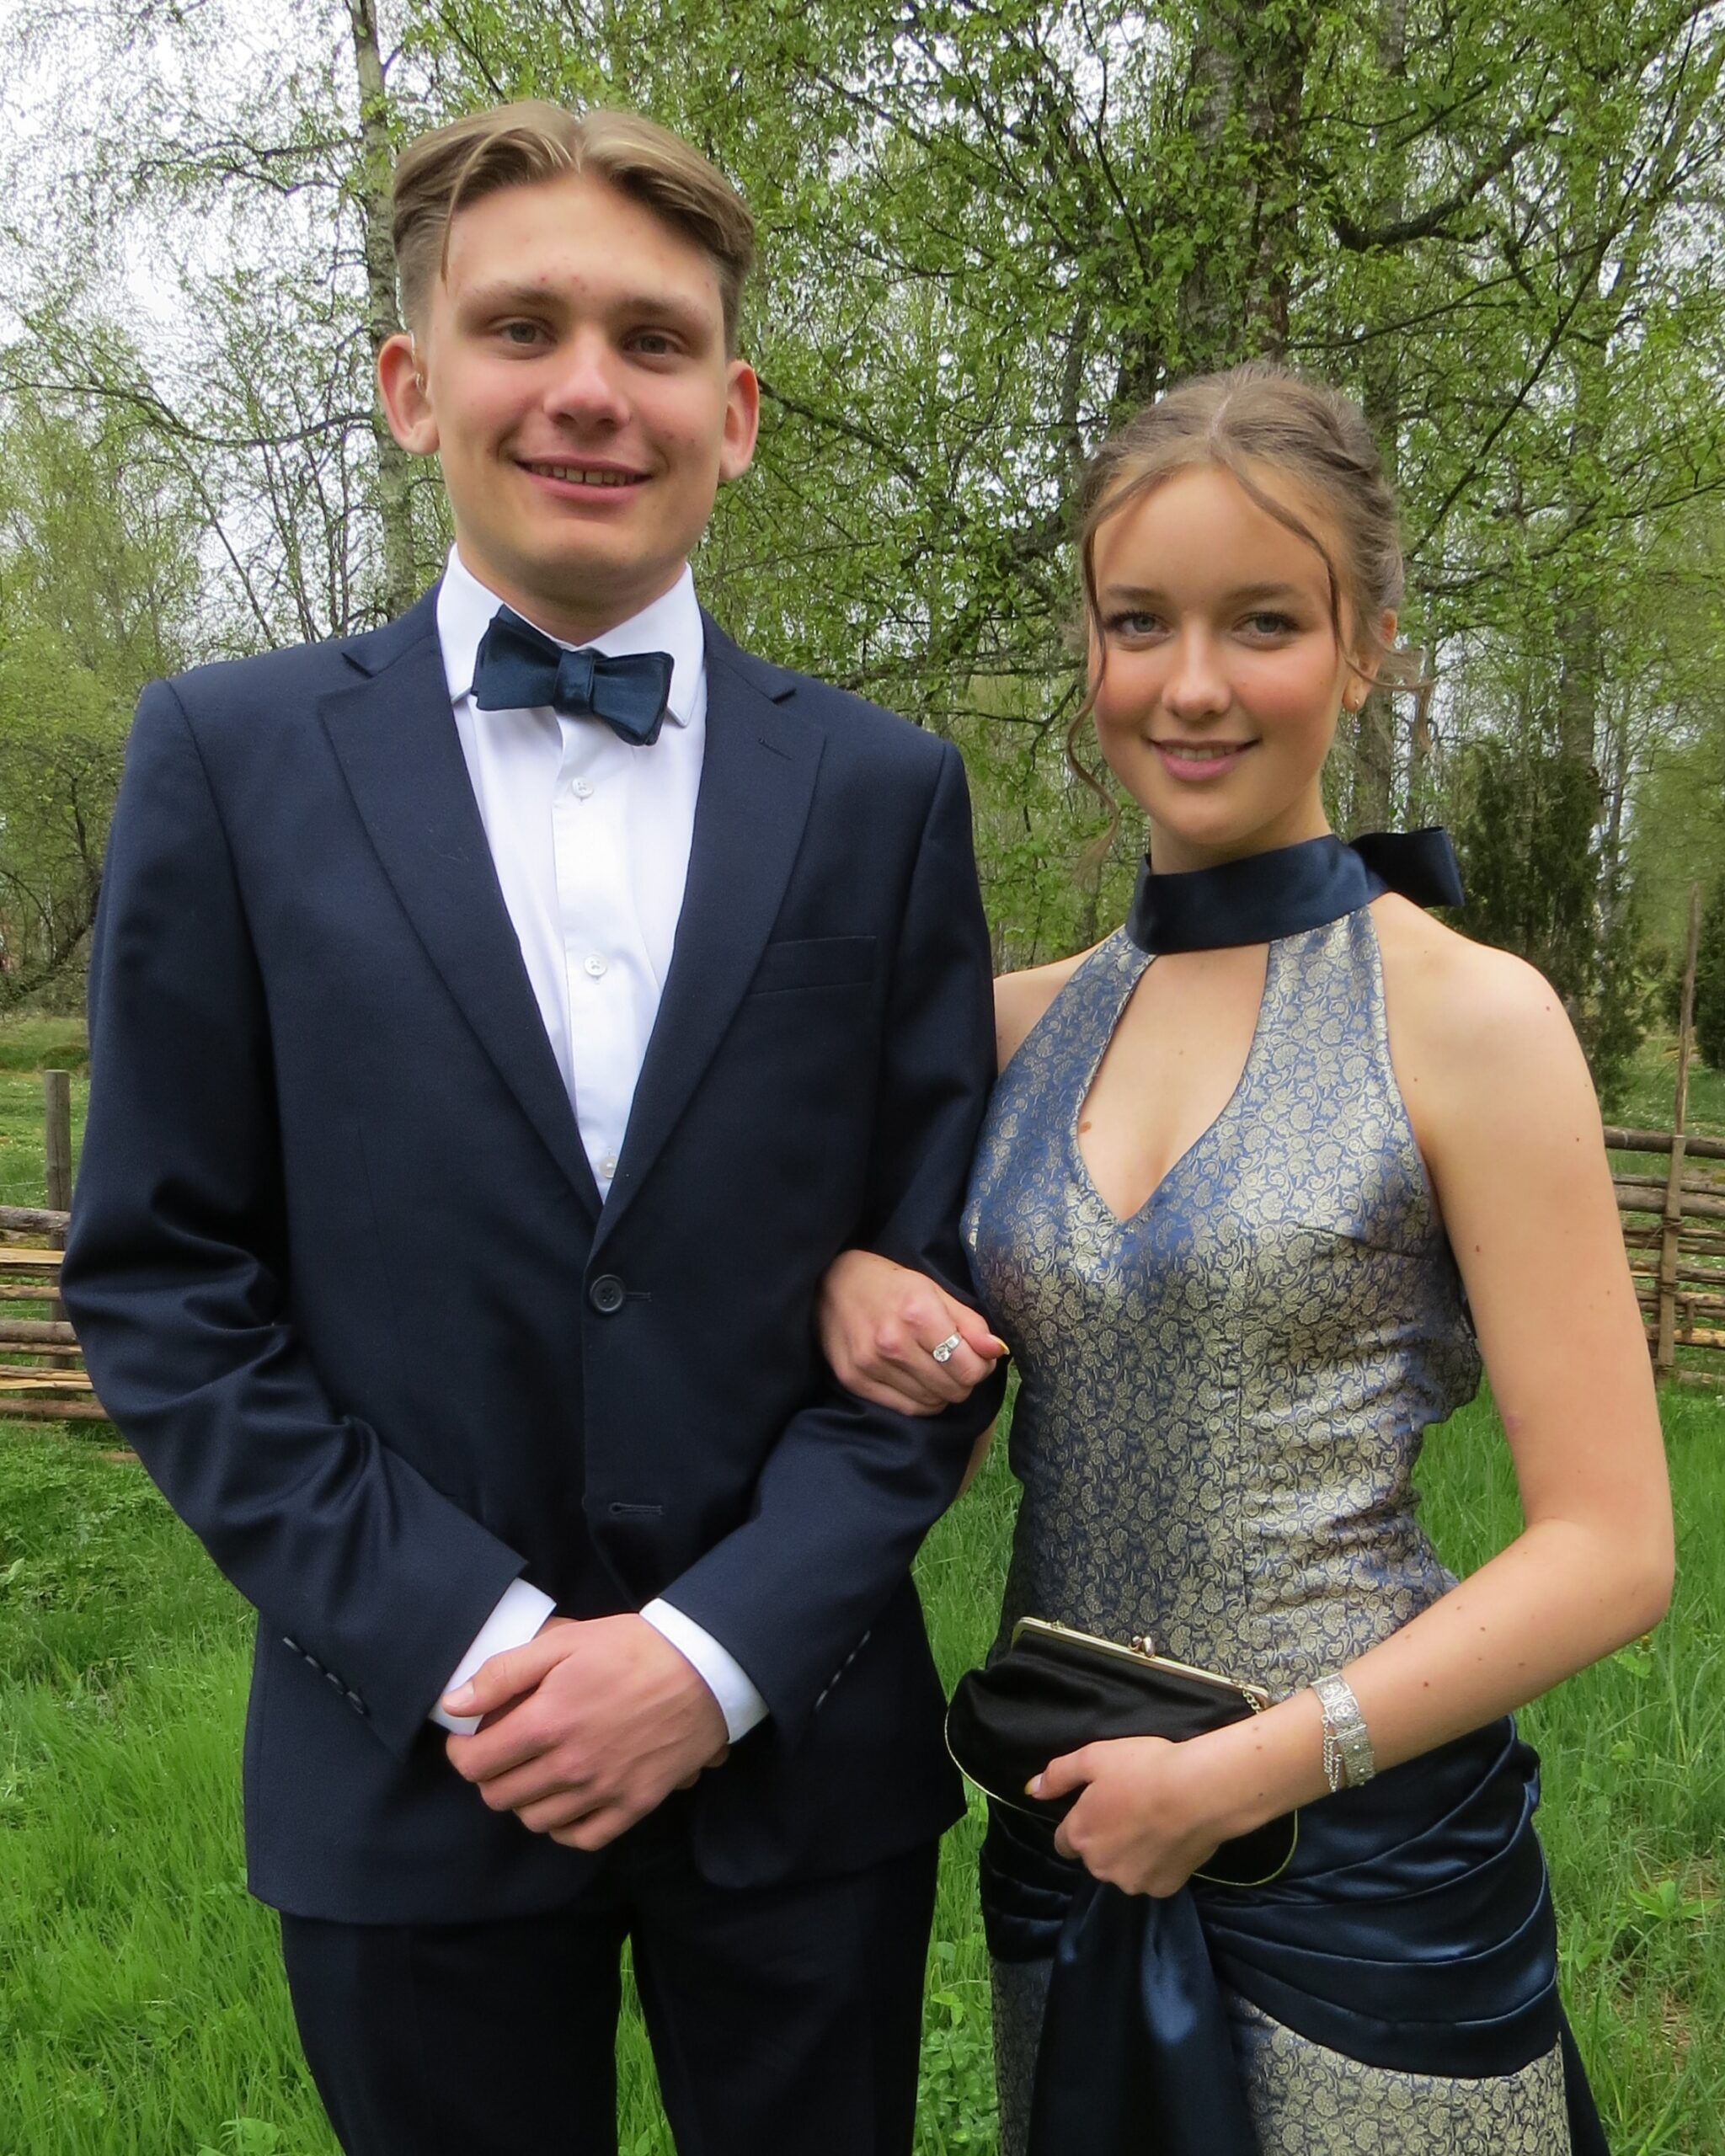
Her chevalier is dashing too!
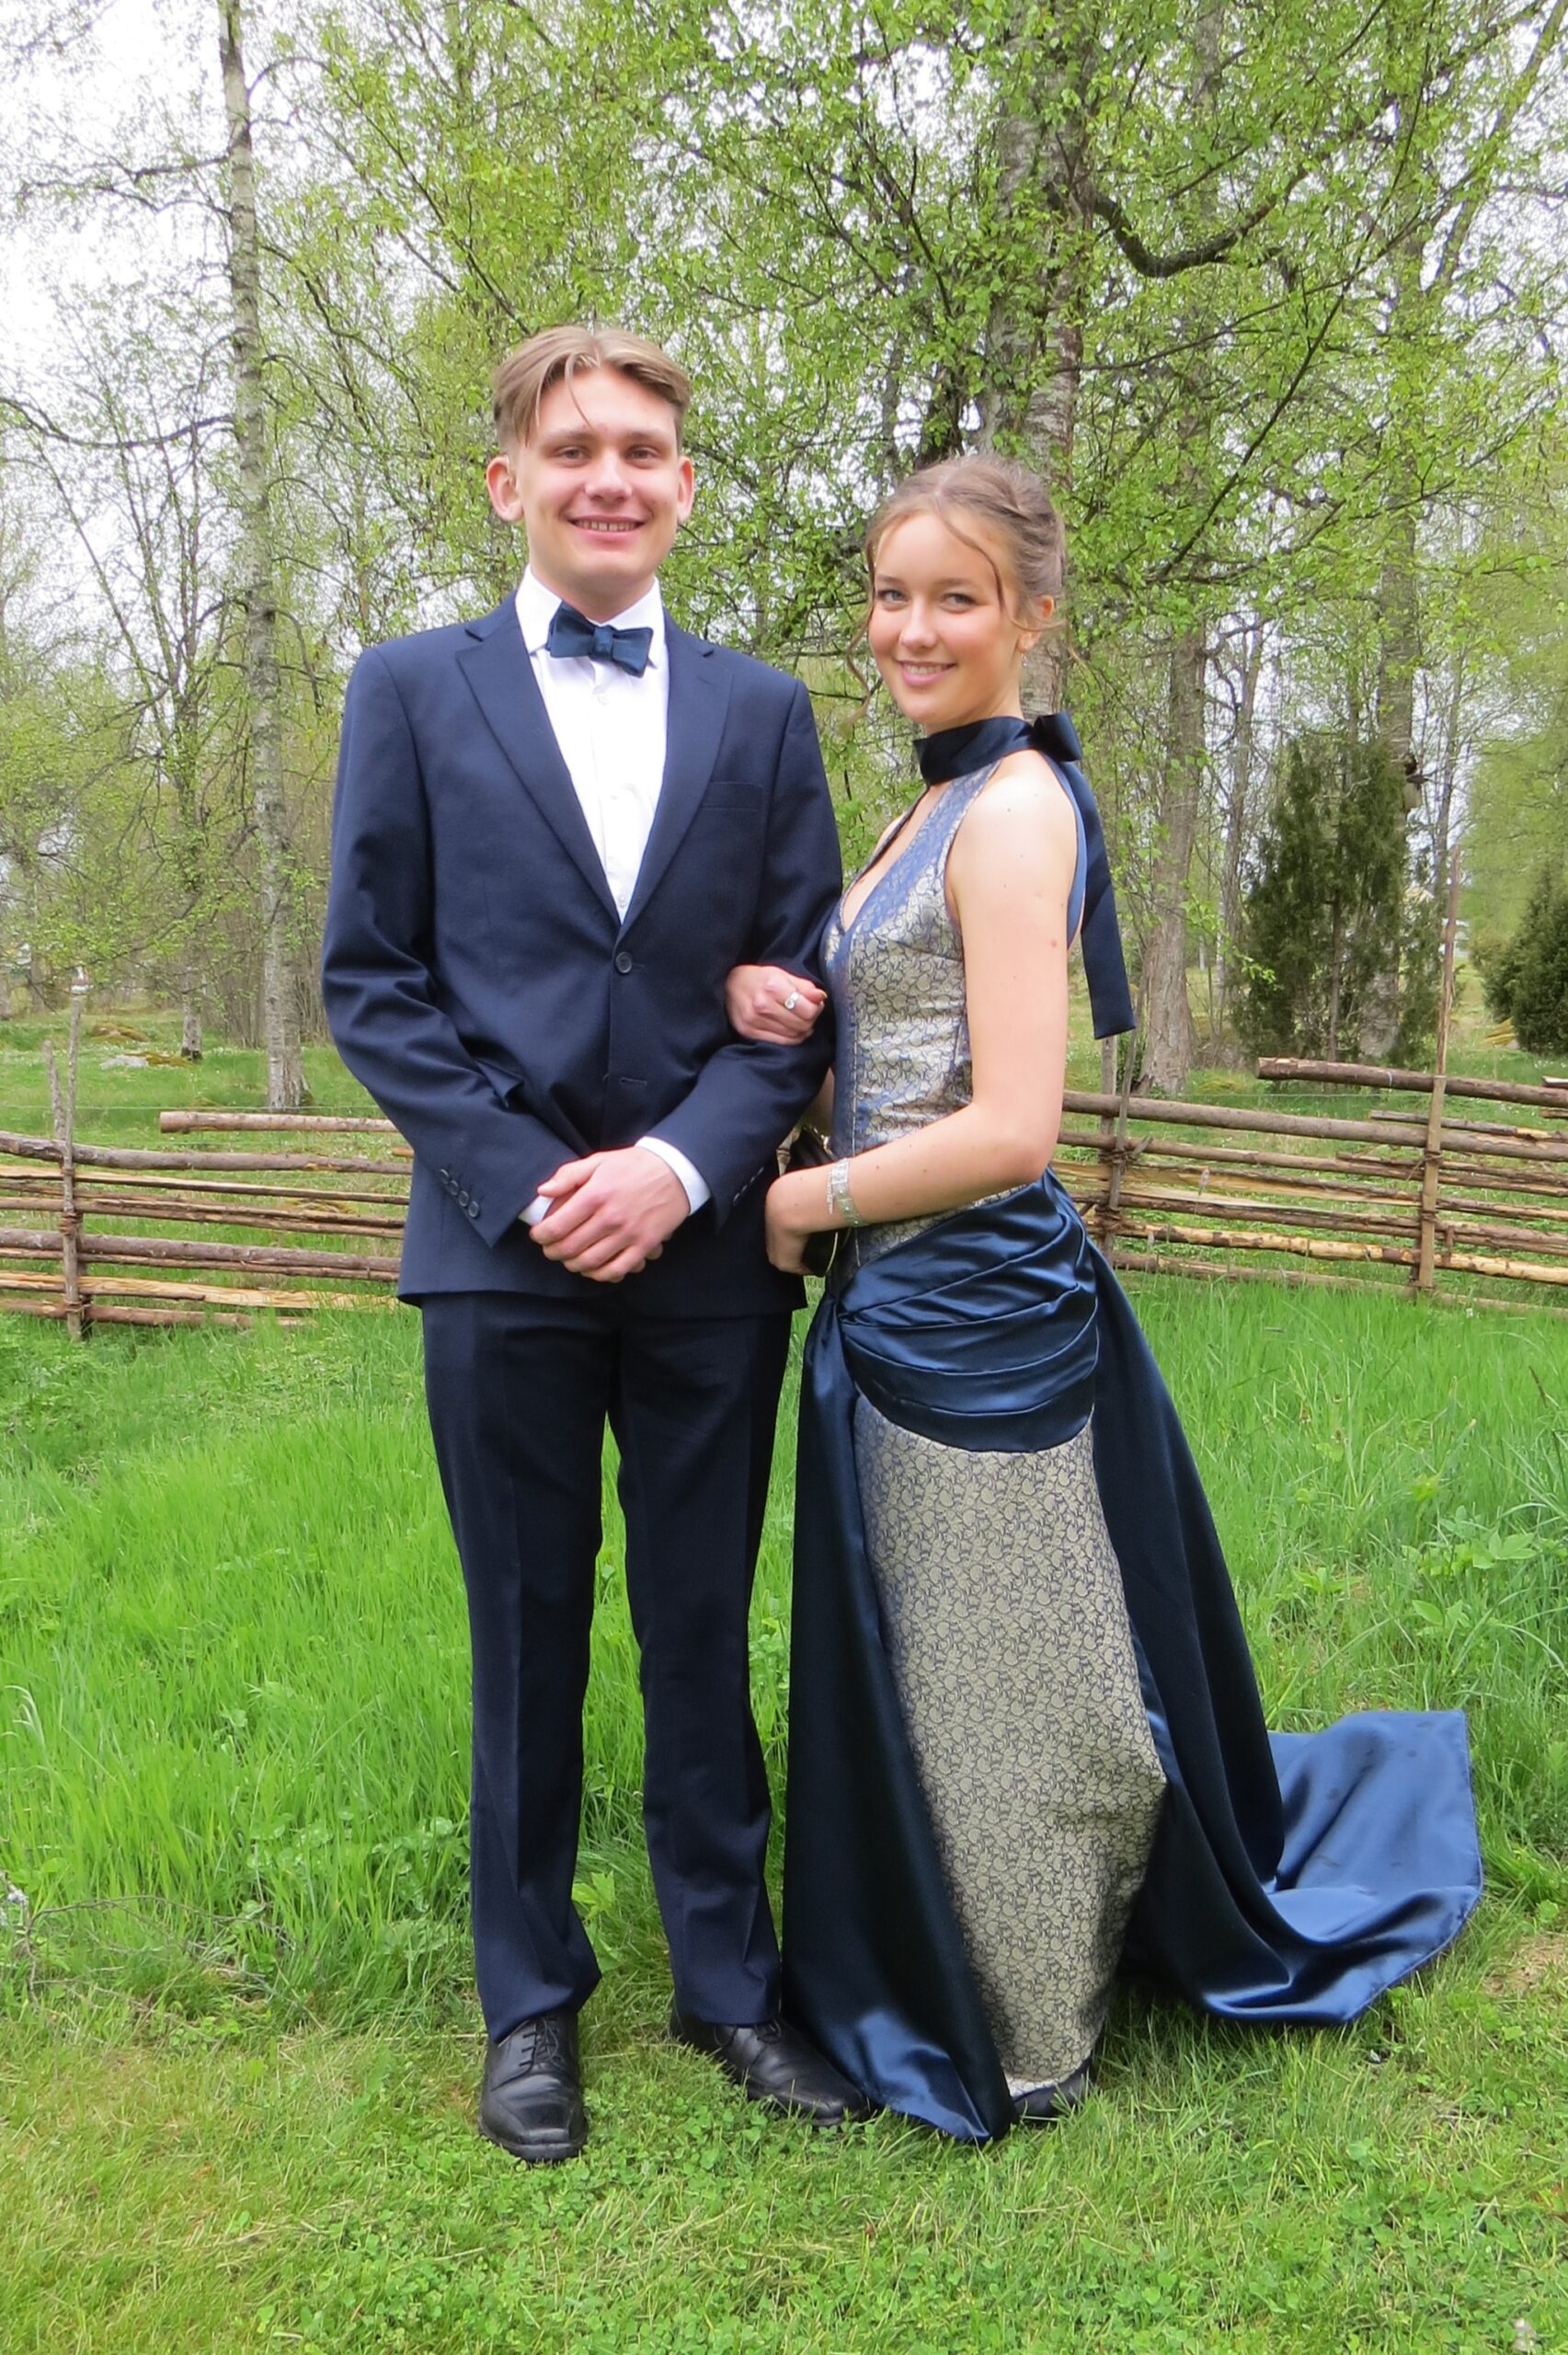
Thank you, dear Neema, for letting me sew your ball gown! You look like a queen. 🤗 You are such a wonderful person, clever and good. I wish you all luck henceforth! ❤️
Tack, finaste Neema, för att jag fick äran att sy din balklänning! Du ser ut som en drottning. 🤗 Du är en så underbar person, smart och godhjärtad. Jag önskar dig all lycka framöver! ❤️
At the local newspaper webpage, Dagens Vimmerby, you can see her and her other companions at the public part of the prom.
På den lokala nyhetssidan, Dagens Vimmerby, flera videoklipp från dansuppvisningen.