Tag Archives: kjol

Kjol och blus – 1903

Dräkt med bomullsblus och kjol
Dräkten, fotograferad efter att jag kört hem i upphettad bil. // The outfit, photographed after driving home in the heated car…

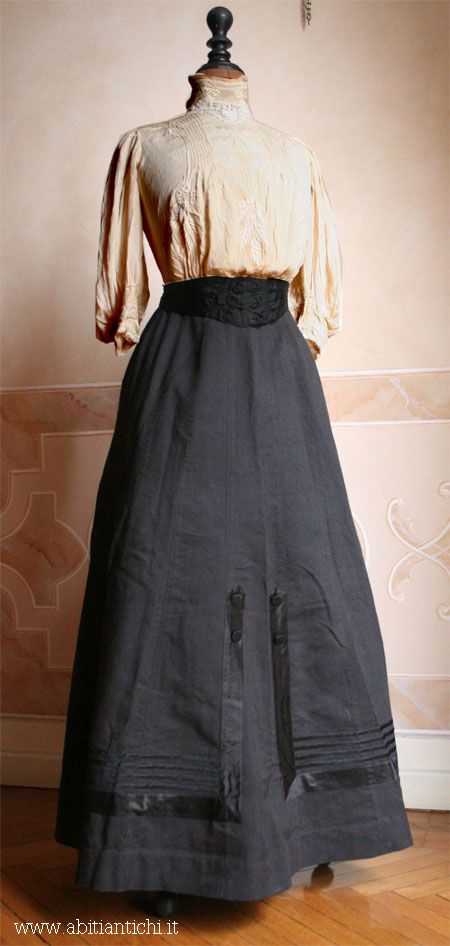
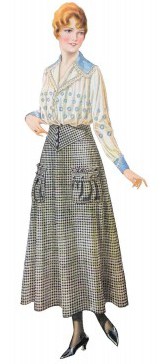
Ni som har läst förra inlägget, om hatten, vet att jag skulle sy en dräkt till 1800-talsdagen i Kisa, 19 juli. Jag ville ha en snoffsig dräkt för en dam från sekelskiftet. I “Patterns of Fashion” hade jag redan sett en del trevliga blus- och kjolmönster. Dessutom kikade jag runt på historiska kläder på Pinterest. Där hittade jag inspiration bland annat från denna dräkt:

Those who have read my last blog post, about my Rose Hat, know that I was about to sew a costume for the “19th century days” in Kisa, 19th of July. I wanted a swanky suit for a lady at the very start of the 20th century. In “Patterns of fashion 2” I had already spotted some nice skirt and shirtwaist patterns. I also roamed Pinterest’s vast plains of vintage garments. There I found inspiration in this shirtwaist.

Dräkt från Pinterest - ca 1904 - med stråveck och broderier
Dräkt från Pinterest – ca 1904 – med stråveck och broderier. // Pinterest clothes – ca 1904 – with pin tucks and white work.

Kjolen

I två månader snokade jag runt på Erikshjälpen, i jakt på ett vettigt kjoltyg. Till slut, helgen innan eventet, hittade jag en blå gardin för 69 kr.

For two months I snooped around at the town’s second hand shop, in hopes to find an appropriate skirt fabric. Finally I found a blue curtain for 69 SEK.

Kjolen, på avigan, innan den sytts samman baktill.
Kjolen, på avigan, innan den sytts samman baktill. // The skirt, from the wrong side, before sewn together in the back.

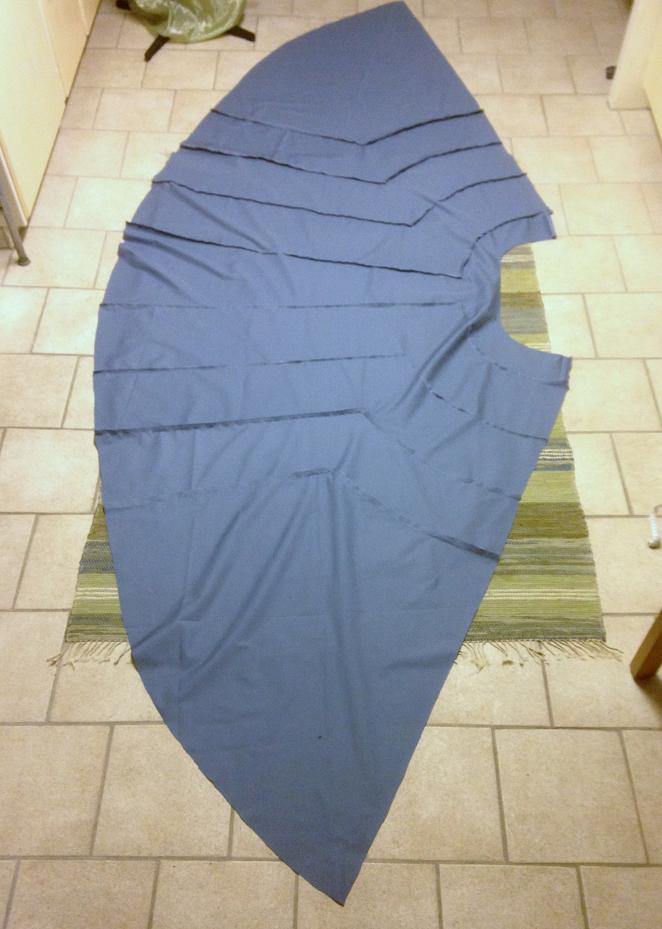
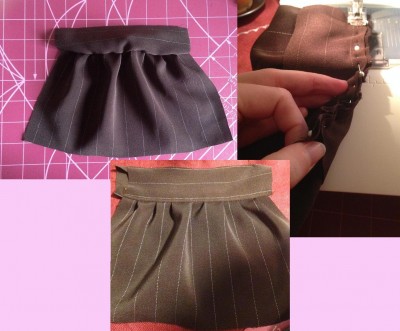
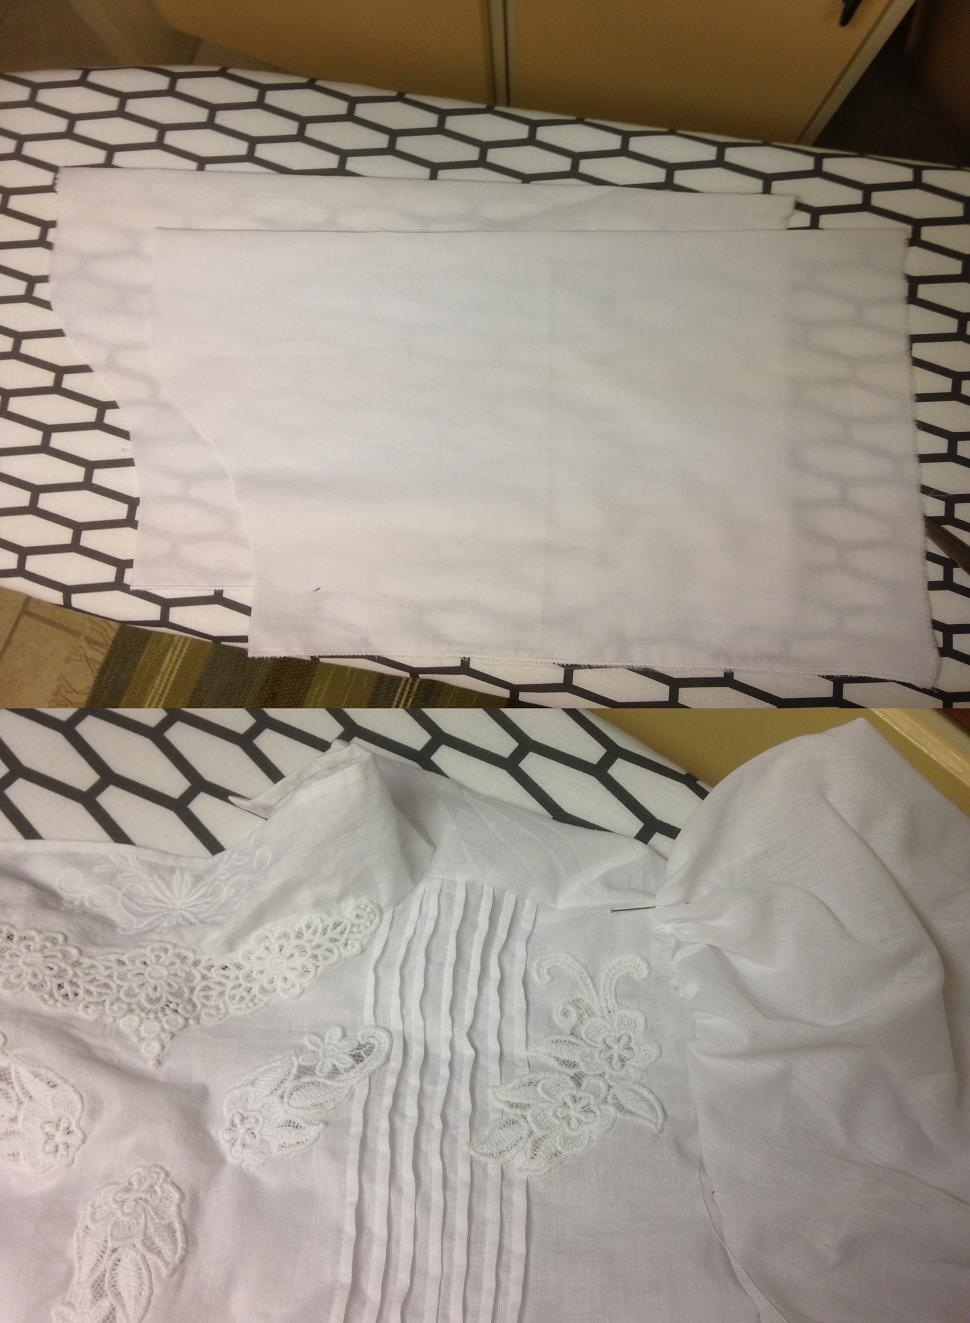
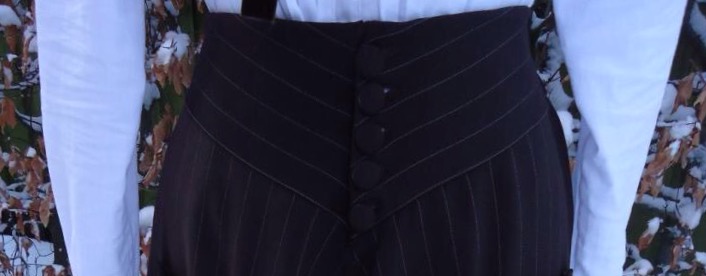
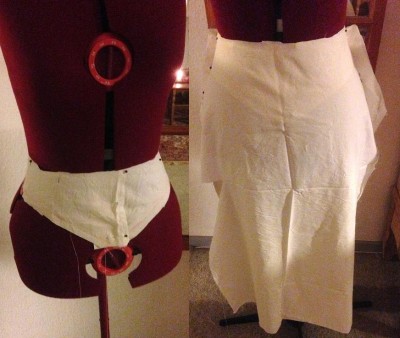
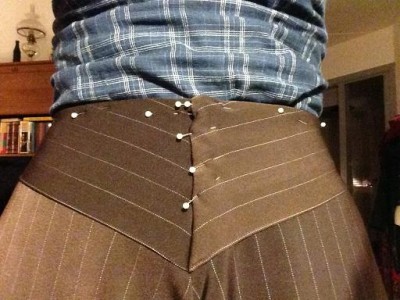
Jag vet inte hur det är med rättigheterna för mönstret, så jag lägger inte ut bilden här, men ni får i alla fall se hur kjolen ser ut innan den är hopsydd baktill.

I don’t know how the copyright works for this skirt pattern, so I won’t show it here. Anyhow, this what the skirt looks like from the wrong side, before it’s sewn together.

Kjolen innan den fållats och pressats.
Kjolen innan den fållats och pressats. // The skirt before hemmed and ironed.

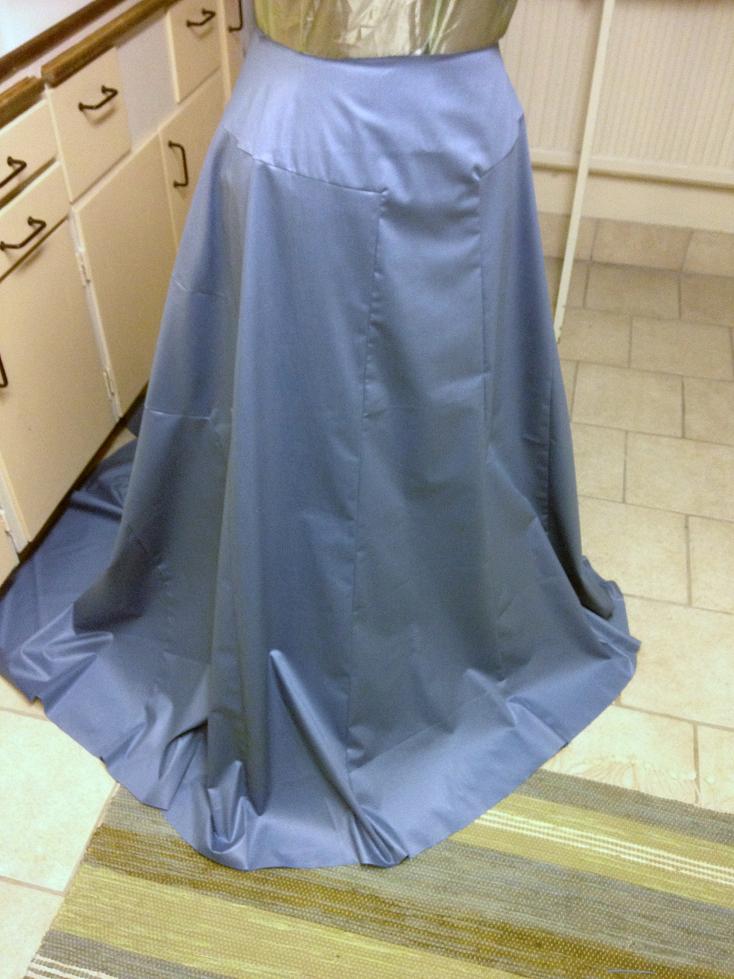
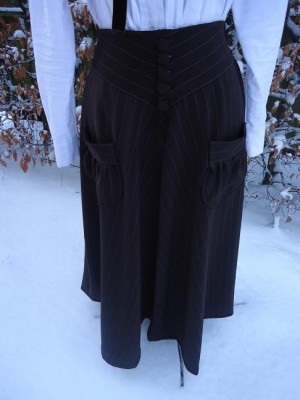
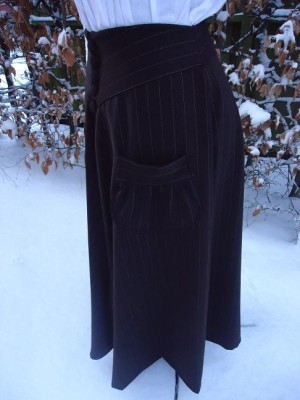
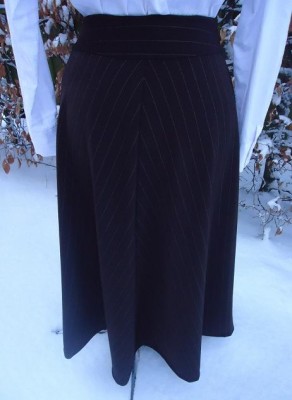
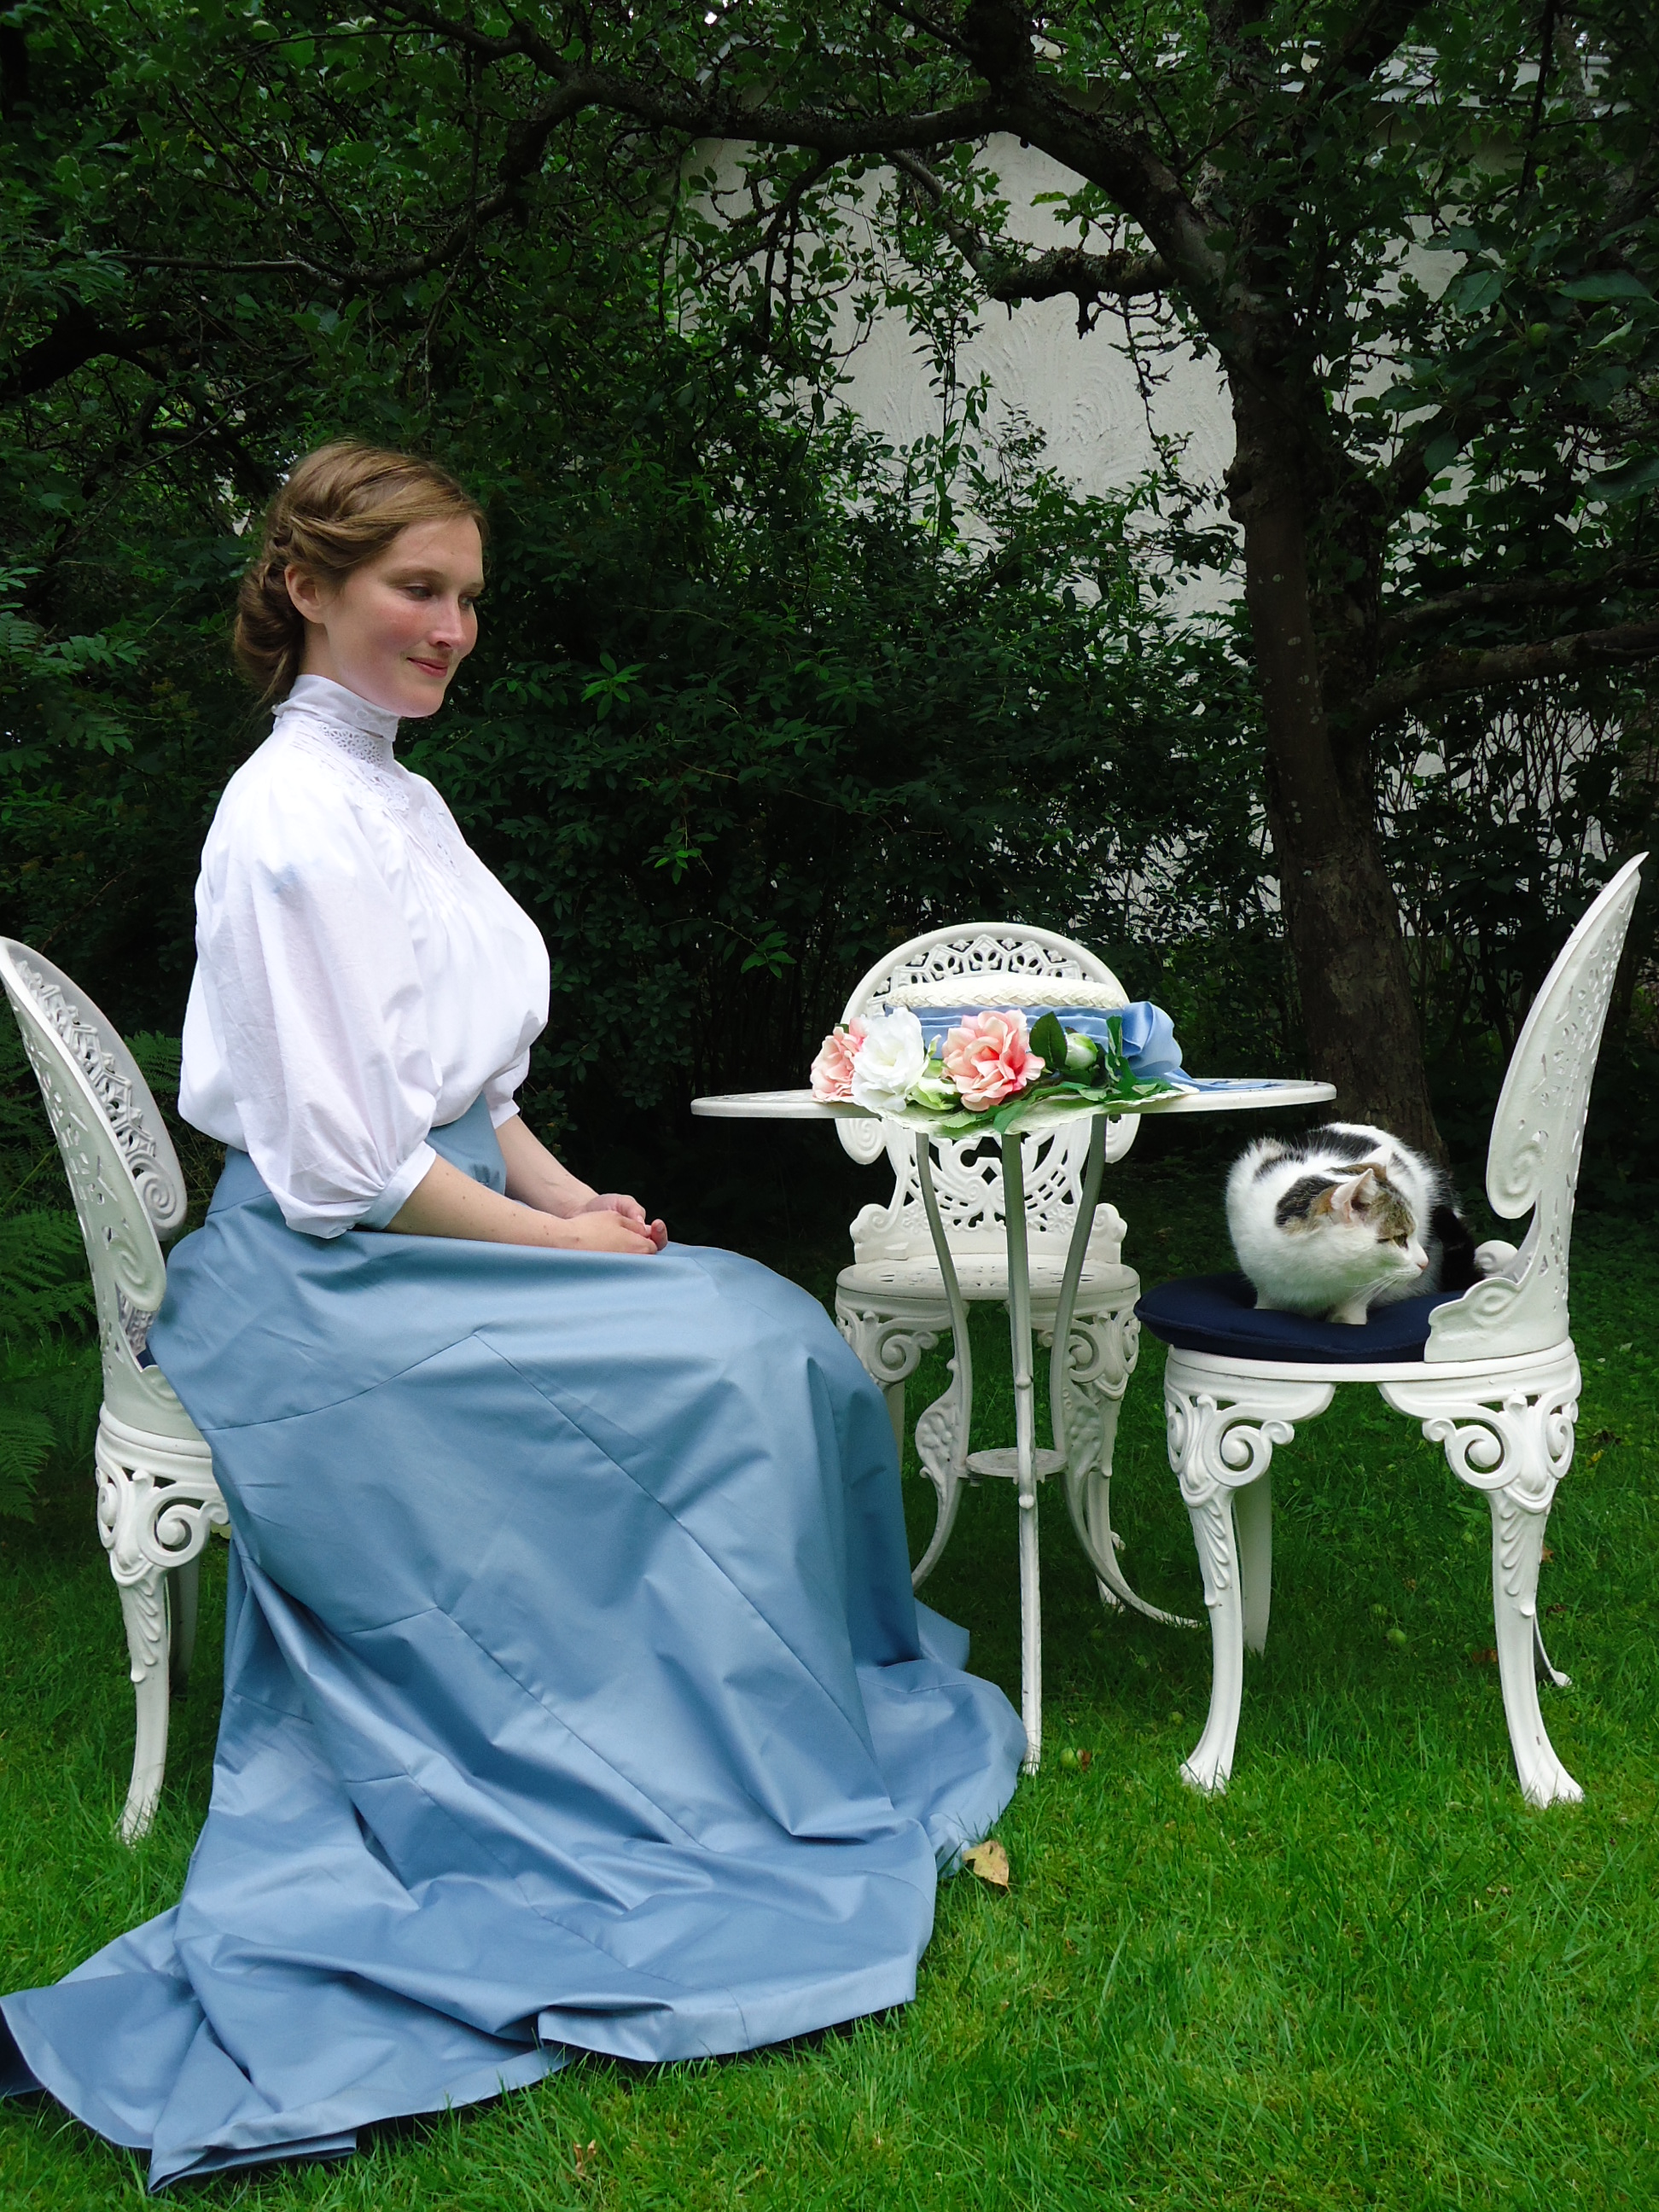
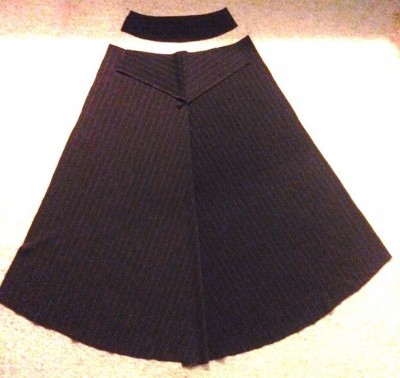
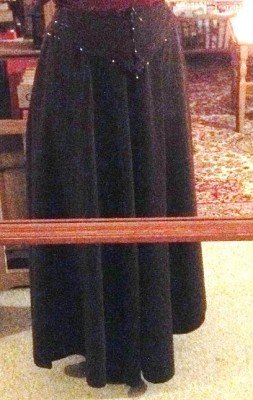
Kjolen knäpps baktill med hyskor och hakar. Den har fortfarande inte fått de dekorativa banden, som ska täcka sömmarna, men i väntan på att jag hittar lämpligt material, tycker jag att den ser helt ok ut som den är.

The skirt is closed with hooks and eyes in the back. It still hasn’t got the decorative ribbons, that should be on top of the seams. Until I find the optimal material for this, I think it looks alright though.

Blusen

Jag var osedvanligt förberedd när jag anlände till Sverige i år. Förutom att redan ha letat reda på lämpliga mönster, hade jag även hittat fina broderifiler på internet, som jag köpt, en snäll bekant hjälpt att konvertera till rätt filtyp, och sedan hade jag maskinbroderat mönstren på tyll.

I was unusually well prepared when I arrived in Sweden this year. Except for having found patterns, I had also bought appropriate machine embroidery files, got help from my sewing machine guru to convert them to the right file type, and had even sewn the embroidery on tulle leftovers.

Maskinbrodyr på tyll
Maskinbrodyr på tyll. // Machine embroidery on tulle.

Dessutom hade jag köpt ett tunt bomullstyg, medan jag praktiserade i Viborg, så därmed hade jag alla ingredienser som jag behövde för min blus.

Furthermore, I had bought a lightweight cotton fabric, while making my internship in Viborg. Hence, I had all the necessary ingredients for th shirtwaist.

Experiment
Stråveck och brodyr fastnålad. // Pin tucks and white work pinned to the shirtwaist.

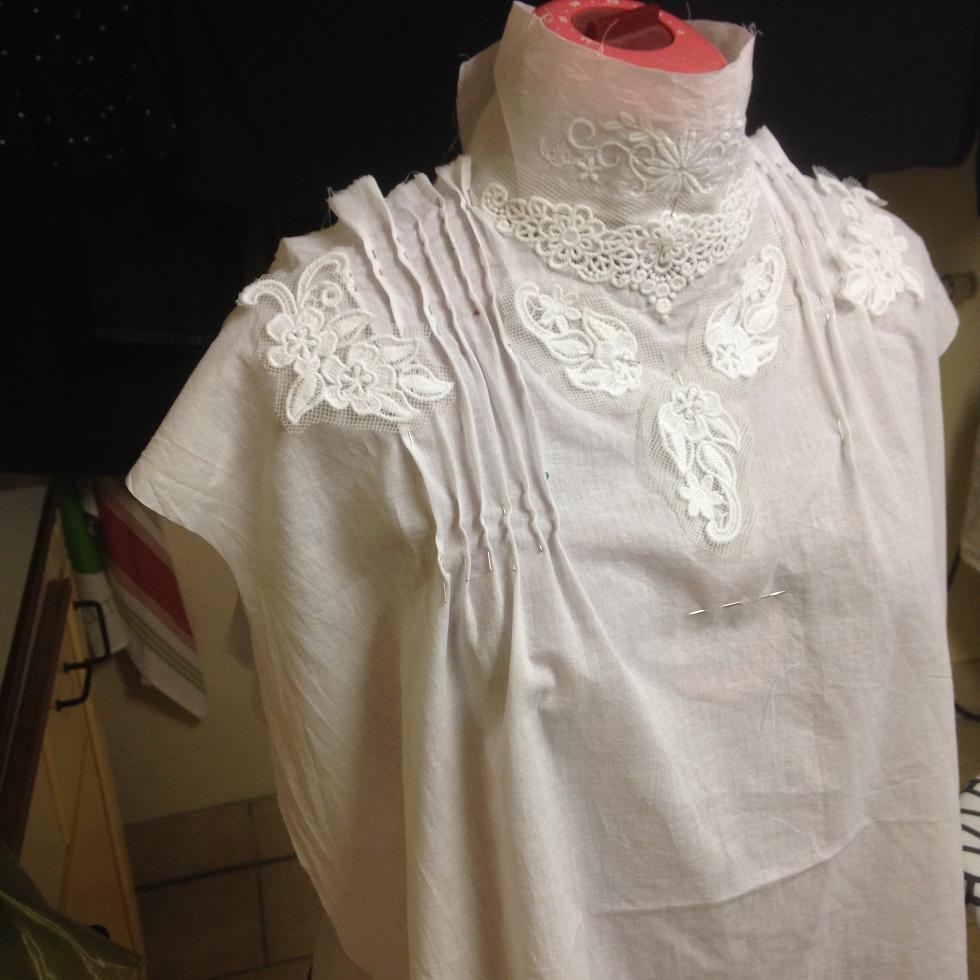
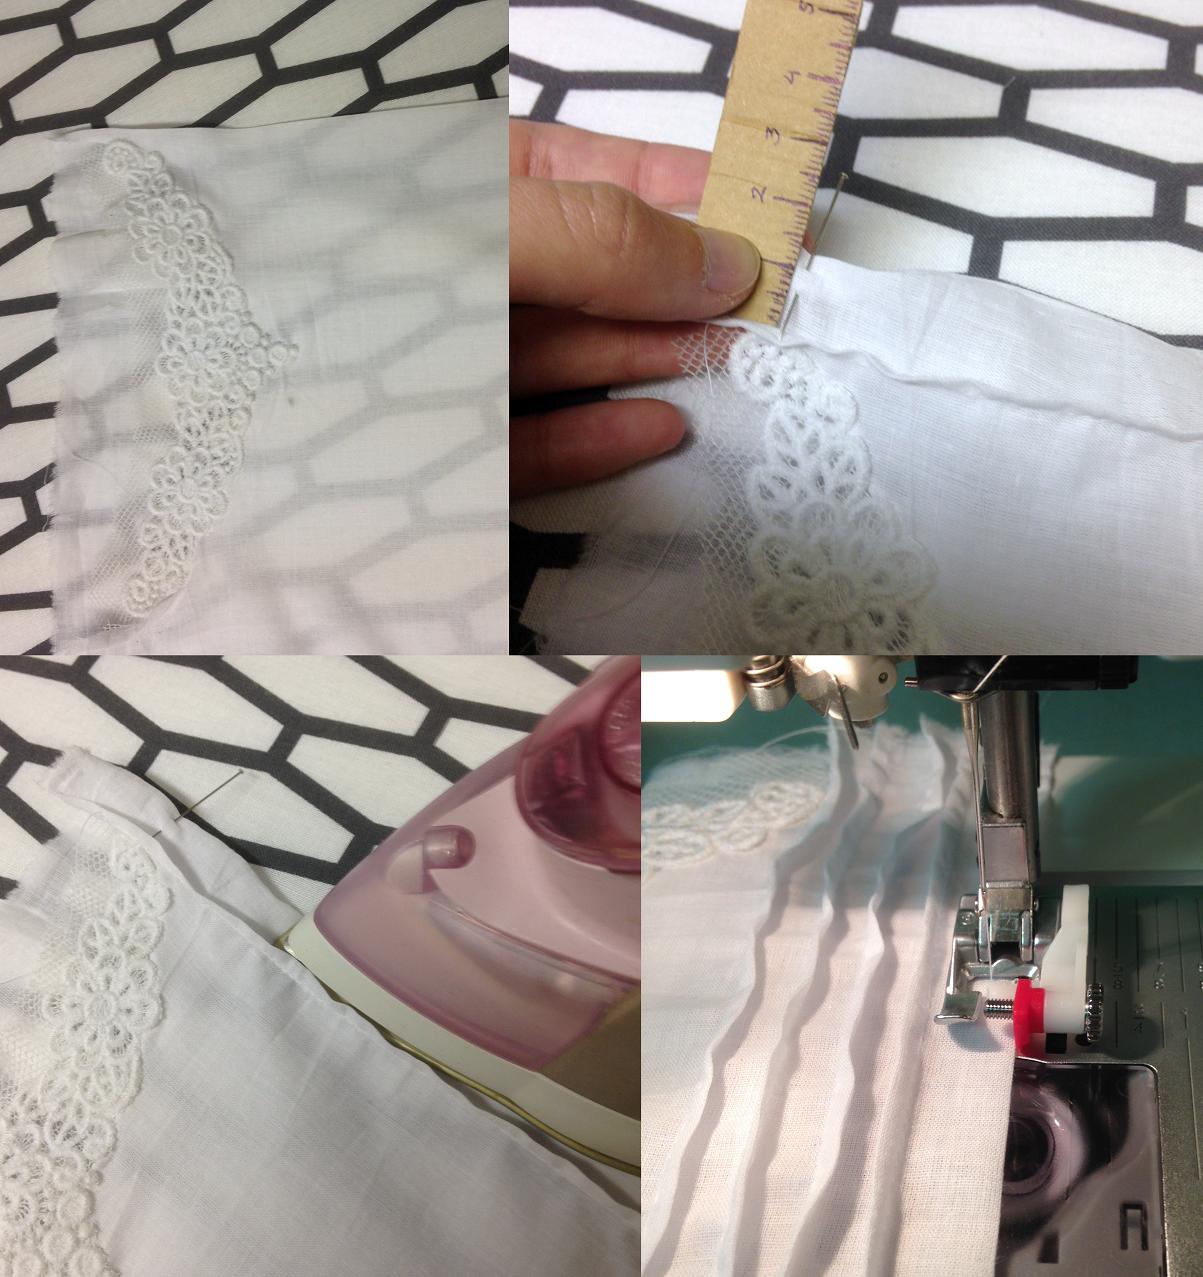
Jag experimenterade med placering av veck och broderier på provdockan, innan jag började sy. Sedan började jag med stråvecken.

I experimented with the placement of the pin tucks and embroideries before I started sewing. Then I obviously made the pin tucks.

Stråveck: 1) Stryk vid första vecket och sy önskad vidd 2) Mät ut nästa veck + mått mellan vecken 3) Stryk vecket 4) Sy vecket... om och om igen
Stråveck: 1) Stryk vid första vecket och sy önskad vidd 2) Mät ut nästa veck + mått mellan vecken 3) Stryk vecket 4) Sy vecket… om och om igen. // Pin tucks: 1) Iron the first fold and sew at the wanted breadth of the pleat 2) Measure the distance to the next pleat + the breadth of the pleat 3) Iron the fold 4) Sew the fold as in the first step and repeat the process for as many times as you want.

När detta var klart var det dags för placering av övriga broderier. Dessa nålade jag noga fast, hela vägen runt. Sedan klippte jag upp tyget bakom och fållade samtidigt som jag sydde fast broderiet i blusen.

When this was done, it was time for placing the embroideries. These I pinned down carefully, the whole way around. Then I cut superfluous fabric away as I hemmed and fastened the embroidery to the shirtwaist, from the wrong side.

Placering av broderier, även över stråvecken
Placering av broderier, även över stråvecken. // Placement of the white work, partly on top of the pin tucks.

Därefter skulle ärmarna fästas i blusen. Eftersom det är sommar och det 1903 verkar ha varit populärt med armbågslånga ärmar, gjorde jag dem korta. Innan jag sydde fast dem i blusen, gjorde jag en raksöm upptill och nedtill, med långa stygn, så att jag enkelt kunde dra åt tråden och rynka vid ärmkullen och runt armbågen. När ärmarna var fastsydda, gjode jag ett kantband i samma tyg och sydde fast nedtill.

Then the turn had come to the arms. As it is summer and elbow length of the arms seem to have been popular in 1903, I decided to go for short arms. Before attaching them, I made a “long, loose machine seam” at the top and the bottom and then gathered the fabric at the shoulder and elbow. Then I attached the arms to the shirtwaist and covered the raw edges with binding in the same fabric.

Två ärmar, 2 dm längre än armbågslängd. Veckas vid ärmkullen och nedtill.
Två ärmar, 2 dm längre än armbågslängd. Veckas vid ärmkullen och nedtill. // Two arms, two decimetres longer than shoulder-elbow length. Gather fabric at the top of the shoulder and at the elbow.

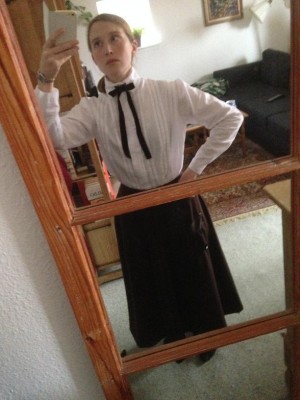
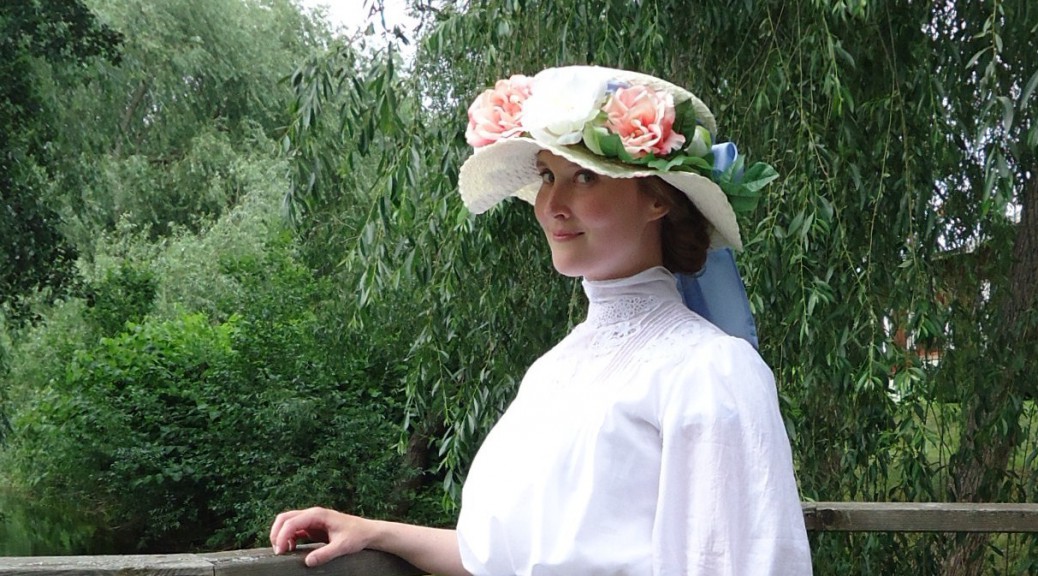
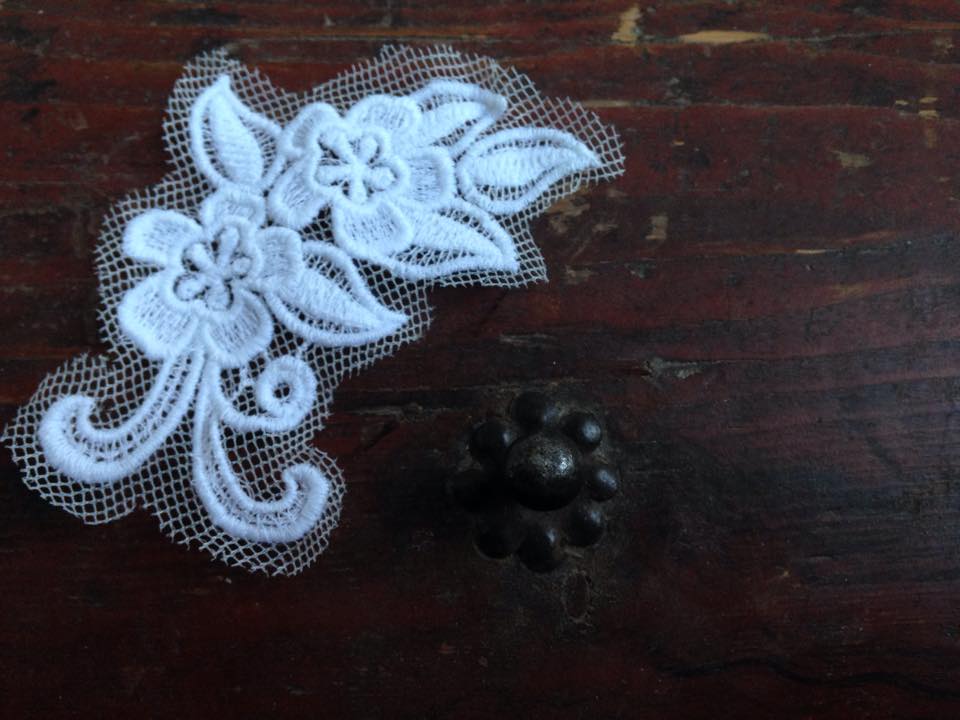
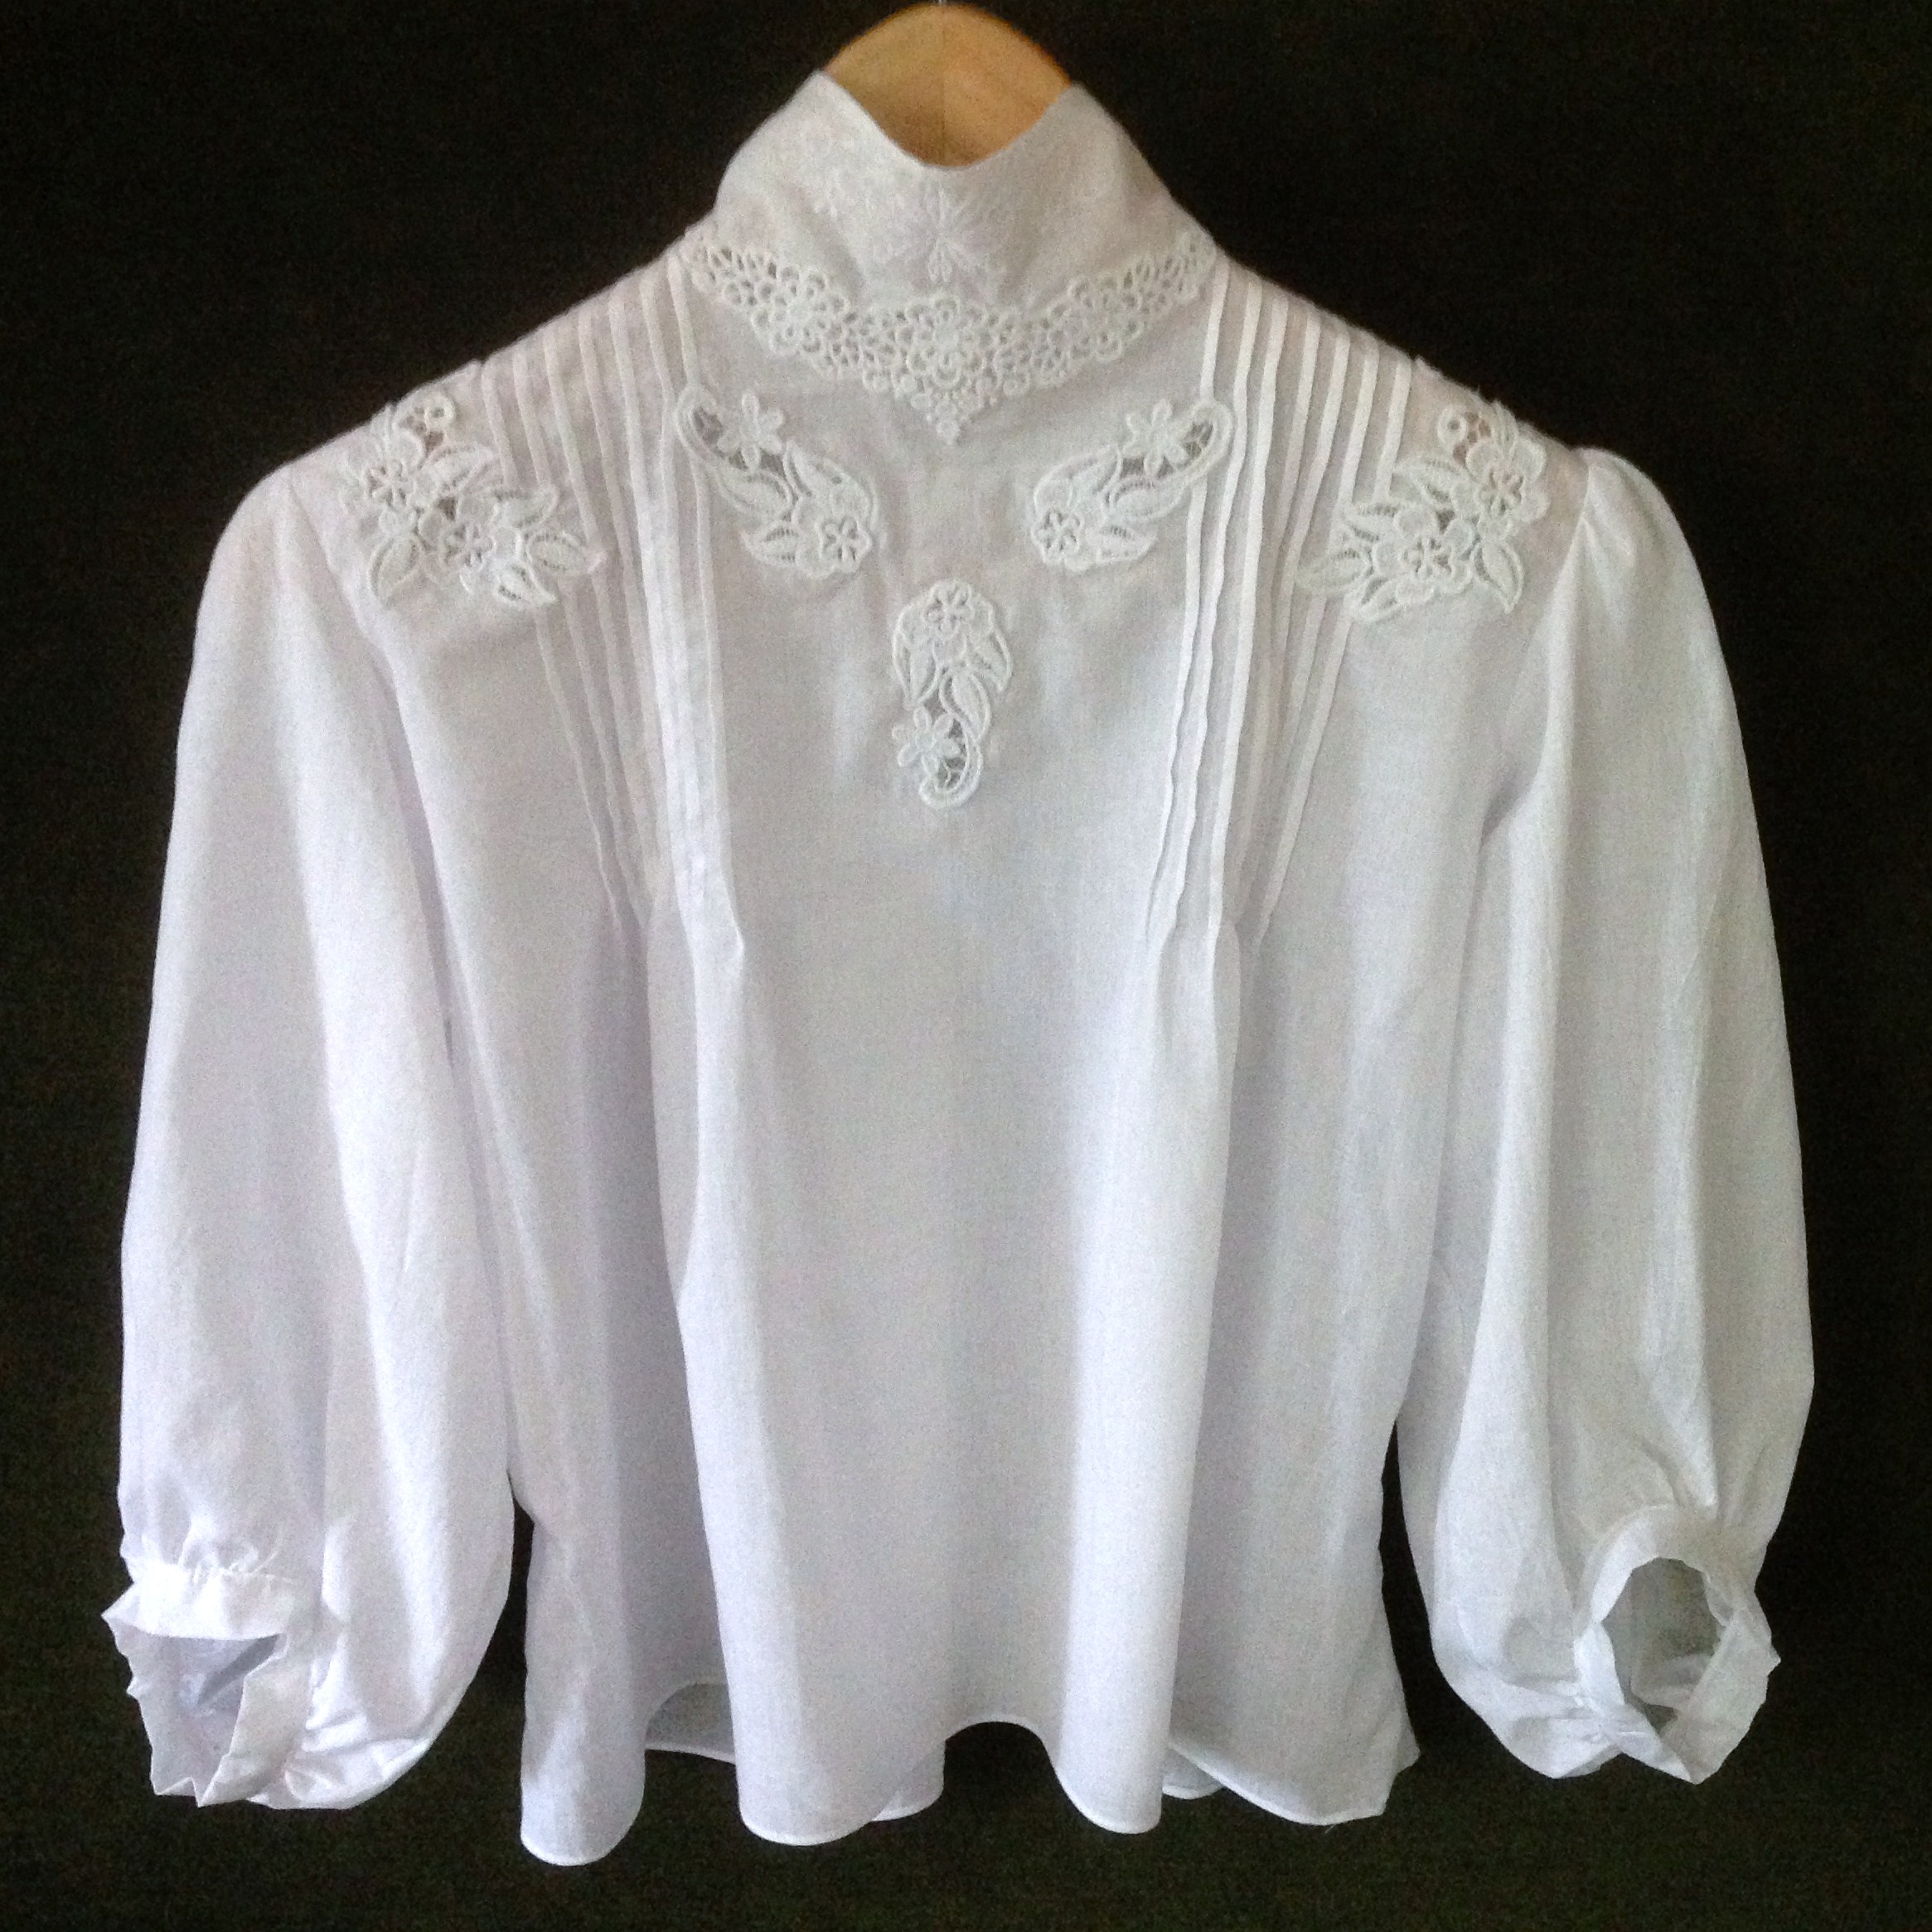
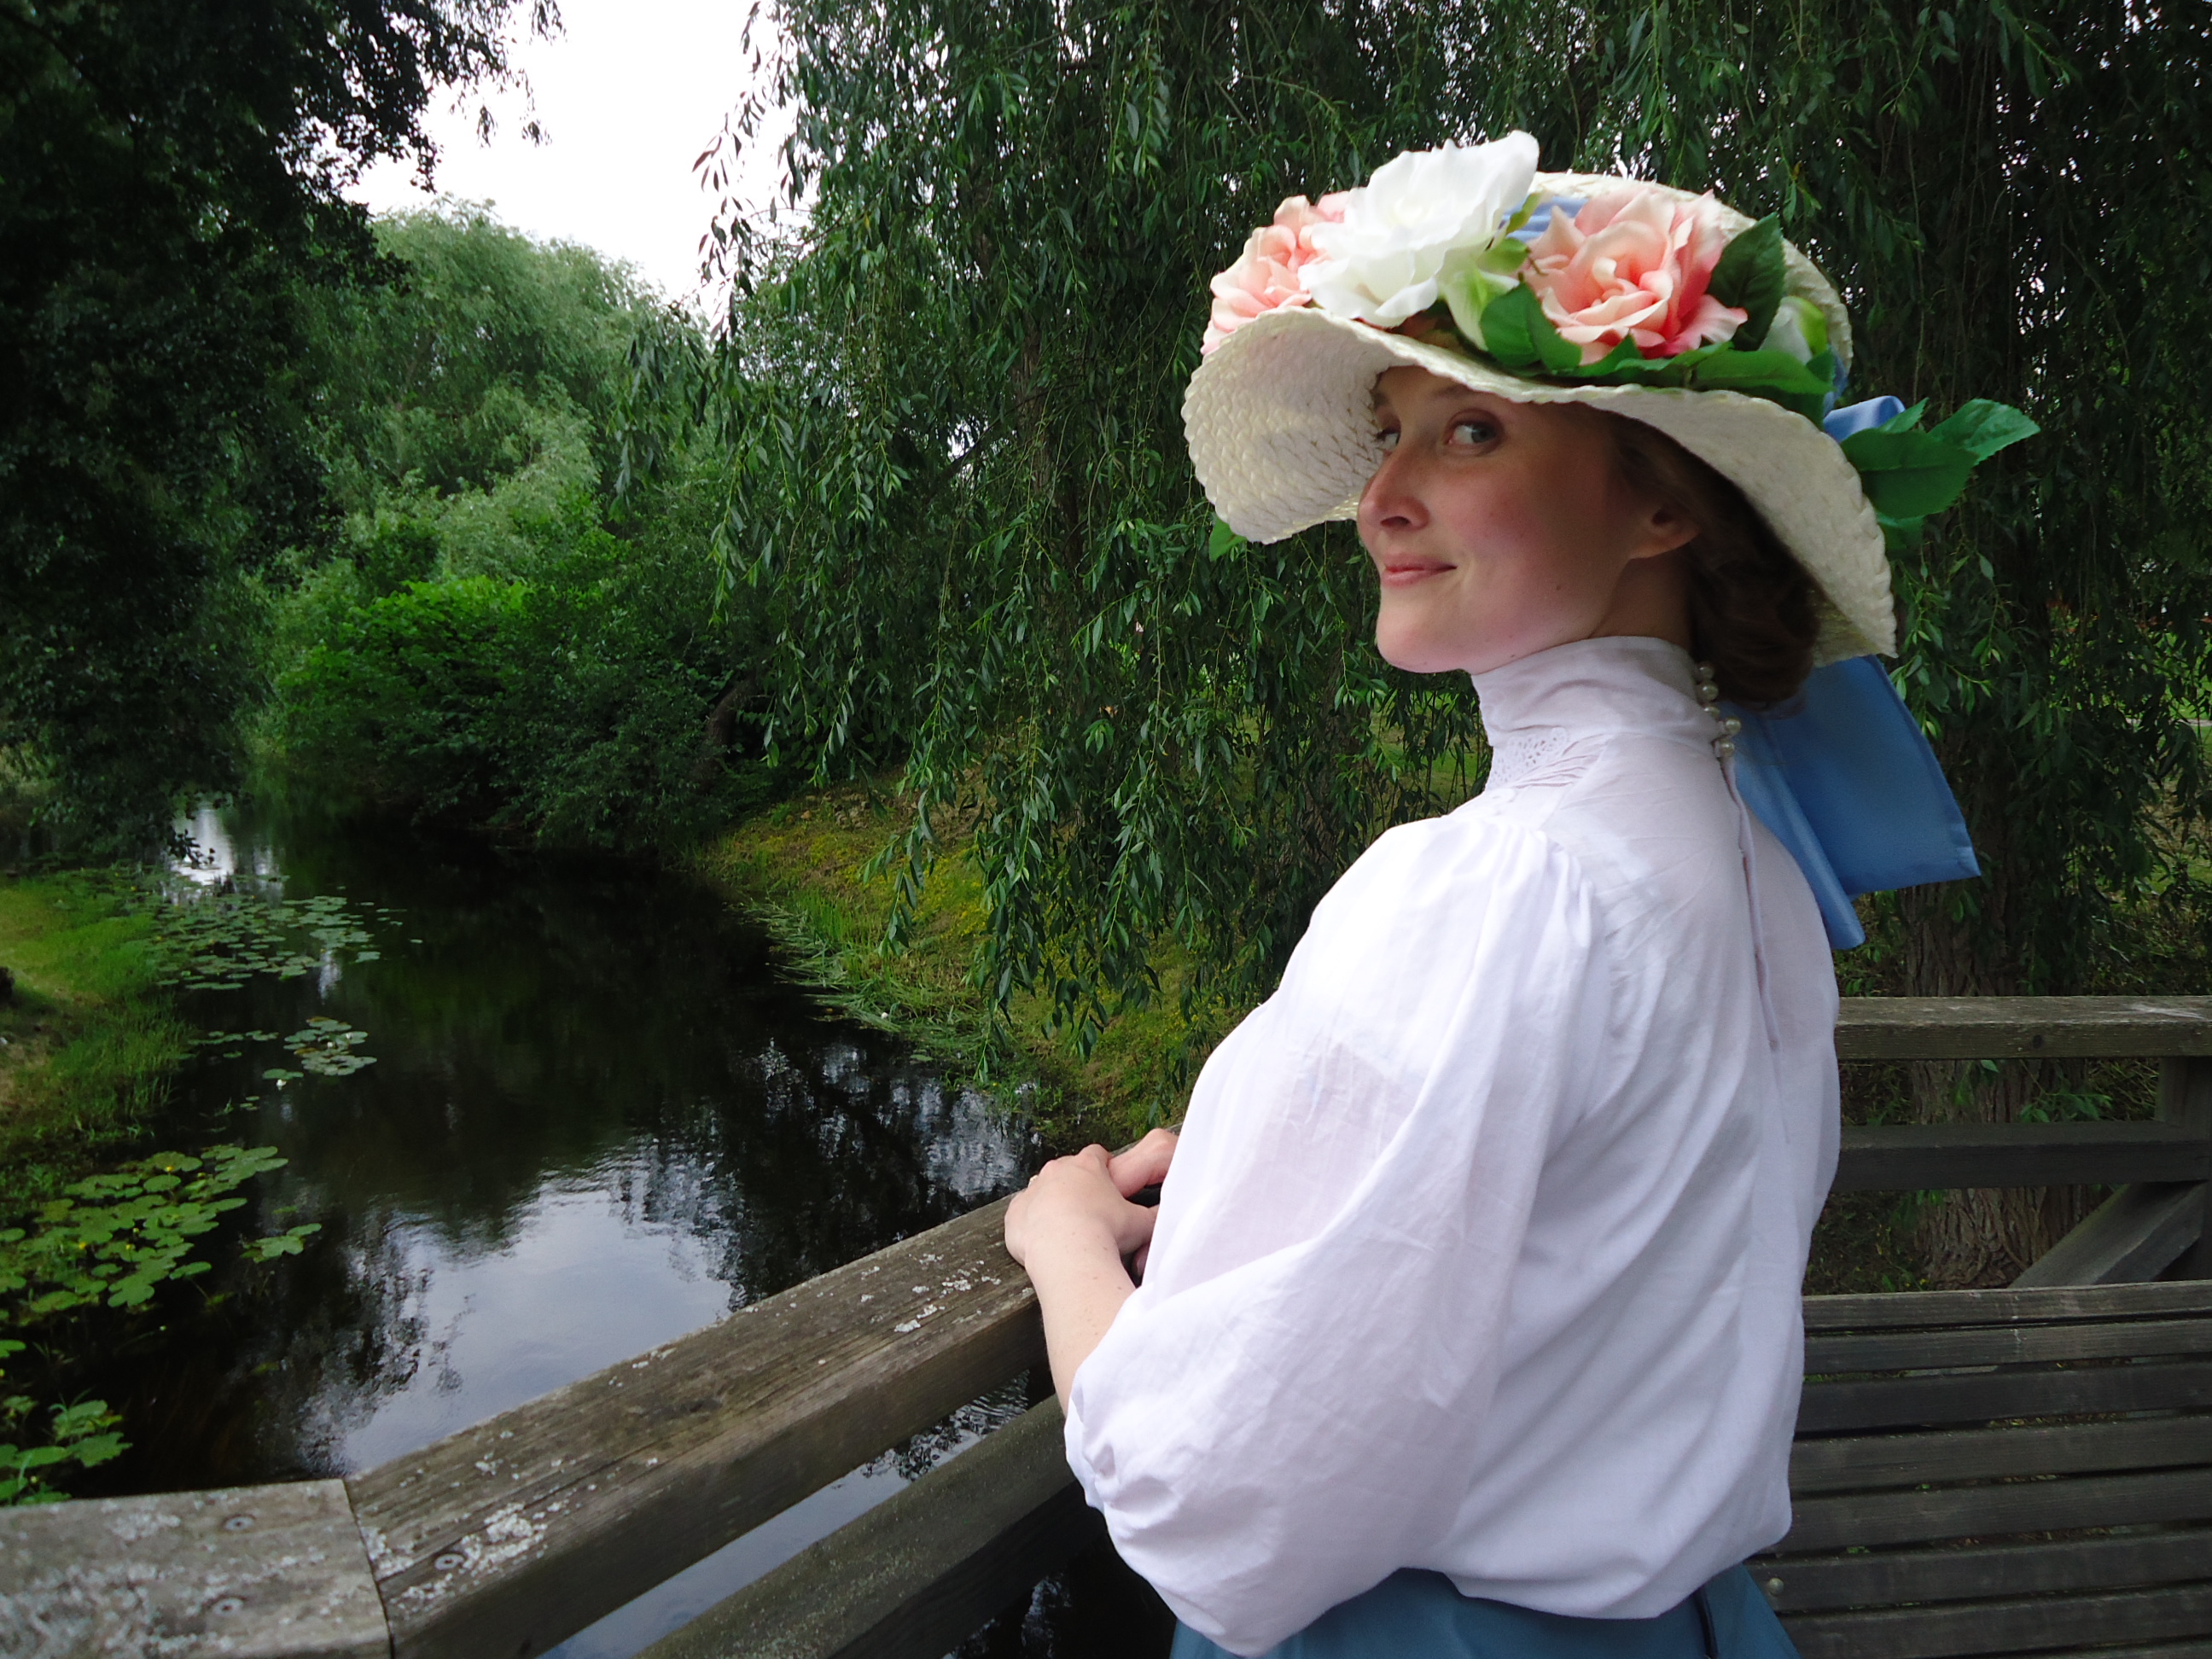
Sedan var det bara knäppningen kvar. Blusen är bara öppen halvvägs ner, så i nacken sydde jag fast dekorativa fuskpärlor med öglor i samma bomullstyg och nedanför knäppning med sydda hyskor och silverhakar.

Then there was nothing left but the closing in the back. It is sewn together at the bottom half. At the neck, I used pearl buttons and loops made from the same fabric. The rest was closed with silver hooks and eyes. This later proved to be a horrible solution, as the unusually big hairstyles use to get stuck in the hooks. Well, it looks great anyway.

Hals med pärlknäppning och nedanför knäppning med hyskor och hakar.
Hals med pärlknäppning och nedanför knäppning med hyskor och hakar. // High neck closed with buttons and loops. The rest of the back closed with hooks and eyes.

Sedan var blusen faktiskt klar!

And suddenly, the costume was actually complete!

Färdig blus
Färdig blus. Det enda som saknas nu är en kanal för midjebandet. // The finished shirtwaist, only lacking a channel and its waistband.
Till bords med katten
Till bords med katten. // At the table with the cat.
Dagens 1800-talssällskap, i Kisa.
Dagens 1800-talssällskap, i Kisa. Foto: Elin Evaldsdotter // In Kisa with today’s participants from the 19th Century Society. Photo: Elin Evaldsdotter
Fotosession med Josefine och Åsa, på 1800-talsdagen.
Fotosession med Josefine (som också bär kläder sydda av mig) och Åsa, på 1800-talsdagen. Foto: Elin Evaldsdotter // Photo session together with Josephine (who also wear my clothes) and Åsa, at the 19th century day in Kisa. Photo: Elin Evaldsdotter.
Bakifrån
Med utsikt över Stångån. Foto: Josefine Antonsson // View over Stångån. Photo: Josefine Antonsson.

Rosenhatt i rosengård.

Share

Kjol 1914

01
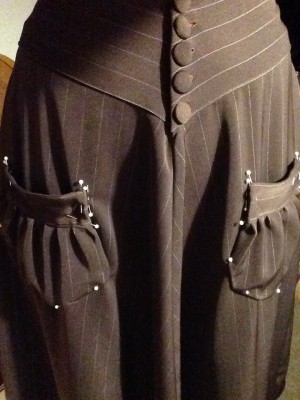
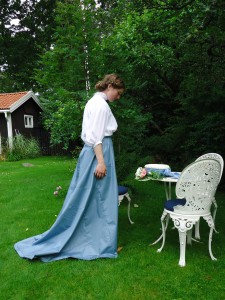
När jag bestämde mig för design på kjolen, försökte jag väga in både att kjolen skulle bäras av en modeintresserad kvinna, men även att hennes ekonomi skulle vara begränsad och att hon gärna skulle kunna cykla i den. Alltså fick den inte vara för uppseendeväckande och säsongsbunden, och helst ganska kort, men gärna med en “modern” siluett.

When I decided what design I would use for the skirt, I tried to consider that it would be worn by a fashion forward young woman, who had a strained economy and used her bicycle on her way to work. Thus it mustn’t be too fancy, but more decent and timeless and with that shorter, more bicycle friendly length that had recently come into fashion.

Modetidningen intill är från 1916, men liknande modeller på kjolar finns redan 1914. Skissen, härunder, baserar jag på en kombination av flera kjolmodeller, som jag har sett på modebilder och i klädkataloger. Samma kjollängd, har jag dessutom sett på “street fashion”-bilder från 1906. Sent omsider beslutade jag mig för att även sätta fickor på kjolen, eftersom det ändå är en praktisk lärarinna som ska bära den.

This fashion plate is from 1916, but I have seen similar skirt models from as early as 1914. The sketch shows a combination of several skirts that I have seen on fashion plates and in catalogs. This length I have also seen in photos of street fashion from 1906. I also added pockets, as it would be very practical for the teacher who would wear it.

02
Skiss på hur jag vill sy kjolen.

Toille

Som vanligt, när jag har en begränsad mängd tyg, börjar jag med att göra en toille.

As usual, when I have a limited amount of fabric and no pattern, I start with making a mockup.

03

Till vänster ser du midjedelen, medan själva kjoldelen syns till höger. Den är inte på långa vägar klar, men man kan se vilket fall kjolen får, med den rundning kjolen har i midjan, på denna bild.

To the left you see the “waist part”, while the skirt is at the right. It isn’t even close to finished, but at least you get an idea of how the skirt falls (?) with the current shape of the waistline.

Kjolen

Jag tog en bild av när alla delar var urklippta ur tyglängden, men insåg sedan att jag behövde justera avsevärt, så att det inte var värt att förvirra er med den bilden. Så här ser i alla fall framsidans bitar ut, innan de har sytts samman. Ovanför ligger också baksidans midjedel.

I took a picture when all parts were cut out of the proper fabric, but then I realised that I had to adjust many things, so let’s not confuse you with that picture. Anyhow, this is what the front parts look like, before put together. Above them, there lays also the back “waist part”.

04

Jag började med att nåla de fyra våderna samman, testa och justera. Sedan sydde jag dem samman, men lämnade de översta decimeterna öppna framtill. Därefter nålade jag fast midjedelen fram och bak.

I started with pinning the four panels together, test and adjust. Then I sewed them together, but left the upper decimetres open. Then I pinned the waist parts to the front and back of the skirt.

05

Så här såg midjedelen ut framtill. Sedan sydde jag knapphål för hand och klädde knappar (ärvda efter svärfarmor Saga), i en rasande fart, sista kvällen innan vi åkte till Svea rike över jul.

The waist part looked like this in the front. I hand stitched the buttonholes and made covered buttons (inherited) in a great hurry, at the last evening before going home to Sweden for Christmas.

06

Kjolen saknade alltså endast fåll och fickor, när vi återvände till verkligheten.

The skirt only lacked hemming and the pockets, when we returned to the grave reality.

Fickor

07

08
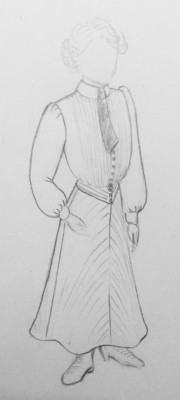
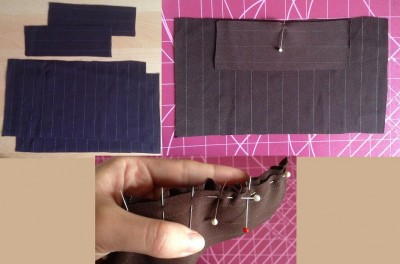
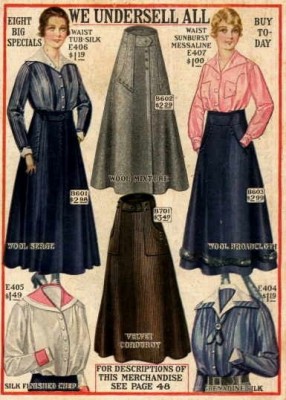
När jag började med fickorna, hade jag fortfarande inte helt bestämt mig för hur de skulle se ut. Jag klippte ut några tyglappar och började experimentera. Jag hade sett flera trevliga veckade fick-varianter, bland annat på denna modebild från 1915:

When I began making the pockets, I still hadn’t figured out exactly how they would look. I cut some bits of fabric and experimented with these. I had seen many different types of pockets, for example in this nice fashion plate from 1915:

Jag testade några olika varianter på kjolen och bestämde mig för att göra något liknande bilden intill, men utan knappar och volanger upptill.

I tested some different variants on the skirt and decided to go for something similar to the one in the picture, but without buttons and flounce.

09

Jag insåg att det skulle krävas väldigt mycket arbete för att få till en rynkad, men ändå rät nedre kant på fickorna, så jag testade mig fram till denna variant.

I realised that it would take some work in order to get that ruffled but at the same time straight bottom edge, so I ended up with this alternative.

10

Man ser ganska rolig ut, när man försöker föreviga processen, från topp till tå.

One looks kind of funny when trying to document the process, from top to toe.

11

Sedan var det bara att sy fast fickorna med raksöm och fålla kjolen.

Then all that remained was to stitch down the pockets with a straight seam and hem the skirt.

Den färdiga kjolen

12 13 14

Dags att dra med min hängivne fotograf ut i naturen för en kylig fotosession!

Time to take my dedicated photographer out for a refreshing photo session.

15

Share