There was a vacuum after the competition gown was finished, so I just had to sew a medieval kirtle for my little niece. She was so happy! This was done in a few hours, so I needed yet another project. I have some beautiful whitework embroidery saved from pillow cases, which I believe were made by my husband’s grandmother. As I also recieved an old curtain with a pretty floral print, screeming Regency, I knew I just had to make a regency dress for another niece.
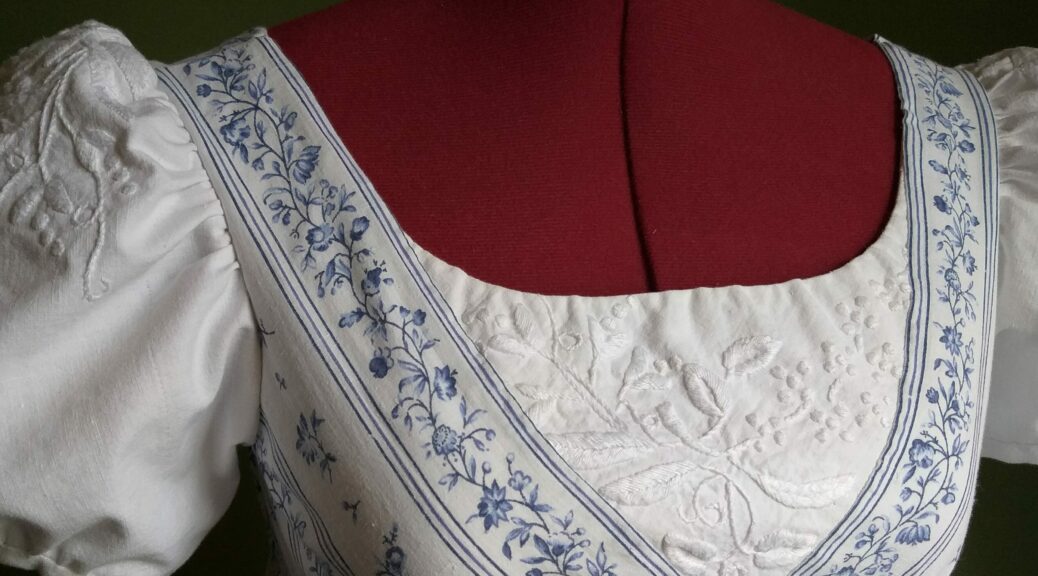
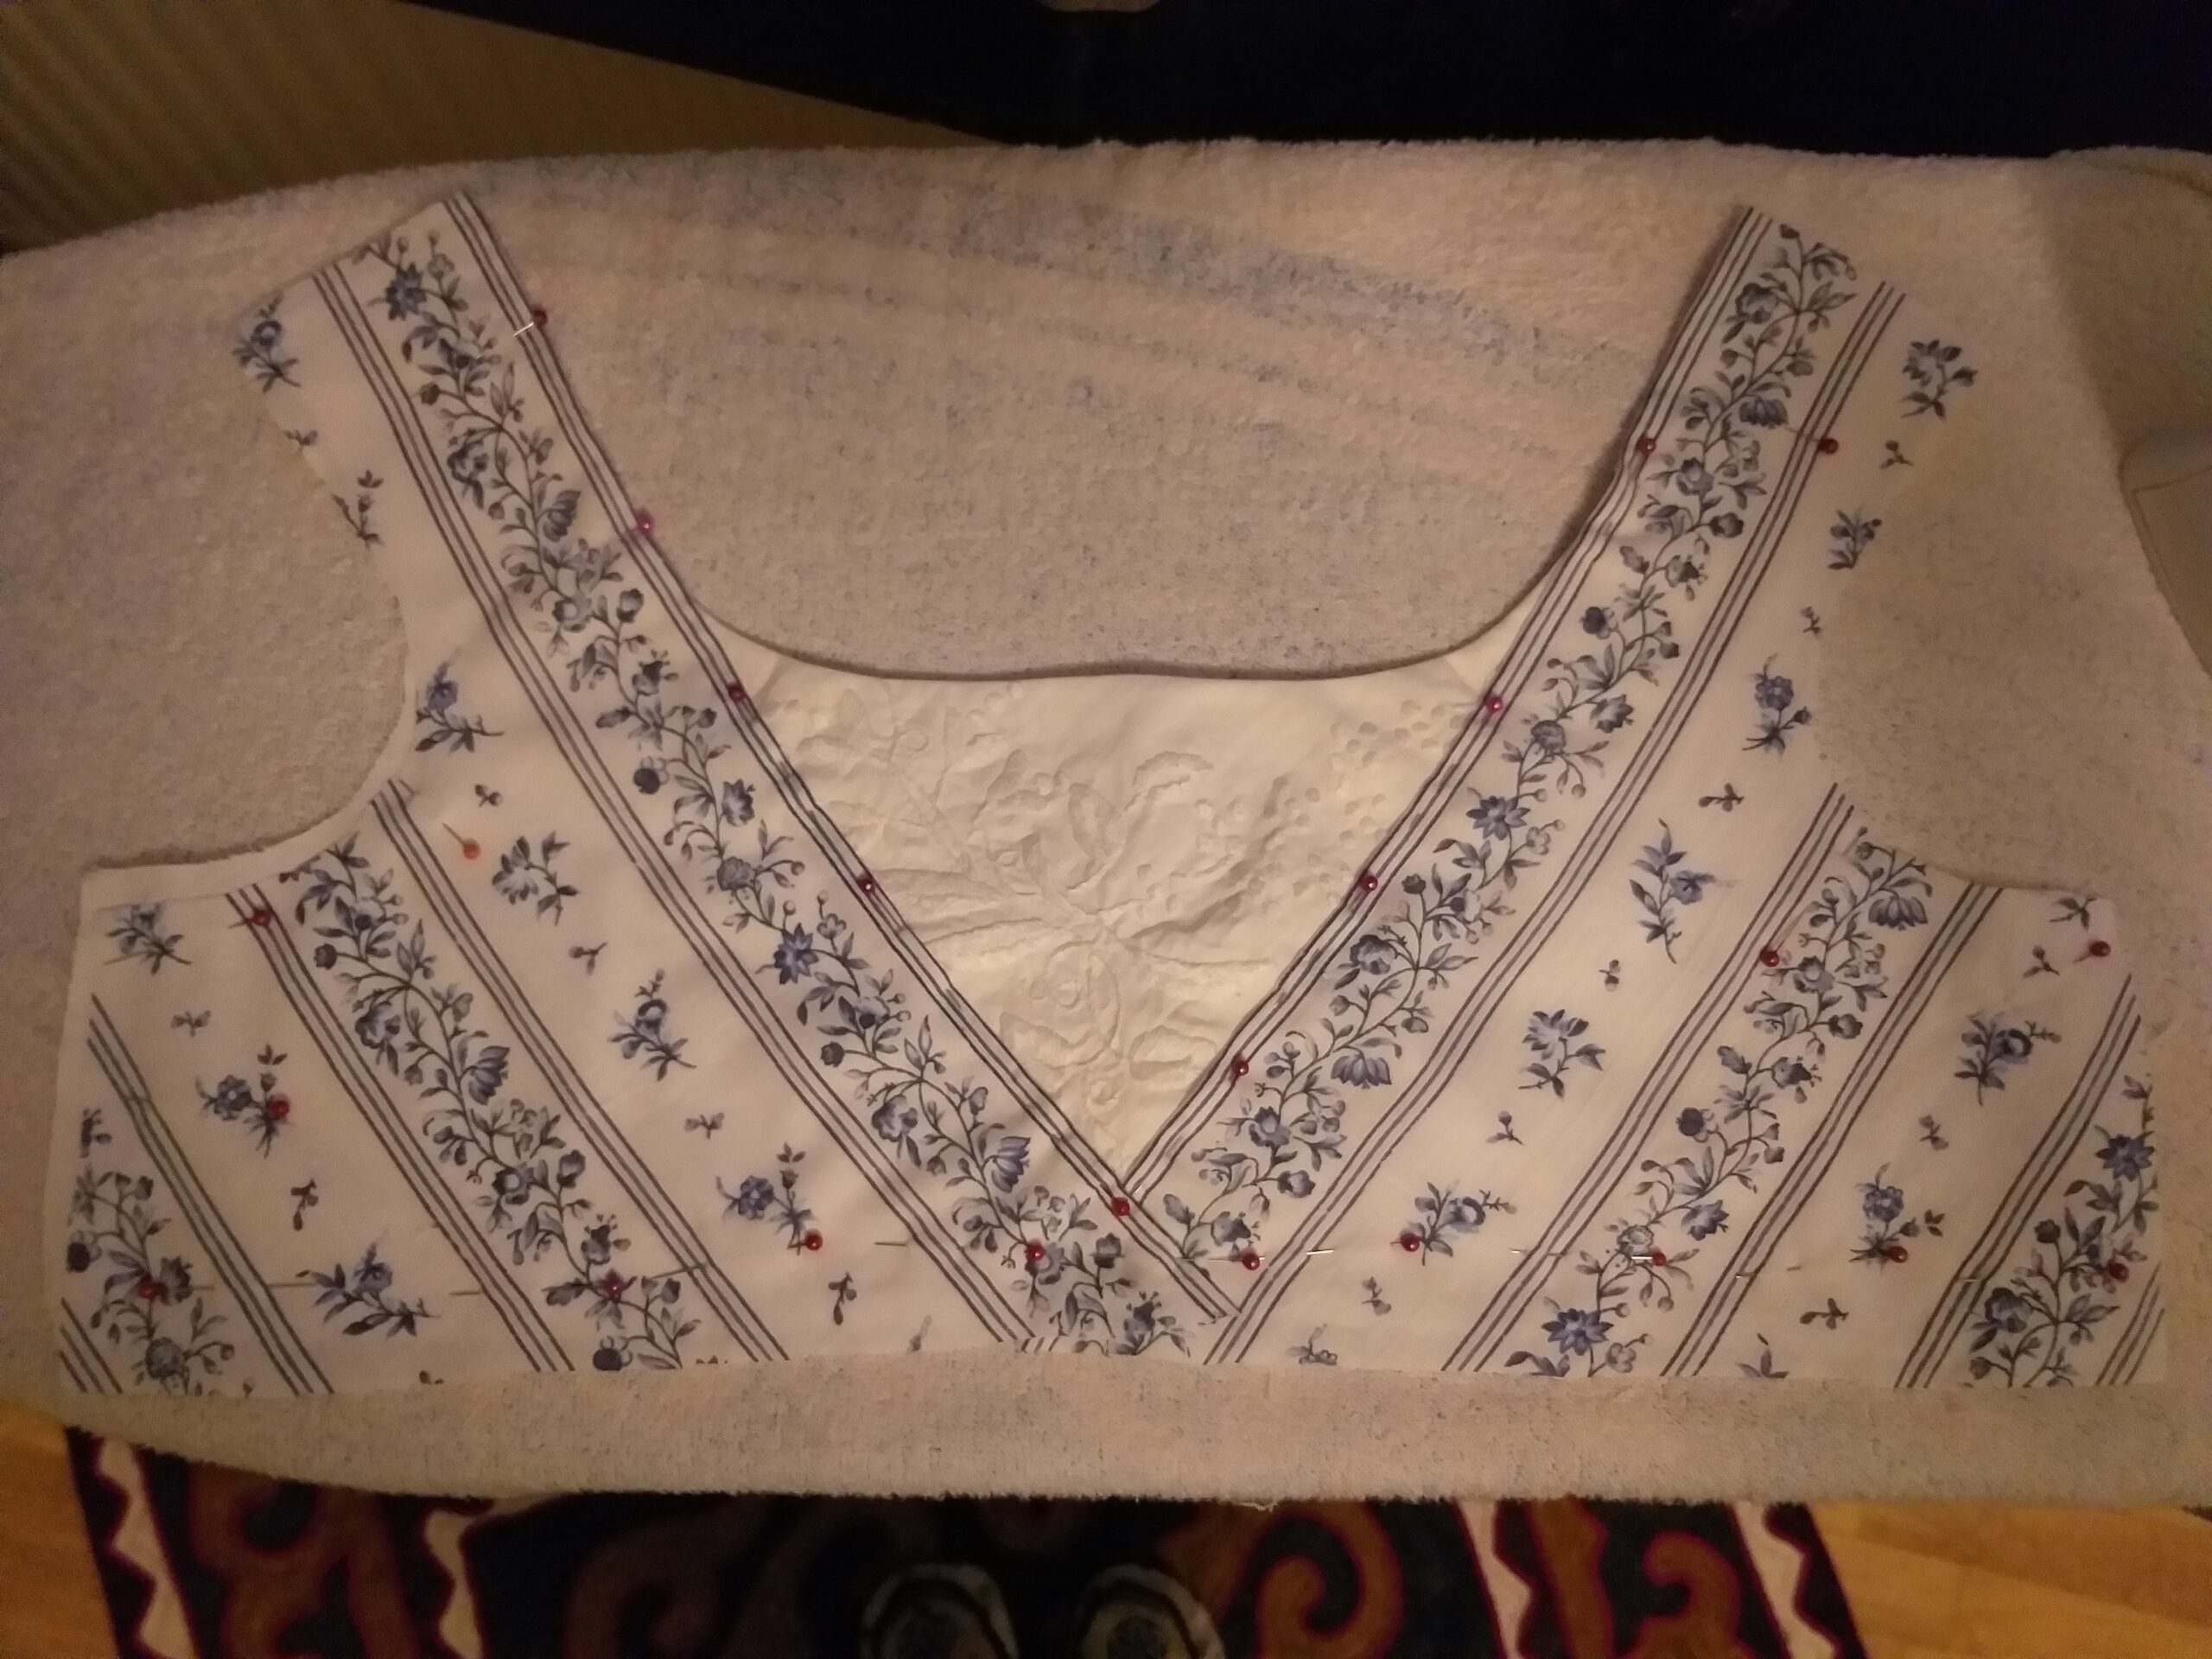
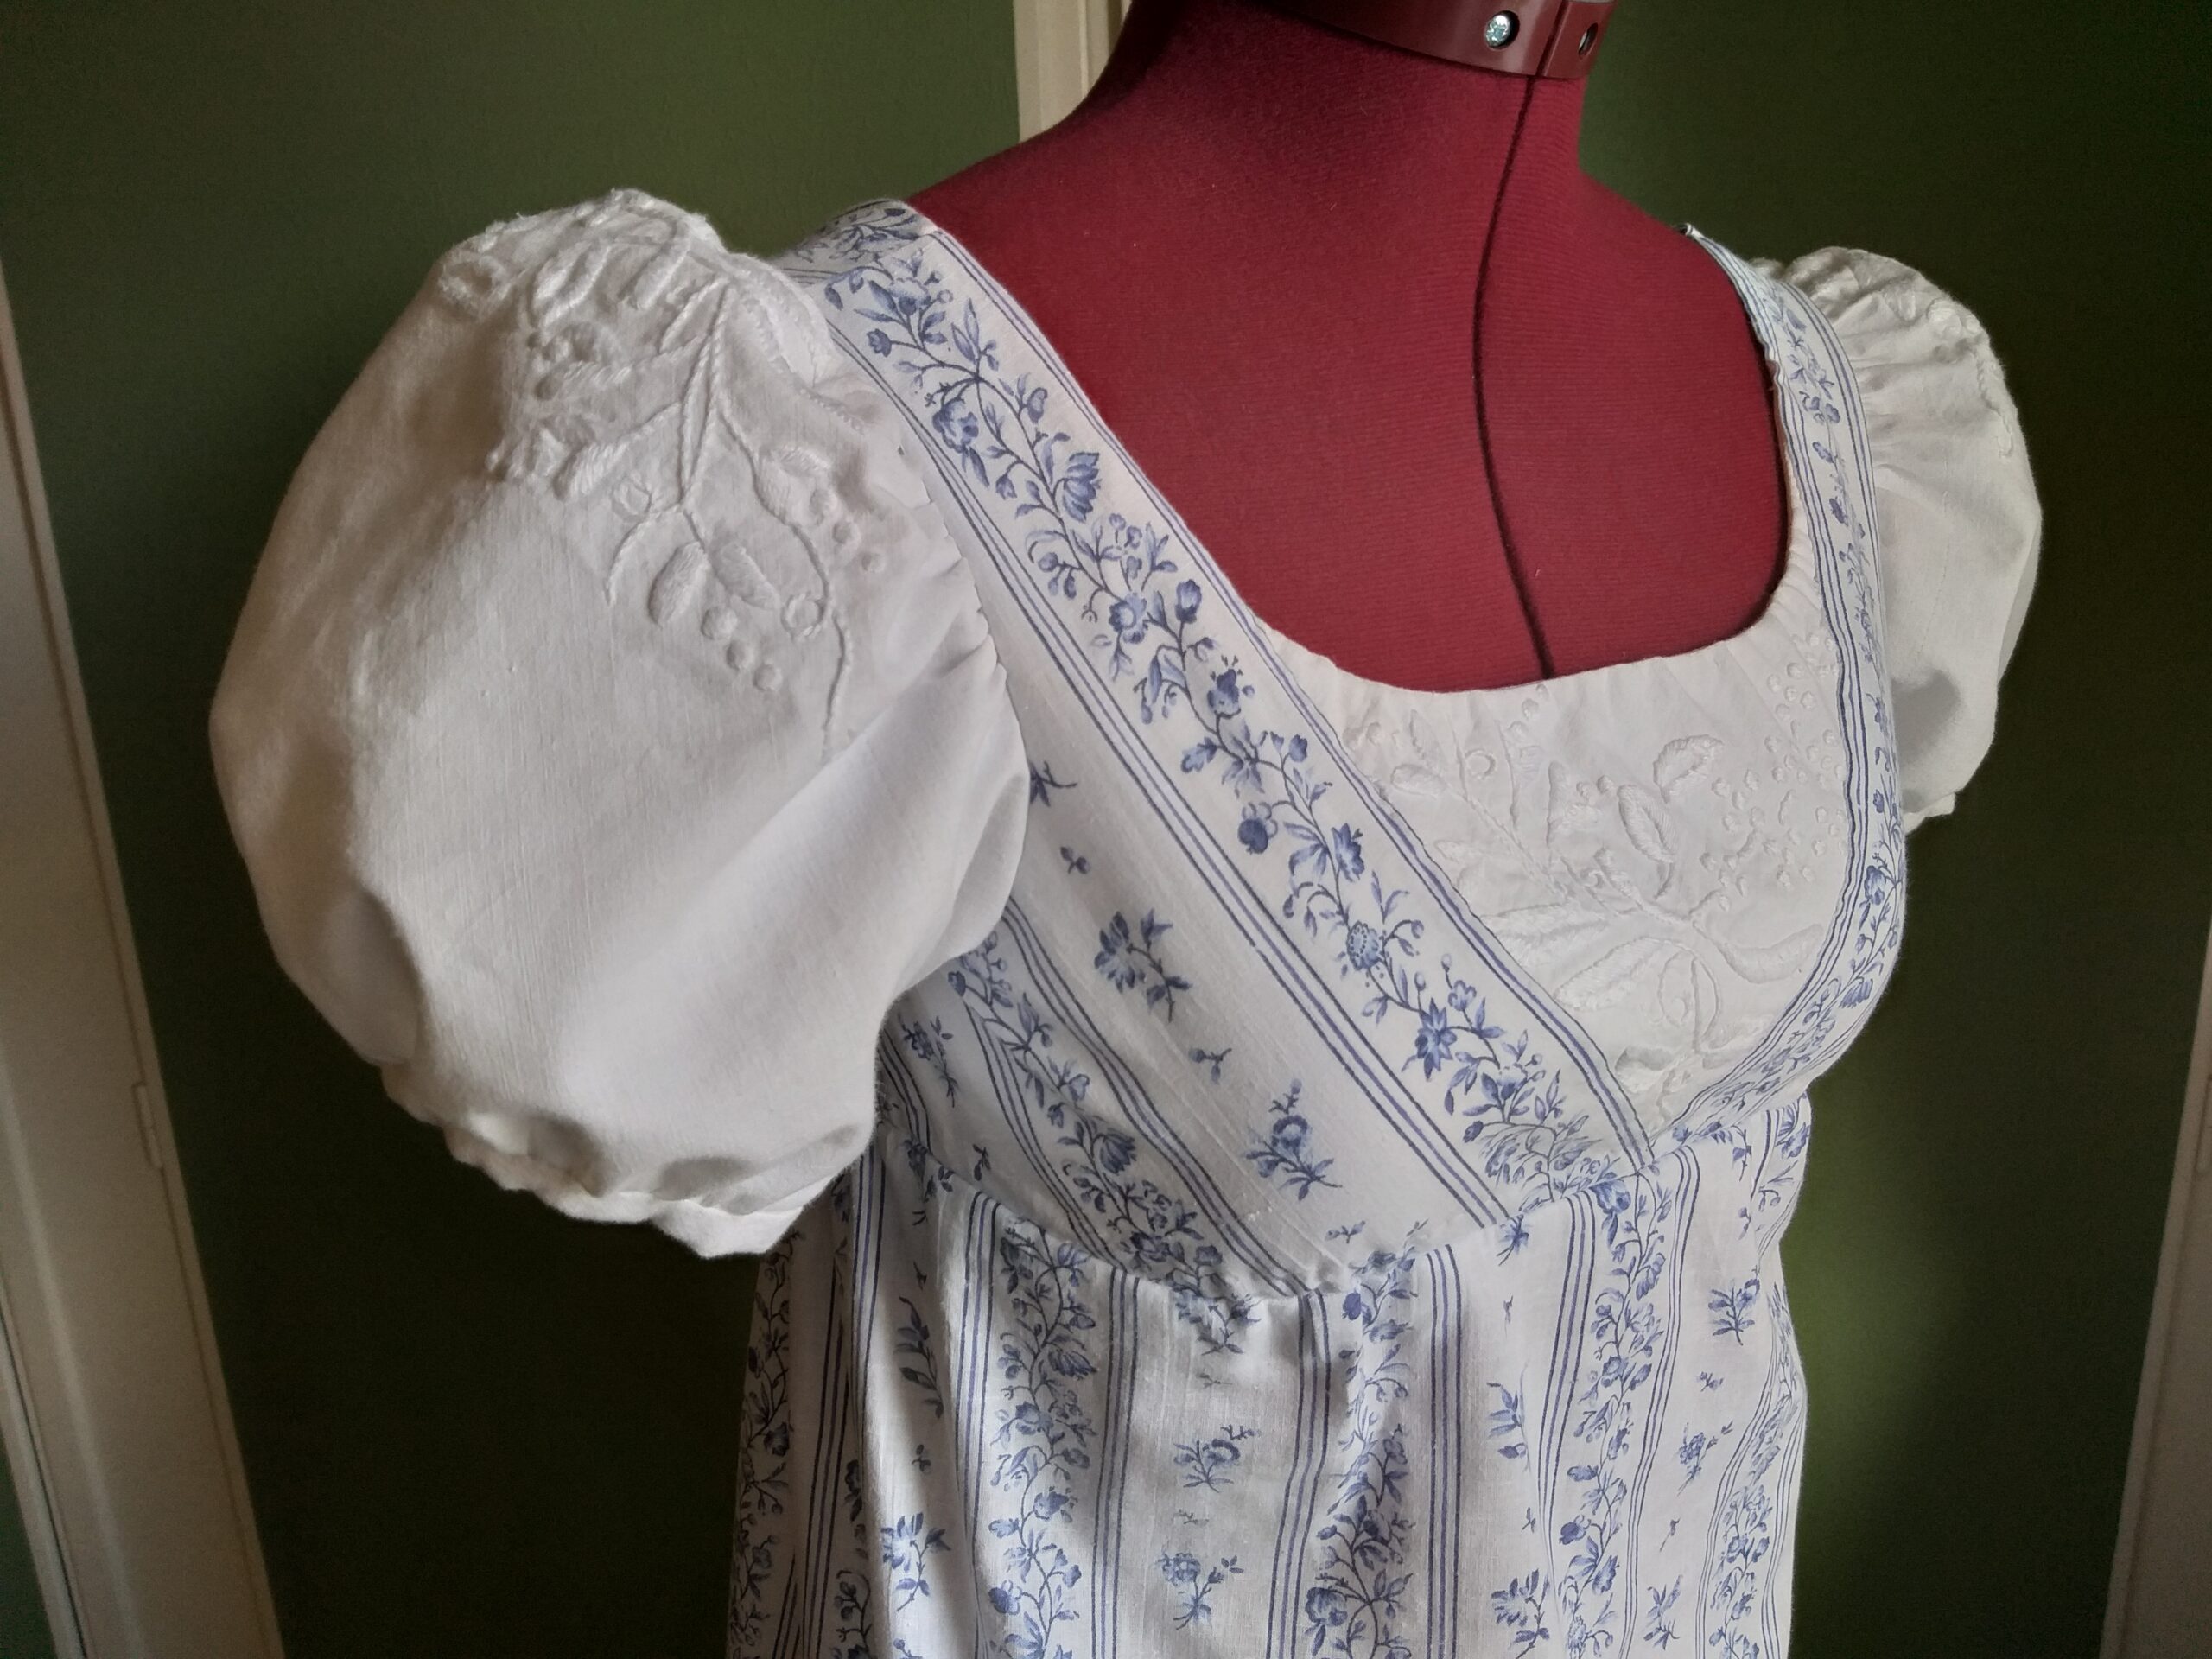
I incorporated the embroidery in the bodice and the poofy arms.
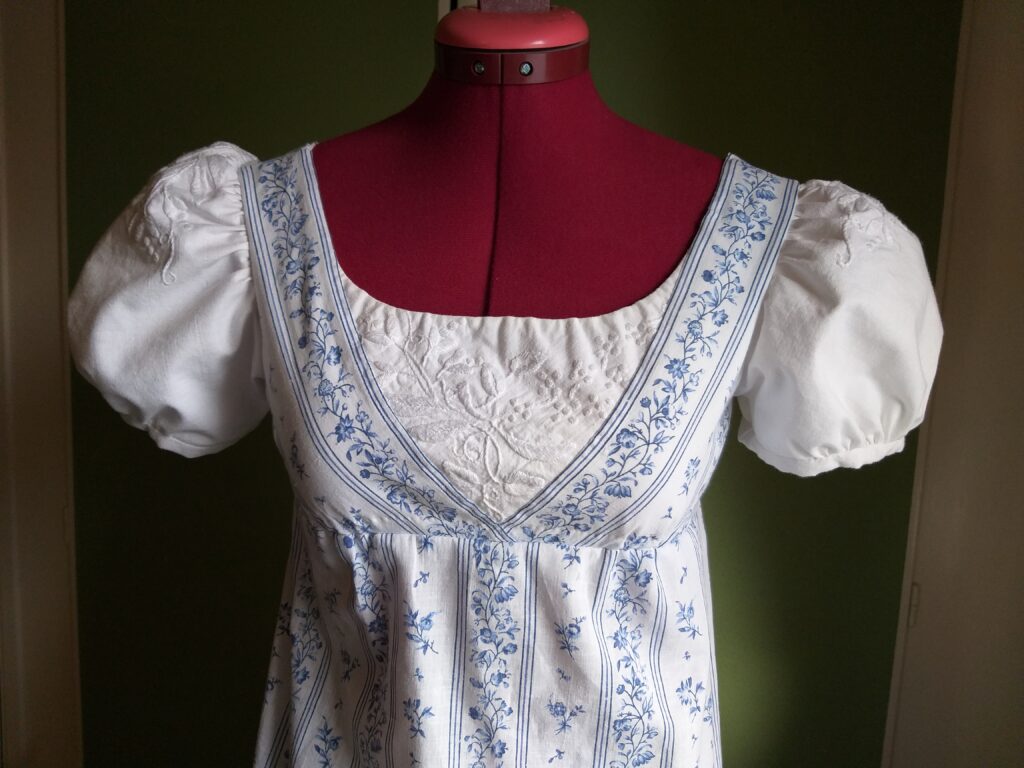
The embroidery piece is stitched to the bodice piece.Then the fashion fabric (or rather, the old curtain) was sewn onto the front of the bodice piece.Embroideries put in the mid front and in the arms.
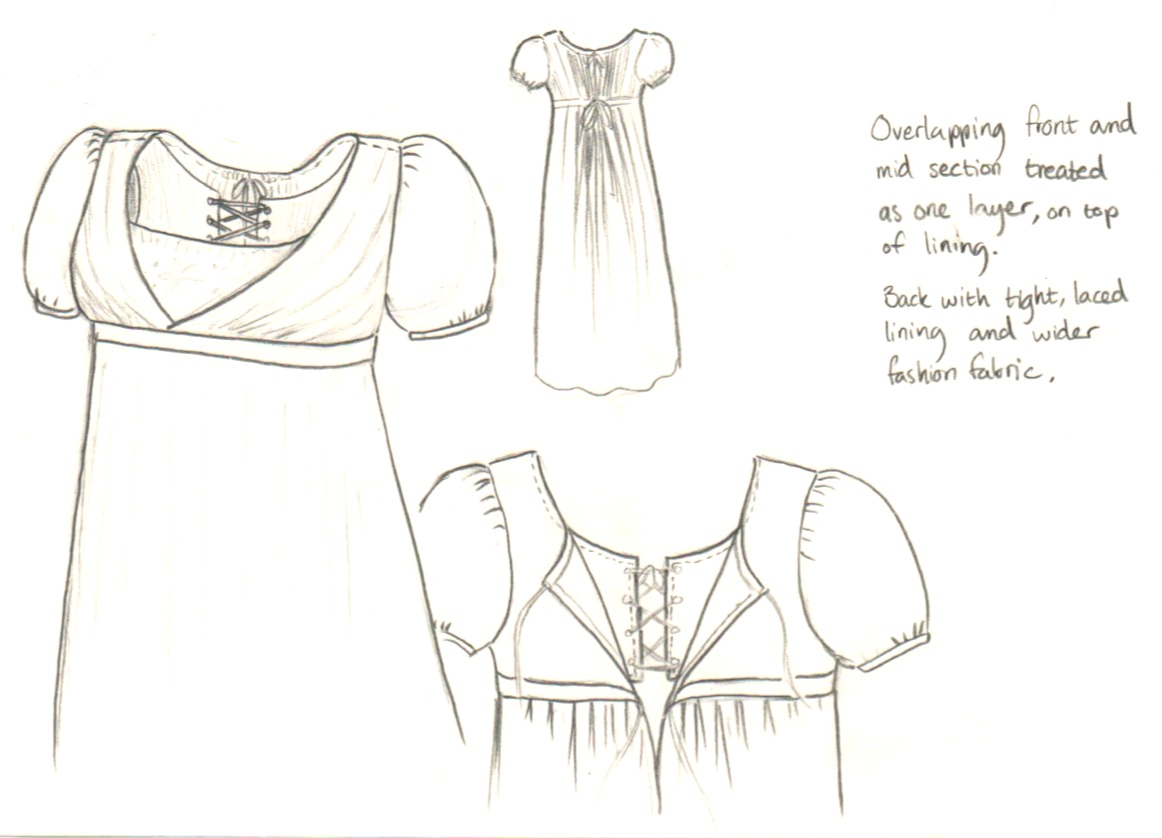
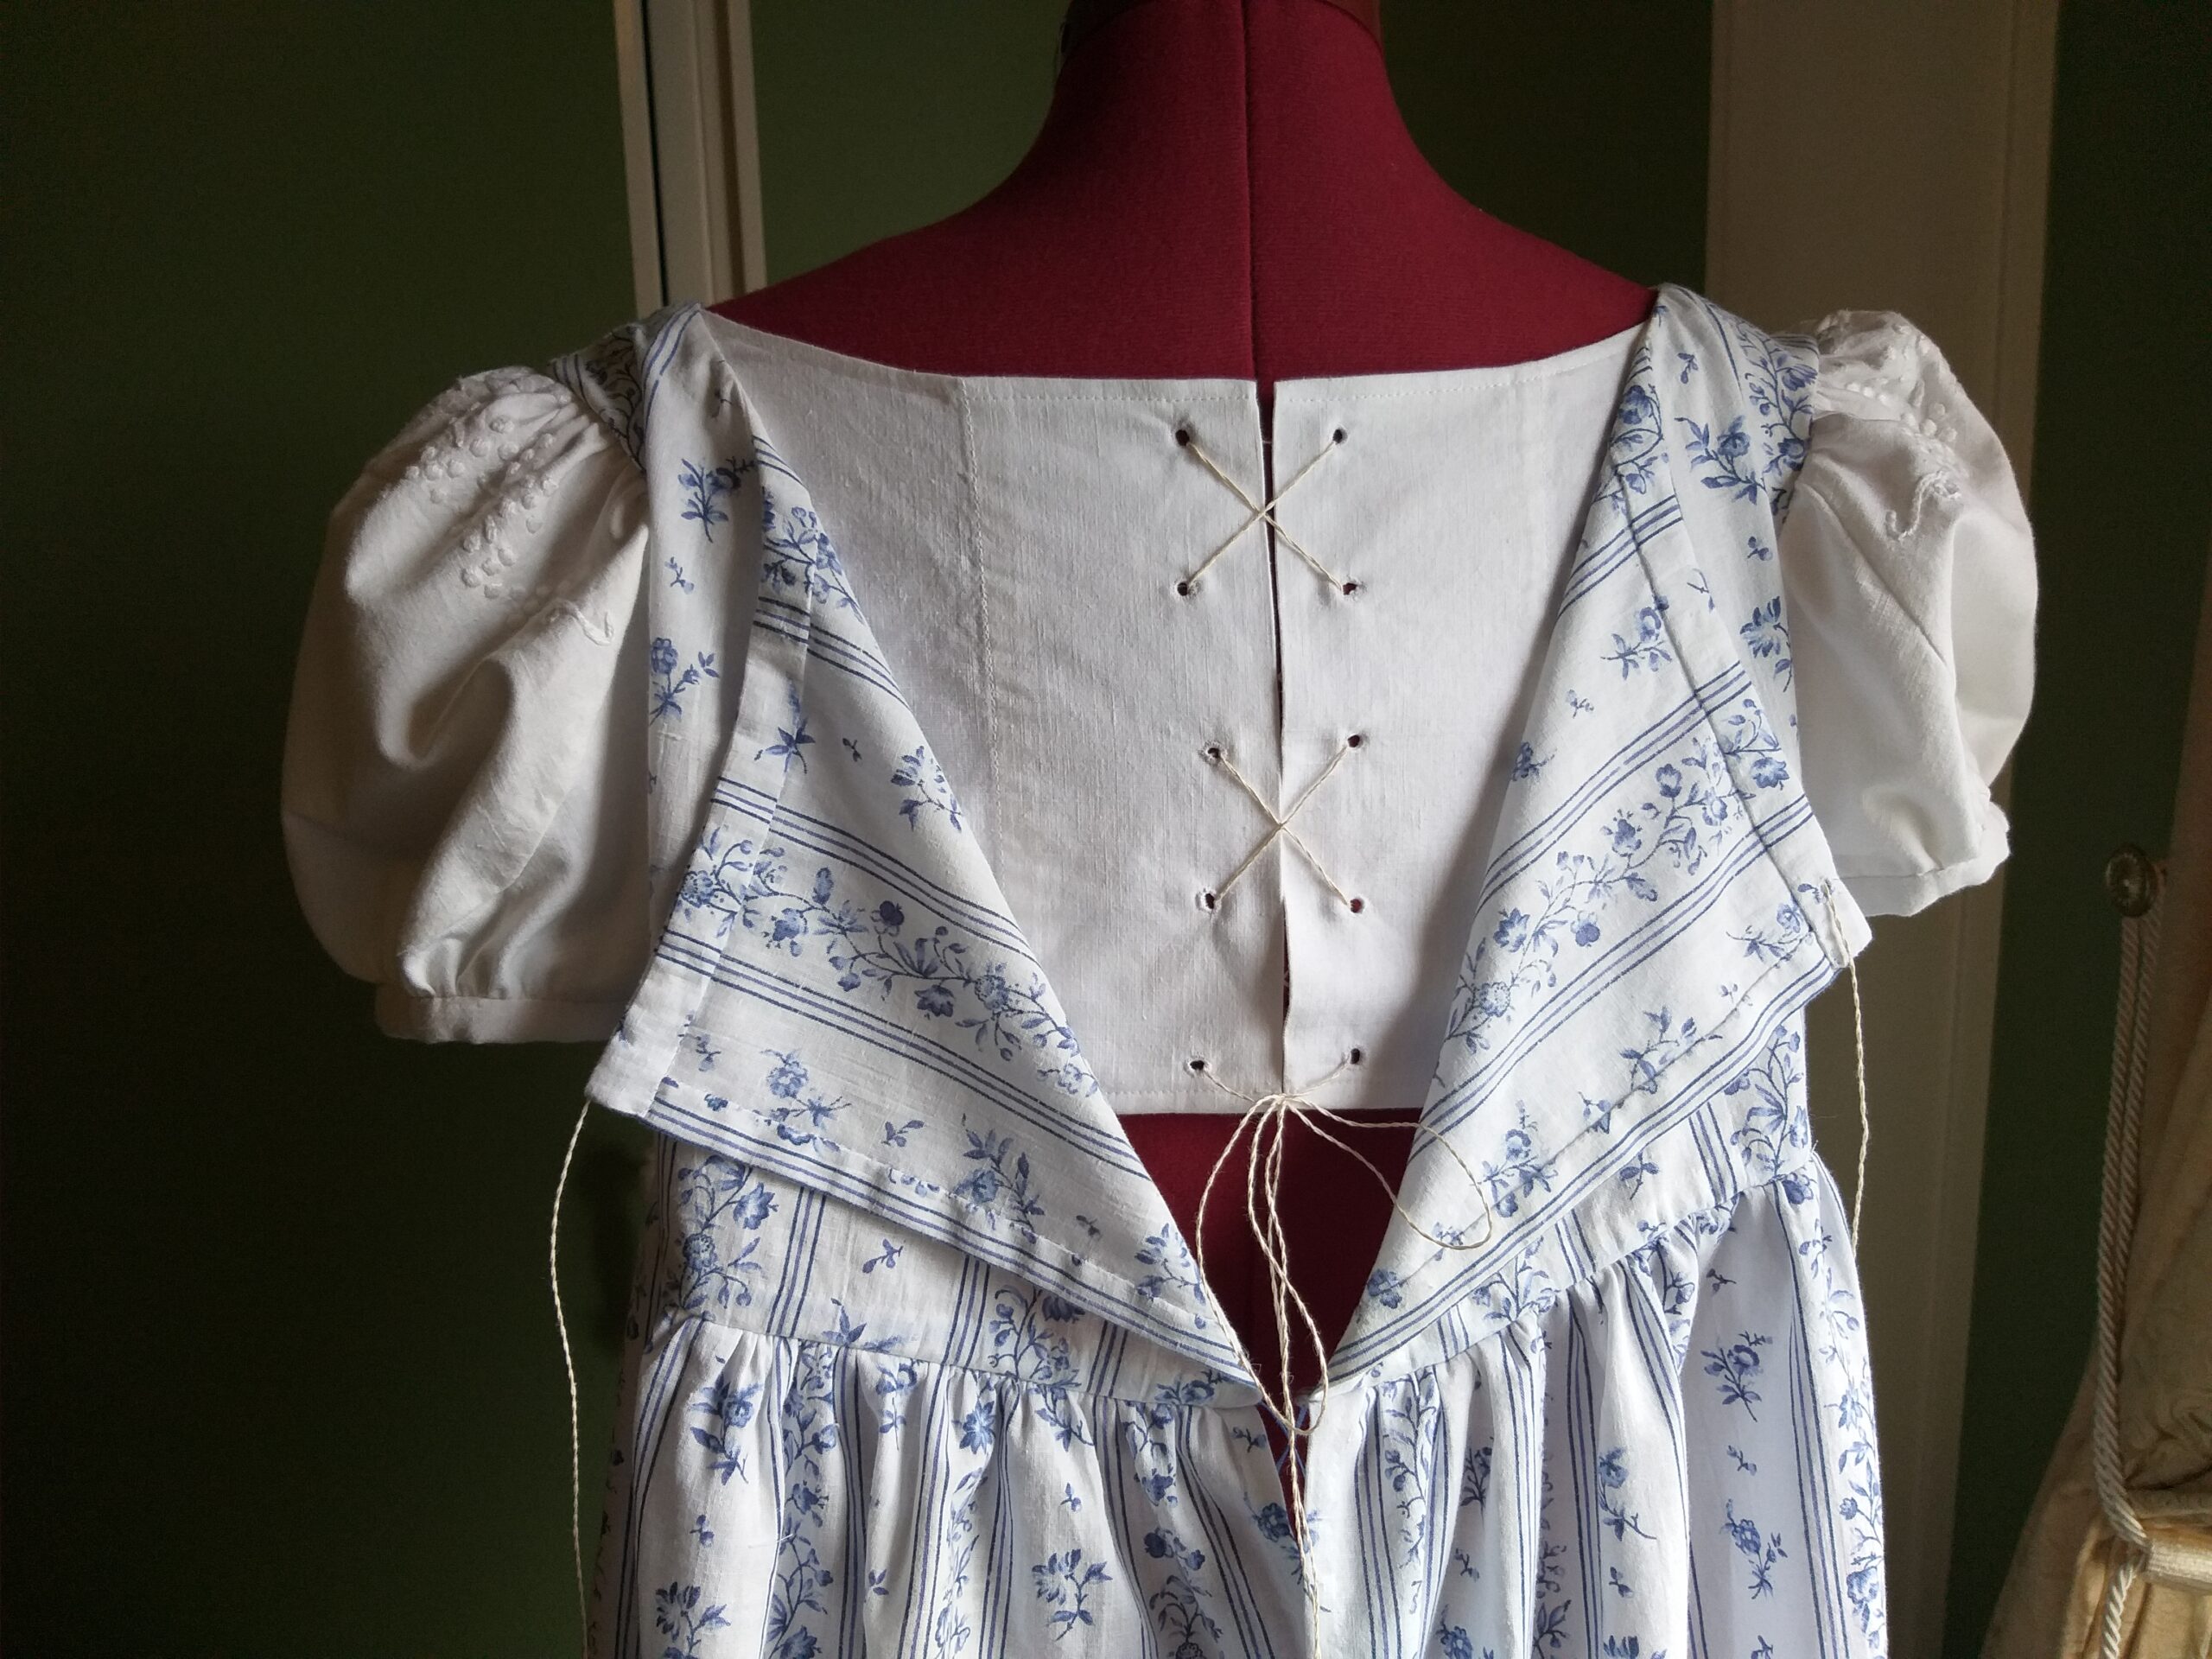
I made an interior bodice with lacing in the back, in order to leave room for some growth. The fashion layer has drawstrings in the neckline and under the bust.
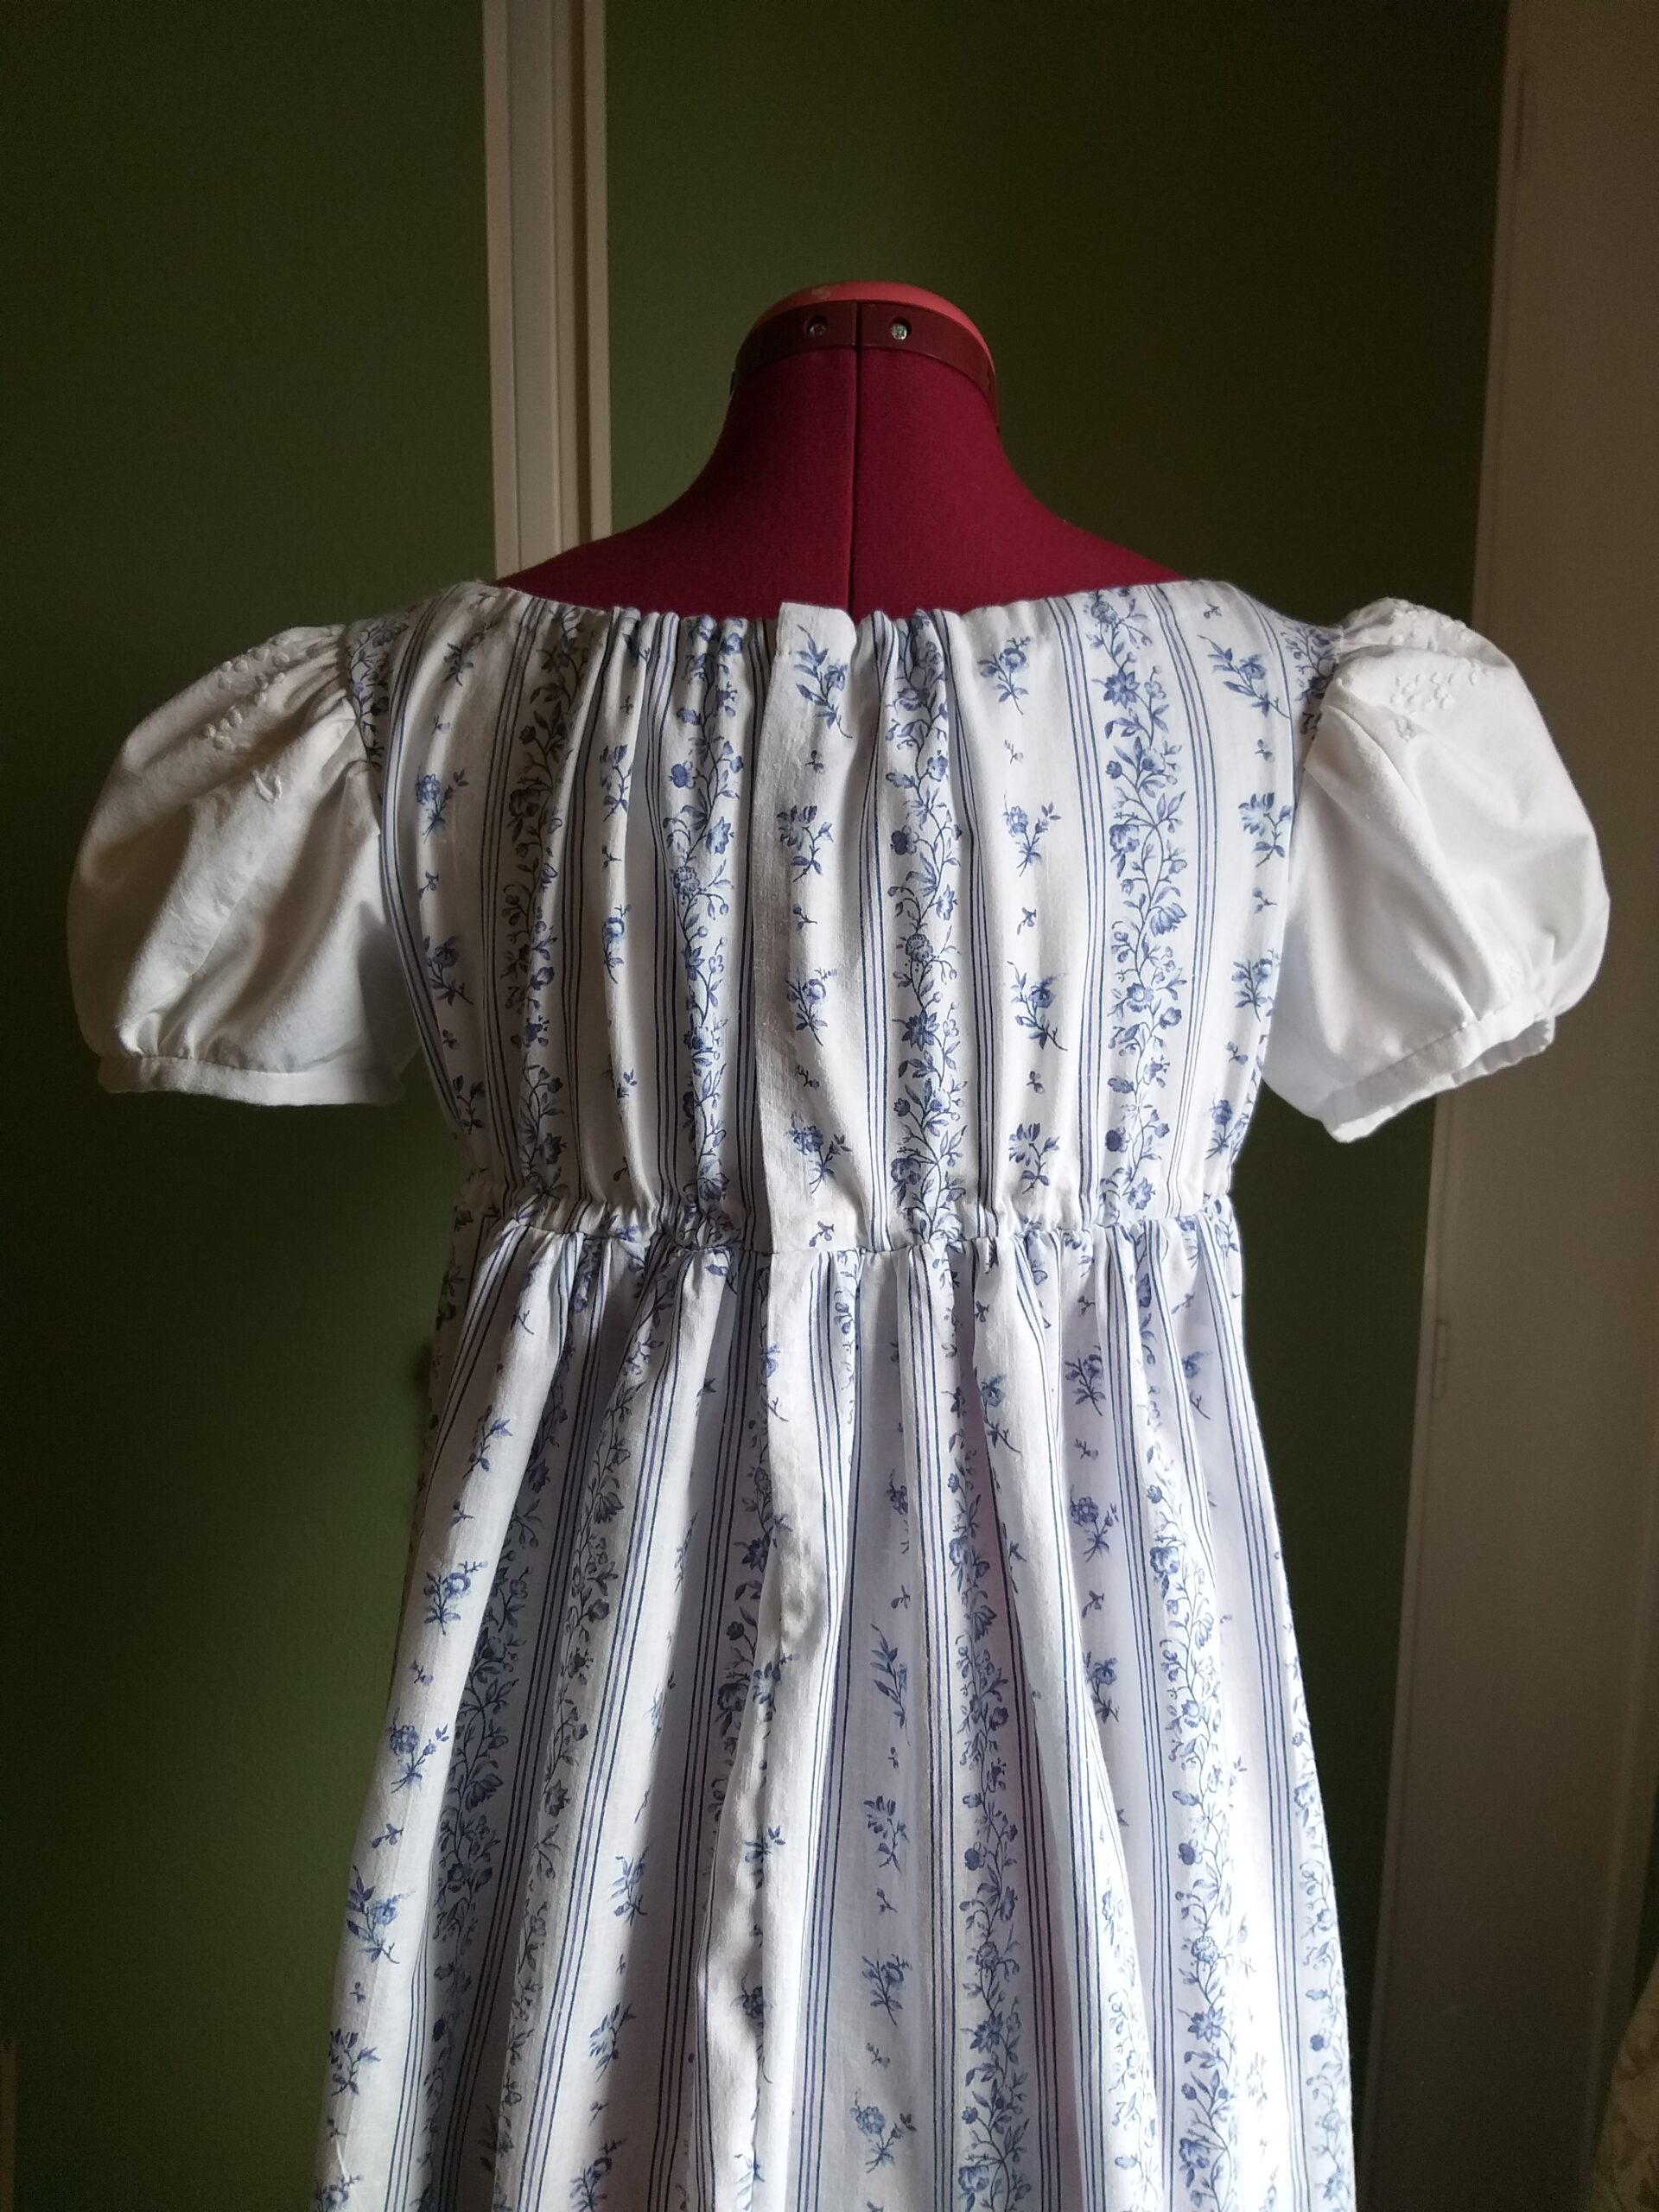
The back lining close with lacing (perhaps there should be boning inside the eyelets?). The eyelets are hand sewn and the strings are also hand made from linen thread.The two sections of the back close with drawstrings in the neckline and under the bust.
Aren’t these embroideries adorable?
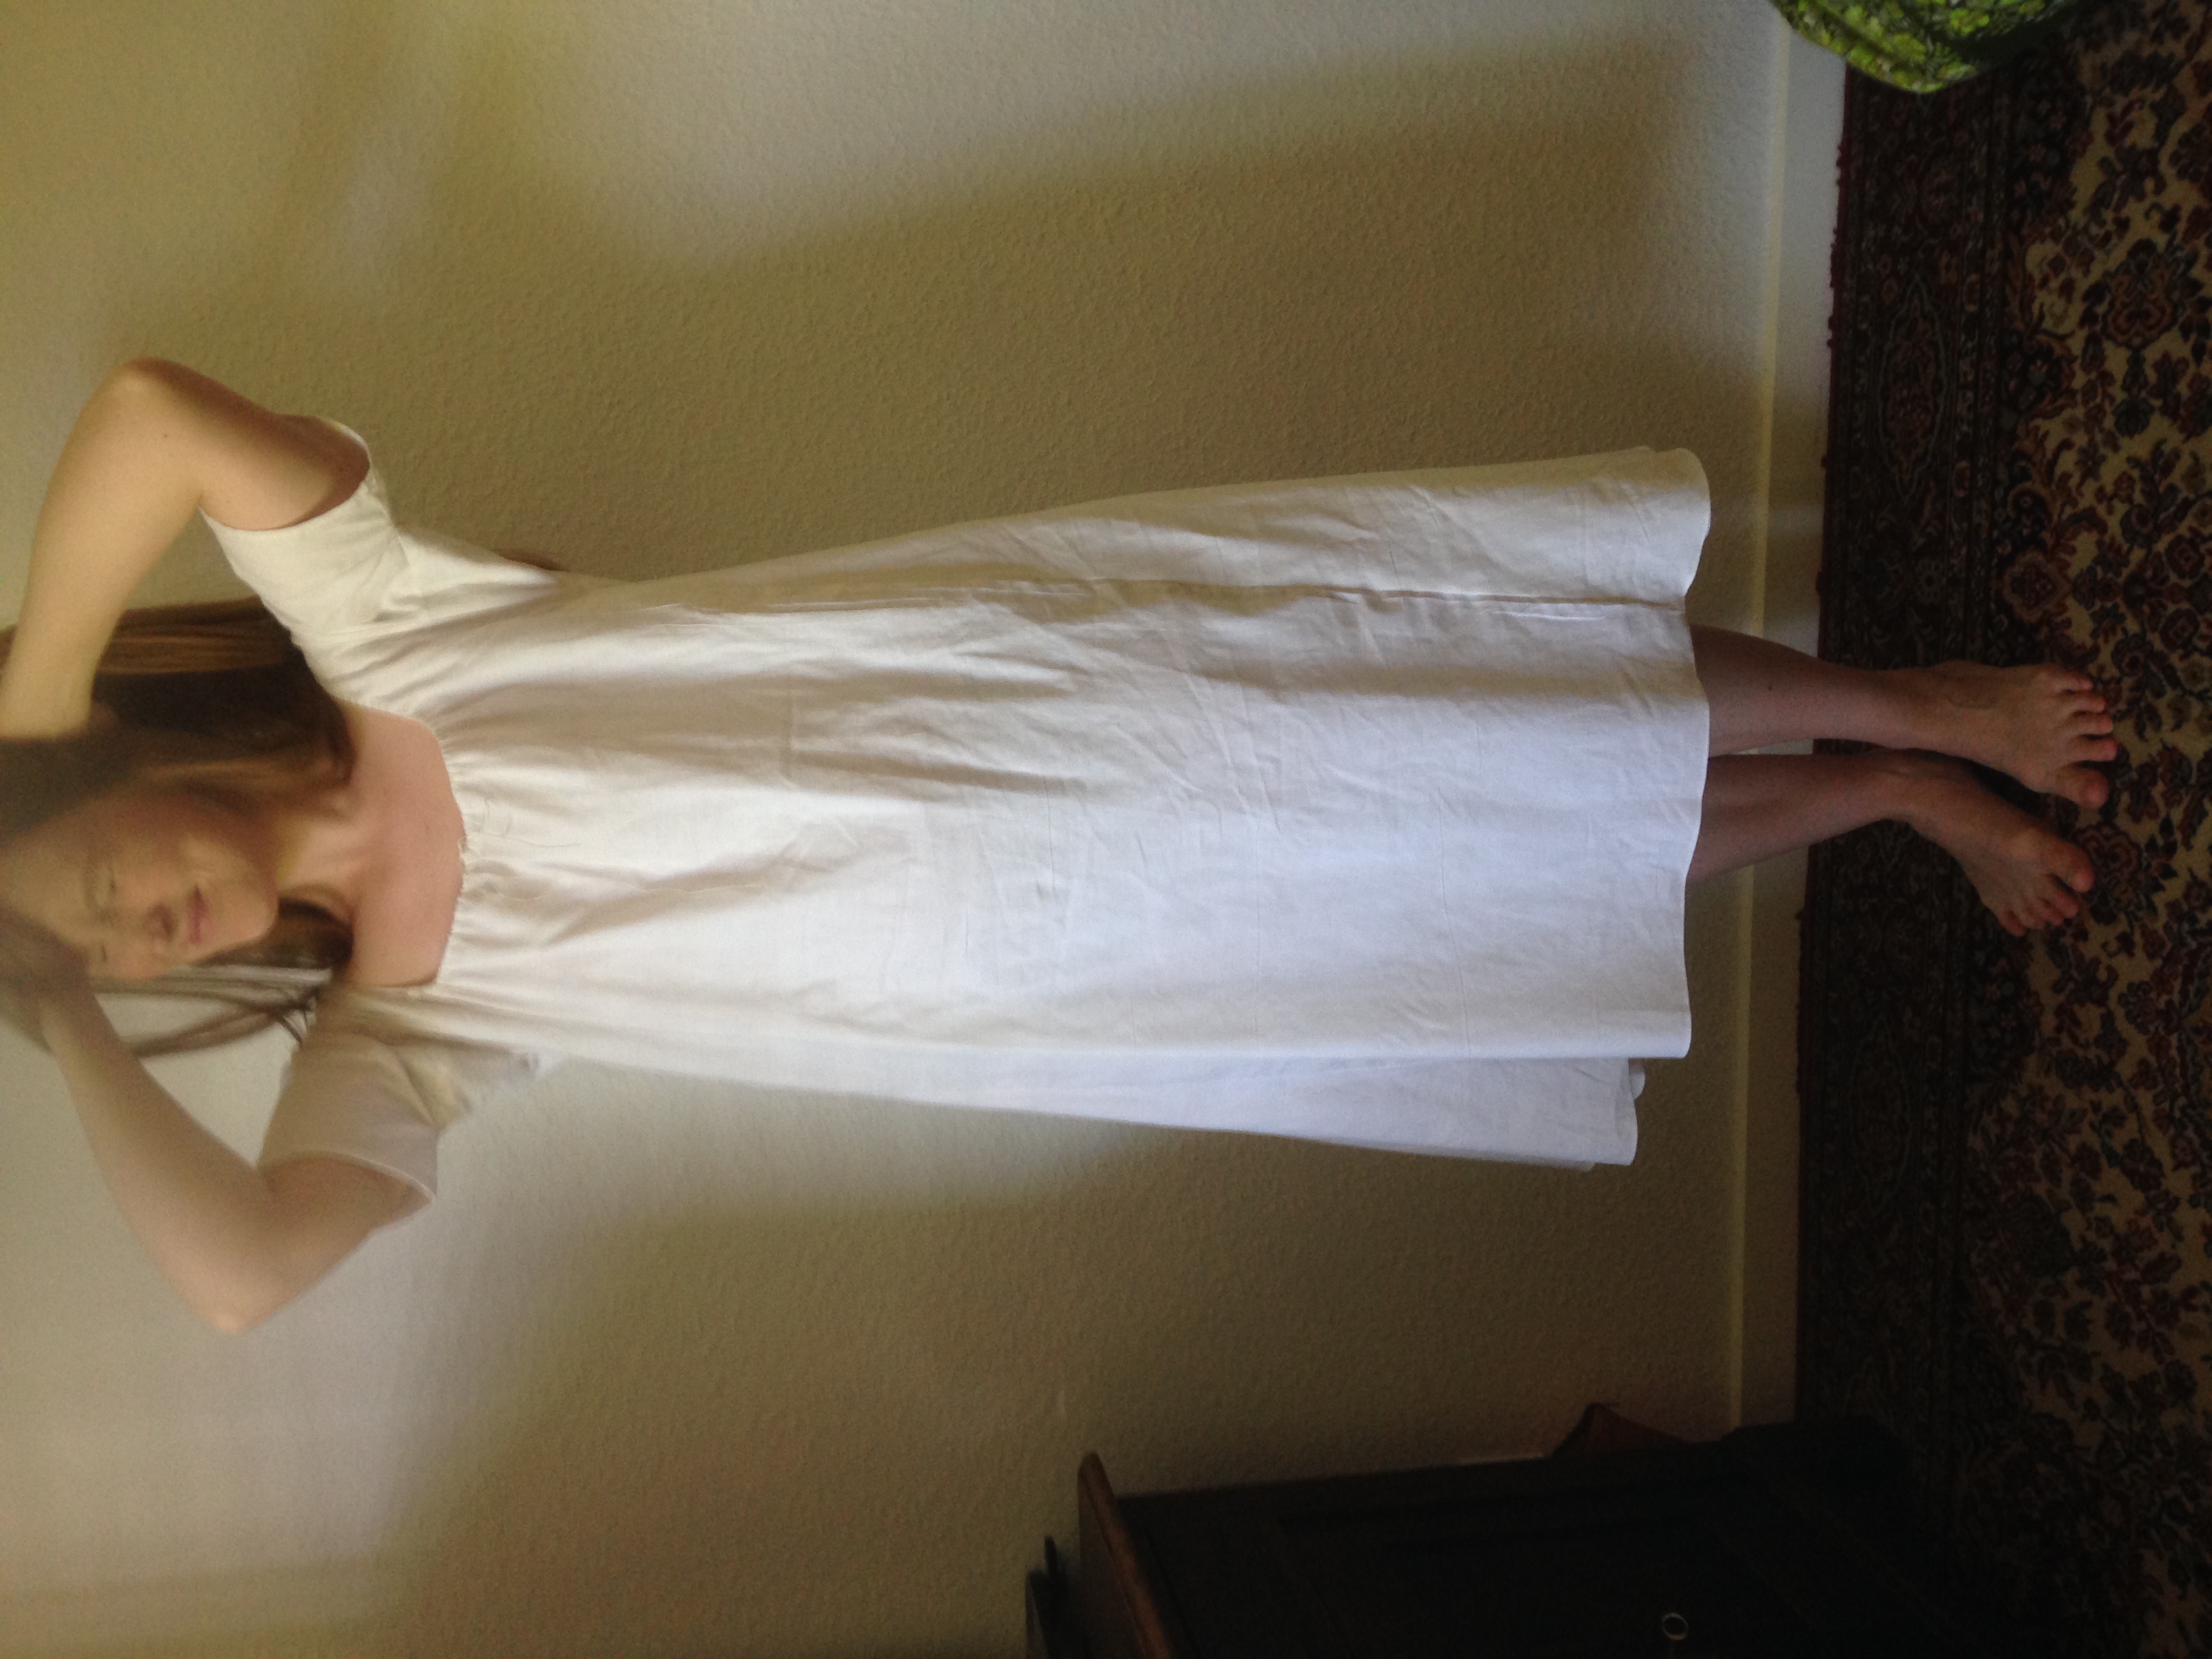
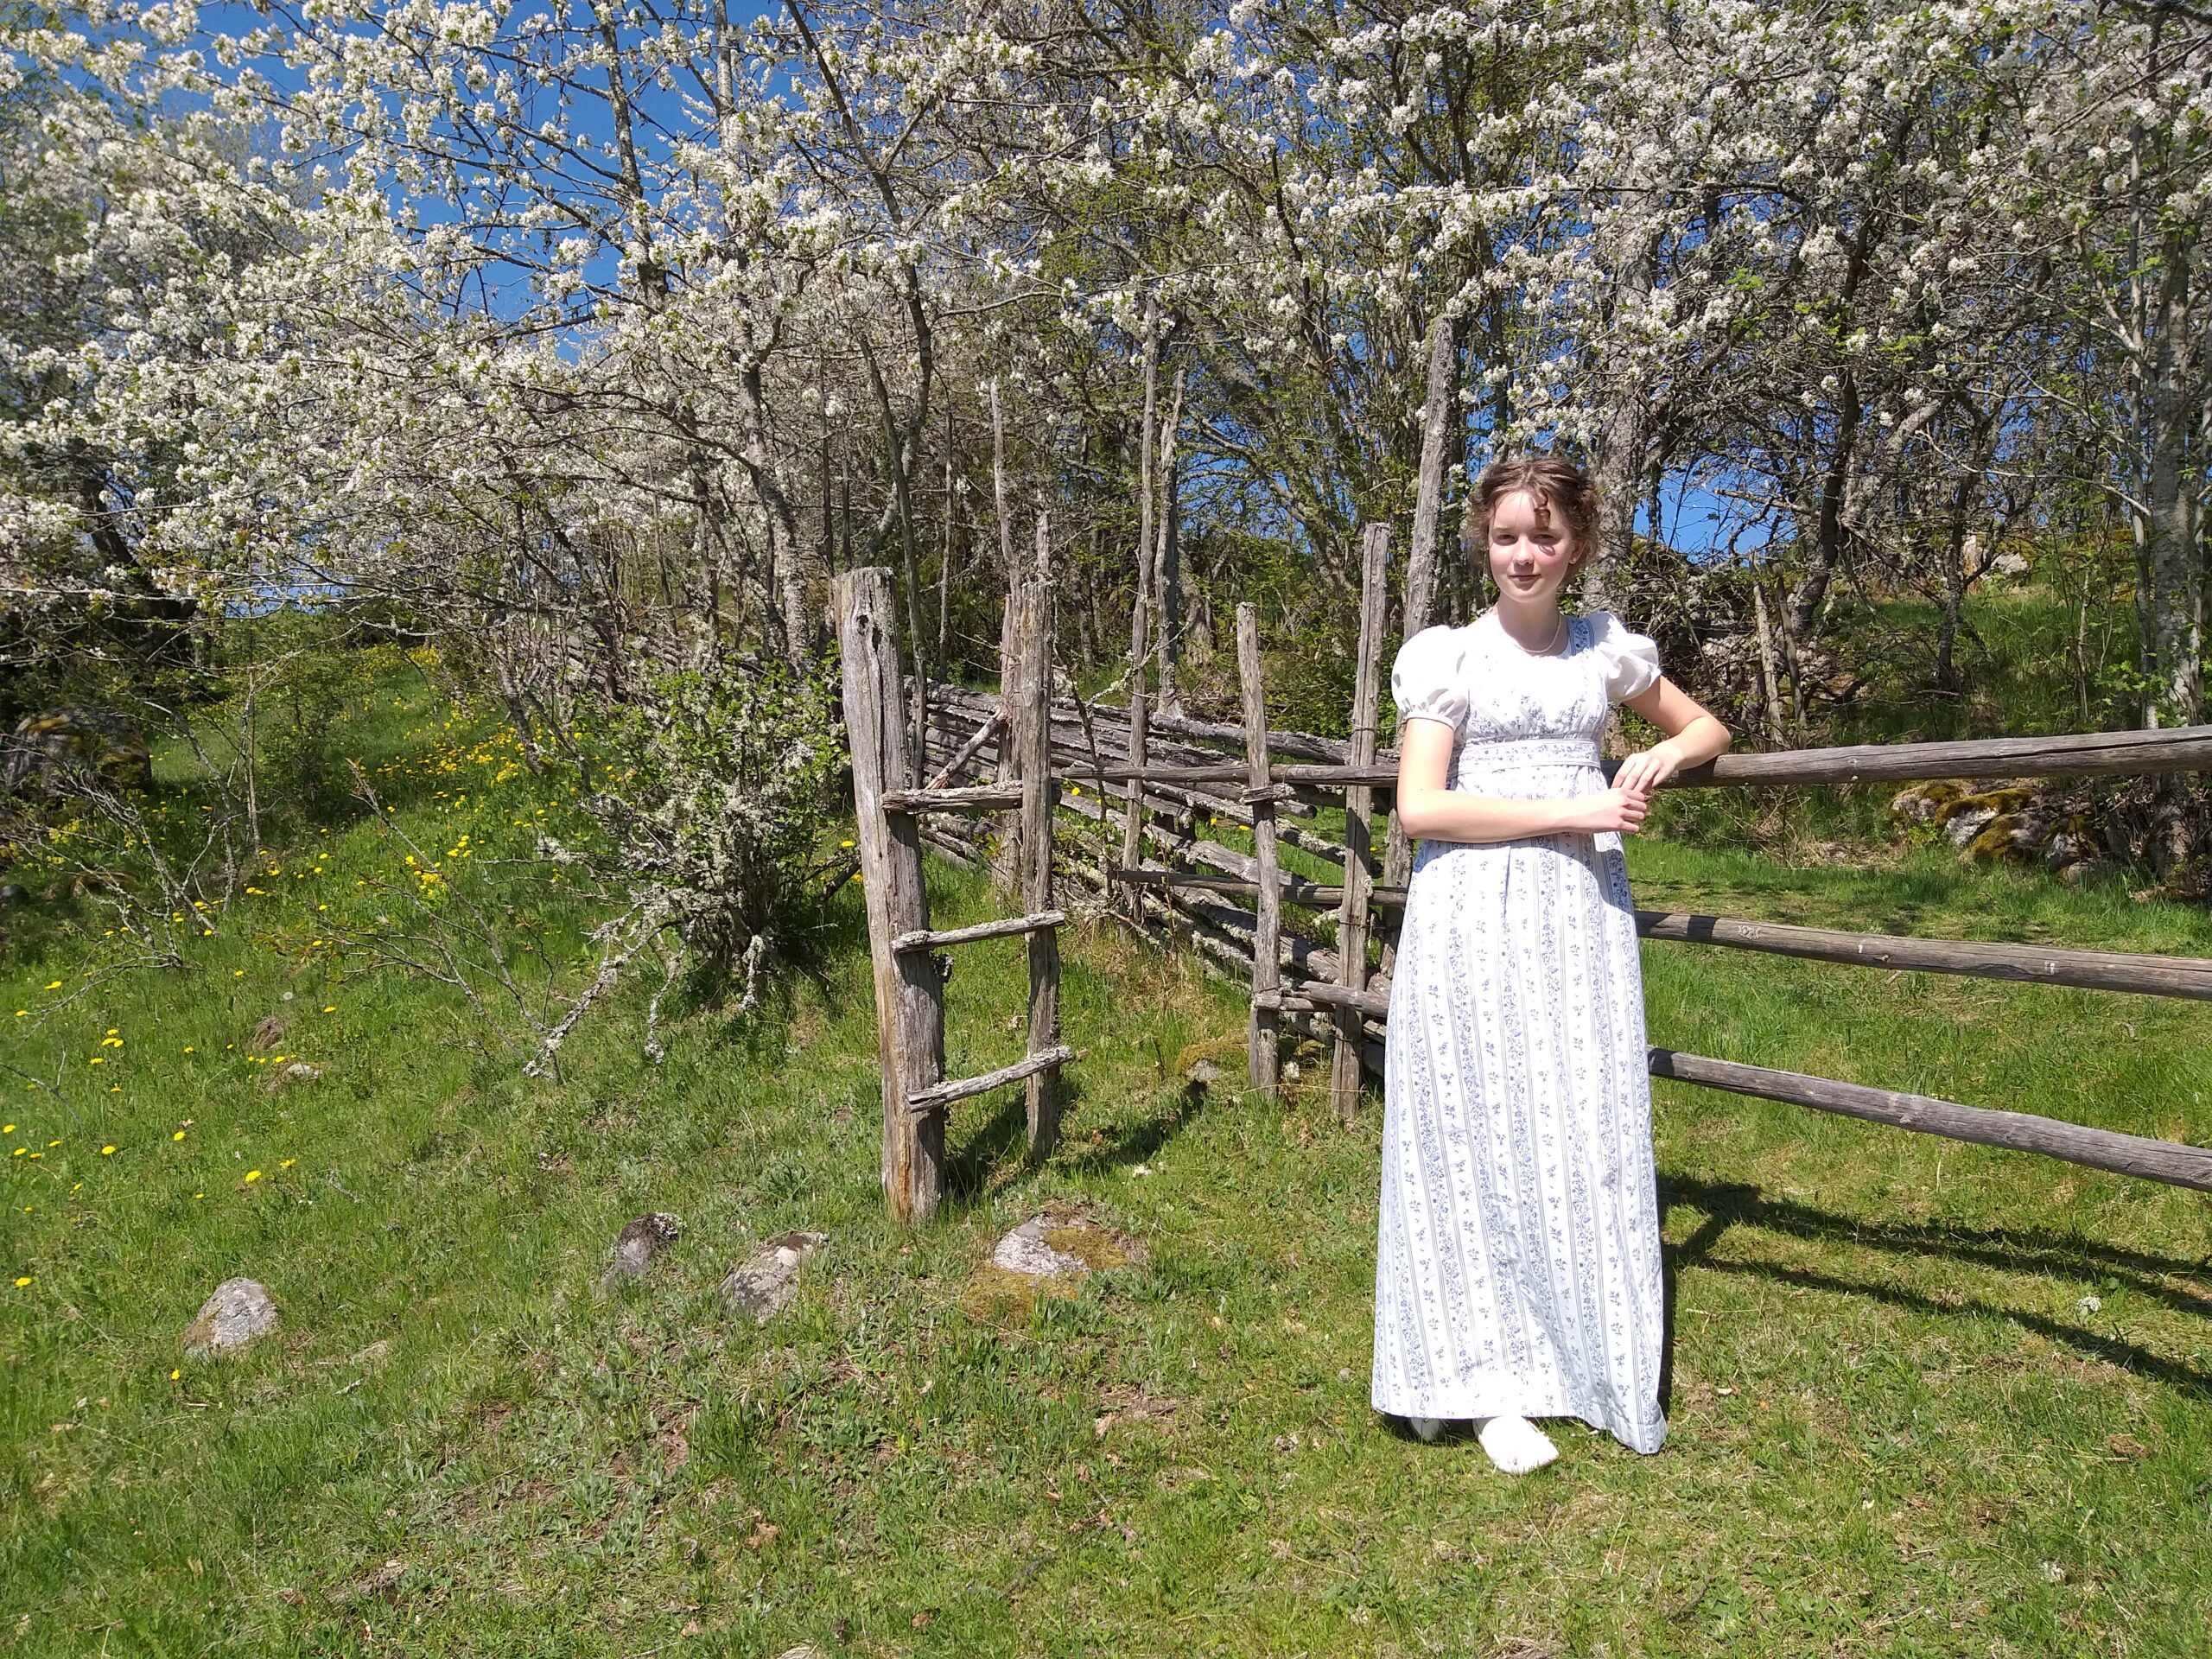
Now I am eager to see whether the dress fits the pretty maiden.
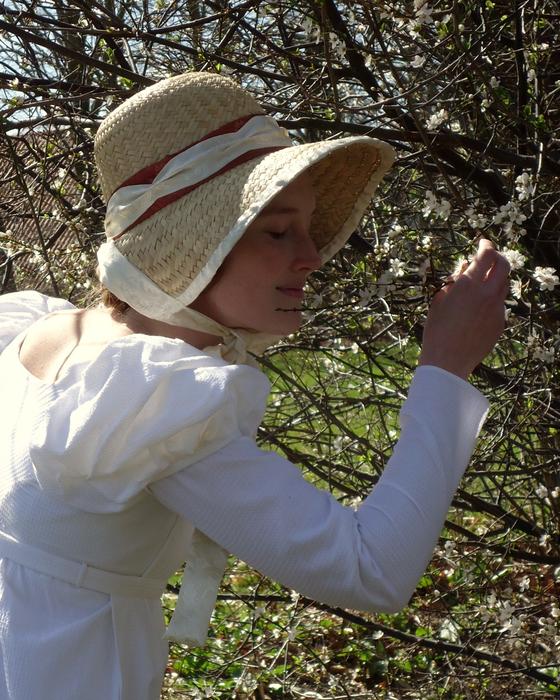
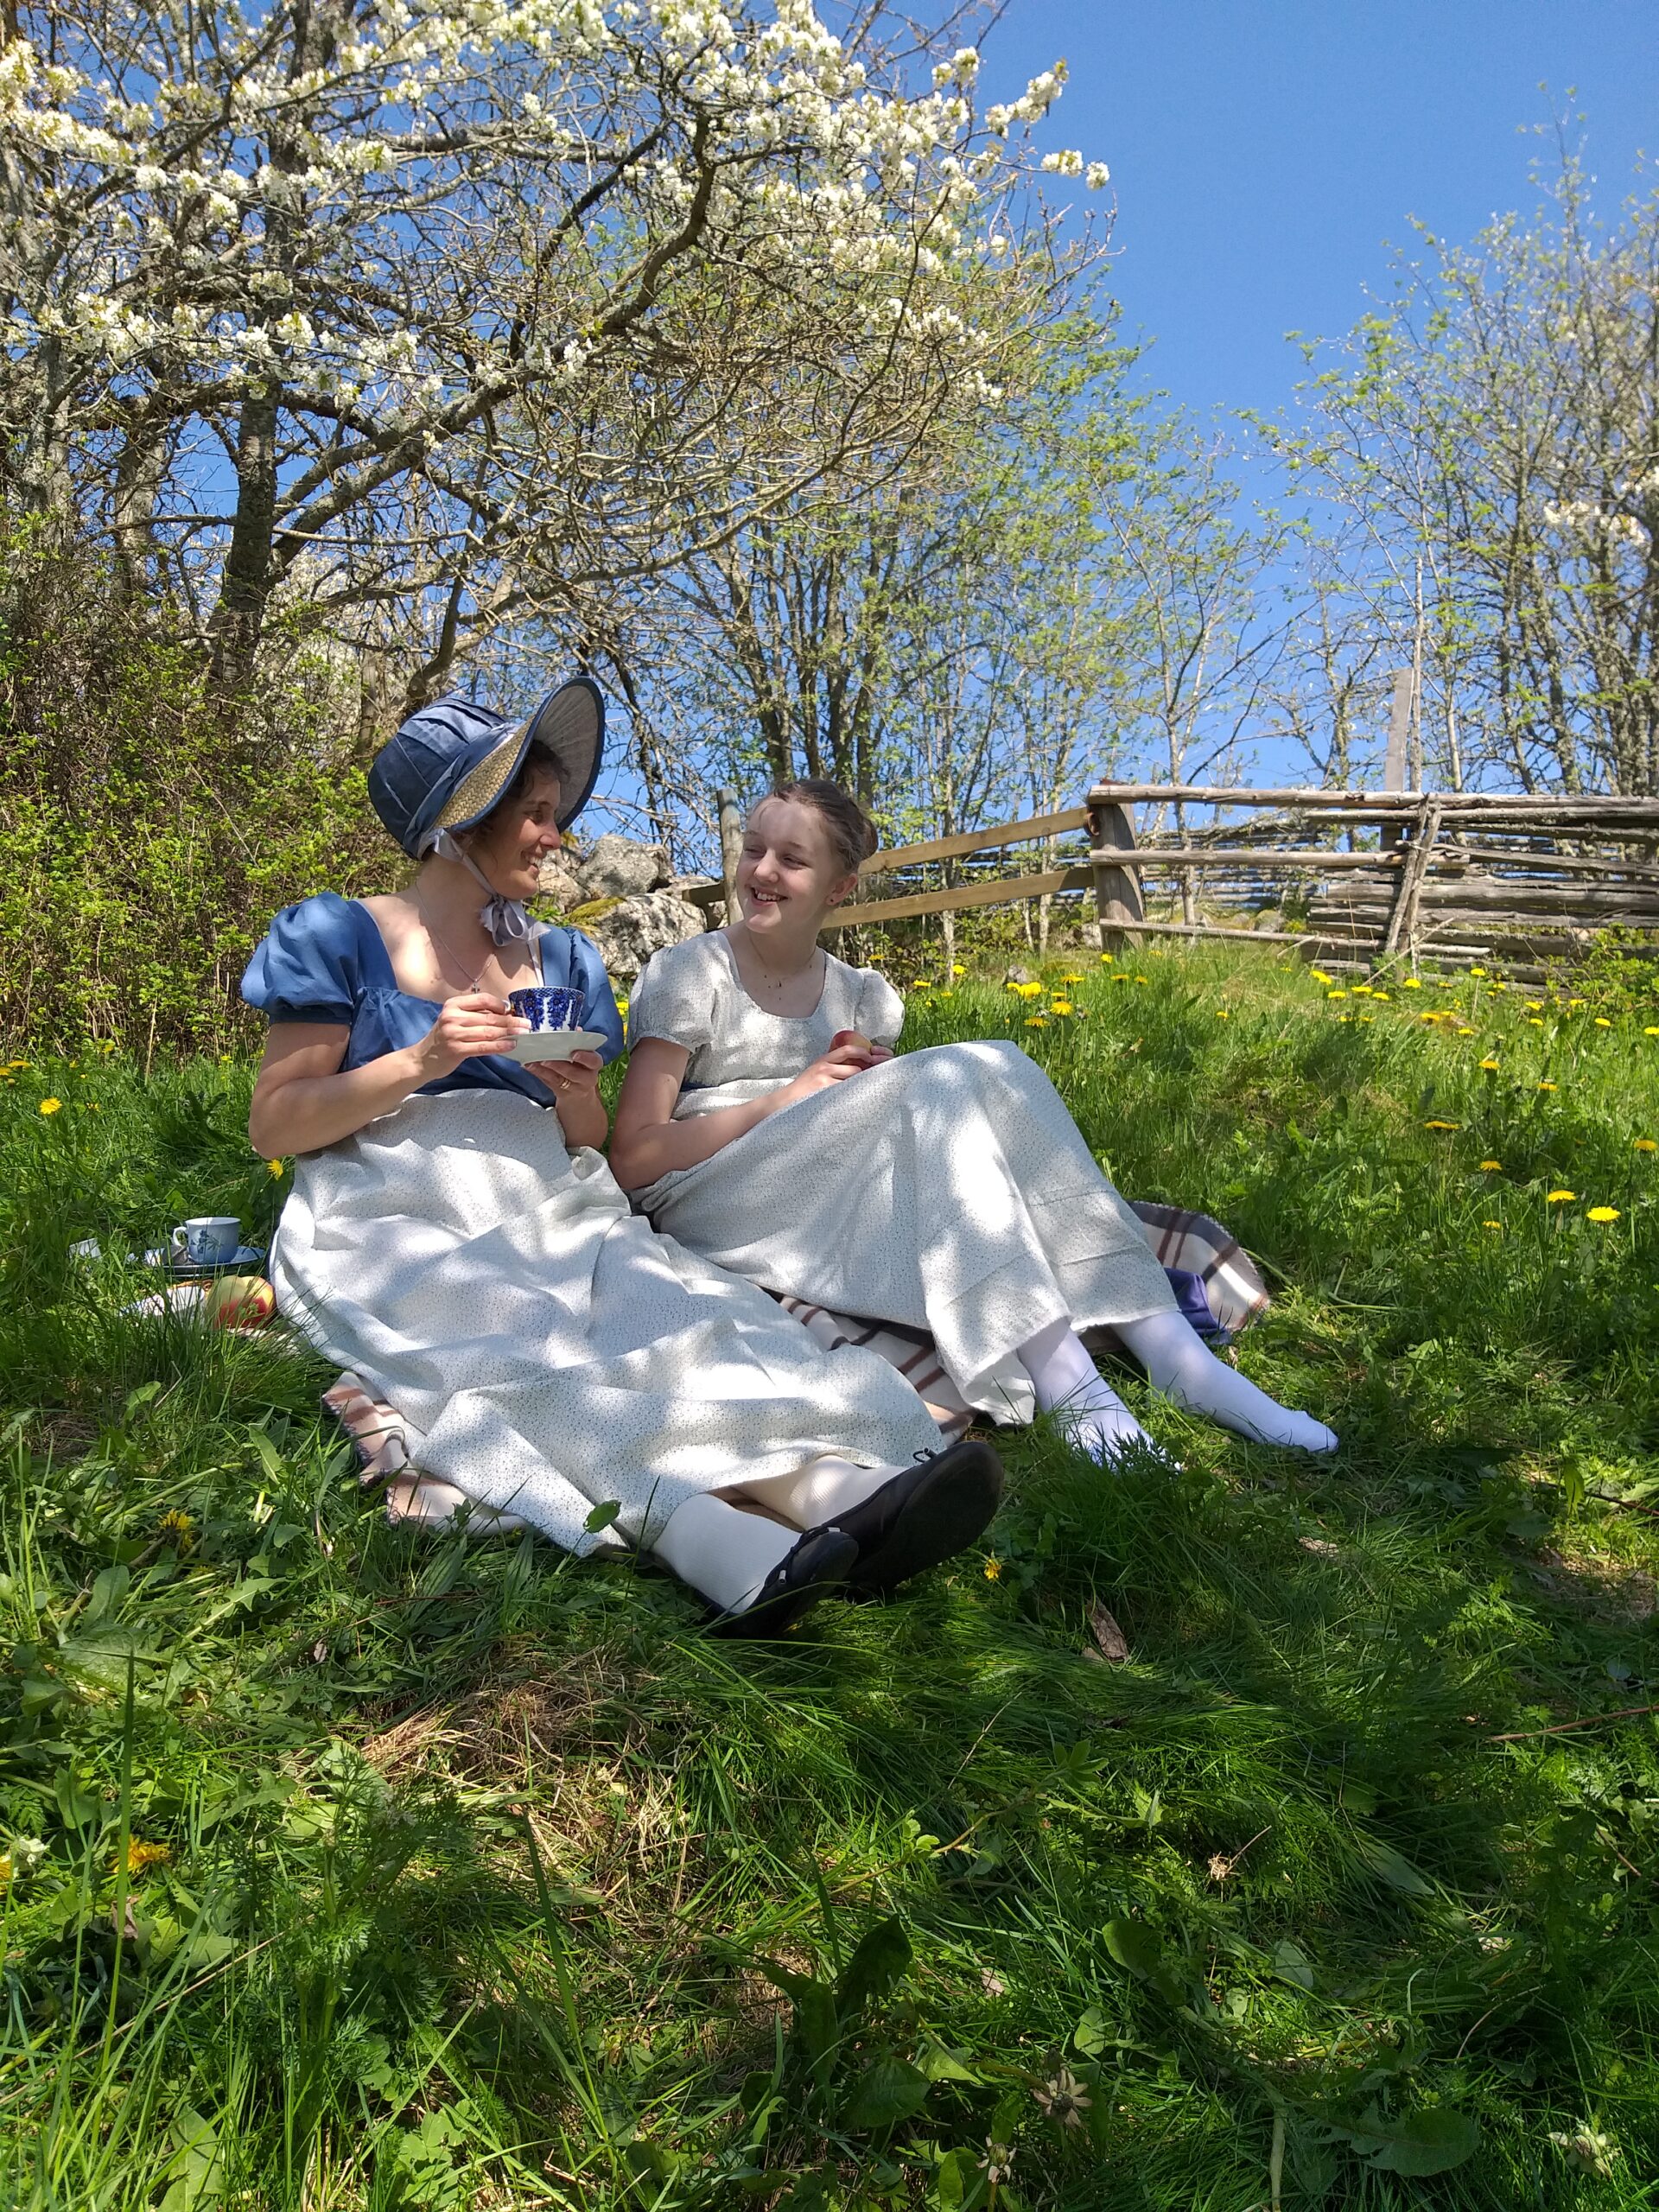
Photo Shoot In The Valley of Cherry Blossoms
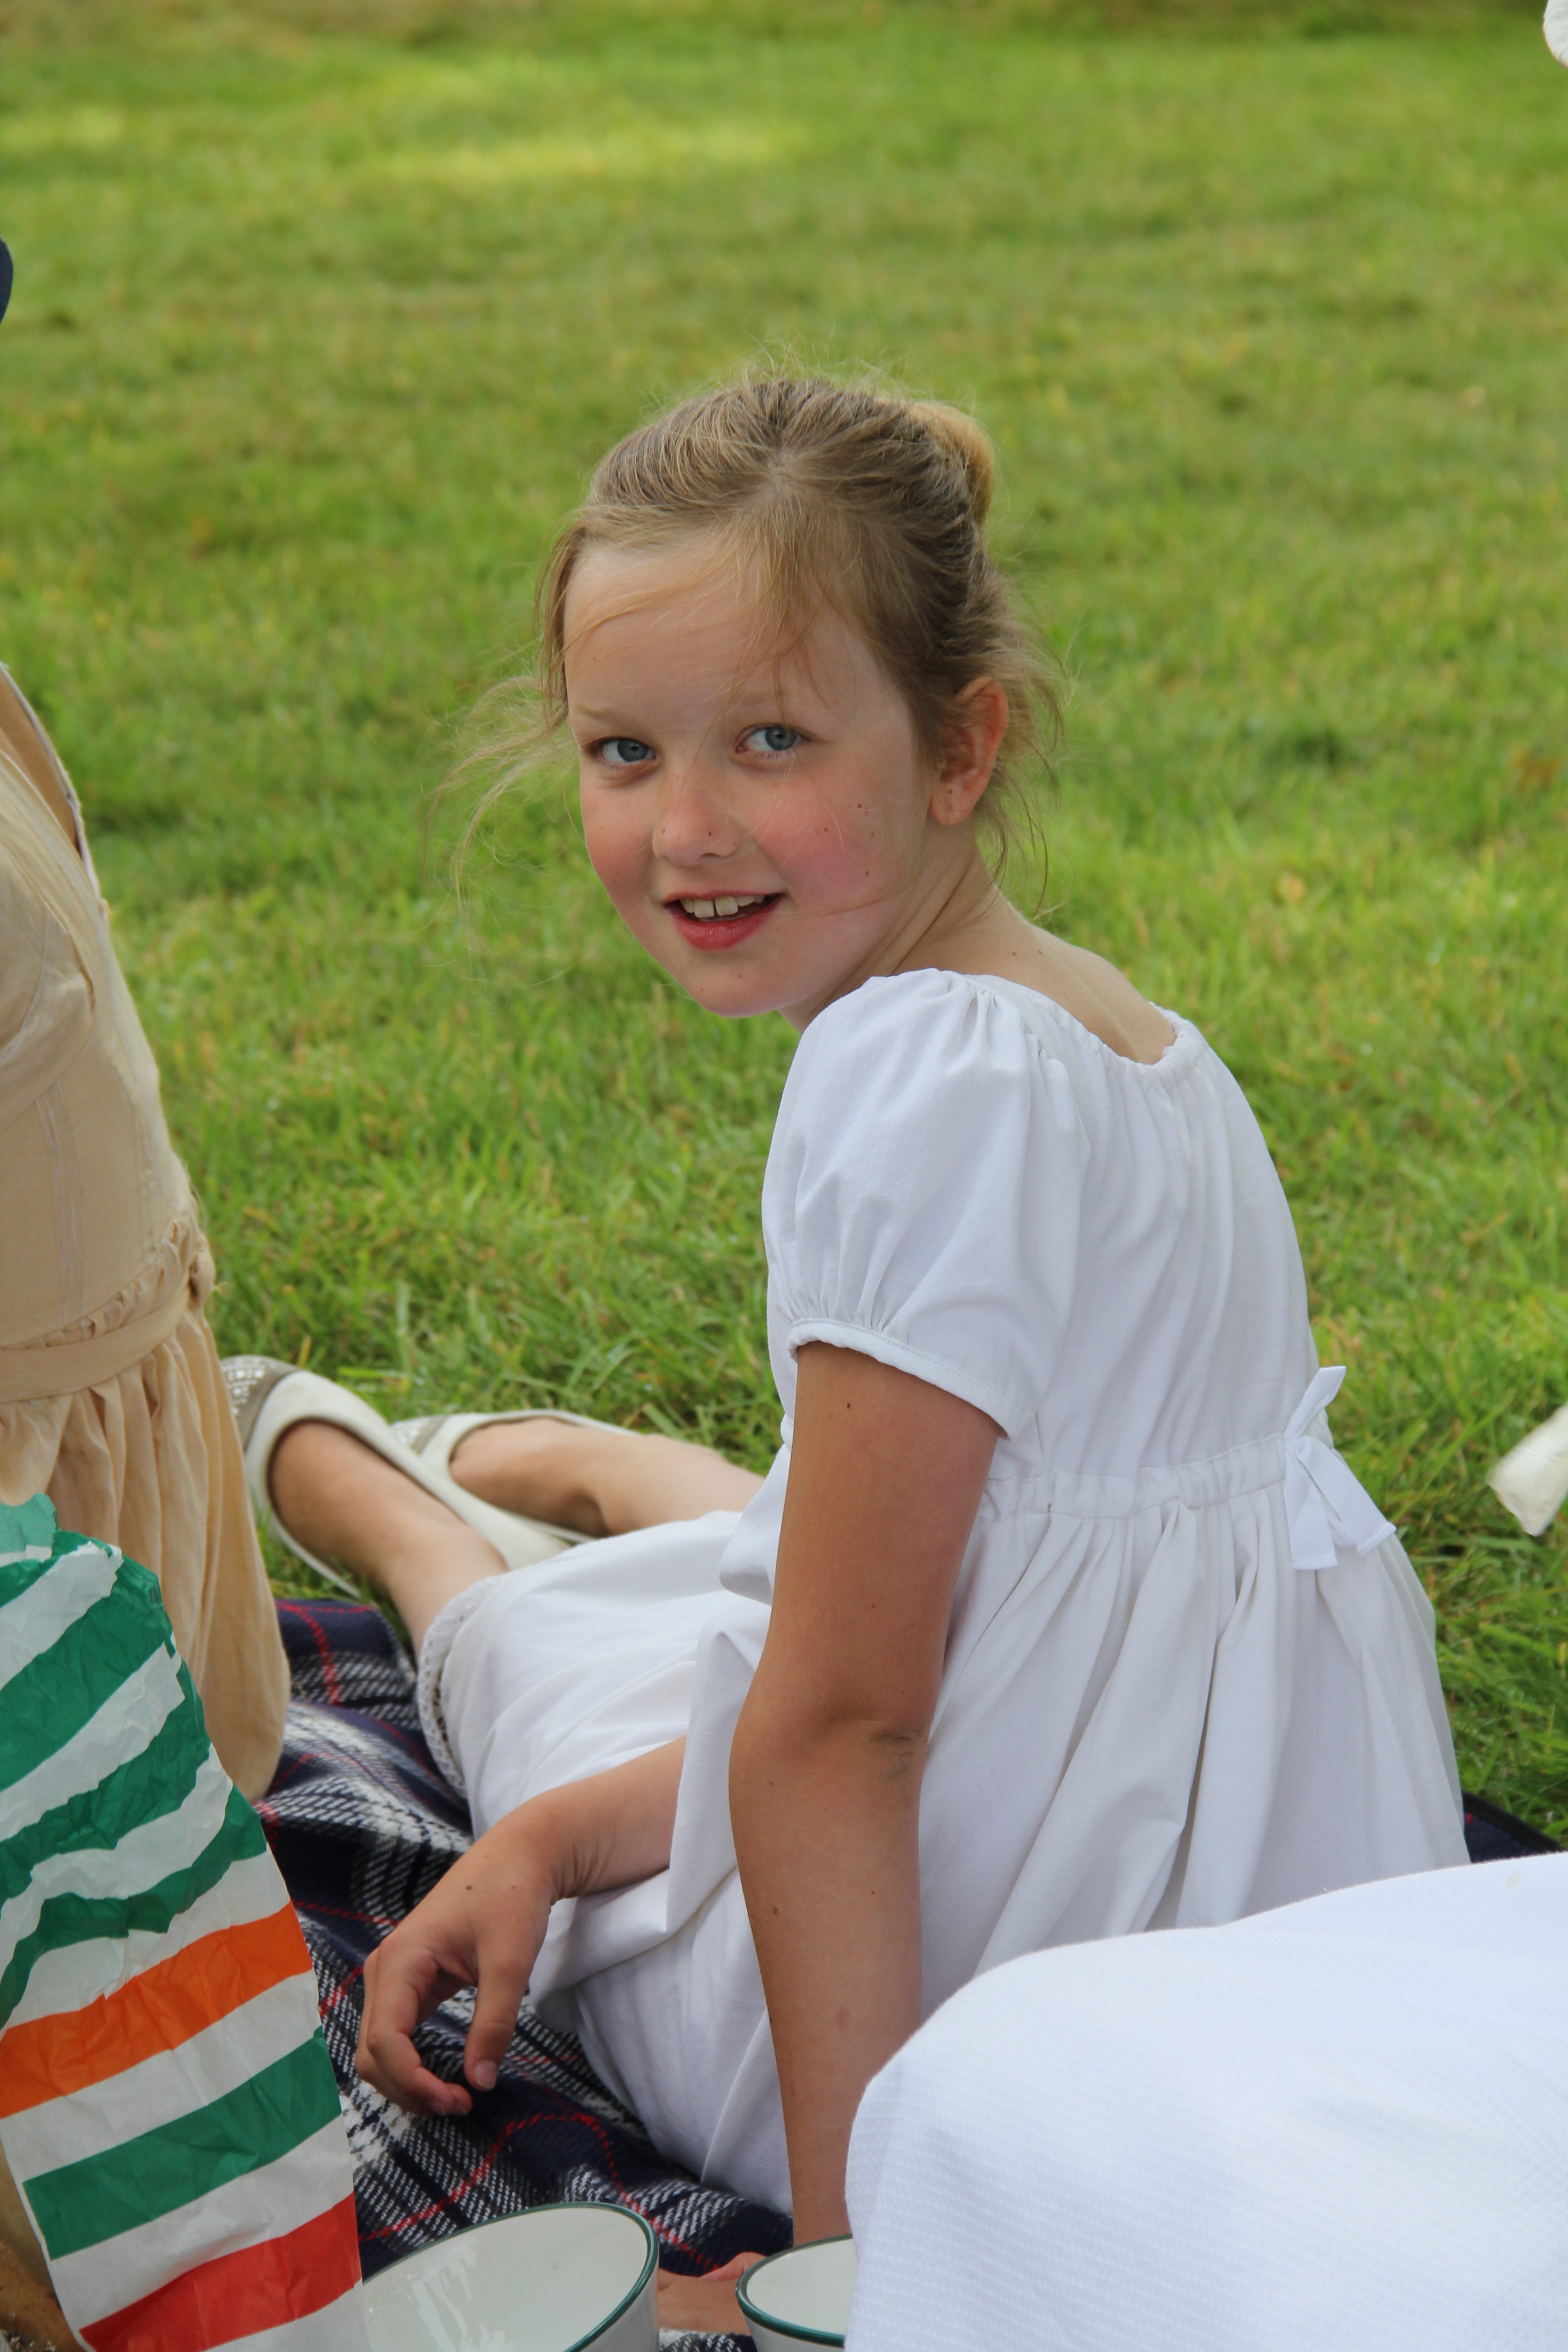
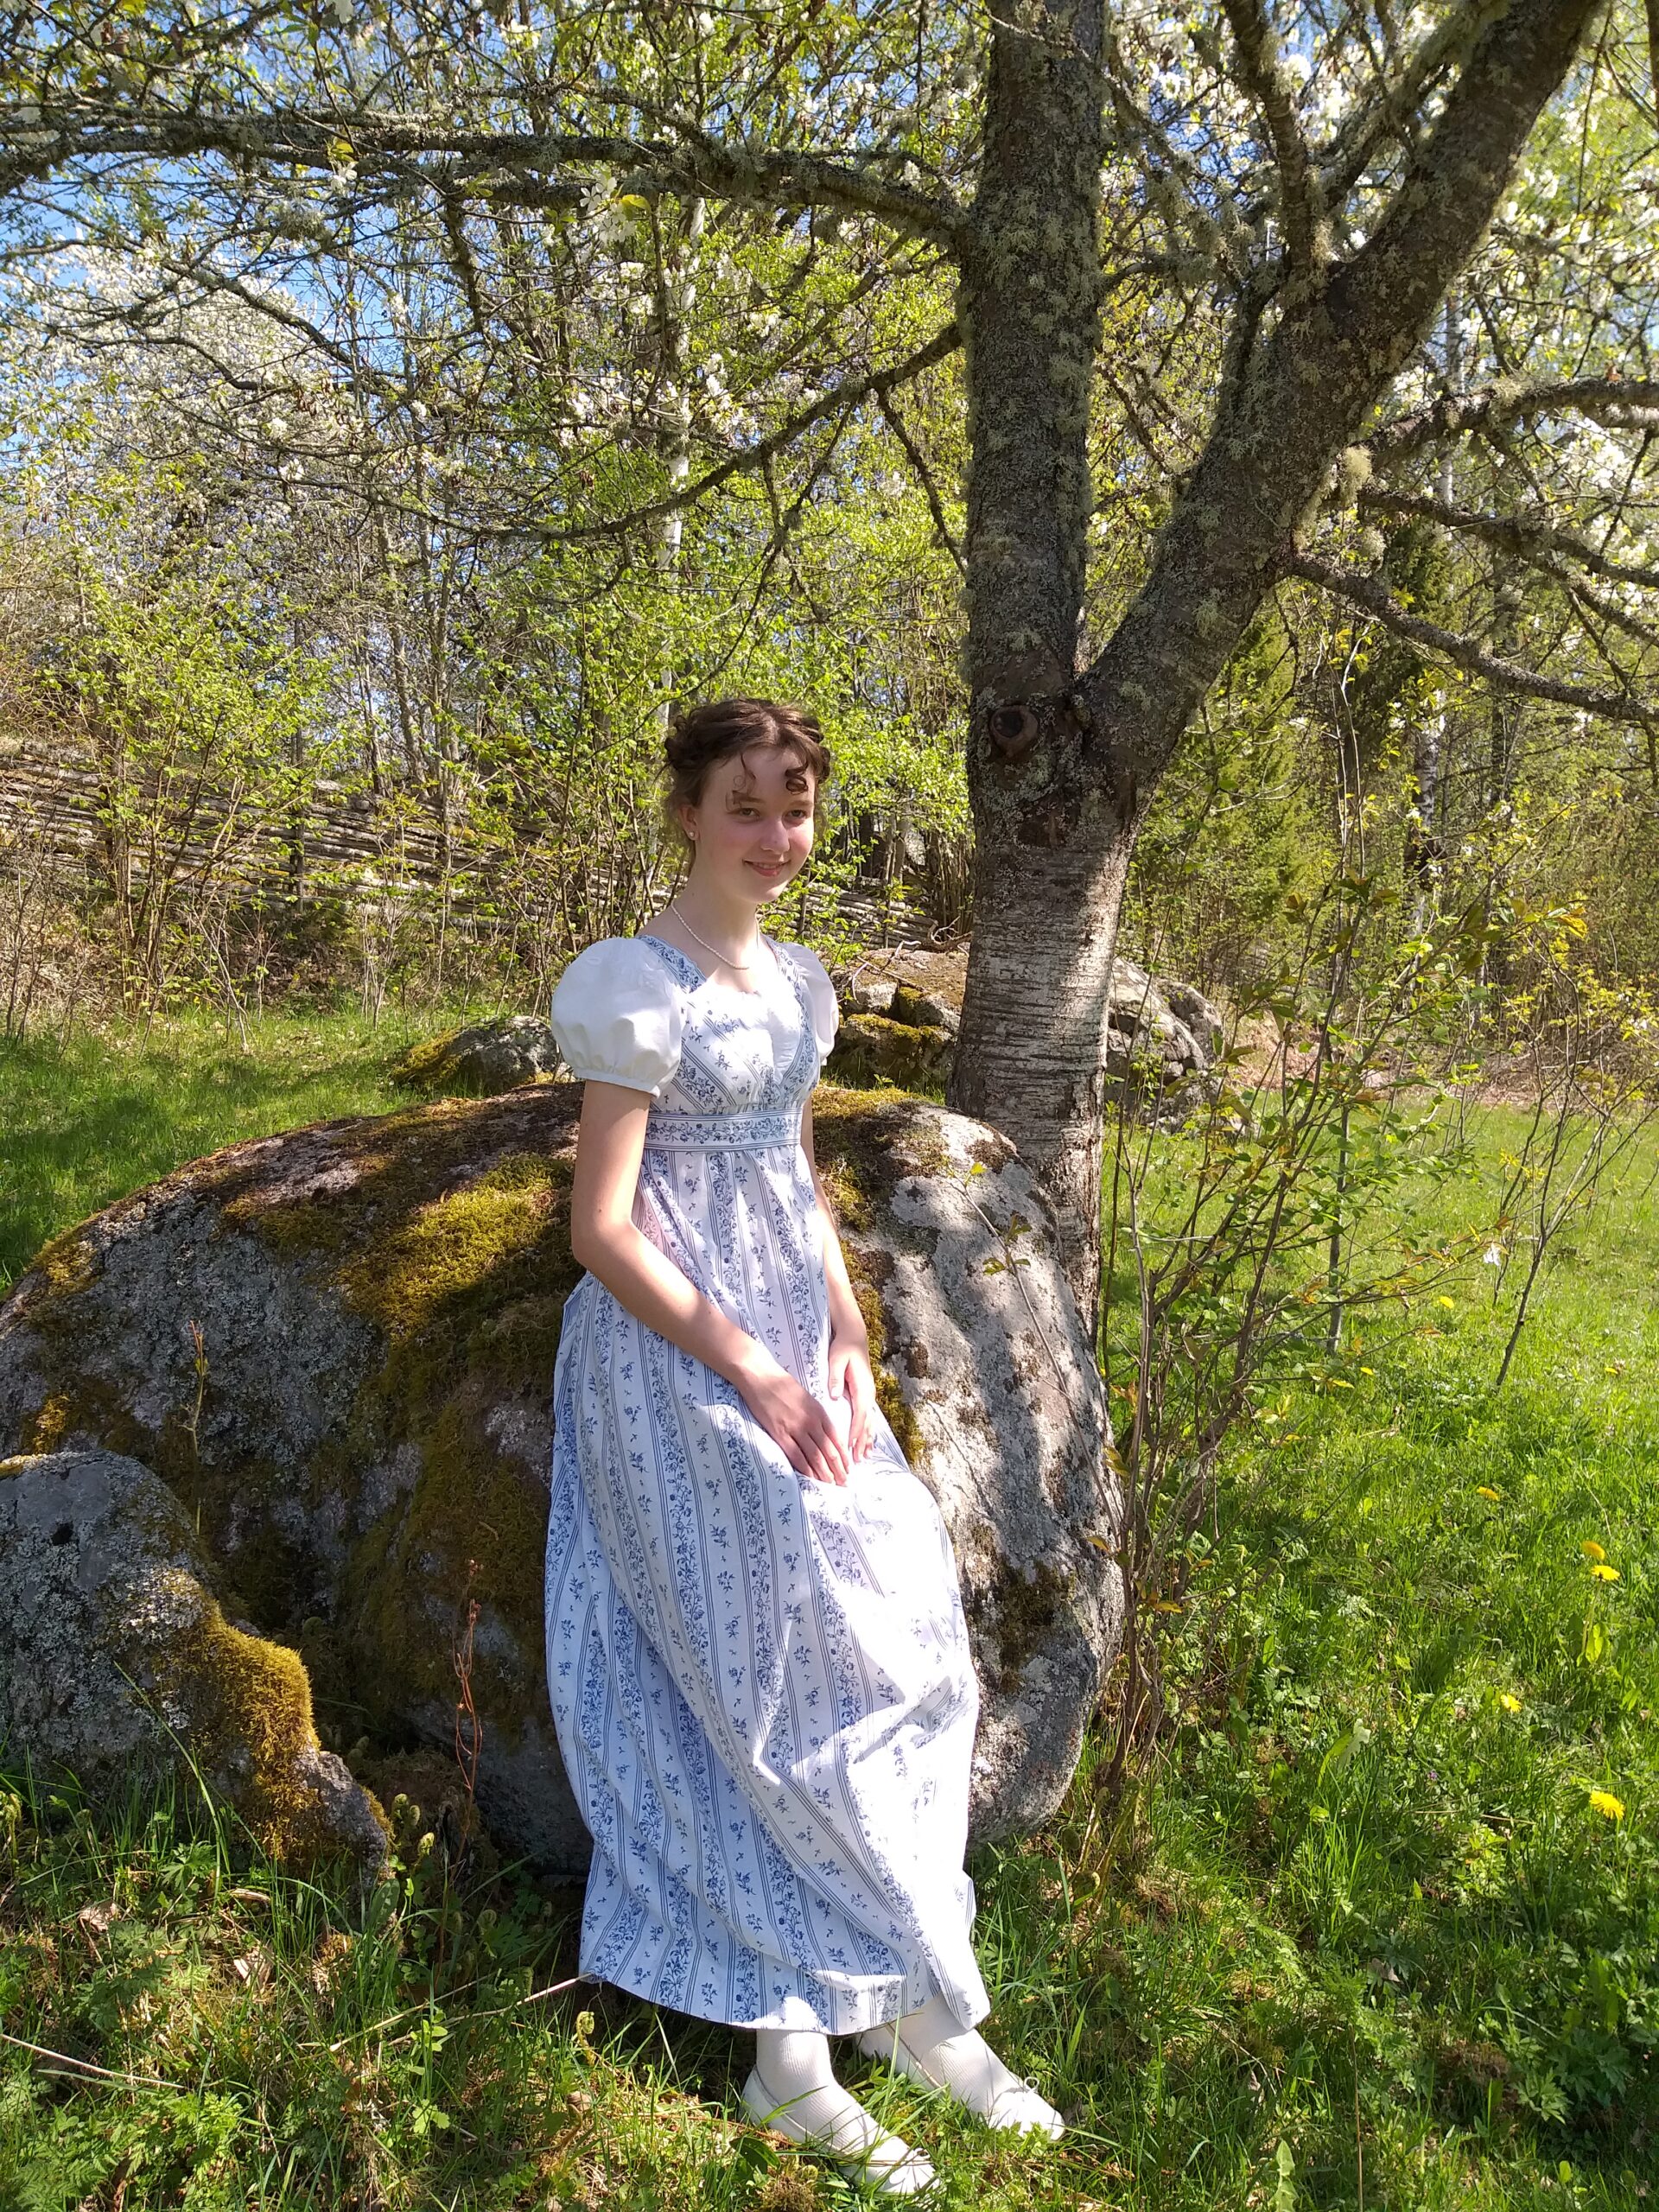
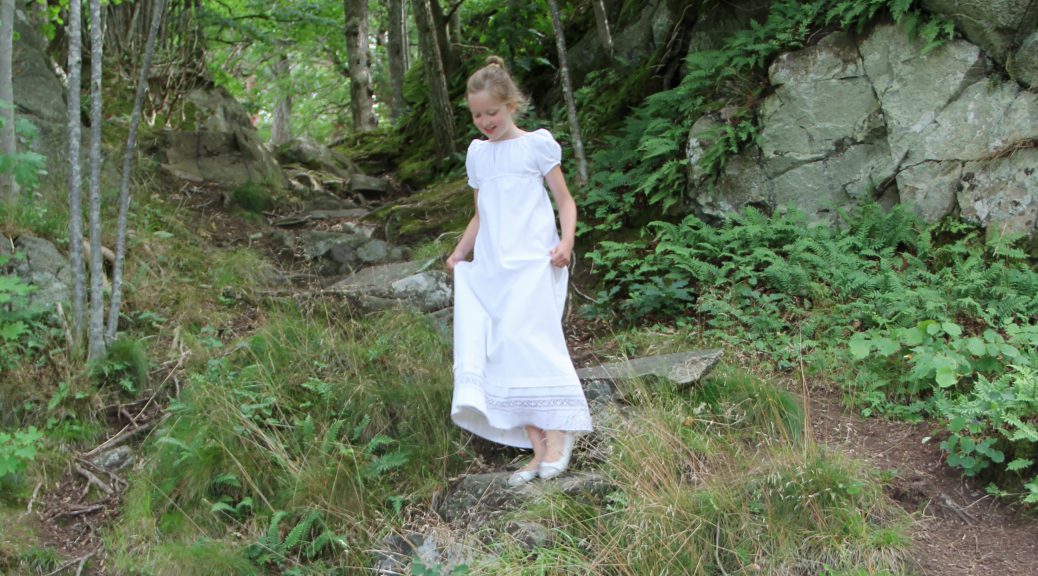
The dress fits my niece so well! I’m so proud of this intelligent, pretty young maiden and her wonderful family.
As you might see, there was also a pregnant seamstress lurking around.
Ugnstorp really is the most beautiful place in May
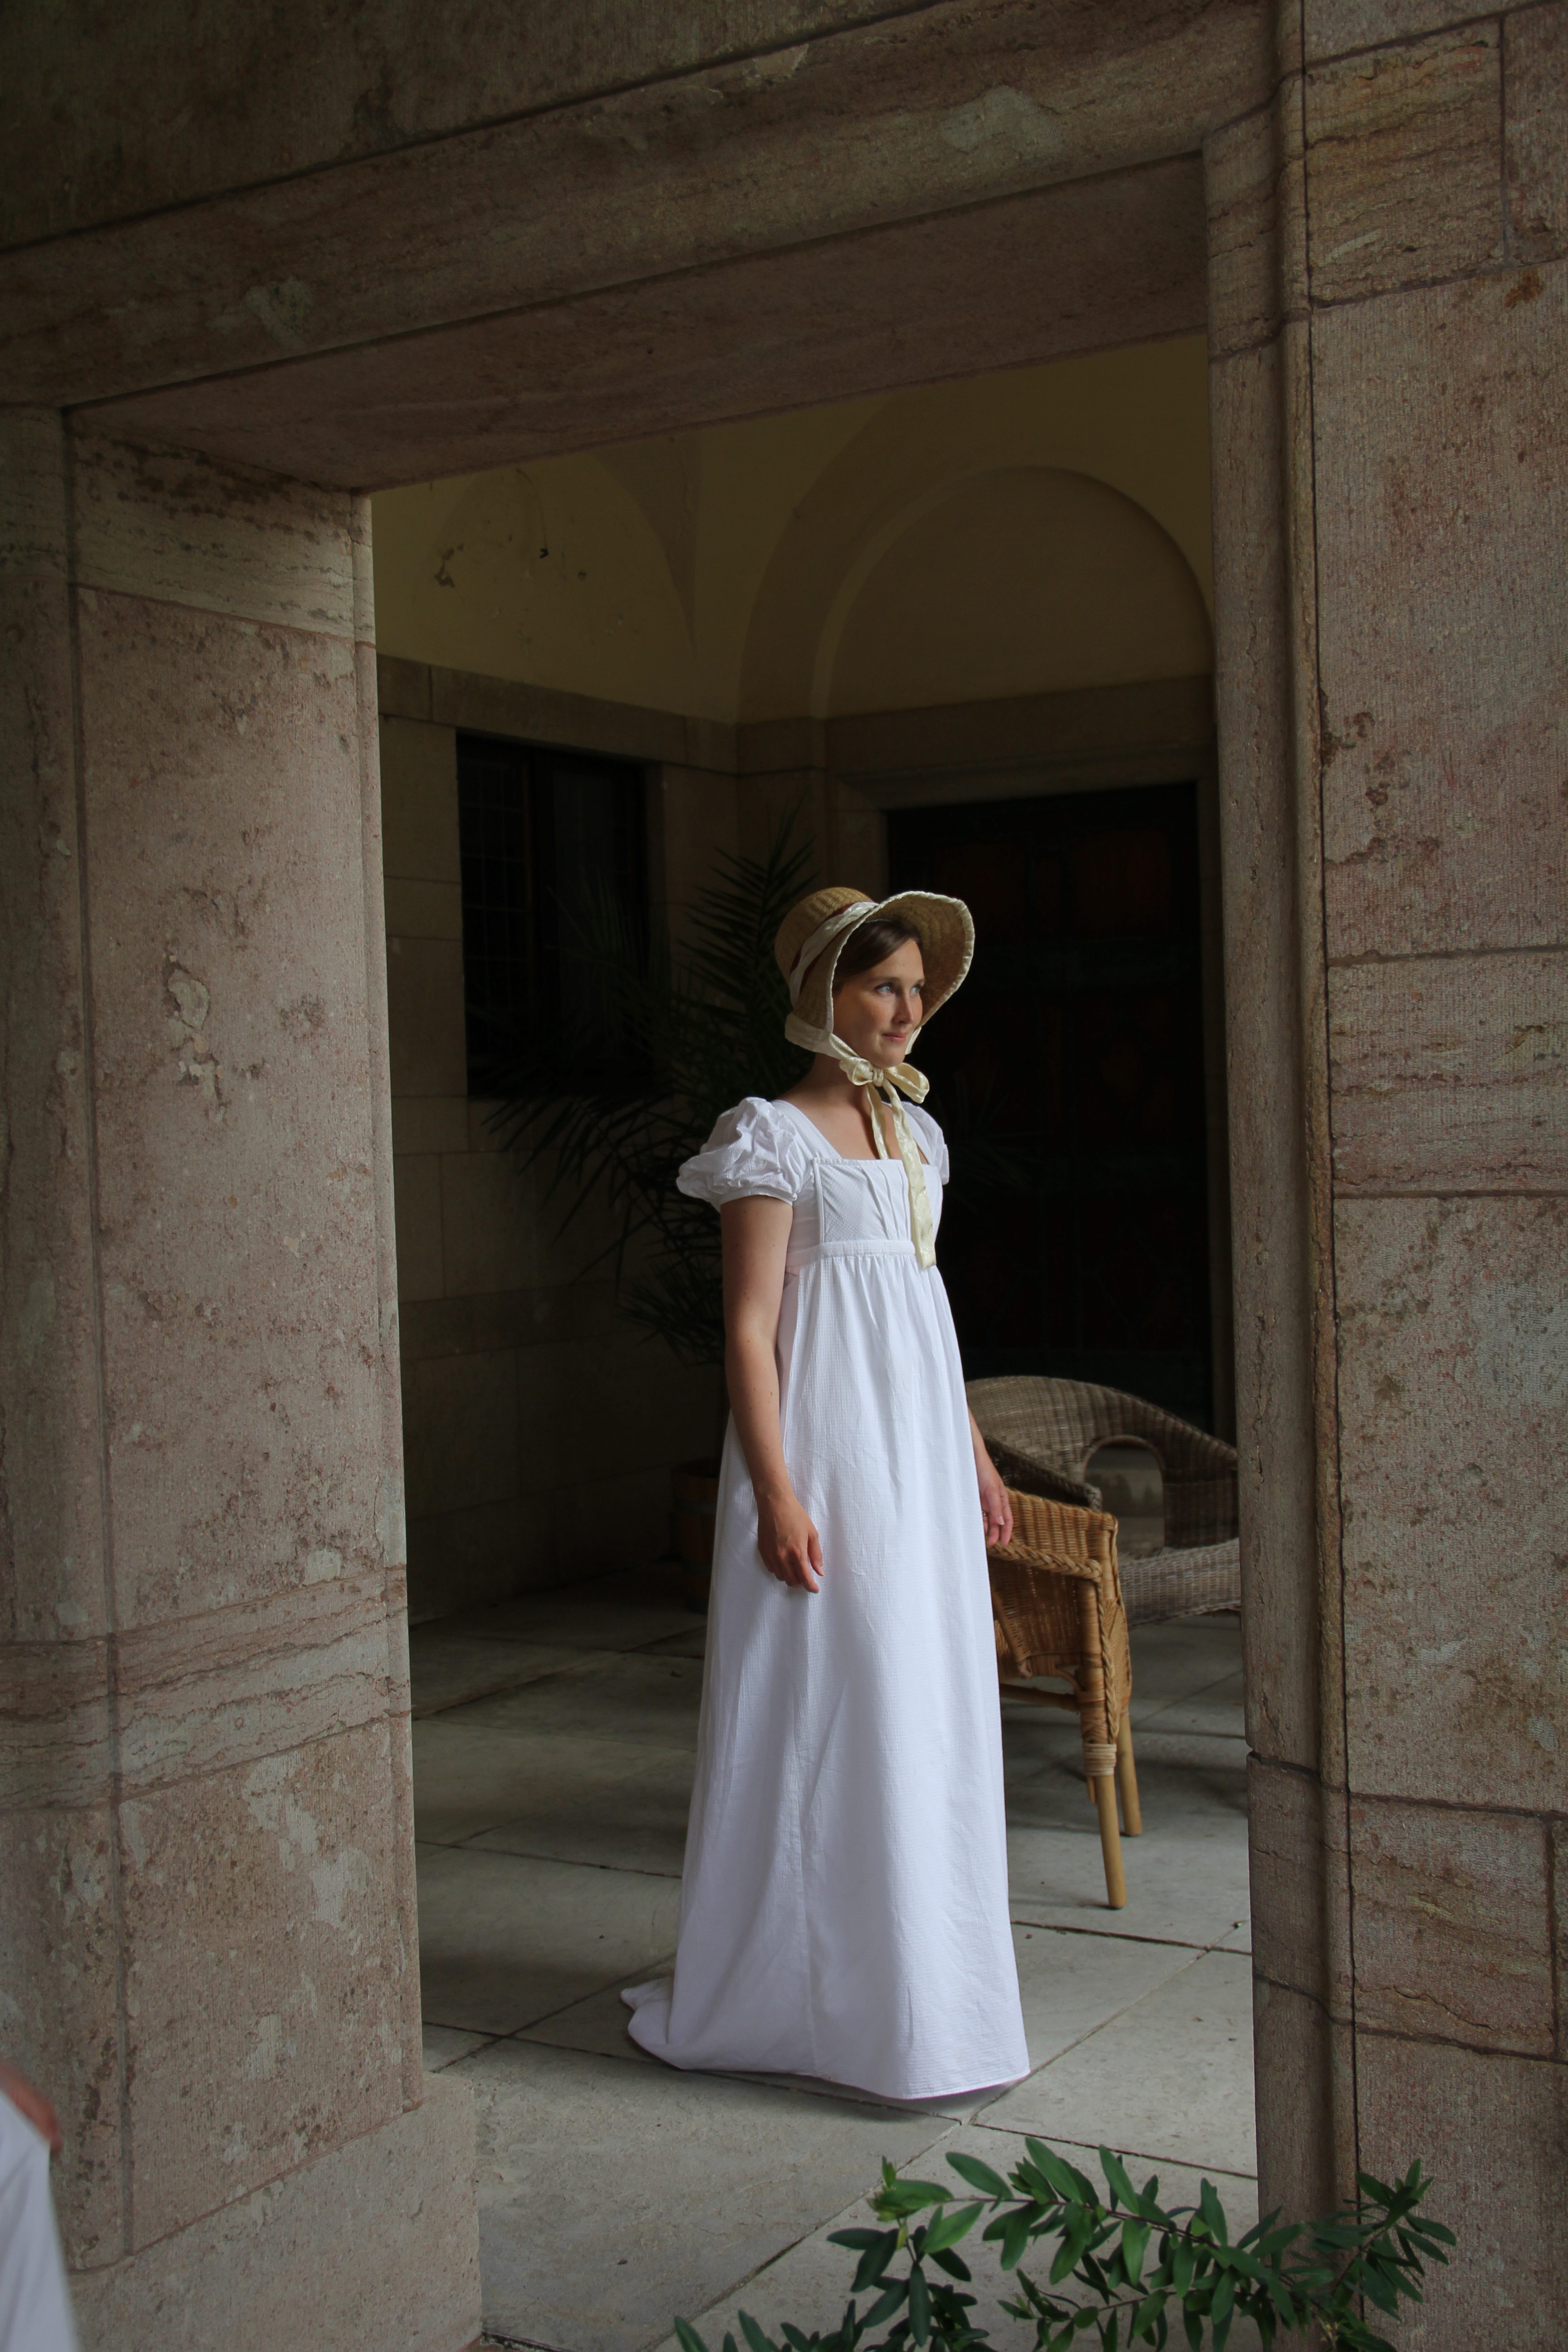
Today, I finished the blue regency gown, which I have thought about during the whole summer! I had planned for wearing it at the castle pick nick with my friends, but this was cancelled, so I had to find some other location for my photo session.
In this post I will first give you a quick look at the construction, then the new underpinnings put on in the right order, the gown put on and last, all of the romantic pictures of the gown.
Idag blev jag äntligen färdig med min nya empirklänning, som jag har tänkt på hela sommaren. Jag hade ju tänkt använda den på Tjolöholmsutflykten, tillsammans med mina vänner, men utflykten blev inställd, så jag var tvungen att hitta ett annat ställe att fota på.
I detta inlägg visar jag först lite av klänningskonstruktionen, sedan alla underklädeslager och sist själva klänningen.
Construction of the gown
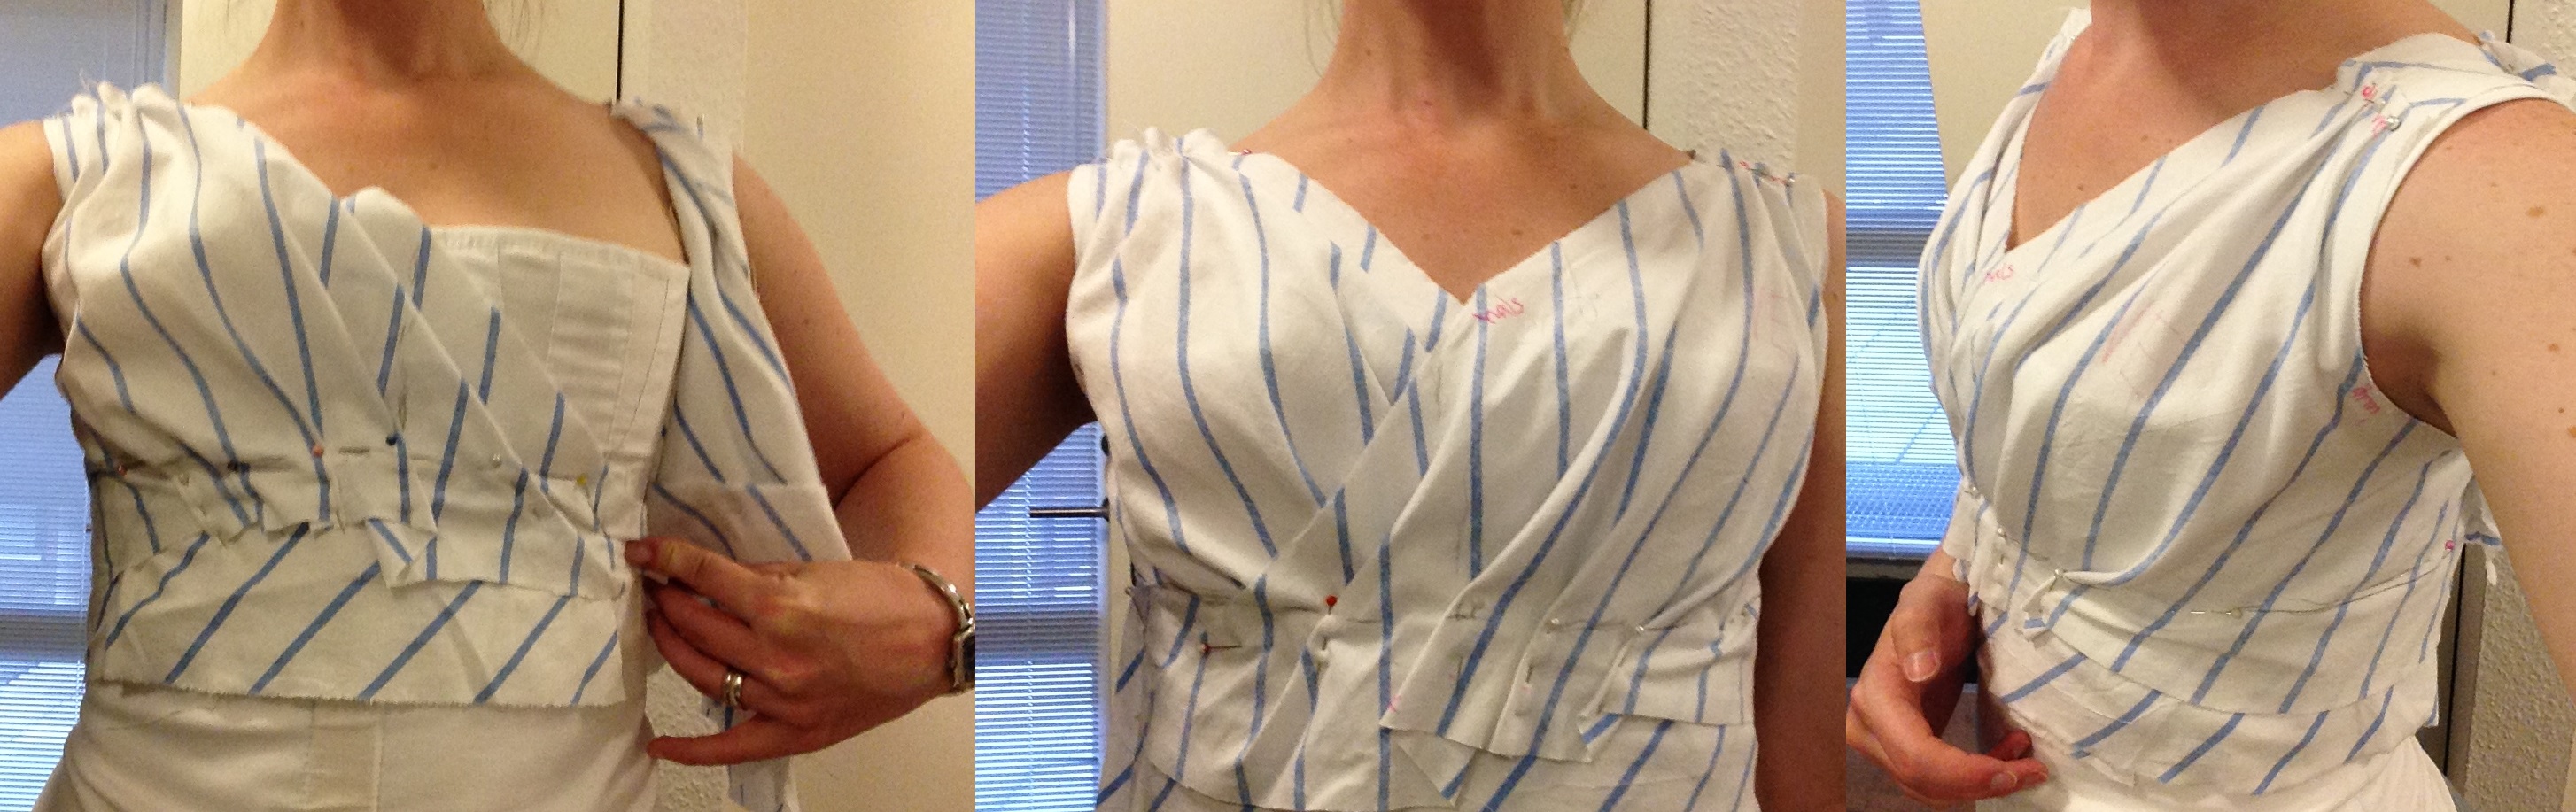
I made a mock-up for the bodice part, on my mannequin before I left it for Sweden. The mock-up was used as a pattern when I cut the fabric.
Jag gjorde en toille på min provdocka i Danmark och använde nu denna som mönster när jag klippte ut tyget.
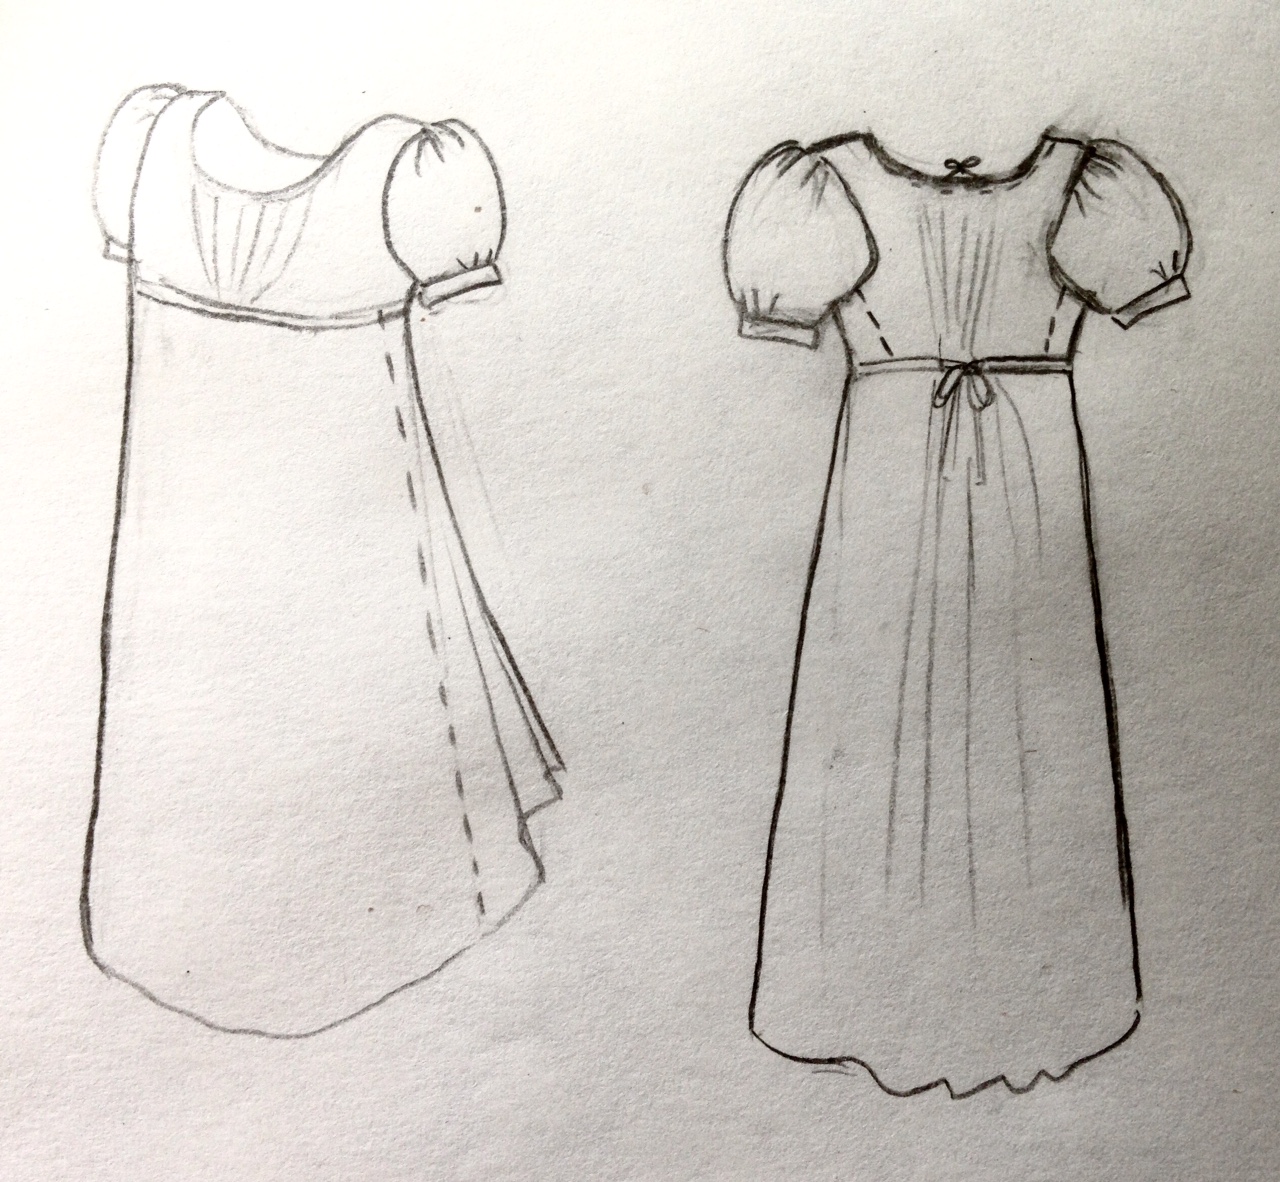
Thus, I constructed the mock-up. The pinned tucks represent the tucks that will be created by drawstrings at the high waist.
First I put the bodice together and hand stitched the hem in the neckline. Then I put on the arms and last, I made the skirt. I cut some corners by sewing long loose machine seams for gathering the fabric in the arms and skirt.
Först satte jag ihop livet och fållade sömmarna i halsringningen. Sedan fäste jag ärmarna och sist kjolen. Jag struntade i att göra vecksömmar för hand, genom att i stället sy långa lösa raksömmar på symaskinen för att rynka puffärmarna och kjolen.
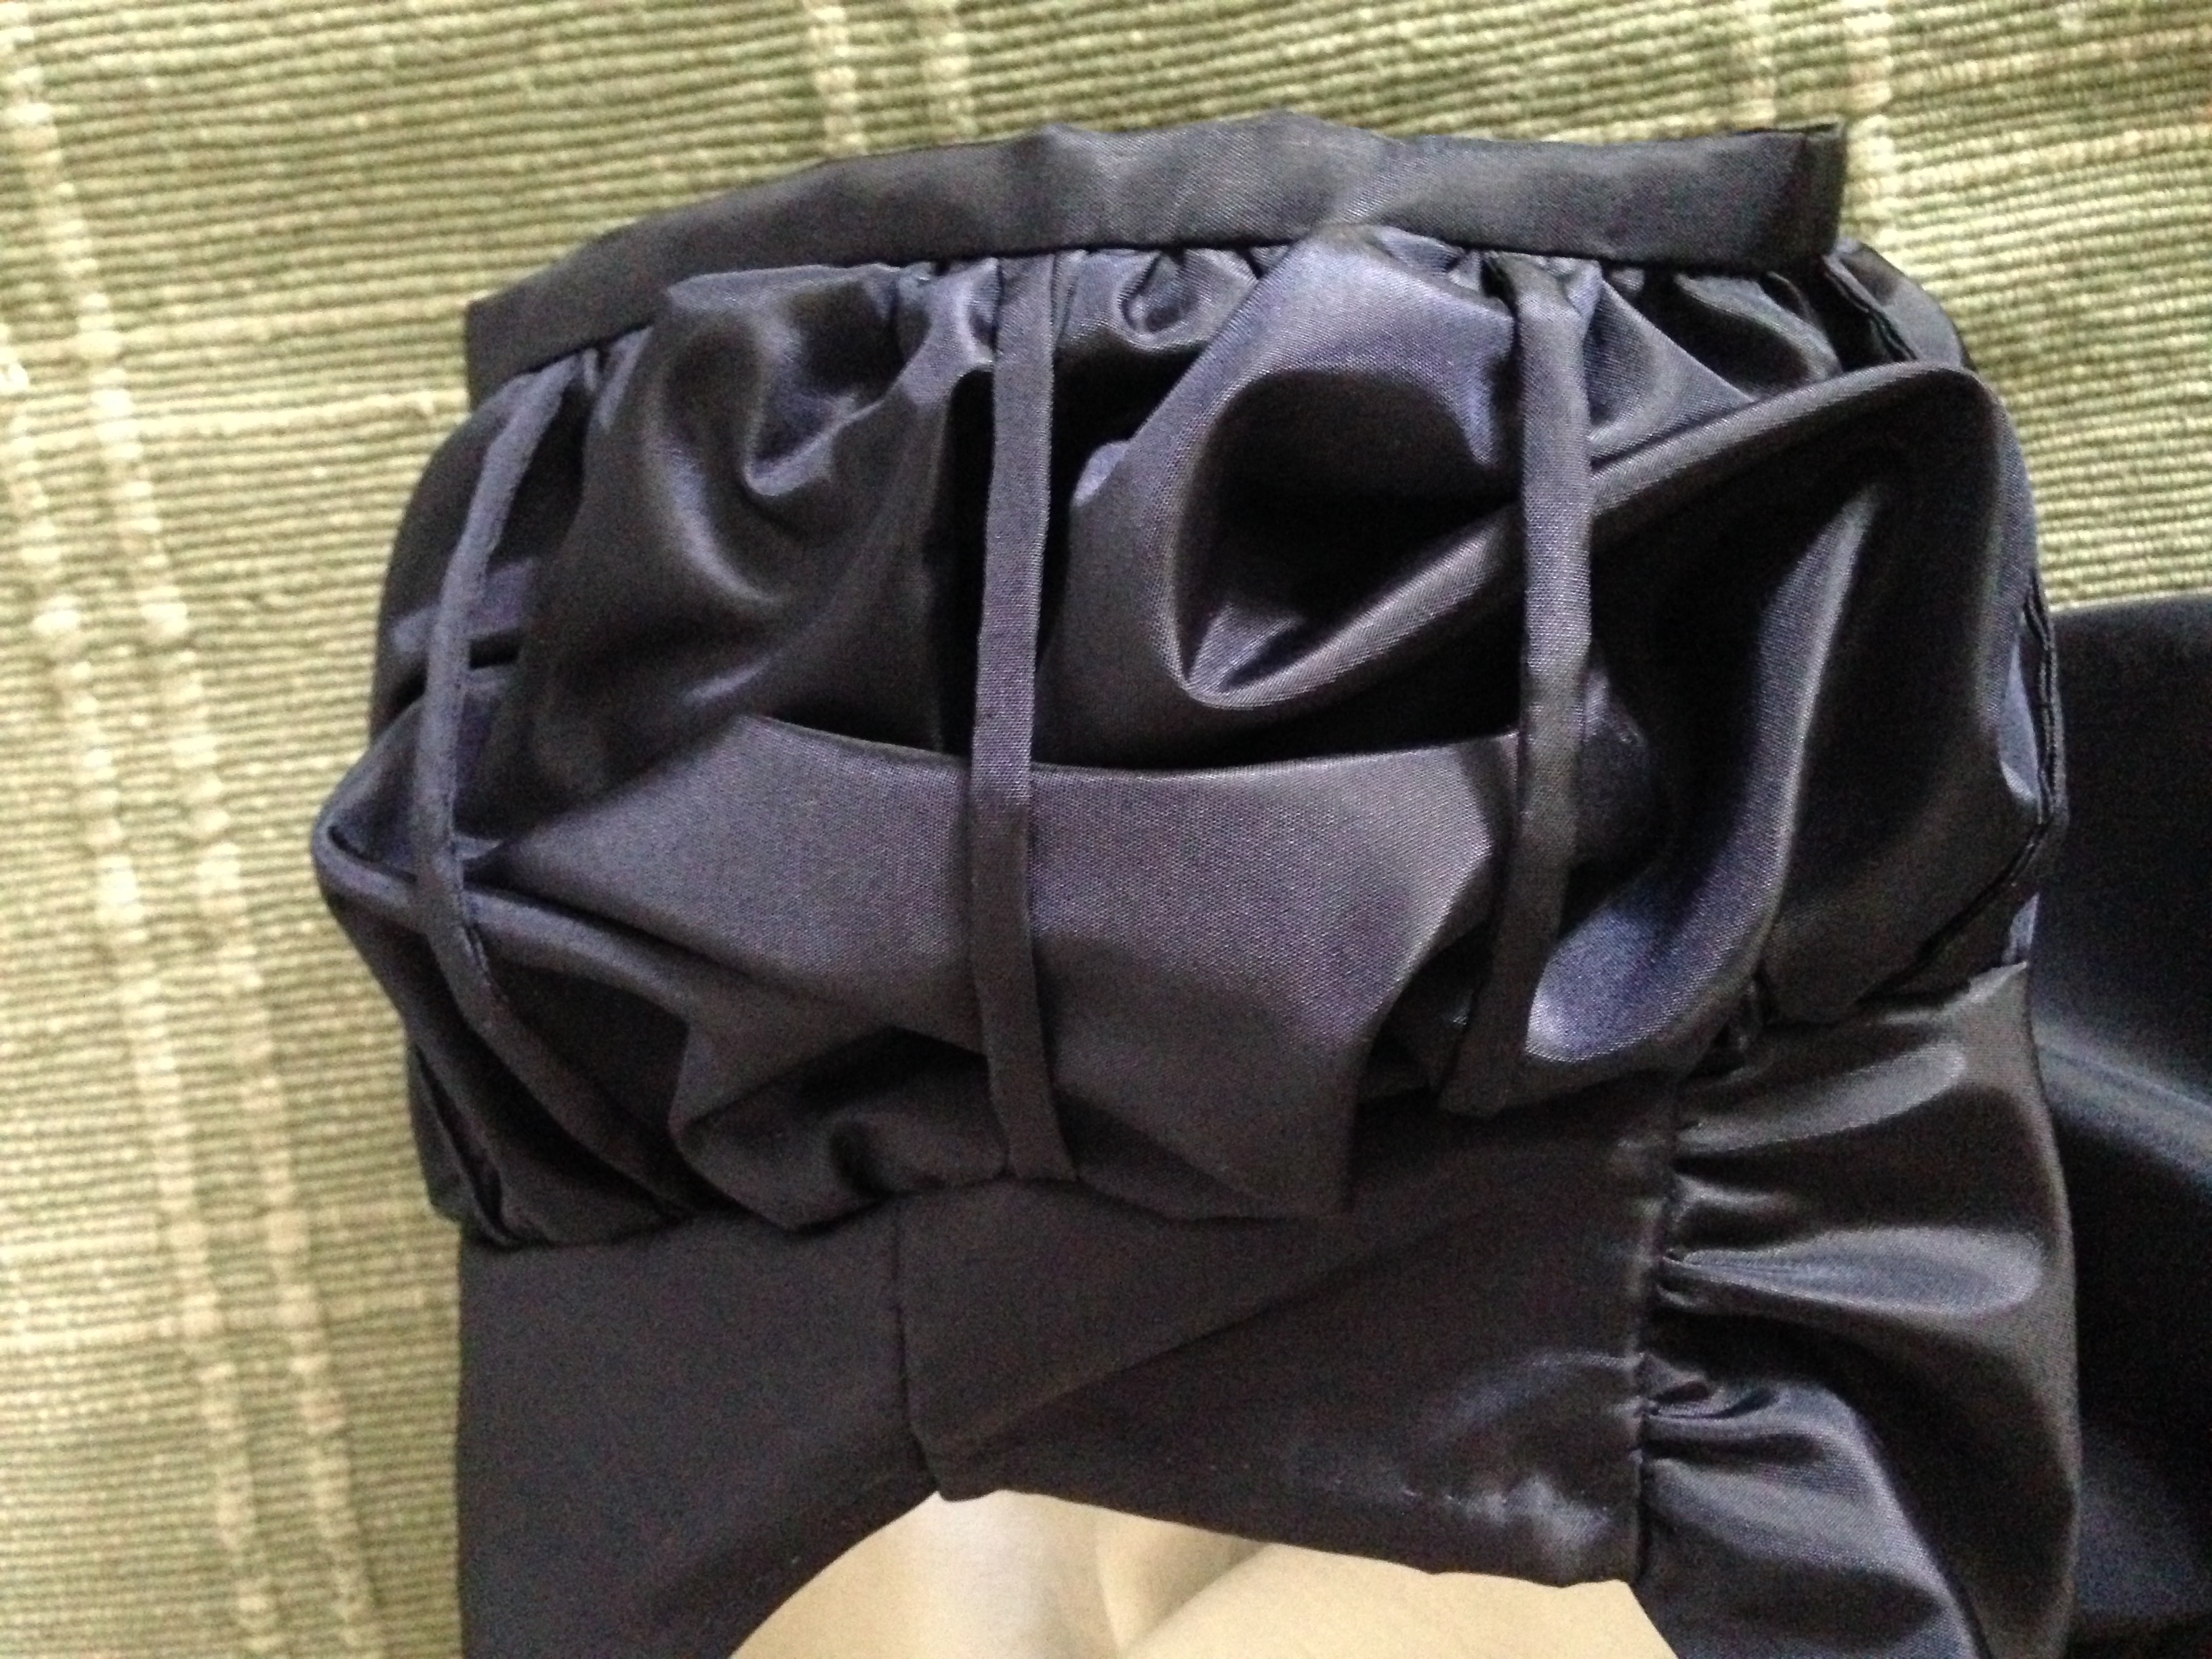
1) The bodice parts are put together after hand stitching all the parts of the neck line. 2) The inside fabric comes from an old pillow case. 3) The fabric of the arms is gathered both at the shoulder and bottom and also vertically by thin strings attatched to the shoulder and tape at the bottom om the arm.
Poofy arm with fabric gathered beneath handsewn strings
Inside the bodice and the closing of it.
The Underpinnings
Here are all the layers of underpinnings (except for stockings and shoes), then the making of the hair and at last comes the wonderful gown:
Här får ni se hur alla underkläder tas på i rätt ordning (utom strumpor och skor), sedan hur frisyren görs i ordning och slutligen den nya klänningen ses i all sin glans:
Chemise
Corset
Petticoat sewn from an old bed sheet, closed in the back with hooks and eyes. Held up with suspenders.
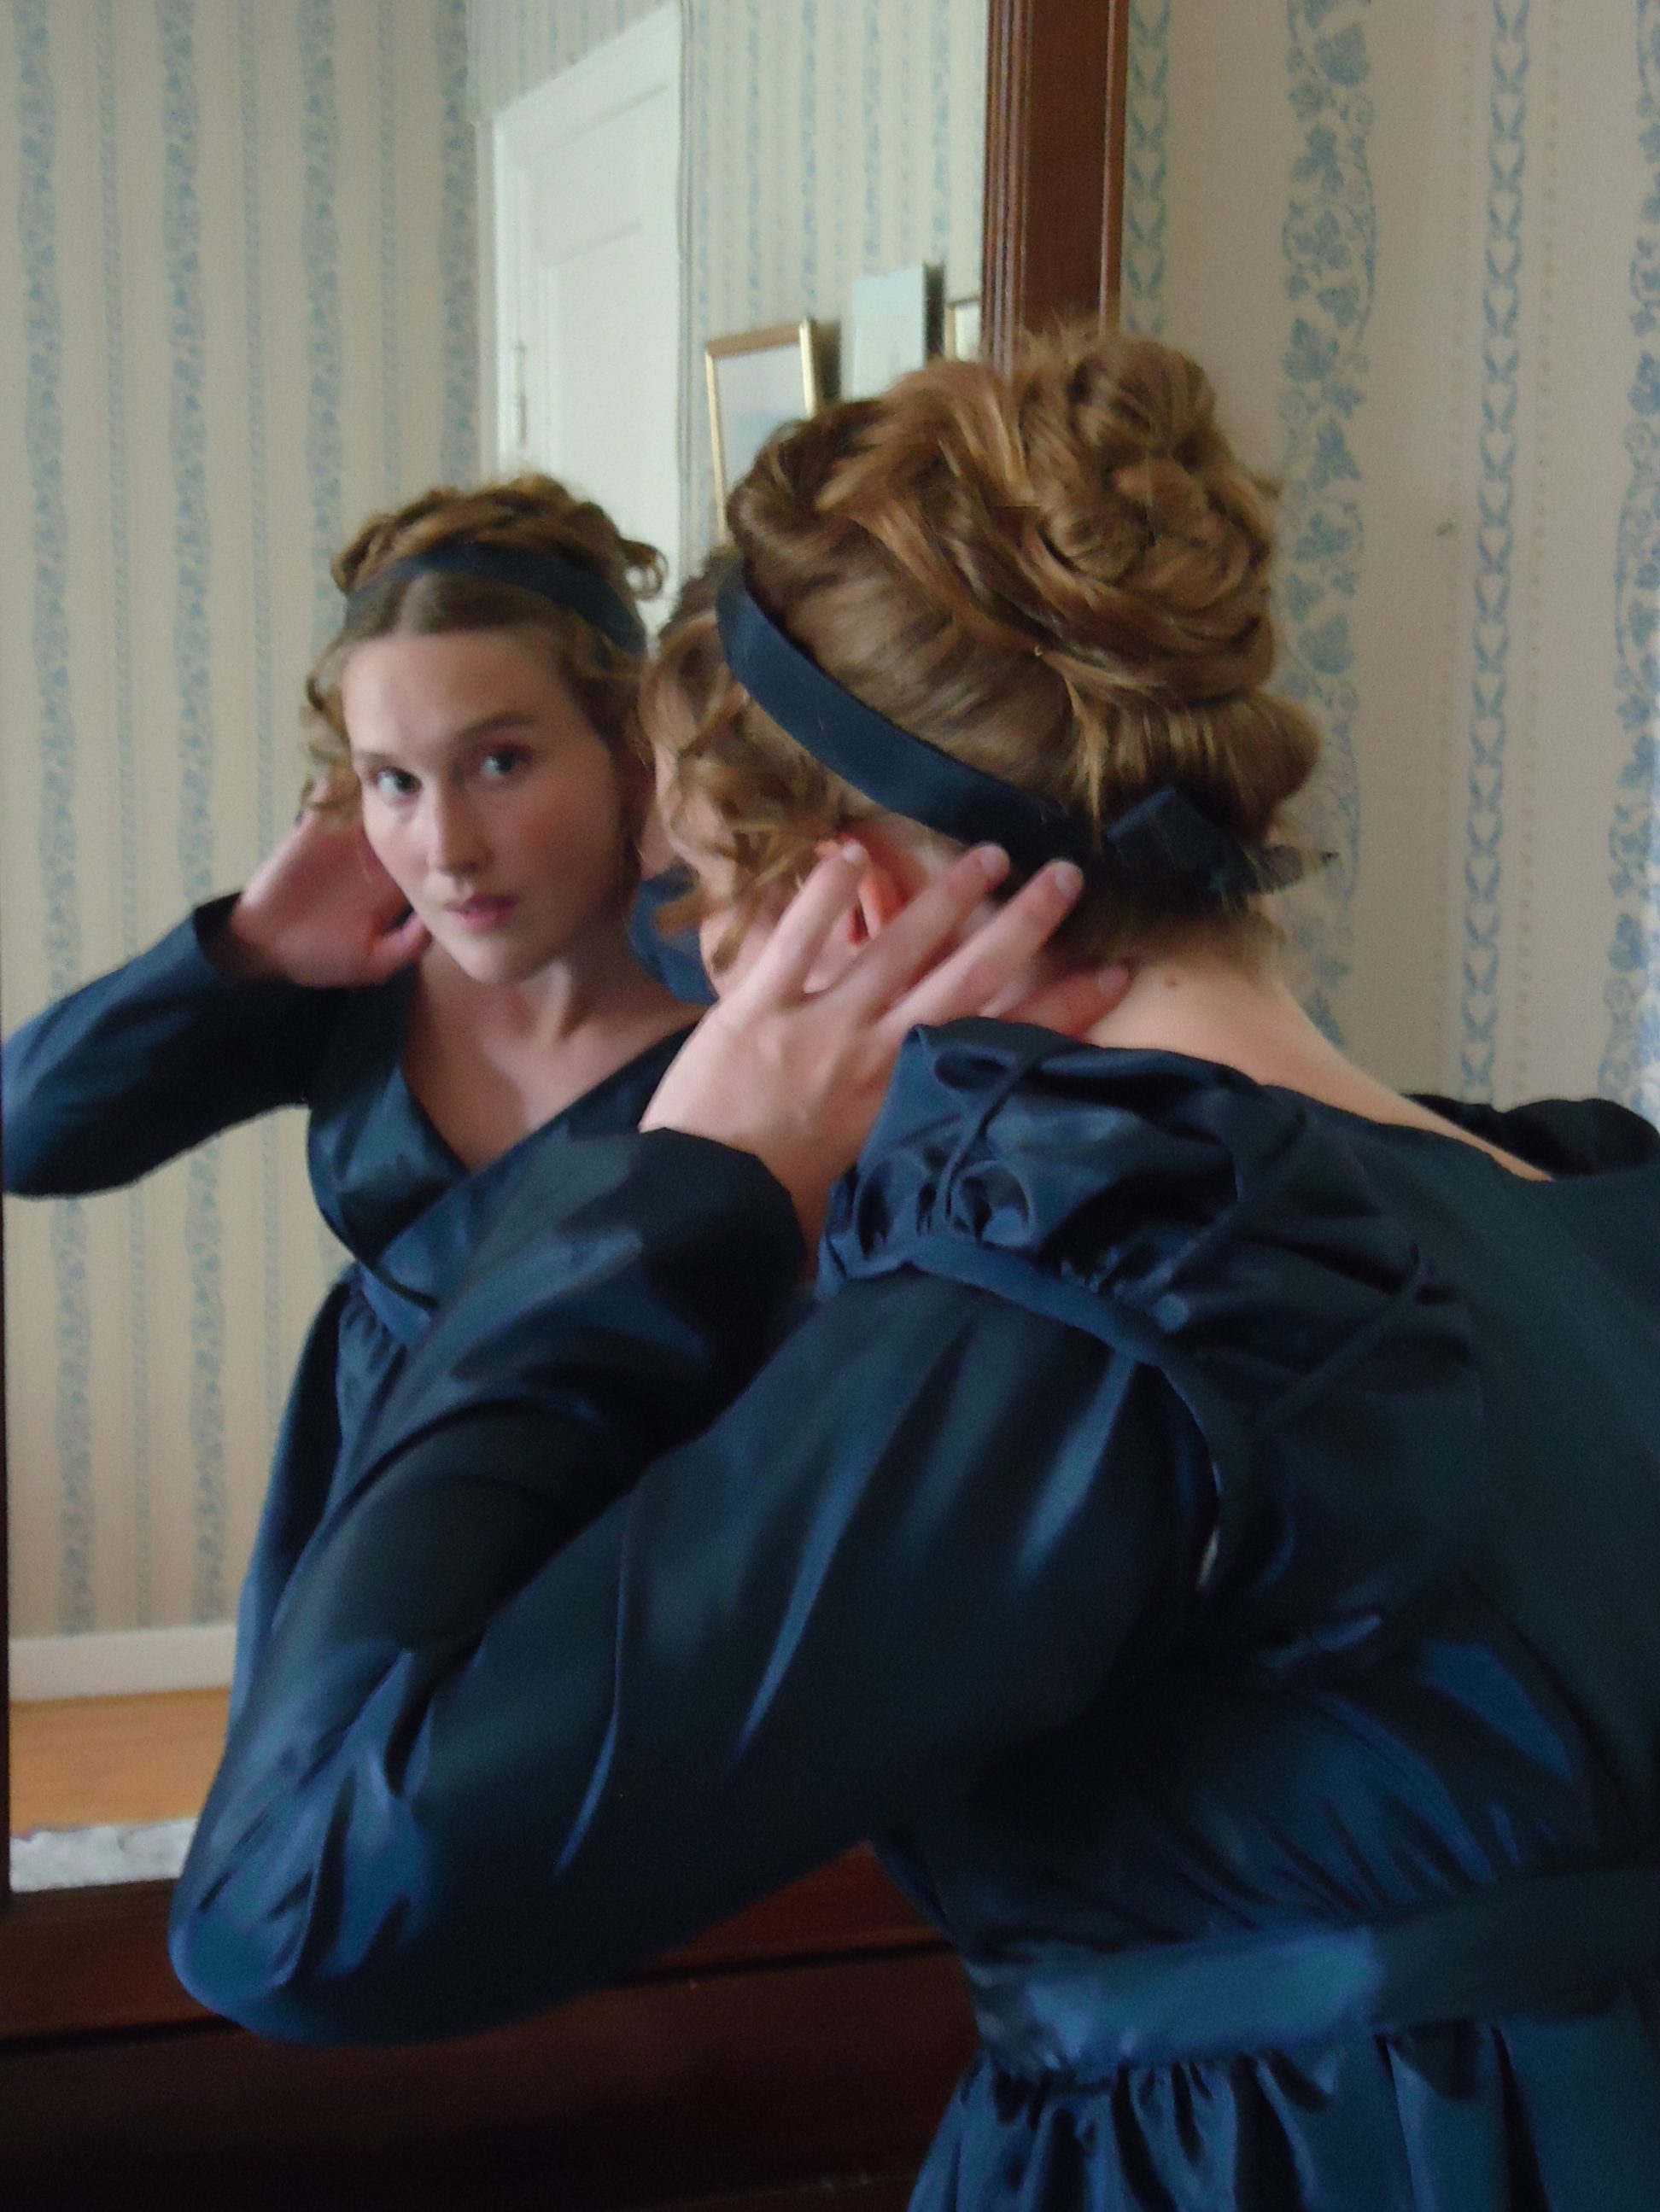
The Regency Hair
Now it is time for making the hair! I have long, straight hair, that never hold the curls for more than five minutes. After some lovely articles at Your Wardrobe Unlocked and the wonderful blog Places in Time, I have finally gathered up enough courage to make my own hair pieces.
Nu är det dags för att fixa håret! Jag har långt, rakt hår, som aldrig låter lockarna stanna i mer än fem minuter. Efter några uppmuntrande artiklar på Your Wardrobe Unlocked och den underbara bloggen Places in Time, har jag äntligen samlat tillräckligt med mod för att fixa eget löshår!
Using the hair pieces (my own hair glued to barrets). After fastening the hairpieces at my temples, I loosened my “curled hair” from the knot at the back of my head (I had hoped for these to be curly, but off course they were as straight as allways) and destributed this hair forward on the top of my head, in a way that made it look a little bit curly. Then I hid the barrets of the hair pieces under a ribbon.
I am too greedy to buy synthetic wig hair, so… I know some of you will think that this is truly shocking… I harvested all the hair that got stuck in my brush for one month, taped it together and finally glued it to a small piece of fabric and to barrets. Then I wound the hair up around my finger and fastened the curl with hair pins. These new hair pieces were put away for about two weeks before I could use them (I tried them after just one week, but that wouldn’t do at all!).
Jag är för gniden för att köpa syntetiskt löshår, så… jag vet att några av er kommer rygga tillbaka i avsky, men… jag sparade allt hår som fastnade i hårborsten i en månad, tejpade samman det och limmade slutligen fast det på hårspännen, samman med en liten tygbit. Sedan rullade jag upp håret runt fingret och fäste lockarna i hårnålar och la undan allt i två veckor innan fotosessionen (jag testade löshåret efter bara en vecka, men då släppte lockarna på en minut).
I have divided my hair into several parts, that I have twined loosely and layed over each other, in order to make it resemble curls. The barrets of the hair pieces are hidden beneath the ribbon.
For those of you, who have shorter hair, I believe that Diary of a Mantua Maker may be helpful.
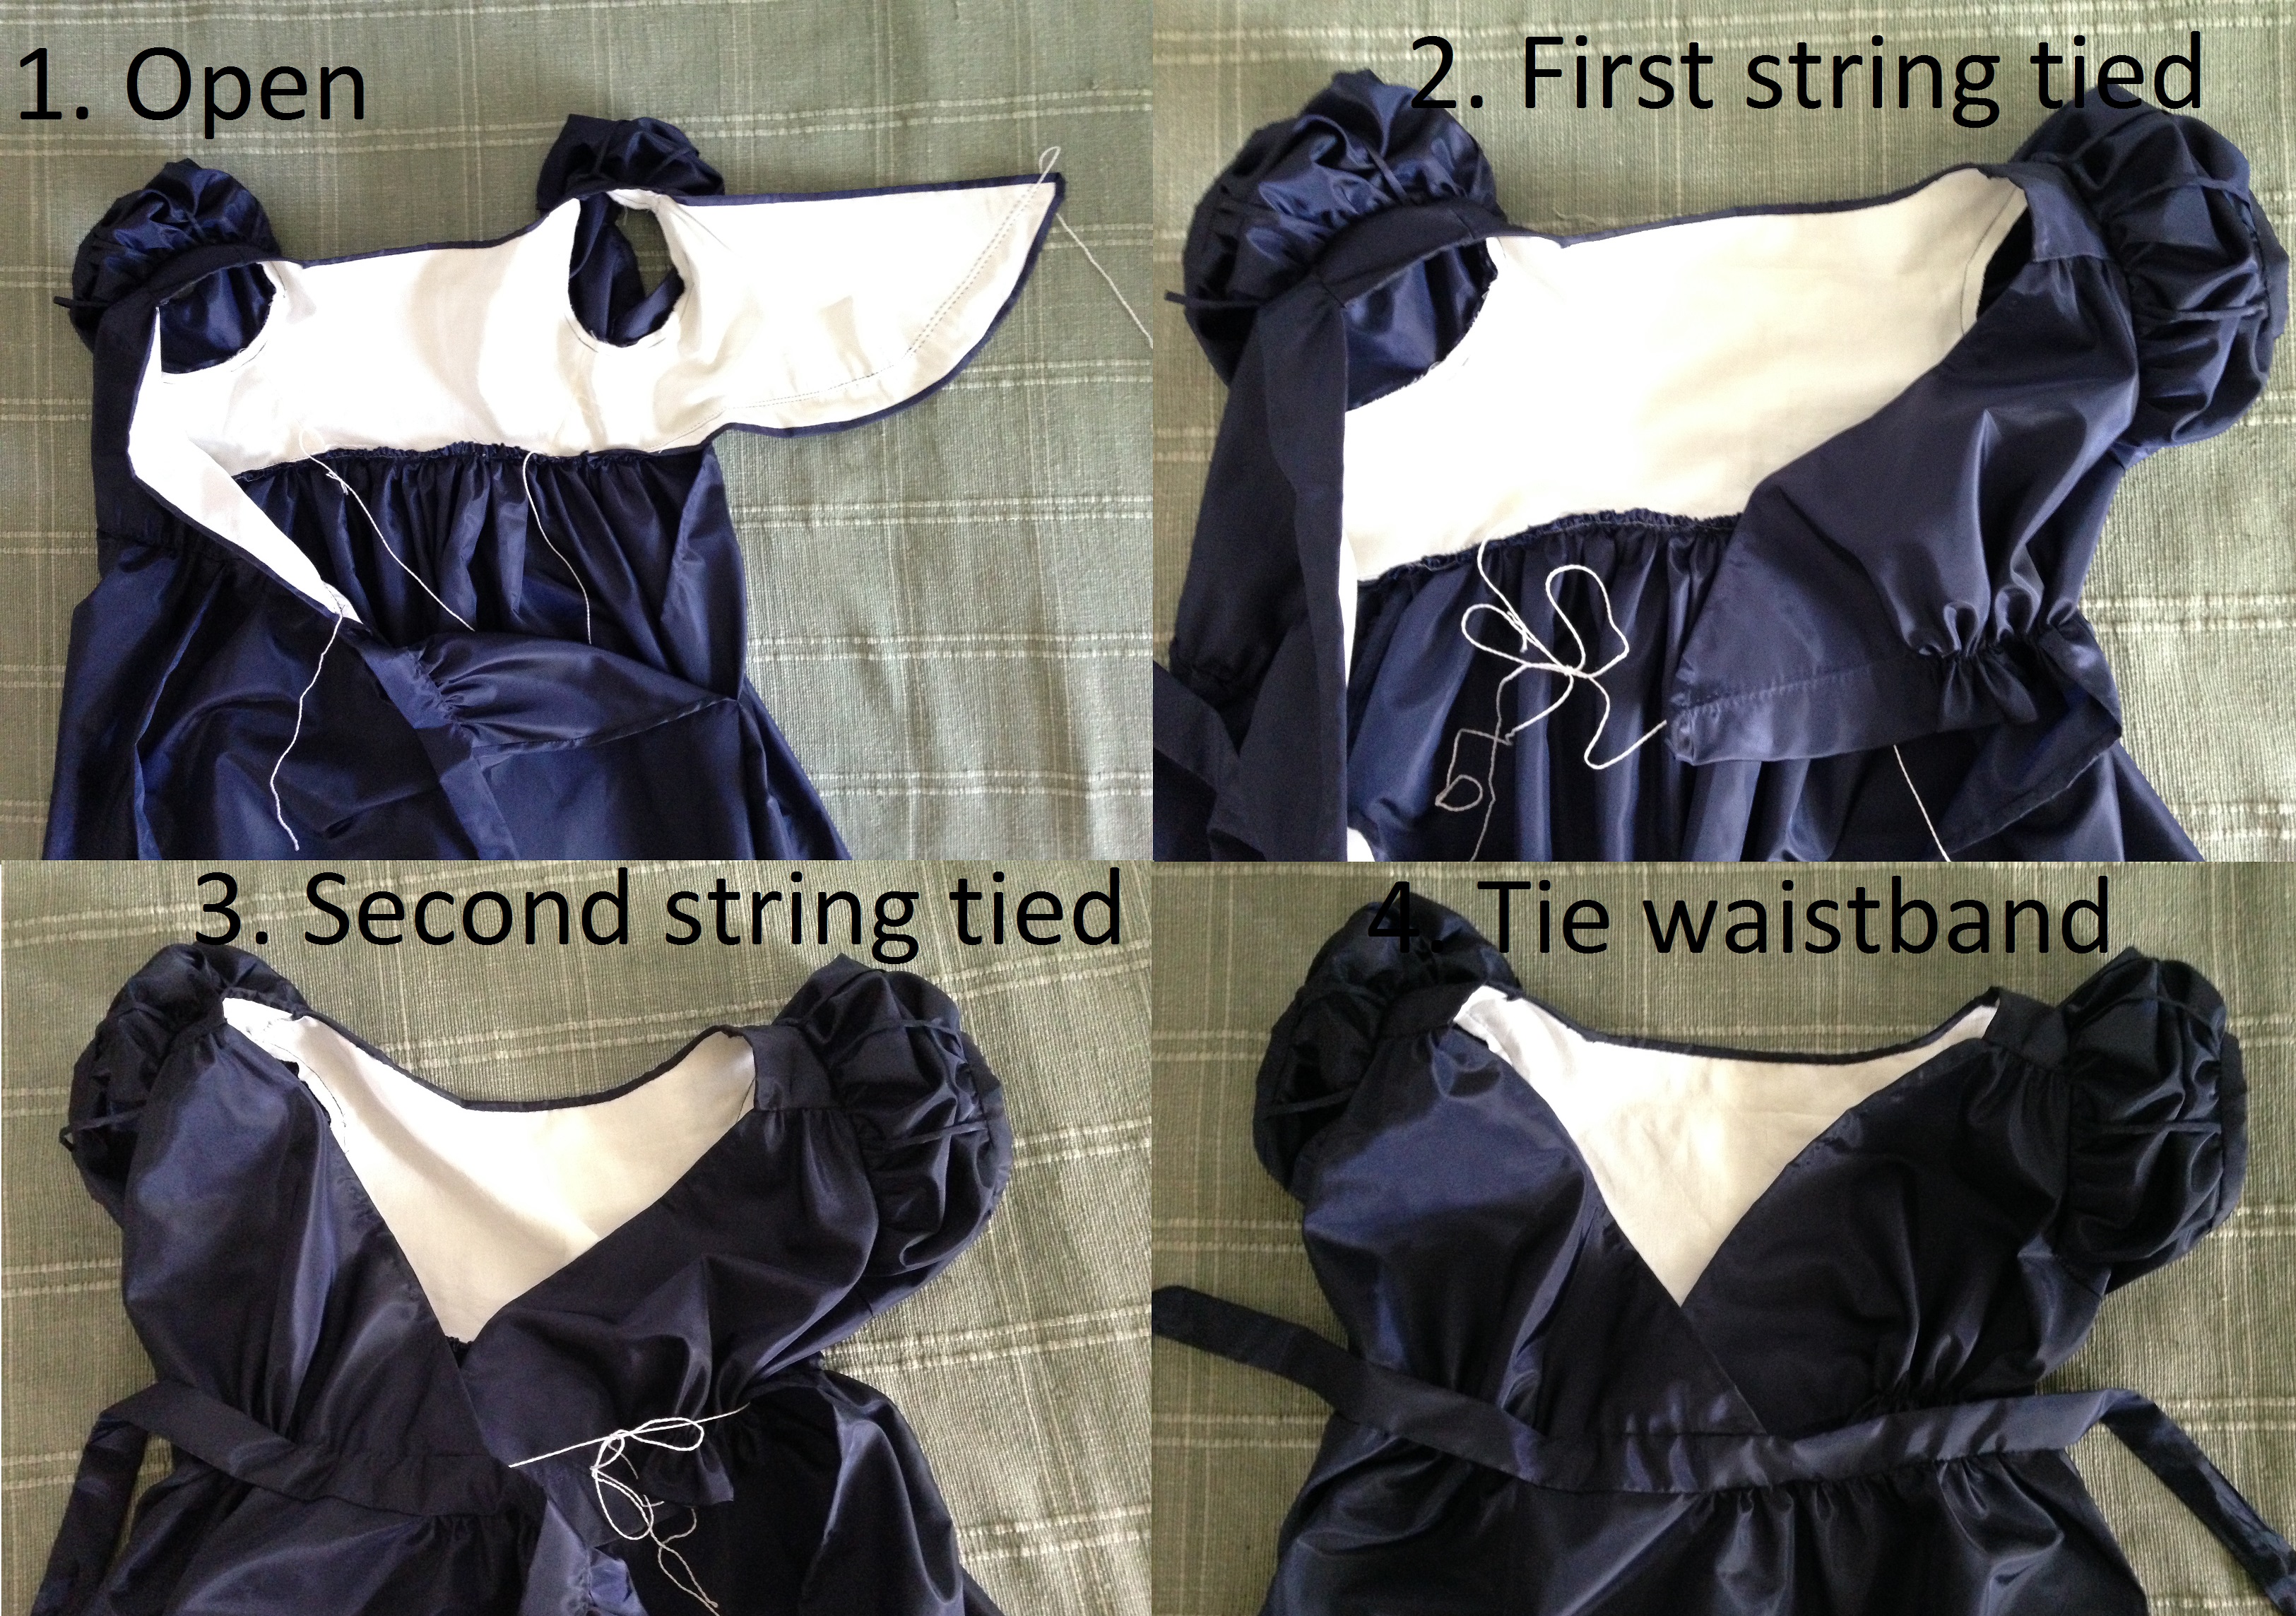
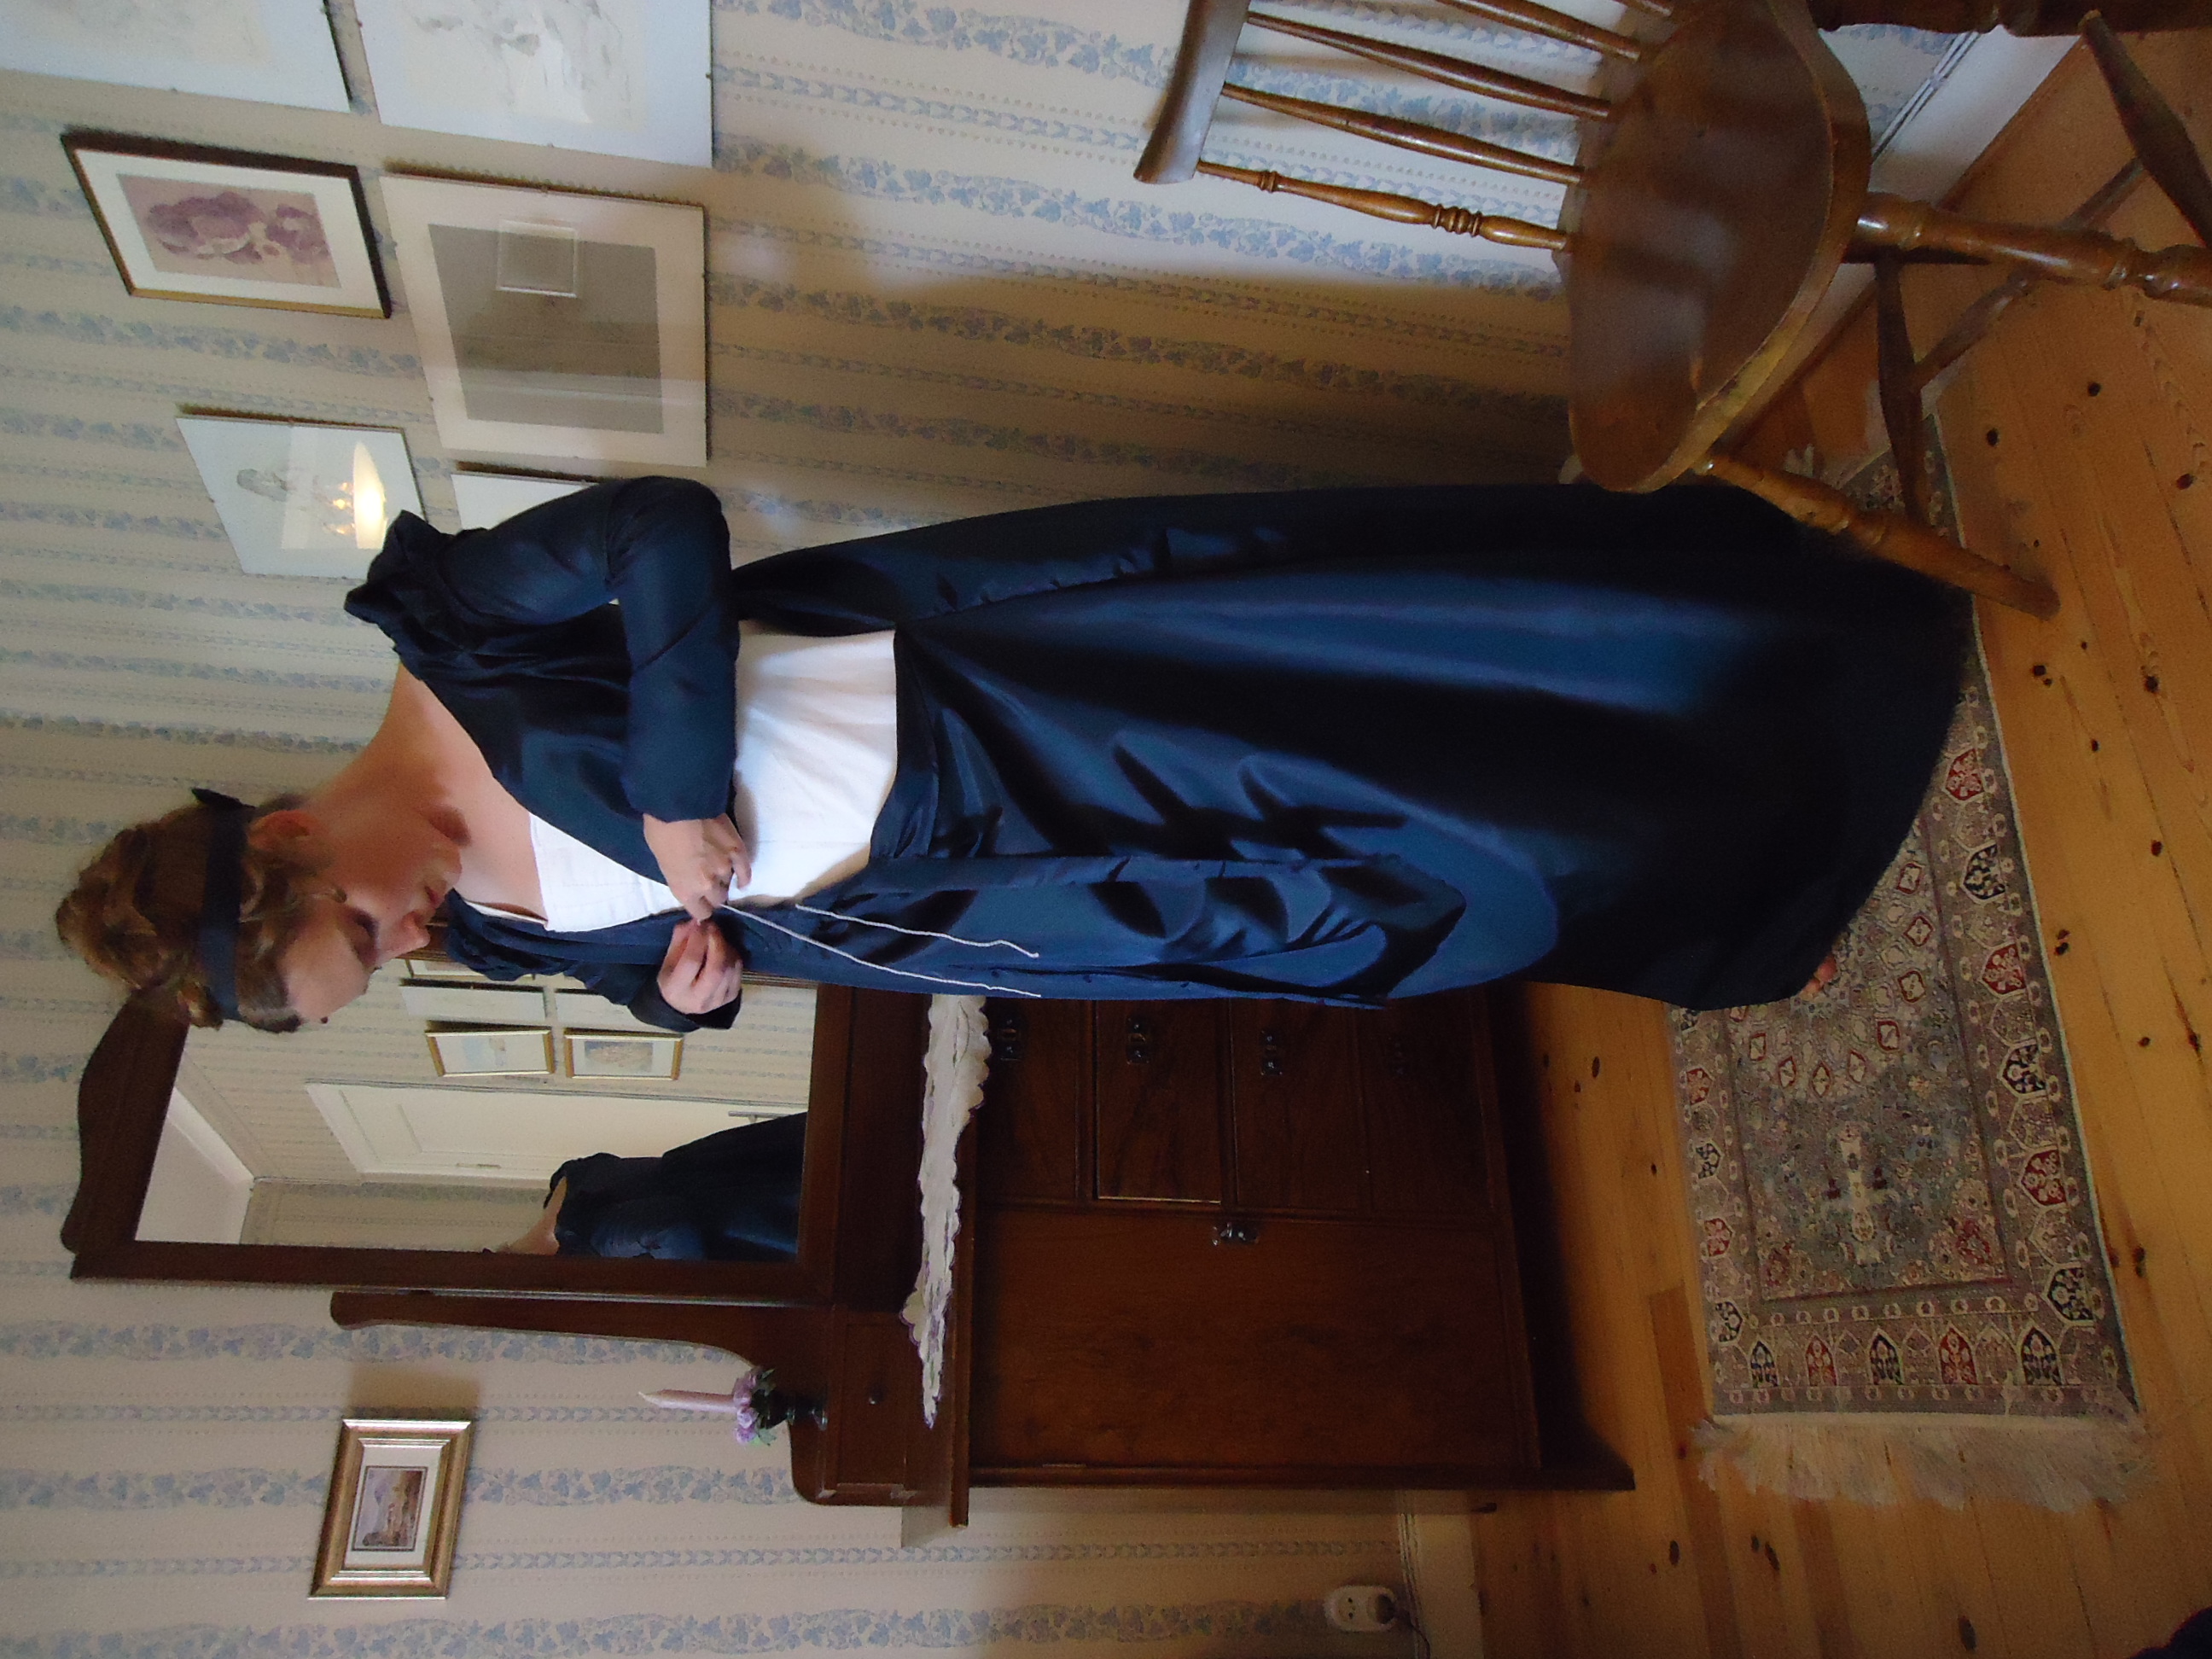
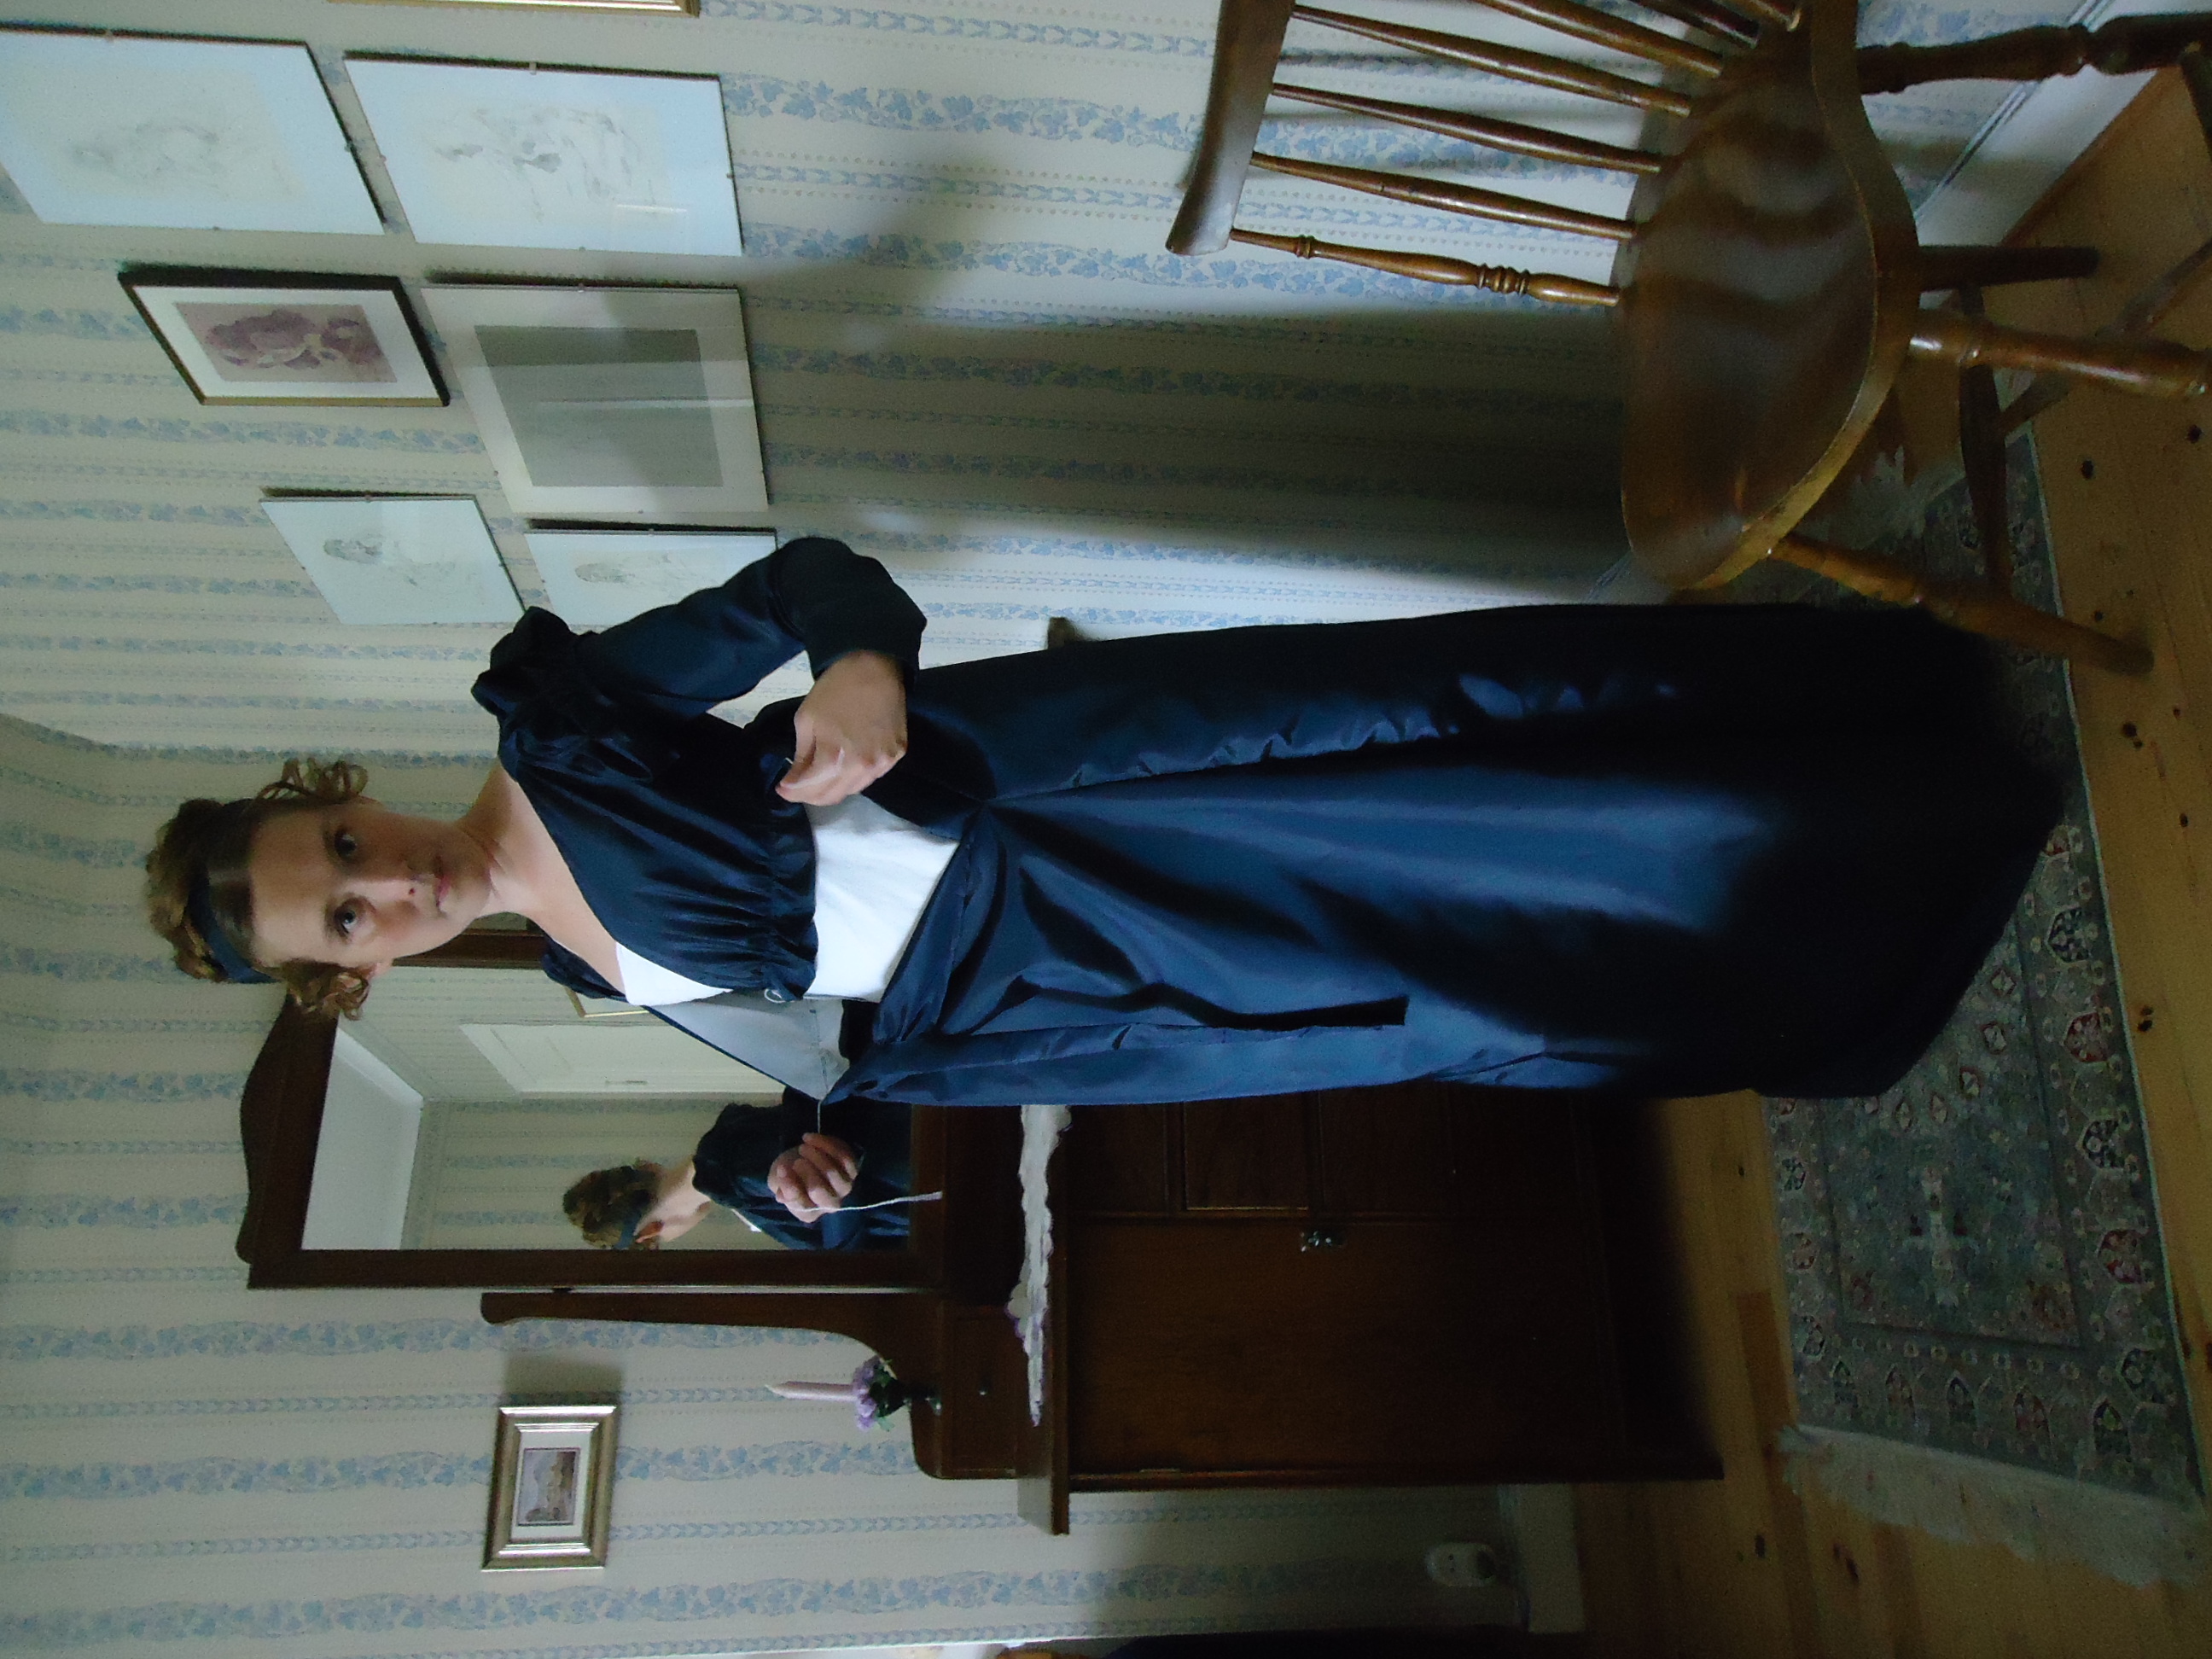
I had to read several blogs and examine many photos of vintage gowns, before I understood how the V-lined gowns are constructed (which is shown in this post), so I will kindly show you how it is put on.
Jag var tvungen att läsa igenom flera bloggar och kolla på många fotografier av vintageklänningar, innan jag förstod hur dessa V-ringade klänningar var konstruerade (vilket syns i detta inlägg). Eftersom kanske fler än jag är förvirrade över detta, visar jag hur man tar på sig den.
Making a knot for one side of the bodice.
Pulling the drawstrings together for making a knot for the other side of the bodice.
Making the last knot.
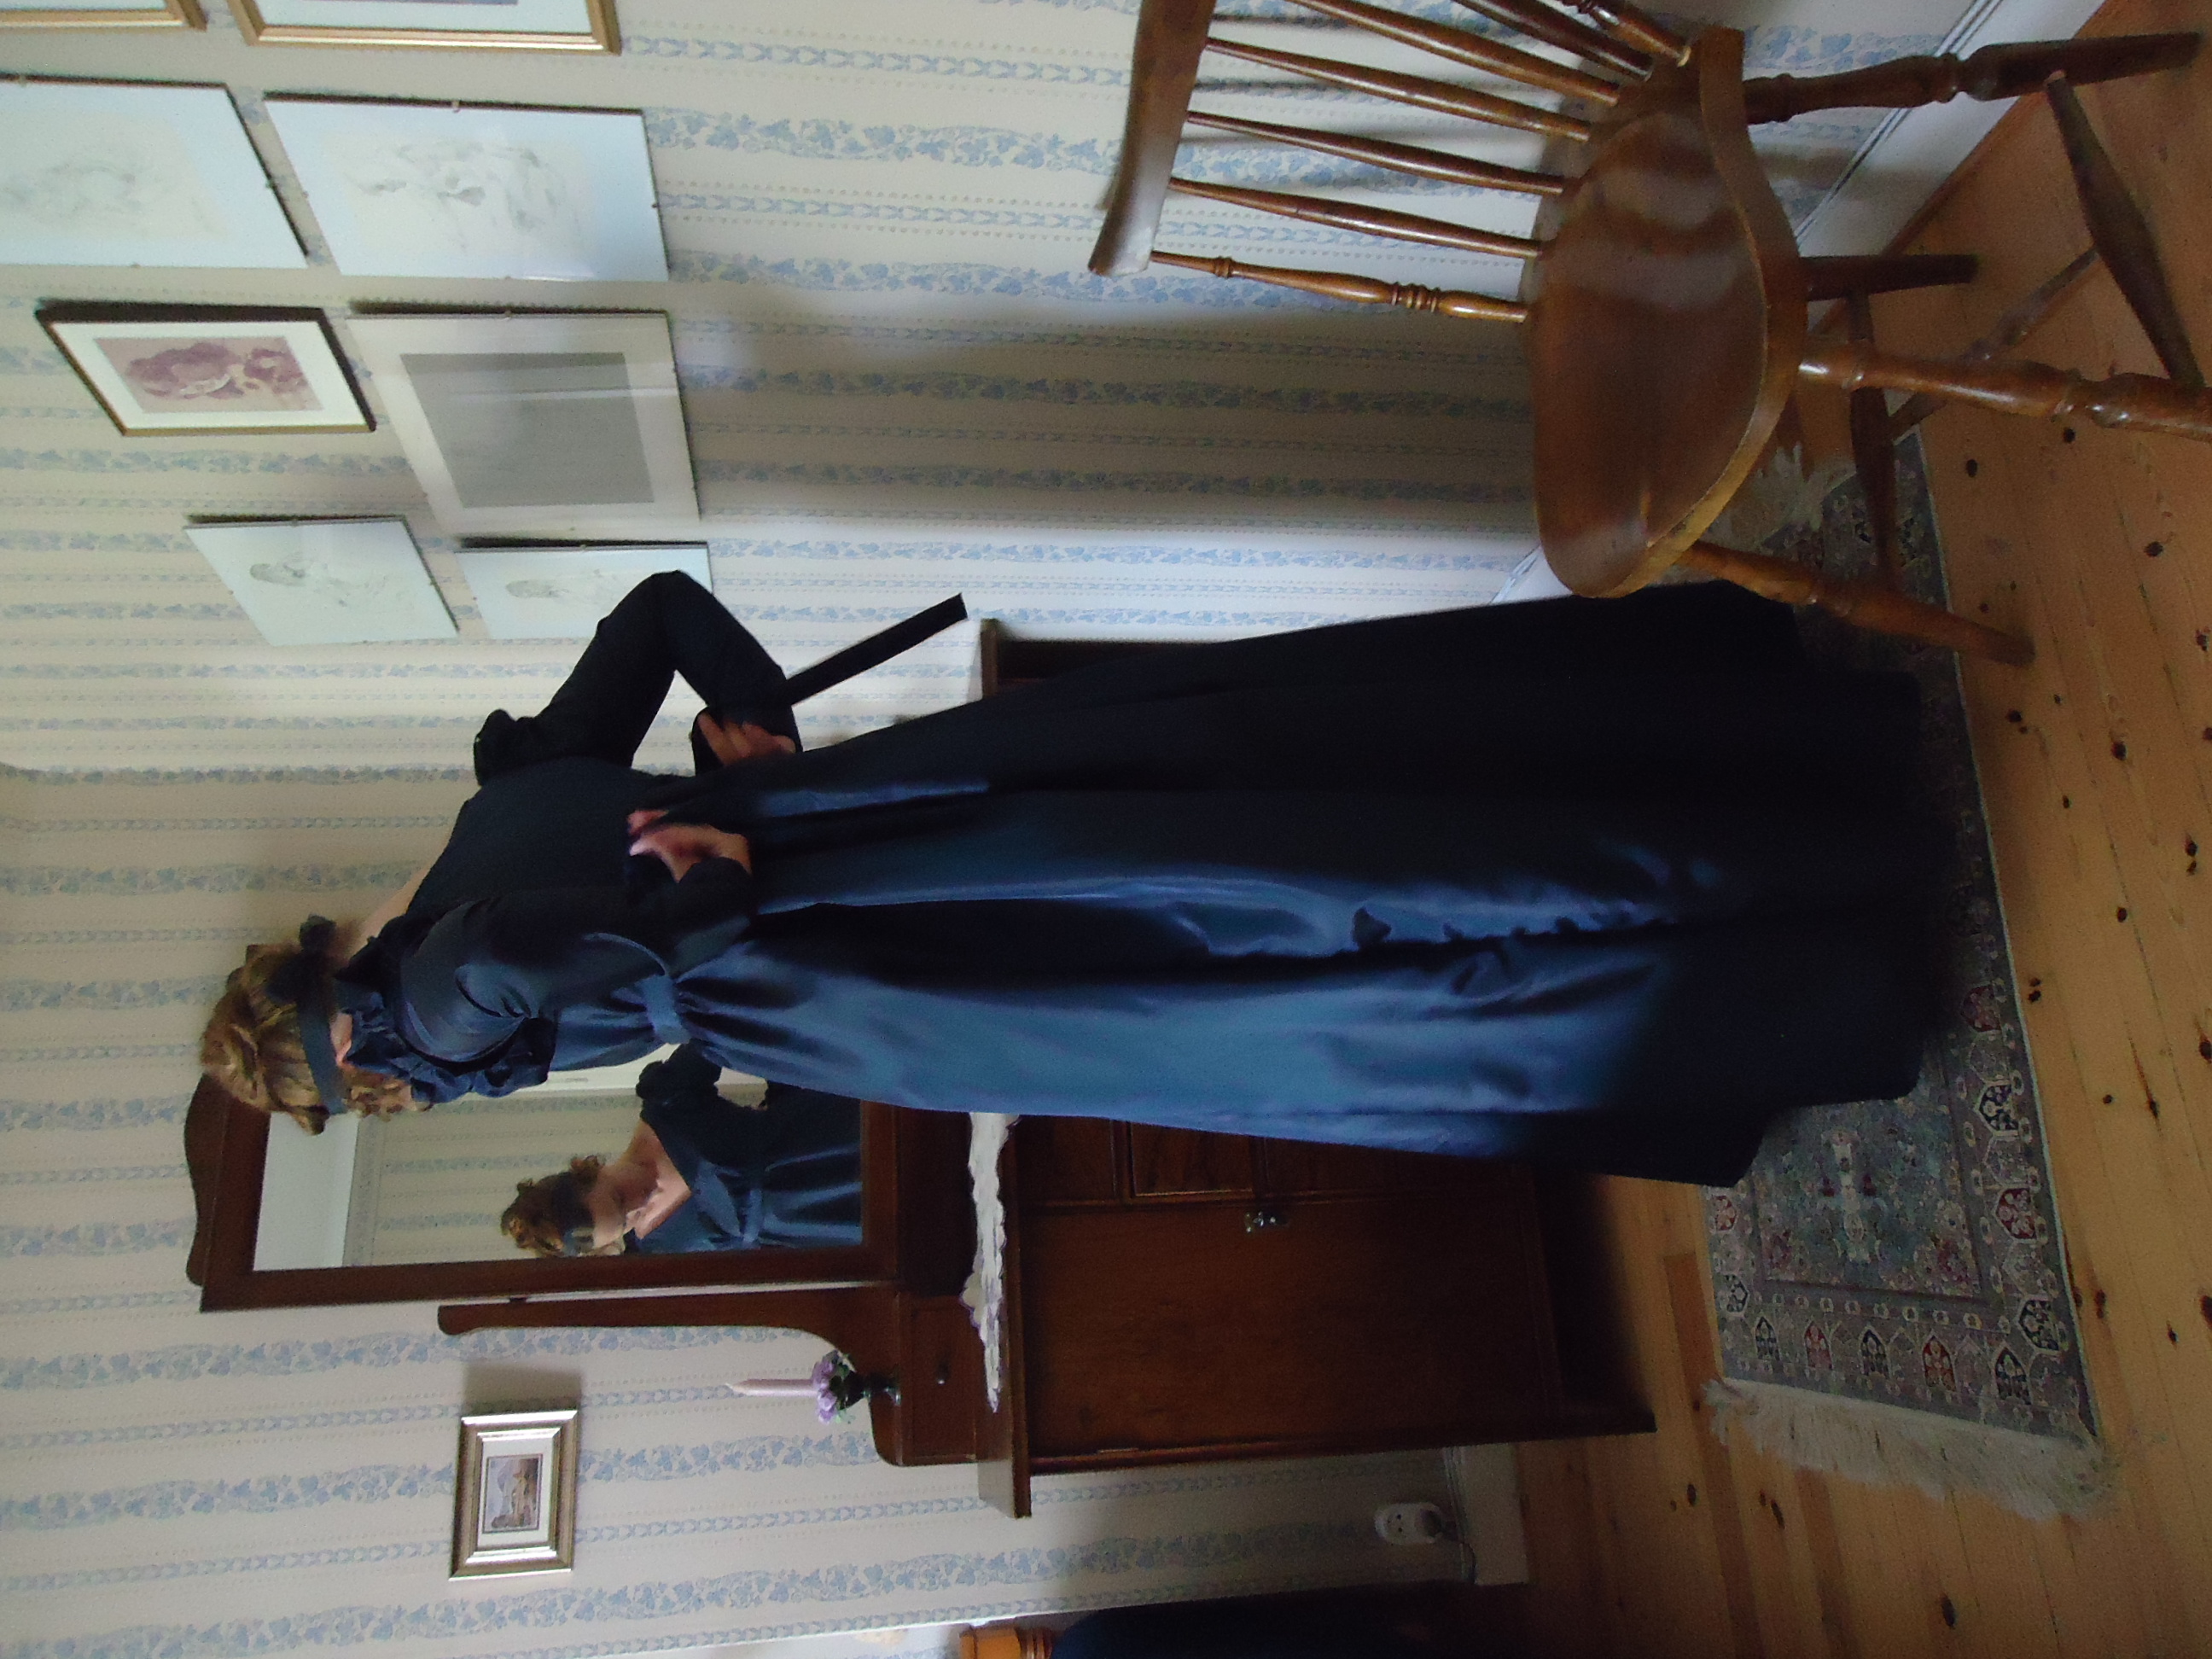
Pulling the outer ribbon together behind the back.
Obviously, it was impossible for me to tie the bow behind my back, so I got help from my skilled husband.
Finally, I am fully dressed!
By the window
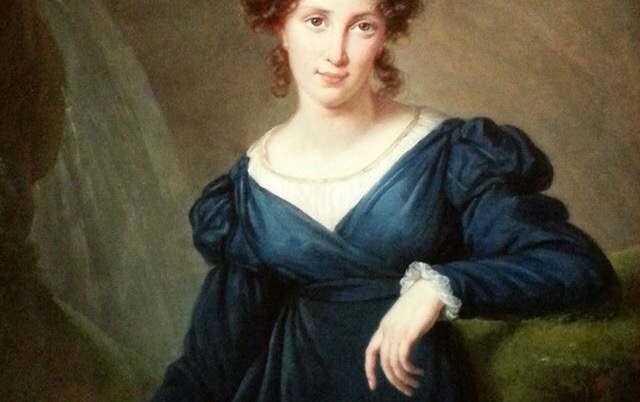
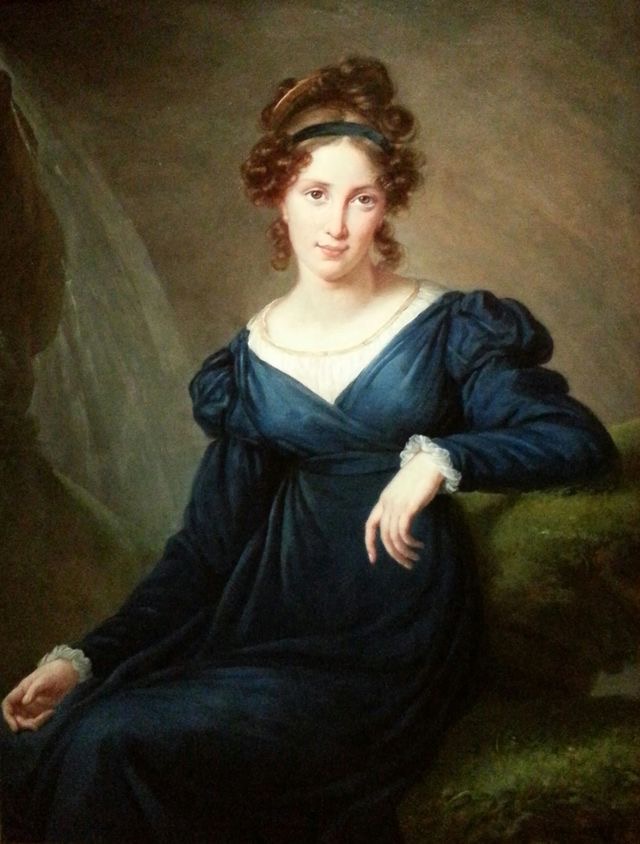
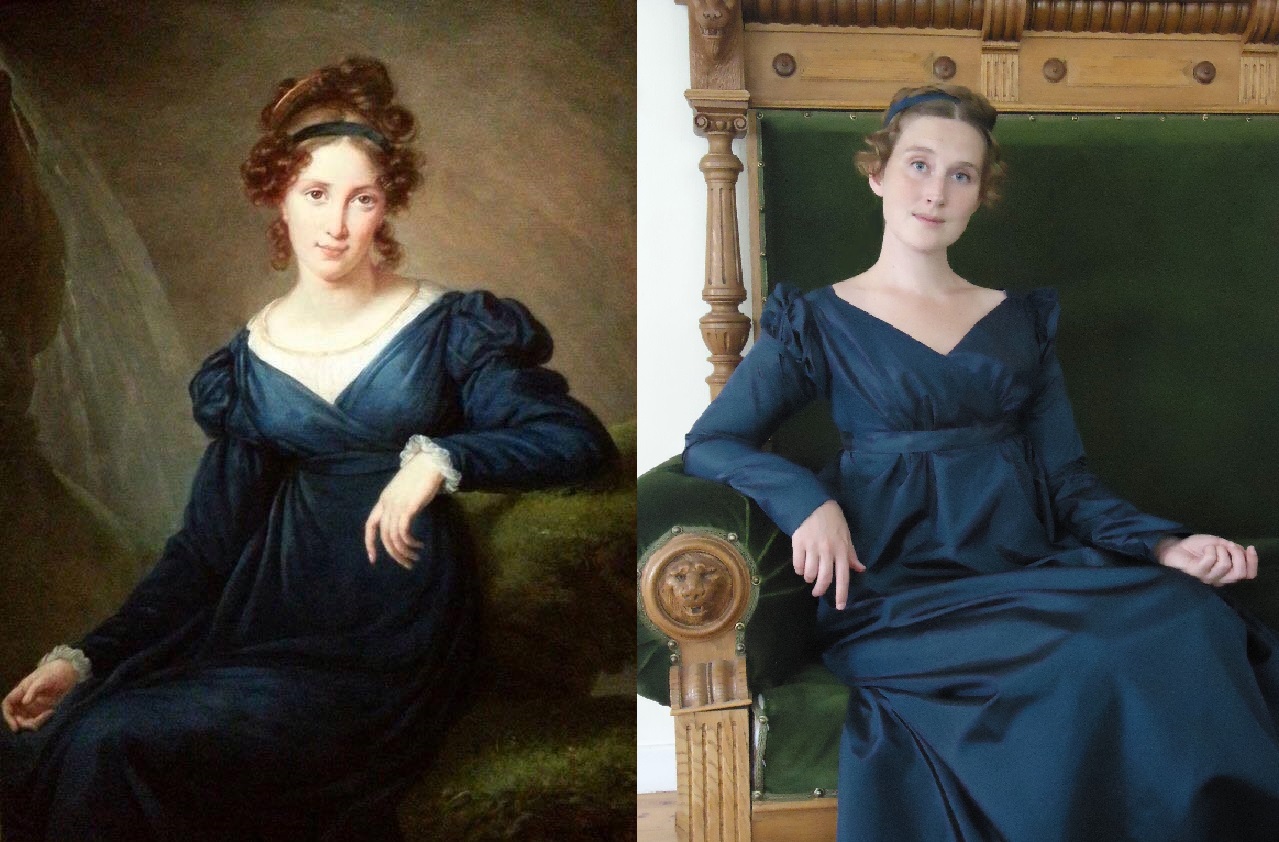
The portrait and myself.
Clearly, we aren’t twins, the lady in the portrait and me, but I am very satisfied with the likeness of the dress. I hope to find a fabric for a similar chemisette with long arms too.
At first, I thought that the lady sat in a velvet sofa, but after a closer look, I think that she is seated in the moss, by a waterfall. Well, I won’t find that in my neighbourhood, so I will make do with the woods of Vimmerby.
Damen i porträttet och jag är kan inte misstas för att vara tvillingar, men jag är väldigt nöjd med hur lika klänningarna blev. Jag hoppas på att hitta ett tyg för en likadan chemisette, med långa ärmar.
Först trodde jag att hon satt i en sammetssoffa (som jag), men när jag tittade närmare på bilden, insåg jag att hon sitter i mossan, intill ett vattenfall. Det finns inte i grannskapet, så jag får nöja mig med mossiga bilder från Vimmerbys skogar.
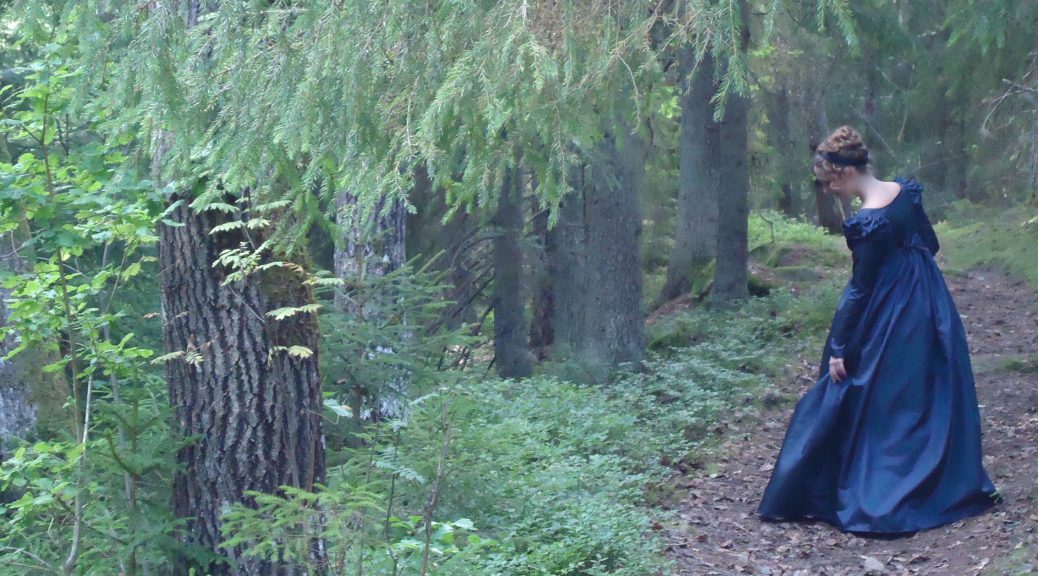
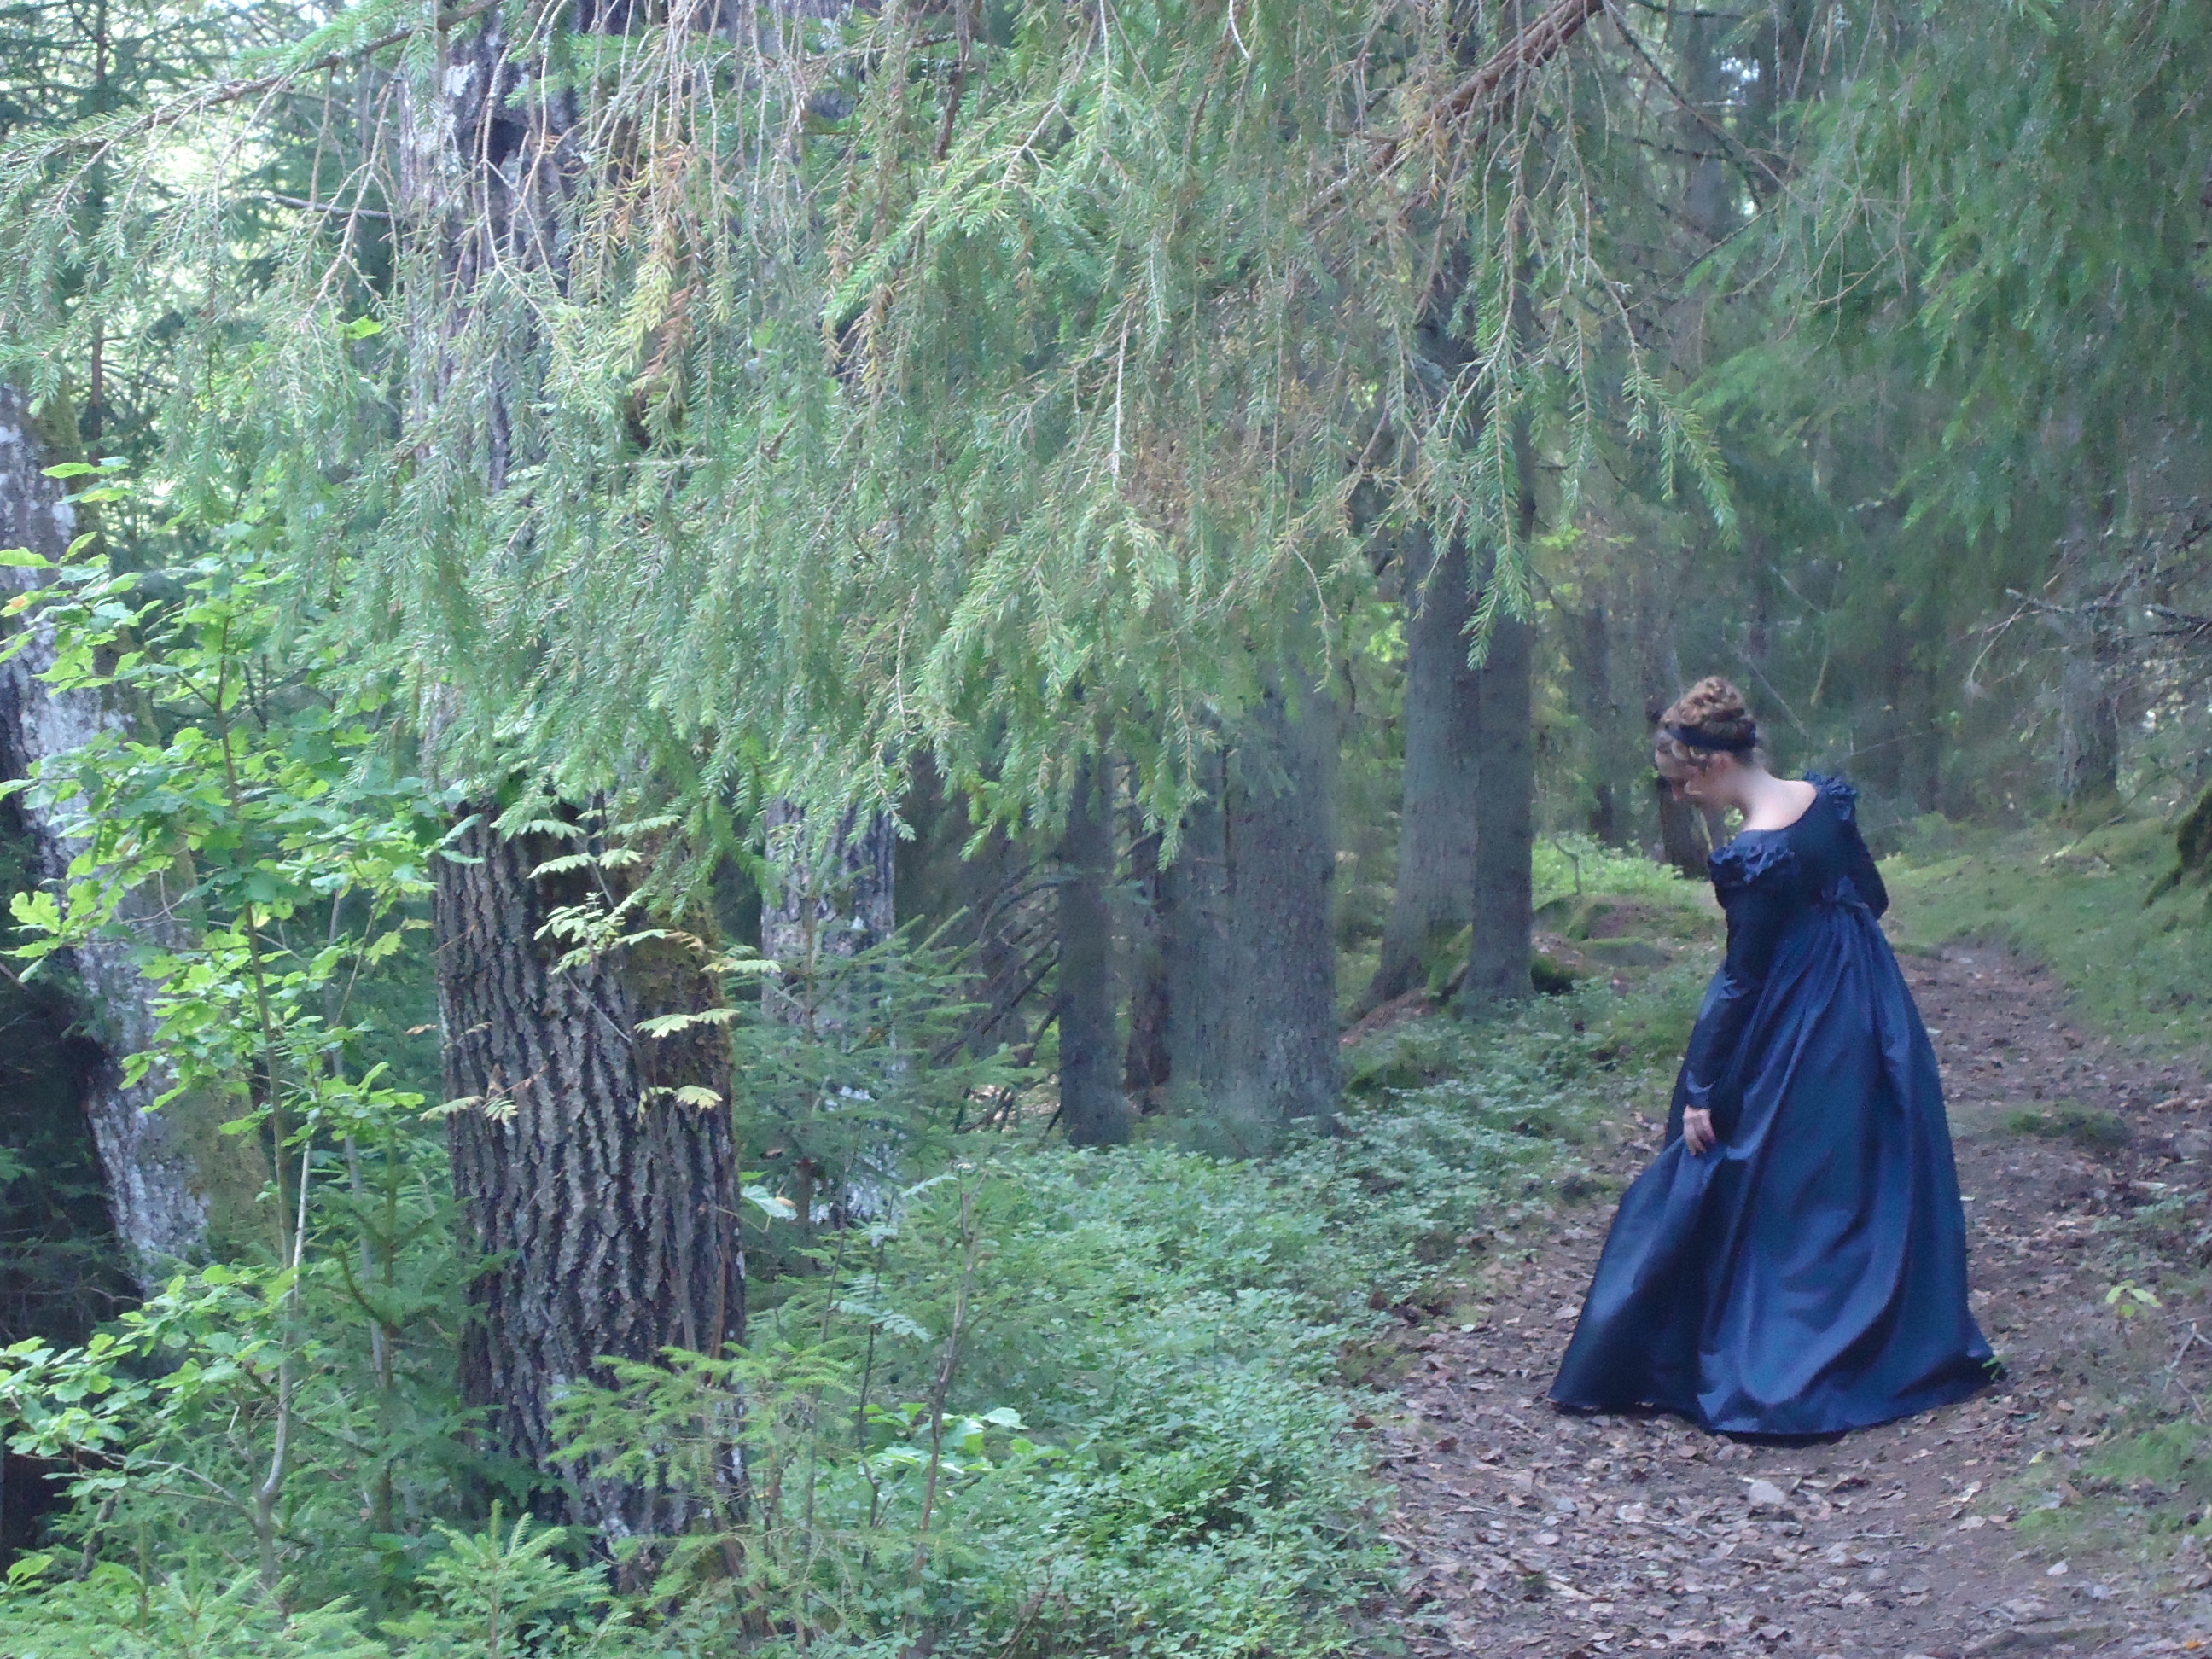
Taking the gown for a walk
In the woods
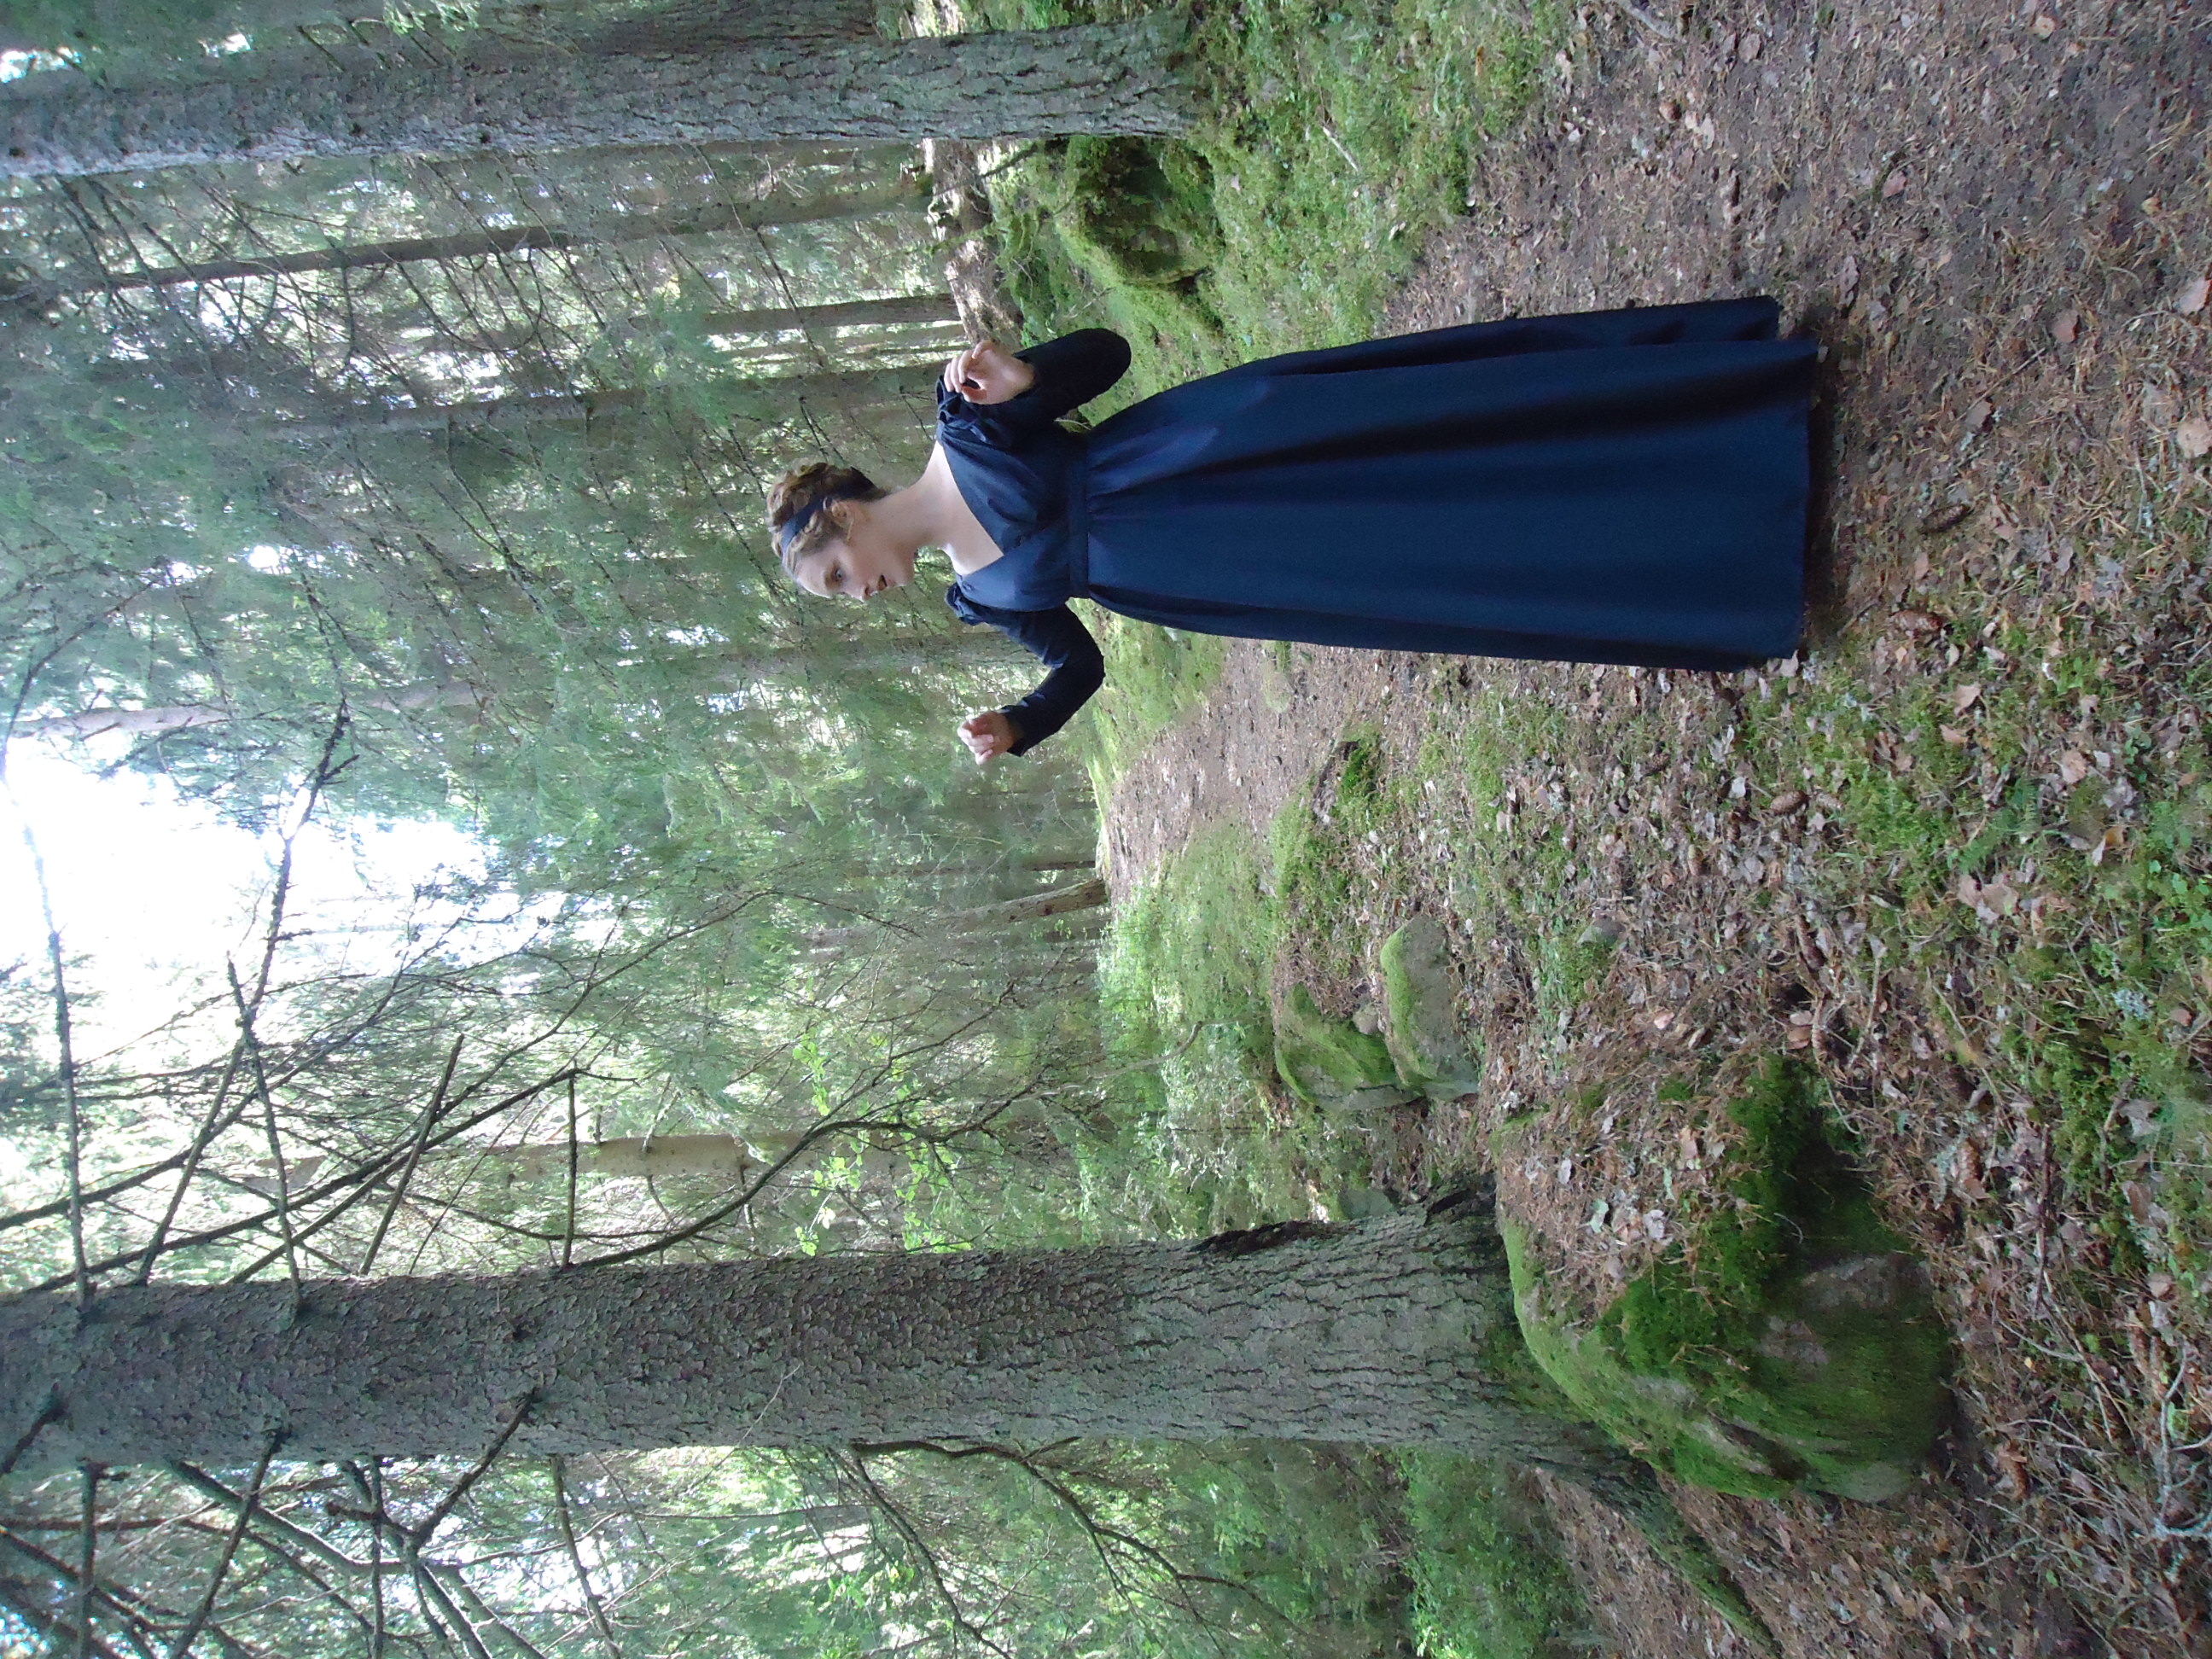
Chasing the mosquitoes, ladylike…
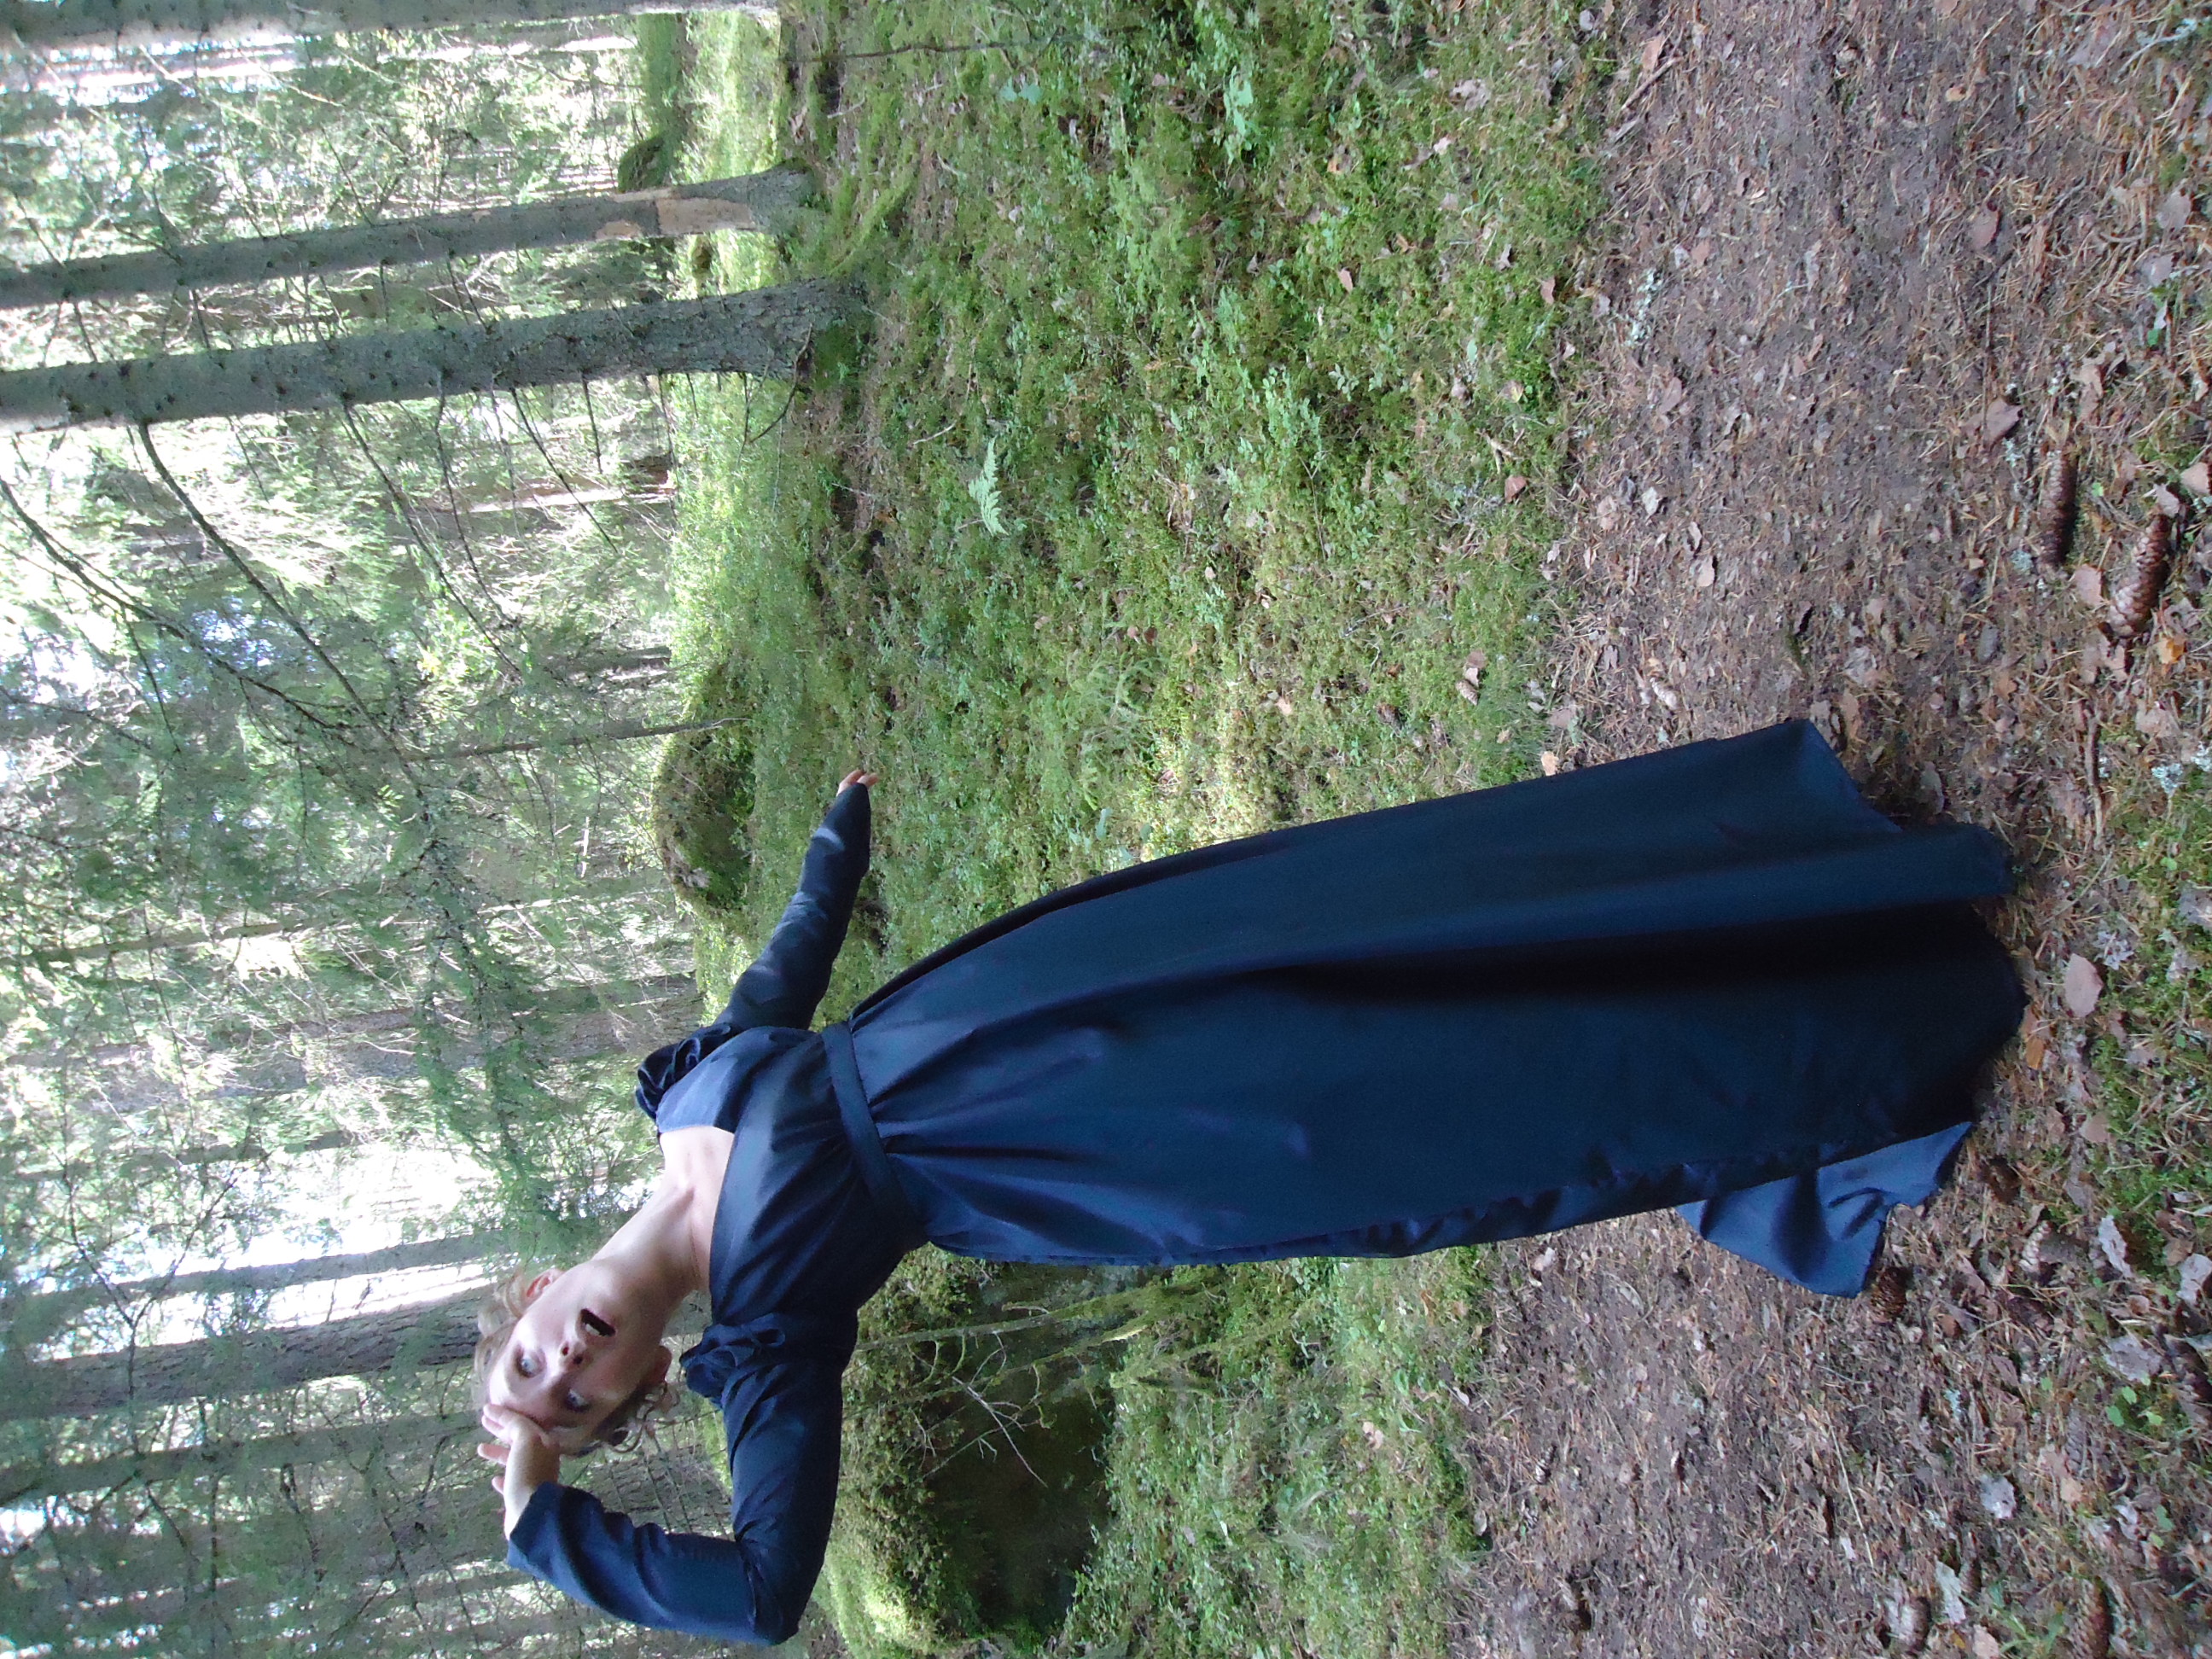
Oh, how terrifying!
I believe I will faint!
Alas
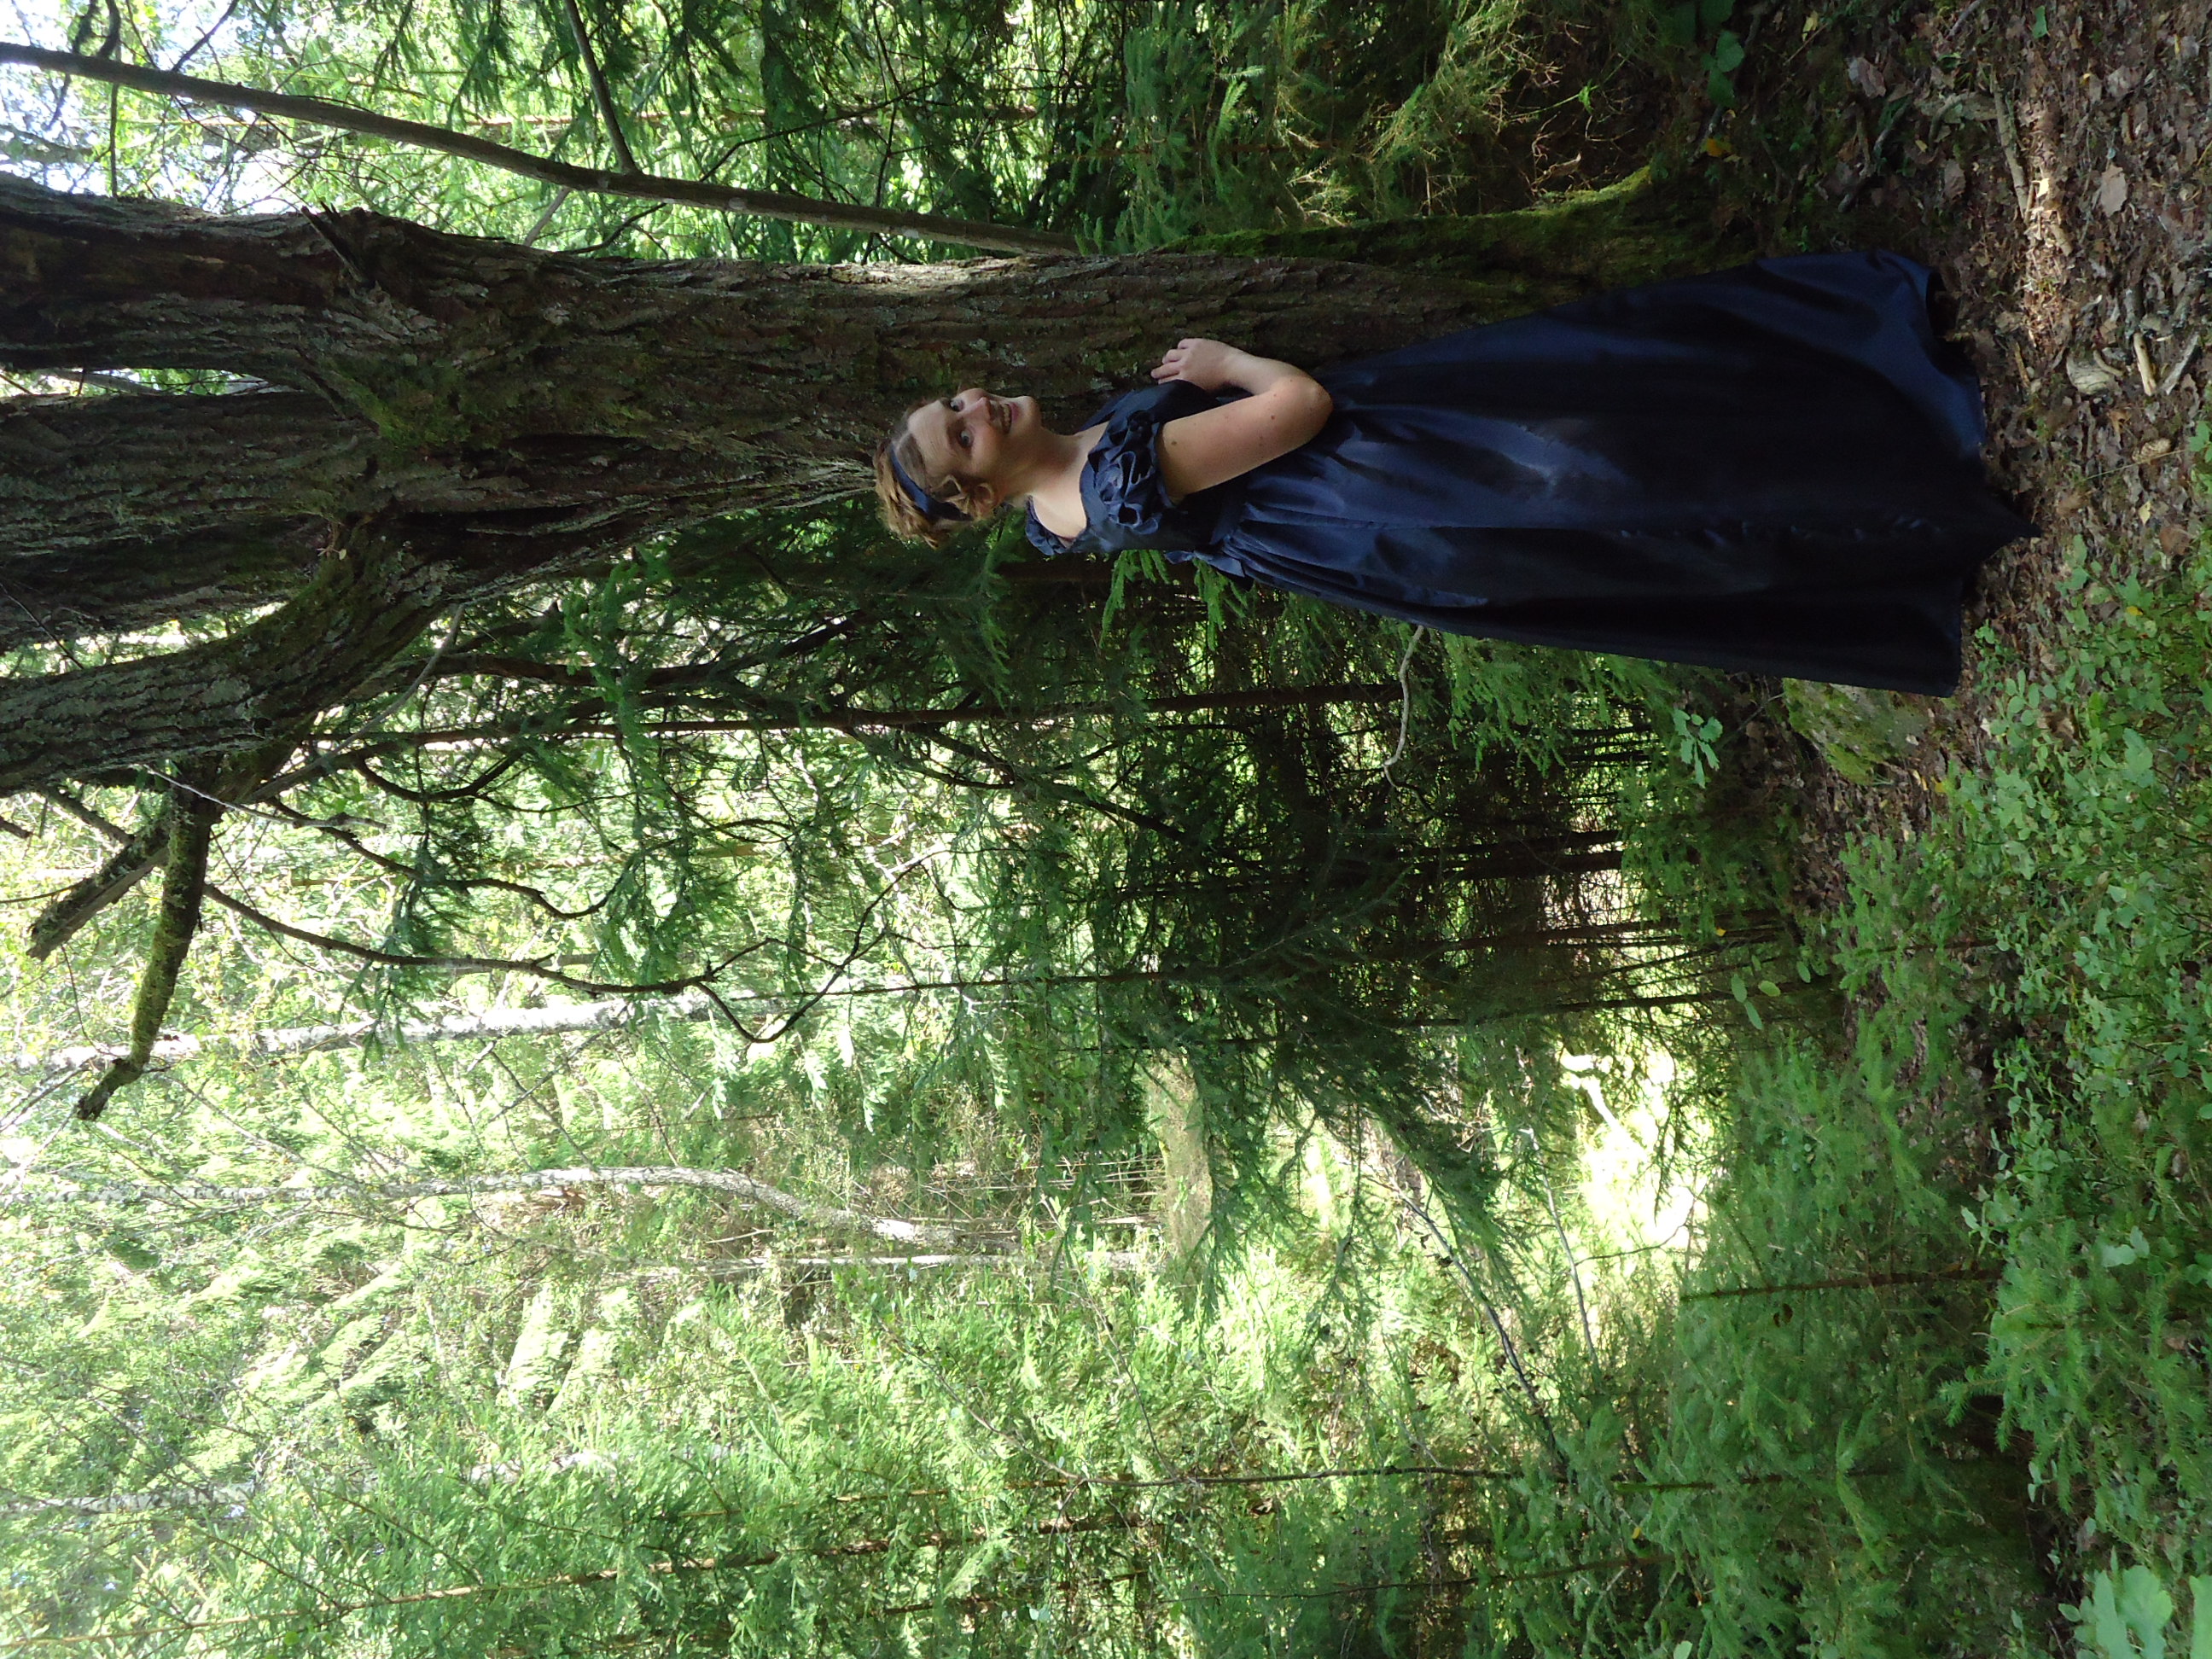
Happy in the woods. See my detachable arms? Suddenly the day gown is transformed to a ball gown. =)
And thus, the lady wishes you all a good day, while she tries to find her way back home to Denmark.
Så önskar damen eder alla en fin dag, medan hon försöker hitta vägen tillbaka till Danmark.
Som några av er vet, har jag och mina vänner länge planerat att besöka Tjolöholms slott i augusti, för att se deras utställning med dräkter från Jane Austen-filmer. Vi har tänkt passa på att själva klä upp oss i empirdräkter, men för att de ska räcka till oss alla fyra, måste jag sy ytterligare en klänning. När min syster fick höra om utställningen blev hon också väldigt sugen. Därför bestämde vi oss för att göra samma utflykt med dem också. Då uppstod problemet att flera barn inte hade lämpliga kläder.
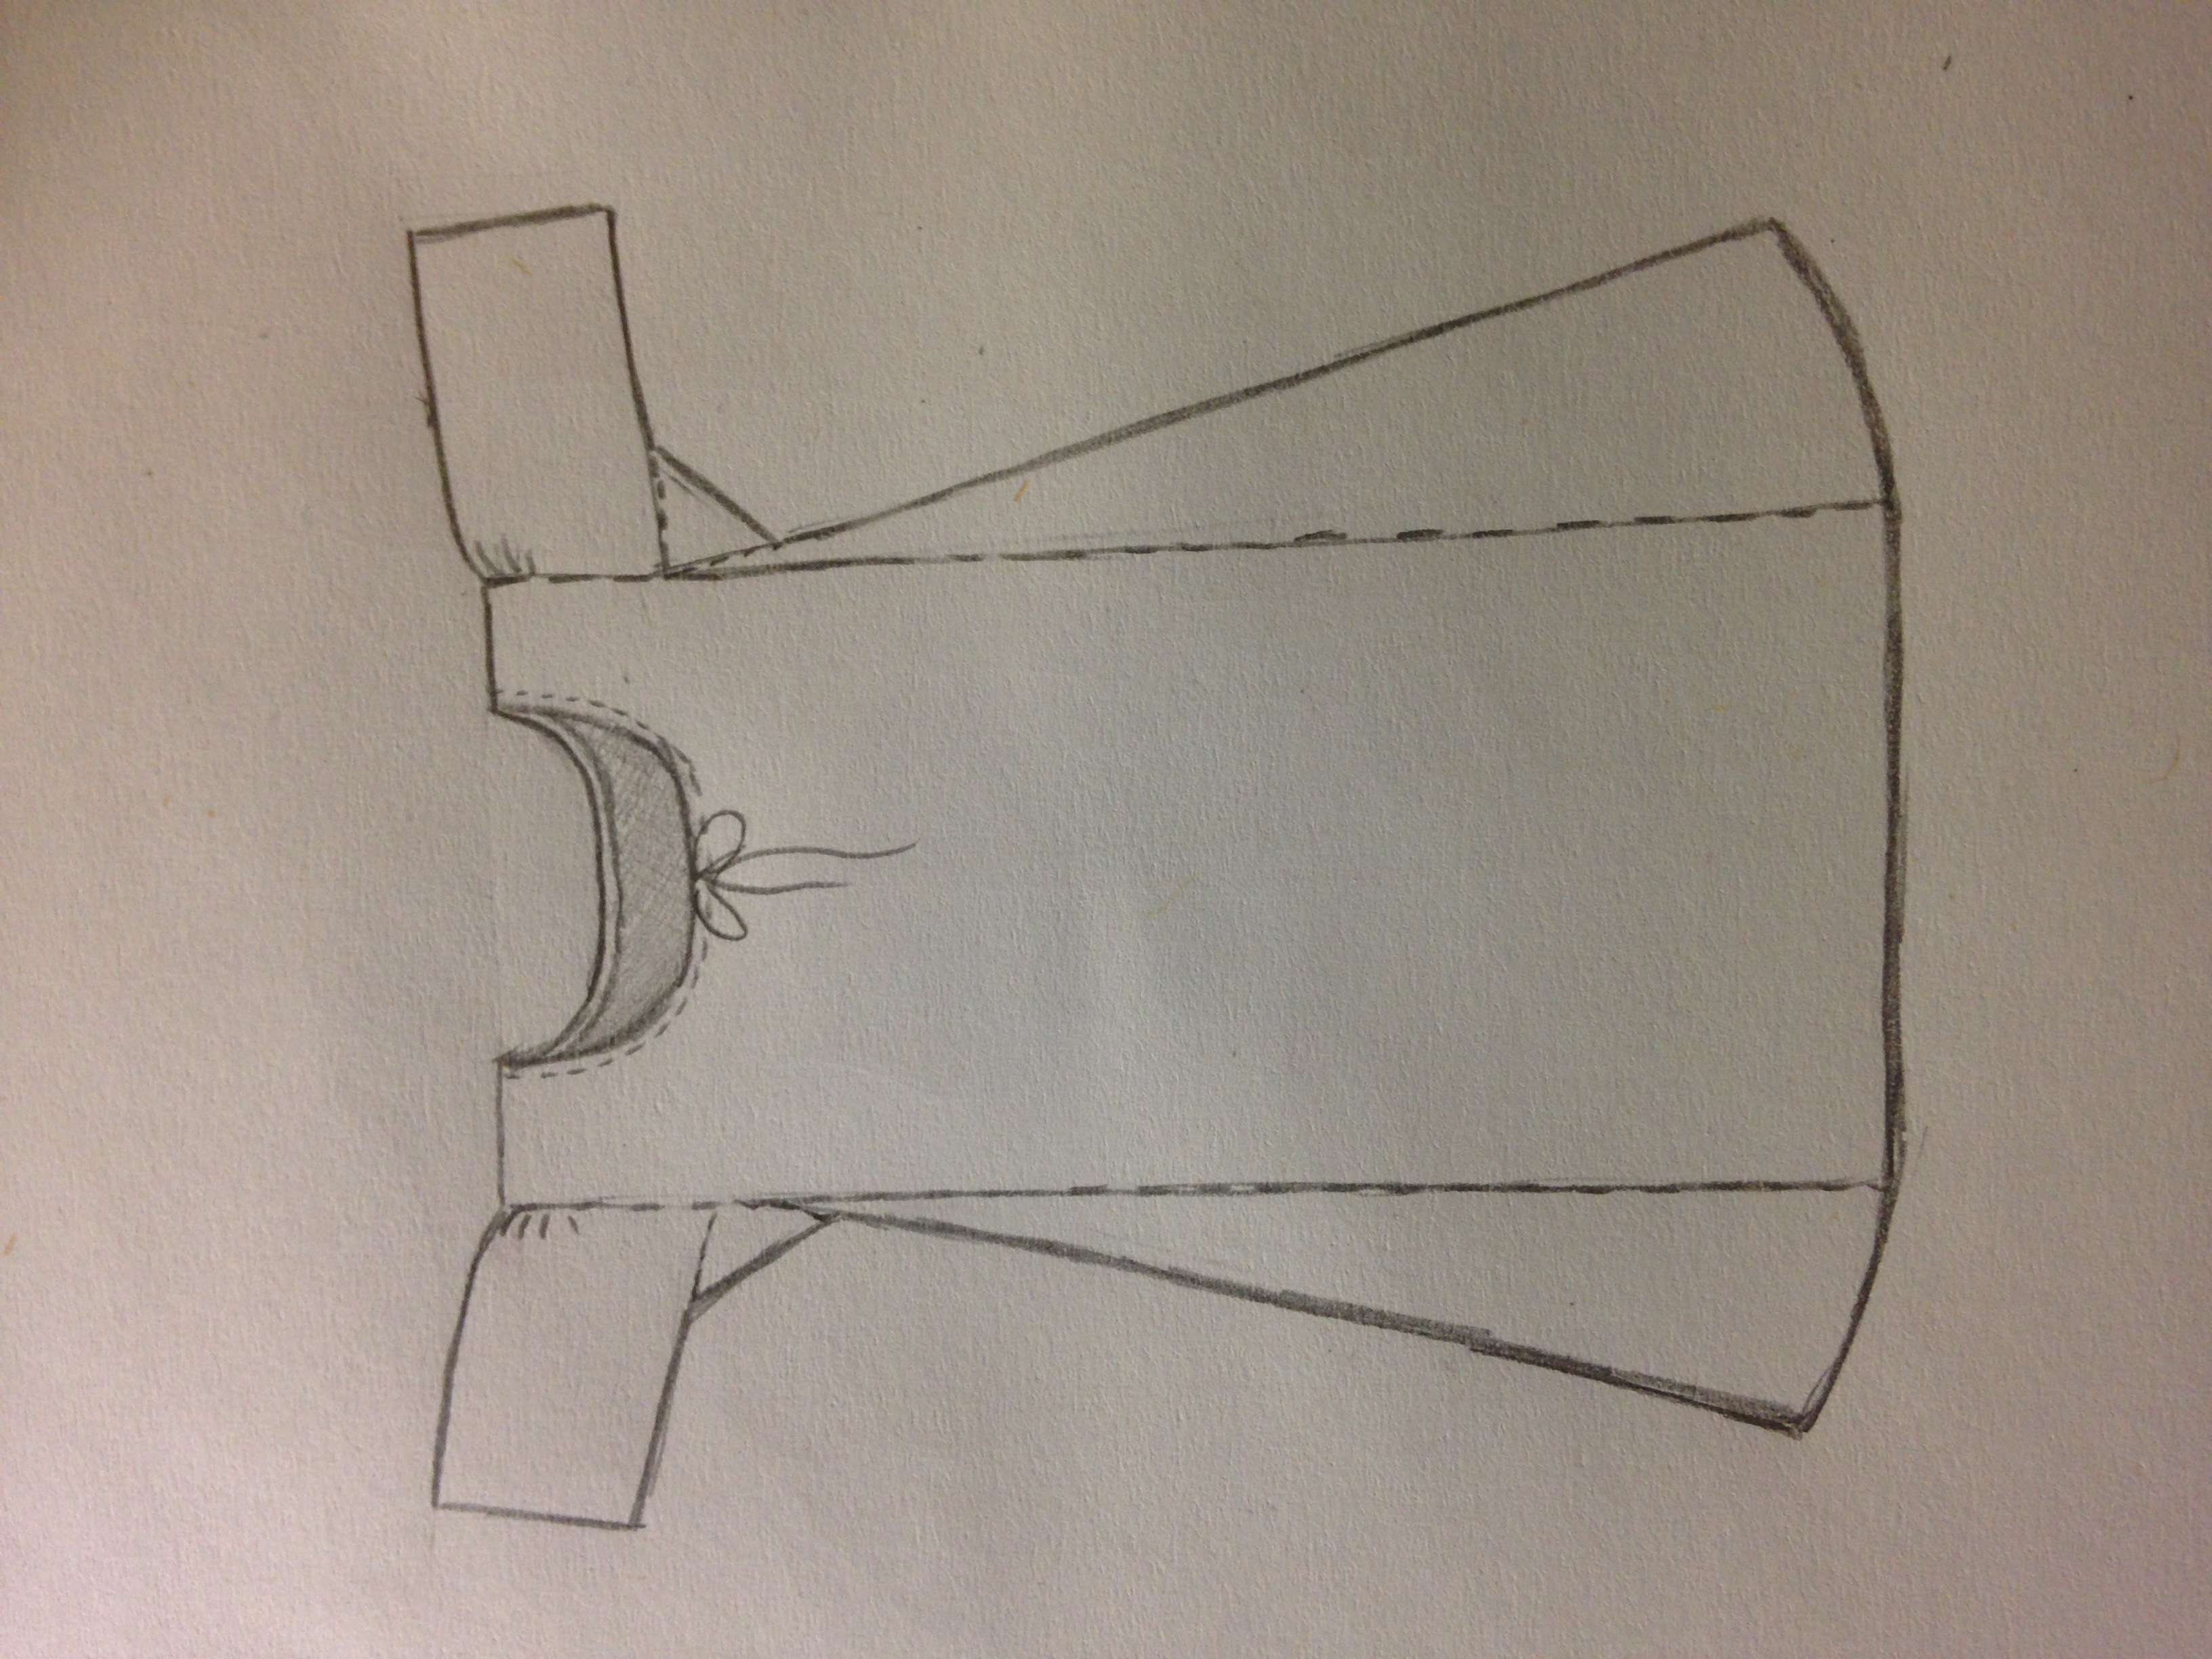
En natt fick jag en snilleblixt. Jag skulle sy en barnklänning i en modell som tillät åtminstone ett års växt innan den skulle vara urvuxen.
As some of you are well aware, I have planned for a visit to a Swedish castle with my friends, in August. In order to have enough gowns for us all, I had planned to create a new gown for myself. As it happened, my sister became as excited as myself, to see the exhibition of Jane Austen film costumes. Therefore my husband and I decided to go there with them too. Then there was the new problem that my nieces didn’t have any appropriate dresses.
One night, I had an epiphany. I would sew a childs’ dress in a model that would allow for at least one years growth.
Nästa gång jag träffade barnet i fråga (den mest entusiastiska Jane Austen-nörden), klippte jag till delarna för klänningen med henne som provdocka.
Next time I saw the eldest of my nieces (and also the most enthusiastic Jane Austen fan), I cut the dress on her skin.
Till klänningen använde jag ett vackert gammalt lakan från Second Hand, med infälld spets:
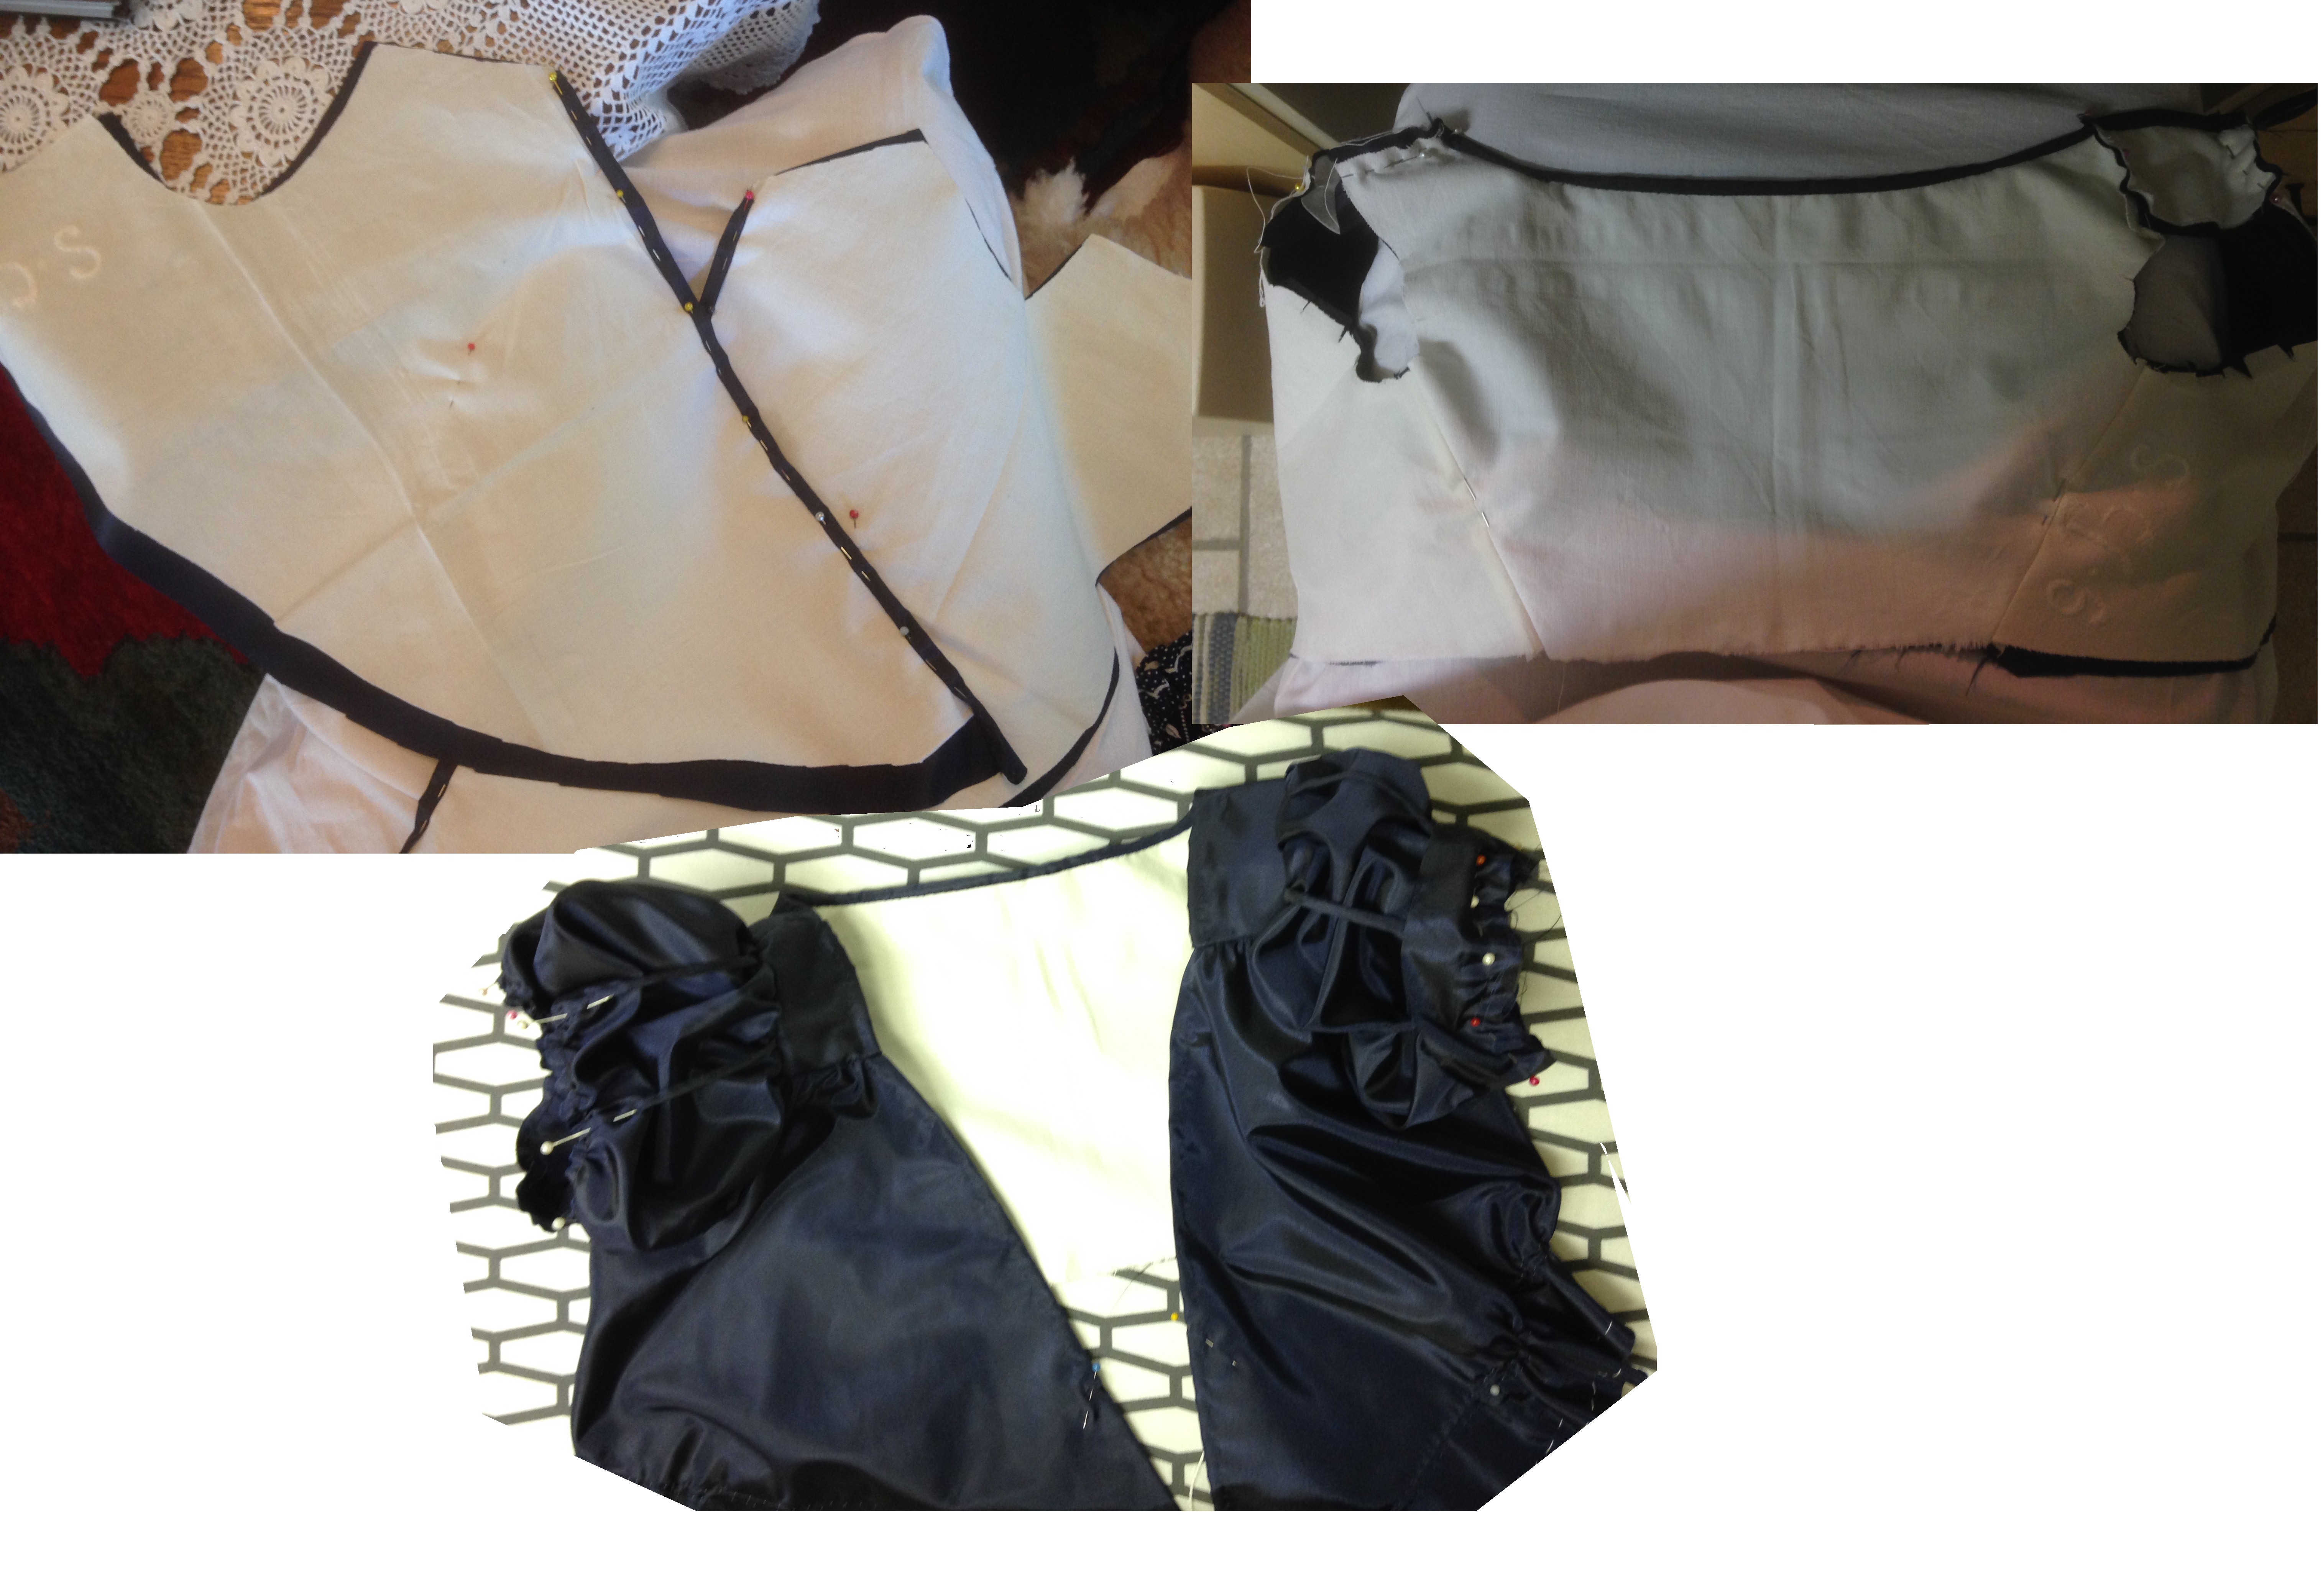
Livet: Jag gjorde två bitar, två dm större än hennes verkliga mått, för överdelen. Efter att ha klippt hål för huvud och armar, nålade jag samman fram- och bakstycke på henne. Framstycket gjordes 2 dm bredare upptill än nedtill, där det matchade hennes verkliga bröstvidd (för att få till de fina vecken från halslinningen). Bakstycket var 2 dm bredare både upptill och nedtill, eftersom klänningsvidden regleras både i hals- och liv-linningen. Jag satte in en dragsko i halslinningen.
Kjol: Jag rev av en lagom lång del av lakanet för kjolen, och använde delen med spetsen nedtil. Allt var ju redan fållat och klart, så jag behövde bara sy samman långsidorna och nåla fast kjolen i livet. Jag började med att nåla fast sömmen mot en av sidorna på linningen och nålade sedan kjolen mot framsidan, helt slätt. Sedan samlade jag allt överflödigt material baktill i jämnt fördelade veck baktill. Sedan sydde jag ihop kjolen och livet.
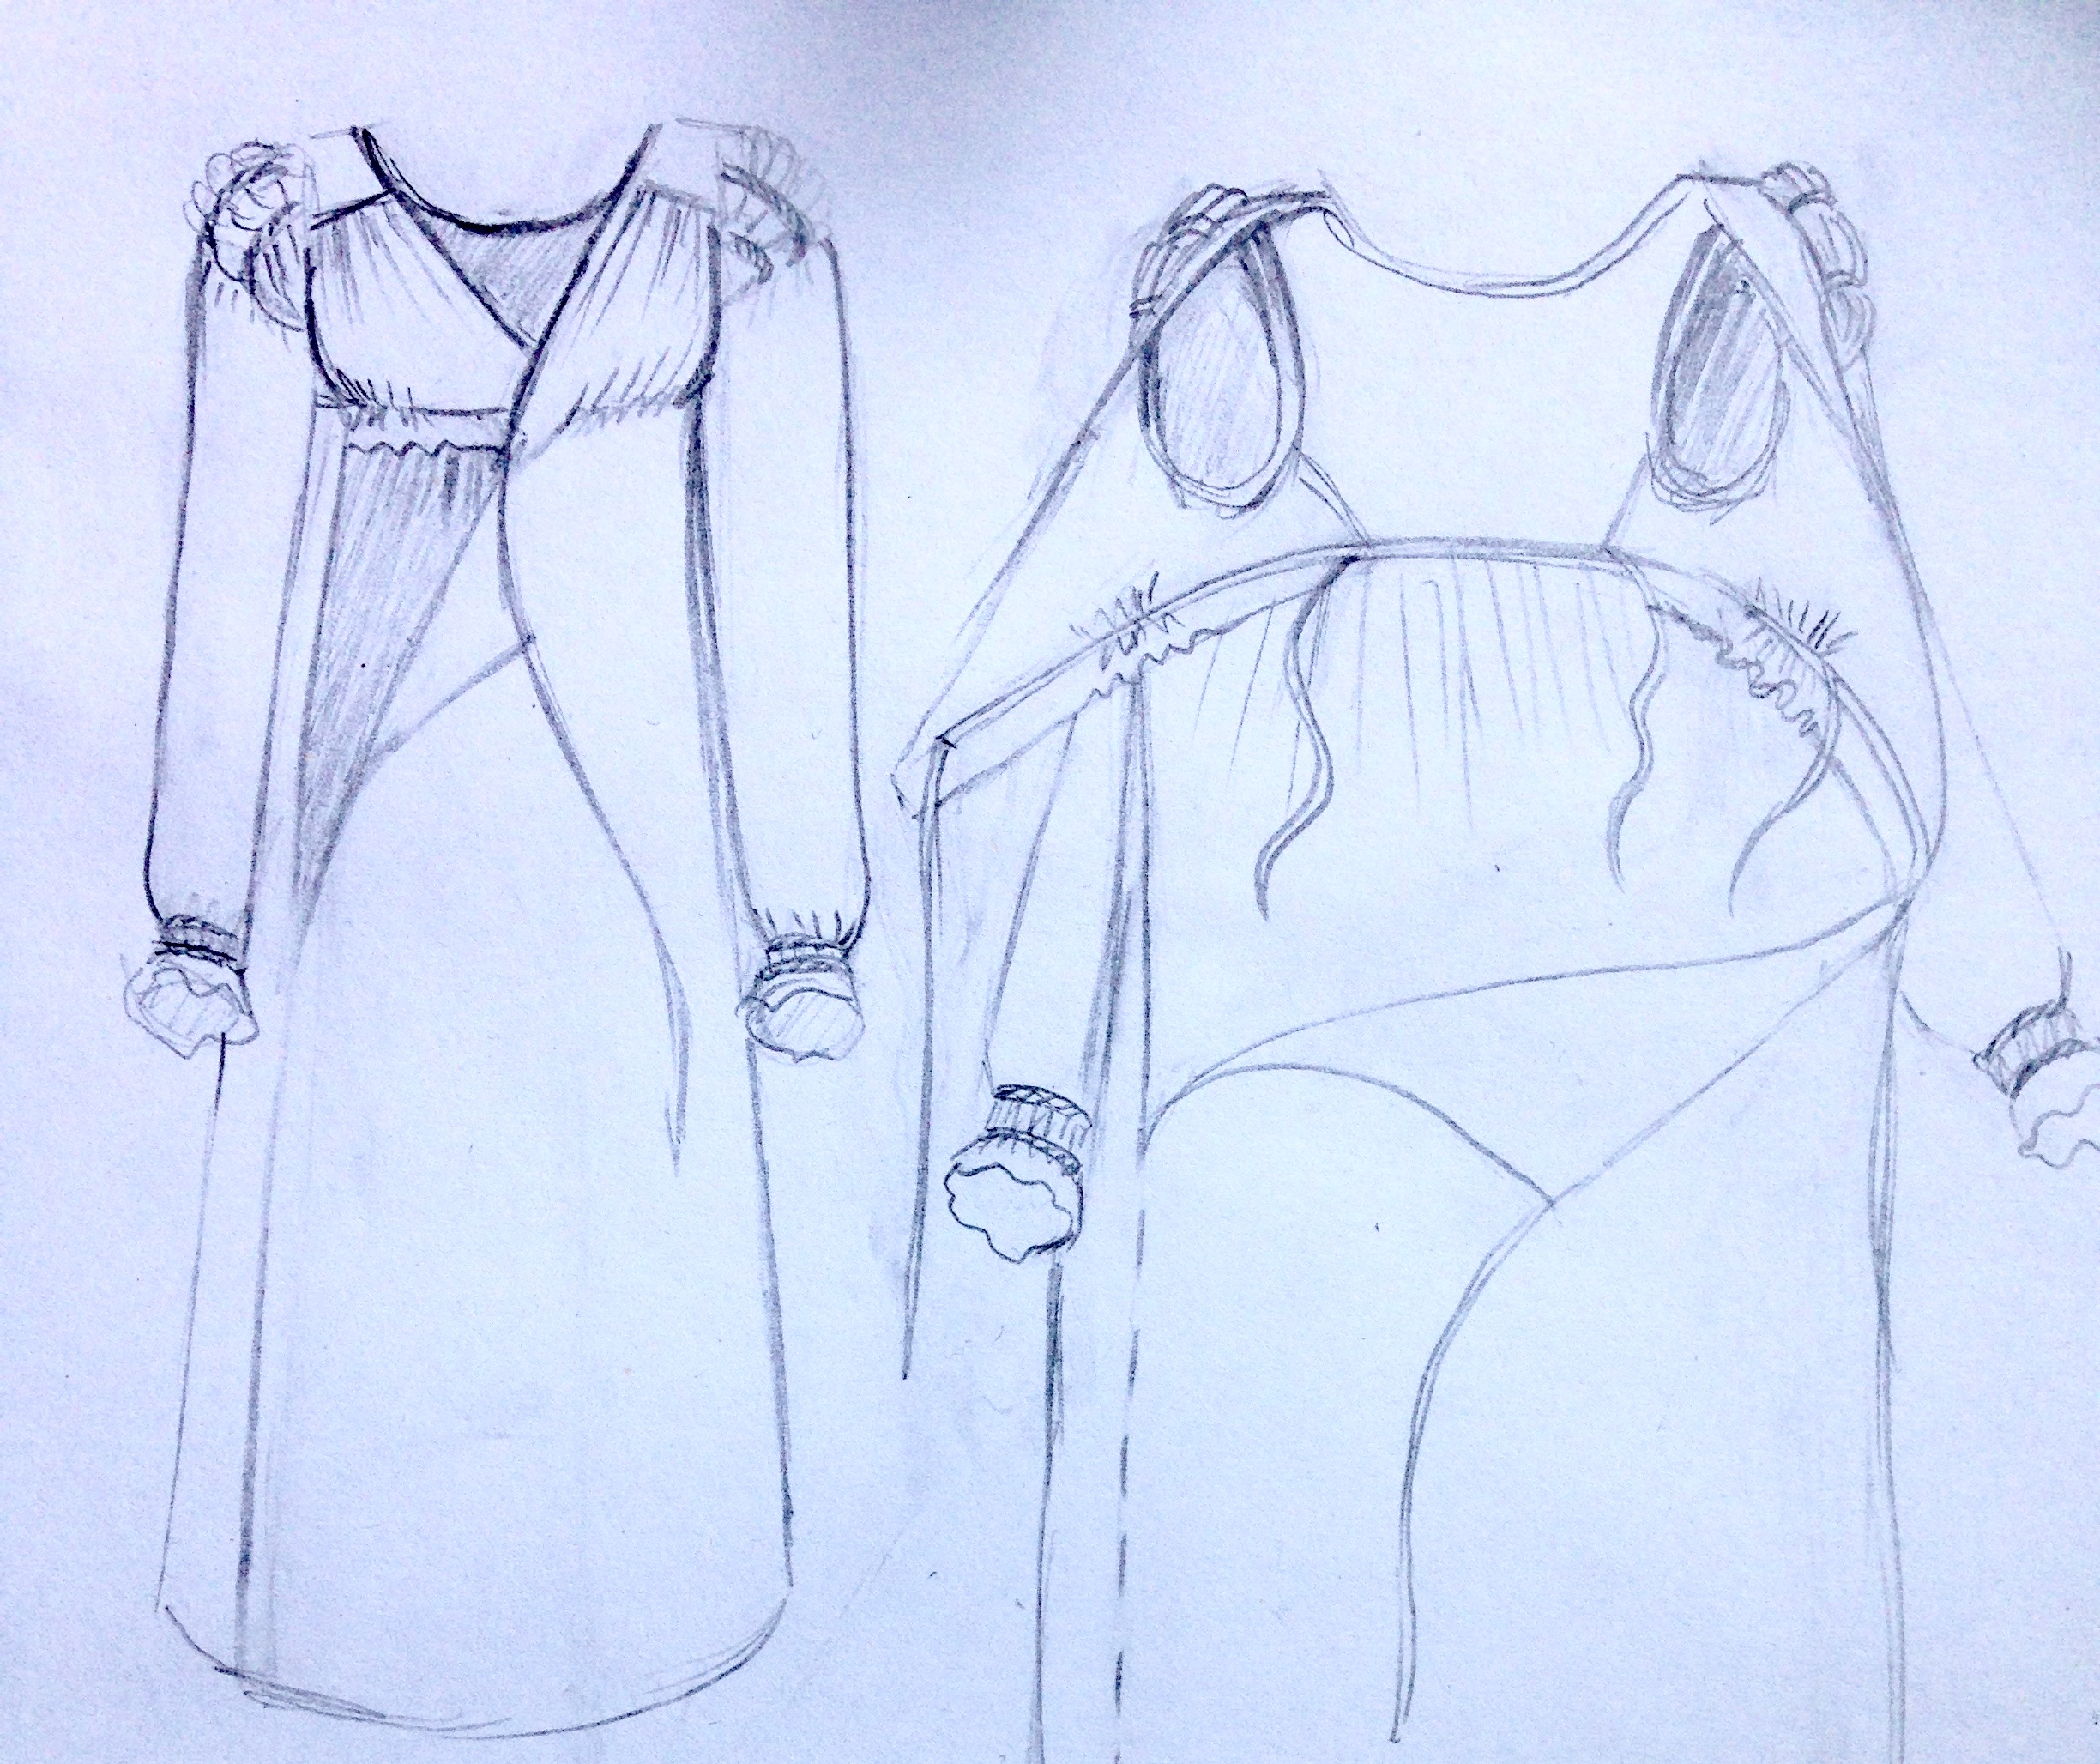
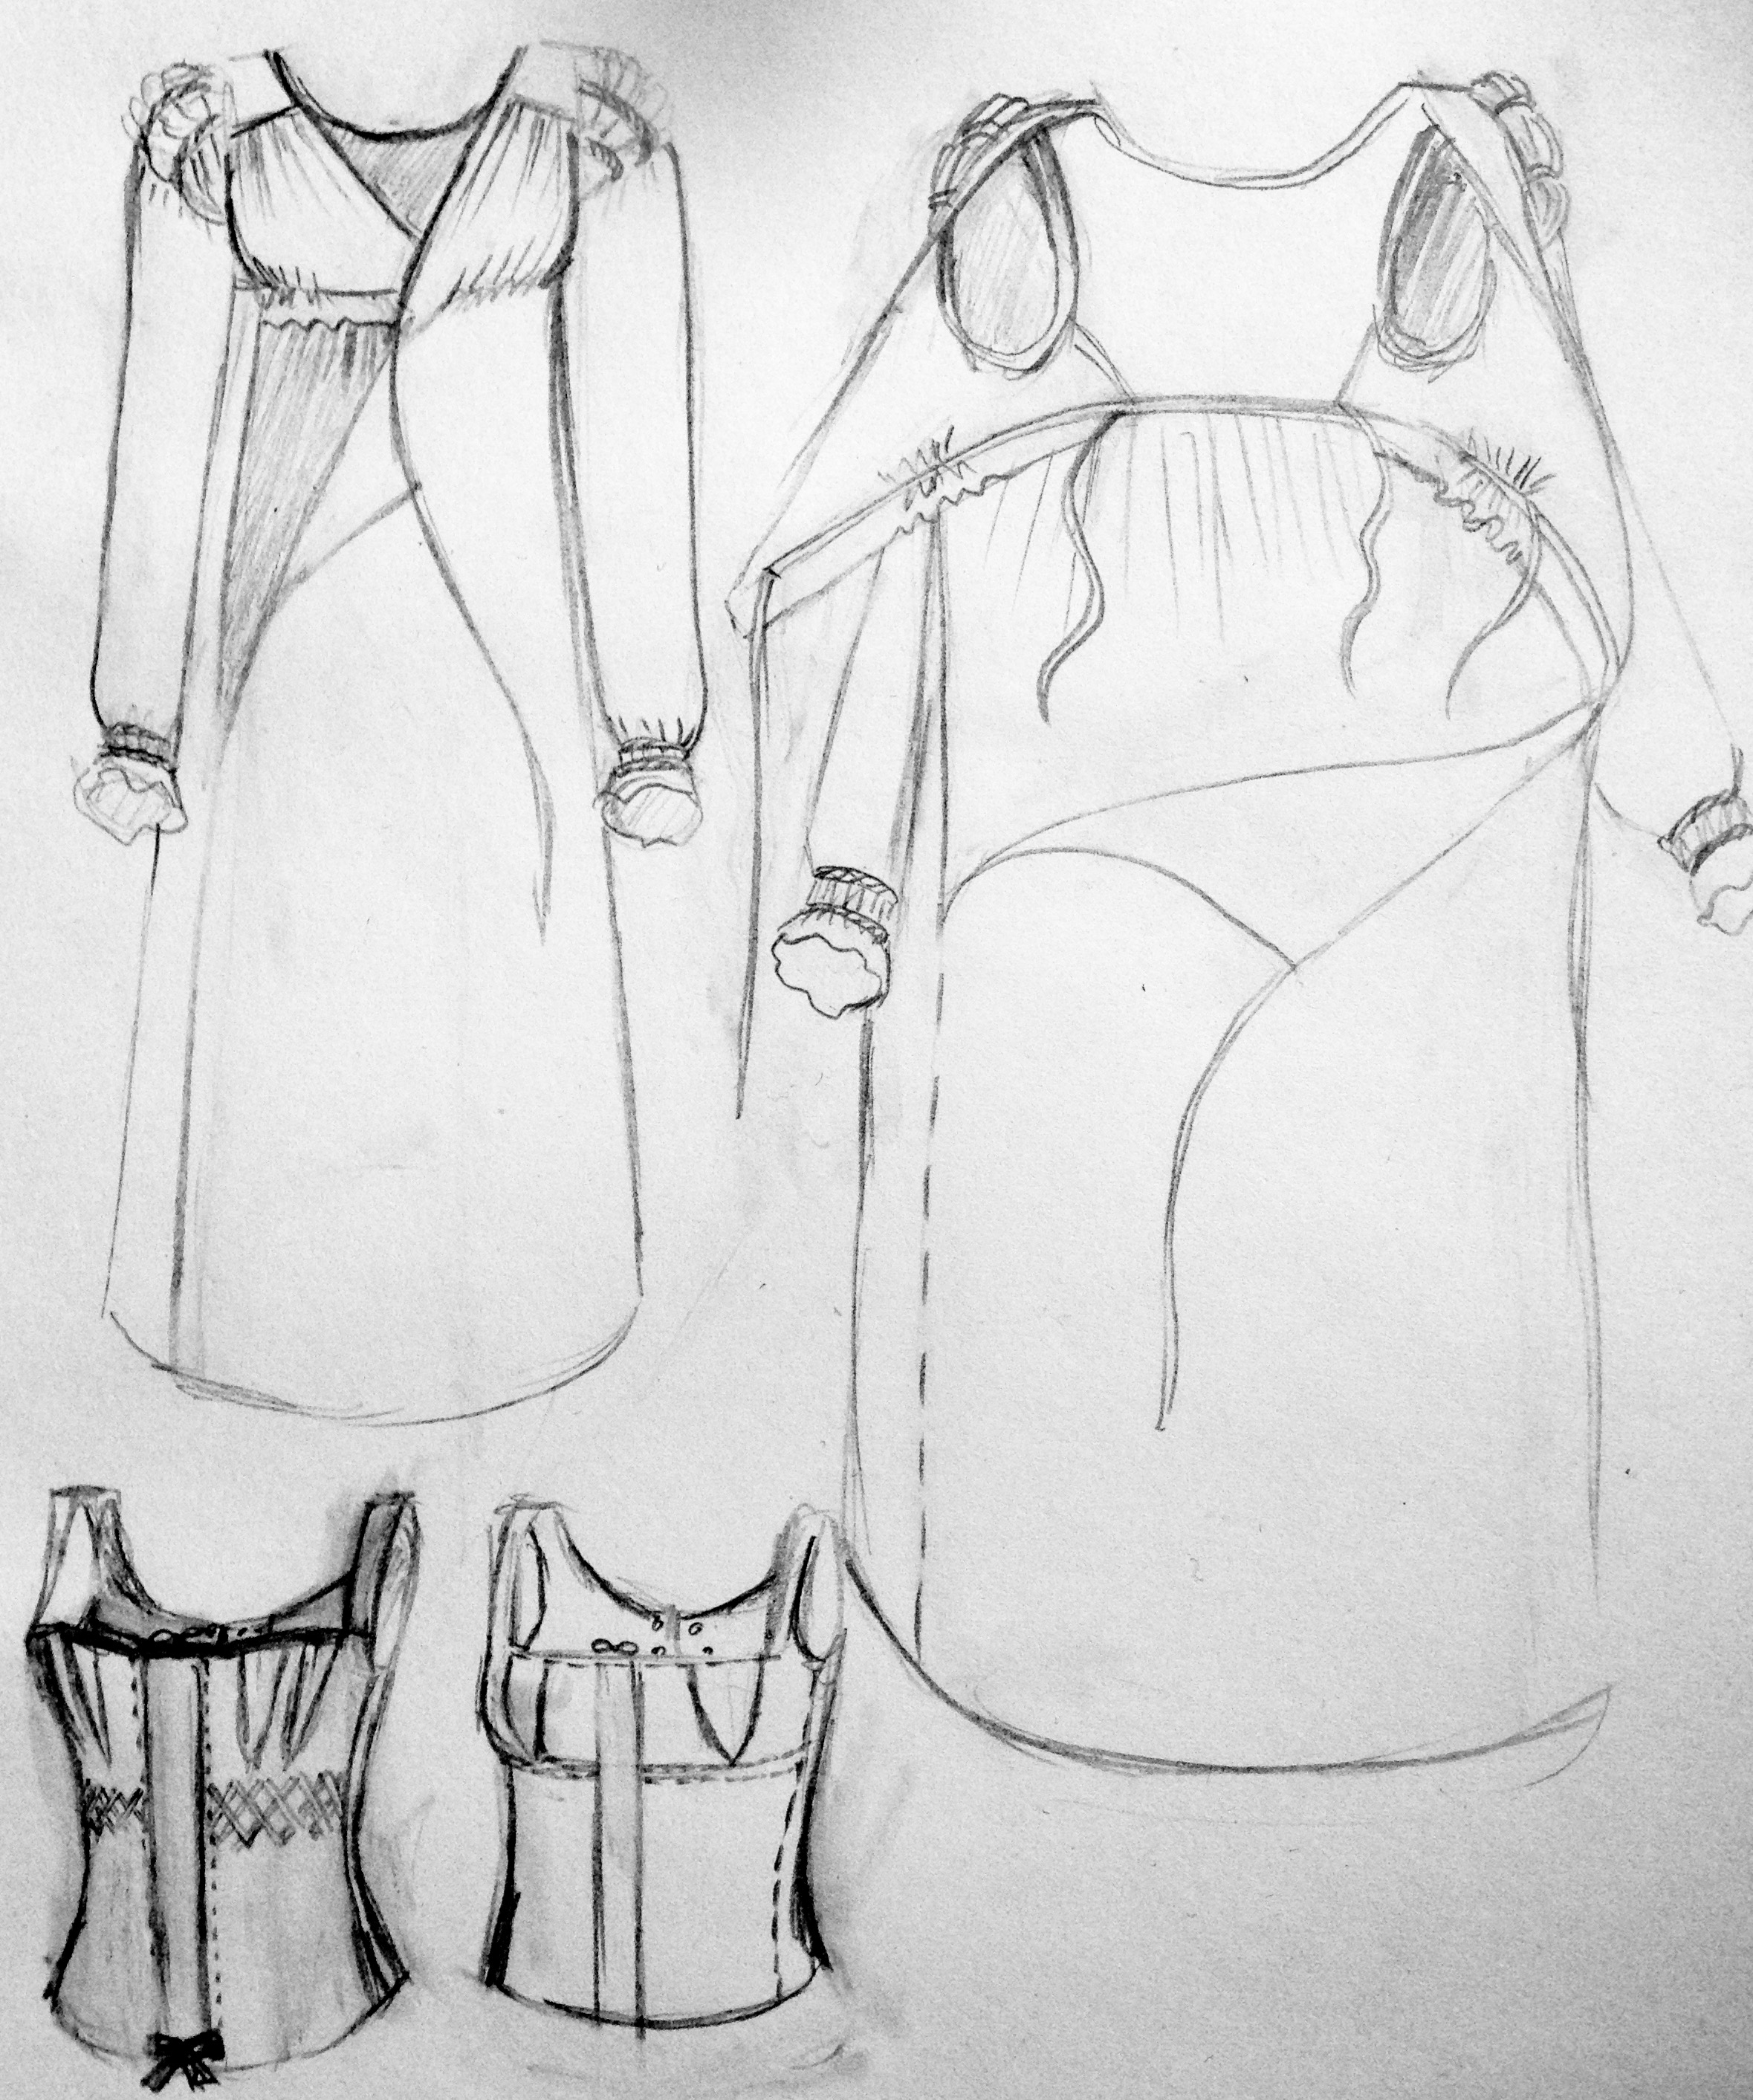
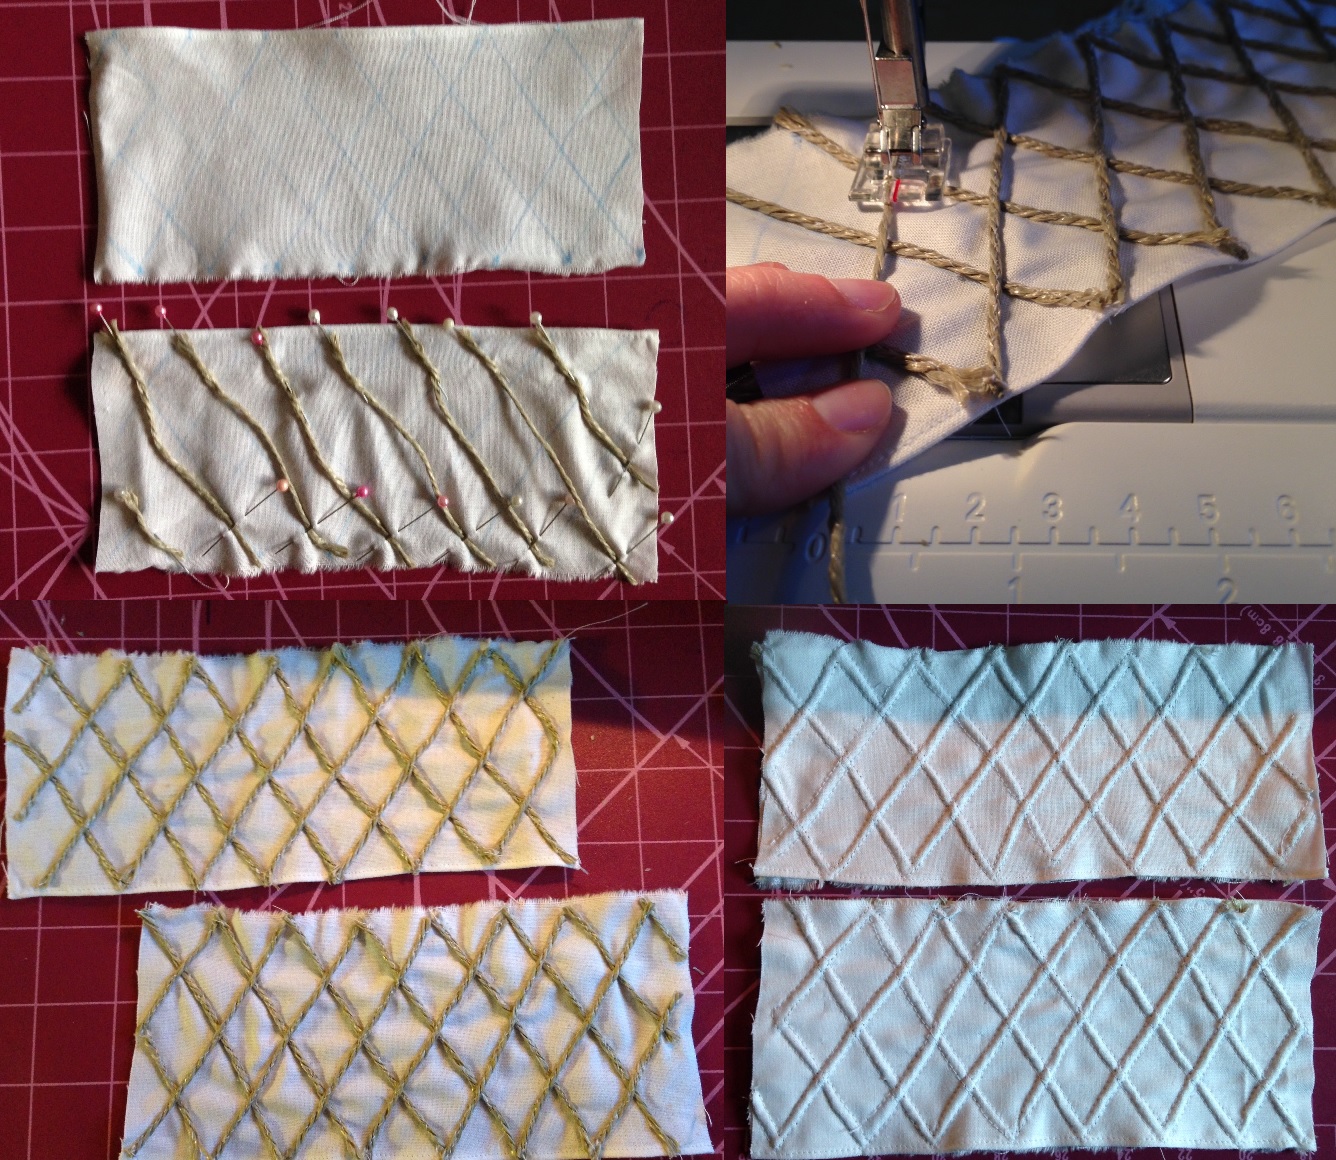
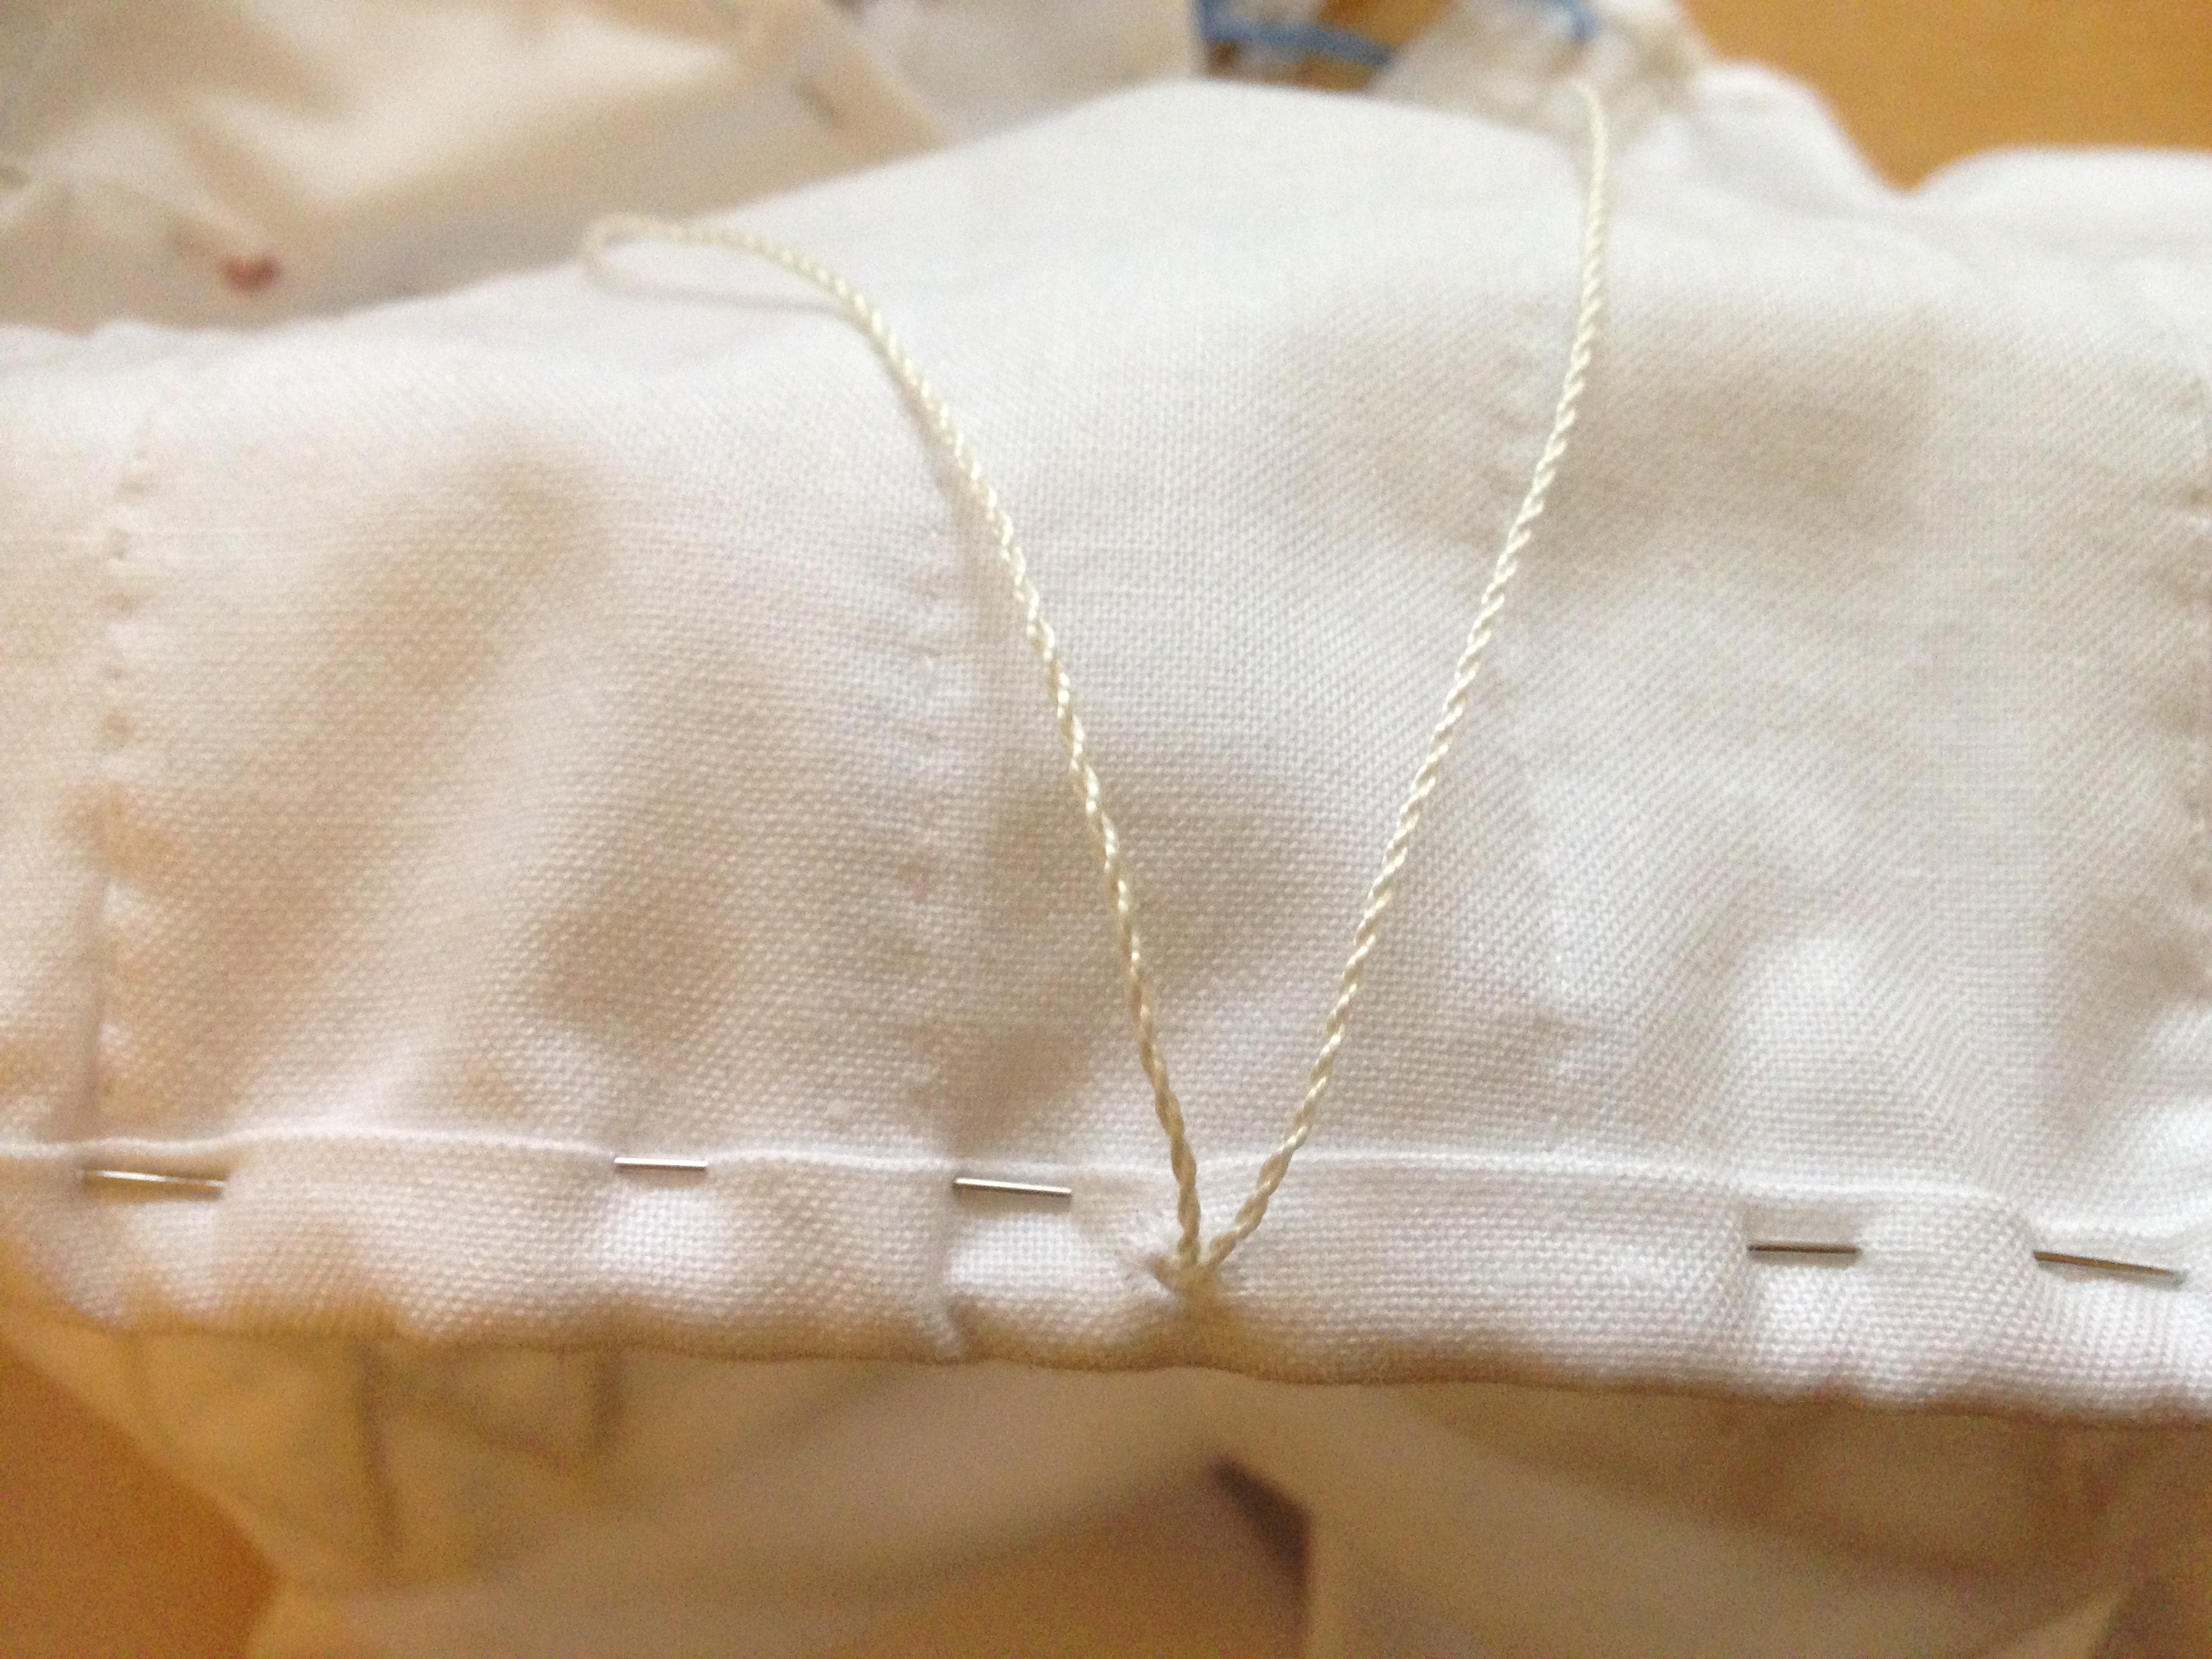
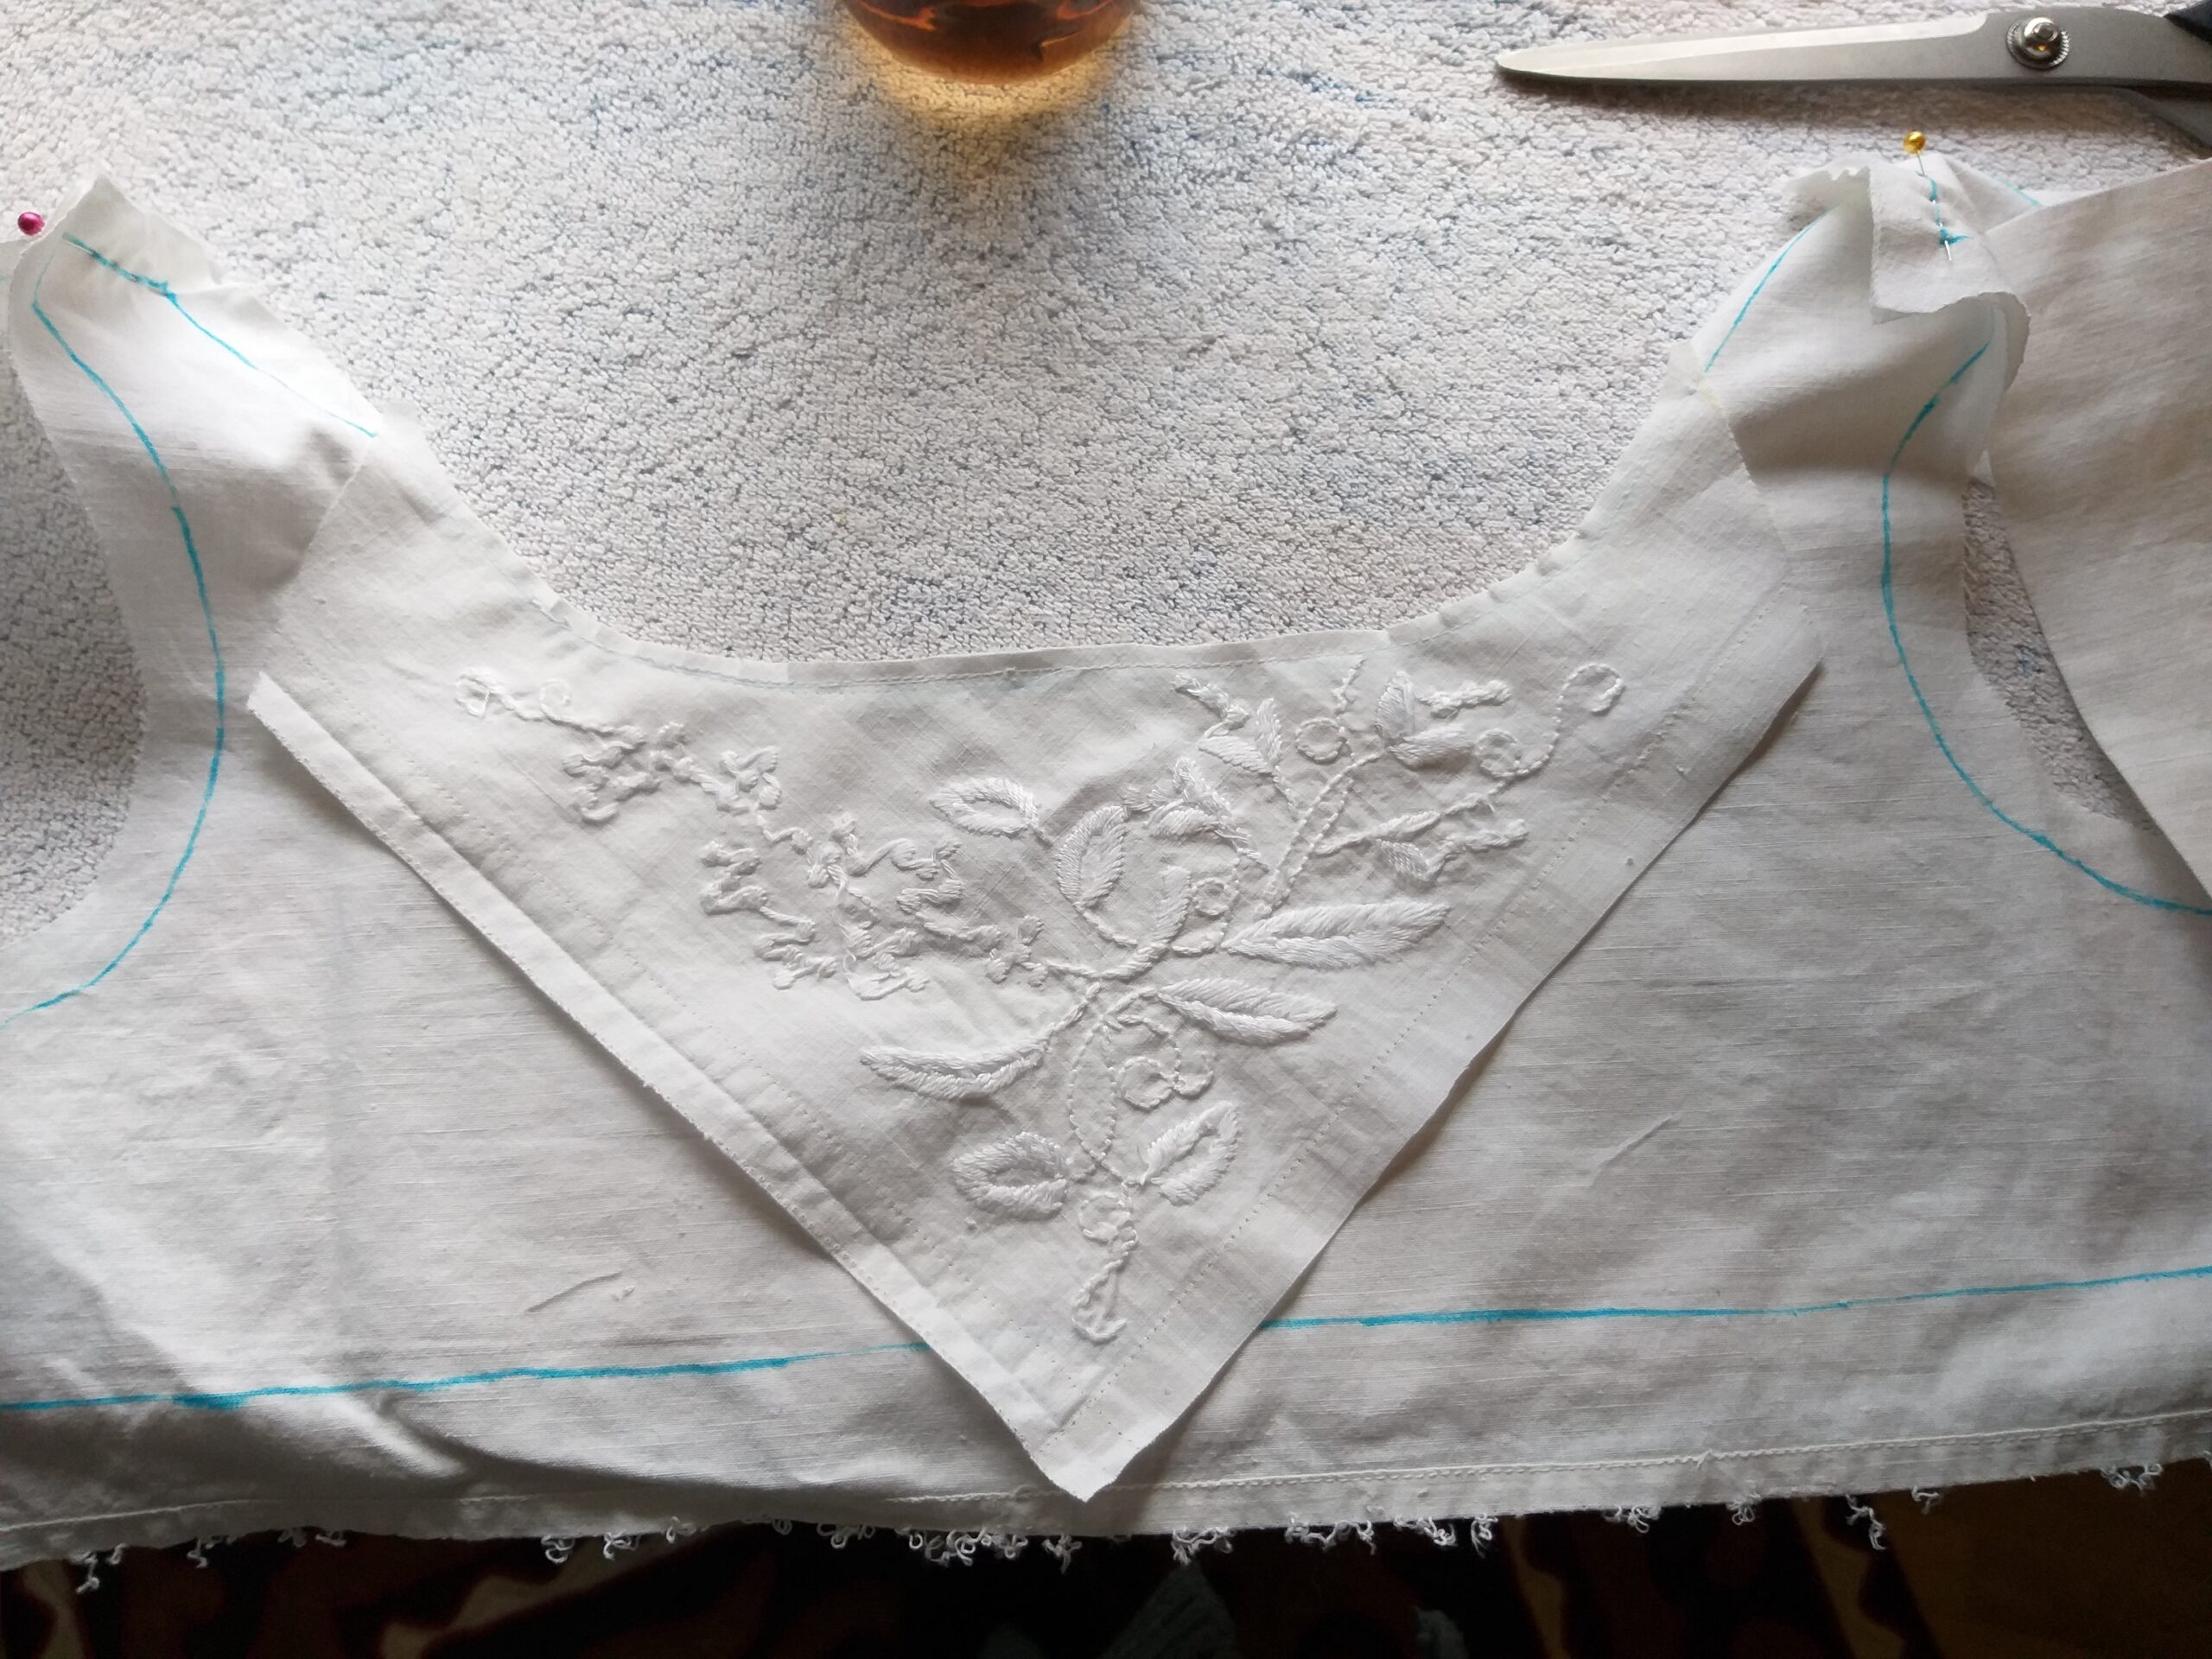
Puffärmar: Jag klippte till två tygbitar, 2 dm bredare än överarmen på min lilla kund. Sedan klippte jag till den som på bilden. Jag sydde “veck-sömmar” för hand längs övre och nedre kanten. Sedan sydde jag ihop sidorna. Jag samlade tyget i veck, på mitten av nedre delen och sydde sedan in kanten i ett kantband. Efter att ha nålat fast ärmet mot lägsta punkten på armhålet, samlade jag det mesta av det överflödiga tyget i veck högst upp på armkullen, men också jämnt fördelat framtill och baktill. Sedan sydde jag.
Sedan var klänningen klar!
I made the dress from one old bed sheet with fine inserted lace, like this:
Bodice: I made two pieces, two decimeters bigger than the wanted measures for the dresses upper part. I pinned them to each other at her shoulders and then cut holes for arms and neck and pinned the front and back piece together. The front piece was made 2 dm wider at the top than her real shoulder measure, while the bottom measure correlated with her real measure (in order to create the right pleats). The back was 2 dm wider both at the top and bottom, because this is where the real fullness of the dress is regulated. Then the front and back were sewn together and I put a drawstring in the neckline.
Skirt: I used the part of the sheet, where the lace was inserted, with the lace at the bottom. Then I sew the long sides together and pinned the part with the seam to one of the sides of the bodice. I pinned the skirt flat to the front. In the back I gathered all the excessive fabric in pleats, pointing to the middle. The skirt was sewn to the bodice.
Puffed arms: I cut two pieces of fabric, 2 dm wider than the overarm of my little customer, then I cut it as in the picture. I sew “gathering seams” by hand along the upper and lower side. Then I sew the sides together. I gathered the fabric to the middle of the arm, at the bottom, then attached a tape. After having pinned the arm to the bottom om the armhole on the bodice, I gathered the fabric mostly to the top of the arm, but also evenly in front and back. Then I sew.
And then, the dress was finished!
“Gathering seams” along the top and bottom of the arms
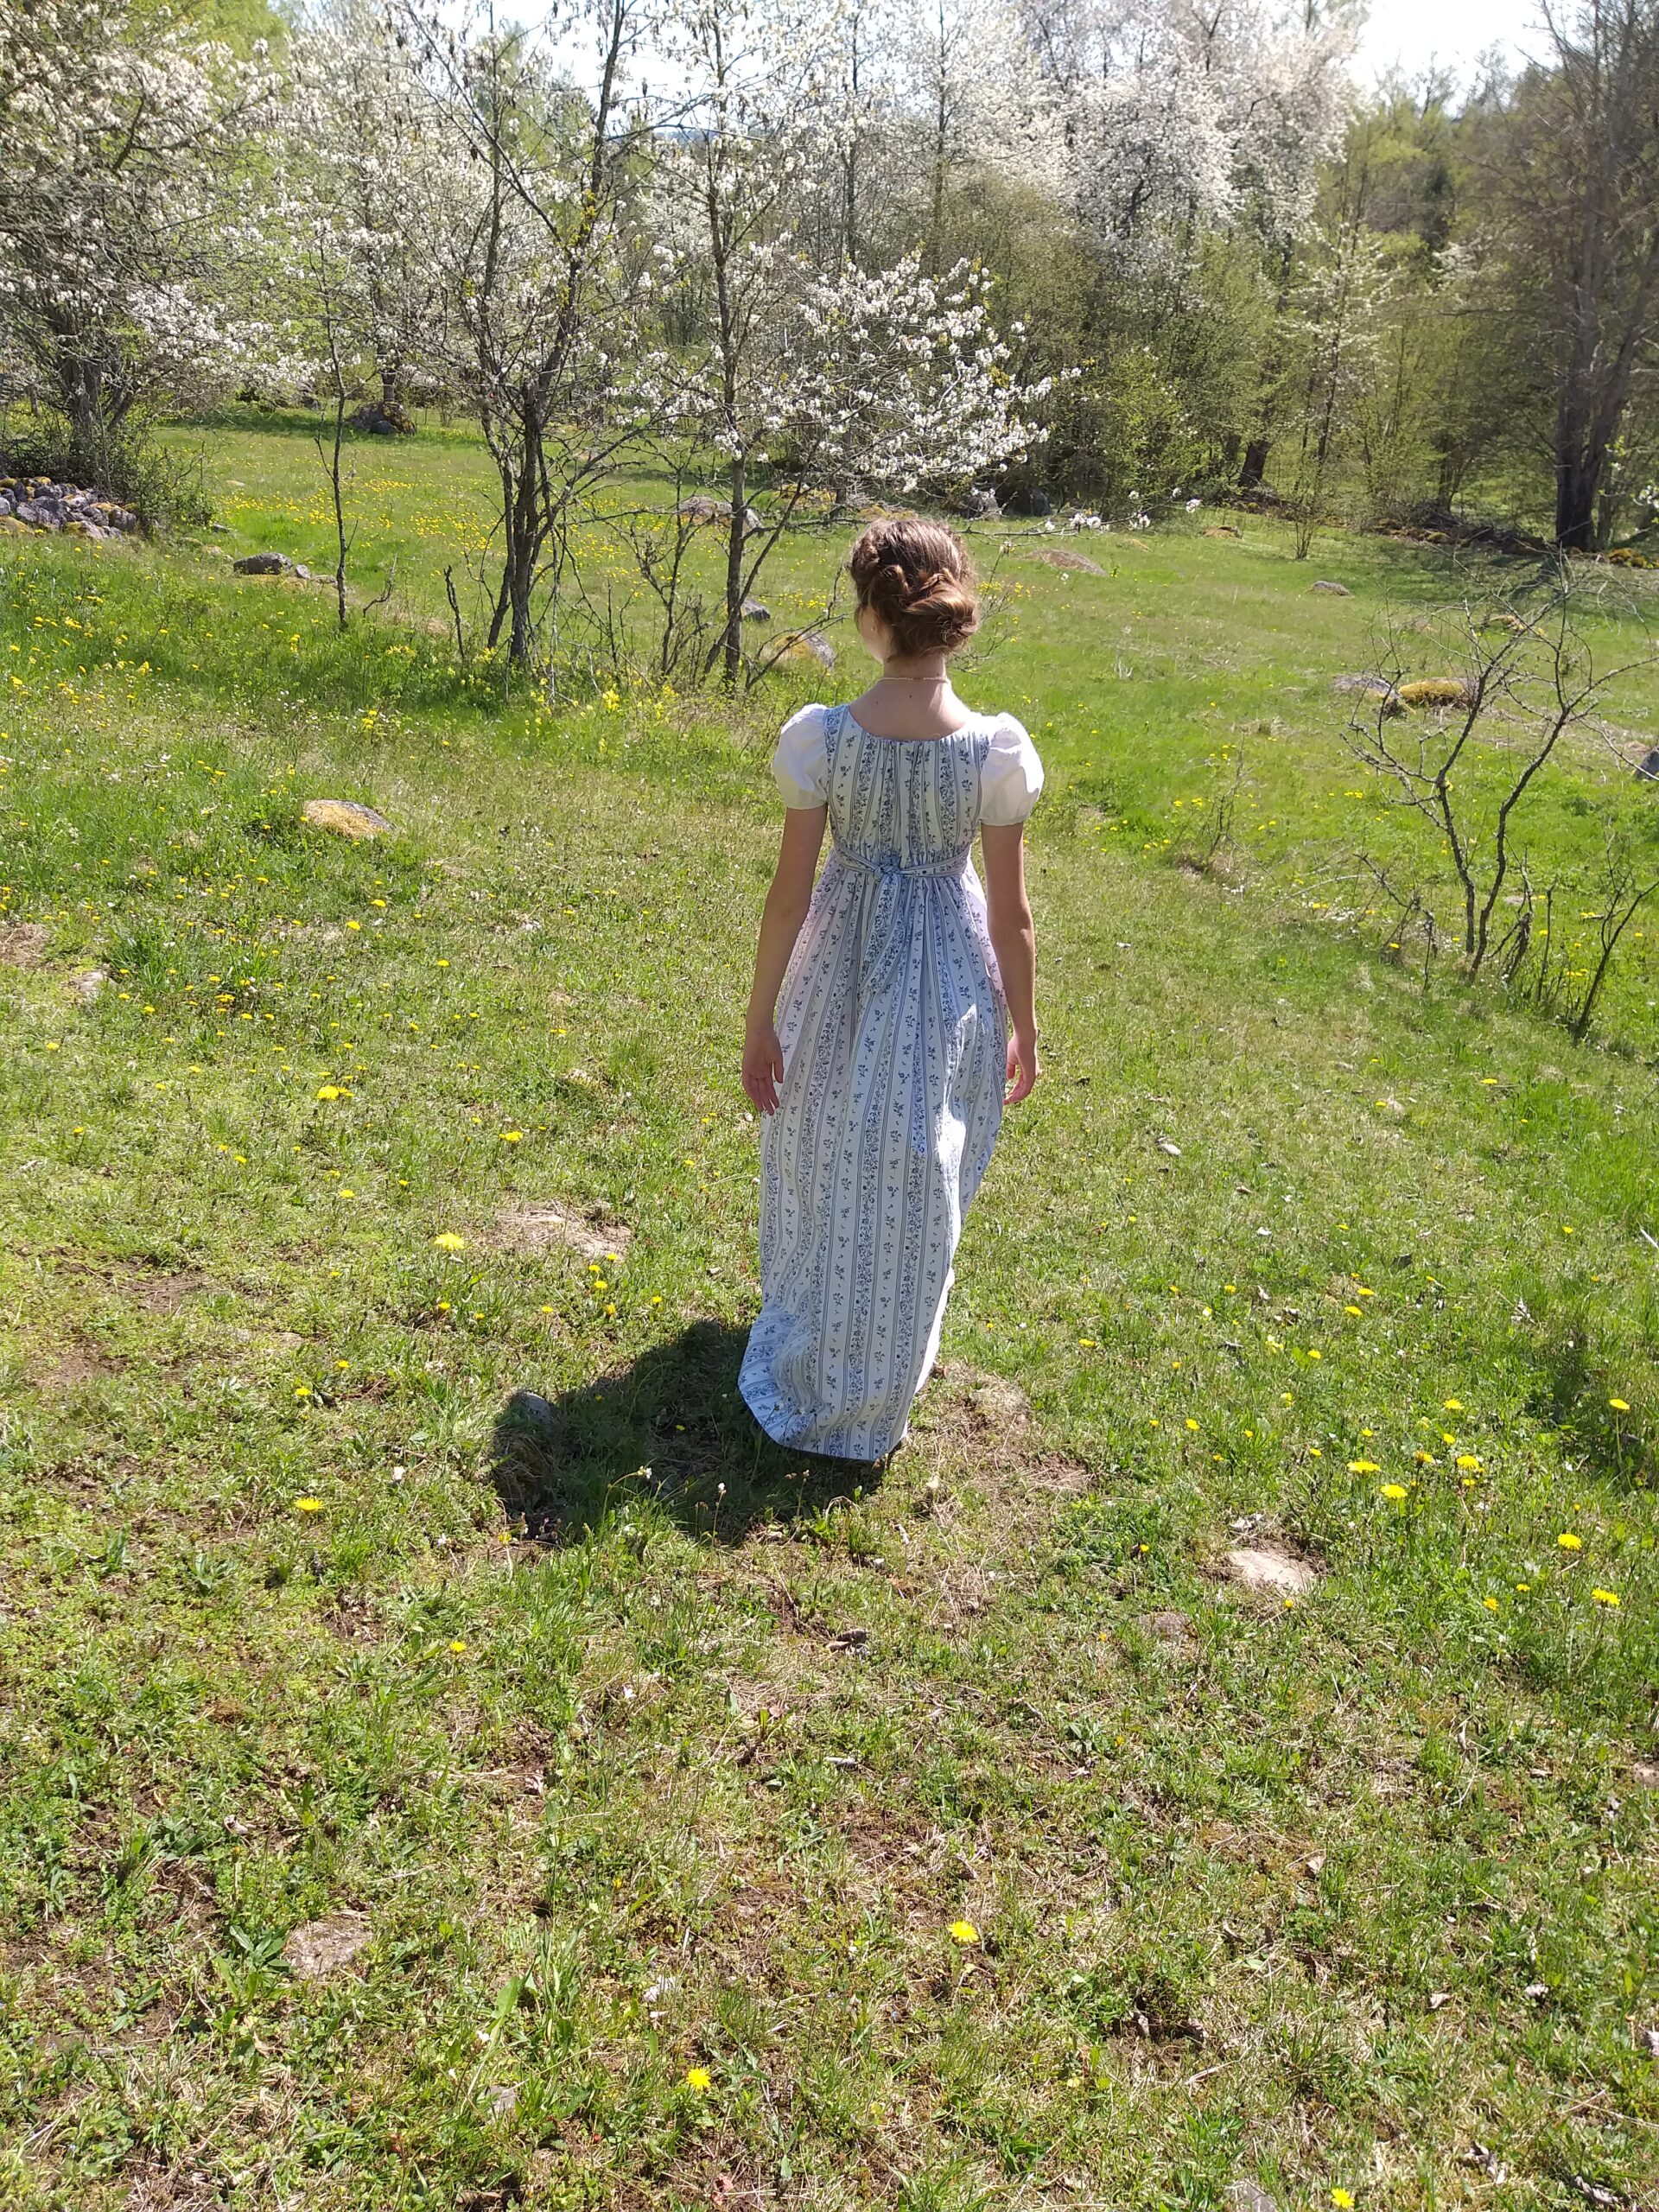
The ribbons attached to the bottom of the poofed arms.Front of the dress.Back of the dress, with gathering drawstring in the neckline and at the bottom of the bodice.Klänningen klipptes till och syddes på 4-6 timmar.
När vi strövade omkring i Tjolöholms slottsträdgård stannade många gäster upp och beundrade oss. Bland annat hörde vi flera kommentera om “prinsessorna”, “de som ska spela teater här” och en kvinna som desperat försökte få sin väninna att vända sig om och fota oss genom att väsa: “Skynda, skynda!”. När vi åkte därifrån tror vi att bortåt hundra personer hade fotat oss. Det känns ju som en underbar bekräftelse på att jag lyckats med våra kläder.
The whole dress was completed in about 6 hours.
We were much admired when we walked through the castle gardens and I believe that at least hundred different people took pictures of us. This is a very good compliment to my efforts with our costumes.
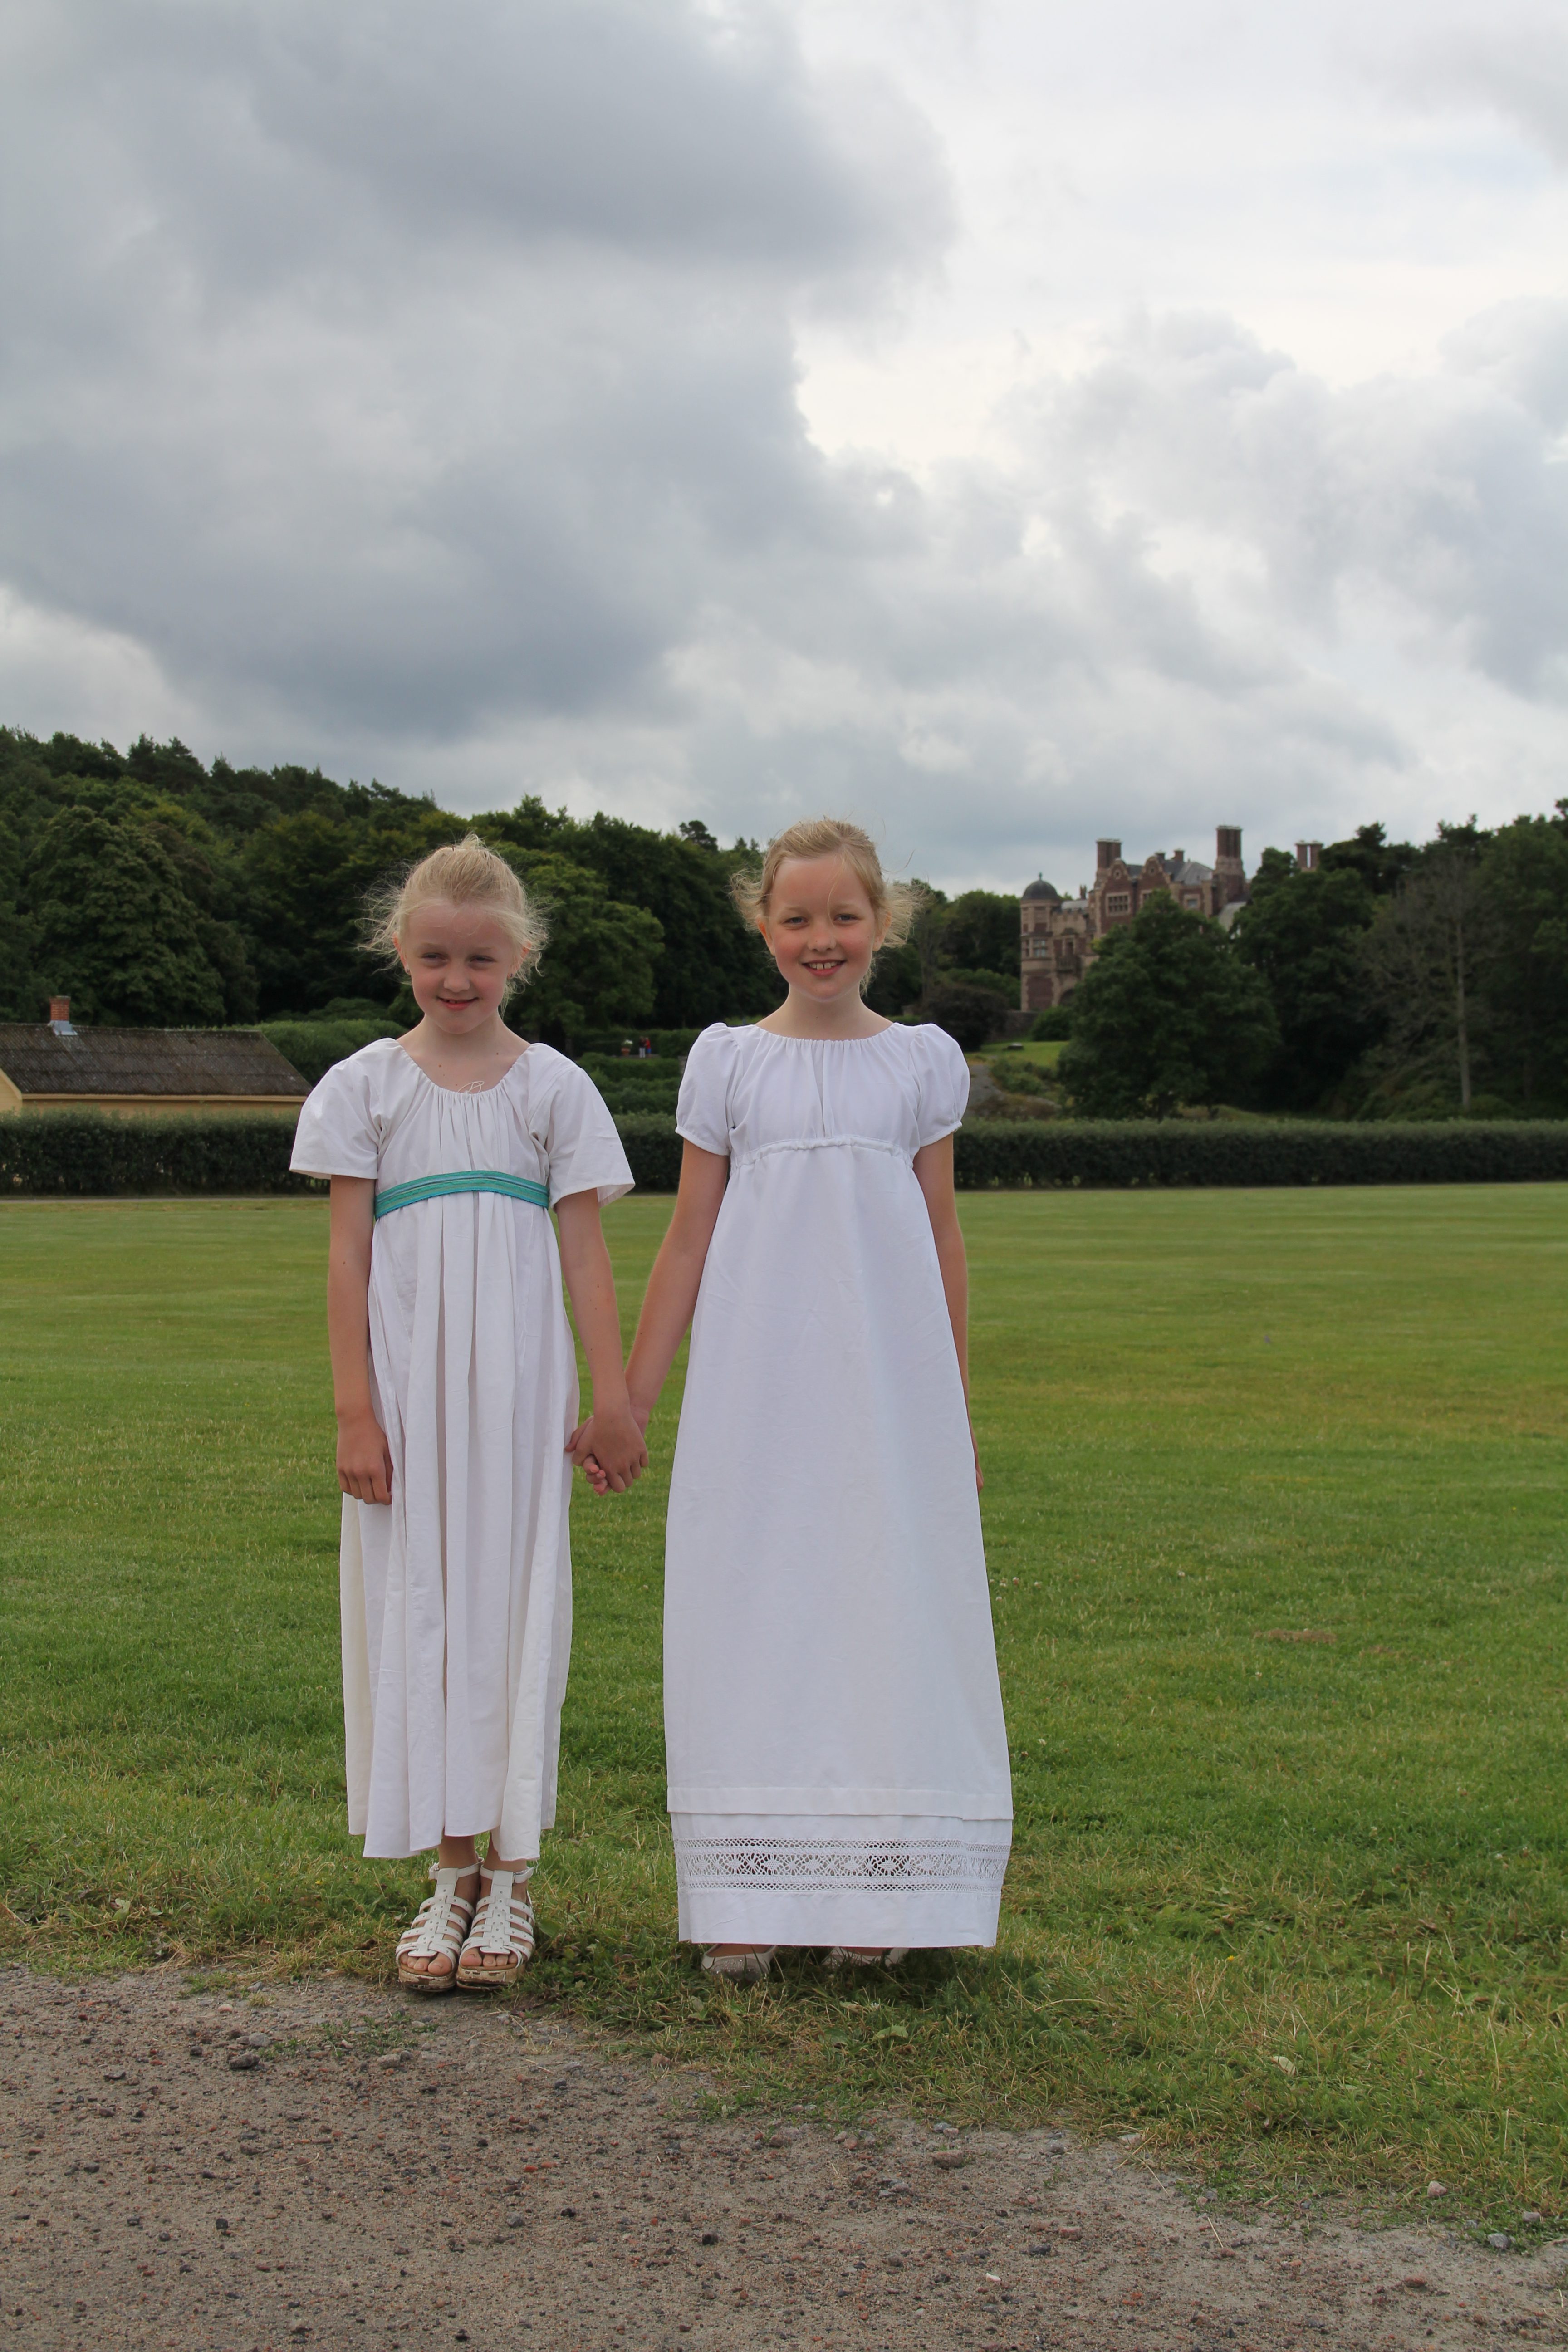
The happy family, preparing for the outing.
My eldest niece with her beloved new gown and my youngest niece in my chemise with a ribbon around her high regency waist.
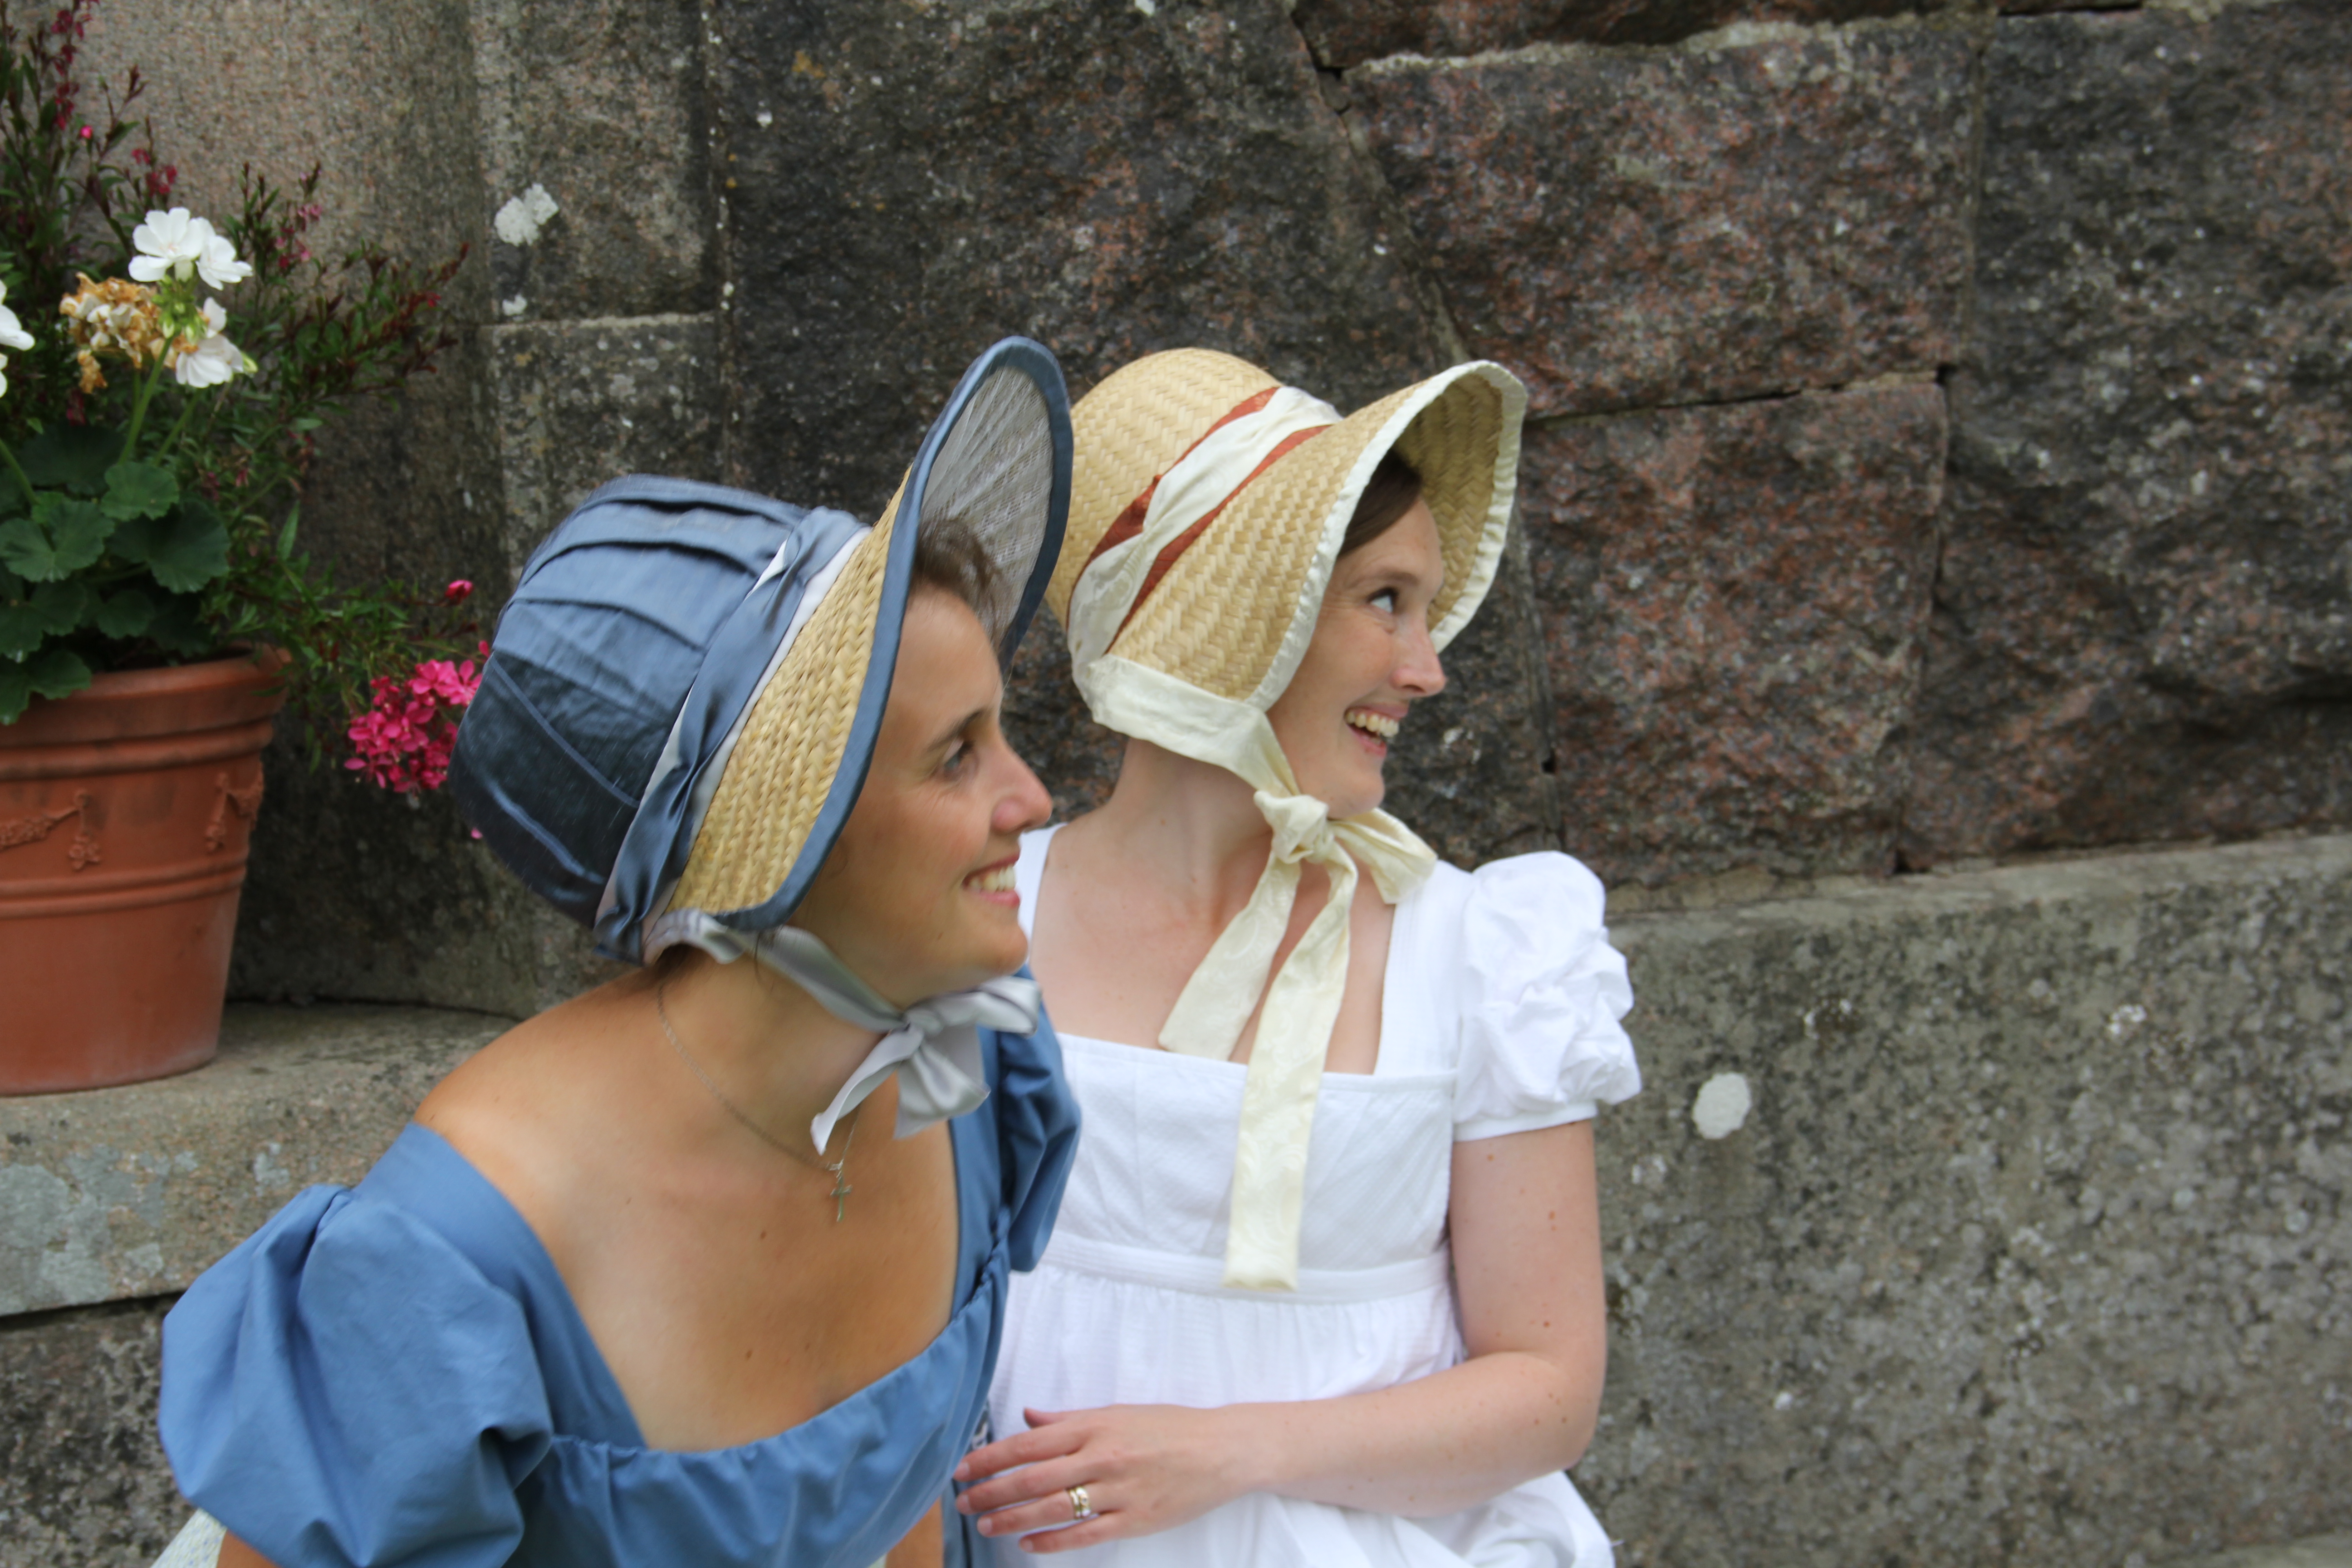
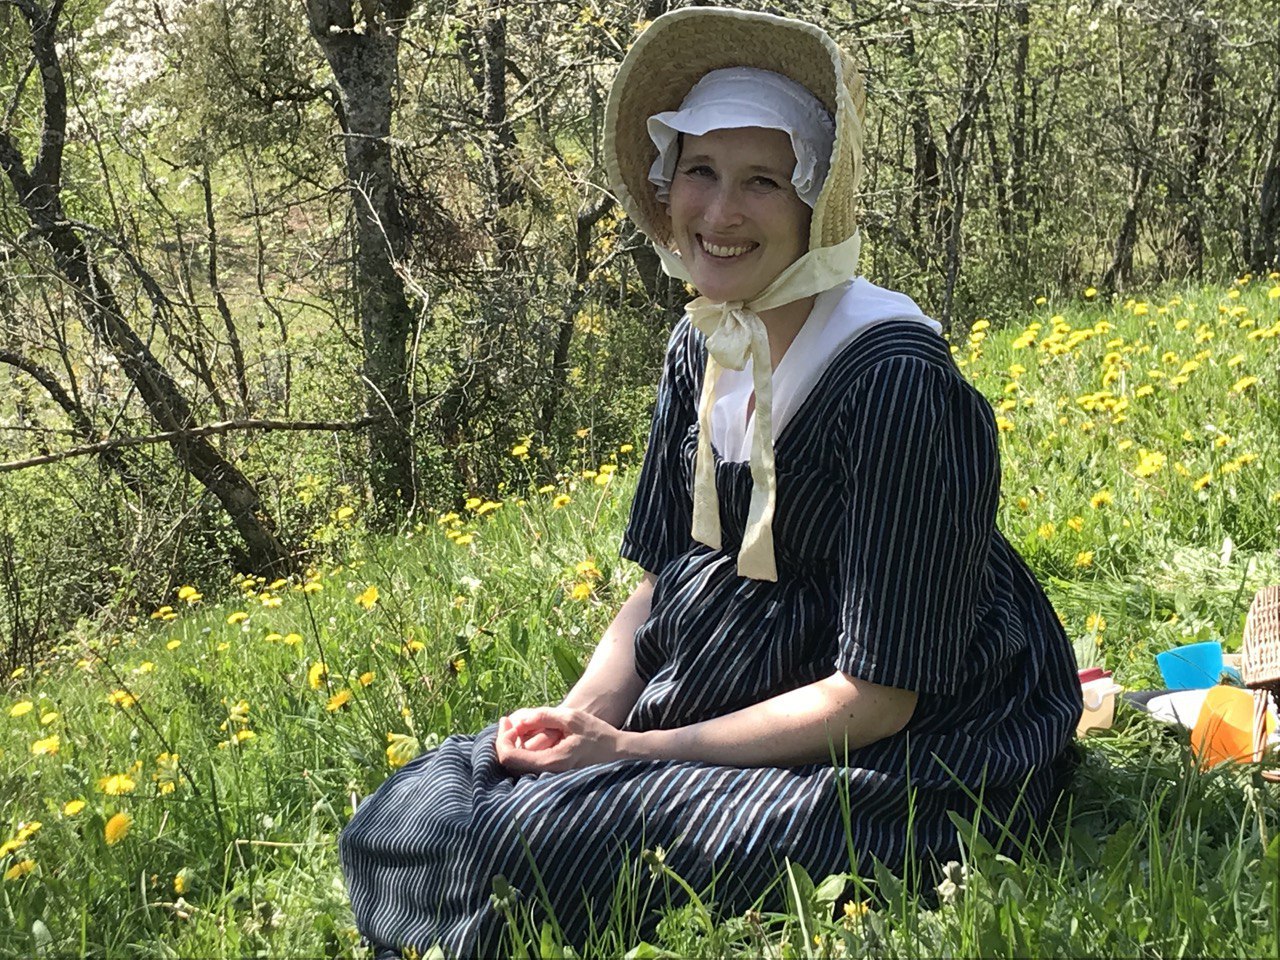
I pimped up my sister’s dress before our adventure. I made the hat several years ago.
As I am already the proud owner of two bib front dresses, I want to make a V-line this time. I had no idea of how to construct such a piece, but roamed Pinterest for answes and found this gown (with several pictures here):
Eftersom mina två andra empirklänningar är sydda efter modellen med nedfällbar framdel och därmed har fyrkantig urringning, vill jag nu sy en klänning med V-ringning. Jag misstänkte att sådana exempel i BBC:s Stolthet och fördom, med knäppning i ryggen, inte var särskilt representativa. Därför letade jag konstruktions-information på Pinterest och Google och fann slutligen detta representativa exemplar (som det dessutom finns mängder av bra bilder på här):
Since the summer of my wedding, I have a blue silk like (probably polyester) fabric in my stash. I have always wanted to sew a regency dress out of this, so now I just wanted to see if there really existed blue V-line gowns at the time. When I looked at fashion plates, museum pieces and portraits, I found out that the V-line was not by far as common as the square neckline and that blue was not a very common colour neither. At last I found this lovely portrait of Tatyana Borisovna Potemkina from 1820 (by Vigée Le Brun) though:
Ända sedan sommaren jag gifte mig, har jag haft ett blått “sidentyg” (antagligen polyester) liggande. Jag har hela tiden velat, men inte kommit mig för att sy en V-ringad empirklänning av denna, så nu ville jag bara försäkra mig om att det verkligen existerade blå klänningar av denna modell. När jag såg på museiexemplar, modebilder och porträtt insåg jag dels att V-ringningar verkar ha varit relativt ovanligt och dels att blått siden var i extrem minoritet (det finns fler porträtt med blå sammetsklänningar). Till slut hittade jag i alla fall detta underbara porträtt av Tatyana Borisovna Potemkina, målat av Vigée Le Brun 1820:
It isn’t only dark blue, it also seems to have the same construction as the dress above!
Den väna damen behagar inte bara att vara klädd i blått, men verkar dessutom ha en klänning med precis den konstruktion jag bestämt mig för!
I have dived into a new, big, lovely project: a new regency gown with all the right underpinnings. This lunacy is partly due to a need to escape the far too big study load this term and partly due to the dear problem that I will have two friends to company me at a regency event this summer, but only own two gowns.
Jag har dykt ned i ett nytt, stort och underbart projekt: en ny empirklänning med alla matchande underkläder. Denna galenskap beror dels på att jag behöver en undanflykt från denna termins alldeles för stora läsebörda och dels på ett kärt problem – jag får med mig två kamrater på ett historiskt evenemang men äger bara två empirklänningar.
I aimed for a costume somewhere in between 1810-1820 and was inspired by museum pieces, fashion plates, portraits and several fantastic blogs.
Jag siktar på att sy en dräkt överensstämmande med mode från början av 1810-talet. Inspiration har jag hämtat från museiexemplar, modebilder, porträtt och en massa fantastiska bloggar.
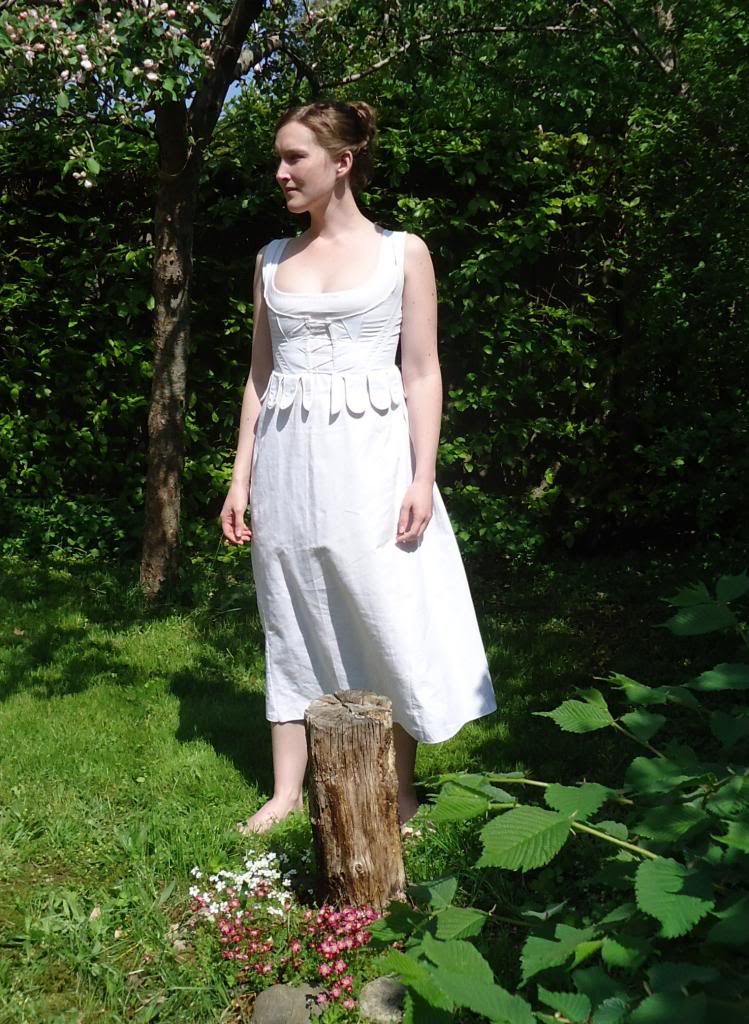
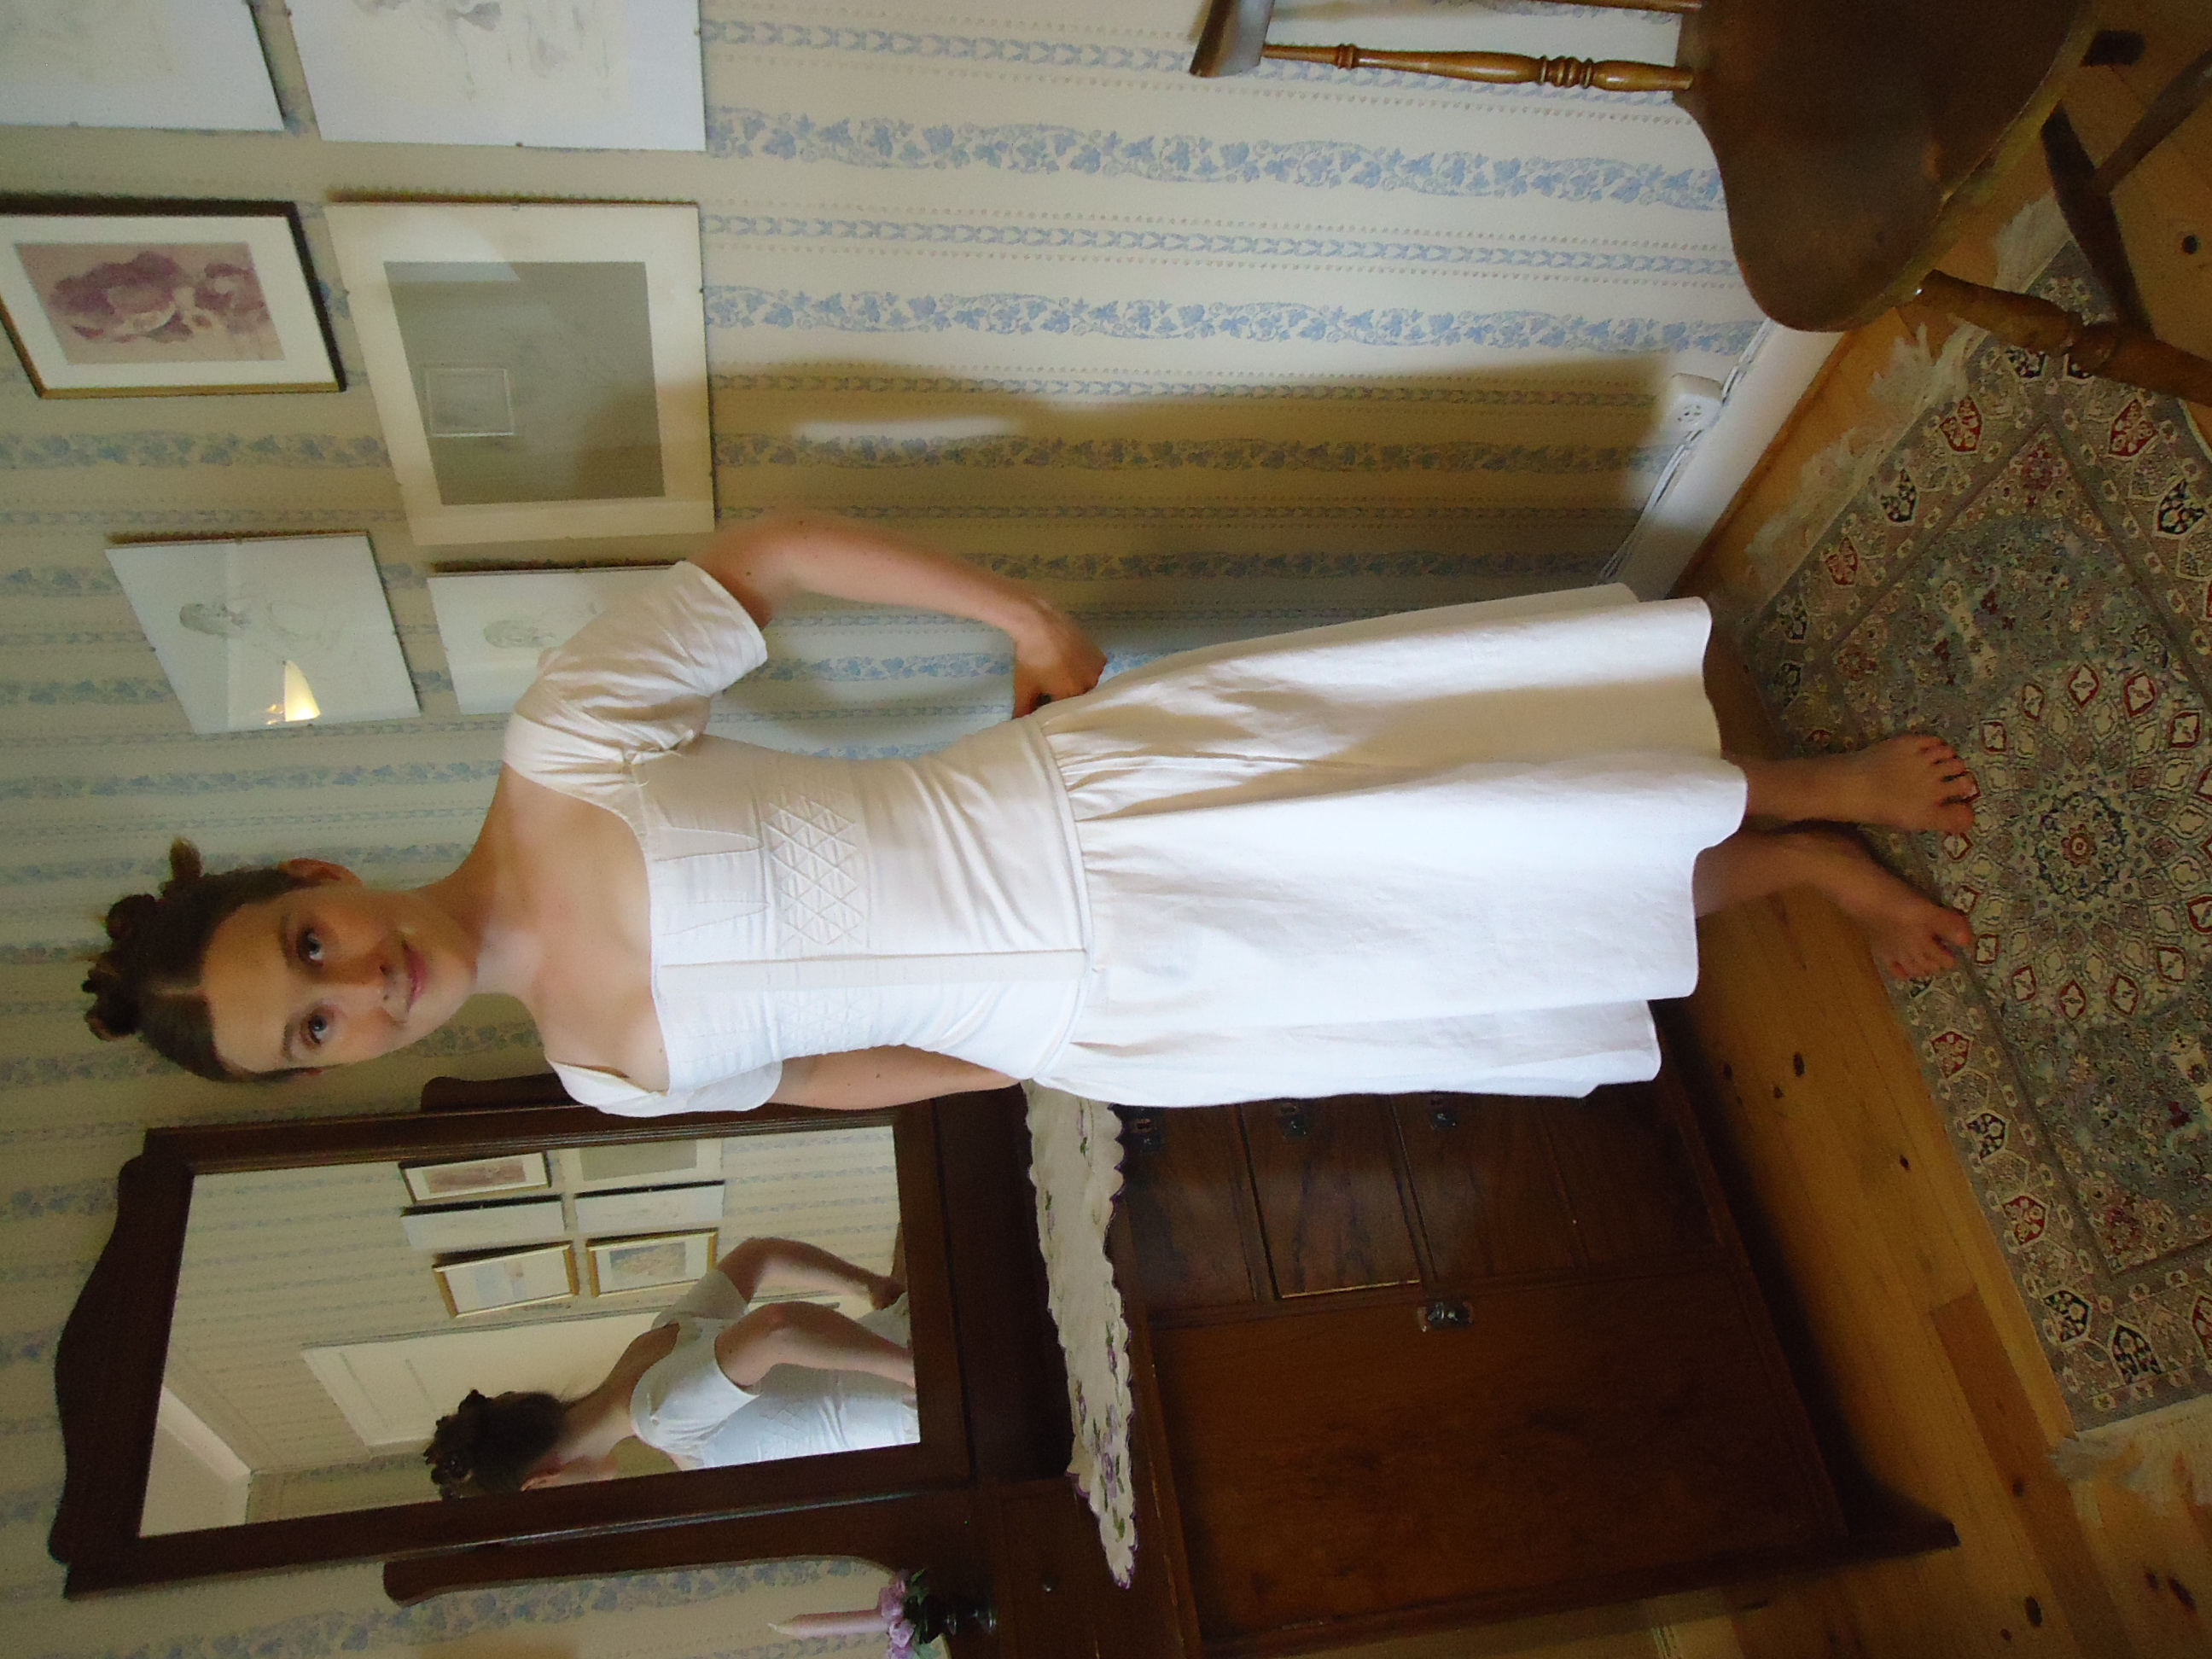
The Corset
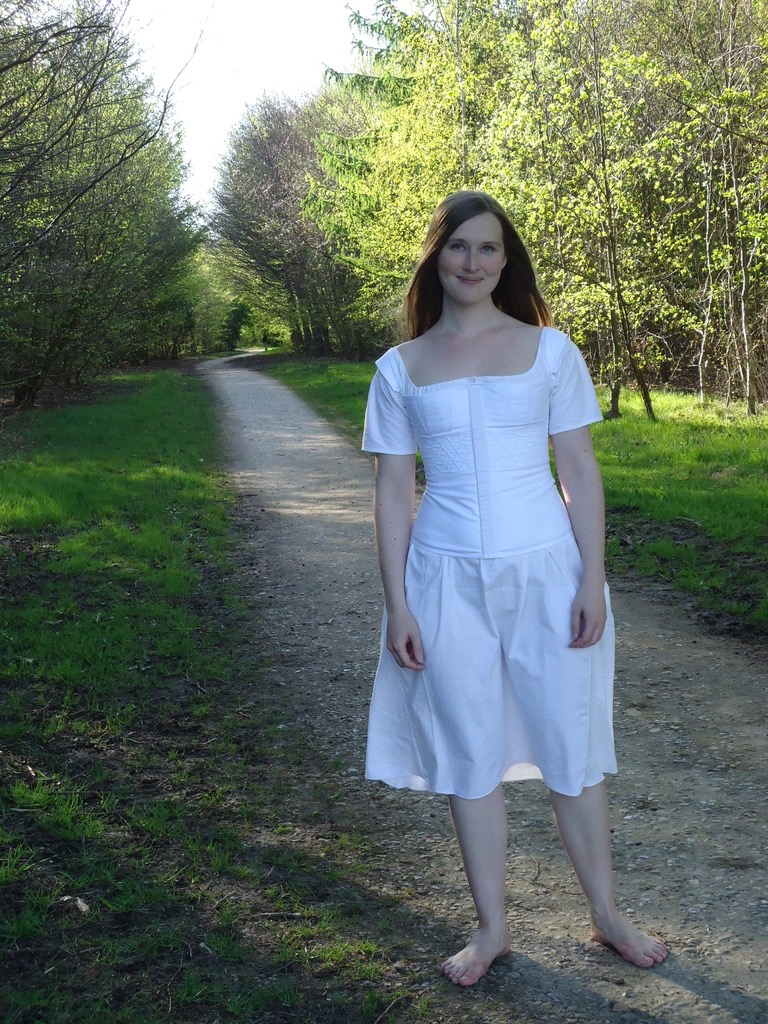
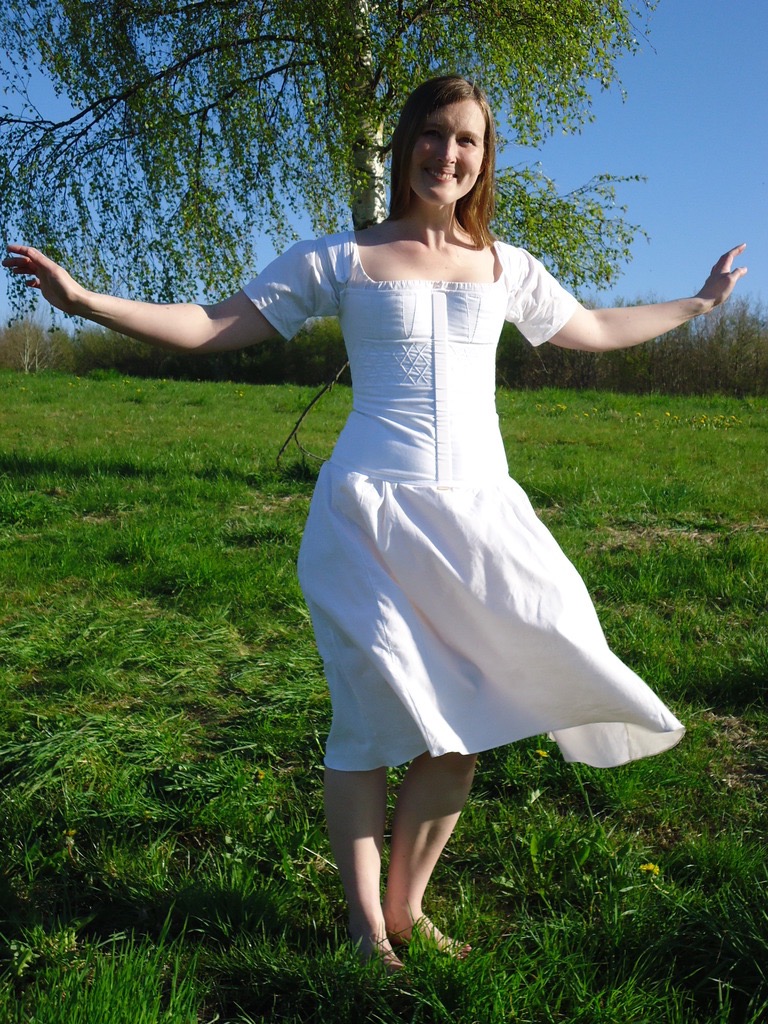
In order to have a proper fit of the gown, I started with the corset. Here are some pictures from today’s photo shoot and further down comes the research and construction process.
För att kunna få en bra passform på klänningen började jag med att sy korsetten. Här kommer några bilder från dagens fotosession. Längre ned skriver jag om bakgrundsinformation och konstruktion.
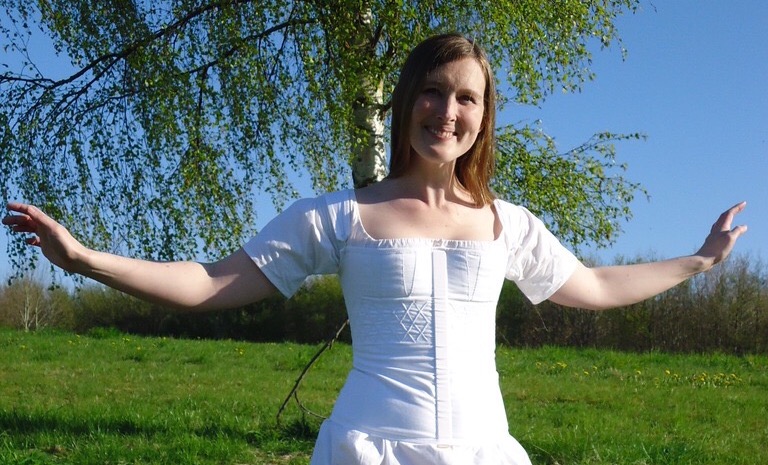
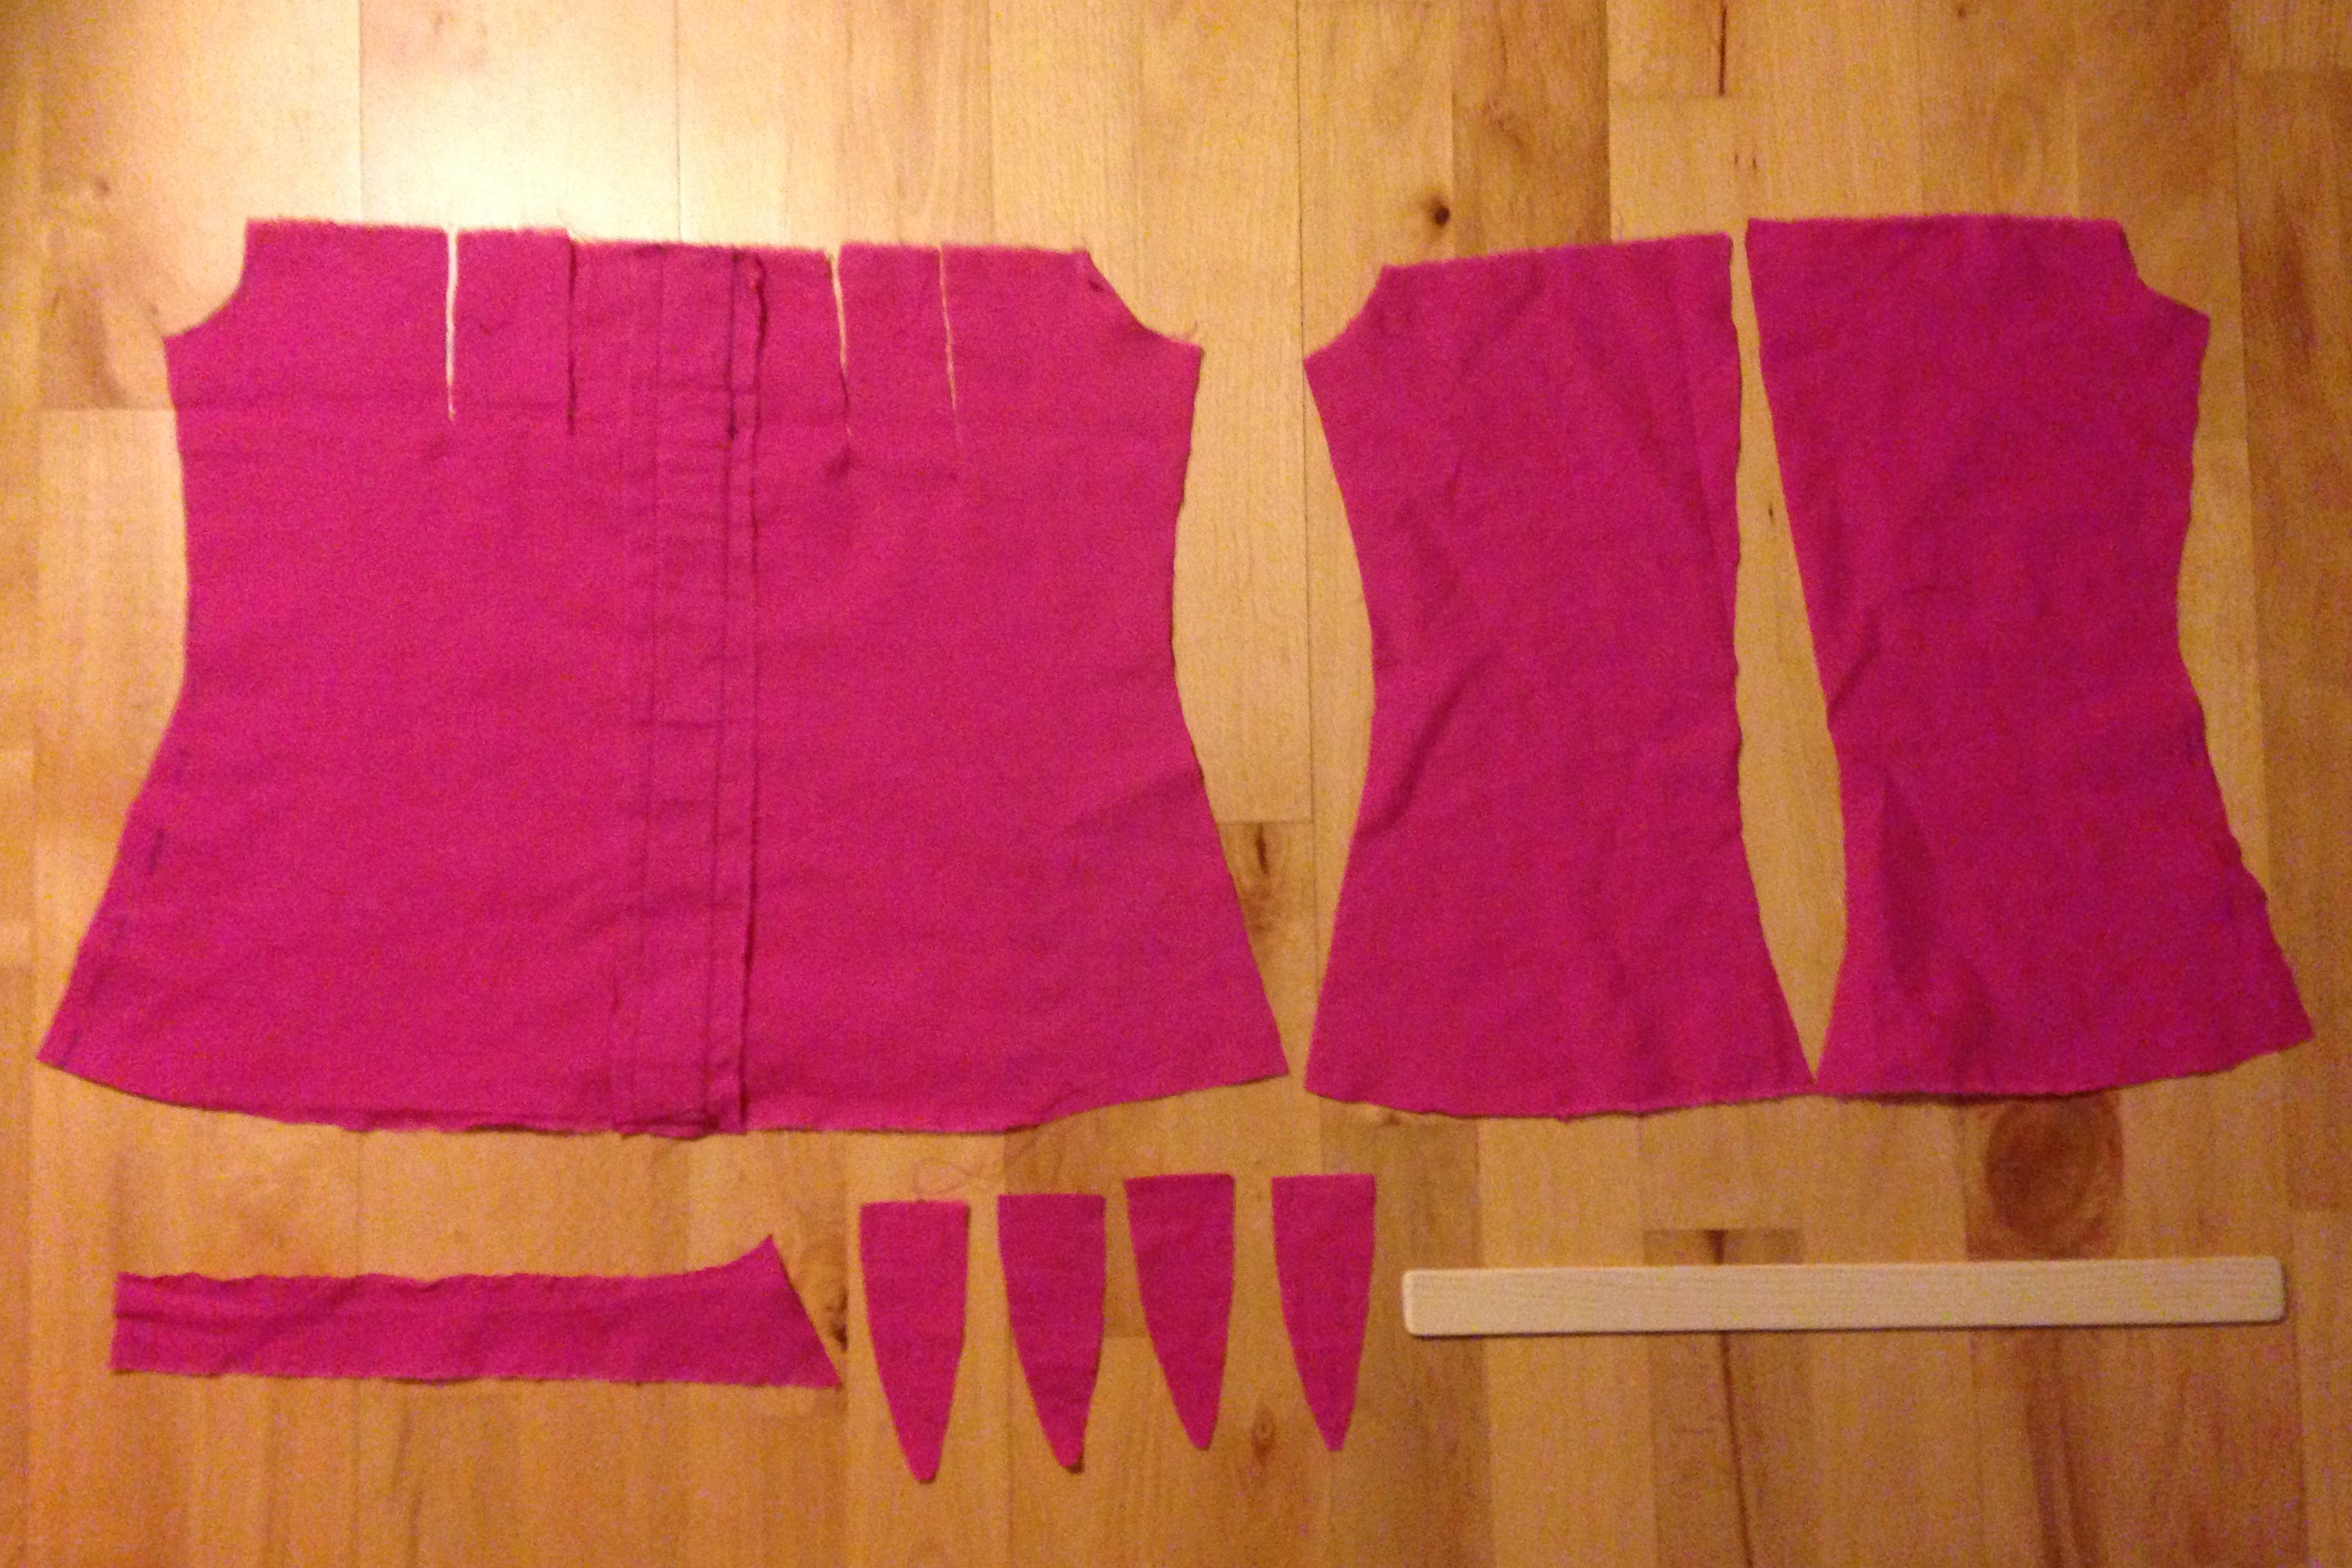
The corset is not boned, as its purpose isn’t to slim the waist, but only to push up the breasts – sideways. This is helped by a thin piece of wood in the front.
Here you see how the piece of wood (a busk) is in its channel. The stability of the corset comes from the chording. I must add that I didn’t try to highlight my push-up, I swear.
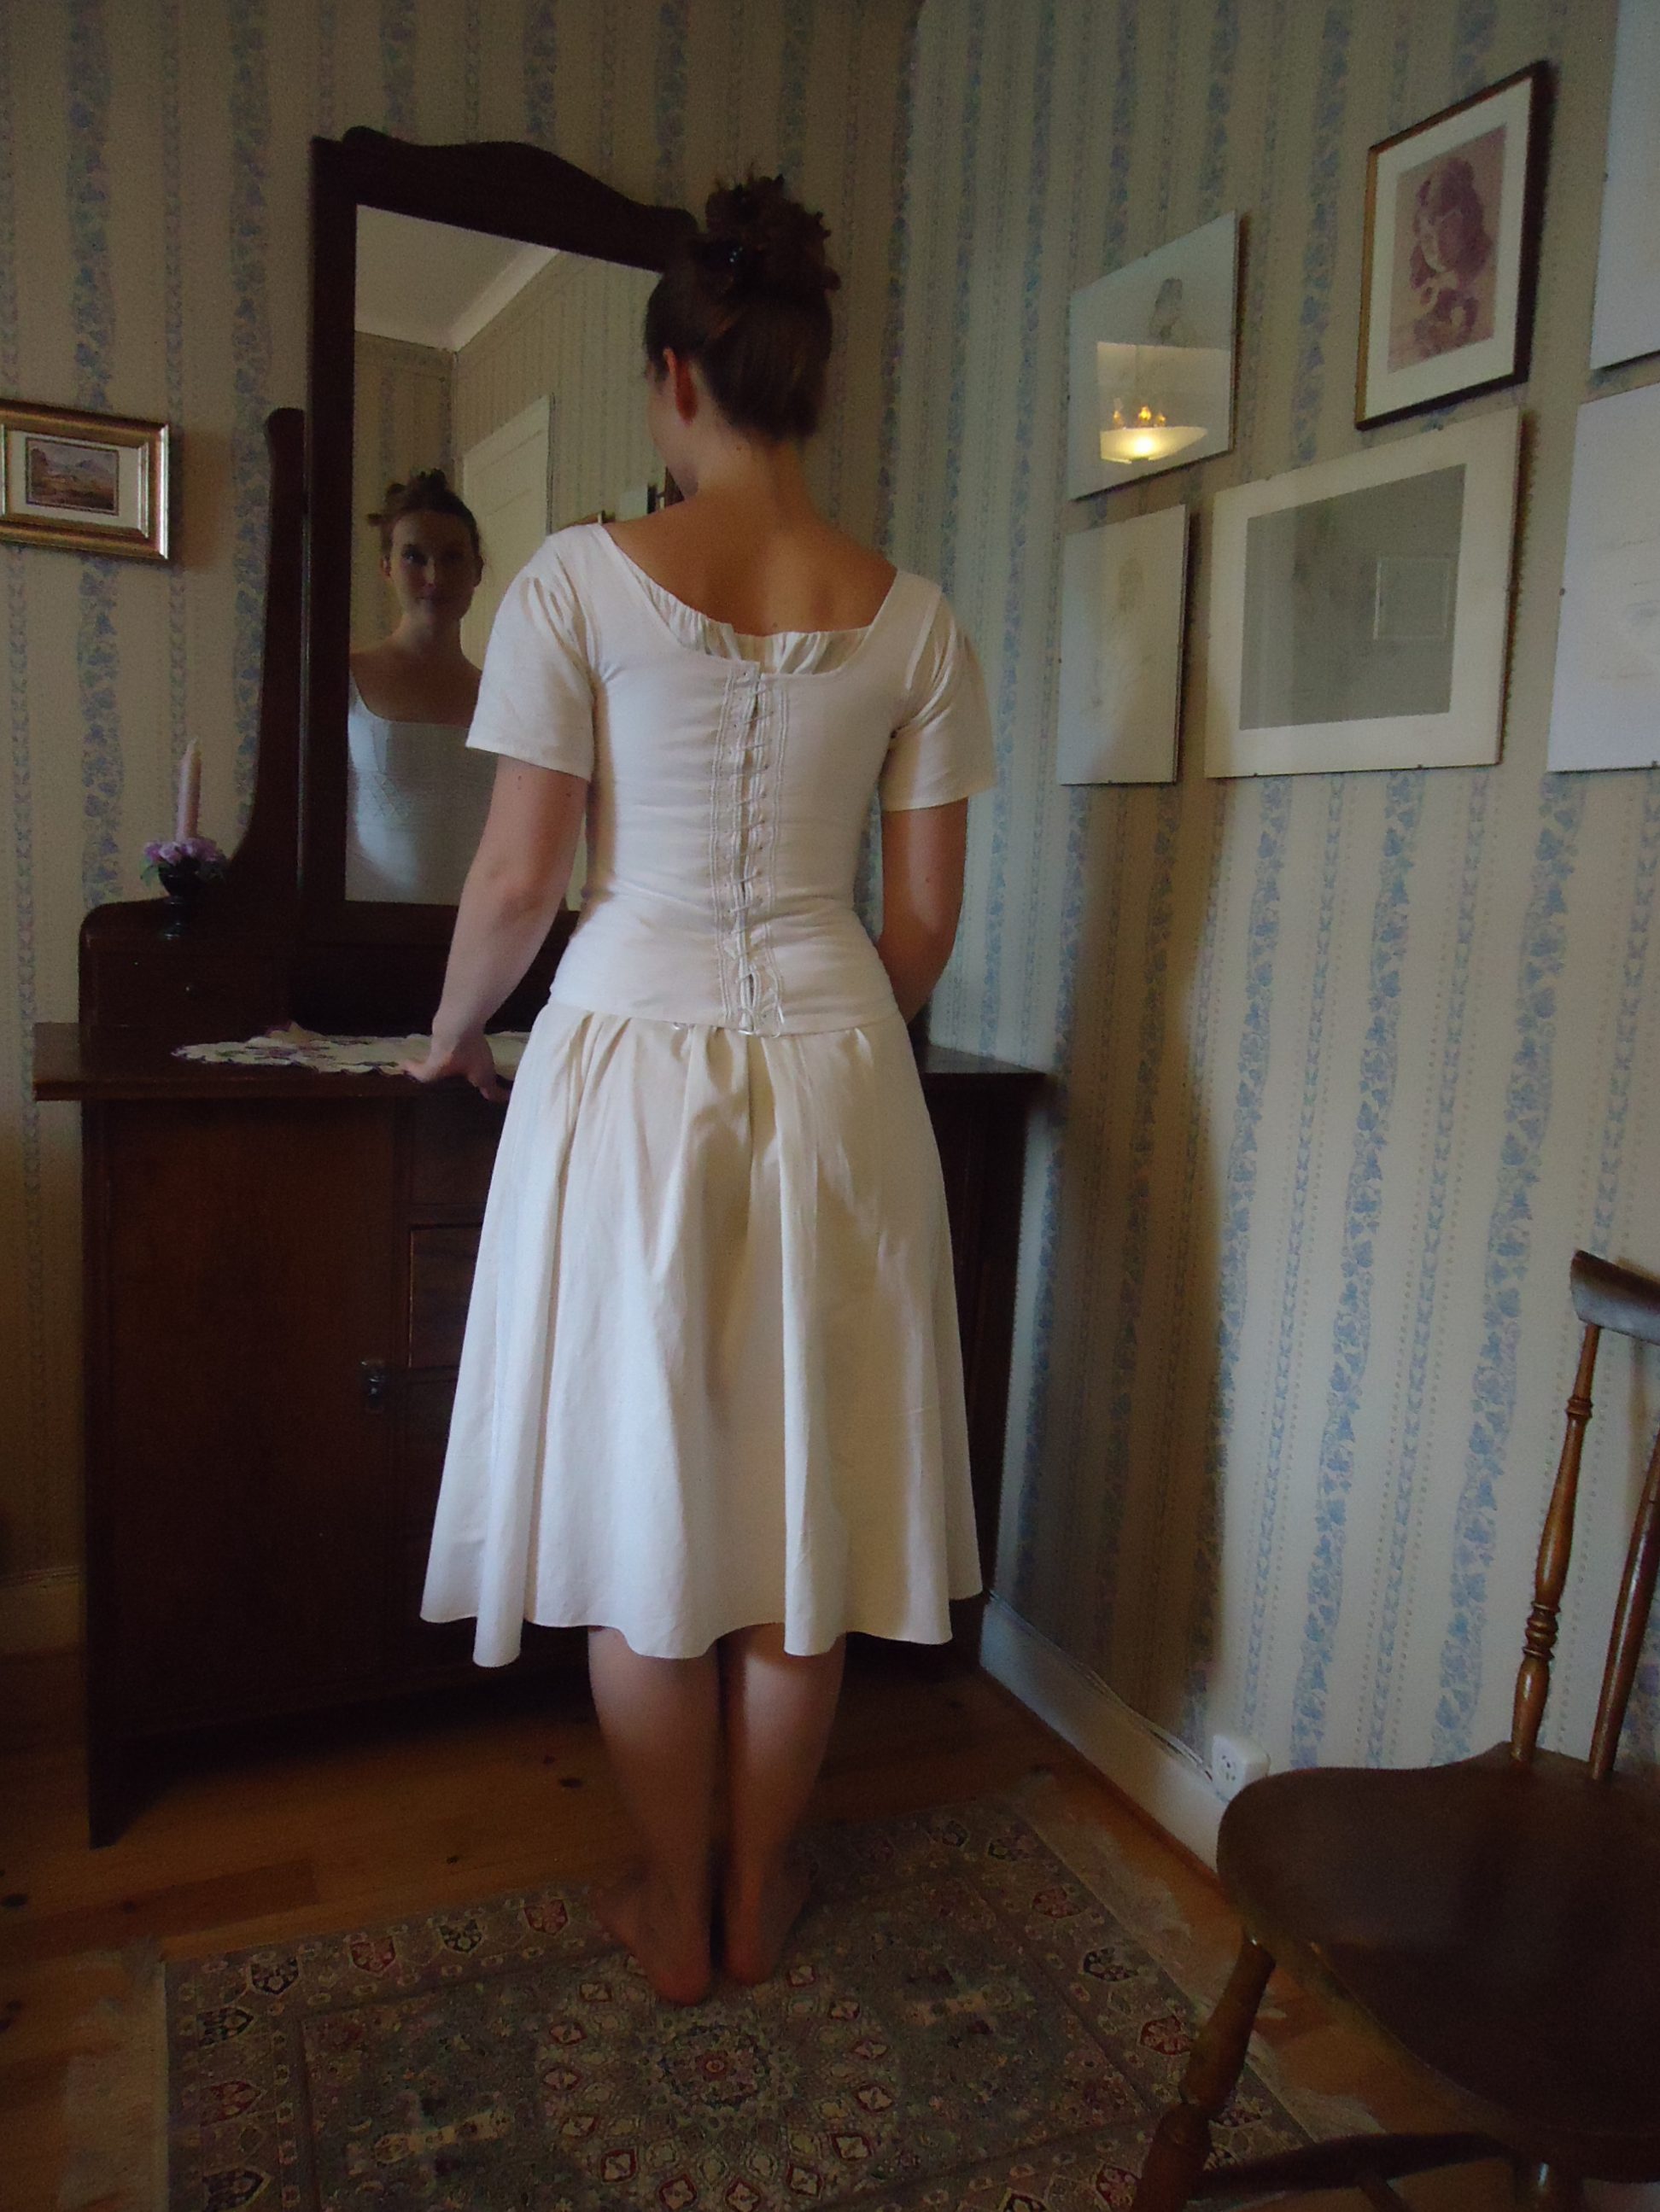
The back isn’t very pretty, but it needn’t be, as the outer layers are very loose. The lacing should, off course , be white. I just couldn’t resist the lovely weather, so I will by white cord later.
Here, the busk channel is very evident and so are the gussets and chording.
This is how happy I am for owning a pretty accurate corset, shift and taking springtime walks with my dear.
Inspiration for the corset
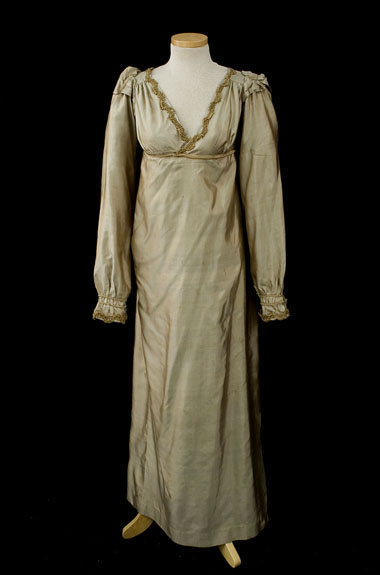
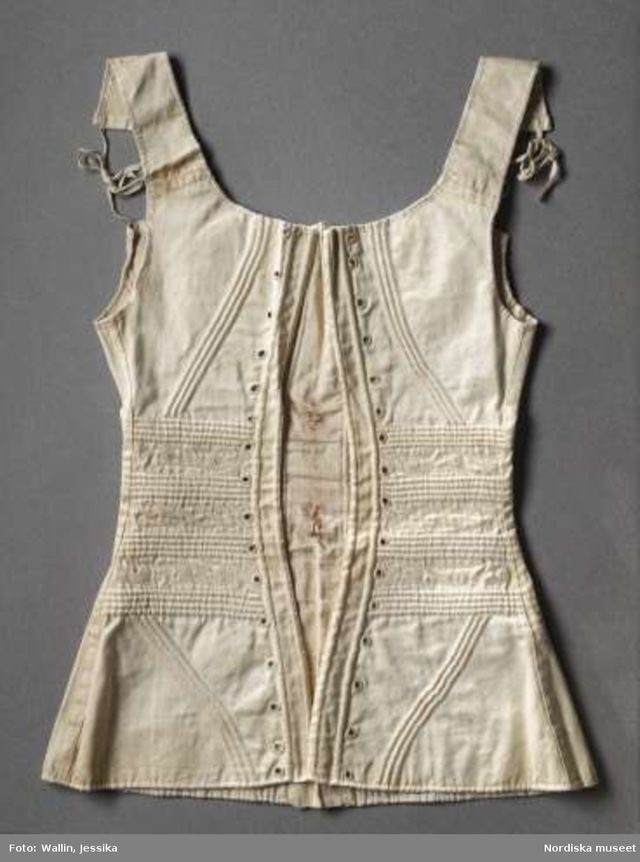
In my regency corset research, was finally most Inpired by these pictures:
Under mina efterforskningar inspirerades jag främst av dessa bilder:
1815-1825 – Met Museum
Ca 1815
Early 19th century – Museum of Fine Arts, Boston
Early 19th century – Nordisk museum
I chose to have the beige one as a model, because it can go under the most part of the regency era and also early 1820’s and even 1830’s costumes, if I may be so bold. It has three panels (one whole front and two in the back) and two shoulder straps.
Jag bestämde mig för att utgå från den beiga korsetten eftersom den fungerar under de flesta empirkläder, tidigt 1820-tal och eventuellt även 1830-tal, om jag skulle vara riktigt djärv. Den består av tre paneler (en hel framsida och två baktill), samt två axelband.
Constructing the corset
I didn’t know if the corsets that inspired me consisted of two or four layers of fabric. The blogs I’ve read to prepare myself for the task, often show four layers, but I didn’t gather whether this was due to the bloggers’ vast knowledge or that they simply preferred the greater sturdiness of four layers. I had less than one meter cotton cloth at home, the choise was easy.
Jag visste inte om mina inspirations-korsetter bestod av två eller fyra lager tyg. Bloggarna som jag läst som förberedelse inför projektet, brukar visa fyra tyglager, men det framgår inte om det är för att de kunniga bloggarna vet att detta är rätt eller för att de bara vill ha ökad stadga. Jag hade bara hemma mindre ön en meter vitt bomullstyg, sp valet blev lätt.
First, I constructed a toille on myself and got these parts. I bought a 1,5 mm thick piece of wood and saw it to about 36 cm.
Jag började med att göra en toille på mig själv och fick dessa bitar. Jag köpte en 1 mm tjock träpinne och sågade till ca 36 cm.
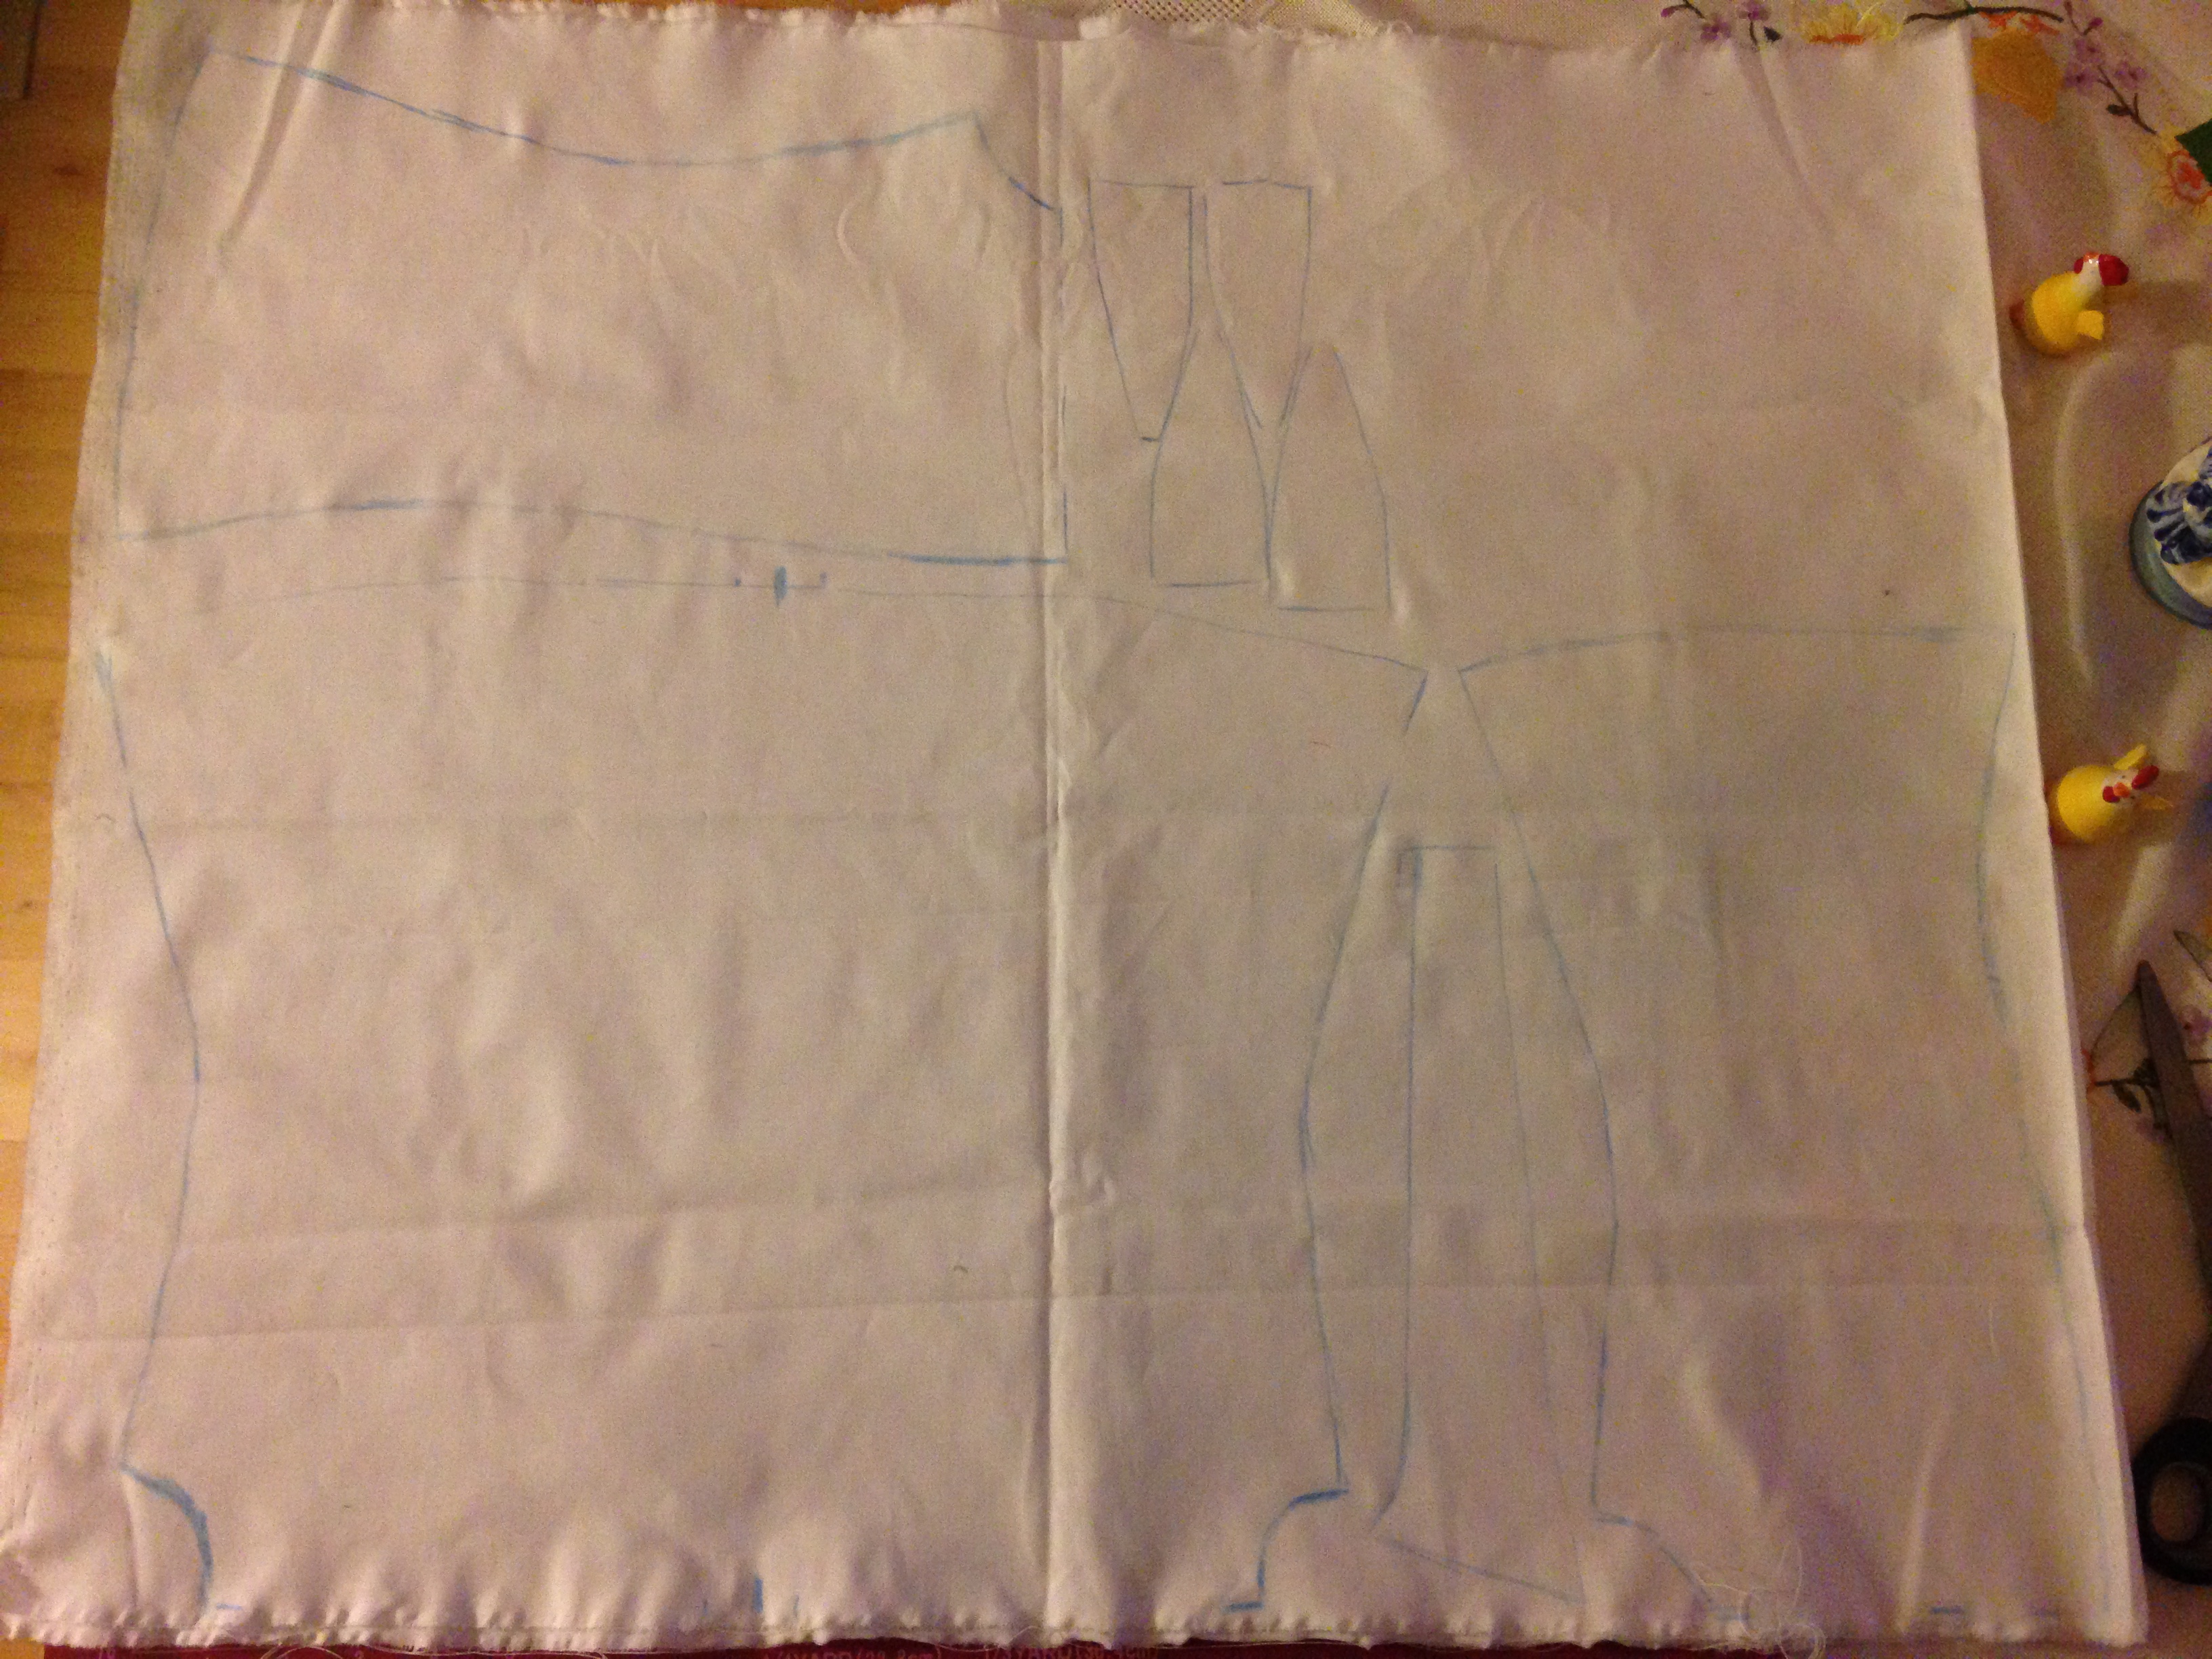
Here are all the pattern pieces on one fold.
Jag fick plats med alla mönsterdelar på en vikning.
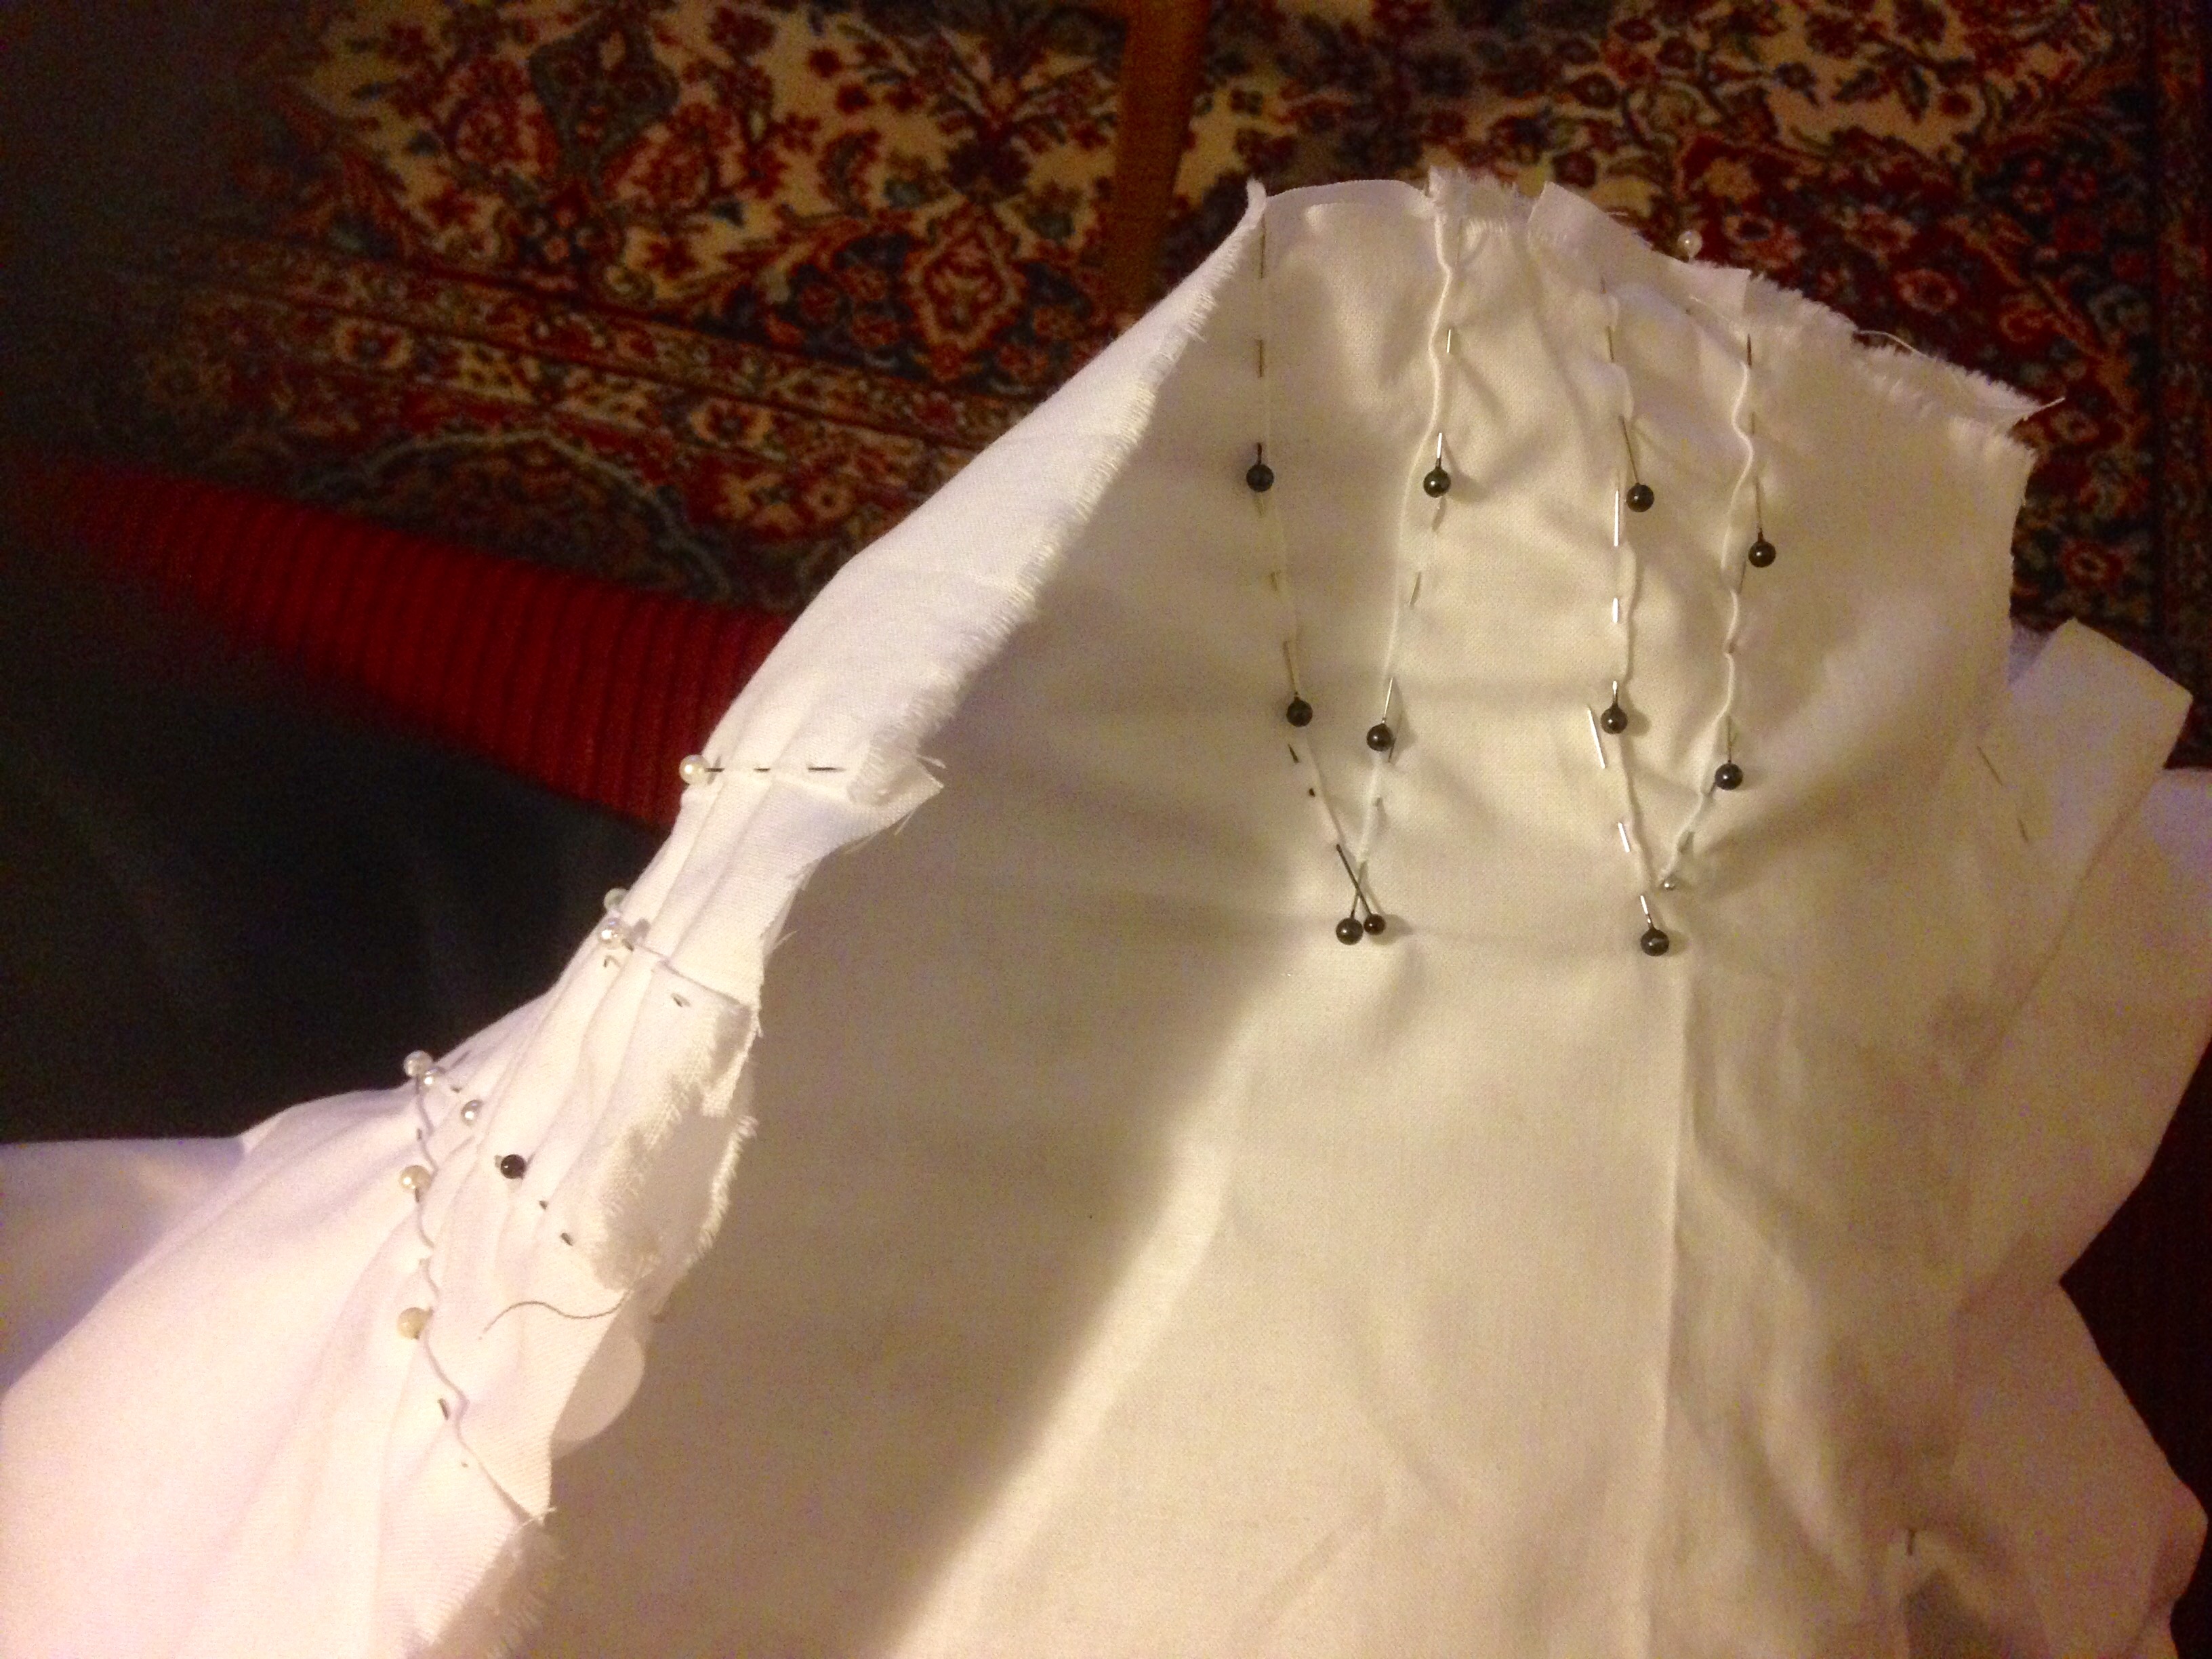
After having put the panels together and then also gathered the inner and outer layer (on machine), I inserted the gussets by hand.
Efter att ha sytt ihop alla paneler och sedan även satt ihop inre och yttre del (på symaskinen), satte jag in kilarna för hand.
Then I cheeted, badly. I thought that I would save myself time by machine sewing the chords onto another piece of cloth and then put it between the existing layers and make the hand sewing last. I also thought that this would add the needed sturdiness that I otherwise would lack, due to the two layers of fabric. When I tried this, I discovered that my coarse chord showed through the white cotton. Therefore I sewed a piece of cloth to the other side too.
Sedan fuskade jag, mycket fult. Jag trodde att jag skulle bespara mig själv tid och arbete genom att sy fast snöret på en tygbit, som jag sedan skulle stoppa in mellan korsettens båda tyglager. Dessutom hoppades jag att detta skulle kompensera för min bortprioritering av de två inre lagren tyg. Jag upptäckte dock att snöret syntes igenom tyget, så jag fick sy fast en bit tyg på andra sidan också (med passpoalpressarfoten).
Then, after having sewn the channel for the busk, I could at last put the chorded pieces in between the layers. I hand stitched around the chords, so that it at least looked right…
I also chorded in the back, oround the hand stitched lacing holes.
Sedan, efter att ha sytt en kanal för pinnen, kunde jag äntligen sätta in snördelarna. Jag sydde för hand runt snöret, så att det åtminstone skulle se rätt ut.
Jag sydde in snören baktill också, på båda sidor om de handsydda snörhålen.
At last, I made matching baning out of the same fabric and put in a thick thread in the front, so that it can be gather if needed.
Sist gjorde jag egna kantband i samma tyg och tvinnade mormors gamla brodertråd till lagom tjocka snören att dra till upptill, vid behov.
Here is a view of the inside, with the threads coming out of the lacinghole.
Här syns mitt lilla snörhål med snörena som kommer ut.
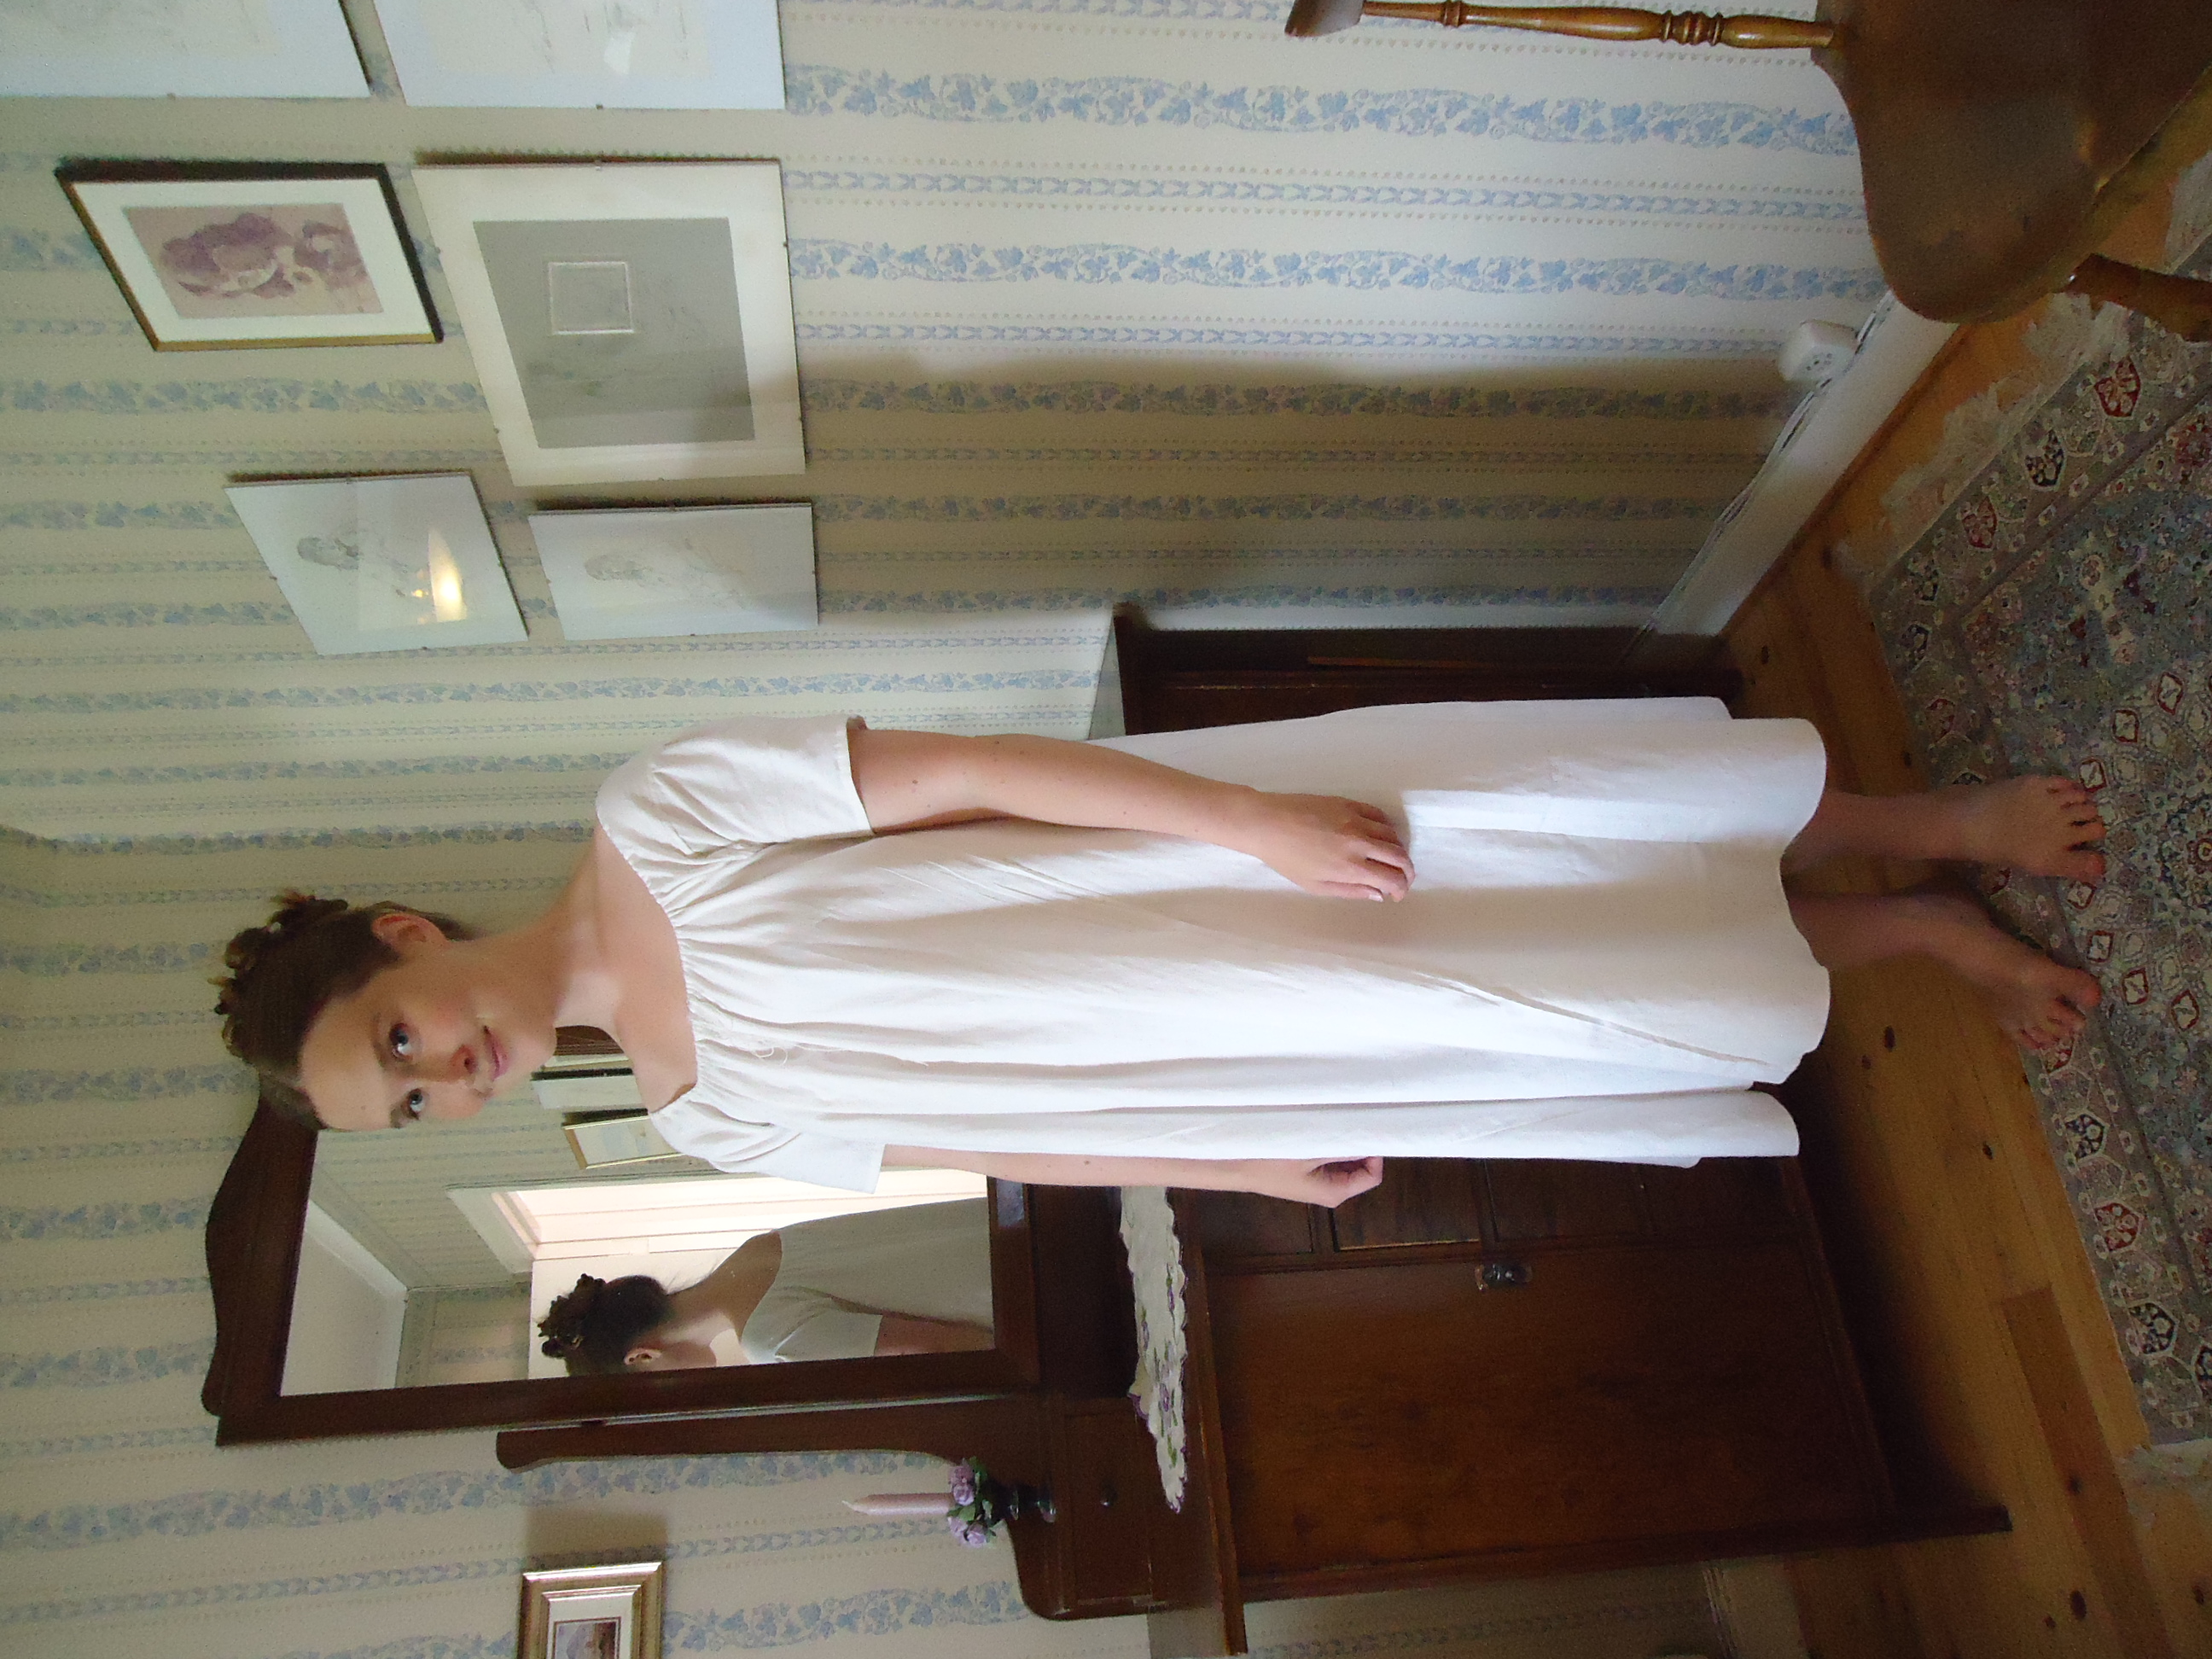
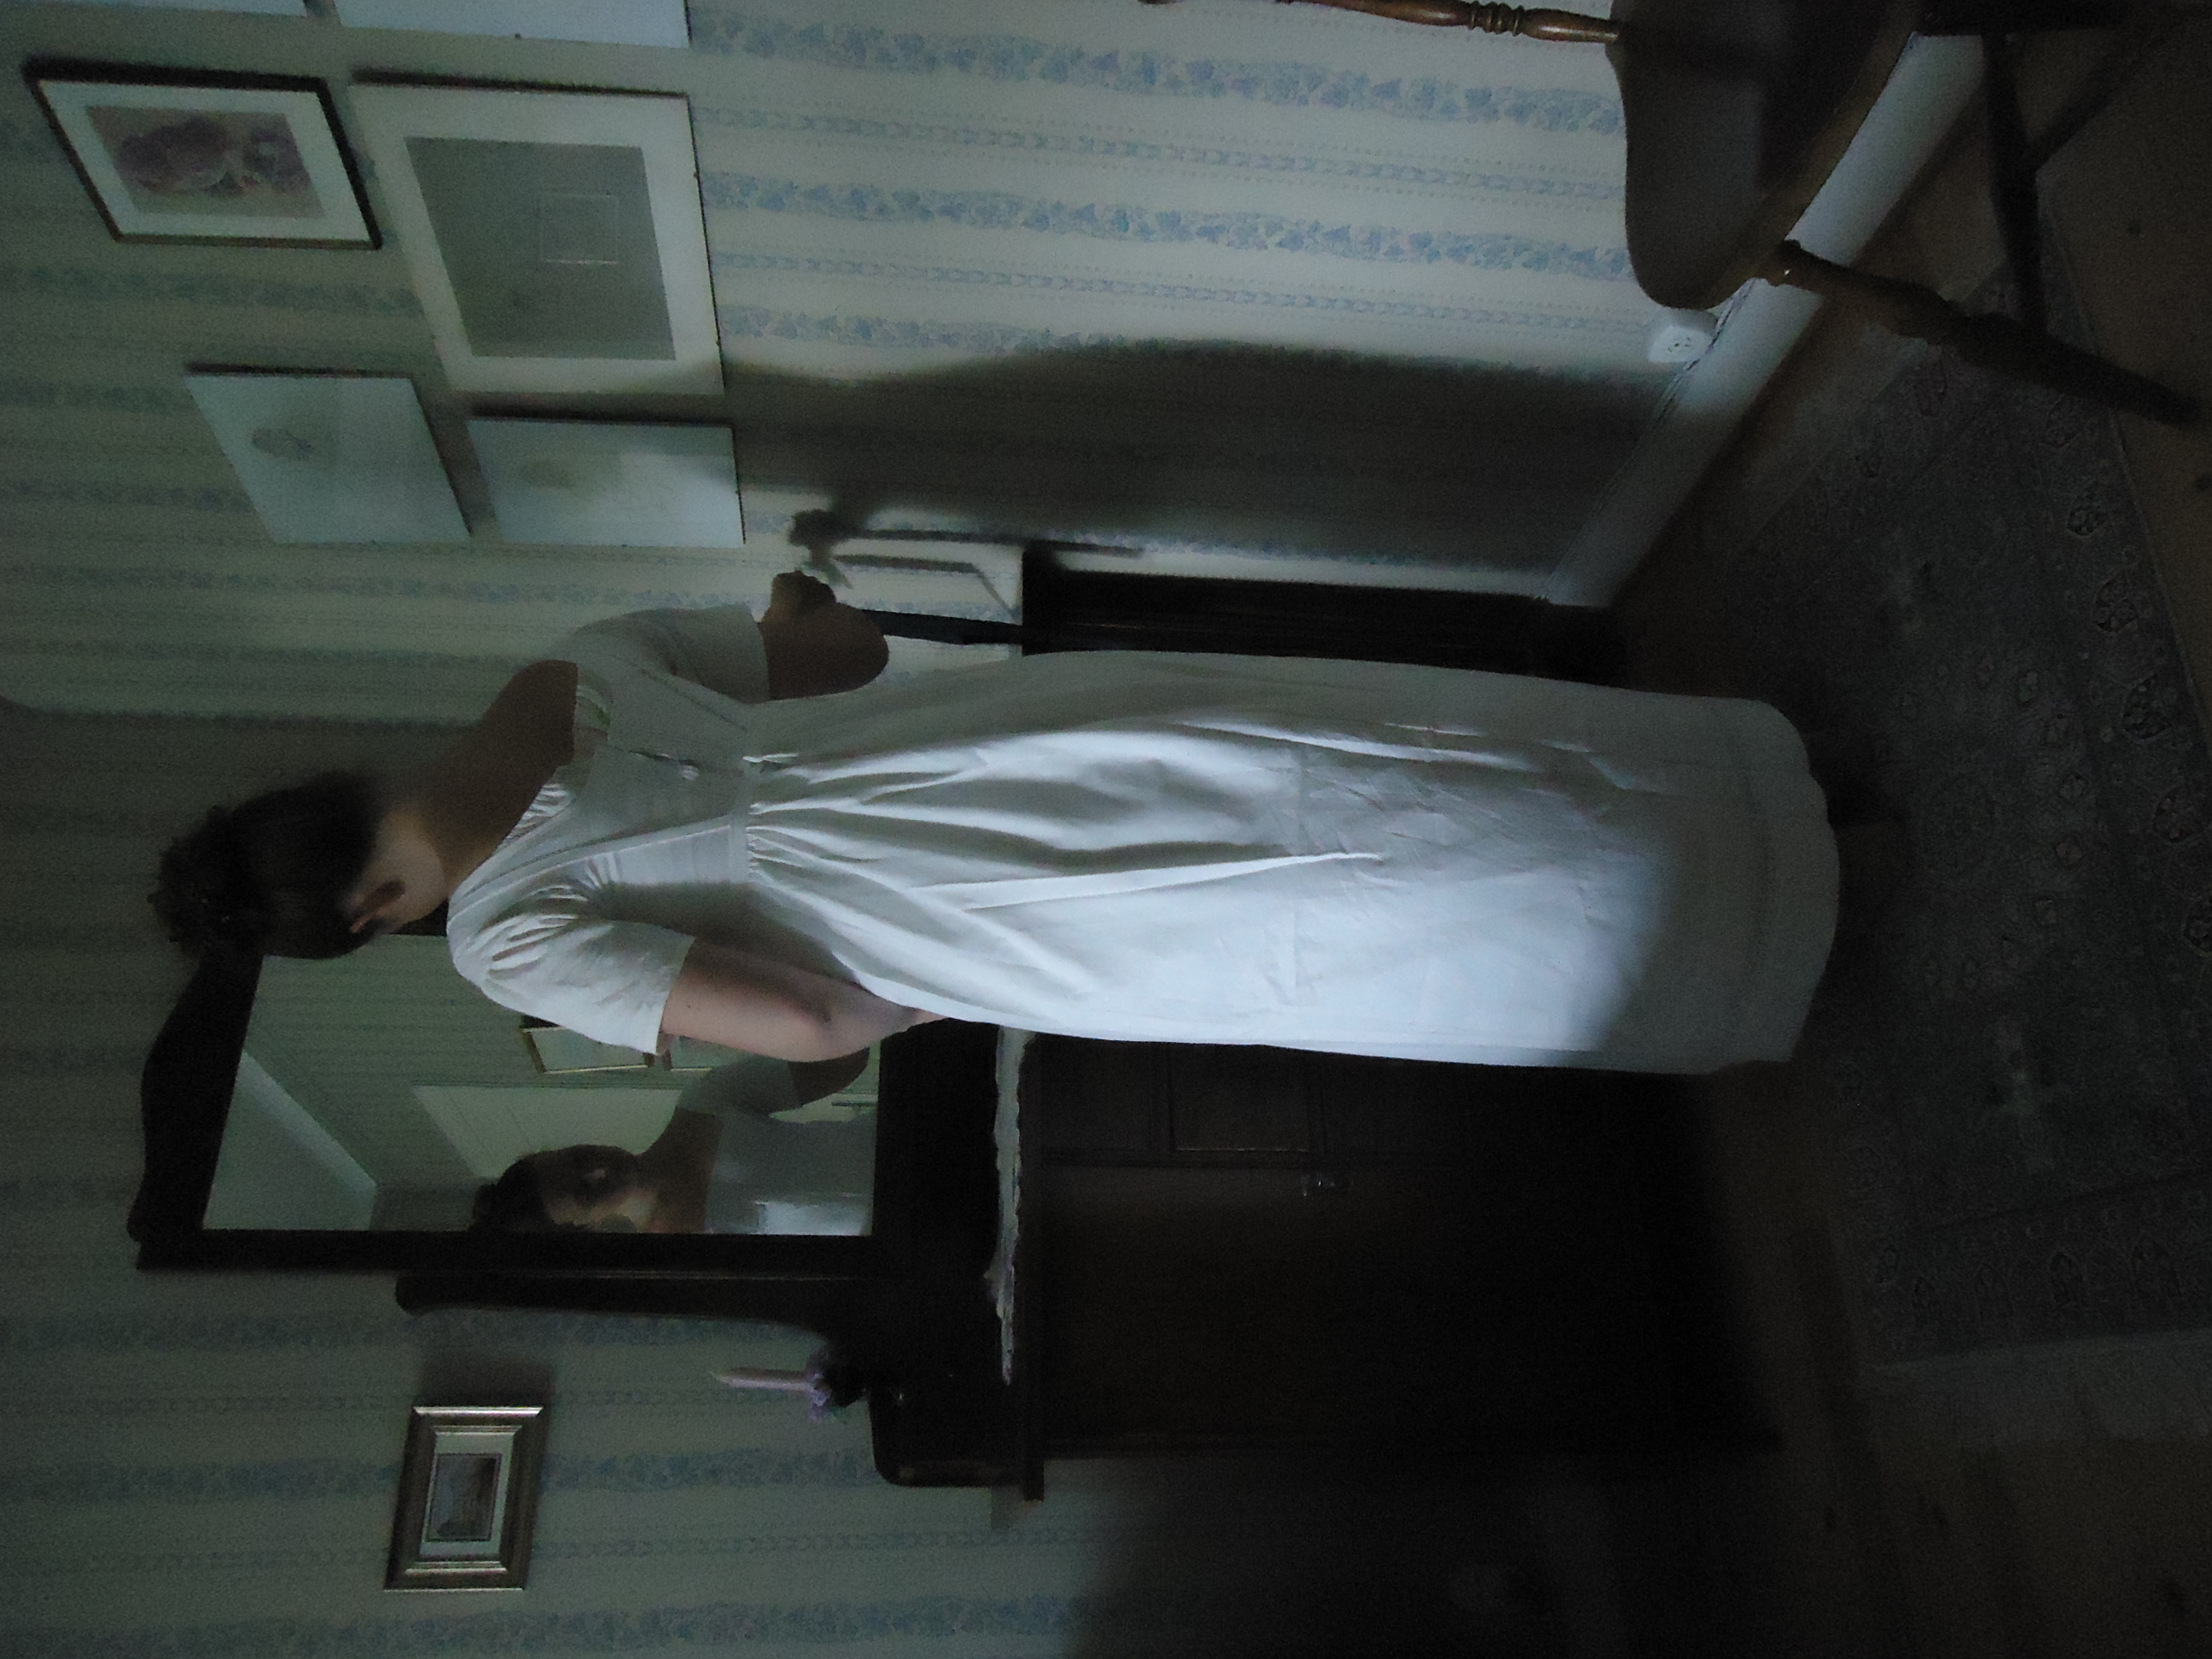
The shift
I made a shift in two hours (mostly by machine, off course). The construction is very simple and is just like it was at the 11th century: One panel in front and one in the back, gussets in the sides of the skirt and between the skirt and arms:
Jag sydde en särk på två timmar (mestadels på maskin, så klart). Konstruktionen är väldigt enkel och är densamma som den var på 1100-talet: en panel fram och en bak, triangulära kilar i kjolens sidor och fyrkantiga kilar mellan klänningsdelen och ärmarna:
For long, I have adored Mr. Darcy and the characters from Jane Austen’s novels. As a fashion obsessed history nerd, I have also fallen in love with the fashion of their time.
The reason for my learning to sew was that I too wanted to wear as beautiful clothes as I saw in pictures and films. Because medieval clothes did not require advanced sewing skills, I started there. Then I went on to regency fashion, using “Recreating History” patterns. As an impatient, poor student, I chose to sew my regency underwear out of old bed sheets, on machine. In the corset I used plastic boning. Recently, I improved the chemise and corset.
The white muslin dress is the only part of the costume that I have bought fabric for. It is mostly hand sewn.In the hopes of making it my passport to a historic tailoring education, I made an effort to show my abilities, with correct materials, precise pleats and unnoticeable stitches. As I lacked experience within all other fields of tailoring, I was not accepted. I have enjoyed my dress at picnics though, feeling beautiful, but awfully cold. Two years ago, I made removable arms for it and a matching bonnet, out of an old sun hat and fabric leftovers.
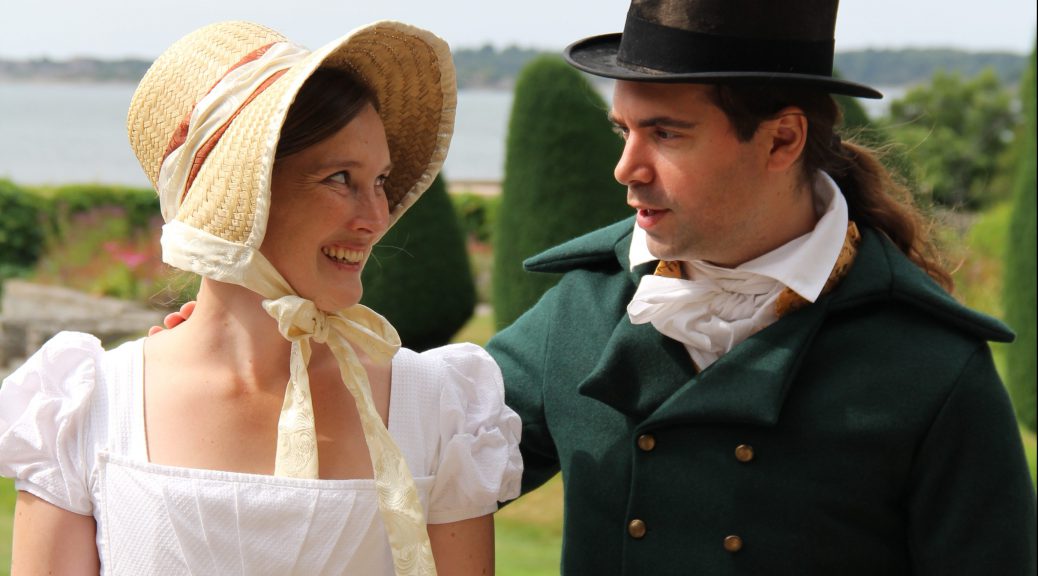
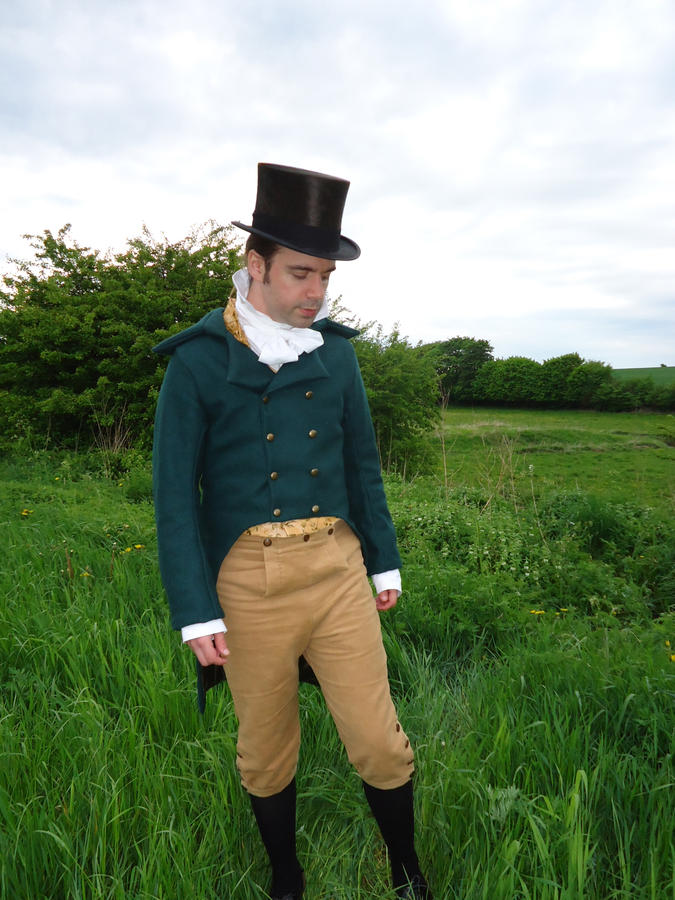
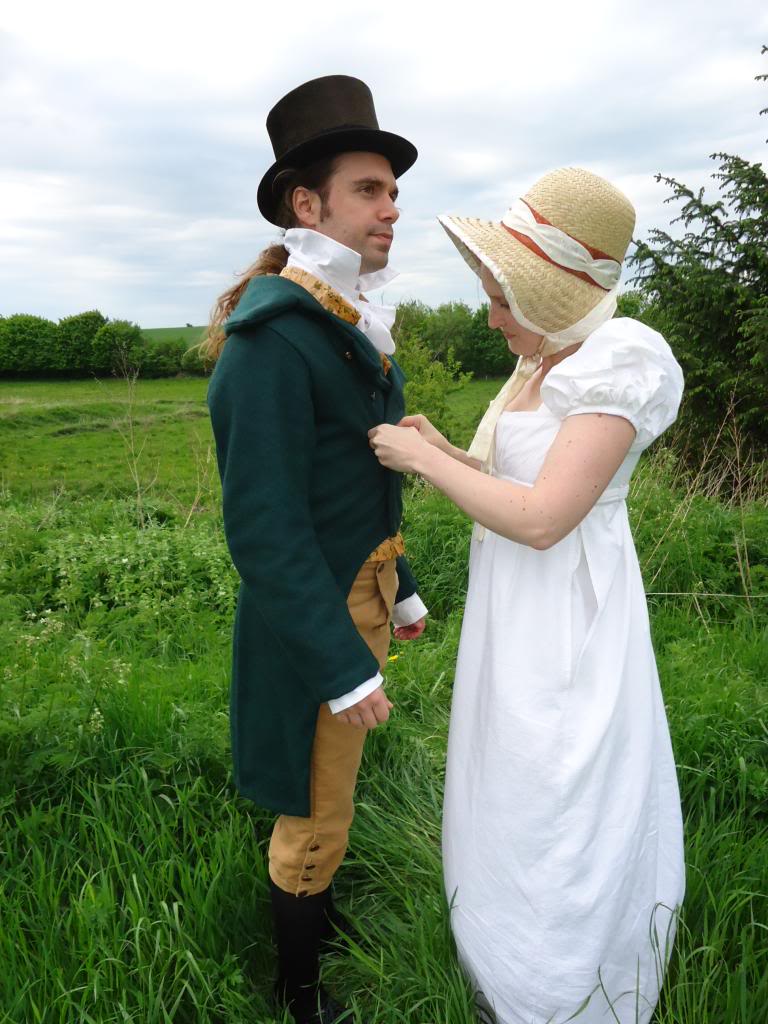
Last year, I sew a regency outfit for my husband. For this, I used both bought and homemade patterns, to finally achieve a costume including a cotton shirt with cravat, fall front knee breeches in moleskin, a satin waist coat and a woolen frock coat. The shoes, stockings and hat were bought.
Researching men’s clothing awoke cravings for outdoor clothes for me, so after completing Christian’s outfit, I decided to set for a spencer and hat. I would use the velvet from our old sofa!
The regency fashion reflects contemporary events. The French revolution got rid of the “suppressors’” fashion and a new fashion was born. The Napoleonic war inspired military decorations. I suppose the popularity of the second Earl of Spencer explains why the accidentally created spencer became fashion.
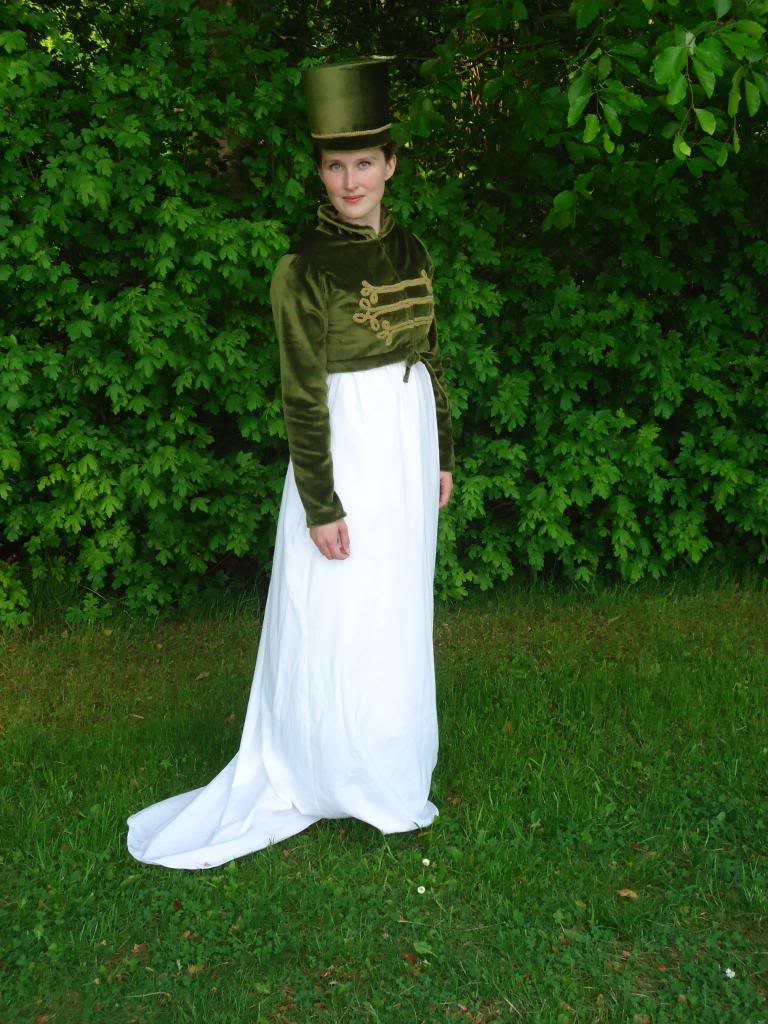
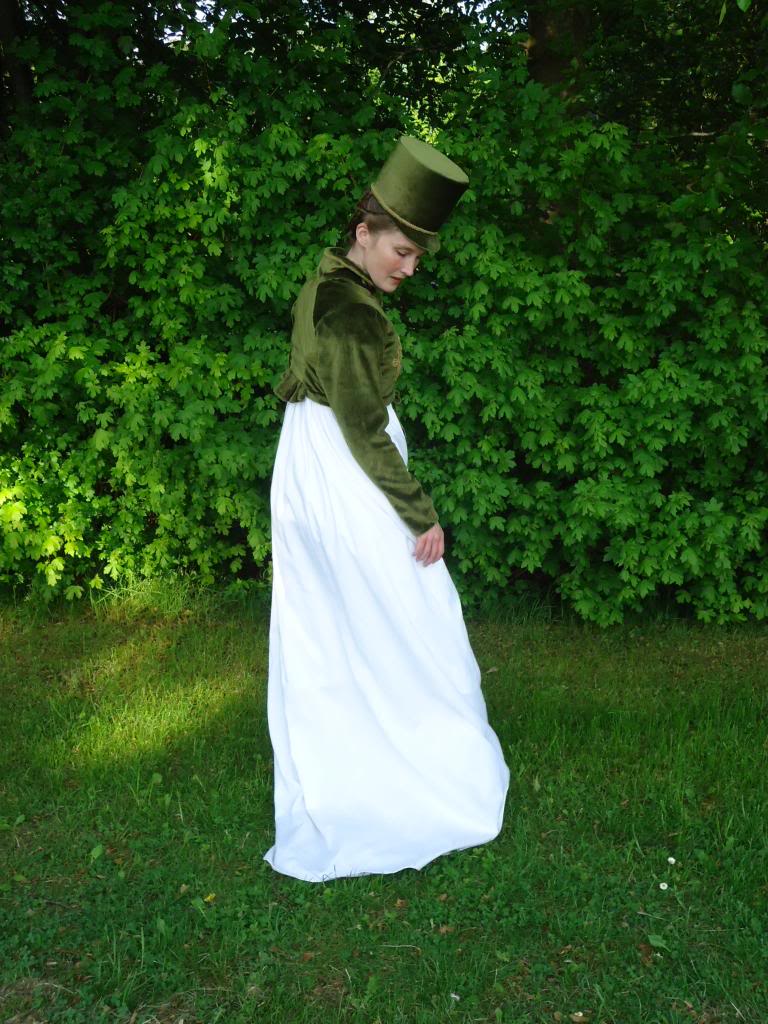
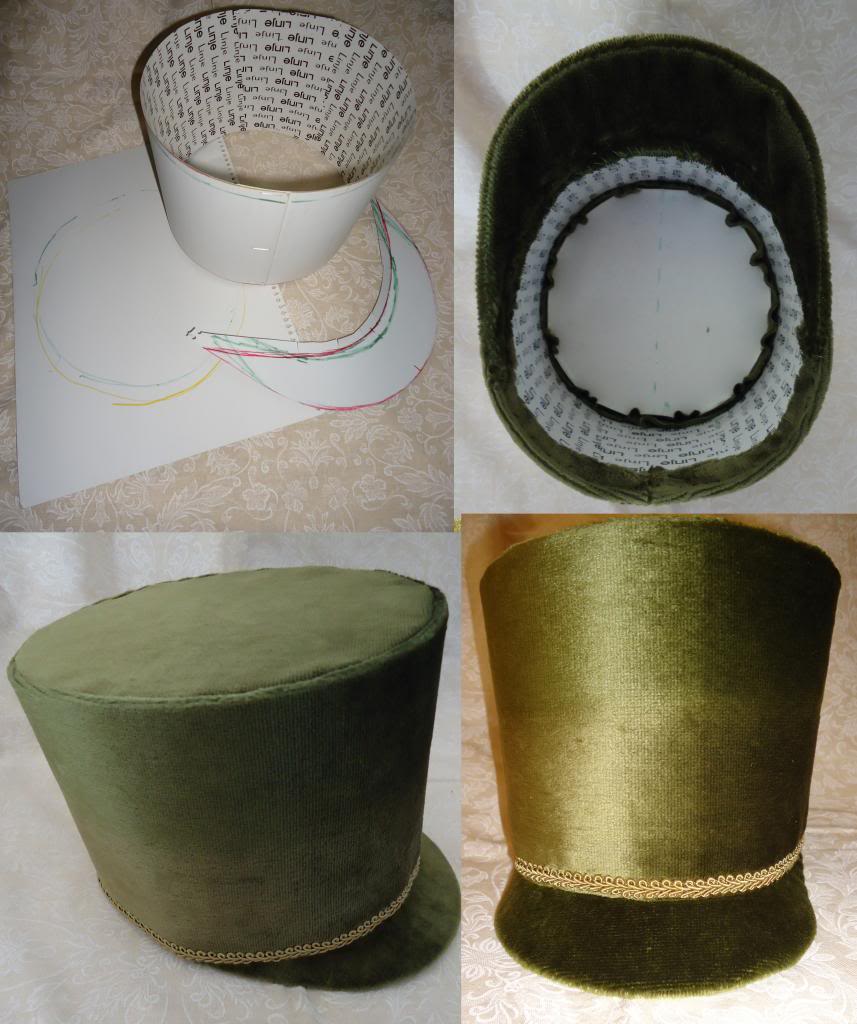
My outdoor clothes are good representatives for my thesis; both the hat and the spencer are feminized (and off course) “unpracticalized” uniform pieces. The spencer is completely hand sewn. It closes with hooks and eyes, and a drawstring at the waist. I almost went mad when trying to attach the ribbon to the “long haired” velvet that constantly pushed the ribbon in the wrong direction. The inside of the spencer is lined with cotton leftovers. The hat gets its structure from cardboard from old notebooks. The pieces are hand sewn and glued together.
I have not made exact copies of historical cloth pieces, but translated my favourite things from the Regency Era to what might pass for contemporary and what suits me and my purse (and after I saw Vanity Fair, I could not refuse the stylish hat, even though it should go with the trainless dresses that came later). The outside is always prioritized before the inside, where I cheat as I like, when I sew for myself. This is a philosophy that actually seems to have been practiced even then. My primary aim, though, has always been to create something that I would want to wear, and I succeeded!
– where you can see what I do – designing, sewing, singing, creating etc.


![IMG_4383[1]](https://blogging.susannaart.se/wp-content/uploads/2016/08/IMG_43831.jpg)
![IMG_4384[1]](https://blogging.susannaart.se/wp-content/uploads/2016/08/IMG_43841.jpg)
![IMG_4385[1]](https://blogging.susannaart.se/wp-content/uploads/2016/08/IMG_43851.jpg)
![IMG_4387[1]](https://blogging.susannaart.se/wp-content/uploads/2016/08/IMG_43871.jpg)
![IMG_4389[1]](https://blogging.susannaart.se/wp-content/uploads/2016/08/IMG_43891-e1470329062519.jpg)
![IMG_4396[1]](https://blogging.susannaart.se/wp-content/uploads/2016/08/IMG_43961-e1470328999232.jpg)