Category Archives: Uncategorised

Serpent Witch – Part 2 – draping the blob into a fairytale gown

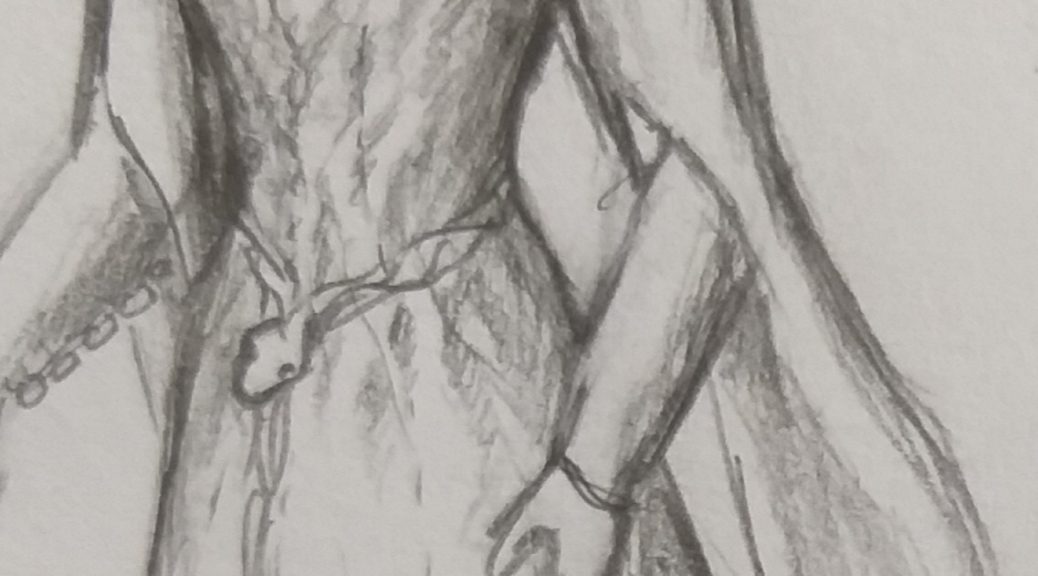
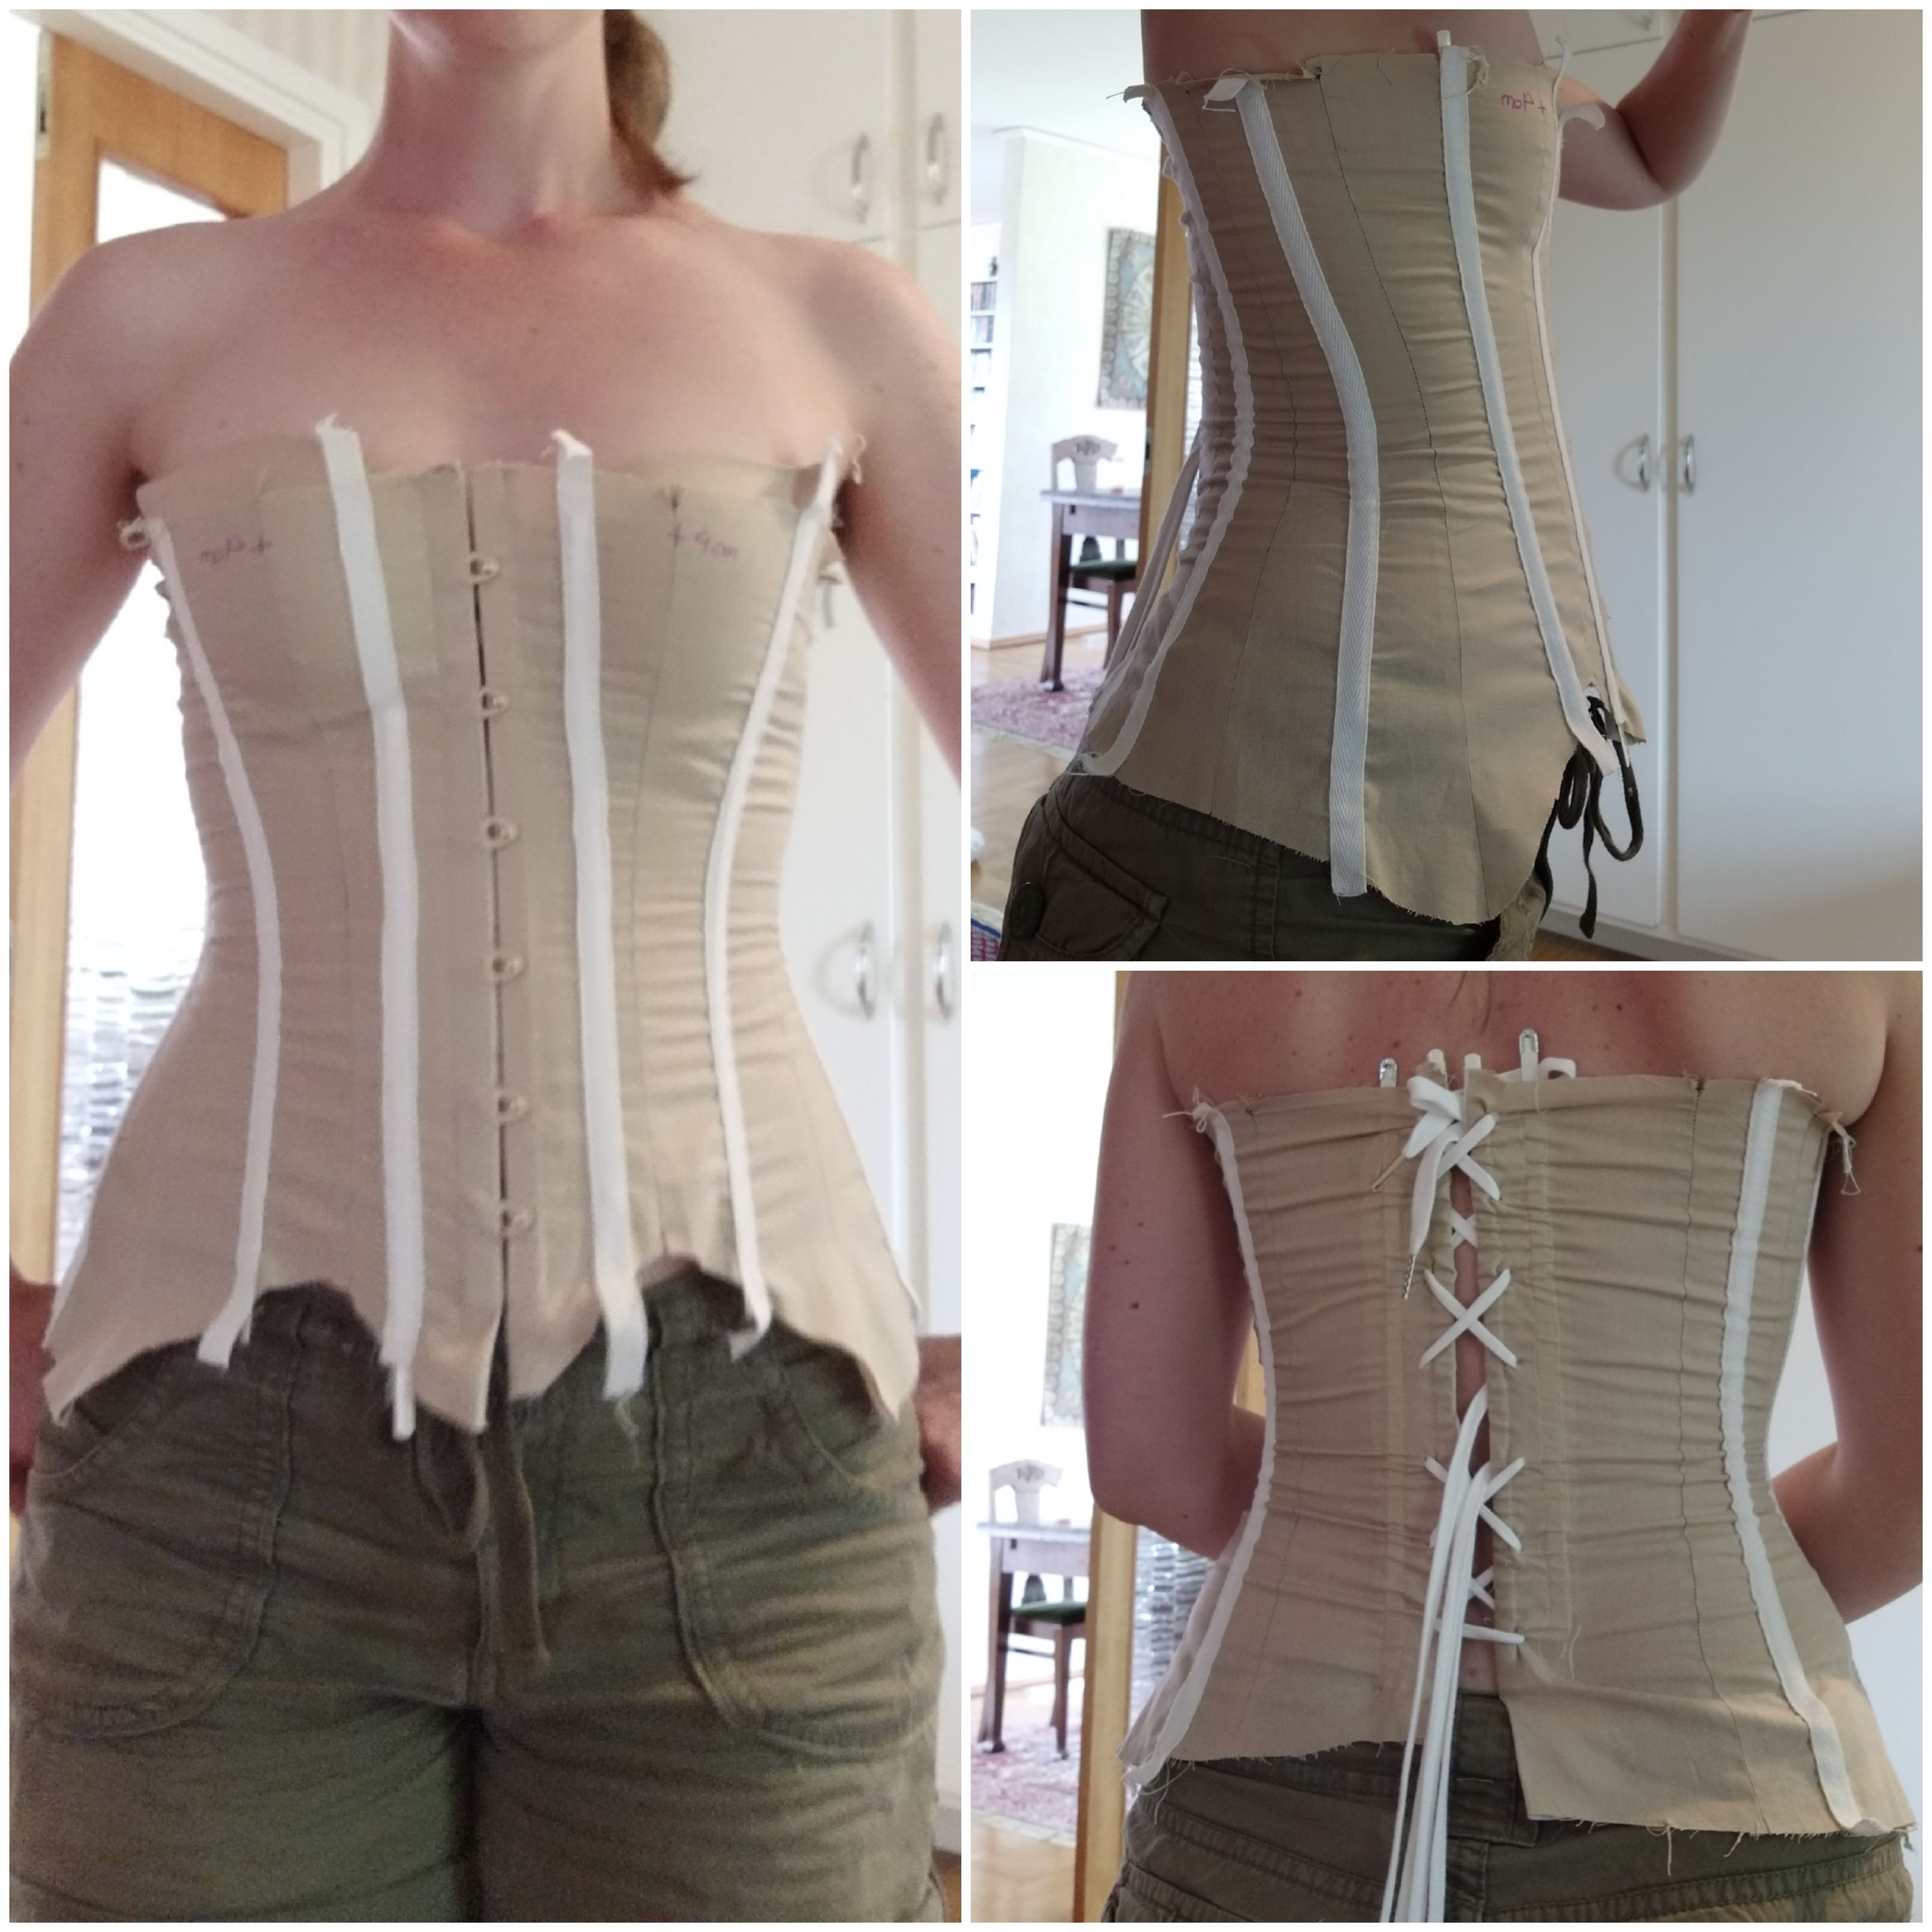
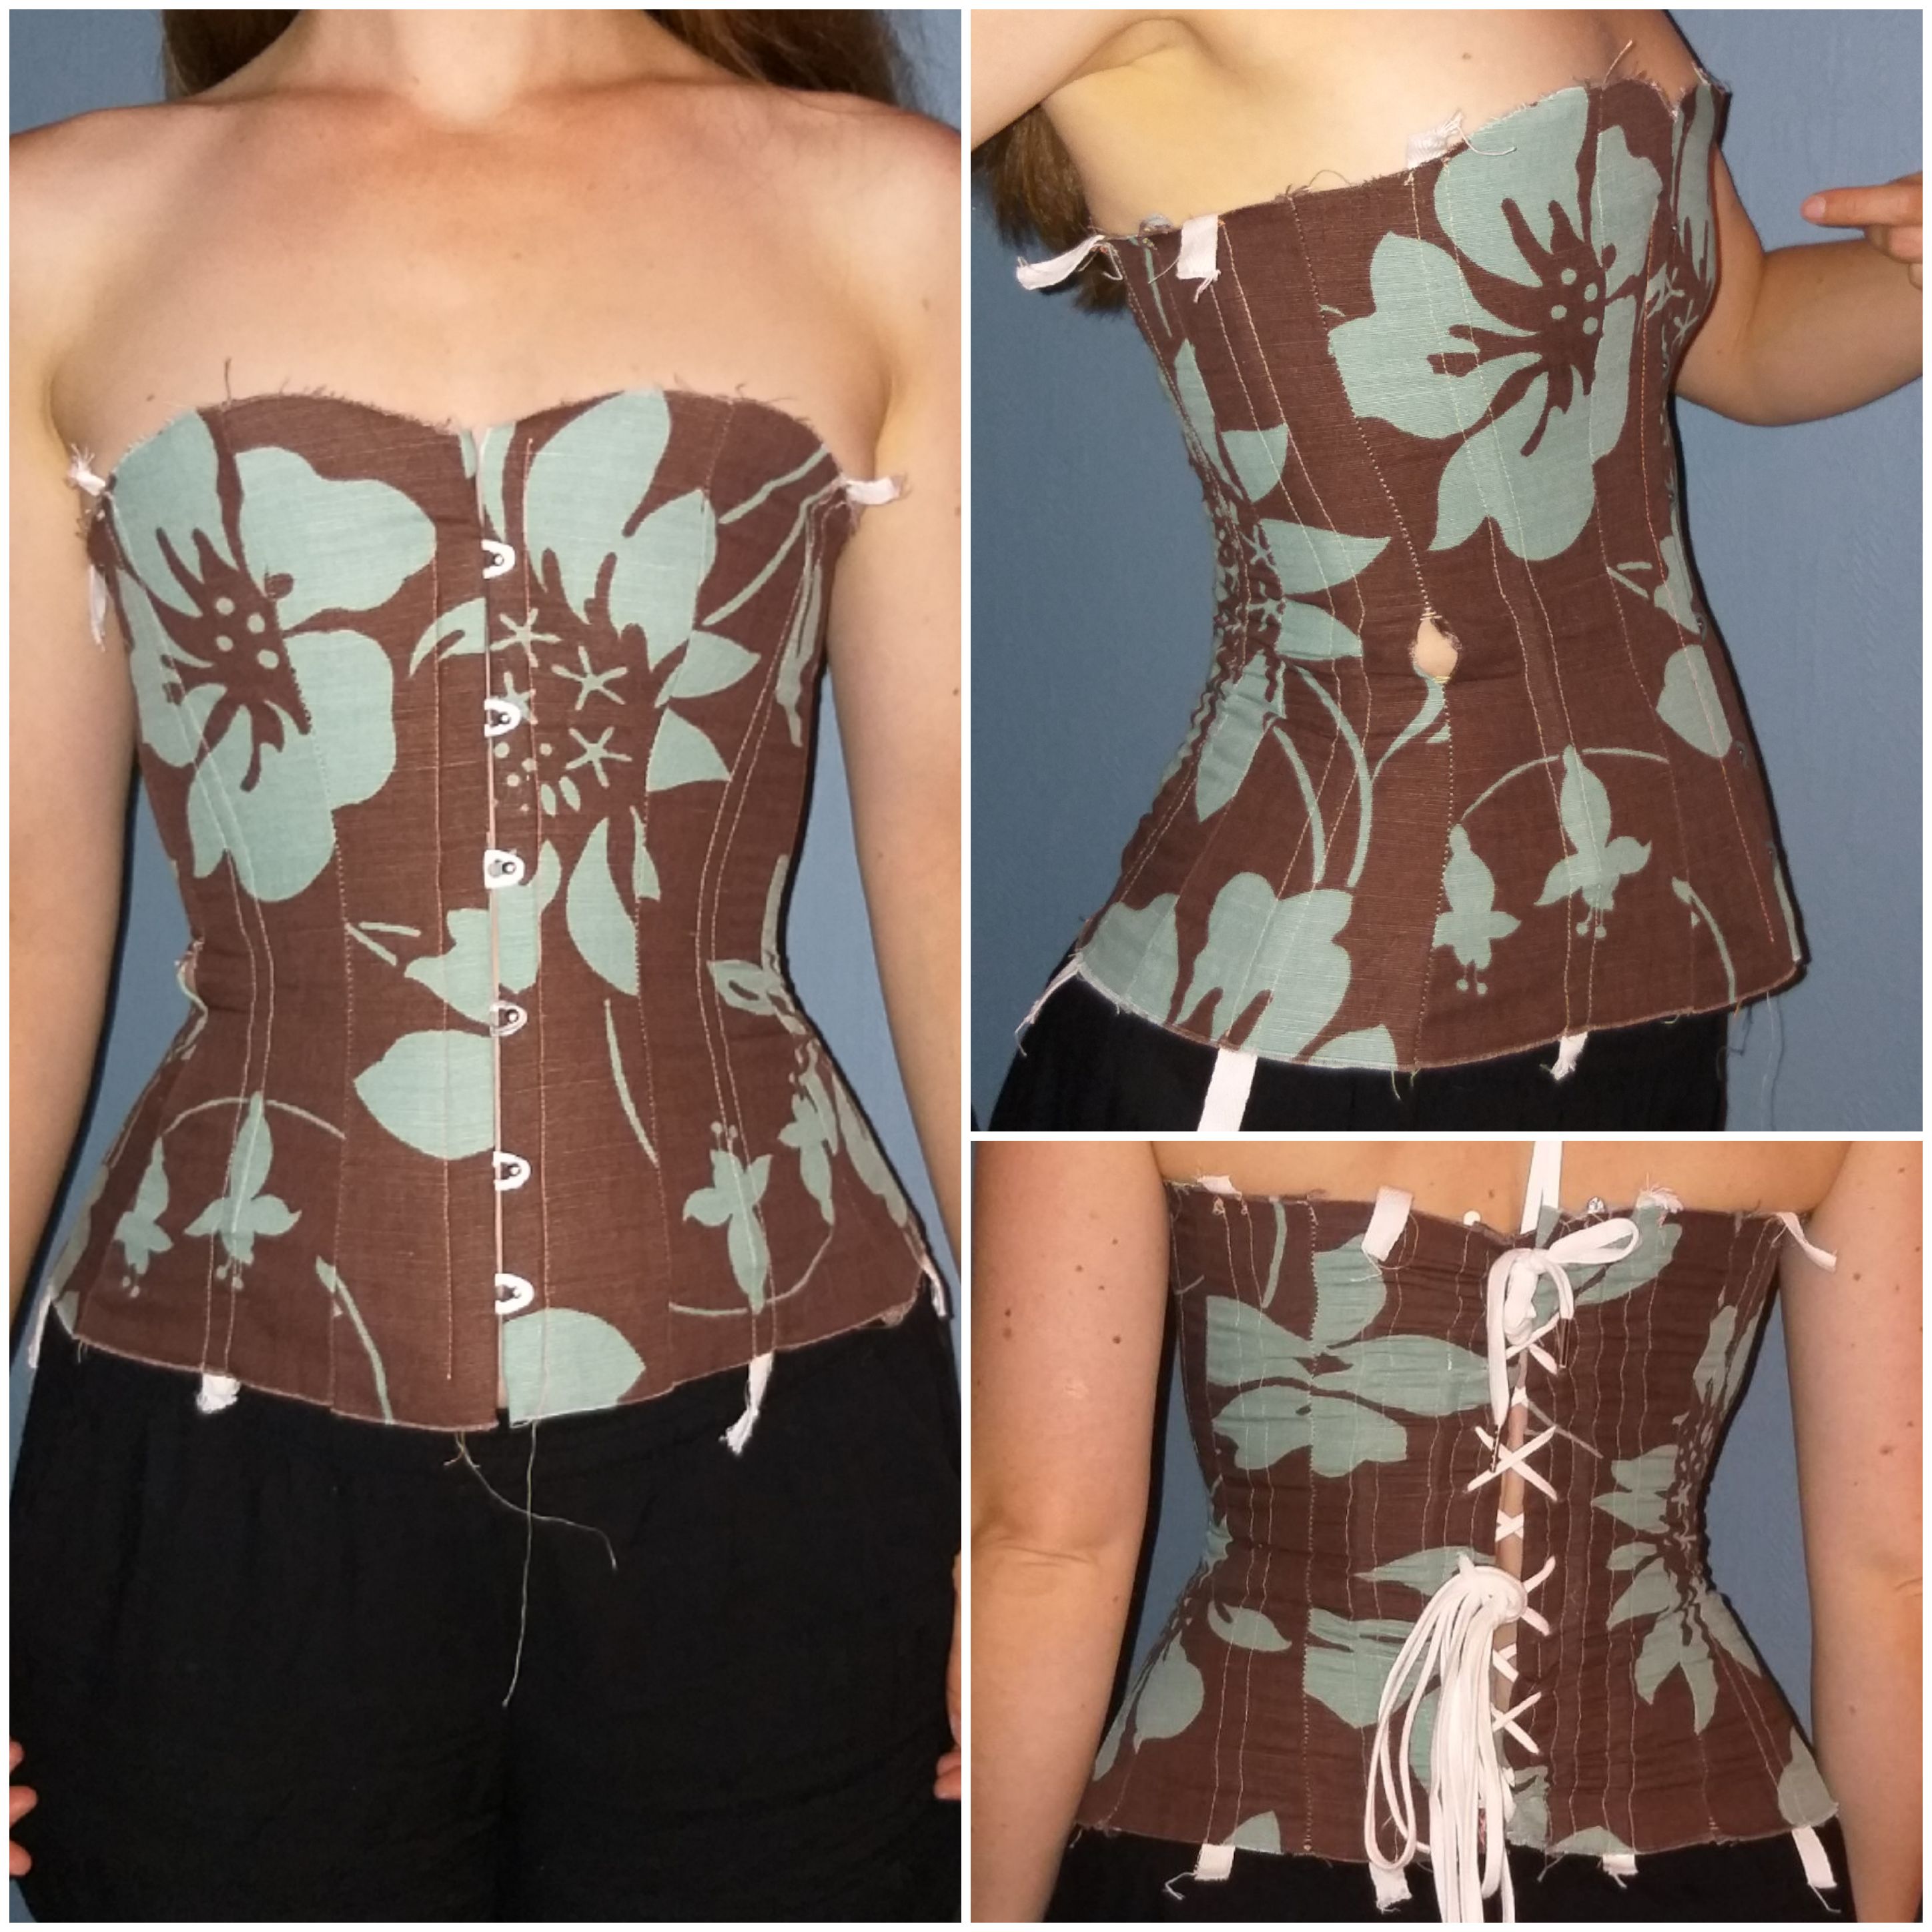
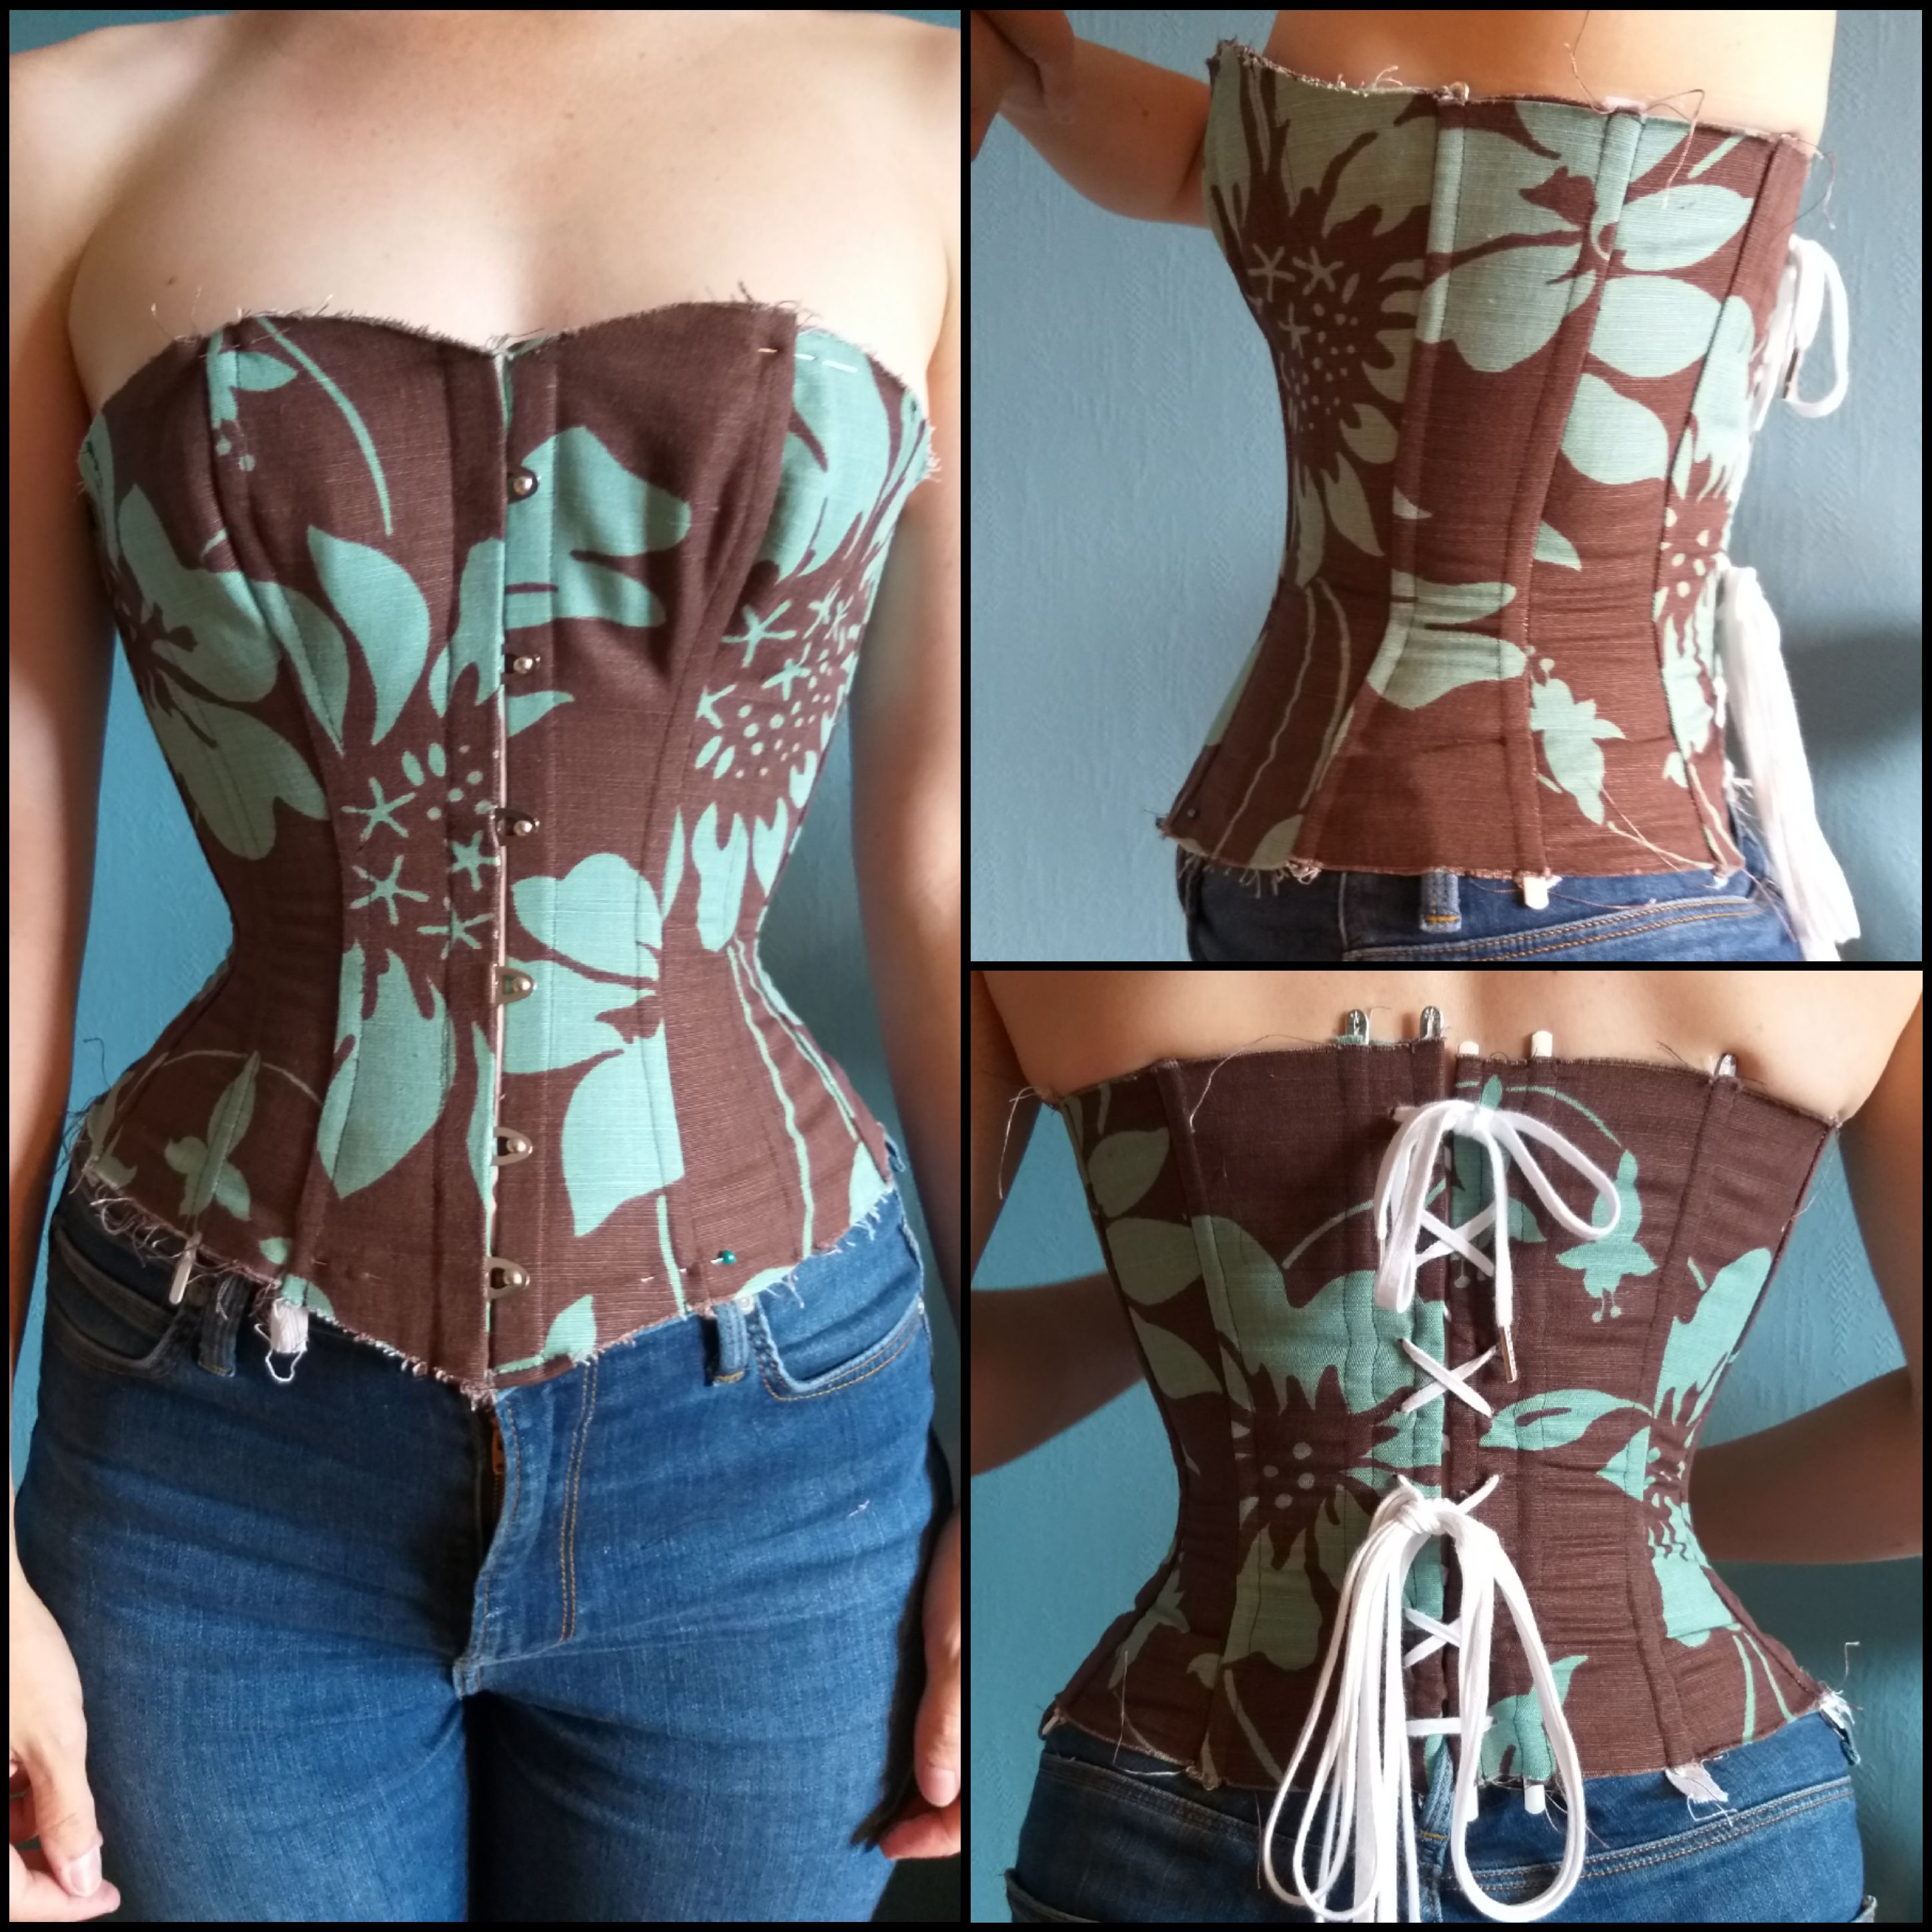
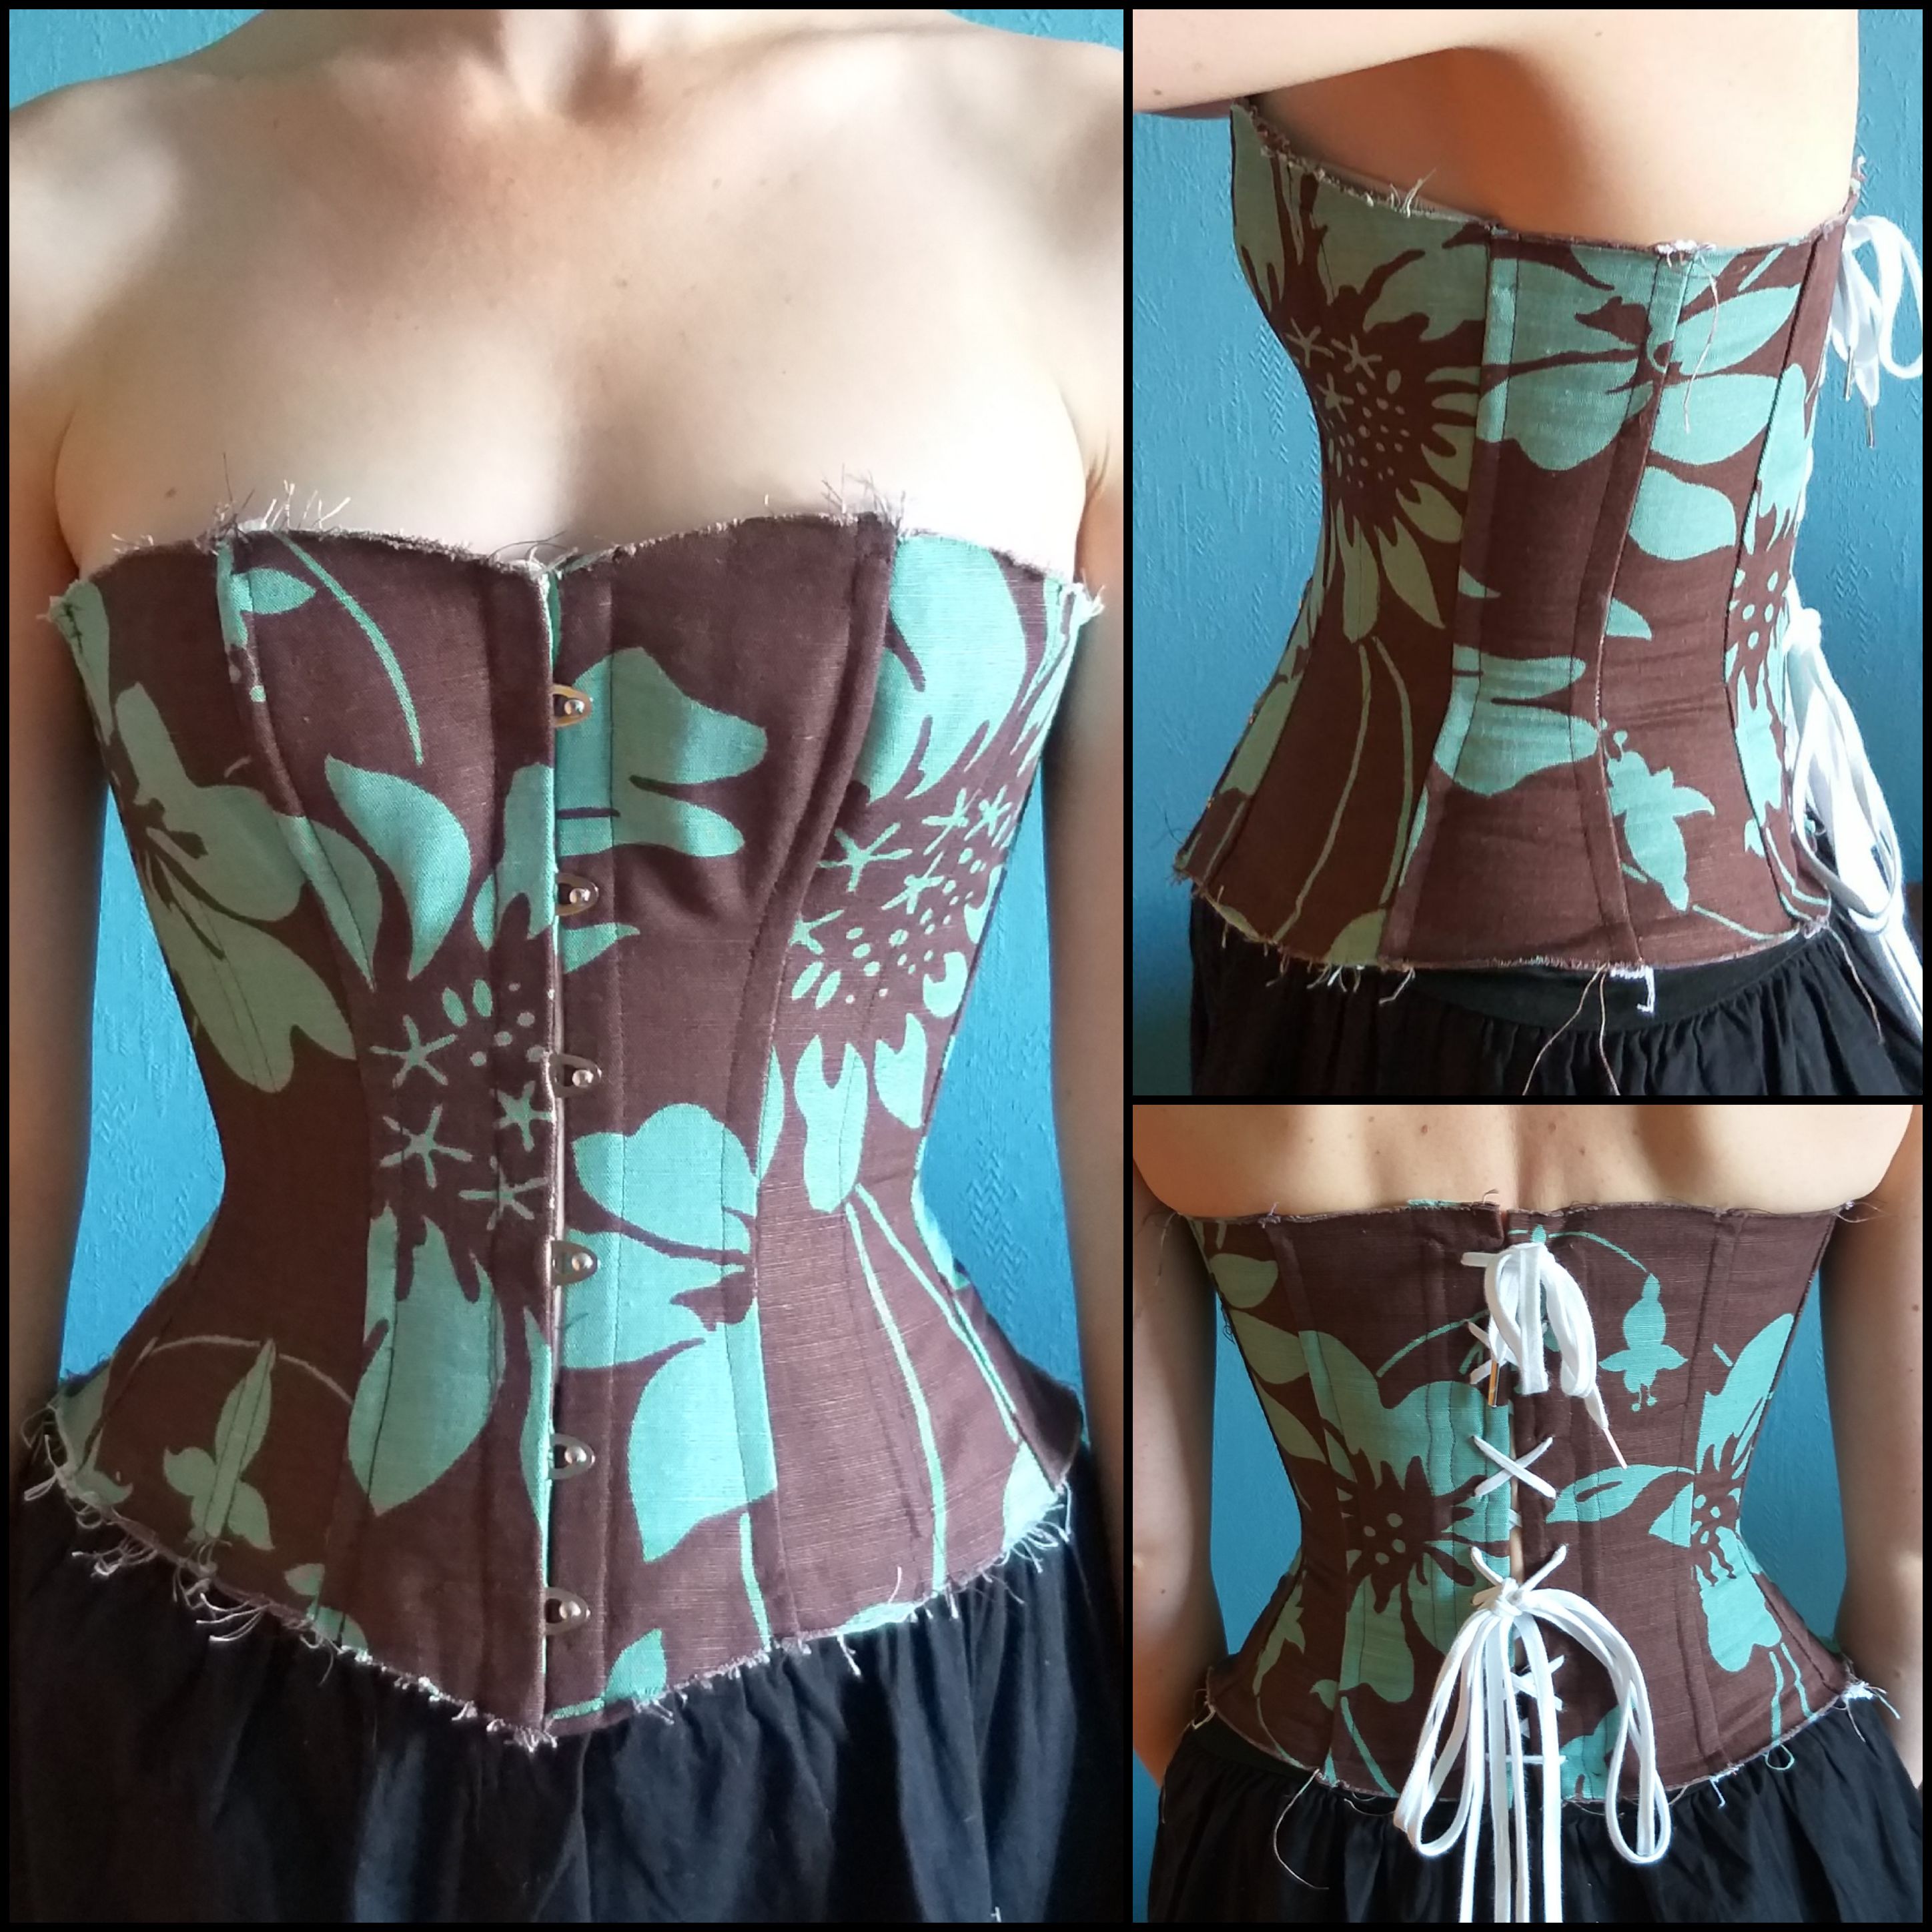
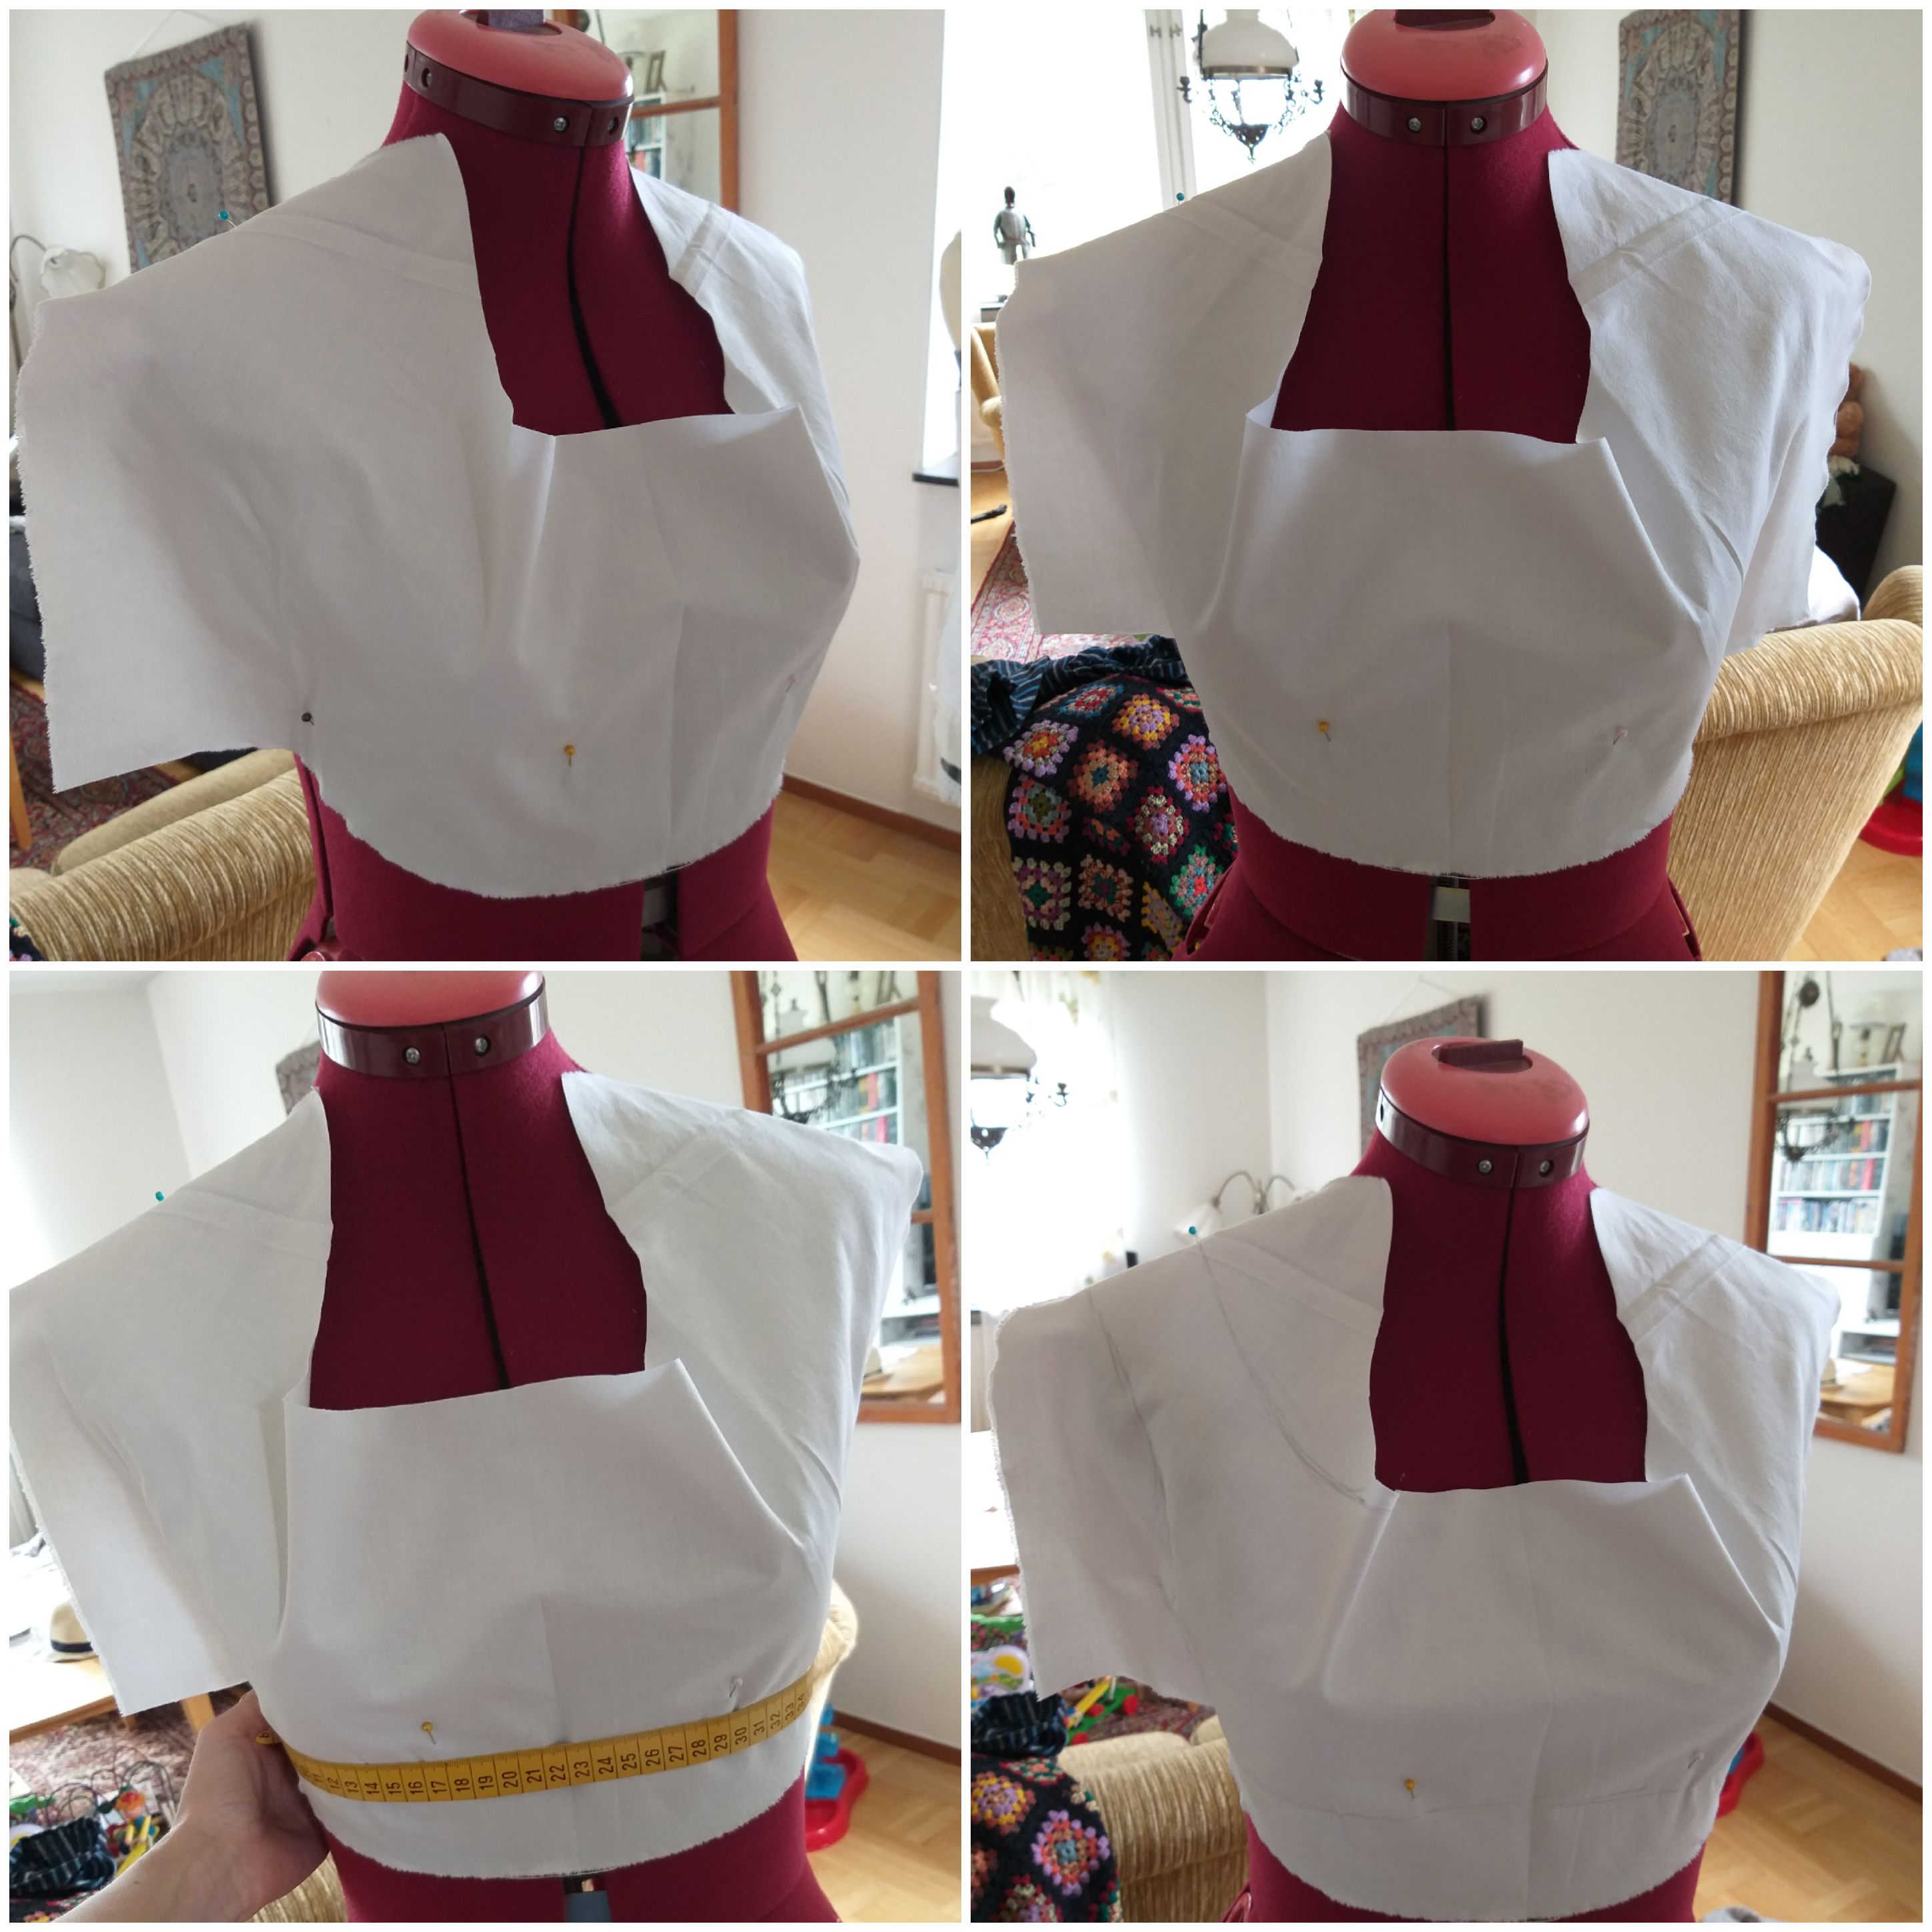
After achieving the right shape for the corset mockup, I have aimed at making the smoothest foundation possible, to go underneath the lightweight silk. A few minutes at a time, I sketch, measure and sew. Tiny steps, over and over again. At last it begins to look like a dress.

Efter att uppnått rätt silhuett på korsetttoillen, försöke jag skapa den jämnaste grunden jag kunde, för det tunna sidenet som ska vara ytterst.  Jag har skissat, mätt och sytt några minuter åt gången. Små steg i taget, om och om igen. Till slut börjar det likna en klänning.

Draping and finding out that it will be best to use a bodice and then an attatched skirt

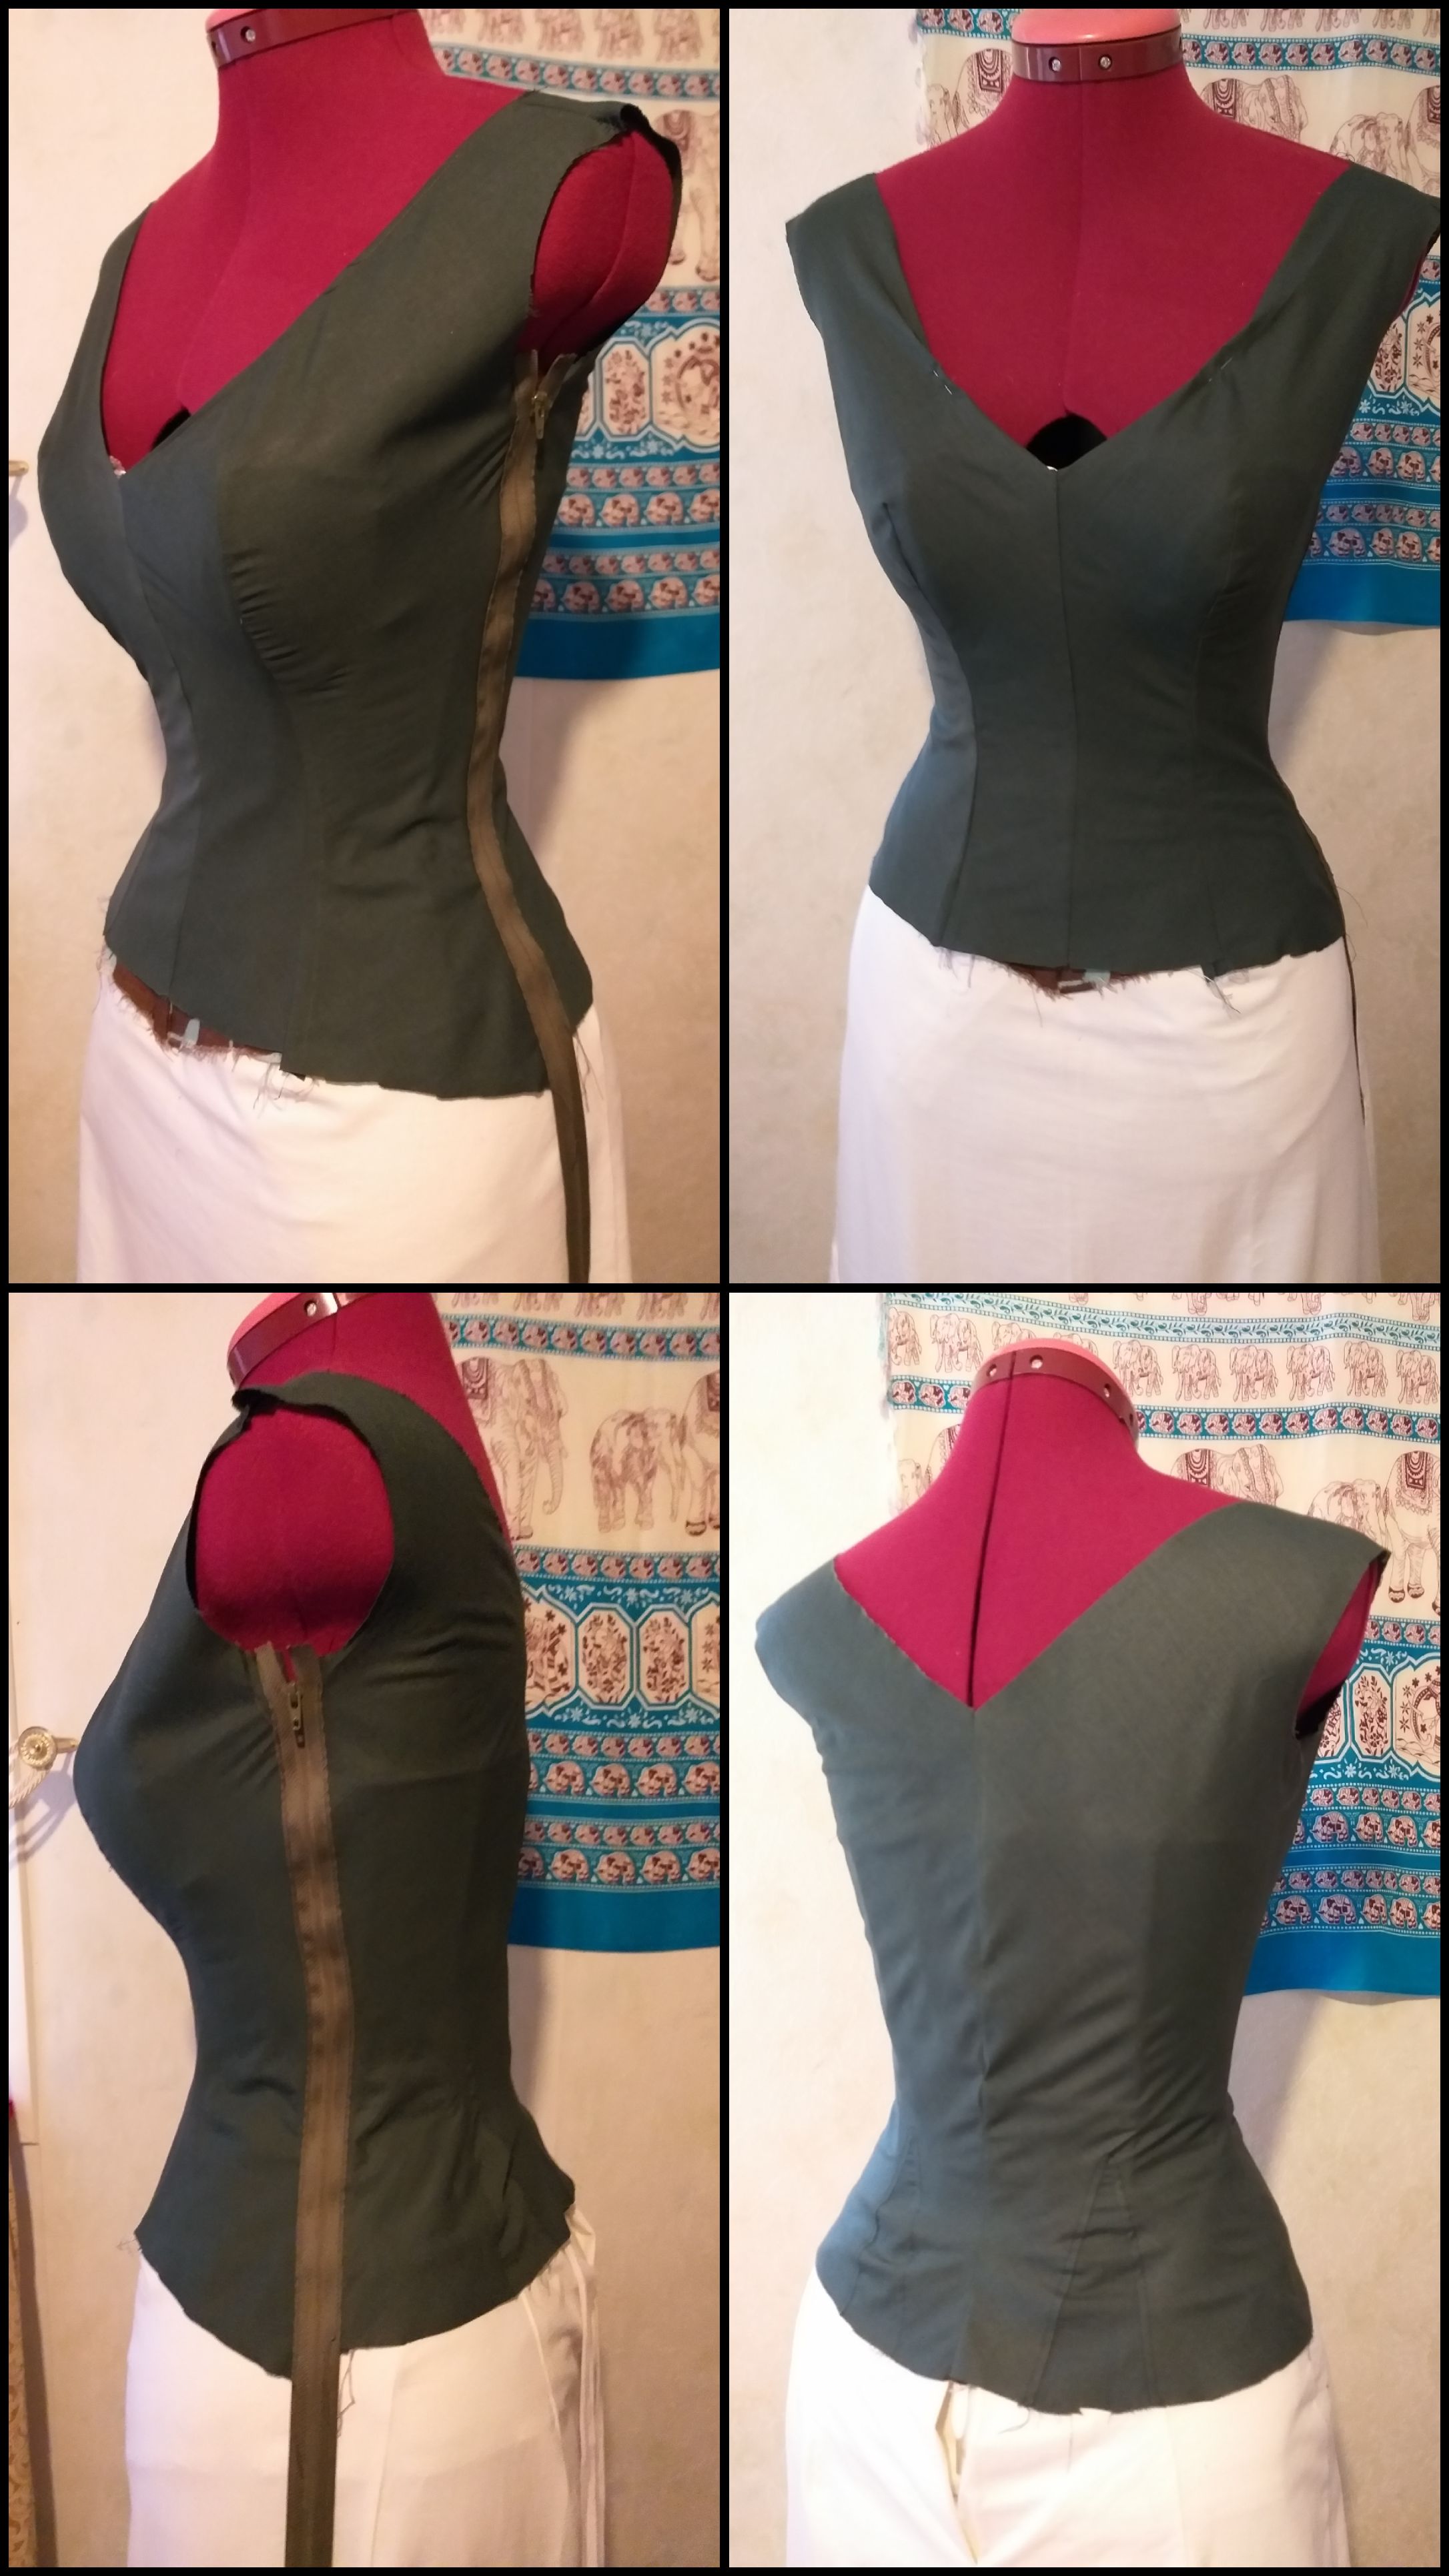
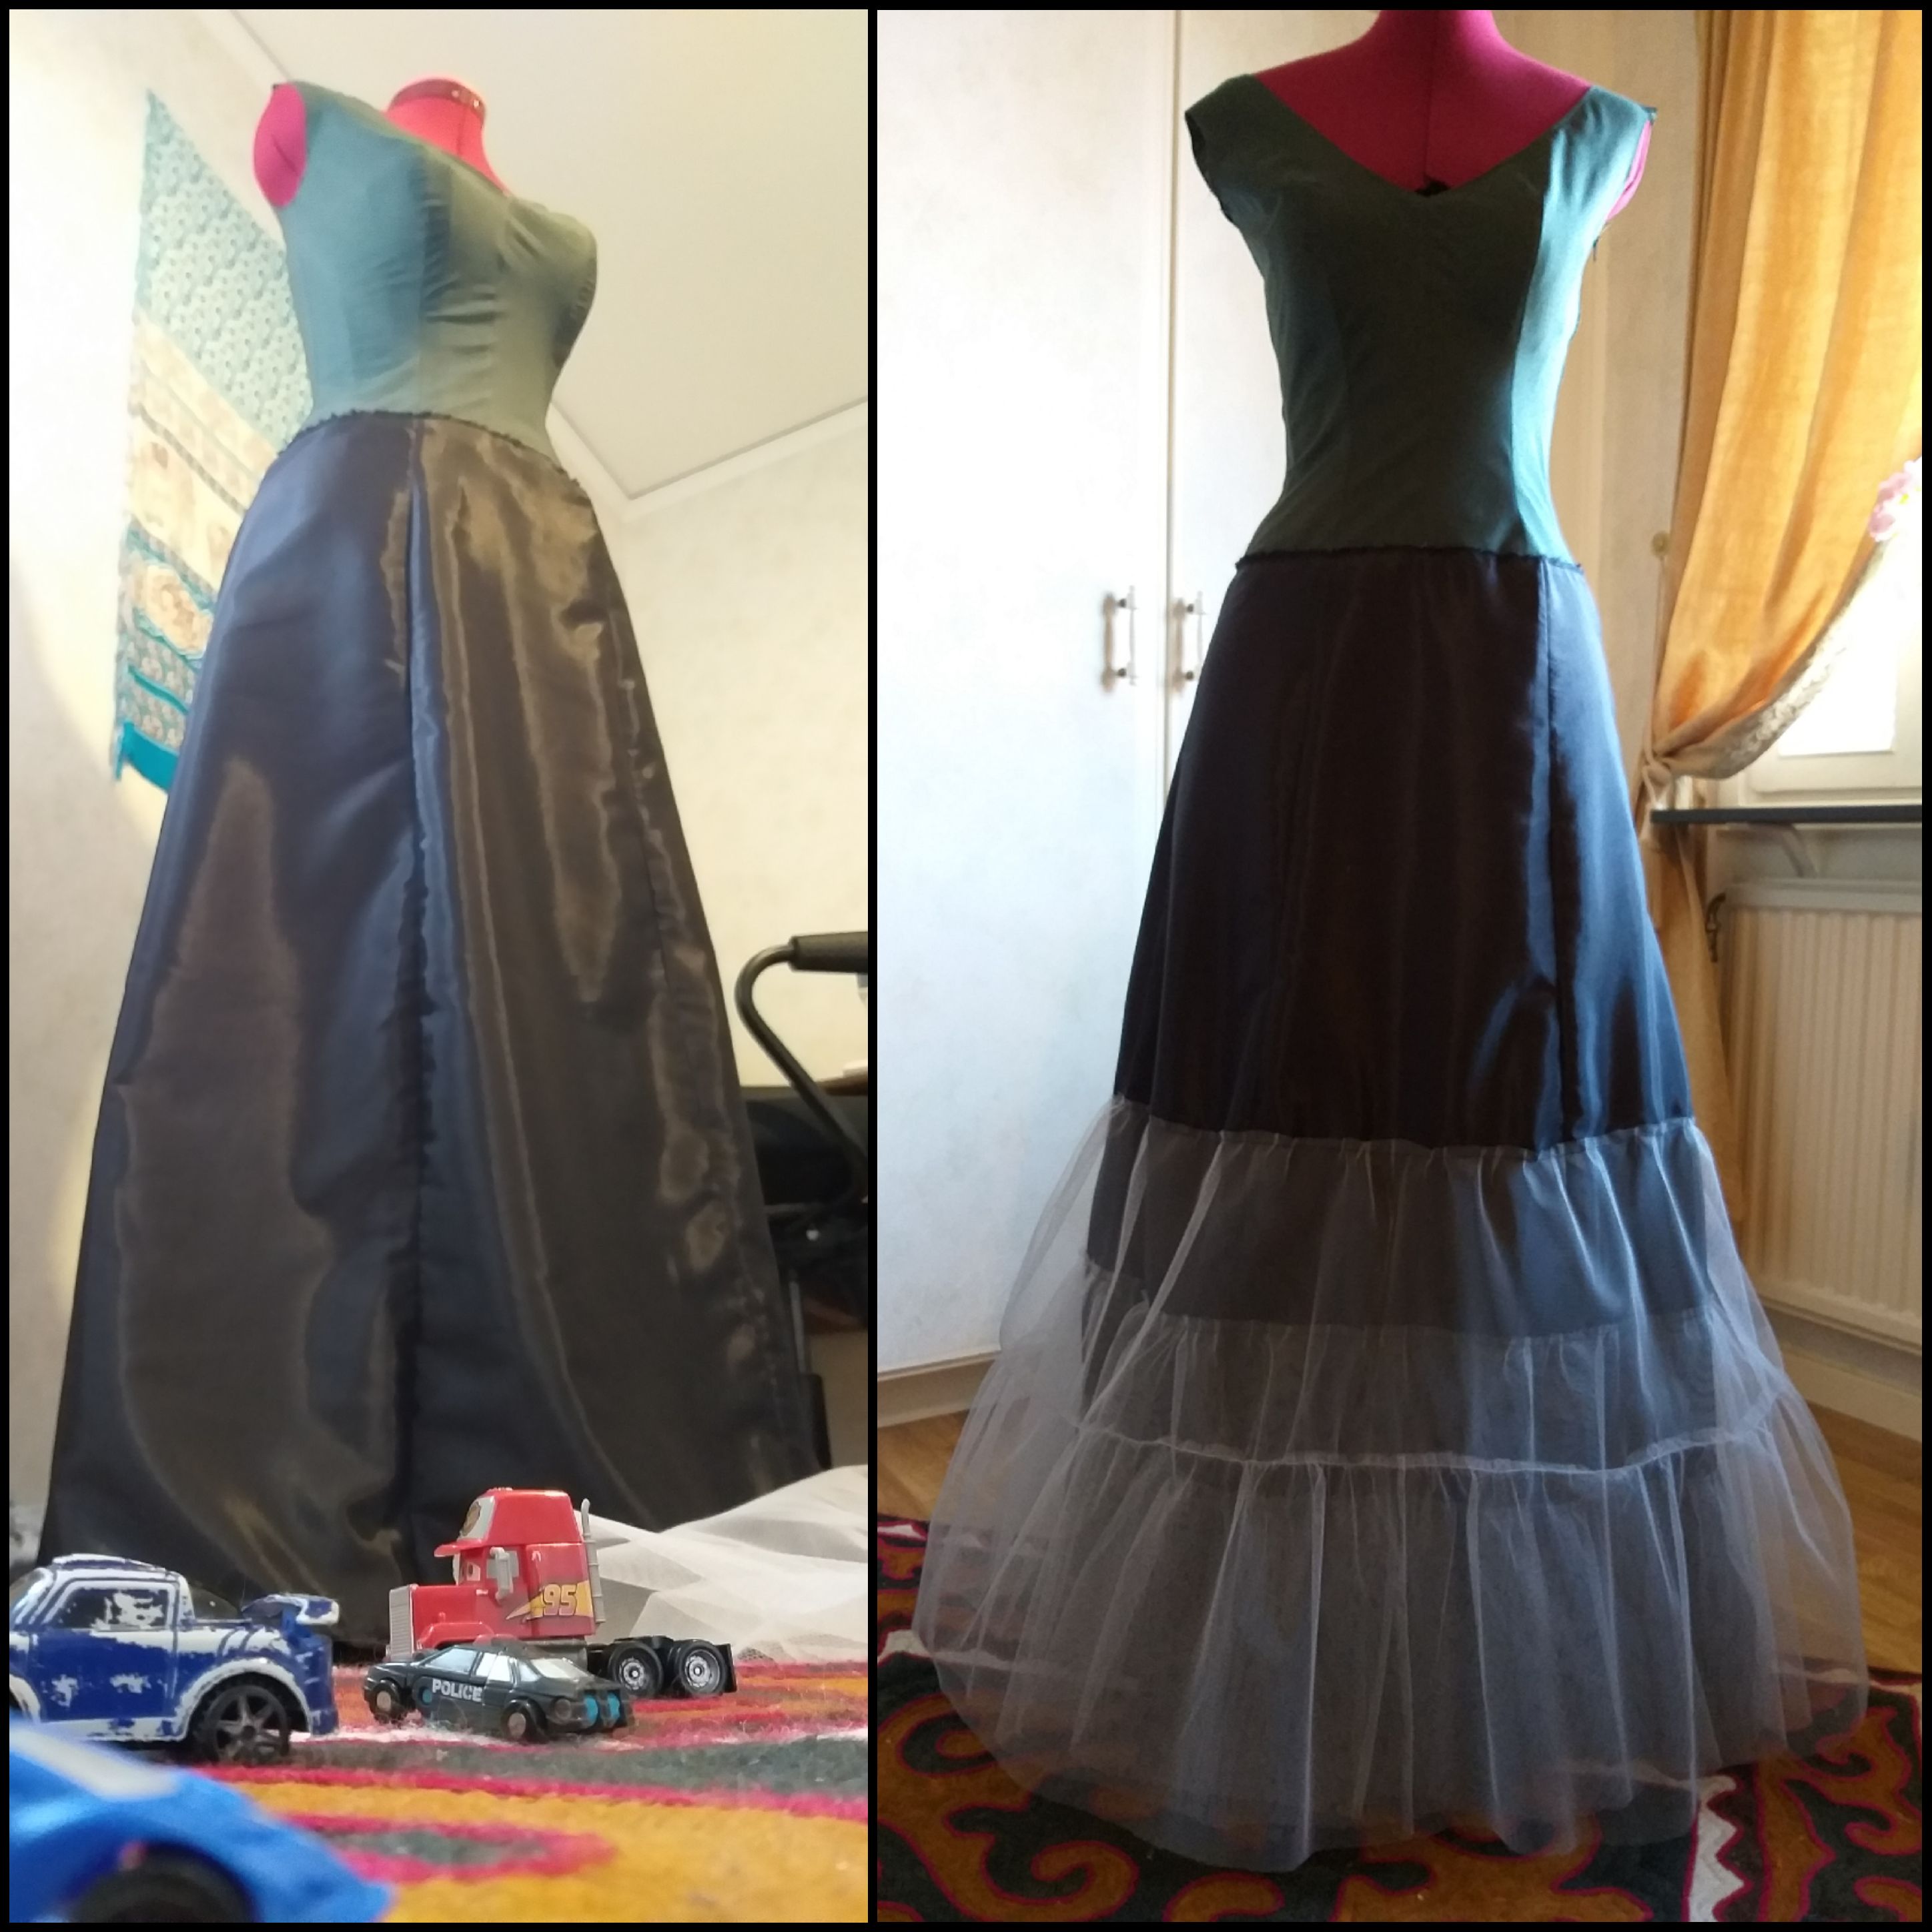
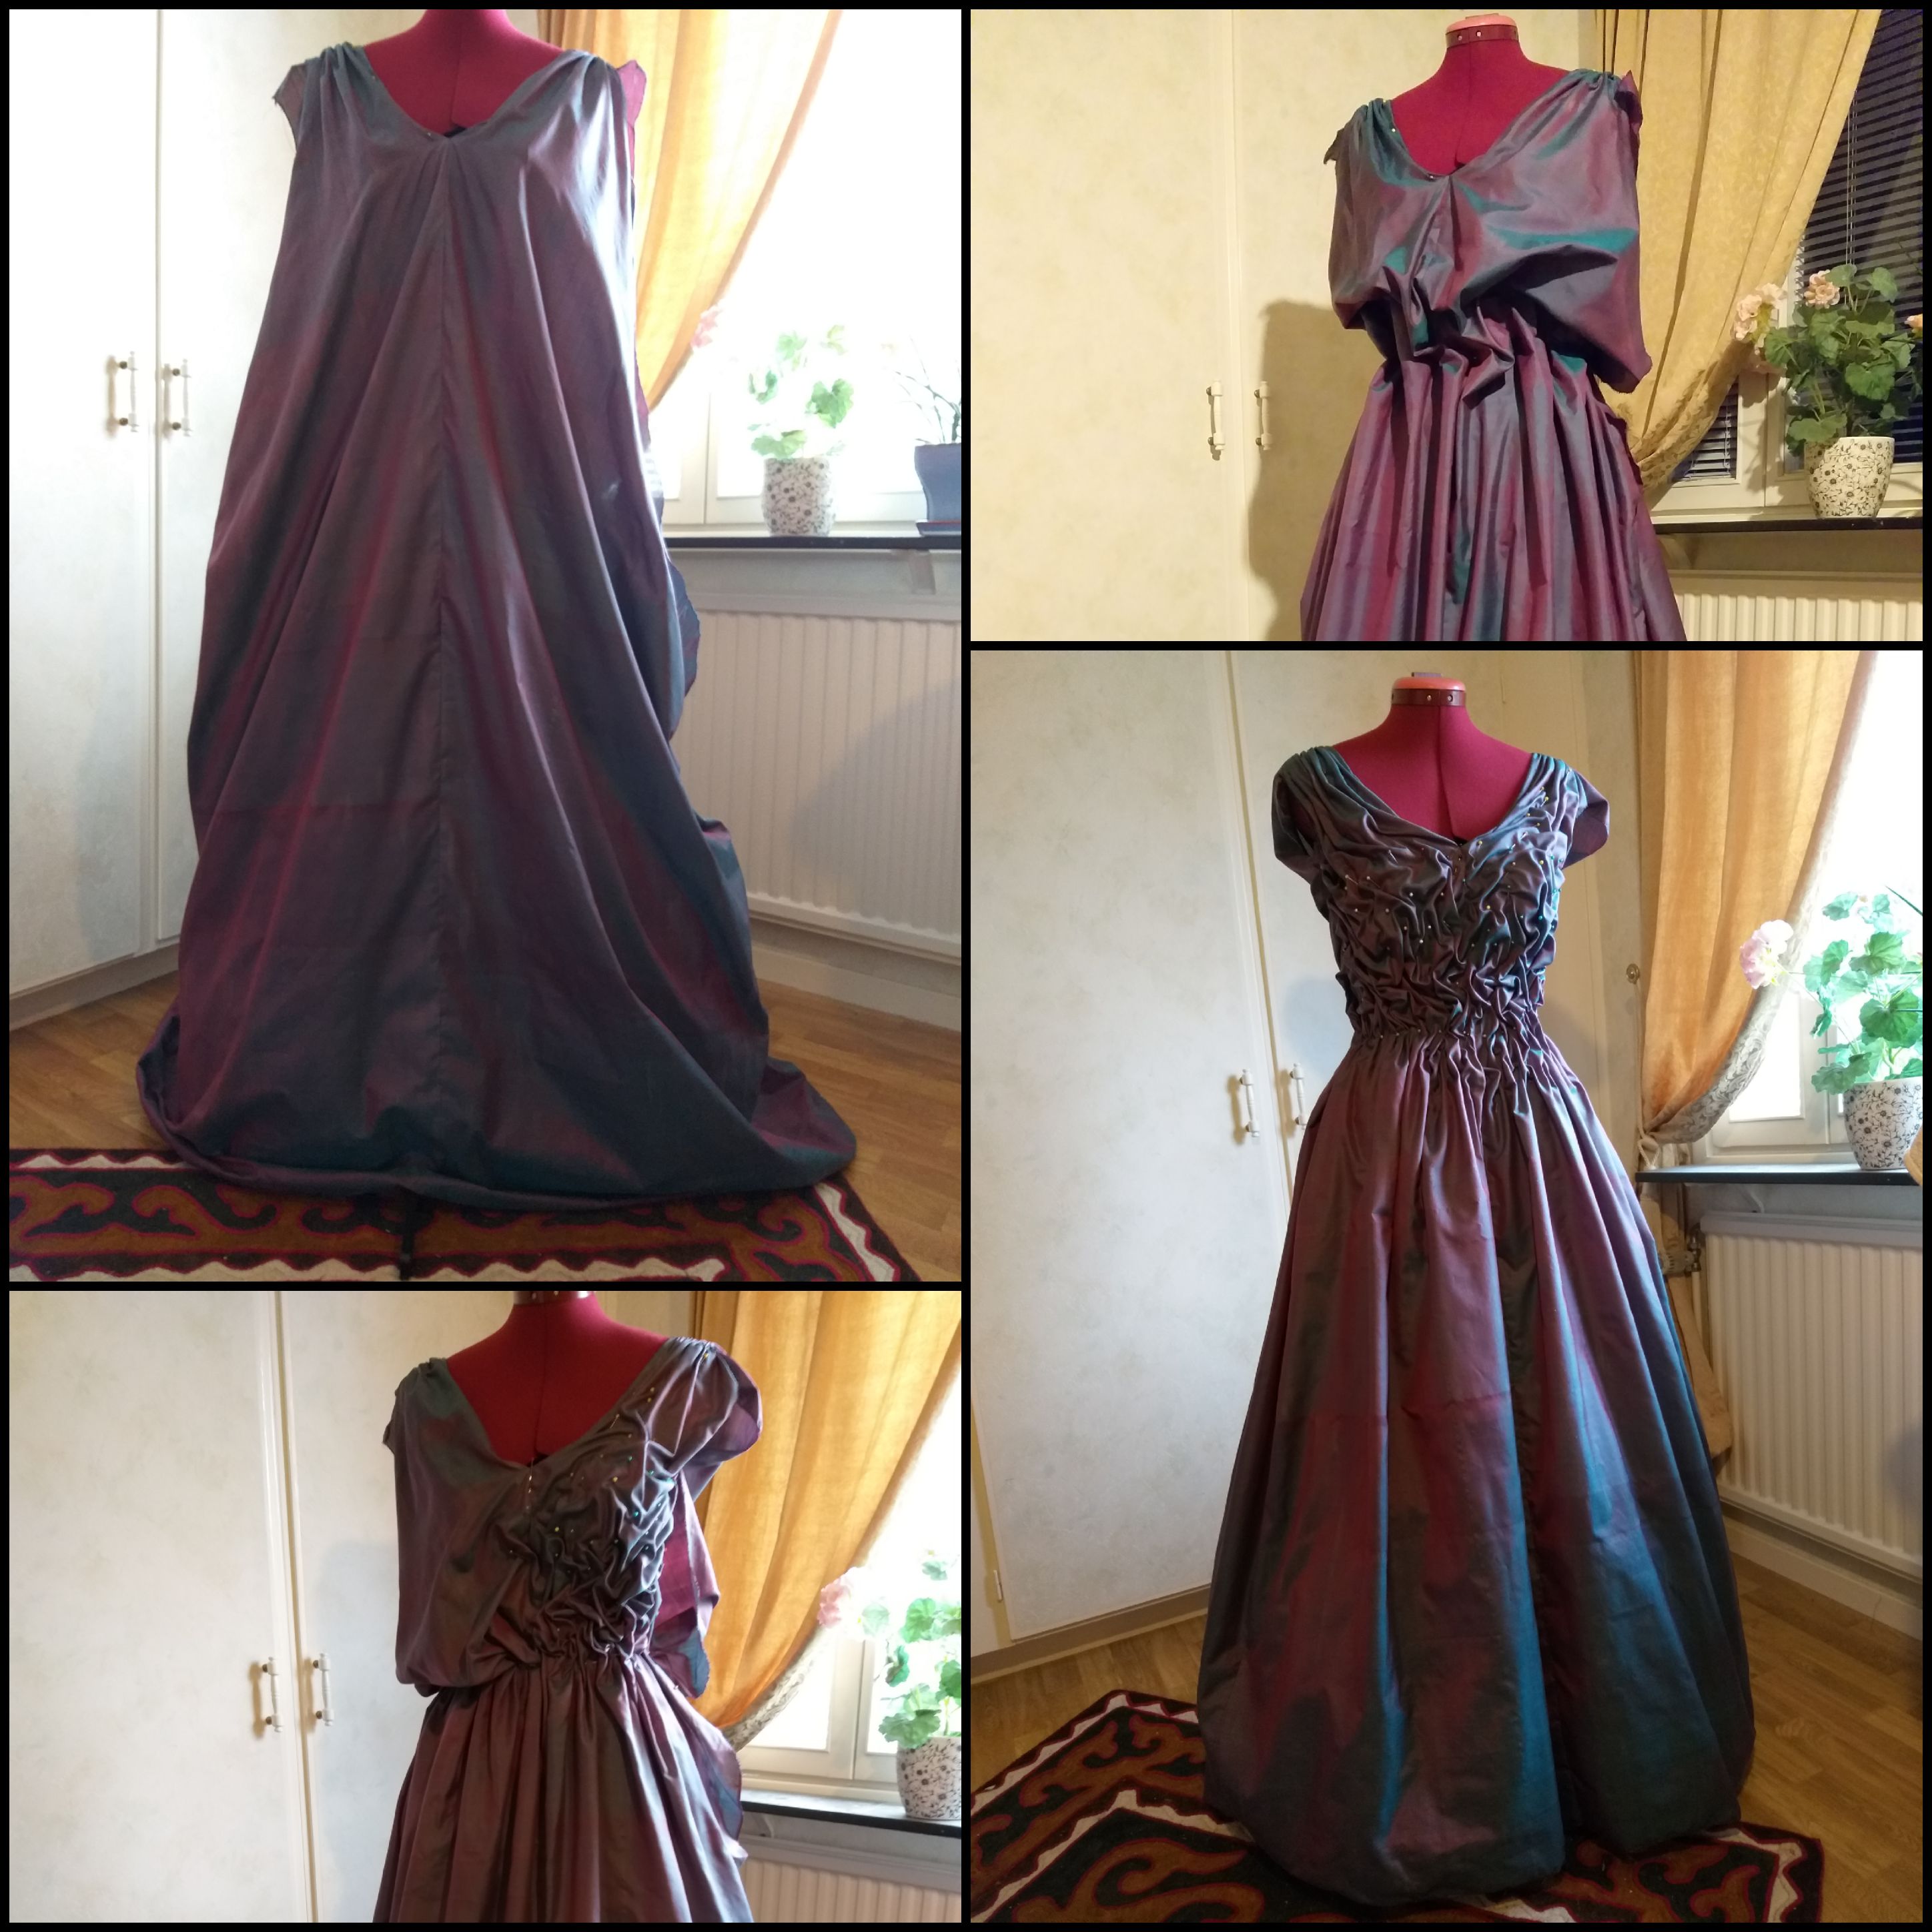
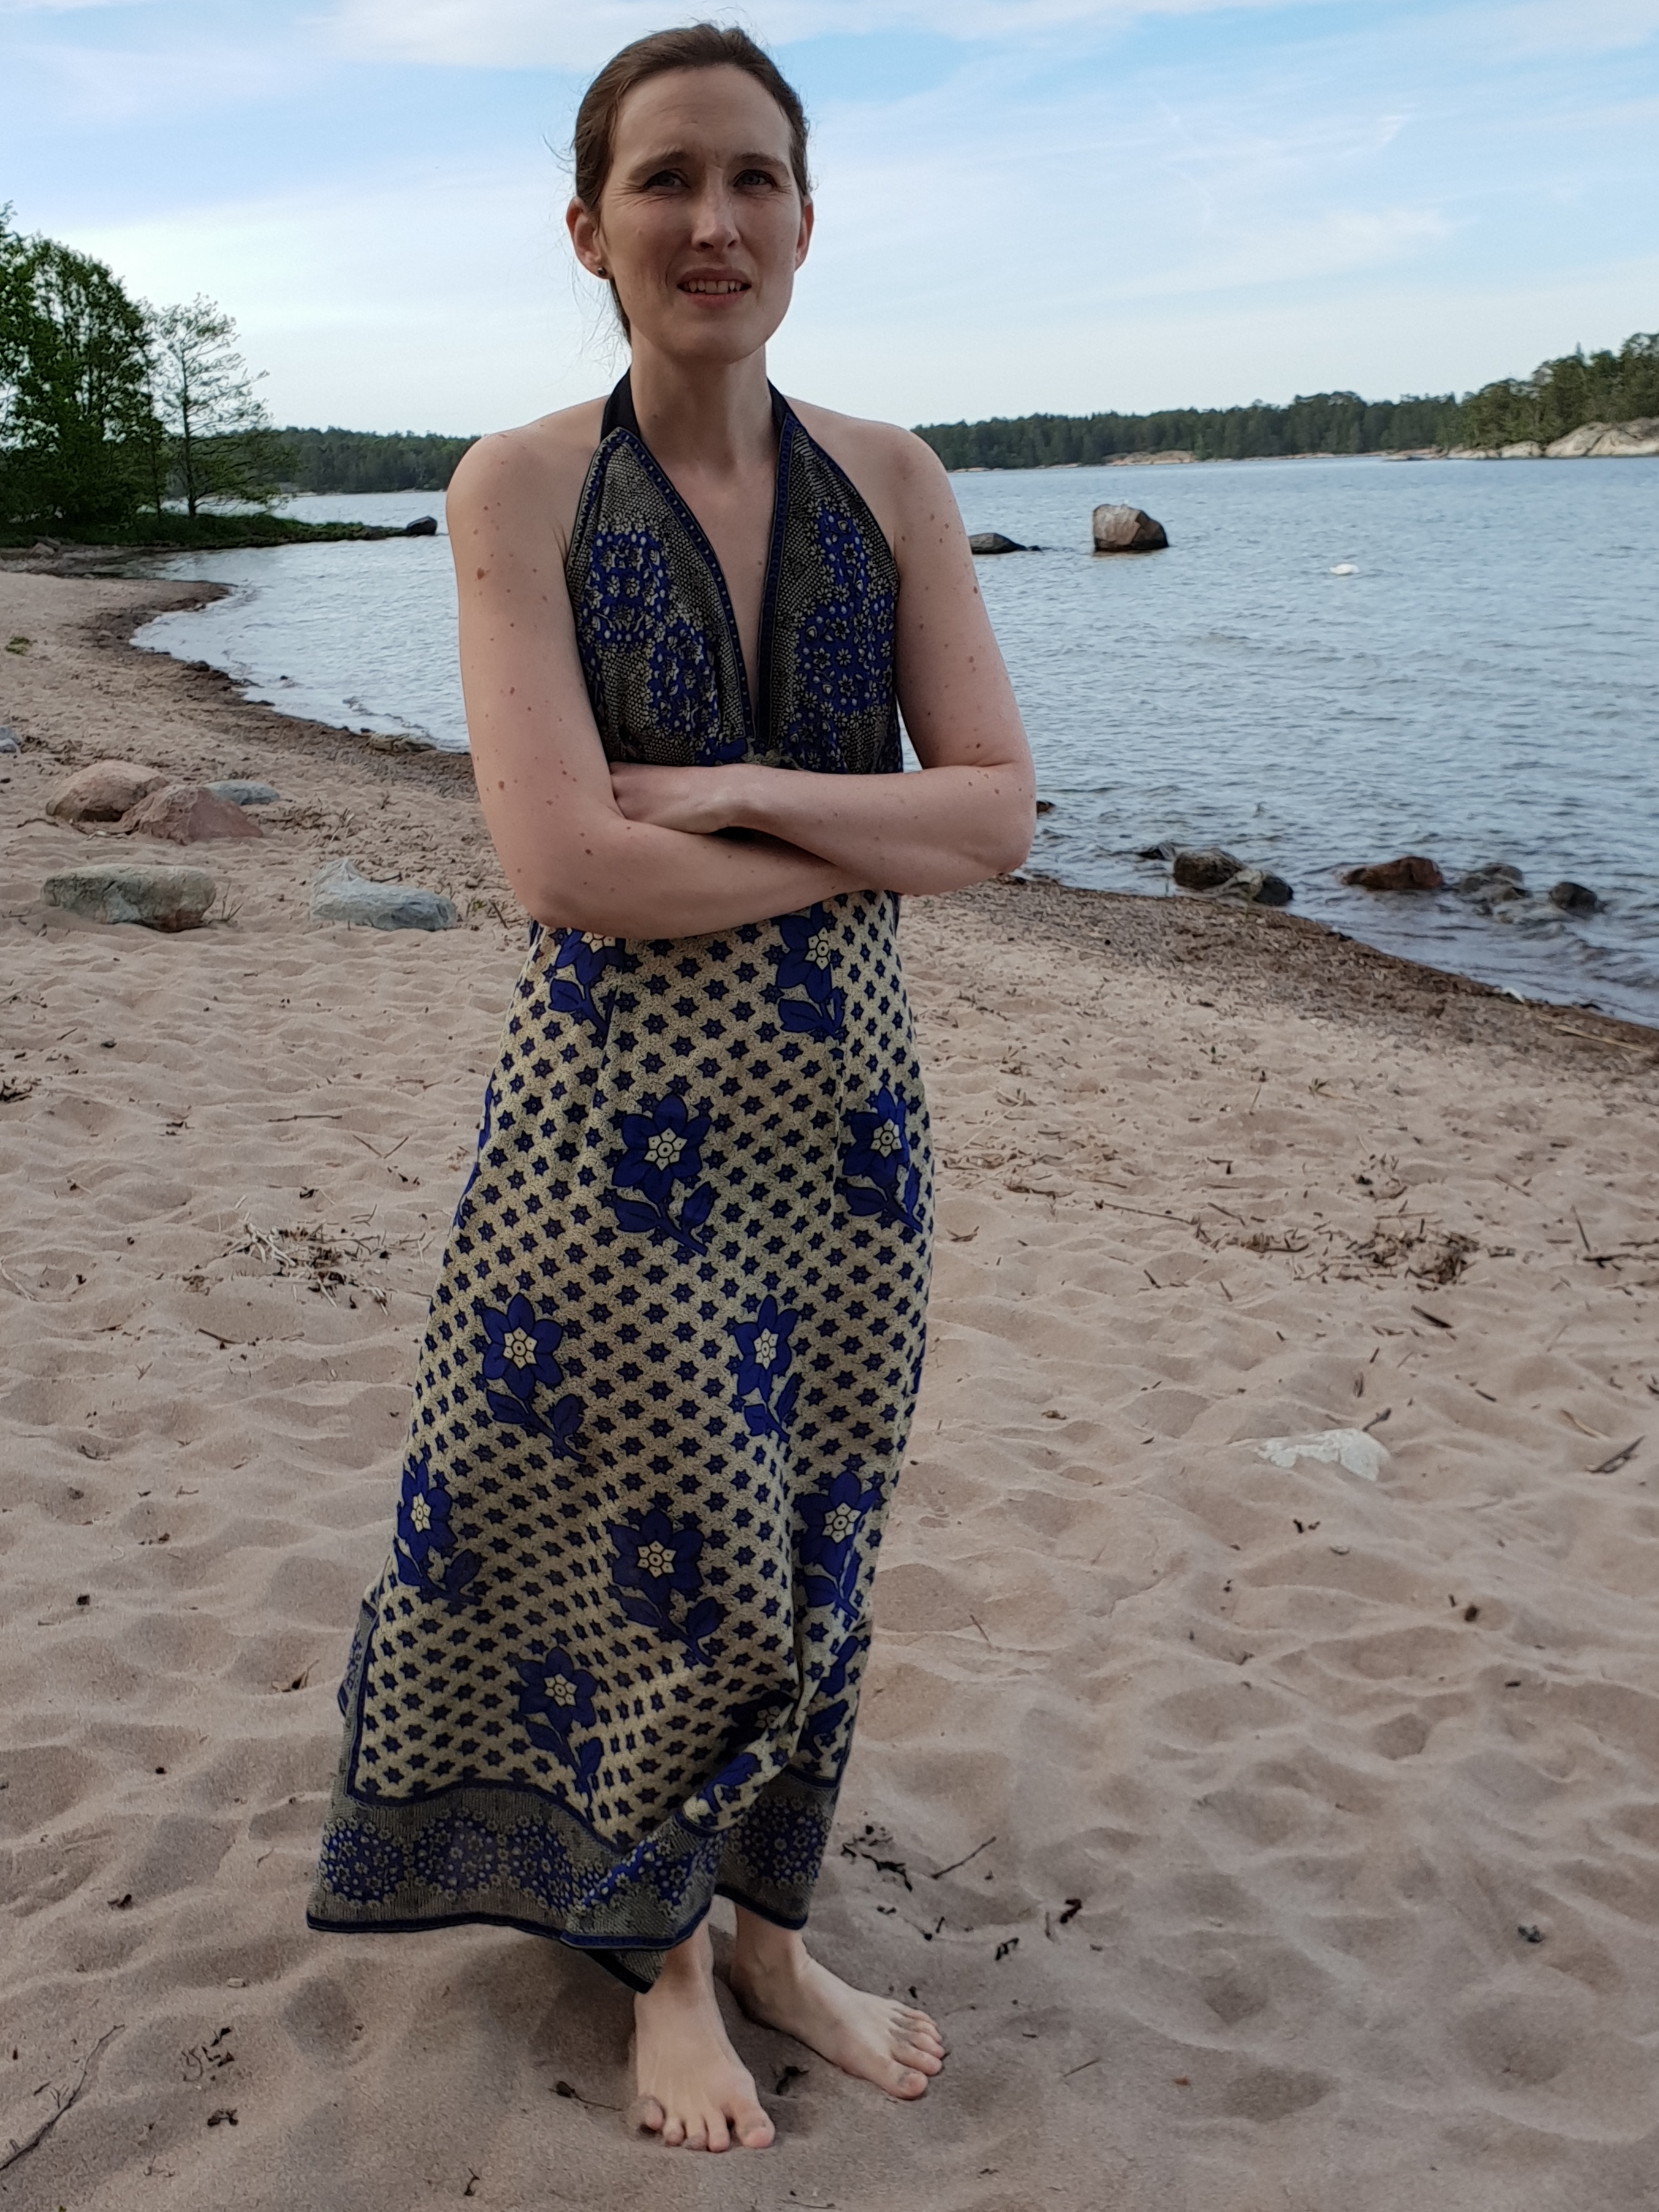
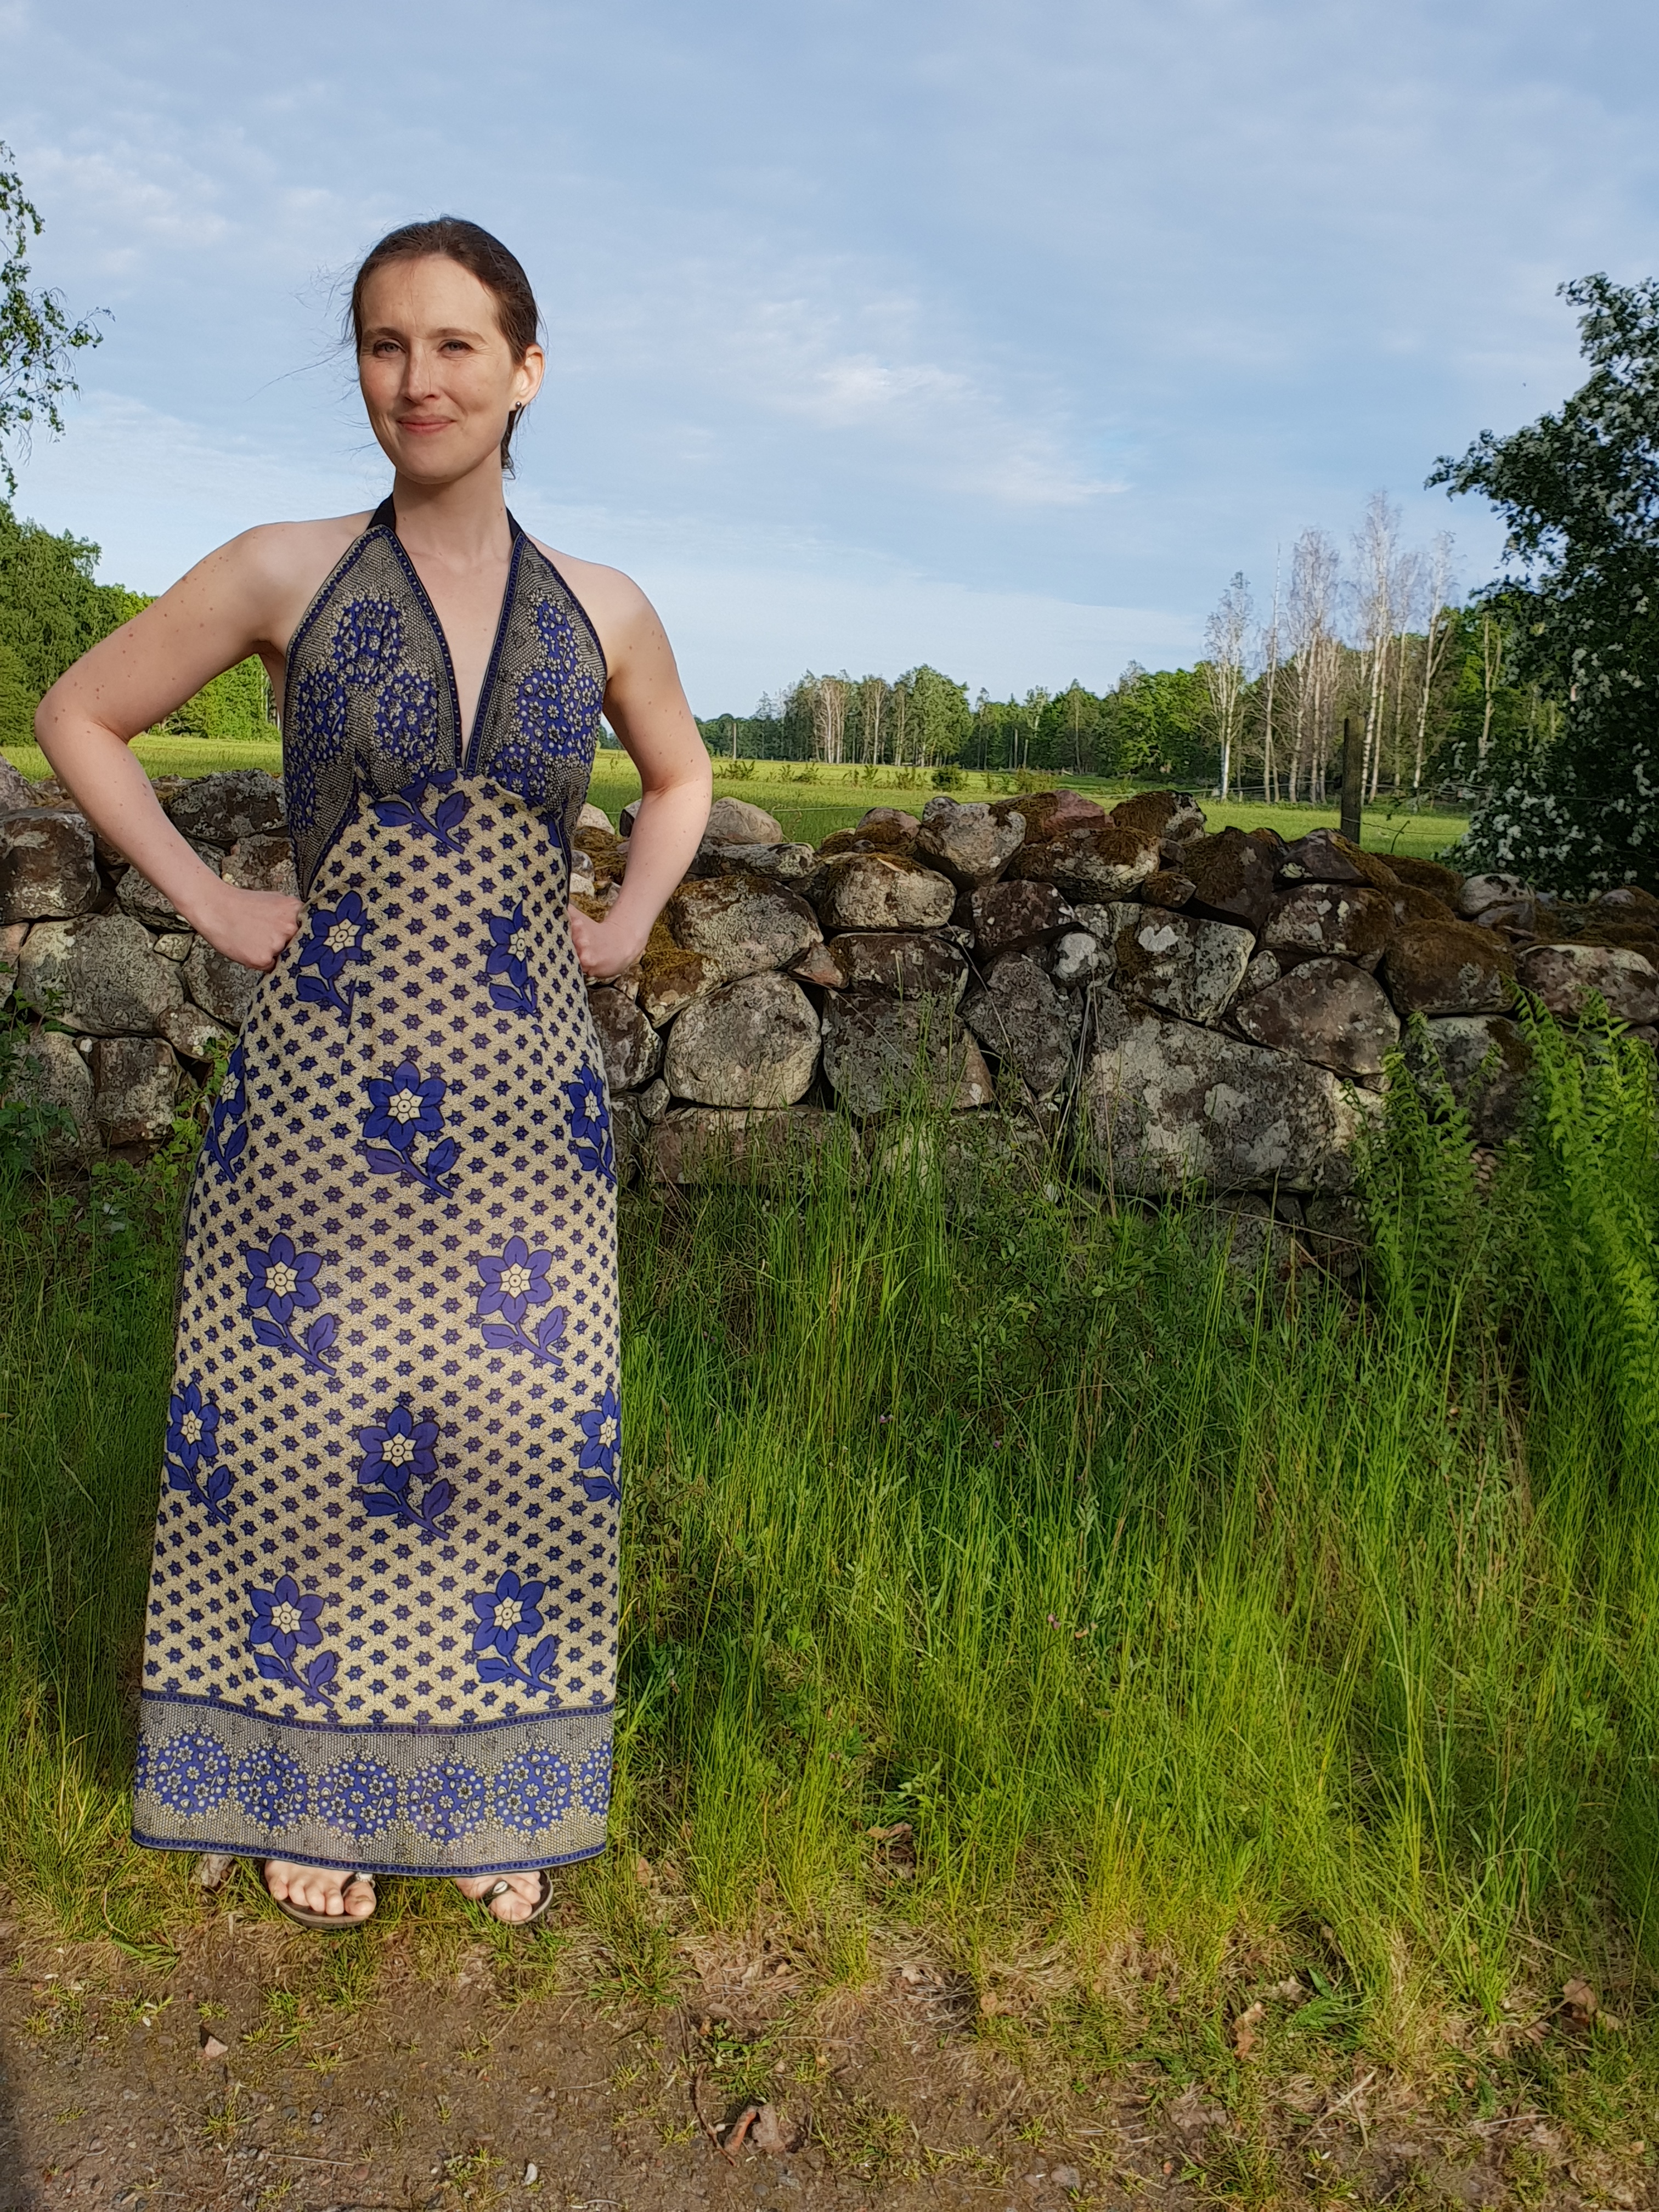
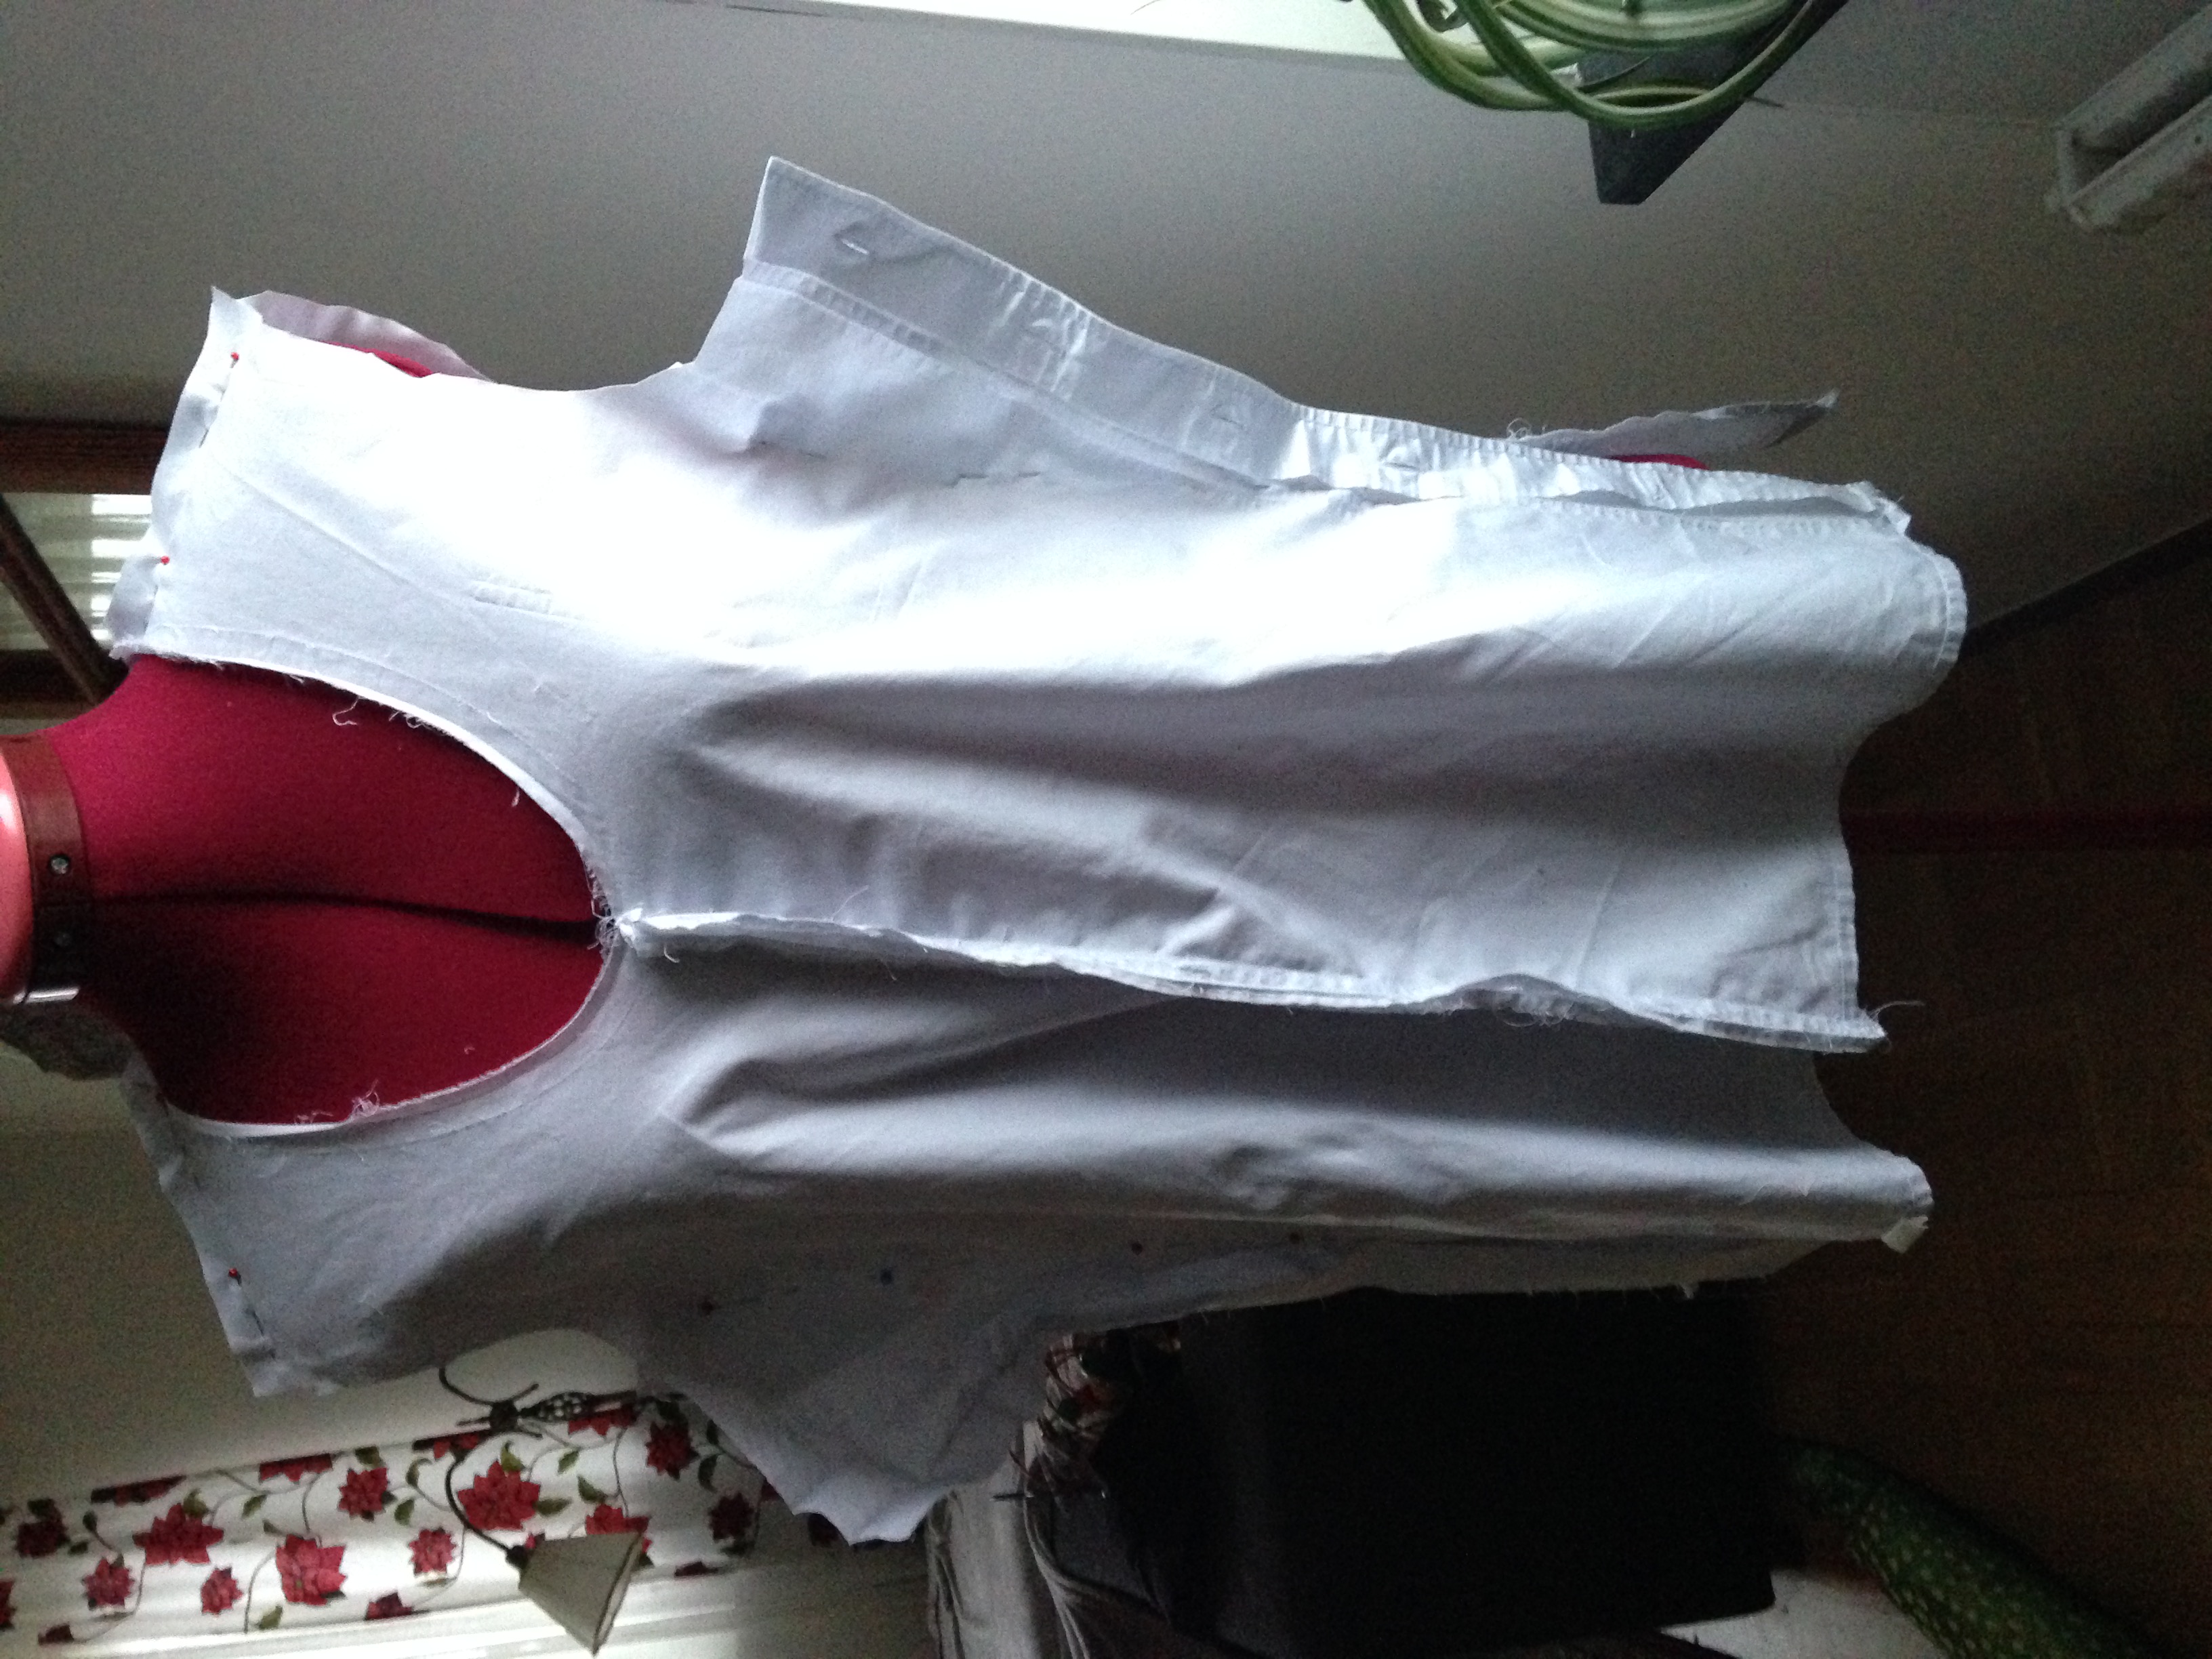
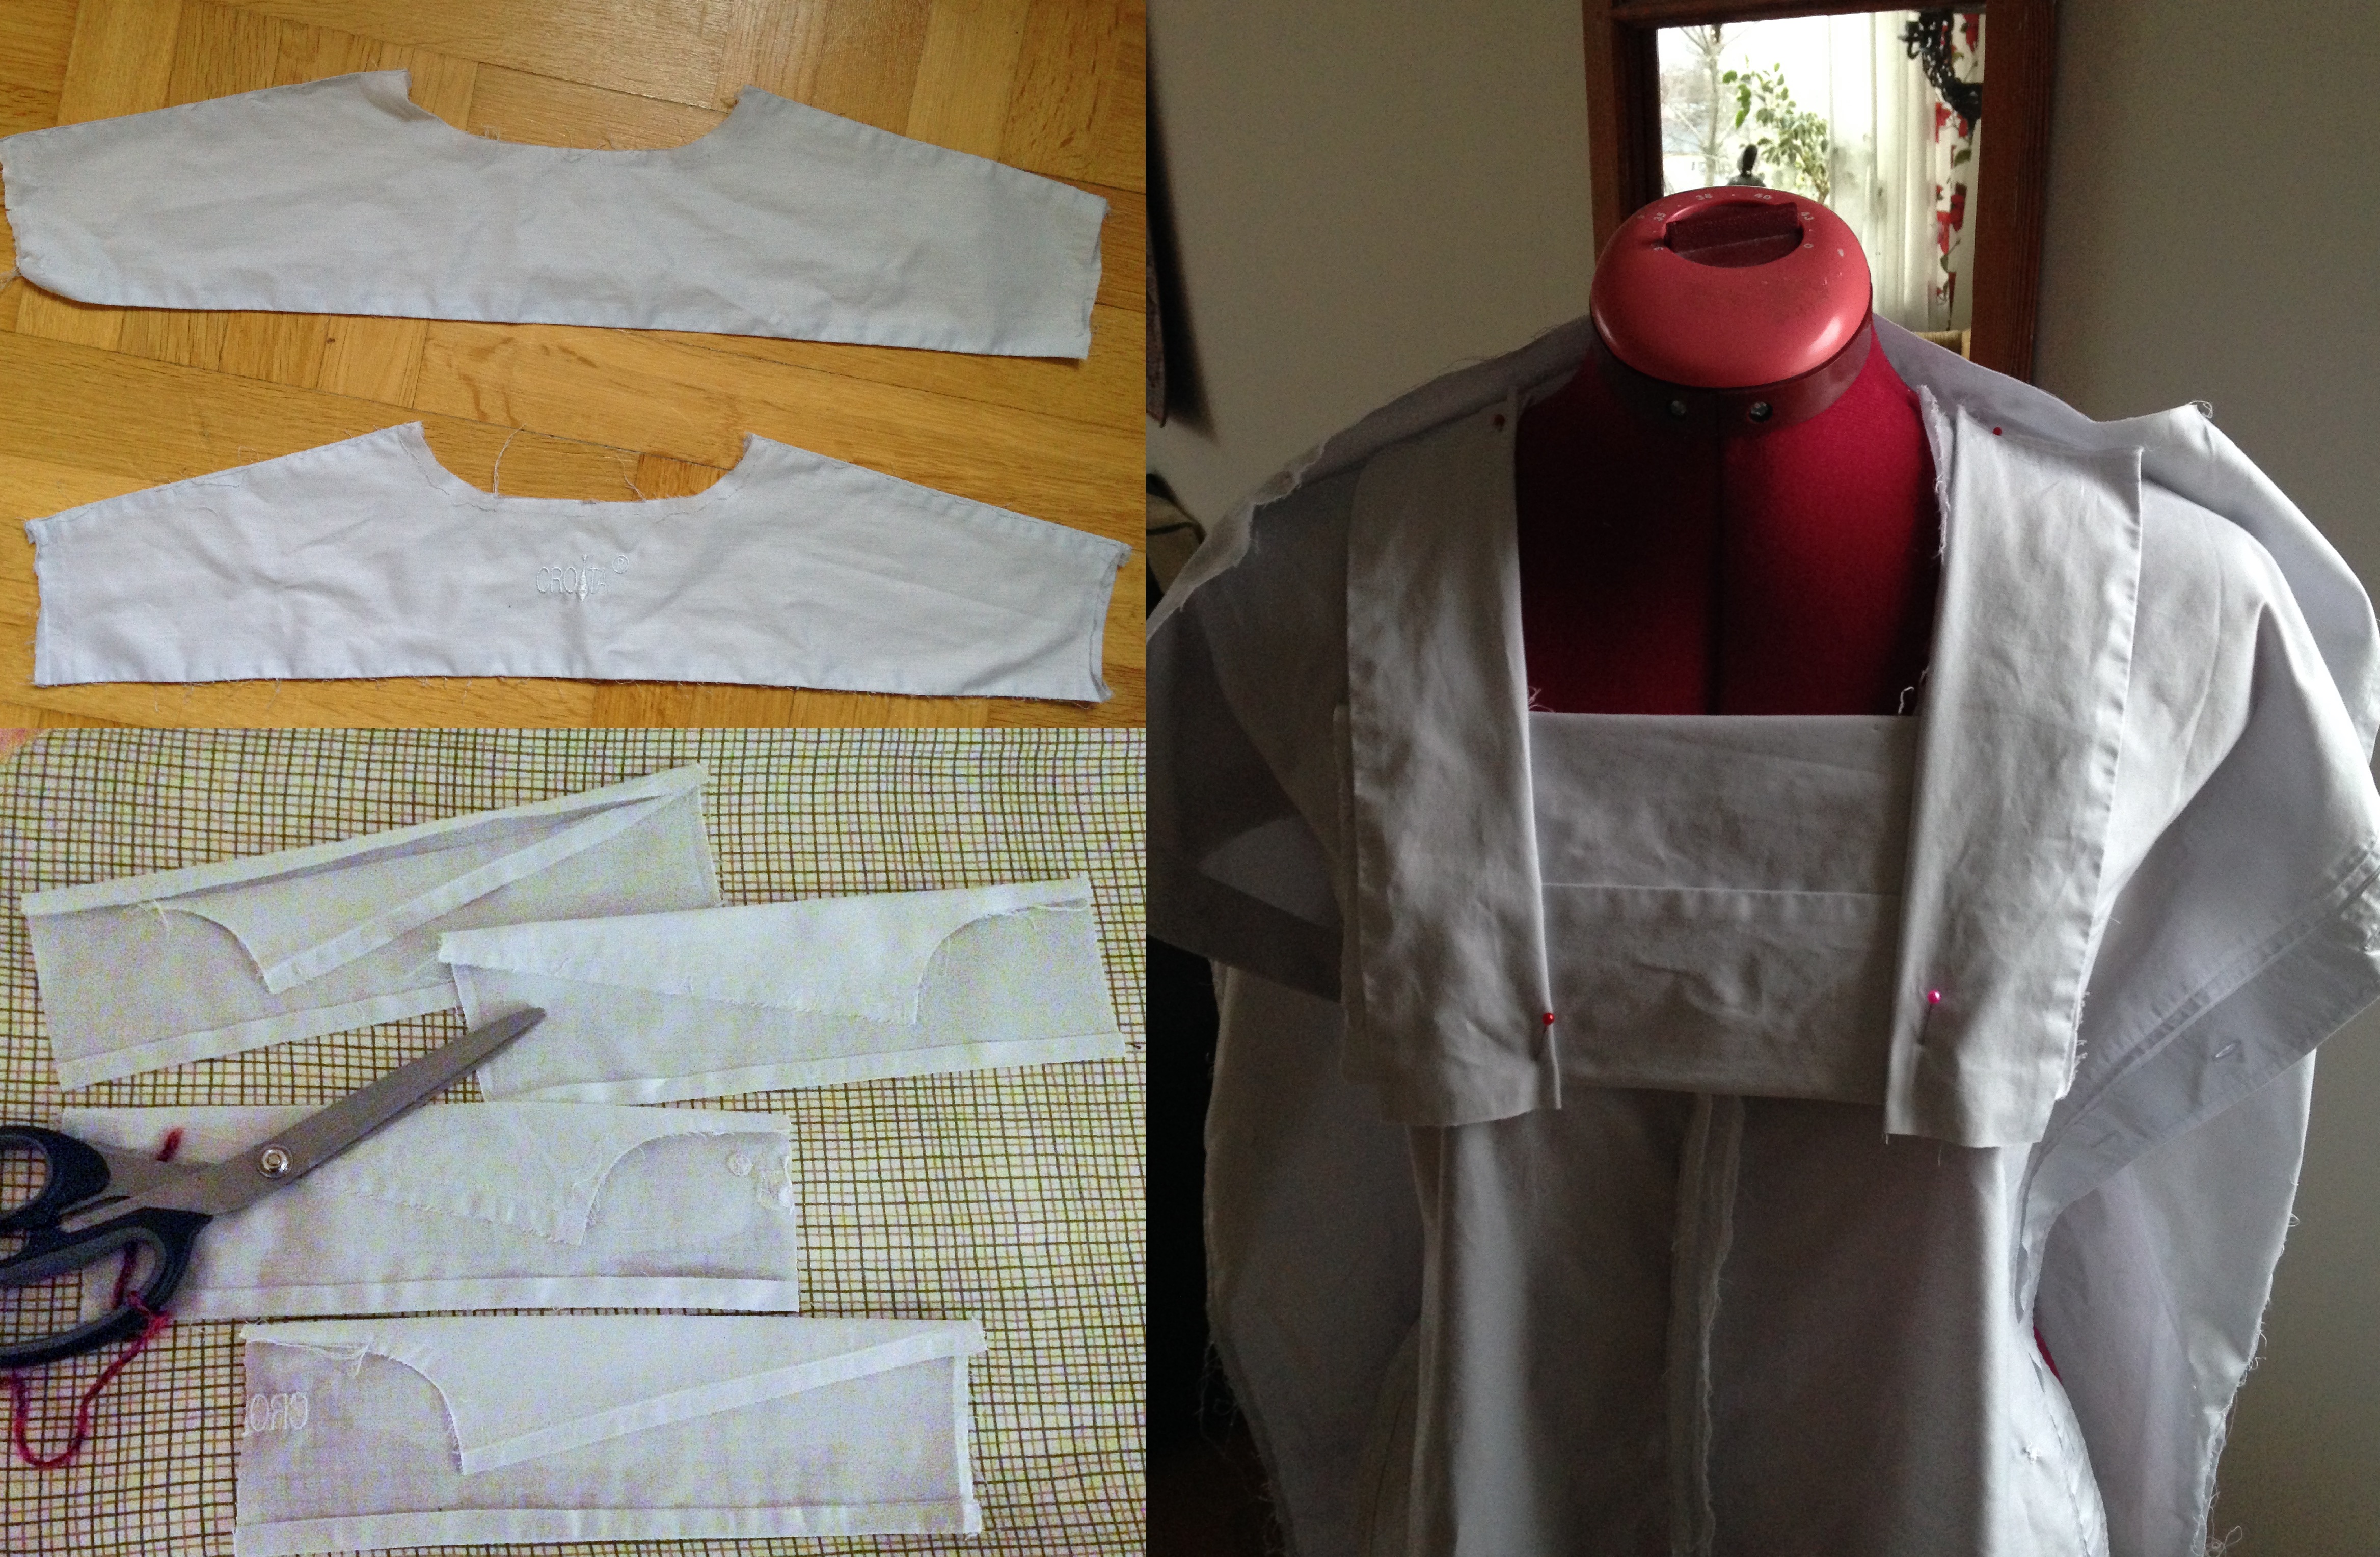
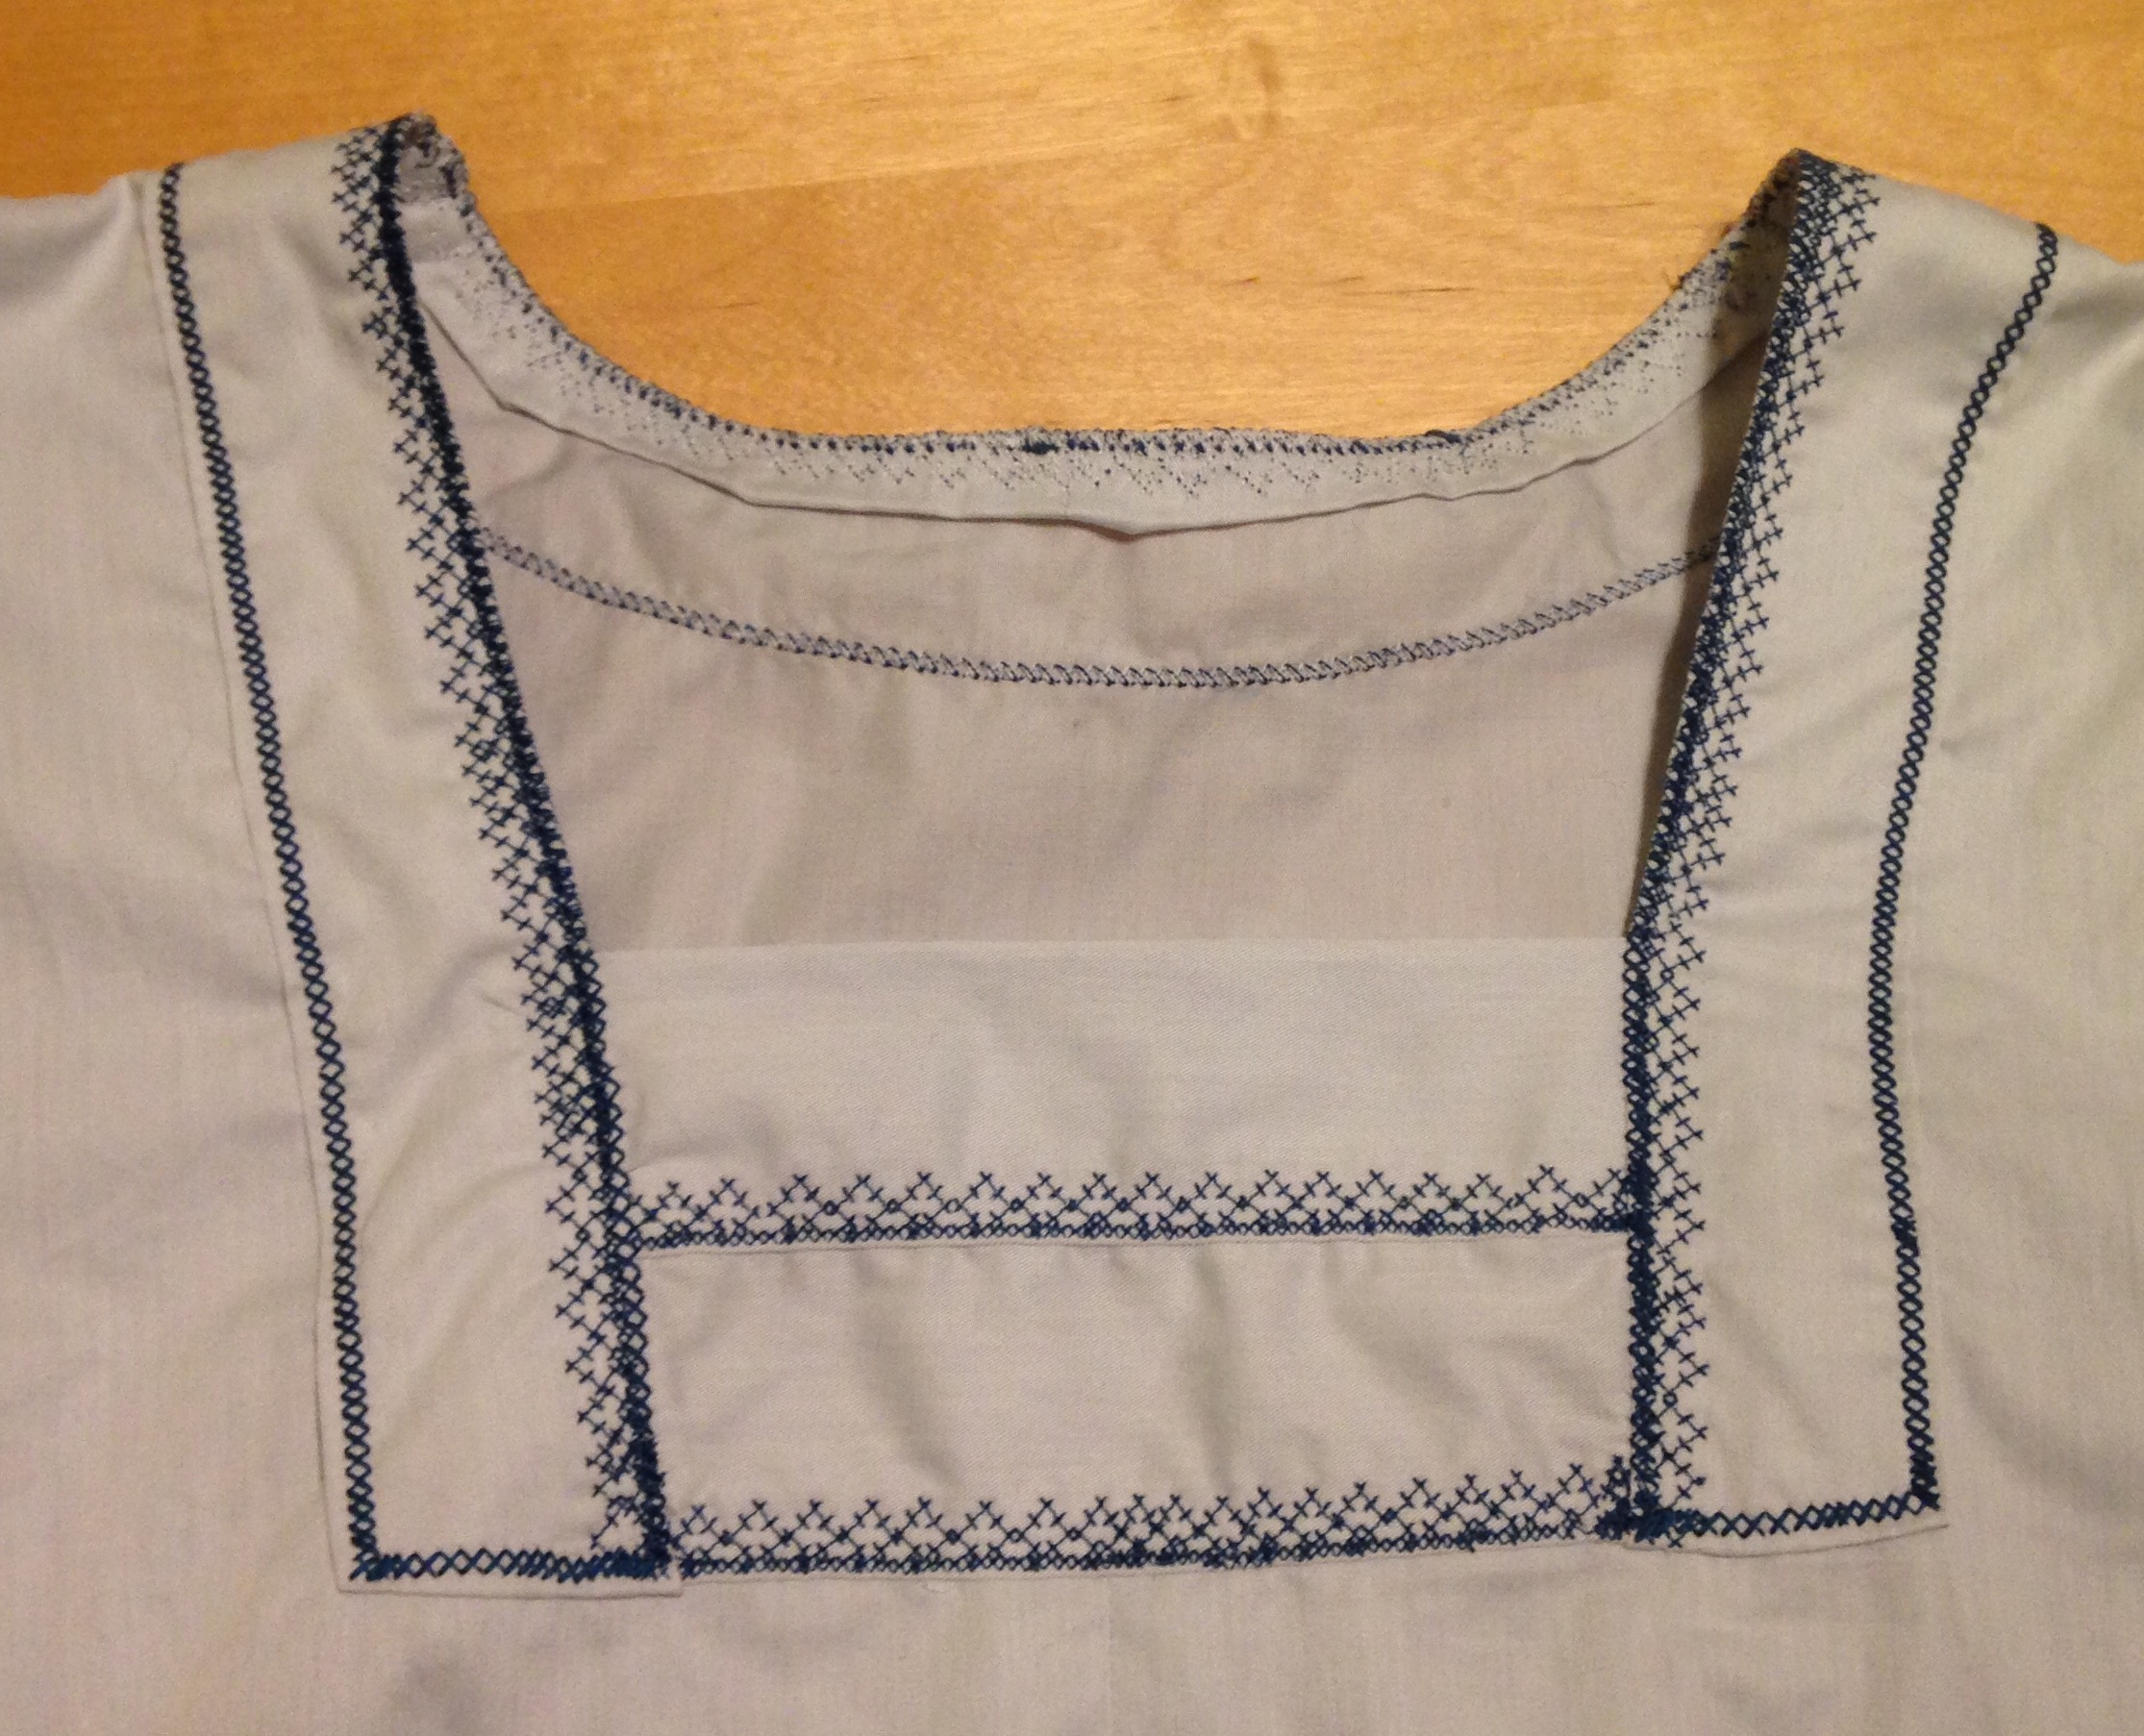
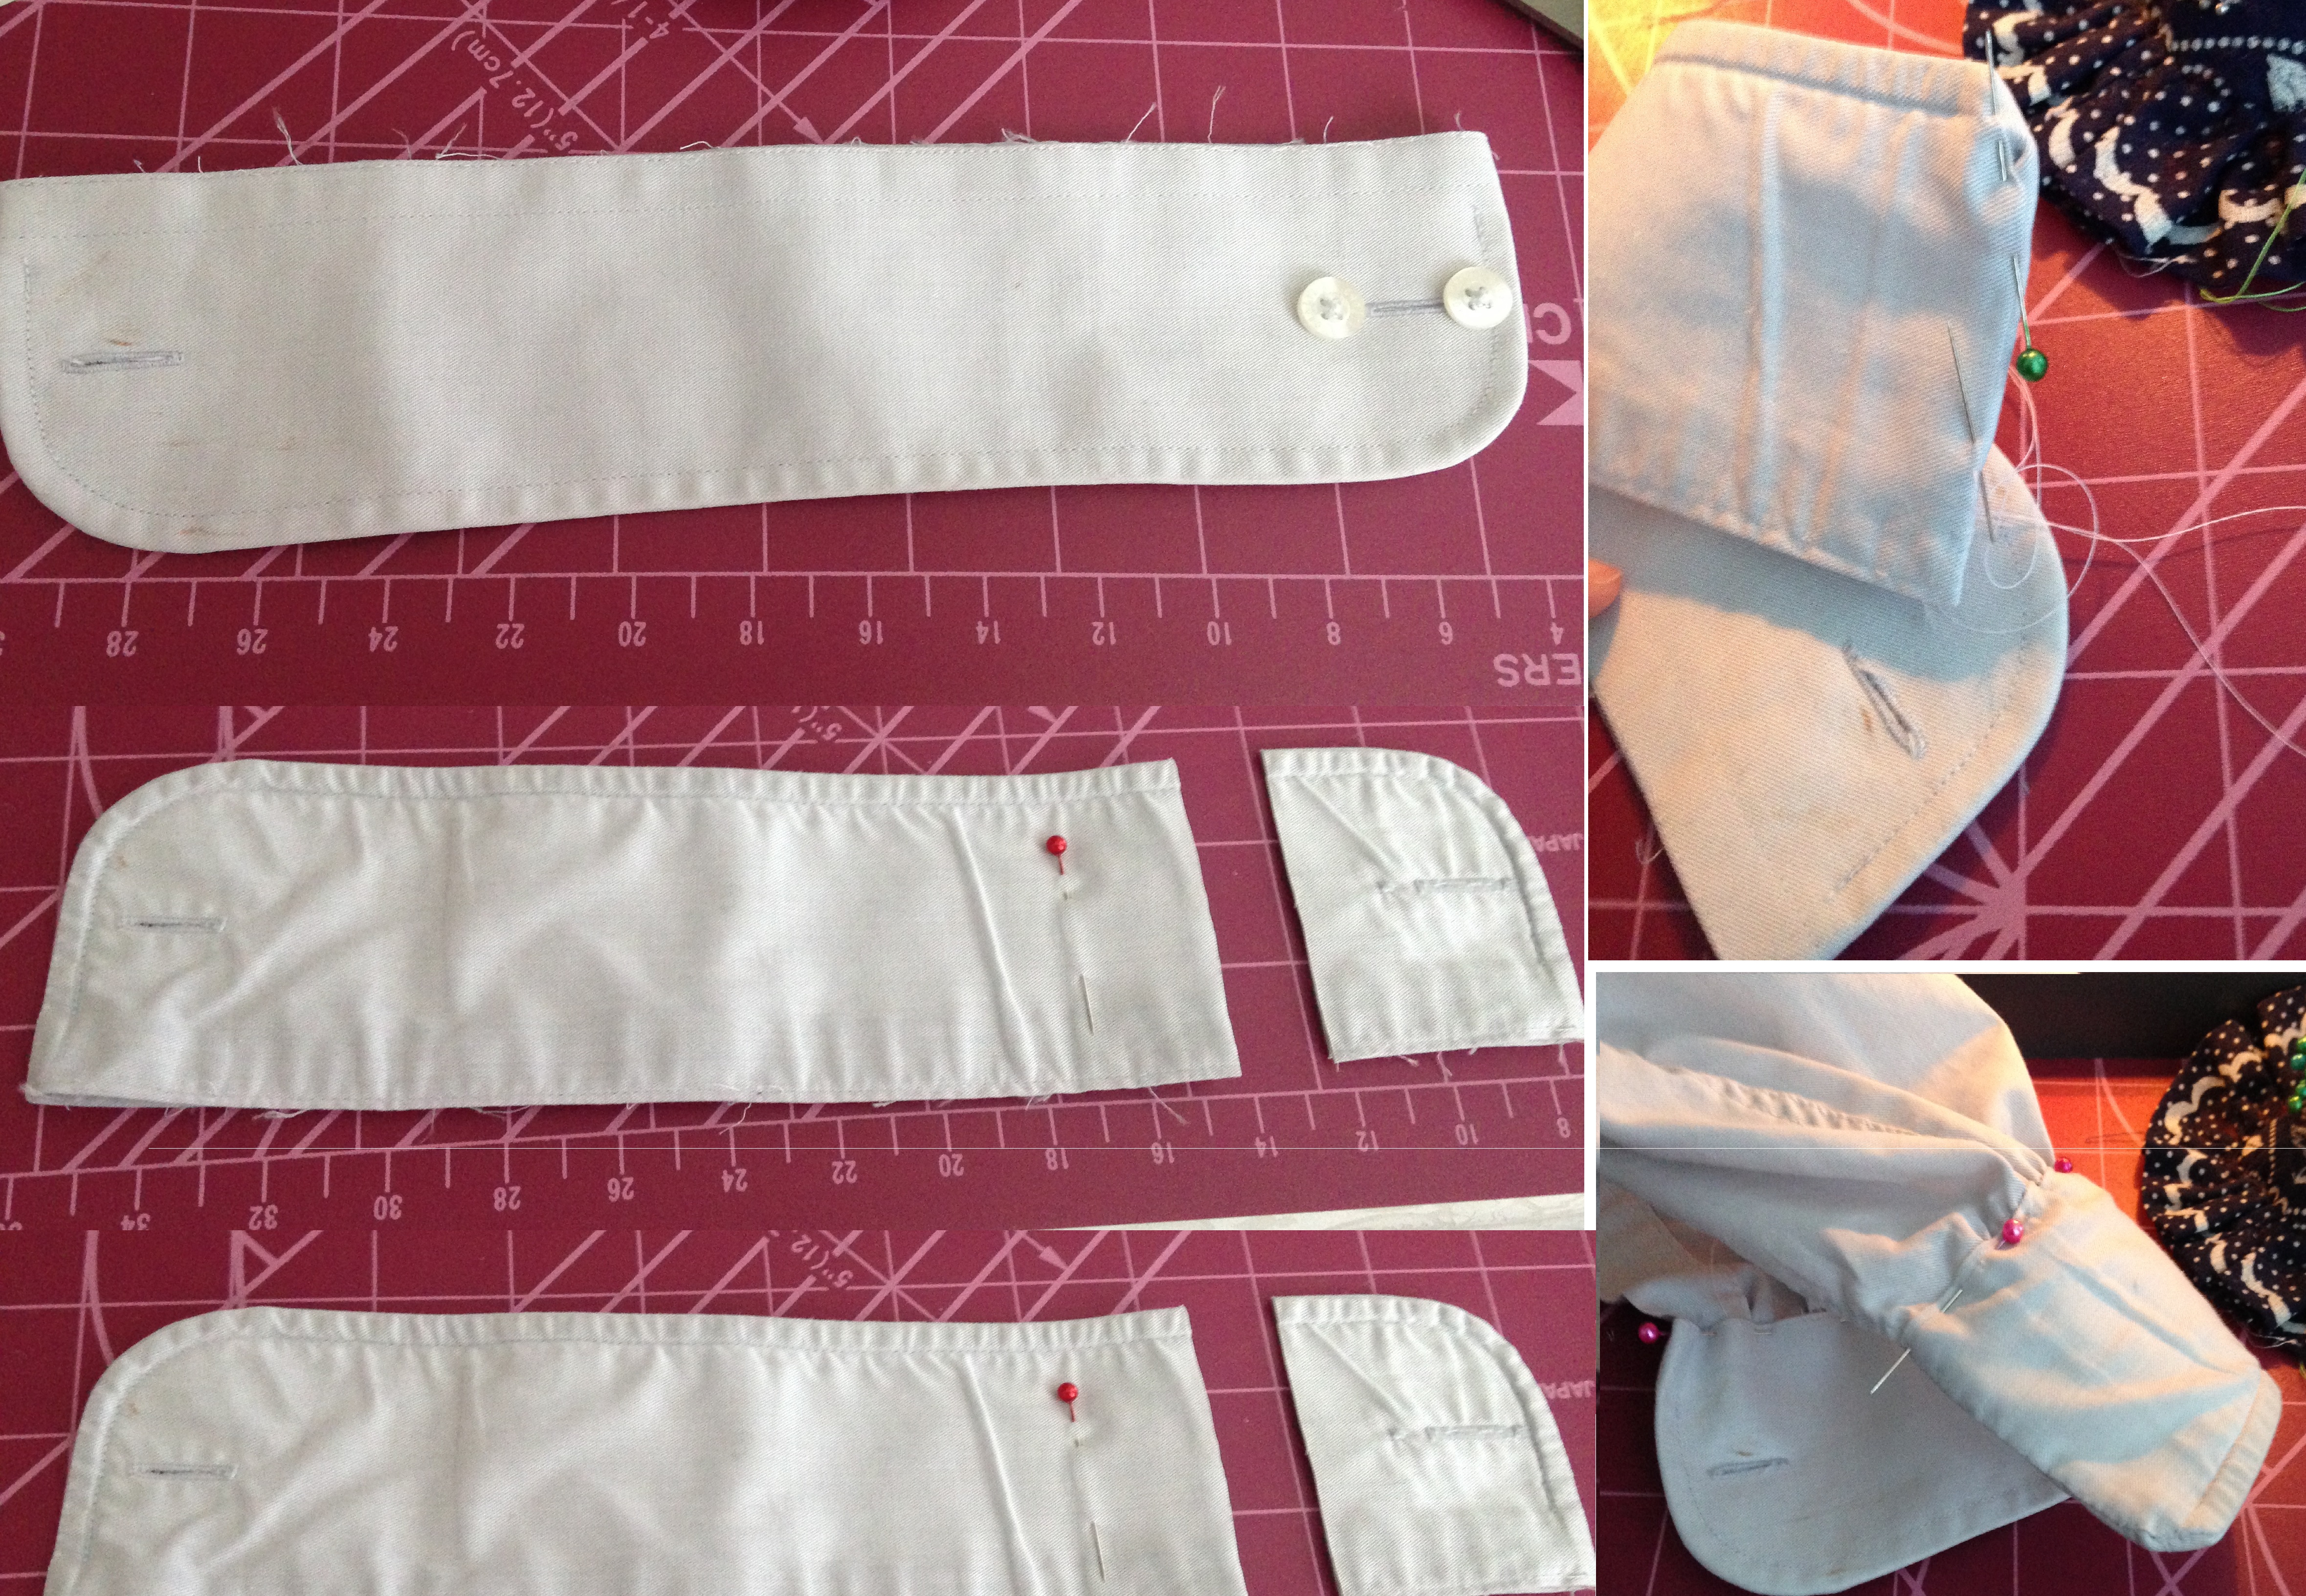
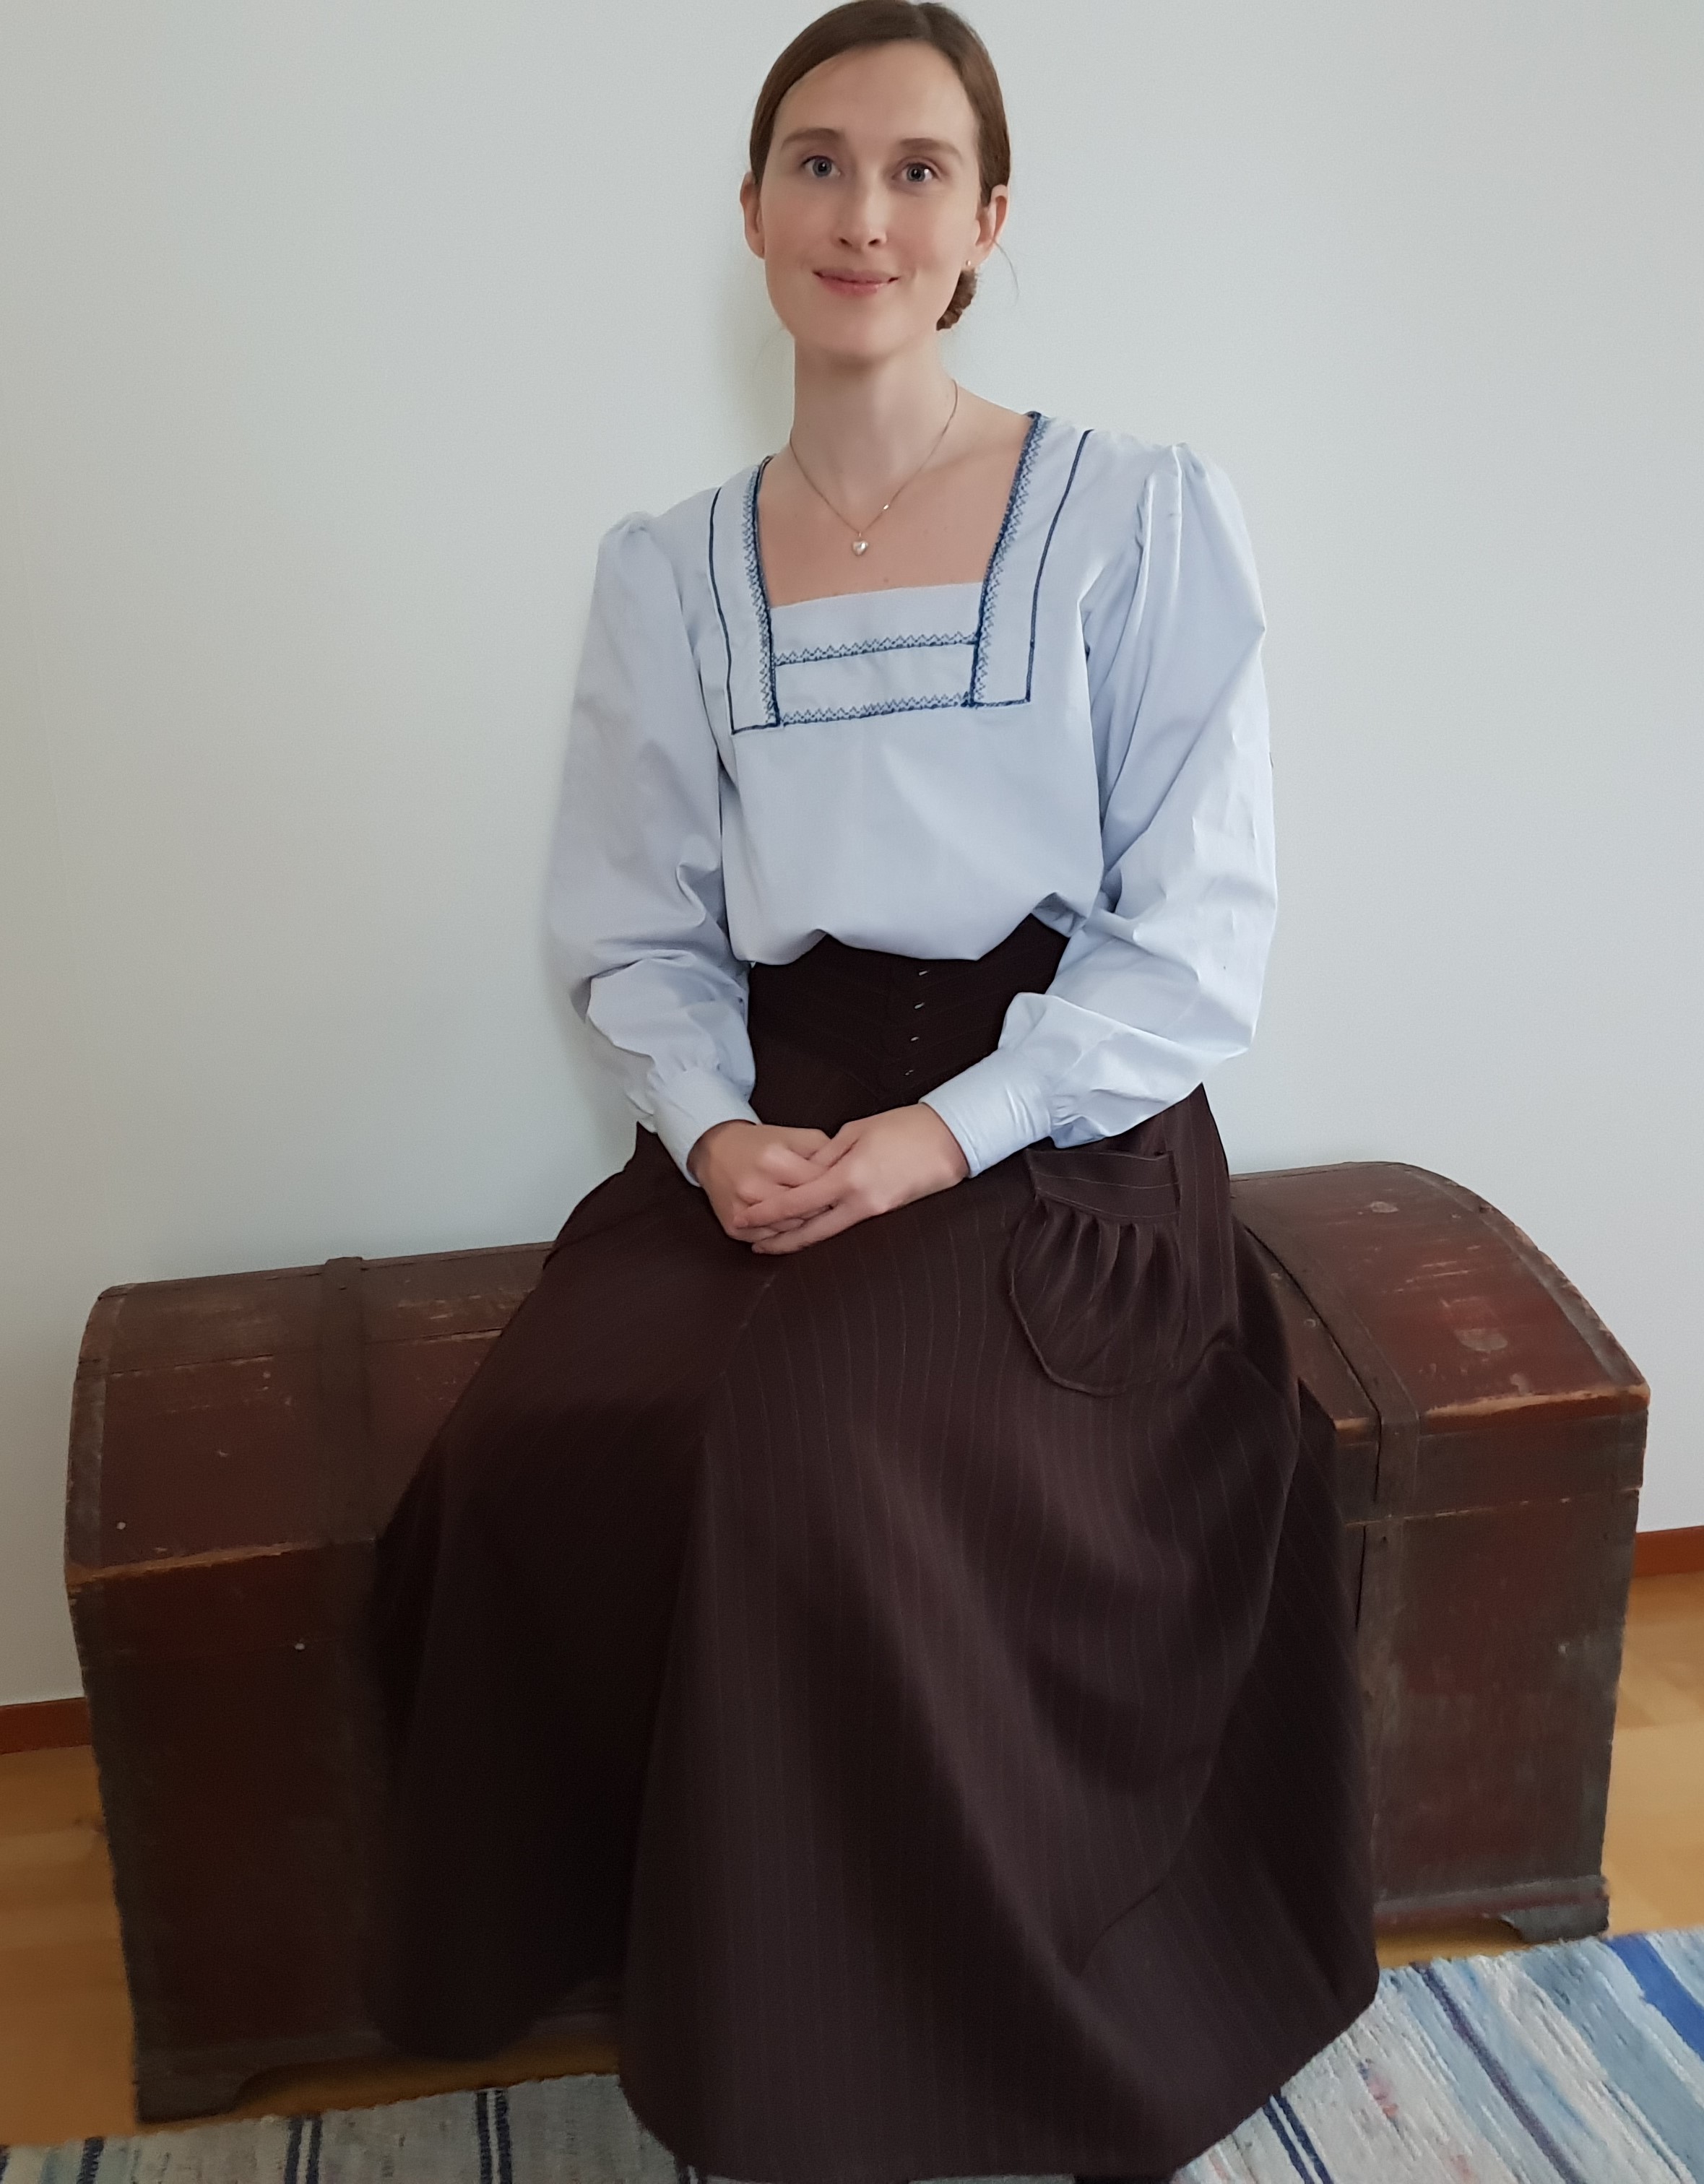
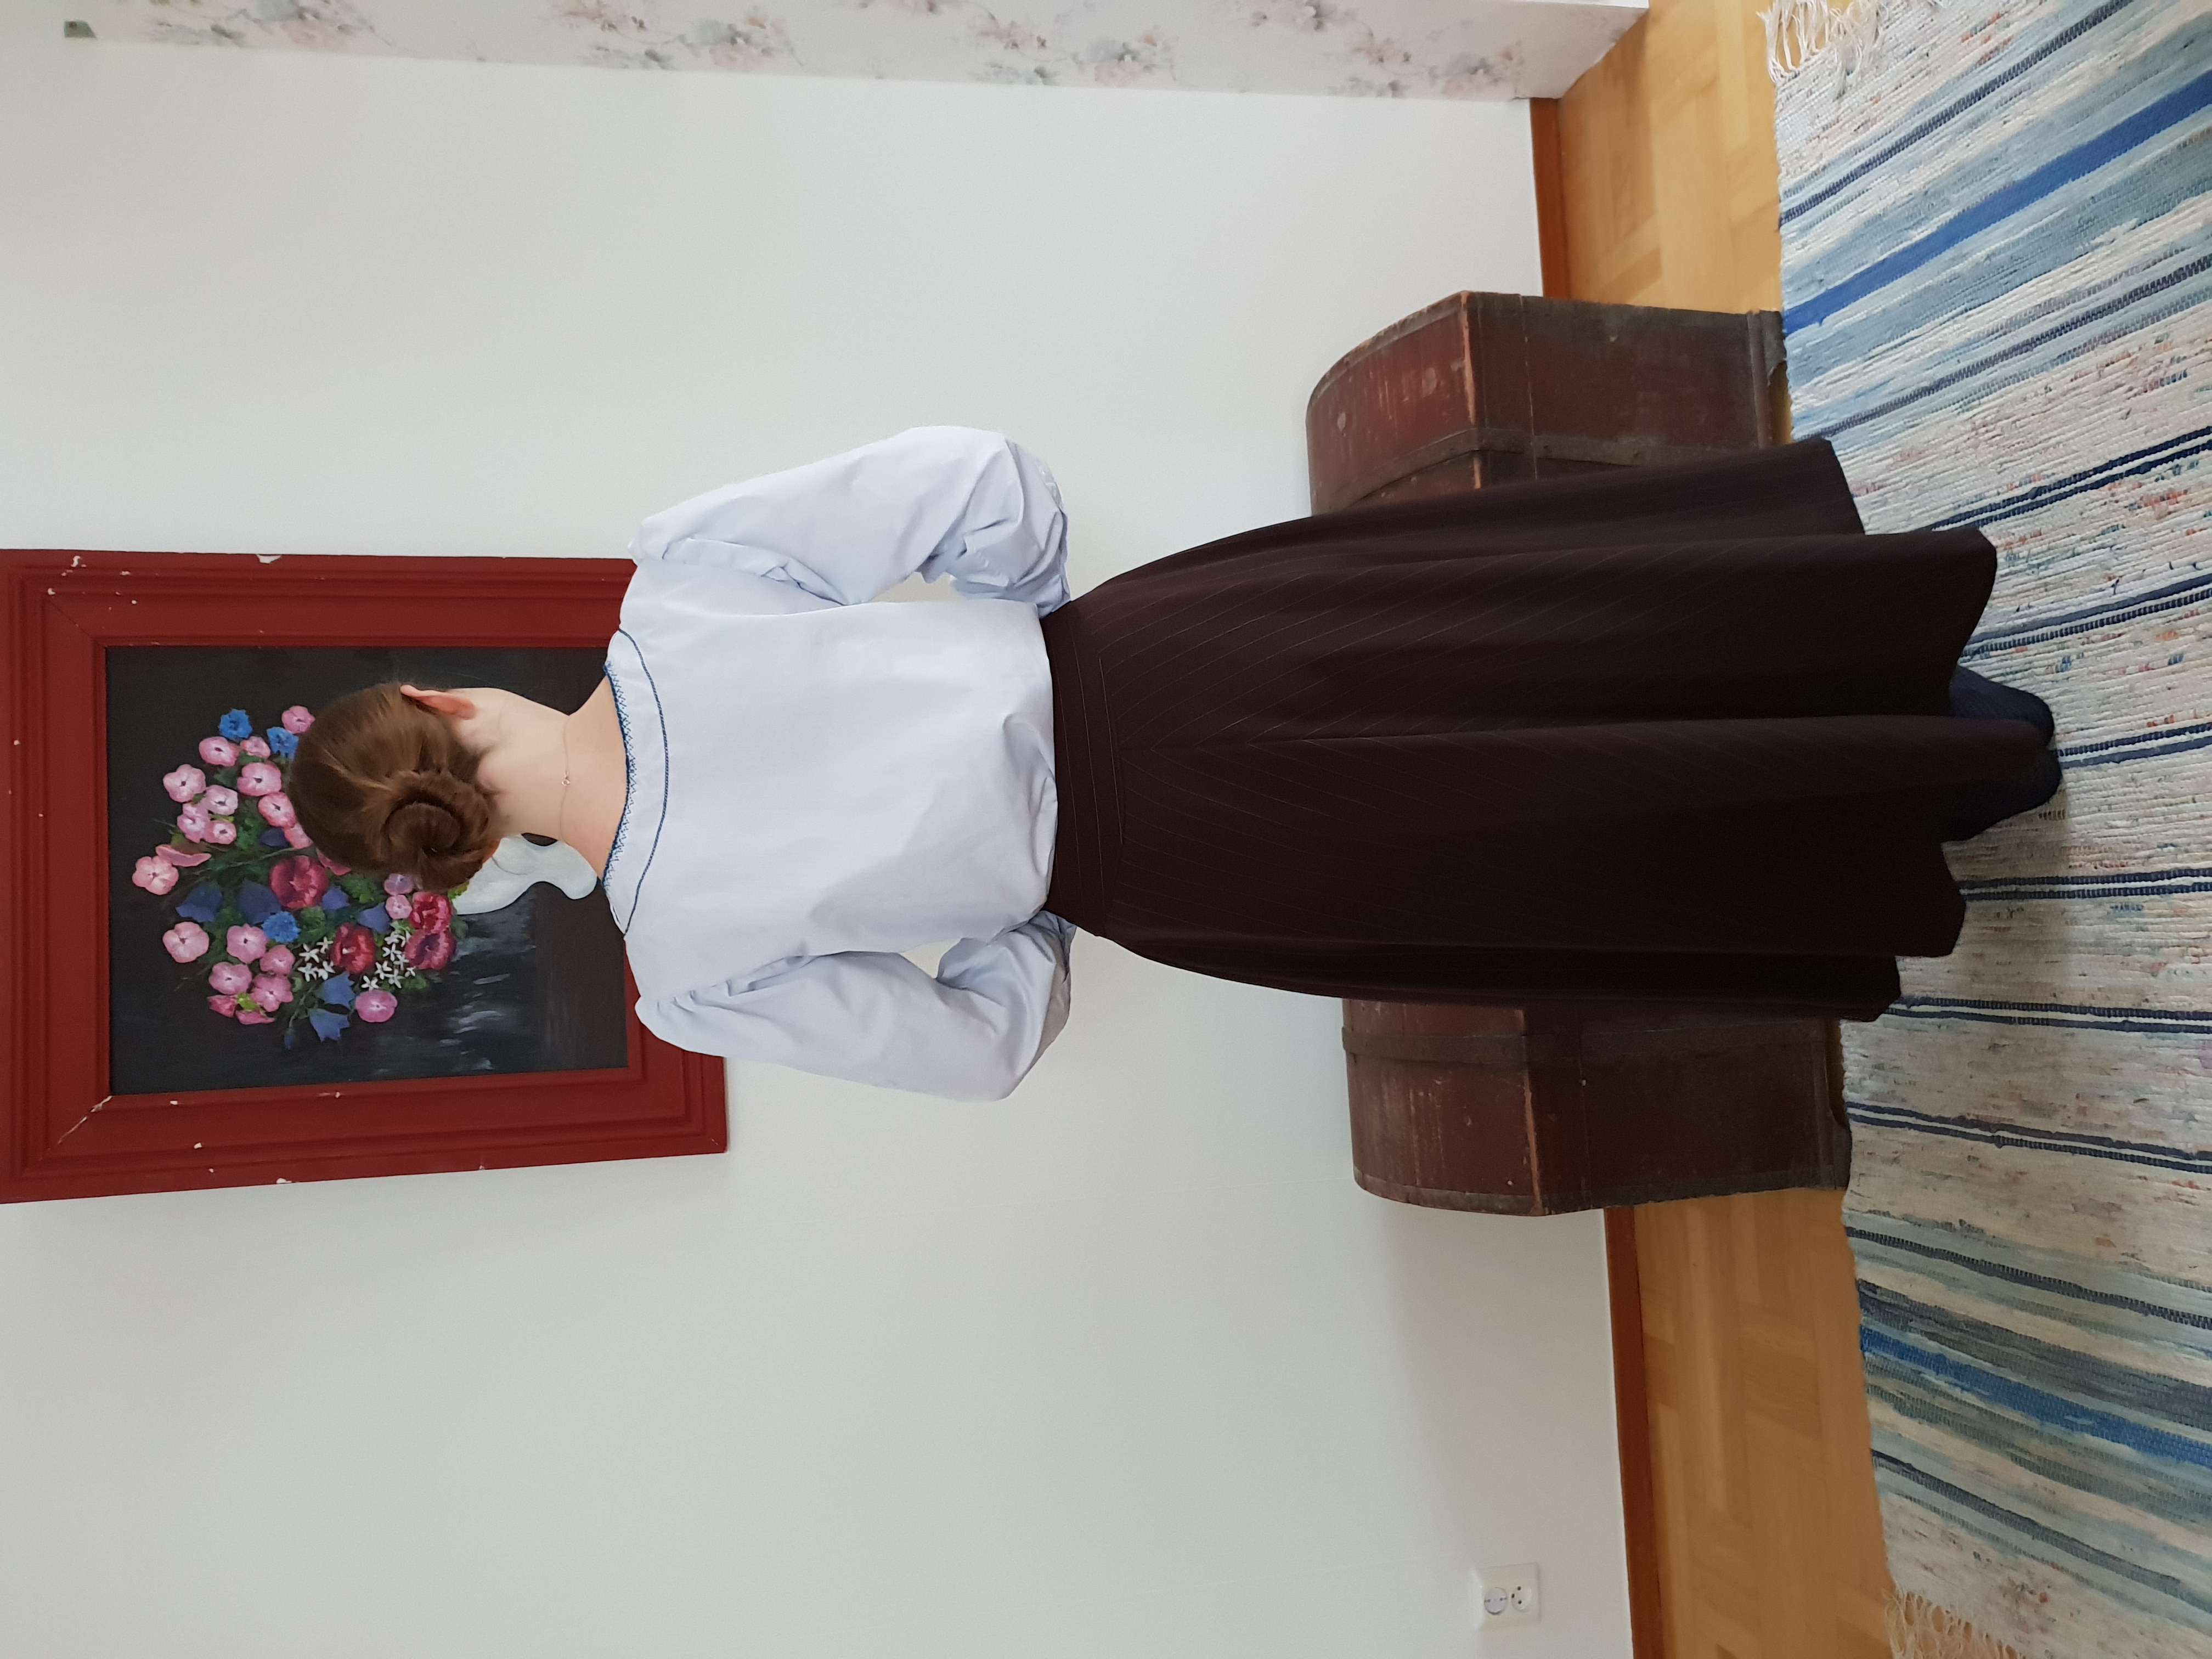
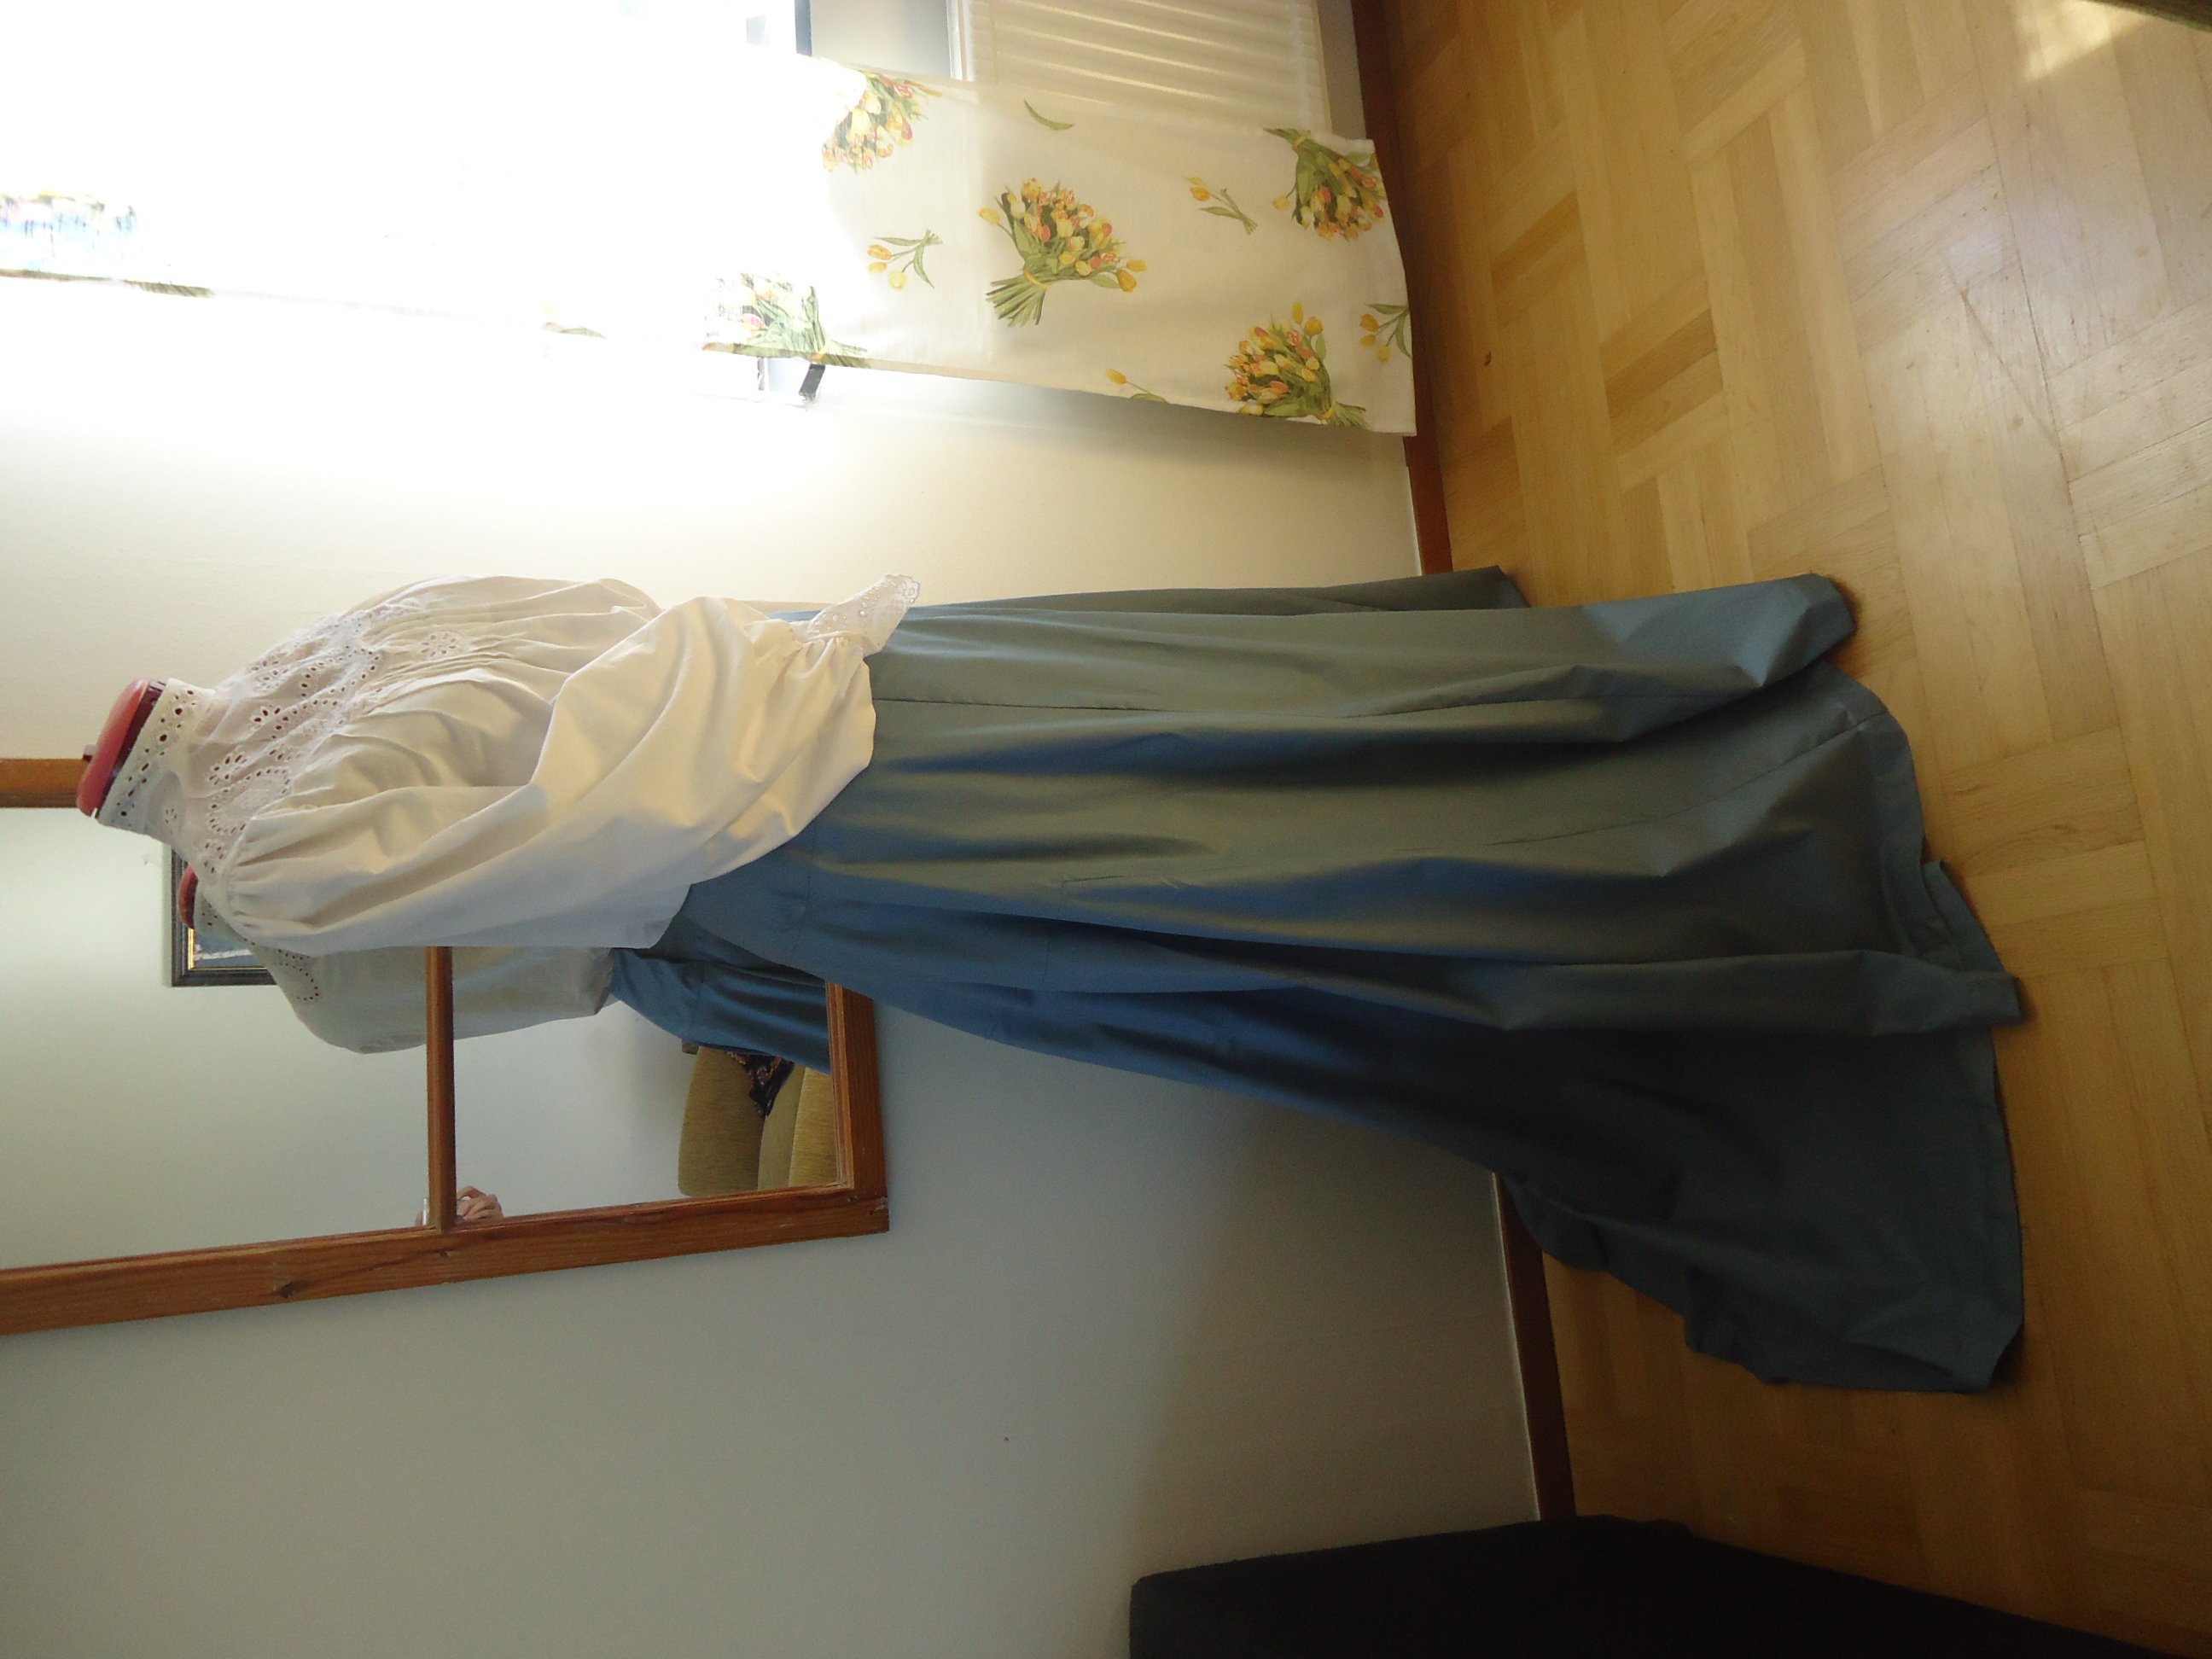
First, I made the bodice part, from a lightweight cotton, that I got from Birgitta. It has a long zipper under the arm. It has two darts in front and, mistortunately two gussets at the lower back (don’t ask me why). Then I added a skirt, made from a synthetic lining fabric, that I got amongst the most beautiful fabrics from Sollan, through Carolina Holmström. In order to get the right  flowy shape, I have added tulle in several rows, smother in the front and more gathered in the back.

Creating a bodice pattern from the draped fabric

Först sydde jag klänningslivet av rester från ett tunt bomullstyg som jag fått av Birgitta. Livet har en lång dragkedja under armhålet, två inprovningar framtill och två sprund i ländryggen (fråga inte varför). Sedan sydde jag fast en underkjol, av tyg som jag fått tillsammans med flera fantastiska tyger från Sollan, genom Carolina Holmström. För att få till den perfekta böljande formen, fäste jag sedan tyll i flera rader nedtill på kjolen – mest rynkade baktill.

Finished bodice with zipper
Petticoat with tulle, to get the right shape

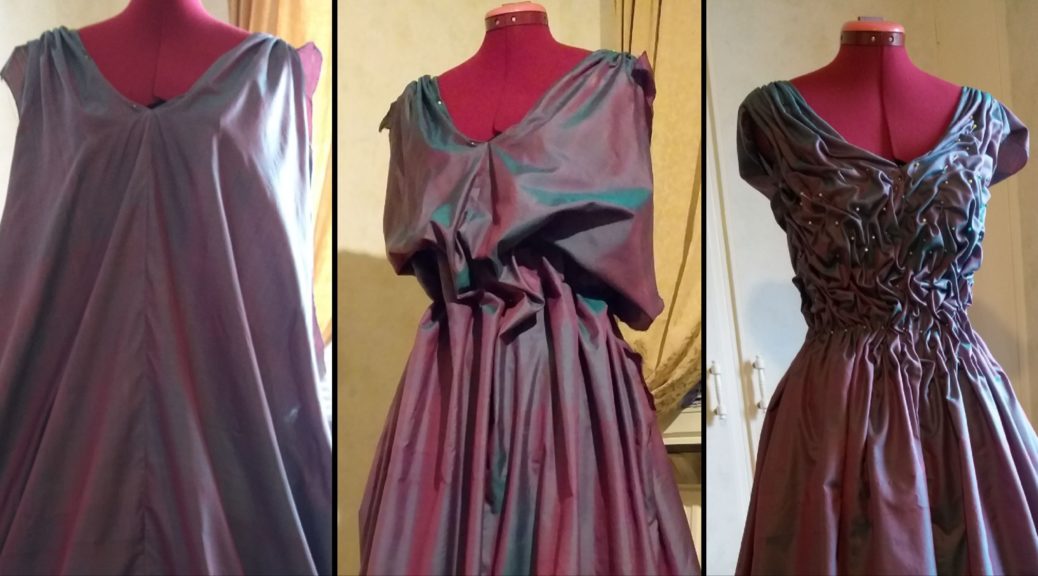
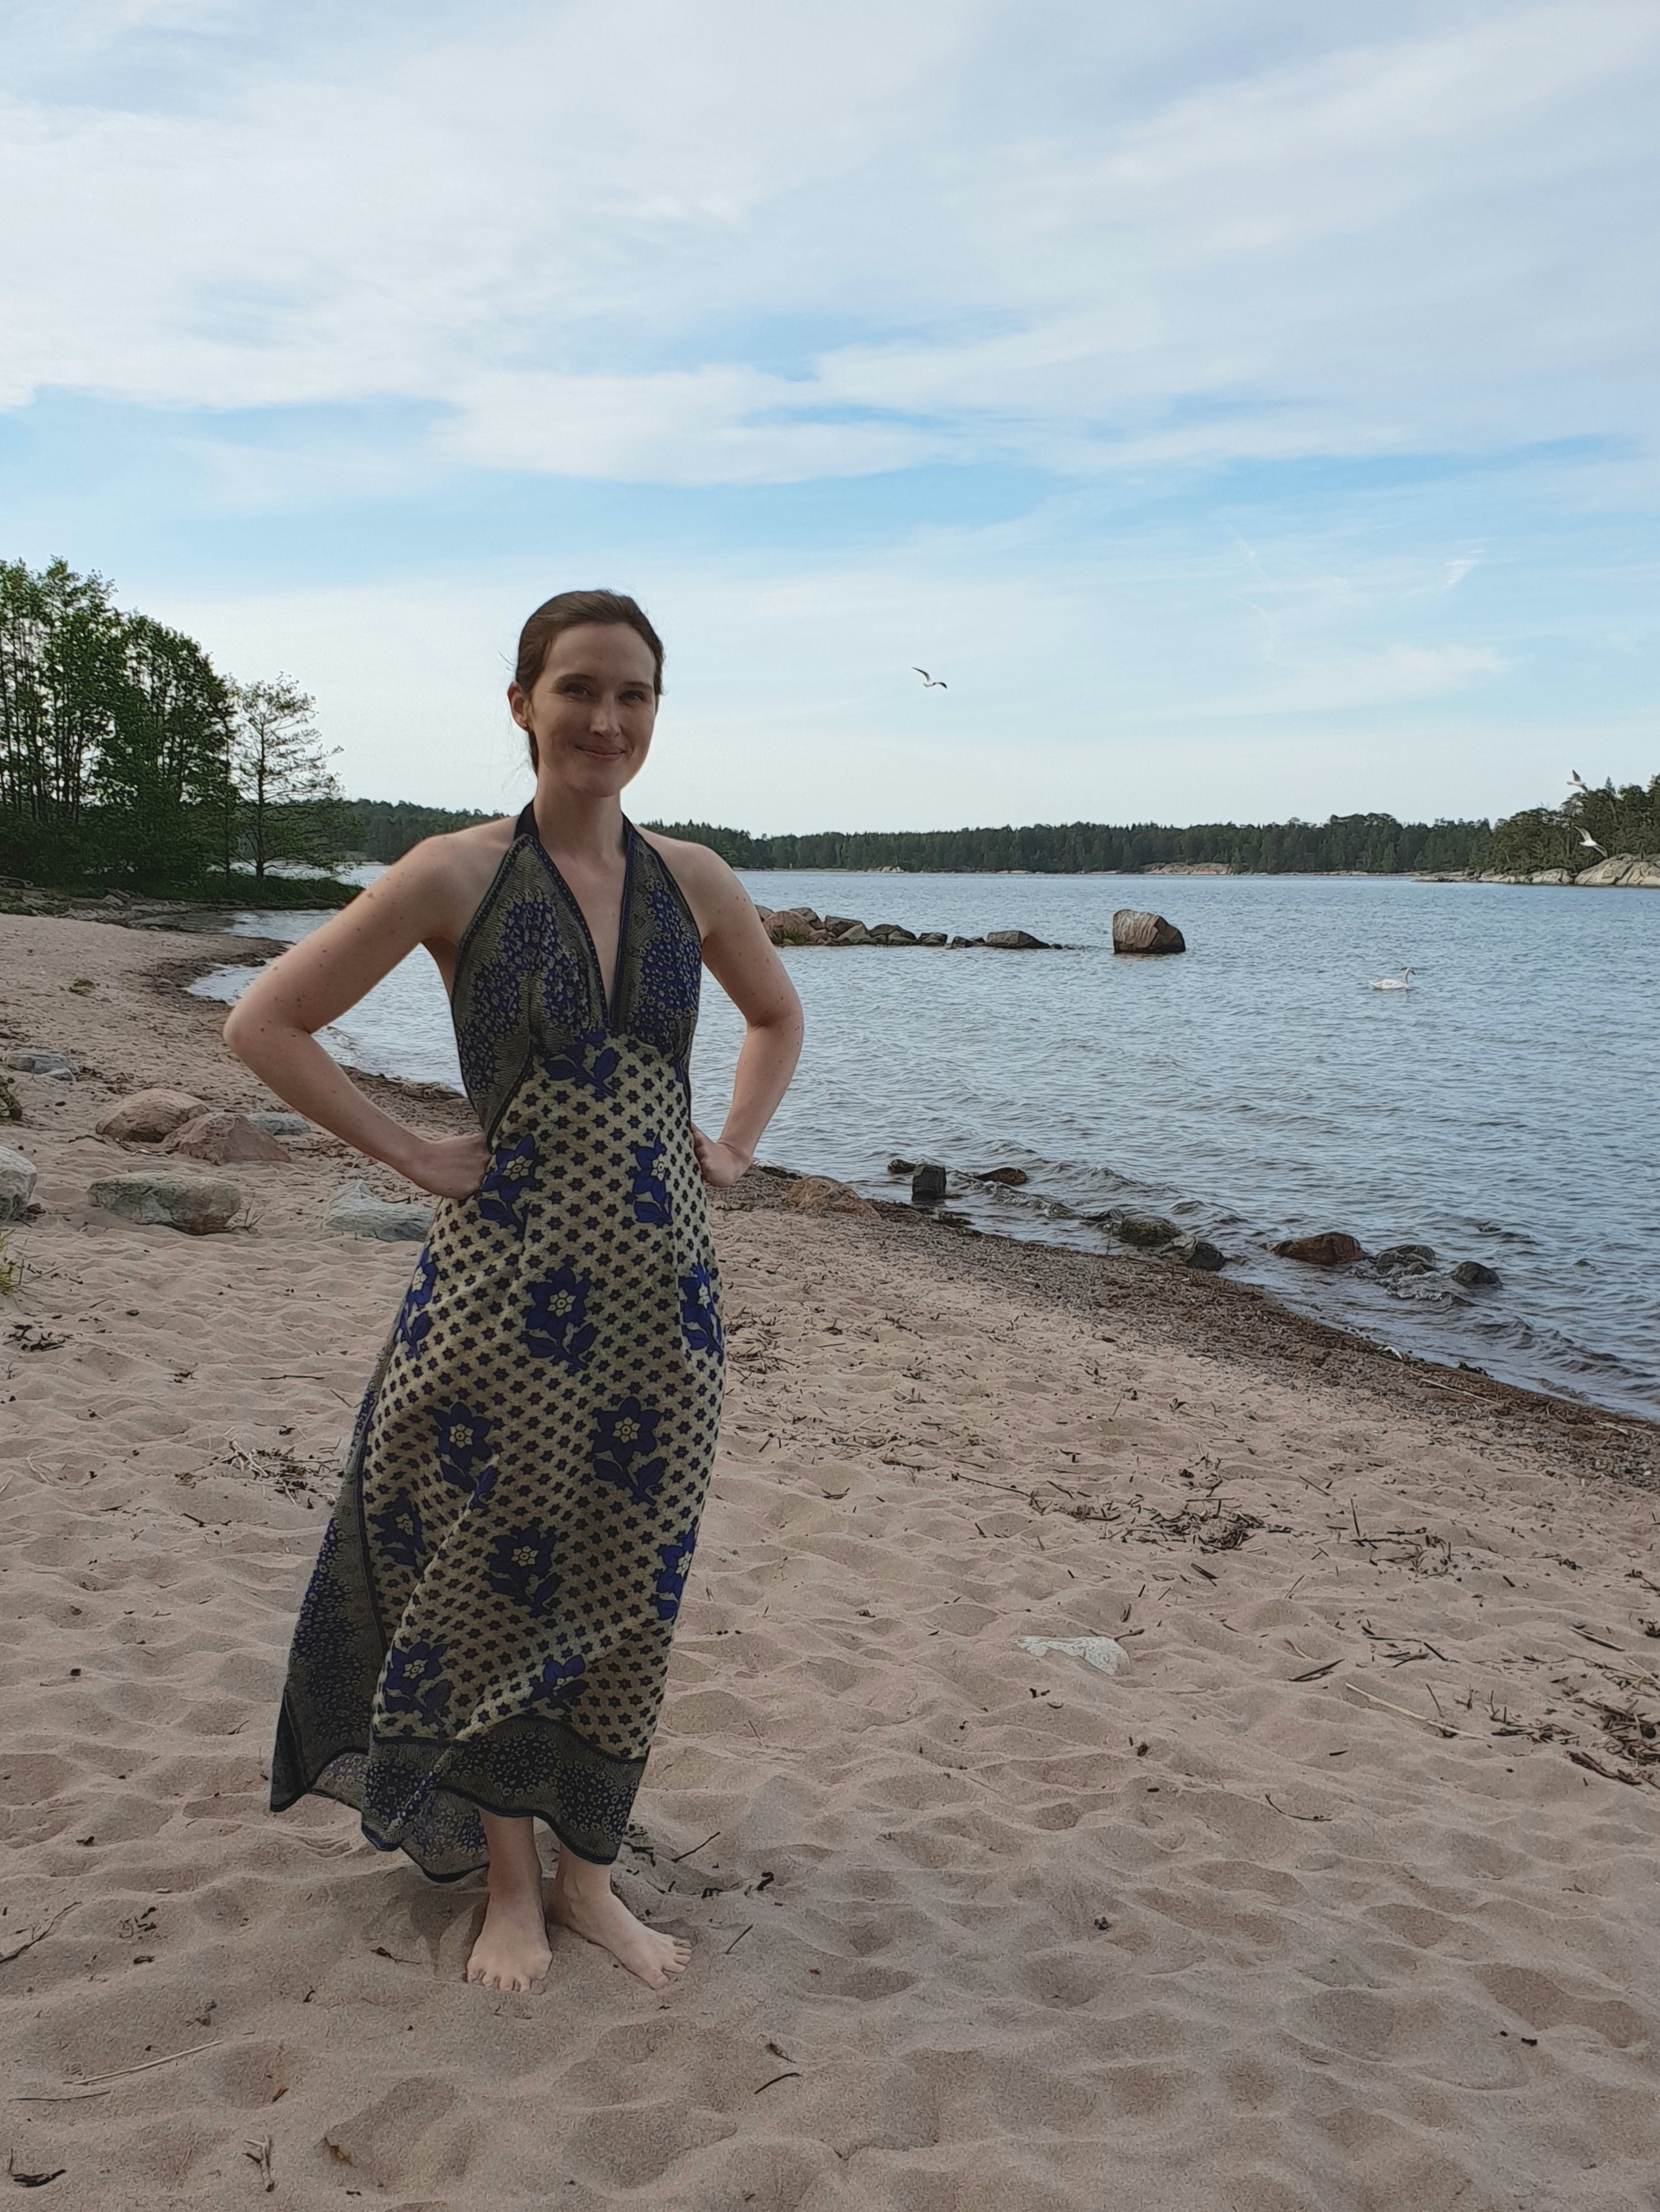
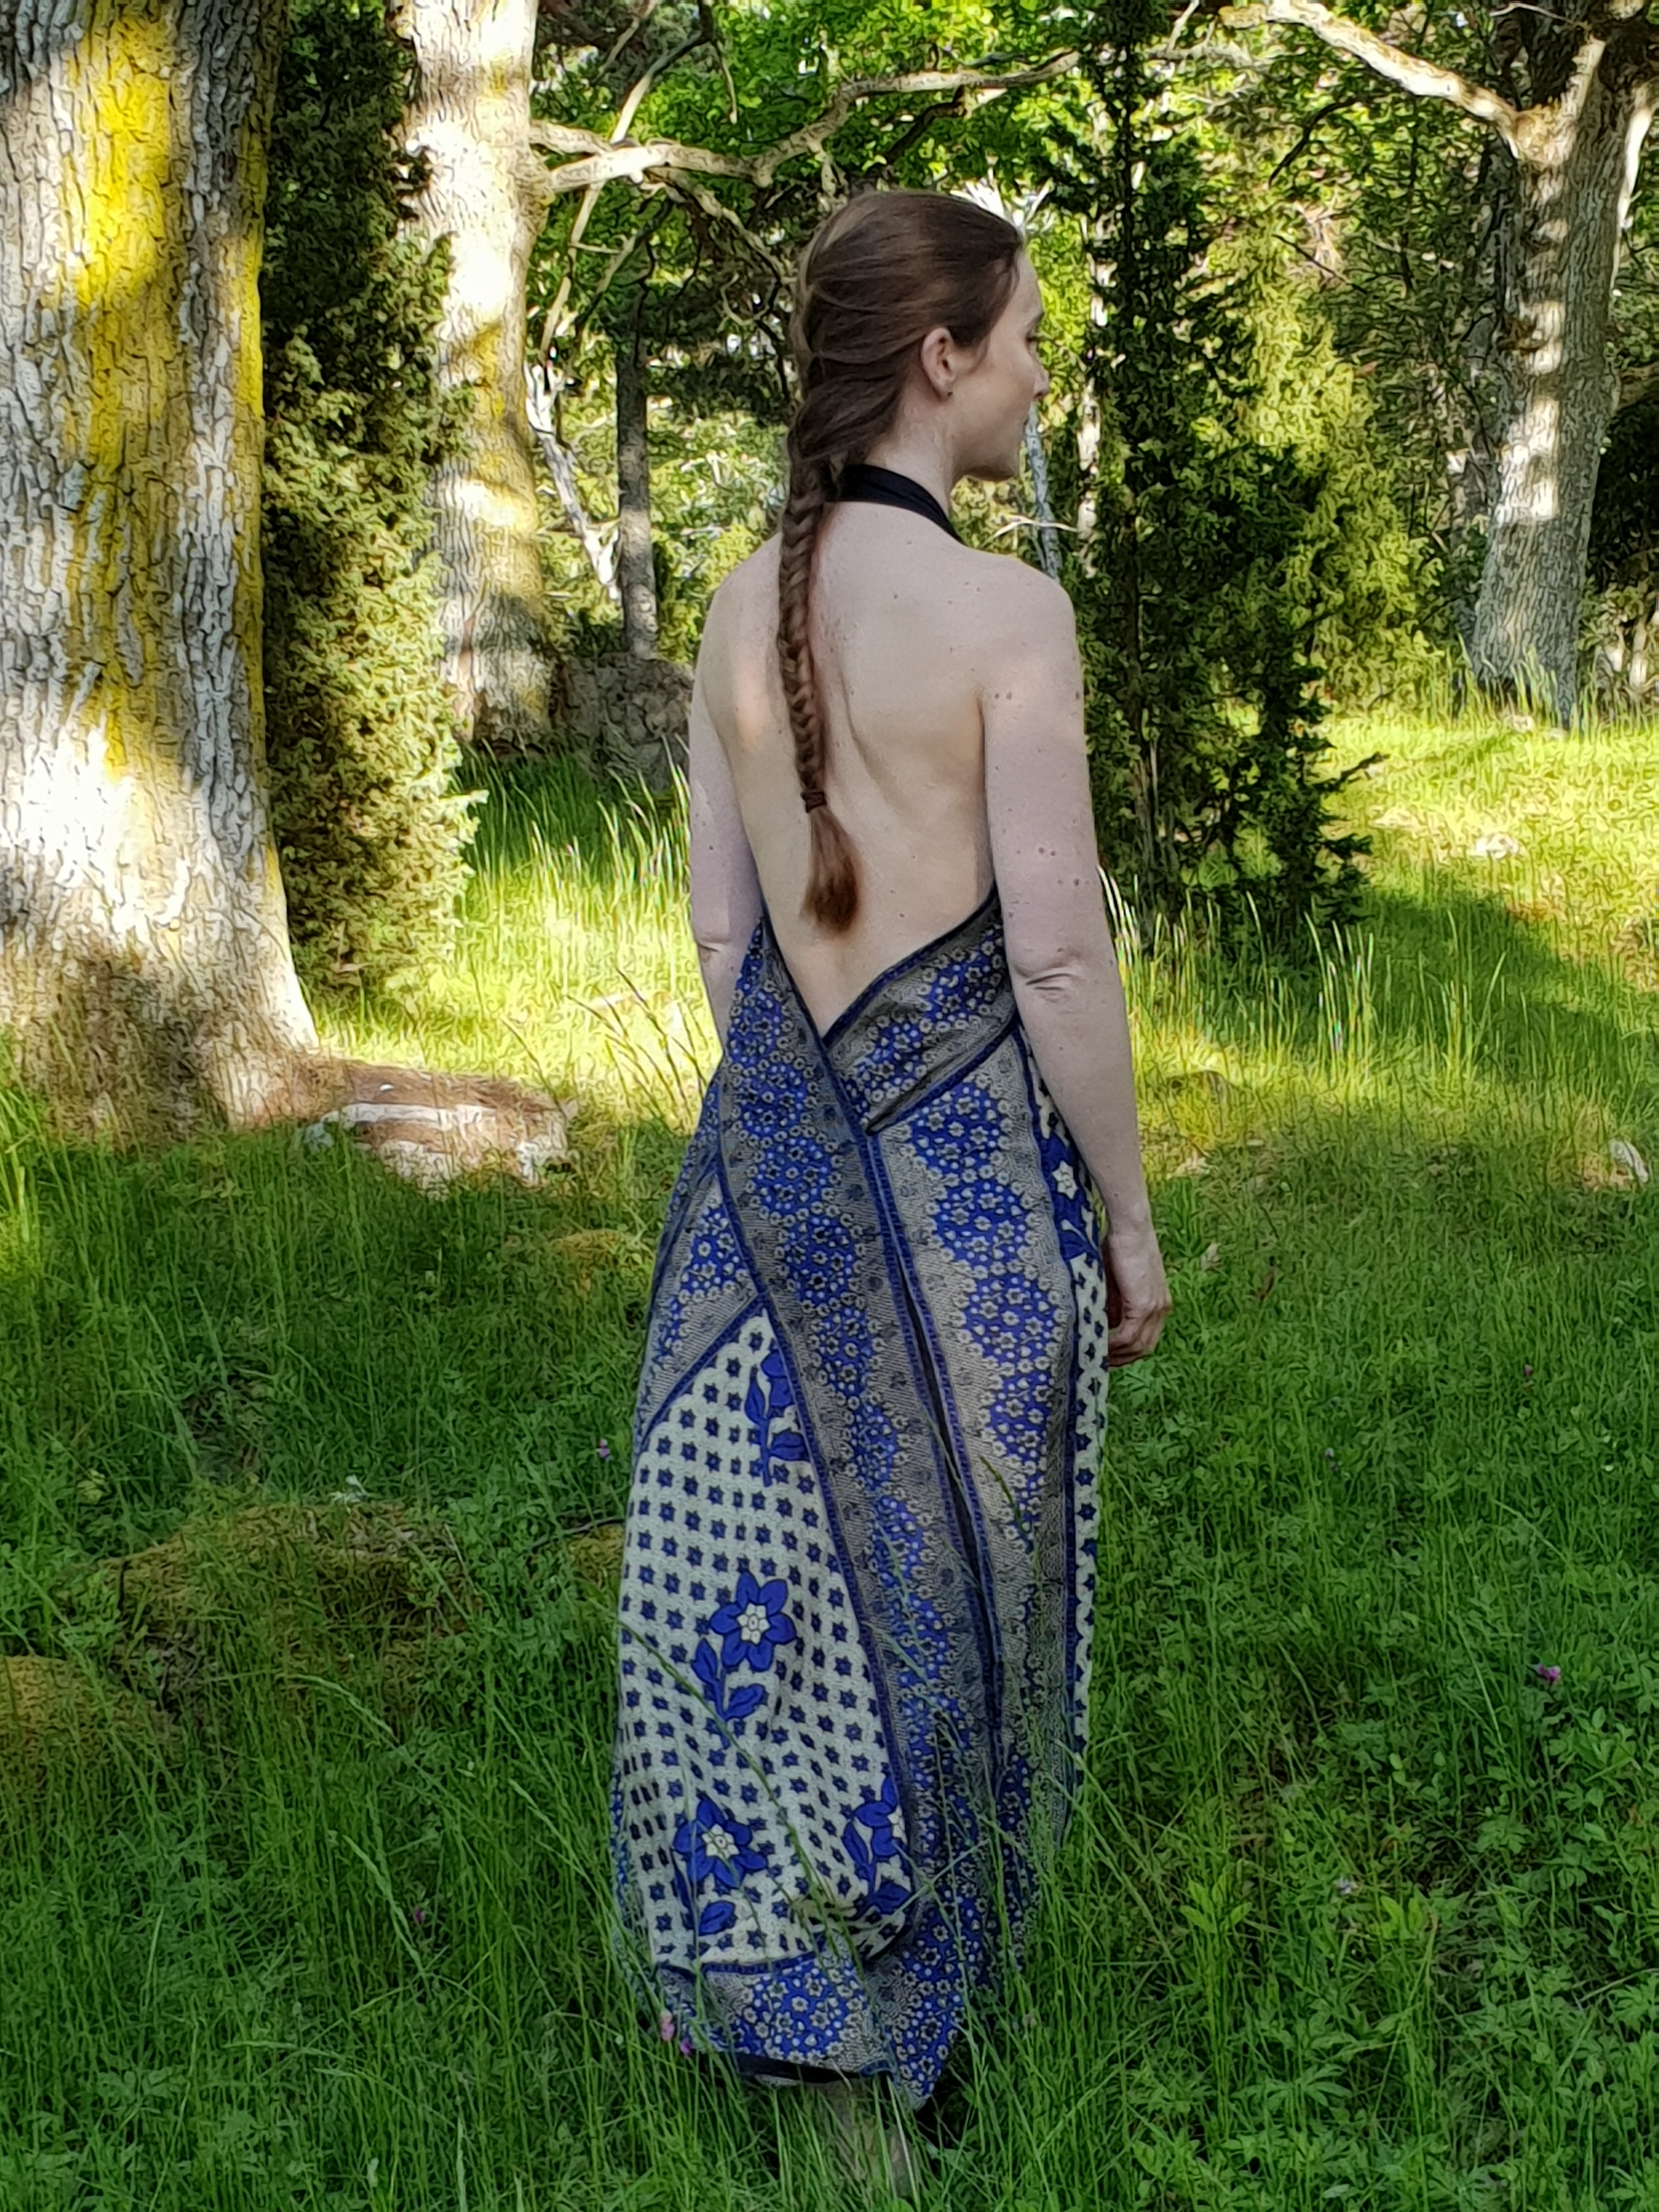
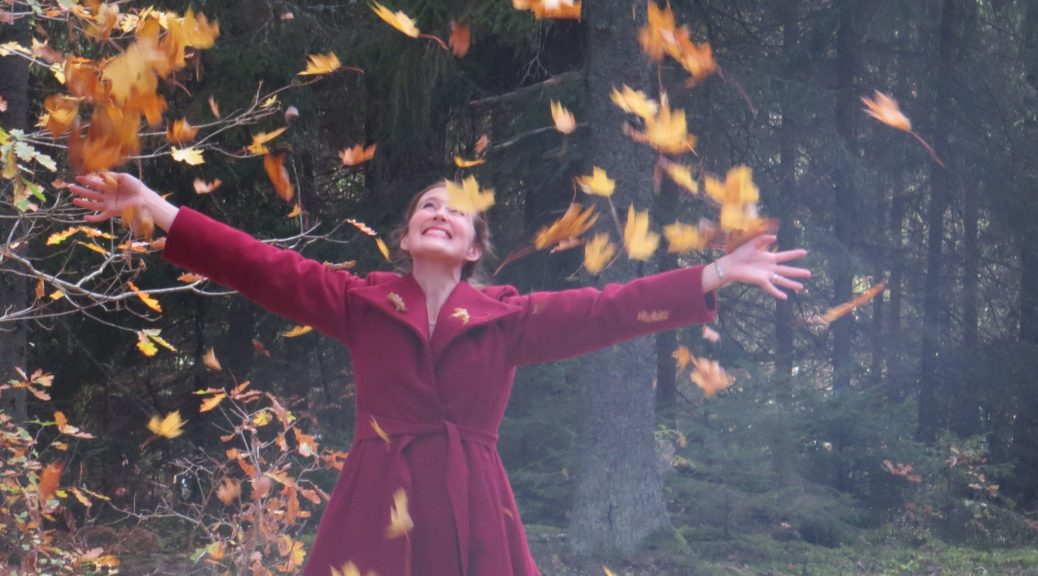
The fashion fabric is a very lightweight dupioni ikat from Khiva (an ancient city along the Silk road), that I got from my mother years ago. Since it doesn’t fit the historical fashions that I use to do and is too beautiful to use for any project, it has just layed in my stash, to be taken out and be stared at for a while every year. I was thrilled when I finally found out that it would suit my serpent witch!

Klänningstyget är ett tunt ikatmönstrat dupionsiden från Khiva (en uråldrig stad längs sidenvägen), som mamma gav mig för många år sedan. Eftersom sådana tyger inte förekommer under de historiska moden som jag sysslar med, har tyget legat i en låda för att bli framplockat och stirrat på med jämna mellanrum. Jag blev så glad när jag kom på att det skulle passa fint på ormhäxan!

It is 60 cm wide and good 9 m long. I have measured and counted so many times, trying to figure out how to cut the fabric and have something left for the sleeves. Finally I have decided to just finish the dress and see what I can come up with with, using what fabric is left afterwards. Oh, the horror.

Tyget är 60 cm brett och drygt 9 m långt. Jag har mätt och räknat så många gånger, för att lista ut hur tyget ska klippas och ändå få något över till ärmarna. Till slut har jag bestämt mig för att göra klart klänningen först och se om det sedan klura ut hur ärmarna ska se ut, utifrån hur mycket tyg jag har kvar då. Kära hjärtanes.

Draping the blob into a fairytale gown

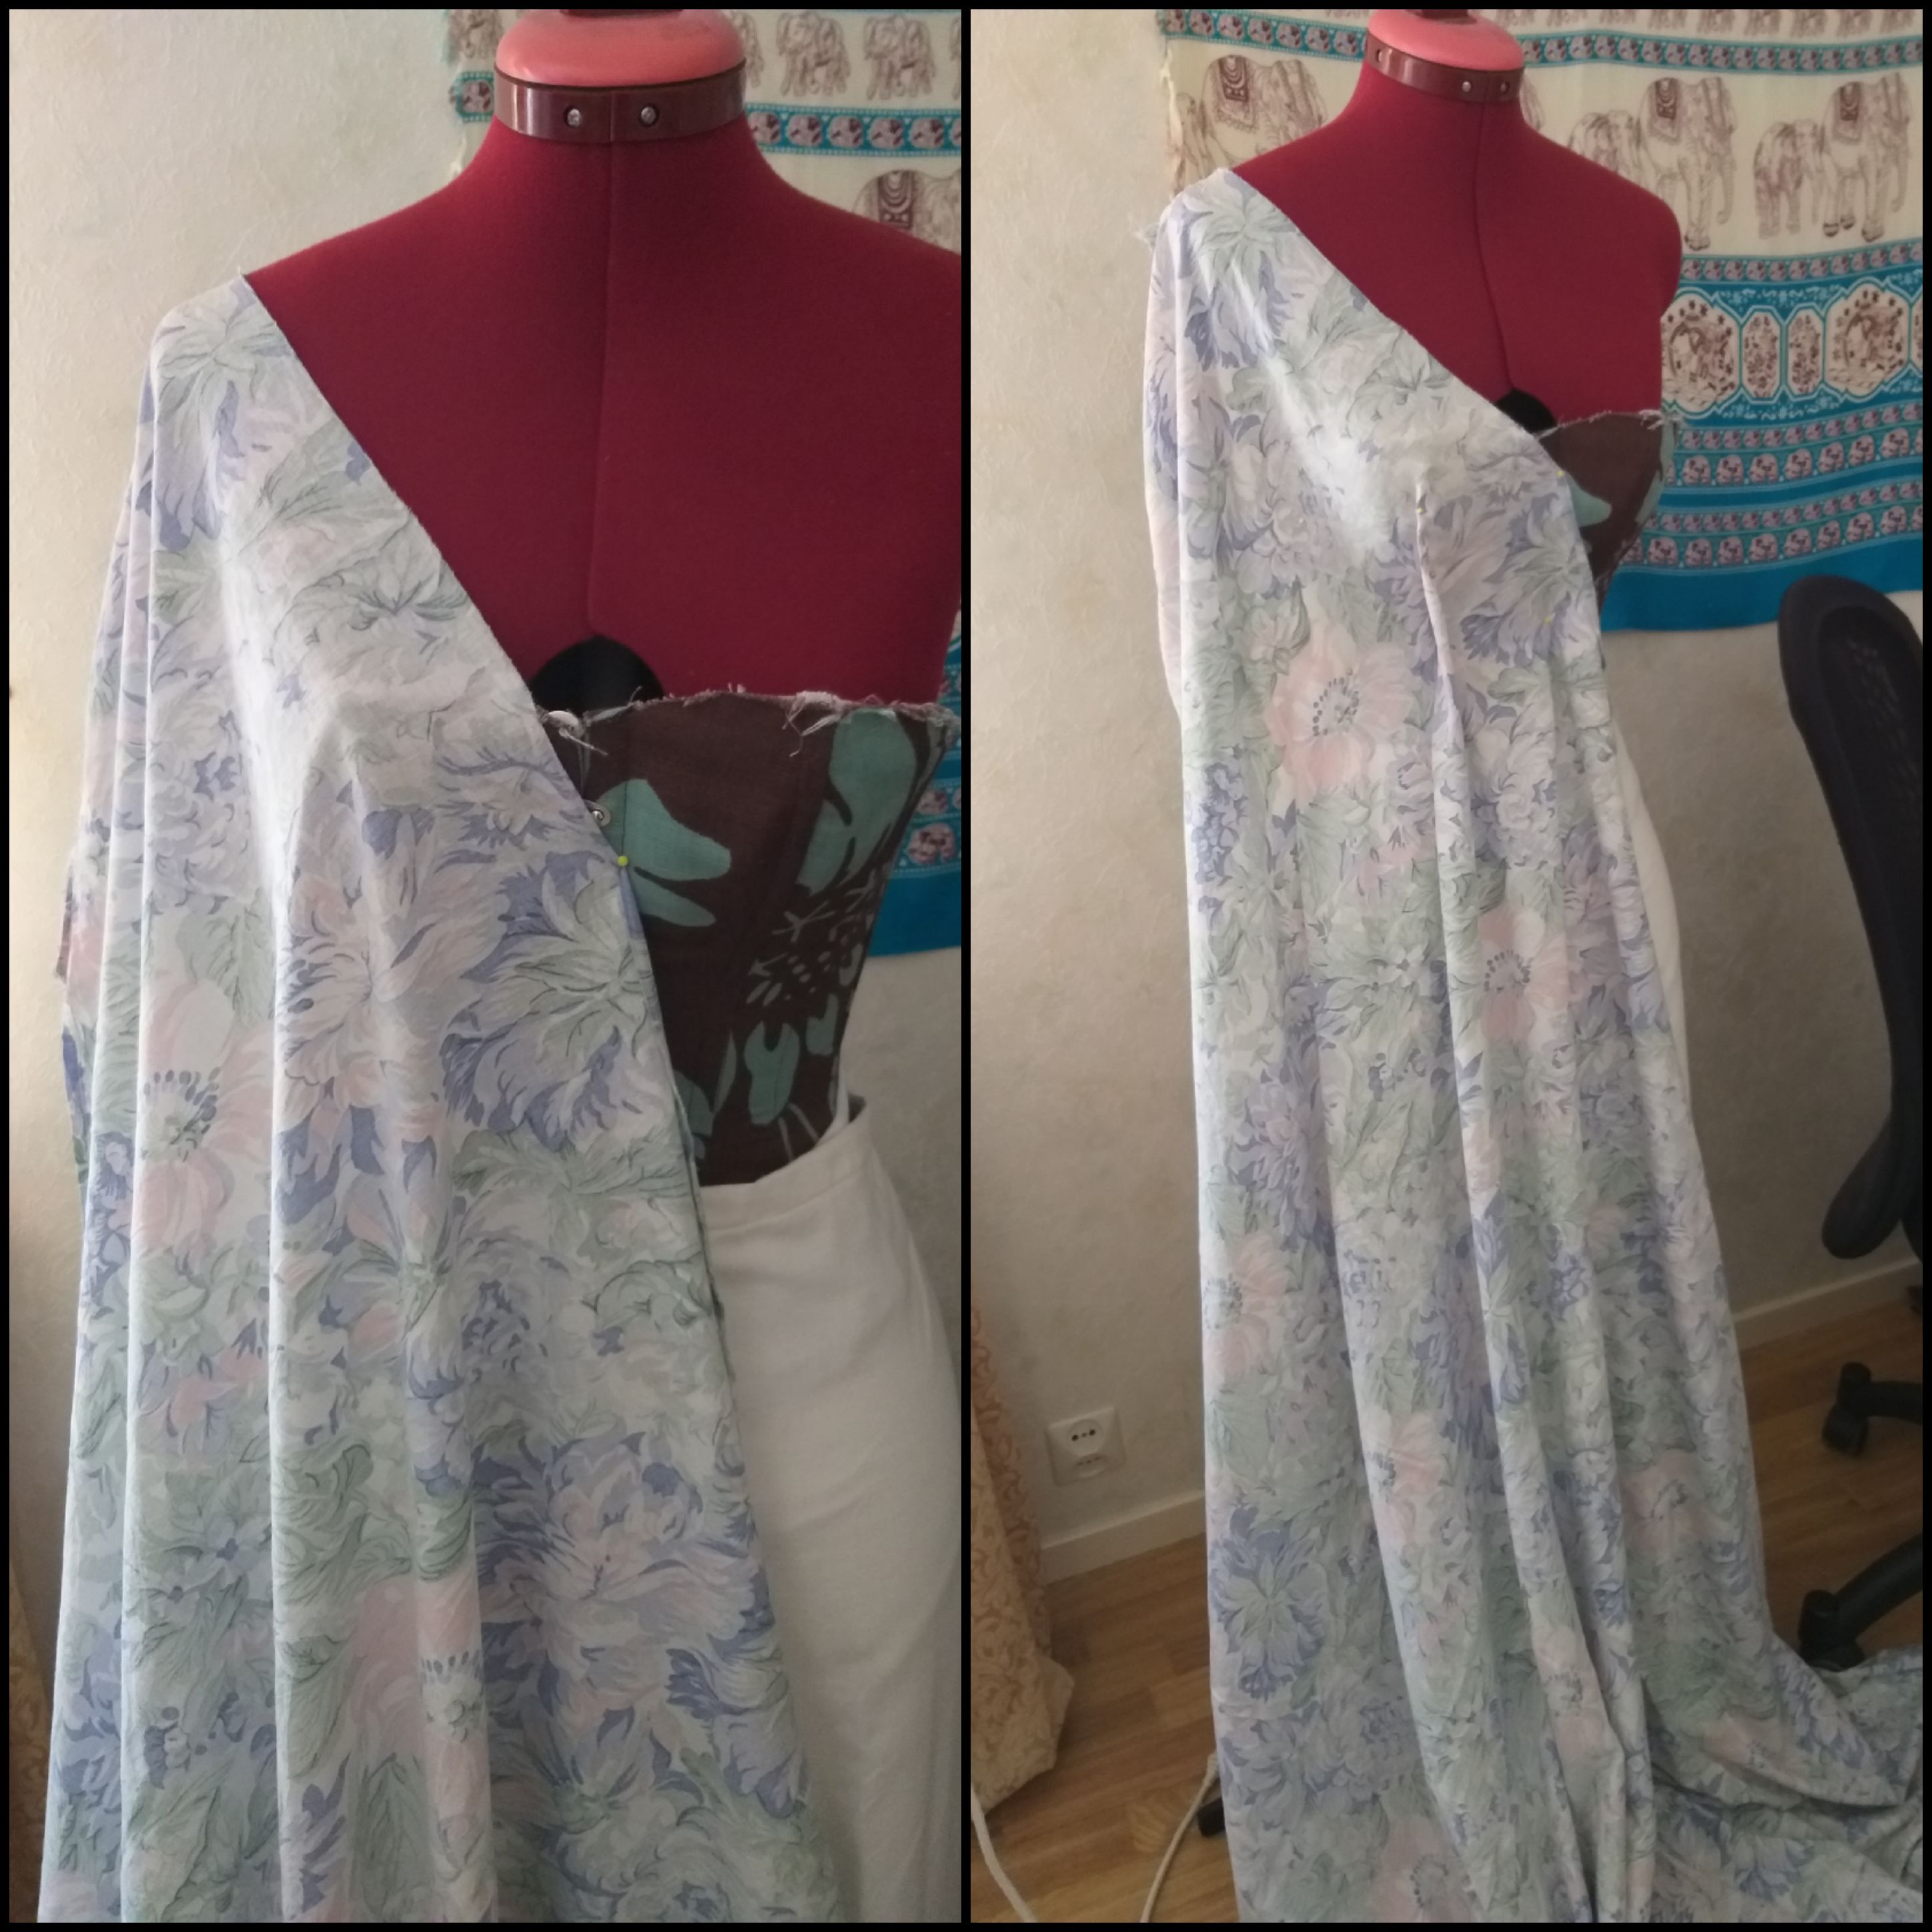
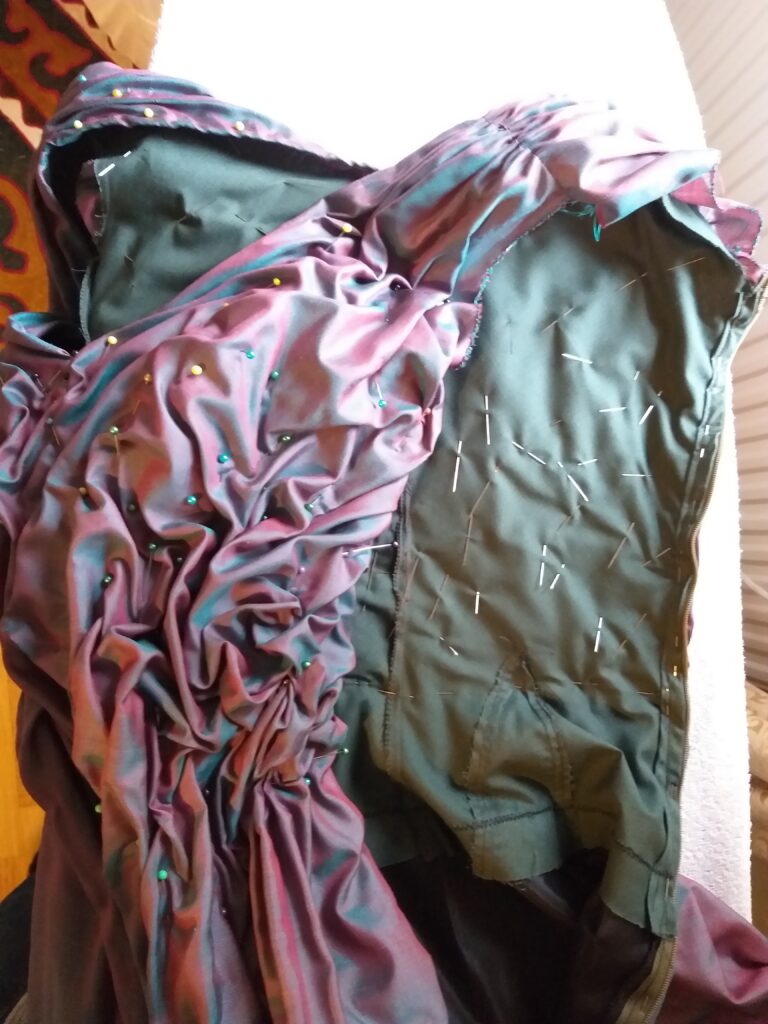
Now I have started draping. It is great fun! But it is challenging to save the hemline at the right height as I  manipulate the fabric. I put a pin in every wrinkle and will then secure all of this stiching by hand with my finest needle. This will take maaaany hours.

Nu har jag börjat drapera tyget. Det är superkul! Men det är knepigt att bevara rätt höjd på kjolfållen medan jag manipulerar tyget. Jag sätter en nål i varje veck och ska sedan fästa allt detta med handsömnad. Detta kommer ta mååååånga timmar.

Share

Serpent Witch – Part 1

Dress Diary Part 1

Background

The journey has finally begun! The theme of next year’s Your Wardrobe Competition is any character from any literature.  Exciting, isn’t it?! I haven’t been able to decide on which character to go for, as I feel like I can’t go down the Jane Austen lane and yet another regency gown. Unfortunately the Elizabeth Gaskell characters are from particular years that I am not willing to spend a year on recreating and the wonderful characters of Dickens are either too young or too old for me. There are some sympathetic background characters in Astrid Lindgren’s books, but I have already made a competition piece inspired by her Edwardian teachers. I have already seen many go for my dear Tolkien characters. For a while, I thought about making a dress for David Eddings’ Polgara.  Then there is a character in the Narnia book “The Silver Chair”, which actually has tickled my mind for many years – the Green Witch! When I was a child I dreamed of designing a dress for her, but then I lacked the skill to carry it out. Now, as a member of the Stitchling Society, surrounded by true masters, I  think that I actually might be able to pull it through!

The Green Witch

I read the passages with the witch again (in Swedish). She is obviously the most beautiful creature Prince Rilian has ever beheld. Haha! She is very slender, with curly hair and glimmering skin. Her dress is flowy, in a venomous green colour.

I want to make a dress for this lovely lady! In order to get such a slim waist, I will need a corset with waist reduction and breast padding. As I like the victorian take on the medieval fashions (especially the preraphaelite take on this), I  will make what I call a Medievorian dress. I will use my lightweight dupioni fabric from Khiva, hoping to create a flowy texture on top of the corset base. I have not  yet  decided  what  the  arms  will  look  like,  as  I am  not  sure  how much  fabric  will  be  left  when  the  rest  of  the  dress  is  finished.

I want to make some kind of belt, incorporating her serpent avatar.

Corset

I made a self drafted corset pattern by Cathy Hay’s tutorial, years ago. Because of lack of money and thus lack of the right materials I have never finished it. I have returned to it several times, though, and drawn cryptical lines… I believe I originally made it for giving 2″ waist reduction and some push up.

Here comes my several mockups.

These lines must have been for an Edwardian shape? The corset fitted like a glove, but gave no extra shape.

2nd mockup, with straight lower line, some waist reduction, but no extra room for breasts. Made from a bed cover fabric, a gift from my brother.

3d mockup with too big bust, and back skin spillage because of breast padding pulling the corset forward. I add 2 cm sloping waist.

4th mockup much better, but I reduce the bust a little more and change bent steel boning for spiral steel at the bust. In the sides I add heavily bent steel boning.

4,5 mockup – almost perfect? Sloping waist, waist reduction and padding for the breasts.

Now I am ready for draping the foundation layer and then the dress on the corset mockup. Hopefully I will have time both for finishing the real corset, the dress and accessories in time for the competition.

Share

Regency Waistcoat and the Ball

This Saturday was hectic and lovely. After a couple of hours terrible sleep, a was awaken by my happy two year old boy. We played for some hours and then I left for singing and playing the violin at a wedding. The road led through a beautiful autumnal landscape and the sun was shining over the church and the lake. The wedding was filled with love and I felt very honored to play for them (even though my violin untuned itself again and again because of the freezing cold). After having played a folk music march, down the stairs and leading the company to their refreshments, my fingers were numb. I went back by car in a hurry and was so happy to arrive in time for changing clothes in time for the Regency Ball!

Denna lördag var hektisk och härlig. Efter några få timmars dålig sömn väcktes jag av min glada tvååring. Vi lekte i några timmar och sedan åkte jag iväg för att sjunga och spela fiol på en vigsel. Vägen ledde genom ett vackert hötlandskap och solen sken över kyrkan och sjön. Vigseln genomsyrades av kärledk och jag kände mig väldigt hedrad som fick spela för dem (även om min fiol stämde ur sig gång på gång på grund av kylan). Efter att ha spelat en gångmarsch, gåendes nedför trappan och ledande gästerna fram till deras förfriskningar, hade fingrarna tappat känseln av kylan. Jag skyndade mig tillbaka och var så glad när jag insåg att jag skulle hinna byta om i tid för empirbalen på Storebro Herrgård!

Regency Waistcoat

I made a new waistcoat to to match the new black tailcoat. After several months of  dithering, I ordered a beautiful silk fabric from Renaissance Fabrics. I really wanted to buy all of their fabrics… I drafted my own pattern, consisting of two lined front pieces with pockets, two back pieces and a standing collar out of two pieces of fabric, as in this sketch. I will upload some better pictures later.

Jag sydde en ny väst som skulle matcha min mans nya empirrock. Efter flera månader av beslutsångest beställde jag till slut ett vackert sidentyg från Renaissance Fabrics. Egentligen hade jag velat köpa alla deras tyger! Jag hade inte goda erfarenheter av det västmönstret från Reconstructing History, som jag använde förra gången, så nu ritade jag ett eget mönster. Det består av två fodrade framstycken och två bakstycken, samt en stående krage, som på denna skiss. Jag ska ladda upp några bättre bilder på västen senare.

My magnificent husband in whole!

Min stilige man, i hela sin härlighet!

Reticule

The last day before the ball, i quickly made a reticule to hide my cell phone. I had some help from my son.

Dagen innan balen sydde jag en retikyl för att gömma min mobiltelefon. Min son hjälpte till.

The company prepares for the ball

Ten years ago, a couple of friends and other Jane Austen fanatics attempted to sew regency dresses, using the hardly decipherable morning dress pattern of Recreating History. My sister and I made our  first regency dresses. Caroline made this lovely yellow dress.  My sister did me the honor of wearing the velvet dress, that was inspired by Kiera Knightley’s in the Hollywood version of Pride an Prejudice. Her daughters wore the white bed sheet dress and the one I made from leftovers from my sisters regency dress.

För tio år sedan hade vi en studiecirkel där jag och några andra Jane Austen-nördar sydde empirklänningar, med hjälp av det svårkodade morgon-klänning-mönstret från Recreating History. Dessa var min och min systers första empriklänningar. Caroline sydde denna fina gula klänning. Min syster gjorde mig äran att använda min sammetsklänning, som jag sydde utifrån Kiera Knightlys i Hollywoodversionen av Stolthet och fördom. Hennes döttrar använde den vita lakan-klänningen och klänningen som jag sydde av stuvbitar från min systers empirklänning.

My niece is a styling pro!

Min systerdotter är ett styling-proffs!

I am quite proud of the fact that I have sewn all of the outfits, except for Carlines dress. I wore my YWU competion entry dress.

Jag är faktiskt ganska stolt över faktumet att jag har sytt alla dräkter, förutom Carolines klänning, som jag dock också var ganska involverad i. Själv använde jag mitt tävlingsbidrag till YWU.

At the ball
Thank you, Ellen, for arranging such a lovely evening!

Share

Green Regency Dress

As my only practical regency dress is now too big for me, I wanted a new, washable dress. Once again, I used the simple model with drawstrings at the neckline and under the bust, just as I have done with the girls’ dresses. I remembered to have seen a dress with smooth waist at the front, but I have not been able to find that picture again. Has anyone else seen this picture, or did I make it up? Probably, the back should be open and closed by drawstrings, in order to be truly accurate.

Eftersom min enda praktiska empirklänning endast passade under graviditeten, var jag sugen på att sy en ny, tvättbar klänning. Jag använde modell som flickornas klänningar, med dragsko i urringning och under bysten. Jag mindes att jag sett en klänning där tyget låg slätt framtill, under bysten, men har sedan inte kunnat hitta bilden igen. Har ni sett den, eller har jag hittat på? För att klänningen skulle vara tidstypisk, borde den egentligen ha haft en öppning i ryggen, som stängts med dragskorna.

This was how I made the pattern smooth over the waist. Then I trimmed away the excess fabric in the neckline and armpit. The back of the bodice is just broad overall.

Back of the bodice at the top. Front at the bottom.

After sewing the front and back bodice parts together, I attached the skirt. In the front it lays smooth, while it is gathered in the back. At the waist seam, I added a waistband, where I hid the drawstring. At the inside of the neckline I also put a drawstring. I made a simple, straight arm. Last, I stitched the rolled hems by hand.

Efter att ha sytt samman fram- och bakstycke satte jag dit kjolen. Framtill ligger den slätt mot överdelen, medan den är rynkad baktill. Över sömmen under bysten fäste jag ett midjeband, som jag använde för dragskon. Ärmarna är bara raks tygstycken med ärmkulle. Jag handsydde rullfållarna sist.

I am happy with the result. I felt like one of the Dashwood sisters. The only thing lacking now are long kid gloves. Please tell me if you find a pair for me!

Jag är nöjd. Jag kände mig faktiskt som en av systrarna Dashwood. Vad som verkligen saknas i denna ensamble är ett par långa skinnhandskar. Säg till mig om ni hittar ett sådant par, snälla!

Share

Medieval Kirtle

This summer was wonderful, but intense. At the first day of my vacation I realized that I would have to prepare three different repertoires for the four concerts in three weeks, so I understood that I needed to finish my sewing projects quickly.  Said and done. In one day I finished a modern dress for my friend, I made a kirtle for my sister’s boy to wear at the Medieval Week of Visby and I also finished the regency waistcoat for my husband. The extremely simple regency dress was sewn in one day on sewing machine, but I finished the long roll hems the other day.

Den här sommaren var underbar, men intensiv. Första dagen på semestern insåg jag att jag måste lära in tre olika repertoarer för de fyra sångtillfällena, fördelade över tre veckor, så jag förstod att jag måste slutföra mina påbörjade sömnadsprojekt innan detta. Sagt och gjort. På en dag sydde jag färdigt en klänning åt min vän, jag sydde en kjortel åt en pojke som skulle med till Medeltidsveckan i Visby och jag blev äntligen klar med en empirväst åt min man. Dessutom blev sydde jag en ny, extremt enkel empirklänning, men handsydde fållarna för några dagar sedan.

Quick Medieval Kirtle

Last summer I helped my nieces sewing their own medievalish dresses for Söderköpings gästabud. This summer we had planned to take their whole family to the Medieval Week of Visby for a day, so now their little brother also needed a kirtle. I used a fabric that I found in a second hand shop and the usual “squares and triangles method”.

Förra sommaren hjälpte jag mina systerdöttrar att sy deras egna medeltida klänningar till Söderköpings gästabud. Den här sommaren skulle hela deras familj följa med oss till Medeltidsveckan i Visby. Därmed behövde även lillebror en kjortel. Jag använde ett tyg som jag hittat på Eriskhjälpen. Den är gjord efter “fyrkanter och trianglar-metoden”.These are the pattern pieces that I used.

Detta är alla mönsterbitar jag använde.

After having sewn the front piece to the back piece, I made the arms (which were way too long). I attached the square gusset for the armpit first, then I stitched the rest of the arm and last I inserted the arms into the kirtle.

Efter att jag sytt samman framdelen och bakdelen, sydde jag armar (alldeles för långa). Jag satte fast de fyrkantiga ärmsprund innan jag sydde samman ärmen och satte in den i själva kjorteln.

Then I inserted the triangle gussets into the front, back and side seams. Last sew the hems by hand. I believe I made this in about four hours.

Sedan satte jag in trianglarna mitt fram, mitt bak och i sidorna. Slutligen fållade jag för hand. Jag tror att allt detta tog fyra timmar.

My nephew was most dashing in his new garment! Unfortunately the best picture was taken in front of some cars, so my mother helped me blend that picture with her picture of a medieval french castle. Isn’t it awesome?!

Pojken var väldigt fin i sin nya dräkt! Tyvärr togs den bästa bilden framför några bilar, så mamma hjälpte mig att sammanfoga den bilden med en av hennes bilder av ett franskt medeltida slott. Är det inte en fantastisk bild?!

And here are some pictures from the Medieval week.

Här kommer några bilder frön Medeltidsveckan.

Our family, looking like going on a roller coaster

Fair young maiden in a romantic ruin

I will soon make a new post showing off the summer dress, the regency waistcoat and the extremely simple regency dress.

Snart ska jag även göra ett inlägg om sommarklänningen, empirvästen och den extremt enkla empirklänningen.

Share

Open back

I made yet another quick dress. ? The idea was radiant, but I simply had no time to execute it well. The construction was complicated and there was too much going on at work and my boy demanded undivided attention). I had no patiens to wait for better times, so I  made one quick seam at a time and did not make enough ajustments as I went. I think it’s kind of pretty and was very happy for it yesterday, when everybody else were sweating and I felt cool. Then I  understood that I perhaps exposed myself more than I  had planned to. ?I thought it was foolproof, covering everything except for the back. But obviously not. I will try to get some nice strings to pull the front tighter to the body, while making some intricate crisscross in the back. Uh. I don’t know…

Jag sydde ännu en snabb klänning. ? Konstruktionen var komplicerad, men jag var alltför ivrig att bli klar med den (samtidigt som jobbet och barnet var för krävande), så klänningen blev inte perfekt och nu är det för sent att ändra på. Den är dock skapligt fin och extremt sval – perfekt om den här sommaren skulle bli lika varm som förra. Jag var hur nöjd som helst, tills jag testade att ha den på kalas igår och insåg att den inte var så idiotsäker som jag trodde, med hela framsidan skyld och endast ryggen fri… Jag ska försöka hitta några fina snoddar att dra framsidan tightare mot kroppen, när de bildar något avancerat mönster på ryggen… Åh. Jag vet inte… I have used two Tanzanian ketenges. I started with using the pretty borders of the first ketenge for covering the bust, going down the sides, crossing each other in the back and then continuing in their uncut state at the bottom. It was really tricky to bring the top together with the skirt part. I used the lower part of the second ketenge for the front, using two sets of longitudinal darts – one pair visible in the from and one invisible pair along the border. At the bottom back, I had to make hidden darts growing toward the corners of the borders.

Jag har anänt två tanzanska skynken. Jag började med att använda två hörn för att täcka bysten, sedan löper borderna snett ned längs sidan och ryggen för att korsa varandra och fortsätta ned i kjolen. Borden är alltså sammanhängande förutom vid bysten, där jag klippt bort en stor del av ketengets kortsida. Det var jätteknepigt att sätta ihop de båda tygstyckena på ett bra sätt. Det är två par longitudinella infodringar på framsidan, ett synligt par och ett par dolt längs hela borden. På baksidans nederdel löper två horisontella infodringar längs borden.

Believe me when I say that it was freezing when we shot these pictures some days ago, in the cool wind and long shadows of the evening. ?

It was better in the sun

Share

Sketches

The day before Christmas Eve, I had the pleasure to sing two songs at the sermon of my home church.

Fjärde advent hade jag nöjet att sjunga i min hemförsamling, kompad av pappa på piano.

After a lovely Christmas Eve, the holidays turned out not to be as festive. We had planned to stay at my parents abandoned house after Christmas, so that we could hang out with our friends and famili in Vimmerby, but our families went down with the flu, my husband and son included. I got a sketchbook and a nice “kneadable art eraser” as a Christmas gift from my thoughtful sister and brother in law. These came very handy, as I could not go outside for days and my sick family members slept a great deal of the time.

Efter en härlig julafton visade sig jullovet inte bli lika festligt. Vi hade tänkt stanna kvar i mitt föräldrahem när de drog vidare på äventyr efter jul, så att vi skulle kunna umgås med vänner i Vimmerby, men många drabbades av influensan, så även min man och vår son. Jag fick en skissbok och ett proffsigt suddgummi i julklapp av min omtänksamma syster och svåger. Detta kom väl till pass nu, eftersom jag inte kunde gå ut på flera dagar och sjuklingarna sov stora delar av dagen.

Snail princess / Snigelprinsessa

The first sketch was inspired by Art Deco, with flowers surrounding a princess on horseback. No, wait a minute, she is riding a snail. I would have prefered to use water colour, but in the arts-and-crafts-stash that my parents keep for their grand children, I found sharpies, oil crayons and a painting kit from IKEA, containing watercolours without any brush, crayons and enormous colour pencils. I used the colour pencils.

Första bilden var lite inspirerad av Jugent, med stiliserade blommor som omger en prinsessa till häst. Nej, förresten, hon rider visst på en snäcka. Jag skulle ha föredragit att färglägga bilden med akvarellfärg, men i pysselhörnan i mina föräldrars hus hittade jag bara oljekritor, tuschpennor, IKEAs målarkit med vattenfärg utan pensel, kritor och gigantiska färgpennor. Jag använde jumbopennorna.

Rabbidile / Krokonin

The next picture shows the unholy alliance between a crocodile and a rabbit. Isn’t it sweet?

Nästa bild visar den oheliga alliansen mellan en krokodil och en kanin. Är den inte söt?

Hippopollion

The last picture shows the great hippopollion, the king of the river. He wishes you a

Happy New Year!

Sista bilden visar flodhäjonet, flodens konung. Han önskar er ett

Gott nytt år!


Share

Blouse out of a Shirt

My father does not care about clothes. This high quality shirt,  made of fine Egyptian cotton, was damaged while  carrying wood. It felt wrong to just throw it away. I thought about just using the unstained parts, but then only the back and the collar remained, so the shirt has been lying in my stash for one year now, awaiting the serendipity.

Pappa bryr sig inte om kläder. Denna fina skjorta, i fin egyptisk bomull, blev sönderriven och nerfläckad när han bar ved. Det kändes fel att slänga så fint tyg. Jag hade tänkt behålla de oskadda delarna, men vid närmare granskning visade sig endast ryggen och kragen ha klarat sig. Därför har skjortan legat undangömd i väntan på en uppenbarelse.

I often wore my historical clothing at home before becoming a mother. Now I have hardly worn anything historical for two years for fear of having it stained or torn and because of the impracticality (it is quite hard to crawl around on the floor and under furniture, wearing floor length skirts). One week ago the need for wearing something historical grew too great and I decided to wear Edwardian clothing for the Christmas dinner at work. Since I ended up sharing table with people who did not know about my interests, nobody understood that my strange hair and clothing was historical and I just felt awkward. I decided that it was time to make something historical that I could wear at home – practical for the sake of my son and nice looking for my sake. This was the perfect purpose for the damaged shirt!

Innan jag blev mamma hade jag ofta historiska kläder till vardags. Nu har jag nästan inte använt något historiskt på två år, dels i fruktan att kläderna ska förstöras och dels för att det är så opraktiskt (det är ganska krångligt att krypa runt på golvet i hellång kjol). Förra veckan blev abstinensen efter att ha historiska kläder för svår, så jag bestämde mig för att ha min edwardianska dräkt till julbordet på jobbet. Jag hamnade vid ett bord med folk som inte känner till detta udda intresse, så ingen fattade att kläderna och frisyren var historiska och jag kände mig bara dum och missanpassad. Jag bestämde mig för att sy något slitstarkt historiskt plagg som jag skulle kunna ha hemma istället. Detta var ju det perfekta användningsområdet för den redan förstörda skjortan!

I decided to refurnish it – I took everything apart and switched sides for the front parts, so that the worst parts were placed at the sides, about the hight of the waistline. The front parts were sewn together and then the armholes made a deep neckline, that I needed to hide.

Jag sprättade isär alla delar och bytte plats på framstyckena, så att de värsta fläckarna hamnade i sidorna, nära midjan. Framstyckena syddes samman framtill. Ärmhålen bildade en djup urringning som behövde fyllas.

I used the pieces from the top of the back, to fill the neckline.

Jag använde delar från ryggens ovandel för att fylla igen urringningen.

Since this blouse should not fit closely,  I made straight seams in the sides and cut armholes. Then i started decorating the neckline with the help of my sewing machine.  Because of the different layering along the neckline, the seams ended up very uneven, and I found myself masking my mistakes by adding more and more decorating seams.

Eftersom blusen inte ska smita åt runt kroppen, sydde jag bara raka sömmar i sidorna och klippte ärmhål. Sedan började jag dekorera runt urringningen med maskinsöm. På grund av alla olika lager blev sömmarna ojämna och jag la till fler och fler sömmar för att maskera tidigare fel. 

Then I gathered the top and bottom of the arms, so that the became poofy. I reinserted the the original cuffs, but shortened them and  used the wrong side out, as this was less stained.

Sedan rynkade jag upptill och nedtil på ärmarna, så att de blev puffiga. Jag satte tillbaka de ursprungliga manchetterna, men förkortade dem och vände ut avigan, eftersom den var mindre fläckig.

The stains remain, but you just see them when looking for them. As I made this blouse in a hurry, there is a vast amount of mistakes, but as I am to wear it at home, I am quite happy with the outcome.

Fläckarna är fortfarande kvar, men man ser dem bara när man letar efter dem. Eftersom jag sydde blusen snabbt och slarvigt är det galet många misstag här och där, men jag ska ju bara använde blusen hemma och jag är nöjd med slutresultatet.

Share

Red Winter Coat

The Indian summer gave me time to finish my new coat. I bought the recycled wool from Korps market stall at Söderköpings gästabud. The interfacing comes from my sister’s old winter coat. I have also used shoulder pads and black lining material from my husband’s regency tailcoat.

I tried to design a pattern that would work for mild winter weather, with the possibility for wearing thick clothing underneath. It ended up being without buttons, only closed with a belt. In order to give the skirt a nice fall and to reduce bulk, I could not make a double fold at the hem, but handstitched the lining to the coat fabric all the way around.

Later, I am planning to make a removable high collar too. I have already made buttonholes on the inside for securing the collar.

Share

Edwardian Blouse out of Reused Materials

The Edwardian Lady Outfit.

I have a dear friend, who loves historic fashions and has swooned over my Edwardian lady outfit. She has had a really rough time, so I wanted to do something for her, and promised her that she would have the outfit. Then I decided to make a new blouse for her, that would have long arms to protect her sensitive skin and that she would be able to close by herself. I dug deep into my stashes and found some lace left from the tank top that I used for the regency chemissette, and a matching off white cotton from other recycled materials.

I layed out the pieces of lace on the mannequin in order to find the best design. Then I added the cotton fabric to fill the great voids. I used the same techniques as in the last high collar blouse:

  1. I started with two rectangles of fabric – the back as wide as half of the bust measurement and the front 10 cm wider than the back
  2. I stitched 5 mm wide pin tucks in the front, starting in the middle and working my way to the sides with 1 cm spaces between the tucks.
  3. I stitched  the lace to the fabric, then I cut the fabric away on the wrong side and hemmed from the wrong side.
  4. Then I added three pin tucks more on each side.

First I stitched the piece of lace to the right side of the fabric, then I cut the fabric away from underneath the lace and last I hemmed the edges.

When this was finished, I stitched the front to the back on the shoulders and sides. Then I attached the great piece of lace and high collar to the bodice in the same way as the other pieces of lace.

Next, I made the very simple arms: I measured the circumference of the armholes, cut to pieces of fabric with this width plus 5 cm, made a rounded top and added lace at the gathered end of the arm.

After attaching the arms to the bodice, I put push buttons and hooks and eyes for closing at the side of the neck. Then the blouse was finished. I can’t wait to see my friend in this outfit.


Share