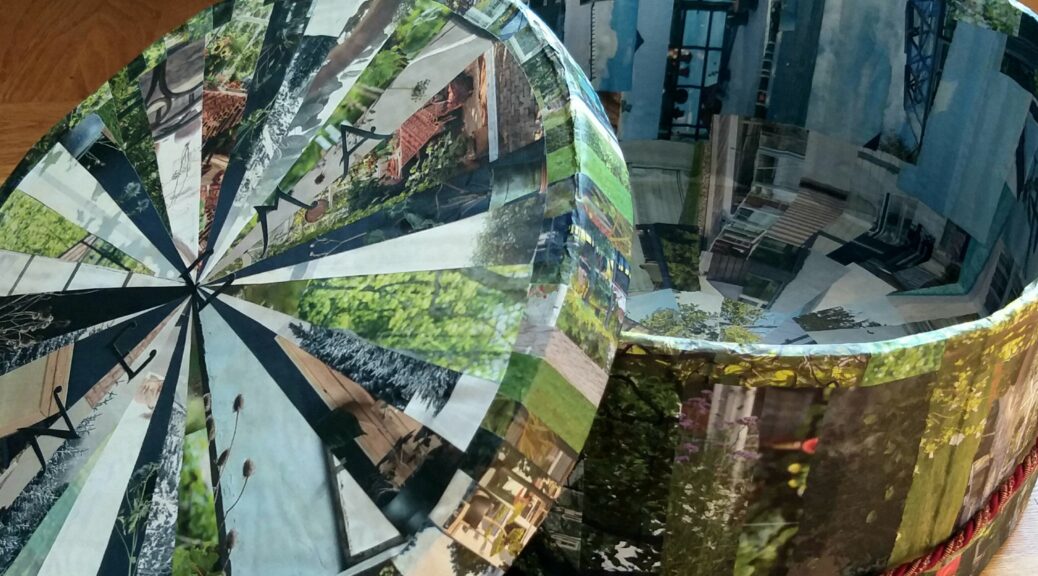
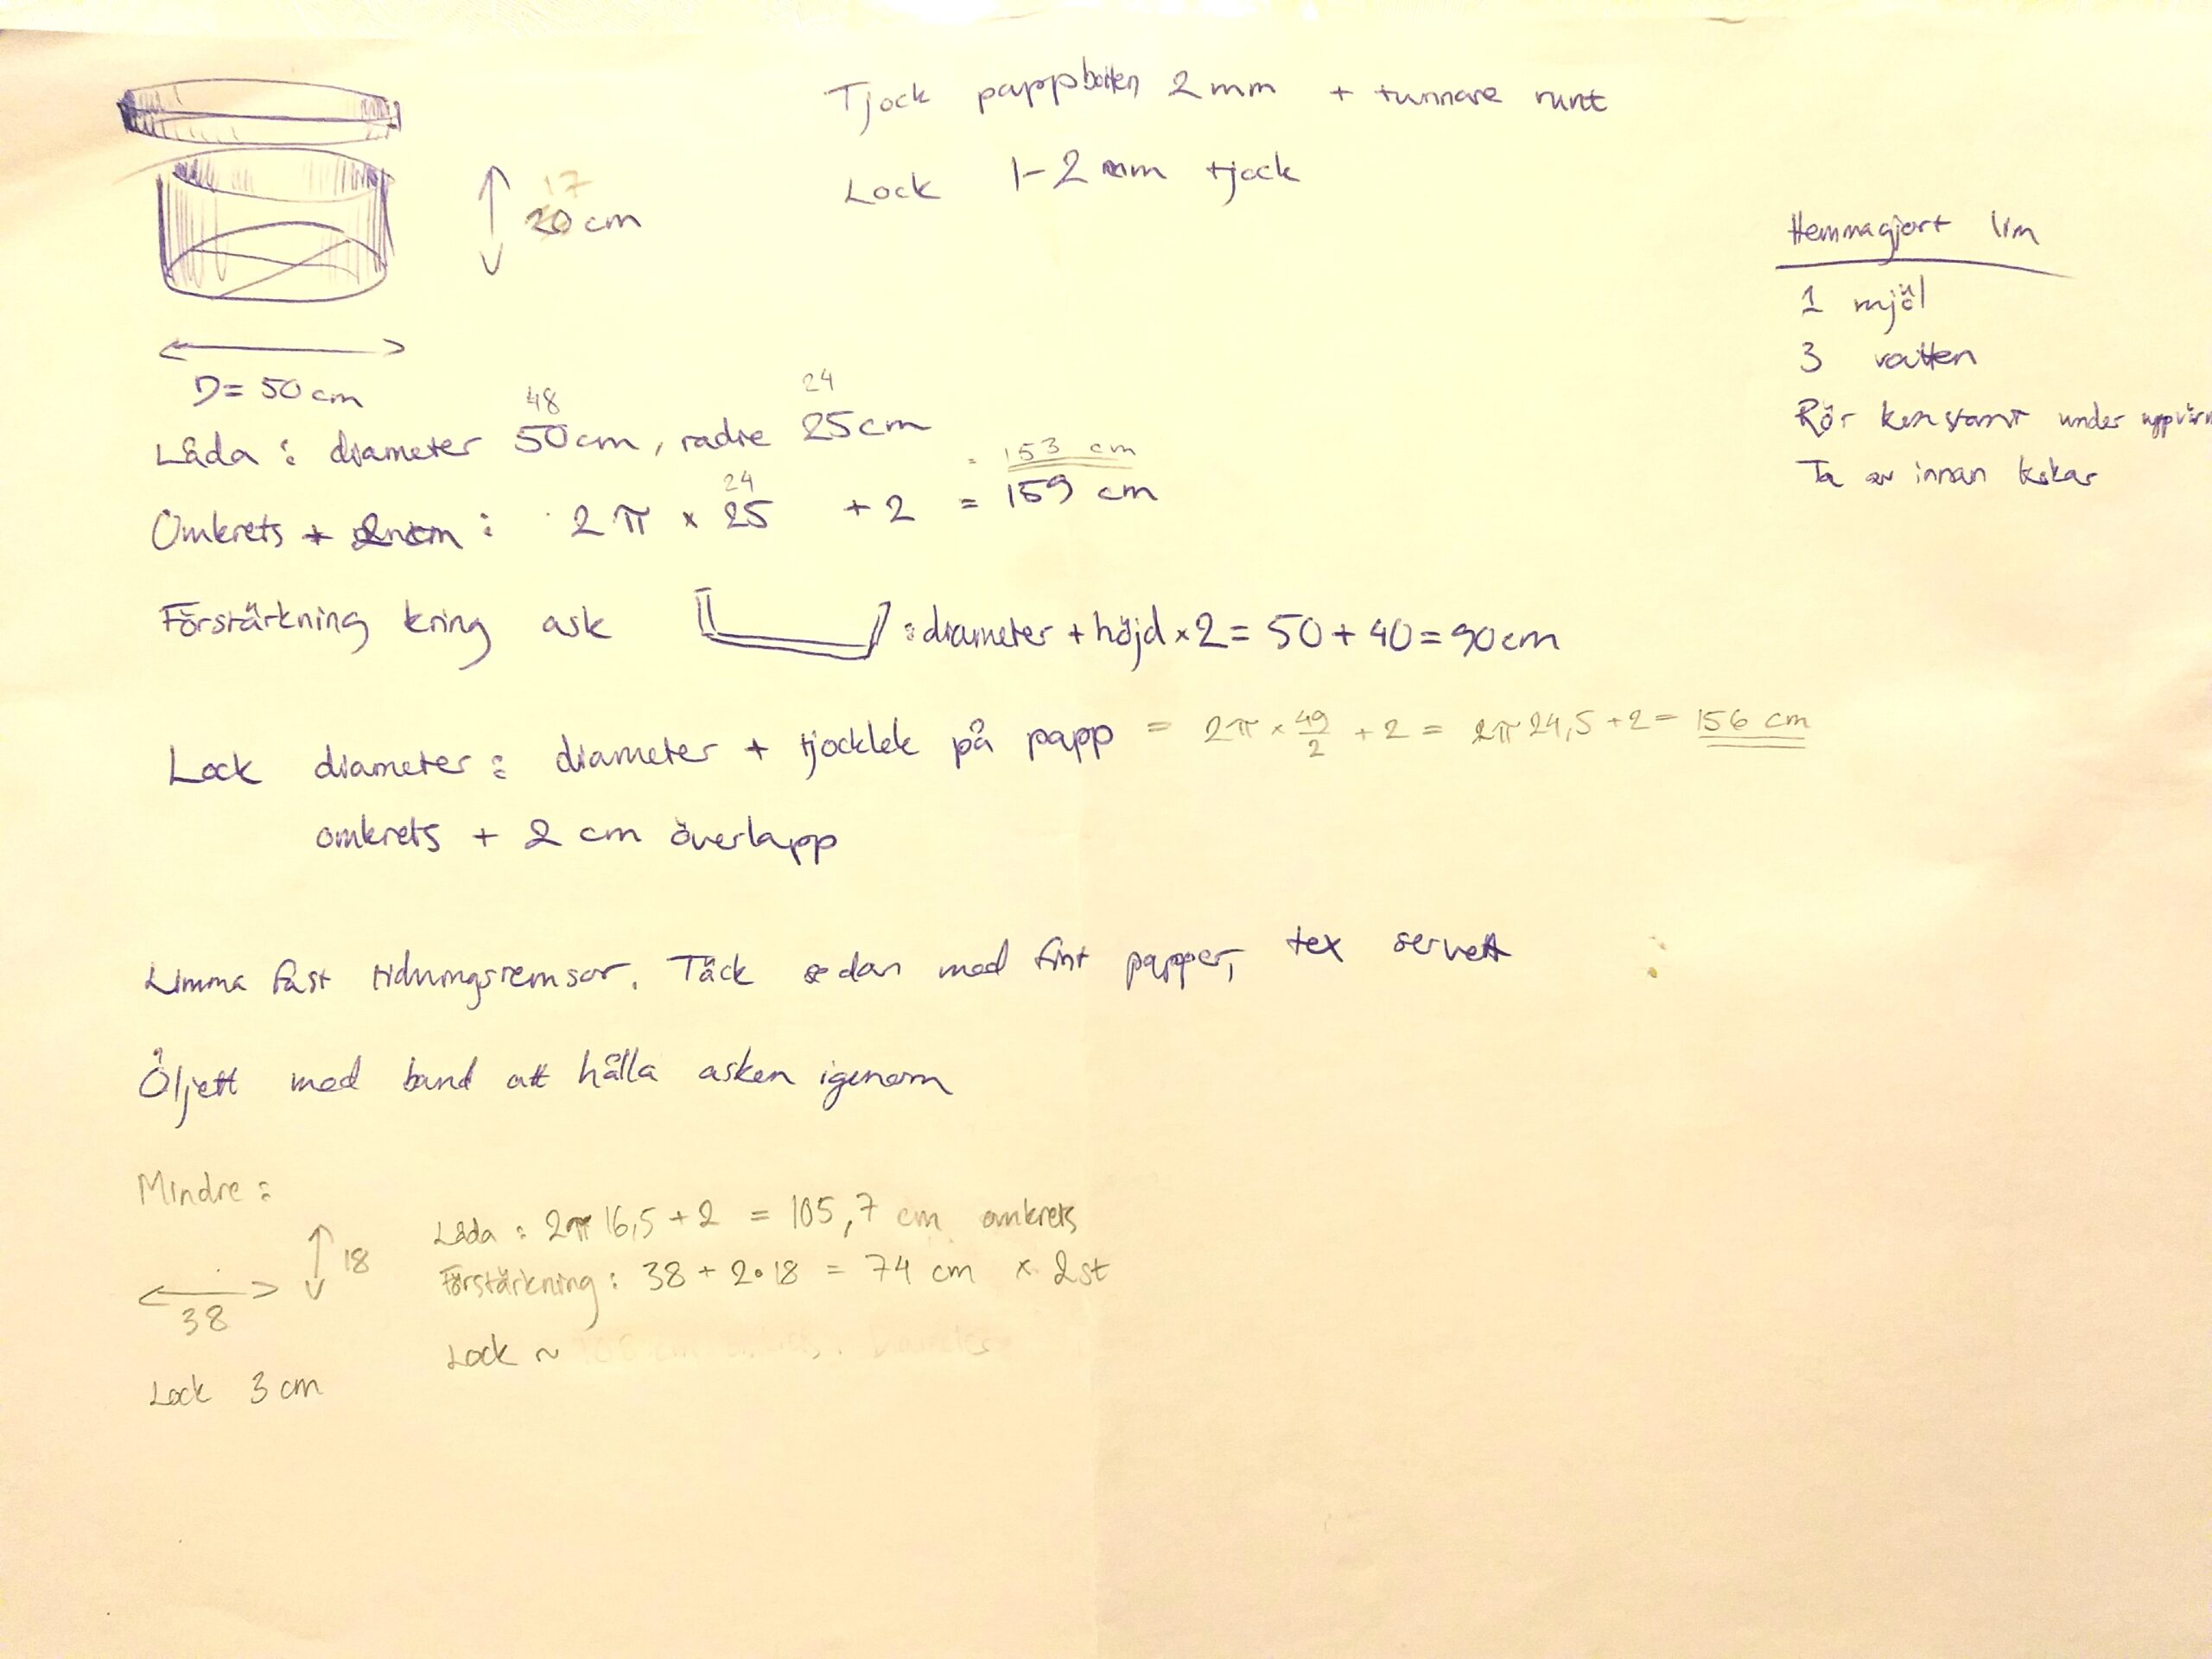
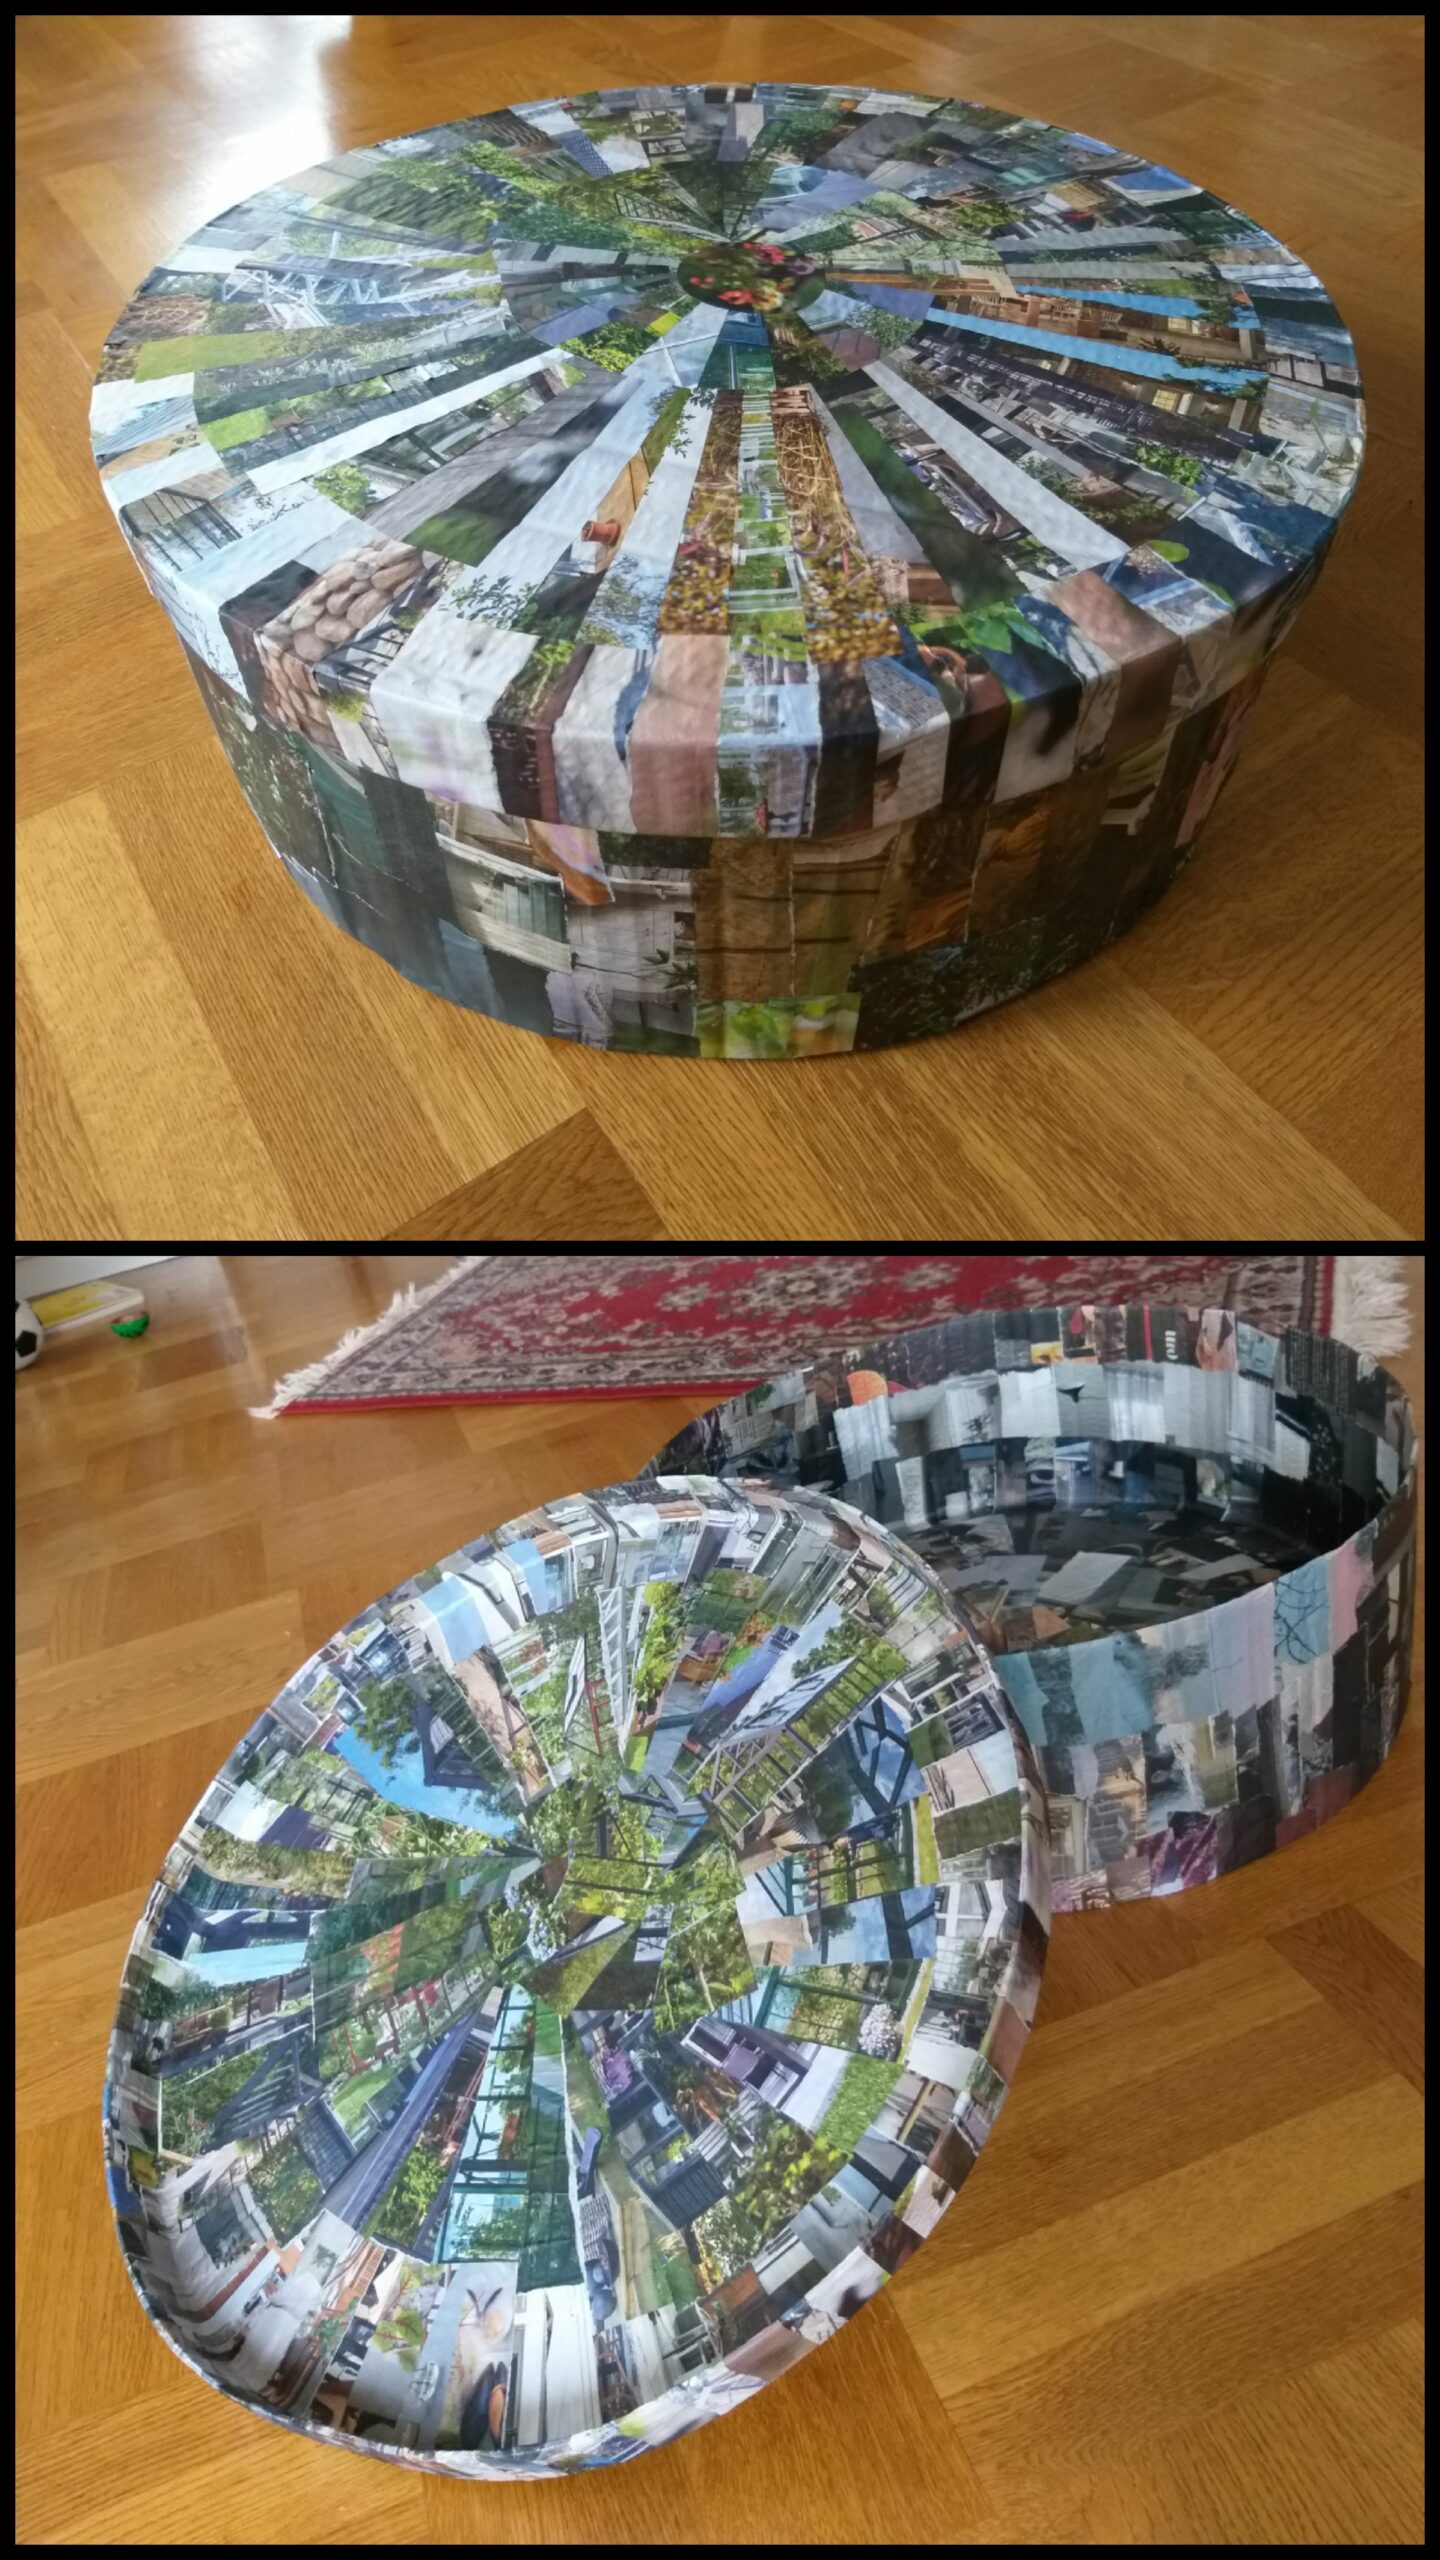
My poor hats have long been in urgent need of proper hat boxes. Last year someone at a forum for historical sewing linked a fantastic tutorial on how to make your own hat box out of cardboard, newspaper scraps and homemade glue. As my niece has made herself a regency hat, I wanted to make a hat box for her Christmas gift. I started by training on a huge box for my Edwardian hat.
Mina stackars hattar har länge behövt lämpliga hattaskar. Förra året postade någon en fantastisk tutorial om hur man tillverkar sin egen hattask utav papp, tidningspapper och eget lim.Min systerdotter har tillverkat sin egen empirhatt, så jag ville gärna ge henne en matchande hattask i julkkapp.
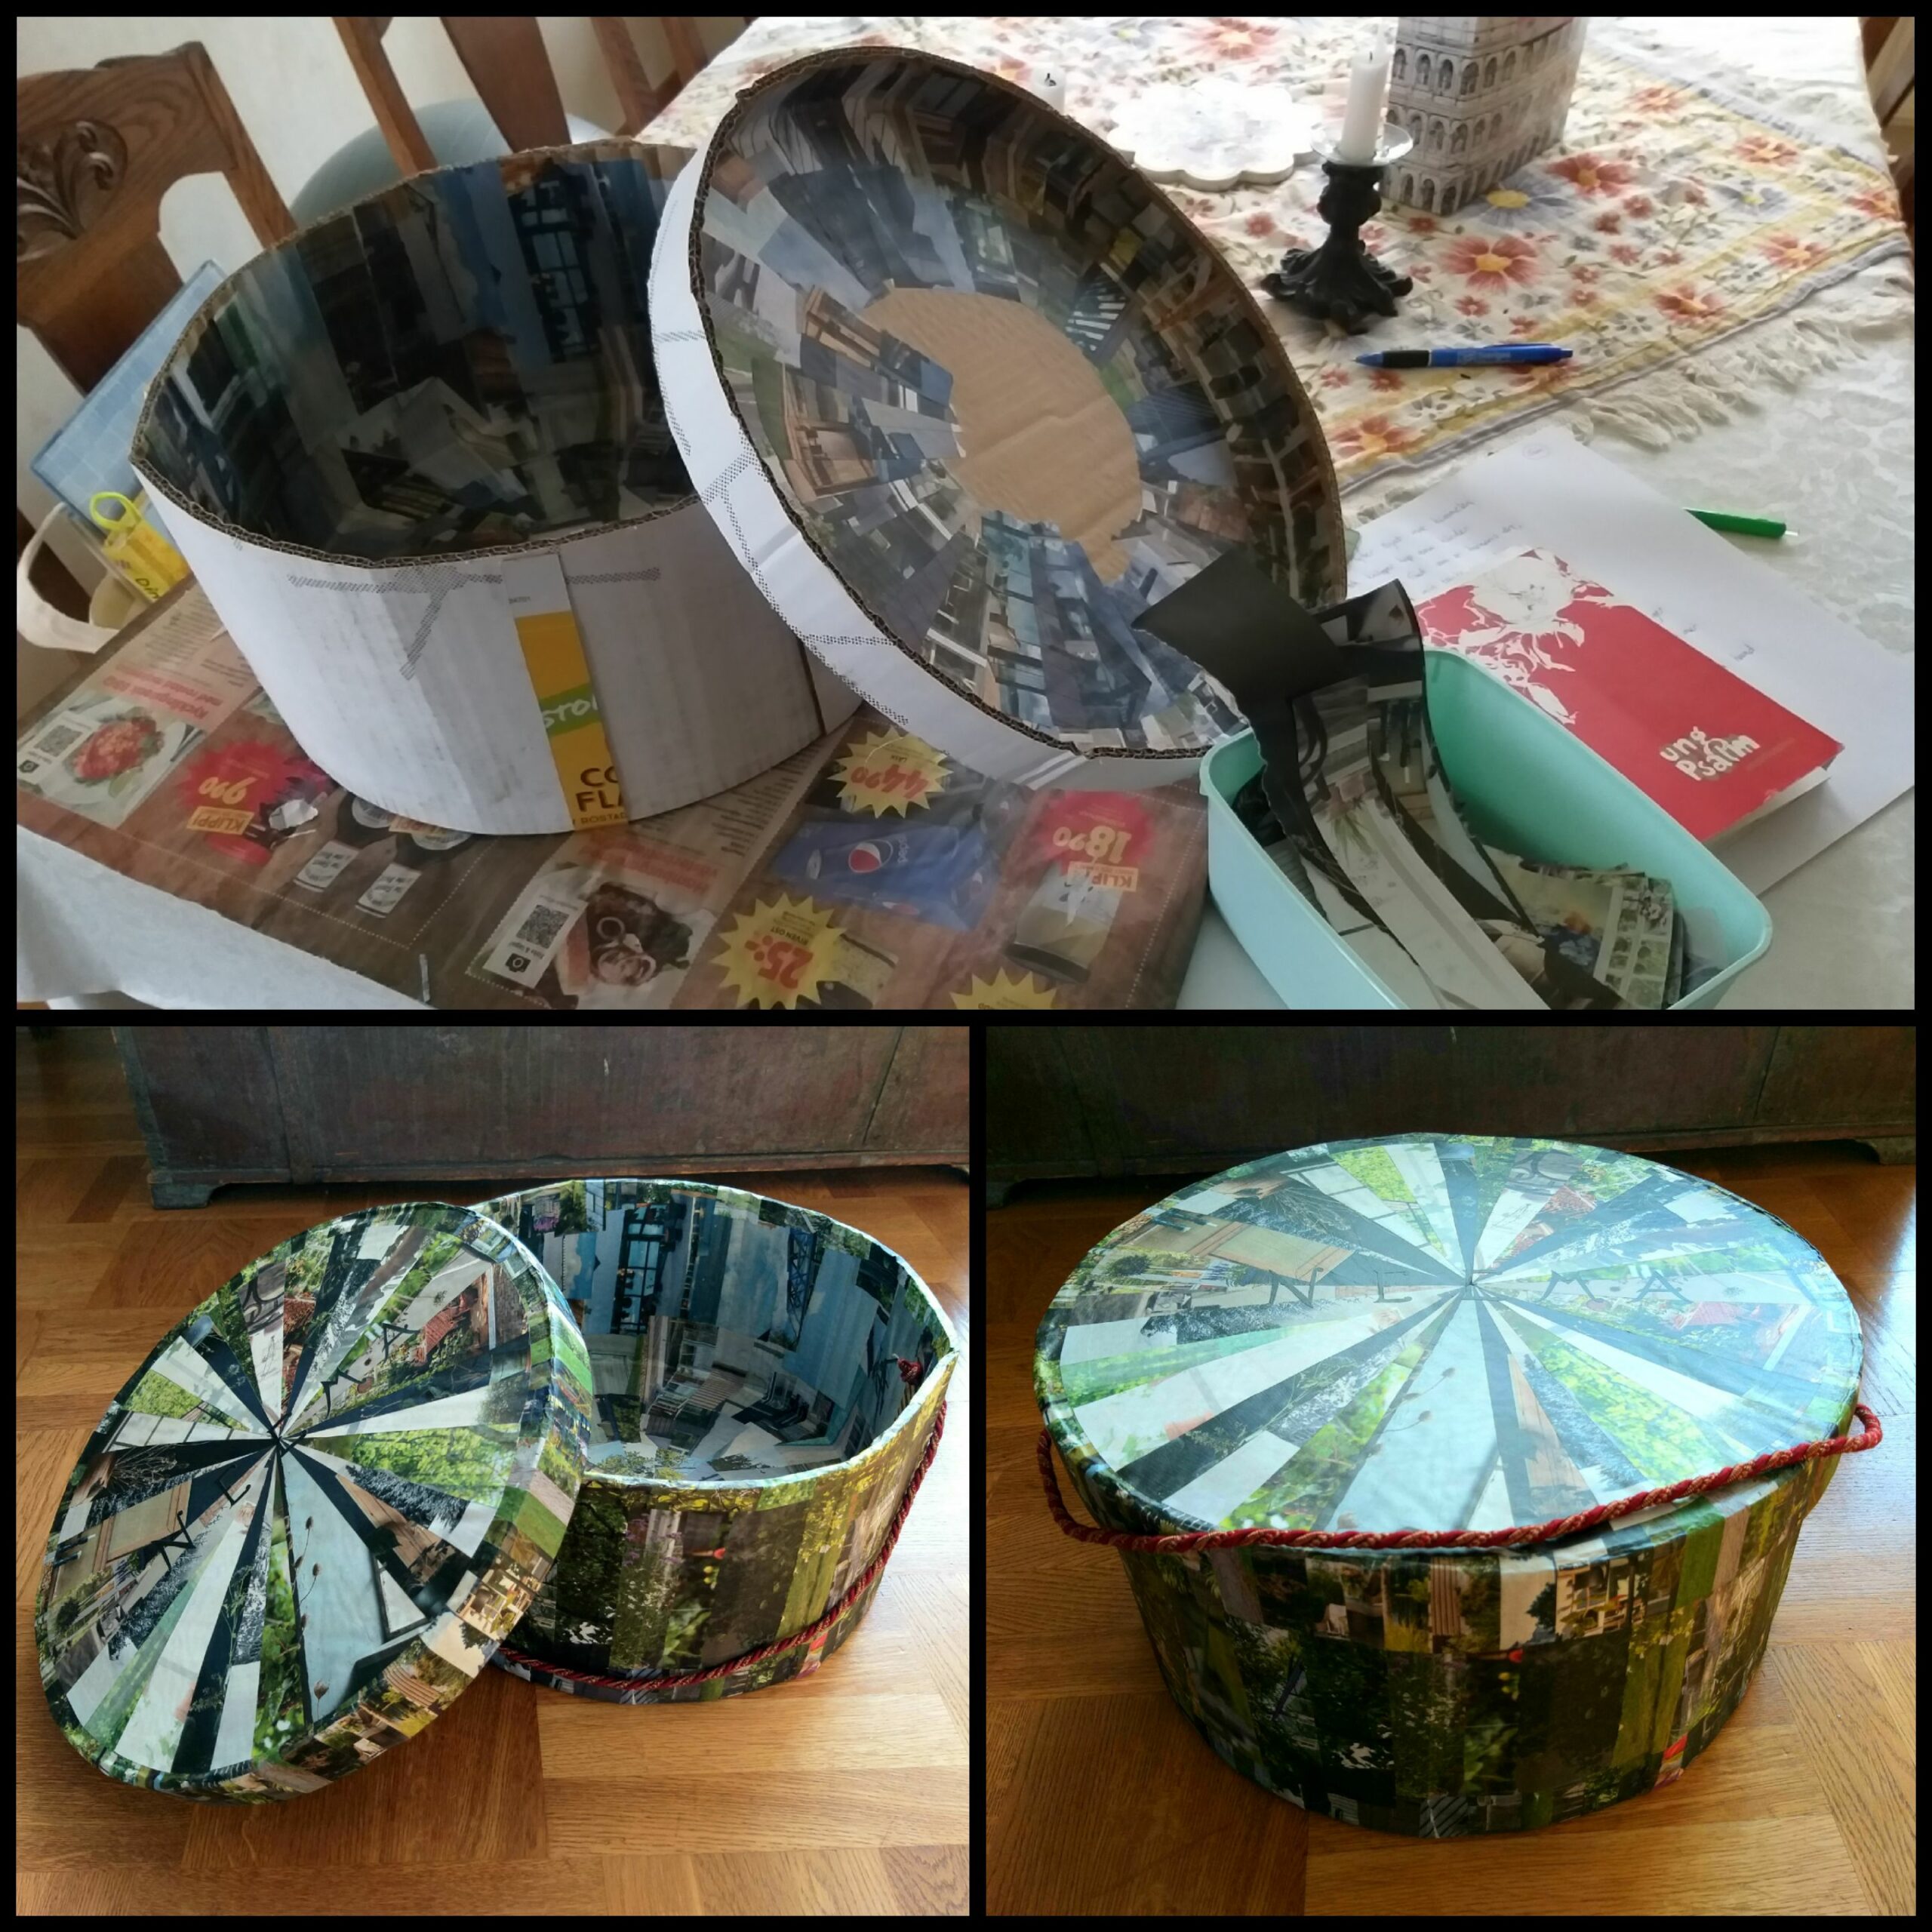
Much time was spent tearing newspapers and brochures apart, watching the TV. The scraps are glued to the cardboard and after drying, the box is quite strong/durable. The glue consists of water and flour and is quite easy to make if one remembers to constantly stir the mixture during the boiling process, which can be hard when taking care of small children at the same time… when not stirred, the glue clots really fast.
Jag ägnade mycket tid åt att riva sönder tidningar och reklamblad. Dessa bitar limmas sedan fast på kartongen och tillsammans bildar lagren en hård och tålig enhet. Limmet består av vatten och mjöl och är enkelt att tillverka själv, om man bara lyckas röra konstant medsn det kokar… vilket kan vara svårt när man har små barn… Om man slutaröra börjar limmet klumpa sig snabbt.
The test box, m
I had planned on covering the box with pretty napkins, like in the video, but didn’t find any good motives. Therefore I selected the prettiest motives from the brochure scraps for the outer layer. Last I made grommet holes for air passage and fastened a string (unfortunately I had no string in matching colour and no time for giing to the sewing shop). I think she was happy for the gift and I made it clear thaI would not be offended if she chose to paint the whole thing or covering with decoupage ore suited for a regency hat.
Jag hade tänkt dekorera asken med vackra servetter, som i den länkade videon, men jag hittade inga tillräckligt fina. Därmed fick jag nöja mig med att samla de finaste motiven på tidningsremsorna och försöka sammanfoga dem till någon slags estetisk helhet. Sist satte jag öljetter för ventilation och fäste för band att bära asken med (tyvärr hade jag inget band som matchade, men hade inte tid att ta mig till sybutiken). Jag tror att hon blev glad för hattasken och jag var tydlig med att jag inte skulle bli sårad om hon valde att måla hela asken eller använda några vackra servetter som decoupage.
The whole process was quite contemplative and the part where I put the scraps together as a decorative outer layer was even great fun.
Helaprocessen var rätt meditativ och att sammanfoga tidningsbitarna till ett dekorativt yttre lager var till och med riktigt roligt.
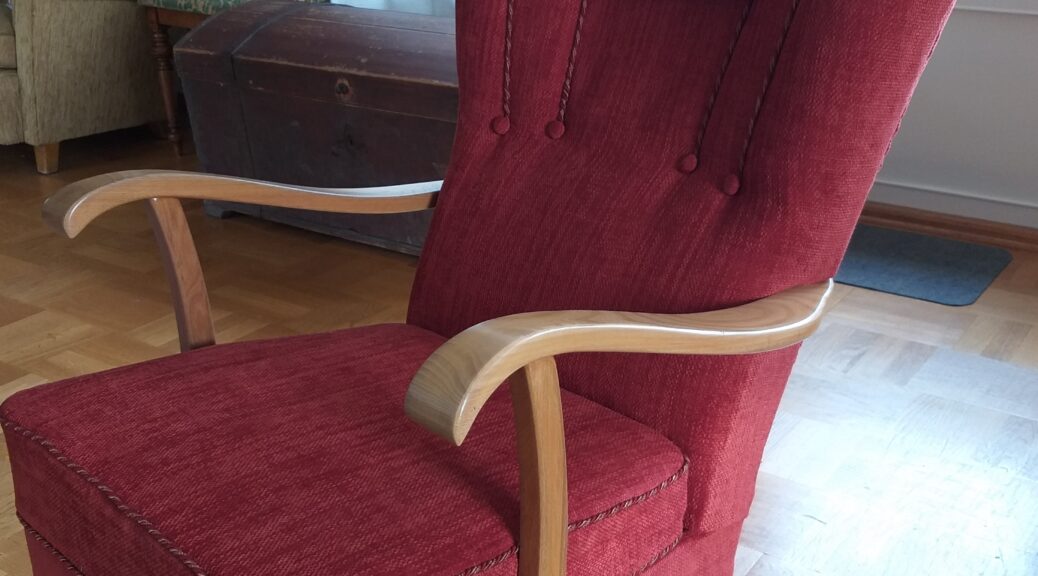
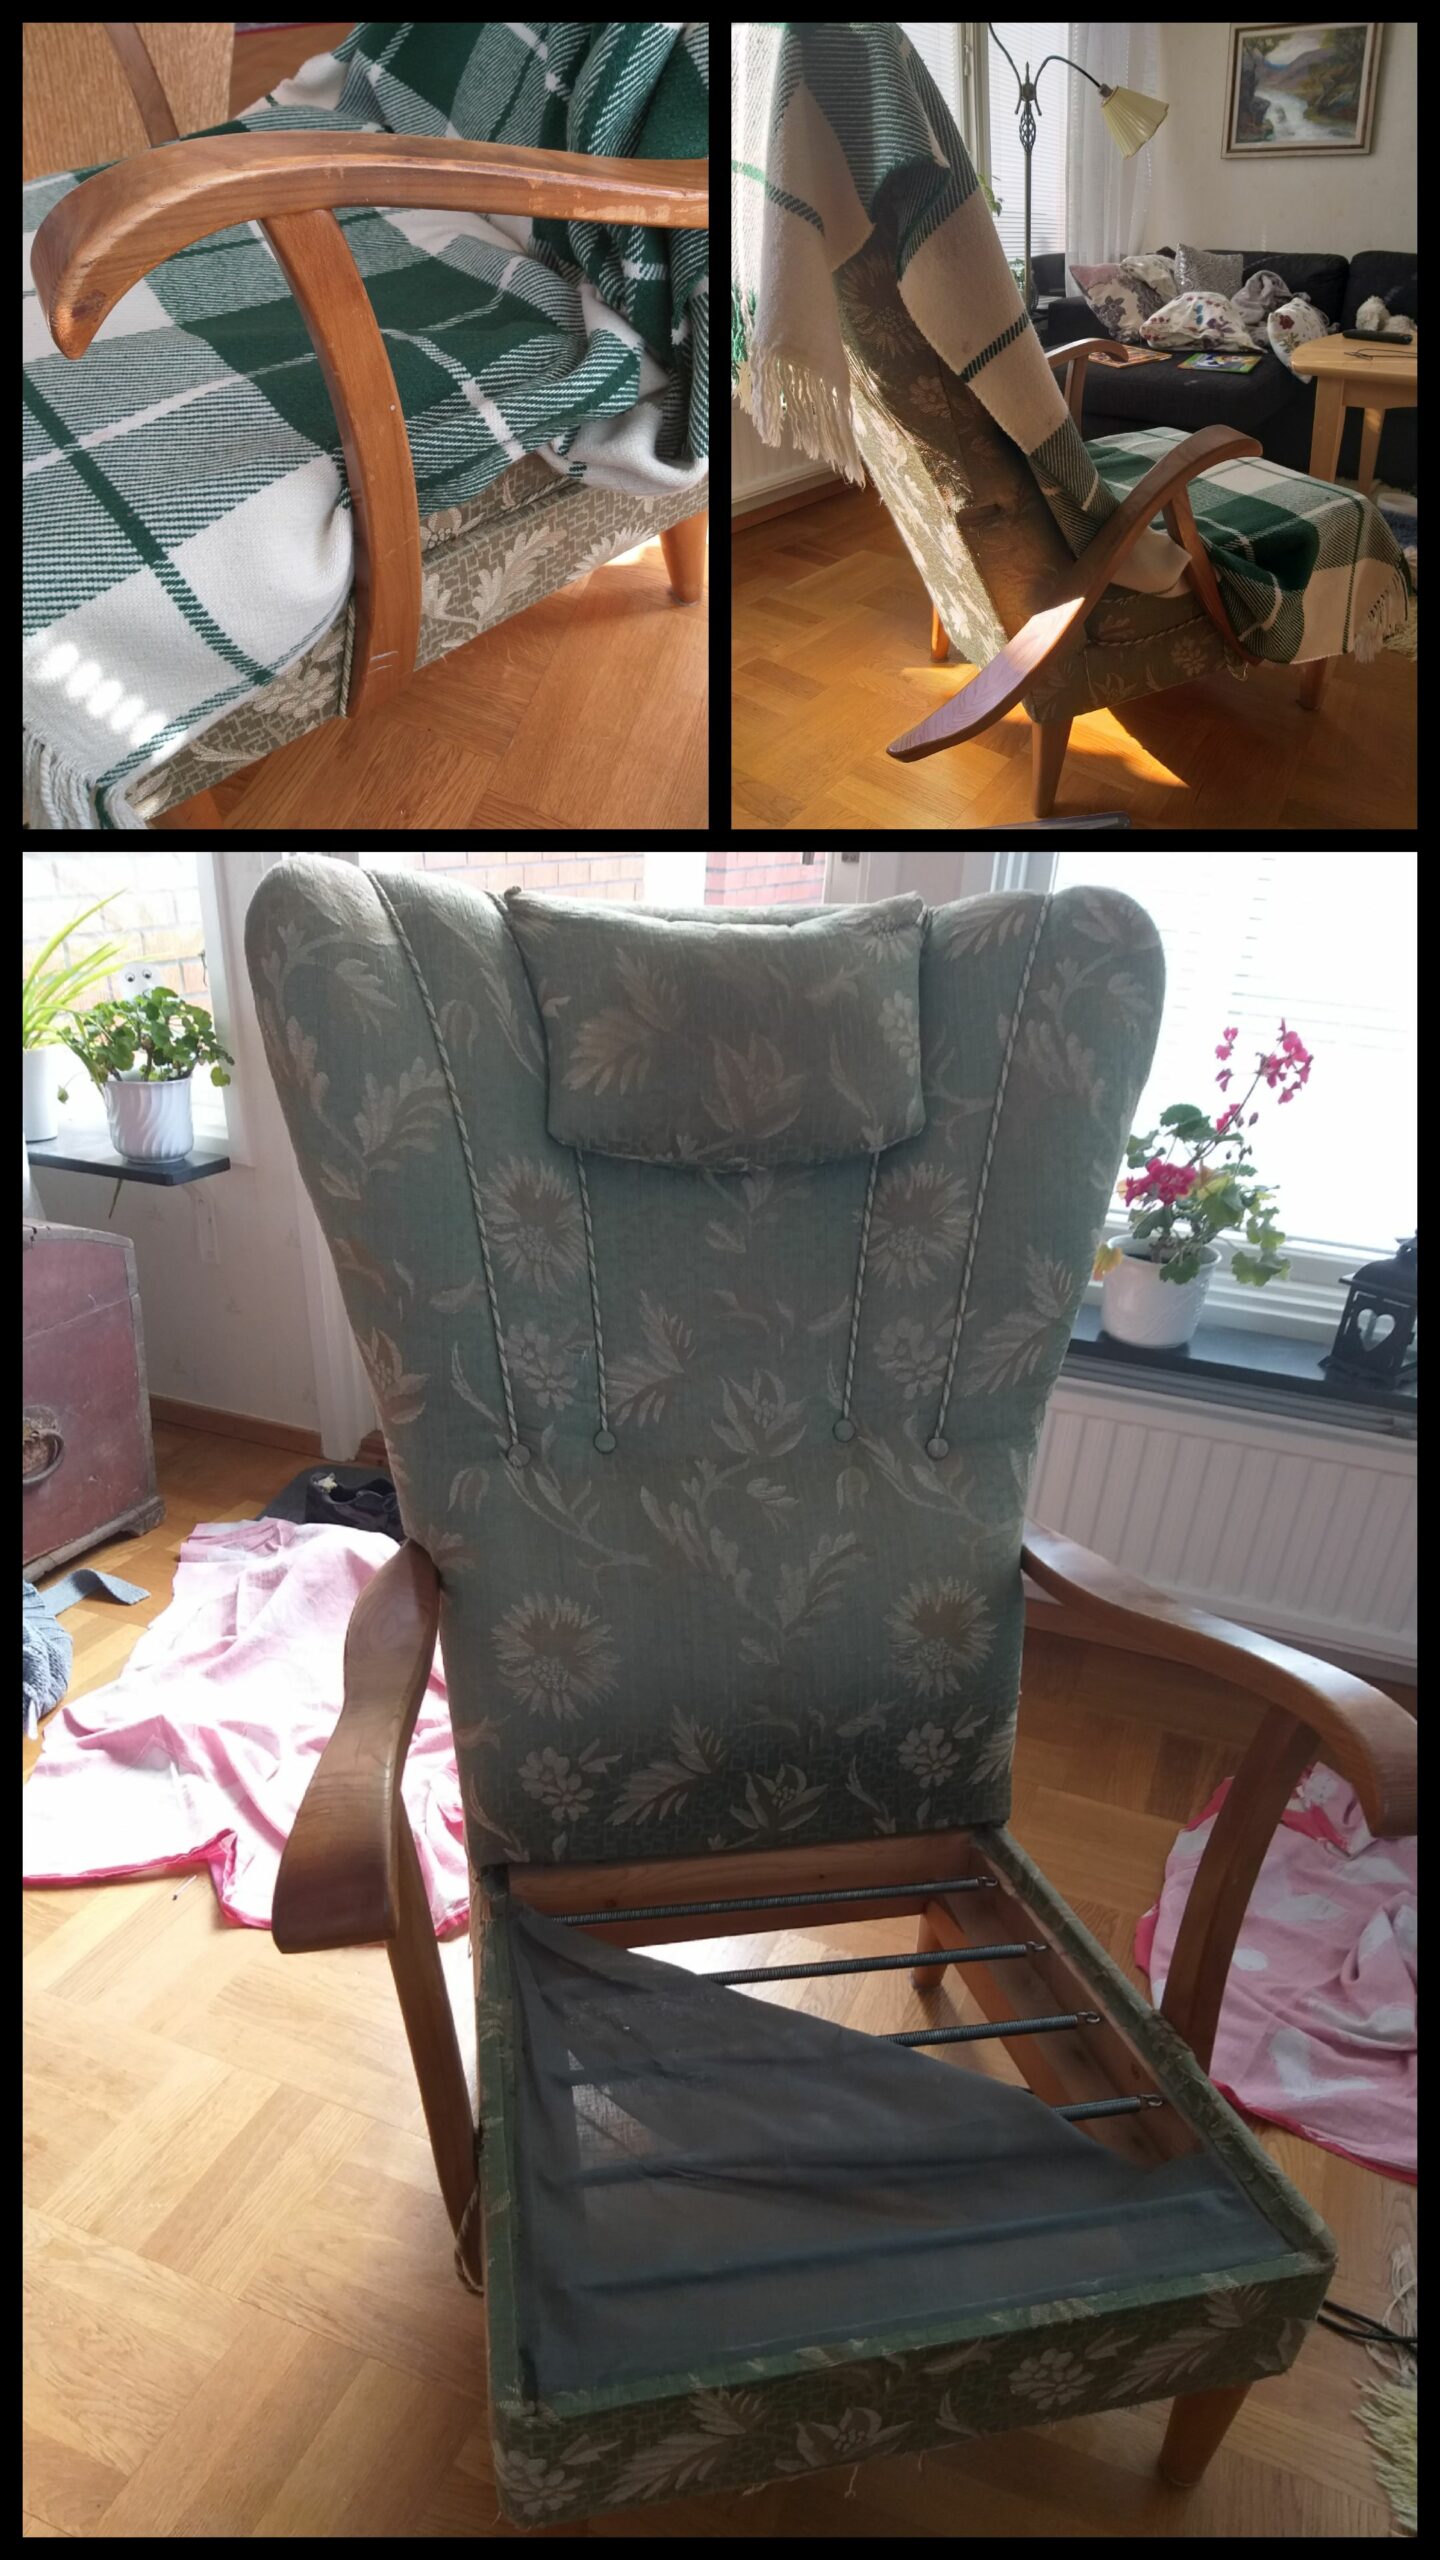
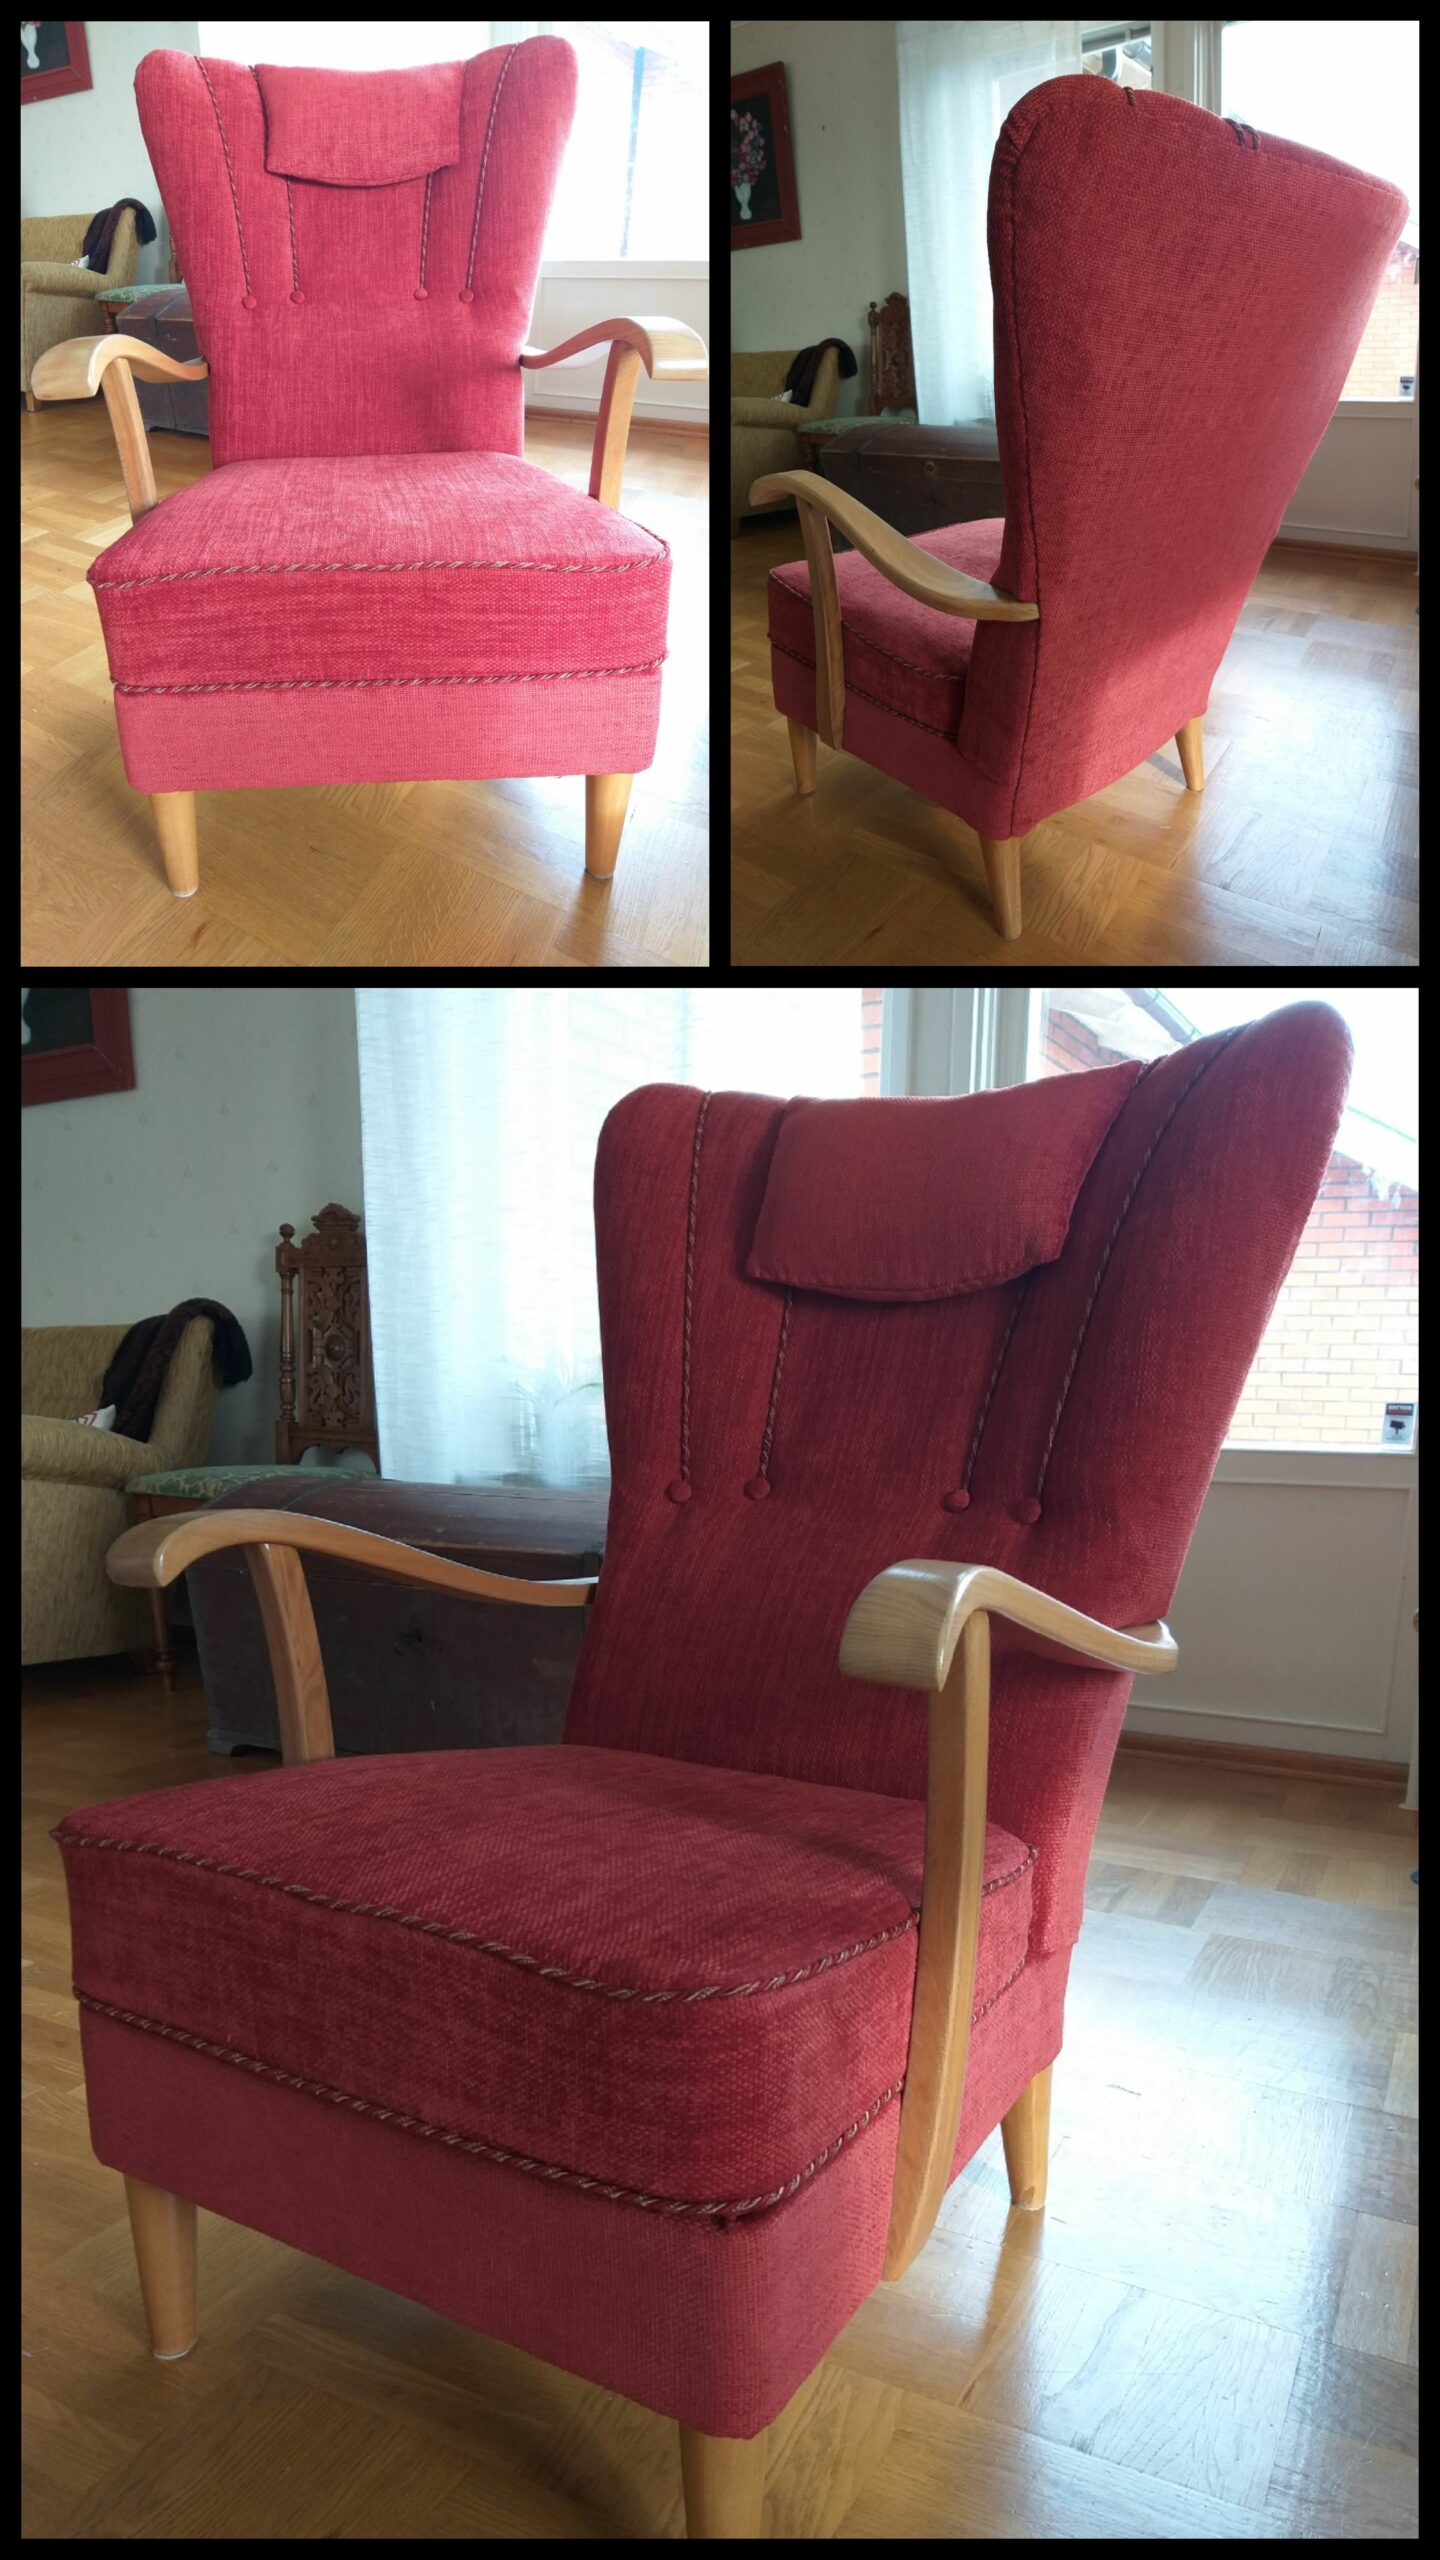
This arm chair was beautiful when I inherited it from my grandparents. After much use, it was in a sad condition, with the fabric in tatters and one of the arms falling off.
Den här fåtöljen var riktigt vacker när jag ärvde den efter mina morföräldrar. Efter några års daglig användning var den dock i ett sorgligt skick, med tyget i trasor och med ett avbrutet armstöd.
For my birthday, I was given fabric for renovating the dear heirloom. As I have never done anything similar before, I picked the armchair apart methodically, so that I would know in which order to put it together again. I sandpapered (?) the wooden parts and put on three layers of varnish (?). Then I put the new fabric on, using both staples and hand stitching. I know that I have probably committed some terrible mistakes but I am very happy with the result.
Jag fick ett fint möbeltyg i födelsedagspresent. Eftersom jag aldrig gjort något liknande tidigare, plockade jag isär fåtöljen metodiskt, så att jag skulle veta i vilken ordning jag sedan skulle sätta ihop allt igen. Jag sandpapprade armstöden och benen innan jag la på tre lager olja. Sedan klädde jag fåtöljen, med hjälp av både häftpistol och handsömnad.Jag är säker på att jag har begått några allvarliga synder inom tapetseringsvärlden, men jag är väldigt nöjdmed slutresultatet.
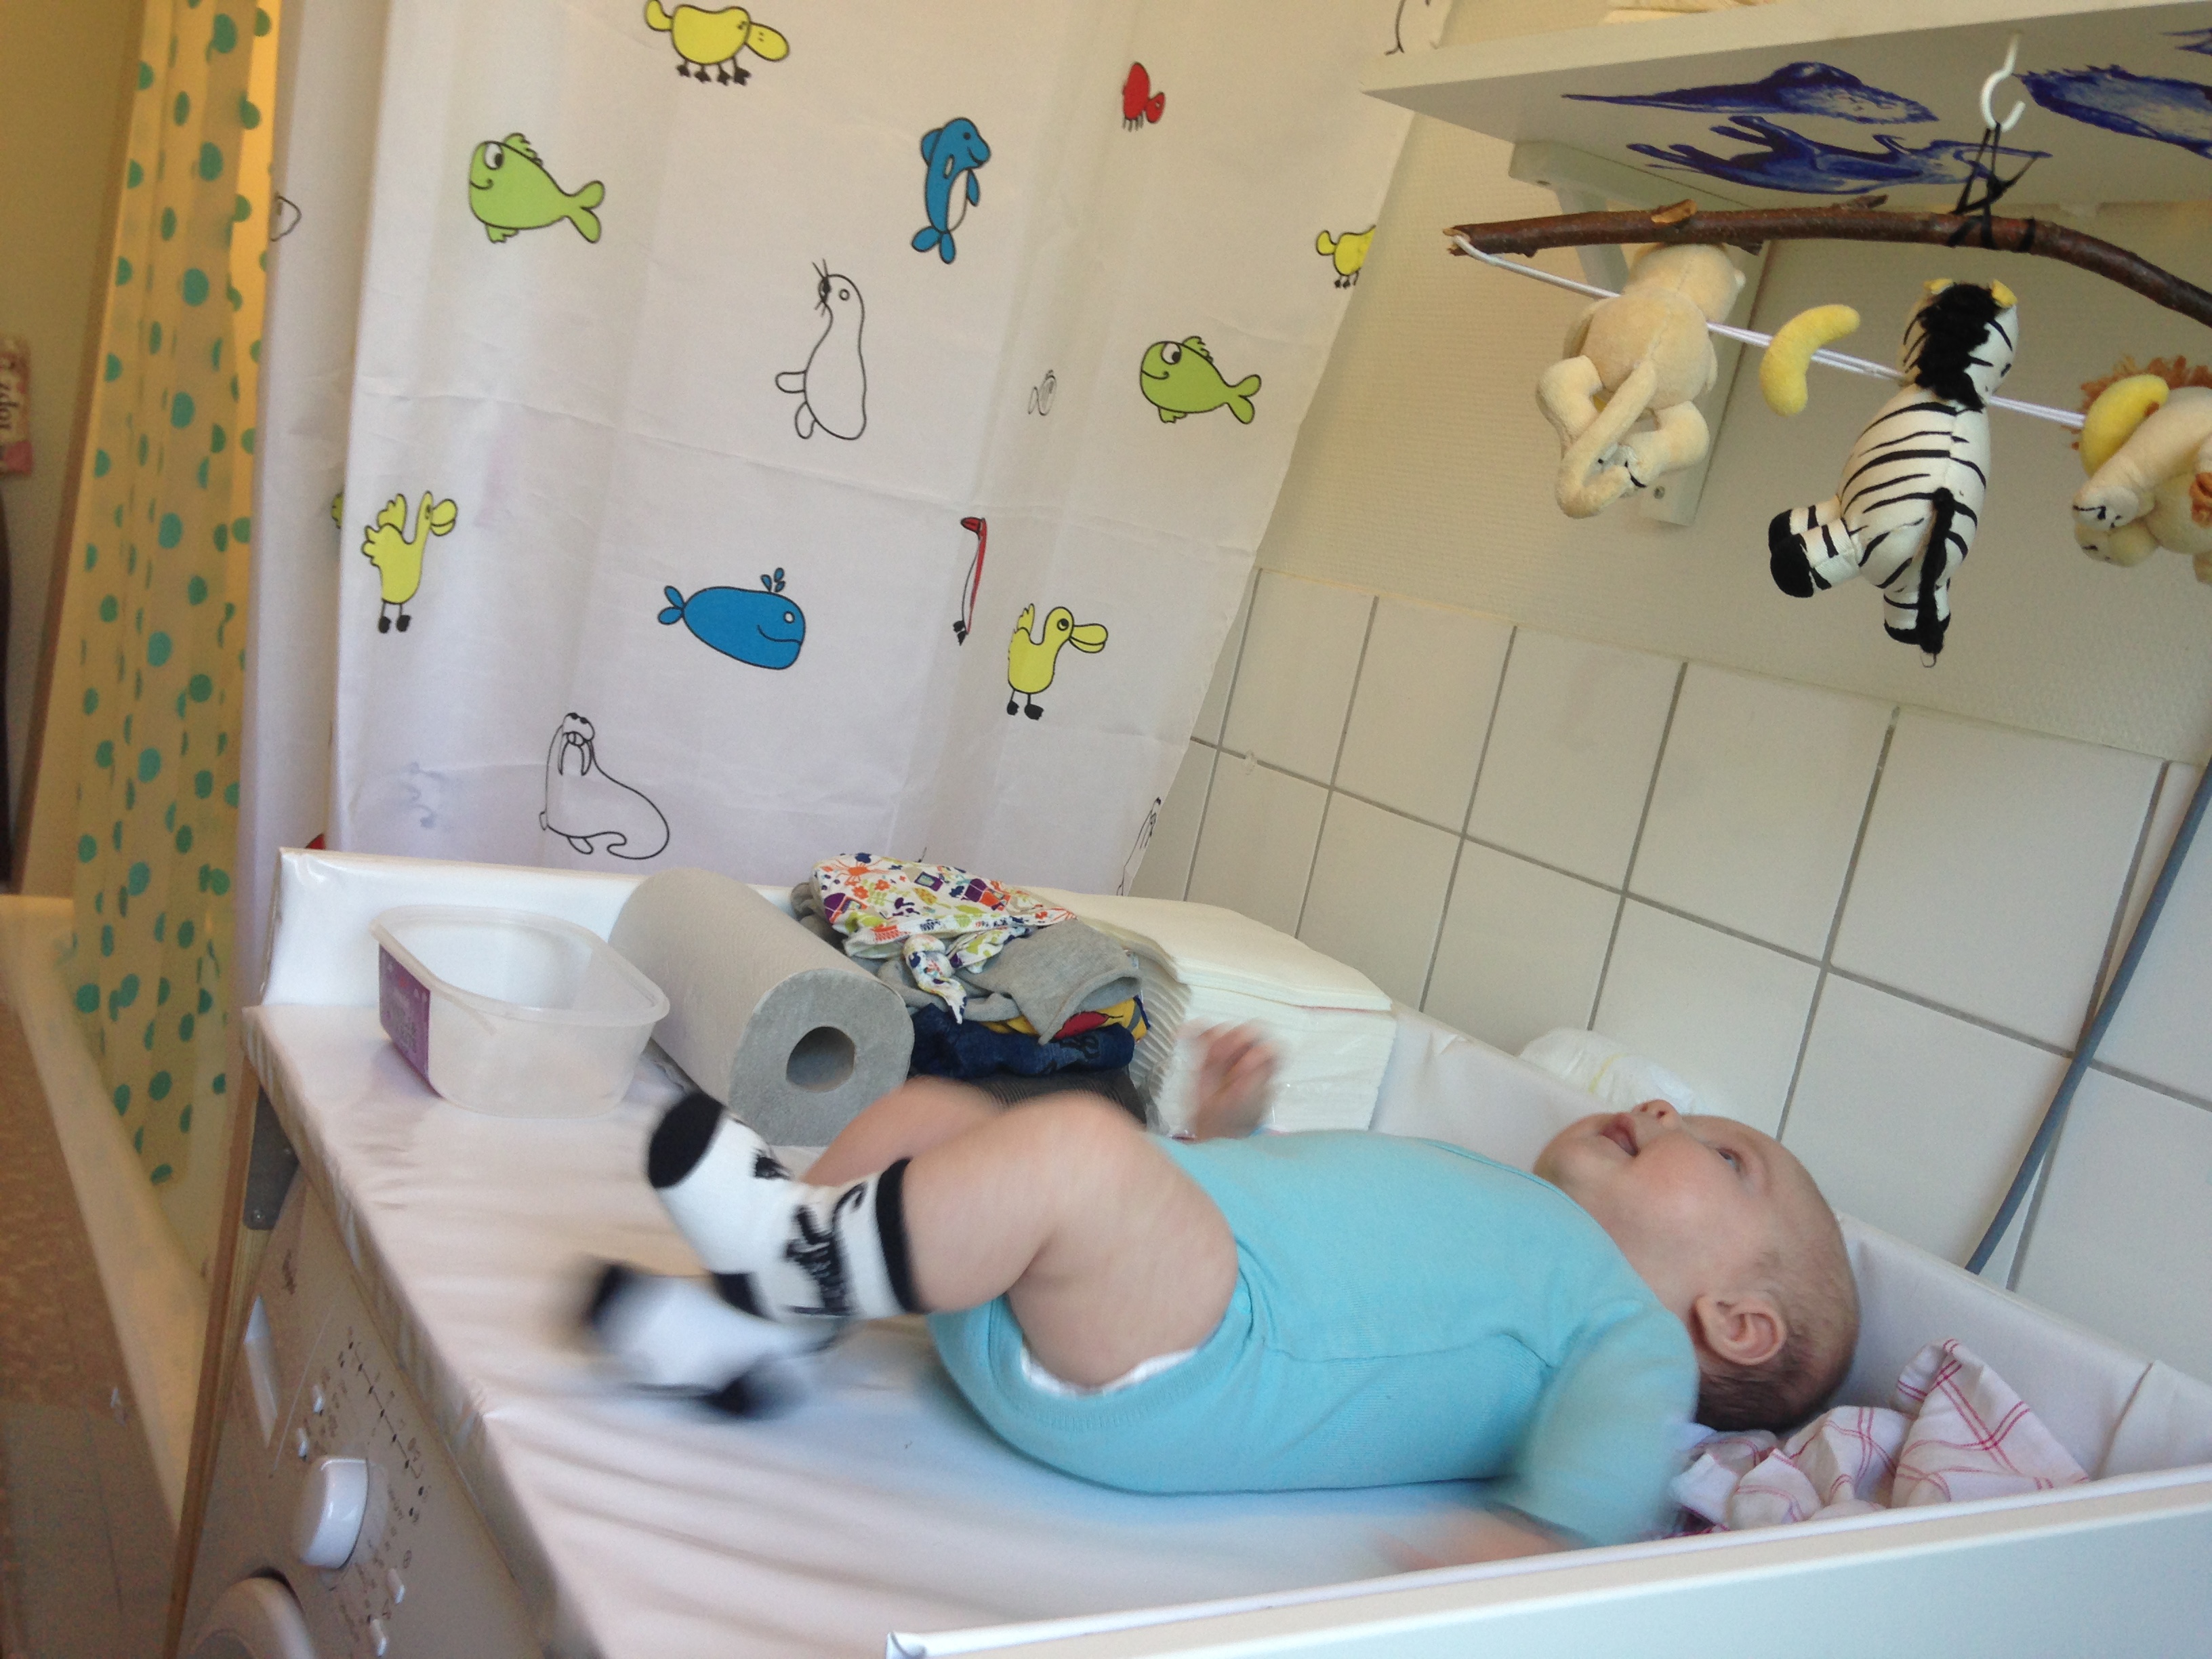
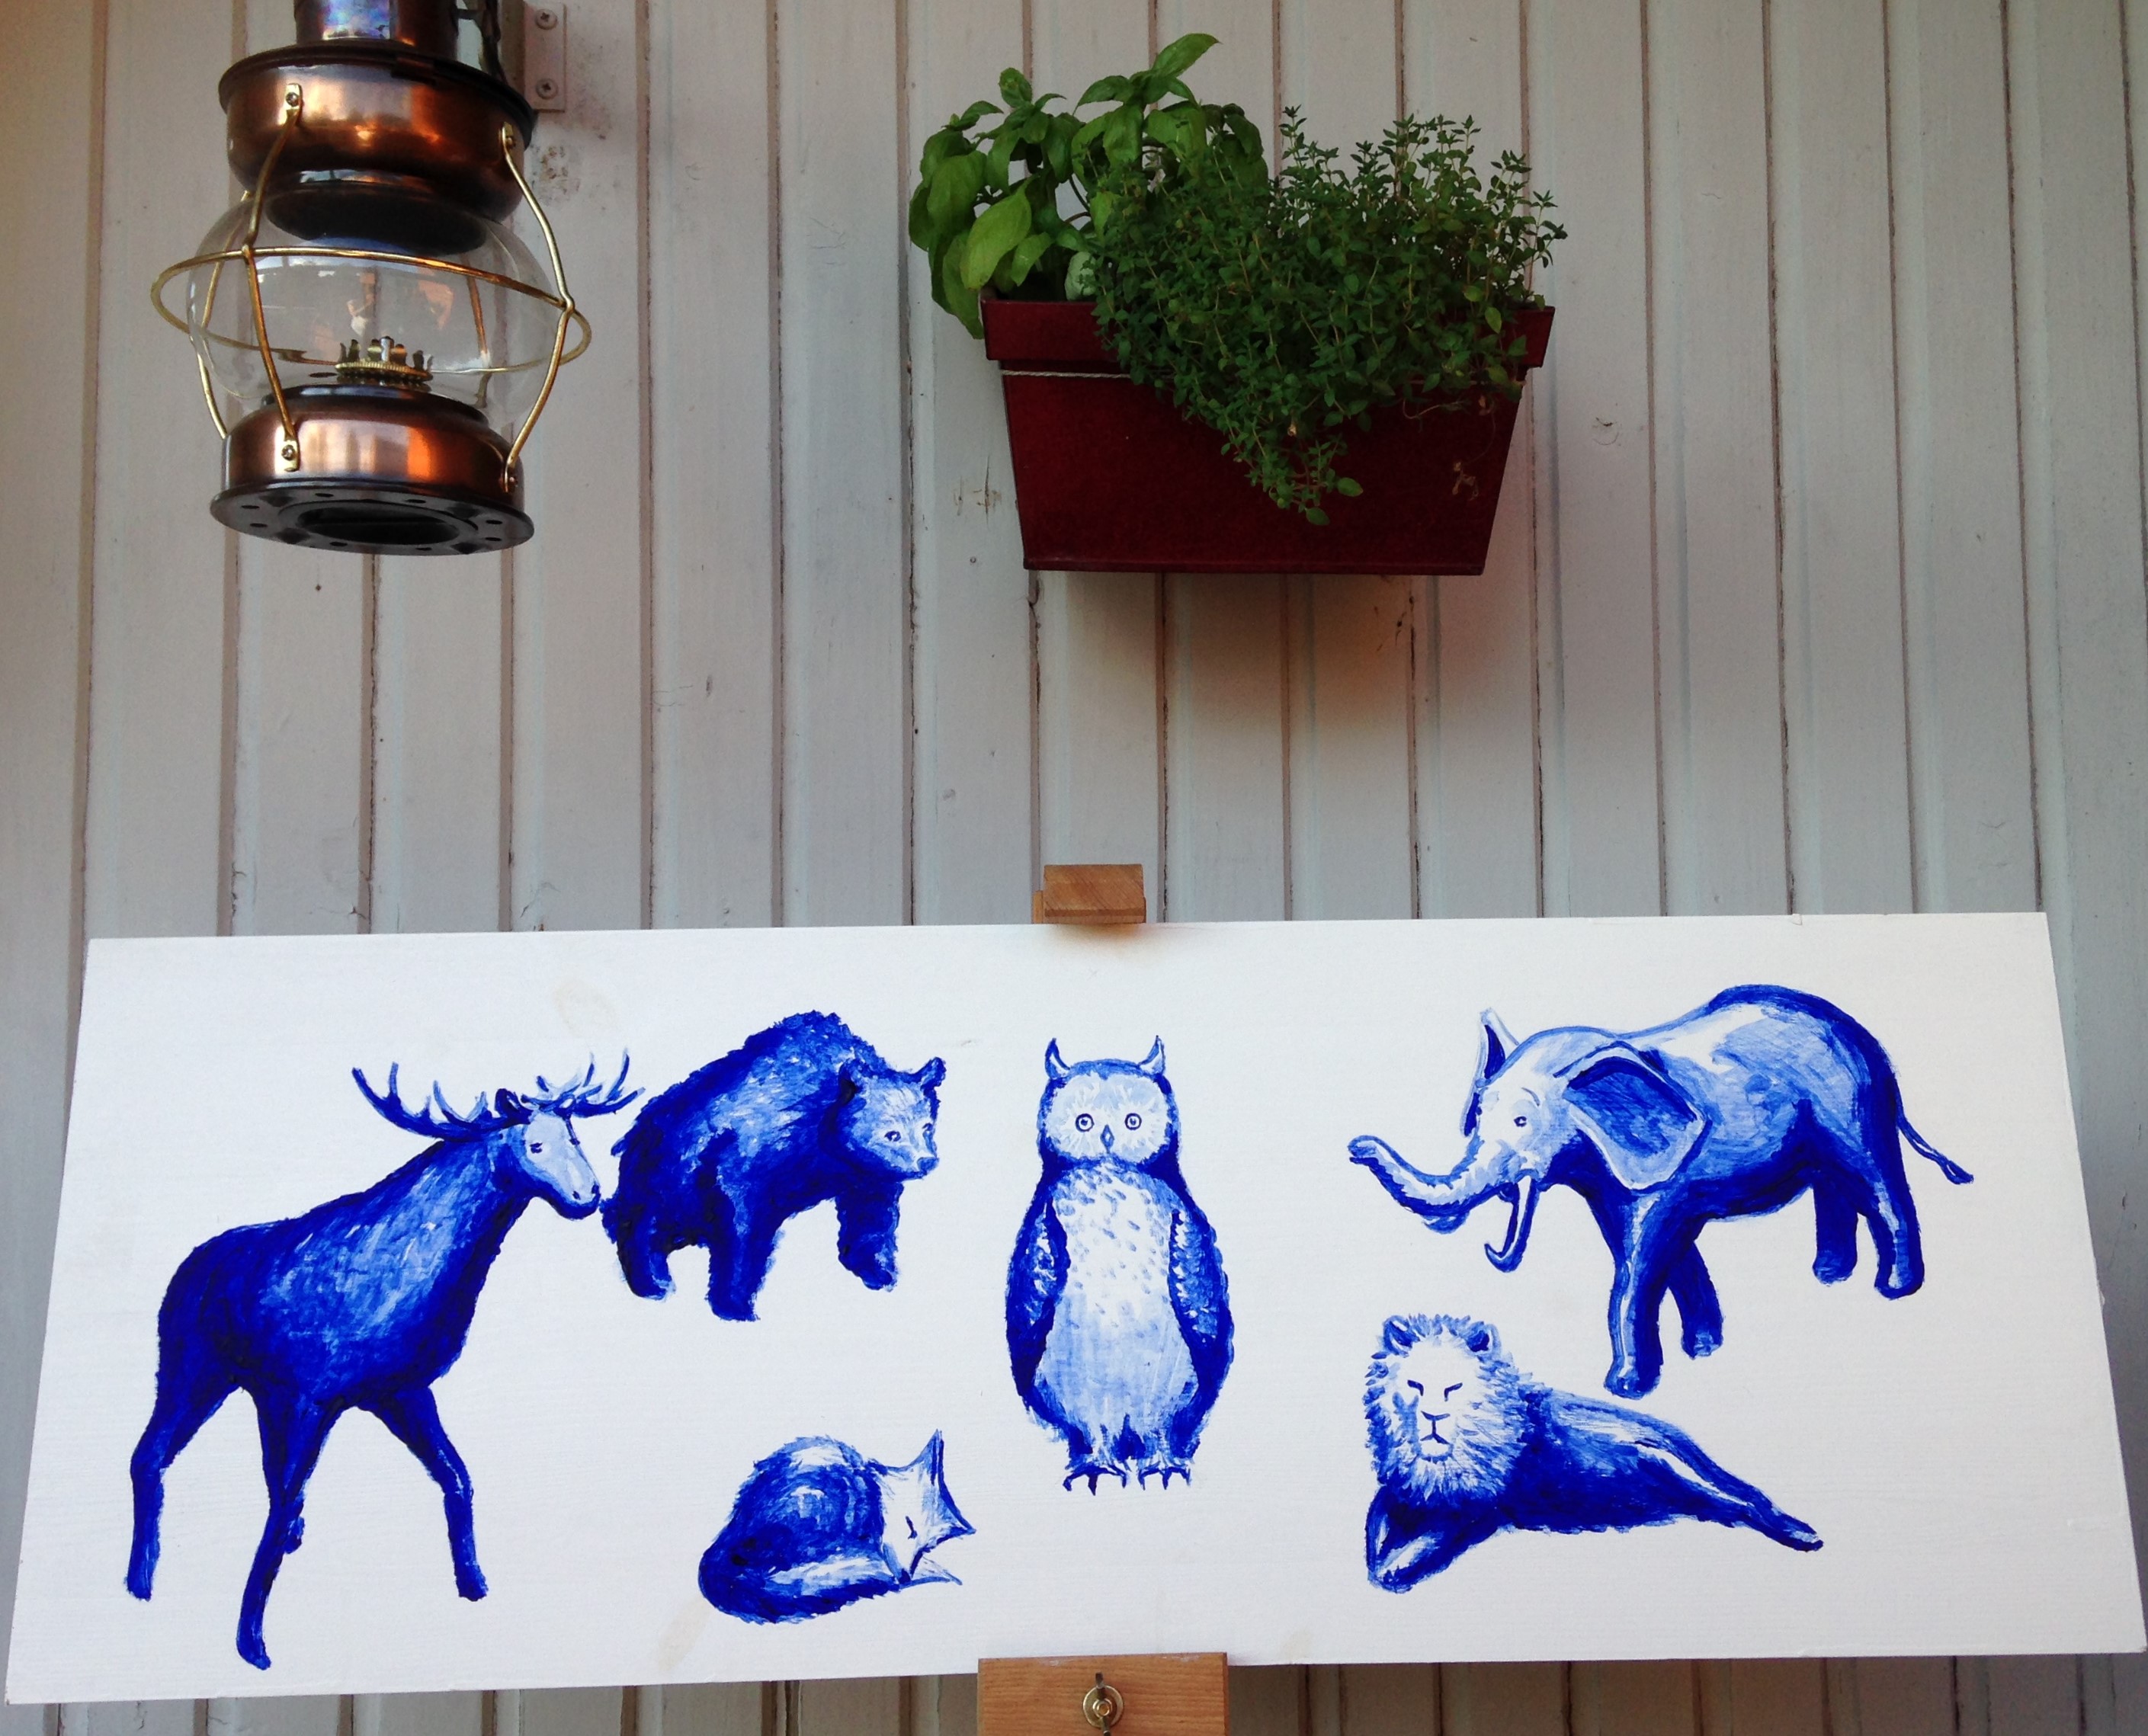
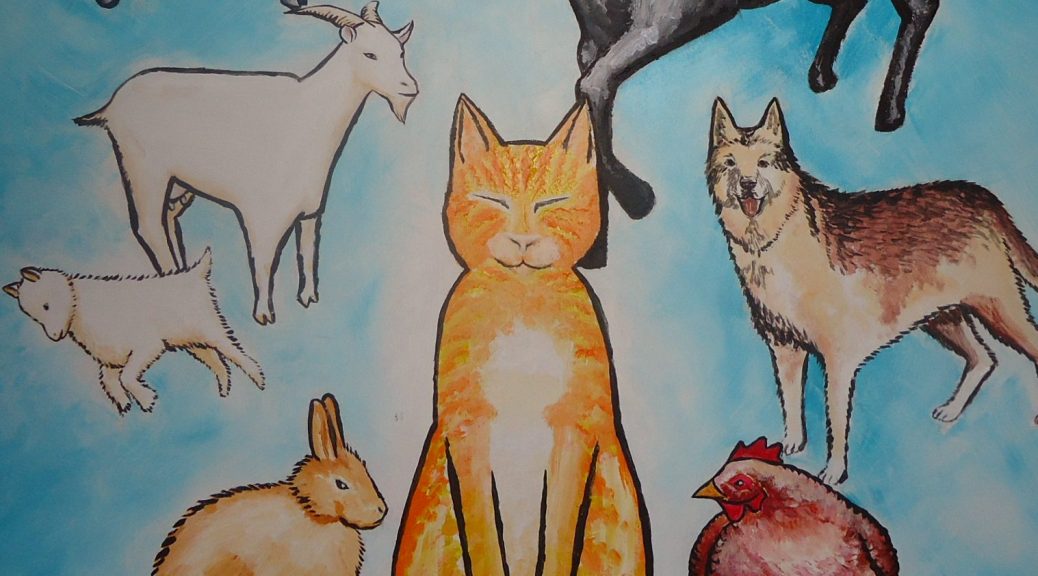
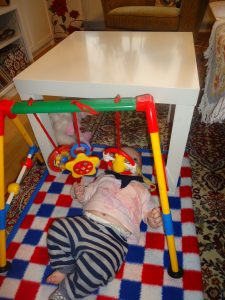
As we noticed that our baby was the happiest when laying on the changing table underneath the shelf that I painted for him, my husband suggested that I should paint something movable, so that we could hang out with our baby at other places than just in the bathroom. Said and done – we bought a small IKEA table in our local second hand shop. It was not painted underneath, so I had to put a white layer of paint first. I googled the cute animals that you see on the picture. Unfortunately, so many things came in between, that I could only paint one body part at a time and was not able to finish the table until this week. The baby likes it, but does not communicate with the animals as he did with the shelf animals when he was younger.
I början var vår bebis gladast när han fick ligga på skötbordet, under hyllan som jag målade åt honom. Därfr föreslog min man att jag skulle måla något motsvarande på en flyttbar möbel. Sagt och gjort – vi köpte ett litet IKEA-bord i second hand-affären. Undersidan var obehandlad, så jag fick börja med att måla den vit. Jag googlade fram några söta djur, som du ser på bilden. Tyvärr kom så mycket i vägen för detta projekt att det blev färdigt frst denna vecka. Bebisen gillar djuren, men han pratar inte med dem, så som han gjorde med djuren på hyllan när han var yngre.
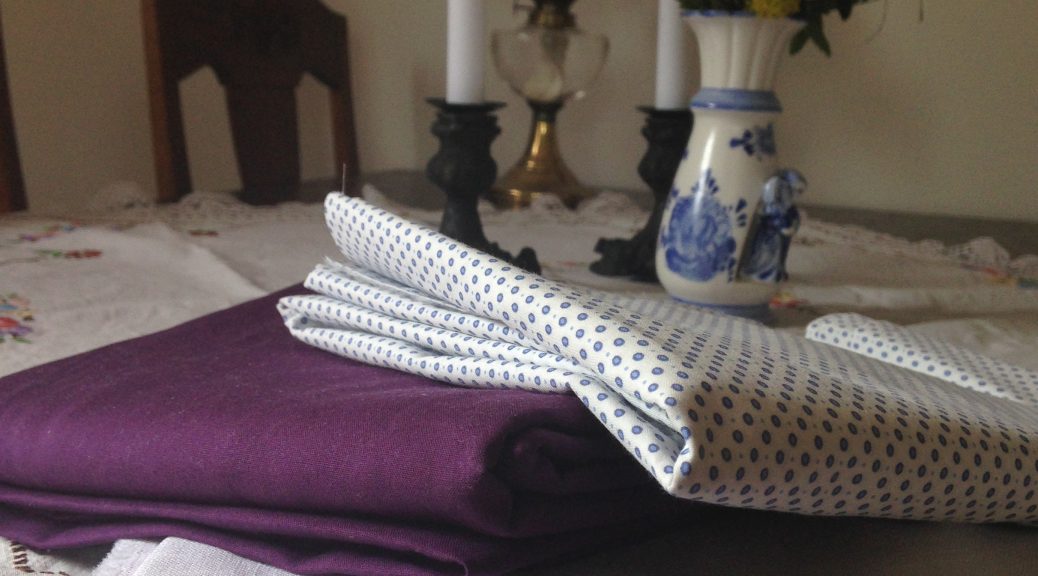
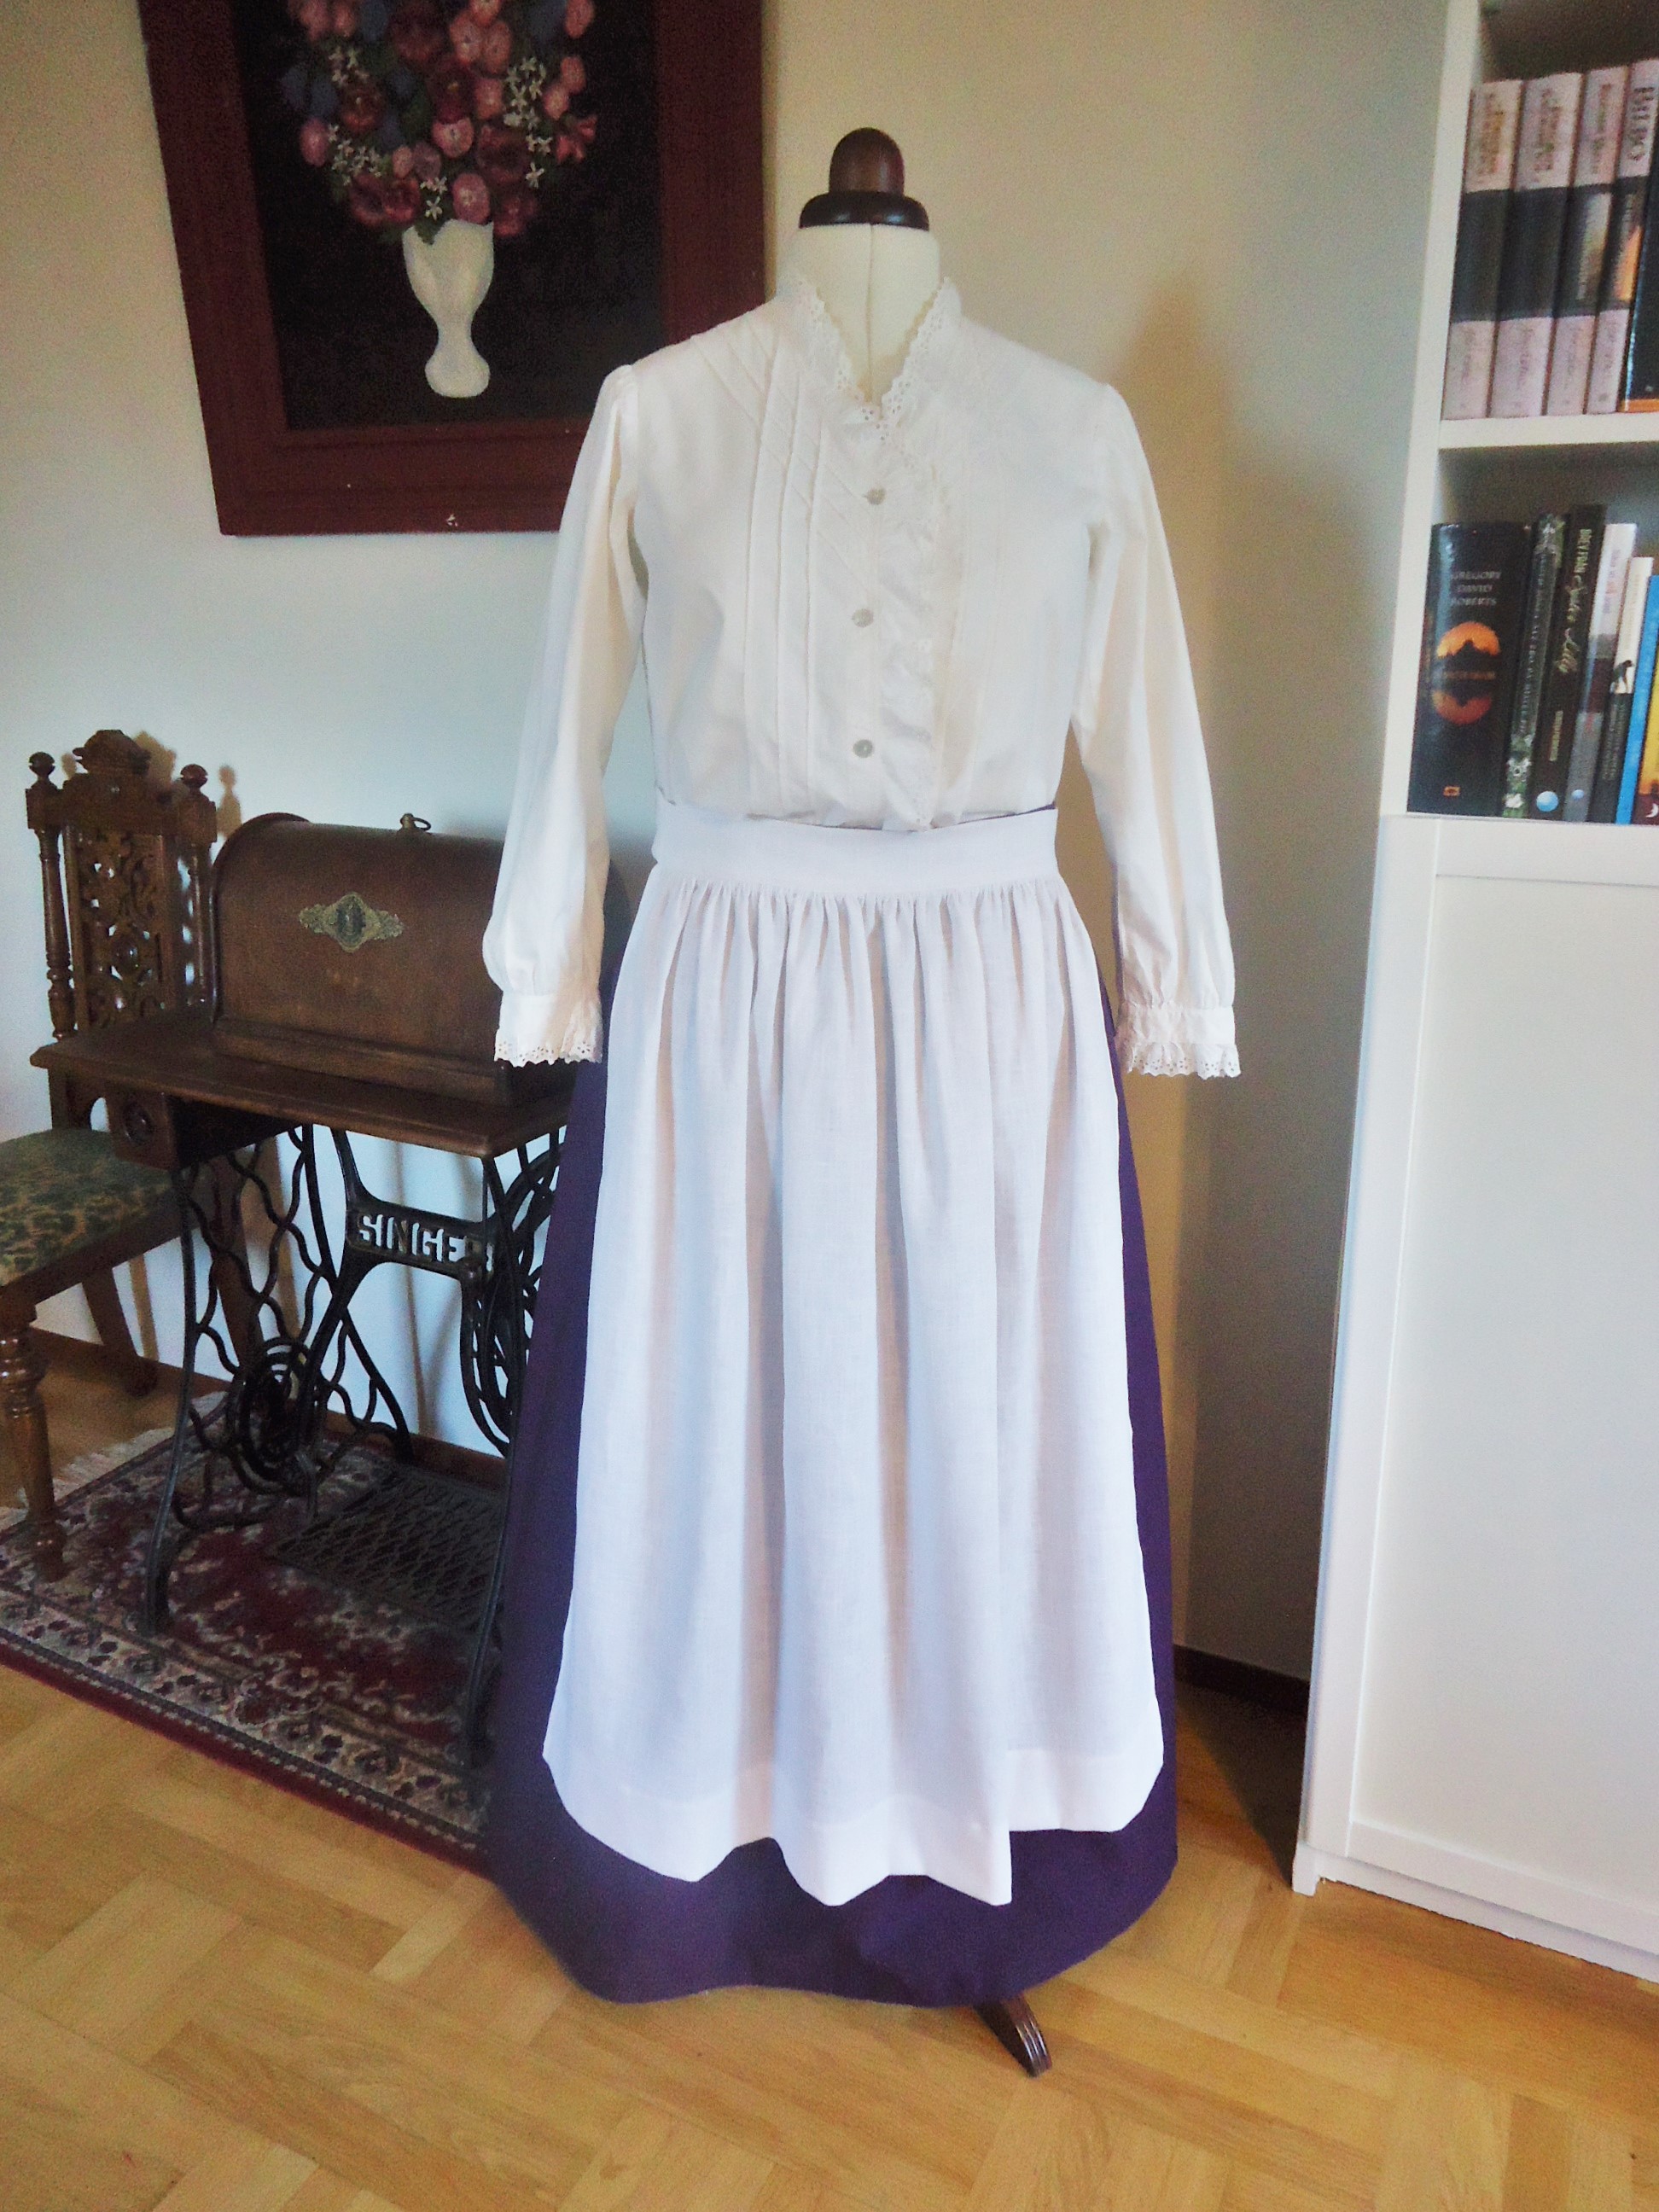
This summer I got a commission to make an Edwardian suit. This would be used at events where my customer would heighten the atmosphere together with her horse. She wanted a skirt, blouse and an apron. What a dream project! I was so eager to get started, but every step was taking unusually long time: I had to hunt down the package with the fabric order, as neither the fabrics, nor any note came to my post box. My pregnant body didn’t move as quickly and gracefully as it otherwise does, so the pattern making and cutting of fabrics was very challenging. Then there came this little boy… I missed out two deadlines, but thankfully, this dear customer told me not to hurry and just enjoy the first time with the baby.
I somras fick jag I uppdrag att sy en sekelskiftesdräkt, som skulle användas vid evenemang där min kund skulle agera stämningshöjare tillsammans med sin häst. Hon ville ha en kjol, en blus och ett förkläde. Vilket drömprojekt! Jag var så entusiastisk och hoppades på att kunna göra klart den innan förlossningen, men varje steg i processen tog ovanligt lång tid: När jag tyckte att jag väntat länge nog på tygerna var jag tvungen att spåra tygpaketet, eftersom de glömt att skicka en avi till min postadress. Min gravida kropp var långsam och otymplig, så det var en utmaning att kravla omkring på golvet för att göra mönstret och klippa tyg. Sedan kom den lille gossen… Jag missade båda kundens deadlines, men hon var förstående och uppmanade mig ta det lugnt och njuta av babytiden istället.
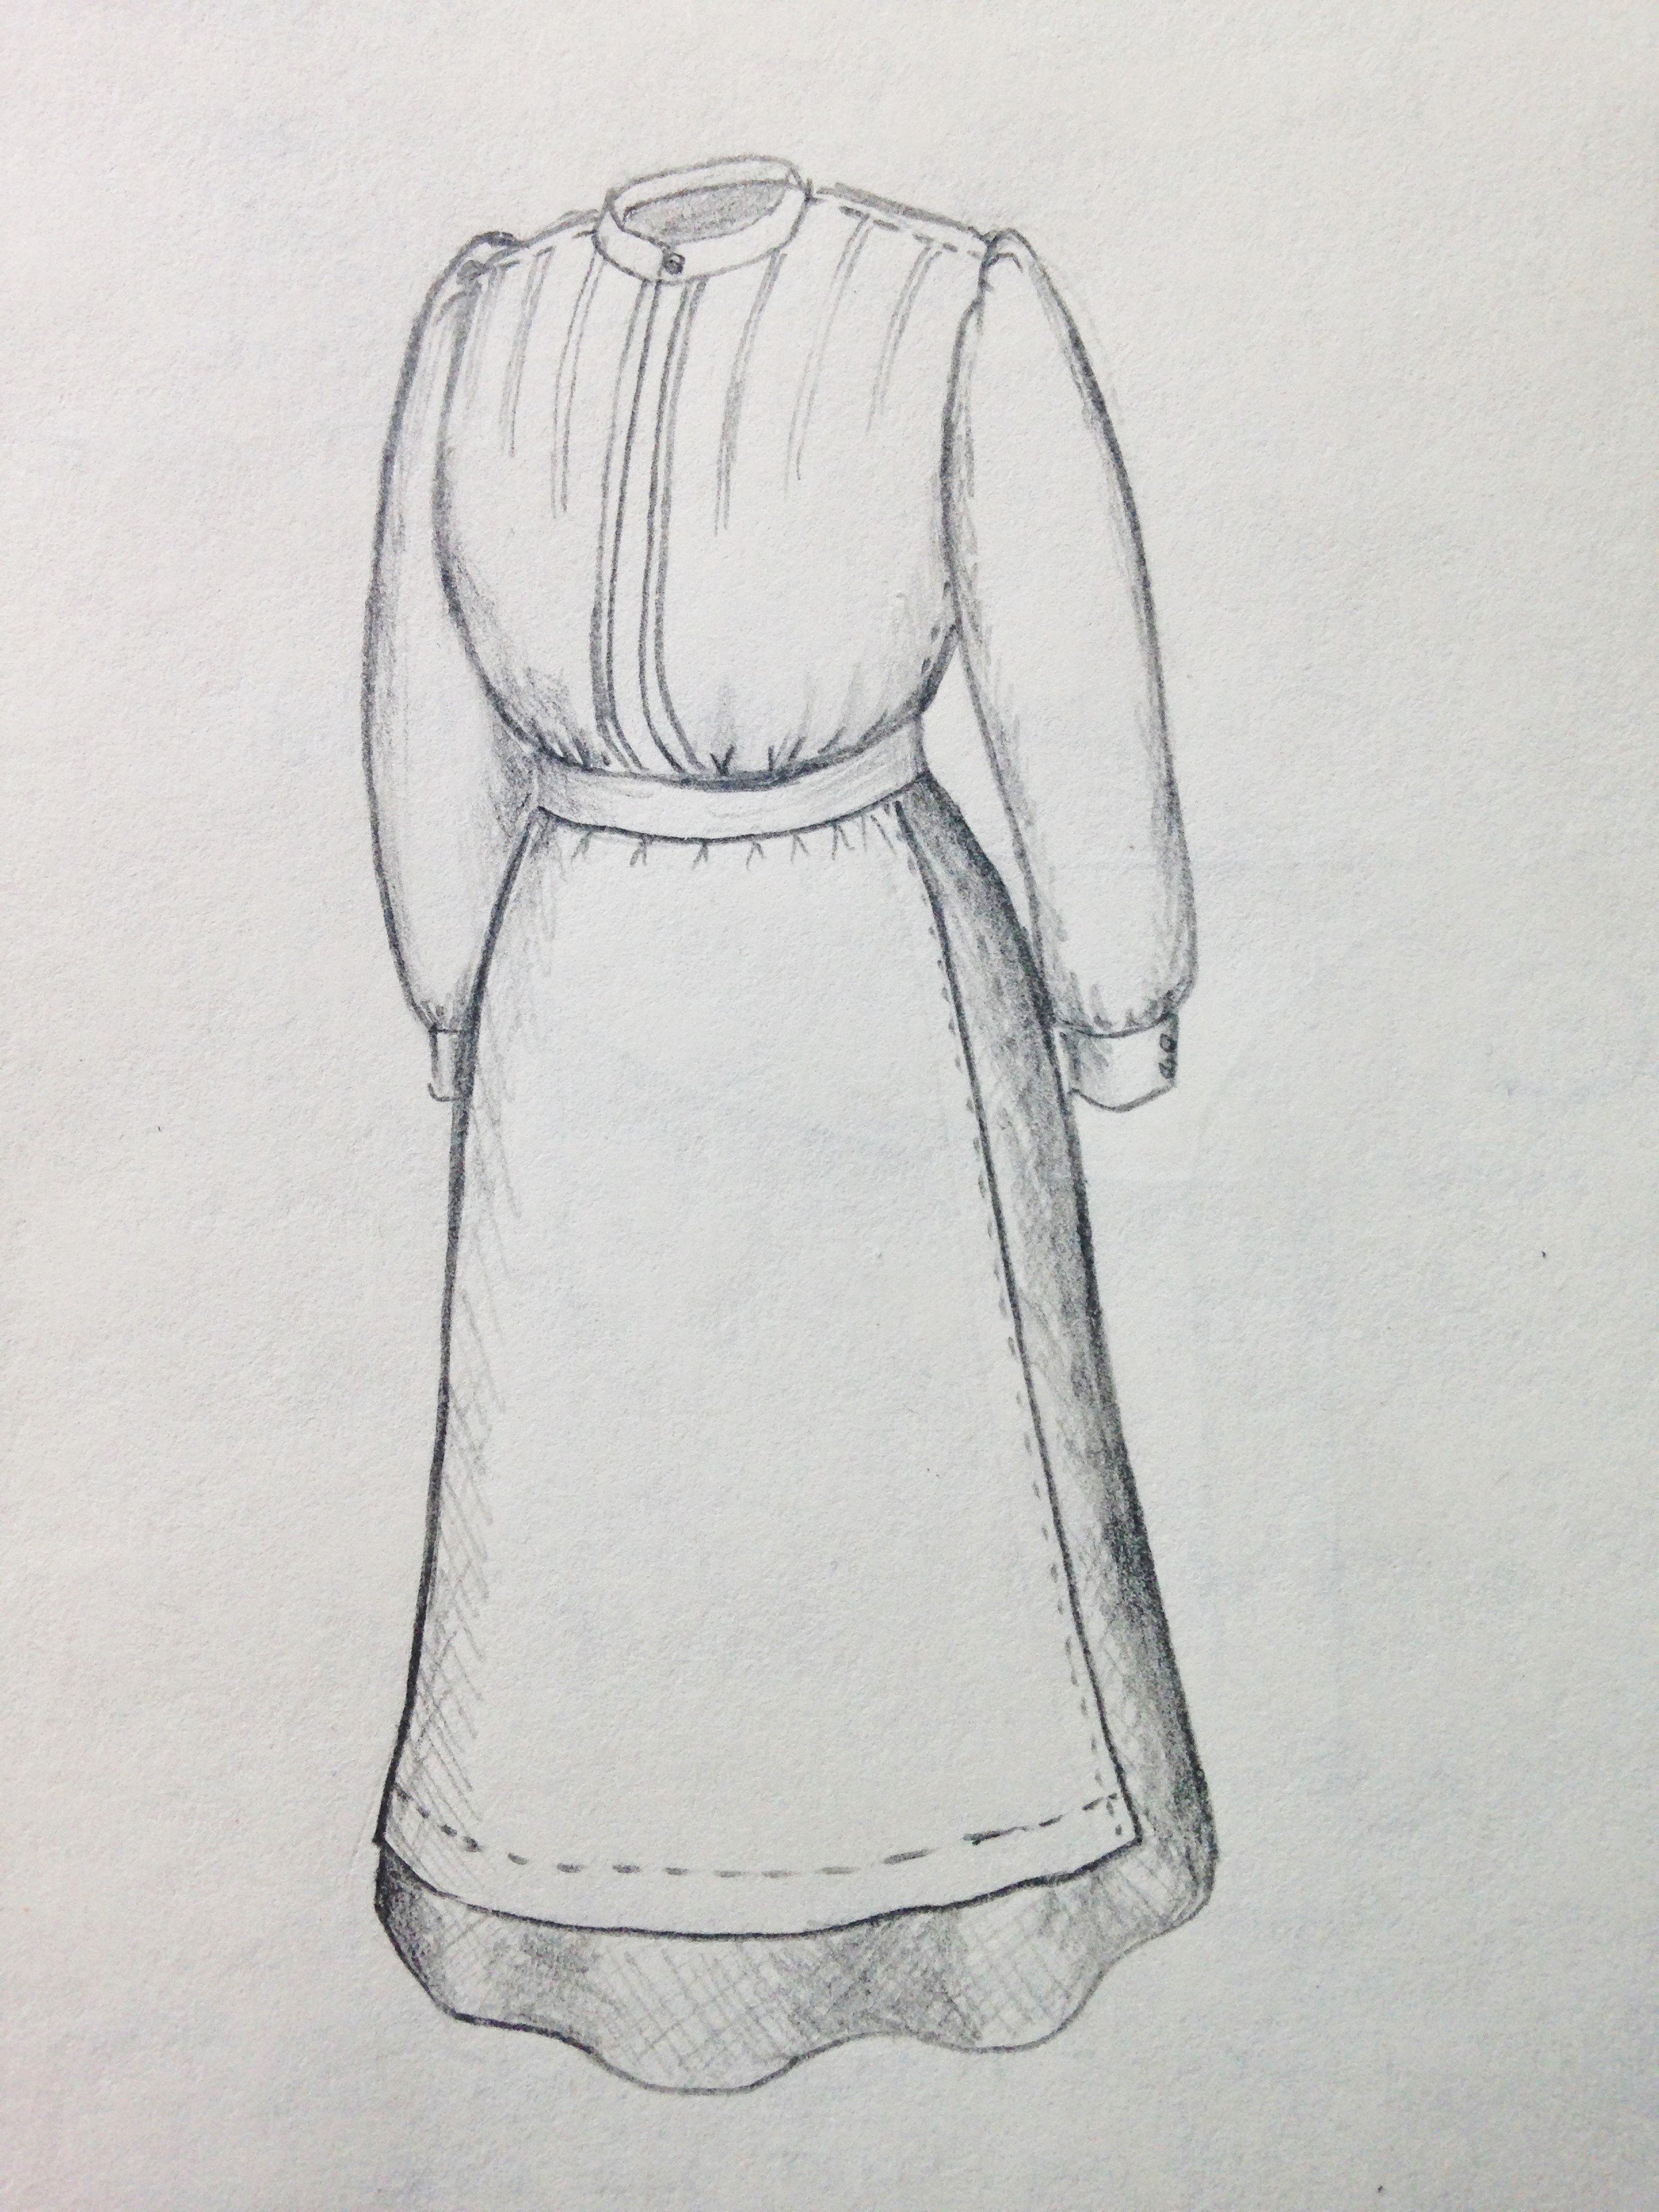
Costume suitable for a farmers wife.
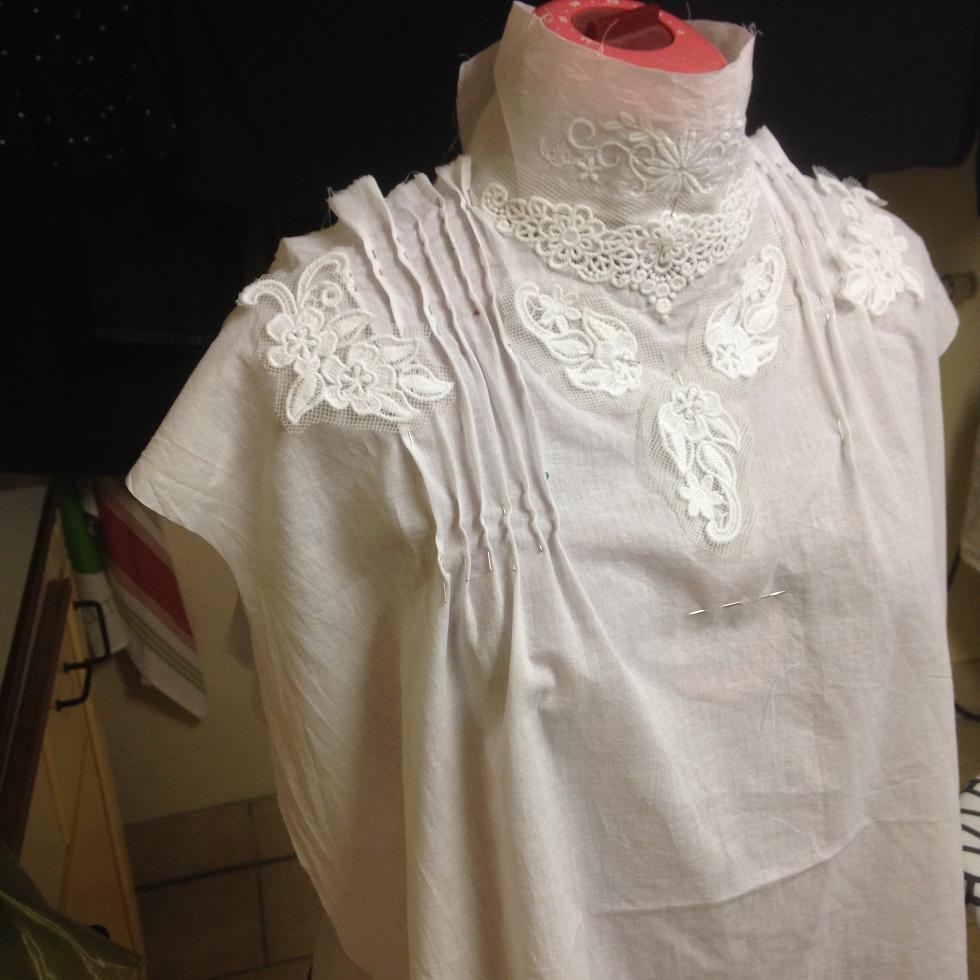
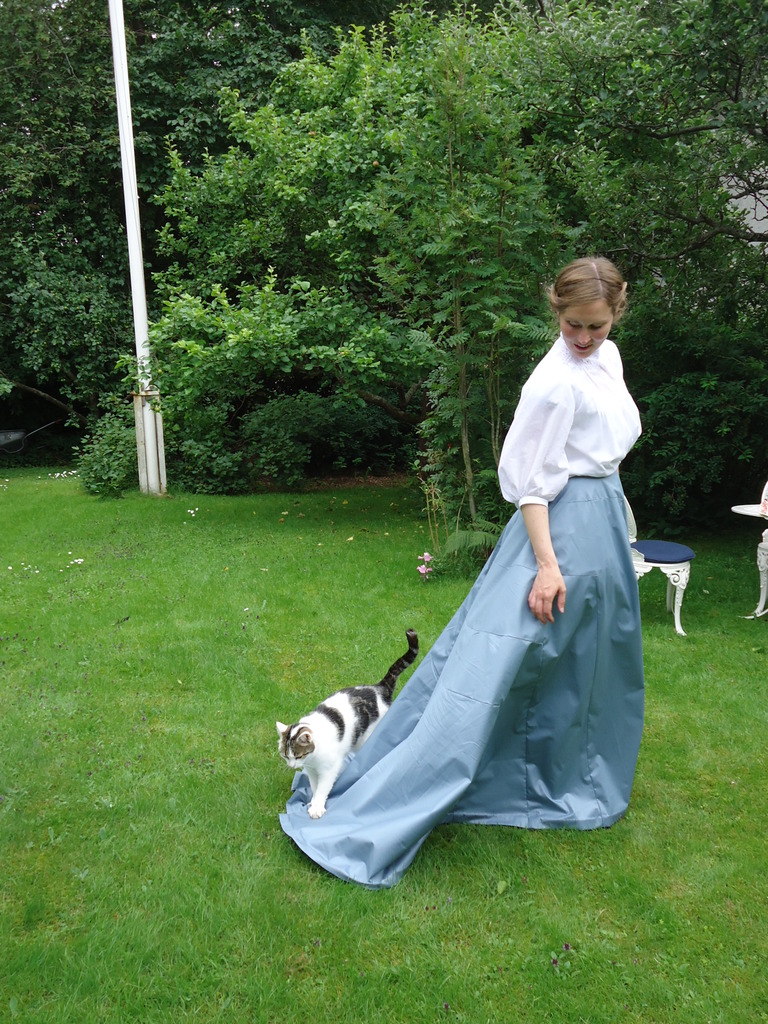
This week, I could finish the cotton skirt at last. It is made of three panels – one in the front and two in the back – and is closed with hooks and eyes. The linen apron was the only piece finished before the delivery. I had made a mock up for the blouse, but still wait for an opportunity to fit it on my customer before I cut the fashion fabric. In the meantime, she can wear this lovely vintage blouse.
Den här veckan kunde jag äntligen sy färdigt bomullskjolen. Den består av tre paneler – en fram och två bak – och stängs med hyskor och hakar. Linneförklädet var det enda plagget som var färdigt innan förlossningen. Jag hade gjort en toille för blusen, men väntar fortfarande på ett tillfälle att testa den på min kund innan jag sätter saxen i blustyget. Tills blusen är klar får hon använda denna underbara vintageblus.
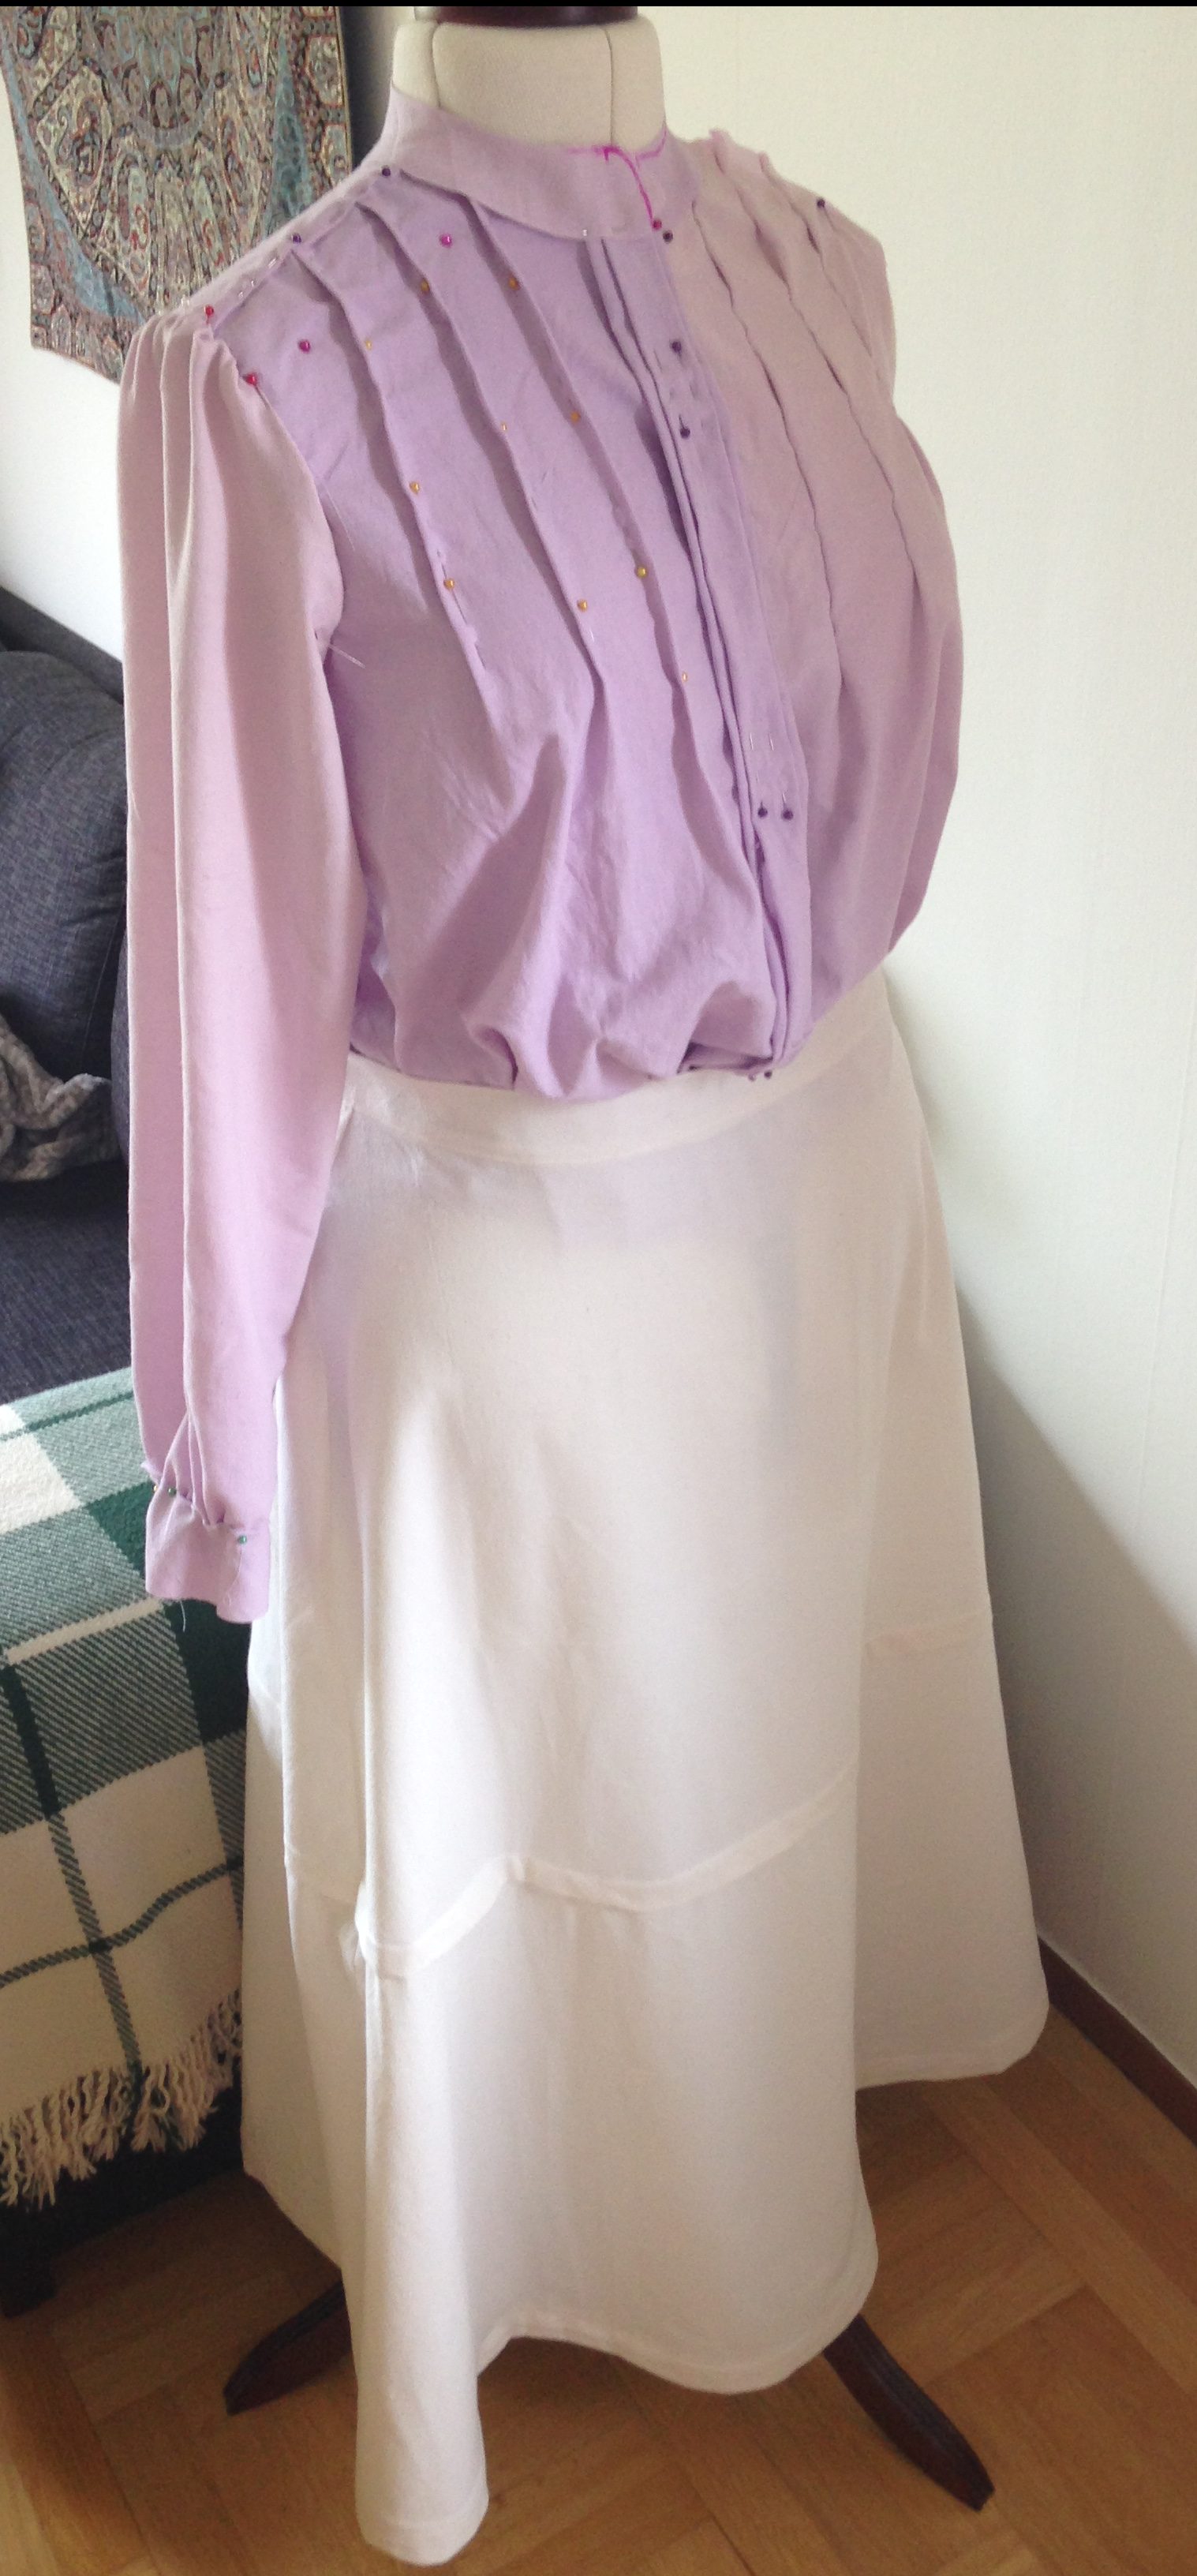
Mockup for the blouse and skirt. After tracing the skirt mockup to pattern paper, I made an petticoat of it.
In order to keep the price down, I made the pleats on machine. It took two hours to make, except for prewashing and calendering.
This is the Edwardian vintage blouse. It is made from quite heavy weight cotton and every seam is made on machine. It does not look home made.
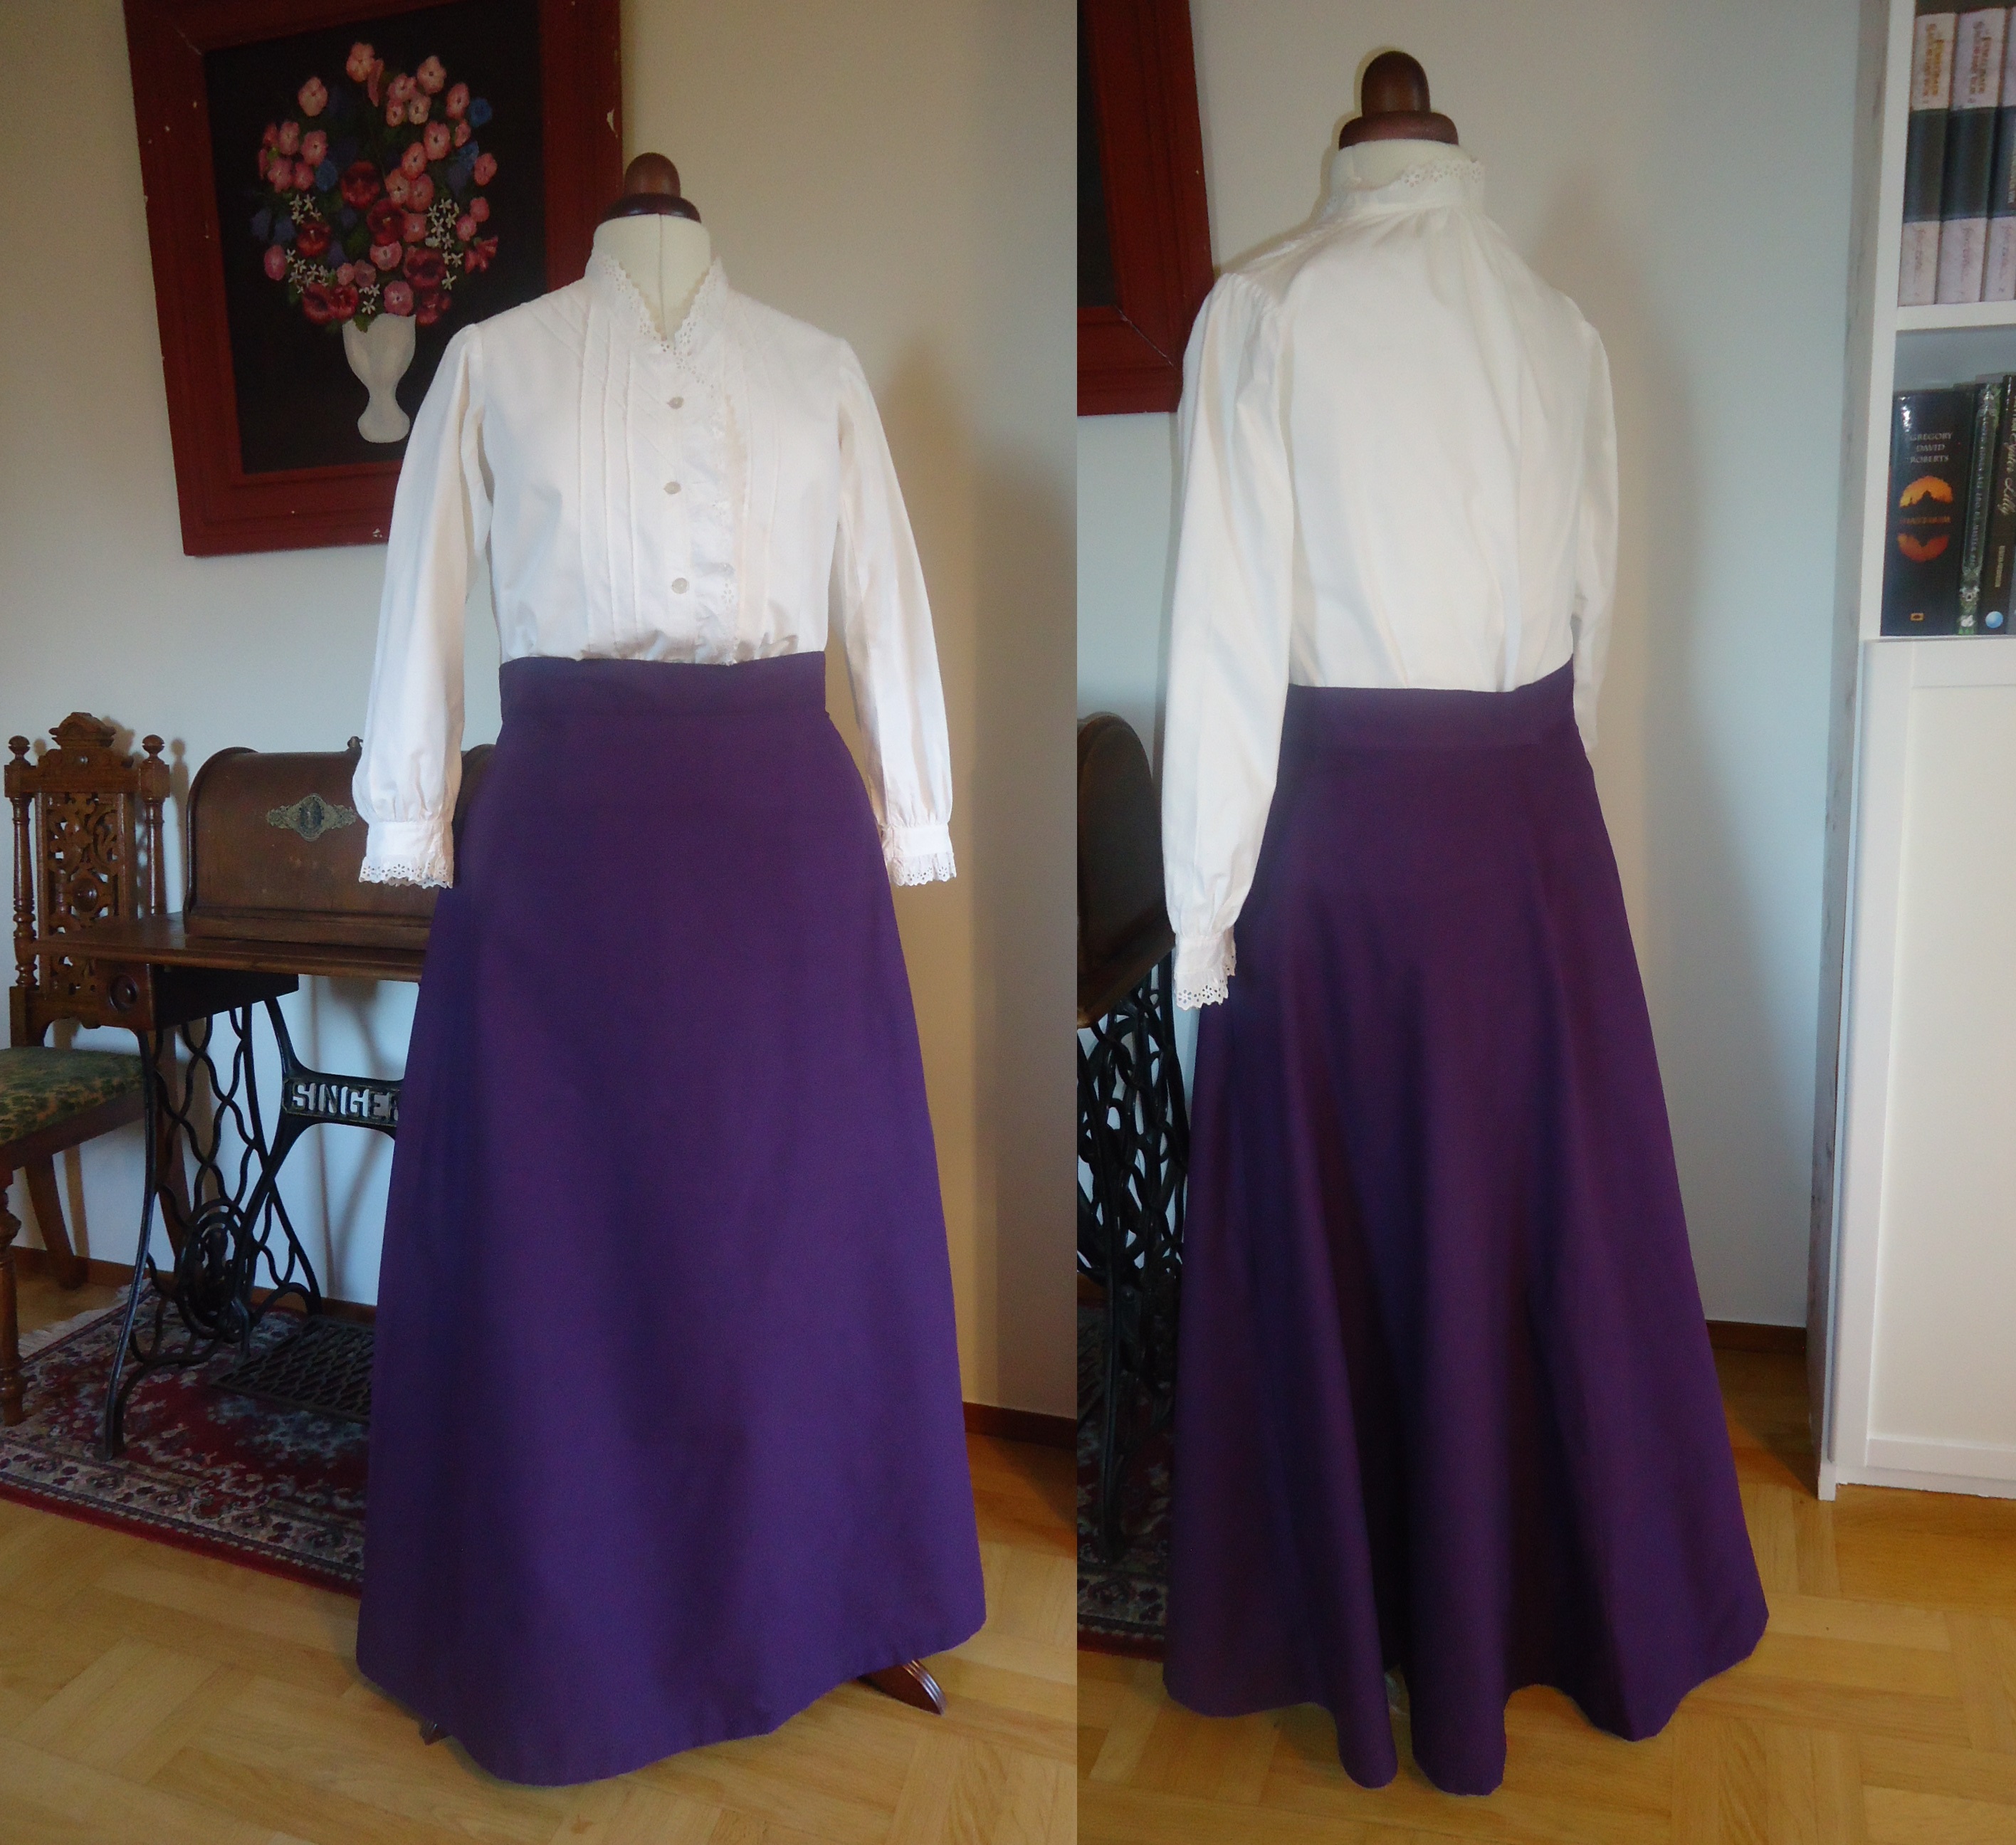
The skirt
The whole costume
Today, I have also finished the changing table! My kind father in law bought the wanting piece of wood that would prevent the baby from falling down. I sawed this into three pieces and screwed them together. The inside was lined with camping mattress underneath oilcloth, fastened with glue gun. Then this frame was fixed to the changing table with screws. The frame serves both as a stabilizer and protection. I know that the changing table could have been steadier and more nice-looking if I had put more money into the right materials and if I had been able to construct it without interruptions. It does not look completely abhorring though, and it is steady when standing over the washing machine. As it answers our present needs, I am really happy with the outcome.
Idag blev skötbordet fullbordat! Min snälle svärfar köpte en fin mdf-skiva att ha som kant. Jag sågade till tre bitar, som jag skruvade ihop. Med limpistol limmade jag sedan fast liggunderlag och vaxduk på insidan av träramen. Sedan skruvade jag fast ramen på själva skötbordet. Förutom att skydda barnet från att rulla ner från skötbordet, stabiliserar den också själva bordet. Jag är medveten om att skötbordet hade kunnat bli både stadigare och finare om jag hade lagt mer pengar på rätt material och om jag hade kunnat jobba ostört. Nu kom vi i alla fall billigt undan och det ser inte helt fasansfullt ut. Eftersom det tillgodoser våra behov nu, är jag faktiskt riktigt nöjd med resultatet.
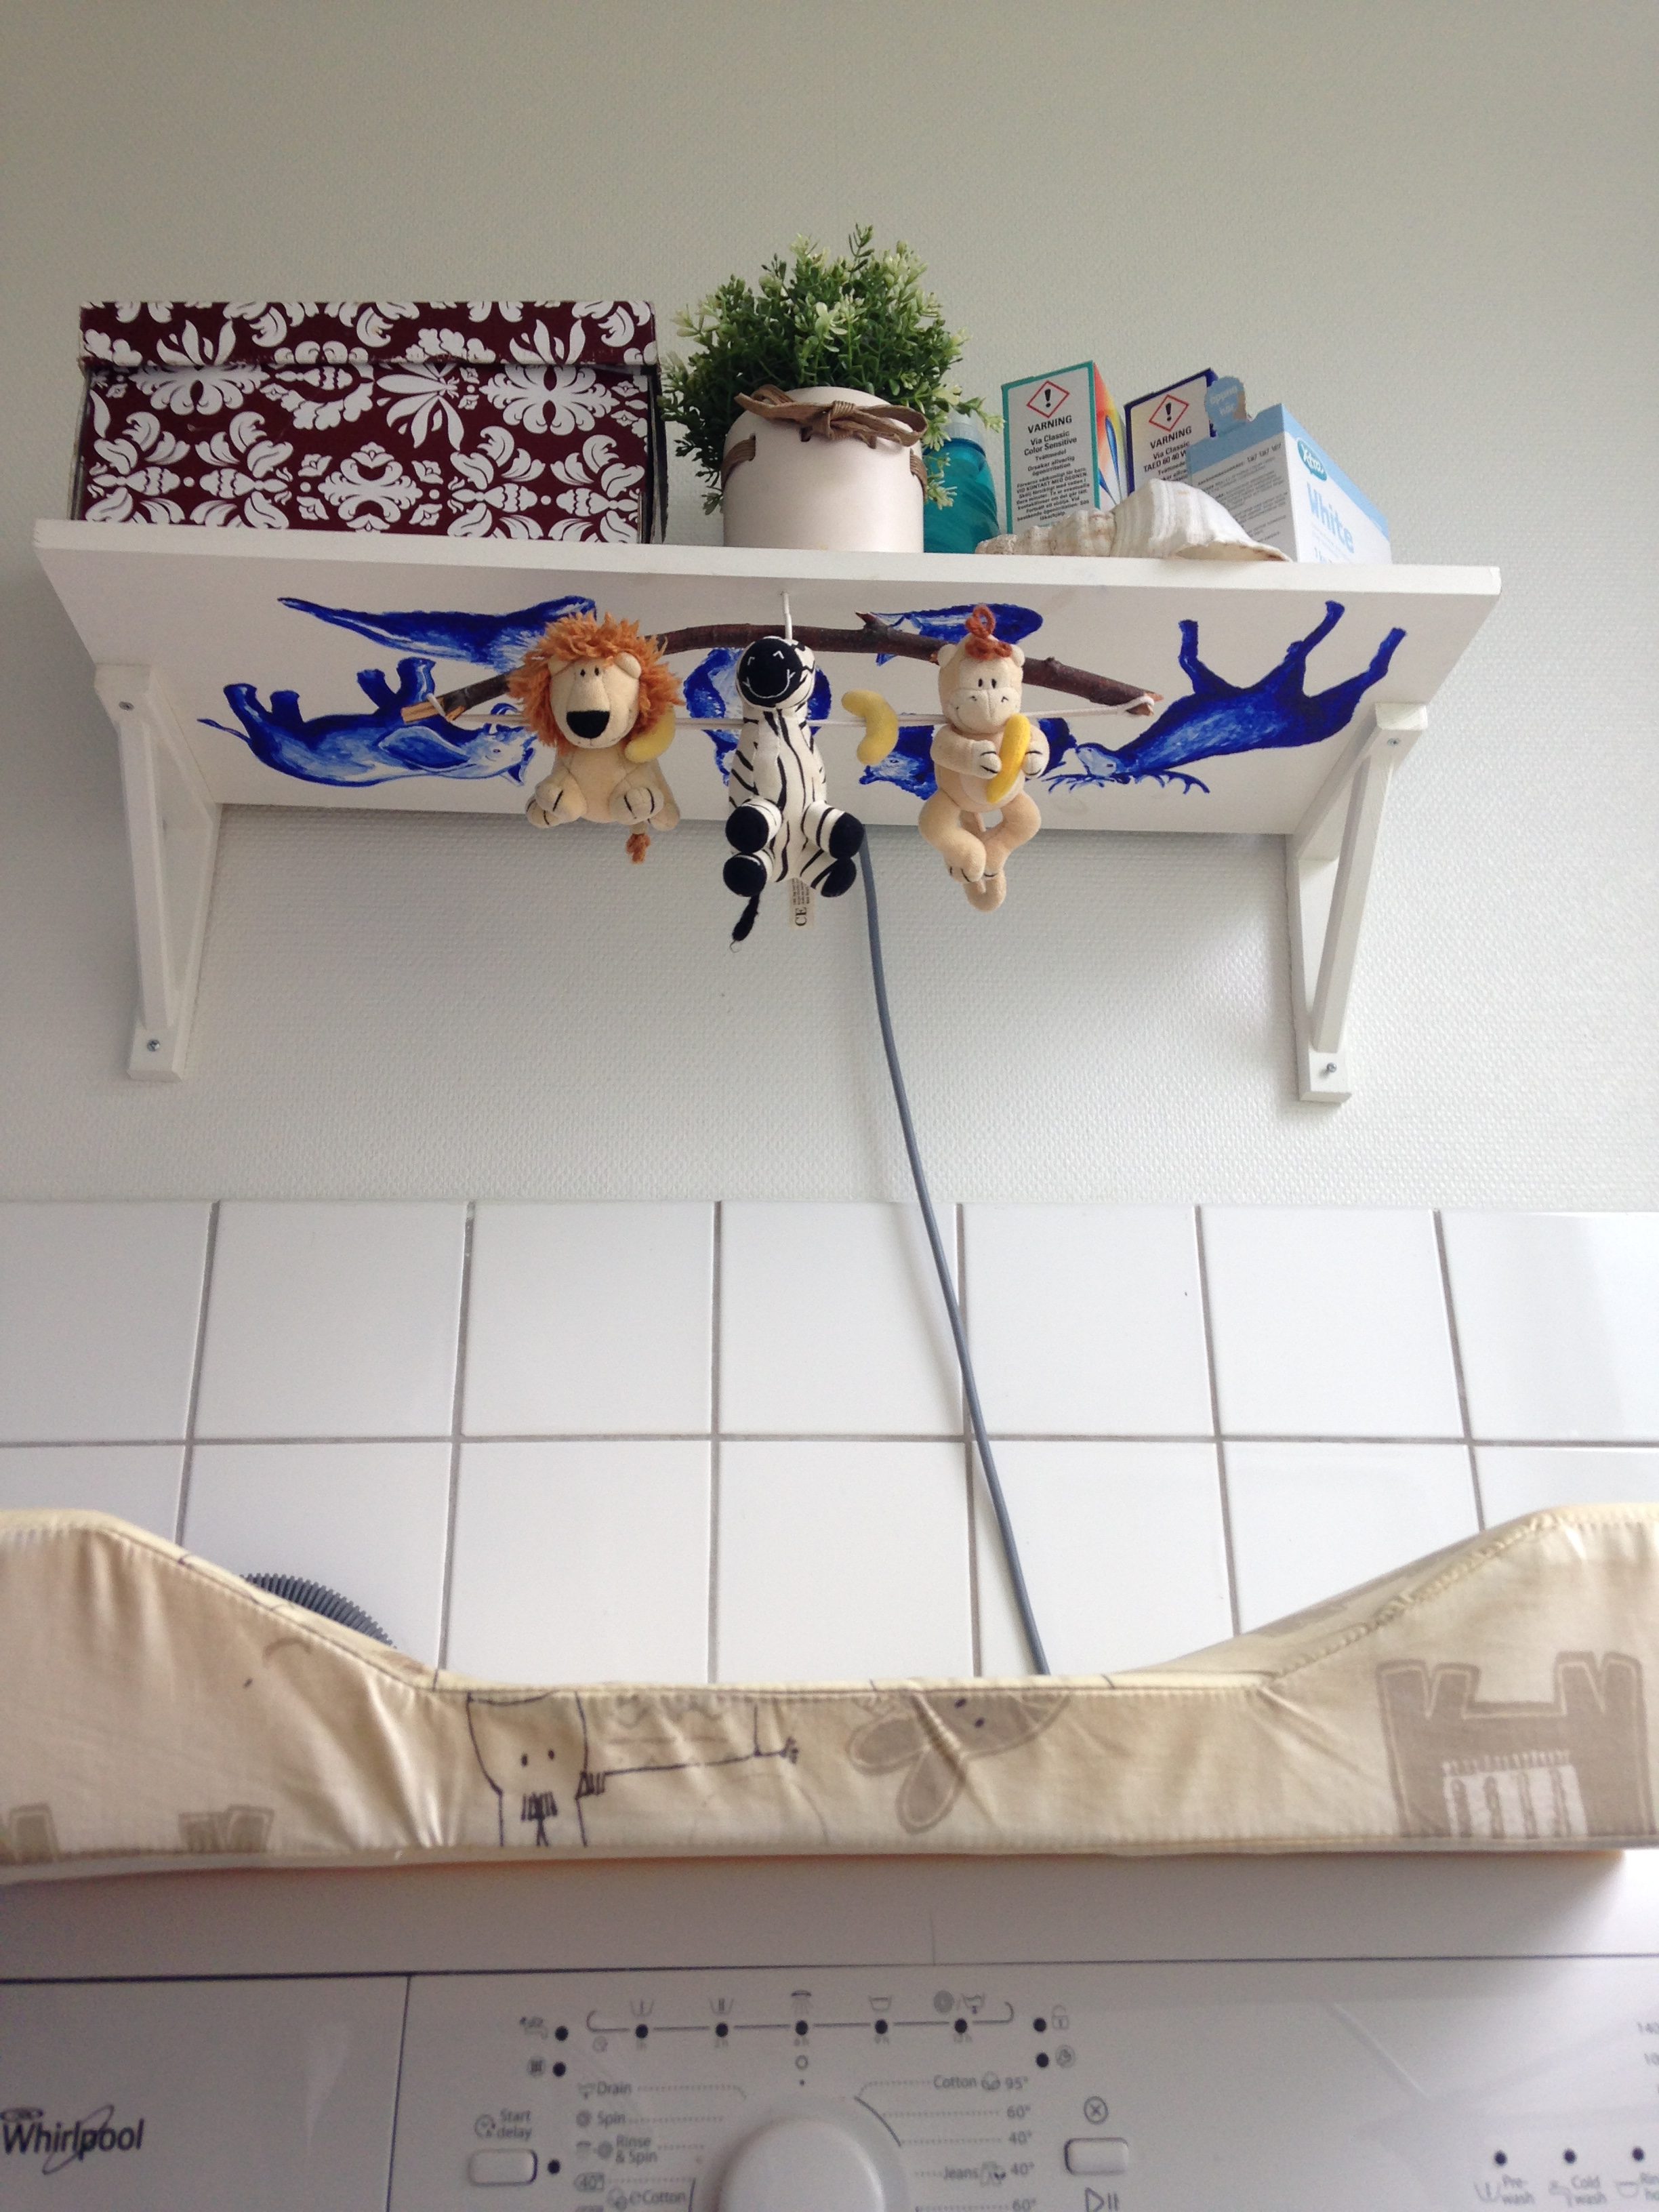
Our baby loves being on his changing table, beneath the shelf that I made for him. During the last week, he has also started talking to the animals at the shower curtain.
Above the baby’s changing table (likewise our washer), we need a shelf. I bought the cheapest shelf I could find, at Clas Olssons (about 100 SEK) and painted it white. Then I drafted some friendly animals and painted these with acrylic colour. From a hook, I hung cuddly toys, originally made for the buggy, bought at a local second hand shop.
Vi behövde en hylla ovanför bebisens skötbord (tillika vår tvättmaskin). Jag köpte det billigaste hyllplanet med konsoller jag kunde hitta på Clas Olssons (ca 100 kr) och målade den vit. Sedan skissade jag några söta djur och färglade dessa med akrylfärg. I en krok hängde jag barnvagns-gosedjur som vi hittat i den fantastiska secondhandbutiken Busfrö.
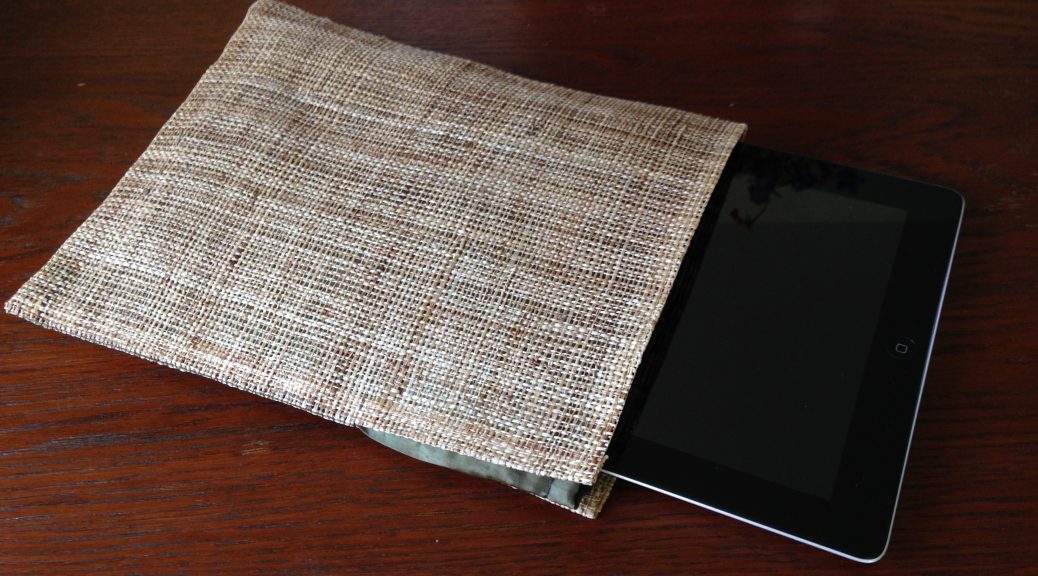
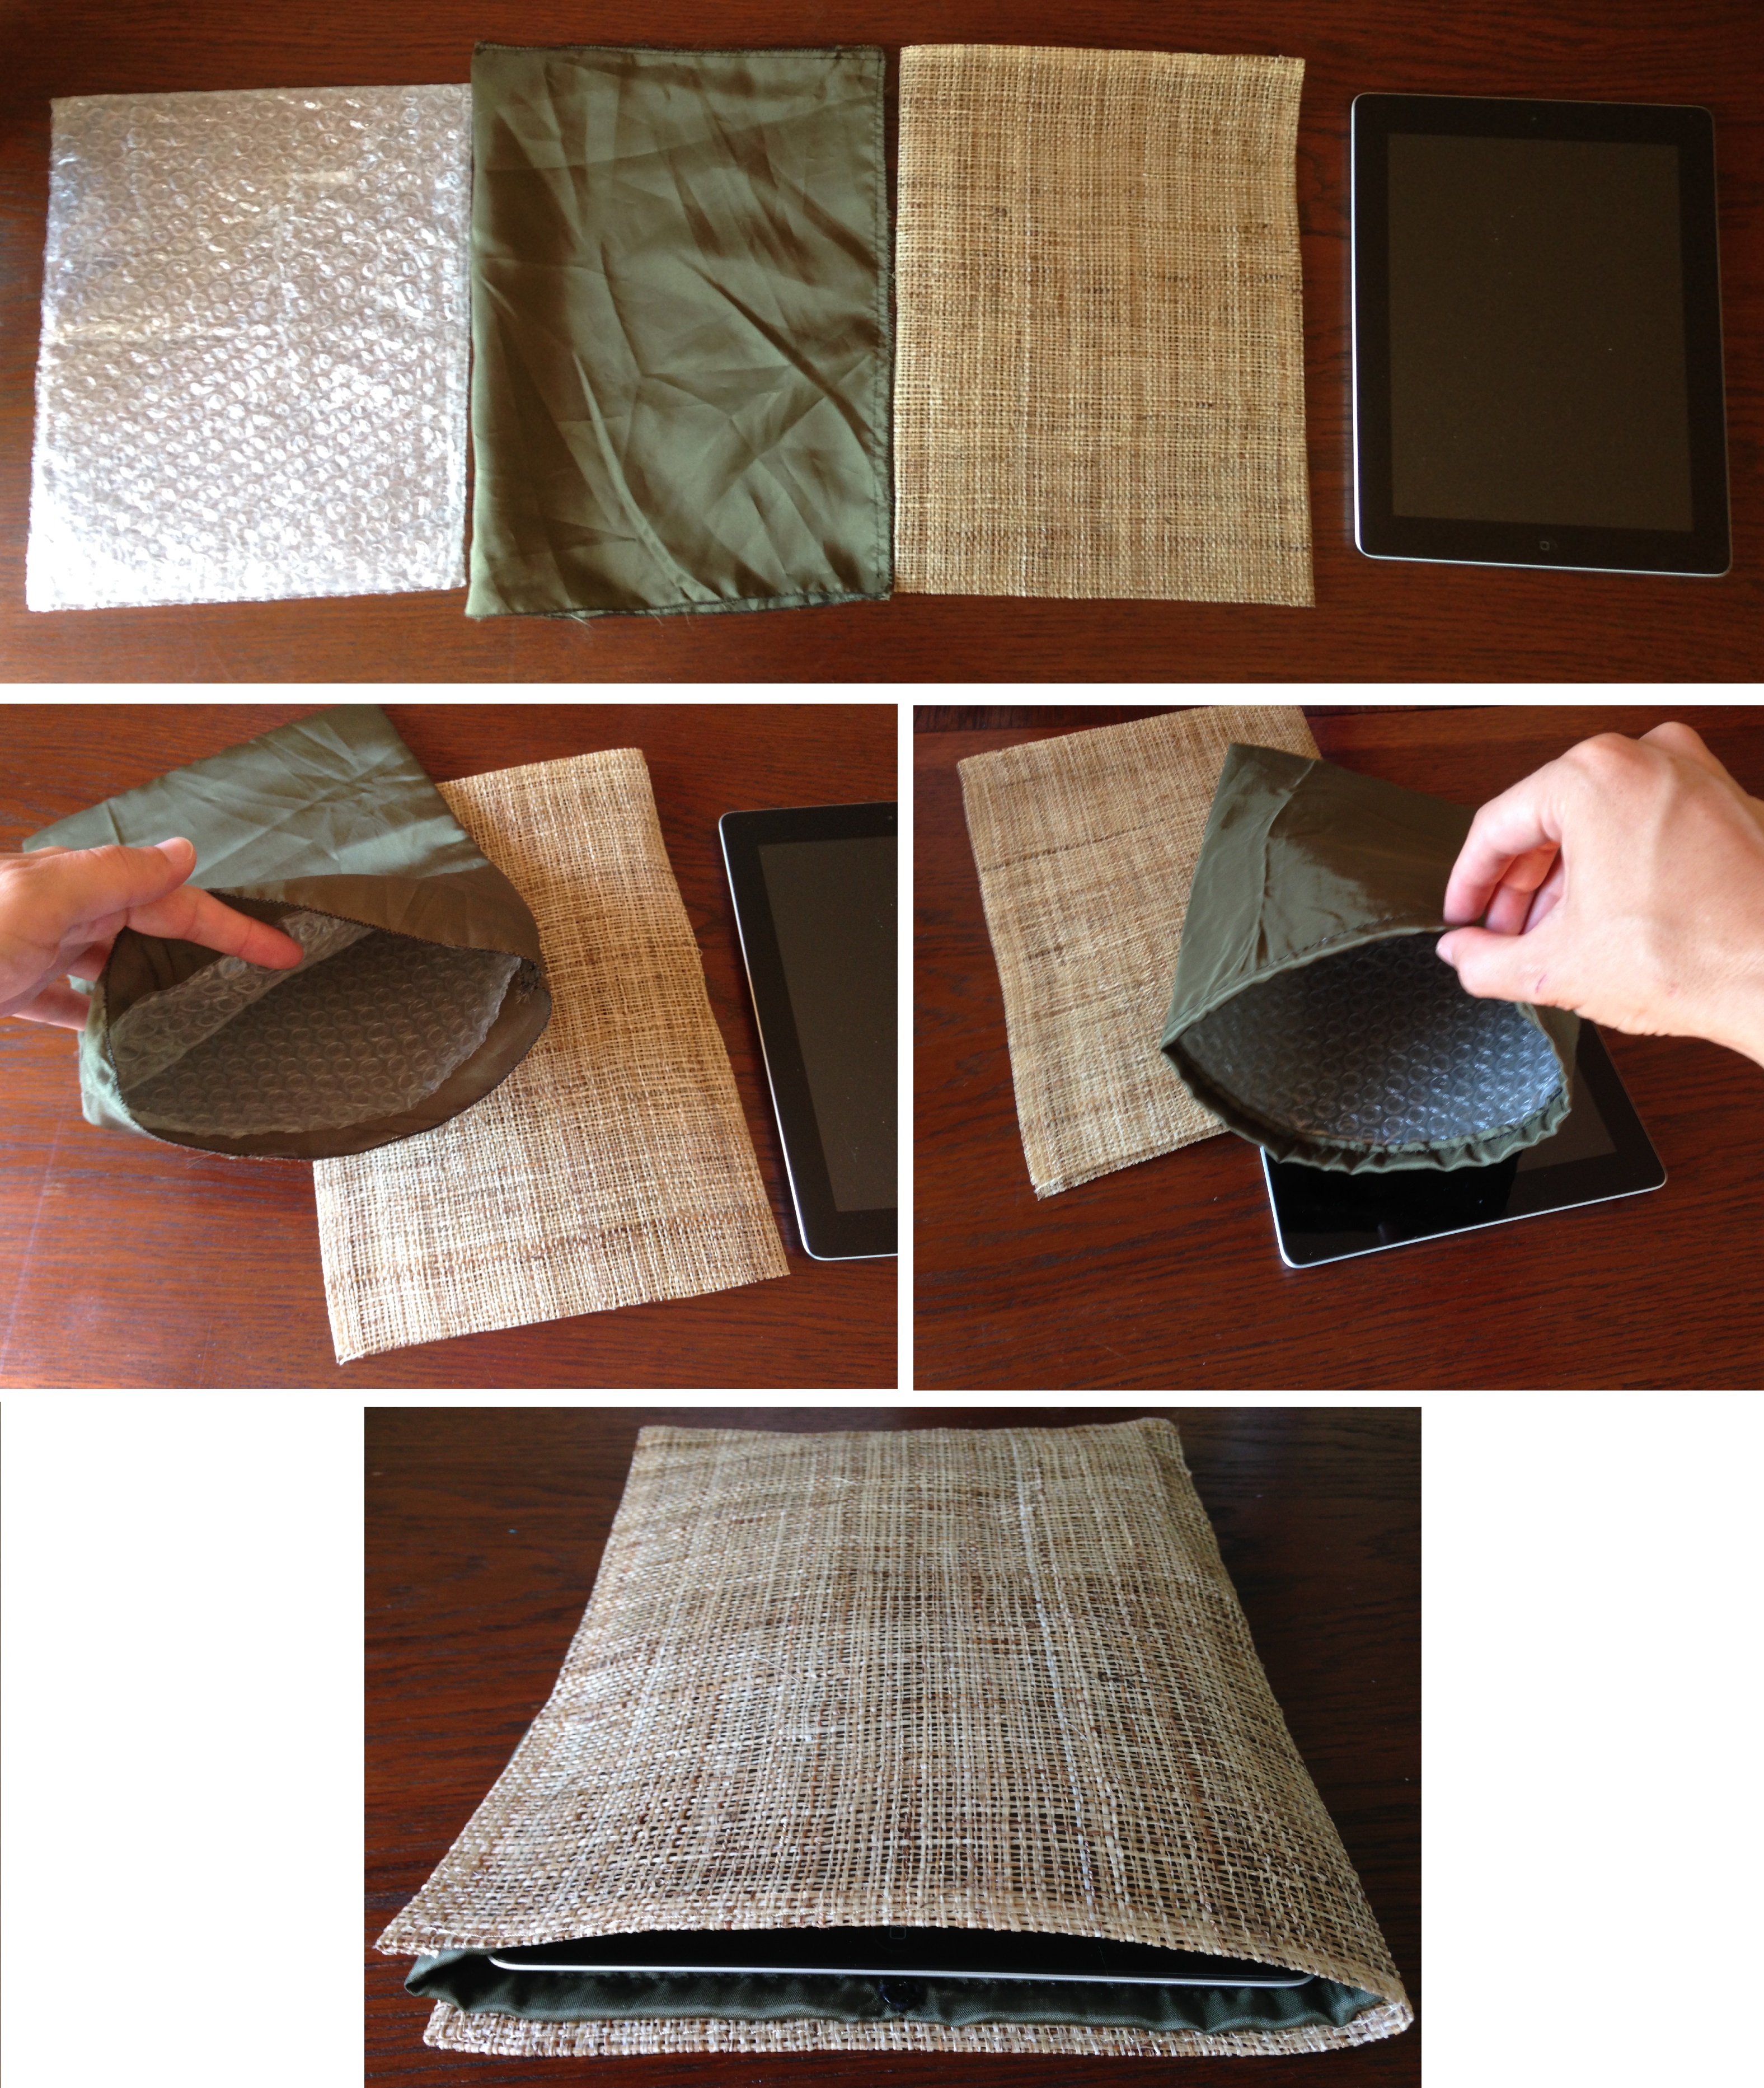
iPad Case
The iPad was in dire need of protection, so I used the bubble wrap in which it had been delivered and made a fabric case for this and yet another case out of a table tablet. It is closed with push buttons.
Den stackars läsplattan var i stort behov av ett fodral. Jag använde den bubbelplast som den kommit i och sydde ett fodral i tyg och ytterligare ett yttre hölje av en bordstablett. Mitt i öppningen satte jag en tryckknapp.
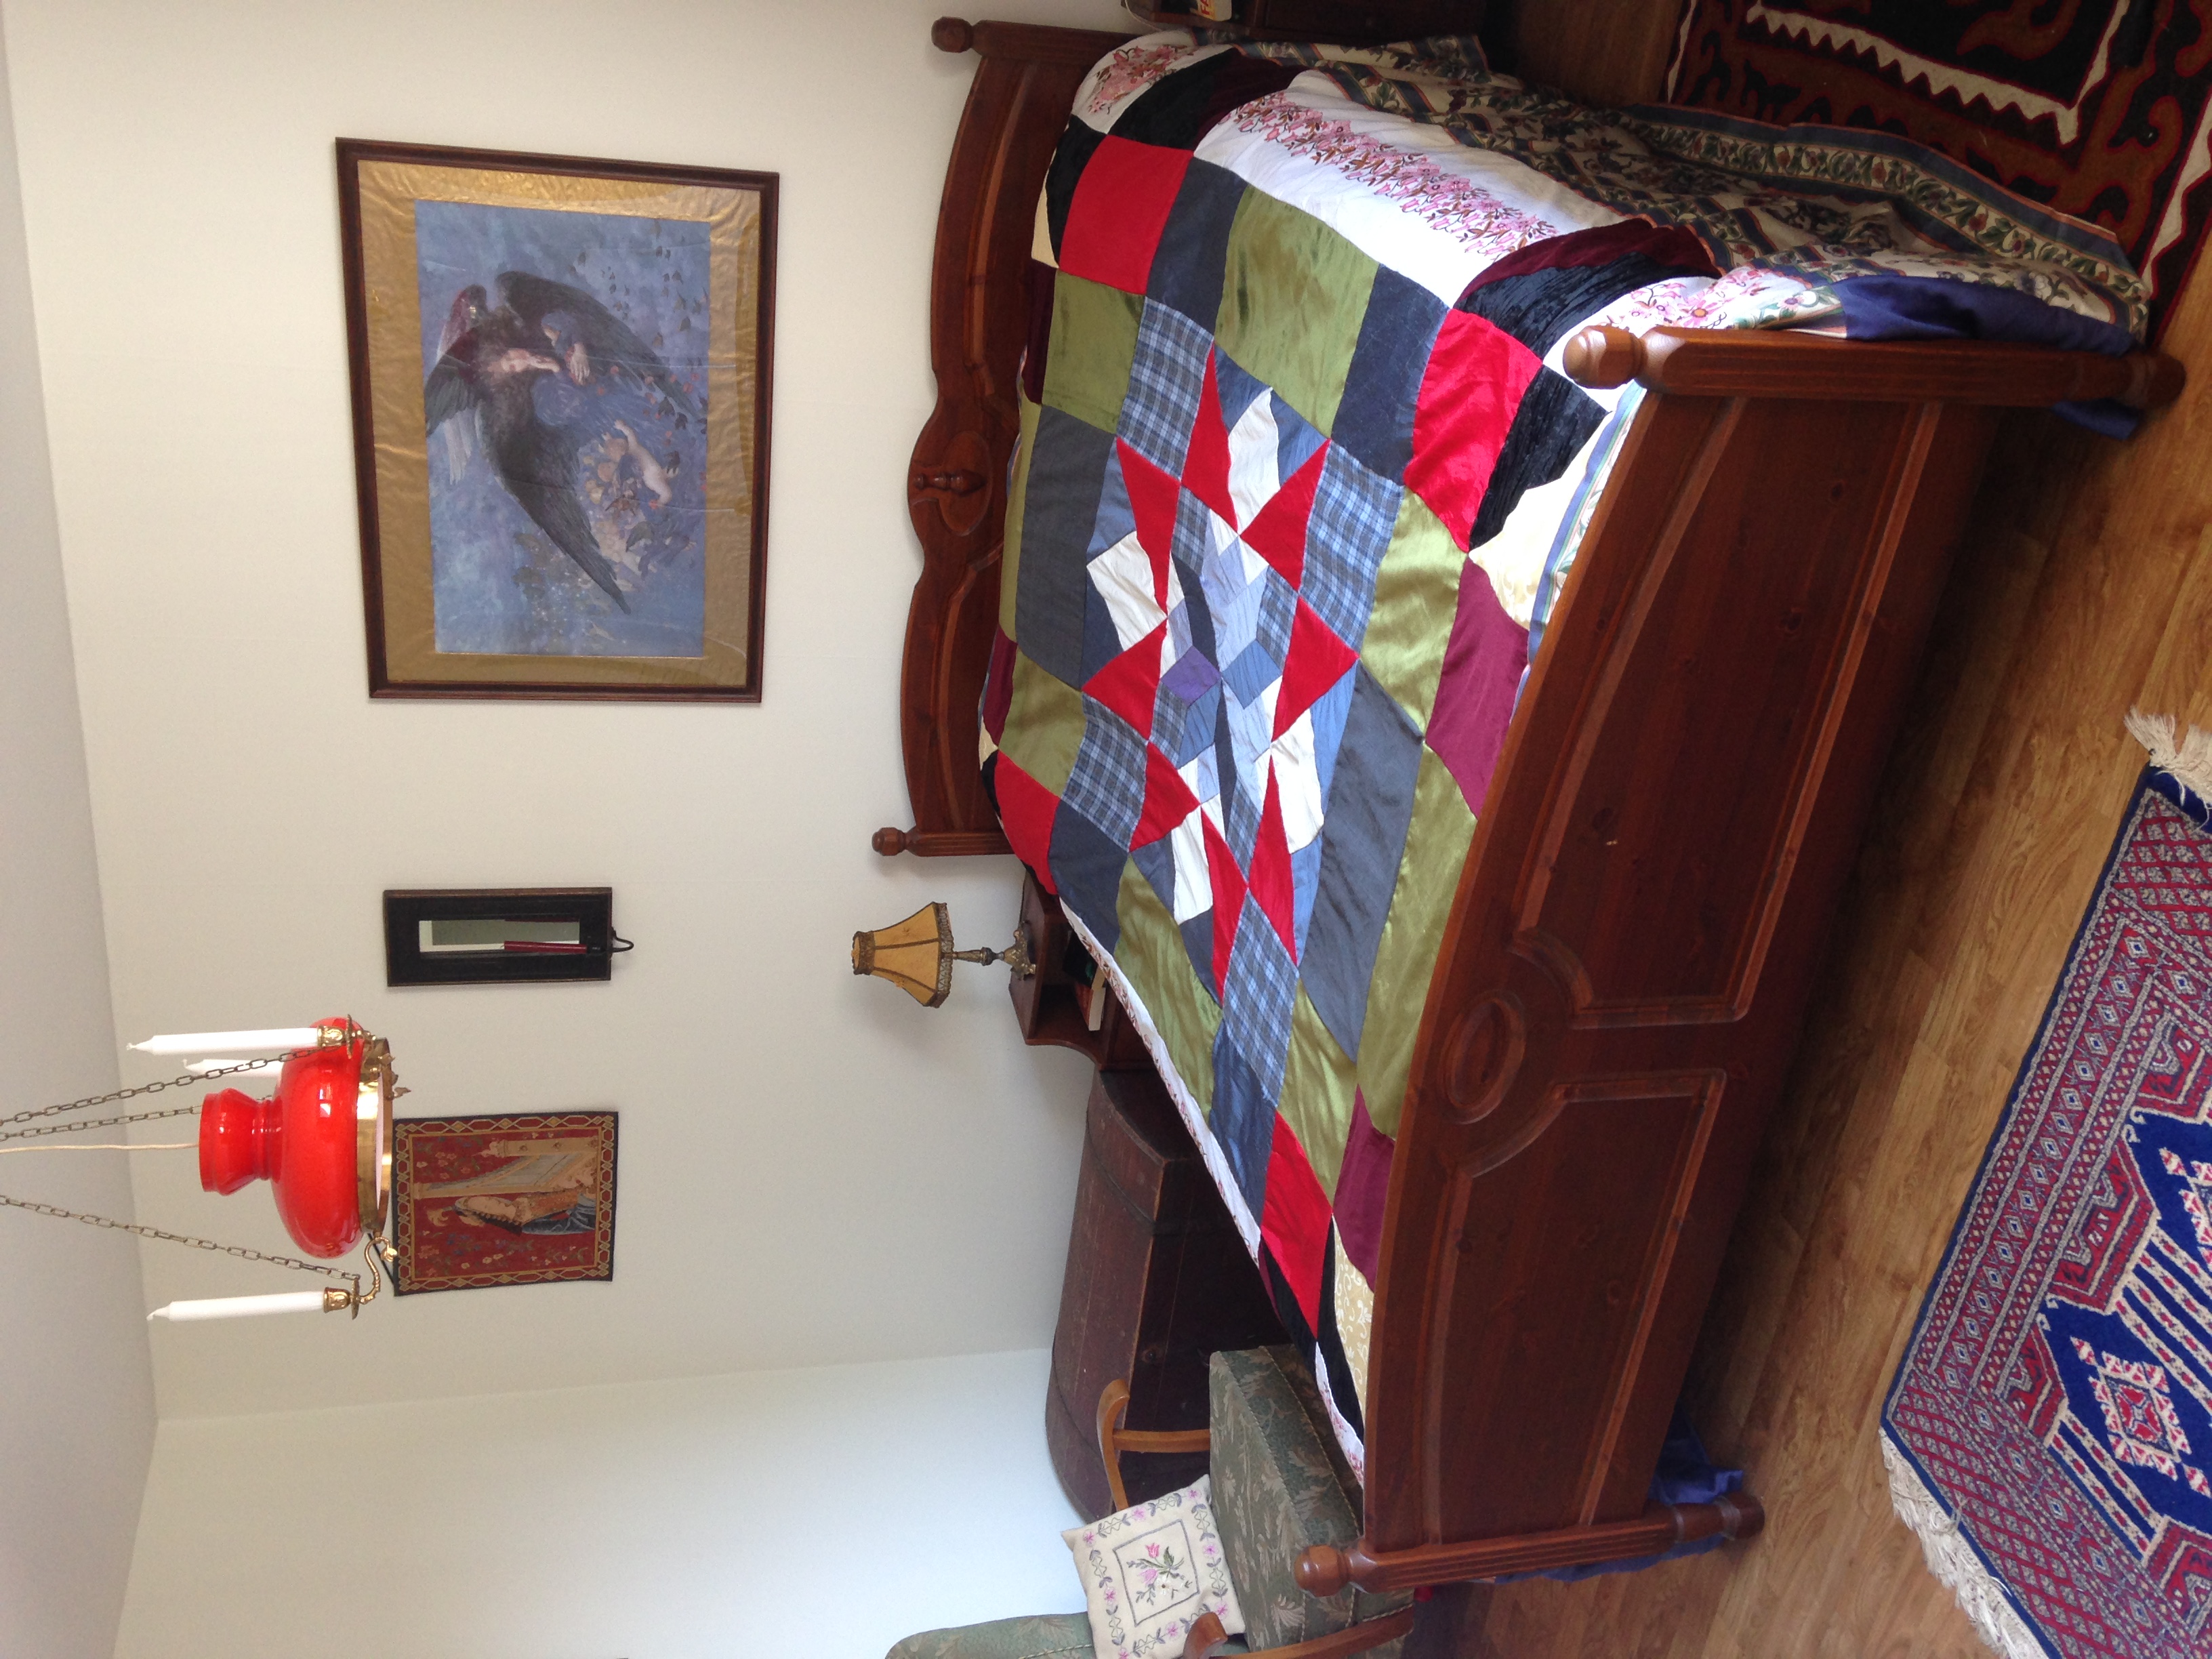
Quilted Bedspread
After several years of struggle (or lack of inspiration) I have also finished a bedspread, made from leftovers after different dress projects etc. I copied the pattern from my grandmother’s beautiful homemade bedspread, bud did not have the patience to use as small pieces. The last big pieces added are old curtains, perfect for covering the bed’s sides.
Efter många års kämpande (eller snarare brist på motivation) har jag äntligen avslutat ett överkast, sytt av överblivna tygbitar från olika klänningsprojekt mm. Jag kopierade mönstret från mormors vackra hemmasydda överkast, men hade inte tålamod till att använda lika små bitar. De sista stora bitarna kommer från gamla gardiner, perfekta för att täcka sängens sidor.
If I had done this again, I would have skipped the bright red fabric, as it certainly does not match the rest. It represents a lovely memory though…
Om jag skulle ha gjort om detta, skulle jag inte ha använt det klarröda tyget, eftersom det verkligen inte matchar resten. Tyget väcker dock härliga minnen…
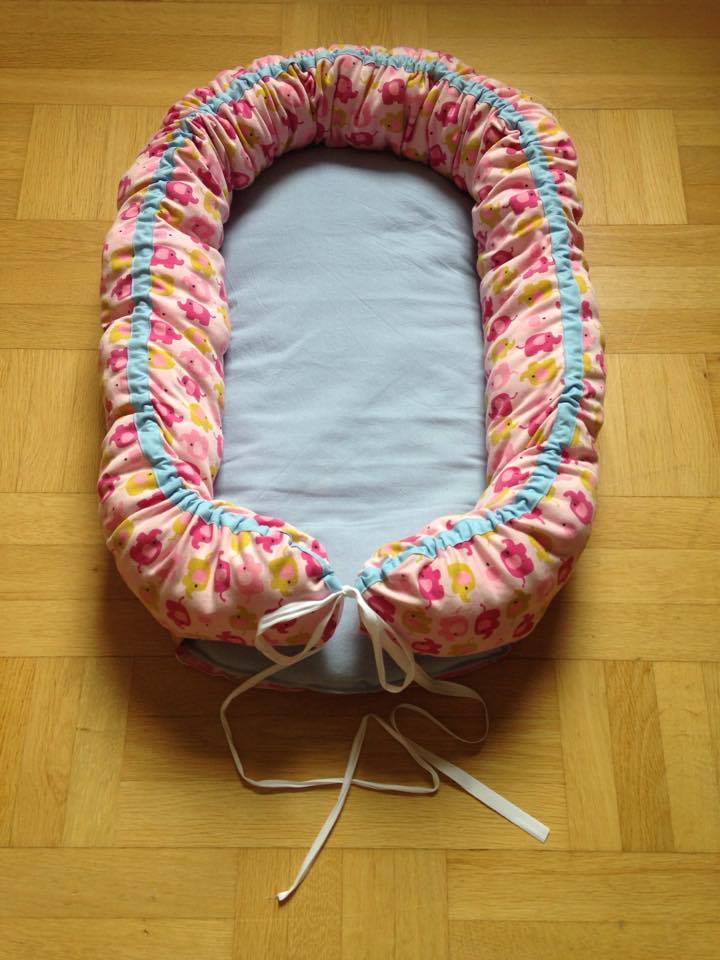
Since the last post, I have finished a dress for my mother, a pillow case and a baby nest. Unfortunately, the baby nest is the only thing I have remembered to take a picture of.
Sedan sista inlägget har jag sytt färdigt en klänning till min mamma, sytt ett nytt kuddfodral utav gamla lakan med farmors fina monogram, samt gjort ett babynäste. Tyvärr är det bara babynästet som jag har kommit ihåg att fotografera.As I copied the pattern and construction from another very pedagogic blog, I will not repeat it here.
Eftersom jag kopierade mönstret och konstruktionen från en annan väldigt pedagogisk blogg, tänker jag inte upprepa det här.
This Wednesday I had my very last exam and I passed. Crazy! Now there is only the Hippocratic oath, by the end of the month, between the world of medical doctorship and myself. It has been a hard ride, with many sleepless nights, tears of anguish and boring “holidays” filled with studies. But now it has finally come to an end. Wow.
I onsdags hade jag min allra sista tenta och klarade den. Galet! Nu är det bara det Hippokratiska läkarlöftet vid månadsslutet, som ligger mellan mig och världen av dokorskap. Det har varit en hård resa, med många sömnlösa nätter, tårar av ångest och tråkiga ”lov” fyllda av studier. Men nu är det äntligen över. Wow.
This semester has been about as tough as the others and I have not had time for bigger projects (except for grandmothers wedding gown). Here comes some small projects that I have used as distraction, though.
Den här terminen har varit lika tuff som de tidigare och jag har inte haft tid för större project (förutom mormors brudklänning, förstås). Här kommer några småprojekt som jag har haft som distraktion.
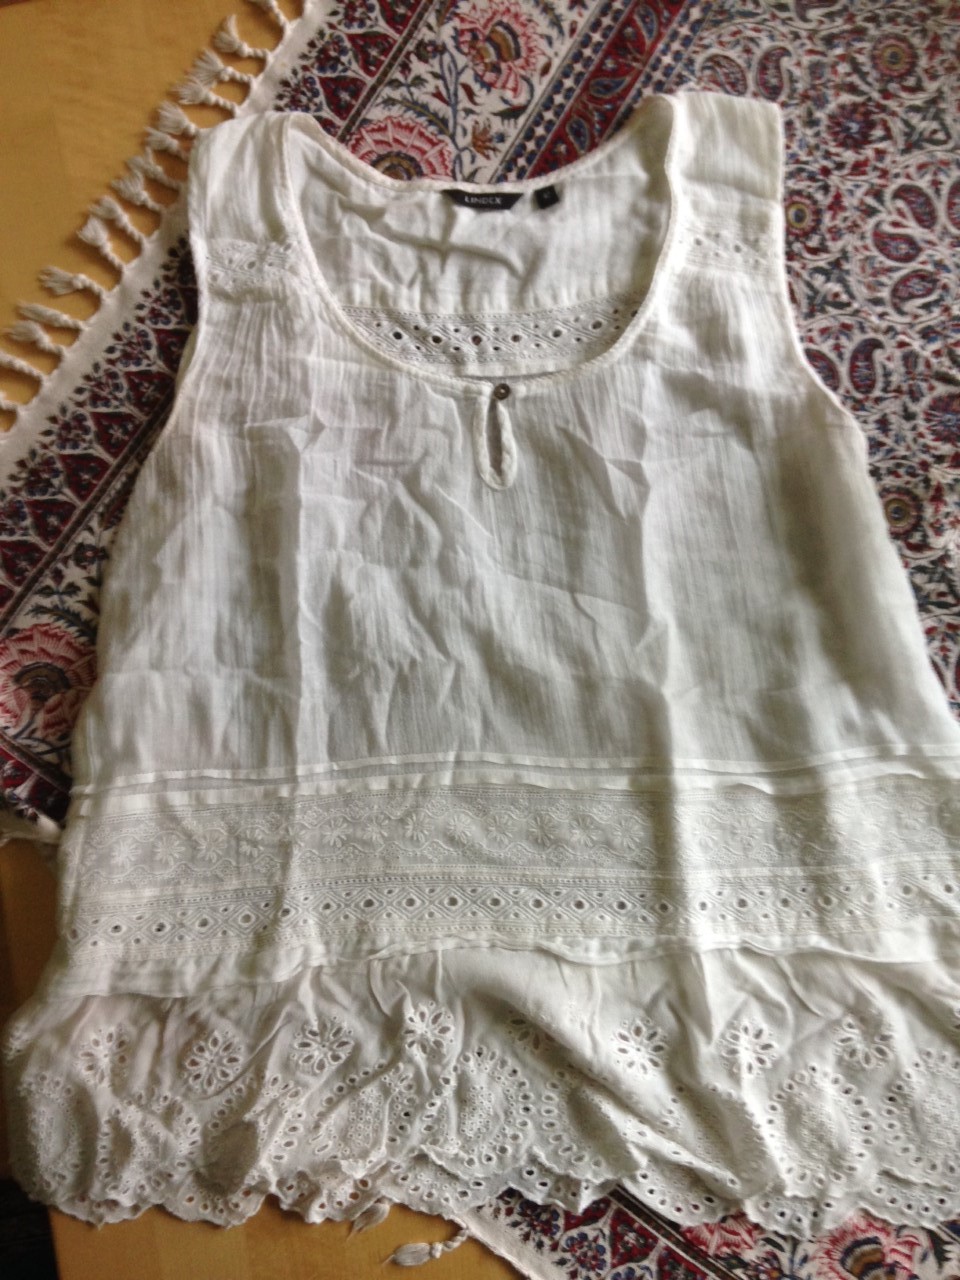
I needed a chemisette for completing Tatyana Borisovna Potemkina’s look. I got material from my ever benevolent mother, who sacrificed a sleeveless blouse for this purpose. I sew it on our bus trip back to Sweden, for the Christmas holidays, so nothing is documented, but before and after.
För att fullborda Tatyana Borisovna Potemkina’s klädsel behövde jag en chemisette. Jag fick material av min ständigt nådiga mor, som offrade en ärmlös blus. Jag sydde samman överdelen på bussresan hem till Sverige över jullovet. Därför är ingenting av processen dokumenterat, men åtminstone hur blusen såg ut före och efter.
The blouse before the transformation // Blusen innan förvandlingen
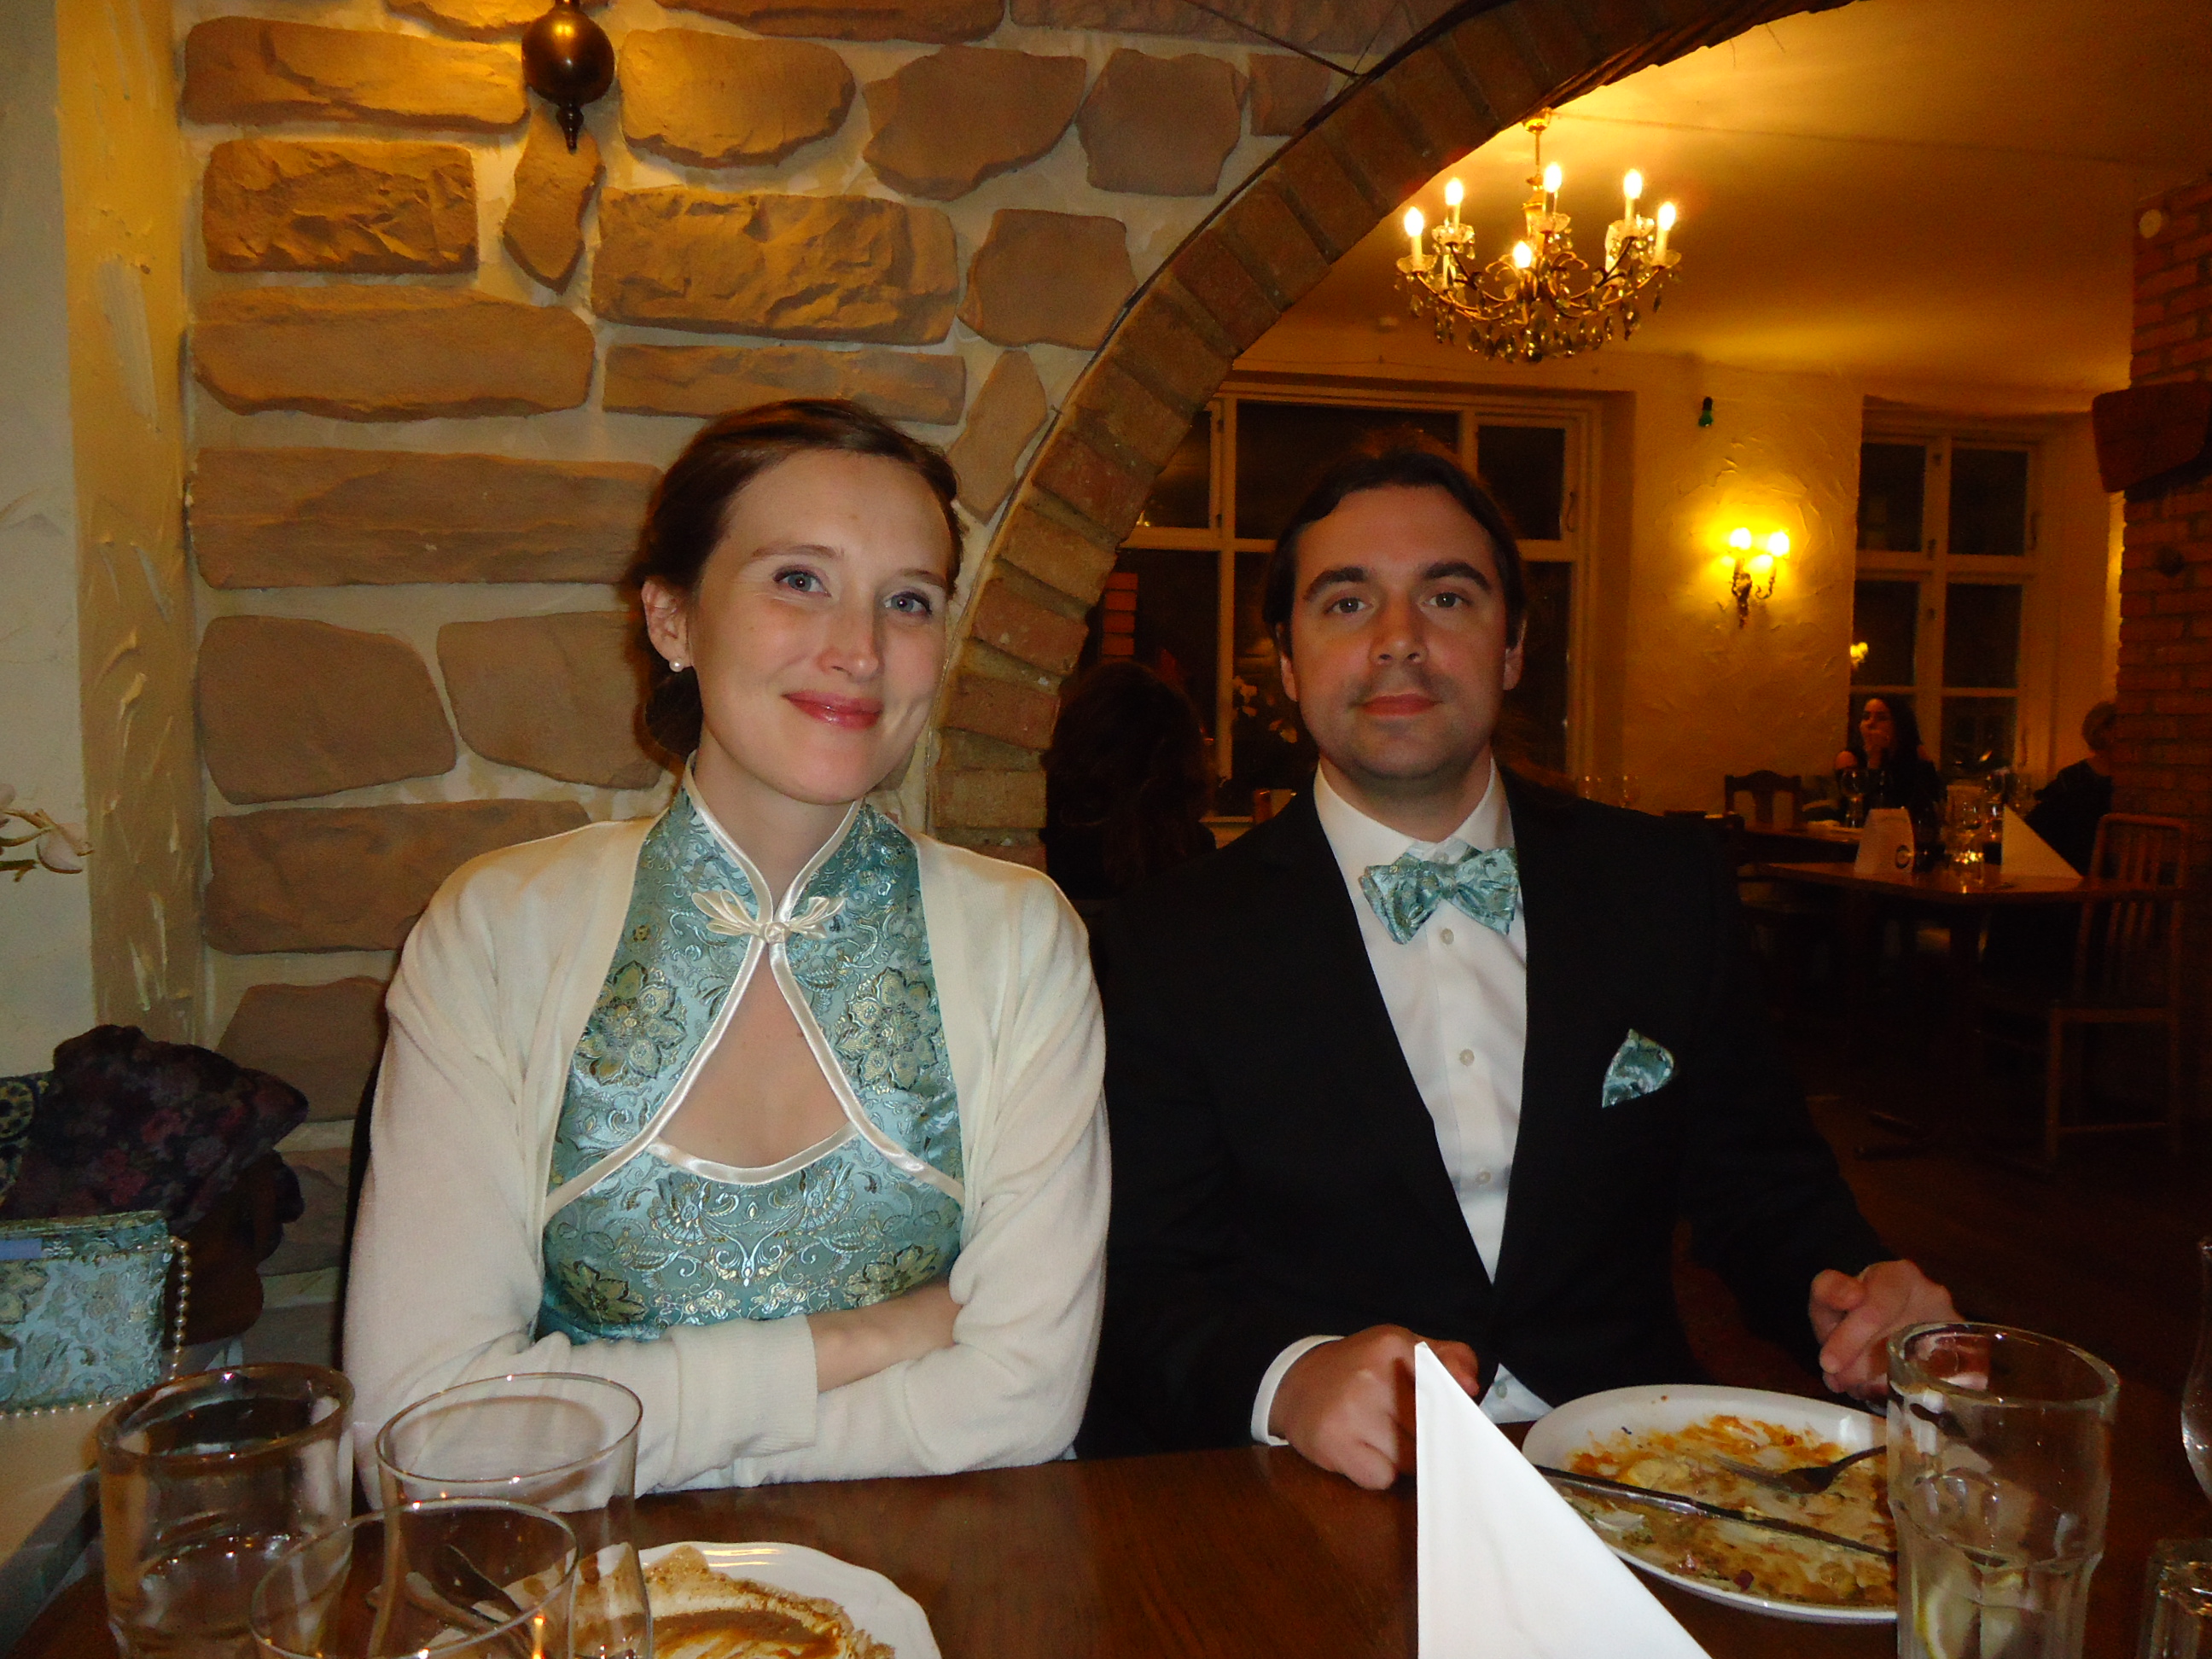
We were so horribly tired, my husband and I, when it was time for photographing the whole look, so the dress does not fit as well as it should. But you have seen the earlier photos, where it is perfect, haven’t you?
Jag och min man var fasansfullt trötta när vi skulle fotografera dräkten, så tyvärr sitter den inte så bra som den borde. Men du har väl sett de tidigare bilderna, där den sitter perfekt, eller hus?
Another look-alike // Ännu ett försök till look-alike-bild
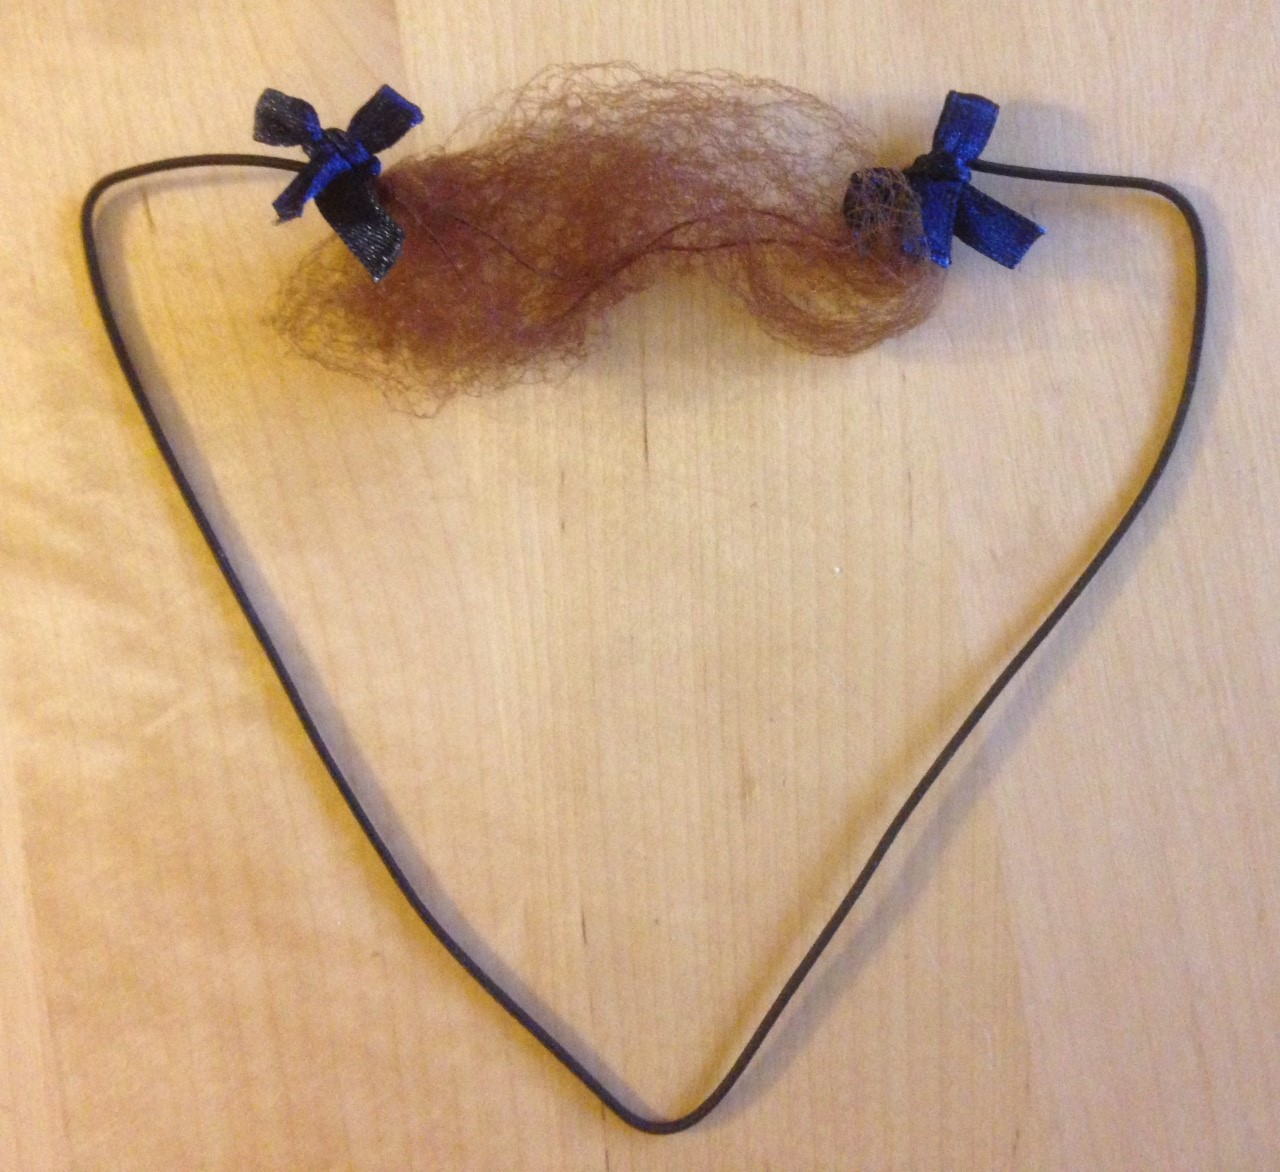
My brother has grown an impressive moustache. It needs some special care. I made a mustache net for his birthday. Therefor I took one of my hair nets and attached an elastic ribbon. I hid the knots underneath some manly bows.
Min bror har fått en präktig mustasch. Den behöver lite extra omvårdnad. Därför gjorde jag ett mustaschnät åt honom i födelsedagspresent. Jag använde ett hårnät och knöt fast ett svart resårband. Knutarna dålde jag under manliga rosetter.
Moustach net // Mustasch-nät
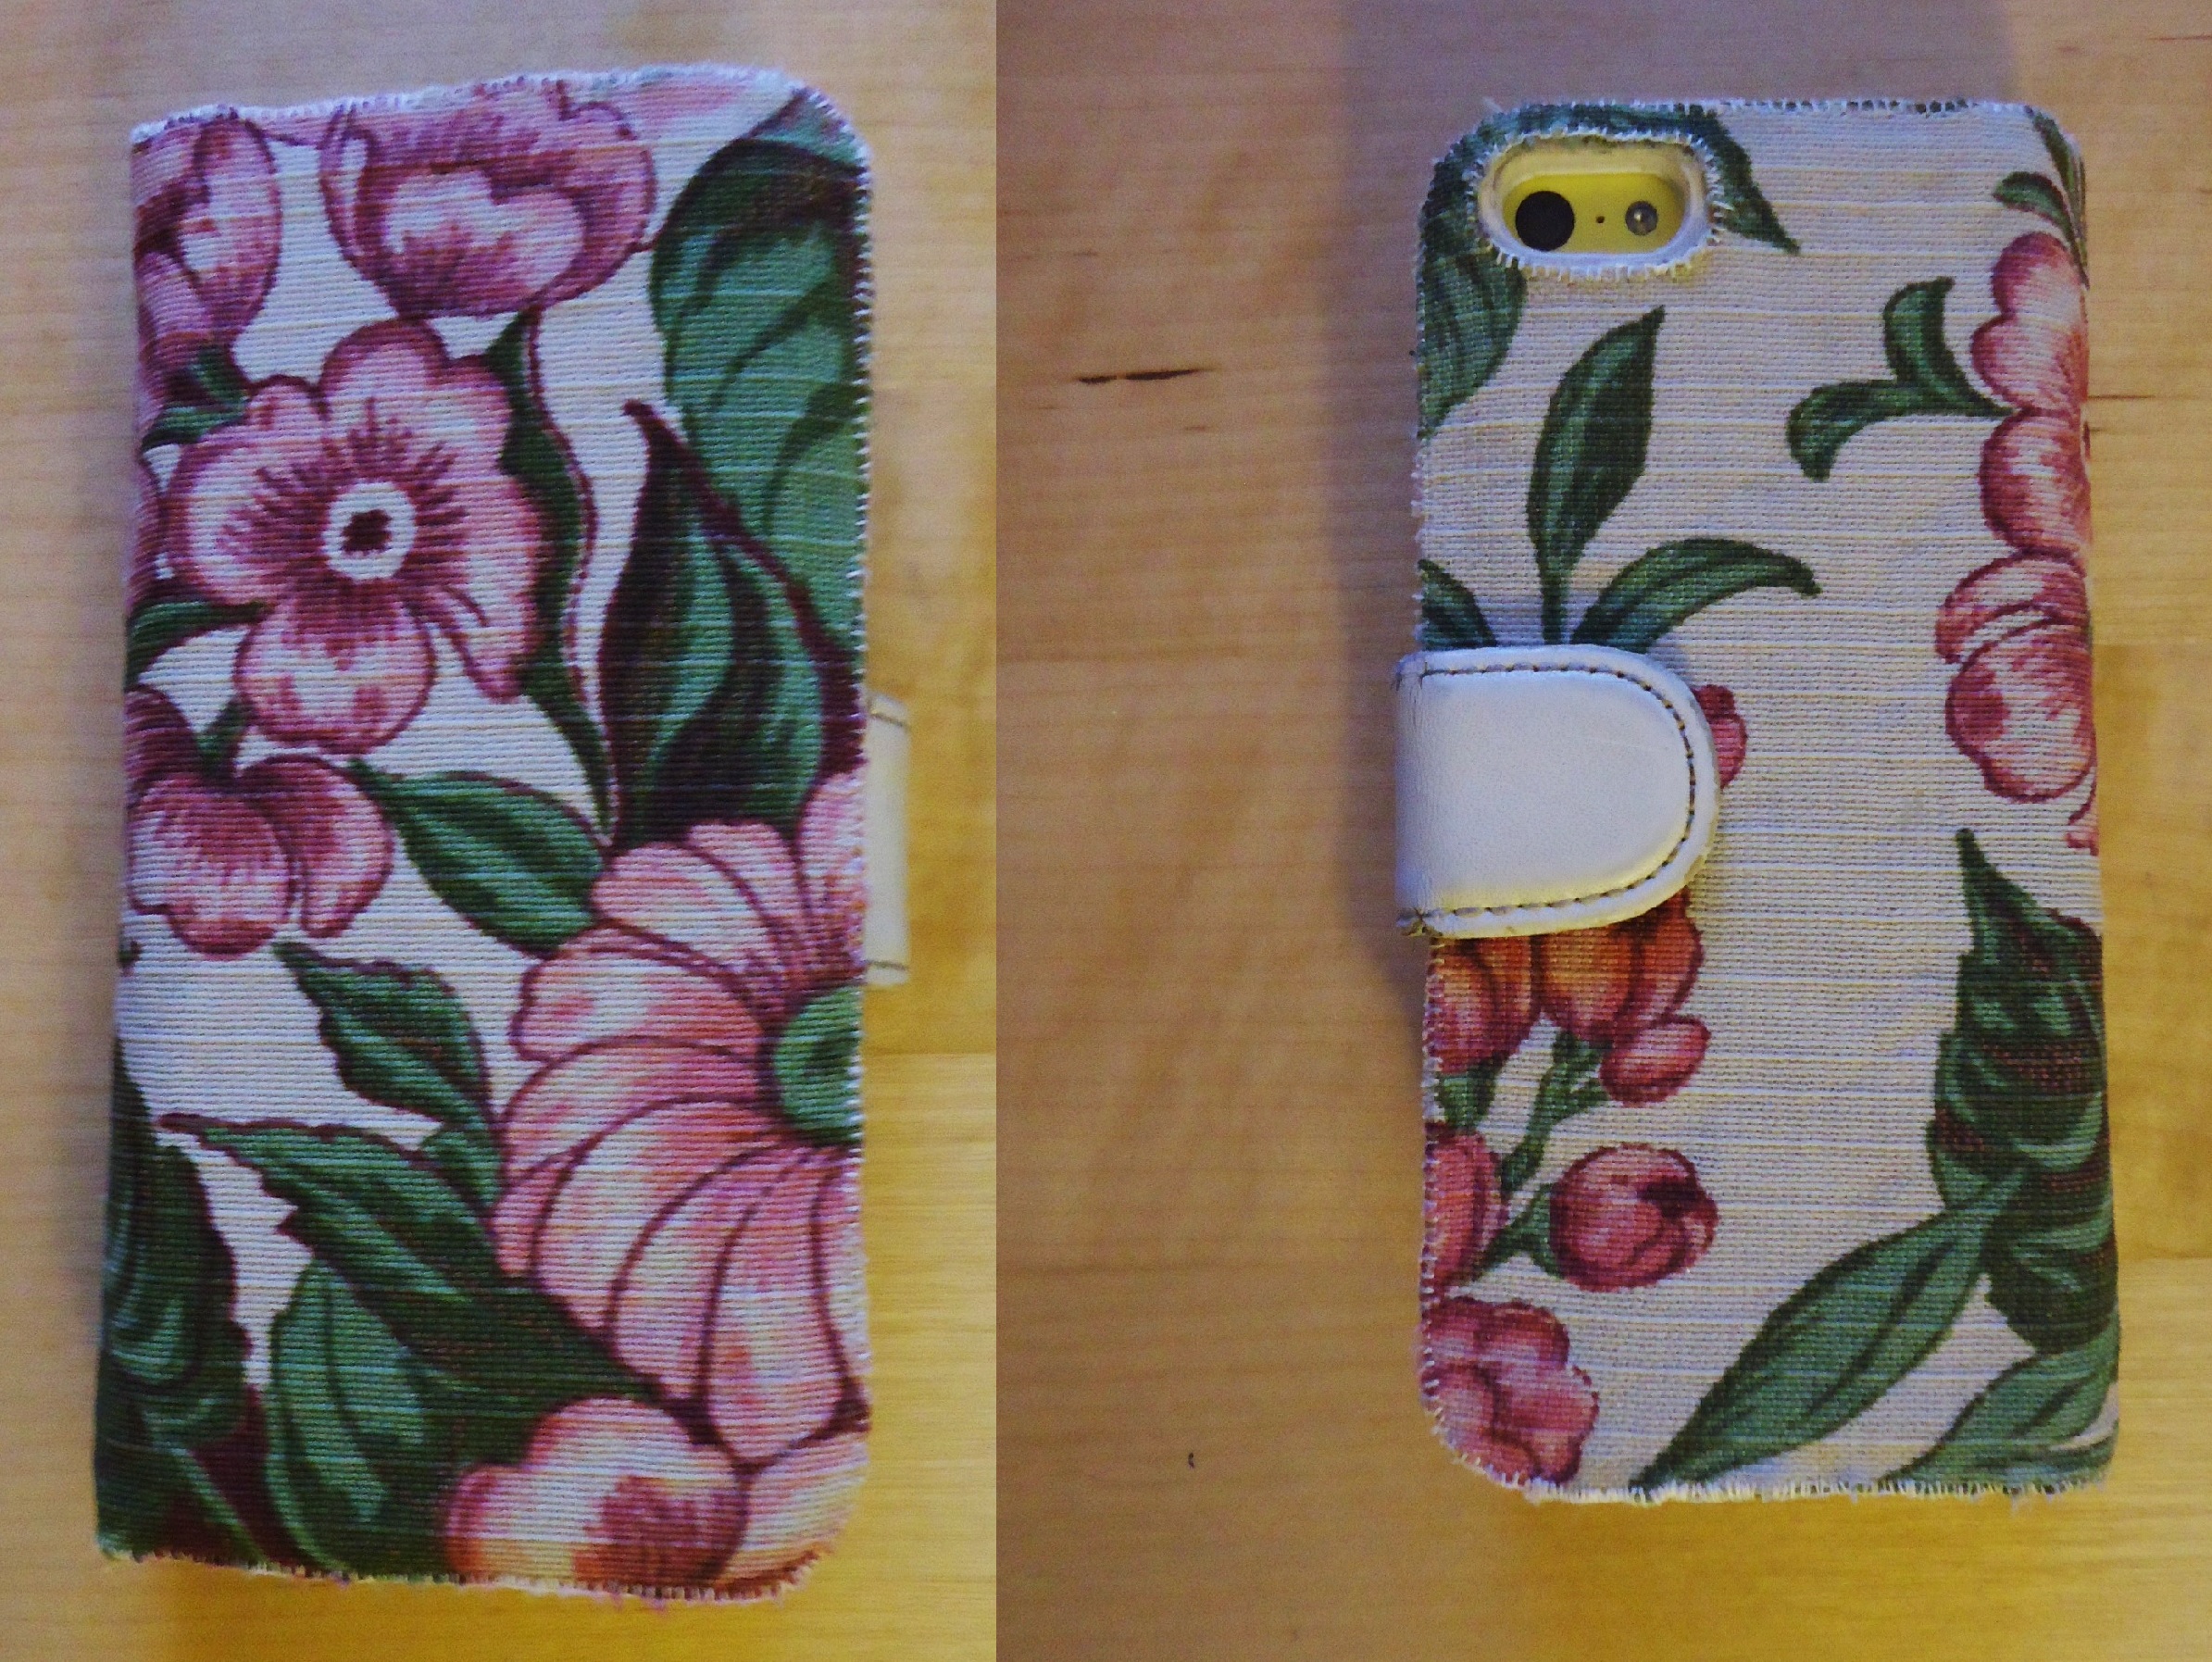
The case for my cell phone was in a horrible state when I should go to my last exam. Because we had the opportunity to use the Internet, while interviewing and examining our patient, I felt that it would be directly disrespectful to use filthy, unhygienic case more. So I used an old scrap fabric (from the lampshade) to dress it up a bit. Sweet. Then I discovered that there was absolutely no time for checking stuff on the internet anyway, but I’m glad I now don’t have to feel gross when I want to use my cell phone.
Mitt mobilfodral såg förfärligt ut när det drog ihop sig för min sista tenta. Vi skulle ha möjlighet att använda internet under journalskrivningen och detta kunde jag bara komma åt via min mobil. Därför kände jag att det skulle vara näst intill respektlöst mot patienten om jag använde detta äckliga fodral. Jag klädde om fodralet med en gammal stuvbit, från när jag klädde om en lampskärm. Det blev ganska fint. Sedan blev det absolut ingen tid över för att använda internet ändå, men det är skönt att slippa känna sig äcklig när man använder sin telefon.
Case for the cell phone // Mobilfodral
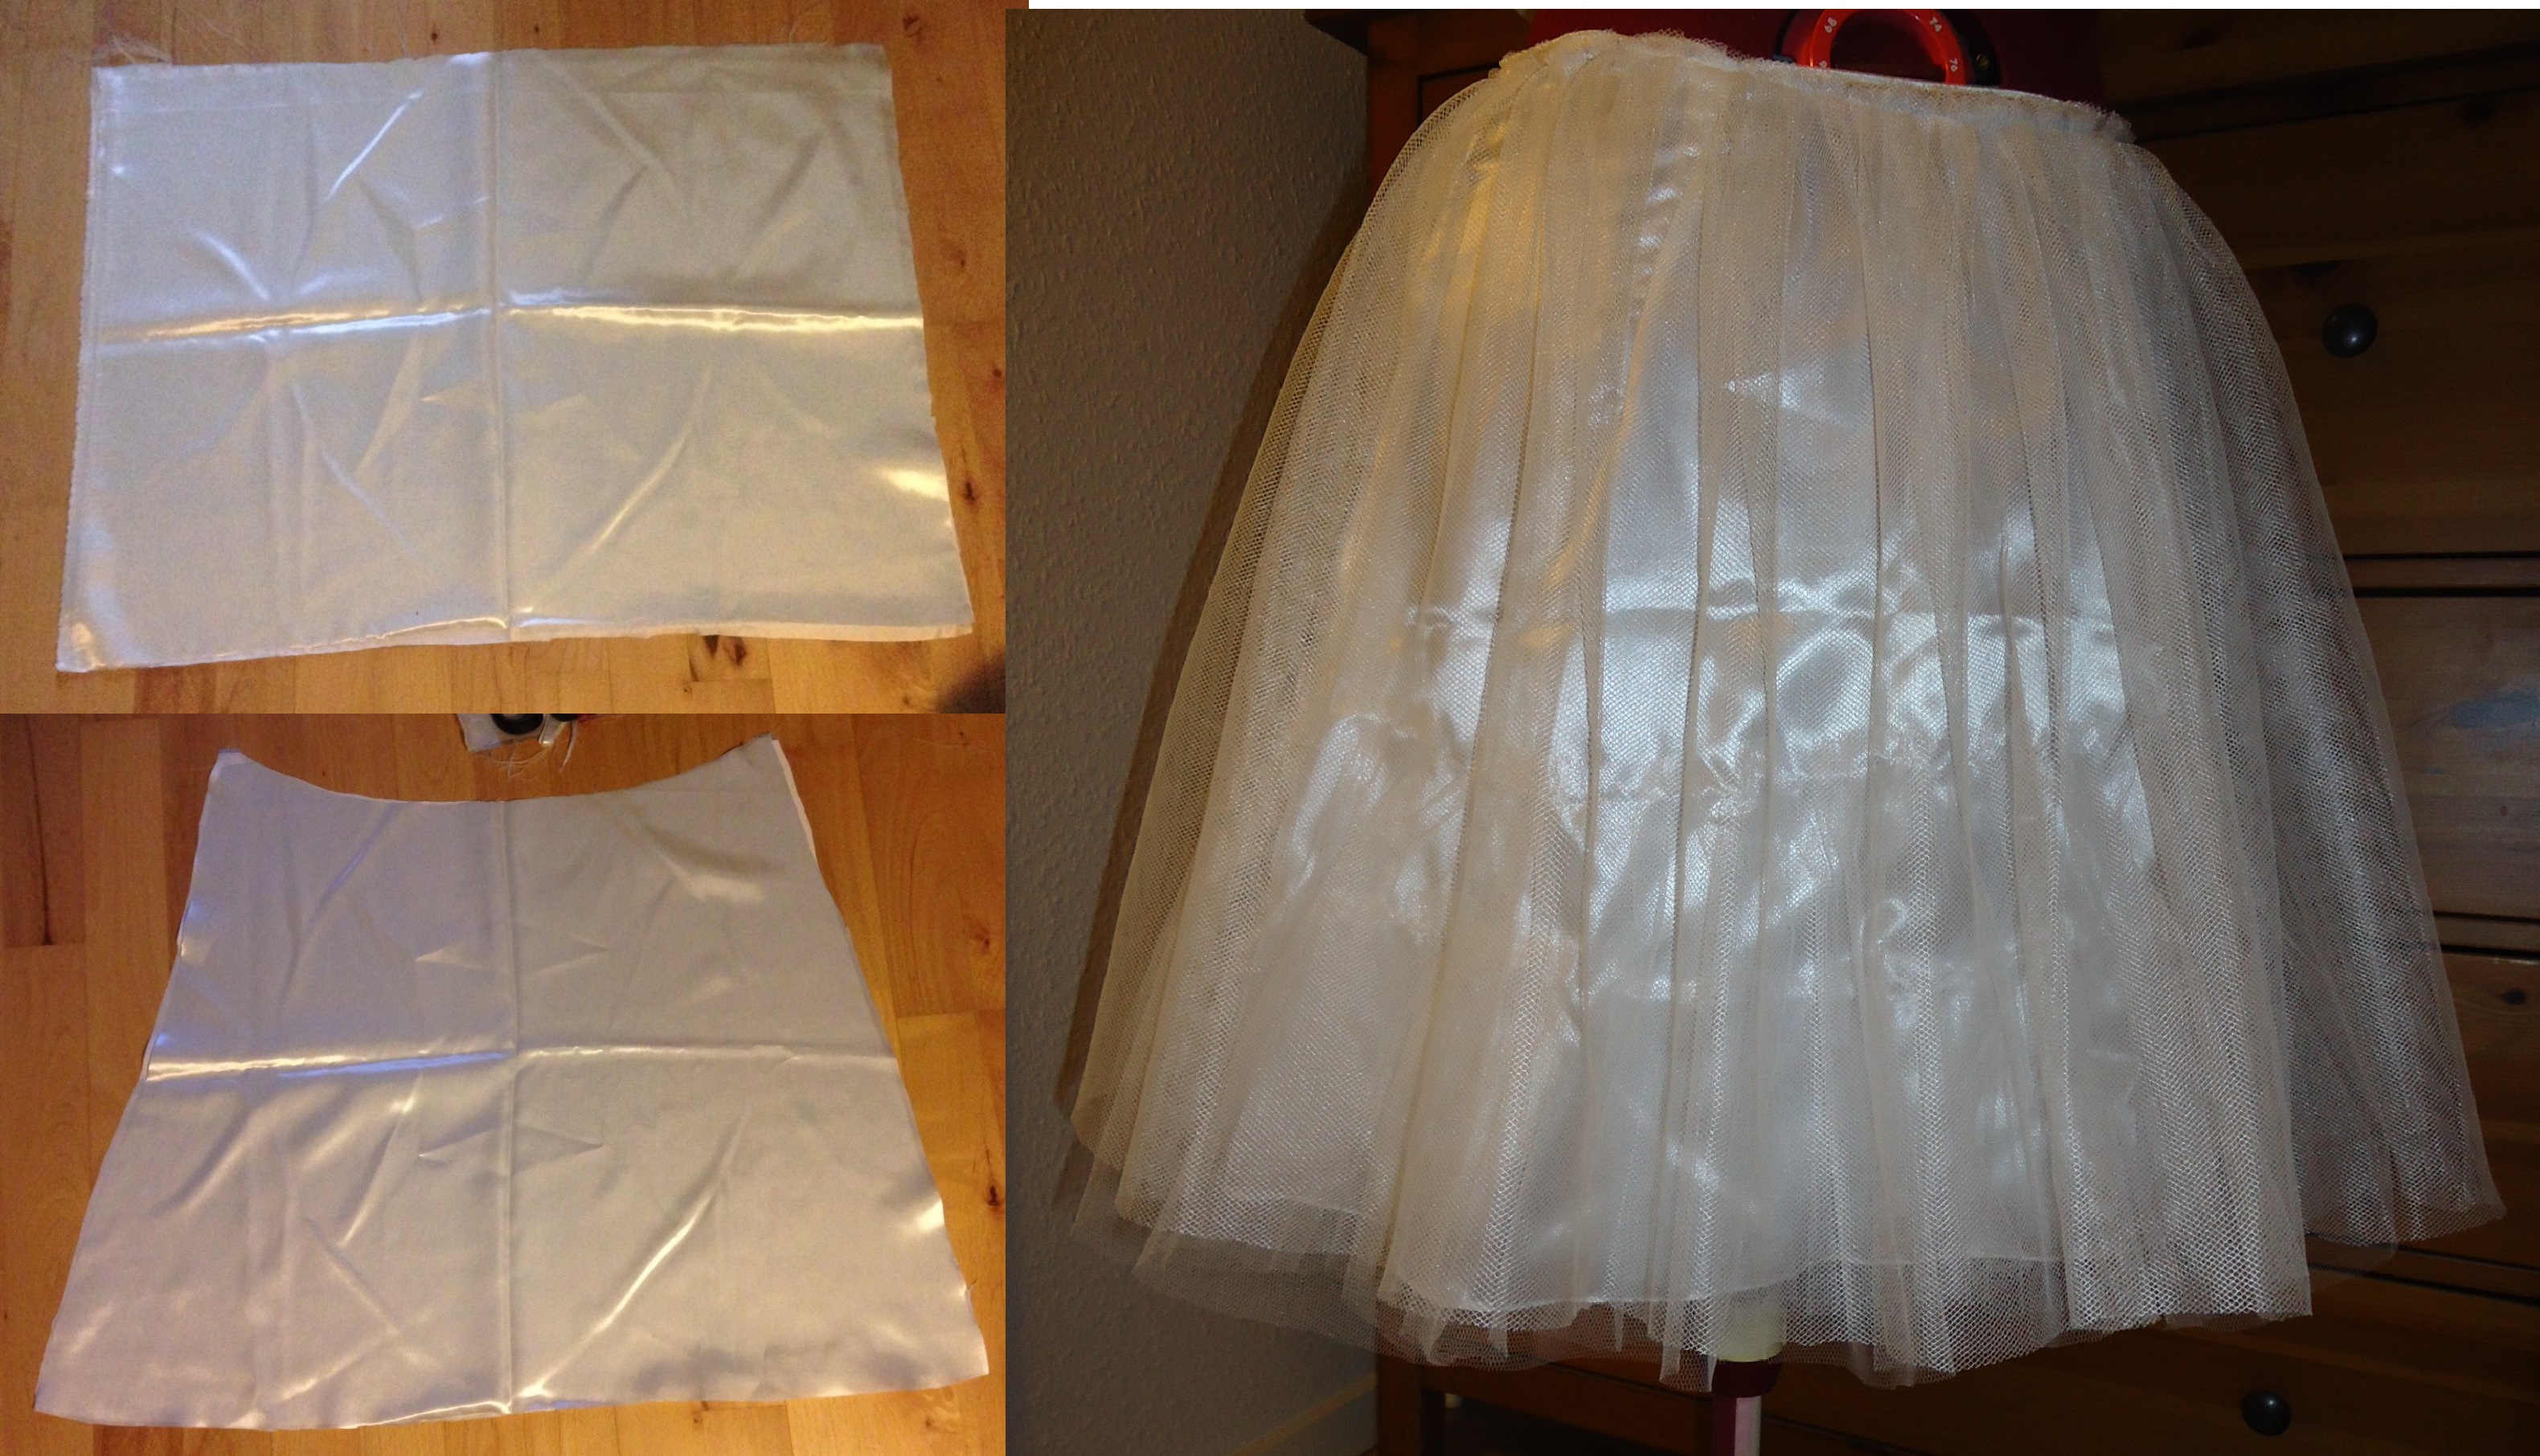
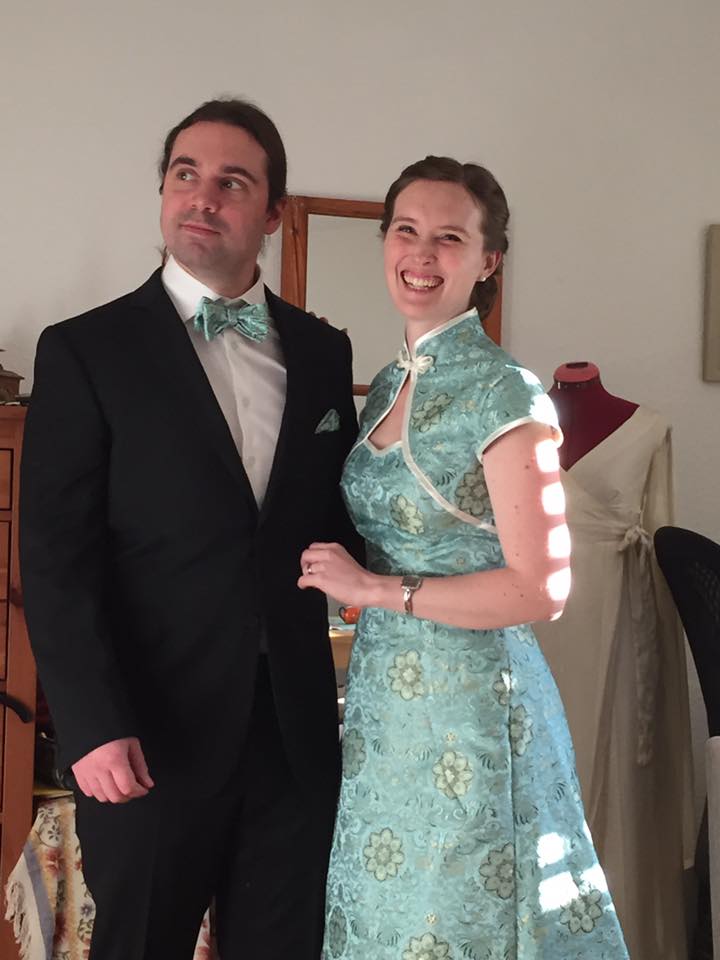
After having made my Chinese silk dress, I found out that I maybe should have a fluffy petticoat underneath. I had some fabric at home, so I threw this together.
Efter att jag hade sytt min kinesiska sidenklänning, insåg jag att den kanske skulle sitta bättre med en fluffig underkjol under. Jag hade lite tyg hemma, så jag slängde ihop denna.
Fluffy petticoat // Fluffig underkjol
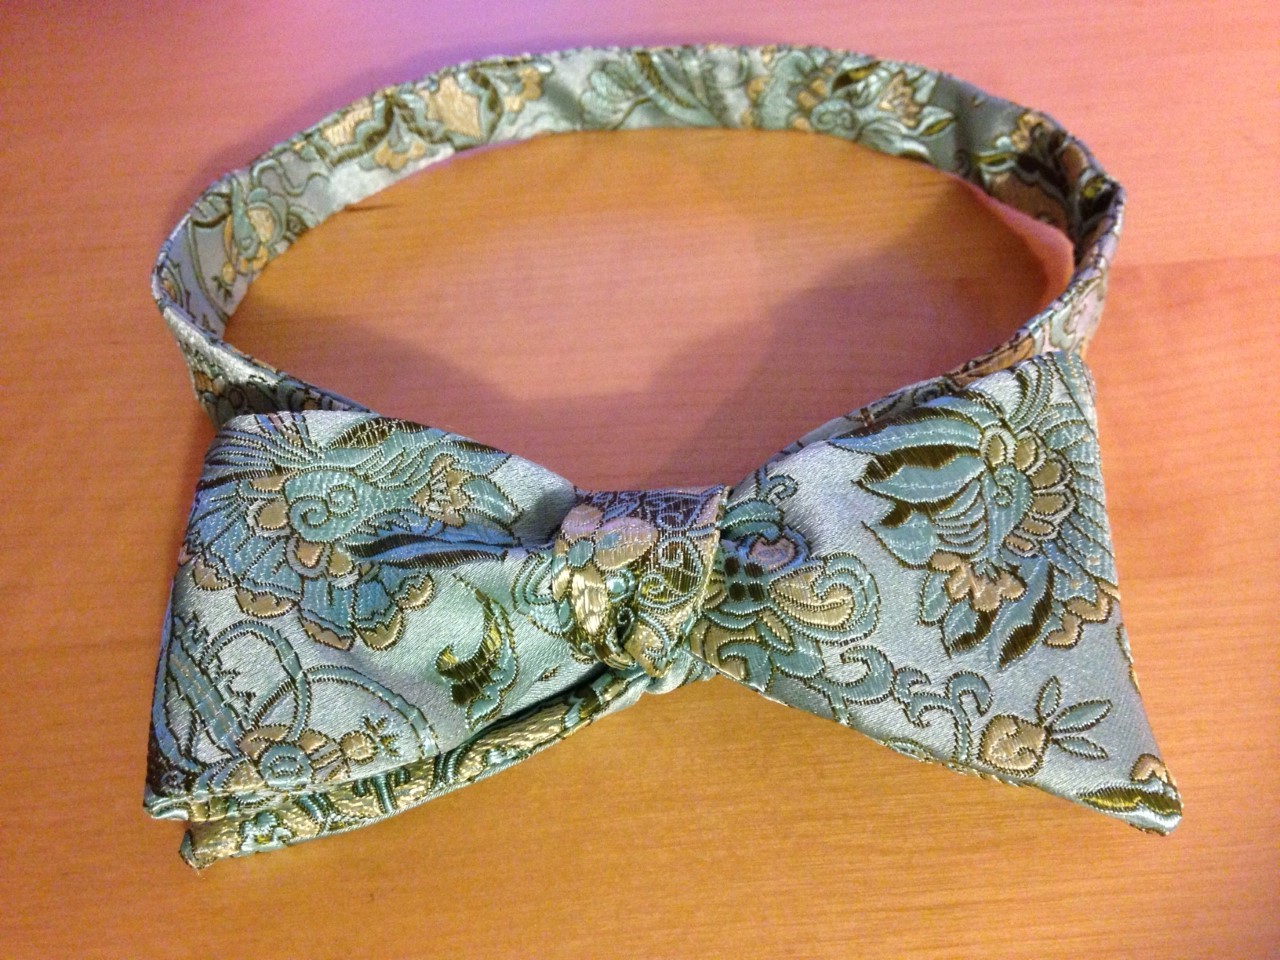
Today, I also made a bow tie for my husband, in the same fabric as the dress. We’ll see if he can wear it without suffocating.
Idag sydde jag en matchande fluga åt min man. Vi får se om han dessutom kan använda den utan att kvävas.
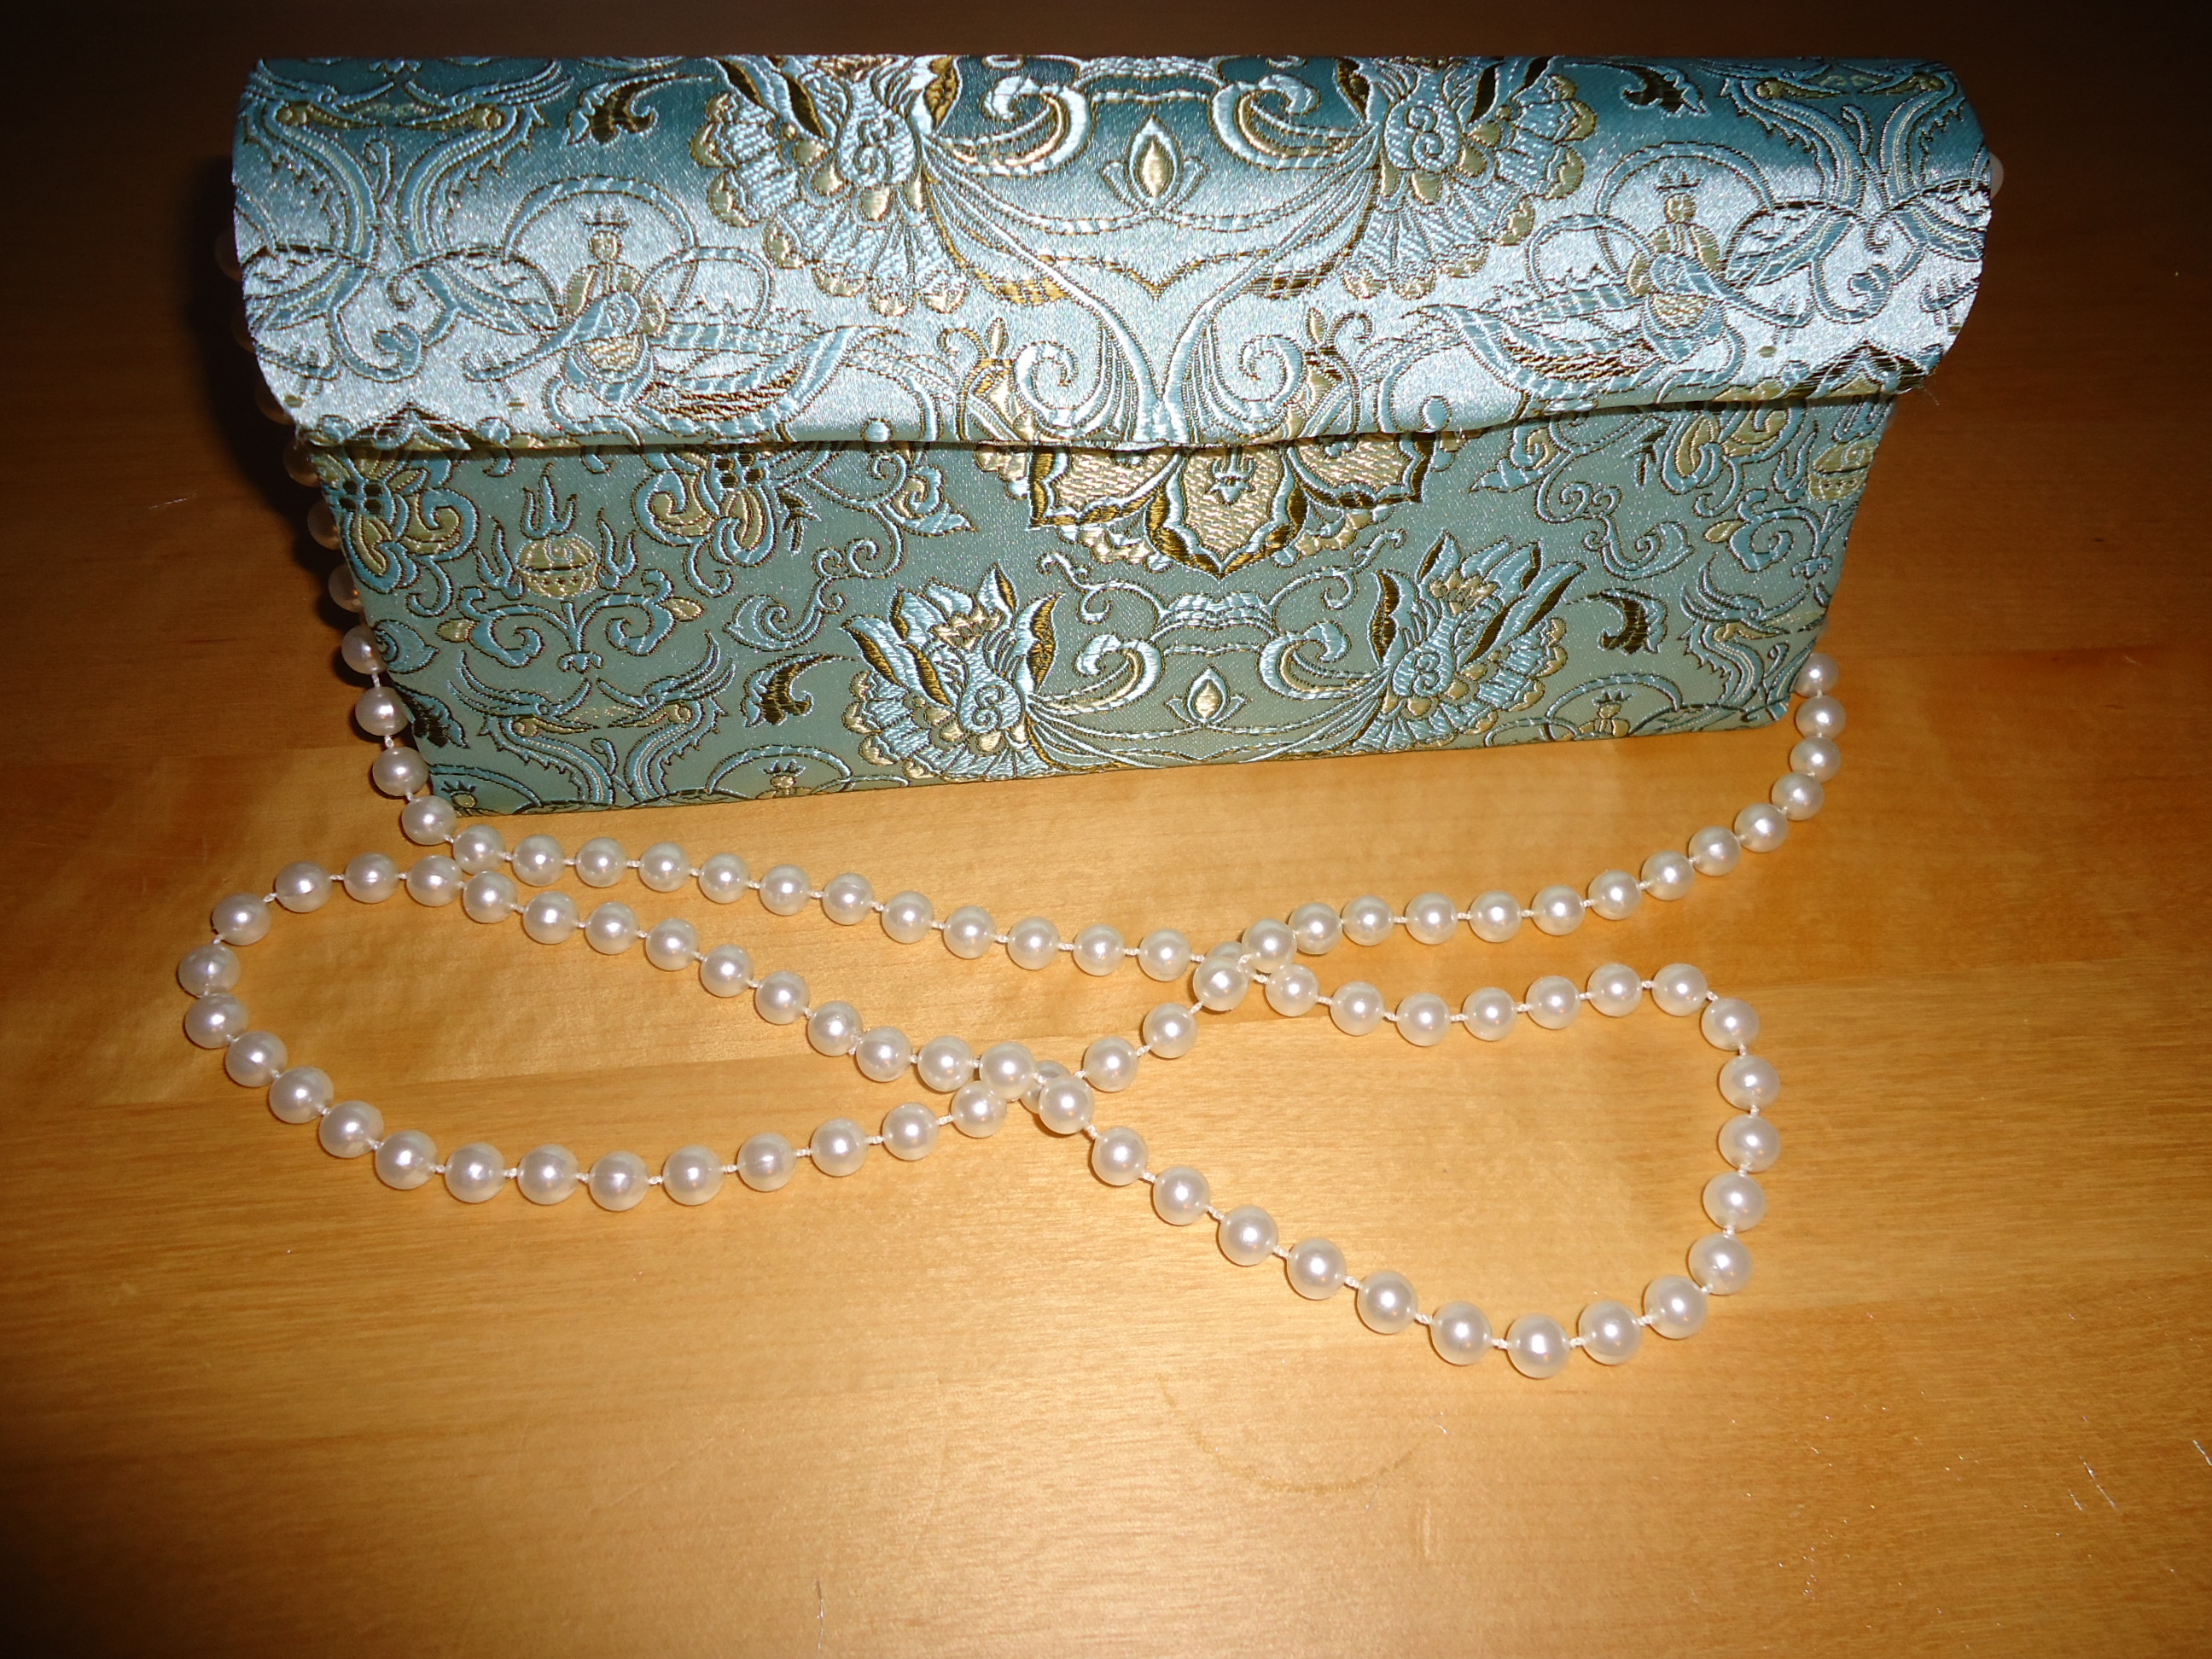
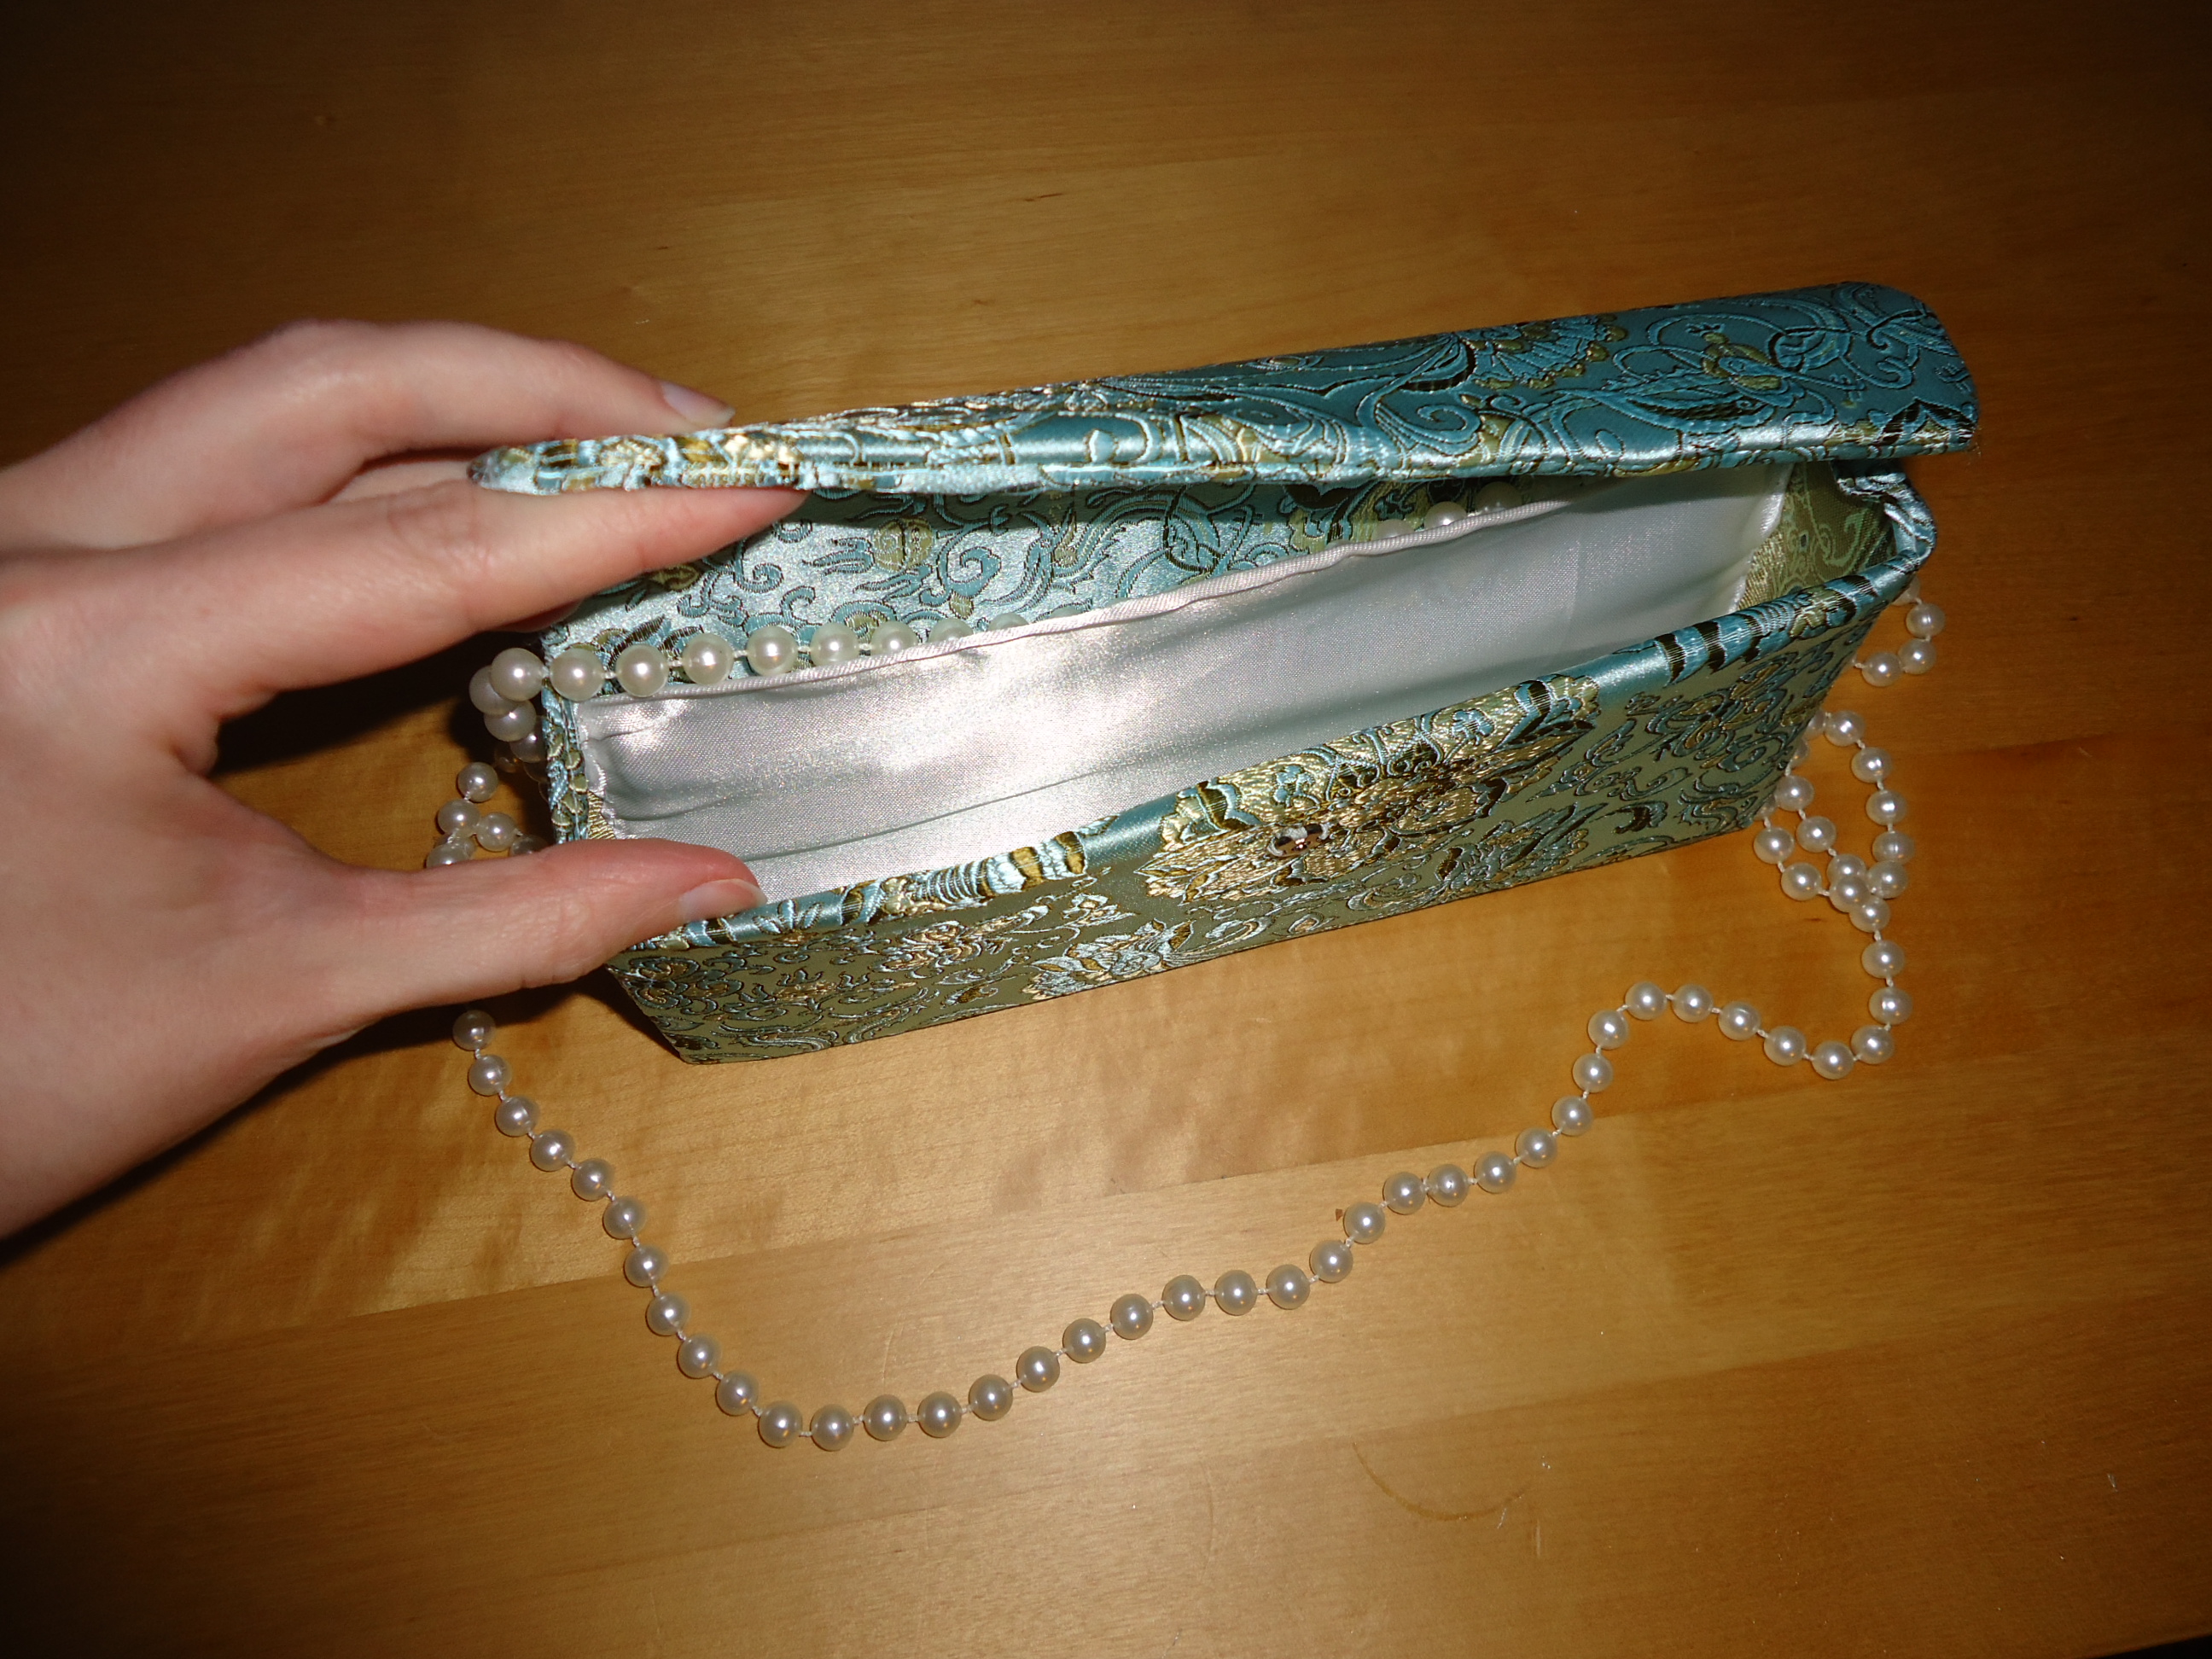
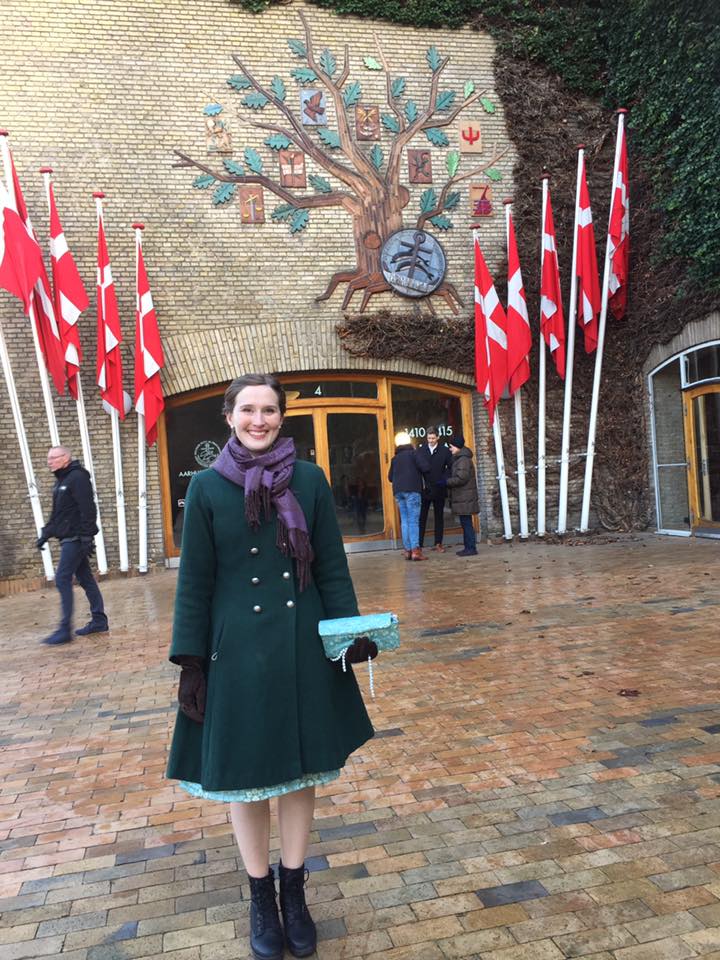
I also wanted a matching purse, so I took the few scraps left of the silk and cut an old plastic portfolio to pieces. The plastic stabilizes the front, back and lid. There was not enough fabric to match the patterns. The lining is from the same fabric as the petticoat. I was able to make a little pocket at the back of the purse, by overlapping the lining and the main fabric. For shoulder strap, I used a plastic necklace bought at a Second Hand store many years ago. I was in a real hurry, so I cut the fabric and threw the purse altogether by instinct. In spite of this carelessness, I think the purse looks really nice.
Jag ville ha en matchande liten handväska, så jag tog de sista små stuvbitarna och klippte itu en av mina gamla plastmappar som jag använt under utbildningen. Mappen ger stadga fram, bak och i locket. Fodret kommer från samma tyg som underkjolen. Genom att överlappa fodret och sidentyget, fick jag till en ficka på bakre väggen. Till axelband använde jag ett gammalt plasthalsband från Second Hand. Jag hade väldigt bråttom, så jag klippte till tygbitarna och sydde samman handväskan på ren instinkt. Trots denna vårdslöshet, tycker jag att den blev riktigt fin.
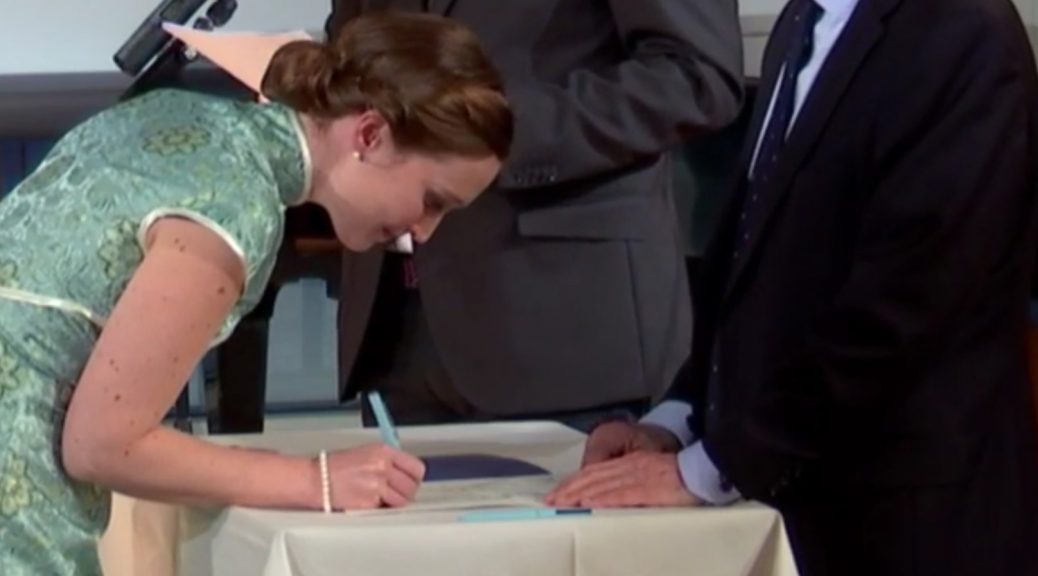
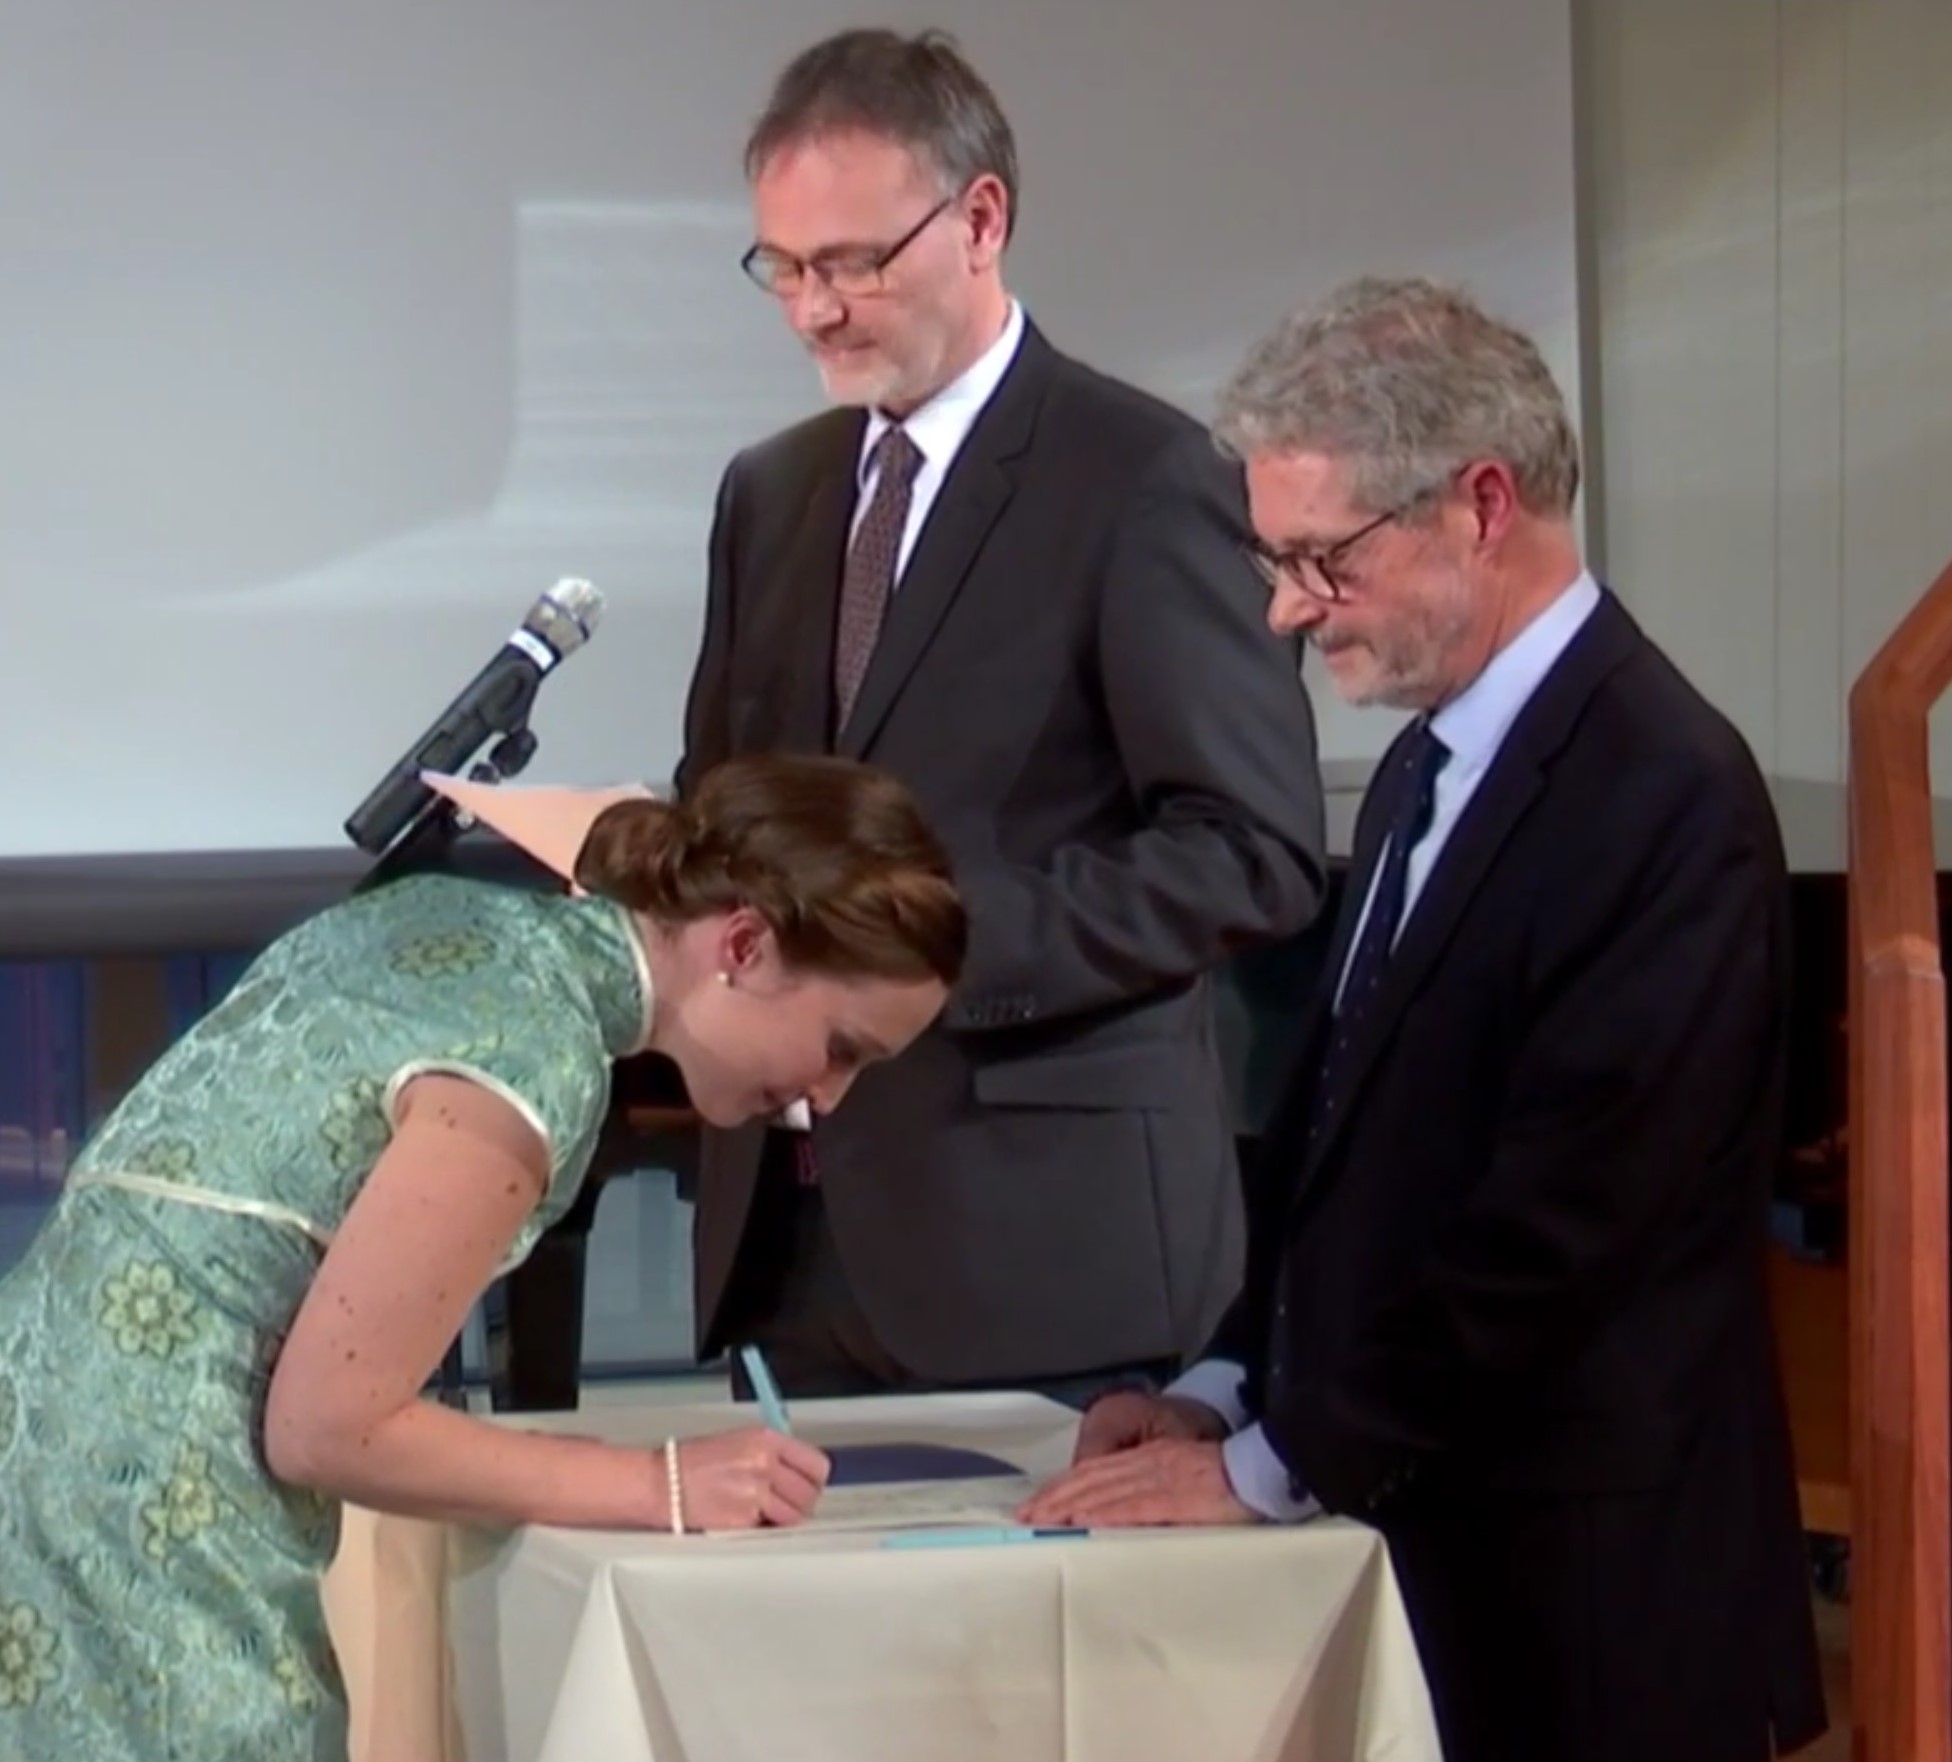
Inauguration/Hippocratic Oath, the 27th of January
Yesterday was the Inauguration/Hippocratic Oath. Today I am exhausted and so inexplicably happy! It is a big thing to swear to always serve others, always do your best and to never make any difference between patients. But its a good thing.
Igår var Läkarlöftet. Idag är jag helt utpumpad och så extremt glad! Det är en väldigt stor grej att lova att alltid tjäna andra, alltid göra sitt allra bästa och aldrig göra skillnad mellan sina patienter. Men det är en väldigt bra grej!
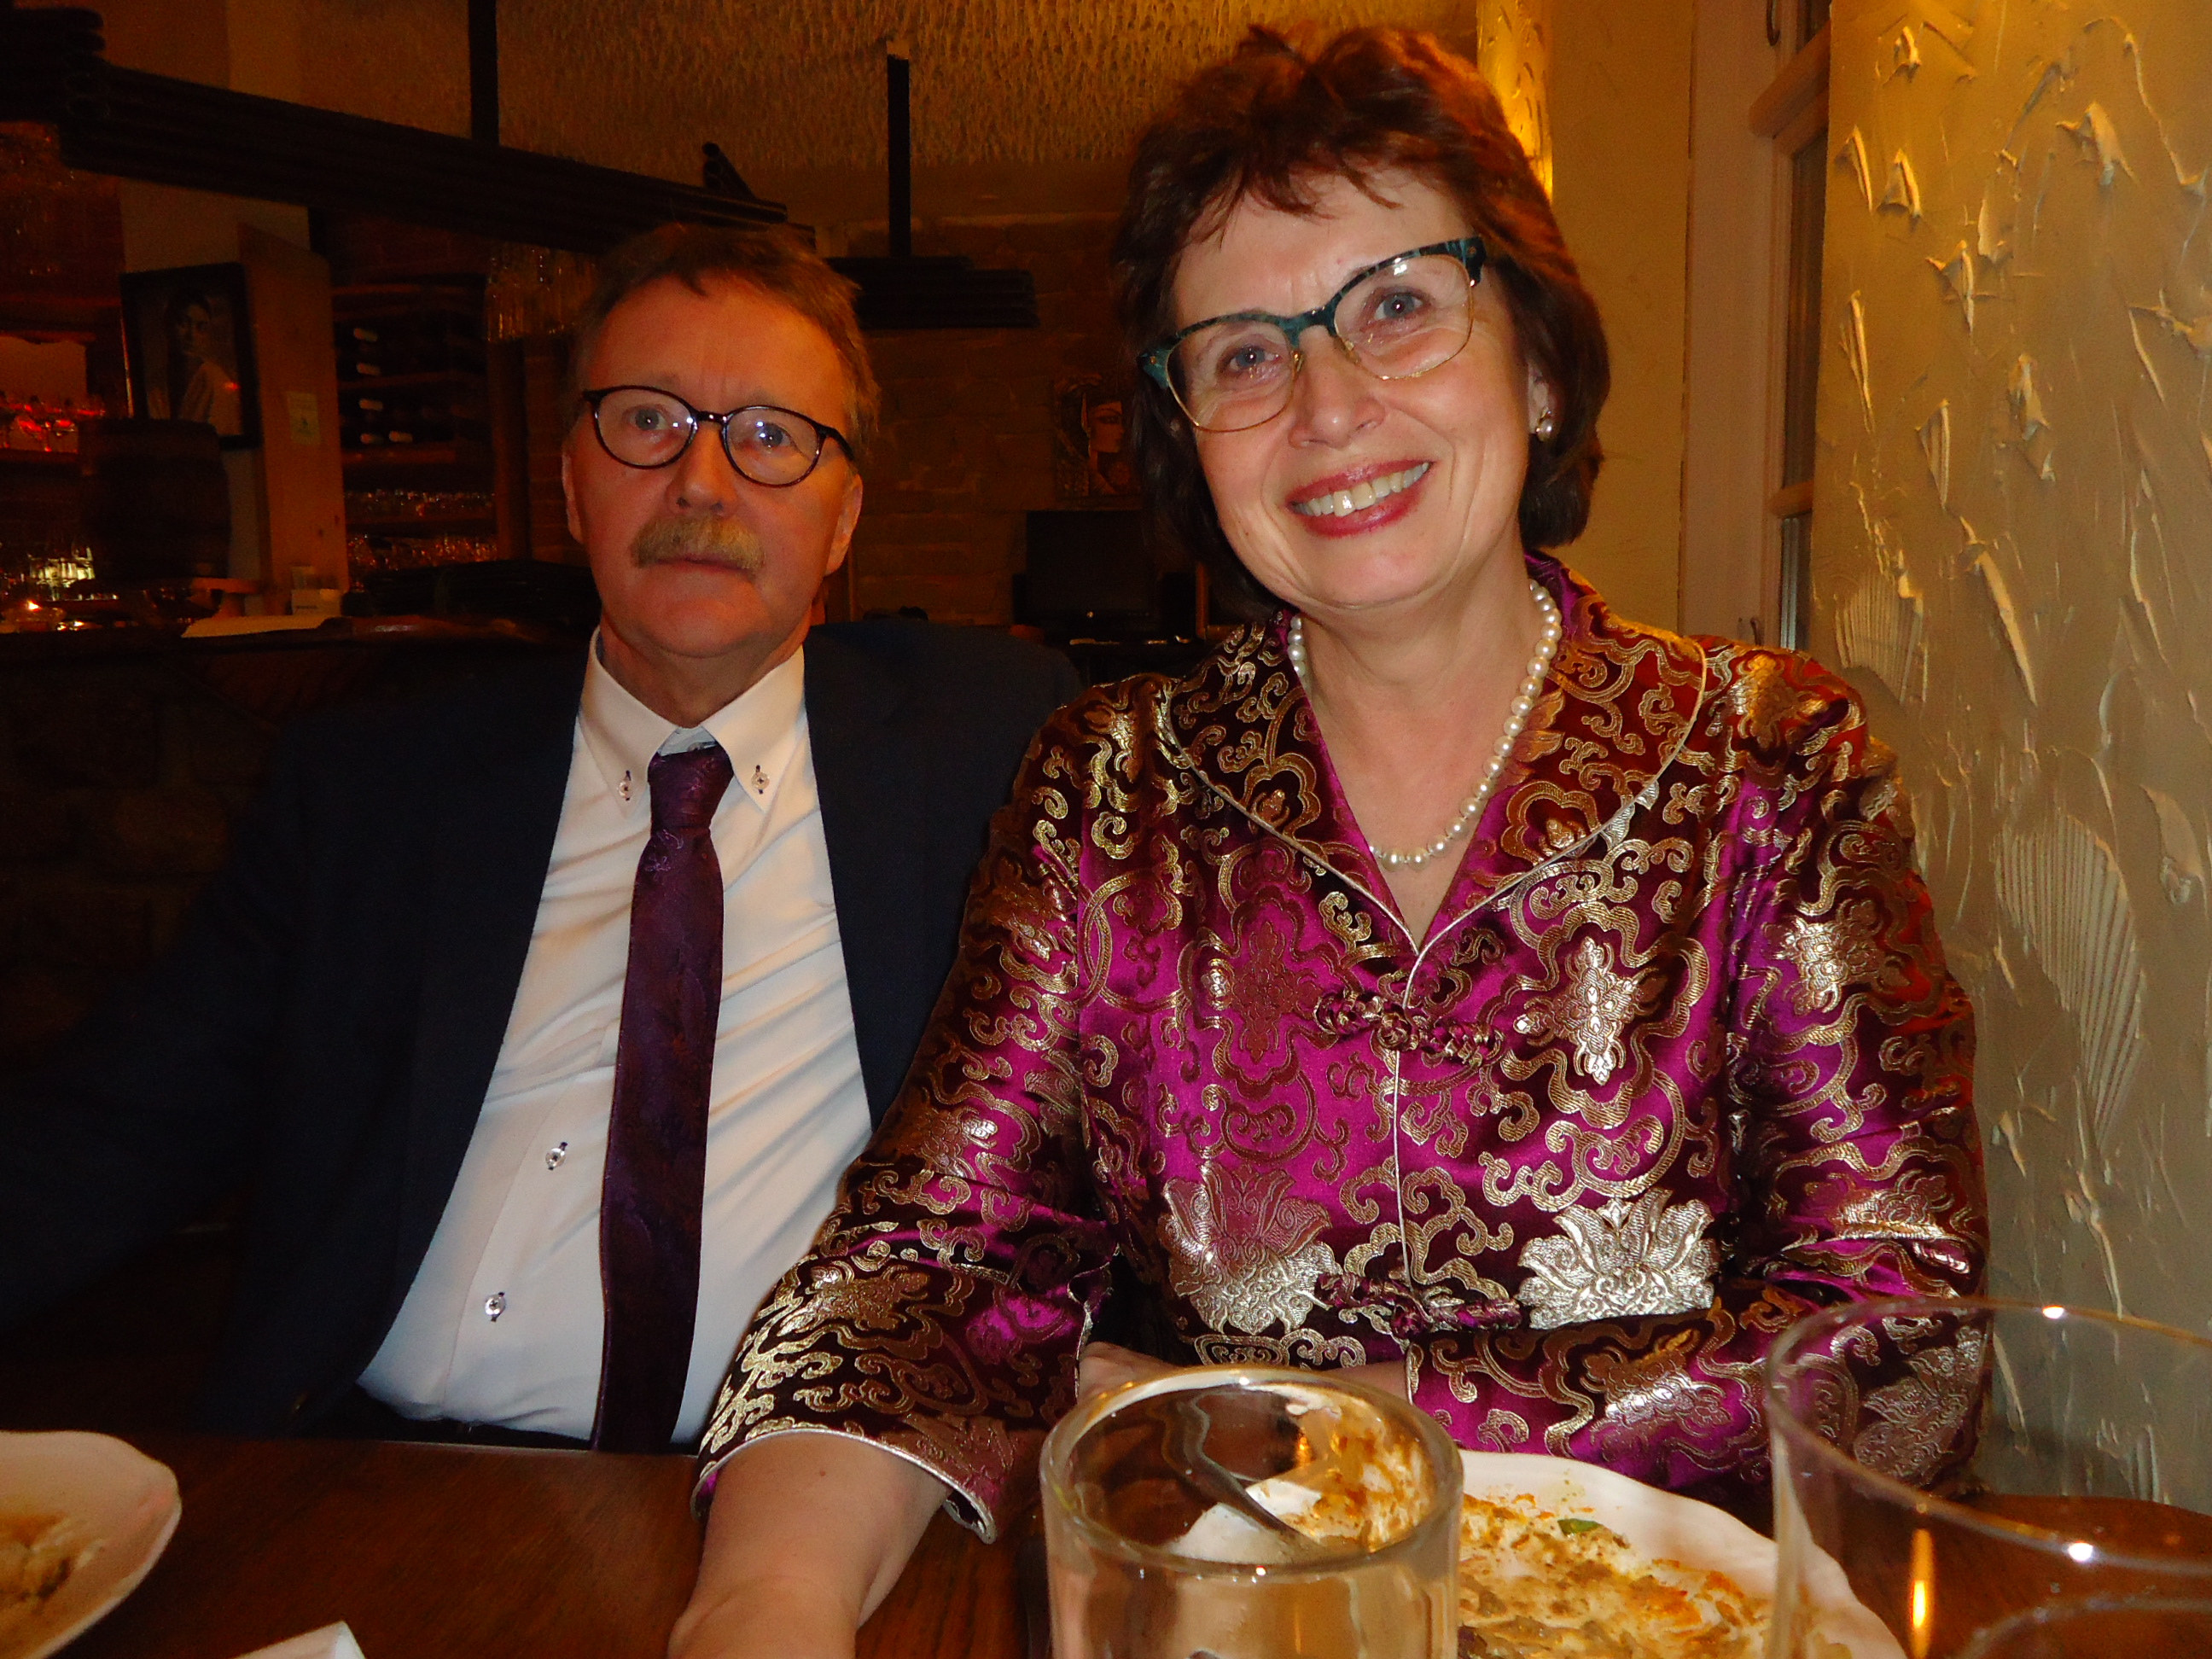
I was very happy that my parents were able to come and celebrate with me! They have been a huge support to me during this education.
Jag var väldigt glad för att mina föräldrar hade möjlighet att komma och fira med mig! De har varit ett stort stöd för mig under den här långa utbildningen.
My greatest support, though, has been my everpatient and loving husband. Thank you so much!
Mitt allra största stöd har dock varit min alltid tålmodige och älskande man. Tack så otroligt mycket!
Off course there have been many heroes involved during these six years! Among them, I have to mention the rest of my family, the family of my husband and my dear Århus-friends Svea, Ingeborg, Camilla, Frida, Hildegunn, Paulina, Abi and Christina and all other lovely people spread out in over Sweden and the rest of the world. Thank you so much for not giving up on me, when I’m in anguish after many sleepless nights and when I reject fun things because of studies. Thank you for all nice distractions that have made surviving possible. I love you and am so thankful for having got to know you! Hope that we will see each other again.
Det har så klart varit många hjältar inblandade under dessa sex år! Bland dem, måste jag nämna resten av min familj, min mans familj och mina kära Århus-vänner Svea, Ingeborg, Camilla, Frida, Hildegunn, Paulina, Abi, Christina och alla andra underbara människor i Vimmerby och resten av världen. Tack så mycket för att ni har stått ut med mig när jag har haft ångest efter många sömnlösa nätter och när jag har avstått från roliga påhitt på grund av studierna. Tack också för alla trevliga avledande förströelser. Jag älskar er och är så tacksam för att ha fått lära känna er! Hoppas att vi får ses igen.This post ended up being more cheesy than I could have ever imagined. Perhaps it’s because of the cheesy music in the background or just because of that I really have so much to be thankful for.
Have a good day!
Detta blogginlägg blev visst väldigt mycket mer tårdrypande än jag hade tänkt mig. Kanske beror det på den sliskiga musiken jag har i bakgrunden, eller bara på att jag har så otroligt mycket att vara tacksam för.
Today, I finished the blue regency gown, which I have thought about during the whole summer! I had planned for wearing it at the castle pick nick with my friends, but this was cancelled, so I had to find some other location for my photo session.
In this post I will first give you a quick look at the construction, then the new underpinnings put on in the right order, the gown put on and last, all of the romantic pictures of the gown.
Idag blev jag äntligen färdig med min nya empirklänning, som jag har tänkt på hela sommaren. Jag hade ju tänkt använda den på Tjolöholmsutflykten, tillsammans med mina vänner, men utflykten blev inställd, så jag var tvungen att hitta ett annat ställe att fota på.
I detta inlägg visar jag först lite av klänningskonstruktionen, sedan alla underklädeslager och sist själva klänningen.
Construction of the gown
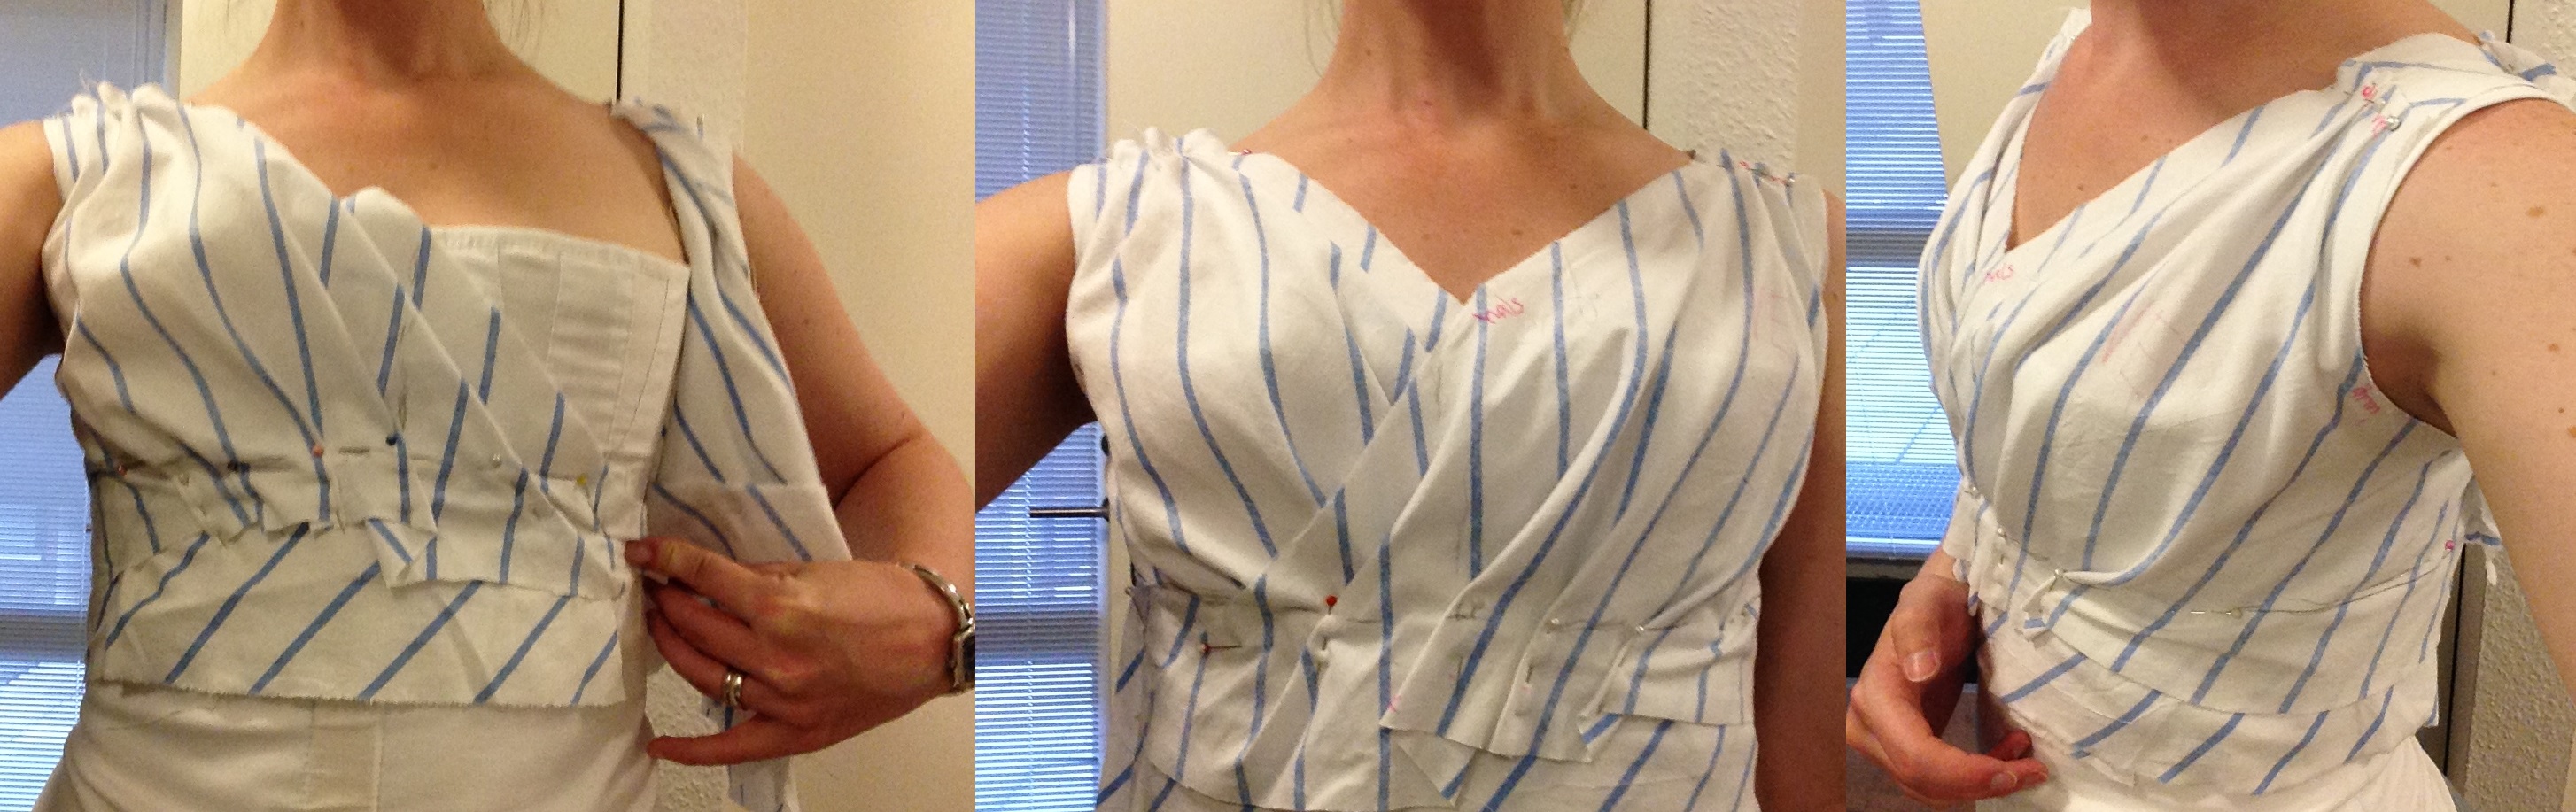
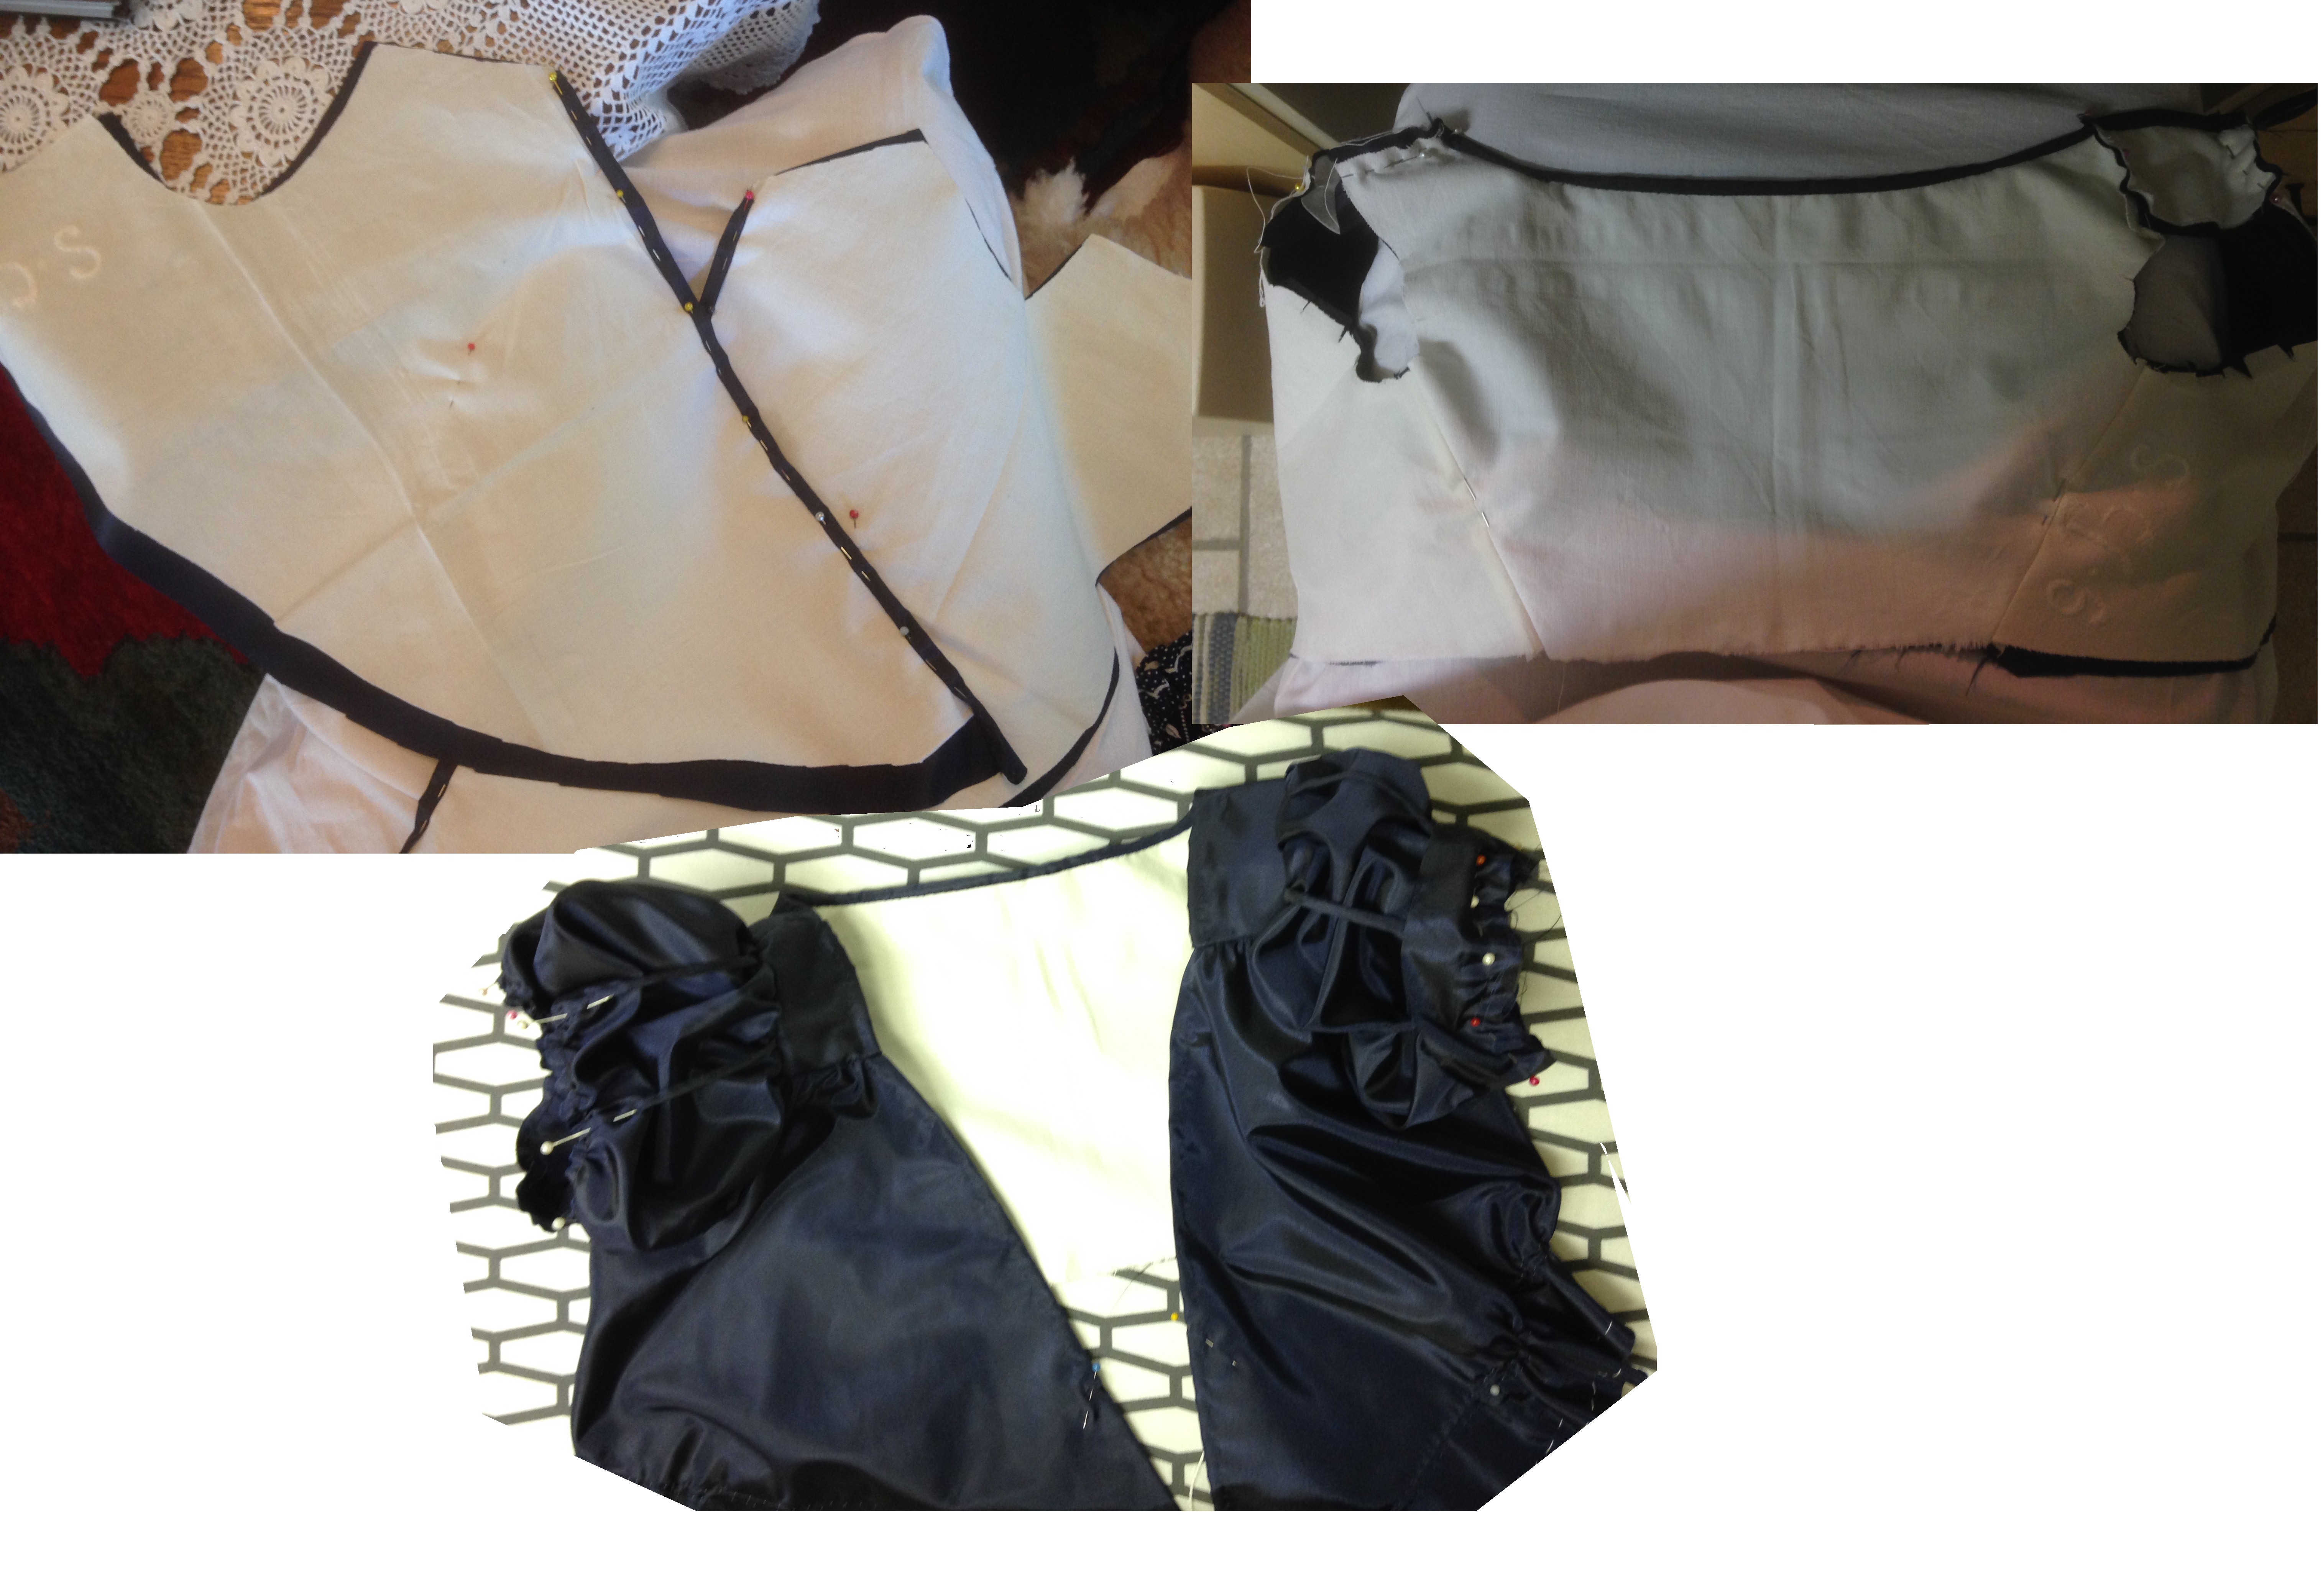
I made a mock-up for the bodice part, on my mannequin before I left it for Sweden. The mock-up was used as a pattern when I cut the fabric.
Jag gjorde en toille på min provdocka i Danmark och använde nu denna som mönster när jag klippte ut tyget.
Thus, I constructed the mock-up. The pinned tucks represent the tucks that will be created by drawstrings at the high waist.
First I put the bodice together and hand stitched the hem in the neckline. Then I put on the arms and last, I made the skirt. I cut some corners by sewing long loose machine seams for gathering the fabric in the arms and skirt.
Först satte jag ihop livet och fållade sömmarna i halsringningen. Sedan fäste jag ärmarna och sist kjolen. Jag struntade i att göra vecksömmar för hand, genom att i stället sy långa lösa raksömmar på symaskinen för att rynka puffärmarna och kjolen.
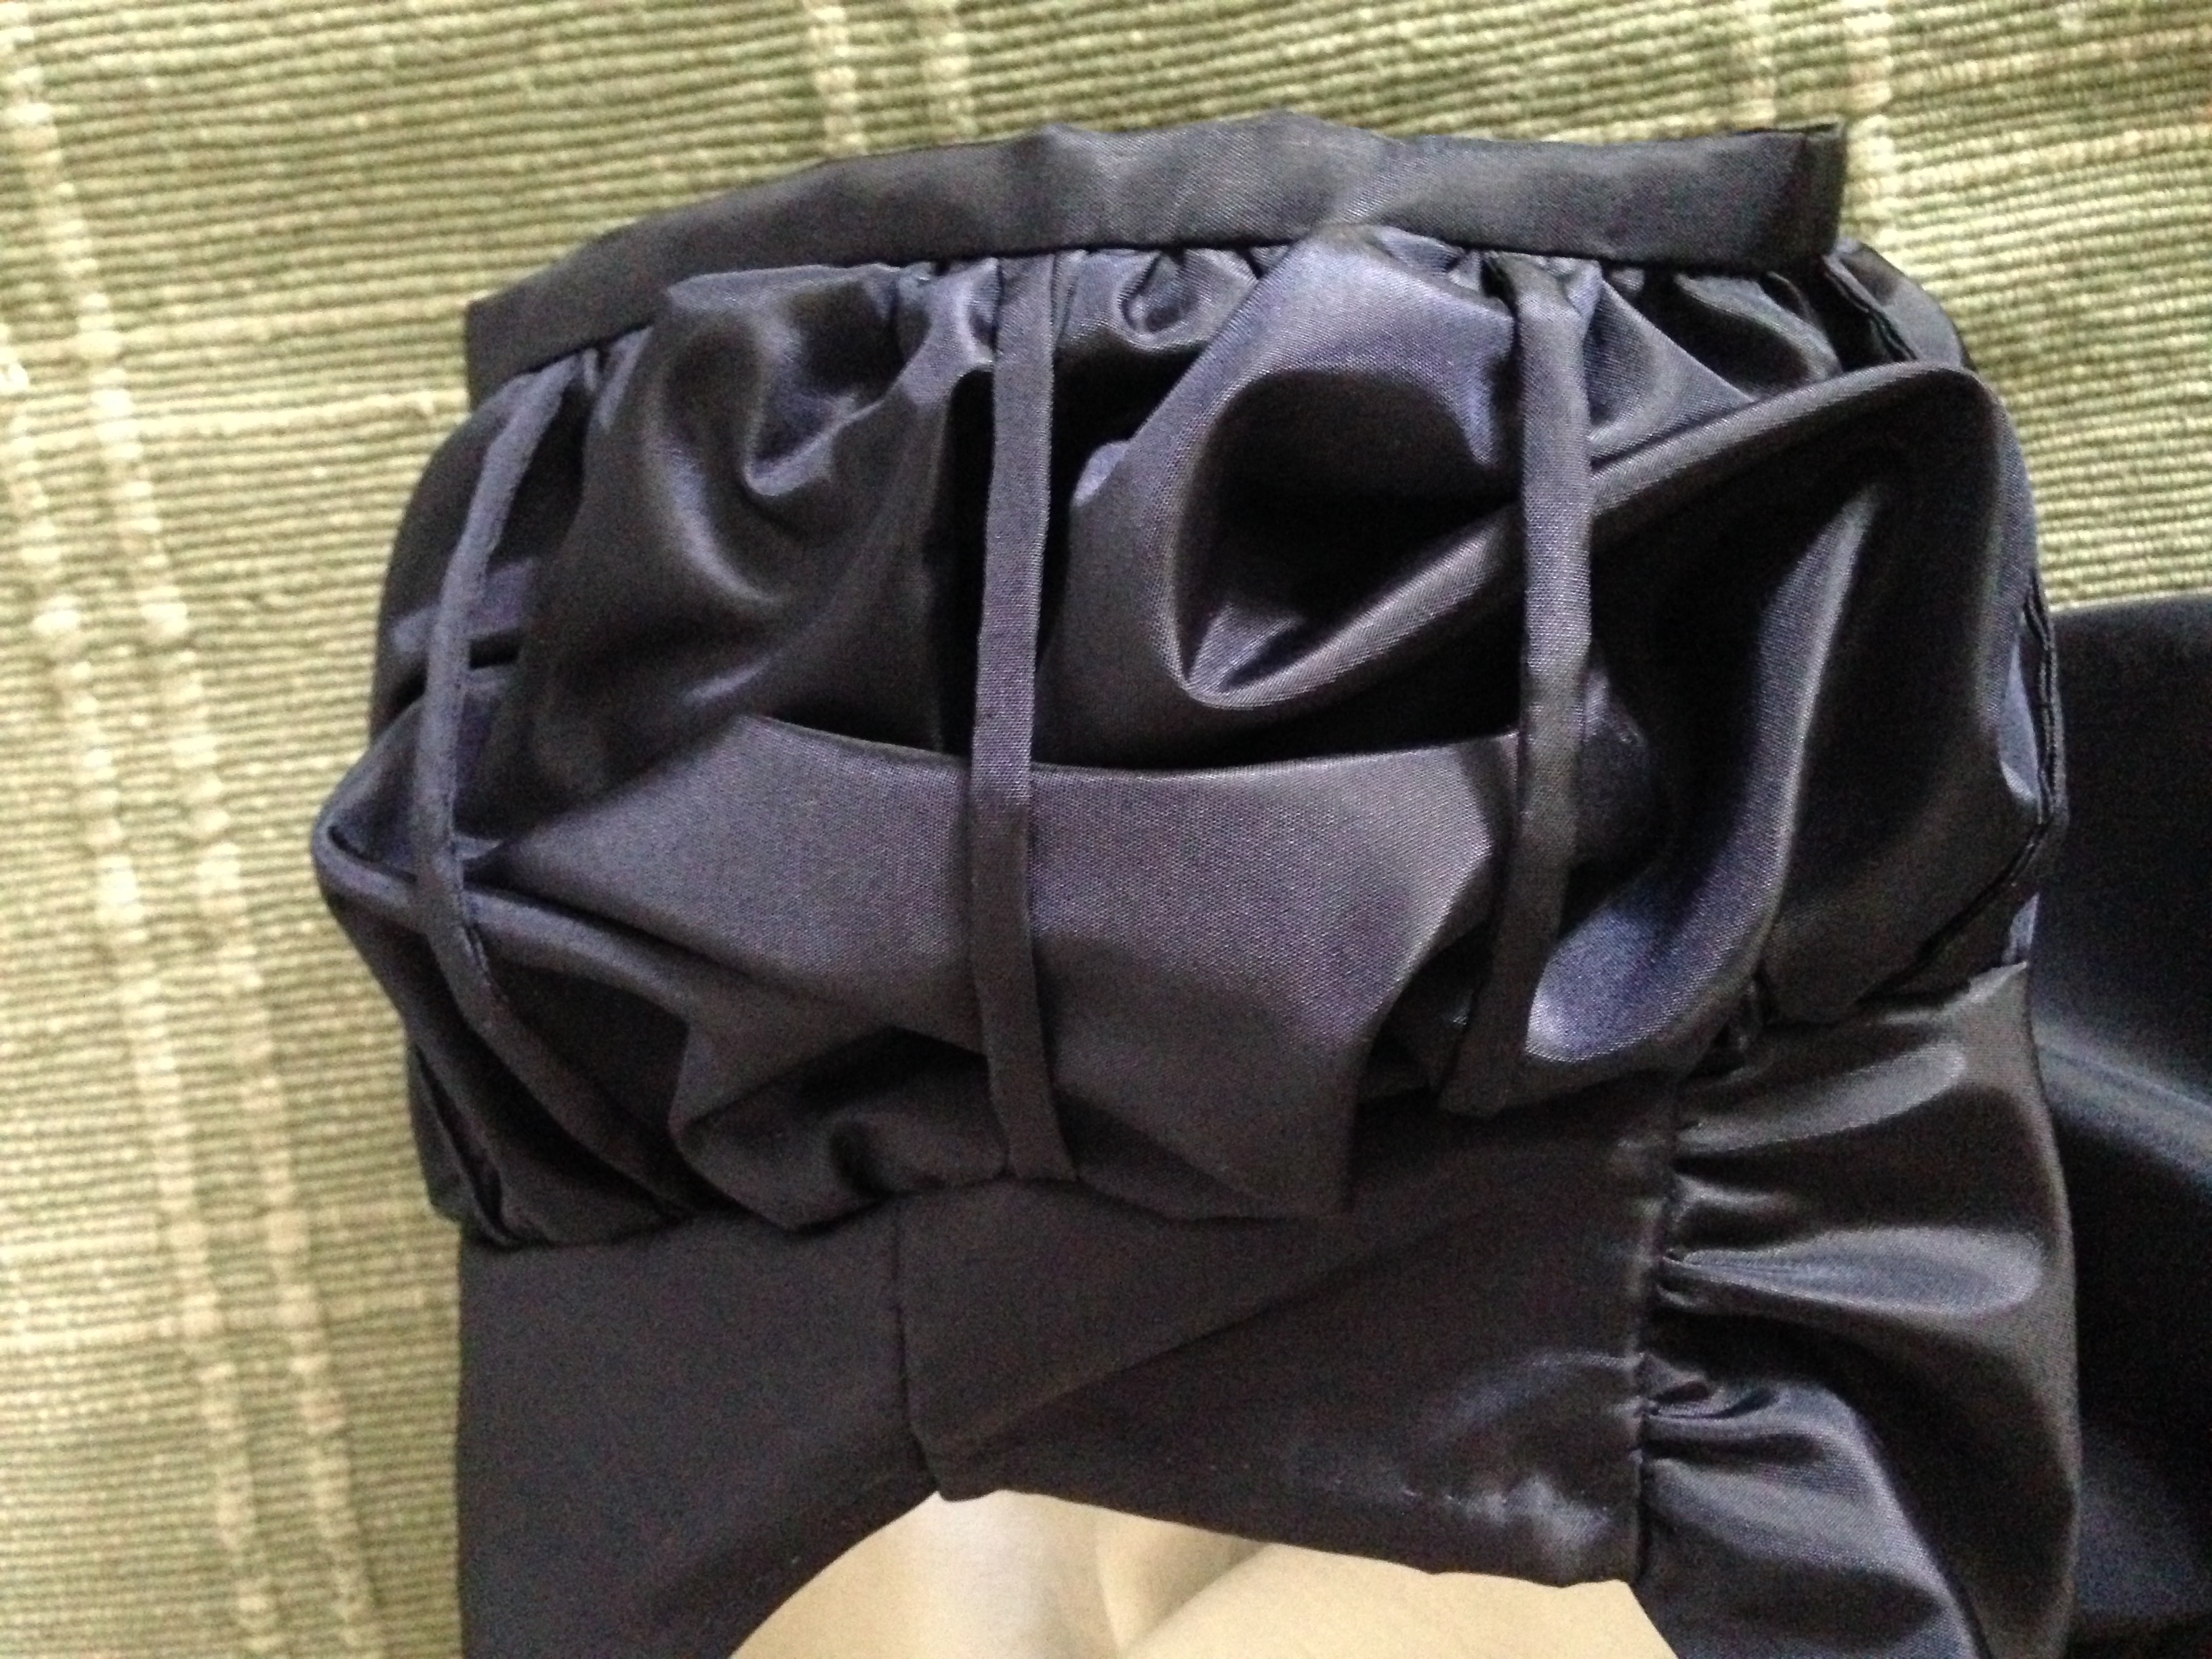
1) The bodice parts are put together after hand stitching all the parts of the neck line. 2) The inside fabric comes from an old pillow case. 3) The fabric of the arms is gathered both at the shoulder and bottom and also vertically by thin strings attatched to the shoulder and tape at the bottom om the arm.
Poofy arm with fabric gathered beneath handsewn strings
Inside the bodice and the closing of it.
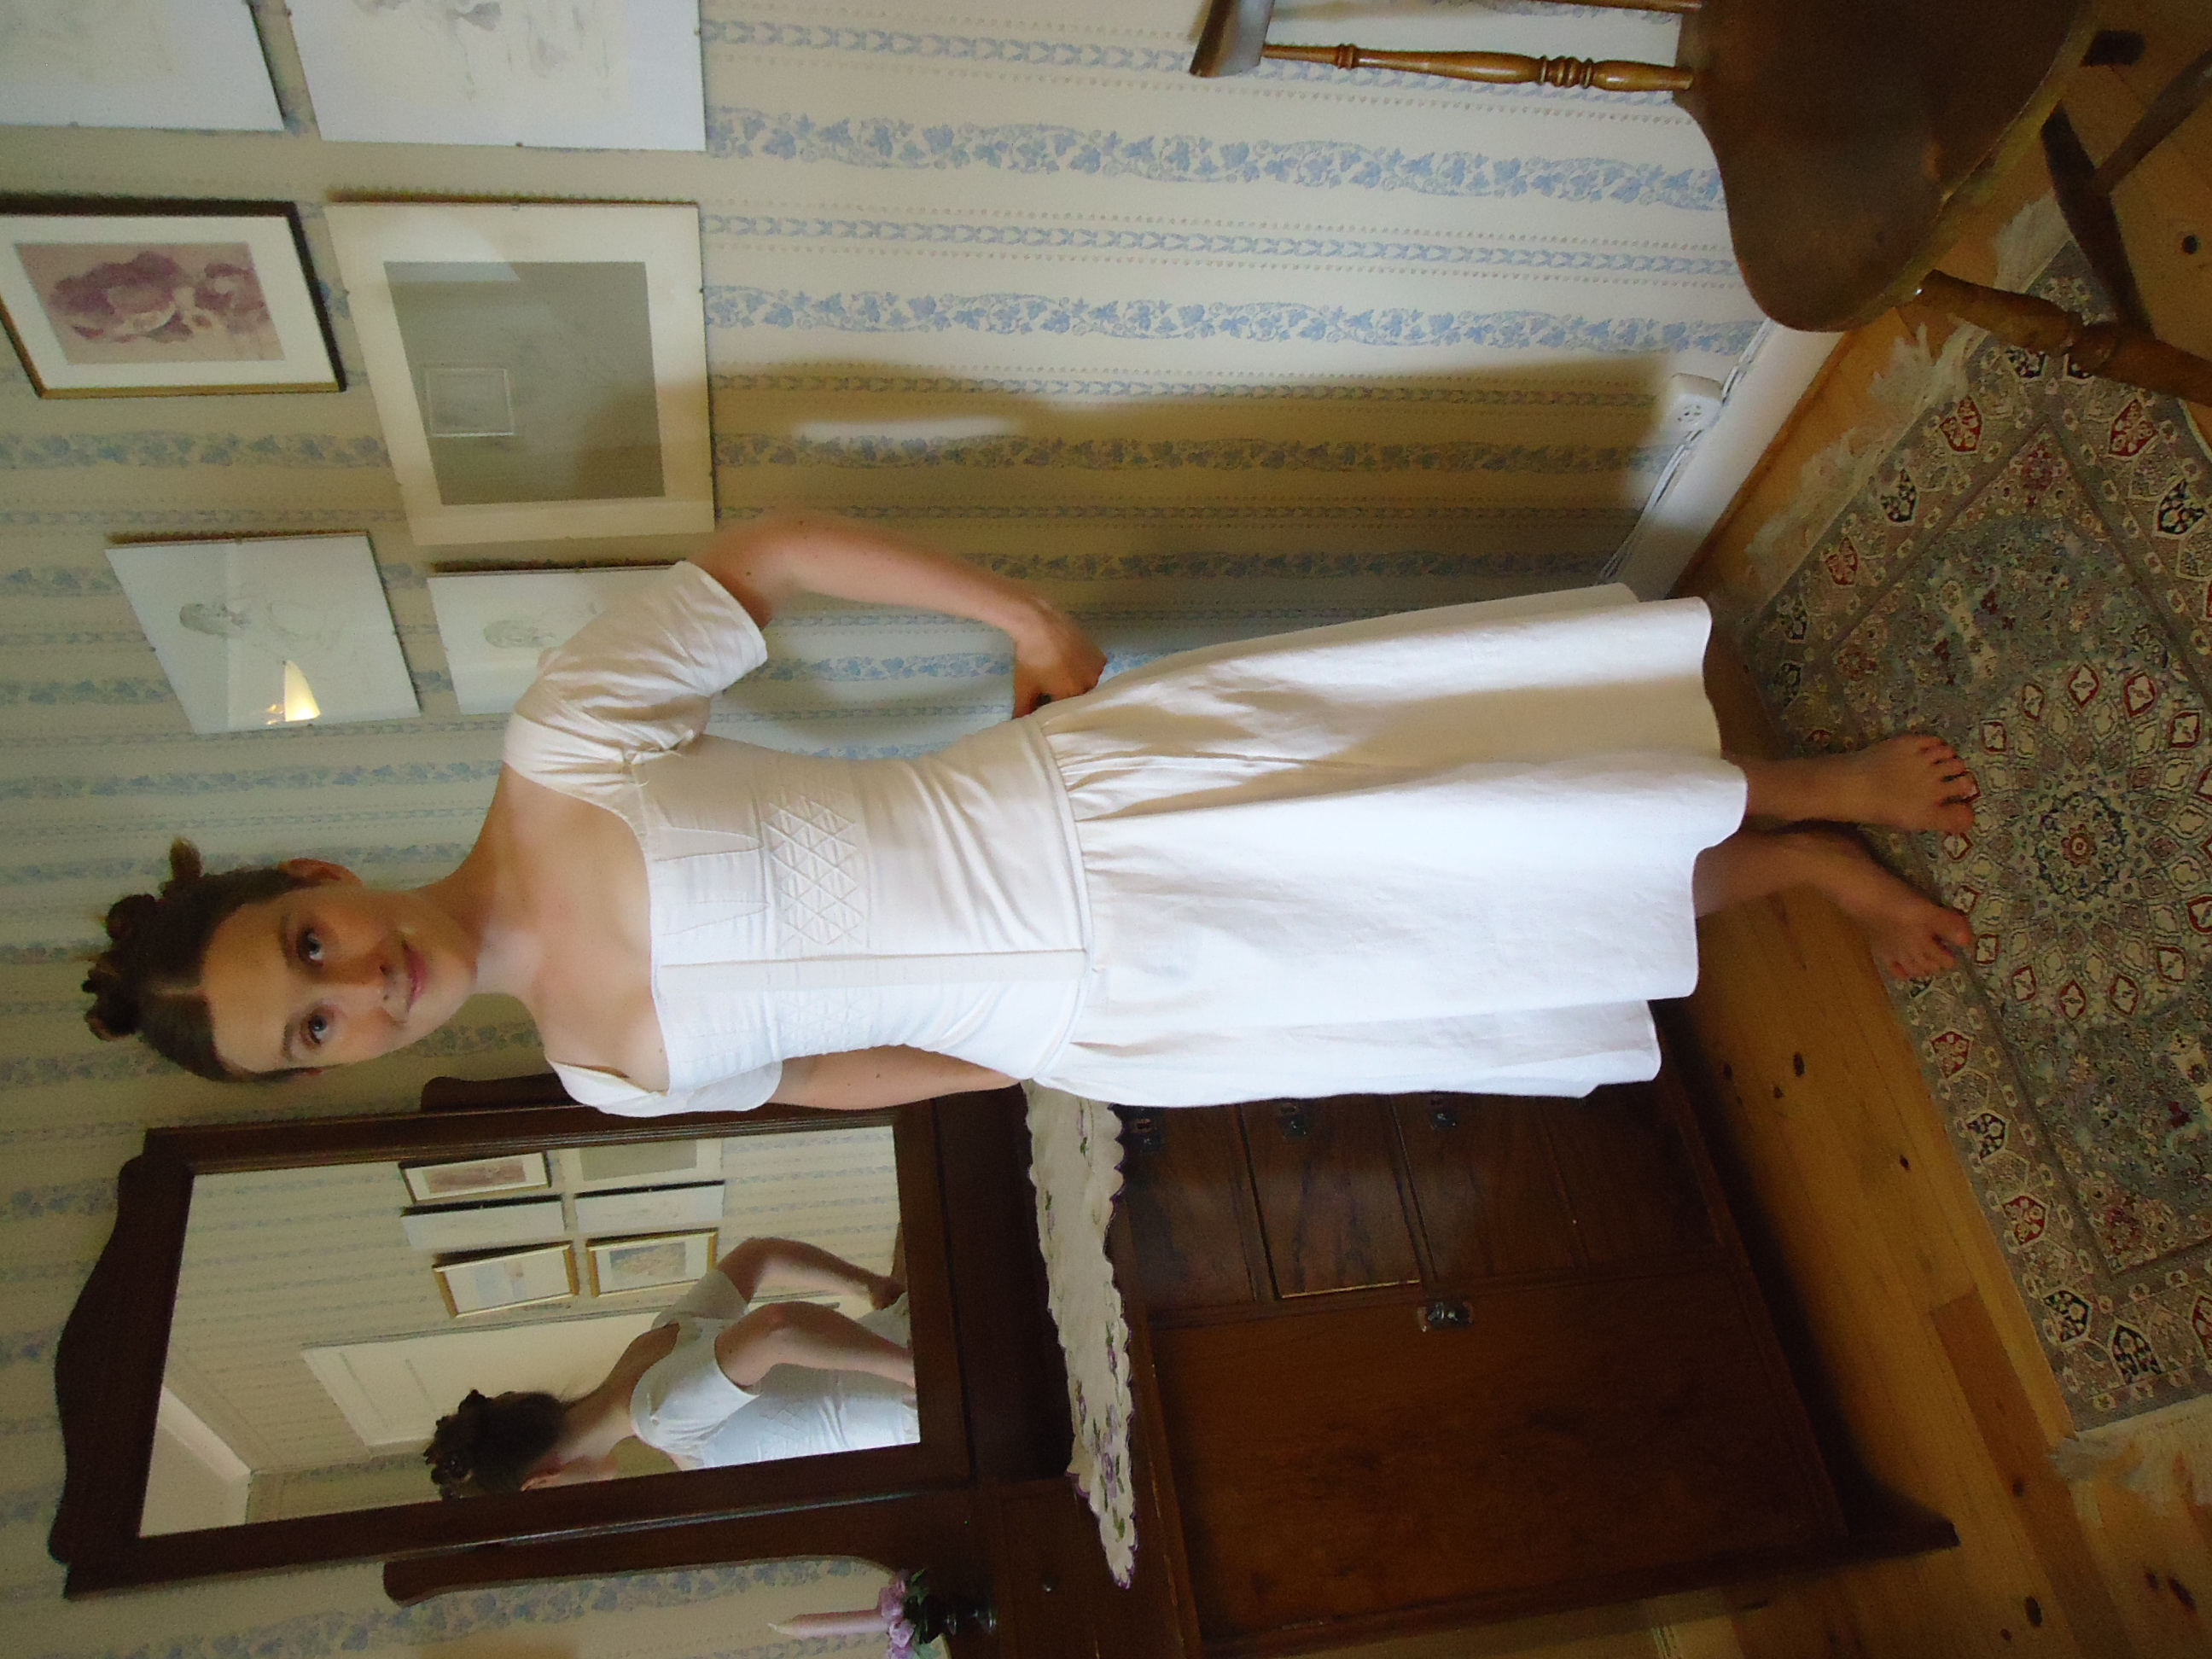
The Underpinnings
Here are all the layers of underpinnings (except for stockings and shoes), then the making of the hair and at last comes the wonderful gown:
Här får ni se hur alla underkläder tas på i rätt ordning (utom strumpor och skor), sedan hur frisyren görs i ordning och slutligen den nya klänningen ses i all sin glans:
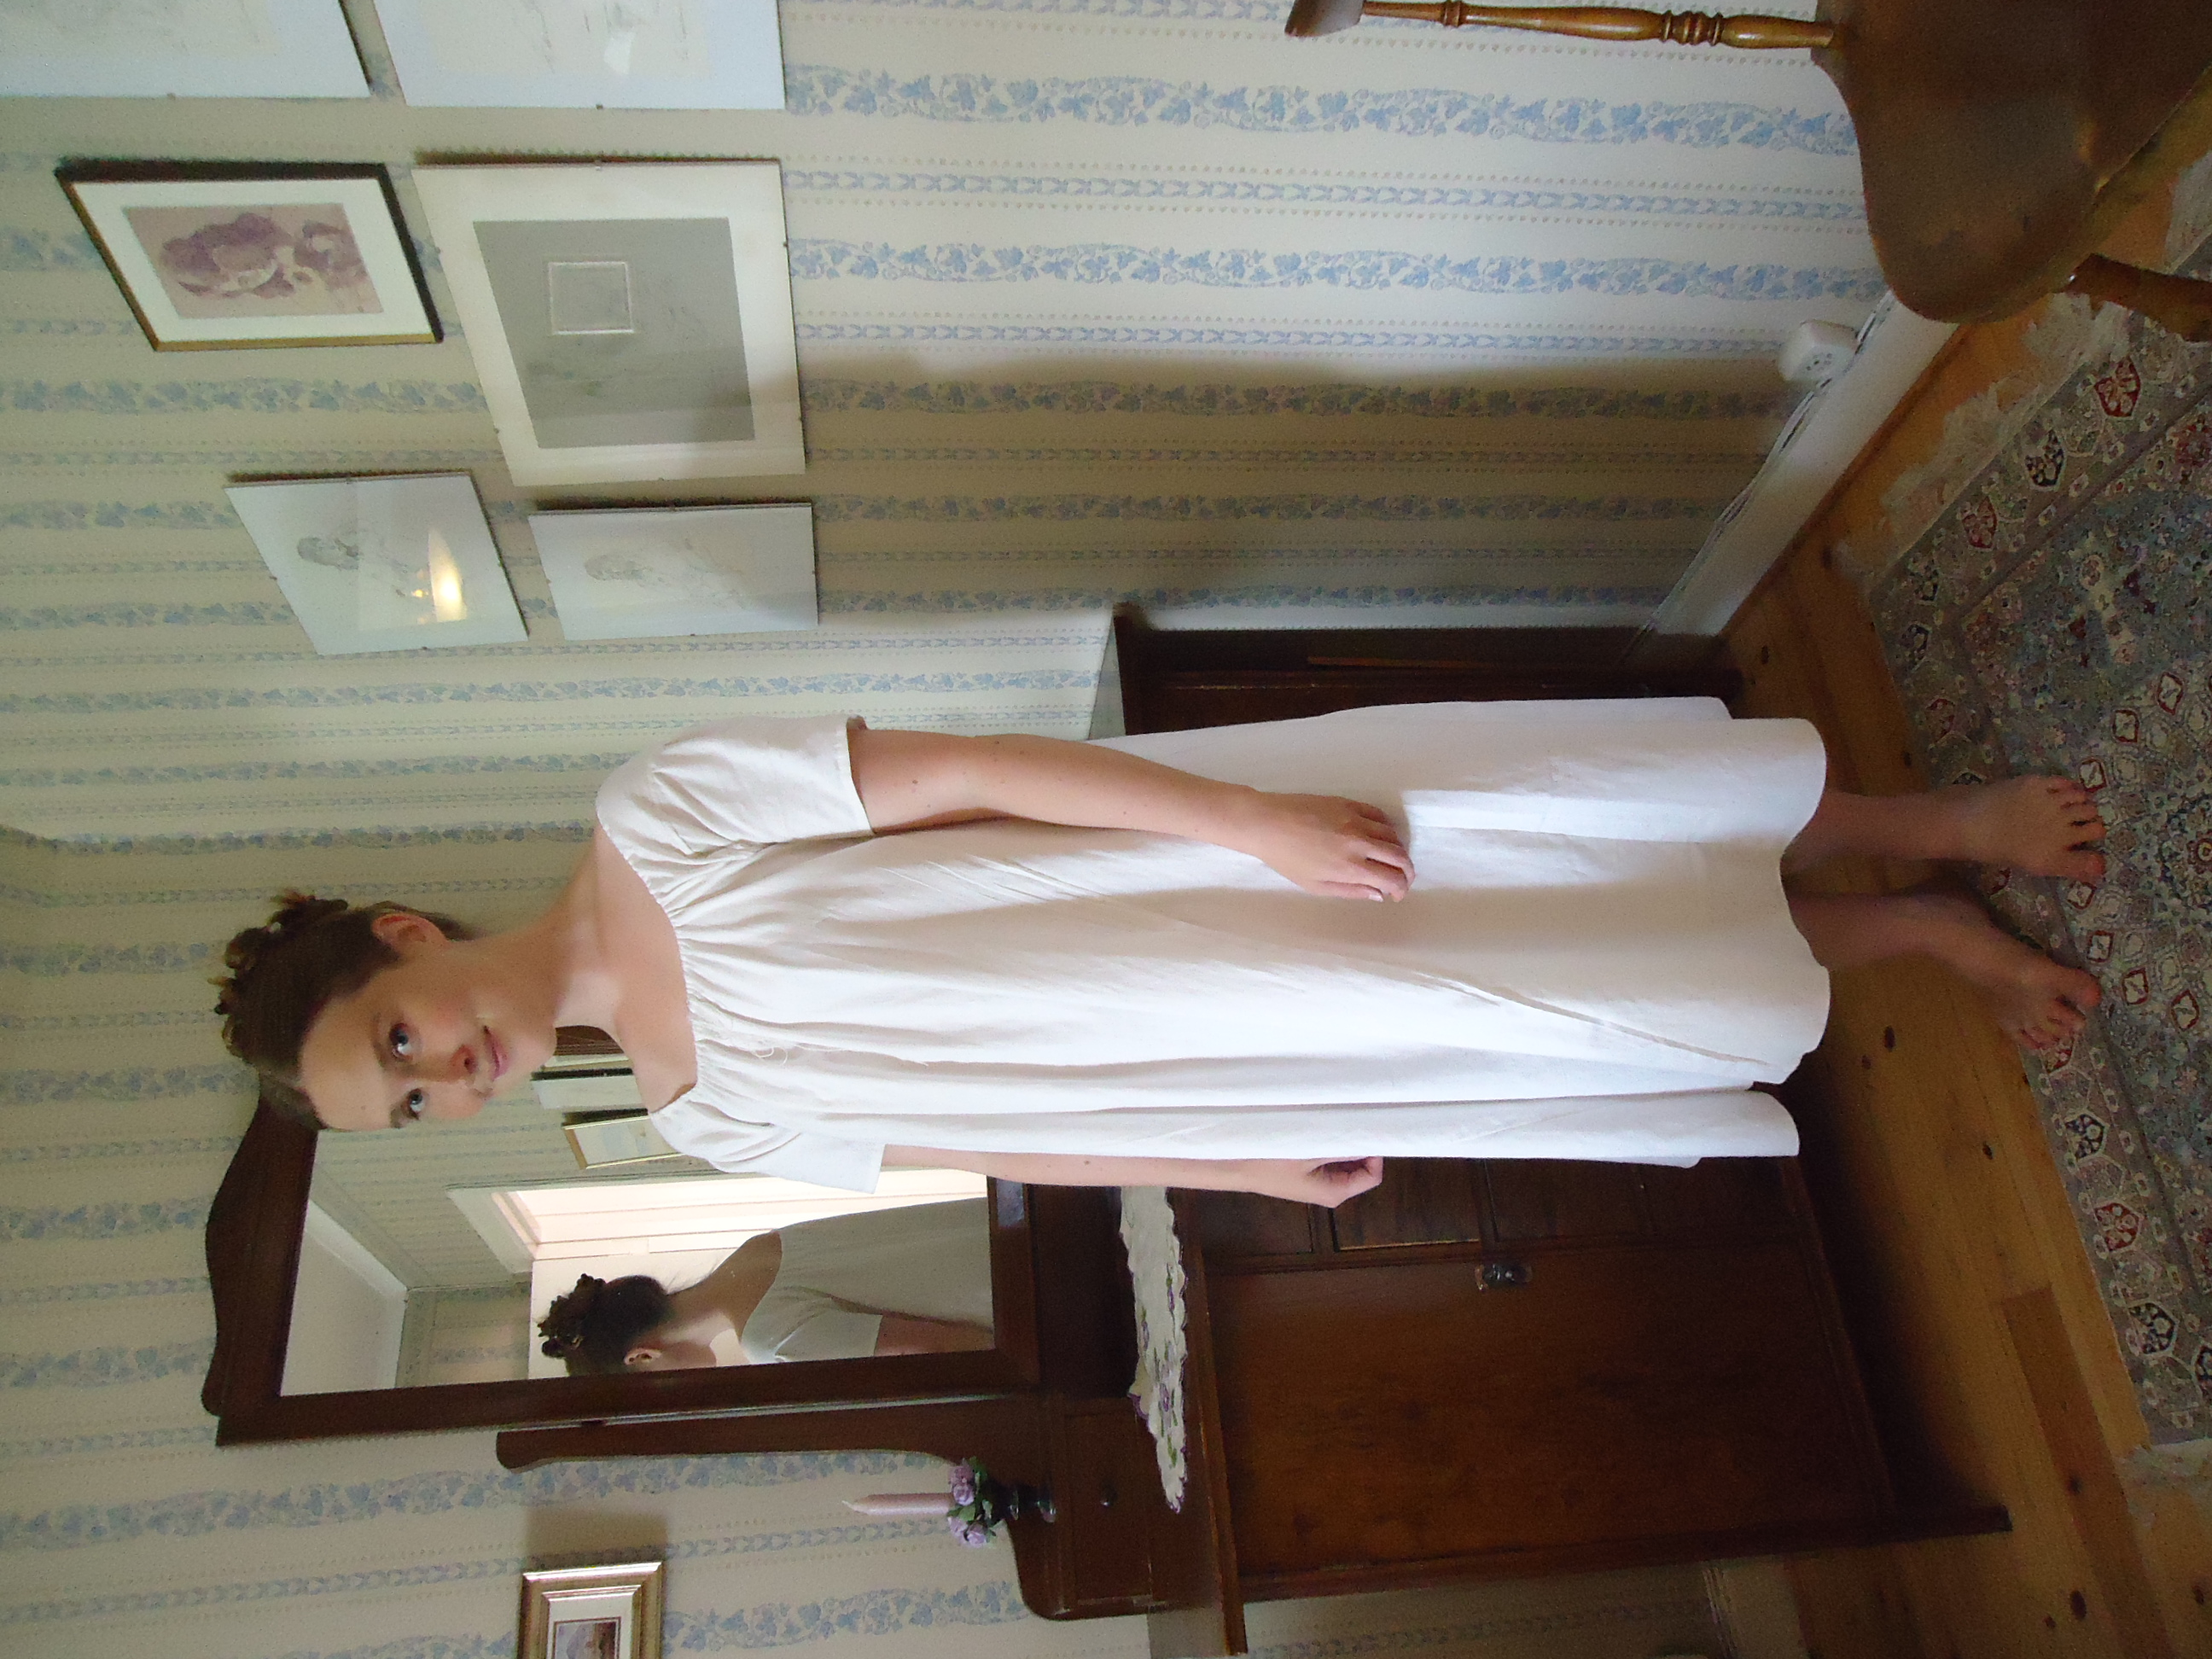
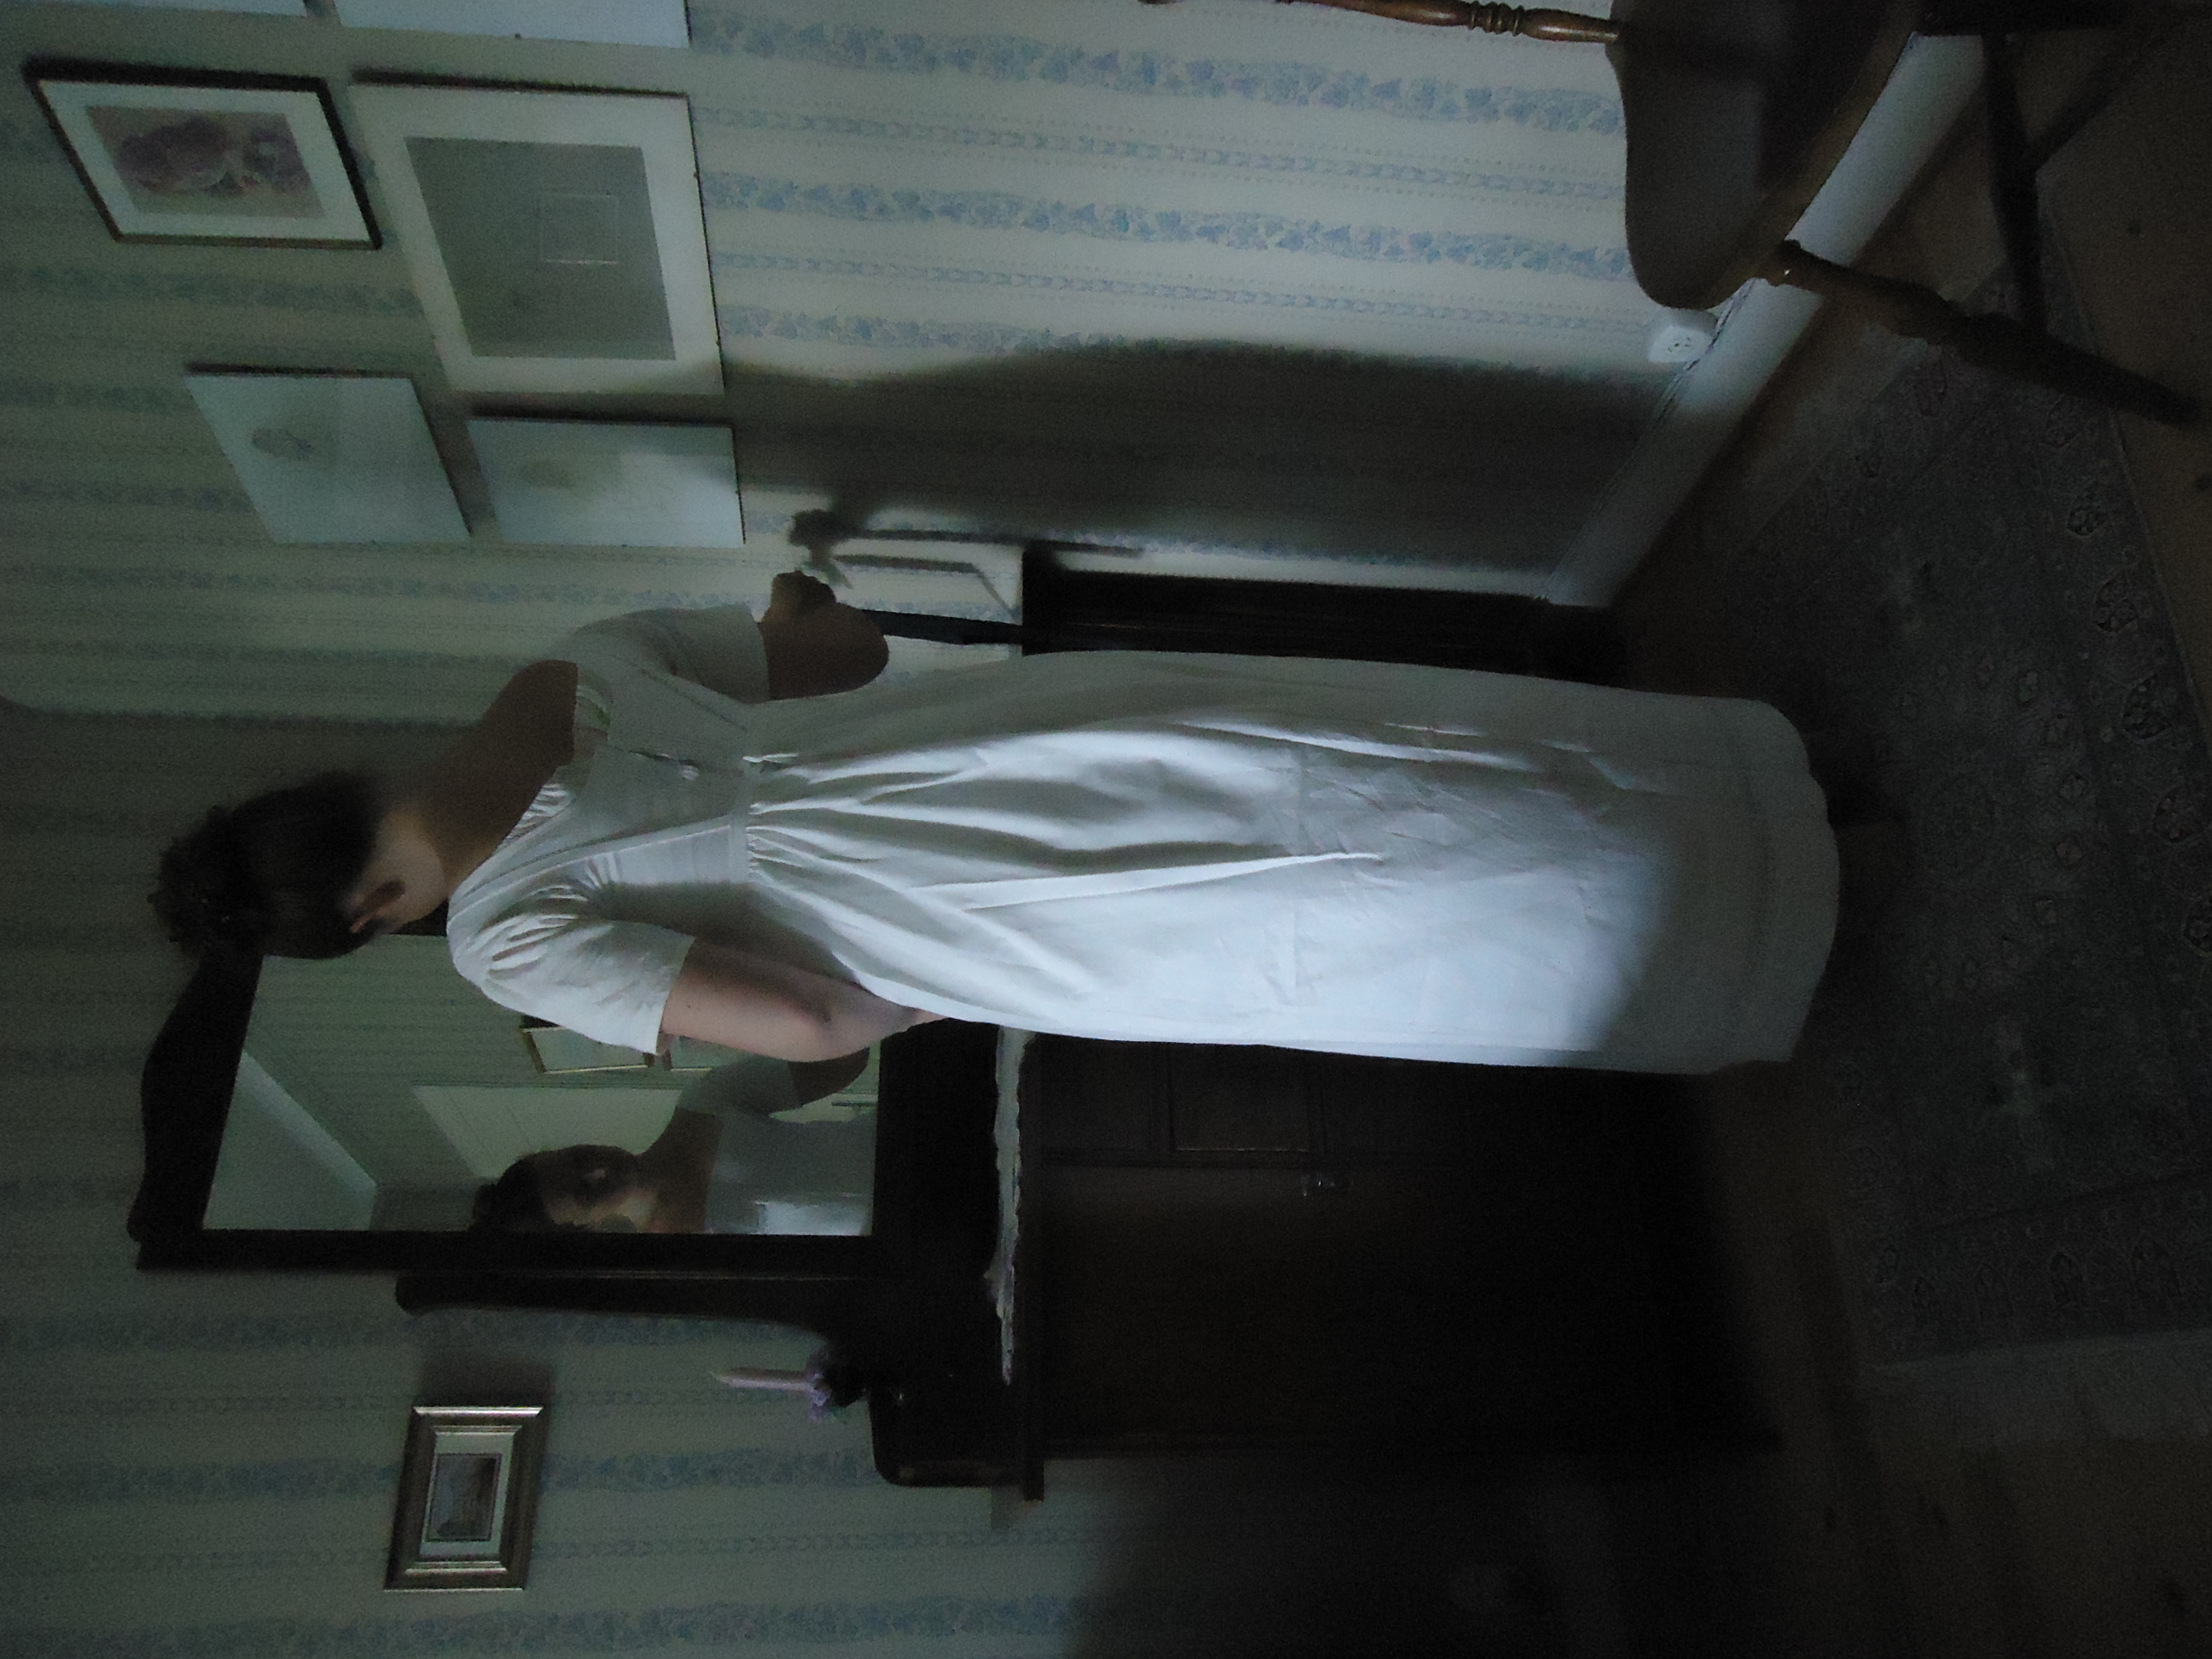
Chemise
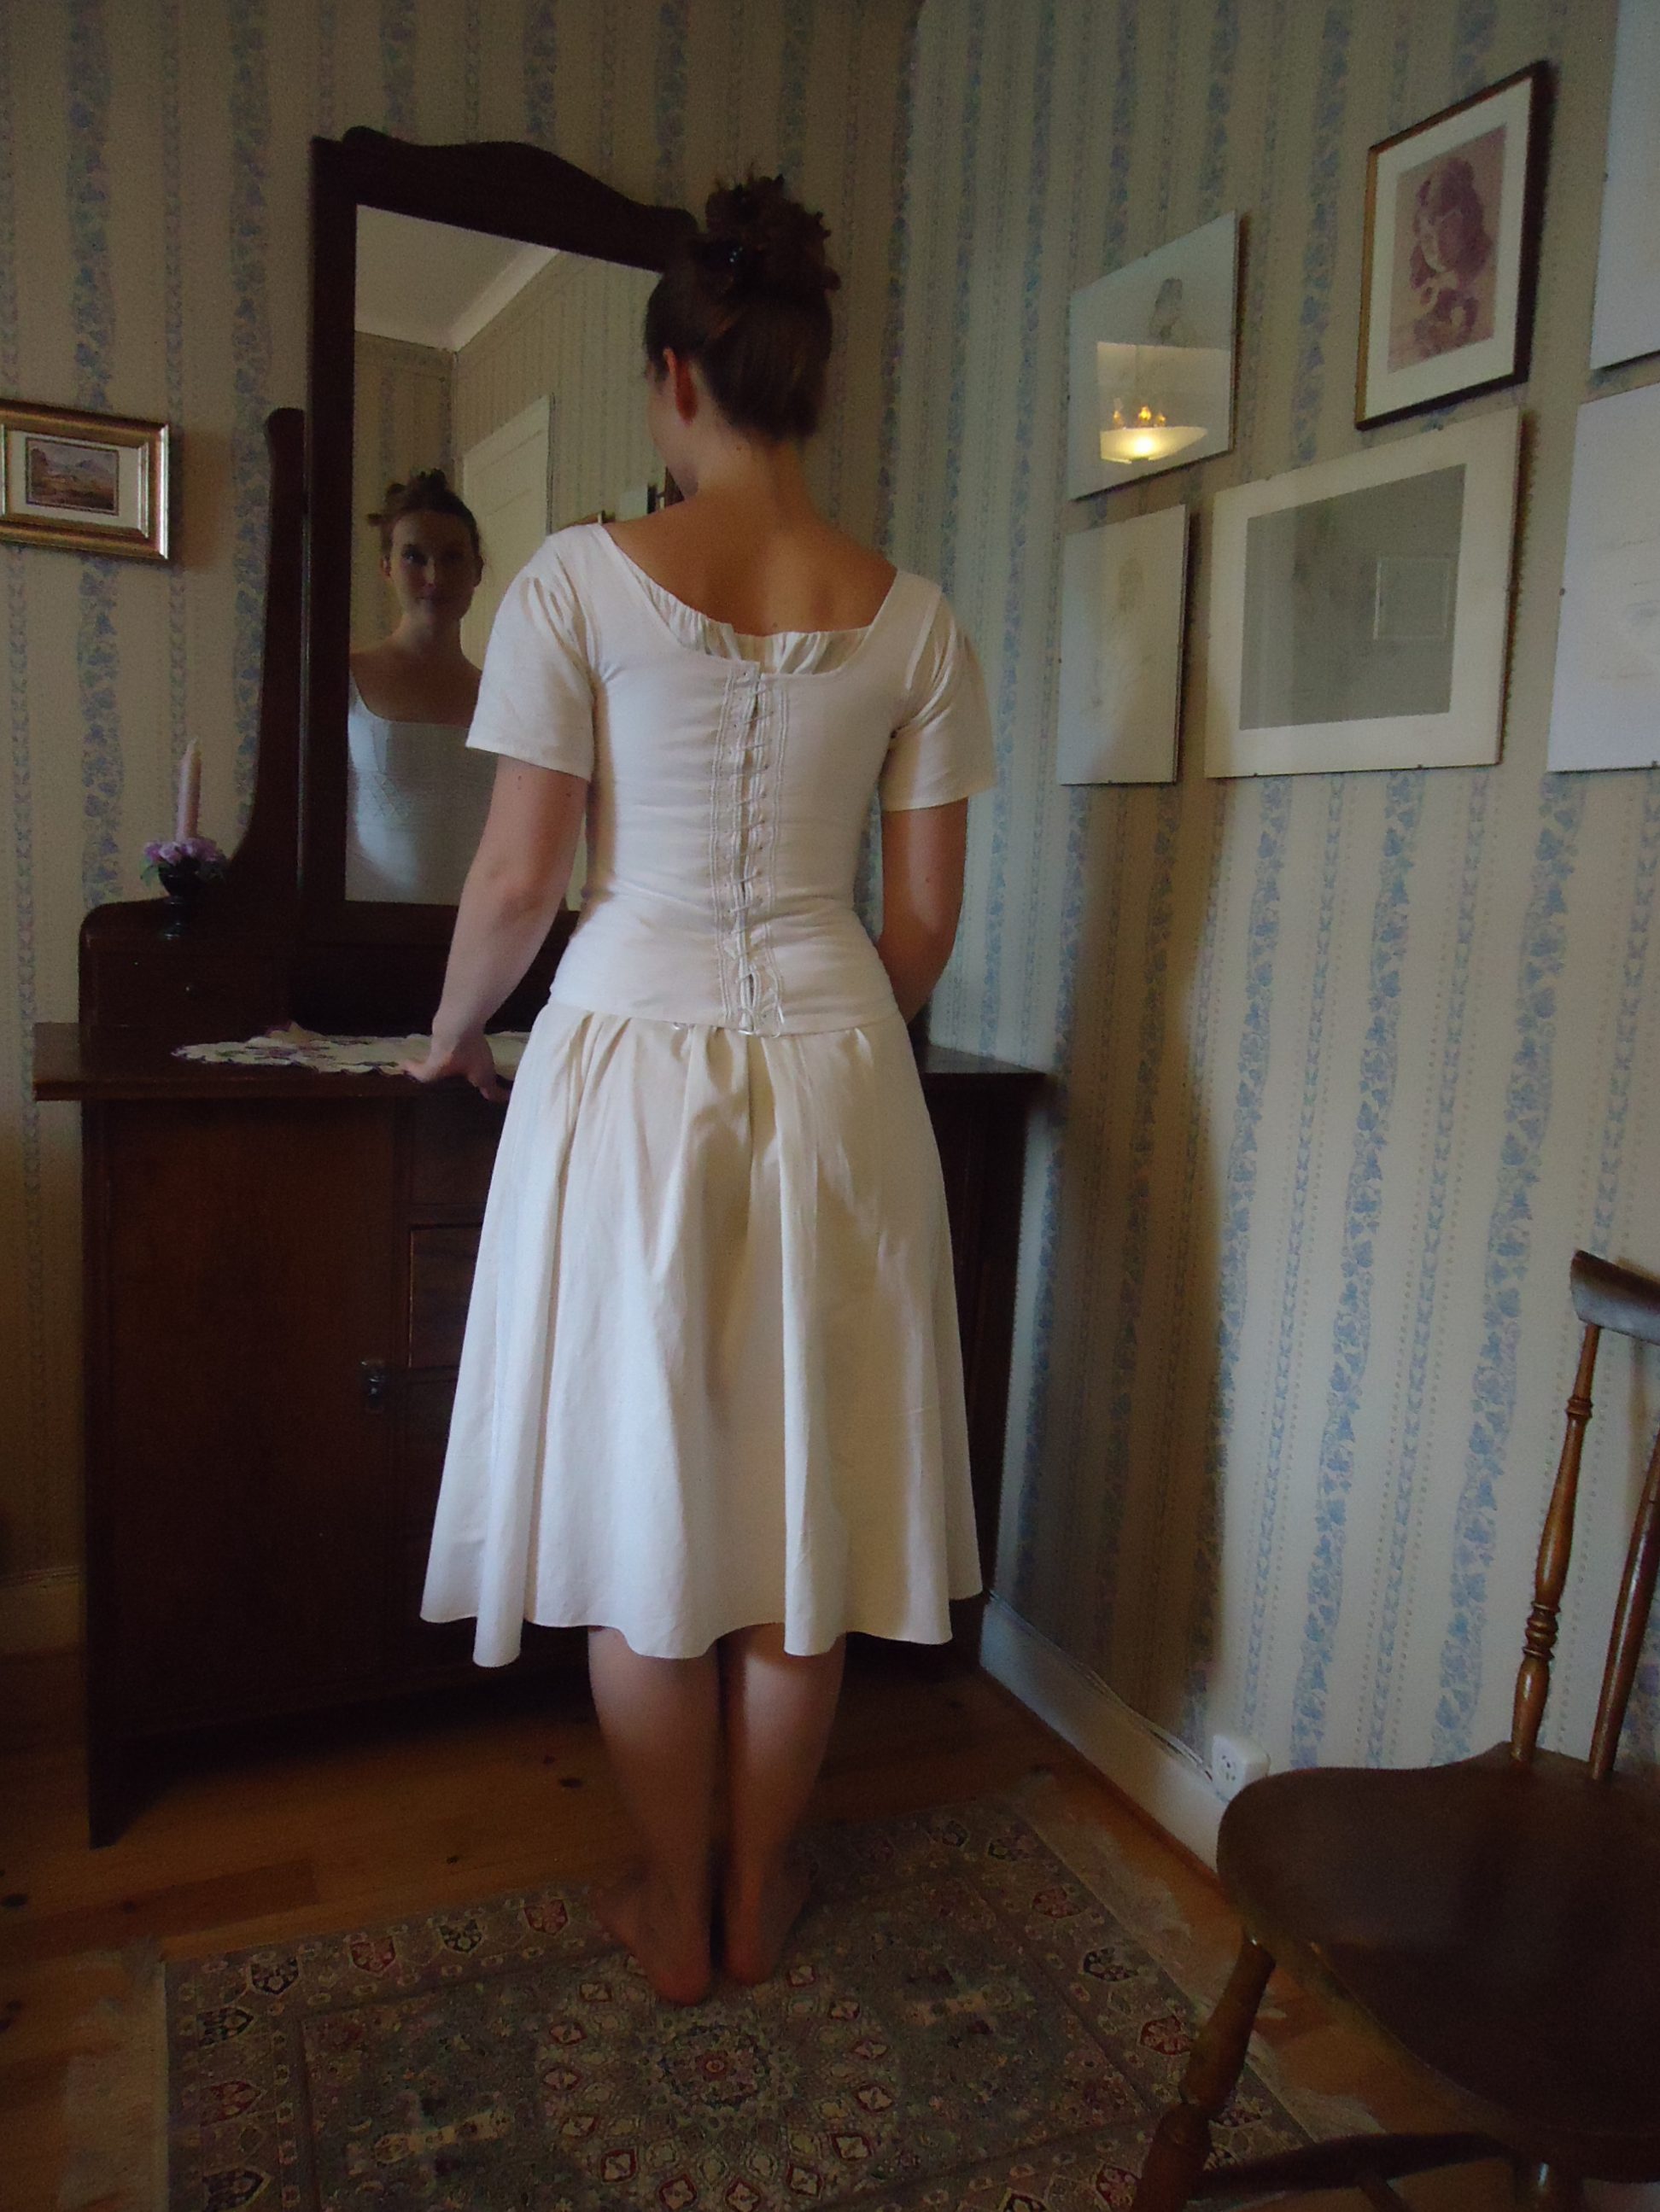
Corset
Petticoat sewn from an old bed sheet, closed in the back with hooks and eyes. Held up with suspenders.
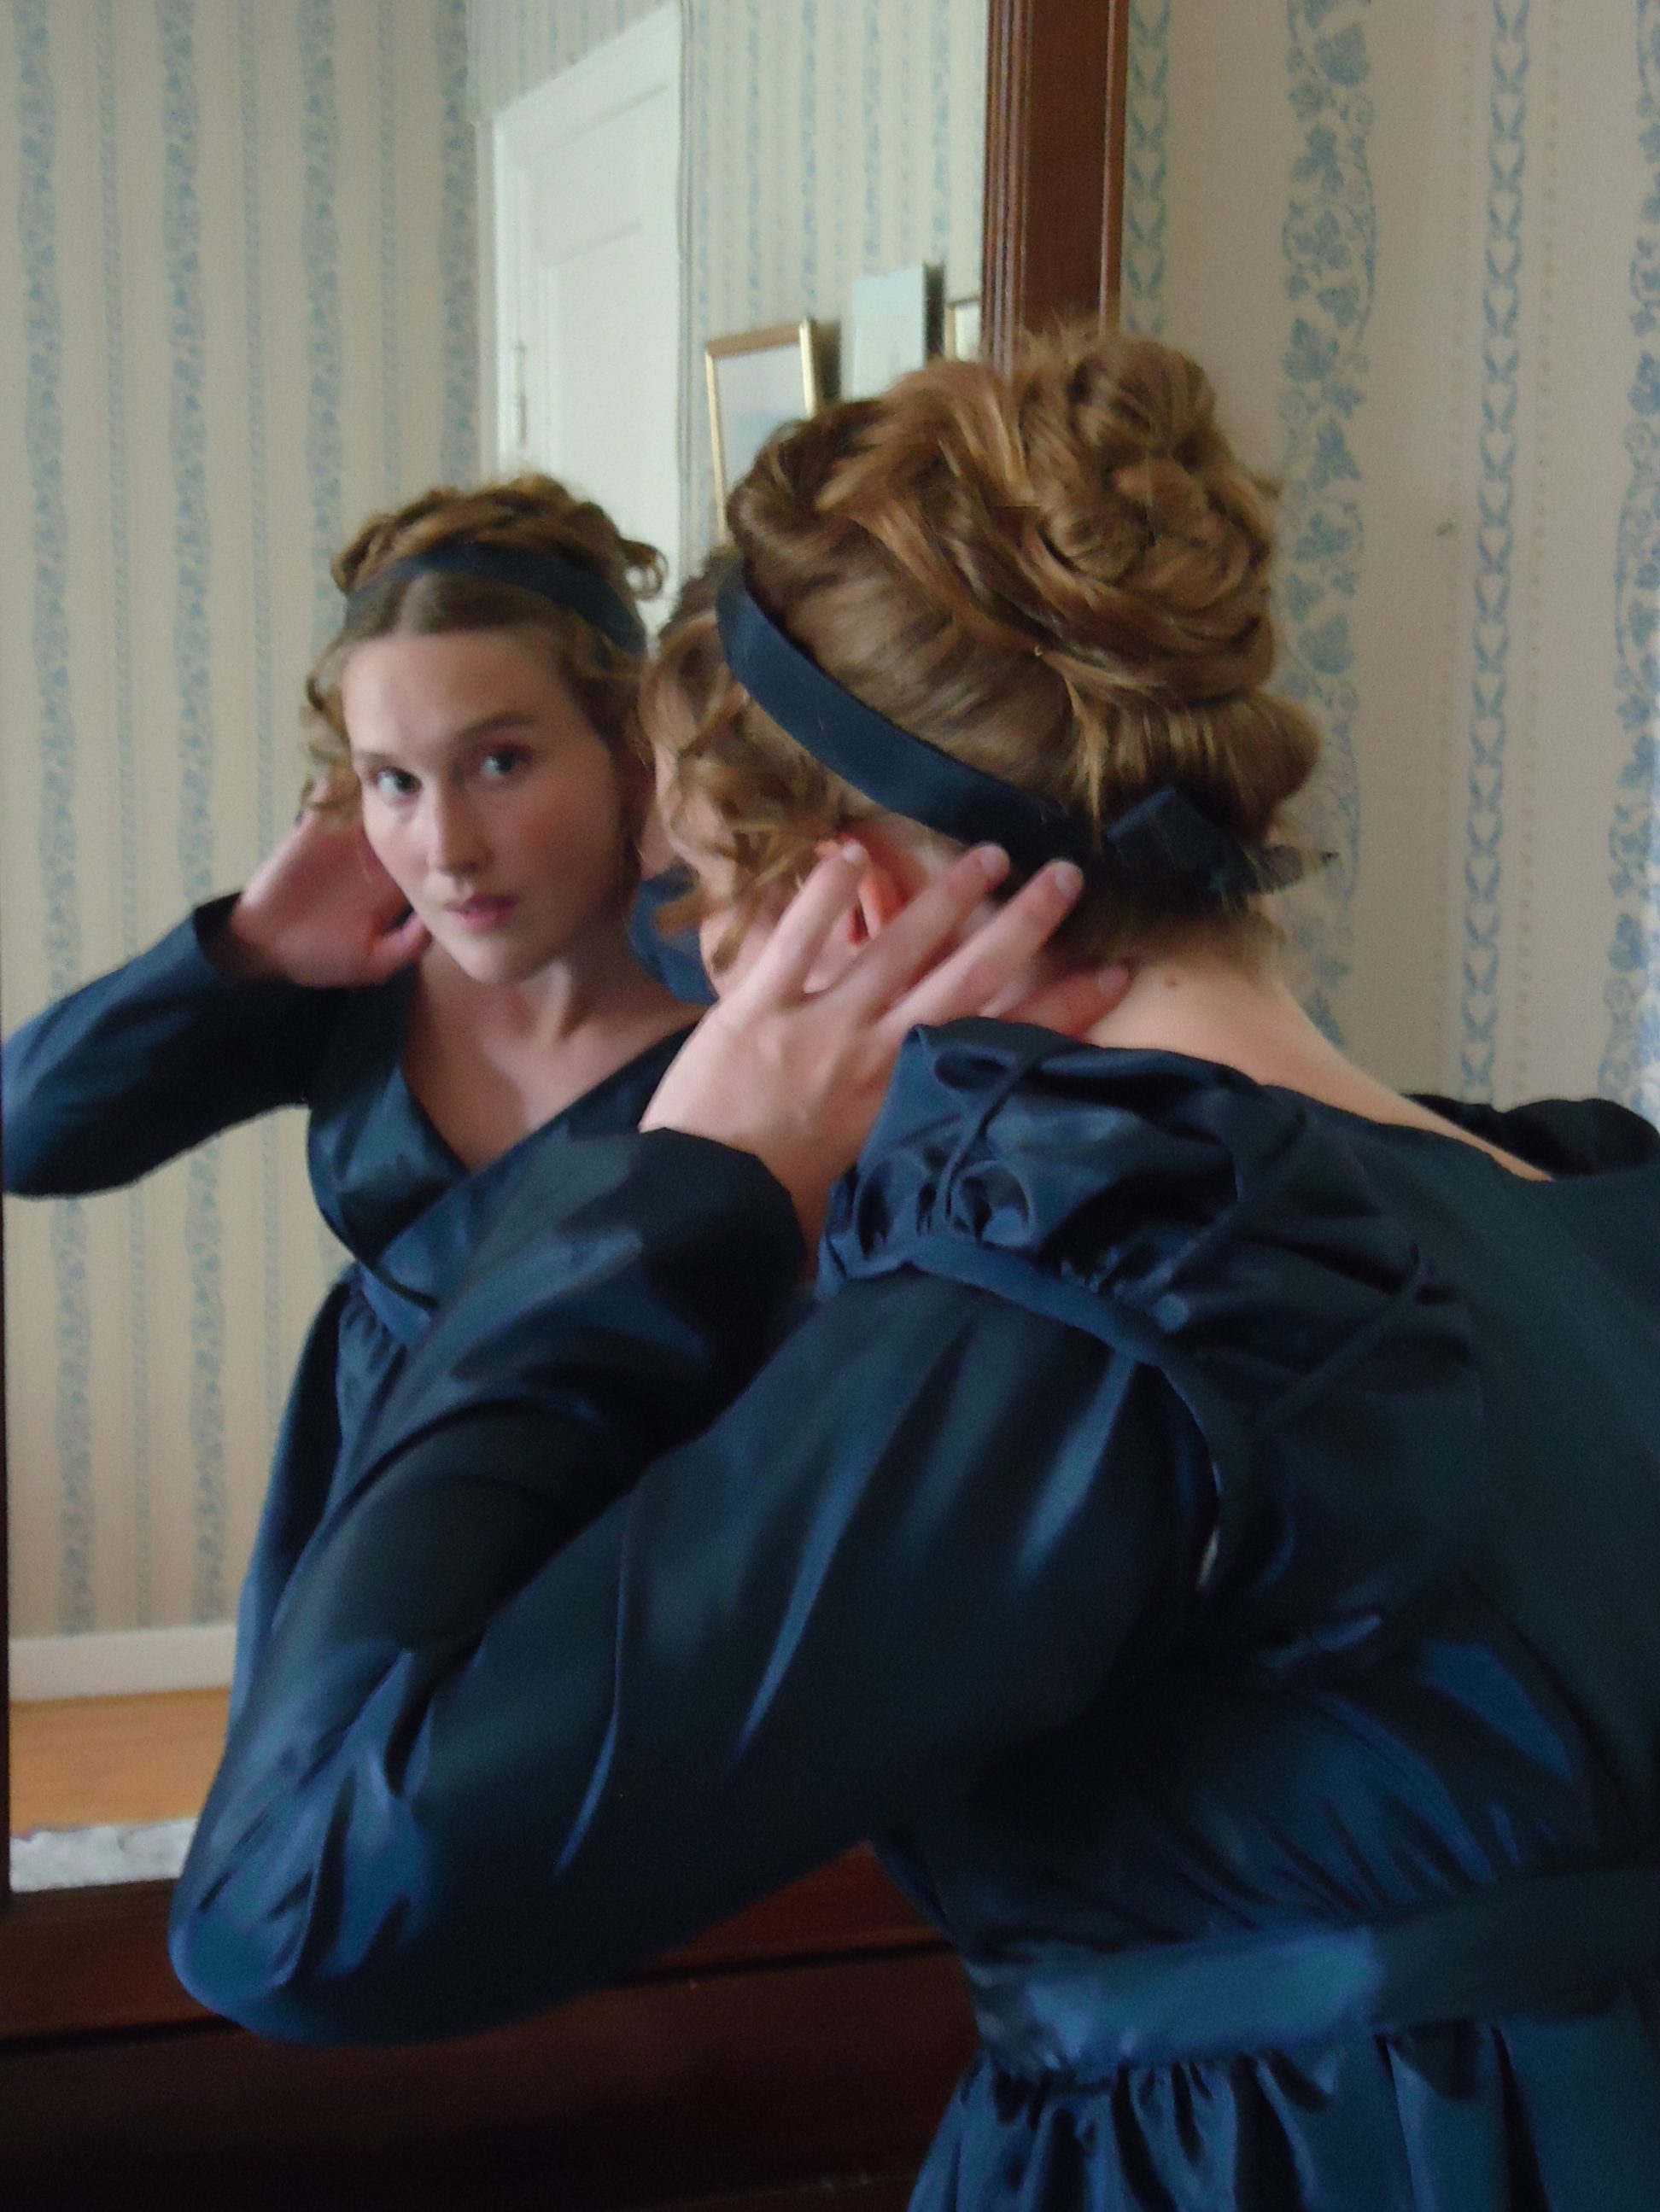
The Regency Hair
Now it is time for making the hair! I have long, straight hair, that never hold the curls for more than five minutes. After some lovely articles at Your Wardrobe Unlocked and the wonderful blog Places in Time, I have finally gathered up enough courage to make my own hair pieces.
Nu är det dags för att fixa håret! Jag har långt, rakt hår, som aldrig låter lockarna stanna i mer än fem minuter. Efter några uppmuntrande artiklar på Your Wardrobe Unlocked och den underbara bloggen Places in Time, har jag äntligen samlat tillräckligt med mod för att fixa eget löshår!
Using the hair pieces (my own hair glued to barrets). After fastening the hairpieces at my temples, I loosened my “curled hair” from the knot at the back of my head (I had hoped for these to be curly, but off course they were as straight as allways) and destributed this hair forward on the top of my head, in a way that made it look a little bit curly. Then I hid the barrets of the hair pieces under a ribbon.
I am too greedy to buy synthetic wig hair, so… I know some of you will think that this is truly shocking… I harvested all the hair that got stuck in my brush for one month, taped it together and finally glued it to a small piece of fabric and to barrets. Then I wound the hair up around my finger and fastened the curl with hair pins. These new hair pieces were put away for about two weeks before I could use them (I tried them after just one week, but that wouldn’t do at all!).
Jag är för gniden för att köpa syntetiskt löshår, så… jag vet att några av er kommer rygga tillbaka i avsky, men… jag sparade allt hår som fastnade i hårborsten i en månad, tejpade samman det och limmade slutligen fast det på hårspännen, samman med en liten tygbit. Sedan rullade jag upp håret runt fingret och fäste lockarna i hårnålar och la undan allt i två veckor innan fotosessionen (jag testade löshåret efter bara en vecka, men då släppte lockarna på en minut).
I have divided my hair into several parts, that I have twined loosely and layed over each other, in order to make it resemble curls. The barrets of the hair pieces are hidden beneath the ribbon.
For those of you, who have shorter hair, I believe that Diary of a Mantua Maker may be helpful.
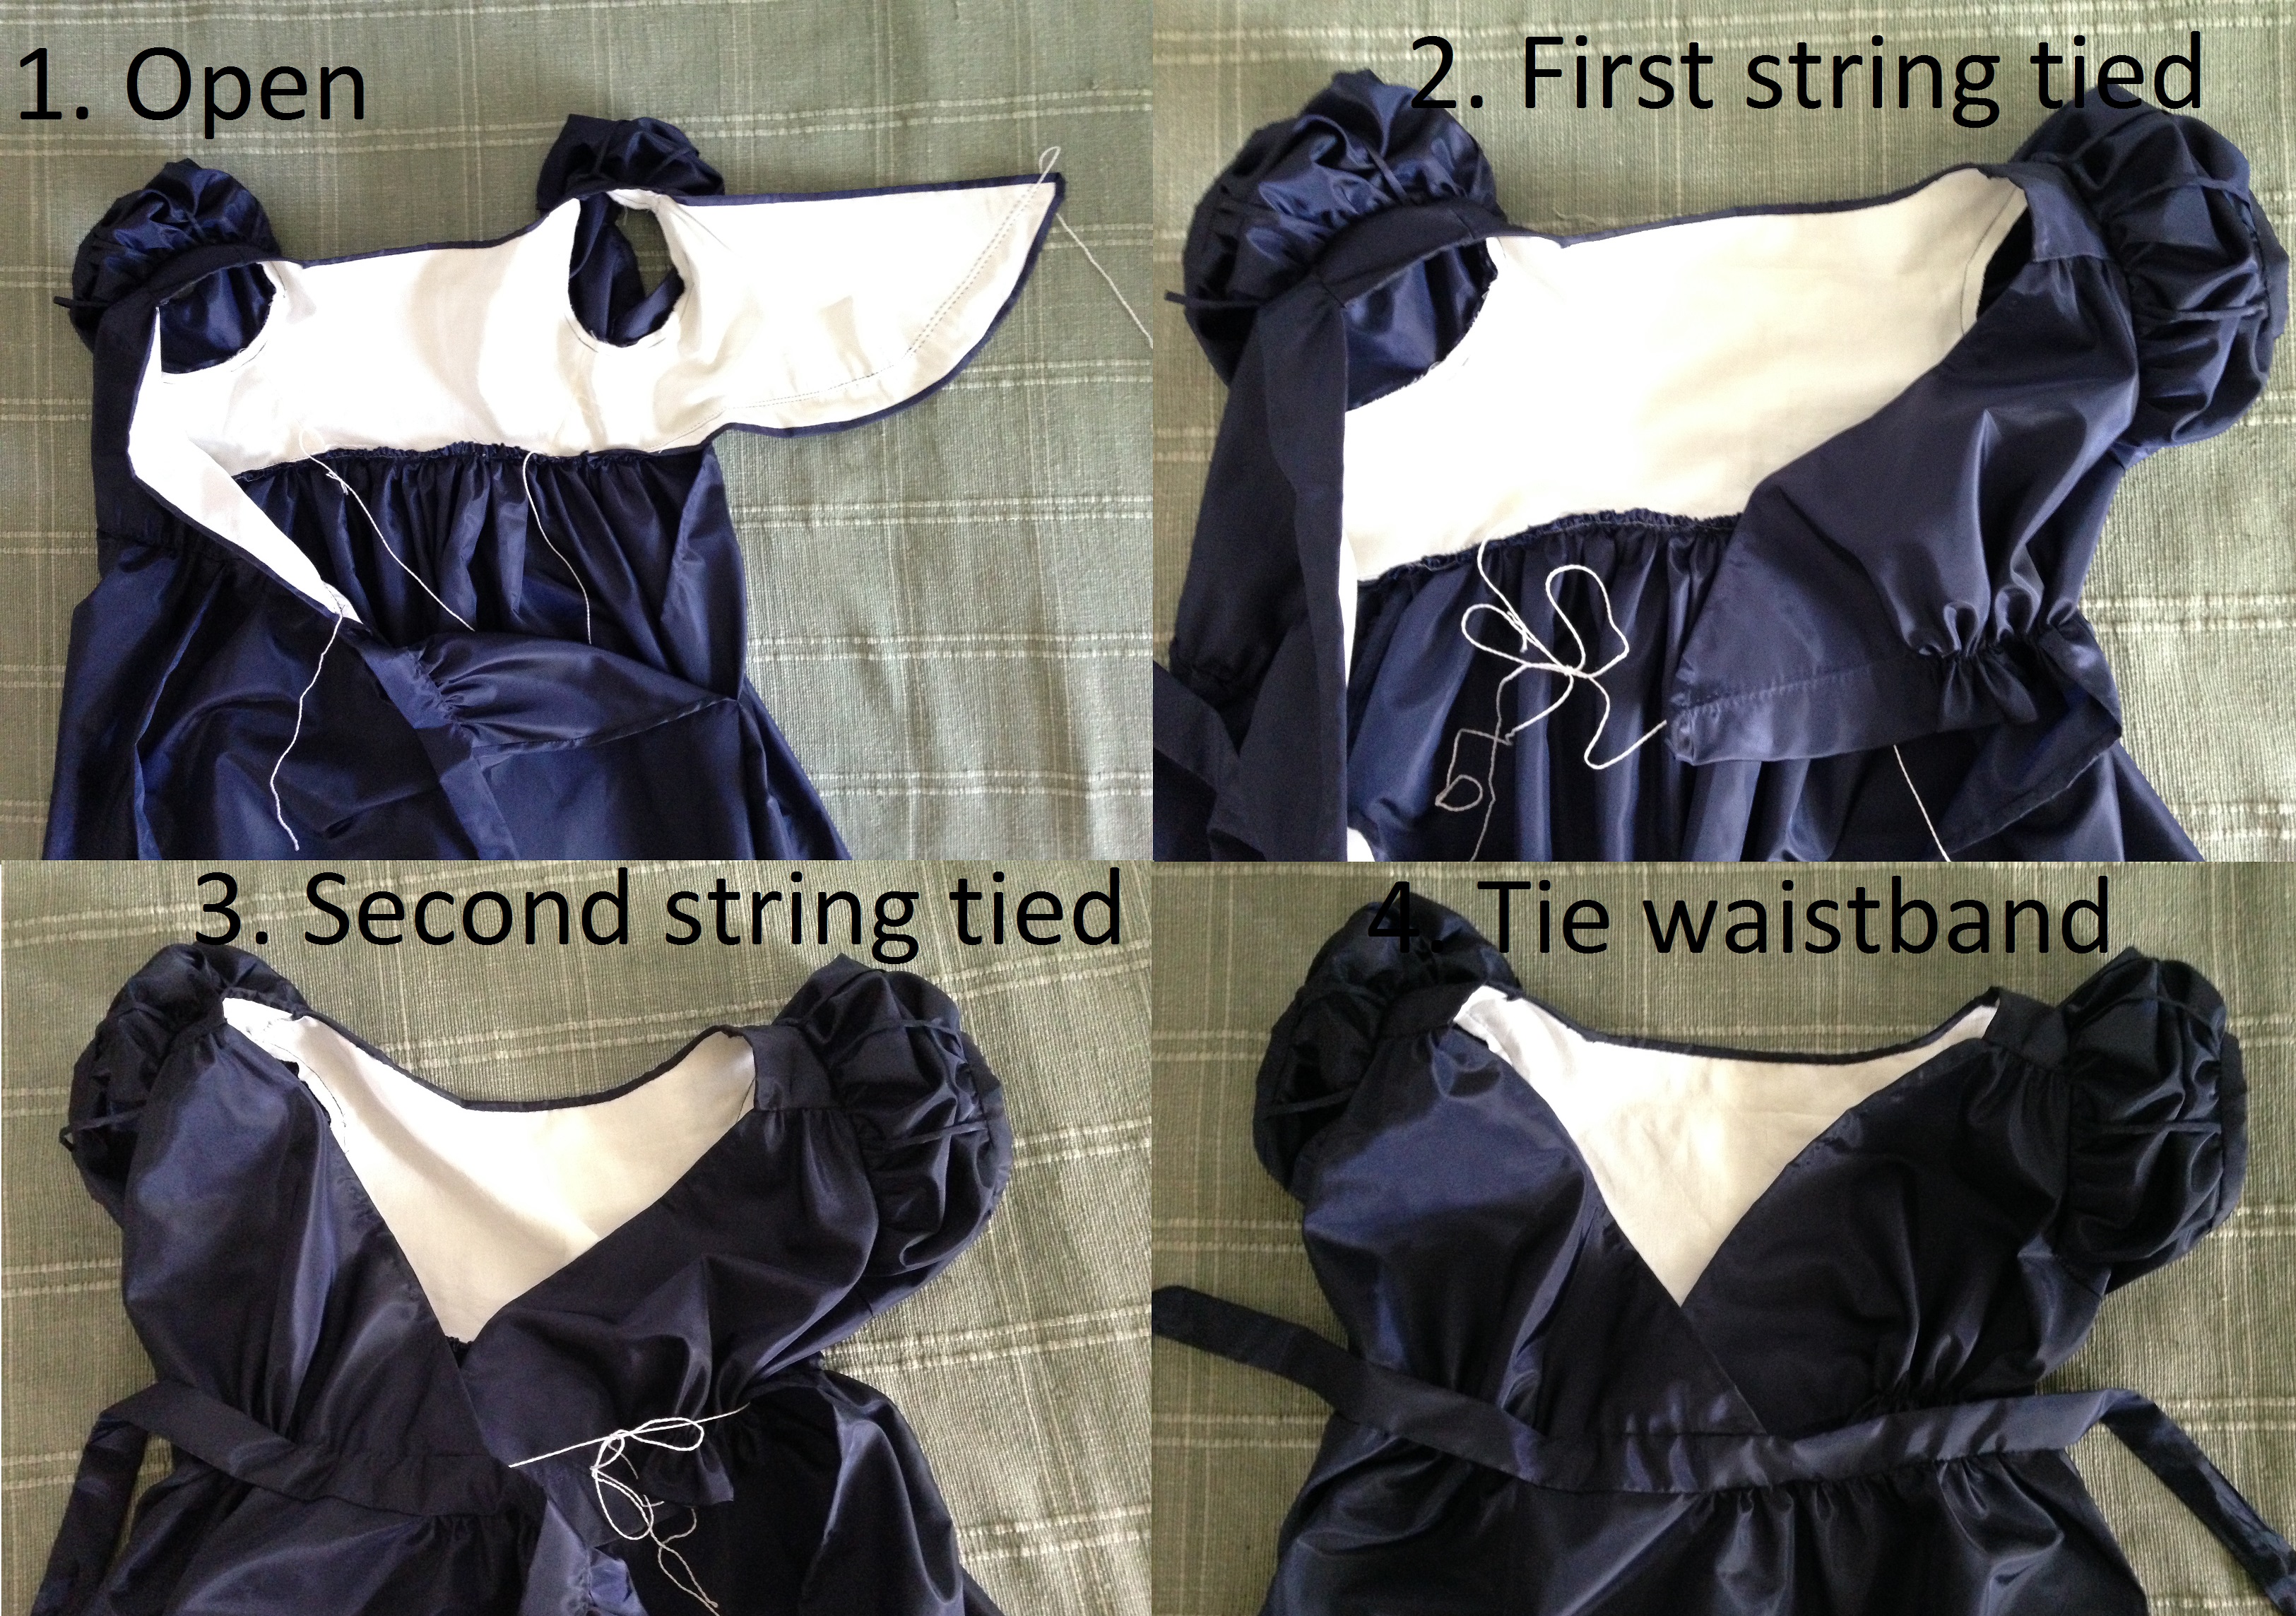
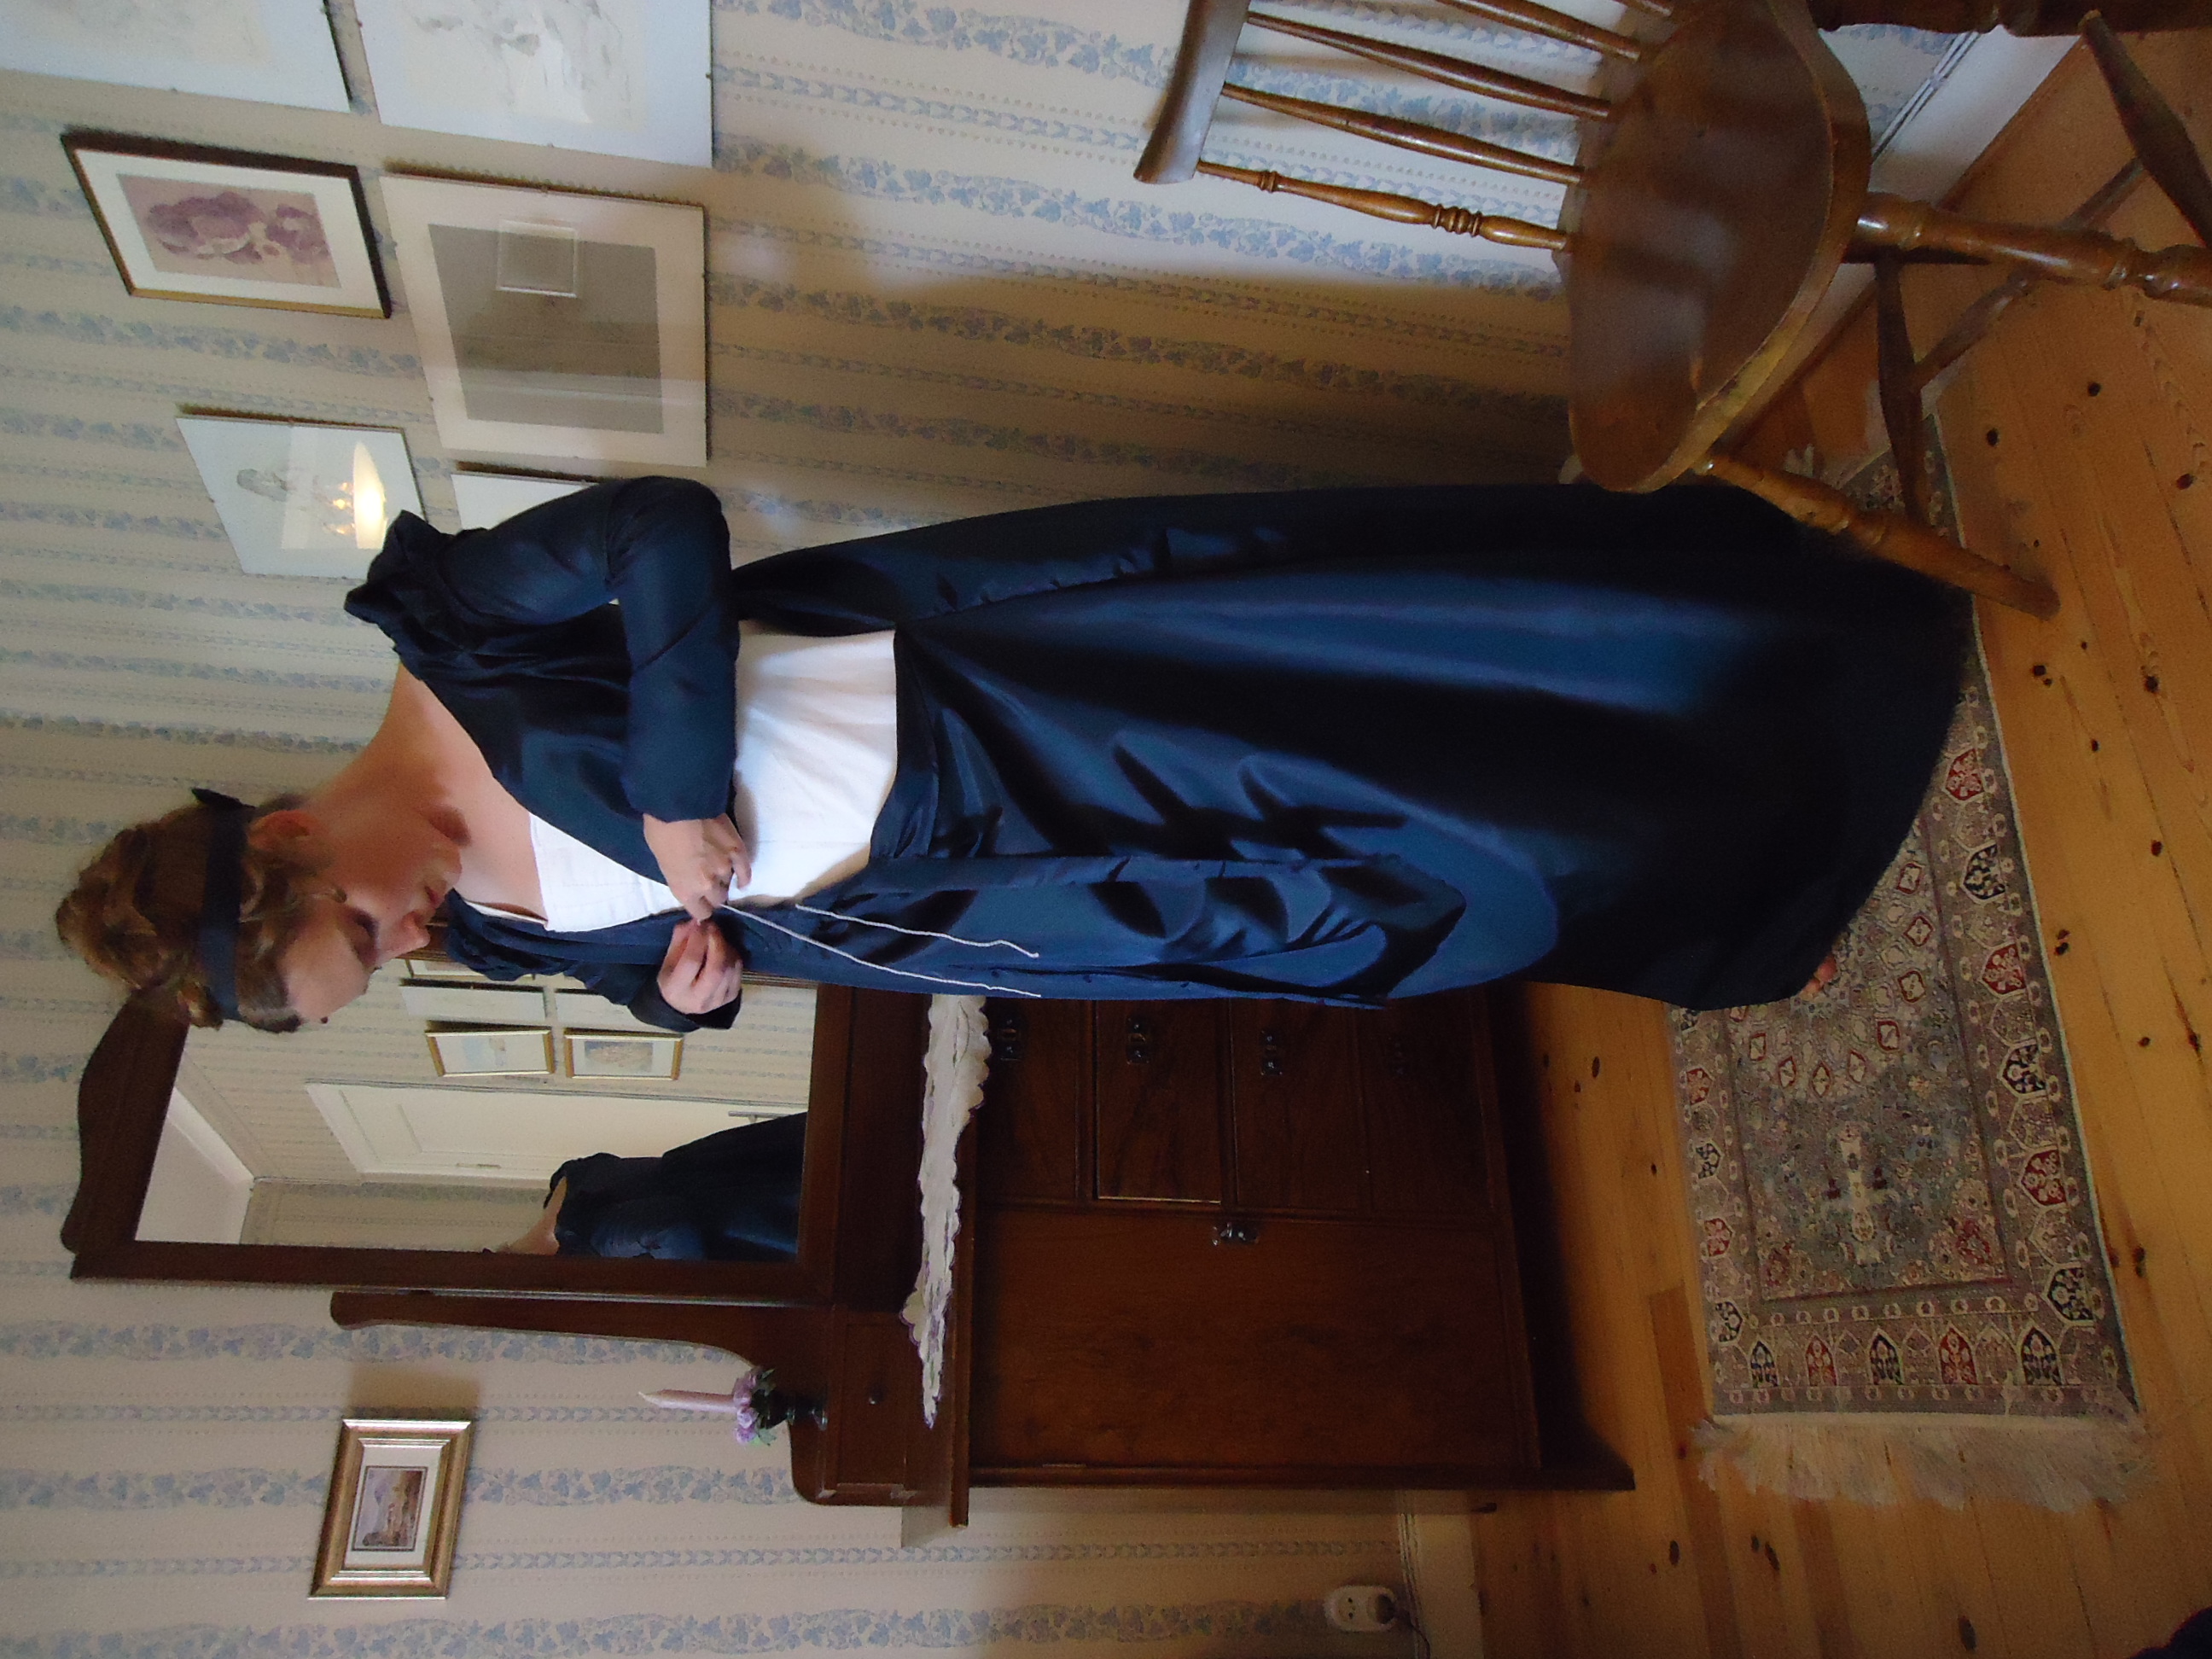
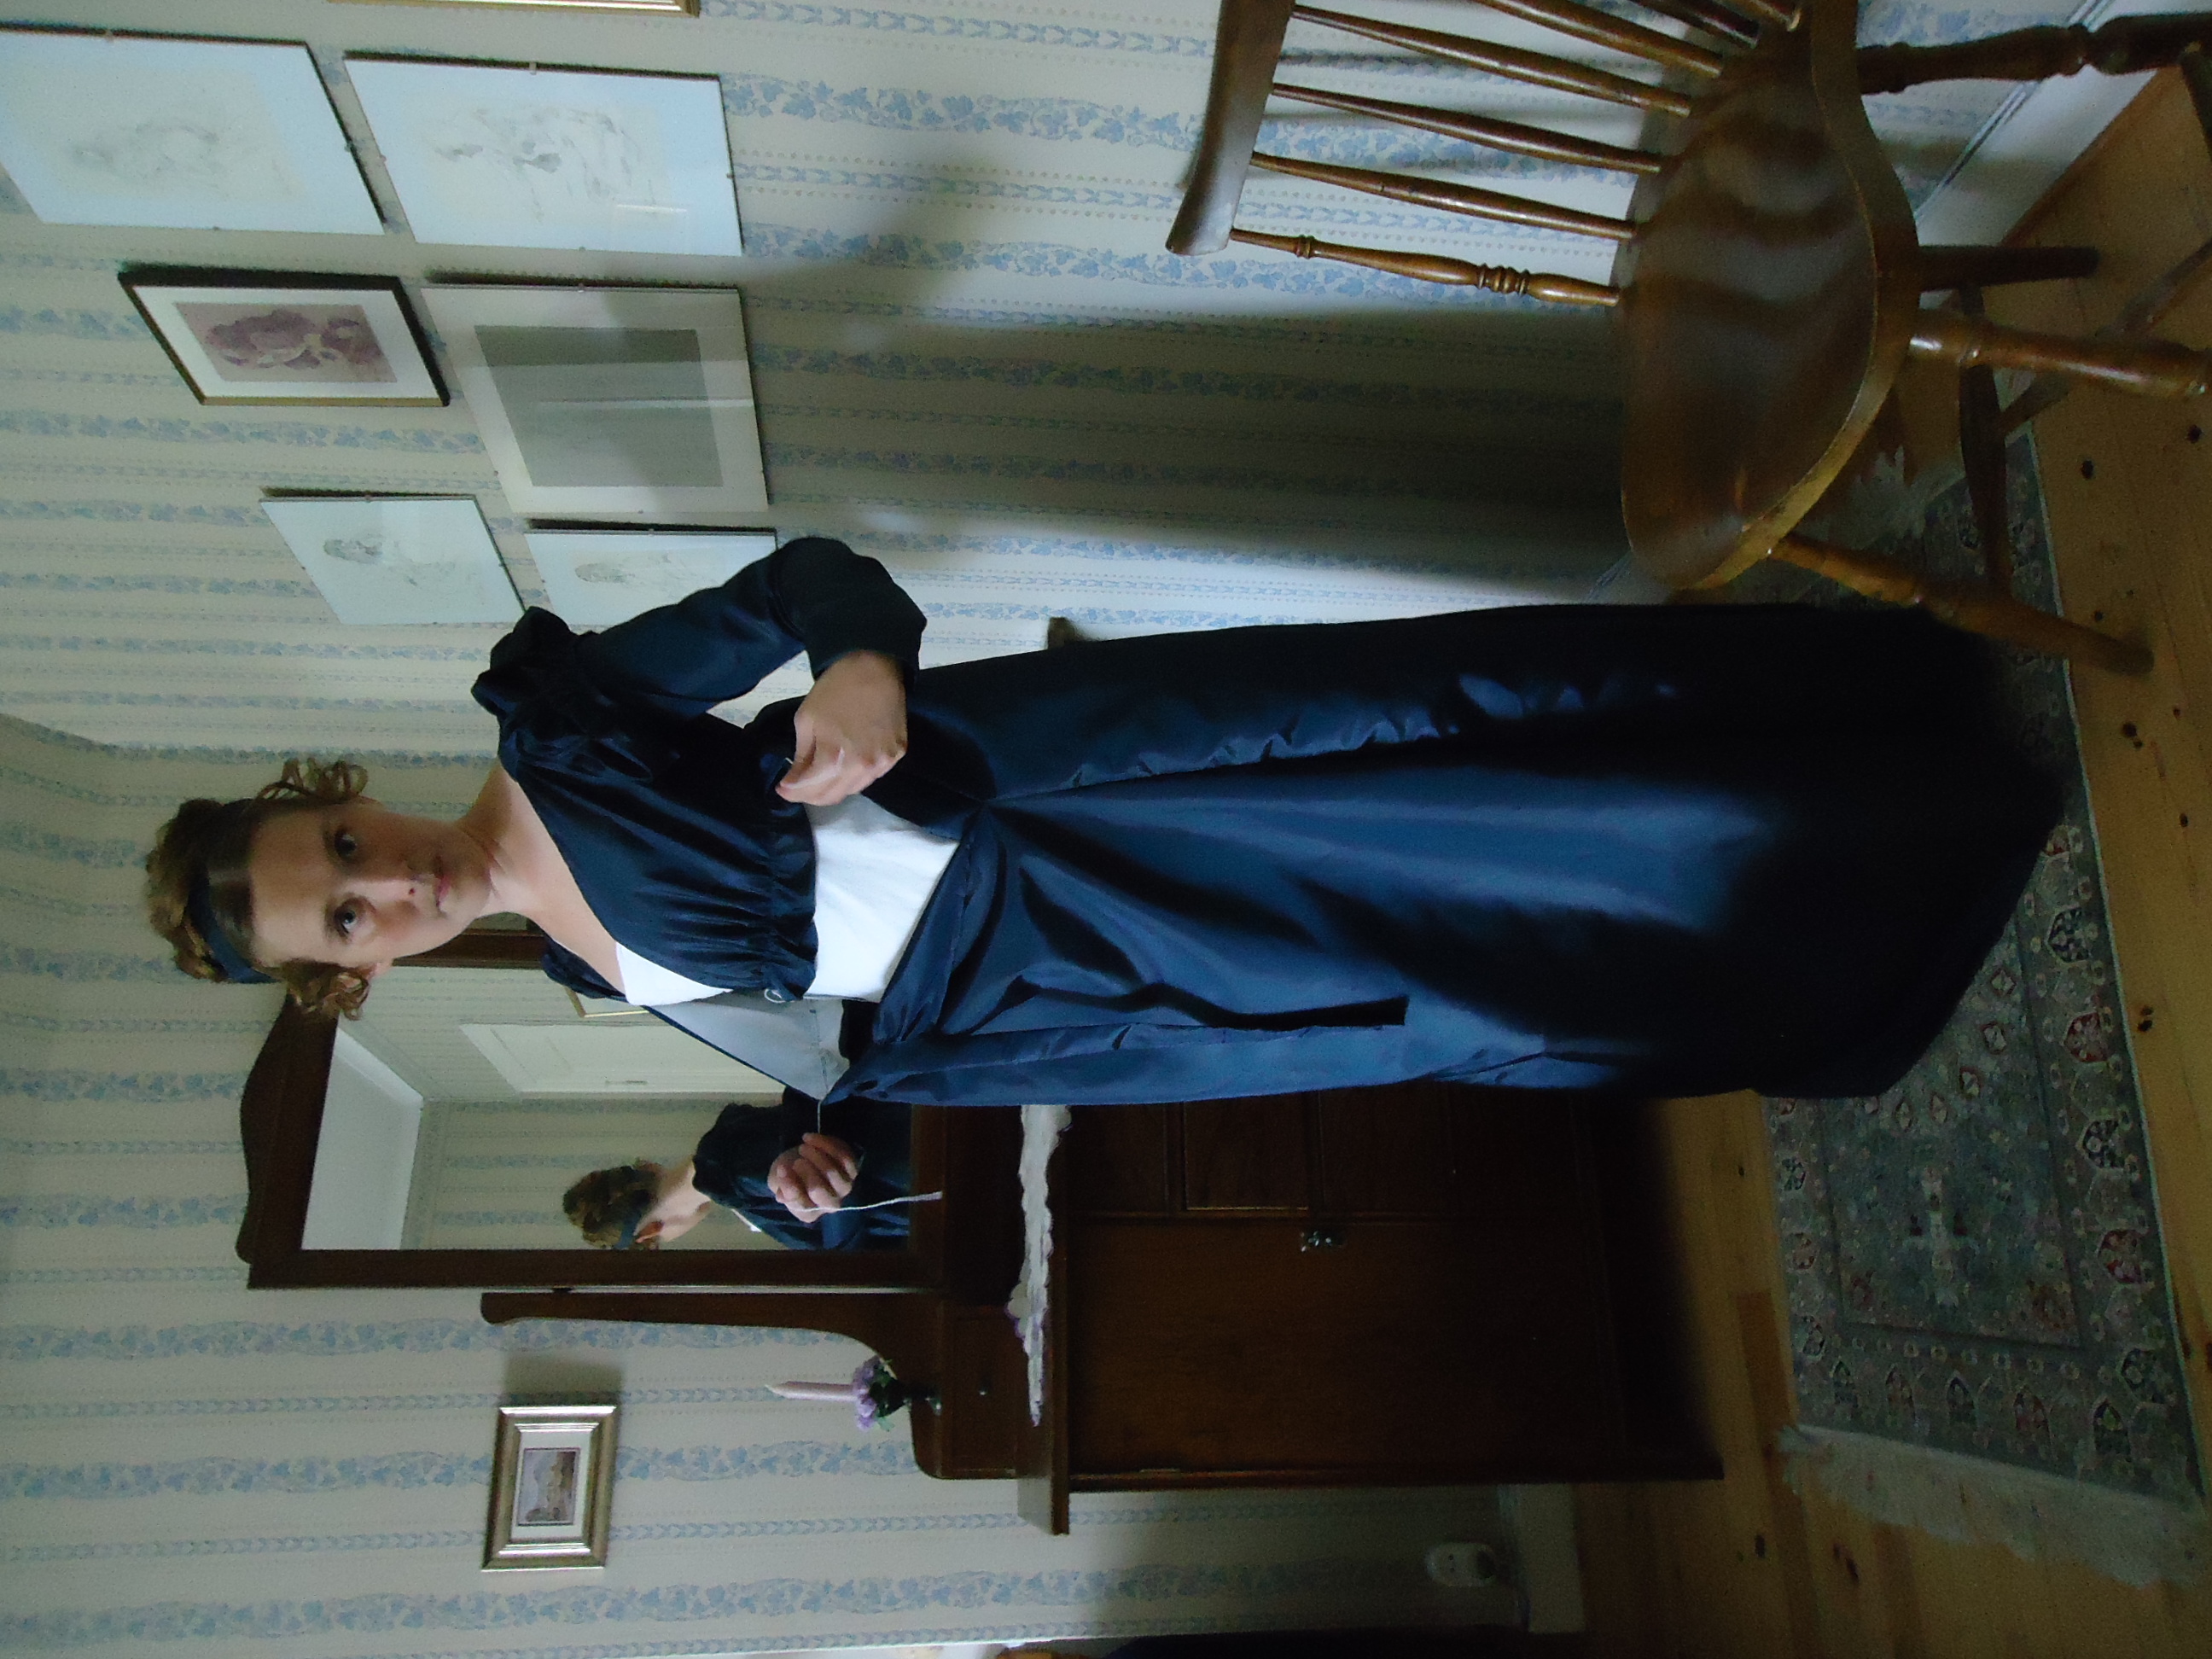
I had to read several blogs and examine many photos of vintage gowns, before I understood how the V-lined gowns are constructed (which is shown in this post), so I will kindly show you how it is put on.
Jag var tvungen att läsa igenom flera bloggar och kolla på många fotografier av vintageklänningar, innan jag förstod hur dessa V-ringade klänningar var konstruerade (vilket syns i detta inlägg). Eftersom kanske fler än jag är förvirrade över detta, visar jag hur man tar på sig den.
Making a knot for one side of the bodice.
Pulling the drawstrings together for making a knot for the other side of the bodice.
Making the last knot.
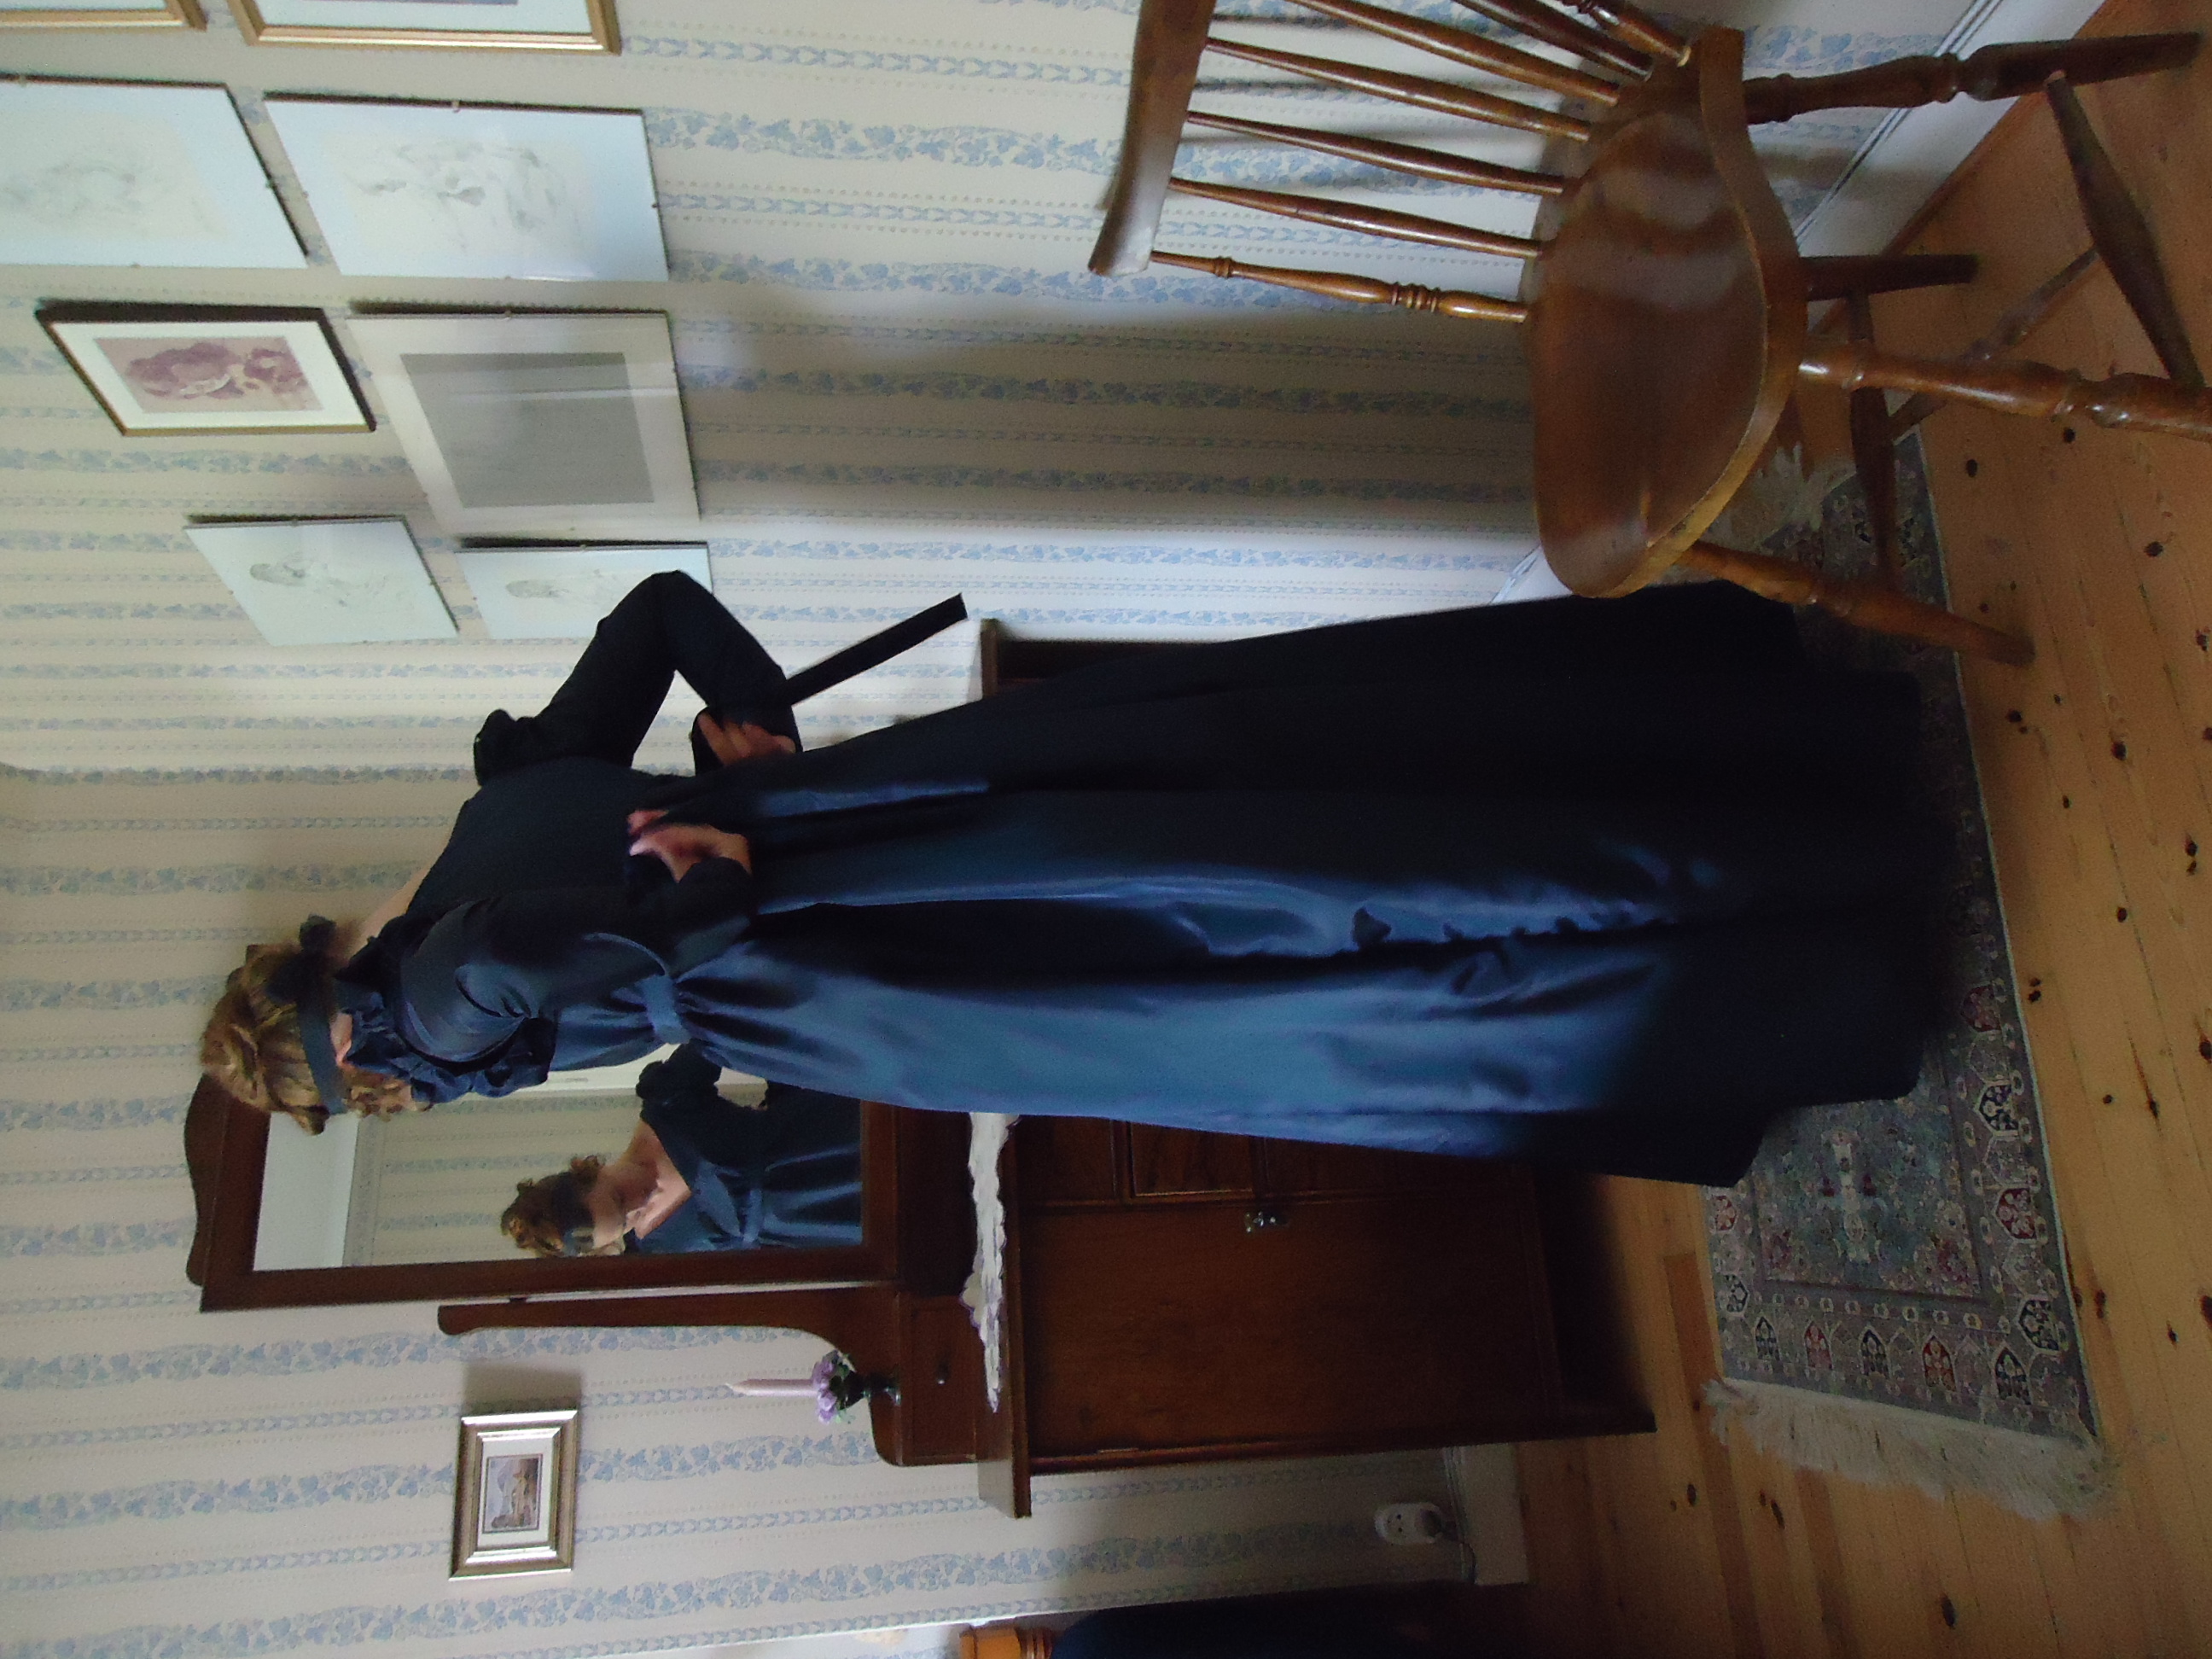
Pulling the outer ribbon together behind the back.
Obviously, it was impossible for me to tie the bow behind my back, so I got help from my skilled husband.
Finally, I am fully dressed!
By the window
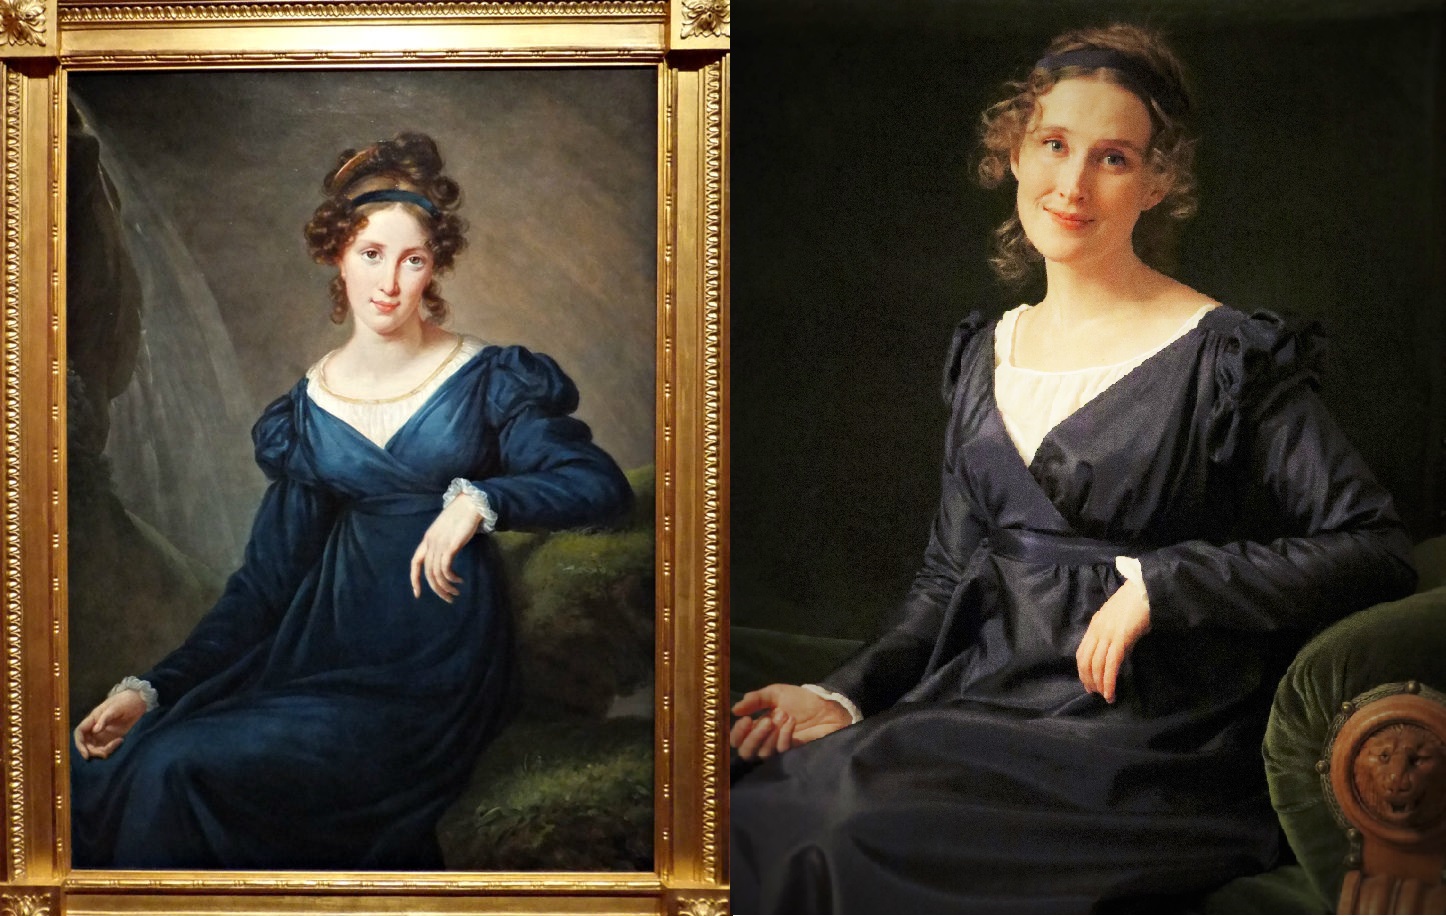
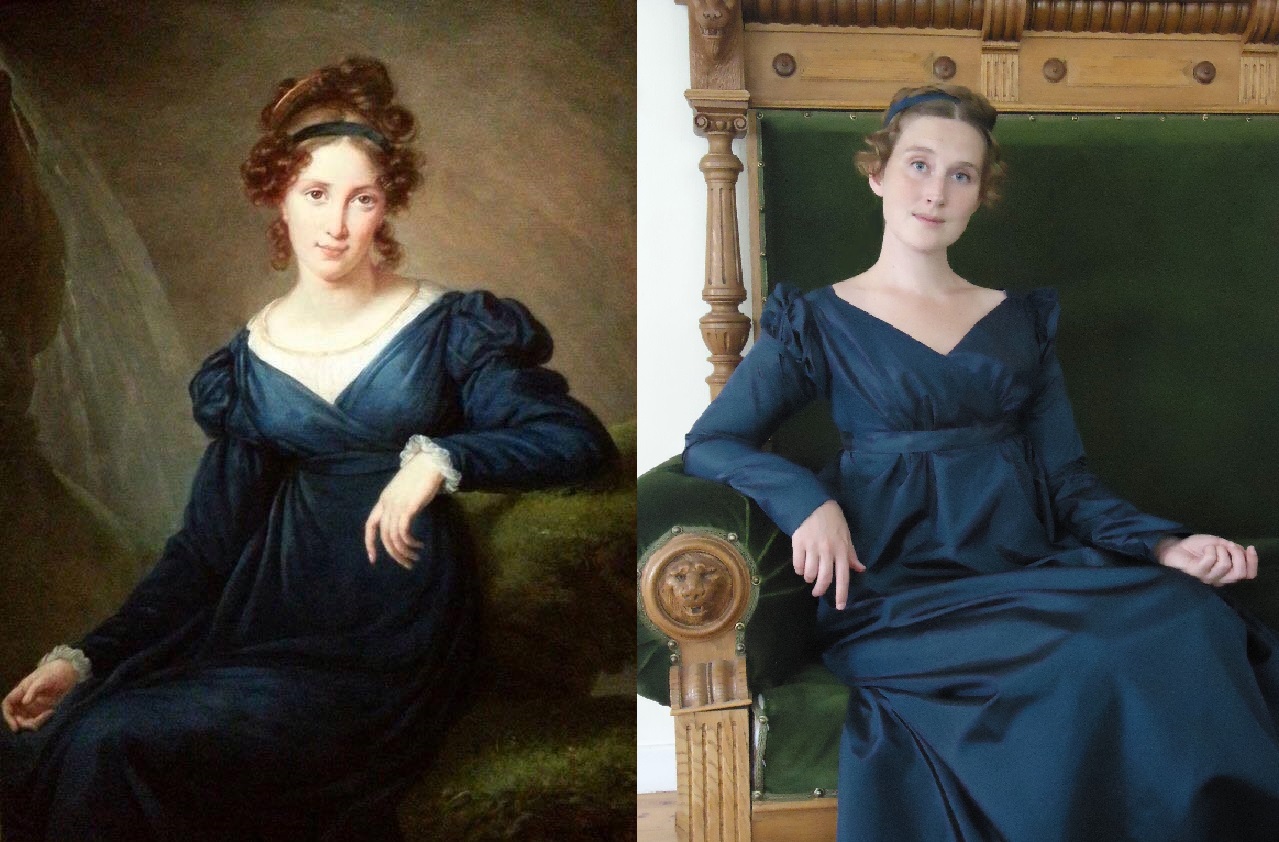
The portrait and myself.
Clearly, we aren’t twins, the lady in the portrait and me, but I am very satisfied with the likeness of the dress. I hope to find a fabric for a similar chemisette with long arms too.
At first, I thought that the lady sat in a velvet sofa, but after a closer look, I think that she is seated in the moss, by a waterfall. Well, I won’t find that in my neighbourhood, so I will make do with the woods of Vimmerby.
Damen i porträttet och jag är kan inte misstas för att vara tvillingar, men jag är väldigt nöjd med hur lika klänningarna blev. Jag hoppas på att hitta ett tyg för en likadan chemisette, med långa ärmar.
Först trodde jag att hon satt i en sammetssoffa (som jag), men när jag tittade närmare på bilden, insåg jag att hon sitter i mossan, intill ett vattenfall. Det finns inte i grannskapet, så jag får nöja mig med mossiga bilder från Vimmerbys skogar.
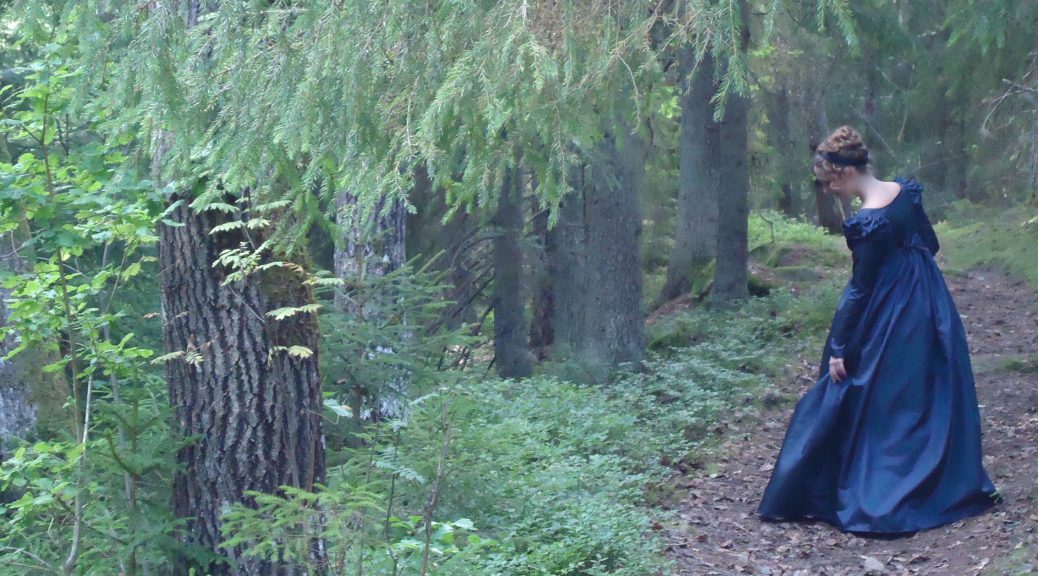
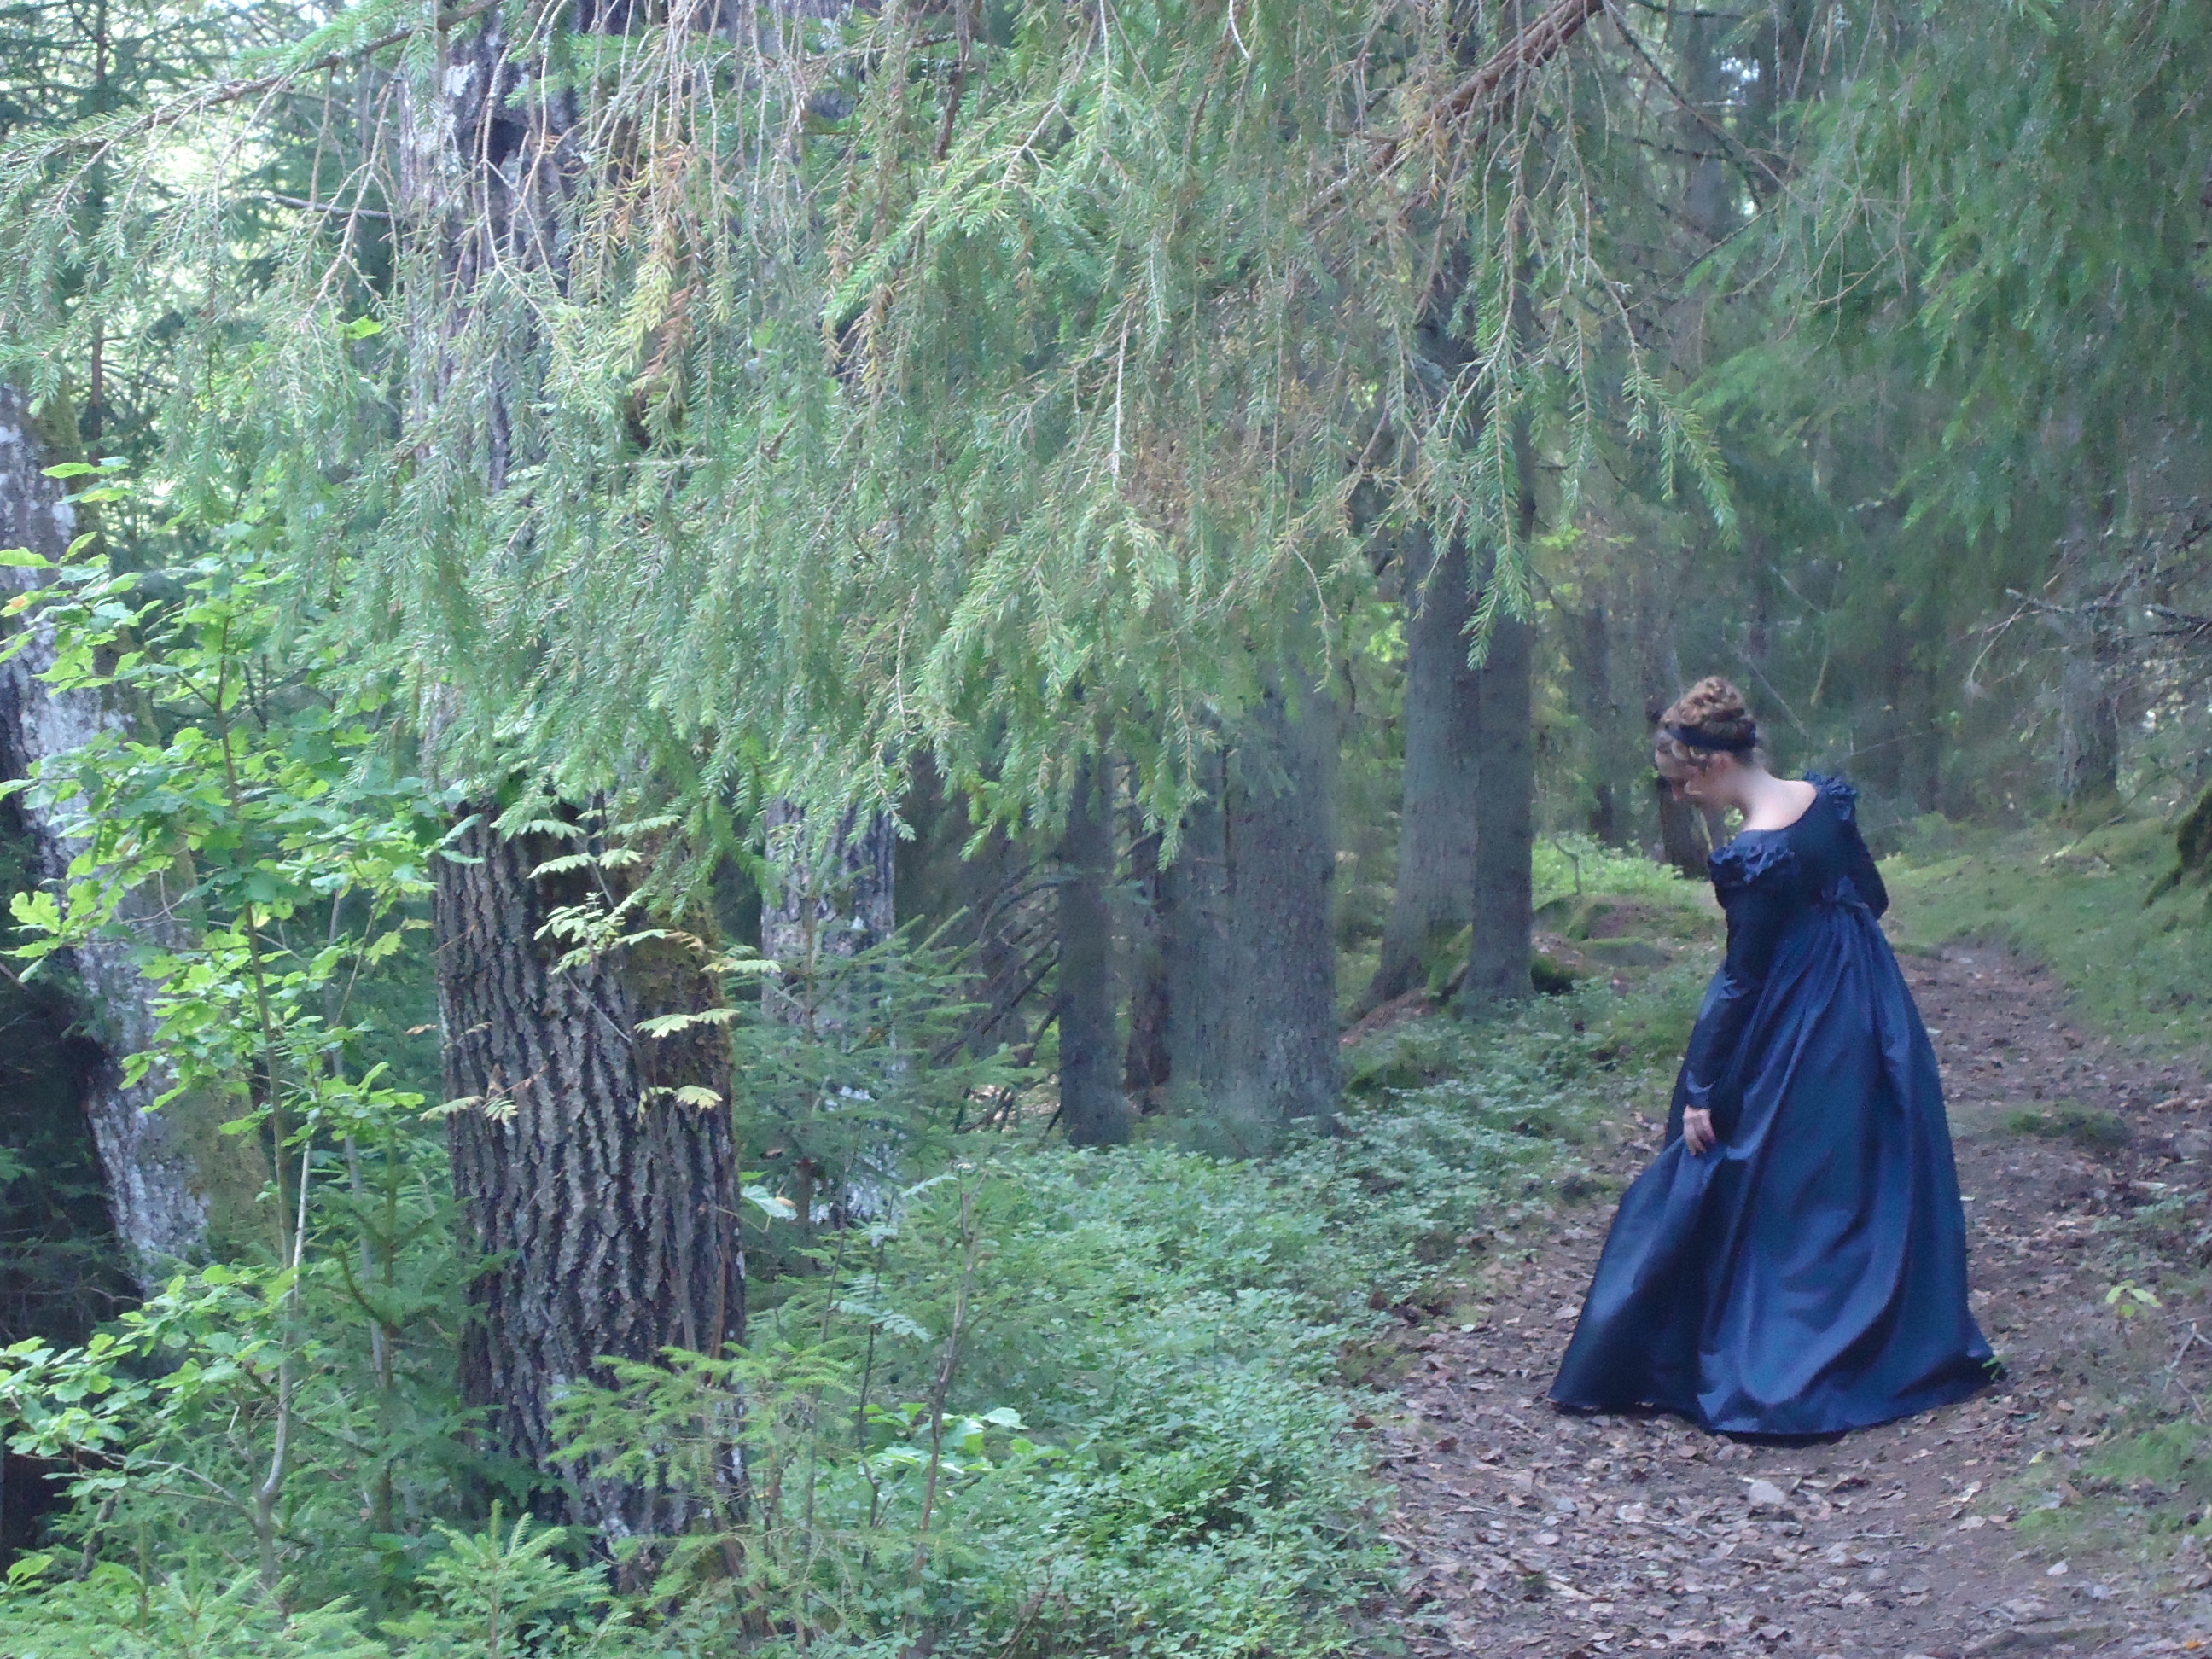
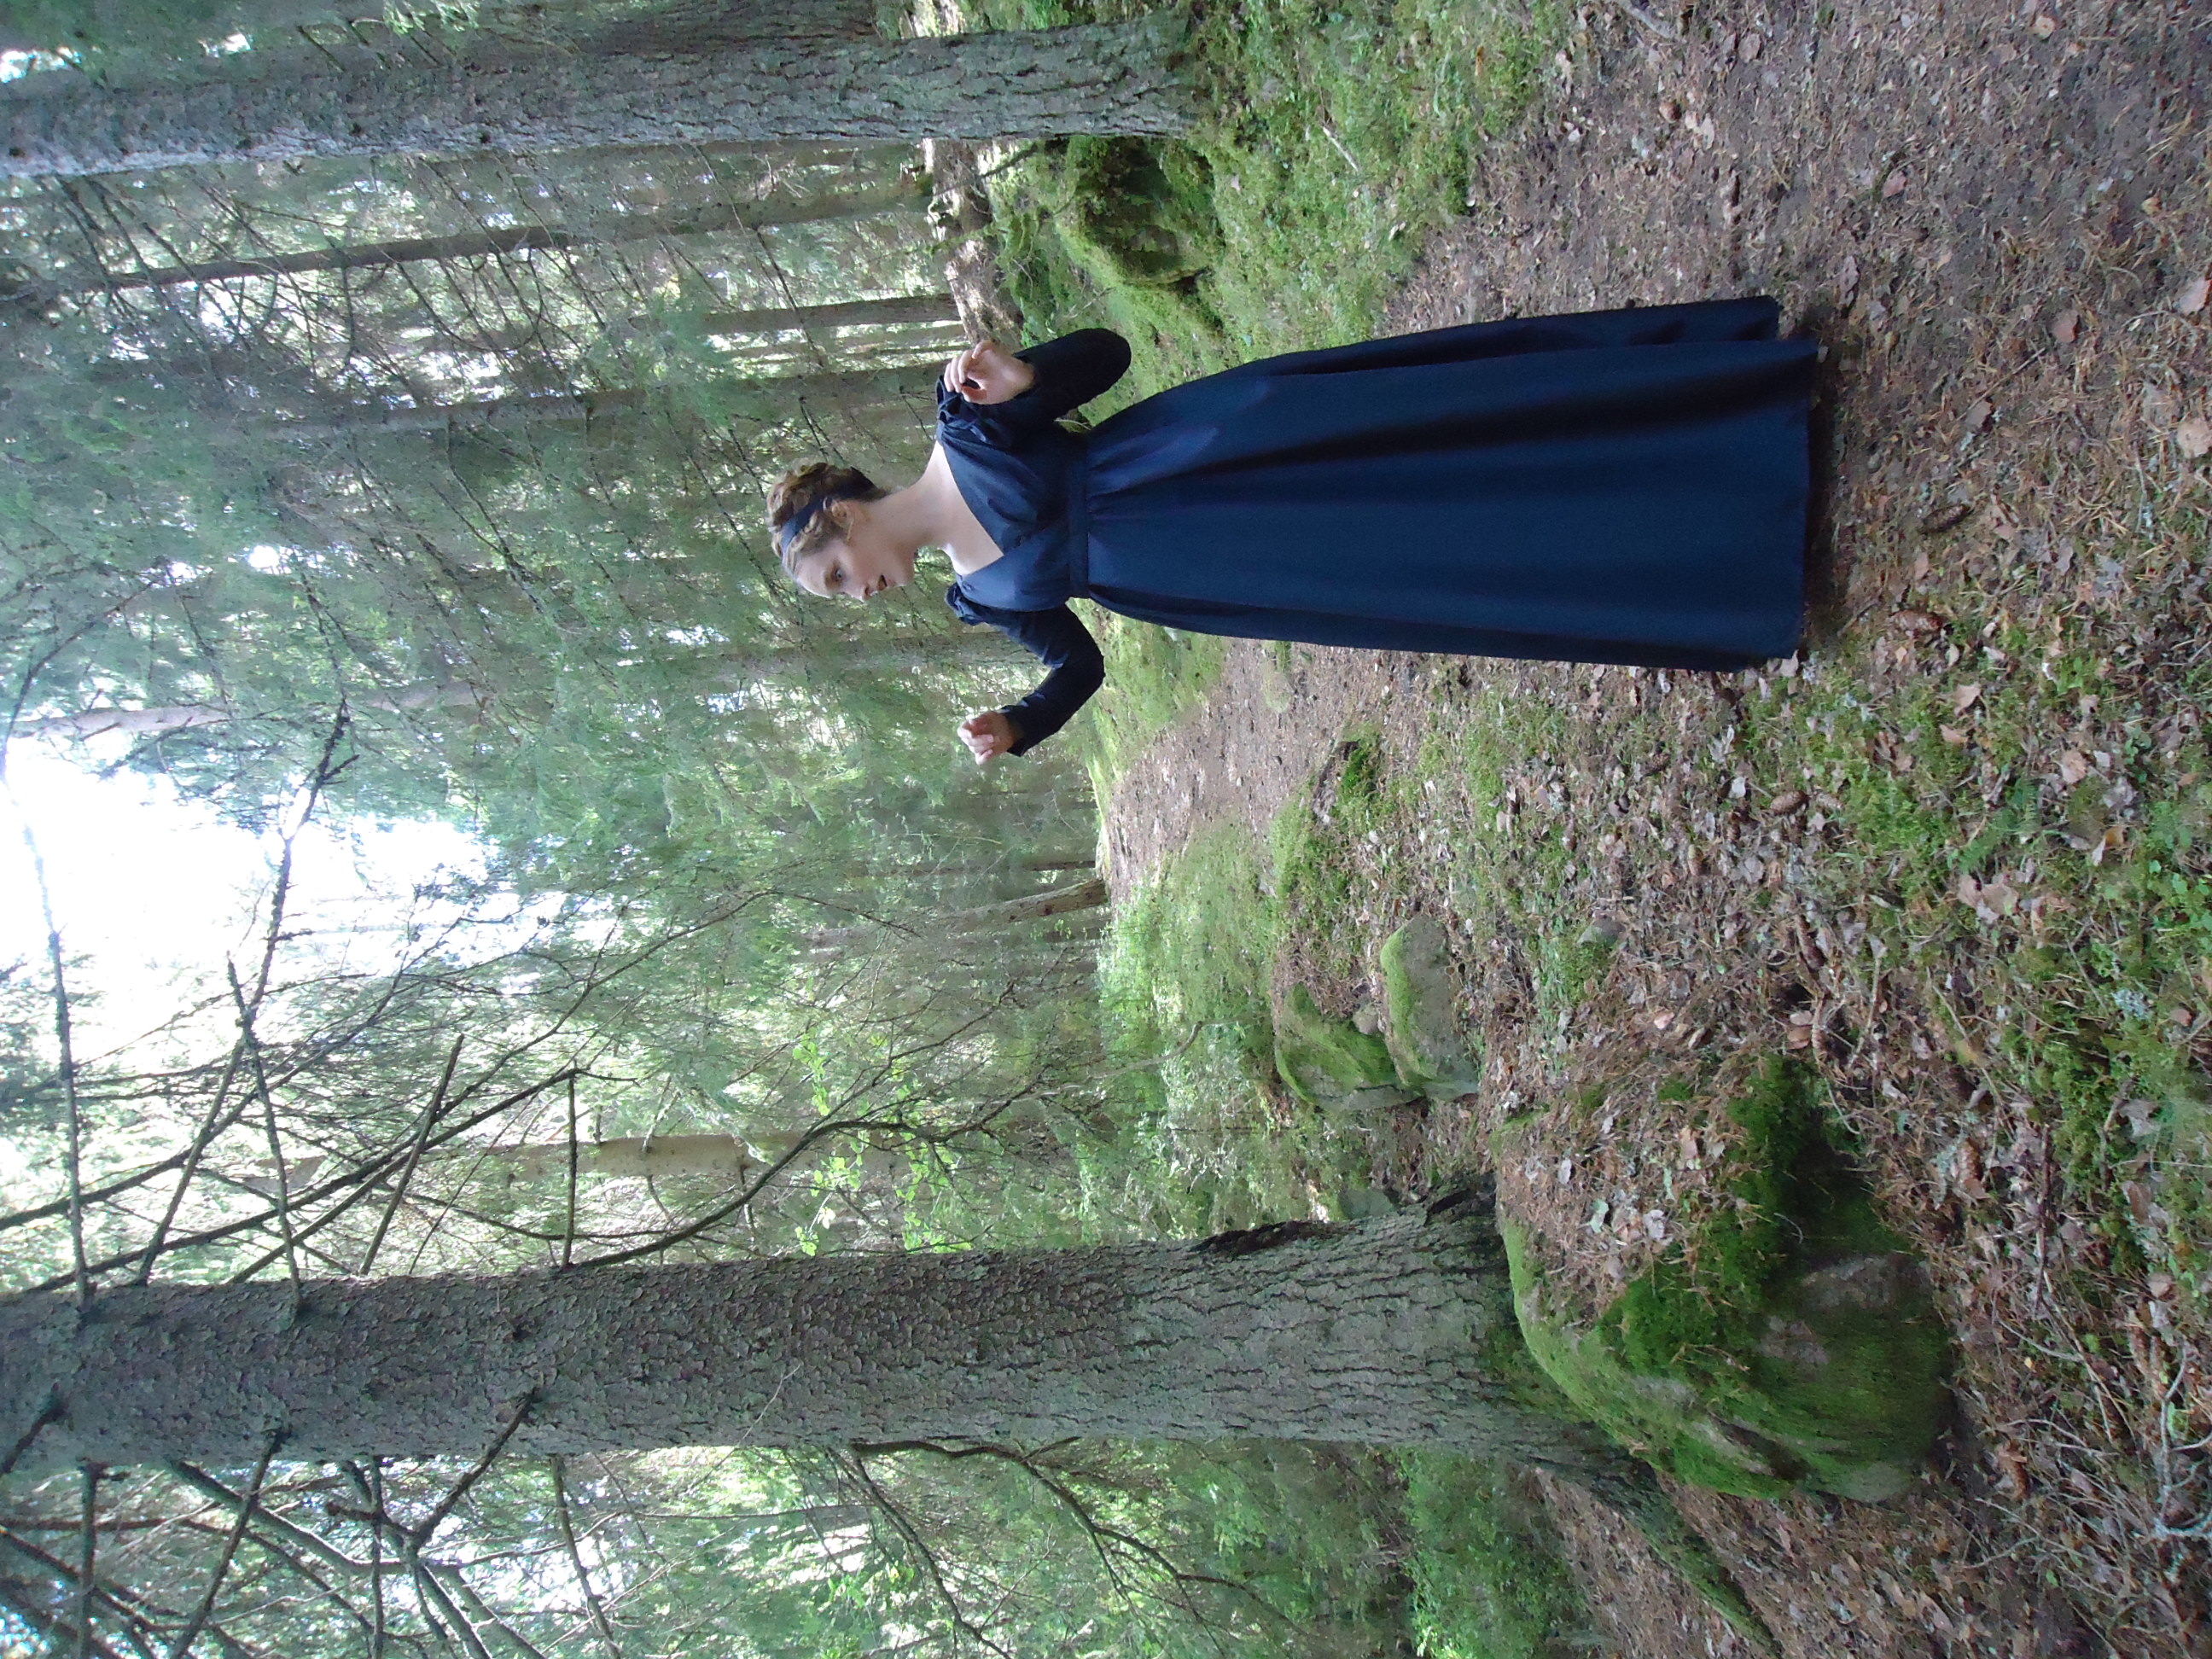
Taking the gown for a walk
In the woods
Chasing the mosquitoes, ladylike…
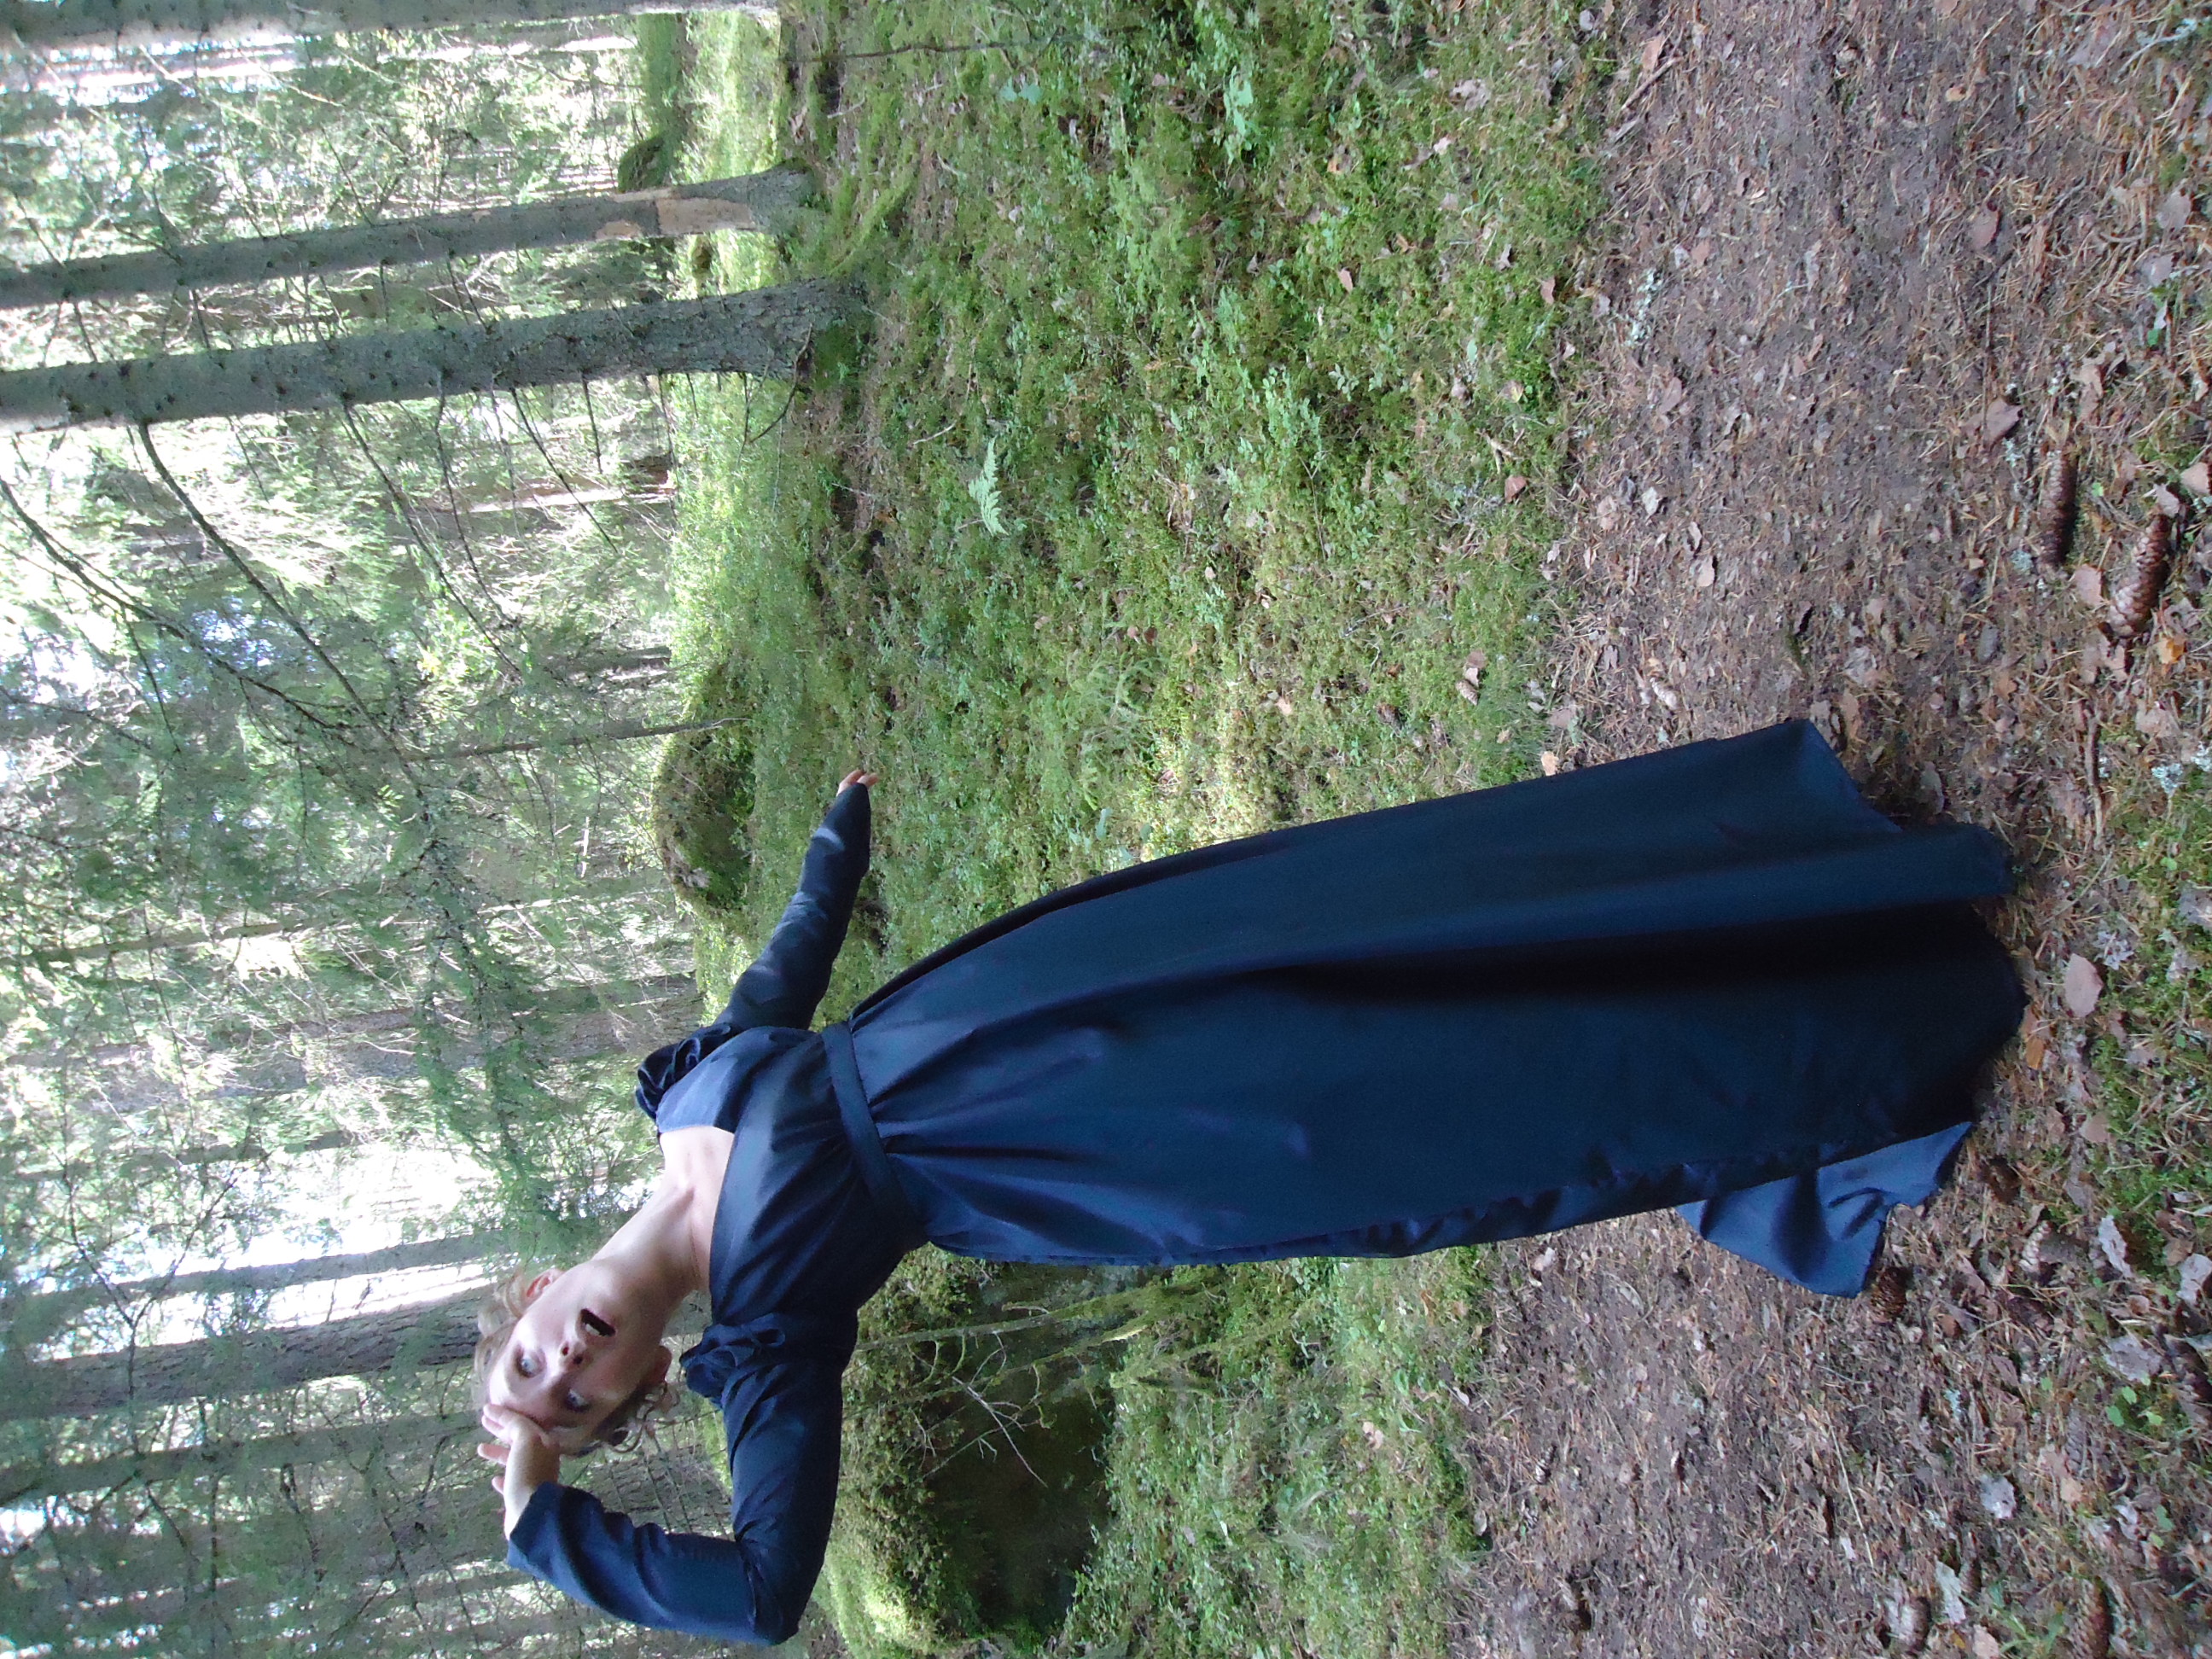
Oh, how terrifying!
I believe I will faint!
Alas
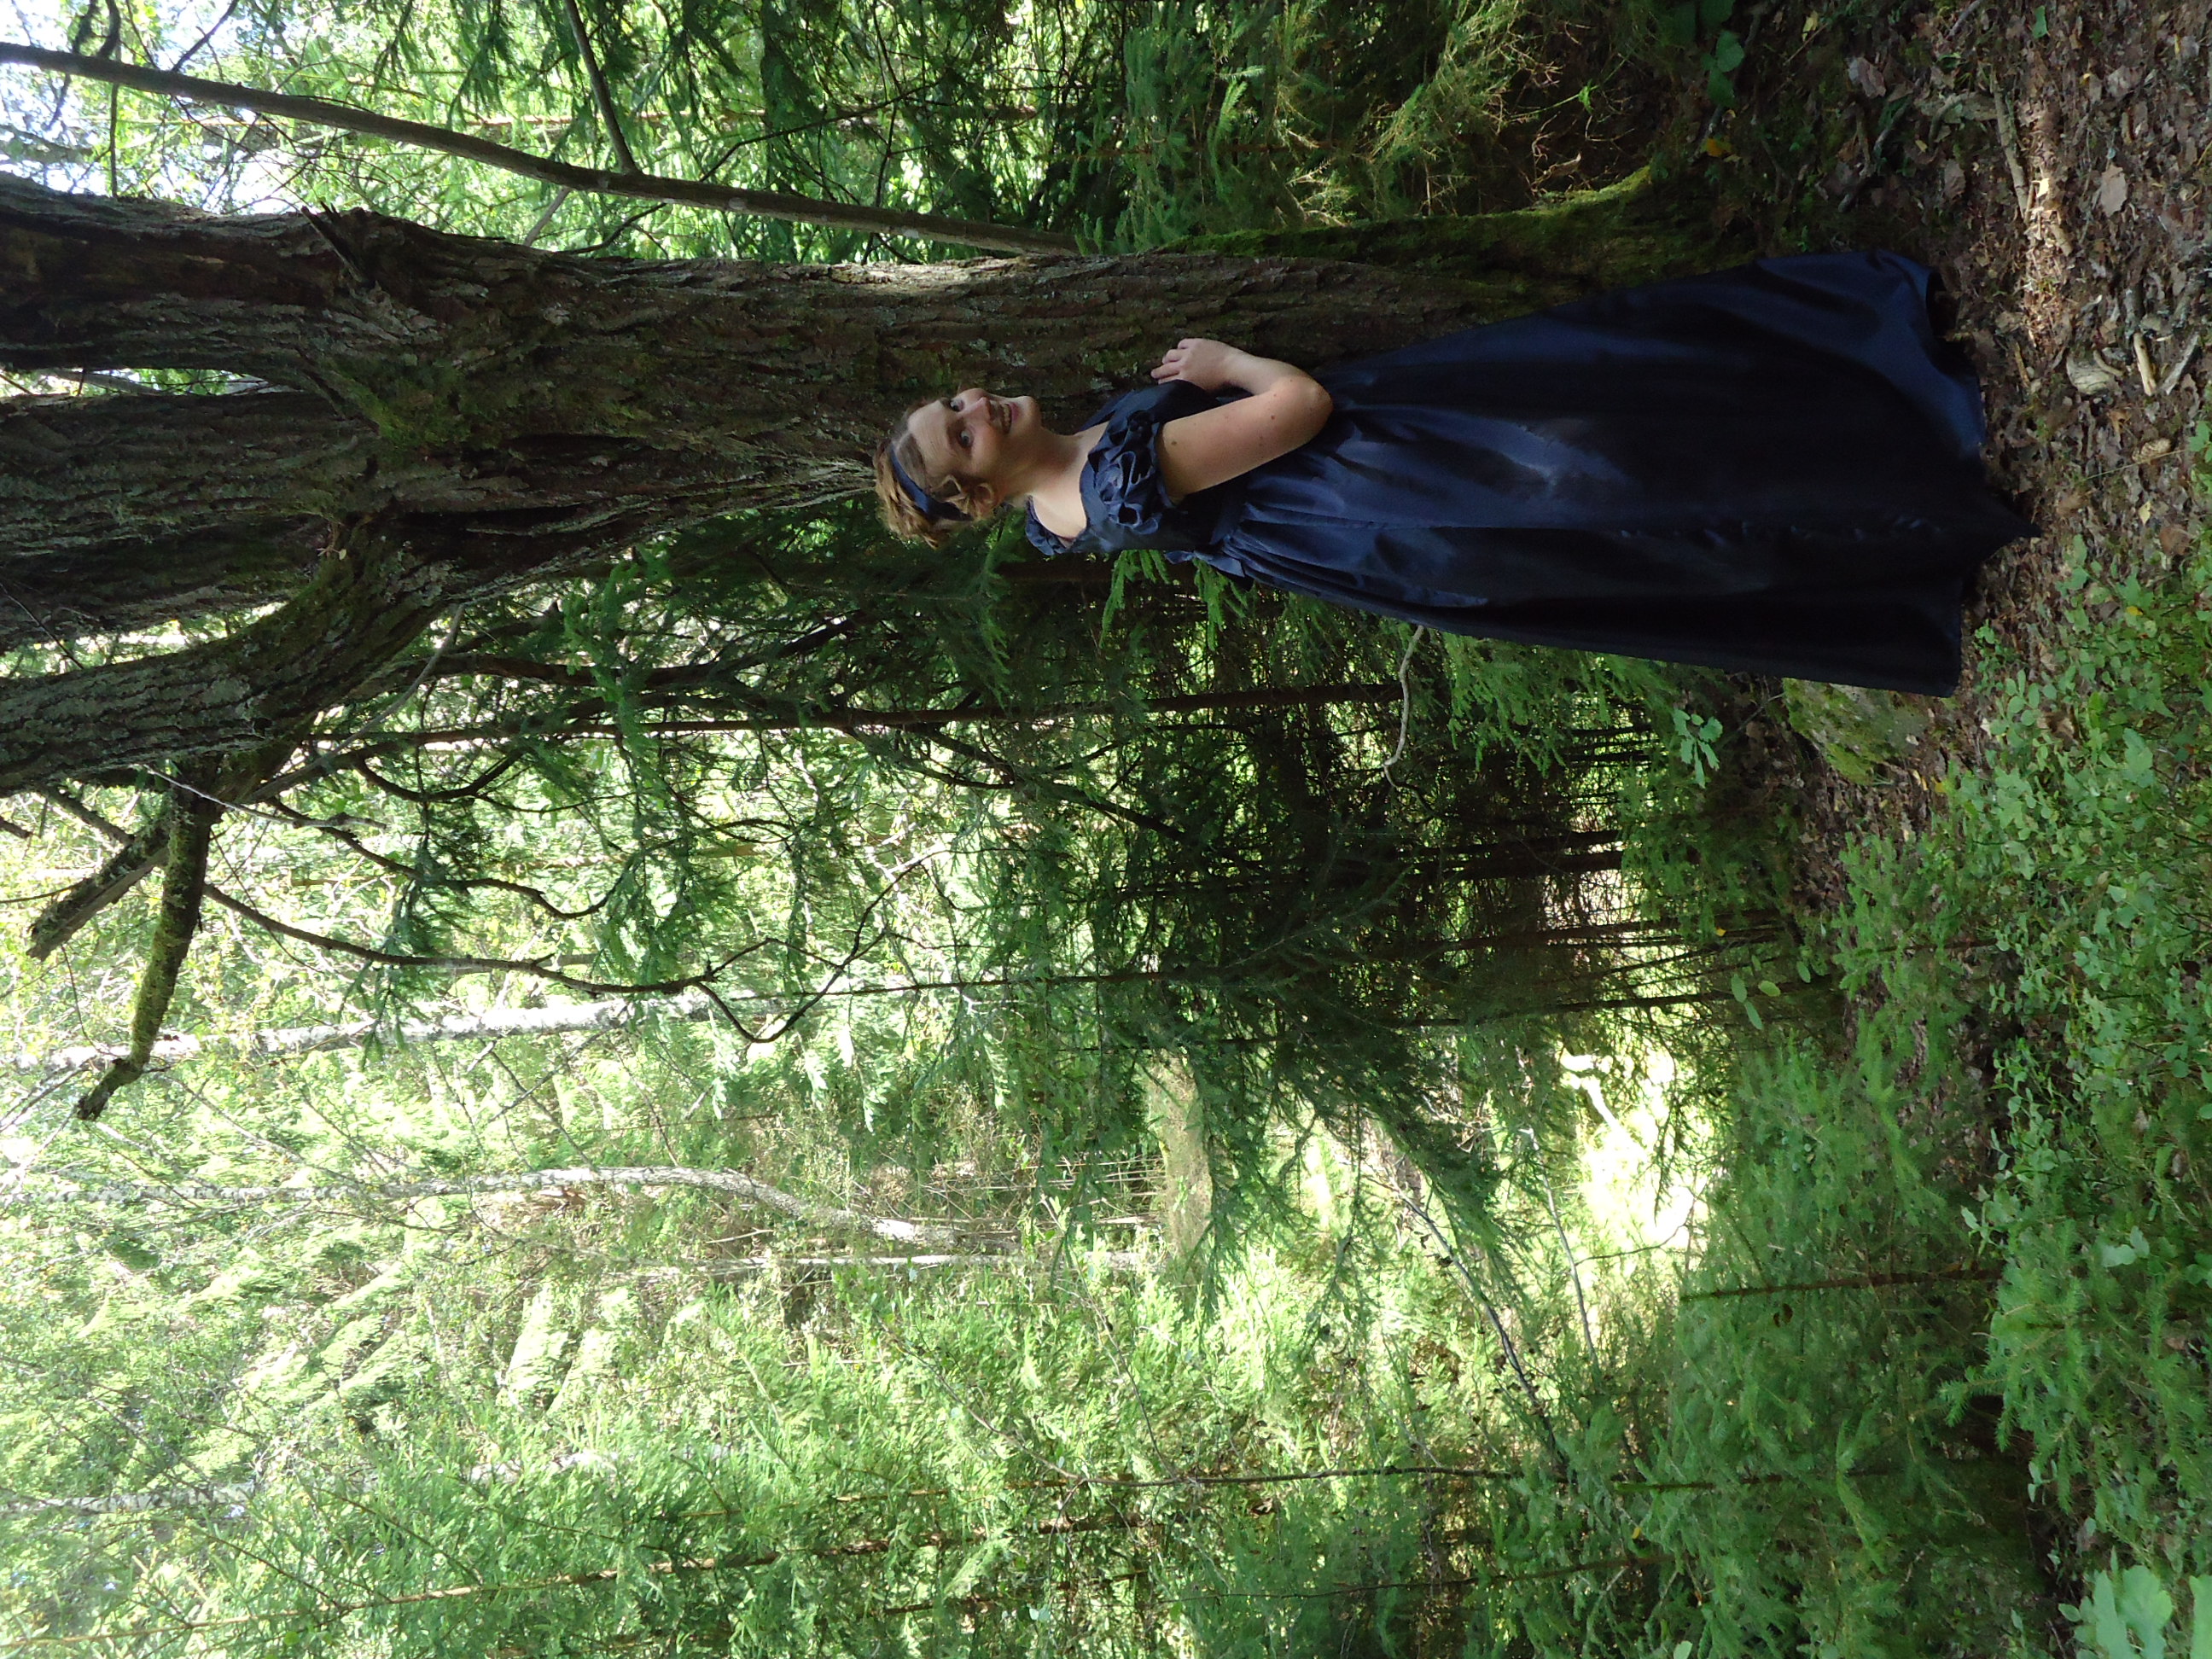
Happy in the woods. See my detachable arms? Suddenly the day gown is transformed to a ball gown. =)
And thus, the lady wishes you all a good day, while she tries to find her way back home to Denmark.
Så önskar damen eder alla en fin dag, medan hon försöker hitta vägen tillbaka till Danmark.
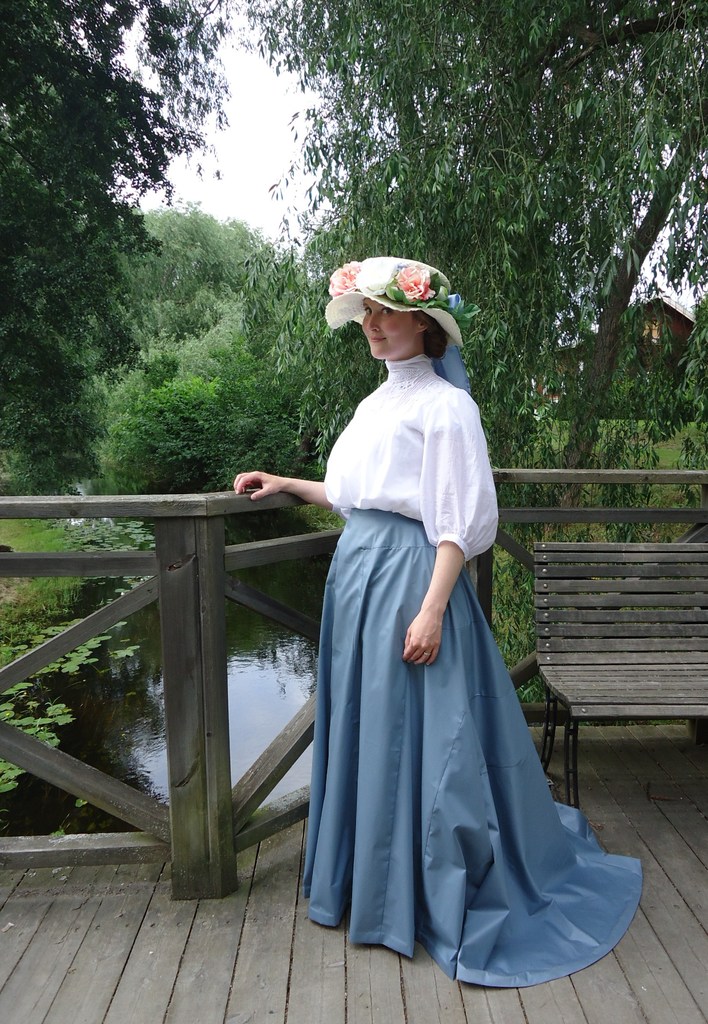
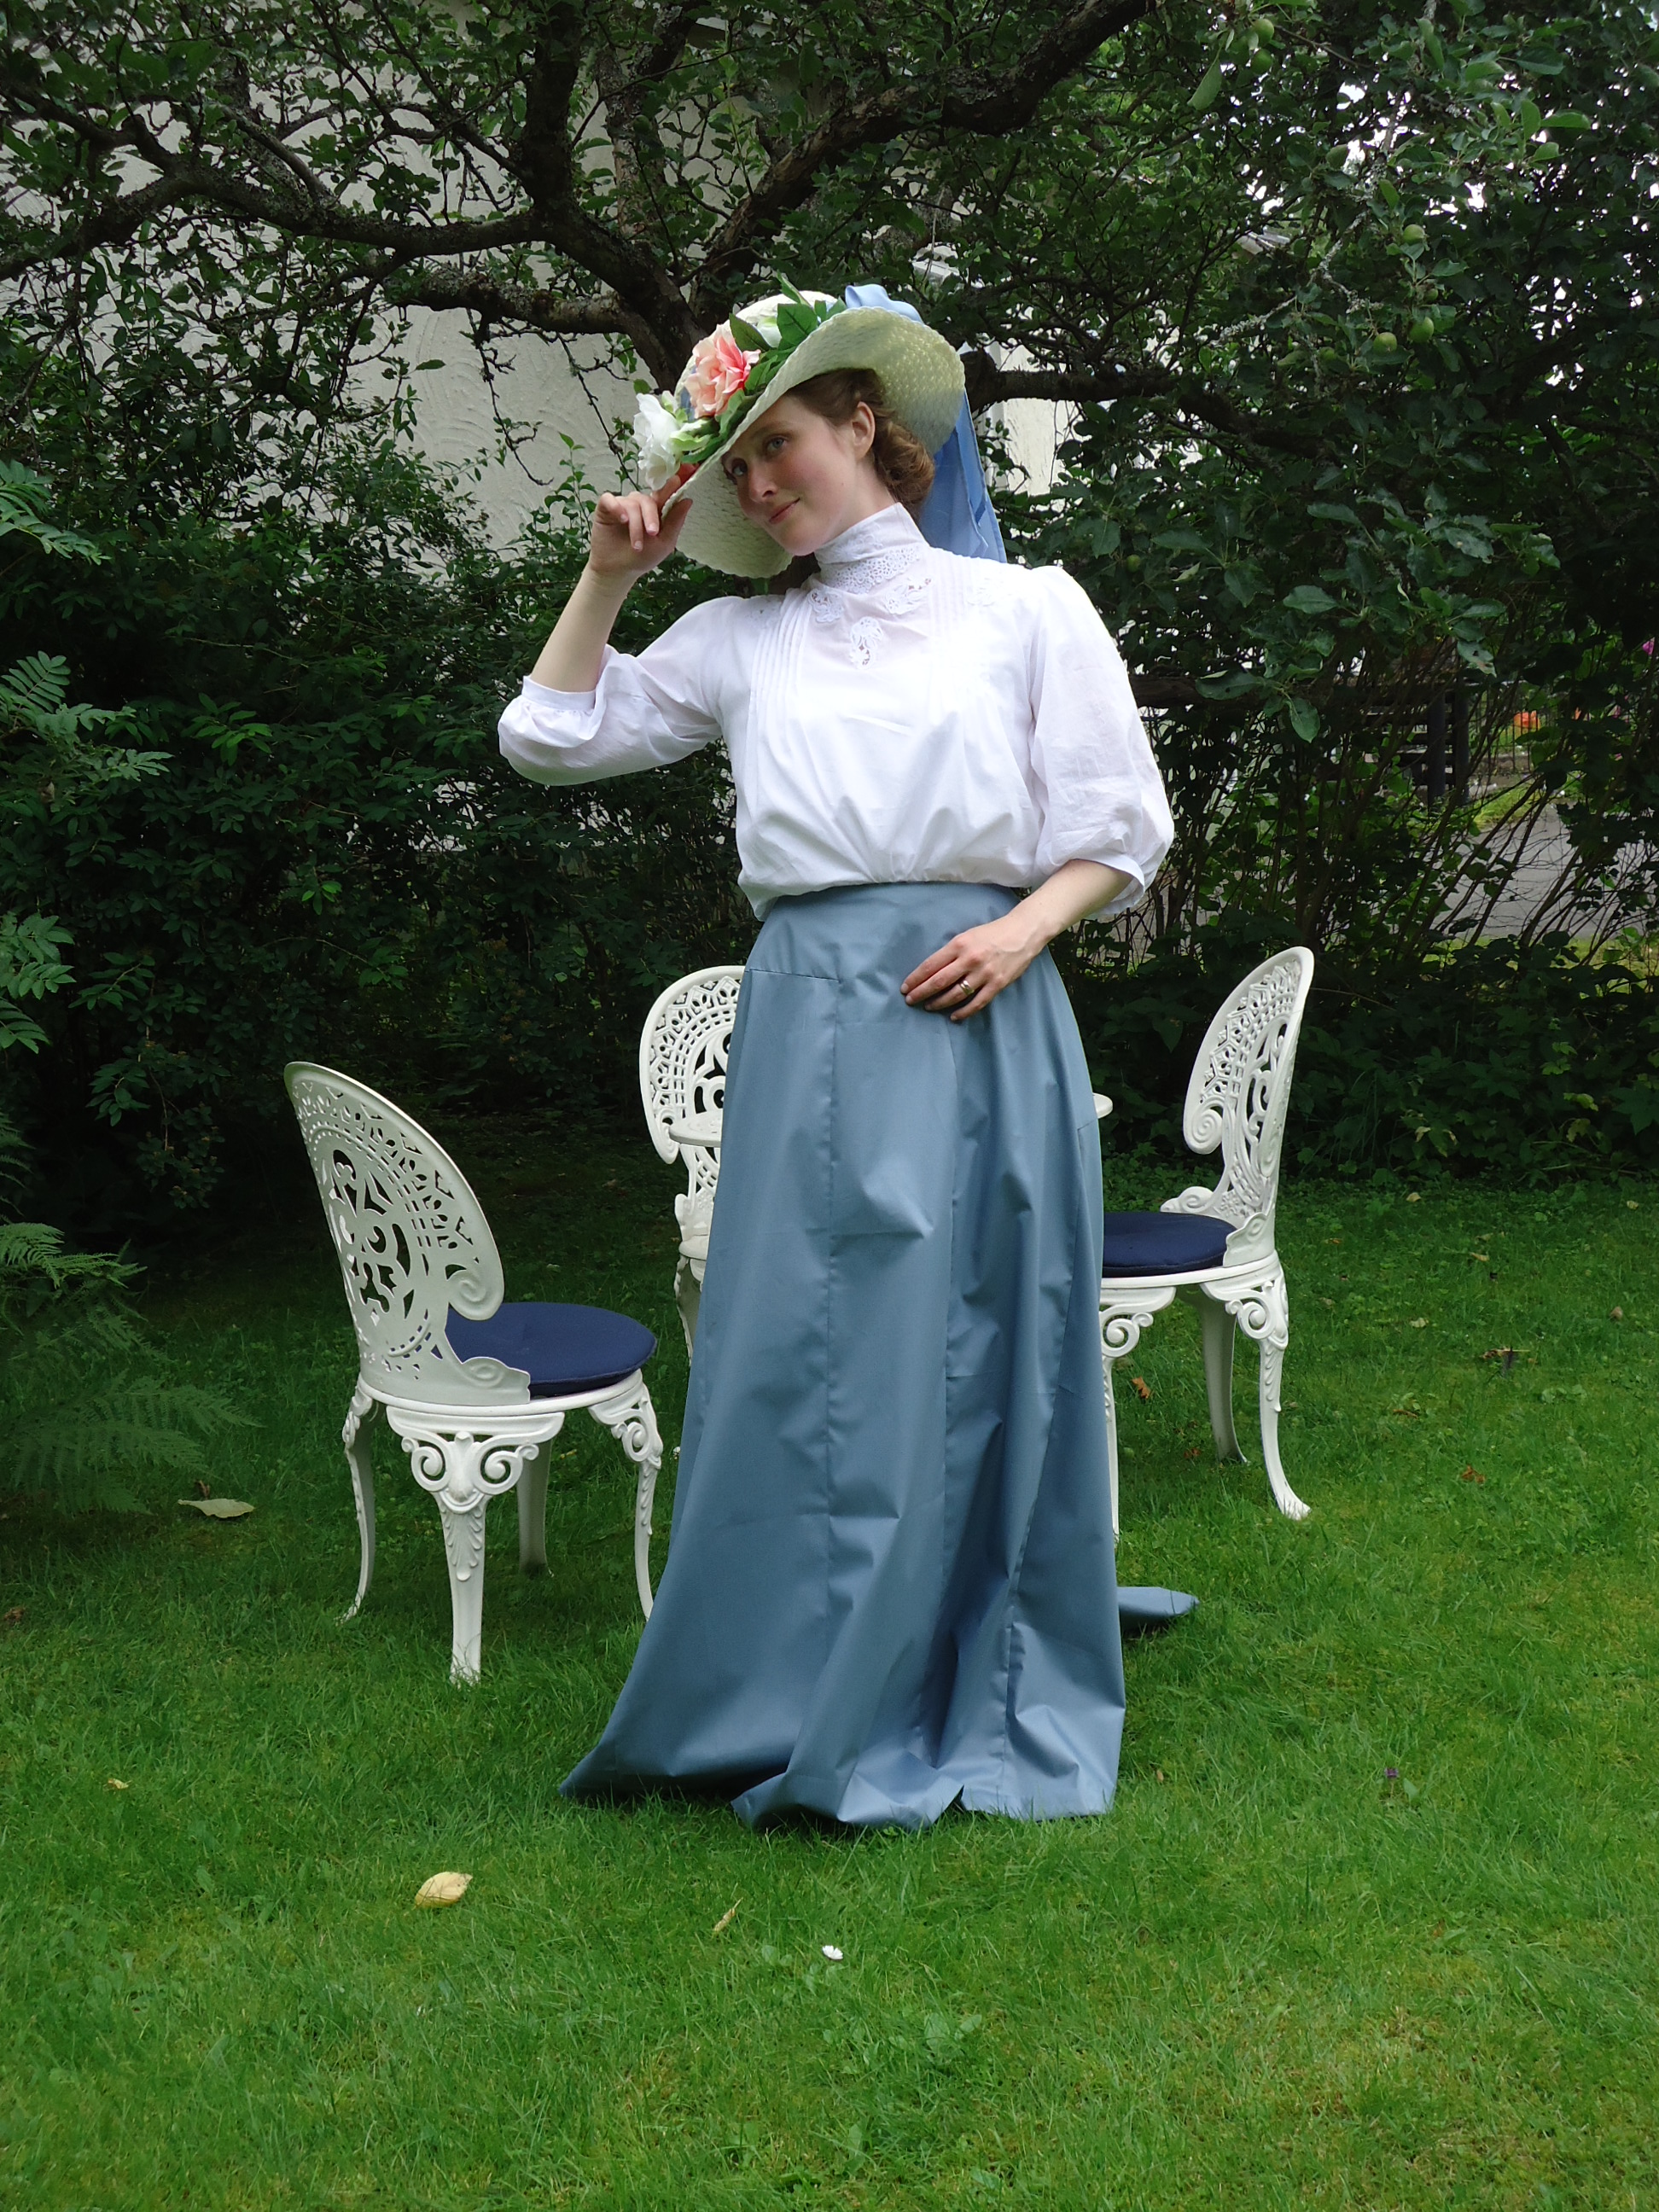
This summer, I had the opportunity to join my first event with the Swedish 19th Century Society. We were meant to show clothes that could have been worn by the people who did not have to emigrate from Sweden, during the famines of the 19th and early 20th century. I wanted to bring a friend, so my beloved edwardian Sunday look was reserved for her. My budget and time was extremely limited, so my bigger projects were discarded. Instead, I decided to take the opportunity to just have fun, making something I would never wear otherwise – a look for a wealthy lady, in 1903.
By the stream in Kisa, at 19th century event. Photo: Josefine Antonsson
For me, the first years of the Edwardian era, represents an unloved fashion, as its’ over-the-top garments, with pigeon breast and flowery decorations, contrast so much with the later, more refined fashions.
Because I had to make the whole look in between exams and work, most of the sewing was done either in the company of my family, in front of the TV, or out in the sun with my relaxing friends. My small budget only allowed me to use plastic table tablets and IKEA-roses for the hat, an old curtain for the skirt and a cotton fabric for the shirtwaist. The most expensive and time consuming part, was buying and making the whitework machine embroidery, before I left my own sewing machine for the summer.
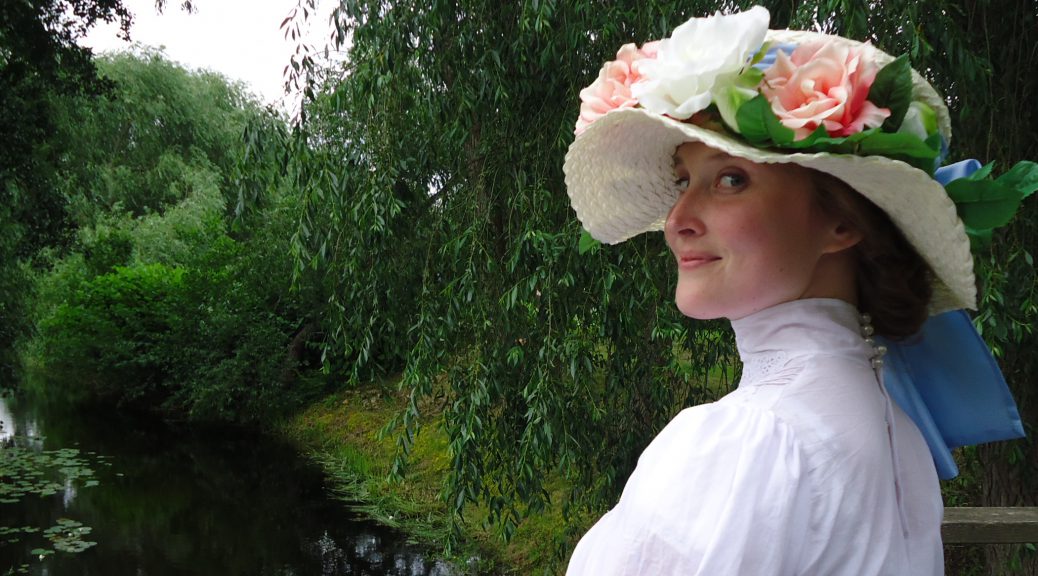
Rosenhatt i rosengård.
I basically followed patterns found in Janet Arnold’s “Patterns of Fashion 2” and was inspired by pictures found at Pinterest. I had great fun making the overly decorated hat, and my little niece enthusiastically gasped: “This is the biggest and most beautiful hat I have ever seen”. Alas, I had neither time, nor material for putting the finishing ribbons onto the skirt. At the event I felt like a cheap, walking flower garden, but to my great surprise I got many compliments for this look. Maybe it is not such an unloved fashion after all?
At least, this is obivously not a fashion unloved by my cat. Photo: Christian Antonsson
Min gamla dator är totalt opålitlig, så när den plötsligt bestämde sig för att ta semester i två veckor inför psykiatritentan, insåg jag att jag måste köpa en ny. I november ska jag veckopendla till min praktik. Jag vill inte utsätta datorn för onödiga påfrestningar under resorna, men vill samtidigt undvika extra utgifter, så nu har jag gjort ett datorfodral av material som ändå låg hemma och skräpade:
Skumgummi – tidigare använt till en numera skrotad gungstol
2 bordstabletter – tänkta som nödlösning till edwardiansk hatt, men sedan hittade jag bättre , varför dessa blev liggande.
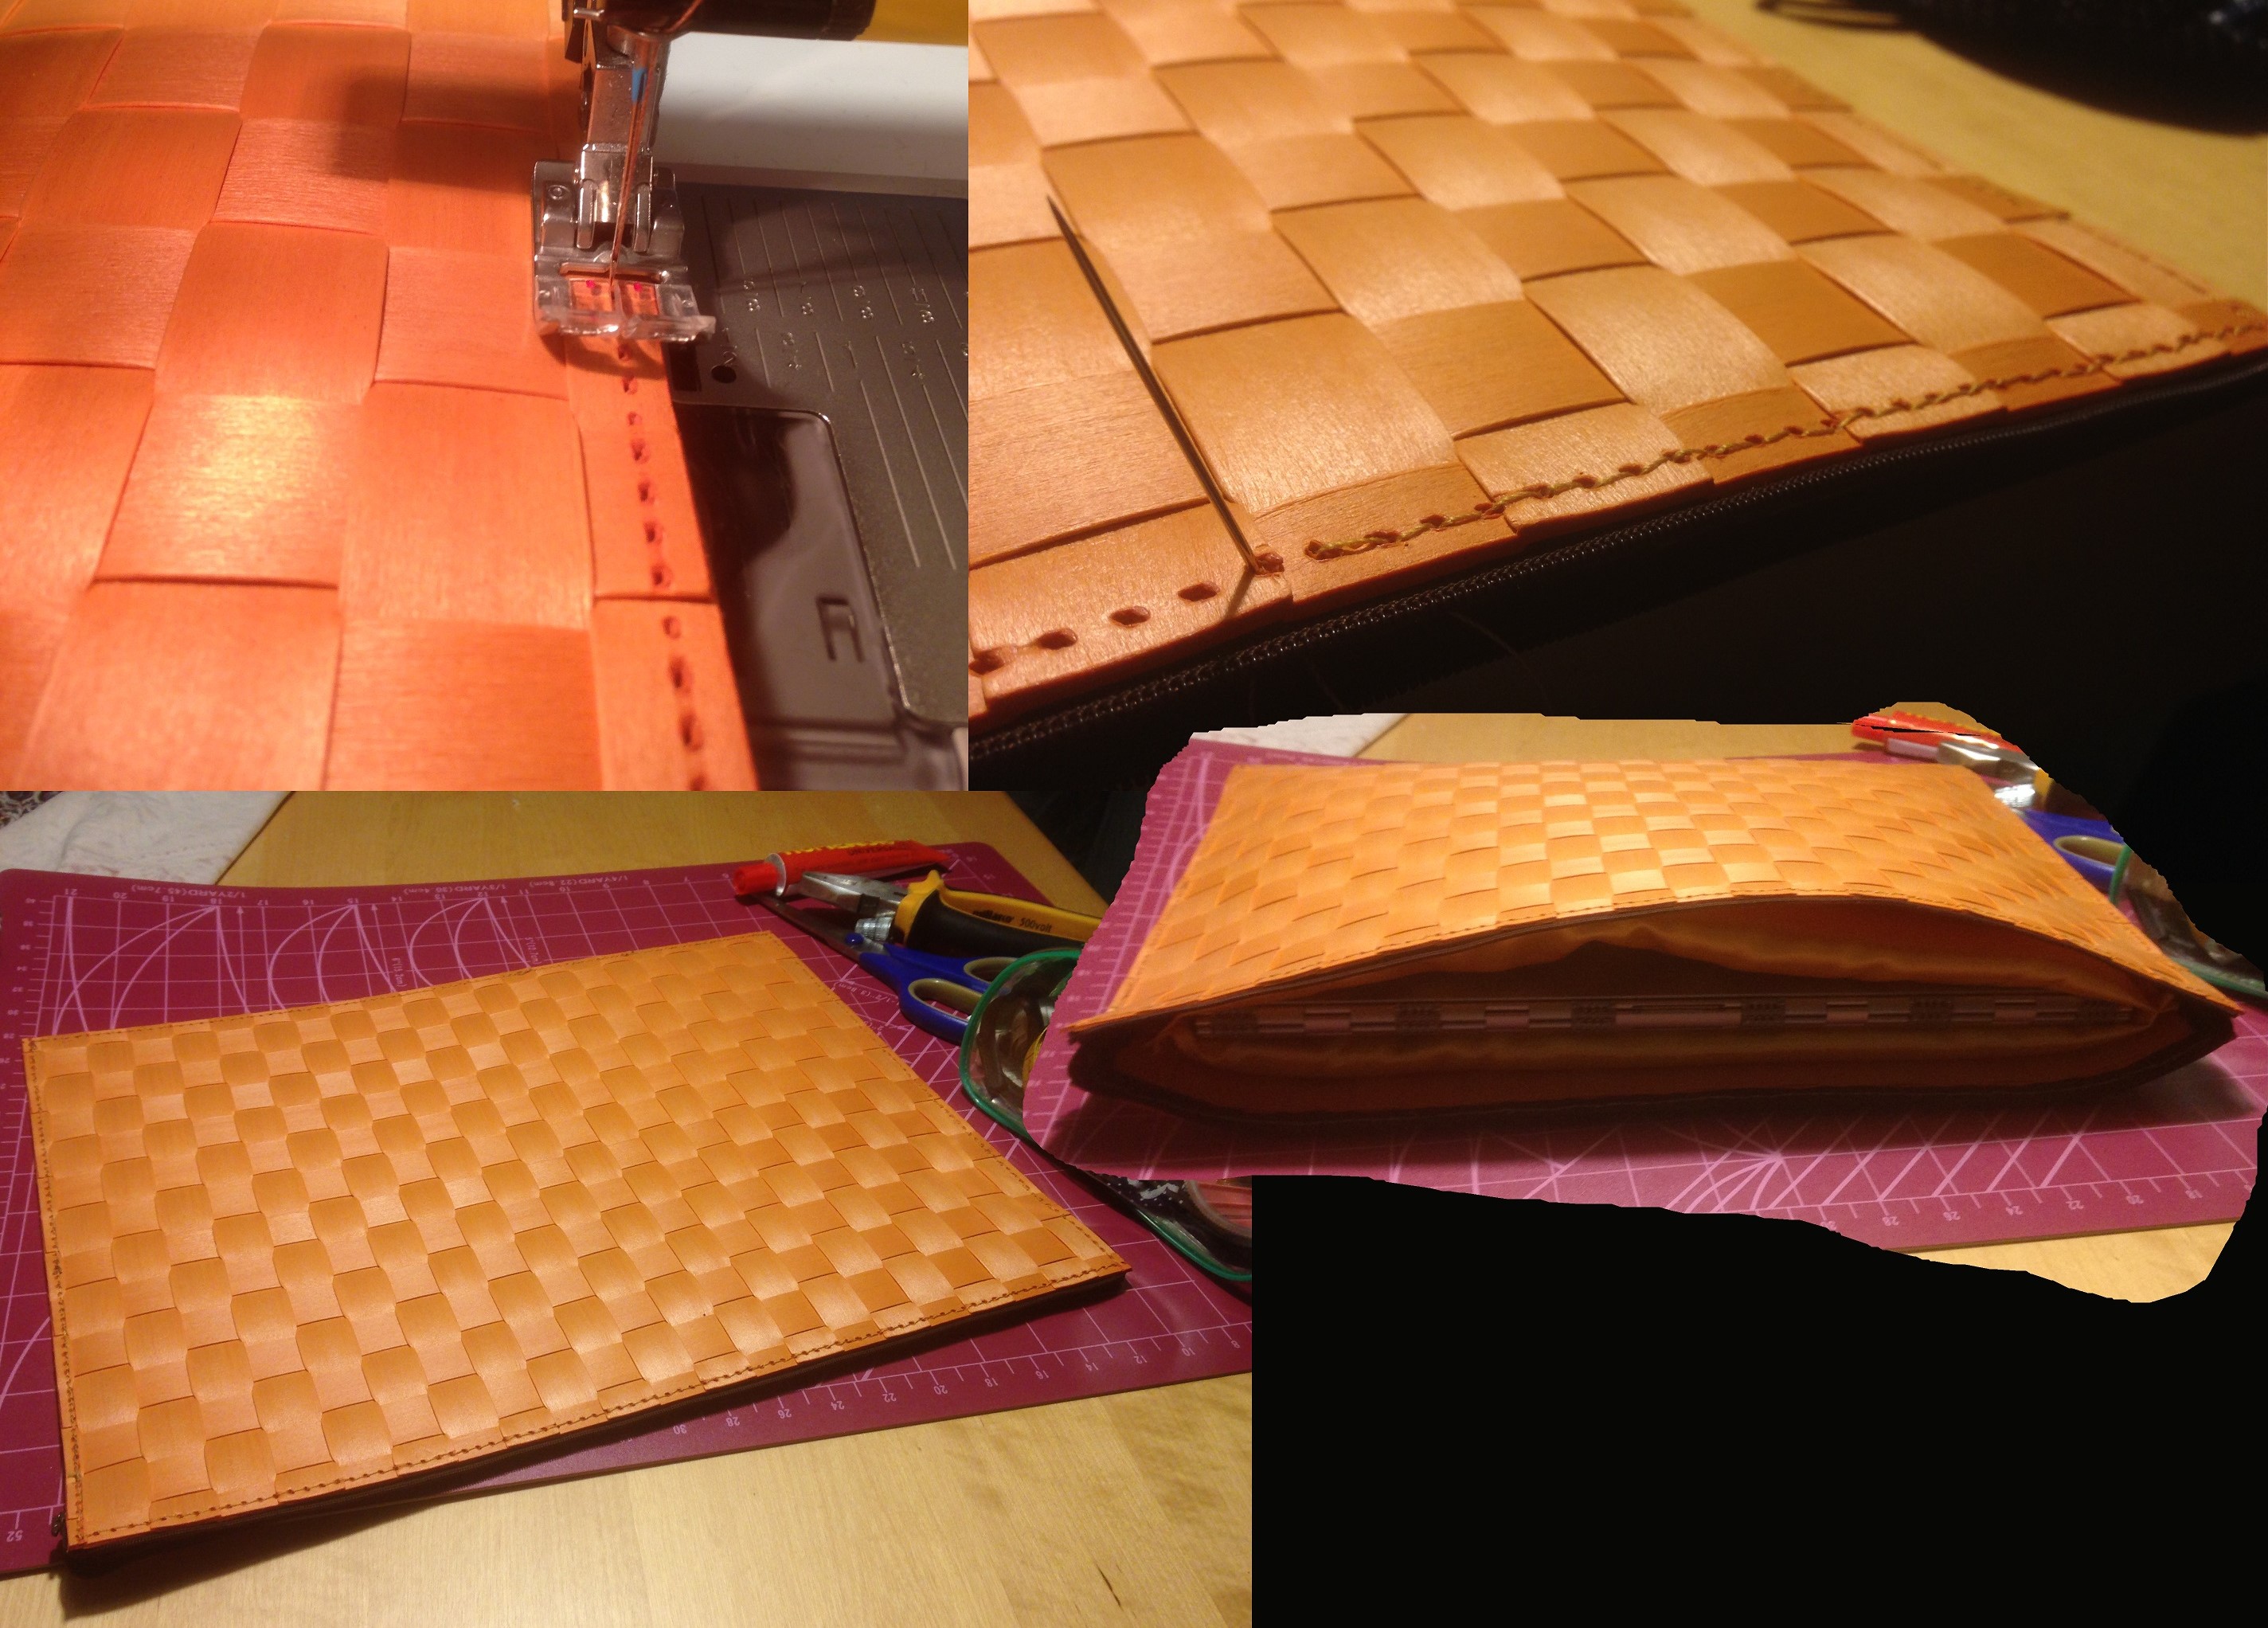
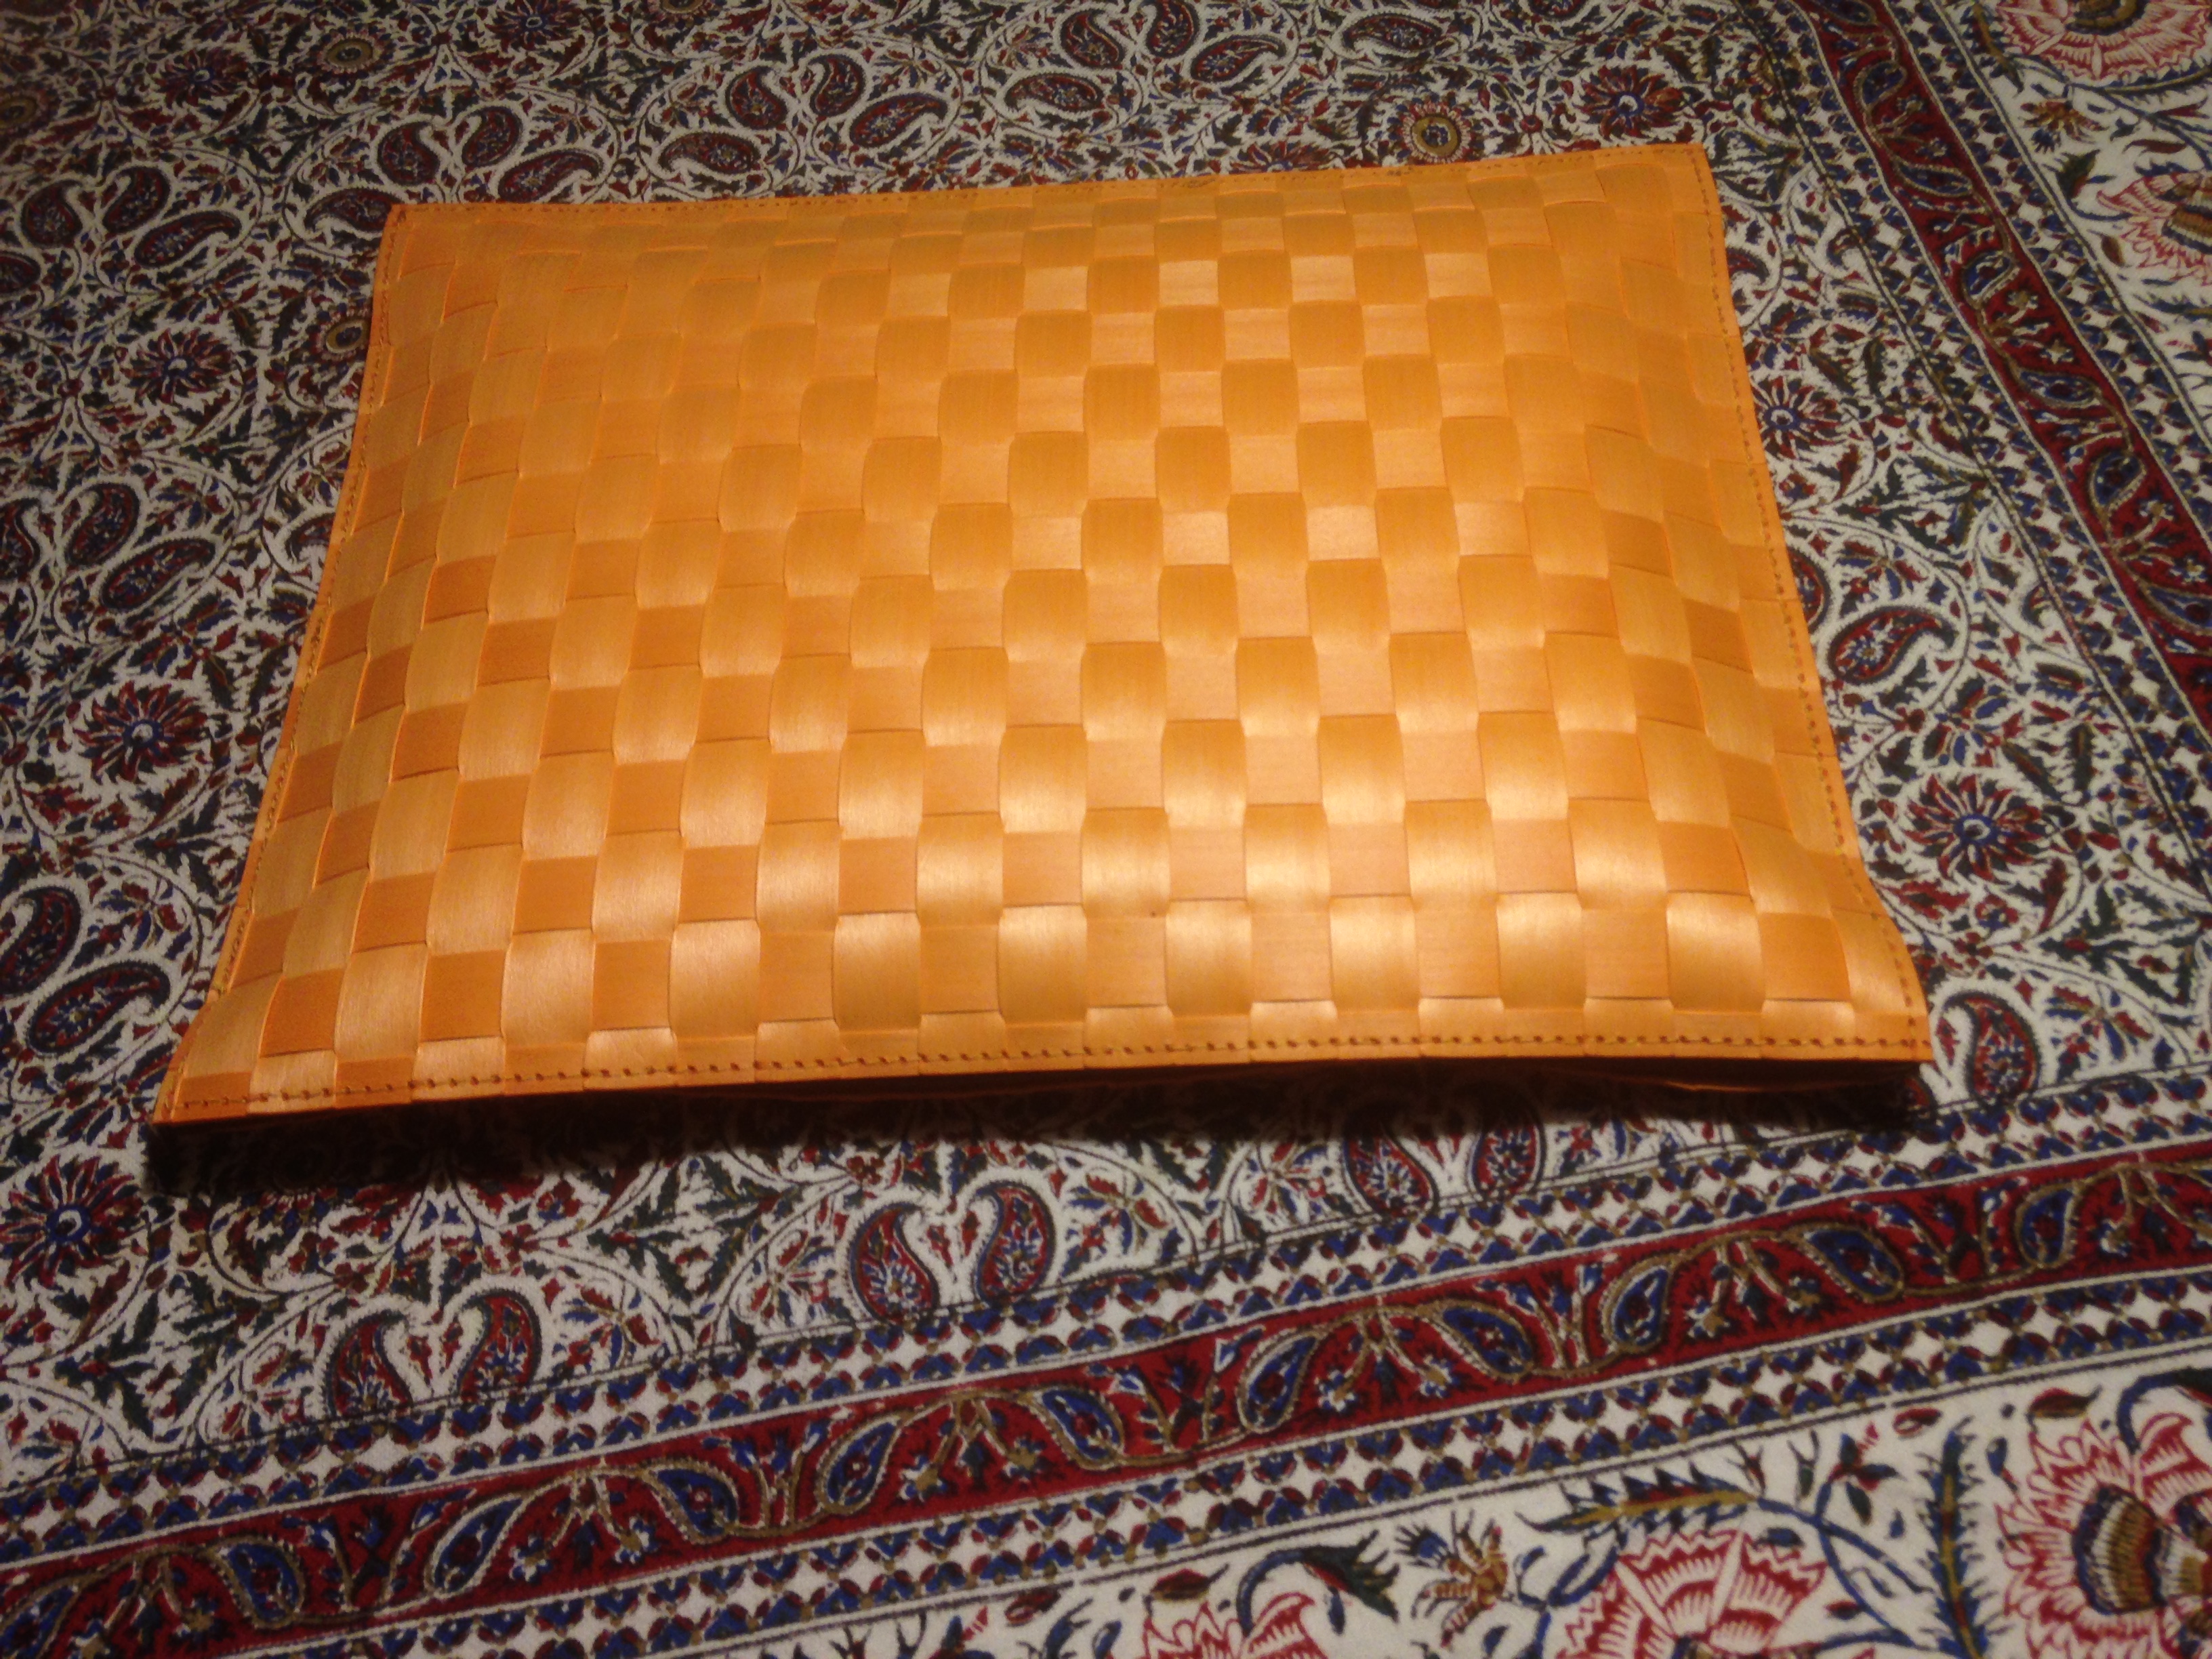
My old lap top is unreliable, so when it suddenly decided to take a vacation for two weeks just before my psychiatry exams, I realized that I had to by a new one. In November, I will commute weekly for my internship. I do not want to put this expensive new device in danger during the journeys, but at the same time I want to save money. Therefor I have made a lap top case out of materials that I would never use otherwise:
Foam rubber – earlier used for a rocking chair
Two tablets (?) that I had planned to use as an emergency solution for my Edwardian hat, but then I found better ones and these were left in the bottom of a drawer
Yellow lining material – leftovers from the Sunday School flag
Bear thread – from some jeans
Zipper – inherited
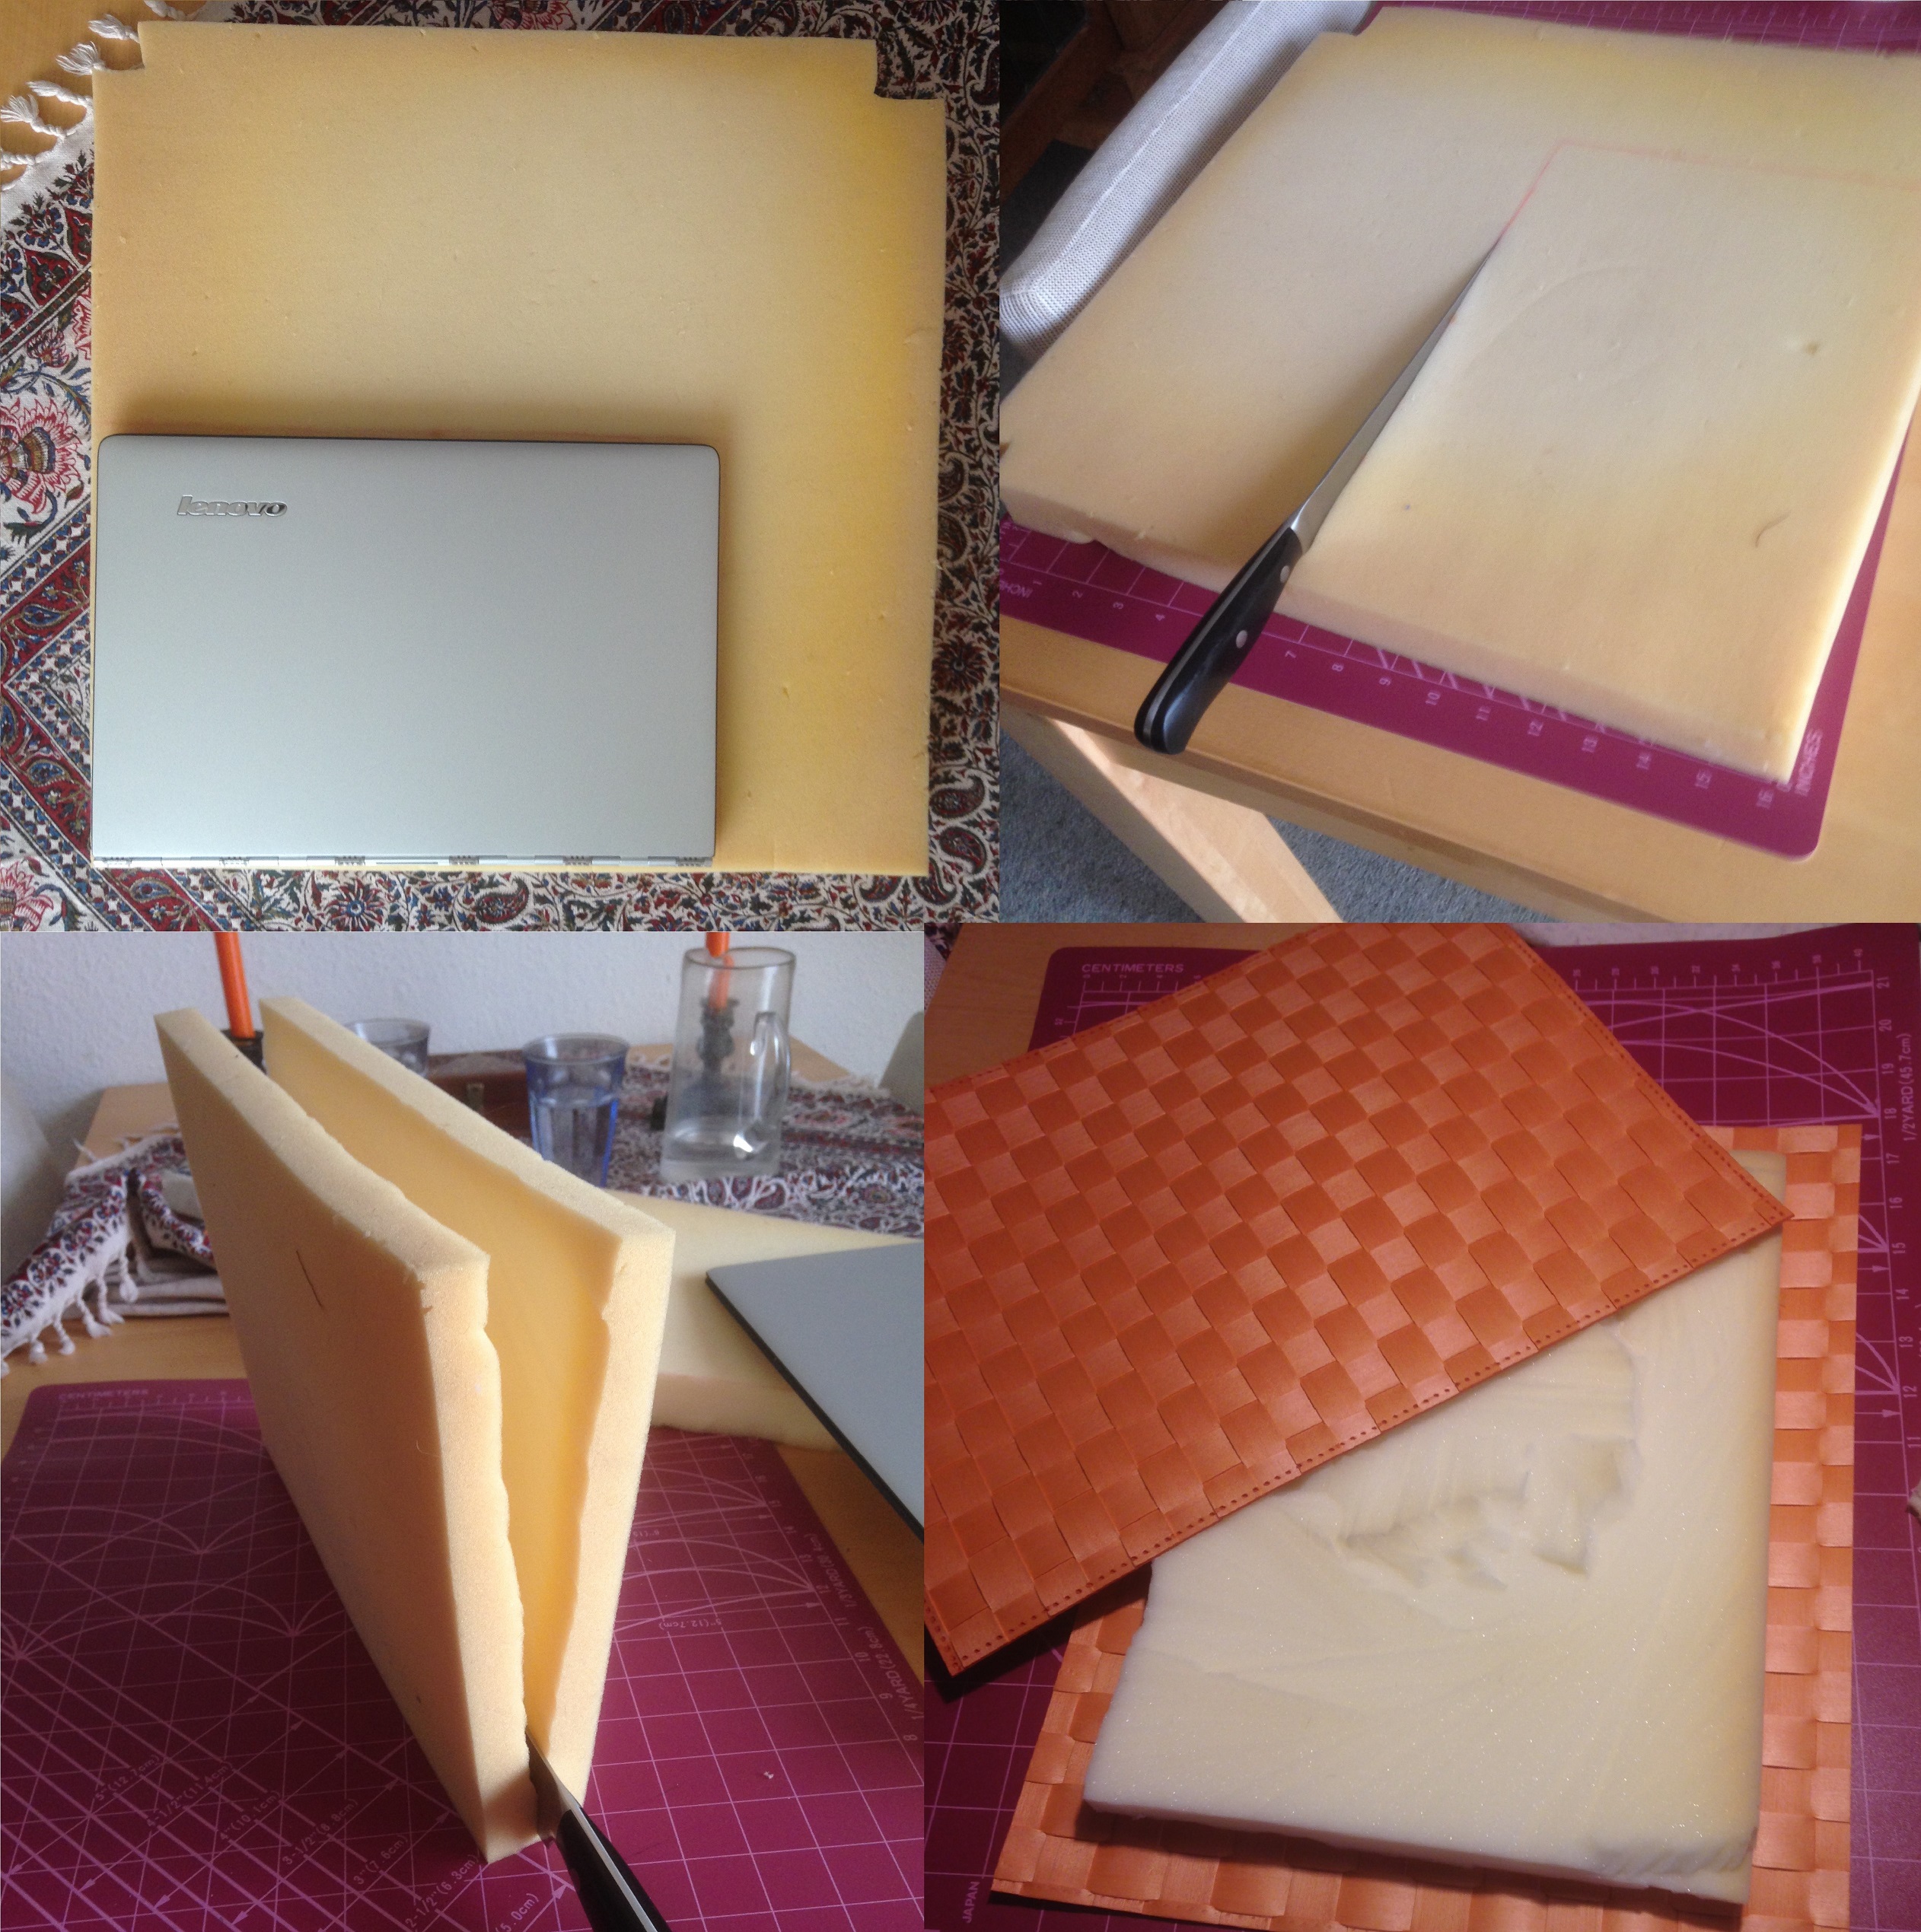
Först ritade jag upp datorns mått på skumgummit och skar ut med hjälp av brödkniv. Sedan delade jag detta på mitten, men lämnade de nedersta millimetrarna. Jag testade att lägga in datorn och insåg att att skyddet var överdrivet tjockt, så jag skar bort ytterligare på utsidorna.
First, I draw the measurements of the laptop on the foam rubber and cut it with a bread knife. I cut it open, leaving a few millimeters at the bottom. I tested putting the computer in between the layers and realized that it was way too thick. I cut away more from the outside.
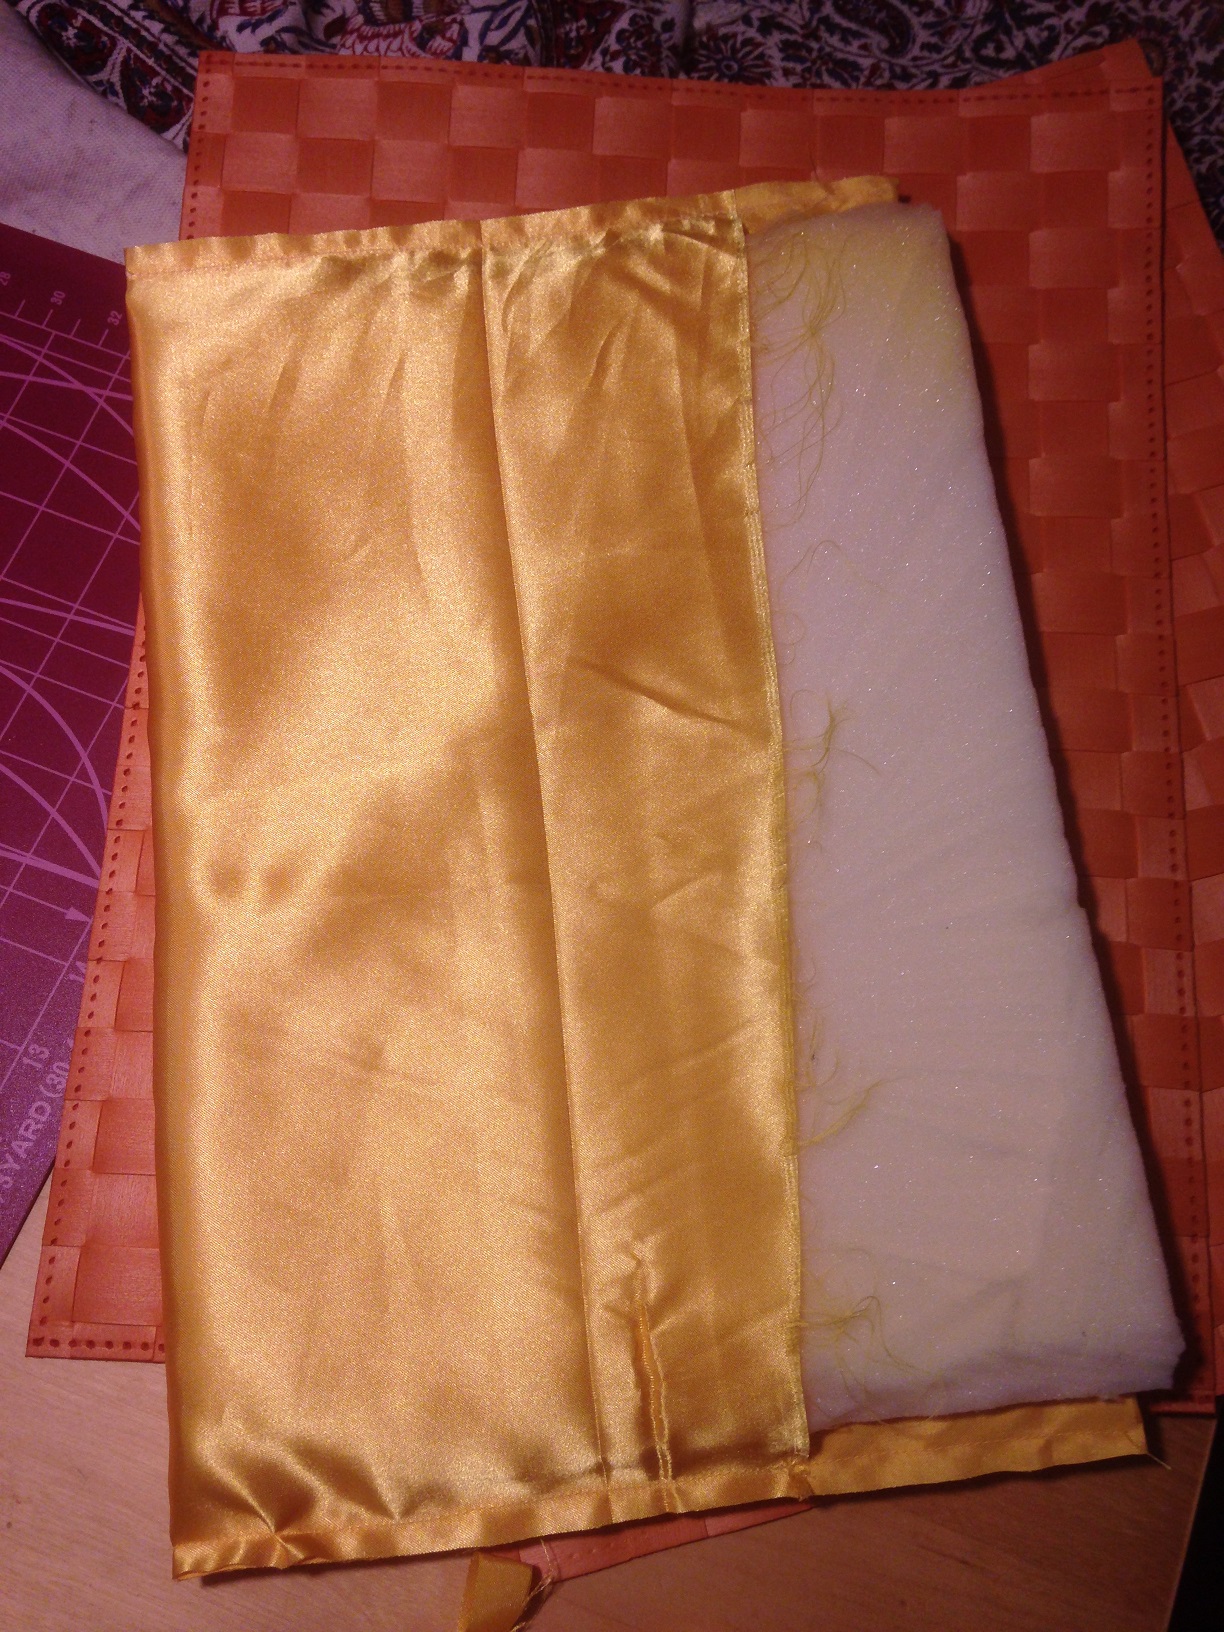
Jag fordrade insidan med tyg, genom att först vika på mitten och stoppa ned mellan skumgummilagren och sedan vika ut det överflödiga tyget mot utsidan. Därefter sydde jag längs kortsidorna, så att det bara var kvar en öppning upptill för datorn.
I lined the inside, by folding the fabric on half and put it down in between the foam rubber layers, then I folded the remaining fabric over the outside. Then I sew the short sides, leaving the long side open for the lap top.
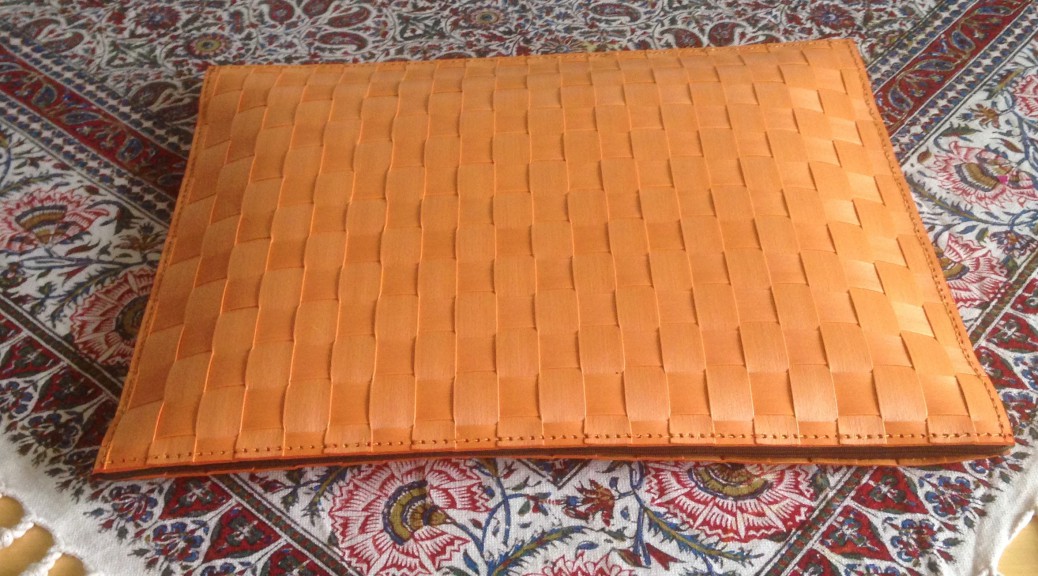
De två bordstabletterna sydde jag försiktigt samman på maskin, med jeansnål och björntråd. En långsida och de närmaste 2 centimetrarna på båda kortsidor lämnades osydda. Här satte jag in en dragkedja, som jag sydde fast för hand. Sedan stoppade jag in fyllningen och datorn.
I stitched the two table tablets together on machine, with jeans needle and bear thread. One long side and the two centimeters closest to this side remained unsewn. Here I put a zipper, which I hand stitched in place. Then I put the foam rubber and lining inside.
Mitt mål var att sy ett fodral som skulle ge gott skydd, samtidigt som det inte skulle ge ett för lyxigt intryck, eftersom jag inte vill göra datorn mer stöldbegärlig än vad den redan är. Jag tror att jag lyckades.
My goal was to make a case that would give a good protection, at the same time as it would not give a too luxurious impression, as I do not want to make the lap top more tempting than it already is. I think that I succeeded.
– where you can see what I do – designing, sewing, singing, creating etc.


 As we noticed that our baby was the happiest when laying on the changing table underneath the shelf that I painted for him, my husband suggested that I should paint something movable, so that we could hang out with our baby at other places than just in the bathroom. Said and done – we bought a small IKEA table in our local second hand shop. It was not painted underneath, so I had to put a white layer of paint first. I googled the cute animals that you see on the picture. Unfortunately, so many things came in between, that I could only paint one body part at a time and was not able to finish the table until this week. The baby likes it, but does not communicate with the animals as he did with the shelf animals when he was younger.