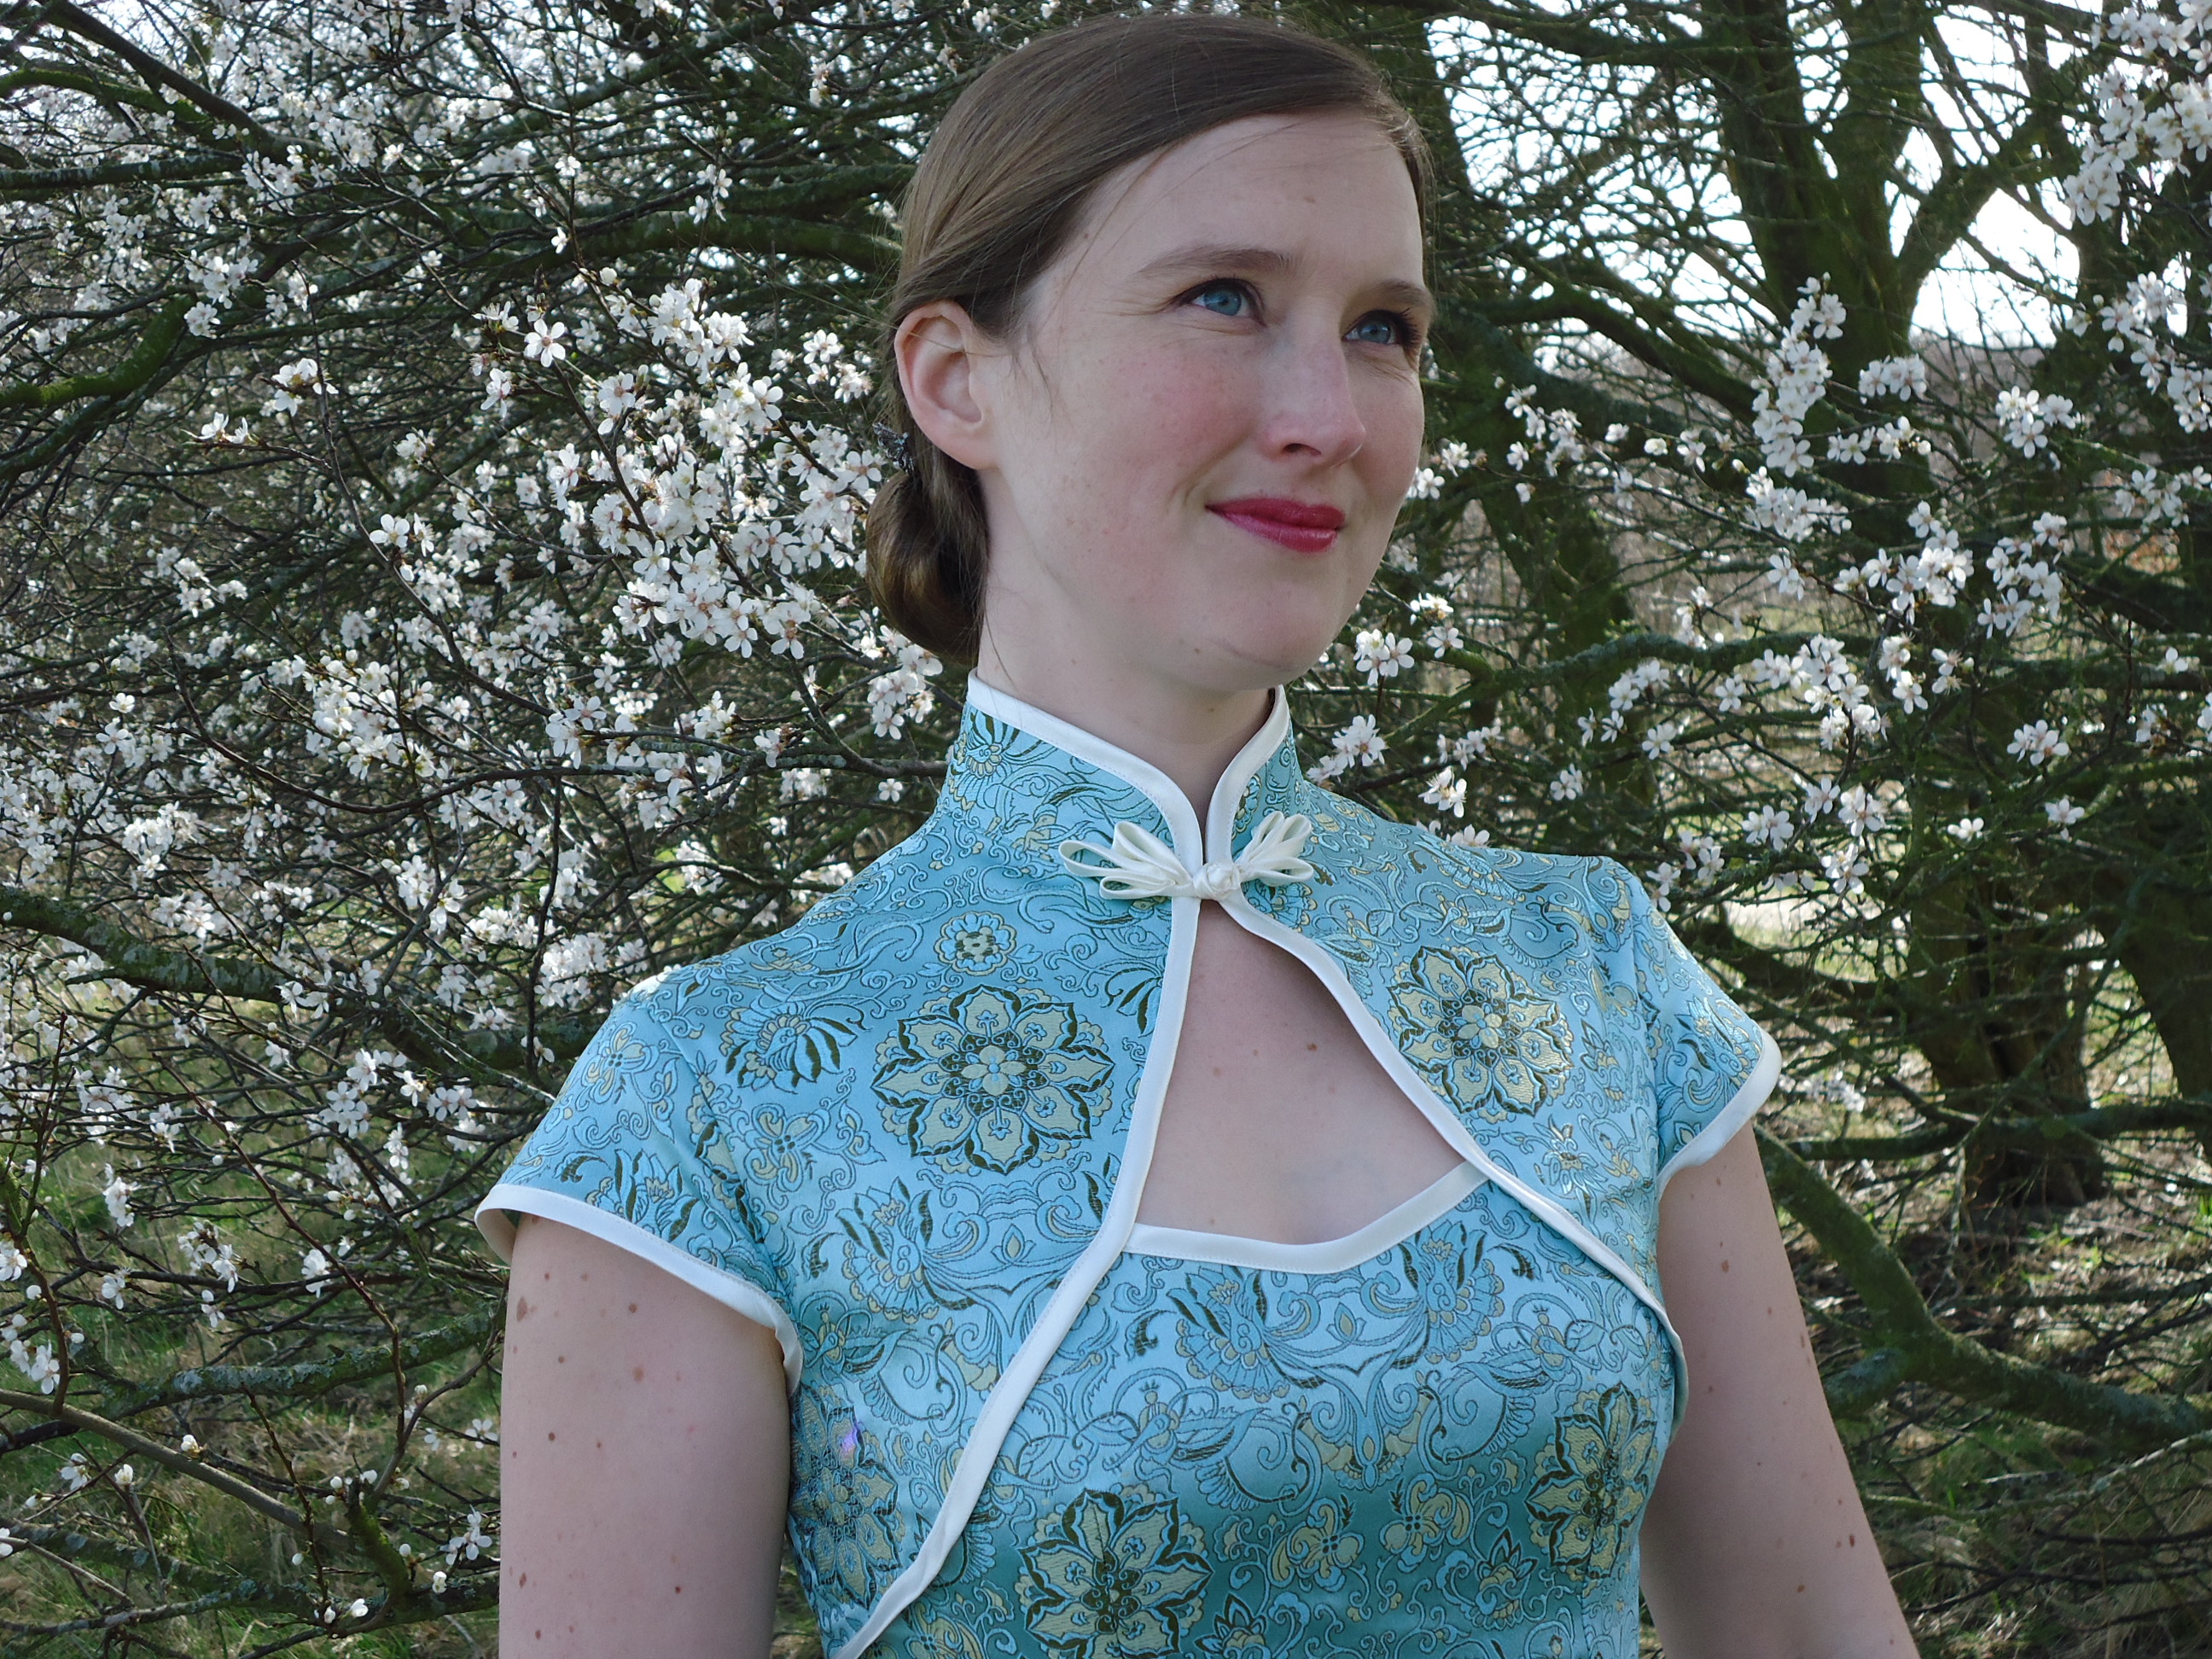
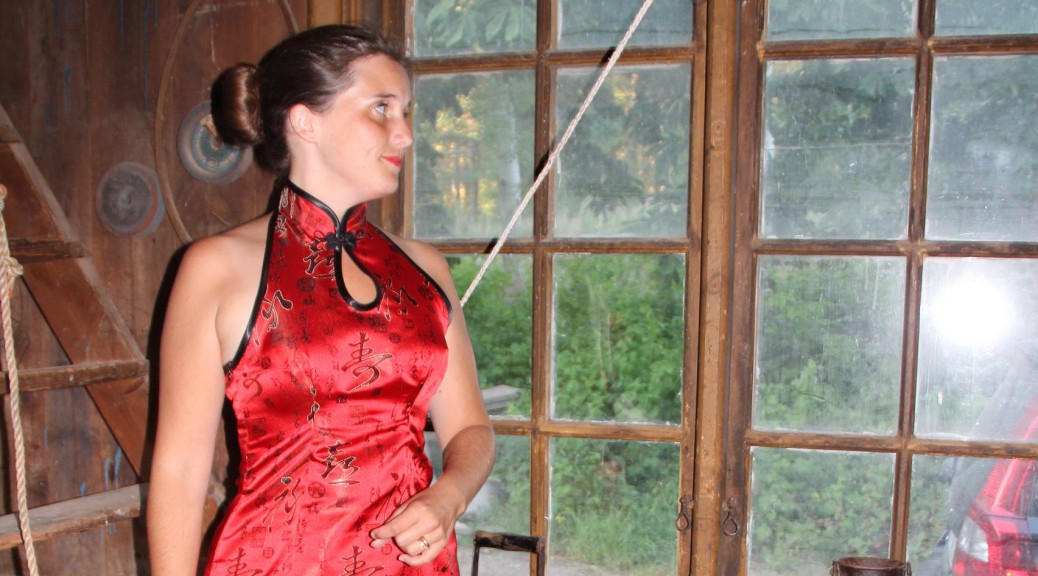
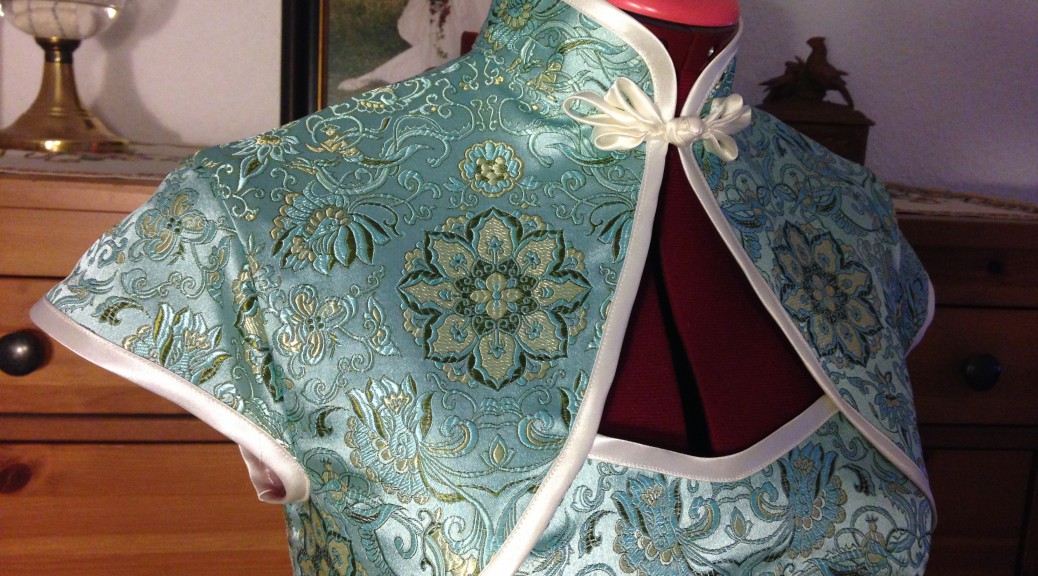
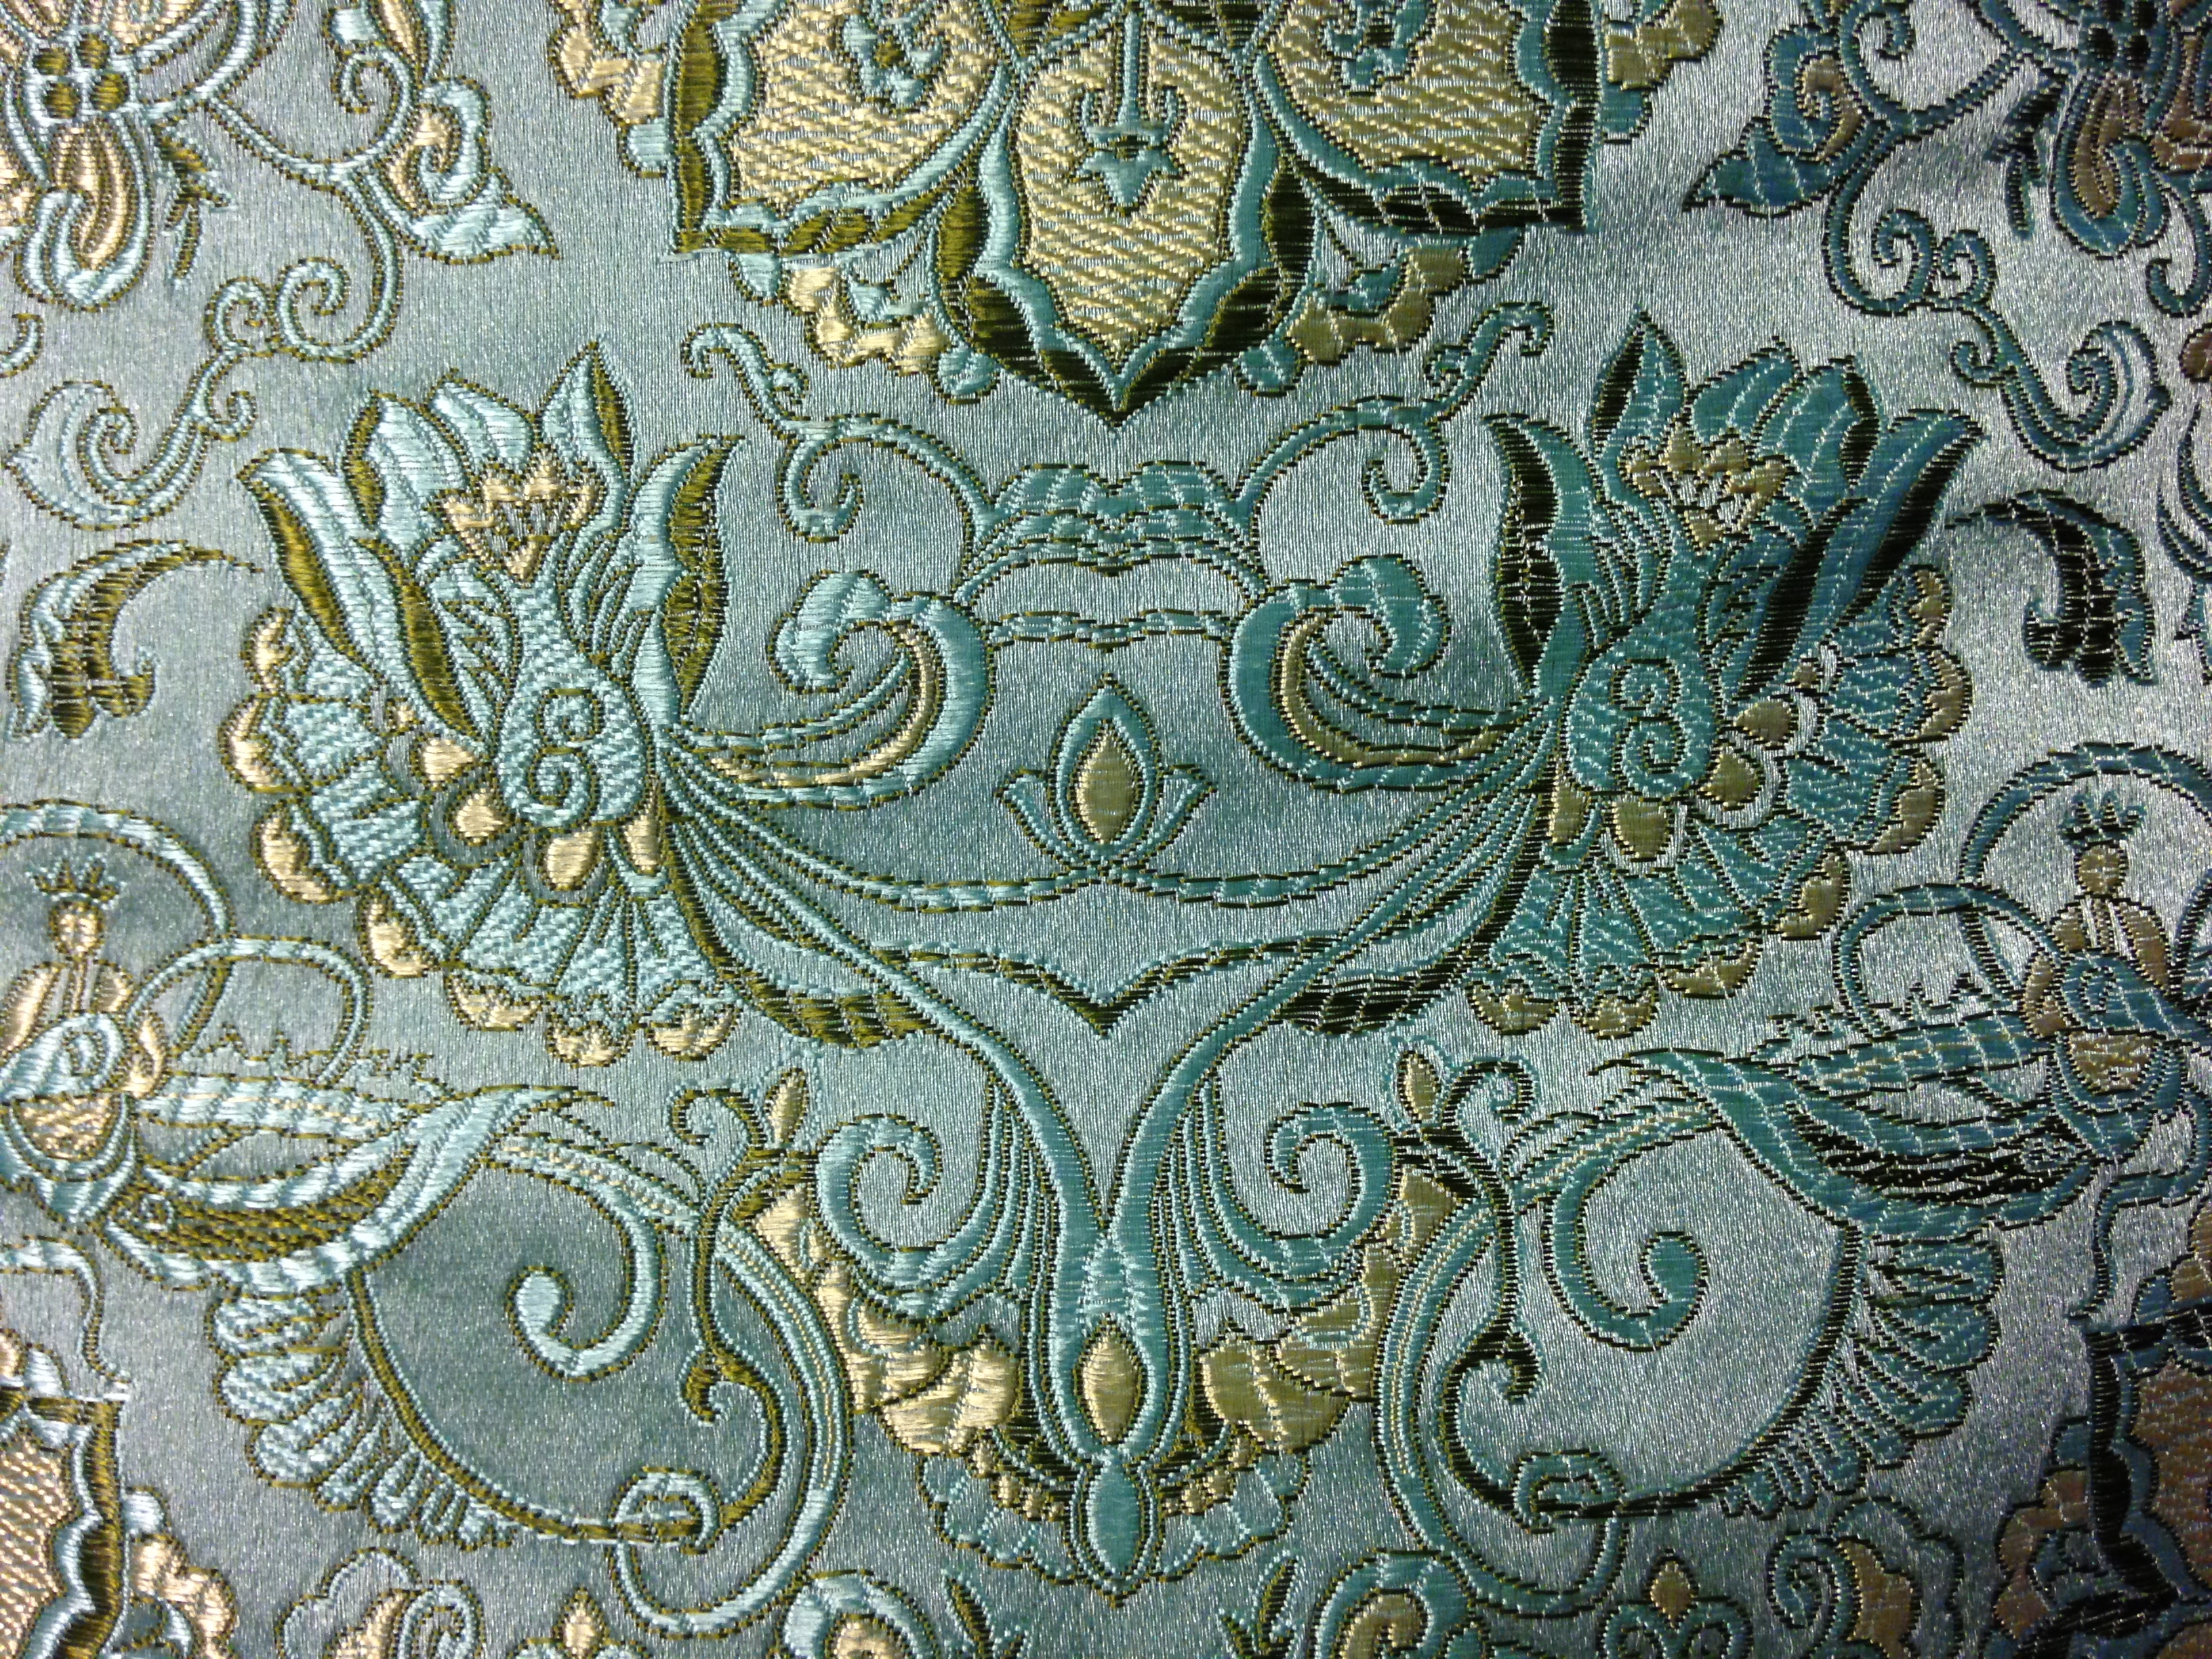
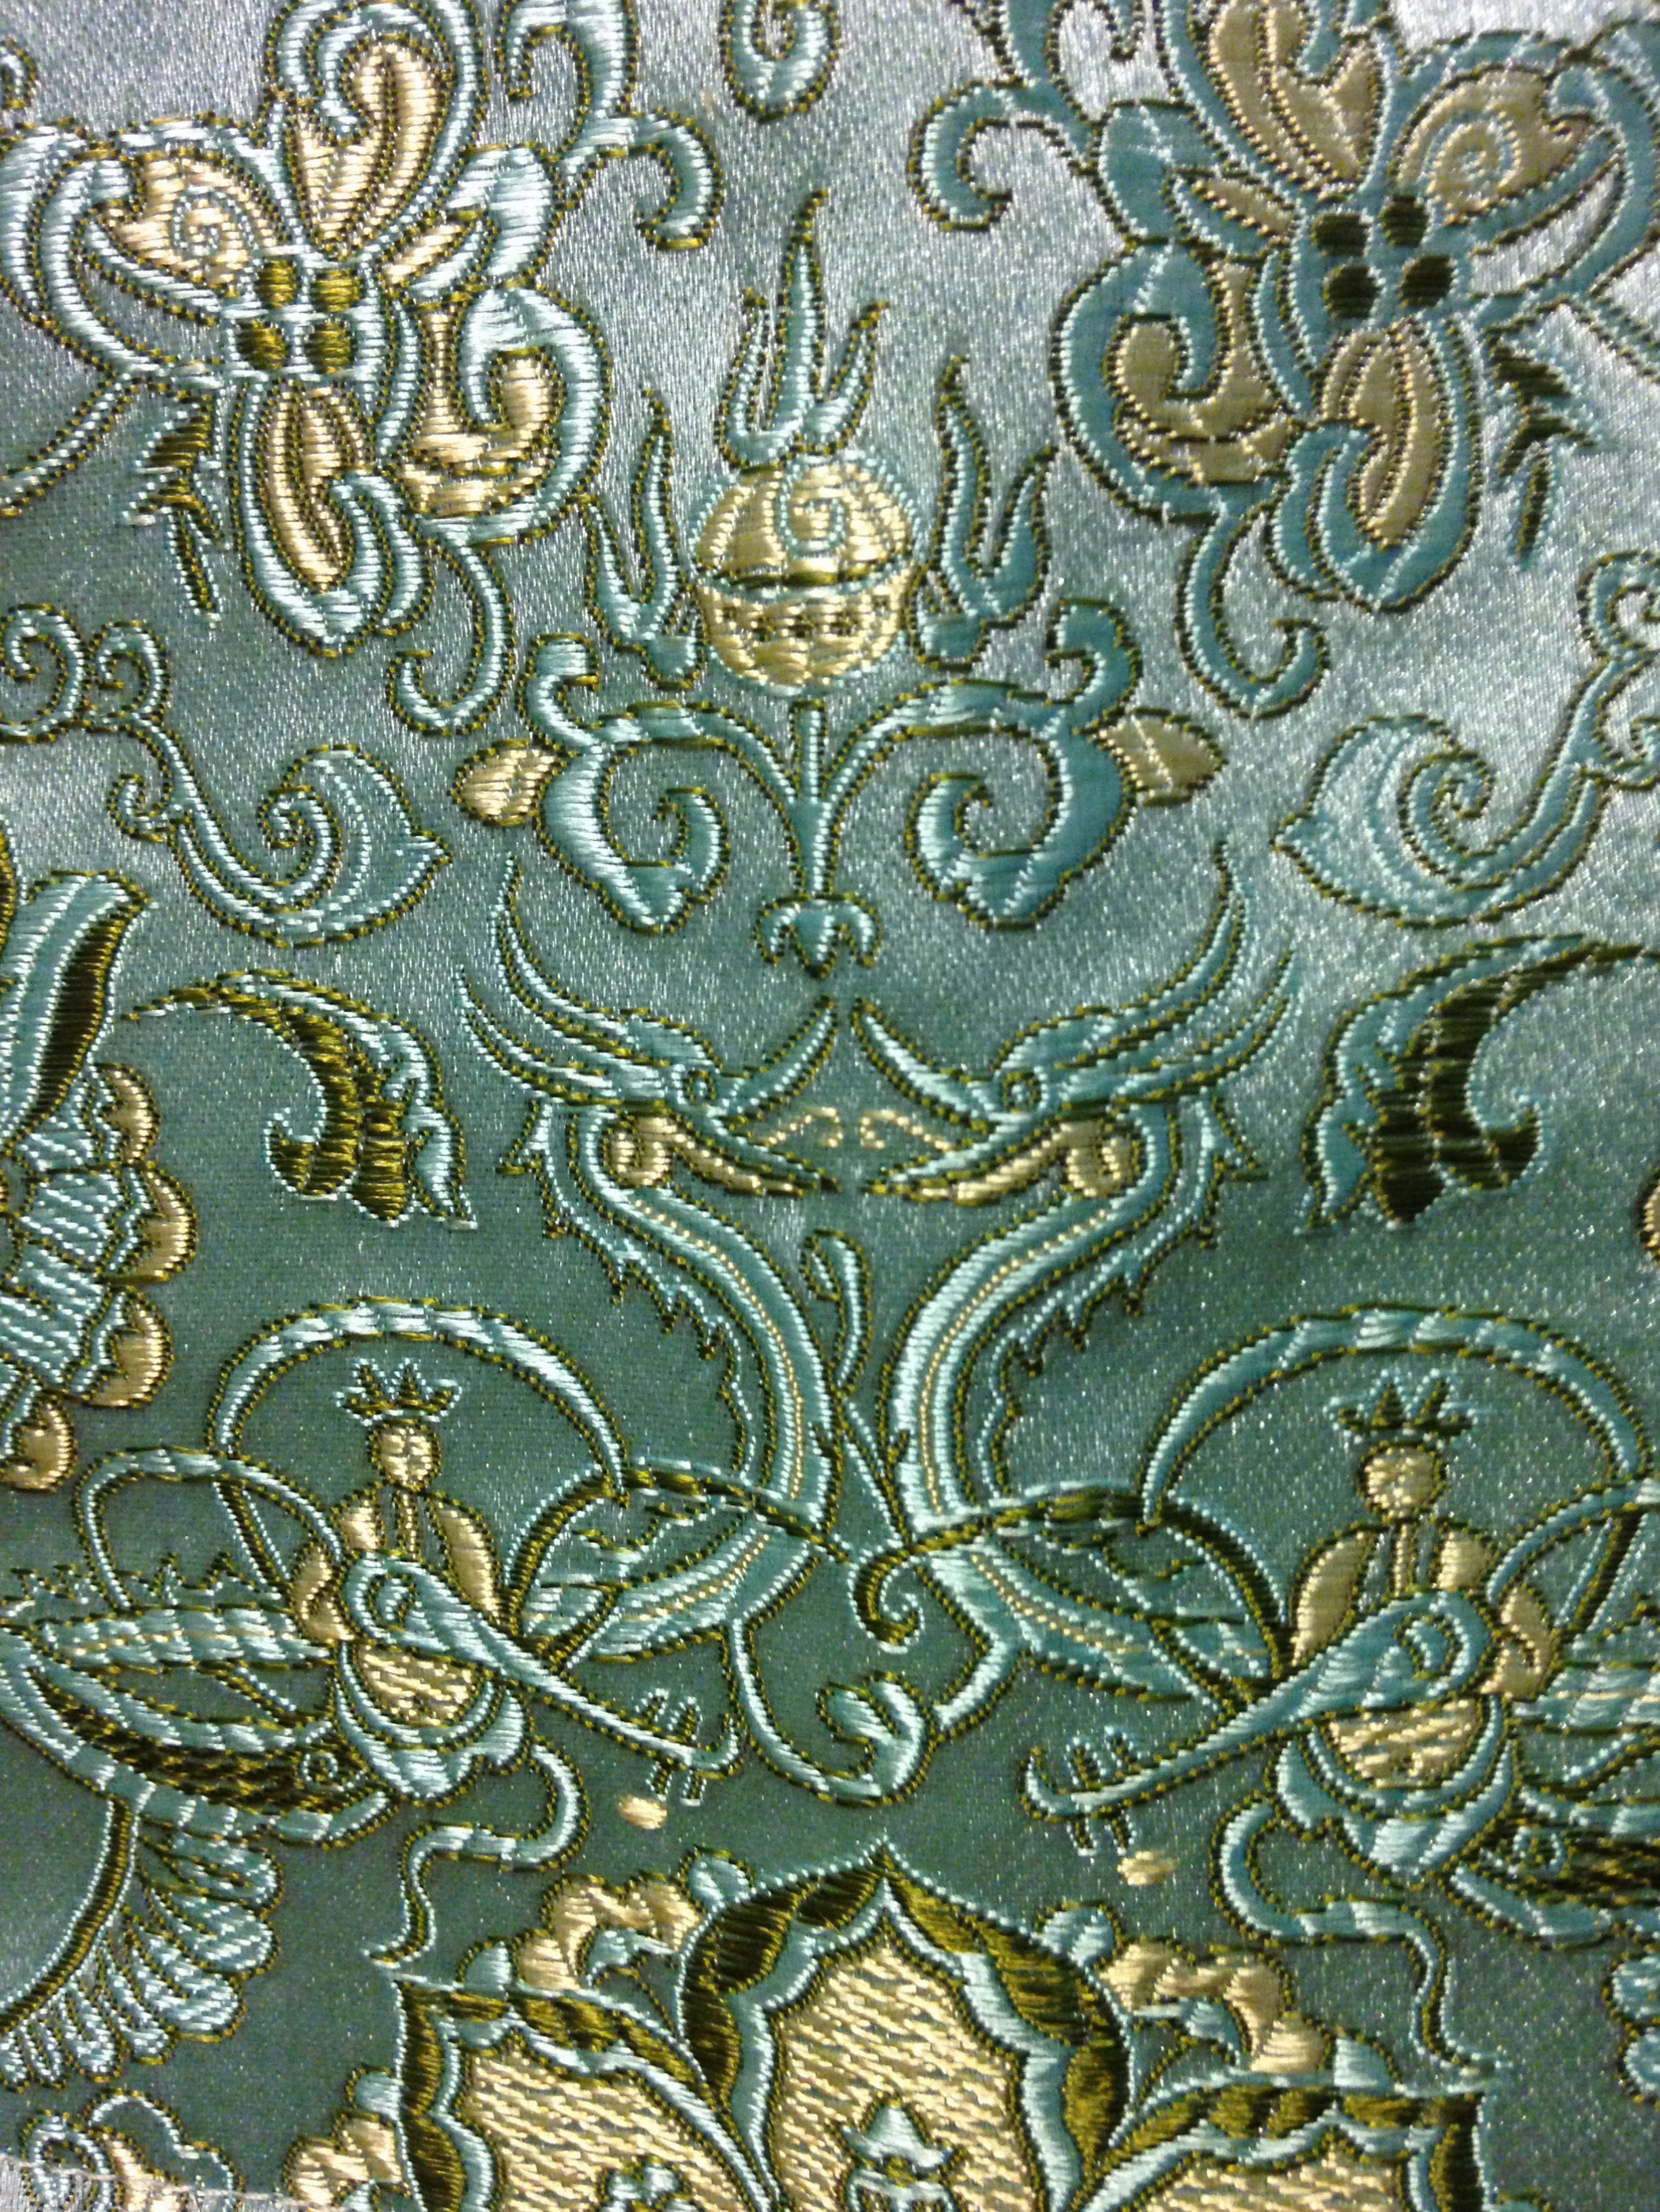
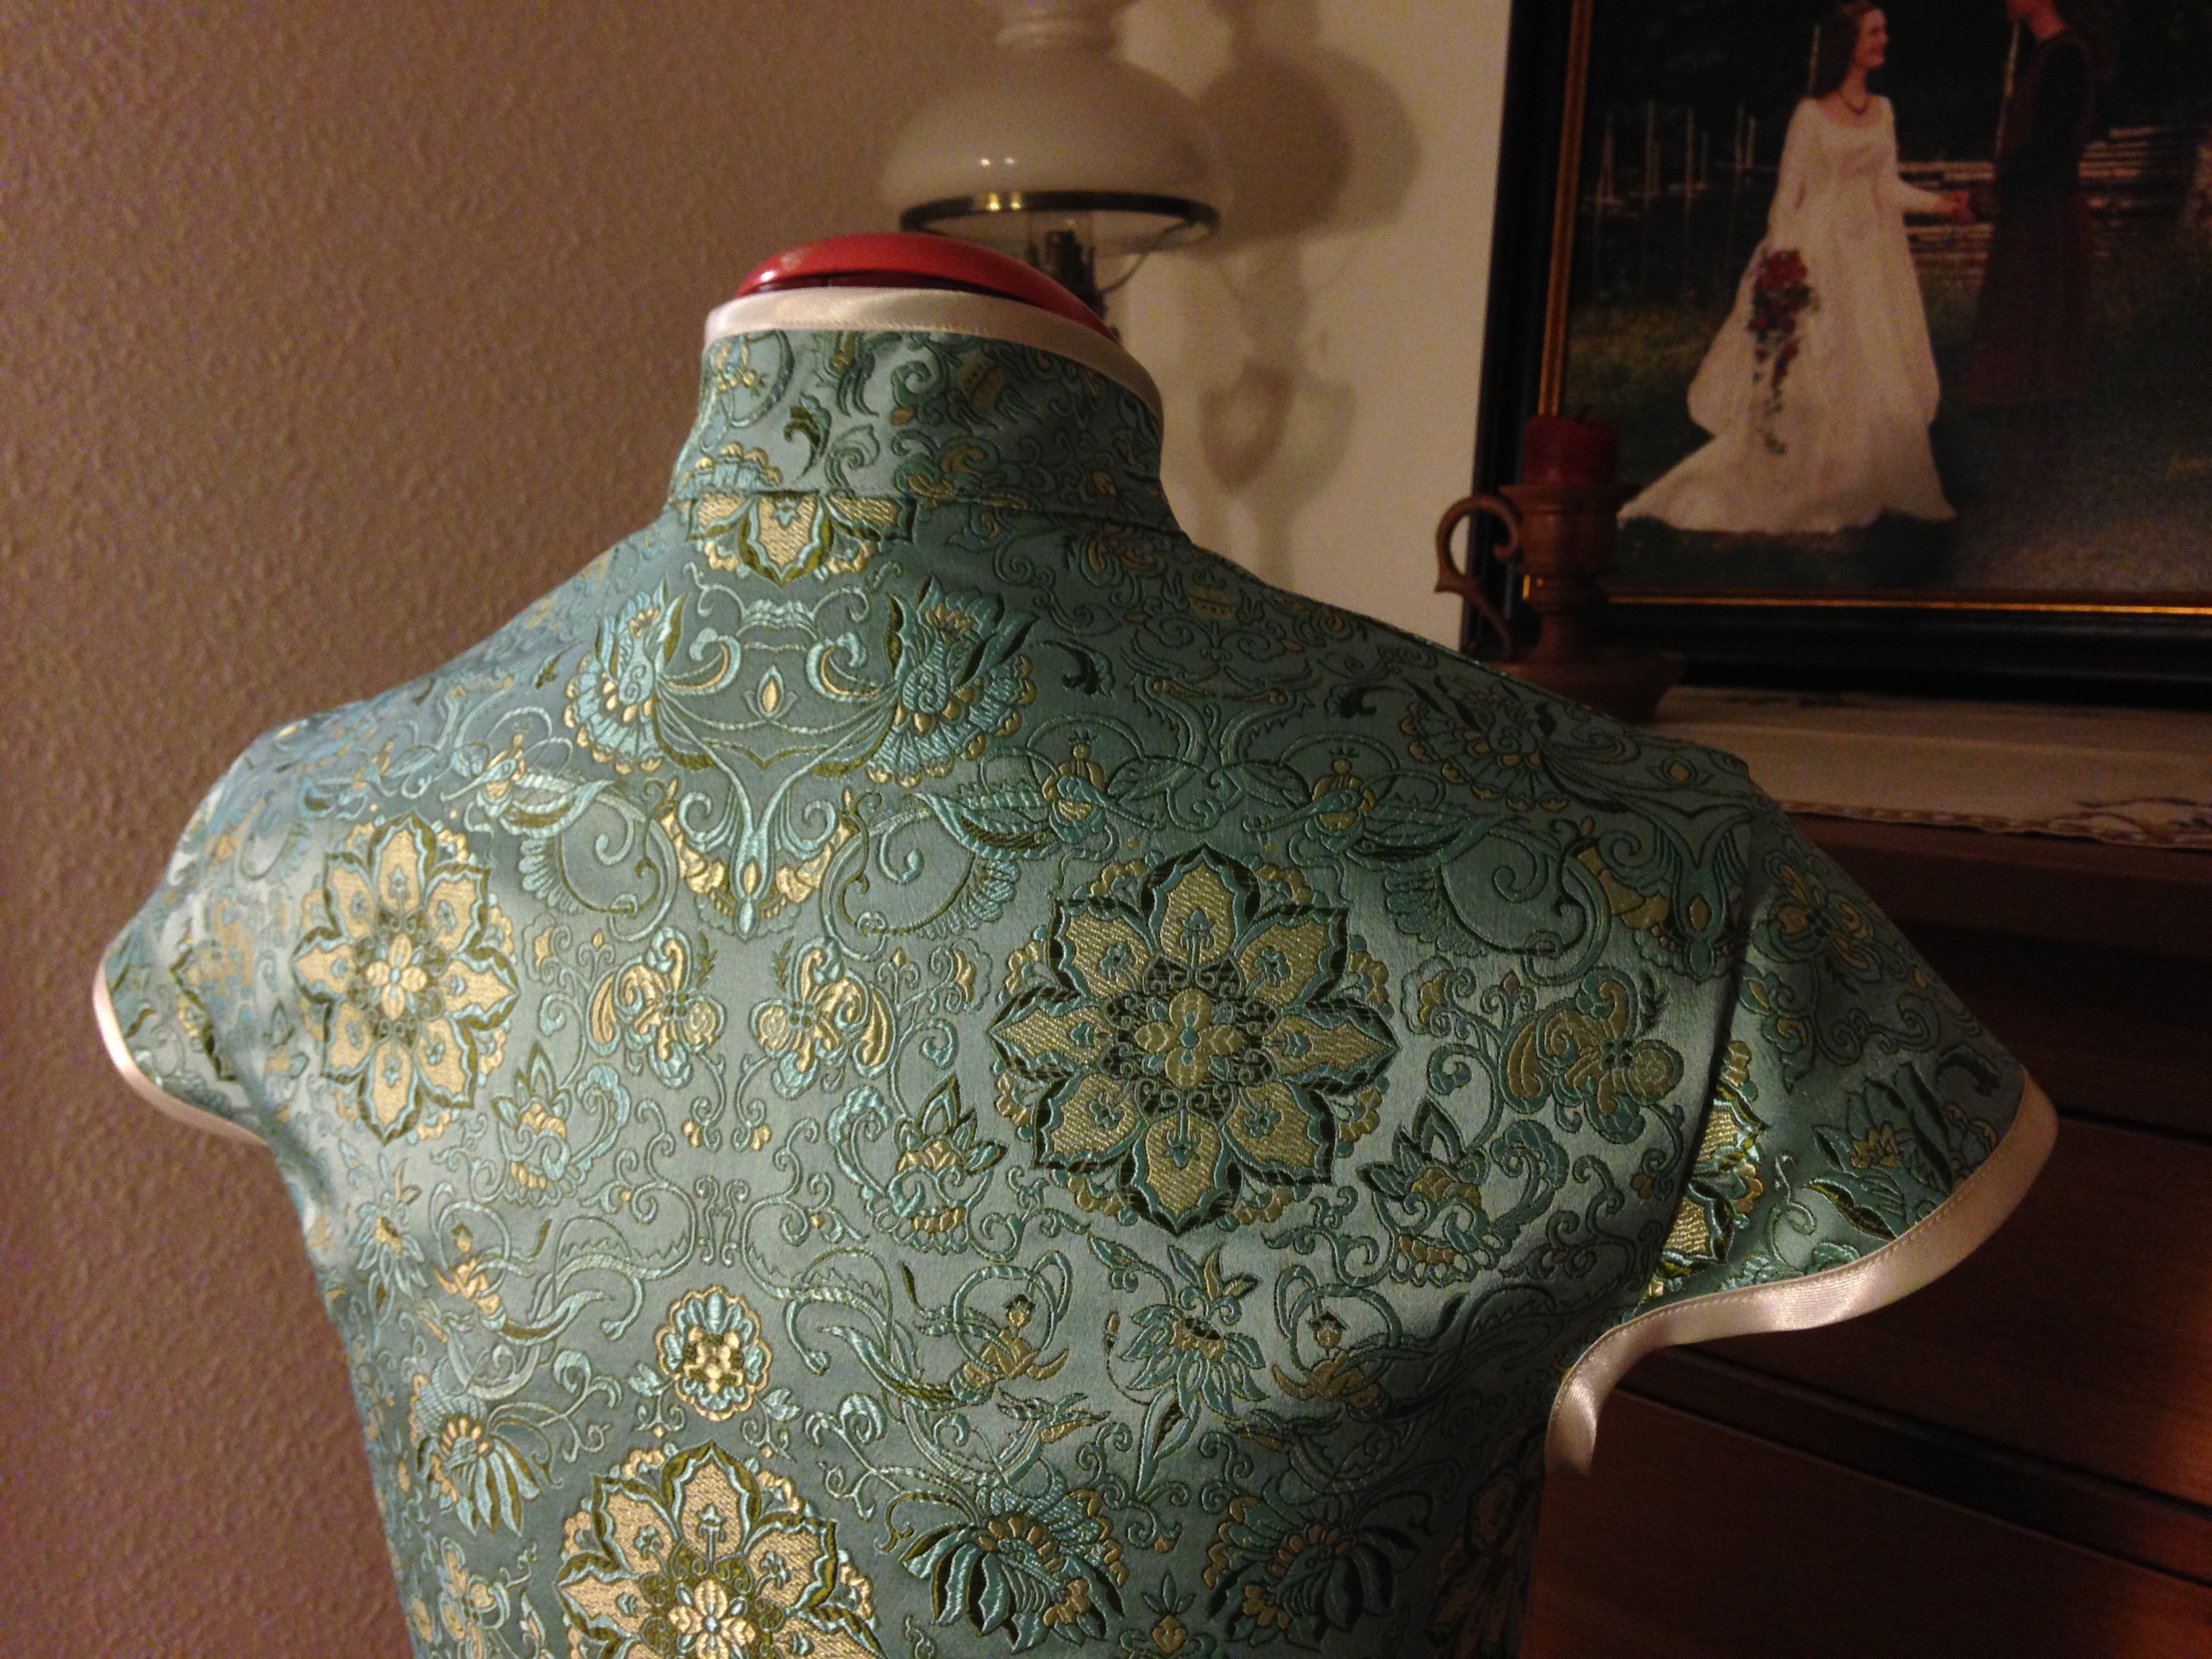
Maybe you’re beginning to get sick of hearing about all the wonderful fabrics my mother gives to me? Sorry, but here’s yet another such post. This Chinese silk she purchased on my behalf, on a trip to that Eastern fabric wonderland. The pattern is lovely, with many different motives, like happy dragons, sea folk and floral patterns. I think it is quite like a fairytale.
My greatest challenge was to use the 3 metres long and 72 cm wide fabric wisely. Because of the motives, the fabric could only be used in one direction, so I couldn’t get as much fabric from it as if I could have used it in both directions. Therefore I sketched and scrapped several ideas before I started the pattern making.
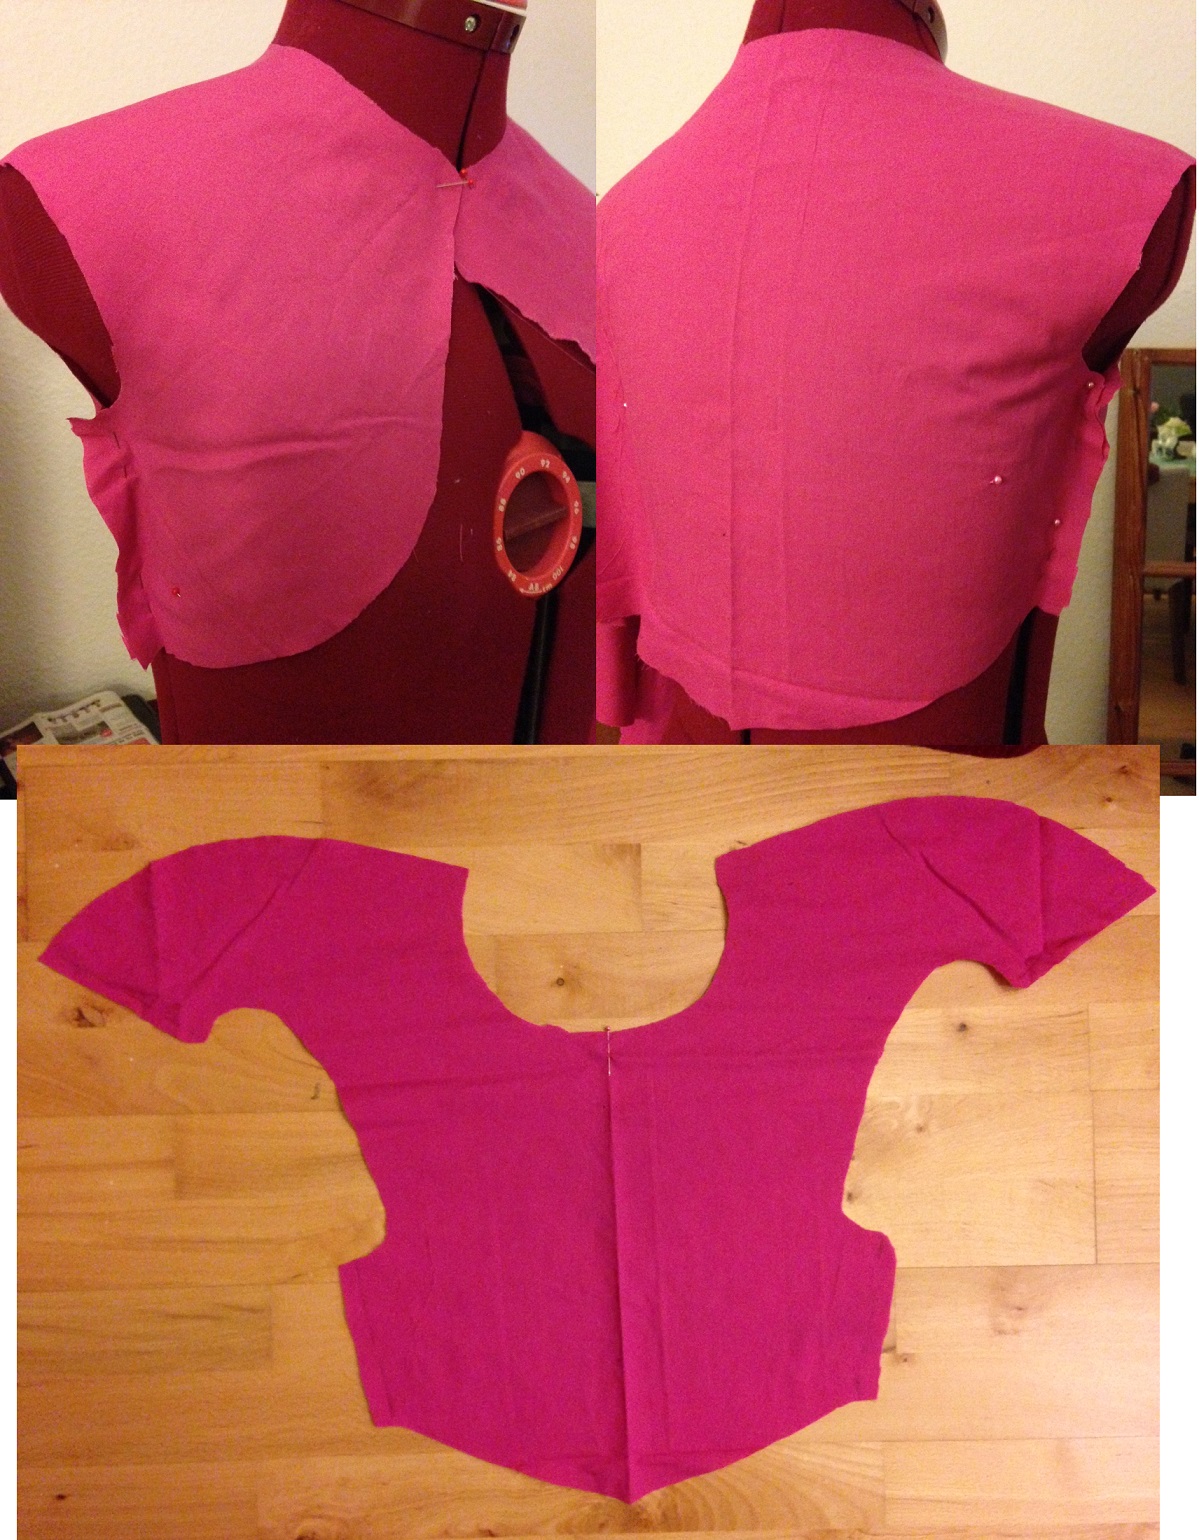
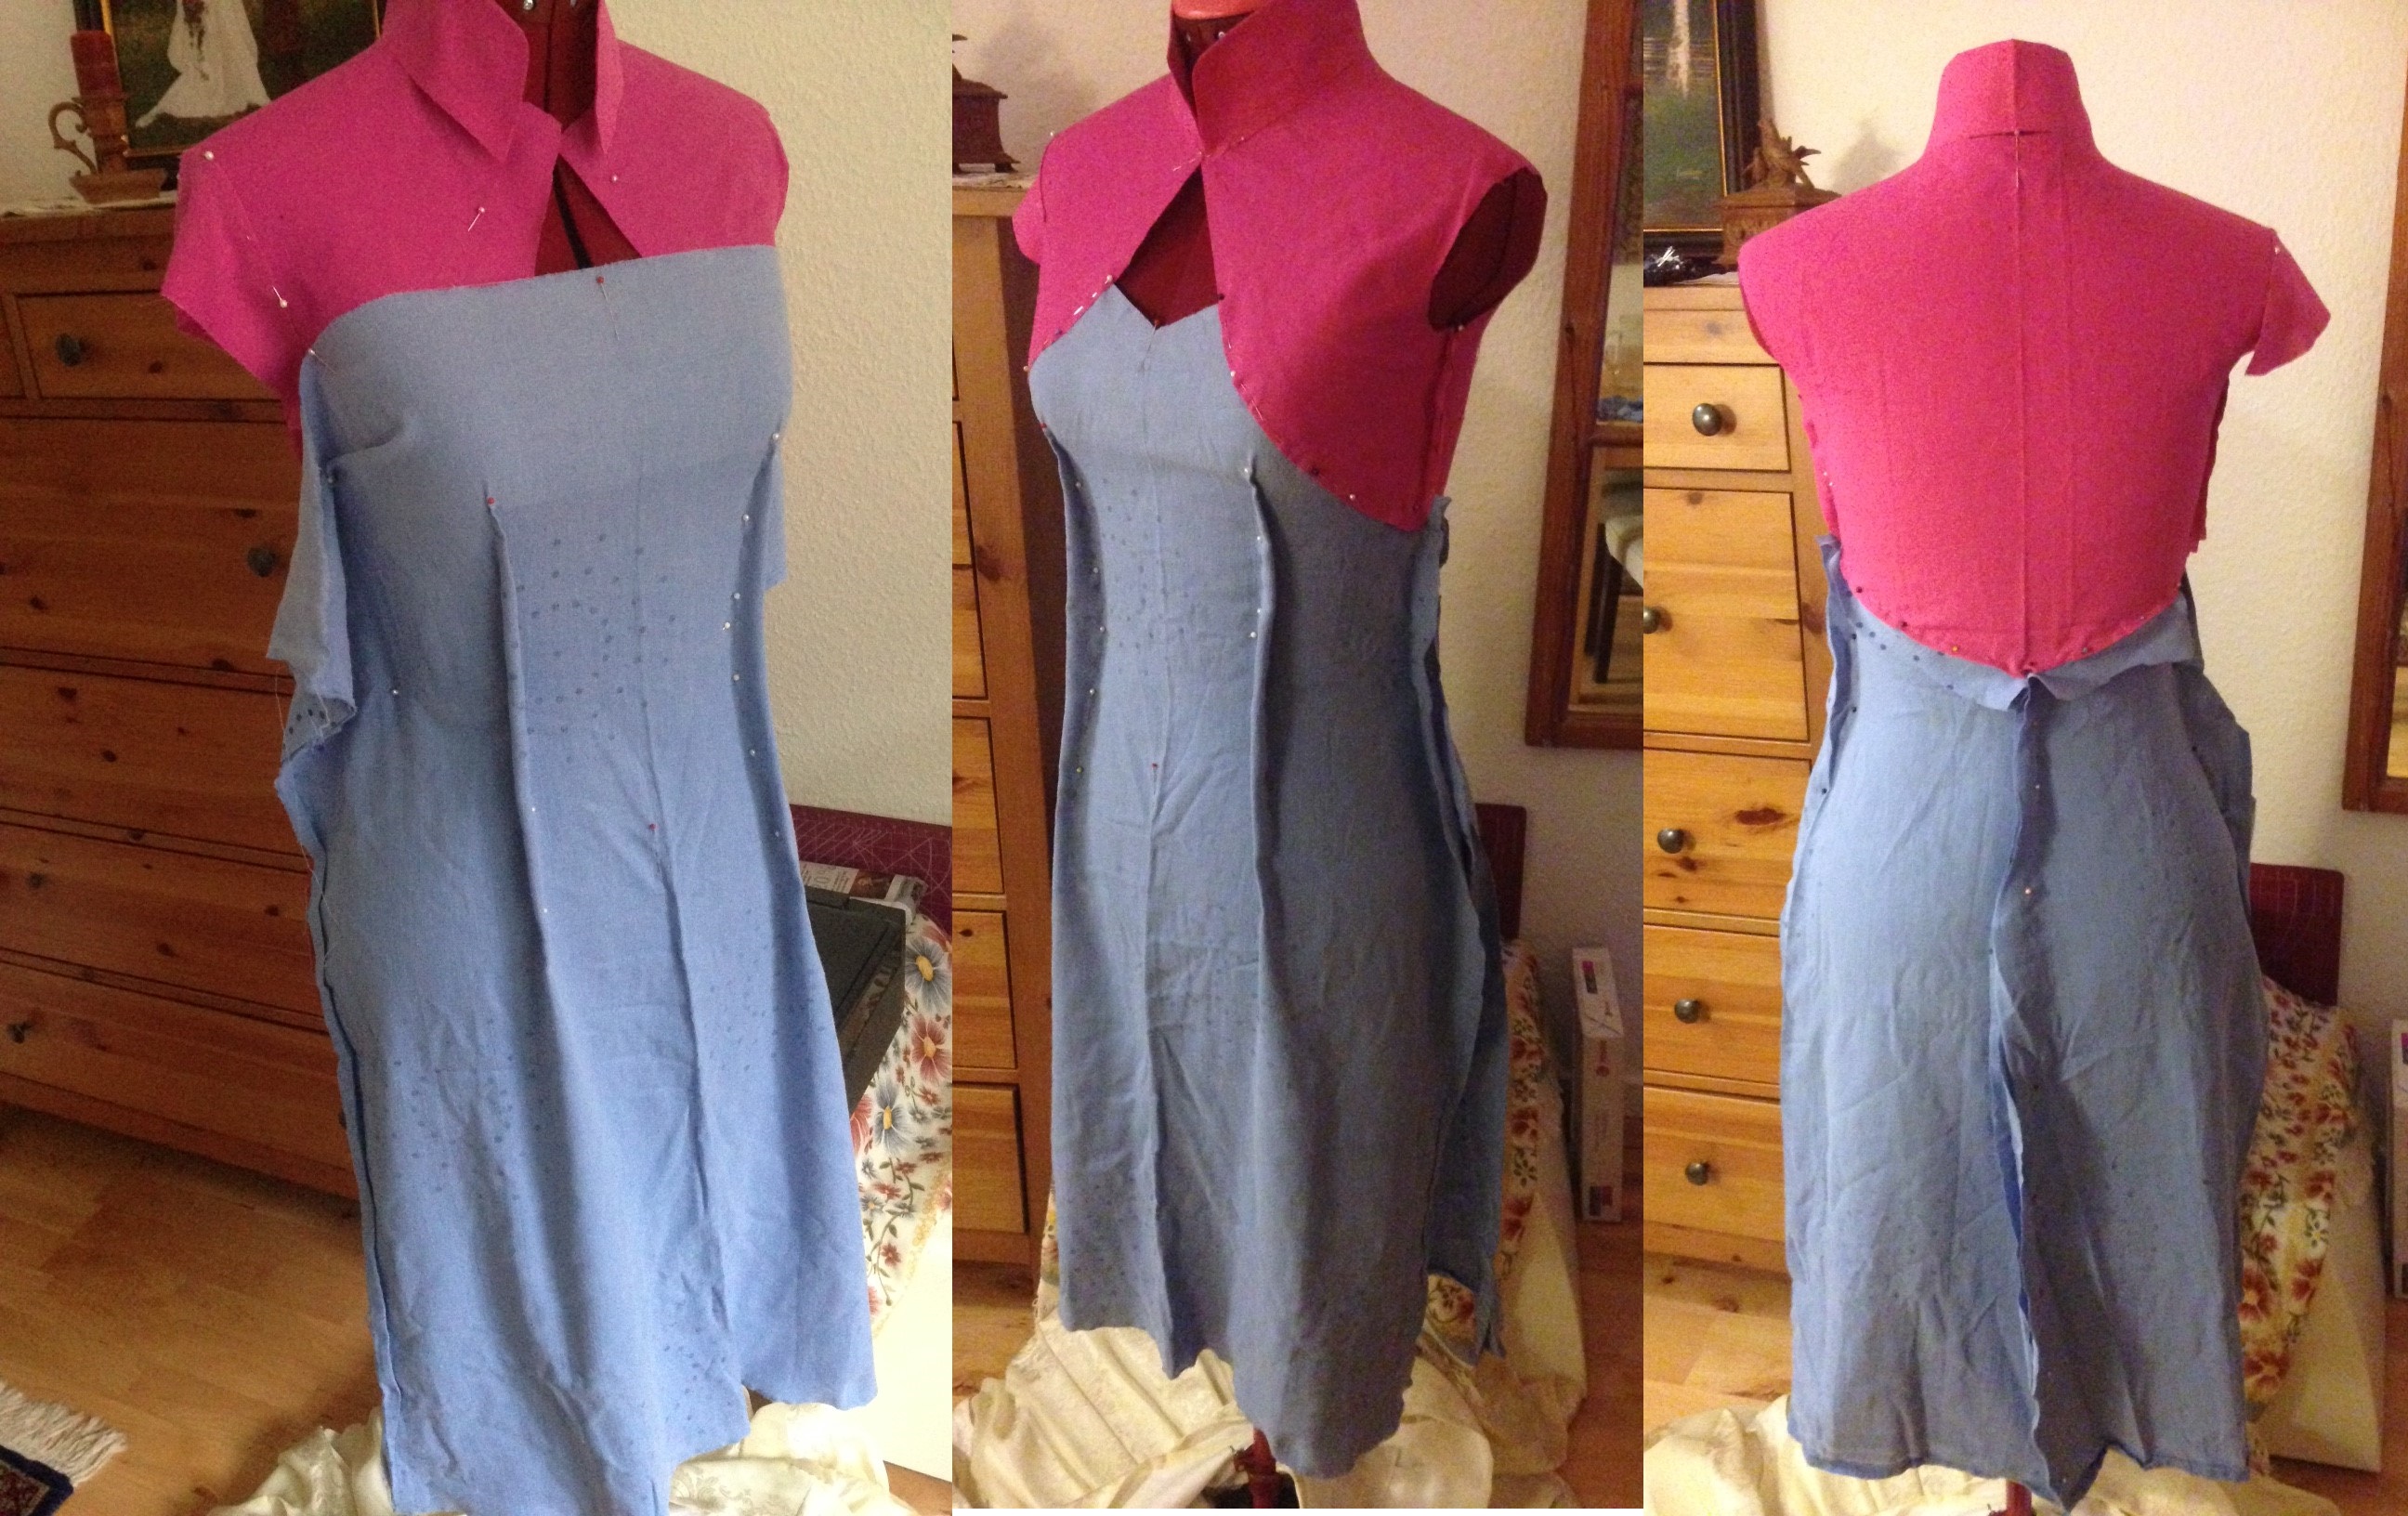
Making the mockup
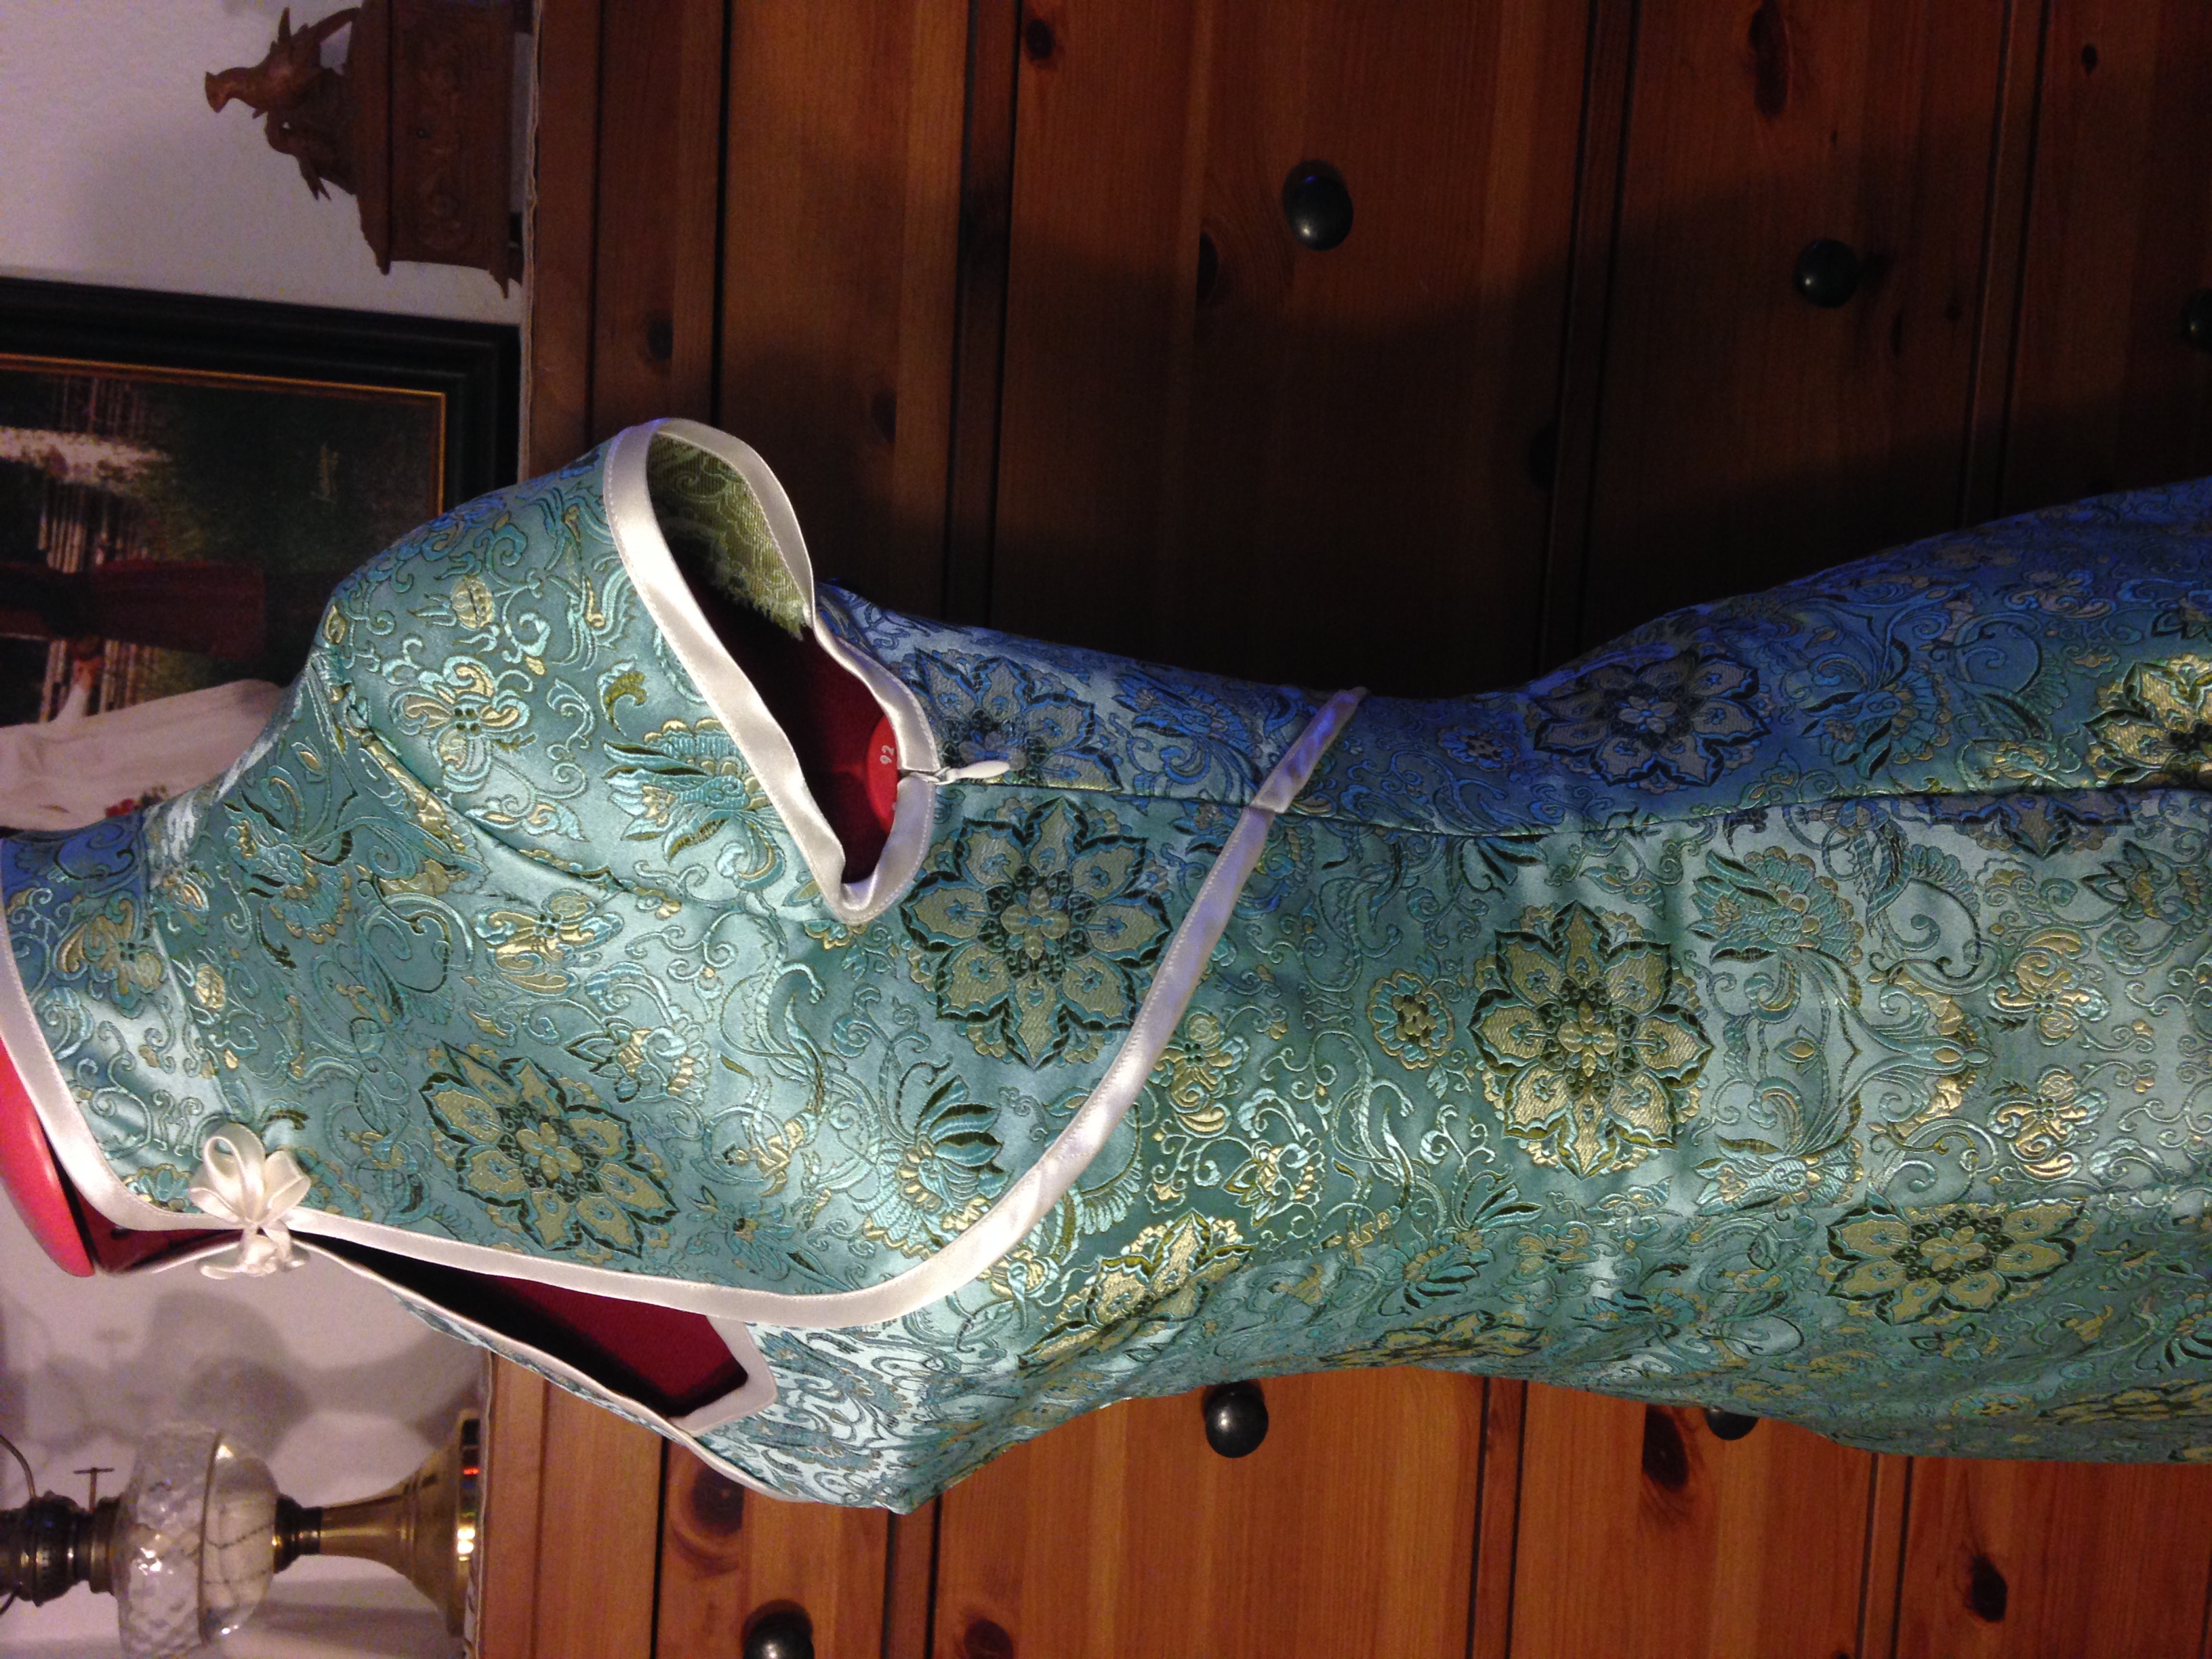
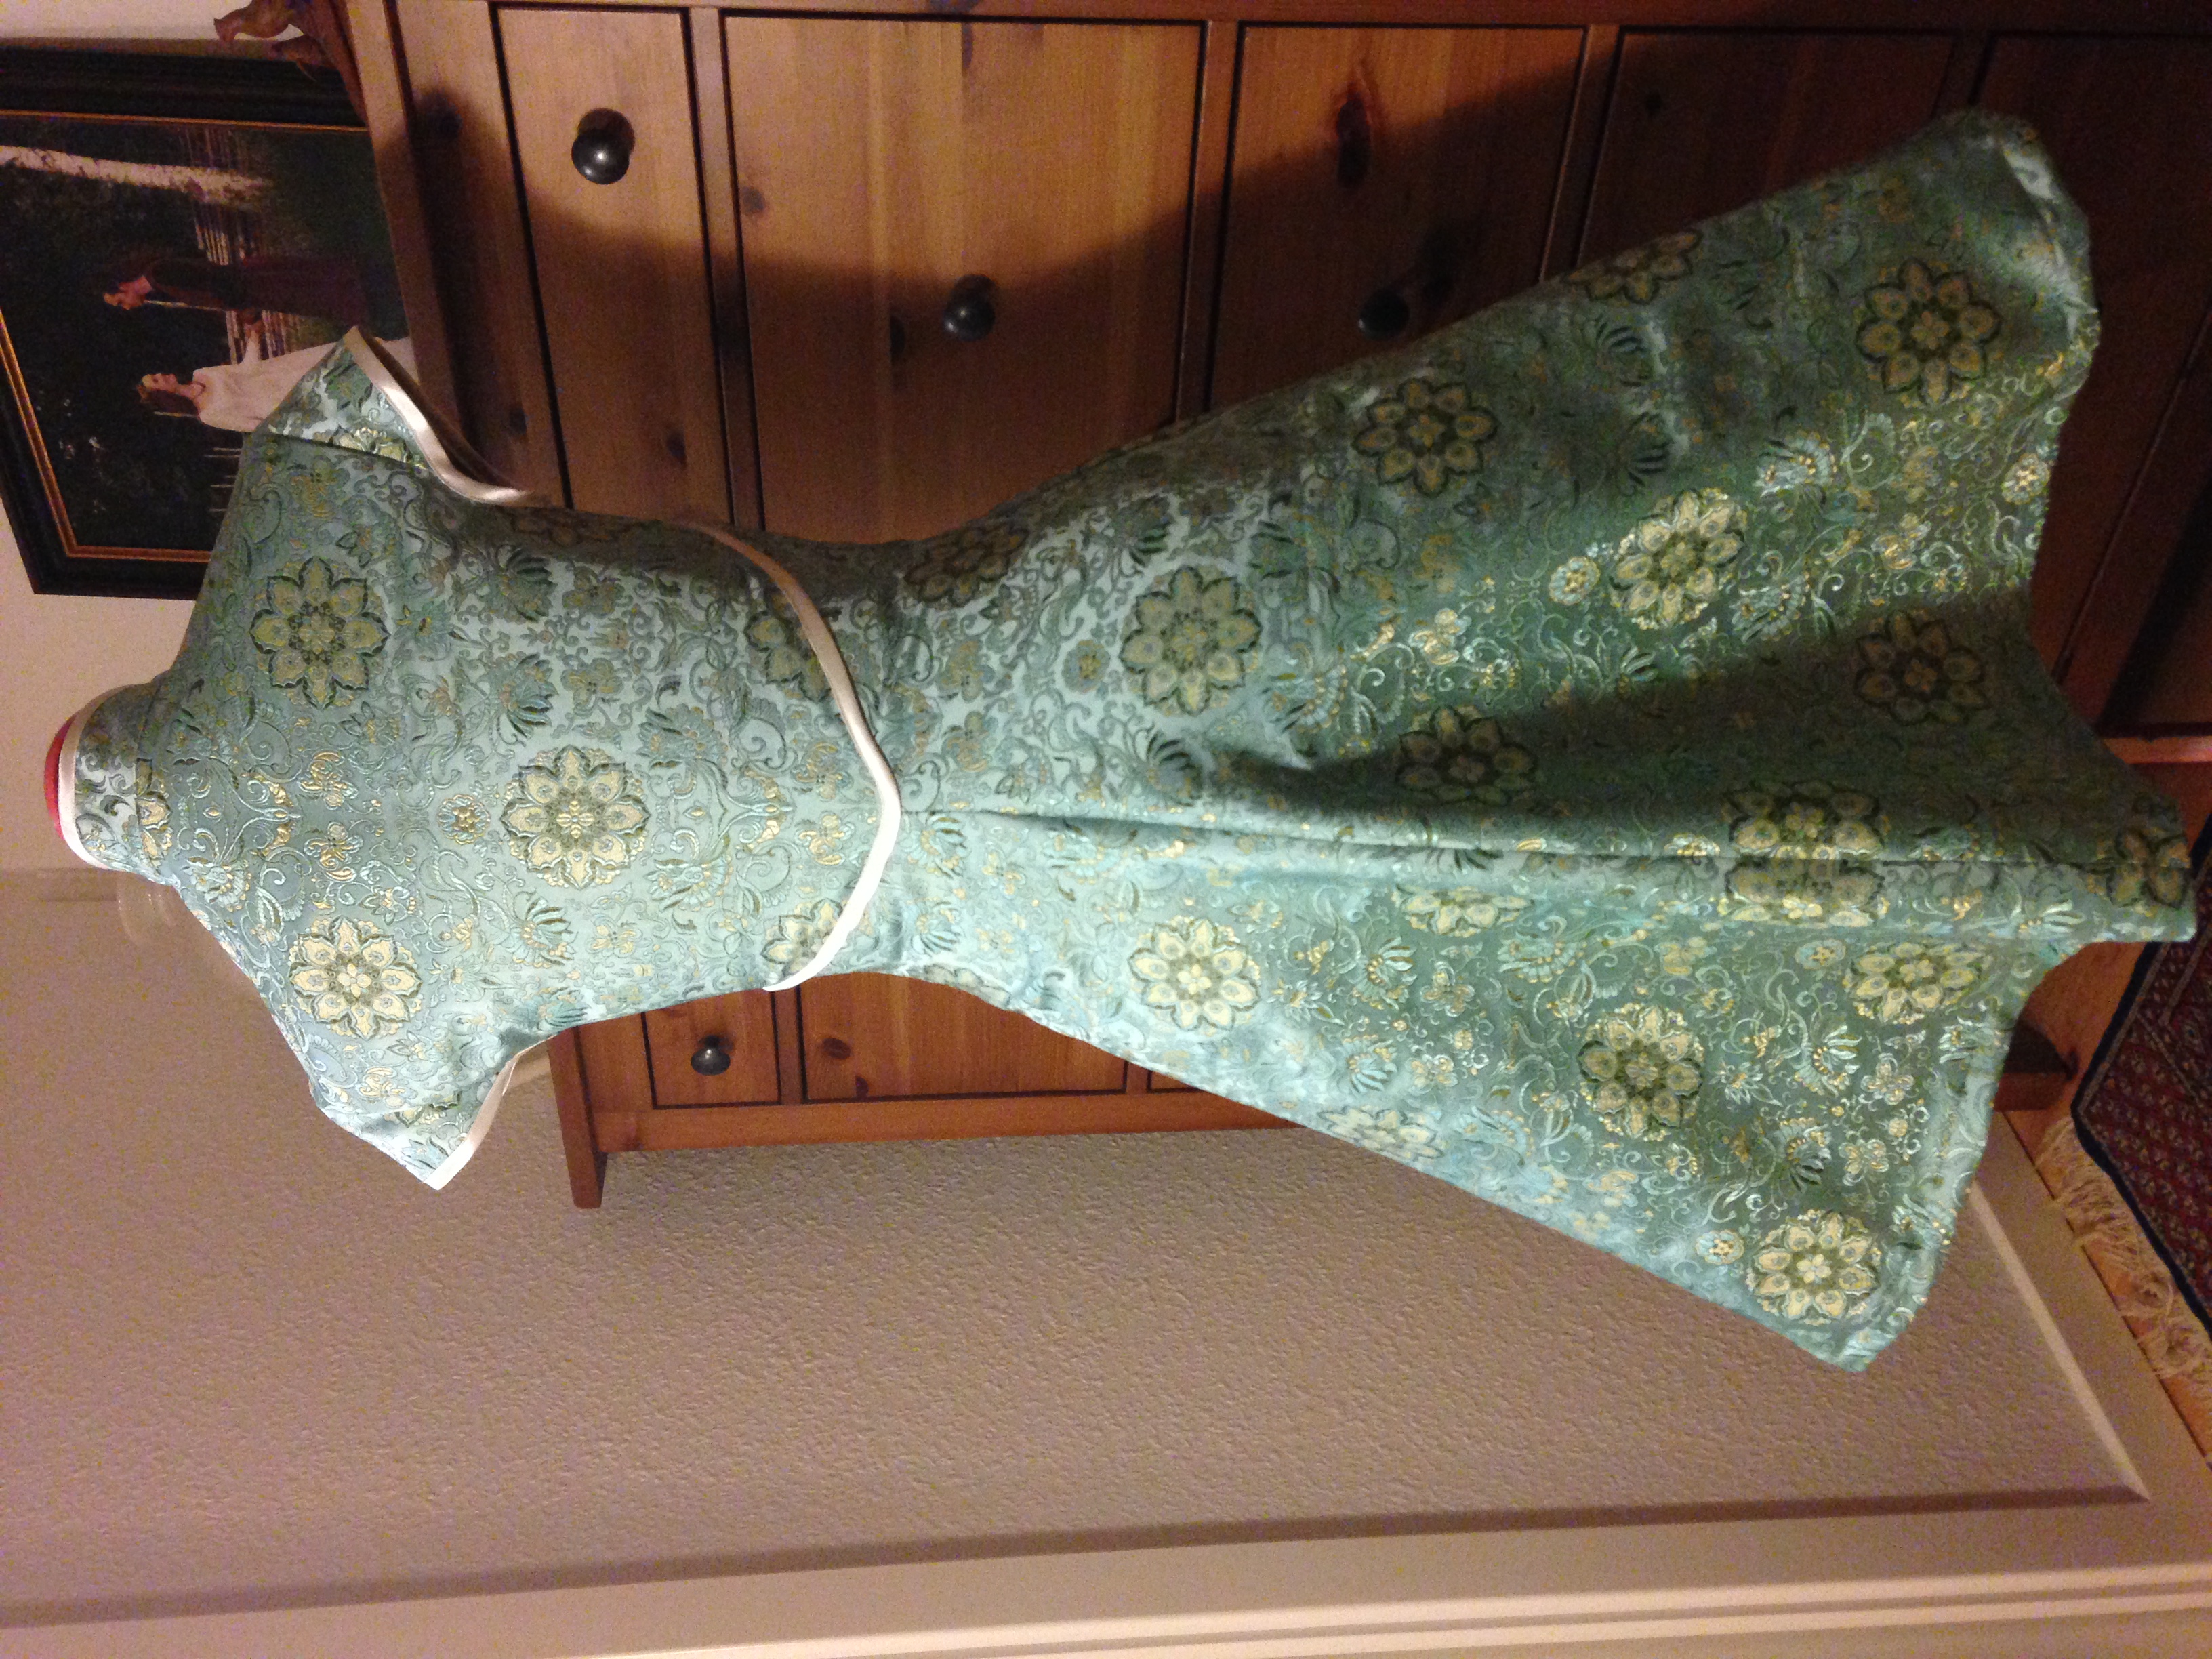
As usual, I layed the fabric out on the mannequin and pinned it down and cut away superfluous fabric, in the way that made the fewest wrinkles.The vest-like top of the dress, cut in one piece, with the only two seams in the sides.The skirt part, where I tried to get as great a circumference as possible out of the narrow fabric. I ended up with three panels – one in the front and two in the back. As you can see, I had not yet decided whether to make the vest and skirt as separate pieces, only sewn together in the back and closed with push buttons in front, or sewn together the whole way around. Because of limited amounts of fabric and lack of persistence, I ended with the latter.
After having made the mockup and transferred it to pattern paper, I was ready to cut the precious fabric. To my horror, I found out that I had made the fancy “one-piece-vest-part” too wide for the fabric. I had to divide this part in three, by making seams at the usual place, at the shoulders.
The unfortunate disproportion of the pattern (with “breast-fronts” in one part with the back)A wiser dressmaker would have folded the pattern at the shoulder, to match the side seams, and the have cut it at the fold. I didn’t, but it turned out alright anyway.
Then, I was finally ready for cutting the fabric and sewing the dress!
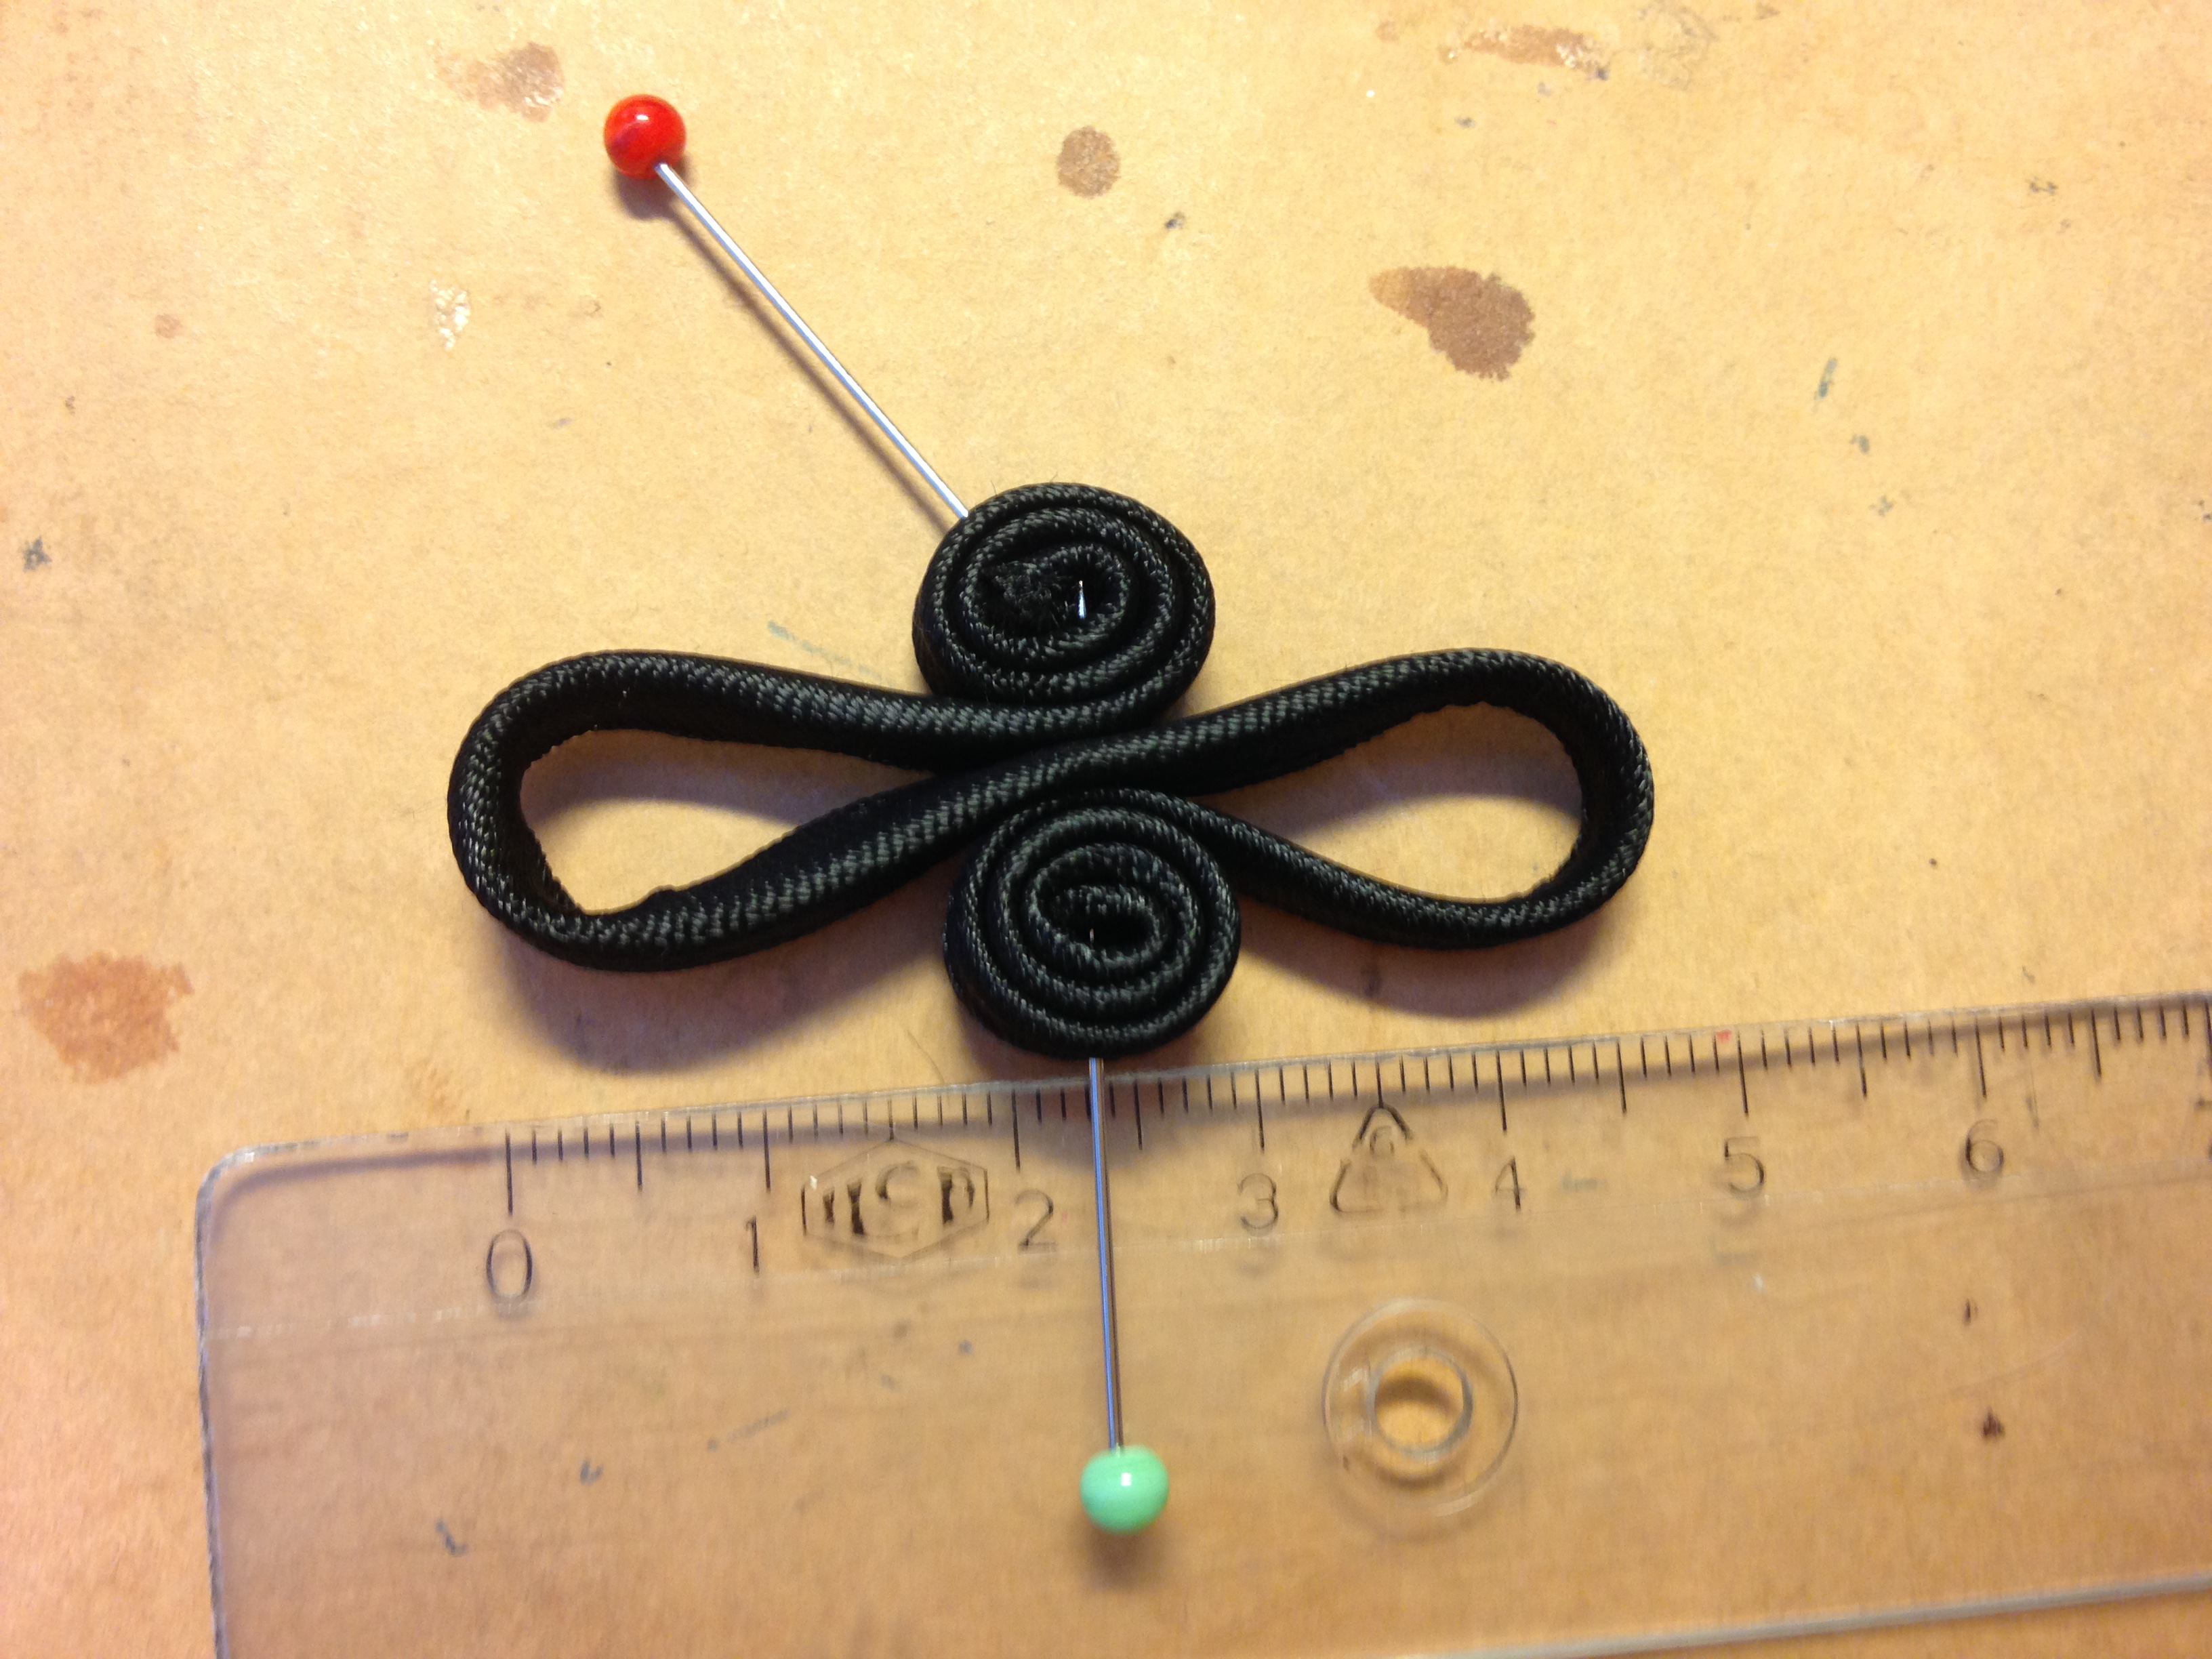
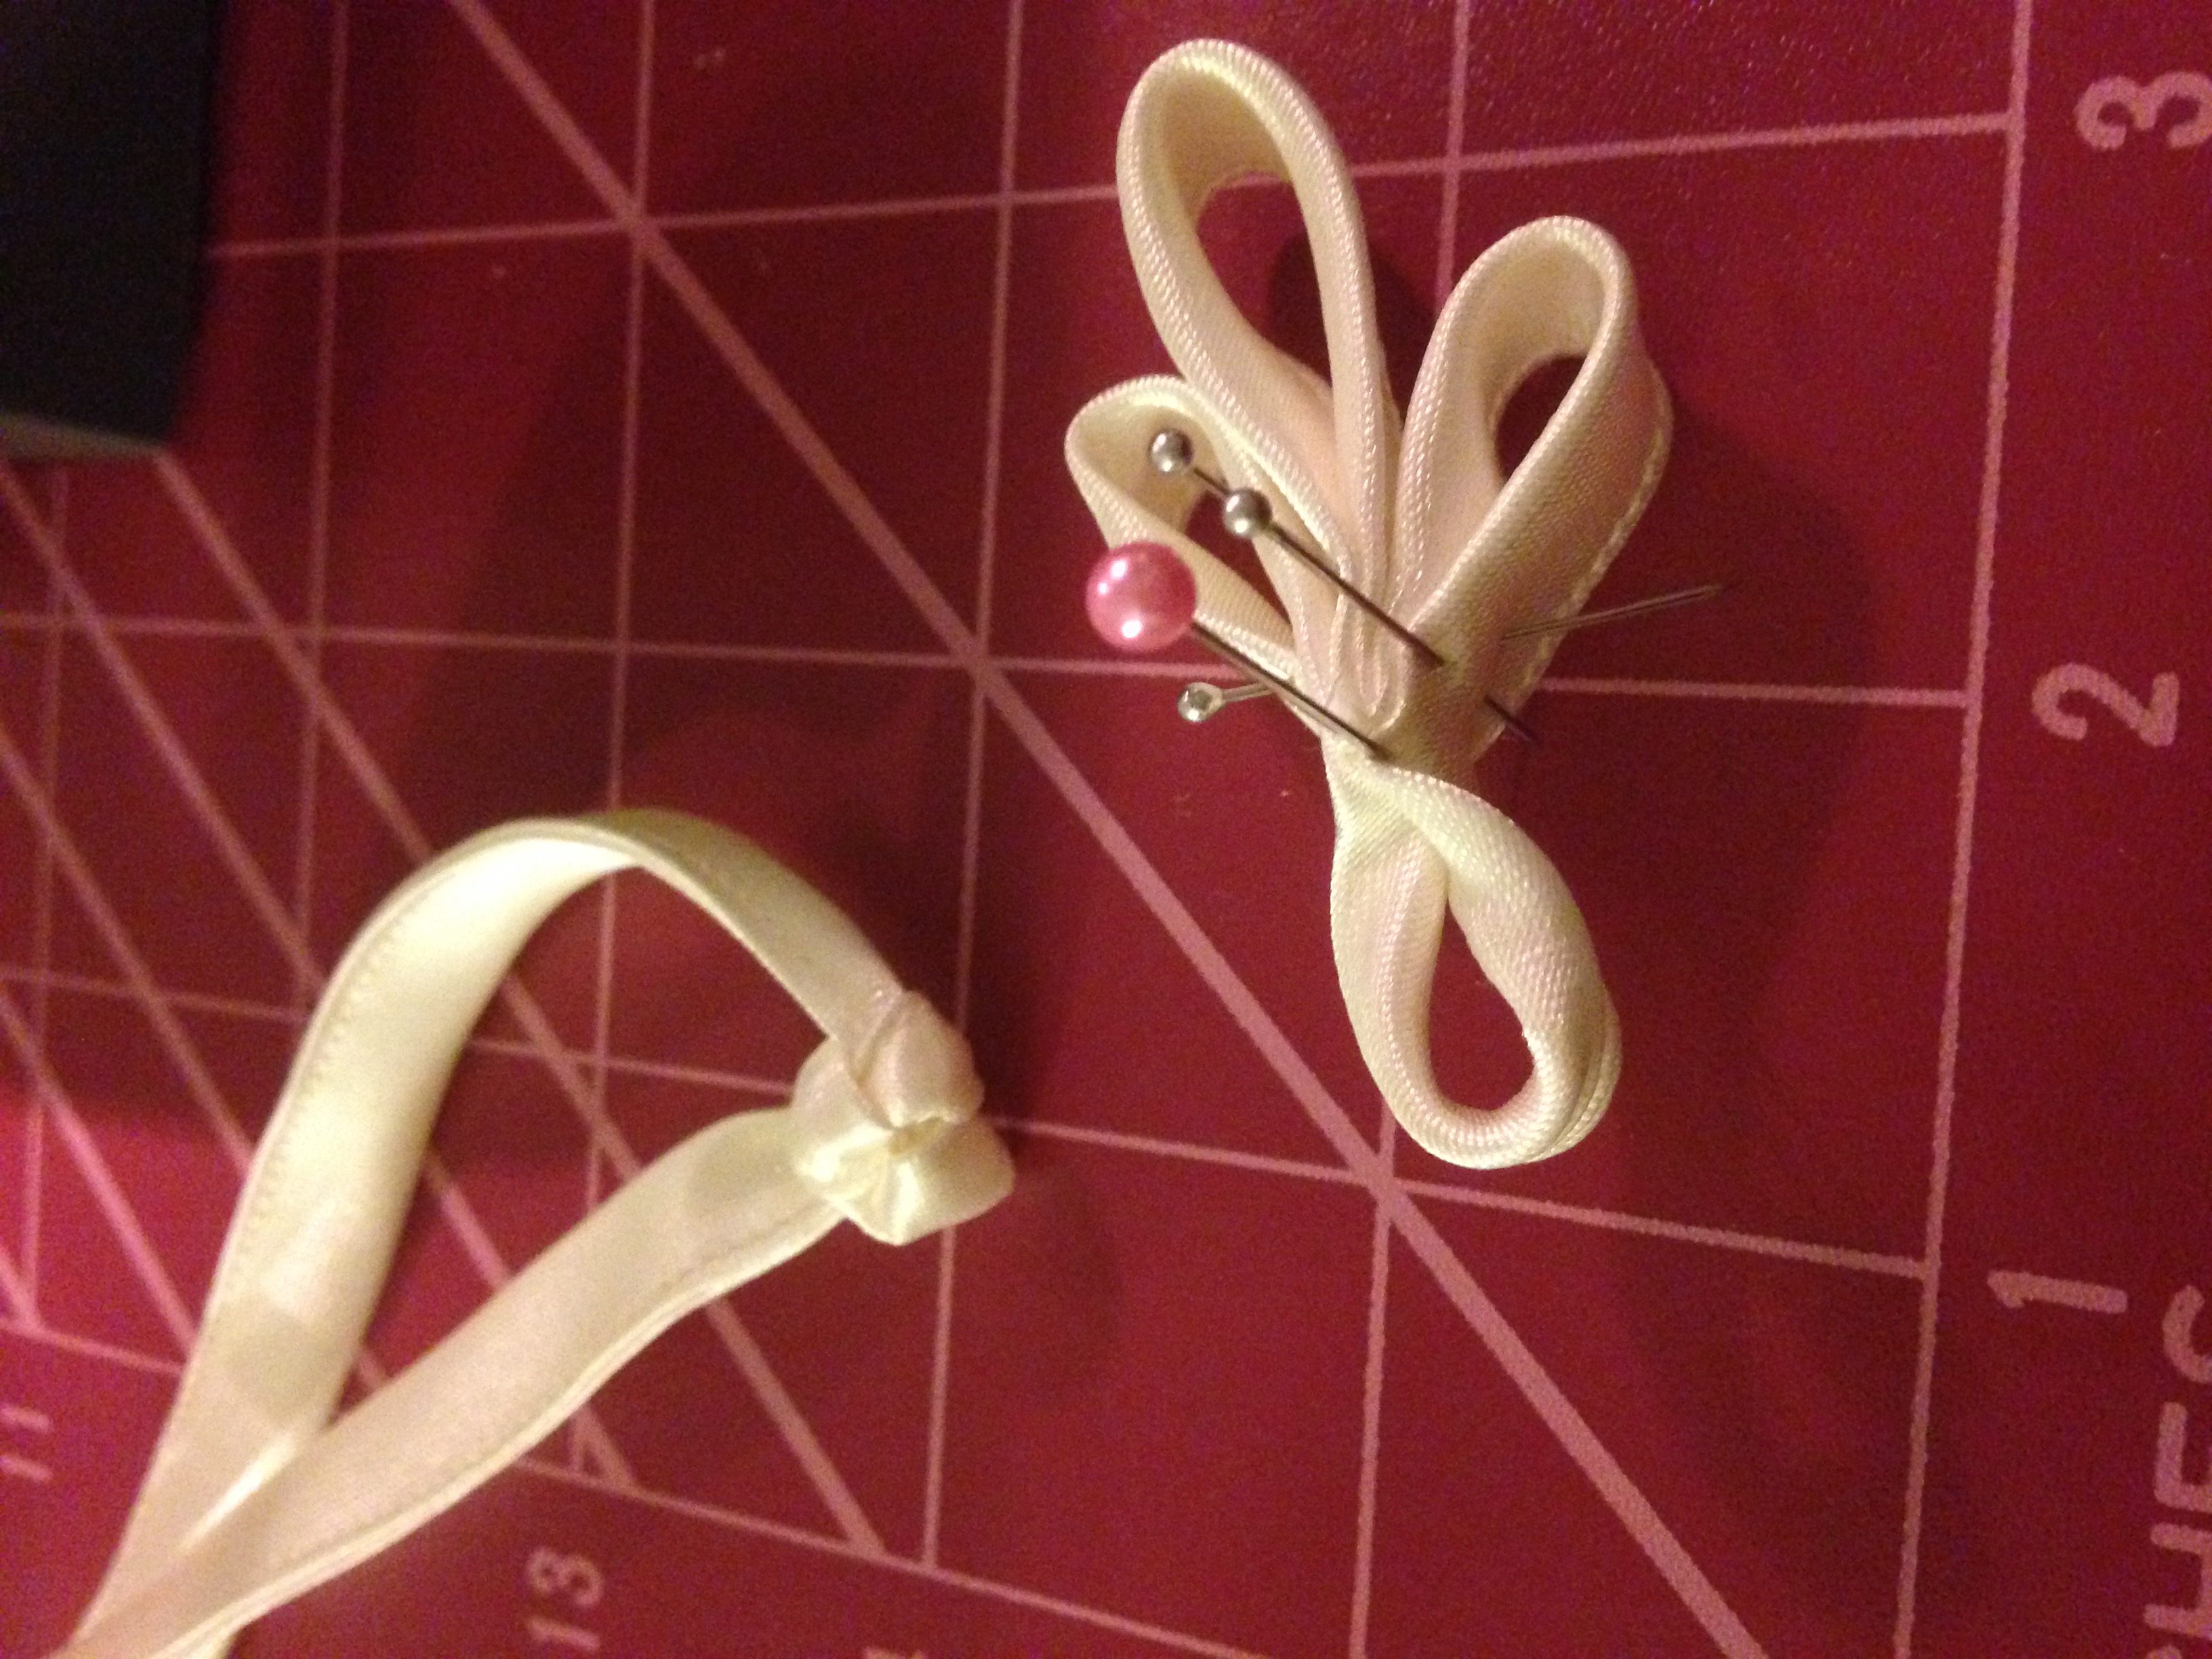
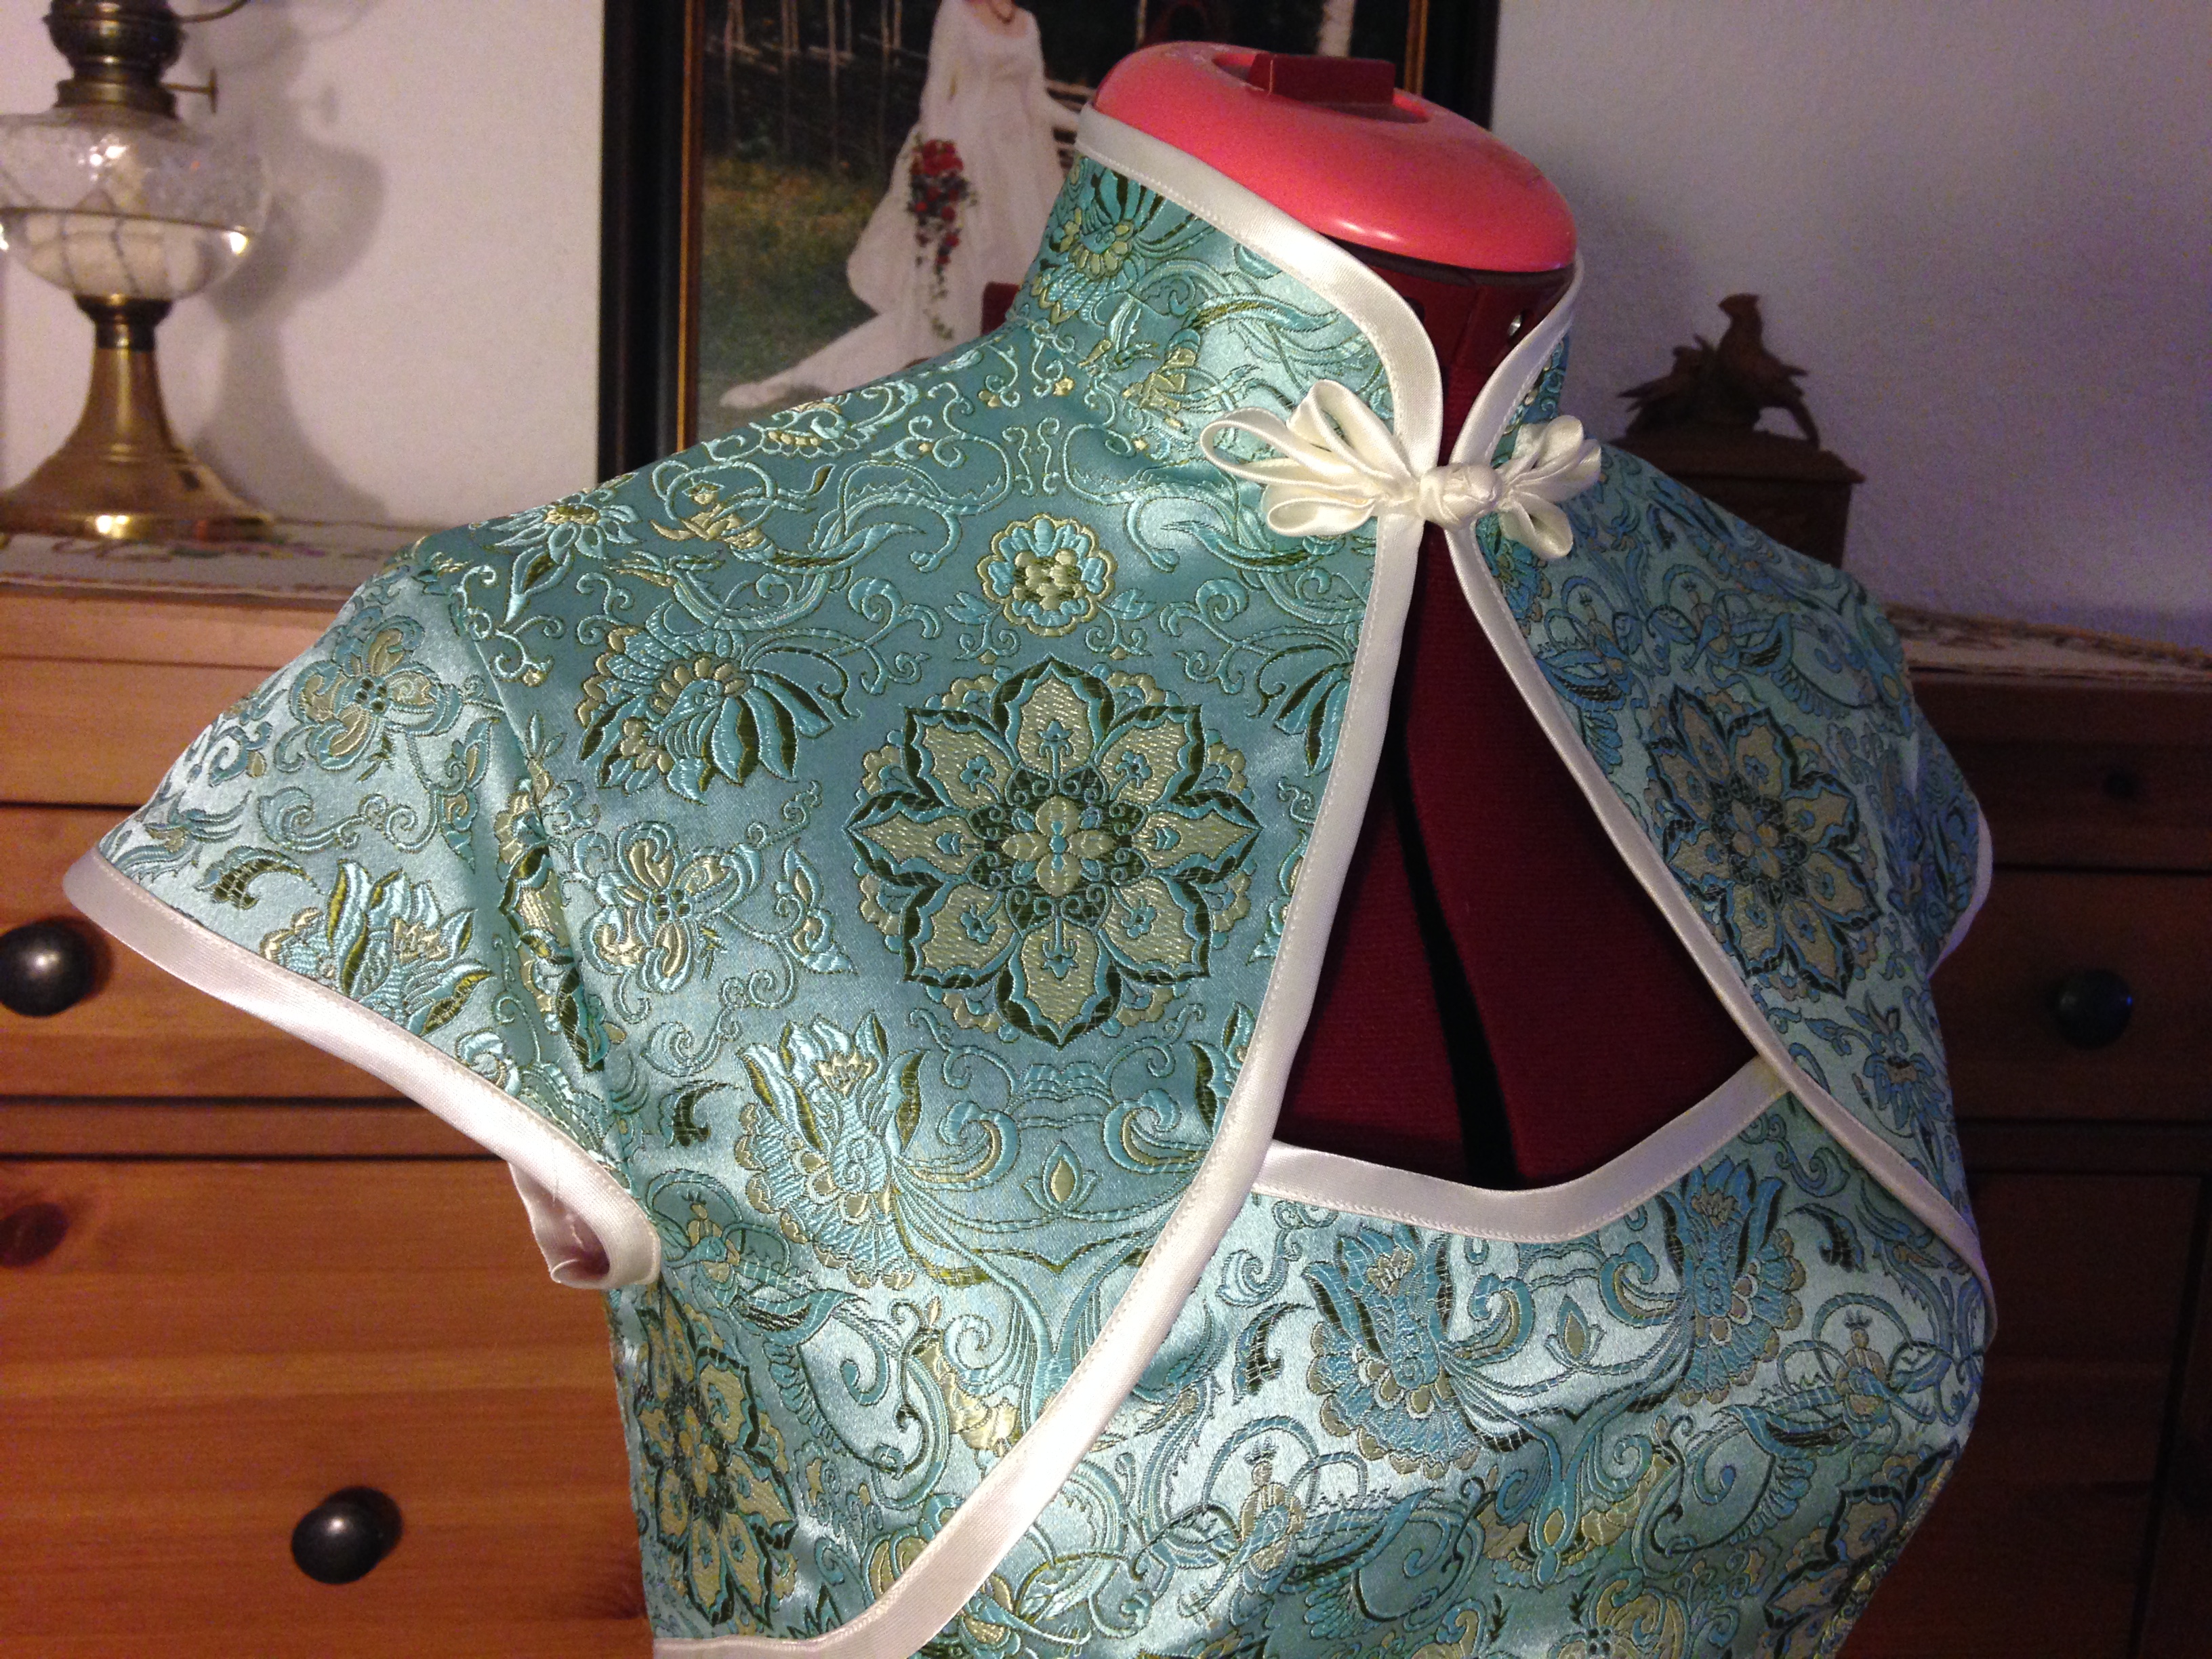
I made my own Chinese fabric buttons. There are great instructions on Google.
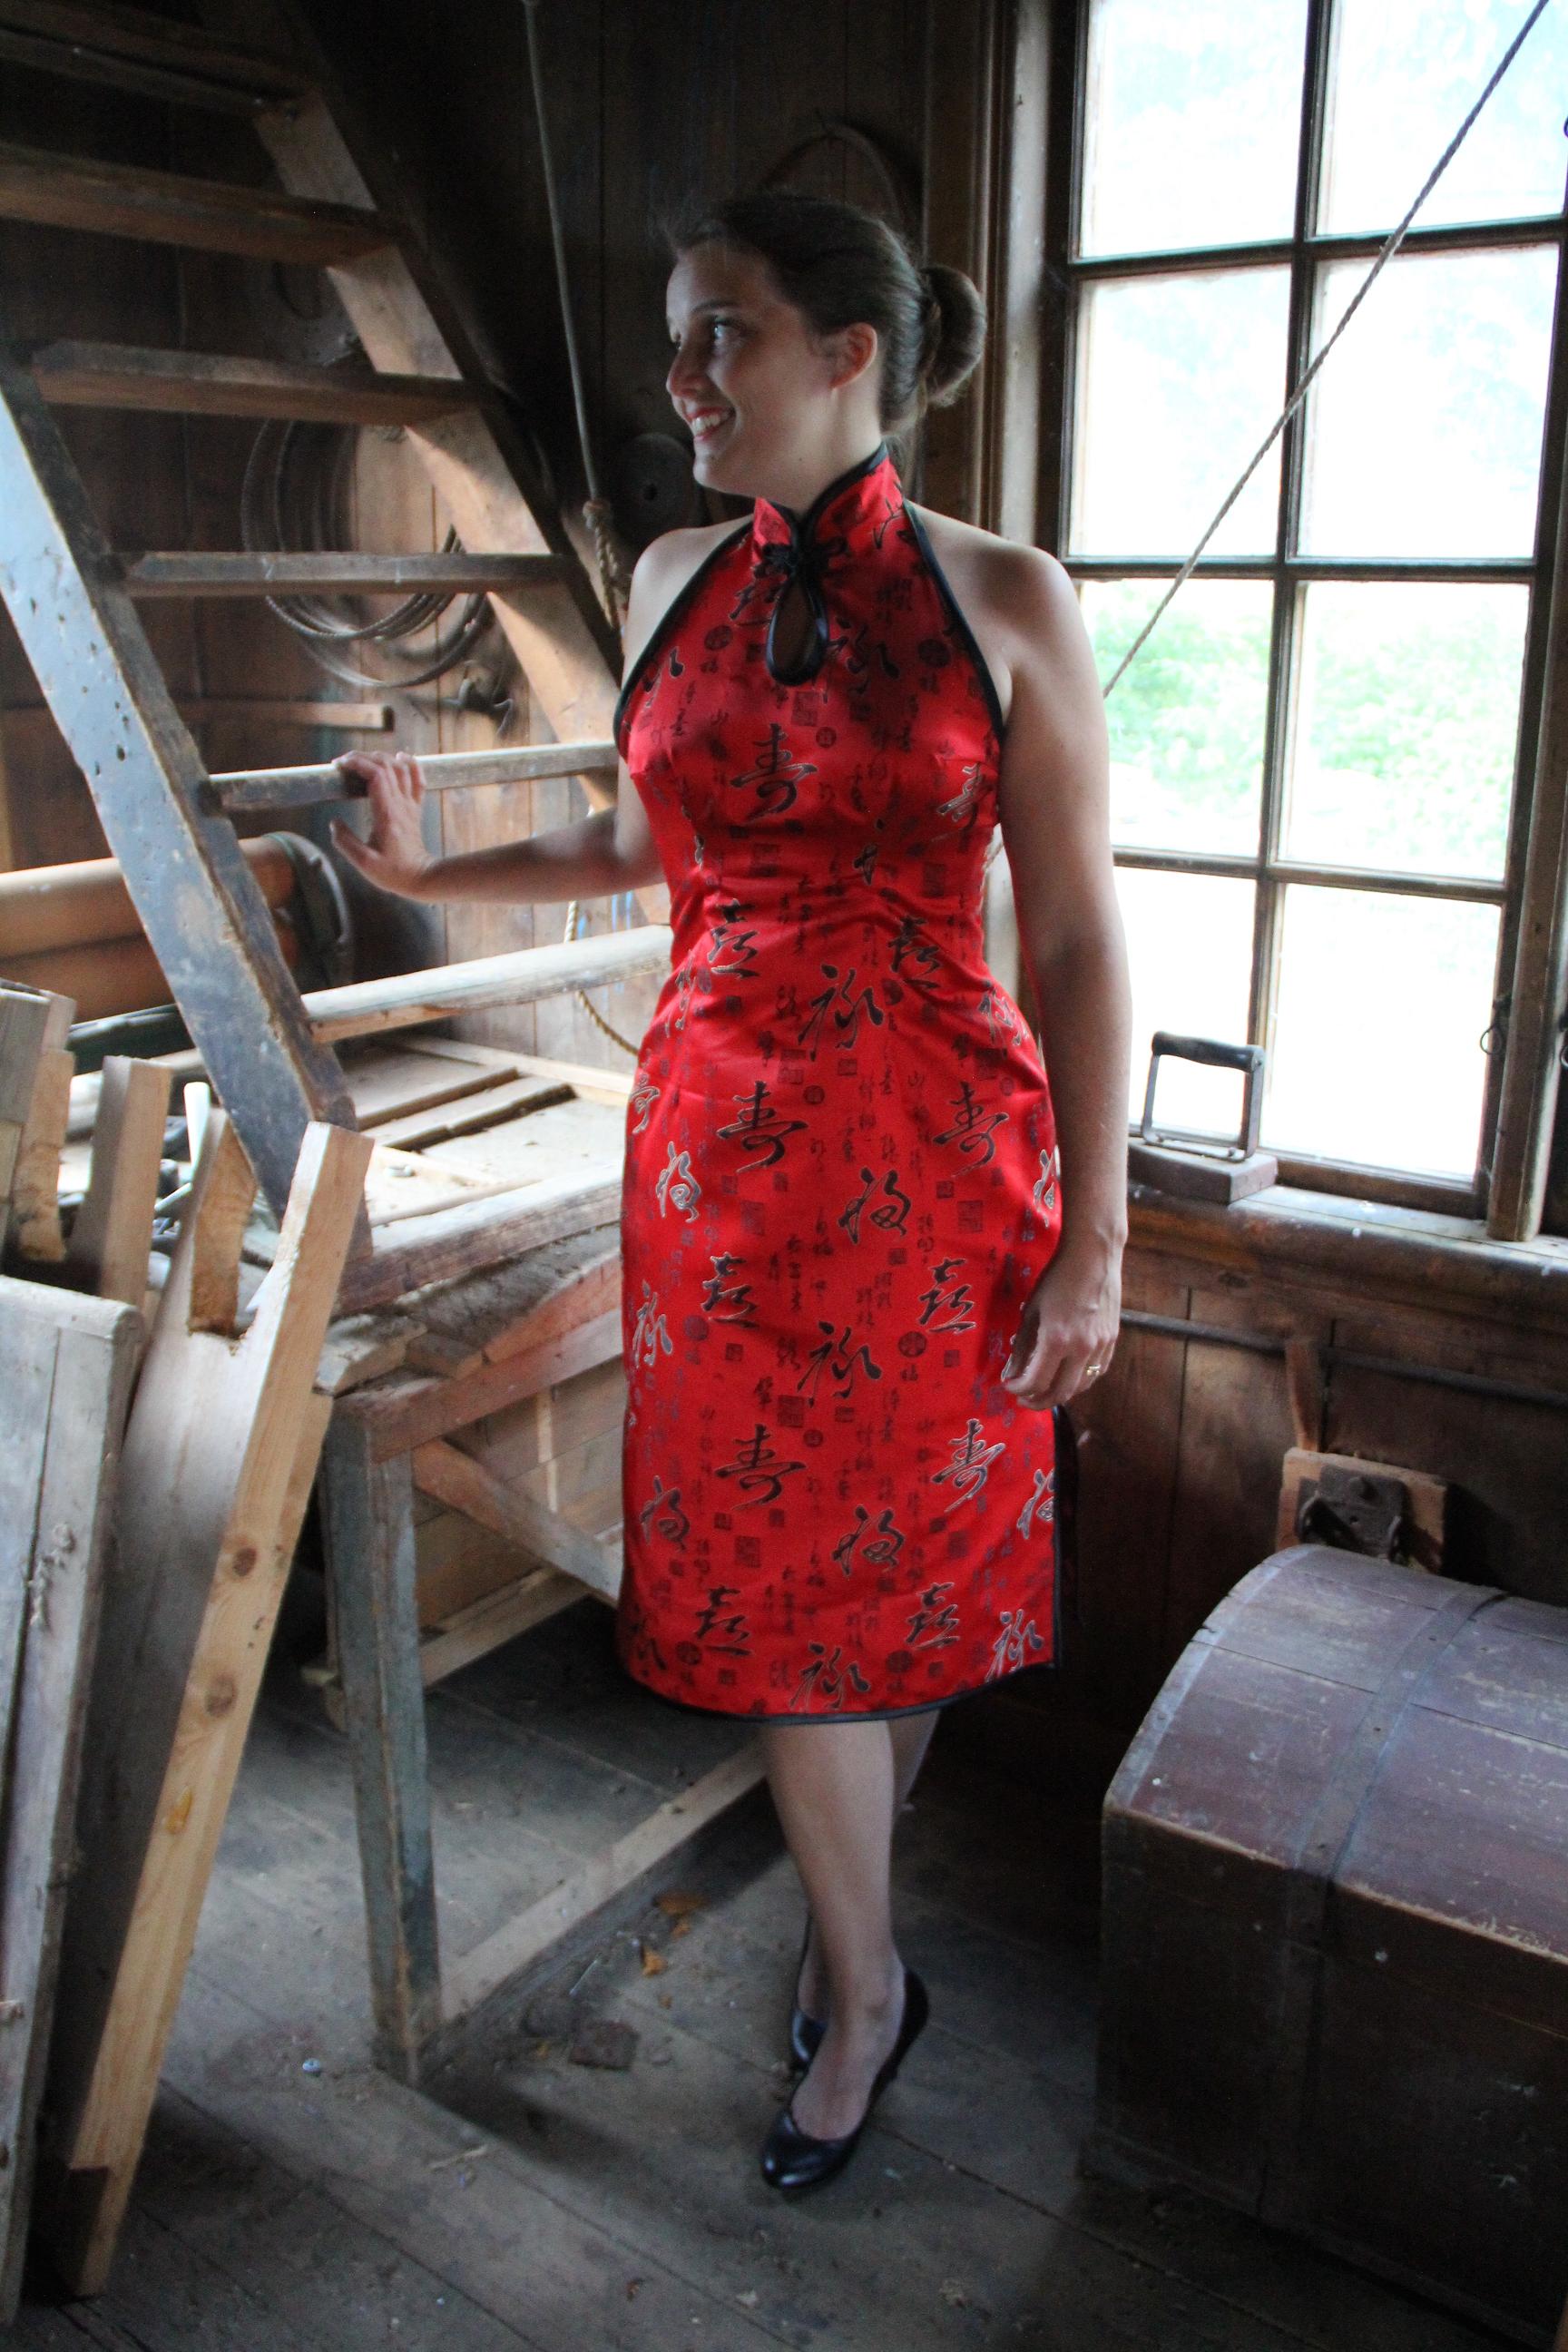
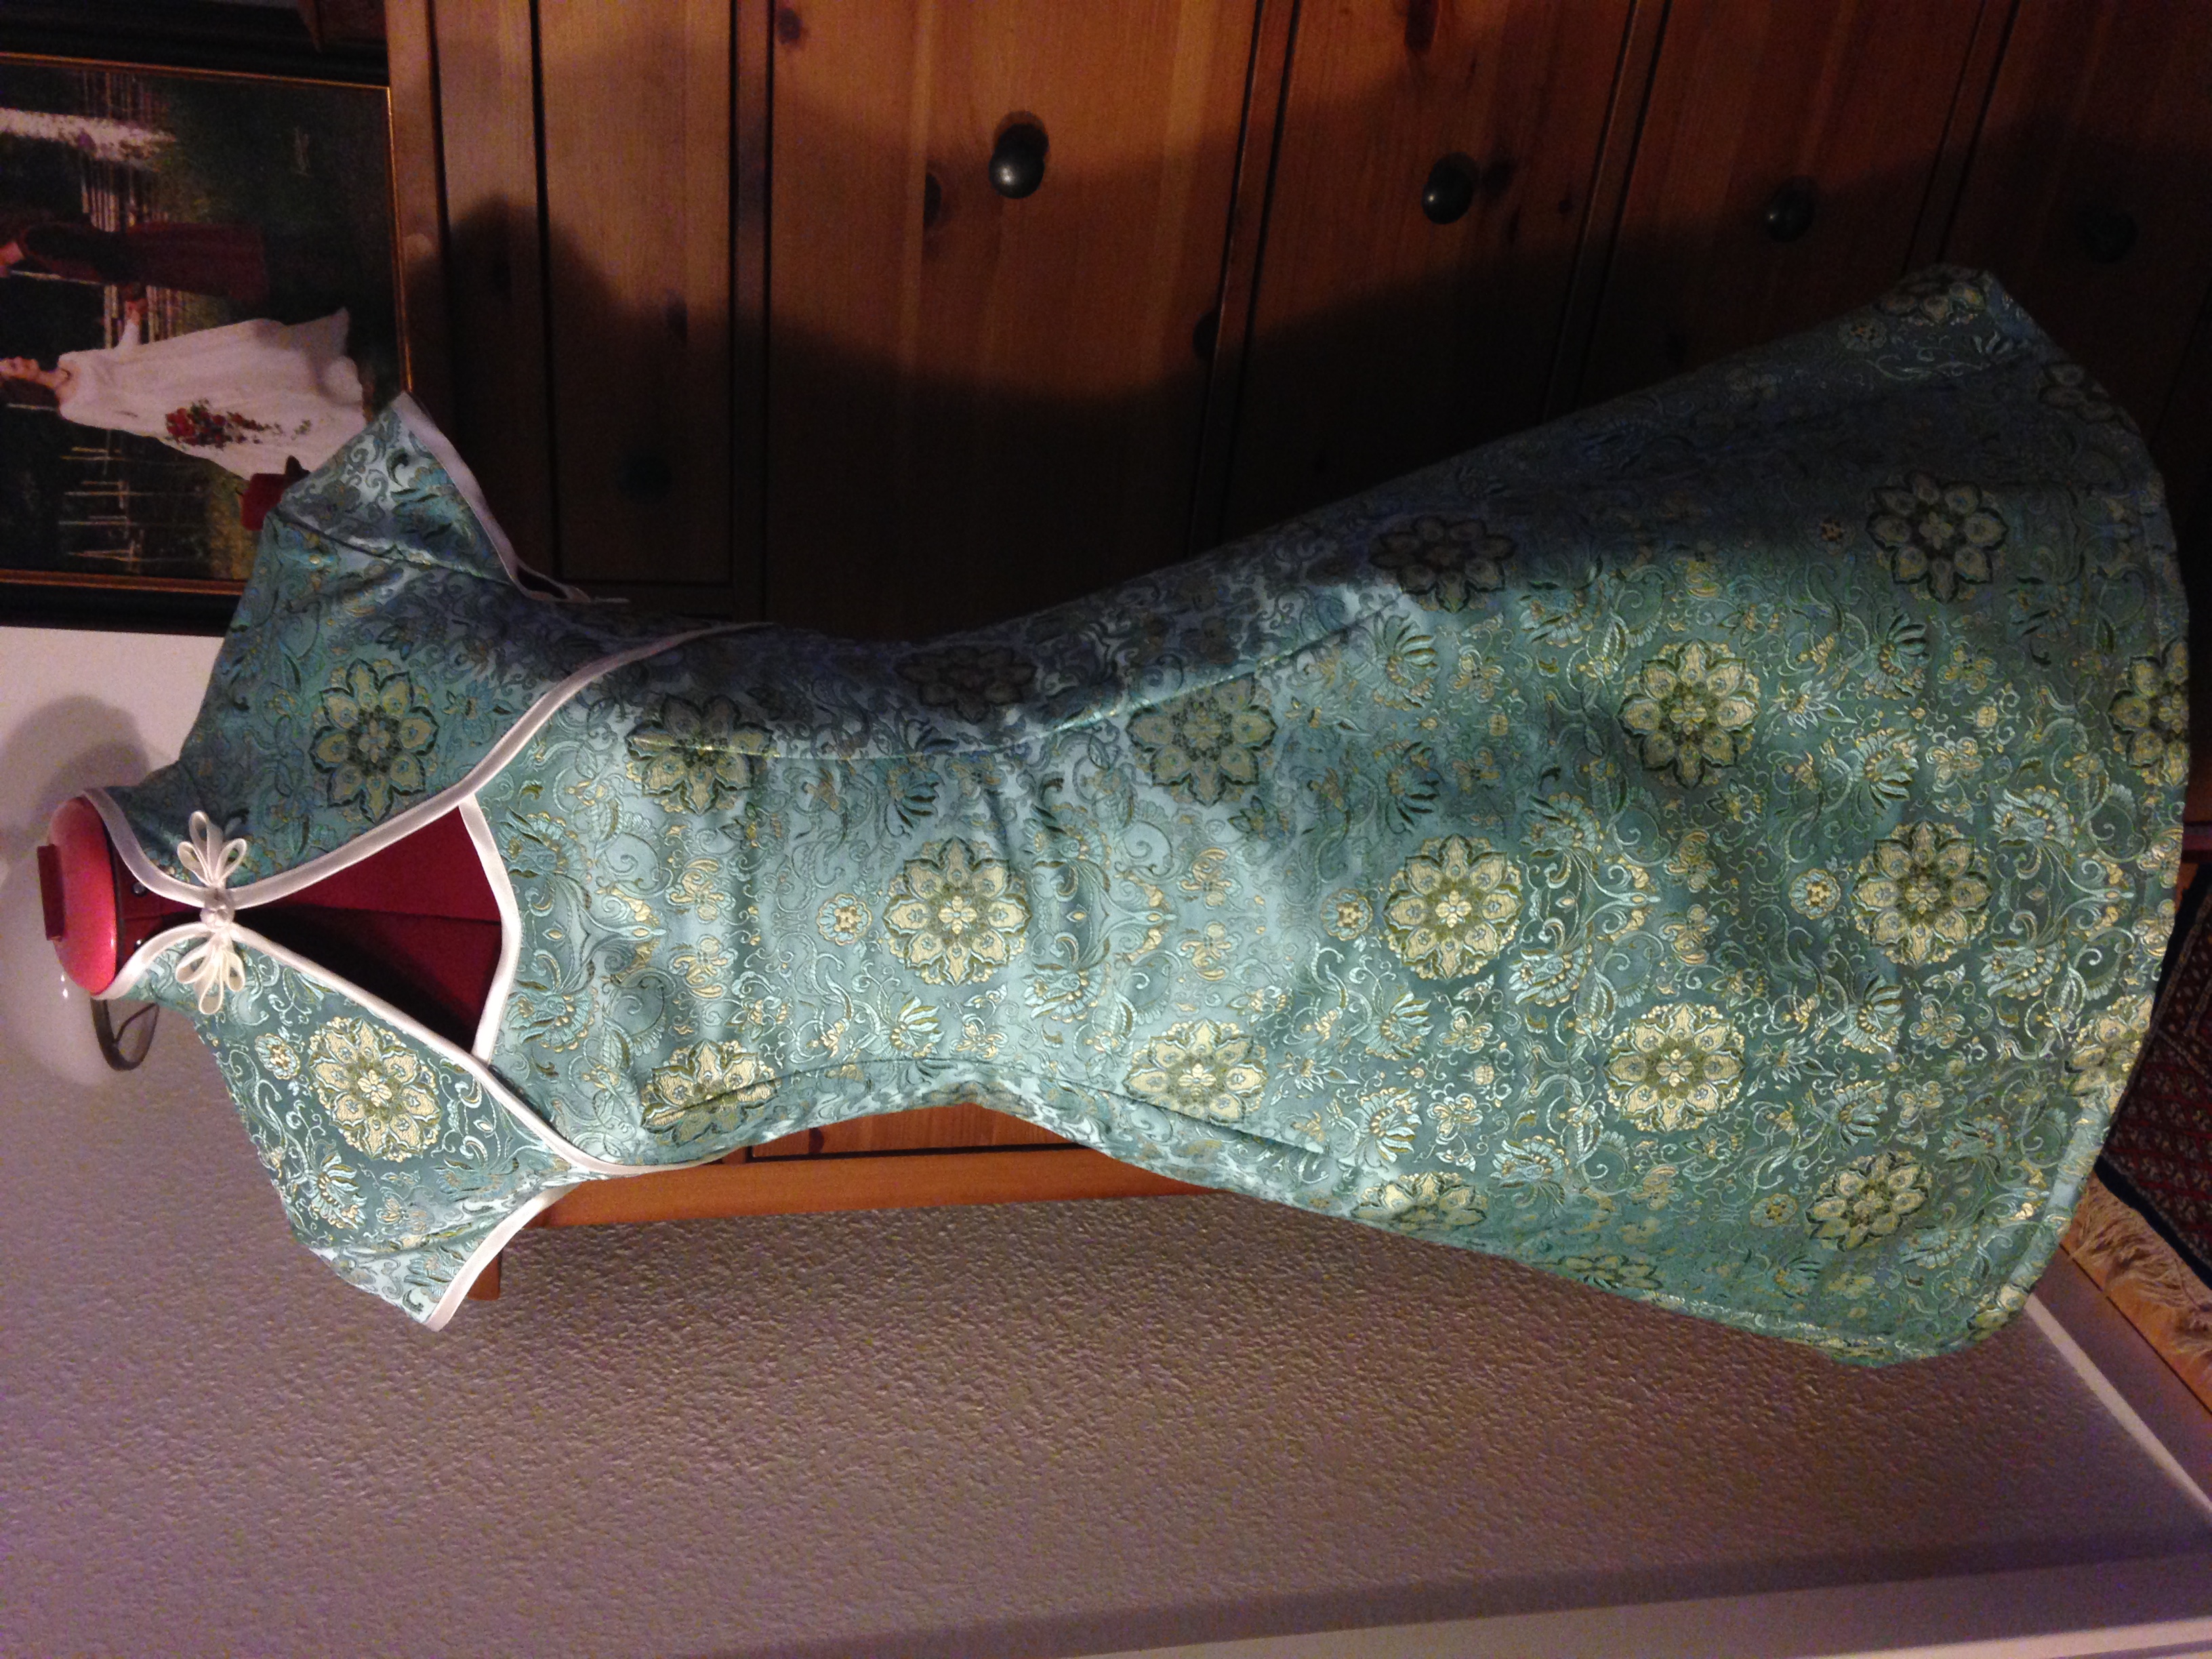
The finished dress
Actually I haven’t tried the dress on since it was finished. I posted a photo of it on Facebook the same night, though, and received so many lovely comments, that I am highly motivated to make a proper photo shoot soon! Unfortunately there’s freezing wind roaming outside, so I will wait some days, until spring find its way back to Denmark.
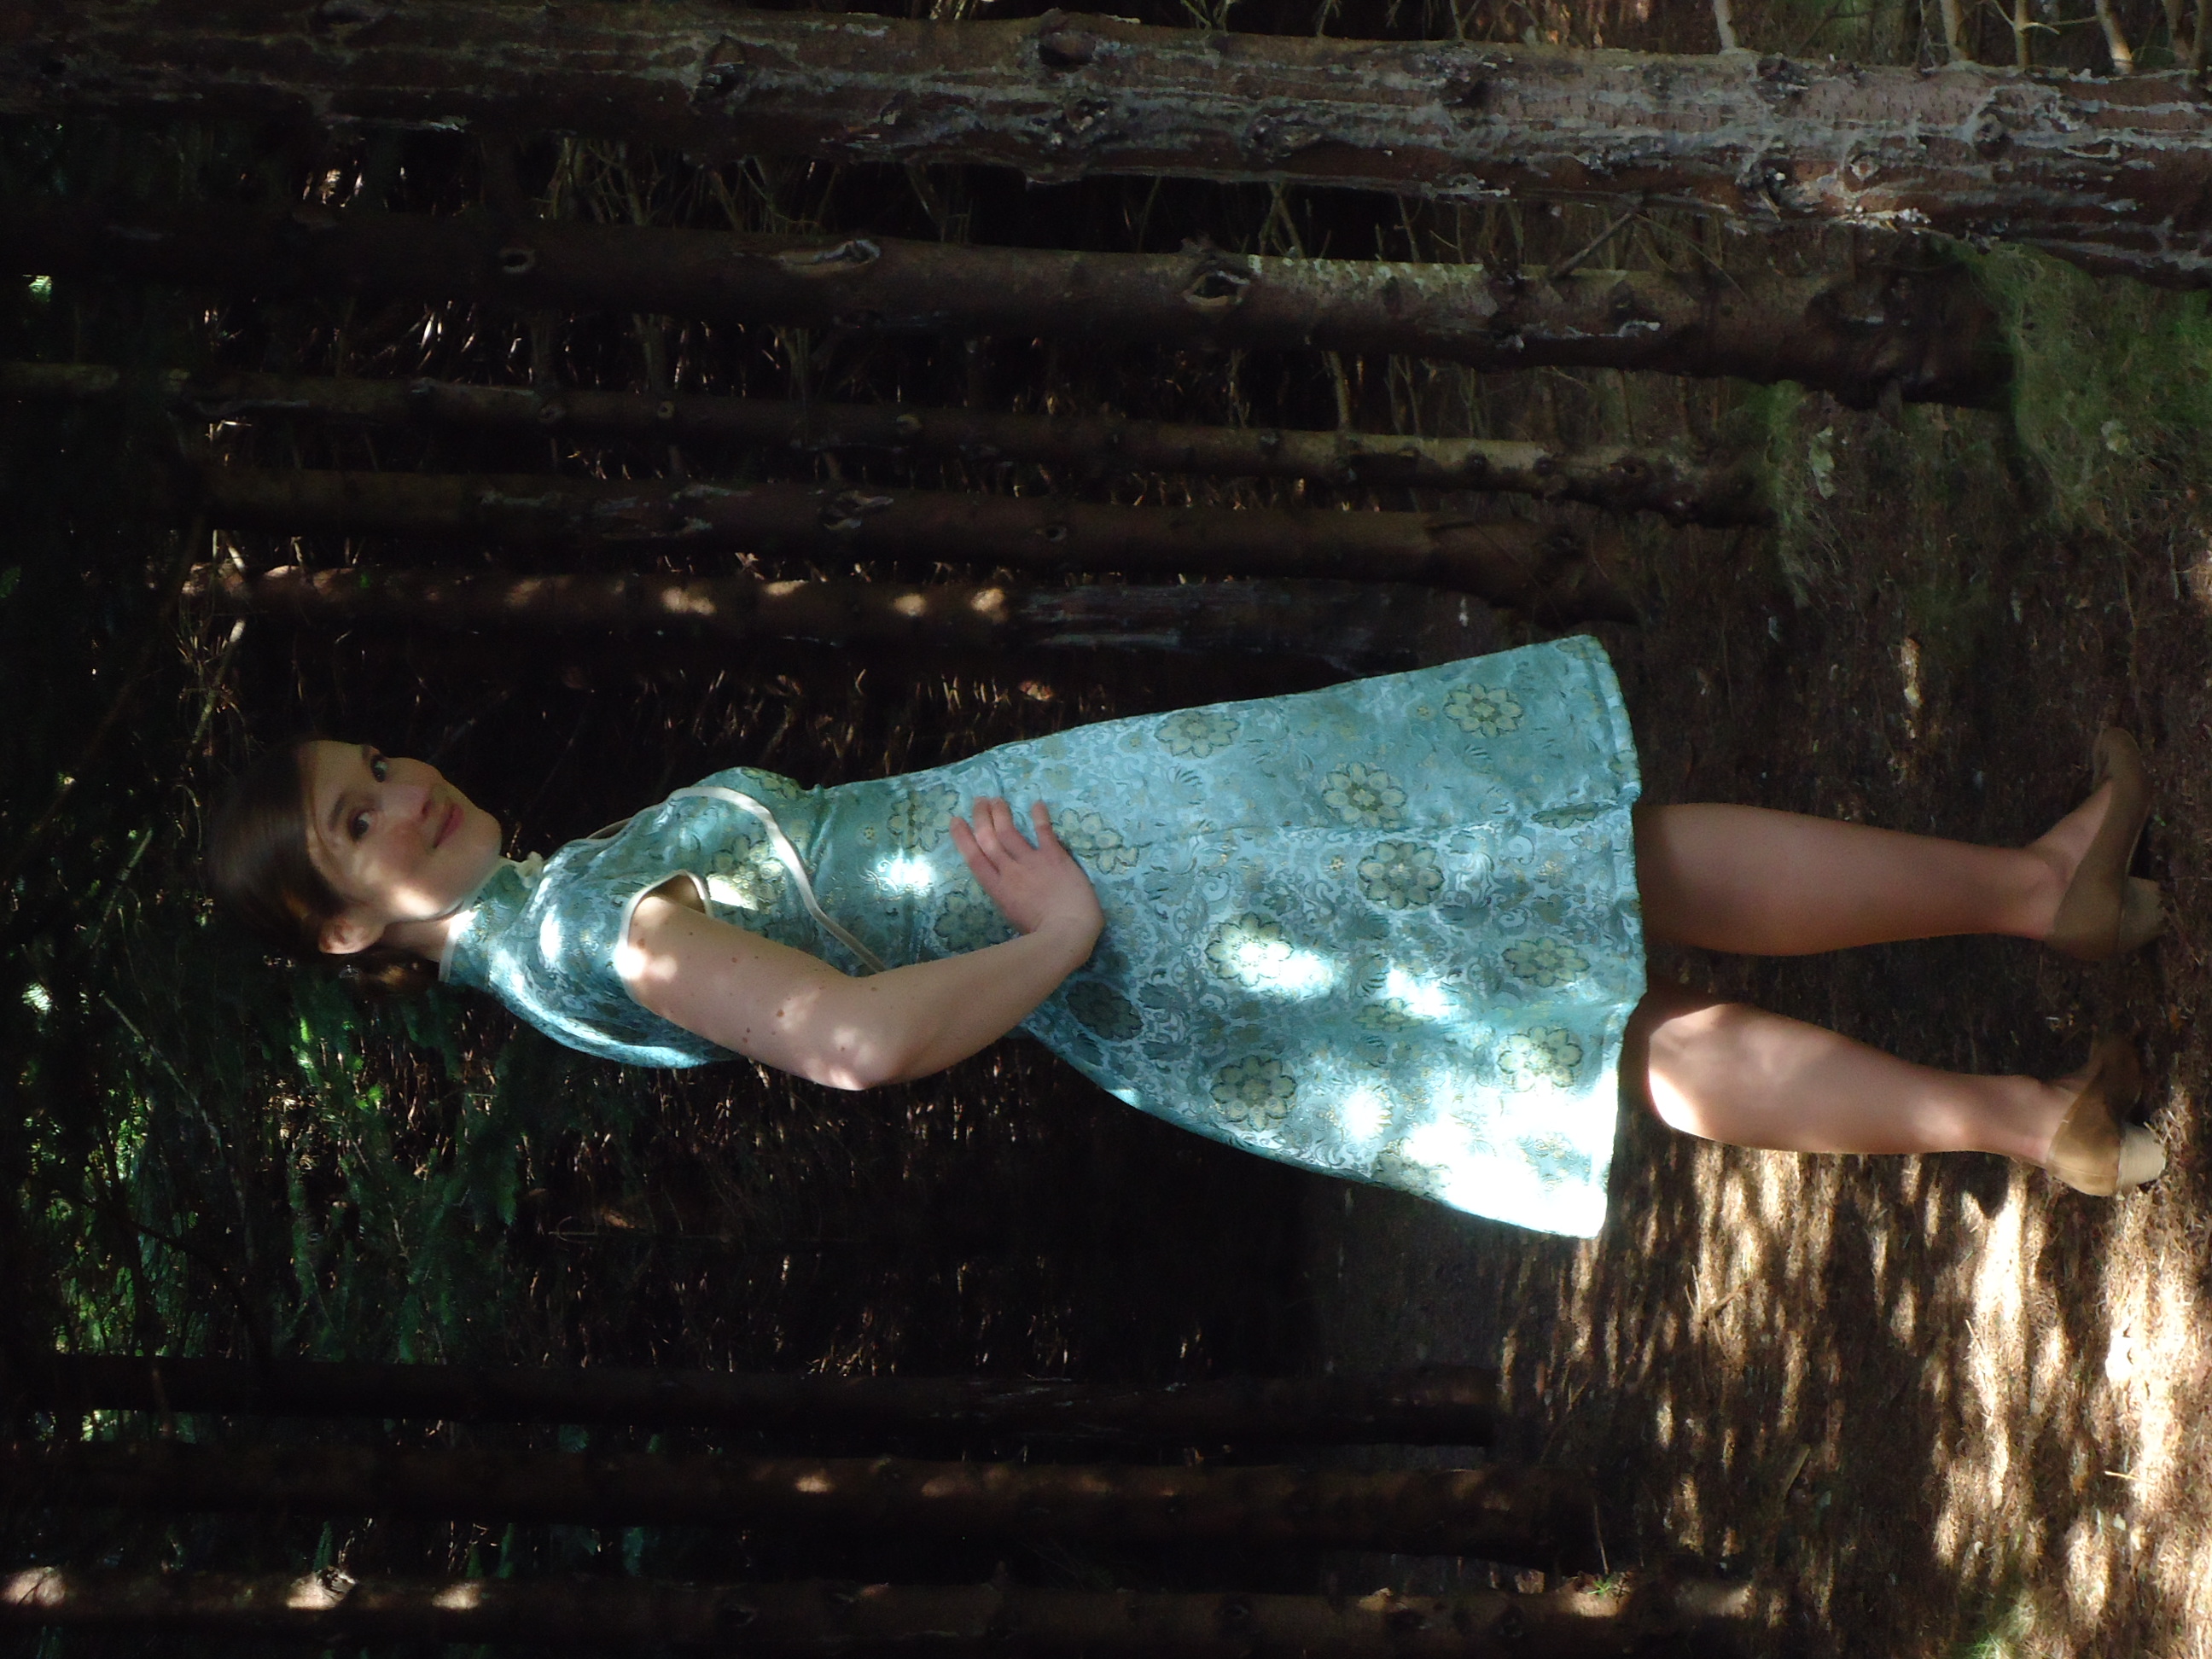
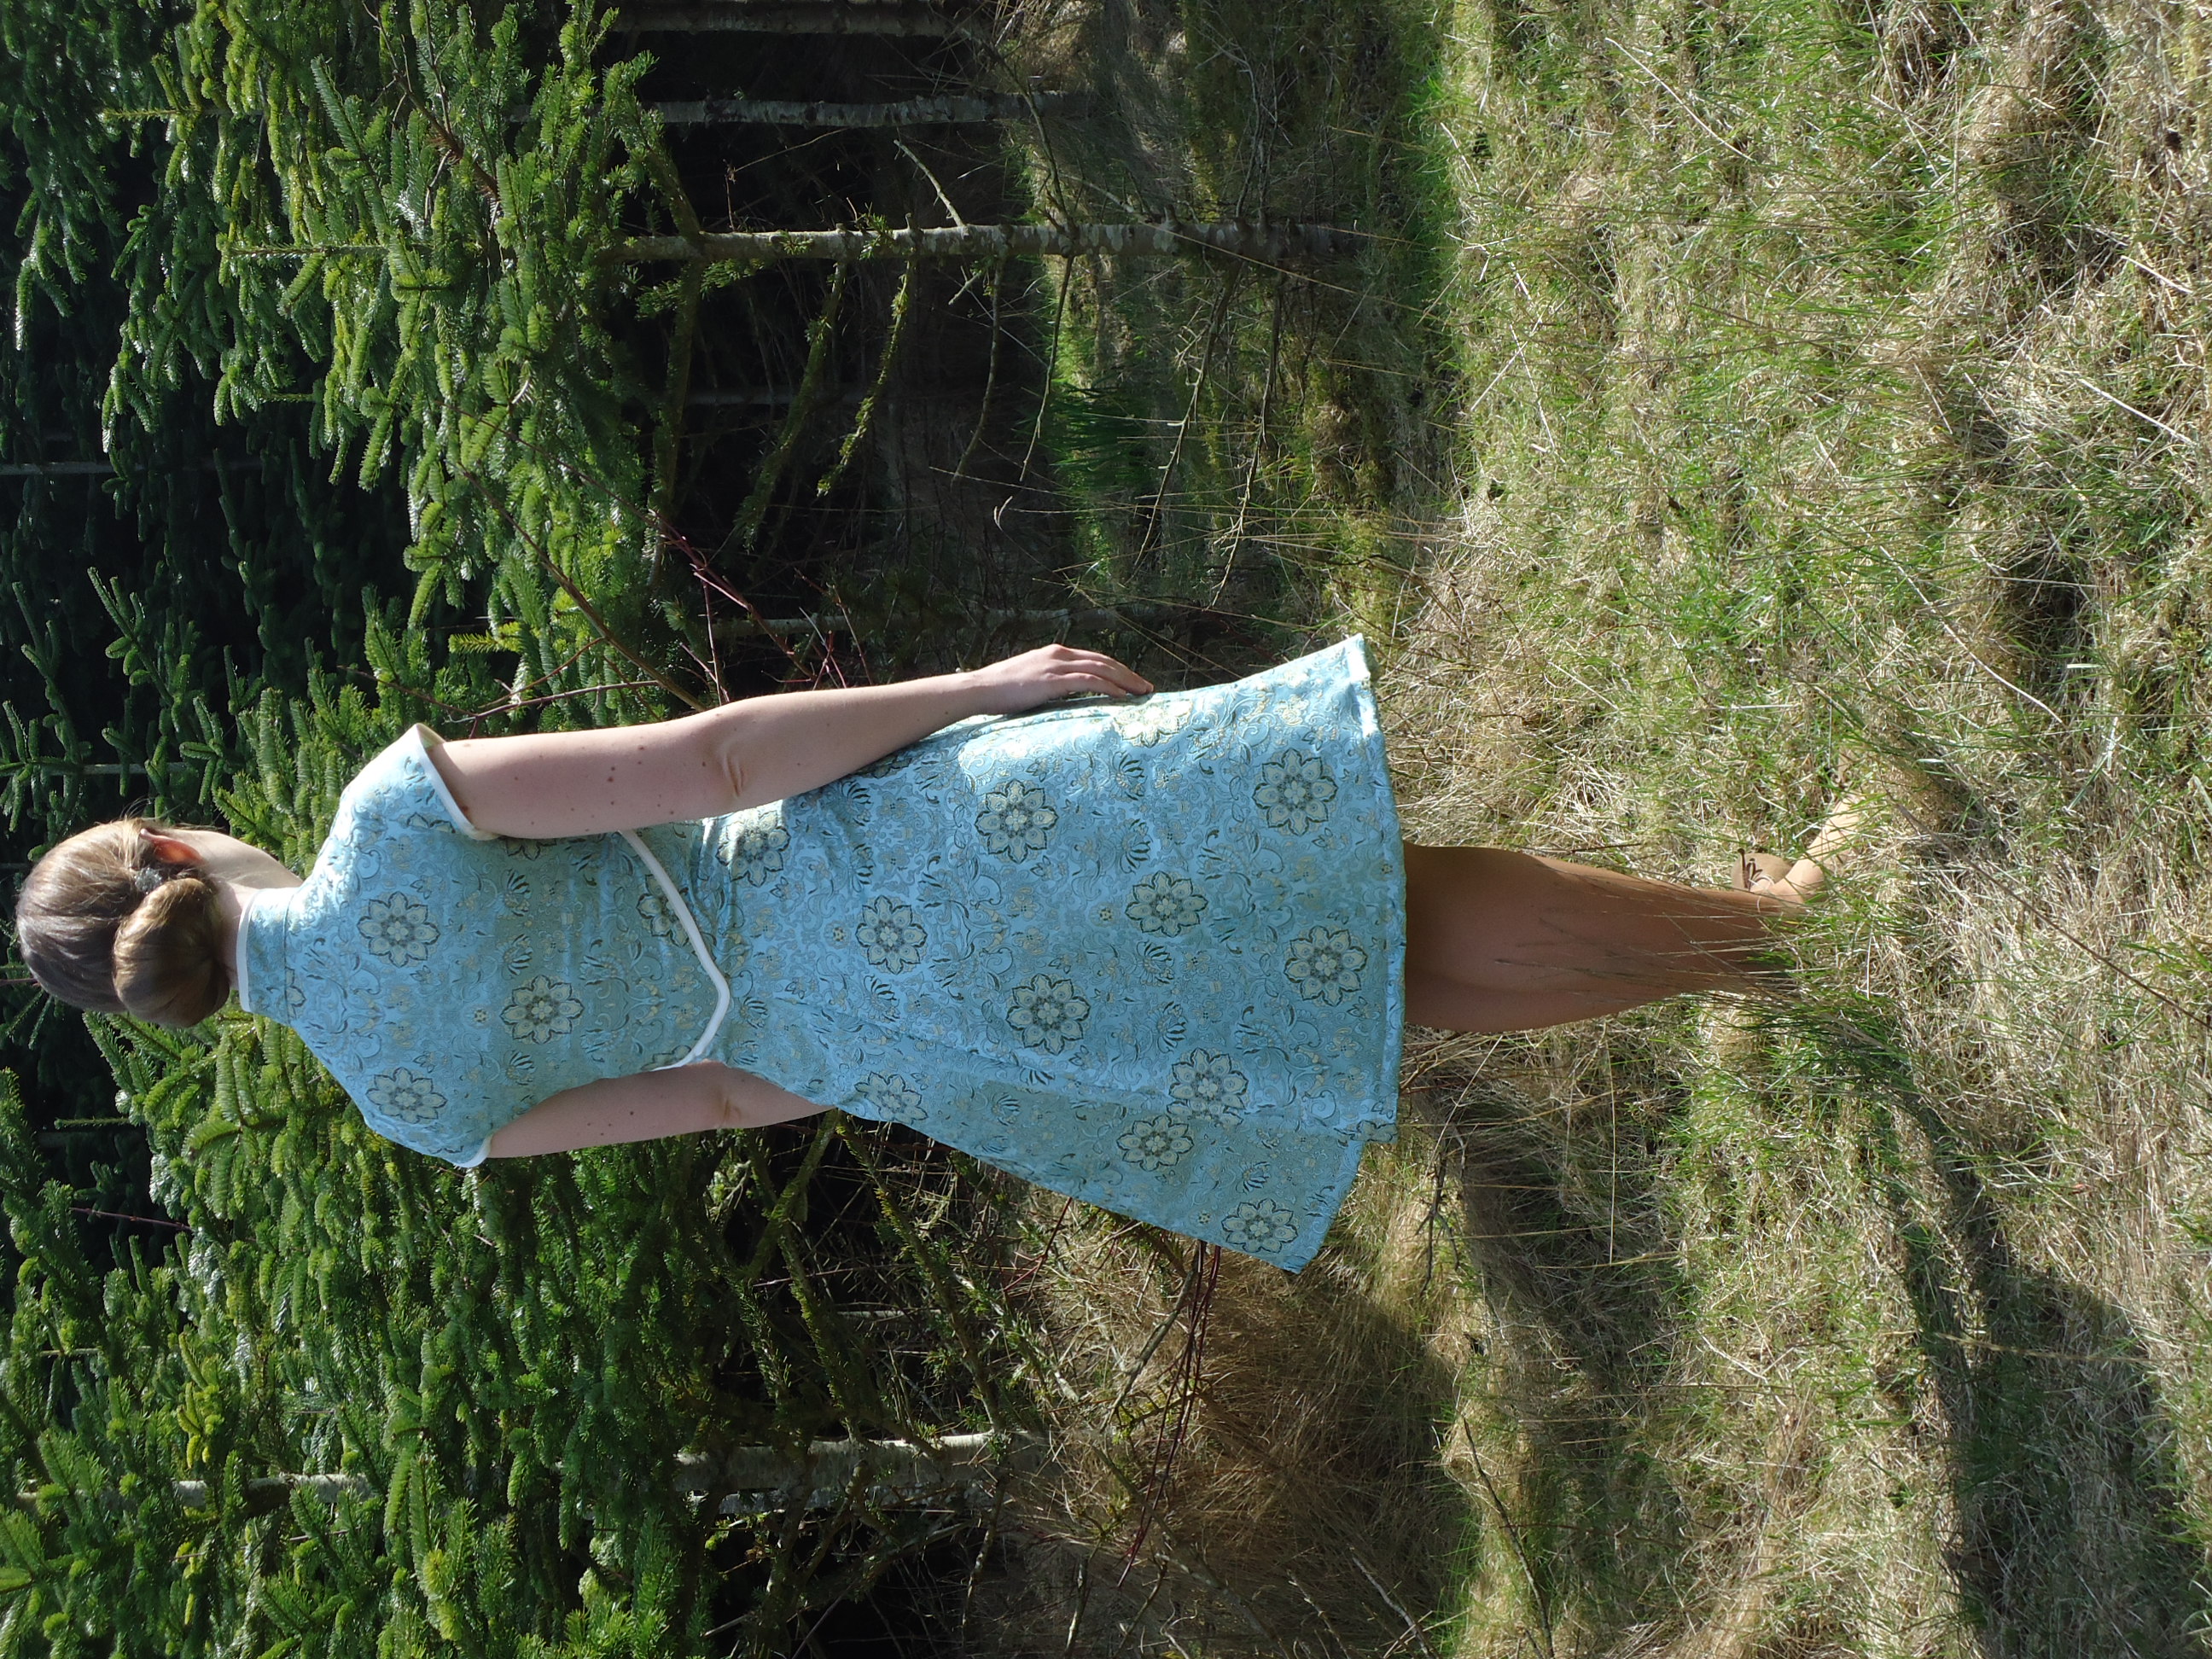
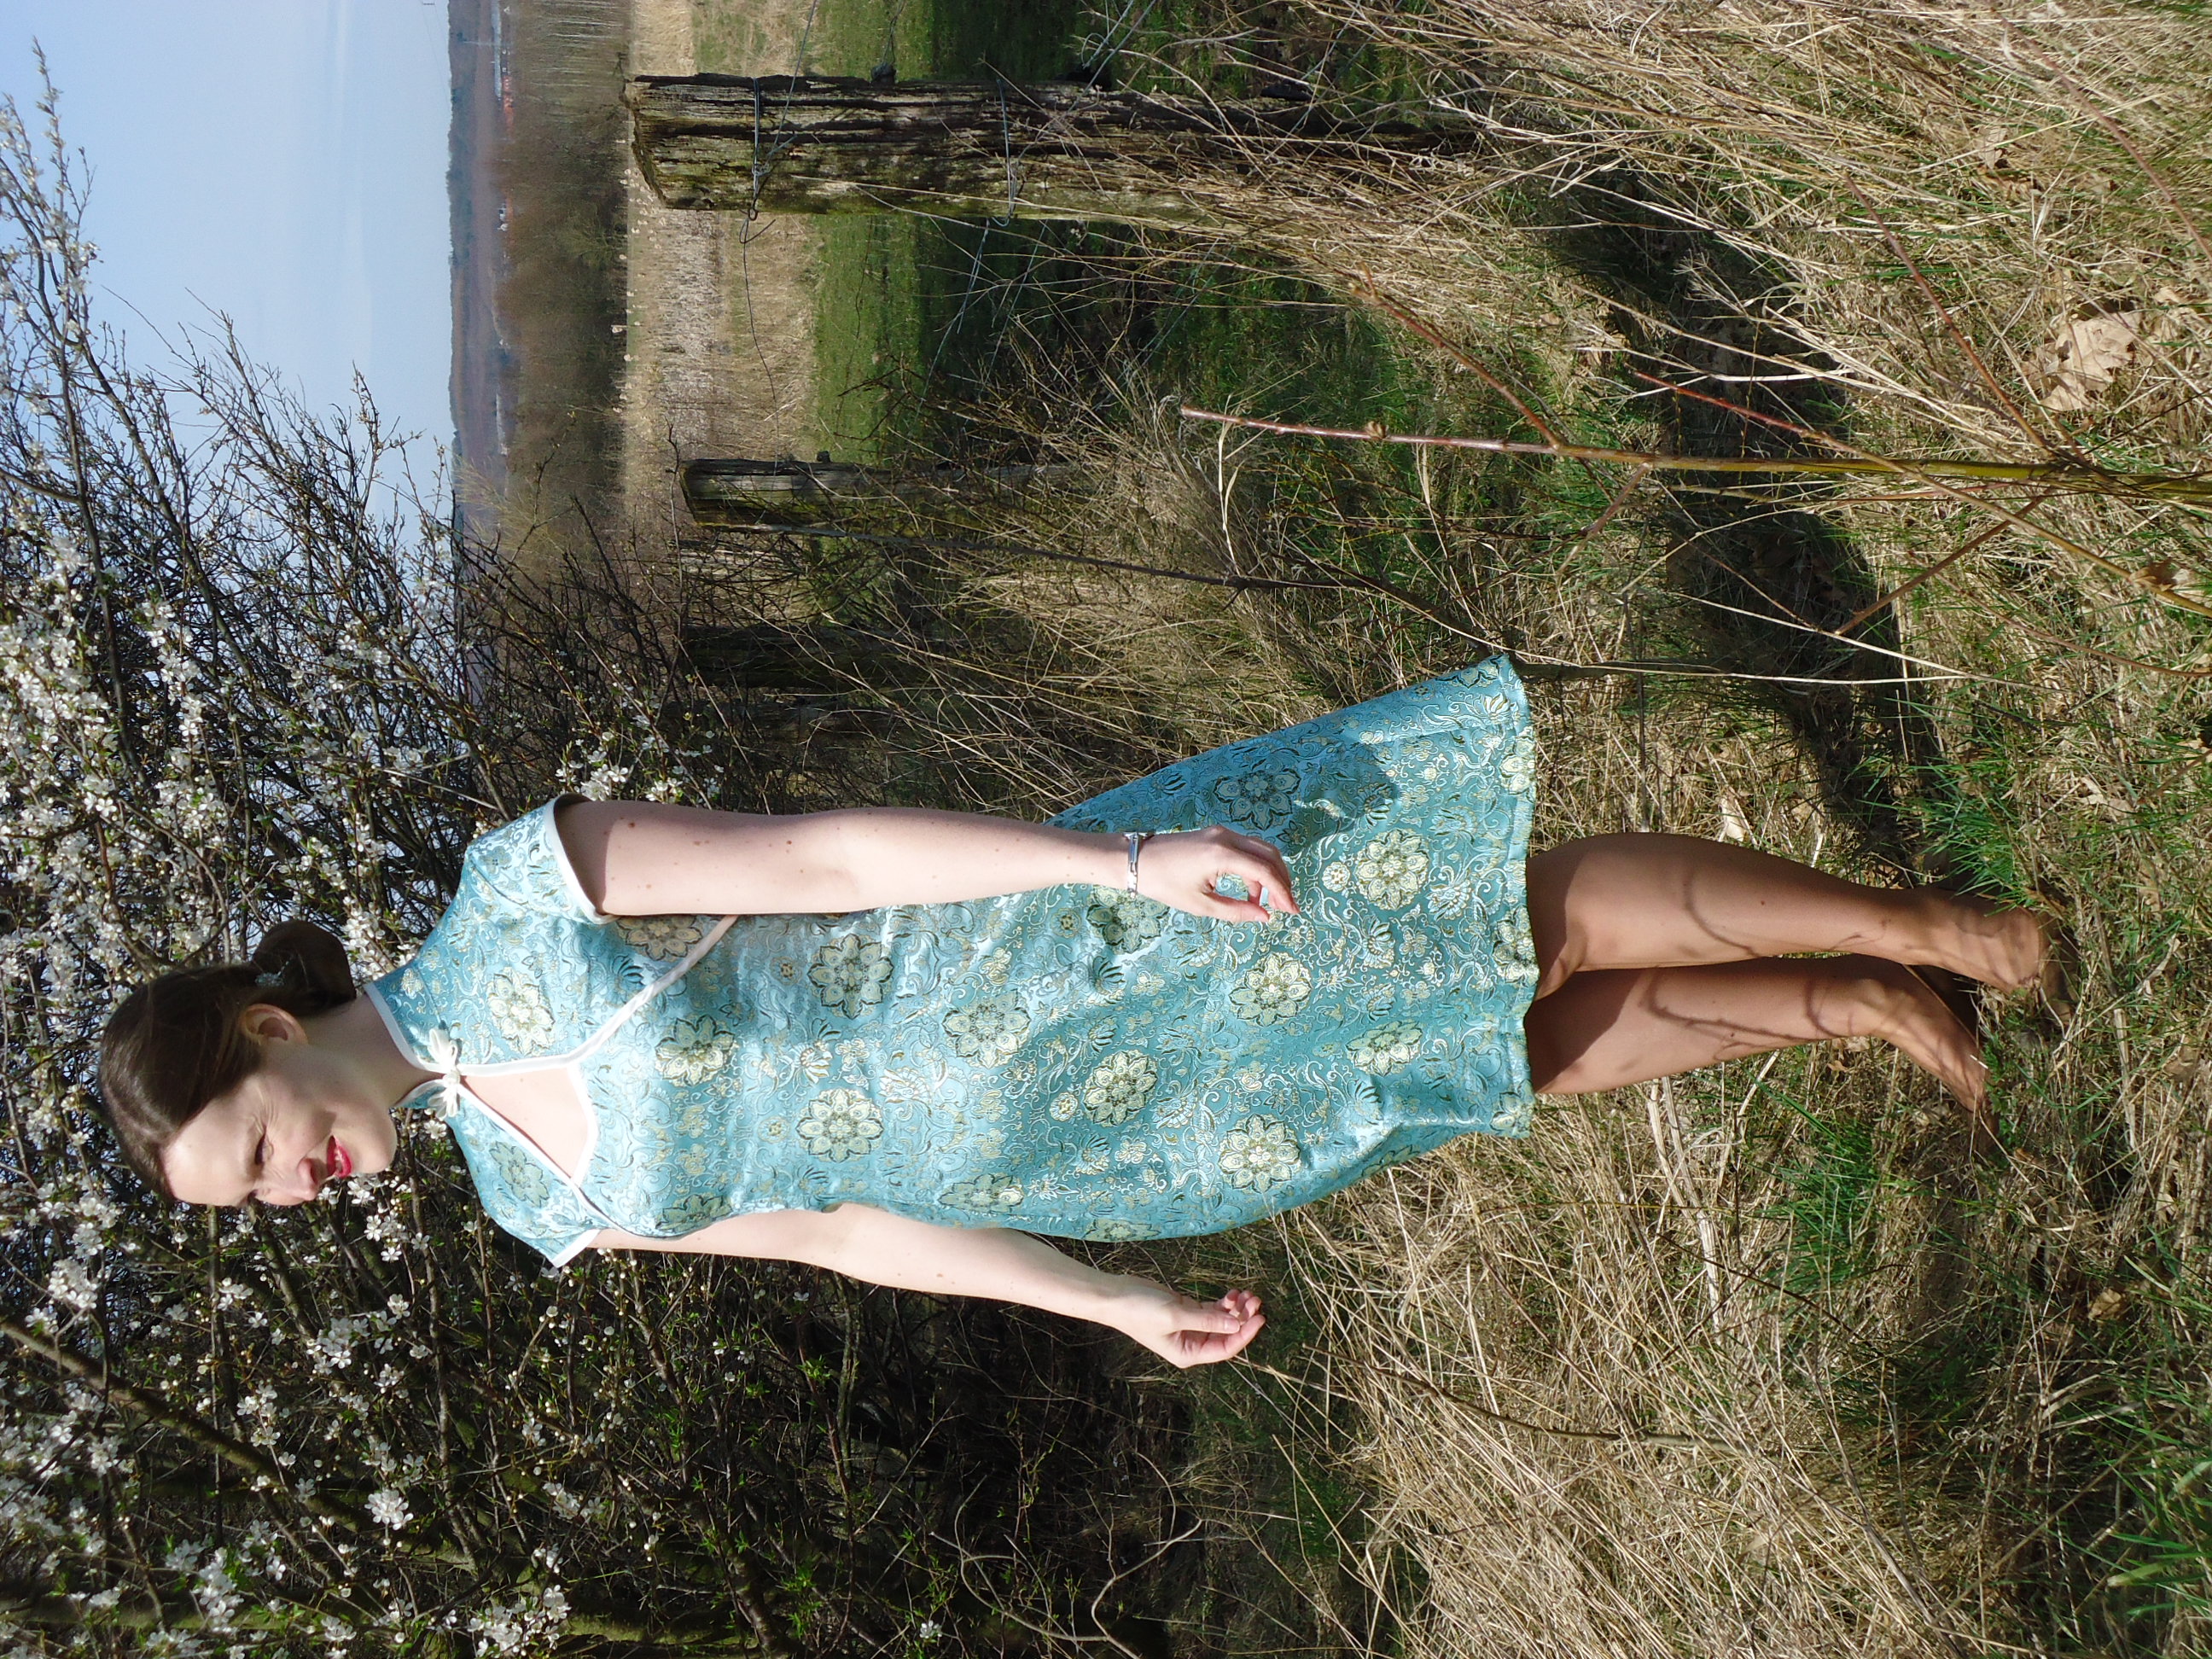
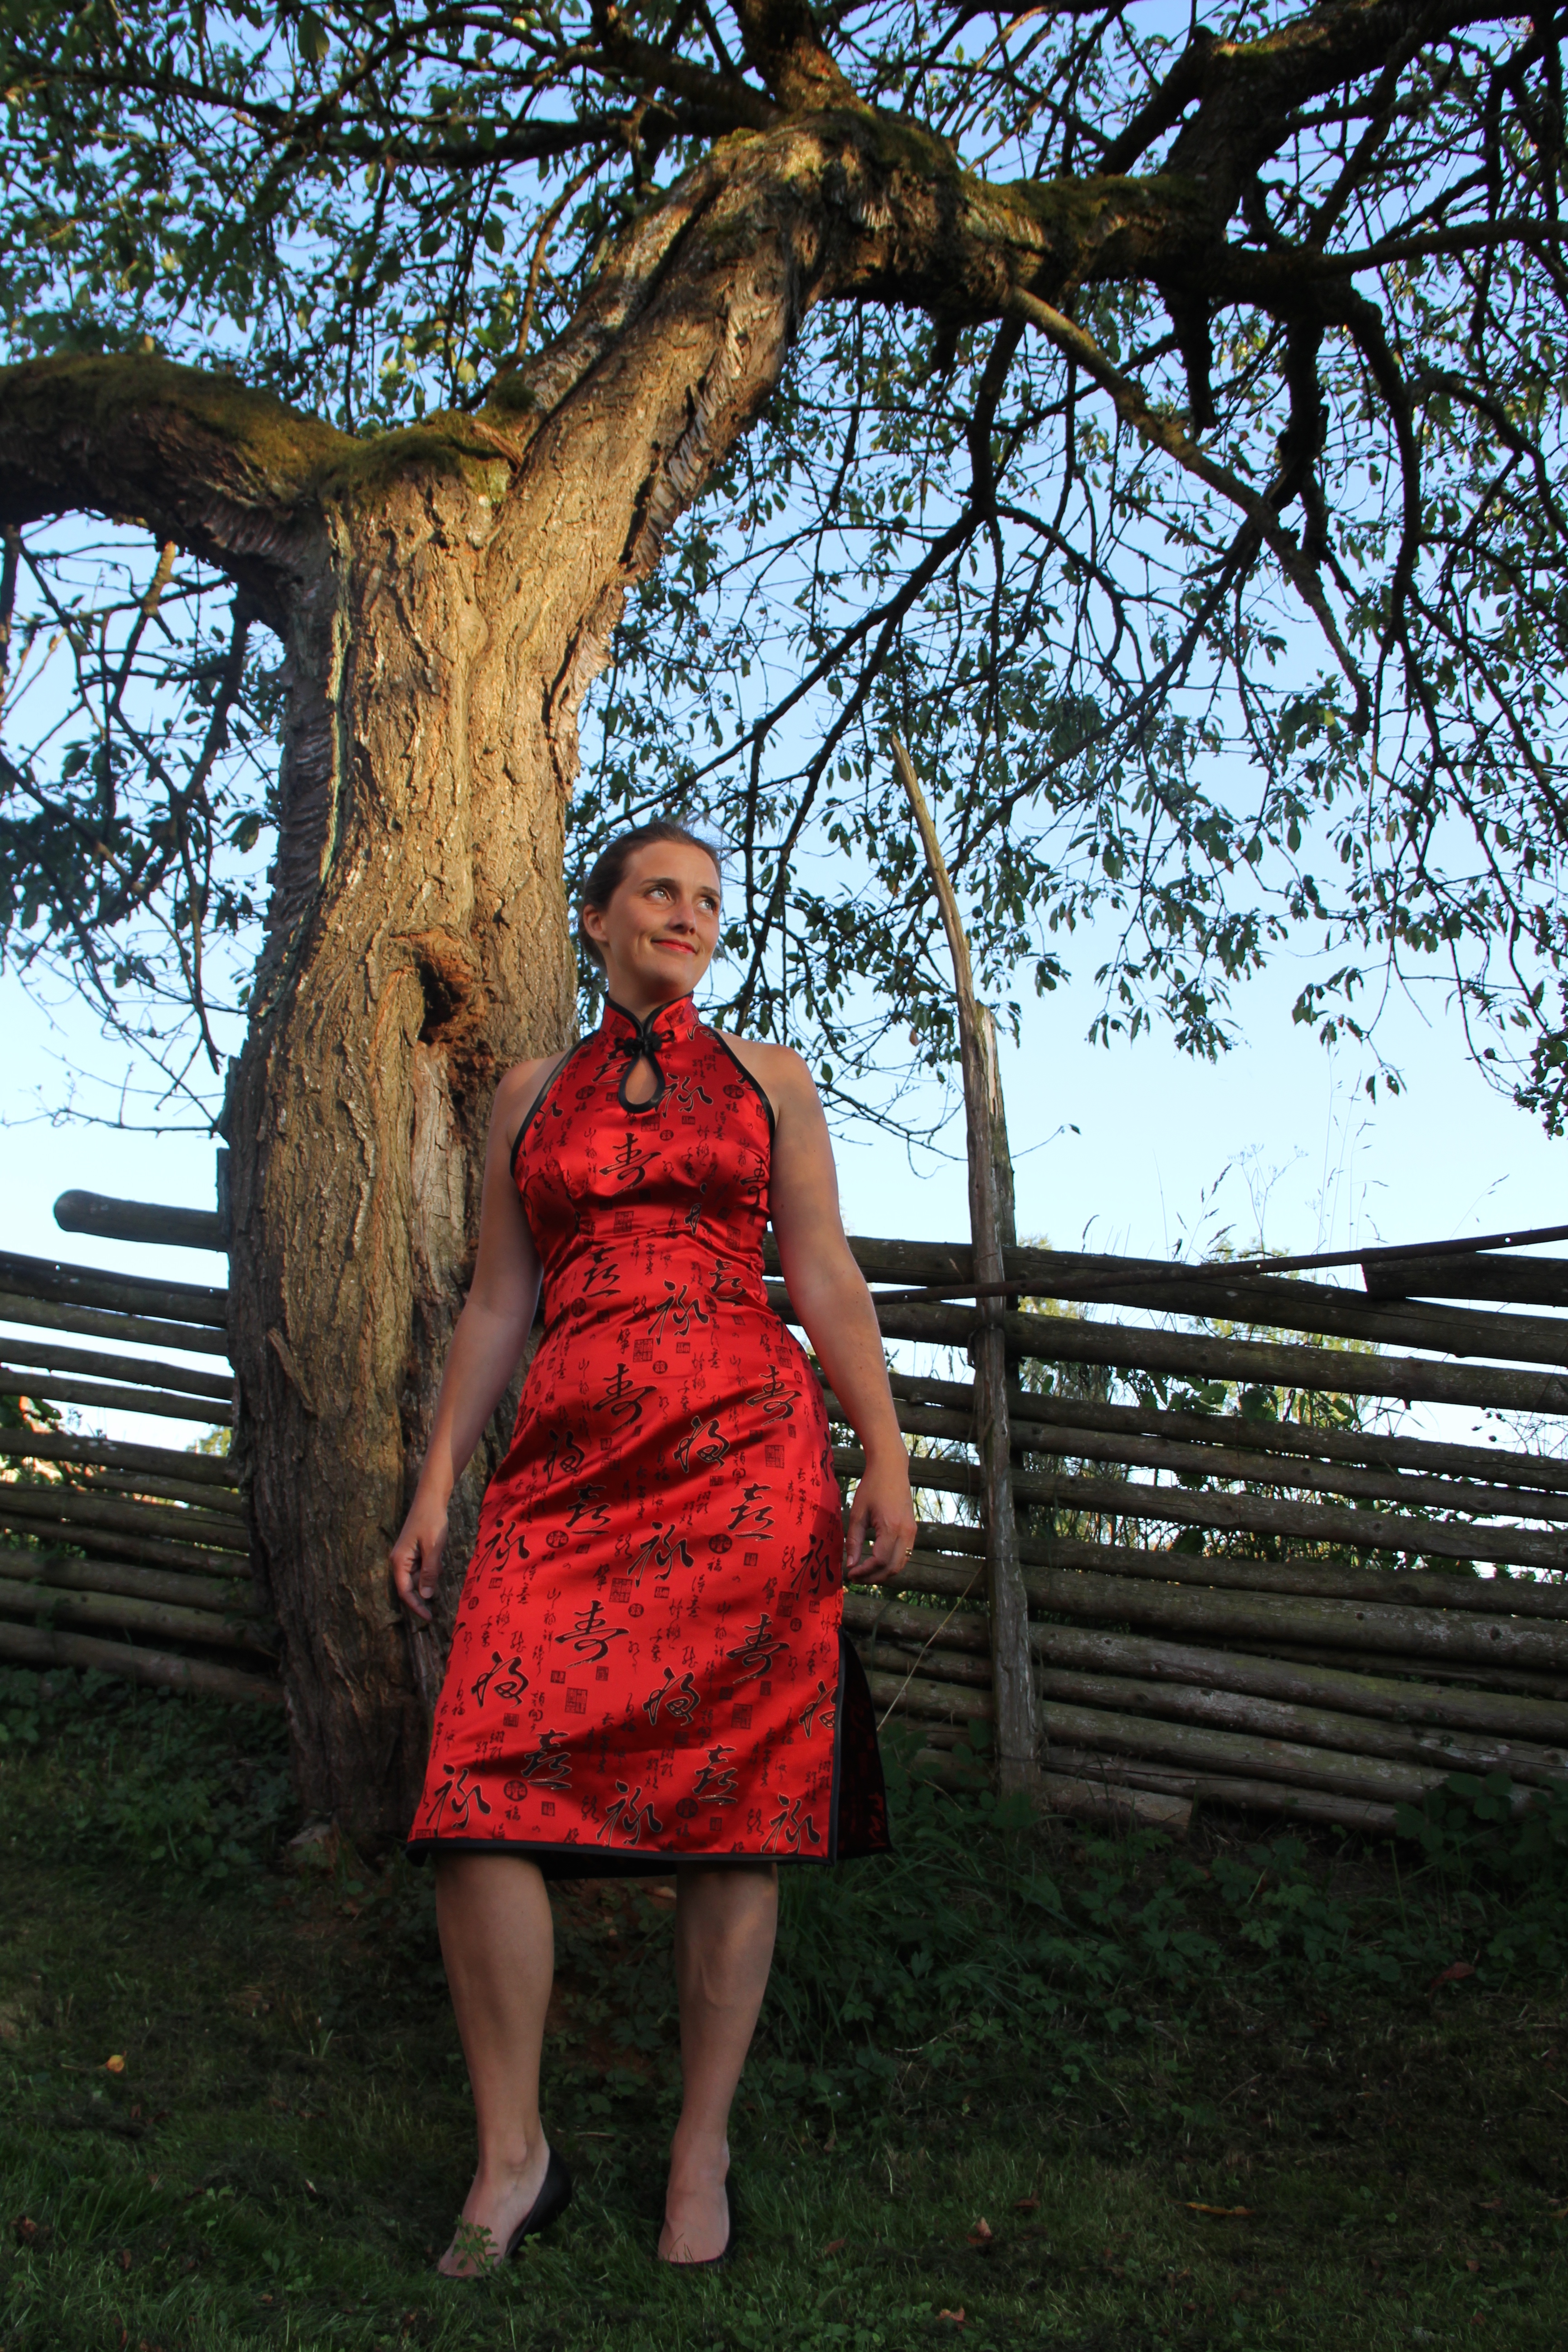
Spring Photoshoot!
I remember well how we laughed at our Swedish friend, when we visited her in England and she proudly took us to a pond, which was called the “lake”. After five years in Denmark, my husband and I experience something similar, but concerning the “woods”. We are so happy to have found a Christmas tree plantage. This our piece of wood. <3
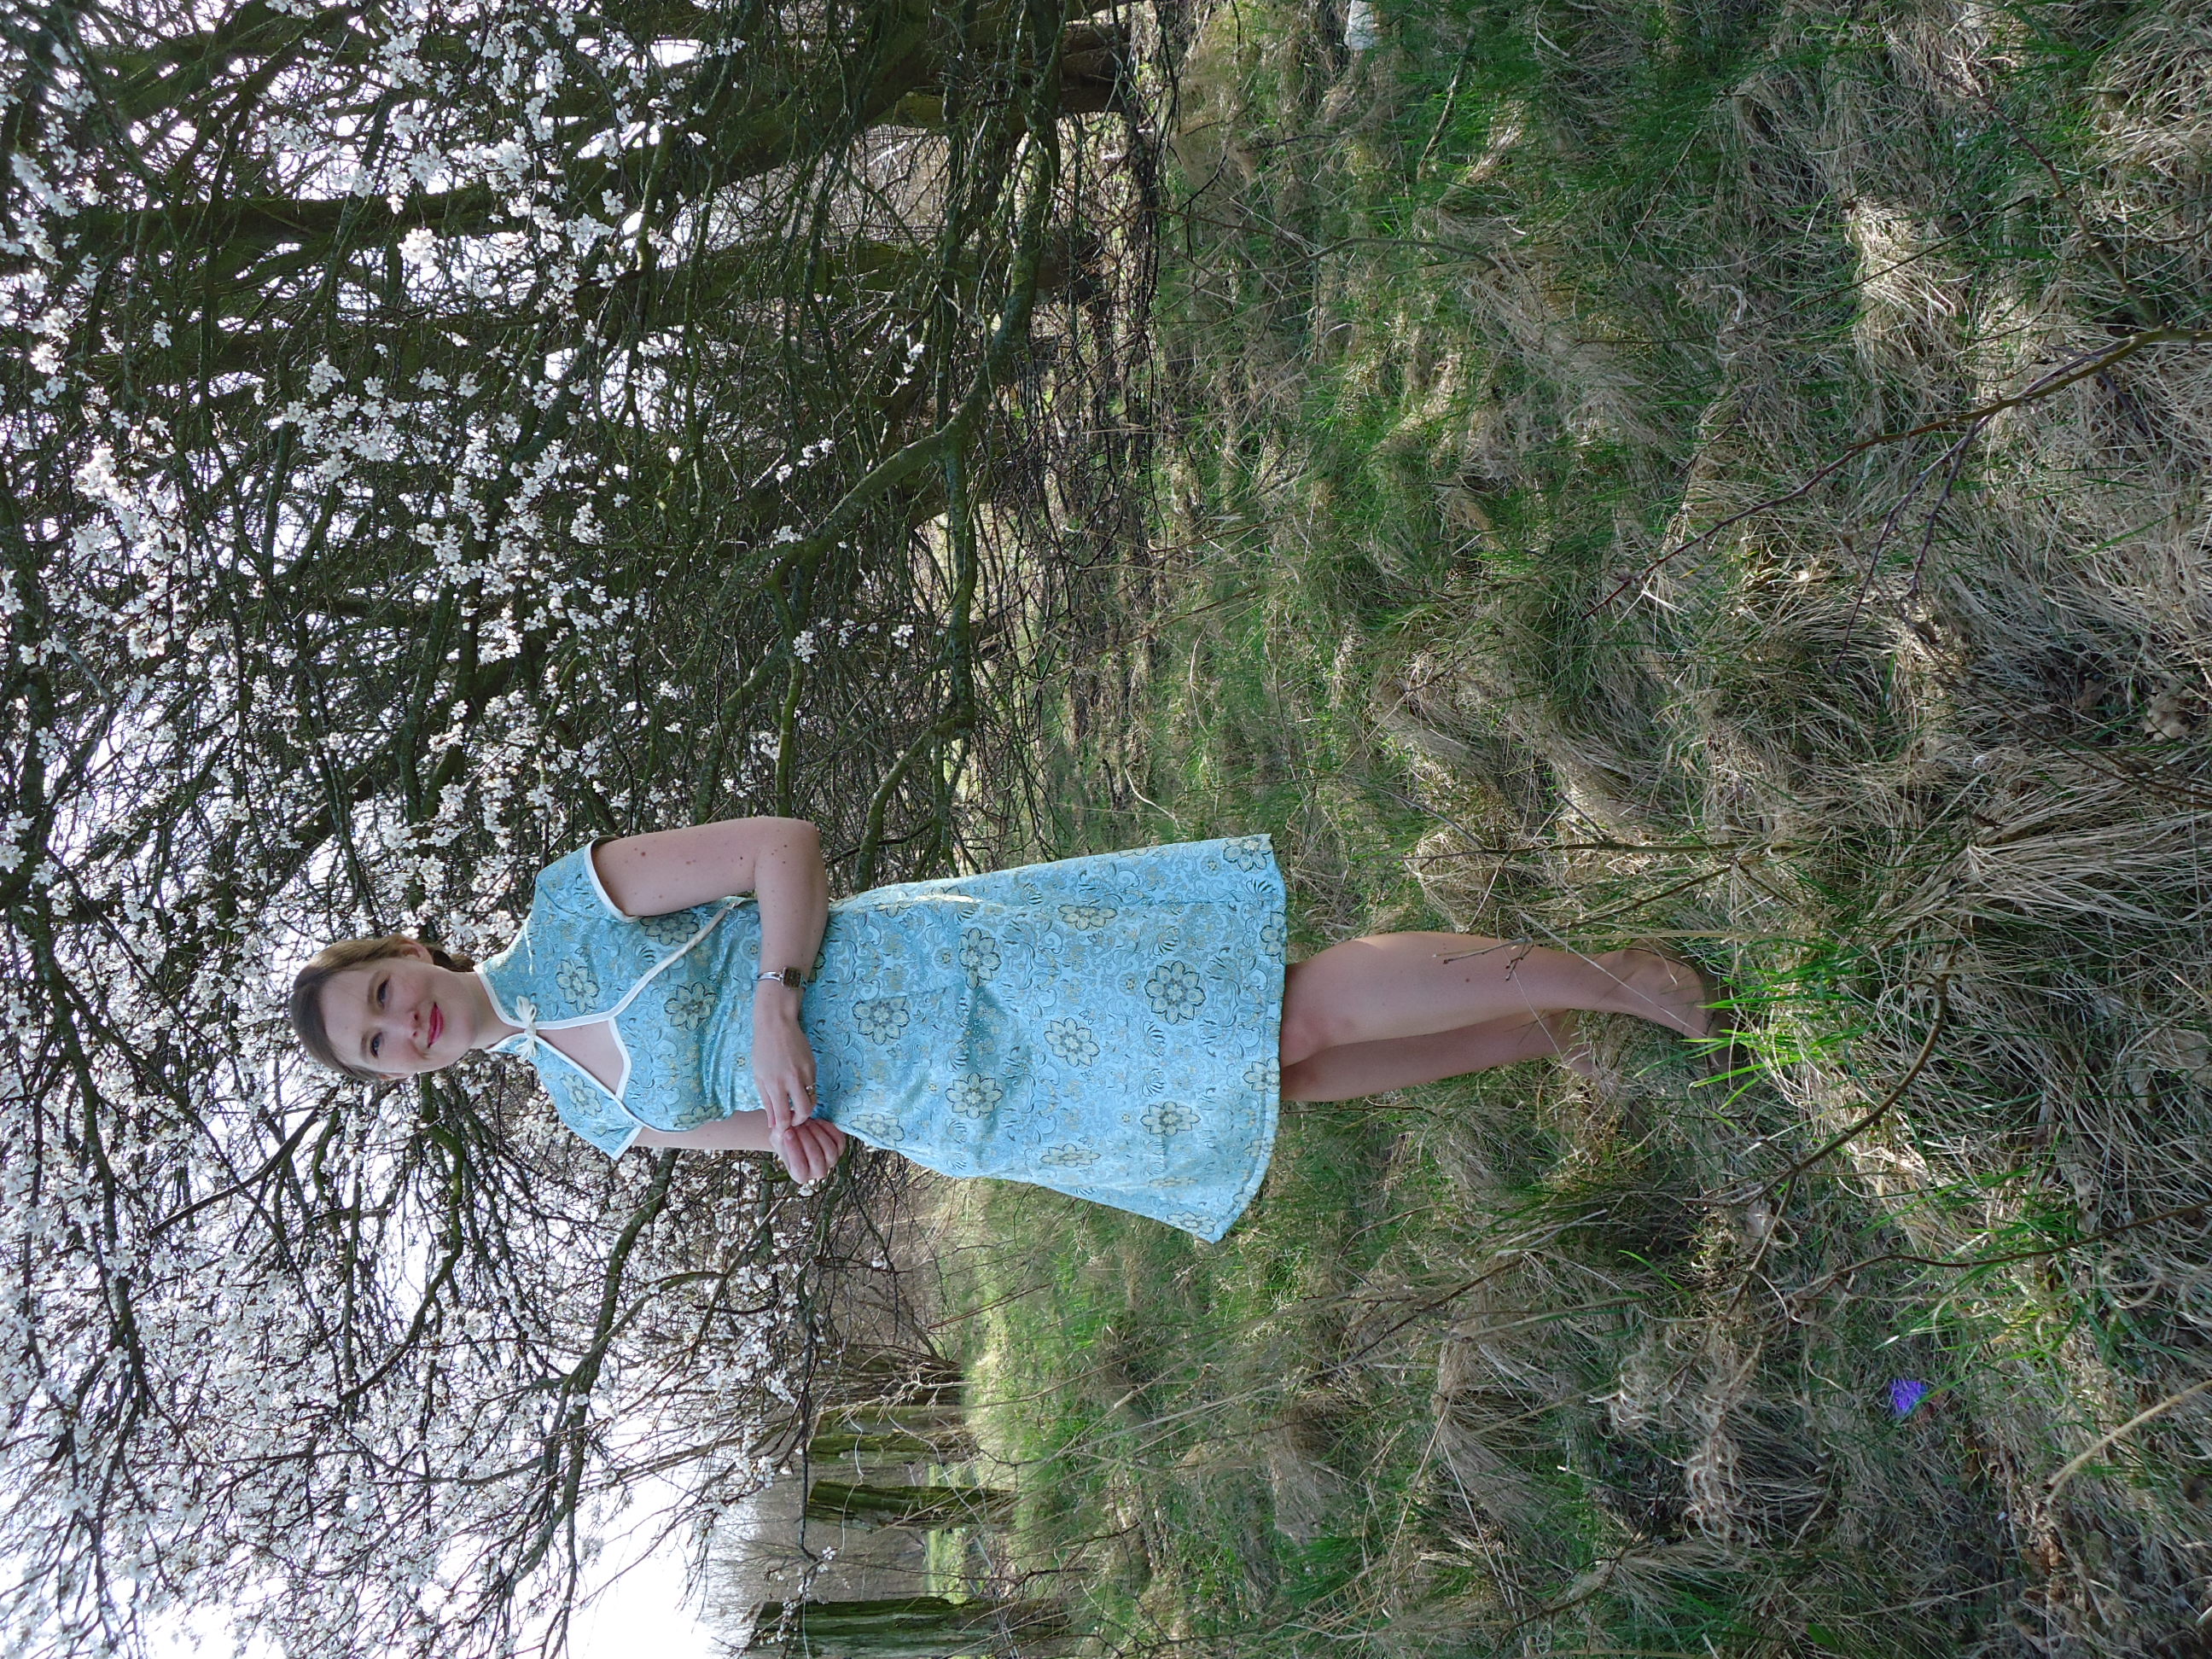
We are also very happy to have discovered a park, surrounding parts of preserved countryside. Here are some beautiful cherry trees, that are now covered with blossoms!
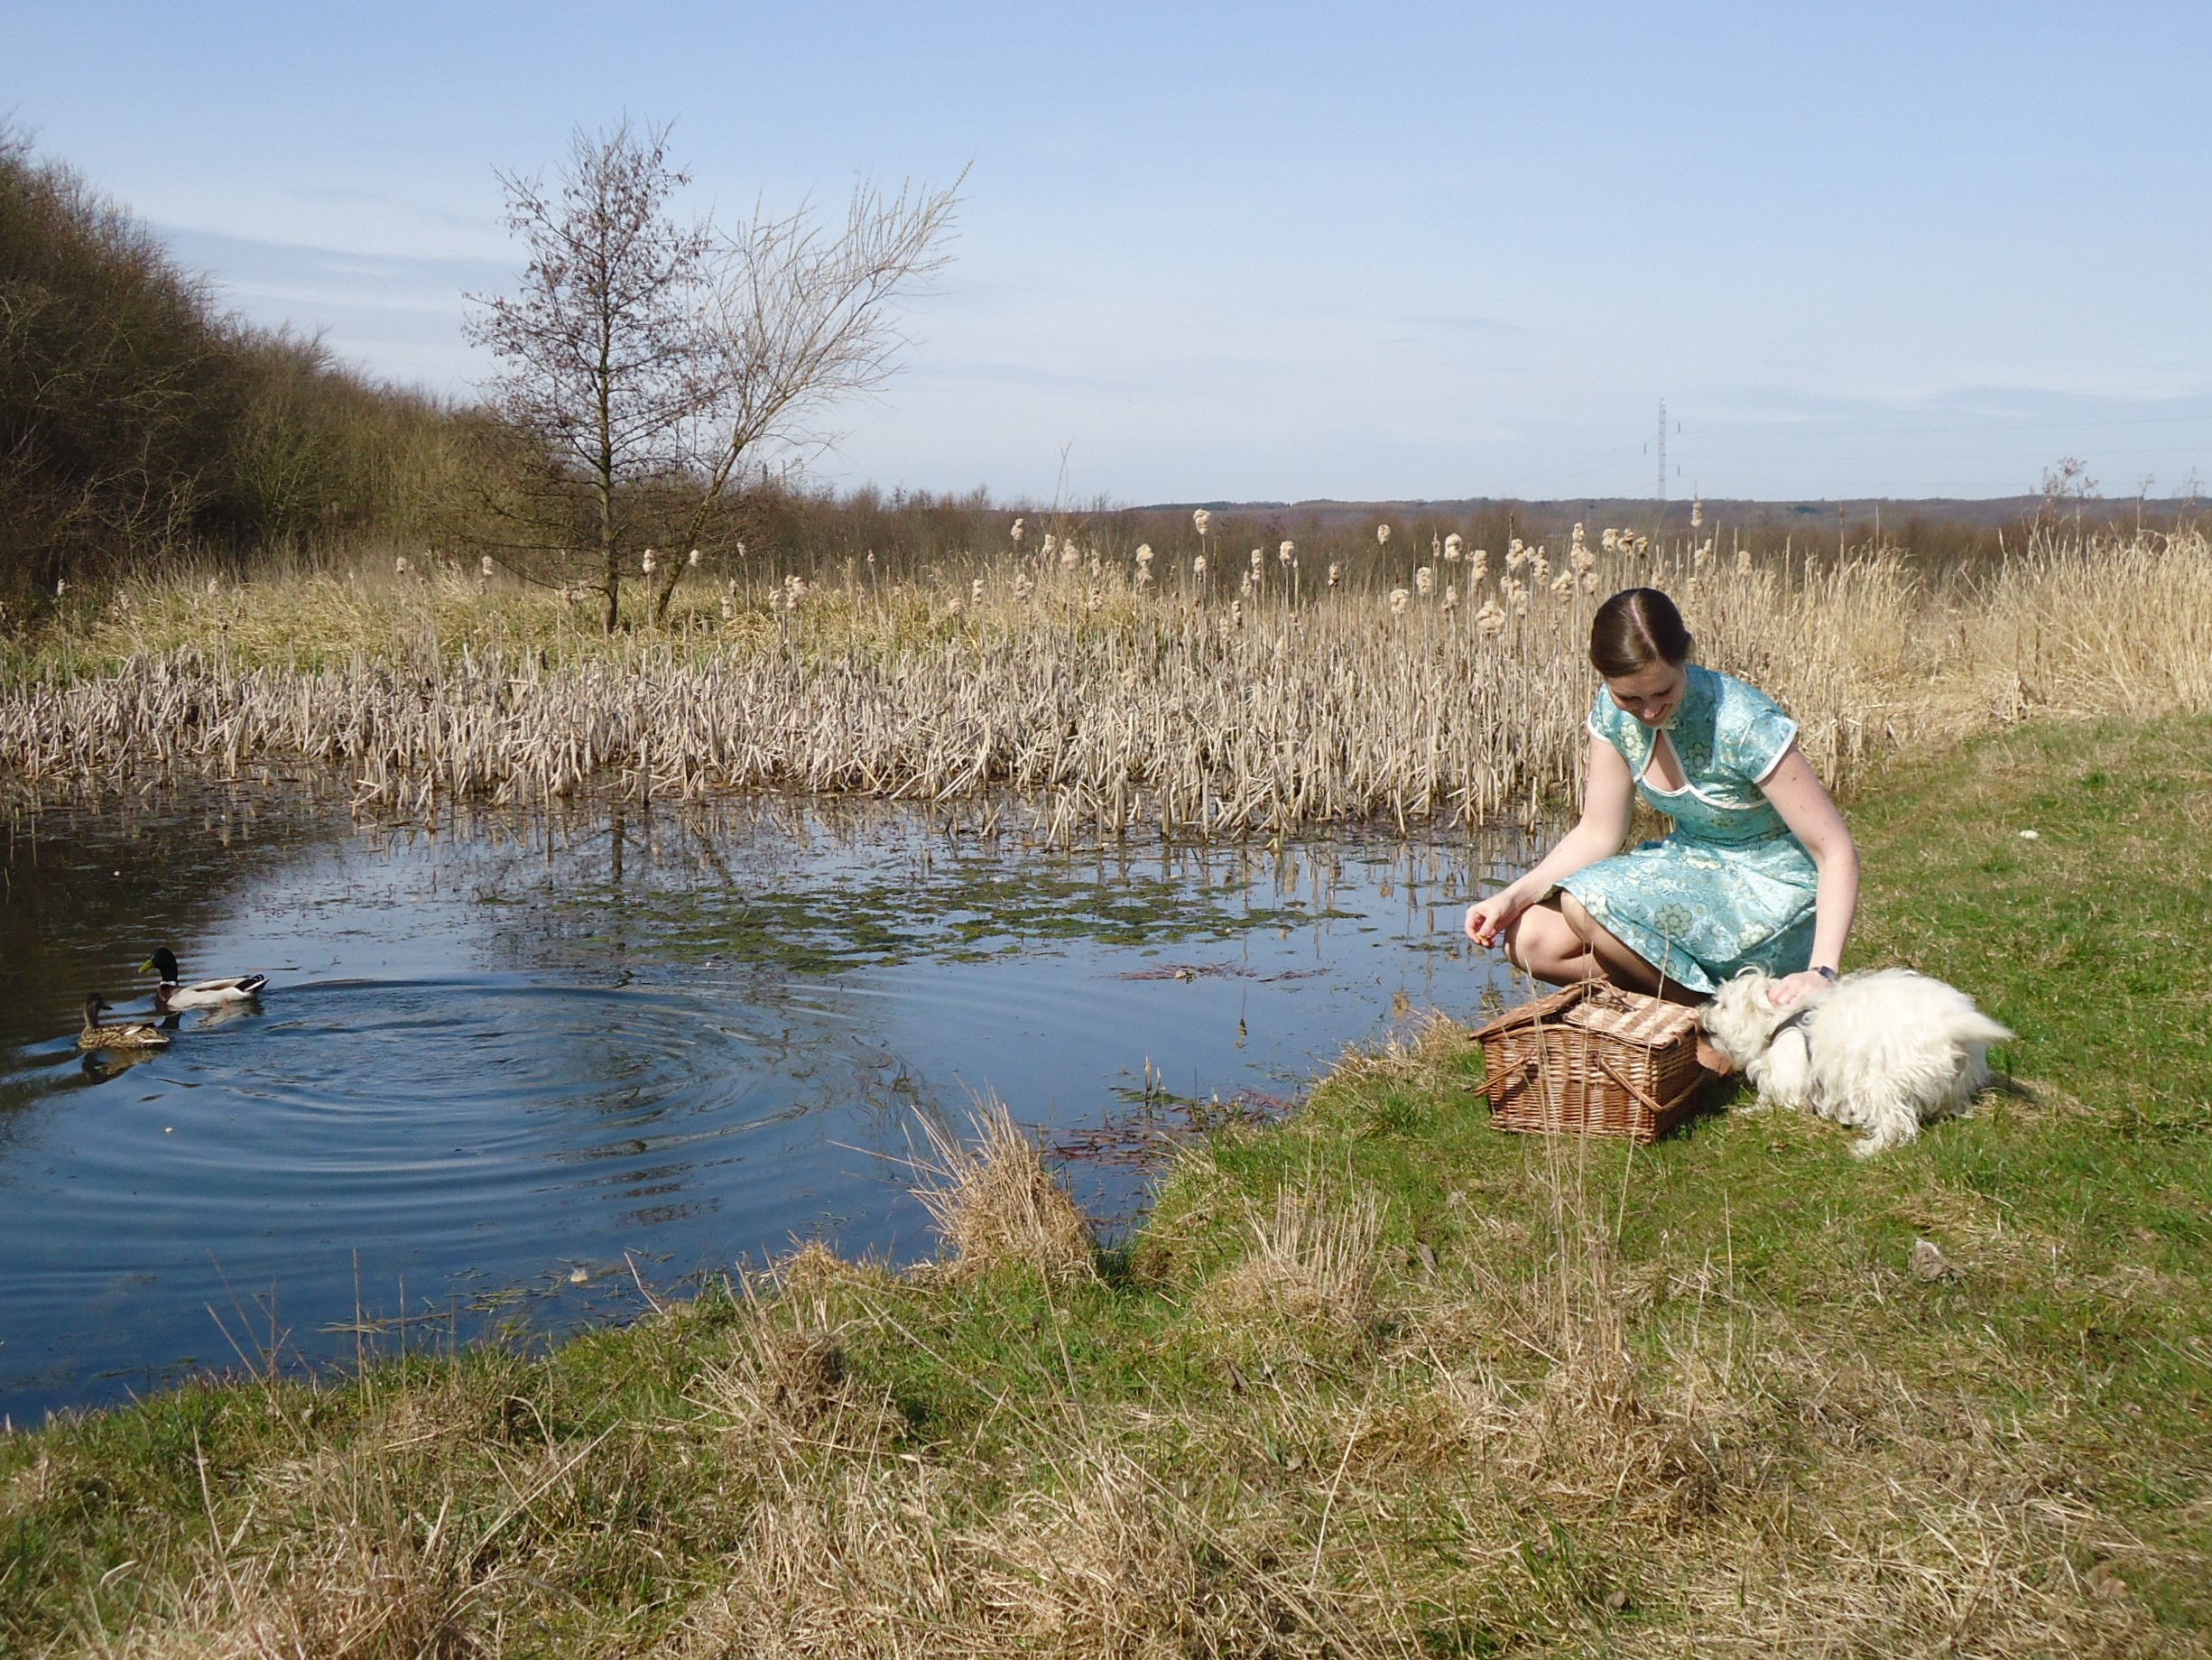
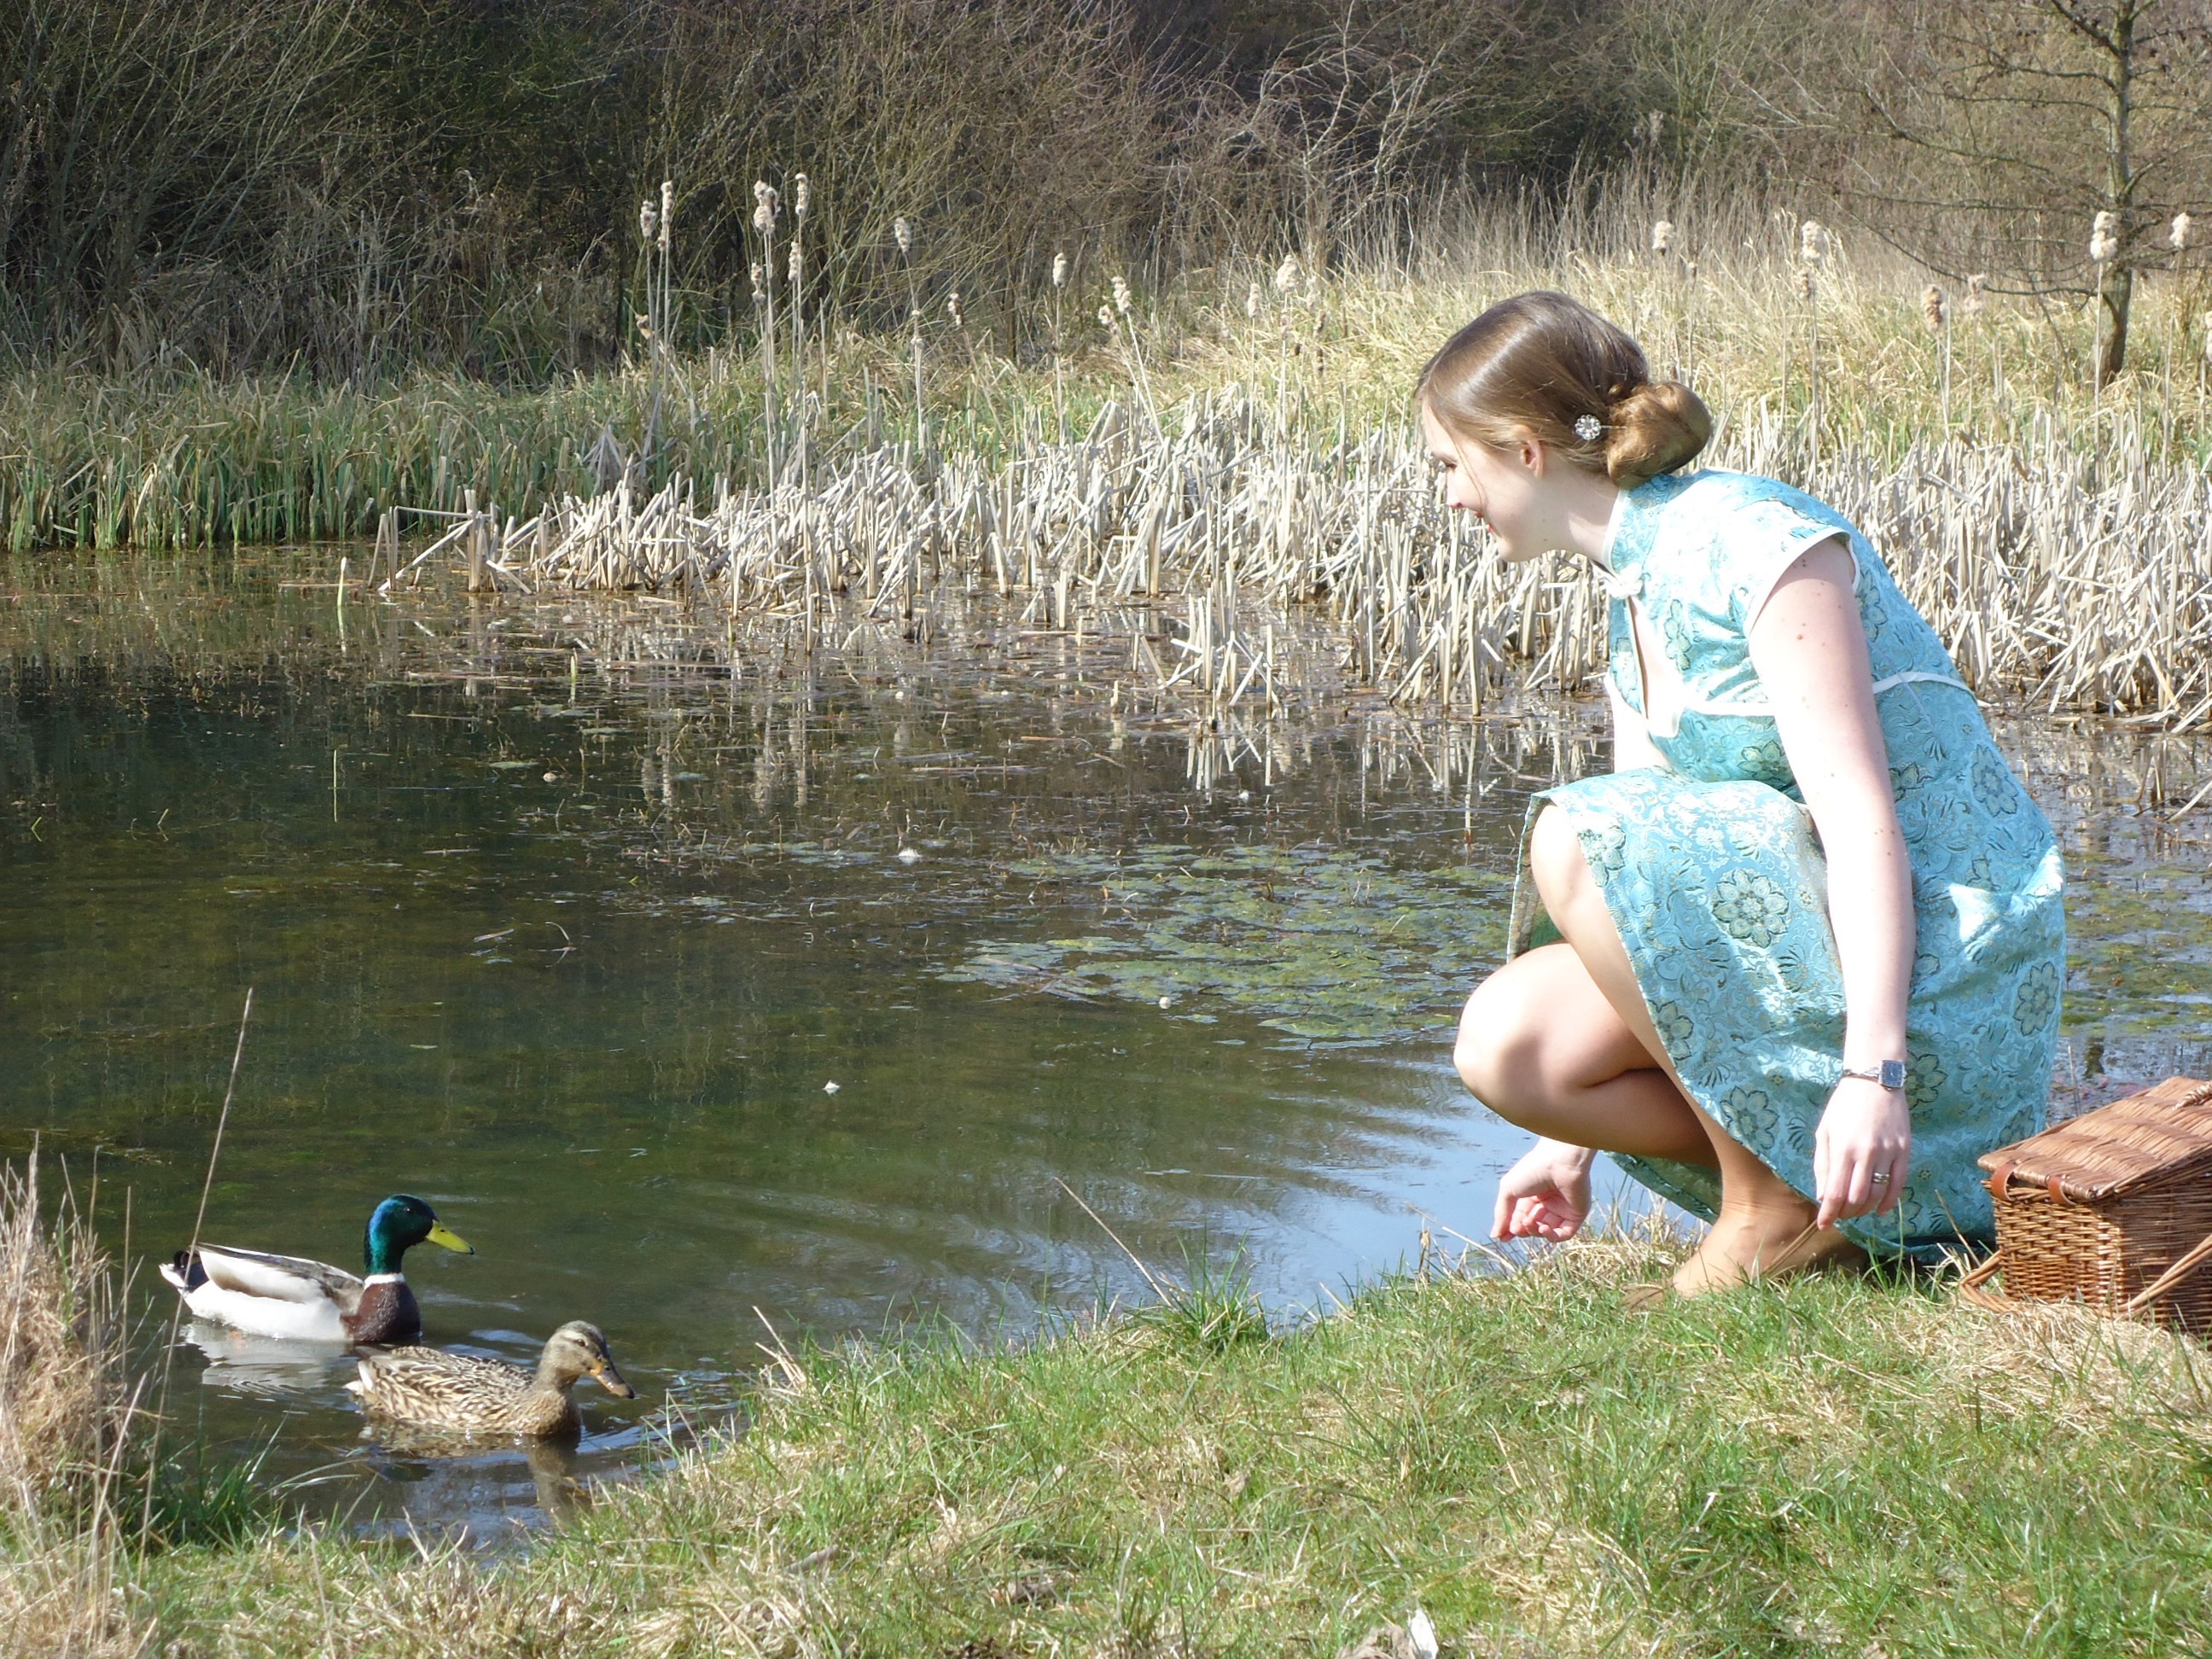
I made a new aquintance today. While trying to attract some pleasant ducks with bits of pizza, there came a white furry ball crashing through the bushes, towards me. This dog was super happy to get some cuddling from a new friend, but his owner was a bit embarrased for him.
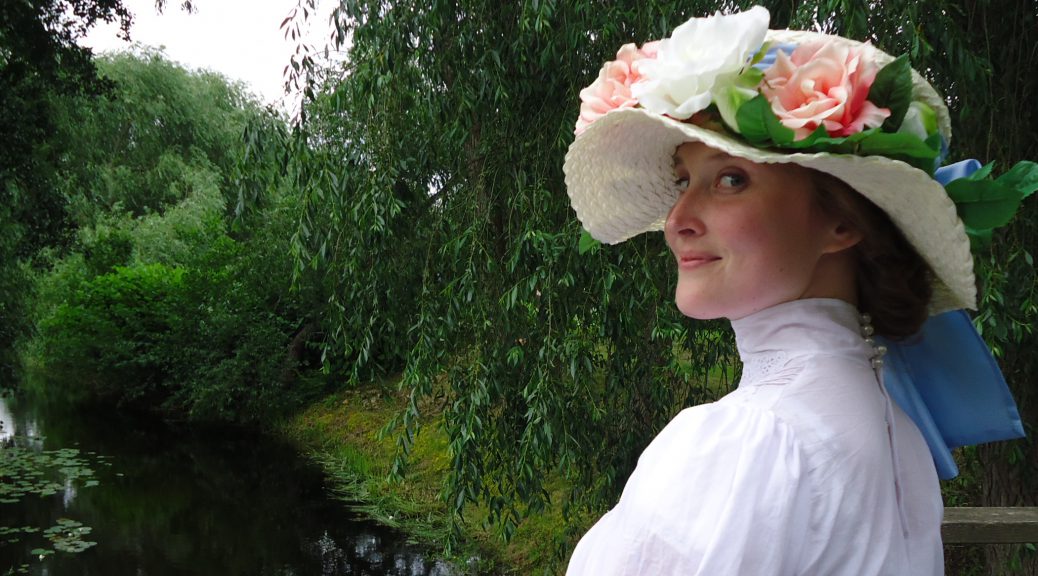
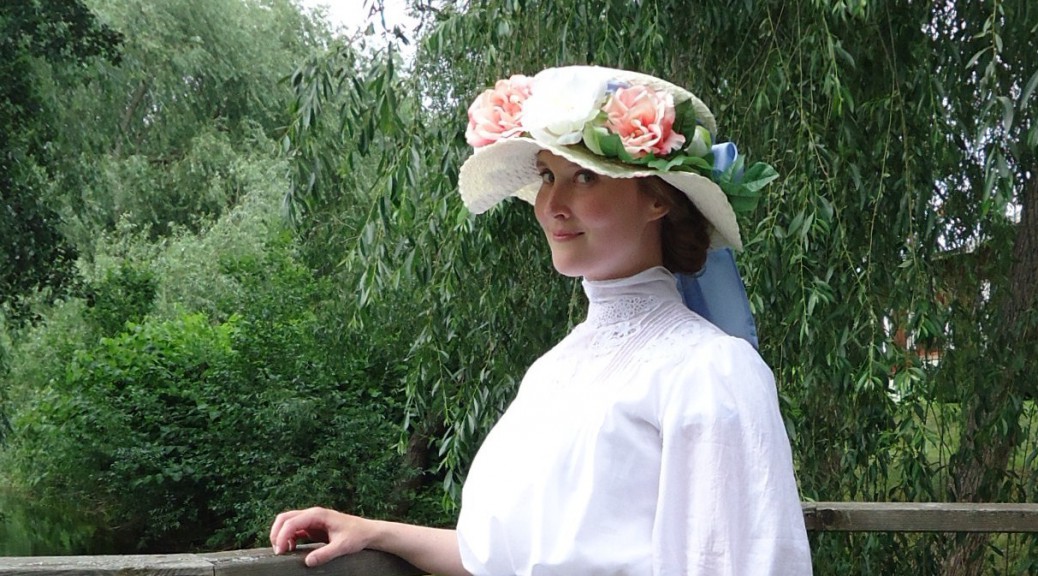
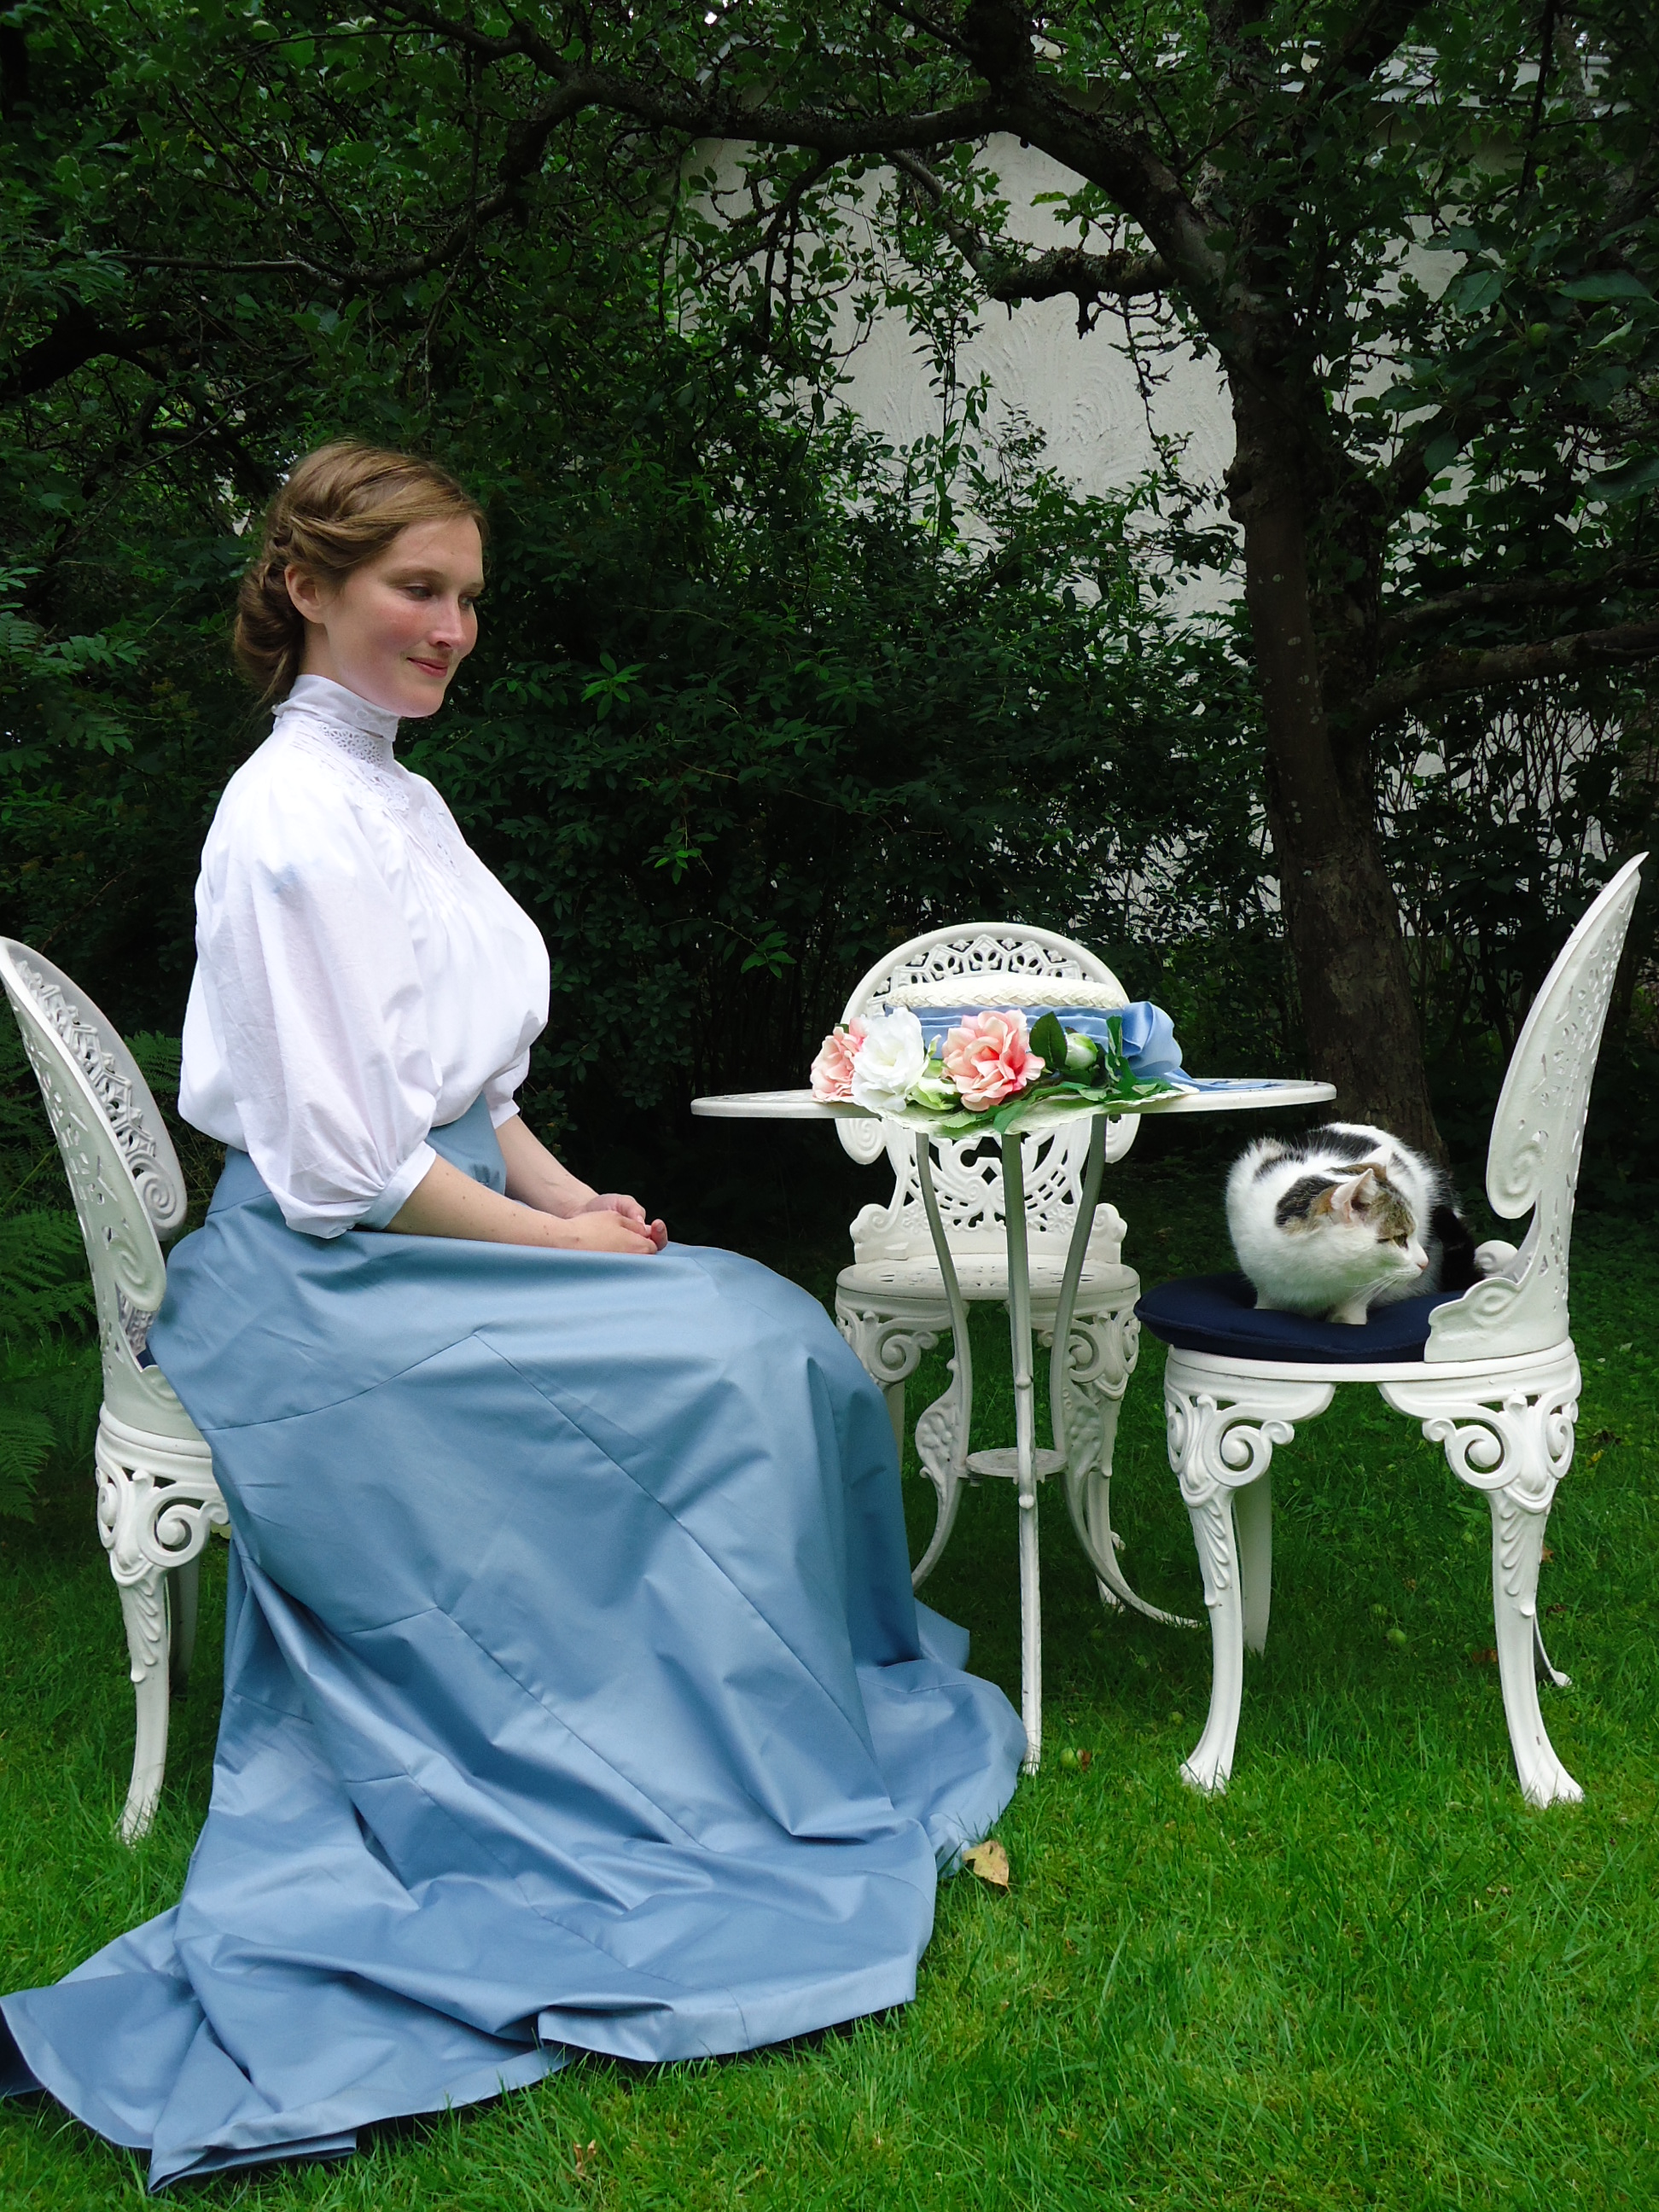
This summer, I had the opportunity to join my first event with the Swedish 19th Century Society. We were meant to show clothes that could have been worn by the people who did not have to emigrate from Sweden, during the famines of the 19th and early 20th century. I wanted to bring a friend, so my beloved edwardian Sunday look was reserved for her. My budget and time was extremely limited, so my bigger projects were discarded. Instead, I decided to take the opportunity to just have fun, making something I would never wear otherwise – a look for a wealthy lady, in 1903.
By the stream in Kisa, at 19th century event. Photo: Josefine Antonsson
For me, the first years of the Edwardian era, represents an unloved fashion, as its’ over-the-top garments, with pigeon breast and flowery decorations, contrast so much with the later, more refined fashions.
Because I had to make the whole look in between exams and work, most of the sewing was done either in the company of my family, in front of the TV, or out in the sun with my relaxing friends. My small budget only allowed me to use plastic table tablets and IKEA-roses for the hat, an old curtain for the skirt and a cotton fabric for the shirtwaist. The most expensive and time consuming part, was buying and making the whitework machine embroidery, before I left my own sewing machine for the summer.
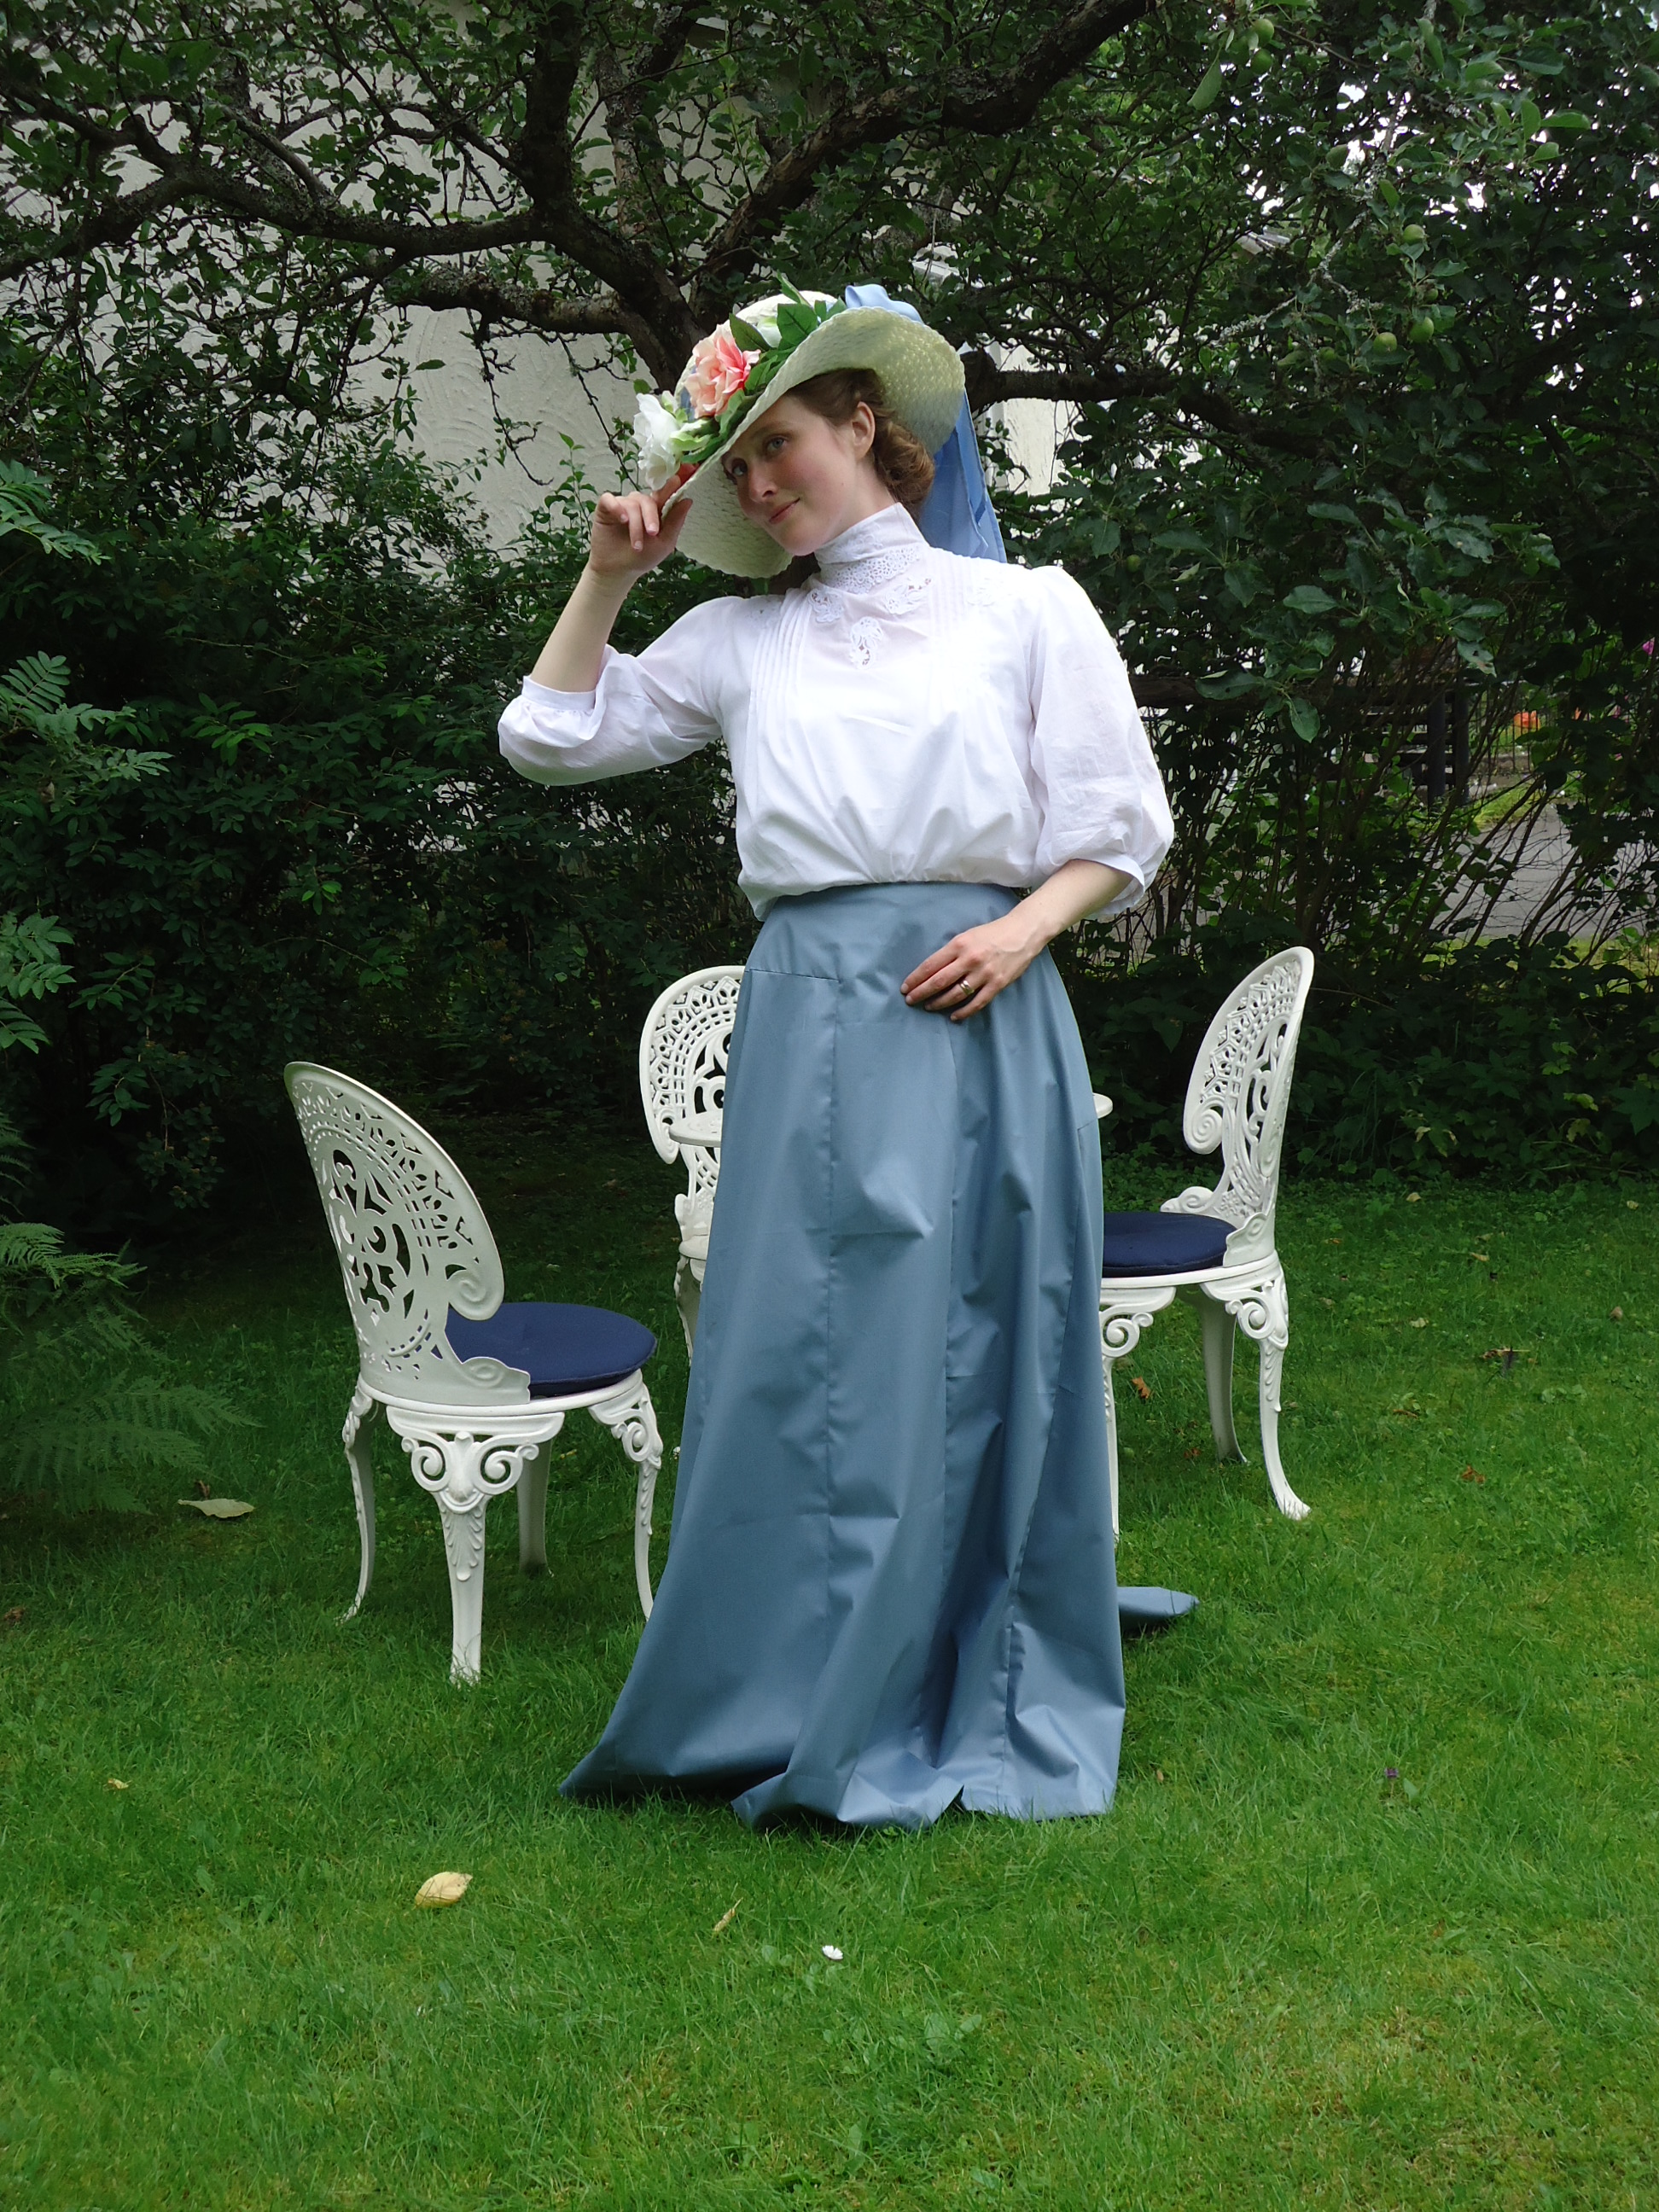
Rosenhatt i rosengård.
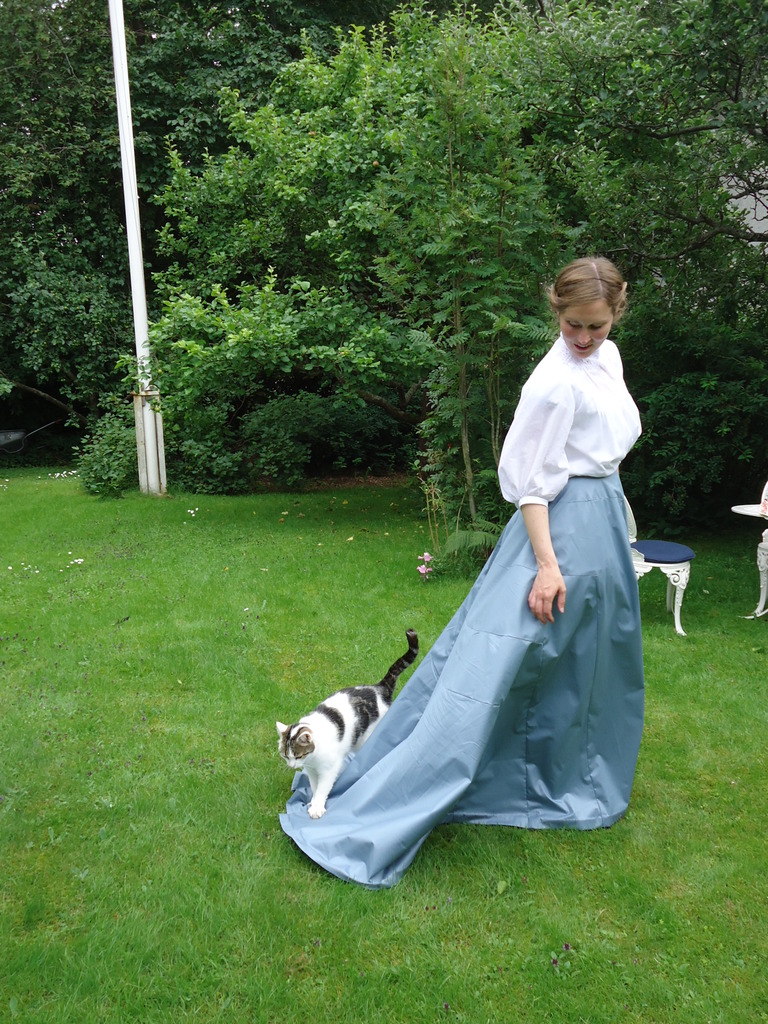
I basically followed patterns found in Janet Arnold’s “Patterns of Fashion 2” and was inspired by pictures found at Pinterest. I had great fun making the overly decorated hat, and my little niece enthusiastically gasped: “This is the biggest and most beautiful hat I have ever seen”. Alas, I had neither time, nor material for putting the finishing ribbons onto the skirt. At the event I felt like a cheap, walking flower garden, but to my great surprise I got many compliments for this look. Maybe it is not such an unloved fashion after all?
At least, this is obivously not a fashion unloved by my cat. Photo: Christian AntonssonHatten på sin ägarinna
Min främsta mecenat, tillika min hulda moder, har under något år hintat om att hon skulle kunna tänka sig att ha en Susanna Art-klänning. Tyvärr har det varit alltför uppbokade scheman när vi två har befunnit oss i samma land, så det har inte blivit av.
I julas kom jag direkt från en psykiatritenta och skulle börja plugga till nästa tenta så snart som möjligt. Hela hösten har dock varit förfärlig och nu var jag helt utpumpad. Förutom tentaplugget, hade jag under julhelgen planerat in åtta sångtillfällen (så här lät det vid ett av tillfällena: https://www.youtube.com/watch?v=V9oaLkCUV9A ). Jag bara längtade efter en ursäkt att slippa plugga. Därför kunde jag inte motstå frestelsen när mamma frågade om jag inte ville sy en sval klänning åt henne, inför en resa till Tanzania, av tyget hon fått av en av sina bästa väninnor där för flera år sedan.
My greatest benefactor, and also my dear mother, has hinted for some years at the possibility of owning a Susanna Art dress. Unfortunately both our calendars have been too crowded during the short times we’ve been in the same country, so hear humble wishes haven’t been fulfilled.
This Christmas I visited my Swedish home, coming directly from an exam in Psychiatry anc had planned to start studying for the next exam as soon as possible. I’ve had a really bad time through all this semester, though, so now I was totally exhausted. Except for the studies, I was booked for singing at eight different events during the Christmas holidays (this is what it sounded like at one of them: https://www.youtube.com/watch?v=V9oaLkCUV9A). I just begged for an excuse for not studying. You might understand that I couldn’t resist the temptation when mum asked me to sew a cool dress for her trip to Tanzania. She had been given the fabric by one of her best friends there, many years ago. Now it would finally be used.
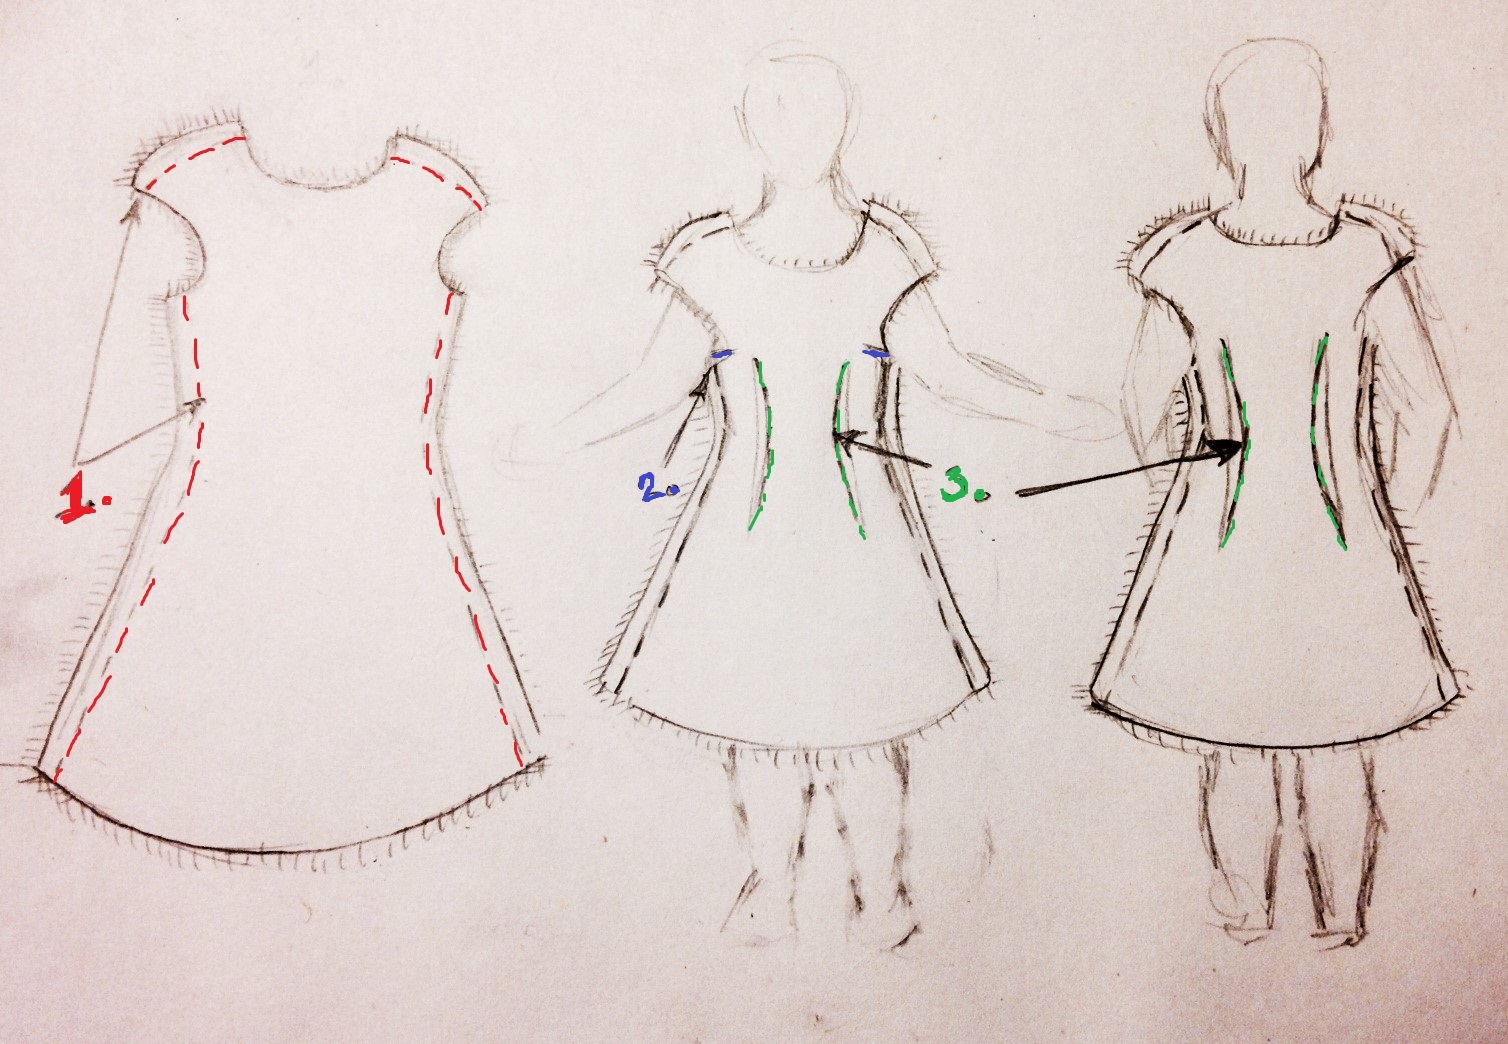
Det första jag gjorde, var att lägga ut en av hennes välsittande, figursydda klänningar på tyget. Sedan klippte jag till tyget med 1 dm marginal på alla sidor, för att ge utrymme för insnitt och felberäkningar.
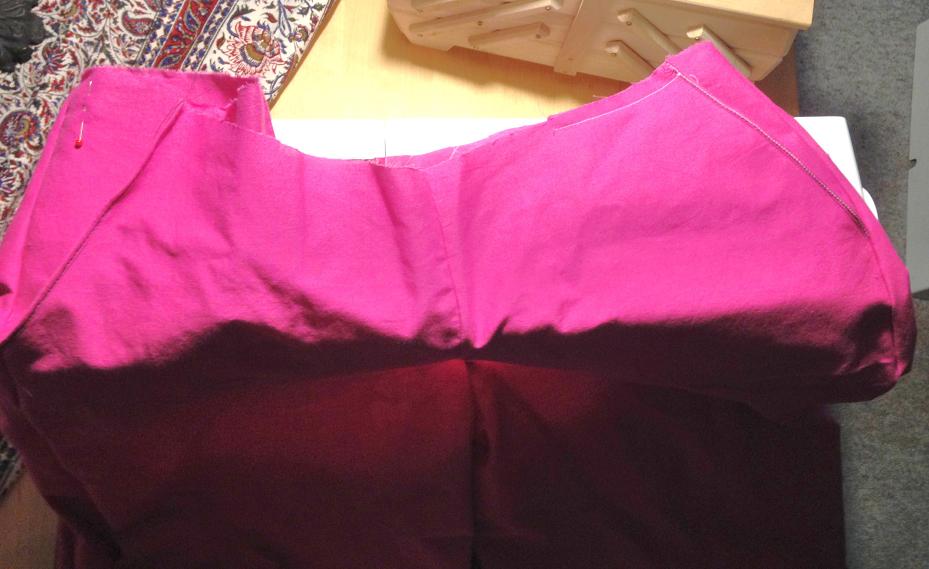
Sedan nålade jag längs sidorna och upptill (markerat med rött på bilden). Detta tält fick hon dra över huvudet och sedan kunde jag justera den befintliga nålningen, för att ta bort veck.
Därefter nålade jag insnitt vid bystens sidor (blått på bilden), så att tyget nedanför insnitten föll trådrakt ned mot golvet.
Nästa steg var att nåla två insnitt med start utför bysten till ca 1 dm under midjan, samt i ryggen (grönt på bilden).
När klänningen satt perfekt och den även kunde dras av min kära kund, sydde jag längs alla nålningar (först byst-insnitten, sedan sidor och axlar och sist insnitten fram och bak).
Därefter fållades kjolen till passande längd.
Sist sydde jag infodring i ärmsprunden och halslinningen, med hjälp av kantband, gjort av samma tyg.
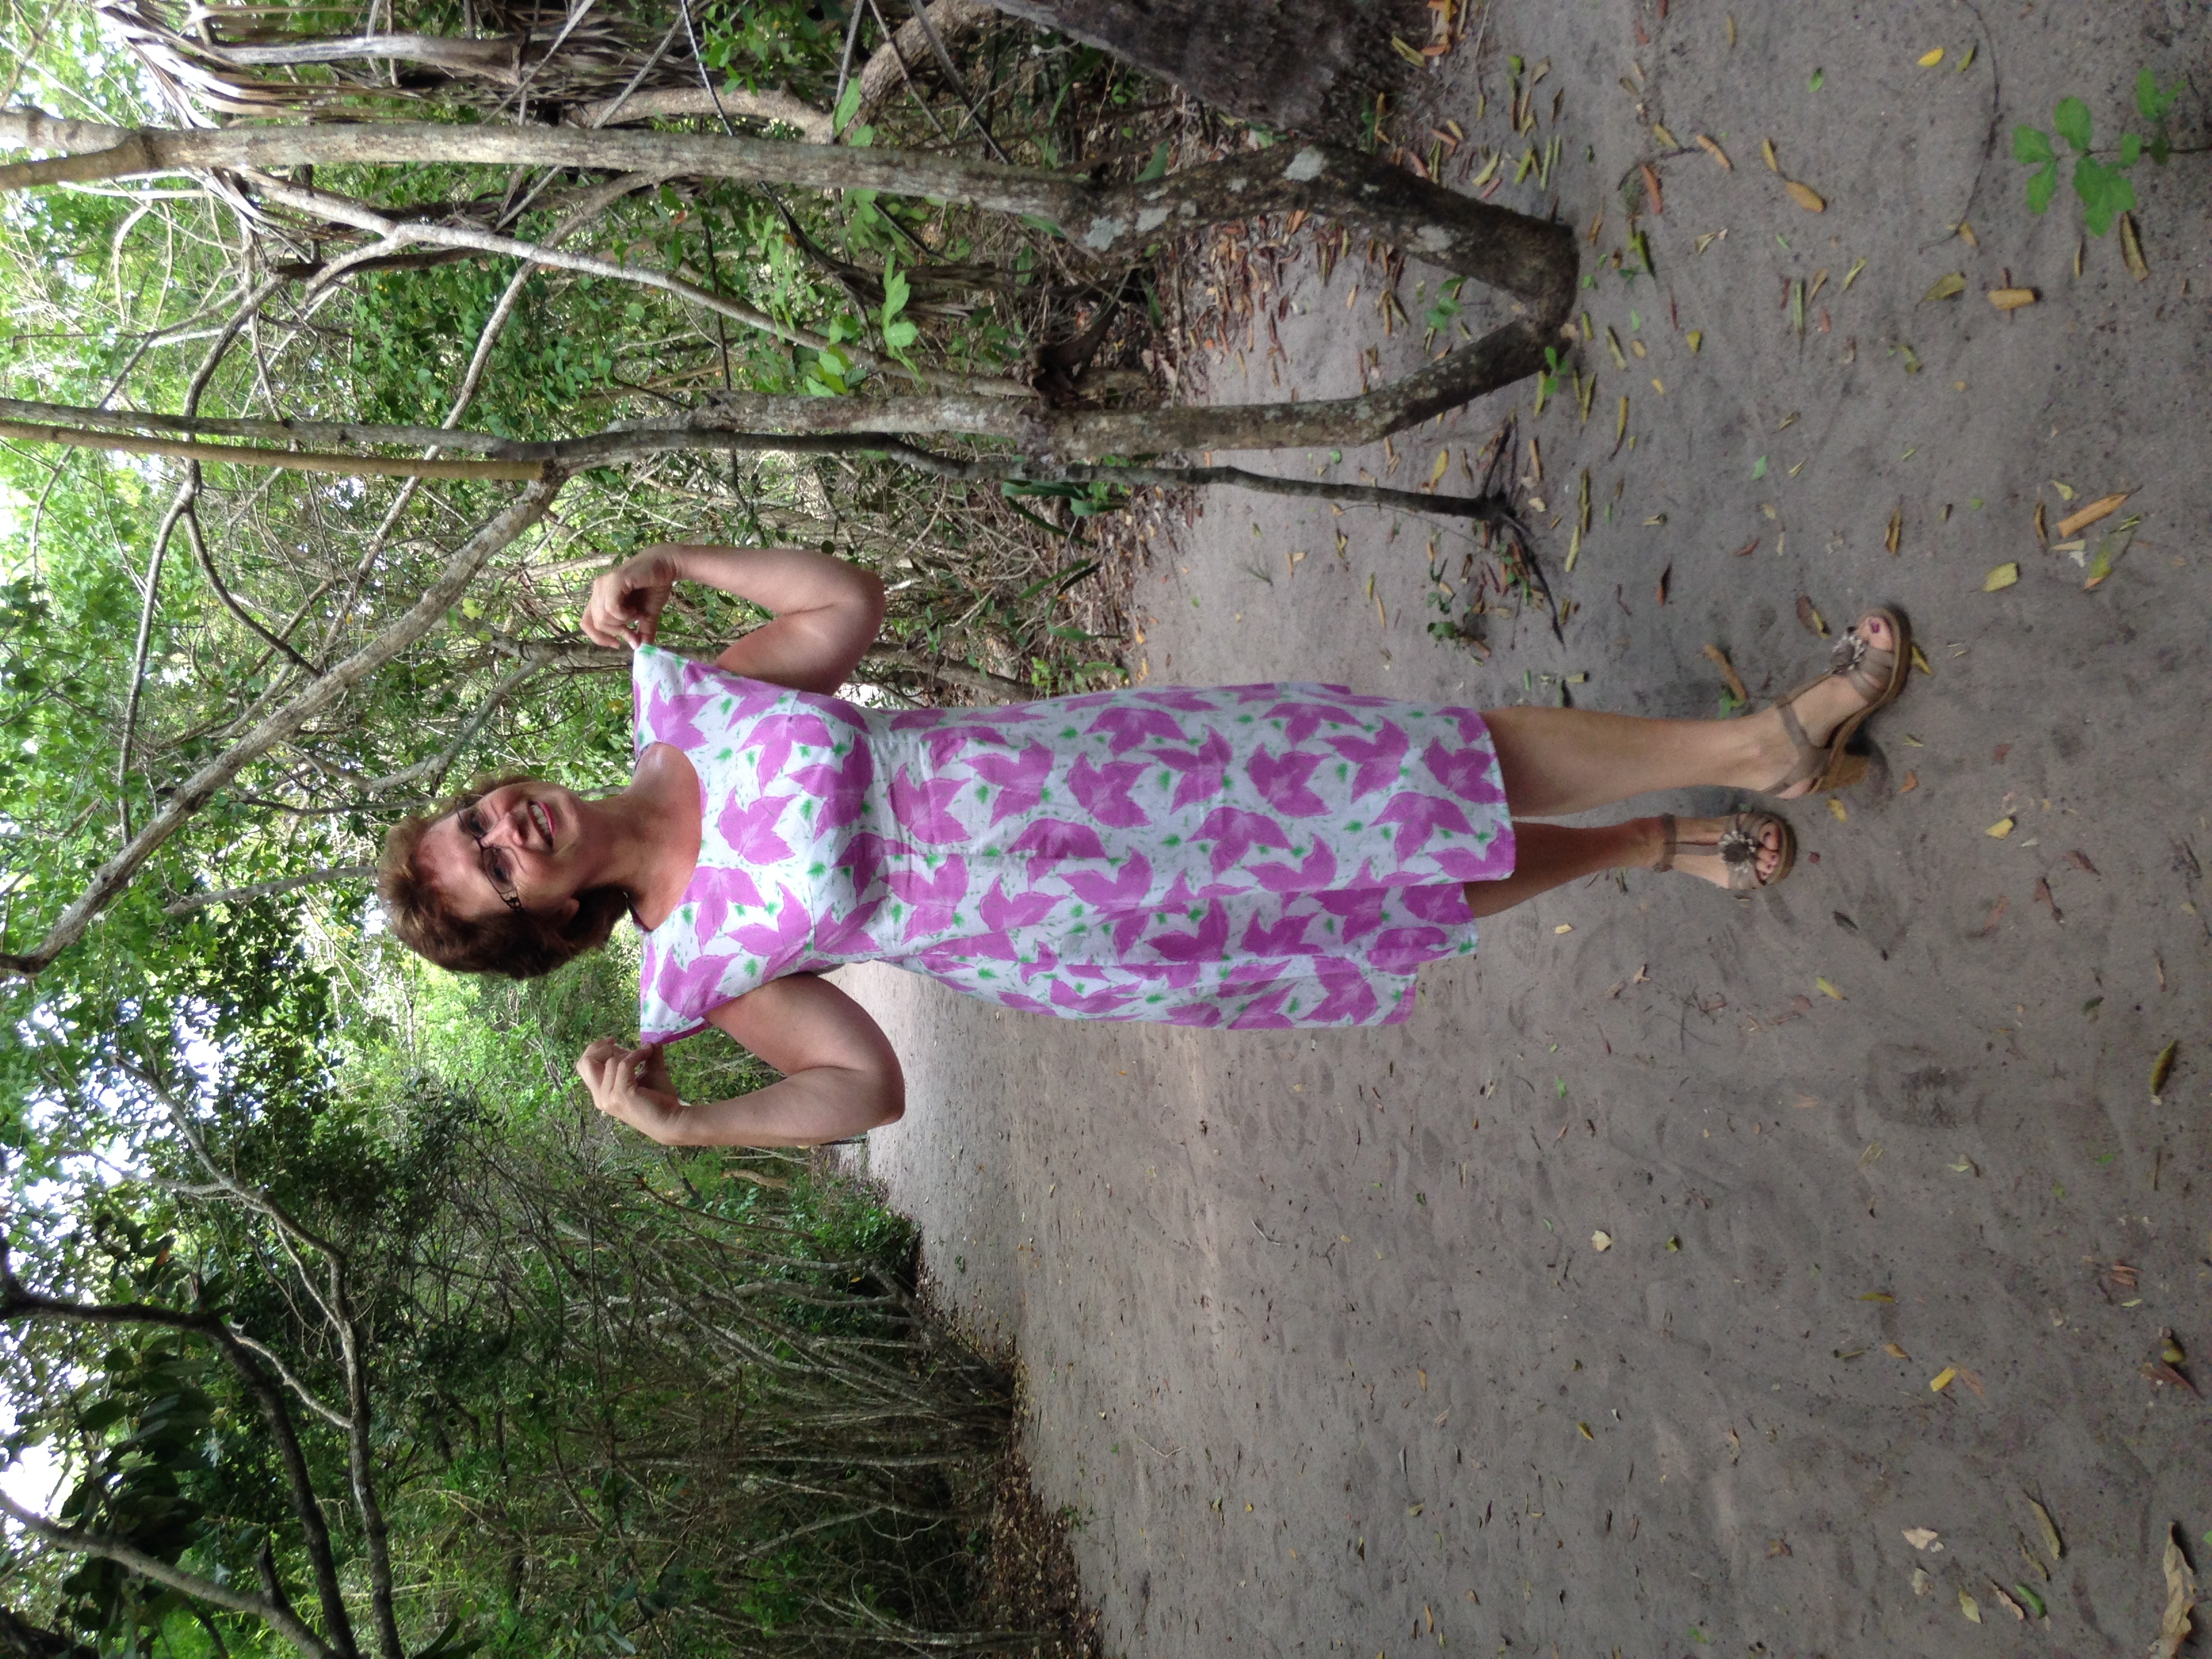
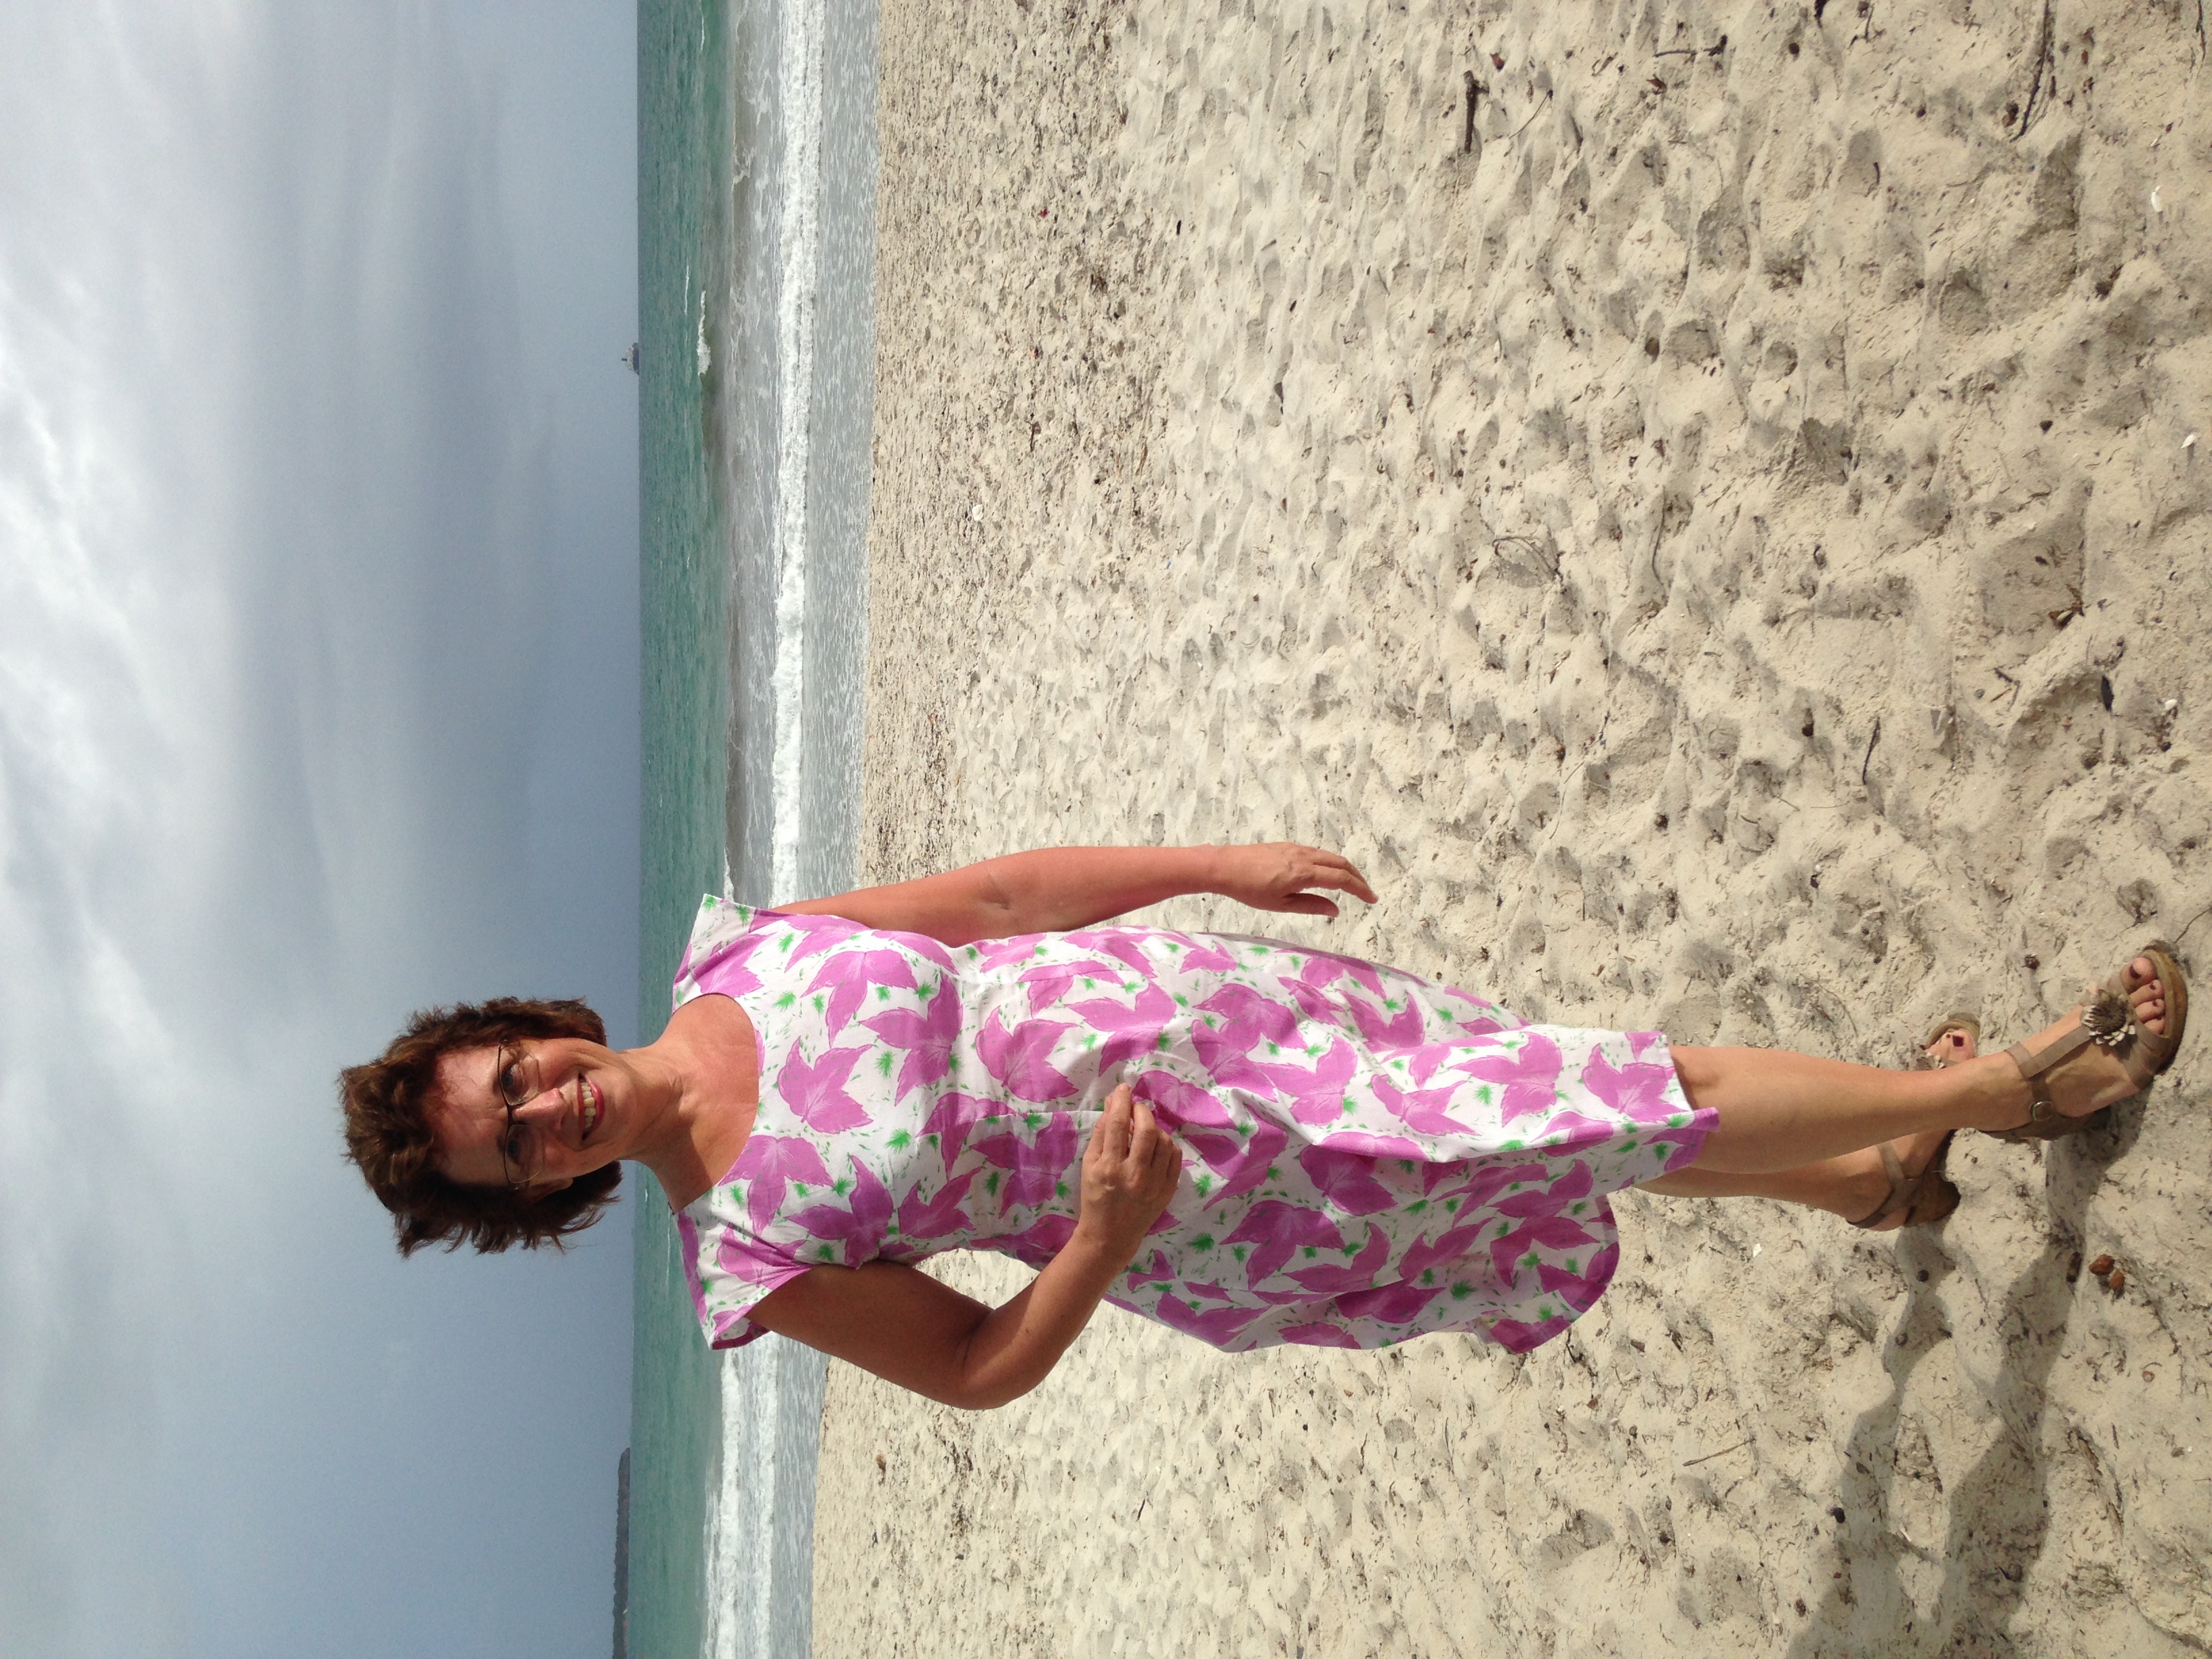
Så här fin blev hon!
First, I lay one of her well fitted dresses out on the quite narrow fabric. Then I cut the fabric with one decimetre margin at every side, in order to make space for fitting and wrong cuts.
Next, I pinned the sides and shoulders (marked with red in the picture). Then she had to crawl inte the saggy dress and j was able to adjust the primary pinning to smooth the puckering parts out.
Then I pinned darts at the sides of the bust (blue in the picture) so the fabric below fell on the grain towards the floor.
The next step was to pin two darts starting by the bust and stopping about one decimetre below the waist, plus a pair of darts in the back too (green in the picture).
When the dress was both perfectly fitted and possible to get out of, I stitched together all the pinned seams (first the darts at the bust, then the side seams and shoulders, then the darts in the front and back).
Then I hemmed the skirt at a Islamic friendly length.
Last, I made a tape out of the same fabric and used it as interface (?) for the inside if the arms and neck line.
This is how great she looked in the dress!
Tack, underbara mamma, för denna förträffliga förströelse och de fina bilderna, samt alla fantastiska sömnadsgåvor som jag fått genom åren!
Thank you, dear mother, for this wonderful distraction and the beautiful pictures and for all the fantastic seamstressy gifts that you have bestowed on me the last ten years!
Min gamla dator är totalt opålitlig, så när den plötsligt bestämde sig för att ta semester i två veckor inför psykiatritentan, insåg jag att jag måste köpa en ny. I november ska jag veckopendla till min praktik. Jag vill inte utsätta datorn för onödiga påfrestningar under resorna, men vill samtidigt undvika extra utgifter, så nu har jag gjort ett datorfodral av material som ändå låg hemma och skräpade:
Skumgummi – tidigare använt till en numera skrotad gungstol
2 bordstabletter – tänkta som nödlösning till edwardiansk hatt, men sedan hittade jag bättre , varför dessa blev liggande.
My old lap top is unreliable, so when it suddenly decided to take a vacation for two weeks just before my psychiatry exams, I realized that I had to by a new one. In November, I will commute weekly for my internship. I do not want to put this expensive new device in danger during the journeys, but at the same time I want to save money. Therefor I have made a lap top case out of materials that I would never use otherwise:
Foam rubber – earlier used for a rocking chair
Two tablets (?) that I had planned to use as an emergency solution for my Edwardian hat, but then I found better ones and these were left in the bottom of a drawer
Yellow lining material – leftovers from the Sunday School flag
Bear thread – from some jeans
Zipper – inherited
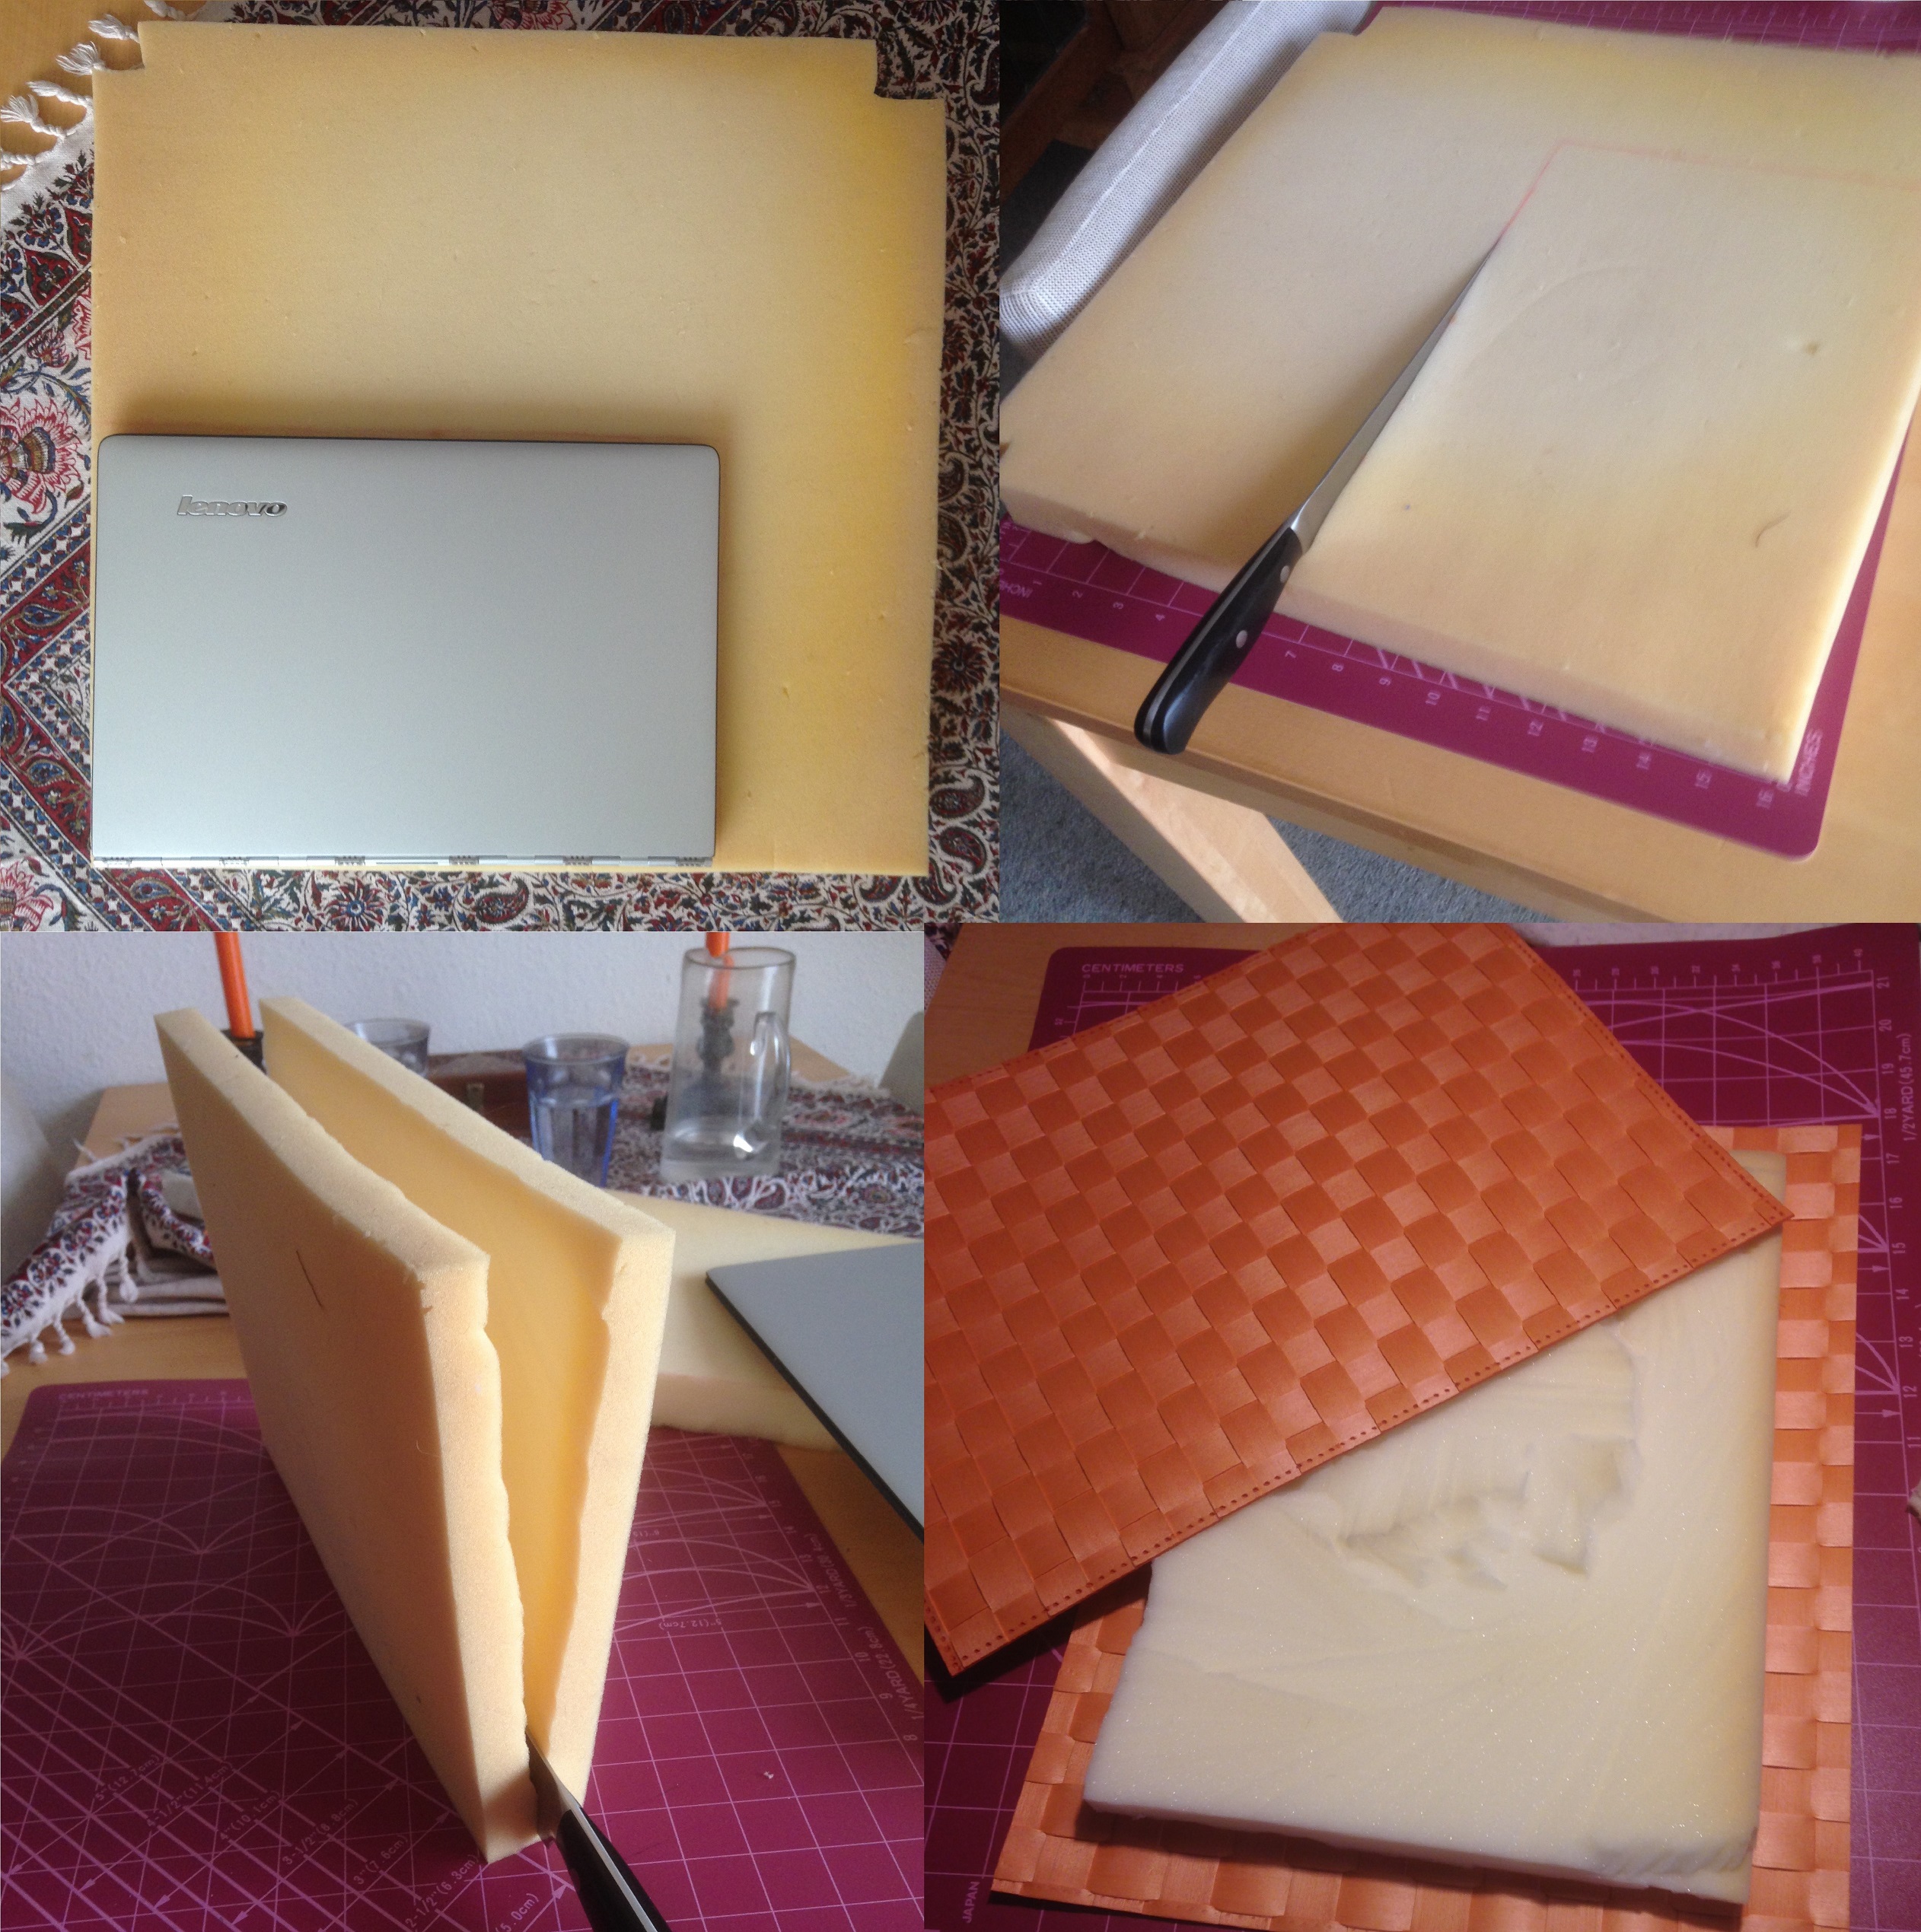
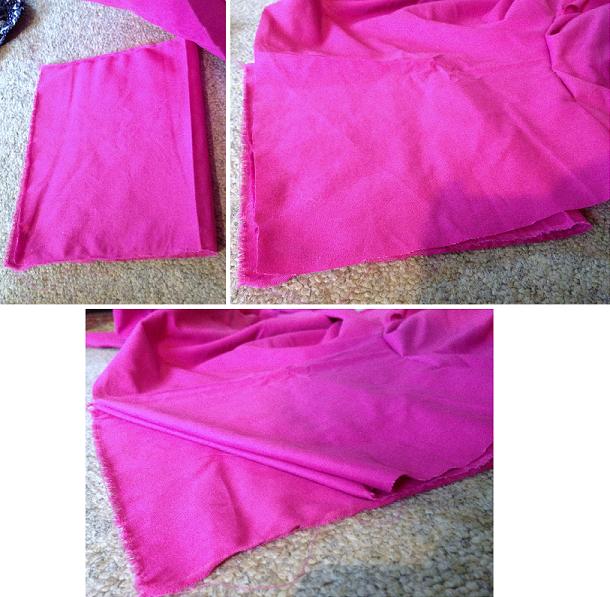
Först ritade jag upp datorns mått på skumgummit och skar ut med hjälp av brödkniv. Sedan delade jag detta på mitten, men lämnade de nedersta millimetrarna. Jag testade att lägga in datorn och insåg att att skyddet var överdrivet tjockt, så jag skar bort ytterligare på utsidorna.
First, I draw the measurements of the laptop on the foam rubber and cut it with a bread knife. I cut it open, leaving a few millimeters at the bottom. I tested putting the computer in between the layers and realized that it was way too thick. I cut away more from the outside.
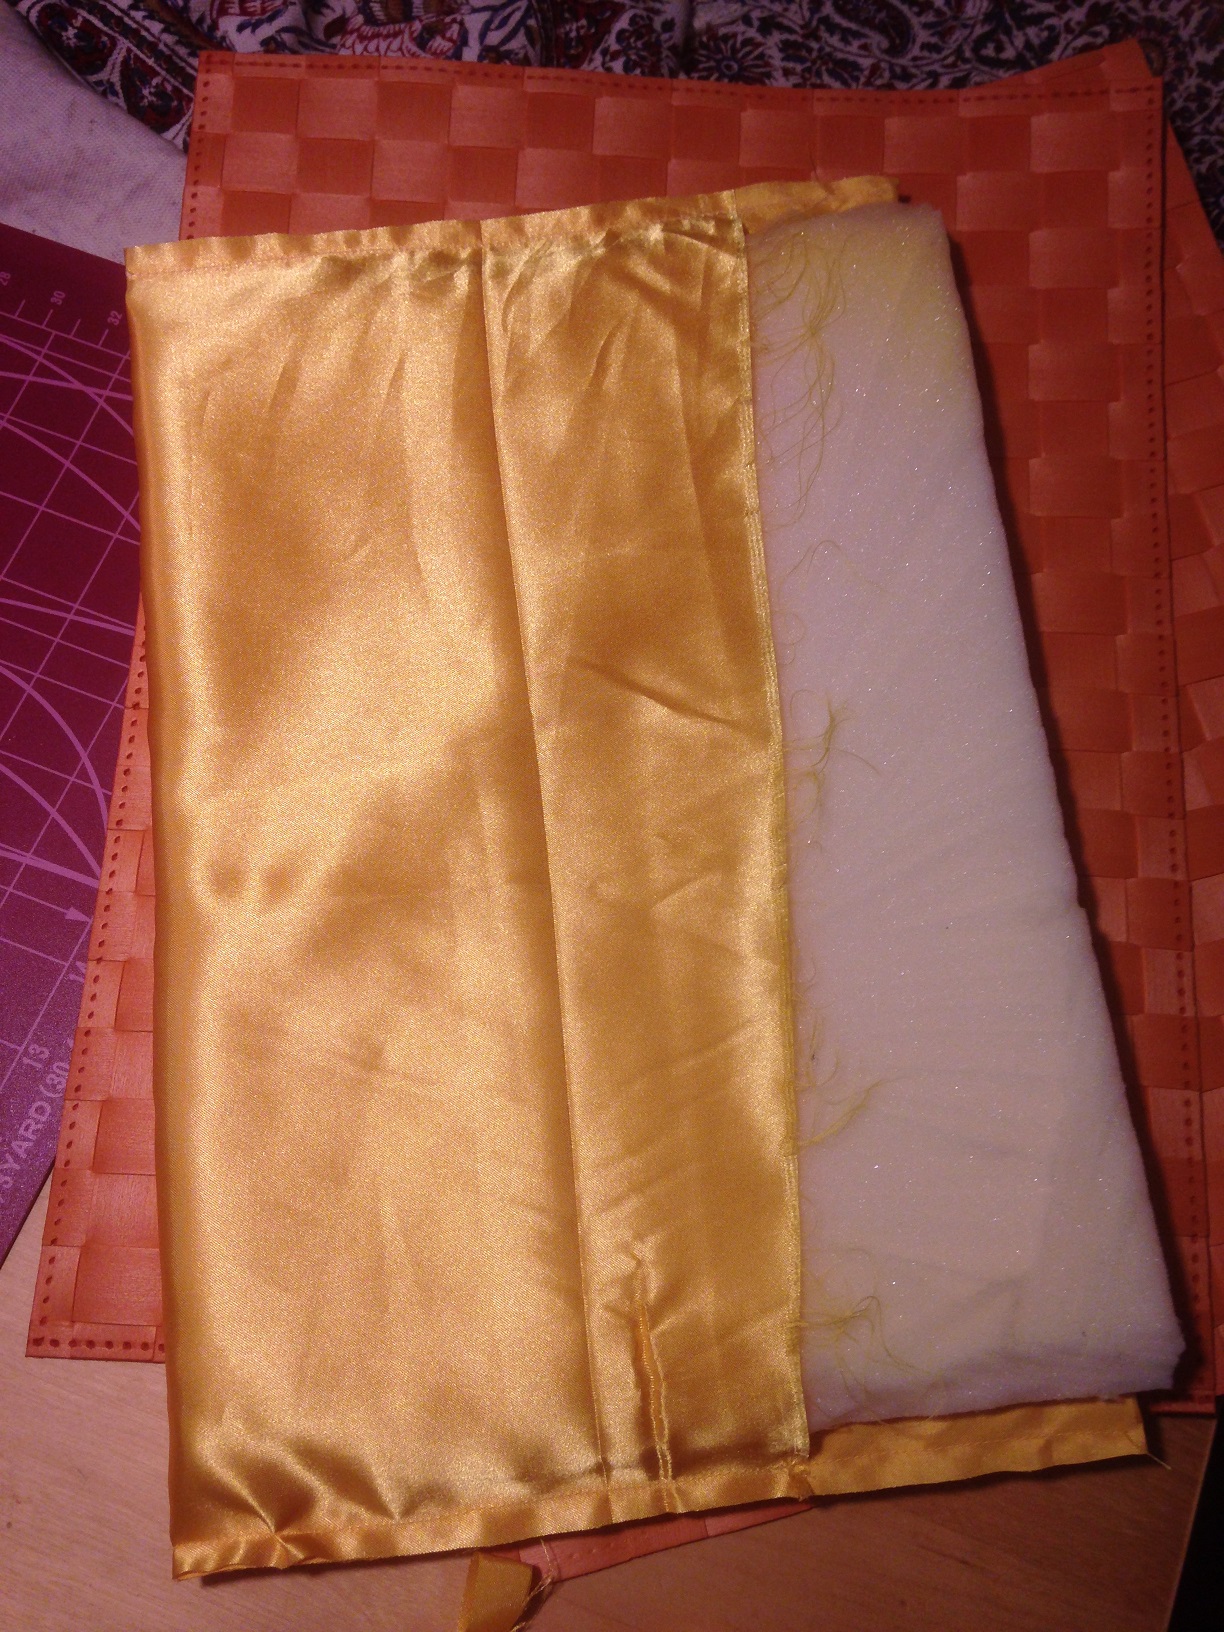
Jag fordrade insidan med tyg, genom att först vika på mitten och stoppa ned mellan skumgummilagren och sedan vika ut det överflödiga tyget mot utsidan. Därefter sydde jag längs kortsidorna, så att det bara var kvar en öppning upptill för datorn.
I lined the inside, by folding the fabric on half and put it down in between the foam rubber layers, then I folded the remaining fabric over the outside. Then I sew the short sides, leaving the long side open for the lap top.
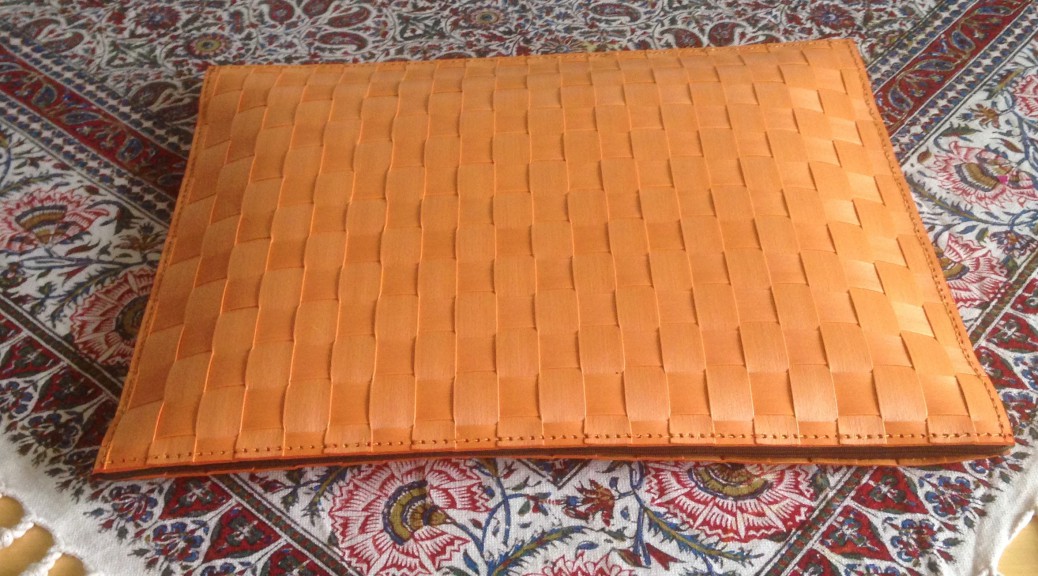
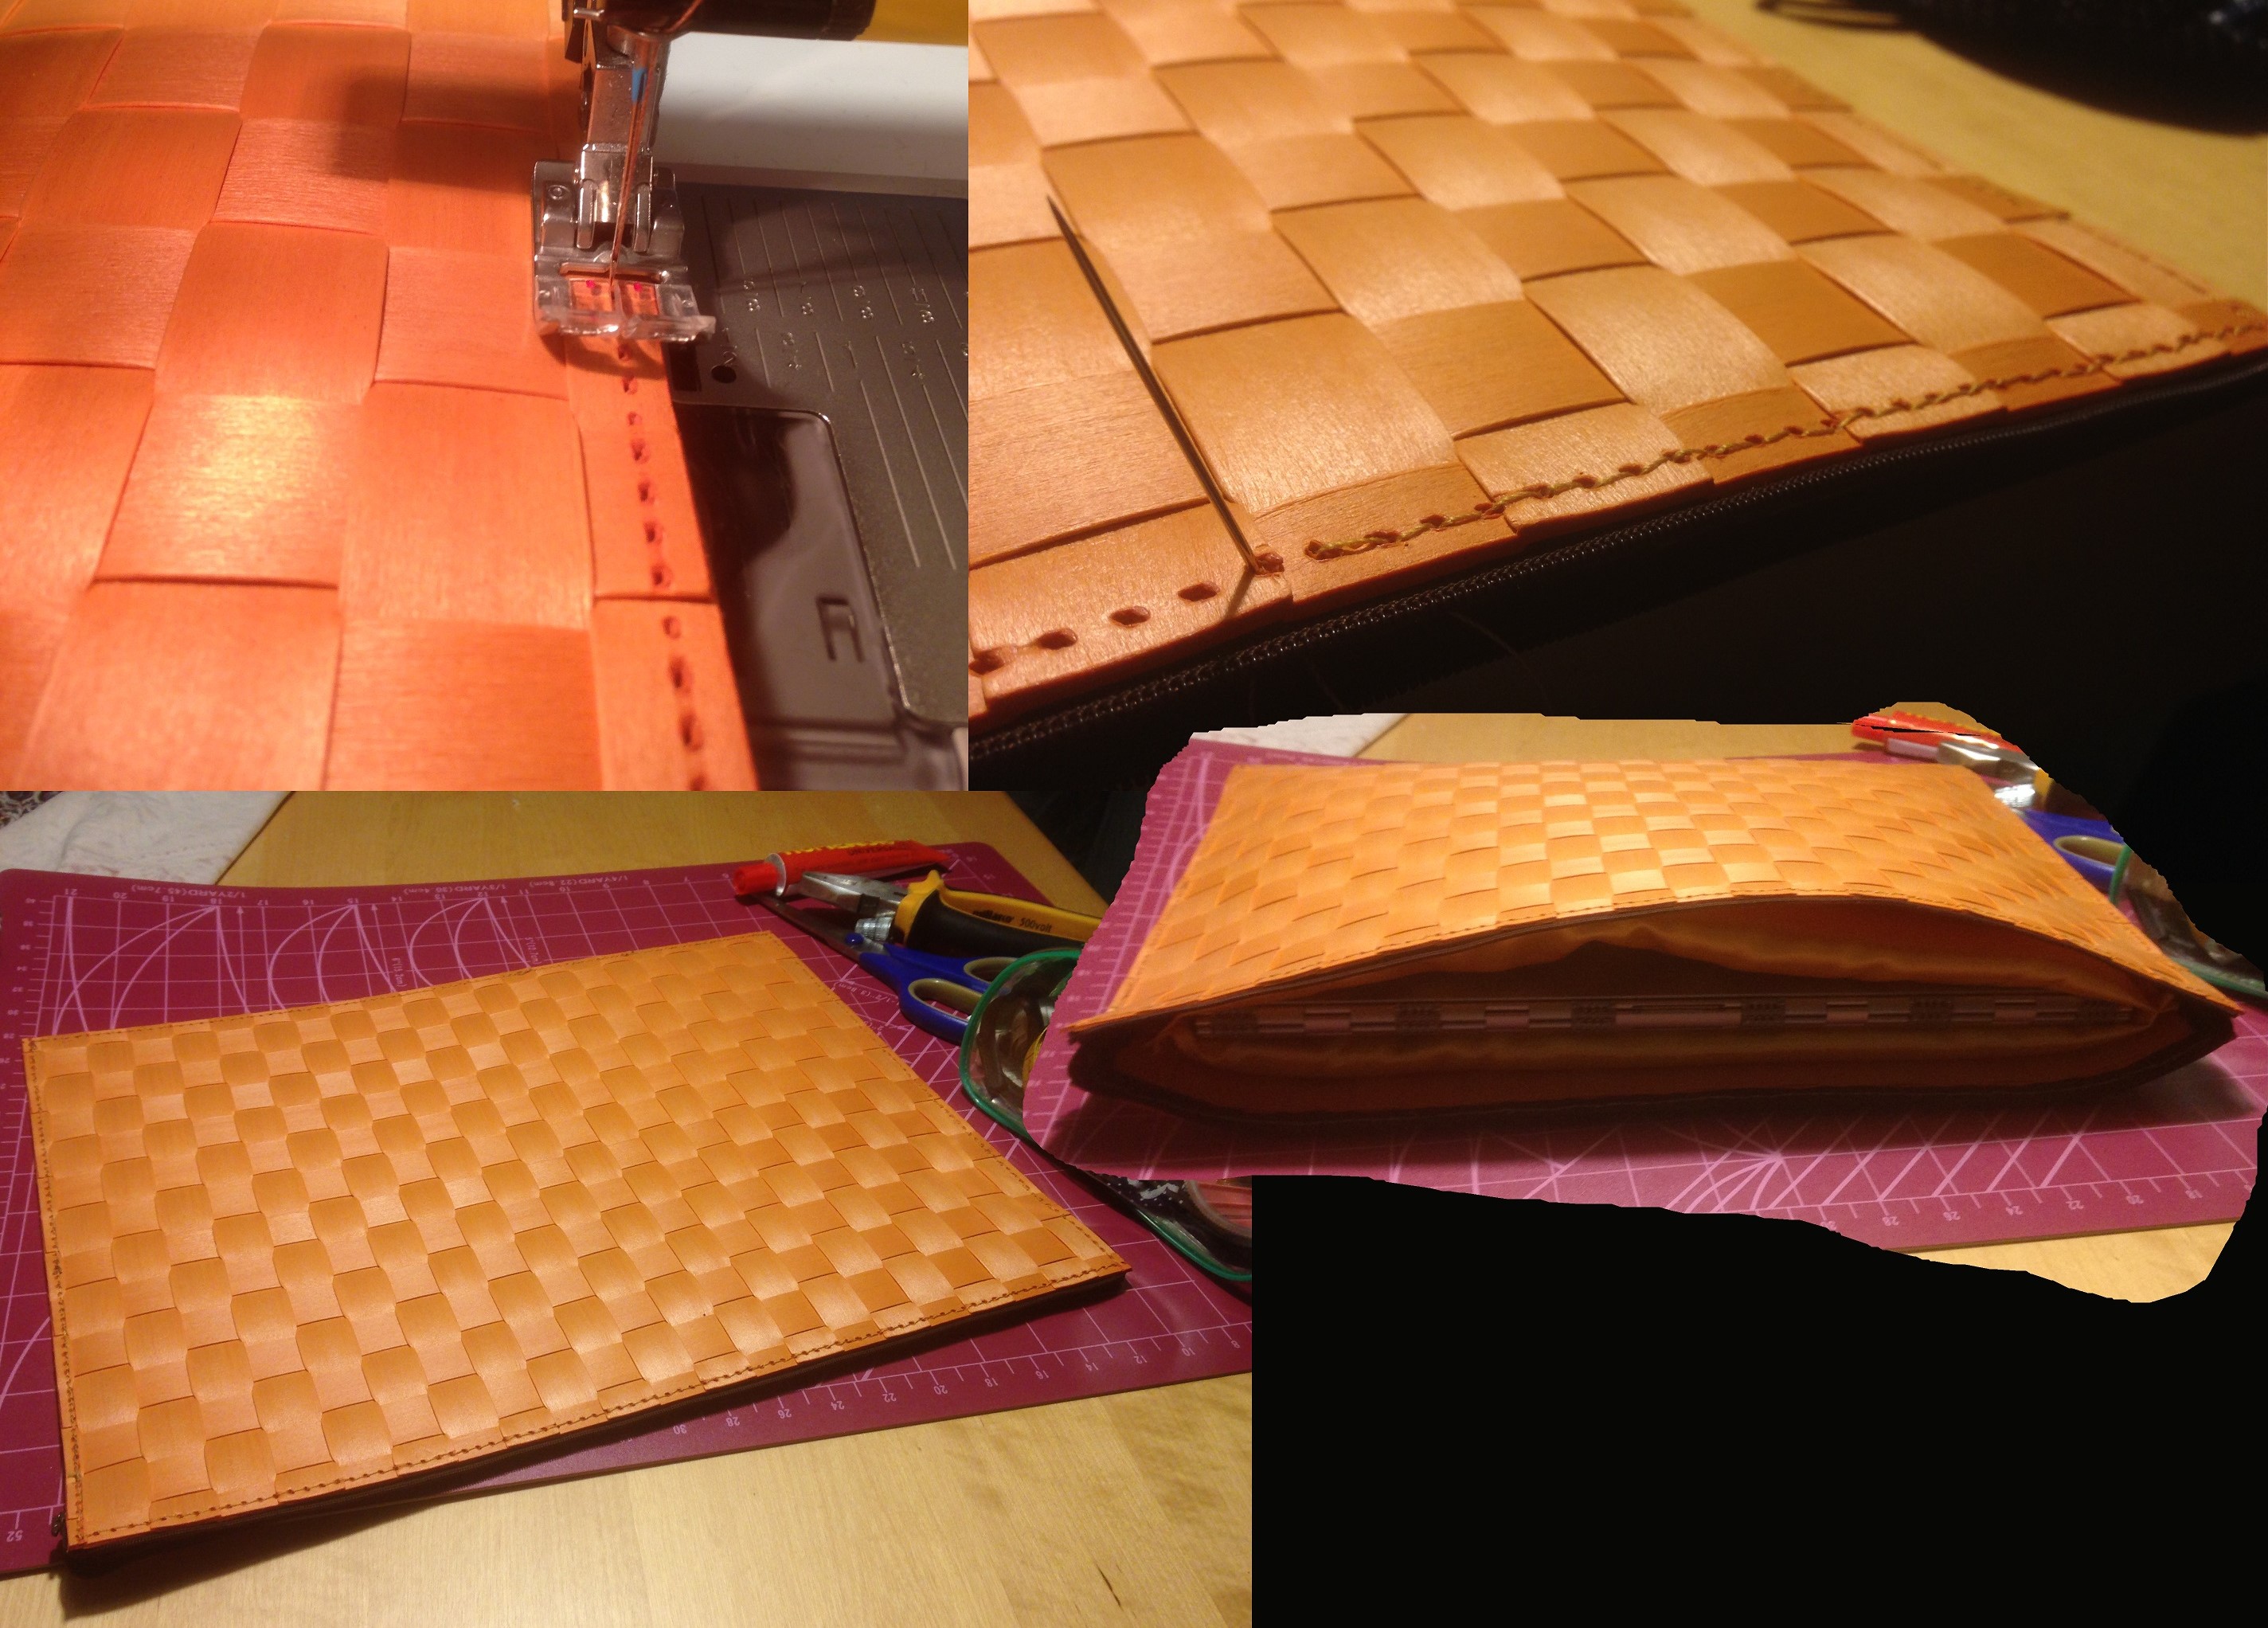
De två bordstabletterna sydde jag försiktigt samman på maskin, med jeansnål och björntråd. En långsida och de närmaste 2 centimetrarna på båda kortsidor lämnades osydda. Här satte jag in en dragkedja, som jag sydde fast för hand. Sedan stoppade jag in fyllningen och datorn.
I stitched the two table tablets together on machine, with jeans needle and bear thread. One long side and the two centimeters closest to this side remained unsewn. Here I put a zipper, which I hand stitched in place. Then I put the foam rubber and lining inside.
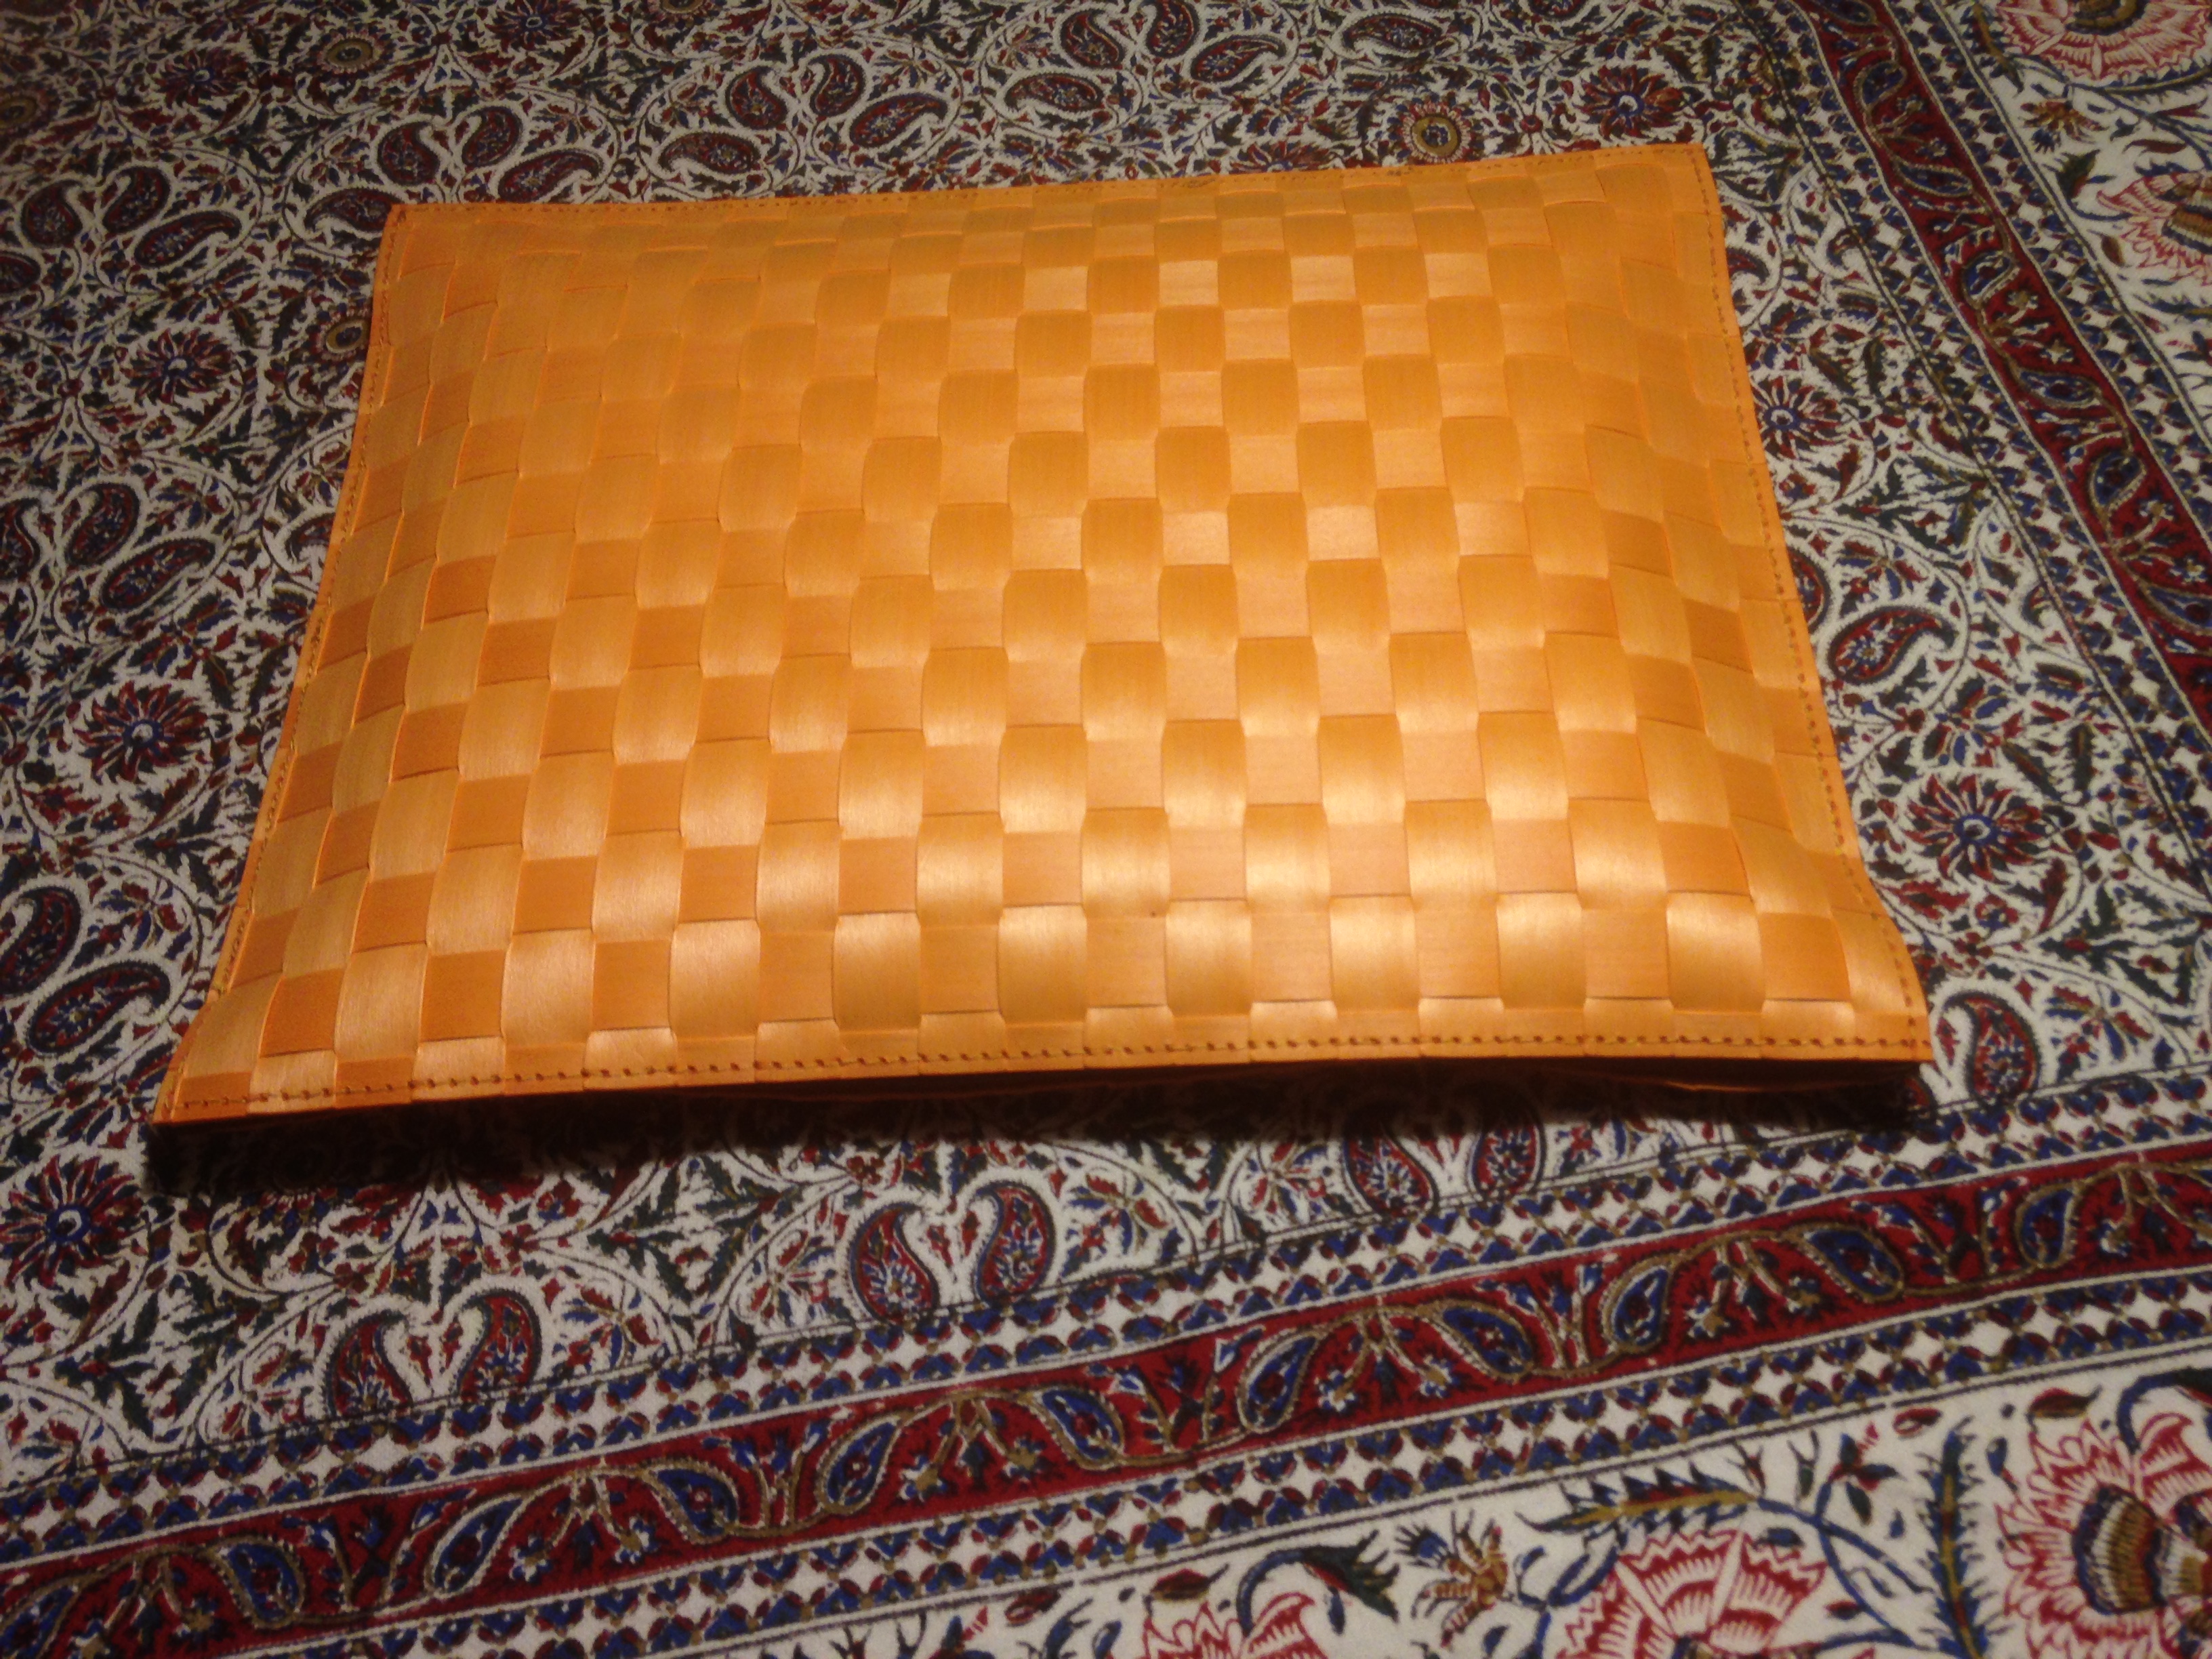
Mitt mål var att sy ett fodral som skulle ge gott skydd, samtidigt som det inte skulle ge ett för lyxigt intryck, eftersom jag inte vill göra datorn mer stöldbegärlig än vad den redan är. Jag tror att jag lyckades.
My goal was to make a case that would give a good protection, at the same time as it would not give a too luxurious impression, as I do not want to make the lap top more tempting than it already is. I think that I succeeded.
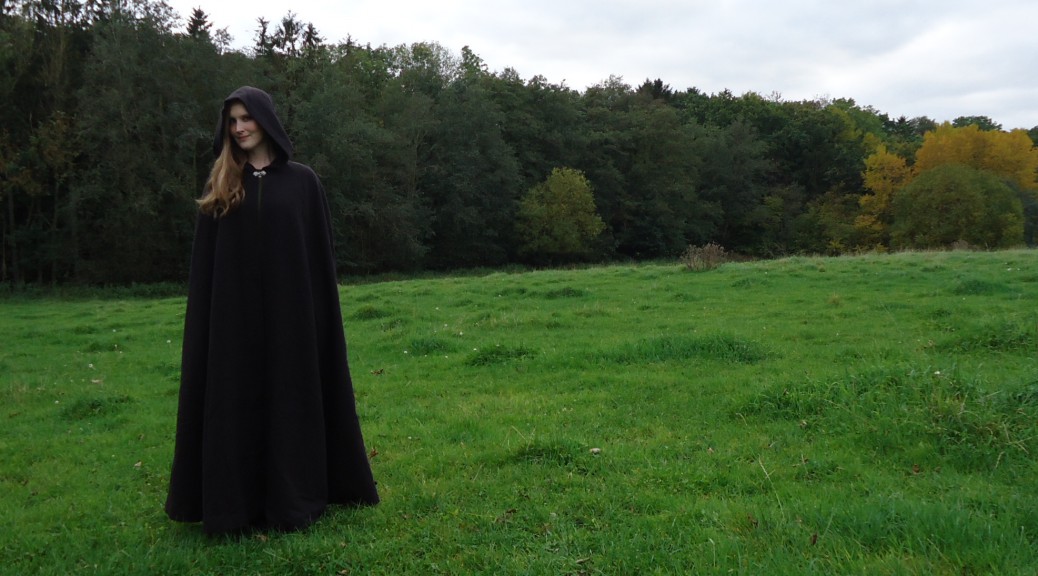
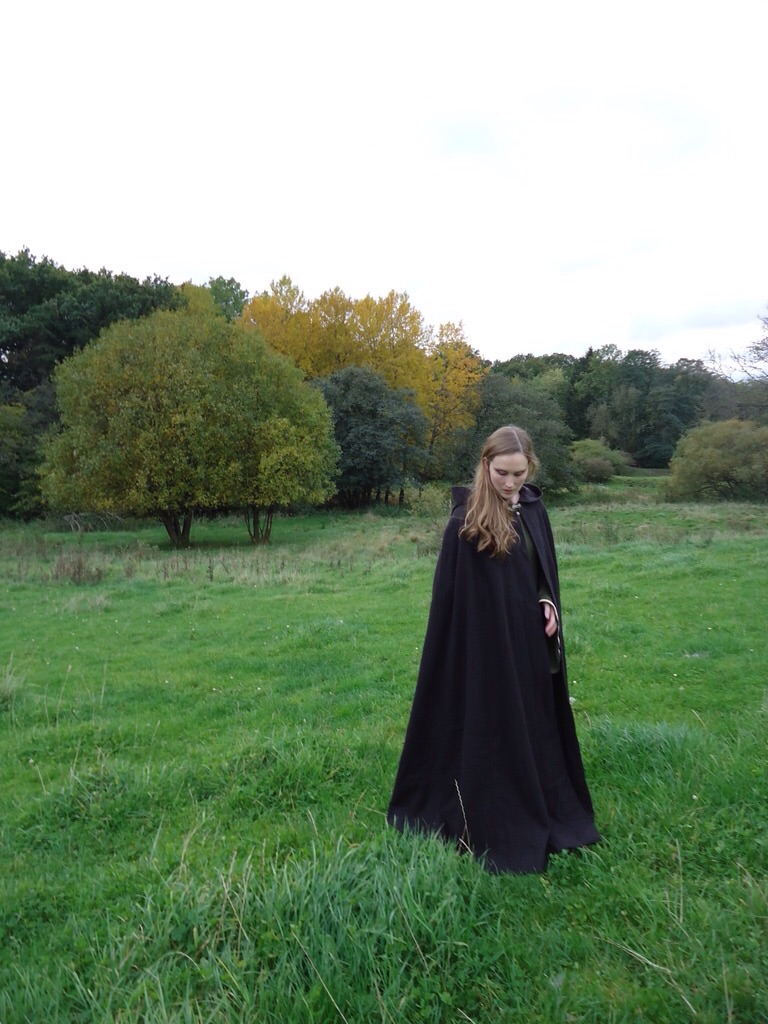
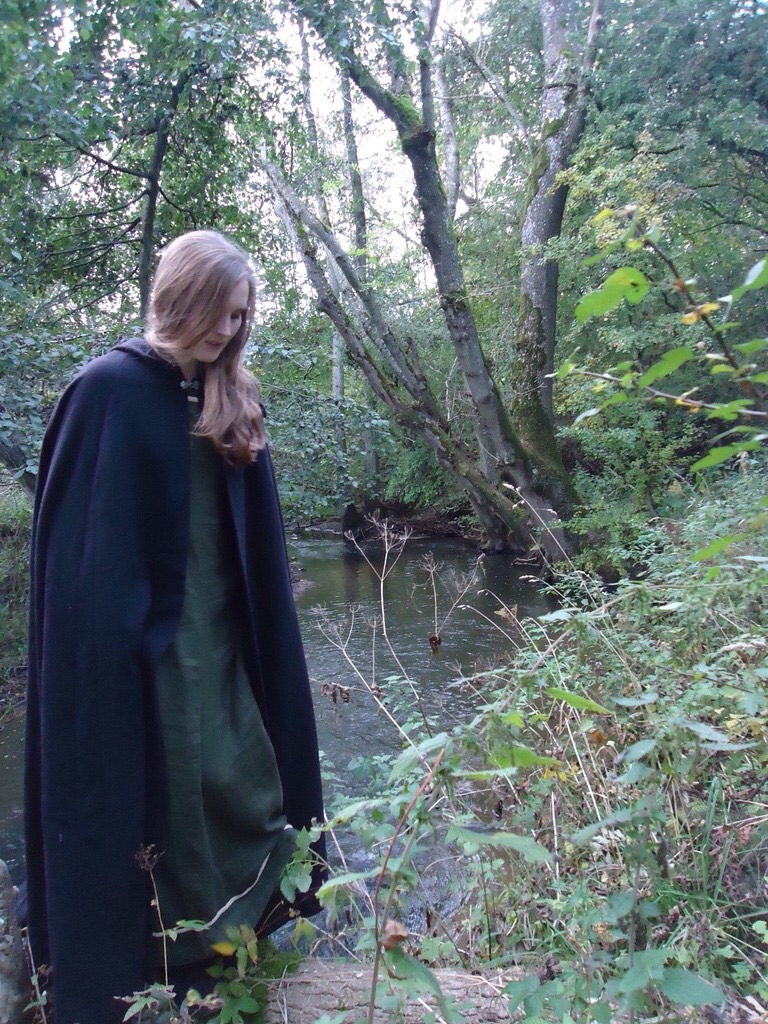
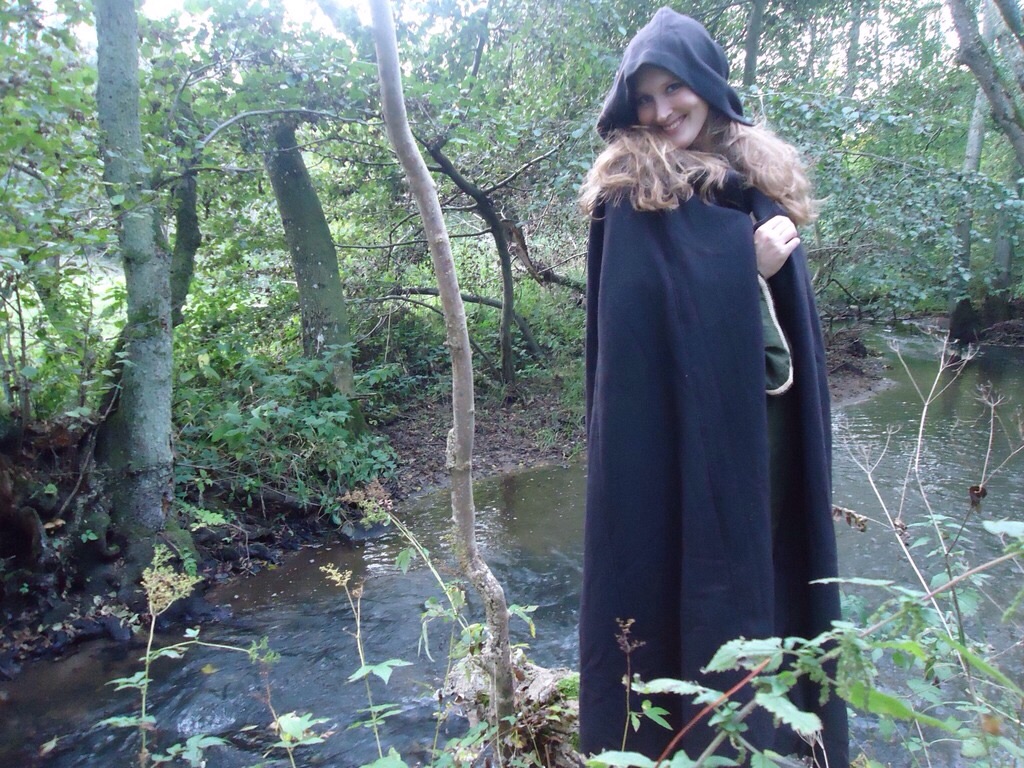
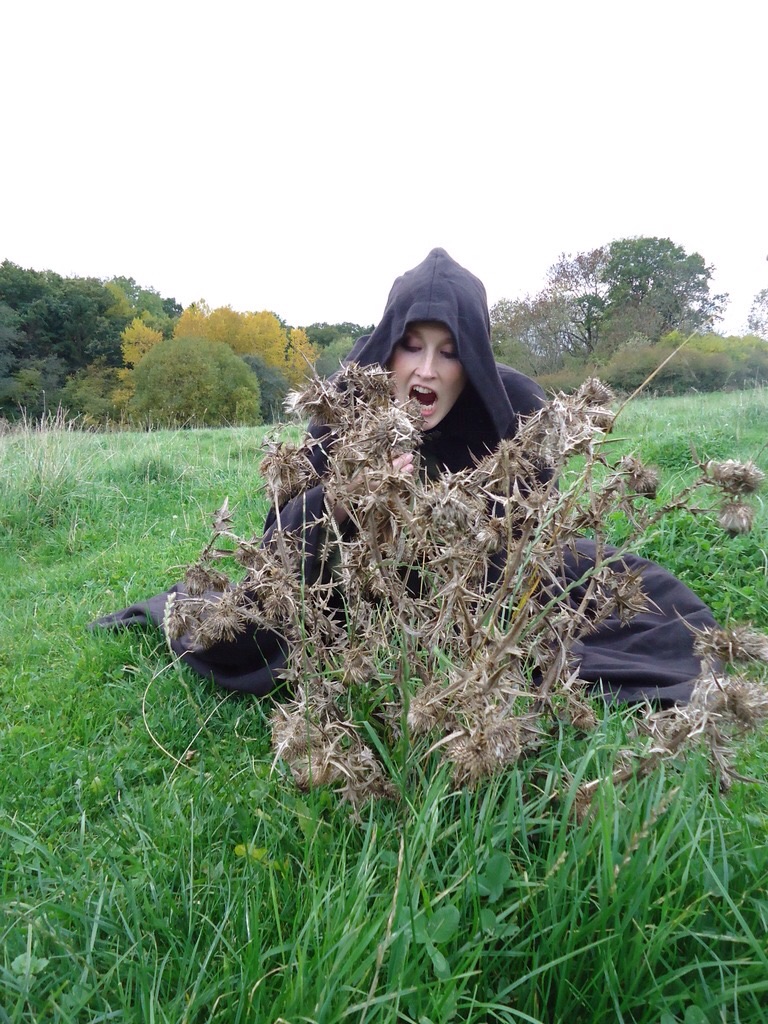
Denna mantel sydde jag inför min första Medeltidsvecka, år 2005. Efteråt har jag insett att den är föga medeltida och har därför inte använt den vid senare besök i Visby. Istället för att fortsätta förvara den i mörka gömmor, överlåter jag den nu till en ny ägare, som förhoppningsvis gör den större heder än jag. Innan jag skiljs från den, vill jag ha den dokumenterad, så här kommer några bilder på manteln i höstlig natur.
I sew this cloak for my first visit at the Medieval Week of Visby, in 2005. Afterwards I have realized that it is hopelessly non-medieval and have therefor not used it at my later visits in Visby. Instead of keeping it stowed away in a box, I will now part from it. The cloac will pass on to a new owner, who hopefully will use it more than I did. Before I part from it I want to have it documented though, so here come some autumn pictures from the pastoral landscape of Spørring.
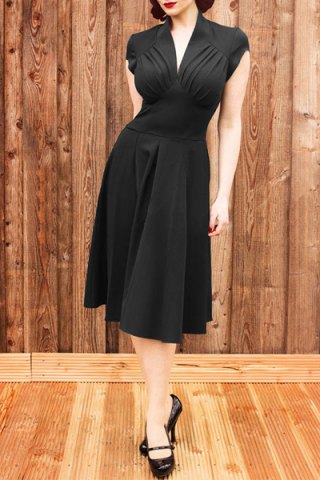
Sedan i våras har jag haft ett lila stretchtyg liggande, i väntan på inspiration. Förra helgen surfade jag runt på Pinterest och upptäckte denna snygga modell, som säljs på Rosegal. Jag insåg att det var denna jag ville ha till mitt tyg.
Since this spring, I have had a stretchy fabric laying waiting for my inspiration. Last weekend I was at Pinterest and discovered this awesome model, sold by Rosegal. I understood that this was what my fabric was made for.
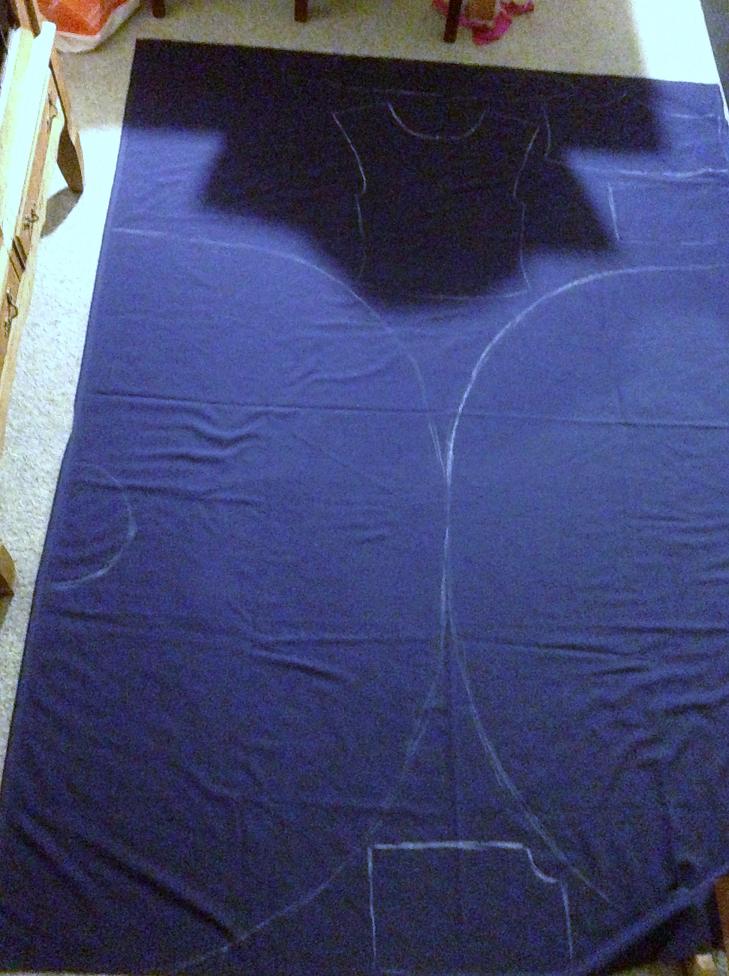
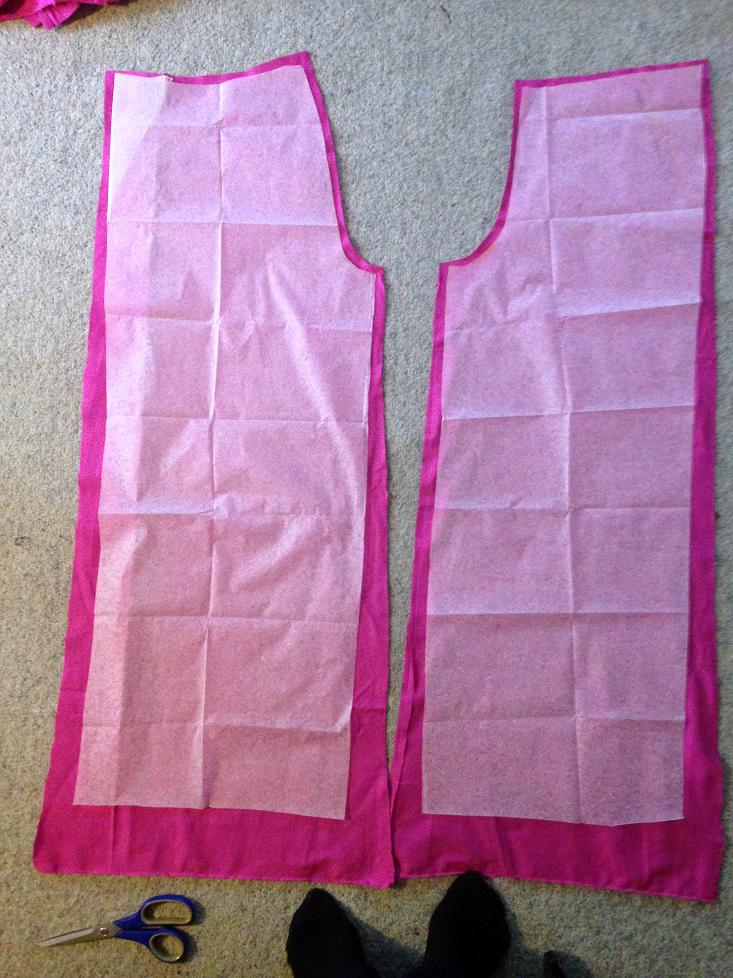
Jag ville egentligen drapera fram klänningen direkt på provdockan, men jag hade bara tyg så att det precis skulle räcka till klänningen. Därför gjorde jag ett mönster av skräptyg.
I wanted to drape the dress directly on the mannequin, but I only had just enough fabric for the dress and no room for mistakes. Therefor I made a pattern out of a scrap fabric.
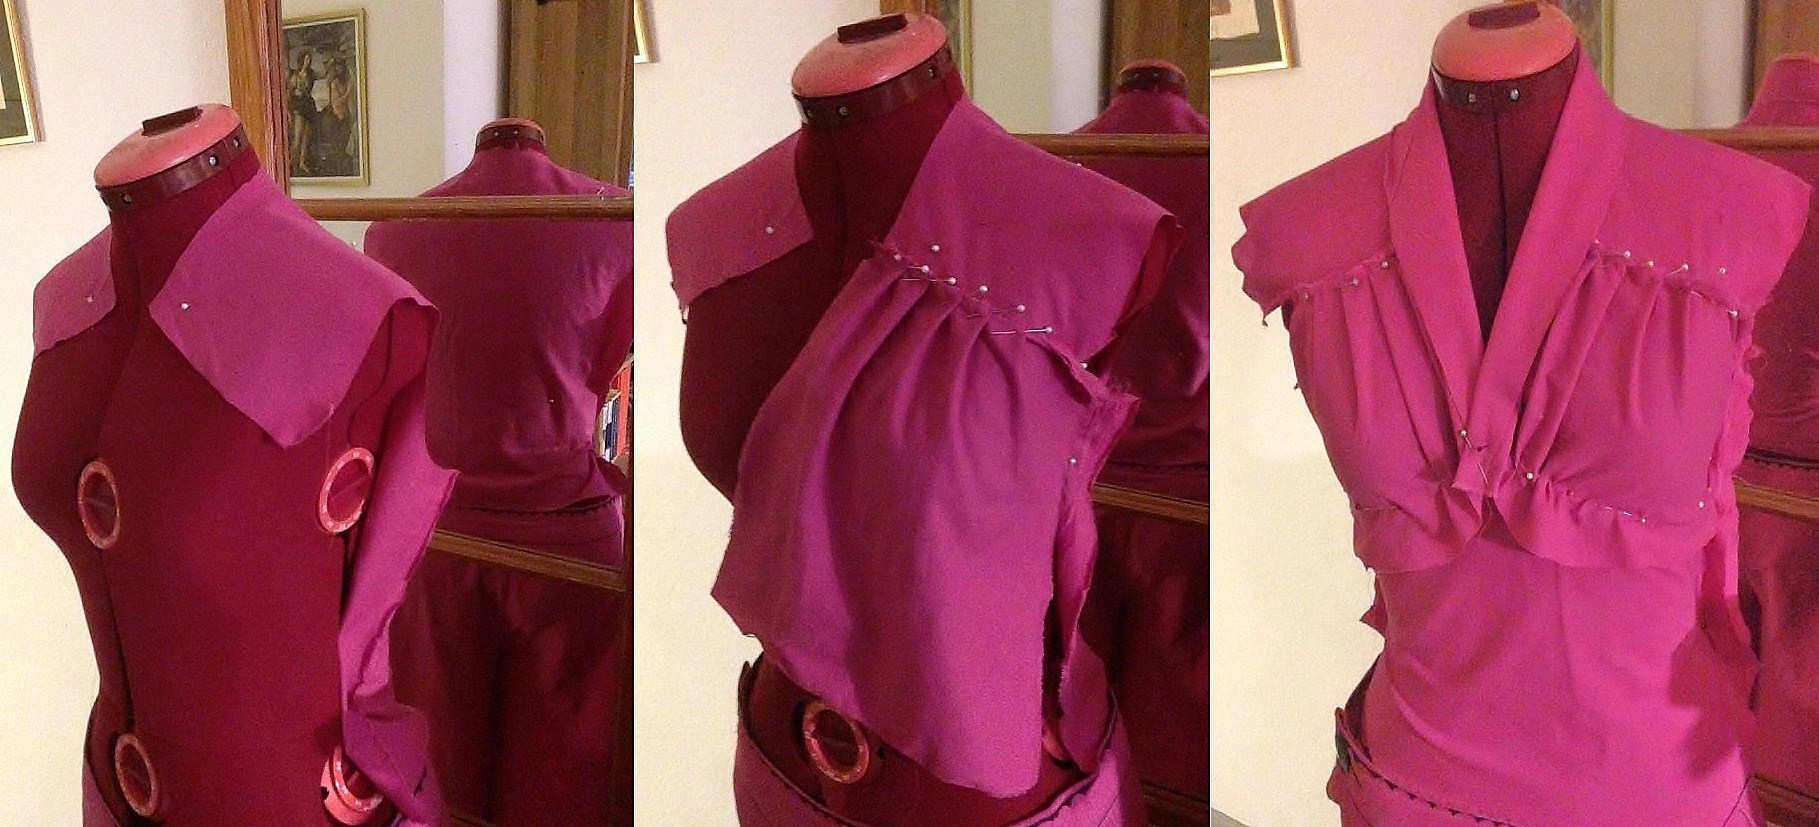
Först gjorde jag i ordning bakstycket, som går fram över axlarna. Sedan nålade fast “bystpartiet” med veck. Därefter gjorde jag i ordning livet framtill och nålade fasti bystpartiet. Sist fixade jag en krage.
First, I made the back, that falls forward, over the shoulders. Then I pinned the bust part with tucks. Then I made the waist part in front and pinned it to the bust part. Last, I made a collar.
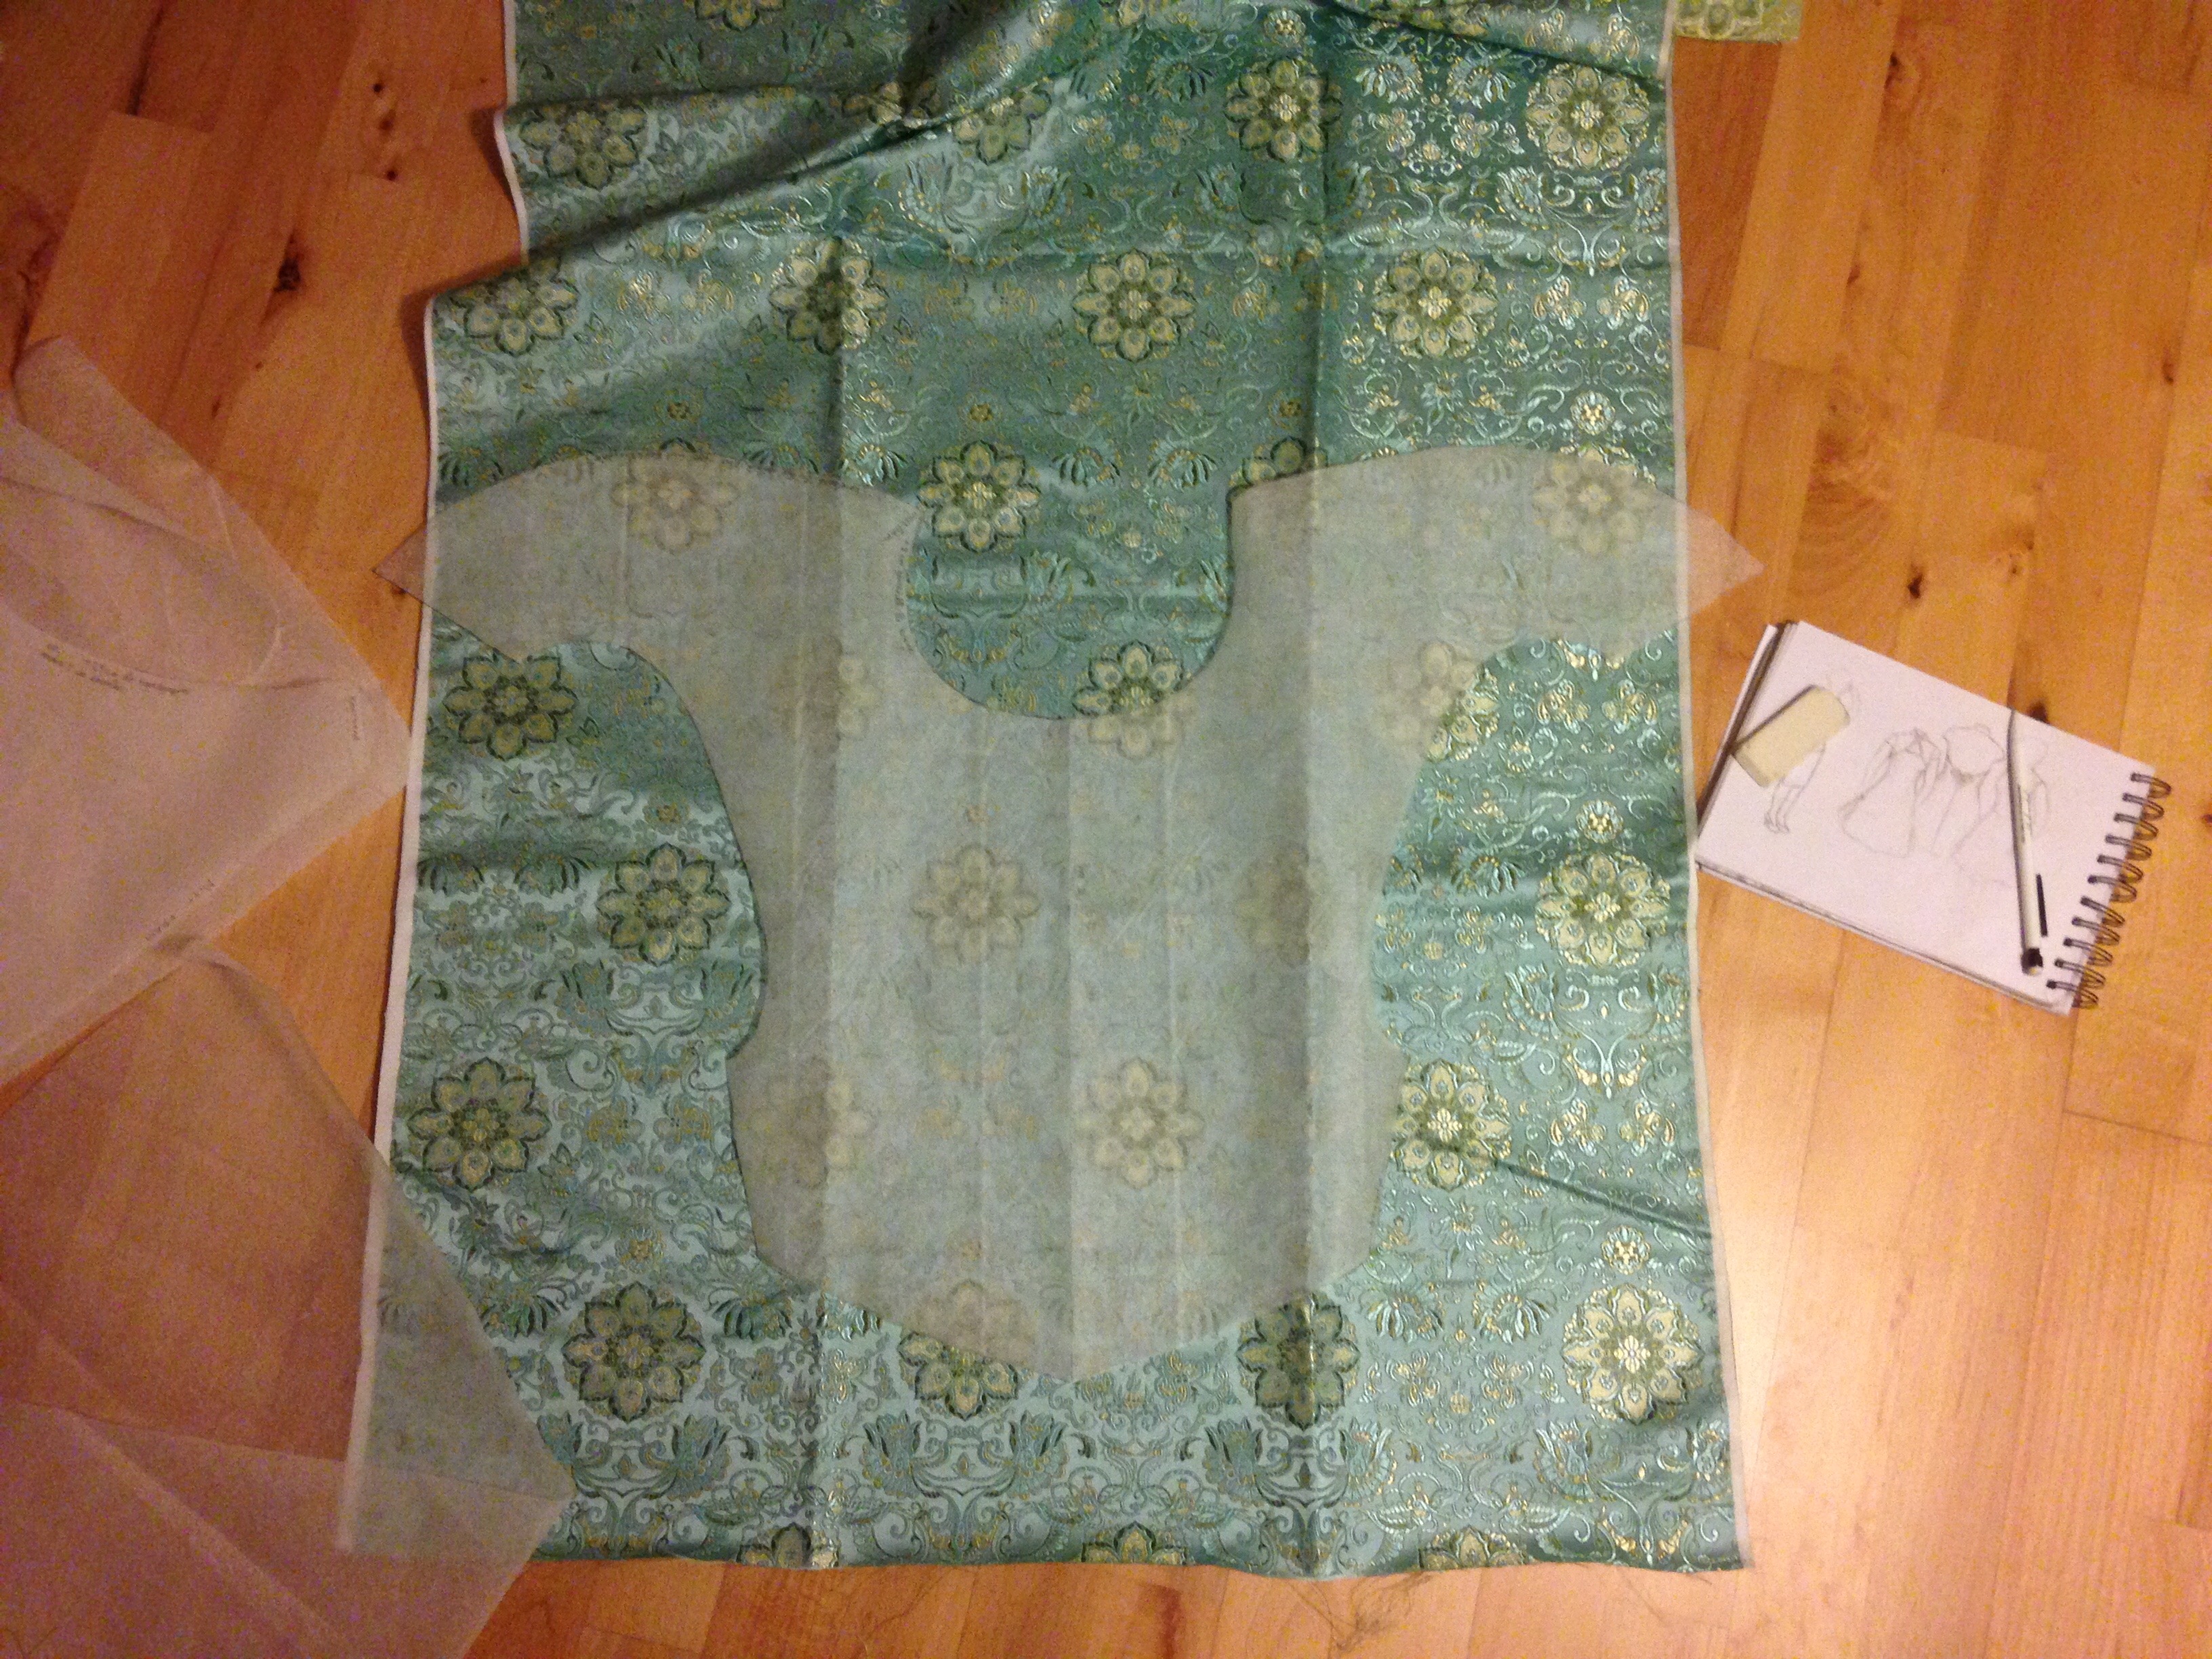
Jag ville ha en helcirkelkjol och därmed blev det stor tygåtgång. Jag fick pussla ett tag, men lyckades passa in alla mönsterbitar. Det tomma fältet uppe i vänster hörn, reserverade jag för ärmar, som jag ännu inte gjort något mönster till. Sedan sydde jag…
I wanted a whole circle skirt and thus, a great amount of fabric. I had to work a while with the pattern on the fabric, but at last I managed to fit it all on the fabric. The empty piece up in the left corner was saved for arms, which did not have any pattern yet. Then I started sewing…
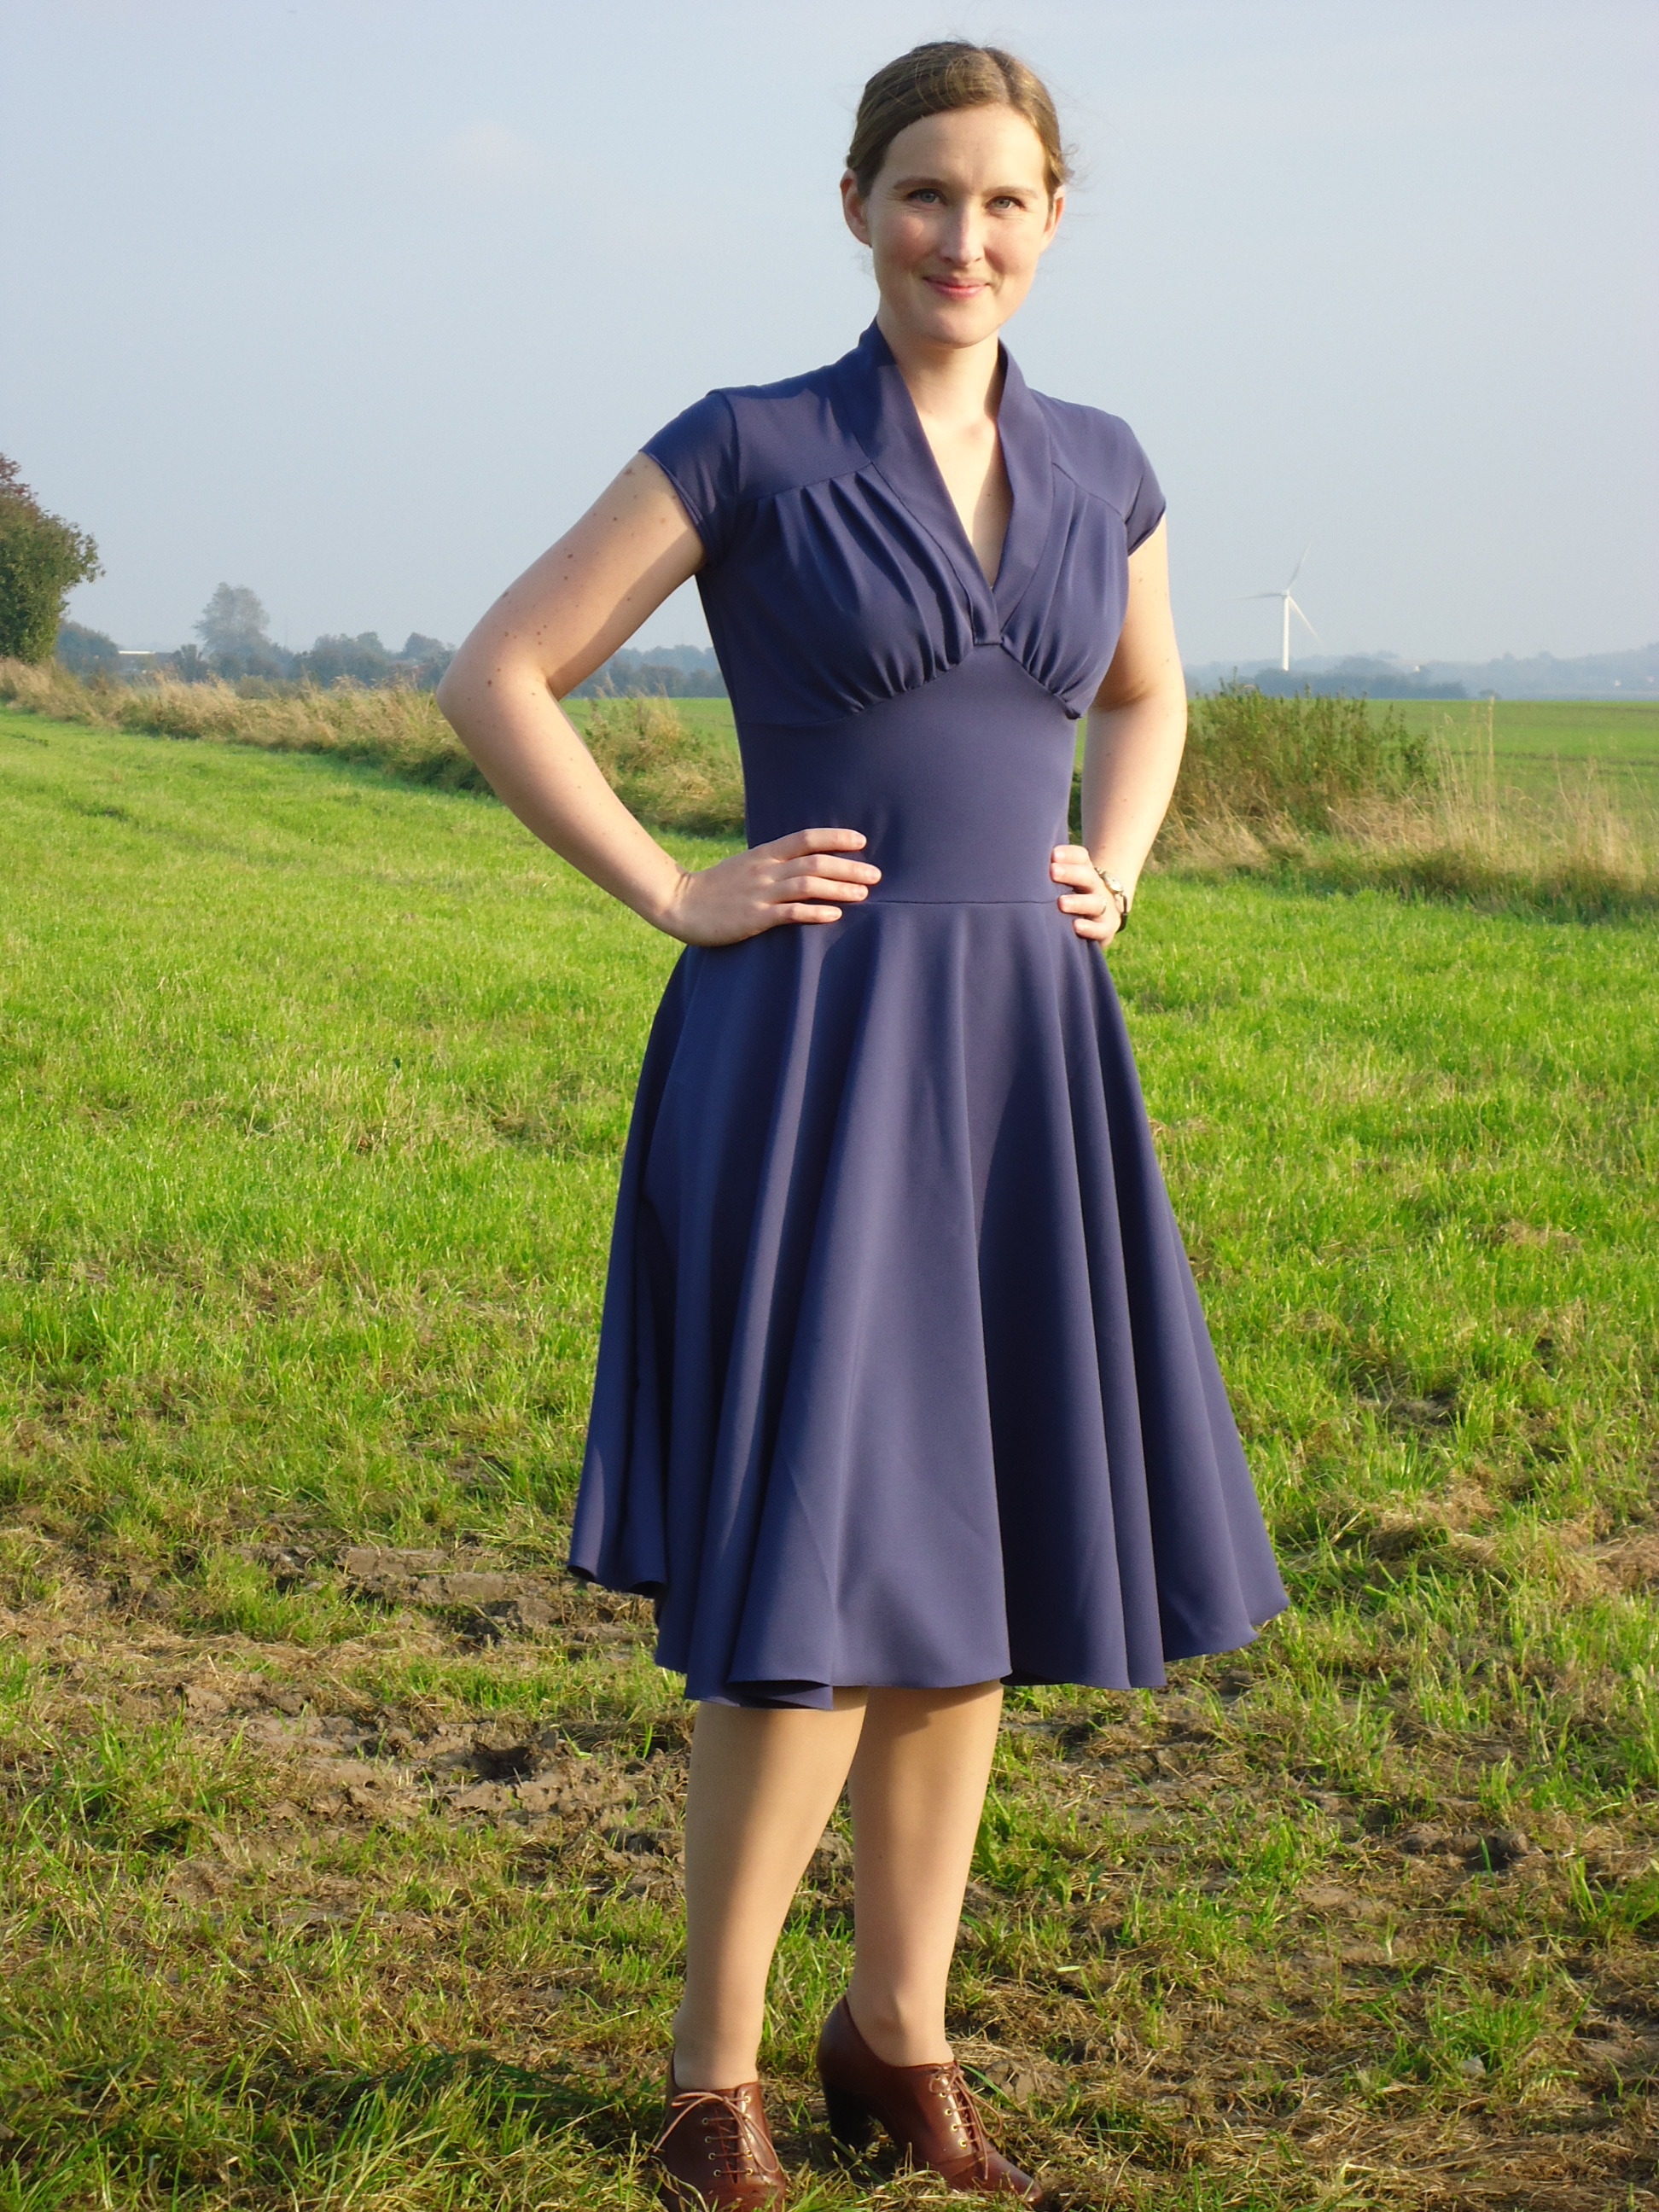
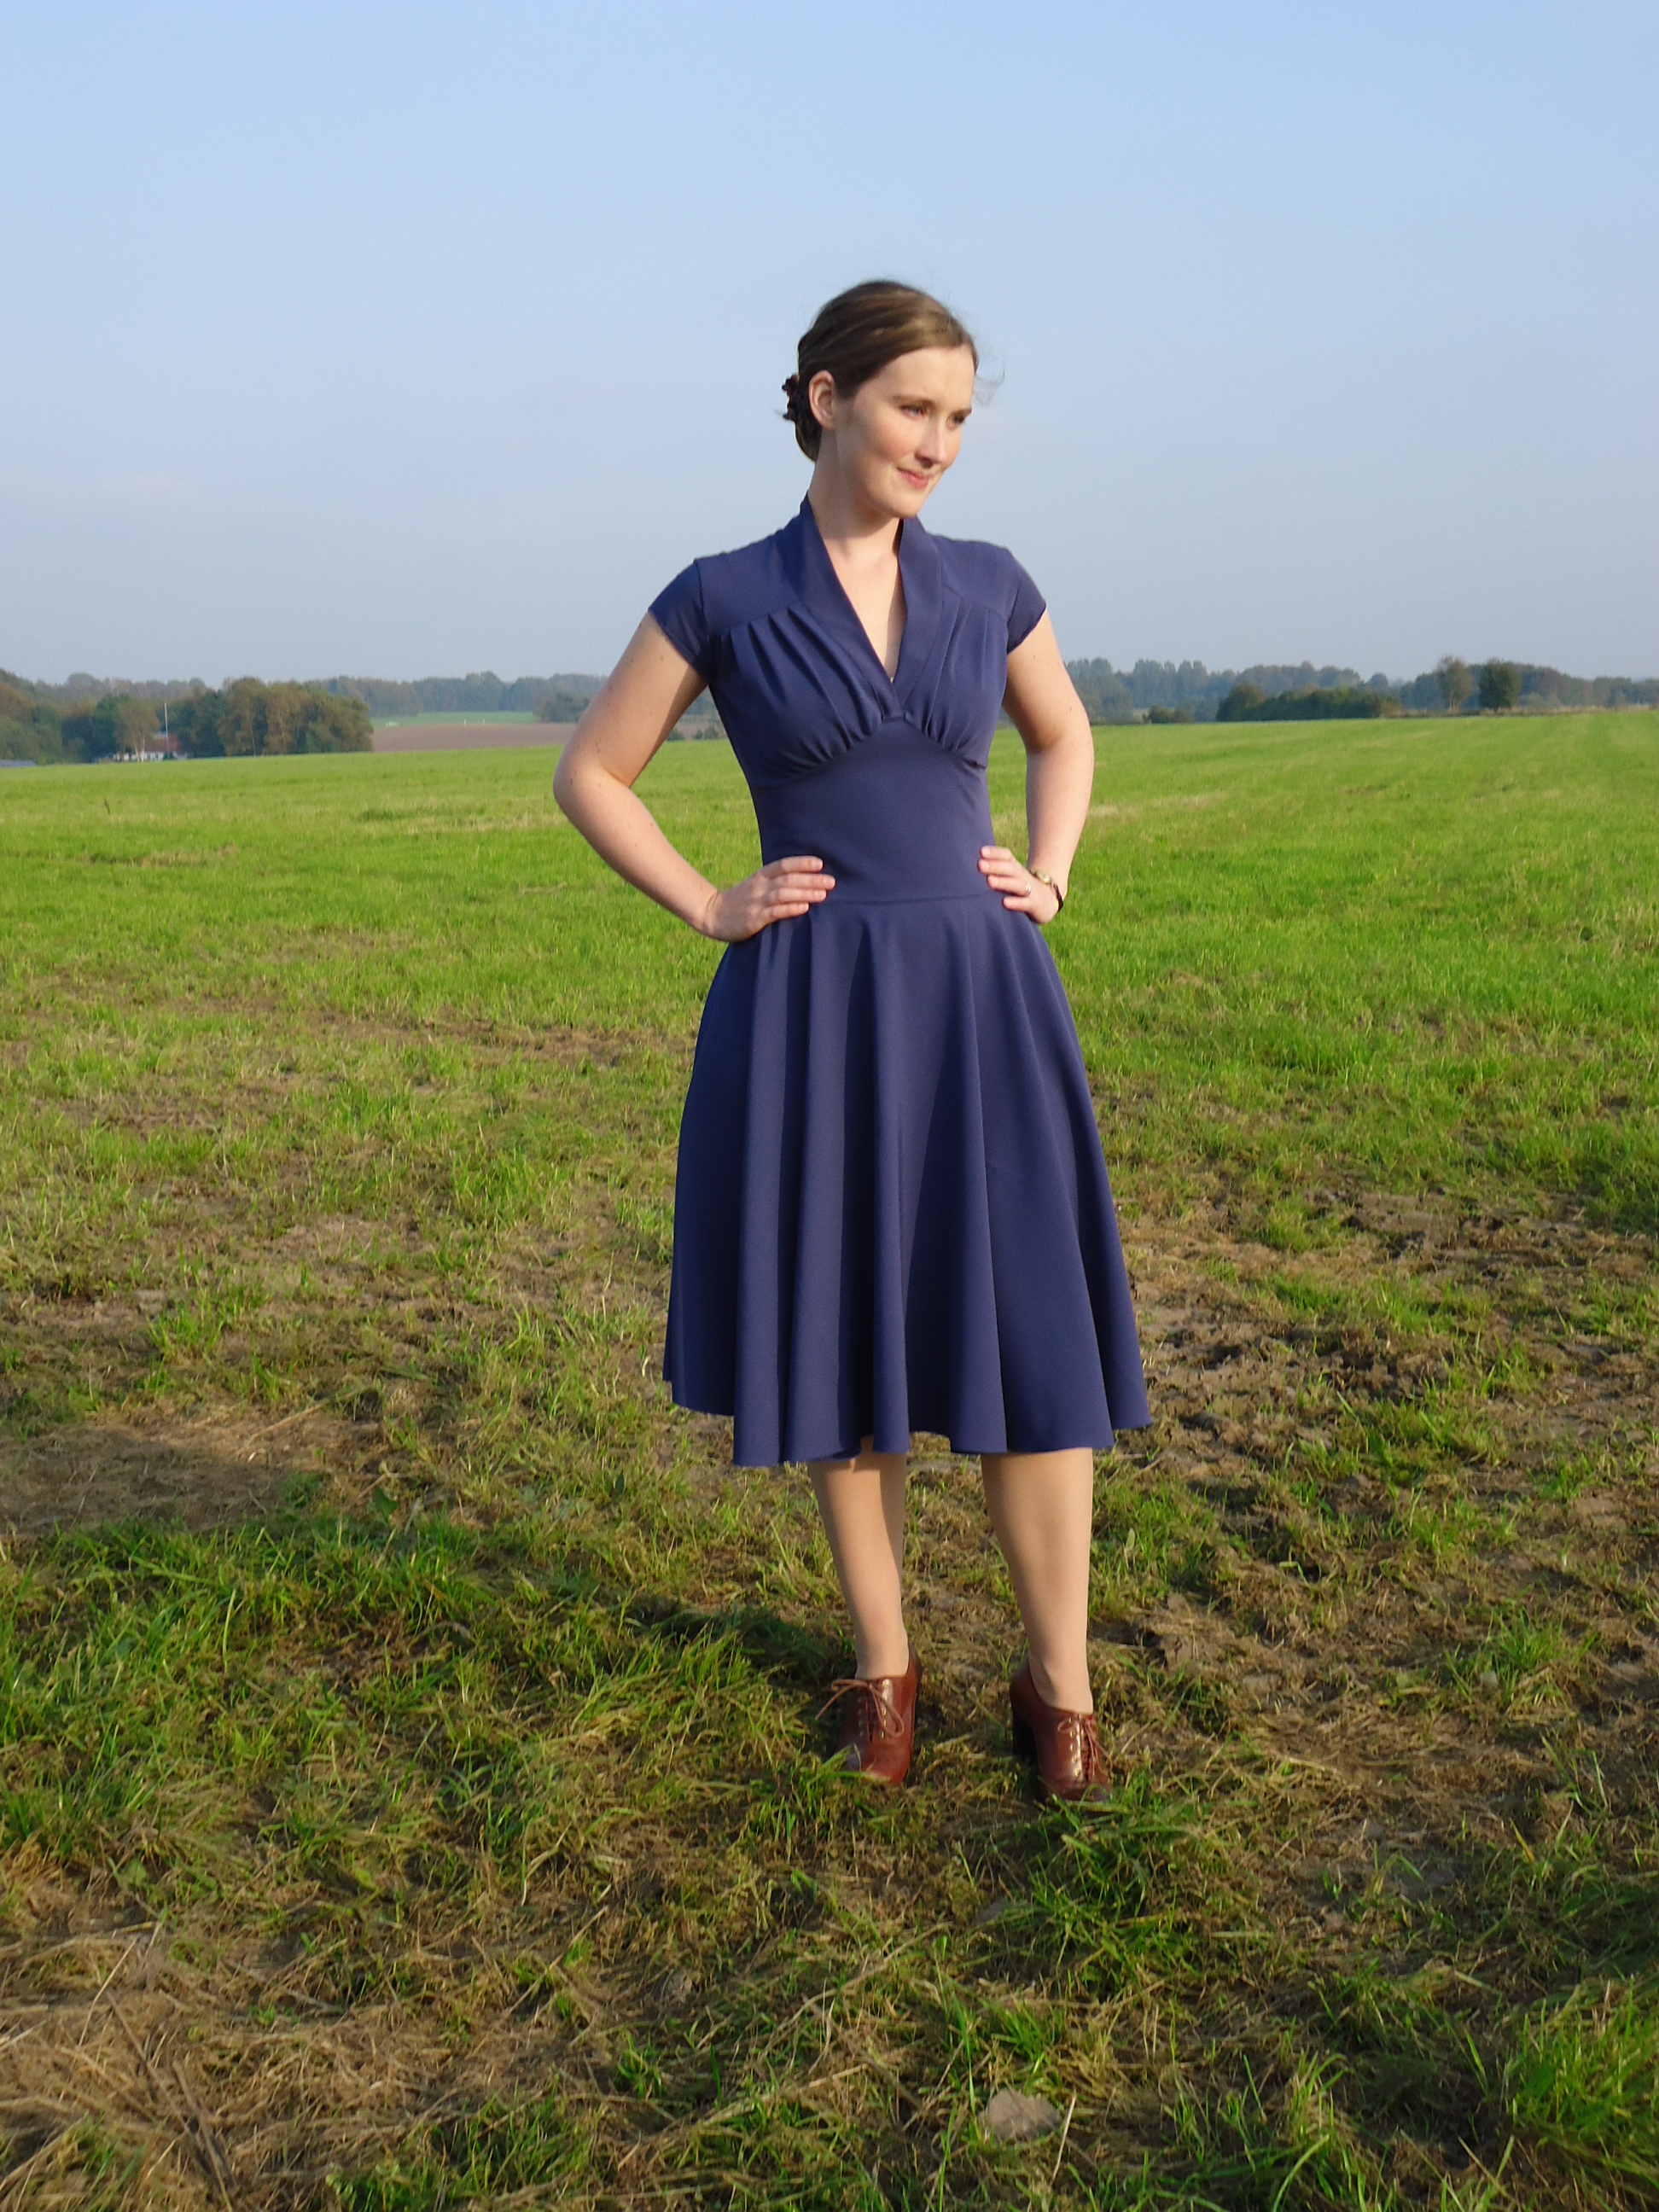
Ni kan nog ana ett återkommande tema – jag var så less, att jag inte orkade prova klänningen tillräckligt många gånger för att få den perfekt. Jag ville bara bli klar, så att vi kunde äta mat på vårt kombinerade middags- och sybord. Därmed blev klänningen inte så festlig som jag hoppats på, men å andra sidan kommer jag med gott samvete kunna slita på den till vardags.
You might have noticed a consistent theme – I was so bored, that I did not have the patience to try the dress on enough times to make it perfect. I just wanted it finished, so that we could eat food at our dinner table (and also my creative space). Therefor my dress did not end up being as festive as I had hoped for, but on the other hand, I will be able to use it for every day wear with a good conscience.
En av klänningens brister, är att sömmarna i livet hänger ner framtill och baktill, vilket är ganska osmickrande för figuren. Detta syns inte så väl när man håller händerna i sidorna. Dessutom orkade jag inte experimentera tillräckligt med vecken över bysten, så där är nu för många veck i olika riktningar. Men “pyt med det”, som de säger, här i Danmark!
One of the faults with this dress is that the seams at the waist droop in the front and in the back, which is not too flattering for the figure. This is effectively masked by putting your hands in the sides, though. Moreover, I did not have the patience to experiment enough with the pleats over the bust, so those pleats go in several different, awkward directions. Well, never mind.
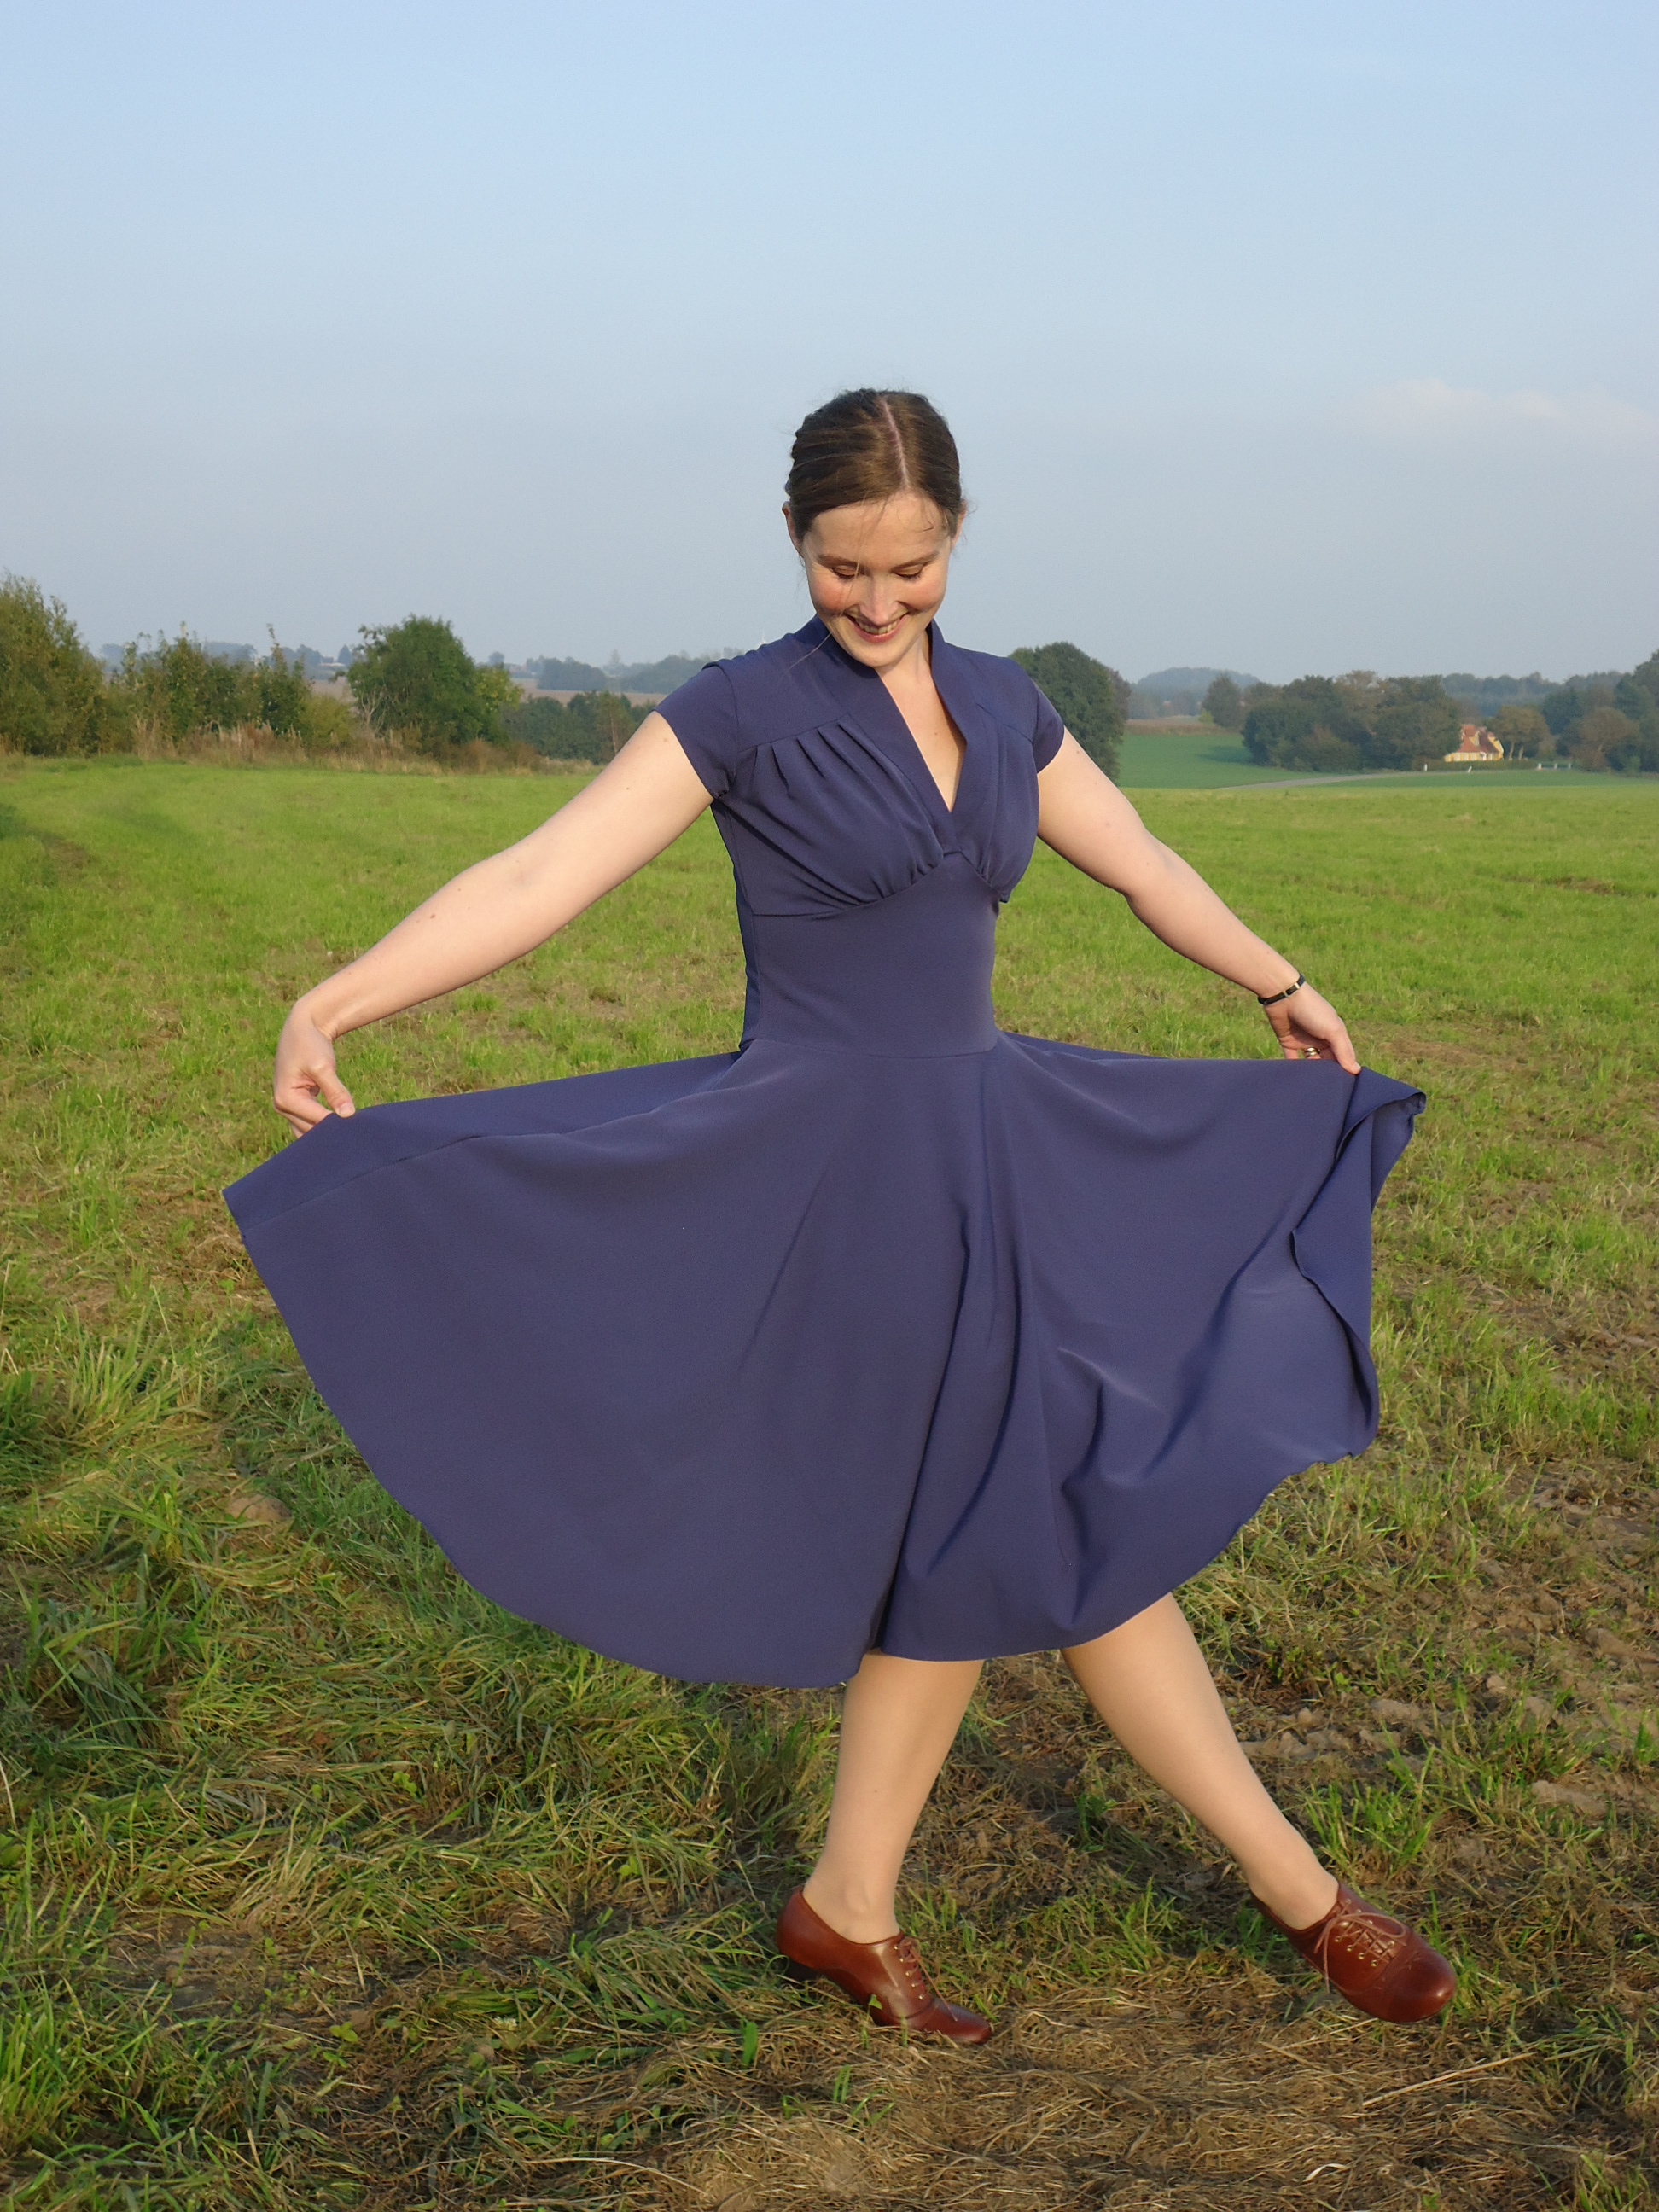
Slokande baksöm och halvfin krage. Jag bekämpar nu tappert mina perfektionistiska drag och försöker glädjas åt att klänningen är otroligt skön och att de flesta som ser den, antagligen inte alls kommer tänka på mina små störningsmoment.
Drooping seam in the back and an imperfect collar. I courageously fight my perfectionistic traits of my personality and try to be happy for this dress being so comfortable and that most who see it won’t notice these peculiarities.
Nu ska jag vara nöjd och fröjdas över min sköna, nya studieklänning!
Now I will be content and rejoice in my comfortable study-dress!
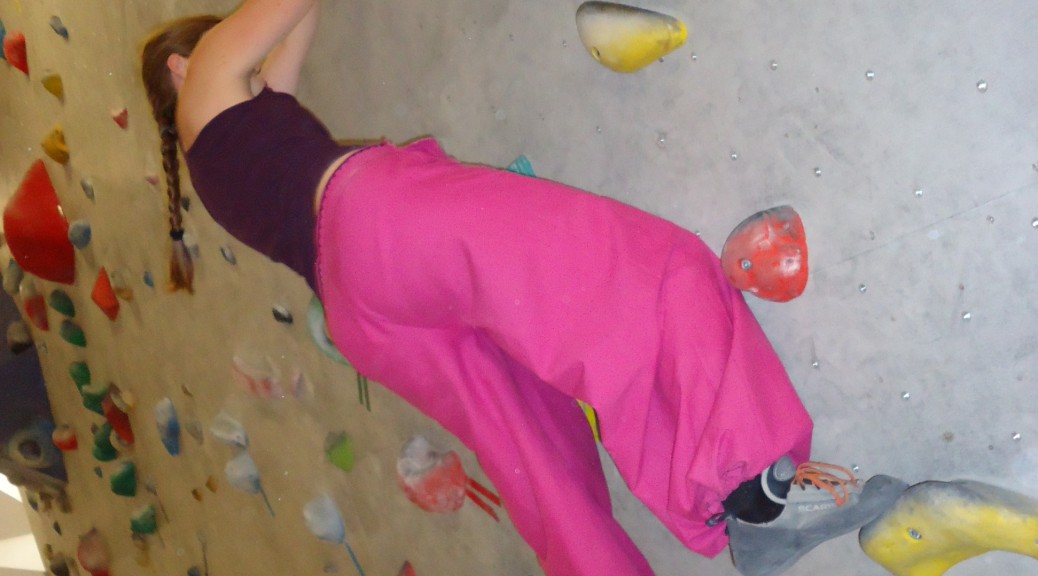
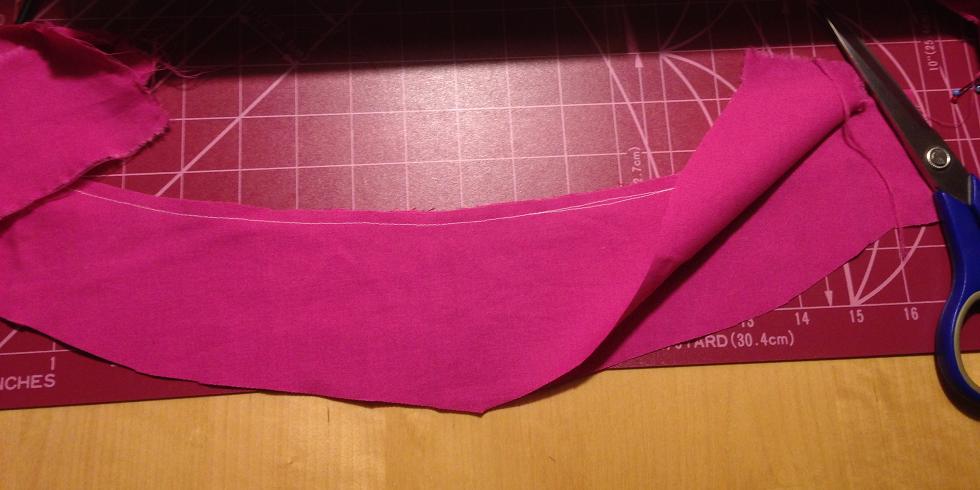
Det har öppnats en underbar klätterhall i närheten av vårt hem, så jag ville gärna ha nya klätterbyxor. Jag använde mitt egna mönster till pösbyxor och ett gammal underlakan i en färg som gör ont i ögonen, precis som sig bör när det gäller sport.
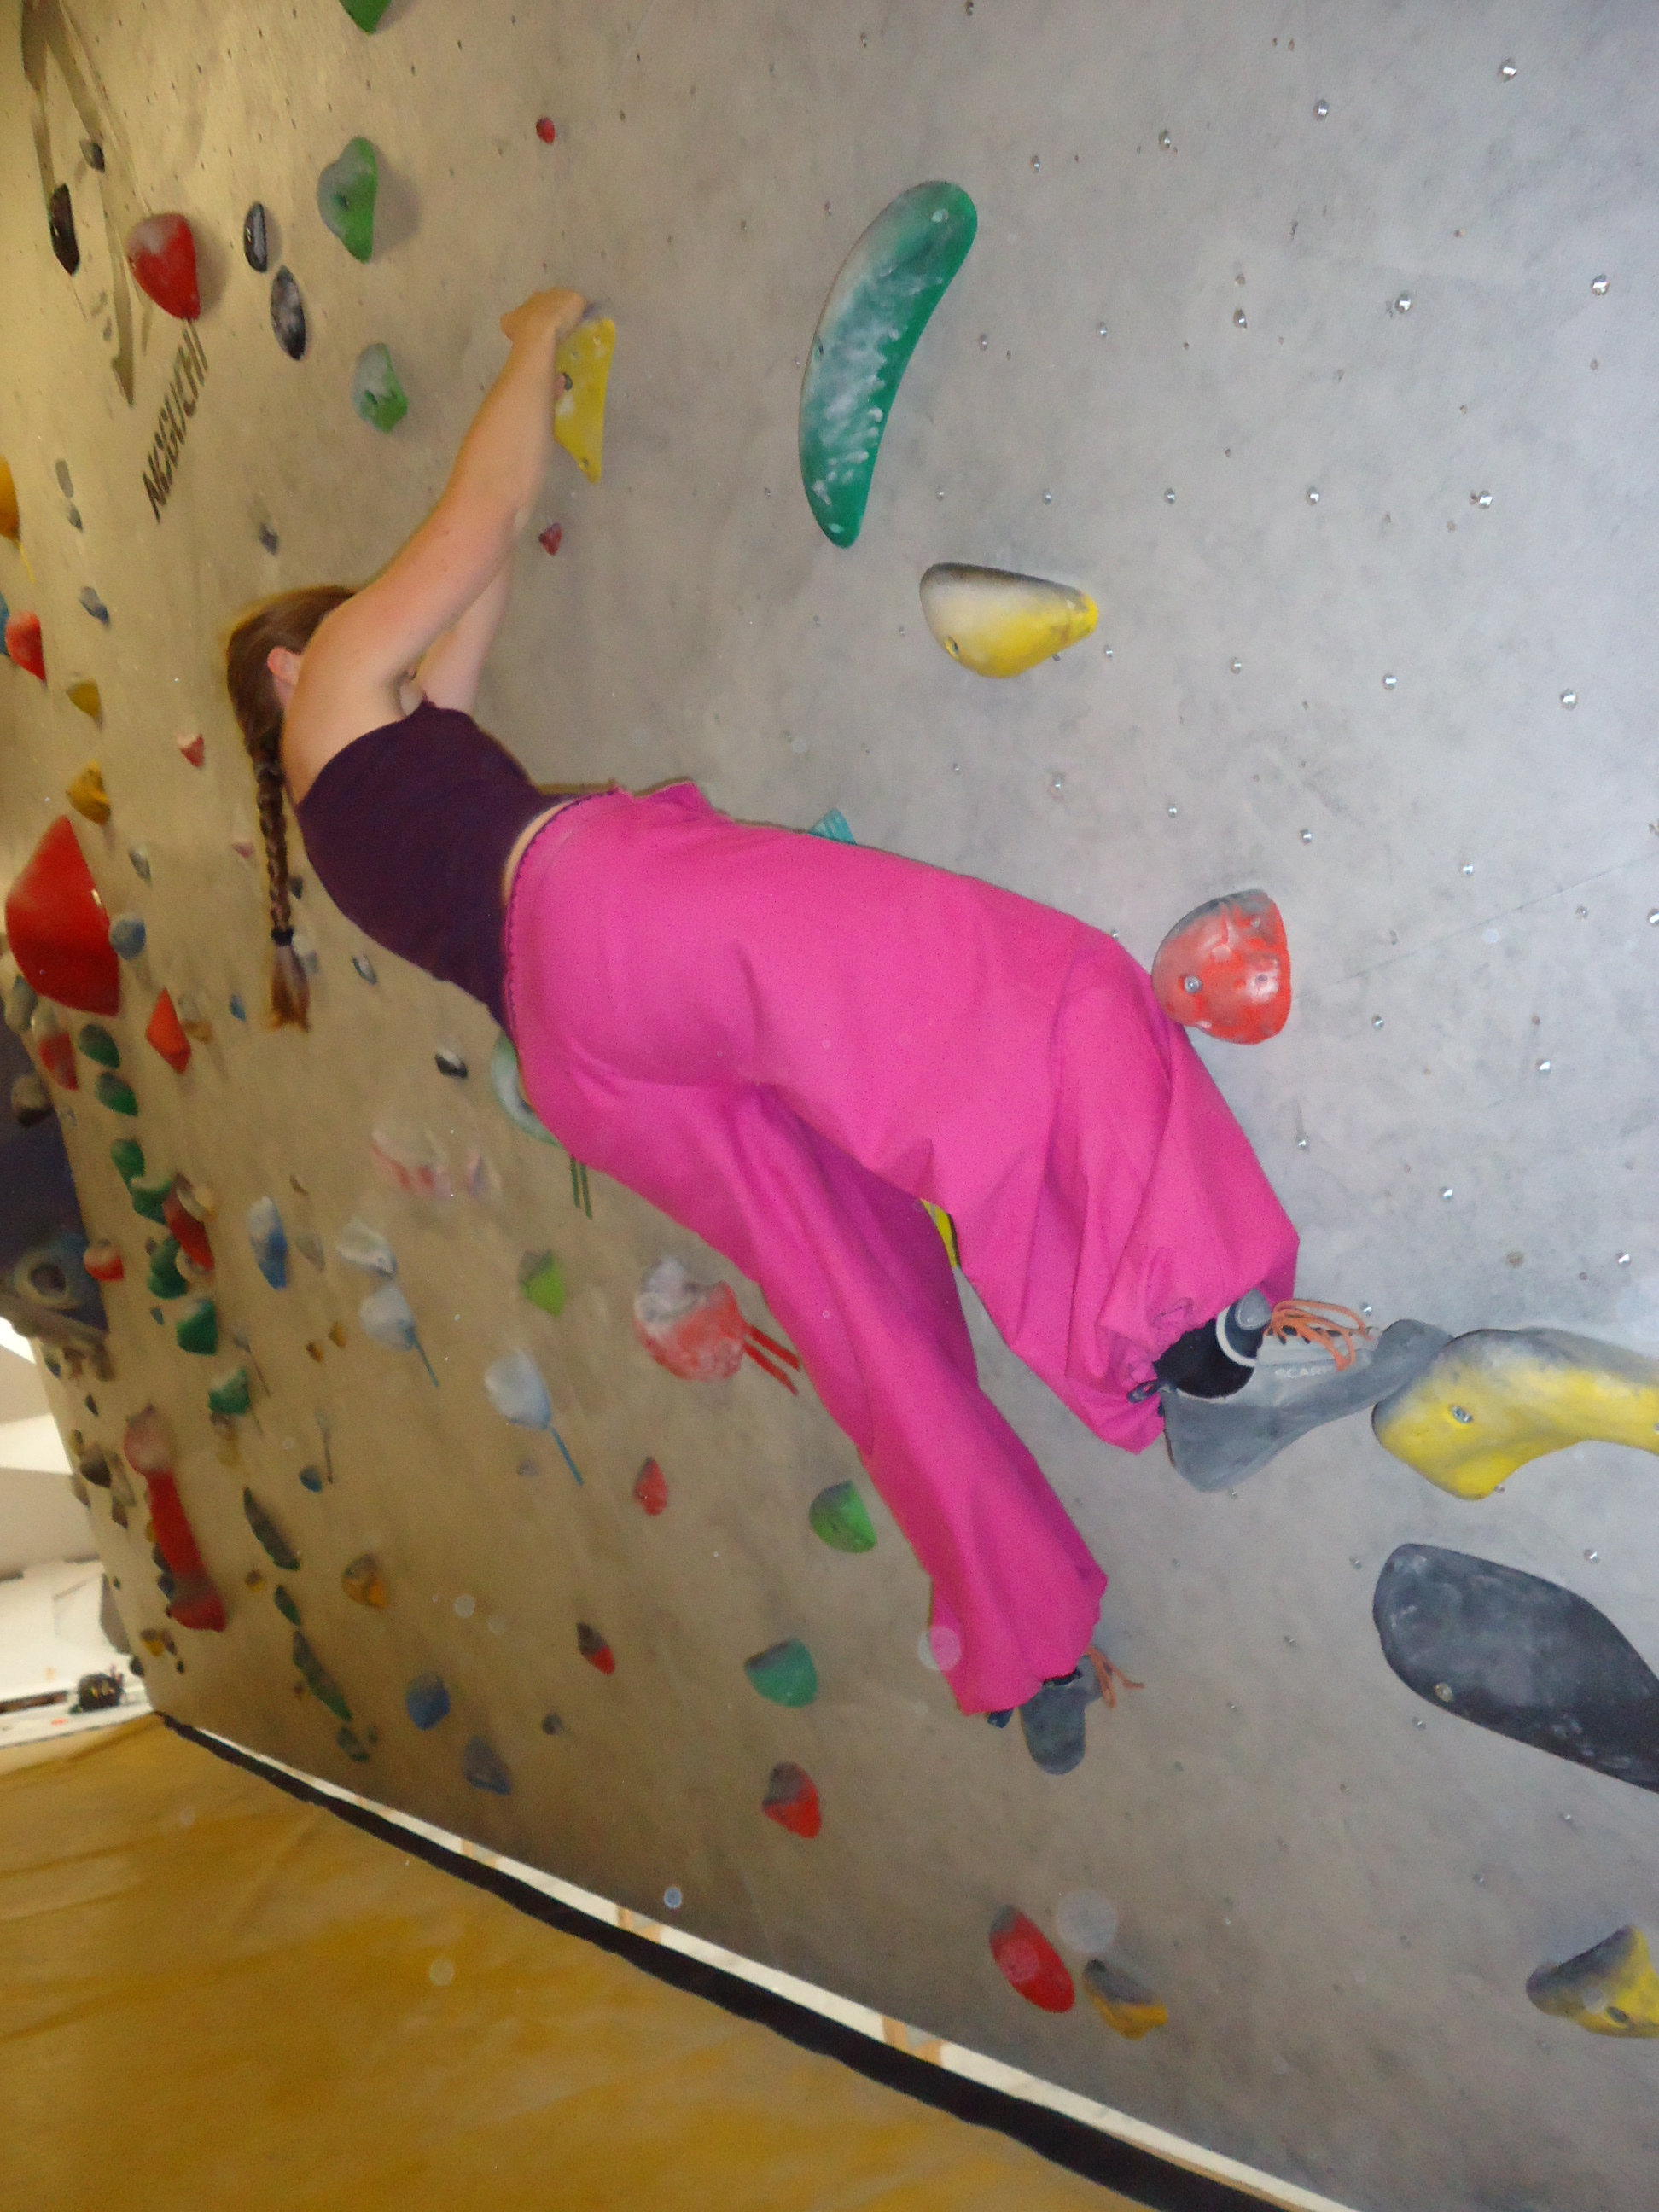
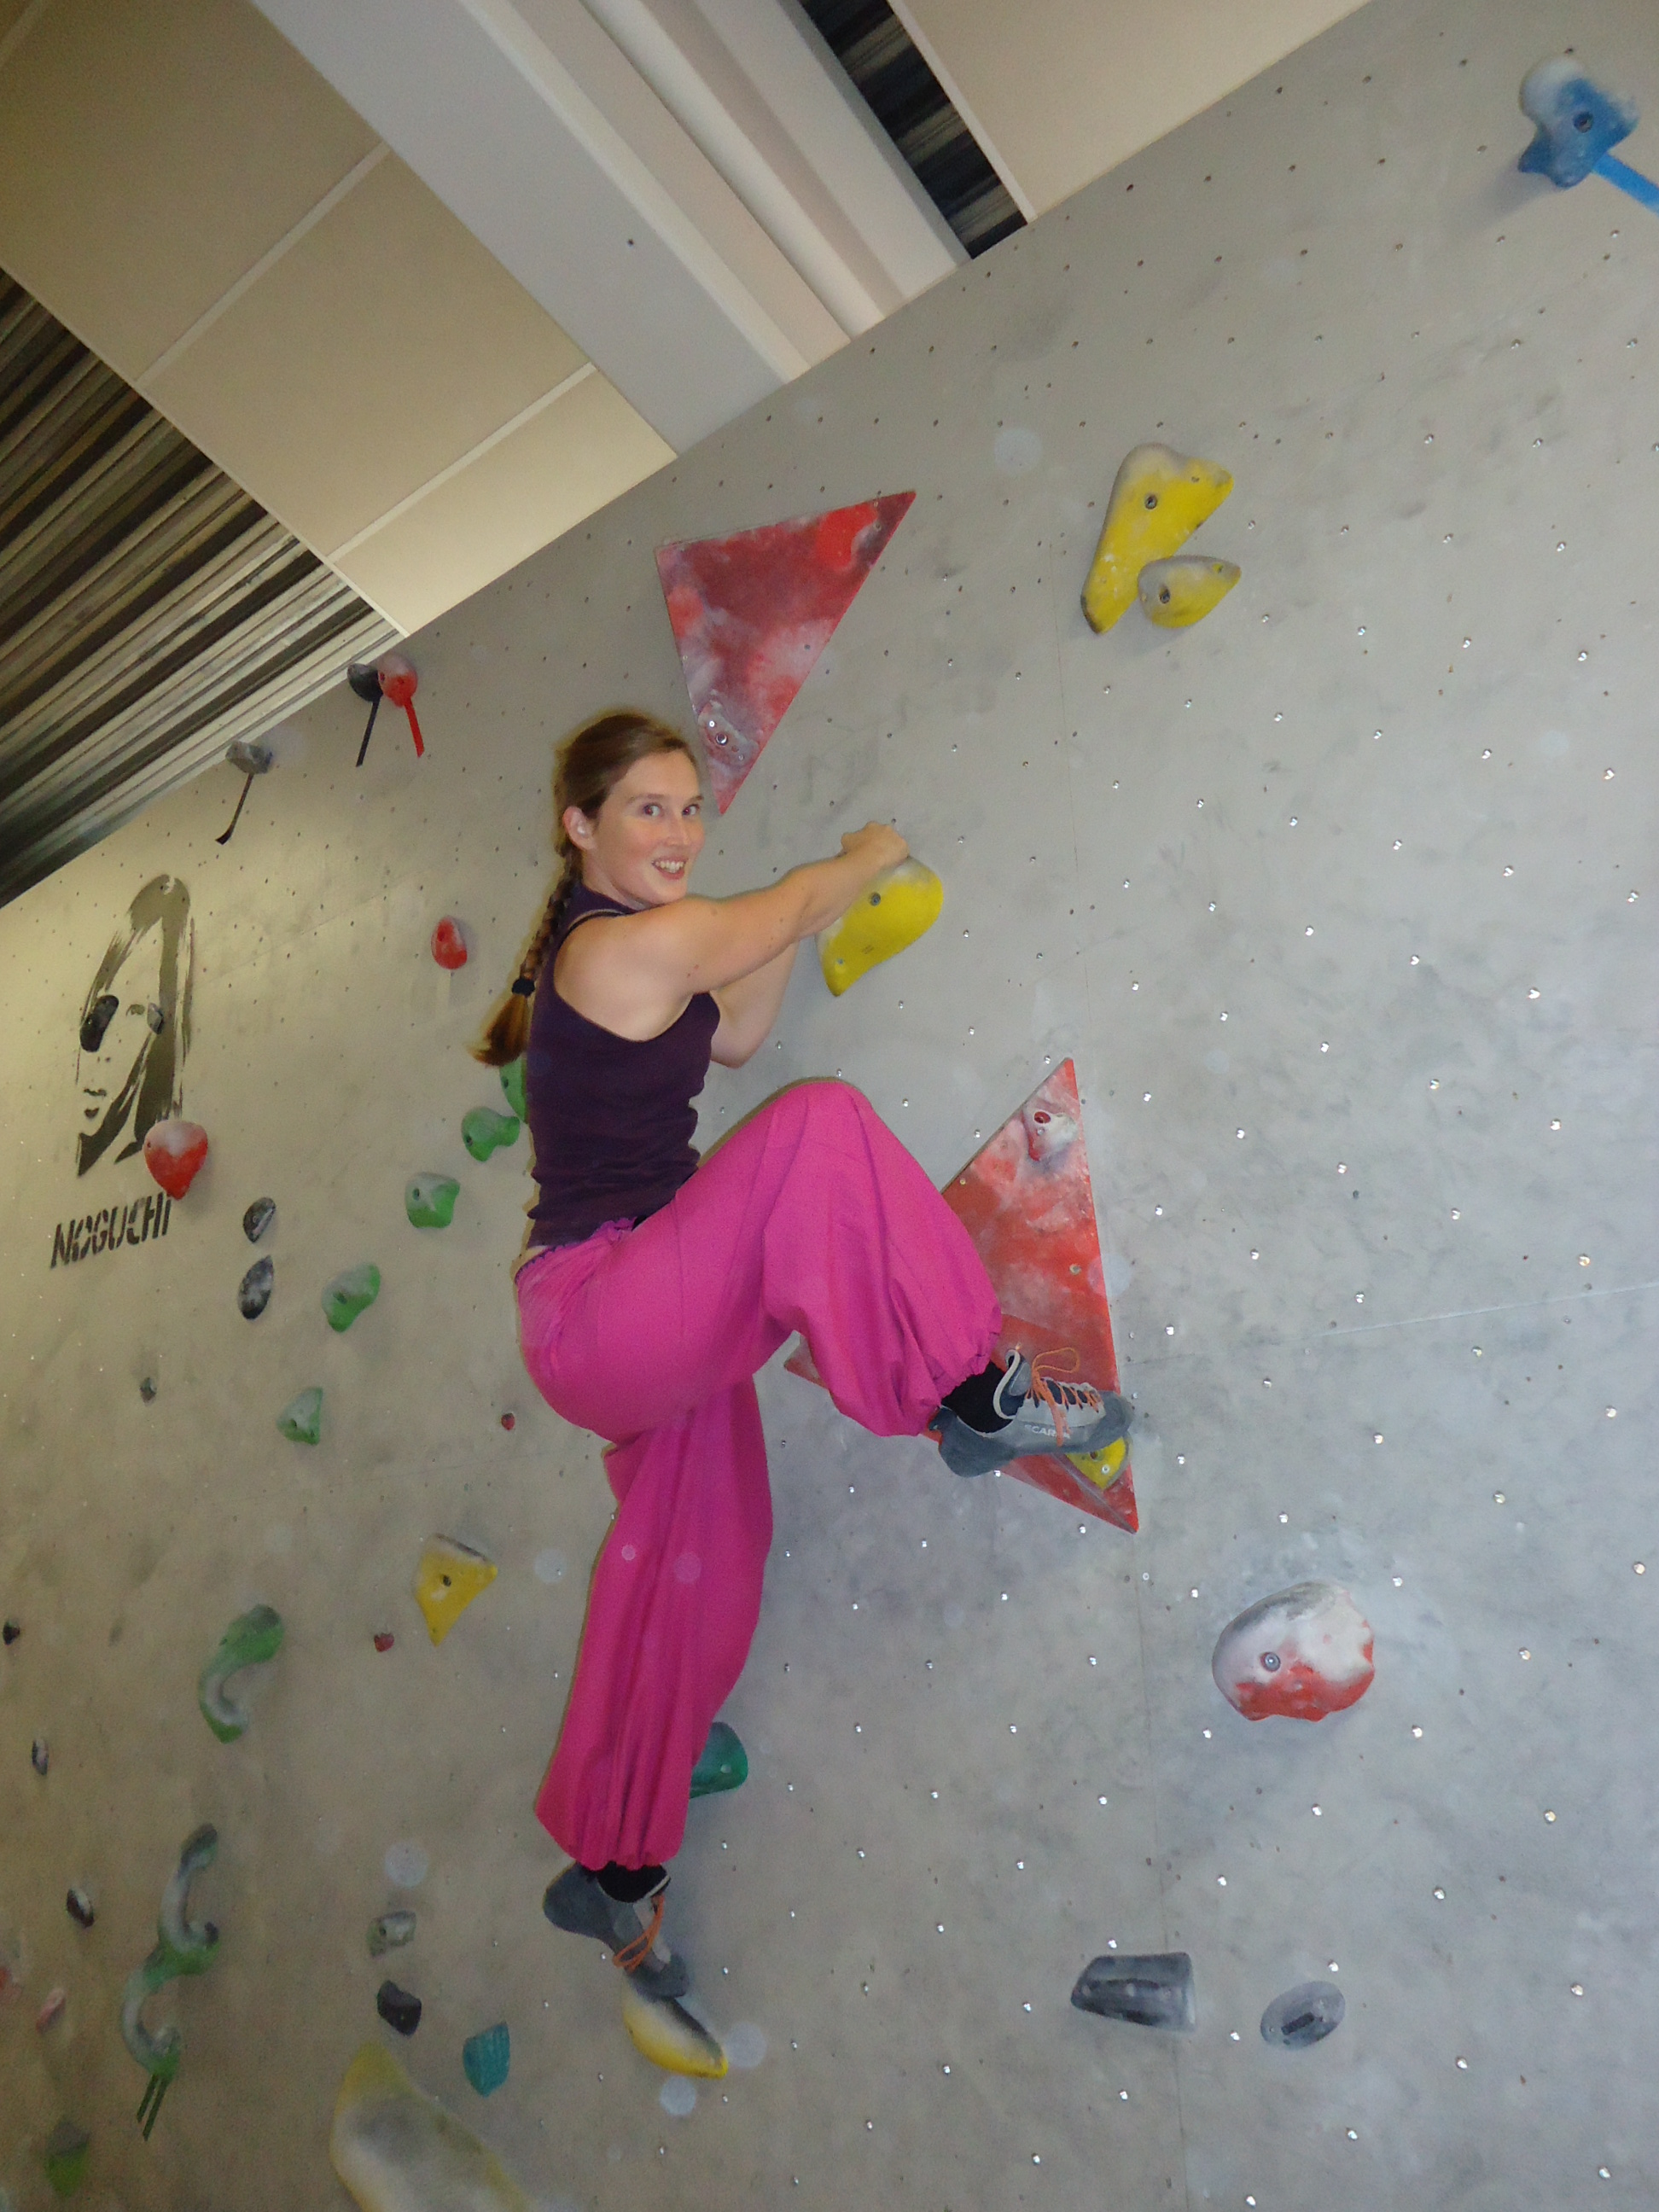
A great, lovely climbing hall has opened, close to our home, so I wanted a new pair of trousers for climbing. I used my own pattern for poofy trousers and an old bed sheet in a colour that hurts the eyes, just as it should when in this sport.
Eftersom det blir härligare ju mer vidd pösbyxorna har, la jag till några cm nedtill. Inte så smidigt dock, när man ska se små tågrepp på väggen… // Because I like it the bigger the trousers are, I added some extra centimeters at the bottom. Afterwards I have realized that it is less practical though...1) Efter att ha sytt ihop framstyckena och bakstyckena, rev jag ut tygstycken till fickorna. Fickorna är dubbelvikta rektanglar 2) Dessa la jag in upptill, under hörnen på byxornas framstycke. 3) Sedan vek jag in kanterna, så att fickans främre del är triangulär och bakstycket är rektangulärt och därmed ingår byxans övre sidsöm. // 1) After having sewn the front pieces and back pieces together, I tore fabric parts for the pockets, which are folded rectangles 2) These were put in, up behind the corners of the front part. 3) Then I folded the seam allowance, so that the front layer of the pocket became triangular and the back layer rectangular and thus formed a part of the upper side seam.
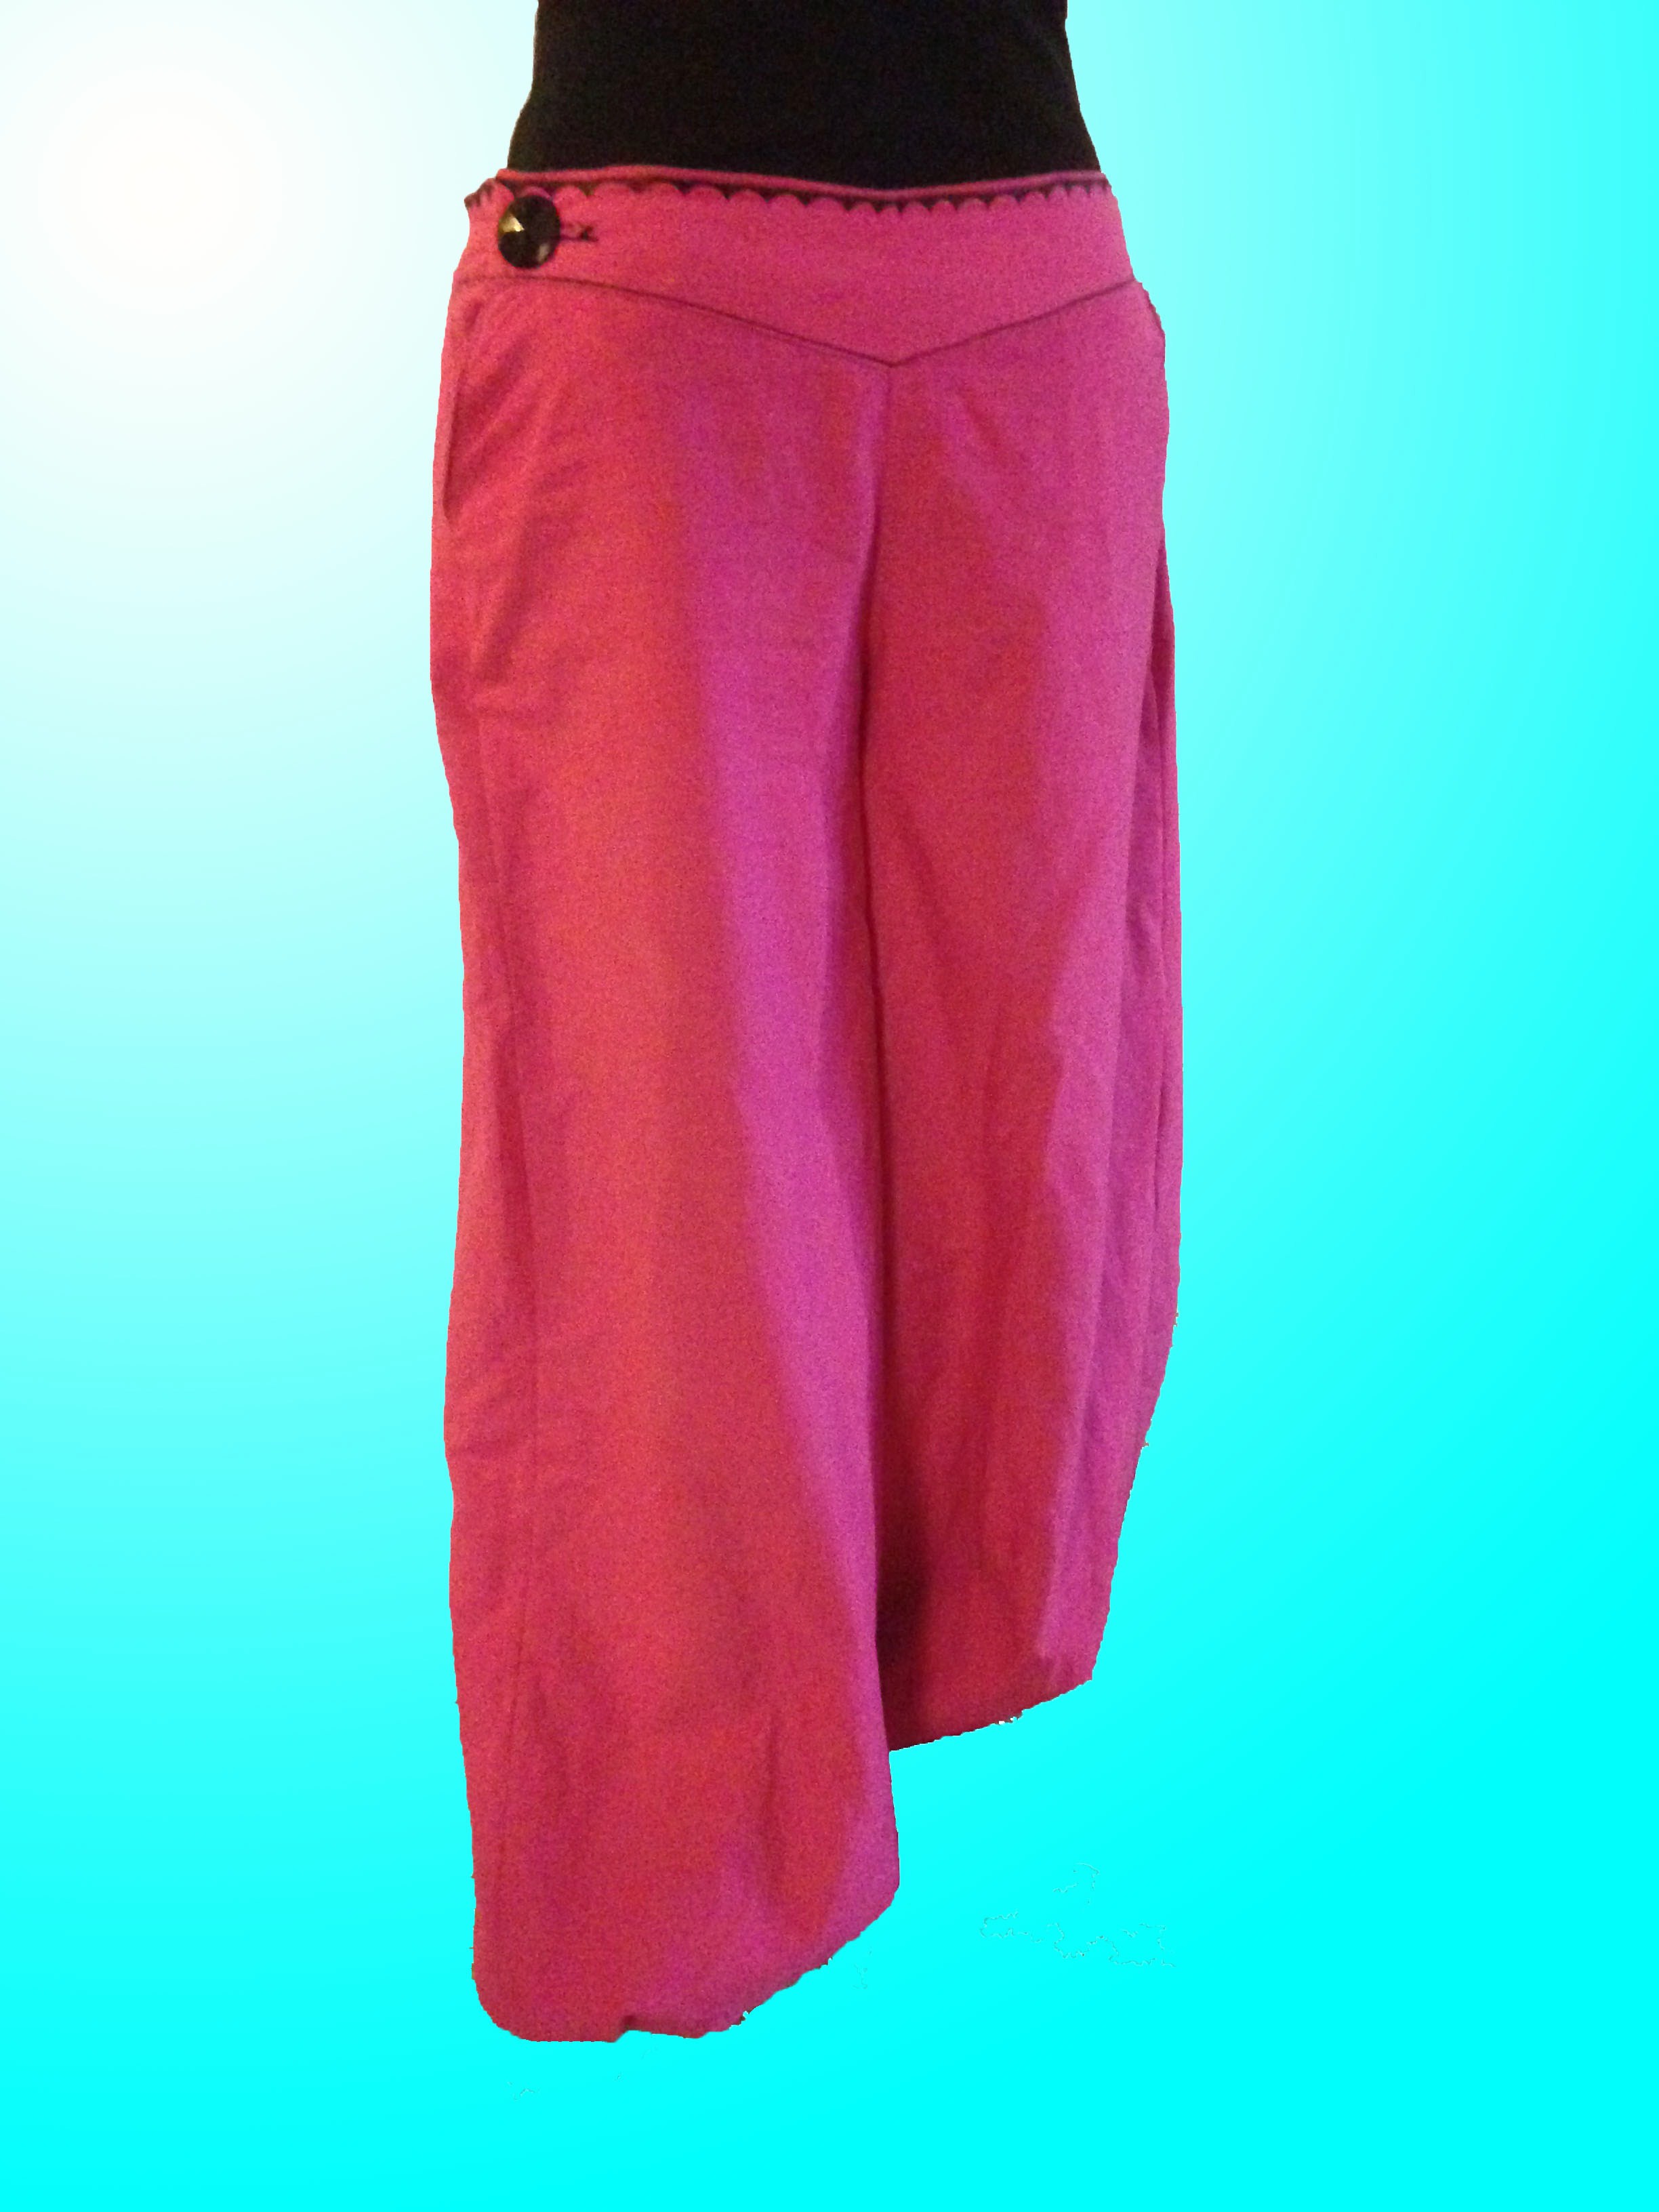
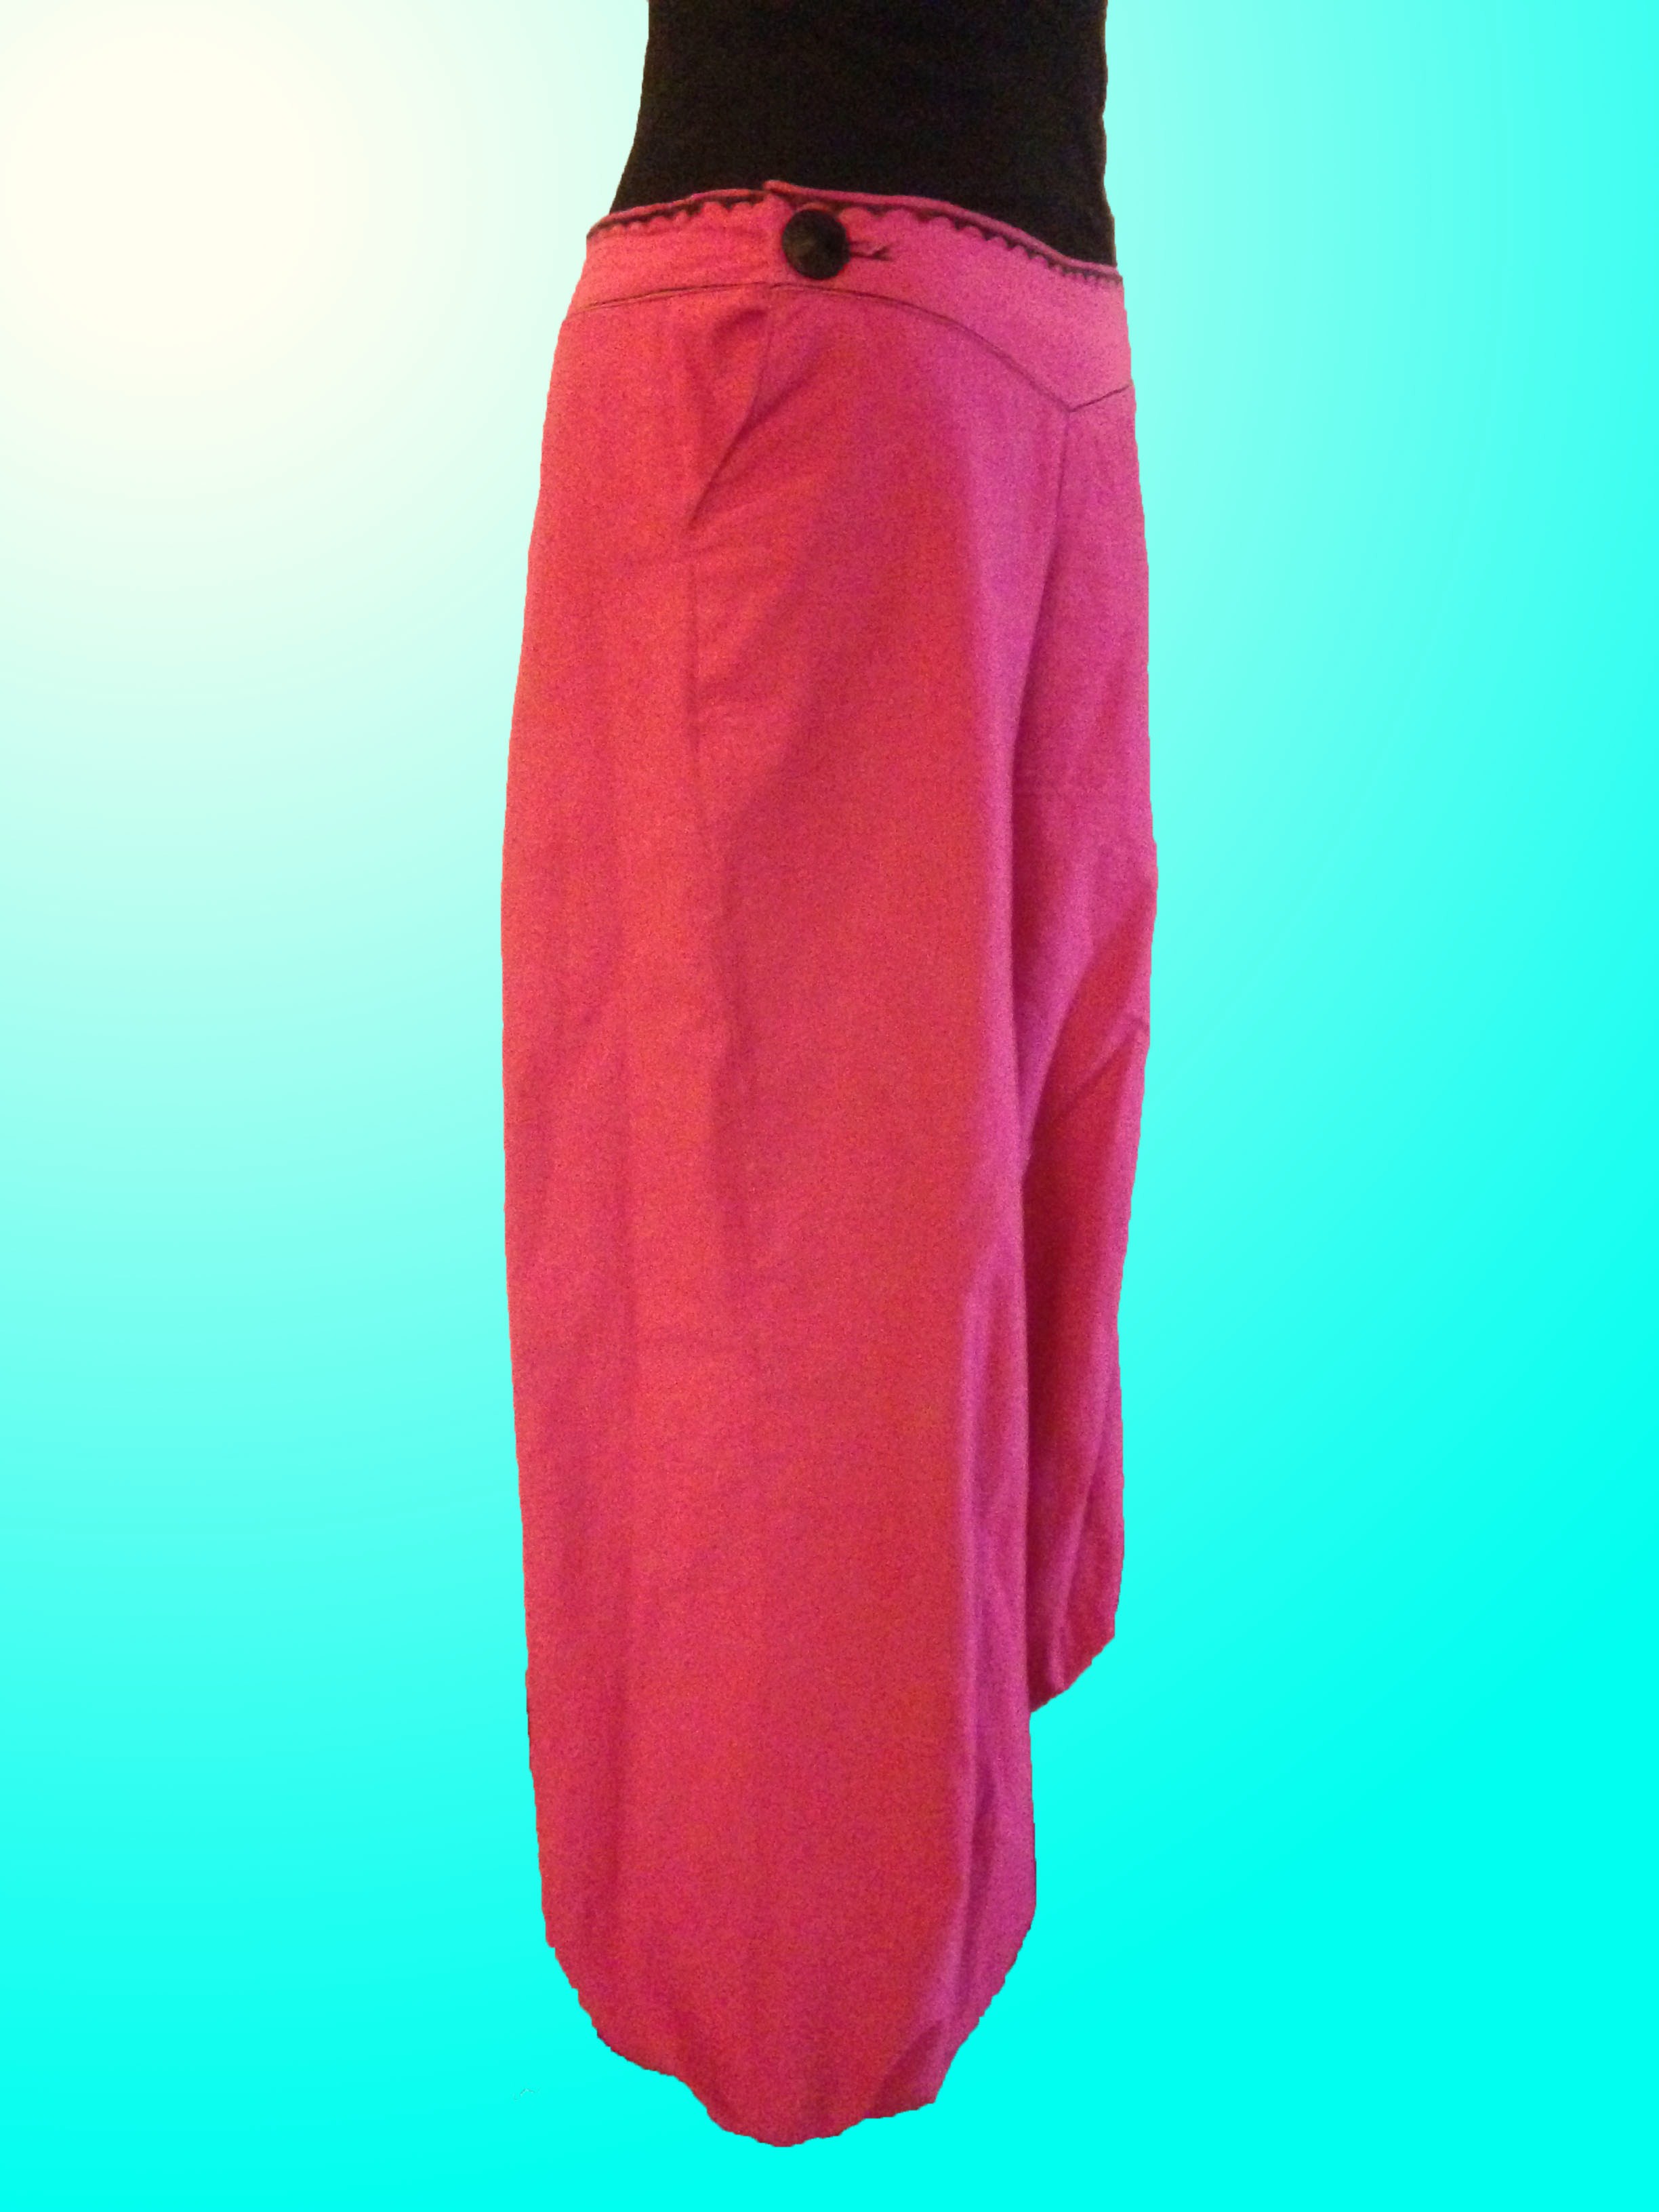
Det som skiljer dessa pösbyxor från mina tidigare, är att dessa har fickor och öppnas med en knapp i ena fickan.
What set these poofy trousers apart from my earlier is that these have nice pockets and open with a button that goes through one of the pockets.
Här är fickorna insydda i byxorna och sidsömmarna är klara. En knäppning ska gå genom höger ficka, som är öppen upptill. // Here the pockets are sewn into the trousers and the side seams are ready. A buttonhole will be put in the front part of the pocket, which is left open in the top.Upptill ville jag ha en linning, liknande den på mina tidigare pösbyxor. Jag sydde ihop linningen upptill och formade kanten nedtill när jag hade fäst linningen på själva byxorna. // At the waist, I wanted a border, similar to my earlier pair of poofy trousers. I made the border and formed the bottom part last.
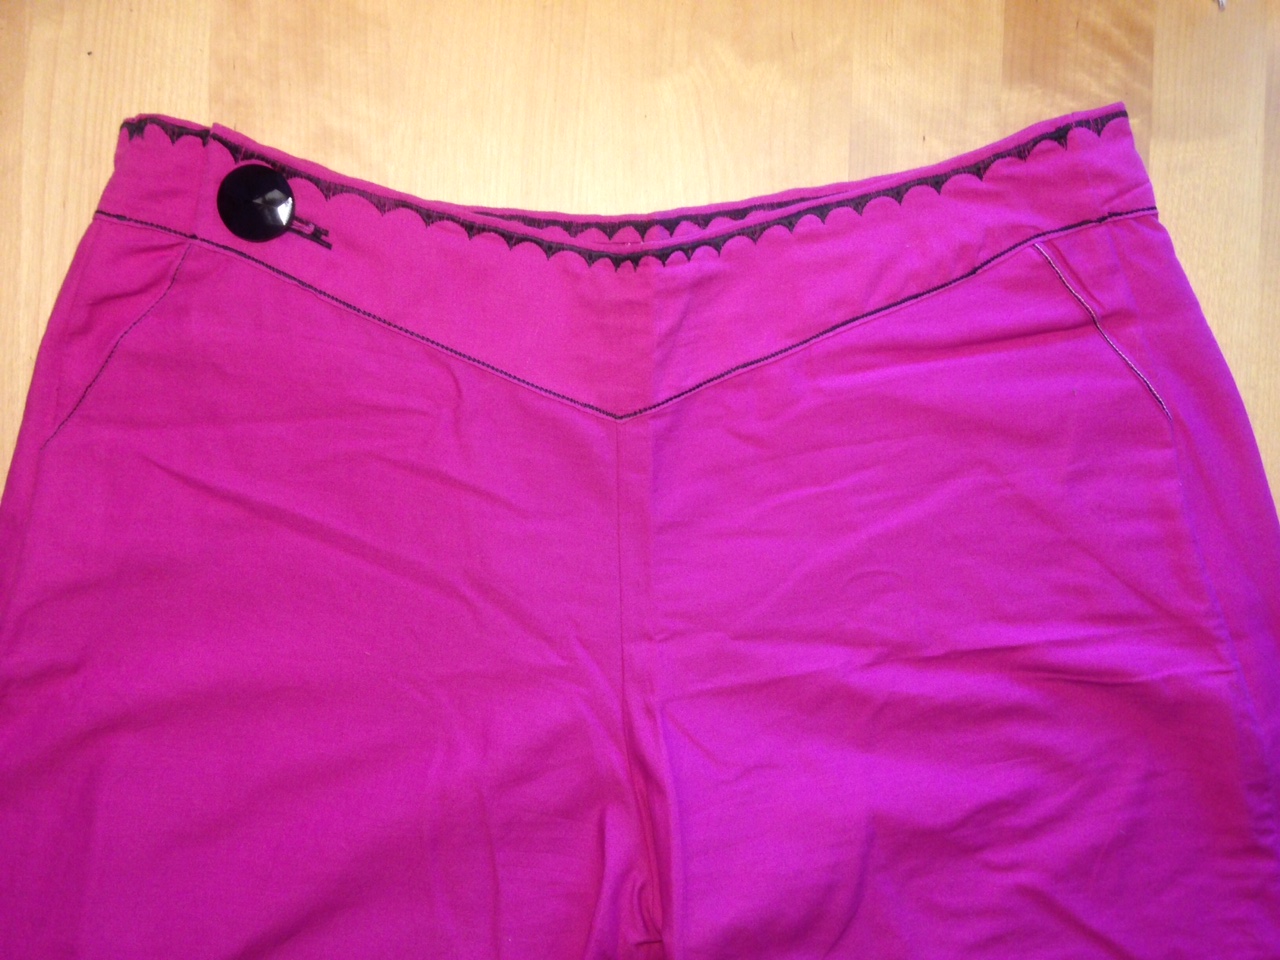
Eftersom byxorna redan hade en hysterisk färg, löpte jag linan ut och dekorerade med tonårsaktigt kontrasterande svart tråd och en bling-blingig knapp som jag hittade bland mitt handarbetes-arvegods.
Because the trousers already had a crazy colour, I followed through and decorated with a teenagerish contrasting black seam and a bling-bling button which I found among inherited sewing stuff.
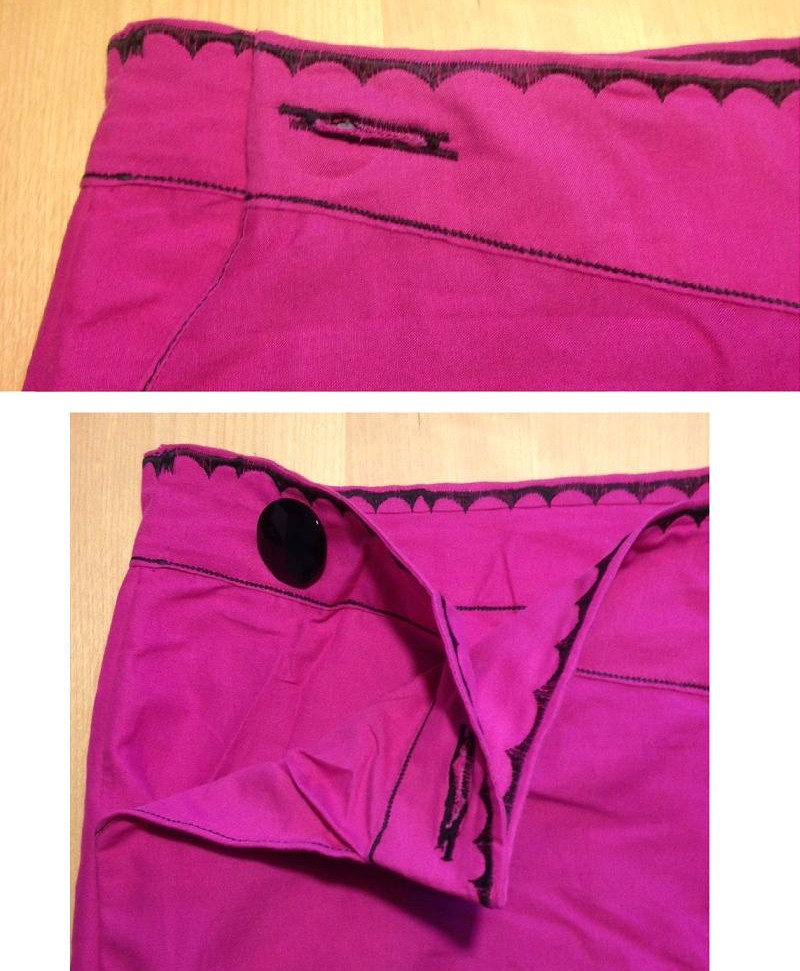
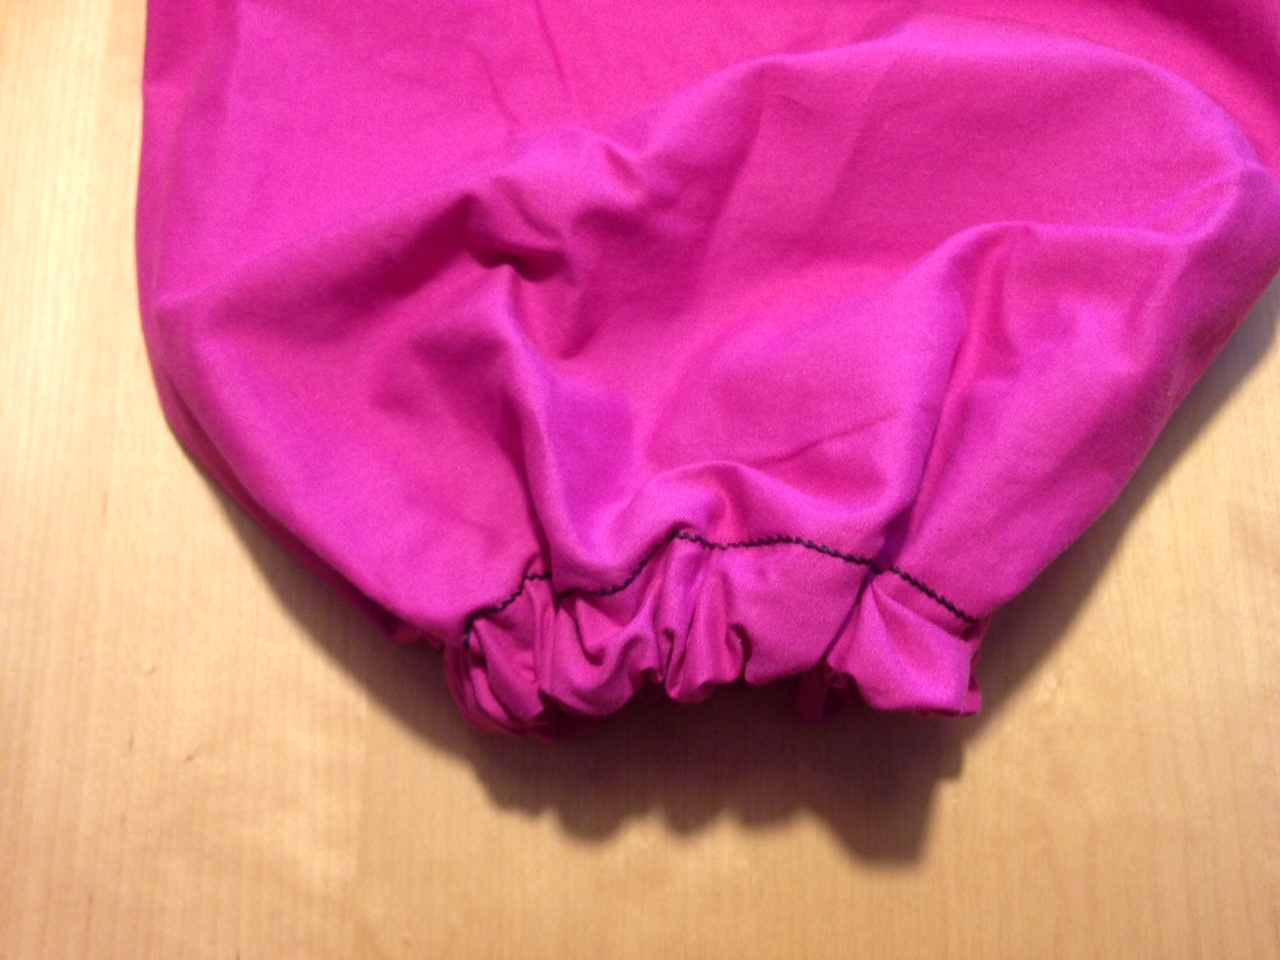
Upptill fäste jag linningen i byxorna med dekorationssöm. // On the top, I fastened the boarder of the trousers with a decoration seam.Jag glömde att koppla in knapphålsinsatsen i symaskinen, så knapphålet blev inte som jag tänkt, men lite skojigt. När byxorna knäpps upp, öppnar man alltså fickan och vidgar på så vis deras övre omkrets. // I forgot to use the buttonhole-advice for the sewing machine, så the button hole did not end up as I had planned, but I looks nice in some kind of way. When the trousers are opened, the pocket is opened and in this way increase the waist circumference.Nedtill fäste jag ett resårband. // I put an elastic band in the bottom seam.
Jag testade byxorna i klätterhallen förra veckan. De är jättesköna, men sömmen sprack faktiskt i skrevet! Som väl var hade jag sicksackat och den sömmen höll. När byxorna sitter där de ska har jag fri rörlighet, men sedan halkar de ned några cm (pga. det jättebreda knapphålet) och då blir det plötsligt knepigt att spreta med benen. Därför satte jag idag en säkerhetsnål utanför knäppningen, så att knappen stannar i sin inre position och alltså håller byxorna så tighta upptill, som jag ursprungligen gjorde dem. Det funkar bra och nu ska byxorna inte spricka igen. Jag har dock förstått varför man vanligtvis syr byxor med dragkedjor.
I tested the trousers in the climbing hall last week. They are so comfortable, but I’m ashamed to admit that the seam actually ripped open in the crotch! Luckily, I had zigzagged and that seam was ok. When the trousers are at the right height, I can move fully, but then they slide down some centimeters and then it suddenly is very difficult to stretch out ones legs. Therefor I put a safety pin at the button hole, so that the button stays in its inner position and keep the trousers tight, as I intended. This works fine and hopefully they won’t rip open again. I have understood why all trousers have zippers, though.
Byxorna på provdocka och klättervägg
De färgglada byxorna framifrån… och från knappsidan.I sitt rätta element.Galet trött klättrare med vild blick.
Klätterryggsäck lagas och pimpas
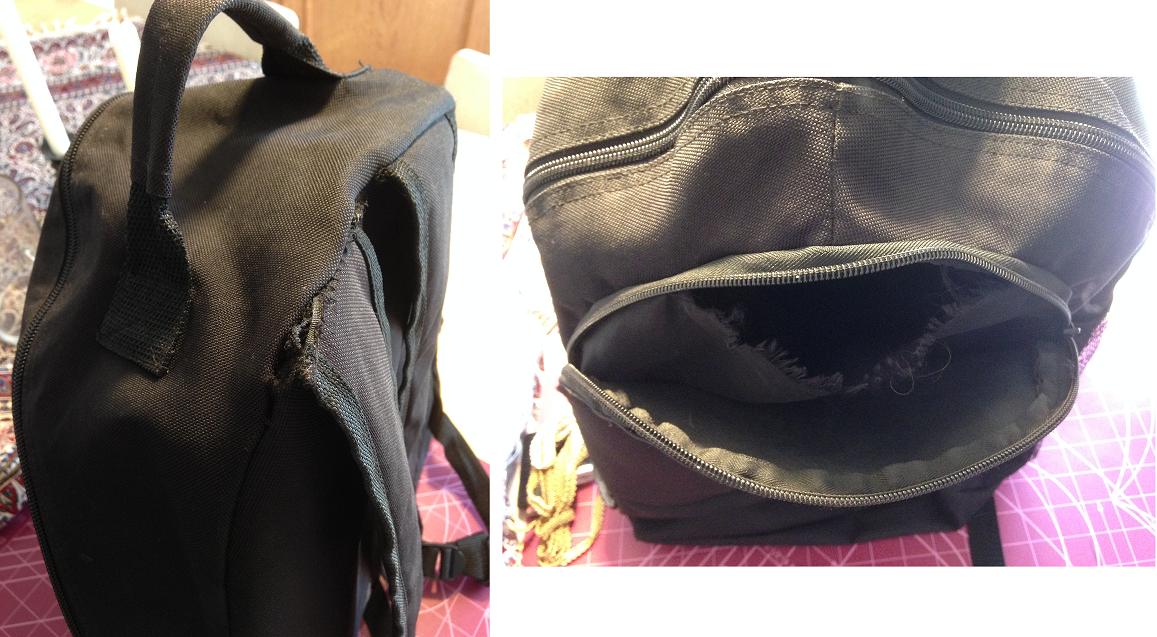
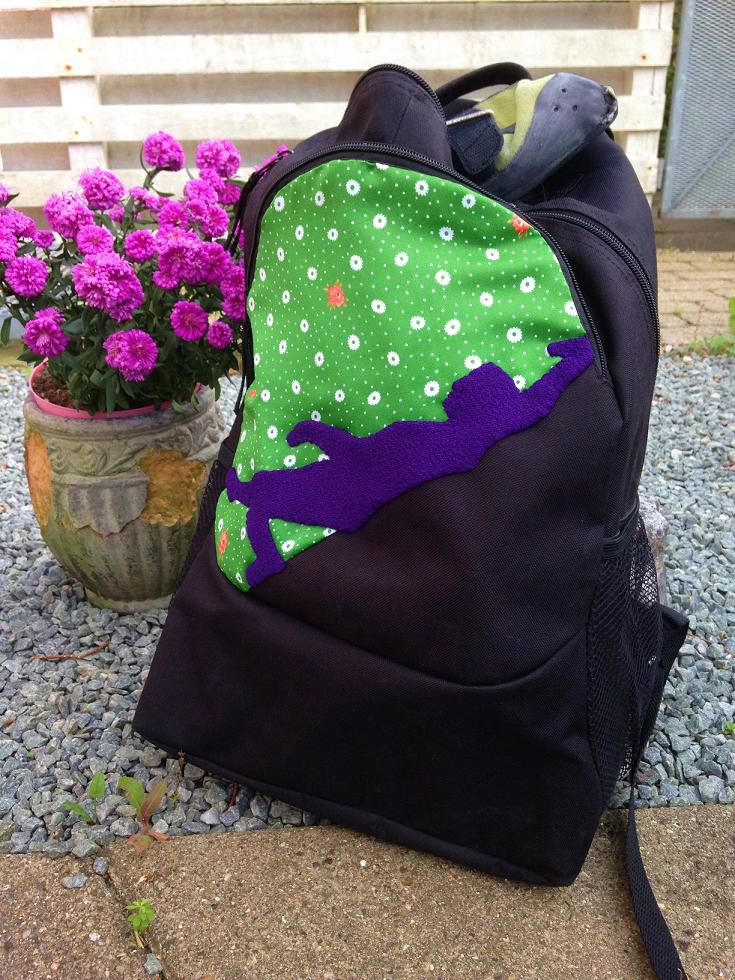
När vi klättrade sist påmindes jag om att ryggsäcken som vi brukar ha skor, tejp, kalk mm. i, sjöng på sista versen. Därför lagade jag den och passade på att pimpa den lite, med stuvbitar från tidigare projekt.
When we climbed last time, I was reminded our backpack for shoes, tape, chalk etc., was gasping for its last breath. I repaired it and pimped it up with some scrap fabric from earlier projects.
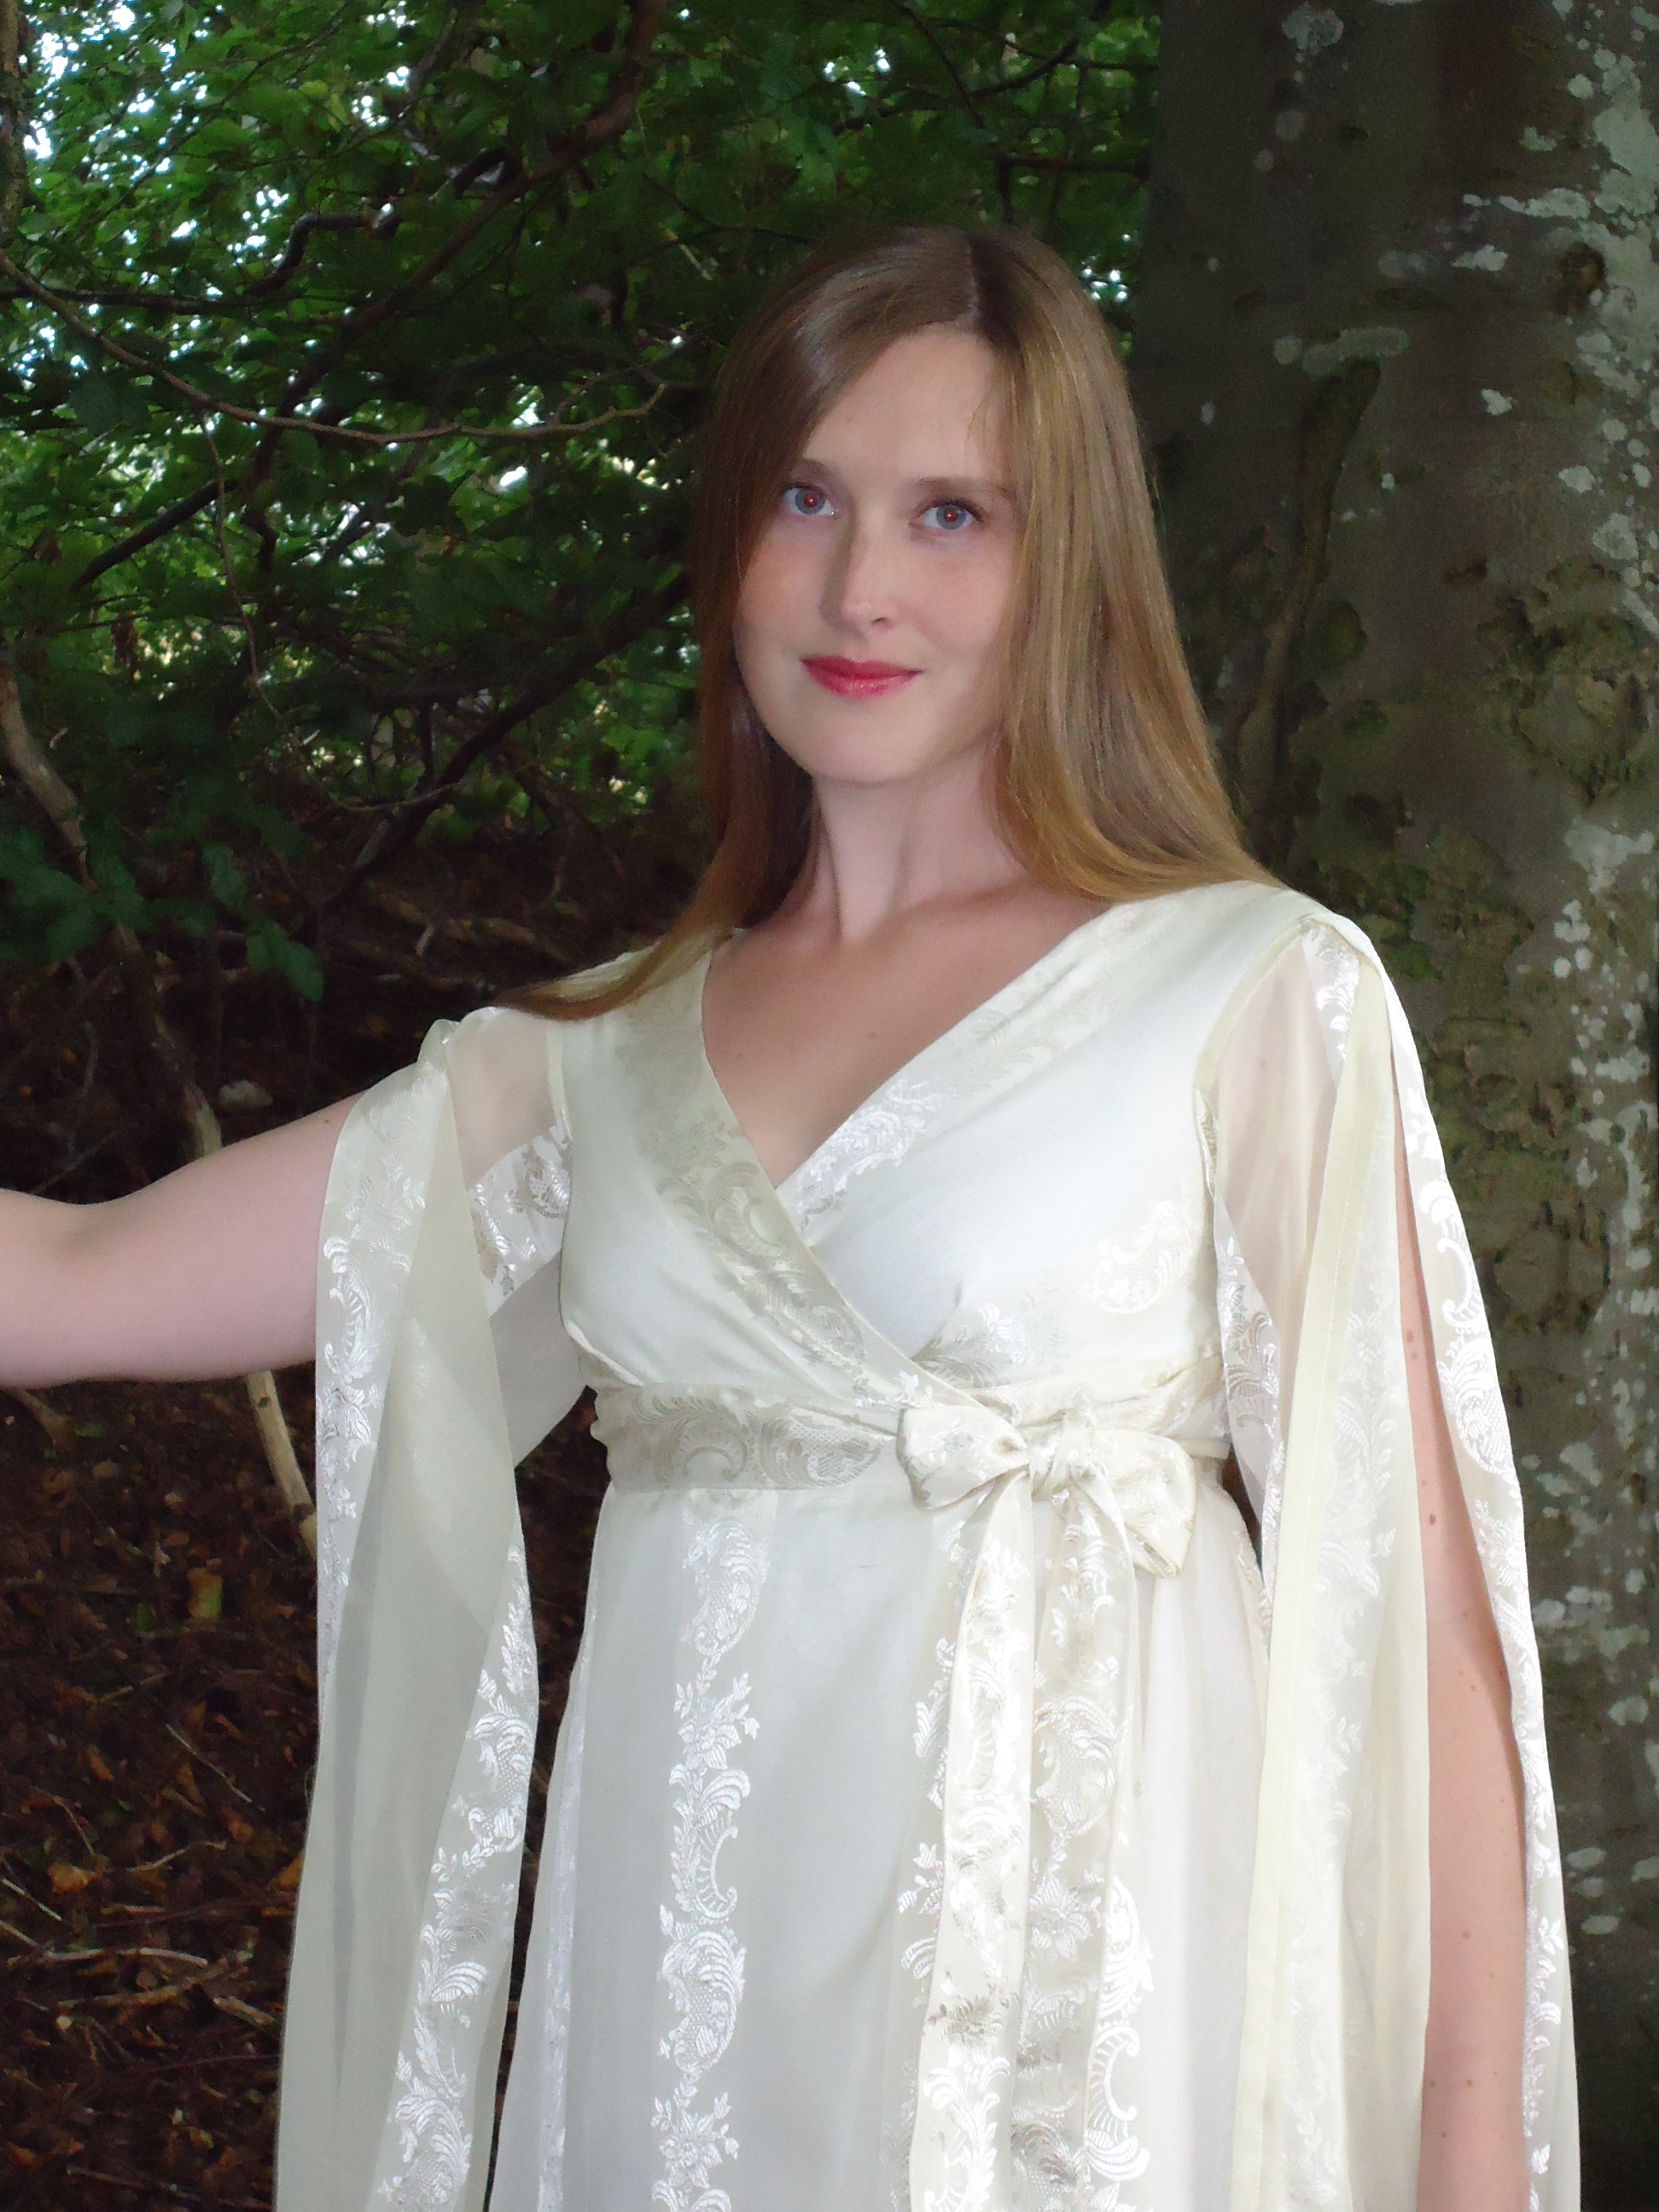
I vintras sydde jag en omlottklänning med empirskärning, av två ketängen (tanzanska skynken). Jag använde en gammal gardin som toille. Redan då tänkte jag att jag måste sy en morgonrock av detta härliga tyg. Nu fick jag äntligen tid.
This winter I made a wrap-around-dress(?) out of two ketenge (Tanzanian cloth pieces). I used an old curtain as toille. Already by then I thought that this pattern would be perfect for a dressing gown, made from my parents very first curtains. Now I had finally time to do it.
Jag använde mig alltså av samma mönster som till den tanzanska klänningen. Skillnaden är att jag har fordrat morgonrocken med ett vitt bomullstyg, eftersom den annars skulle vara helt genomskinlig og alldeles för sval för denna frusna varelse.
I used the same pattern as I made for the Tanzanian Dress. The difference is that I have lined the dressing gown with a white cotton, because it would otherwise be completely transparent and far too cool for this frozen creature.
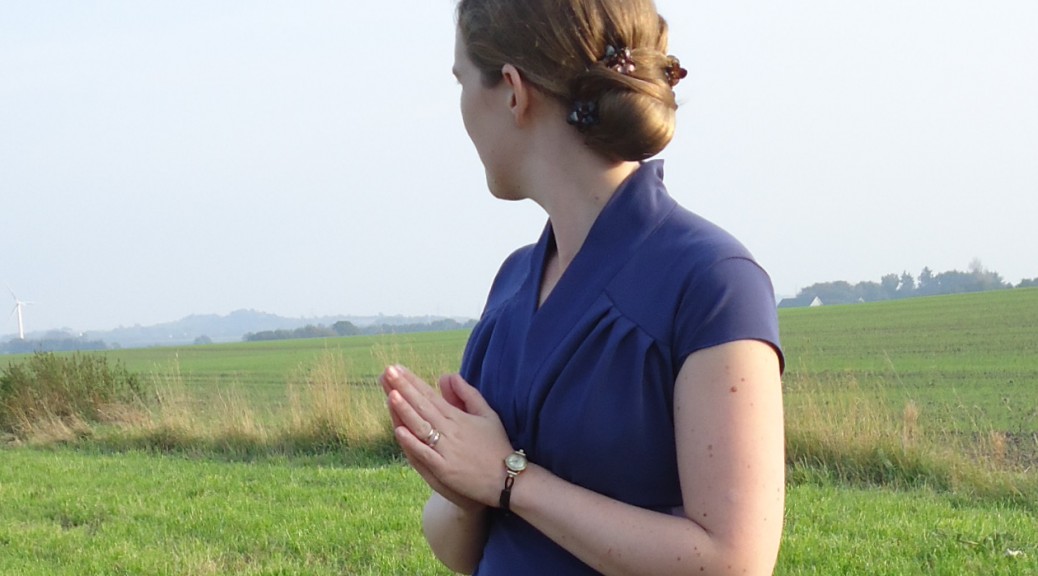
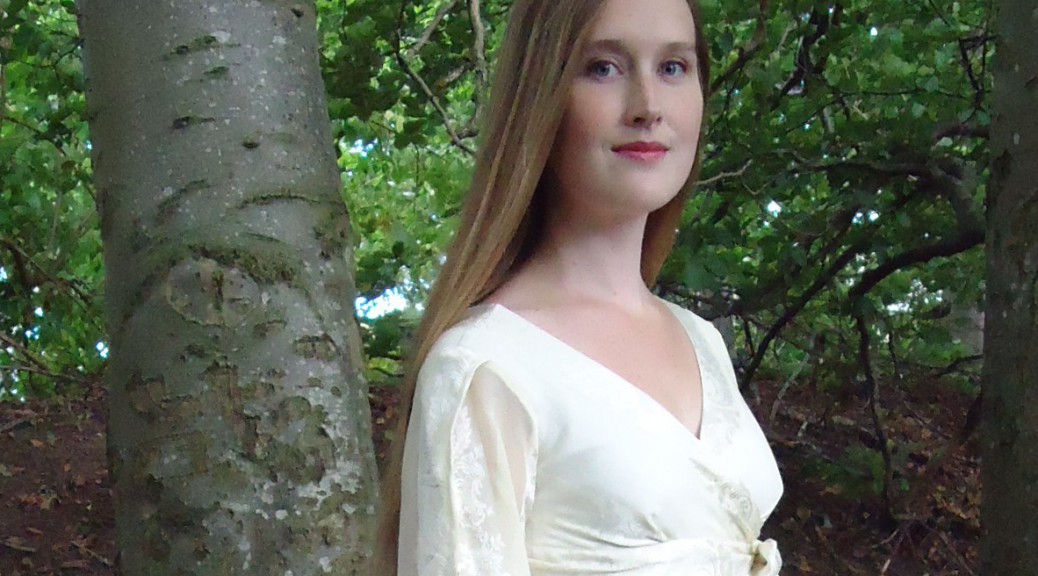
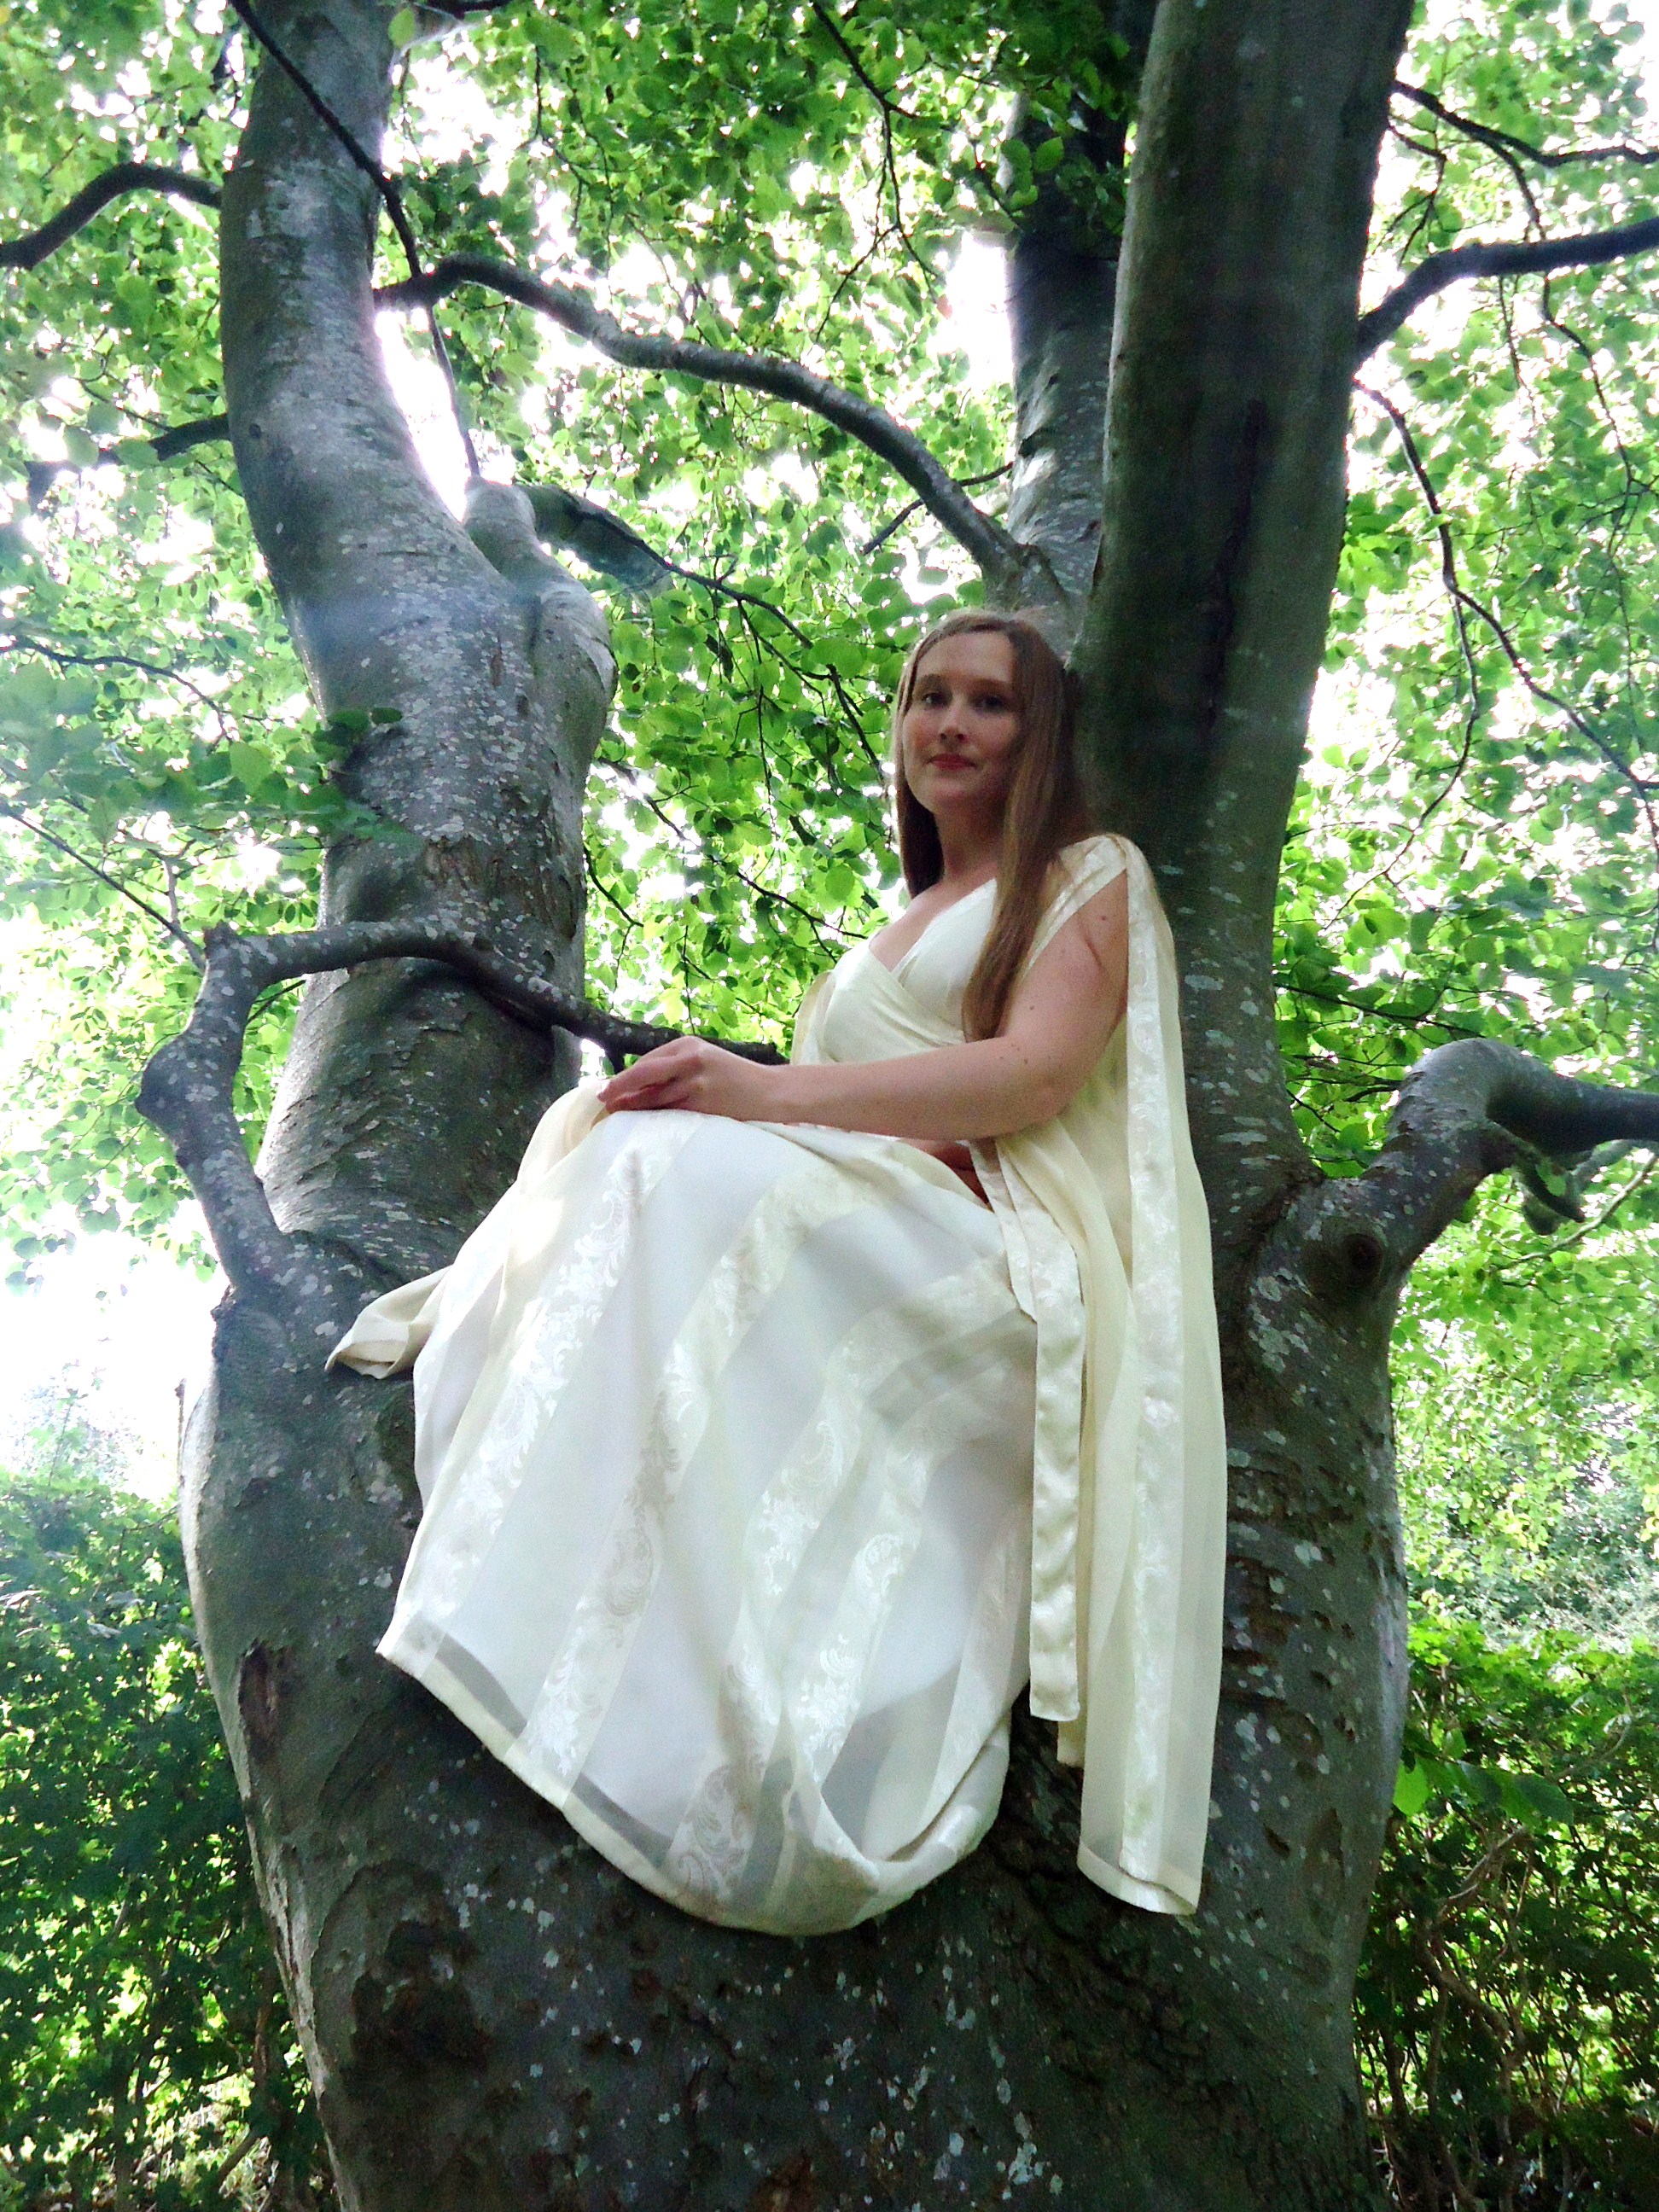
Jag hade egentligen tänkt fotografera morgonrocken ute på en åker, eftersom det var sådan dramatisk blåst och läckra ovädersmoln. Jag var dock inte helt bekväm med att promenera genom samhället i denna stass och den förkylda fotografen blev väldigt tacksam när jag föreslog att vi skulle återanvända bokarna vid fotbollsplanen (som vi fotade min spencer vid).
I had planned for a photo shoot out on the fields, as there is now a superbly dramatic wind and glorious storm clouds. Yet, I was not fully comfortable with strolling around in town in this outfit and the photographer had a bad cold and was only too happy when I suggested that we reuse the beeches around the football field (which we used for my spencer).
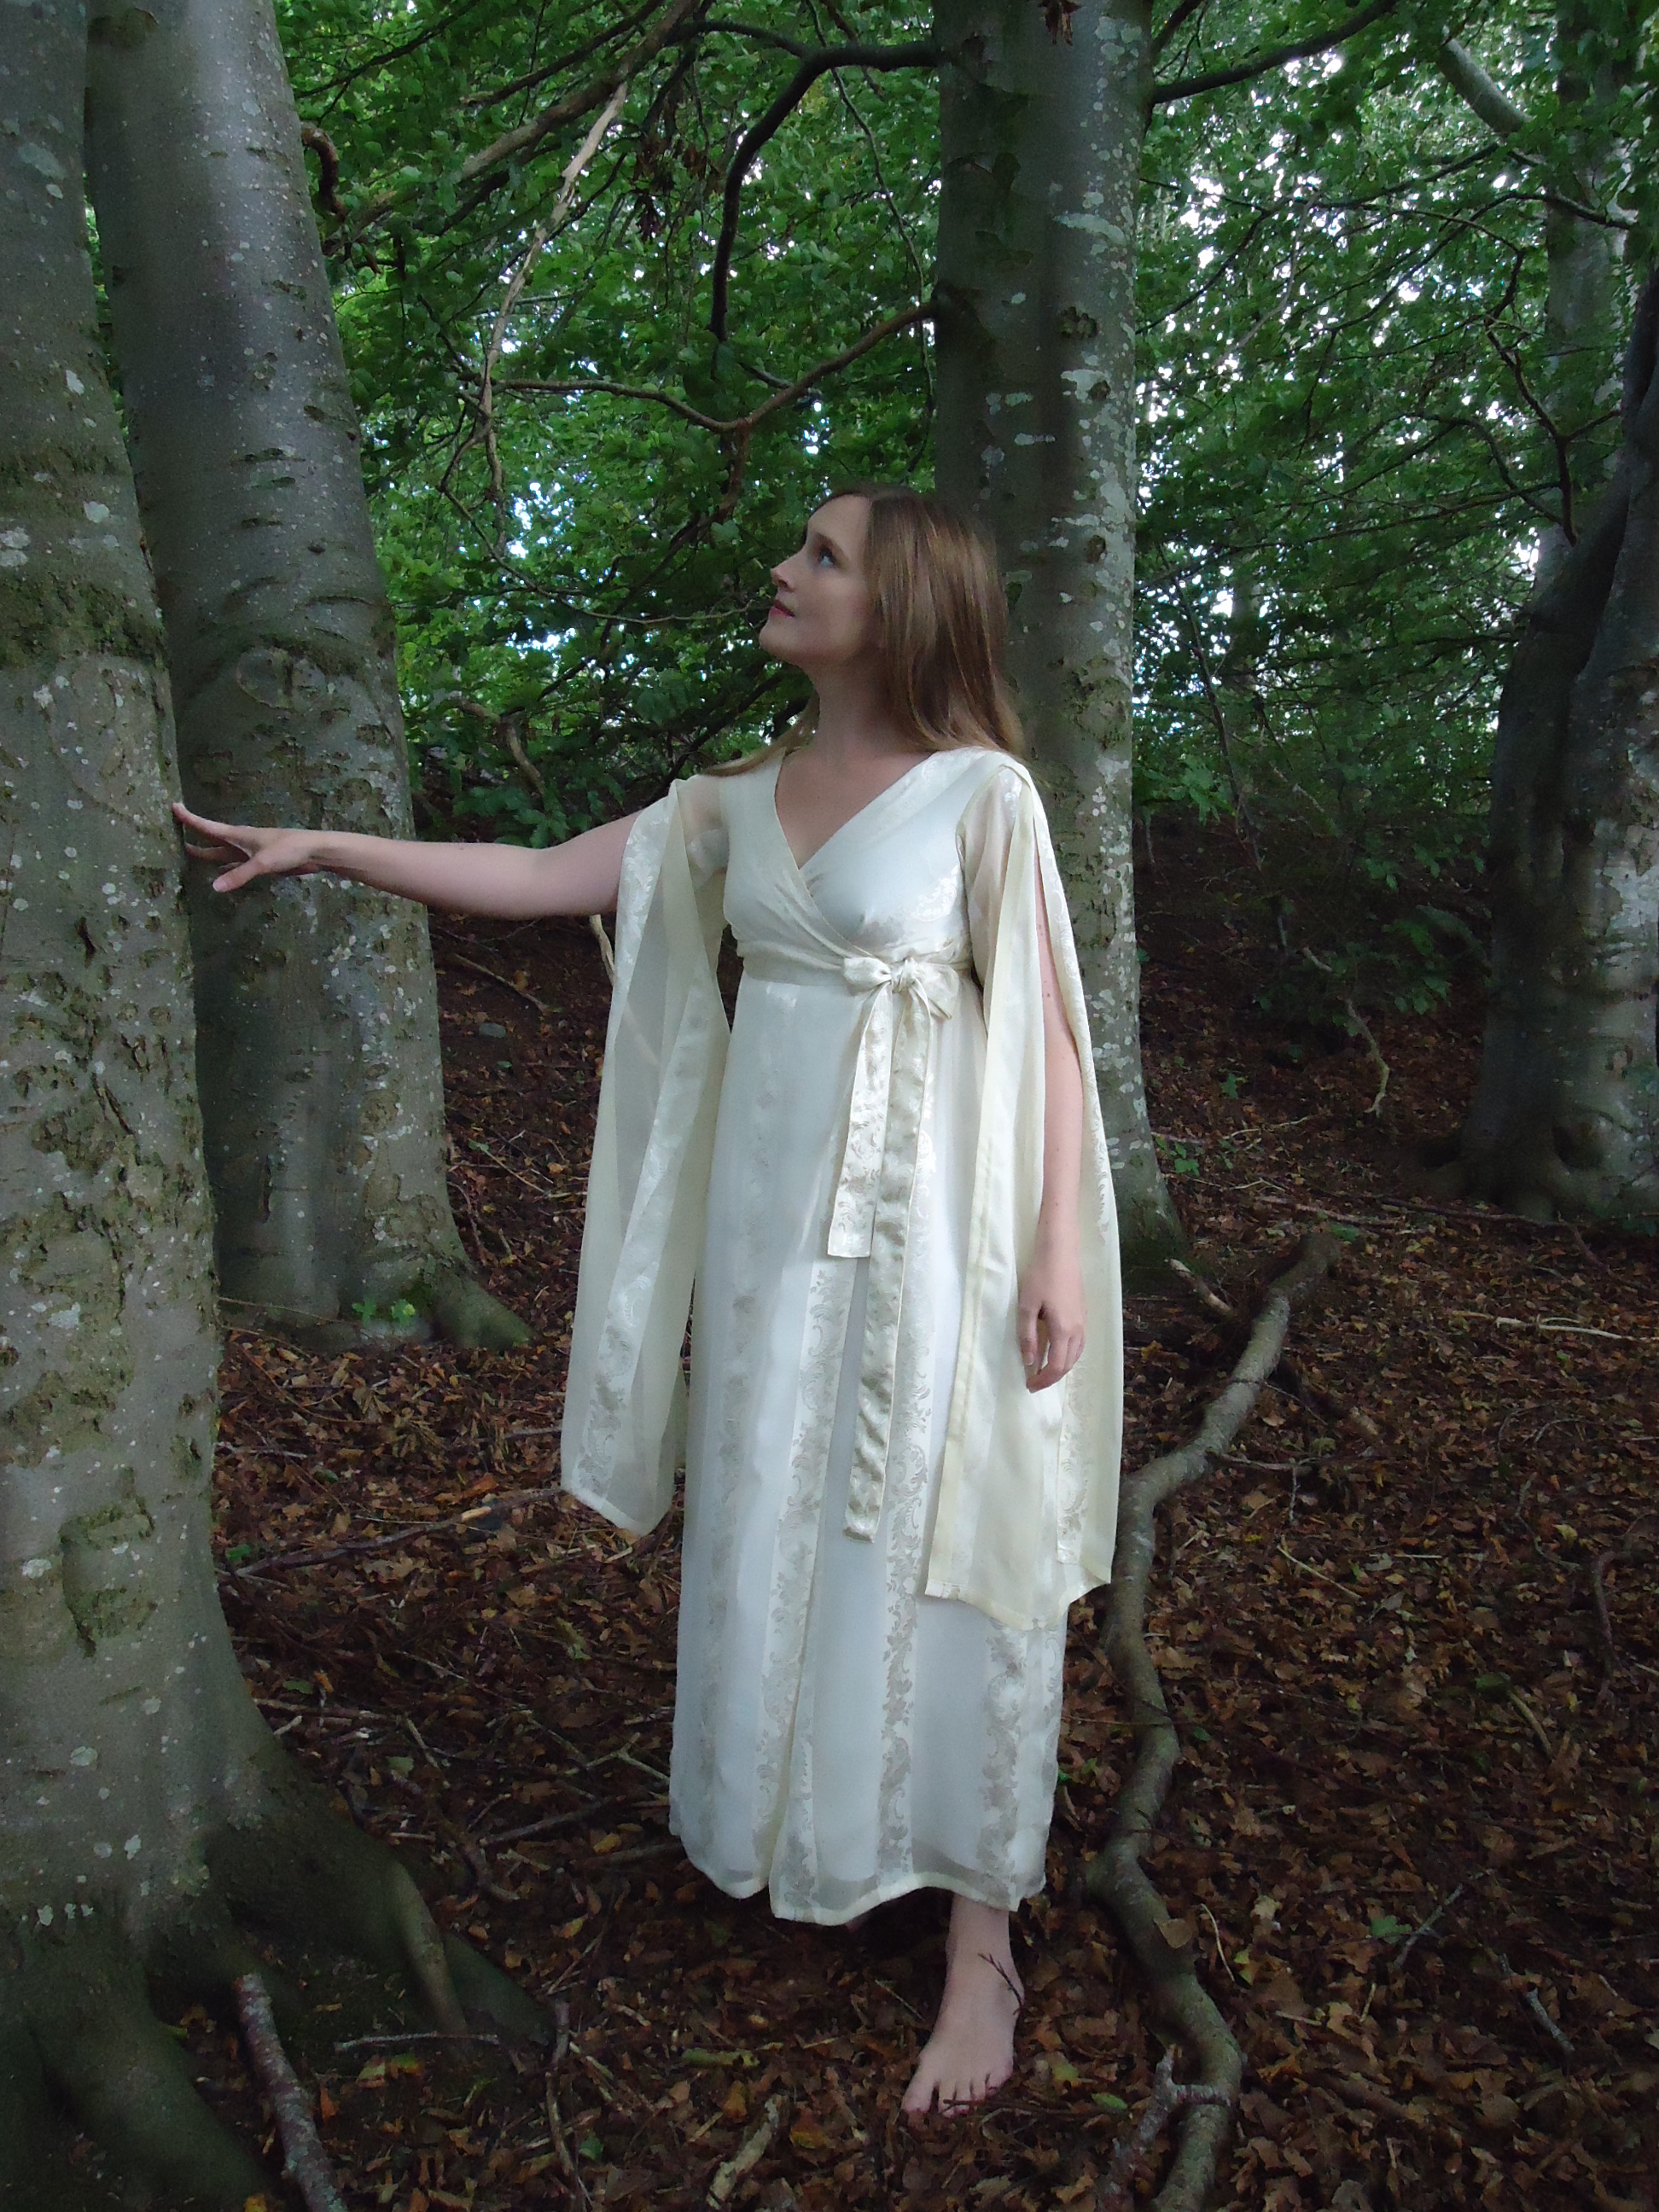
Morgonrockens ärmar är “omvända”, och har den potentiella sömmen upptill. Jag överväger att sätta några stygn vid armvecket, så att de ger lite mer värme till överarmarna, nu när hösten blir kyligare.
The sleeves of the dressing gown are ”converted” and has the potential seam on the shoulder. I consider placing some stitches at the elbow, so that the arms give a bit more warmth above the elbows as the autumn now grows colder.
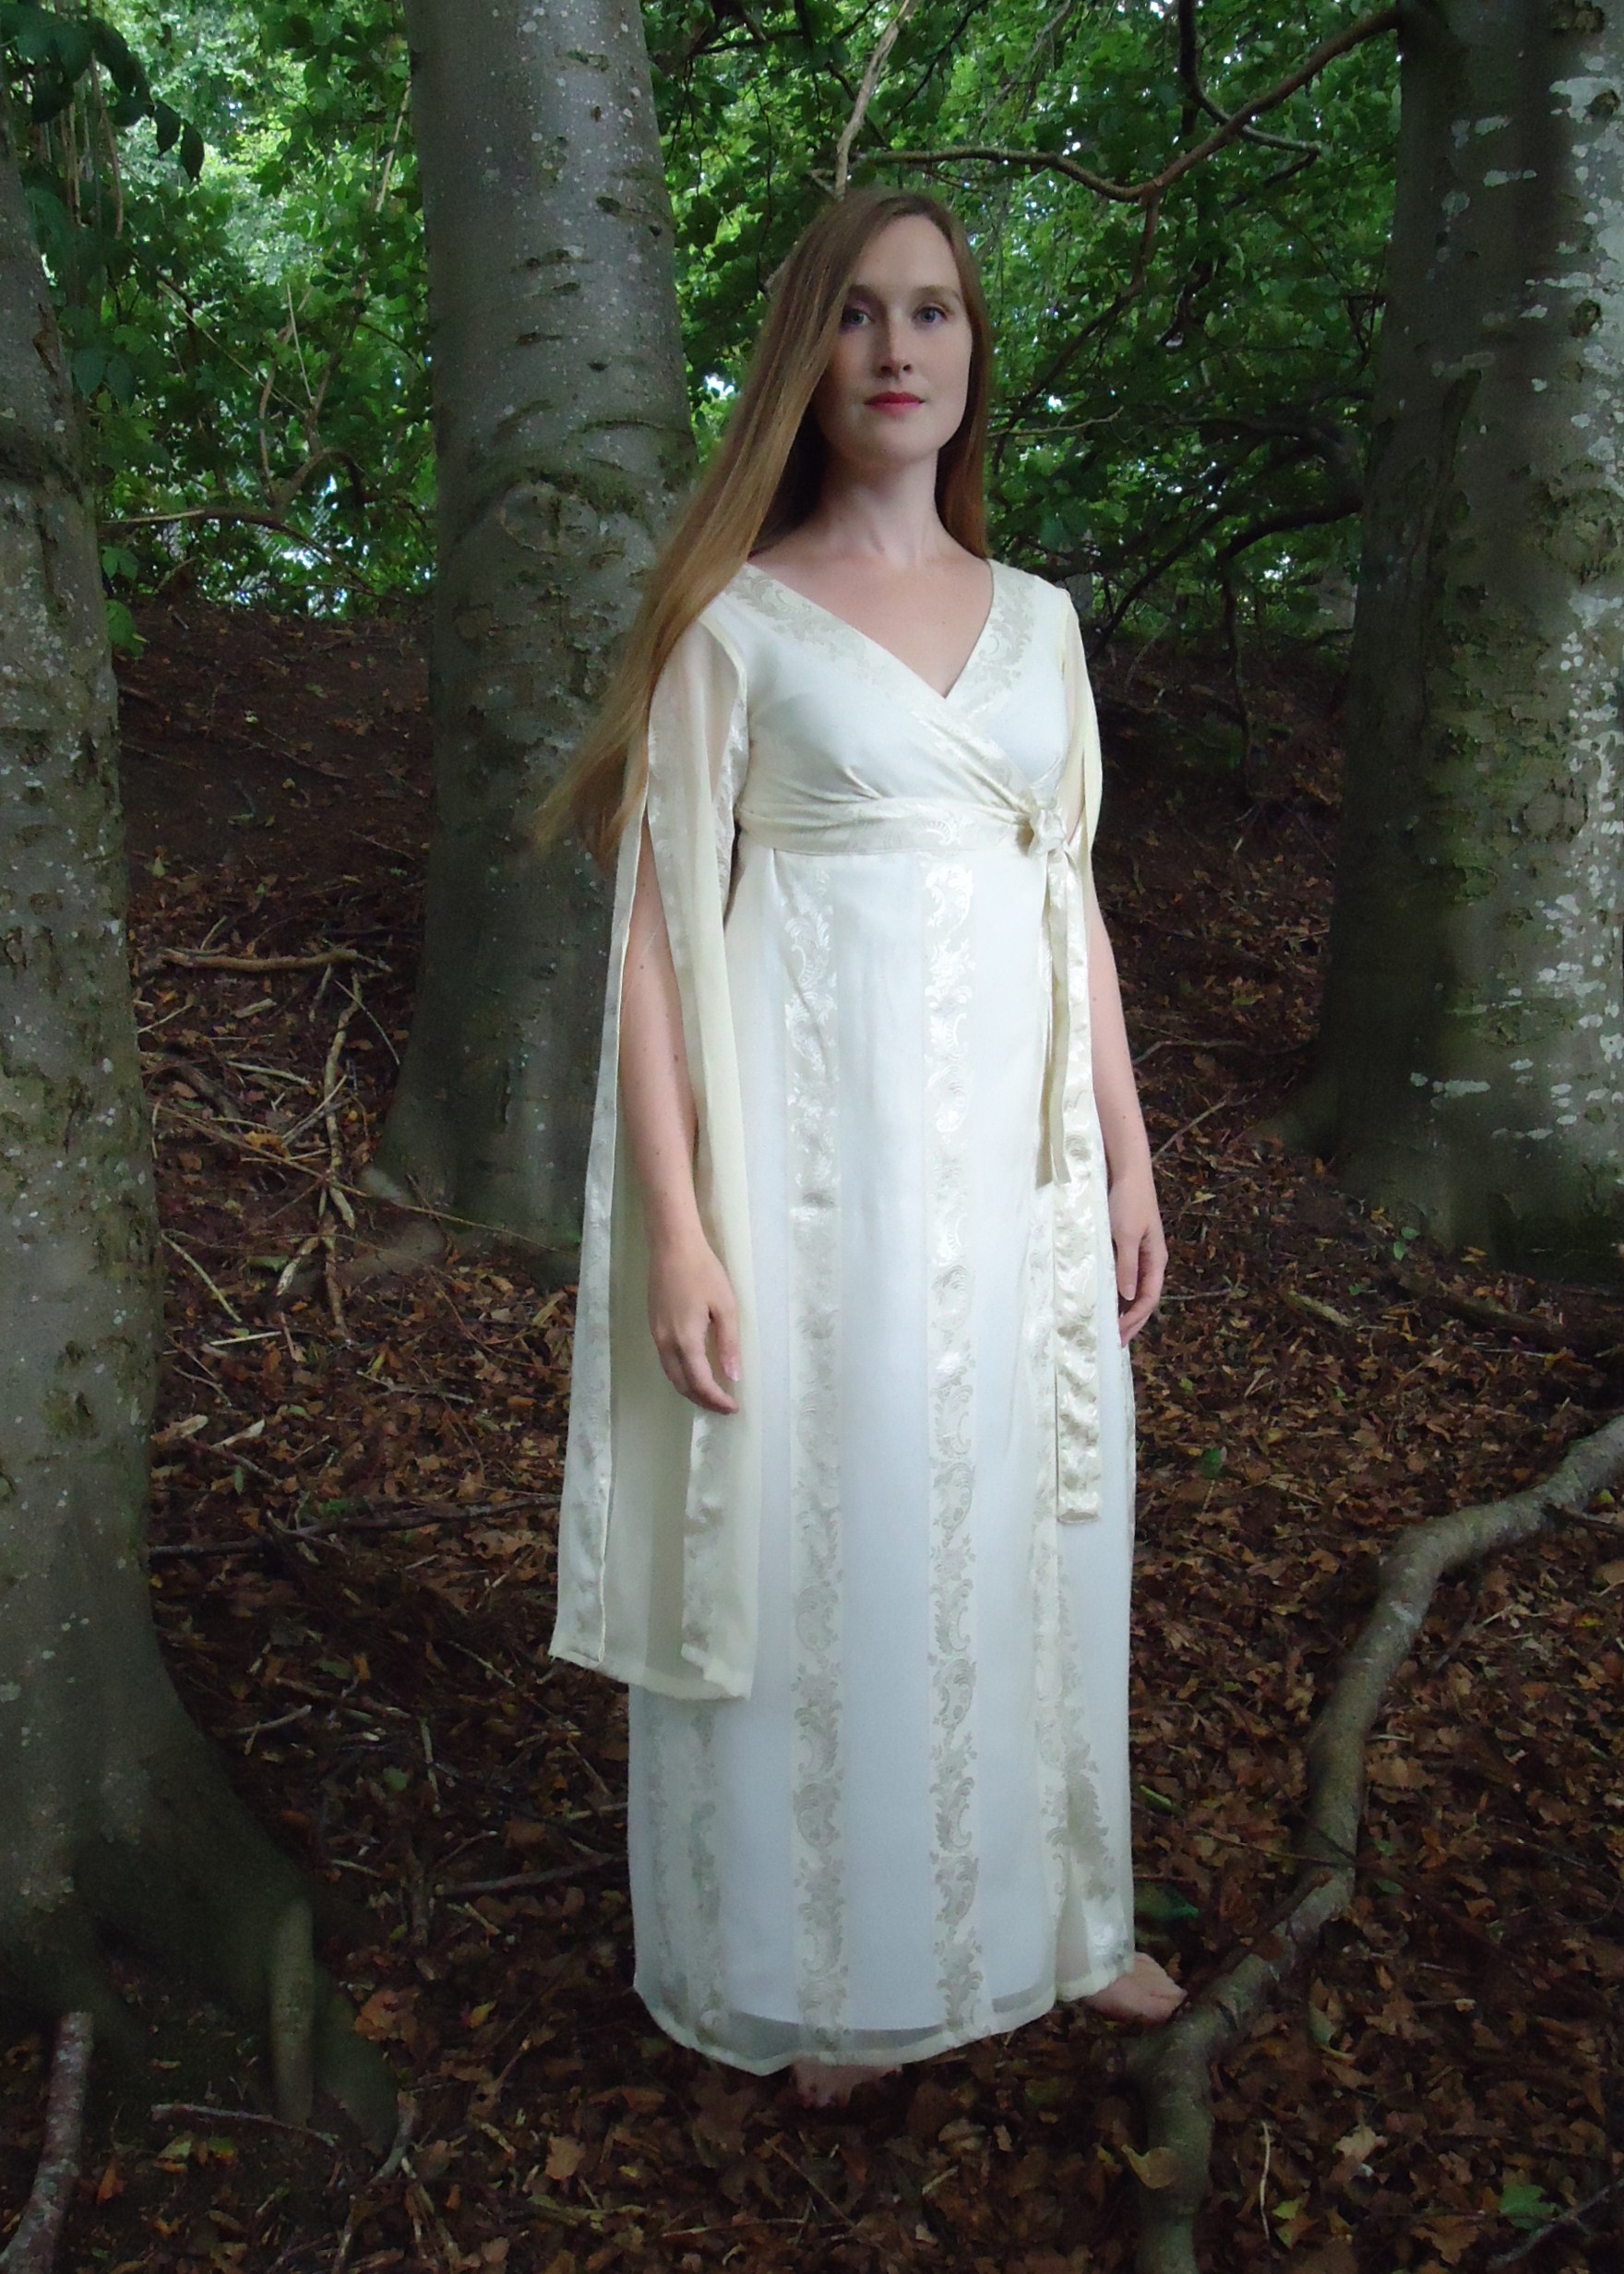
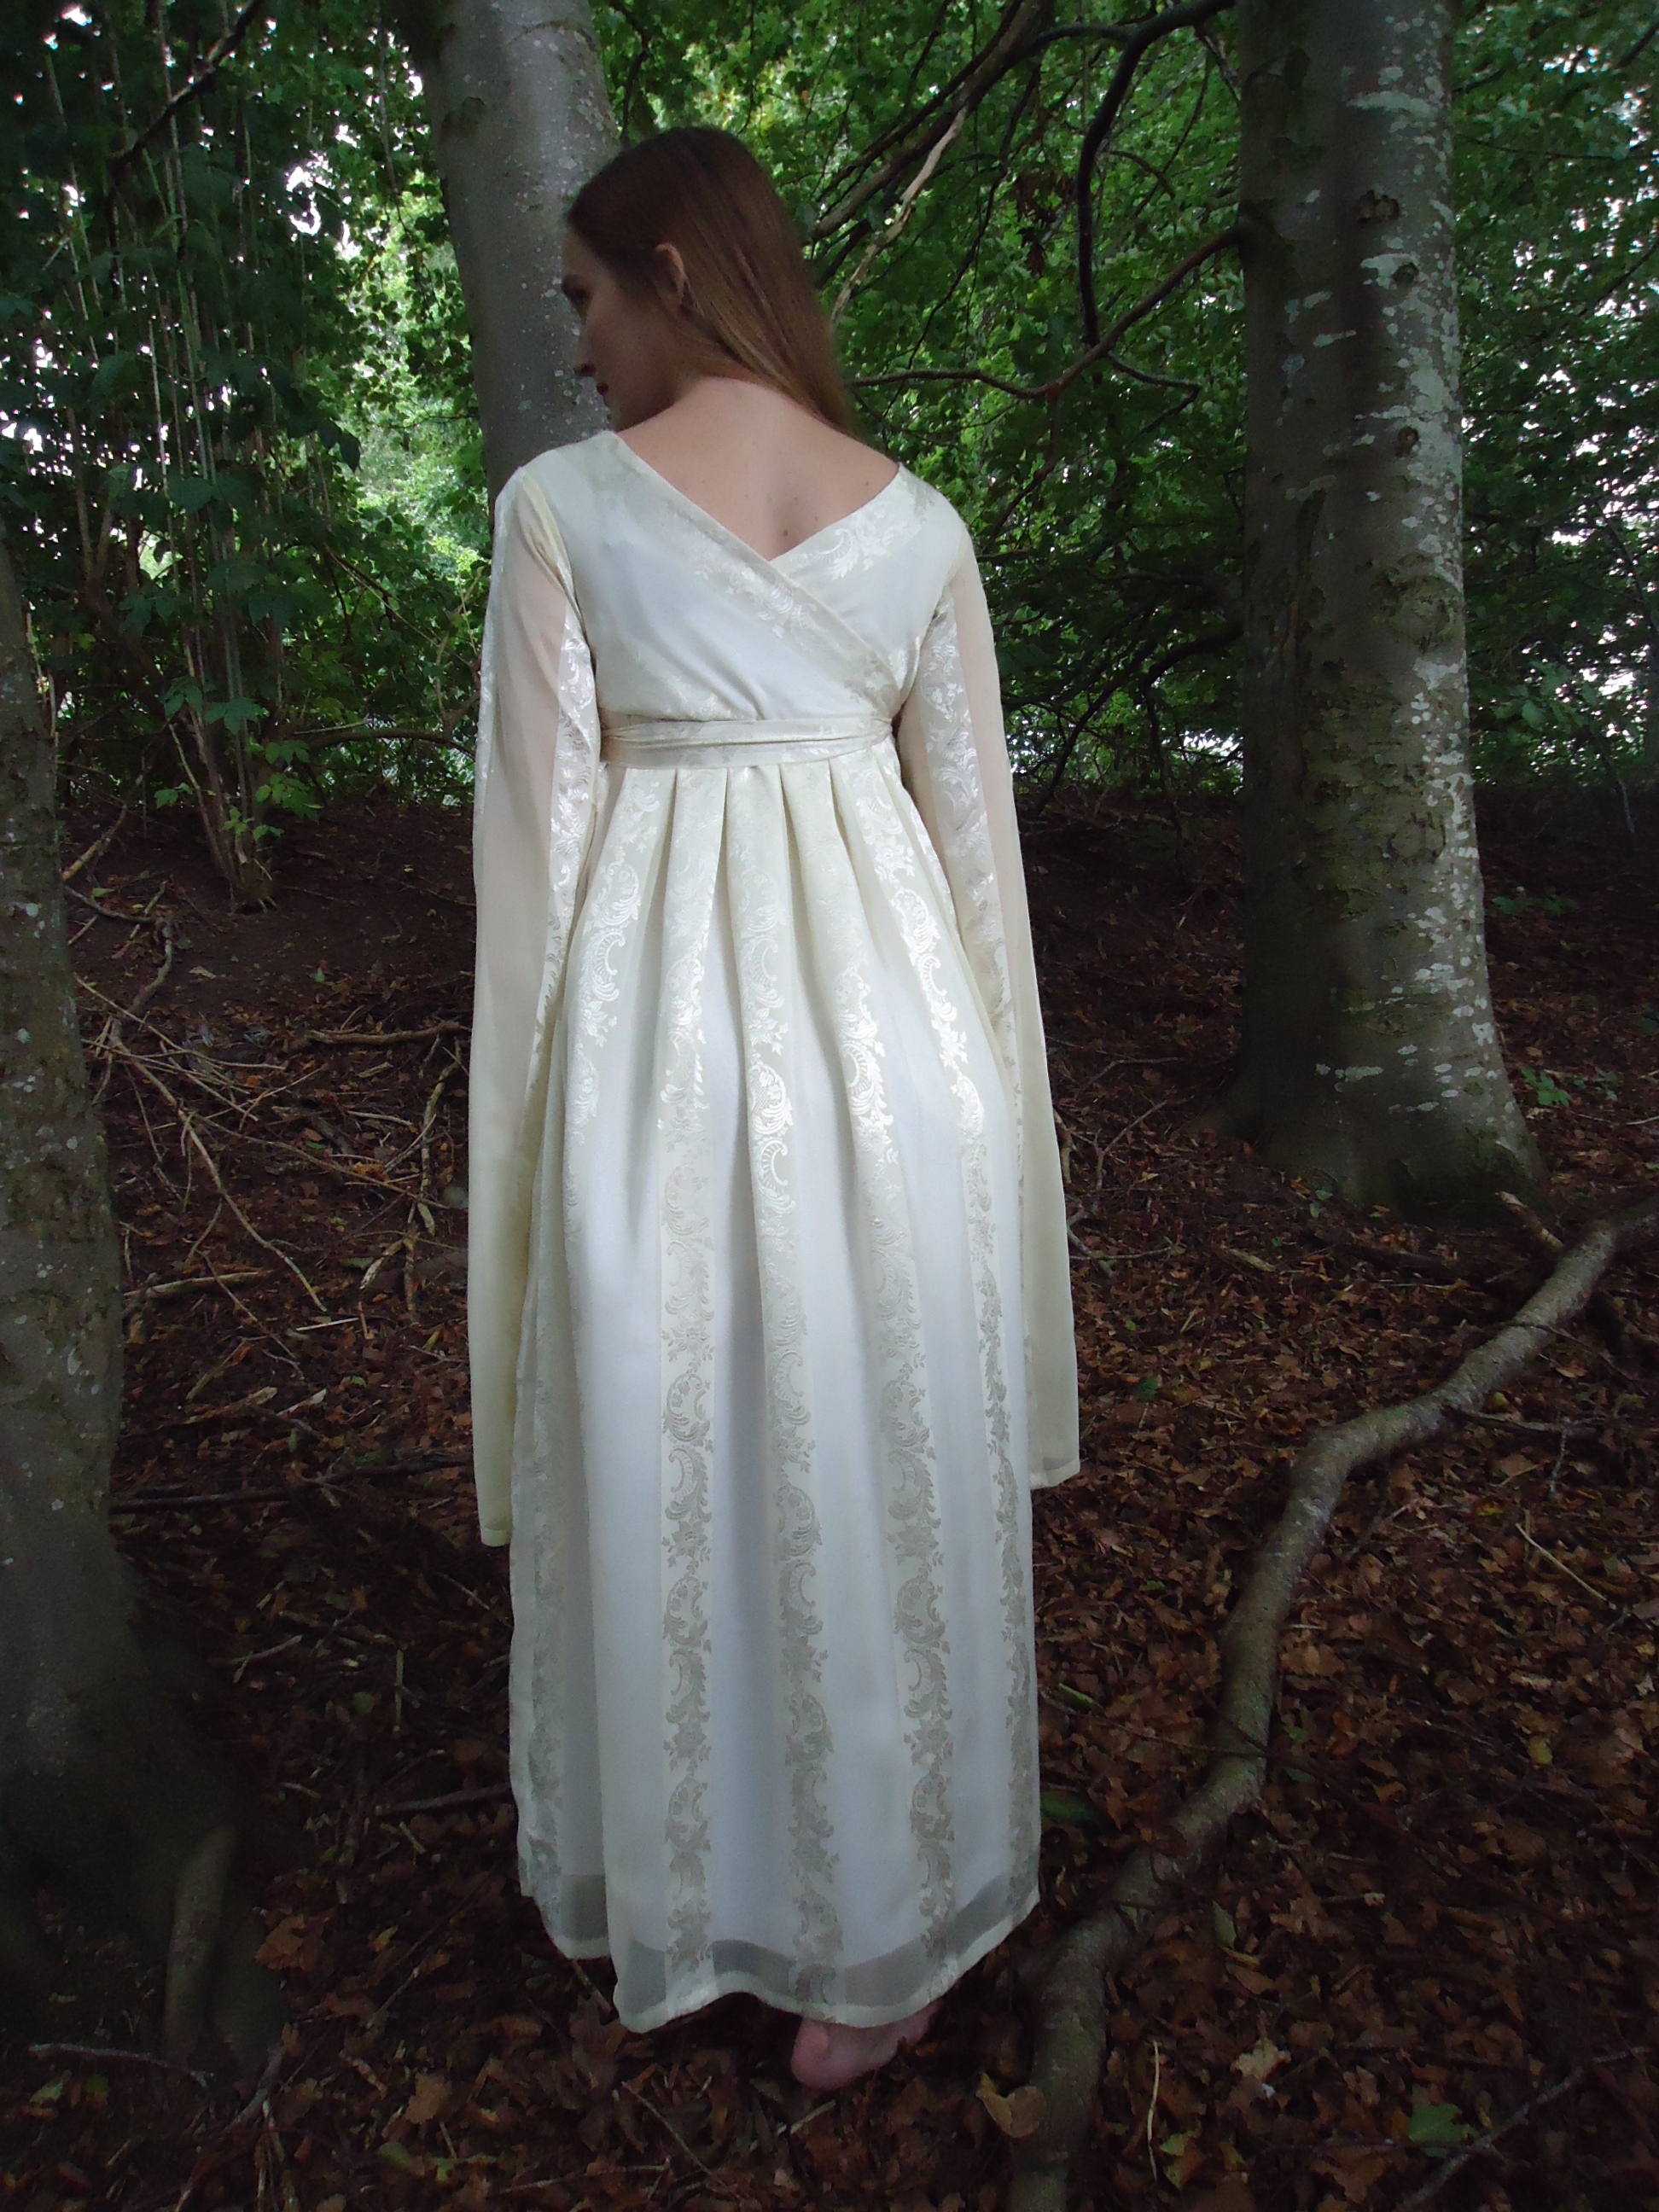
Jag veckade baktill och satte “brokad-linjerna” ytterst.
I pleated the back and placed the ”brocade lines” on the outside.
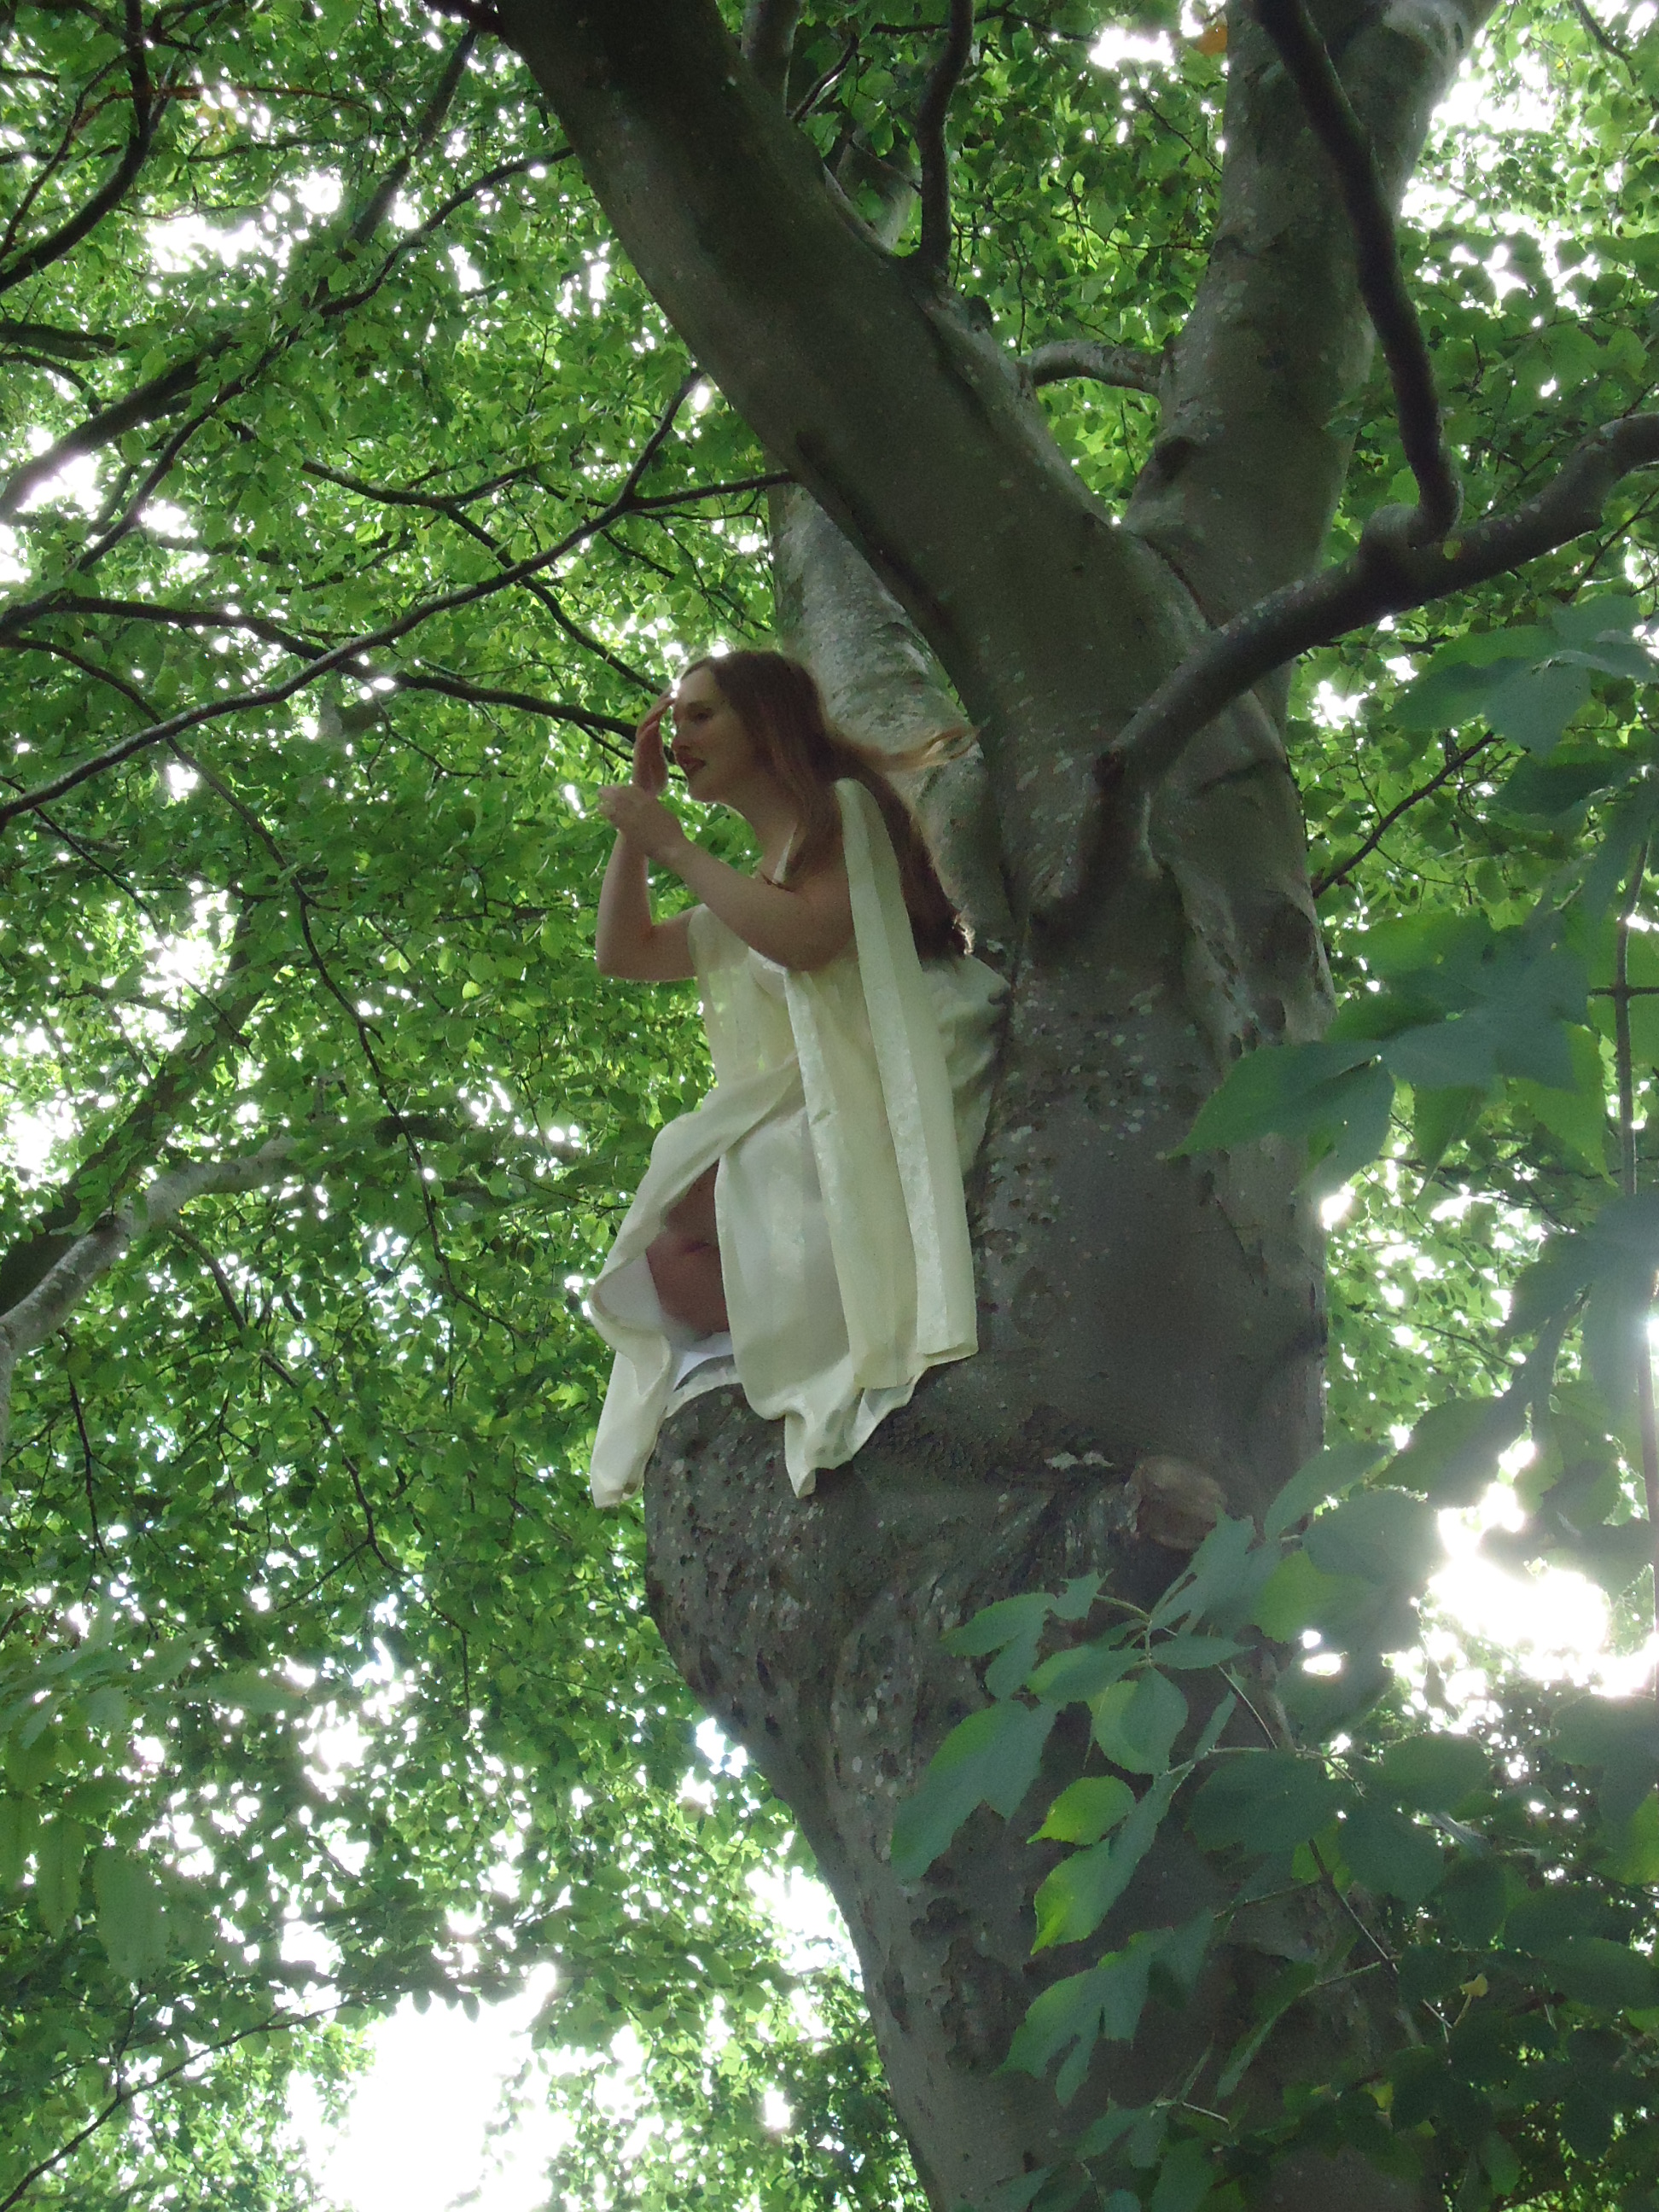
Ärmarna är långa, men behöver inte nödvändigtvis vara opraktiska, eftersom de bara hänger utefter sidorna. Om det skulle vara risk för att fastna i saker, kan ärmarna knytas bakom ryggen.
The sleeves are long, but not unpractical, because they just hang down along the sides. If there is any risk of getting stuck, the arms can actually be tied behind the back.
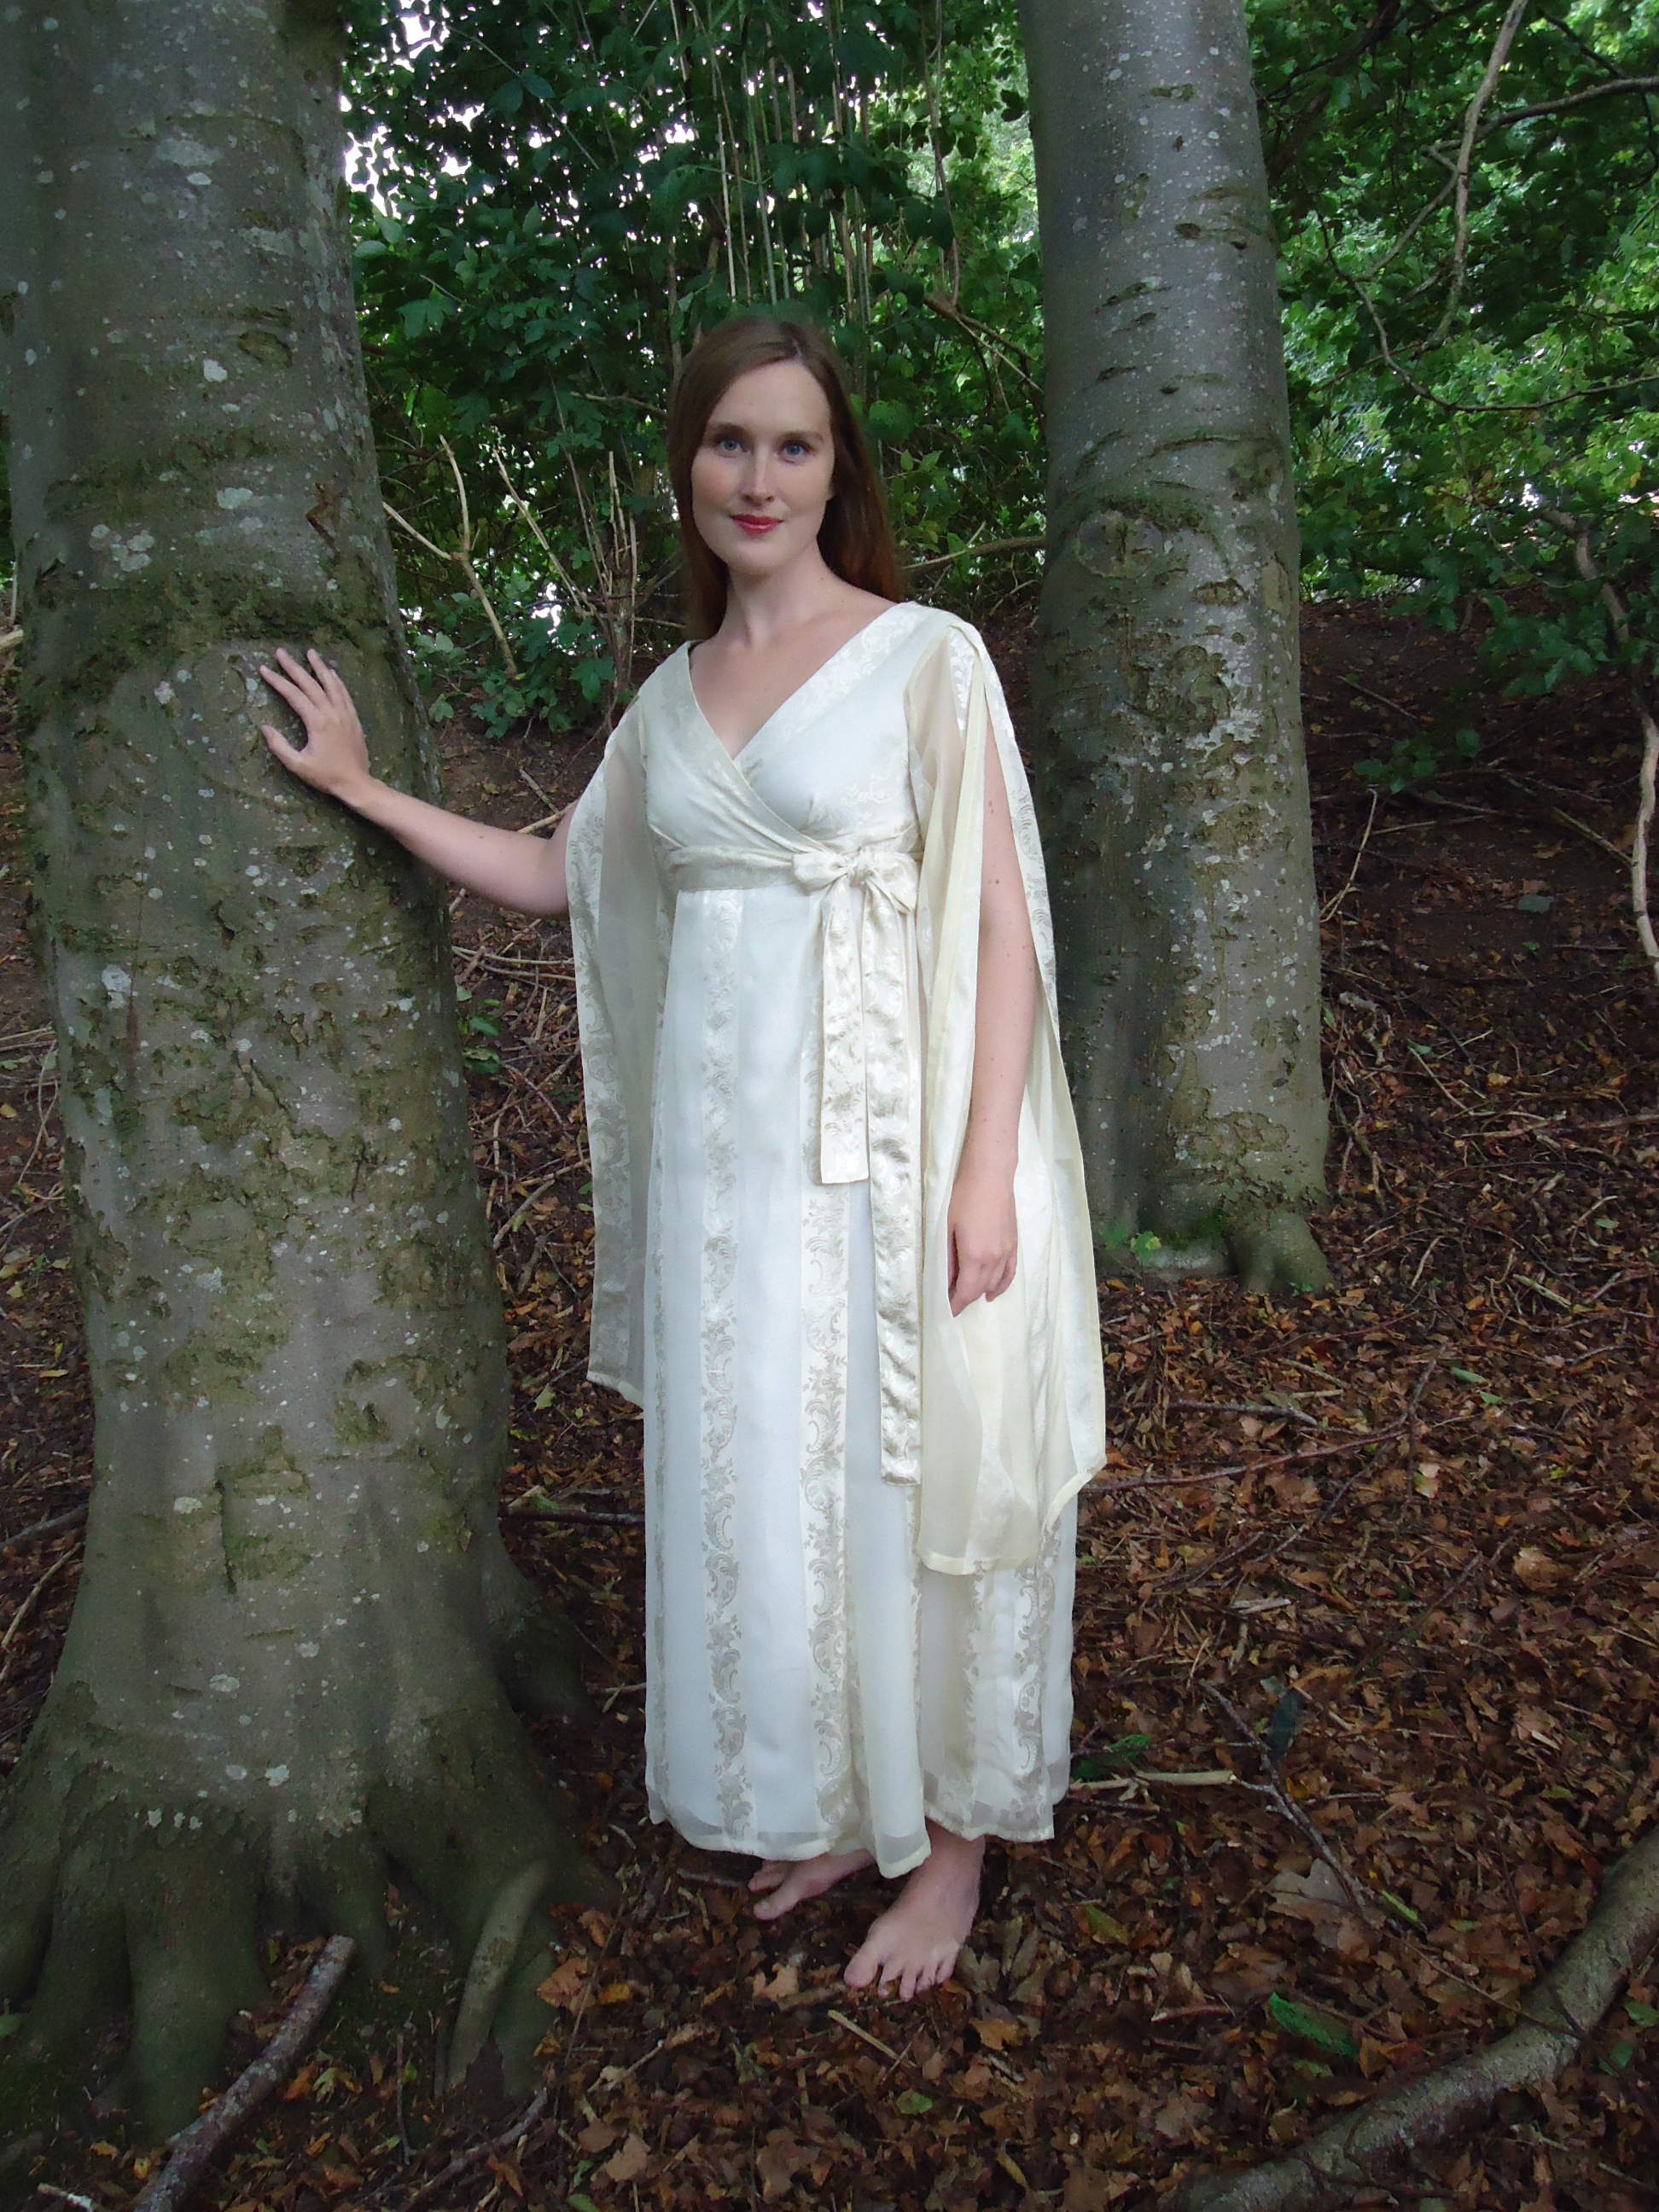
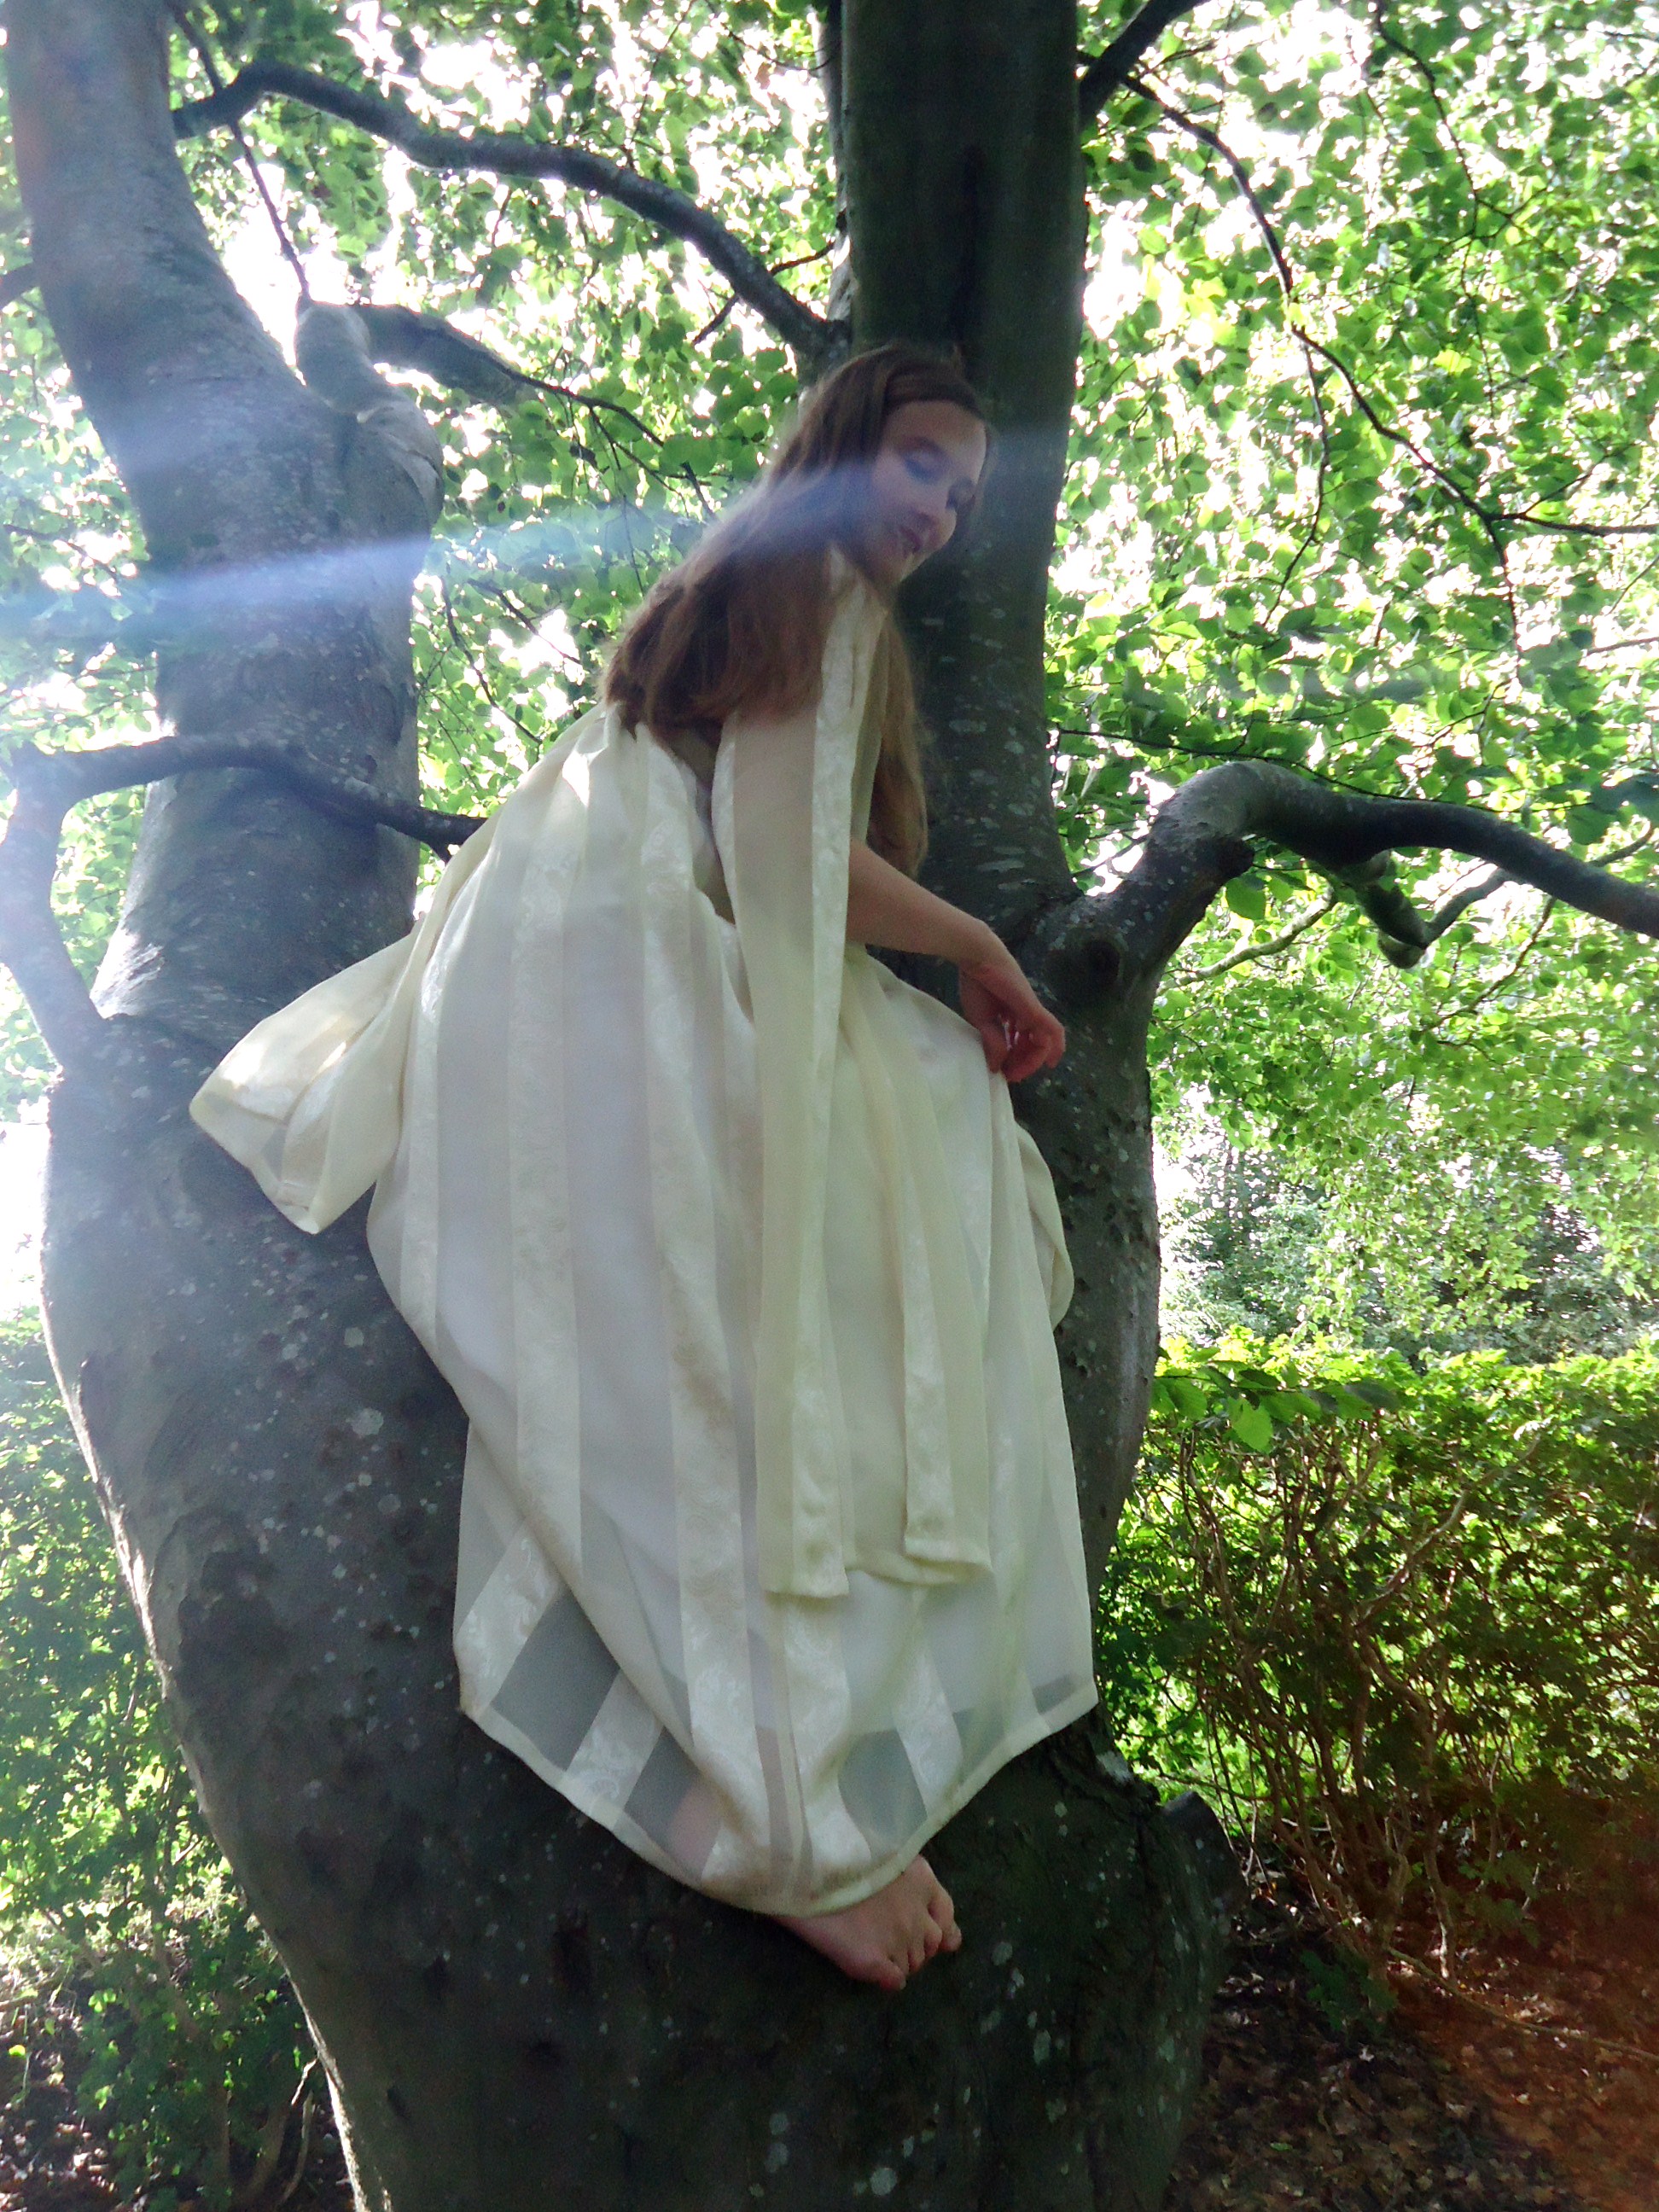
För att bevisa hur praktisk denna morgonrock är, klättrade jag för er skull upp i ett träd!
In order to prove for you how practical this dressing gown is, I climbed up this tree.
Nej, det var förstås för min egen skull som jag tog mig dit. Jag älskar att klättra i träd och skulle gärna ha levt som en trädalv, om jag hade levt i ett lite mindre krävande klimat och inte varit så besvärad av insekter.
No, off course it was for my own sake that I got up. I love climbing trees and would gladly have spent my life as a tree elf, if I had but lived in a more forgiving climate and had not been so afraid of insects.
Kom ihåg att alltid hålla blicken riktad mot skyn, så kan du kanske få se skygga väsen visa sig.
Remember to always look to the sky, then you may see lucid creatures.
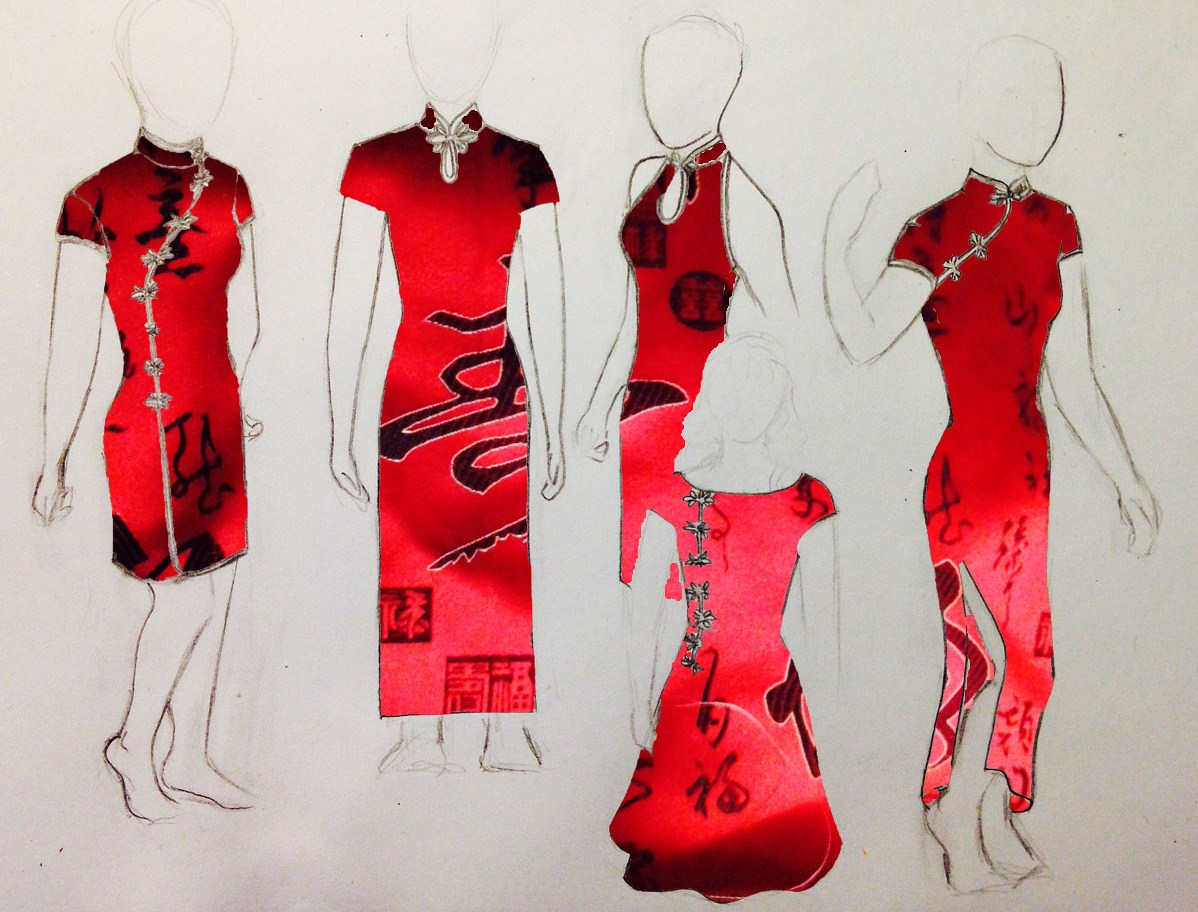
Idag är min sista dag i Sverige. I våras gav jag min syster löftet att sy en klänning av det vackra tyget, som mamma tagit med från Kina. Hon fick välja mellan modellerna på denna skiss.
Today is my last day in Sweden, for this summer. This spring I gave my sister the promise of making her a dress out of the beautiful fabric that our mother had brought home from China. She could choose from these models.
Hon valde den som är lite skymd av en annan. Jag fick hennes mått via mail och började göra en toille. När jag kom hem till Sverige kunde jag justera toillen och börja klippa i det riktiga tyget, som var 1*4 m långt.
Sedan har jag jobbat och haft en massa andra projekt, så jag planerade att åtminstone bli klar innan sommarens slut. Nu i veckan hade vi provning. Jag har sytt som en tok och igår blev klänningen klar!
She chose the model that is a little hidden behind another. I had her measurements by email and stared making a pattern. When I got home to Sweden, I just had to ajust the pattern and start cutting the real fabric, which was 1 x 4 metres.
Then I had worked and had a lot of other projects, so I planned to at least be ready by the end of the summer. This week we tested it. I have sewn like crazy since and yesterday it was ready!
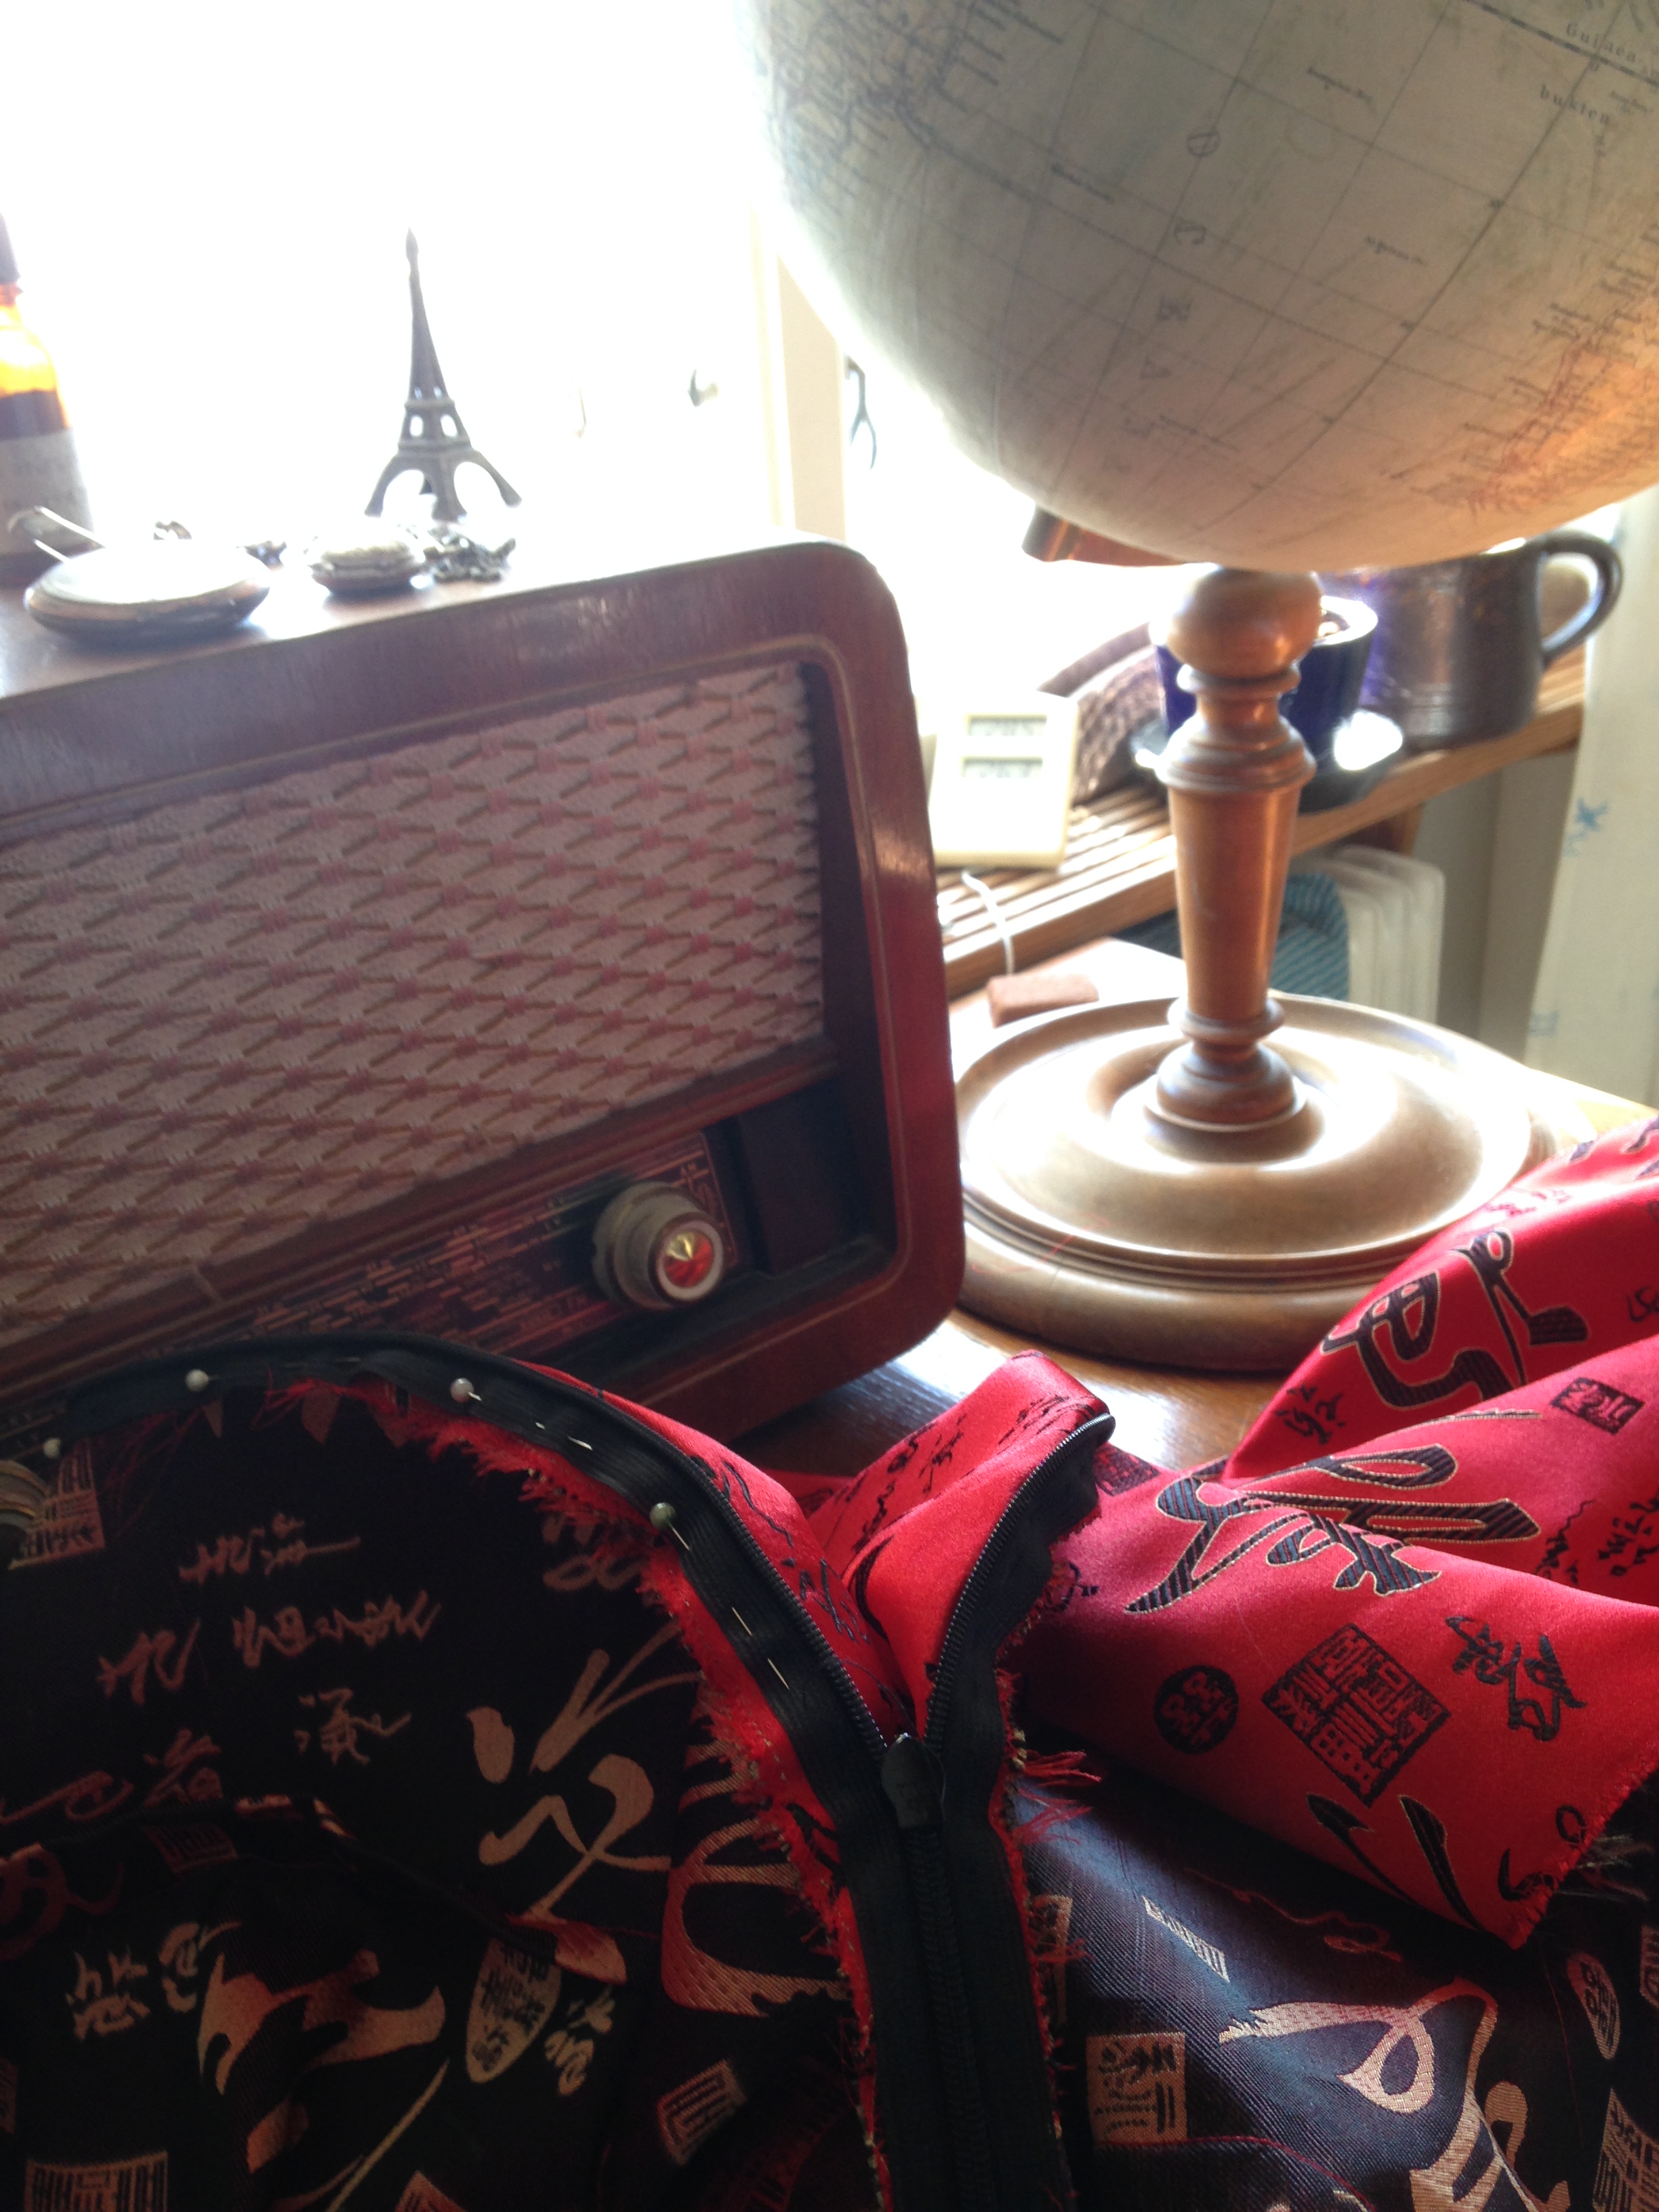
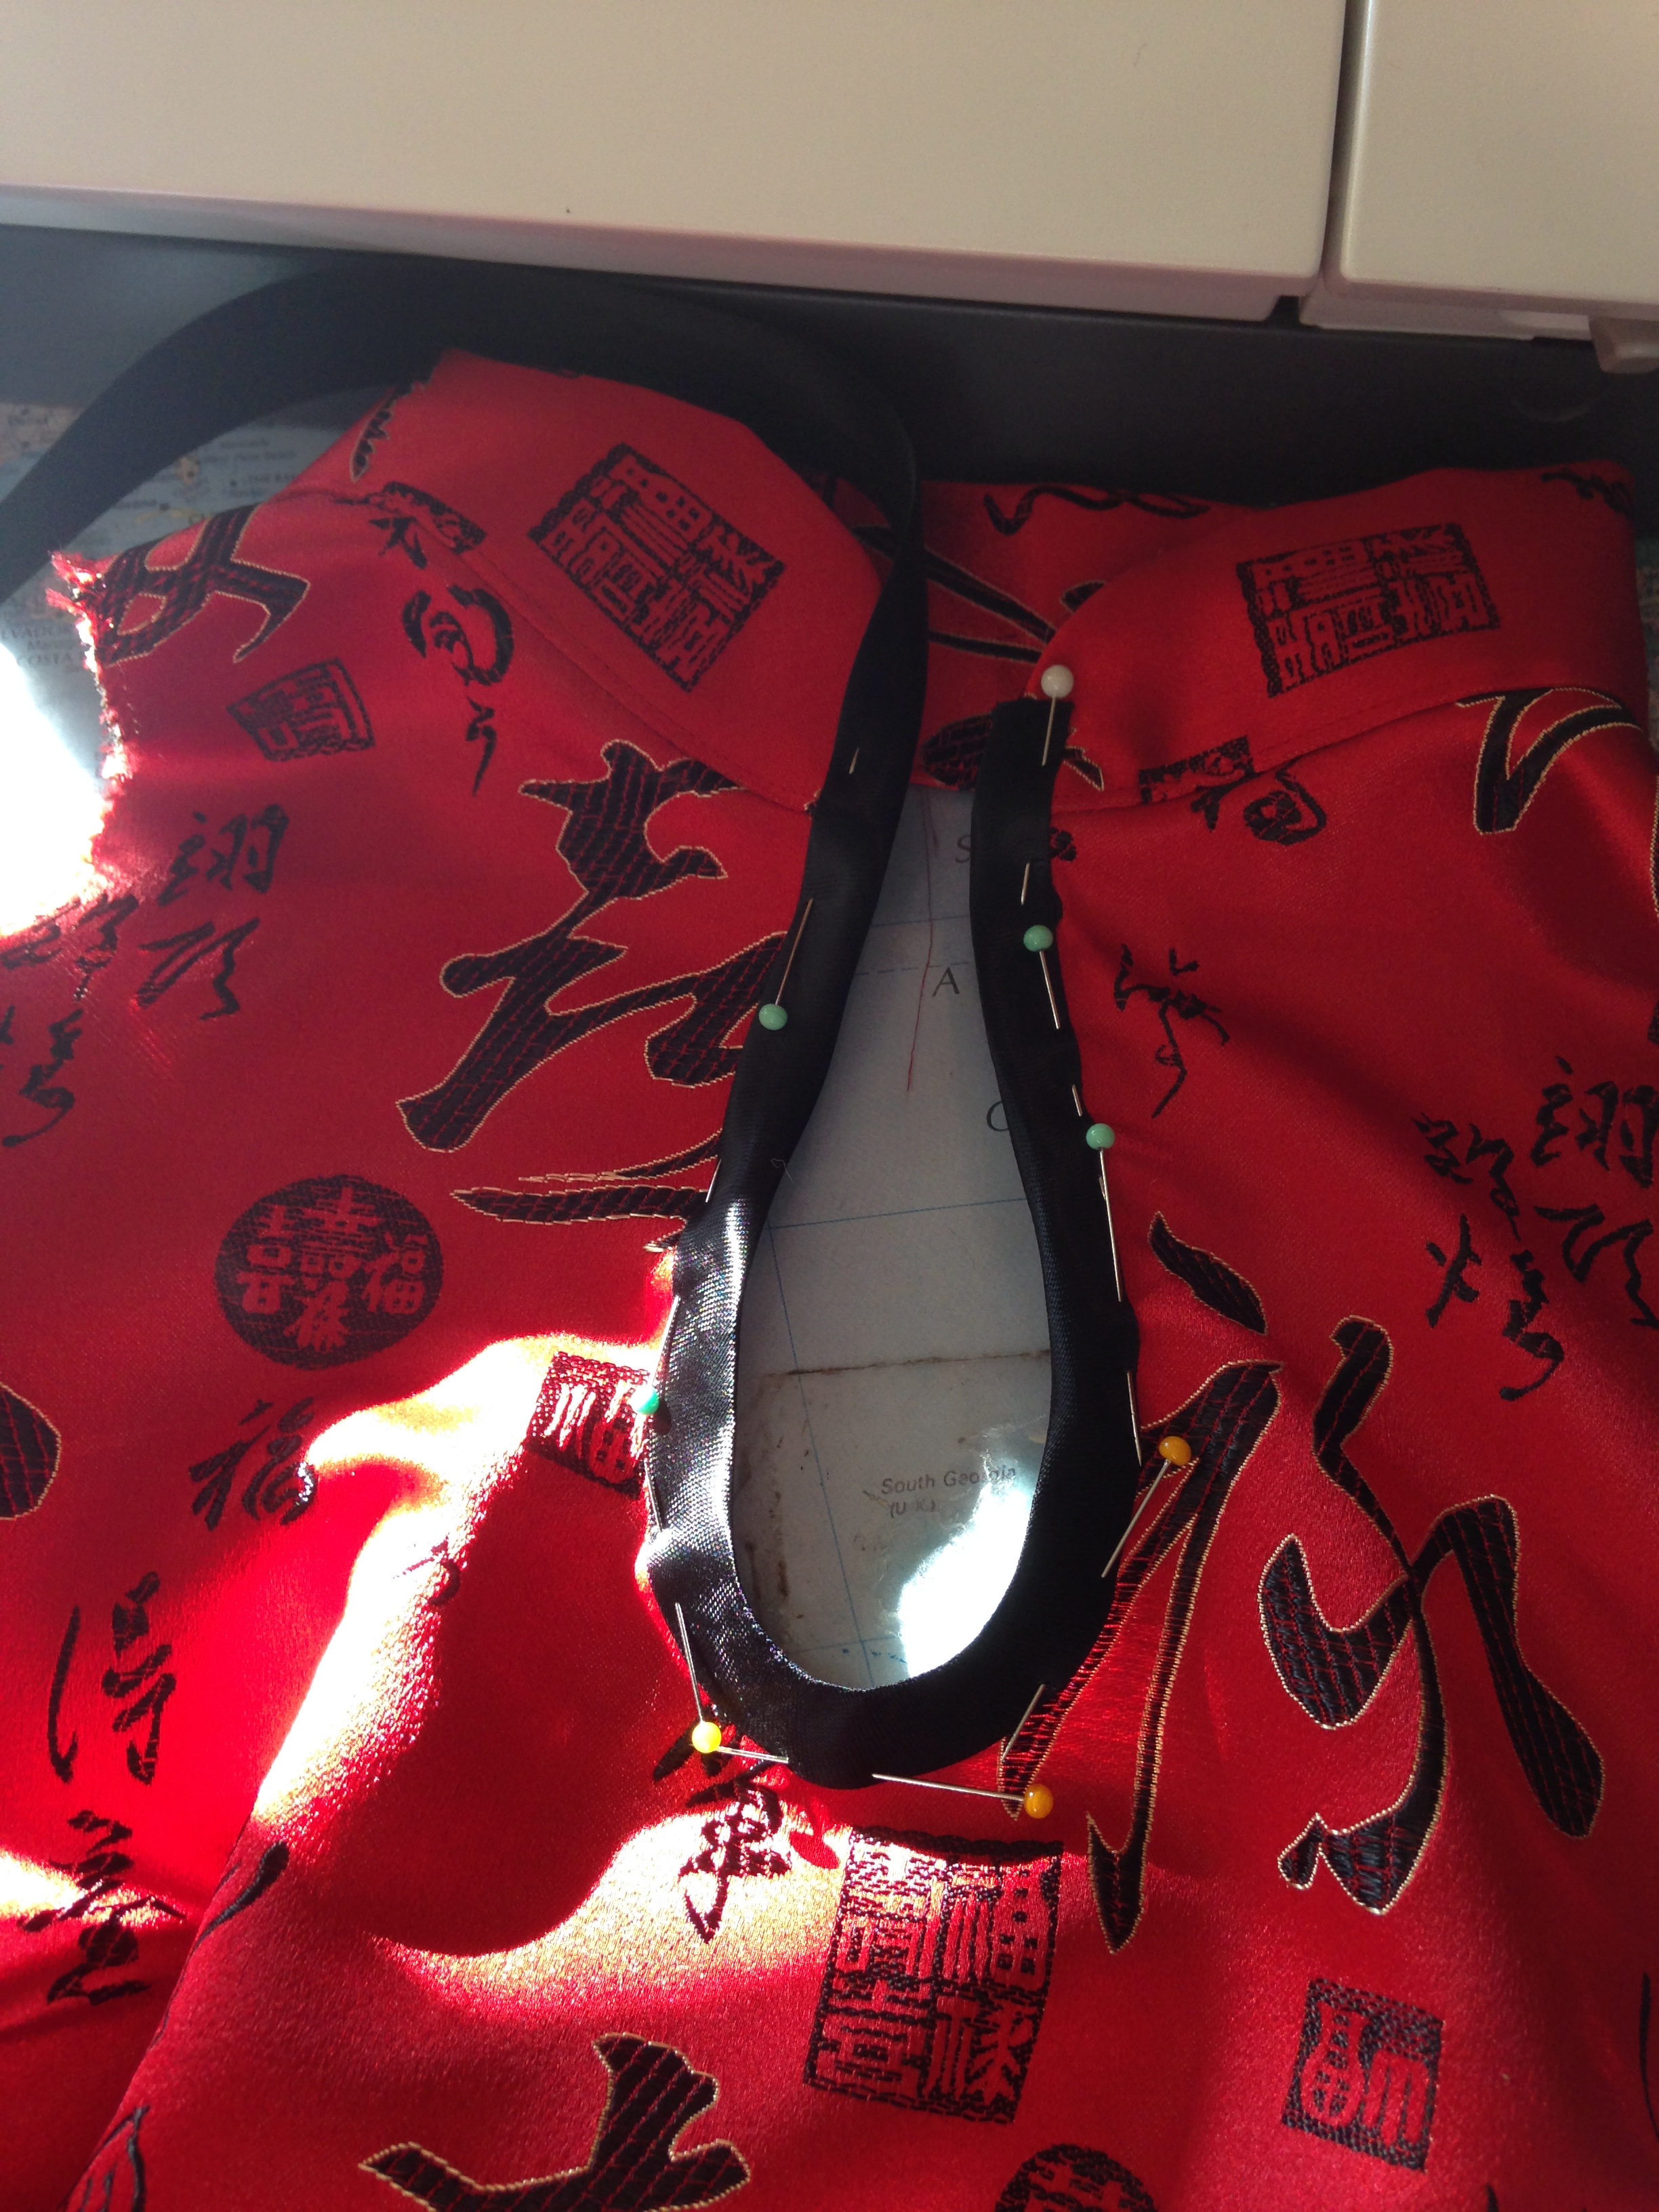
Min ovanligt trevliga syateljé, denna vecka. För instruktion om hur man syr i dragkedja, se inlägget om min rutiga klänning. // My unusually nice sewing studio, for this week. For instructions on how to put in a hidden zipper, se the post on “My checked dress”.Klänningen färdigsydd, men utan kantbanden. // The dress is ready, but still without its lining tape.Kantband i urringningen // Lining tape in the neckline
Eftersom ni ser i tidigare inlägg hur klänningar med liknande modeller, tar form på en provdocka, visar jag bara det som är unikt för denna klänning: de “kinesiska tygknapparna”:
Because you see similar models taking form on the mannequin in my earlier blog posts, I will only show you what is unique about this dress: the “Chinese buttons”.
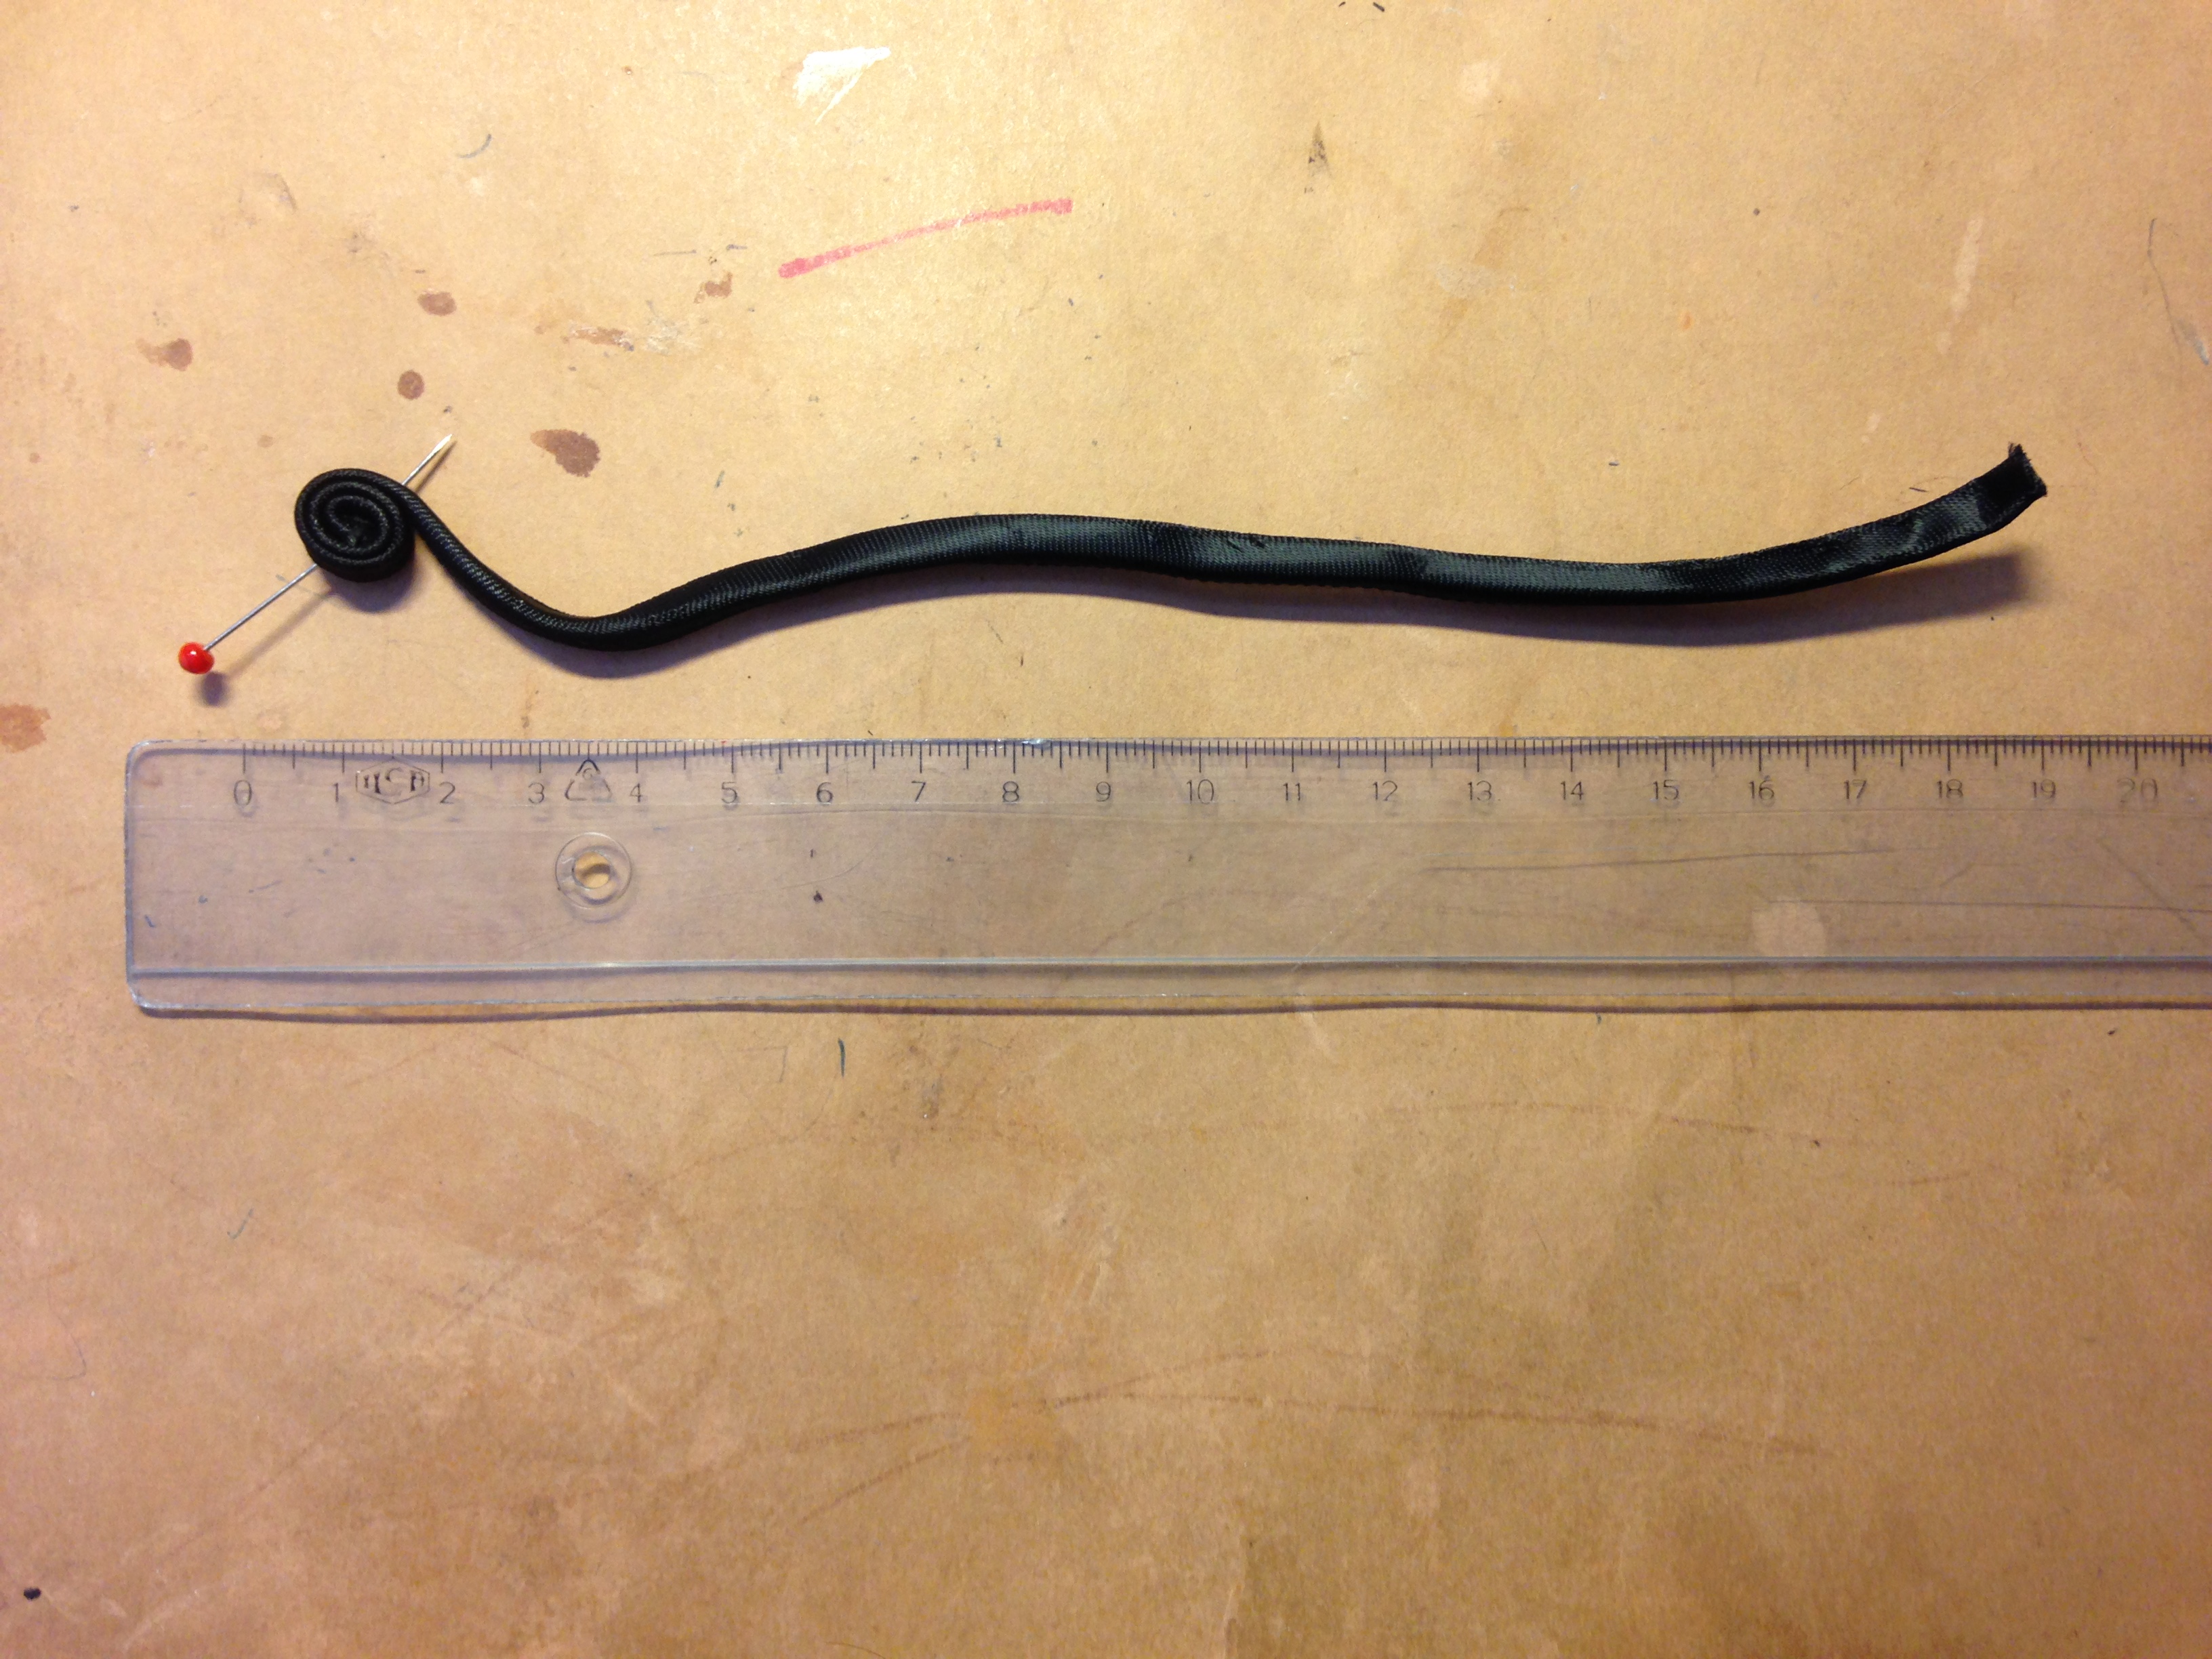
Jag använde kantbandet, men vek och sydde ihop det på längden. Sedan vek jag det ytterligare en gång och började forma knappen av ca 24 cm långt band. // I used the tape, but folded it and stitched it on the long side. Then I folded it again and started to form the button from a 24 cm long ribbon.Jag rullade båda ändar och nålade ihop. // I rolled both ends and fastened wit needles.Sedan sydde jag // Then I sew.Och slutligen fäste jag knapparna i kragen. // I finished by adding the buttons to the collar.
Jag blev jättenöjd med klänningen och det var en fröjd att överräcka den. Hon är ju vacker som en dag och en av döttrarna utbrast: “Du är så vacker att jag måste krama dig!”. Dessutom fick vi några fina kort i deras coola verkstad och trädgård.
I was so satisfied with the dress and it felt so good to give it to my sister. She is beautiful. One of her daughters exclaimed: “You are so beautiful, I just have to hug you!”. We had some nice photos in their rustic work shop (?) and in their garden.
Förutom klänningen, visar jag här lite annat som jag sysselsatt mig med under sommaren:
Except for the dress, I show you some of the other things that have kept me busy during the summer.
Konserter
Den 7 juli hade jag konsert med Olle Långström, i Vimmerby kyrka och den 1 augusti hade vi vår årliga konsert på Kröngården – jag, Hanna Karlsson, Malin Karlsson, Kalle Sellbrink med vänner. Jättekul!
The 7th of July I had a concert together with Olle Långström, in the Church of Vimmerby. The 1st of August, we had our annual concert at Kröngården – Hanna Karlsson, Malin Karlsson, Kalle Sellbring and his friends, and myself of course. We had great fun!
Små sömnadsprojekt
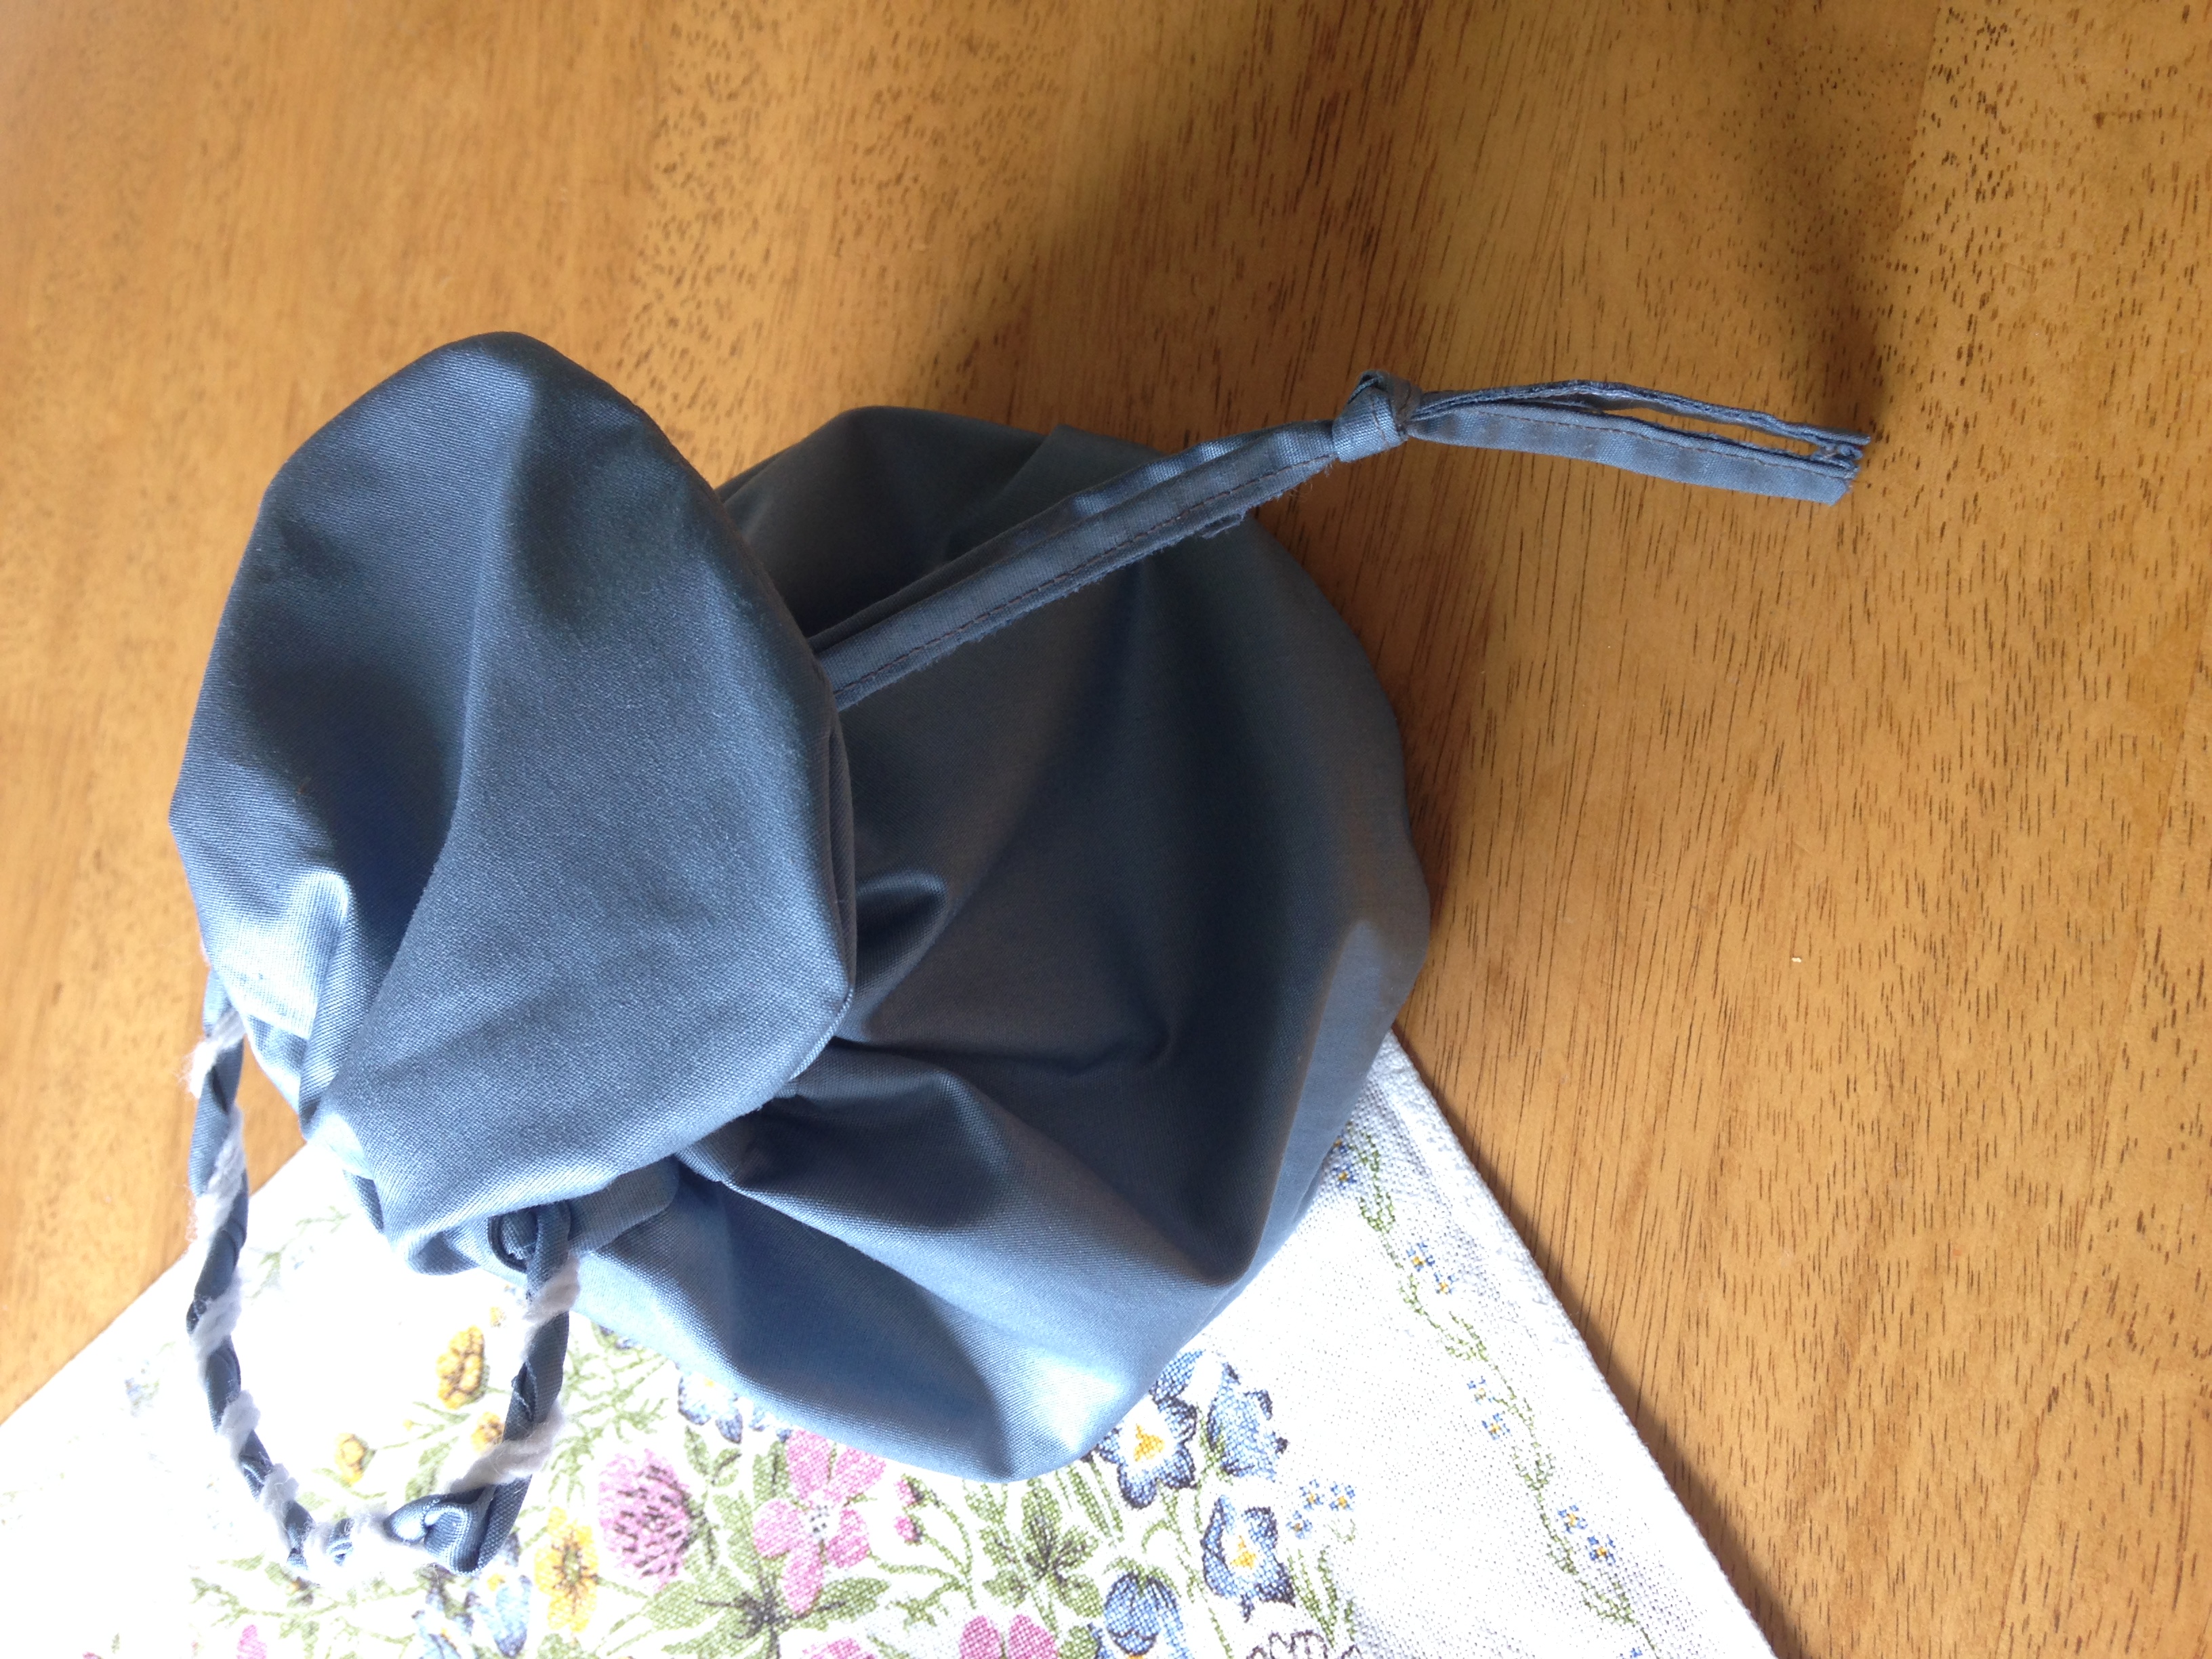
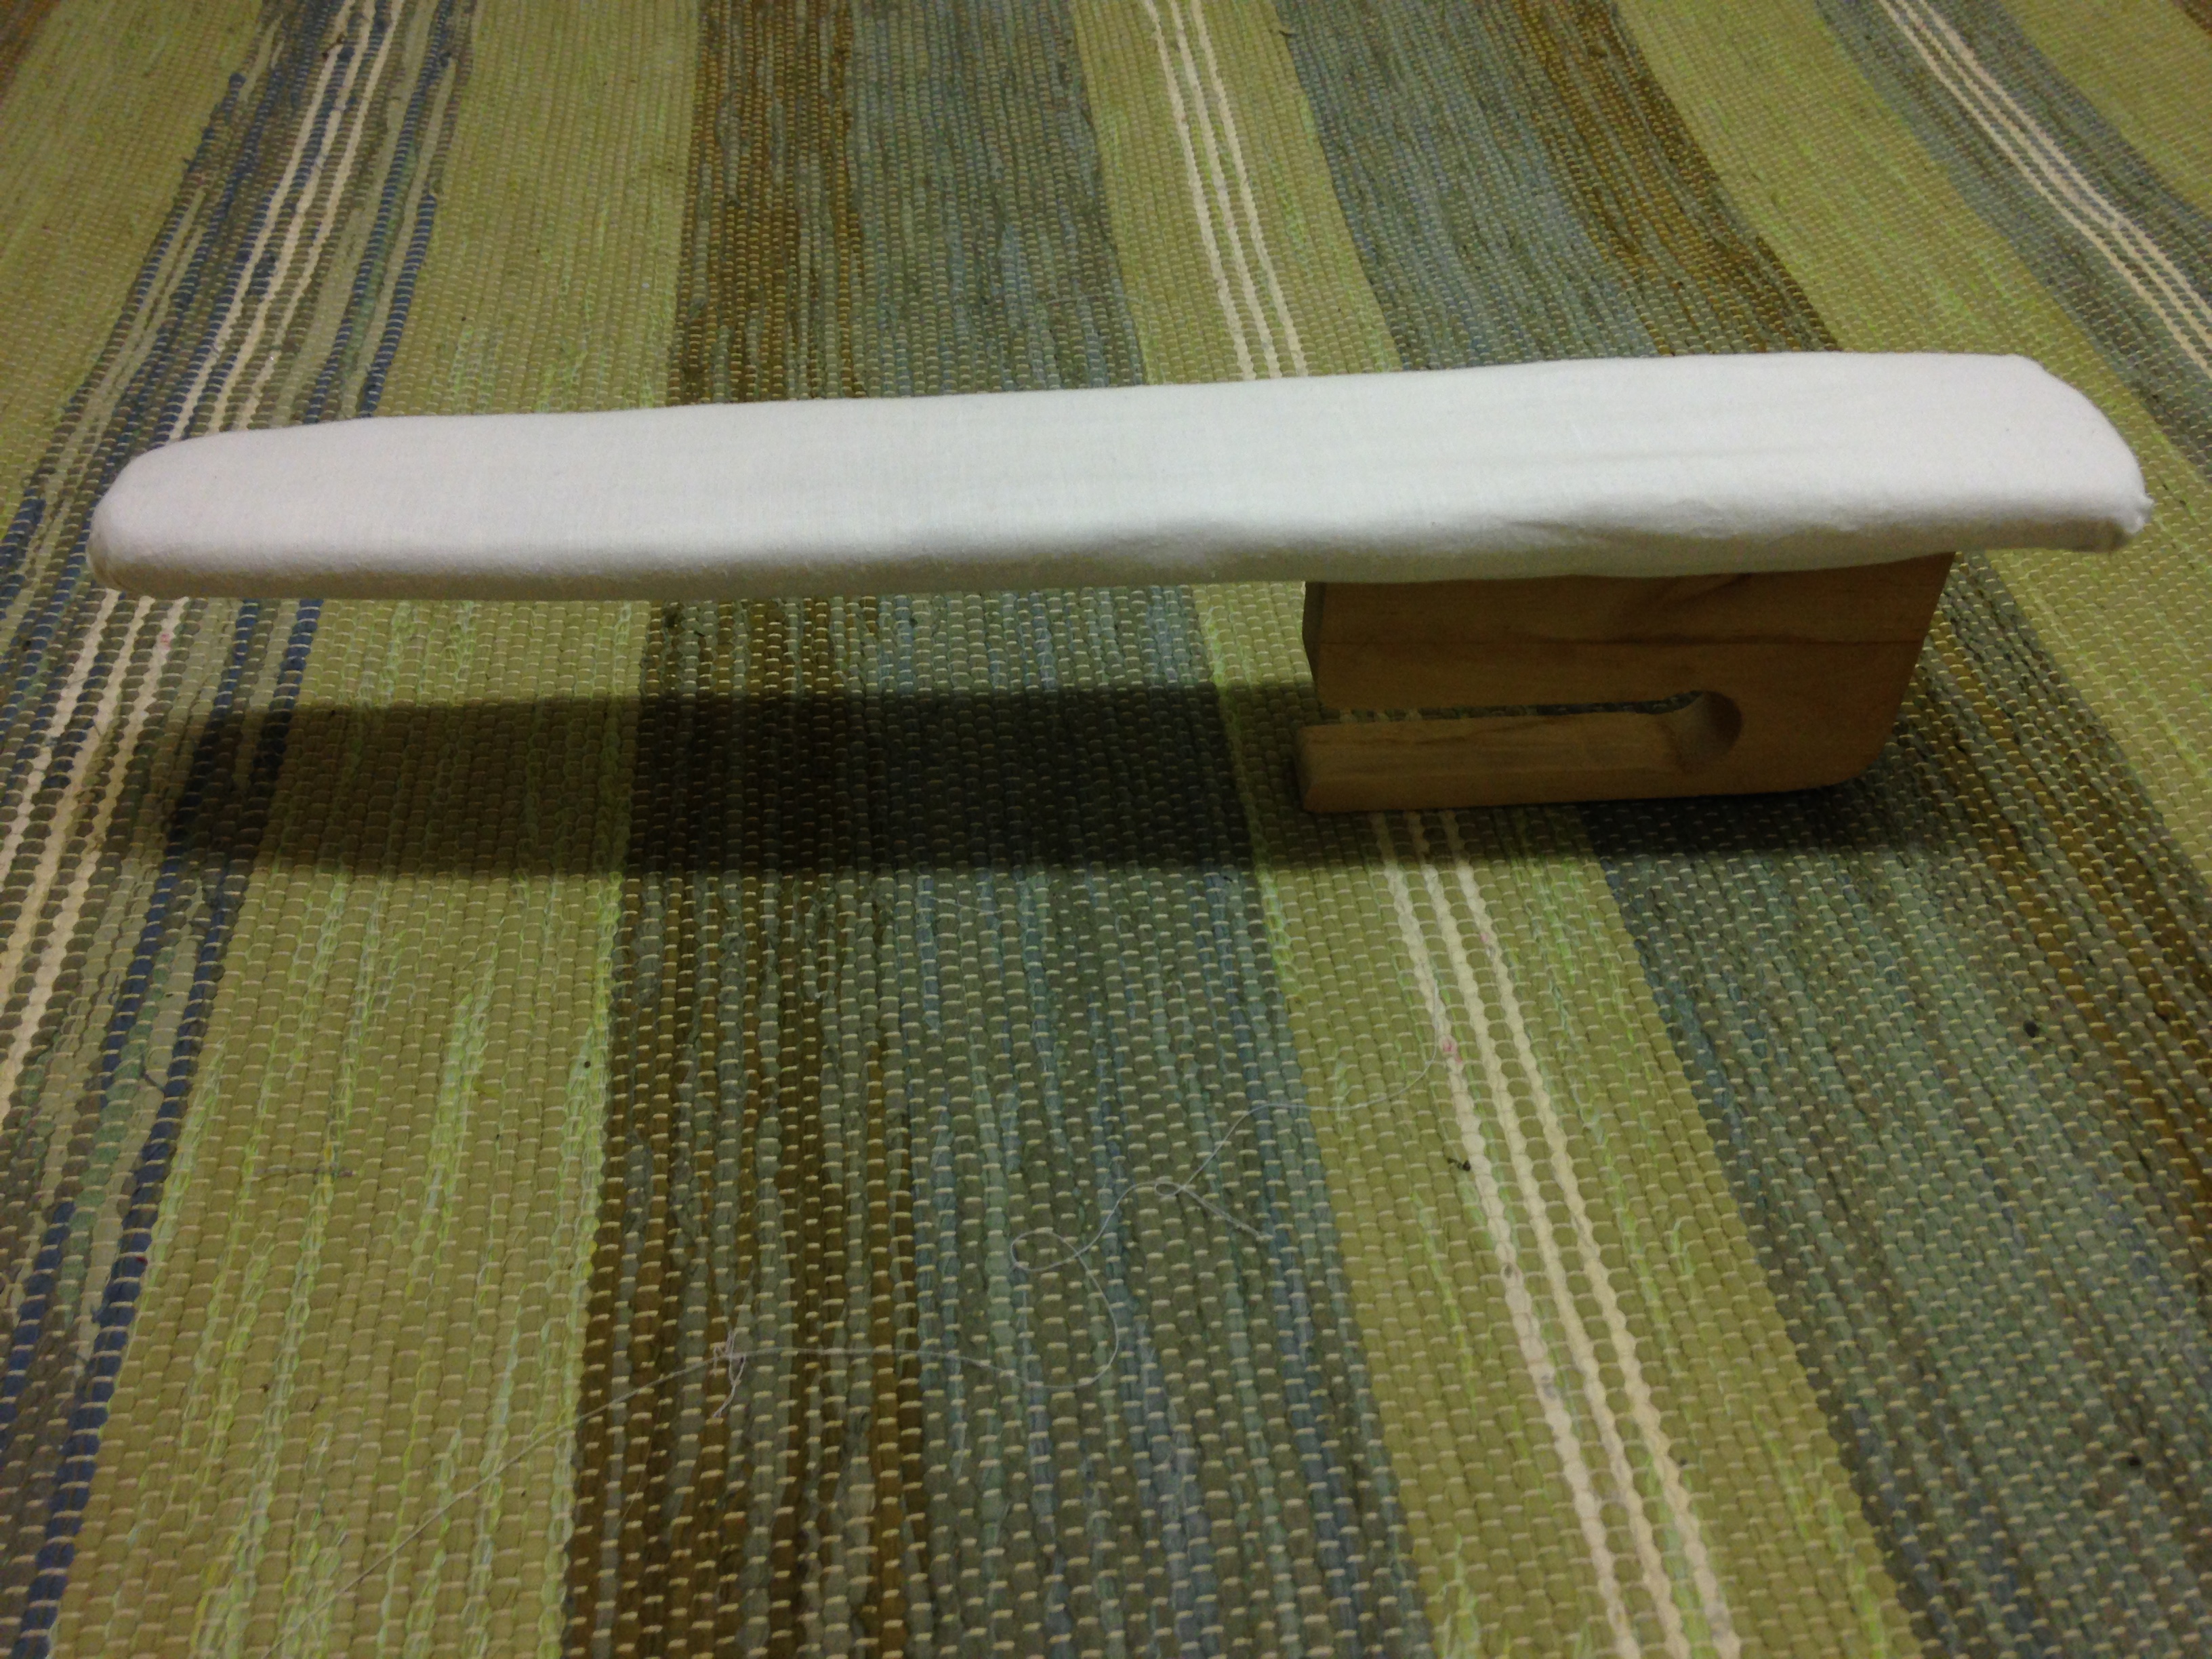
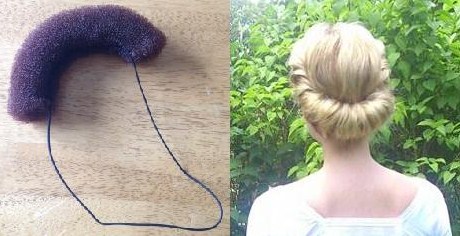
Liten väska till att matcha den edwardianska kjolen från försommaren. // Reticule-wanna-be, sewn in a haste to accompany my Edwardian skirt from last summer.Jag klädde om en ärmstrykbräda, som jag fått av mormor. . // I put new fabric on a ironing board for sleeves, which I got from my grandmother.Till edwardiansk håruppsättning – klipp itu en hår-donut, sy fast ett elastiskt snöre. Trä över huvudet och vik om håret runt, et voilá! // For an Edwardian hair – cut a ”hair doughnut”, fasten an elastic ribbon to it. Put over your head and twist your hair around it, et voilá!
Reparera lampskärm
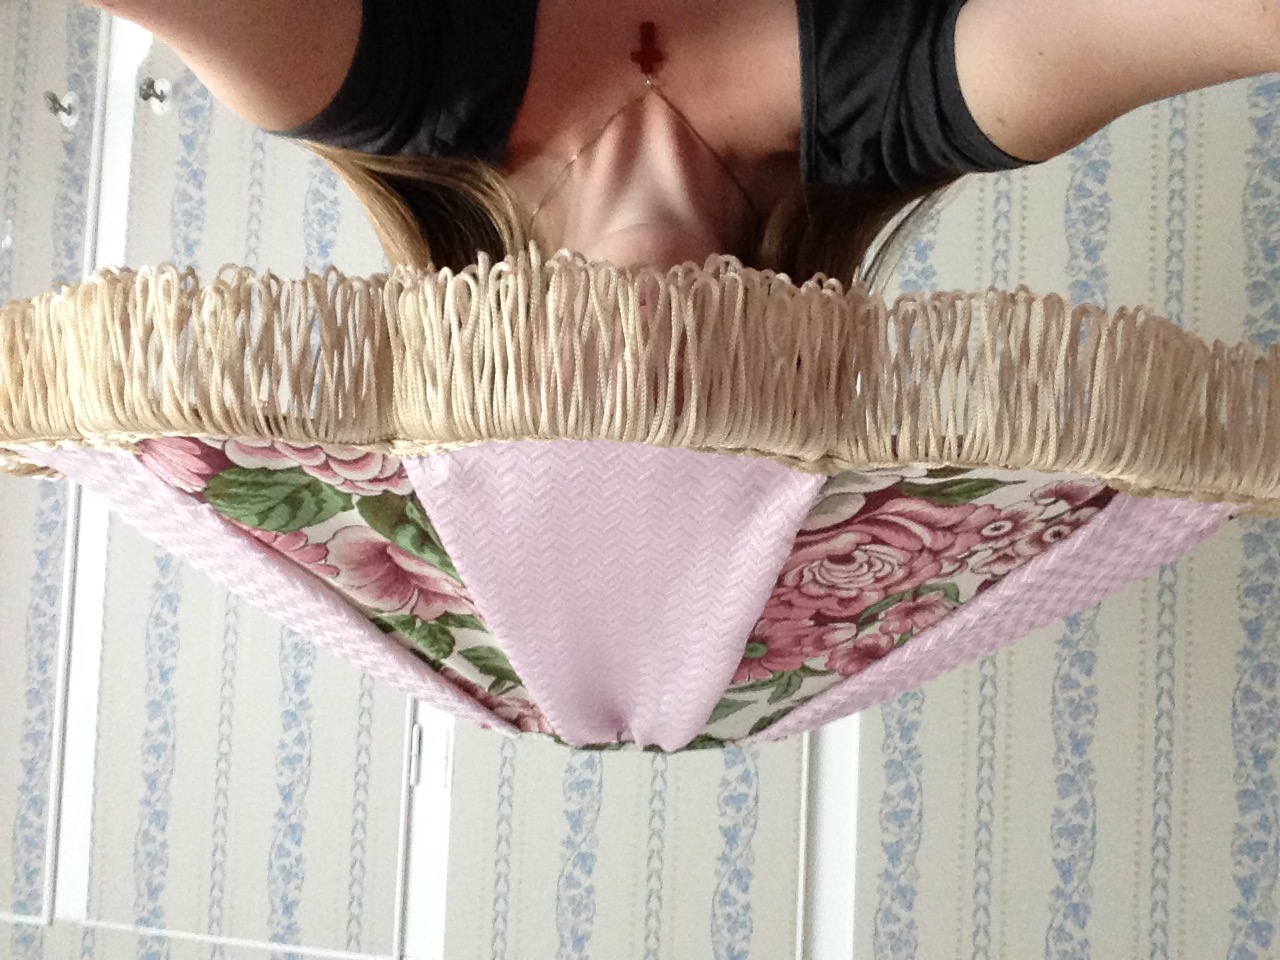
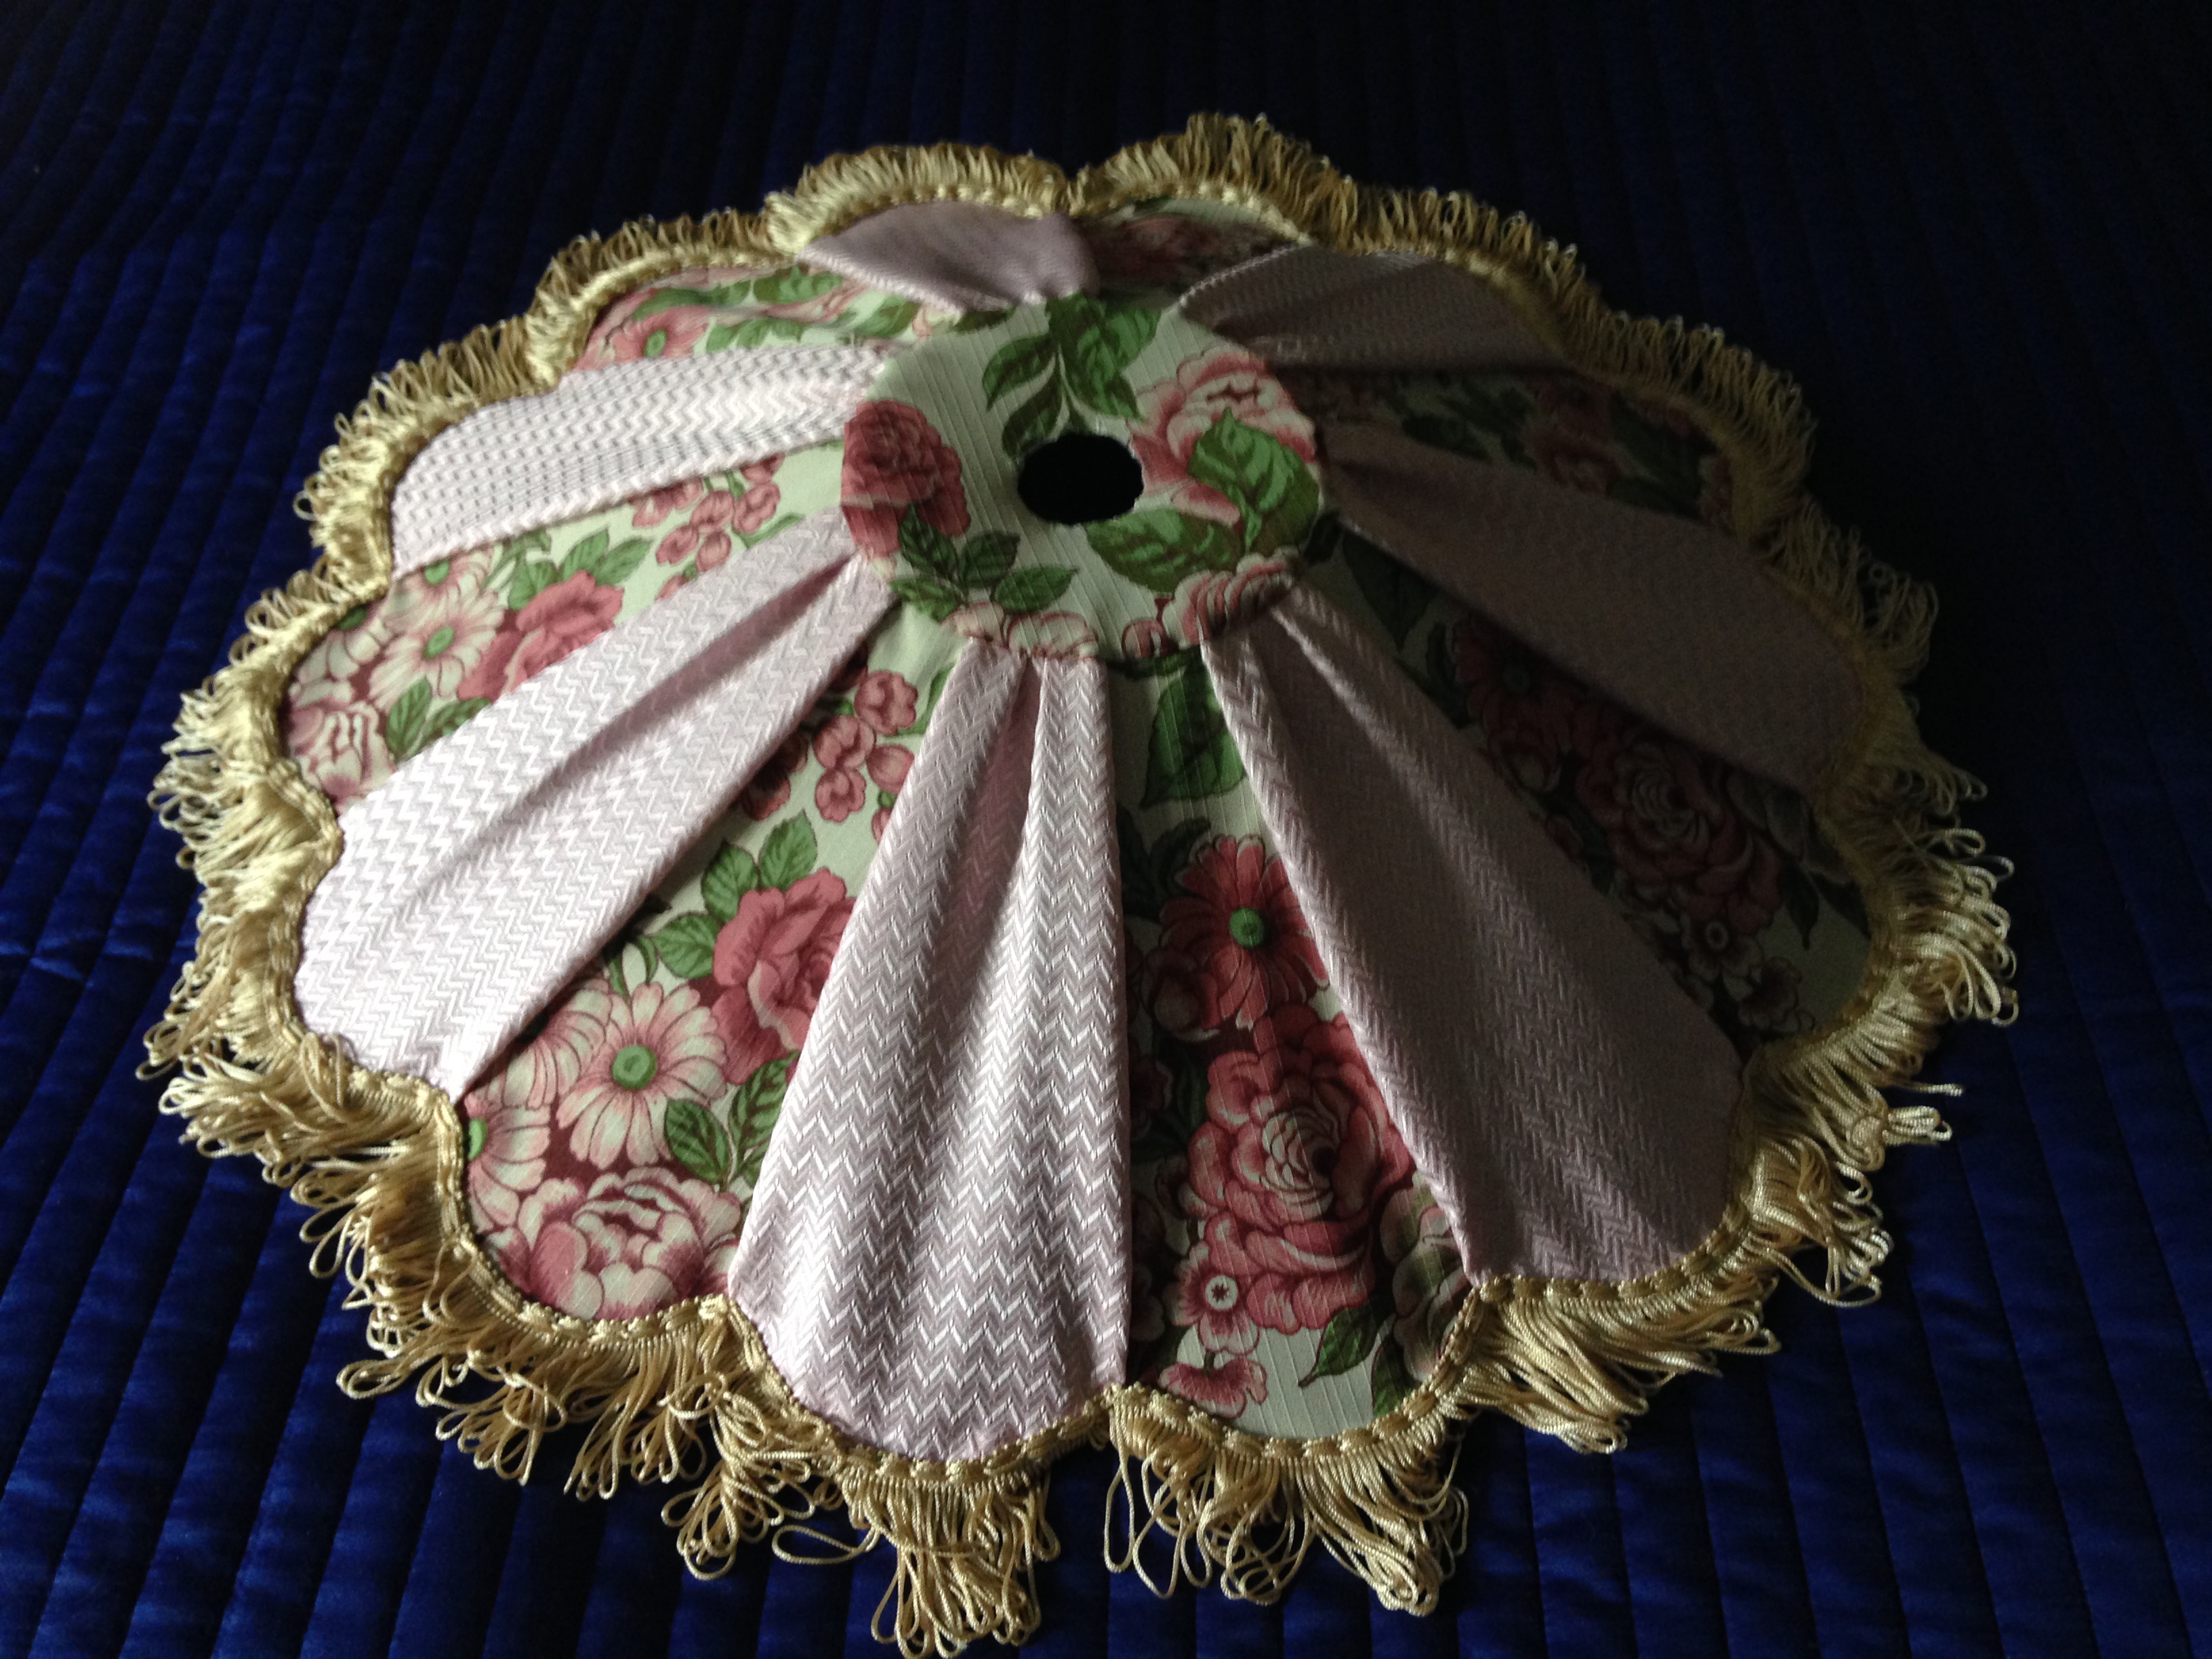
Jag klädde om en lampskärm, som tillhör en lampa som min gammelfarbror satte ihop i sin ungdom. Den hör förresten hemma i “Gamla Stugan”, där den numera beryktade Hilda växte upp. // I put new fabric on an old lampshade, belonging to a lamp that my great uncle made in his youth. The lamp itself belongs to ”The Old House”, where the now famous Hilda grew up.
Historisk trevnad
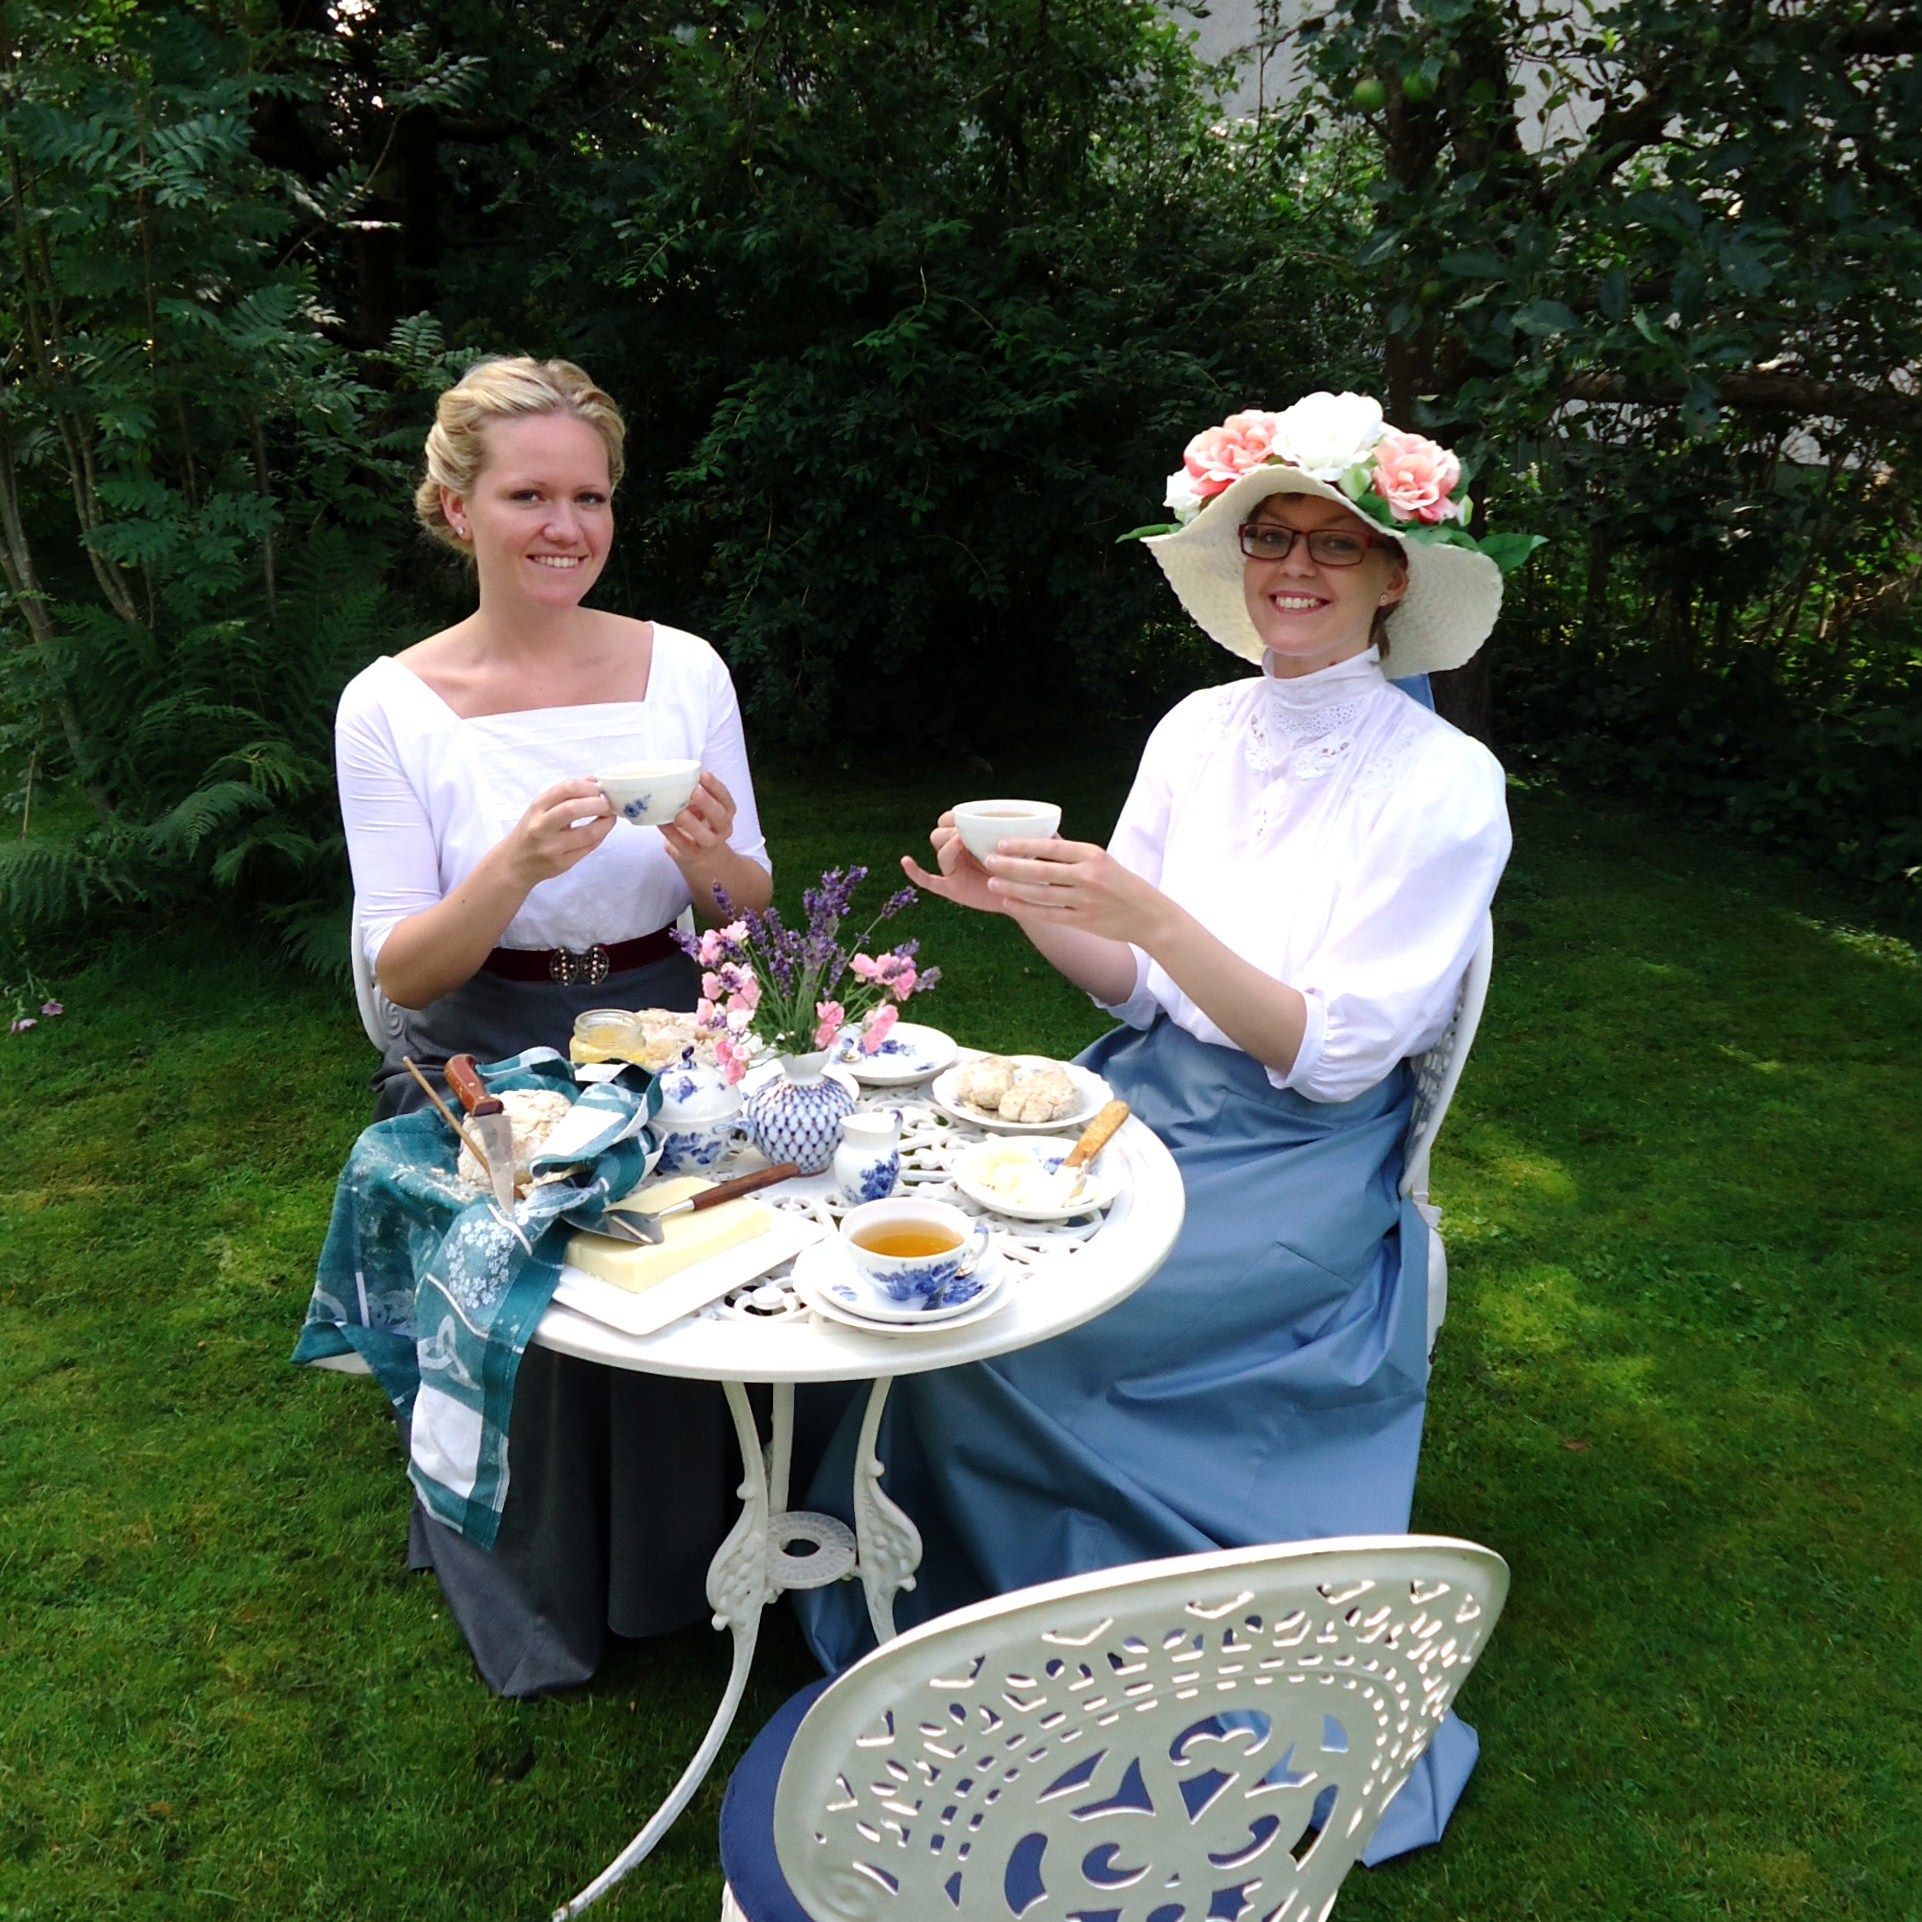
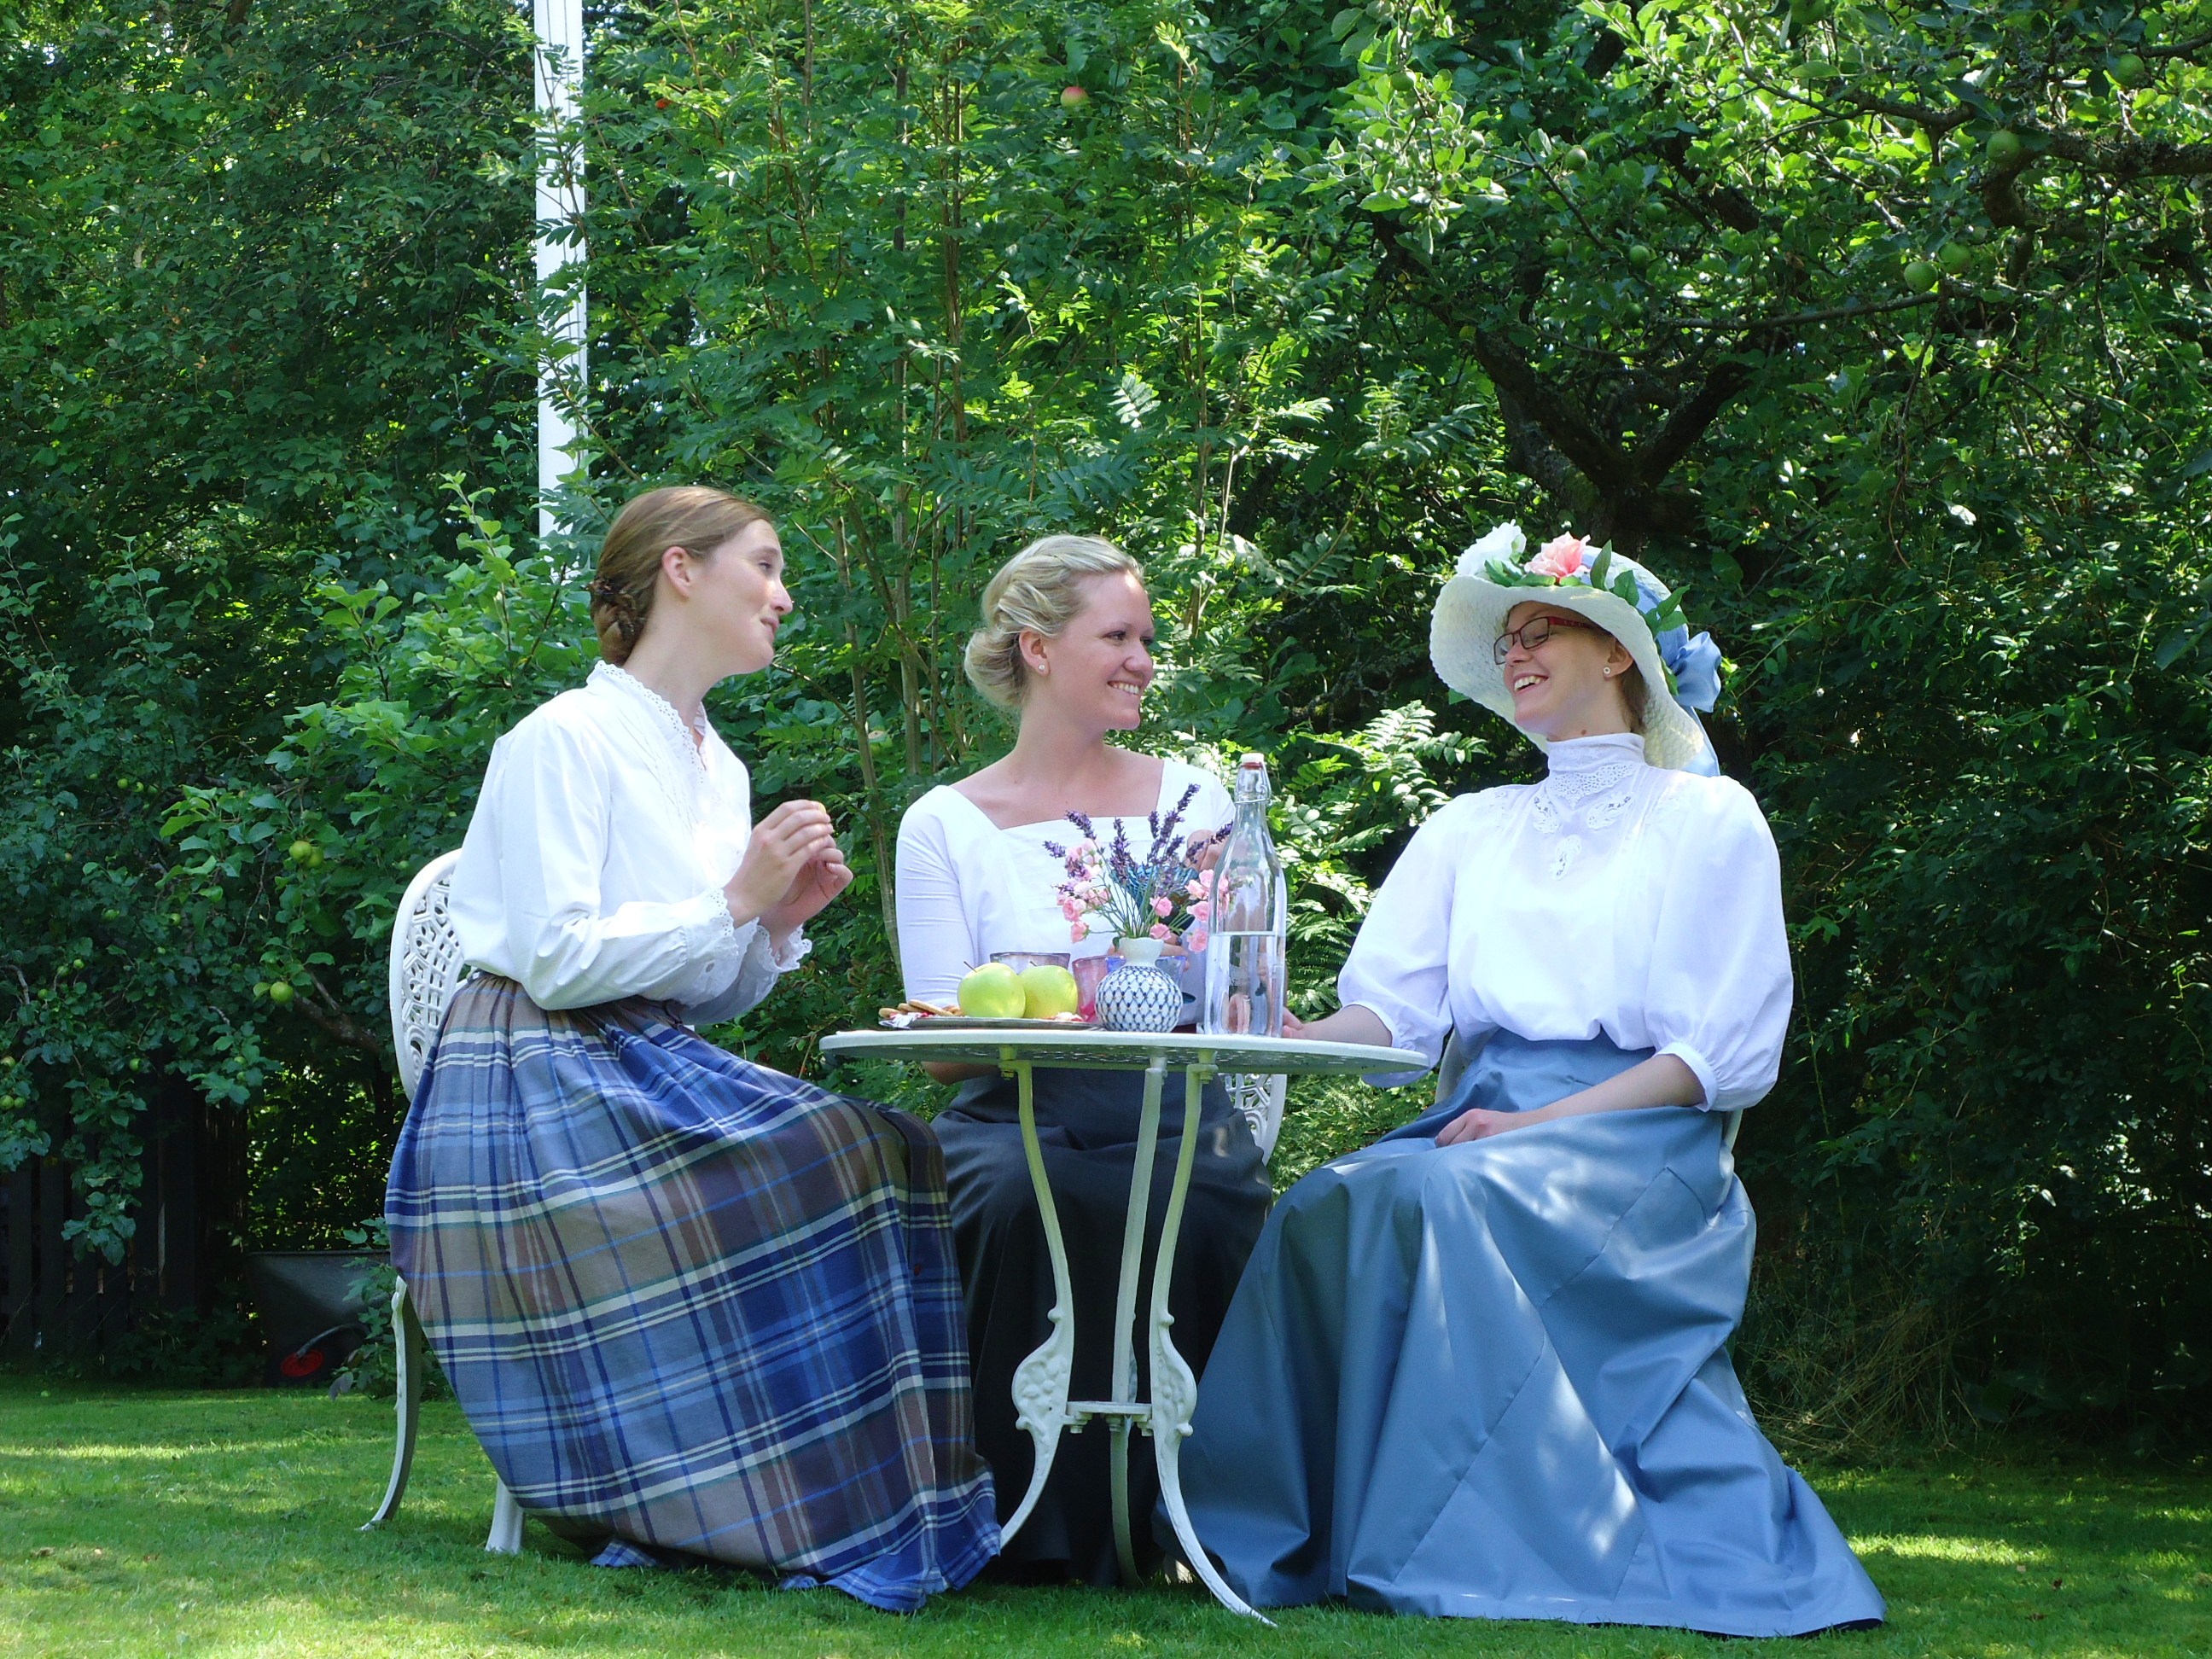
I sommar gick det upp för mig att jag inte är ensam i Vimmerby, om intresset för historiska dräkter. Mot slutet av lovet fick jag nöjet att hålla edwardiansk tebjudning för de kära systrarna, Hanna och Malin. Otroligt trevligt!
This summer, it became clear that I was not the only one in Vimmerby, who was interested in historical clothing. By the end of the holidays, I had the pleasure of having an Edwardian tea party for the dear sisters, Hanna and Malin. Delightful!
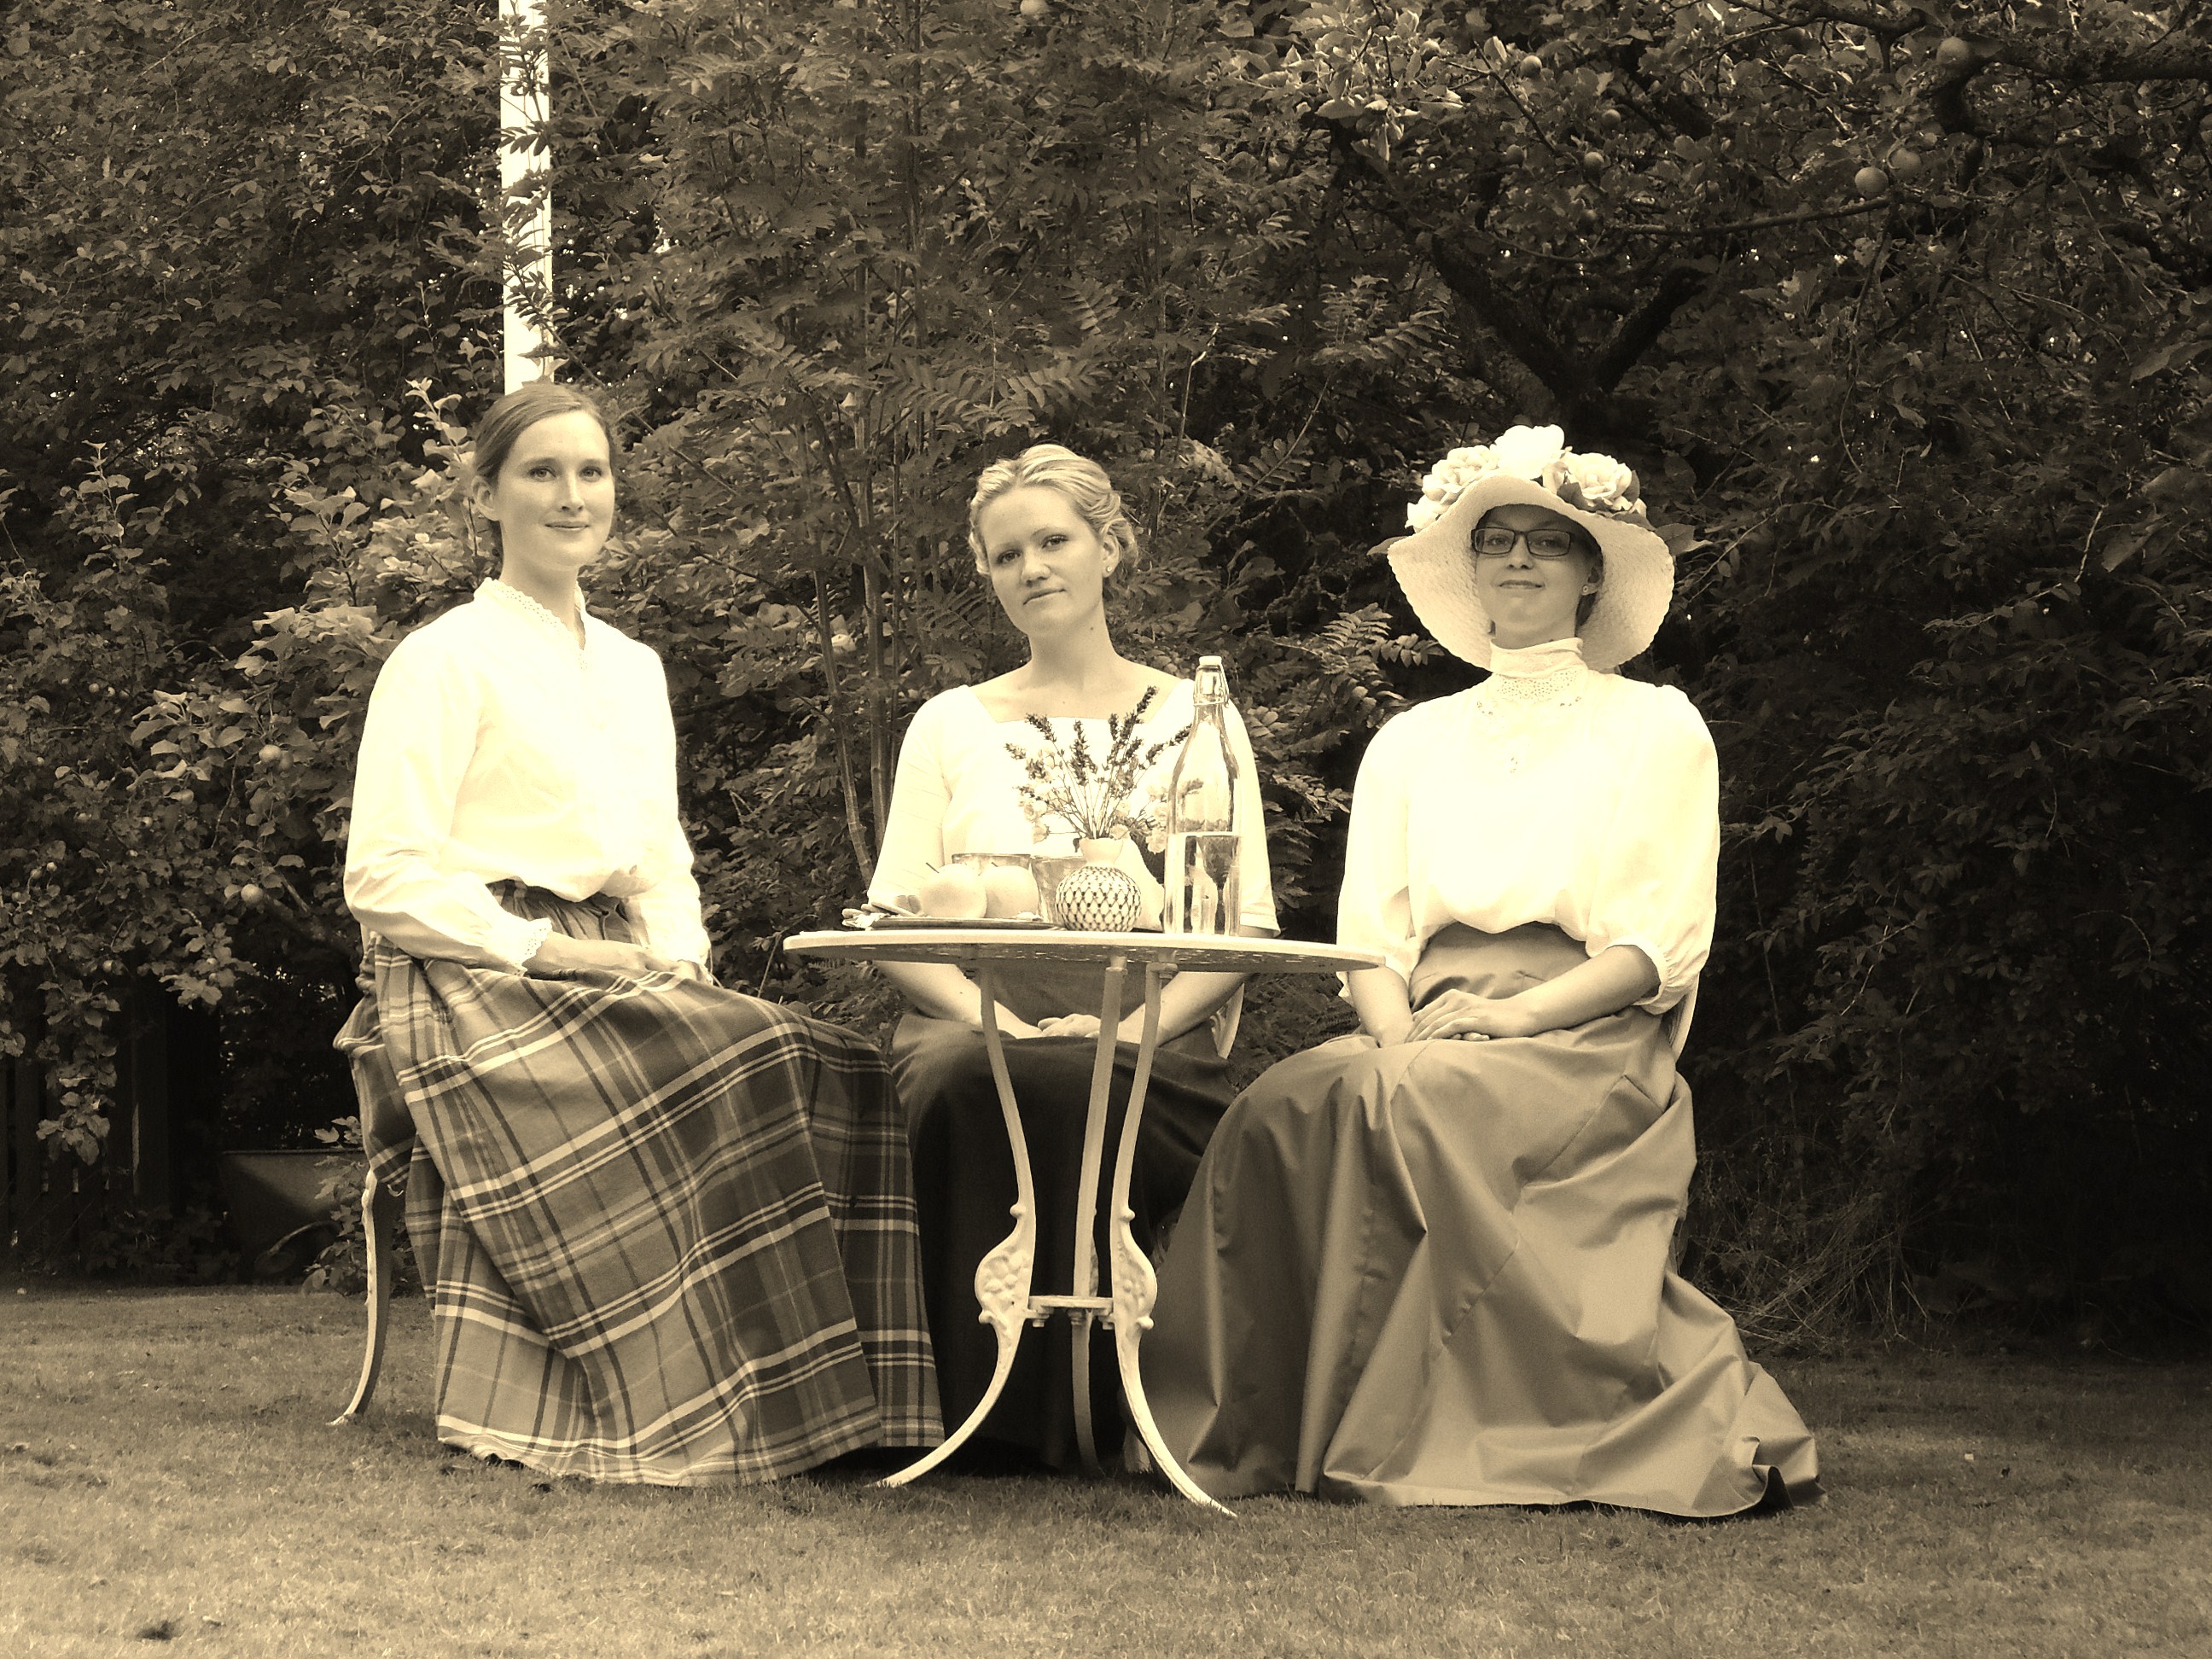
Till min lycka, upptäckte jag att dessa förtjusande systrar också gärna ville bära historiska kläder. Därmed klädde vi upp oss i mina olika kreationer och ordnade edwardiansk tebjudning. // To my great joy, I discovered that these delightful sisters also wanted to wear historical clothes. So we dressed up in my costumes and had an Edwardian tea party.Lika stelt som det ska vara vid lång exponeringstid. // Just as stiff as it should, when using the camera obscuraInnan de fasansfulla sconesen kom fram på bordet. // Before the horrible scones appeared.
Tack för en härlig sommar, alla ni som har förgyllt den med er närvaro!
Thank you for a lovely summer, all of you who have made it so by your existence.
Dräkten, fotograferad efter att jag kört hem i upphettad bil. // The outfit, photographed after driving home in the heated car…
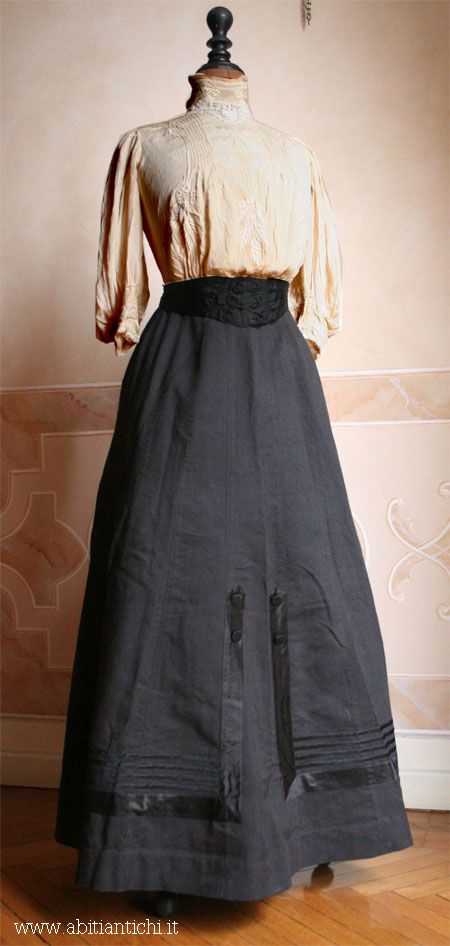
Ni som har läst förra inlägget, om hatten, vet att jag skulle sy en dräkt till 1800-talsdagen i Kisa, 19 juli. Jag ville ha en snoffsig dräkt för en dam från sekelskiftet. I “Patterns of Fashion” hade jag redan sett en del trevliga blus- och kjolmönster. Dessutom kikade jag runt på historiska kläder på Pinterest. Där hittade jag inspiration bland annat från denna dräkt:
Those who have read my last blog post, about my Rose Hat, know that I was about to sew a costume for the “19th century days” in Kisa, 19th of July. I wanted a swanky suit for a lady at the very start of the 20th century. In “Patterns of fashion 2” I had already spotted some nice skirt and shirtwaist patterns. I also roamed Pinterest’s vast plains of vintage garments. There I found inspiration in this shirtwaist.
Dräkt från Pinterest – ca 1904 – med stråveck och broderier. // Pinterest clothes – ca 1904 – with pin tucks and white work.
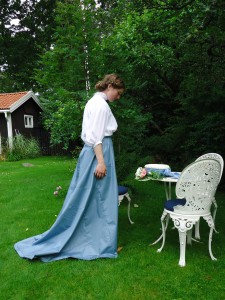
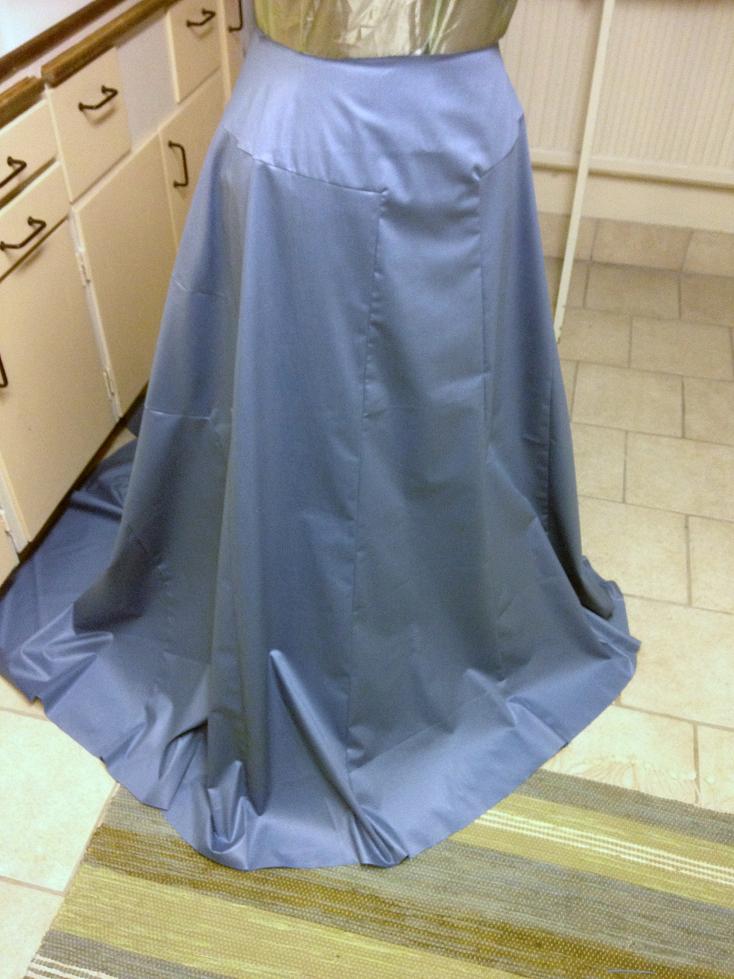
Kjolen
I två månader snokade jag runt på Erikshjälpen, i jakt på ett vettigt kjoltyg. Till slut, helgen innan eventet, hittade jag en blå gardin för 69 kr.
For two months I snooped around at the town’s second hand shop, in hopes to find an appropriate skirt fabric. Finally I found a blue curtain for 69 SEK.
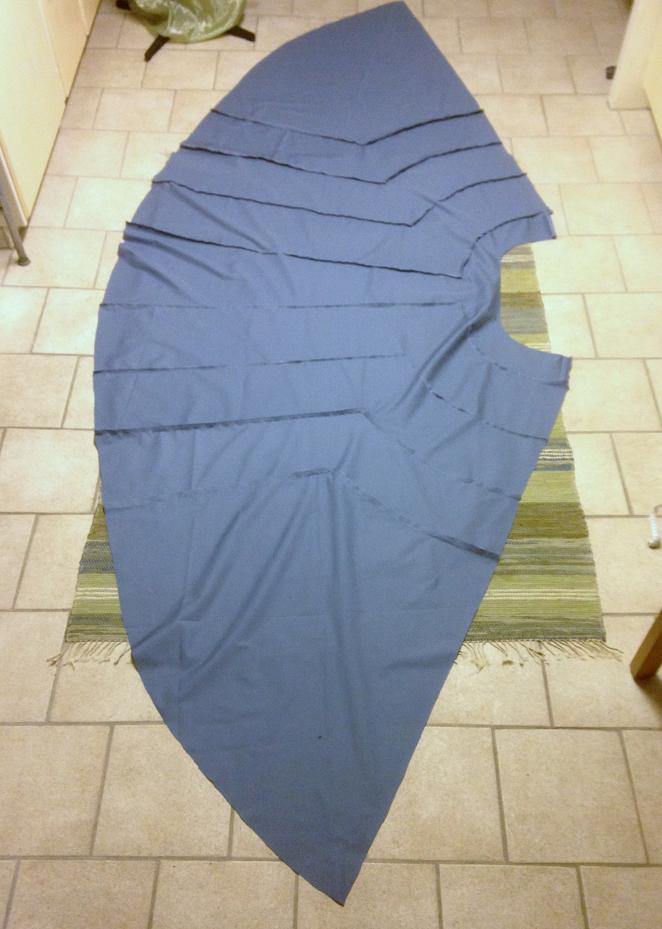
Kjolen, på avigan, innan den sytts samman baktill. // The skirt, from the wrong side, before sewn together in the back.
Jag vet inte hur det är med rättigheterna för mönstret, så jag lägger inte ut bilden här, men ni får i alla fall se hur kjolen ser ut innan den är hopsydd baktill.
I don’t know how the copyright works for this skirt pattern, so I won’t show it here. Anyhow, this what the skirt looks like from the wrong side, before it’s sewn together.
Kjolen innan den fållats och pressats. // The skirt before hemmed and ironed.
Kjolen knäpps baktill med hyskor och hakar. Den har fortfarande inte fått de dekorativa banden, som ska täcka sömmarna, men i väntan på att jag hittar lämpligt material, tycker jag att den ser helt ok ut som den är.
The skirt is closed with hooks and eyes in the back. It still hasn’t got the decorative ribbons, that should be on top of the seams. Until I find the optimal material for this, I think it looks alright though.
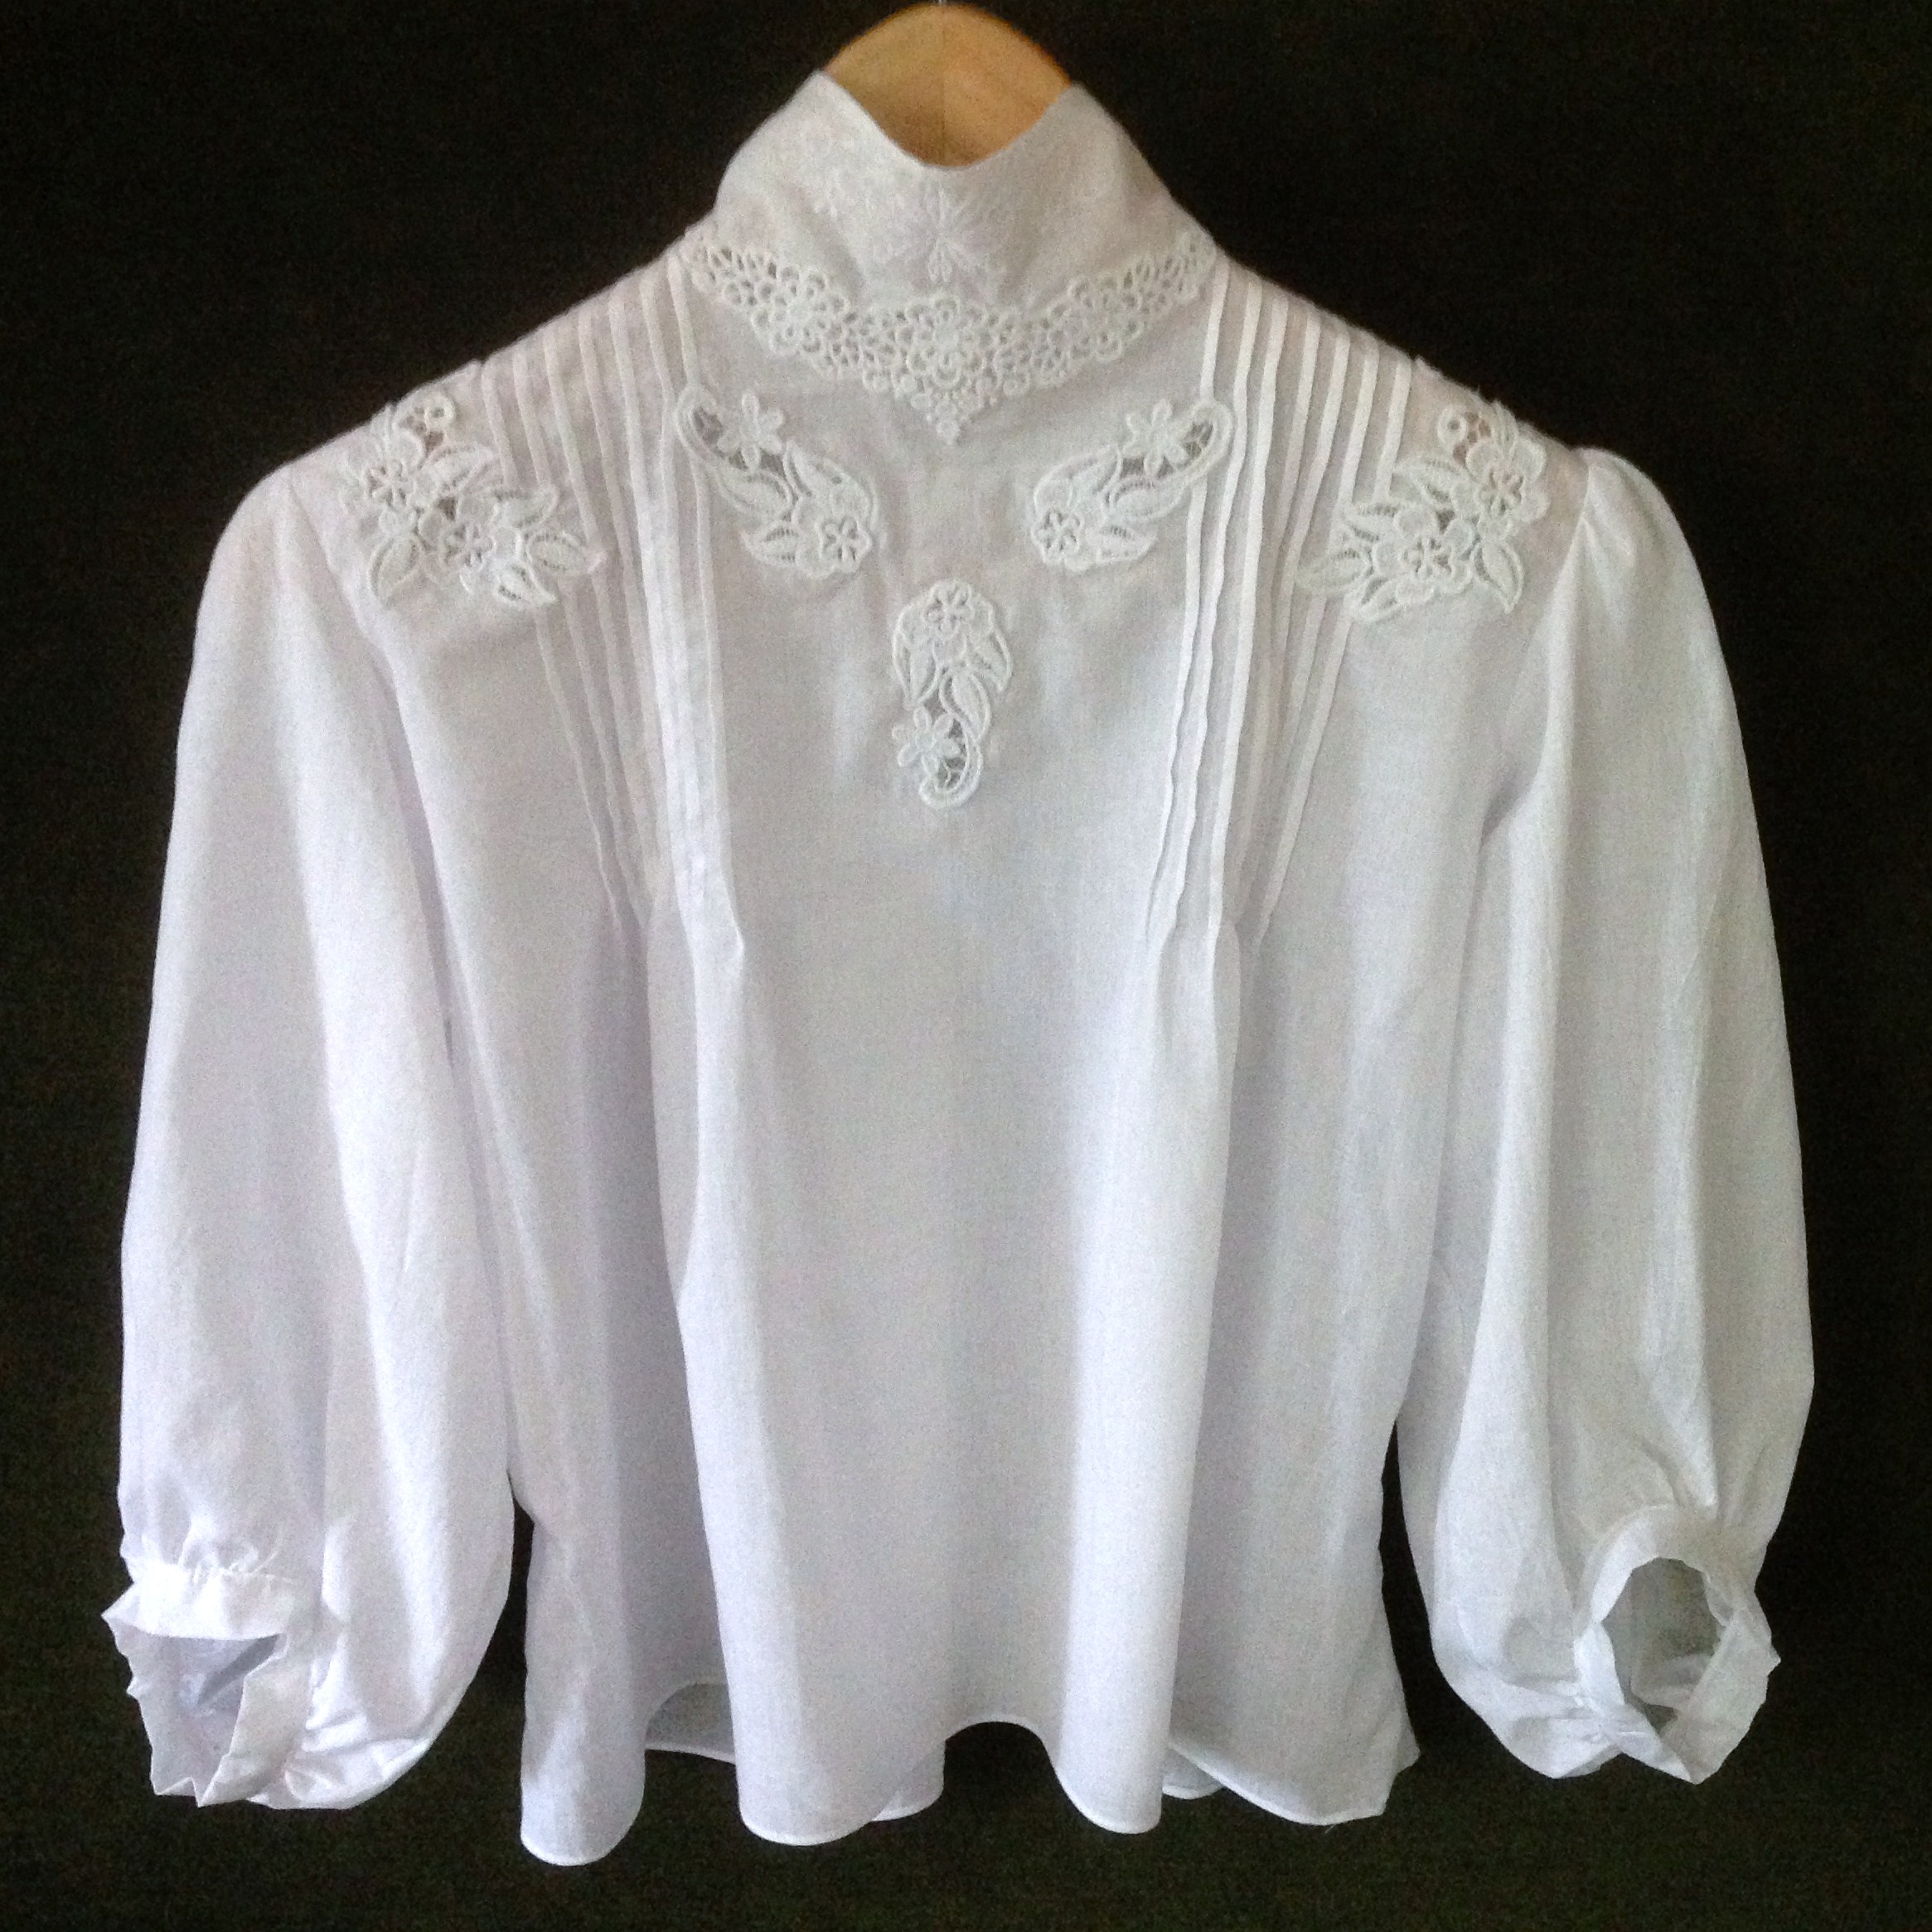
Blusen
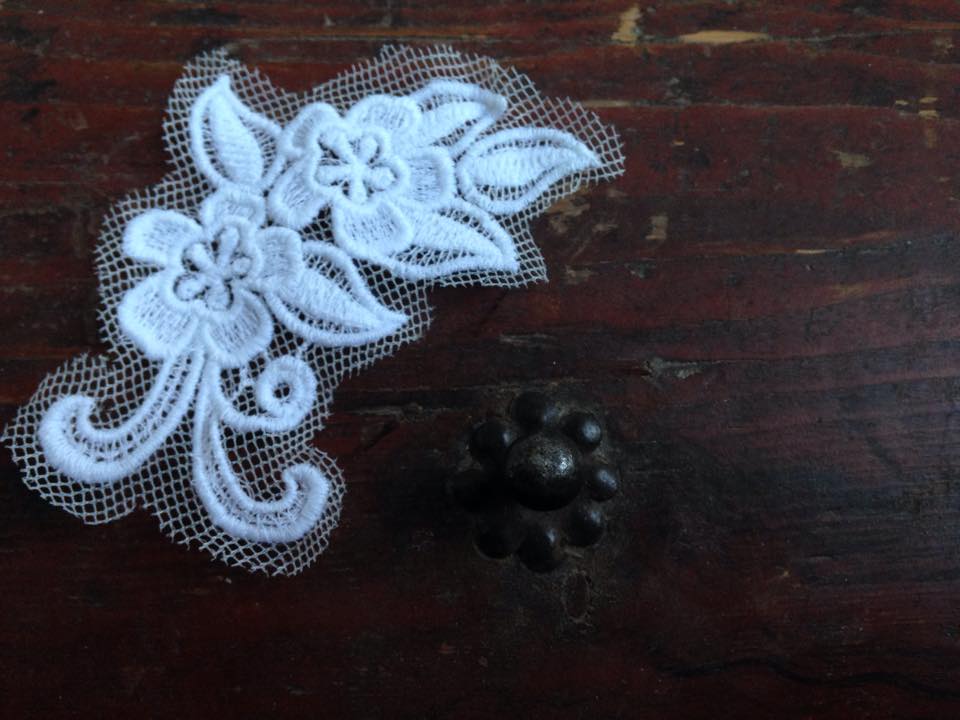
Jag var osedvanligt förberedd när jag anlände till Sverige i år. Förutom att redan ha letat reda på lämpliga mönster, hade jag även hittat fina broderifiler på internet, som jag köpt, en snäll bekant hjälpt att konvertera till rätt filtyp, och sedan hade jag maskinbroderat mönstren på tyll.
I was unusually well prepared when I arrived in Sweden this year. Except for having found patterns, I had also bought appropriate machine embroidery files, got help from my sewing machine guru to convert them to the right file type, and had even sewn the embroidery on tulle leftovers.
Maskinbrodyr på tyll. // Machine embroidery on tulle.
Dessutom hade jag köpt ett tunt bomullstyg, medan jag praktiserade i Viborg, så därmed hade jag alla ingredienser som jag behövde för min blus.
Furthermore, I had bought a lightweight cotton fabric, while making my internship in Viborg. Hence, I had all the necessary ingredients for th shirtwaist.
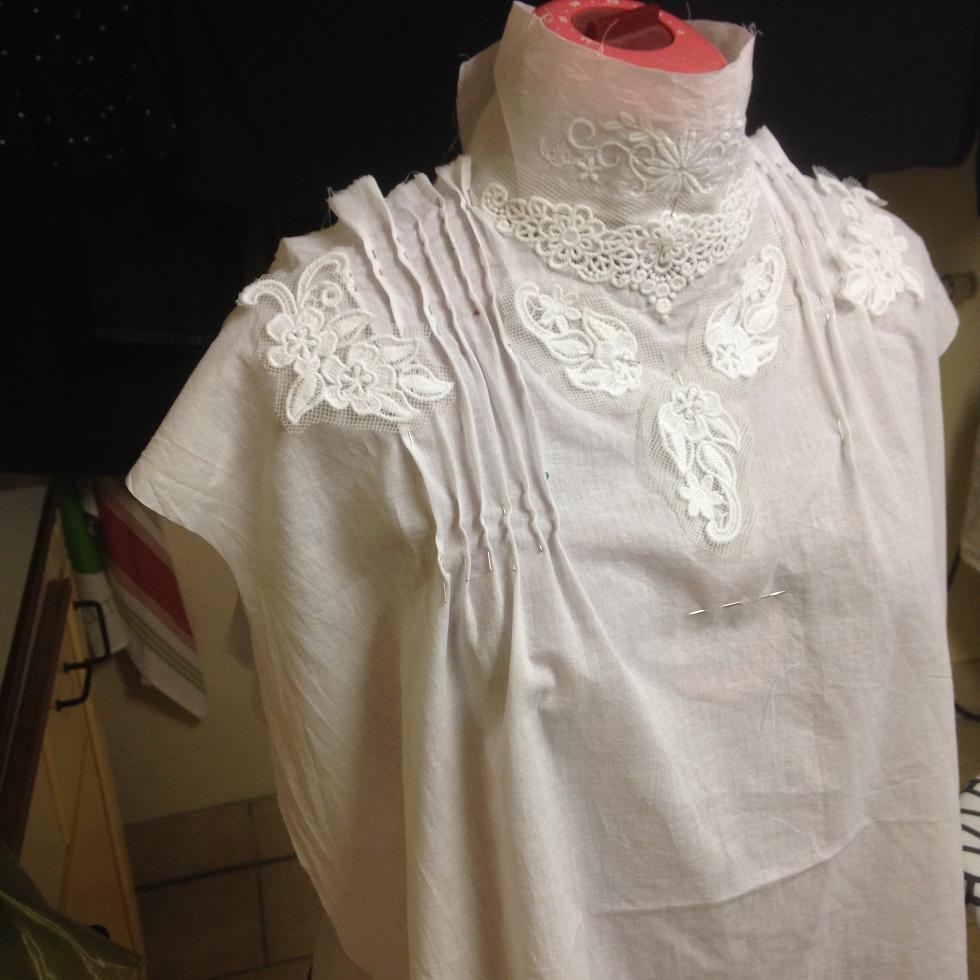
Stråveck och brodyr fastnålad. // Pin tucks and white work pinned to the shirtwaist.
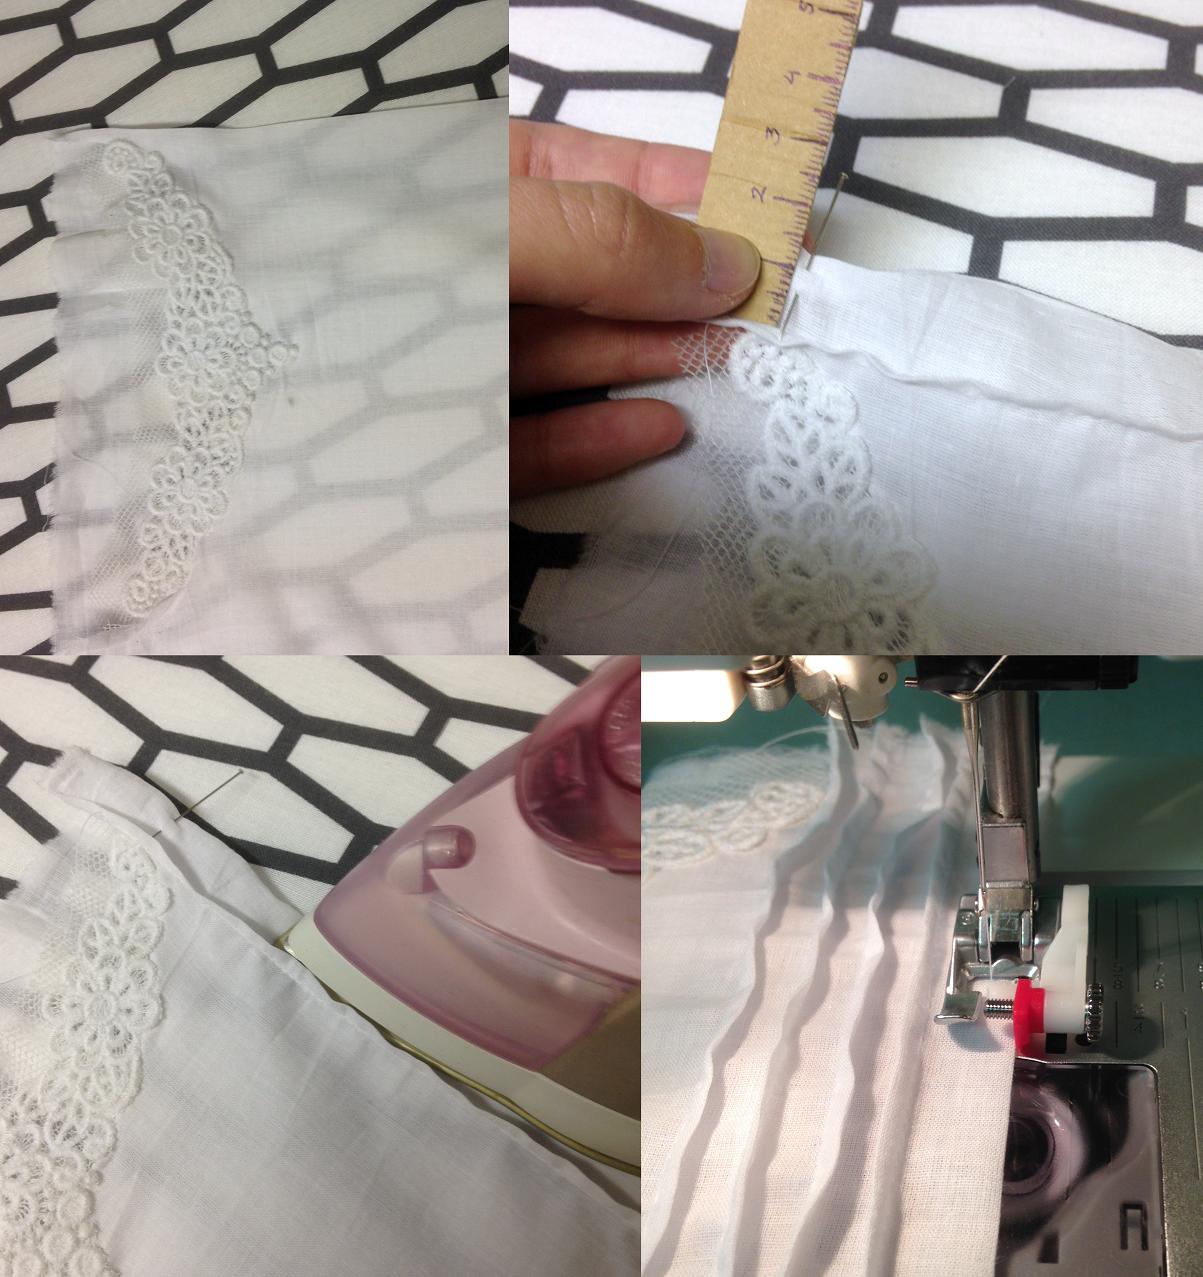
Jag experimenterade med placering av veck och broderier på provdockan, innan jag började sy. Sedan började jag med stråvecken.
I experimented with the placement of the pin tucks and embroideries before I started sewing. Then I obviously made the pin tucks.
Stråveck: 1) Stryk vid första vecket och sy önskad vidd 2) Mät ut nästa veck + mått mellan vecken 3) Stryk vecket 4) Sy vecket… om och om igen. // Pin tucks: 1) Iron the first fold and sew at the wanted breadth of the pleat 2) Measure the distance to the next pleat + the breadth of the pleat 3) Iron the fold 4) Sew the fold as in the first step and repeat the process for as many times as you want.
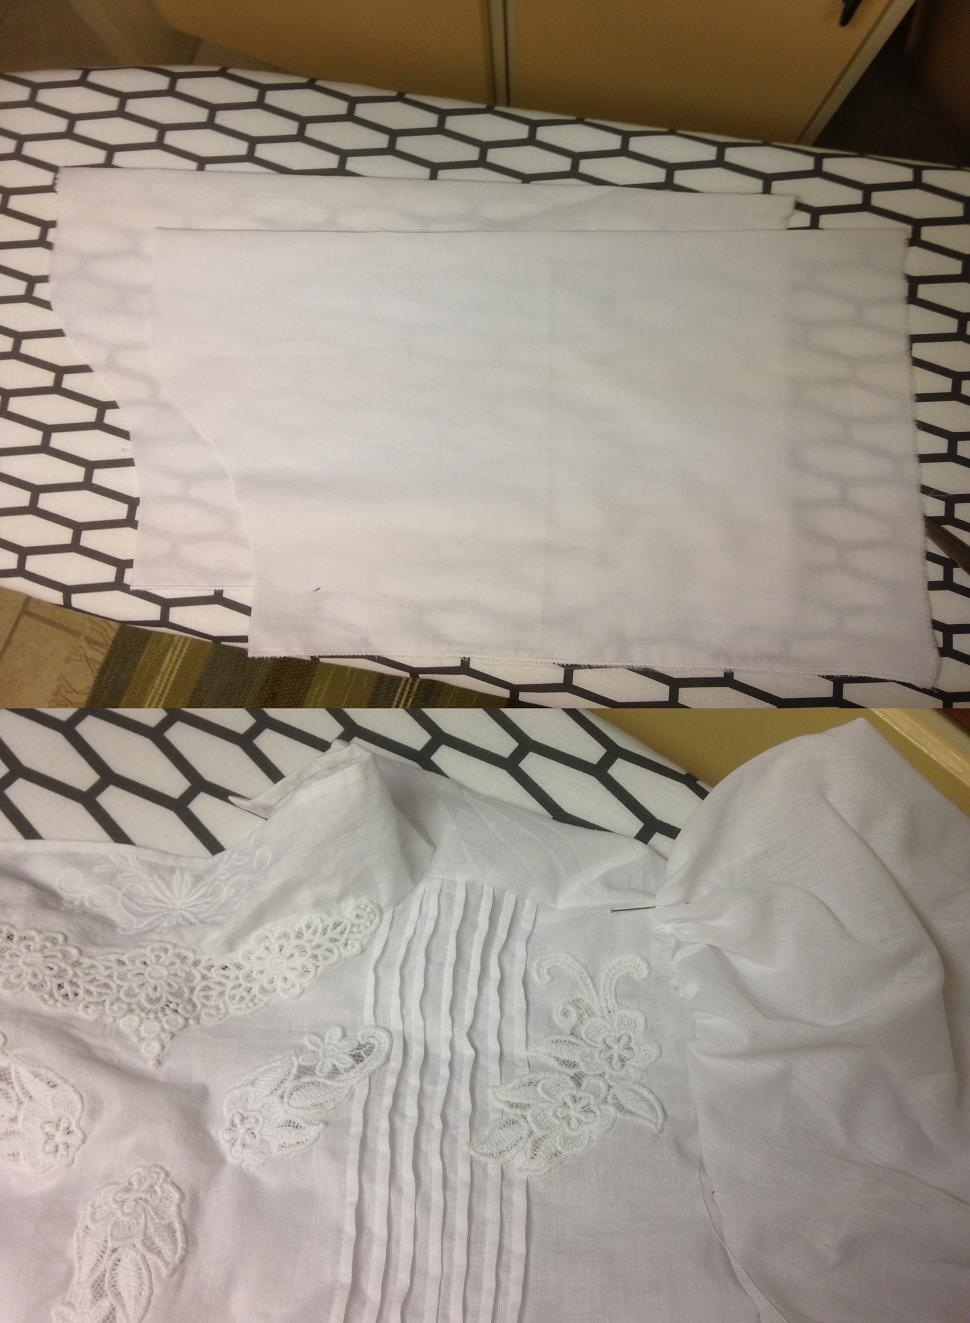
När detta var klart var det dags för placering av övriga broderier. Dessa nålade jag noga fast, hela vägen runt. Sedan klippte jag upp tyget bakom och fållade samtidigt som jag sydde fast broderiet i blusen.
When this was done, it was time for placing the embroideries. These I pinned down carefully, the whole way around. Then I cut superfluous fabric away as I hemmed and fastened the embroidery to the shirtwaist, from the wrong side.
Placering av broderier, även över stråvecken. // Placement of the white work, partly on top of the pin tucks.
Därefter skulle ärmarna fästas i blusen. Eftersom det är sommar och det 1903 verkar ha varit populärt med armbågslånga ärmar, gjorde jag dem korta. Innan jag sydde fast dem i blusen, gjorde jag en raksöm upptill och nedtill, med långa stygn, så att jag enkelt kunde dra åt tråden och rynka vid ärmkullen och runt armbågen. När ärmarna var fastsydda, gjode jag ett kantband i samma tyg och sydde fast nedtill.
Then the turn had come to the arms. As it is summer and elbow length of the arms seem to have been popular in 1903, I decided to go for short arms. Before attaching them, I made a “long, loose machine seam” at the top and the bottom and then gathered the fabric at the shoulder and elbow. Then I attached the arms to the shirtwaist and covered the raw edges with binding in the same fabric.
Två ärmar, 2 dm längre än armbågslängd. Veckas vid ärmkullen och nedtill. // Two arms, two decimetres longer than shoulder-elbow length. Gather fabric at the top of the shoulder and at the elbow.
Sedan var det bara knäppningen kvar. Blusen är bara öppen halvvägs ner, så i nacken sydde jag fast dekorativa fuskpärlor med öglor i samma bomullstyg och nedanför knäppning med sydda hyskor och silverhakar.
Then there was nothing left but the closing in the back. It is sewn together at the bottom half. At the neck, I used pearl buttons and loops made from the same fabric. The rest was closed with silver hooks and eyes. This later proved to be a horrible solution, as the unusually big hairstyles use to get stuck in the hooks. Well, it looks great anyway.
Hals med pärlknäppning och nedanför knäppning med hyskor och hakar. // High neck closed with buttons and loops. The rest of the back closed with hooks and eyes.
Sedan var blusen faktiskt klar!
And suddenly, the costume was actually complete!
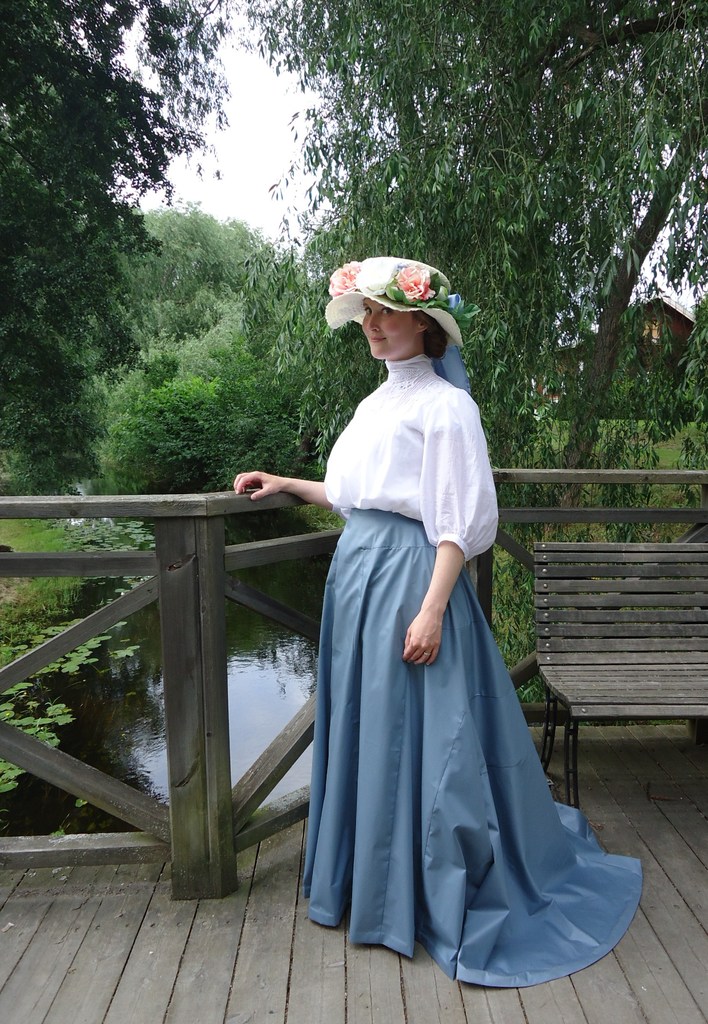
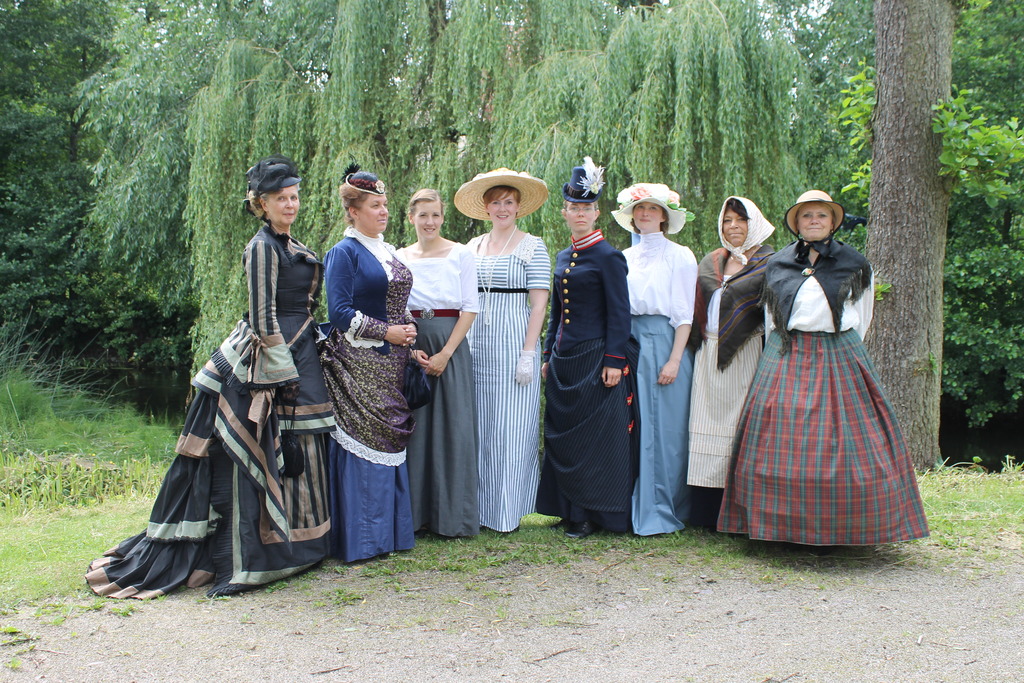
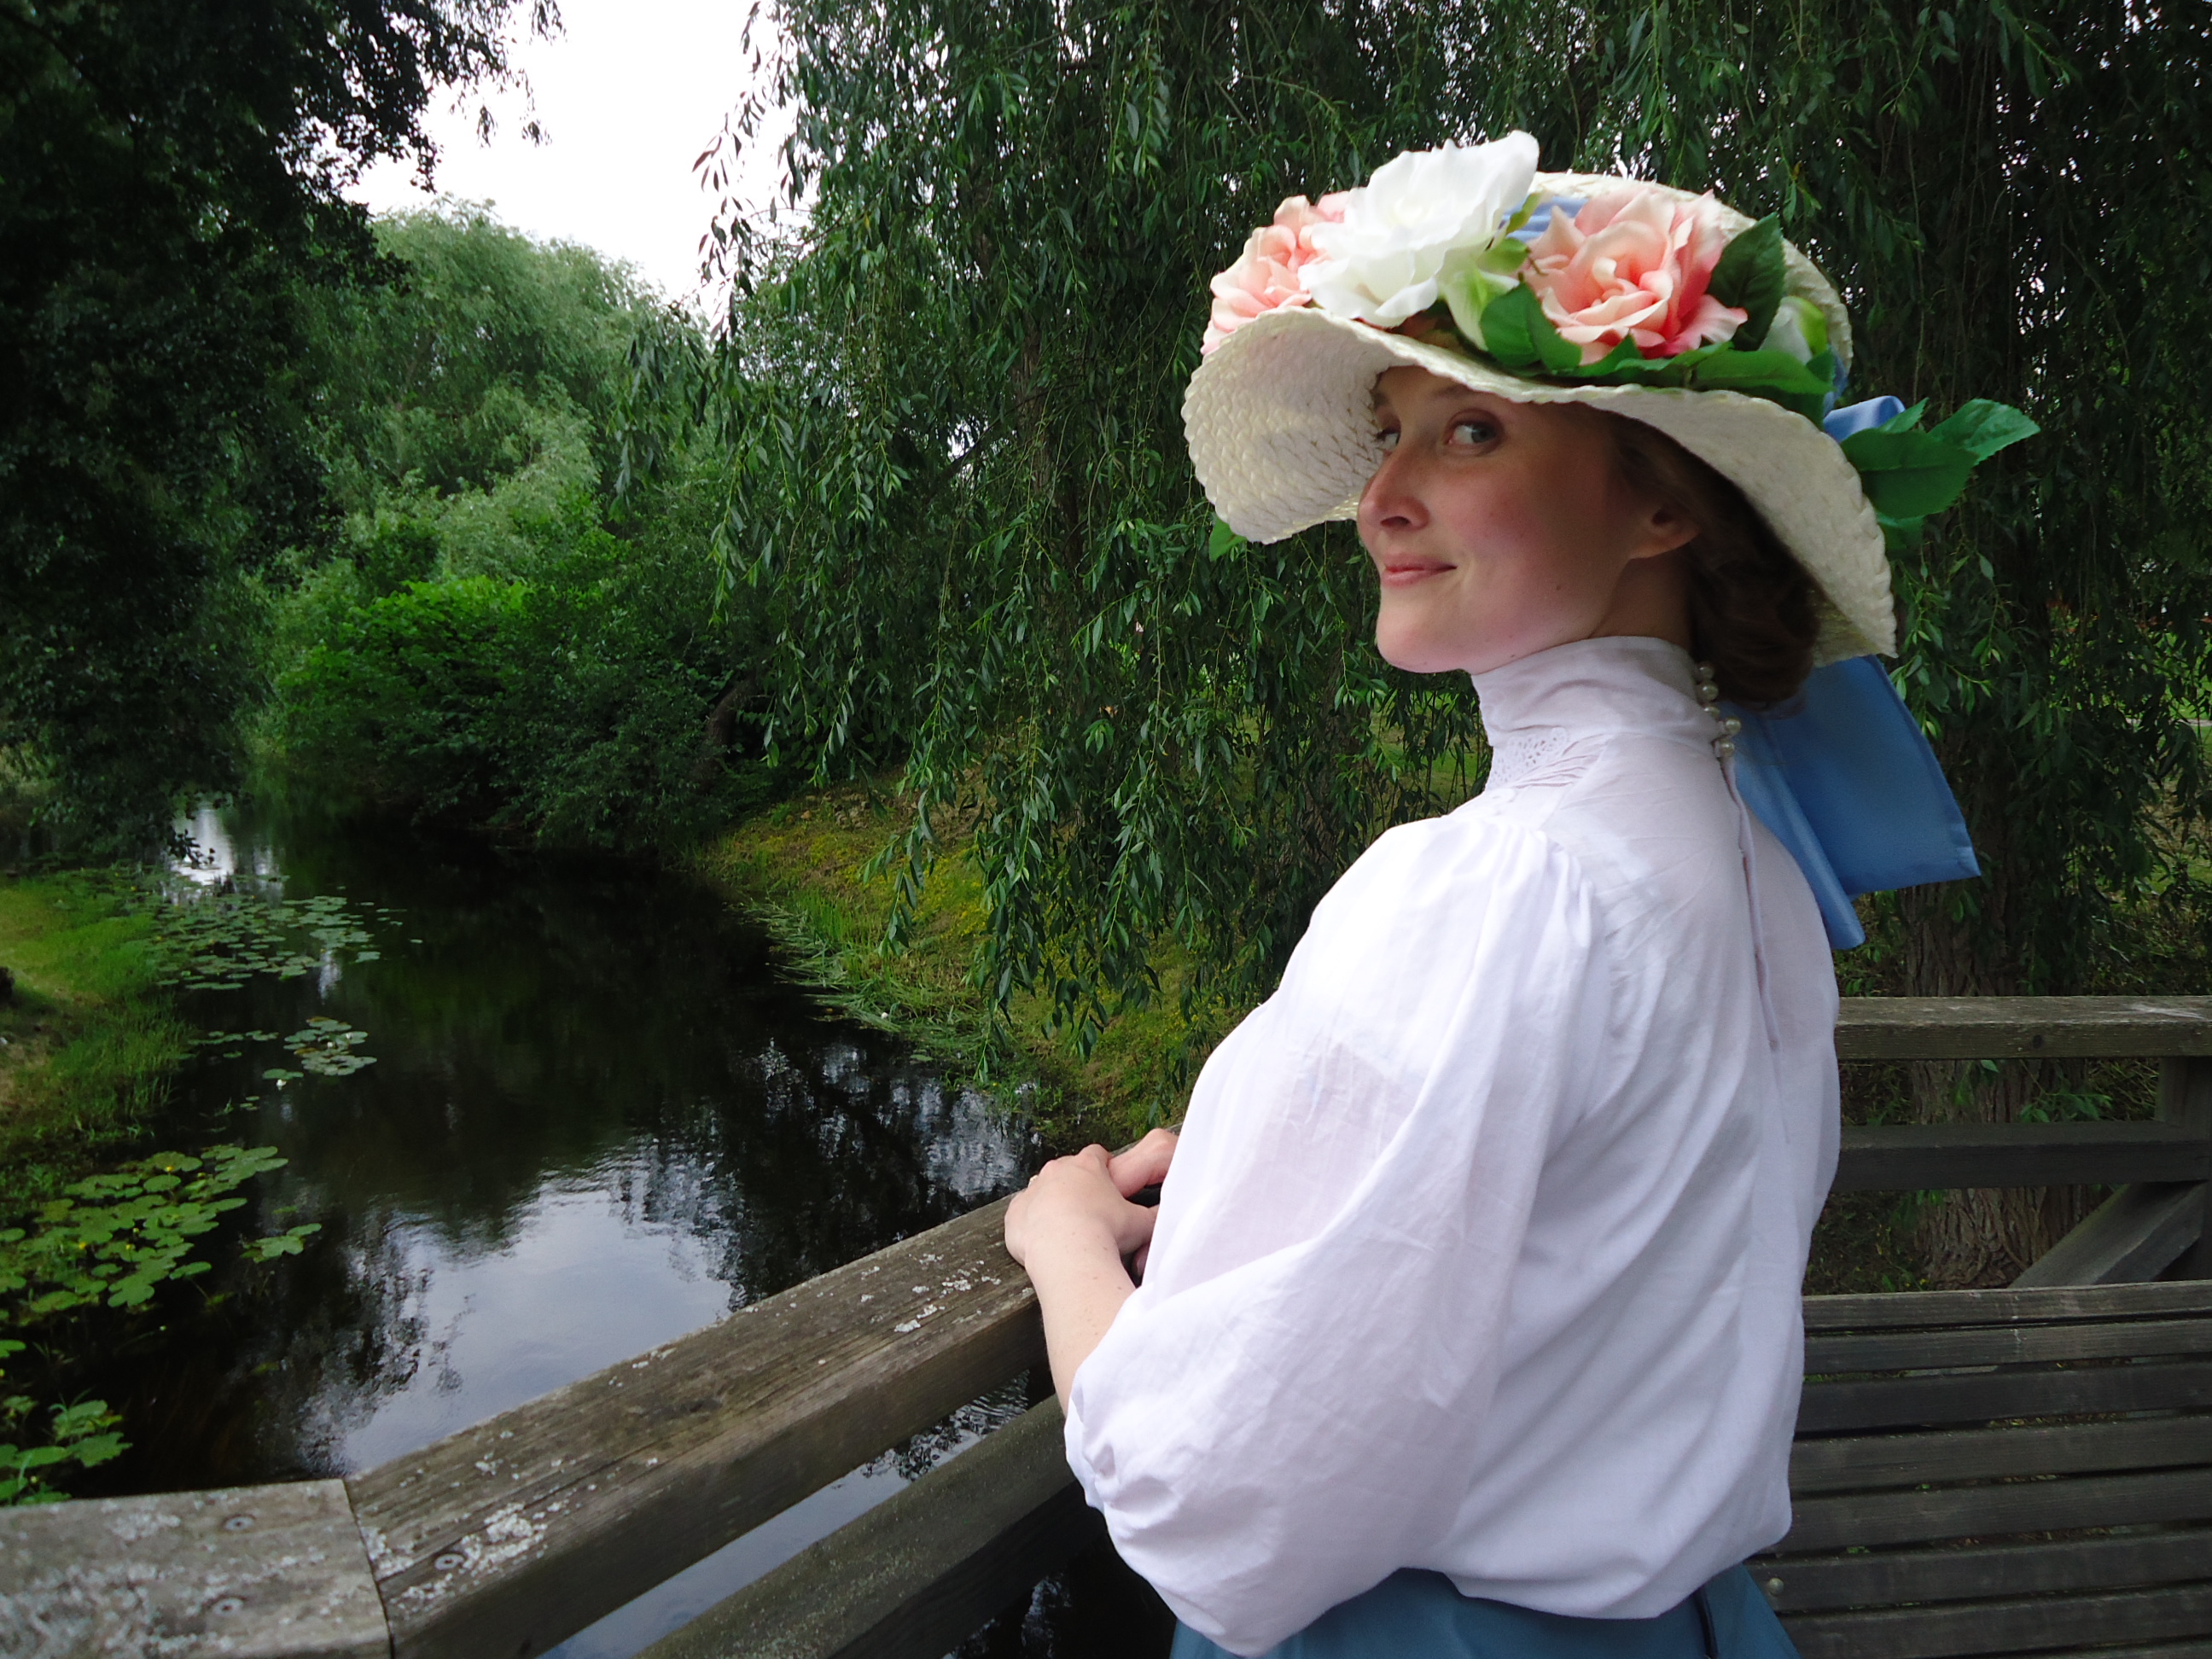
Färdig blus. Det enda som saknas nu är en kanal för midjebandet. // The finished shirtwaist, only lacking a channel and its waistband.Till bords med katten. // At the table with the cat.Dagens 1800-talssällskap, i Kisa. Foto: Elin Evaldsdotter // In Kisa with today’s participants from the 19th Century Society. Photo: Elin EvaldsdotterFotosession med Josefine (som också bär kläder sydda av mig) och Åsa, på 1800-talsdagen. Foto: Elin Evaldsdotter // Photo session together with Josephine (who also wear my clothes) and Åsa, at the 19th century day in Kisa. Photo: Elin Evaldsdotter.Med utsikt över Stångån. Foto: Josefine Antonsson // View over Stångån. Photo: Josefine Antonsson.
– where you can see what I do – designing, sewing, singing, creating etc.


 Actually I haven’t tried the dress on since it was finished. I posted a photo of it on Facebook the same night, though, and received so many lovely comments, that I am highly motivated to make a proper photo shoot soon! Unfortunately there’s freezing wind roaming outside, so I will wait some days, until spring find its way back to Denmark.