Category Archives: Period clothing

Identical Medievalish Kirtles

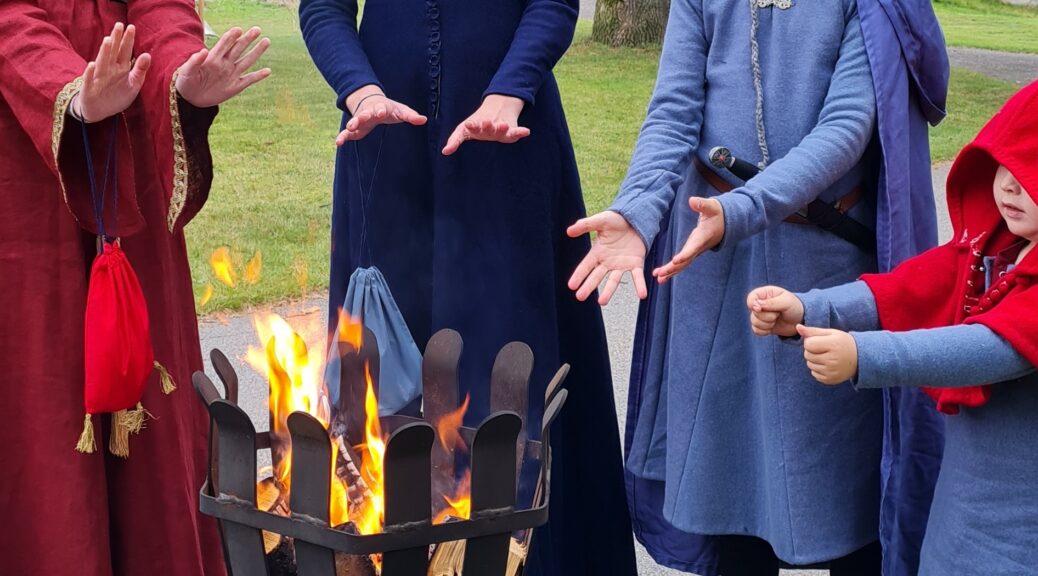
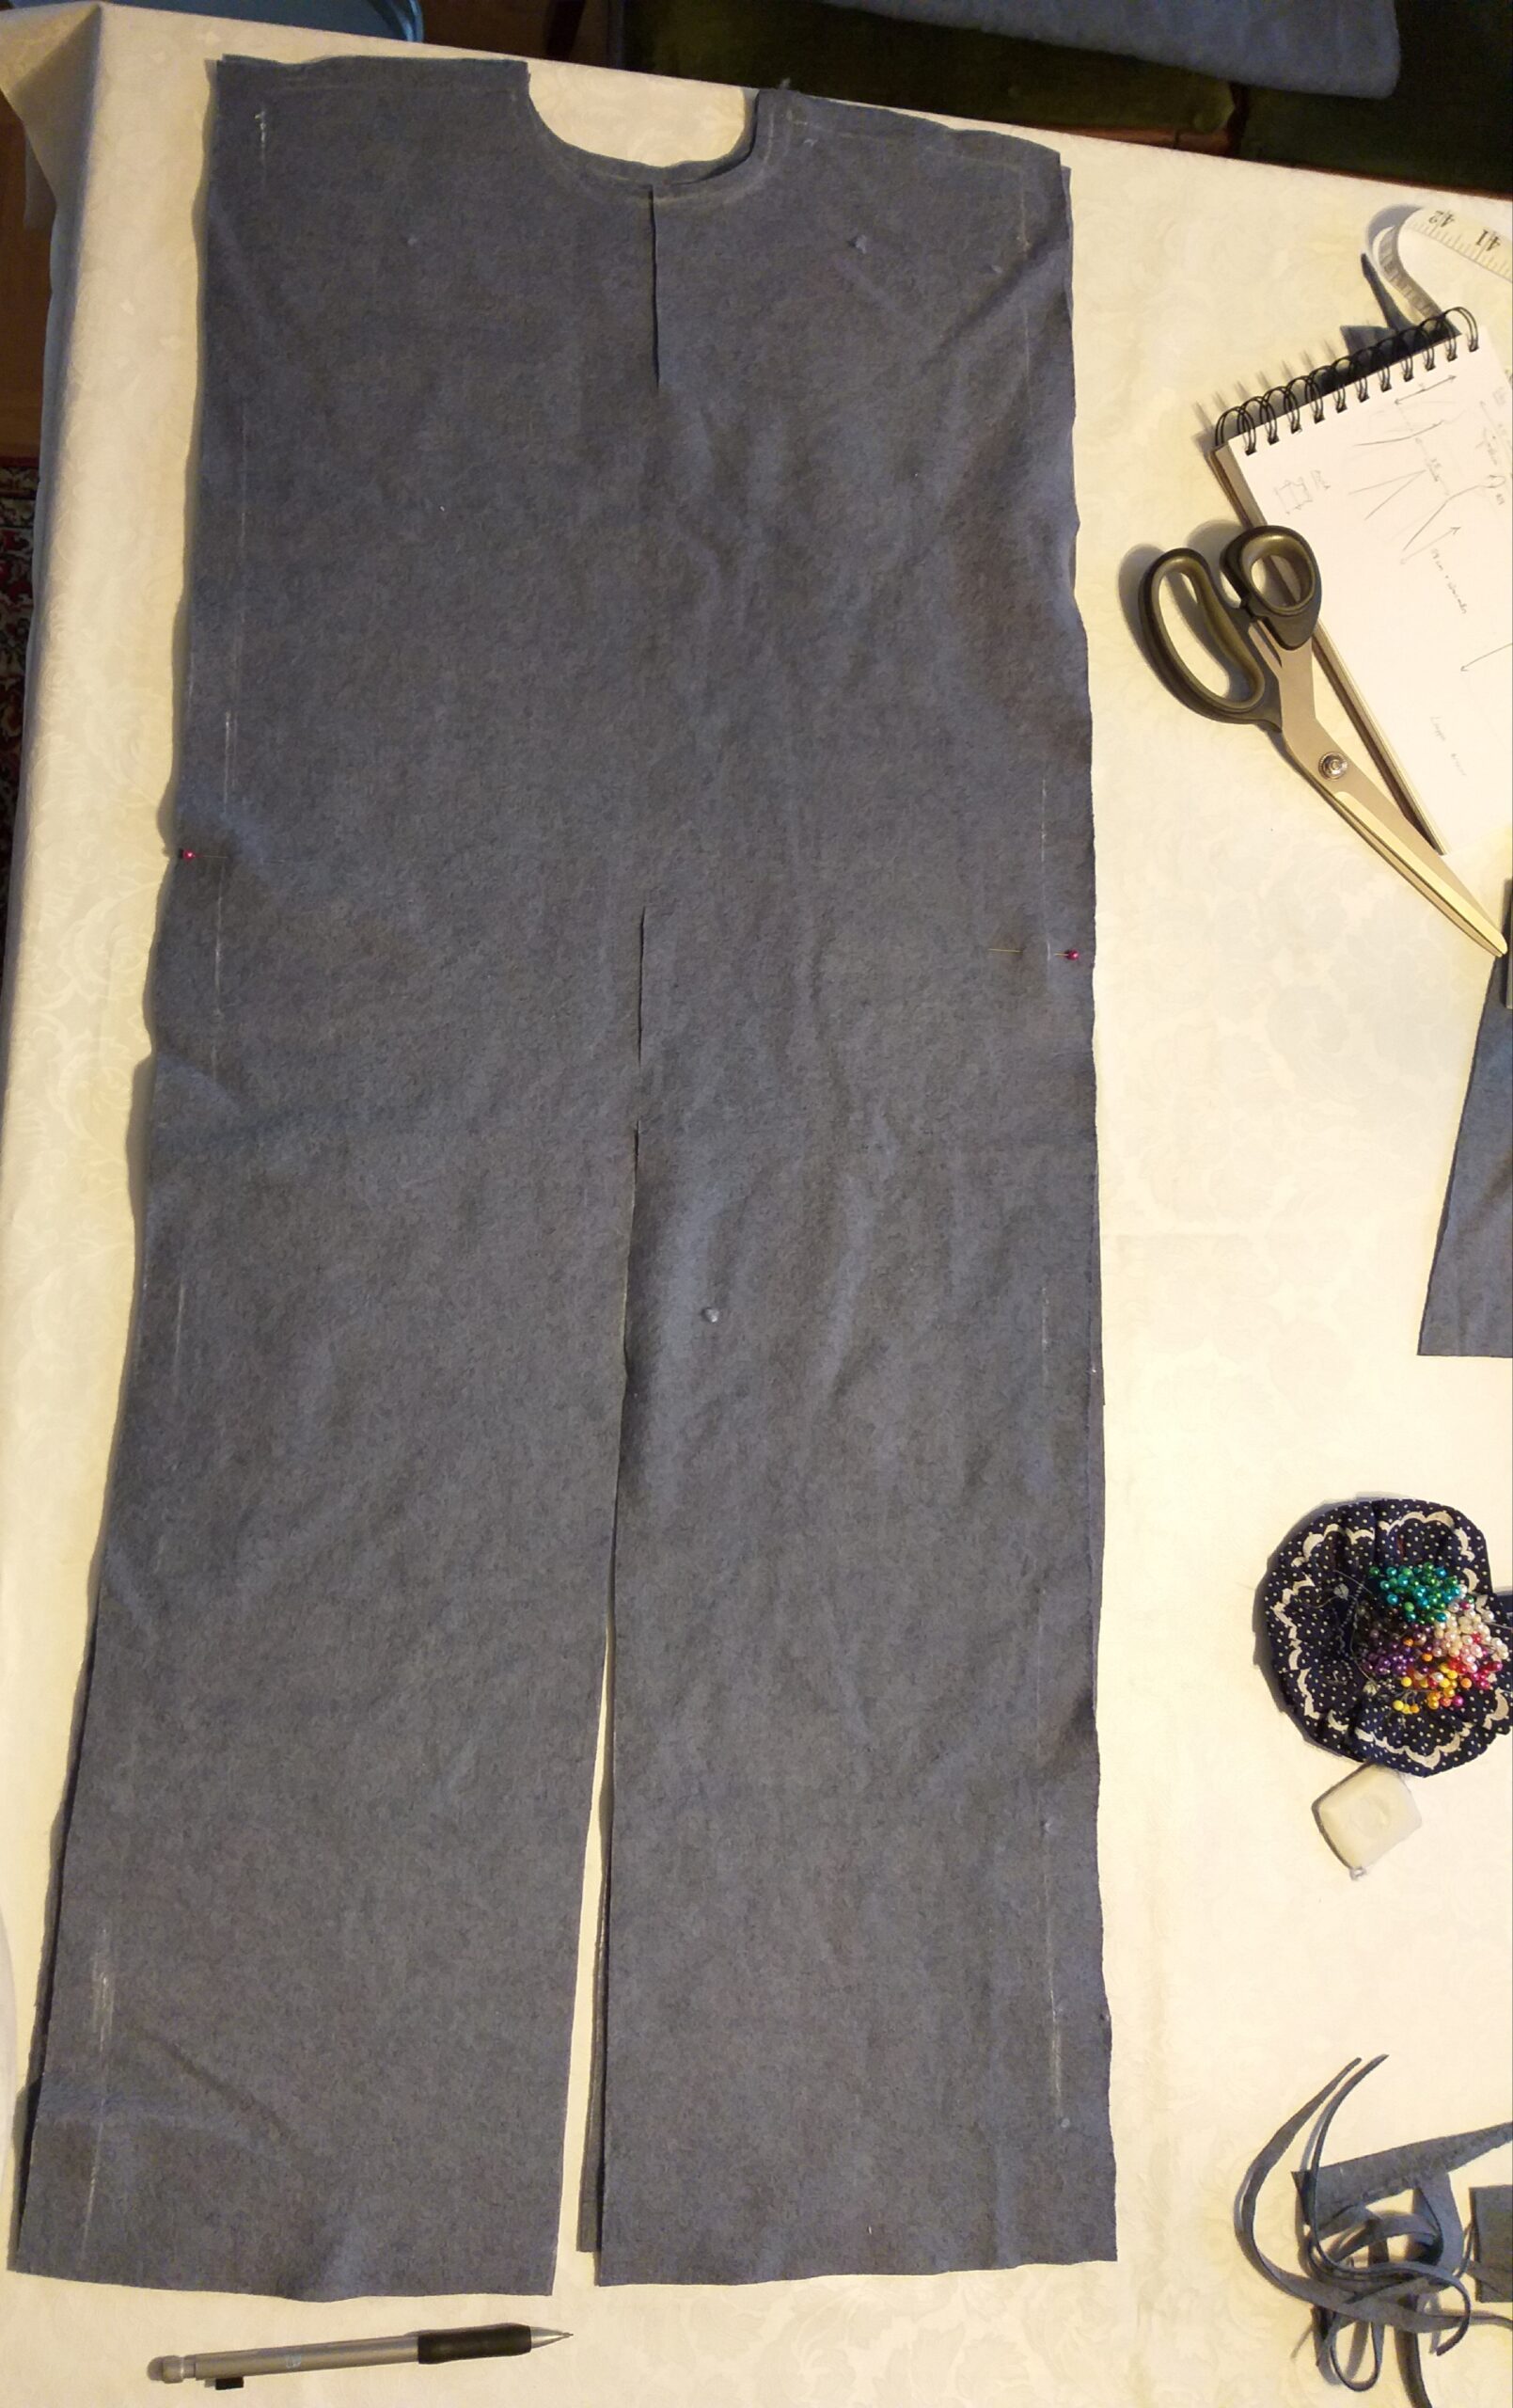
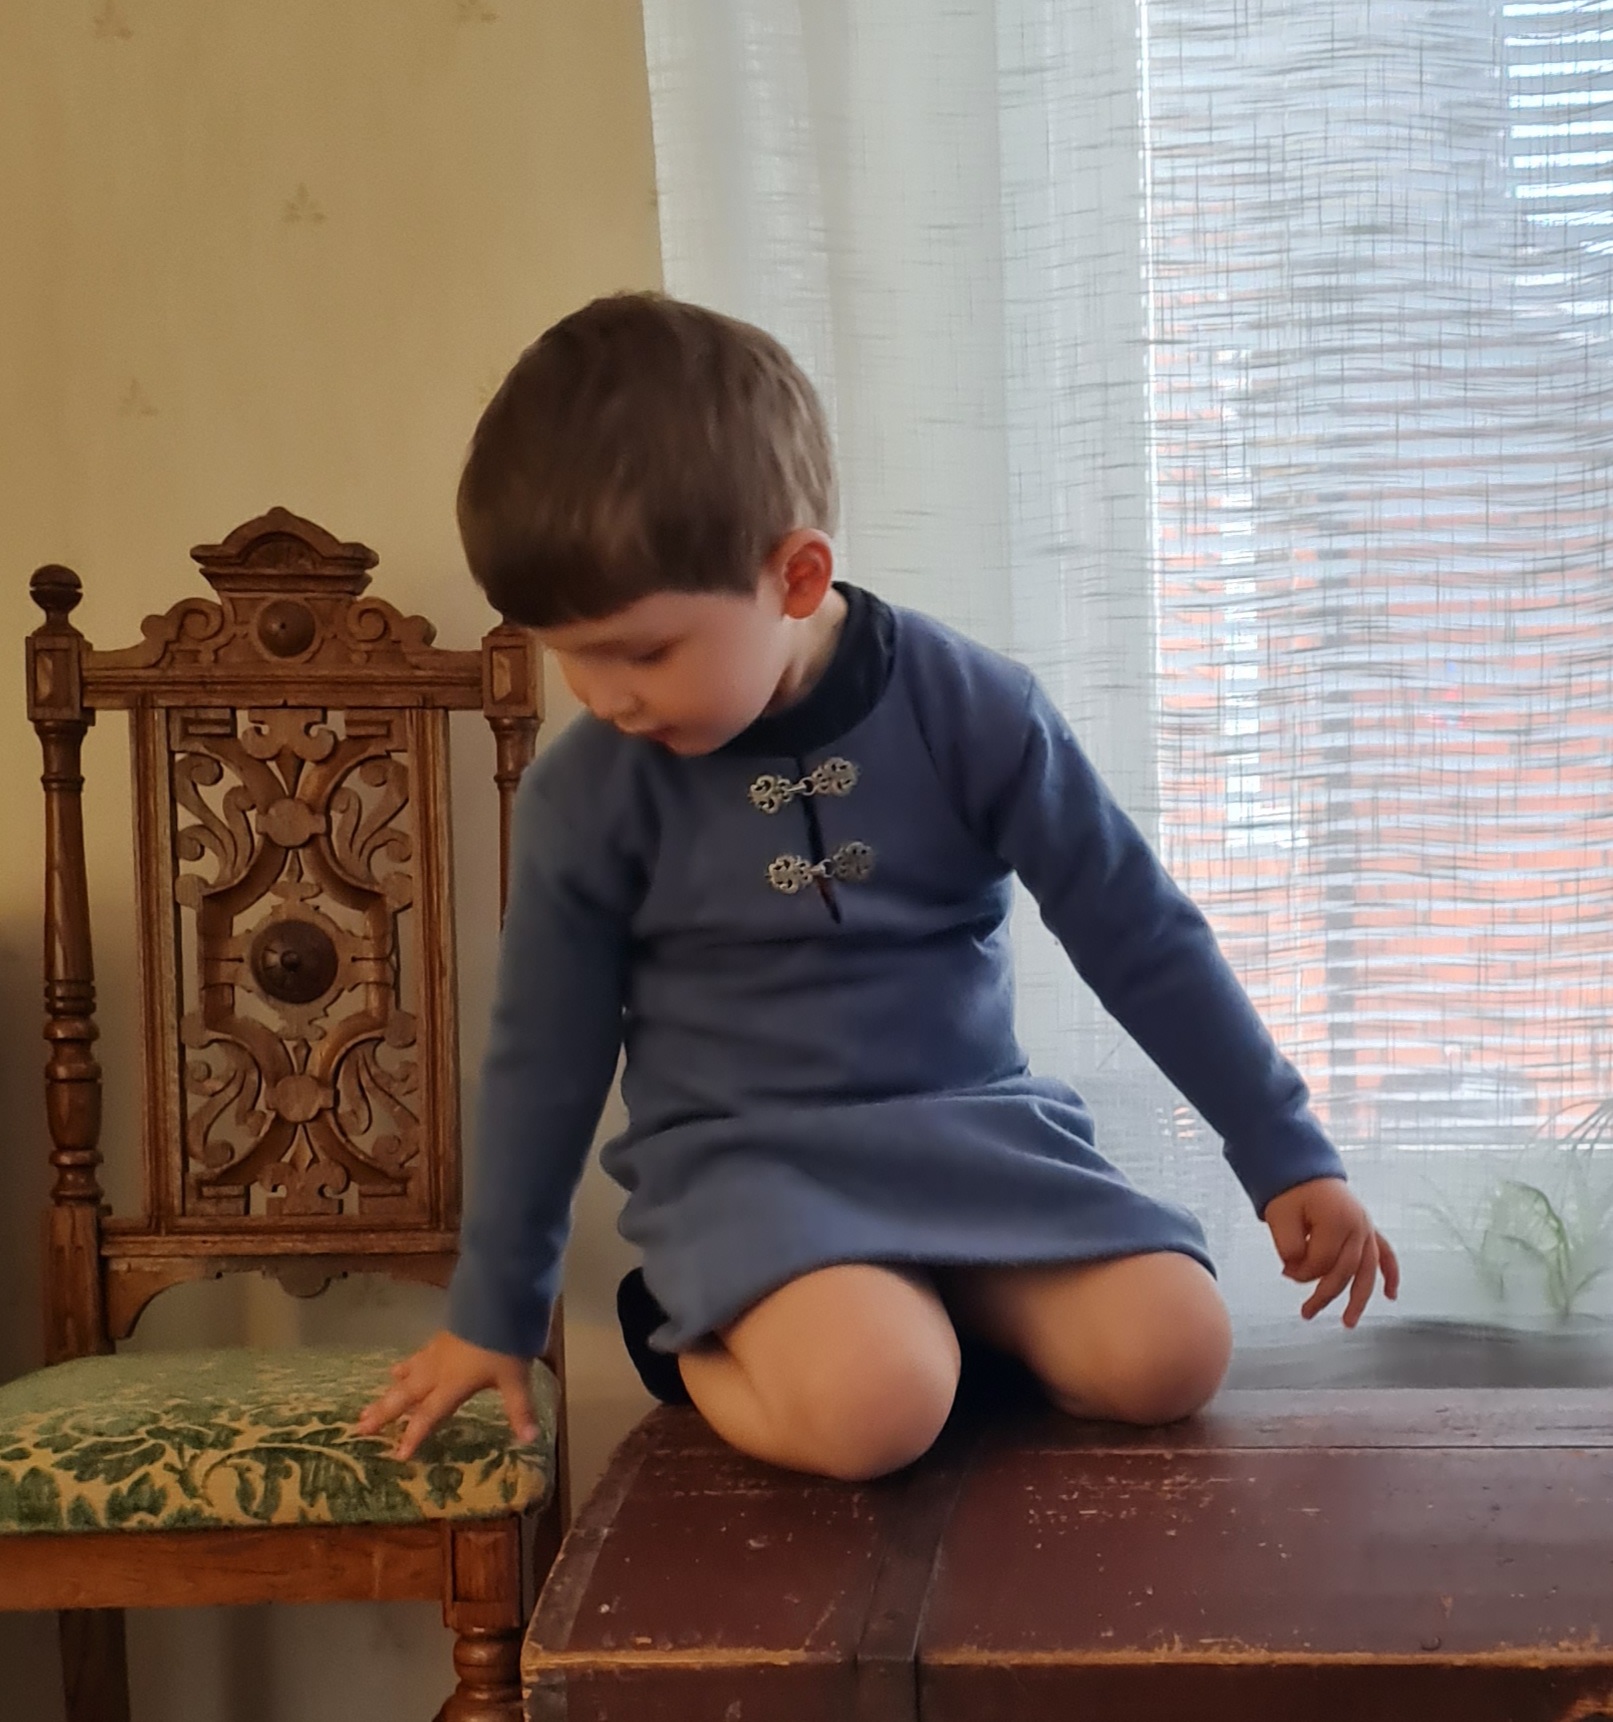
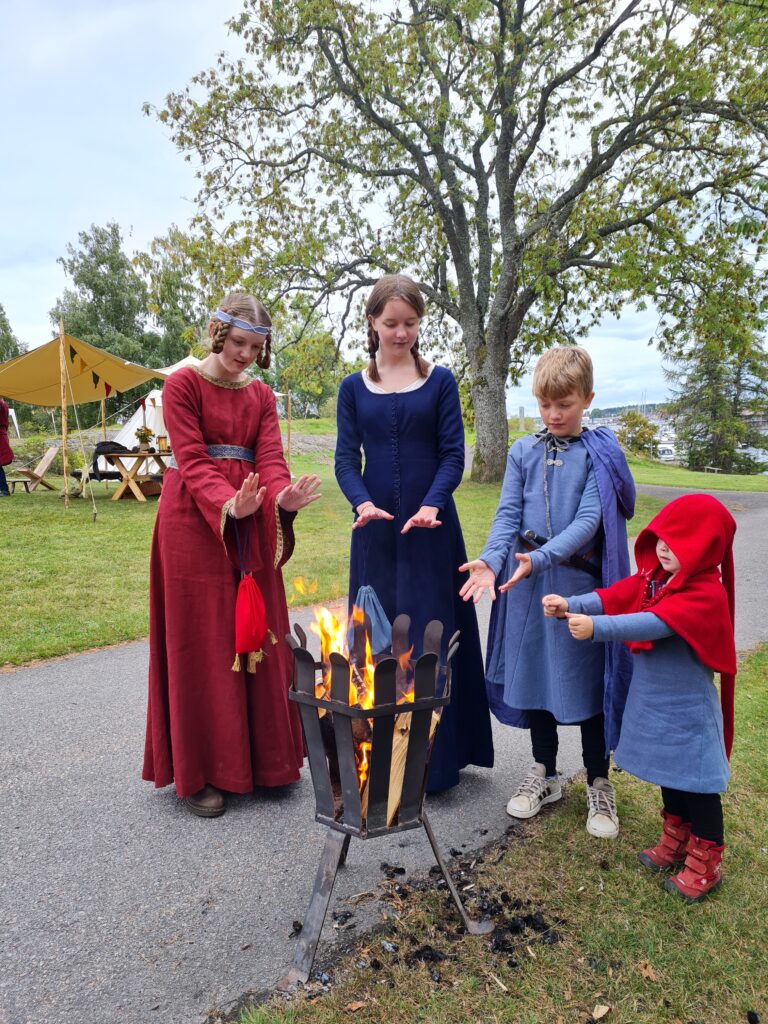
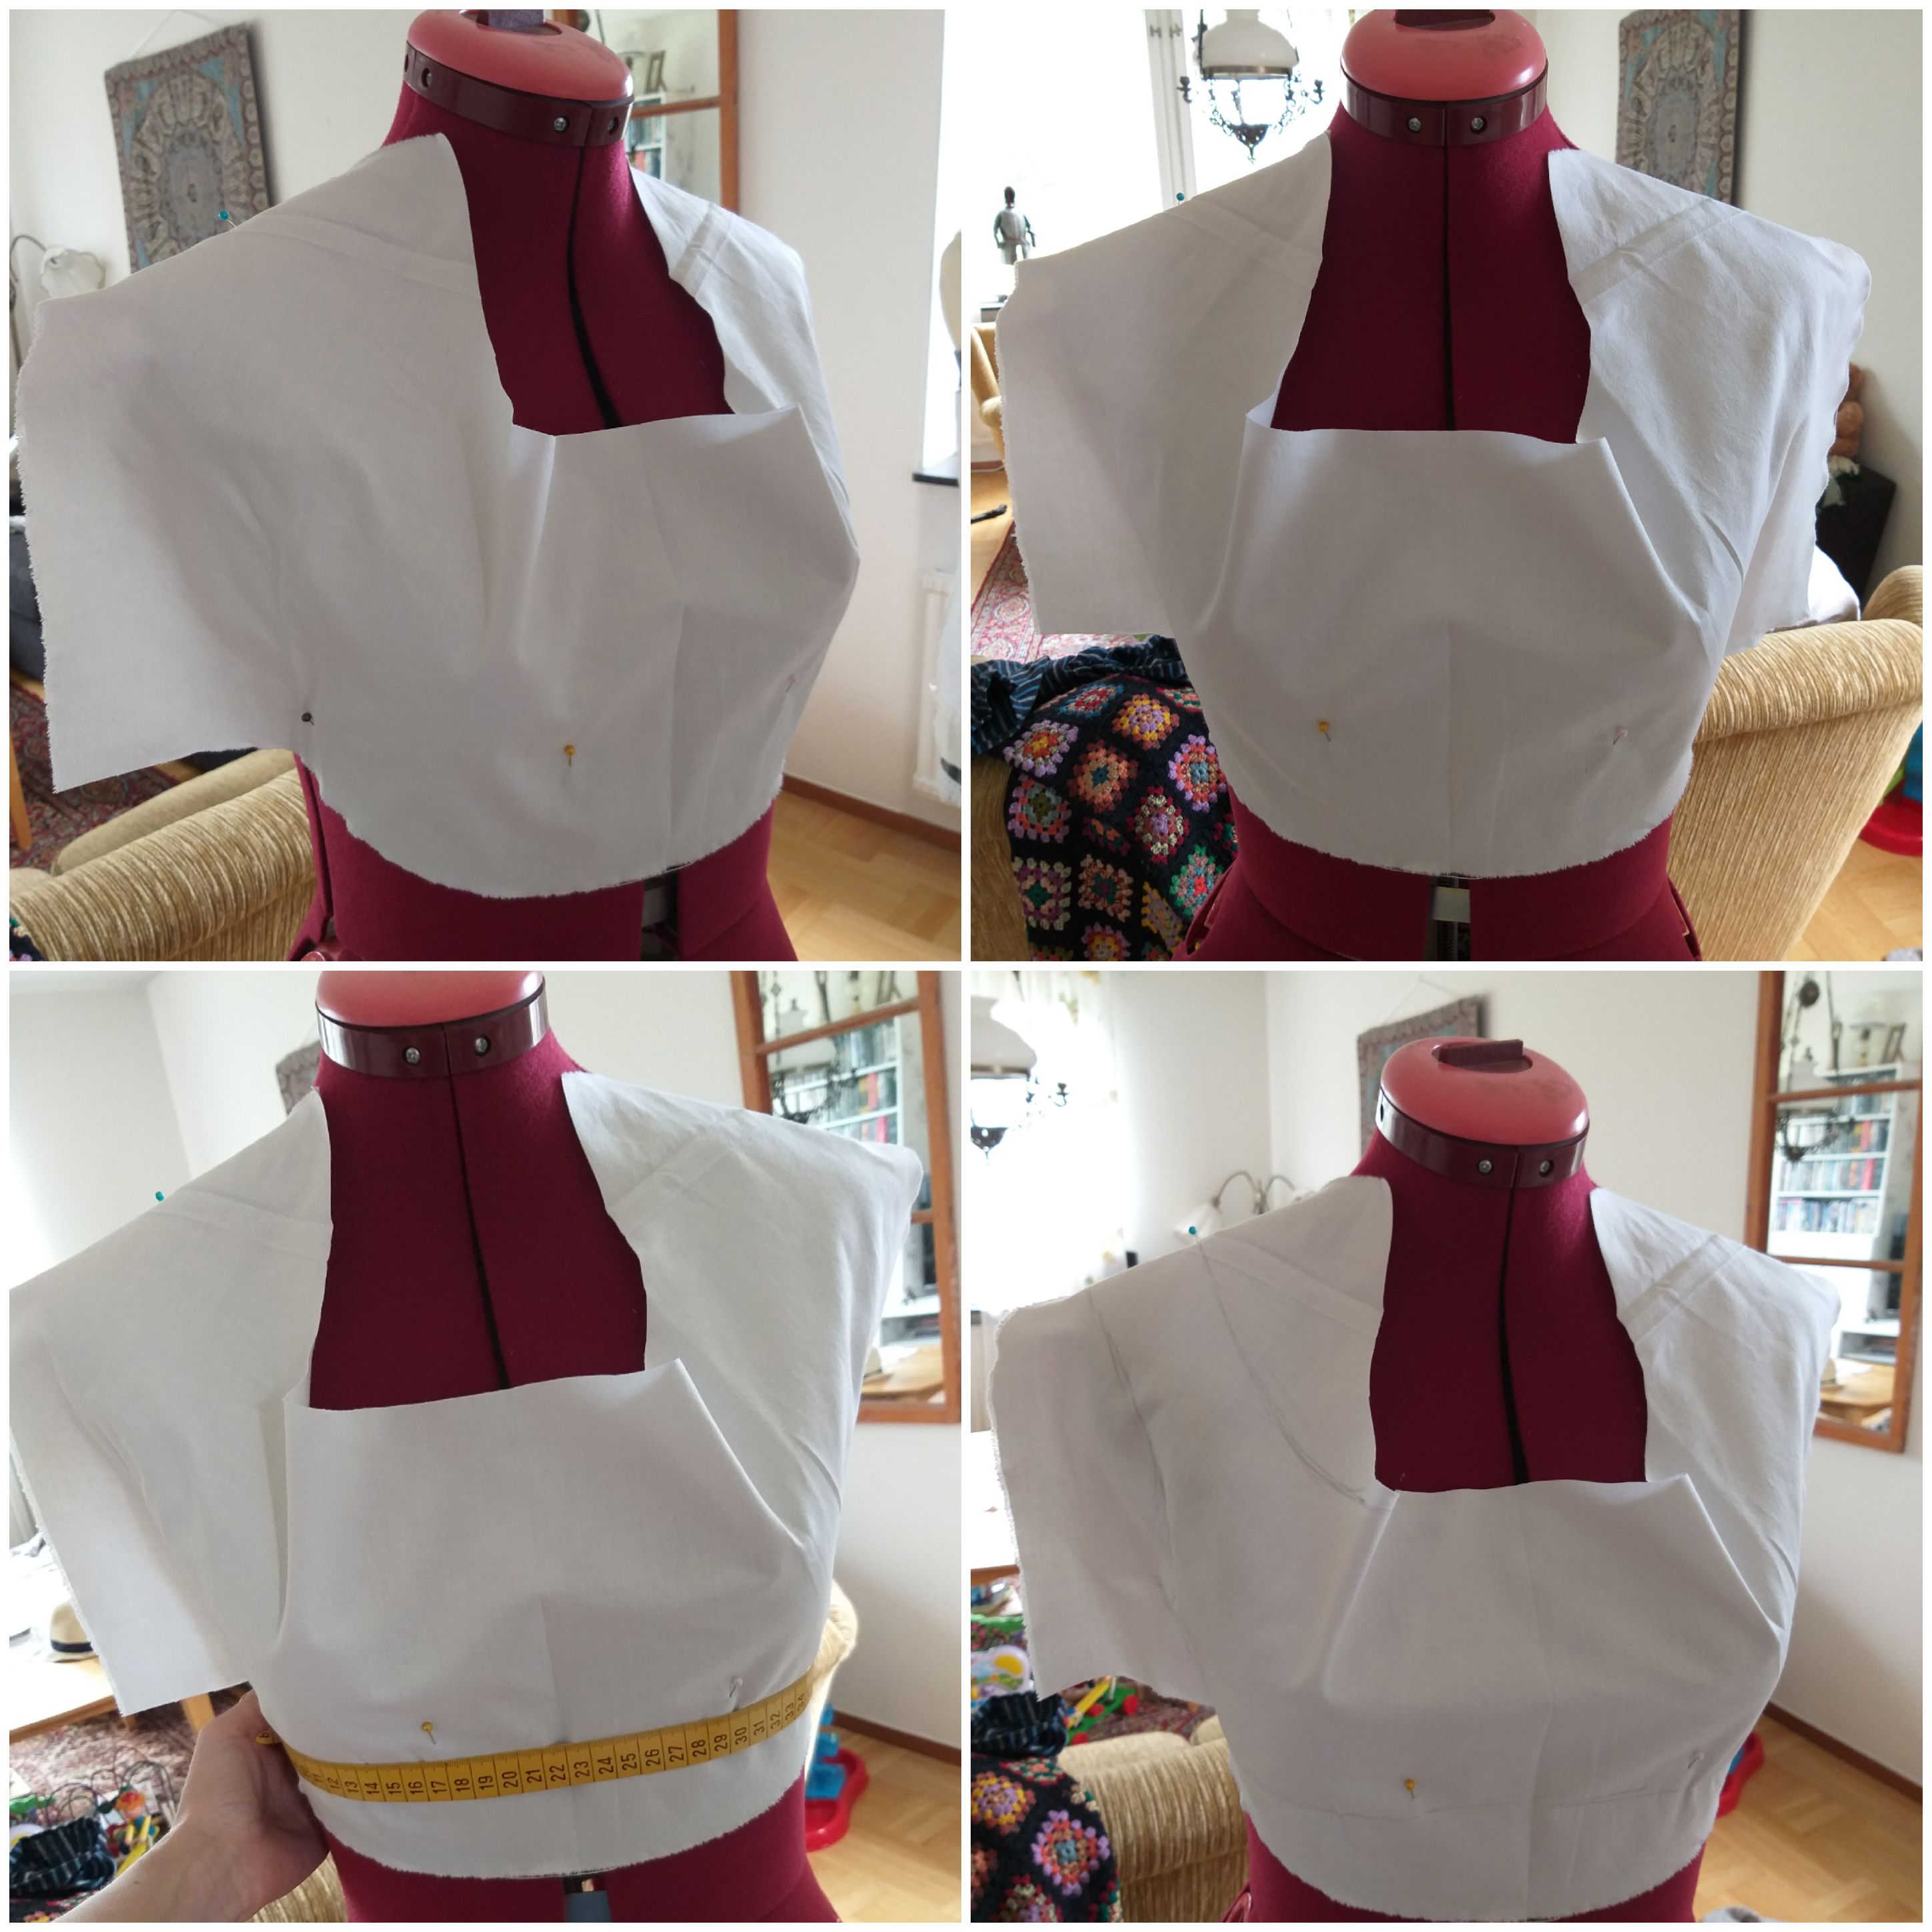
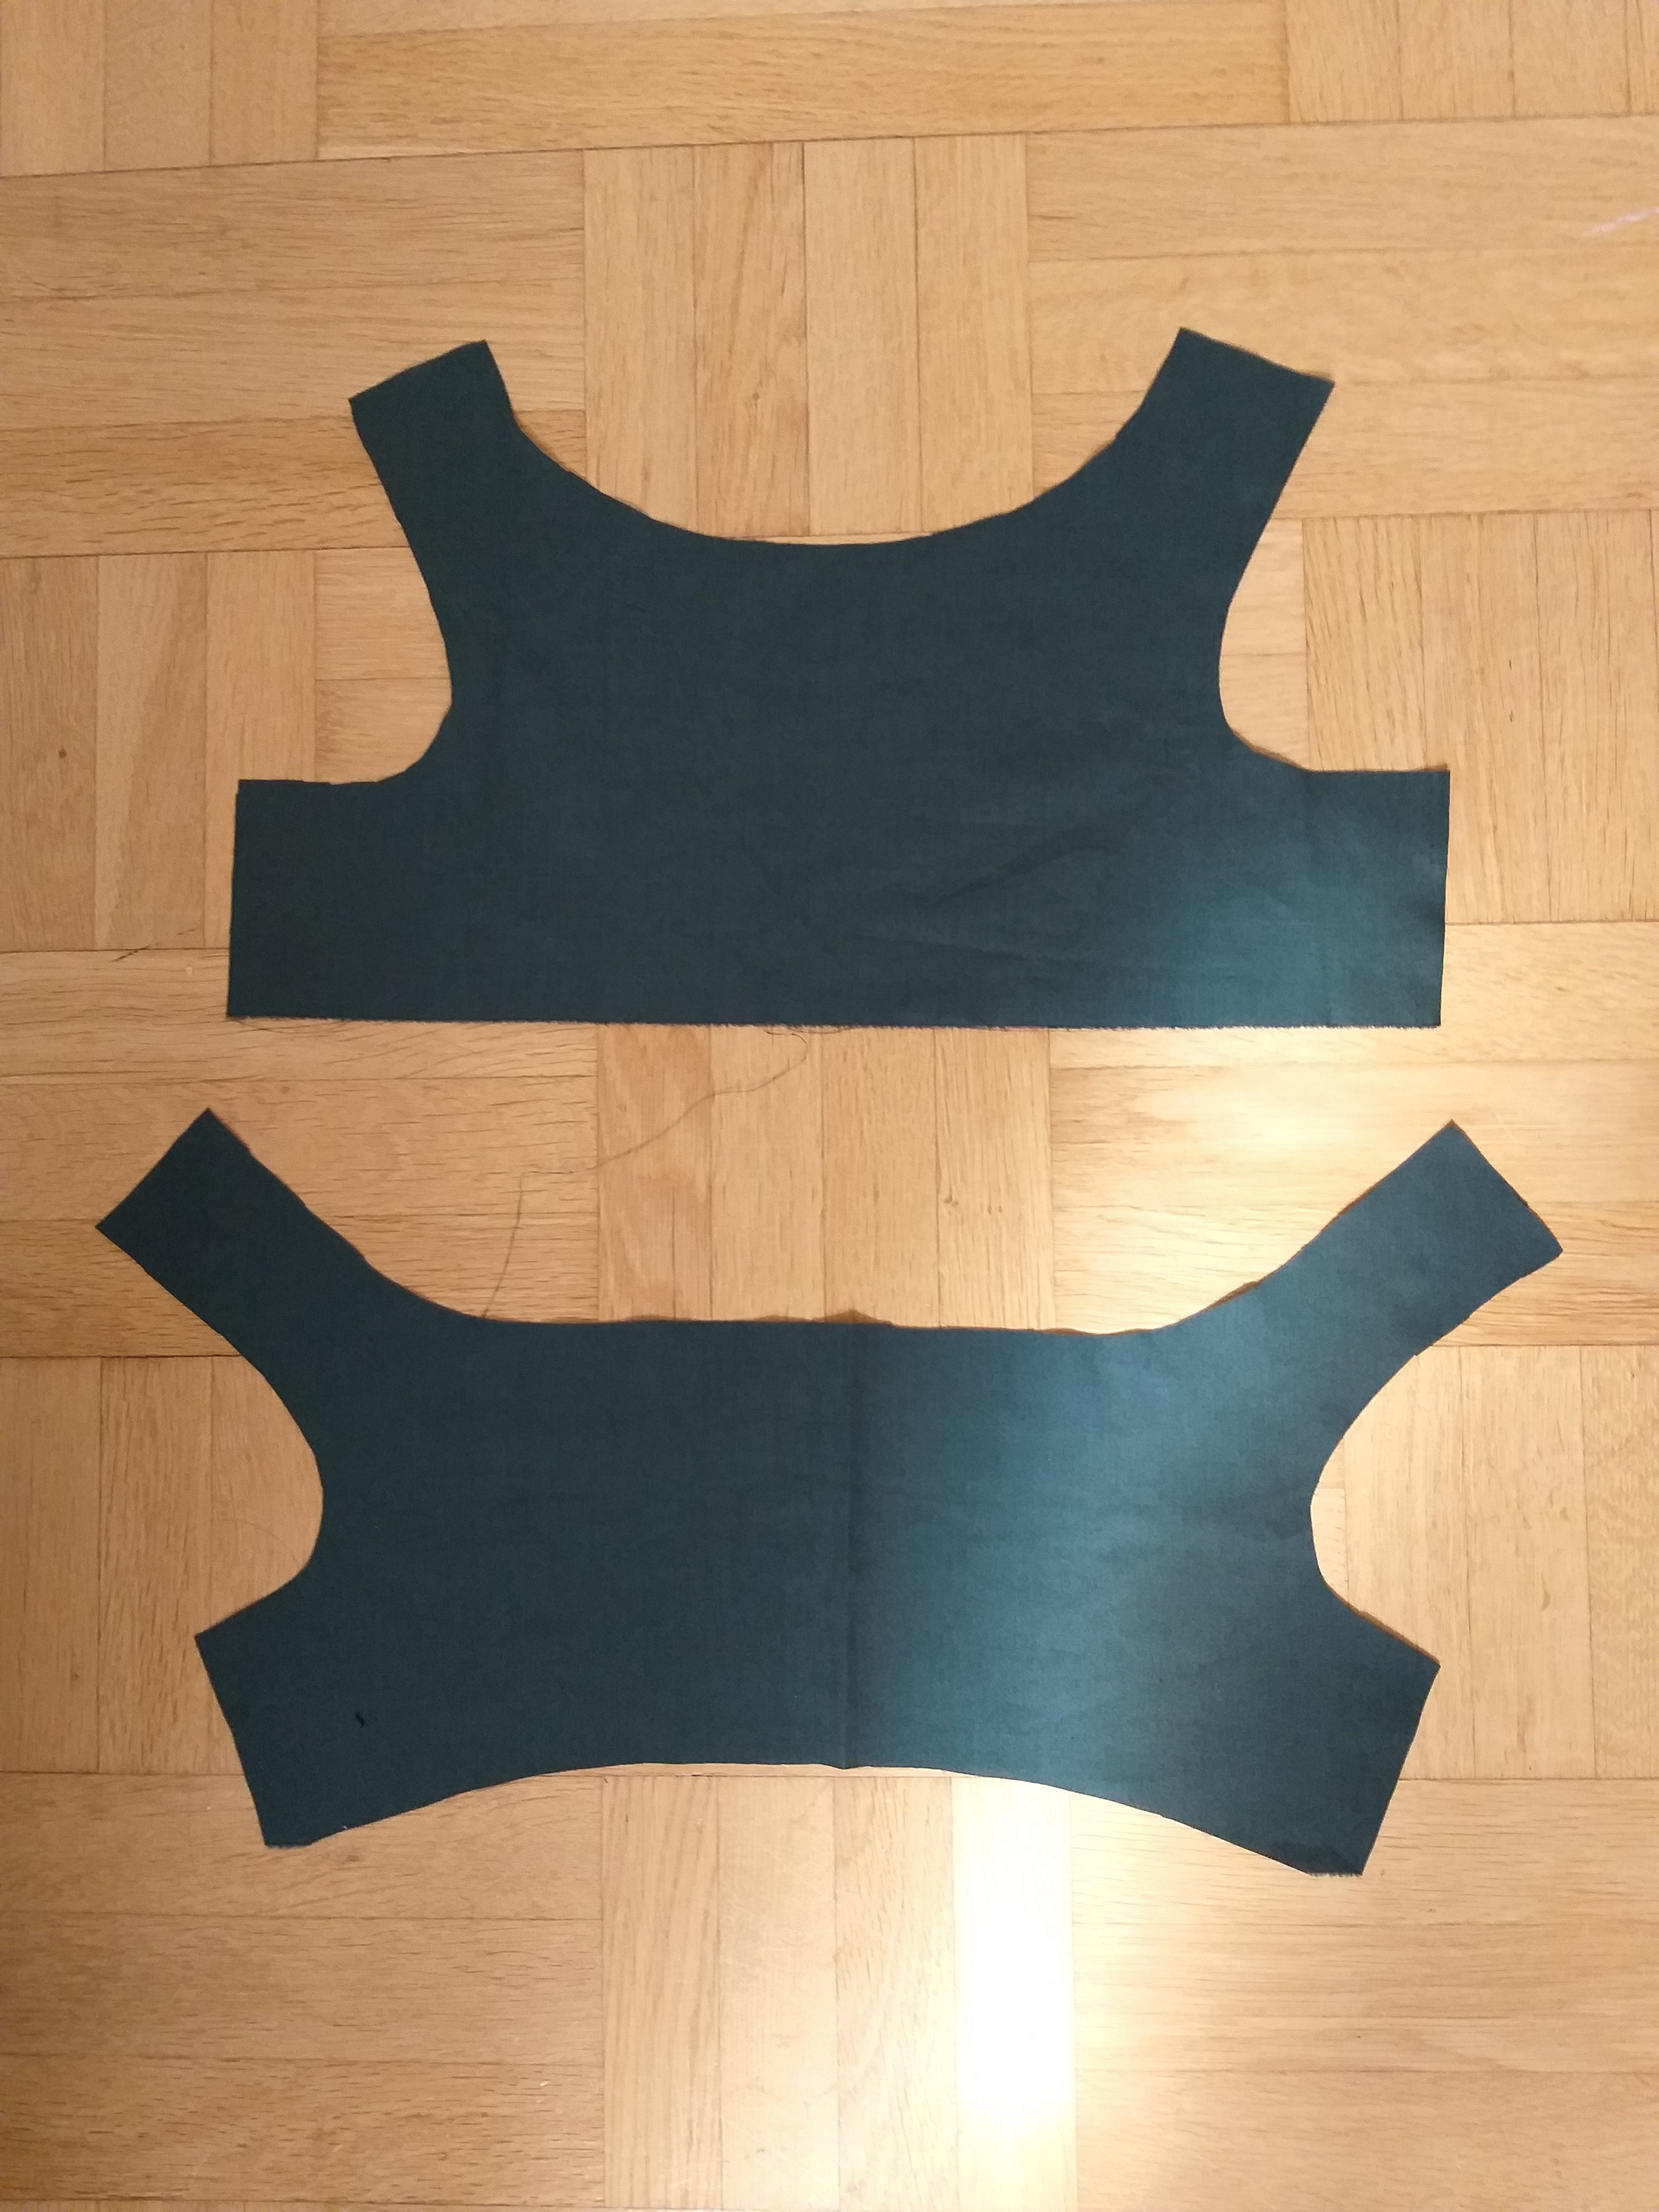
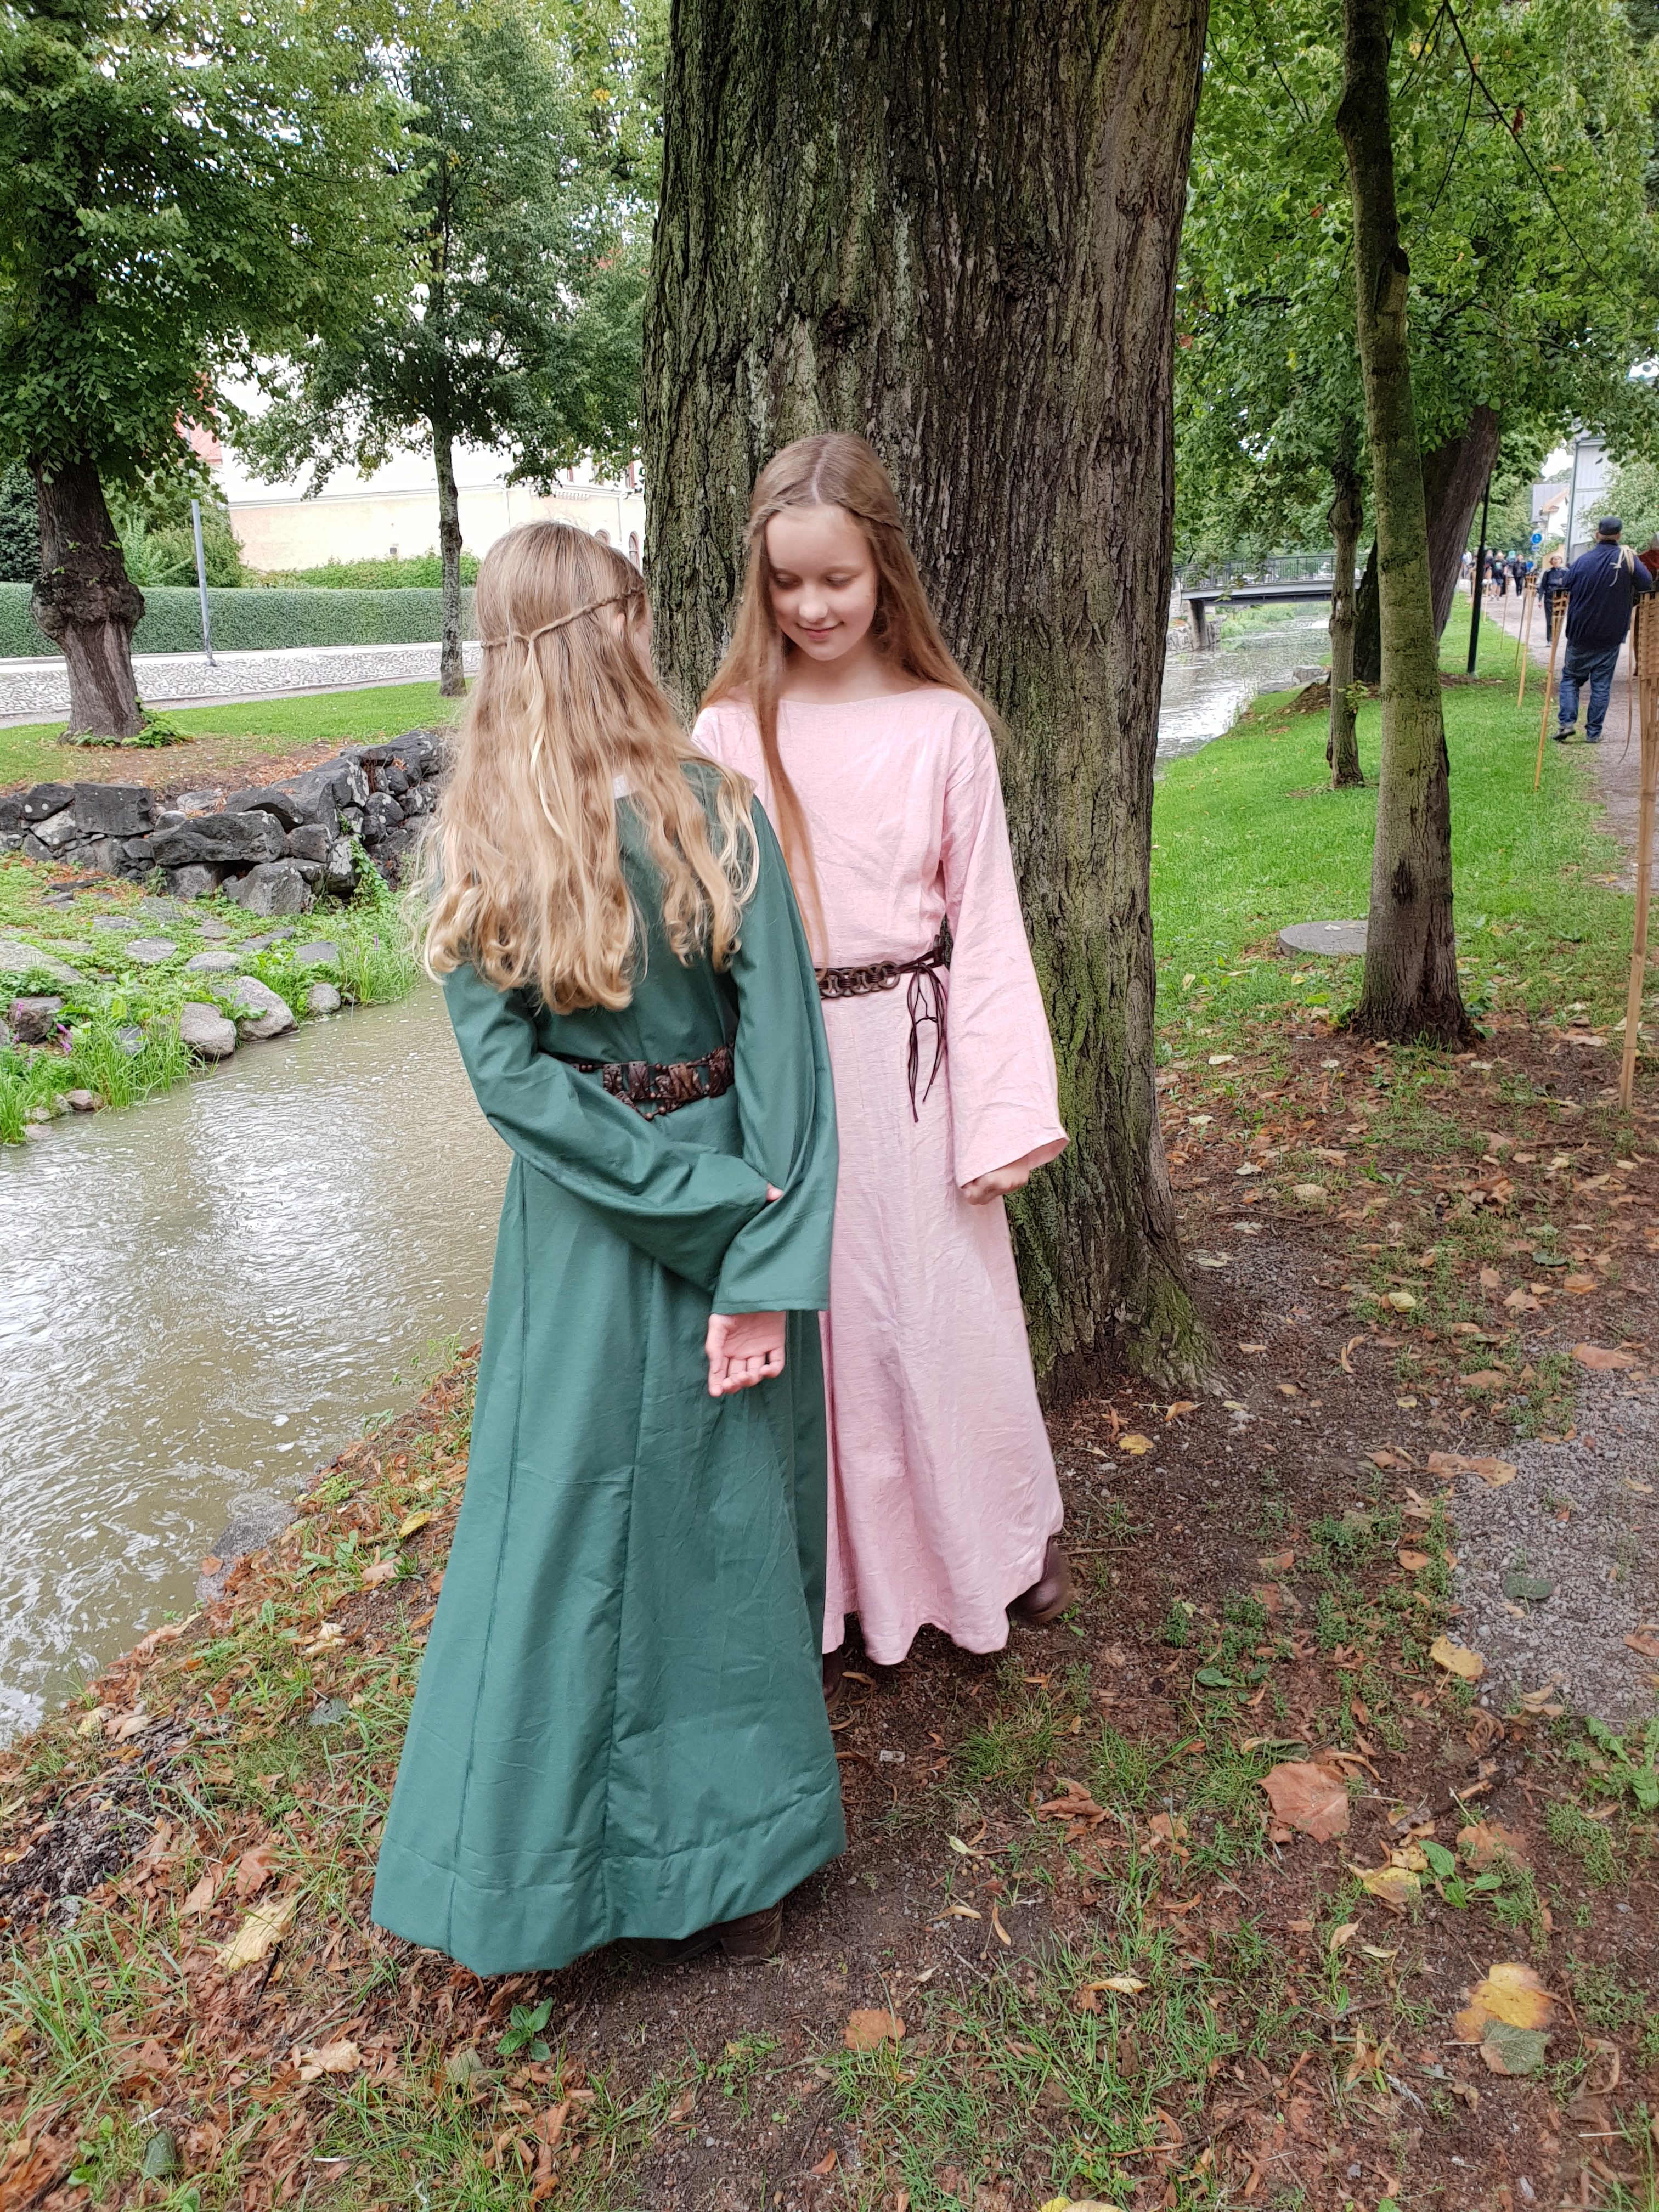
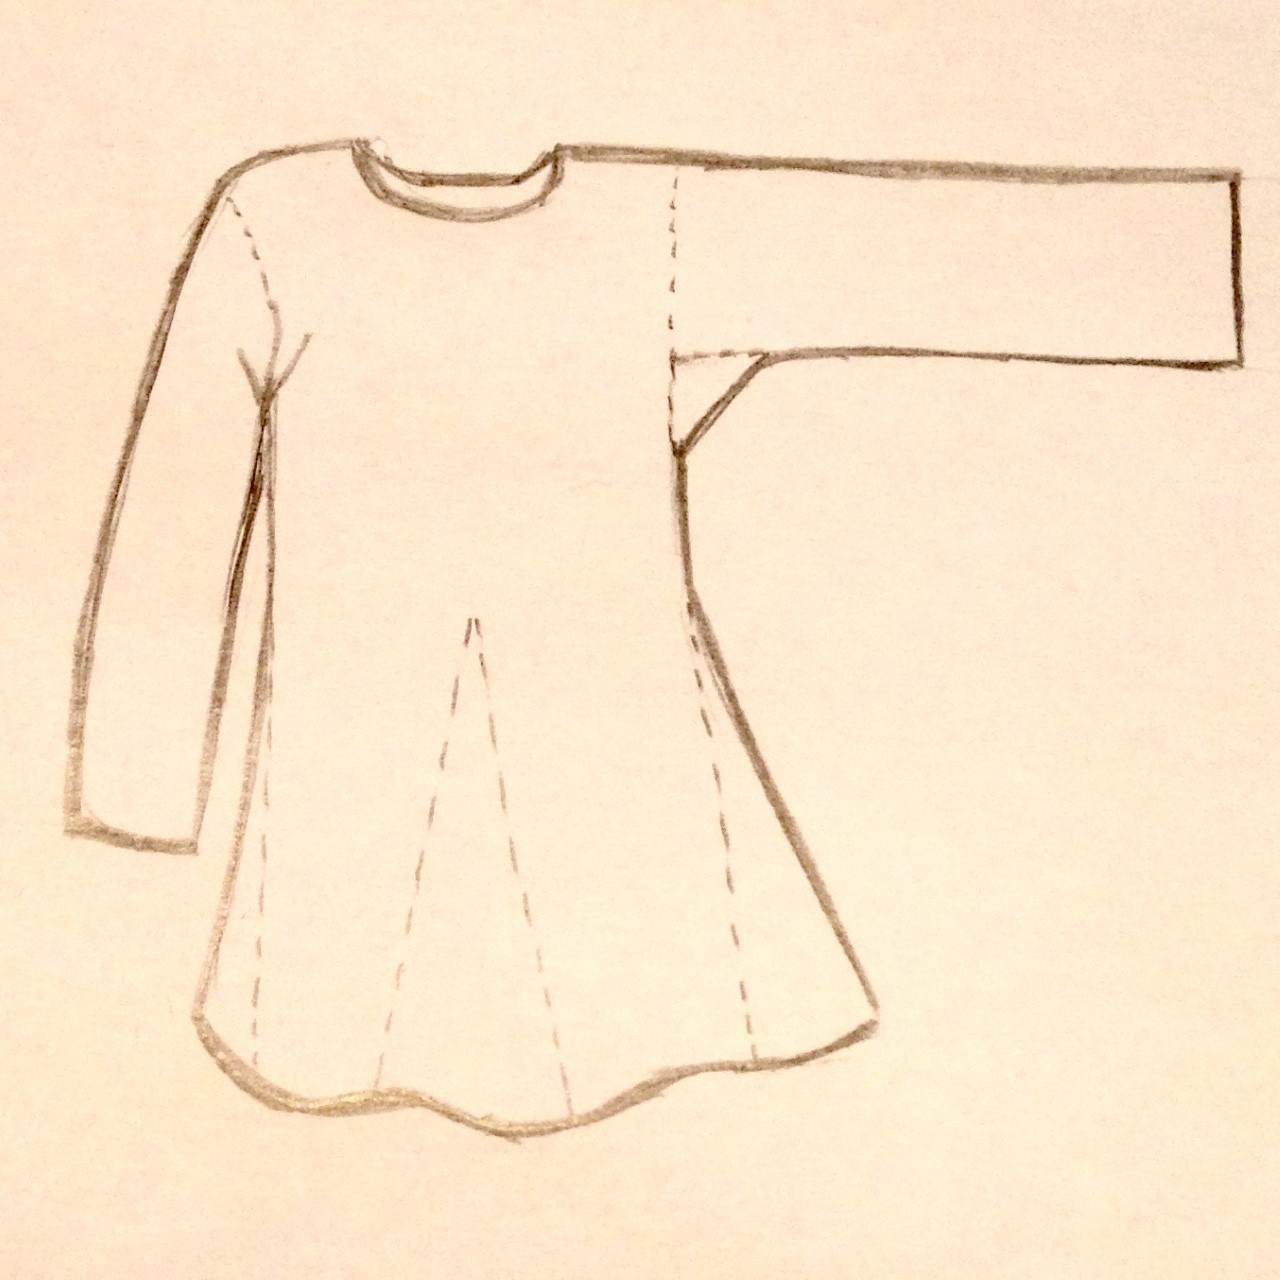
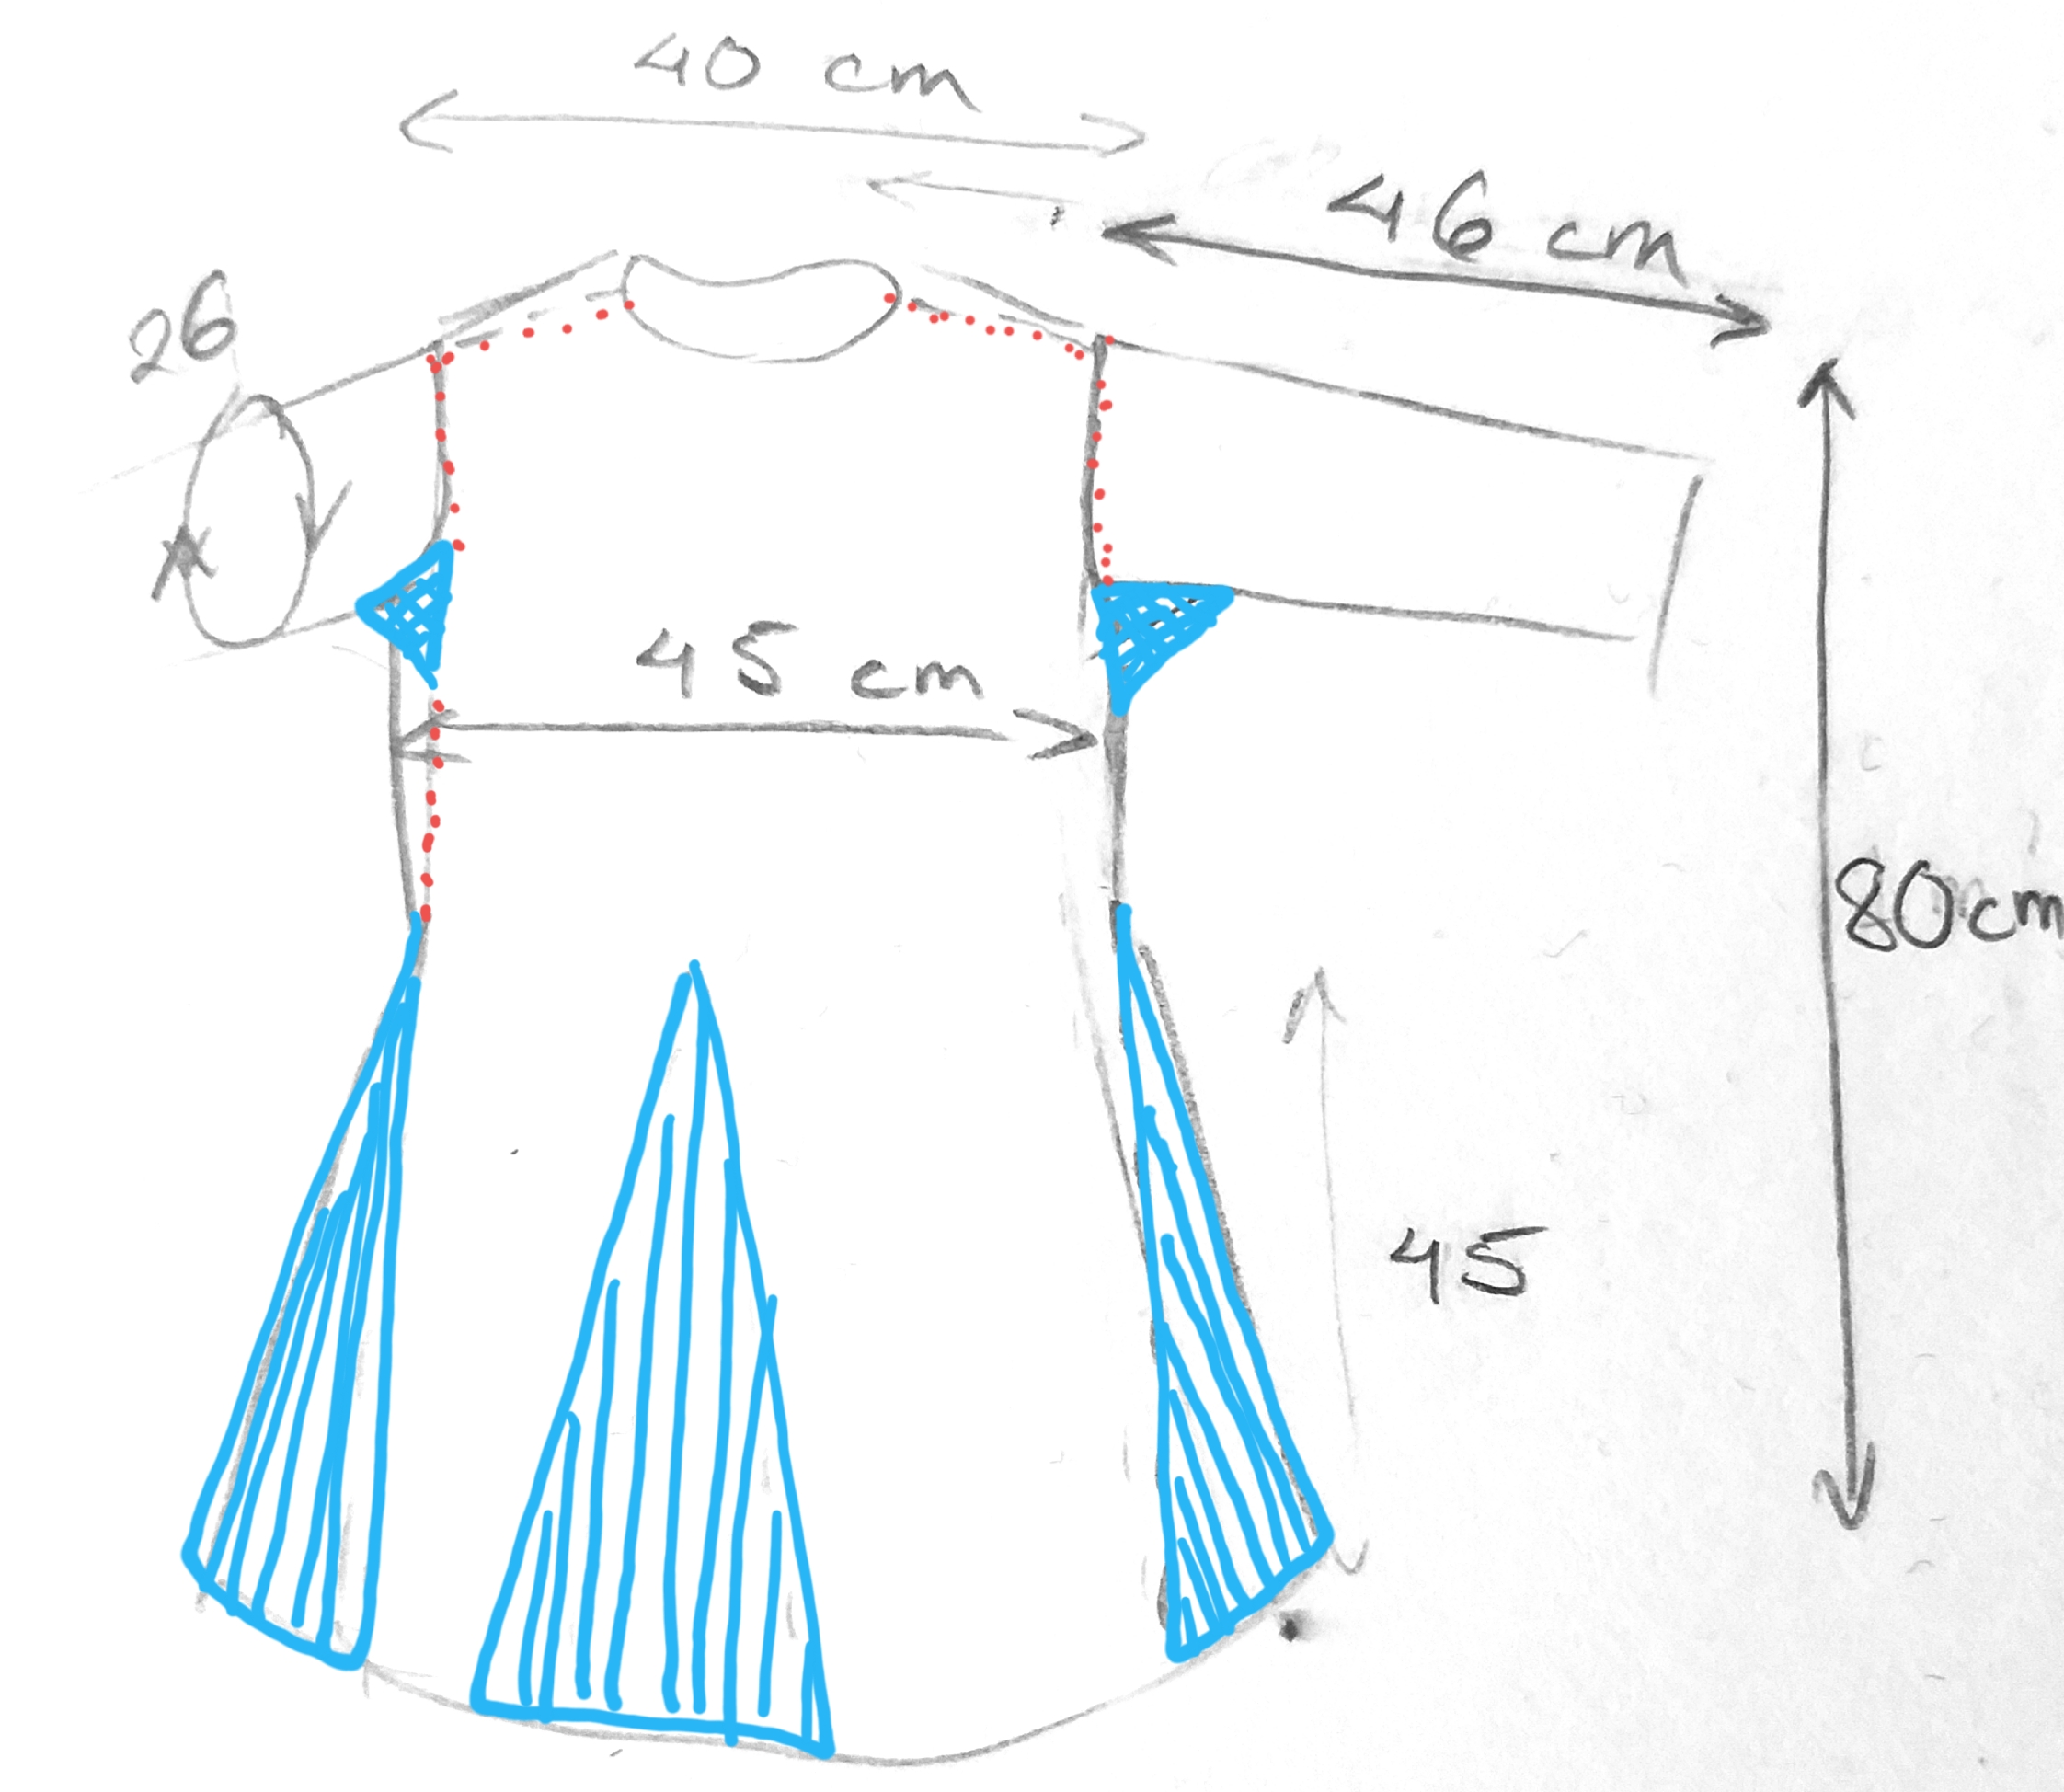
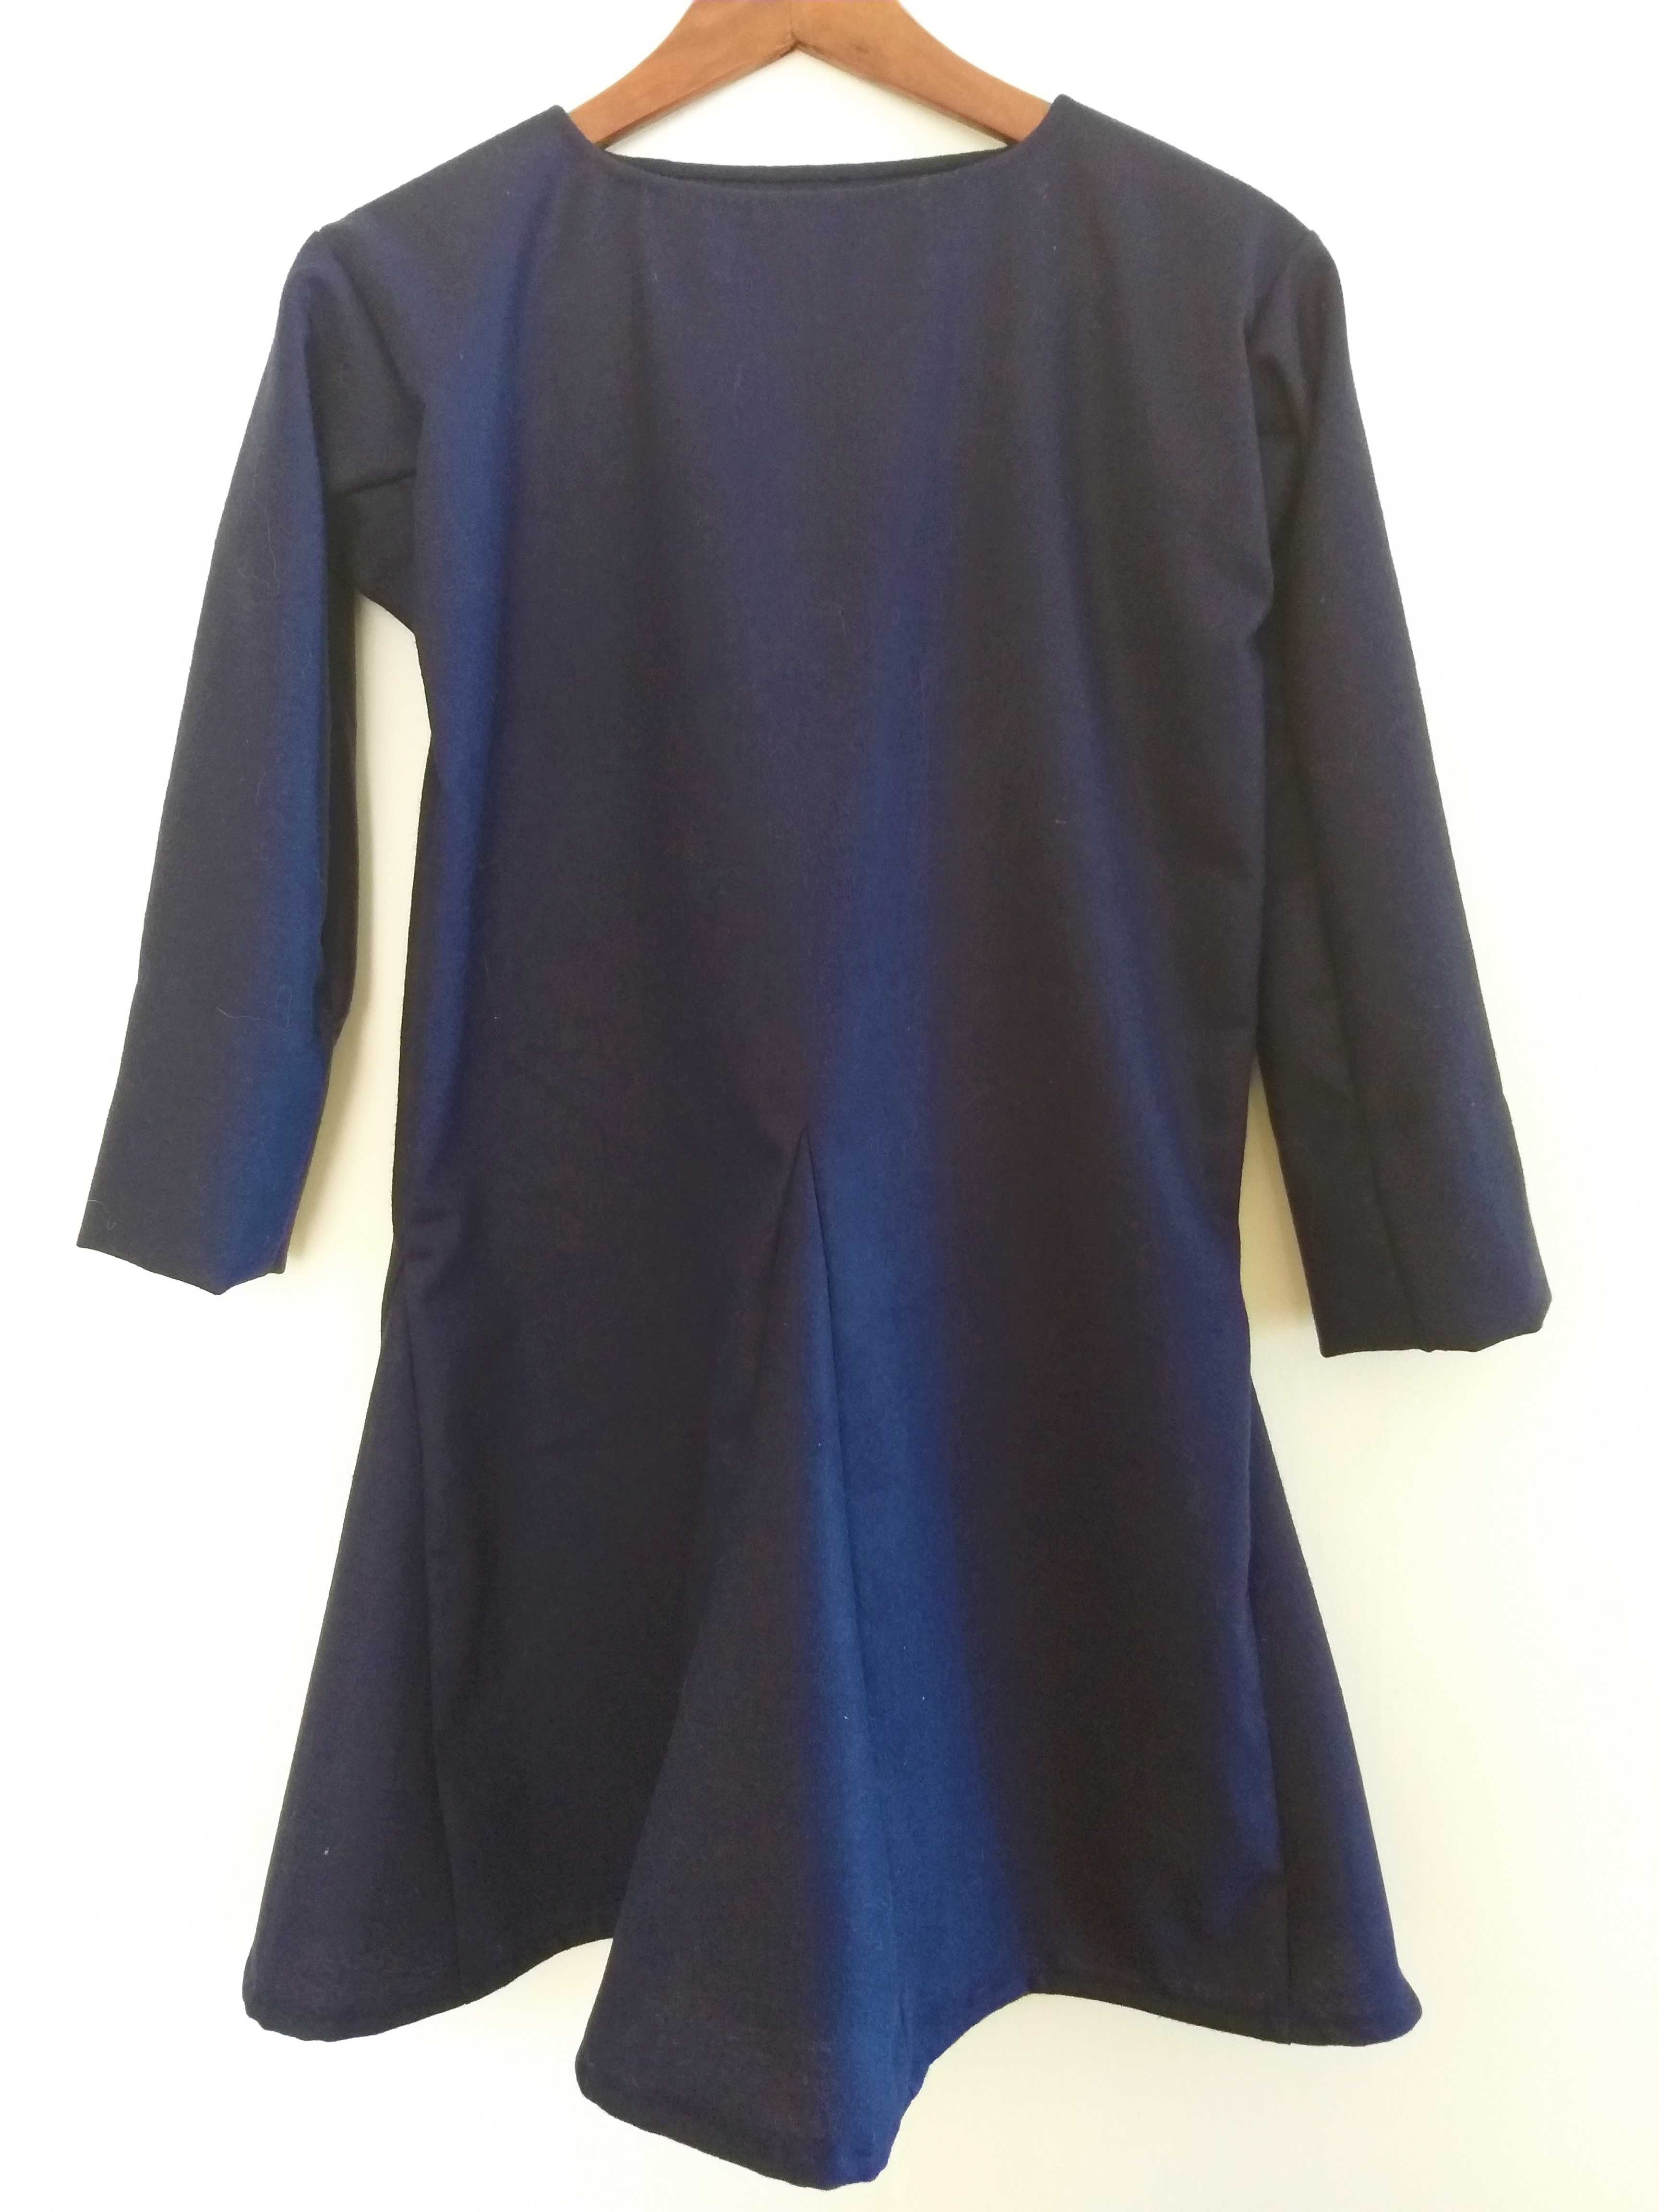
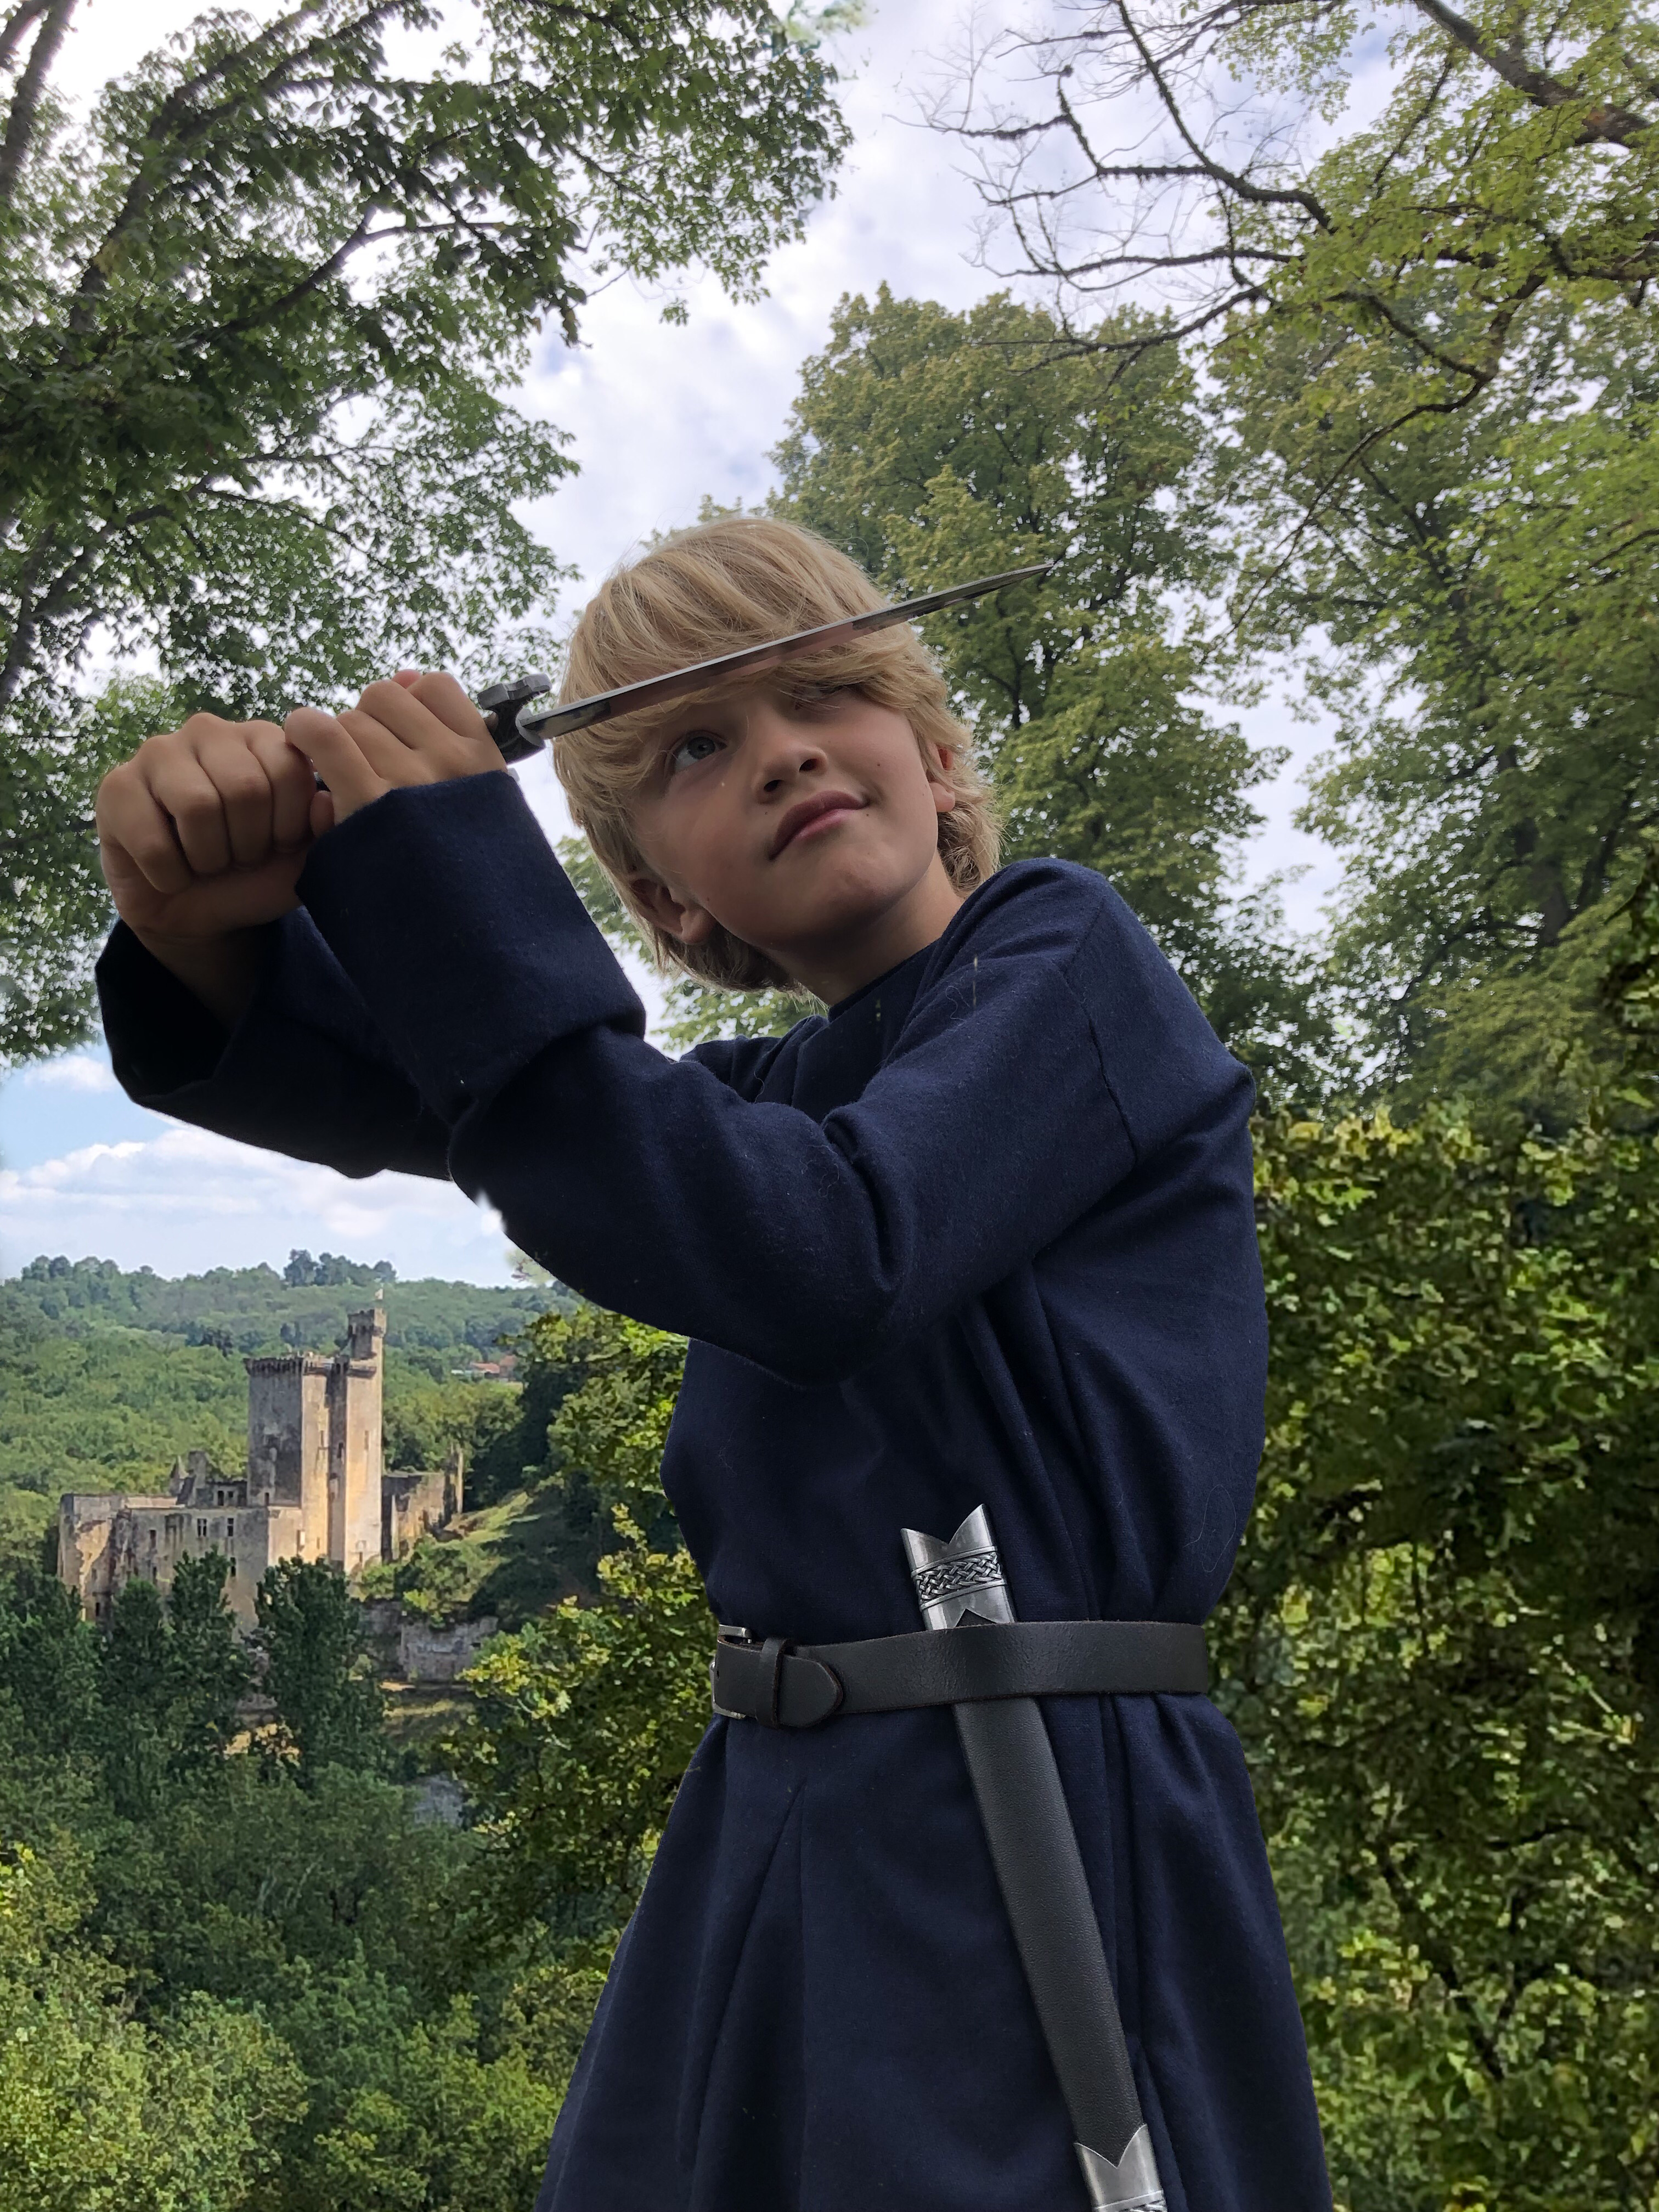
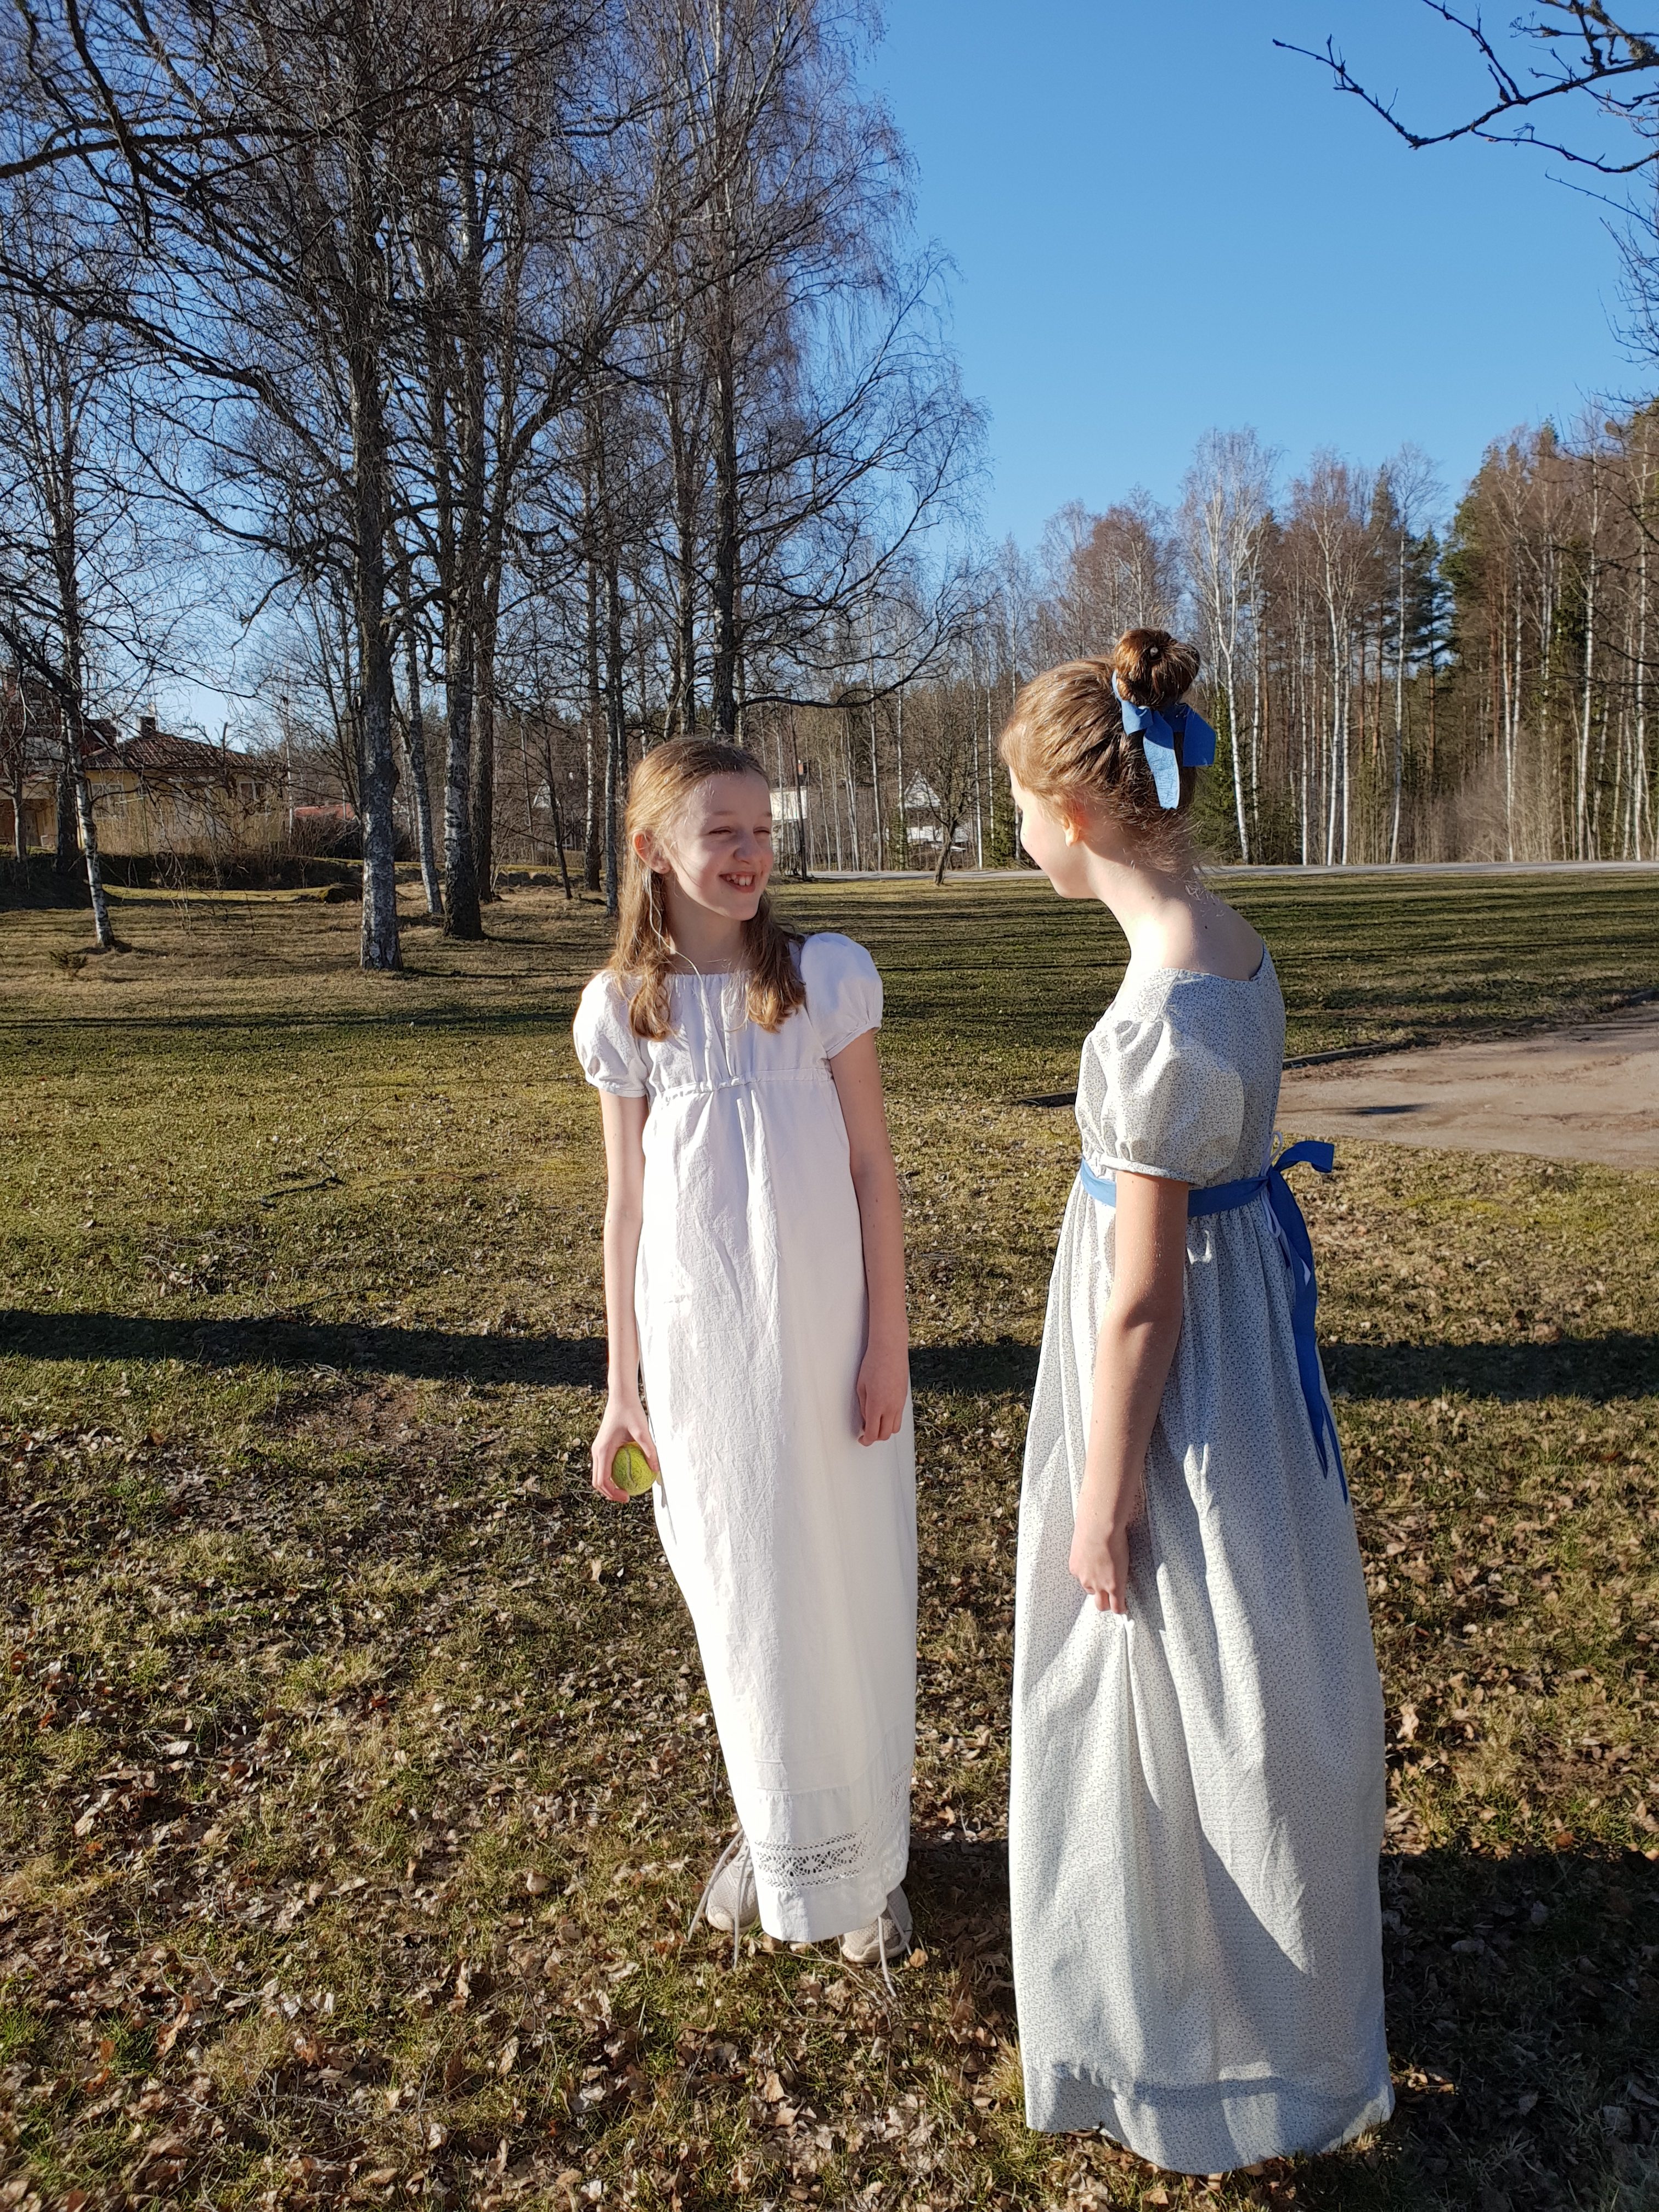
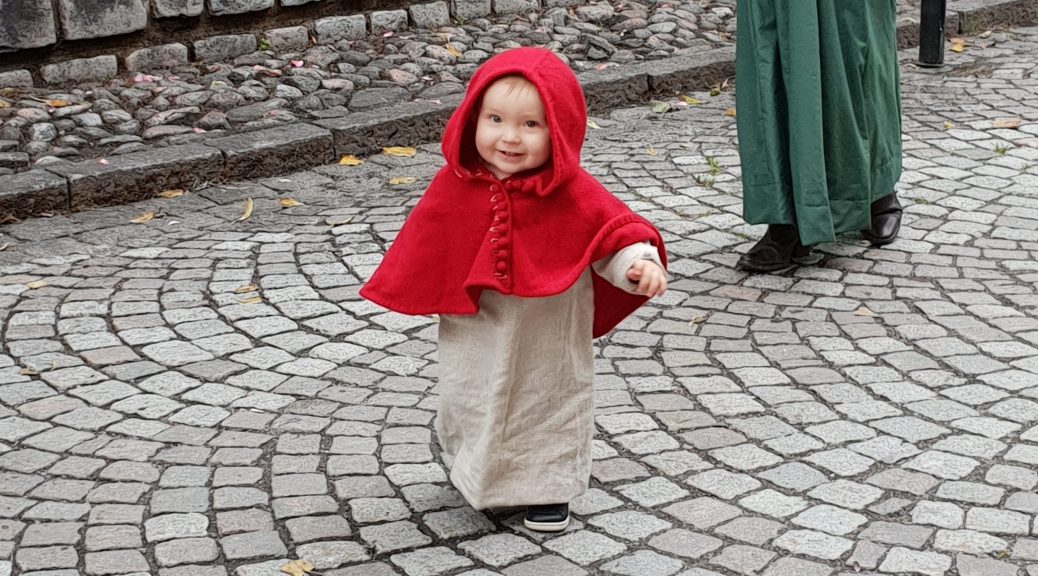
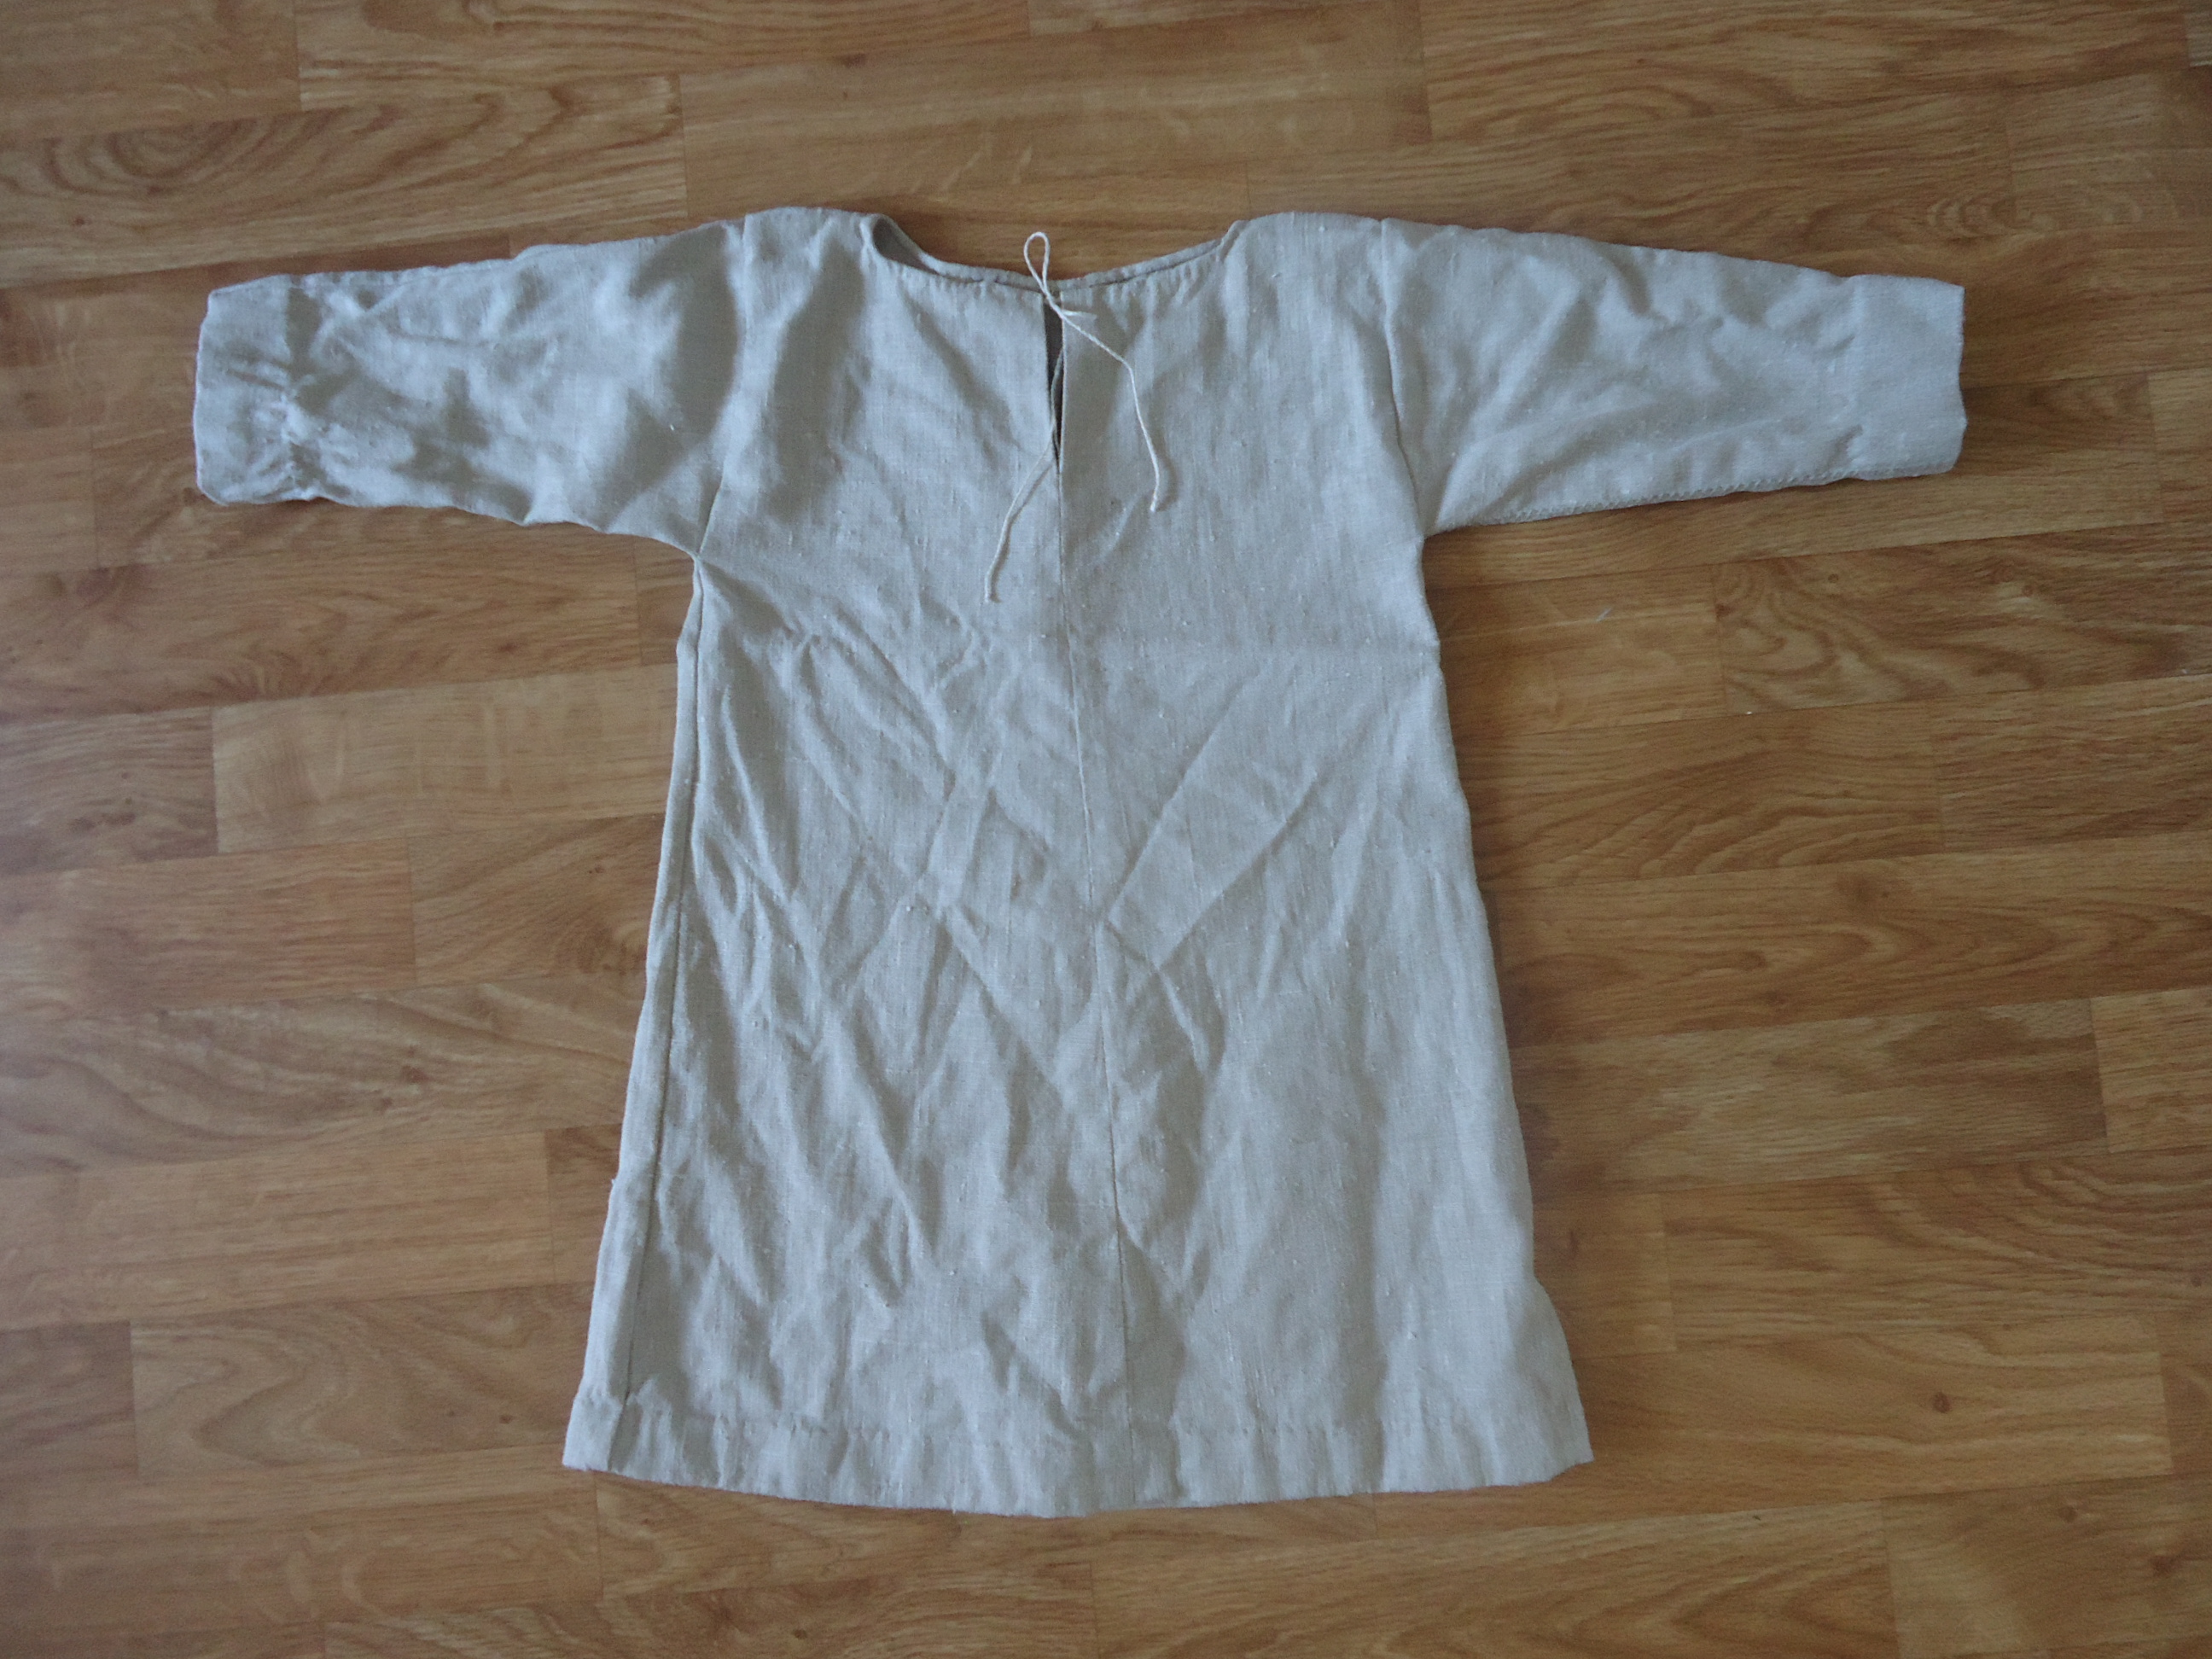
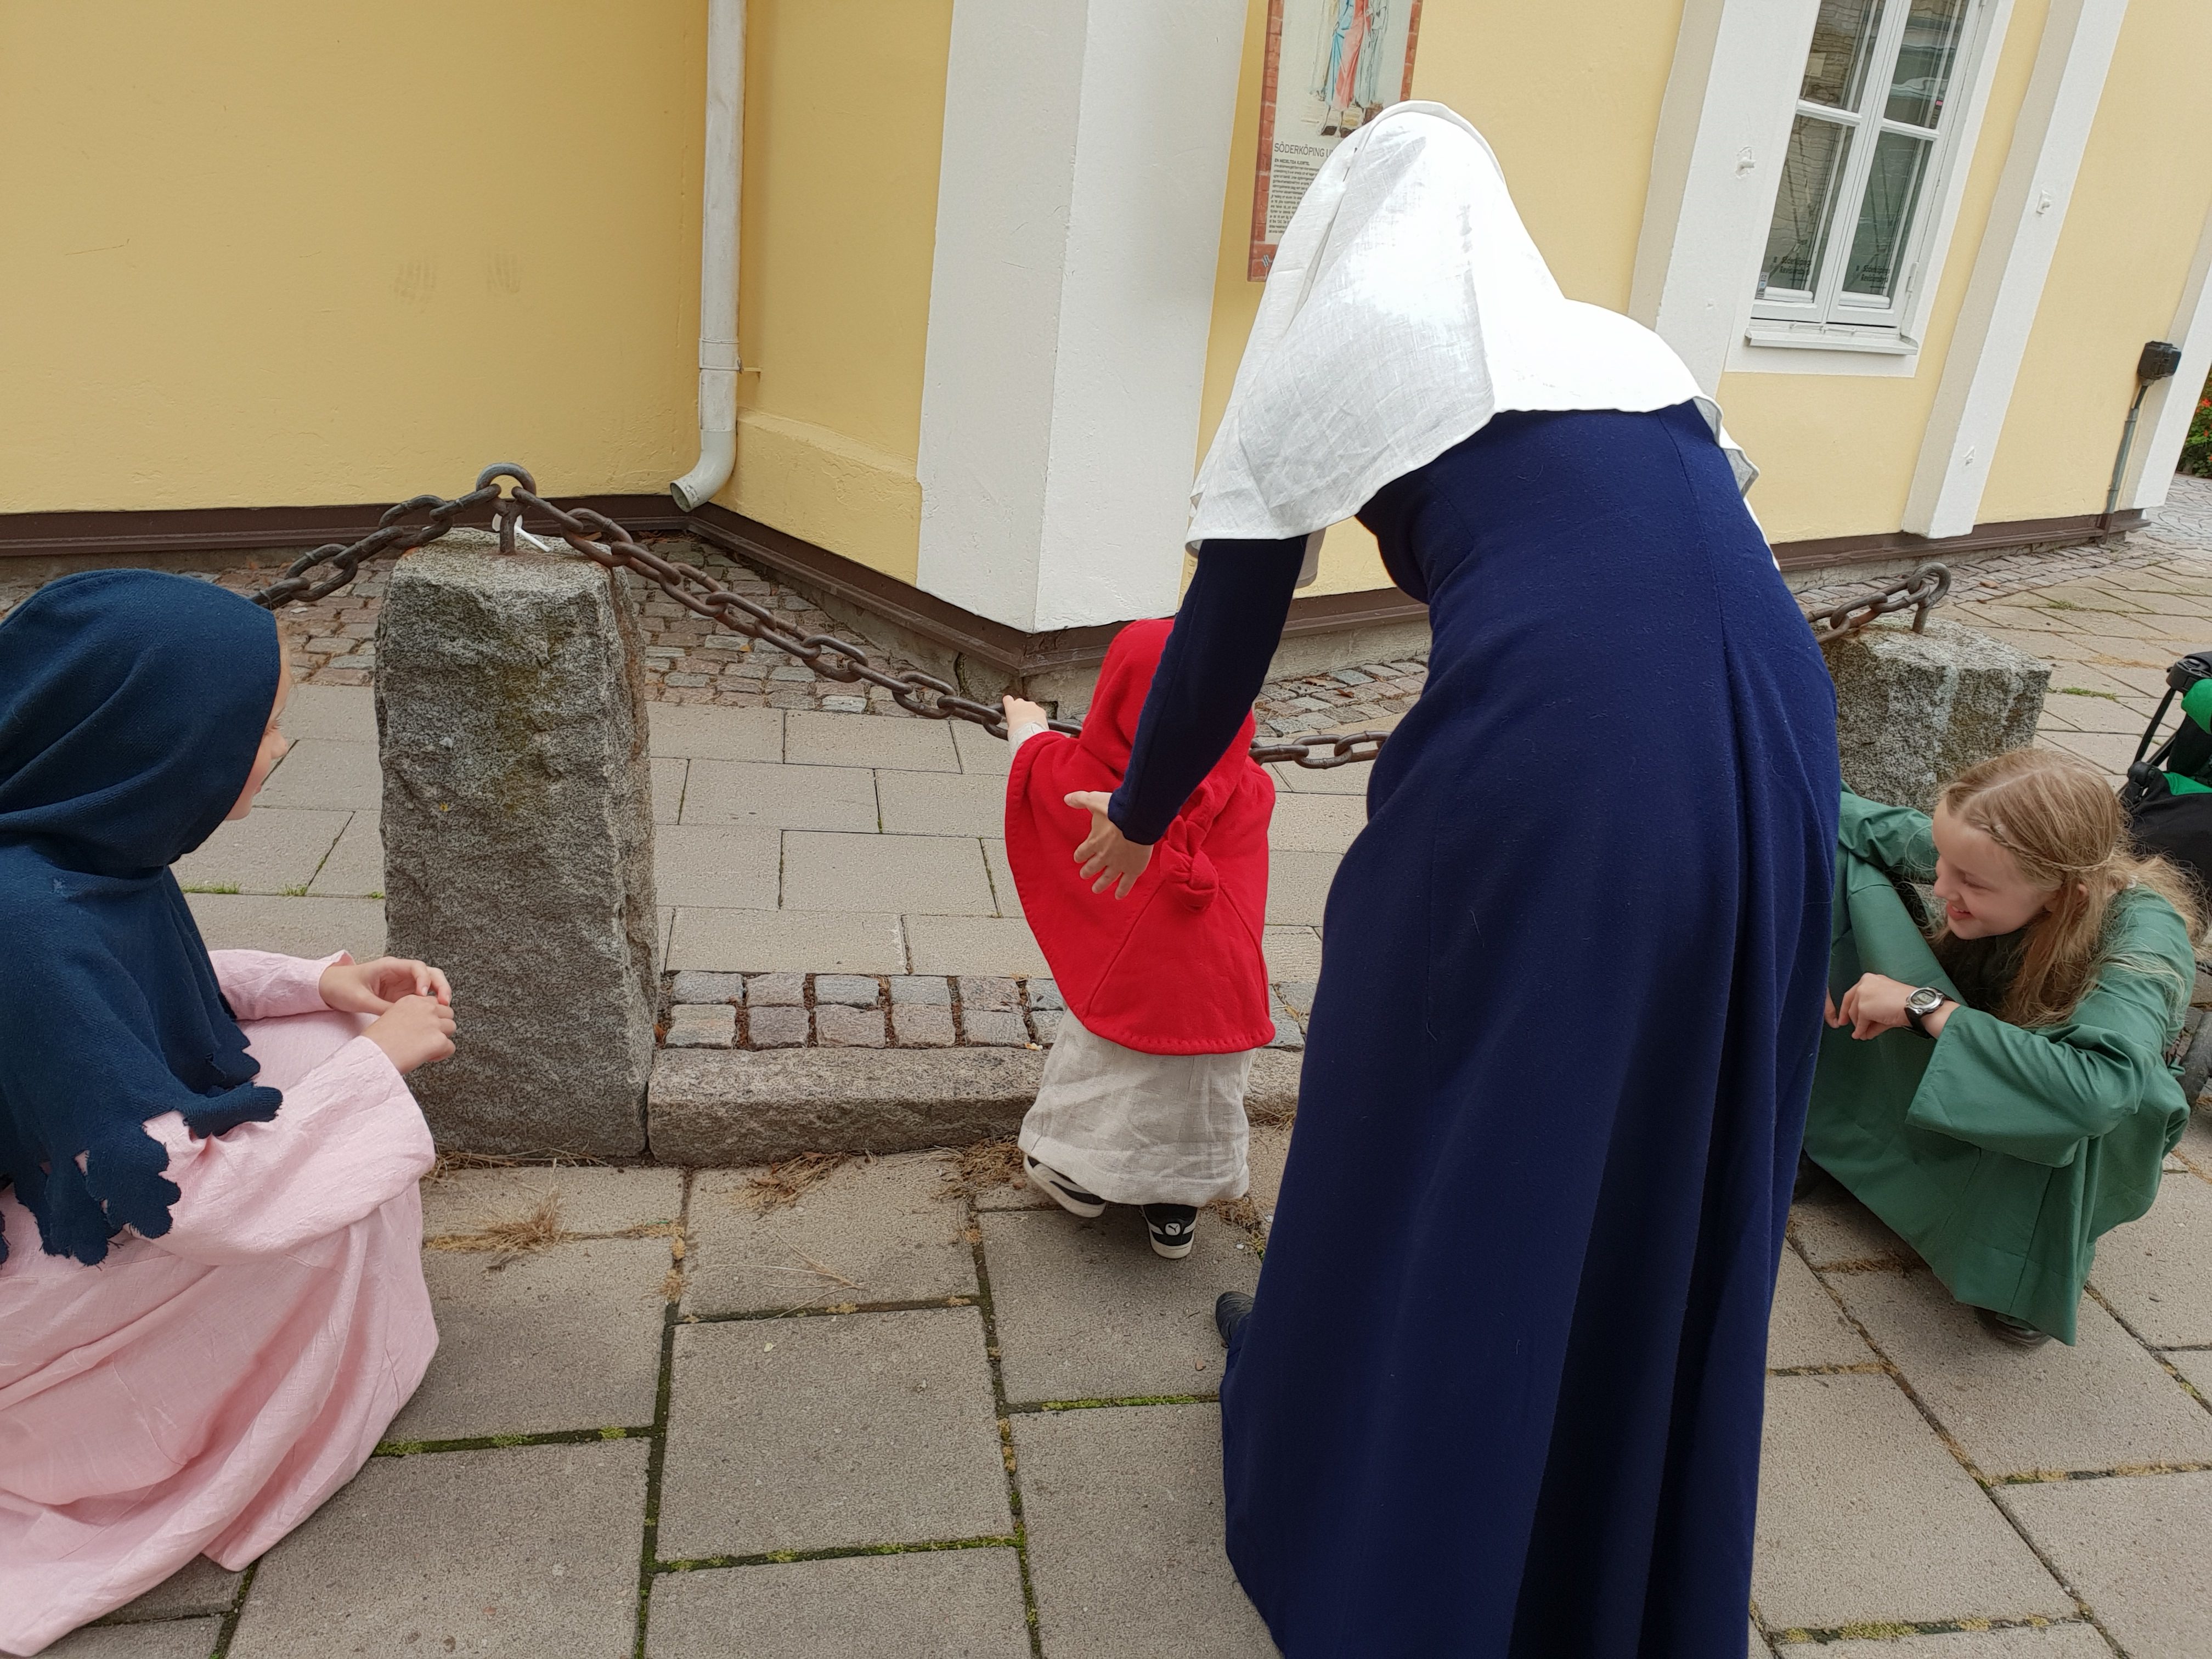
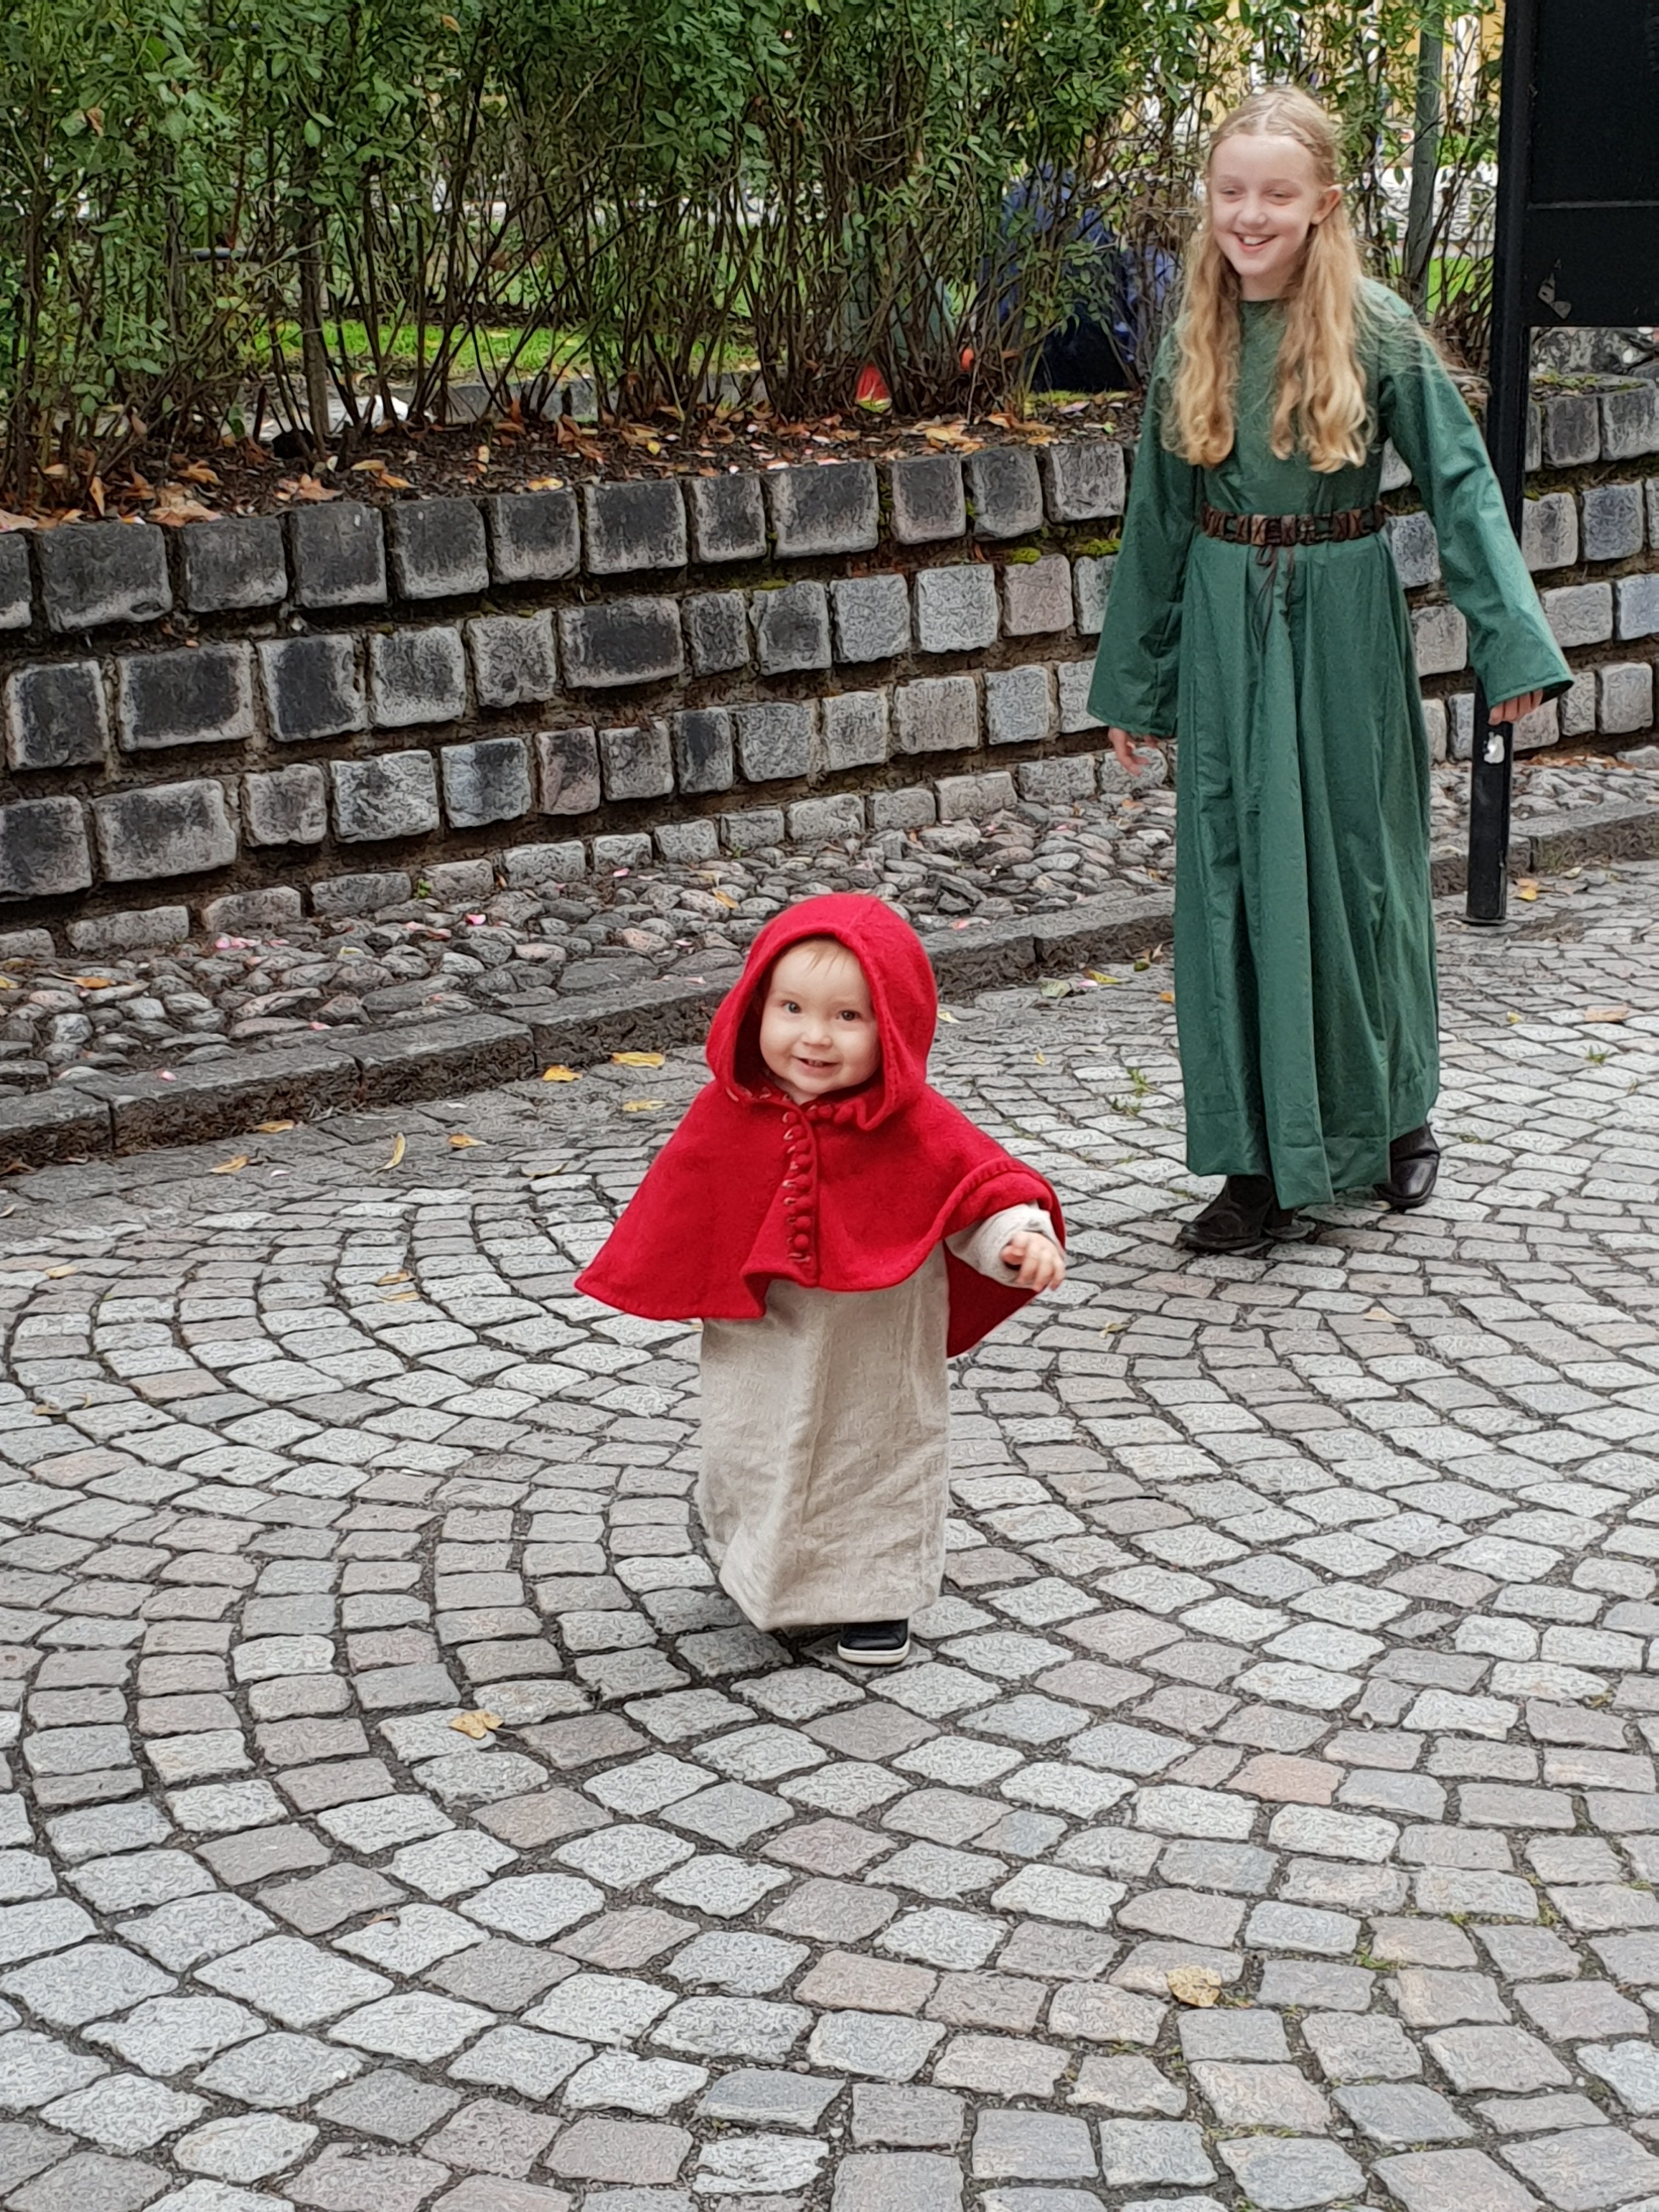
Two years have passed since we last visited the Medieval Week of Visby and we have missed it much. Last week, our neighbour town hosted an event called “The Happy Middle Ages”. As our son suddenly has grown a strong interest for both fairytales and magic, this event felt as if it had been created for him. His older cousins were interested as well. The two teenage girls could borrow my dresses (that don’t fit my 9 month pregnant body very well at the moment), but both of the boys needed new kirtles and my husband’s 12th century kirtle needed some adjustments. I had leftovers from that same woolen fabric and as my boy only would agree to wear an identical garment as his idol cousin, I spent the week sewing two identical kirtles. My boy also made it clear that he would only accept the kirtle if they would suit his new fairytale heroes, Ronja and Birk, so he chose folklore clasps from his pirate treasure (originally rescued from an old cardigan). Thanks to the well known pattern with rectangles and triangles, the last garment was finnished the night before the event. Unfortunately, I must have counted wrong when creating the pattern for the older boy, so that his kirtle was a tad too tight under the arms.

The basic rectangle, with opening for a triangular gore mid front and back (and in the sides).
The finished bigger kirtle, with cardigan clasps.
Very content with his “Ronja outfit”, worn together with monster slippers

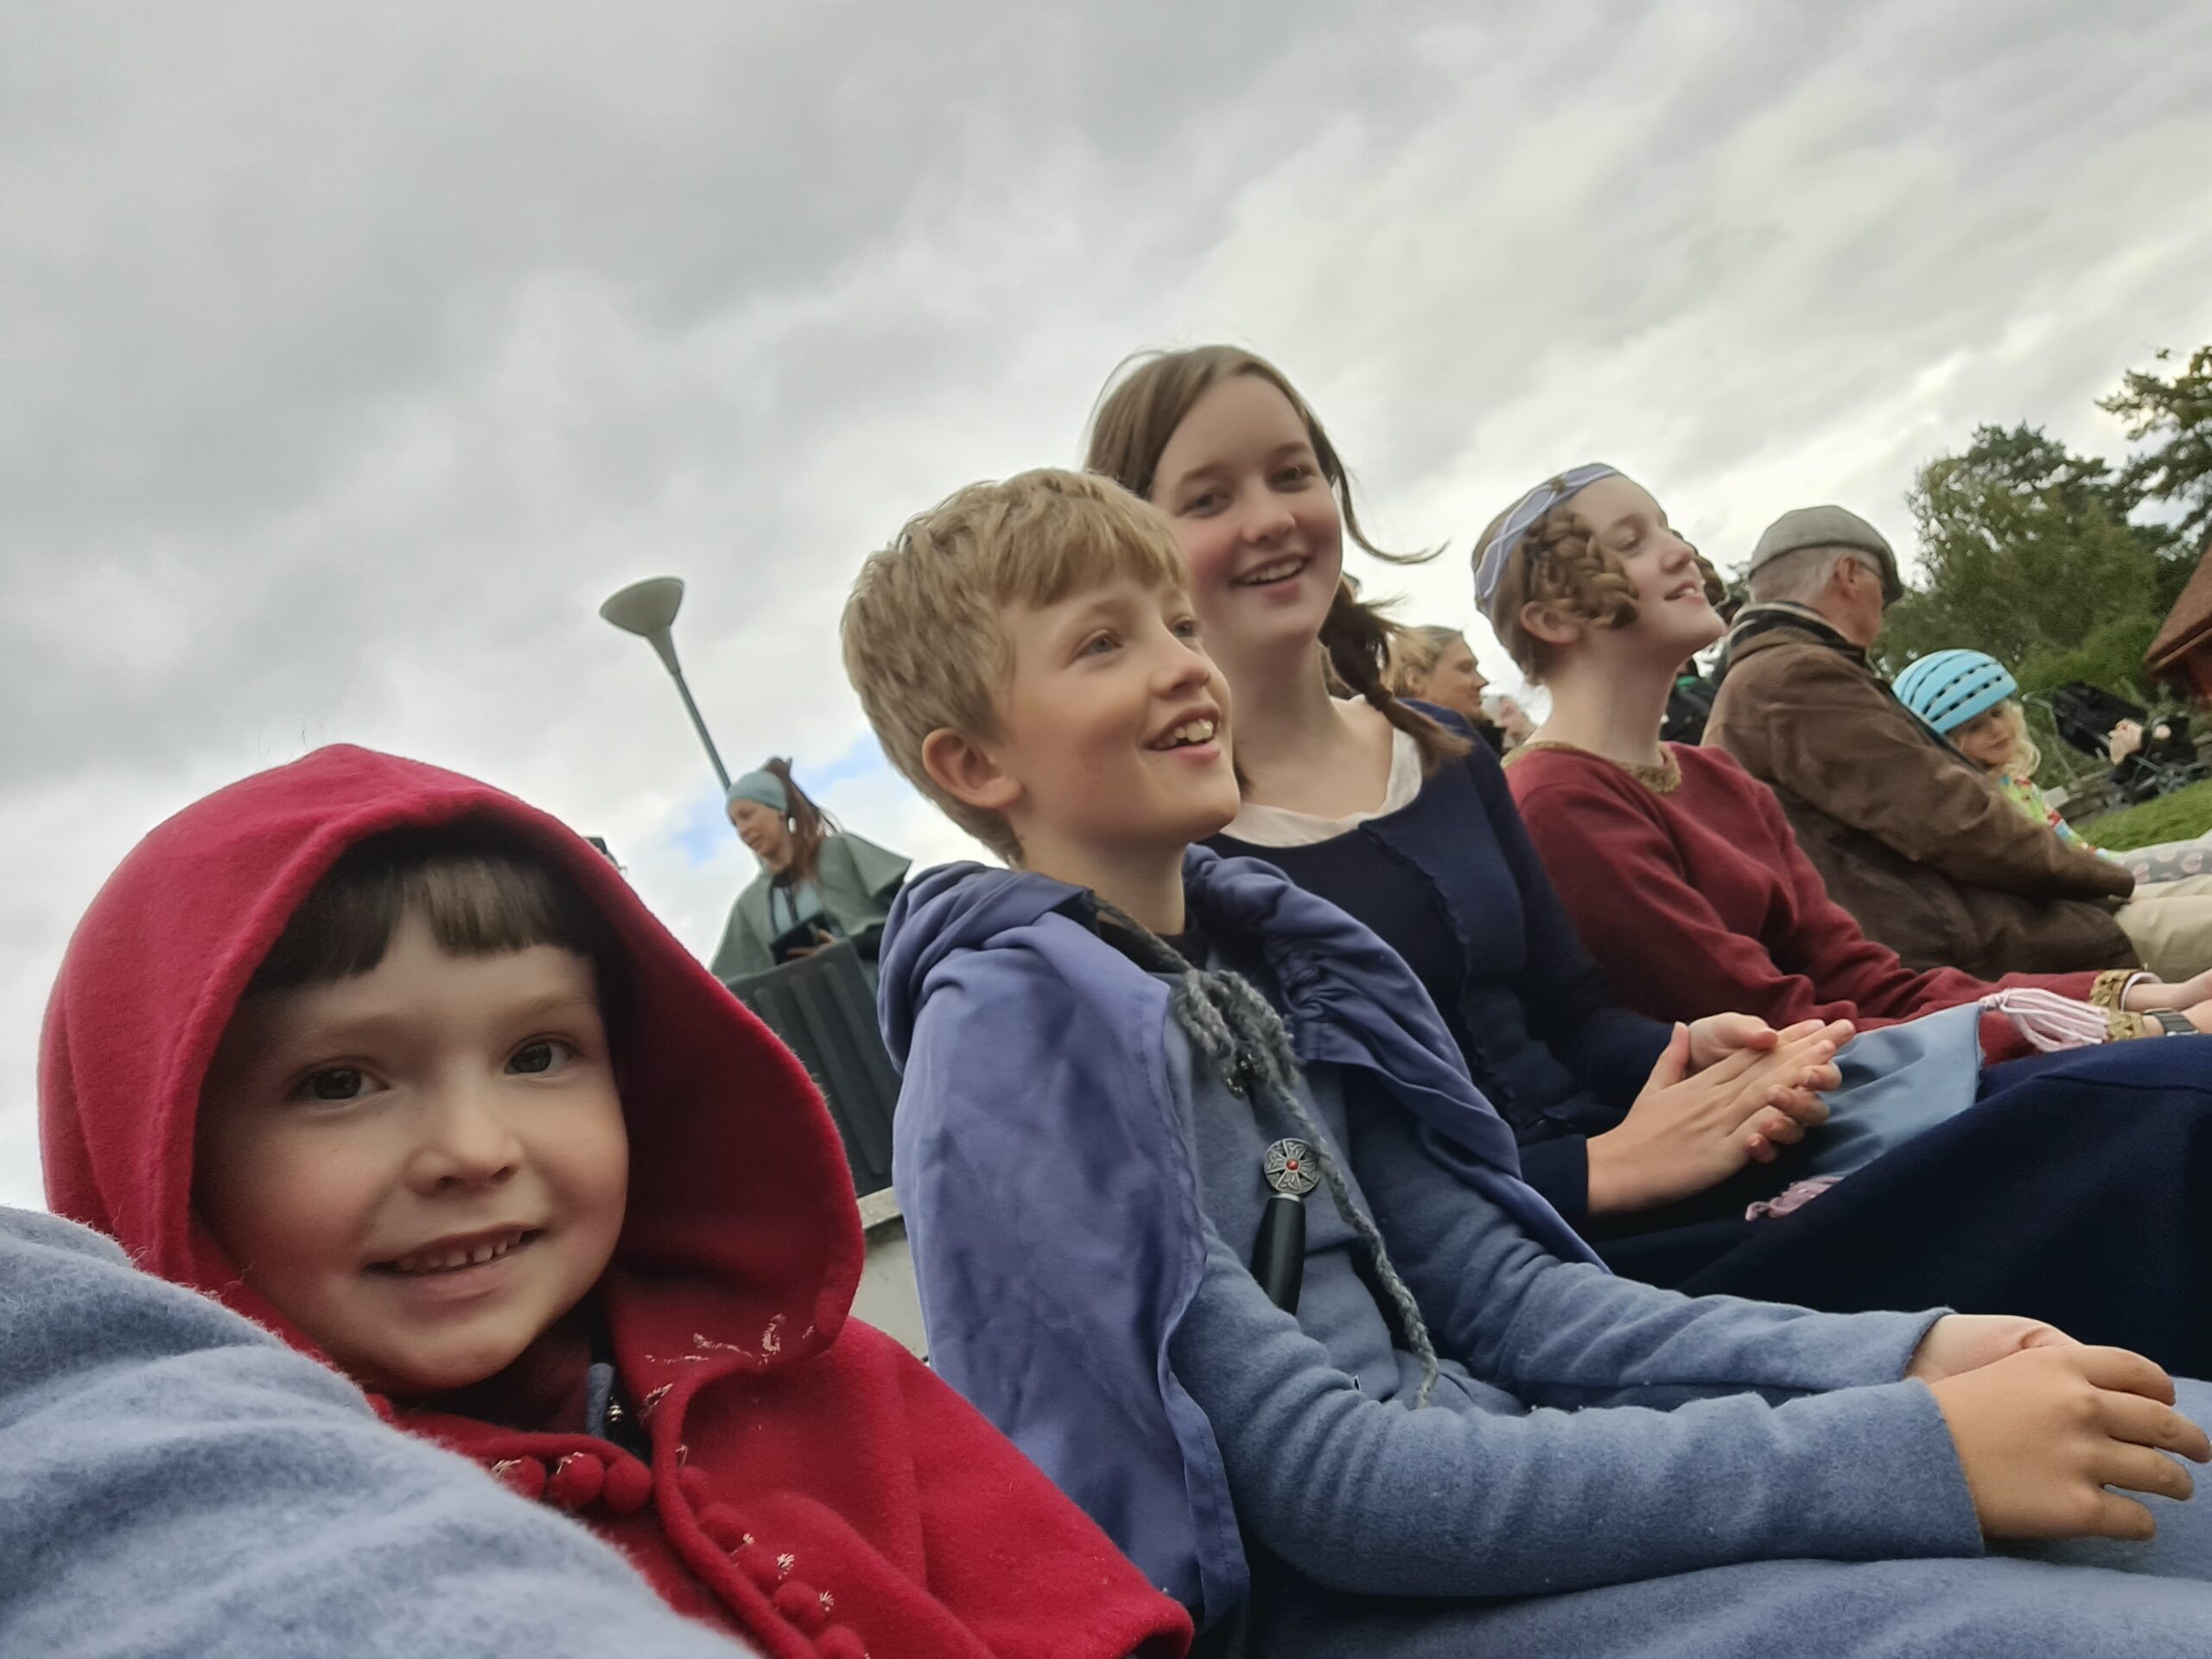
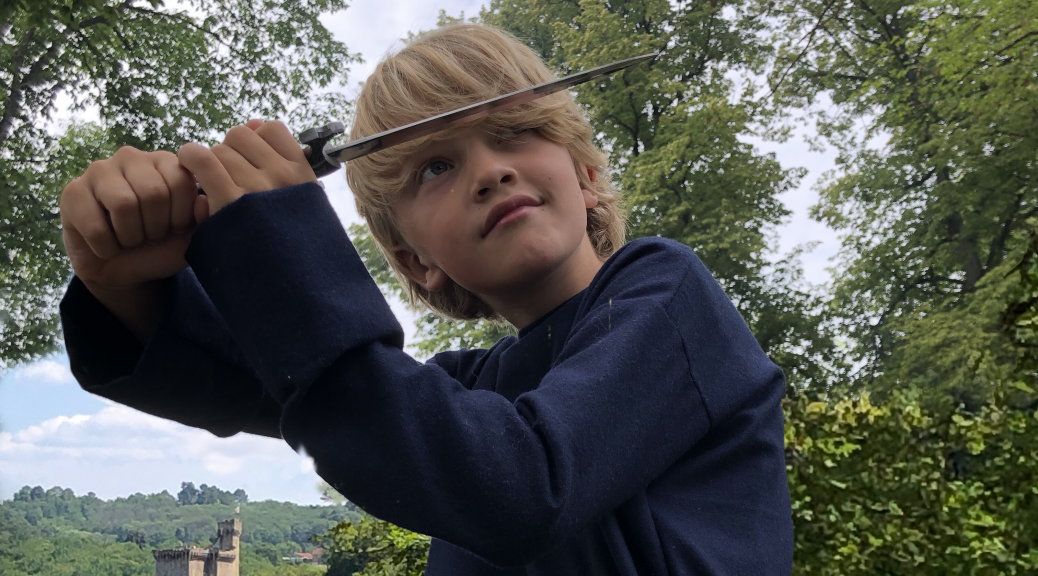
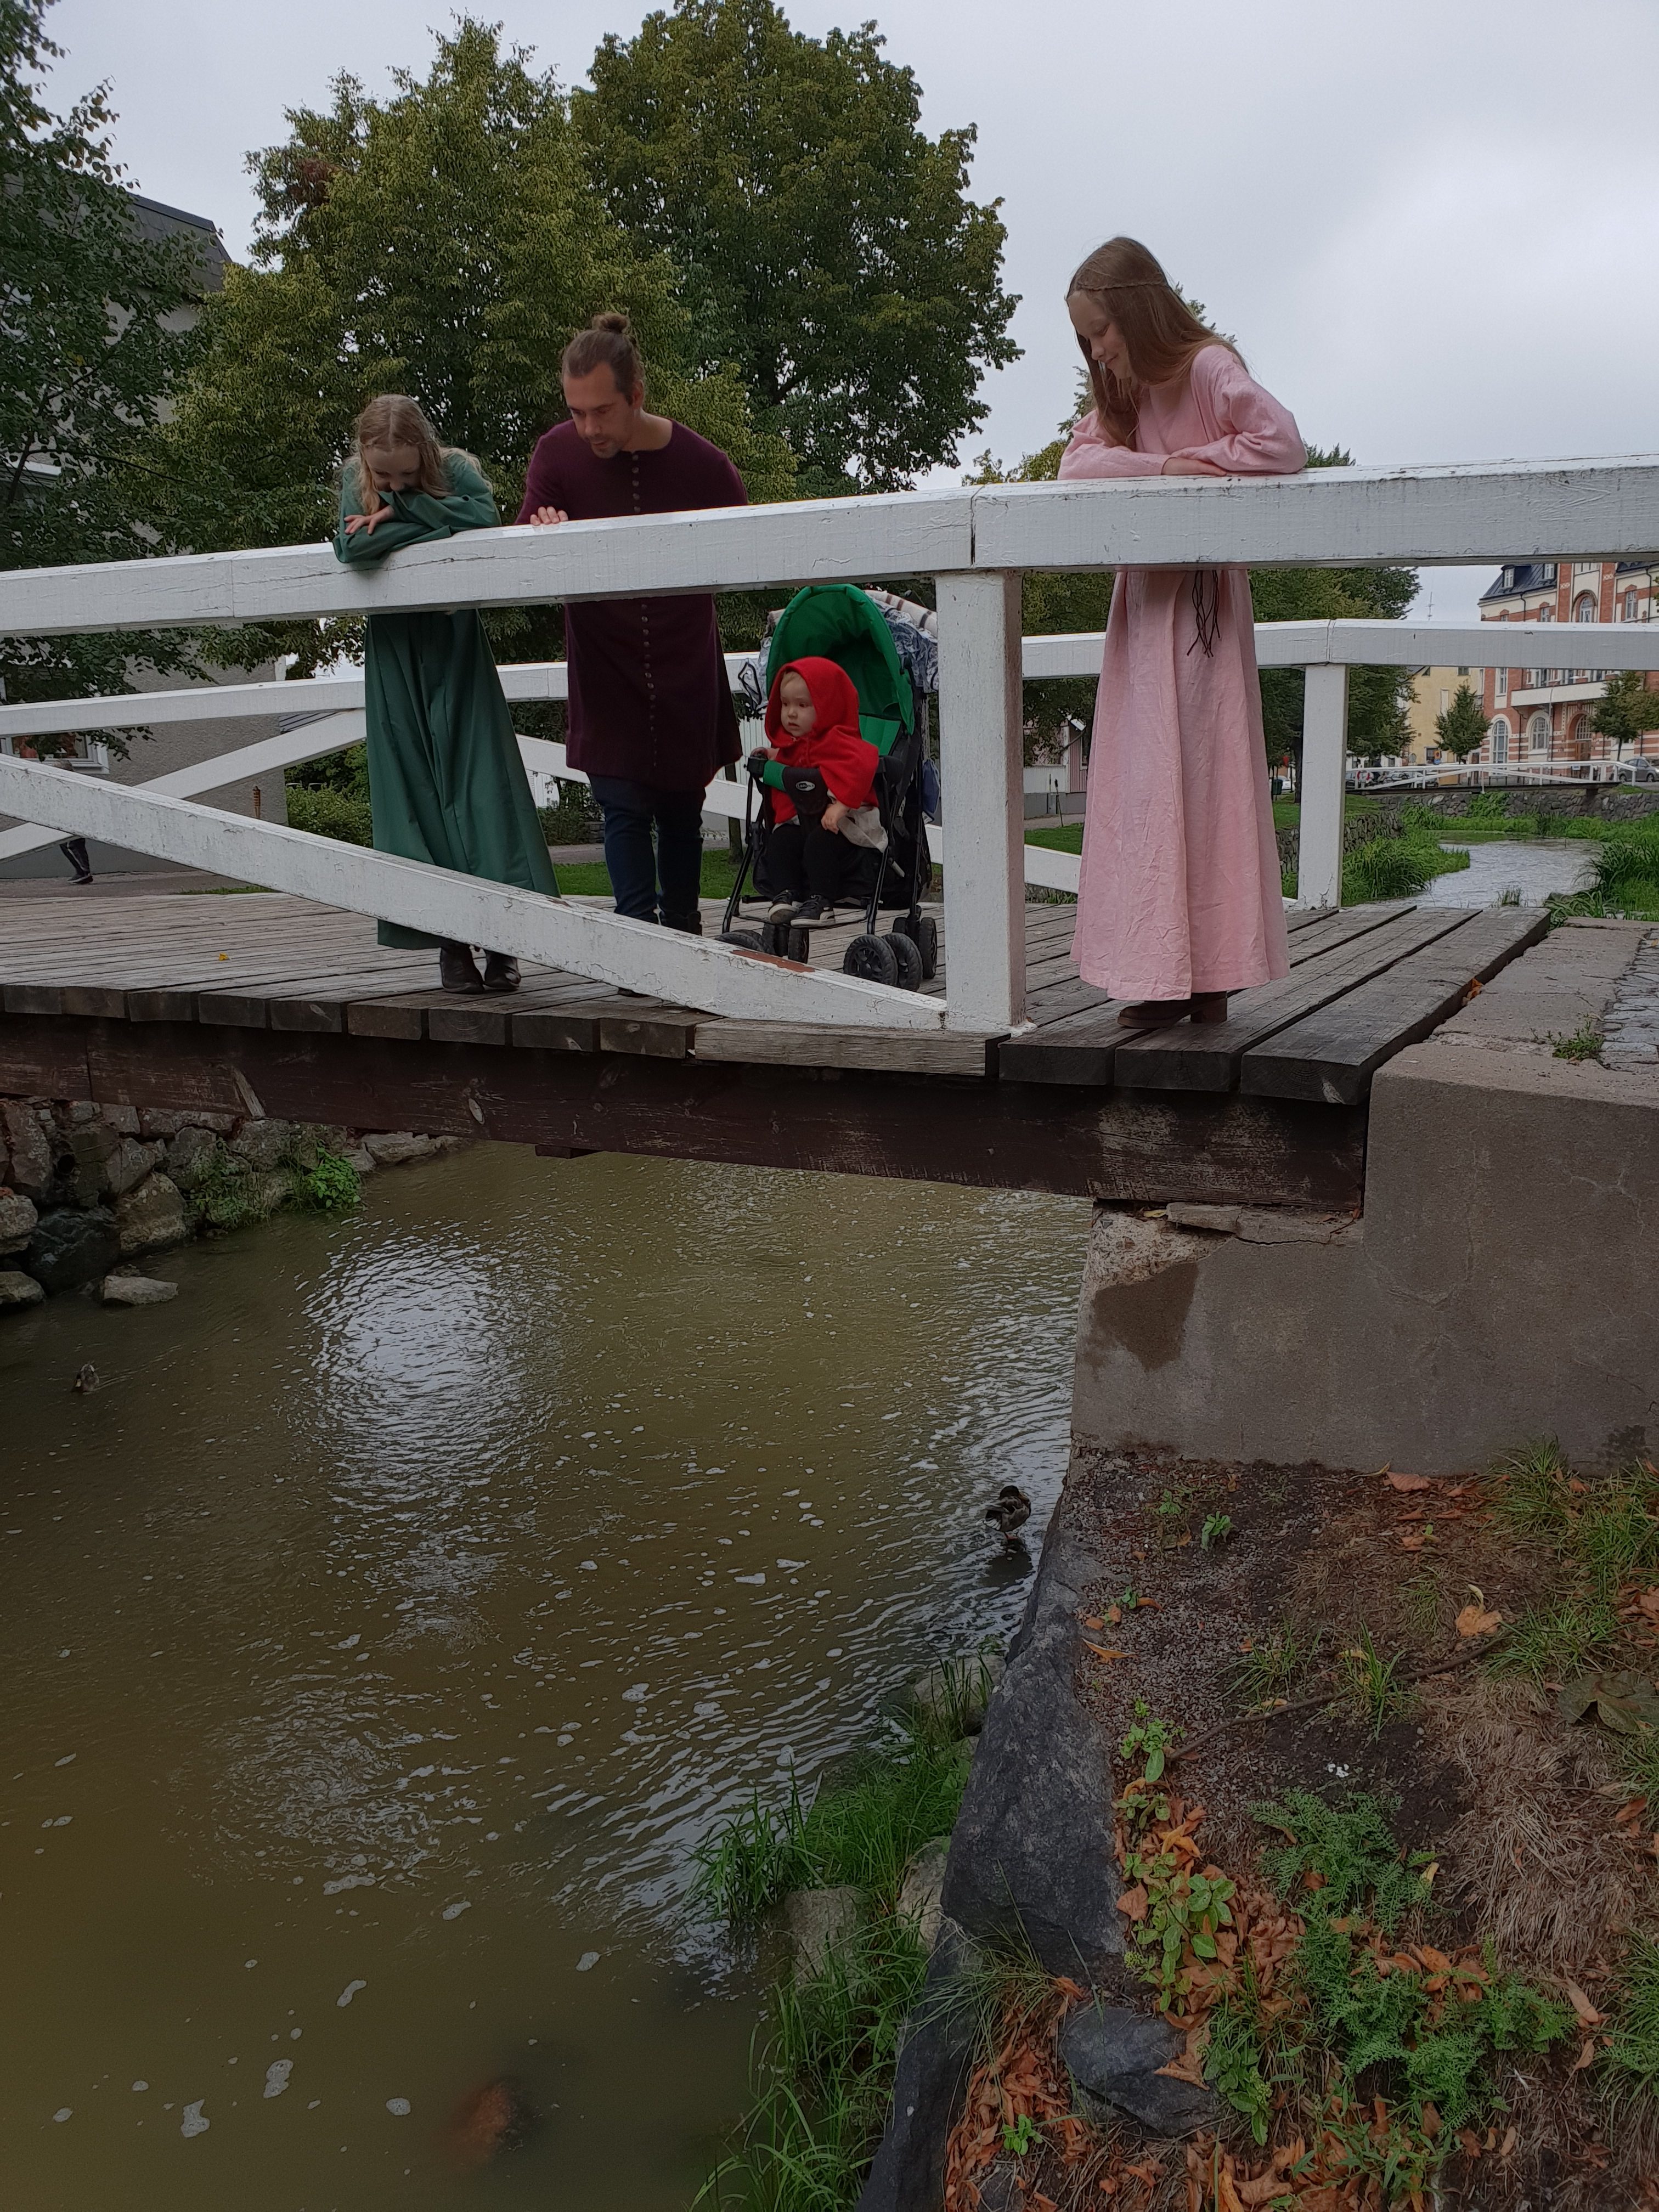
I was sorry to have to stay at home, but my dear husband sent many wonderful pictures from the event, which seemed to have met every expectation. There was magic, juggling with fire, combat, wonderful company and hotdogs. Our boy has talked much about it afterwards and I do believe that even his older cousins appreciated it.

Det har gått två år sedan vi besökte Medeltidsveckan senast och vi har saknat det mycket. Förra veckan hölls en medeltidsdag i Västervik, “Den glada medeltiden”. Eftersom vår son nyligen utvecklat ett starkt intresse för både sagor och trollerier, kändes det som om detta evenemang hade skapats för honom. Hans äldre kusiner var också intresserade. Tonårstjejerna kunde låna mina klänningar (som inte passar min nuvarande 9-månaders-graviditetskropp särskilt bra), men båda pojkarna behövde nya kjortlar och min mans 1100-talskjortel krävde några justeringar. Jag hade kvar lite av samma blå ylletyg och eftersom min son bara gick med på att ha på sig en identisk dräkt som sin kusin och idol, spenderade jag veckan med att sy och justera tre dräkter i samma tyg. Sonen hade även klargjort att han bara skulle använda dräkten om den liknade något som Ronja eller Birk kunde ha haft, så han fick välja folklore-spännen från sitt piratskrin, som vi fyllt med knappar från en gammal koftor. Tack vare det välbekanta mönstret med rektanglar och trianglar så lyckades jag göra klart den sista dräkten kvällen innan evenemanget. Tyvärr måste jag ha räknat fel när jag gjorde kusinens mönster, så det var rätt trångt under armarna.

A fairytale creature climbing the cliffs.

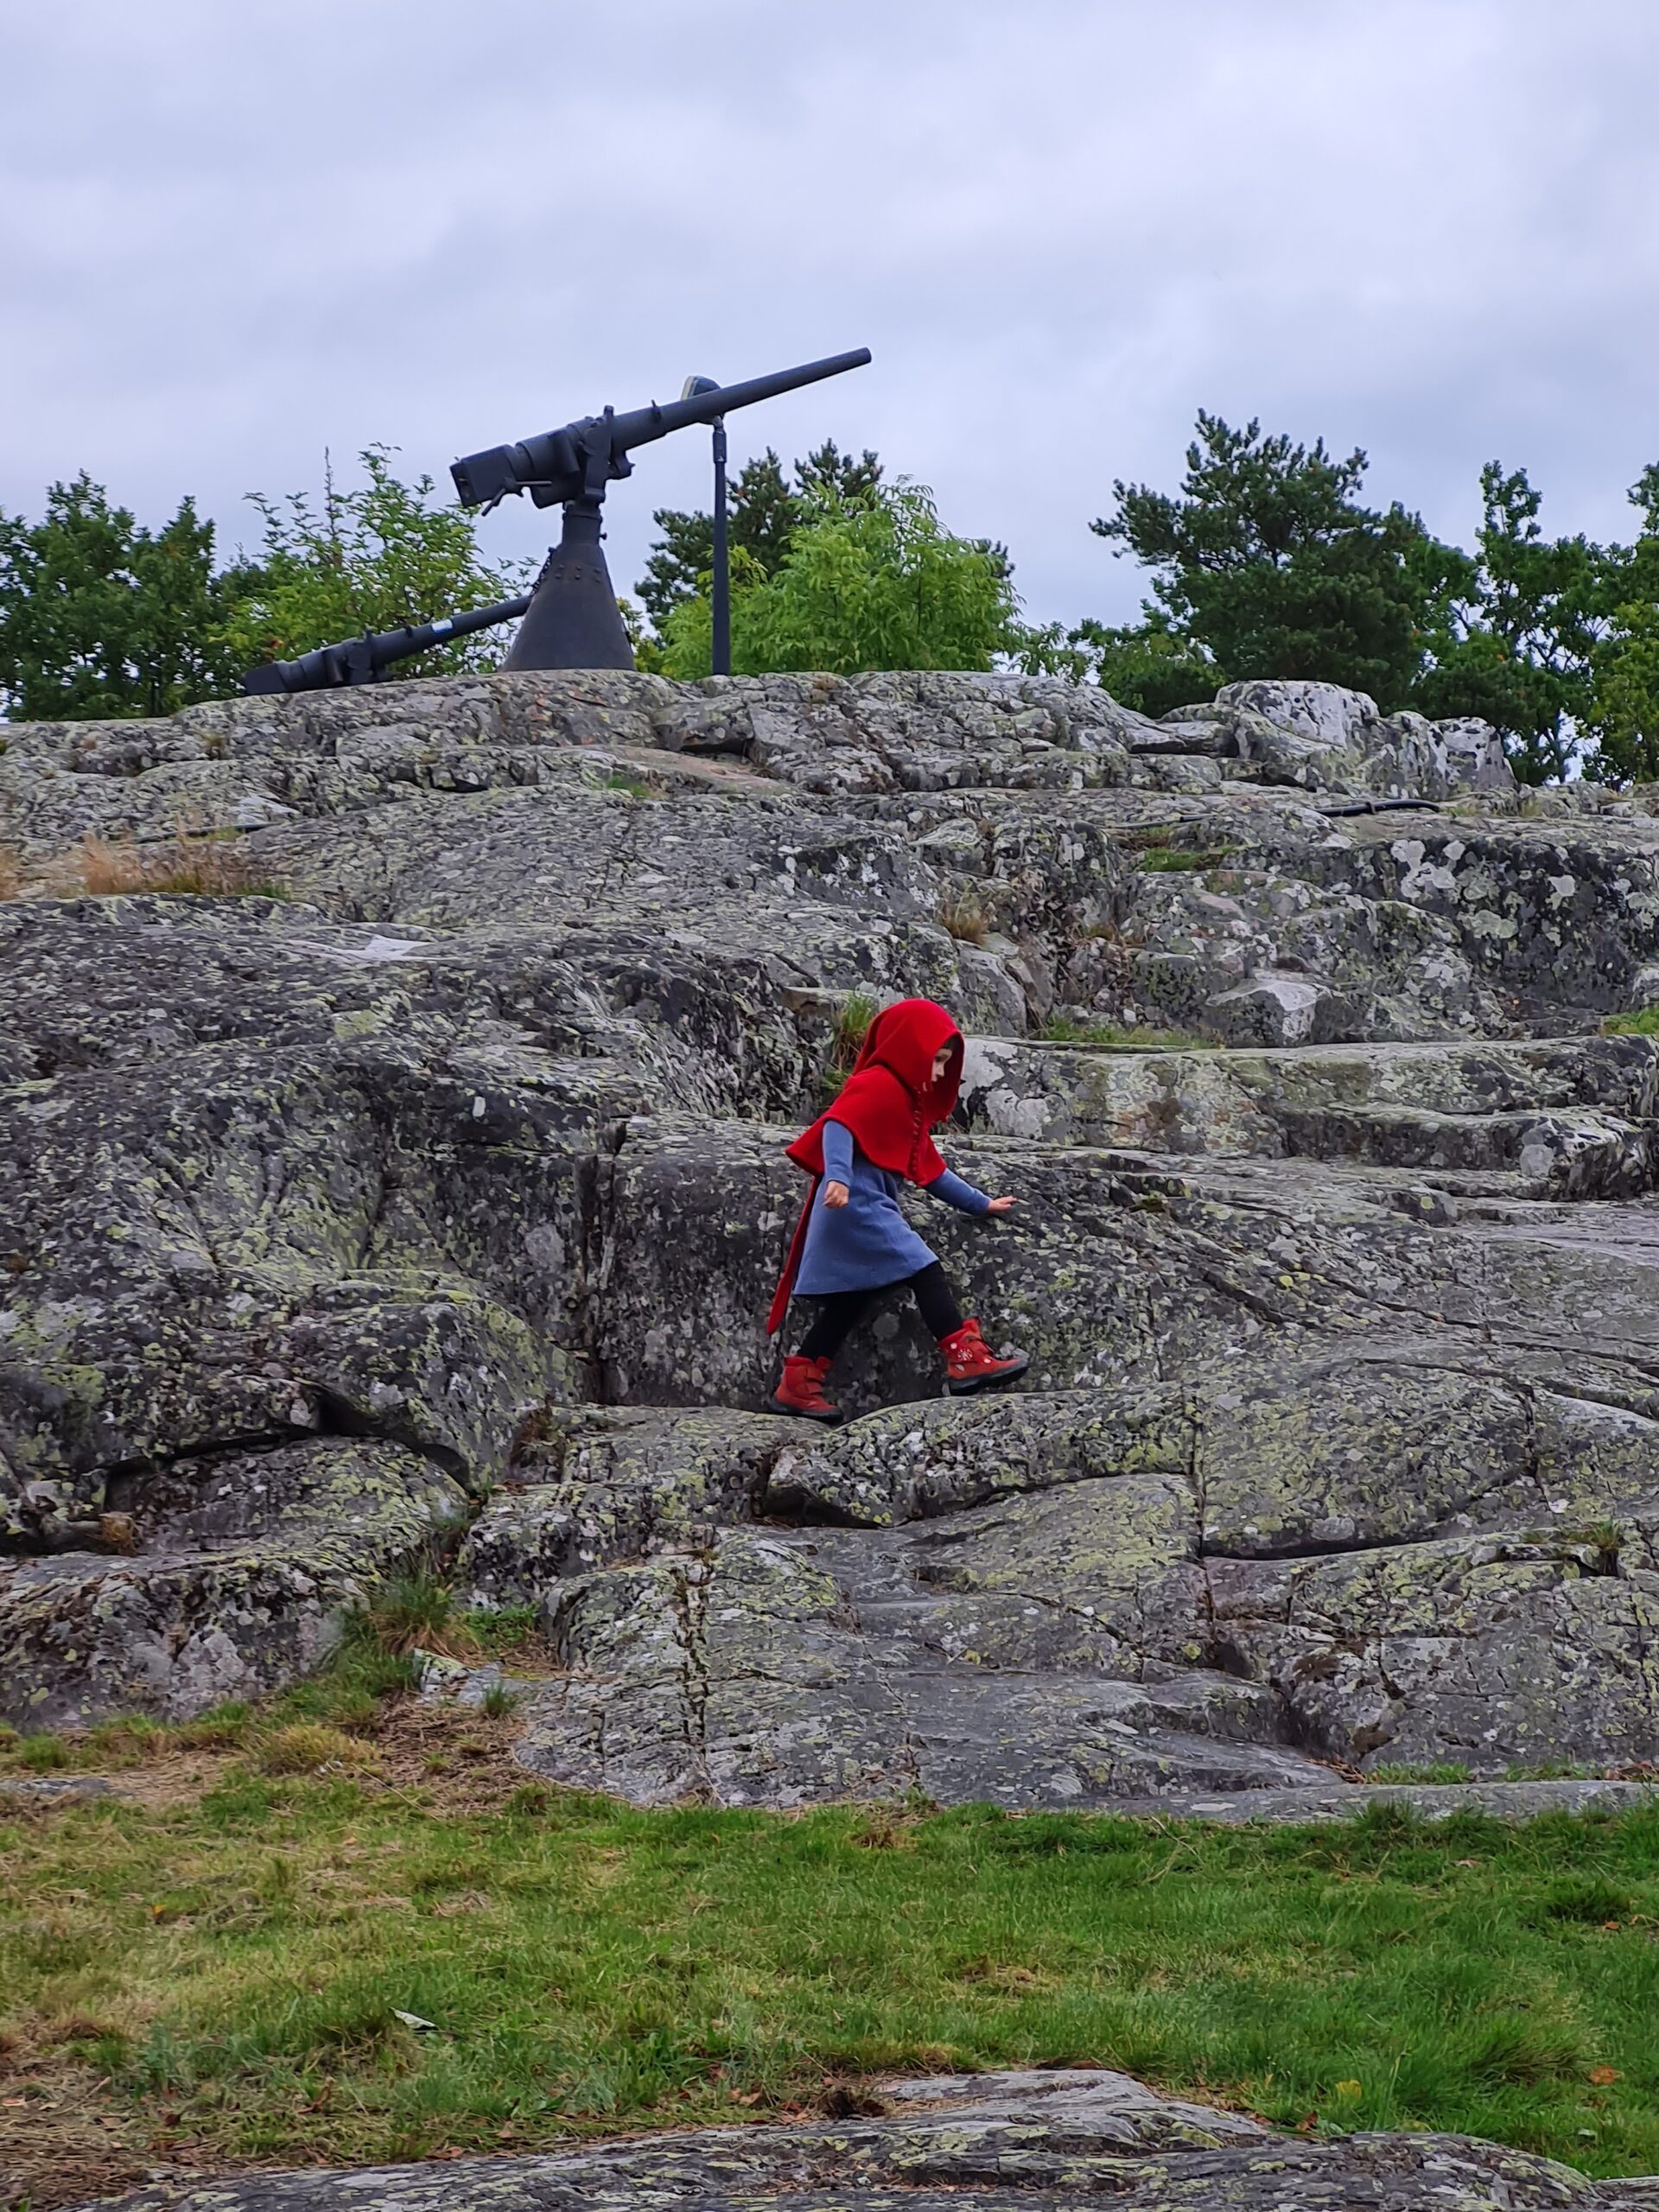
Det tog emot att stanna hemma, men min käre man skickade flera underbara bilder från evenemanget, som verkade uppfylla alla förväntningar. Det bjöds på trolleri, eldshow, medeltida krigskonst, ypperligt sällskap och varmkorv. Vår son har pratat så mycket om det efteråt och jag tror att även kusinerna uppskattade det.

Together with the magician Arkadia
The last freezing picture from the event. I think they look pretty amazing. 😍

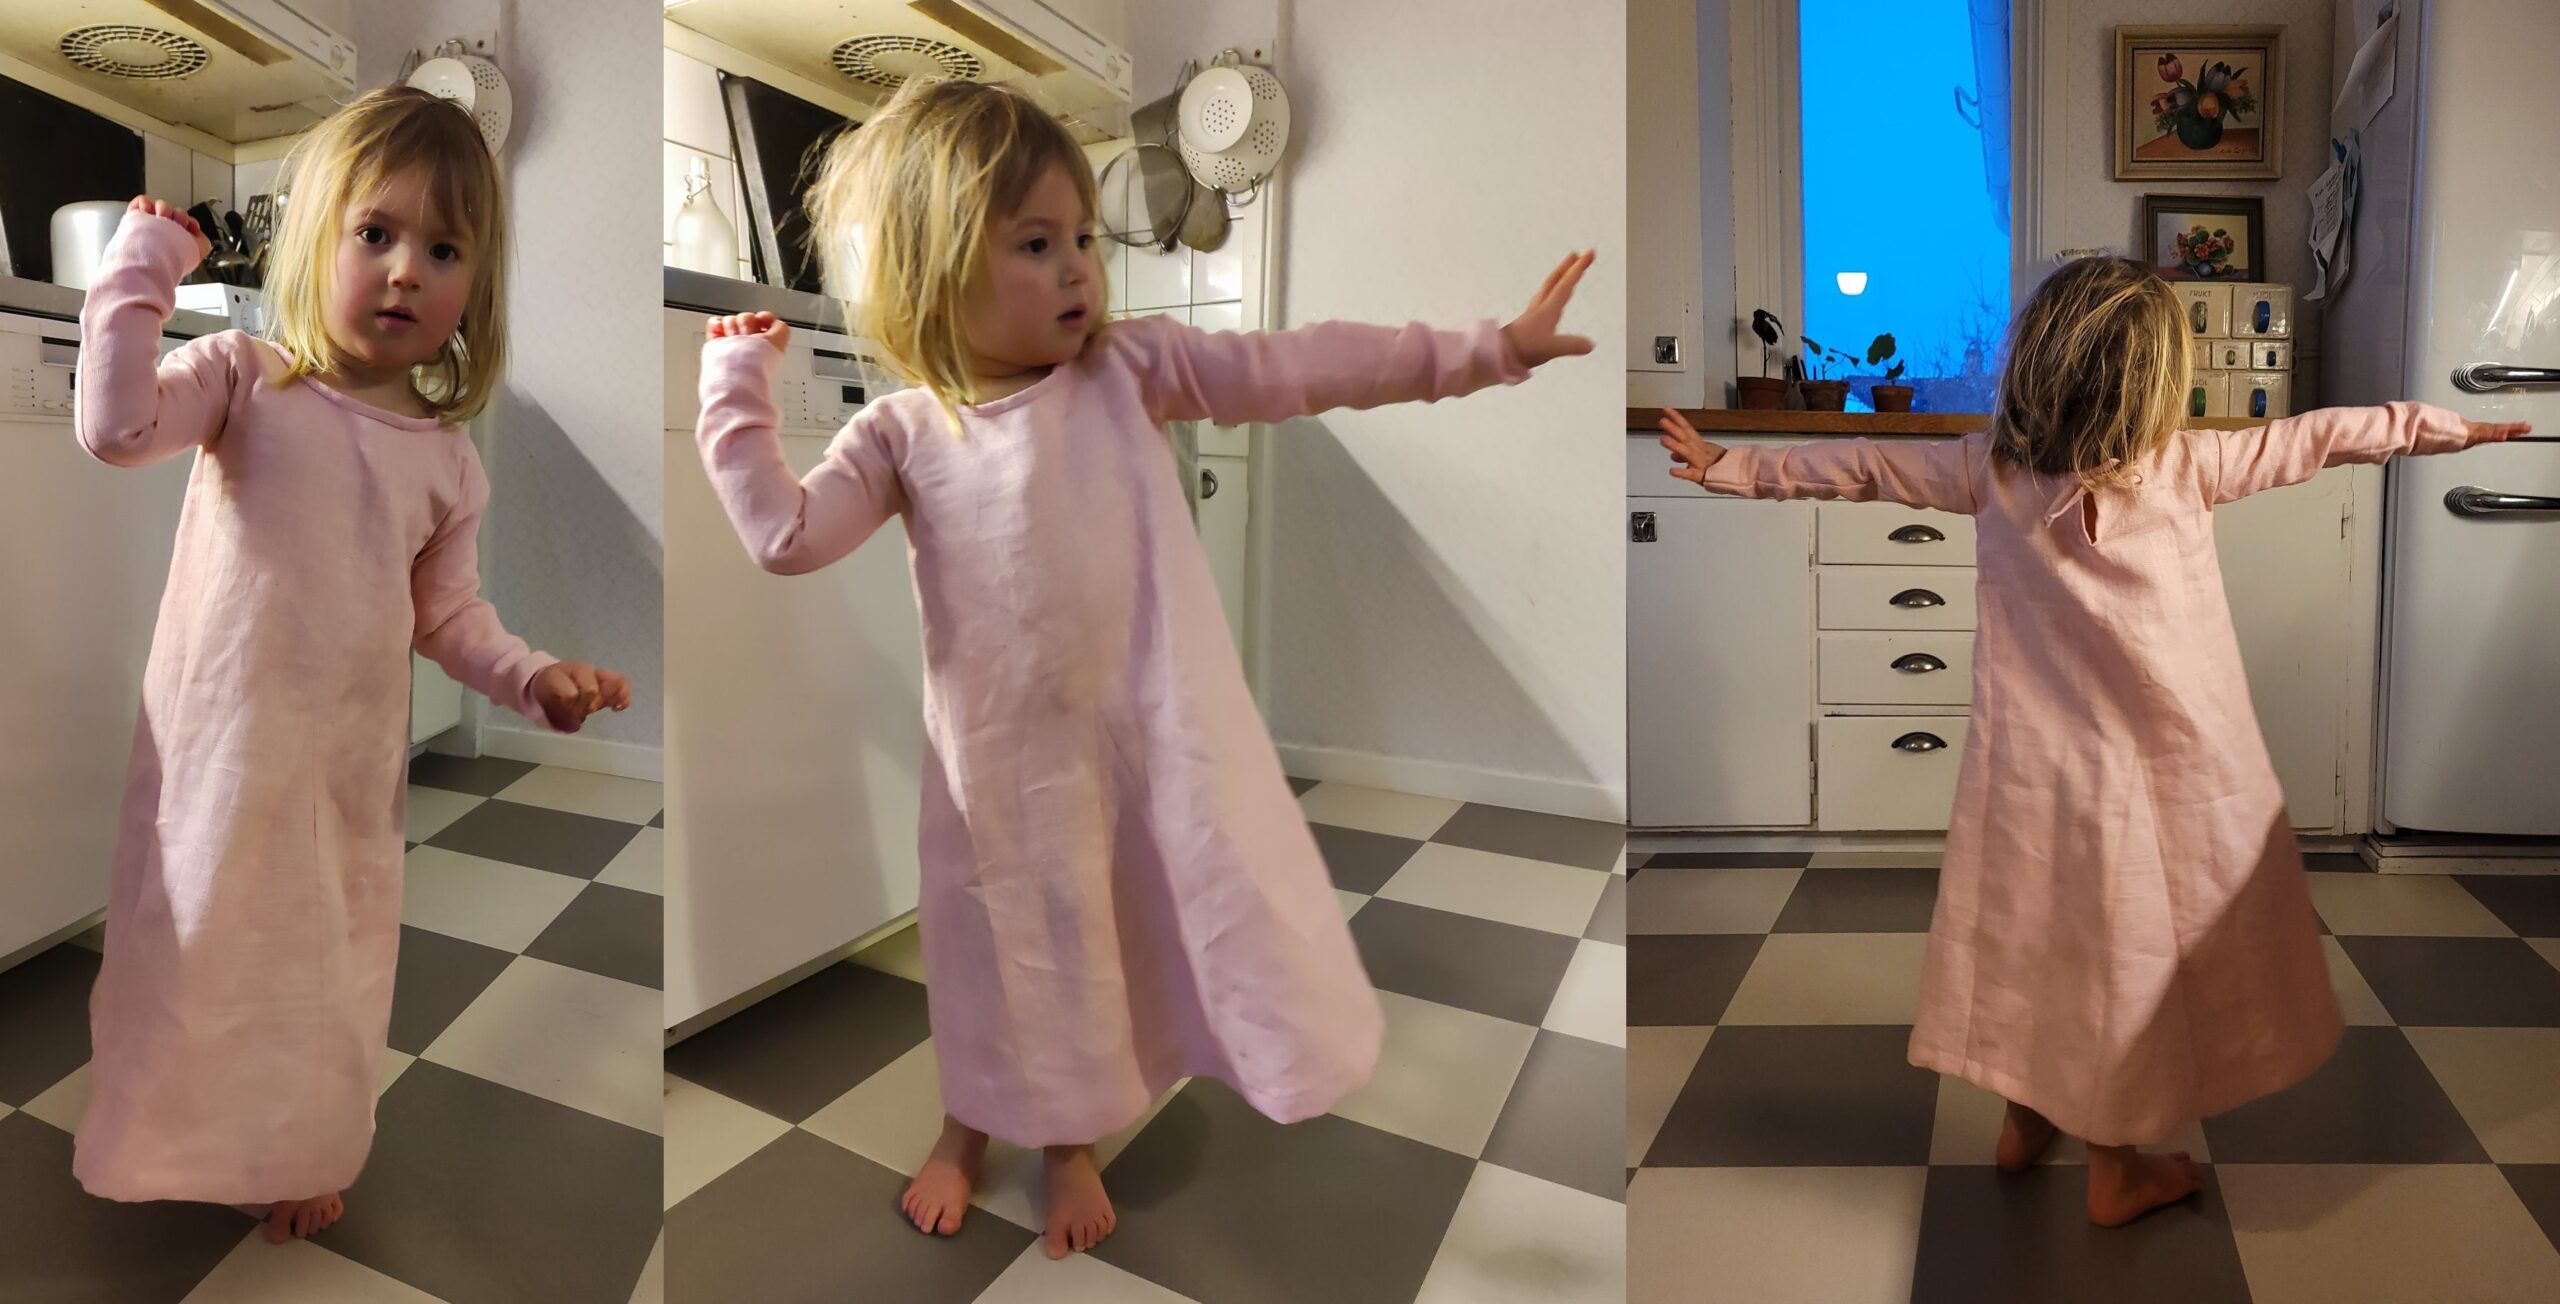
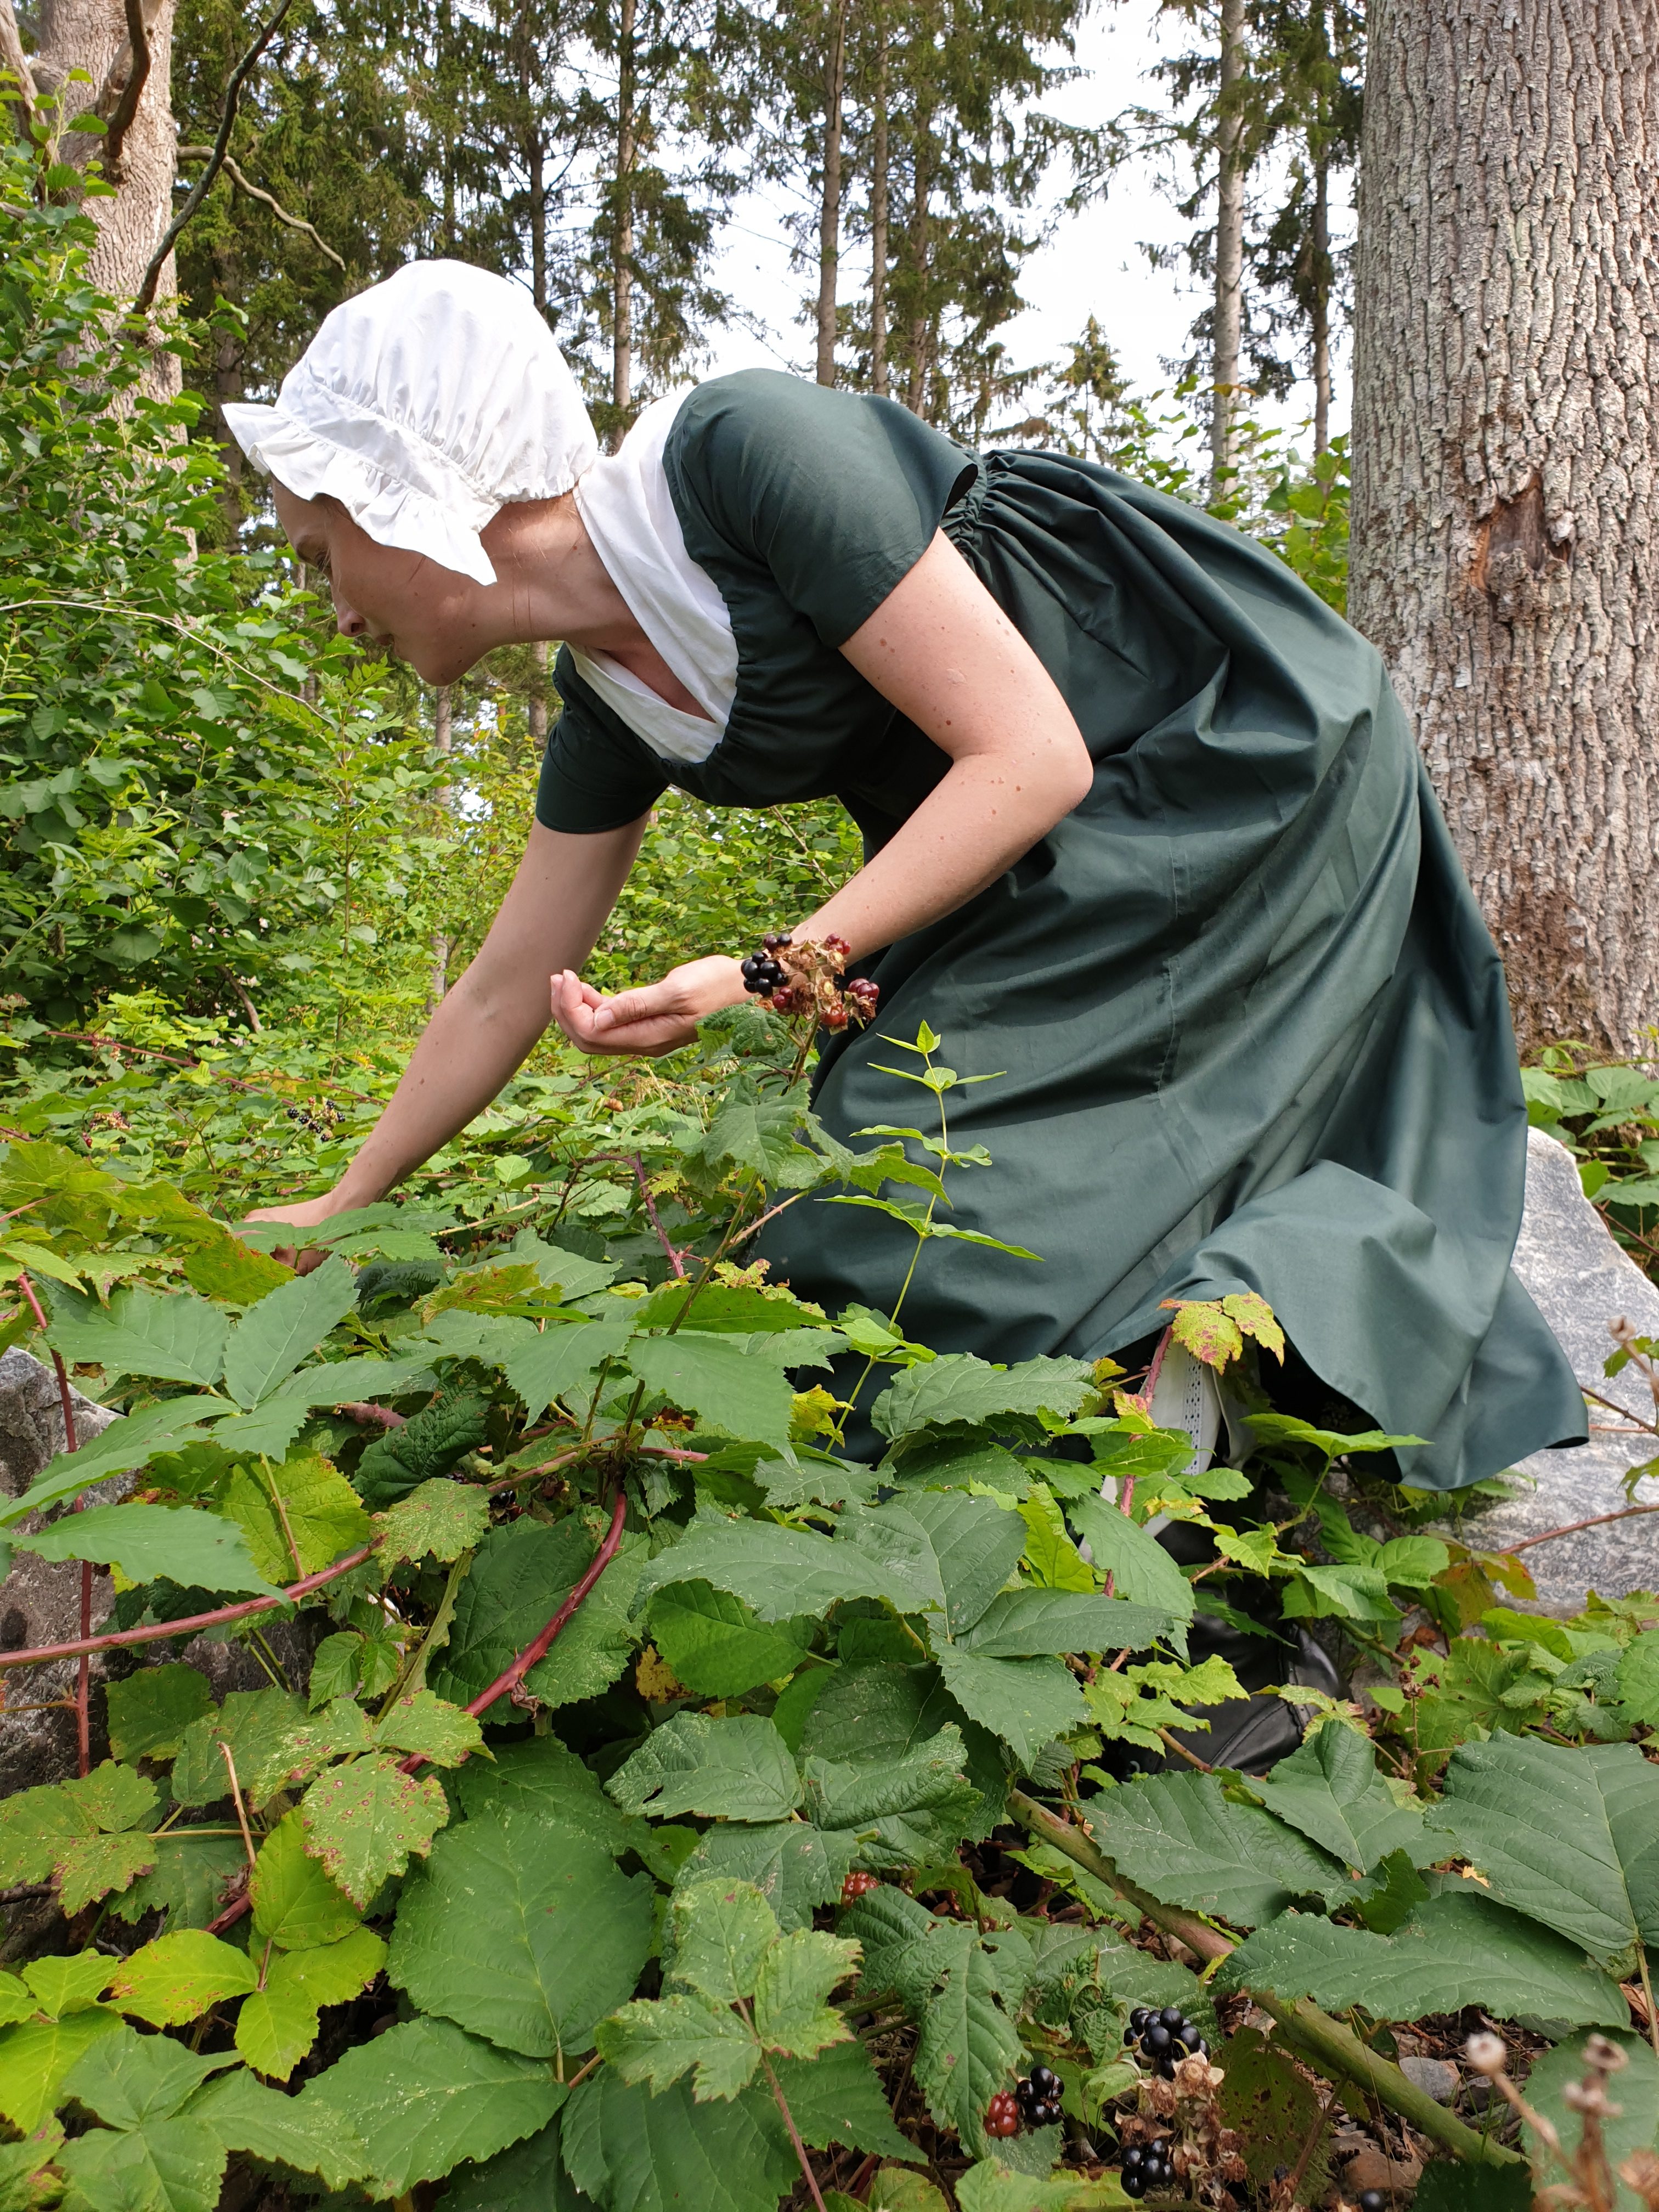
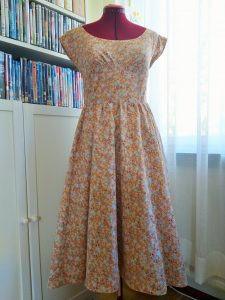
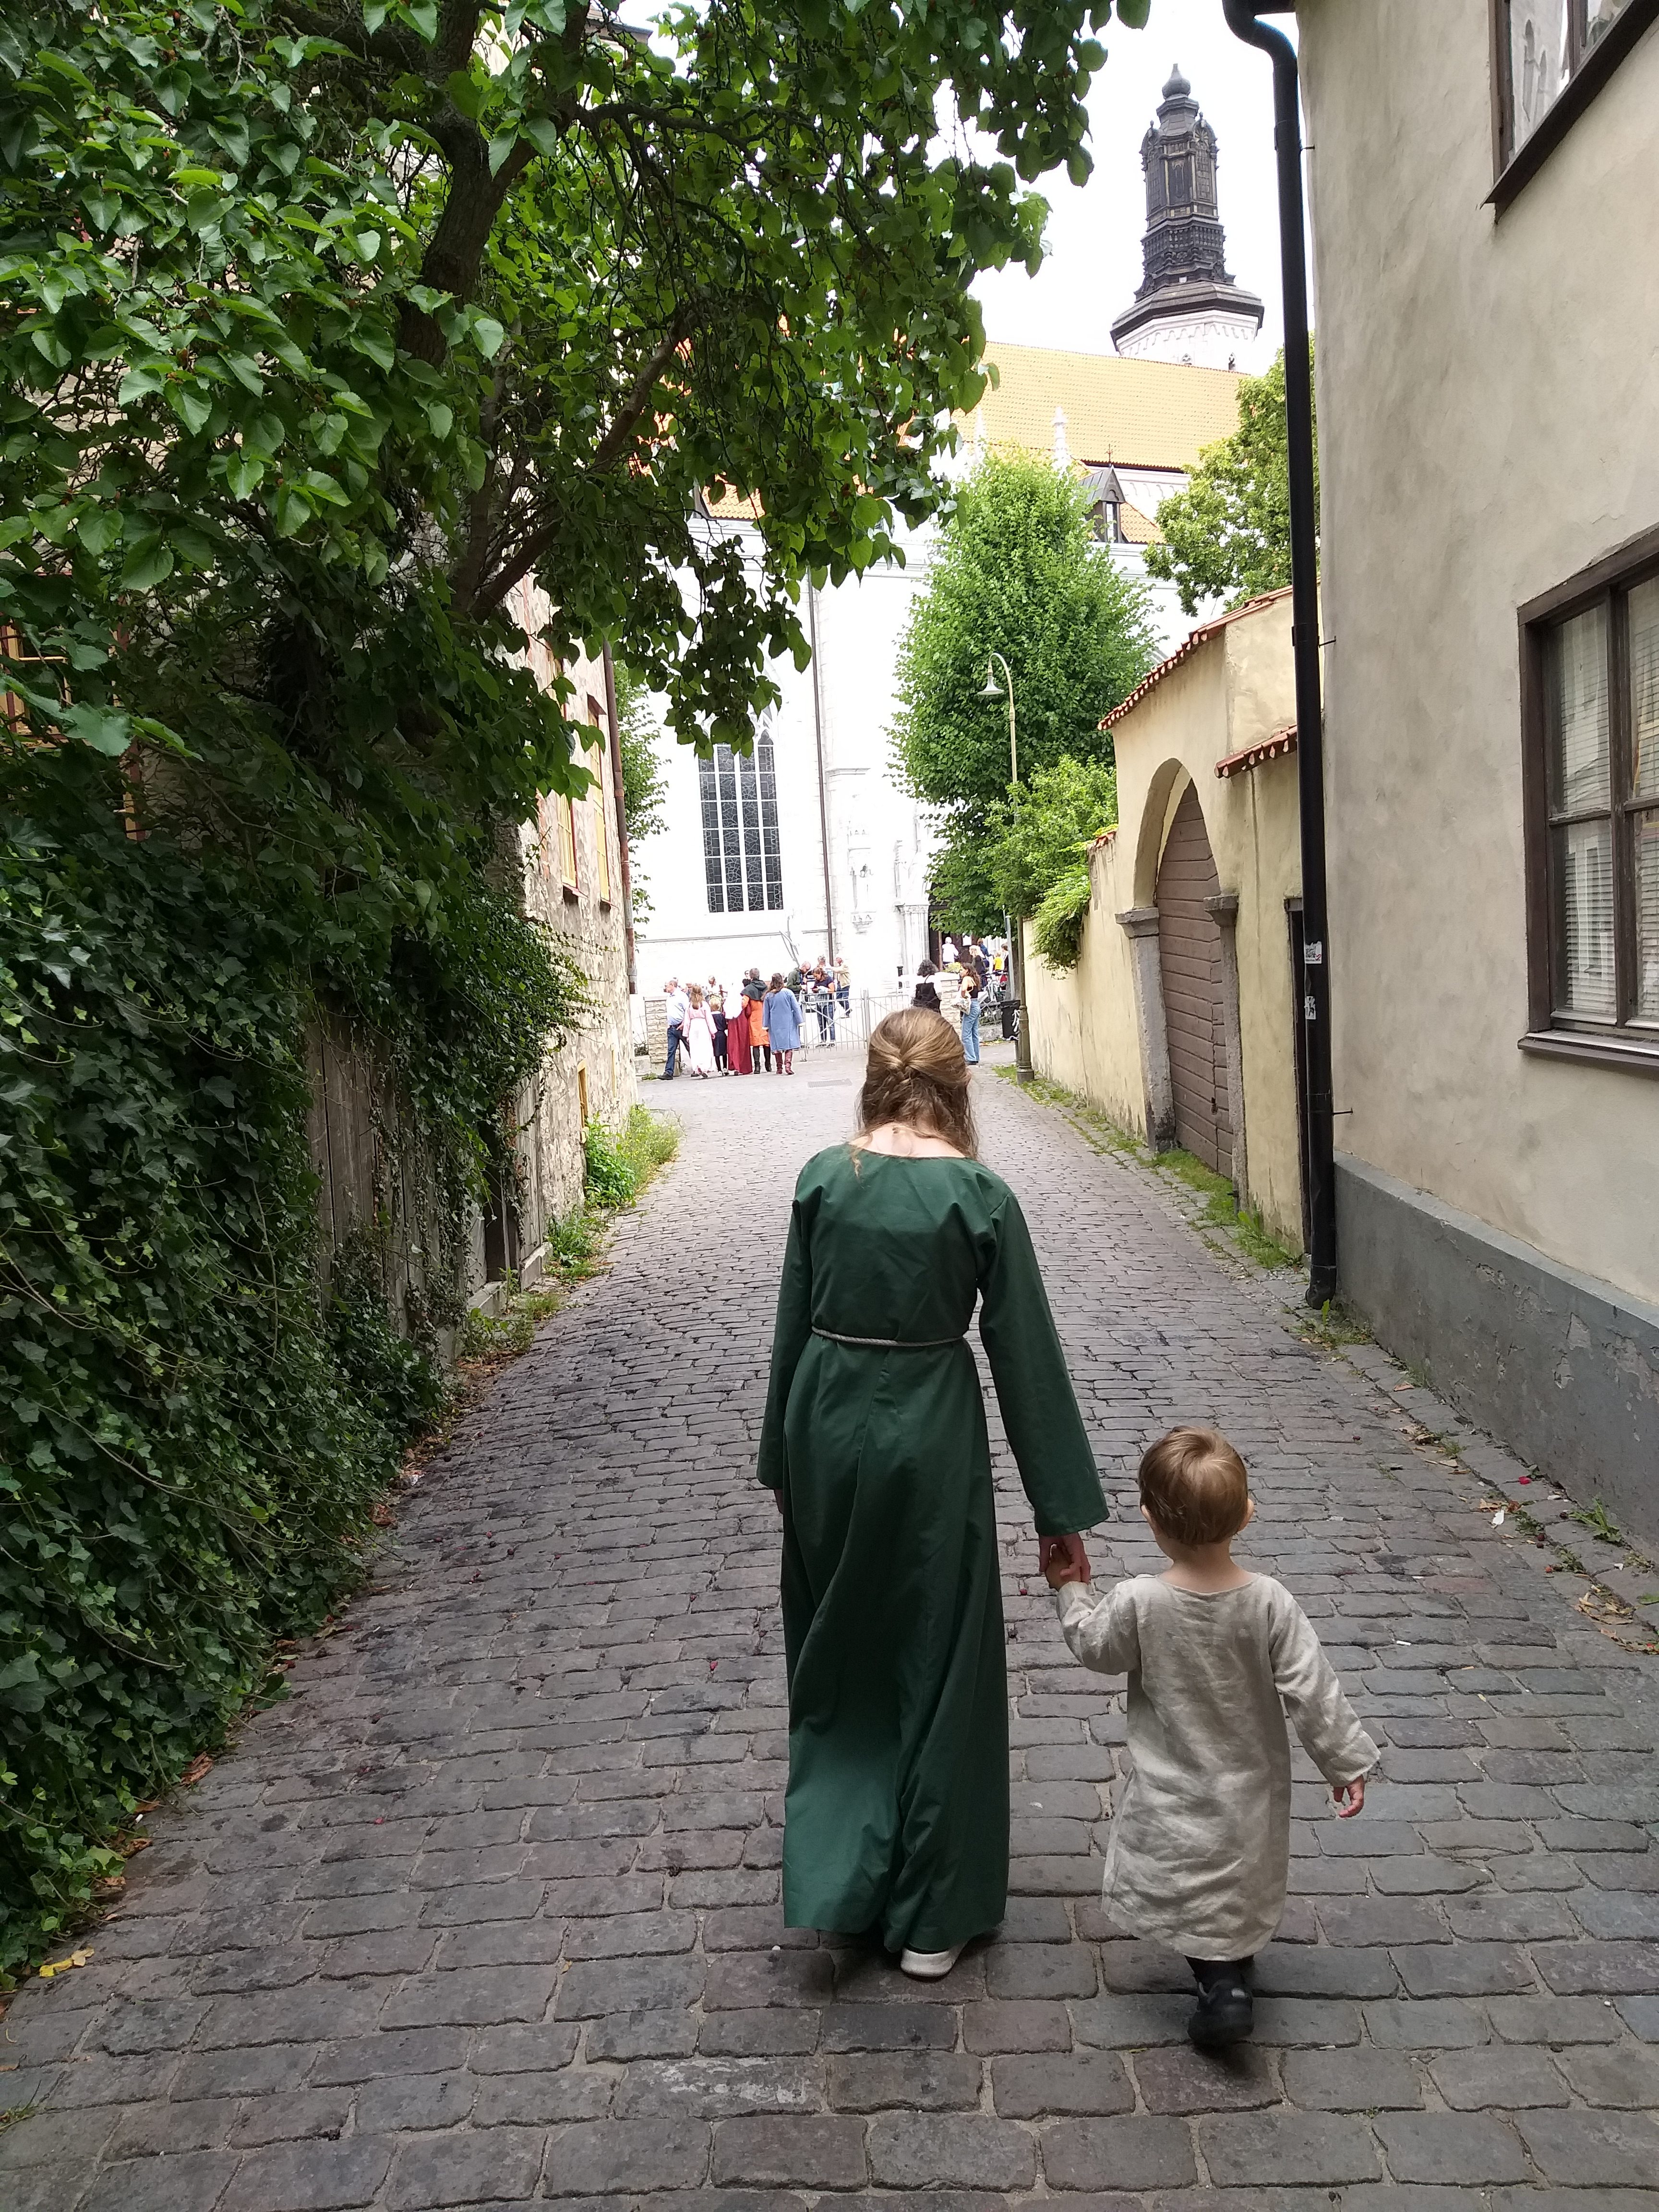
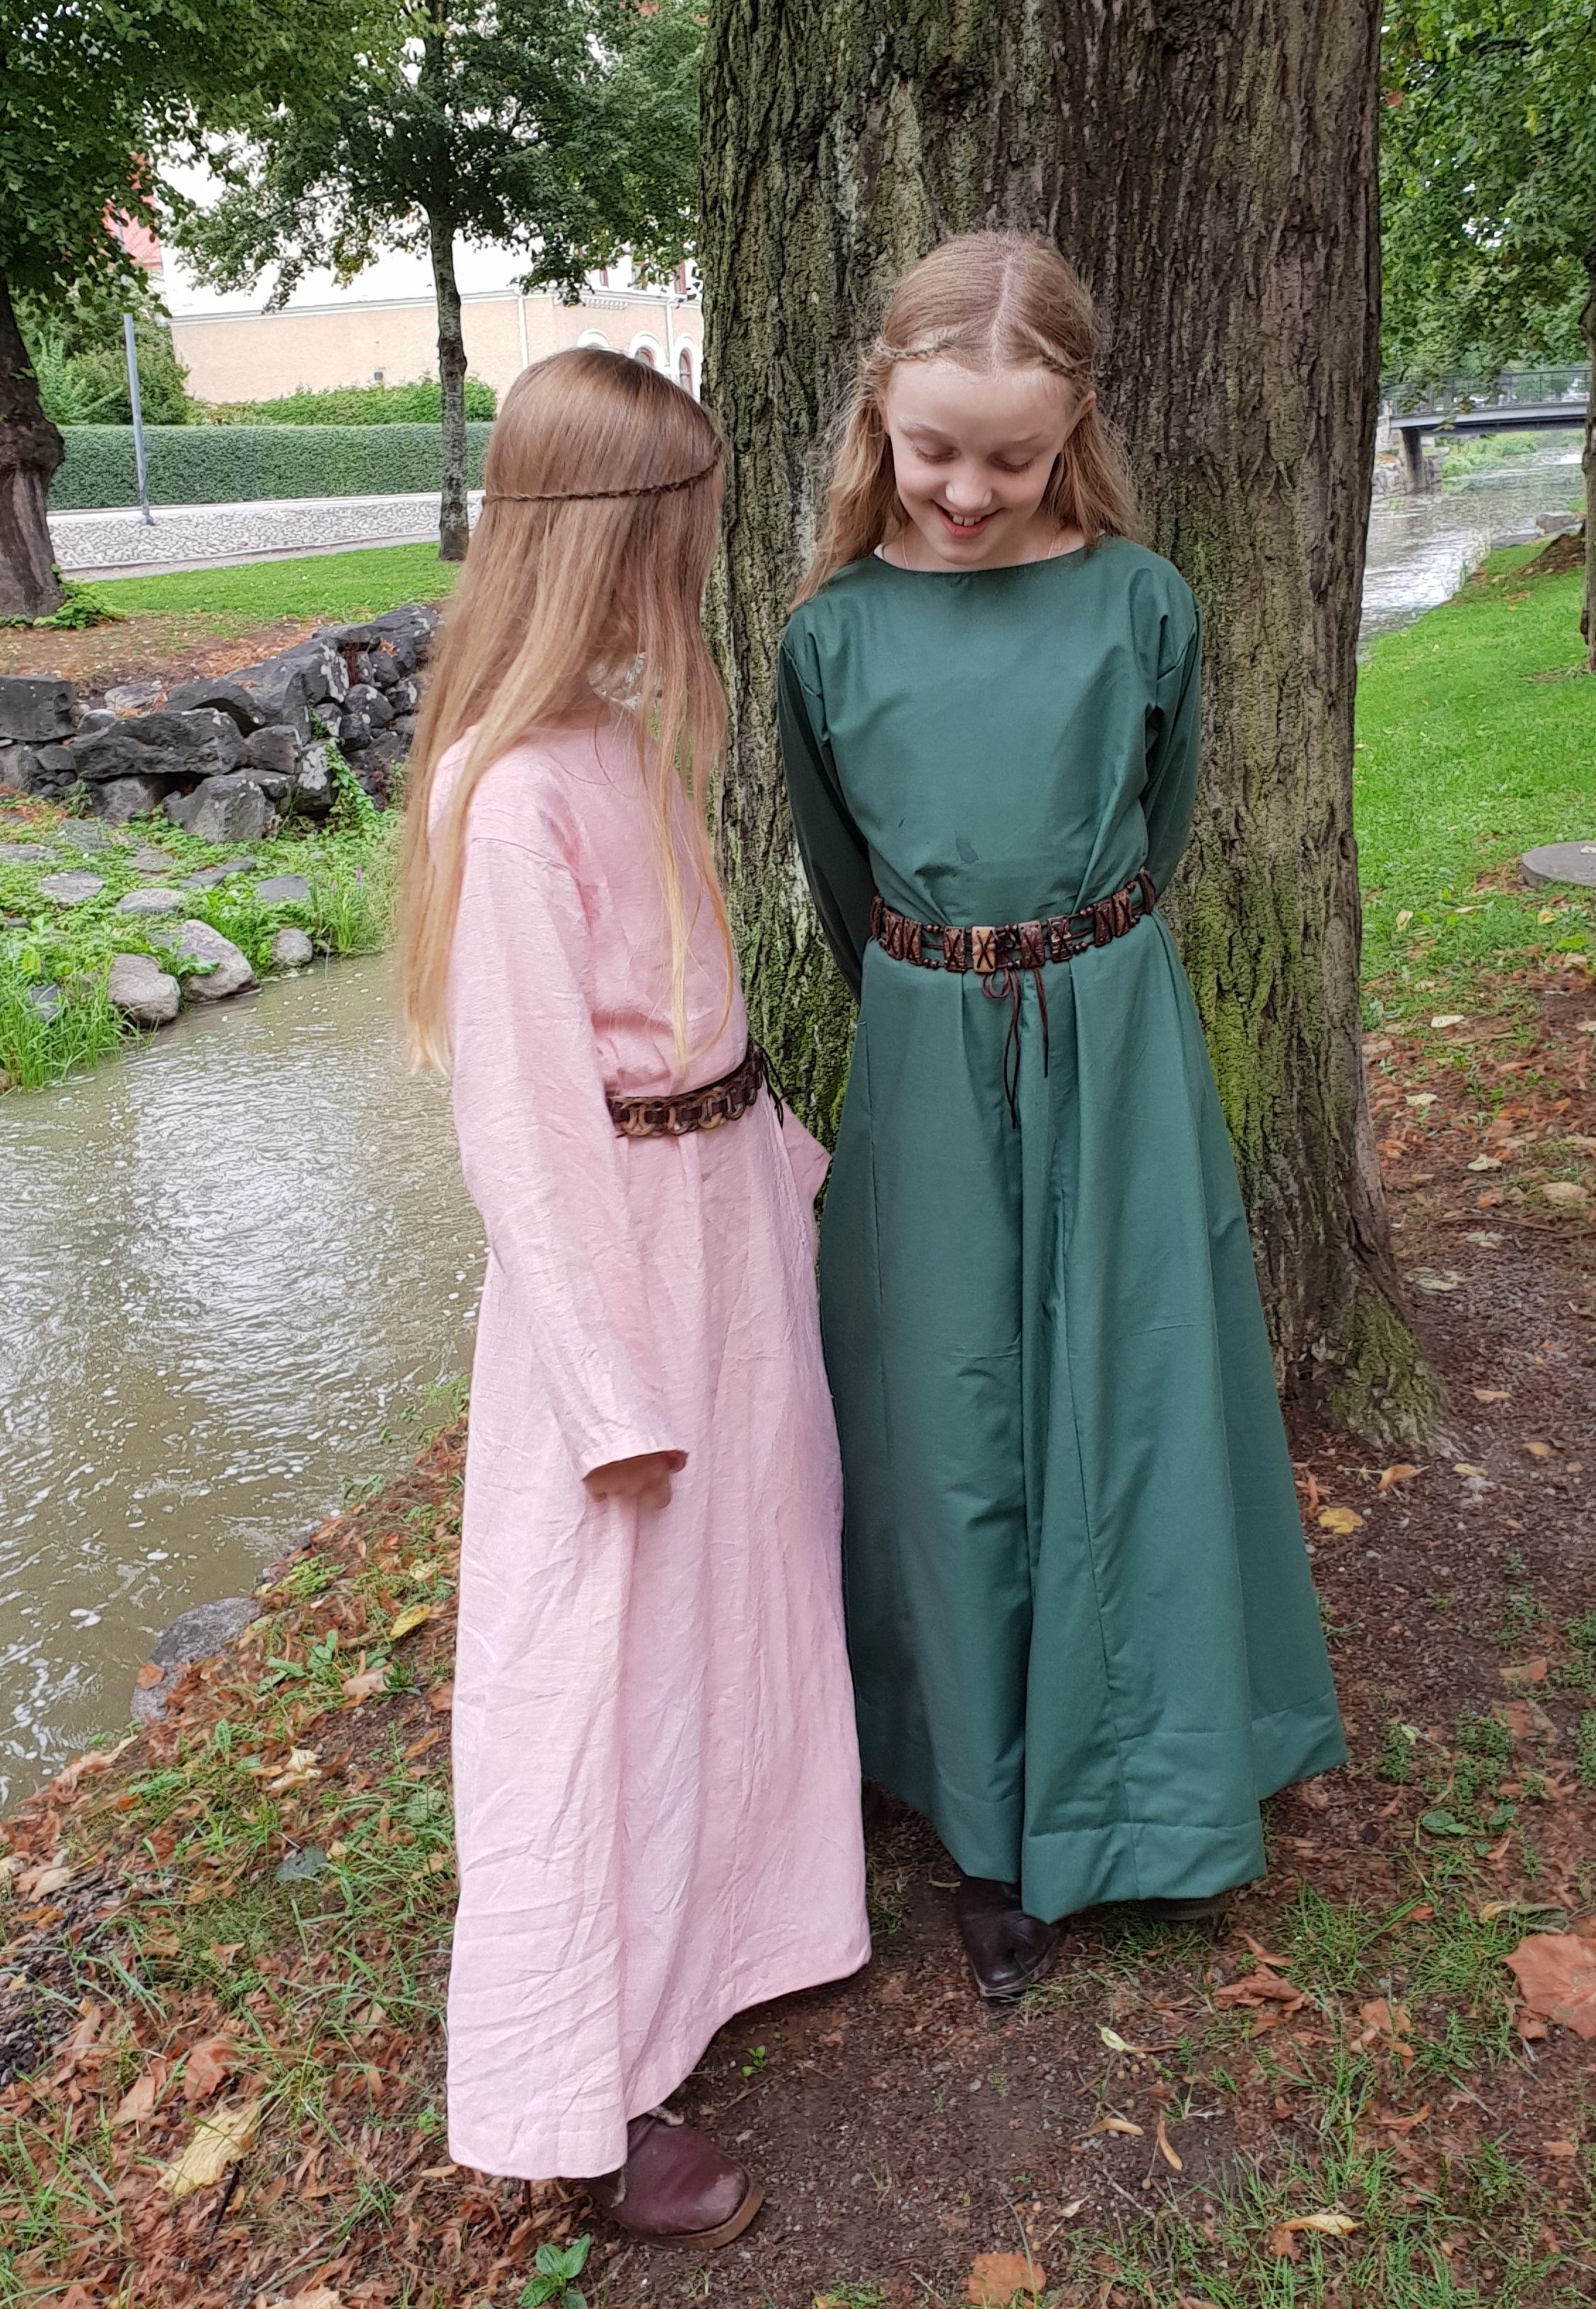
Earlier this summer, I also made this kirtle for another cousine, who felt like a princess in hee new dress. Perhaps even that family might be converted eventually.

Tidigare i somras sydde jag även denna kjortel åt en annan av kusinerna, som kände sig som en prinsessa i sin nya klänning. Kanske kommer även den familjen omvändas så småningom.

Share

Embroidered Regency Dress

There was a vacuum after the competition gown was finished, so I just had to sew a medieval kirtle for my little niece. She was so happy! This was done in a few hours, so I needed yet another project. I have some beautiful whitework embroidery saved from pillow cases, which I believe were made by my husband’s grandmother. As I also recieved an old curtain with a pretty floral print, screeming Regency, I knew I just had to make a regency dress for another niece.

I incorporated the embroidery in the bodice and the poofy arms.

The embroidery piece is stitched to the bodice piece.
Then the fashion fabric (or rather, the old curtain) was sewn onto the front of the bodice piece.
Embroideries put in the mid front and in the arms.

I made an interior bodice with lacing in the back, in order to leave room for some growth. The fashion layer has drawstrings in the neckline and under the bust.

The back lining close with lacing (perhaps there should be boning inside the eyelets?). The eyelets are hand sewn and the strings are also hand made from linen thread.
The two sections of the back close with drawstrings in the neckline and under the bust.
Aren’t these embroideries adorable?

Now I am eager to see whether the dress fits the pretty maiden.

Photo Shoot In The Valley of Cherry Blossoms

The dress fits my niece so well! I’m so proud of this intelligent, pretty young maiden and her wonderful family.

As you might see, there was also a pregnant seamstress lurking around.

Ugnstorp really is the most beautiful place in May
Share

Regency Waistcoat and the Ball

This Saturday was hectic and lovely. After a couple of hours terrible sleep, a was awaken by my happy two year old boy. We played for some hours and then I left for singing and playing the violin at a wedding. The road led through a beautiful autumnal landscape and the sun was shining over the church and the lake. The wedding was filled with love and I felt very honored to play for them (even though my violin untuned itself again and again because of the freezing cold). After having played a folk music march, down the stairs and leading the company to their refreshments, my fingers were numb. I went back by car in a hurry and was so happy to arrive in time for changing clothes in time for the Regency Ball!

Denna lördag var hektisk och härlig. Efter några få timmars dålig sömn väcktes jag av min glada tvååring. Vi lekte i några timmar och sedan åkte jag iväg för att sjunga och spela fiol på en vigsel. Vägen ledde genom ett vackert hötlandskap och solen sken över kyrkan och sjön. Vigseln genomsyrades av kärledk och jag kände mig väldigt hedrad som fick spela för dem (även om min fiol stämde ur sig gång på gång på grund av kylan). Efter att ha spelat en gångmarsch, gåendes nedför trappan och ledande gästerna fram till deras förfriskningar, hade fingrarna tappat känseln av kylan. Jag skyndade mig tillbaka och var så glad när jag insåg att jag skulle hinna byta om i tid för empirbalen på Storebro Herrgård!

Regency Waistcoat

I made a new waistcoat to to match the new black tailcoat. After several months of  dithering, I ordered a beautiful silk fabric from Renaissance Fabrics. I really wanted to buy all of their fabrics… I drafted my own pattern, consisting of two lined front pieces with pockets, two back pieces and a standing collar out of two pieces of fabric, as in this sketch. I will upload some better pictures later.

Jag sydde en ny väst som skulle matcha min mans nya empirrock. Efter flera månader av beslutsångest beställde jag till slut ett vackert sidentyg från Renaissance Fabrics. Egentligen hade jag velat köpa alla deras tyger! Jag hade inte goda erfarenheter av det västmönstret från Reconstructing History, som jag använde förra gången, så nu ritade jag ett eget mönster. Det består av två fodrade framstycken och två bakstycken, samt en stående krage, som på denna skiss. Jag ska ladda upp några bättre bilder på västen senare.

My magnificent husband in whole!

Min stilige man, i hela sin härlighet!

Reticule

The last day before the ball, i quickly made a reticule to hide my cell phone. I had some help from my son.

Dagen innan balen sydde jag en retikyl för att gömma min mobiltelefon. Min son hjälpte till.

The company prepares for the ball

Ten years ago, a couple of friends and other Jane Austen fanatics attempted to sew regency dresses, using the hardly decipherable morning dress pattern of Recreating History. My sister and I made our  first regency dresses. Caroline made this lovely yellow dress.  My sister did me the honor of wearing the velvet dress, that was inspired by Kiera Knightley’s in the Hollywood version of Pride an Prejudice. Her daughters wore the white bed sheet dress and the one I made from leftovers from my sisters regency dress.

För tio år sedan hade vi en studiecirkel där jag och några andra Jane Austen-nördar sydde empirklänningar, med hjälp av det svårkodade morgon-klänning-mönstret från Recreating History. Dessa var min och min systers första empriklänningar. Caroline sydde denna fina gula klänning. Min syster gjorde mig äran att använda min sammetsklänning, som jag sydde utifrån Kiera Knightlys i Hollywoodversionen av Stolthet och fördom. Hennes döttrar använde den vita lakan-klänningen och klänningen som jag sydde av stuvbitar från min systers empirklänning.

My niece is a styling pro!

Min systerdotter är ett styling-proffs!

I am quite proud of the fact that I have sewn all of the outfits, except for Carlines dress. I wore my YWU competion entry dress.

Jag är faktiskt ganska stolt över faktumet att jag har sytt alla dräkter, förutom Carolines klänning, som jag dock också var ganska involverad i. Själv använde jag mitt tävlingsbidrag till YWU.

At the ball
Thank you, Ellen, for arranging such a lovely evening!

Share

Green Regency Dress

As my only practical regency dress is now too big for me, I wanted a new, washable dress. Once again, I used the simple model with drawstrings at the neckline and under the bust, just as I have done with the girls’ dresses. I remembered to have seen a dress with smooth waist at the front, but I have not been able to find that picture again. Has anyone else seen this picture, or did I make it up? Probably, the back should be open and closed by drawstrings, in order to be truly accurate.

Eftersom min enda praktiska empirklänning endast passade under graviditeten, var jag sugen på att sy en ny, tvättbar klänning. Jag använde modell som flickornas klänningar, med dragsko i urringning och under bysten. Jag mindes att jag sett en klänning där tyget låg slätt framtill, under bysten, men har sedan inte kunnat hitta bilden igen. Har ni sett den, eller har jag hittat på? För att klänningen skulle vara tidstypisk, borde den egentligen ha haft en öppning i ryggen, som stängts med dragskorna.

This was how I made the pattern smooth over the waist. Then I trimmed away the excess fabric in the neckline and armpit. The back of the bodice is just broad overall.

Back of the bodice at the top. Front at the bottom.

After sewing the front and back bodice parts together, I attached the skirt. In the front it lays smooth, while it is gathered in the back. At the waist seam, I added a waistband, where I hid the drawstring. At the inside of the neckline I also put a drawstring. I made a simple, straight arm. Last, I stitched the rolled hems by hand.

Efter att ha sytt samman fram- och bakstycke satte jag dit kjolen. Framtill ligger den slätt mot överdelen, medan den är rynkad baktill. Över sömmen under bysten fäste jag ett midjeband, som jag använde för dragskon. Ärmarna är bara raks tygstycken med ärmkulle. Jag handsydde rullfållarna sist.

I am happy with the result. I felt like one of the Dashwood sisters. The only thing lacking now are long kid gloves. Please tell me if you find a pair for me!

Jag är nöjd. Jag kände mig faktiskt som en av systrarna Dashwood. Vad som verkligen saknas i denna ensamble är ett par långa skinnhandskar. Säg till mig om ni hittar ett sådant par, snälla!

Share

Medieval Kirtle

This summer was wonderful, but intense. At the first day of my vacation I realized that I would have to prepare three different repertoires for the four concerts in three weeks, so I understood that I needed to finish my sewing projects quickly.  Said and done. In one day I finished a modern dress for my friend, I made a kirtle for my sister’s boy to wear at the Medieval Week of Visby and I also finished the regency waistcoat for my husband. The extremely simple regency dress was sewn in one day on sewing machine, but I finished the long roll hems the other day.

Den här sommaren var underbar, men intensiv. Första dagen på semestern insåg jag att jag måste lära in tre olika repertoarer för de fyra sångtillfällena, fördelade över tre veckor, så jag förstod att jag måste slutföra mina påbörjade sömnadsprojekt innan detta. Sagt och gjort. På en dag sydde jag färdigt en klänning åt min vän, jag sydde en kjortel åt en pojke som skulle med till Medeltidsveckan i Visby och jag blev äntligen klar med en empirväst åt min man. Dessutom blev sydde jag en ny, extremt enkel empirklänning, men handsydde fållarna för några dagar sedan.

Quick Medieval Kirtle

Last summer I helped my nieces sewing their own medievalish dresses for Söderköpings gästabud. This summer we had planned to take their whole family to the Medieval Week of Visby for a day, so now their little brother also needed a kirtle. I used a fabric that I found in a second hand shop and the usual “squares and triangles method”.

Förra sommaren hjälpte jag mina systerdöttrar att sy deras egna medeltida klänningar till Söderköpings gästabud. Den här sommaren skulle hela deras familj följa med oss till Medeltidsveckan i Visby. Därmed behövde även lillebror en kjortel. Jag använde ett tyg som jag hittat på Eriskhjälpen. Den är gjord efter “fyrkanter och trianglar-metoden”.These are the pattern pieces that I used.

Detta är alla mönsterbitar jag använde.

After having sewn the front piece to the back piece, I made the arms (which were way too long). I attached the square gusset for the armpit first, then I stitched the rest of the arm and last I inserted the arms into the kirtle.

Efter att jag sytt samman framdelen och bakdelen, sydde jag armar (alldeles för långa). Jag satte fast de fyrkantiga ärmsprund innan jag sydde samman ärmen och satte in den i själva kjorteln.

Then I inserted the triangle gussets into the front, back and side seams. Last sew the hems by hand. I believe I made this in about four hours.

Sedan satte jag in trianglarna mitt fram, mitt bak och i sidorna. Slutligen fållade jag för hand. Jag tror att allt detta tog fyra timmar.

My nephew was most dashing in his new garment! Unfortunately the best picture was taken in front of some cars, so my mother helped me blend that picture with her picture of a medieval french castle. Isn’t it awesome?!

Pojken var väldigt fin i sin nya dräkt! Tyvärr togs den bästa bilden framför några bilar, så mamma hjälpte mig att sammanfoga den bilden med en av hennes bilder av ett franskt medeltida slott. Är det inte en fantastisk bild?!

And here are some pictures from the Medieval week.

Här kommer några bilder frön Medeltidsveckan.

Our family, looking like going on a roller coaster

Fair young maiden in a romantic ruin

I will soon make a new post showing off the summer dress, the regency waistcoat and the extremely simple regency dress.

Snart ska jag även göra ett inlägg om sommarklänningen, empirvästen och den extremt enkla empirklänningen.

Share

Regency Gentleman, Toddler and Teen

At Tjolöholm Castle 2016

Teenager’s Dress

These last few months have been crazy. I’ve had my internship at the psychiatric ward, which have been both thrilling and exhausting, as I have been working nights a lot more than I tolerate. At the same time I have been preparing clothes for a recency ball. In a weak moment I decided to even participate in dancing sessions before the ball, in order to fully enjoy the historically authentic ball (for those of you who don’t know me, I  am not the dancing type). My dear nieces will accompany us for the dancing lessons and thus, there is need for one more regency dress, for a  slender thirteenyearold. The younger niece will wear this dress which will be long enough after having removed the pin tucks. I made the quickest dress ever, with the least amount of material ever, leaving approximately five square centimetres of scraps. This is the result. 

This is what fabric was left after making the dress. I’m quite proud of myself.

The new dress with floral print and the old white dress which has now been successfully lengthened by removing the pin tucks.

Toddler’s Dress

Our toddler will join the dancing sessions, off course. So he needs a kirtle. I made one in a few hours by machine. He should have a pair of trousers and a hat too, but there is no time and what does it matter, really? If you want some background about children’s clothing, see this lovely page.

Tired boy in the company of his best friends

Fall Front Breeches

I have been working on a new pair of breeches for my husband for some years, moments at a time. Now only the buttons remain. I have tried to solve the mystery of the construction of the elusive fall front breeches and drafted the pattern myself. This is how I have interpreted what I have seen in pictures.

1) putting together front, back and both sides 2) cutting slits by the sides for narrow or broad fall front 3) adding the pieces behind the fall front

5) adding fabric pieces to the fall front sides 6) folding the pieces around the sides in order to hide the raw edges 7) adding one piece more to the top of the fall front in the same way

After I stopped documenting this process – why, in heavens name? – I added a waistband to hide the raw edges at the rest of the top of the breeches. I hid the raw edges of the end of the legs in the same way. And at the very last I will add buttons and make button holes!

Shirt with Ruffles

I thought that he also needed a nicer shirt and cravat than the first set of clothes, so I made a new shirt with ruffles in the neckline and by the cuffs. Afterwards, I have found excellent tutorials for period regency shirt construction, as in Fabric and Fiction and at Your Wardrobe Unlocked. This one is obviously wrong in many ways.

I started by cutting the double length wished for, folded and cut a whole for the head and a slit at the mid front. Then I added two square arms with square gussets at the arm pits, with gathering at the shoulder and at the end of the arms. I also added ruffles at the slit in the front, although I found out later that the slit should probably have been 3-4 dm long and the ruffles should have been in one continuing piece, instead of one on each side.

I have no idea how this should be done, but this was my way of making the ruffles at the end of the arms: I had two pieces of fabrics in which I hid the raw edge of the arm gathering. After having stitched this in place, I added a folded piece of fabric with gathering, which I tucked in between the two layers in the same way as the arm gathering.

I believe that the opening in the from should have been longer, but then there would not have been enough of fabric for ruffles.

Ruffles sewn by hand and self covered buttons for the collar.

Tailcoat

My most time consuming sewing project ever must be his new tailcoat. I have used historical methods and made all of the interlining by hand – hundreds of stitches that no one will ever see… ? I used the fantastic pattern of Laughing Moon that I bought for the prize money for my win in the 2017 competition of Your Wardrobe Unlocked.

Now there is only a new waistcoat left to make the suit complete. And a pair of shoes, stockings, pocket watch, new hair etc… When starting to update the historical wardrobe, there is no end to it, especially as the family expands.

If I’m still alive by the end of the week, after two more nights at work, I look forward to see all of these clothes during the dancing session.

The dance training was featured in the local newspaper, with some nice pictures. This was what our family looked like. Alas, it was all too obvious that I had not made adjustments for the tail coat during the process, for it did not fit as well as I had hoped for.

Share

Blouse out of a Shirt

My father does not care about clothes. This high quality shirt,  made of fine Egyptian cotton, was damaged while  carrying wood. It felt wrong to just throw it away. I thought about just using the unstained parts, but then only the back and the collar remained, so the shirt has been lying in my stash for one year now, awaiting the serendipity.

Pappa bryr sig inte om kläder. Denna fina skjorta, i fin egyptisk bomull, blev sönderriven och nerfläckad när han bar ved. Det kändes fel att slänga så fint tyg. Jag hade tänkt behålla de oskadda delarna, men vid närmare granskning visade sig endast ryggen och kragen ha klarat sig. Därför har skjortan legat undangömd i väntan på en uppenbarelse.

I often wore my historical clothing at home before becoming a mother. Now I have hardly worn anything historical for two years for fear of having it stained or torn and because of the impracticality (it is quite hard to crawl around on the floor and under furniture, wearing floor length skirts). One week ago the need for wearing something historical grew too great and I decided to wear Edwardian clothing for the Christmas dinner at work. Since I ended up sharing table with people who did not know about my interests, nobody understood that my strange hair and clothing was historical and I just felt awkward. I decided that it was time to make something historical that I could wear at home – practical for the sake of my son and nice looking for my sake. This was the perfect purpose for the damaged shirt!

Innan jag blev mamma hade jag ofta historiska kläder till vardags. Nu har jag nästan inte använt något historiskt på två år, dels i fruktan att kläderna ska förstöras och dels för att det är så opraktiskt (det är ganska krångligt att krypa runt på golvet i hellång kjol). Förra veckan blev abstinensen efter att ha historiska kläder för svår, så jag bestämde mig för att ha min edwardianska dräkt till julbordet på jobbet. Jag hamnade vid ett bord med folk som inte känner till detta udda intresse, så ingen fattade att kläderna och frisyren var historiska och jag kände mig bara dum och missanpassad. Jag bestämde mig för att sy något slitstarkt historiskt plagg som jag skulle kunna ha hemma istället. Detta var ju det perfekta användningsområdet för den redan förstörda skjortan!

I decided to refurnish it – I took everything apart and switched sides for the front parts, so that the worst parts were placed at the sides, about the hight of the waistline. The front parts were sewn together and then the armholes made a deep neckline, that I needed to hide.

Jag sprättade isär alla delar och bytte plats på framstyckena, så att de värsta fläckarna hamnade i sidorna, nära midjan. Framstyckena syddes samman framtill. Ärmhålen bildade en djup urringning som behövde fyllas.

I used the pieces from the top of the back, to fill the neckline.

Jag använde delar från ryggens ovandel för att fylla igen urringningen.

Since this blouse should not fit closely,  I made straight seams in the sides and cut armholes. Then i started decorating the neckline with the help of my sewing machine.  Because of the different layering along the neckline, the seams ended up very uneven, and I found myself masking my mistakes by adding more and more decorating seams.

Eftersom blusen inte ska smita åt runt kroppen, sydde jag bara raka sömmar i sidorna och klippte ärmhål. Sedan började jag dekorera runt urringningen med maskinsöm. På grund av alla olika lager blev sömmarna ojämna och jag la till fler och fler sömmar för att maskera tidigare fel. 

Then I gathered the top and bottom of the arms, so that the became poofy. I reinserted the the original cuffs, but shortened them and  used the wrong side out, as this was less stained.

Sedan rynkade jag upptill och nedtil på ärmarna, så att de blev puffiga. Jag satte tillbaka de ursprungliga manchetterna, men förkortade dem och vände ut avigan, eftersom den var mindre fläckig.

The stains remain, but you just see them when looking for them. As I made this blouse in a hurry, there is a vast amount of mistakes, but as I am to wear it at home, I am quite happy with the outcome.

Fläckarna är fortfarande kvar, men man ser dem bara när man letar efter dem. Eftersom jag sydde blusen snabbt och slarvigt är det galet många misstag här och där, men jag ska ju bara använde blusen hemma och jag är nöjd med slutresultatet.

Share

Medievalish

Two years ago, we planned on going to the Medieval Week at Visby together with my brother and my sisters family.  At the eleventh hour, I noticed that we had booked the ferry ticket and hotel nights for the wrong week.  Oh, the horror.  We comforted ourselves by going to the beautiful castle of Tjolöholm instead, where there was a Jane Austen display. My nieces have been very keen on experiencing the Medieval week though. I had no vacation this summer, so Visby was out of the question, but I had time for a day at the medieval fair at Söderköpings gästabud.

With a tiny bit of help from me, my nieces made their own gowns – all from cutting to sewing. I am so proud of them! We used fabric from my stash. The green cotton was initially blue, but became green when I was trying to dye it black for the Scary Robe. The pink linen was a huge table cloth. The dresses are made from rectangles and triangles. As the fabric is so unmedieval, the girls went all in by using Tanzanian wooden belts fort decoration. I think that they look like fantasy princesses!

Linen kirtle and liripipe hood out of soft wool

They asked me several times what our boy would wear. Eventually I could not resist making a little kirtle for him, out of an old linen skirt.

Earlier, we worn the cheapest underwear, made out of old cotton bed sheets. At our last stay at the Medieval week though, I bought linnen. During my internships far away from home, I spent the lonely evenings hand stitching a new shirt and a pair of breeches for my husband. I made a new chemise for myself the last night, on machine. I am quite proud of that I succeeded in making alterations for my husbands cotehardie. I made it for him ten years ago, when he was quite slender. Since he began bodybuilding, he has not been able to get into these clothes again. Astonishingly, I seem to have been wise enough to save broad seam allowances, so that I could make both the torso and sleeves wider. After adding sleeve gussets at the shoulders, he was even able to move!

New underwear: linen chemise, shirt, breeches and a little kirtle for the boy

The day at Söderköping was cosy. Off course, it could not compare with Visby, but our boy was happy in the clothes (he had my liripipe hood because of the cold weather) and my nieces were happy to play with him for a whole day.  The city is beautiful; the main part consists of pretty wooden houses from the 19th and early 20th century. The market was nice and I found a nice fabric for a new modern coat. All together, it was a nice day, in great company. Thank you, dear nieces!

Share

Edwardian Blouse out of Reused Materials

The Edwardian Lady Outfit.

I have a dear friend, who loves historic fashions and has swooned over my Edwardian lady outfit. She has had a really rough time, so I wanted to do something for her, and promised her that she would have the outfit. Then I decided to make a new blouse for her, that would have long arms to protect her sensitive skin and that she would be able to close by herself. I dug deep into my stashes and found some lace left from the tank top that I used for the regency chemissette, and a matching off white cotton from other recycled materials.

I layed out the pieces of lace on the mannequin in order to find the best design. Then I added the cotton fabric to fill the great voids. I used the same techniques as in the last high collar blouse:

  1. I started with two rectangles of fabric – the back as wide as half of the bust measurement and the front 10 cm wider than the back
  2. I stitched 5 mm wide pin tucks in the front, starting in the middle and working my way to the sides with 1 cm spaces between the tucks.
  3. I stitched  the lace to the fabric, then I cut the fabric away on the wrong side and hemmed from the wrong side.
  4. Then I added three pin tucks more on each side.

First I stitched the piece of lace to the right side of the fabric, then I cut the fabric away from underneath the lace and last I hemmed the edges.

When this was finished, I stitched the front to the back on the shoulders and sides. Then I attached the great piece of lace and high collar to the bodice in the same way as the other pieces of lace.

Next, I made the very simple arms: I measured the circumference of the armholes, cut to pieces of fabric with this width plus 5 cm, made a rounded top and added lace at the gathered end of the arm.

After attaching the arms to the bodice, I put push buttons and hooks and eyes for closing at the side of the neck. Then the blouse was finished. I can’t wait to see my friend in this outfit.


Share

Edwardian Costume on Commission

This summer I got a commission to make an Edwardian suit. This would be used at events where my customer would heighten the atmosphere together with her horse. She wanted a skirt, blouse and an apron. What a dream project! I was so eager to get started, but every step was taking unusually long time: I had to hunt down the package with the fabric order, as neither the fabrics, nor any note came to my post box. My pregnant body didn’t move as quickly and gracefully as it otherwise does, so the pattern making and cutting of fabrics was very challenging. Then there came this little boy… I missed out two deadlines, but thankfully, this dear customer told me not to hurry and just enjoy the first time with the baby.

I somras fick jag I uppdrag att sy en sekelskiftesdräkt, som skulle användas vid evenemang där min kund skulle agera stämningshöjare tillsammans med sin häst. Hon ville ha en kjol, en blus och ett förkläde. Vilket drömprojekt! Jag var så entusiastisk och hoppades på att kunna göra klart den innan förlossningen, men varje steg i processen tog ovanligt lång tid: När jag tyckte att jag väntat länge nog på tygerna var jag tvungen att spåra tygpaketet, eftersom de glömt att skicka en avi till min postadress. Min gravida kropp var långsam och otymplig, så det var en utmaning att kravla omkring på golvet för att göra mönstret och klippa tyg. Sedan kom den lille gossen… Jag missade båda kundens deadlines, men hon var förstående och uppmanade mig ta det lugnt och njuta av babytiden istället.

Costume suitable for a farmers wife.

This week, I could finish the cotton skirt at last. It is made of three panels – one in the front and two in the back – and is closed with hooks and eyes. The linen apron was the only piece finished before the delivery. I had made a mock up for the blouse, but still wait for an opportunity to fit it on my customer before I cut the fashion fabric. In the meantime, she can wear this lovely vintage blouse.

Den här veckan kunde jag äntligen sy färdigt bomullskjolen. Den består av tre paneler – en fram och två bak – och stängs med hyskor och hakar. Linneförklädet var det enda plagget som var färdigt innan förlossningen. Jag hade gjort en toille för blusen, men väntar fortfarande på ett tillfälle att testa den på min kund innan jag sätter saxen i blustyget. Tills blusen är klar får hon använda denna underbara vintageblus.

Mockup for the blouse and skirt. After tracing the skirt mockup to pattern paper, I made an petticoat of it.

In order to keep the price down, I made the pleats on machine. It took two hours to make, except for prewashing and calendering.

This is the Edwardian vintage blouse. It is made from quite heavy weight cotton and every seam is made on machine. It does not look home made.

The skirt

The whole costume

Today, I have also finished the changing table! My kind father in law bought the wanting piece of wood that would prevent the baby from falling down. I sawed this into three pieces and screwed them together. The inside was lined with camping mattress underneath oilcloth, fastened with glue gun. Then this frame was fixed to the changing table with screws. The frame serves both as a stabilizer and protection. I know that the changing table could have been steadier and more nice-looking if I had put more money into the right materials and if I had been able to construct it without interruptions. It does not look completely abhorring though, and it is steady when standing over the washing machine. As it answers our present needs, I am really happy with the outcome.

Idag blev skötbordet fullbordat! Min snälle svärfar köpte en fin mdf-skiva att ha som kant. Jag sågade till tre bitar, som jag skruvade ihop. Med limpistol limmade jag sedan fast liggunderlag och vaxduk på insidan av träramen. Sedan skruvade jag fast ramen på själva skötbordet. Förutom att skydda barnet från att rulla ner från skötbordet, stabiliserar den också själva bordet. Jag är medveten om att skötbordet hade kunnat bli både stadigare och finare om jag hade lagt mer pengar på rätt material och om jag hade kunnat jobba ostört. Nu kom vi i alla fall billigt undan och det ser inte helt fasansfullt ut. Eftersom det tillgodoser våra behov nu, är jag faktiskt riktigt nöjd med resultatet.

Our baby loves being on his changing table, beneath the shelf that I made for him. During the last week, he has also started talking to the animals at the shower curtain.

Share